



Hair gets different jobs after 50. Some days it needs more lift at the crown. Some days it needs to skim the jaw a little softer. And on a good day, it does both without looking chopped up or overworked.
That’s where medium length layered haircuts for women over 50 earn their keep. They keep enough length to tuck behind the ear, clip back, or pull into a low twist, but they’re short enough that the ends don’t sag into a flat curtain. A blunt shoulder cut can look sharp on the right head of hair, sure, but once density changes, texture gets coarser, or the top goes a little flatter than it used to, layers often do more for the shape than another inch of length ever will.
I’ve always thought the best layered cuts are the ones that look like nothing happened until the hair moves. You turn your head, and the shape shows up. That’s the sweet spot. Not too fussy. Not too feathered. Just enough structure that the cut does some of the styling for you.
Why These Layered Cuts Keep Showing Up in Good Salons
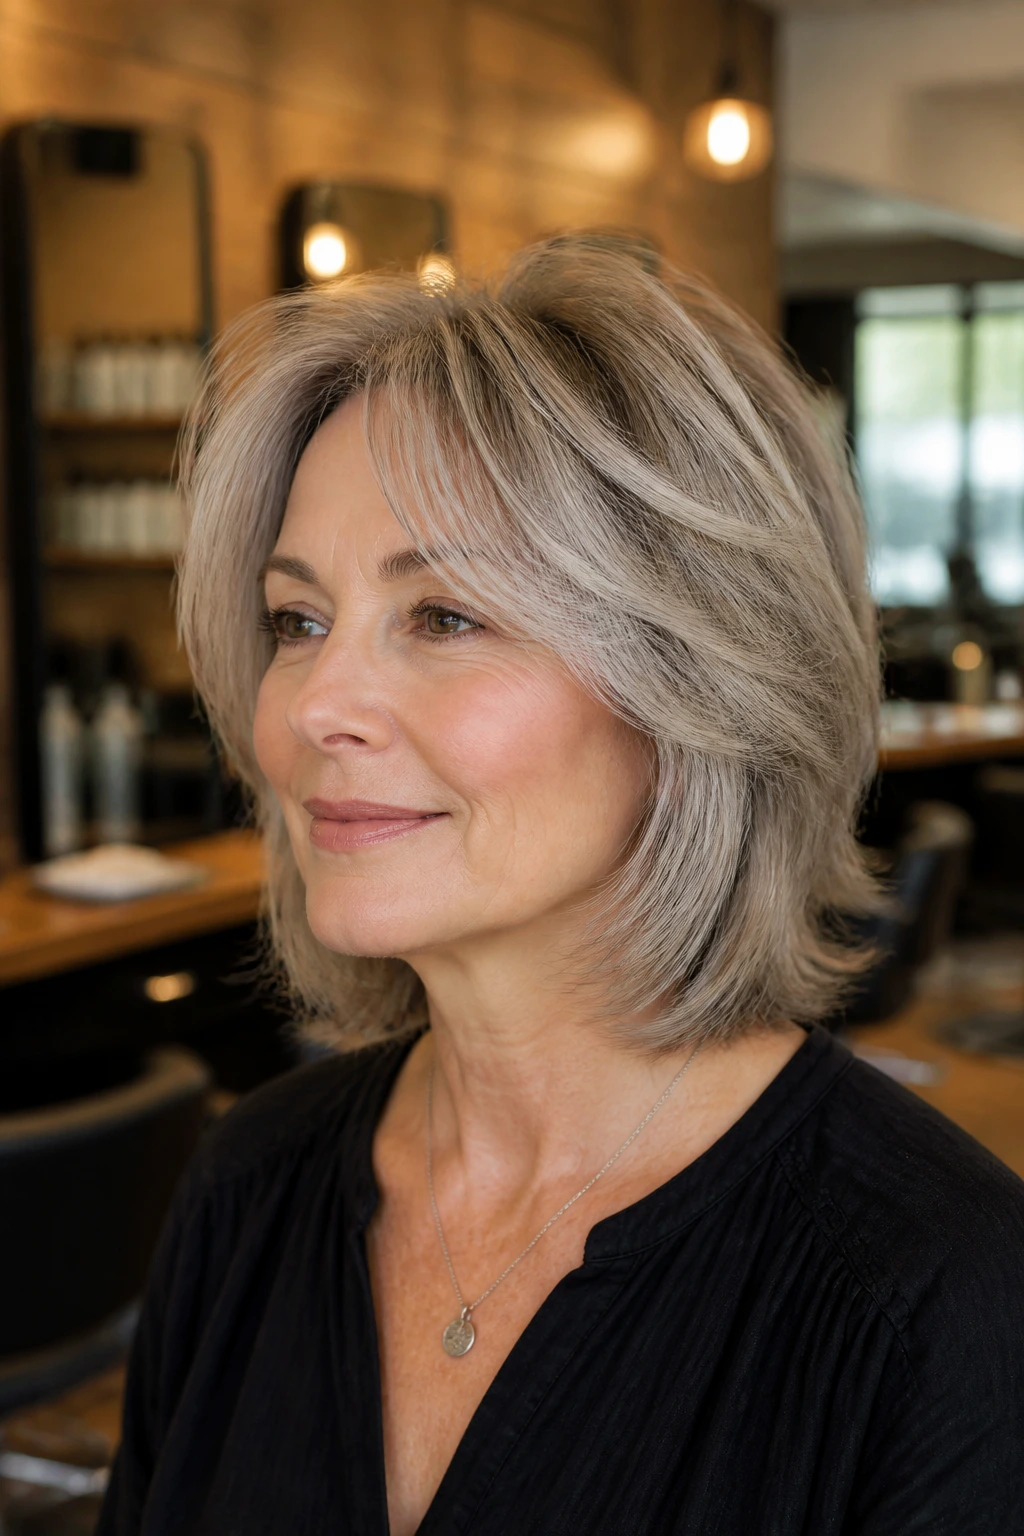
-
They keep the neckline light. A medium cut with smart layers doesn’t sit there like a shelf; it lifts away from the shoulders so the whole shape looks cleaner.
-
They make flat crown areas less obvious. A little layer placement at the right height can create lift where the hair has started to lie closer to the scalp.
-
They work with gray and silver strands. Layered cuts let tone changes, shine, and movement show up better than a dense, blunt line ever will.
-
They can be dressed up or left alone. The same cut can look smooth with a round brush or relaxed with air-dry texture, which matters when you don’t want a high-maintenance routine.
-
They’re easier to adjust than a dramatic chop. If you like length around your face but want more movement through the ends, layers let you tweak the balance without going short-short.
-
They grow out with less drama. A good medium layer map softens as it grows, so you’re not stuck with a hard line that starts looking awkward after six weeks.
1. Soft Collarbone Layers
Soft collarbone layers are the easy-going cousin in this whole group. The length lands right around the collarbone, where it still has swing but doesn’t drag the face down, and the layers are gentle enough that the cut reads as shape rather than “I got a haircut with a lot of opinions.” It’s one of my favorite places to start for women who want change without a drastic shift.
What Makes It Work
The collarbone is a useful anchor because it gives the hair a place to rest. When the shortest pieces start just below the chin, the face gets softness without that over-layered look that can happen when every angle gets chopped too high. The cut moves, but it doesn’t flutter into frizz the way a shorter, more aggressive layer map can.
This is a strong choice if your hair has lost some density at the temples or along the length. The layered ends keep the perimeter from feeling heavy, while the longer top pieces still give you enough coverage if you like to tuck one side behind your ear.
What to Ask For
- What to use: Ask for collarbone length with long internal layers and soft face-framing pieces that begin around the chin or just below it.
- Preparation: Bring photos that show the front, side, and back if you can find them. One front-facing shot never tells the whole story.
- Substitutions: If you wear glasses or want more forehead coverage, add a soft side fringe instead of a blunt bang.
- Tips: Tell your stylist how often you blow-dry. A collarbone cut that looks gorgeous with a round brush can look much flatter if you air-dry it every time.
Quick styling note
A 1.5-inch round brush gives this cut the nicest bend at the ends. Don’t over-flip the layers. You want a soft turn, not a pageant curl.
2. Feathered Shoulder Sweep
Feathering has a reputation for being old-fashioned, which is unfair. Done badly, yes, it can look like a haircut from a mall salon memory you’d rather forget. Done well, it gives shoulder-length hair that light, brushed-out motion that makes the whole head look less dense and more alive.
The trick is that feathering should live in the ends and mid-lengths, not only around the crown. When the layers taper away from the face and shoulders, they create a soft sweep that moves when you walk. That motion is the whole point. No stiff helmet. No hard shelf. Just hair that bends.
This cut is especially good if your hair is thick enough to hold shape but heavy enough to go flat when it’s all one length. The feathering removes enough weight that the cut feels lighter, yet the shoulder length keeps the style grounded.
Best for
- Hair that gets bulky at the bottom
- Women who like a polished blow-dry
- Frames, especially if you wear glasses
- Necklines that need a little softness
Styling reality
Use a medium round brush and direct the ends away from the face. A tiny bit of mousse at the roots helps, but don’t drown the length in product. Feathered cuts hate overloading.
3. Face-Framing Lob with Curtain Fringe
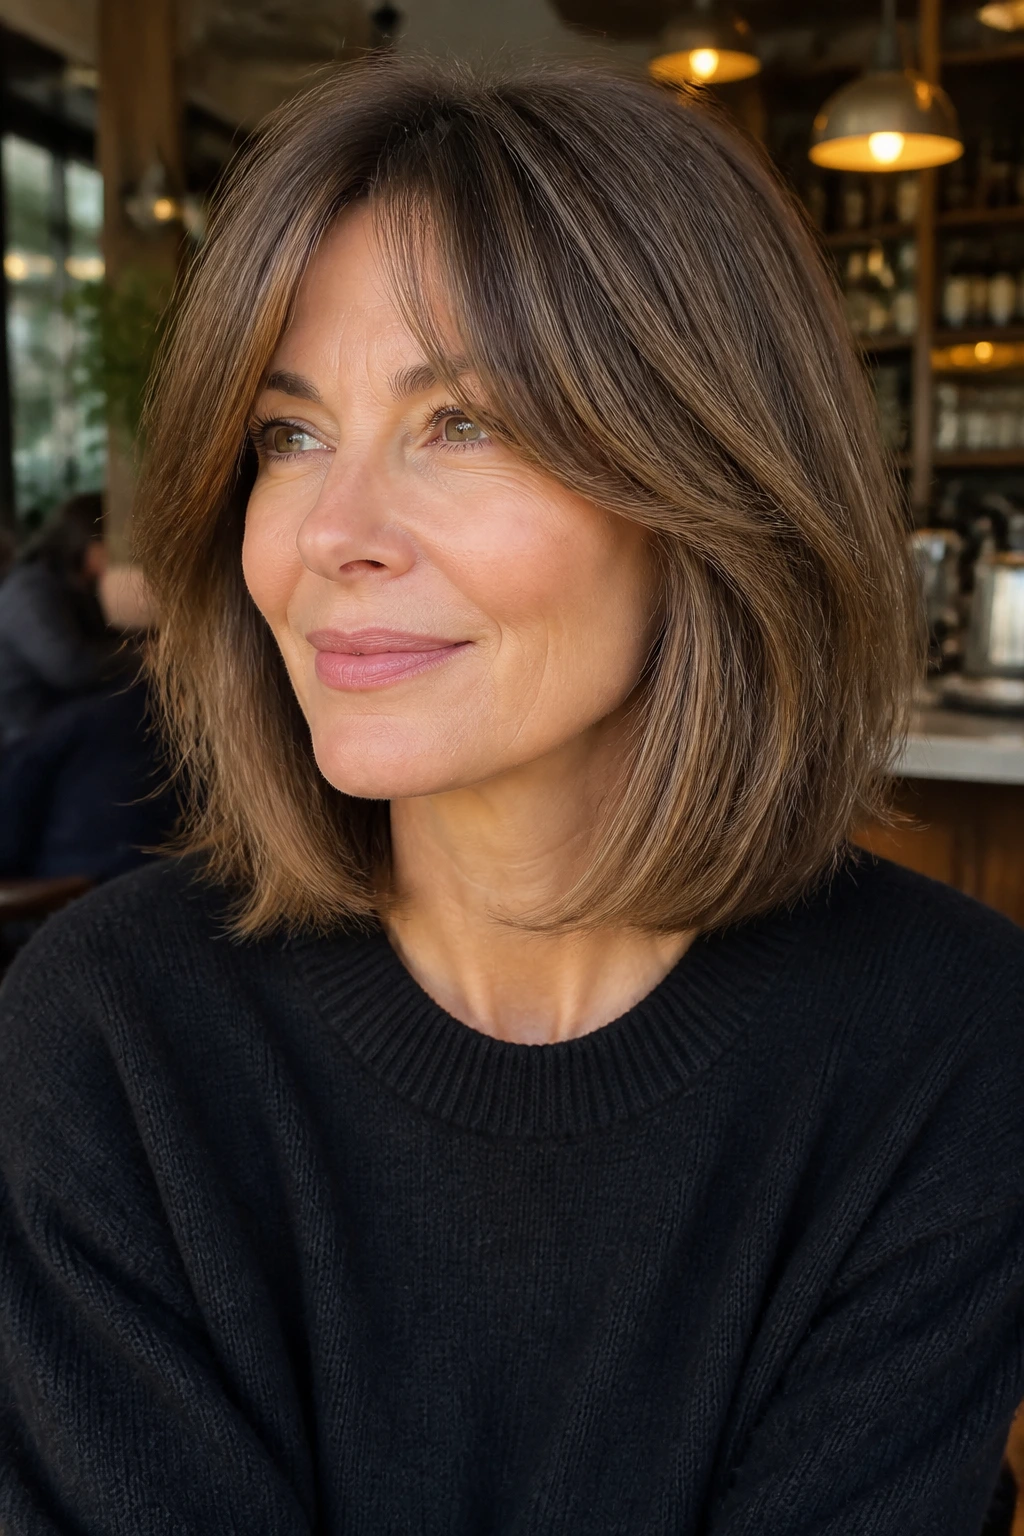
A lob with curtain fringe gives you a lot of face-softening without sacrificing a clean outline. The base stays around the collarbone or just above it, while the fringe opens in the middle and curves into the cheekbones. It’s the haircut version of pulling back a curtain and letting the light in—except we’re not using that phrase because nobody needs another cliché.
The best thing about this shape is how it handles glasses, high foreheads, and slightly fuller cheeks. The curtain fringe doesn’t sit like a block on the brow. It breaks up the line in a way that looks easy, and the longer sides blend into the rest of the cut instead of hanging there as a separate piece.
A good curtain fringe should be cut to move. If the shortest point sits too high, the bang starts to dominate the haircut. If it’s too long, it just becomes another layer. The sweet spot is usually cheekbone length at the shortest point, then longer pieces that skim toward the jaw.
Why it’s worth considering
The lob keeps the shape tidy. The fringe keeps the face from looking too open. Put them together and you get a cut that can look smooth for dinner or tousled for errands without changing the bones of the style.
A small warning
If your hairline swirls hard in the front, curtain fringe needs a stylist who will work with the growth pattern, not against it. Otherwise you’ll spend too much time fighting one side of the bang every morning.
4. Chin-Brushing Shaggy Layers
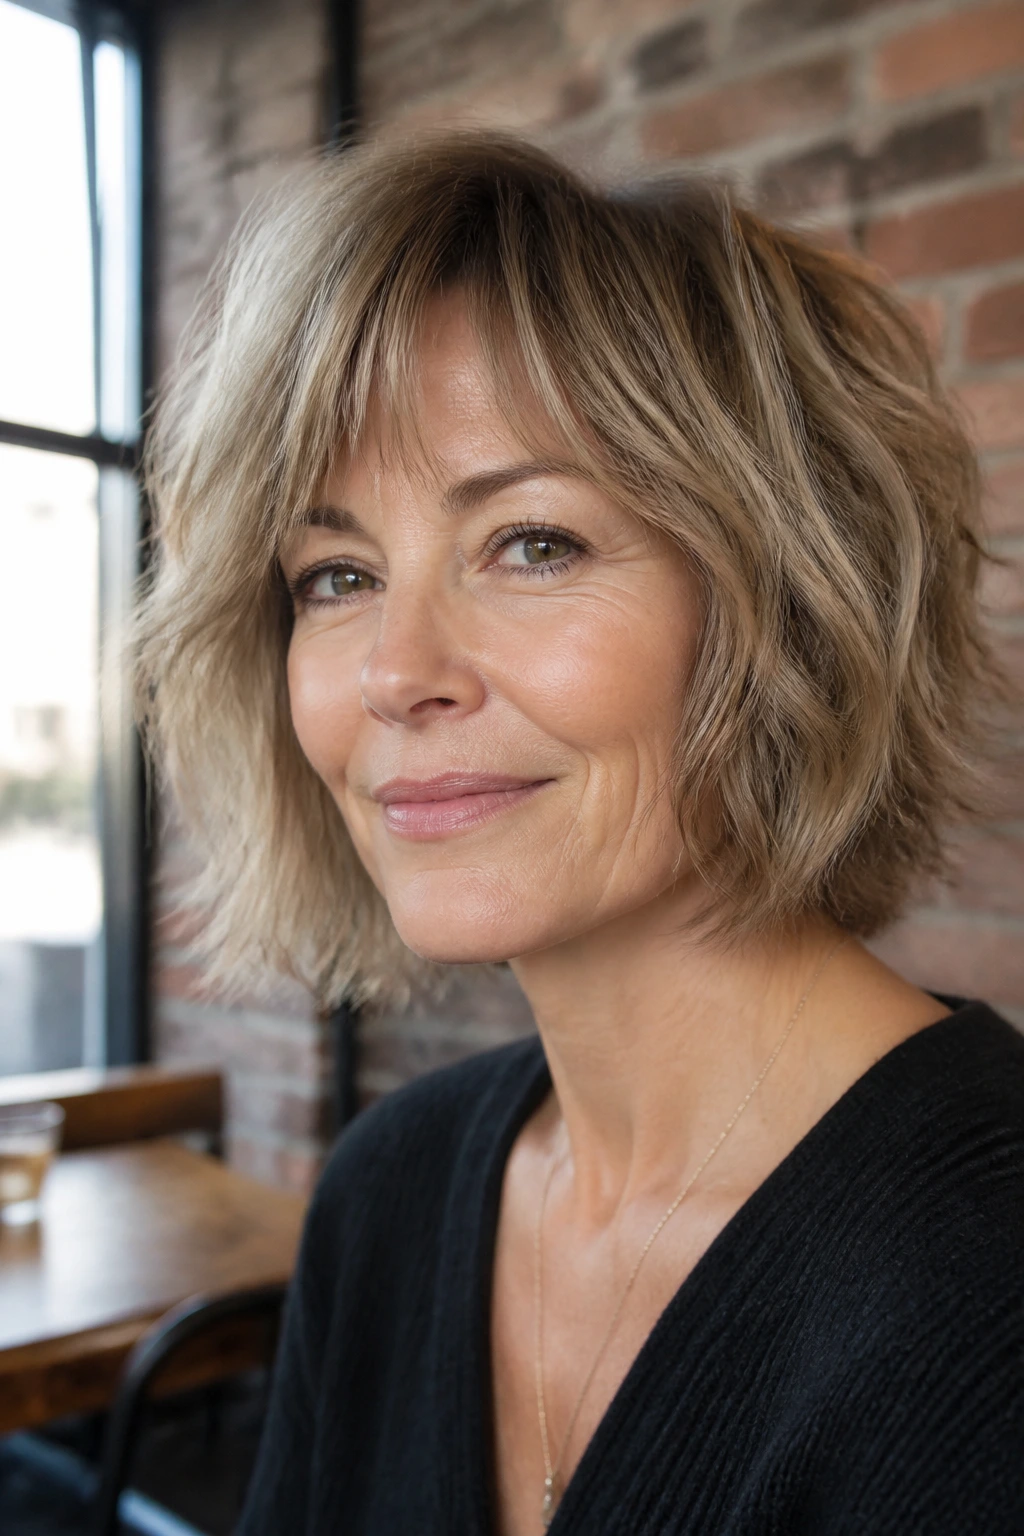
This is the cut with a little edge, but not the messy kind that makes people think you slept in a wind tunnel. Chin-brushing shaggy layers sit in that sweet spot where the hair looks relaxed and full of movement, especially if you have a wave that wakes up as soon as it hits damp air.
The layers start higher than in a classic lob, which gives the crown and cheek area more lift. The ends are piecey rather than blunt, so the haircut never gets heavy at the bottom. That matters if your hair tends to droop by lunch and then look tired by dinner. This cut keeps its shape better than a one-length style when you don’t want to spend twenty minutes reworking it.
What to watch for
Too many short pieces around the chin can make the cut look triangular. You want the face frame to open, not box in the lower half of the face. A good shaggy cut keeps longer threads around the jaw and uses texture to do the rest.
Styling I’d trust here
Use a lightweight mousse on damp hair, scrunch the mid-lengths, and either diffuse on low or let it air-dry until about 80 percent dry before touching it. Once it’s dry, a dab of texture paste at the ends can separate the layers just enough. Too much, and it turns crunchy. Nobody needs crunchy.
5. Blended C-Shape Layers
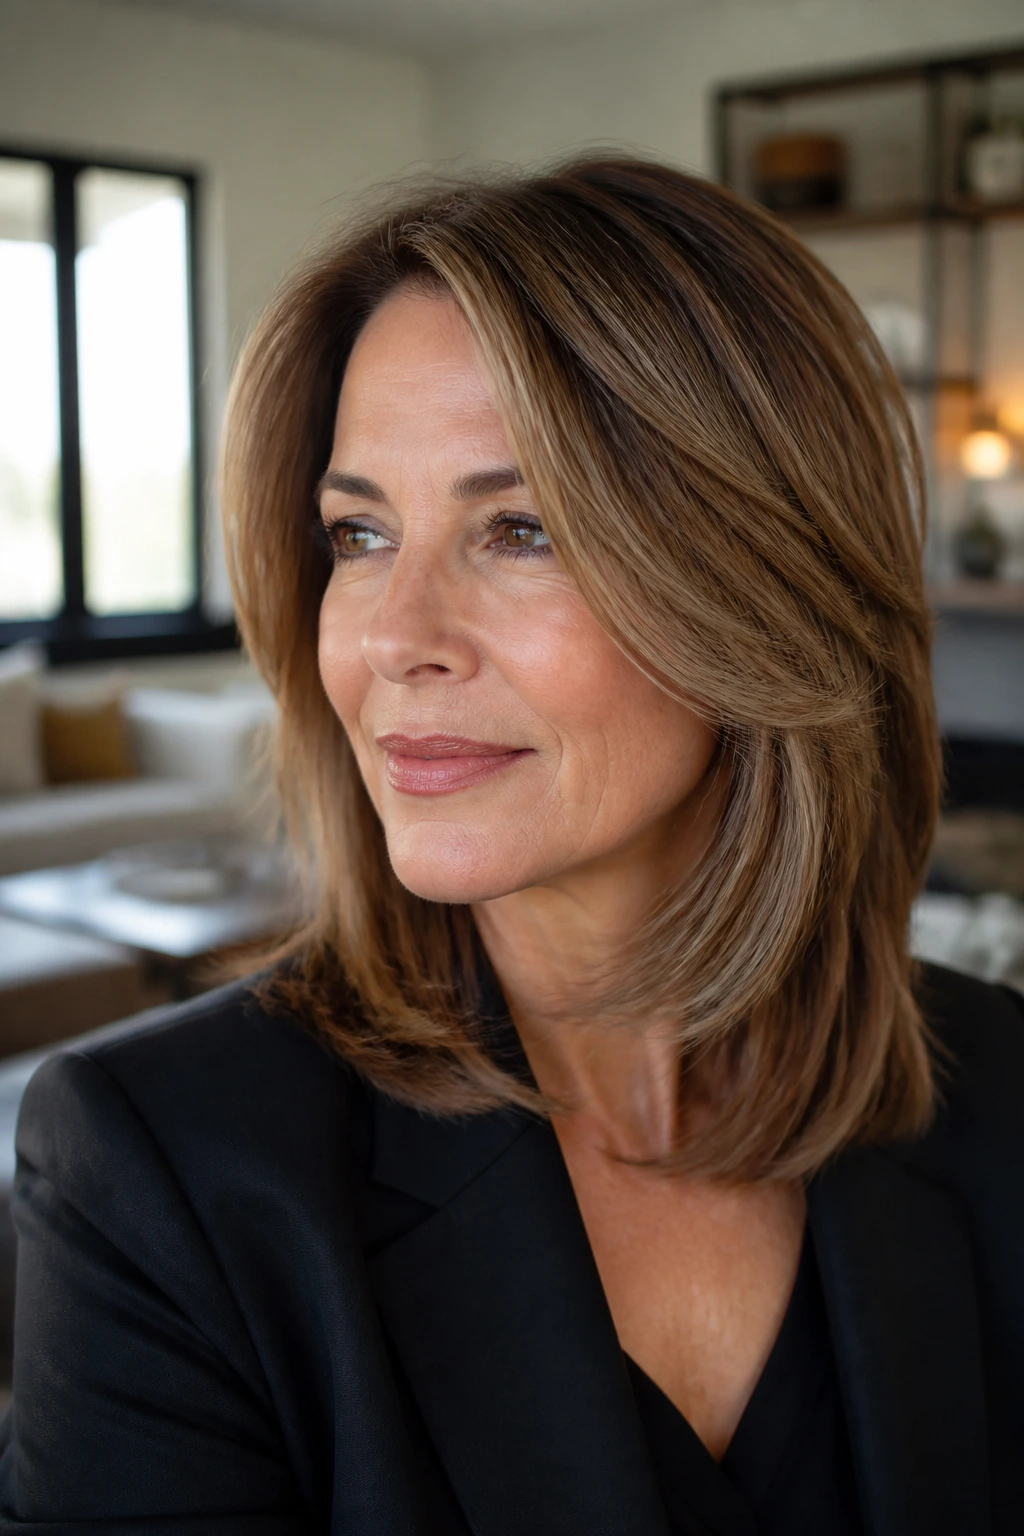
Not every layered cut needs to look “layered” at first glance. That’s the charm of a C-shape cut. The hair falls in a soft curve around the face and down through the ends, creating movement that reads smooth rather than choppy. It’s one of the best options if you want a haircut that still looks neat with a blazer, but doesn’t feel stiff.
The C-shape works because the longest layers follow the contour of the head and then sweep inward at the ends. It makes the cut feel intentional, especially on medium-length hair that would otherwise sit flat against the shoulders. If your hair has a little bend already, this shape makes the most of it.
This is a cut for someone who likes control. Not control in a rigid sense. More like, “I want the hair to do what I meant for it to do.” That’s a fair ask.
Who tends to love it
- Straight hair that needs some movement
- Fine hair that can’t handle too much thinning
- Anyone who likes a polished finish
- People who wear side parts and don’t want the haircut to fight them
One good detail
Ask for the first face-framing layer to hit around the nose or lip line if you want softness without losing the stronger outline. It’s a tiny shift, but it changes how the whole cut sits.
6. Piecey Razor Lob
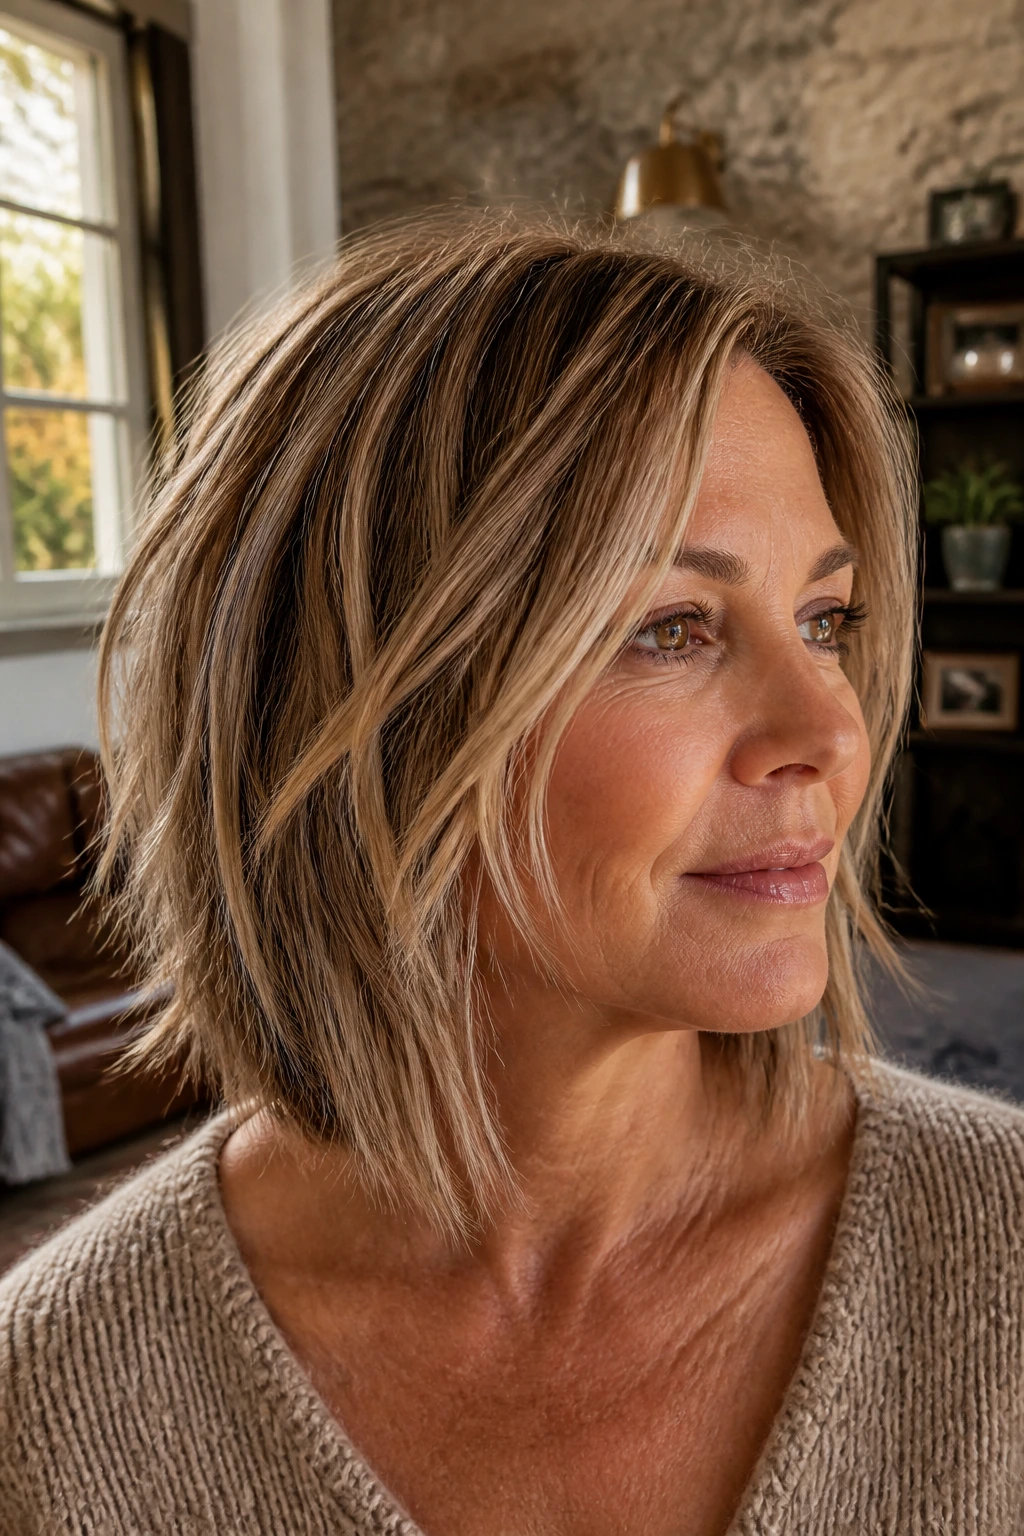
A razor lob changes the texture more than the length. The ends are carved rather than blunt-cut, which gives straight or slightly wavy hair a lighter, airier edge. If your hair feels heavy when it’s cut with scissors, this is the style that can make it feel like somebody took a few pounds off the bottom.
The catch is that razor cutting is not for every head of hair. On healthy, medium-to-thick strands, it can create a clean, lived-in piecey look. On hair that’s already frizz-prone or dry at the ends, too much razor work can make the perimeter look fuzzy. So this is a cut that needs judgment, not a zealot with a razor.
Why it works
The lob length gives structure. The razor texture takes away stiffness. You get a cut that moves when you turn your head, but still looks neat enough to pin back or wear straight.
Quick styling cues
A smoothing cream through the mid-lengths keeps the ends from going fluffy. If you like a little lift, dry it with a nozzle attachment and flip the ends under with a large brush for the last few minutes only.
7. Voluminous U-Shape Cut
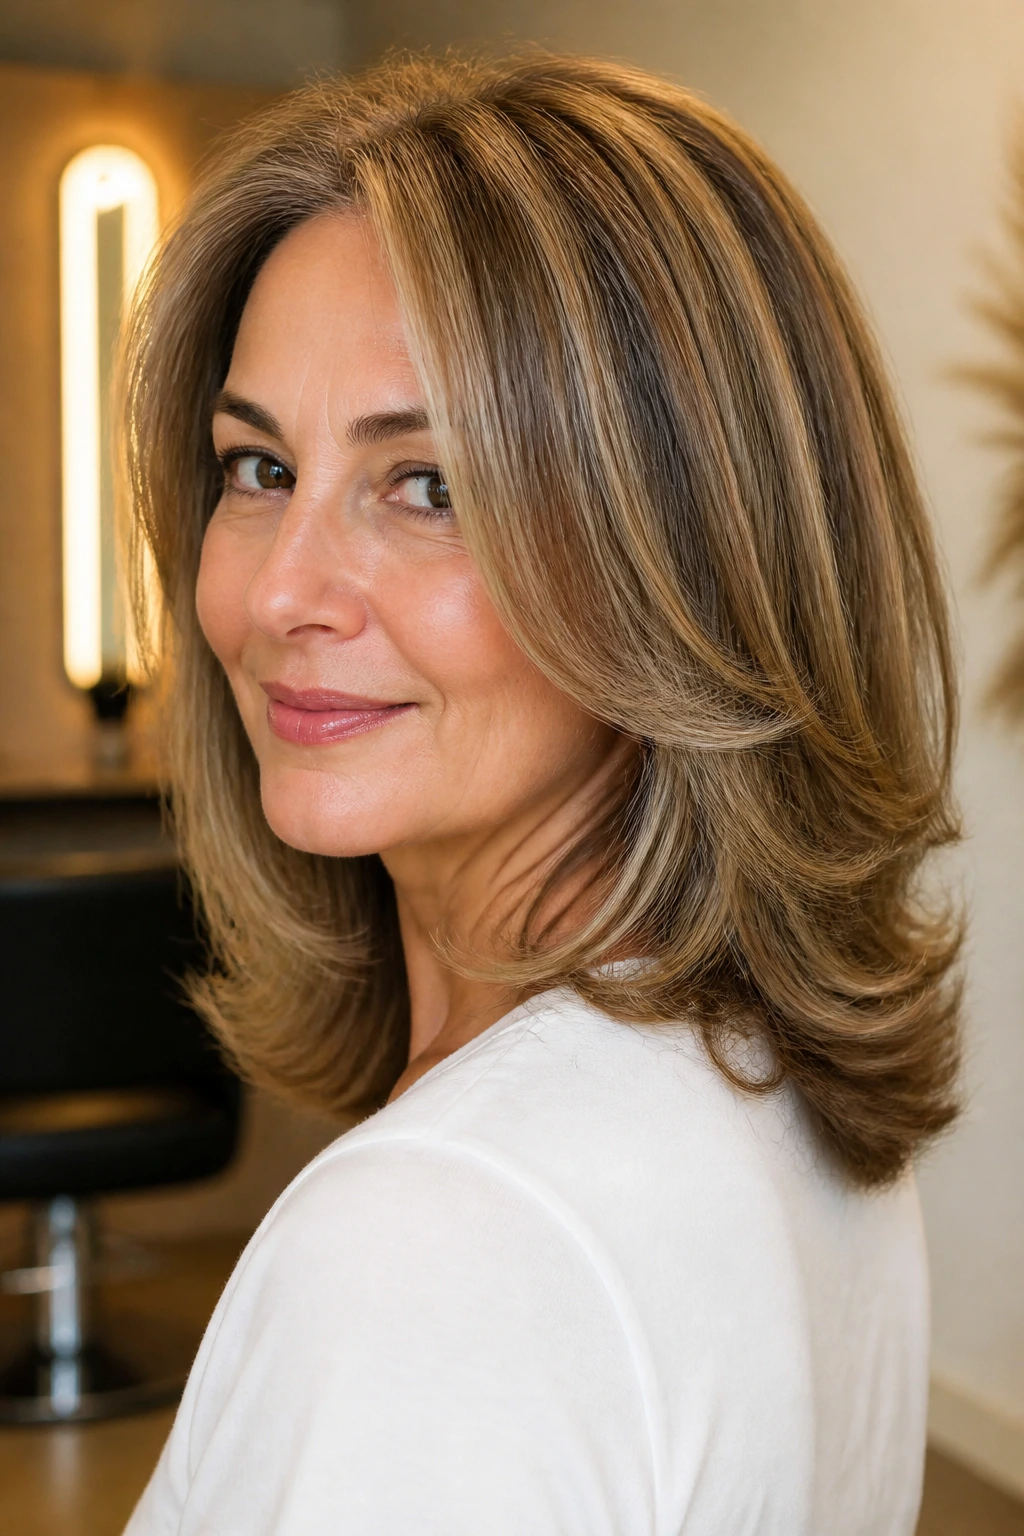
The U-shape cut is one of those quiet shape tricks that makes hair look fuller without stuffing it with product. The back sits a little longer in the center and rises gently toward the sides, so the cut forms a soft U when viewed from behind. It’s subtle. That’s why it works.
This shape is especially useful for hair that’s dense but not necessarily thick at the scalp. A blunt line at the bottom can make that kind of hair feel like one big block. The U-shape removes some of that boxiness and lets the hair fall with more swing. If you like to wear your hair curled, this silhouette also gives the curls a better place to sit.
What to ask your stylist
Tell them you want movement in the ends, not lots of short layers at the top. That distinction matters. A U-shape is about preserving length where you want it while softening the bulk where you don’t.
Small maintenance note
This cut grows out gracefully if the layers are kept long. If you let it go too long between trims, the U becomes more of a straight line, and the shape gets less obvious.
8. Silver-Enhancing Soft Layers
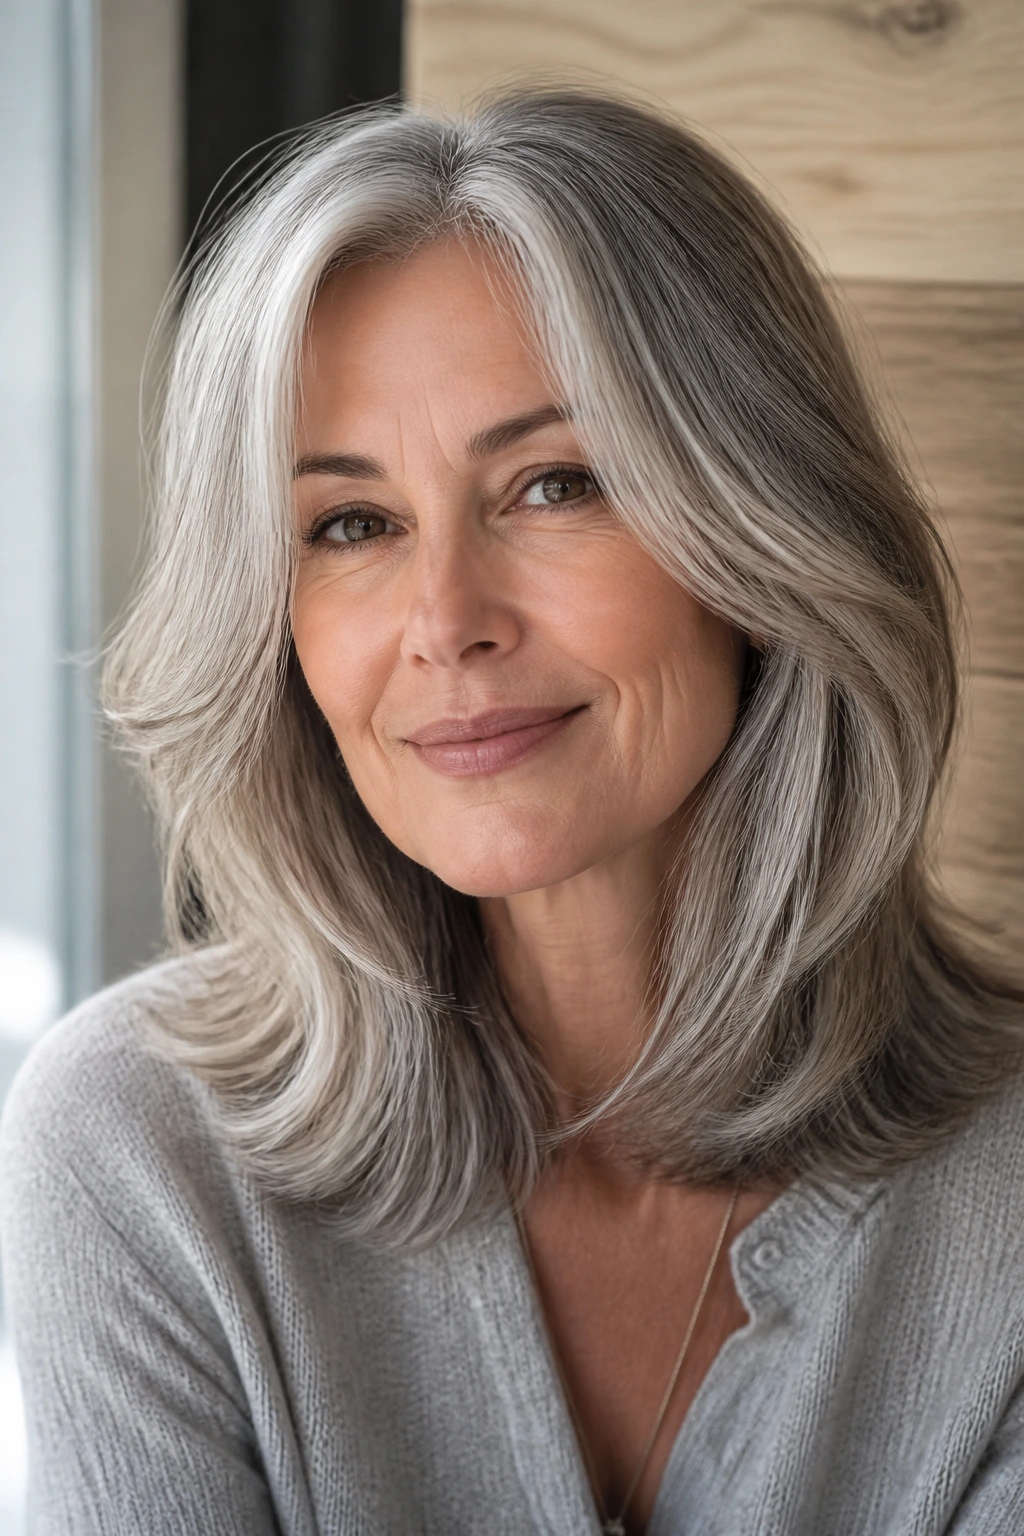
Gray and silver hair deserves a cut that shows off the shine, not one that hides it under a blunt sheet of weight. Soft layers around medium length let the light bounce through the strands, which is a nicer look than forcing a heavy, helmet-like shape onto hair that has changed texture over time.
A lot of silver hair is coarser than it used to be, and that means the haircut has to respect the movement of the strand. Too many choppy layers can make the texture look wiry. Too little layering, though, and the shape looks dense and static. The best version sits in the middle: soft movement through the sides, longer face-framing pieces, and a perimeter that keeps its dignity.
What makes it different
This cut isn’t about age. It’s about texture. Silver hair can be glassy and striking, but it can also be stubborn, and the layering has to work with that. The right shape helps the color read brighter because the cut creates shifts in light and shadow.
Styling note
A drop of shine serum on the ends is enough. Don’t cake it on. Silver hair shows heavy product faster than darker hair does, especially around the temples and neck.
9. Long Layers with Side-Swept Bangs
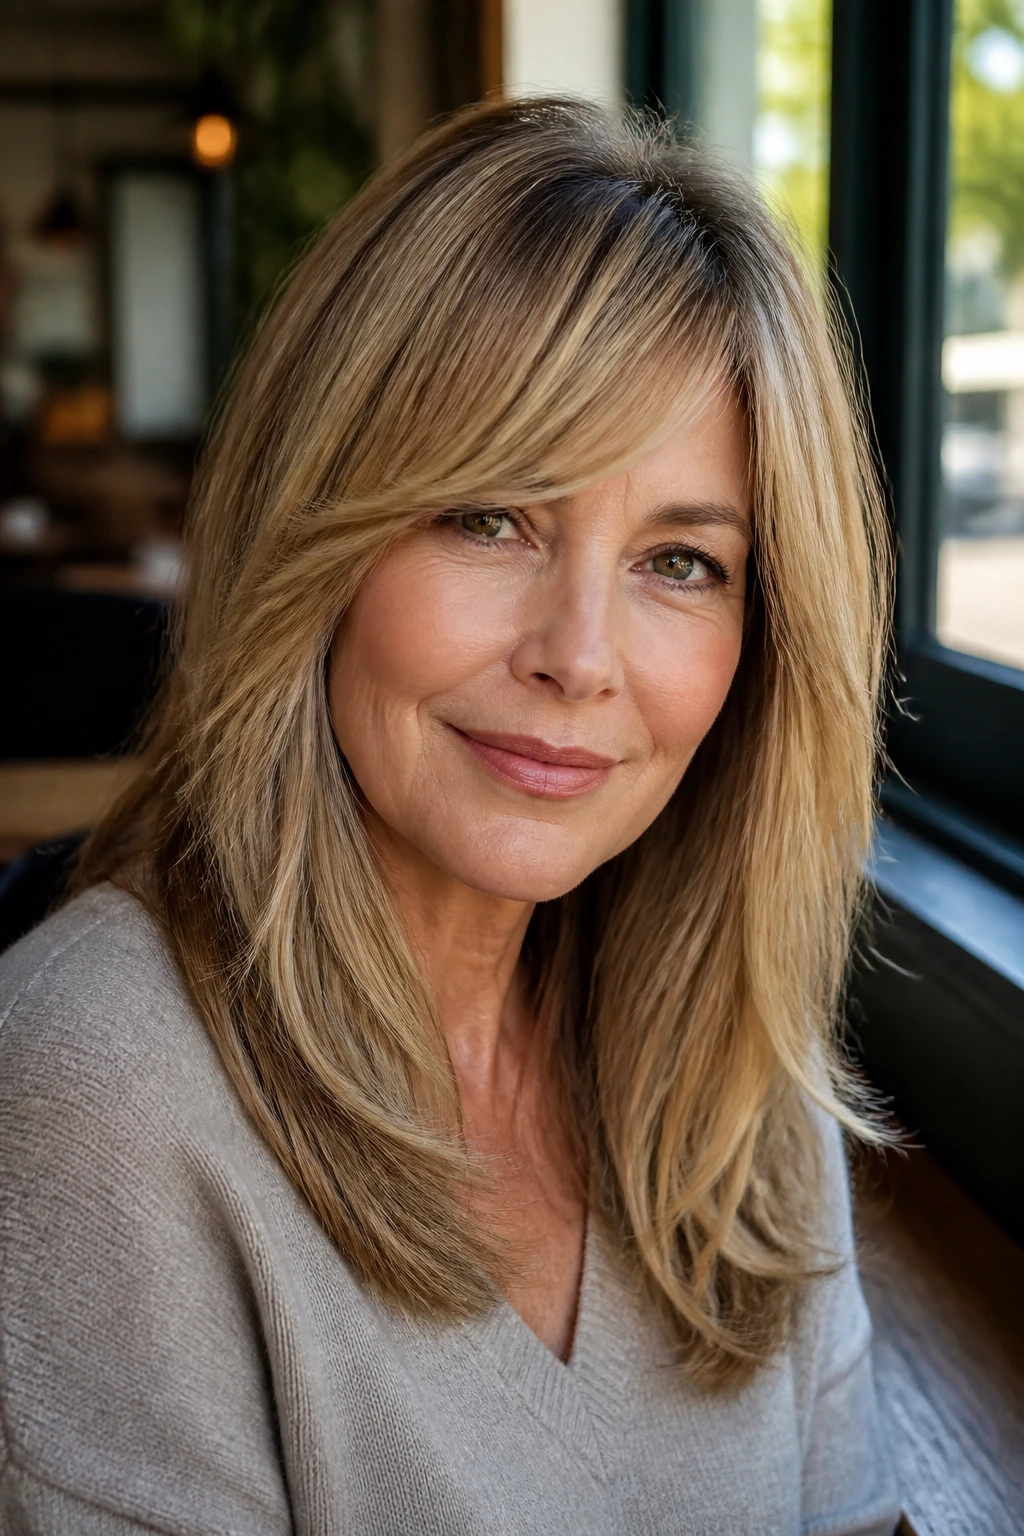
Side-swept bangs are still one of the easiest ways to soften a medium-length cut without committing to a full fringe. They blend into long layers so the transition is smooth, and they’re more forgiving on days when you don’t feel like wrestling the front section into place. That matters more than people admit.
This shape is useful if your forehead feels a little long, if you wear glasses, or if you want some movement around the eyes without an abrupt line. The side sweep keeps the face open on one side and gives a little direction to the front of the haircut. It’s a nice antidote to the “hair just hangs there” problem.
A practical advantage
Side-swept bangs grow out in a much friendlier way than blunt bangs. If you’re not ready for regular fringe trims every three weeks, this is the safer move. It looks deliberate even when it’s grown out by half an inch.
Styling tip
Dry the bangs first, from side to side, with a small round brush or a vent brush. If you leave them for last, they dry in whatever strange direction they feel like, and you’ll spend the morning trying to negotiate with them.
10. Rounded Layered Lob
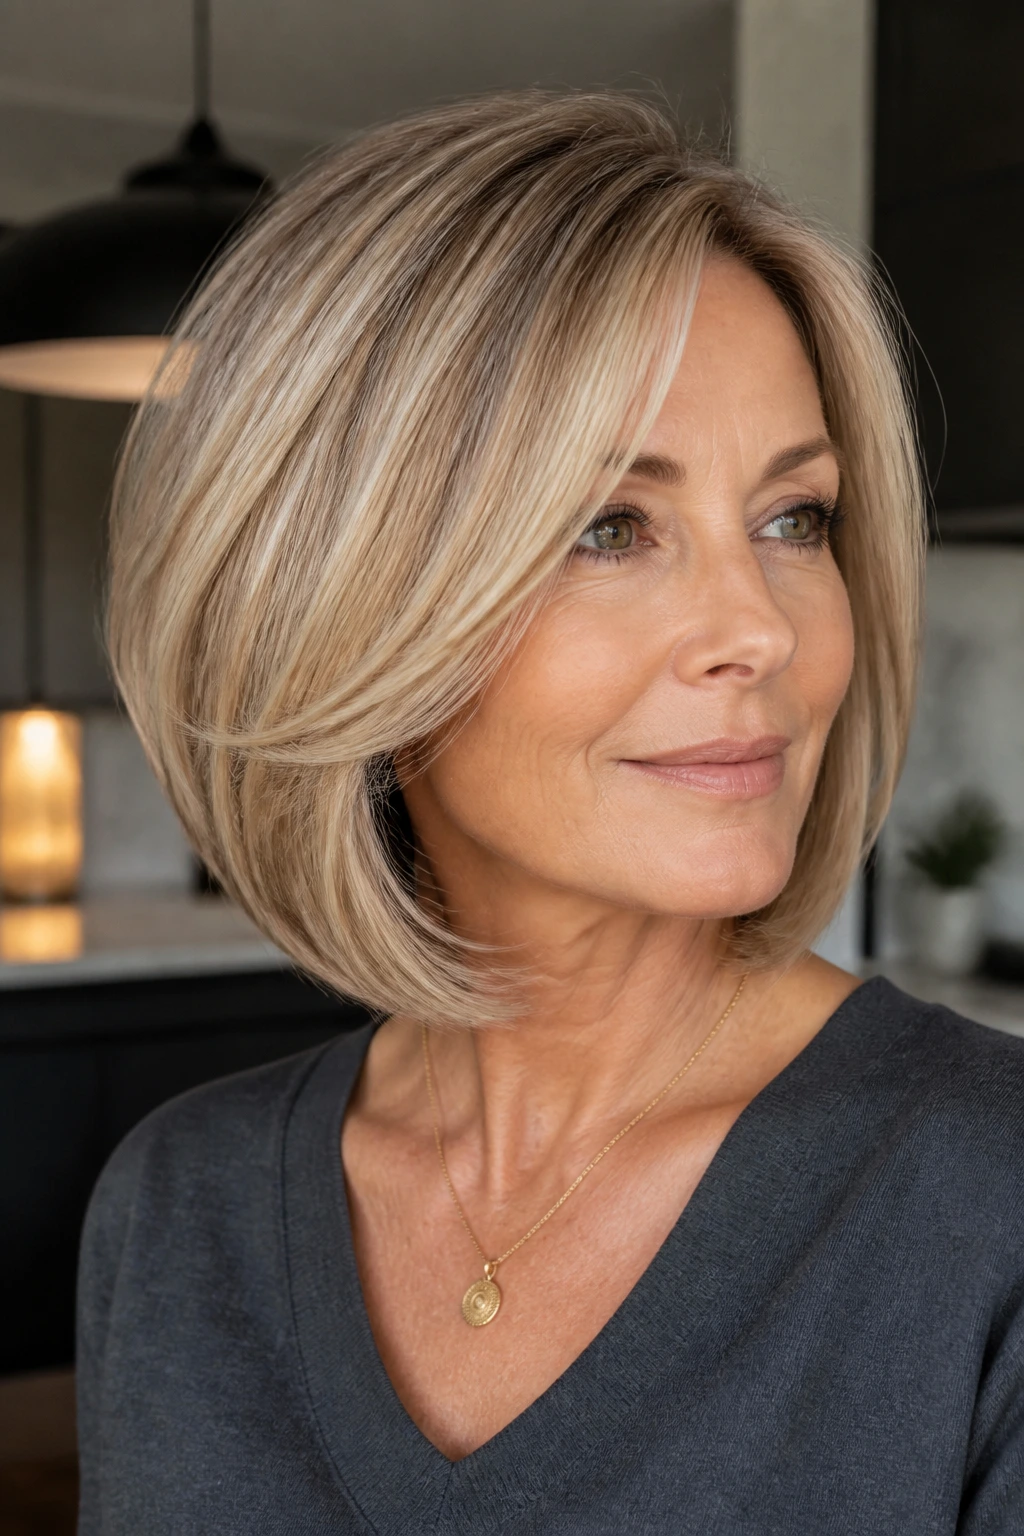
The rounded layered lob is the neat one in the family. It sits around the chin to collarbone zone and curves inward slightly at the ends, which gives the whole style a fuller outline. It’s especially good for jawline definition because the rounded shape doesn’t end in a hard blunt edge.
I like this cut for people who want their hair to look finished with very little drama. It has enough structure to work for a polished office look, but it doesn’t demand a curling iron every single time. If your hair naturally bends a bit under, this cut may feel almost suspiciously cooperative.
Who should look at it
- Straight hair that needs a better outline
- Fine to medium density hair
- Anyone who likes to tuck the sides behind the ears
- People who want shape, not shredding
What not to do
Don’t ask for the layers to start too high. That’s how the cut loses its rounded body and starts looking scattered. The beauty of this one is the curve.
11. Airy Textured Mid-Length Cut
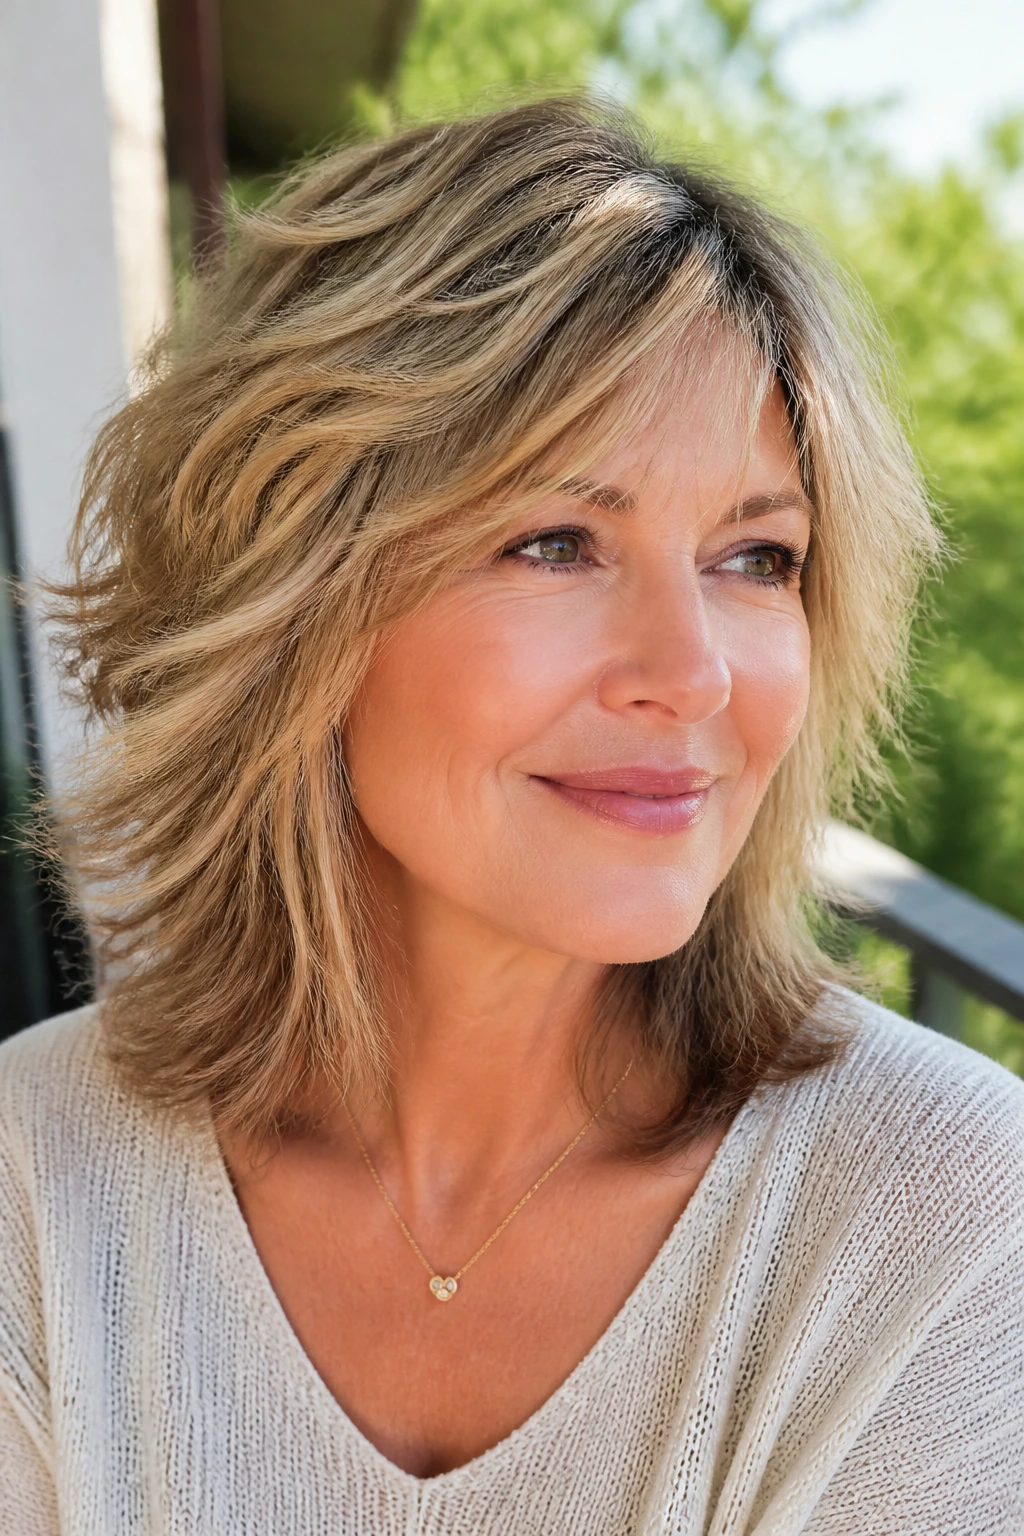
Airy textured cuts are for women who want their hair to look like it has been lived in, not lacquered into place. The texture comes from soft point-cutting and slide-cutting, which removes the bluntness from the ends and lets the layers settle with more separation. The result is lighter on the head, both visually and physically.
This shape works especially well if you don’t love spending time on heat styling. It still looks intentional when air-dried because the layers are long enough to fall naturally. That said, the cut has to be done with restraint. A little texture goes a long way. Too much, and the style turns frayed.
Best use case
If your hair has a slight wave or a bend that shows up on its own, this cut can be a dream. If it’s stick-straight and slippery, you may need a little mousse or texture spray to keep the layers from collapsing.
My opinion
This is one of the most honest haircuts on the list. It doesn’t pretend the hair will behave perfectly. It just gives the hair a shape that still looks good when it doesn’t.
12. Tapered Layers for Fine Hair
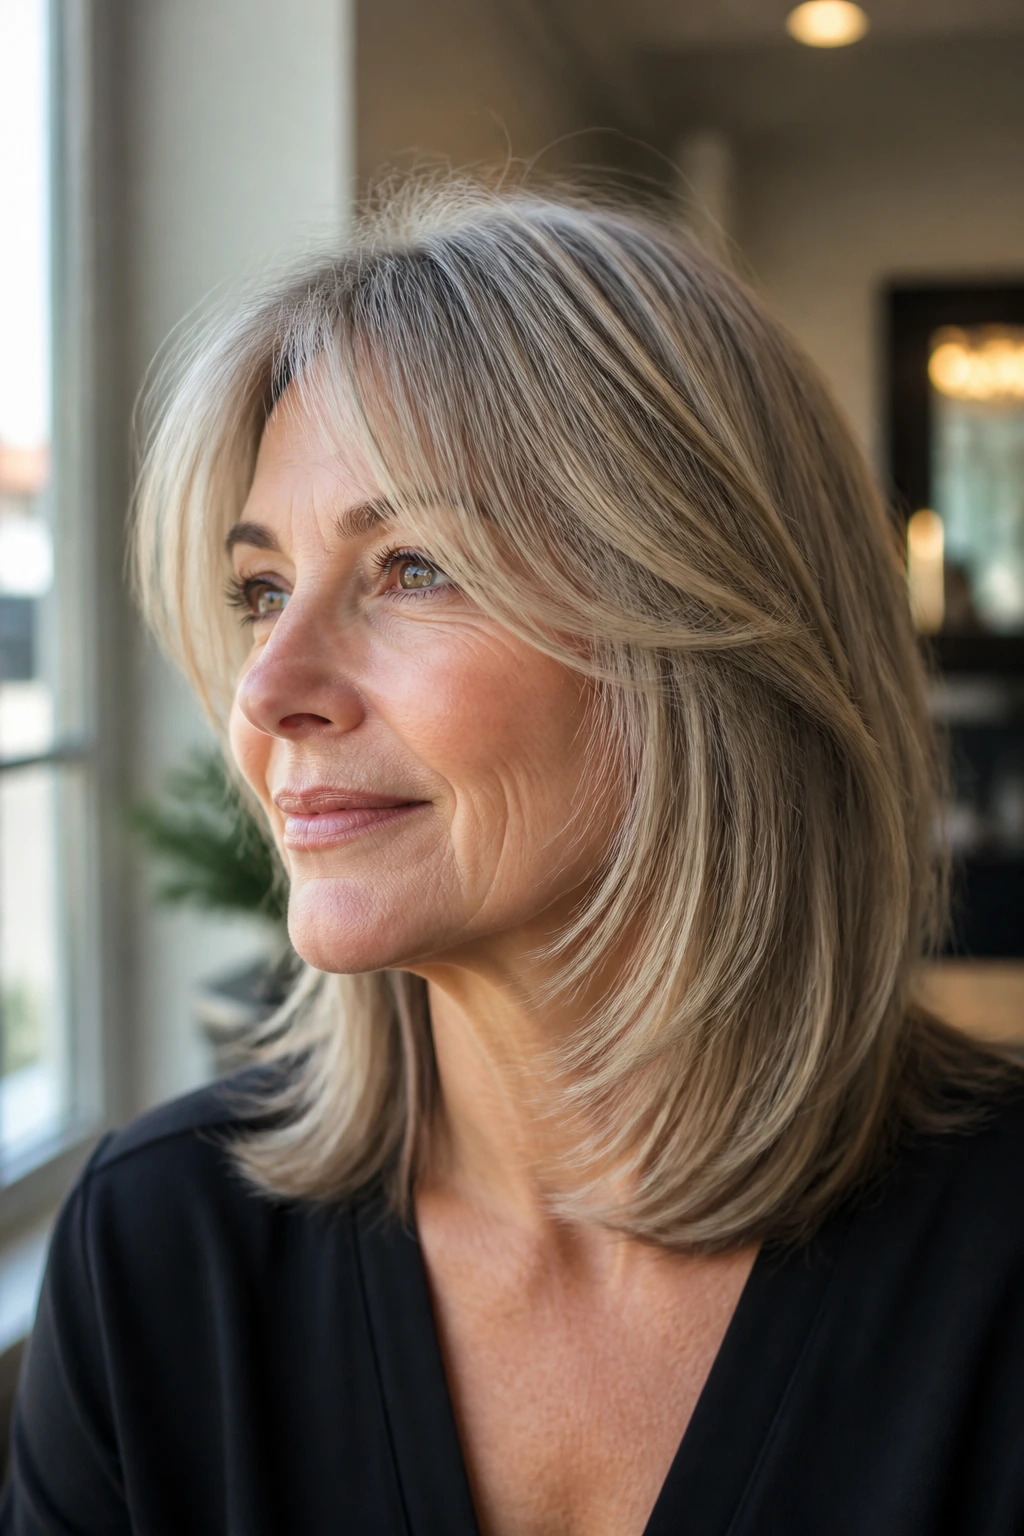
Fine hair needs a haircut that gives lift without removing too much substance from the ends. Tapered layers do exactly that when they’re placed carefully. The crown gets a little internal lift, the sides stay lighter, and the ends still have enough weight to look like hair instead of wisps trying their best.
That balance is harder than it sounds. Too many short layers at the top can make fine hair stick out in a funny little triangle. Too much thinning at the bottom makes it look sparse. The taper should be gradual, with the shortest pieces helping the top rise and the rest of the cut staying long enough to keep fullness at the perimeter.
What to ask for
Ask your stylist to keep the layers soft and leave the ends blunt enough to hold density. If they reach for thinning shears first, pause and ask how much weight they plan to remove. That question alone can save a lot of regret.
Styling cue
Root-lift spray at the crown helps, but don’t spray the whole head. Fine hair gets weighed down fast. A little at the base, then blow-dry with the brush lifting away from the scalp.
13. Wavy Mid-Length Shag
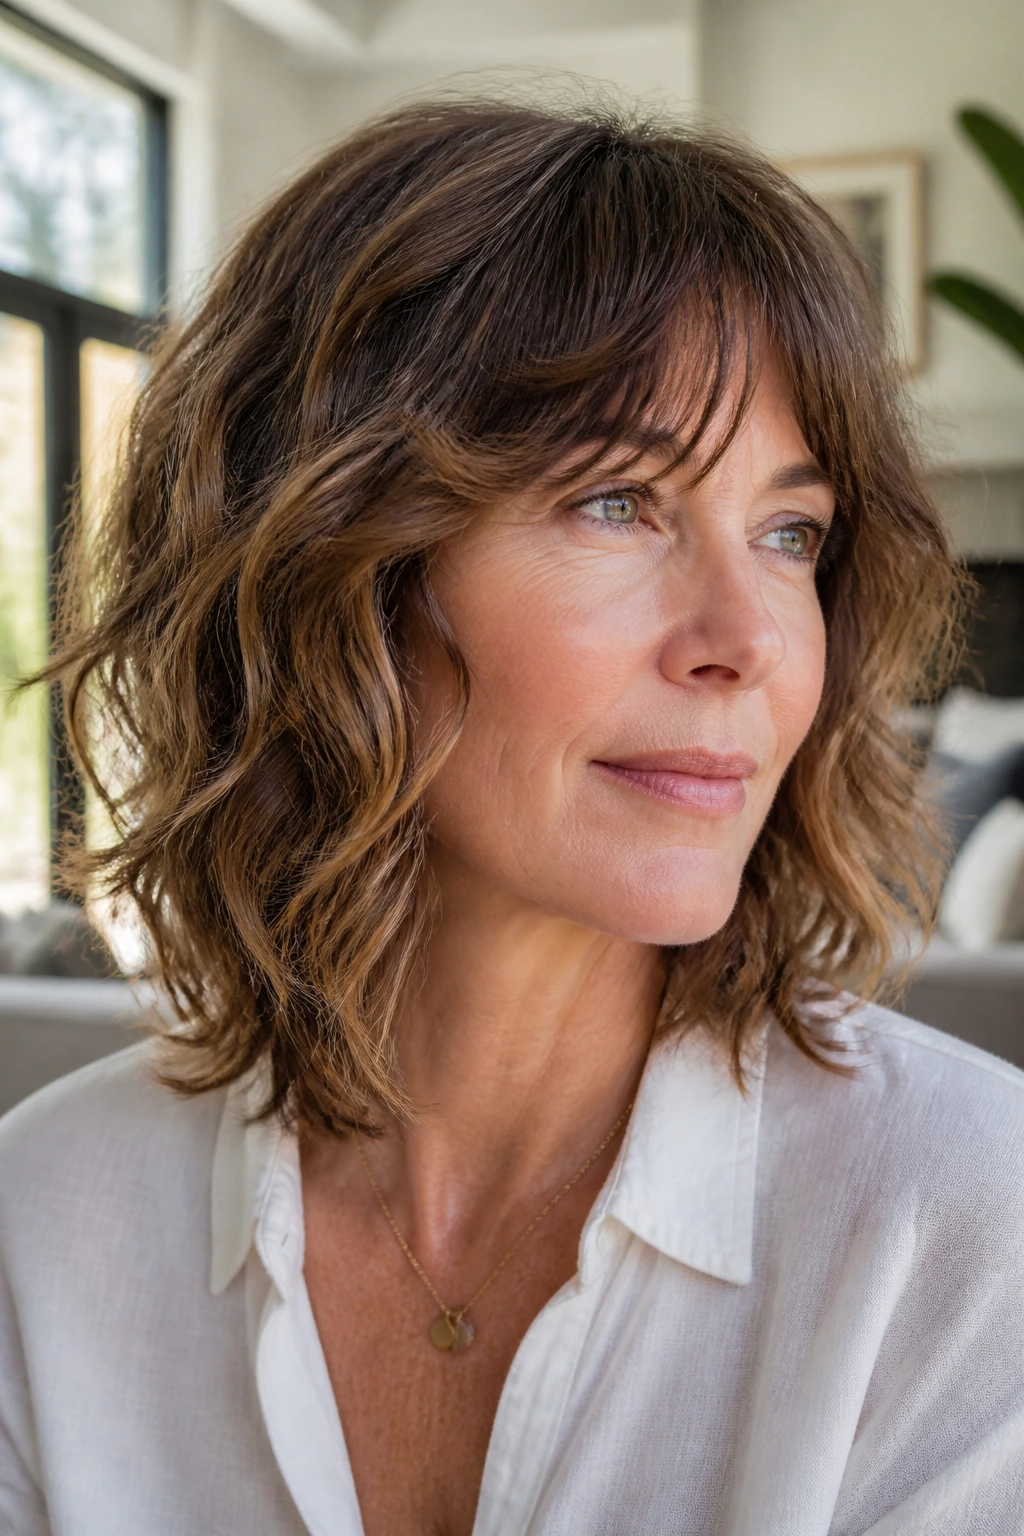
If your hair has a natural wave, the shag can feel like a shortcut and a style choice at the same time. The layers are built to catch the wave instead of flattening it out, and the length usually lands somewhere between the chin and shoulders so the texture has room to move. This is not the old shag that looked shaggy for the sake of it. The modern version is softer and more controlled.
What makes the cut sing is the interaction between the fringe, the side pieces, and the mid-length layers. You get body at the top, separation through the sides, and enough length at the ends that the style doesn’t feel too short. If your wave has been hiding inside a blunt cut, a shag can wake it up.
How to style it
Drying Pattern
Start with a curl cream or lightweight mousse on damp hair, then scrunch from the ends upward. Air-dry if you can stand it, or diffuse on low heat. High heat can make the top layer puff out while the rest stays flat. That mismatch is maddening.
The honest part
A shag wants a little attitude. If you prefer every hair in perfect place, this is not your haircut. If you like shape that loosens up through the day, it’s a strong contender.
14. Sleek Layered Lob with Tucked Ends
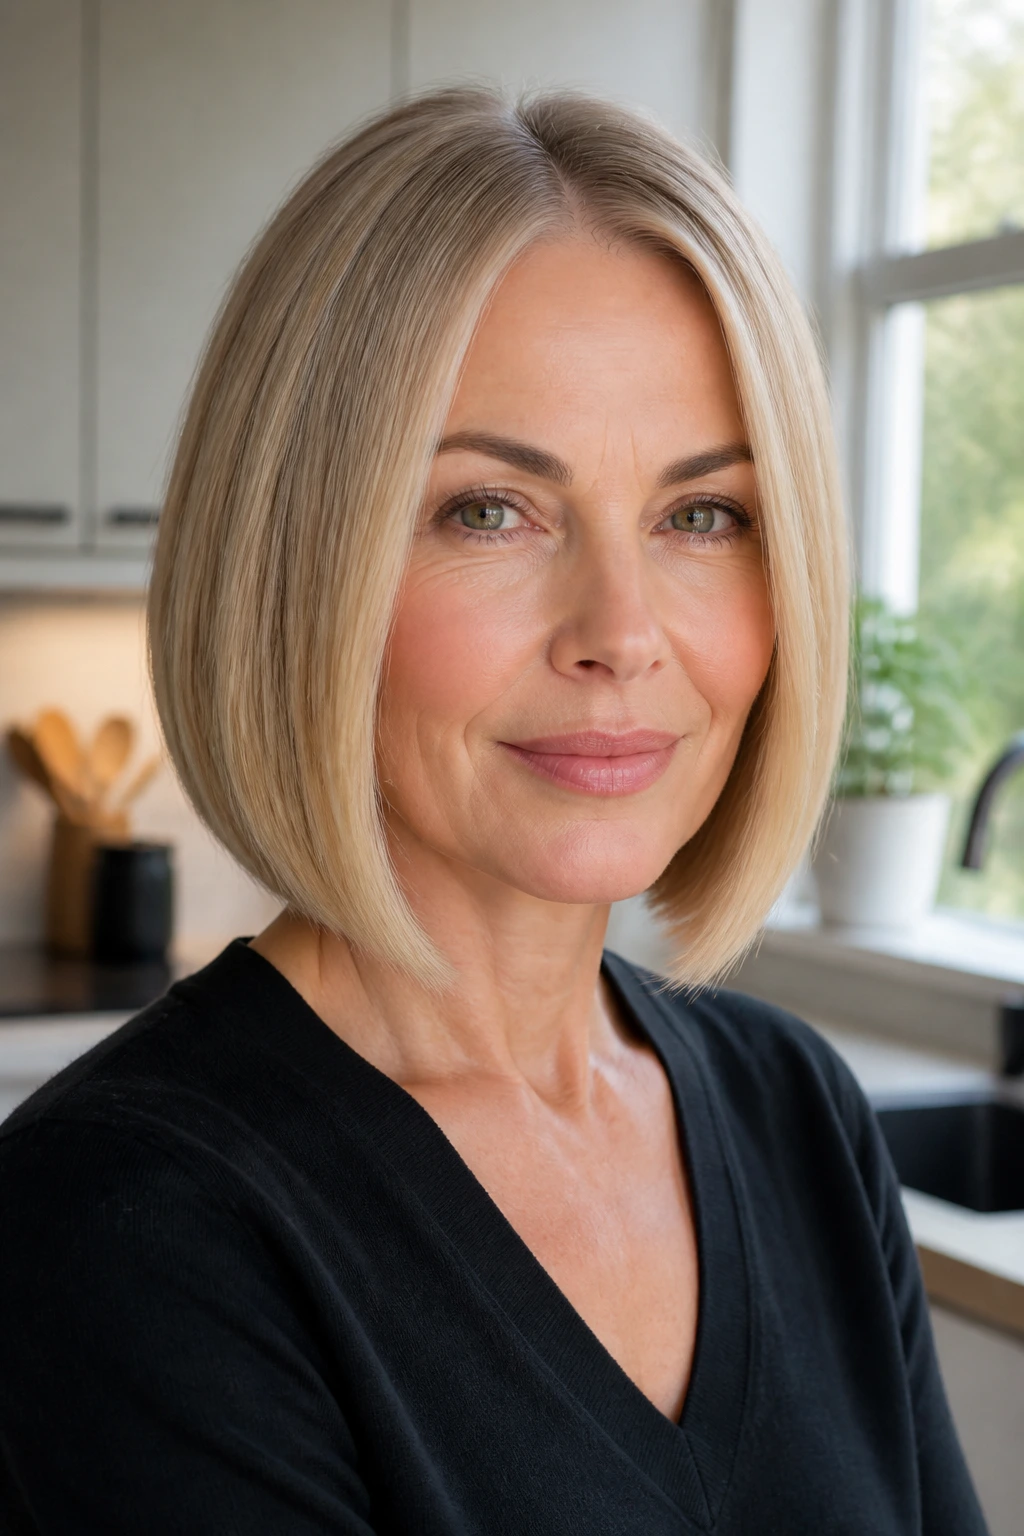
Some haircuts are built for movement. This one is built for polish. The sleek layered lob keeps the base clean, then sneaks in long internal layers so the hair doesn’t fall like a single rigid curtain. Tucked under at the ends, it looks smooth and controlled, almost architectural.
The style is especially good if you like a tidy profile. It doesn’t flare out at the shoulders, which is a small mercy on days when collars, scarves, or blazer lapels are involved. A center or slightly off-center part works well here, and the haircut looks particularly sharp when the ends brush just below the jaw.
Why it stands out
This is the cut for anyone who wants medium length without too much texture showing. The layers are there, but they don’t need to shout. They just keep the lob from getting boxy.
Styling note
A paddle brush plus a quick pass with a round brush at the ends is enough for most days. If you use a flat iron, bend the last half-inch under, not more. Too much curve makes the whole thing look dated.
15. Bouncy Blowout Layers
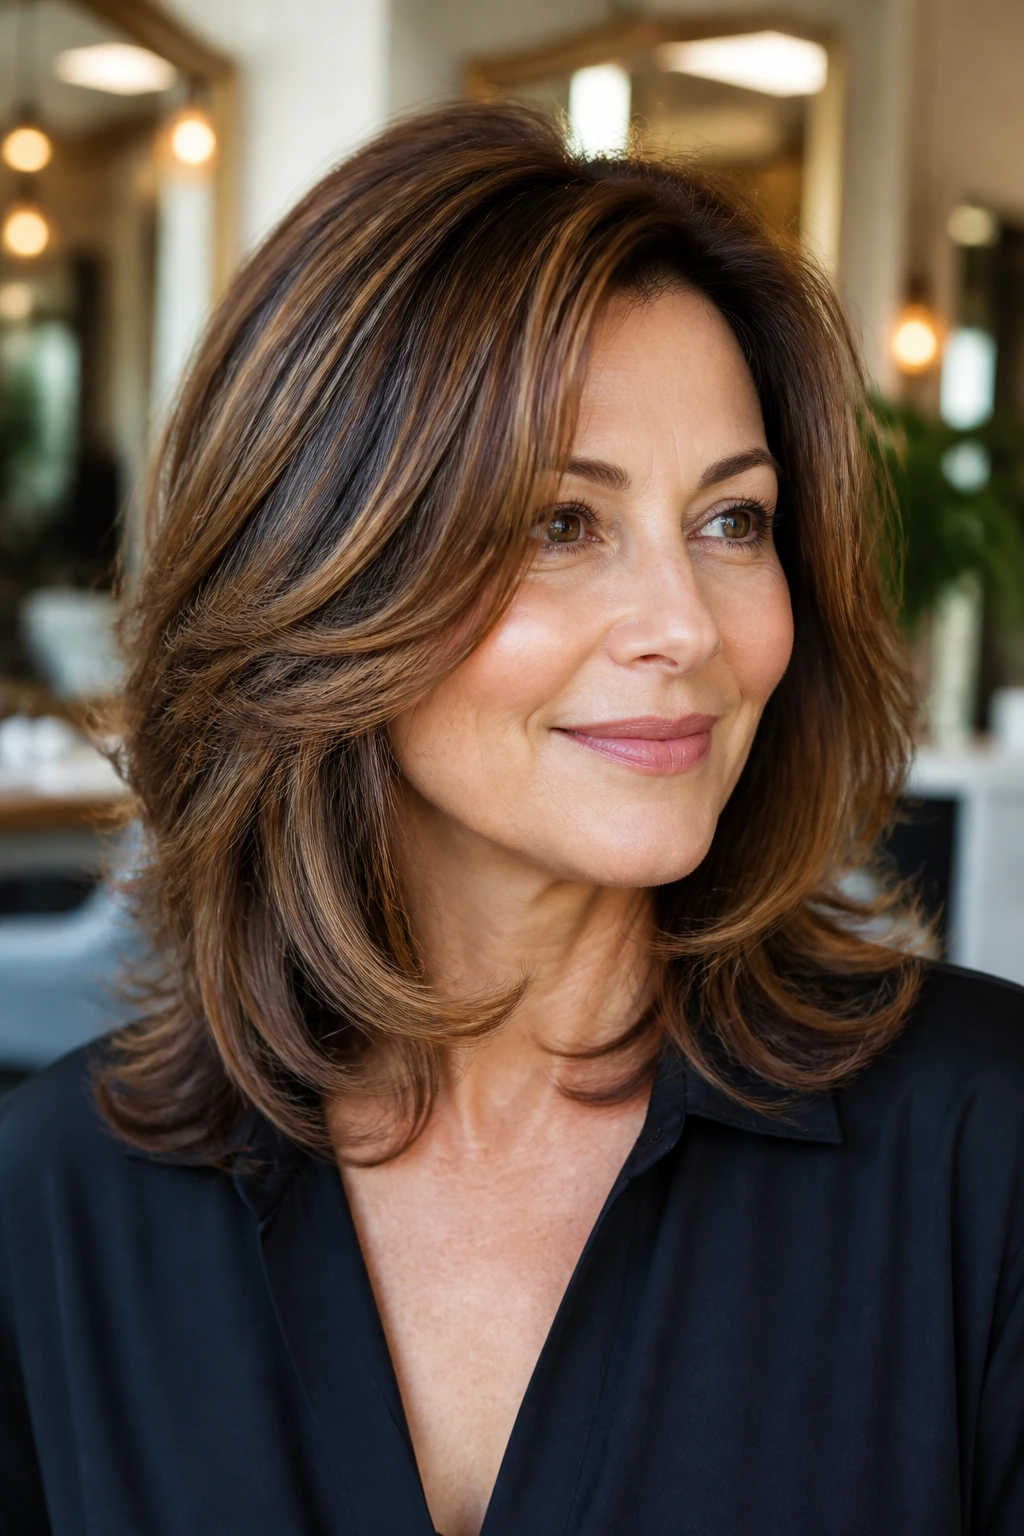
If you like the look of hair that still remembers a salon blowout by the next day, this is the cut. Bouncy layers are placed to help the hair lift off the shoulders and spring away from the face. The result is movement that feels full rather than fluffy. That distinction matters.
The layers usually start around the cheekbone or lower and gradually open toward the ends. This gives the hair enough structure to hold a large round-brush shape without collapsing into a flat sheet. It’s a particularly good choice for medium-to-thick hair that wants body but not bulk.
How to get the bounce
Use a blow-dryer with a nozzle, a medium round brush, and sectioning clips. Dry the roots first, then roll the ends under and hold the brush for a few extra seconds before releasing. That little pause helps the bend last. Hot rollers can also be useful if you want more lift with less arm work.
Small opinion
This is one of the few styles where product matters less than technique. A good blow-dry beats a cabinet full of mousses that never get used.
16. Soft Wolf-Inspired Mid Cut
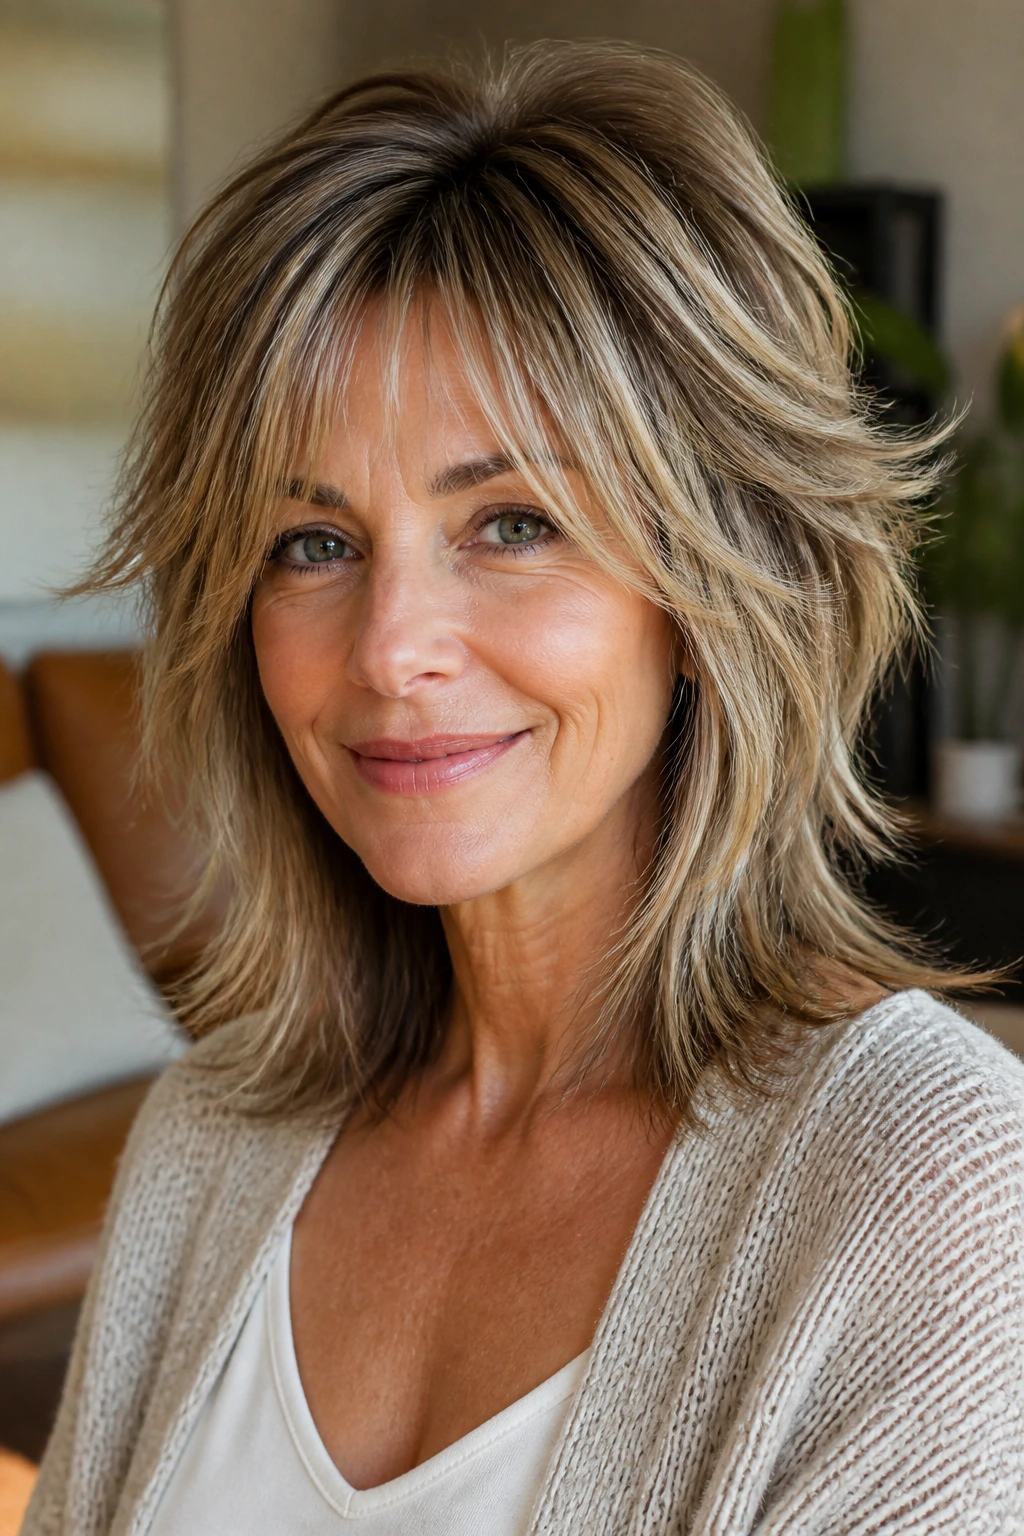
The wolf cut can get too extreme for some faces, but the softer mid-length version is a different story. It keeps the layered energy up top, brings in some face-framing texture, and leaves enough length at the bottom that the whole thing feels wearable. Less rock concert. More smart rebellion.
The crown gets some lift, the sides get some movement, and the perimeter stays long enough to keep the haircut from looking too spiky. If you have naturally wavy hair or hair that resists neatness in humid weather, this style may actually work better than a more controlled shape.
What makes it wearable
The softer version depends on restraint around the face. You want a lift, not a halo of short pieces. Keep the shortest layers near the cheekbone area and let the rest of the cut fall with some softness.
Who should skip it
If you hate texture or you want a style that always looks smooth, this isn’t your haircut. It wants some irregularity. That’s the whole point.
17. Layered Cut for Thick Hair
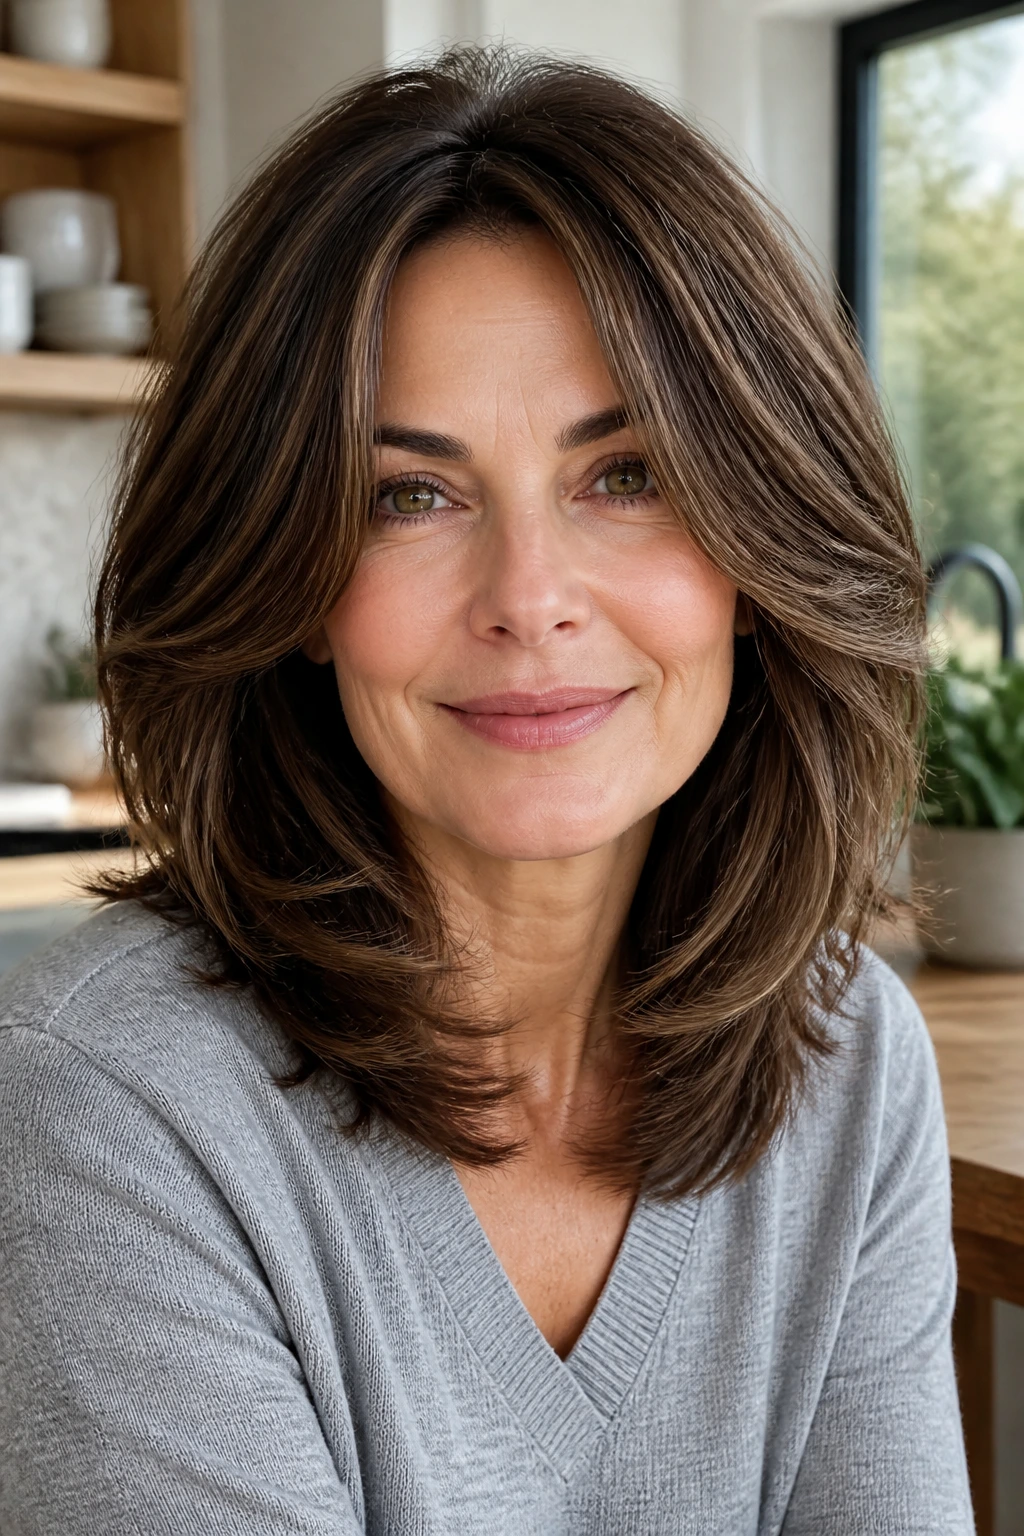
Thick hair can look gorgeous in layers, but not when those layers are hacked in too high. A good layered cut for thick hair removes bulk where the head needs relief—usually through the mid-lengths and lower sections—while keeping enough weight at the bottom so the hair doesn’t end in frayed pieces.
The most common mistake with thick hair is over-thinning the top. That can make the crown puff out while the ends go too light. A better approach is longer layers with internal shaping and maybe some subtle face framing. The haircut should feel lighter, not thinner in a nervous way.
Practical payoff
This kind of cut dries faster, sits closer to the neck, and usually behaves better when you put it up. Thick hair owners know the joy of a ponytail that doesn’t feel like a helmet. Layers help with that, too.
Styling note
A cream-based leave-in works better than heavy mousse on dense hair. You want slip and control, not a crunchy finish that makes the ends look dry.
18. Low-Maintenance Air-Dry Layers
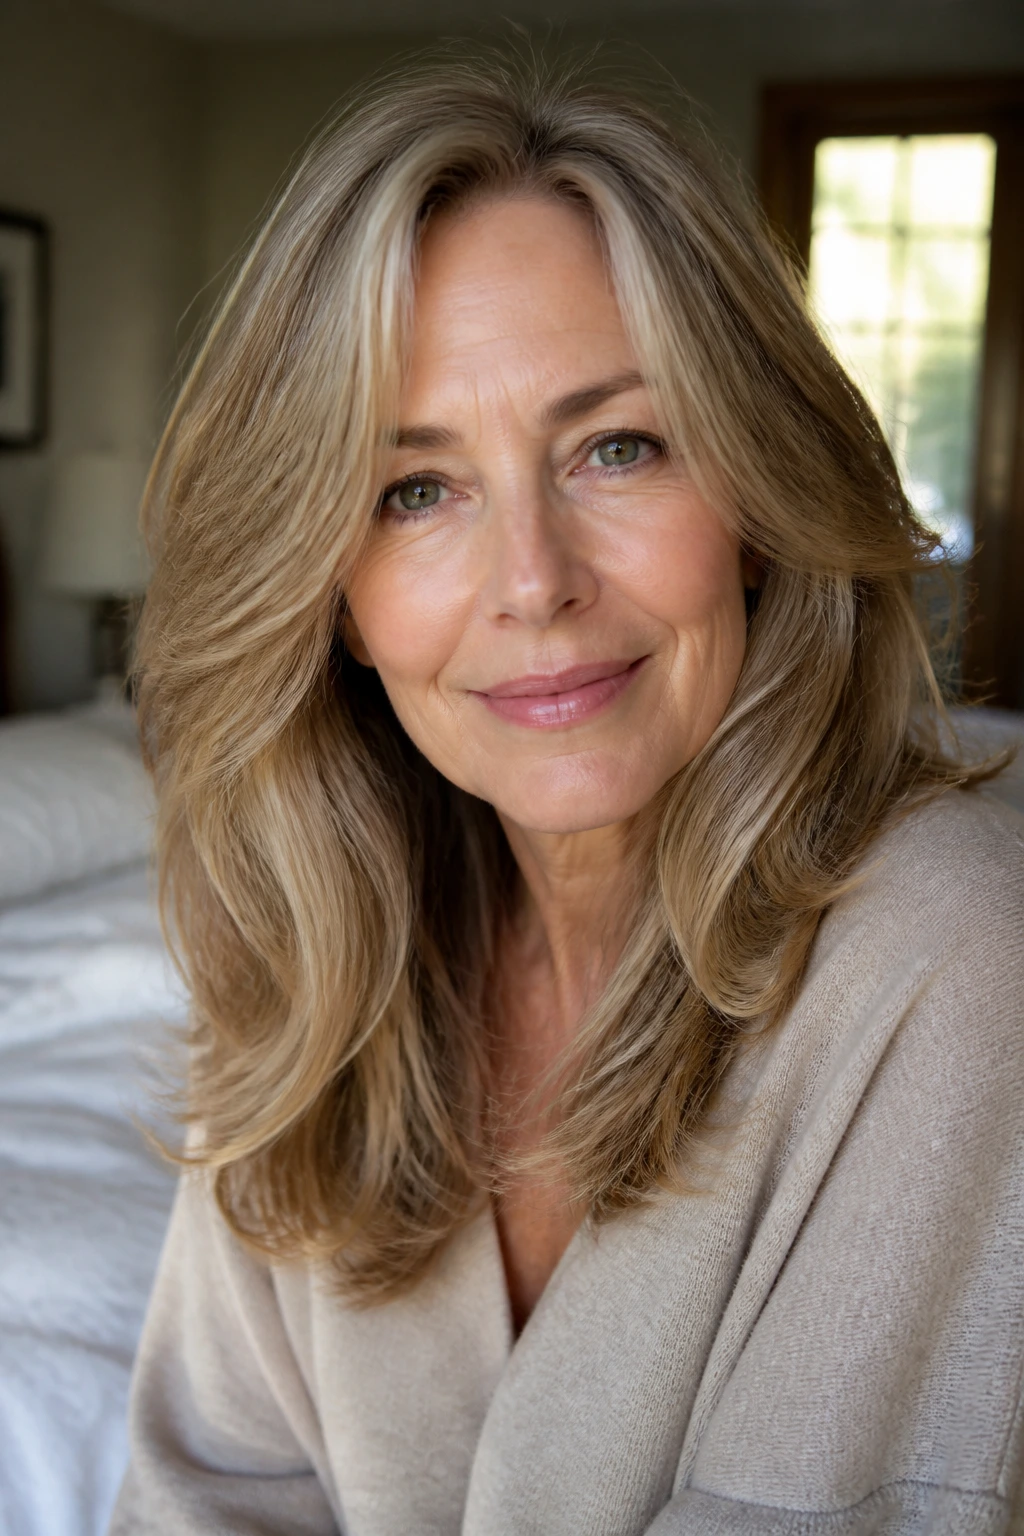
If your routine is more “shake it out and go” than “twenty minutes with a brush,” this is the cut to study. Low-maintenance air-dry layers are shaped to follow your natural bend, so the haircut looks intentional even when you don’t blow it out. That is not a small thing. It saves time and it saves your patience.
The layers should be long enough to avoid hard steps, and the face-framing pieces should blend rather than sit like a separate fringe. If the cut is done well, you can add a bit of leave-in conditioner, scrunch the ends, and let the hair do the rest. A bad version of this cut just looks unfinished. So the shaping matters a lot.
A simple rule
If your hair naturally bends inward at the ends, keep the layers soft and long. If it bends outward or flips all over the place, the stylist may need to tame the perimeter a bit more so the air-dry finish doesn’t fray.
Best part
This is the style that makes people think you have a better routine than you do. Frankly, that’s useful.
19. Elegant Shoulder-Length Layers with Soft Bangs
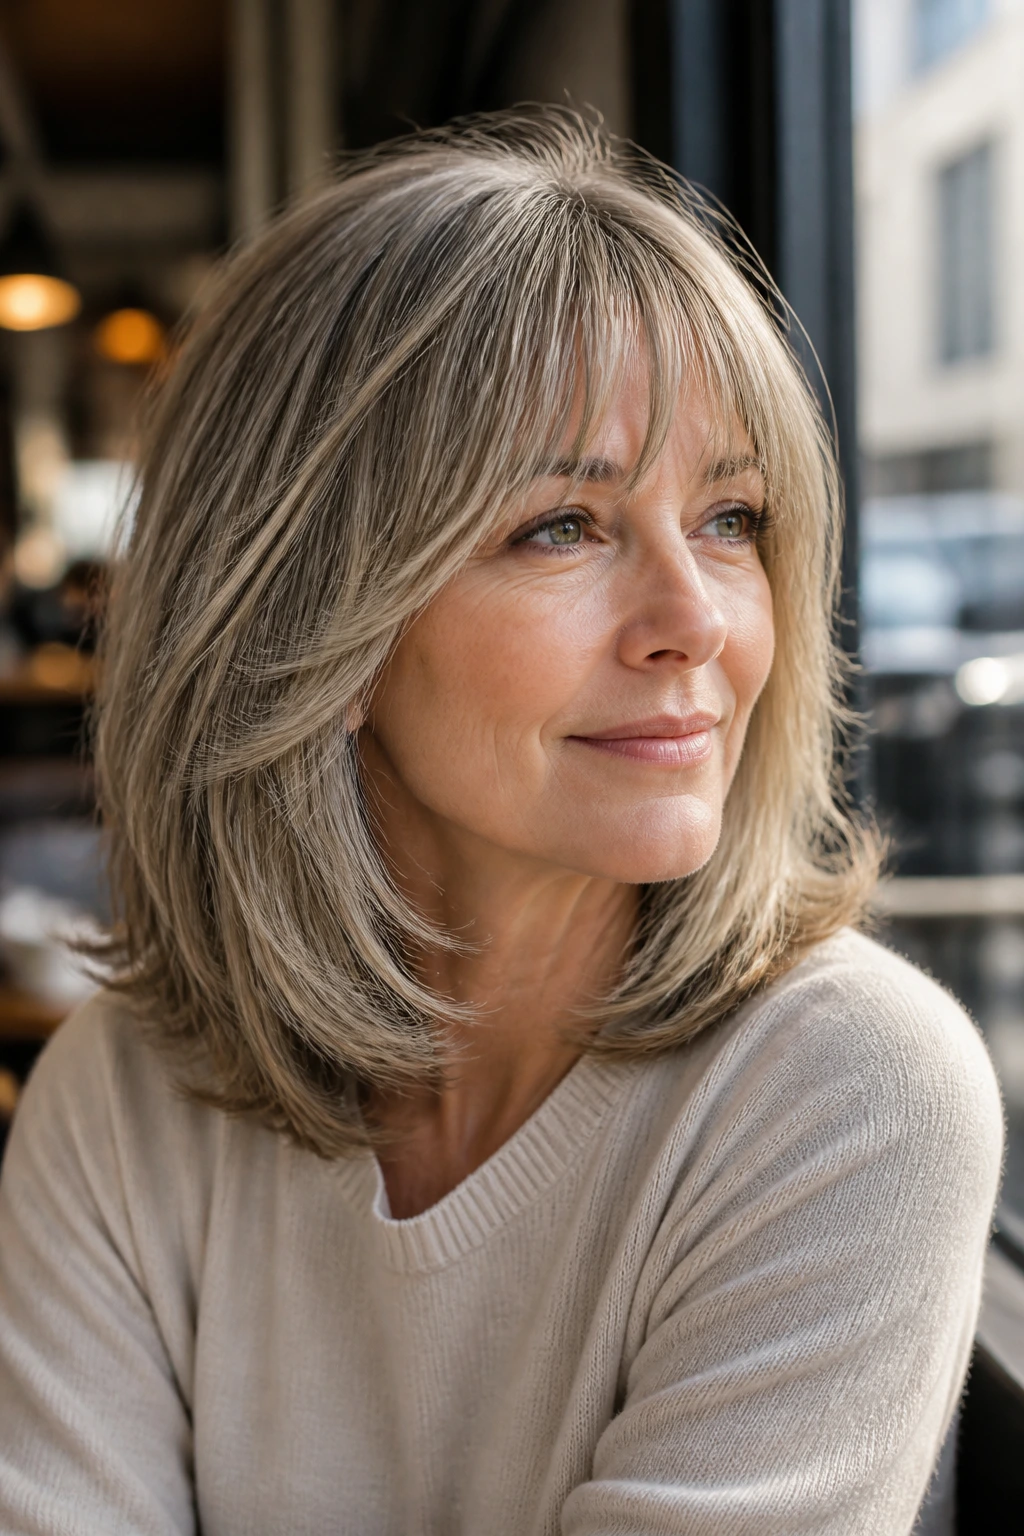
This is the classic that never needs a speech. Shoulder-length layers keep enough weight for polish, while soft bangs make the front of the cut feel less severe. The bangs don’t have to be full or blunt; in fact, that’s usually the wrong move here. A softer fringe that skims the brow or breaks slightly at the center gives the haircut more ease.
The shoulder length is long enough to pull back and short enough to keep the shape visible when worn down. That’s a handy middle ground if you want one haircut to handle errands, work, and dinner without a lot of fussing. It’s also a useful style for anyone who wants to soften the upper face while still keeping some length around the shoulders.
Why it lands so well
The softness in front matters. Bangs can do too much if they’re cut heavy, but when they’re feathered or split just a little, they make the haircut feel kind and deliberate.
My take
If someone asked me for one medium-length layered style that could survive real life and still look refined, this would be near the top of the pile.
Why Medium Layers Beat a Heavy One-Length Cut

A one-length cut has its place, but it can become a bit stubborn when hair changes texture or density. Medium layers give you more control over where the shape lives. You can keep fullness at the perimeter, open up the face, and take pressure off the shoulders without chopping everything to bits. That’s why the best layered cuts often look calm rather than busy.
The mechanics matter. Hair falls from the crown to the ends under its own weight, and medium layers reduce some of that drag. If the hair is fine, the right layer placement can create the illusion of more body at the top. If the hair is thick, the right internal shaping lets it move instead of swelling into a triangle by noon. That’s not magic. It’s geometry with a little styling help.
What a lot of people miss is that layers should be tailored to the way the hair behaves on a normal Tuesday, not just on salon day. If you air-dry, the cut needs to live without a blowout. If you wear glasses, the front needs to sit around the frames without sticking out. If your neckline hates bulk, the ends should taper away from it. A good cut thinks about the whole head, not only the front-facing photo.
Essential Tools for Styling These Haircuts
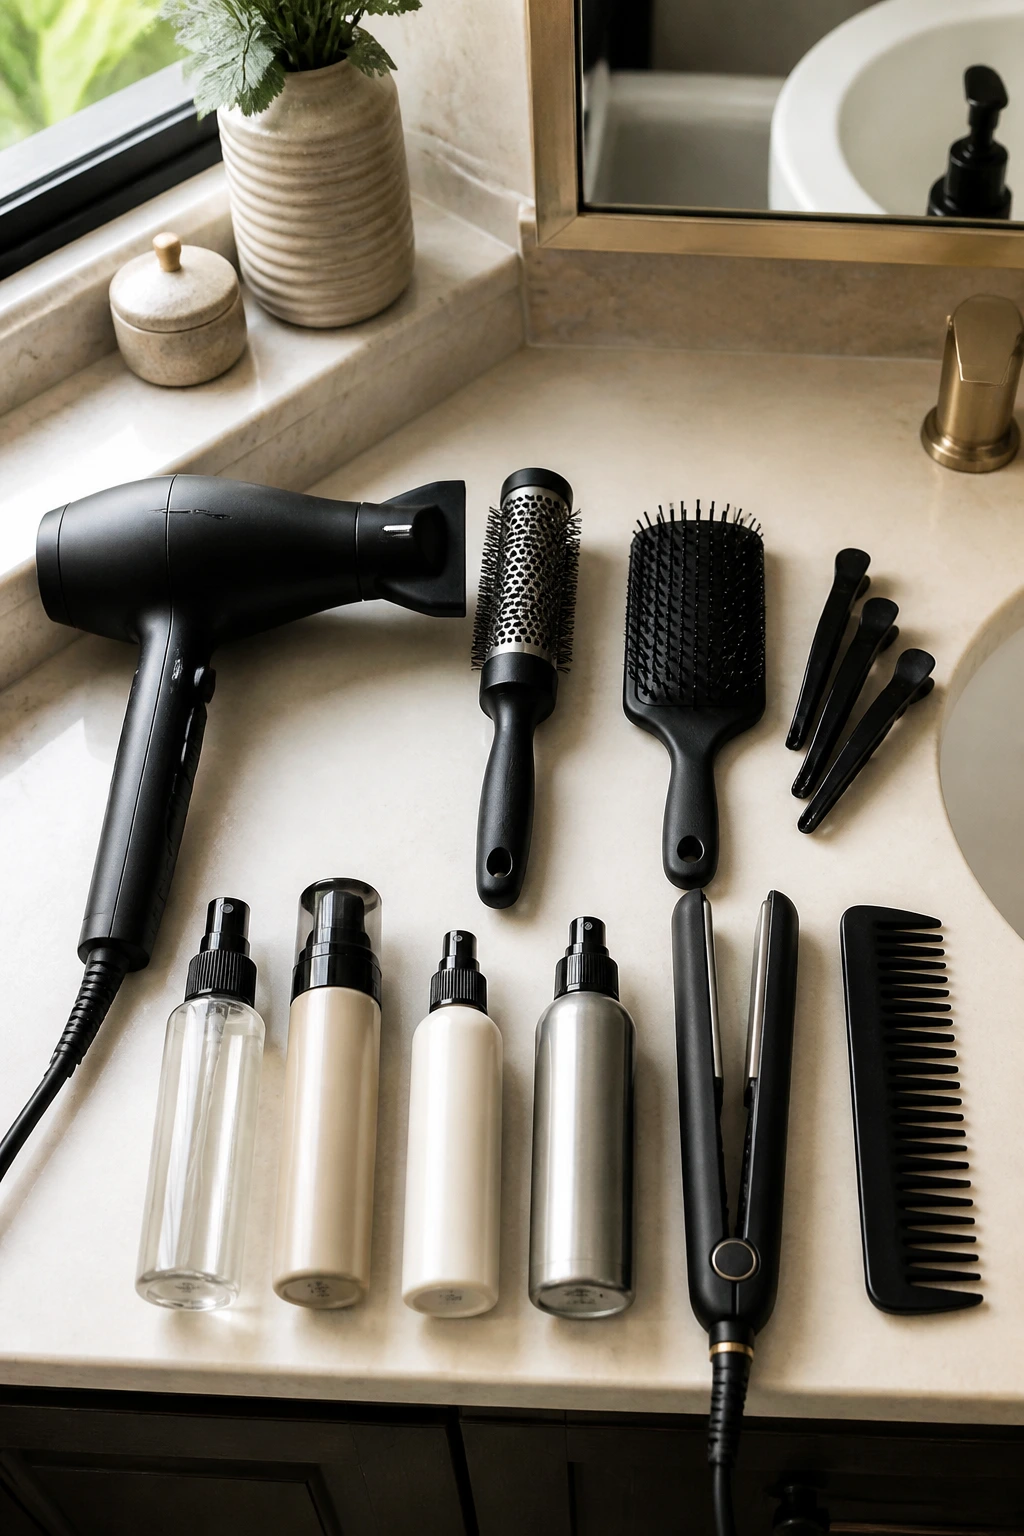
- Blow dryer with a nozzle attachment — Gives you direction at the roots and keeps the ends smoother than a bare dryer.
- Medium round brush, 1.5 to 2 inches — The most useful brush for collarbone cuts, lobs, and shoulder-length layers.
- Paddle brush — Handy for sleek finishes and quick daytime touch-ups.
- Sectioning clips — Keep the top and side pieces out of the way while you dry the underside properly.
- Heat protectant spray — Worth using every time you reach for a dryer or iron; medium layers show heat damage fast at the ends.
- Lightweight mousse — Good for fine or flat hair when you need root lift without sticky buildup.
- Leave-in conditioner — Helps coarse, gray, or wavy hair stay soft through the mid-lengths.
- Texture spray — Useful on shaggy, air-dry, or piecey cuts when you want separation through the ends.
- Small flat iron or curling wand — Optional, but useful for smoothing bangs or bending the front pieces only.
- Wide-tooth comb — Better than yanking through damp layers with a fine comb, especially if the hair tangles easily.
How to Bring the Right Photo to the Salon
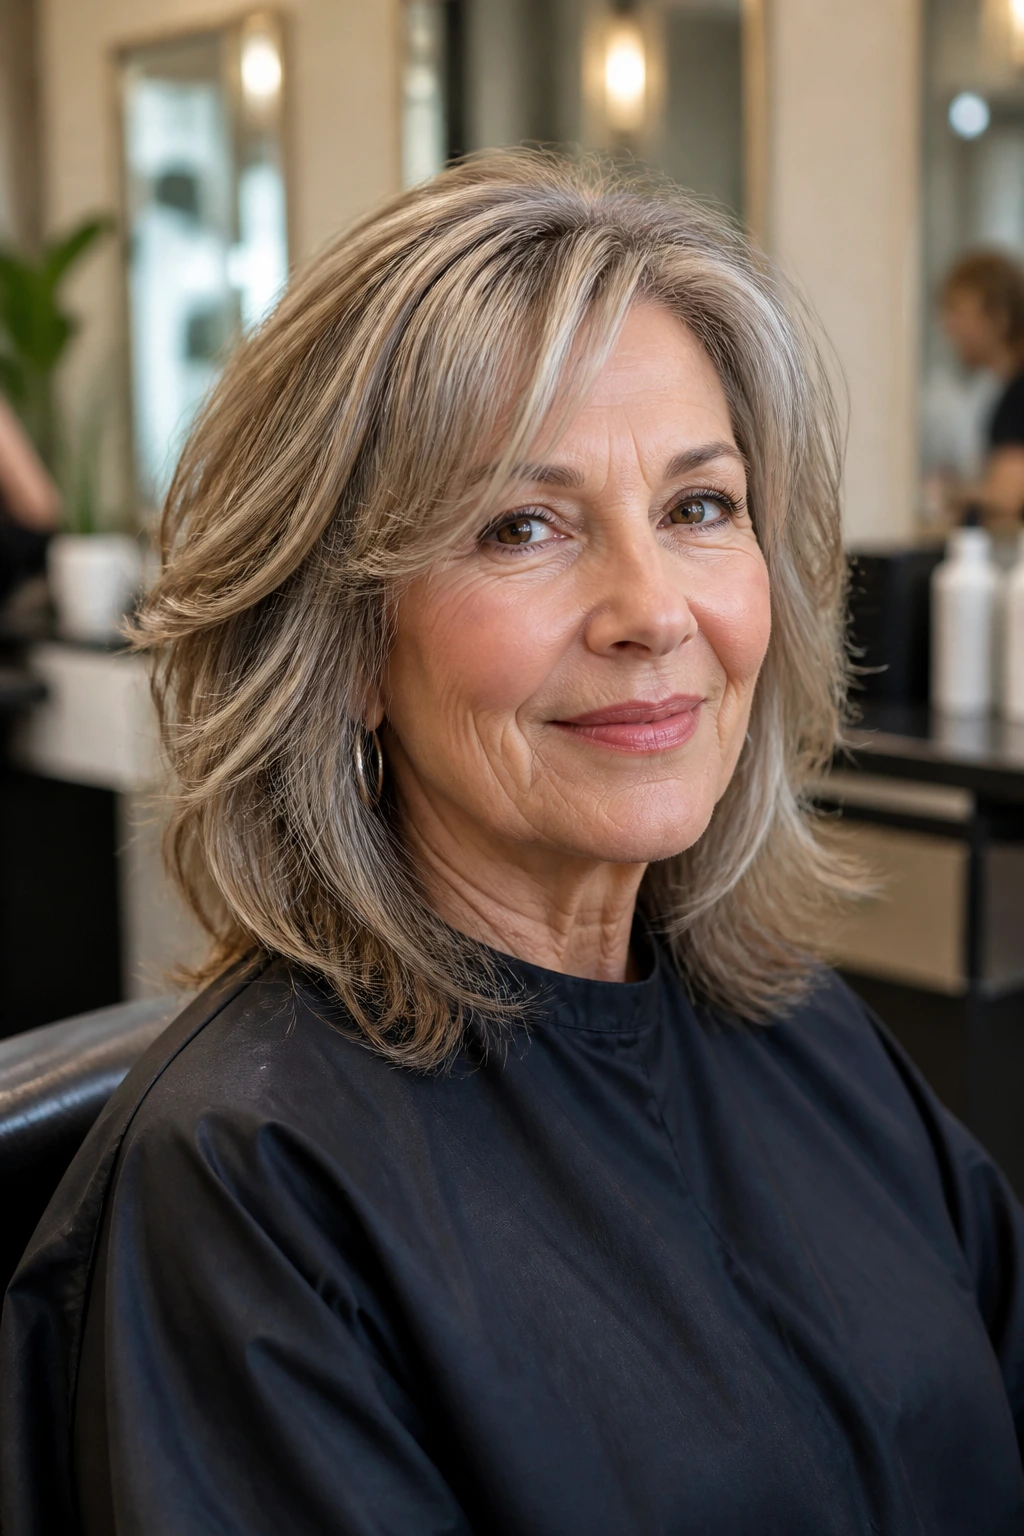
Bring more than one picture. One image can be misleading if the model has a different hair density, curl pattern, or face shape. A front view helps with the fringe and face frame, a side view shows how the length sits on the shoulder, and a back view keeps you from ending up with a shape you never meant to ask for in the first place.
Length Anchor
Say exactly where you want the hair to land: chin, collarbone, top of shoulder, or just below it. “Medium length” means different things to different stylists. A clear anchor saves time and avoids disappointment.
Texture Match
Tell your stylist whether your hair is fine, medium, coarse, straight, wavy, or curly when dry. That part matters more than the inspiration photo. A cut built for smooth straight hair can behave very differently on a wave that swells in humidity.
Maintenance Reality
Be honest about your morning routine. If you air-dry five days a week, don’t ask for a shape that only comes alive with a round brush and a barreled iron. If you like to blow-dry once and wear it for three days, say so. That changes where the layers should sit.
Face Frame Details
Ask where the shortest layer will land. Cheekbone? Jaw? Collarbone? That one line changes the whole face effect. It also tells the stylist whether you want softness, lift, or both.
How to Style These Cuts So They Look Intentional
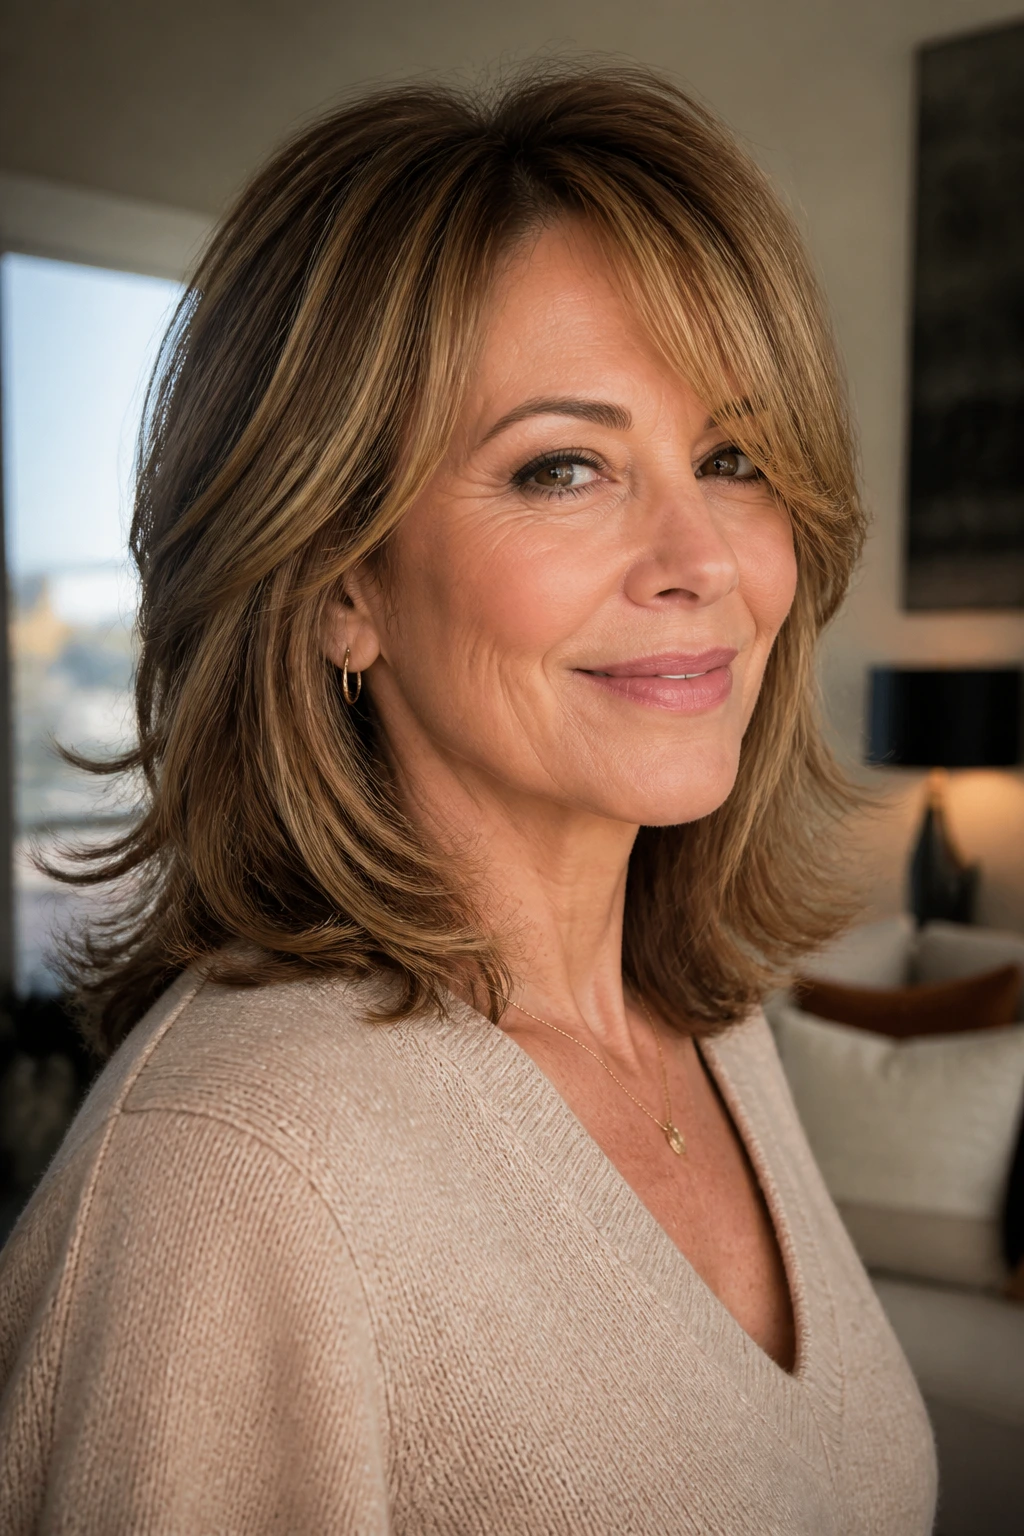
Presentation: Start with the finish you actually wear most. If you like tucked sides and a smooth crown, ask for a shape that stays close to the head. If you prefer movement, the layers can sit a little higher and the ends can be more separated.
Accompaniments: Earrings, glasses, and neckline choices matter more than people think. A soft lob sits nicely with open necklines and medium hoops. A layered shag looks better when the collar isn’t fighting the hair for attention. Small things, but they change the whole read of the cut.
Portions: If you want more volume, keep the layers longer on the outside and lighter inside. If you want less bulk, ask for internal shaping below the cheekbone rather than lots of short pieces at the crown. That keeps the silhouette cleaner.
Product Pairing: Fine hair usually wants mousse or root spray. Thick hair tends to like smoothing cream or leave-in conditioner. Wavy hair often does best with a small amount of curl cream and a touch of texture spray at the ends. Use the product to support the cut, not to fight it.
Styling Tricks That Make the Cut Behave Better
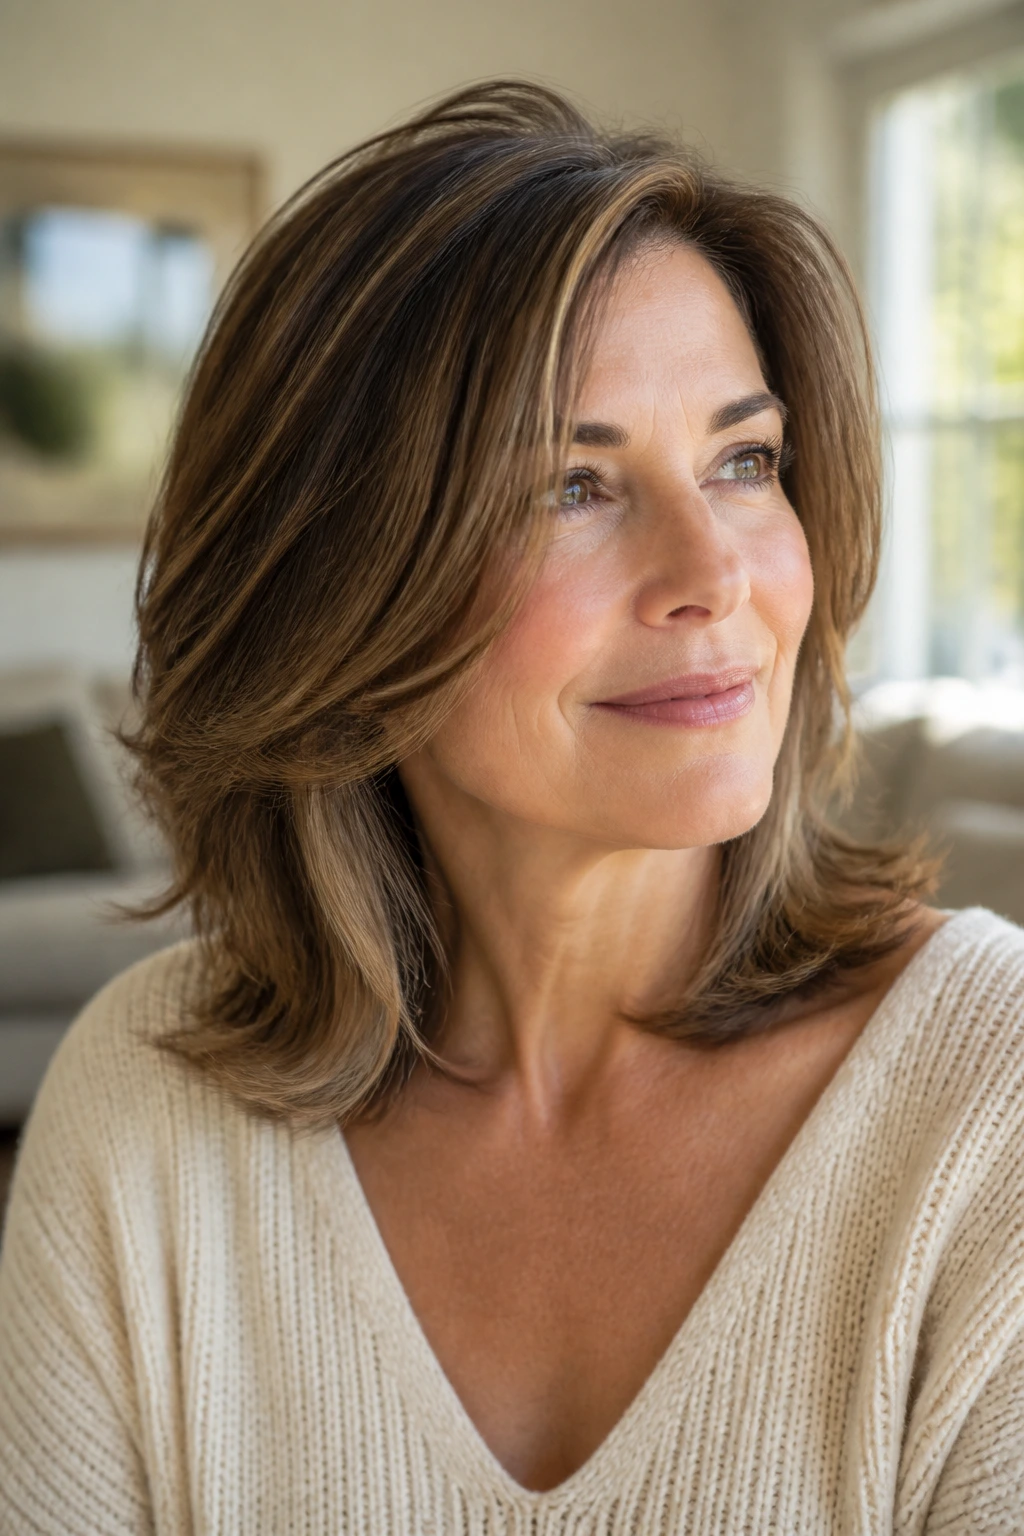
Volume Boost: Blow-dry the crown in the opposite direction of your part for the first minute or two, then switch back. That tiny reset helps the roots lift instead of lying flat by lunchtime.
Texture Boost: Put texture spray only on the mid-lengths and ends. If you spray the roots too, the cut can turn sticky or rough where you least want it.
Face-Frame Control: If your layers around the face puff out, bend them inward with a round brush or a large barrel iron for just five seconds per section. Don’t curl the whole head. You only need the front to cooperate.
Make-It-Yours: If you wear glasses, keep the shortest face-framing pieces below the frame line so they don’t compete. If you have strong cowlicks at the front, ask for a softer side part or longer curtain pieces instead of a blunt front edge.
Common Mistakes That Flatten the Cut
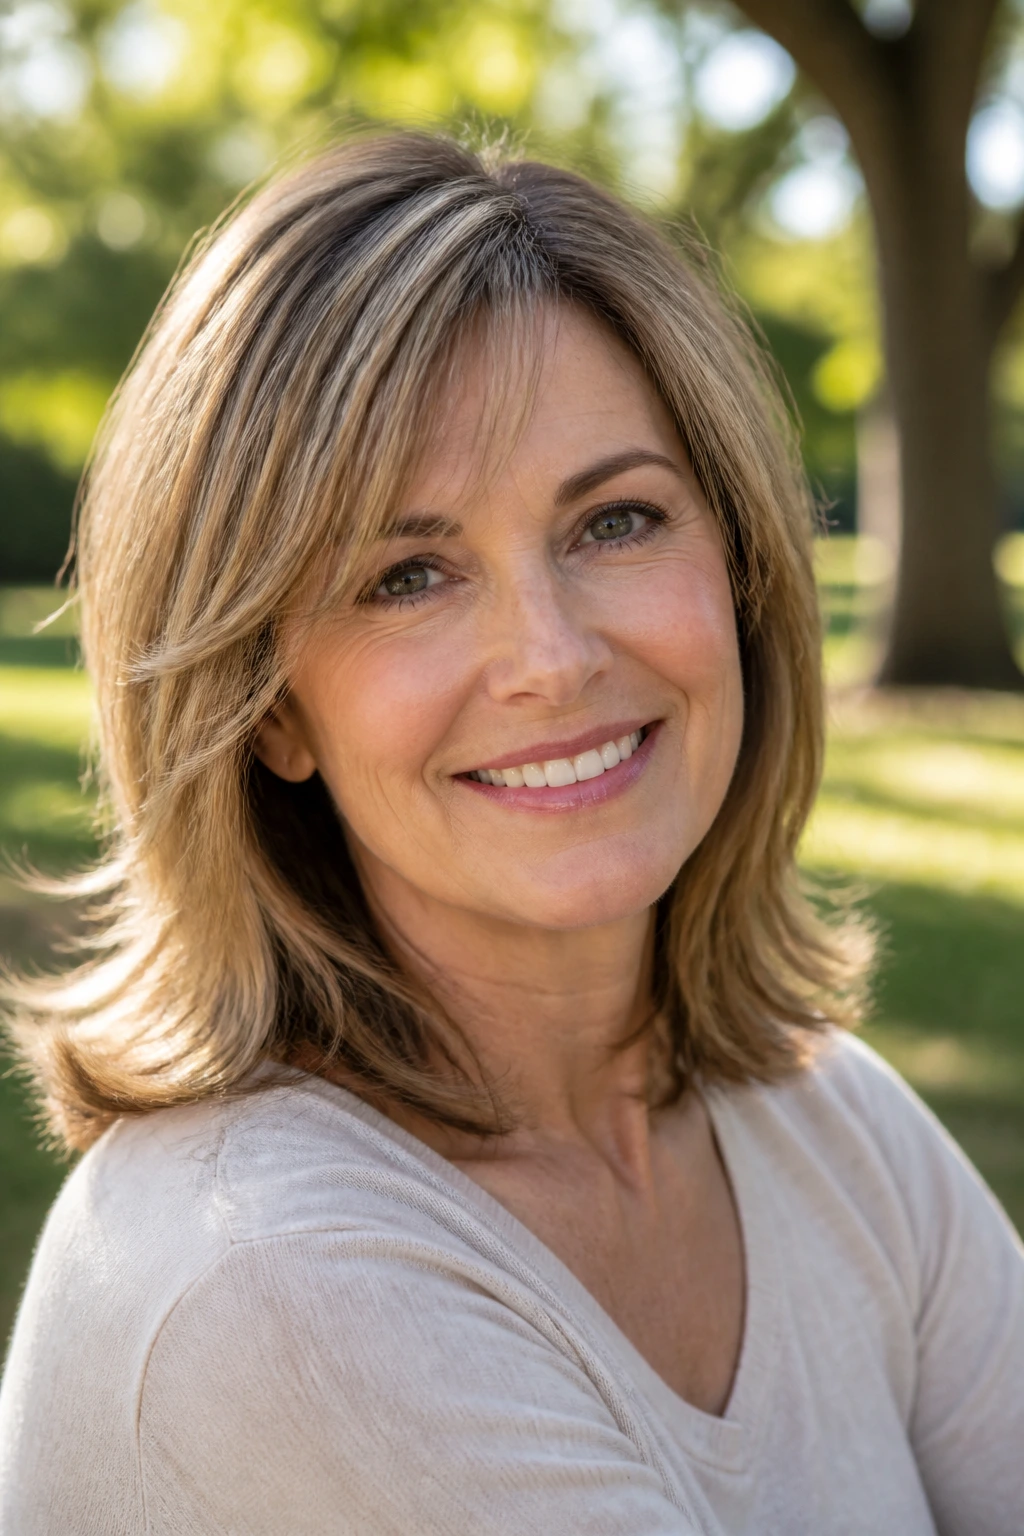
One mistake shows up over and over: starting the shortest layers too high. The haircut can go from soft to puffy in a hurry, especially around the crown. The symptom is that odd mushroom shape where the top stands up and the ends look thin. The fix is simple in theory and hard in practice: keep the shortest layers lower and let the lift come from the styling, not from aggressive cutting.
Another one is thinning the ends too much on fine hair. It sounds like a way to add movement, but the hair can end up looking wispy and see-through. If the perimeter loses too much weight, the cut stops looking polished. Ask for soft shaping, not heavy texturizing.
Ignoring natural growth patterns causes more trouble than people admit. Cowlicks, wave direction, and a stubborn part can make a neat-looking photo impossible without adaptation. If your front hair kicks to one side, don’t fight it with a cut that assumes perfect symmetry. Work with the bend you already have.
And then there’s the classic mistake of bringing a heavily styled photo and expecting air-dry results. A cut that lives on hot tools needs different layer placement than a cut that survives a towel and a leave-in cream. Be honest about how you live. That’s the real stylist briefing.
Variations and Adaptations to Try
Fine-Hair Lift Version: Keep the length at the collarbone or just above, then ask for very long internal layers and soft face framing. The goal is lift at the roots and a fuller-looking edge, not lots of short pieces that make the hair look threadbare.
Thick-Hair Weight-Removal Version: Ask for longer layers that remove bulk below the cheekbone, with a gentle taper at the ends. This version stops the cut from swelling at the bottom and makes blow-drying faster, which thick hair always appreciates.
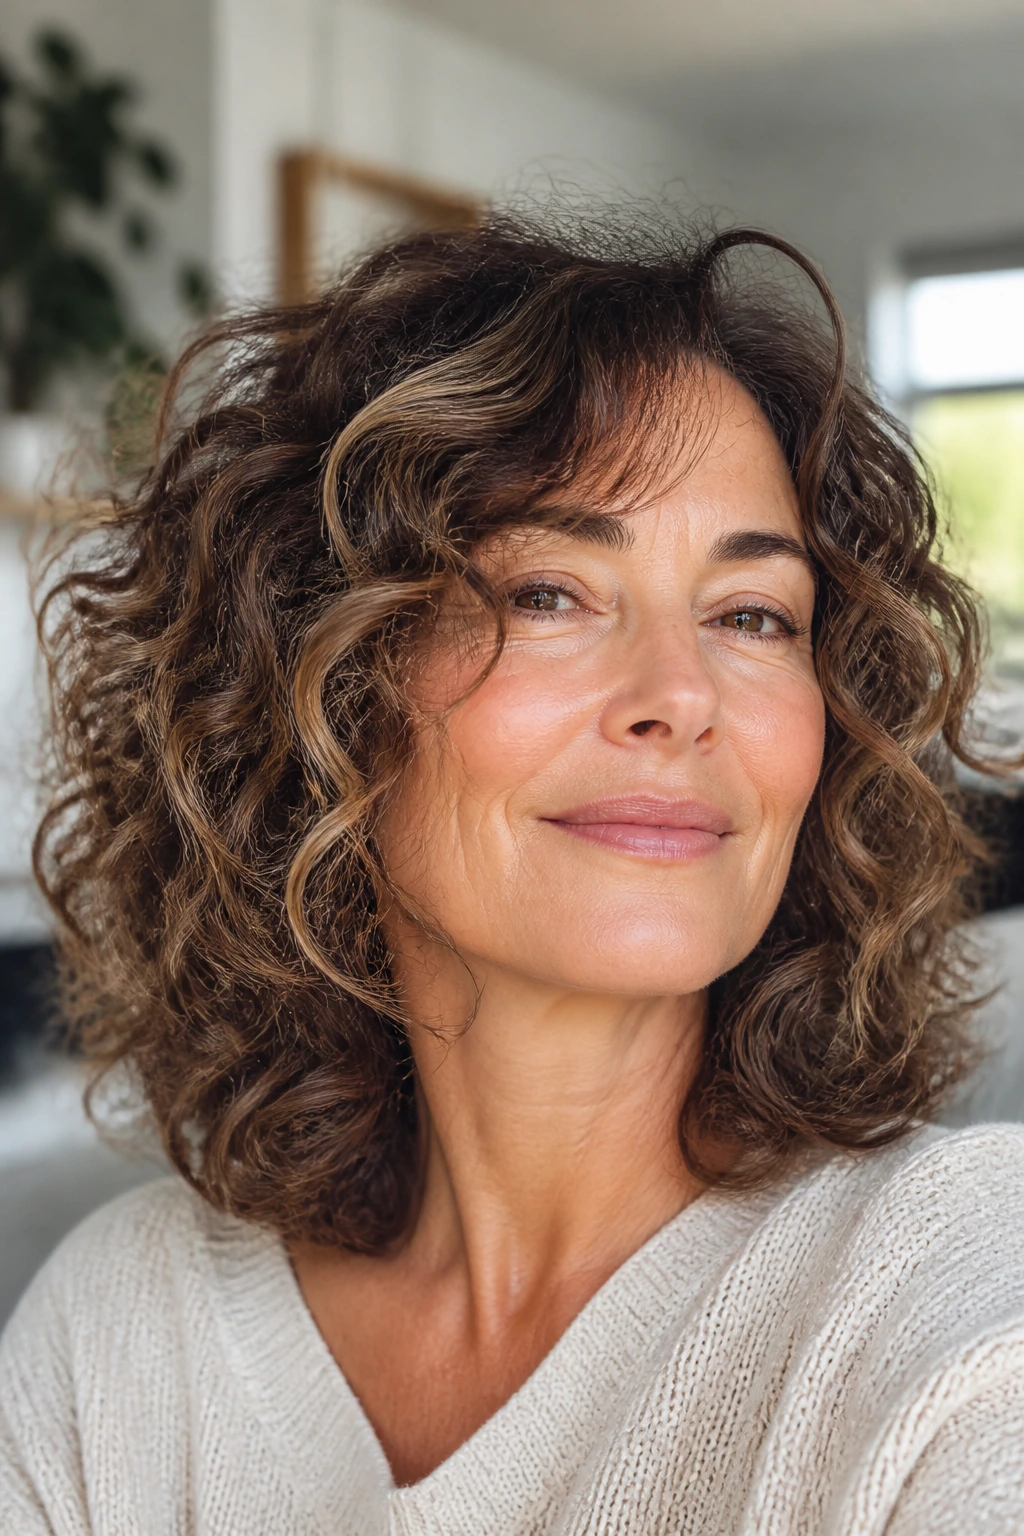
Curly and Wavy Version: Let the layers follow the curl pattern instead of forcing a straight-hair shape onto it. A dry cut or a cut done on fully dry, natural texture can give a more honest result, especially around the face where curls can shrink more than you expect.
Gray-Silver Shine Version: Keep the layers soft and the perimeter clean so the metallic shine reads clearly. Too much choppiness can make silver hair look fuzzy; controlled layering keeps it bright and composed.
Low-Maintenance Air-Dry Version: Choose longer face-framing pieces and minimal layering through the top. The cut should sit well with a leave-in conditioner, a quick scrunch, and no round brush at all.
Fringe Optional Version: If you want some face softness but aren’t ready for bangs, ask for longer curtain pieces that can be tucked back or split down the center. It’s a flexible compromise, and it grows out without drama.
How to Keep the Shape Between Salon Visits
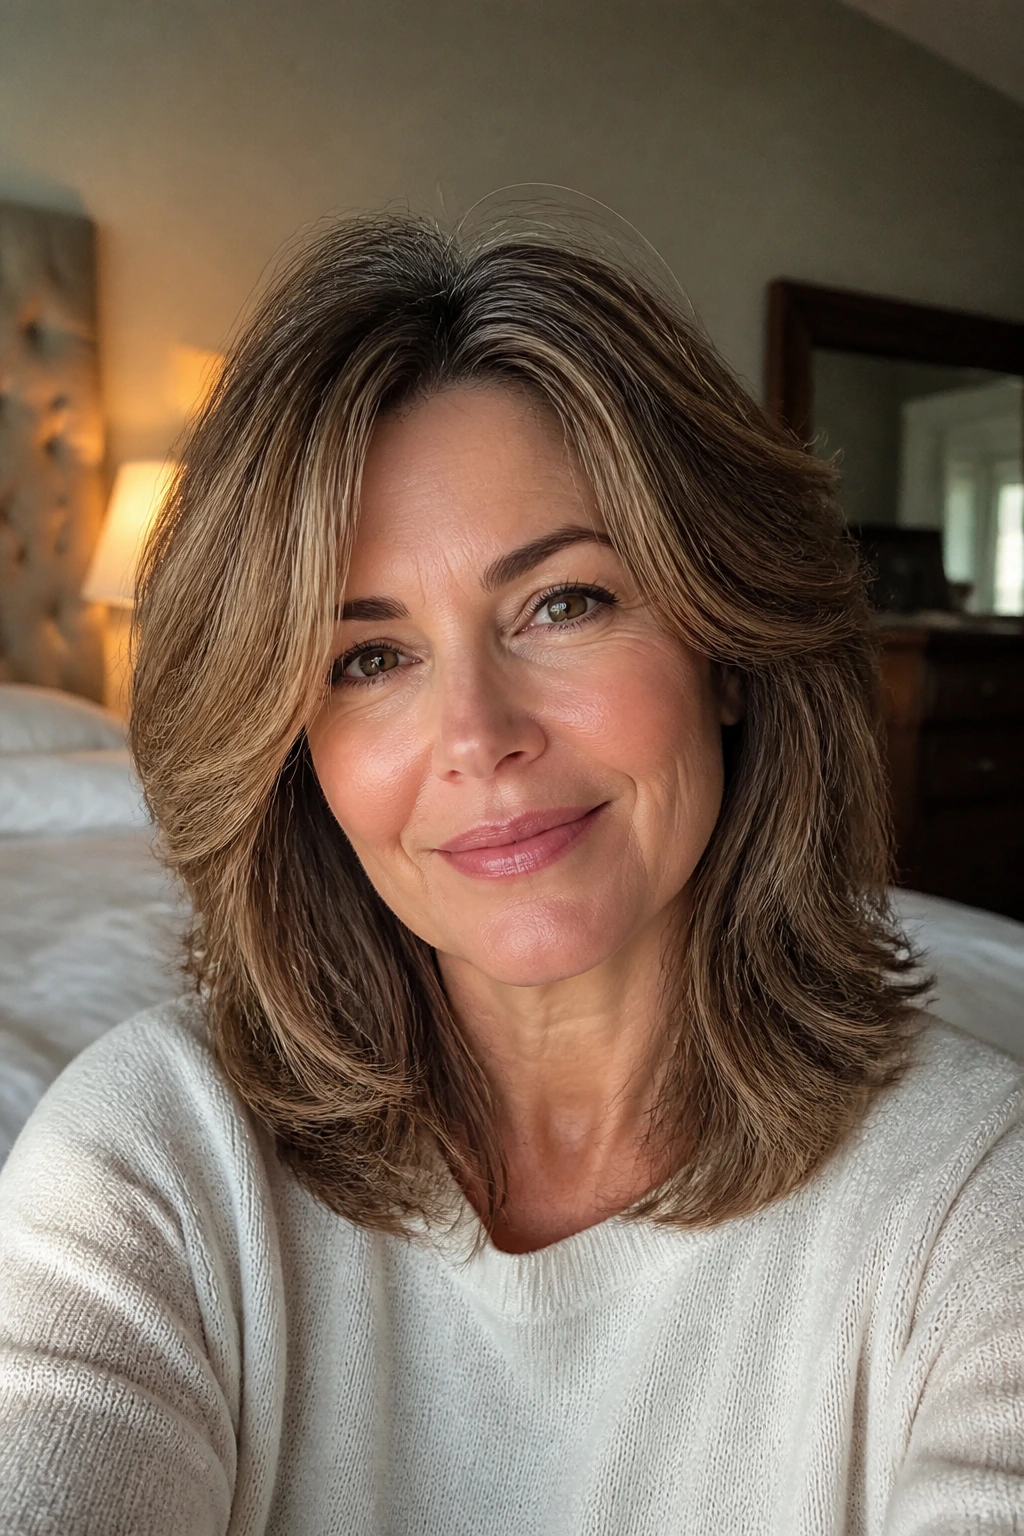
Medium layered cuts usually hold their shape for 6 to 8 weeks if the layers are visible and the fringe matters. Softer, longer layers can stretch closer to 8 to 10 weeks before the outline starts to sag. If you wear bangs, fringe trims every 3 to 4 weeks keep the front from falling into your eyes or splitting in annoying ways.
Wash-day habits matter too. If you use mousse, spray, or dry shampoo often, a clarifying wash every 2 to 4 weeks helps the hair stay light. Heavy buildup near the roots can flatten the crown and make even the best layered cut look tired. Use conditioner mainly on the mid-lengths and ends; keep it off the scalp unless your hair is coarse and dry enough to need extra help.
At night, the cut holds better if you sleep on a silk pillowcase or loosely clip the top section away from the face. That’s especially useful for curtain bangs, shaggy layers, and blowout styles. If you wake up with one side bent wrong, a few minutes with a damp brush and a little heat can reset the front without redoing the whole head.
Questions People Ask Before They Chop the Length

Which layered haircut is best if my hair is fine and flat?
A collarbone cut with long internal layers or a tapered version for fine hair usually works best. The goal is to keep density at the ends while creating a little lift at the crown, not to thin the whole head into submission.
Will layers make thinning hair look thinner?
They can, if the layers are cut too high or thinned too much. With the right placement, though, layers can make thinning hair look fuller by keeping movement near the face and preserving weight at the perimeter.
Are bangs a bad idea after 50?
No. Bad bangs are a bad idea. Soft curtain fringe, side-swept bangs, and light brow-skimming pieces can soften the face and make a layered cut feel more finished, especially if the forehead feels more prominent than it used to.
How do I ask for layers without getting a shag I didn’t want?
Be specific about where you want the shortest layer to land and how much texture you want at the ends. Say whether you want a soft blend, a visible piecey finish, or a smooth shape. “Layers” alone is too vague.
Can I still wear a ponytail with medium layers?
Yes, and that’s one reason these cuts work so well. The shorter face-framing pieces will fall out around the ears, but the rest can go into a low ponytail, claw clip, or twist without trouble.
What if my hair turns frizzy when it’s layered?
That usually means the cut was too aggressively thinned or the ends were cut in a way that exposed dryness. Ask for longer layers, use a leave-in conditioner, and avoid heavy razor work if your hair already has a rough edge.
Do these cuts work with gray hair that’s gotten coarse?
They do, but the layers should be softer and longer. Gray hair often needs shape without too much fragmentation, so the cut should encourage movement while keeping enough weight for control.
How can I tell if the cut is too short around my face?
If the front pieces bounce above your cheekbones and you keep tucking them away out of annoyance, they’re probably too short for your taste. A good face frame should feel flattering when it’s loose, not only when it’s styled into submission.
The Shape That Keeps Hair Moving
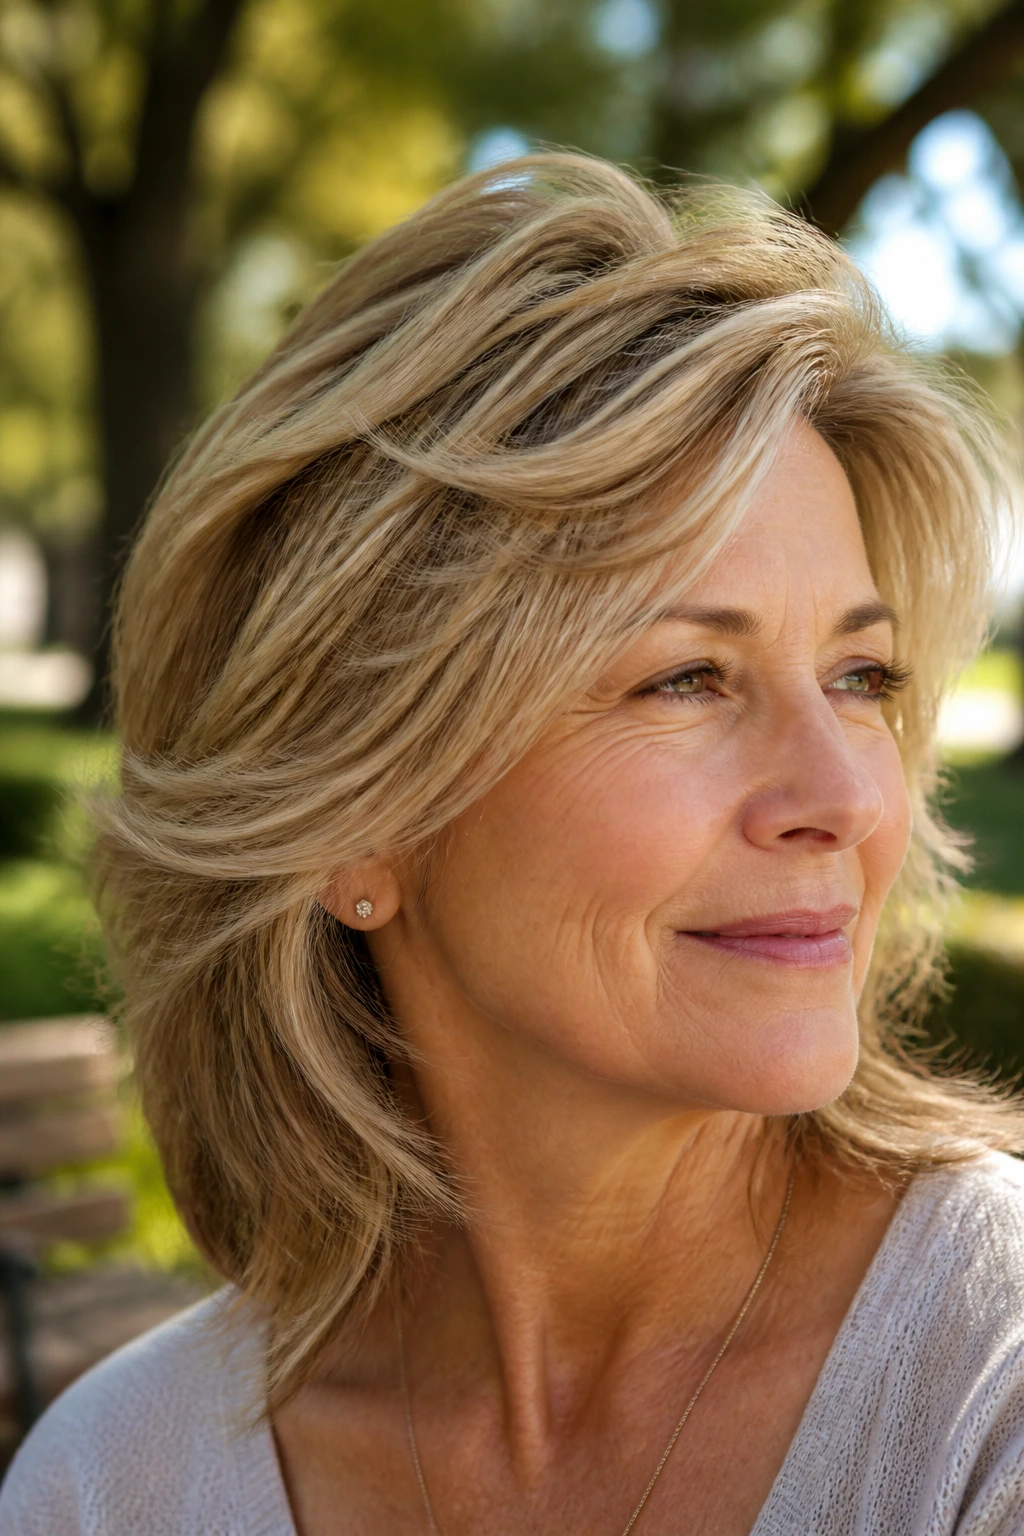
The best medium layered cuts don’t shout. They solve small problems in plain sight: flat roots, bulky ends, a face frame that needs softening, or hair that no longer behaves the way it did ten years ago. That’s why the list above works so well as a menu rather than a single prescription. You can pick the version that fits your texture, your routine, and how much styling you actually want to do.
If you take one thing with you, make it this: layer placement matters more than the word “layers.” Bring a photo, yes. But also bring your real habits, your real texture, and your real patience level. The haircut gets much better once those details are part of the conversation.
