



Updos for long hair for Christmas get tricky fast. Long hair has weight, and weight does what it always does: it drags, loosens, and pulls at the exact moment you want your style to stay put through coats, photos, and one more hug at the door. The styles worth wearing on a holiday night are the ones that respect gravity instead of pretending it isn’t there.
That’s why the best looks here are built on anchors, twists, braids, and hidden pins. They don’t depend on a perfect blowout or a salon chair to look finished. They depend on smart structure, a little texture at the roots, and a shape that still makes sense after dessert.
There’s also a sweet spot with holiday hair that people miss: you want enough polish to feel dressed up, but not so much stiffness that the whole thing looks like it can’t relax. Velvet ribbon, pearl pins, a clean bun line, a wrapped ponytail, a braid that disappears into a coil—those details do more work than a pile of spray ever will. Start with the shape. The sparkle can come later.
Why These Christmas Updos Hold Their Shape
-
They use the weight of long hair instead of fighting it: A low bun, braided crown, or wrapped ponytail has something real to grip, so the style doesn’t collapse the second you move your head.
-
They leave room for holiday accessories: A velvet ribbon, pearl pin, or gold comb looks intentional when the base is already clean and secure. The accessory should finish the style, not rescue it.
-
They work on more than one texture: Straight, wavy, curly, and coily hair all have a place here. Some styles want smoothness; others look better with a little grip and bend.
-
They survive indoor heat and outerwear: Scarves, collars, and warm rooms flatten loose hair fast. An anchored updo keeps the shape off your neck and out of the way.
-
They can read formal or relaxed: The same low bun can feel church-ready, dinner-ready, or family-photo-ready depending on how tight the base is and what you pin into it.
-
They give long hair a job: Instead of letting length hang and tangle, these styles fold it, braid it, or wrap it into a shape that stays visible from the back, which matters when the back of the head is half the story.
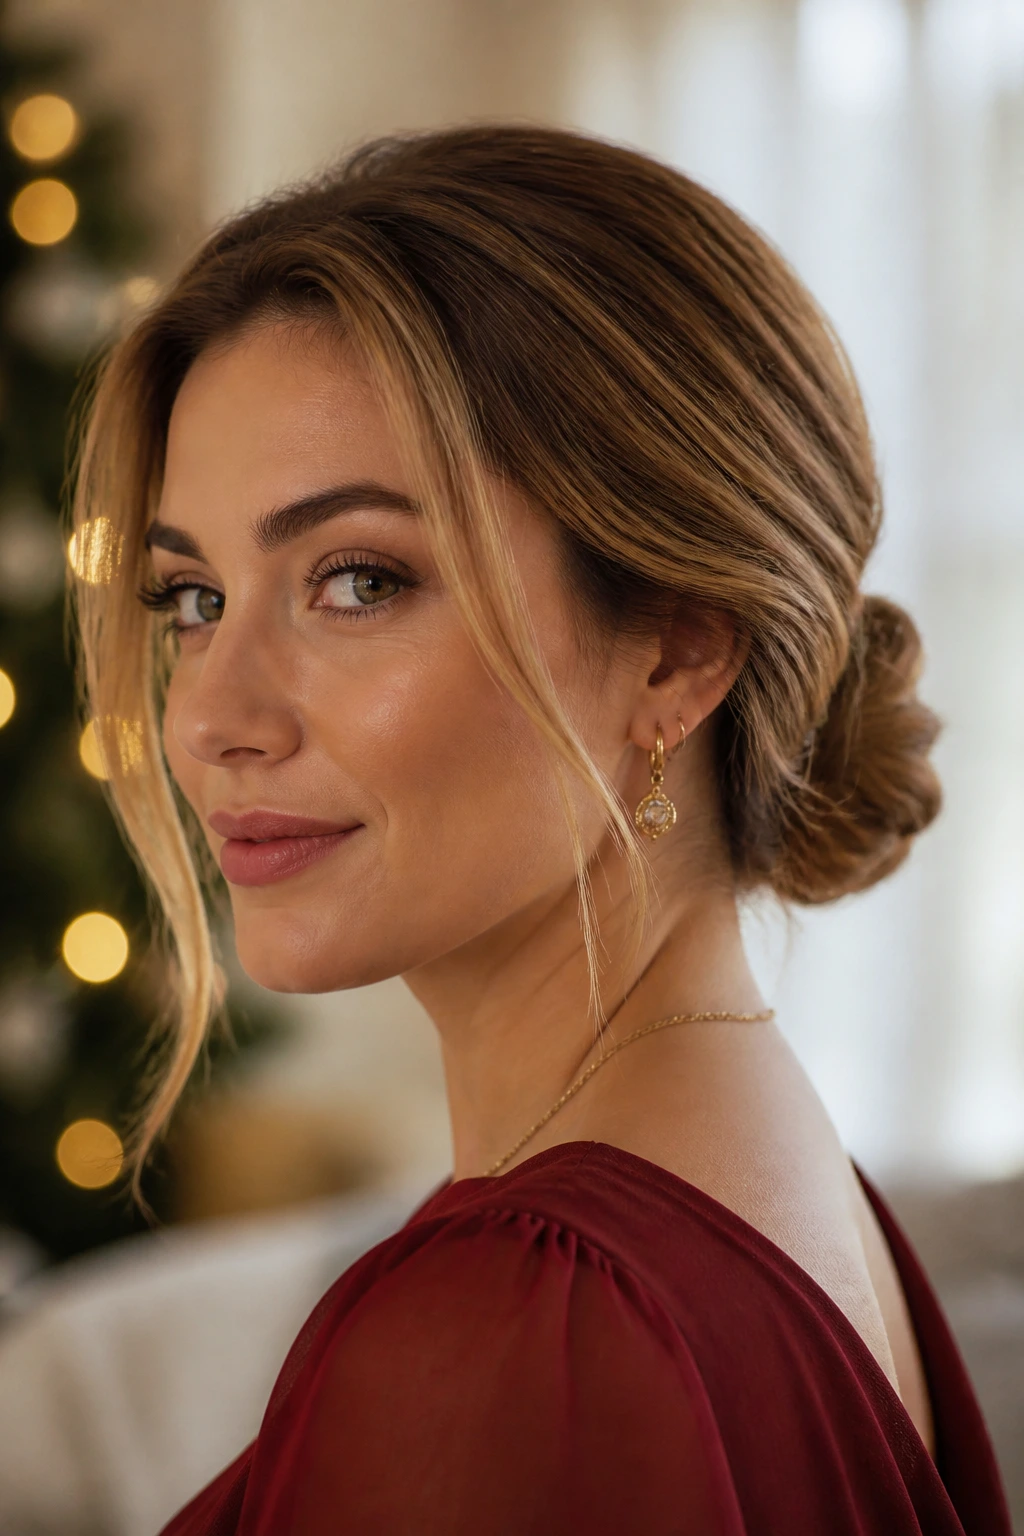
1. Velvet Ribbon Low Chignon
A low chignon with a velvet ribbon is the style I’d reach for when the outfit already has enough going on at the neckline. It sits at the nape, so it doesn’t compete with earrings or a collar, and the ribbon gives you that obvious holiday note without making the hair look overworked.
The best version uses a low ponytail as the base, then folds the length into a loose knot and pins the ends under. Velvet is the right ribbon here because it has a little drag; it stays put better than satin, which can slide before you’ve tied the knot twice. If your hair is layered, tuck the shorter pieces into the bun first and let the smoother ends disappear underneath.
Why It Feels Right With Long Hair
The weight of long hair gives the chignon a fuller shape, so it doesn’t shrink into a tiny knot. That means you can keep the bun low and soft without losing structure. I also like it because the ribbon can be tied off-center, which keeps the style from looking too formal or too stiff.
If you want the face to open up a little, pull two slim pieces loose near the temples. Don’t overthink them. A soft bend is enough.
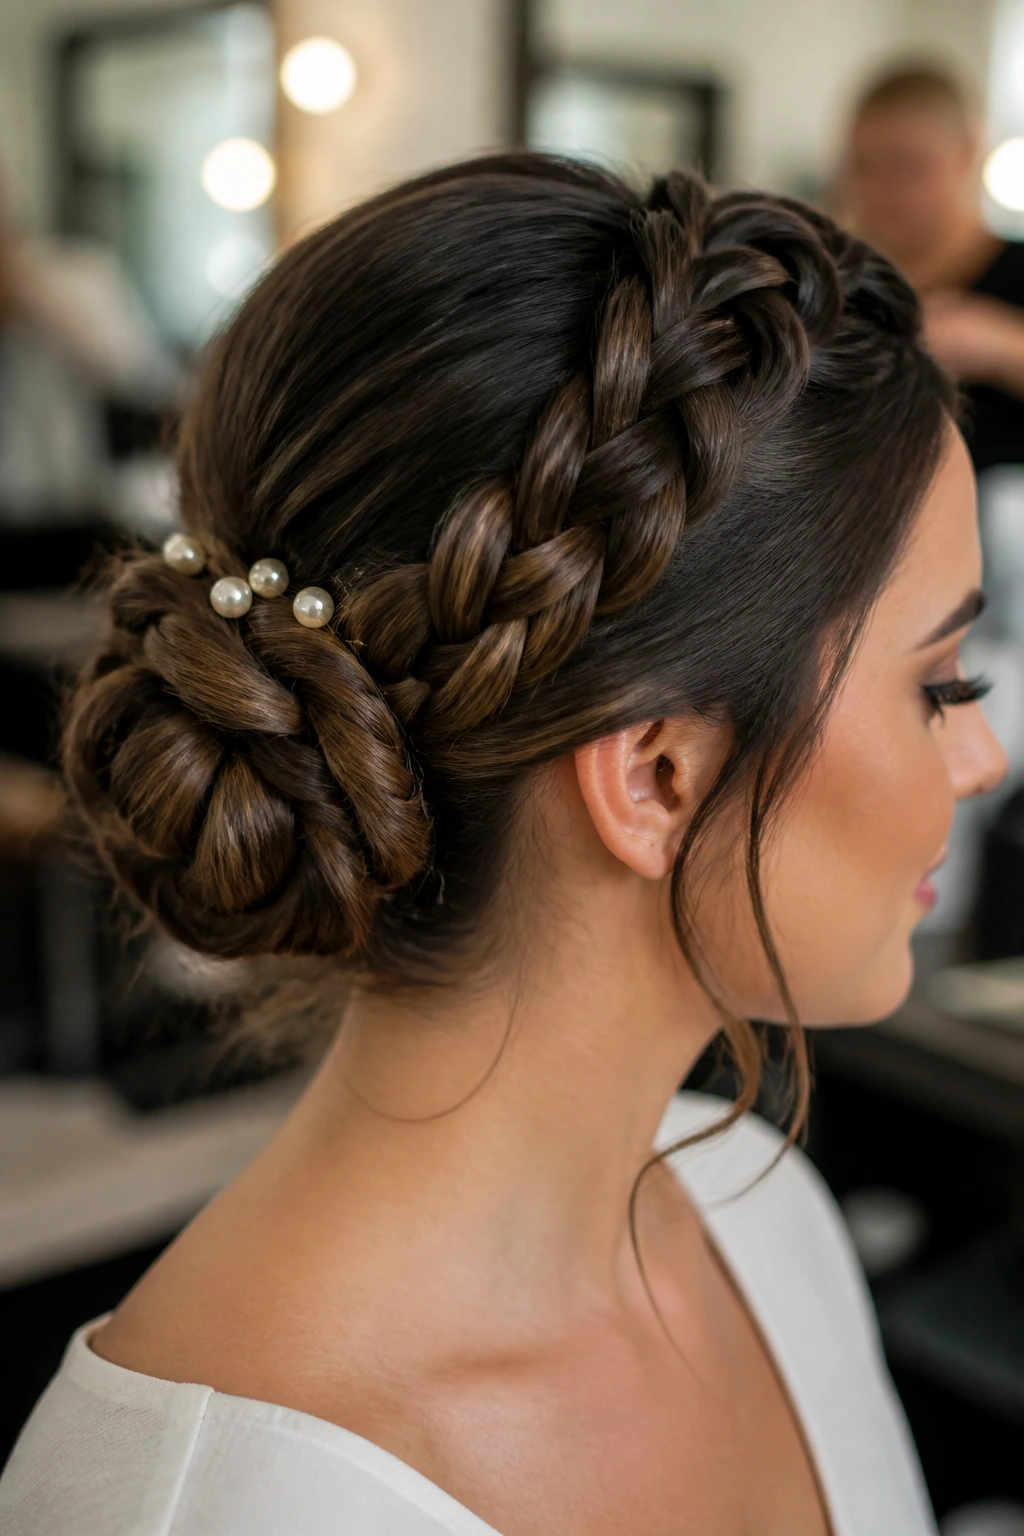
2. Braided Crown Bun
Why does a braided crown bun work so well on long hair? Because the braid takes the first hit of the weight and spreads it across the head before the bun ever has to do the work. That makes the style feel secure, not bulky.
Start with a deep side part or a center part, then braid each side back toward the nape. Cross the braids over one another, wrap the length into a bun, and pin the coil flat against the head. A braided crown bun is one of those styles that looks intricate from across the room and is less fussy than it appears once you get the first braid in place.
- Best for: thick hair, layered hair, and anyone who wants the style to stay put for hours.
- Finish it with: pearl pins or tiny rhinestone clips tucked into the braid seam.
- Watch for: bulky braid edges at the crown; keep the braid close to the head so the top doesn’t puff out too high.
If your hair is slippery, mist the roots with dry shampoo before you begin. It gives the braid more grip and keeps the bun from sliding toward the back of the head.
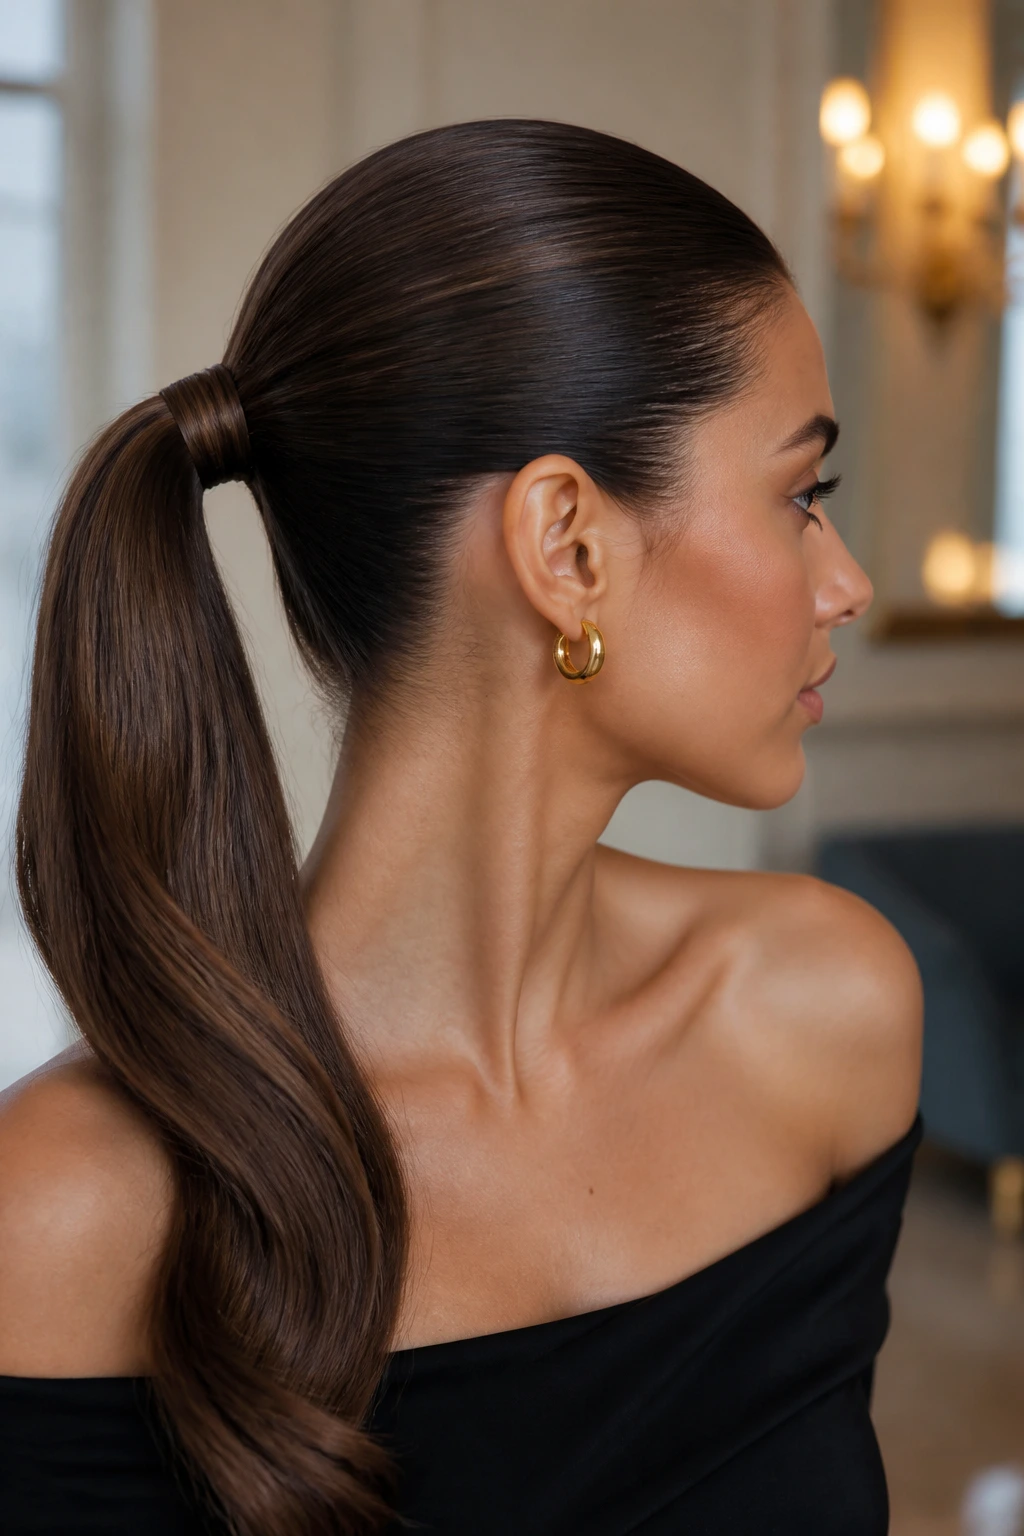
3. Sleek Wrapped Ponytail
A sleek wrapped ponytail is the cleanest answer when you want long hair to look polished and not overly styled. It’s sharp, direct, and easy to match with a strong lip or a dress that already has texture. There’s no fluff here. That’s the point.
Smooth the crown with a light serum or styling cream, then gather the hair at mid-height or high on the back of the head. Secure it with a strong elastic, wrap a 1-inch strand around the base to hide the band, and pin the wrap underneath with two bobby pins crossed in an X. If the tail is very long, bend the ends slightly with a 1-inch curling iron so the last few inches don’t hang like a rope.
This one works especially well for straight hair or hair that has been blown out smooth. If your hair is layered, tuck the shortest pieces under the elastic before you wrap the base so they don’t pop out around the crown later.
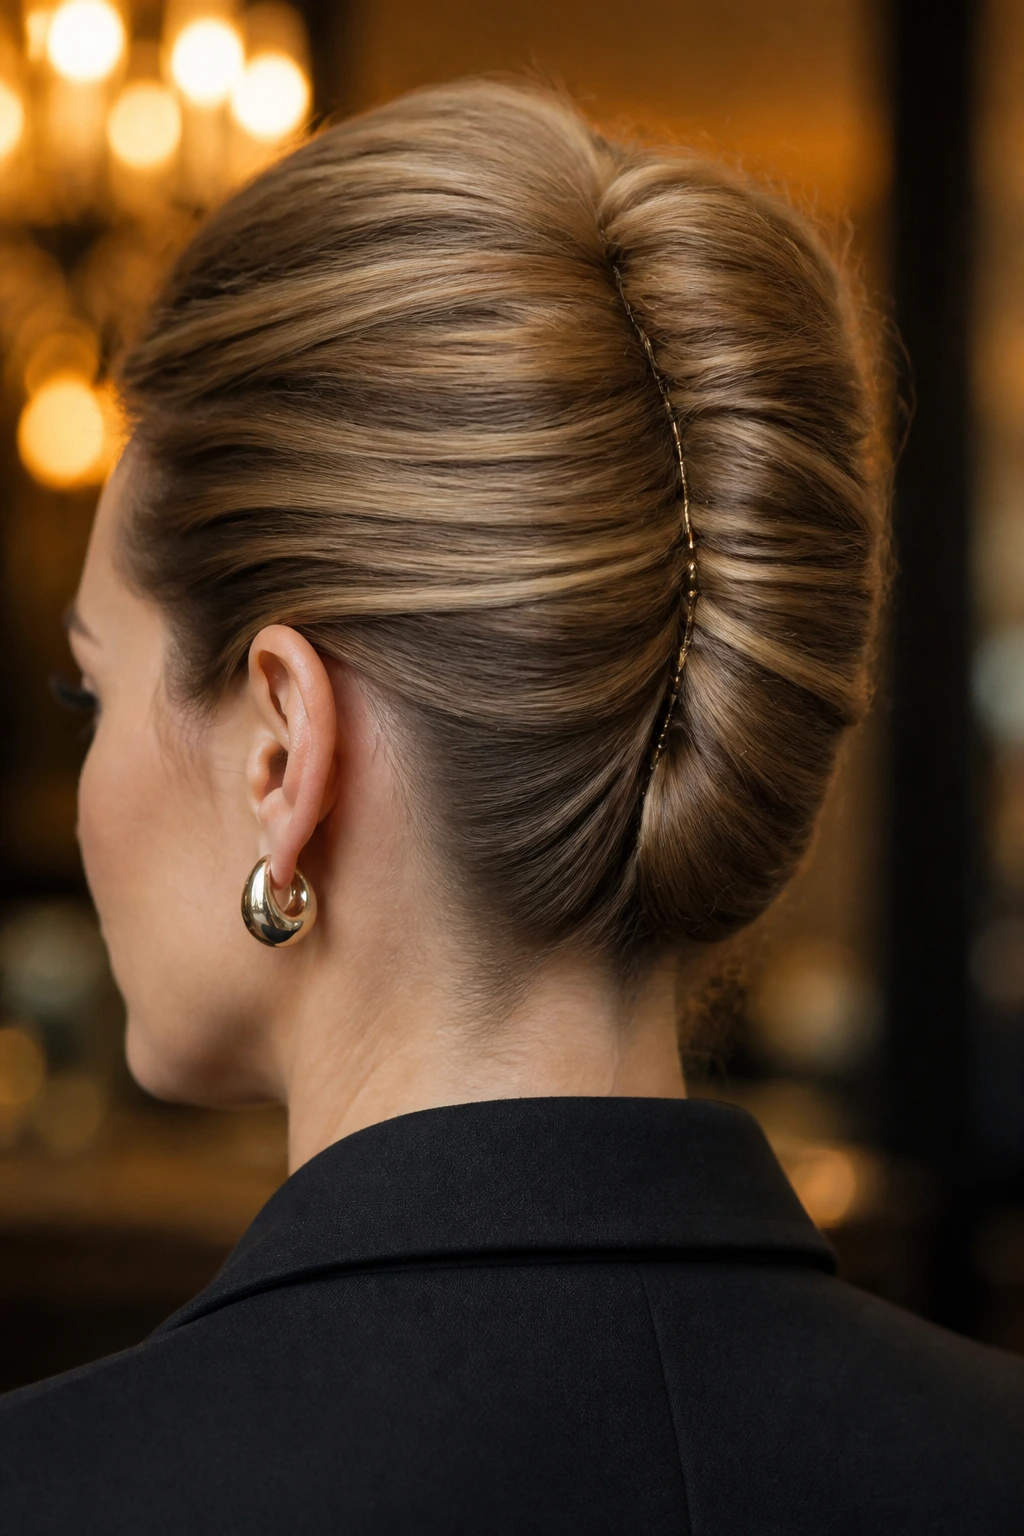
4. Twisted French Roll With Pin Line
A French roll feels old-school in the best way. Not stiff. Just sharp. On long hair, it becomes even better because there’s enough length to build a proper roll instead of a skinny shell that looks like it might unclip if you breathe on it.
Twist the hair upward from one side of the nape, fold the roll tight against the head, and pin vertically along the seam. That pin line matters more than people think; the roll is only as secure as the hidden pins holding its center. I like this style when the outfit is tailored or the jewelry is simple, because the roll itself does the visual work.
A quick root tease at the crown helps if your hair is very smooth. Keep it small. You want lift, not a bump that announces itself from across the table.
5. Bubble Ponytail With Satin Ties
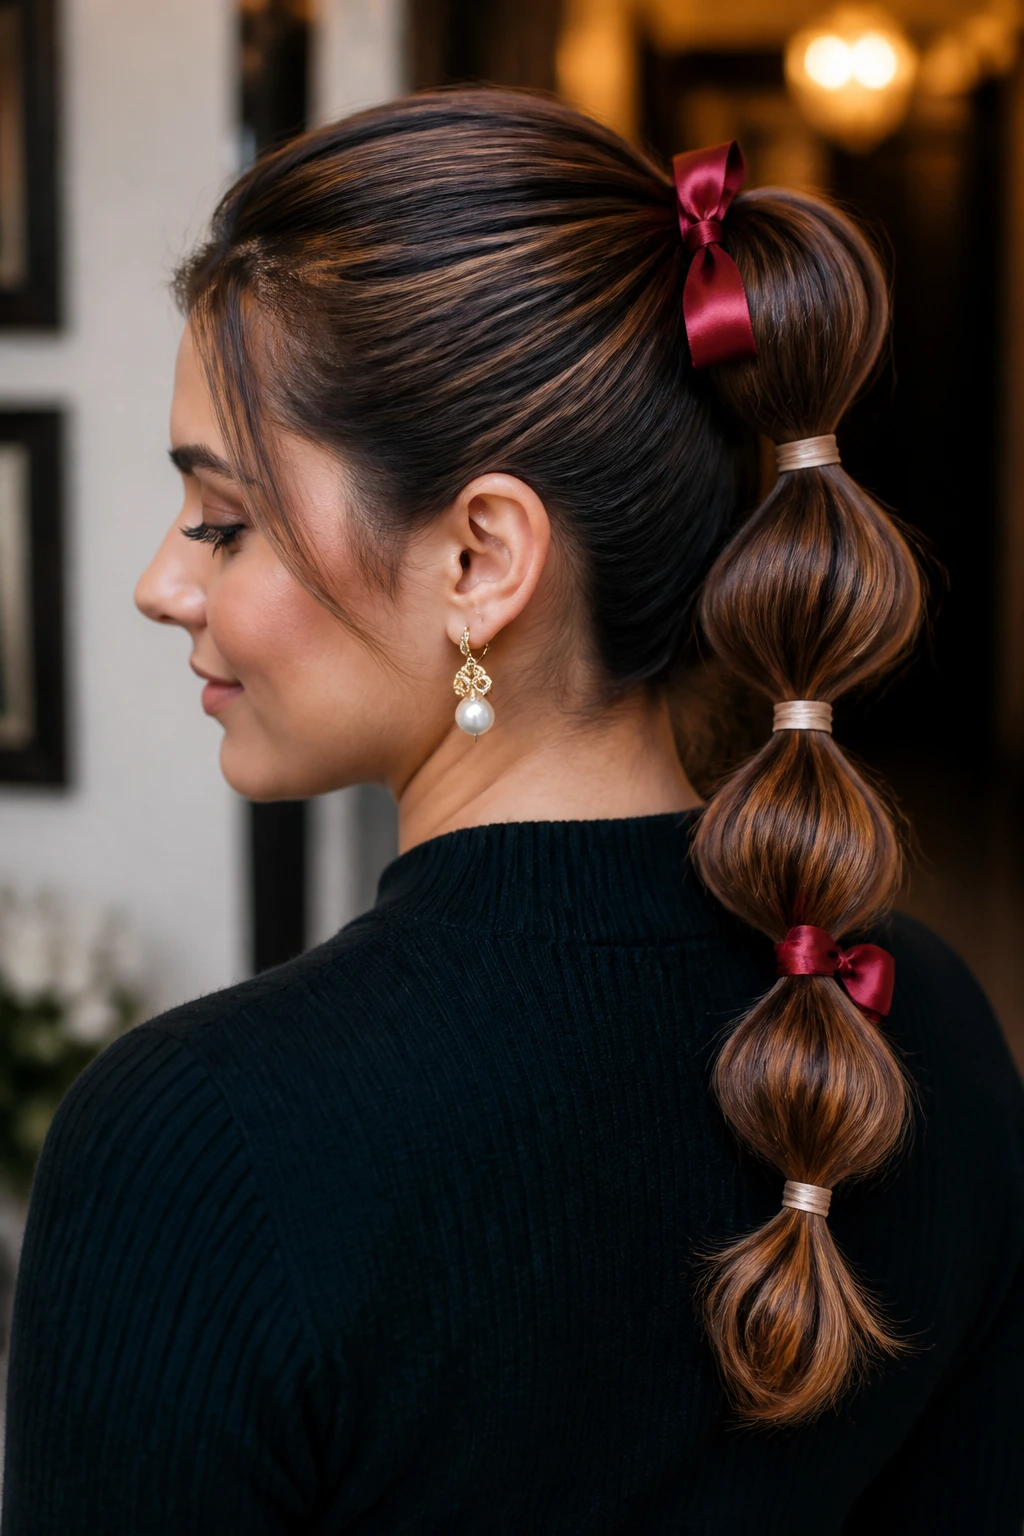
If you want something festive that still feels fun, the bubble ponytail is a smart move. It shows off the length, keeps the hair controlled, and looks better on long hair than it does on medium length because the bubbles have room to stretch.
Tie the hair into a low or mid ponytail, then add clear elastics every 1.5 to 2 inches down the tail. Gently tug each section outward until it rounds into a bubble, then wrap slim satin ties or tiny bows around a few of the elastics if you want the style to read more holiday than sporty. The trick is restraint. Pull the bubbles out just enough to look full, not enough to make the tail fray.
- Best for: very long hair, thicker hair, and people who want a style that moves.
- Use it with: textured hair or lightly waved hair, because the bubbles hold shape better when the strands aren’t slippery.
- Skip heavy products: they can make the sections collapse instead of rounding out.
This is one of the few styles here that still looks good if you’ve got a little movement in the tail. In fact, that movement is half the appeal.
6. Soft Side-Swept Bun
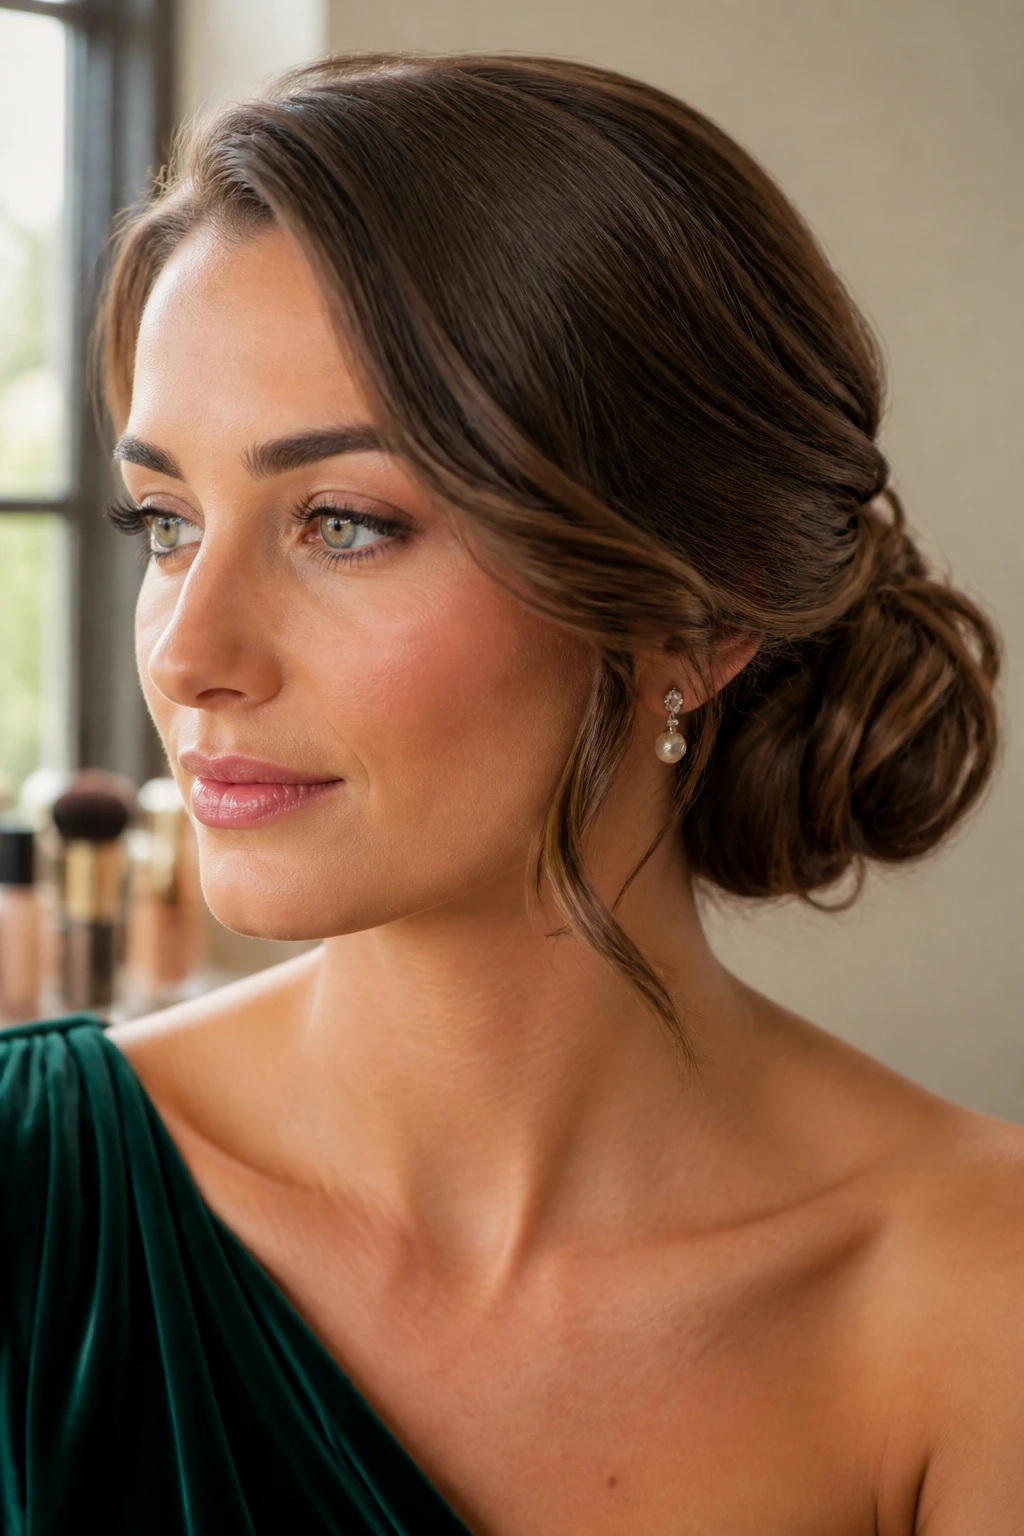
A side-swept bun is the sleeper style in this whole group. It’s softer than a strict center bun, and the offset shape gives the face a little lift without forcing the hair into a severe line. If you’re wearing statement earrings, this is the one that lets them speak.
Gather the hair just behind one ear, twist it into a low bun, and pin the bun so it sits close to the head rather than hanging outward. Leave one section at the front with a bend through it, then sweep it back so it blends into the bun. The whole thing should look deliberate but not fussy.
I like this style for dresses with one-shoulder necklines or asymmetrical collars. It balances the body line. That’s what makes it feel finished.
7. Dutch Braid Into a Low Bun
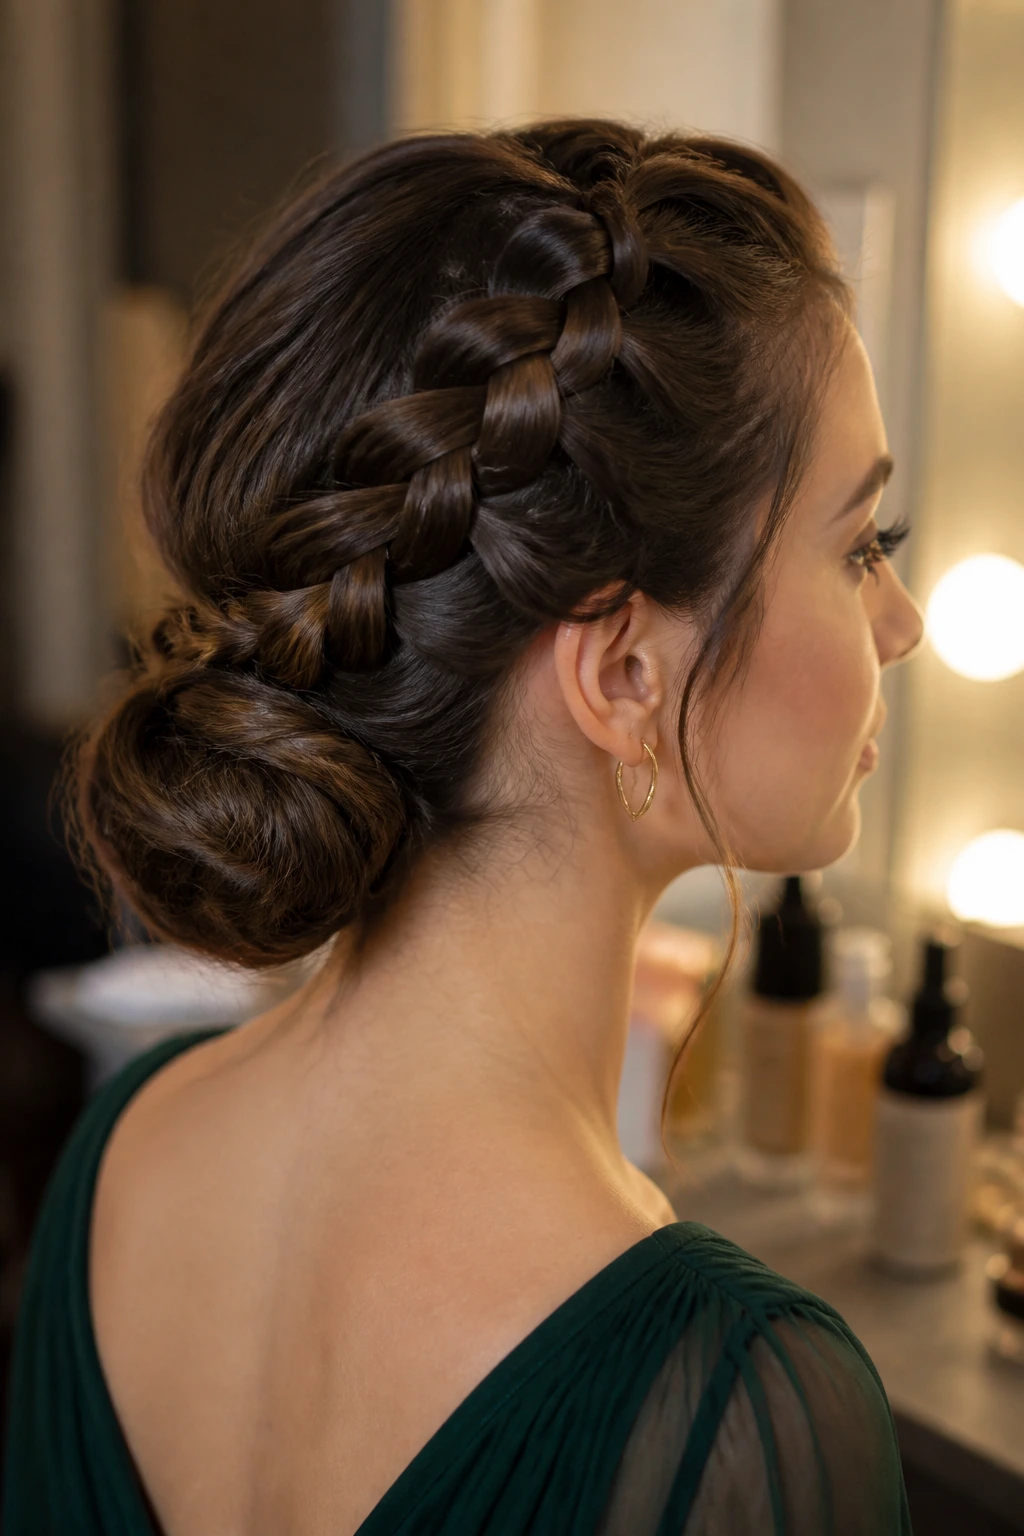
A Dutch braid into a low bun is the style I’d pick if I knew I’d be moving around all evening. Braid first, bun second. That order matters because the braid gives the hair a rough surface that pins hold onto better than slick straight lengths.
Why It Holds So Well
A Dutch braid sits raised on the scalp, which gives the crown shape before the bun ever forms. That little ridge also keeps the top from flattening too quickly. Once the braid reaches the nape, coil the remainder into a compact bun and pin through both the braid and the bun, not just the bun itself.
Use this when your hair is heavy or when your holiday plans involve more than one room and more than one outer layer. It’s not the most delicate style on the list. It is one of the most dependable.
A small mist of flexible hairspray at the end helps the braid stay defined without turning it crunchy. That matters if you’re wearing it for several hours and want the braid pattern to stay visible in photos.
8. Half-Up Knotted Crown
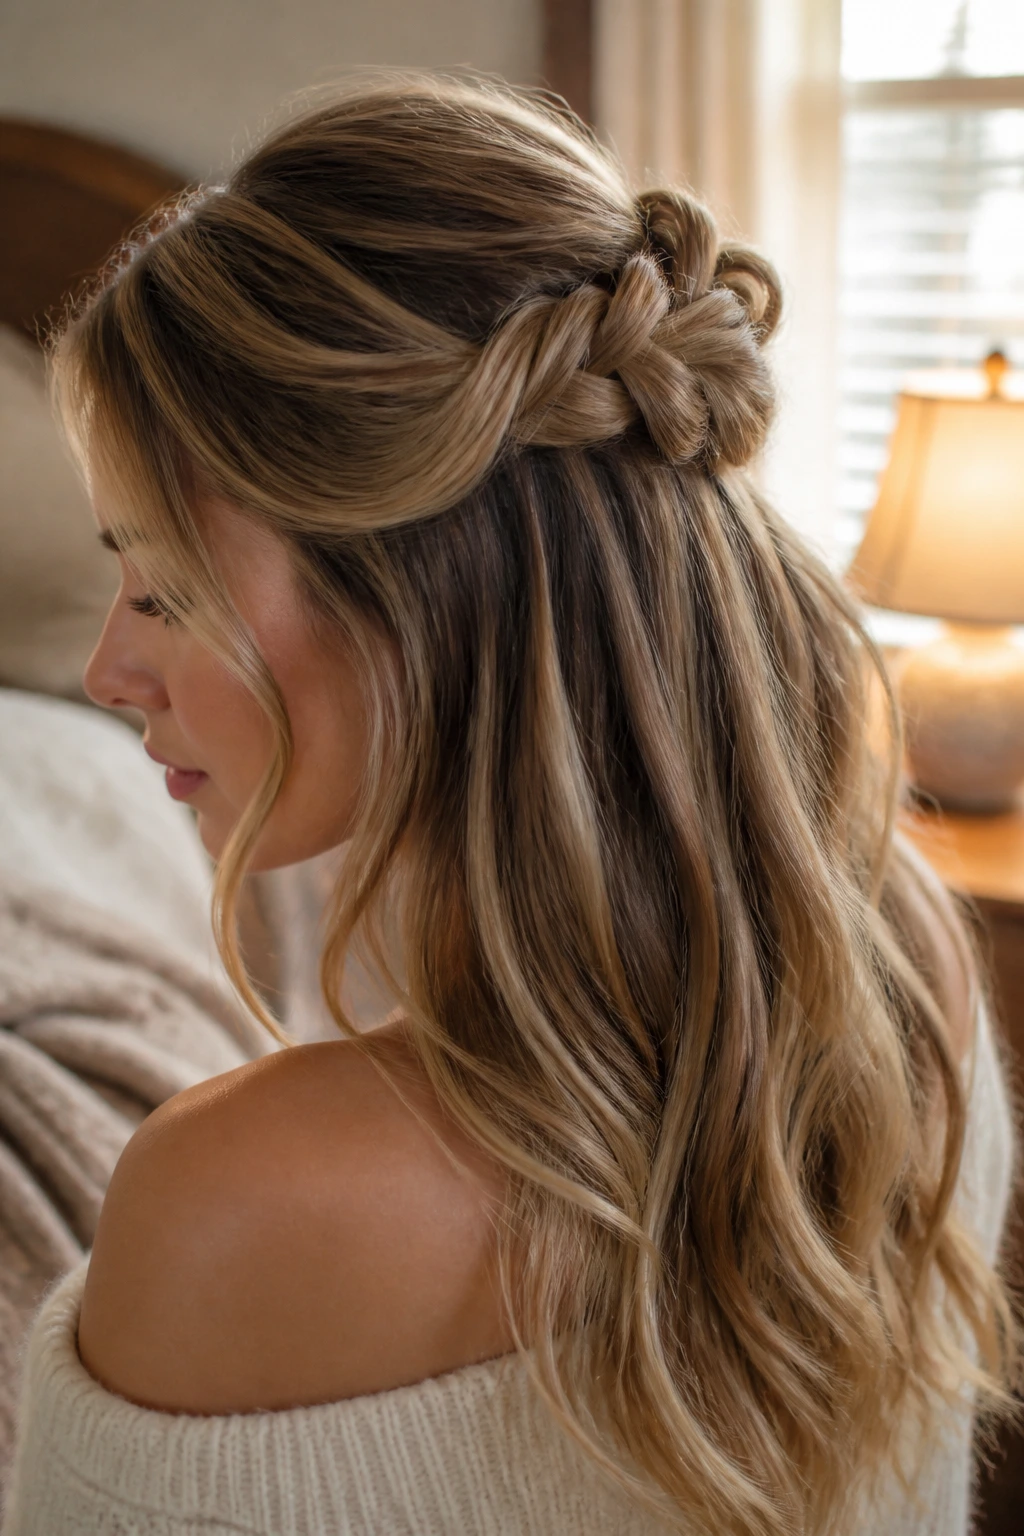
Can a half-up style count as a proper holiday updo? Absolutely, if the top half is shaped with enough intention. The knotted crown is one of the easiest ways to control long hair without hiding it.
Take two sections from the temples, tie them into a loose knot at the back, then cross them again or tuck the ends under and pin them flat. The rest of the hair can stay straight, waved, or lightly curled. What I like here is the contrast: the top looks controlled, while the length stays visible and soft.
This is a good option for people who want some movement around the shoulders. It also works if your hair is very long and a full bun starts to feel heavy by the end of the evening. Add a narrow ribbon or one small jewelled barrette where the knot meets the back of the head, and stop there. One detail is enough.
9. Gibson Tuck With Face-Framing Pieces
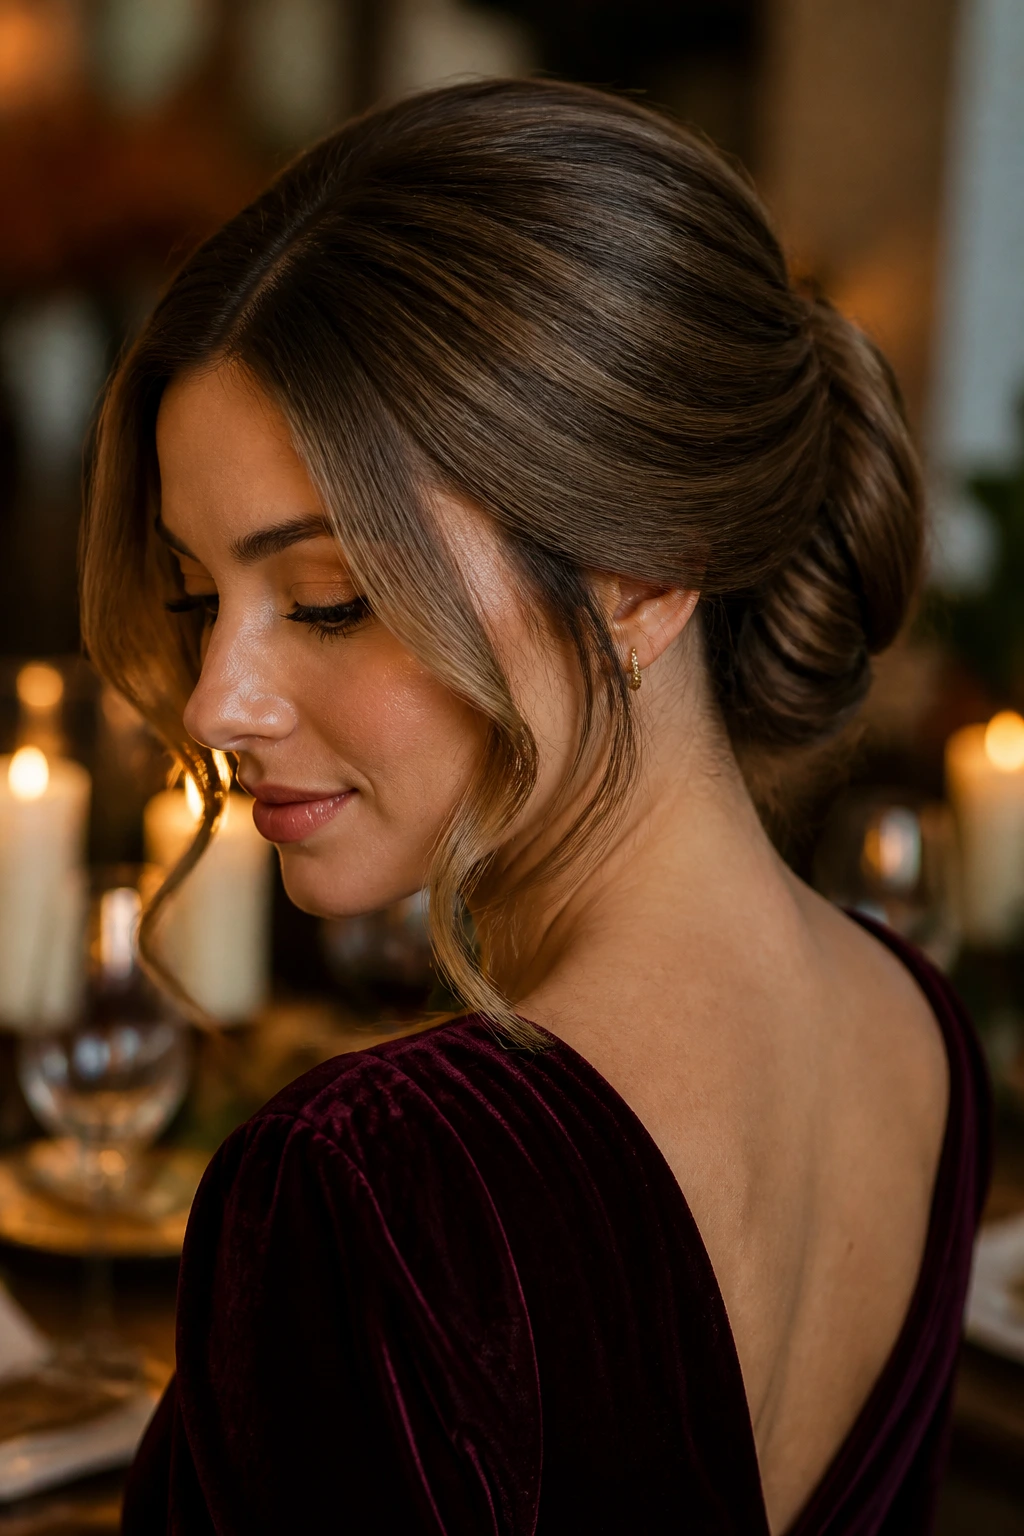
The Gibson tuck has the kind of old-fashioned shape that looks right at a candlelit dinner. It also solves a real long-hair problem: what to do with all that length when you want the back neat but not severe.
Fold the hair inward along the nape to create a rolled pocket, then tuck the length up and into itself. With hair this long, you may need to split the tail into two sections and roll them separately before pinning them together. Leave a few face-framing pieces out at the front, especially if the hairline tends to look too pulled back when it’s completely slicked.
This style is a little more forgiving than it looks. Once the roll is pinned, the back stays clean, and the front can be softened with a curling iron or a quick brush-through bend. The whole thing has a vintage finish without feeling costume-y.
10. Rope-Braid Low Ponytail
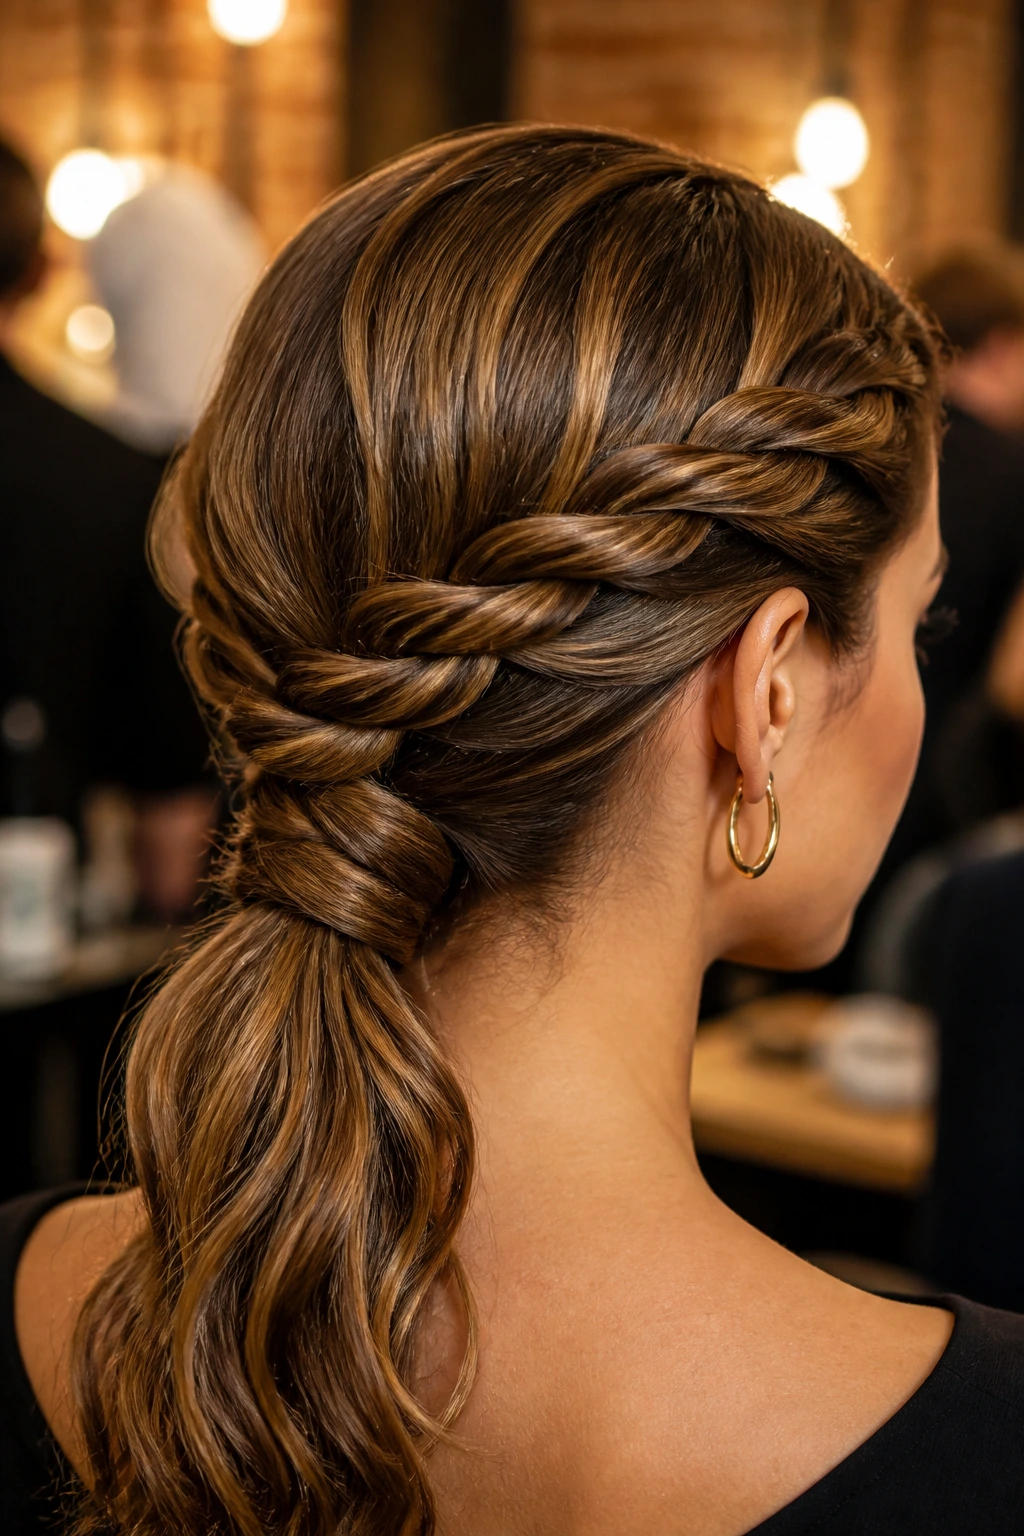
The rope-braid low ponytail is a sharp choice when you want a style that feels tidy from every angle. It’s faster than a fishtail and tighter than a loose three-strand braid, which makes it a good fit for thick long hair that tends to loosen the second you stop touching it.
Divide the ponytail into two sections, twist each section in the same direction, then wrap them around one another in the opposite direction so the rope locks together. Secure the end with a clear elastic, then smooth the crown and wrap the base with a small strip of hair if you want the finish to look cleaner. The twist pattern gives the tail a little shine and movement, even if the rest of the hair is held close.
This is the style I’d choose for a night that starts early and ends late. It doesn’t wilt in a dramatic way. It just stays there.
11. Polished High Ponytail
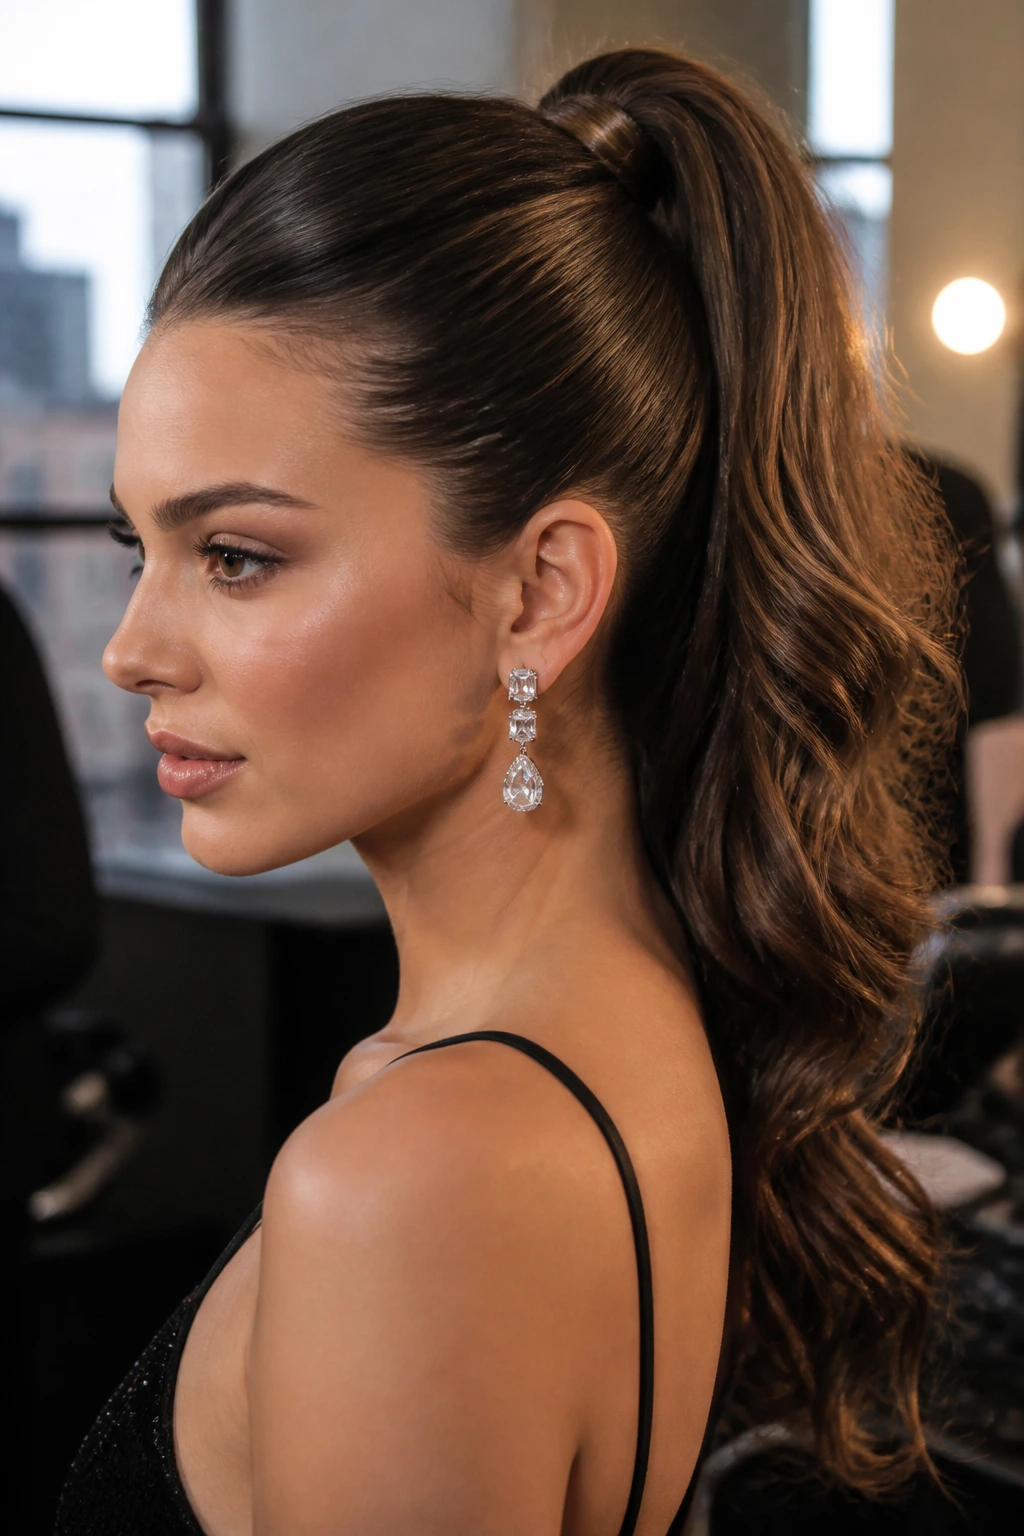
A polished high ponytail is not subtle, and that’s fine. On long hair, it gives you a long line from crown to tail, which reads strong in photos and keeps the face open. If you like a clean neckline and a little lift at the eyes, this is a good bet.
Brush the hair up to the point where the sides feel taut but not painful, then secure it with a firm elastic. Wrap a strand around the base and pin it under the ponytail. If the tail is very long, curl the last 4 to 6 inches with a 1.25-inch wand so the ends don’t look flat. That small bend keeps the style from reading too gym-like.
I’d pair this with a dress that has a dramatic back or a simple neckline, because the ponytail already gives you enough shape. It doesn’t need extra drama. It makes its own.
12. Braided Halo Updo
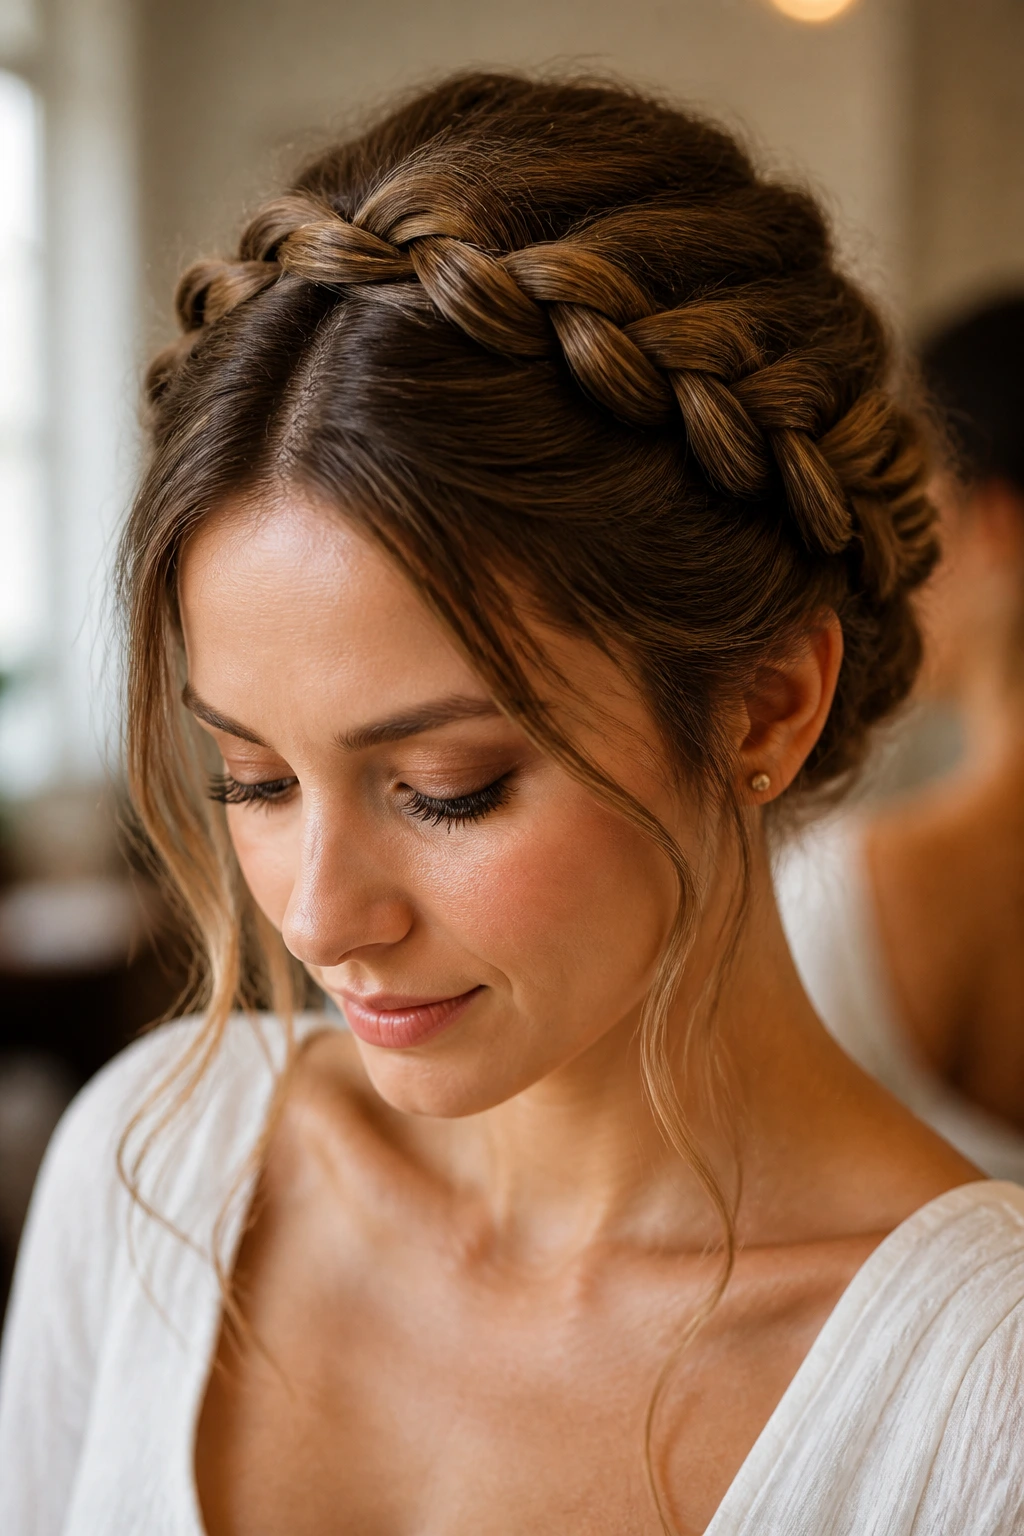
A braided halo updo is what happens when you want the hair completely controlled but still visible from the front. The braid wraps around the head like a frame, which is useful when you’re wearing a dress with detail around the shoulders or chest and don’t want the hair to compete with it.
Create two braids or one continuous braid, then pin the length around the crown so it sits like a halo. Long hair helps here because the braid has enough length to make a full circle instead of a half-done loop. Keep the braid close to the scalp and avoid pulling it too tight at the hairline; otherwise the face can look pinched.
This style takes a little more time than a bun, but the payoff is a strong shape that stays neat even if the rest of the room gets warm. If you want it to feel less severe, pull two slim strands loose near the ears and curve them with your fingers.
13. Messy Bun With Pearl Pins
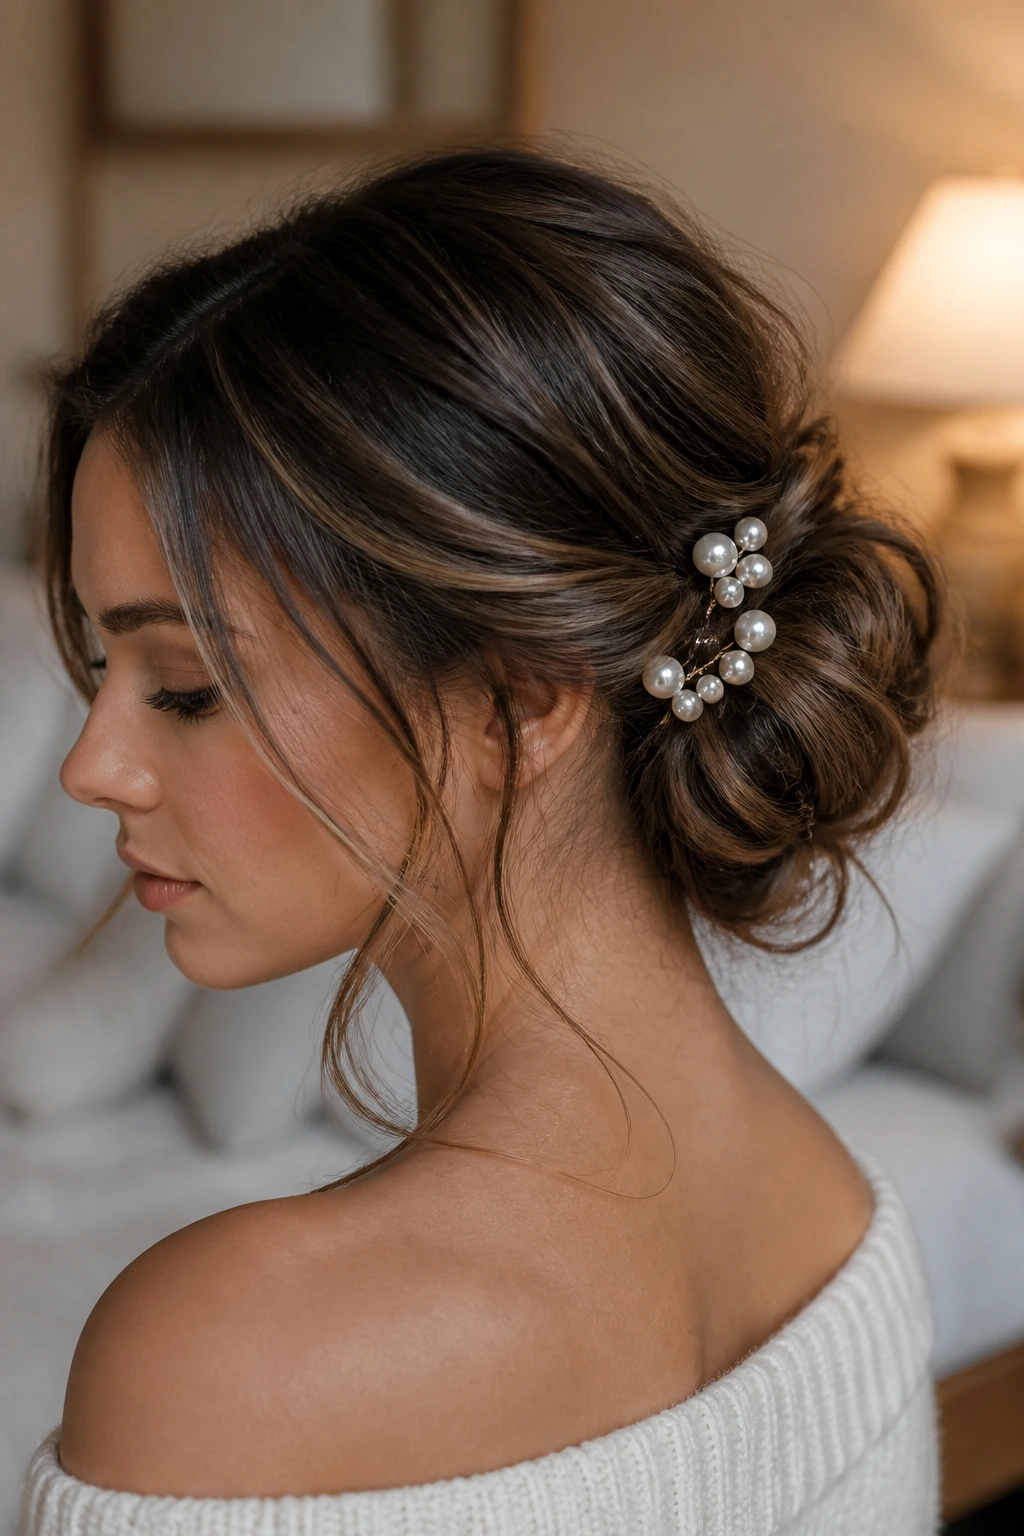
Can a messy bun still look deliberate? Yes, if the bun has a clear anchor and the mess is controlled instead of random. That’s the difference between a style and a knot you made on your way out the door.
Build a low or mid bun, leave a few soft pieces around the face, then tuck pearl pins into the bun in small clusters rather than scattering them everywhere. Three pins close together looks intentional. One pin here and one pin there can start to look accidental. If your hair has natural wave or curl, don’t brush it all the way smooth first. Let the bend stay in the length.
This is one of my favorites for long hair because the fullness works in your favor. The bun doesn’t need to be tiny. In fact, a little size gives the pearl pins room to sit without disappearing into the shape.
14. Fishtail Side Bun
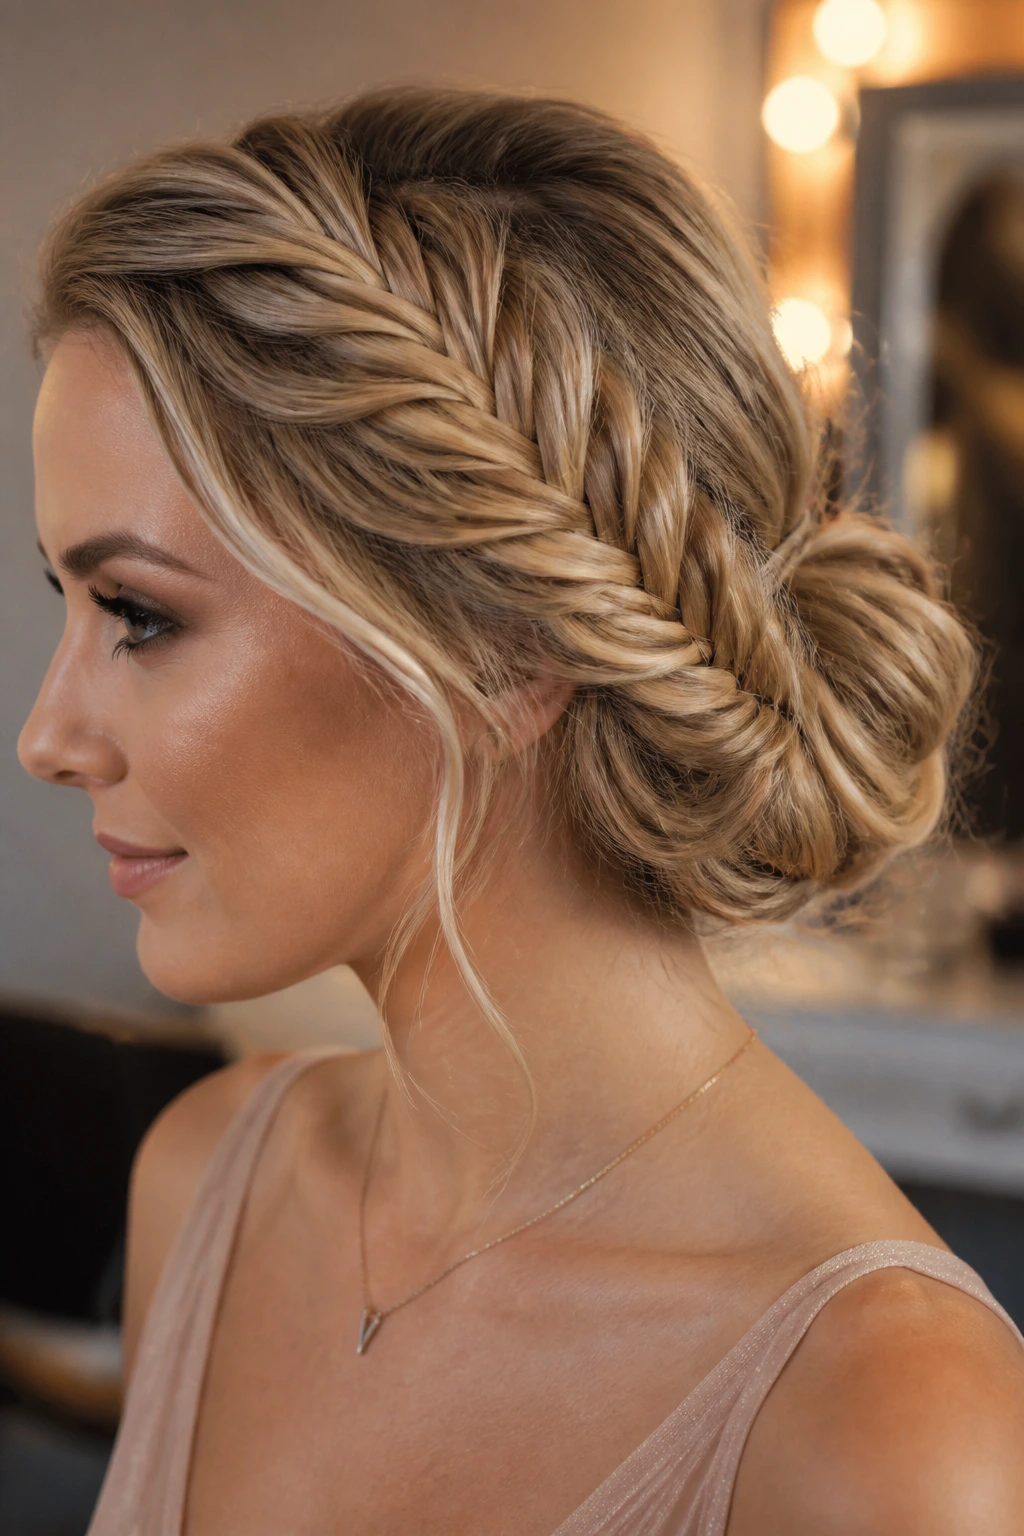
A fishtail side bun gives you texture that a plain side bun can’t fake. The braid pattern is tighter, finer, and more detailed, which makes the finished bun feel dressed up even before you add anything decorative.
Start the fishtail on one side, braid it down toward the nape, and coil the braid into a bun just behind the ear. A fishtail takes more patience than a regular braid, but long hair shows the pattern better because there’s enough length for the weave to read clearly. Keep the braid slightly loosened after it’s finished; if it stays too tight, the bun can look hard and small.
This one is especially good with off-shoulder dresses or a side-parted hairstyle. The asymmetry gives the whole look a little swing. You do not need much else with it.
15. Cascading Twist Half-Up
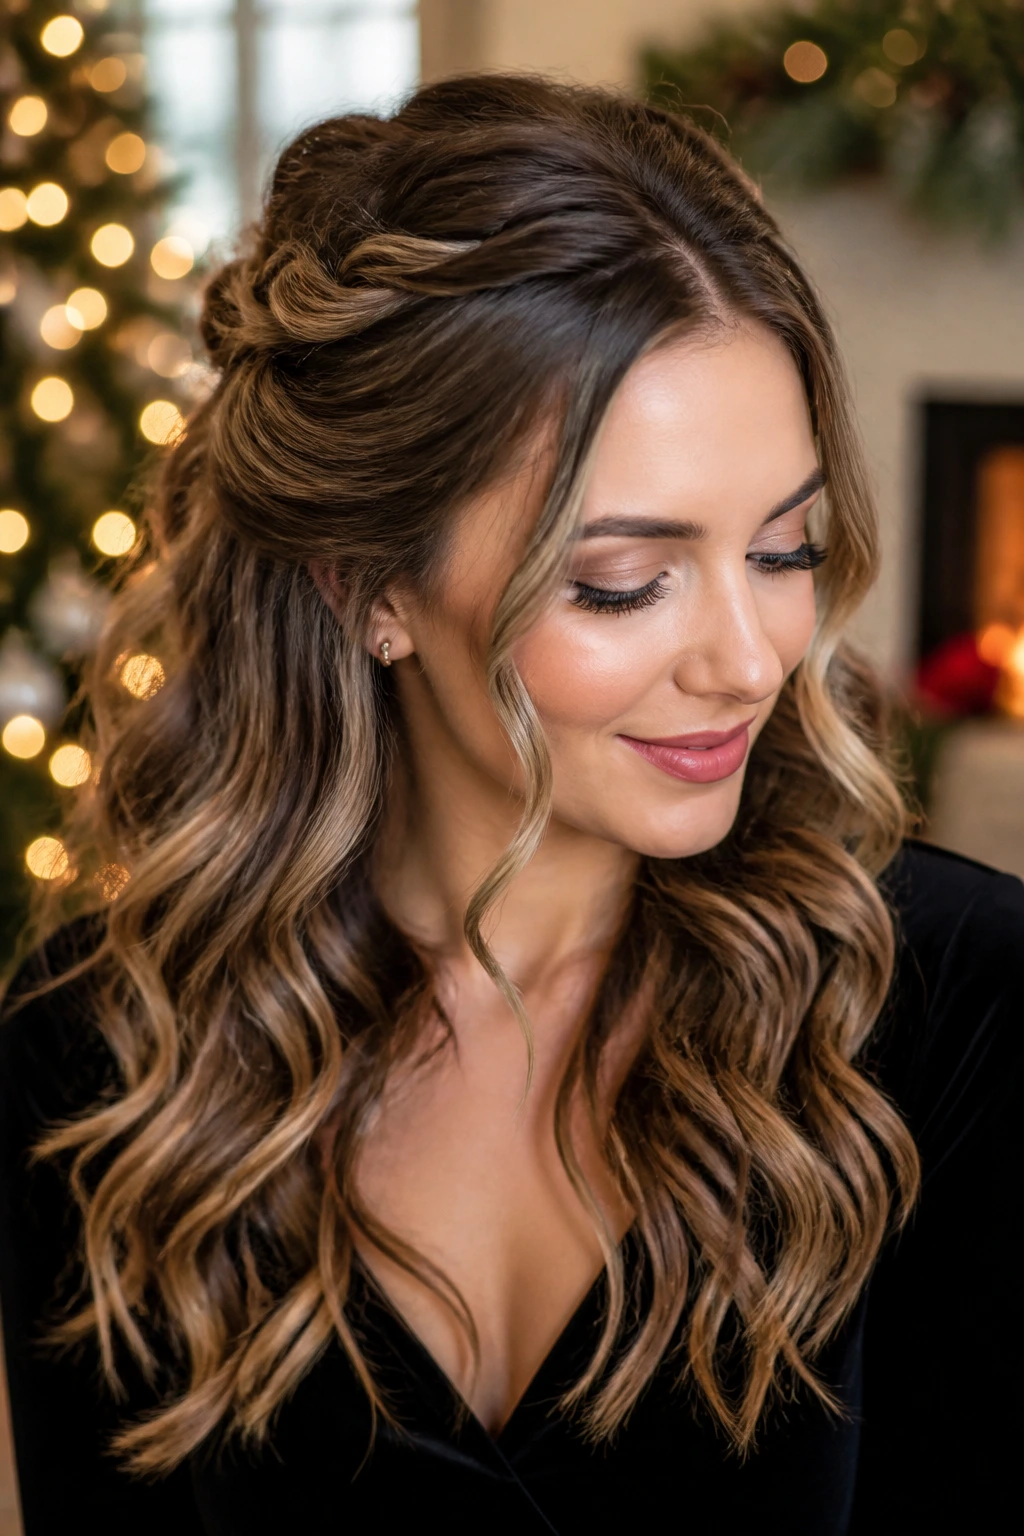
The cascading twist half-up is the answer when you want the feeling of an updo without losing the length entirely. The top and sides are controlled, the lower section stays loose, and the result feels softer than a full bun.
Take two sections from the front, twist them back, and pin them at the center or slightly off-center. Let the rest of the hair fall over the shoulders, but add a bend through the lengths so it doesn’t hang limp. A curling wand or even a large hot brush can help. The twist should hold the crown in place while the ends do their own thing.
This style works well if your hair is layered or if you want to show off length that took some effort to grow. It also plays nicely with festive clips because you only need one piece of jewelry near the twist. Too many accents would fight the shape.
16. French Twist With Side Sweep
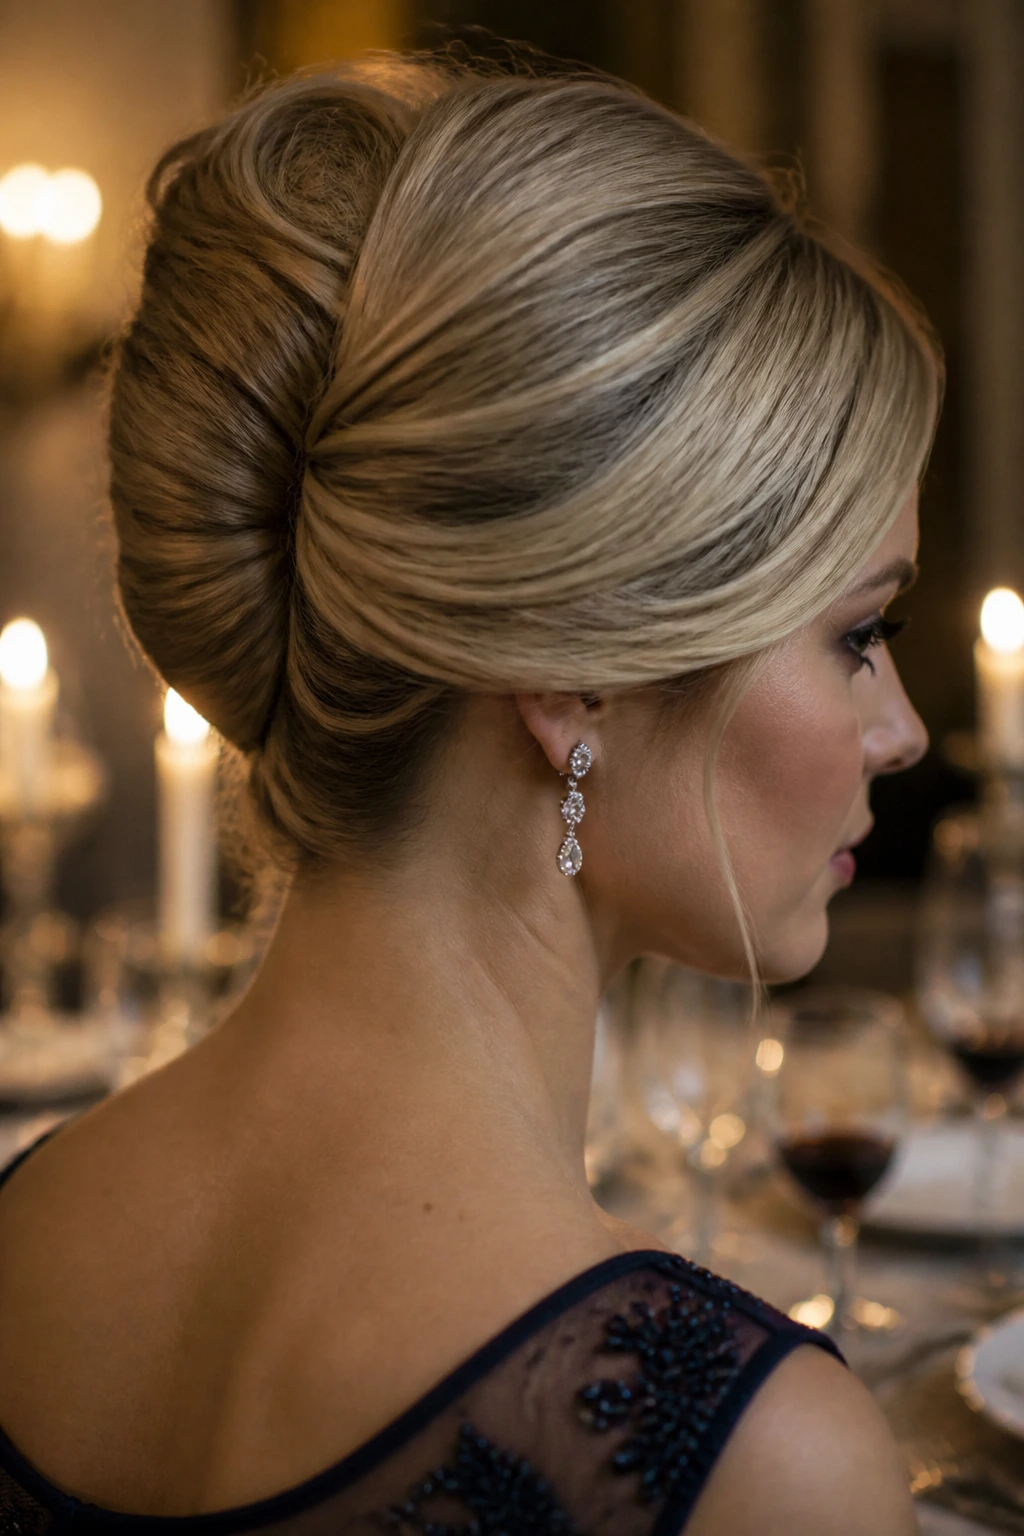
A French twist with a side sweep is the most formal style on this list, and I mean that in the best possible way. It has spine. It also gives long hair somewhere to go without making it look crammed into a tiny roll.
Sweep the hair to one side, twist it upward, and tuck the ends into the roll. Long hair sometimes needs a little extra structure at the start, so a low elastic or a hidden clip can help you build the twist before the pins go in. The side sweep keeps the front softer than a straight-back twist, which is useful if your dress or makeup is already quite strong.
This is the style for a structured dinner, a family portrait, or any evening where you want the hair to look calm and fixed. The key is clean pinning. If the seam is messy, the whole twist loses its shape.
17. Rosette Bun
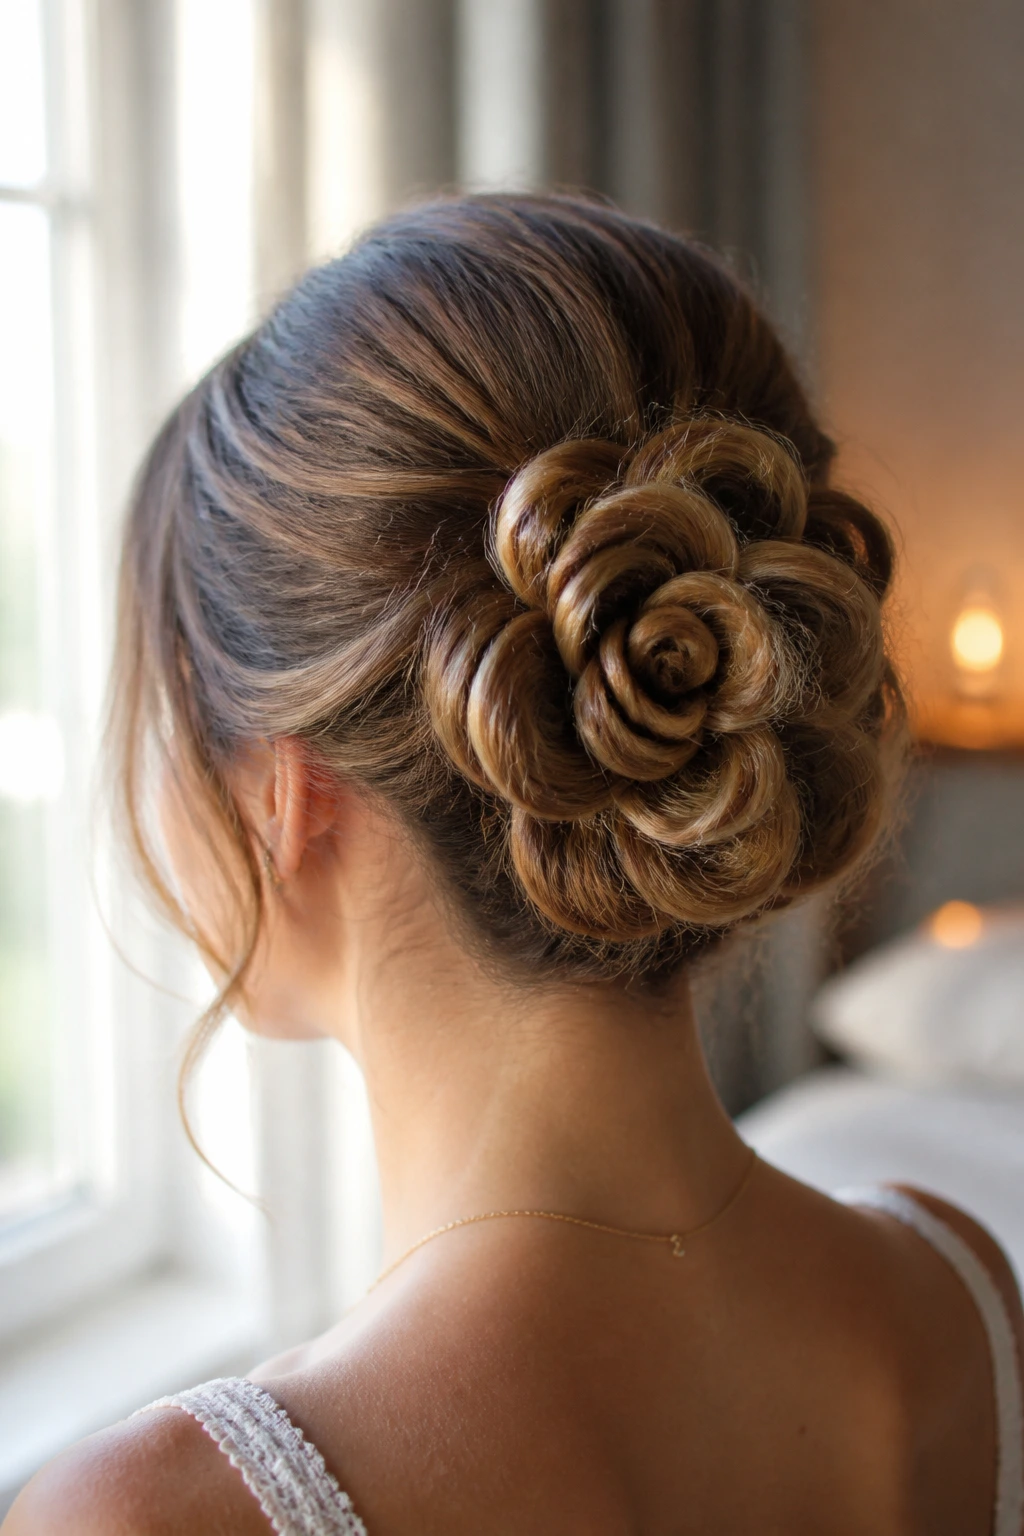
A rosette bun looks decorative because it’s built from loops that sit like petals. It sounds more complicated than it is, which is part of the appeal. Long hair gives you enough length to create those loops without making the bun flatten out.
Form the hair into several rolled sections, pin each loop around a center point, and keep the petals slightly uneven so the shape feels soft rather than engineered. The style works best when the hair has a little texture, because very slick hair can make the loops slide before they’re secured. A light mist of texturizing spray helps.
I like this one for a dress with a simple front and more detail in the back. The bun becomes the ornament. If you want to add sparkle, place one pin or one small jeweled comb at the center, not around the whole thing.
18. Ribbon-Laced Ponytail
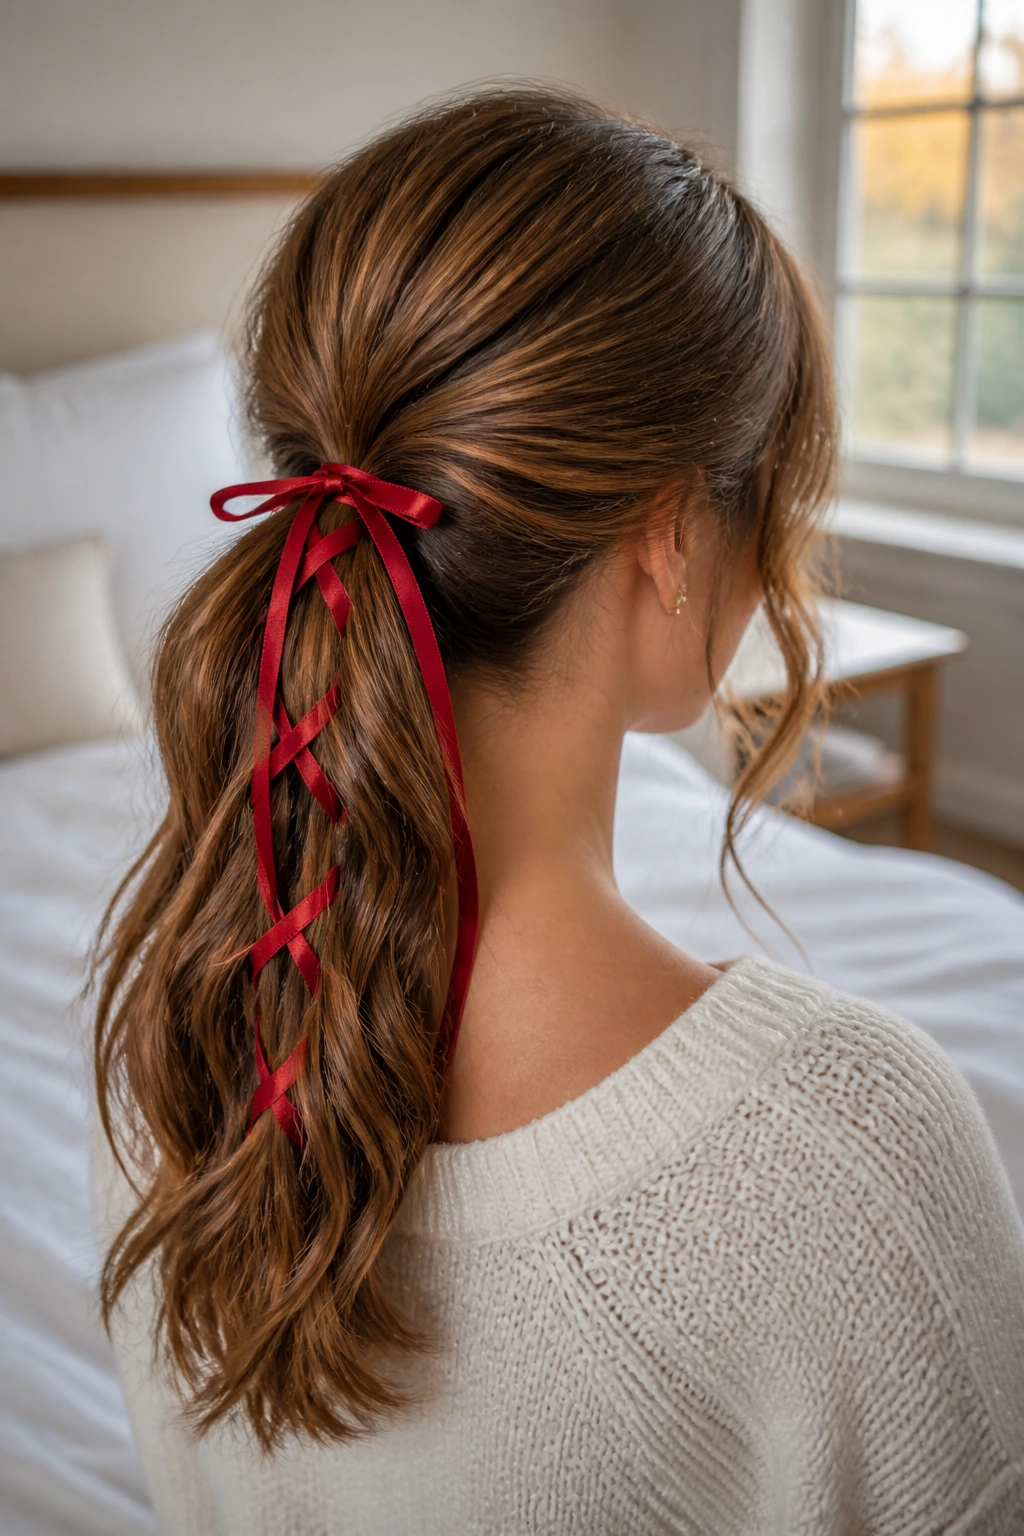
A ribbon-laced ponytail is holiday hair without apology. It’s cheerful, clear, and easy to make read festive with one narrow ribbon threaded through the tail or tied around the base.
Secure the hair in a low or mid ponytail, then divide the tail into two or three sections and weave the ribbon through them, or keep the ribbon wrapped at the base and let the tails trail down with the hair. A 1/4- to 1/2-inch ribbon is usually enough; anything wider can overwhelm the ponytail unless your hair is very thick. Satin looks smooth, but velvet or grosgrain grips better and tends to stay in place through a long evening.
This is a good choice when you want something obvious enough for photos but easy enough to redo if a section slips. It’s the kind of style that can go casual or polished depending on the ribbon color and how neatly you smooth the crown.
19. Faux Bob With Hidden Pins
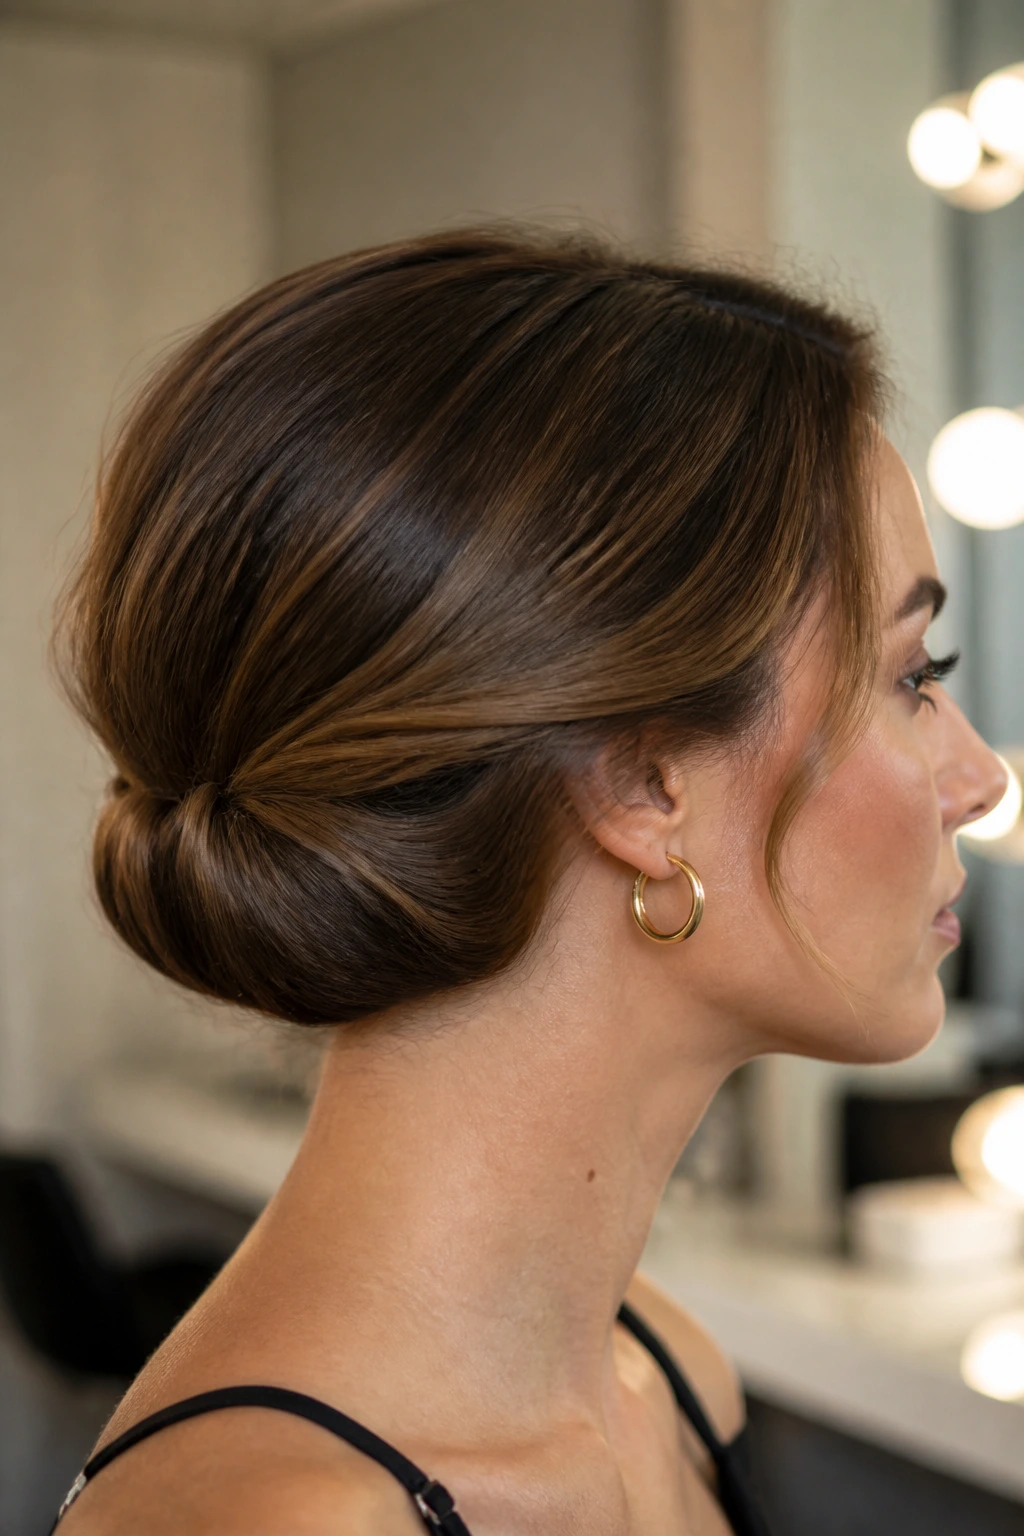
A faux bob is one of the smartest tricks for long hair because it lets you wear a shorter shape without cutting anything. It also gives the neck a clean line, which can be lovely under a collar or a dress with a detailed back.
Curl or bend the ends first, then tuck the length upward under itself and pin in layers at the nape. A few hidden pins at the base, plus a couple more along the sides, keep the bob shape from opening up. If the hair is very long, you may need to create two tucked sections rather than one large fold. A hair net under the pins can help if the strands are slippery.
This is the style that gets the most double takes. It looks like you did something dramatic, when really you just hid the ends with a little patience and enough pins.
How to Pick the Right Style for Your Hair and Neckline
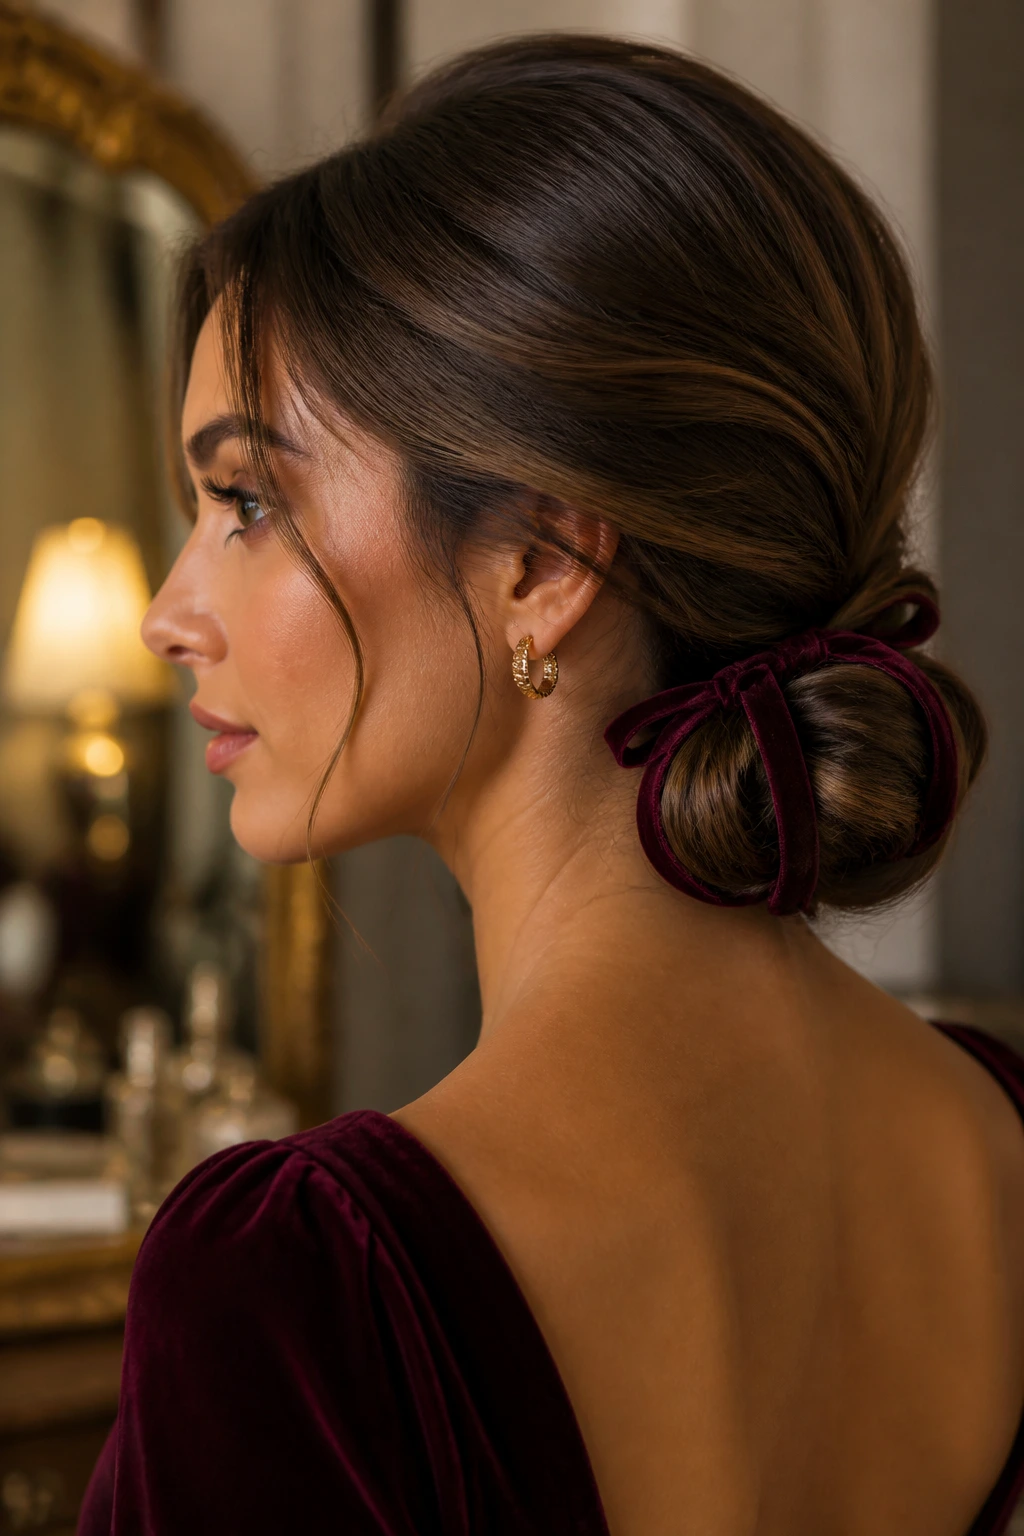
The easiest way to narrow the list is to start with the outfit, then work backward to the hair. A high neckline or ornate collar usually wants a low chignon, French twist, faux bob, or side bun so the fabric can stay visible. A lower neckline or open back gives you room for a high ponytail, bubble ponytail, or ribbon-laced ponytail that stretches the silhouette upward.
Hair texture matters just as much. Fine hair likes braid-based styles, because the braid gives grip and the pins have something to hold onto. Thick hair needs a base that can carry weight without sagging, which means low buns, French rolls, and structured ponytails tend to hold up better than loose twists. Very long hair benefits from shapes that show the length somewhere, even if the ends are tucked away.
And if time is tight, don’t choose a style that needs perfect sectioning. Pick a shape you can build fast: knotted crown, wrapped ponytail, messy bun with pearl pins. Less handling usually means less frizz, too.
Tools That Make Styling Easier
- Bobby pins in two sizes: Short pins grip small sections; longer ones hold heavier folds in long hair.
- U-pins: These are useful for buns, especially rosettes, French rolls, and low chignons where you want hidden support.
- Clear elastics: Best for bubble ponytails, braided bases, and any style that needs a tight anchor without showing the band.
- Tail comb: The pointed end makes sectioning cleaner and helps you lift small pieces at the crown without making a mess.
- Texturizing spray or dry shampoo: Gives clean hair a little grit so braids and twists stay put instead of slipping apart.
- Strong-hold hairspray: A light finish helps the style last, but don’t soak it. Too much can make the hair brittle and flaky.
- 1-inch or 1.25-inch curling iron/wand: Handy for bending ends, shaping face-framing pieces, and softening blunt tails.
- Boar-bristle brush or smoothing brush: Useful for sleek ponytails and French twists when you want the crown to lie flat.
- Decorative pins, ribbon, or a small comb: These finish the look, but they should never be the thing holding the style together.
Prep Tricks That Help Long Hair Stay Put
Start with texture, not perfection. Freshly washed hair can be too slippery for a lot of these styles, especially if it’s very long and straight. Day-old hair, or hair with a little dry shampoo at the roots, gives pins a better surface to grab. If you do wash it the same day, make sure it’s completely dry before you start. Damp roots slide. Fast.
A little bend in the lengths helps more than people expect. You do not need full curls through every section, but a soft wave or at least curled ends gives the style some body, and body keeps the shape from collapsing. Long hair that hangs dead-straight can look sleek for about five minutes and then start pulling everything down.
Pin from the inside out. That means you anchor the base first, then tuck the visible surface later. If a bun or roll starts to feel loose, don’t just add pins on top. Push them into the densest part of the hair and cross two pins in an X when the section is heavy. That small move can make the difference between “stays put” and “starts sinking before dessert.”
Keep a tiny rescue kit nearby. One comb, six pins, a travel spray, maybe one extra elastic. That’s enough. Anything more usually means you’ve brought a whole emergency that you won’t want to carry around.
Common Mistakes That Flatten the Shape
-
Starting with hair that’s too clean and too soft: The style slips because the strands have no grip. The fix is simple—add dry shampoo at the roots or work from day-two hair whenever you can.
-
Using decorative pins as the main support: Pretty pins look nice, but they are not structural. If you rely on them to hold a heavy bun or twist, the style will sink. Put the real pins underneath first, then add decoration last.
-
Pulling the crown too tight: A style that’s stretched flat at the front often looks harsh and can feel sore by the end of the night. Leave a little lift at the roots so the shape has room to breathe.
-
Overloading the hair with spray too early: If you soak the hair before you’ve finished shaping it, the sections can get sticky and start clumping. Use spray after the structure is set, then add a light second mist only where flyaways show.
-
Ignoring the weight of very long hair: Some styles look lovely on paper and sag in real life because the length is too heavy for the base. If your hair is past the bra strap, choose styles with multiple anchors, not one loose knot.
-
Leaving no backup for the ends: Long loose ends can poke out of a bun or roll and make the back look unfinished. Tuck them under in smaller sections, pin them flat, and check the nape in a mirror before you leave.
Variations for Fine, Thick, Curly, and Very Long Hair
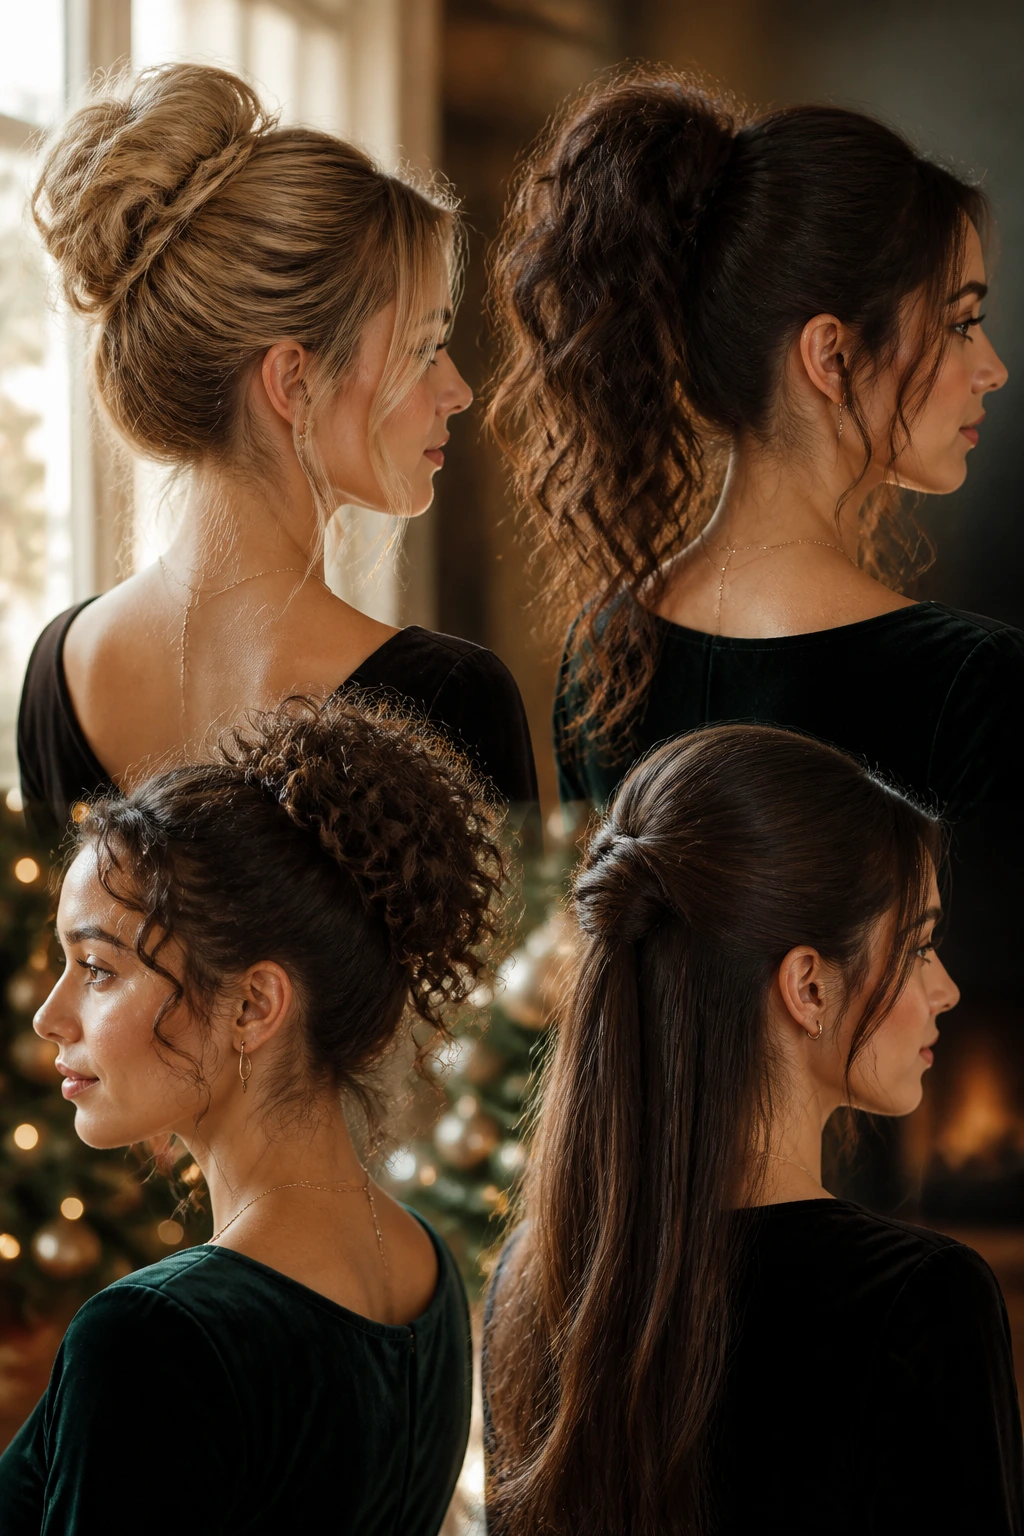
Fine-Hair Lift: Start with dry shampoo at the roots and a small amount of teasing at the crown. Styles like the braided crown bun, rope-braid ponytail, and French twist hold better when the hair has a little roughness. Keep the accessory light so the style doesn’t sag under its own weight.
Thick-Hair Anchor Build: Use two elastics when the hair is dense, especially for ponytails and low buns. Put the first elastic where the base should sit, then secure the shape with a second one once the hair is folded or braided. Thick hair needs pins that go deeper than the surface, so U-pins can help more than decorative clips.
Curly-Hair Holiday Shape: Don’t brush the curl pattern into submission unless you want a smoother finish on purpose. Styles like the messy bun, half-up knot, and halo braid look rich when the curls stay visible. A little curl cream on the ends keeps frizz down without flattening the shape.
Heatless Evening Prep: If you’d rather avoid hot tools, make the base the night before with braids, twists, or soft pin curls. The next day, the hair already has the kind of bend that helps an updo hold. This is one of the easiest ways to cut styling time without giving up shape.
Extra-Long Hair Fix: Split the hair into sections instead of trying to pin everything in one sweep. Very long hair often works better in two folded layers than one big coil. That one change keeps the bun from becoming too heavy and gives the back of the style a cleaner line.
How to Keep Updos for Long Hair for Christmas in Place All Night
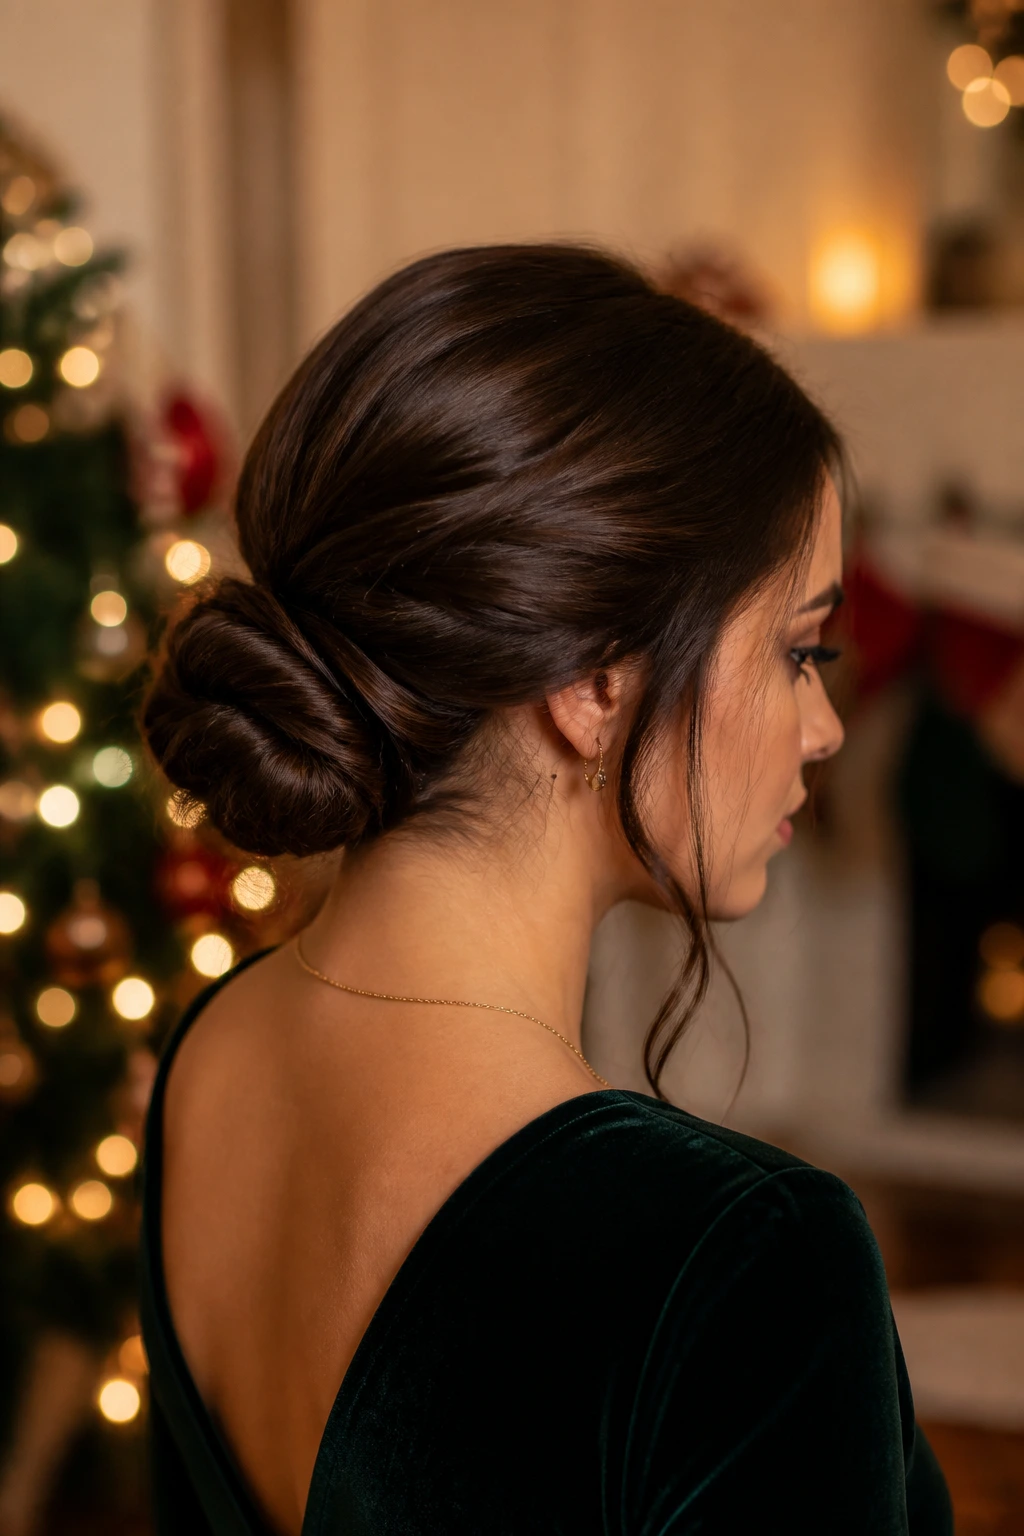
The first rule is to let the style set before you touch it again. Once the pins are in and the spray is on, give the hair a few minutes to cool and settle. If you keep pulling at the shape while it’s still soft, the base loosens before you’ve even left the mirror.
When you get home, remove the decorative pieces first. Then take out the structural pins in reverse order, not all at once. That keeps the hair from snagging on itself. If you’ve used a lot of spray, run your fingers through the lengths before brushing, then use a wide-tooth comb from the ends upward. That’s the least aggressive way to undo a pinned style on long hair.
If you need the style to last into the next day, sleep on a silk pillowcase or wrap the hair loosely in a silk scarf. In the morning, smooth the crown with a tiny amount of cream or mist, then revive the front pieces with a brush or fingers. If the ends need help, touch them with a curling iron for 10 to 15 seconds each. Don’t re-spray the whole head every time. That’s how hair gets stiff and dull.
The styles that survive best overnight are the low ones: chignons, rolls, tucked buns, and braided bases. High ponytails and loose half-up looks tend to flatten more, so if you’re planning to wear a style twice, start lower and anchor harder.
Frequently Asked Questions
Which updos work best for very long, thick hair?
Low chignons, French twists, braided crown buns, and Dutch braid buns usually hold best because they distribute the weight across more of the head. Very long hair needs more than one point of support, so single-loop buns tend to slide if they’re not reinforced with enough pins.
Can I do these styles on freshly washed hair?
You can, but the hair will be slicker and harder to control. If you do wash it the same day, add dry shampoo at the roots, let it dry fully, and use a bit of texturizing spray before you start sectioning.
How many bobby pins do I need for one holiday updo?
More than you think. For a simple wrapped ponytail, you might only need 4 to 6. For a full bun, French twist, or braided crown, 10 to 18 pins is common because long hair needs hidden support, not just a few surface pins.
What if my hair is too slippery for braids and twists?
Start with a rough base. Dry shampoo, texture spray, or even a tiny bit of volumizing mousse at the roots can help. If the hair still slides, choose styles with more anchors—two braids feeding into one bun usually hold better than one loose twist.
Can I add clip-in extensions or a ponytail piece?
Yes, especially for bubble ponytails, high ponytails, and full buns where you want extra bulk. Just make sure the extension clips sit under a strong anchor and are covered by the wrapped section or braid so they don’t show when you turn your head.
Do these styles work with layers or face-framing bangs?
They do, but layers need a little extra pinning. Shorter pieces around the face can be left out on purpose if you want softness, or tucked and smoothed with a small pin if you want a cleaner silhouette.
How do I stop frizz from showing up after a few hours?
Use less product at the start and add a tiny bit of smoothing cream only to the surface flyaways once the style is done. A toothbrush or clean spoolie sprayed lightly with hairspray can also smooth the hairline without flattening the whole style.
Which styles are fastest if I only have about 15 minutes?
The wrapped ponytail, the half-up knotted crown, the messy bun with pearl pins, and the ribbon-laced ponytail are the quickest. They give you a finished look without demanding precise braiding or a dozen hidden pins.
The Styles That Stay Put
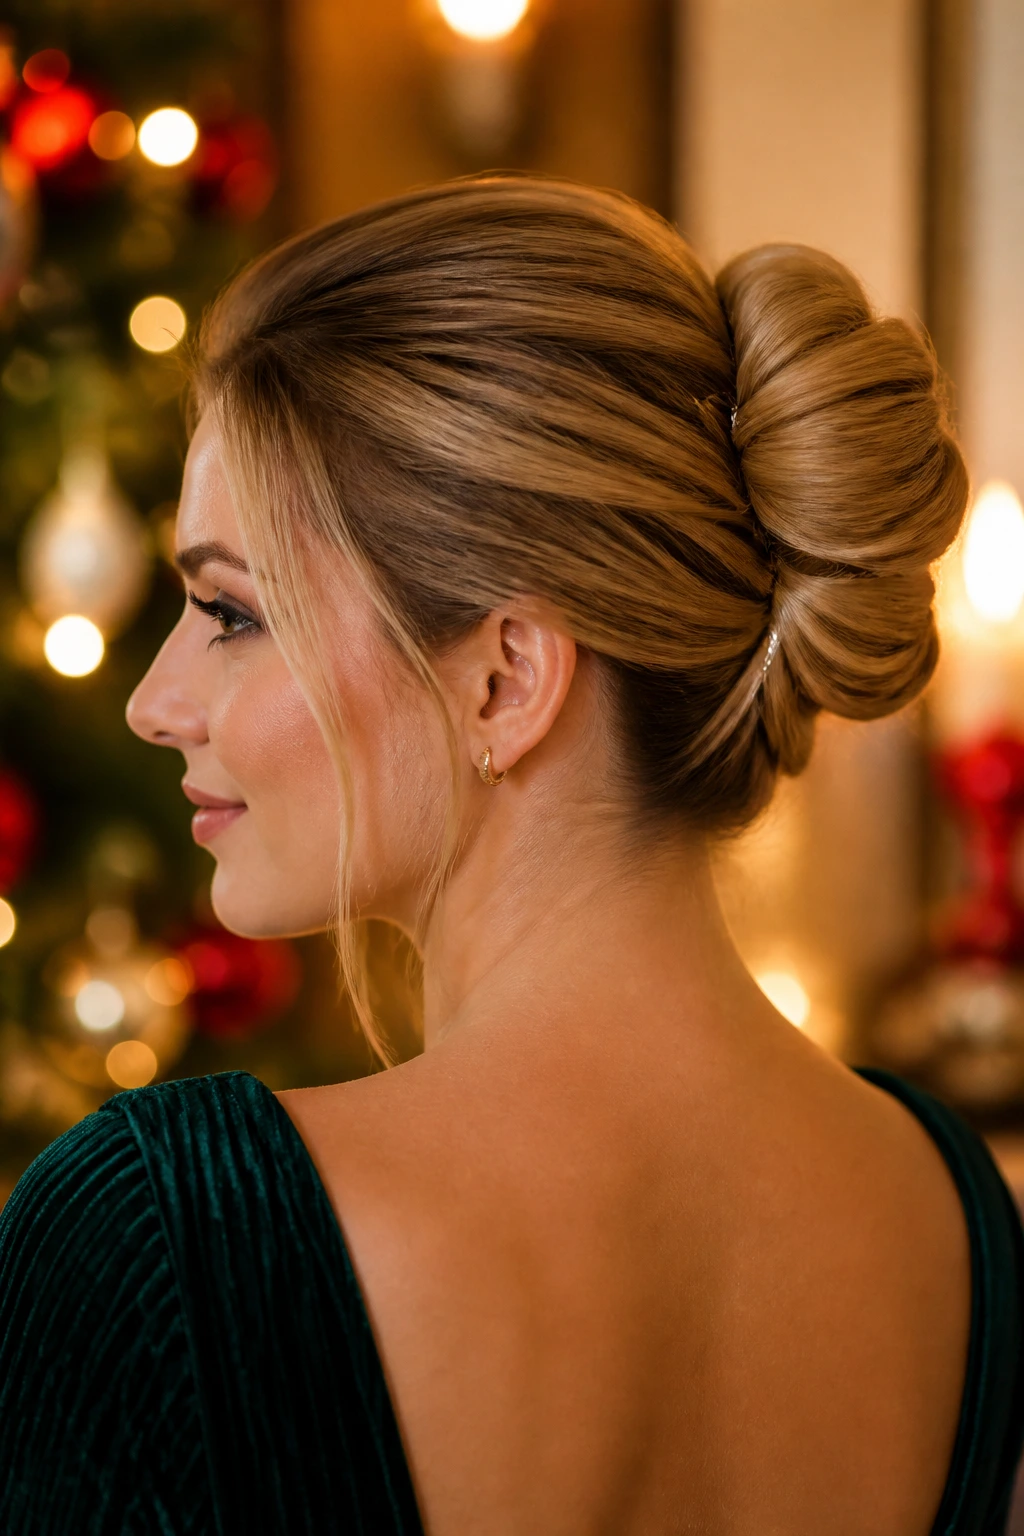
The best Christmas updos for long hair are the ones that know what long hair wants to do and then steer it gently into shape. Some days that means a polished ponytail with a wrapped base. Other days it means a low chignon, a braid-fed bun, or a faux bob that makes everyone do a second look at the back of your head.
What I like most about this whole set is that none of it depends on one magic trick. It’s all about structure, texture, and choosing the right silhouette for the neckline you’re wearing. Once you get that part right, the ribbon, pearl pins, and sparkly clips stop being decoration and start doing their real job.
Pick the base first. Then add the holiday detail that makes sense for the rest of the outfit, and the style will look like it belongs there.
