



Braided everyday updo hairstyles are the ones I trust when hair has its own agenda and I still need to leave the house looking like I meant it. A braid at the base changes the whole game. It gives pins something to grip, hides uneven lengths, and keeps frizz from spreading across the crown like it pays rent there. If your hair is freshly washed and slippery, some of these styles will slide a bit more; day-two hair usually holds the structure better.
That’s the appeal, really. You do not need a blowout, a curling wand, or a ten-step routine to make hair look finished. A low braid, a tucked bun, a crown wrap, or a loc-friendly twist can carry a whole day on its back and still look fine after lunch, after errands, after a long commute with the windows cracked.
These styles lean practical first and pretty second, which is exactly why they stay useful. Some sit sleek and close to the scalp. Some are softer and a little loose around the edges. All of them are built for real life — quick mornings, humid air, gym bags, and that stubborn middle stretch of the day when hair usually starts to give up.
Why These Braided Updos Earn a Permanent Spot in the Rotation
- They hold on second-day hair: A little texture gives the braid something to catch, so you spend less time fighting slippery roots.
- They tame the shape, not just the ends: The braid creates a clean line at the hairline, which matters more than a perfect bun ever will.
- They work with more than one texture: Straight, wavy, curly, coily, locs, twists, and installed braids all have a place here.
- They survive real movement: A braid at the base keeps the style from loosening the second you bend over, drive, or toss a coat over your shoulders.
- They buy you time between washes: When the roots are clean enough but the lengths need help, a braided updo can stretch the life of the whole style.
1. Low Braided Bun with a Center Part
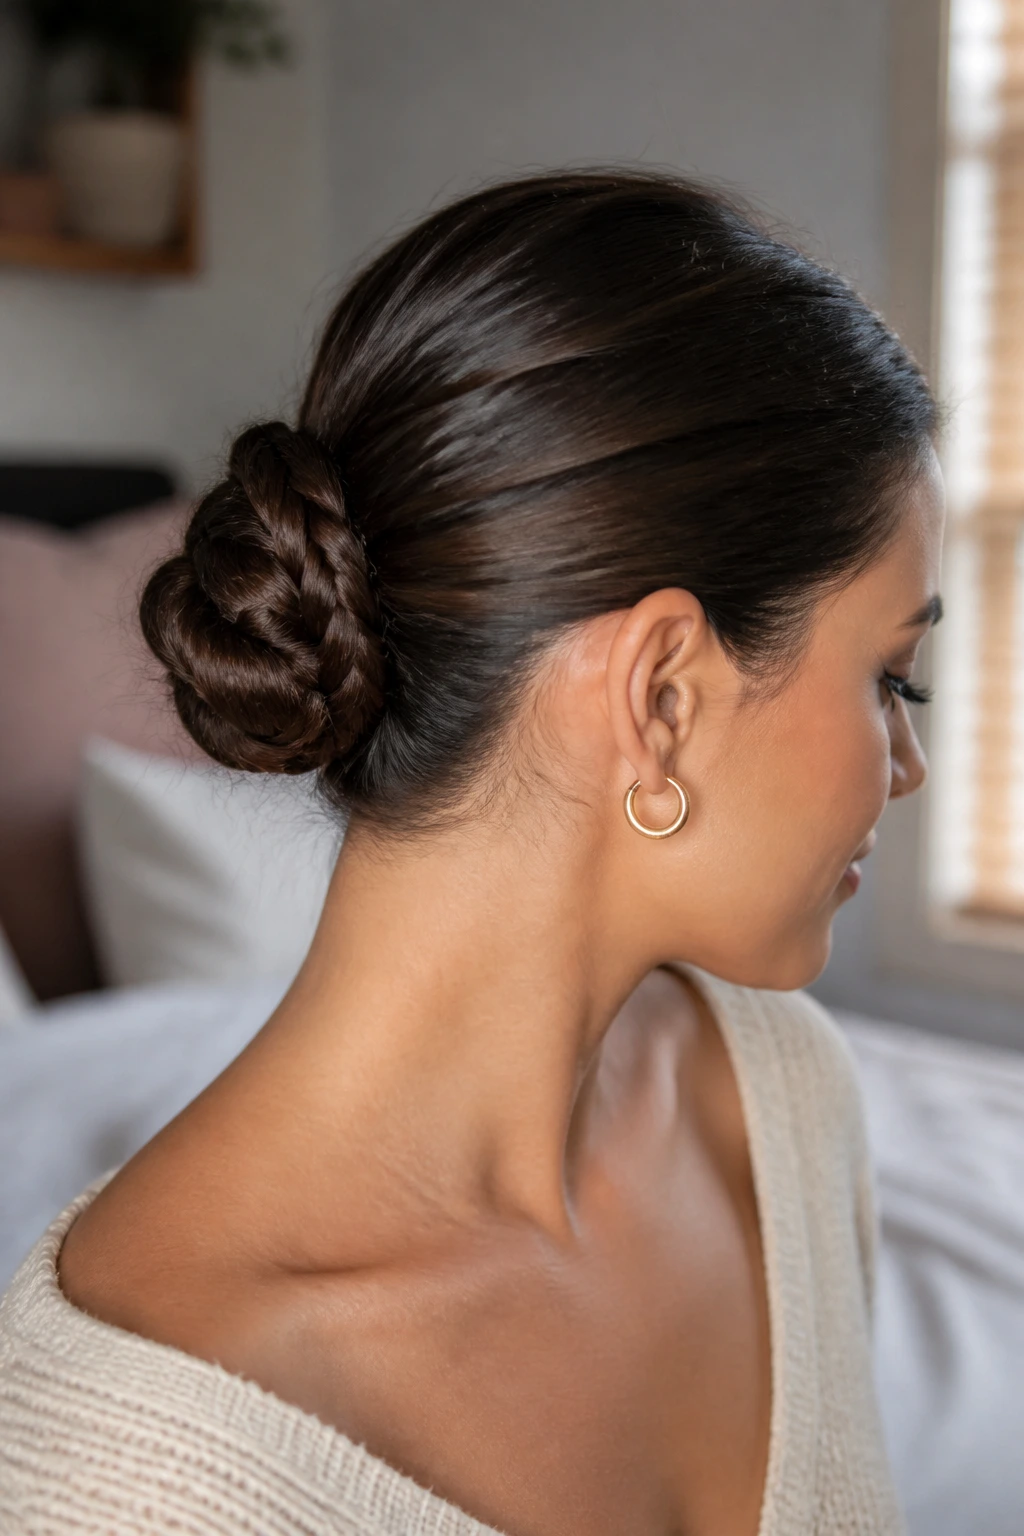
A low braided bun with a center part is the kind of style that looks calm even when the rest of the morning does not. The middle part gives it structure right away, and the braid on each side keeps the whole thing from collapsing into a plain knot. It reads neat, not stiff. That matters.
Why it stays neat
A braid gives the bun a base that grips itself. If you start with two narrow braids from the temples or just behind the front hairline, the bun has more shape and less slip at the nape. I like this one on medium hair because the low placement takes weight off the crown, and that usually means fewer headaches by lunchtime.
Small details that help
- Use a tail comb to make the center part clean.
- Secure each braid with a tiny elastic before wrapping.
- Tuck the ends under the bun and pin in an X-shape.
- Finish with a light mist of hairspray only on the outer surface.
It works especially well when the front pieces are a little short. The braid hides the awkward length, and the bun does the rest.
2. Crown Braid Tucked into a Nape Bun
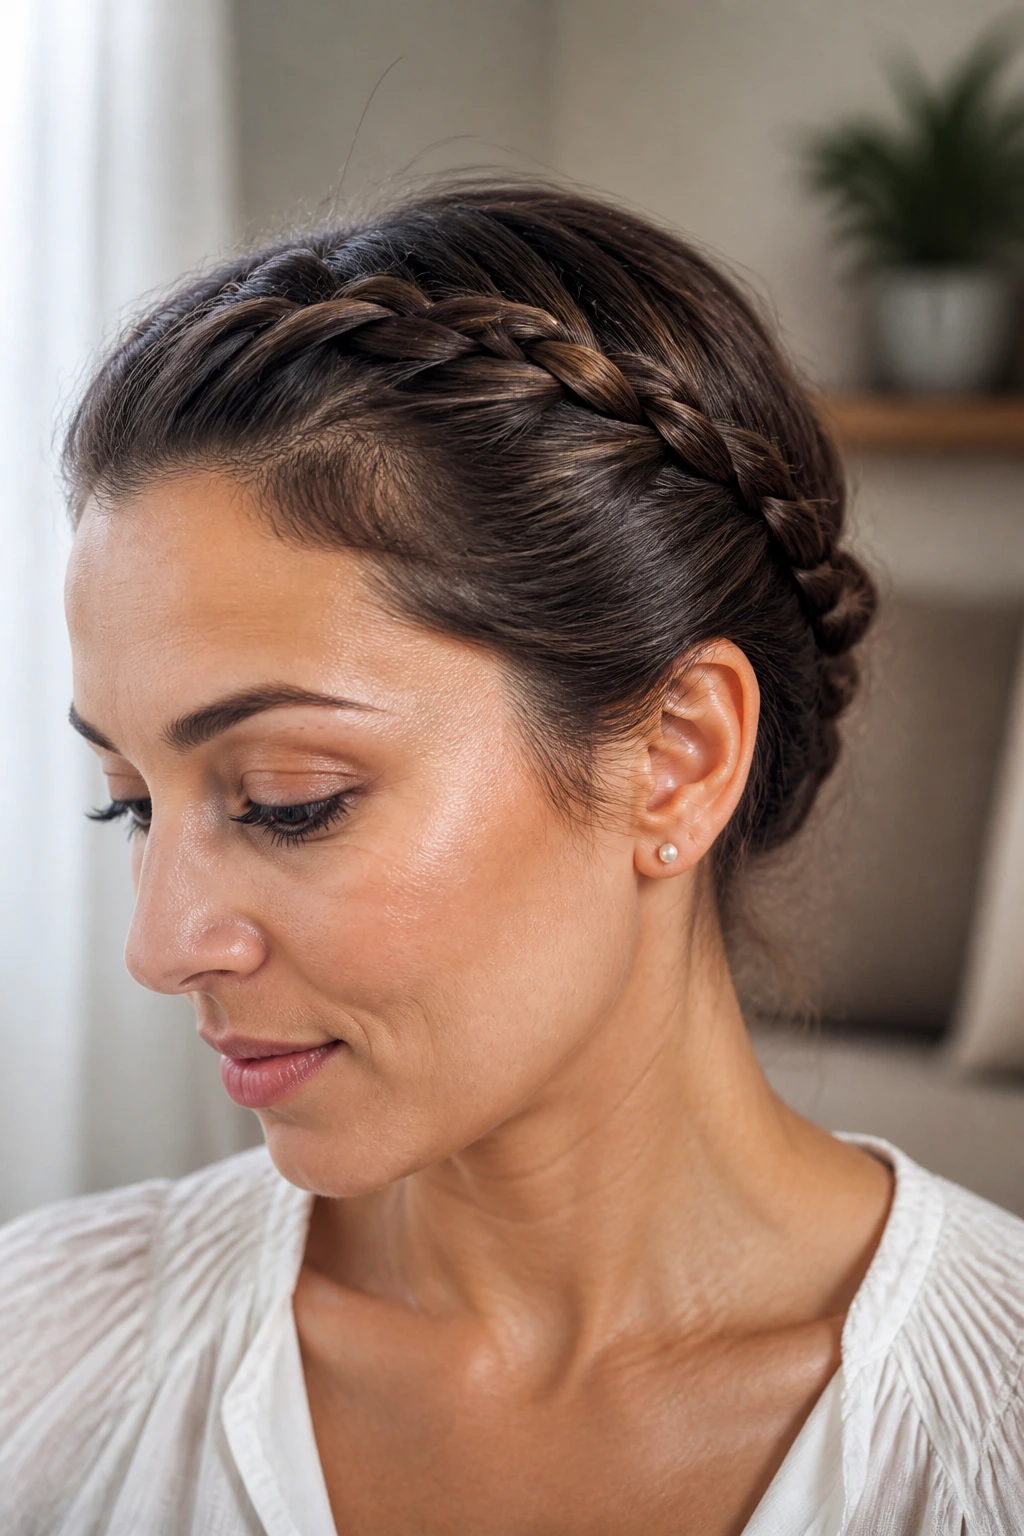
This is the style I reach for when I want the hairline covered but I do not want anything severe. The braid travels across the front of the head like a soft band, then disappears into a low bun at the nape. From the front, it looks intentional. From the side, it has just enough shape to feel finished.
The trick is to keep the braid close to the head without pulling the roots tight. If the braid sits too high, it starts looking busy. Too loose, and it loses the whole point. A medium-tension braid with a little smoothing cream at the temples usually lands in the right place.
This one is especially useful for layered cuts or grown-out bangs. The braid corrals the short pieces, and the bun keeps the length from swinging around. It also works well on damp-not-wet hair if you want a sleeker finish without going full flat-iron.
3. Double Dutch Braids Rolled into a Single Knot
Double Dutch braids are already sturdy. Rolling them into one knot turns that sturdiness into a style that can survive a full day without much fuss. Start with a center part, braid each side down toward the nape, then twist the two tails together and coil them into a single bun. Clean. Secure. Done.
The beauty here is the grip. Dutch braids sit on top of the hair, so they create texture that pins can catch. That matters if your hair is silky or freshly blown out. It also matters if you have thick hair and need a style that won’t sag after an hour.
This is the one I’d pick for a long day with a lot of movement. It stays put better than a loose chignon, and it has less friction than a high knot. If your hair is dense, use two elastics at the base before you start coiling. It sounds small. It isn’t.
4. Side Braid Chignon
A side braid chignon has a softer feel than the center-part styles, and that little asymmetry changes the mood fast. Sweep a deep side part, braid the heavier side back toward the opposite nape, then fold the length into a low chignon just off-center. It works because the braid gives the bun a line to follow.
This is a good option when one side of the haircut is shorter or when the layers around the face refuse to stay in place. Instead of fighting those pieces, let the side part absorb them. The braid on the heavy side pulls the eye across the head, which makes the bun look fuller than it is.
A couple of cross-pins under the fold will hold it better than one giant clip. And if you want the chignon to look a little less formal, pinch out one thin loop from the bun before pinning. Small change. Big difference.
5. Braided Ponytail Wrap-Under Bun
This one is fast because the ponytail does half the work before you even braid. Tie the hair into a mid or low ponytail, braid the tail, then wrap the braid around the base and tuck the ends underneath. The pony gives the style a solid anchor, which is why it’s such a solid weekday move.
I like this version on hair that’s long enough to form a bun but not quite long enough to make the bun feel full. The braid adds body without needing extra padding. If you’re using box braids or long twists, the same shape works, just with a lighter hand on the pins.
The base placement matters. Too high, and the bun can feel top-heavy. Too low, and the braid may drag. Put the ponytail just below the crown ridge or at the nape, then wrap from there. That keeps the weight balanced and the bun less likely to slide.
6. Halo Braid with Hidden Ends
A halo braid looks like it took longer than it did, which is one reason it keeps showing up in real life instead of just photos. Braid around the perimeter of the head, following the hairline, then tuck the end under the braid near the ear or at the back and pin it out of sight. The finish should feel smooth, not bulky.
What makes this one useful is how well it handles mixed textures. The braid can corral coarse roots, softer lengths, and little flyaways all in one move. If you want a softer halo, pull a few tiny pieces loose around the temples after it’s pinned. Not much. Just enough to keep it from looking carved in.
One small fix that helps a lot
If the braid starts getting puffy halfway through the day, the problem is usually product load at the roots. Use less cream or gel at the front, and let the braid do the holding. A halo braid does not need a thick coating to look tidy.
7. Feed-In Braids Gathered into a Puff Bun
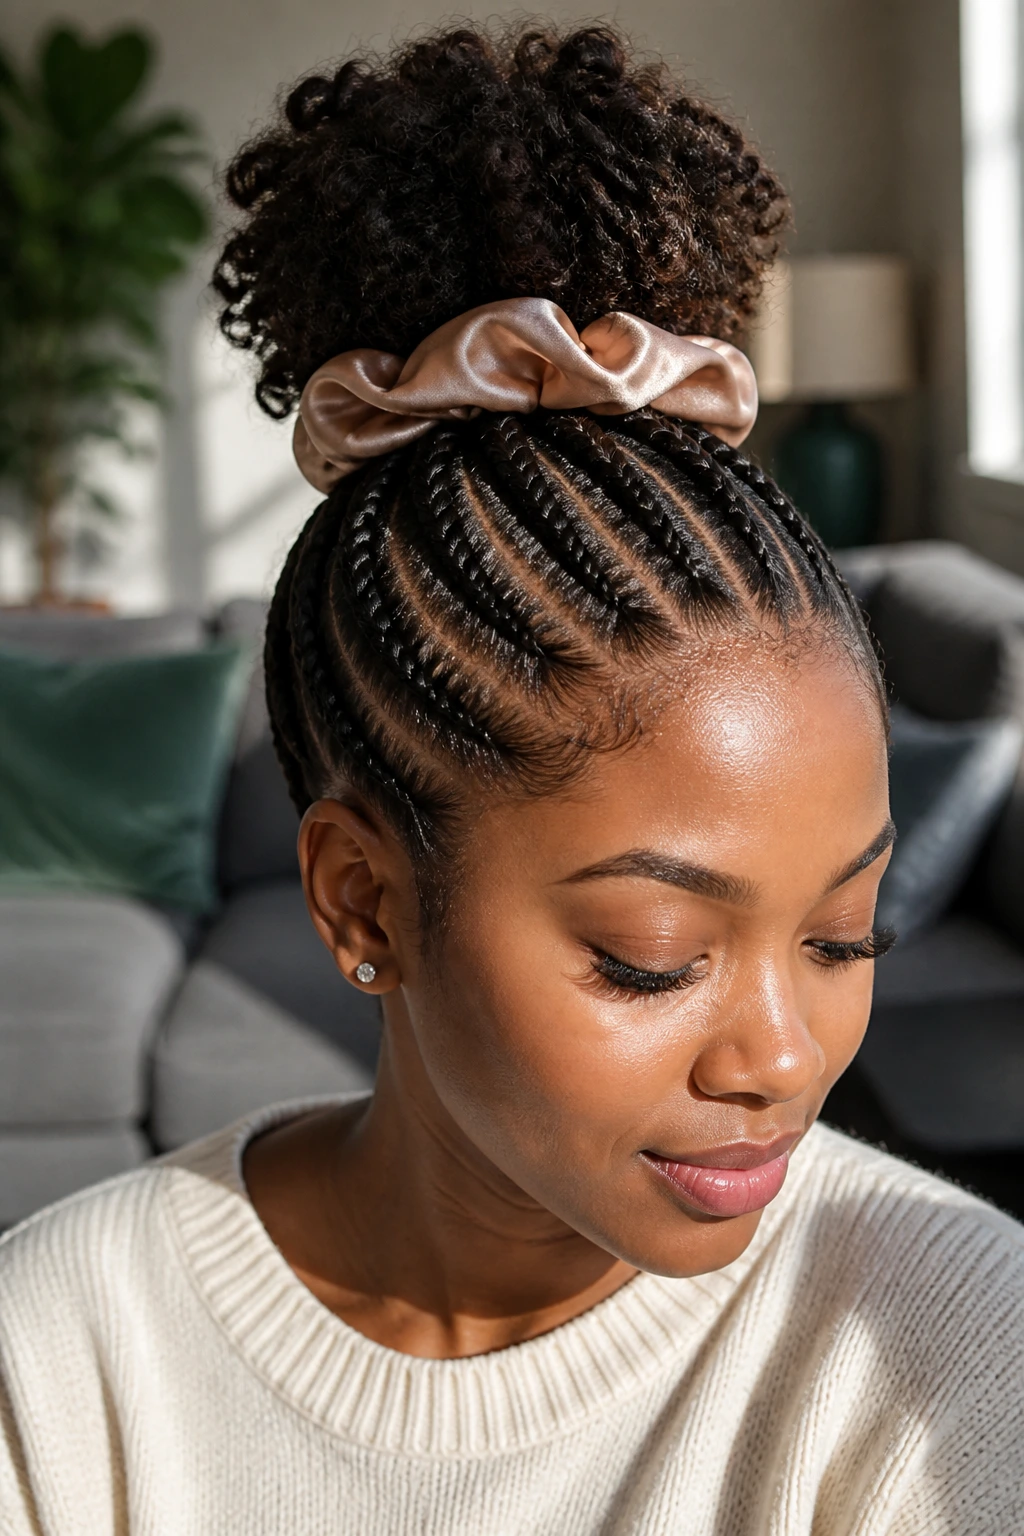
Feed-in braids are smart when you want a close-to-the-scalp look without a lot of tension. Start small at the hairline, add hair gradually, and braid the sections toward the crown or nape before gathering everything into a puff bun. On textured hair, this can look polished and still feel light enough for daily wear.
The feed-in method matters because it spreads the weight out. Instead of one tight start point, the braid builds slowly. That gives you a cleaner edge and less pulling around the temples. If you’ve ever had an updo feel too heavy by noon, this solves a chunk of that problem.
I like this one for natural hair that wants shape but not a stiff finish. A satin scrunchie or a wide, soft band around the puff keeps the bun from feeling smashed. And if you’re working with shorter lengths, you can let the puff sit a little looser instead of forcing every strand into the same shape.
8. Fishtail Coil at the Nape
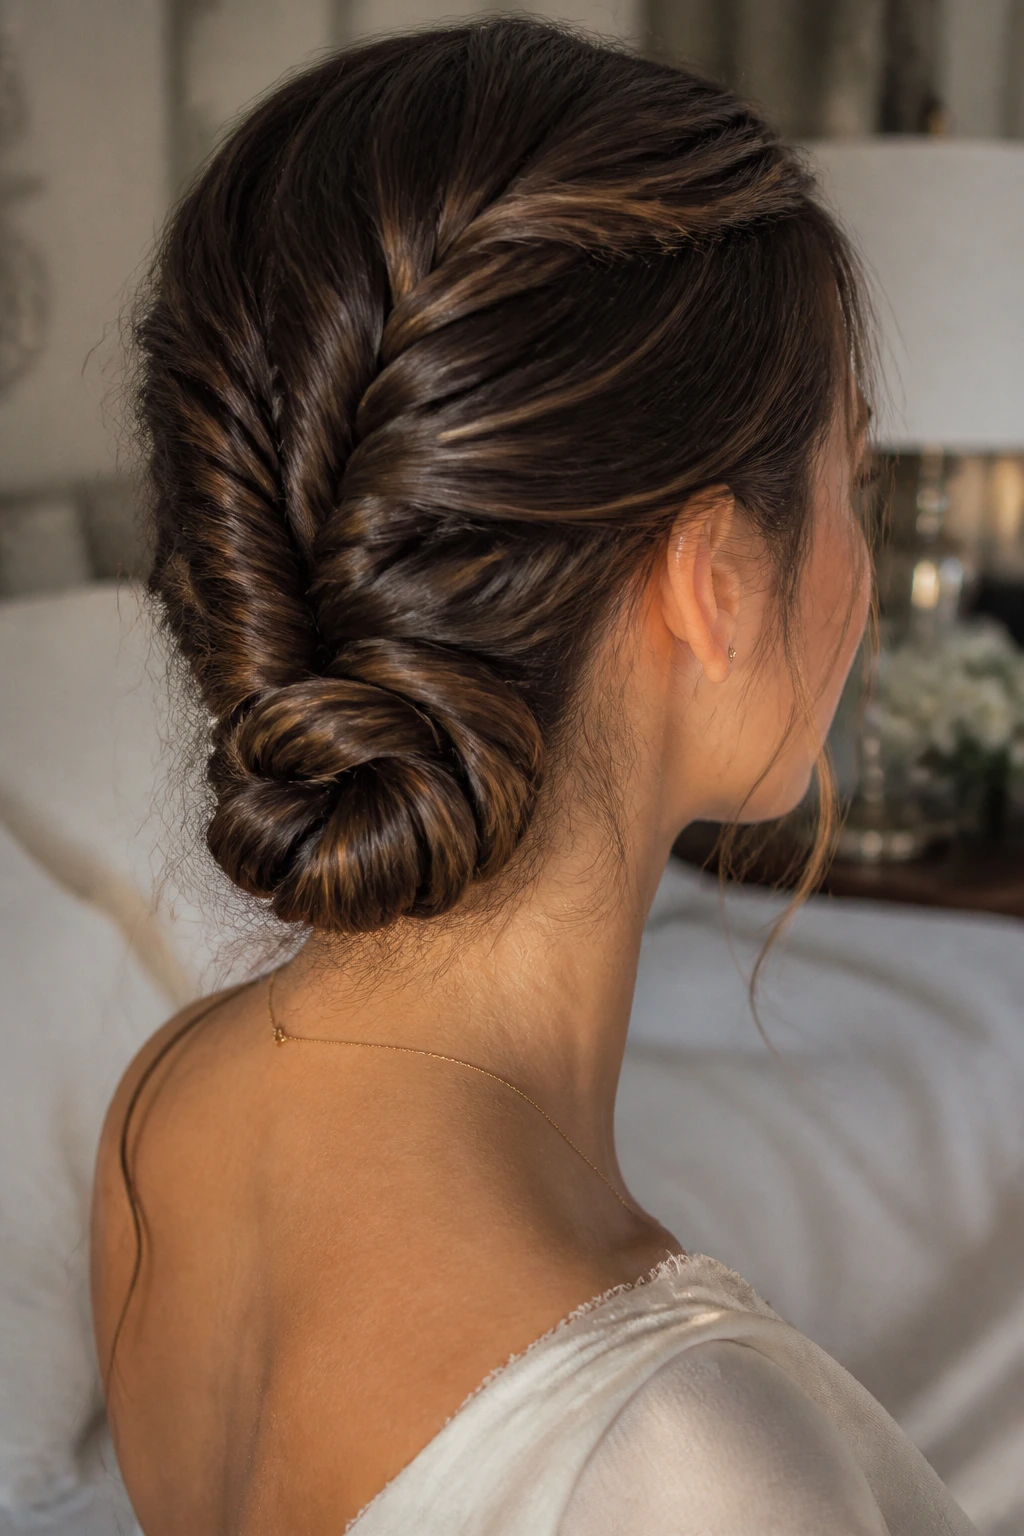
A fishtail braid looks fancier than it behaves, which is exactly why I like it. Once you get the hand movement down, the braid becomes a narrow, textured rope that coils beautifully into a low bun. The braid itself does not need to be perfect. The texture does the heavy lifting.
This style is especially good on smooth or layered hair because a fishtail has more surface grip than a regular three-strand braid. It wraps tighter, too, which keeps the bun from looking bulky at the base. If your hair tends to slip, a tiny bit of powder at the roots helps more than extra hairspray ever will.
For the bun, twist the fishtail once before coiling it. That keeps the braid from fanning out and gives the pinning a cleaner shape. It’s one of those styles that looks delicate from a distance but holds up much better than you’d expect.
9. Braided Top Knot for Shoulder-Length Hair
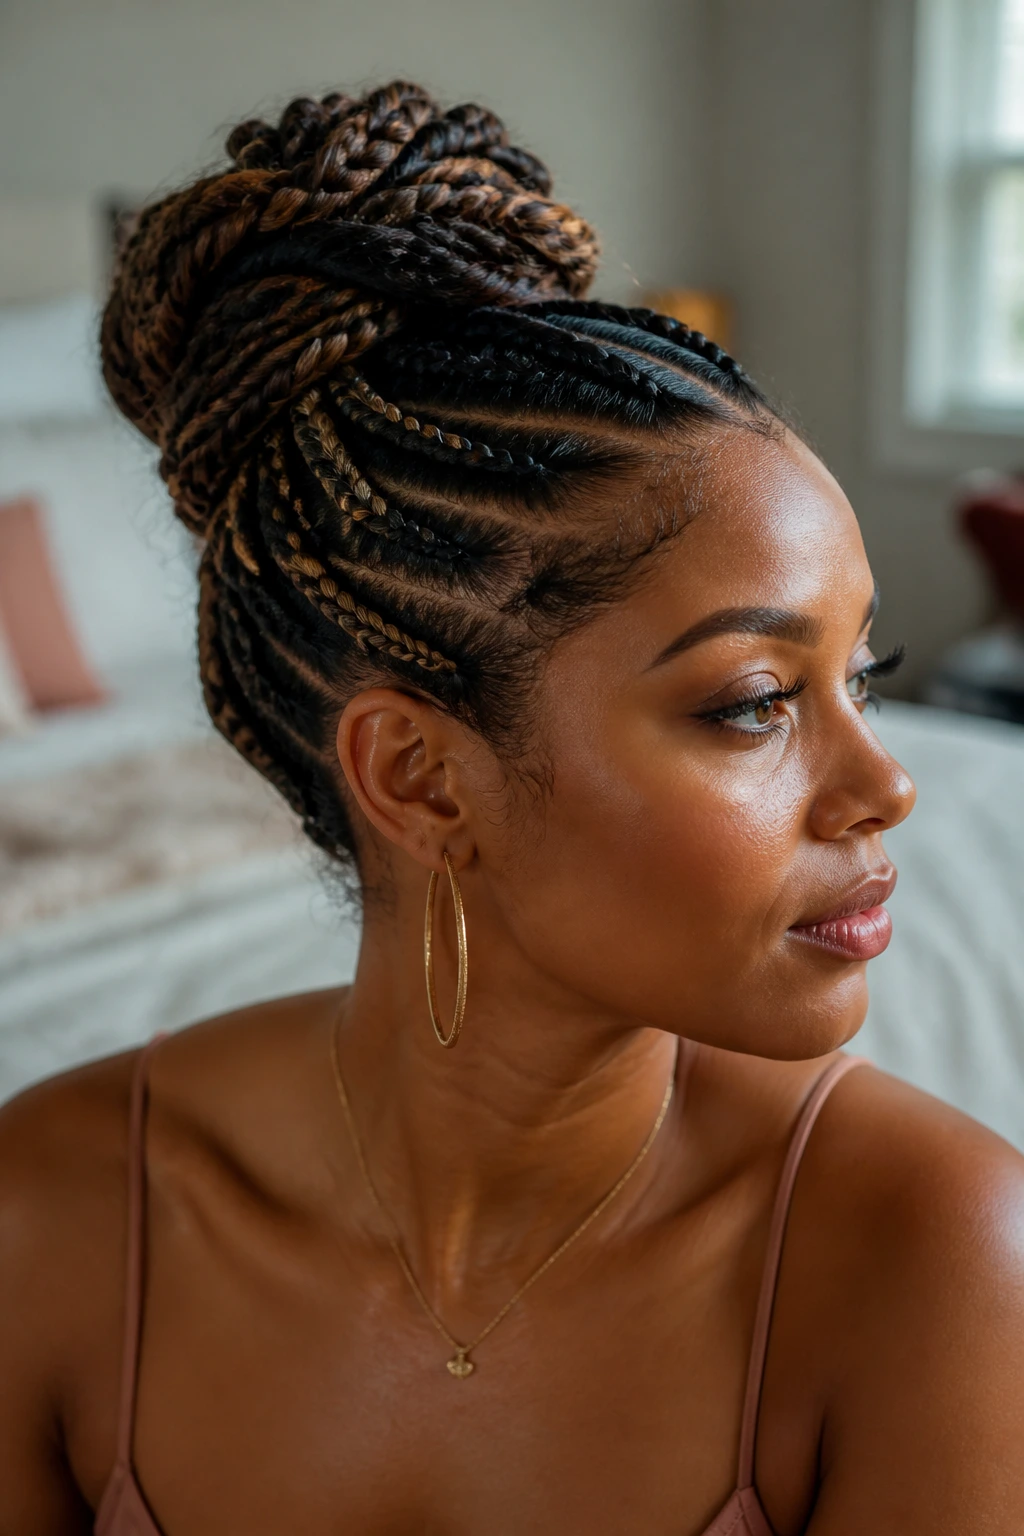
Shoulder-length hair can be annoying for buns. It’s long enough to get in the way and too short to behave like long hair. A braided top knot solves that by giving the length something to latch onto before you twist it upward. Start with a high ponytail, braid the tail, and coil it into a knot right at the crown.
The braid is doing two jobs here. It gathers the ends so they don’t poke out, and it adds enough texture that the knot doesn’t collapse. If the hair is layered, use a small elastic at the end of the braid before wrapping. That little grip point saves you from redoing the whole thing.
A foam donut can help if your hair is fine and the knot tends to sink. If your hair is thick, skip the donut and keep the knot flatter. Either way, pin the base first. The top knot only stays cute if the anchor is solid.
10. Box Braids High Bun
A high bun made from box braids has one job: get the length off your neck and keep the lines clean. Gather the braids high, wrap them into a bun, and pin the perimeter so the weight sits evenly around the base. With fresh box braids, I’d wait until the first day settles before pulling them up too high.
The best part is how little styling it needs. The braids already bring the texture, so you do not need to make the bun complicated. A wide satin scrunchie or a snag-free elastic can hold the first loop, and a few jumbo pins finish the job. If the bun feels too heavy, split the braids into two coils before wrapping. That spreads the load and keeps the top from pulling backward.
This is a protective style that still looks deliberate. It’s one of the few high buns that can read neat from every angle without becoming too neat, if that makes sense.
11. Twist-Braid Hybrid Bun
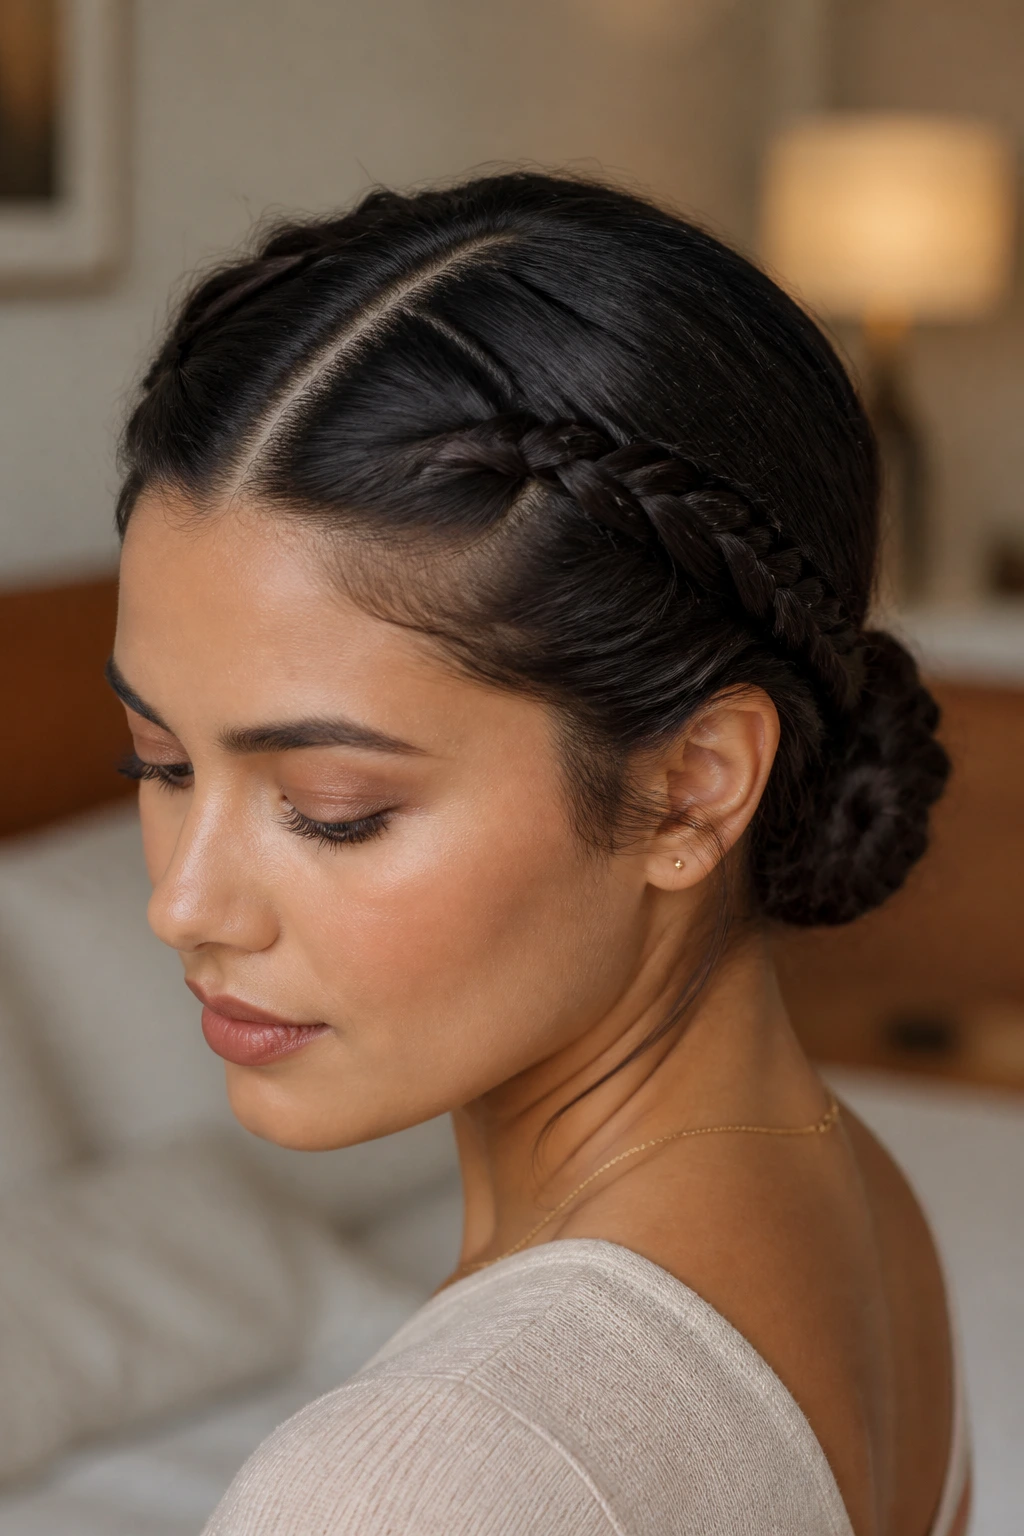
Some mornings call for a style that can handle more than one texture, and the twist-braid hybrid does that well. Braid the front pieces or the parts that need more control, then twist the rest into a bun. The braid brings structure; the twist keeps the finish softer and a little less rigid.
This is a very good choice for twist-outs, stretched natural hair, or hair that frizzes quickly at the ends. A braid alone can look too tight on this kind of texture. A twist alone can start to unravel. Put them together, and you get a style that behaves better than either one by itself.
I’d use this one when I want the front to look neat but the back to stay flexible. It also gives you more room to work with shorter layers. If a section is too short to braid cleanly, twist it instead and pin it under the bun. No need to force one method everywhere.
12. French Braid Crown with a Low Bun
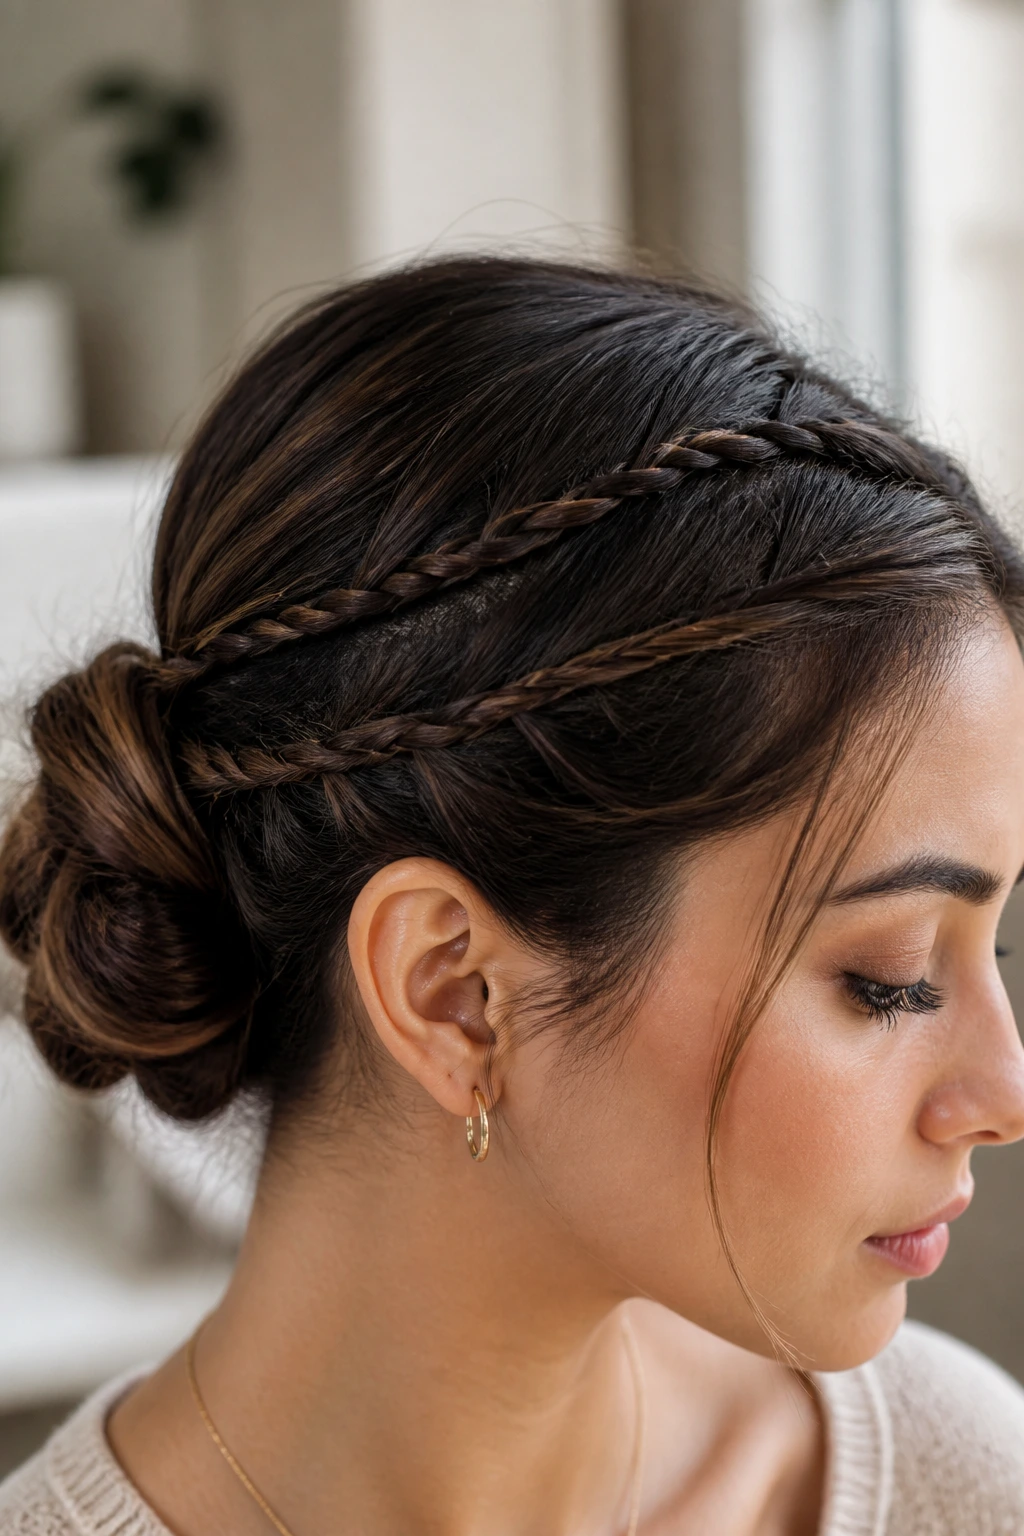
A French braid crown gives you the clean sweep of a halo braid without the same amount of wrapping. Braid from one temple across the hairline toward the opposite side, then collect the remaining hair into a low bun. The result feels softer than a full crown and usually takes less time.
It’s a strong everyday pick because the braid sits where people actually see the style — around the face and temples — while the bun handles the rest. That means the style looks finished even if the back isn’t perfect. And let’s be honest, the back rarely is.
If your hair is slippery, mist the braid lightly with water and add a pea-sized bit of styling cream at the roots. Too much product makes the crown look greasy, and that ruins the clean line. Better to keep the braid tight enough to hold and soft enough to move.
13. Rope-Braid Top Knot
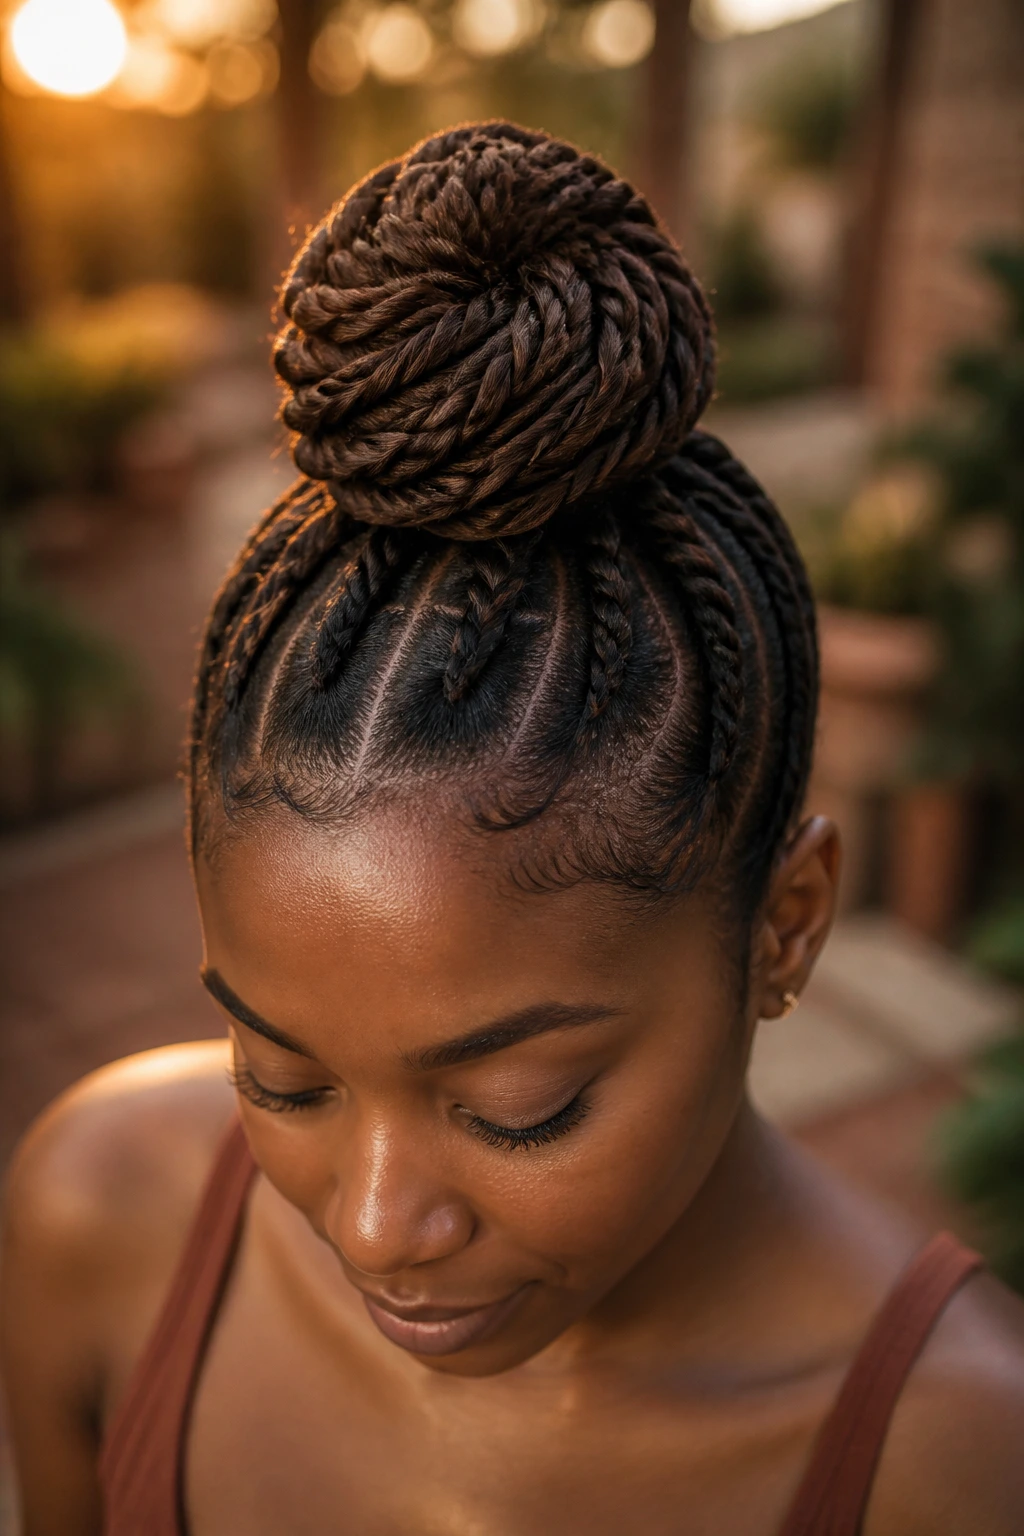
A rope braid is faster than a three-strand braid because the sections stay obvious the whole way through. Twist two sections in opposite directions, wrap them around each other, then coil the rope into a top knot. That’s the whole trick. Short sentence. Big payoff.
This style works well for hair that is long and smooth, or for ponytail extensions that need a compact finish. The rope braid has a neat, cord-like shape that looks intentional even if the knot itself is loose. If you want the knot to sit higher, start the ponytail at the crown. If you want it calmer, drop it back a little.
Rope braids can unravel if the twist direction gets sloppy. Keep both sections evenly tensioned and stop twisting before they start to kink. Once the rope goes shiny and tight, you’re there. Any more and it gets snappy instead of smooth.
14. Cornrow Side Sweep into a Tucked Bun
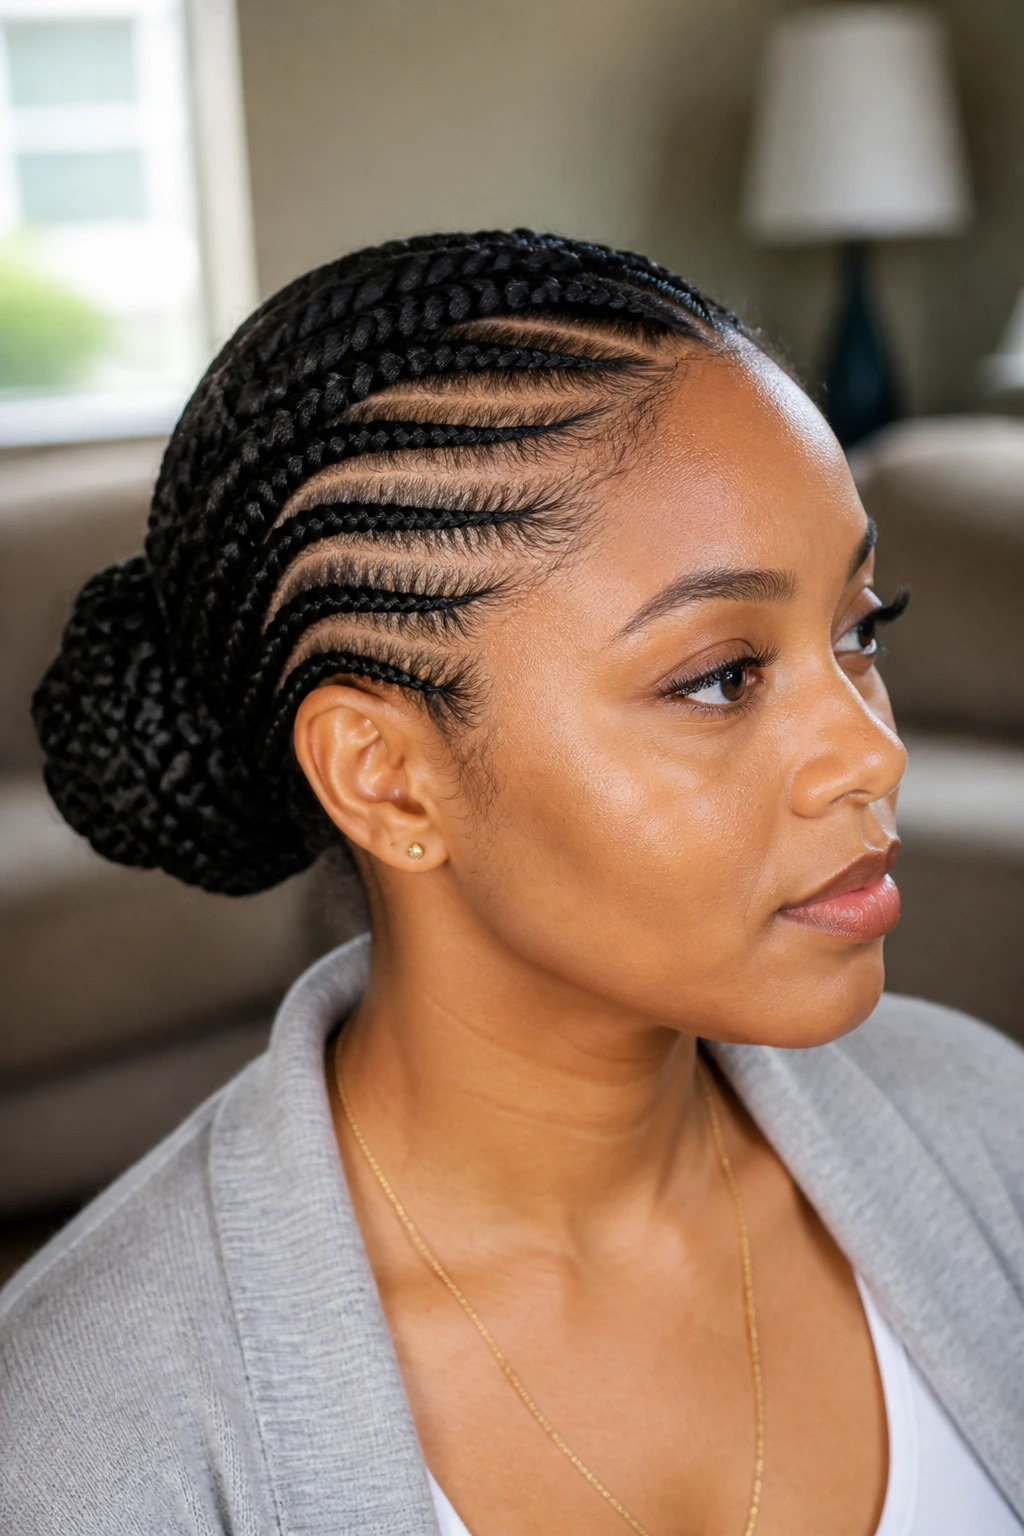
Cornrows swept to one side and tucked into a bun give you the cleanest outline on this whole list. The scalp braids lay the foundation, and the tucked bun keeps the ends protected and out of the way. It’s practical in a very direct way.
This one is especially good for dense, coarse, or coily hair that benefits from a flatter profile at the roots. The side sweep softens the shape a little, so it doesn’t look too severe. If you’re not comfortable cornrowing all the way back, two or three neat flat braids can do a similar job.
Tension is the part to watch. Snug is fine. Pain is not. A style that pulls at the temples or makes the scalp ache by midafternoon is too tight, and no amount of edge control fixes that. Keep the braid secure, then let the tuck do the finishing.
15. Braided Bubble Ponytail Bun
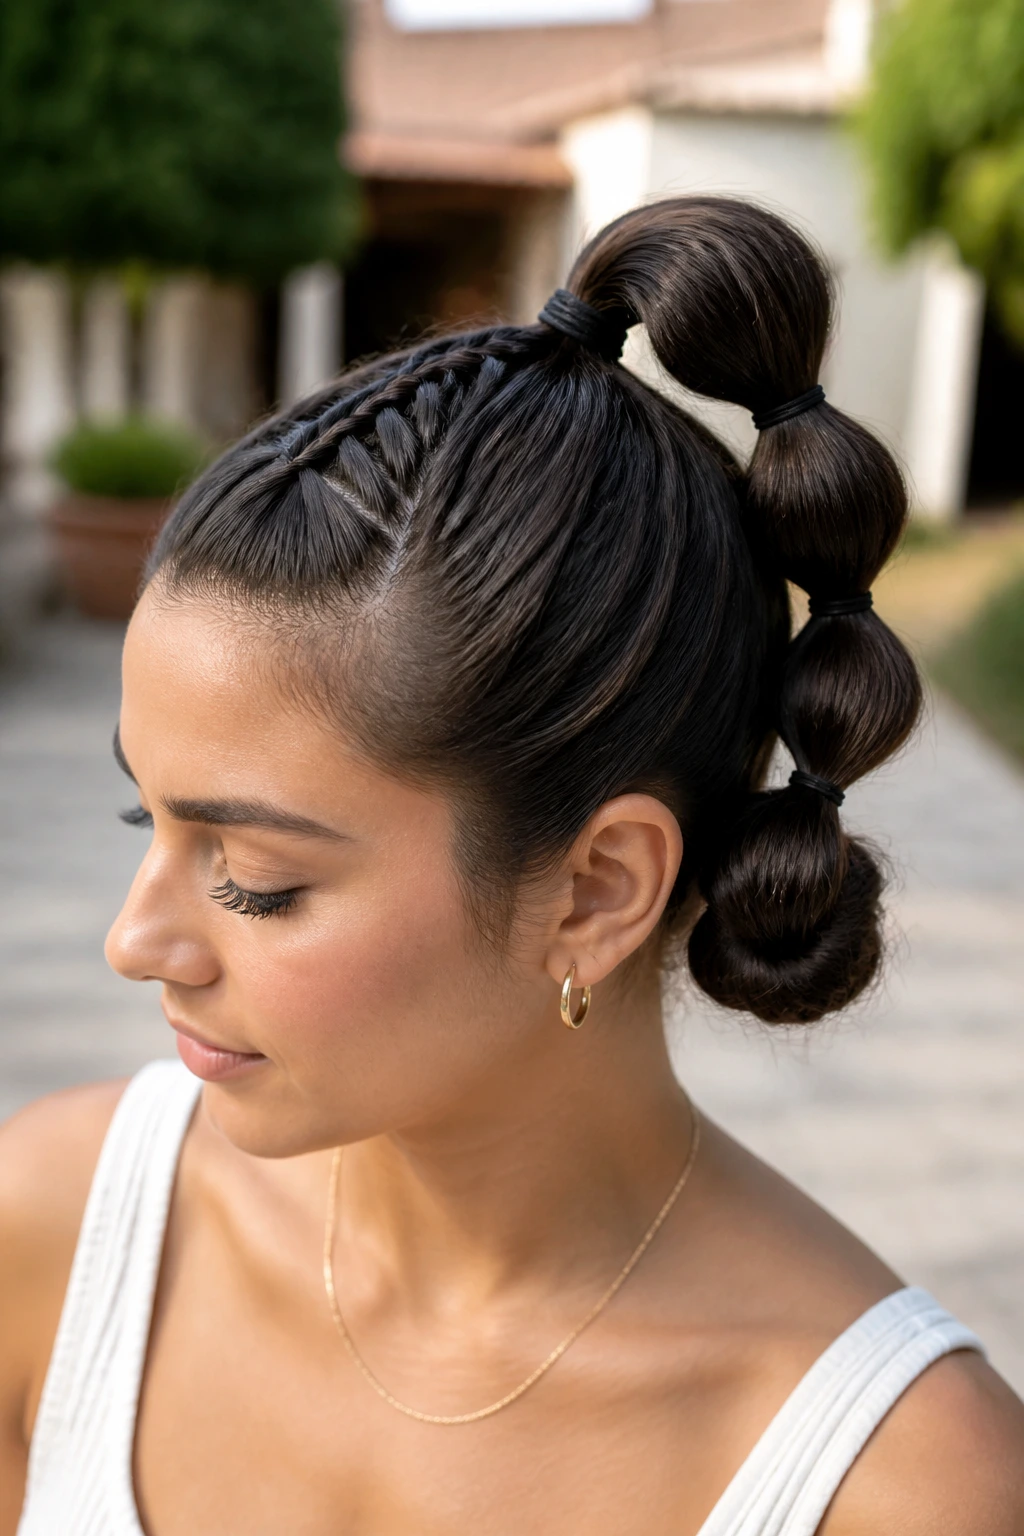
This one sounds playful because it is, but it still holds up as an everyday style when you keep the shape tight. Start with a ponytail, braid the front or base for grip, then place small elastics down the length of the tail every 2 to 3 inches. Gently puff each section into a bubble, then wrap or tuck the tail into a bun.
The bubbles add visual texture, which is useful when the bun itself would otherwise look plain. They also help shorter layers stay contained. That makes the style friendly for longer hair that needs a little structure but not a severe finish.
Use clear elastics if you want the line to disappear. Colored ties are fine if you want the style to feel more casual. Either way, don’t pull the bubbles too hard. A little roundness looks better than a series of flattened knots.
16. Space Buns with Braided Bases
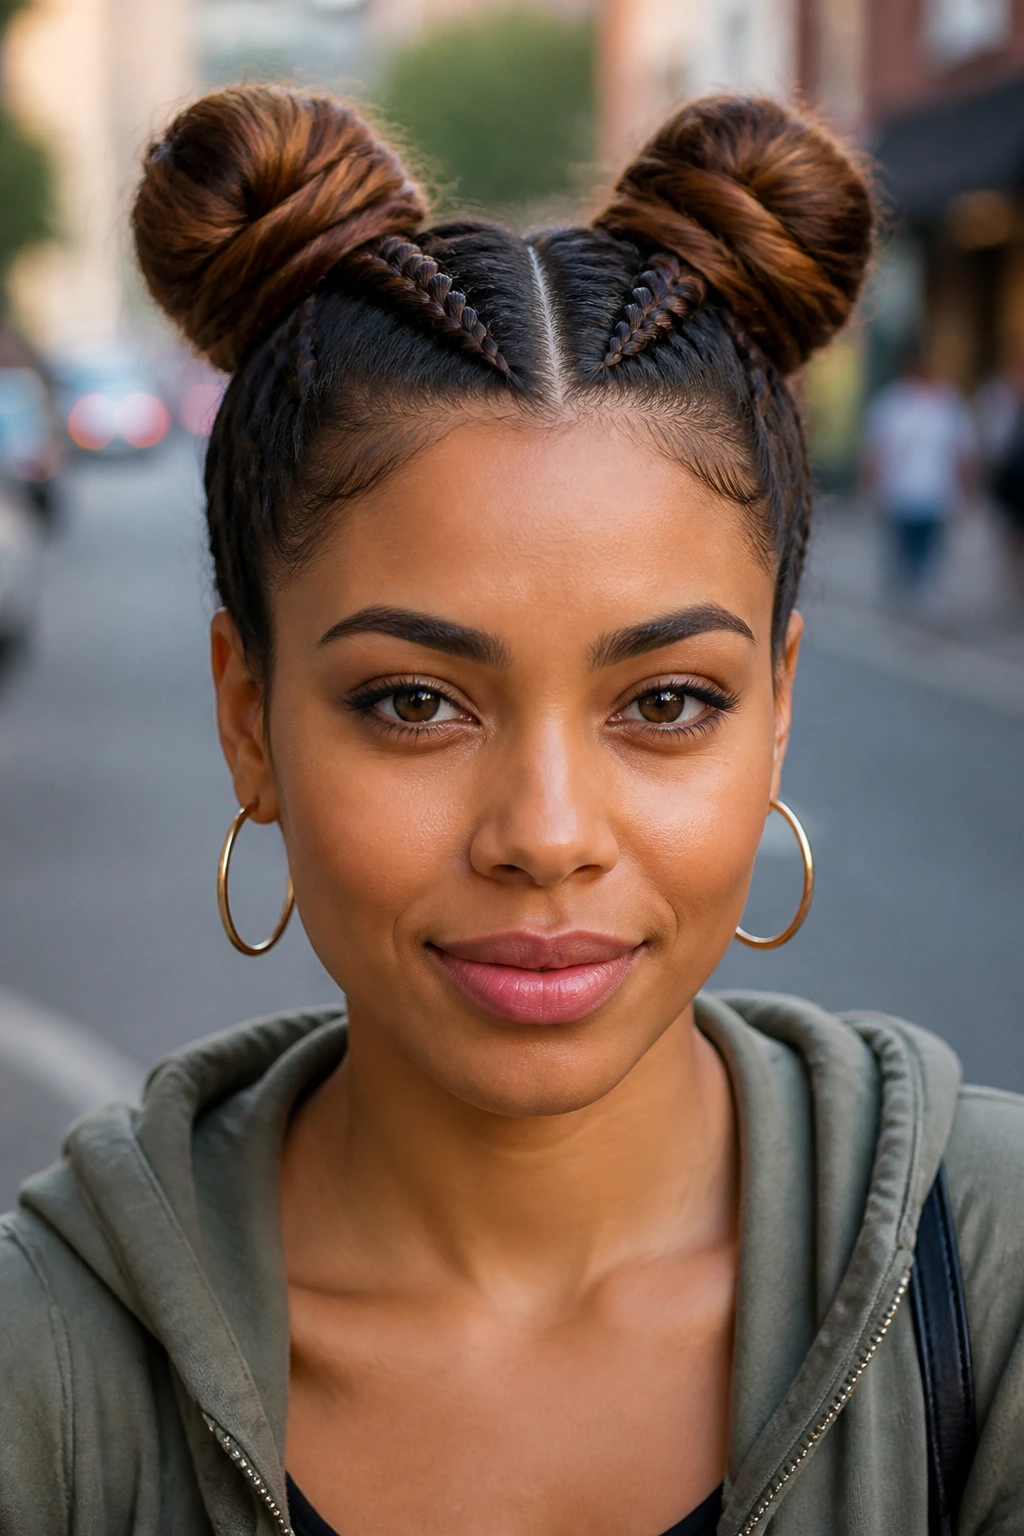
Space buns are not just for weekends if you keep them tight and low. The braided base is what makes them work here. Braid the sections near the scalp or just at the start of each ponytail, then wrap each side into a small bun and pin the ends under. Clean parts help a lot.
This style is good when you want something practical but a little less expected than a single bun. It also balances the head well, which is handy if one side of your hair always feels heavier than the other. Keep the buns level with each other. Uneven placement makes the whole thing look accidental.
I like this best on medium-length hair, twist-outs, and box braids that are starting to feel bulky in one big knot. Two smaller buns spread out the weight. They also cool the neck down a bit, which matters more than people admit.
17. Stacked Mini Braids into a Sleek Bun
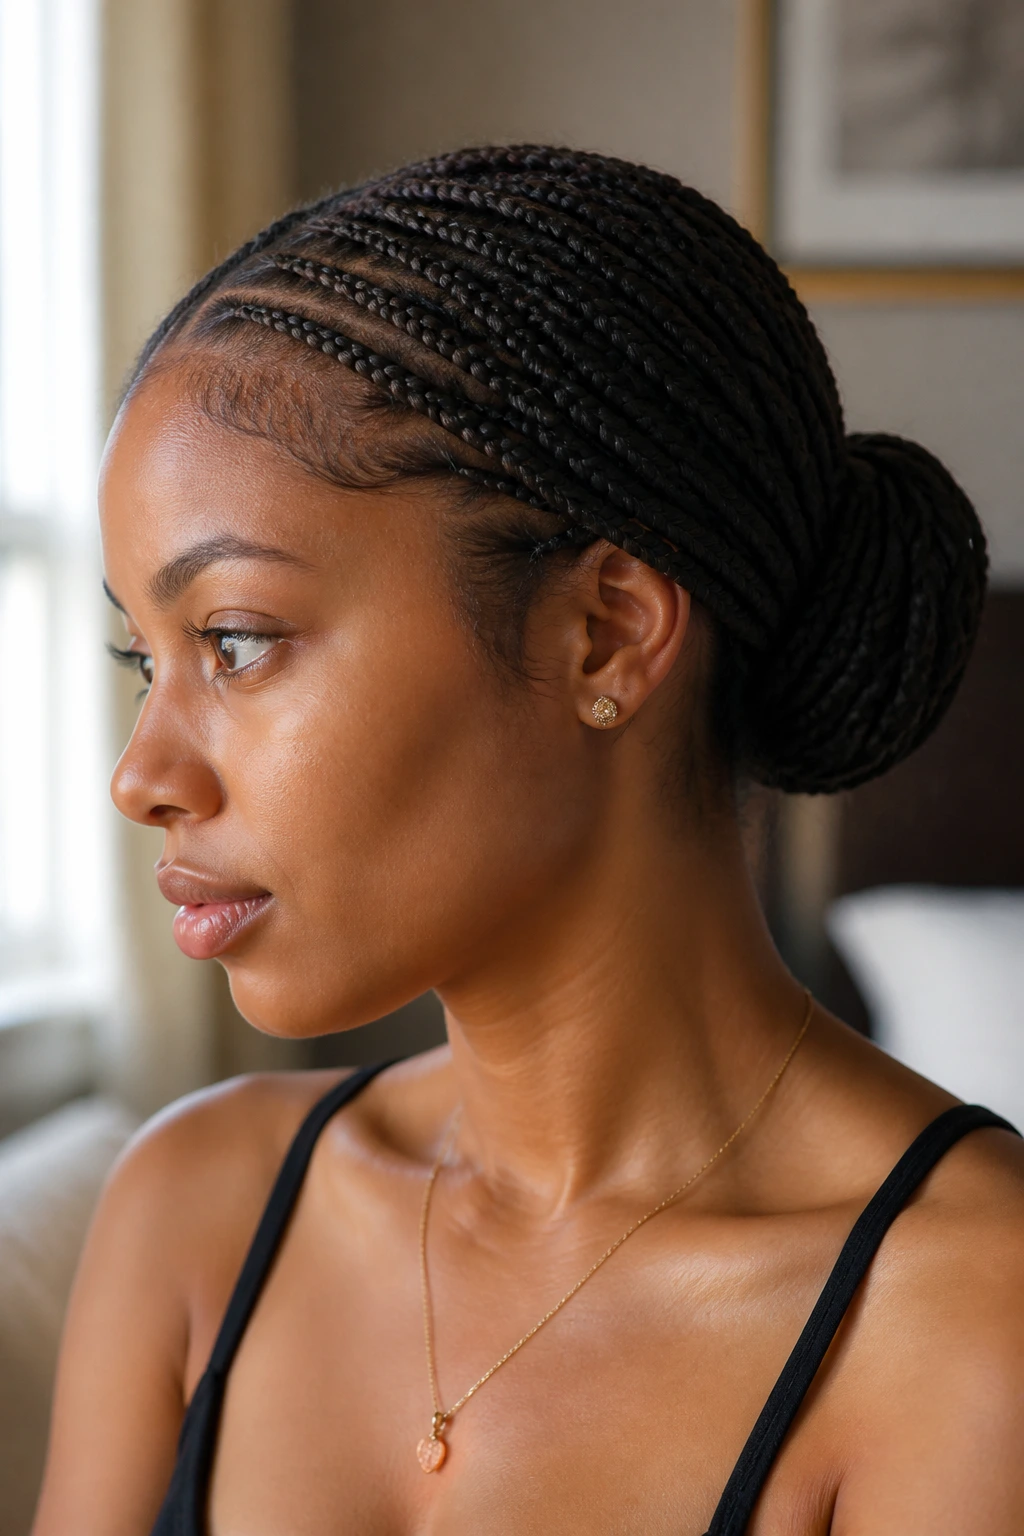
Stacked mini braids are useful when layers keep popping out of everything else. Make several slim braids from the front and top sections, then gather them into a low or mid bun. The smaller braids catch short pieces that a single large braid would miss.
This style has a tidy, almost woven look, but the real advantage is control. Fine hair gets extra grip from the multiple braids. Thick hair gets a cleaner outline because the sectioning is doing some of the visual work. If you’ve got bangs or face layers that won’t stay tucked, this is one of the easier fixes.
A little smoothing cream goes a long way here. Too much and the braids start sliding over each other. Too little and the flyaways win. I aim for enough product to calm the surface, not enough to make it glossy and soft.
18. Loc-Friendly Wrapped Crown Updo
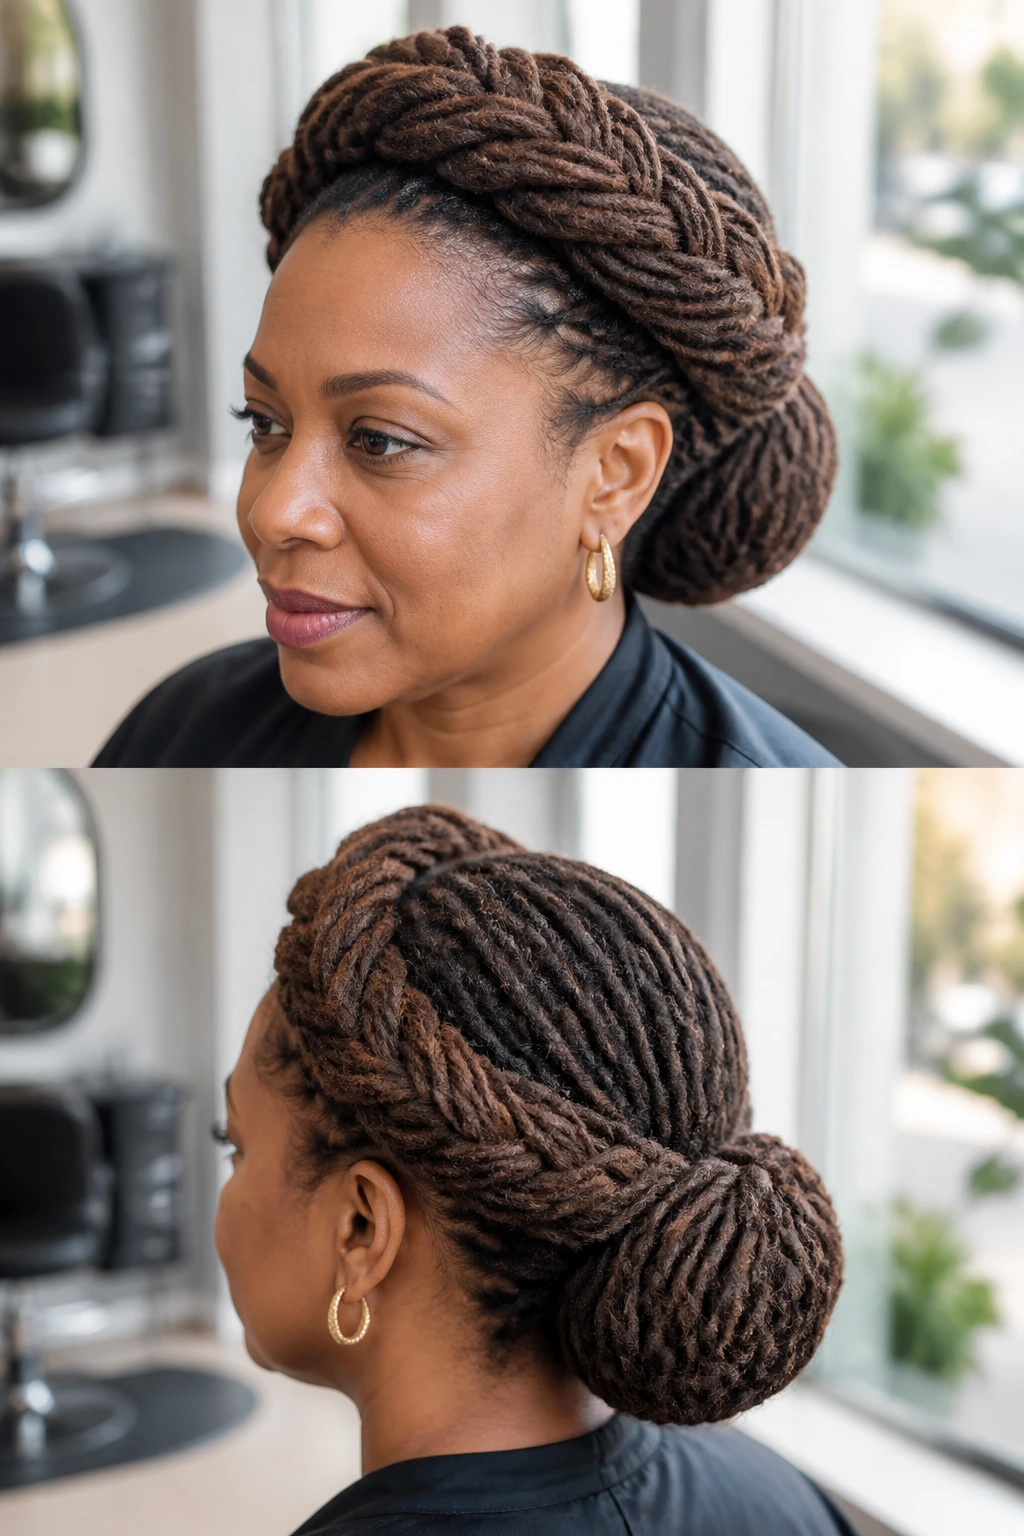
Locs need a different kind of respect. They have weight, memory, and their own shape, so the goal is not to force them into a tiny bun and hope for the best. A wrapped crown updo works better: braid or twist the front locs into a band, then wrap the remaining lengths into a low bun or tucked roll.
This style spreads weight across the head and keeps the locs from hanging on one point. That matters if your locs are mature or dense. Use loc-safe pins and let the shape be a little full. A loc updo looks best when it has room to breathe.
If you want a cleaner finish, use a soft scarf for ten minutes after pinning. It helps the surface settle without crushing the shape. And don’t be shy about leaving a bit of height at the crown. Flat locs can look tired fast.
19. Braided Claw-Clip Twist-Up
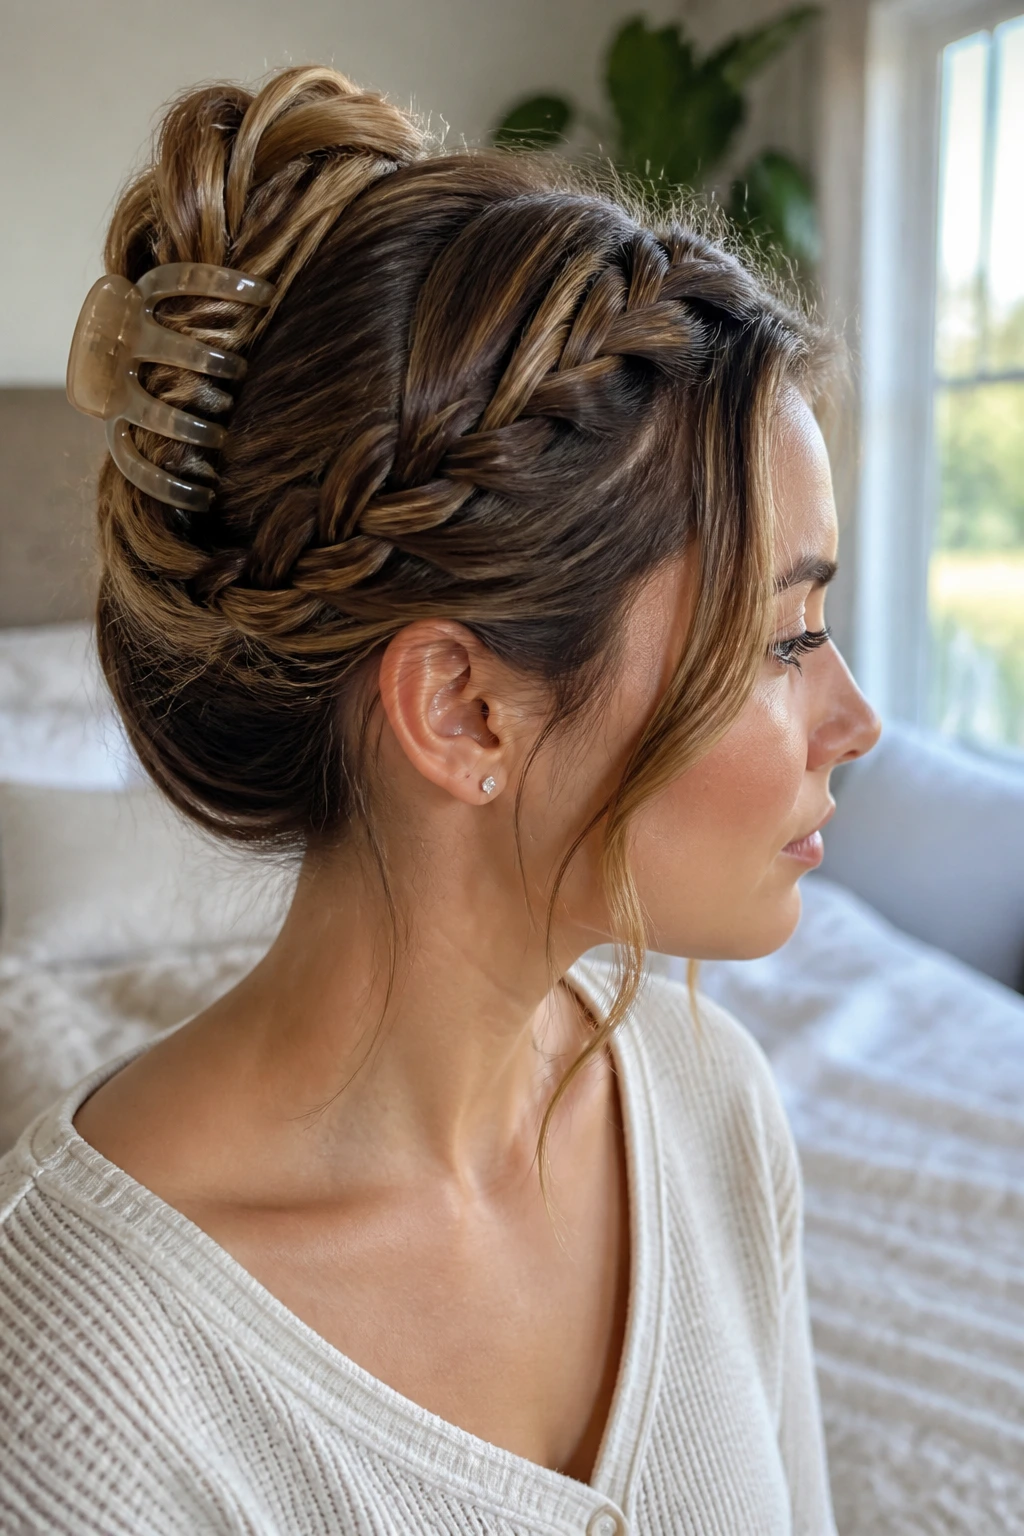
This is the fastest style on the list, and I keep coming back to it on mornings that start sideways. Braid one front section or the top strip of hair, twist the rest upward, and clamp the whole thing with a sturdy claw clip. The braid gives the clip something to hold, which is why it slips less than a plain twist.
The clip matters more than people think. Pick one with strong teeth and enough length to catch the twist without crushing it. If the clip is too small, the style loosens by noon. If it’s too wide, it sits awkwardly and looks like it’s bracing itself for impact.
This is a good in-between style when you need hair up fast but do not want a bare clip showing from every angle. The braid makes the whole thing feel finished. Barely any effort. Still looks like you meant it.
20. Braided French Pin Bun
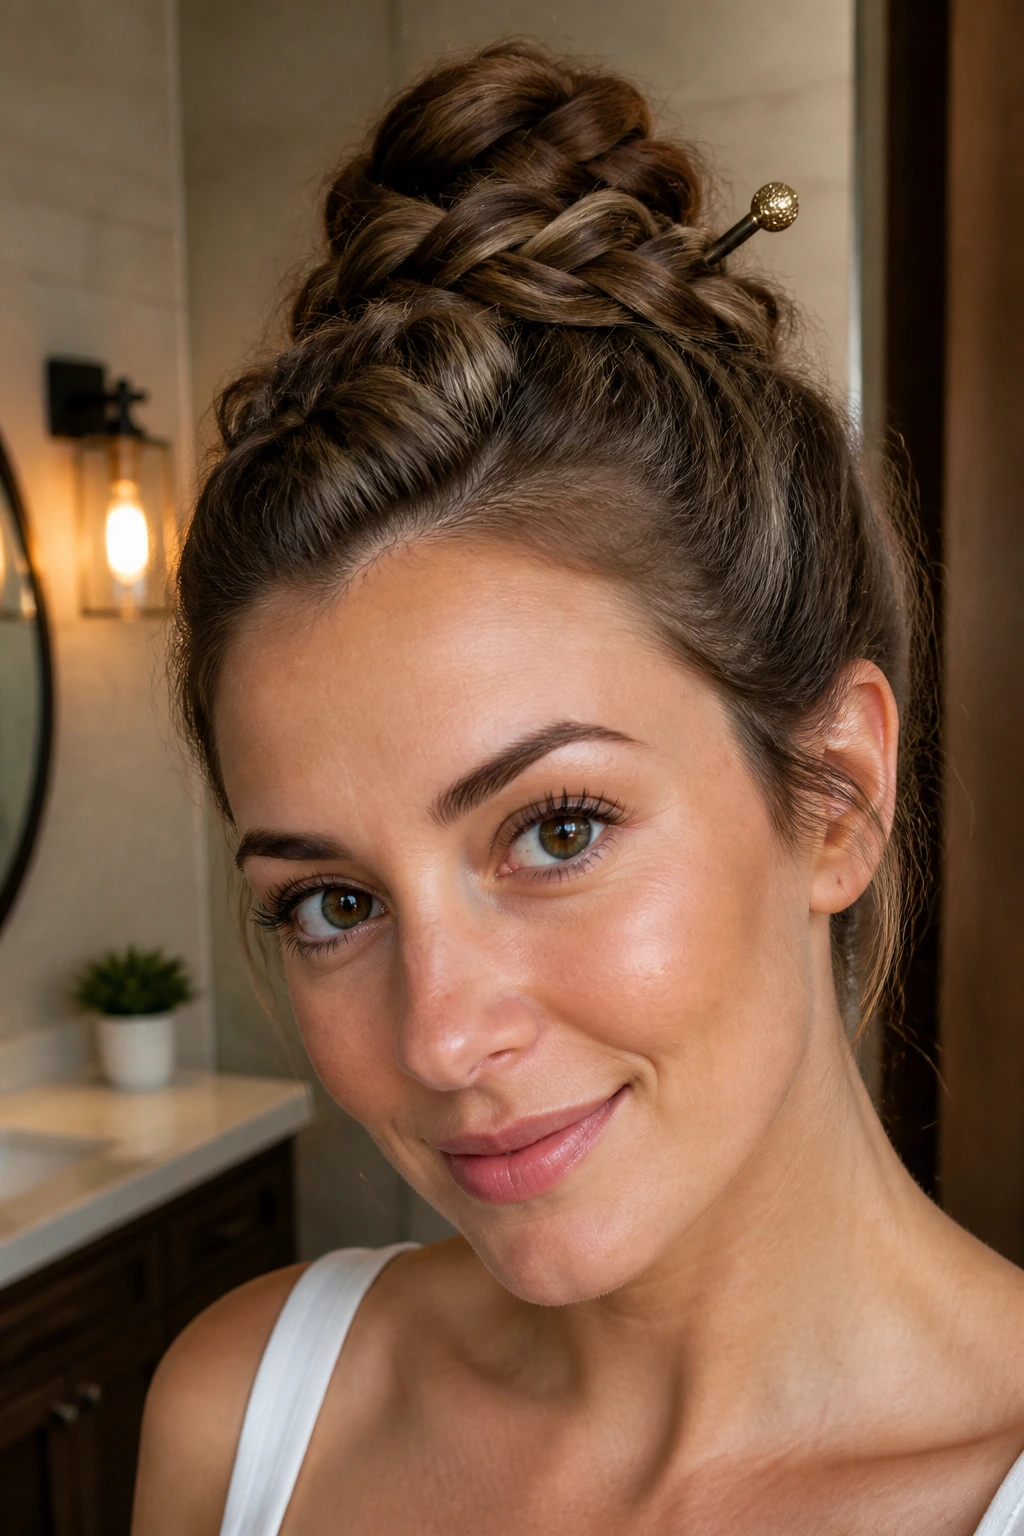
A French pin bun has a certain old-school steadiness to it, and adding a braid makes it sturdier. French braid from the nape upward or from the crown down, fold the braid into a bun, and secure it with a French pin or hair stick. The braid keeps the roll from sliding, which is the part that usually goes wrong with pin buns.
This style works best when the braid is snug but not tiny. Too thin, and the bun can feel flimsy. Too thick, and the pin has trouble anchoring. The sweet spot is a braid that can fold once or twice without bulking up.
I like this one for medium-thick hair and for days when I want the style to survive a lot of touching. You know the days. The French pin gives it a clean shape, and the braid keeps the center from loosening the second you move your head.
Why Braided Updos Hold Their Shape Better Than Loose Styles
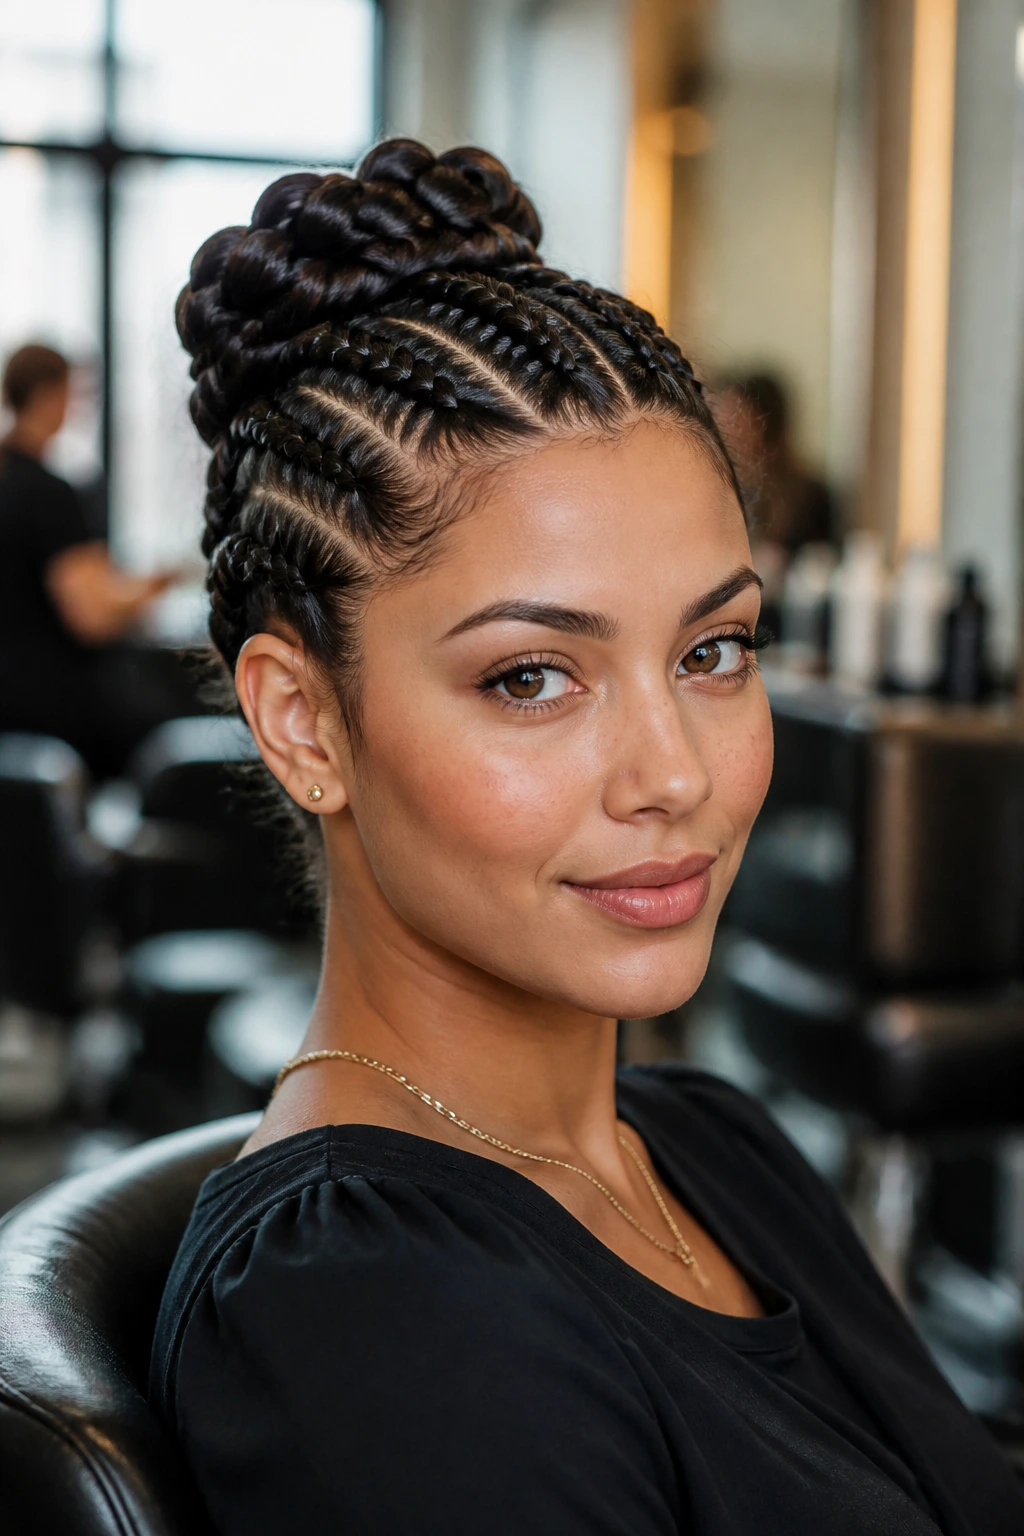
Braids do more than look pretty. They give the hair a built-in scaffold. That scaffold matters because loose buns often fail at the same point: the surface gets smooth, but the center has nothing to grip, so the style slides, droops, or splits open after a few hours.
Braided updos also distribute tension more evenly. A single knot can pull all the weight into one spot, especially on thick hair or long lengths. A braid breaks that load into smaller sections. That is one reason these styles tend to feel more comfortable by the end of the day. The pins are doing less fighting.
The other quiet advantage is texture. Smooth hair is lovely, but it can be slippery. A braid adds ridges, edges, and a little friction, which helps bobby pins stay where you place them. That’s why the same bun often behaves better once there’s a braid under it. The style isn’t just prettier. It’s mechanically easier to keep in place.
The Small Kit That Makes These Styles Easier
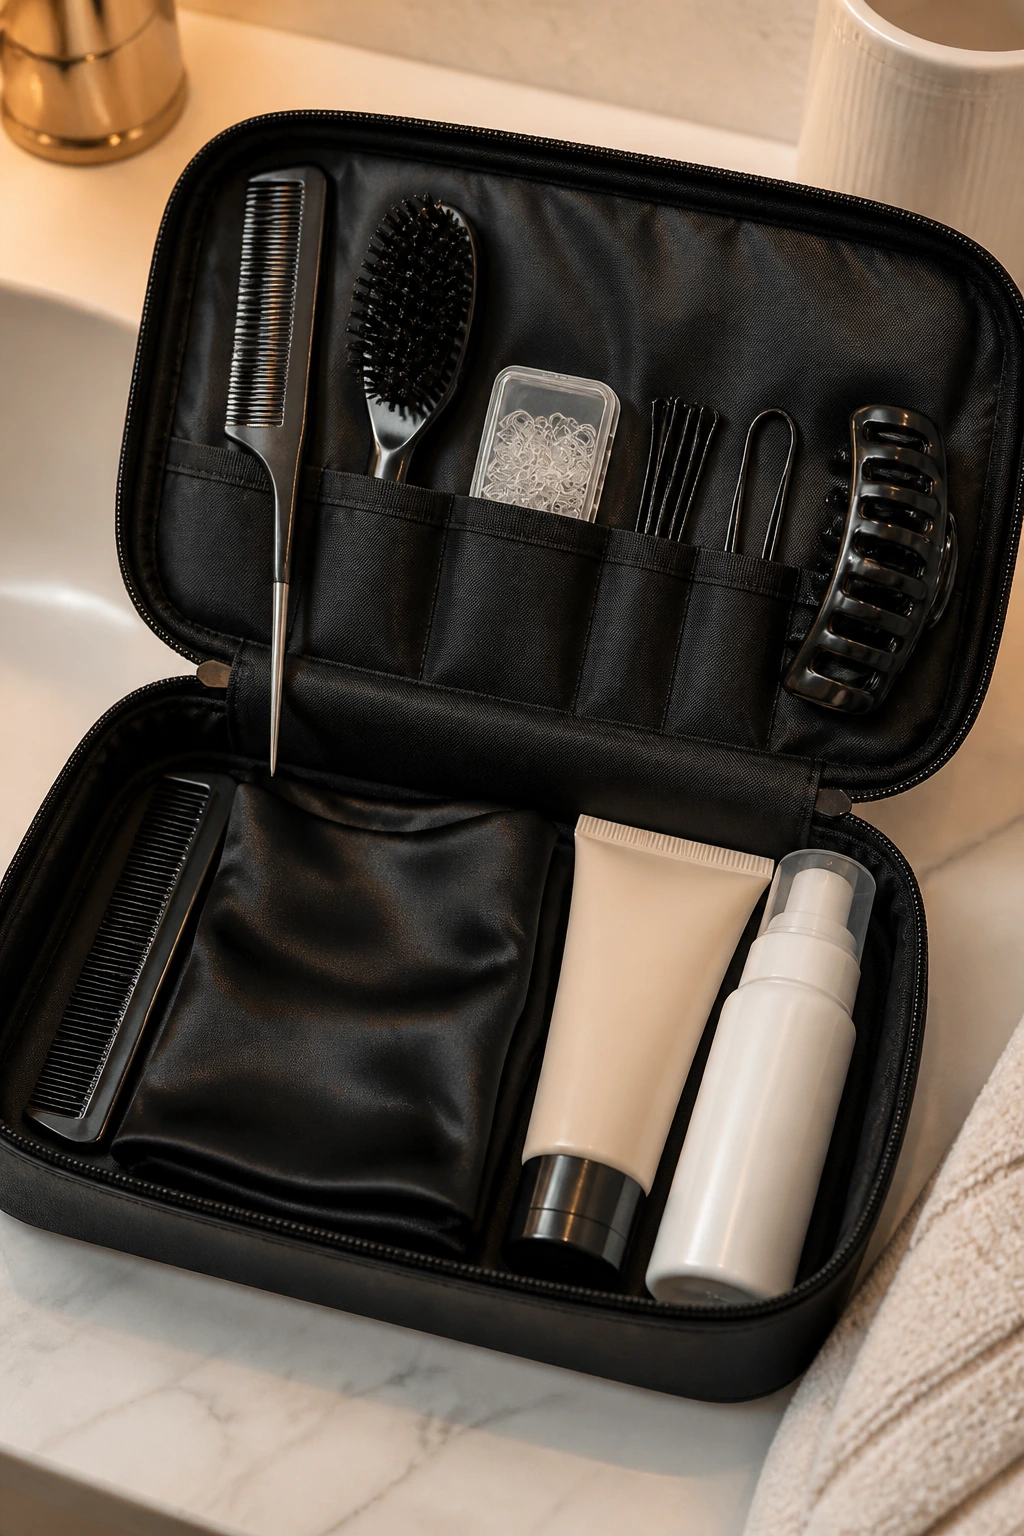
- Tail comb: Clean parts and sectioning are half the battle, especially for crown braids and side sweeps.
- Detangling brush or smoothing brush: Use it before braiding so you are not dragging knots into the finished style.
- Clear elastics: Good for tiny braids, pony bases, and bubble sections; snag-free matters.
- Bobby pins and U-pins: Bobby pins handle the finer work, while U-pins are better for bulky buns, locs, and box braids.
- Claw clip: Handy for the quick twist-up and for holding hair while you section the rest.
- Light styling cream or edge control: Use a small amount at the hairline so the braid looks clean without getting greasy.
- Mousse or setting foam: Helpful on textured hair and braids that need the surface to settle.
- Satin scarf or bonnet: Not optional if you want the style to survive overnight without frizzing up.
Hair Prep That Makes Braids Grip Better
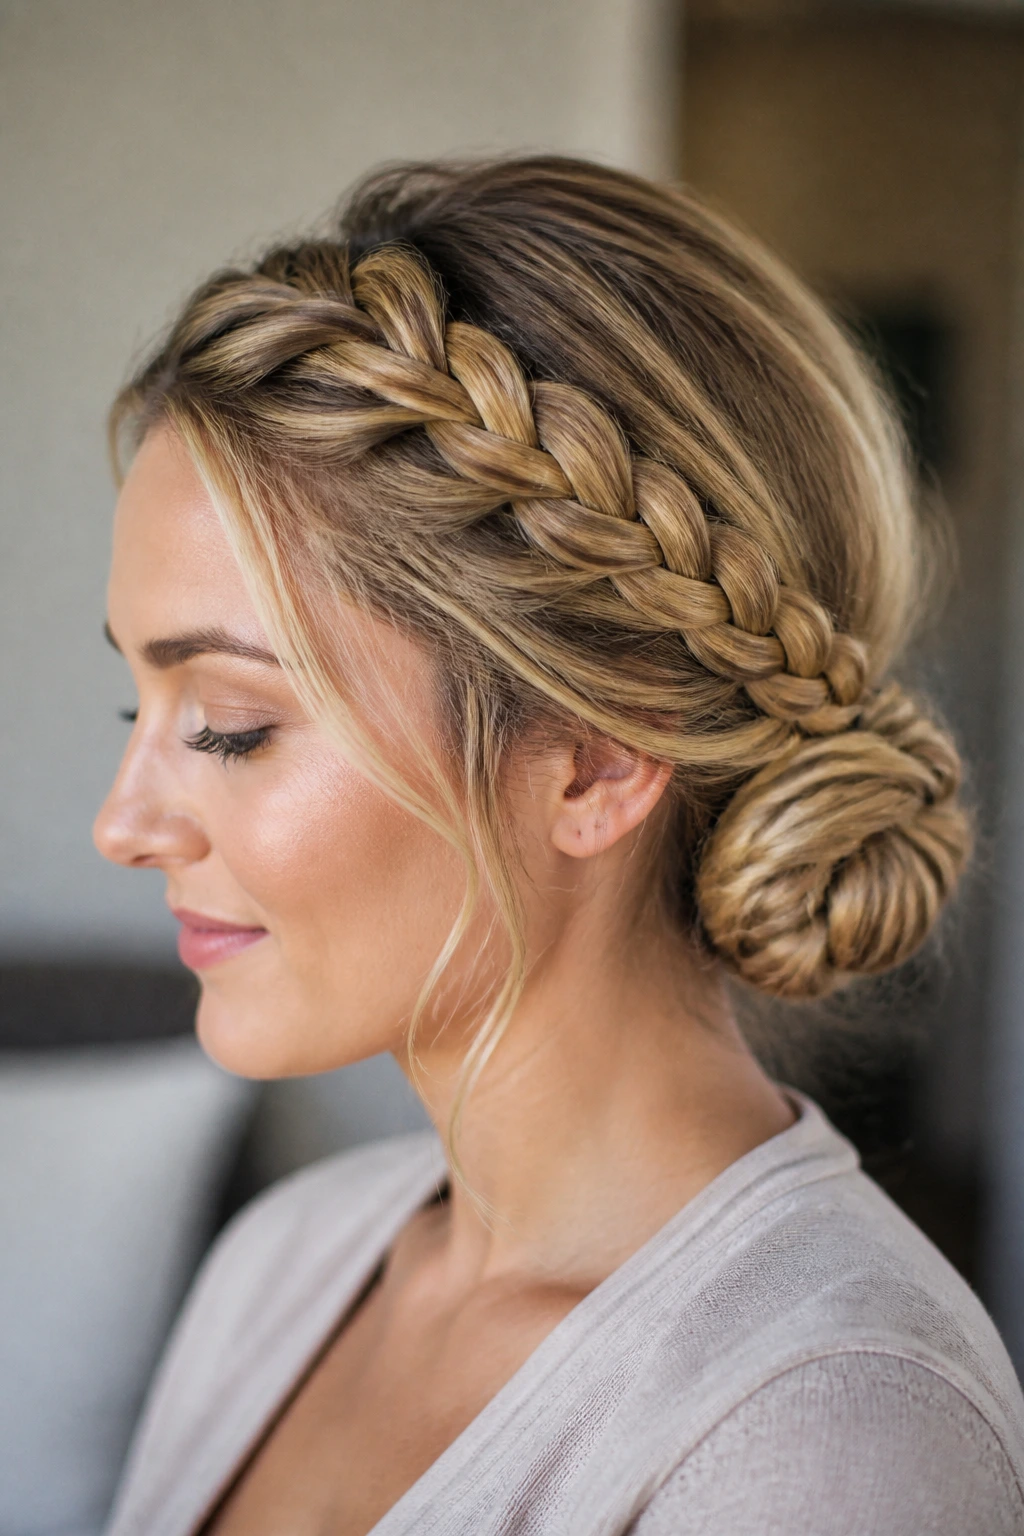
The style starts before the braid. If the hair is tangled, the braid will fight you from the first pass, and that usually shows up later as lumps, loose ends, or sections that never sit flat. Detangle first, from ends to roots, and don’t rush the parting just because your arm is tired. Bad sectioning shows up in every mirror.
Product choice matters too. Fine or silky hair usually needs a little texture at the roots, not a heavy cream all over the lengths. A light spray of dry shampoo or texture spray can help a clean blowout hold a braid without sliding. Curly and coily hair often do better with a small amount of cream or gel at the front so the braid stays smooth where people actually see it.
Wet hair is a trap if you plan to pin it up for the whole day. It can feel obedient at first, then puff up as it dries in the bun. If you want a sleeker result, get the hair mostly dry first, then braid. On natural hair, a stretched base often makes the style easier to build and easier to refresh later.
Practical Tips for Cleaner Parts and Longer Hold
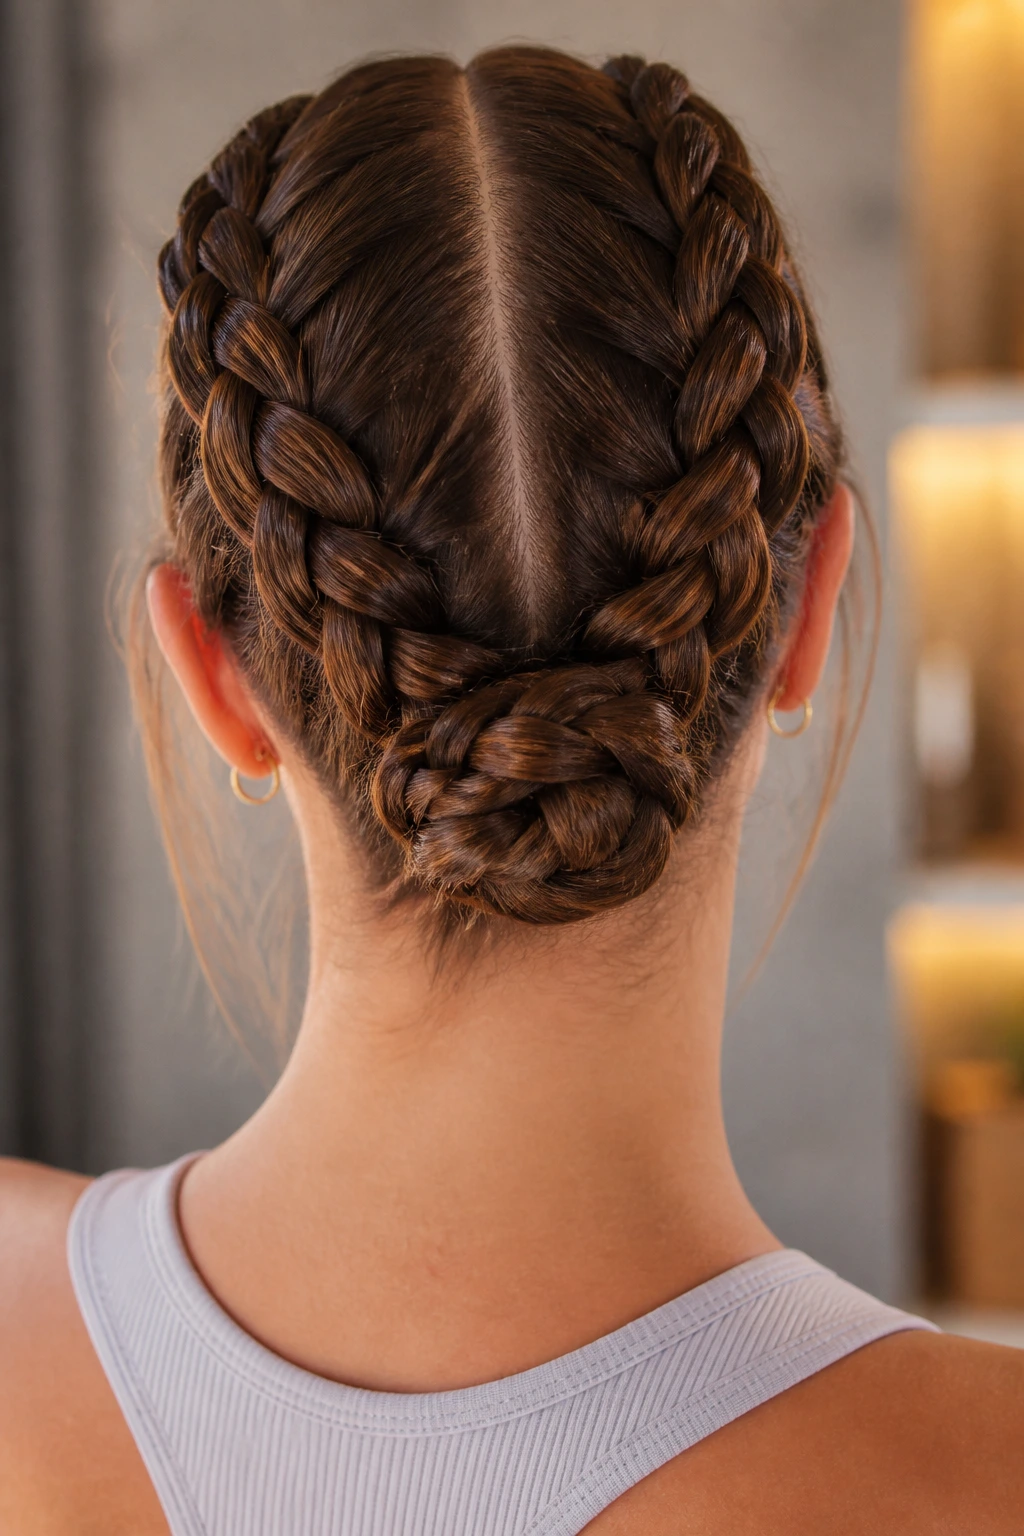
Sectioning: Part the hair with the tip of a tail comb, then clip away each section before you braid. Clean parts keep the braid from wandering, and they make the final shape look sharper than a rushed finger part ever will.
Grip: If the braid keeps slipping, use a smaller amount of product at the roots and add a touch of texture instead. Too much cream makes the hair too slick, especially around the crown and temples.
Pinning: Cross bobby pins over the base of the braid instead of poking them in straight. The X-shape catches the braid better and stops the bun from rotating loose.
Finish: Wrap a satin scarf around the style for 5 to 10 minutes after pinning. It settles the surface, smooths the little flyaways, and helps the braid hold its line.
Heavy styles: If you are working with box braids, locs, or thick hair, build the bun lower than you think you should. A low center of gravity keeps the style from pulling backward after an hour.
Common Mistakes That Make Braided Updos Sag Early
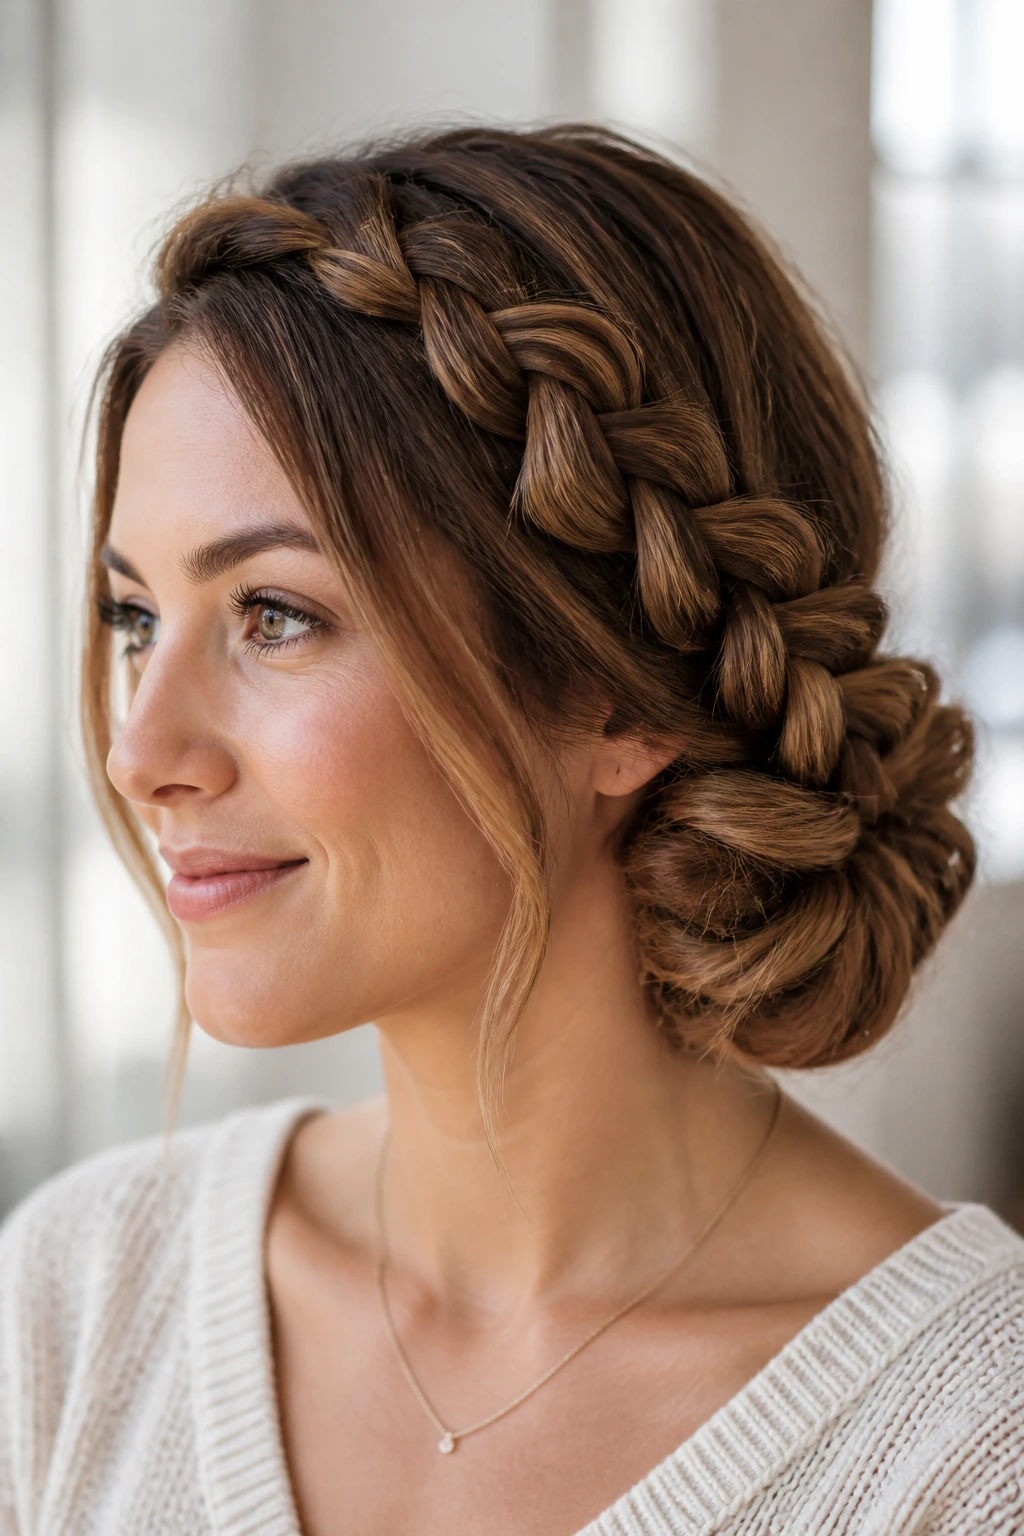
Braiding too tight at the hairline: The symptom is a sore scalp before lunch and little dents around the temples. Keep the first inches of the braid snug, not punishing, and let the braid settle into the head instead of yanking it flat.
Using too much product at the roots: If the braid slides or feels greasy, the hair probably has more cream or gel than it needs. Wipe down the parting, start over with a smaller amount, and add product only where frizz is actually showing.
Putting the bun in the wrong spot: A high bun can feel heavy on top, while a low bun can drag if it sits too close to the neckline. Match the placement to the weight of the hair so the style balances instead of tipping.
Leaving the ends loose: If the braid tail or twist ends stick out, the style looks unfinished by the end of the day. Tuck them under the bun, pin them flat, or fold them back into the braid path.
Skipping overnight protection: Even the neatest braid goes fuzzy on a cotton pillowcase. A satin scarf or bonnet keeps the surface smoother and makes the next day much easier.
Variations and Small Changes That Alter the Whole Mood
Soft Face-Frame Version: Leave two thin pieces loose near the temples and braid everything else back. That gives a braided updo a gentler edge without turning it into a loose style.
Sleek Office Version: Use a center part, a little edge control, and a low bun with hidden pins. The shape gets sharper, and the style reads more structured under blazers, collars, or a clean neckline.
Protective Crown Version: Braid closer to the scalp, keep the tension even, and avoid redoing the style every day. This version is better when you want less manipulation and more coverage at the hairline.
Loc or Twist Swap: Replace the three-strand braid with a two-strand twist or a wrapped loc section when the hair is already in a set style. You get the same tucked-up shape without stressing the root pattern.
Quick Errand Version: Use a braid on only one side, twist the rest, and finish with a claw clip. It takes less time, but it still looks like the hair was handled on purpose.
Night Care and Day-Two Refreshing
These styles usually look best for one to three days, depending on hair texture, product, and how hard you’ve been on them. Fine hair may need a refresh after one day because the braid loosens faster. Box braids and locs can hold longer, but the edges and the surface still need care.
At night, wrap the style with a satin scarf or sleep on a satin pillowcase. If the bun is bulky, pin it in place before you wrap so it doesn’t squash itself into a strange angle. For loose flyaways, a tiny mist of water on a hand followed by a little smoothing cream at the temples is usually enough. Do not soak the whole style. That just resets the frizz.
If a braid has loosened, re-pin the bun before trying to touch up the whole head. Start at the anchor point. That’s usually the real problem. Once the base is secure, the rest often looks better without much work.
Frequently Asked Questions
Can I do braided everyday updo hairstyles on short hair?
Yes, but you’ll want styles that build grip fast, like a side braid chignon, a braided claw-clip twist-up, or stacked mini braids into a bun. Shorter pieces usually behave better when the braid starts near the front and the bun sits low or mid-height.
What works best for fine hair that slips easily?
A little texture at the roots helps more than heavy product. Try the low braided bun, rope-braid top knot, or braided French pin bun, and use small bobby pins crossed over the base so the style has more bite.
Do these styles work on locs or box braids?
They do, but the shape needs to respect the weight. Loc-friendly wrapped crowns and box braid high buns are the easiest matches because they keep the ends protected and the tension spread out.
How tight should the braid be?
Snug enough to hold its line, never so tight that the scalp aches. If the skin around your hairline feels tender or the braid leaves a deep groove, ease up on the tension next time.
What if my braid keeps slipping out of the bun?
The problem is usually a slippery base, not the braid itself. Add a touch of texture spray or dry shampoo at the roots, secure the pony or braid tail with a second elastic, and pin through the braid rather than just around it.
Which style is fastest when I’m rushing?
The braided claw-clip twist-up and the braided ponytail wrap-under bun usually win on speed. Both rely on a simple anchor first, so you are not building the whole shape from scratch.
Can I wear these styles to work out?
Absolutely, and double Dutch braids rolled into a single knot or a cornrow side sweep into a tucked bun tend to stay put best. Just keep the braid secure at the root and choose pins or elastics that won’t snag when you sweat.
How do I make a braided updo look cleaner around the part line?
Use a tail comb, clip away the sections you are not touching, and smooth the part before braiding. A neat part makes the entire style look more deliberate, even if the bun itself is slightly soft.
A Few Last Pins
Braided everyday updo hairstyles keep proving the same point: a good braid does more than decorate hair. It gives the style structure, helps the pins work harder, and makes ordinary days look a little more sorted than they felt thirty minutes earlier.
That’s why these styles stay in rotation. They handle the real stuff — humid air, layers that refuse to cooperate, locs that need room, braids that are growing out, and mornings when there’s no appetite for drama. Pick one or two that fit your hair length and texture, then keep them close. You’ll end up using them more than the fancier ideas, and that’s usually how the best everyday styles earn their place.
