



Some mornings, hairstyles that tame frizzy hair are the only sane answer. Not a lecture about serums. Not a promise that one more pass with the flat iron will fix everything. Just a style that keeps the puff under control, hides the fuzz where it wants to show up, and lets you get on with your day.
Frizz has a habit of appearing in the exact places you’d rather not notice: the temples, the crown, the part line, the little hairs that break loose around the nape after you’ve already left the house. The smartest looks don’t try to bulldoze all of that into submission. They use shape, tension, braiding, and a little shine in the right spots so the texture reads as intentional instead of unruly.
That’s the difference between fighting your hair and working with it. A low bun can make a rough day look polished. A braid can keep the outer layer from expanding like a sponge in damp air. A claw clip can turn second-day puff into something that looks planned. Some of these are sleek. Some are soft. A few lean into the curl instead of flattening it. All of them have one job: keep frizz from running the whole show.
Why These Looks Earn Their Keep
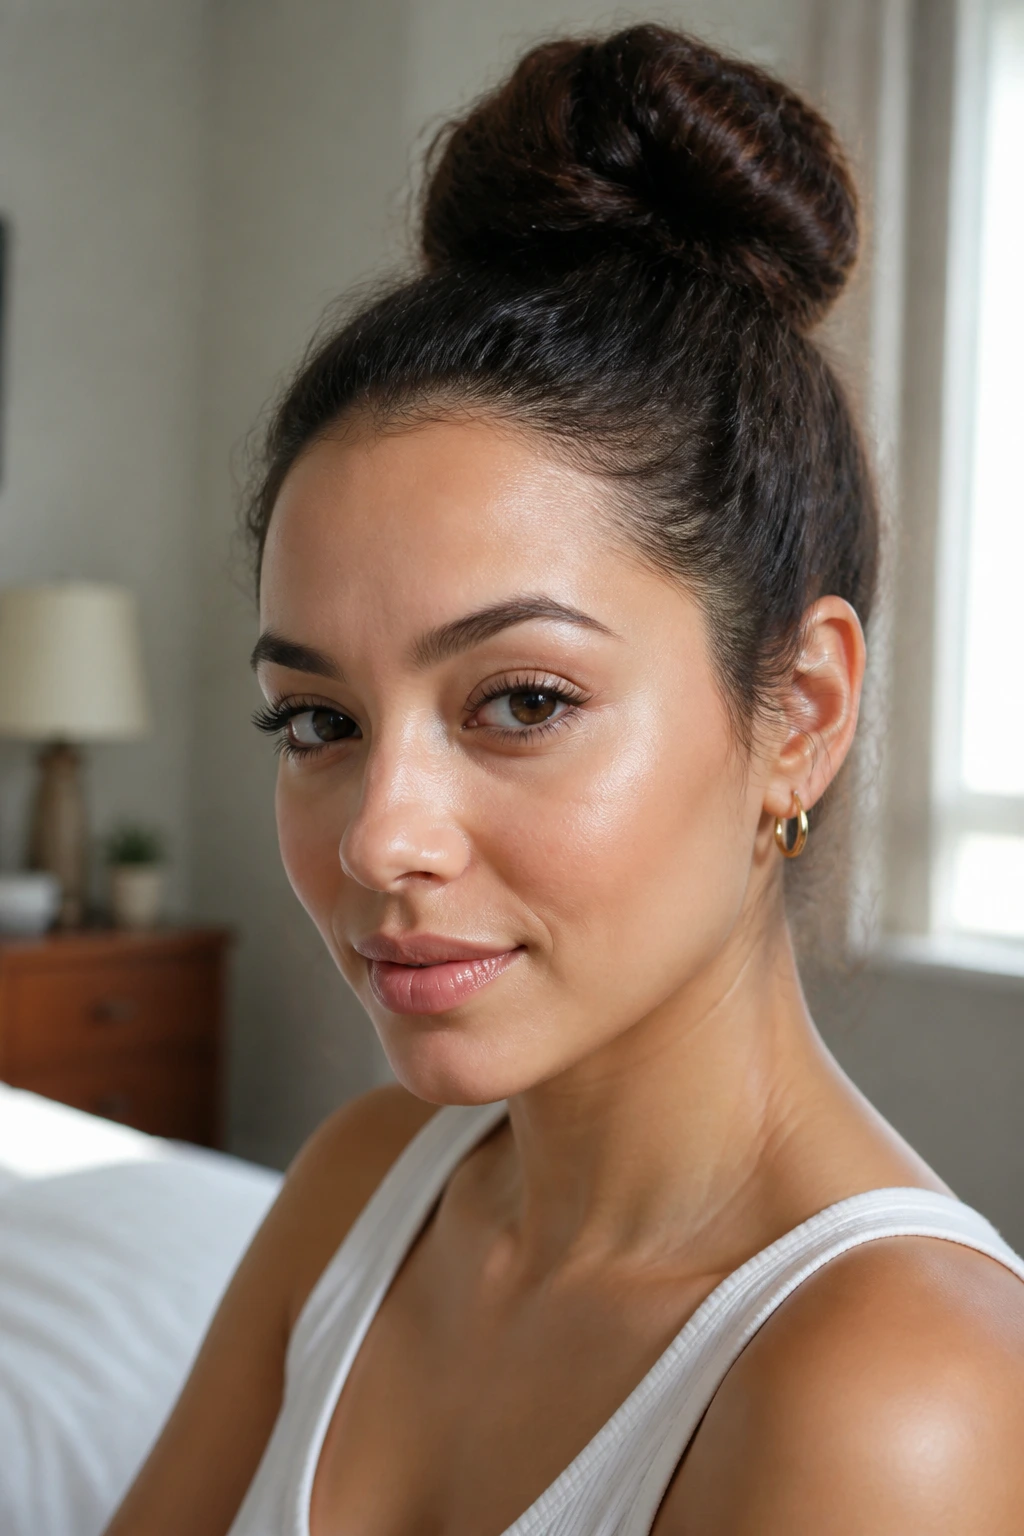
- Humidity Resistance: Styles that sit close to the head or tuck the ends away give humid air less hair surface to grab, which is why they tend to hold longer than loose hair.
- Fast Fixes: A braid, bun, or twist hides a rough crown fast, even when you do not have time to rewash or blow-dry.
- Texture-Friendly: Several of these looks keep curl pattern, wave, or bend in place instead of scrubbing it smooth until it explodes later.
- Low-Heat Friendly: Most of them need a brush, a few pins, and a small amount of product — not a full heat-styling session.
- Office-to-Errands Ready: The same hairstyle can look neat at 8 a.m. and still hold together after a grocery run, a commute, or a long day outdoors.
- Works Across Lengths: Short hair, shoulder-length layers, thick curls, and fine flyaway-prone strands all get at least a few real options here.
1. Sleek Low Bun
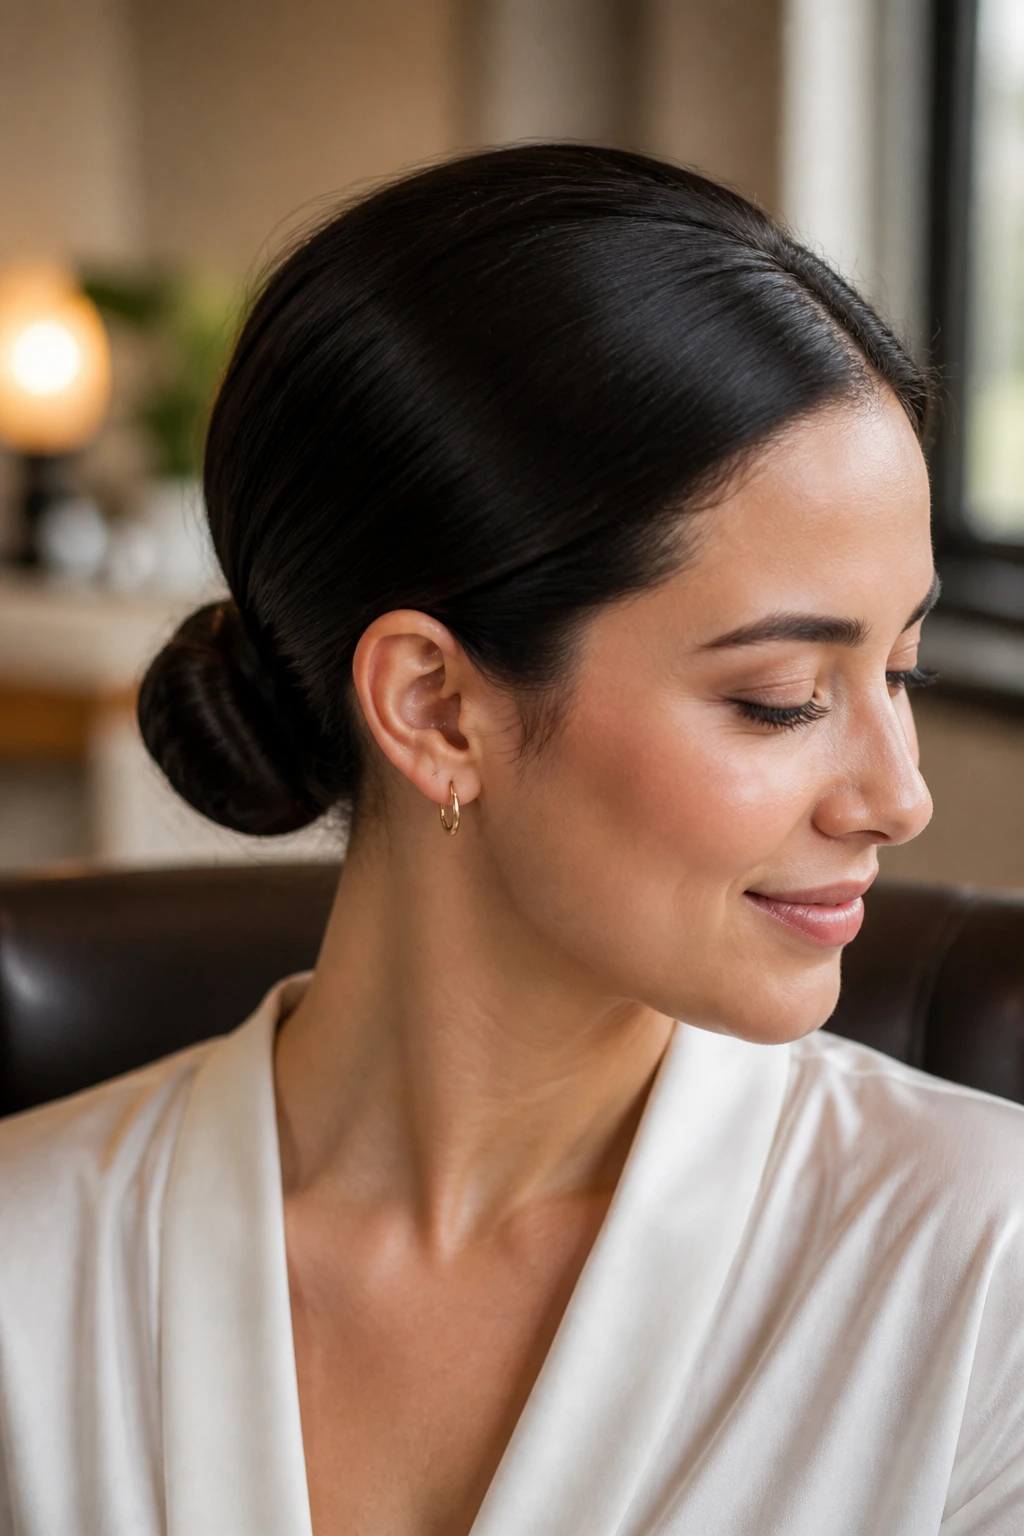
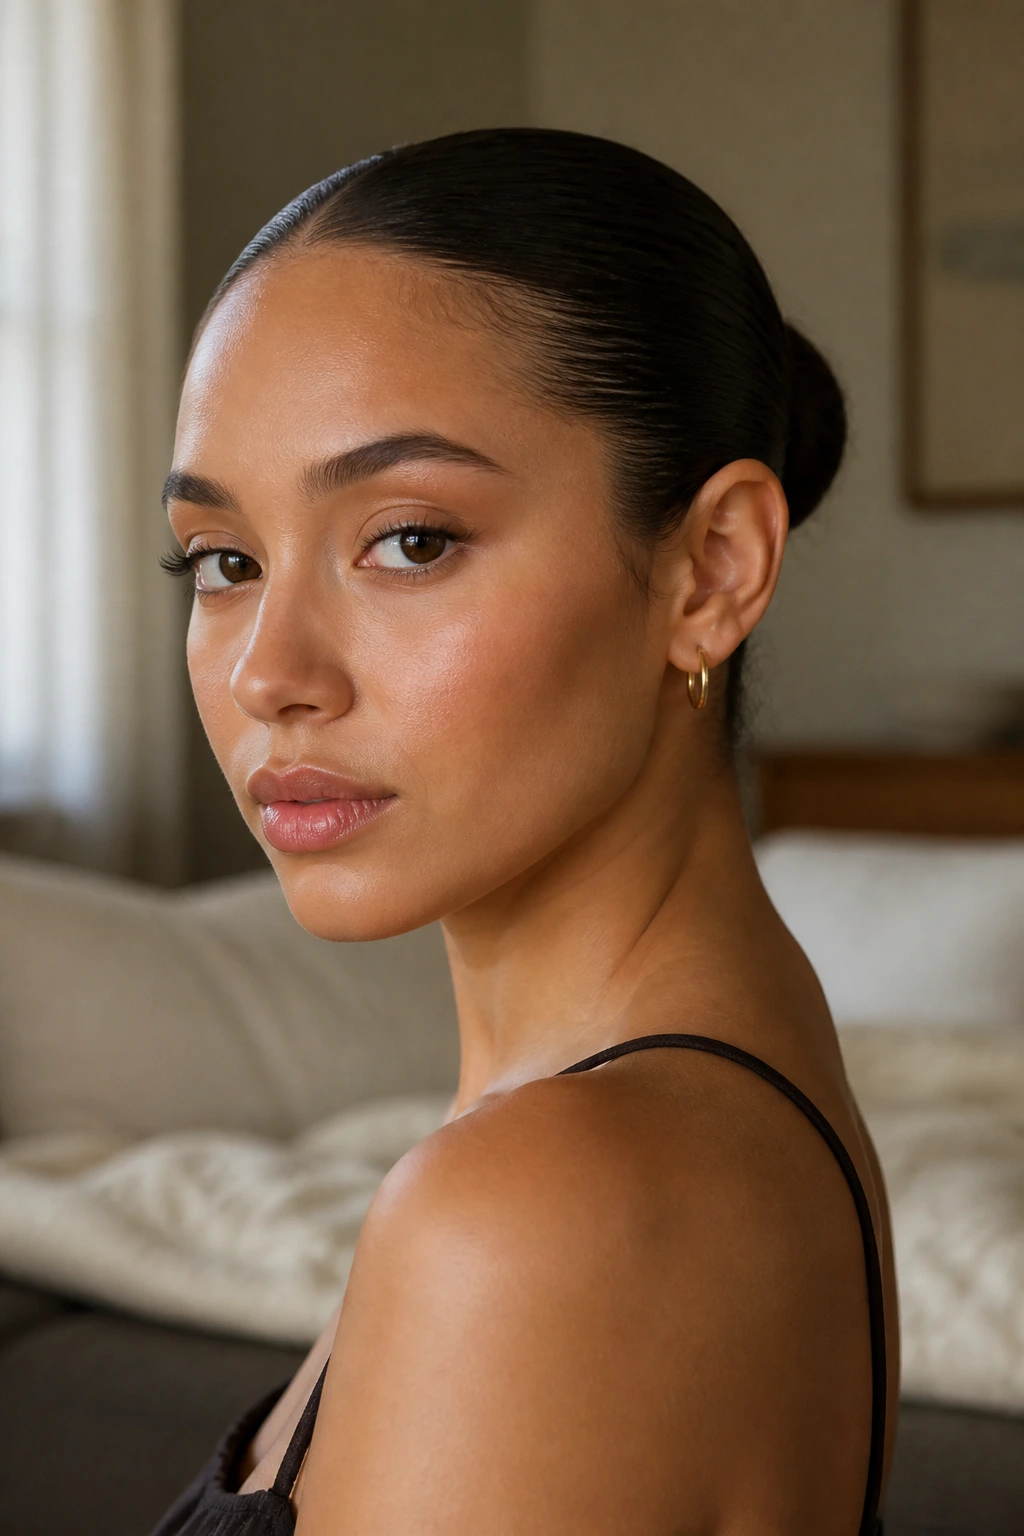
A sleek low bun is the style I reach for when the hairline is already trying to puff up and I want the rest of the day to stop arguing with me. It sits low enough to keep the crown calm, and it keeps the ends tucked where they can’t fray in the air. Clean, simple, done.
Why It Works
Frizz usually starts where hair is rubbed, brushed, or left exposed. The low bun cuts down on all three. When the twist sits near the nape, the outer layer stays smoother, and the tight little coil gives the style a shape that does not need constant fixing.
A center part makes the whole thing look sharper; a side part softens it. Either way, the smoothest version starts with damp, not dripping, hair and a pea-size amount of cream or serum brushed through the top and lightly over the ends. If the bun is built on soaking-wet hair, the outside dries too fast and the inside stays puffy. That’s the part people skip, then wonder why the style falls apart.
- Best for medium to long hair
- Good on second-day hair with a little serum
- Needs 3 to 5 bobby pins if your hair is thick
- Looks cleaner when the bun sits just below the occipital bone
- Works with a sharp center part or a gentle side part
Best move: smooth the top with a fine-tooth comb, then twist the length before you coil it. That extra twist keeps the bun compact instead of fluffy.
2. Braided Low Ponytail
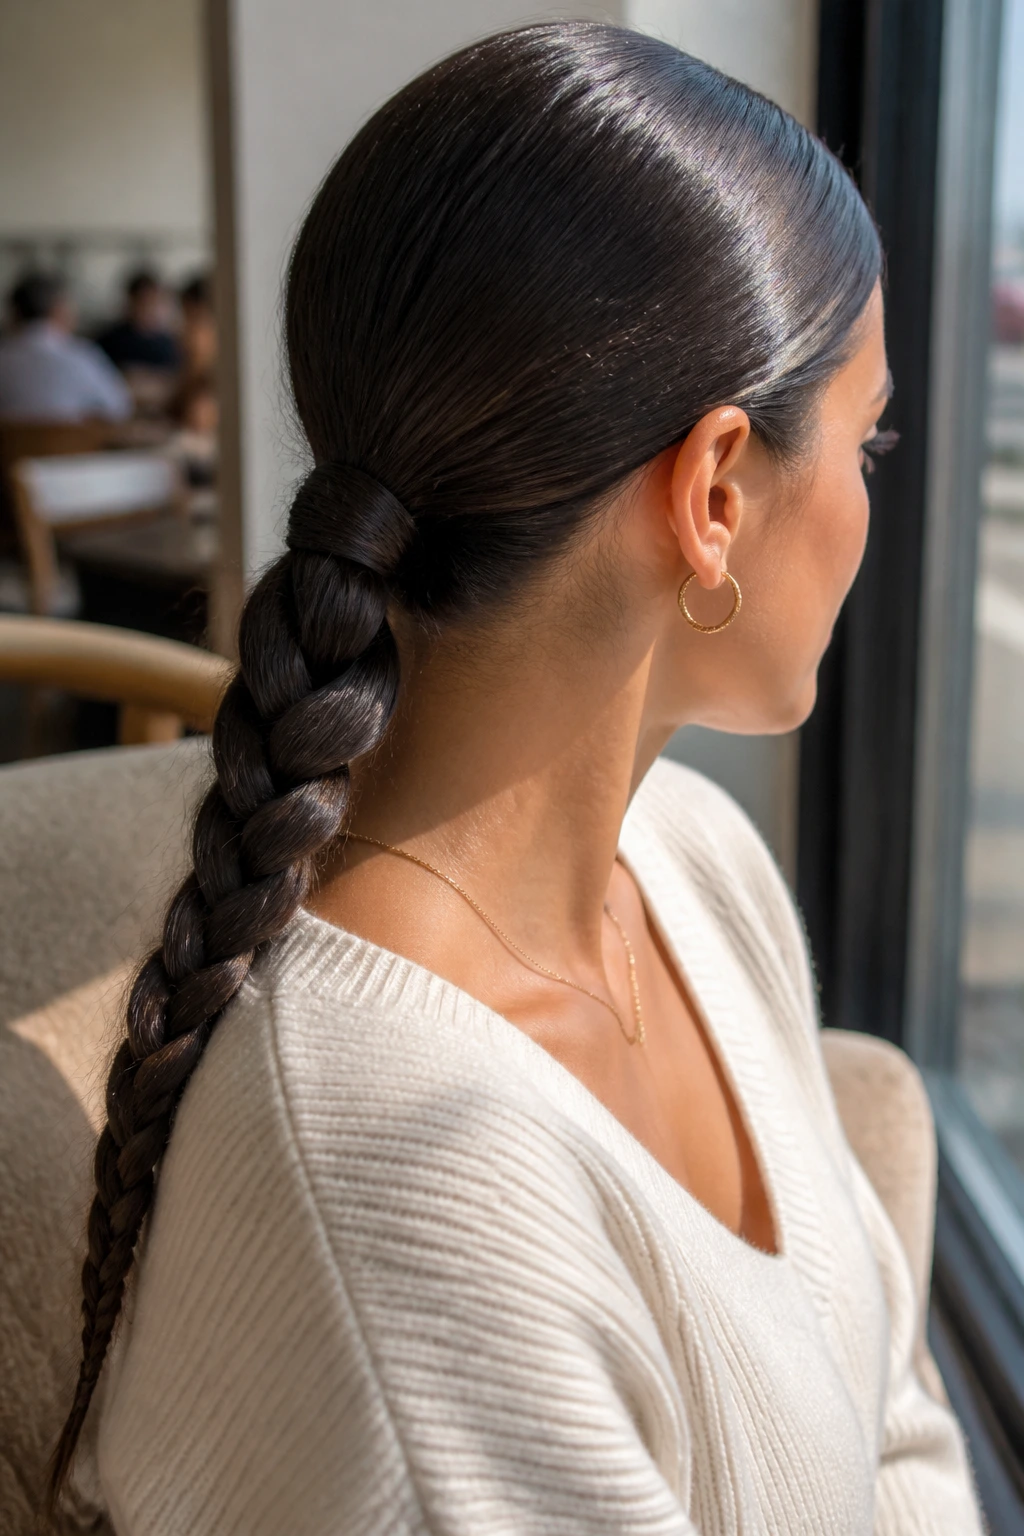
A braided low ponytail is the style that looks calm even when your hair is not. The ponytail base keeps the crown under control, and the braid keeps the lengths from fuzzing out in every direction. It’s less precious than a bun and more secure than leaving the ends loose.
The braid matters here. A plain low pony still gives frizz a place to bloom at the tail. Once you braid the length, the surface area shrinks, which is exactly what you want on a muggy day or after a night of rough sleep. If your hair is thick, braid it a little looser so it doesn’t look like a rope. If it’s fine, keep the sections neat and the elastic snug.
You can dress it up with a ribbon wrapped over the elastic or keep it bare and blunt. Either way, the cleanest version starts with a smooth base and a braid that reaches all the way to the ends.
3. Half-Up Twist With Soft Ends
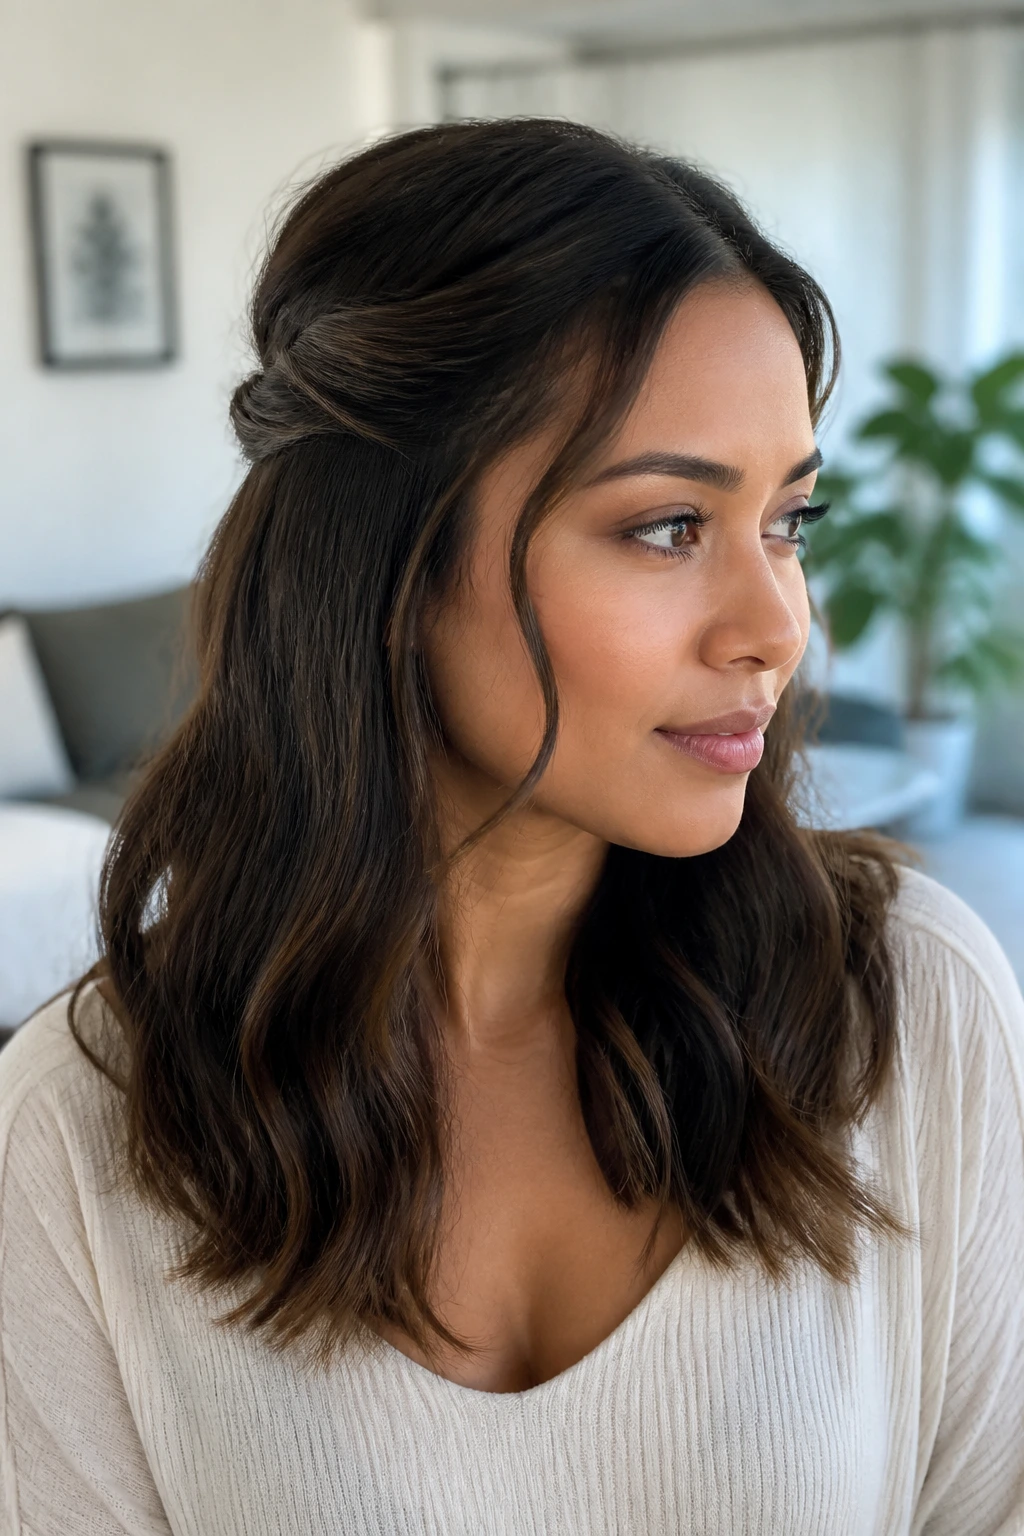
Why does a half-up twist calm frizz better than leaving everything down? Because it pins the puffiest zone — the crown and temples — while letting the lower length keep its movement. That balance matters. A fully slicked style can feel too severe, and fully loose hair can get bigger by the hour.
Take two sections from the front, twist them back, and secure them with a small clip or two crossed bobby pins. Leave the ends soft, or bend them with a wide-barrel iron if your hair tends to turn triangular when it’s left alone. The twist keeps the front from expanding, and the loose lower half keeps the style from looking stuck to the head.
How to Use It
This one works especially well if your hair is wavy or curly and you want to tame the top without flattening the whole head. It’s also a solid move for growing-out layers, because the twists hide the shorter pieces that often start the frizz first. A tiny dab of gel along the part line makes the whole look feel finished, not accidental.
4. Classic French Braid
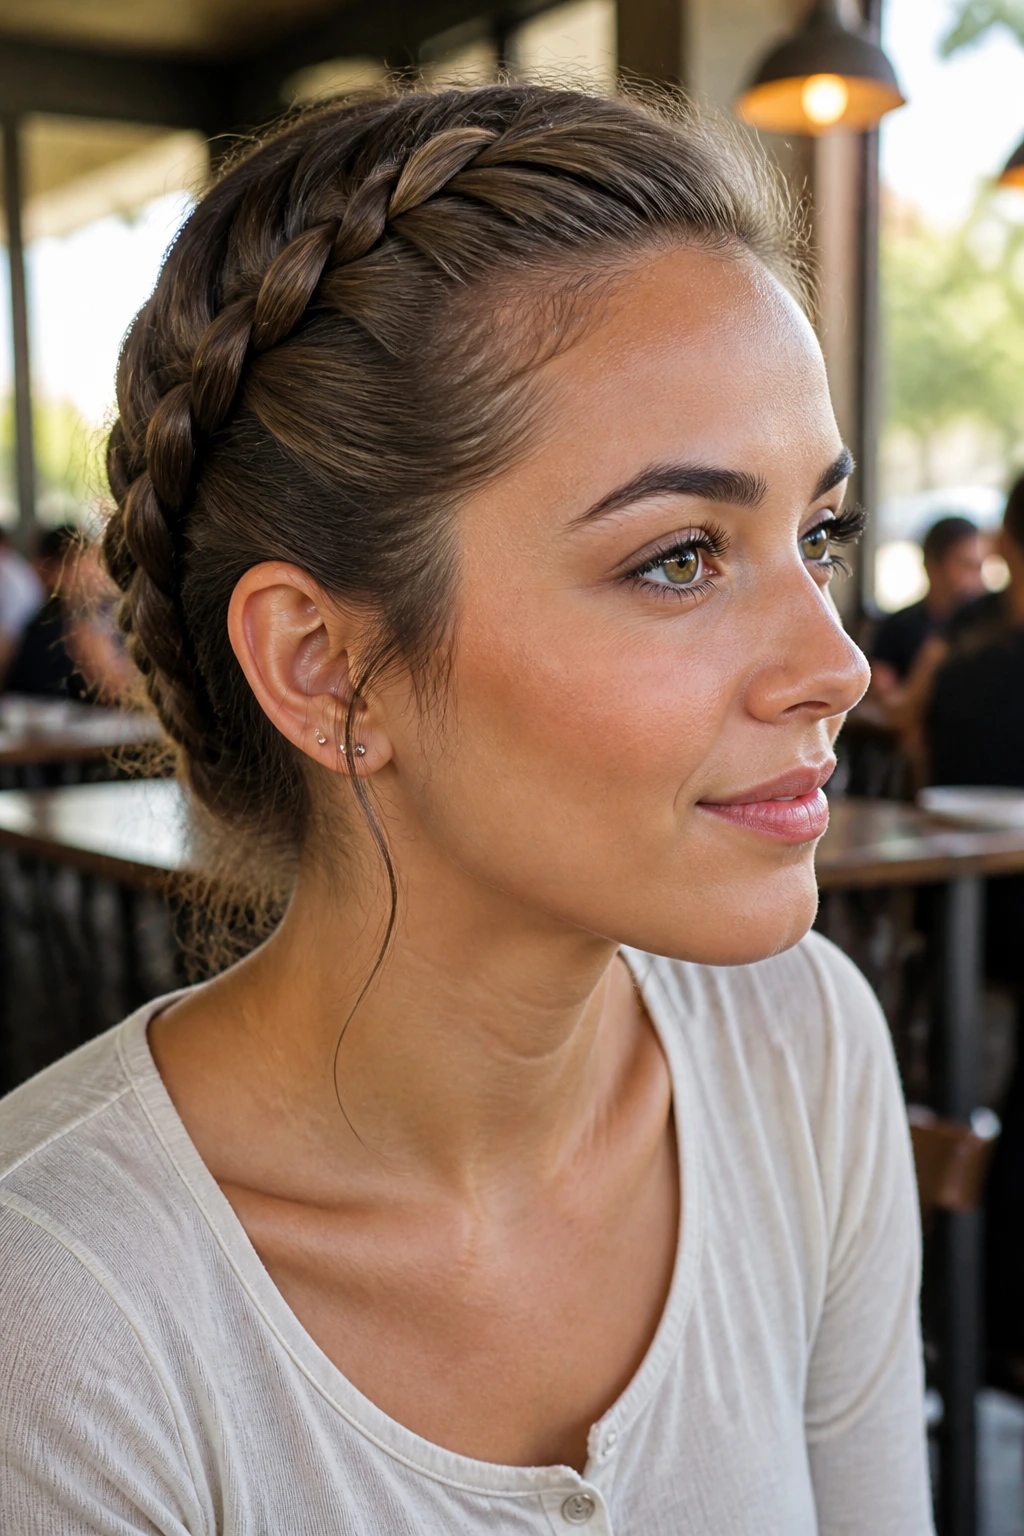
The French braid survives bad hair days for a reason. It grips the scalp, pulls the loose outer layer into one lane, and keeps the braid itself from fanning out the way loose hair does. If you’ve ever stepped out into wind with your hair down, you already know why this helps.
The style looks neatest when you start on hair that’s dry enough to hold shape but not so squeaky-clean that the sections slip. Day-two hair usually behaves best. Gather the first three sections at the crown, keep your hands close to the head, and add only a little hair at a time from each side so the braid lies flat instead of puffing into a puffy ridge.
- Better on medium to long hair
- Great for active days and travel
- Looks polished with a middle part or no part at all
- Holds better if you finish with a small clear elastic and a drop of oil on the tail
- Good for thick hair that swells in humidity
One thing people miss: a French braid does not need to be ironed flat first. That’s a waste of time. A little texture gives the braid grip, and grip gives you control.
5. Claw-Clip Chignon
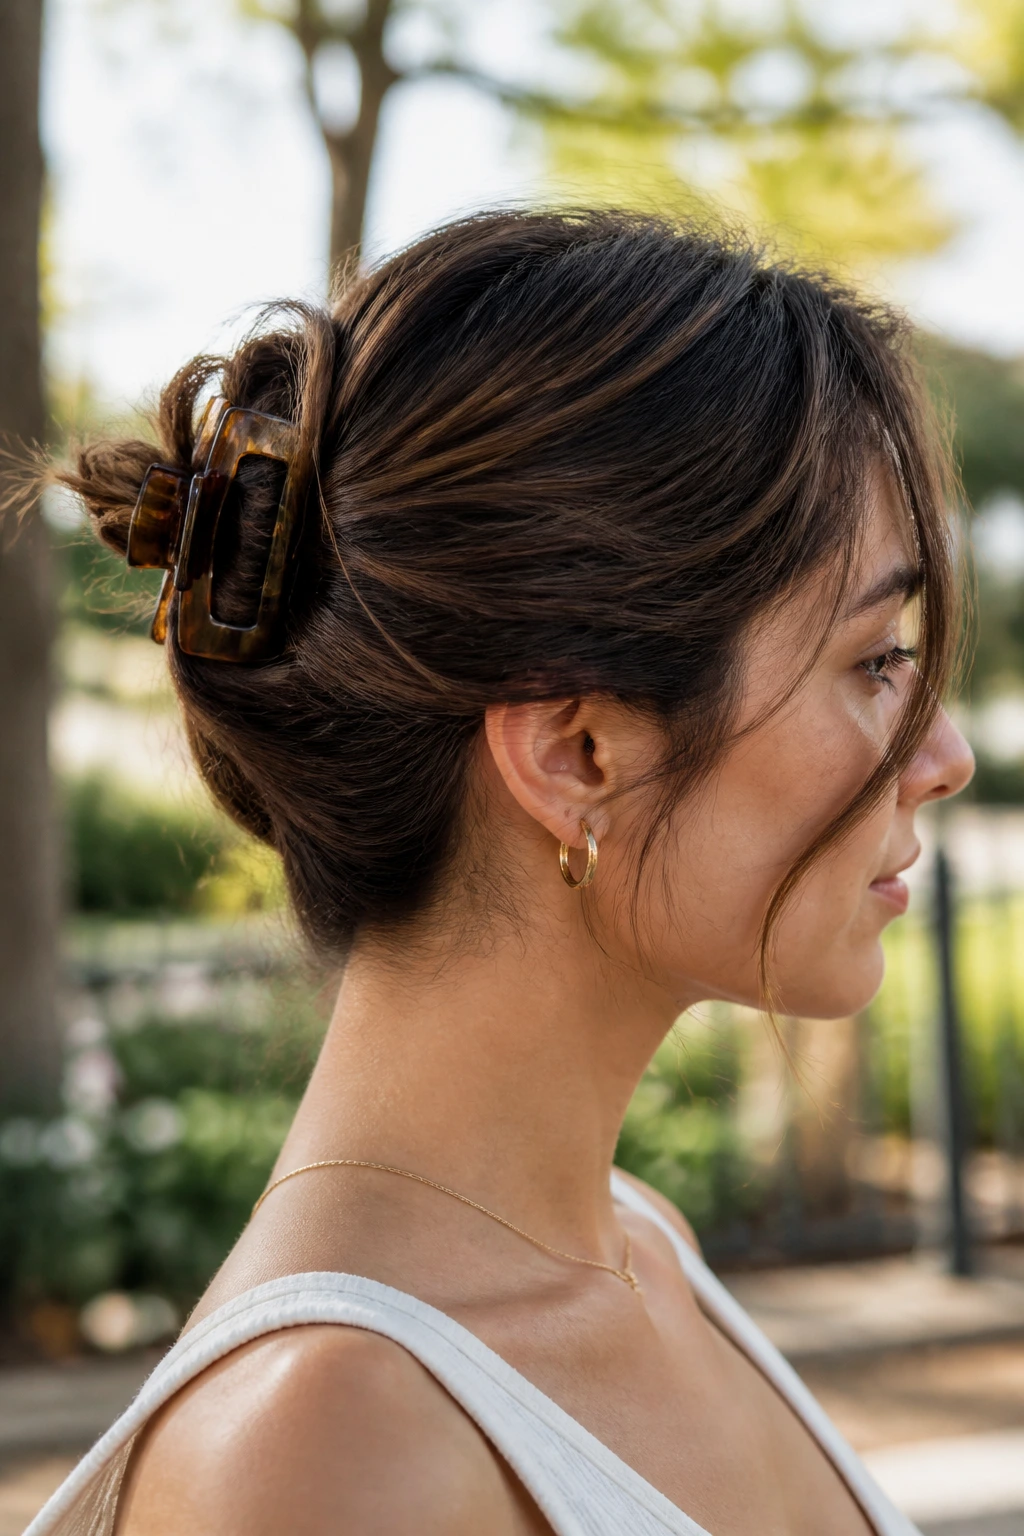
A claw-clip chignon is what happens when you want your hair off your neck but you do not want the style to look overworked. The clip catches the twist, the chignon tucks the ends, and the whole thing stays softer than a tight bun. There’s room for a little bend and movement, which is why it reads as easy instead of fussy.
This is one of those styles that rewards a good clip. Cheap clips slip on fine hair and feel painful on thick hair. A medium-to-large clip with teeth that actually grip the hair gives you a far better hold. Twist the hair upward, fold the length back under itself, and let the clip catch both the twist and the base. If a few wispy pieces escape, leave them. The goal is not helmet hair.
The chignon works especially well when your ends are a little rough and you do not want to advertise it. Tuck them in. Let the clip do the hiding.
6. Dutch Braid Pigtails
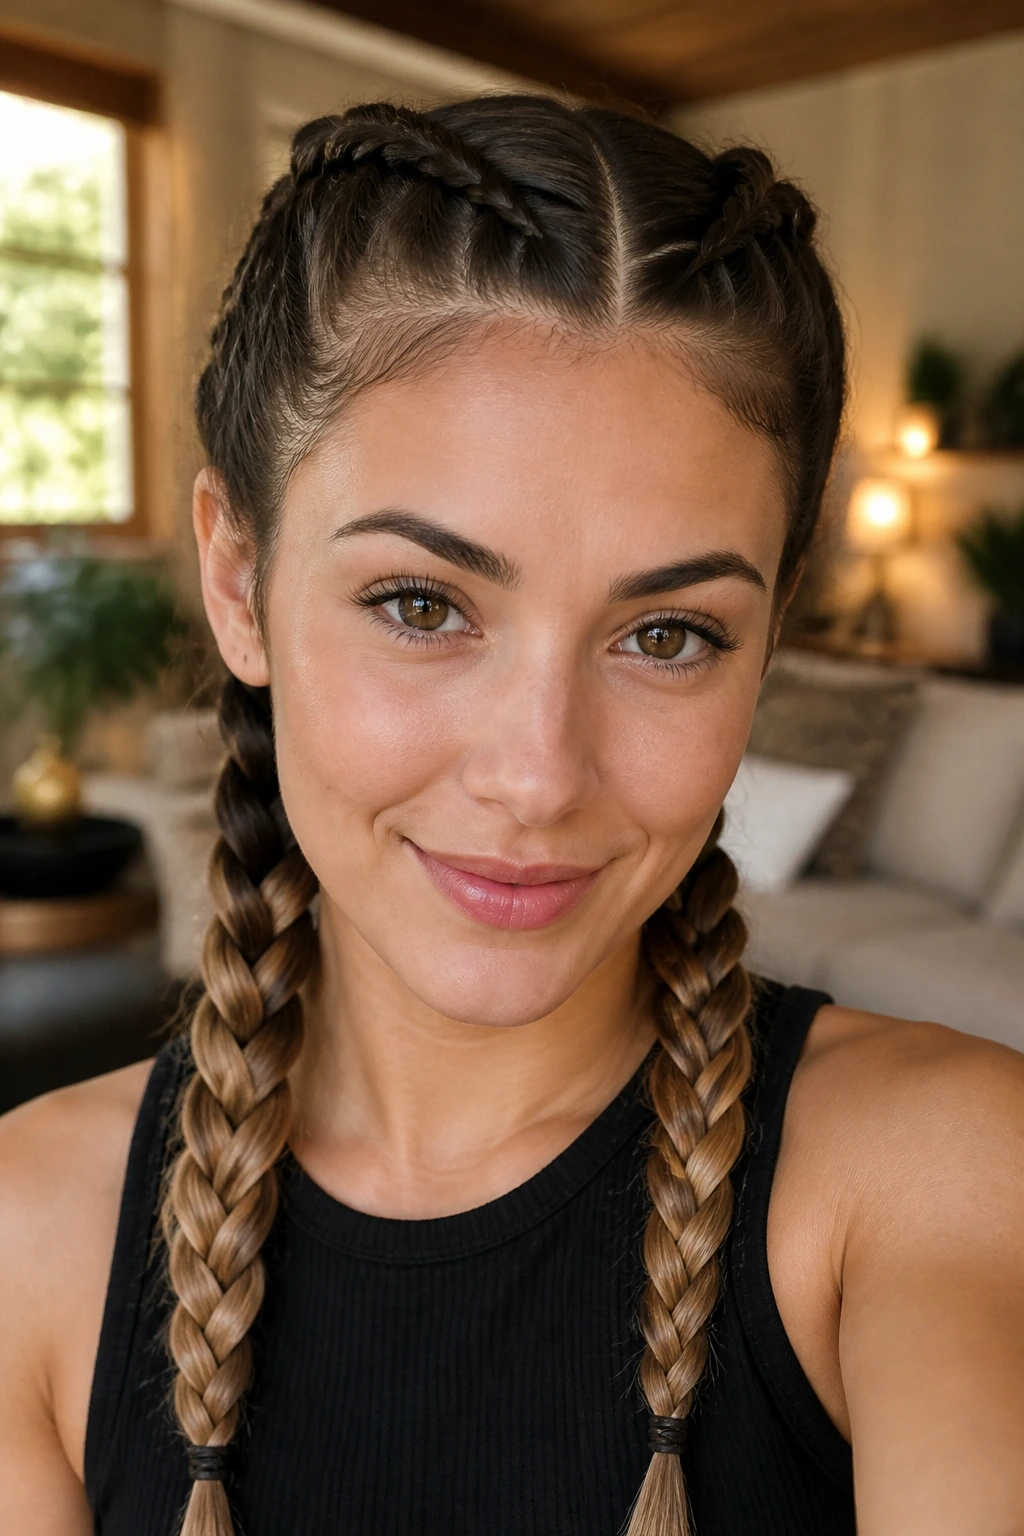
Dutch braid pigtails look more deliberate than loose pigtails and hold frizz better than two separate ponytails. The braid sits on top of the scalp instead of sinking into it, which gives the style a bit of structure and keeps the outer layer compact. That’s a nice trade when the weather is rude.
Compared with a French braid, a Dutch braid pops outward more, so the style has more visual texture and less “school uniform” energy. It also gives thick hair somewhere to go. Two braids split the weight, which makes the style easier to wear for hours without turning into a neck ache.
Best For
- Hair that gets wide in humidity
- Dense curls or waves that need a firm hold
- Gym days, walking days, travel days
- Second-day hair that needs shape fast
If your hair is very fine, keep the braid tension moderate and tug the edges of each braid only a little. If it’s coarse, start with a light cream and a touch of gel at the roots. Either way, the braid should sit close enough to the head that you can feel the control from the first inch.
7. Bubble Ponytail
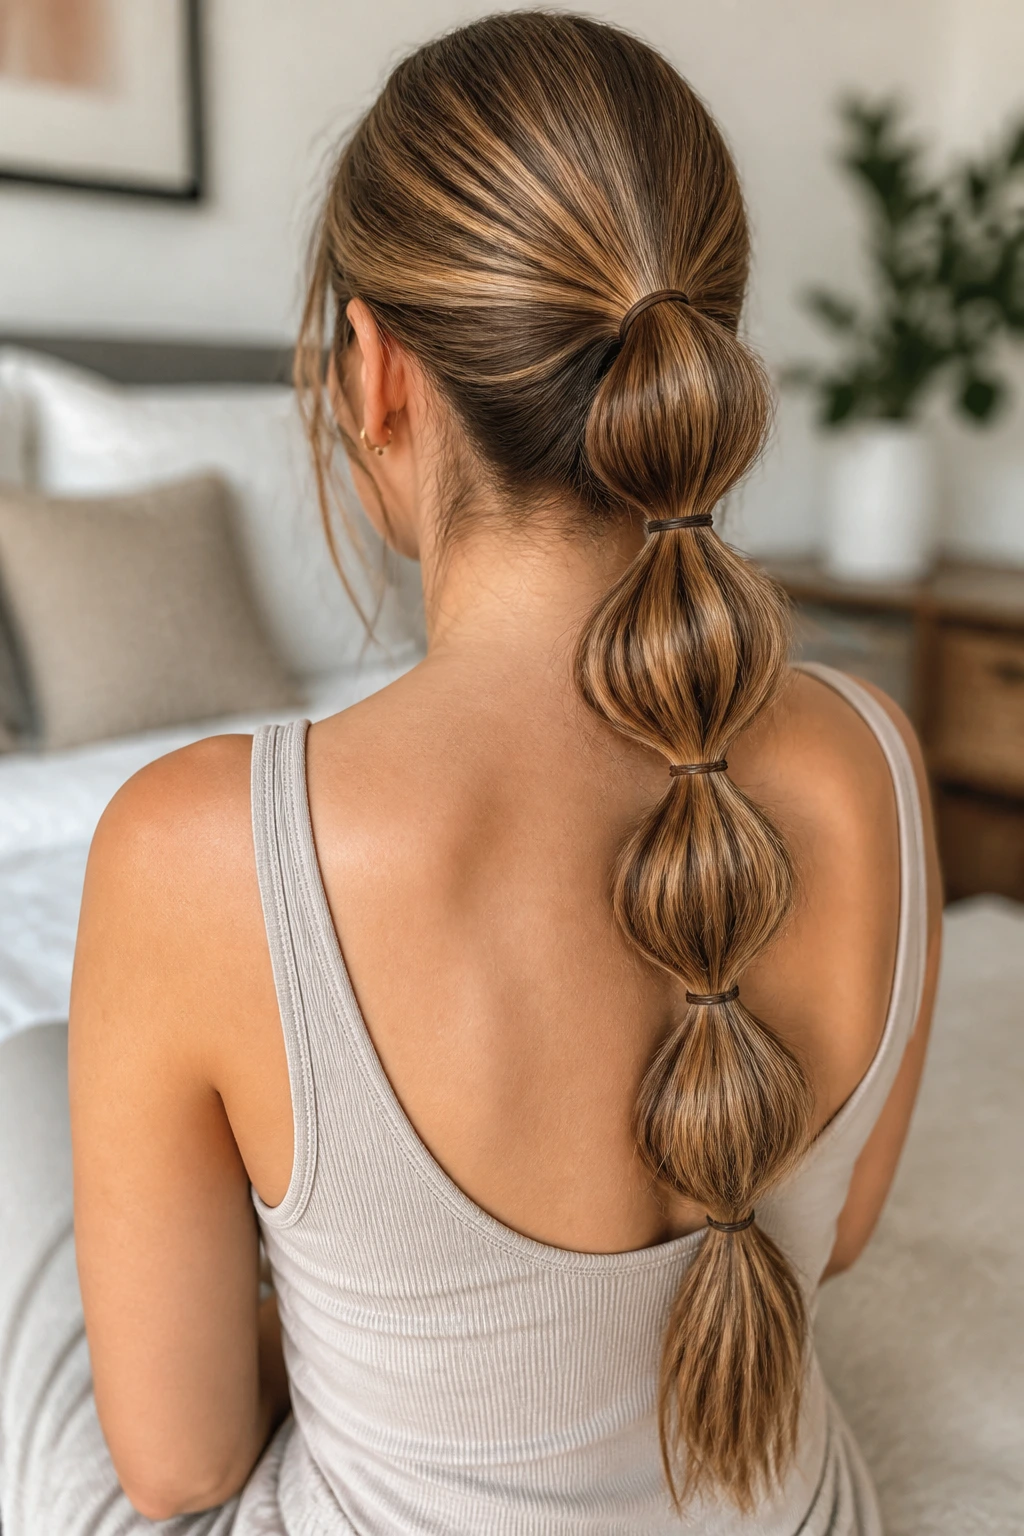
A bubble ponytail is a sneaky fix for frizz because it turns every little elastic into a design choice. Instead of pretending the length will stay sleek on its own, you section the ponytail into rounded “bubbles,” and each one controls the puff a little better than the last.
Start with a ponytail that’s as smooth as you can get it at the crown. Then add small elastics every 2 to 3 inches down the length. Gently pull each section outward between the elastics to form the bubble shape. The beauty of this style is that it welcomes texture in the body of the ponytail while keeping the roots neat.
- Looks best on medium to long hair
- Use snag-free clear elastics or thin coated bands
- Works on straight, wavy, and curly hair
- Hides uneven texture better than a single ponytail
If your hair frizzes at the ends first, seal the tail with a tiny bit of serum before you add the last elastic. That one little move keeps the whole ponytail from looking frayed by lunch.
8. Wrapped High Ponytail
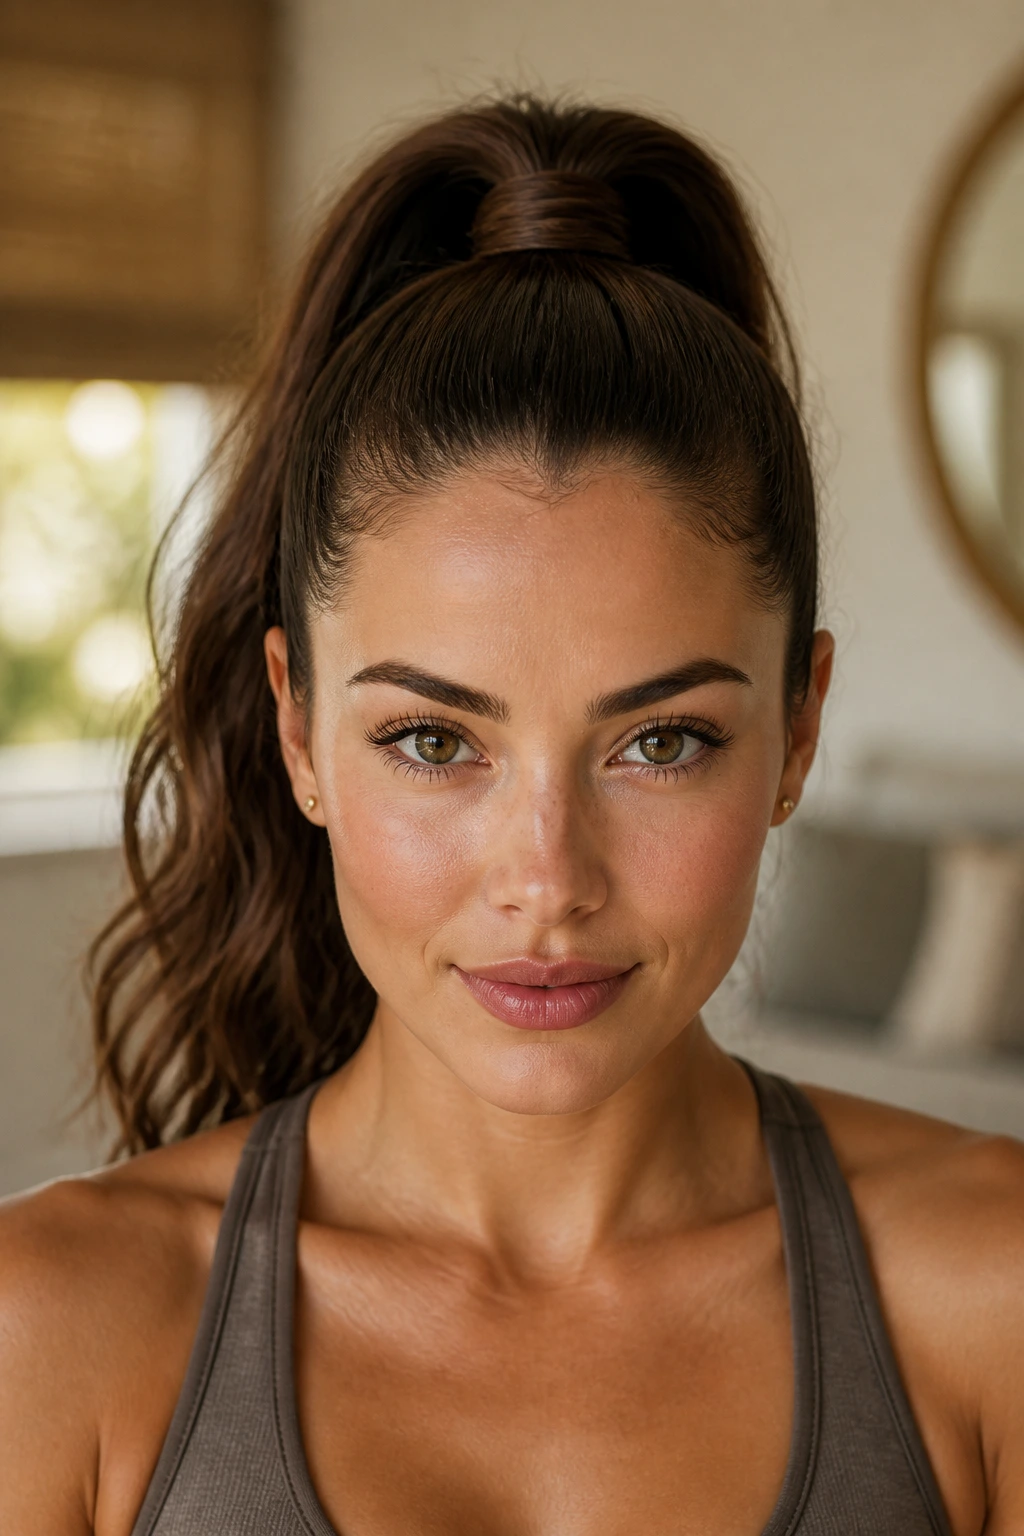
A wrapped high ponytail gives you height at the crown without leaving the roots to wander. The base is the important part here. Smooth it back with a brush and a little gel, tie the ponytail high, then wrap a small section of hair around the elastic so the whole thing looks finished.
This is the style I like when the front pieces are behaving and the rest of the hair just needs a container. A high ponytail lifts the hair off the neck, which helps in heat, and the wrapped base hides the one spot where frizz usually clings hardest — the tie itself. If your hair is thick, use a strong elastic and a second hidden one underneath. If it is fine, add a bit of texturizing grip at the roots before you gather it.
The wrapped base is not just pretty. It’s practical. A plain elastic often creates a little halo of flyaways right where everyone can see them.
9. Low Knot With a Side Part
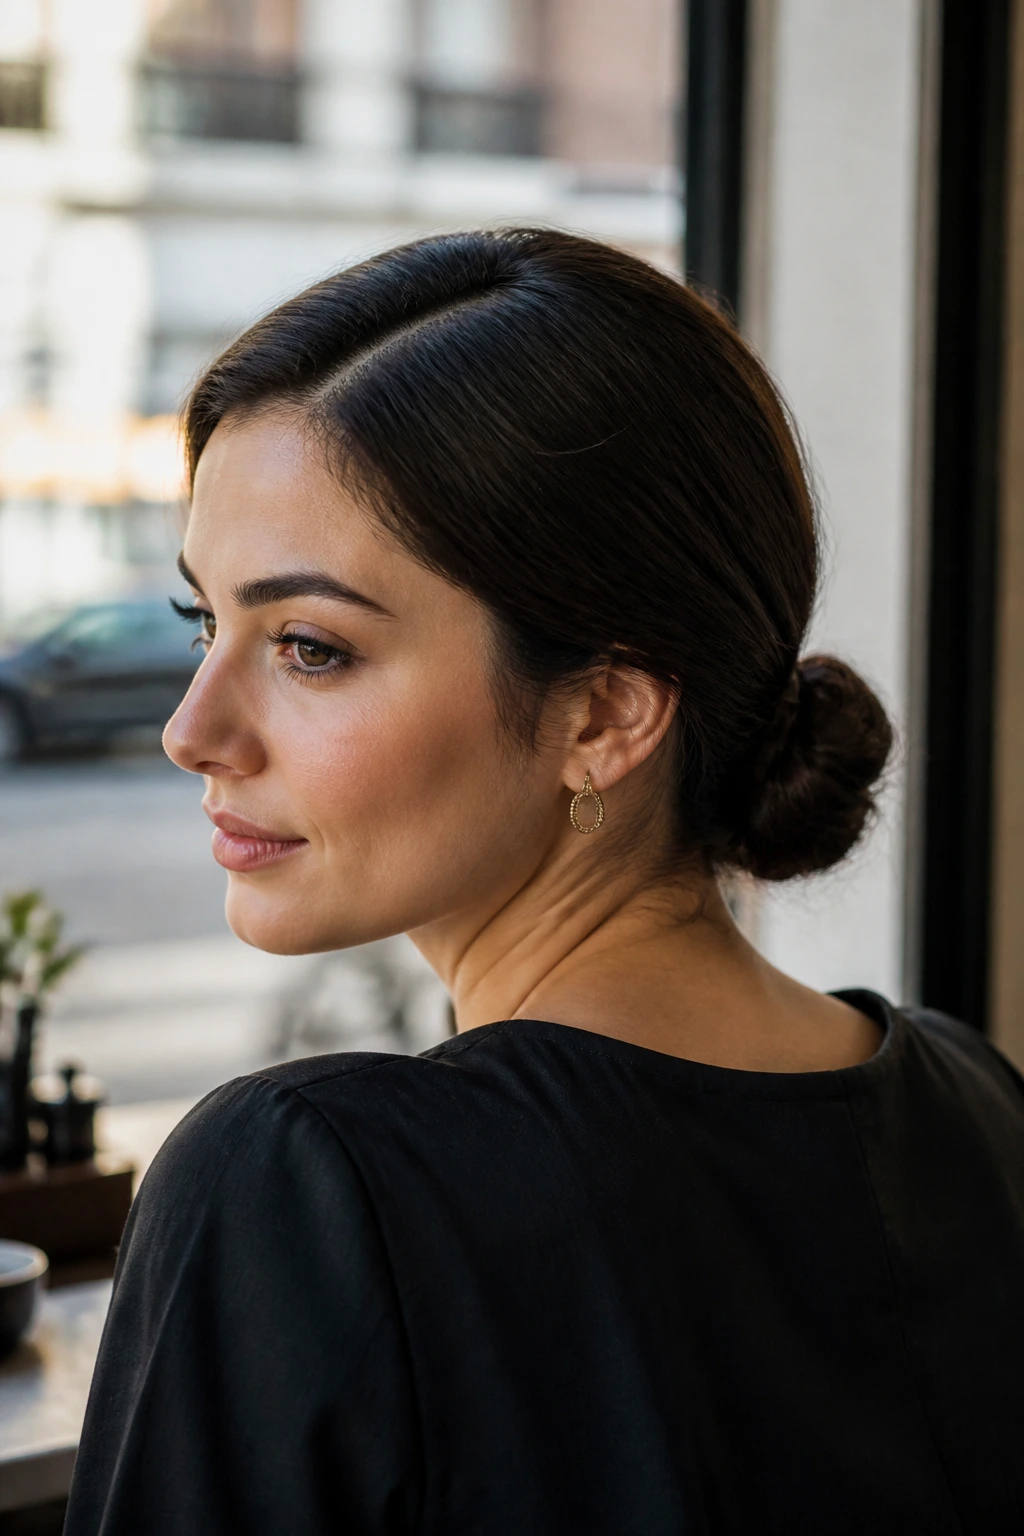
Want polished without the severity of a center part? A low knot with a side part gives you a softer line at the front and enough control at the back to keep frizz from taking over. It’s especially good when the crown wants to puff but the rest of the hair still has some swing.
A side part changes the whole mood. It breaks up the straight line around the hairline and makes small flyaways look deliberate instead of messy. Brush the hair toward the lower side, gather it near the nape, twist into a knot, and pin it flat. Keep the knot compact. A loose knot turns fluffy fast.
How to Wear It
This is one of the better options for fine hair, because a side part adds some visual fullness without needing extra teasing. If you have thicker hair, keep the knot lower and anchor it with a few crossed pins so the weight doesn’t drag it down by mid-afternoon.
A small dab of smoothing balm around the part line does the job. A huge amount does not. That’s how people end up with a greasy hairline and a dry-looking knot, which is a strange look and not a flattering one.
10. Braided Crown
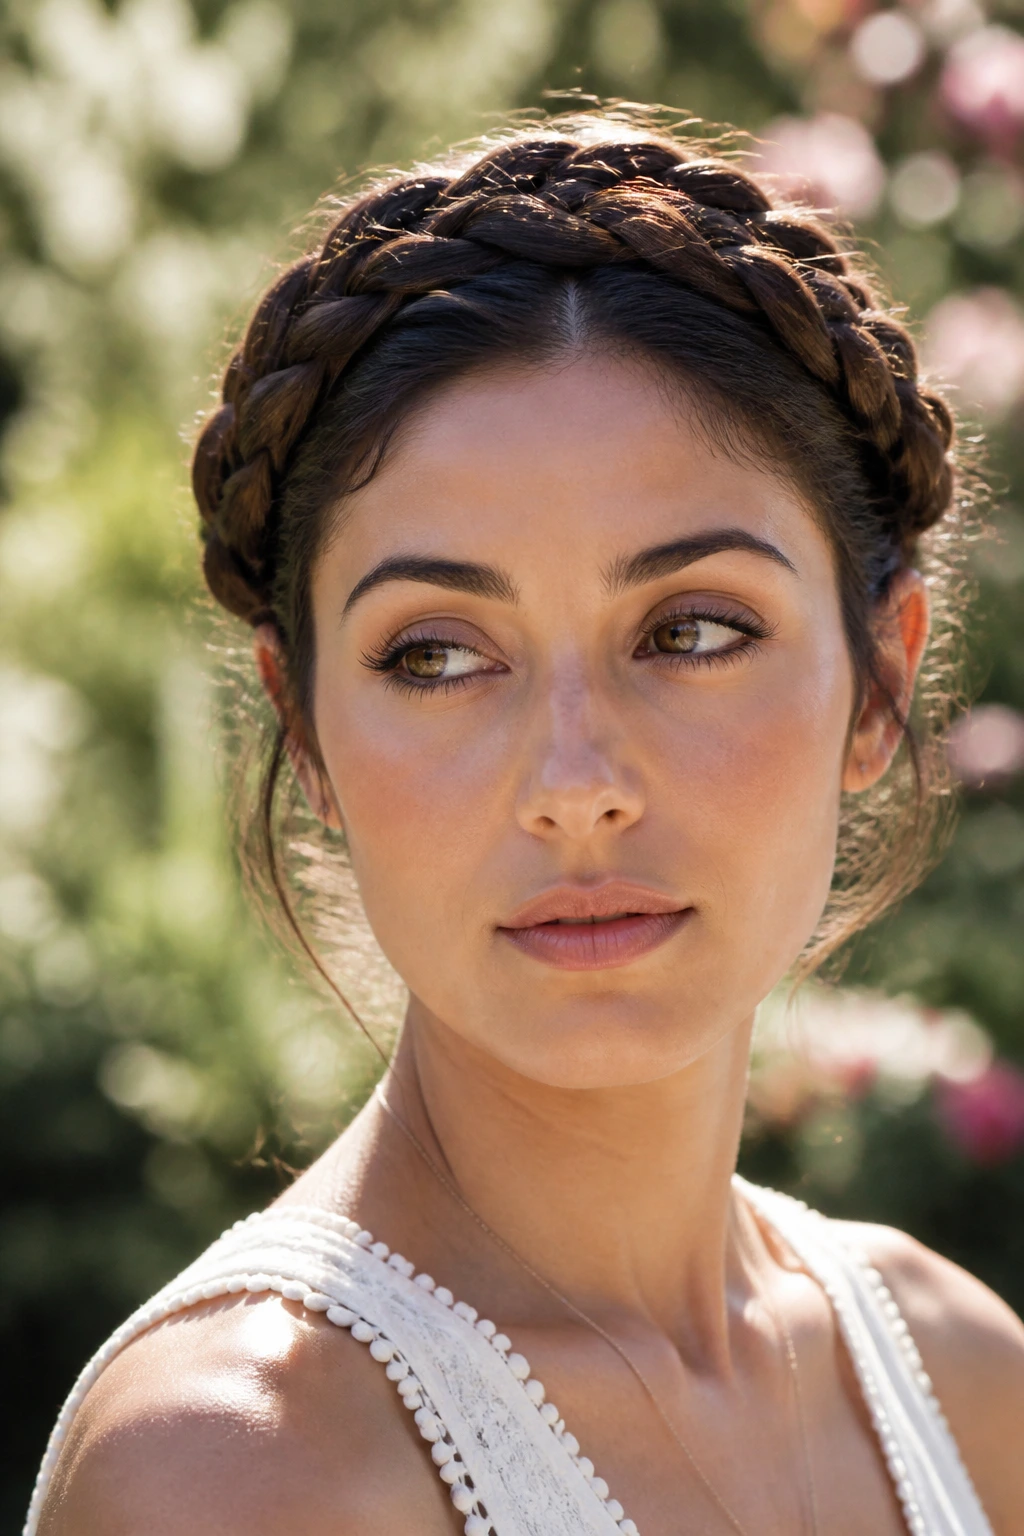
A braided crown takes the parts of the hair that frizz first — the top layer, the temples, the areas near the ears — and turns them into the style itself. That’s why it works so well. You stop hiding the braid and let it become the frame.
It’s a strong choice when you want the rest of the hair up and off the face but still want a little softness around the head. Start with two braids or one braid wrapped across the hairline, pin them tightly enough that they do not slide, and keep the crown close to the scalp. If you braid too loosely, the style balloons. Nice in a photo. Not nice when you want the look to last.
- Best on long hair or medium hair with good pin hold
- Works on wavy, curly, or coily textures
- Strongest when secured with hidden bobby pins at every crossing point
- Looks better when the braid thickness is even from side to side
The odd thing about a braided crown is that it can be both polished and forgiving. A few small flyaways make sense here. They belong to the shape.
11. Rope-Braid Ponytail
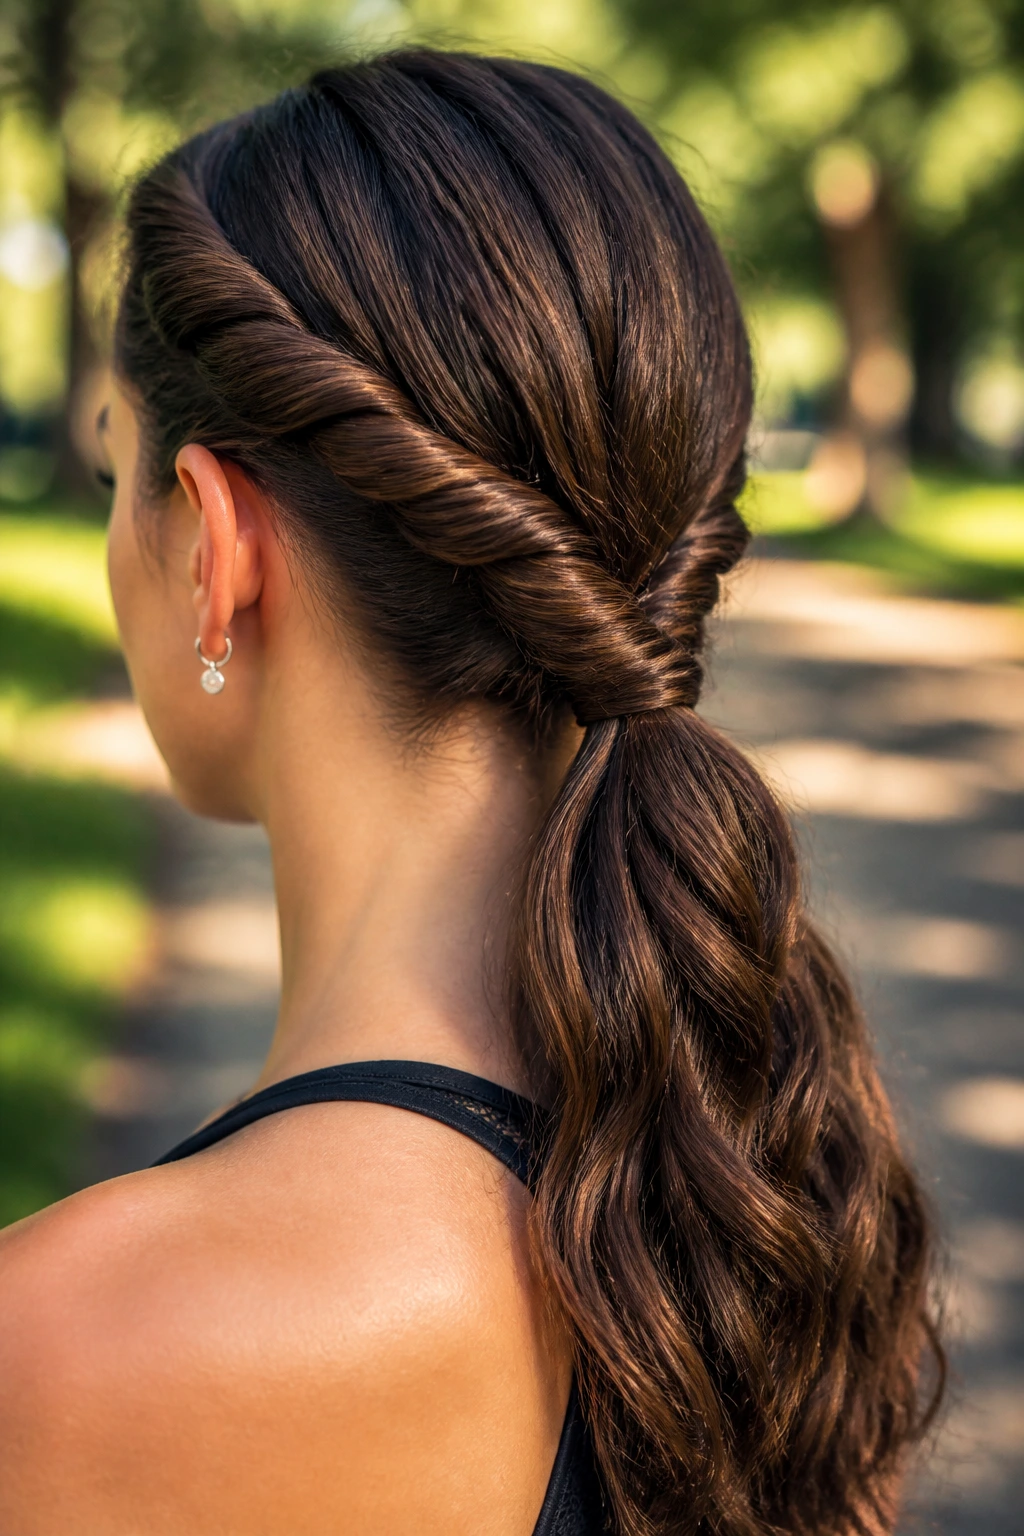
A rope-braid ponytail is the quiet overachiever of this whole list. Instead of three strands, you twist two sections around each other, and the result tends to hold its shape with less fuss. For some hair types, especially hair that slips out of regular braids, this is the smarter move.
There’s less surface roughing than with a three-strand braid, which can help the finished tail stay smoother longer. It also creates a clean spiral that looks tidy even if the rest of your hair is having a modest frizz day. If the sections are even and the twist stays tight, the braid stays neat. If you let one side sag, it loosens fast.
This works well on ponytail lengths that need a little polish but not a full updo. Wrap the base with a small strand or a ribbon if you want the style to look a little sharper. Plain rope braids can look sporty. Wrapped ones look intentional.
12. Scarf-Wrapped Ponytail
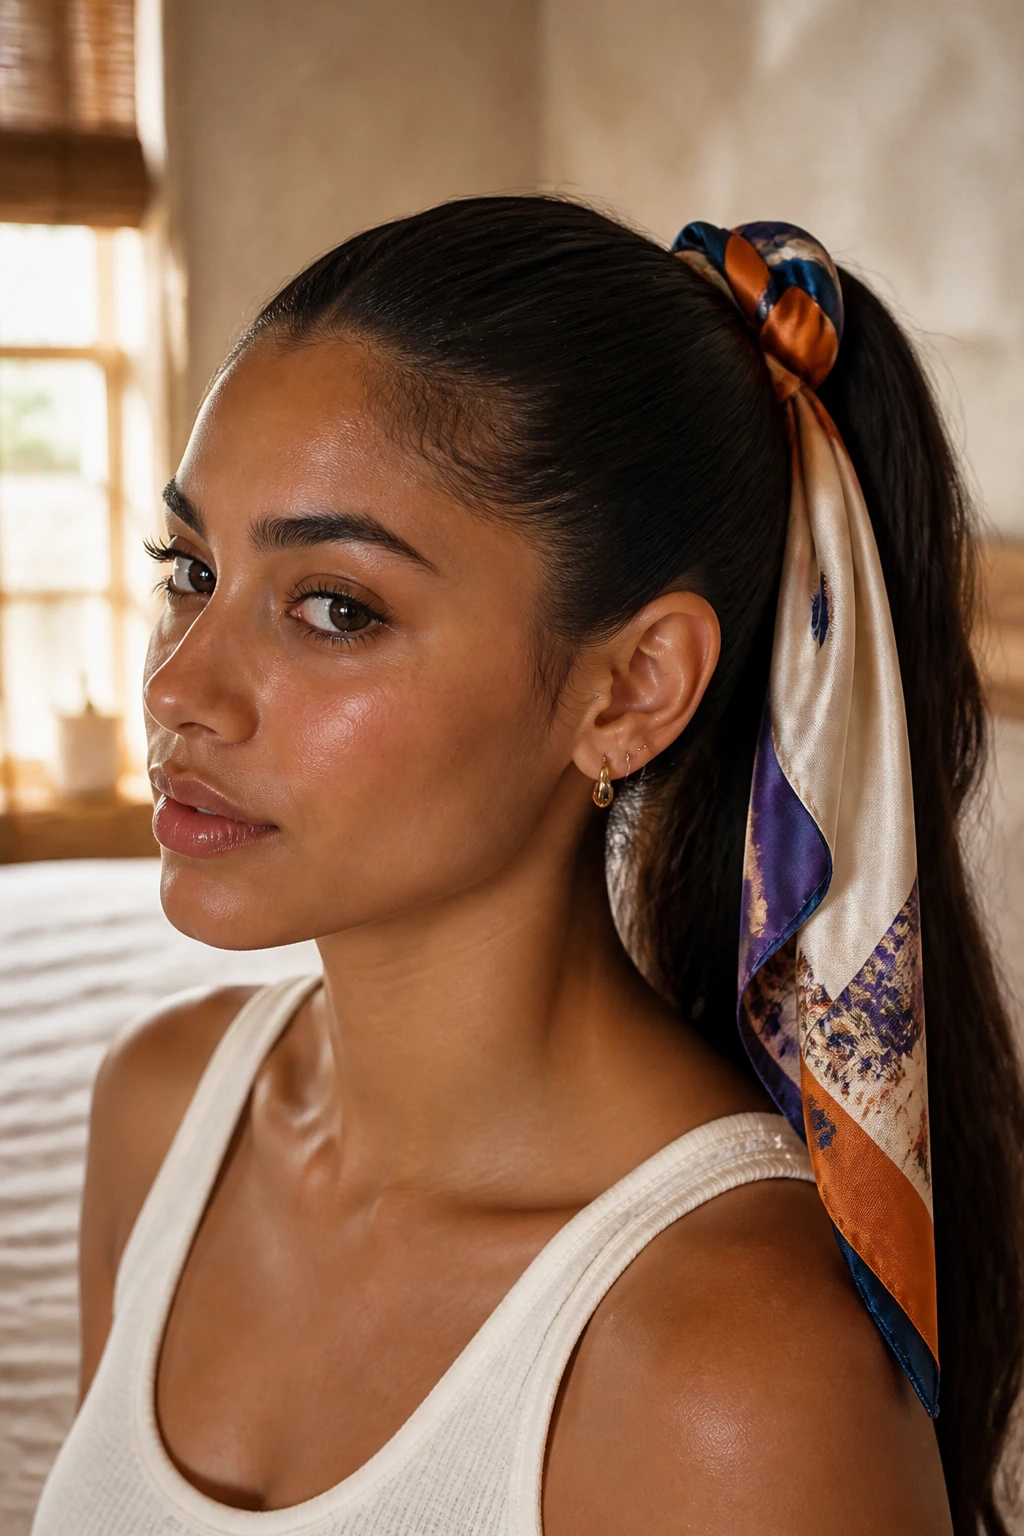
A scarf-wrapped ponytail does two things at once: it controls the base and gives the whole style a reason to exist. The scarf hides frizz around the elastic, cushions the hair against rubbing, and adds enough color or pattern that people notice the accessory first.
Use silk or satin if you want glide. Cotton bandanas have charm, but they grab more than they should, especially on textured hair. Tie the scarf around the ponytail base, then let the ends trail, knot, or bow depending on the mood. Keep the ponytail itself smooth at the crown and let the scarf carry the visual weight.
This is a strong choice for days when the hair is not perfect and you do not feel like pretending otherwise. The scarf says “styled” even if the ponytail underneath is having an off moment. That’s worth a lot.
13. Twisted Halo Updo
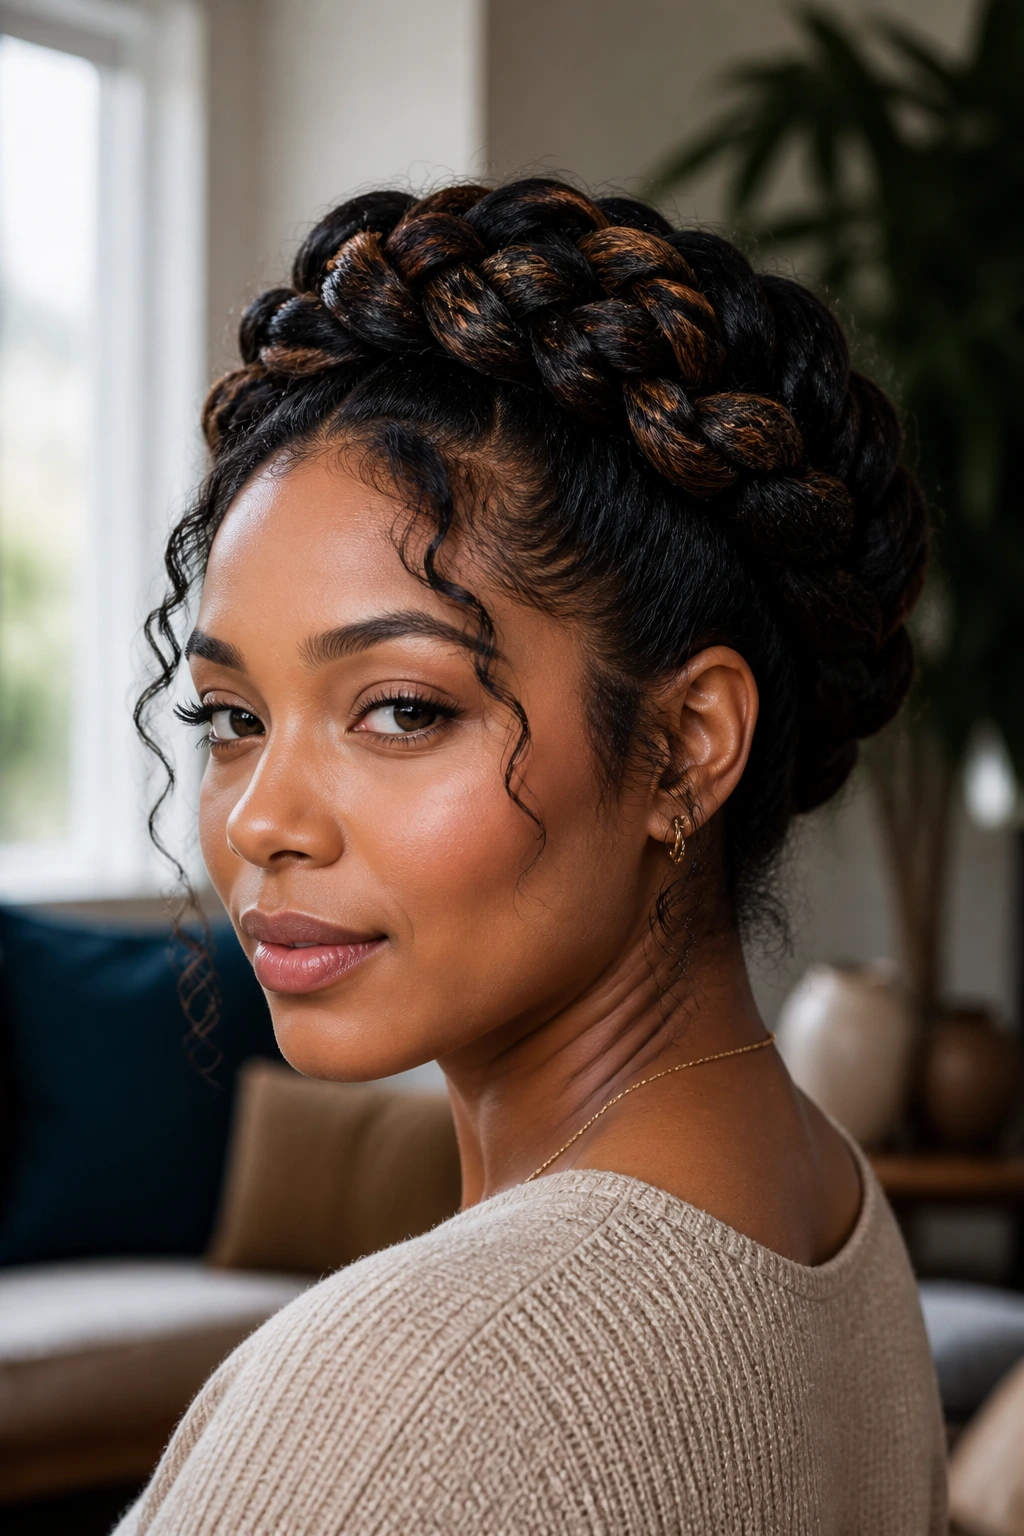
A twisted halo updo gives you that clean frame around the head without asking the hair to stay loose in the wind. Twists are easier on frizz than a lot of brushing, because they keep the sections aligned and tucked into one shape. That’s the whole trick.
Start by taking sections from each side of the head, twist them back toward the center, and pin them into a halo shape. The hair in the back can be tucked, coiled, or pinned into a low knot depending on length. Keep the twists flat at the temples. If they sit high and loose, they puff out fast.
Why I Like It
It’s one of the few updos that can look formal without feeling stiff. A few face-framing pieces soften it, but I would not add too many. Too many strands around the face can turn this from elegant into “I gave up halfway through.”
A light mist of flexible-hold spray helps, though the spray should land on the surface, not soak the whole head. That’s a recipe for crunch, and nobody asked for helmet hair.
14. Half-Up Claw Clip Stack
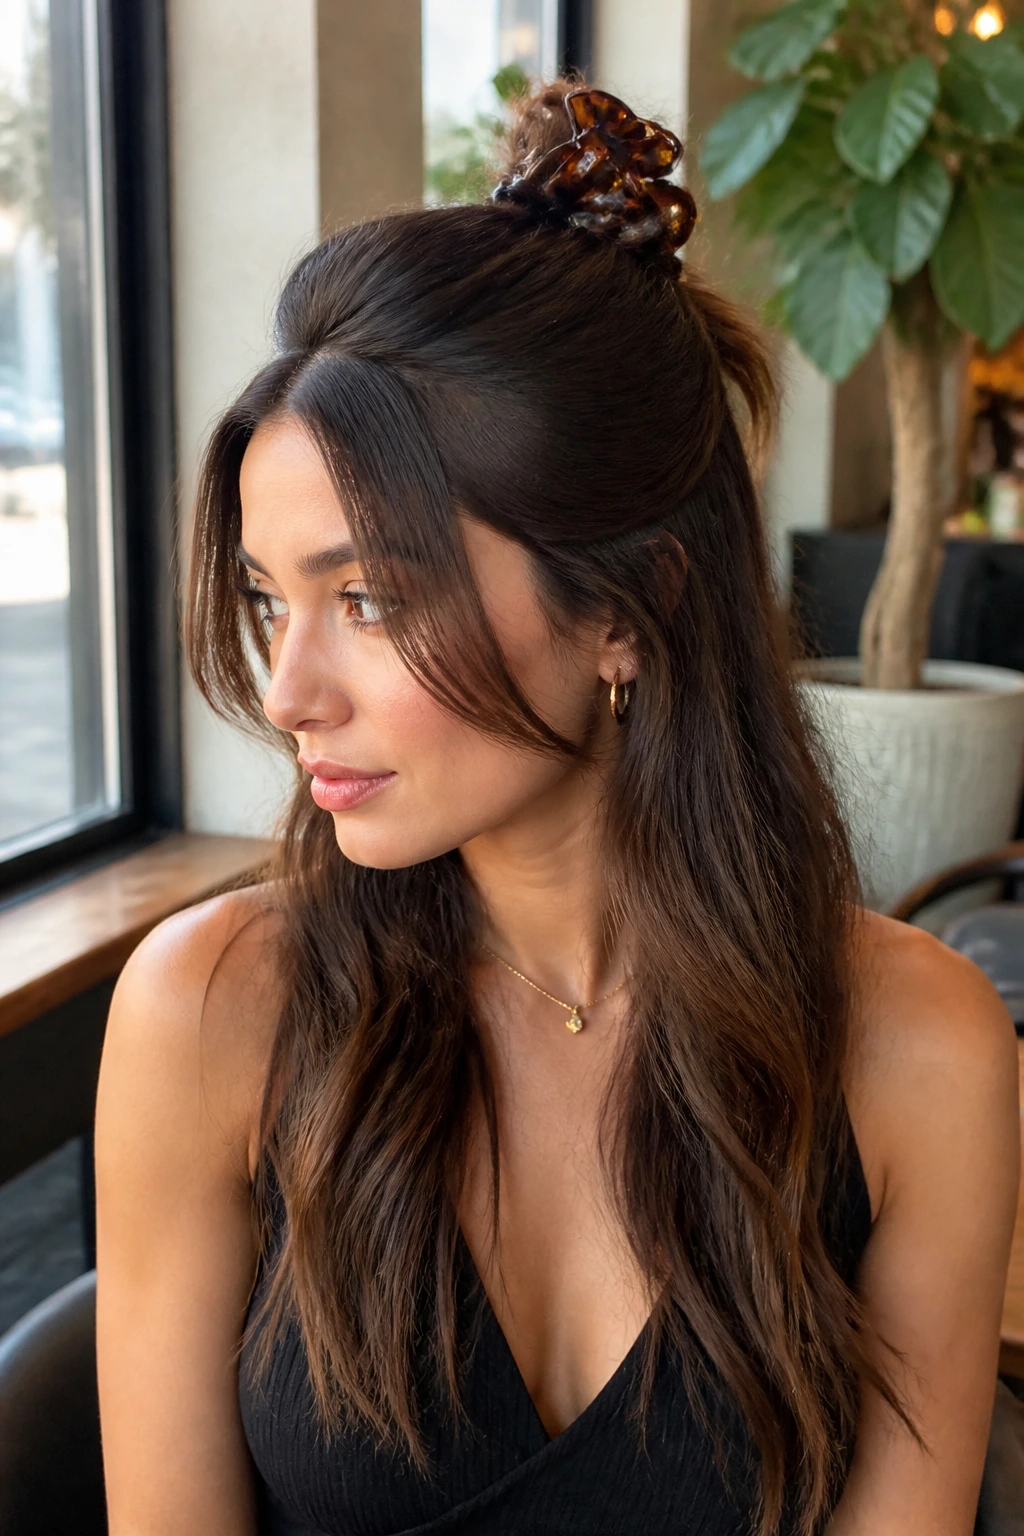
A half-up claw clip stack is what you reach for when the roots need control but the length still has enough shape to be interesting. Instead of pulling everything back, you clip the top section up and let the bottom section keep moving. That means less frizz at the crown and less tension on the whole head.
The stack part matters. Rather than stuffing all the hair into one clip and hoping for the best, you twist the top half, fold it, and stack it in the clip so the hair sits at an angle. The result is more stable and less likely to collapse into a puff by lunchtime. If your hair is thick, choose a larger clip with deep teeth. If it’s fine, a smaller clip with a tighter grip usually works better.
It’s casual, but not sloppy. That’s the sweet spot.
15. Sleek Side Bun
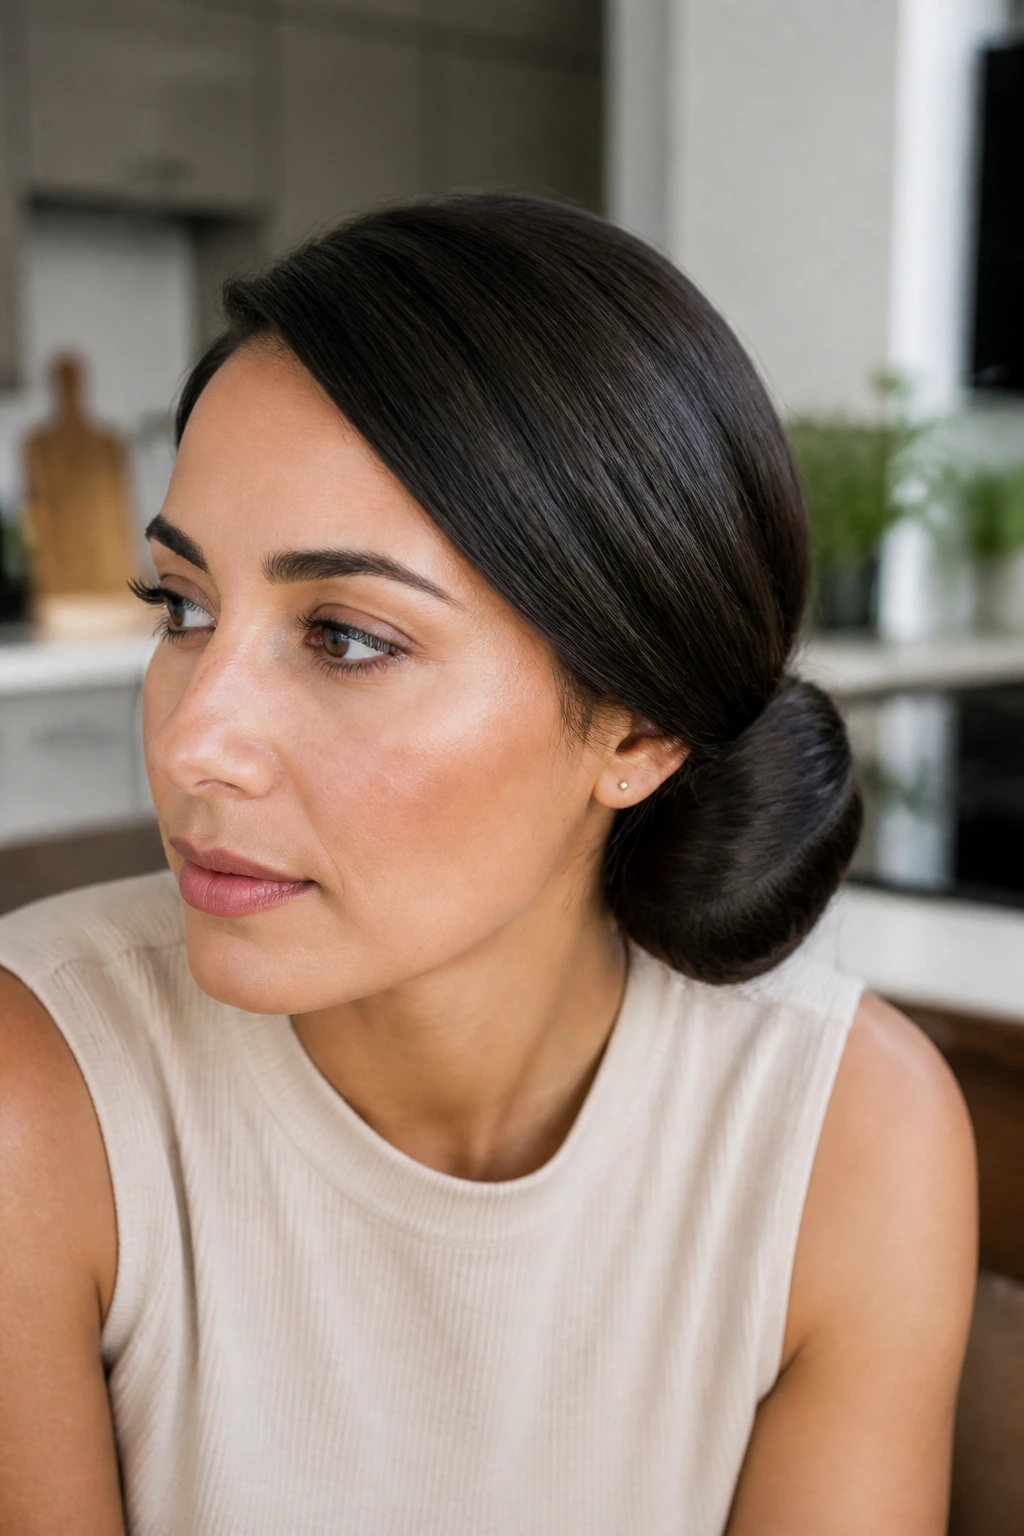
A sleek side bun softens the line of the face and keeps the ends out of the air, which is exactly what frizzy hair often needs on a day when the weather is messing around. A side placement also helps balance the style if one side of your hairline is more unruly than the other.
Brush the hair over to one side, smooth it with a small amount of cream, and twist it into a bun just below the ear. The bun can be compact or slightly looped, but it should sit low enough that gravity does not pull the top loose. If the side near your temple frizzes up first, tuck a bobby pin right there. That tiny anchor helps more than people think.
How to Use It
This style looks especially good with earrings or a clean neckline, because the bun leaves that space open. It’s also one of the better choices when your hair has gone flat at the crown and puffy at the ends — which is a frustrating mix, but a common one.
16. Mini Space Buns
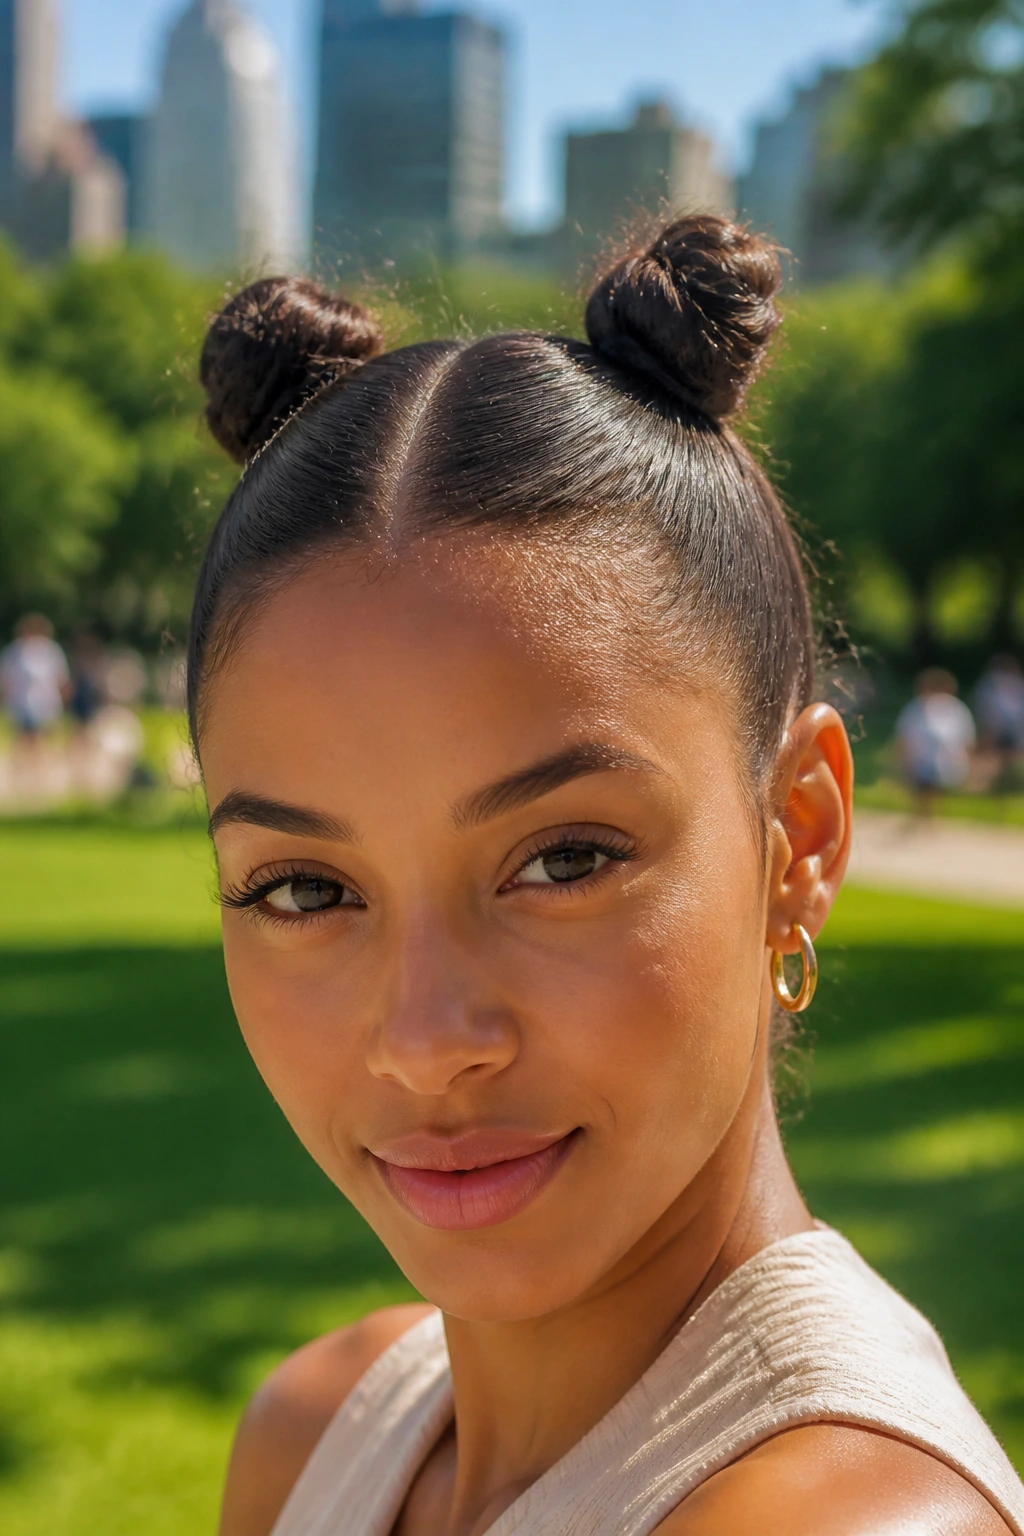
Mini space buns are not just for playful days. On frizz-prone hair, they divide the hair into two controlled zones, which keeps the shape from expanding all over the place. They also work well when you want to keep texture visible without letting it run wild.
The trick is to keep the buns fairly small and fairly low, not perched like horns. Part the hair down the center, smooth each side, and twist each section into a bun near the top or mid-head. Use enough pins that the buns stay put, but not so many that your scalp complains by noon. If the ends are fuzzy, tuck them under with a touch of gel or cream.
This style is better than it gets credit for. It can read sporty, cute, or sharp, depending on how tight the parts are and whether you leave any face-framing pieces out.
17. Tucked-In Roll Updo
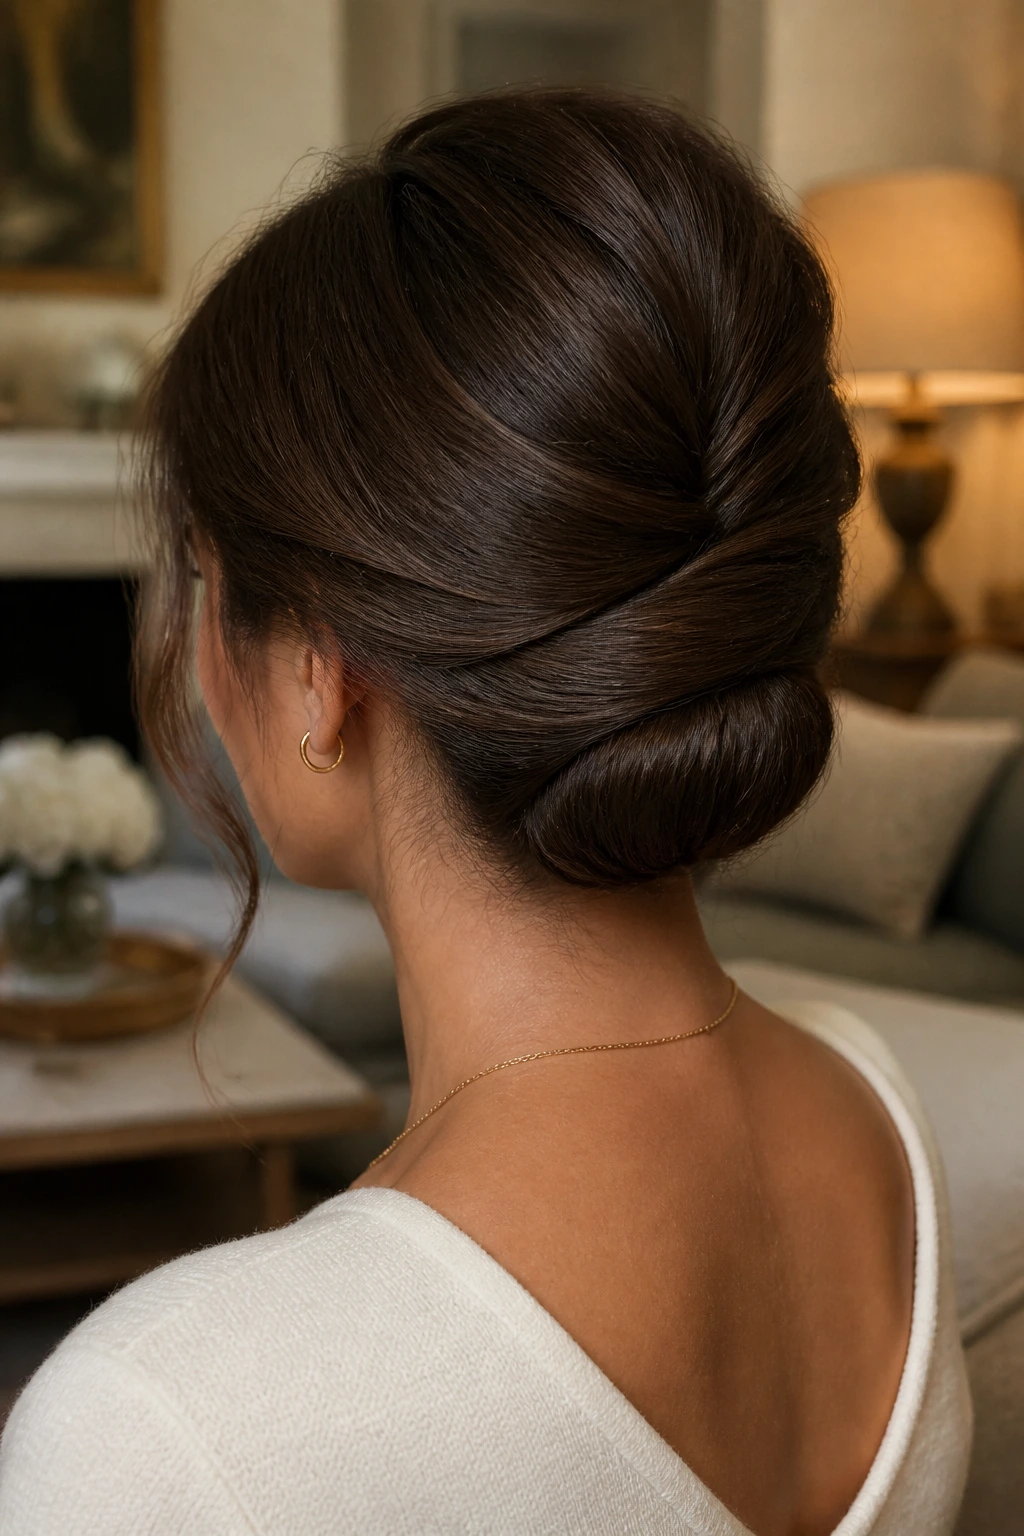
A tucked-in roll updo is the quietest way to hide frizz, and sometimes that’s exactly the point. The ends disappear into the roll, the surface stays smooth, and there’s very little for humidity to puff up later.
Work with medium-damp or fully dry hair, smooth the crown, and roll the length inward toward the nape. Pin along the roll so the shape stays flat. If the hair is layered, pinning becomes more important, because short pieces love to escape at the first sign of movement. A little spray on the outer surface helps, but the real hold comes from the way the hair is tucked under itself.
This is one of those styles that looks much harder than it is. That’s a good thing. The best updos often are.
18. Defined Twist-Out With a Gel Cast
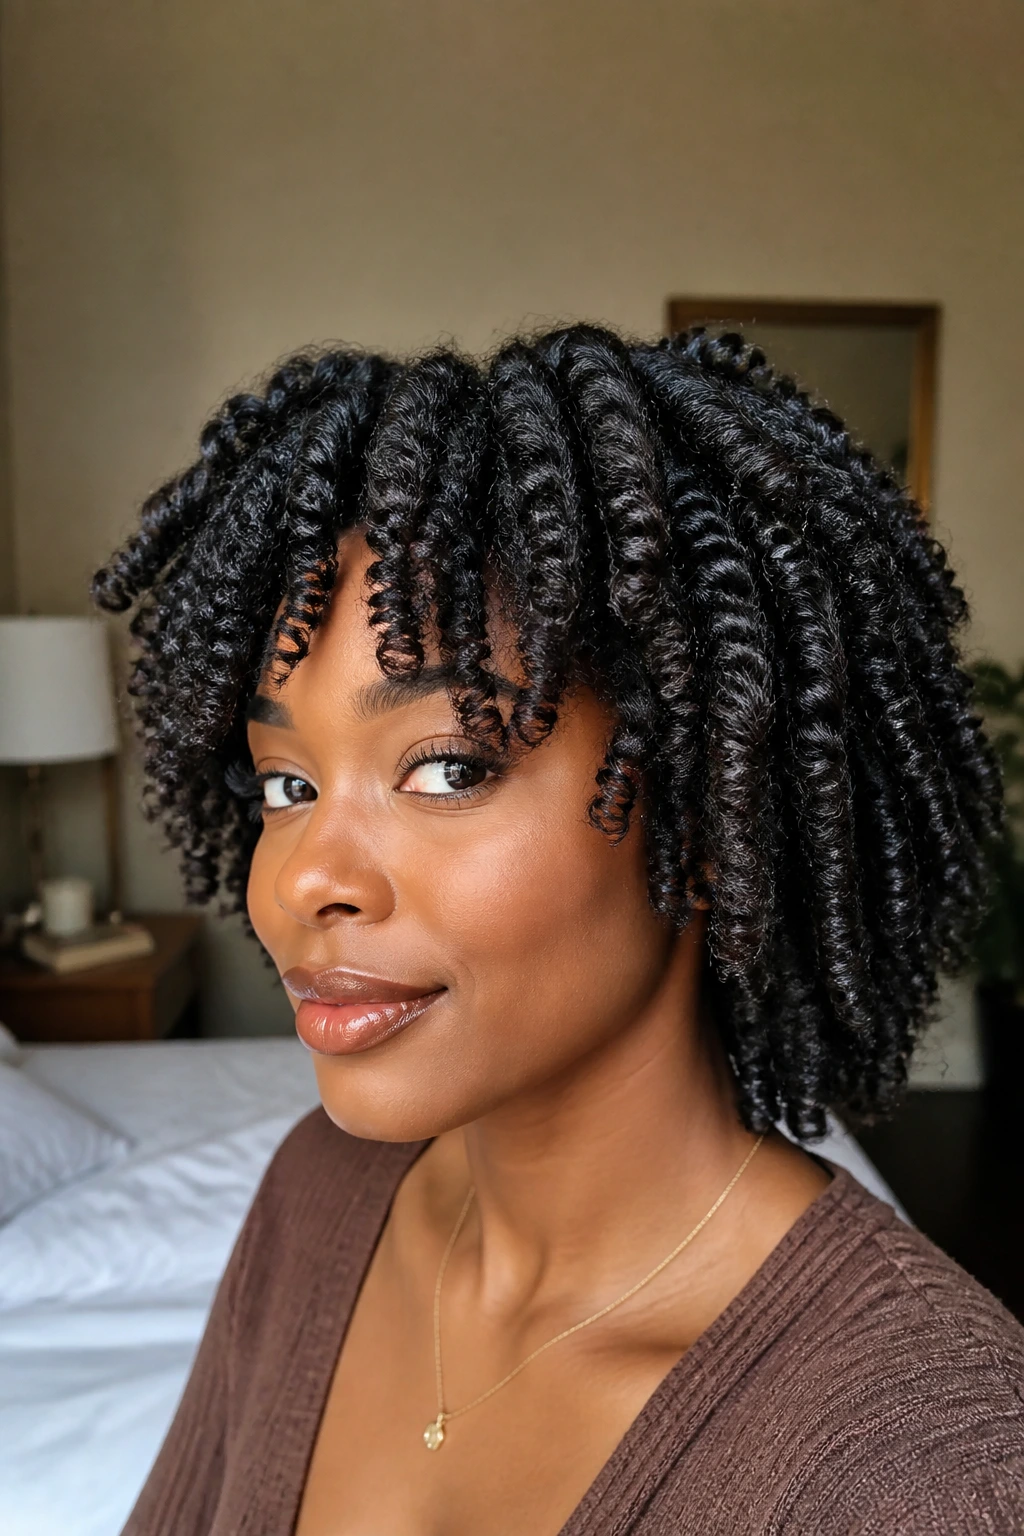
A defined twist-out is one of the rare styles here that does not fight texture. It uses curl pattern on purpose, which means less puff later because the hair has been set in a controlled shape from the start. The cast from gel keeps the twists in line while they dry, and when you unravel them carefully, the shape stays defined instead of frizzy.
This works best when the hair is fully dry before you touch it. Fully dry. Not “almost.” Not “feels okay on the outside.” If the inside is still damp, the twist-out expands the minute you separate it. Start with damp hair, apply leave-in and gel in small sections, twist each piece with even tension, and let it dry all the way. Then separate with oiled fingers, not rough hands.
Best For
- Curly and coily hair that frizzes when disturbed
- People who want to wear texture, not flatten it
- Styles that need two or three days of wear
This is not the fastest style on the list. It is one of the most rewarding, though, because the frizz is managed by definition instead of suppression.
19. Sleek Bob With Tucked Ends
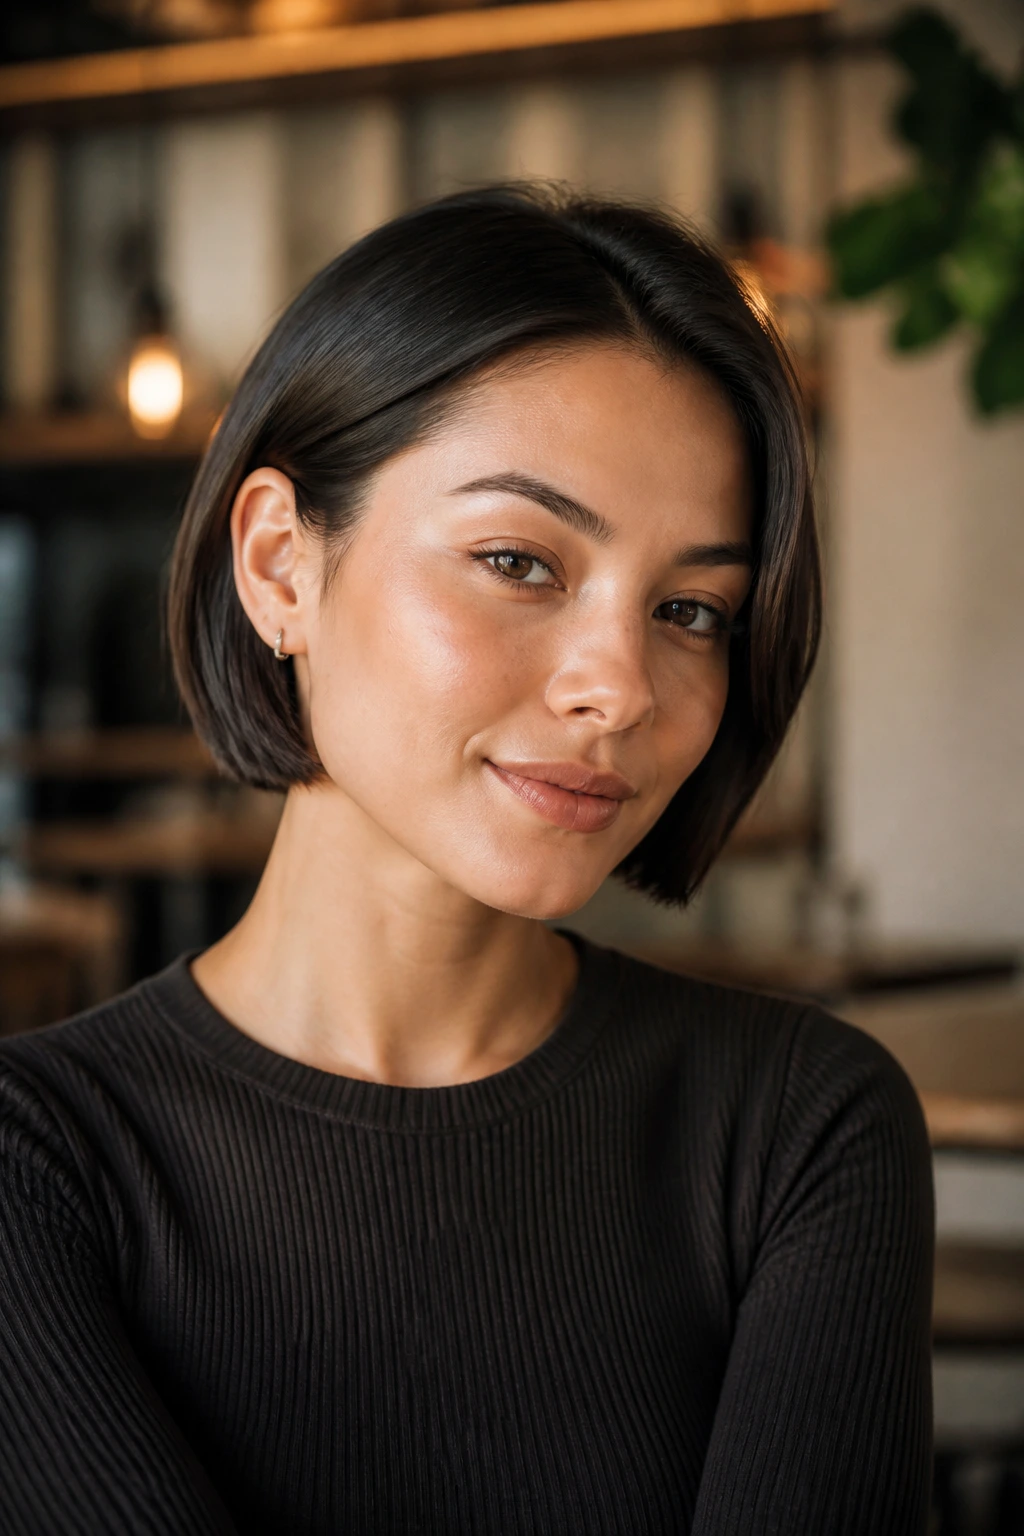
A sleek bob with tucked ends is a smart answer for short hair that wants to puff outward at the first sign of humidity. Instead of trying to force the whole cut straight, you keep the crown smooth, tuck the ends behind the ears or under at the nape, and let the shape stay neat.
Short hair frizzes in a slightly different way than long hair. There’s less weight pulling it down, so every little bit of texture shows. A bob with tucked ends gives that texture a frame. A side part can soften the line, while a center part makes the cut look sharper. Either way, the main goal is a clean surface near the top and a controlled edge at the bottom.
If your bob is chin-length, a few small clips can help keep the ends in place. If it hits the collarbone, the tuck holds more easily. Either way, a bob that stays behind the ears for half the day already looks more intentional than one that’s constantly getting pushed back.
20. Puff Ponytail With a Smooth Hairline
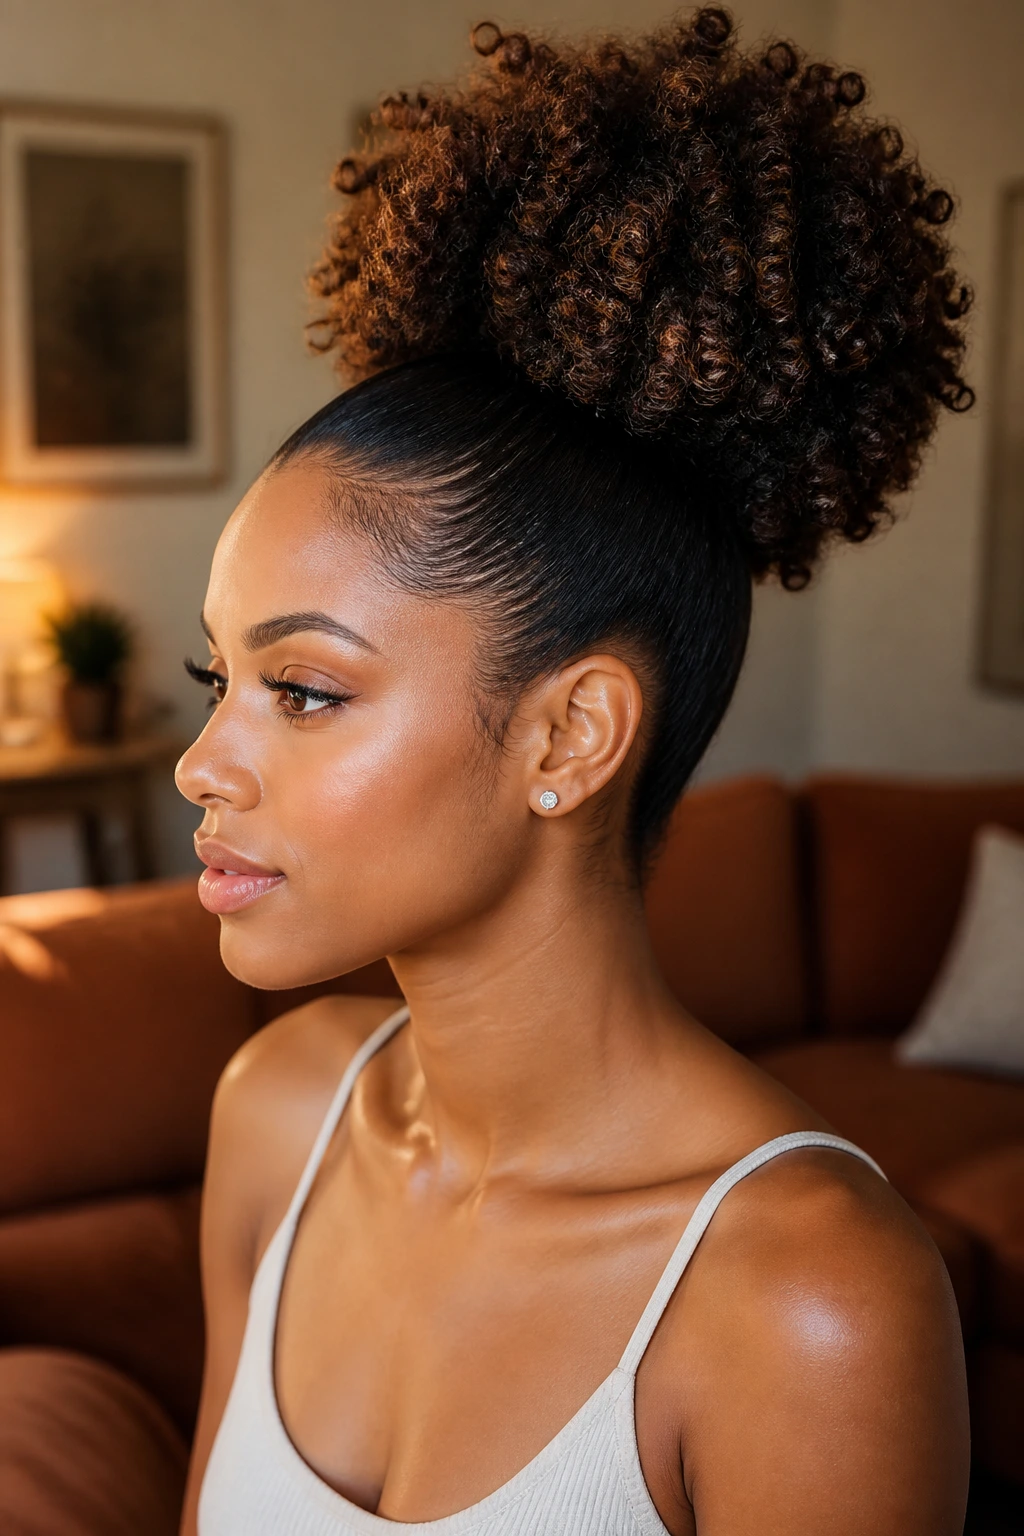
A puff ponytail is one of the best styles for curly and coily hair because it keeps the texture where it belongs while smoothing the part line and edges. The hair up top gets controlled; the puff does the flattering part. That division matters.
Brush or smooth the front with a light gel or edge control, gather the hair at the crown or mid-head, and secure it with a band that will not snag. Then shape the puff with your hands so it looks rounded instead of stretched. If the base is neat, the puff can be as full as it wants. That’s the whole game. You do not have to flatten your texture to tame frizz — you just have to guide it.
This style is especially useful on days when humidity is high and wearing the hair down would turn the length into a cloud by noon. A well-shaped puff ponytail keeps the hair off the neck and still lets the texture do the talking.
Why These Hairstyles Work for Frizzy Hair
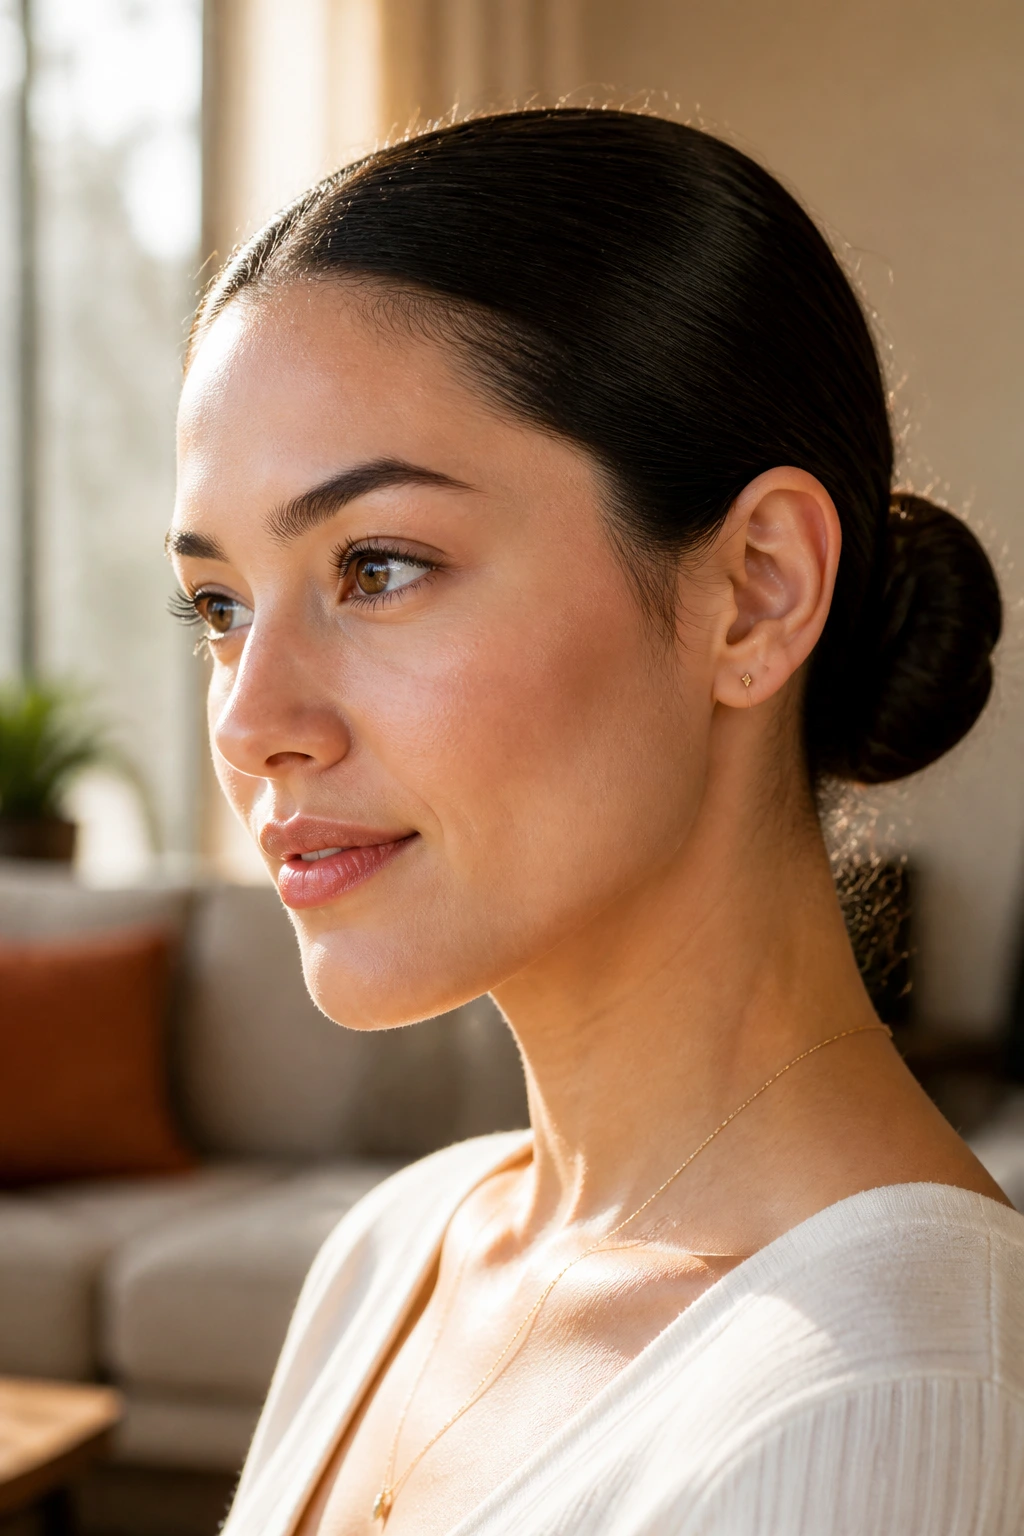
Frizz usually shows up when the hair cuticle is lifted, the strands are rubbing, or the air around the hair keeps changing shape faster than the style can keep up. A good frizz-control hairstyle fixes at least one of those problems, and usually two. Braids limit movement. Buns and knots tuck away the ends. Twists keep the surface aligned. Clips and scarves reduce friction against coats, collars, and seat backs.
That’s why these styles last better than loose hair. Loose hair has too many edges exposed. Every strand has room to swell, separate, and catch light in a way that makes the fuzz obvious. A compact style keeps the hair closer to itself, which gives you a smoother outline even when the texture underneath is not perfectly flat.
There’s also a psychological trick here, and I mean that in the least dramatic way possible. When a hairstyle has a clean shape, a little texture looks deliberate. A braid with tiny flyaways still reads as a braid. A bun with a bit of softness around the temples still reads as a bun. A wide, loose mess around the face reads as a bad hair day.
The best frizz-friendly hairstyles are not always the sleekest ones. They are the ones that can survive motion, weather, and time without turning into a shape you have to keep rescuing.
Tools That Make Frizz-Control Styling Easier
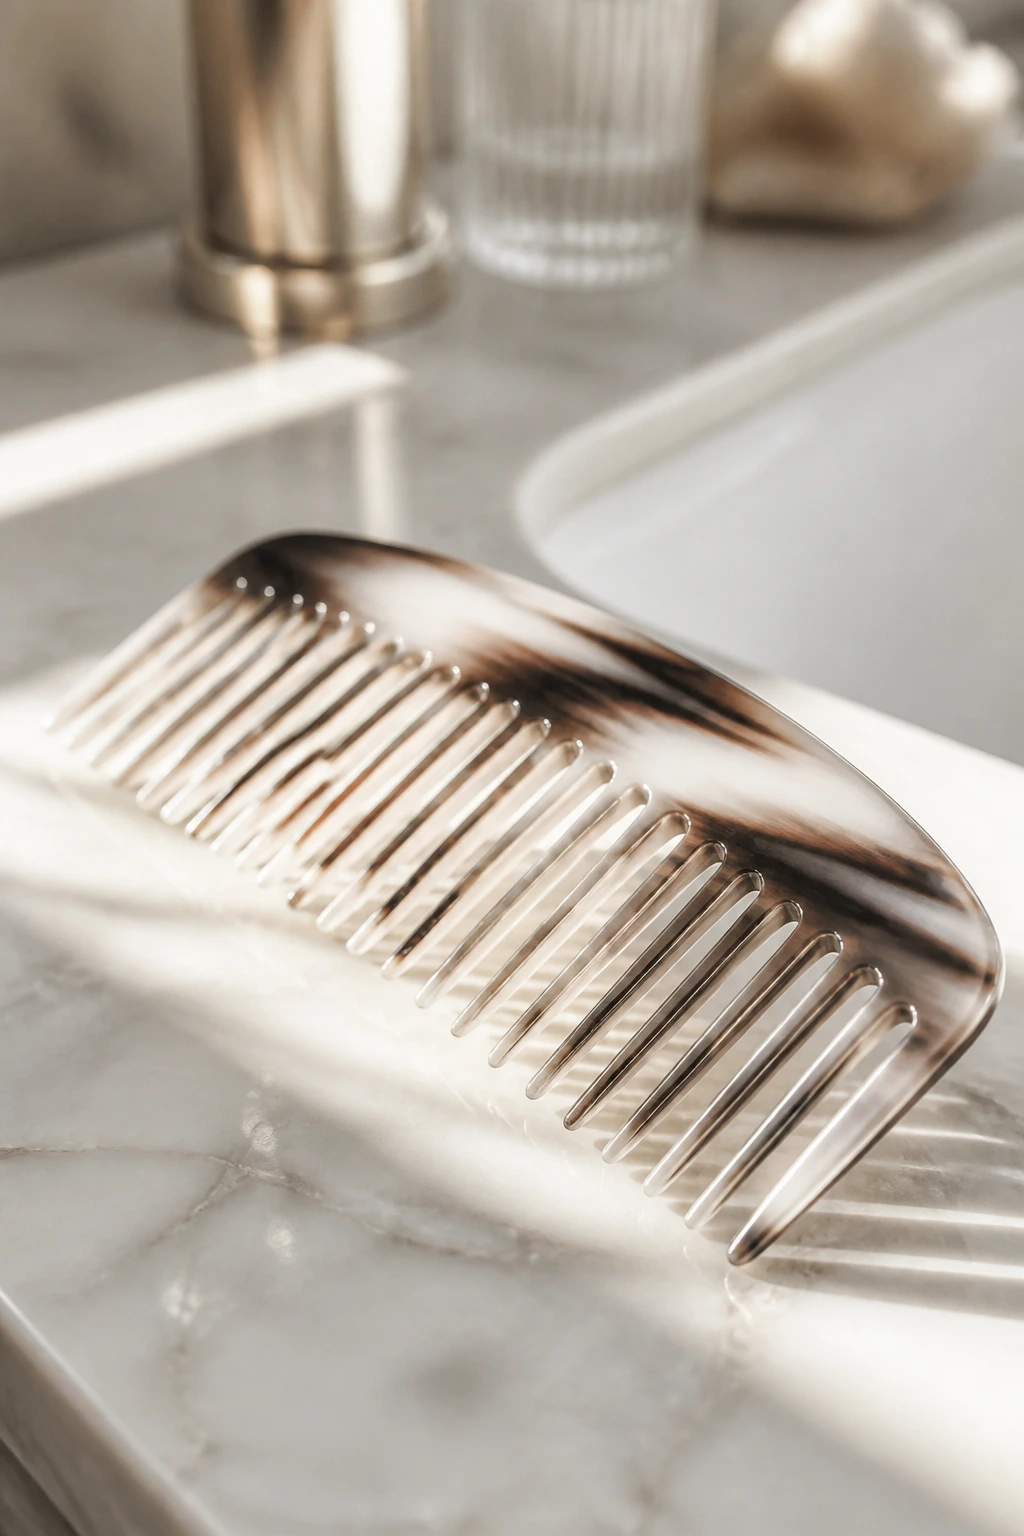
- Fine-tooth comb: Best for laying down the crown and drawing a part line that stays clean long enough to matter.
- Wide-tooth comb: Better for detangling curls or waves before you style, especially when the hair is damp.
- Boar-bristle brush: Helpful for smoothing the surface of the hair without roughing it up too much.
- Edge brush or clean spoolie: Good for coaxing down baby hairs and temple flyaways with a tiny amount of gel.
- Silk or satin scrunchies: They hold ponytails and buns without leaving the dents and snagging that rough elastics create.
- Clear no-snag elastics: Useful for braids, bubble ponytails, and half-up styles where a small tie needs to disappear.
- Bobby pins and U-pins: The real backbone of buns, rolls, and halo styles. U-pins are underrated for thick hair.
- Claw clip with strong teeth: A weak clip slides; a good one grips the hair from different angles and stays put.
- Microfiber towel or cotton T-shirt: Better than rough terry cloth for blotting moisture before styling.
- Diffuser attachment: Helpful if you want to keep curl pattern intact while drying the hair enough to style.
- Silk scarf or bonnet: Keeps the style from rubbing apart overnight.
- Lightweight serum or cream: Use it to smooth the outer layer, not to drown the hair.
Smart Product Picks for Frizzy Hair
Pick products that match the kind of frizz you actually get, not the kind you wish you had. If your hair puffs in humidity, a lightweight oil alone usually will not hold it down for long. You need some kind of control on the surface — a cream, gel, mousse, or smoothing balm — plus the right amount, which is usually less than people think.
For fine hair, start small. A dime-size amount of cream or a light mousse at the roots and mid-lengths can be enough. Too much product weighs the hair down and makes the style slide. Thick or coarse hair usually needs a little more body in the formula, not just more of the same product. A richer cream or firmer gel can help the style stay compact.
Pay attention to the feel after application. If your hair feels coated but still puffy, the product is too soft for your texture. If it feels sticky and stiff before you’ve even styled it, you’ve gone too far. A good frizz-control product should smooth the surface and still let the hair move. That middle ground matters.
Ingredients matter, but not in a mystical way. Silicone-based serums can help seal the outer layer when humidity is the enemy. Humectants like glycerin can work well in some conditions and swell the hair in others. Heavy oils can calm coarse hair, while lighter lotions tend to suit finer strands. The real trick is testing one product at a time instead of layering three and hoping for magic.
How to Wear These Looks in Real Life
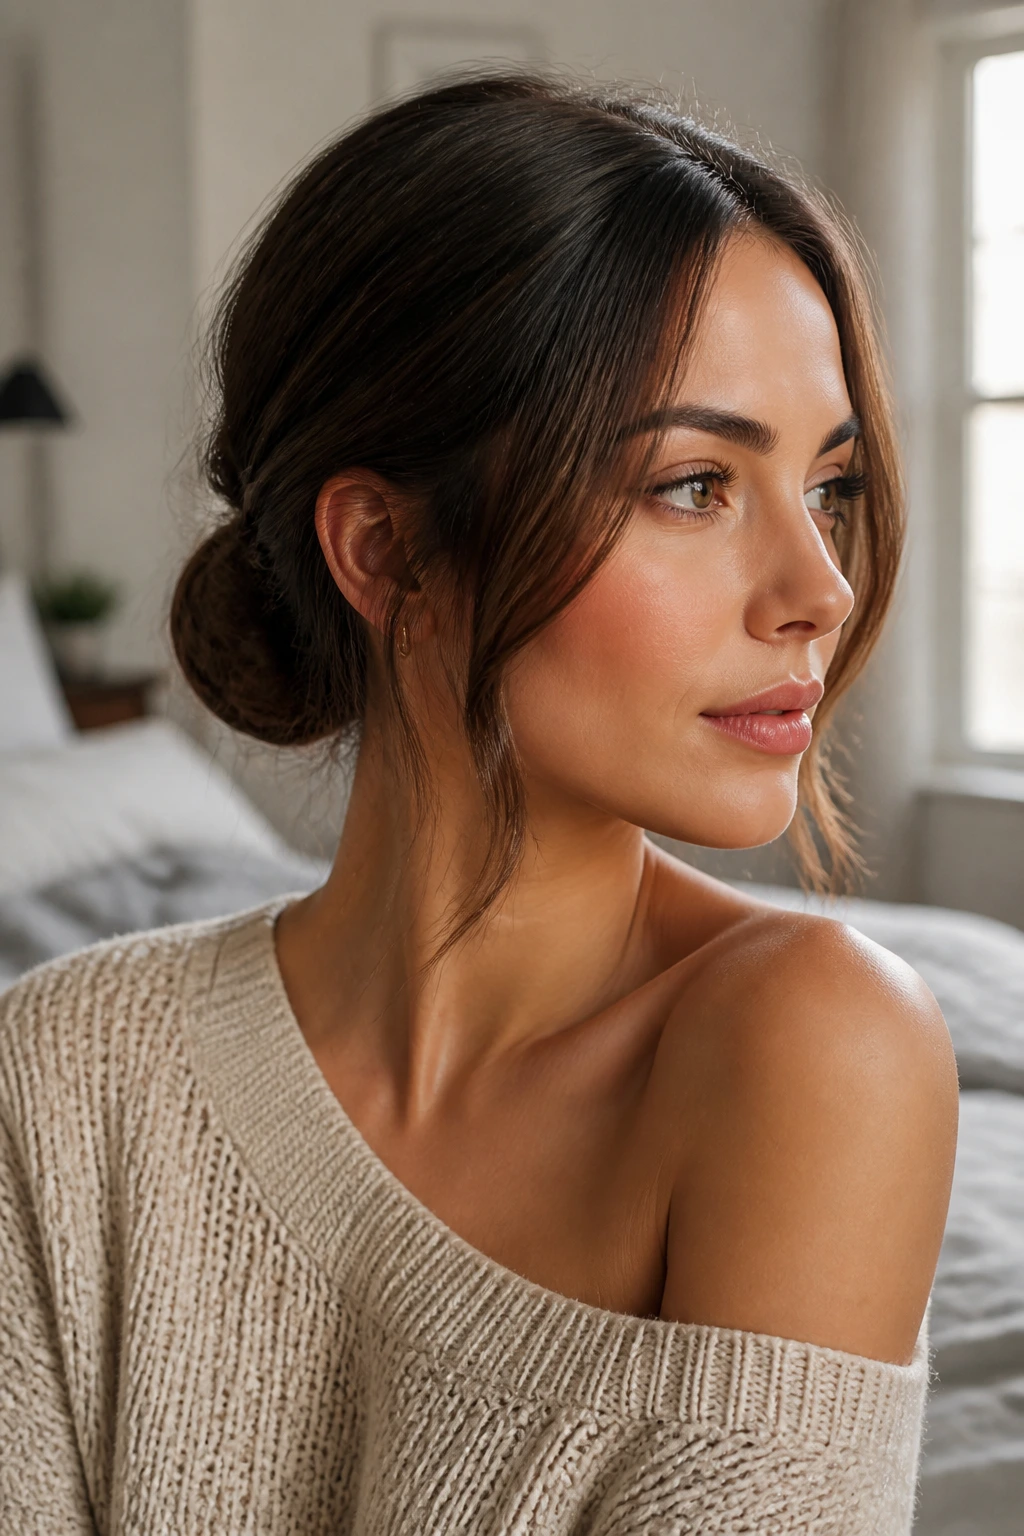
Presentation: Keep one part of the style visibly clean — the part line, the bun base, the braid crown, or the clip placement — and let the rest do less work. A style looks more polished when it has one neat anchor point instead of being smoothed everywhere at once.
Accompaniments: Small hoops, a collar that does not rub the nape, a scarf at the neck, or a jacket with a clean shoulder line all pair nicely with buns, braids, and tucked styles. Busy necklines can fight with a strong braid or clip, so it helps to think about the whole shape, not just the hair.
Portions: Thick hair usually does better in styles that divide the load — two braids, a low bun, a puff, or a stack of clips. Fine hair usually looks best when you keep the crown flatter and avoid making the style too tall or too loose. In both cases, the goal is balance. A style that fits the amount of hair on your head will hold better and feel better.
Beverage Pairing: Finish your hair before you stand under steam or hover over a hot drink. A mug of coffee can fog the front, and a quick walk outside with an iced drink in hand is less likely to undo the smooth work around the hairline.
Small Tweaks That Make the Style Look Intentional
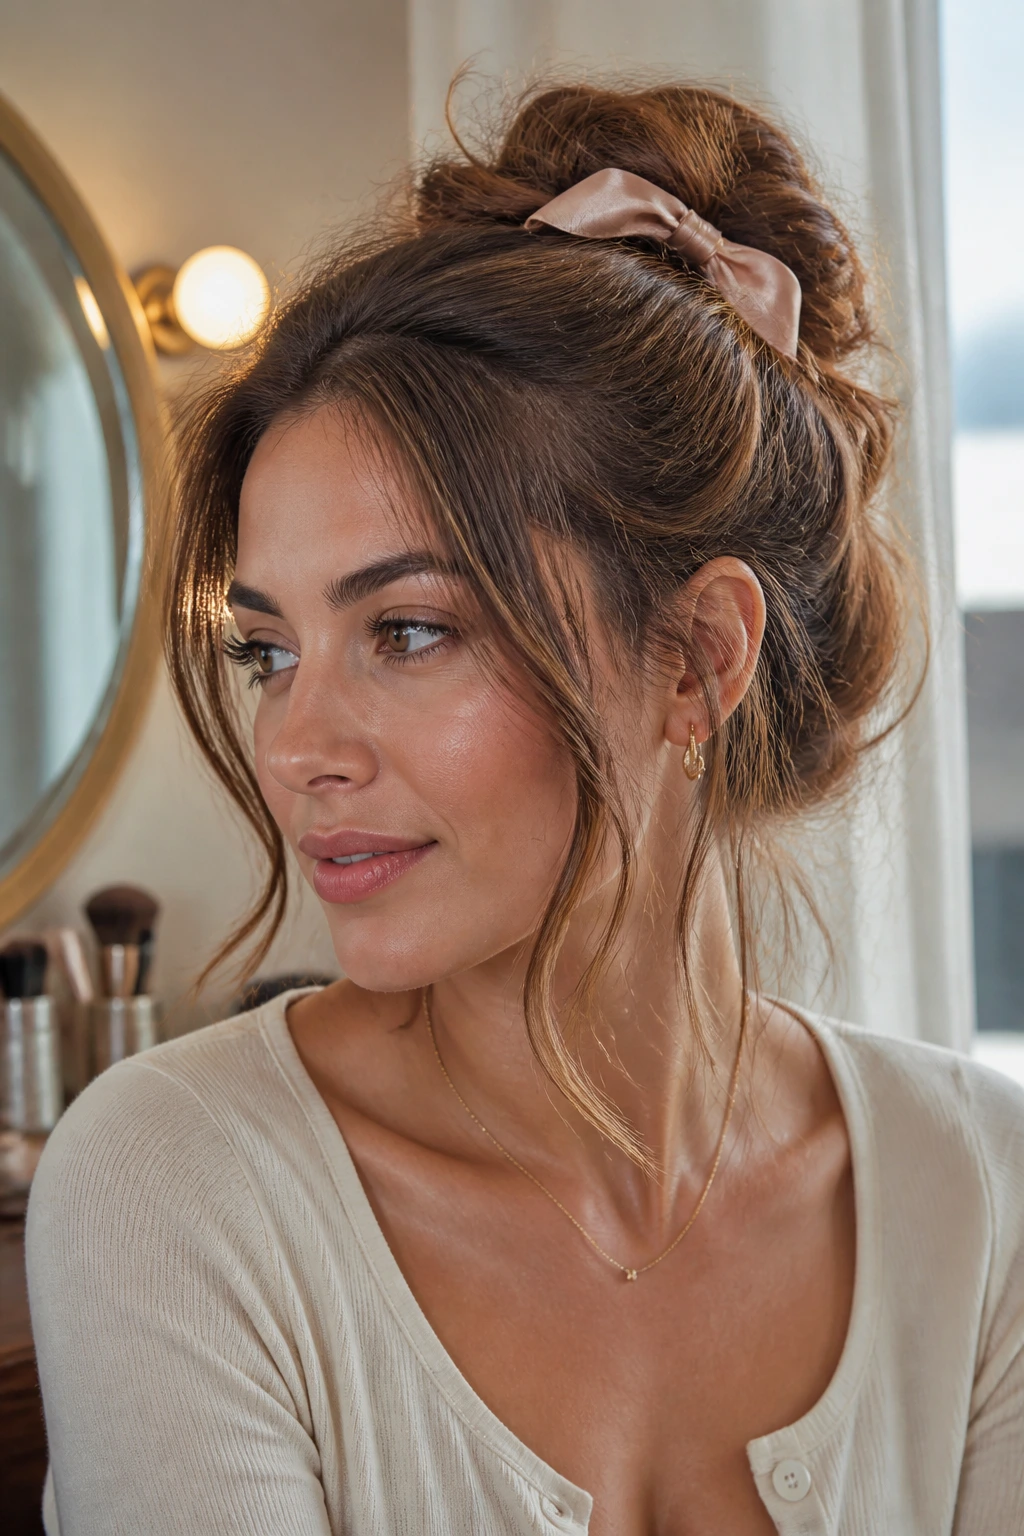
Frizz-Blocking Finish: After the style is in place, rub a pea-size drop of serum between your palms and skim it over the outer layer only. Do not rake it through the whole head. That just breaks up the shape and makes the ends look greasy while the crown still puffs.
Customization: Shift a middle part to one side, trade a plain elastic for a ribbon, or swap a bun for a knot that sits an inch lower. Tiny changes matter because they alter where the eye lands. A hairstyle that fights frizz does not need to be boring.
Serving Suggestions: If the front looks a little too strict, leave out two thin face-framing pieces and bend them once with a low-heat iron or a quick pass of your fingers and a little serum. That softens the line without turning the whole style into a mess.
Make-It-Yours: Fine hair tends to want smaller sections and lighter hold. Coarse or curly hair usually needs firmer pins, more grip at the base, and less brushing after the style is set. Straight hair with frizz at the crown often benefits from a smoothing cream at the roots and a compact shape at the back. Same goal. Different path.
Sleep, Refresh, and Day-Two Survival
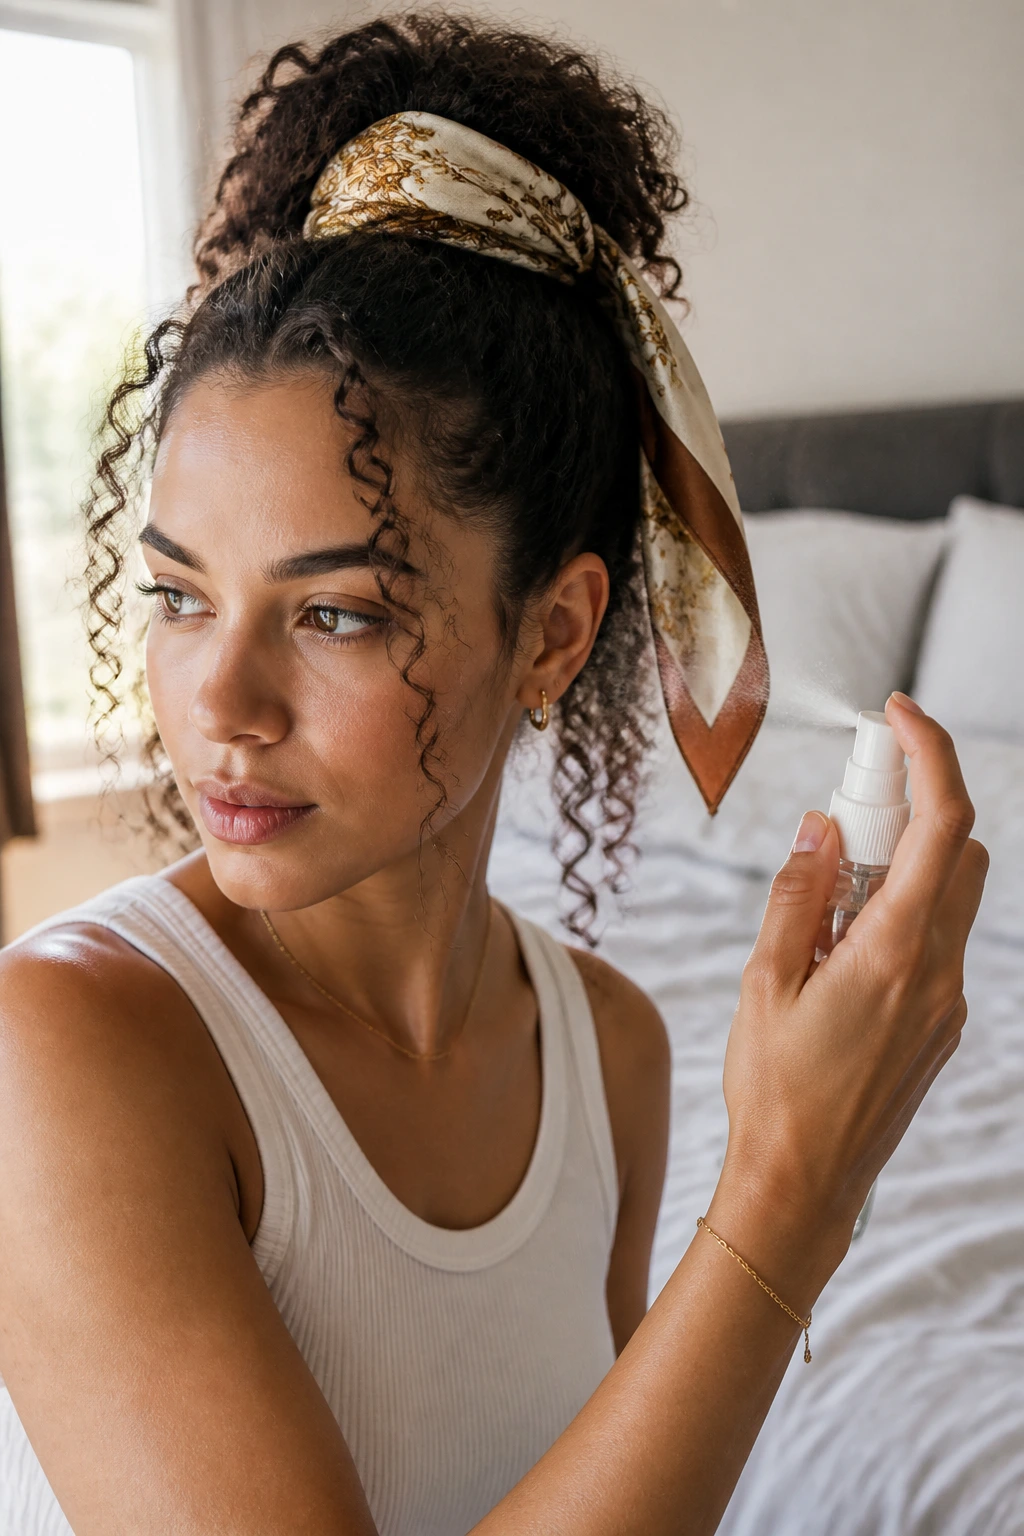
A lot of frizz-control styles fail because the person wears them beautifully for six hours and then treats sleep like it’s irrelevant. It isn’t. Cotton pillowcases rough up the surface. Loose bun loops flatten. Braids loosen at the ends. If you want a style to last, the night before matters almost as much as the morning.
Sleek buns and wrapped ponytails usually last one to two days if you protect them with a silk scarf or bonnet. A tiny bit of smoothing cream on the hairline the next morning is often enough. If the bun is sitting too high or too tight by day two, start over. Pushing it farther usually makes the crown fuzzier.
Braids and twists tend to last longer, often three to five days on medium-textured hair and a bit longer on coily hair if you keep the scalp clean enough. Refresh the surface with a light mist of water or leave-in, then smooth only the frizzy sections with your fingers. Don’t soak the whole head. That wakes up the frizz instead of calming it.
Twist-outs and puff styles need a little more respect. A twist-out usually looks best on day one or day two, before the separation gets too wide. A puff ponytail can last several days, but the hairline often needs a quick clean-up in the morning with gel and an edge brush. If the style starts asking for full repair every day, that’s your sign to change it, not keep rescuing it.
Common Mistakes That Make Frizz Worse
- Starting from soaking-wet hair: The outside dries before the inside, which leaves the top looking smooth and the core puffing out later. Let the hair get to damp or partially dry before you build the style.
- Brushing curls after they’ve dried: That breaks up clumps and makes the halo frizz worse. Detangle earlier, then stop touching the hair once the style is set.
- Using rough elastics and cheap clips: They snag the outer layer, split the style, and leave little broken points that stick up all day. Use coated ties, silk scrunchies, or clips with real grip.
- Piling product only on the surface: The top may look sleek for an hour, but the underneath still swells. Smooth product through the mid-lengths and ends first, then use the leftover amount on the crown.
- Pulling everything too tight: A style that hurts by lunch is too tight, full stop. It can also create more flyaways as the hair tries to escape the tension. Firm is enough.
- Choosing the wrong shape for the hair density: A tiny bun on very thick hair or a loose braid on slippery fine hair will unravel fast. Match the style to the weight and texture you actually have.
Style Swaps and Adaptations to Try
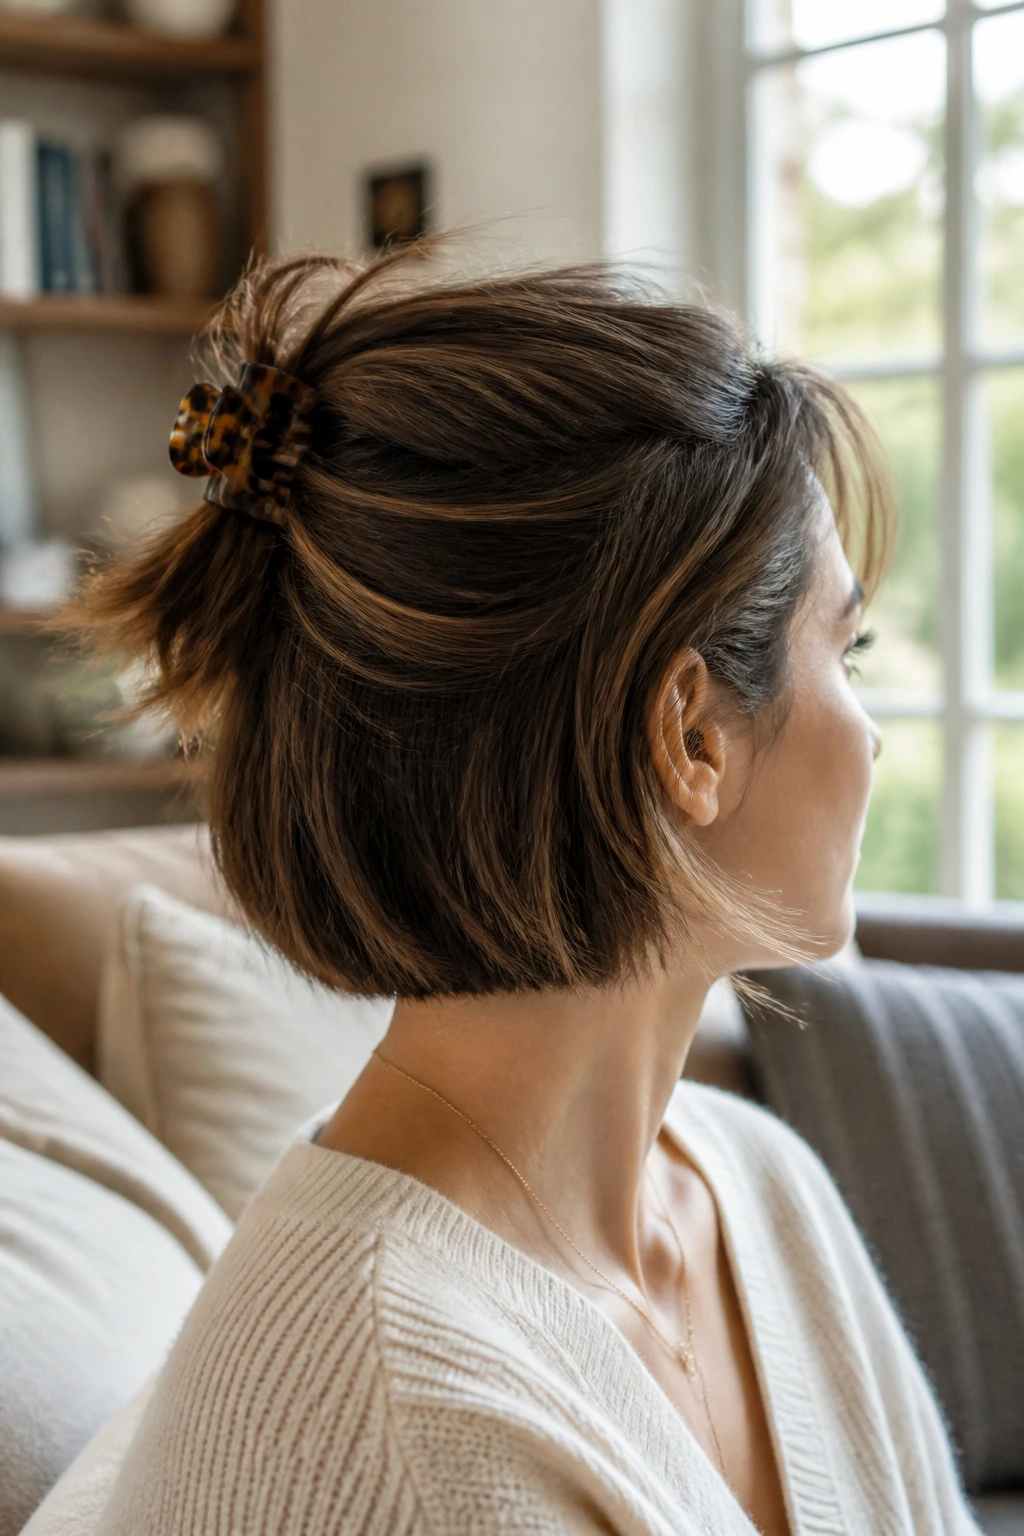
Short-Hair Shortcut: If your hair is too short for full buns or braids, lean on claw clips, tucked ends, mini twists, and half-up shapes. The goal is not to force length that isn’t there. It’s to create a neat outline where frizz usually takes over.
Humidity Armor: In damp weather, choose low buns, tight braids, scarf wraps, and styles that keep the ends tucked. Use a smoother with silicone if your hair tolerates it, and skip heavy creams that swell the hair in moisture. You want less exposure, not more shine.
Low-Tension Version: If your scalp gets sore or your hairline is fragile, loosen the base and move the control farther back. A braided ponytail, loose chignon, or half-up twist usually gives enough order without a headache attached.
Curly-First Finish: For waves, curls, and coils, use styles that shape the texture instead of flattening it. A puff ponytail, defined twist-out, halo braid, or pinned-up curls can keep frizz controlled while still looking like your hair. That matters. Nobody needs to iron out their whole texture just to look polished.
Office-Safe Polish: Keep the part clean, the base smooth, and the accessory small. A satin ribbon, slim clip, or wrapped elastic tends to read more composed than a giant claw clip or a loud scrunchie.
Weekend Fast Track: When you need to leave in ten minutes, choose a low bun, half-up twist, or scarf-wrapped ponytail. These are forgiving. They let you hide a rough crown without pretending you spent half an hour styling.
Frequently Asked Questions
Which hairstyle holds up best in humid weather?
Braids, low buns, and tucked styles usually last the longest because they expose less hair to the air. A French braid or sleek low bun will often beat a loose ponytail by a wide margin when the weather turns damp.
Can I do these styles on second-day hair?
Yes, and in many cases second-day hair is better. It has a little grip, which helps braids, buns, and clips hold without sliding all over the place.
What if my hair is too fine for buns and braids?
Use smaller sections and lighter product, then lean on styles that create shape without needing a lot of bulk, like a half-up twist, low knot, or wrapped ponytail. Fine hair usually needs grip at the base more than weight at the ends.
How do I keep flyaways down without looking greasy?
Use a tiny amount of serum or gel on a spoolie or your fingertips and smooth only the outer layer. If the product is shining all the way through the style, you used too much.
Are these styles safe for fragile or color-treated hair?
They can be, if you keep the tension moderate and avoid rough elastic bands. Fragile hair usually does better with soft scrunchies, fewer heat tools, and styles that are anchored with pins instead of yanked tight.
Can short hair actually work with frizz-control styles?
Absolutely. Short hair often does best with tucked bob styles, mini clips, half-up shapes, and side parts. You just need smaller tools and a cleaner finish around the edges.
How do I refresh a braid or bun the next day?
Smooth the hairline with a damp fingertip or a small amount of serum, then tighten only the loose pieces. If the style is unraveling at the base, re-pin that spot instead of remaking the whole head.
What should I do if my style collapses halfway through the day?
Do not keep tugging at the same pieces. Add one or two pins at the weak point, smooth the outer layer, and stop there. Over-fixing usually makes the frizz worse than the original problem.
Styles Worth Keeping Around
Frizz is annoying, but it isn’t random. Once you notice where your hair puffs first, the right style starts to feel obvious: keep that spot controlled, keep the ends contained, and stop asking loose hair to survive weather it was never going to enjoy.
A good rotation helps. One sleek style for the days you want everything close to the head. One braid for the days you need staying power. One texture-friendly option for the days you would rather work with your hair than flatten it. That mix covers most real mornings, which is the part that matters.
Pick the styles that fit your hair’s actual behavior, not the version of it you wish showed up on command. Then keep the pins, elastics, and smoothing cream where you can reach them. The next time the air turns humid or your crown starts to fuzz out, you’ll already have a plan.
