



Updos for curly hair work best when you stop trying to bully the texture into acting straight. The curl pattern is the architecture here. Once you work with it instead of against it, a bun stops looking like a panic move and starts looking deliberate, even a little sculptural.
The trick is not “make it flat.” It’s “place the volume where you want it.” Curls shrink, puff, and bend in ways straight hair never will, which is exactly why the right updo can look fuller, softer, and more expensive than the same style on other textures. A few pins in the wrong spot, though, and the whole thing can tip into lopsided. I’ve seen perfectly good curls flattened by too much brushing and too many rubber bands. Such a waste.
Give curly hair a soft grip, a little tension at the base, and room for the ends to do their own thing, and the style holds. That’s the heart of these updos for curly hair: not control, but shape. Not stiffness, but intention.
Why These Curly Updos Earn Their Keep
-
Texture does the heavy lifting: Curls already have built-in volume, so these styles rely on shape and placement instead of hours of teasing or heat styling.
-
Second-day hair is a gift: A little natural oil and a bit of grip at the roots make many of these updos stay put better than freshly washed curls.
-
The range is real: You’ll find polished buns, loose knots, ponytail-based styles, and protective looks that tuck away the ends when your hair needs a break.
-
Pins beat brute force: Bobby pins, U-pins, and satin scrunchies do more for curly hair than one tight elastic ever will.
-
You can dress them up or down: The same base style can read gym-day casual or event-ready just by changing the part, the finish, or the accessory.
-
Curl health stays in the picture: Several of these styles keep manipulation low, which matters when your hair feels dry, fragile, or frizzy around the edges.
1. The Pineapple Puff
The pineapple puff is the curly-haired answer to “I need this up in under two minutes.” It sits high, lets the curls spill upward instead of dragging down, and keeps that crown-of-volume look that straight hair can only fake with a lot of teasing. On the right head, it looks playful and clean at the same time.
Tie it with a satin scrunchie or a soft coil tie so the base doesn’t flatten into a dent. Then fan the curls gently with your fingers, not a brush. A small toothbrush or edge brush can smooth the hairline if you want the finish to look more polished, but don’t overdo the perimeter. The whole point is that the curl cloud stays visible.
Best when you want height fast
This style is strongest on medium to long curls, especially 3B to 4A textures that already have spring. If your hair is shorter, keep the puff a little lower and let the sides frame your face. That keeps it from looking like the top got cut off.
2. Low Twisted Chignon
A low twisted chignon on curly hair has a very different feel from the sleek version you see on straight textures. The twist gives the bun a soft ridge and helps hide the fact that curly hair never sits perfectly flat. That’s the charm of it. It looks finished without looking fussy.
Gather the curls at the nape, split the ponytail into two sections, and twist each one before wrapping them into a low knot. Use bobby pins in a crisscross pattern so the weight sits against the scalp instead of pulling downward. If a few curls escape at the nape, let them. The style gets better with a little movement.
3. Curly High Bun with Face-Framing Pieces
A high curly bun is the style I reach for when the hair needs to be out of the way but I still want the texture to read from across the room. The bun sits up top, usually loose enough that the curls can keep their shape, while the front pieces soften the whole thing. Without those tendrils, the look can get too severe.
Pull the hair into a high ponytail with a satin scrunchie, twist the length, and coil it loosely around the base. Pin from underneath, not just the top surface, or the bun will sag by lunch. Leave two front sections out before you tie up the ponytail; those pieces keep the face from looking boxed in.
A touch of gel at the hairline helps if you want the crown smoother. Don’t plaster it down. Just tame the fuzz.
4. Braided Crown Halo
The braided crown halo works because it gives curly hair a frame before the rest of the style is even finished. You braid along the perimeter, pin the ends, and let the curls inside the halo stay soft and airy. It’s one of those styles that looks complicated from a distance and pretty manageable in your own mirror.
It’s especially good when your curls are a little stretched from the week and need a shape that doesn’t depend on perfect ringlets. The braid handles the structure; the loose curls handle the volume. If your hair is layered, tuck the shorter pieces into the braid as you go instead of fighting them. They’ll stick out if you pretend they don’t exist.
5. Side-Swept Pinned Cascade
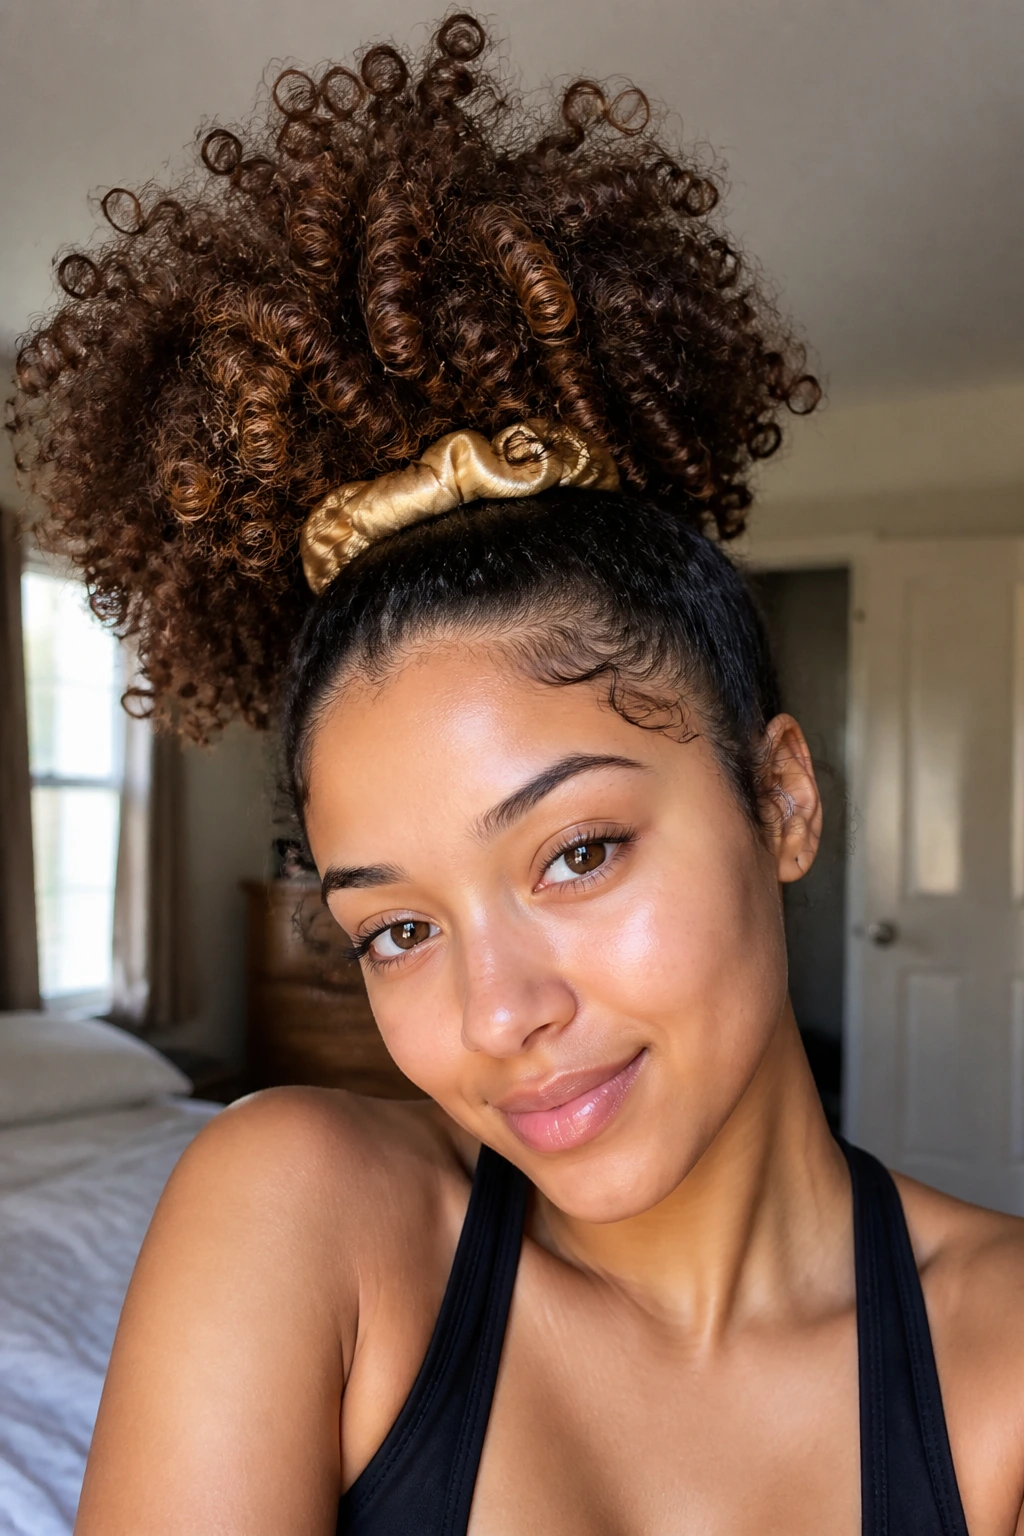
This one has a little old-Hollywood drama, but curlier and less rigid. Sweep the hair to one side, pin the top section back, and let the remaining curls fall in a soft diagonal line. It’s not really a “formal” style unless you want it to be. It can also read as deliberately undone, which I like a lot more.
Use pins that match your hair color if you want the illusion to stay clean. Work in layers: pin the top at the temple, then anchor the lower sections near the ear and at the nape. If your curls are thick, do not try to force every strand into the same direction. Let the bottom layer keep some width.
6. Loose Top Knot with Soft Ends
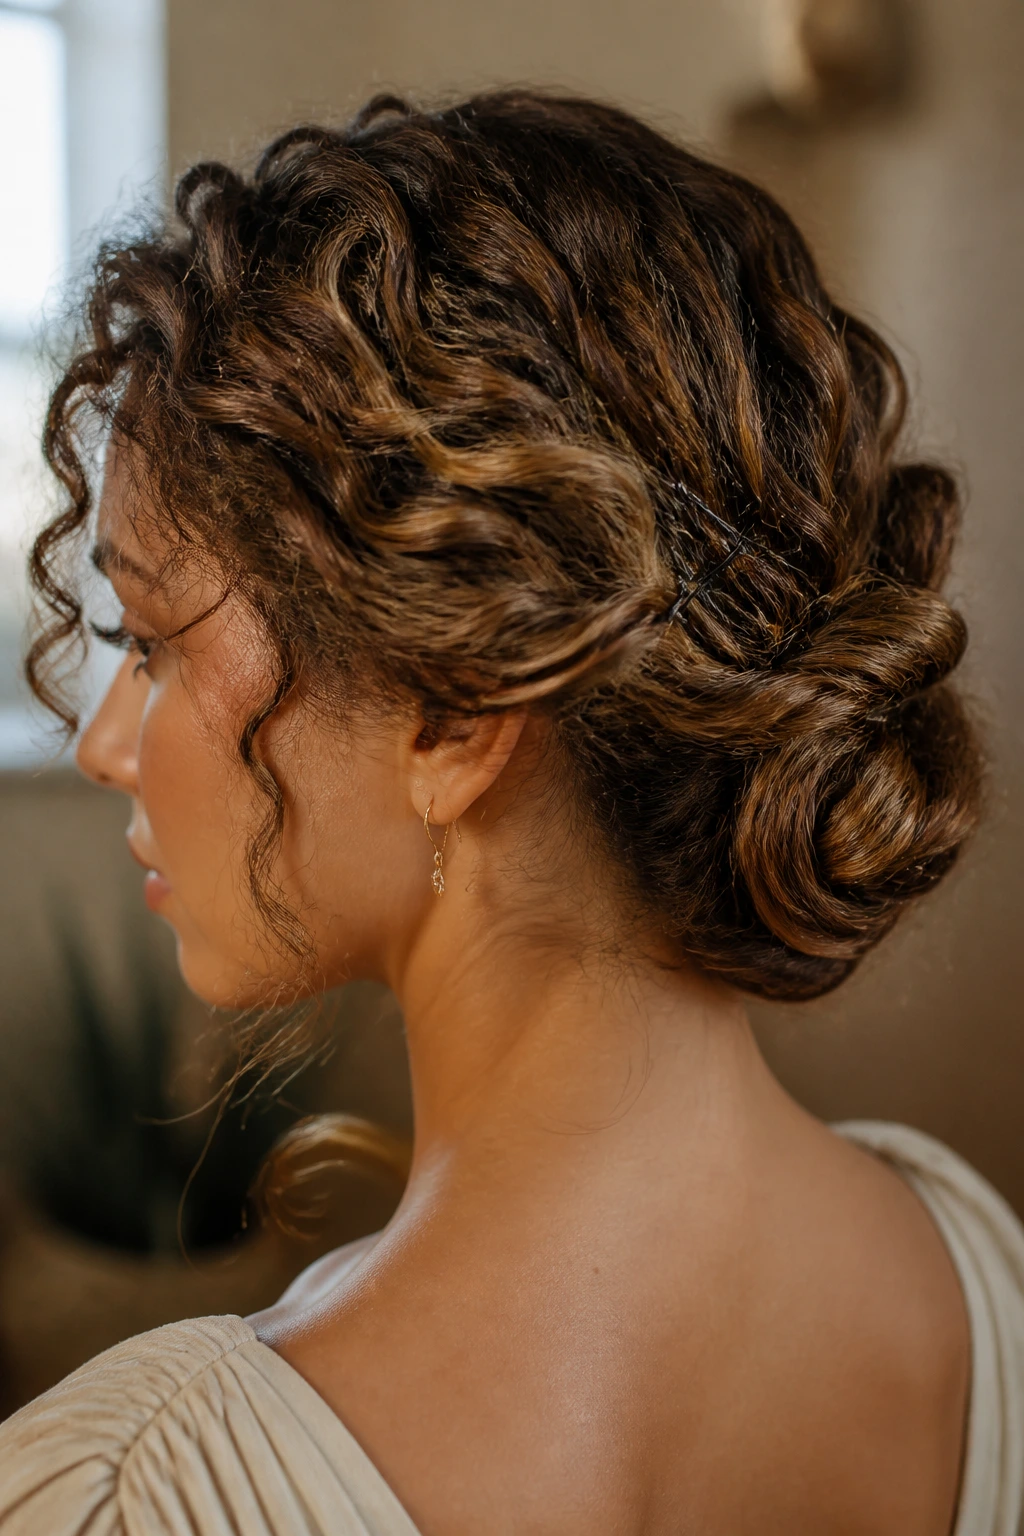
A loose top knot gives curly hair room to breathe. The knot sits high enough to keep the neck clear, but the ends are not tucked so tightly that the curl pattern gets crushed into a hard ball. That slight messiness is the point. Too much polish and you lose the shape that makes curly hair look good in the first place.
This version works best when you twist the ponytail once or twice, then pin only the heavy points. You want the knot to feel secure, not strangled. If the ends poke out, leave them. A few visible coils make the style look intentional rather than over-managed.
What makes it different
Unlike a sleeker top knot, this one depends on texture at the edges. That means less brushing, fewer pins, and fewer little dents from tight elastics. It’s the kind of style that forgives a bend in the road. Or three.
7. Faux Hawk Puff
The faux hawk puff has attitude, and curly hair gives it the height it needs without extra teasing. You section the hair into a central ridge of puffs or gathered coils, then keep the sides pinned closer to the head. The result is sharp in silhouette but still soft in texture.
This style shines on dense curls because the center line can carry the shape. If your hair is finer, use smaller gathered sections and more pins to keep the ridge from slumping. A little edge smoothing at the temples helps, but only a little. The style should still look like curls, not a shell.
Best for
- Thick, springy curls that can support a vertical shape.
- Medium-length hair that wants height without a full bun.
- Days when you want something bolder than a ponytail.
8. Rope-Twist Halo
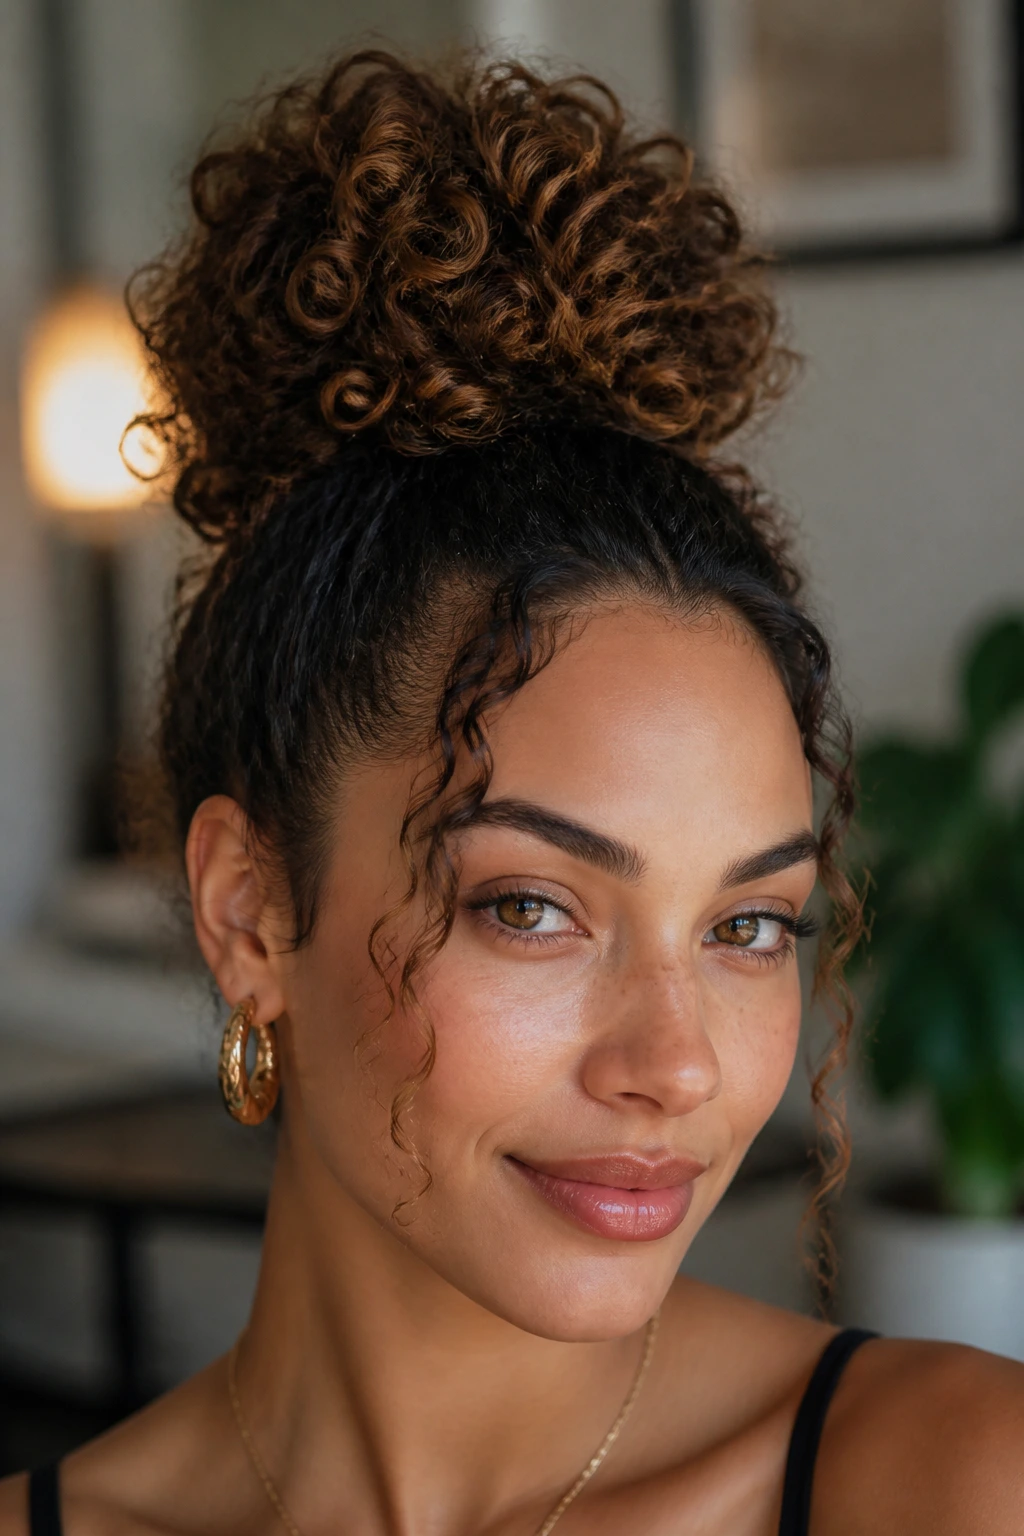
A rope-twist halo is one of the easiest ways to make curly hair look more put together than it really is. Two twisted sections run around the head like a soft crown, and the remaining curls can stay tucked, loose, or pinned low depending on how formal you want it to feel. It’s clean without being severe.
The twist itself should stay snug enough to hold but not so tight that the root gets pulled. Curly hair hates that kind of tension, and the scalp will tell you quickly. Pin the twist every few inches, especially behind the ears where styles tend to slide. If the last inch or two of your hair won’t cooperate, tuck it under and pin it flat. Nobody needs to see every ending.
9. Sleek Low Bun with Curly Ends
This style lives in the interesting middle ground between polished and textured. The roots get smoothed, the bun sits low, and the ends are left curly rather than hidden completely. That contrast is what gives it personality. It reads cleaner than a messy bun but softer than a straight-hair chignon.
The secret is to smooth only the top and sides, not the whole head. Use gel or cream at the crown, brush it back, then gather the length at the nape and twist it into a bun. Leave a few curls free at the base if you want the shape to look less severe. If the bun feels too tight, loosen it a bit with your fingers after pinning. Tiny changes matter here.
10. Curly French Twist
A curly French twist has a lovely built-in contradiction: it looks formal, but the texture keeps it from feeling stiff. The hair rolls upward at the back of the head, and the curls create depth inside the twist that straight hair has to fake. I prefer this version on hair that has a little stretch from a diffuser or a braid-out. The shape holds better.
Don’t try to smooth the curl pattern to death before you twist it. You want enough control to guide the section upward, but not so much that the style turns flat and slippery. Pin from the inside of the roll, not just across the outside seam, so the twist can actually carry its own weight. If a few curls spill at the top, let them. That softness saves the whole style.
11. Half-Up Twisted Crown
The half-up twisted crown is one of those styles that looks complicated until you break it into two simple twists. You pull back the top sections, twist them toward the back, and pin them together so they sit like a small crown while the rest of the curls stay free. It’s easy to wear and easy to adjust.
This is the style for when you want your curls on display but need the front off your face. It works on shoulder-length hair and longer, especially when the curls have some definition left from the last wash day. If your crown tends to puff out, anchor each twist with a pin crossed over the seam, not straight through it. Straight pins slide. Crossed pins stay.
12. Claw-Clip Coil Roll-Up
A claw-clip style sounds casual because it is, but on curly hair it can look surprisingly finished. Gather the curls into a loose roll, fold them upward, and clamp them with a strong claw clip that can actually hold the density. Cheap clips snap or slide. That’s the whole story.
The coils should stay visible around the clip, not buried under it. Let a few curls spill over the top or out the sides. That’s what keeps the style from looking like an accident on the way to the car. If your hair is very thick, twist the length once before folding so the clip has something to grip. Otherwise the weight just pulls free.
What to watch for
- Clip width matters more than decoration.
- Thick curls need a curved clip with a deep jaw.
- A little texture spray at the roots can help if the hair is freshly washed.
13. Bubble Ponytail with Curl Segments
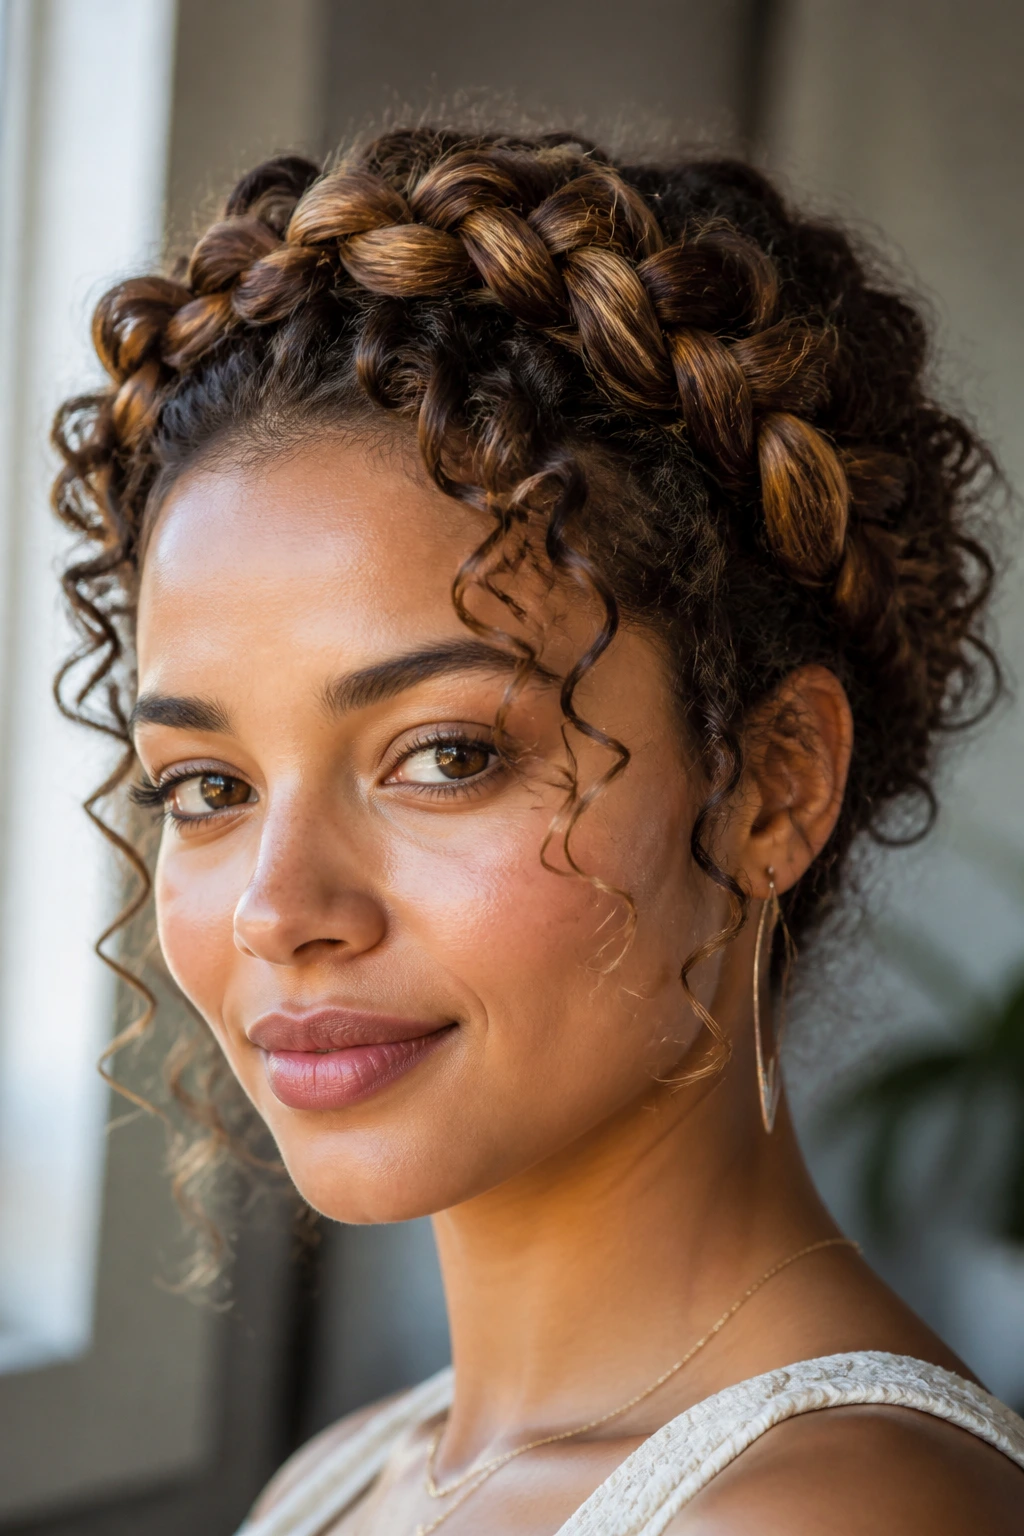
A bubble ponytail on curly hair looks better than on straight hair because the texture already breaks up the shape. You stack small elastics down the length of the ponytail, then gently pull each section outward to create those rounded “bubbles.” The curls fill in the gaps and make the style feel plush instead of rigid.
This one works best when the ponytail starts high or mid-height, where the sections can be seen. Use clear elastics or soft black ones if you want the structure to disappear. The trick is not to over-stretch the bubbles. Just puff them enough to show separation. If you tug too hard, the curl clumps fray and the whole thing goes fuzzy.
14. Braided Bun with Loose Ends
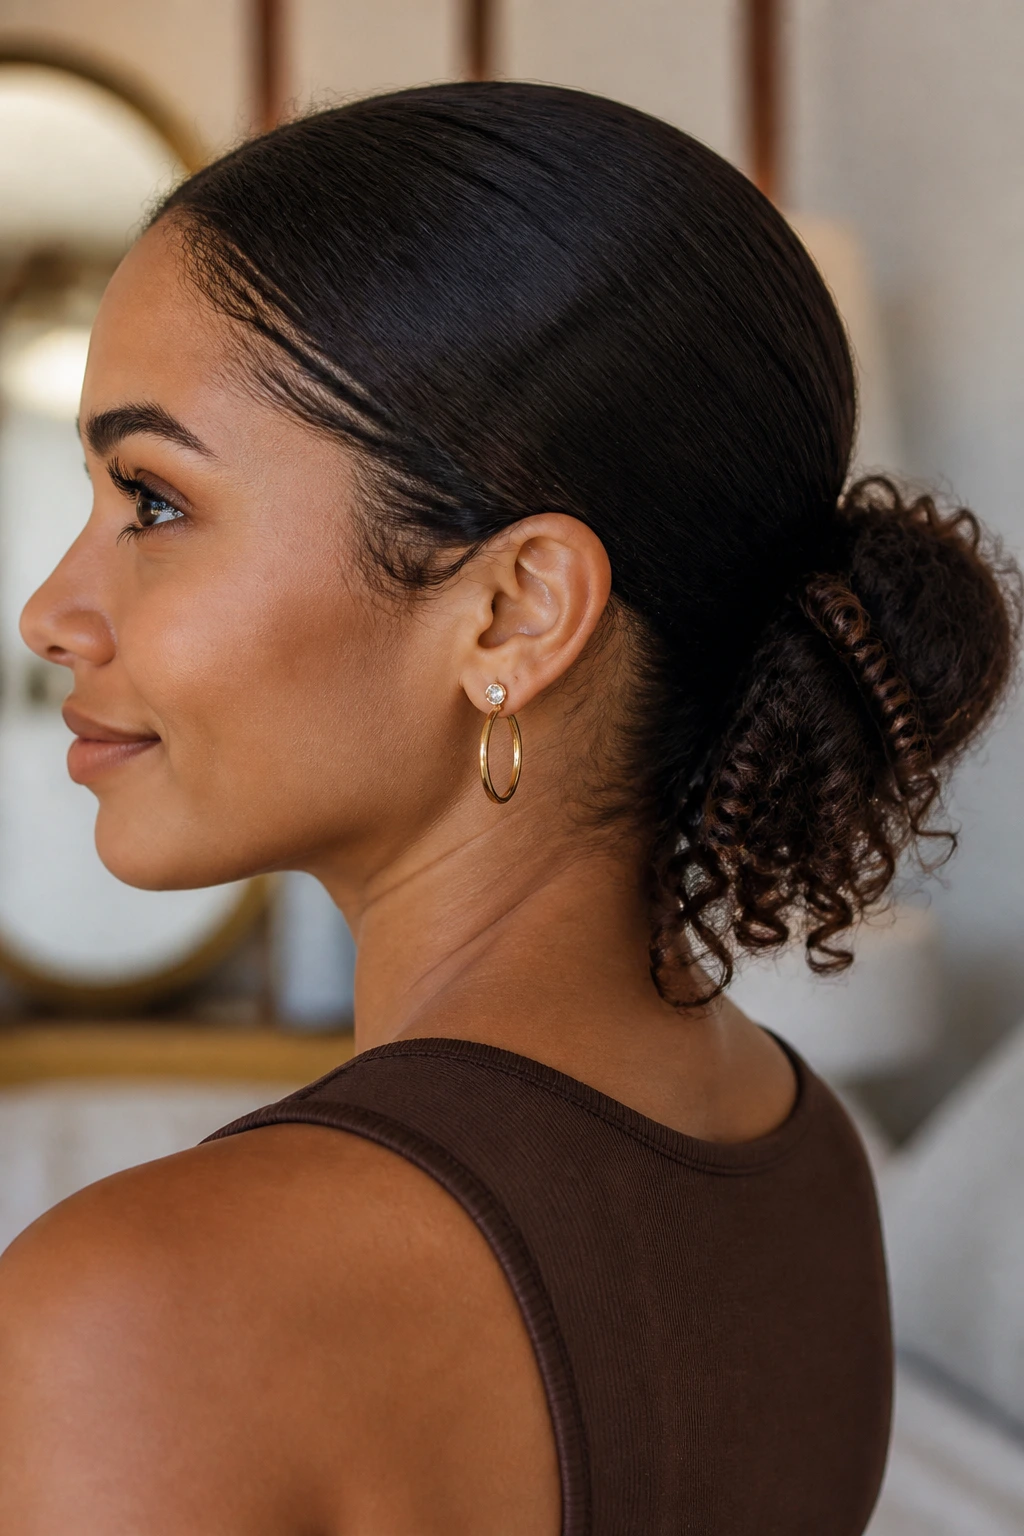
A braided bun gives you the comfort of a bun with a little more structure around the base. Braid the ponytail first, coil the braid into a bun, then leave the ends slightly loose if you want a softer finish. On curly hair, that loose end can look very good. It keeps the bun from reading too severe.
The braid also helps dense hair stay under control, which is useful if your curls have a habit of escaping every pin you own. Use a medium-hold cream or gel before braiding so the ends don’t fray immediately. Pin the bun close to the scalp, especially on the side opposite your part. Hair likes to lean. Don’t let it.
Hands-on note
If your curls are layered, braid from just below the crown instead of all the way from the roots. That makes the bun less bulky and keeps the shorter layers from poking out like tiny springs.
15. Tucked Under Roll
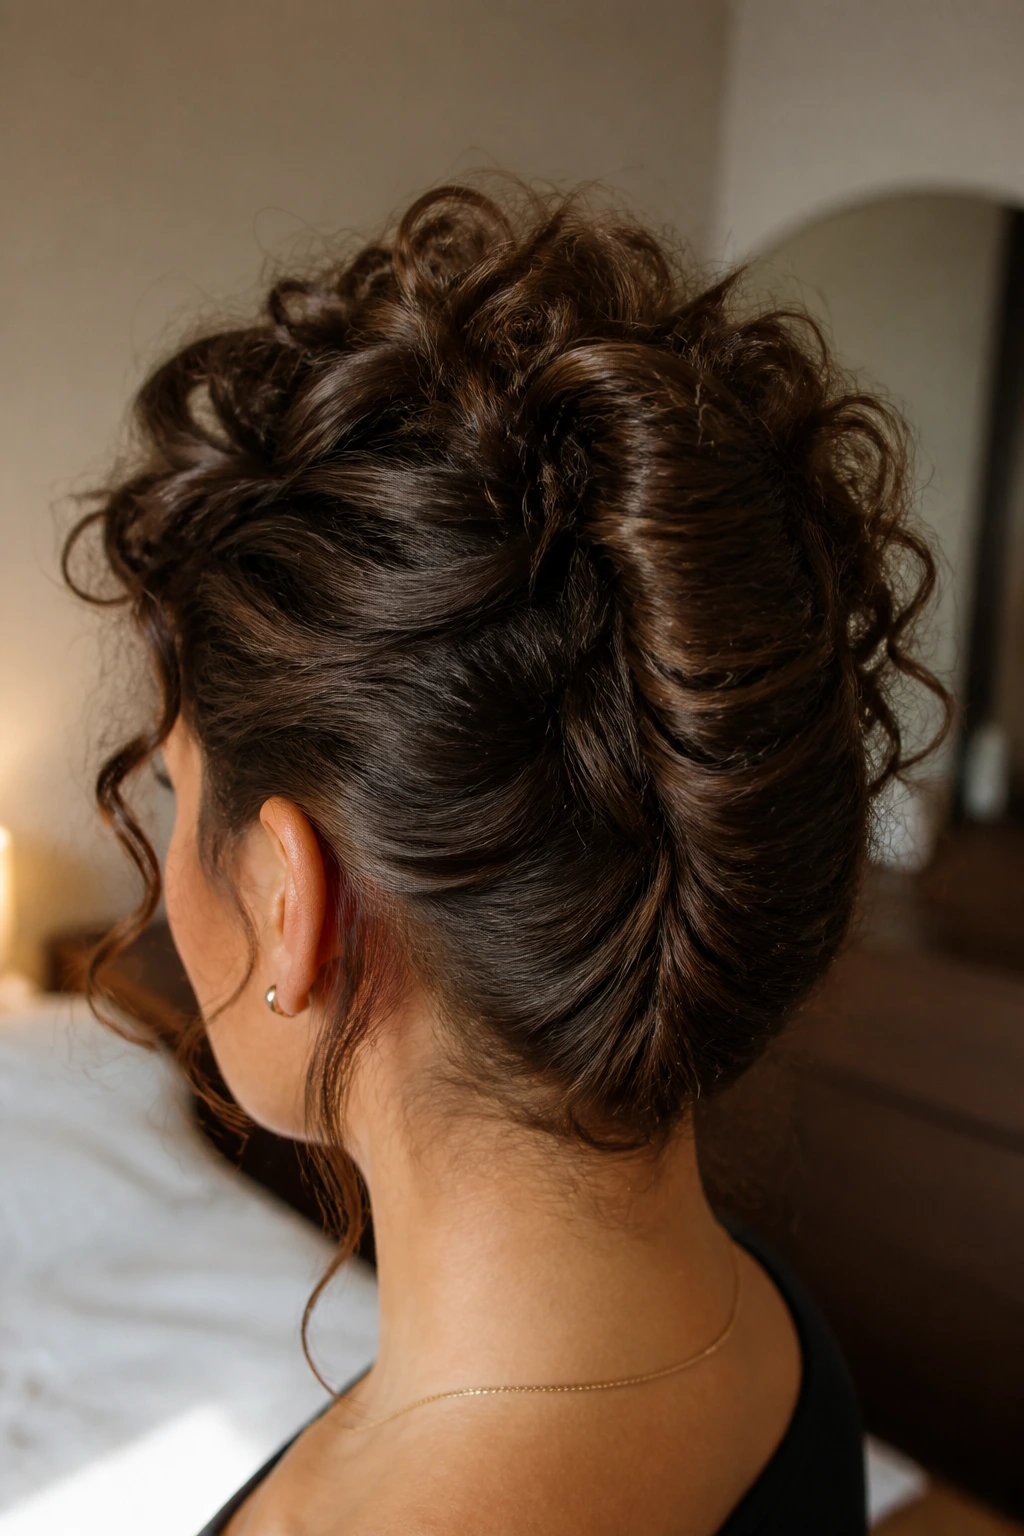
The tucked under roll is a quiet little style that can be dressed up with almost no effort. Gather the hair low, roll the ends upward and inward, and tuck them under so the curl ends disappear into the body of the style. The shape looks neat, but the texture still peeks through at the sides.
This works beautifully on medium-length curls that are long enough to fold but not so long that the roll gets unwieldy. Secure the roll with U-pins or a few long bobby pins from the nape upward. The key is to hide the hardware inside the fold. If the style loosens, don’t start over. Add one pin where the roll starts to gape.
16. Scarf-Wrapped Puff
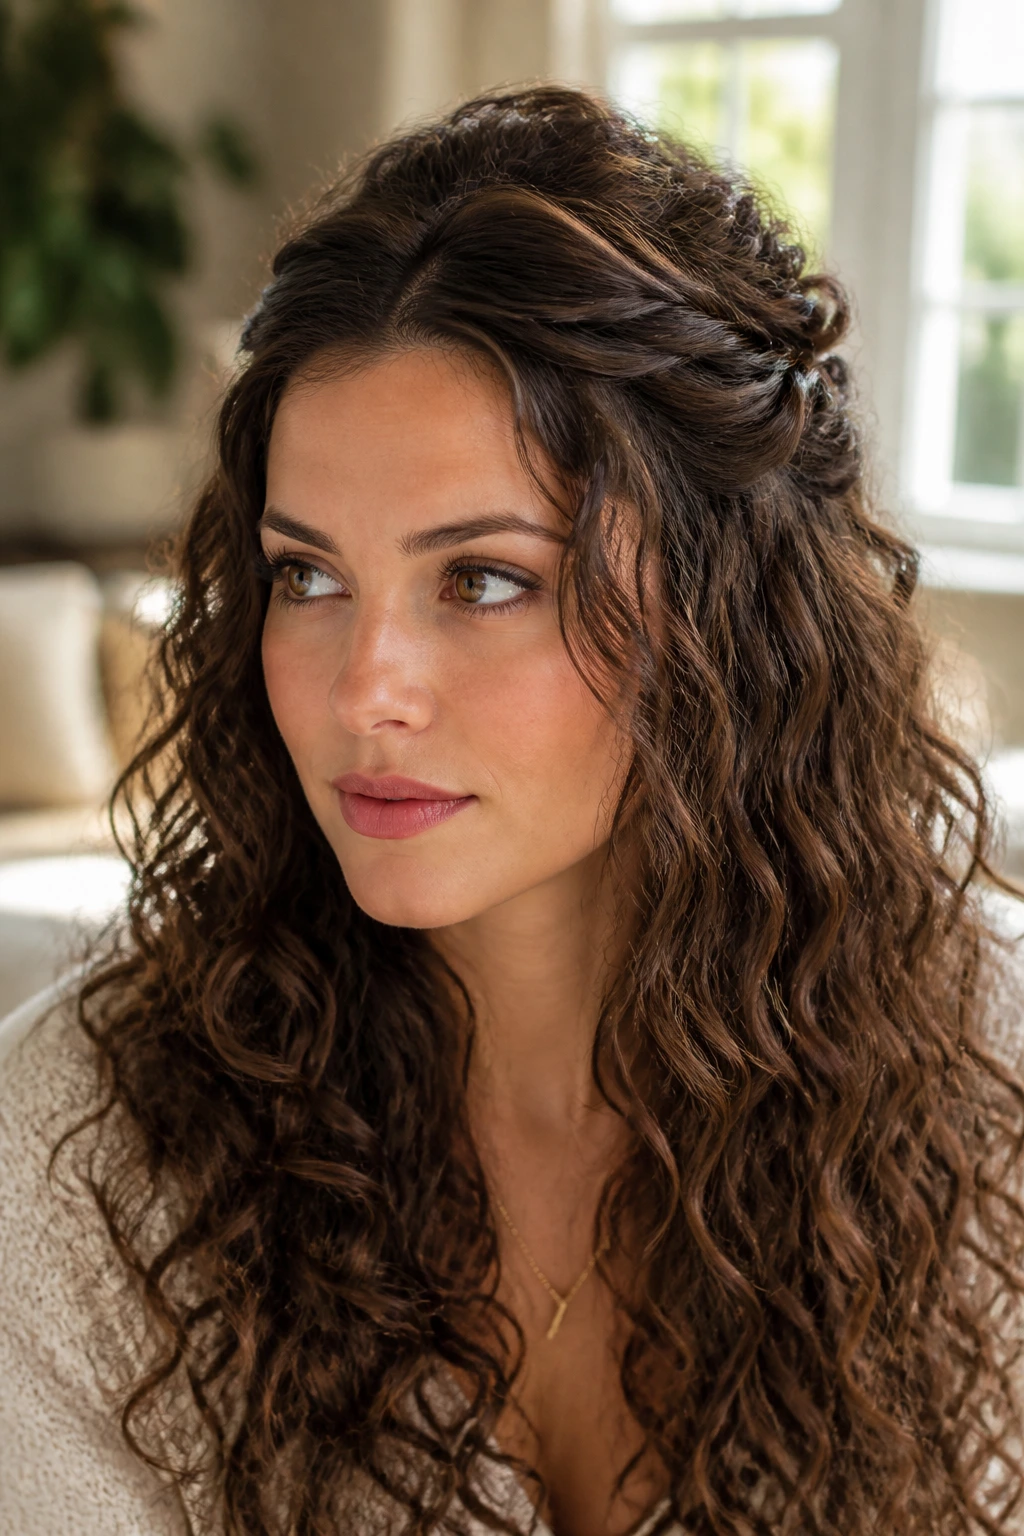
A scarf-wrapped puff is one of the easiest ways to make curly hair feel styled without spending half the morning in front of the mirror. The scarf gives you a clean line at the hairline, and the puff gives you the volume that curly hair does so well. It’s practical. It also looks like you meant it.
Choose a scarf with enough width to anchor the base without cutting into the curl shape. Tie it around the puff, then leave the tail visible or tucked, depending on how much color you want to show. I like this style when the roots are a little oily and the lengths still have life. The scarf hides the roots, and the puff does the rest.
17. Double Mini-Buns
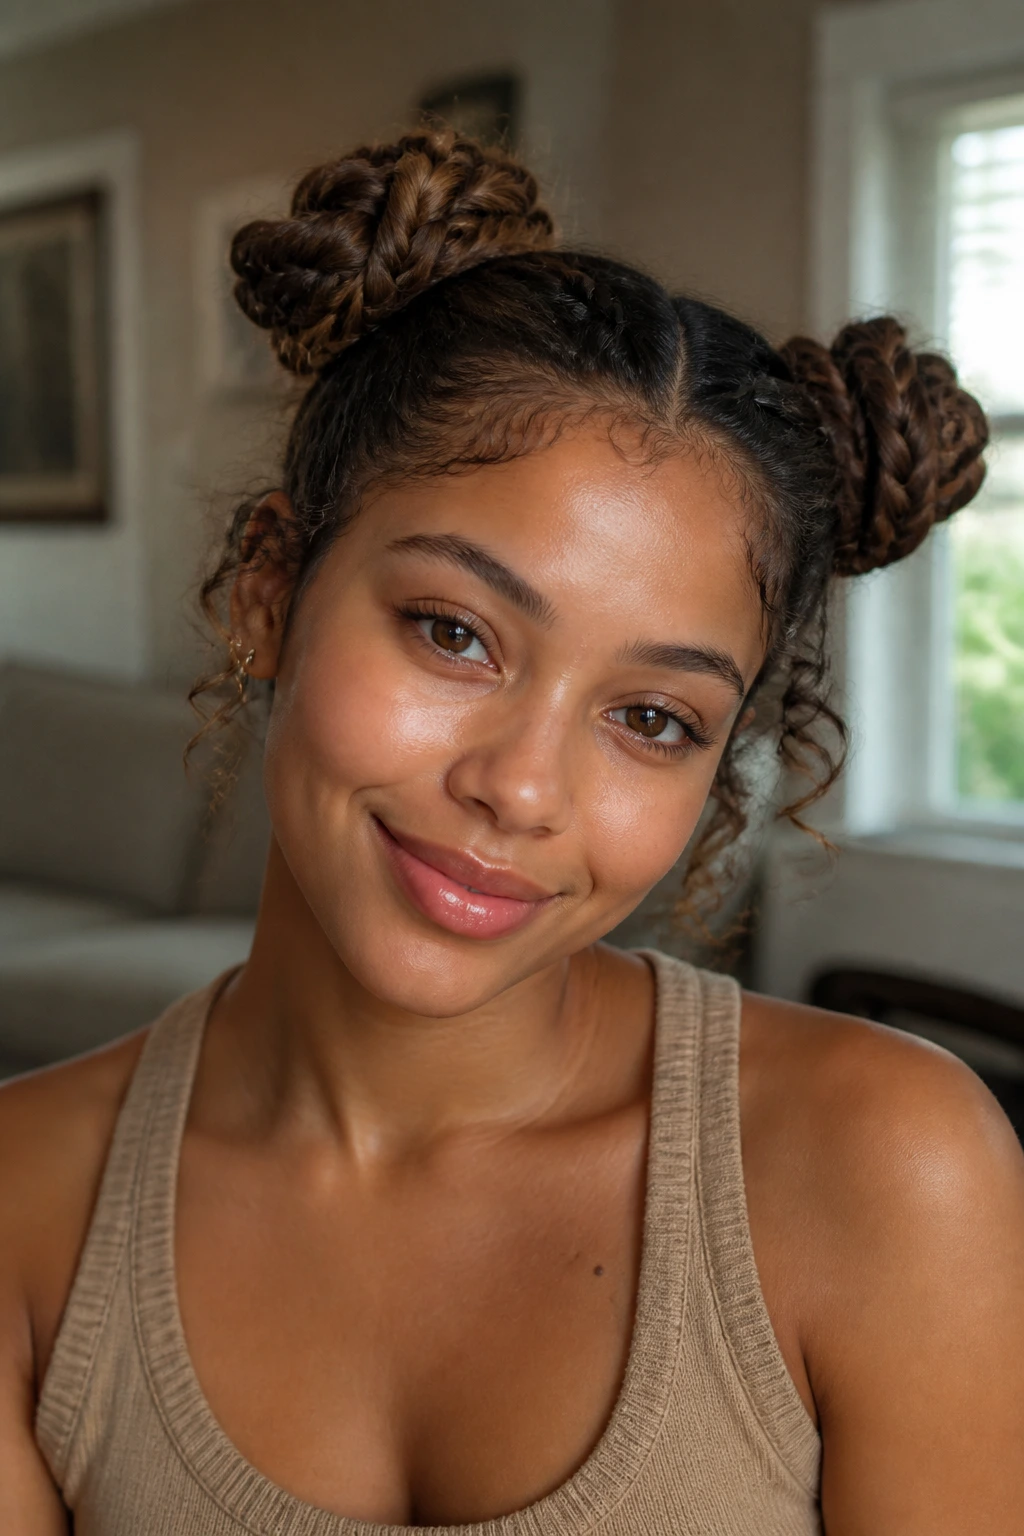
Double mini-buns are playful, but on curly hair they’re not childish unless you make them that way. The buns sit high or mid-height, one on each side, with the curl texture giving each one a soft, rounded edge. If you keep the parts clean and the bases neat, the style reads polished enough for a real outing.
This is a smart option for curls that are thick at the crown but shorter through the ends. You don’t need long hair to get the look. Divide the hair evenly, twist each side into a small bun, and pin the center of each one first. Then shape the perimeter. If one bun ends up slightly bigger, leave it. Perfect symmetry can look weird on curly hair anyway.
18. Knot-and-Pin Low Bun
The knot-and-pin low bun is one of my favorite no-nonsense styles for curly hair because it doesn’t pretend to be anything else. You twist the hair into a loose knot at the nape, then pin the crossing points until it holds. That’s it. The texture does the styling for you.
It works best when the hair has already been stretched a bit, either from braids, twists, or a prior blow-dry with a diffuser. If the curls are too springy, the knot can bounce out of shape. In that case, smooth the outer layer with a little gel before you begin. Don’t chase every curl. Just gather enough control to let the knot stay visible.
Quick reality check
This style can look minimalist on one person and messy on another. That usually comes down to pin placement, not hair type. Pin where the hair crosses itself, not where it looks convenient.
19. Curly Mohawk with Pinned Sides
A curly mohawk is bold, but not as wild as it sounds. The sides are pinned tight or slicked close to the head, while the center strip stays high and full. Curly hair gives the center plenty of lift on its own, which means you don’t need to backcomb unless the hair is very fine.
The contrast between flat sides and volume on top makes the shape read instantly. I like this for nights out, parties, or any day when a regular ponytail feels dull. Use a strong hold gel on the sides and a few extra pins behind the ears. The center should stay soft and springy. If it starts to collapse, add pins under the ridge, not on top of it.
20. Dutch-Braid Bun
A Dutch-braid bun gives curly hair a strong base and a neat finish without flattening the whole head. The braid starts at the scalp, rises slightly, and feeds into a bun at the back or top. That raised braid line gives the style some architecture, which is helpful when your curls are thick and heavy.
If your hair is layered, the braid may not look perfectly smooth. Good. That little unevenness keeps it from looking severe. Braid firmly but not painfully tight, then coil the remaining length into a bun and secure it with pins beneath the braid tail. The braid itself does half the work, which is the whole reason this style exists.
21. Rolled Nape Bun
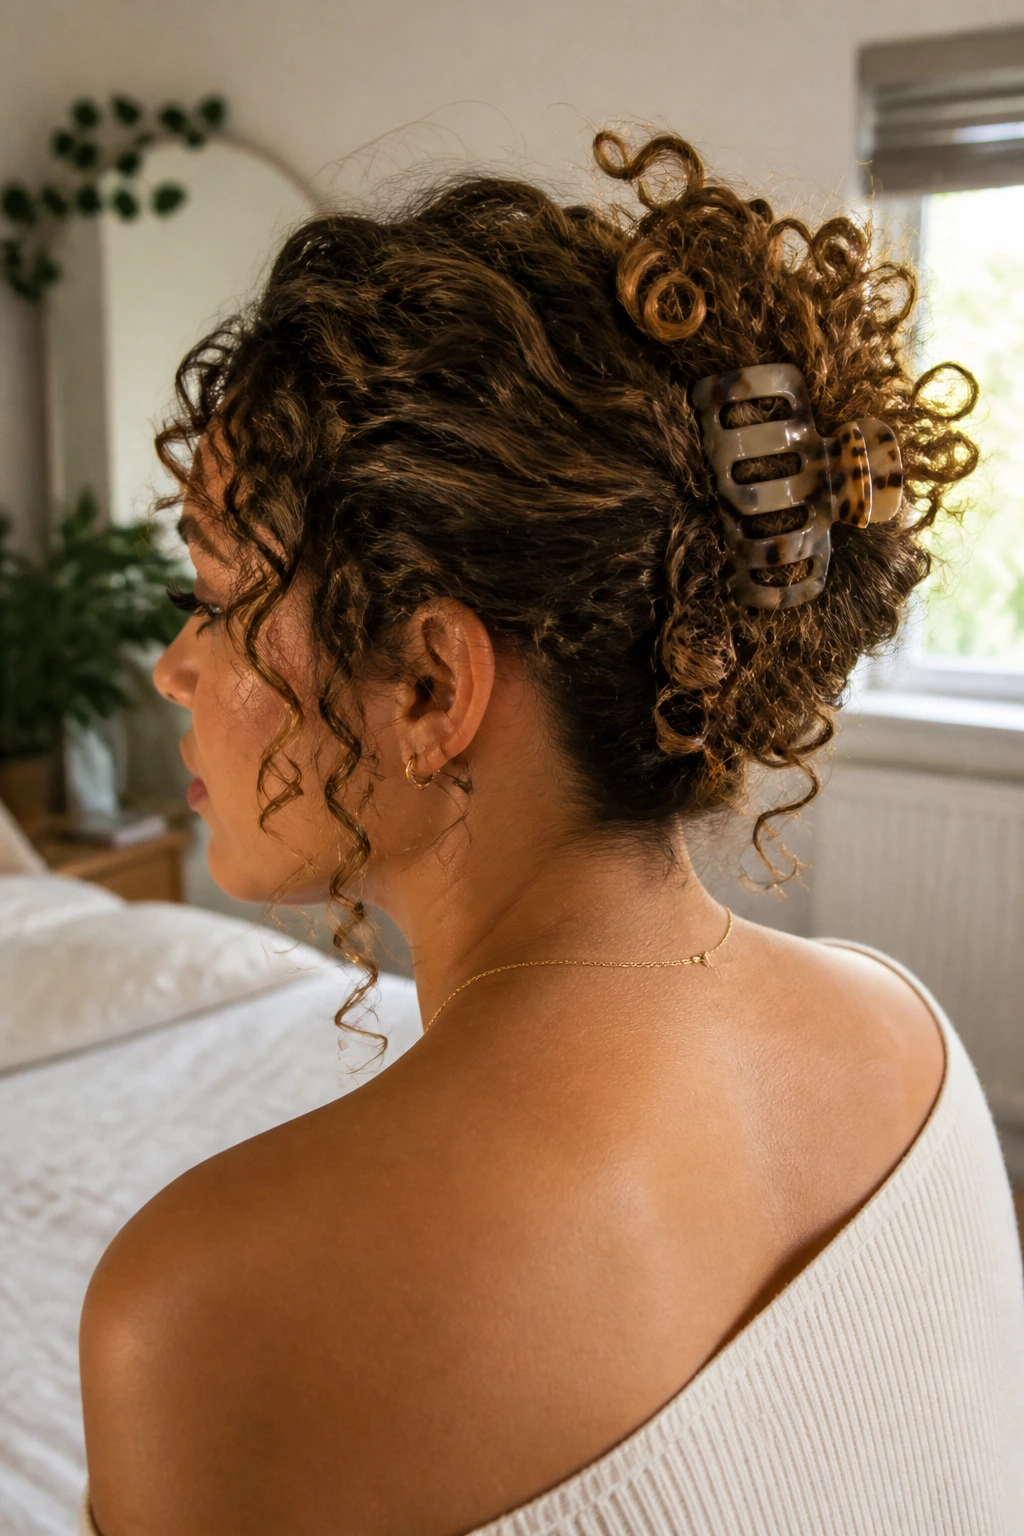
The rolled nape bun sits low and neat, but on curly hair it still has a little softness around the edges. Roll the lengths upward from the nape, tuck the ends inward, and pin across the base in a cross pattern. The style is tidy enough for a blazer, but not so slick that it loses texture.
This is the bun I’d choose when I want the neck clear and the profile smooth without dragging a brush over the whole head. Keep the front slightly loose if your curls have a tendency to expand. A few framing pieces can save the style from looking severe. And if the roll feels bulky, split it into two smaller rolls and overlap them.
22. Deep-Side-Part Side Bun
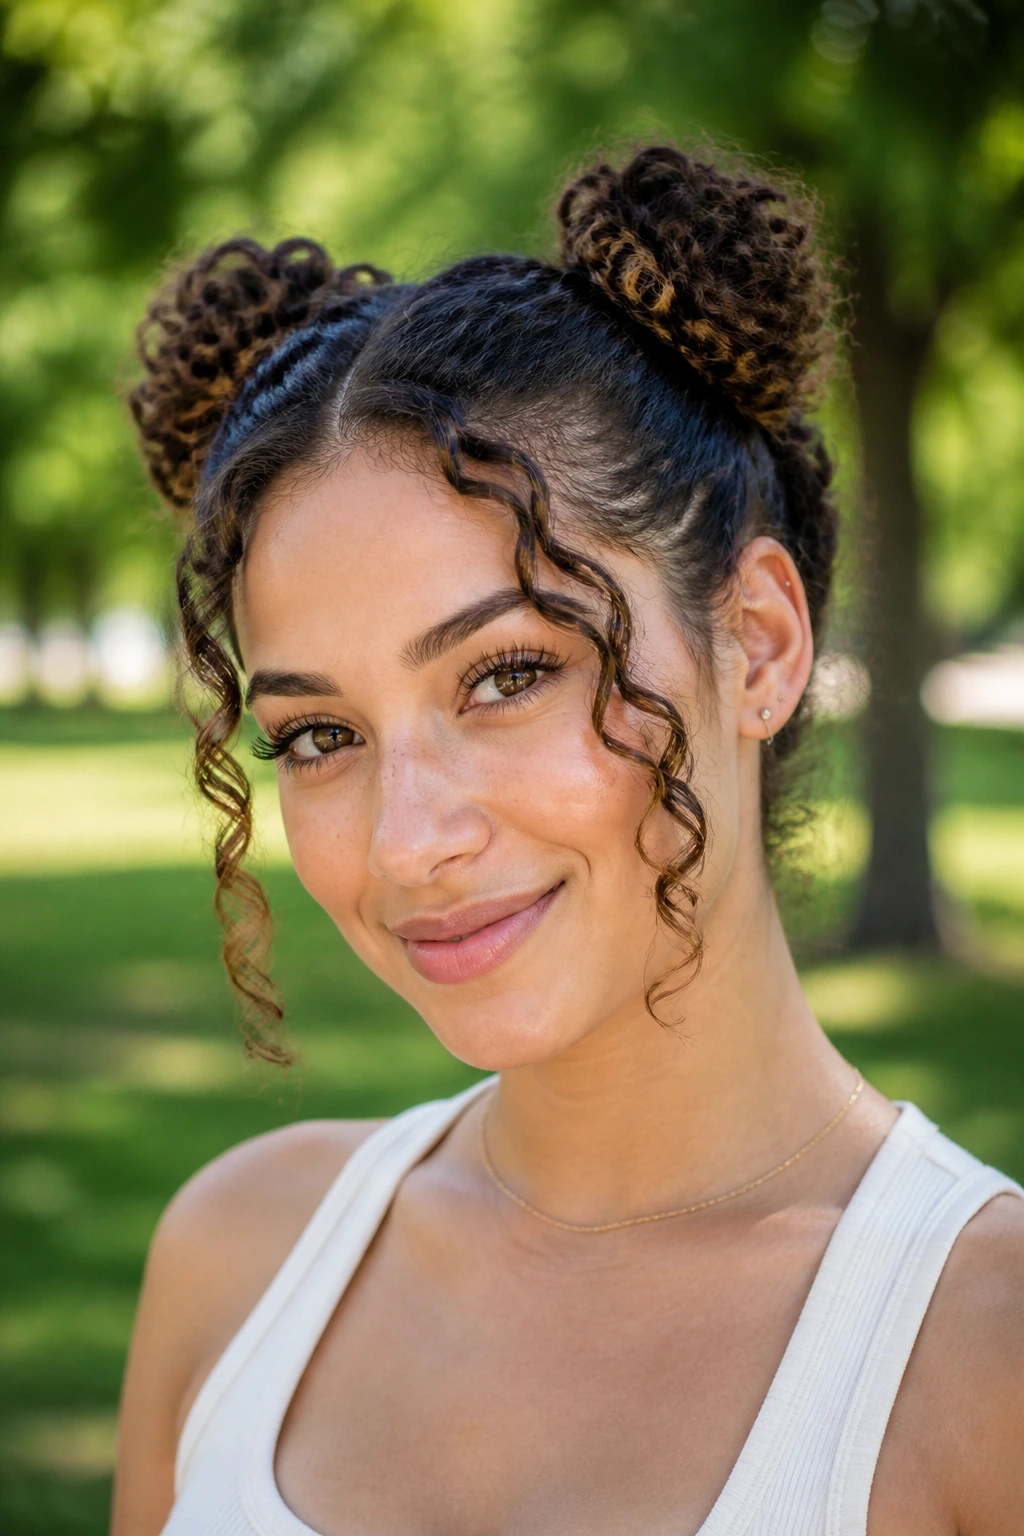
A deep side part changes everything. It makes a side bun feel softer and more deliberate, and it gives curly hair a nice diagonal line before the bun even starts. The bun itself can sit low near one ear or slightly back toward the nape. Either way, the part does some of the visual work.
This style is especially useful when one side of your hair is flatter than the other. Instead of fighting the asymmetry, you lean into it. Sweep the bigger side across the forehead, pin underneath, and gather the rest into a side bun. The result is more flattering than a centered bun on a lot of curl patterns. Hair doesn’t always want to be even. This is one of those times.
23. Twisted Low Ponytail
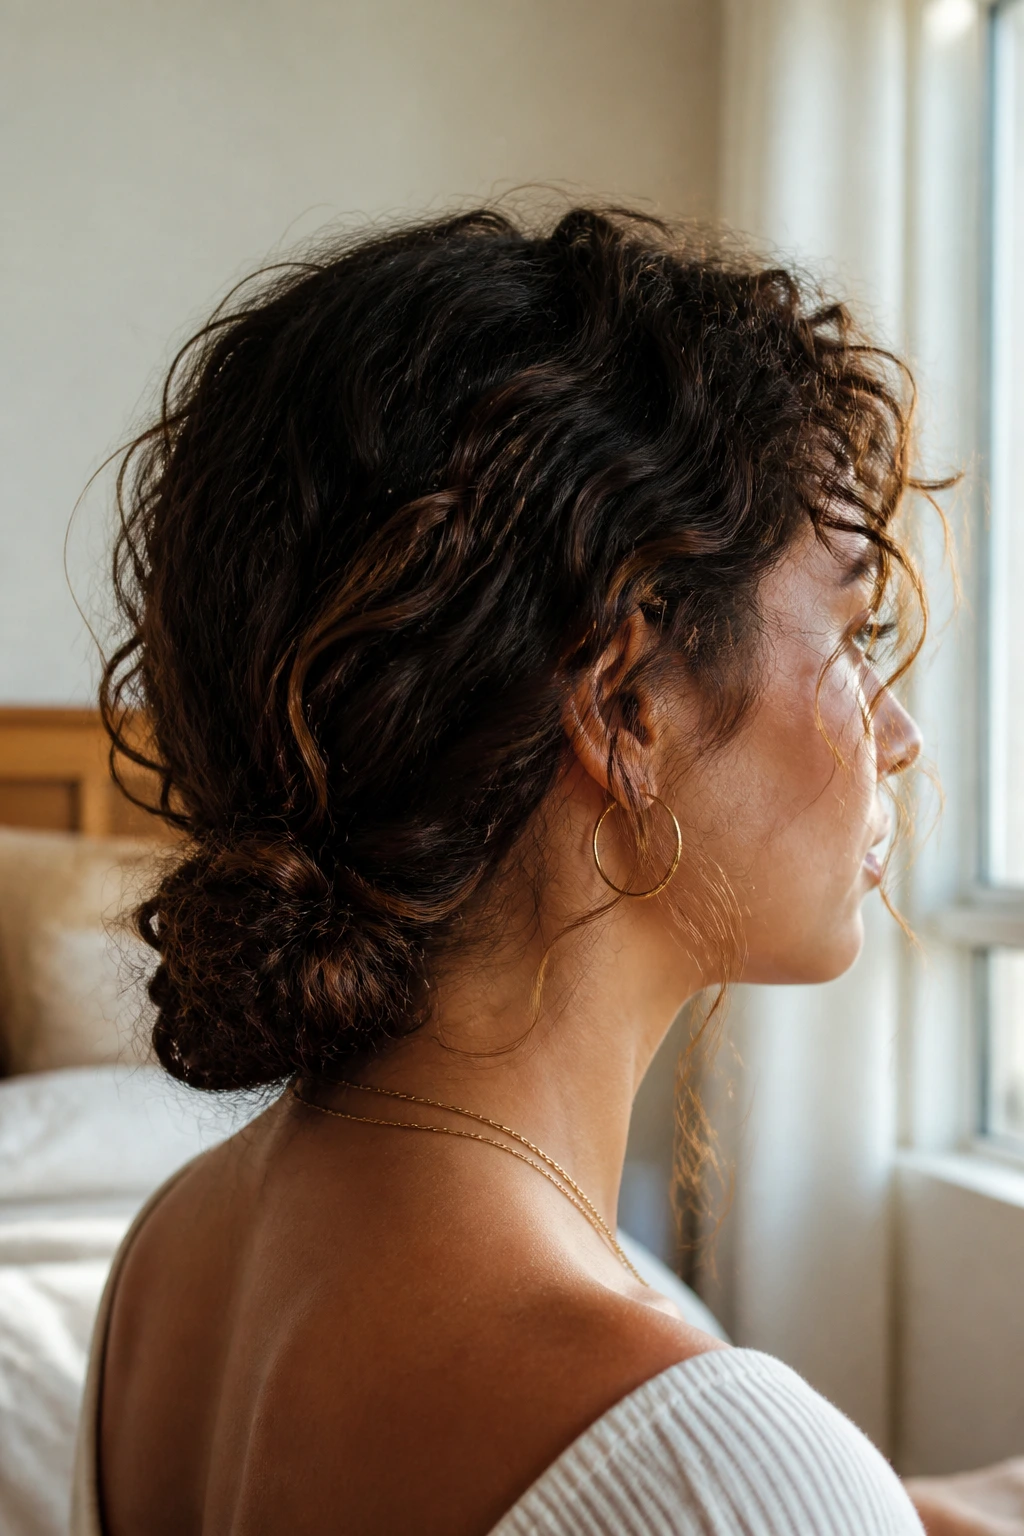
A twisted low ponytail gives you ponytail ease with a little more polish at the base. Twist two side sections back before gathering the lengths low, or twist the ponytail itself once it’s tied and let the curls spill from there. The twist acts like a built-in detail, which means you don’t need a pile of accessories to make the style feel finished.
Keep the elastic low and soft, then wrap a small curl or a ribbon of hair around it if you want the base to disappear. That single move changes the whole look. The ponytail can stay loose and airy, or you can define the front with gel for a cleaner finish. Curly hair gives you that choice without much extra work.
24. High Ponytail with Wrapped Base
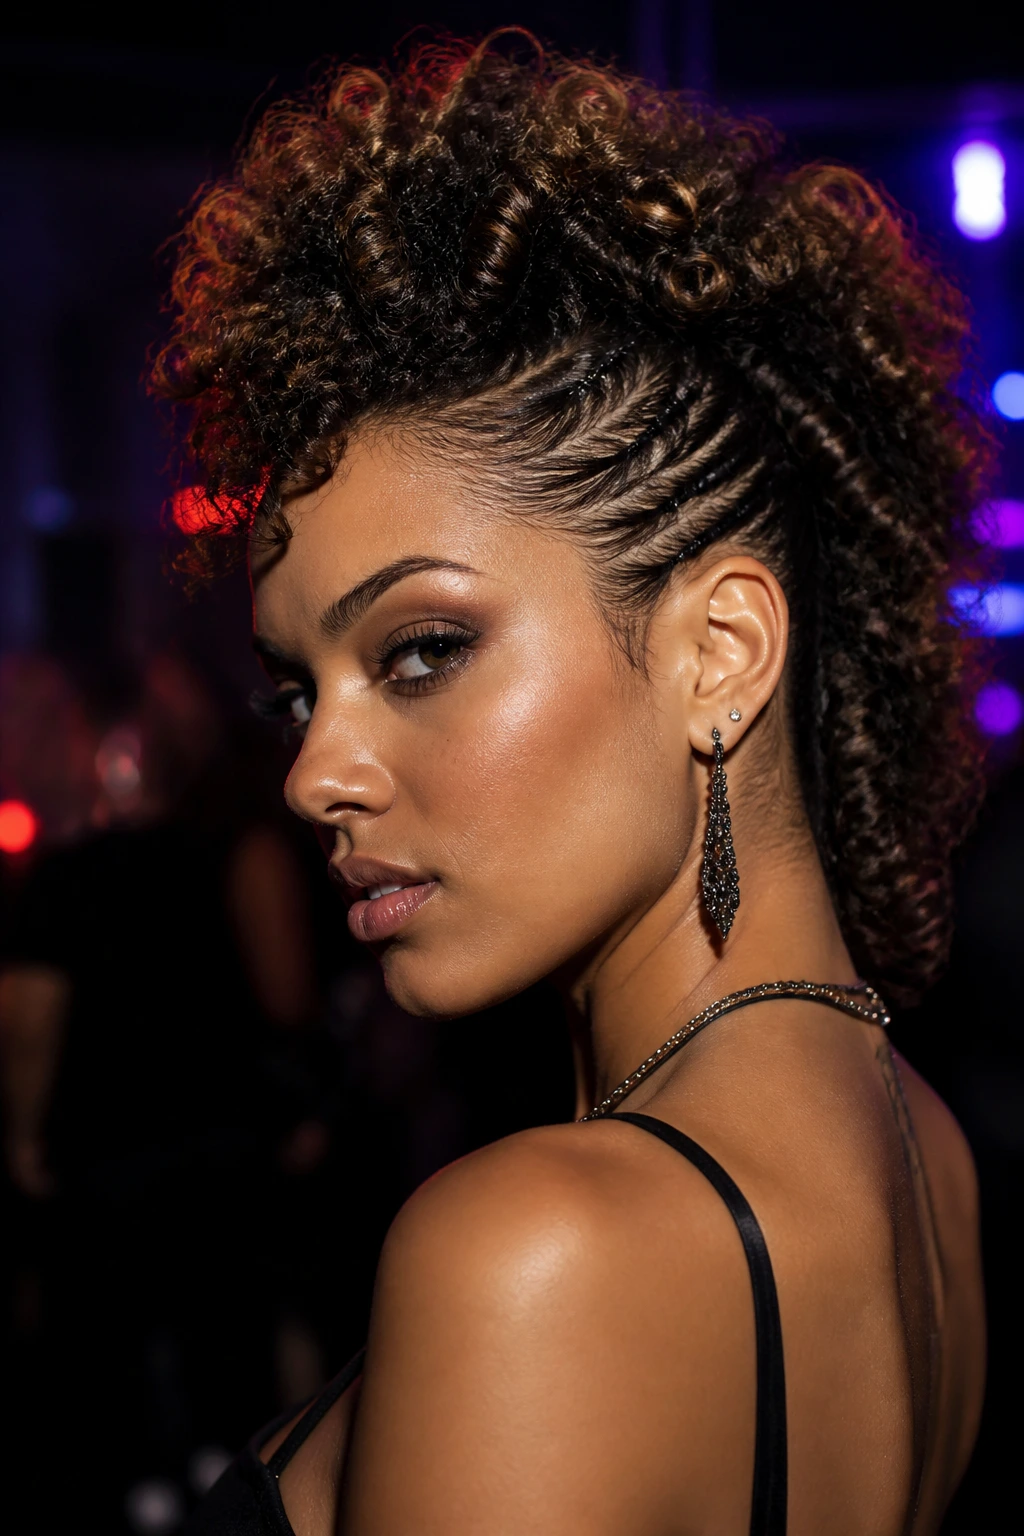
A high ponytail on curly hair can look plain if you stop at the elastic. Wrap a small section around the base, though, and it reads much more intentional. The high lift shows off the curls, while the wrapped base hides the machinery. I prefer this version when the ends are still good but the roots need a reset.
Brush only the section you’re pulling back. Leave the ponytail itself curly and full. If you smooth too much, the contrast gets weird and the ponytail hangs flat at the top. After securing it, tug the crown very lightly to create height. Not enough to loosen the elastic. Just enough to avoid the helmet effect.
How to get the most from it
- Use a strong elastic at the base, then hide it with a matching curl wrap.
- Fluff the ponytail after tying, not before.
- Keep a few face-framing curls out if your hairline feels too exposed.
25. Crown Twist Into Bun
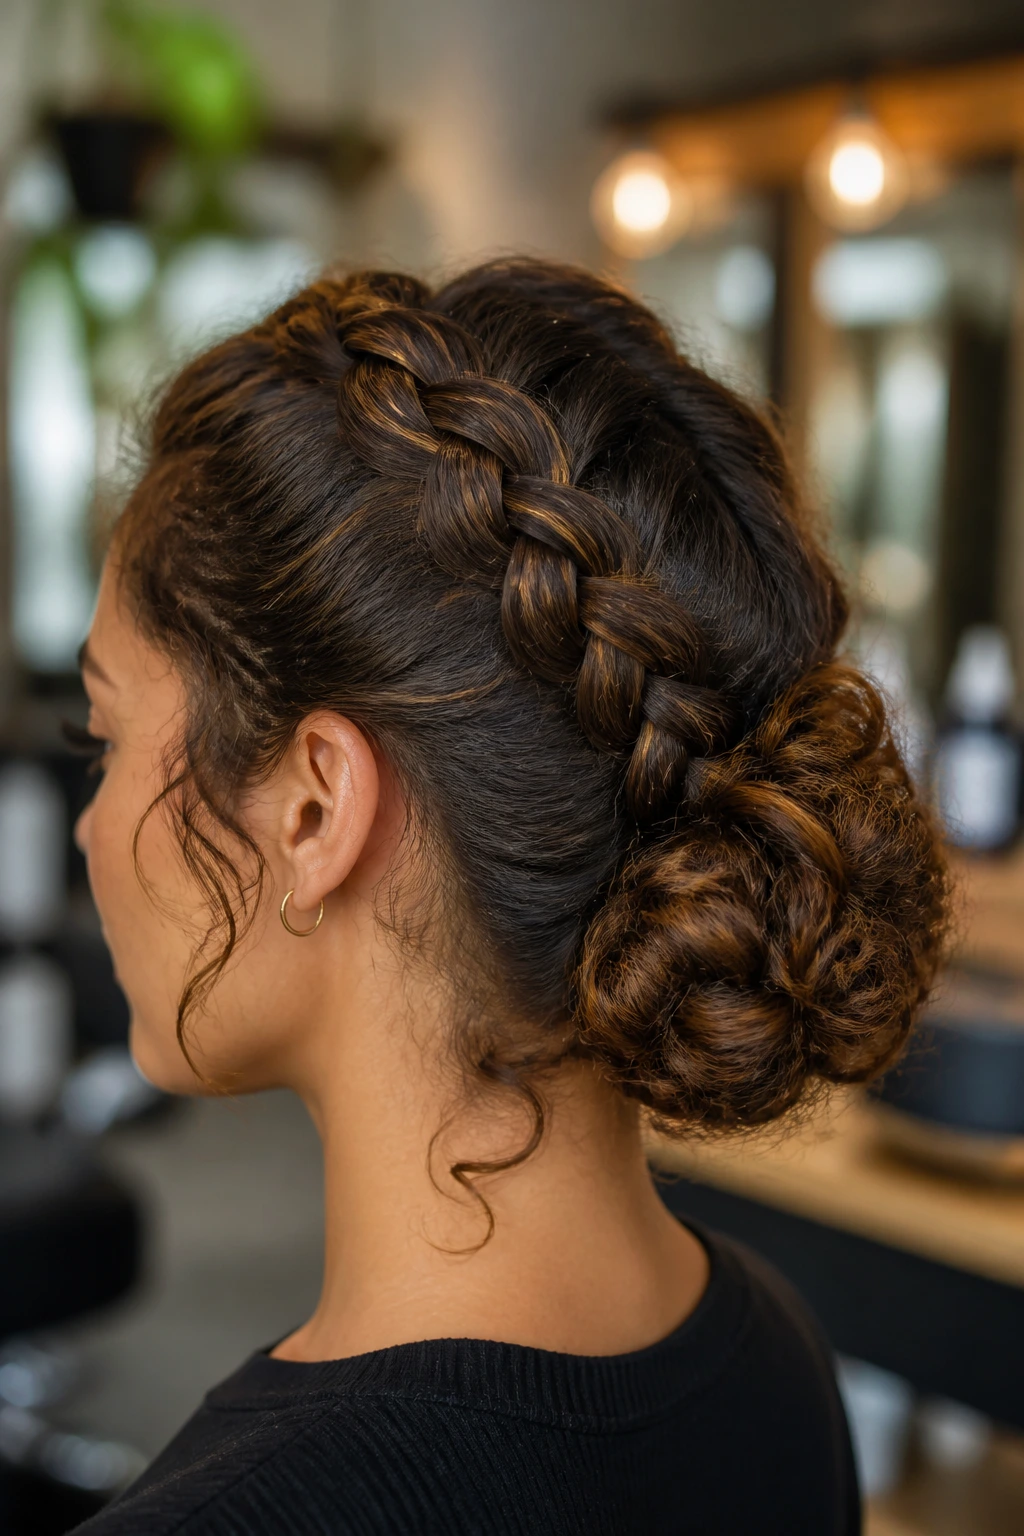
The crown twist into bun has a nice, continuous line that curly hair picks up beautifully. Twist the front sections back along the hairline, feed them toward the nape, and turn the remaining length into a bun. The twist gives the style movement, and the bun grounds it.
This one looks especially good when the curls have some second-day separation, because the twists keep the top tidy while the bun stays full. Pin the twists low enough that they blend into the bun base, not above it. If you pin too high, the style can look like two separate ideas stuck together. Everything should flow toward the same center point.
26. Pin-Curl Updo
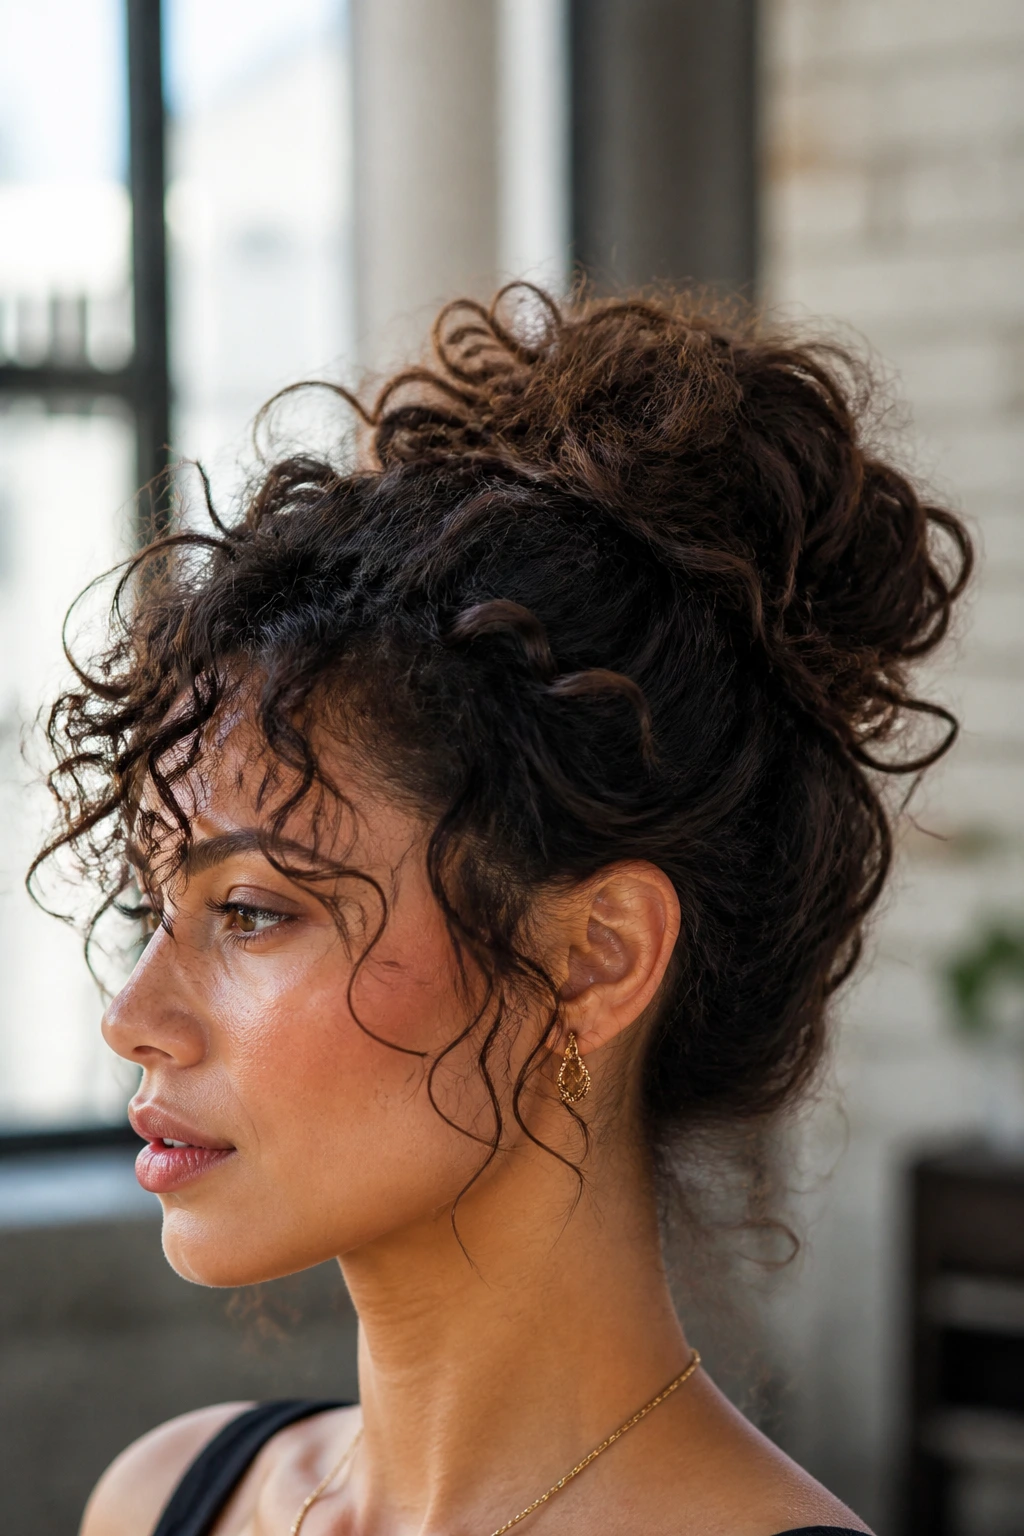
A pin-curl updo is one of the prettiest ways to use curly texture without hiding it. You shape small sections into loops or rolls, pin them flat against the head, and let the finished style look like sculpted petals. It takes a bit more time than a ponytail, but the finish is worth it.
This style loves medium to long curls with a defined curl pattern. You’re not fighting the texture; you’re arranging it. Use a light styling cream first so the sections keep their shape, then pin each loop where it naturally wants to fall. If one curl is much looser than the rest, make it a side piece instead of forcing it into the pattern. That odd strand can end up being the thing that makes the whole style feel alive.
27. Gibson Tuck for Curls
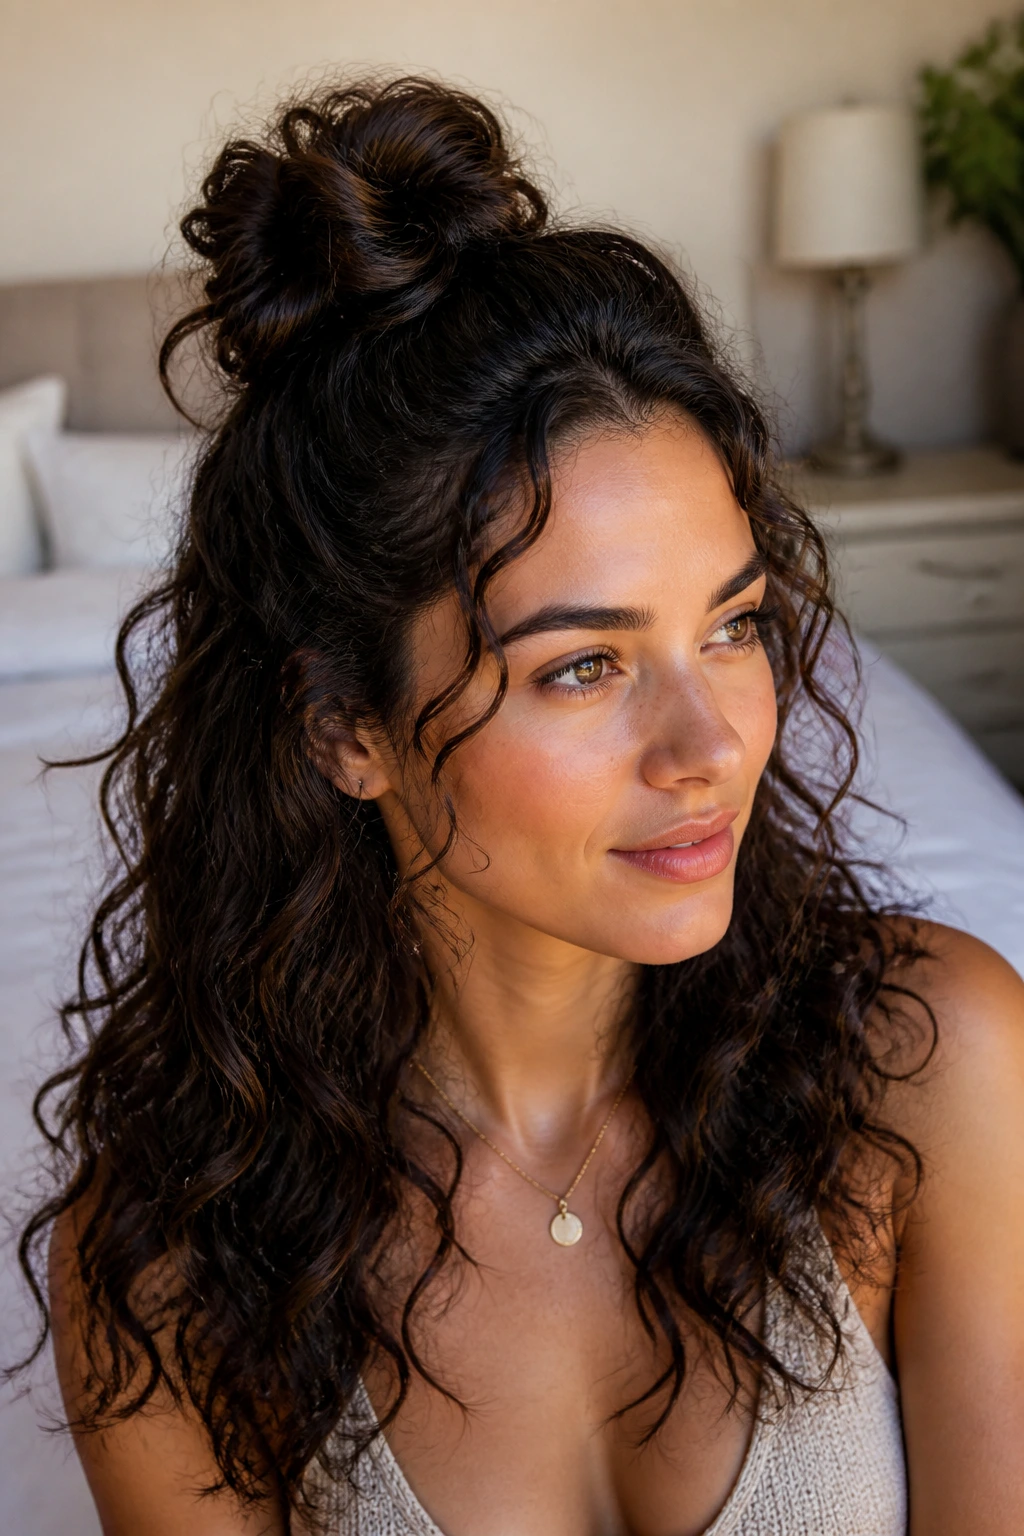
The Gibson tuck is old-school in the best way, and curly hair gives it enough body that it doesn’t look costume-y. Tuck the hair upward into a rolled pocket at the nape, and let the curl ends disappear inside. You get a low, rounded shape that’s clean but still soft.
The important part is not making the roll too tight. Curly hair needs space in the tuck, or the style bulges in odd places. Use pins along the base and one or two on the sides to keep the roll even. If your hair is layered, leave the shorter front pieces loose or lightly pinned. That keeps the tuck from looking too severe against the face.
Best for when you need polish
A Gibson tuck is a smart choice for weddings, interviews, dinners, or any moment when you want the hair off your neck and the shape under control. It also behaves well on day-two curls.
28. Braided Ponytail Crown
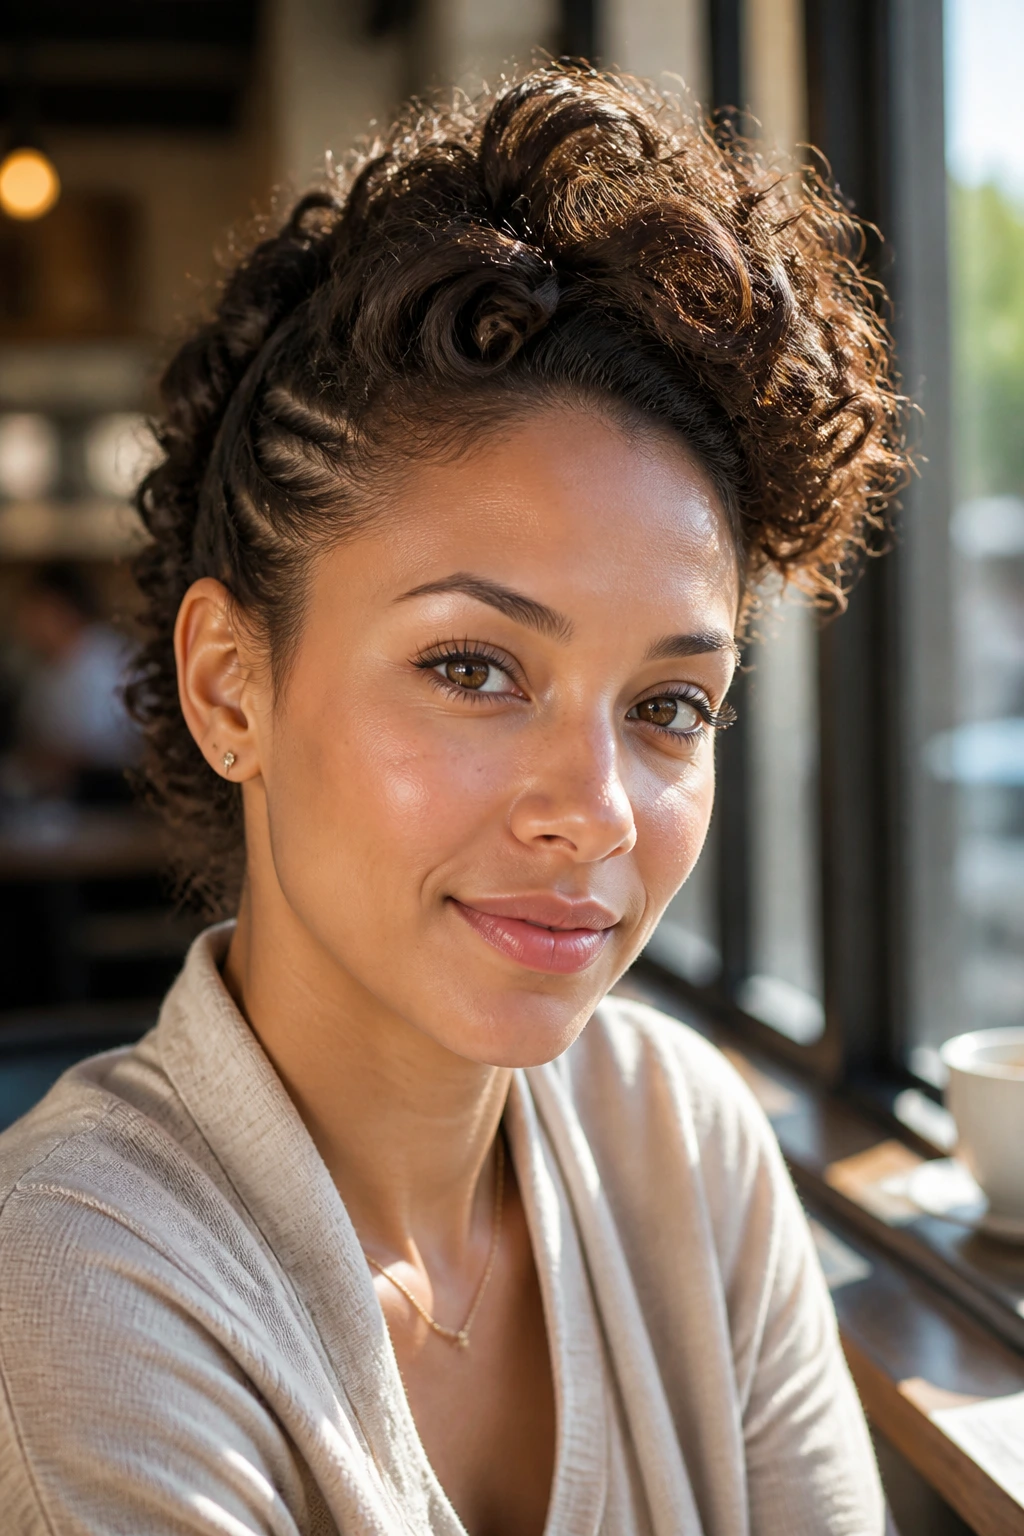
This style combines the clean line of a braid with the fullness of a ponytail. Braid the front or crown section back, then gather the rest into a ponytail so the braid acts like a headband with structure. On curly hair, that contrast between woven top and loose length looks rich without being complicated.
If the ponytail is very thick, don’t braid the front section too tightly. A braid that’s too narrow can look tiny next to a big ponytail. Keep the braid a little wide, then pinch it gently to spread the pattern. The whole point is to give the style a frame. Not a fence.
29. Loose Knot with Crown Volume
A loose knot with crown volume is the messy bun’s more intentional cousin. The top stays a little lifted, the bun sits low or mid-height, and the curls at the crown keep their shape instead of being crushed backward. It’s a good choice if your hair naturally wants height at the roots.
Work with that, not against it. Gather the hair loosely, then pin the knot where it settles instead of dragging it tighter and tighter. If the crown looks too flat, lift a few small sections at the roots with the tip of a tail comb. A quarter-inch makes a difference. Too much, and the style turns shaggy.
30. Knotted Half-Up Bun
The knotted half-up bun is one of the best “I don’t have time, but I still want something cute” options in the whole group. Pull the top half of the curls back, knot it once, and pin the knot into a small bun while leaving the bottom length loose. It gives the face a lift without taking away the movement.
This style works because it uses the natural volume of curly hair instead of trying to contain it all. Keep the knot centered, or shift it slightly higher if your crown is flat. If you have face-framing layers, let them stay out. They soften the front and make the top bun feel less abrupt.
31. Twisted Side Pompadour
A twisted side pompadour has a little retro swagger, and curls make the front height look fuller than it would on straight hair. Sweep a front section upward and back, twist it slightly, then pin it in place so the front lifts before flowing into the rest of the style. The side volume becomes the focus.
This is the style I pick when I want interest at the front and not much else. It can be paired with a bun, a ponytail, or a loose back section. Keep the twist soft. If you twist too hard, the front goes flat where it should rise. The rest of the hair can stay simple. This one is all about that first few inches at the hairline.
32. Sculpted Afro Puff Updo
A sculpted afro puff updo celebrates volume instead of shrinking it down. The hair gets shaped upward and outward, then anchored in a way that keeps the silhouette rounded and lifted. It can look bold, elegant, or casual depending on how clean you keep the edges and how high you place the puff.
Use a wide band or stretchy puff cuff if your hair is very dense. That gives the style enough support without flattening the coils. Smooth the perimeter if you want the outline crisp, or leave a little softness around the hairline for a more relaxed finish. The whole style hinges on balance: a strong shape, but not a stiff one.
33. Braided Space-Bun Pair
Braided space buns bring a little play to curly hair without making it feel juvenile. Braid or twist two sections, then wrap each into a bun on either side of the head. The braids give each bun structure, and the curls keep the style from looking too neat.
This works especially well on hair that has medium density and enough length to create two balanced buns. If your hair is thick, keep the buns slightly lower and wider. If it’s finer, smaller buns can look better than trying to fake bulk. That’s the thing with curly hair: size is relative. The style just needs to fit the actual hair, not the idea of it.
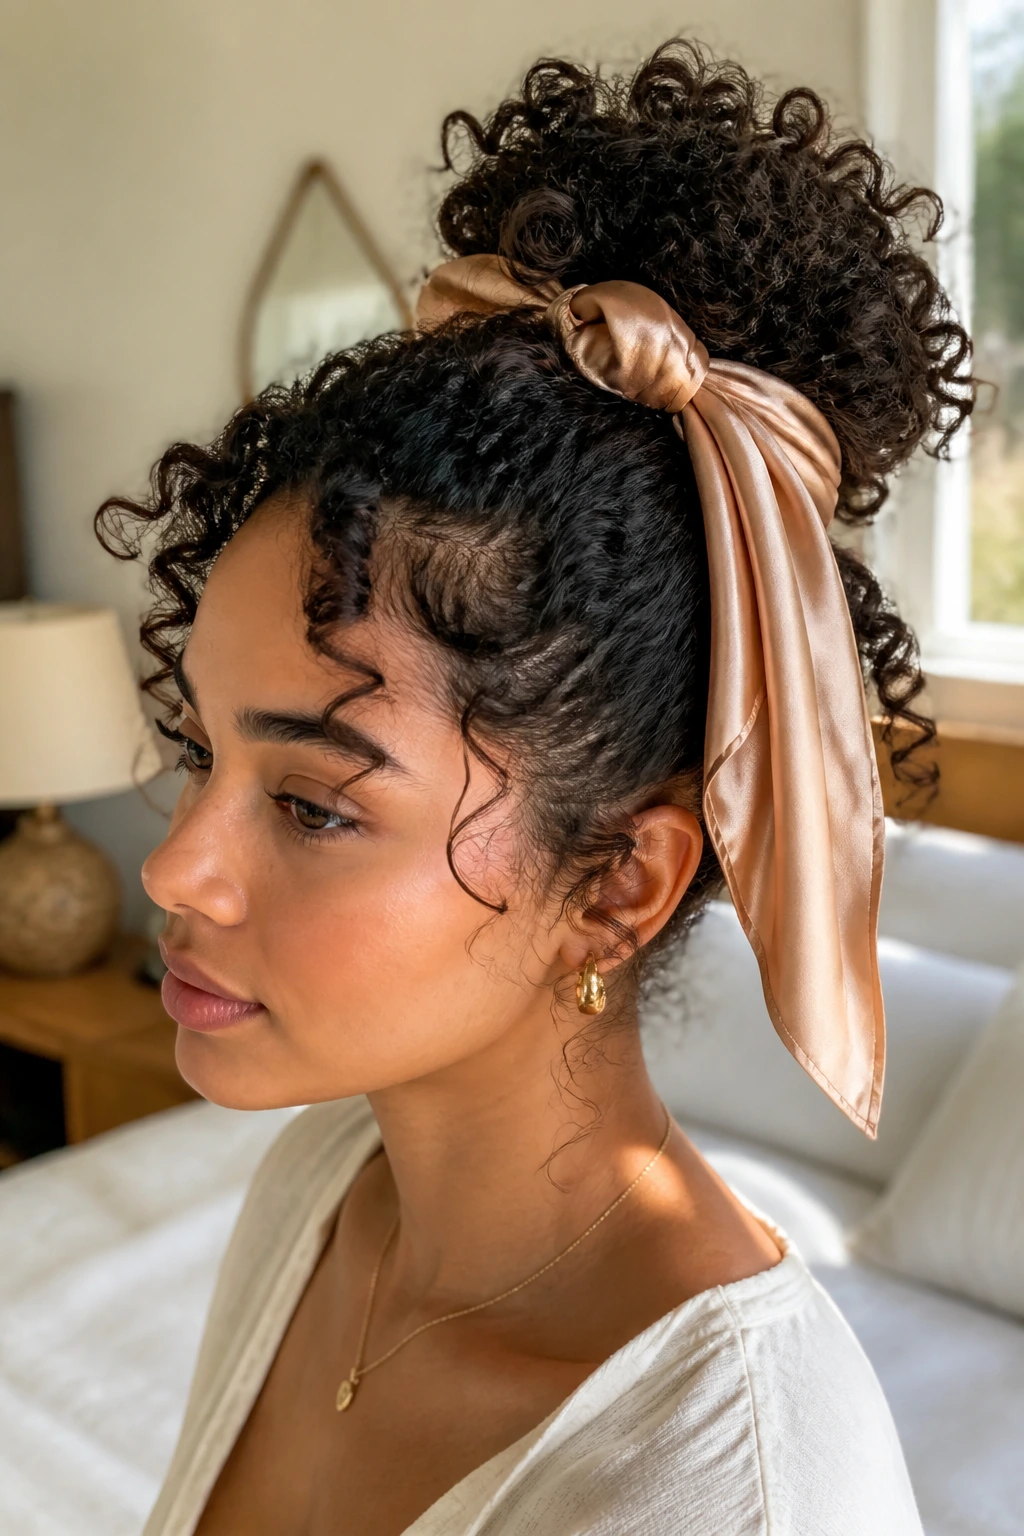
34. Satin-Scarf Bun
A satin-scarf bun solves two problems at once: it holds the hair and keeps the finish from looking too bare. Wrap the bun base with a scarf, then let the tail hang or knot it into a bow if the mood calls for it. The satin gives the look a little shine and helps cut down on friction.
I like this style when curls need protection and a little personality. The scarf can cover a less-than-perfect base, which is helpful on days when the ends are frizzy or the bun itself is still a work in progress. Choose a scarf that’s long enough to tie securely without cutting into the crown. If it’s too tight, it will flatten the very volume you’re trying to keep.
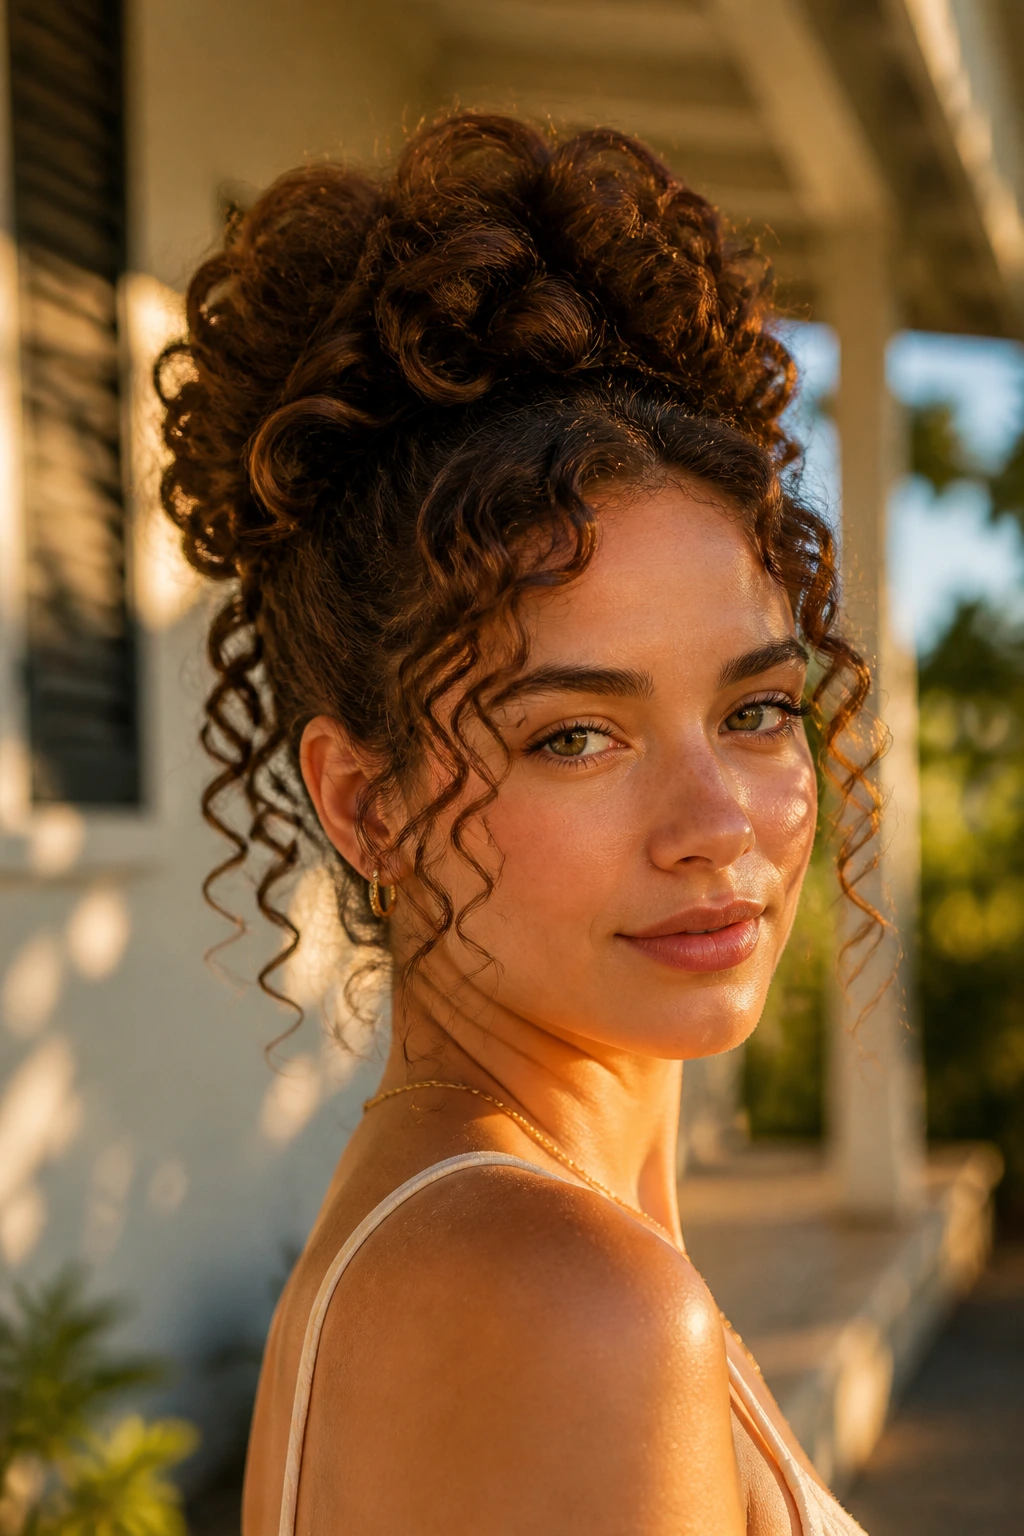
35. Sculpted Curly Bun with Tendril Halo
The sculpted curly bun with a tendril halo is the most balanced version of “put together but not rigid.” The bun is shaped enough to look intentional, and the loose tendrils around the face and temples keep the whole style from hardening up. It’s the one I’d wear when I want curls to look styled, not restrained.
Build the bun first, then decide where to leave the tendrils. Don’t pull them out randomly. A few pieces at the temples and one or two lower curls near the ears usually do the job. Pin the bun from underneath so the surface stays rounded. The halo pieces should frame the face, not hang there like an afterthought.
Why Curly Hair Needs a Different Updo Playbook
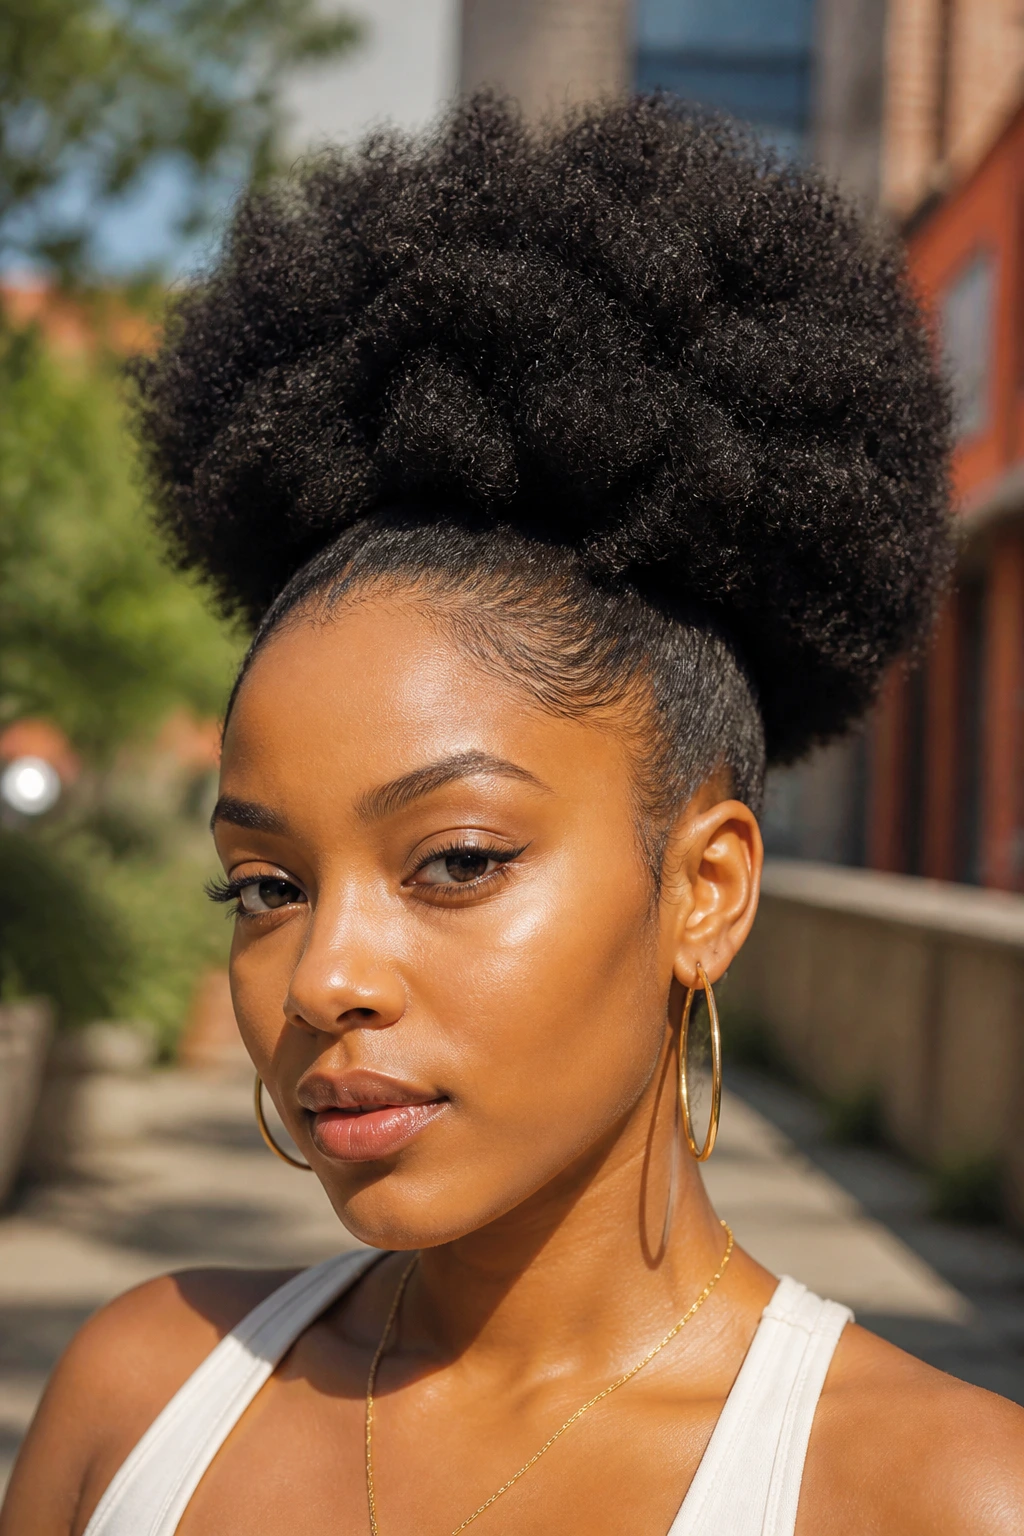
Curly hair doesn’t behave like straight hair, and pretending otherwise is the fastest way to end up with a flat crown and a frizzy perimeter. Shrinkage changes the length. Curl clumps change the shape. A style that starts low can end up much higher after the hair settles, and a bun that looks roomy in the mirror can feel tiny by the end of the day. That’s normal. Work with it.
The other thing people underestimate is weight. Dense curls pull harder at the base, which means a flimsy elastic will stretch out and a single pin in the wrong spot won’t do much. I trust a strong hold gel at the roots, then a mix of bobby pins and U-pins, then a satin scrunchie if the style needs one more layer of grip. Not all at once, but enough to keep the structure from sliding.
Dryness matters too. Curly hair often looks best in updos when it has a little day-old texture, because the strands have more grip and less slip. Freshly washed curls can be gorgeous, but they’re also slicker, softer, and harder to anchor. That’s why so many curly updos behave better on day two. A little lived-in texture is not a flaw here. It’s useful.
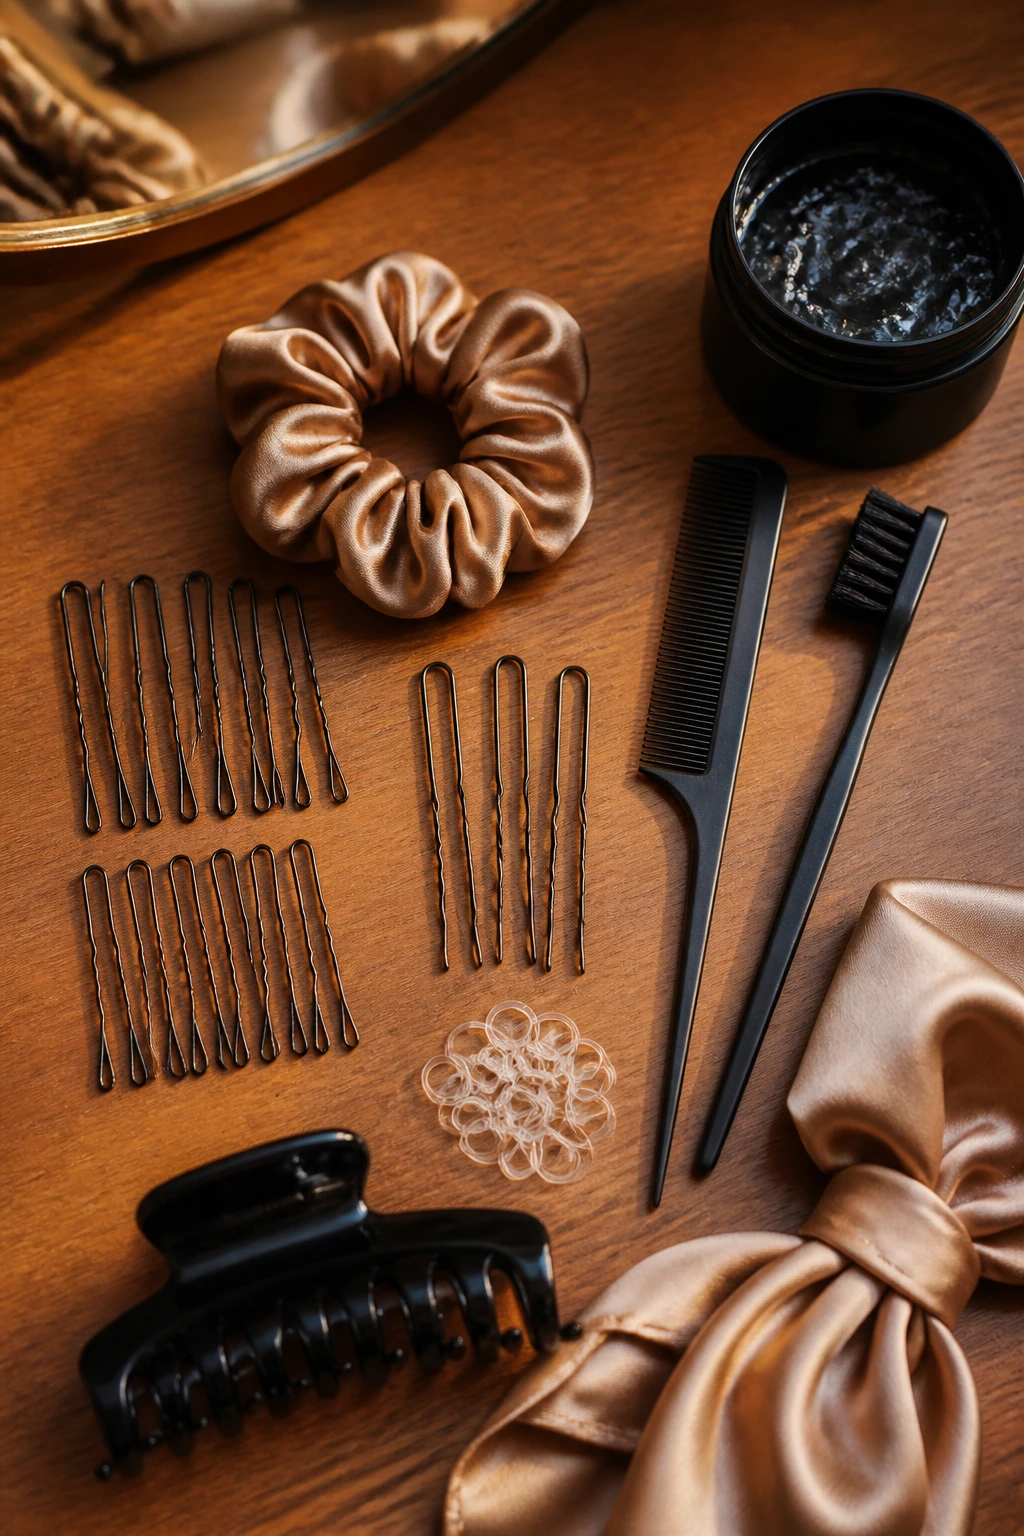
Essential Tools for These Styles
-
Bobby pins in two sizes: Short pins help with detail work at the hairline, while longer pins can support buns and twists at the nape.
-
U-pins: These are handy for sculpted buns and rolls because they hold bulk without leaving a visible pin line.
-
Satin scrunchies: They grip curly hair more gently than skinny elastics and don’t carve such harsh dents into the shape.
-
Small clear elastics: Best for bubble ponytails, half-up sections, and tiny anchor points that need to disappear.
-
Tail comb: Good for clean parts, lifting crown sections, and guiding twists without dragging through the whole head.
-
Edge brush or soft toothbrush: Useful for smoothing the hairline with gel when you want a cleaner finish.
-
Strong-hold gel or styling cream: Choose one that gives grip without turning crunchy; the goal is control, not shellac.
-
Claw clip with a deep jaw: A cheap, shallow clip slips right out of thick curls. Get one with a real grip.
-
Satin scarf or bonnet: Keeps the style from catching on pillowcases and helps reduce overnight frizz.
-
Hand mirror: Sounds basic, but it matters when you’re checking the back of a bun or the seam of a twist.
How to Prep Curly Hair So the Style Holds
The first decision is whether you’re working on fresh curls or day-two curls. Freshly washed hair can give you shine and definition, but it often needs more product and more pinning because it slips. Day-two hair usually has the grip you want. If you washed today, let the roots dry fully before you start. Damp roots and updos are a bad marriage.
A light leave-in plus a gel at the hairline is enough for most of these styles. You do not need a heavy stack of creams unless the curls are dry to the touch and begging for moisture. Too much cream makes the base slippery. Too much water makes the whole shape collapse. If you need to revive a bendy section, mist your hands and smooth the hair that way instead of spraying the whole head.
Stretching can help. Not straightening. Stretching. A quick blow-dry with a diffuser, a loose braid-out, or even a low-tension twist-out can make pinning easier because the hair has a little length to work with. Let it cool before styling. Warm hair loses shape faster.
How to Choose the Right Style for the Day
For short curls: Pick styles that depend on lift rather than length, like the pineapple puff, the faux hawk puff, the twisted side pompadour, or the claw-clip roll-up. They don’t need much length to read clearly, which is half the battle with shorter curls.
For medium-length curls: You’ve got the most options here. Low chignons, half-up crowns, Gibson tucks, and bubble ponytails all work without fighting the length. Medium curls can be shaped into more polished silhouettes because they still have enough spring to fill the form.
For long, dense curls: Choose styles with strong anchors. Braided buns, Dutch-braid buns, sculpted buns, and pinned cascades hold better because the braid or twist gives the weight somewhere to sit. One elastic is rarely enough on this hair. It feels heroic for about ten minutes, then starts sliding.
For heat, humidity, or a long day out: Keep the base clean, use more pins than you think you need, and avoid over-smoothing the lengths. If the style gets too slick, it loses grip when the weather changes. Texture is not the enemy. It’s the thing holding the style together.
Small Tweaks That Make the Finish Look Better
Pin at the crossings: The place where two sections overlap is the strongest anchor point. Put the pin there and the style feels locked in without looking overloaded.
Keep one piece soft: A single loose curl at the temple or nape can make a rigid bun feel human again. Don’t scatter tendrils everywhere. One or two is enough.
Use the product at the roots first: A little gel at the base matters more than coating the whole length. That’s where slip starts.
Hide the elastic, not the curl: A wrapped base or a tucked-in section looks cleaner than a giant band sitting out in the open.
Match the shape to the density: Thick hair needs wider buns and deeper clips. Fine hair needs tighter twists and smaller anchors. Forcing the wrong shape never looks better.
Common Mistakes That Flatten Curly Updos
The first mistake is over-brushing. People think they’re “smoothing” the style, but they’re really breaking up curl clumps and creating frizz that shows up around the edges an hour later. Use your fingers or a soft brush only where the hair needs to be guided.
Another common problem is pulling everything too tight at the front. The style might look neat for ten minutes, but the scalp starts to feel sore and the crown goes flat. Curly hair needs a little lift where it’s gathered. If the roots are glued down, the whole shape loses life.
Wet hair is trouble. A damp base slides, stretches, and cools into a weird flat seam. Let the hair dry before you pin, or at least work from mostly dry curls. If you have to rework a damp section, give it a few minutes of air first.
Too few pins is a classic one. Curly hair often needs several small anchors rather than one heroic pin. Spread them out. Cross them if the style feels heavy. And don’t forget the underside of the bun or twist; that’s where most of the weight sits.
Finally, people sometimes build the style and then forget to adjust the silhouette. Step back. Look at the head shape. Curly hair can handle width, height, or softness, but not all three in random amounts. Pick one to emphasize.
Variations and Alternatives to Try
The Fine-Curl Lift Version: Use smaller sections, tighter pins, and a little texture spray at the roots. Fine curls can look beautiful in updos, but they need more support and less bulk.
The Thick-Coil Anchor Version: Add braids, twists, or a second elastic at the base before forming the bun. Dense coils need structure underneath or the style settles too fast.
The Short-Hair Shortcut: Go for half-up crowns, mini puffs, small side buns, or claw-clip rolls. These styles give short curls shape without pretending there’s more length than there is.
The Humidity Shield Finish: Smooth only the perimeter with gel, keep the lengths textured, and choose styles that tuck ends away. A completely sleek finish usually gives humidity too much to grab.
The Accessory Swap: Satin scarves, pearl pins, or a wide headband can change the tone of a style in seconds. A plain bun becomes dinner-ready with one clip near the temple.
The Protective Night-Out Version: Use more tucked ends, fewer loose tendrils, and a soft satin base. It lasts longer and keeps the curls from getting snagged on jackets, collars, and bags.
Maintenance and Overnight Care
Most curly updos are best worn for a day or two, not endlessly recycled until the pins feel archaeological. If the base starts slipping, the crown flattens, or the curls around the face turn fuzzy, it’s time to reset. A style that is still holding shape in the morning can often be revived with a tiny amount of water on the hands and one or two fresh pins.
At night, a satin bonnet or pillowcase is worth the tiny effort. If the style is high and loose, a very soft pineapple at the crown can keep the curl pattern from getting crushed. Low buns and tucks usually do better if you leave them alone and let the satin do the work. Avoid soaking the hair to refresh it. That just turns a held style into a damp compromise.
If you plan to wear the style again the next day, loosen only the pieces that look cramped. Re-pin the heavy spots, smooth the hairline if needed, and leave the rest alone. The best upkeep is usually the least dramatic. Once a curly updo starts looking too fuzzy at the base or too stretched at the crown, don’t keep rescuing it. Start over. Your hair will thank you.
Frequently Asked Questions About Updos for Curly Hair
Should I style curly hair wet or dry for updos?
Mostly dry. Damp hair slips, stretches, and can shrink in odd ways as it dries, which makes the final shape unpredictable. If you need a little moisture to tame frizz, mist your hands instead of wetting the whole head.
What updos work best on short curly hair?
Pineapple puffs, half-up twists, mini puffs, twisted side pompadours, and claw-clip rolls are the easiest wins. They use height and shape instead of length, so shorter curls still get a strong finish.
How do I keep curly updos from frizzing at the edges?
Use a small amount of gel or styling cream at the hairline, then smooth it with a soft brush or your fingertips. The biggest mistake is brushing the whole head down and hoping it stays neat. It won’t.
Why does my bun shrink during the day?
Because curls compress when they sit in one place. If the bun feels perfect at noon and tiny by dinner, you probably built it too tightly at the start. Leave a little more volume in the coil and pin from underneath next time.
Can I wear these styles on type 4 curls?
Yes, and many of them look excellent on type 4 hair because the texture gives the styles more body. Just use stronger pins, deeper clips, and a bit more prep at the base so the weight stays anchored.
What if my style keeps sliding out?
You need more anchor points, not more force. Add pins at the intersections, swap a skinny elastic for a satin scrunchie, and make sure the roots are fully dry before you start. A slippery base is the usual culprit.
How many bobby pins does a curly updo usually need?
More than most people expect. A small bun might hold with 4 to 6 pins, while a larger twist or braided style can need 8 to 12, especially if the hair is dense. If the style moves when you shake your head gently, it needs another anchor.
Can I sleep in a curly updo?
You can, but choose a soft, low-tension style like a loose bun, pineapple, or tucked roll. Anything with hard pins pressed into the scalp will feel better if you take it down first and preserve the curls another way.
What’s the fastest fix when the crown goes flat?
Lift a few roots with the tip of a tail comb, then pinch the base of the style gently and pull it upward by a quarter inch. Sometimes that tiny shift is enough. Don’t over-lift or you’ll create a bump that looks accidental.
The Curly Shape Is the Whole Point
Curly hair does not need to be hidden to look polished. It needs a shape that respects the bend, the bounce, and the fact that one strand will always have its own opinion. That’s why the best updos for curly hair never look overworked. They look placed.
Once you stop chasing a perfectly smooth finish, the options open up fast. A high puff can feel playful. A low chignon can feel sharp. A twisted crown can look soft enough for daytime and deliberate enough for evening. The same head of curls can do all of it, which is honestly the fun part.
The styles here are flexible on purpose. Change the part, change the accessory, add one more pin, leave one more curl loose. That’s usually all it takes to make the whole thing feel new again.
