



French braid styles for women have a useful little trick: they look deliberate even when the braid itself is a little imperfect. That’s the whole charm. A French braid can read polished at the office, sporty at the gym, soft for dinner, or neat enough for a long day when you don’t want your hair brushing your neck every ten minutes.
What makes the style so useful is the structure. Hair gets gathered into the braid as you move down the head, which means the shape clings to the scalp instead of hanging loose and collapsing after an hour. Freshly washed hair can be slippery and stubborn. Day-two hair, with a little grit, often behaves better. That tiny detail matters more than any fancy accessory.
The range is the real draw here. A French braid can stay strict and clean, or it can be loosened into something softer and fuller. It can turn into a ponytail, a bun, a crown, a half-up style, or a side sweep that changes the whole mood of the hair. The pattern stays the same. The personality changes fast.
Why These French Braid Styles Keep Getting Pulled Into Rotation
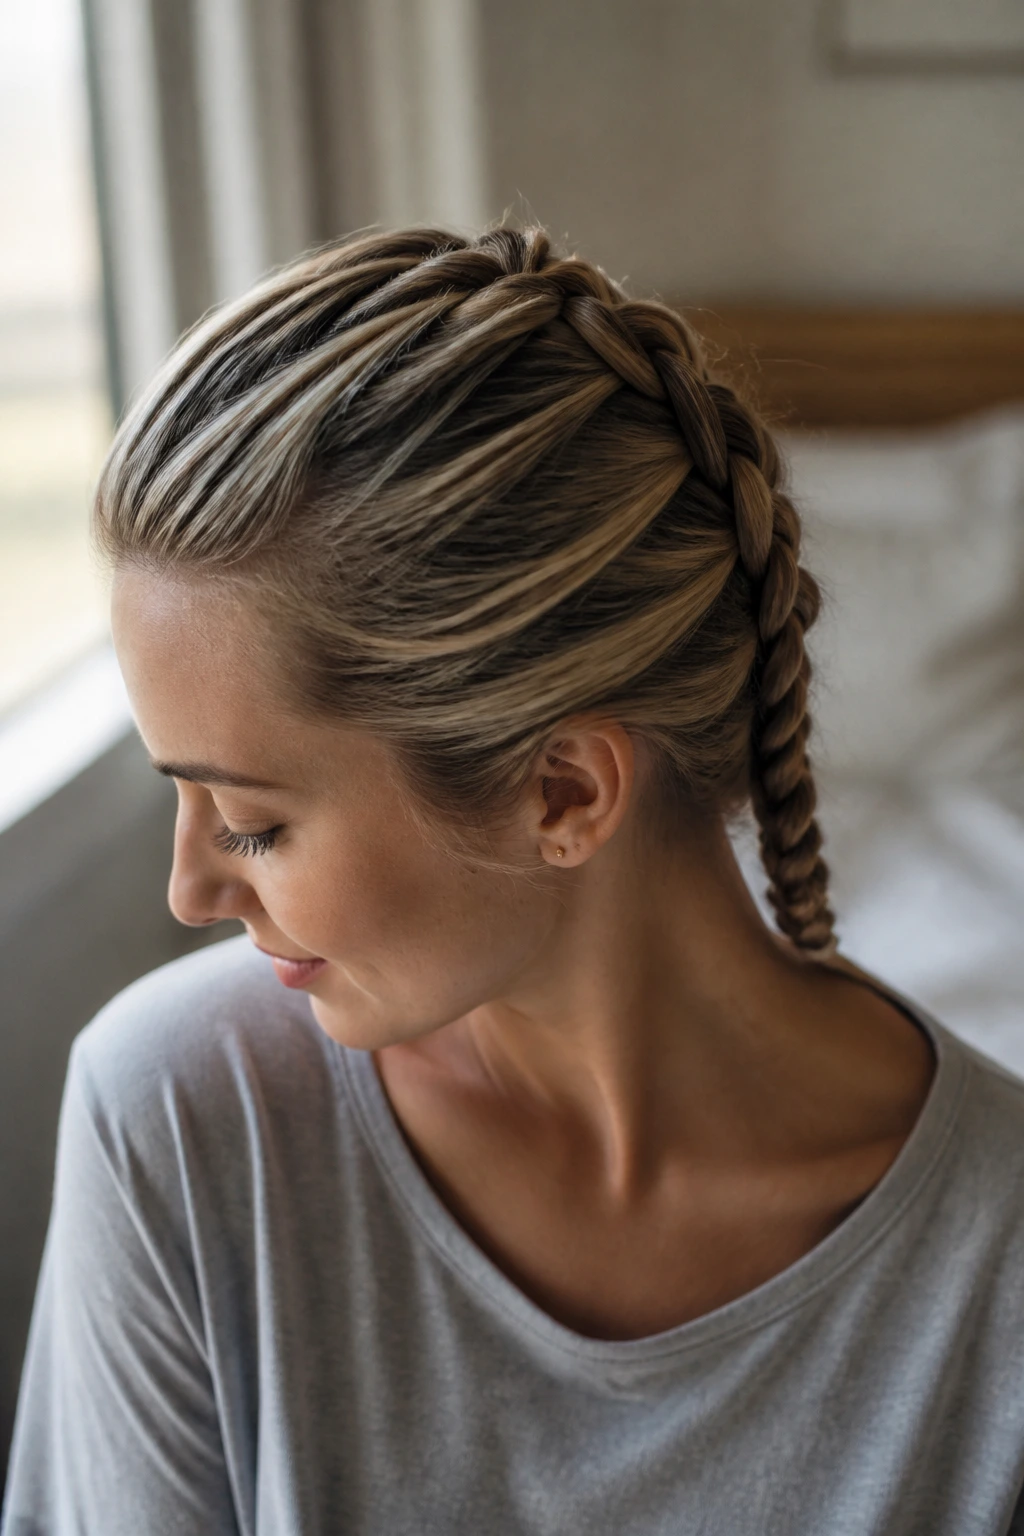
-
They work on ordinary mornings: A French braid takes hair that’s already misbehaving and gives it a shape that looks intentional, even if you only had ten minutes and a mirror you could barely see in.
-
They handle different textures well: Fine hair, thick hair, waves, curls, and stretched natural hair all behave differently, but the braid pattern gives each one a clean route instead of forcing the same finish on everyone.
-
They can look tight or soft: Keep the sections small and the braid close to the scalp for a sharp finish, or loosen the outer edges for something wider, gentler, and less school-uniform.
-
They save the ends: Tucking the length into a ponytail, bun, or chignon keeps the fragile parts of the hair from rubbing against collars, coats, and bag straps all day.
-
They make second-day hair useful: A little dry shampoo, a little grip, and suddenly the hair that looked flat yesterday has enough texture to hold a clean braid without fighting back.
Why the French Braid Pattern Holds So Well
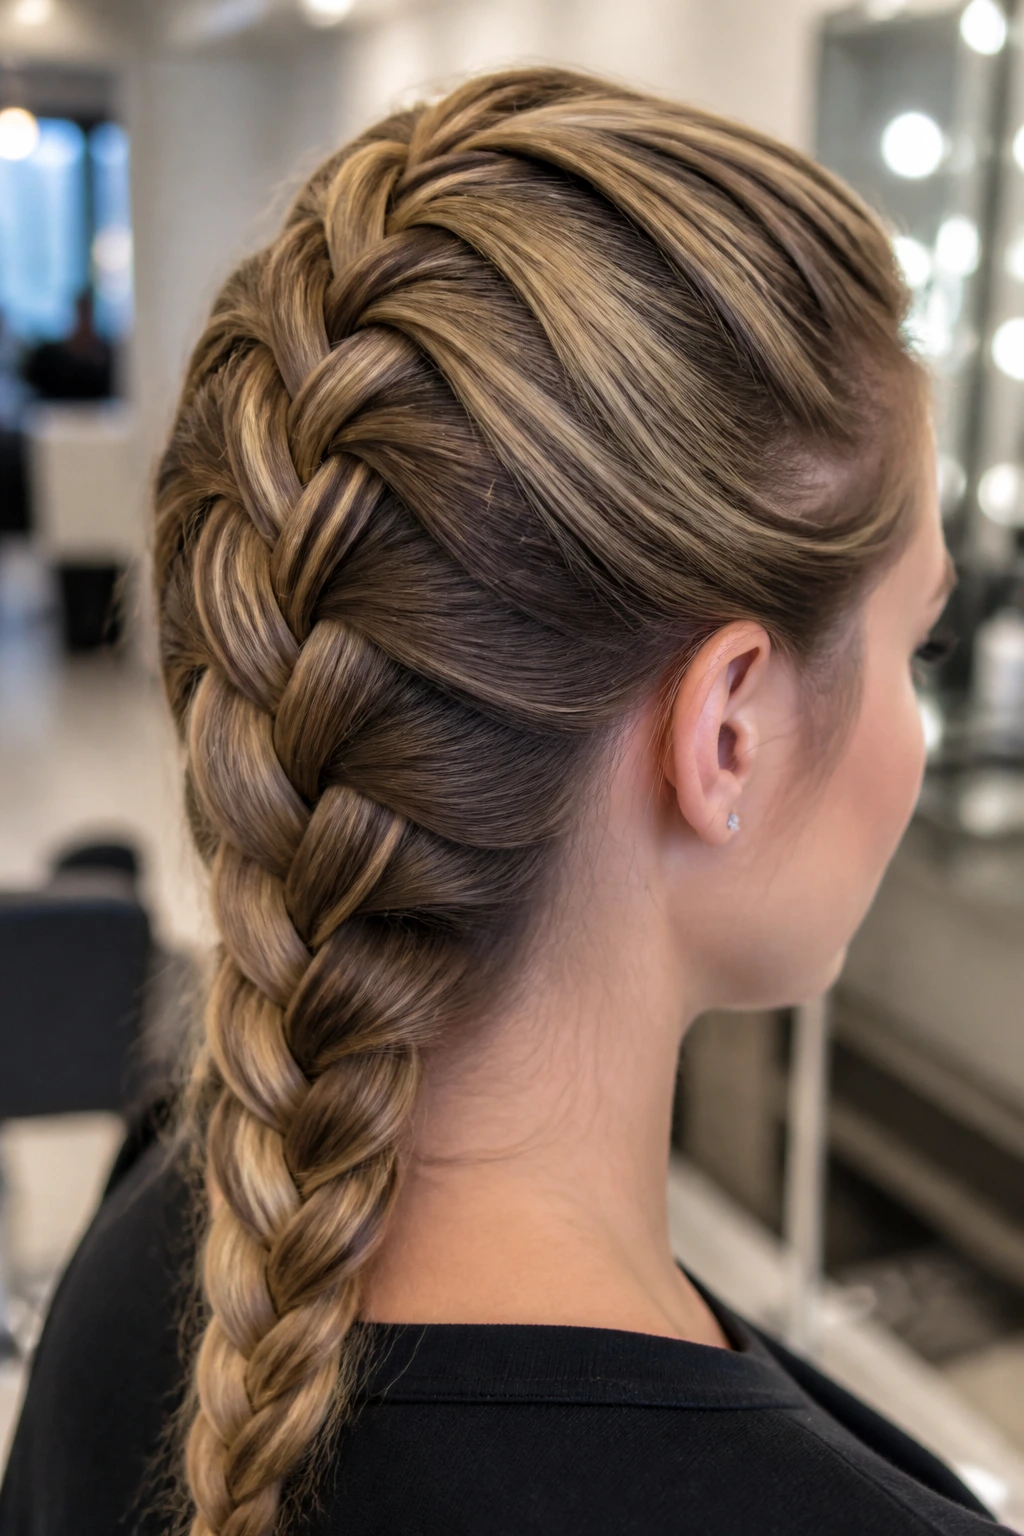
A French braid is more than a pretty way to divide hair. It works because the braid is anchored to the scalp from the first section onward, so the structure doesn’t depend on one loose tie at the bottom. That matters when you’re moving around, bending over, pulling on sweaters, or spending the day under a coat collar. The braid spreads tension down the head instead of loading all the weight at the ends.
The other quiet advantage is control. The braid collects hair as it goes, which keeps flyaways from wandering off in every direction. If you’ve ever tried to wear a plain three-strand braid and watched it puff out or slip halfway through the afternoon, you already know the difference. French braid styles for women tend to last longer because the style itself keeps gathering in fresh hair as you move downward.
There’s one catch, and it’s not a small one: sectioning matters. A braid that starts with uneven parts will keep that unevenness all the way down, which is why the first two inches at the crown deserve more attention than most people give them. Clean parting, steady tension, and a comb with a fine tail will do more for the final look than any amount of hairspray sprayed at the end.
When the hair is slippery, I usually prefer a little texturizing spray or light mousse at the roots rather than drowning the braid in product later. It gives the strands something to hold onto. That one small prep step changes everything.
1. Classic Center-Part French Braid
The classic center-part French braid is the braid most people picture first, and for good reason. It has that clean, straight-down-the-back shape that looks tidy without feeling fussy. Keep the middle part crisp and the first sections narrow if you want the braid to sit flat against the head instead of puffing out near the crown.
Best on: medium to long hair, especially if you want something that stays put through a workday or a long errand run. The clean line makes it easy to dress up with a blazer or keep plain with a tee and jeans.
2. Side-Swept French Braid
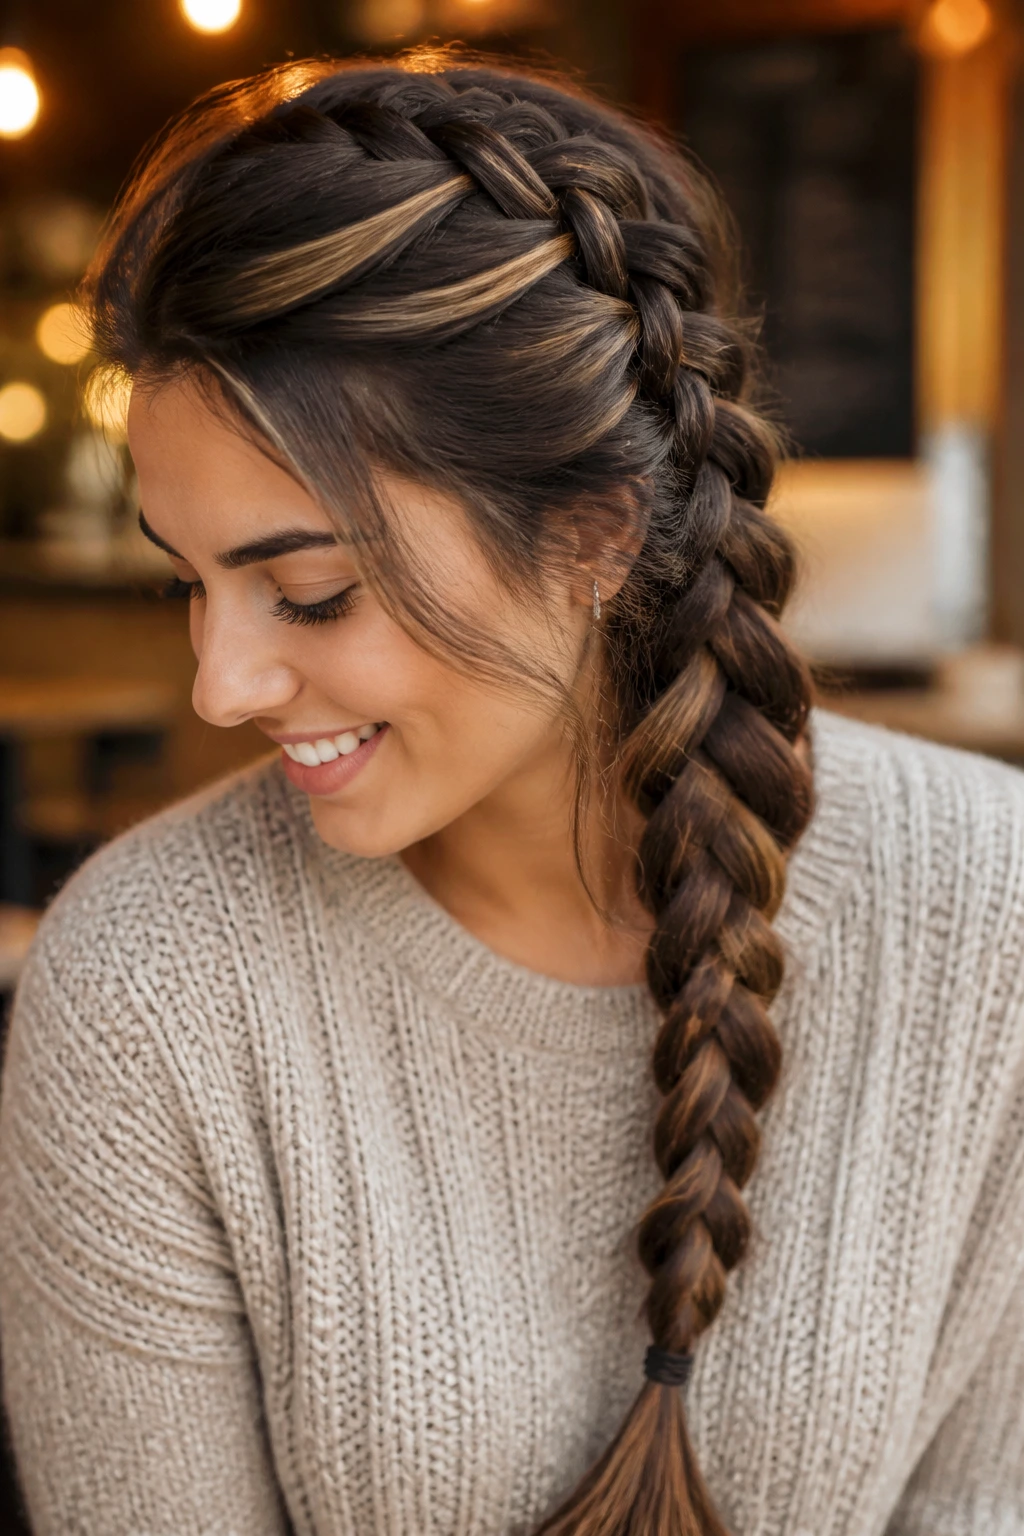
A side-swept French braid changes the mood fast. Instead of dropping straight down the back, the braid starts near one temple and travels diagonally across the head, which gives the style a softer, slightly more romantic shape. It also works well when one side of the hair is flatter or more cooperative than the other. That happens more often than people admit.
Keep the part a little deeper than you think you should, then braid loosely enough that the curve reads clearly. If the braid starts to pull too close to the ear, loosen the first few sections with your fingers before it gets too far down. The angle is the point.
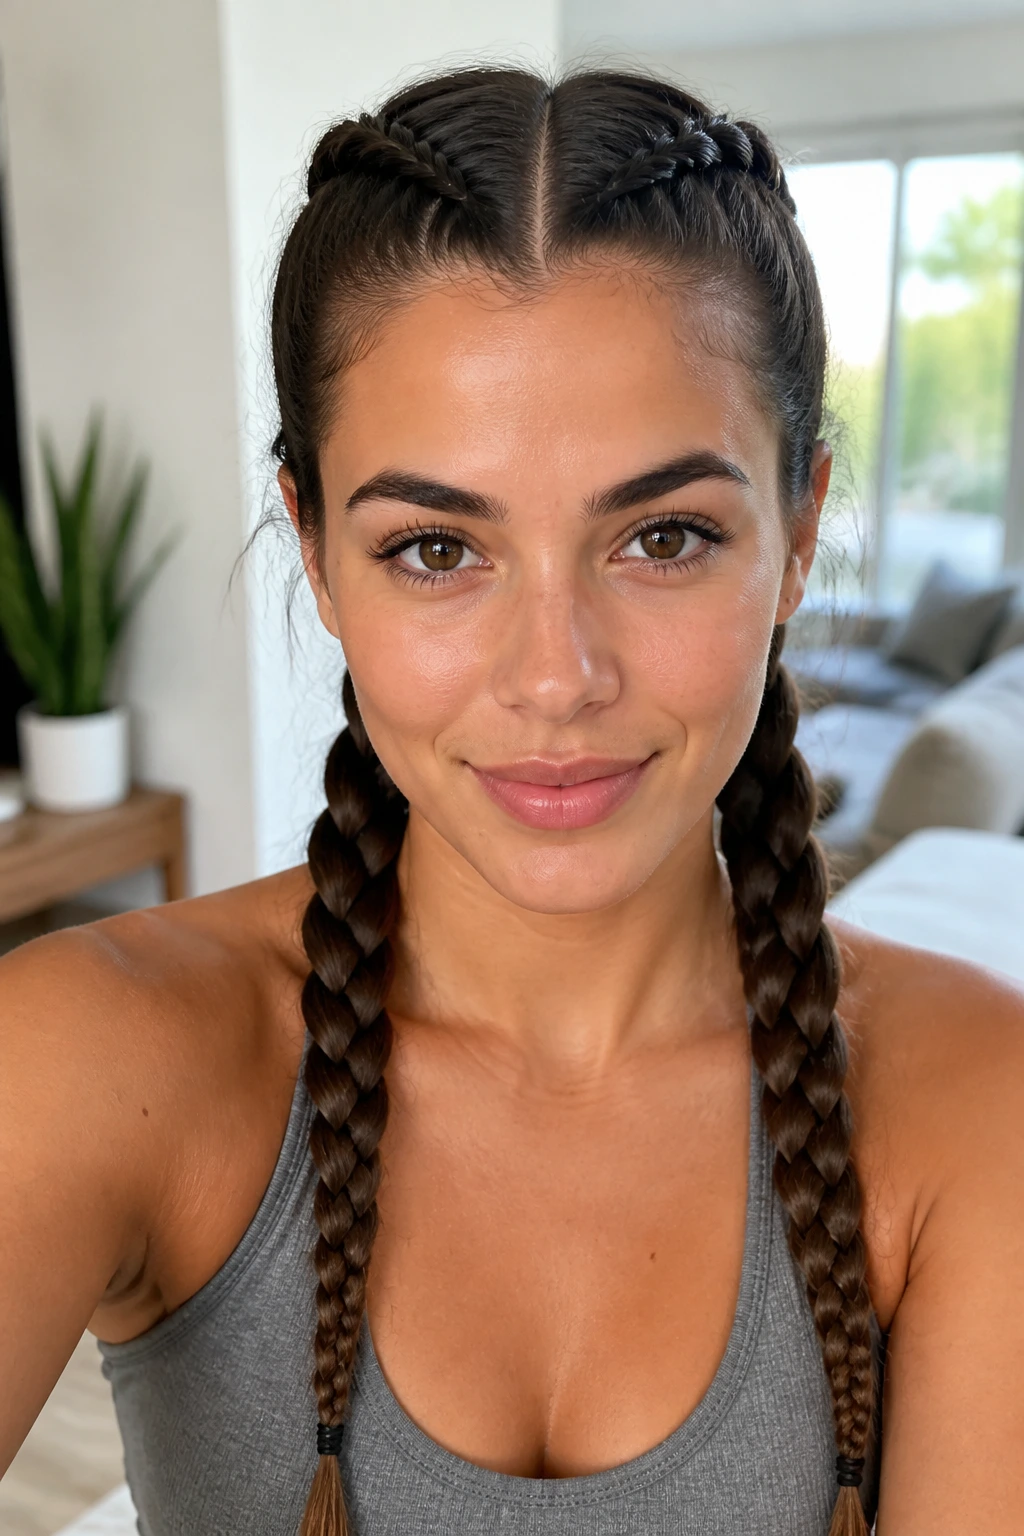
3. Double French Braids
Two French braids do something useful: they make a simple style feel stronger and more balanced. They also distribute weight across the head, which is nice if you’ve got thick hair that tends to drag on one side when worn loose. The look lands somewhere between athletic and neat, depending on how tight you keep the plaits.
I like this style best when the part is exact. Use the tail of a comb and make the center line clean from forehead to nape, then clip each side before you start. If one braid is looser than the other, you’ll notice it immediately in the mirror. So will everyone else.
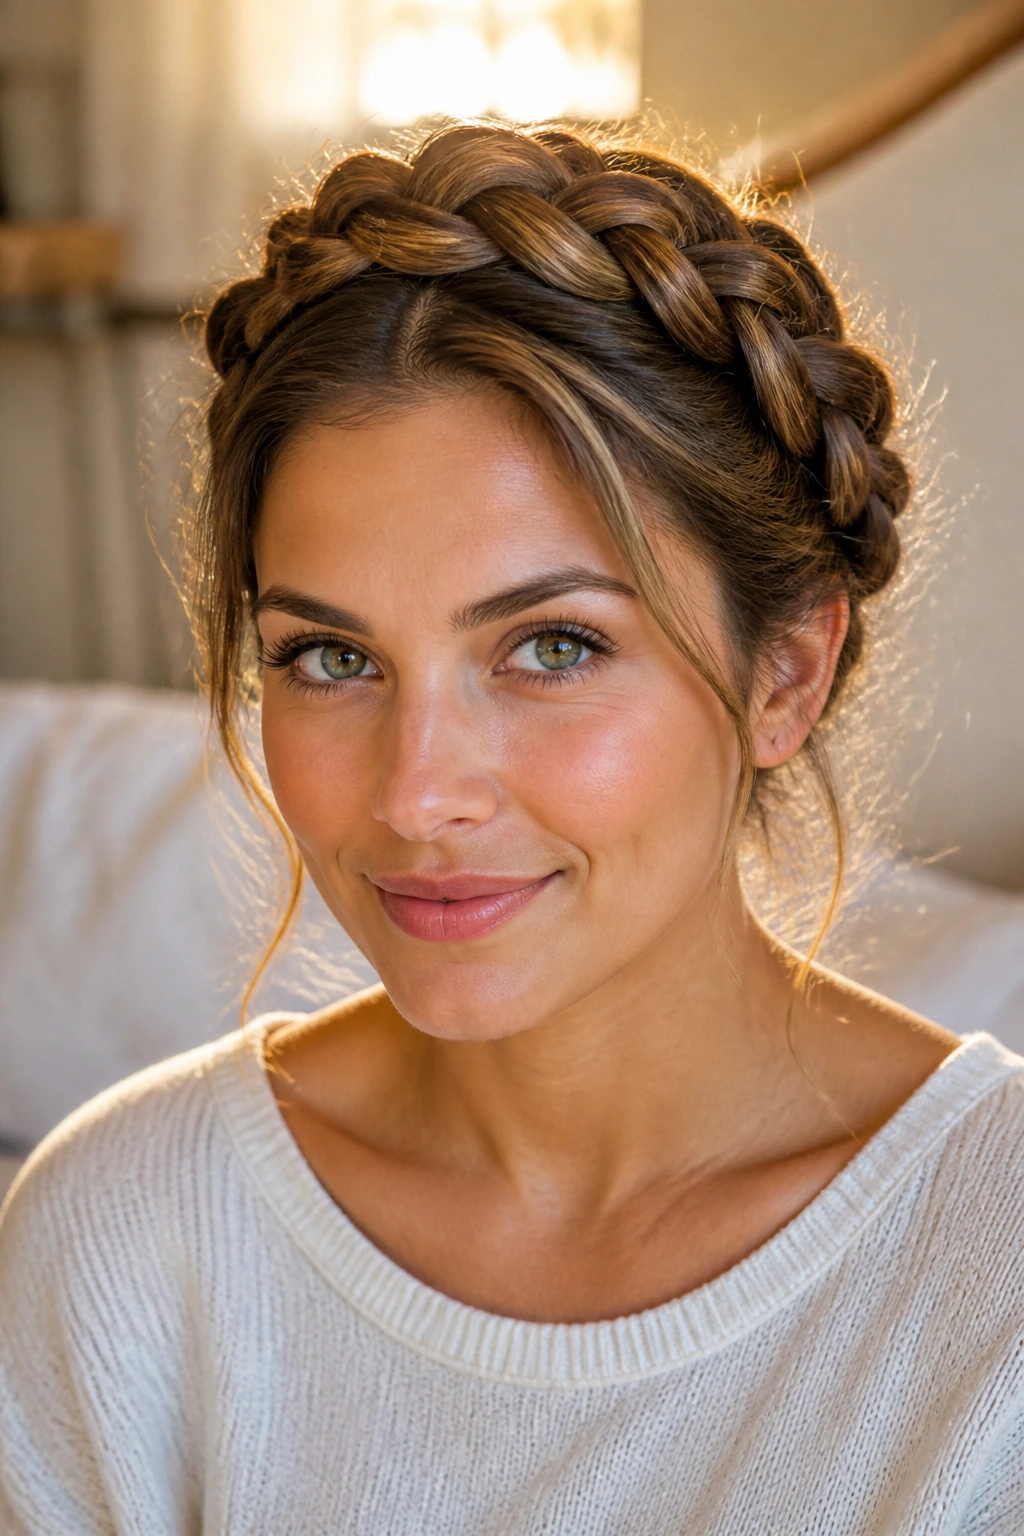
4. French Braid Crown
The French braid crown wraps the braid around the head like a soft halo, and it’s one of those styles that looks more complicated than it really is. The shape is flattering because it lifts the hair away from the face without piling everything into a stiff bun. Keep the braid close to the hairline and pin it with hidden bobby pins as you move around the crown.
A little asymmetry helps here. If the braid starts perfectly symmetrical and stays that way, it can look too rigid. Let the outer edge loosen just enough to curve around the head. A few delicate pins and a light mist of flexible hairspray are usually enough.
5. French Braid into a Low Ponytail
This one is practical in the best way. The French braid starts at the crown, feeds hair into itself for a few inches, and then stops in a low ponytail near the nape. It keeps the top half controlled while leaving the ends free, which makes it a nice compromise when you want structure but not a fully braided finish.
The ponytail tie should sit low and secure. If it rides too high, the whole style loses its calm, grounded feel. Wrap a small strand of hair around the elastic if you want a cleaner finish. It takes thirty extra seconds and makes the whole thing look more finished.
6. French Braid Bun
A French braid bun gives you the neatness of a braid and the stability of a bun in one style. Braid from the crown to the lower back of the head, then twist the remaining length into a bun and pin it flat. It’s a smart choice when you want hair off the neck and out of the way, but still want a little visible braid detail.
Keep the bun low and slightly compact if you want the braid to stay the star. A huge bun can swallow the whole style. If your hair is layered or slippery, tuck the ends under before pinning so the bun doesn’t unravel by lunchtime.
7. Half-Up French Braid
The half-up French braid is the braid version of “I made an effort, but not too much effort.” Only the top section is braided, which lets the rest of the hair stay loose and soft. It’s especially good when you want to show length or curl while still keeping the front pieces under control.
The secret is stopping the braid at the right place. Too high, and it looks tiny. Too low, and it loses the half-up shape. I usually stop around the crown or just below it, then let the braid disappear into a small elastic or a hidden pin. The loose hair below can stay straight, wavy, or curled.
8. Loose Boho French Braid
This is the version I’d pick when the hair is already a little wavy and you want that to work in your favor. The braid is started with a softer hand, then gently widened by tugging on the outer edges after it’s secured. That “pancaking” motion makes the braid look fuller without needing extra hair.
A loose boho French braid looks best when a few face-framing pieces are left out around the temples. Don’t overthink those pieces. A couple of soft, imperfect strands are enough. The style gets ruined fastest when people try to make every flyaway behave like it’s in a school portrait.
9. Sleek Athletic French Braid
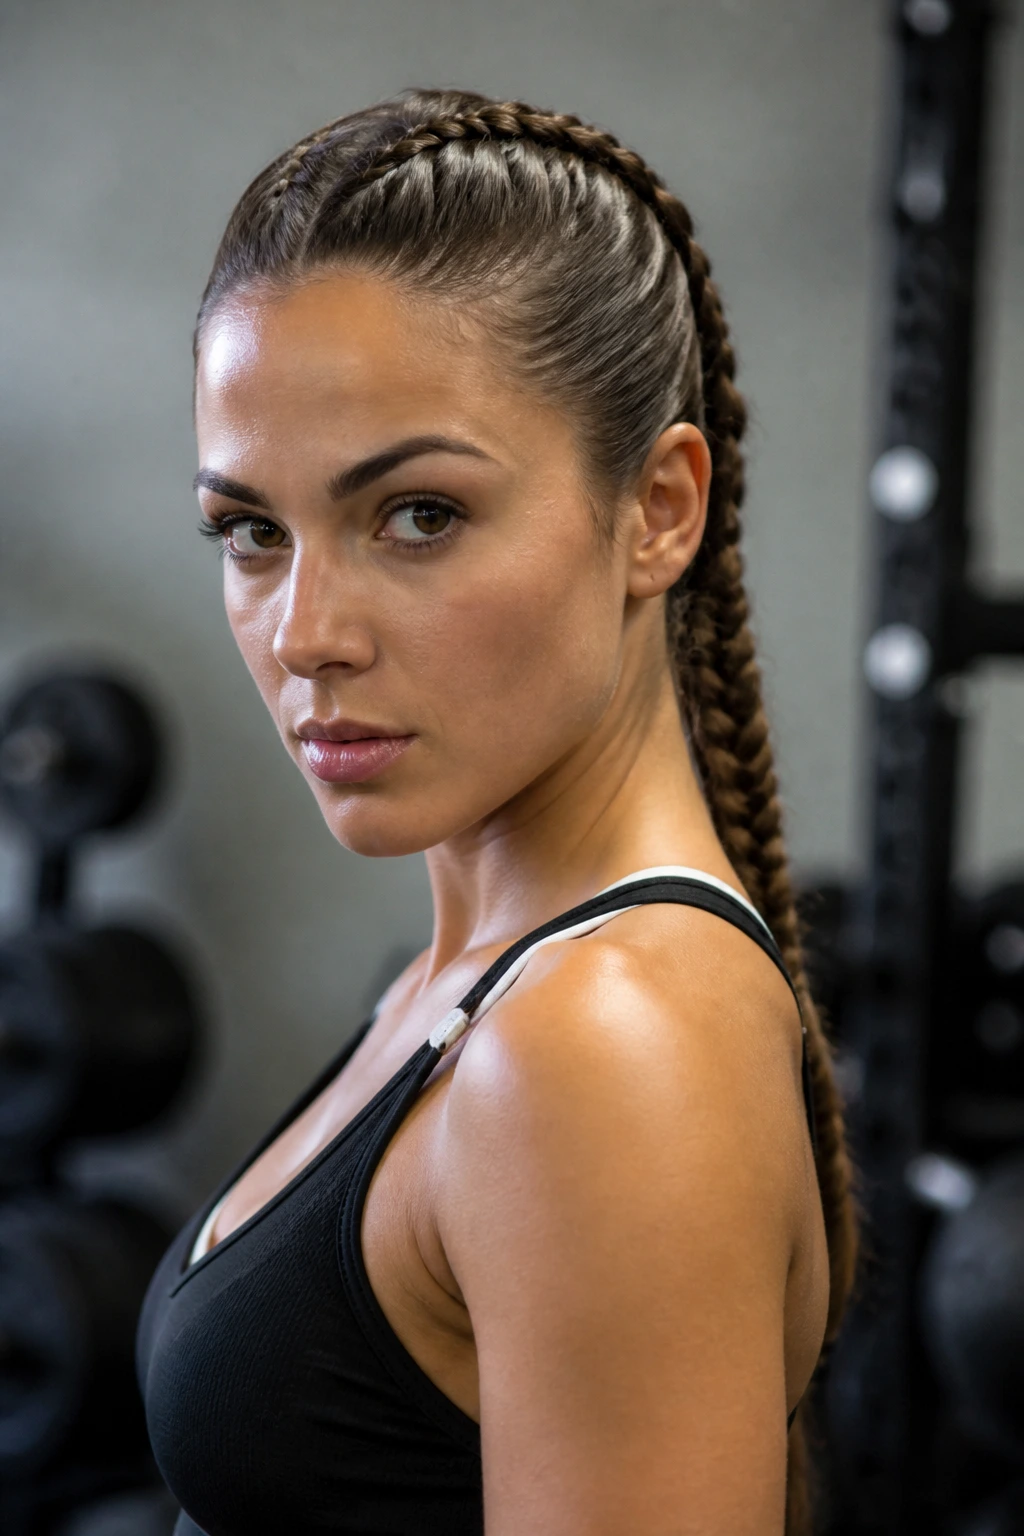
The sleek athletic French braid is all about staying close to the scalp and holding through movement. Use a smoothing cream or lightweight gel at the roots, comb everything firmly into place, and keep the sections narrow and even. The result is the kind of braid that stays tidy under a hoodie or during a workout without collapsing into frizz after ten minutes.
This is not the place for softness. Tight is the point. If you have baby hairs that always escape, smooth them down before you start rather than trying to fix them after the braid is done. It’s much easier to control the hair at the beginning than to wrestle it at the end.
10. French Braid Pigtails
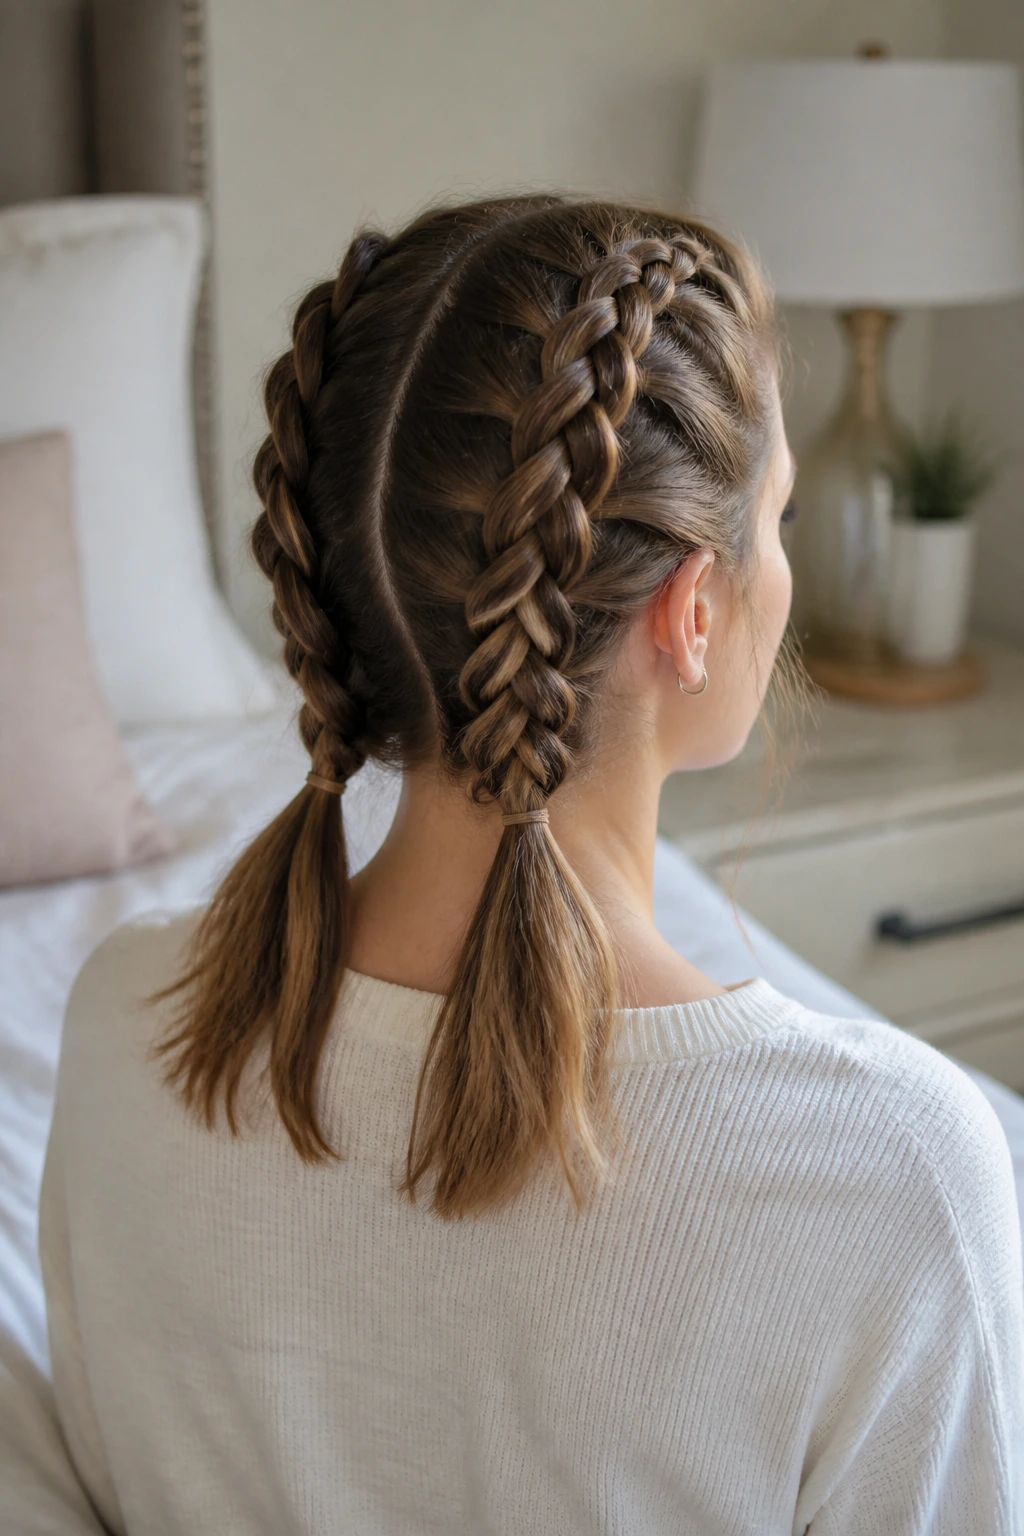
French braid pigtails are playful, but they also solve a real problem: thick or long hair can get heavy fast, and two braids split the load. The look can go childish if the braids are tiny and high, so I prefer a slightly lower start with fuller sections. That keeps them from feeling too juvenile.
A clean center part matters here, but not a ruthless one. If the scalp line is too severe, the style can look harsh. Start the braids a little behind the hairline, then braid down toward the nape and secure with matching elastics. The symmetry does most of the work.
11. French Braid Mohawk
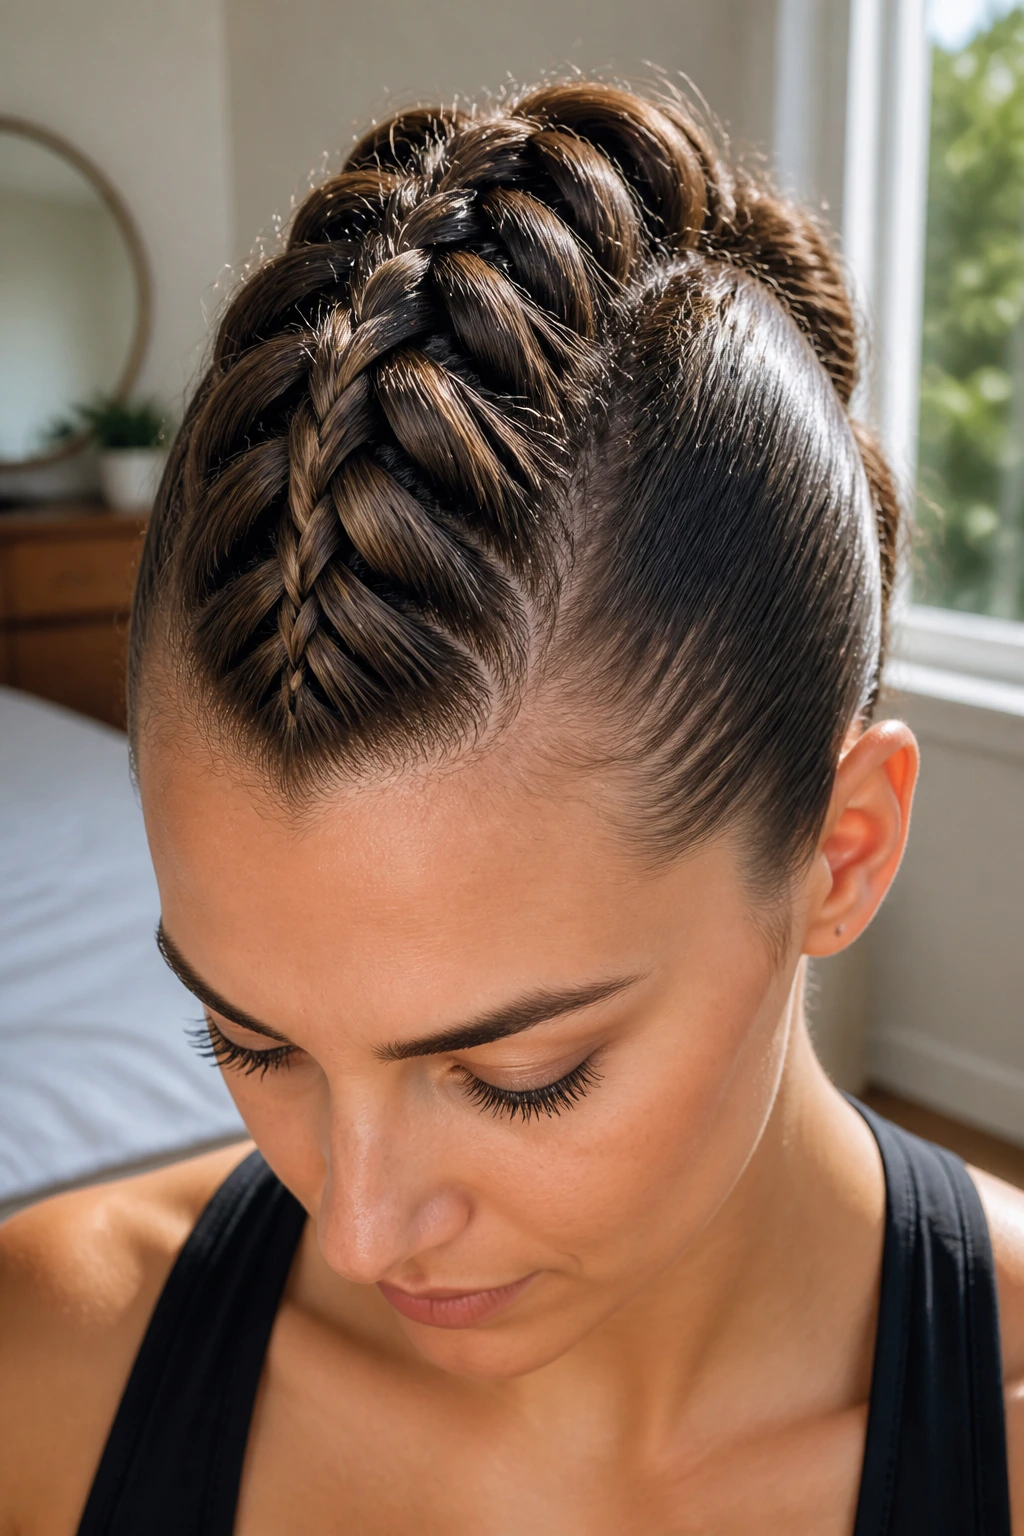
A French braid mohawk gives the middle section of the hair all the visual attention while the sides stay tight and controlled. It’s a bolder shape, and it works best when you want height down the center without a full updo. The braid sits like a ridge from forehead to nape, which gives the hair some attitude without needing any heat styling tricks.
The trick is keeping the side sections sleek. If the sides puff out too much, the mohawk effect gets blurry. A touch of gel or mousse at the temples helps. This style looks best when the top braid has a little lift, not when it’s pressed flat like it’s afraid of being noticed.
12. French Braid Headband
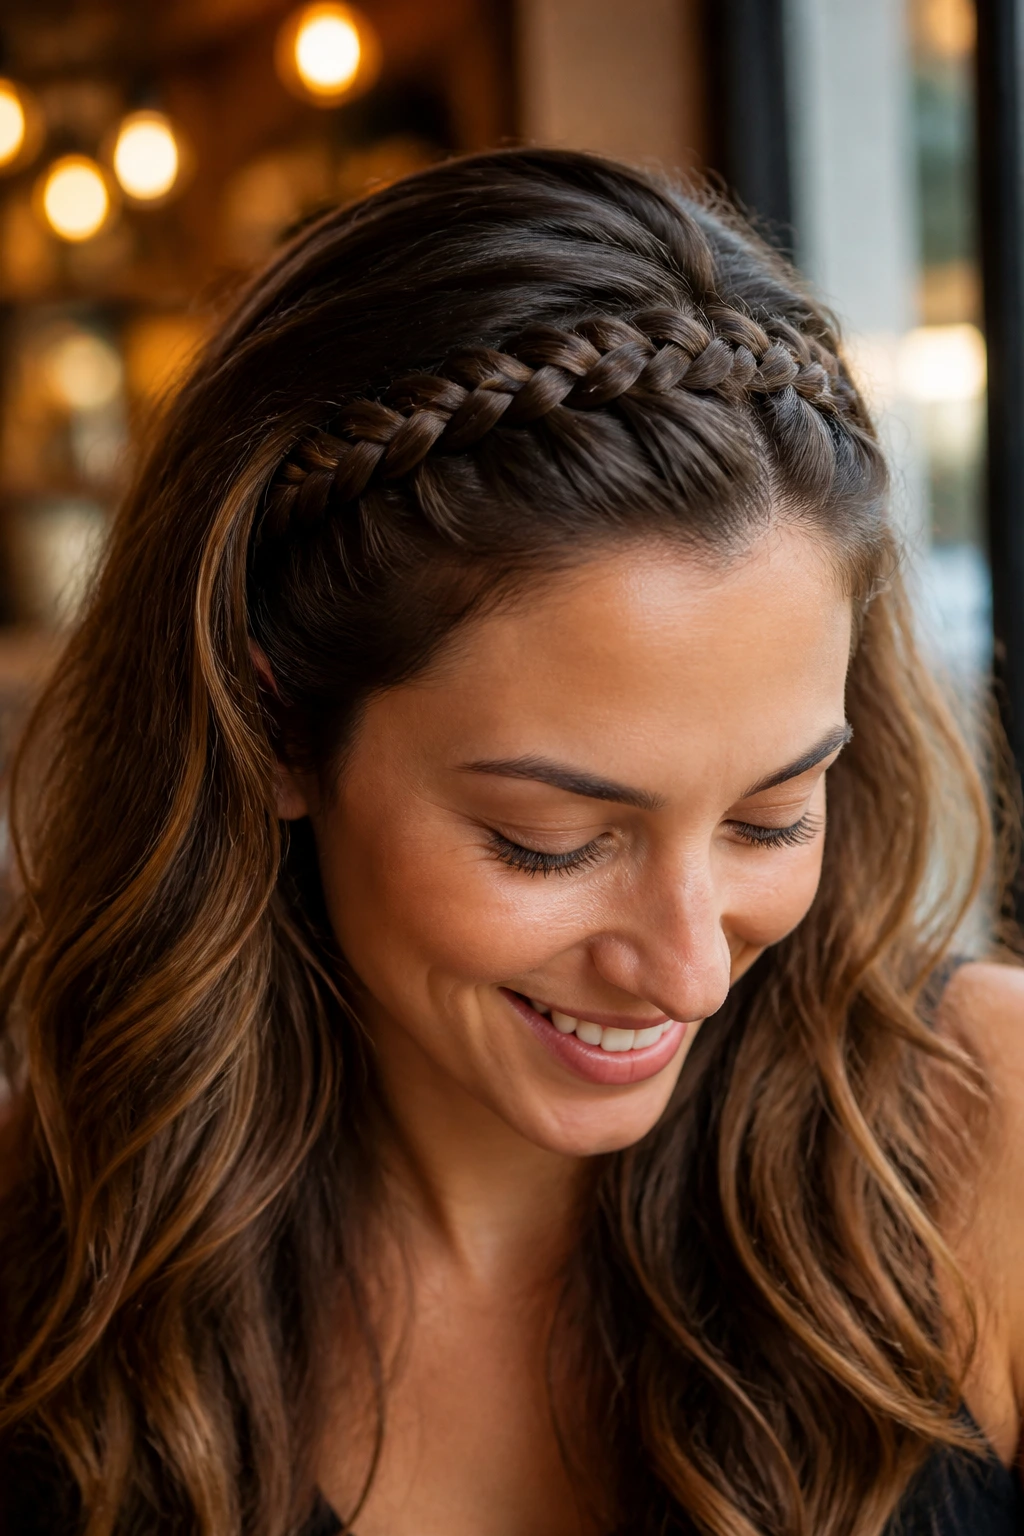
A French braid headband uses the braid itself as a fake headband, usually starting near one ear and wrapping across the front hairline. It’s one of the most useful styles for second-day hair because the braid controls the front while the rest can stay loose and textured. That balance is what makes it feel wearable instead of costume-like.
Keep the braid narrow and low across the forehead. If it sits too far back, it stops reading as a headband and becomes just another braid. A few pins hidden behind the ear are usually enough to secure it. If your hair is fine, this style can make the front look fuller than it really is.
13. French Braid with Ribbon
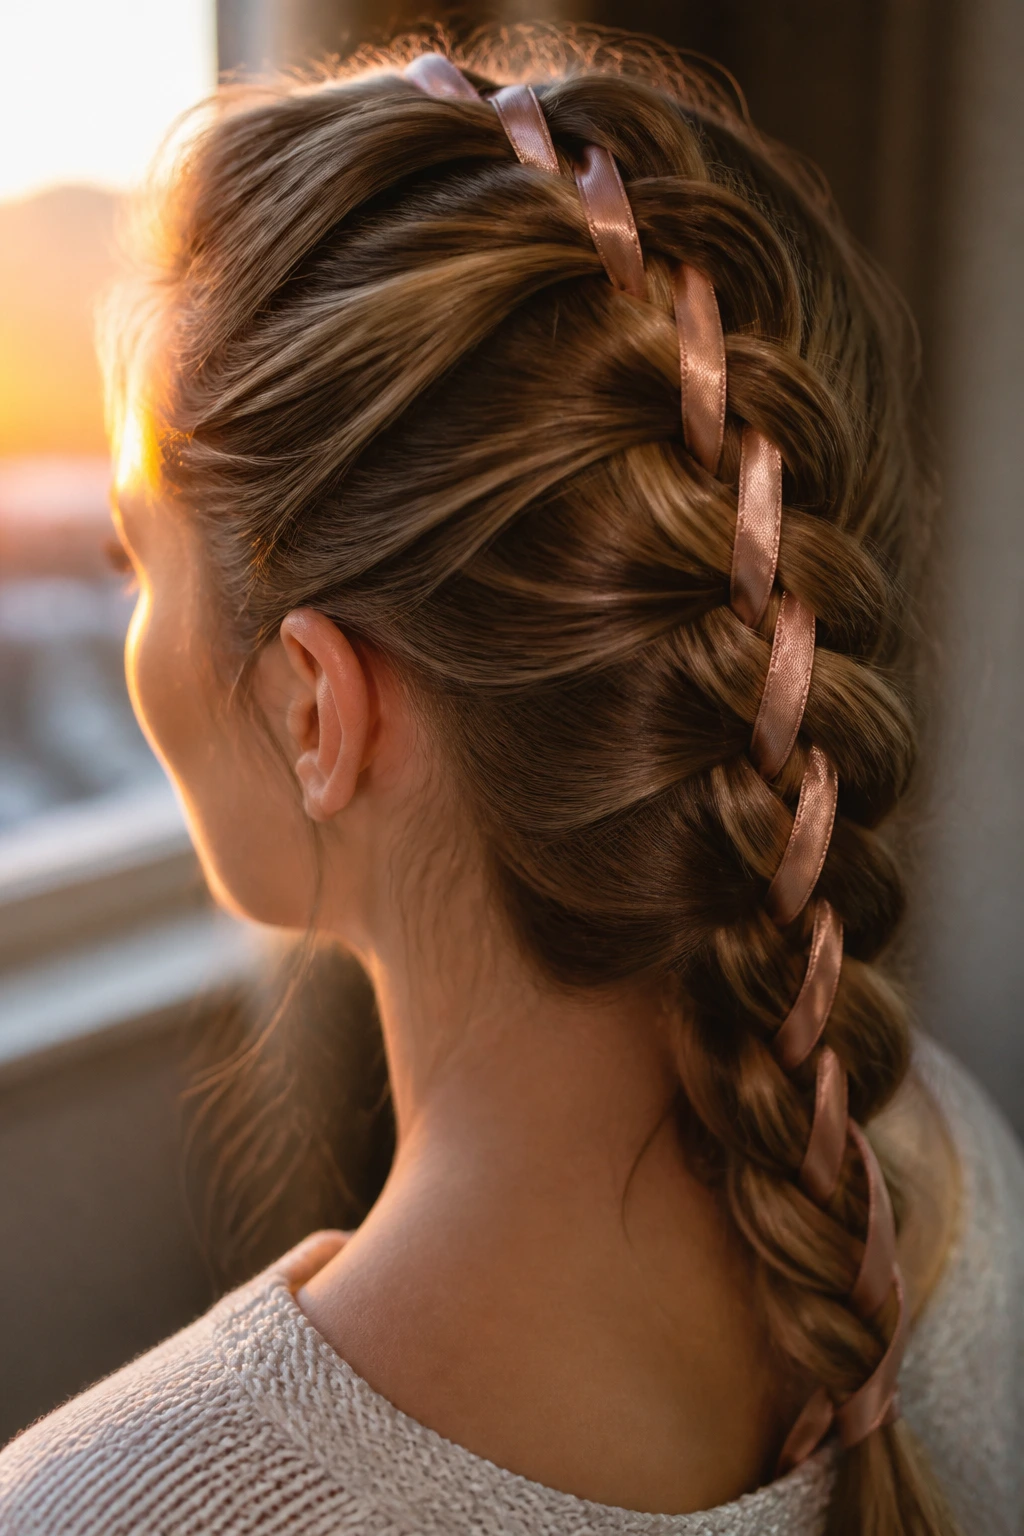
A ribbon woven into a French braid changes the whole tone of the style. A plain braid can look clean and understated, but a slim satin ribbon or grosgrain strip gives it a little color and movement. You don’t need much. One ribbon, about a quarter-inch wide, is usually enough unless you want the ribbon to be the headline.
I like this best with a braid that’s fairly tight at the top and slightly loosened at the ends. That keeps the ribbon visible. If the ribbon slips, tie it to one of the first sections before you start braiding so it stays anchored. It’s a small thing, but it keeps the whole style from unraveling halfway down.
14. French Braid with Soft Curls
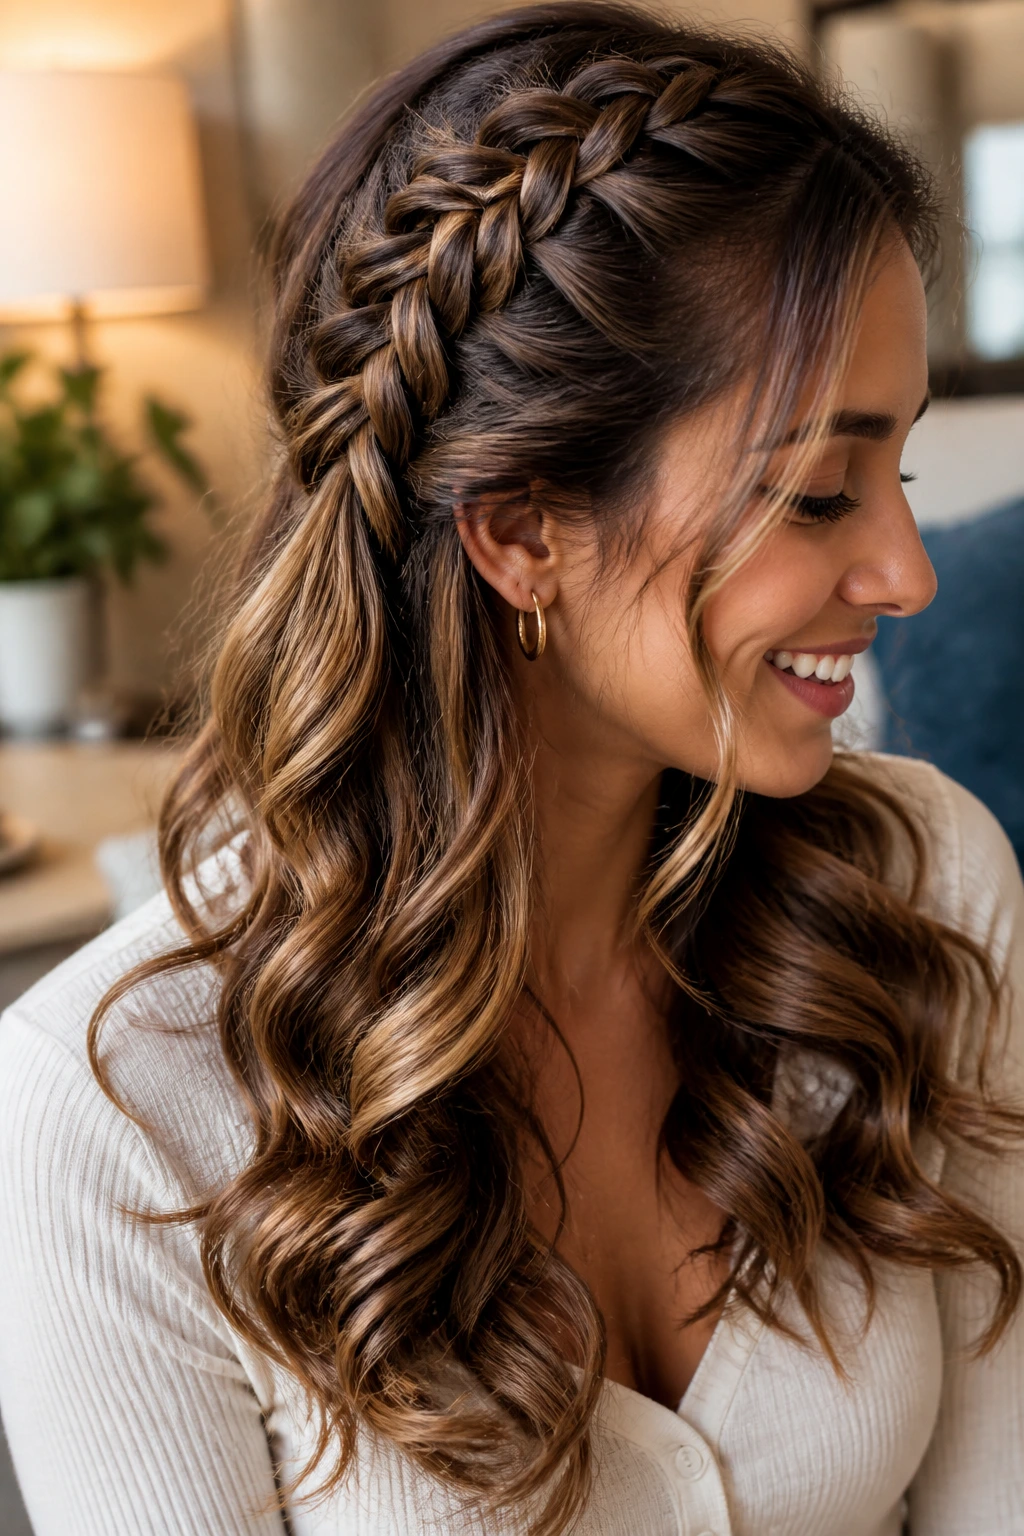
When the braid stops partway down and the remaining hair is curled, the style gets a softer finish. The braid controls the top, and the curls handle the rest. It’s a nice way to use a French braid for an event when you want the front of the hair to stay neat but still want some movement at the ends.
Curl the loose length away from the face in 1-inch sections so the ends don’t all fold together into one heavy shape. A curling iron around 1 to 1¼ inches usually gives the best balance here. Smaller irons can look too springy; larger ones can fall flat before the evening is over.
15. French Braid Finished as a Fishtail
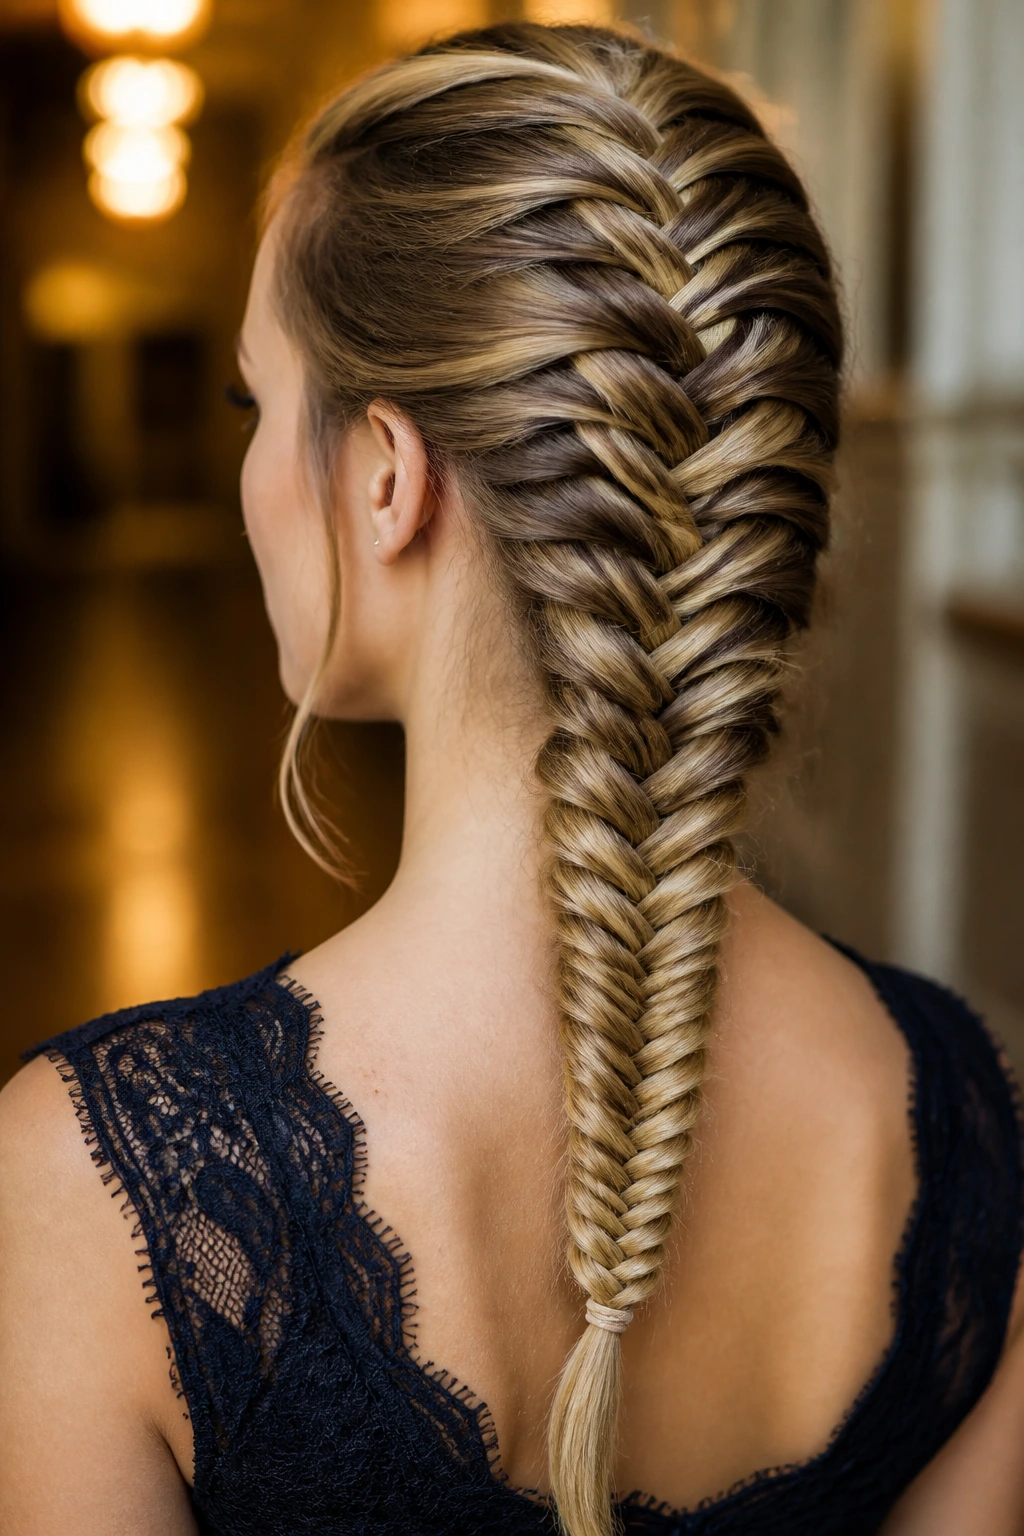
This hybrid style starts as a French braid and ends as a fishtail, which makes the bottom half look finer and more intricate than the top. It’s a nice choice when you want the braid to feel a little less expected without changing the whole process. The top still gives you the scalp-hugging structure that makes French braids so useful.
Switch only after the braid has enough length to hold itself comfortably—usually once you’re past the crown. The transition should feel smooth, not abrupt. If your hands are more comfortable with standard three-strand braids, this is a good place to play around without starting from scratch.
16. Milkmaid French Braid
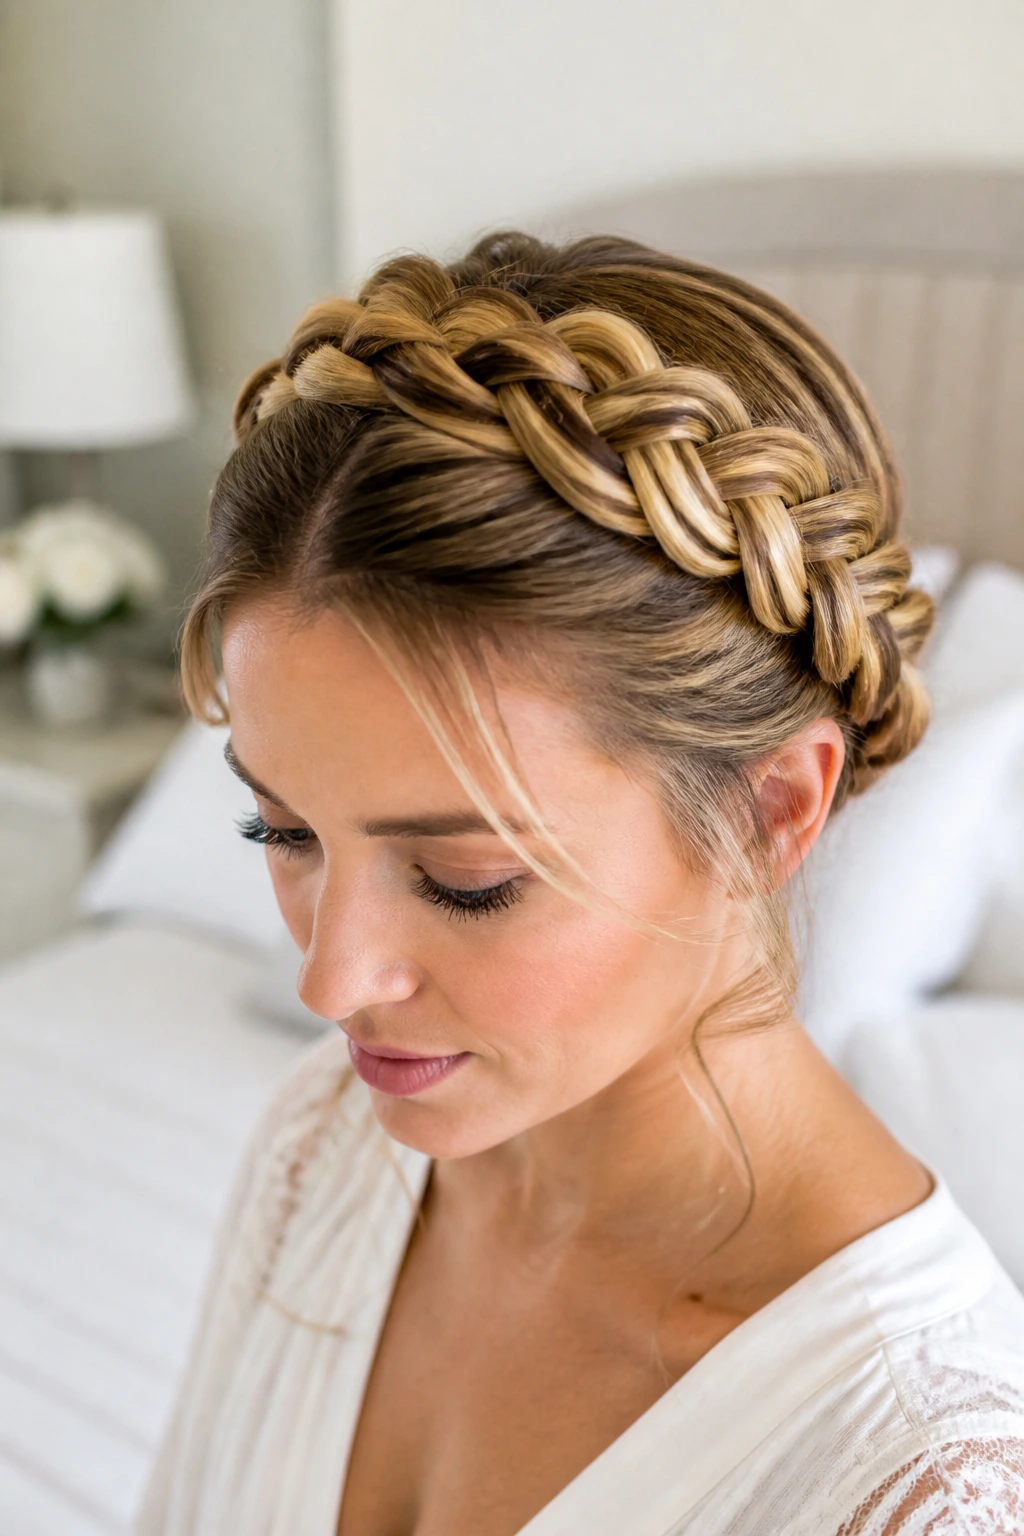
The milkmaid French braid wraps the braid or braids over the top of the head, creating that soft wrapped shape around the hairline. It has a vintage feel, but it’s not fragile-looking when it’s done with a little tension. Keep the crown area smooth and pin the braid ends flat so nothing sticks up like an afterthought.
This style looks especially good when the braids are slightly loosened before pinning. That makes them look fuller against the head. If your hair is long enough, you can wrap the ends under the braid to hide them completely. It’s tidier than leaving tails to poke out the back.
17. Pull-Through French Braid Look
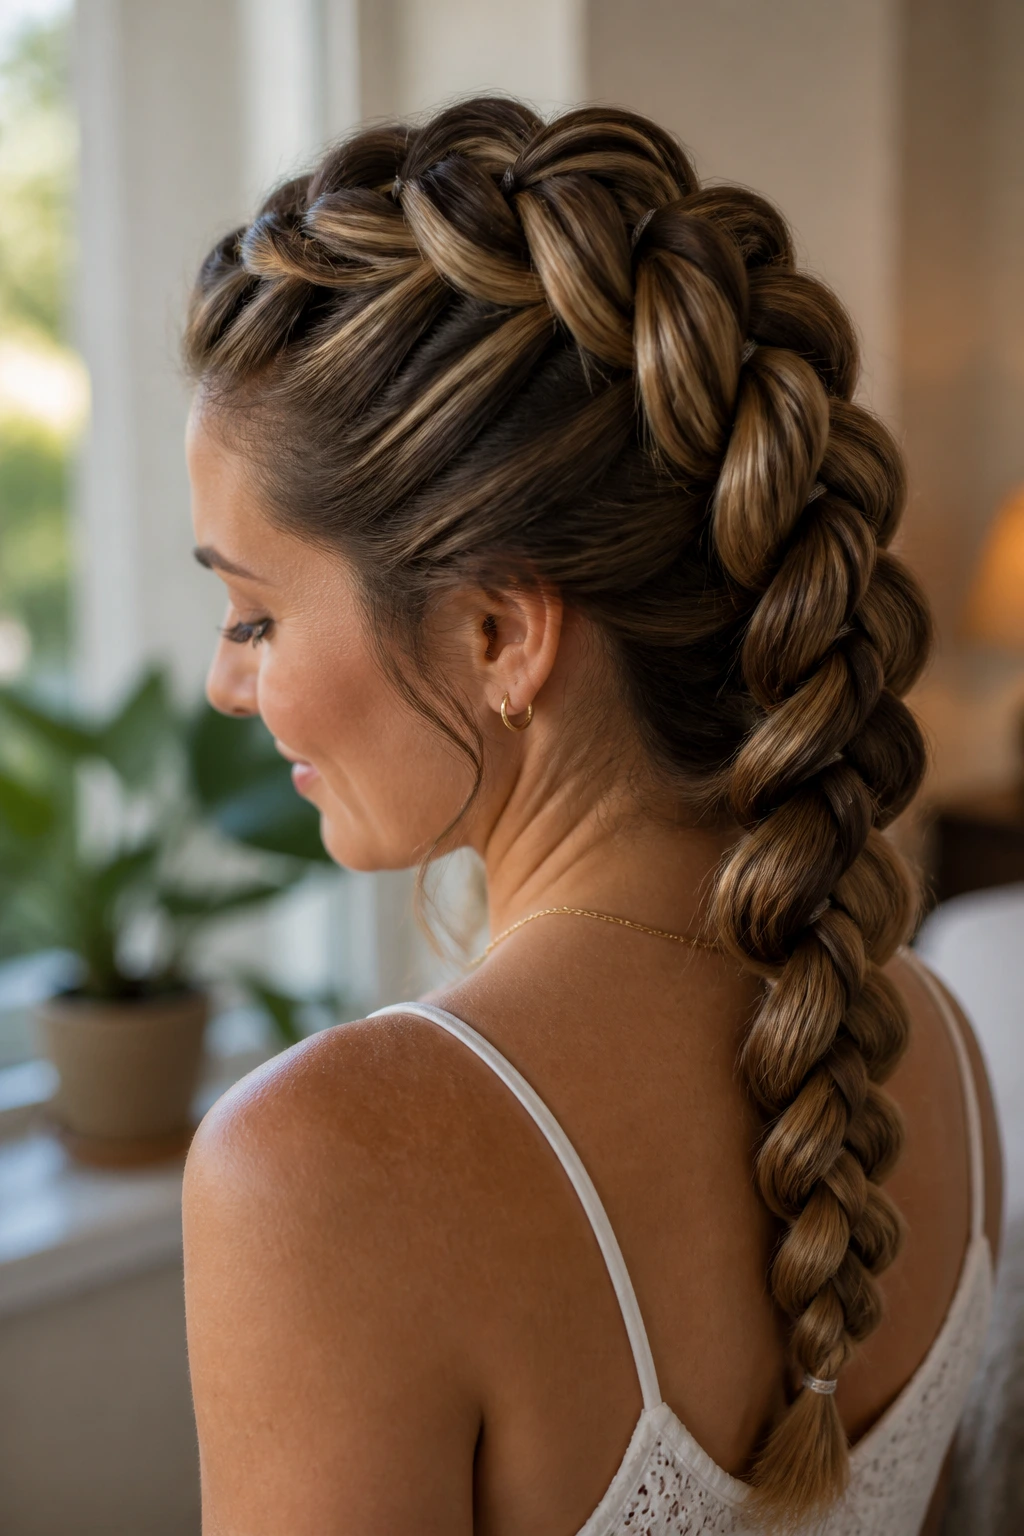
A pull-through braid imitates the shape of a French braid but uses small ponytails layered one under the other. It’s a cheat in the best sense. The result is thick, structured, and full-looking, which makes it a good option when you want a braid with more bulk than your hair naturally gives you.
The style is especially kind to fine hair. Small elastics do the heavy lifting, and you don’t need perfect hand tension to make it work. If you’re impatient with traditional braiding, this one gives you a similar visual effect with less finger strain. Not a bad trade.
18. French Braid with Face-Framing Pieces
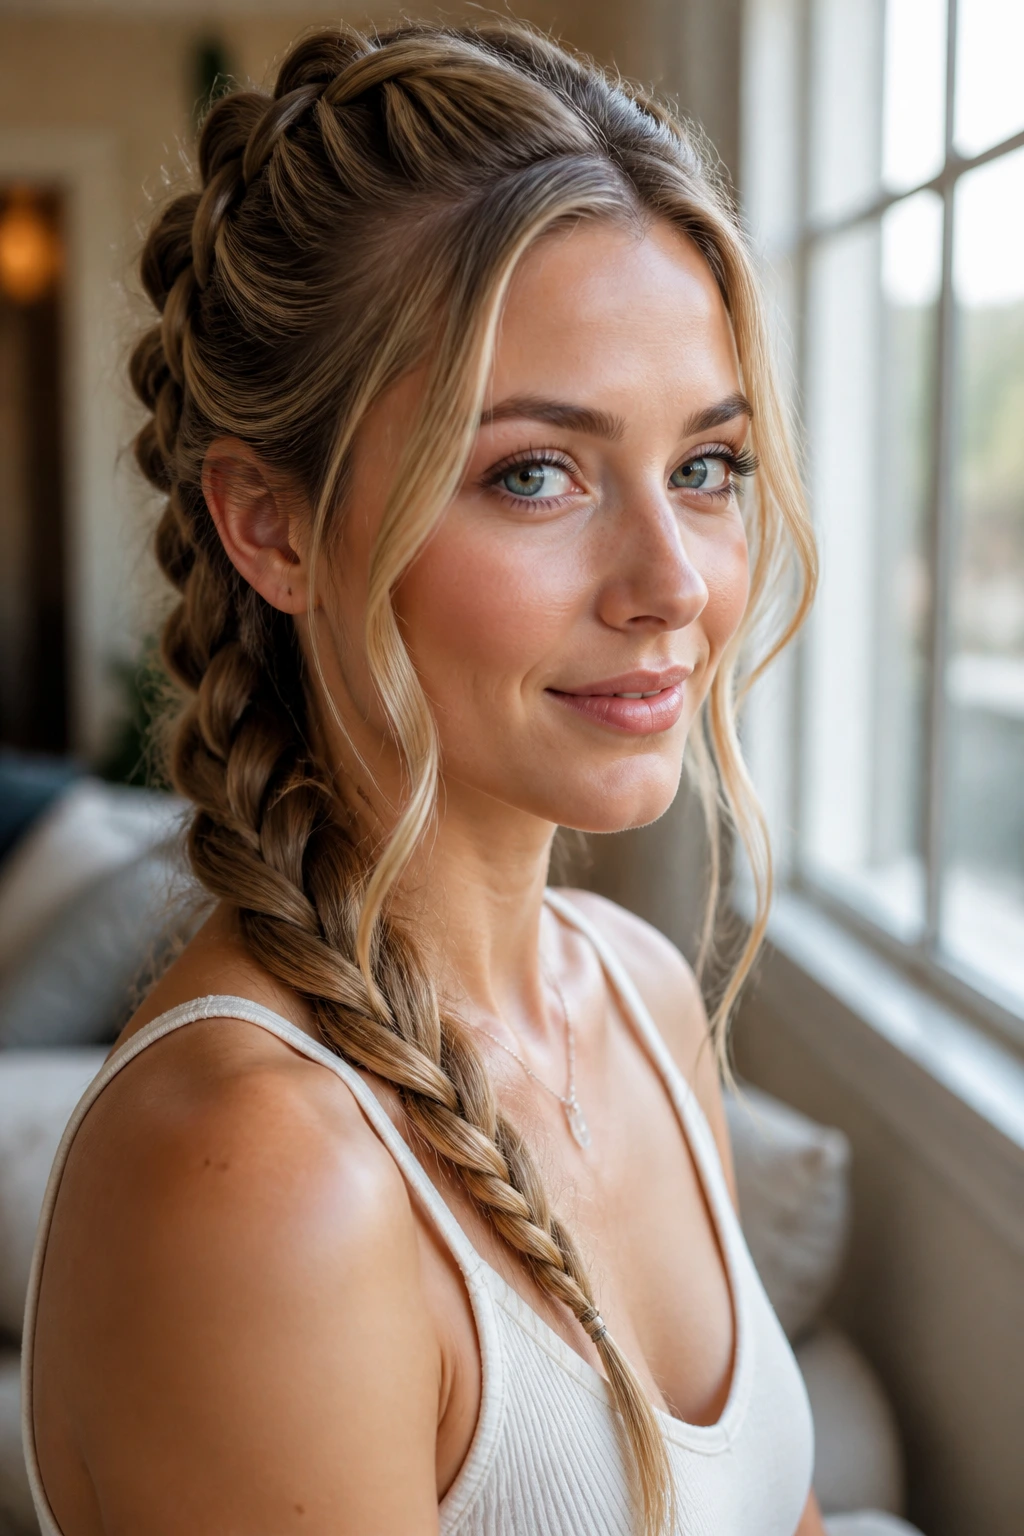
A French braid with face-framing pieces keeps the braid neat but leaves a little softness around the cheeks and jaw. That small detail changes the whole mood. Without those pieces, the style can look strict; with them, it feels more relaxed and flattering around the face.
The key is restraint. Take out only a few strands on each side—too many, and the braid loses its shape. Curling or smoothing those front pieces depends on your hair texture, but either way, the pieces should look intentional, not like they escaped. This style is one of my favorites when a braid needs to feel less severe.
19. Low French Braid Chignon
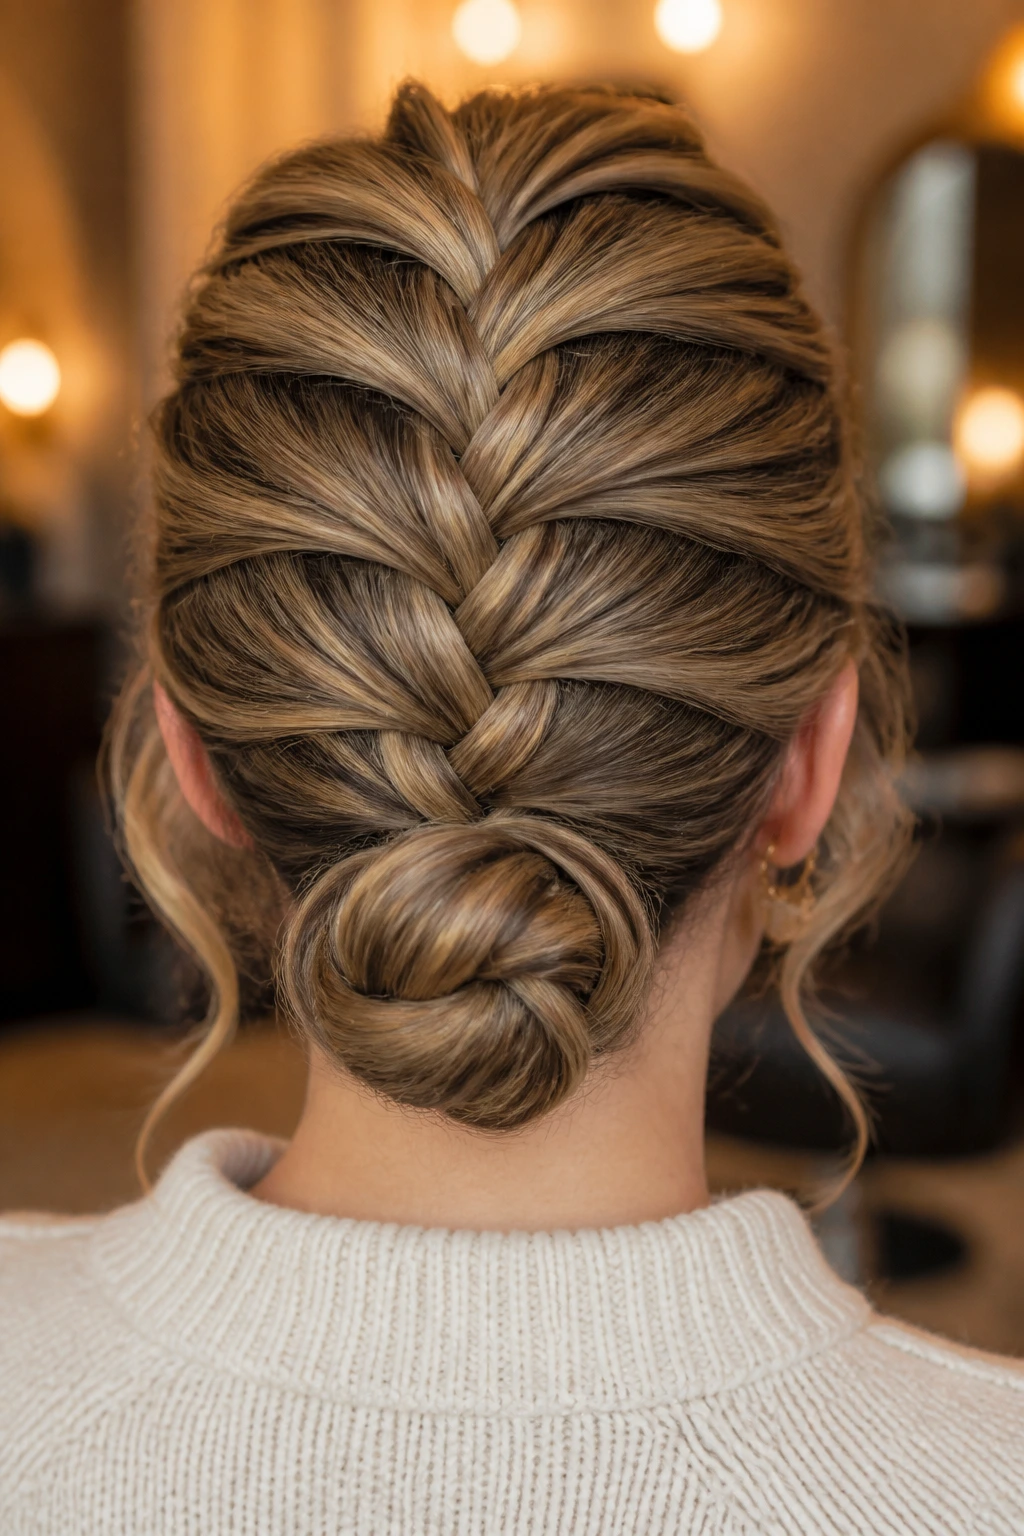
A low French braid chignon gives you a quiet, tucked-up finish that sits at the nape of the neck. Braid down to the lower back of the head, coil the length into a chignon, and pin it firmly underneath. The finished shape stays compact, which makes it useful under collars, scarves, or a coat that likes to rub hair around.
The braid should remain visible at the top so the style doesn’t disappear into a regular bun. If your hair is layered, cross-pin the loose ends rather than twisting them into a tight knot. That keeps the chignon smooth and stops little ends from sticking out later.
20. French Braid into a Bubble Ponytail
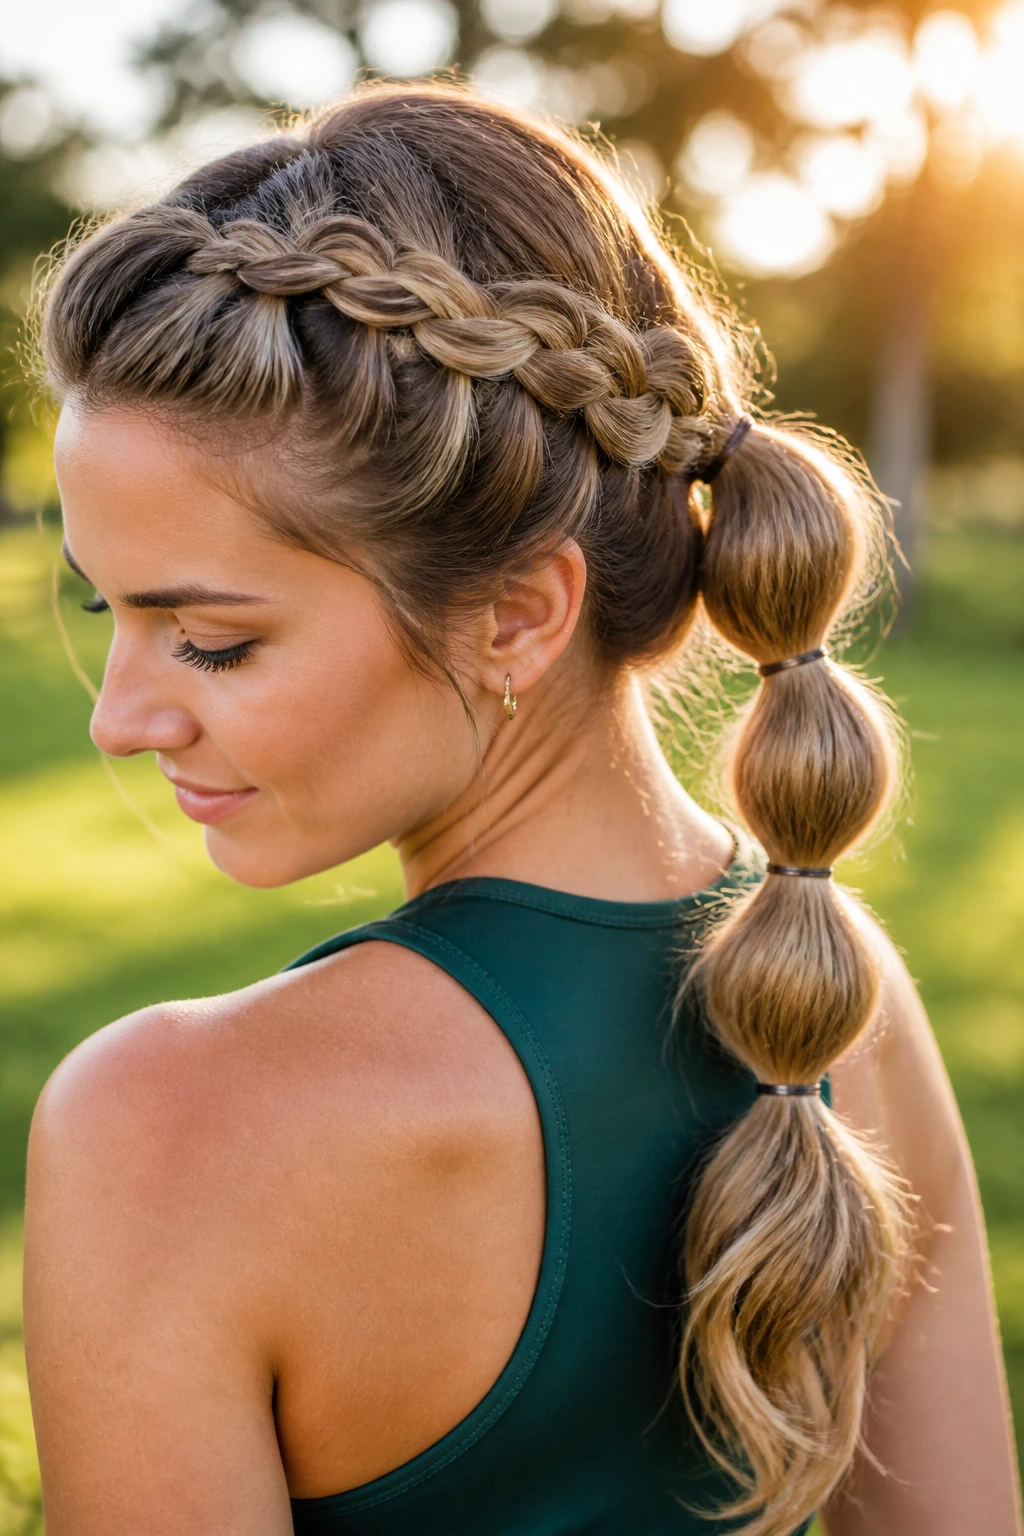
This one has a little personality. Start with a French braid at the crown, then switch to a ponytail and add elastics every few inches down the length to create a bubble effect. It’s playful, but the French braid at the top keeps it from looking too casual or too sweet.
The spacing between the elastics matters. Leave about 2 to 3 inches between each one, then gently pull each section outward to create the rounded bubble. If the bubbles are too tight, the style looks stiff; if they’re too loose, the shape gets lost. A fine tail comb helps here more than fingers do.
21. French Braid on Curly Hair
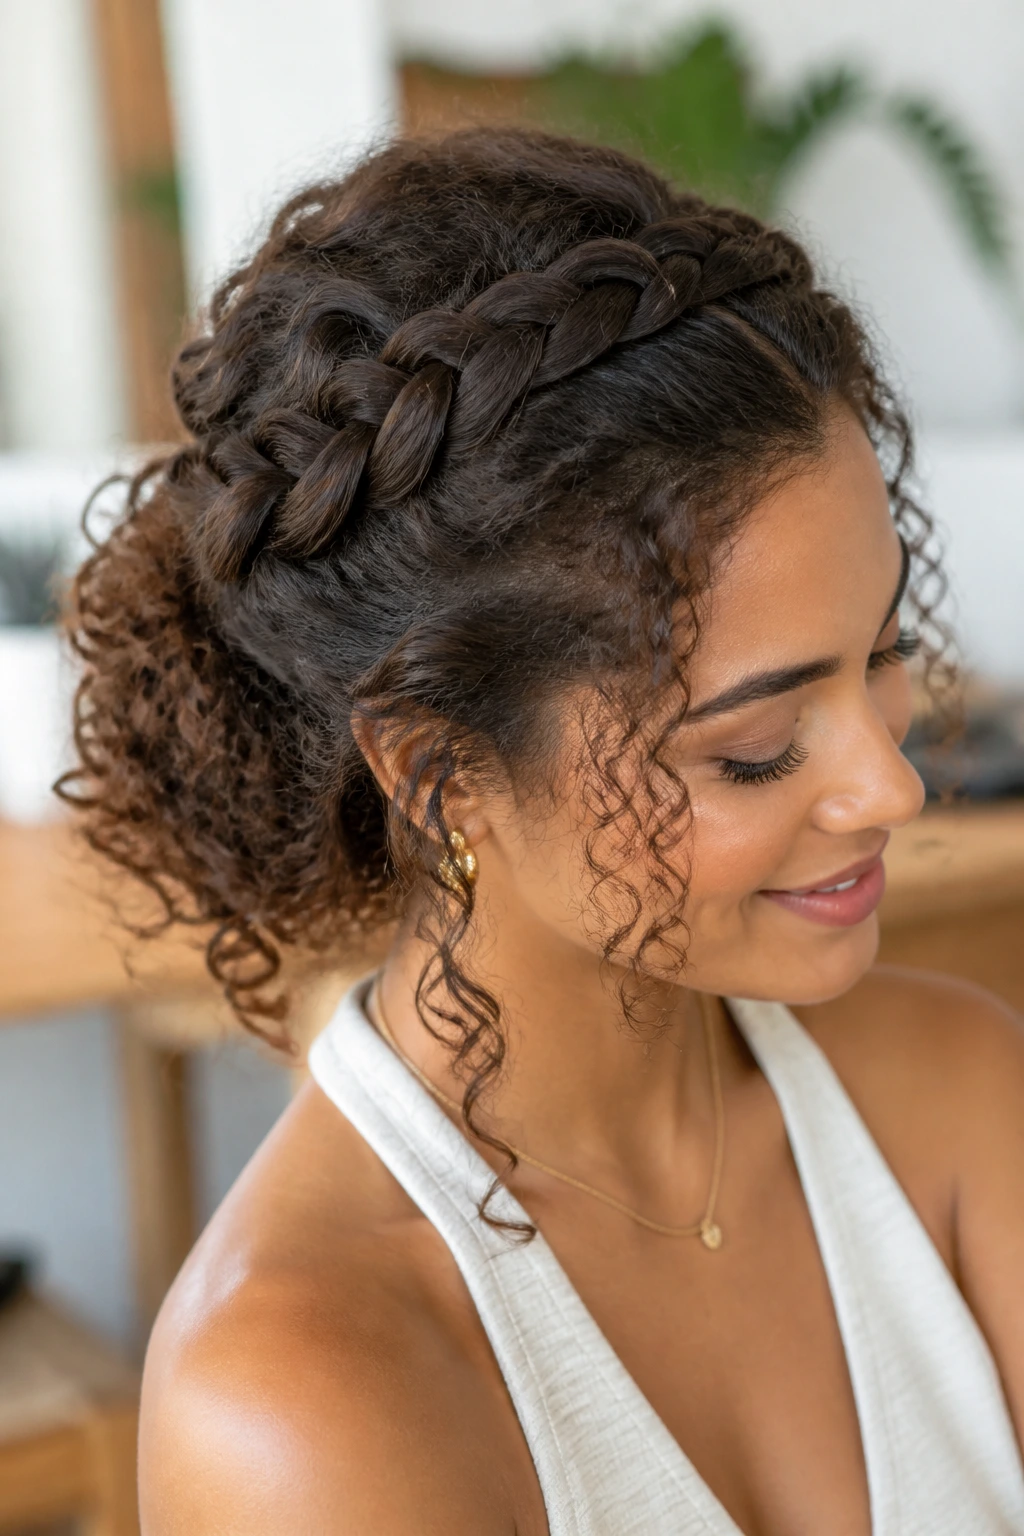
Curly hair gives a French braid a different life. The braid usually has more body, more texture, and a little less predictability, which I think is part of its appeal. Instead of trying to flatten the curls into submission, work with the bend and let the braid look full and plush.
A leave-in conditioner or light styling cream helps the curls stay soft while you section them. Don’t brush the curls dry unless you want the braid to turn frizzy at the first sign of humidity. A wide-tooth comb or fingers are often enough. The braid can look softer and richer on curly hair than on straight hair, which surprises people the first time they see it done well.
22. French Braid for Fine Hair
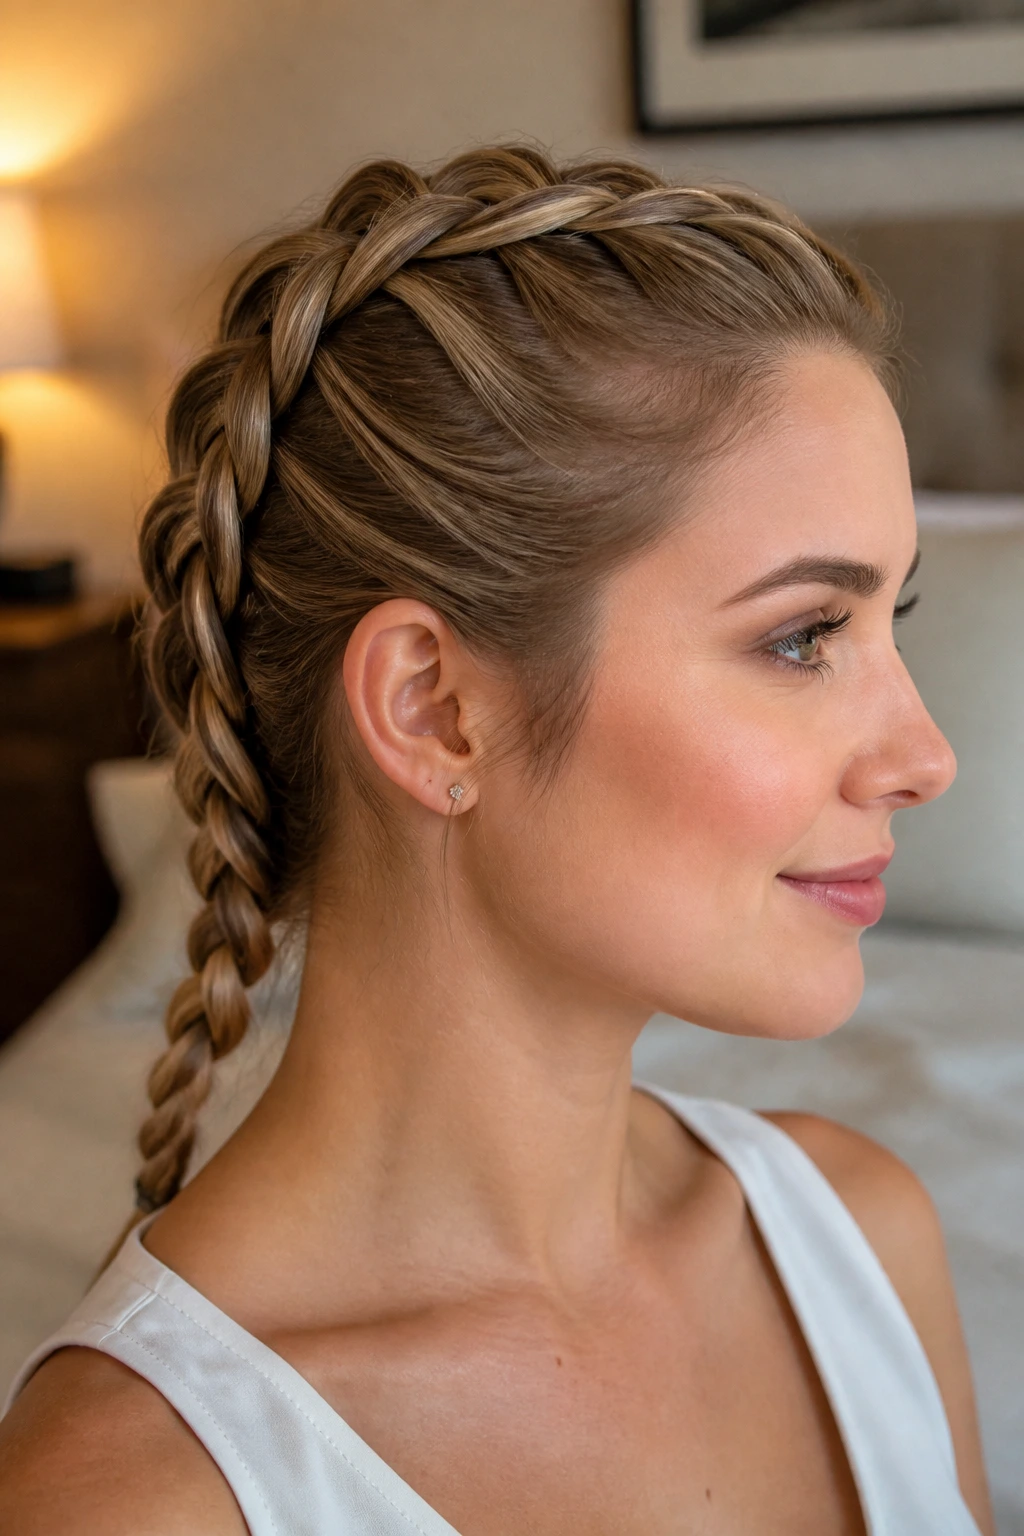
Fine hair benefits from a French braid that is built for volume rather than perfection. Start with dry shampoo or texturizing spray at the roots, because fine hair tends to slip when it’s too clean and silky. Smaller sections help the braid stay compact, and pancaking the braid later can make it look thicker than it really is.
A little tug goes a long way. Pull the outer loops gently, not aggressively, or the braid will collapse into a loose mess. Fine hair often looks best in styles that are a touch softer and a touch wider than the original braid pattern, because a narrow braid can vanish against the head.
23. French Braid for Thick Hair
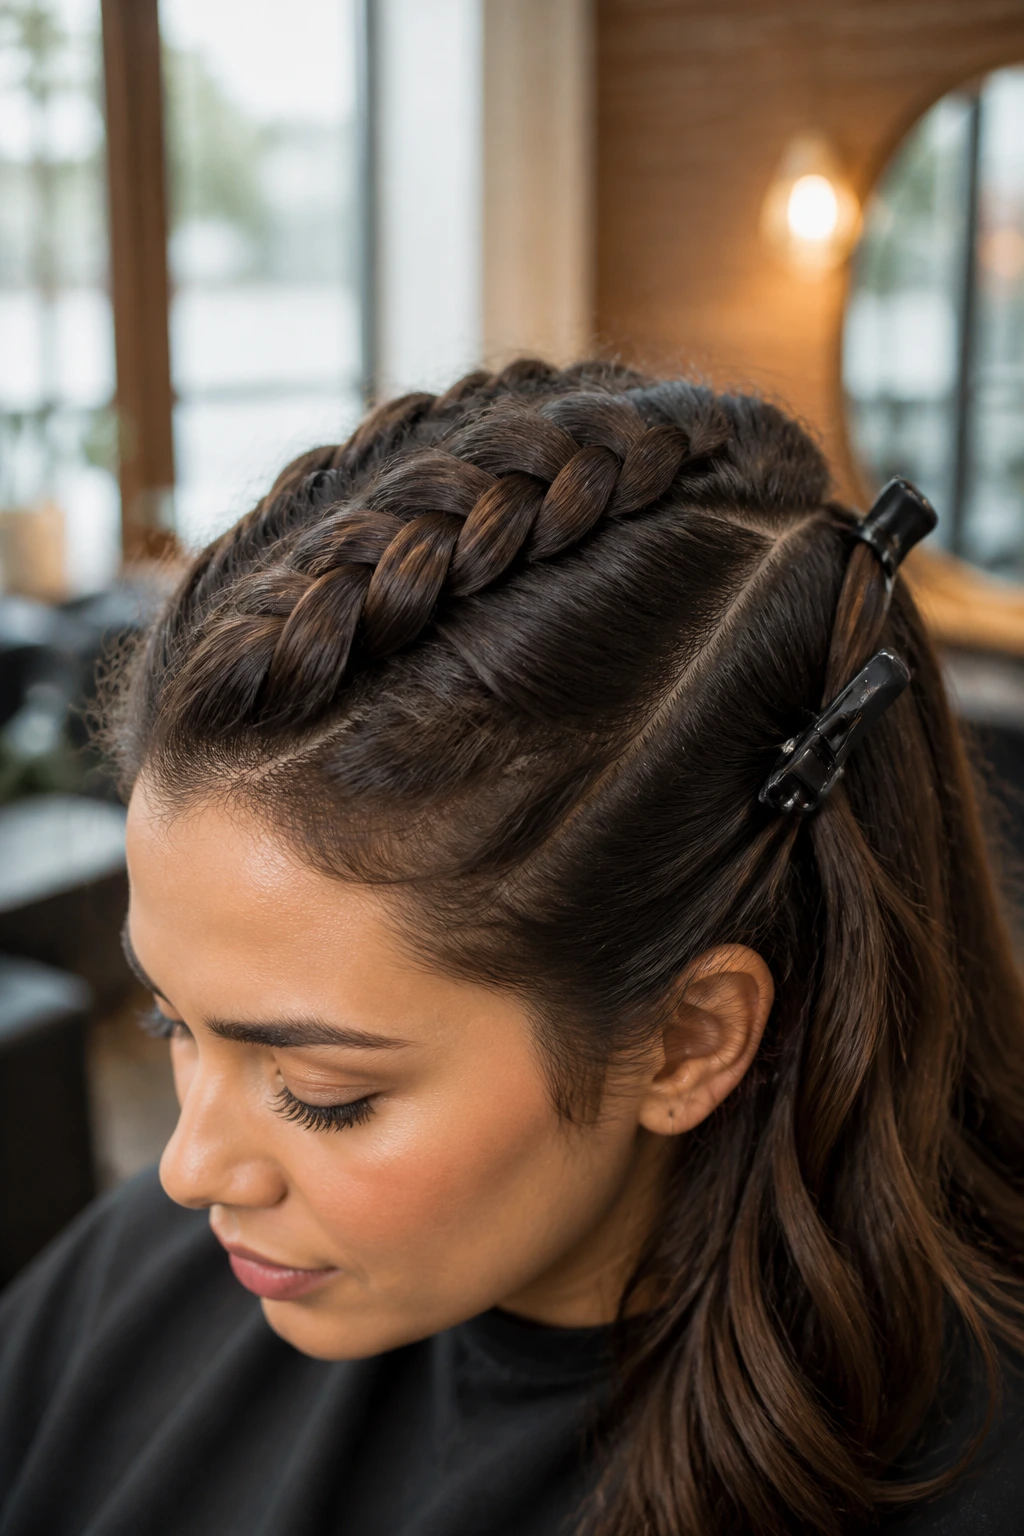
Thick hair can make a French braid look rich and full, but it also means your hands will work harder. Use clips to hold the sections you’re not braiding yet, and don’t fight the density by taking too much hair at once. Small, even picks create a cleaner line and keep the braid from bulging in odd places.
A smoothing cream at the crown can help tame bulky roots. If the braid starts to feel too heavy halfway down, that’s a clue your sections were too large at the top. Thick hair usually looks best in styles that are anchored tightly and then relaxed slightly at the outer edges. Heavy hair needs structure first.
24. French Braid for Short Hair
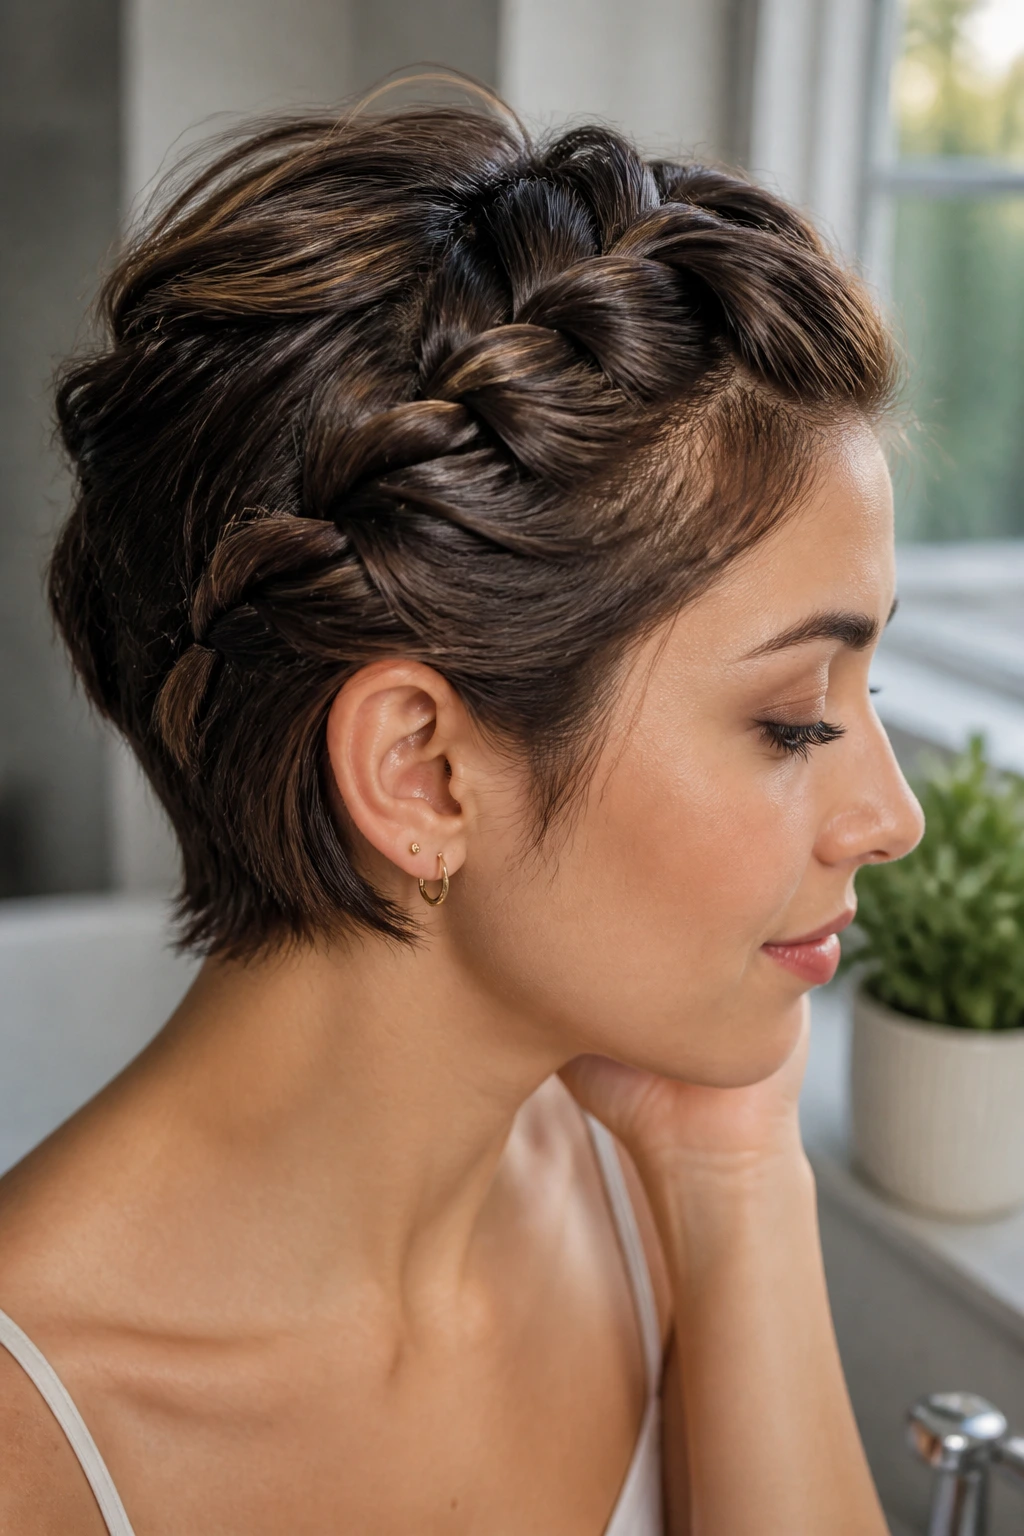
Short hair can still take a French braid, but the style changes. Instead of a long trailing braid, you’re often building a partial braid that stops at the crown, the nape, or just behind the ear. That can look sharper than forcing the hair into a longer braid it can’t support.
The key is picking up small sections and keeping your fingers close to the scalp. If the hair is too short to fully braid, secure the last section with a tiny elastic and let the ends stay loose. It will still read as a French braid, just a compact one.
25. French Braid for Long Layers
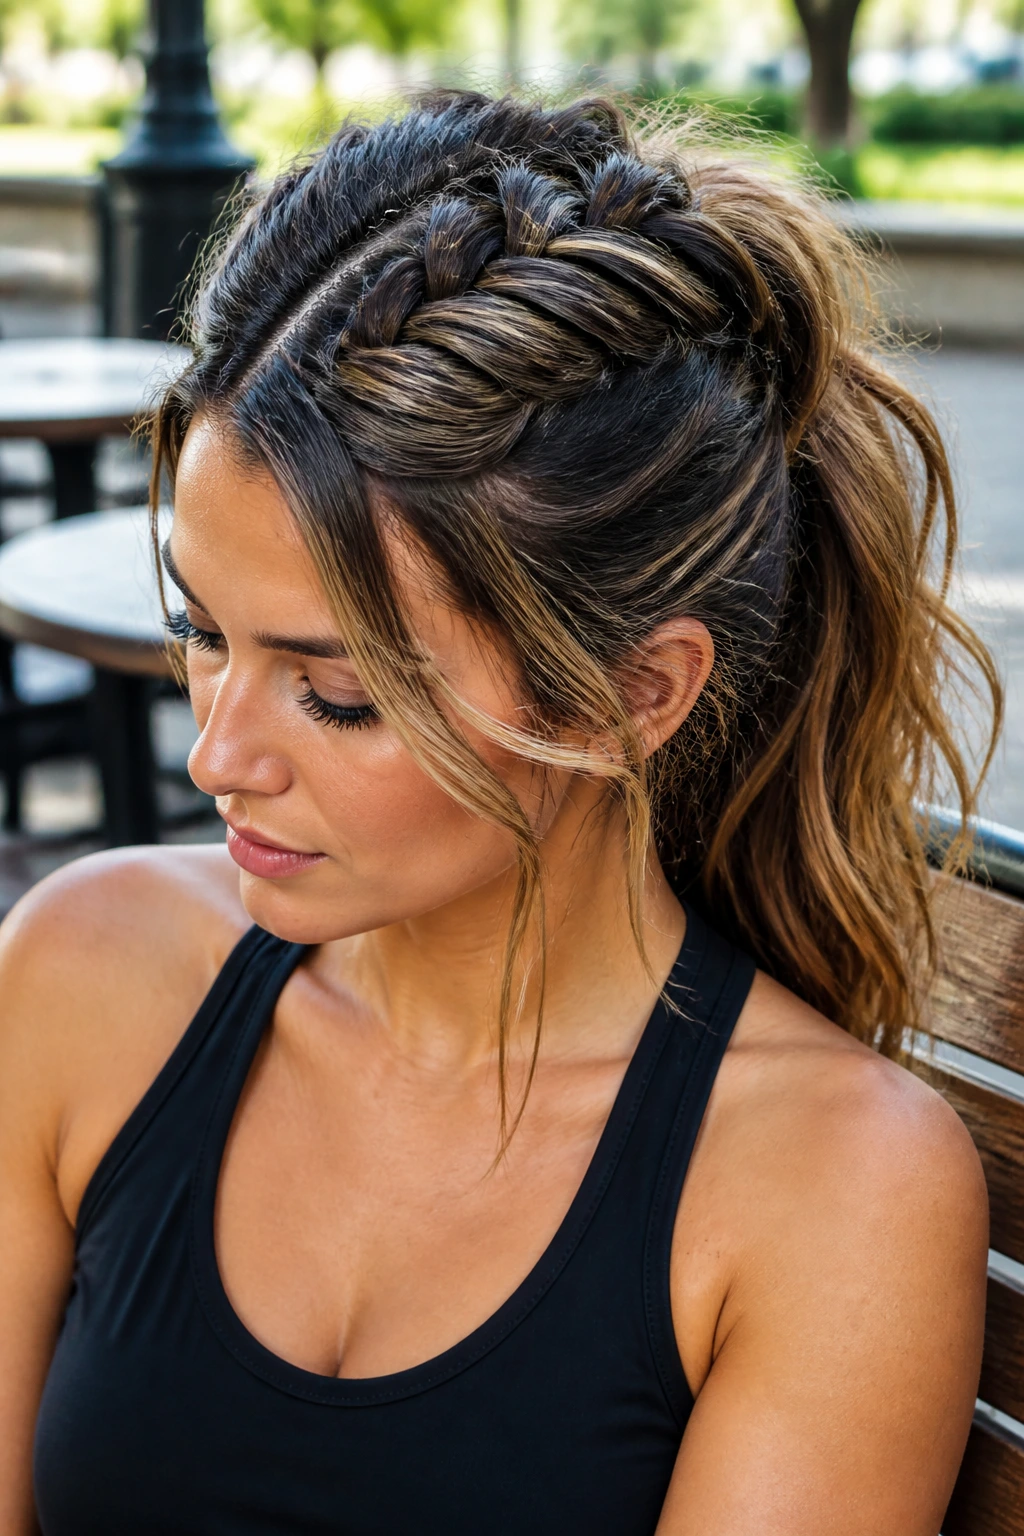
Layers are where French braids can get slippery. Shorter pieces near the face like to escape and poke out, especially when the braid is looser. A little texturizing spray on the layers before braiding helps, and keeping the first few passes tight makes the whole style behave better.
I like this version when the braid is finished with either a ponytail or a tucked bun. That gives the shorter layers fewer chances to slide out of place. If your layers are cheekbone-length or shorter, keep a few face-framing pieces out on purpose so the braid doesn’t look like it’s shedding.
26. French Braid with a Scarf
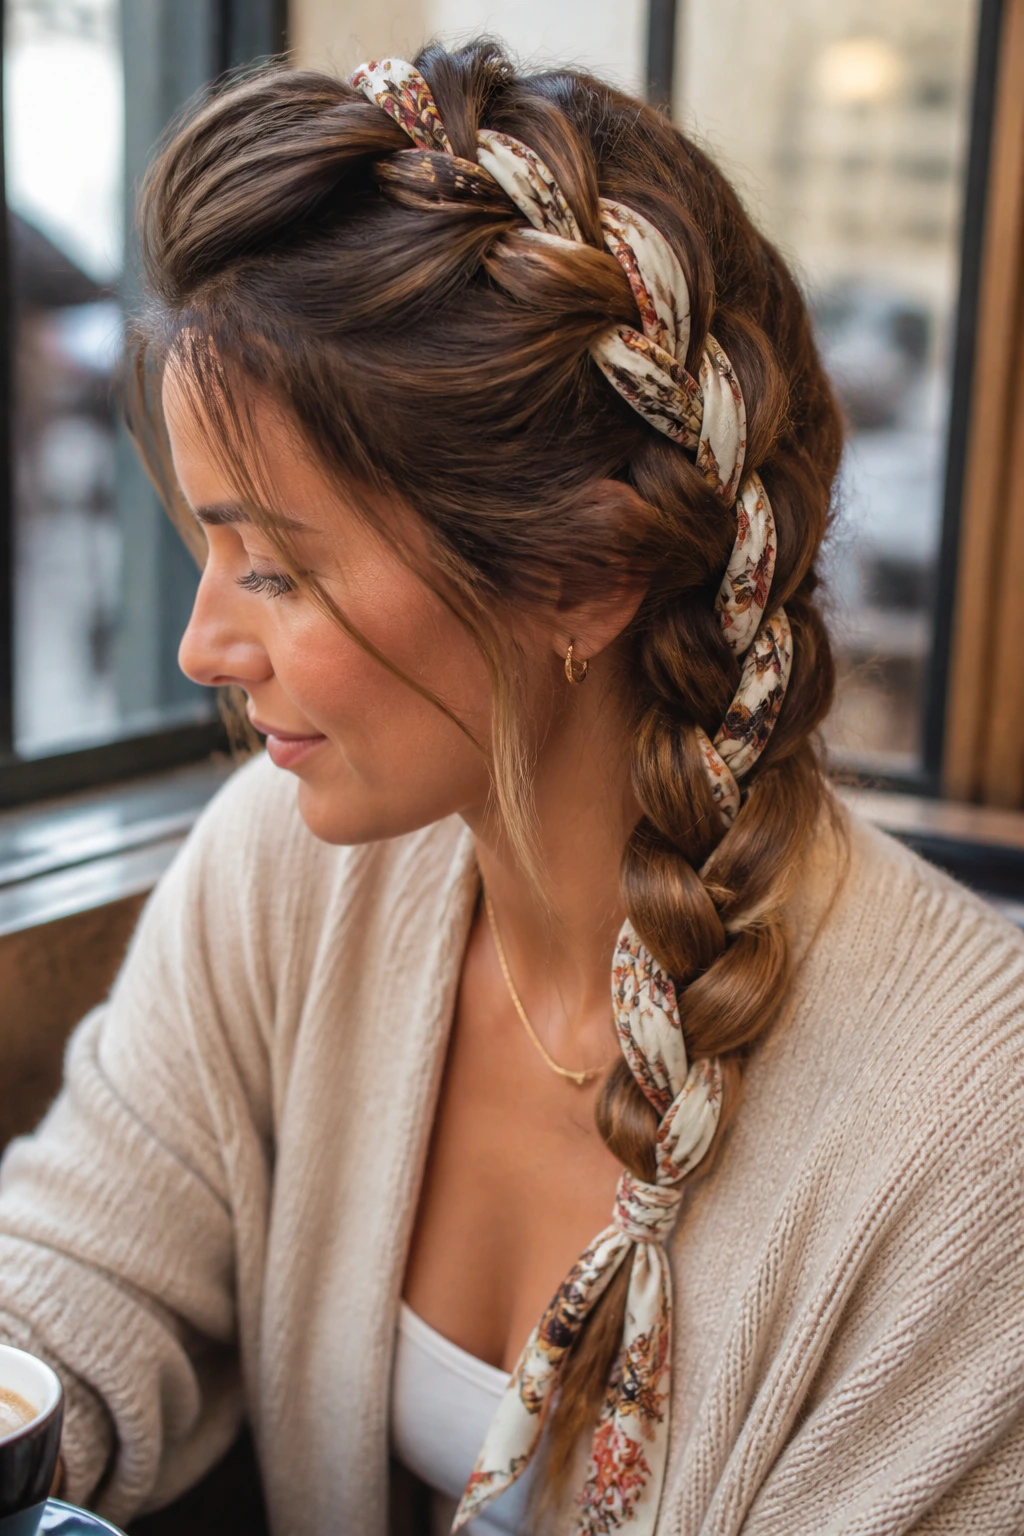
A scarf woven through a French braid gives the style texture before the braid even finishes. Choose a thin silk or cotton scarf if you want it to move easily through the sections, and anchor it under the first pass so it doesn’t slip out. A scarf with a narrow width works best; a heavy square can make the braid feel bulky fast.
This style is strongest when the scarf color either matches the hair or pushes against it on purpose. Soft blush, navy, cream, and black all work well. If the print is loud, keep the braid simple. The scarf is already doing enough.
27. French Braid with Beads
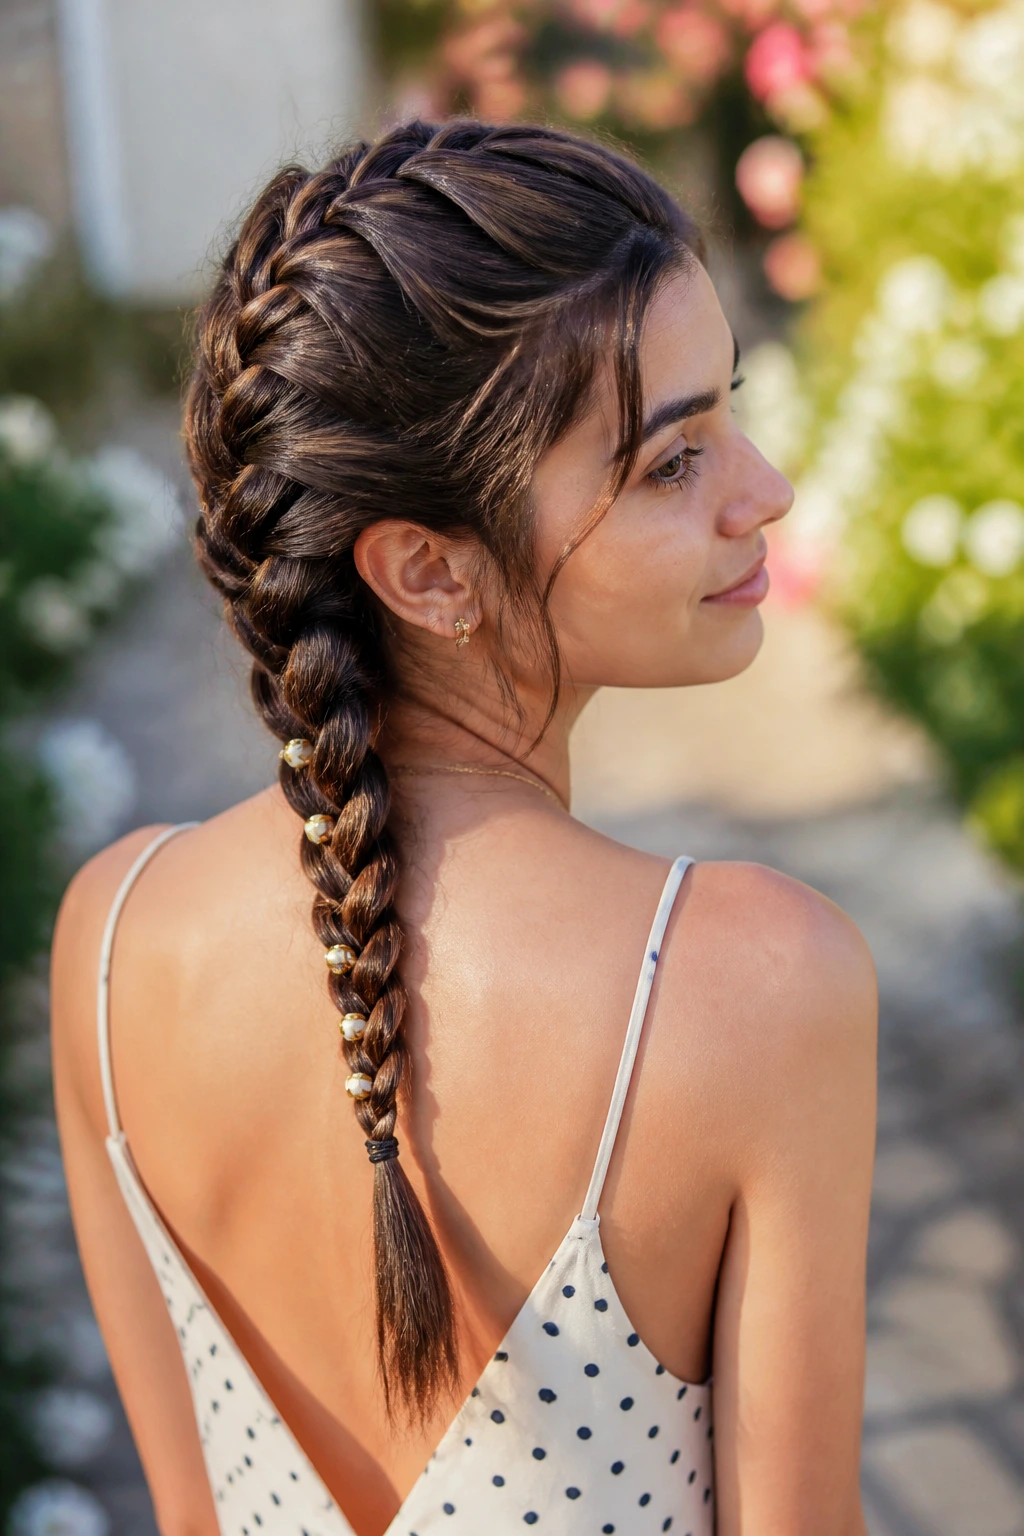
Beads bring a little rhythm to the braid. They work especially well when placed near the ends or spaced down a few face-framing strands. The trick is not to overload the style. A few beads placed with intention look elegant; too many can turn the braid into a craft project.
I prefer small, lightweight beads that won’t tug on the hair. If the braid is fine or layered, use tiny silicone-lined beads or secure the hair first with a small elastic before sliding on the bead. The style should move when you do, not clatter around.
28. French Braid with Rope-Twist Ends
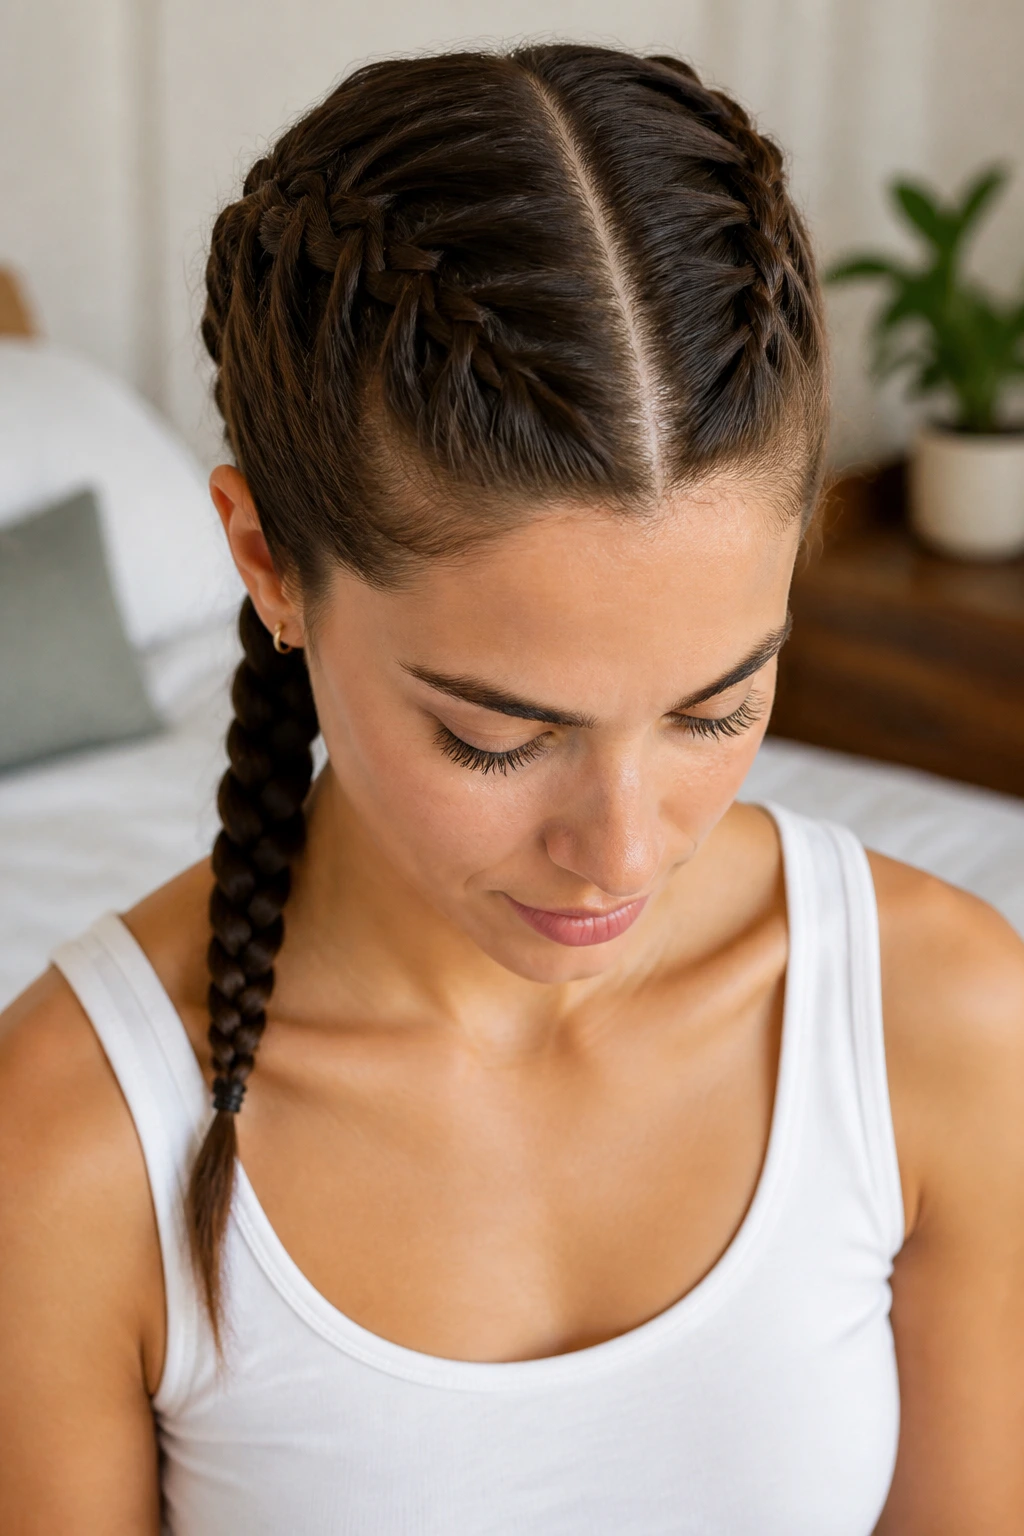
A rope-twist finish gives the braid a different texture at the bottom without changing the top half. Once the French braid reaches the point where you want the switch, split the remaining hair into two sections and twist them around each other. It’s neat, fast, and a little less expected than a standard tail.
The tighter the rope twist, the cleaner the final shape. If you want softness, tug the twist slightly after securing it. This version works well on hair with some natural wave because the twist shows off the bend instead of fighting it.
29. Dutch-to-French Hybrid Braid
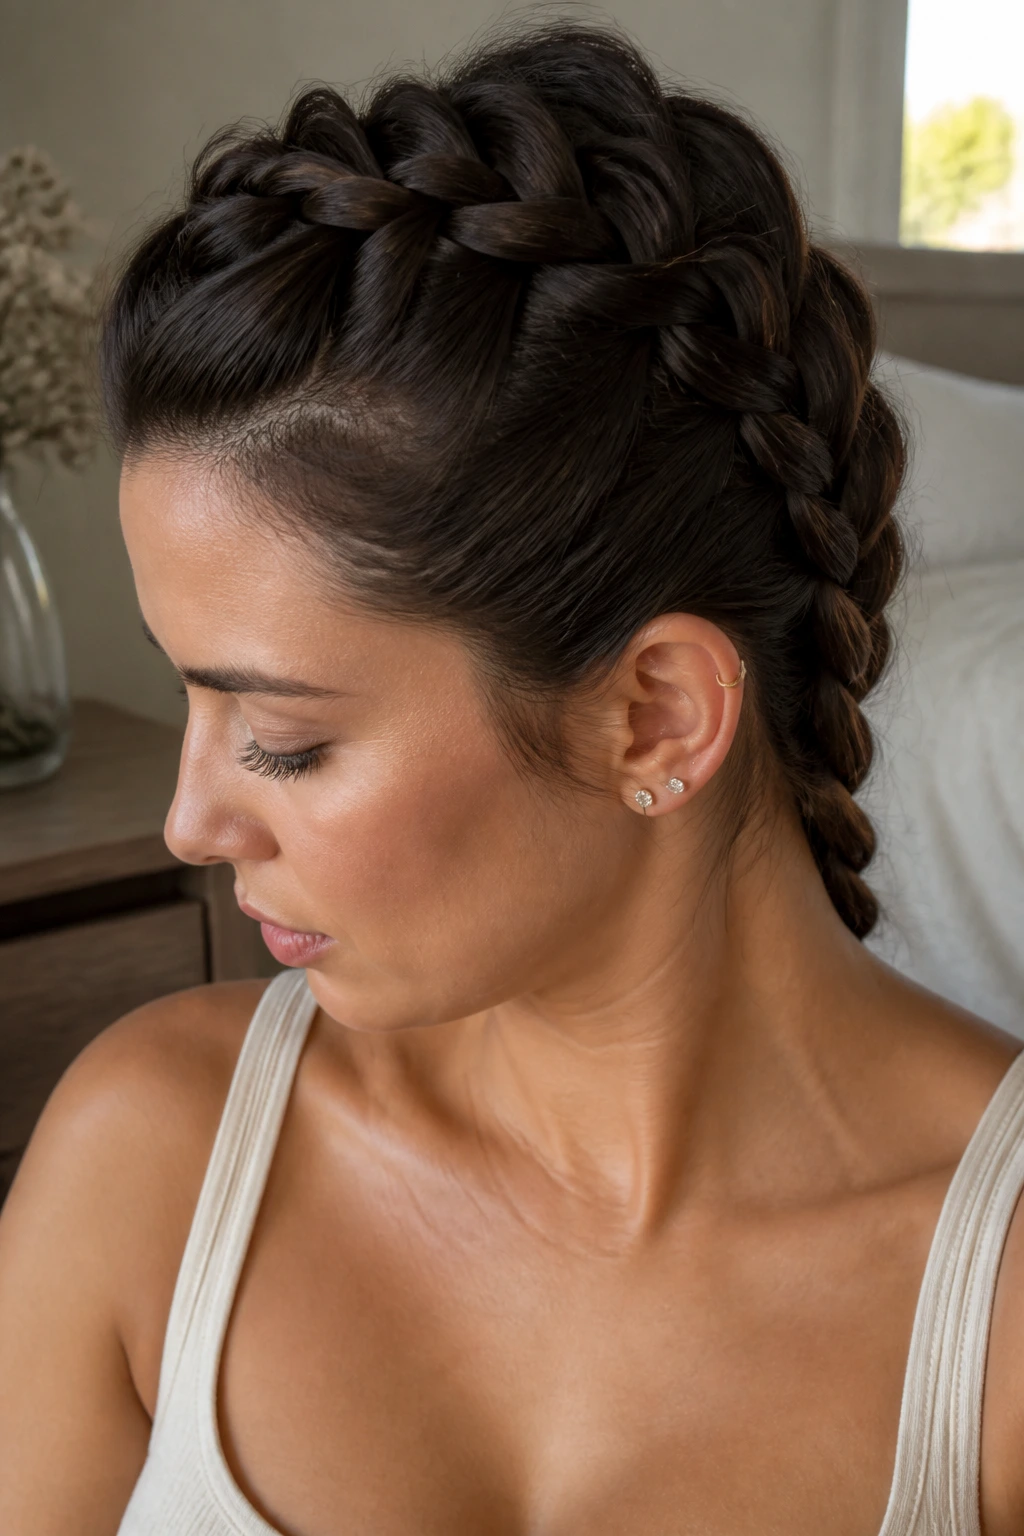
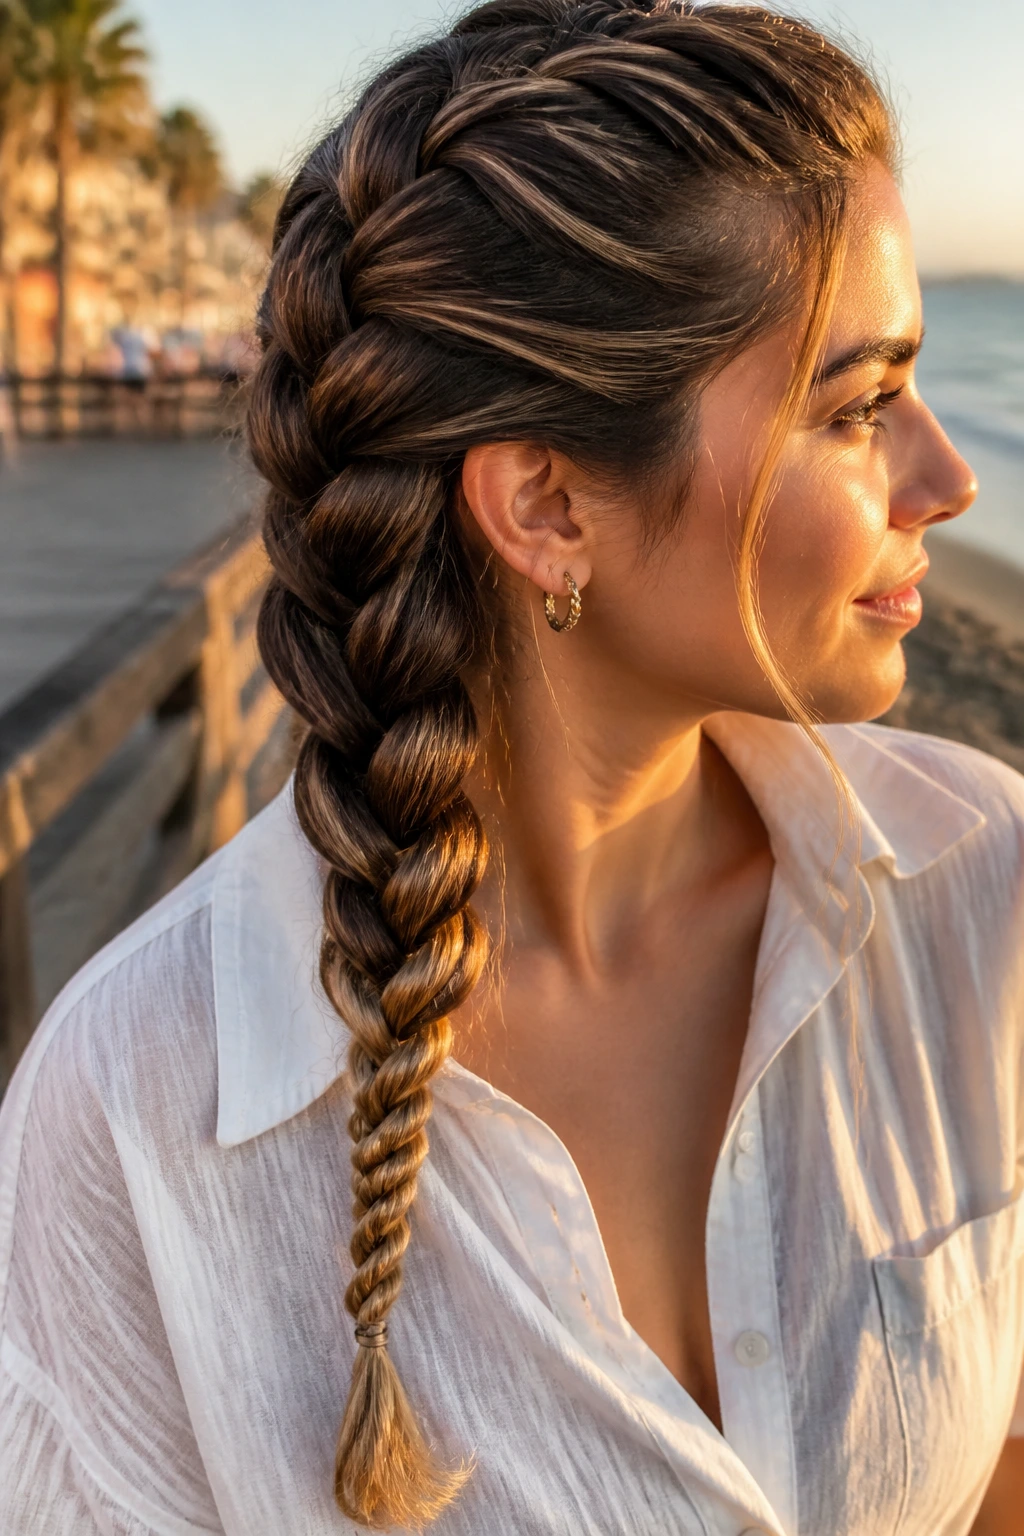
Starting with a Dutch braid and easing into a French braid gives the style a raised top and a flatter finish underneath. That contrast is what makes it interesting. The braid pops off the head near the crown, then settles down as it moves toward the nape.
This is a good style if you like a little height but don’t want a fully lifted Dutch braid from top to bottom. Keep the first section snug and the transition smooth; the switch should happen once the shape is already clear. It’s a small technical twist that changes the whole visual line.
30. Messy Festival French Braid
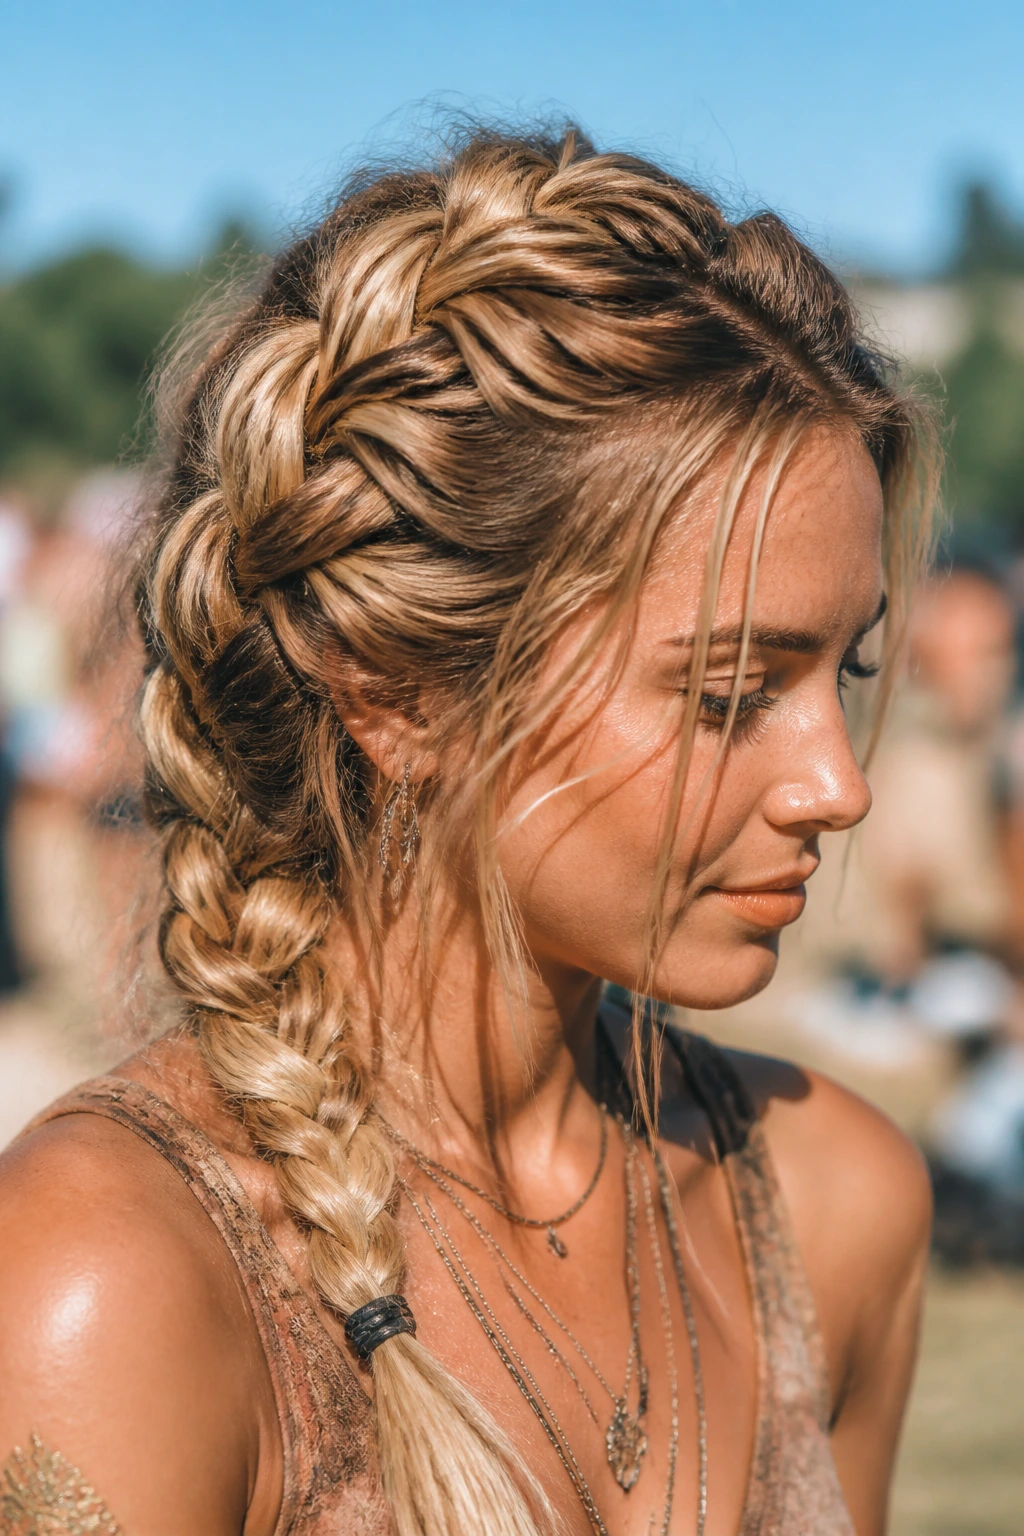
A messy festival French braid is where you stop worrying about symmetry and start caring about texture. The sections can be imperfect, the face-framing pieces can fall loose, and the braid can be pancaked until it looks wide and lived-in. That softness is the point.
This is the style I’d choose when the hair has a little wave, a little frizz, and not much patience. Add a few small elastics or a fabric tie at the end, then tug the sides gently. It should look like you made a choice, not like the braid surrendered halfway through the day.
31. Slick-Back French Braid
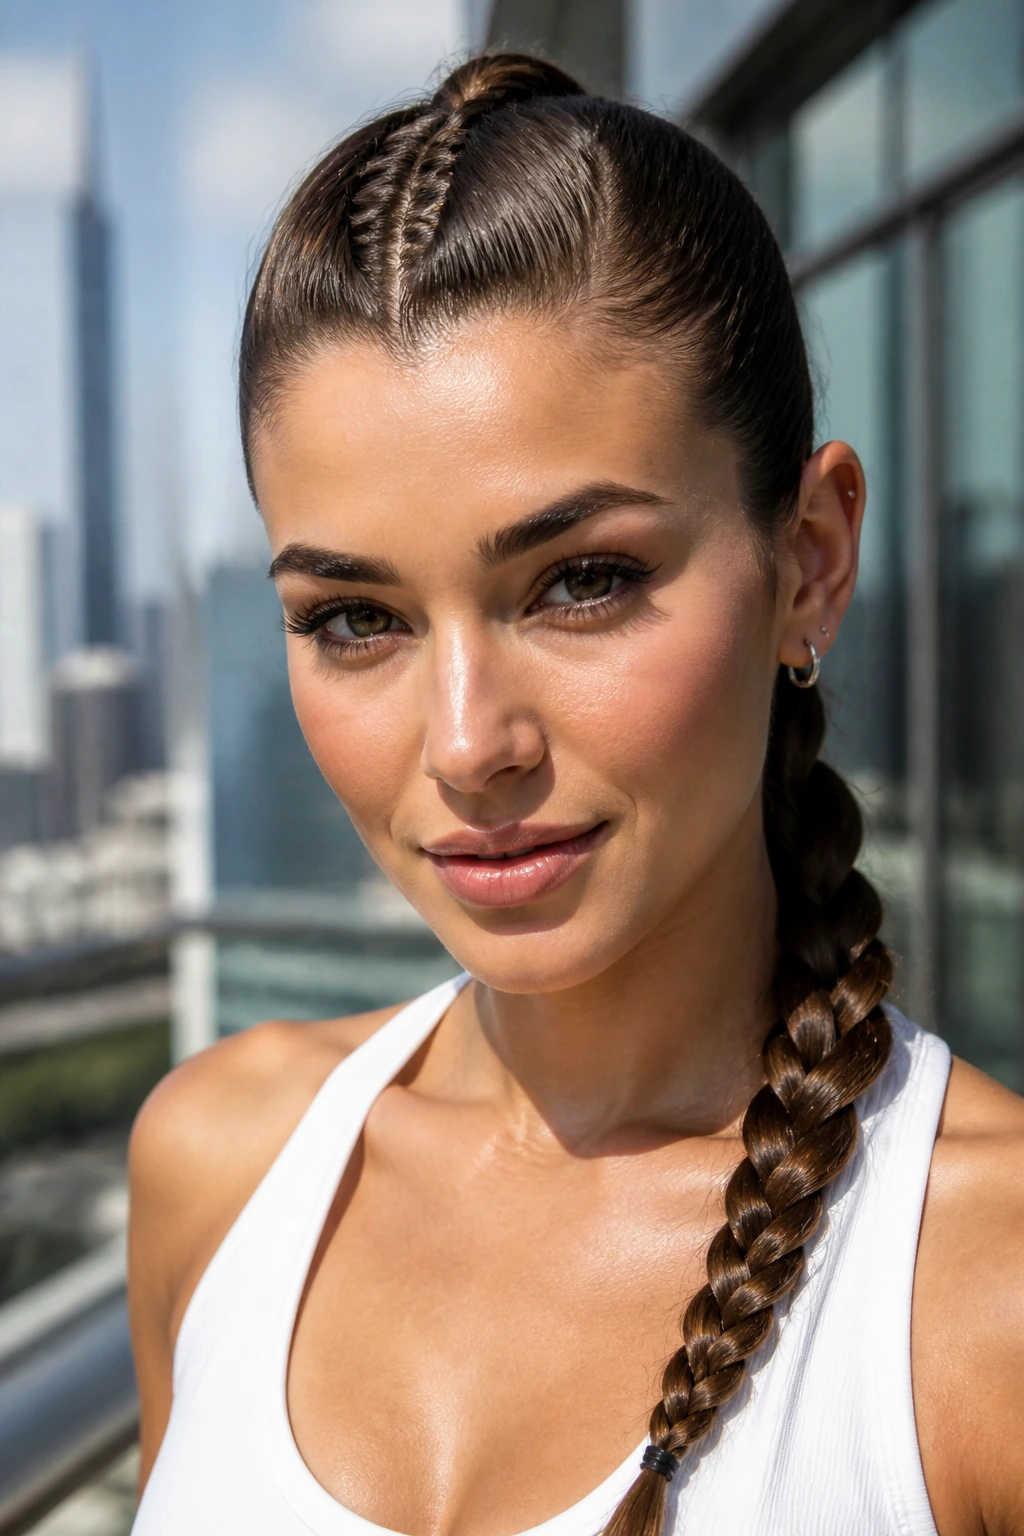
The slick-back French braid leans hard into polish. Hair is brushed straight back from the hairline, often with gel or a firm smoothing cream, and the braid begins with almost no softness at the front. It’s a sharp, clean look that works well when you want the braid to feel modern and deliberate.
This style depends on a smooth base. If the roots are fuzzy before you start, the braid will fight that texture the whole way down. Use a comb rather than fingers for the front section, and don’t be shy about flattening the sides. Clean lines are the whole story here.
32. Deep Side-Part French Braid
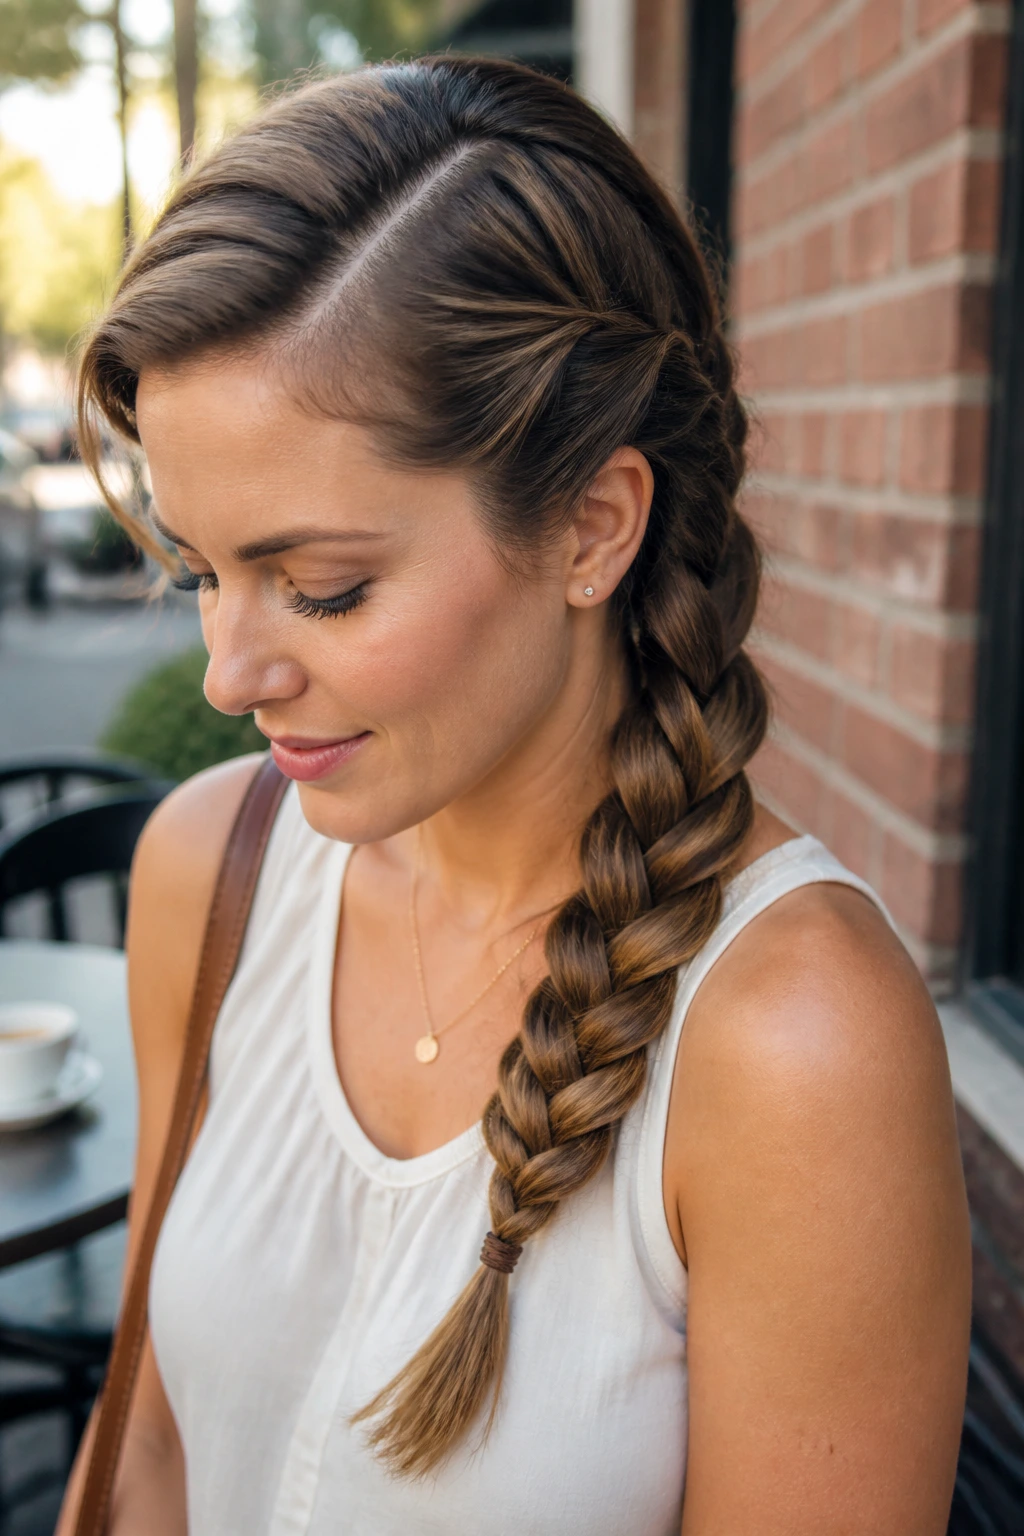
A deep side-part French braid gives the face more shape than a center part does. It also changes the braid’s direction right away, which makes the style feel a little more dramatic without becoming fussy. That offset line can be especially flattering on hair with some natural movement.
The deep part should be clean and obvious. If the line disappears halfway down, the style loses its edge. After the braid begins, keep the tension even and let the braid settle slightly over one shoulder or down the back, depending on how much visibility you want.
33. Braided Bangs into a French Braid
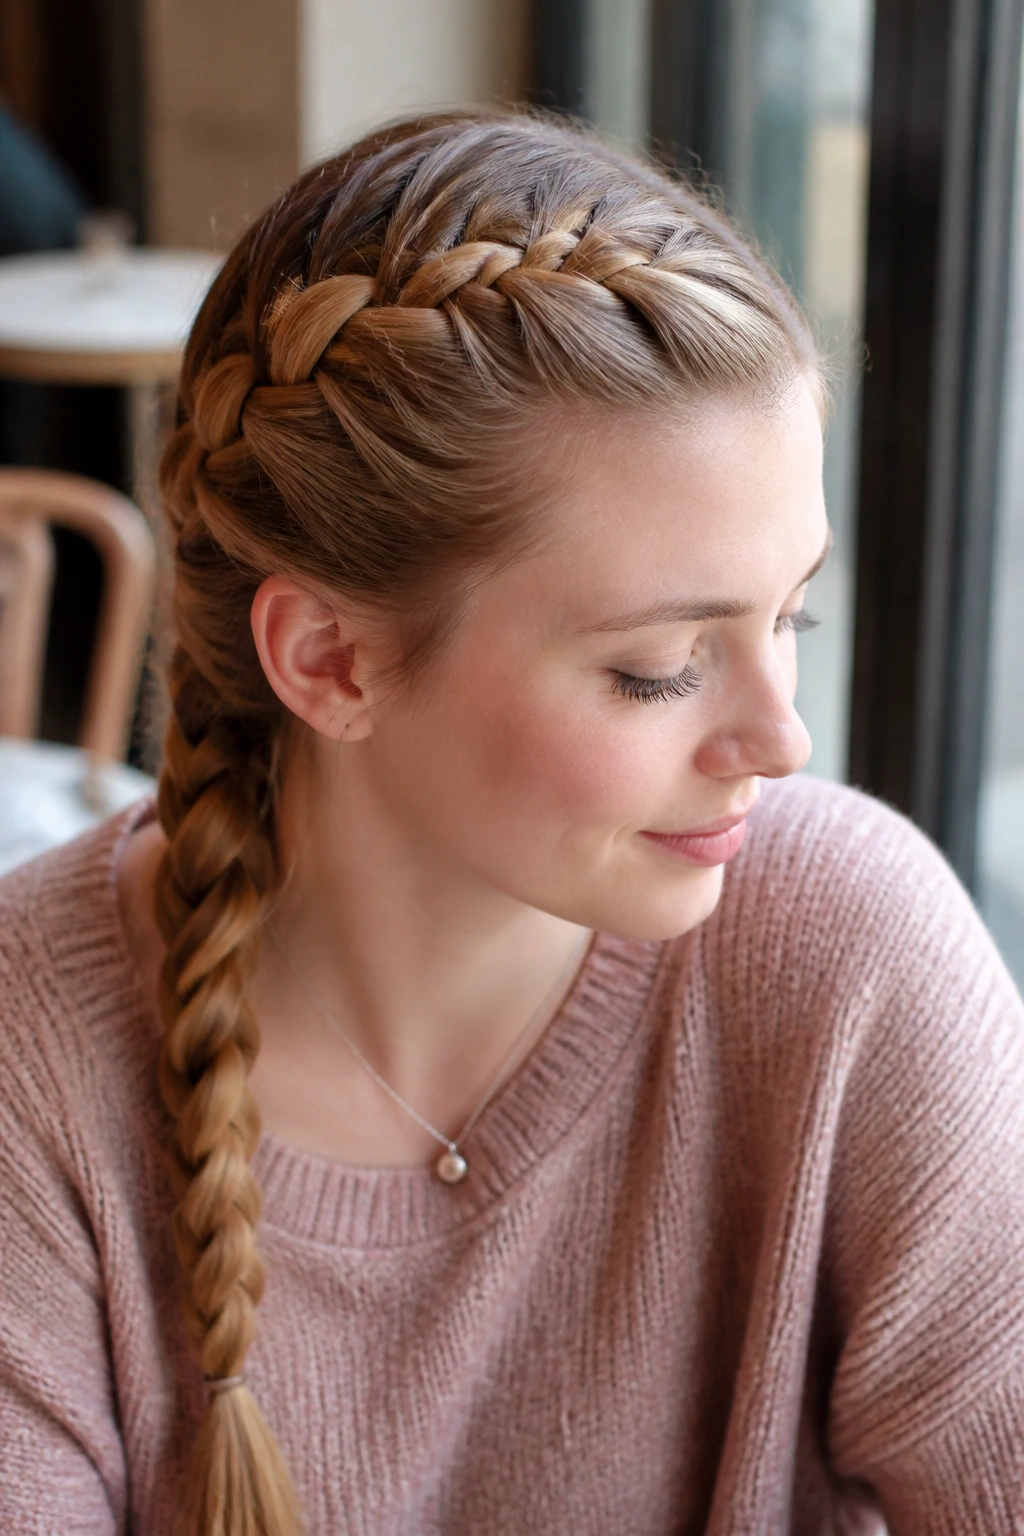
This is a clever way to deal with bangs or shorter front layers without leaving them loose. The bangs are braided back into the main French braid, which keeps them off the face and folds them into the style instead of making them look like an afterthought. It’s a neat fix when grown-out fringe is being difficult.
The first section should be small and controlled so the bangs lie flat before they’re picked up. If the front pieces are too short to join the braid cleanly, twist them back and pin them first. That tiny bit of prep keeps the front from popping loose later.
34. French Braid with a Braided Bun
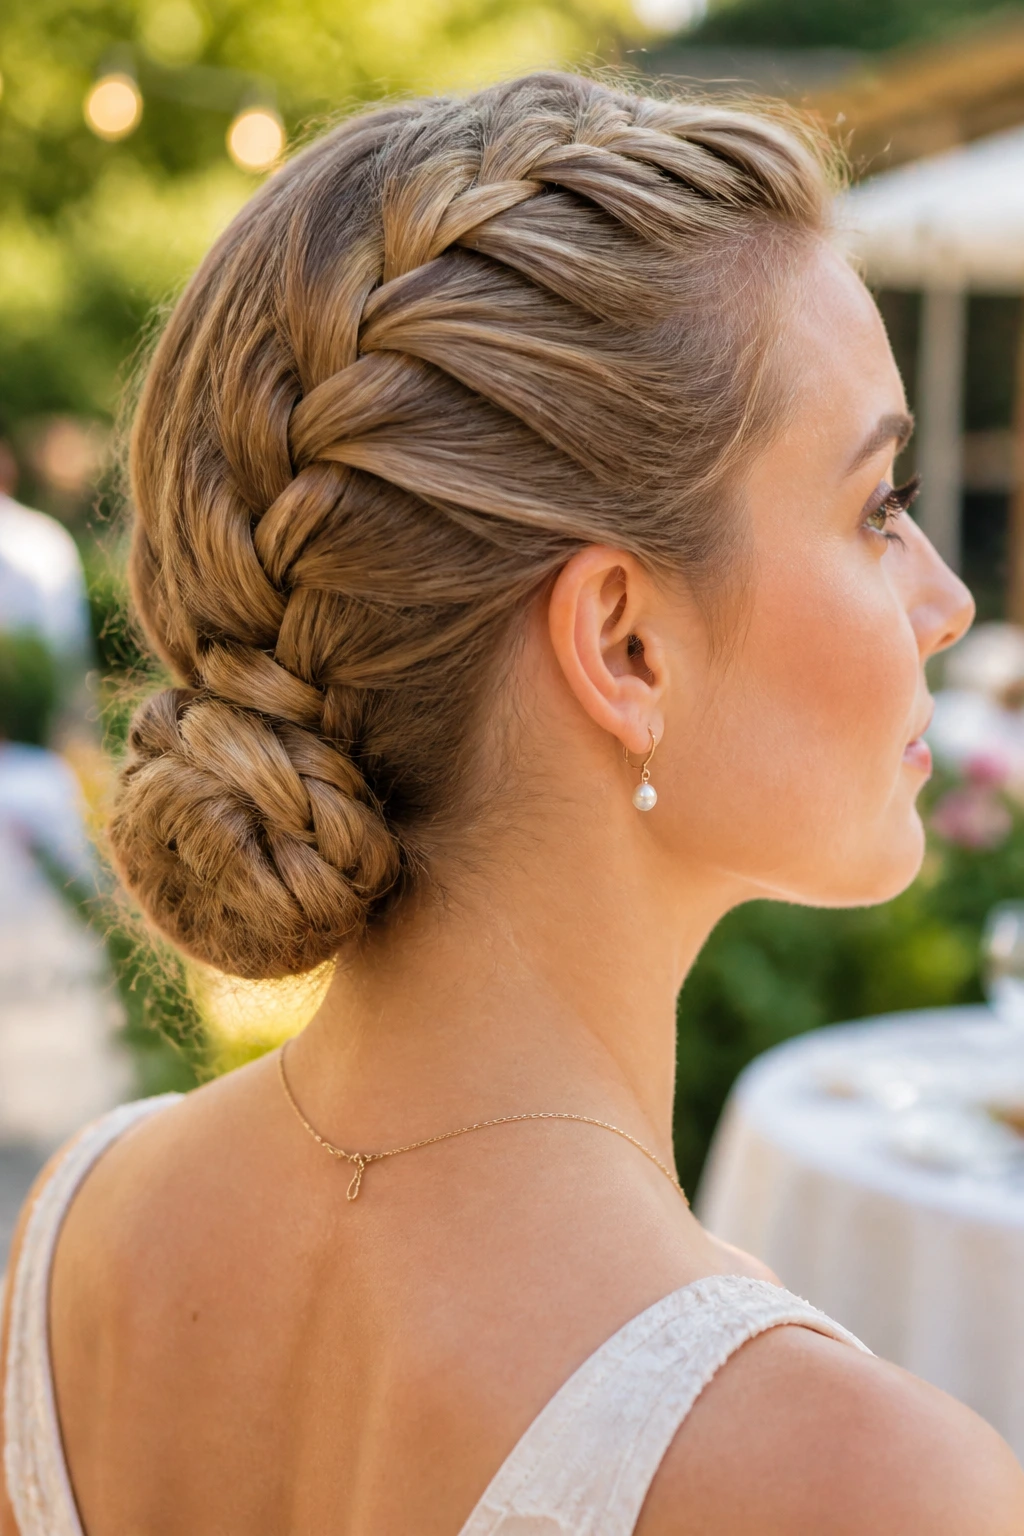
A braided bun stacks braid on braid, which sounds busy but usually looks very intentional. The French braid runs from the crown into a gathered bun at the nape or mid-back of the head. The braid detail gives the bun texture, and the bun gives the braid a clean landing place.
Keep the bun compact if the braid itself is already full. Otherwise the style can start to feel too large. This is a good option for thick hair, because the bun helps manage the length without needing a lot of extra pins. It also keeps the neck completely clear.
35. Pancaked French Braid
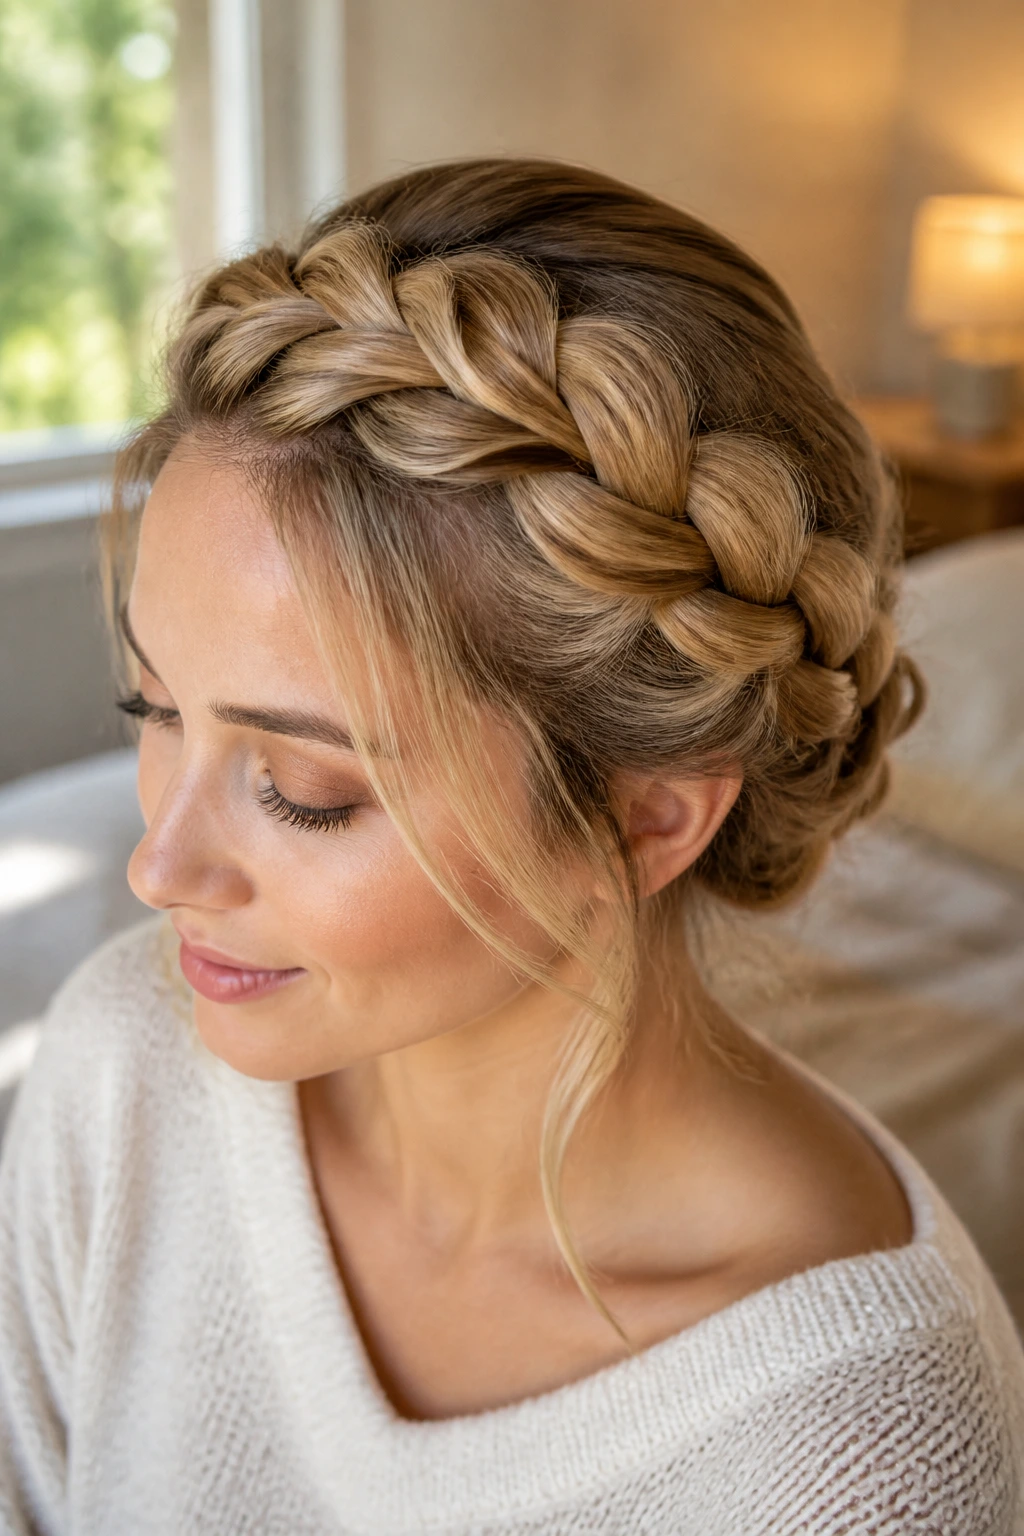
Pancaking is the move that makes a French braid look wider and softer. After the braid is secured, gently tug at the outer edges of each section so the braid opens up a little. Do it slowly. If you pull too hard, the whole thing can flatten unevenly and start to look loose in the wrong way.
This style is especially helpful on fine hair or on braids that feel a little too strict. The wider shape gives the braid more presence, which photographs well in person and in real life. Use your fingertips, not your nails, so the braid stays smooth instead of snagged.
36. French Braid with a Claw Clip Finish
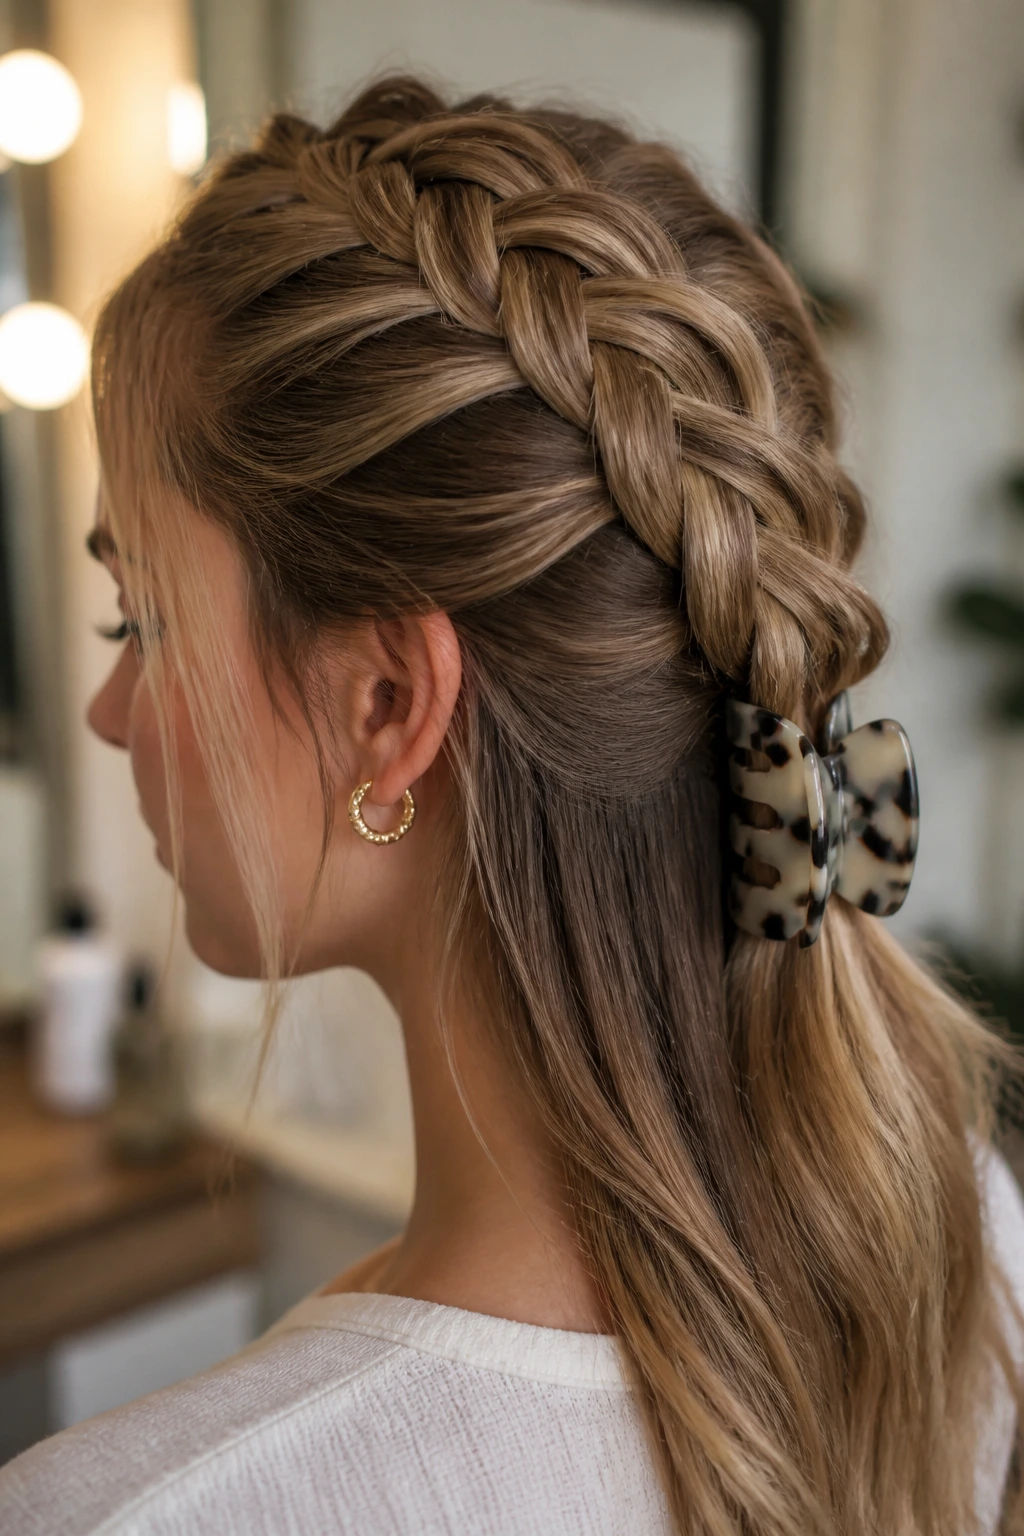
A claw clip finish is the easiest way to turn the braid into something casual and practical. Braid the top section, gather the remaining length, twist it once, and clip it up with a medium or large claw clip. It keeps the back of the head off-limits to collars and makes the style simple to reset later.
The clip matters more than people think. A cheap clip that slips will undo all the work you did braiding the front. Pick one with strong teeth and enough width to hold the gathered hair without crushing it. Metal clips can work, but they’re less forgiving on fine strands.
37. Reverse French Braid Updo
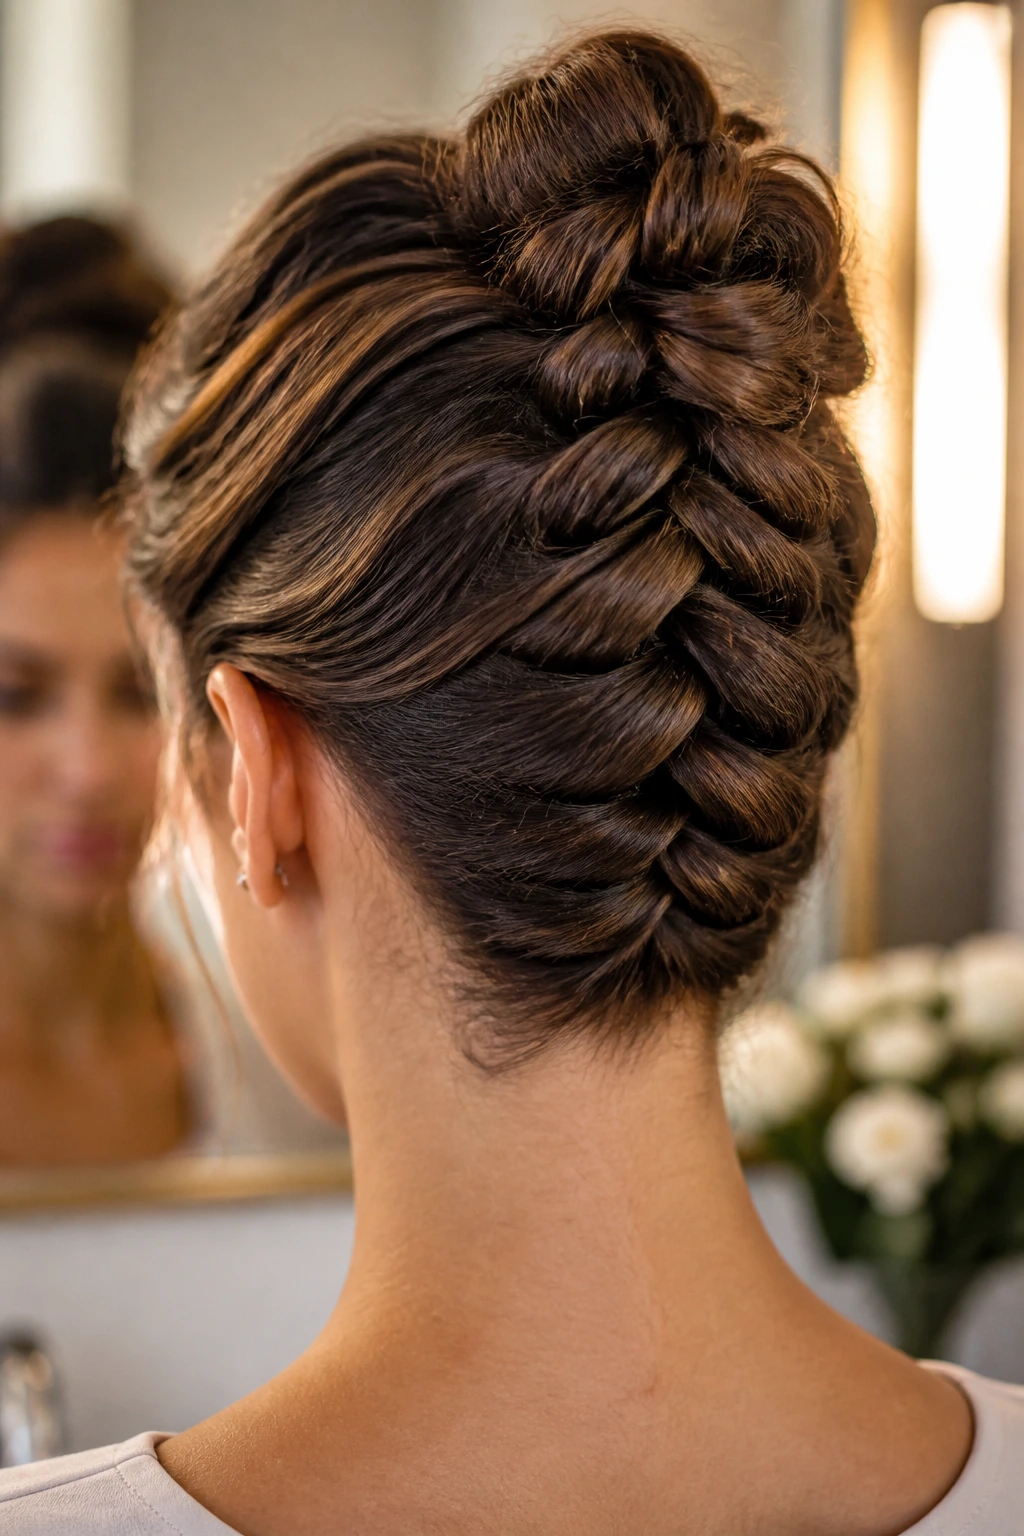
A reverse French braid updo starts lower and works upward, which gives the braid a slightly unexpected direction. Instead of dropping from the crown, it can begin at the nape and build toward the top before being tucked into an updo. The result is more sculptural than a standard braid-bun pairing.
This is one of the more technical styles in the group, so sectioning and hand placement matter a lot. It helps to flip your head forward while you start, especially if the hair is thick. If you’re not used to braiding in reverse, practice the direction before you try to pin the final shape.
38. Low-Slung French Braid with Tucked Ends
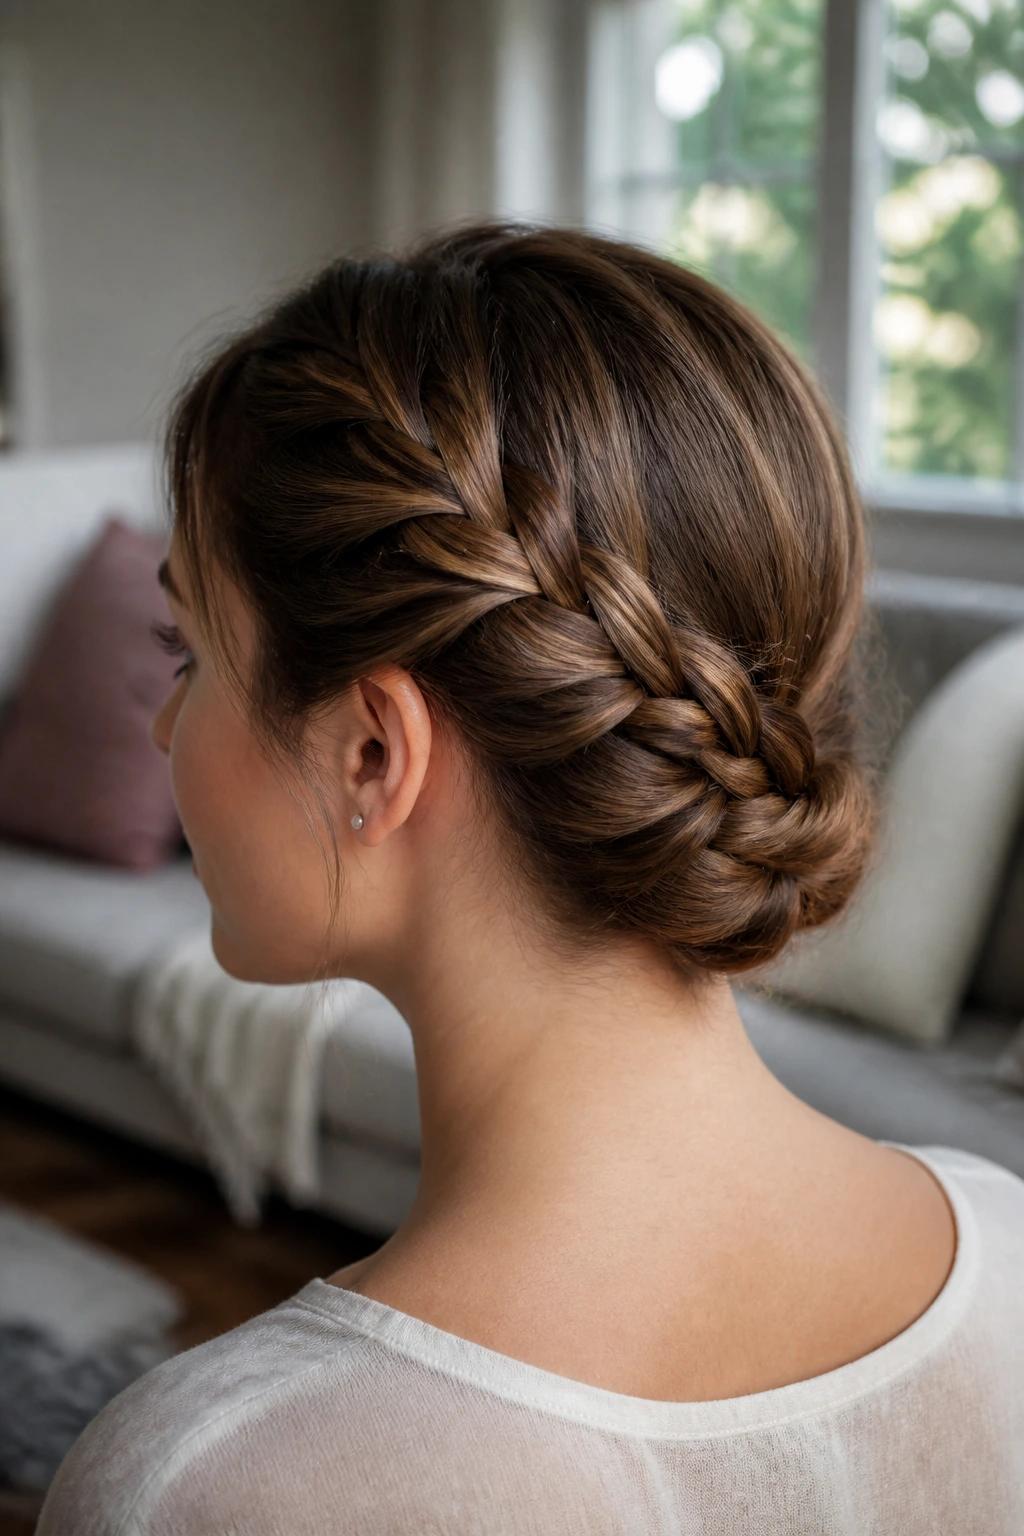
This style is soft, low, and very wearable. The French braid sits near the nape, then the ends are tucked under and pinned so the finish feels smooth rather than trailing. It’s a good choice when you want the braid to stay elegant without drawing attention to every inch of length.
The tucked ends should disappear into the base, not bulge out under the pins. Use enough bobby pins to cross-secure the fold, especially if the hair is layered. A little flexible hairspray keeps the shorter pieces from springing free later.
39. French Braid with Accent Braids
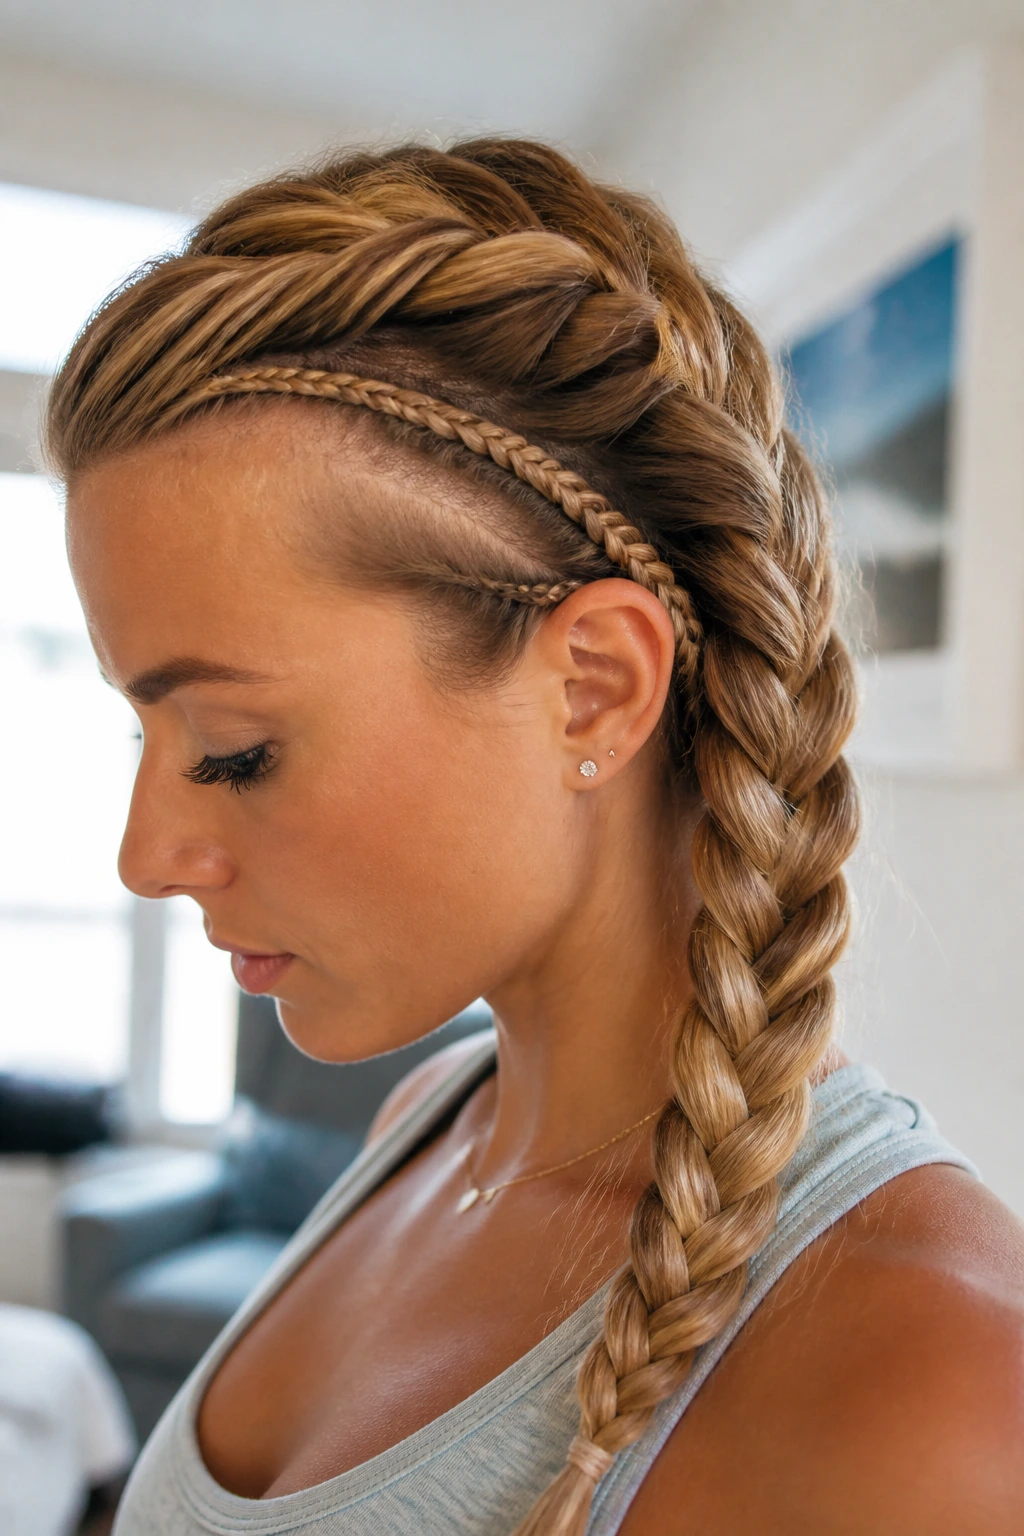
Accent braids add detail without changing the whole structure. Two tiny braids near the hairline, or one thin braid feeding into the main French braid, can make the style feel more deliberate. It’s a smart move when the main braid is simple but you want a little extra texture around the face or temple.
Keep the accent pieces fine. If they’re too thick, they start competing with the main braid instead of supporting it. A single accent braid on one side can be enough. You do not need a whole braid parade to make the style interesting.
40. French Braid for Wavy Hair
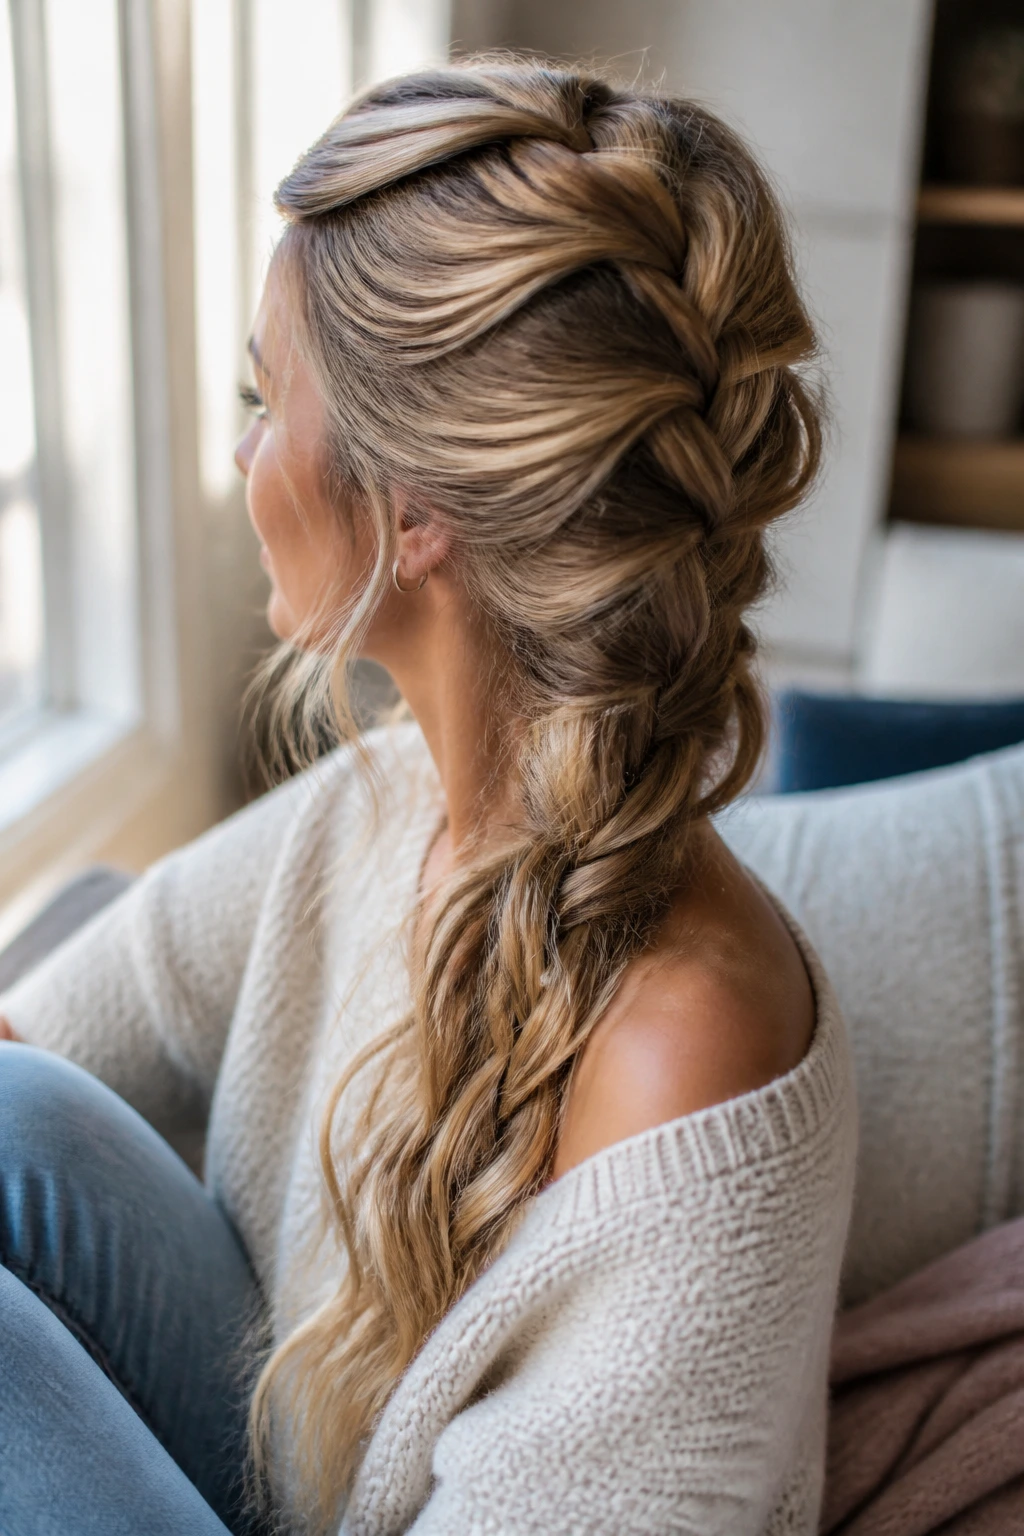
Wavy hair gives a French braid easy texture, and that texture can look better when it’s not over-controlled. Let the wave shape guide the braid instead of trying to flatten every bend. The result usually feels fuller, softer, and a little less severe than a braid on pin-straight hair.
A light smoothing cream on the mid-lengths can stop the waves from frizzing while still keeping their shape. If the braid starts to look too bulky, pinch the outer edges lightly rather than pulling hard. Wavy hair often needs a soft hand, not a hard one.
41. French Braid for Natural Hair
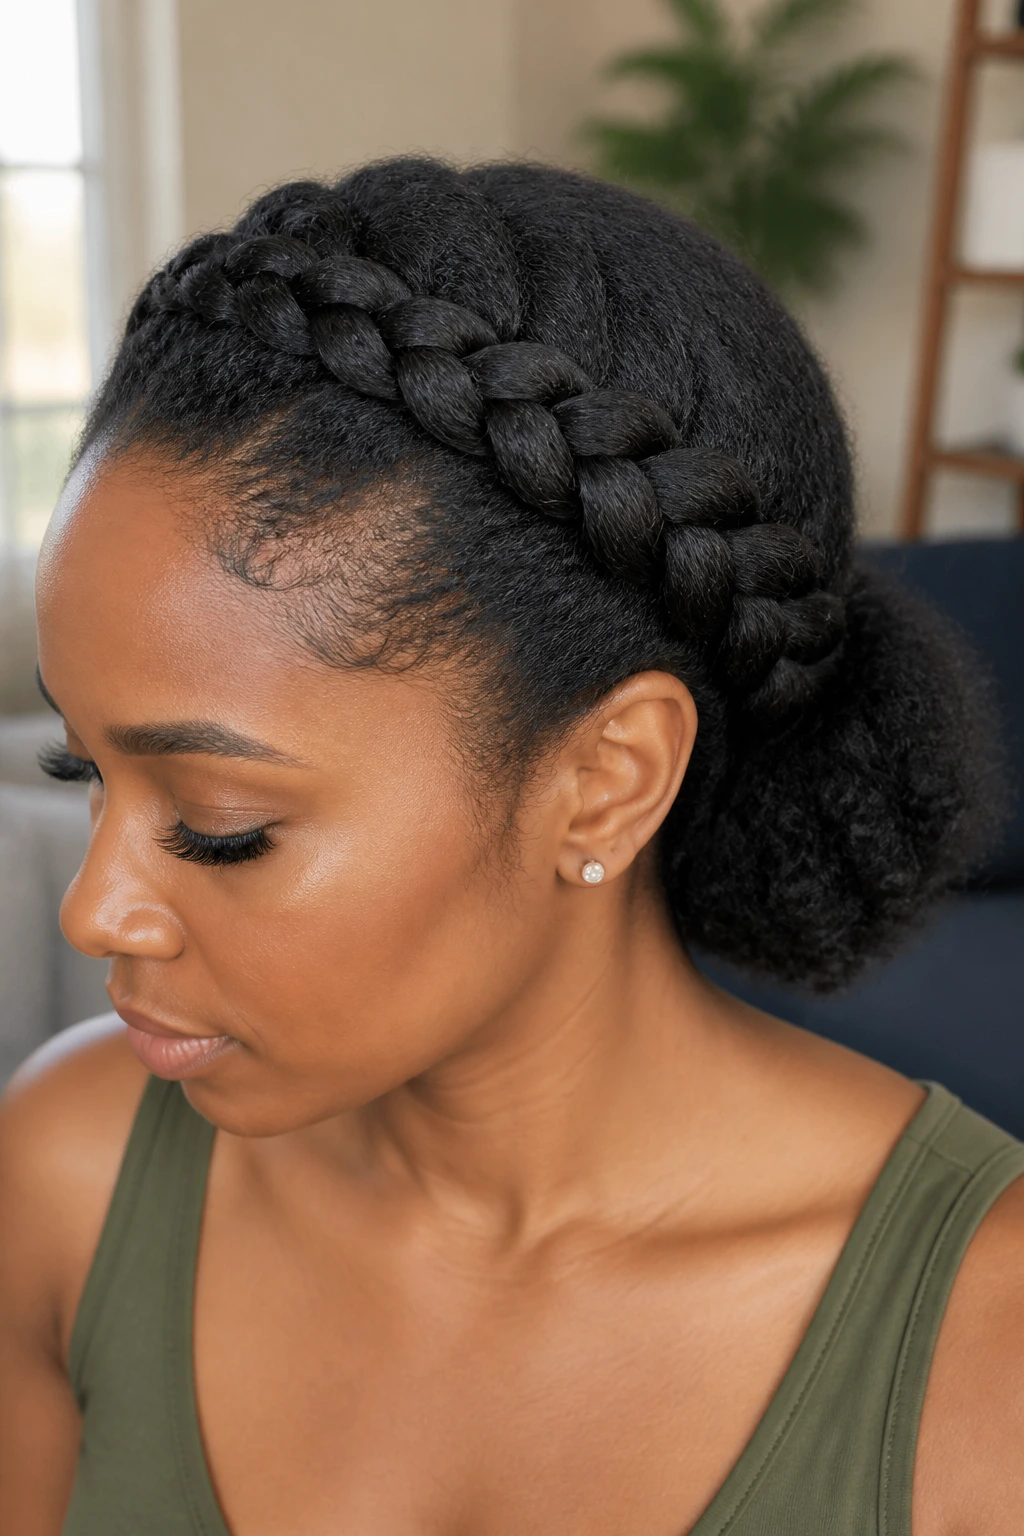
Natural hair can hold a French braid beautifully, especially when the texture has enough stretch and moisture. A leave-in conditioner or light cream helps the strands glide while you braid, and a gentle detangling session before you start keeps the process easier on the hands and the hair. The braid often looks rich and dimensional because the texture gives it body from the start.
Sectioning matters even more here. Keep the parts clean and don’t rush the first few passes, since the shape at the crown sets the whole style. If shrinkage is part of the hair’s personality, the braid may sit shorter than expected—and that’s fine. The style can still look strong and finished.
42. French Braid Crown with a Middle Part
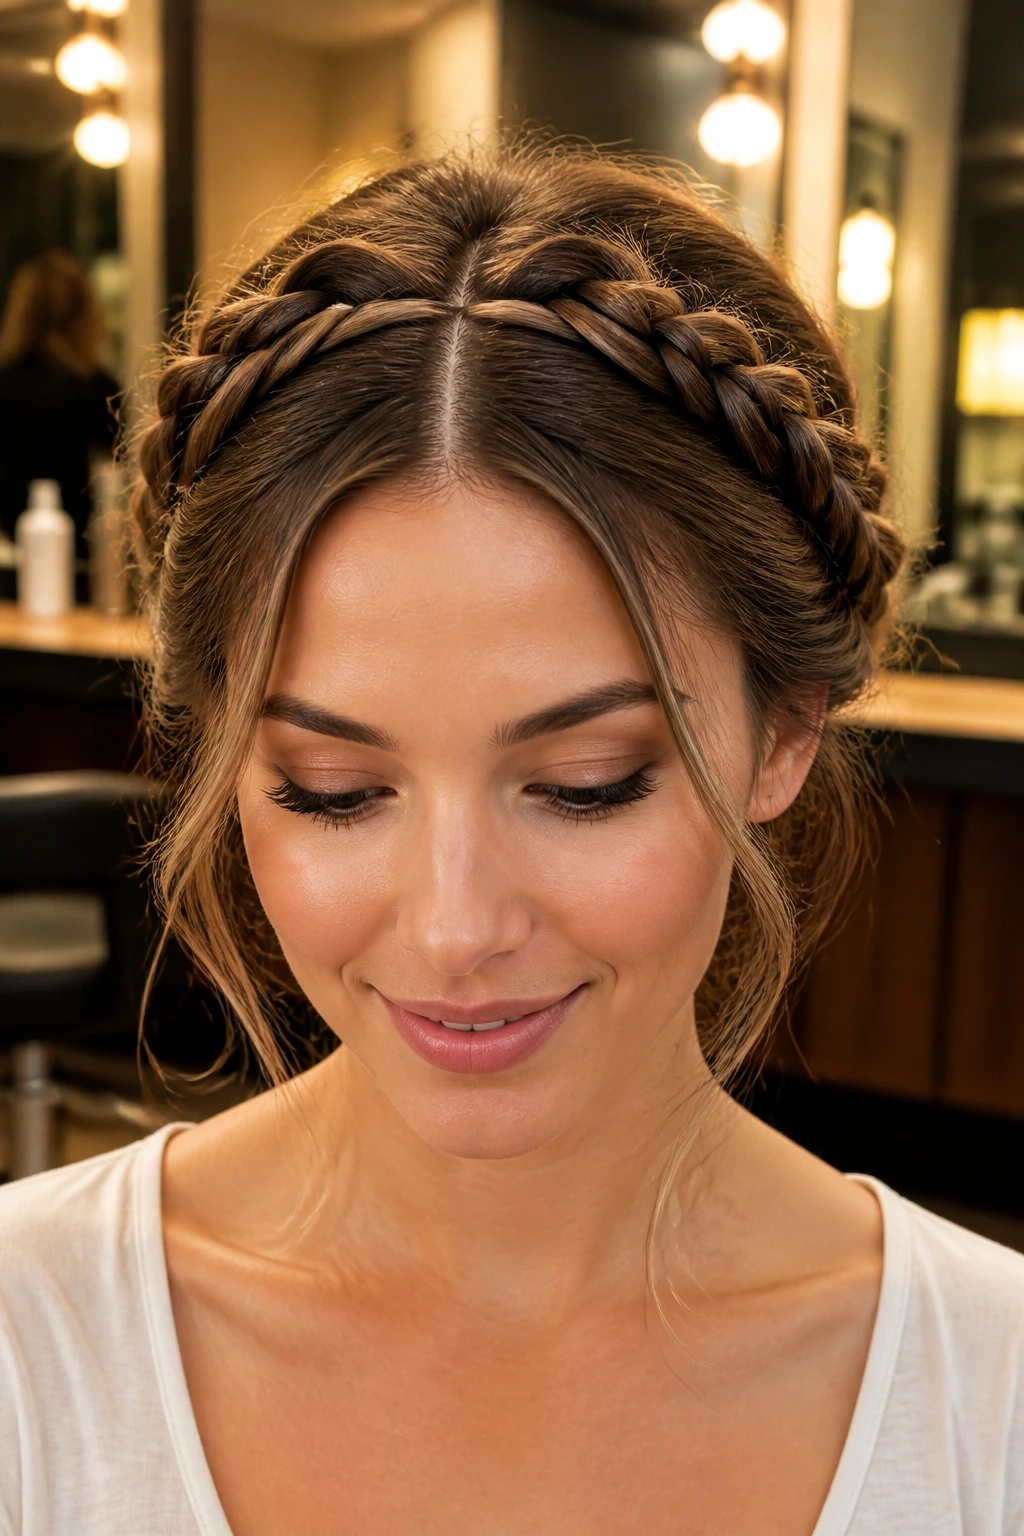
A middle-part crown braid gives the face a tidy frame without feeling severe. Two braids start on either side of a straight center part, then travel around the head and meet at the back. The result is balanced, but not stiff, especially if the crown is loosened just enough to avoid a helmet shape.
I like this version when the hair needs to stay off the face but still look a bit romantic. Keep the part precise and the braids even, then soften the perimeter with your fingertips once they’re pinned. It’s a controlled style, but it shouldn’t look overworked.
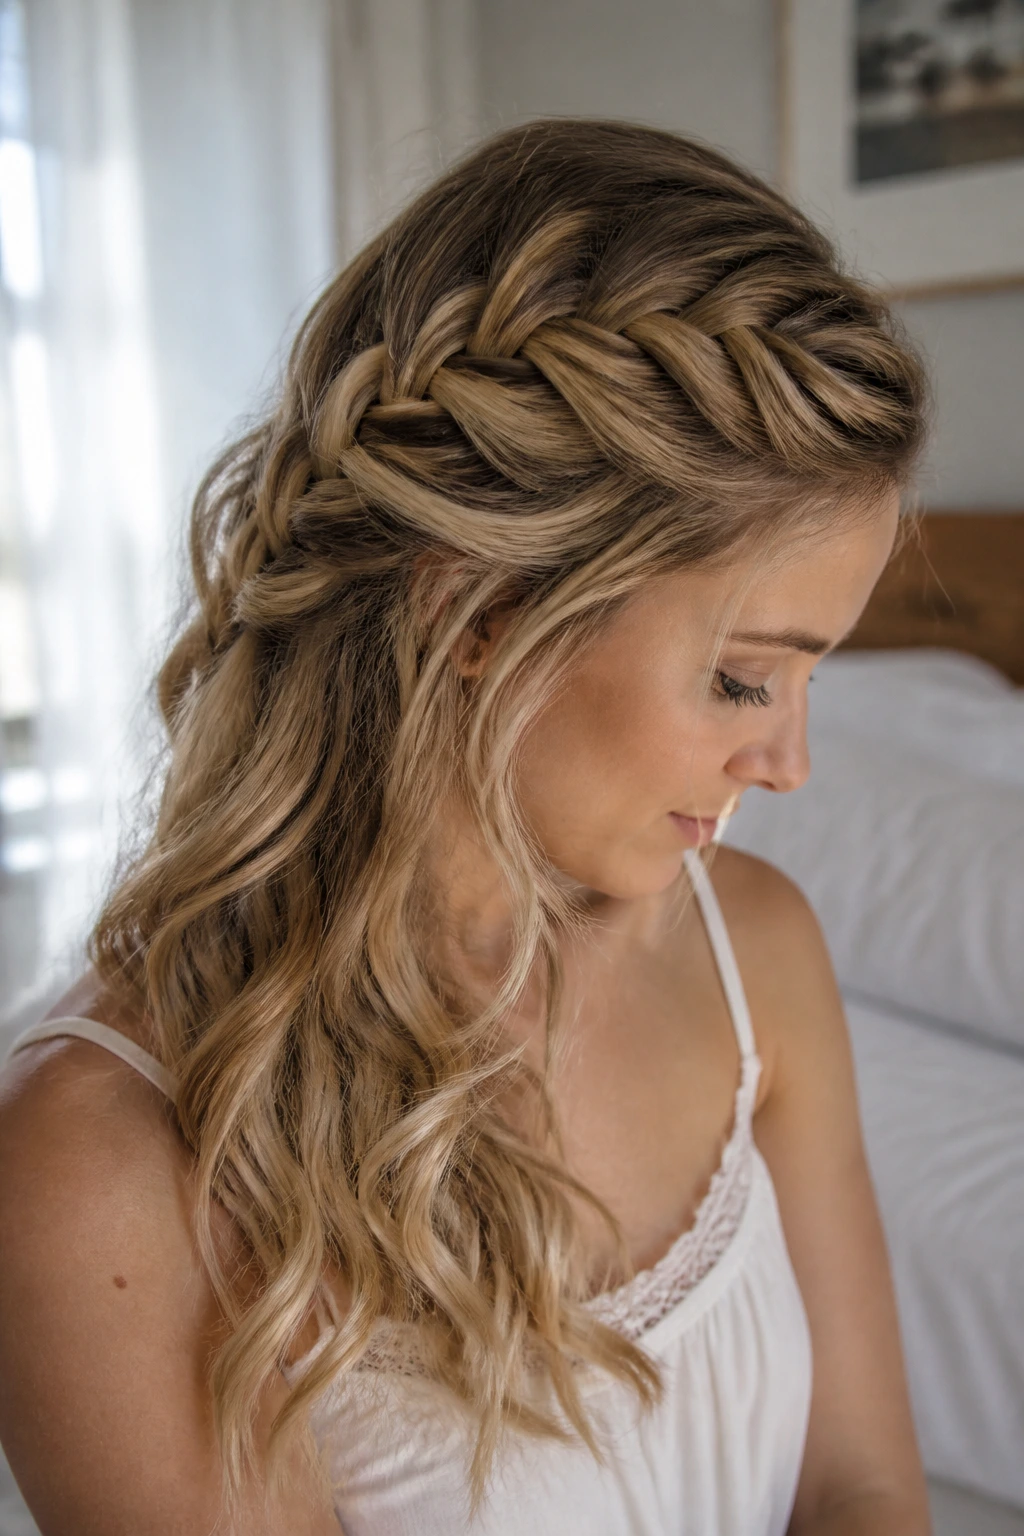
43. Romantic Side French Braid with Loose Waves
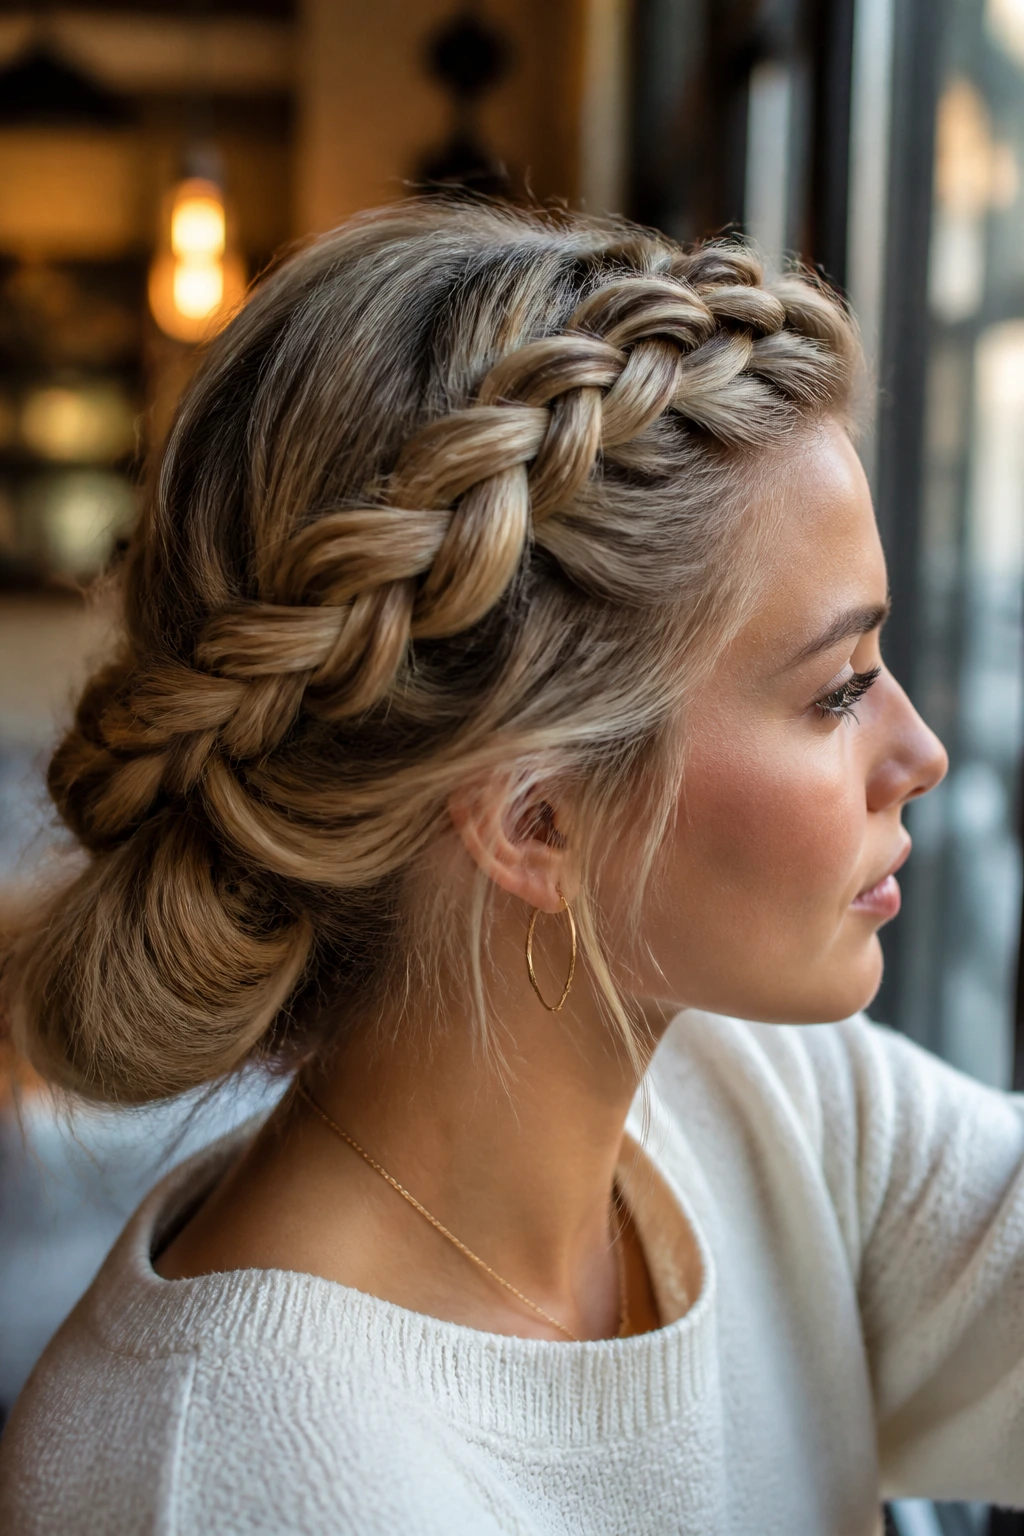
This one has the best kind of softness. The braid starts off to one side, then trails into loose waves that feel relaxed instead of finished to death. If you curl the remaining length in large sections and leave the ends a little undone, the whole style gets a gentler silhouette.
A side braid like this works well when the hair is medium to long and has a little natural bend. Too much heat styling can make it look formal in the wrong way, so I usually keep the waves loose and touchable. A small clip or pin at the ear keeps the braid from slipping out of view.
44. French Braid with Gold Cuffs
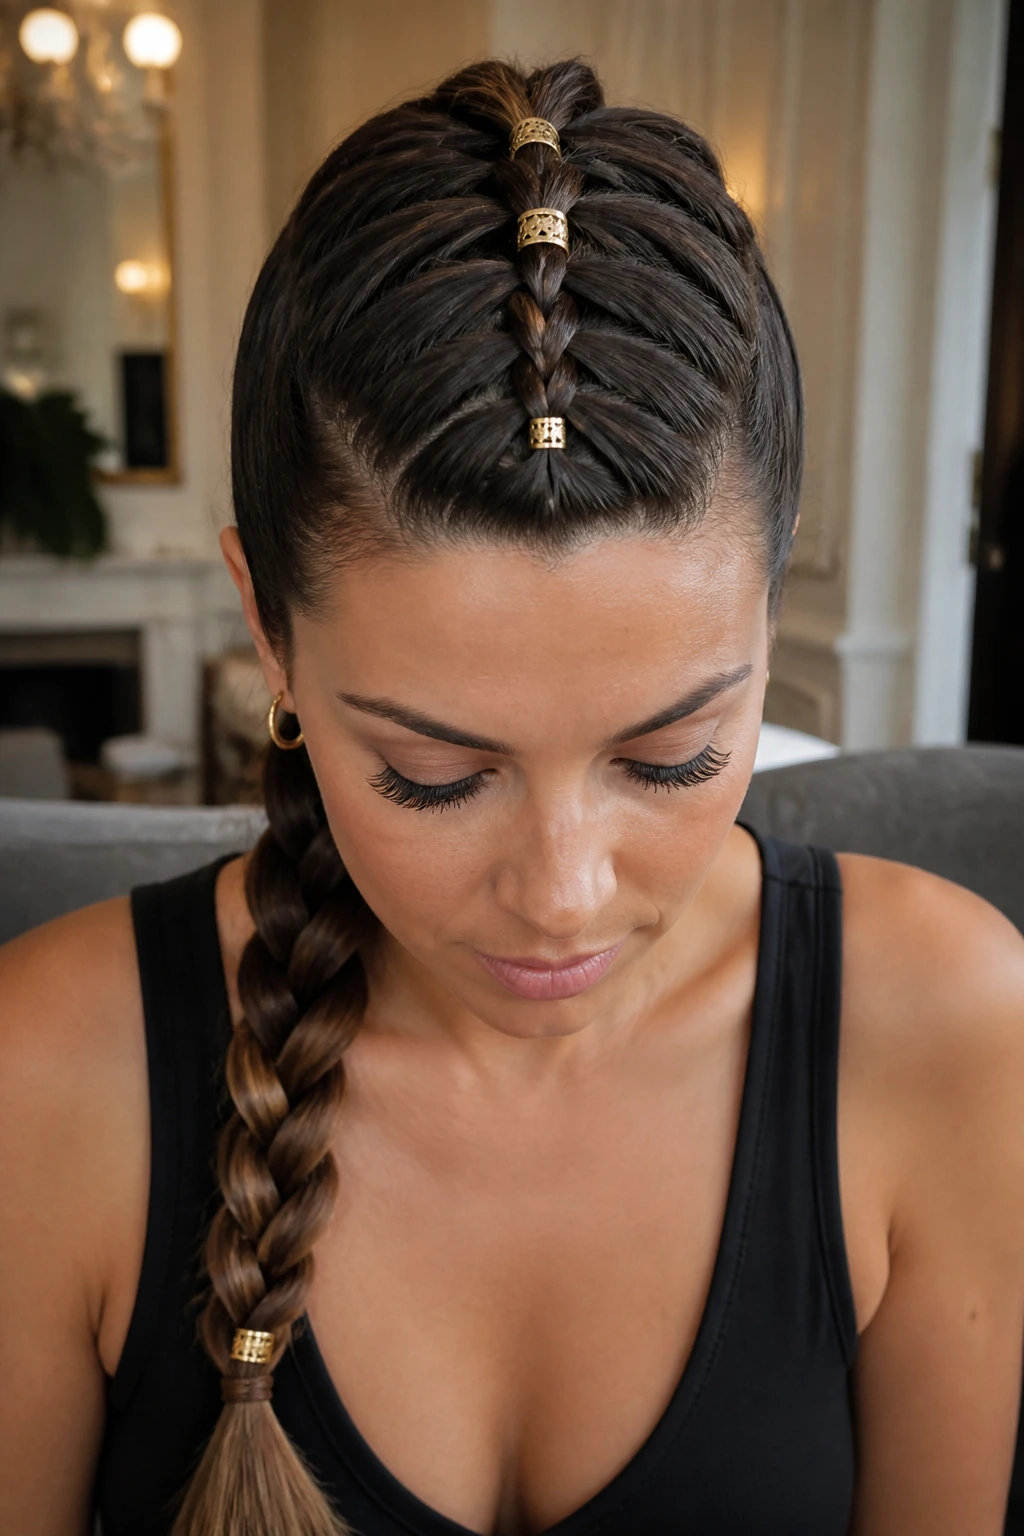
Gold cuffs give a French braid a sharper, more dressed-up edge. They’re tiny, but they catch the eye fast when placed along the braid or near the bottom sections. A few cuffs are enough. If you cover the whole length, the braid starts to feel overdecorated and loses its clean line.
I prefer this on a braid that’s fairly smooth and not too loose, because the cuffs look better when the braid has a defined shape. Slide them onto small sections after the braid is secured, then check the spacing in a mirror. Uneven cuff placement is one of those little things that makes the whole style look accidental.
45. French Braid into a Low Chignon with Tendrils
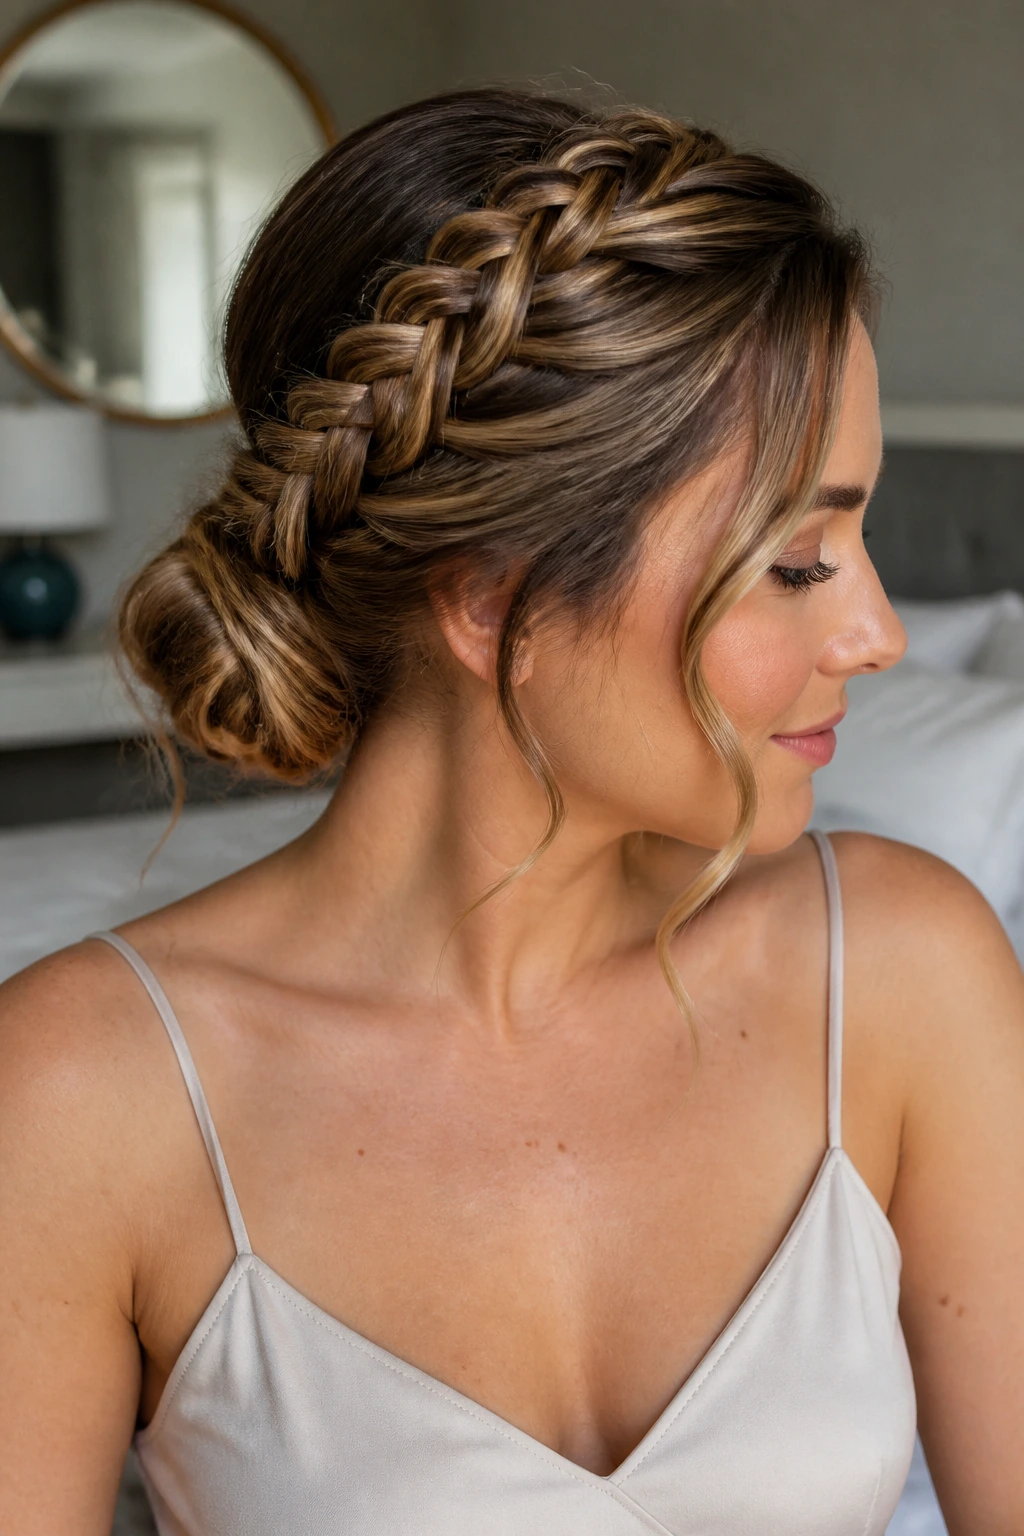
A low chignon with tendrils is the version I’d choose for something a little softer than a standard bun. The French braid runs down the head, then gathers into a low, tucked chignon with a few loose strands left around the face and neckline. Those tendrils stop the style from feeling too formal and give it some movement.
The face-framing strands should be intentional, not stray pieces you forgot to pin. Curl them lightly or smooth them with a flat iron, then leave them alone. The finished shape looks best when the chignon is compact and the front pieces are gentle, not fussy.
The Braiding Habit That Makes These Styles Hold Better
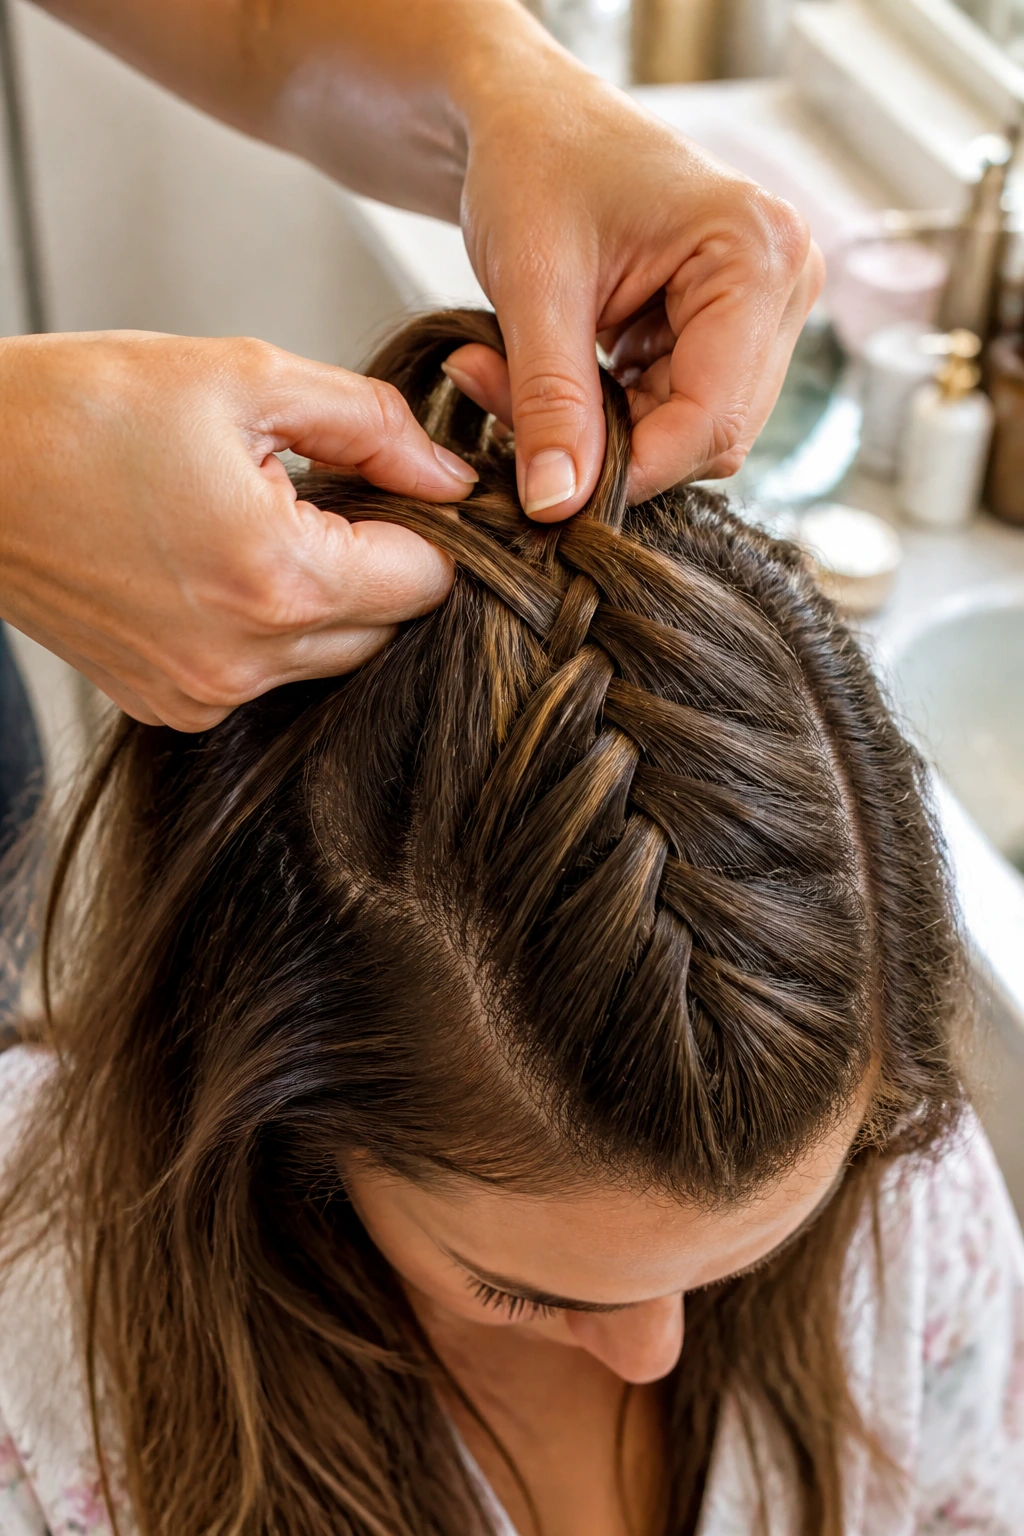
A French braid stays prettier when you stop chasing perfection and start focusing on tension and section size. Tiny differences in the first two inches near the crown change the whole braid later on. If the starting sections are clean and the grip is steady, the rest of the braid gets easier, even when your hair is layered, slippery, or textured.
The best habit I know is boring, and that’s probably why it works: comb the section, smooth it once, and braid without constantly reopening the same spot. Tugging the same strands over and over makes the braid fuzzy and slow. Clean passes save time.
The Part That Matters Most
If the hair is freshly washed, I’d reach for dry shampoo or a touch of mousse before I even pick up the comb. If it’s day-two hair, you may need less product than you think. Either way, the braid should feel secure before the first elastic goes on. That’s the difference between a braid that lasts and one that needs rescuing after lunch.
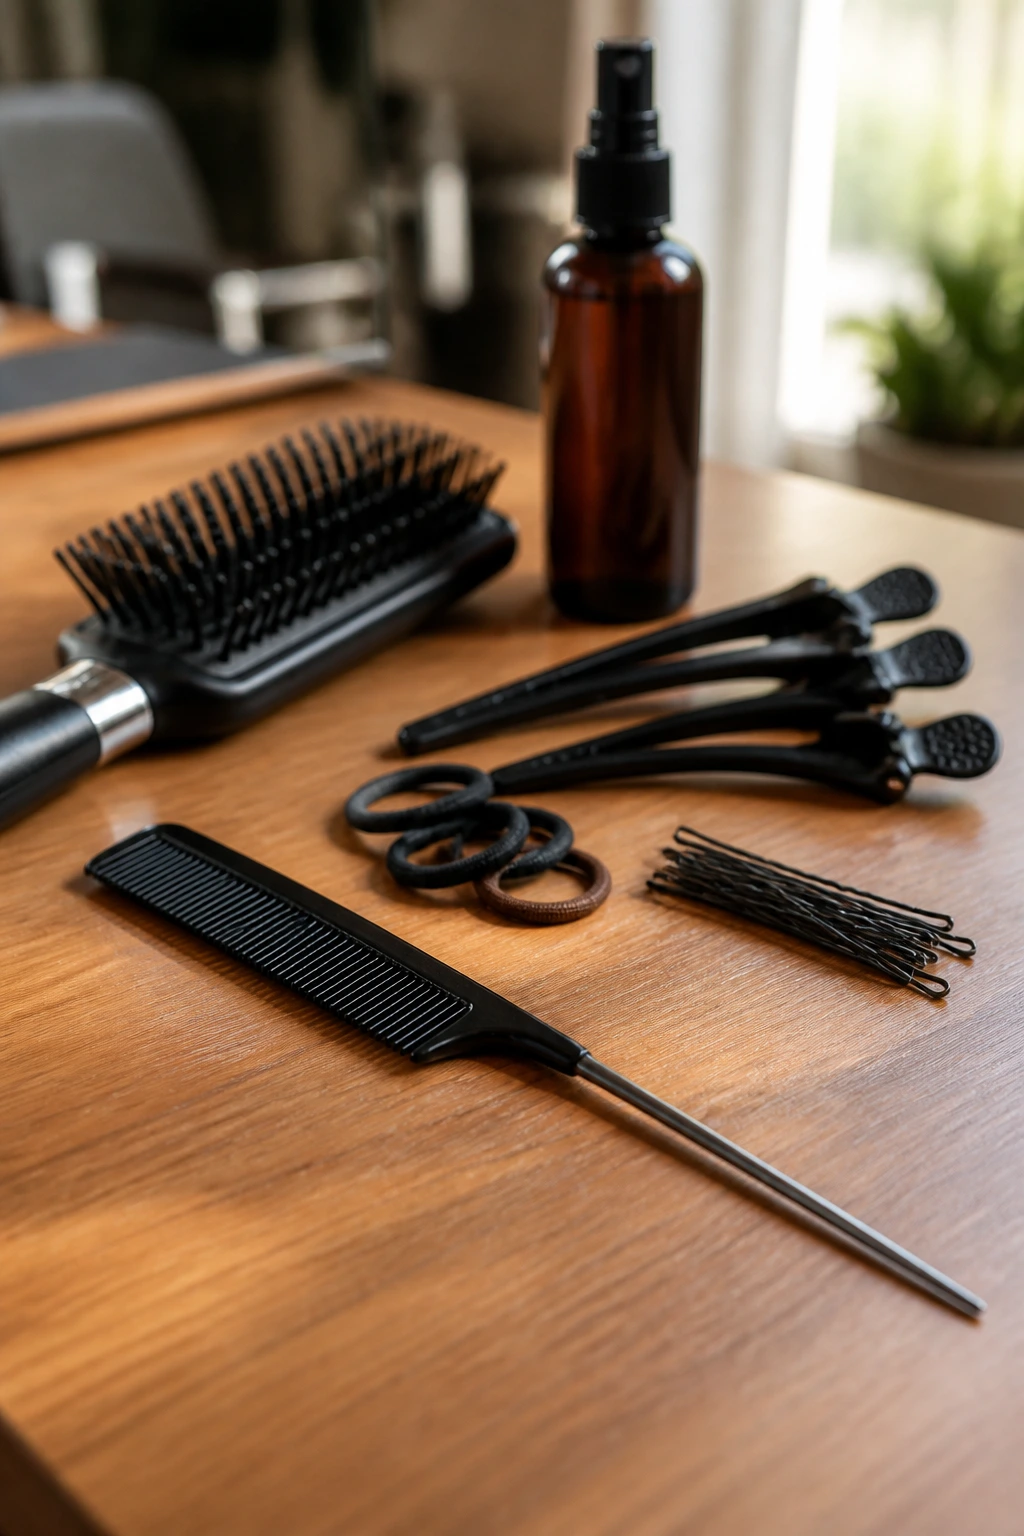
Essential Tools for These Styles
-
Rat-tail comb: The pointed tail makes clean parts and crisp sections much easier, especially for crown braids, center parts, and any style that starts close to the hairline.
-
Detangling brush or paddle brush: Use this before you braid, not halfway through. Smooth hair behaves better and keeps the braid line cleaner.
-
Sectioning clips: These keep the loose hair out of the way while you build the braid one piece at a time, which matters a lot on thick or layered hair.
-
Small snag-free elastics: Clear or hair-matched elastics are best for the ends and for styles like bubble ponytails or pull-through looks.
-
Bobby pins: Get a pack with a strong grip. You’ll need them for crowns, buns, tucked ends, and anything that wraps around the head.
-
Light texturizing spray or dry shampoo: A little grit helps braids hold, especially on freshly washed hair that wants to slide apart.
-
Flexible-hold hairspray: This keeps flyaways down without turning the braid into a helmet.
-
Hand mirror or two mirrors: Braiding the back of the head without checking the shape is a gamble. I wouldn’t take it.
Smart Product and Hair Prep Tips
If you’re shopping for braid prep, skip the heavy shine products unless your hair is extremely dry. A slick finish looks nice for about ten minutes, then it starts slipping. A light mousse, texturizing spray, or a small amount of smoothing cream gives the braid enough grip without making it greasy. That balance matters more than people think.
For fine hair, I’d pick dry shampoo and tiny elastics before I’d pick anything shiny. Fine strands need help staying together, and a little roughness at the roots gives the braid a better chance. For thick or curly hair, a leave-in conditioner or detangling cream makes the early sectioning less painful and keeps the strands from snagging as you cross them.
Pay attention to the elastic, too. Thin black elastics disappear in darker hair, but they can dig in if they’re cheap and overstretched. If you wear braids often, buy more than one kind: small clear elastics for delicate finishes, strong snag-free bands for heavy styles, and a few that match your hair color. That’s the kind of small stash that saves a lot of time.
How to Wear These Styles Without Overthinking Them
Polished wear: The classic center-part braid, low chignon, and slick-back braid look the sharpest with simple clothes and clean lines. A blazer, button-down, or plain knit lets the braid stay the focal point without competing with busy fabric.
Casual wear: Side-swept braids, half-up braids, and loose boho versions work well with denim, sweaters, and bare-minimum makeup. They have enough shape to look finished but not so much that they feel overdressed for errands or lunch.
Active wear: Sleek athletic braids, double French braids, and low ponytail finishes hold best when hair is tucked tight and pinned well. If you’re moving around a lot, keep the ends secured and don’t leave extra length swinging loose.
Hair length notes: Shorter hair usually does better with half-up braids, headband braids, or braid-to-bun styles. Longer hair can carry crowns, bubble ponytails, side sweeps, and tucked chignons without losing shape halfway through the day.
Additional Tips and Finishers That Make the Braid Look Intentional
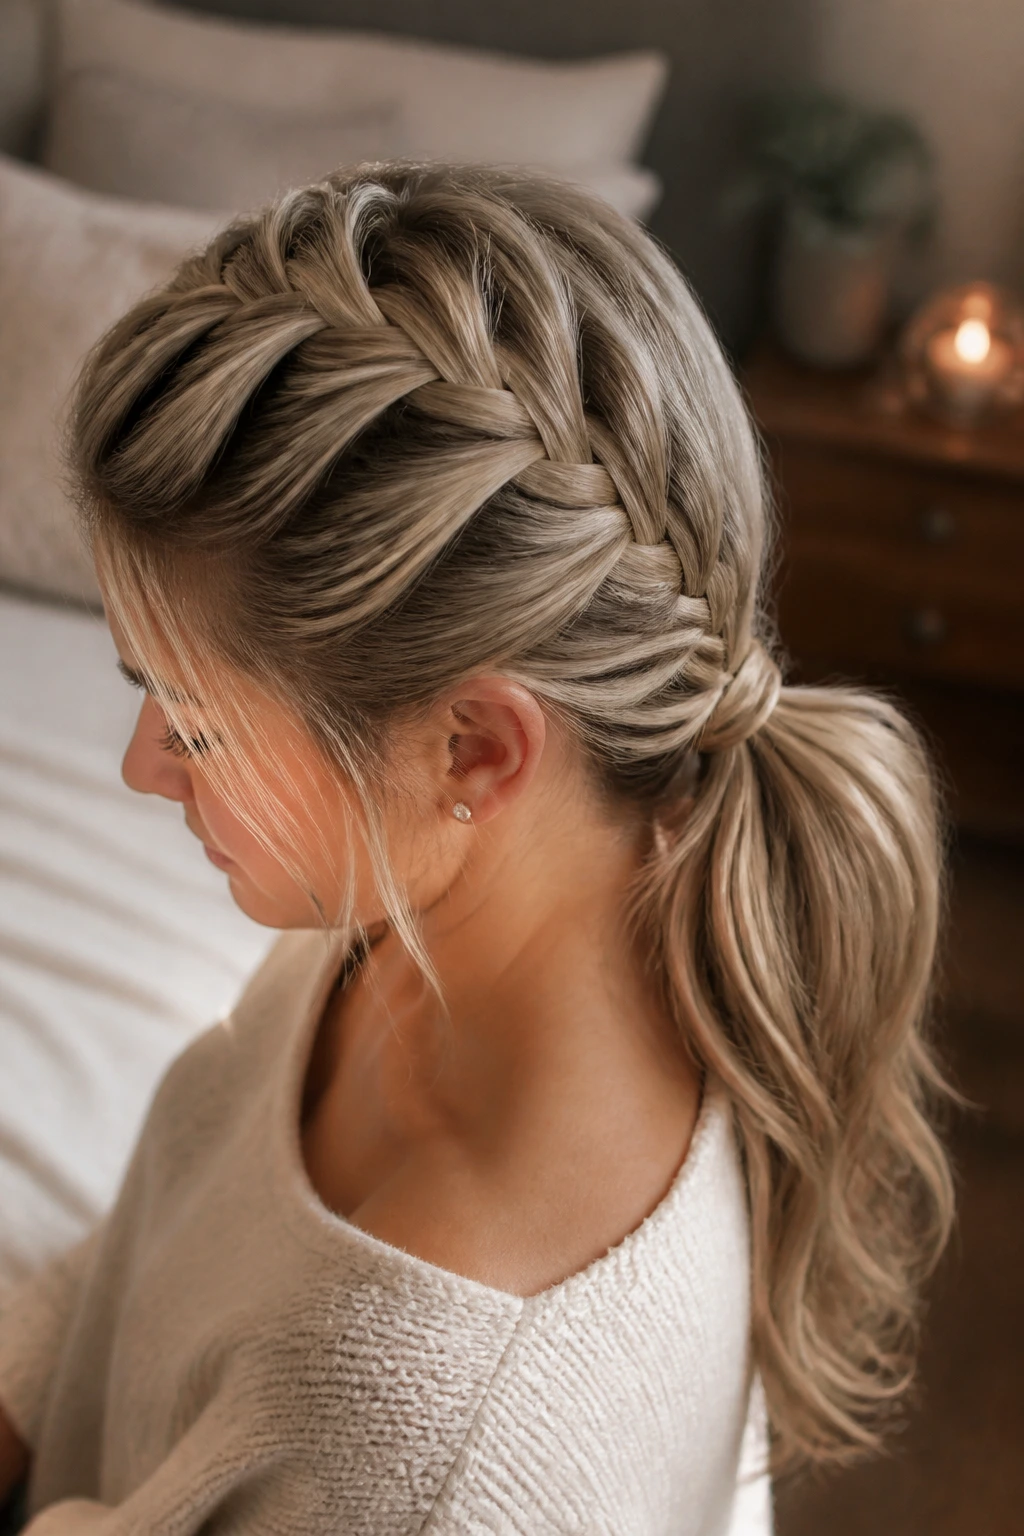
Grip: If your hair slips, mist the roots with texturizing spray before braiding and let it sit for a minute. That dry, slightly rough feel helps every section hold a little better.
Volume: If the braid looks too narrow, gently pancaking the outer loops gives it more presence. Pull from the sides, not the center. The center is the spine of the braid; leave it alone.
Clean Finish: Wrap a small strand of hair around the elastic and pin it underneath. It’s one of those tiny moves that makes the style look much more finished with almost no effort.
Accessory Switch: Ribbons, beads, cuffs, and scarves all change the tone fast. Keep the braid simple if the accessory is bold. Keep the accessory subtle if the braid is already elaborate.
Make-It-Yours: For a softer look, leave out face-framing strands. For a sharper look, smooth every edge and tuck every loose end. The braid can take either direction.
Common Mistakes to Avoid When Braiding
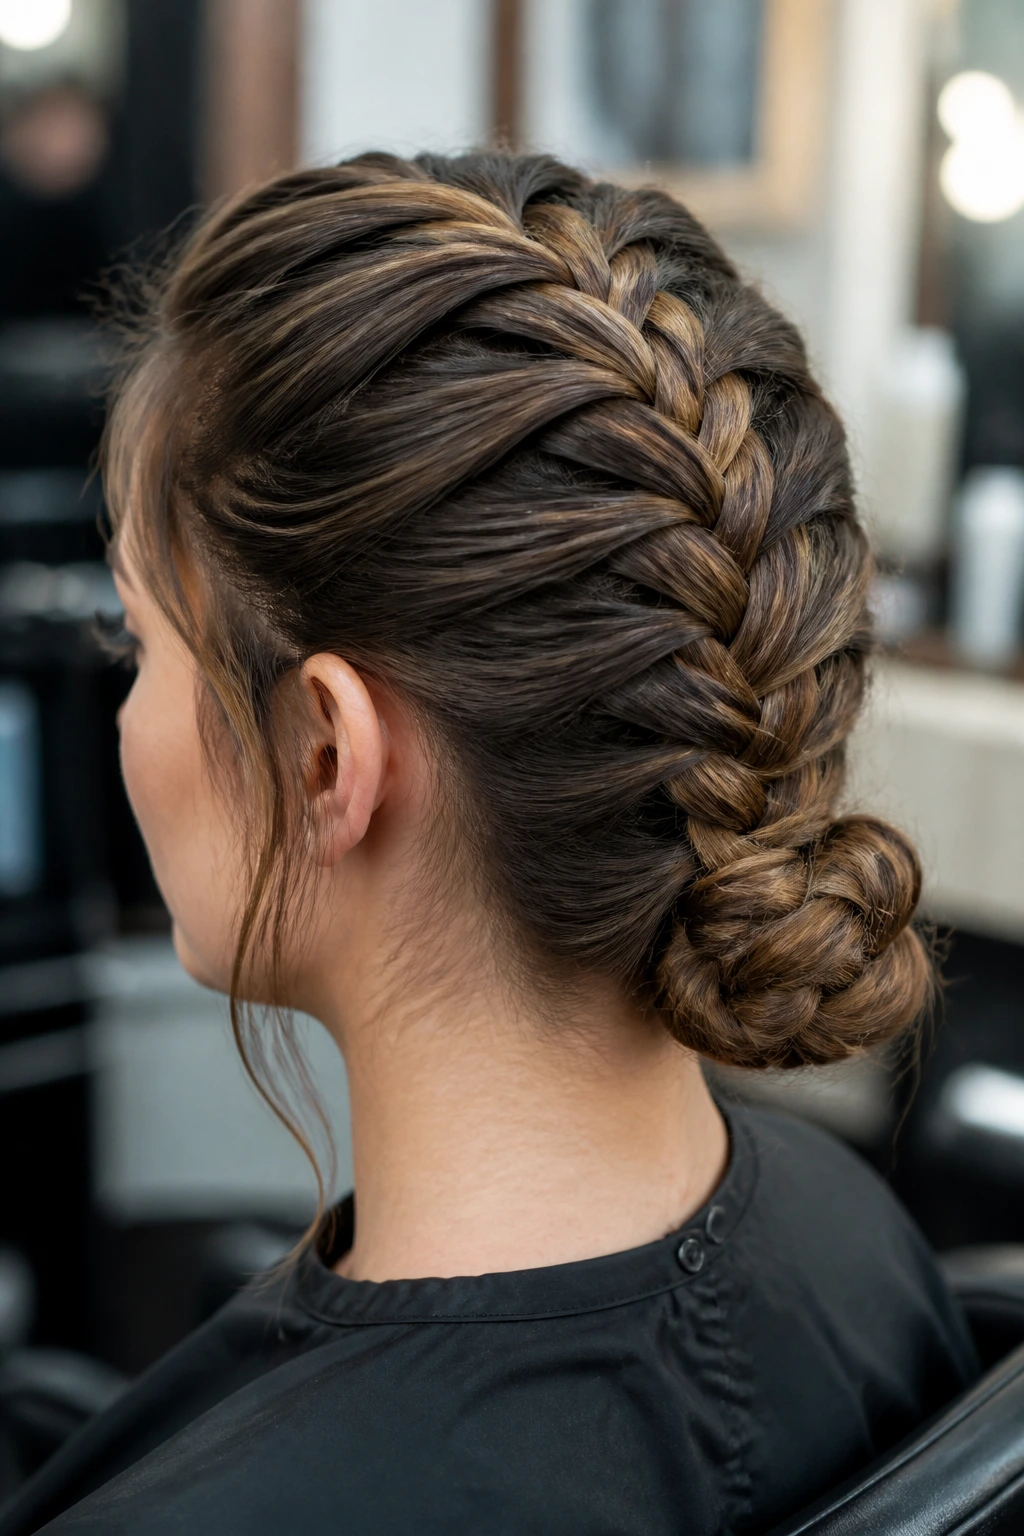
-
Starting with hair that’s too silky: Freshly washed hair can slide apart before the braid gets traction. If that’s your hair, use dry shampoo or wait until day two.
-
Taking sections that are too big: Big sections make the braid lumpy and uneven, especially near the crown. Smaller, consistent sections give a cleaner line and make the braid easier to control.
-
Pulling too tight at the hairline: A braid that feels like it’s tugging at your temples will look sharp for about five minutes, then it starts to hurt. Keep it secure, not punishing.
-
Stopping without securing the end well: If the last elastic is weak, the whole braid starts to unravel from the bottom. Use a tight snag-free tie and check that the ends are fully caught.
-
Ignoring the shape in the back: A braid can look good in front and awkward from behind if the curve wanders. Use a mirror and check the line before you call it done.
Variations and Adaptations to Try
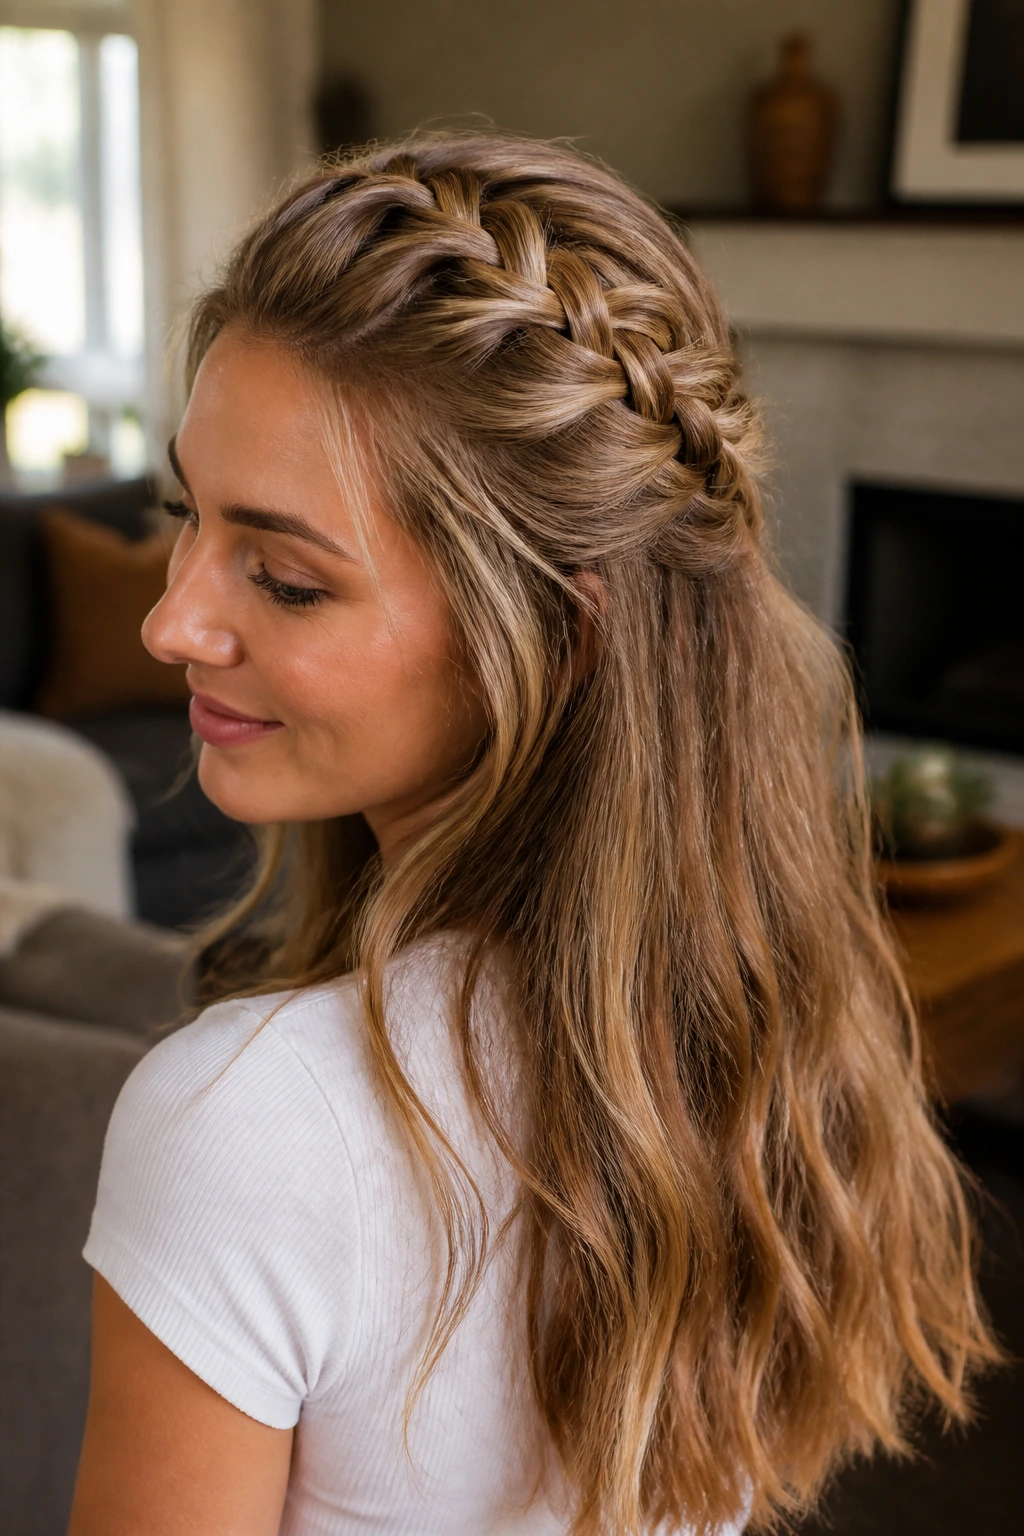
Curly-Hair Friendly Version: Use a moisturizing cream before braiding and leave the braid a little looser so the curls can keep their shape. This works especially well when you want fullness instead of a tight, flat finish.
Short-Length Workaround: Stop the braid earlier and finish with a small bun, clip, or tucked twist. You still get the French braid shape at the top, which is where most of the visual payoff lives anyway.
Event-Ready Polish: Smooth the crown with a light gel, hide the elastics, and add one subtle accessory—gold cuffs, a ribbon, or a slim pin. The braid stays simple, but the finish looks more deliberate.
Protective Night Style: Braid the hair loosely and tuck the ends under before sleep. This keeps the hair from tangling overnight and can buy you an extra day of wear without a full redo.
Volume-Boost Version: Pancake the braid after securing it and tease the ponytail, bun, or ends lightly if you want more body. It’s a good fix for fine hair that disappears when braided too tightly.
Make-Ahead, Overnight Care, and Refreshing
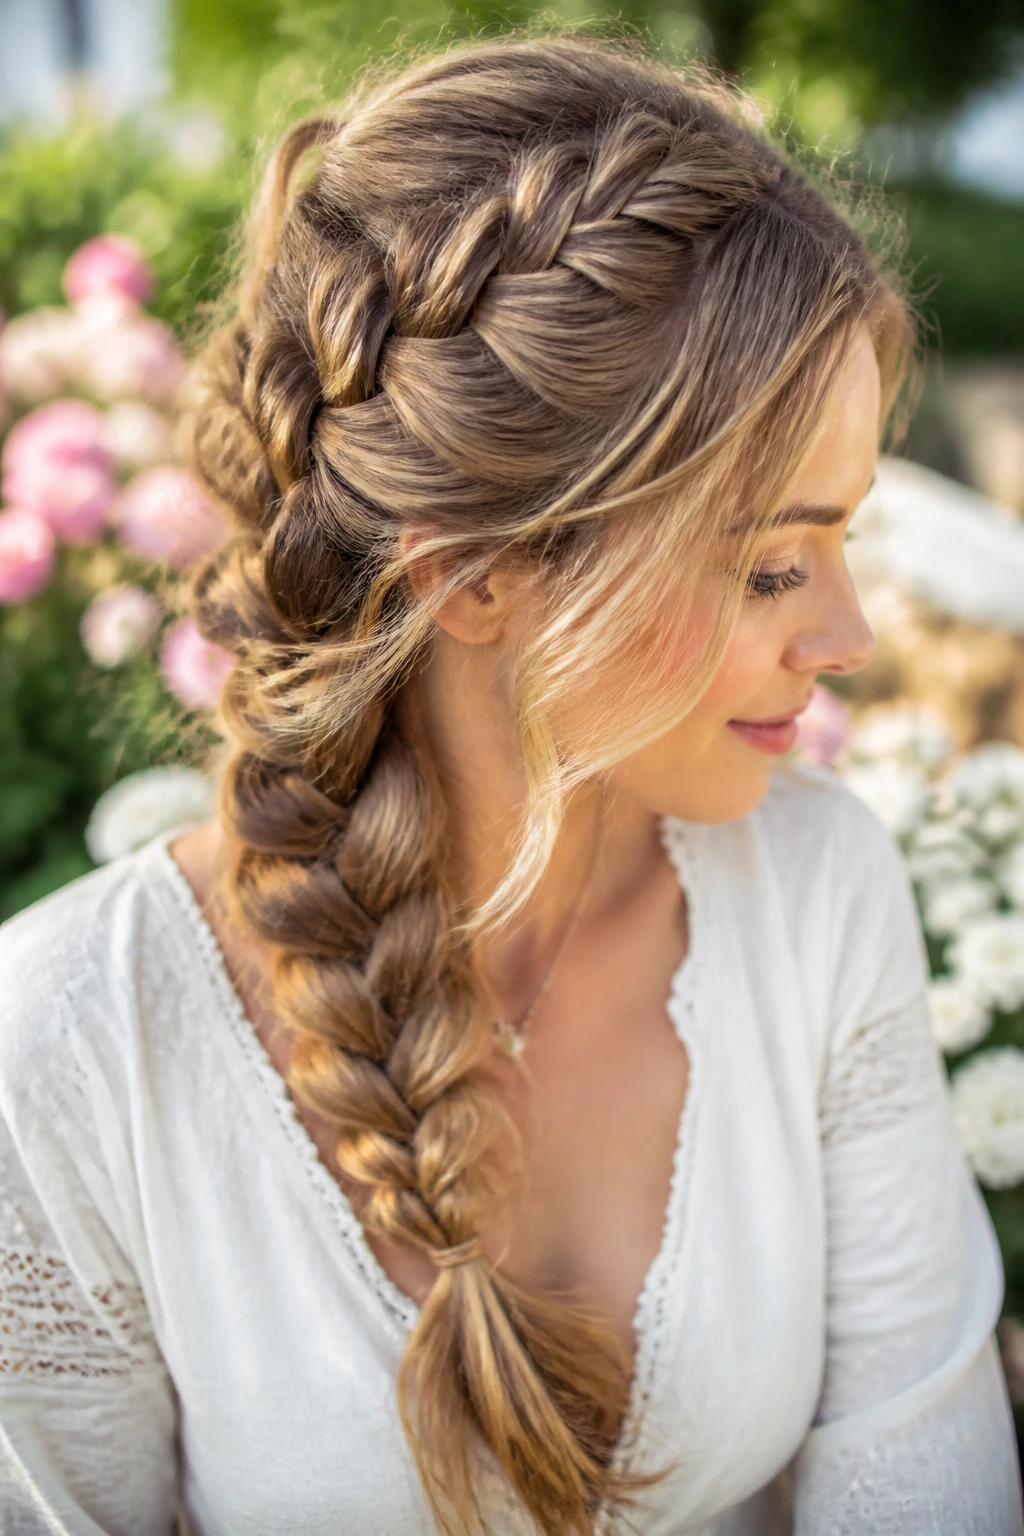
French braids hold up well overnight if they’re secured properly and not braided so tight that the scalp feels tender. A satin bonnet or scarf helps a lot. Cotton pillowcases suck moisture and create friction, and friction is how a decent braid turns fuzzy by morning.
If you want to wear the style for more than one day, sleep with the braid pinned up or tucked under at the ends, then refresh the crown with a light mist of water and a dab of leave-in or mousse the next morning. Don’t soak the braid. Too much moisture makes the sections puff out and can turn a sleek style into a frizz festival.
Most braided styles can be worn for one to two days before they start to lose their shape, though thicker or more textured hair may last longer if the scalp stays comfortable. If the braid starts pulling at the roots or the sections separate near the crown, redo it. Hanging on too long usually makes the whole thing look tired.
Frequently Asked Questions
How do I keep a French braid from falling apart halfway through the day?
Start with dry or lightly textured hair, not freshly conditioned hair that still feels slippery. Keep the first few sections small and even, then secure the end with a snug elastic and a little hairspray if needed.
Can I French braid clean hair, or does it have to be dirty?
Clean hair can work, but it often needs a little help. A touch of texturizing spray, mousse, or dry shampoo gives the strands enough grip to stay together without slipping.
What if my hair is layered and pieces keep falling out?
Leave a few face-framing pieces out on purpose, or use a light styling cream on the shorter layers before you braid. If the layers are very short, a half-up style or crown braid is usually easier than forcing a full braid.
Is a French braid better than a Dutch braid for fine hair?
French braids sit flatter and can look softer, while Dutch braids pop up more from the scalp. Fine hair often benefits from the flatter profile of a French braid, though pancaking either style can give you more width.
How do I make the braid look fuller without extensions?
After securing the braid, gently pull at the outer edges to loosen it a little. Dry shampoo, texturizing spray, and a slightly imperfect part can also make the braid read thicker.
Can I braid curly or natural hair without flattening the texture?
Yes, if you handle it with moisture and a soft grip. Use leave-in conditioner or cream, detangle gently, and braid without trying to erase every curl pattern. The texture is part of the look.
How soon can I take a French braid out after wearing it?
Whenever the scalp starts to feel tired or the style stops holding its shape. For most people, one to two days is the useful window. After that, the braid often looks less fresh than it feels.
What’s the easiest French braid style for beginners?
A classic center-part French braid or a low French braid into a ponytail is usually the easiest place to start. The shape is simple, the sections are easy to track, and you can see the line of the braid clearly as you go.
Braids Worth Reaching For Again
French braid styles for women work because they do something hair doesn’t always want to do on its own: they give shape without asking for a blowout, a curling iron, or a full hour in front of the mirror. A clean braid can be strict, soft, sporty, romantic, or a little bit all at once. That range is what makes it worth learning properly.
Start with the version that fits your day, not the one that looks hardest on social media. A braid that stays put and feels comfortable will get worn again. And the more you work with section size, tension, and texture, the less mysterious the whole thing becomes. After that, the styles stop feeling like separate tricks and start feeling like one useful skill you can change on the fly.
