



Shoulder-length hair behaves differently once you split it down the middle. The shape stops looking accidental, and the fringe starts doing real work. That’s why shoulder length hairstyles with middle part bangs can look polished even on days when the rest of your routine is half-done and slightly chaotic.
The trick is that this combo has range. It can read soft and romantic, sharp and modern, airy and undone, or sleek enough for a black blazer and a clean lip. A center part exposes more of the face than a side part does, so the bangs have to earn their keep. They need enough length to skim the cheekbones, enough texture to move, and enough balance so they do not flop into a damp little curtain at the first sign of humidity.
There’s also a very practical reason this cut keeps showing up in salons: shoulder length is forgiving. It brushes the collarbone, tucks behind the ears, still clips up when you need it out of the way, and gives the fringe room to blend instead of hanging there like a separate category. The best versions don’t fight the natural bend of your hair. They use it. That’s where the good ones get their shape.
Why This Collection Works So Well

-
The length does half the styling for you: Hair that lands around the shoulders has enough weight to settle, but not so much length that the ends drag the whole style flat by noon.
-
Middle-part bangs make symmetry feel deliberate: A center fringe can soften a strong forehead, balance rounder cheeks, and pull attention upward without hiding the face.
-
It plays nicely with real hair texture: Straight hair gets cleaner lines, wavy hair gets movement, and curly hair gets shape without losing bounce.
-
You can change the mood fast: A round brush, a flat iron, or a little salt spray can take the same cut from glossy to piecey to airy.
-
It grows out in a livable way: When the fringe lengthens, it blends into face-framing layers instead of turning into a blunt wall you have to fight every morning.
-
It photographs the same way it wears: The shape is visible from the front, the sides, and the back, which sounds obvious until you’ve tried a cut that only looks good from one angle.
1. The Airy Collarbone Lob
This is the one I reach for when someone wants movement without mess. The cut sits just at or a touch below the collarbone, and the middle-part bangs skim the cheekbones instead of crowding the eyes. It’s soft, clean, and easy to bend with a brush or a flat iron.
Why it works: The collarbone gives the ends a natural place to stop, so the hair doesn’t puff out at the shoulders the way shorter cuts sometimes do. The fringe opens the face without stealing focus from the length, which keeps the whole shape light.
Best for: Fine to medium hair, especially if you want lift at the front without a lot of layering at the back.
How to style it: Blow-dry the bangs first, directing them away from the face with a medium round brush. Then smooth the lengths with a large brush or a quick pass of a flat iron, leaving the ends slightly curved under.
Watch for: If the fringe is cut too short, the whole look gets jumpy. Keep the shortest pieces around the brow or just below it, then let the rest feather down.
2. The Soft Shag With Grown-Out Curtain Bangs
A shag at shoulder length can go wrong fast if it’s sliced too high, but a softer version gives you that easy, broken-up texture without the ragged edges. The bangs split at the center and drape into the cheekbones, which makes the whole cut feel lived-in rather than overworked.
Why it stands out: The layers are meant to move. Not explode. That’s the difference. You get lift around the crown, a little swing through the mids, and enough softness at the perimeter to keep the cut from looking crunchy.
What makes it different
The best shag here uses internal layers more than obvious exterior steps. That means the shape can hold its volume while still lying close enough to the head to stay wearable. If your hair waves on its own, this cut is friendly to that bend. If it is pin-straight, you’ll want a bit of mousse or texturizing spray to bring the layers to life.
How to wear it: Air-dry until damp, then scrunch a small amount of curl cream through the front and mid-lengths. You do not need perfect symmetry. In fact, the cut gets better when the ends land a little unevenly.
3. The Blunt Midi Cut With a Sleek Center Part
This is the cleanest answer in the group. One line. Very little nonsense. The ends sit around the shoulders, the outline stays blunt, and the middle-part bangs are kept long enough to melt into the face instead of sitting on top of it like a separate accessory.
A blunt edge gives you density, which is why this style looks so good on hair that can hold a shape. It also makes the center part feel intentional. There’s nothing fussy about it. The eye goes straight to the straight line of the cut, then to the fringe, then back to the face.
If your hair is fine and flat, this version can still work, but it needs a root lift product and a careful blow-dry at the crown. On thicker hair, the blunt edge can feel heavy unless the interior is slightly debulked. So yes, the cut is simple. The execution matters.
4. The Wavy Beach Midi With Feathered Bangs
Picture hair that bends at the mid-lengths, kicks out softly at the ends, and has bangs that split cleanly before tapering along the jaw. That’s the shape here. It has that easy, salt-air kind of movement, even if the nearest beach is a long drive away and the actual weather is disagreeable.
Why it works: Wavy hair already wants to break into separate pieces. The shoulder length keeps the waves from stretching out too much, and the feathered fringe stops the front from looking blocky. The result is relaxed, but not sloppy.
How to style it:
- Mist damp hair with a lightweight wave spray.
- Twist the front sections away from the face.
- Diffuse on low heat, or air-dry and scrunch once the hair is half dry.
- Finish with a drop of shine oil on the ends only.
Who should ask for it: Anyone with natural wave who wants shape without a heavy blowout. It also works well if your hair gets frizzy at the ends but stays smooth near the roots.
5. The Face-Framing Layers Cut
This is the safest cut for people who want shoulder length hairstyles with middle part bangs but do not want the bangs to feel like the whole story. The fringe blends into longer pieces around the cheekbones and jaw, so the front of the hair becomes a frame, not a curtain.
There’s a reason stylists keep coming back to this structure. It gives the face movement without forcing the hair into one obvious pattern. You can wear it straight, tucked, waved, clipped back, or half-up, and it still behaves.
The part matters here. A true center part gives the front layers a mirror-image feel. If your cowlick pushes the part off-center, don’t fight it so hard that the roots buckle. Shift it a quarter inch and let the face-framing pieces do the balancing.
6. The Curly Shoulder-Length Shape
Curly hair needs a different conversation. A center part can look fantastic on curls, but only if the cut respects the spring and shrinkage in the hair. The bangs should be shaped dry or at least observed in their natural pattern, because curls lie. They absolutely lie when they’re wet.
Why this version works: Shoulder length keeps curls from stretching under their own weight, and the middle-part fringe allows the curl pattern to open around the forehead instead of stacking into one heavy mound. It’s airy when it’s cut well. Puffy when it isn’t.
How to ask for it
Ask for length that lands at the shoulders when dry, then have the fringe shaped to sit around the brow-to-cheekbone range once it springs up. If your curls are tight, that usually means cutting longer than you think. If they’re loose waves, you can go a little shorter, but not by much.
Best styling move: Use a diffuser or air-dry with curl cream and a touch of gel. Then separate the bangs gently with your fingers after they’re dry. Don’t rake through them while they’re wet unless you want a frizzy triangle.
7. The Italian Bob-Grown-Out Mix
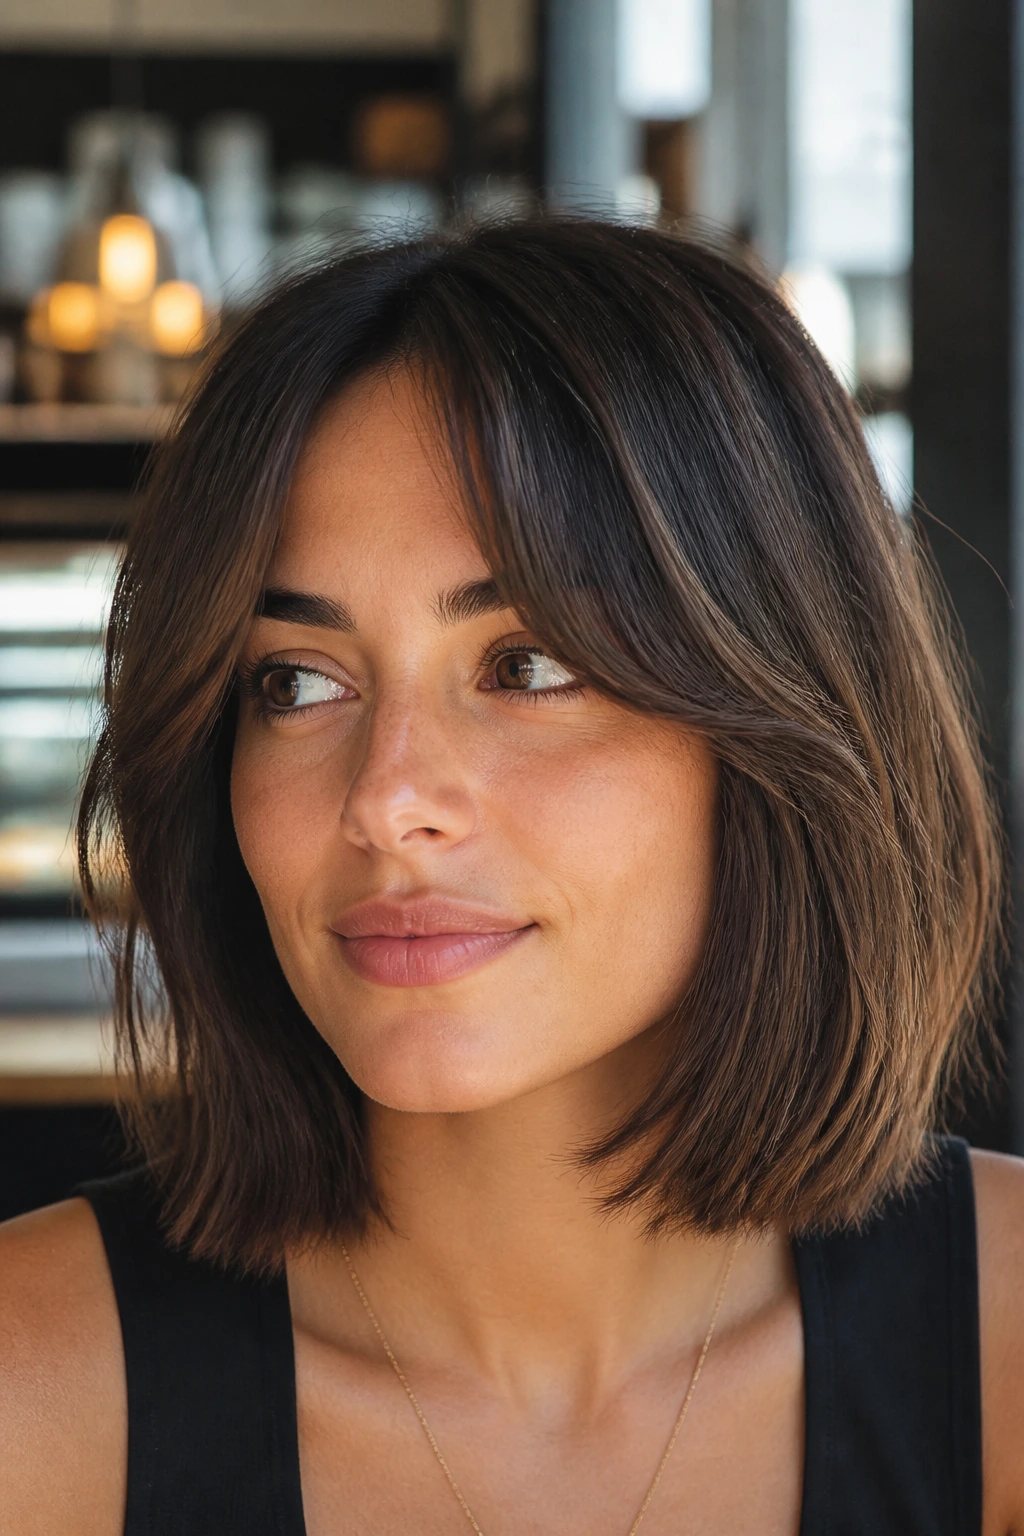
This cut lives between a bob and a lob, and that’s exactly why I like it. It has the fullness people love in an Italian-style bob, but the extra length lets the middle-part bangs blend into the cheekbones instead of sitting on a hard shelf near the chin.
The effect is plush. Soft edges, a little swing, and enough body to make the hair look expensive without trying too hard. The center part keeps it from turning cute in a juvenile way. It lands in a sharper lane than that.
If your hair is medium to thick, this cut gives you structure without looking puffy. If your hair is fine, the trick is not to over-layer the perimeter. Keep the outline clean. The movement should come from the bend, not from the haircut being shredded to pieces.
8. The Wolf Cut Lite
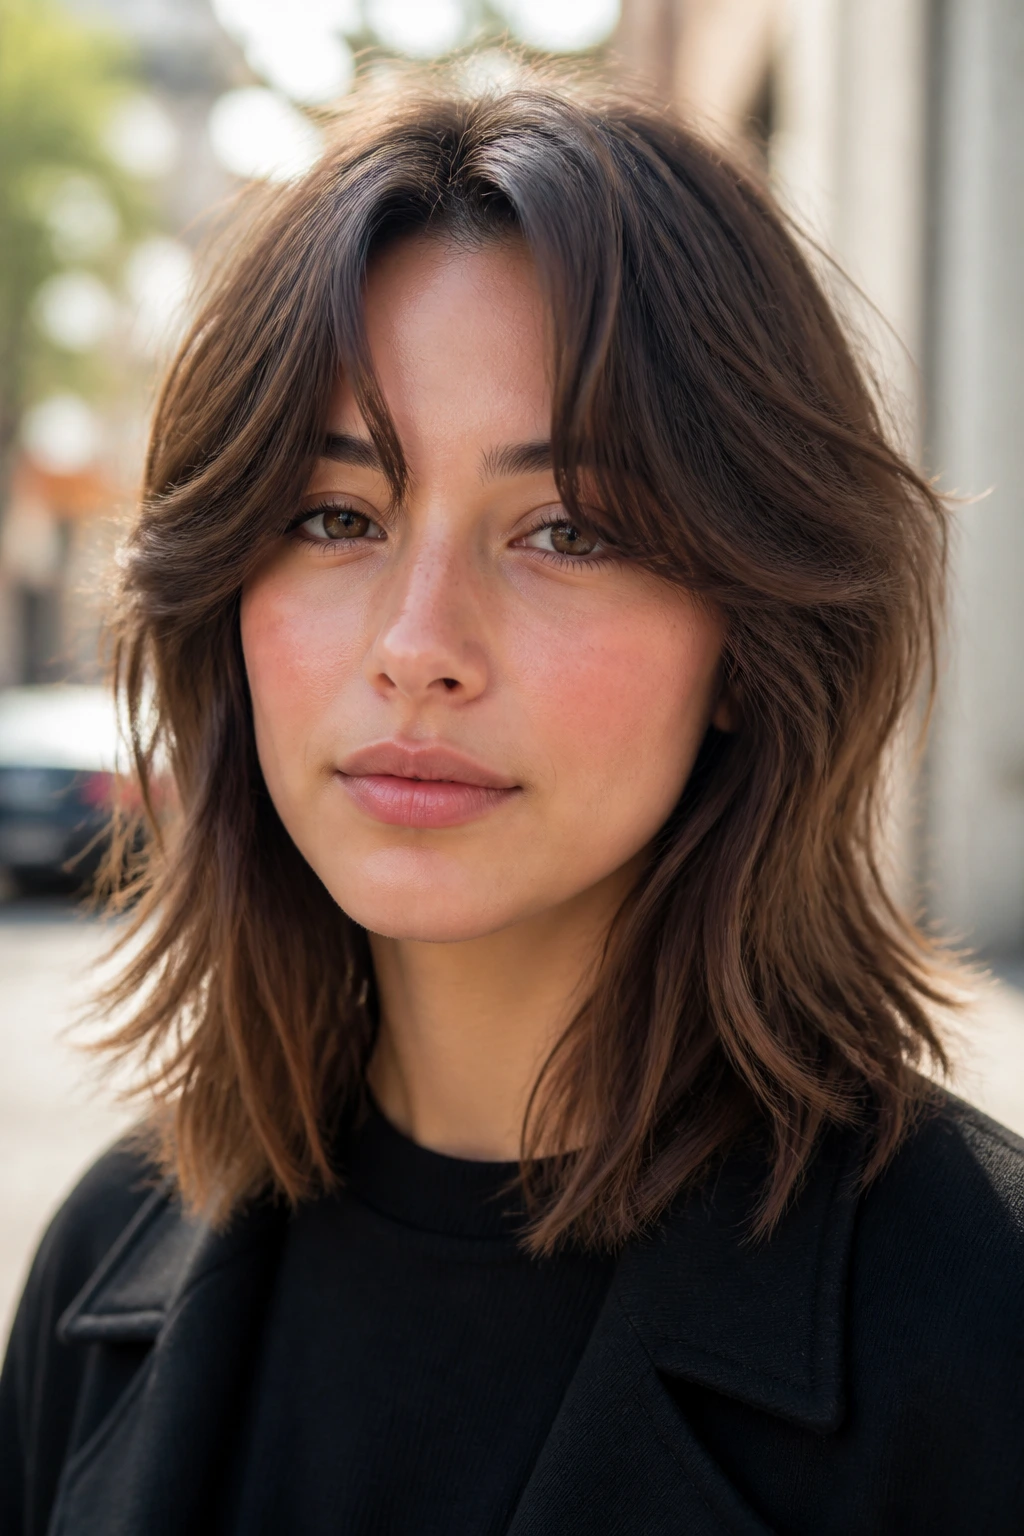
The full wolf cut can be a lot. This version is the calmer cousin. You still get crown volume, broken-up layers, and fringe that splits at the center, but the finish is softer and easier to live with at shoulder length.
What makes it useful: It adds shape to hair that falls flat at the sides and tends to collapse around the face. The shorter pieces near the front lift the middle-part bangs, while the shoulder grazing length keeps it from feeling too punk or too deliberately messy.
Who it suits: Thick hair, wavy hair, and anyone who wants texture without the commitment of a dramatic cut. If you like to air-dry and leave the house, this one makes sense.
Styling note: A little mousse at the roots and a dab of cream through the mids is usually enough. Too much product turns the layers sticky and kills the motion that makes this cut good in the first place.
9. The Polished Blowout Cut
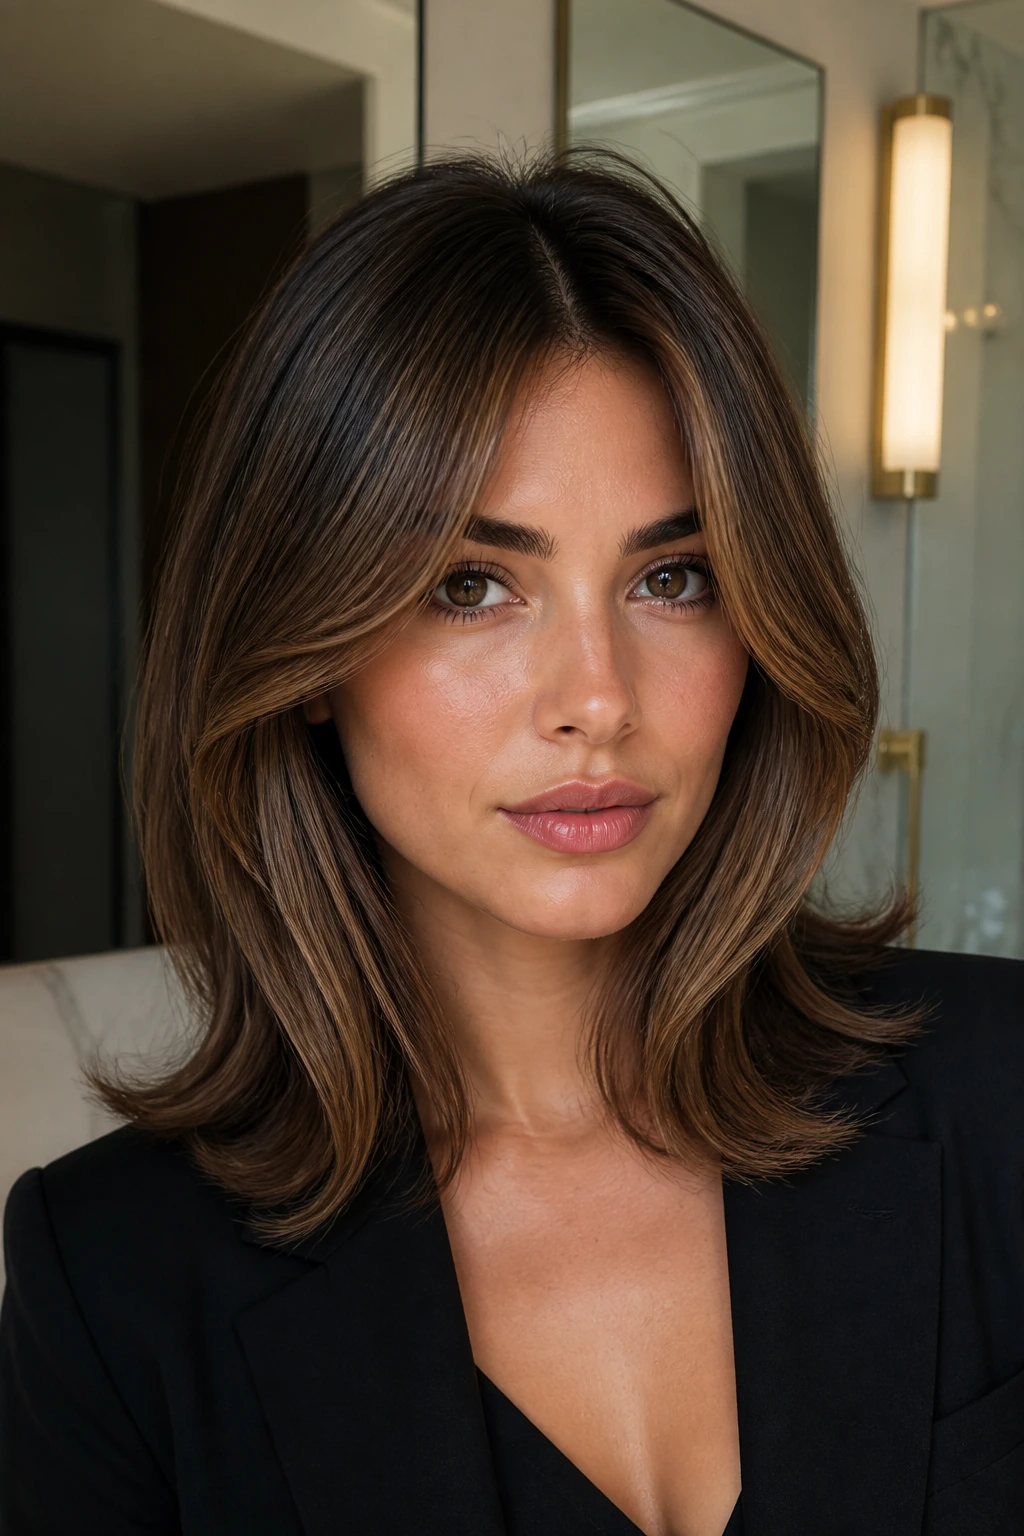
This is the style that looks like someone took an extra 12 minutes in the bathroom and that’s a compliment. The shoulder-length perimeter stays smooth, while the bangs are blown away from the face and then let fall softly into the center part.
You can tell when this cut is done well because the front pieces swing rather than stick. The ends have a gentle curve, and the overall shape looks clean without feeling stiff. It’s a good cut for work, events, or any day you want the hair to look deliberate instead of casual.
How to get the finish
Use a round brush with a nozzle on your dryer. Lift the roots at the front, roll the bangs away from the face, and finish with a cool shot so the curve holds. If the ends flip out too much, smooth them under with one pass of a medium iron.
A heavy serum is the wrong move here. Light cream, light spray, maybe a mist of flexible hairspray. That’s enough.
10. The Choppy Razored Mid-Length Cut
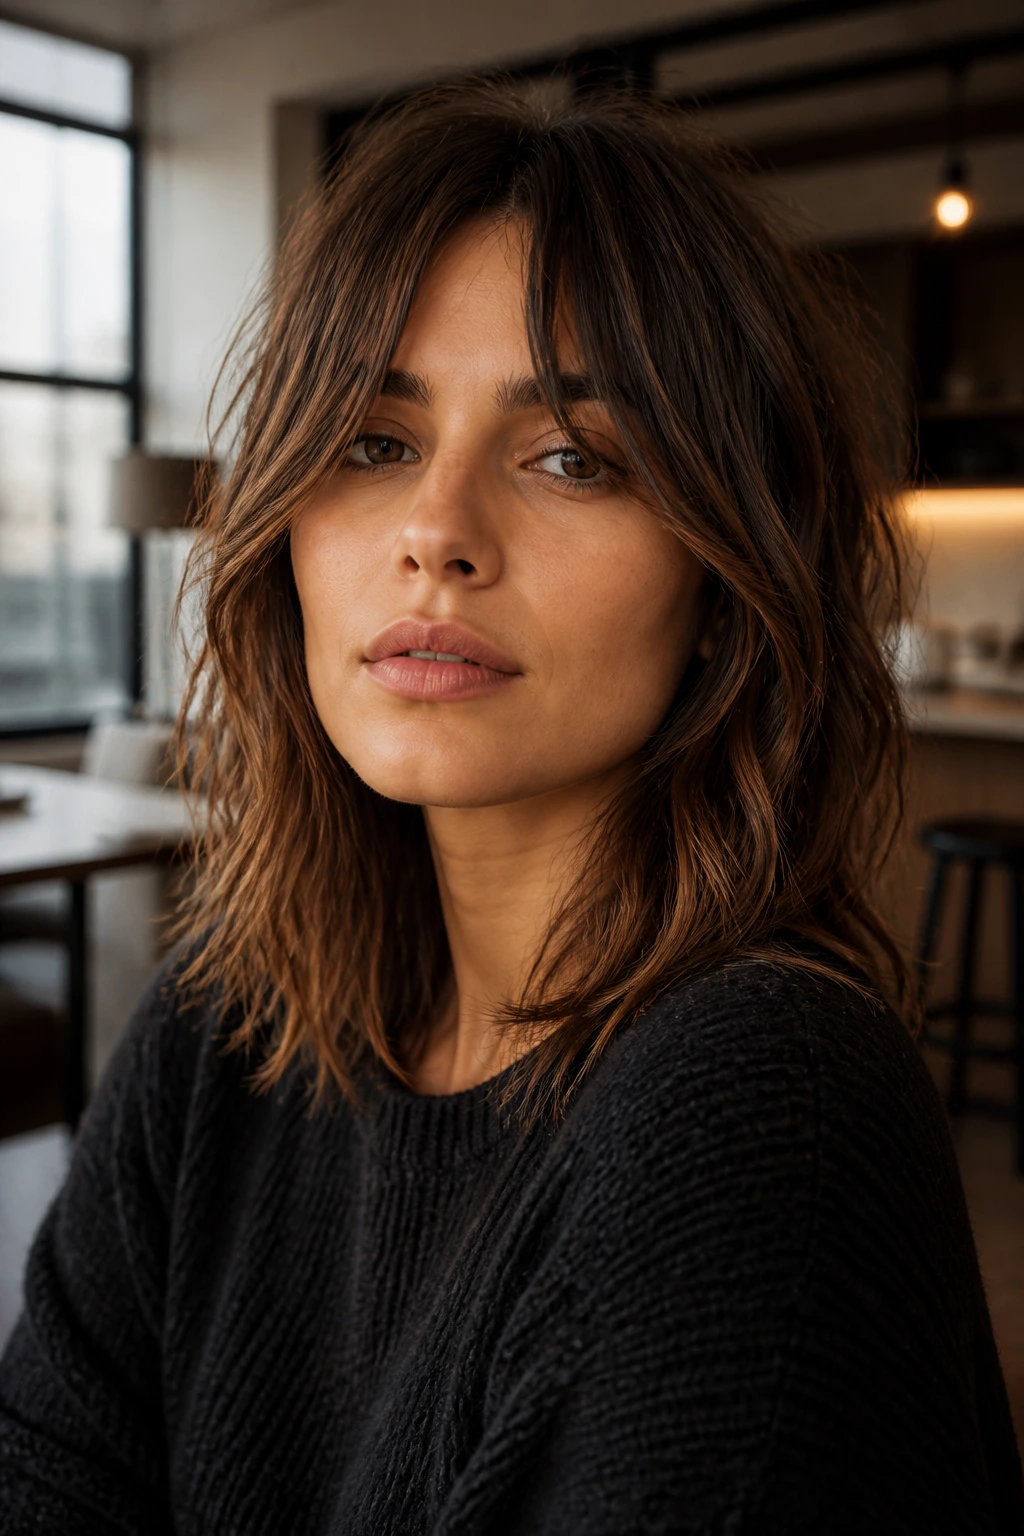
This one has edges. Not drama, just bite. The razor work softens the outline and creates thin, separated ends that move easily around the shoulders. The middle-part bangs follow the same idea, so the whole cut feels lighter than a blunt shape.
A razored cut can look fantastic on hair that resists movement. It breaks up bulk, removes that solid block feeling, and gives the front pieces enough taper to drape properly. On very fine hair, though, too much razor work can make the ends look wispy in a bad way. That’s the catch.
Use this if you want a slightly undone line that still reads modern. The style likes dry texture spray, quick bends with a flat iron, and a little bit of imperfection. Not chaos. Just enough grit to keep the shape from going flat.
11. The U-Shaped Layered Cut

The U shape is one of those quietly smart cuts people ignore until they see it moving. The back keeps more length, the sides sweep forward, and the middle-part bangs connect everything so the front doesn’t look detached from the rest of the style.
Why it works: The curve in the back makes the hair feel fuller, especially if your ends tend to taper too much at shoulder length. The front layers lean into the face, which helps a center part look softer and less severe.
Best for: Medium to thick hair, especially if you want a little length in the back but still need the front to feel light.
Styling tip: Dry the front pieces forward, then tuck the ends slightly under with a brush or iron. If you let the sides kick out too much, the U shape gets lost and the whole thing starts to read as random layers instead of a cut with intention.
12. The Shoulder-Length Cut With Arched Curtain Bangs
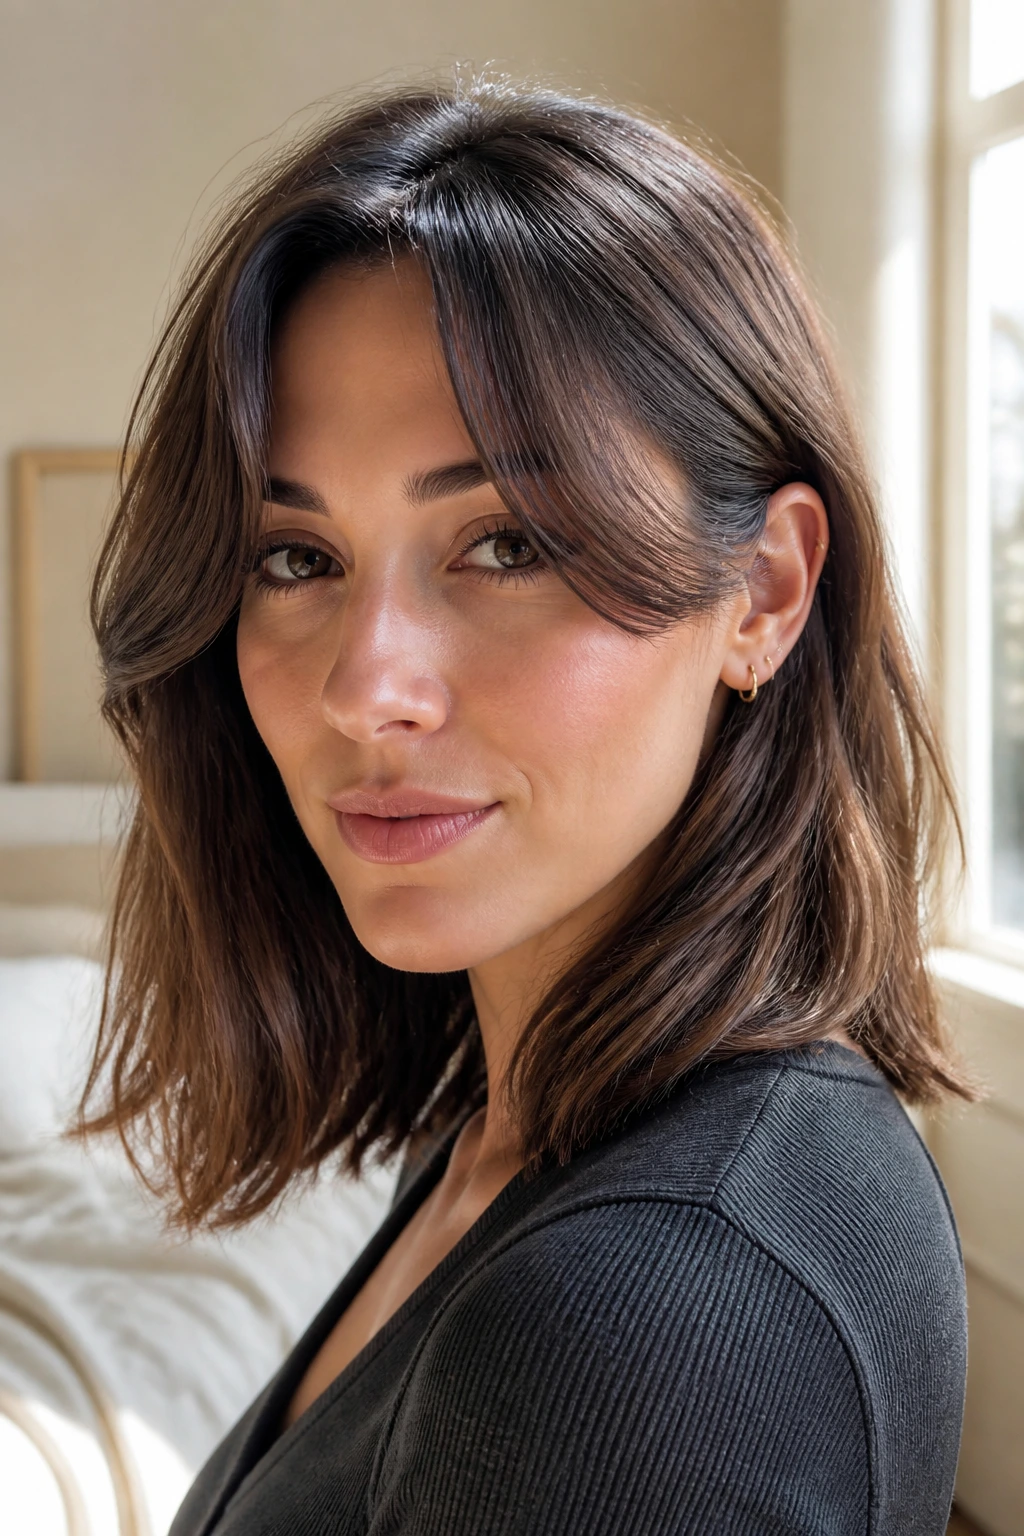
This is a cleaner, more lifted take on the middle-part fringe. Instead of dropping straight down from the center, the bangs arc outward along the temples and cheekbones. It opens the face in a way that feels tailored, not fussy.
A strong feature of this cut is that it flatters a lot of forehead lengths. The arch softens the center line, and the shoulder-length base gives the bang shape something to blend into. It’s especially good if you like wearing your hair tucked behind one ear on one side and loose on the other.
If you want this to sit well, the shortest point should usually hit around the bridge of the nose or upper cheekbone, then graduate longer toward the jaw. Shorter than that, and the arch can spring up too much. Longer than that, and you lose the open effect.
13. The Textured Flip-Out Ends
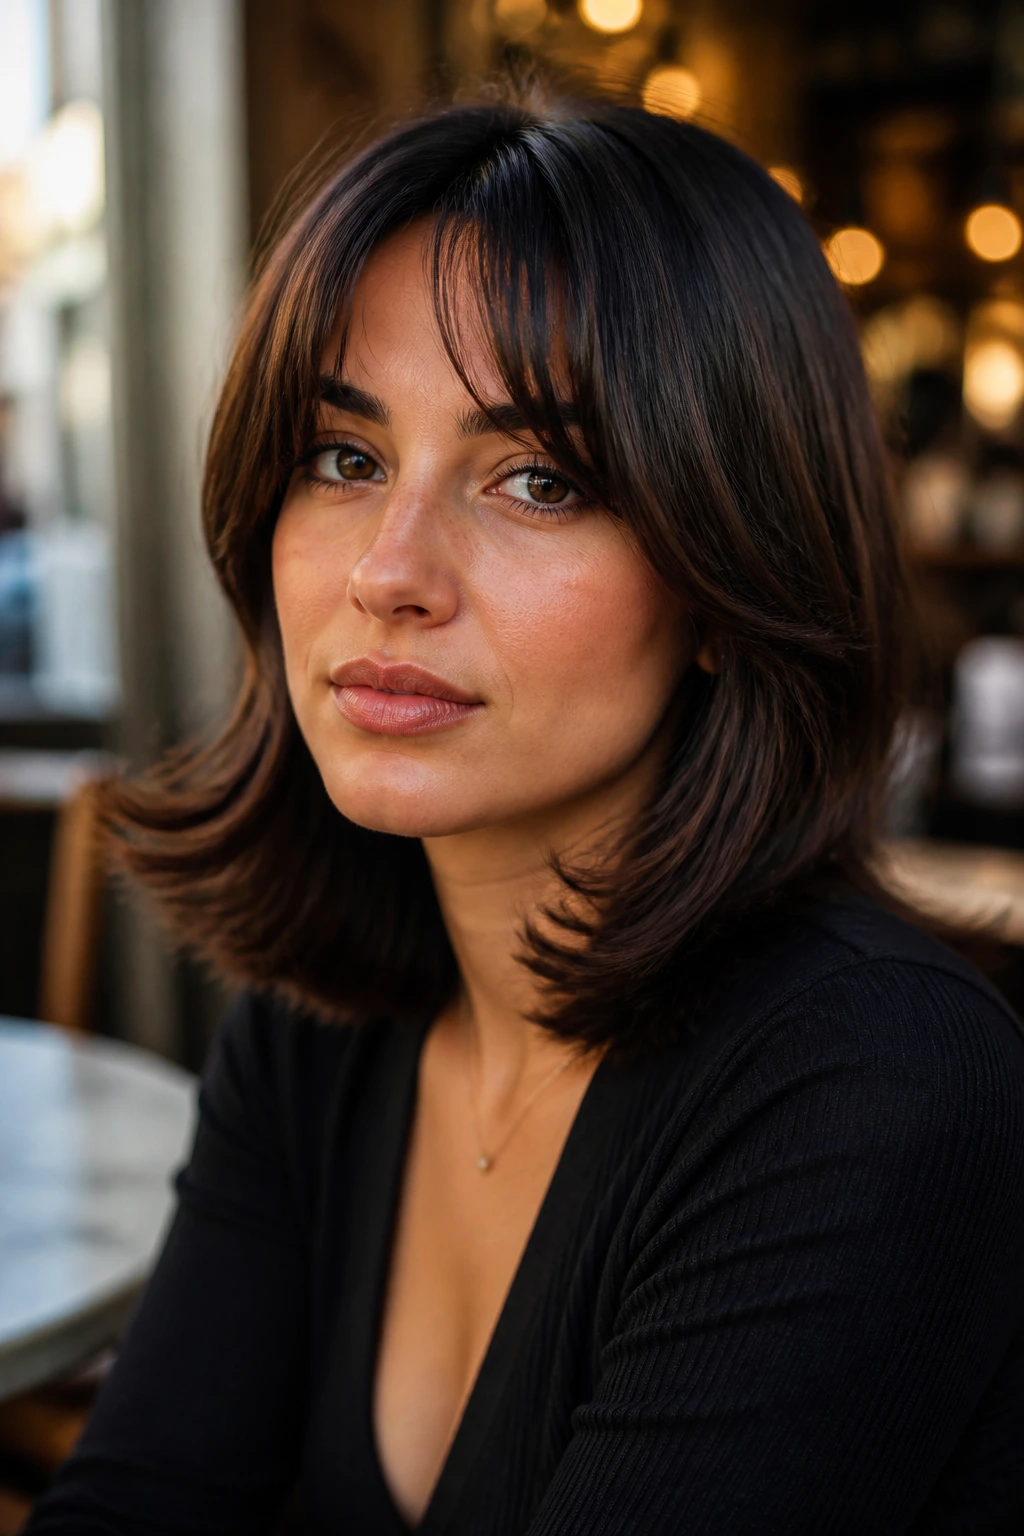
This cut takes a very familiar shoulder-length shape and gives it a tiny 90s kick at the bottom. The ends flip out just enough to be visible, but not so much that the style looks costume-y. The middle-part bangs keep it grounded.
That flip does a useful thing. It keeps the hair from hugging the neck in a heavy way. The movement at the ends adds air, which helps especially if your hair is one-length and tends to fall flat against the shoulders.
What to ask for
- A shoulder-length perimeter with soft texturizing at the ends.
- Curtain-style bangs that split at the center and taper to the cheekbones.
- Enough weight removed only at the very bottom to encourage movement.
Use a round brush or a straightener to flick the ends outward. Keep the bends soft. Hard flips can look dated fast. The good version looks a little playful, not loud.
14. The Sleek Straight Glass Hair Look
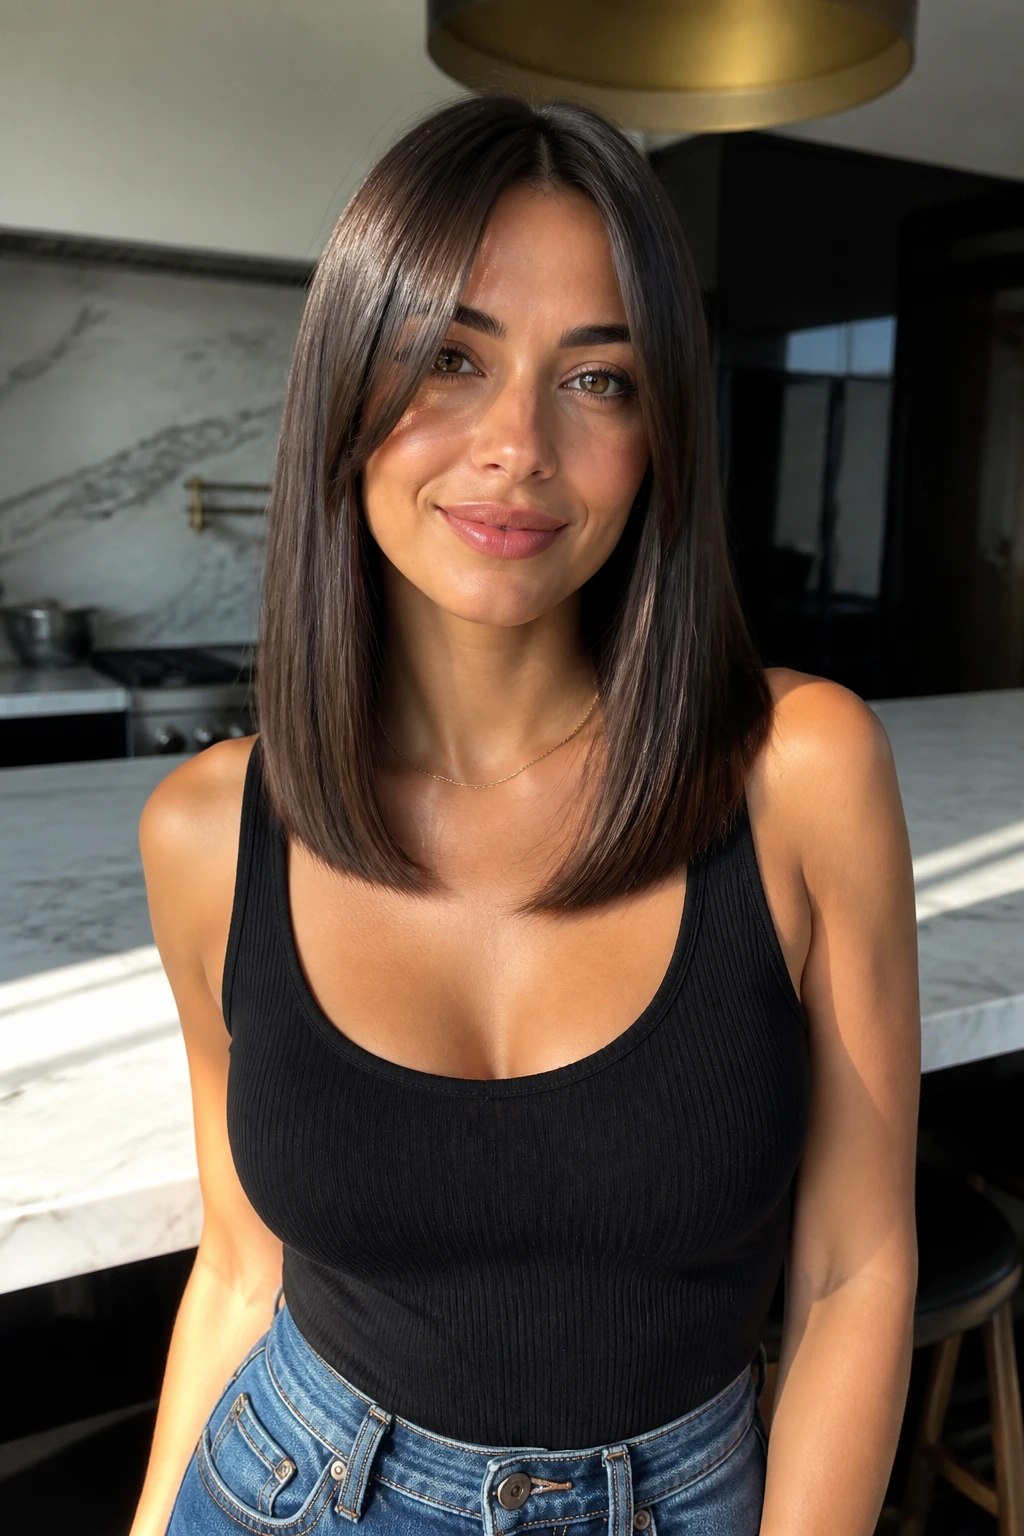
If your hair naturally likes to lie flat, stop fighting it. This cut turns that tendency into a feature. The shoulder-length line stays sharp, the middle part stays clean, and the bangs blend into the sides with a glossy finish that looks crisp from every angle.
The reason this works is simple: straight hair shows off shape. A center part on straight hair can look severe if the cut is too blunt at the face, but shoulder length gives the outline enough softness to keep it wearable. A little bend at the front ends keeps it from looking like a helmet.
I like this look best when the bangs are long enough to tuck behind the ears on a bad hair day. That sounds like a small detail. It’s not. It keeps the style useful, which is half the battle.
15. The Low-Maintenance Grow-Out Cut
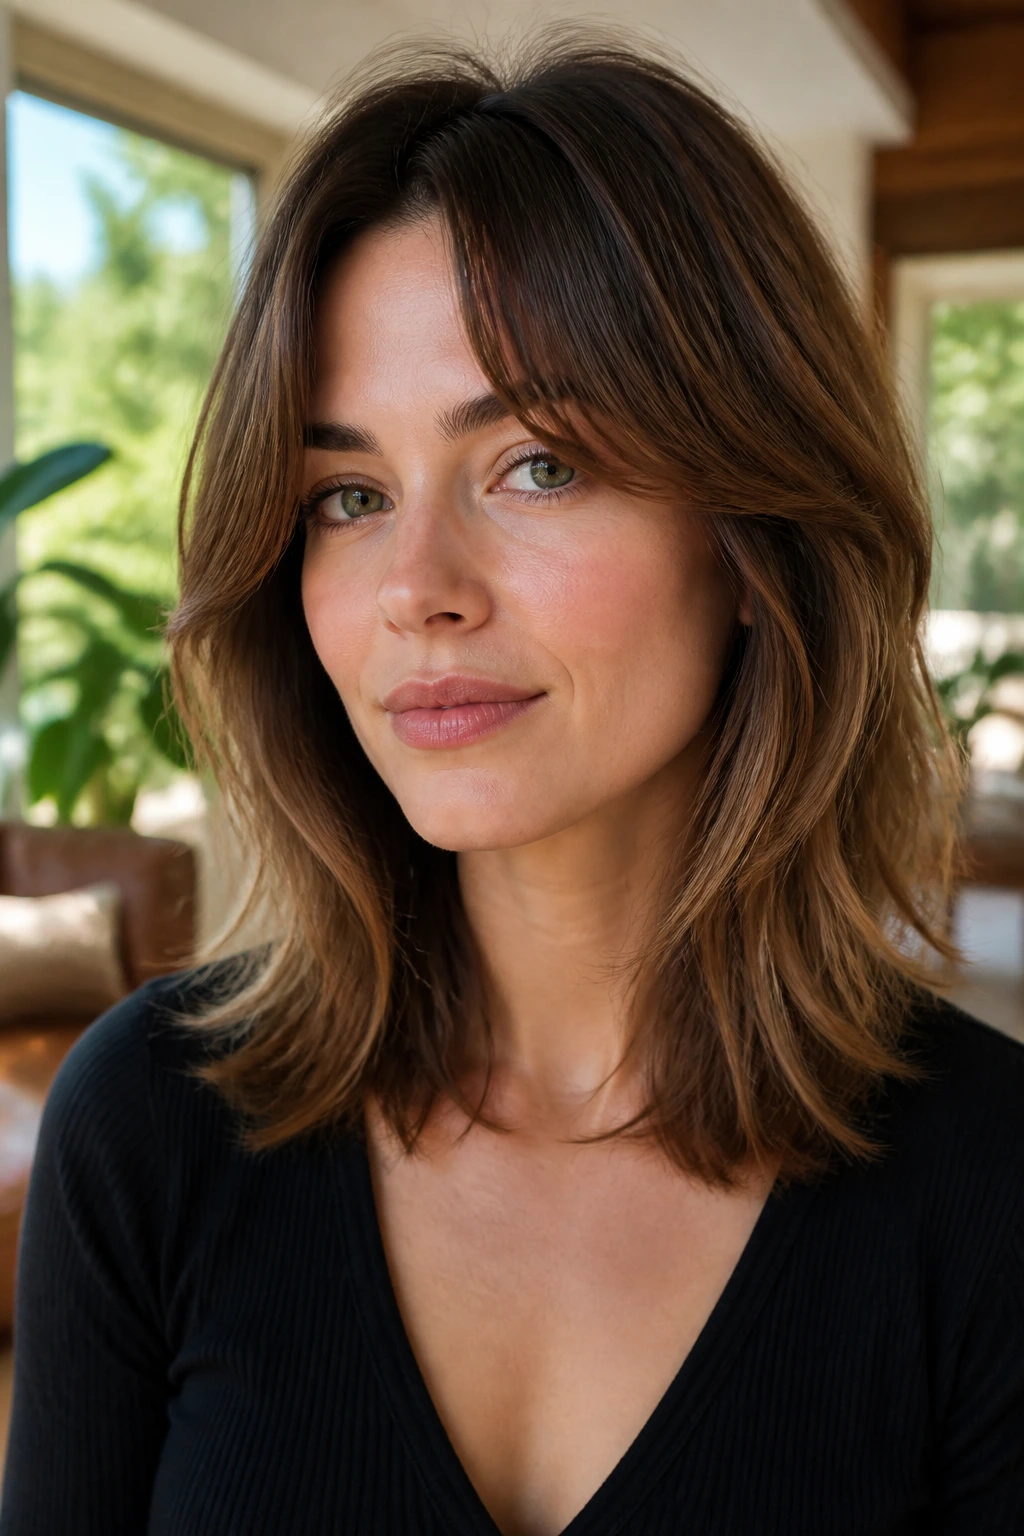
This is the one for people who are tired of babysitting their hair. The shape is built so it can grow from a shorter cut, or into one, without losing its line immediately. The middle-part bangs start as face-framing fringe and slowly merge into layers as they lengthen.
Why it’s smart: Growth does not ruin it. That matters. A lot of cuts look good on day one and annoying by week eight. This one keeps changing in a useful way.
Best for: Anyone coming out of a bob, curtain fringe, or blunt bang situation.
Styling approach: Use a light spray leave-in and let the hair air-dry whenever you can. If the front starts collapsing, a quick root lift at the fringe and a few seconds with a round brush are enough to wake it back up.
16. The Romantic Soft Wave Cut
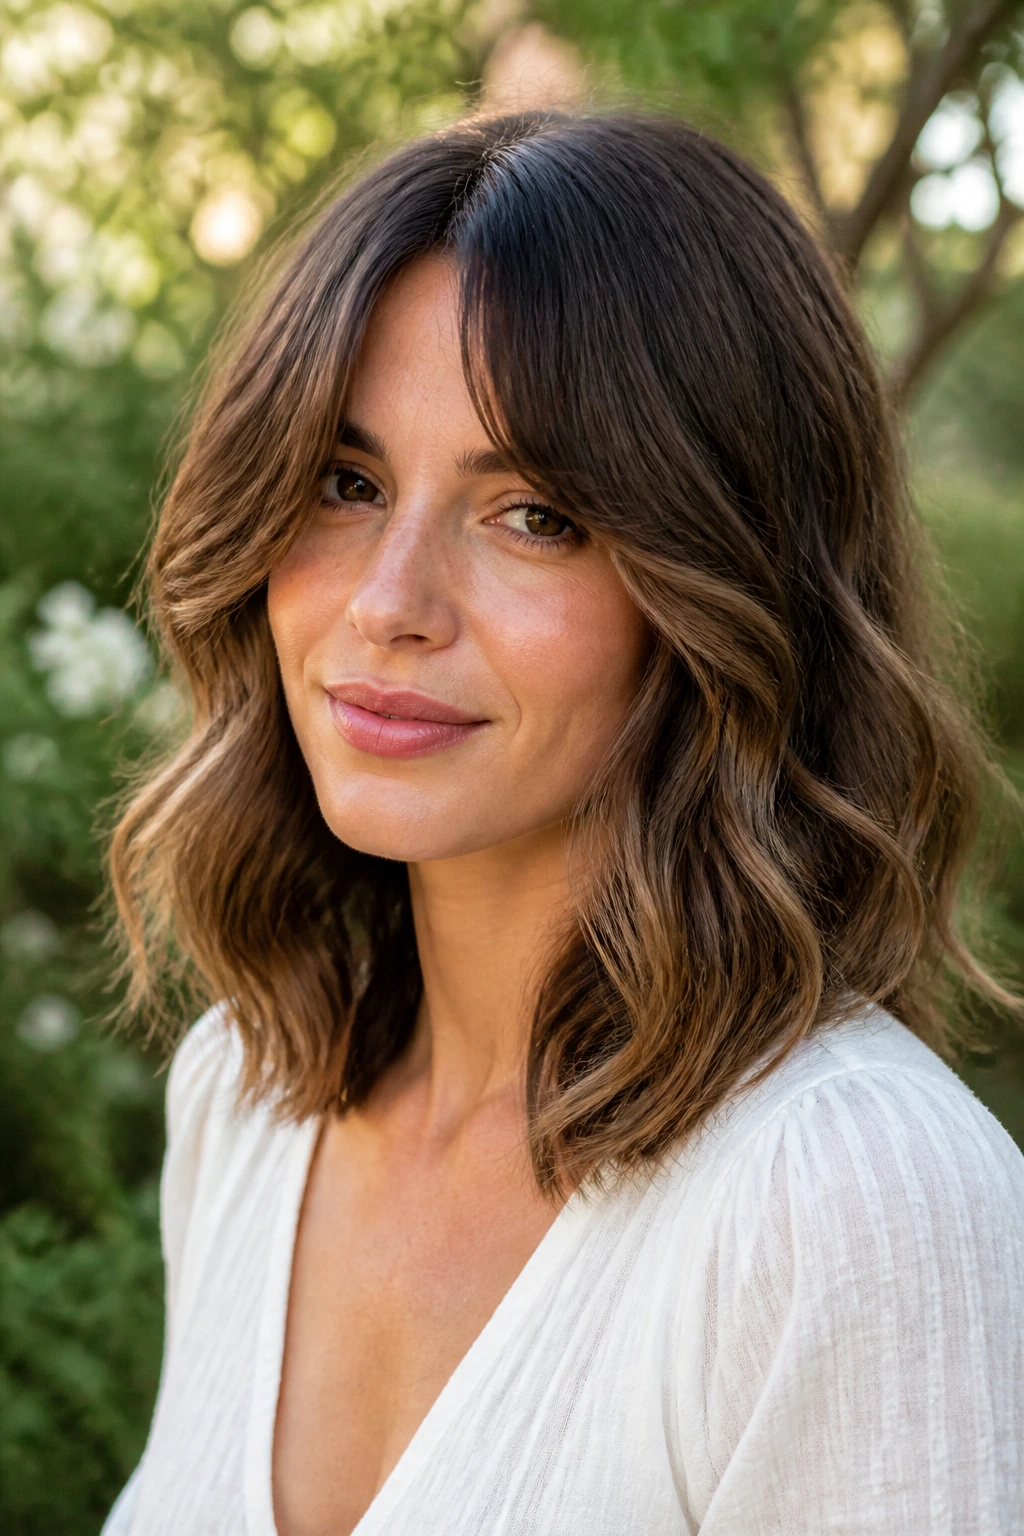
This shape is softer than the beach version and more controlled than a full blowout. The waves are loose, rounded, and touchable, and the middle-part bangs melt into the sides instead of making a hard division down the forehead.
The style works because the shoulders give the wave pattern a place to stop. Anything longer can start to drag. Anything shorter can turn too fluffy. At this length, the wave can bend and sit without overthinking itself.
If your hair is naturally straight, a wide-barrel curling iron or a hot brush can create this look in about 10 minutes per side. Leave the last inch of the ends out. That little bit of straightness at the bottom keeps the style from feeling too neat.
17. The Thick-Hair Lightened Shape
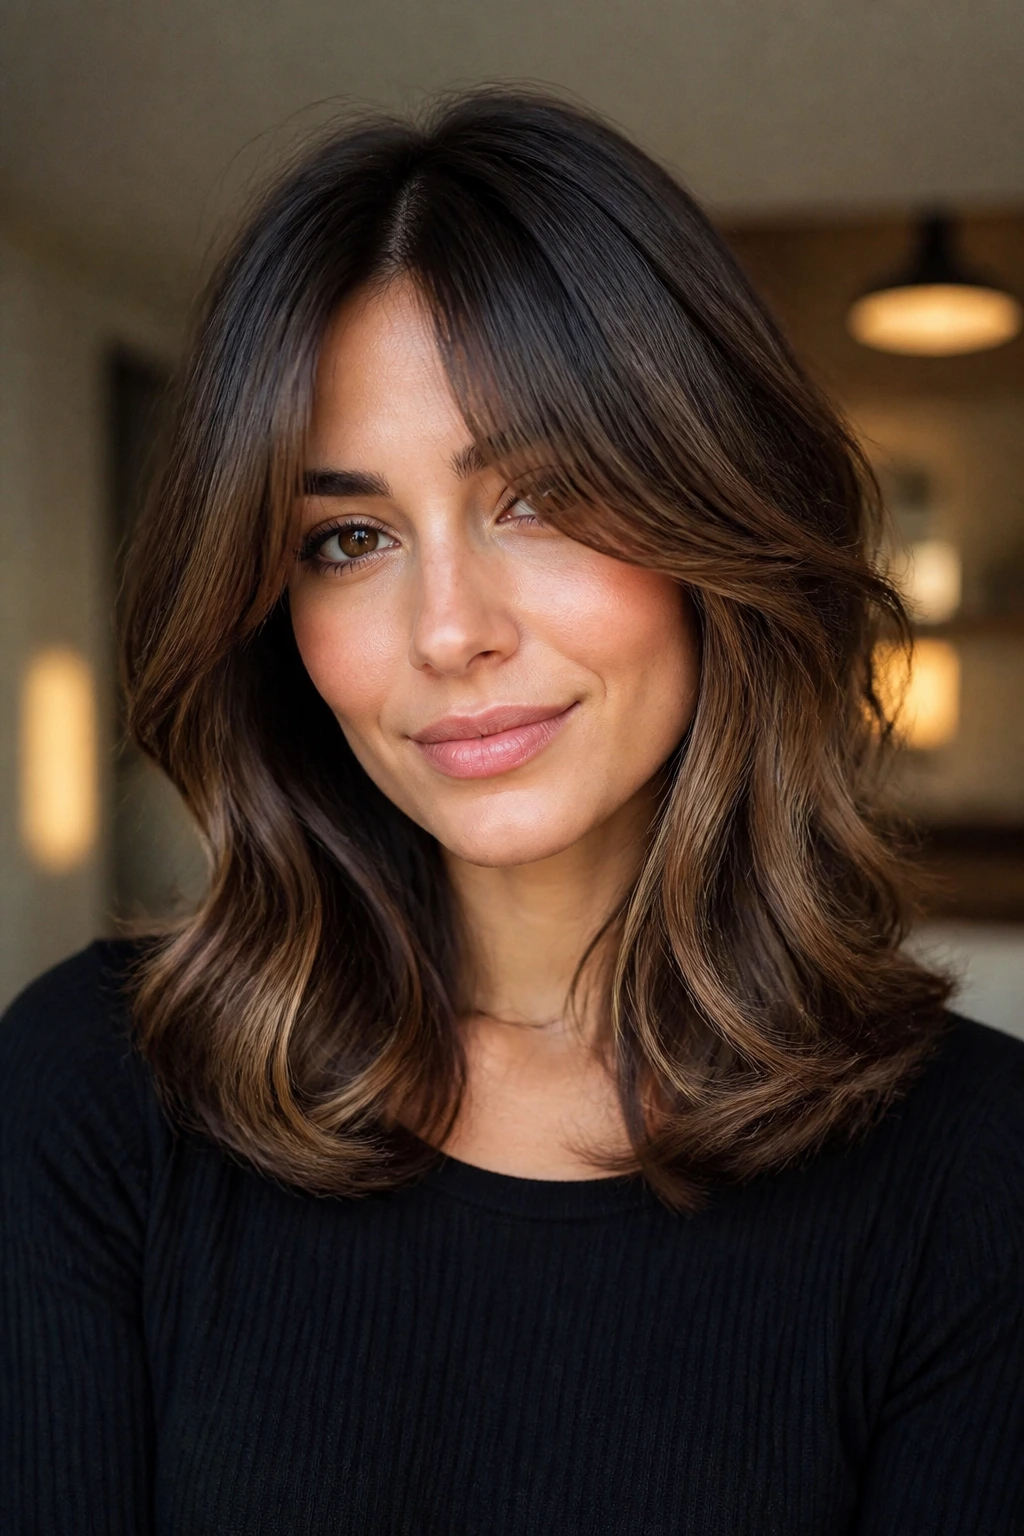
Thick hair can carry a middle part and bangs beautifully, but only if the interior is handled with care. You want movement, not bulk removal for its own sake. A good version of this cut takes weight out where the hair stacks up, then leaves enough perimeter to keep the shape strong.
This is where a lot of cuts go wrong. They get thinned too aggressively, and then the bangs separate into little wisps while the rest of the hair still feels heavy. Bad combination. Better to remove weight in controlled sections and keep the face-framing pieces long enough to lay over the sides.
Ask for soft internal layering, not a full chop into razor-thin pieces. Then style with smoothing cream on the mids and a small amount of texture spray only where you need separation. Thick hair usually needs less product than people think.
18. The Fine-Hair Lift Cut

Fine hair needs a cleaner outline than thick hair does. A shoulder-length blunt base gives it the illusion of density, while the middle-part bangs should stay long and airy enough to move, not disappear. The goal is lift at the root and a perimeter that looks full.
Why it works: Fine hair often collapses when it’s over-layered. A center fringe with too many short pieces will split and see-through almost immediately. Keeping the bangs longer and the cut more compact solves that.
Use this if: Your hair loses shape when it gets past the chin, or if you want to fake a little more body without using half a can of mousse.
Styling note: Dry the roots first, then set the fringe with a round brush or a velcro roller while you do makeup. That tiny bit of setting time makes more difference than piling on heavy creams ever will.
19. The Balayage Midi That Shows Off the Cut
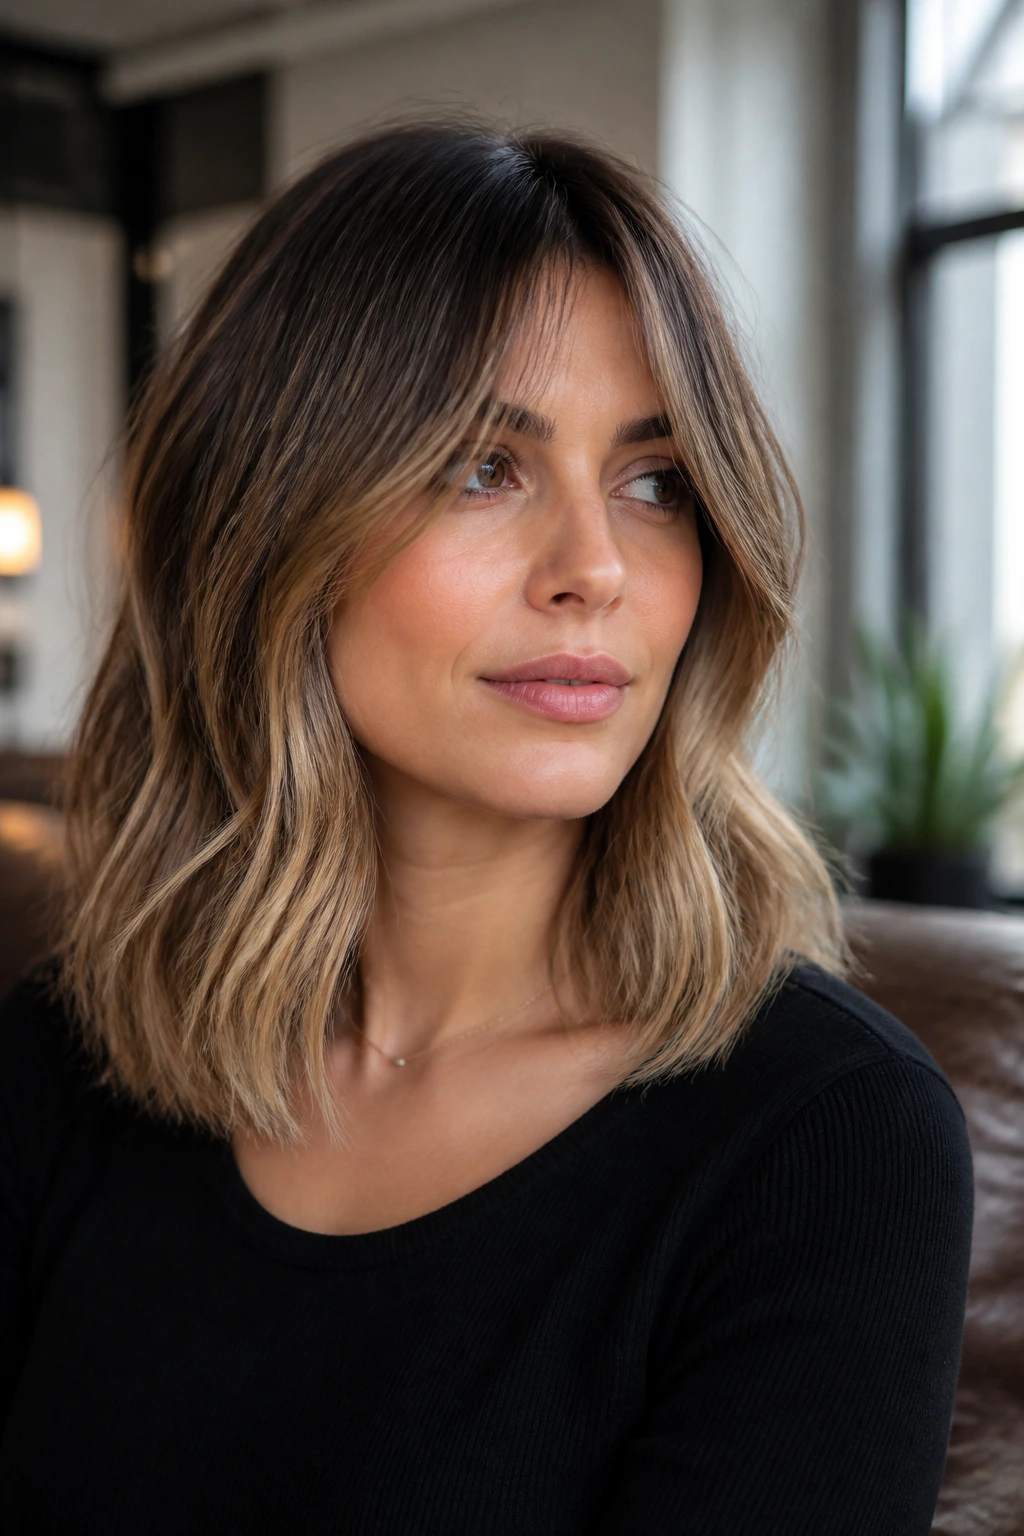
Color changes the way a cut reads. Balayage on shoulder-length hair with middle-part bangs makes the layers visible without shouting about them. The lighter pieces around the face pick up the fringe, the shoulder-length ends show off the gradient, and the whole haircut looks more dimensional.
The reason I like this combo is that the shape and the color support each other. A center part can sometimes flatten a style visually, but balayage breaks that up with tone and light. Just keep the face-framing pieces blended enough that the fringe still looks like part of the haircut, not a separate streak map.
If your hair is naturally dark, a few soft ribbons around the front can be enough. You do not need to flood the whole head with highlights to make this work. A little contrast near the cheekbones often does more than a lot of brightness everywhere.
20. The Easy Updo-Friendly Everyday Cut
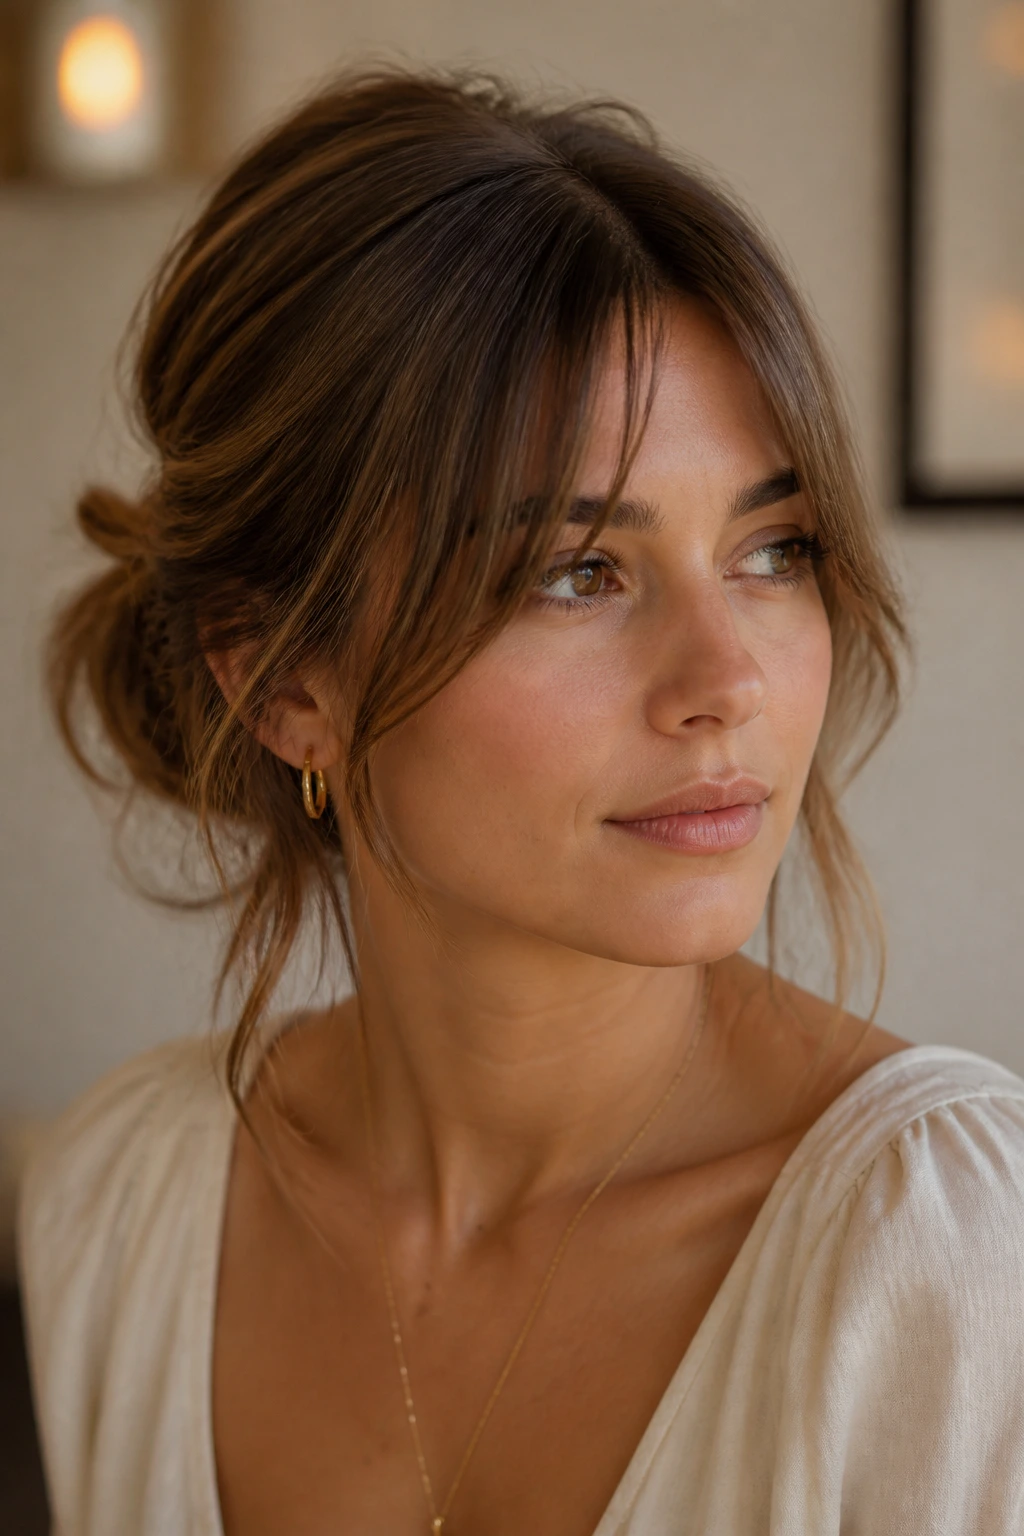
Some cuts look cute down and then turn into a battle the second you clip them up. This one is built to go both ways. The shoulder-length base leaves enough length for a low bun, half-up twist, or claw-clip tuck, and the middle-part bangs soften the front when the rest is pulled back.
That makes it a very practical choice. You get the option to wear it loose, then throw it up without creating a severe hairline. The bangs can hang loose, bend into curtain pieces, or be tucked and pinned back on either side.
Best for: Busy people, gym people, commuters, parents, and anyone who needs a cut that does not punish them for being in a hurry.
Styling tip: If you plan to wear it up a lot, keep the front layers long enough to reach the jaw. Short fringe pieces can fall out in awkward bits and make the style look unfinished.
Why Shoulder-Length Hair and a Center Fringe Keep Working
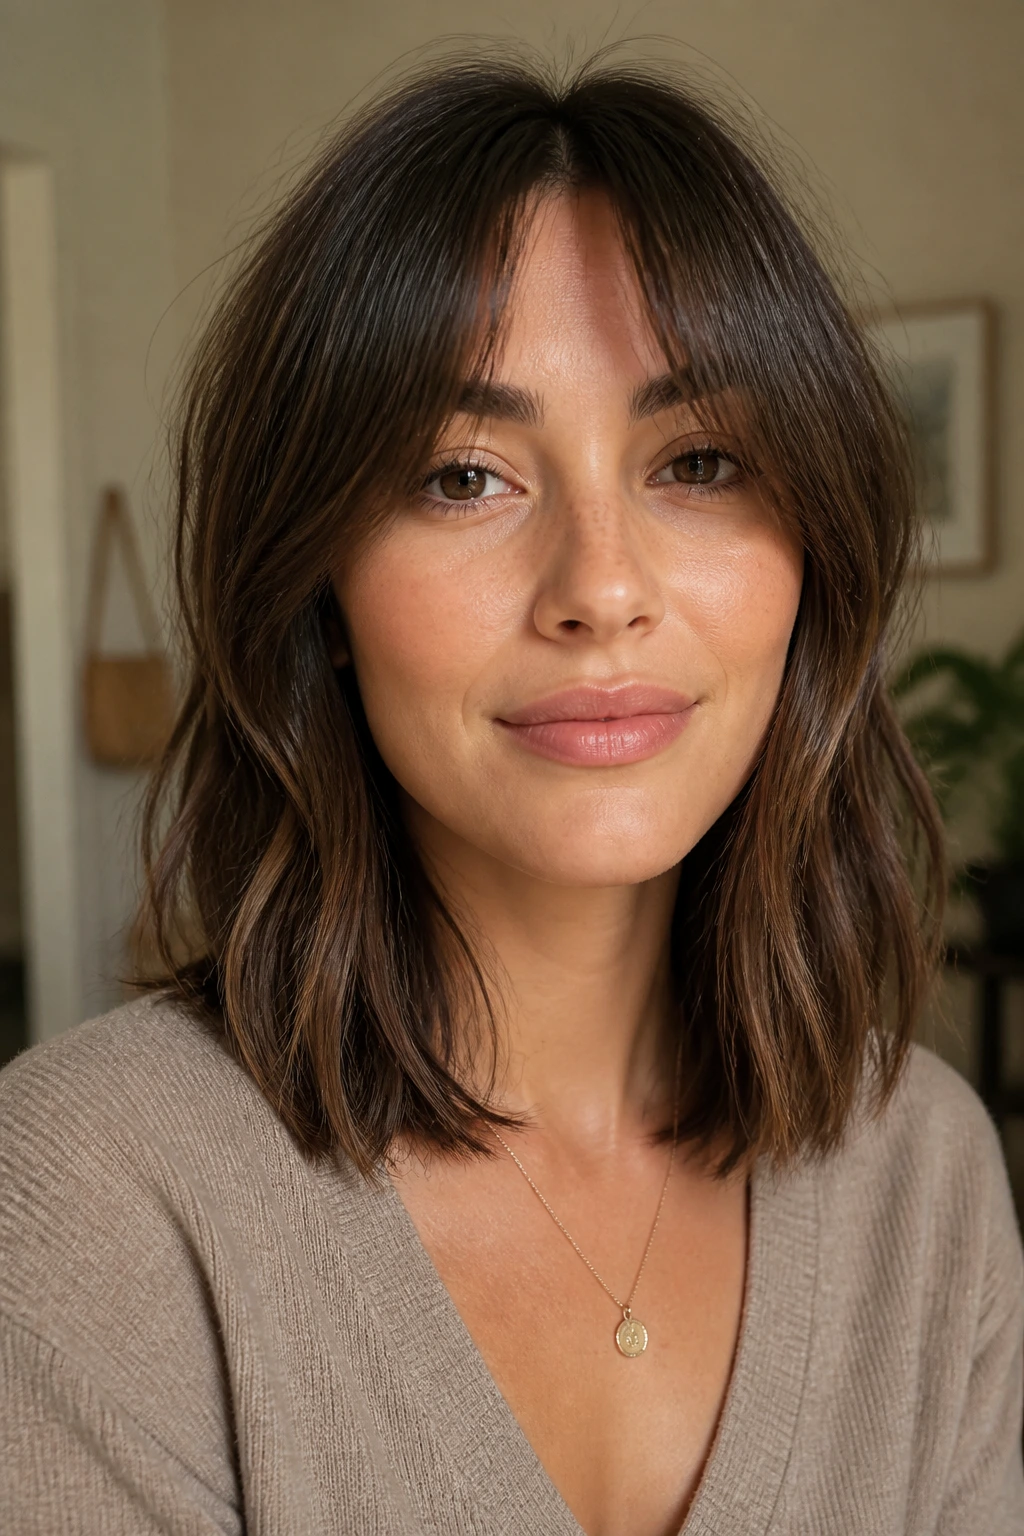
The shoulder-length shape solves a problem that a lot of longer or shorter cuts create. It gives hair enough weight to behave, but not so much that the style turns sluggish. Add middle-part bangs, and the front of the haircut starts doing something useful instead of just hanging there.
That’s the real reason this pairing stays relevant. It can be sharp or soft, polished or undone, and it does not depend on one hair type to make sense. Fine hair gets lift from a blunt edge. Thick hair gets relief from smart layering. Waves get movement. Curls get space. The center part ties it all together, as long as the bangs are cut with the actual hairline in mind, not with a ruler and a fantasy.
It also grows in a civilized way. That sounds boring, but boring is useful when you’re trying to live with hair every day. A fringe that can blend into layers, and a length that can be worn up, tucked, waved, or straightened, saves you from starting over every six weeks.
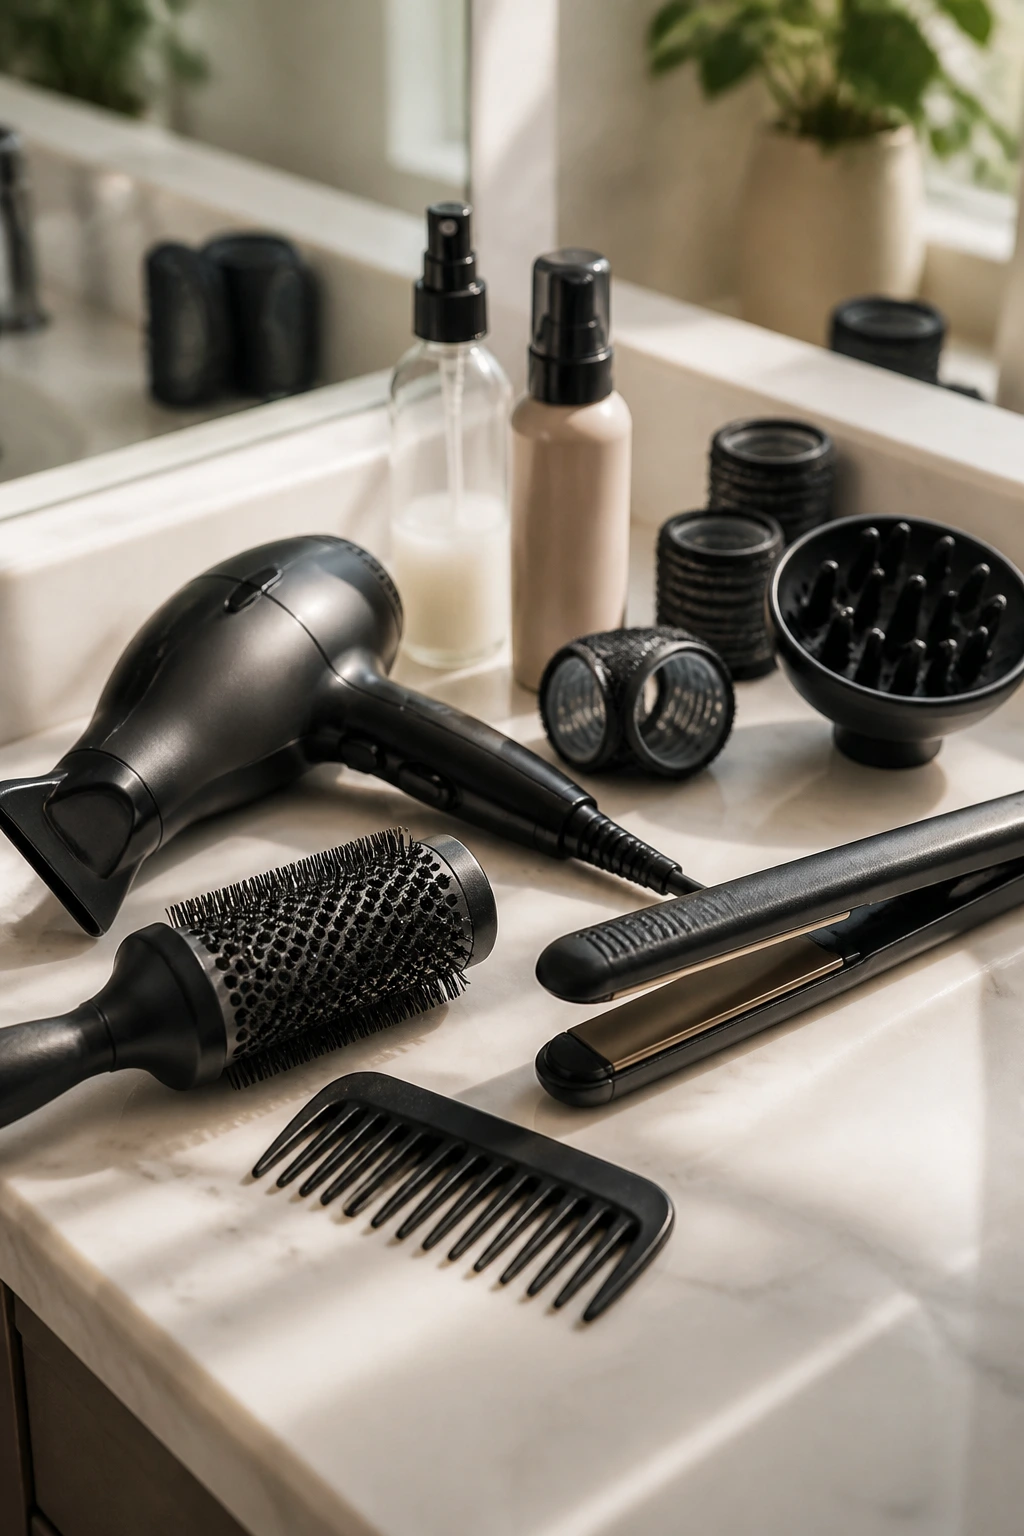
Essential Tools for Styling Shoulder Length Hair With Middle Part Bangs
-
Blow dryer with a nozzle attachment: Keeps the front pieces smooth and helps the bangs dry in the direction you want, not the direction they choose.
-
Medium round brush, 1.5 to 2 inches: Best for flipping the fringe away from the face and curving the ends under or out.
-
Wide-tooth comb: Useful for setting the center part without roughing up curls or waves.
-
Flat iron with rounded plates: Good for a quick bend in the bangs or a soft polish through the mids.
-
Velcro rollers or clip rollers: Handy when you want the fringe to stay lifted while you finish makeup or get dressed.
-
Diffuser: Non-negotiable if you have curls or waves and want the fringe to dry with shape instead of fuzz.
-
Heat protectant spray: Use it before blow-drying or ironing the bangs; the front pieces are the first to fray when heat is careless.
-
Lightweight mousse or root lift spray: Helps fine hair hold the crown shape and keeps the center part from falling open too fast.
-
Texture spray or dry shampoo: Best for second-day volume, especially if the fringe starts separating by lunch.
Smart Cut, Product, and Salon Notes
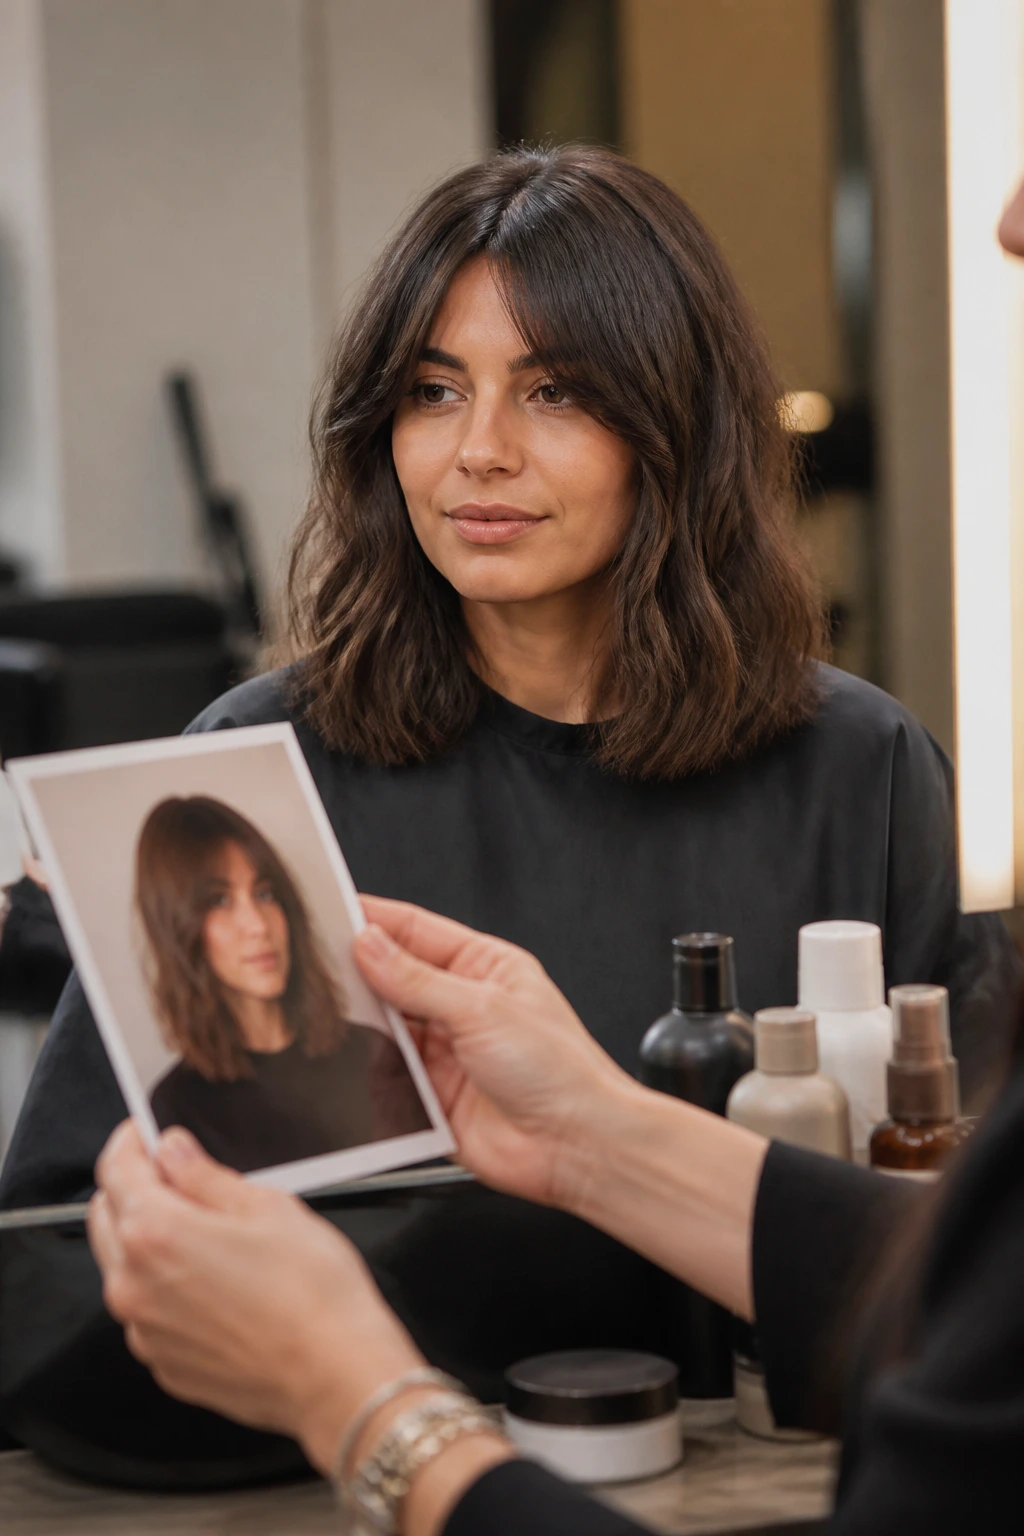
Bring photos that show the same texture you have. That sounds basic, but it saves a lot of grief. A pin-straight model with a thick blowout does not tell you much if your hair is wavy and dense. Show the stylist how the fringe sits on similar hair, then point to the exact cheekbone length, jaw length, or shoulder line you want.
Ask where the shortest part of the bangs should land when dry. That question matters more than asking for “curtain bangs” alone, because curtain bangs can mean almost anything. On a short forehead, the fringe may need to start lower, or it will eat up too much face. On a longer forehead, you can usually go a bit shorter at the center and keep the sides longer.
Product choice should follow texture, not trend. Fine hair likes light mousse, root sprays, and airy texturizers. Thick hair usually does better with smoothing cream or a small amount of anti-frizz serum. Curly hair wants slip and hold, which means leave-in conditioner plus something that controls frizz without making the bangs stiff.
Ask for dry cutting on curls and often on waves. Wet hair can hide the way the fringe actually springs up, and that is how people end up with bangs that live two inches shorter than expected. Straight hair is more forgiving in the chair, but even there, a bit of caution around the front pieces goes a long way.
How to Wear These Styles on Busy Mornings
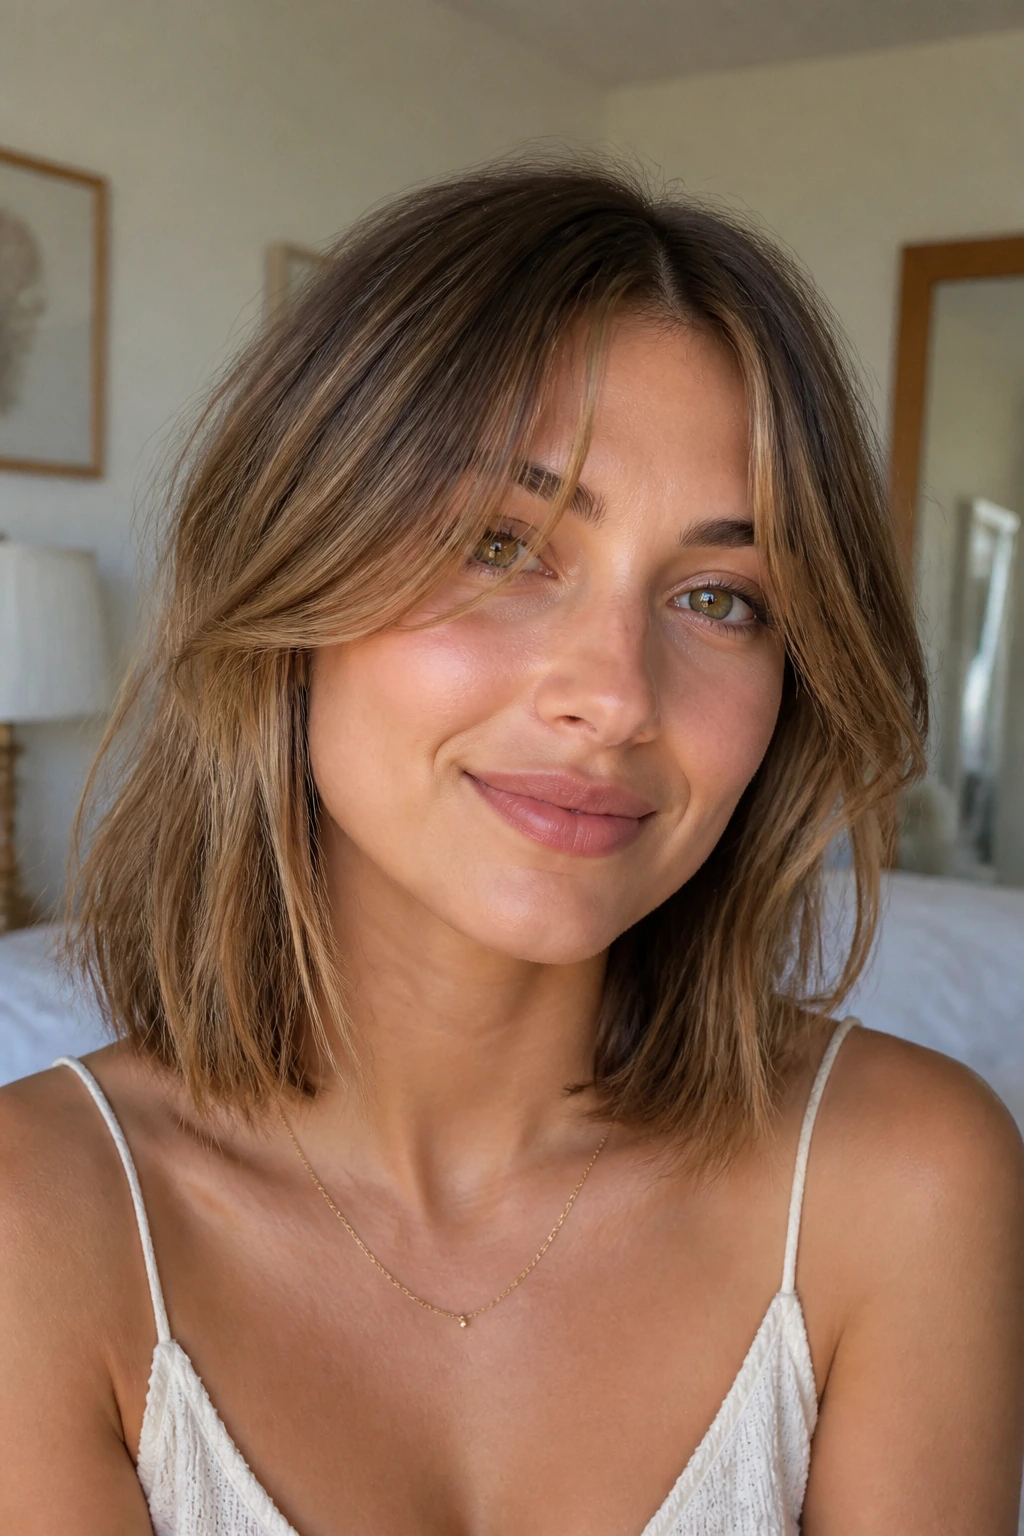
Fastest Version: Mist the bangs with water, blow-dry just the front for 60 to 90 seconds, and leave the rest to air-dry with a dab of leave-in. The cut should still look like a cut even when the styling is minimal.
When You Want Polish: Use a round brush on the fringe and the front two inches on each side, then smooth the ends under with one pass of a flat iron. That gives you the cleanest version of the shape without making the whole head look overdone.
When Humidity Gets Mean: Keep product light. A touch of anti-frizz cream on the mids, a small puff of dry shampoo at the roots, and a mist of flexible hairspray on the fringe are enough. Heavy oils near the bangs usually backfire.
When You Need It Up by Noon: Clip the back in a low twist or messy bun and let the fringe fall free. Shoulder length gives you enough hair to tie up, and the middle-part bangs soften the hairline so the style does not look severe.
Additional Tips and Finishers
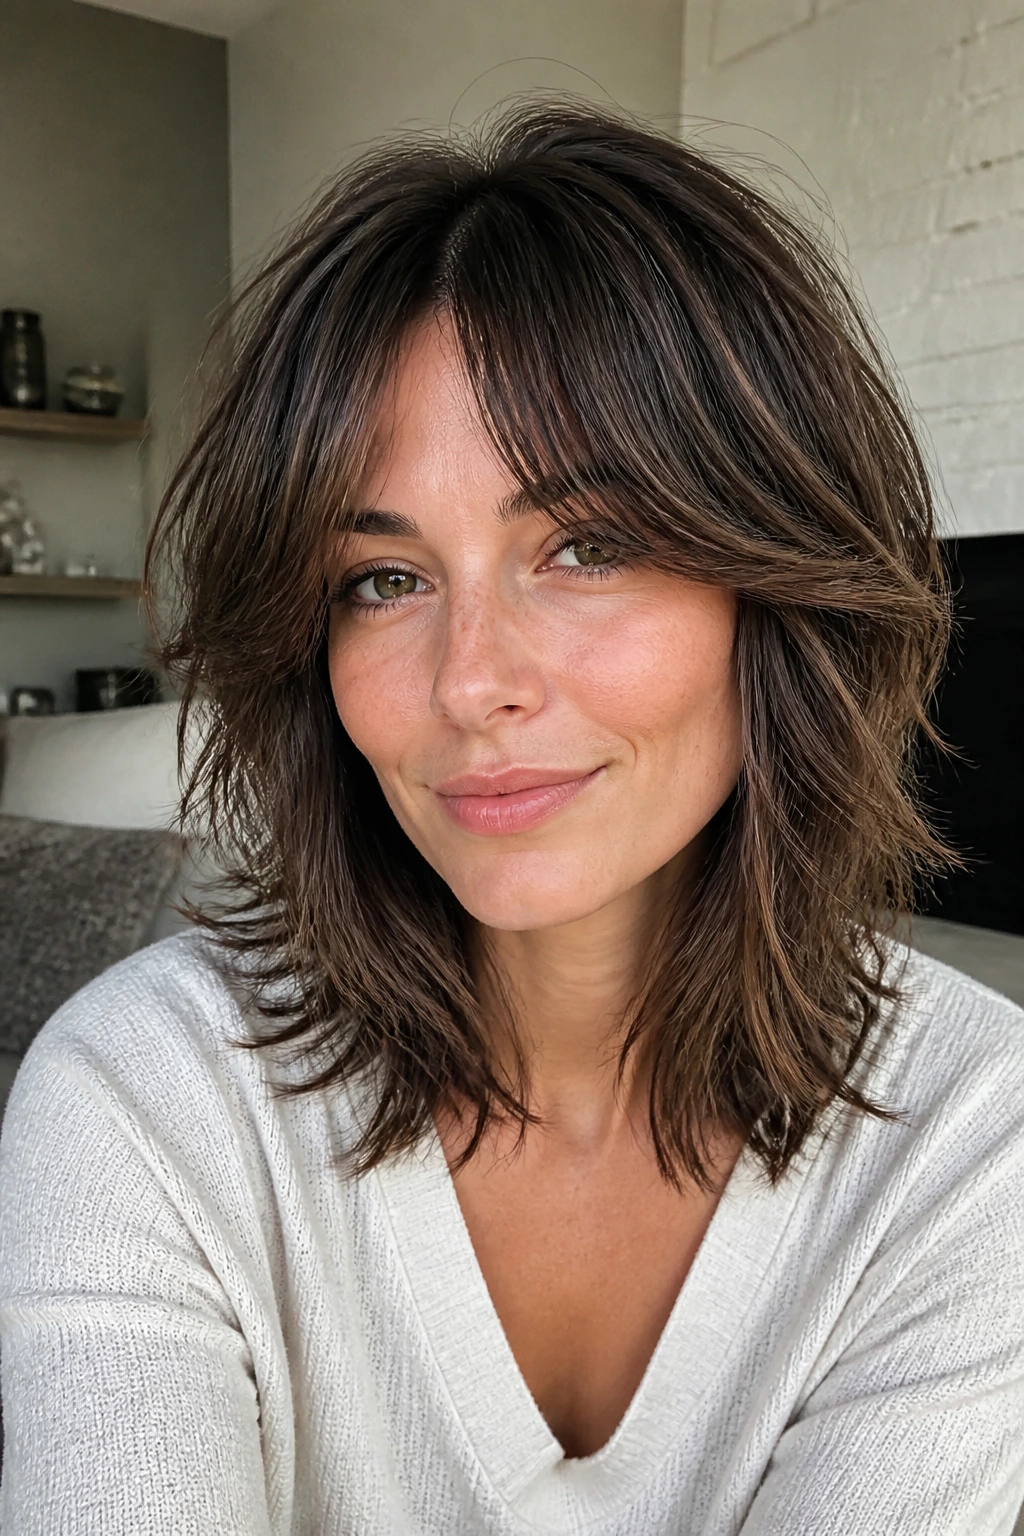
Part Placement: A true center part is not always a mathematically perfect line. If your cowlick pushes one side higher, shift the part a hair off-center so the roots lie flat. The eye will still read it as center.
Bang Behavior: Dry the fringe in the direction you want it to live, not the direction it is currently bending. That one habit prevents a lot of split ends at the front and makes the shape last longer between washes.
Texture Boost: Twist the front sections while they are damp, then release them once mostly dry. You get softer movement than you do from rough scrunching, and the bangs keep their bend.
Serving Suggestion: Yes, that sounds like a recipe heading, but it fits here too: tuck one side behind the ear, leave the other loose, and let the fringe fall in the middle. It’s a small asymmetry, and it stops the style from looking too staged.
Common Mistakes to Avoid
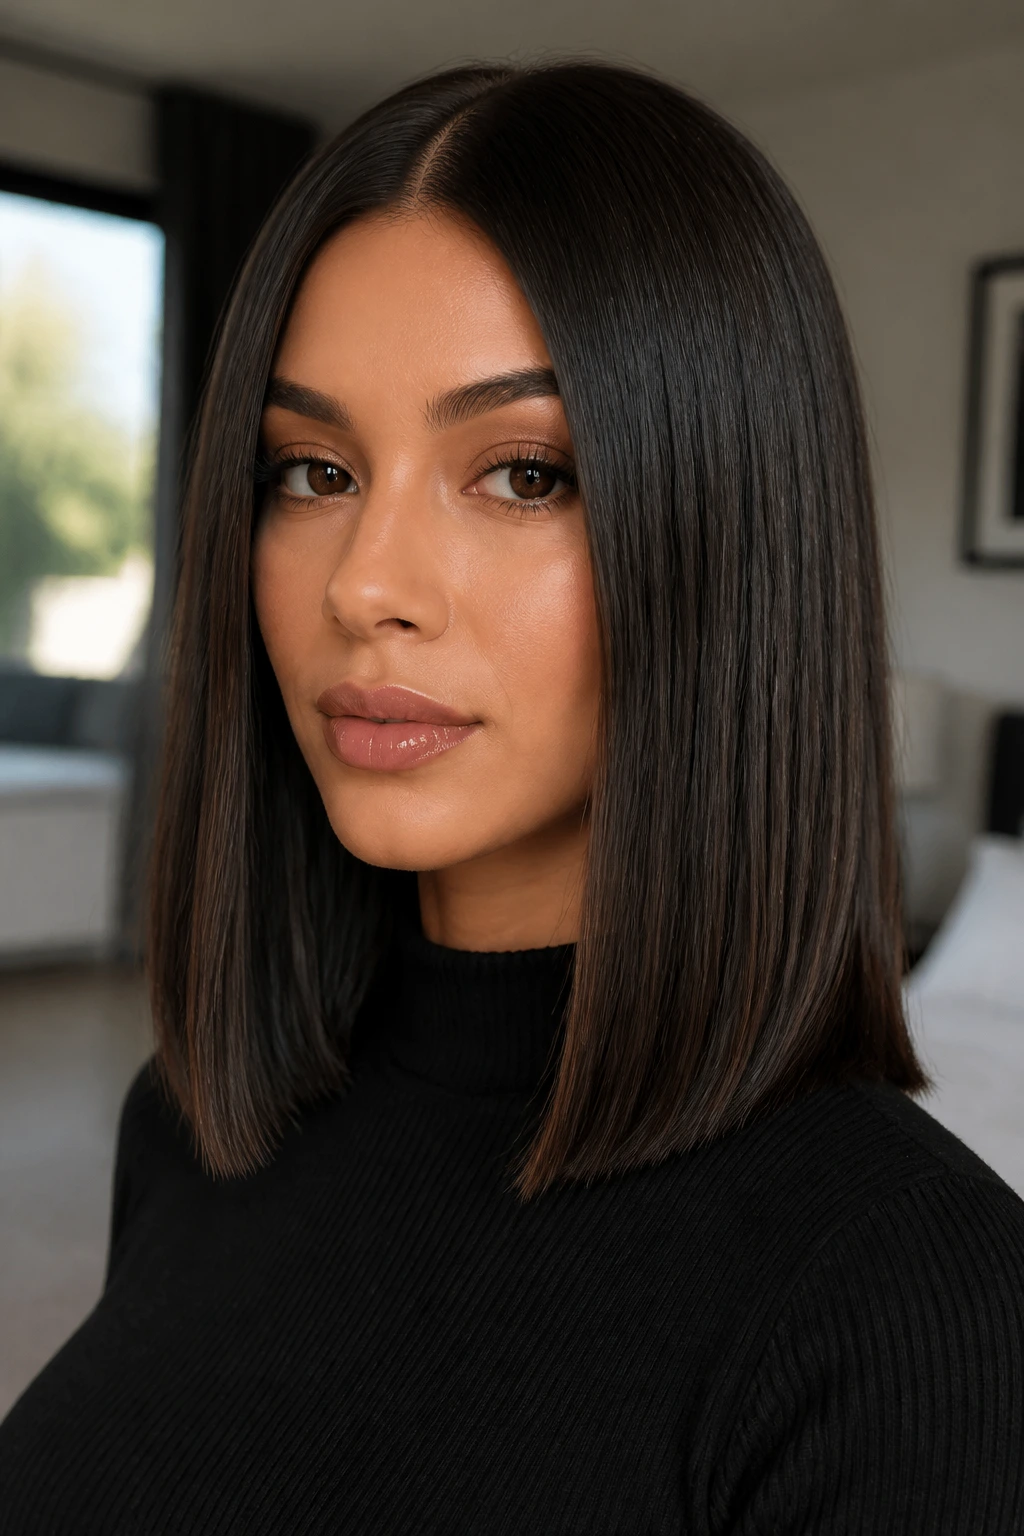
Cutting the fringe too short: That is the fastest way to make a middle part feel harsh. If the shortest pieces sit much above the brow, they lose the softness that makes the style work. Keep the first cut conservative; you can always shorten later.
Over-layering fine hair: Too many choppy layers make the ends look scraggly and the bangs separate into thin pieces. Fine hair usually wants a cleaner outline, not more slicing.
Using heavy cream on the bangs: A thick leave-in or rich oil can make the fringe fall into flat strips by noon. Use the lightest amount possible near the face, then save richer products for the mids and ends.
Ignoring cowlicks: A center part that fights the natural growth pattern will puff, split, or slide. Shift the part slightly if needed and let the hair settle in a more stable direction.
Thinning thick hair too aggressively: If the inside is over-thinned, the front can look stringy while the back still feels bulky. Ask for controlled weight removal, not a general attack with the shears.
Variations and Alternatives to Try
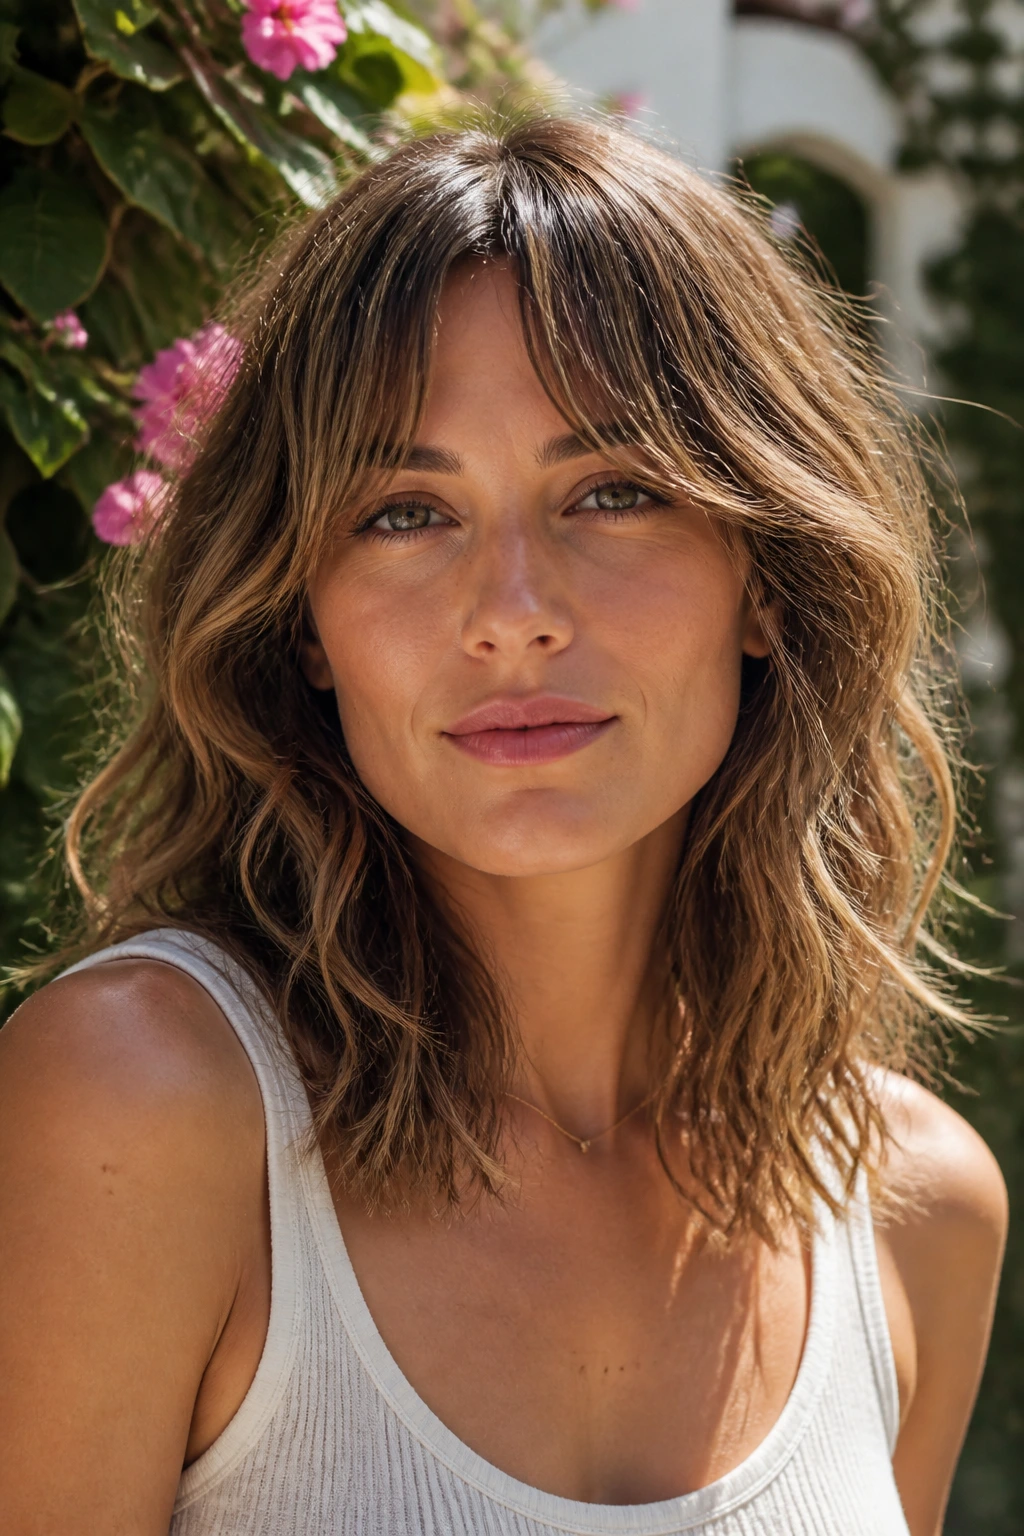
The Curly Halo Version: Keep the shoulder length, but shape the fringe so it opens around the forehead instead of dropping straight down. This works best when the curls are cut dry or almost dry, because shrinkage changes everything.
The Fine-Hair Lift Version: Use a blunt perimeter with the lightest possible internal layers. The bangs stay long and airy, and the root gets a little mousse or spray so the front does not cave in.
The Thick-Hair Airier Version: Ask for weight removal in the interior only, then keep the outer line clean. The goal is less bulk around the shoulders, not a shredded finish that frays by the second wash.
The Glossy Office Version: Straighten the lengths, curve the bangs slightly away from the face, and finish with a very light serum. It’s sharper than the textured versions and easy to wear with a blazer or simple shirt.
The Grow-Out Friendly Version: Start the bangs a bit longer than you think you need. As they lengthen, they merge into cheekbone layers, which buys you time between salon visits and keeps the shape from looking stranded.
Maintenance, Trims, and Grow-Out Timing
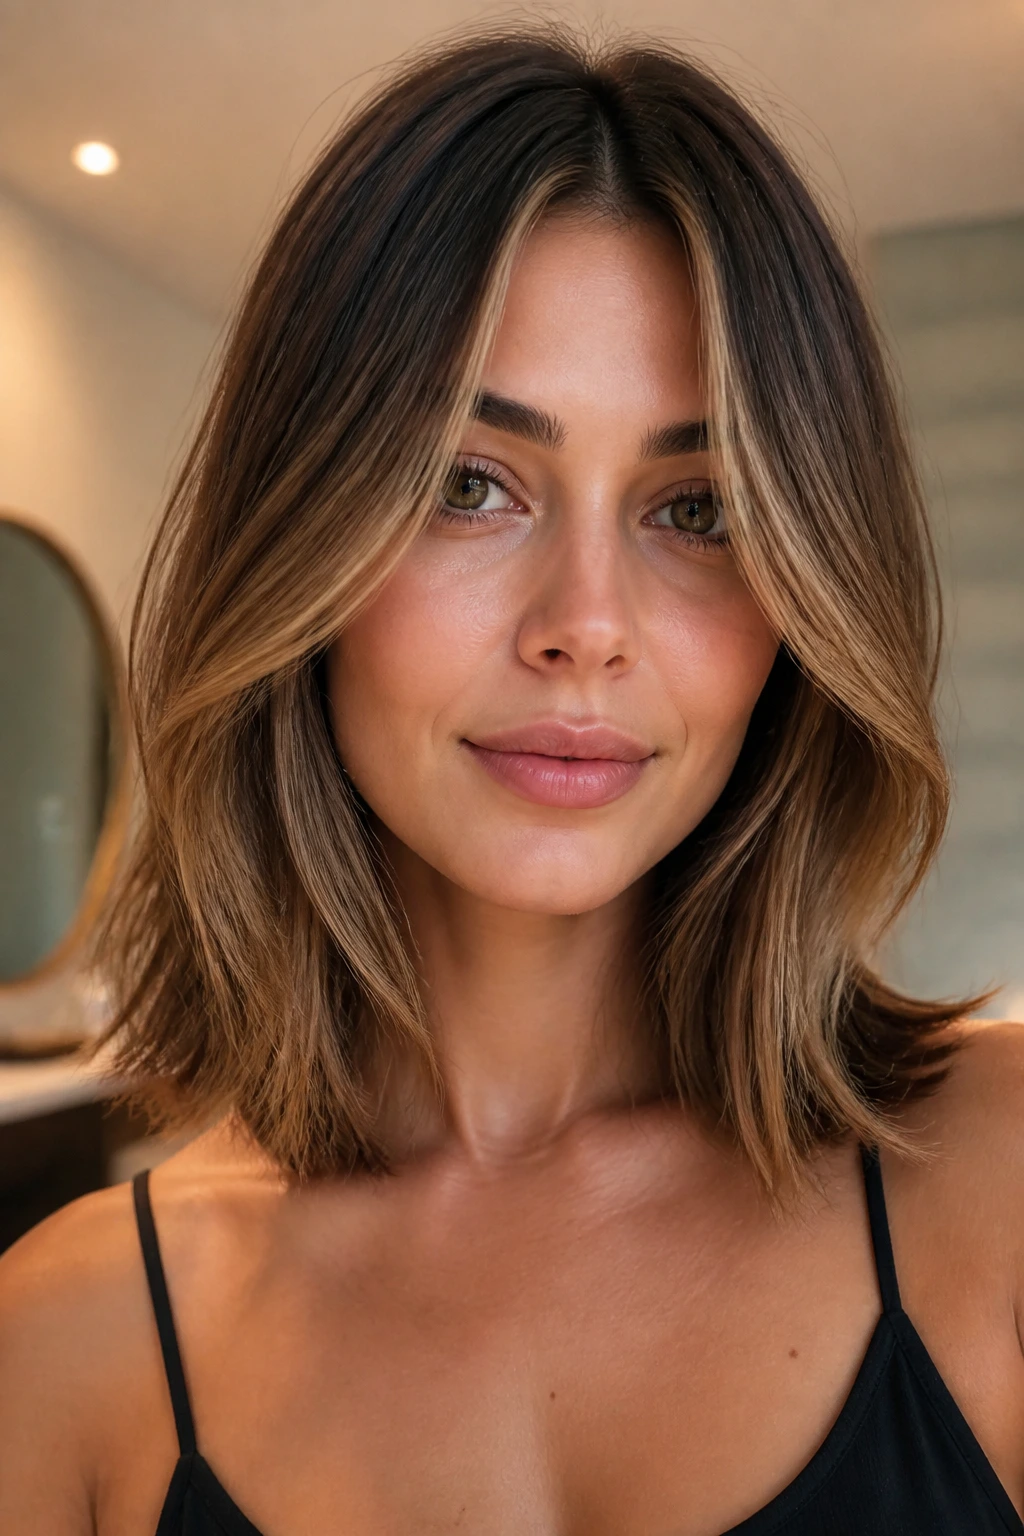
The fringe usually needs attention before the rest of the cut does. Bang trims every 3 to 4 weeks keep the middle-part pieces from sliding into your eyes or collapsing into the cheeks. If you’re growing the style out, stretch the full shape trim to about 8 to 10 weeks, depending on how fast your hair grows and how much layering you have through the front.
Shoulder-length cuts are forgiving, but they still lose their line if you let them go too long. Once the ends start hooking weirdly at the shoulders, the whole shape can look bigger than it should. A tiny trim around the perimeter keeps the movement clean.
At home, a silk or satin pillowcase helps the fringe stay smoother overnight. So does clipping the bangs out of your face before bed if they tend to bend in the wrong direction. In the morning, a quick mist of water and a 1-minute blow-dry on the front pieces is often enough to reset them.
If you heat-style often, a trim schedule matters more. The front pieces show damage first. Dry ends around the fringe split faster than the rest of the head, and once they fray, the center part starts looking fuzzy even when the rest of the hair is fine.
Frequently Asked Questions

Do shoulder-length hairstyles with middle part bangs work on every face shape?
Not in the exact same way, no. The length and fringe can be adjusted so the shortest pieces hit the brow, cheekbone, or jawline depending on what you want to soften or emphasize. The cut is flexible, but the details matter.
Can I wear a center-part fringe if I have a cowlick?
Yes, but you may need to move the part a little off true center. Dry the front in the direction it wants to go, then train it with a brush or roller. Fighting a strong cowlick usually creates more frustration than symmetry is worth.
Are middle-part bangs good for curly hair?
They can be excellent on curly hair if they’re cut with shrinkage in mind. The bangs should be shaped by curl pattern, not by a straight-hair ruler, or they’ll spring up shorter than intended.
How often should I trim curtain-style bangs?
Most people need a bang trim every 3 to 4 weeks. If the fringe is longer and blending into the layers, you can sometimes stretch that a little, but once the center starts hanging into the eyes, styling gets annoying fast.
What’s the easiest version to style without heat?
A soft shag or wavy midi tends to air-dry best. Use a lightweight leave-in, scrunch a bit of texture cream through the front, and let the bangs fall where they want. Trying to force a glass-sleek finish without heat usually ends badly.
Will this cut make my face look wider?
It can if the fringe is cut too short or too straight across. The safer version keeps the shortest point at the cheekbone or just below and lets the sides taper softly. That vertical movement helps the face look longer, not wider.
What if my bangs separate into two strange pieces?
That usually means they were cut too short, too thin, or dried in the wrong direction. Re-wet the front, blow-dry it forward first, then split it at the center only after the roots are set. A tiny root-lift spray can help.
Is this a good cut if I usually wear my hair up?
Yes, especially if you keep the front pieces long enough to fall near the jaw. The fringe softens buns, clips, and ponytails, which keeps the hair from looking severe when it’s pulled back.
A Shape That Keeps Its Shape
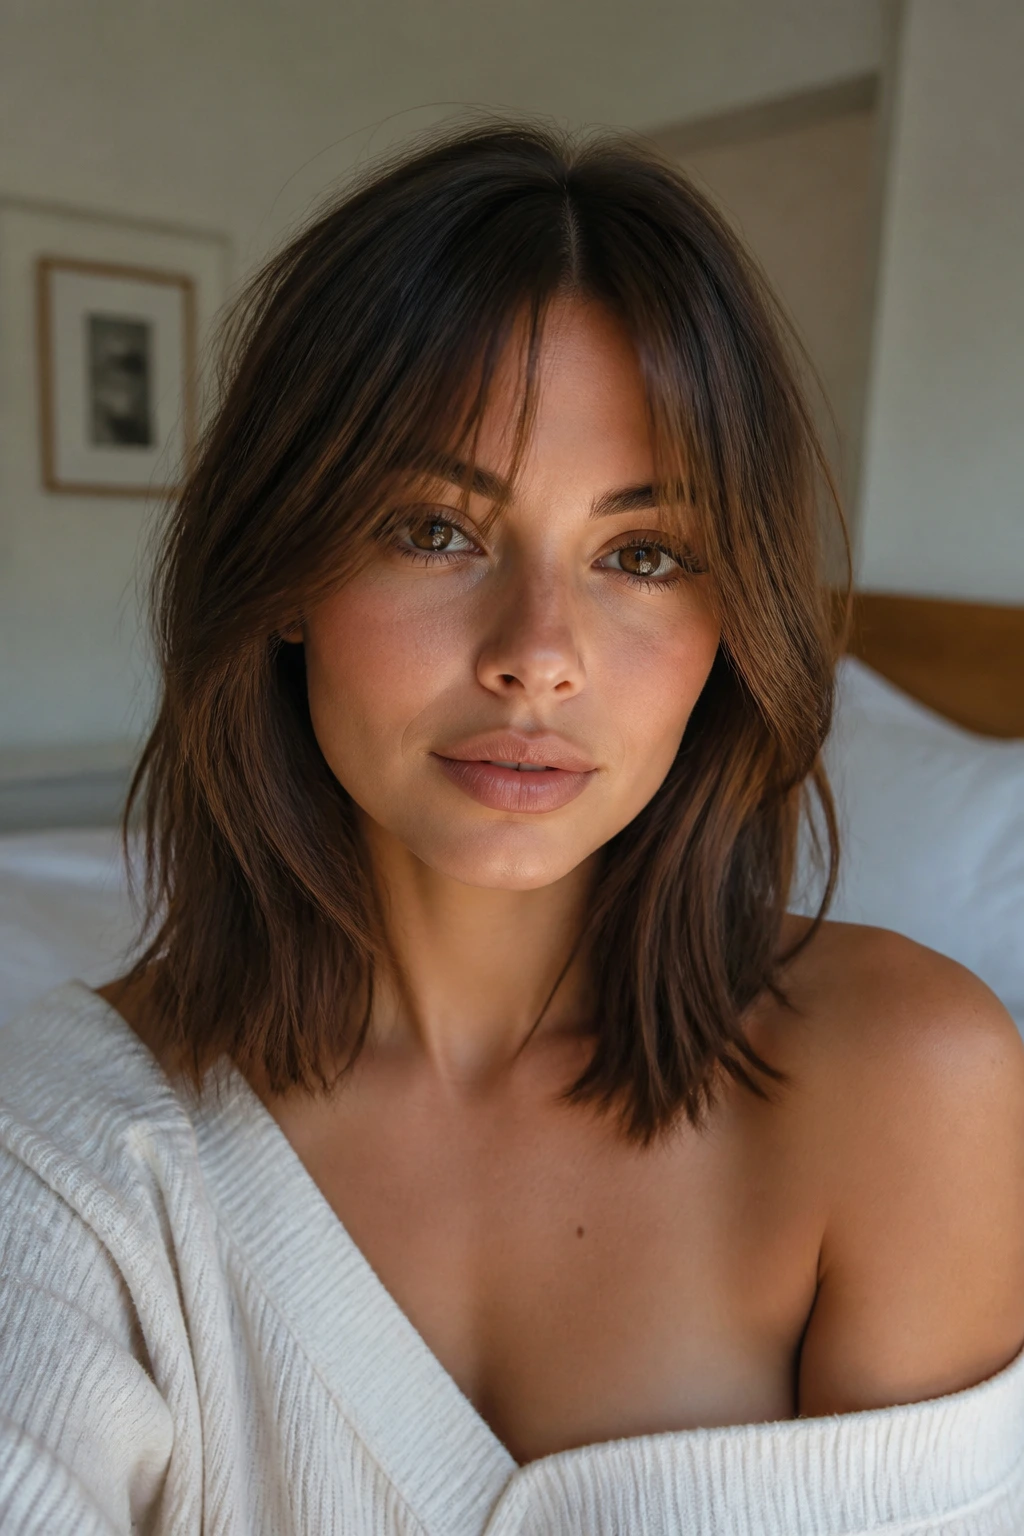
The best thing about this haircut is that it does not demand a perfect life. It can survive a rushed blow-dry, a damp morning, a skipped styling step, and a grow-out phase that would flatten a more fragile cut. That’s rare. Most haircuts either need attention every day or stop making sense after six weeks.
Shoulder-length hair with middle-part bangs works because the shape is doing real structural work. The fringe opens the face, the length gives balance, and the style can slide between polished and undone without losing its line. That kind of flexibility is worth keeping around, especially if you like a cut that still looks intentional when you barely touched it.
A tiny adjustment in bang length or layering can change the whole mood. That’s the fun part.
