



Wedding hairstyles for medium length hair sit in a very useful middle zone: long enough to twist, pin, braid, and wrap, but short enough that the style still has shape by the last toast. That’s the sweet spot. You get movement without the drag of extra-heavy lengths, and you can build a polished finish without needing a mountain of extensions or an hour of re-pinning every time you hug somebody.
The trick is choosing a style that respects the length you actually have. Medium hair behaves differently from waist-length hair. It won’t always lie flat the same way, and it won’t always fill out a massive bun without help. But give it a clean foundation, the right sectioning, and a few well-placed pins, and it can look far more refined than hair that’s been forced into a shape it doesn’t want.
There’s also a practical bonus people forget about on wedding mornings: medium-length hair is easier to control in heat, humidity, and all the movement that comes with a ceremony, photos, dinner, and dancing. The styles below lean into that. Some are soft and romantic. Some are sleek and sculpted. A few live in that sweet in-between space where you can still feel like yourself, only a little more finished.
Why This Collection Works So Well on Shoulder-Length Hair
-
The length is manageable, not limiting: Medium hair gives you enough material for twists, low buns, and half-up styles without the weight that pulls bigger shapes down by the end of the night.
-
The finish stays visible from every angle: Collarbone-length hair still shows texture, shine, and movement in photos, which matters when the back of the hairstyle is just as important as the front.
-
It plays nicely with accessories: Veils, pearl pins, combs, and floral clips sit more securely in medium hair than they do in some slick, ultra-short cuts.
-
You can go soft or structured: The same length can support loose waves, a tucked chignon, or a precise center-part bun, depending on the dress and the mood.
-
Touch-ups are simpler: A few hidden bobby pins, a travel-size spray, and a small comb are usually enough to keep these styles in shape through the reception.
1. Soft Hollywood Waves with a Deep Side Part
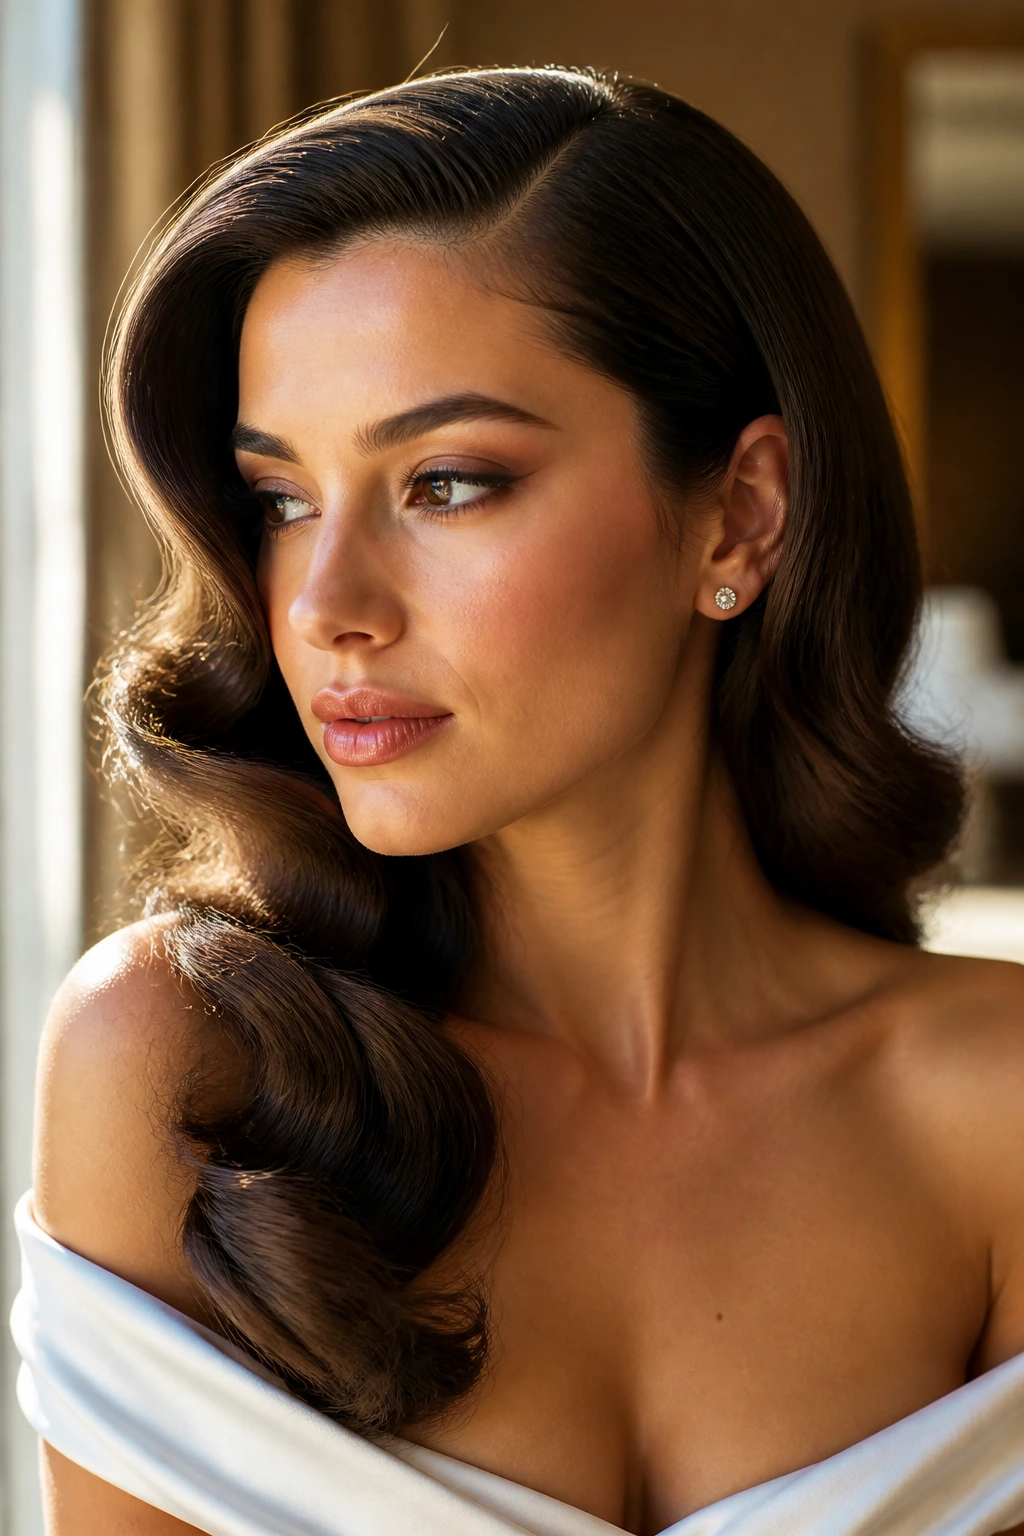
A deep side part and brushed-out waves do a lot of work for medium-length hair. The shape brings a little old-Hollywood drama, but it still sits light enough to move when you turn your head. I like this style when the dress already has clean lines; the hair adds softness without fighting the outfit.
The key is control at the root and softness through the ends. Set the hair with a 1.25-inch curling iron, let each curl cool fully, then brush it into one smooth wave pattern. If you rush the cooling stage, the wave collapses into loose bends, and the whole style loses that sculpted finish.
A single pin behind the ear helps hold the front sweep in place. That tiny detail changes the whole profile.
Best for: satin gowns, one-shoulder necklines, and medium hair with a little natural bend.
Extra note: a shine spray misted from arm’s length gives the waves a clean finish, not a greasy one.
2. Low Chignon with Face-Framing Pieces
Why It Holds So Well
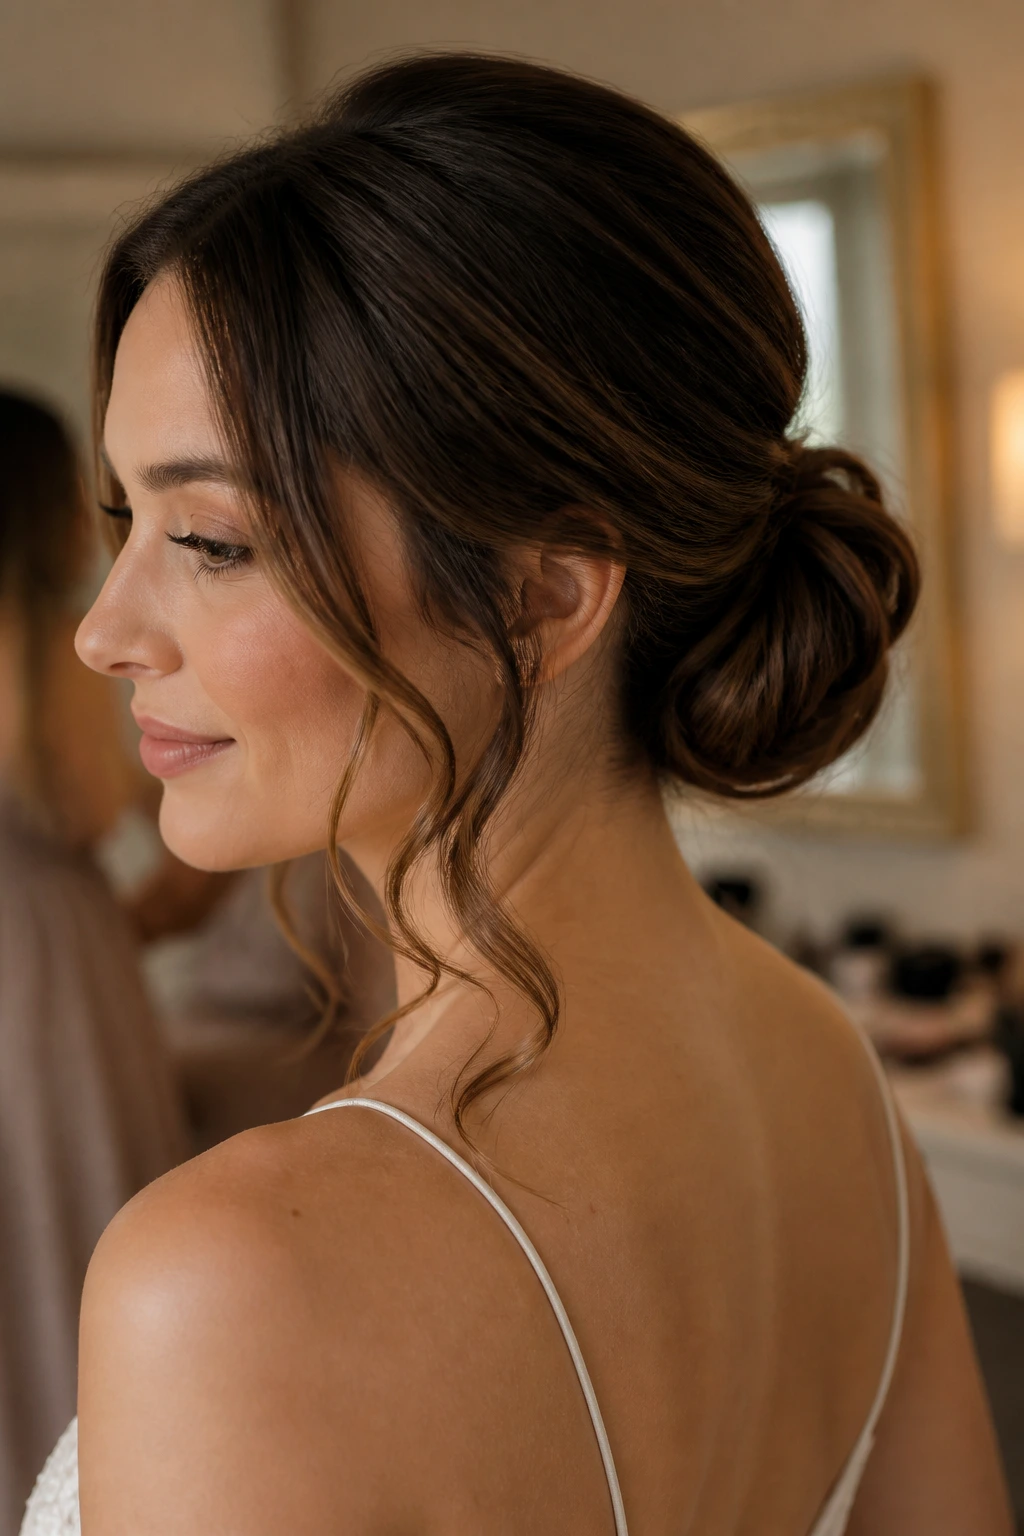
A low chignon can look far more substantial on medium hair than people expect, as long as you build it with texture first. Day-old hair or a light spray of texturizer gives the strands enough grip to coil into a compact bun at the nape.
Face-framing pieces keep it from feeling severe. Two loose sections near the cheekbones soften the whole look and help the style sit well with both veils and statement earrings. That matters on medium hair, where a bun can turn too neat if every strand is pulled back.
- Placement: sit the bun just above the nape, not mid-head.
- Shape: keep it compact and slightly oval, not a round knot.
- Finish: tuck the ends under with U-pins so the bun doesn’t split open.
The style feels calm. Not stiff. That’s the point.
3. Textured Half-Up Twist
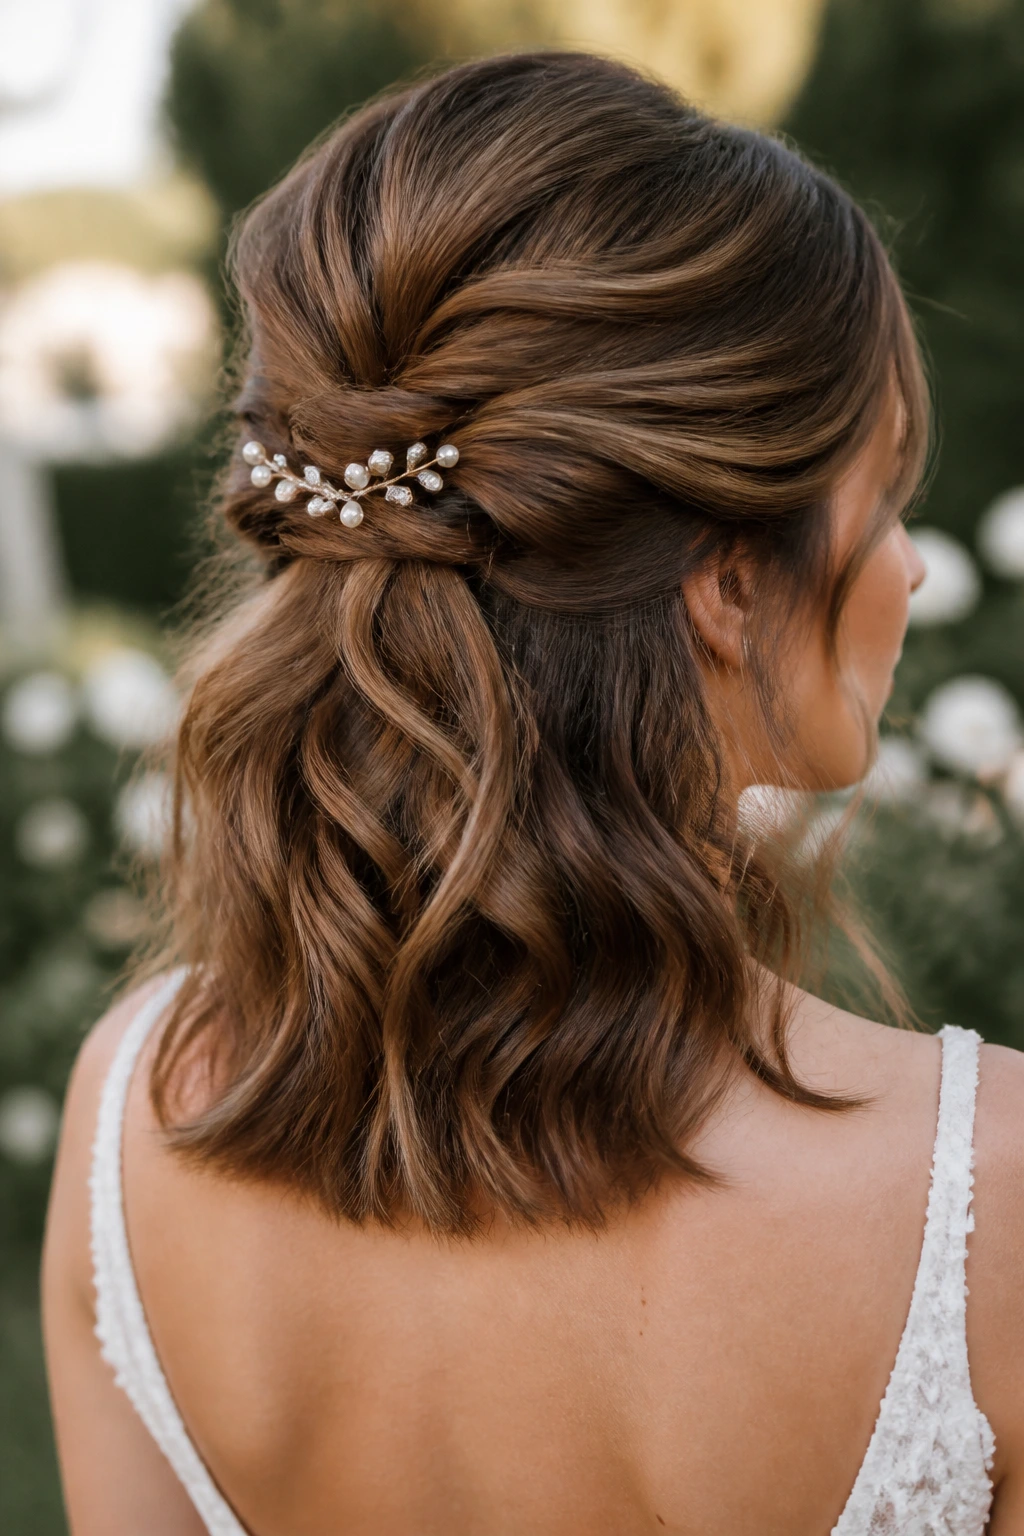
Want the hair off your neck without losing that soft bridal movement? A textured half-up twist is the easy answer. It works especially well on medium-length hair because the lower half still has enough length to fall in clean waves while the top half gives you lift and a little structure.
Twist small sections from each temple toward the back of the head, pin them just under the crown, and leave the lower layers loose. A curling wand with 1-inch sections gives the best shape here; the curls should be loose enough to brush out, not ringlet-tight. If the top looks flat, lift the crown with a tail comb and a few tiny backcombed strokes before you pin.
This one wears well with delicate combs or small pearl pins. It’s also one of the few wedding hairstyles for medium length hair that still looks good if a few pieces shift over the course of the night.
4. Braided Crown with Loose Ends
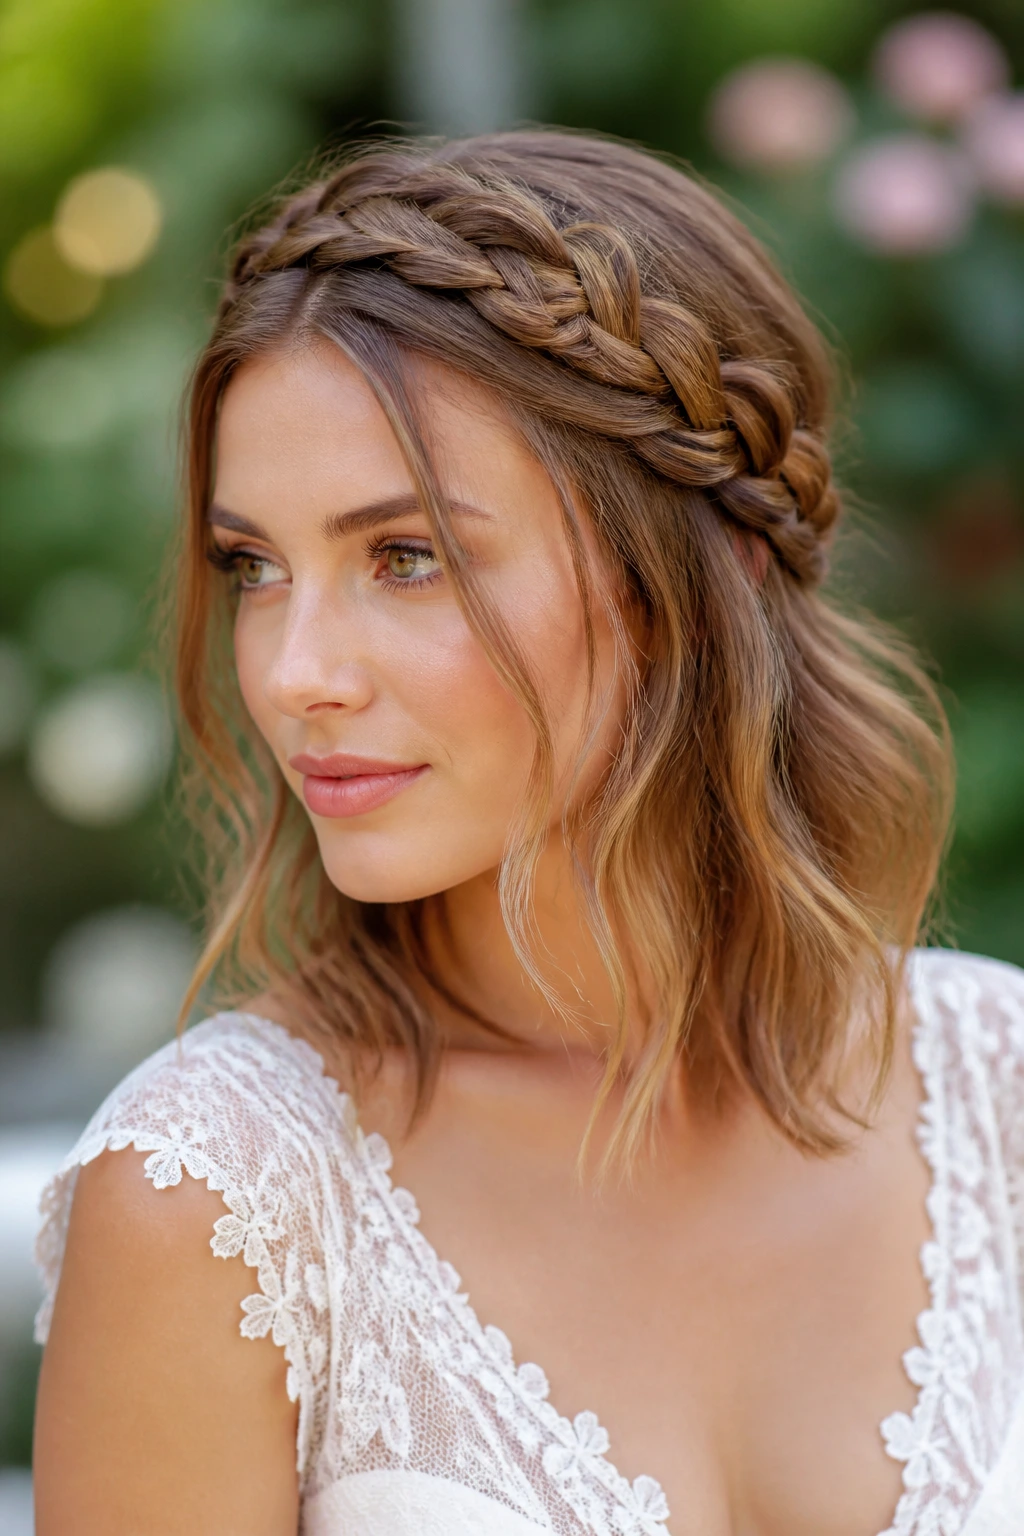
At a garden ceremony, this is the style that makes sense. Two slim braids sweep back from the sides and meet near the crown, where they hide under the top layer of hair. The remaining length falls soft and loose, which keeps the whole look from feeling overworked.
Medium hair is a nice fit for this because the braids don’t need endless length to wrap around the head. They just need enough to cross the back and anchor cleanly. I prefer a braid that starts just above the temples, not too low near the ears, so the shape opens up the face.
Use a little texture spray before braiding. Without it, the sections can slip and the braid looks thin. With it, the plait holds its shape and the loose ends keep a touch of polish instead of frizzing out.
5. Polished Side-Part Tuck
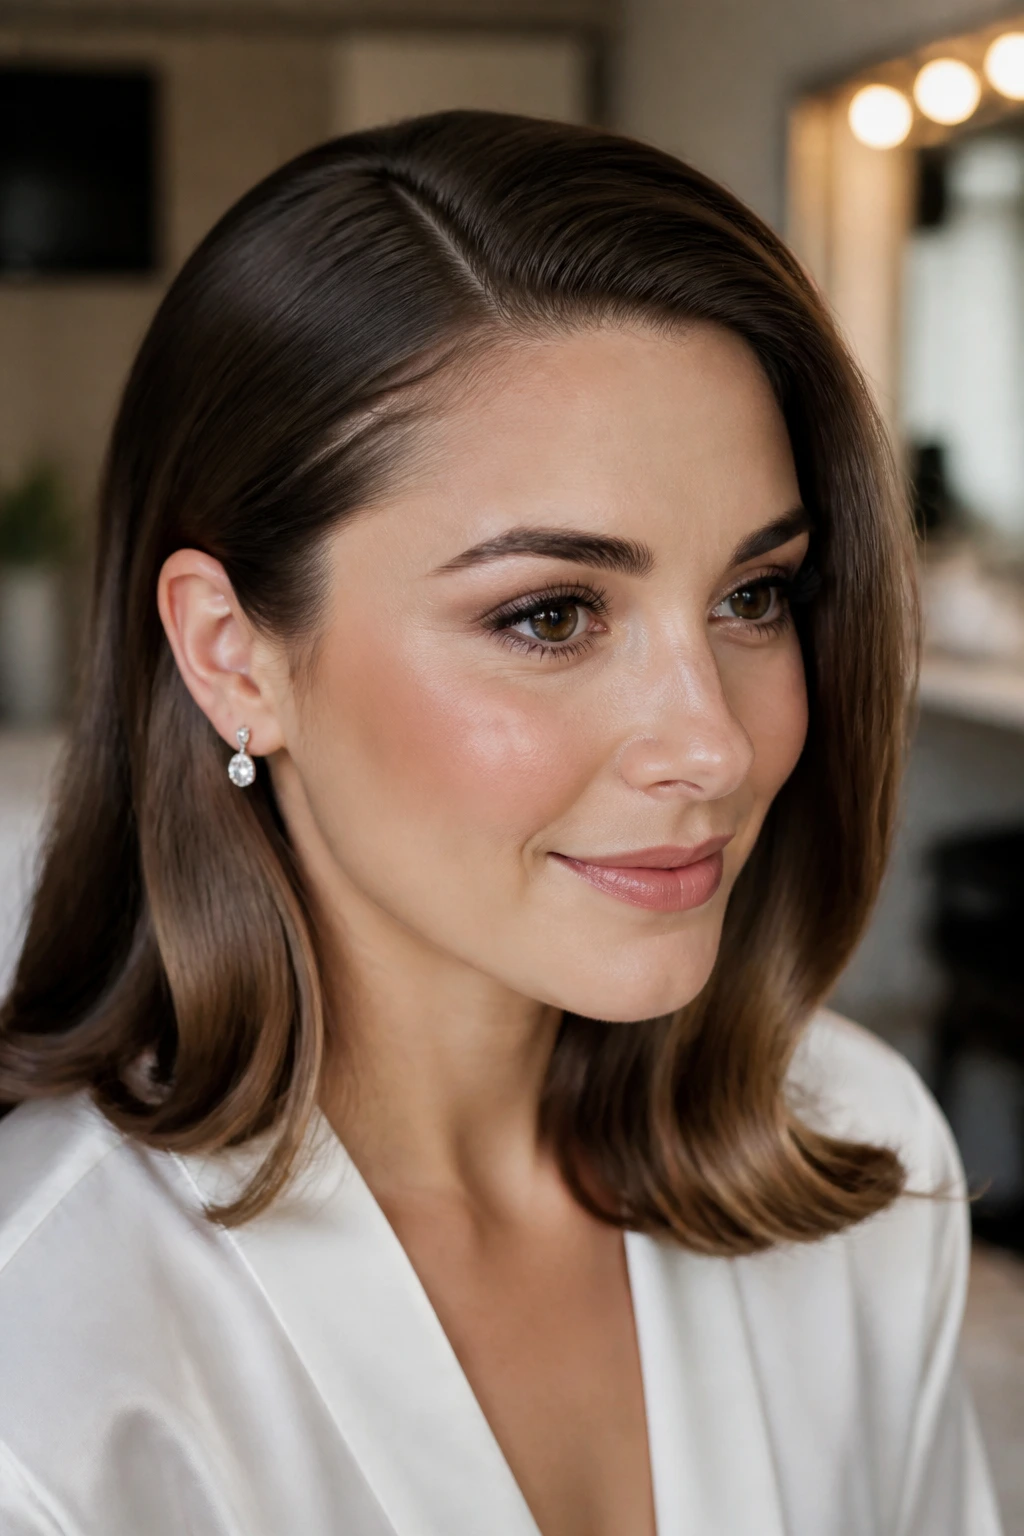
A clean side part can be more striking than a full updo. This style starts with a smooth blowout, then tucks one side behind the ear and secures it with pins or a decorative comb. The rest of the hair falls in a controlled curve over one shoulder.
It’s sharp. Quiet, but sharp.
Medium-length hair is the right length for this because the ends still have enough weight to drape neatly, which gives the style a finished edge. If the hair is too short, the tuck can look accidental. If it’s much longer, the style can get heavy and lose the clean line.
A few drops of lightweight serum on the mids and ends help the tuck lie flat. Keep the roots soft, though. Too much product at the scalp makes the style look slick in the wrong way.
6. Messy French Twist for Medium Hair
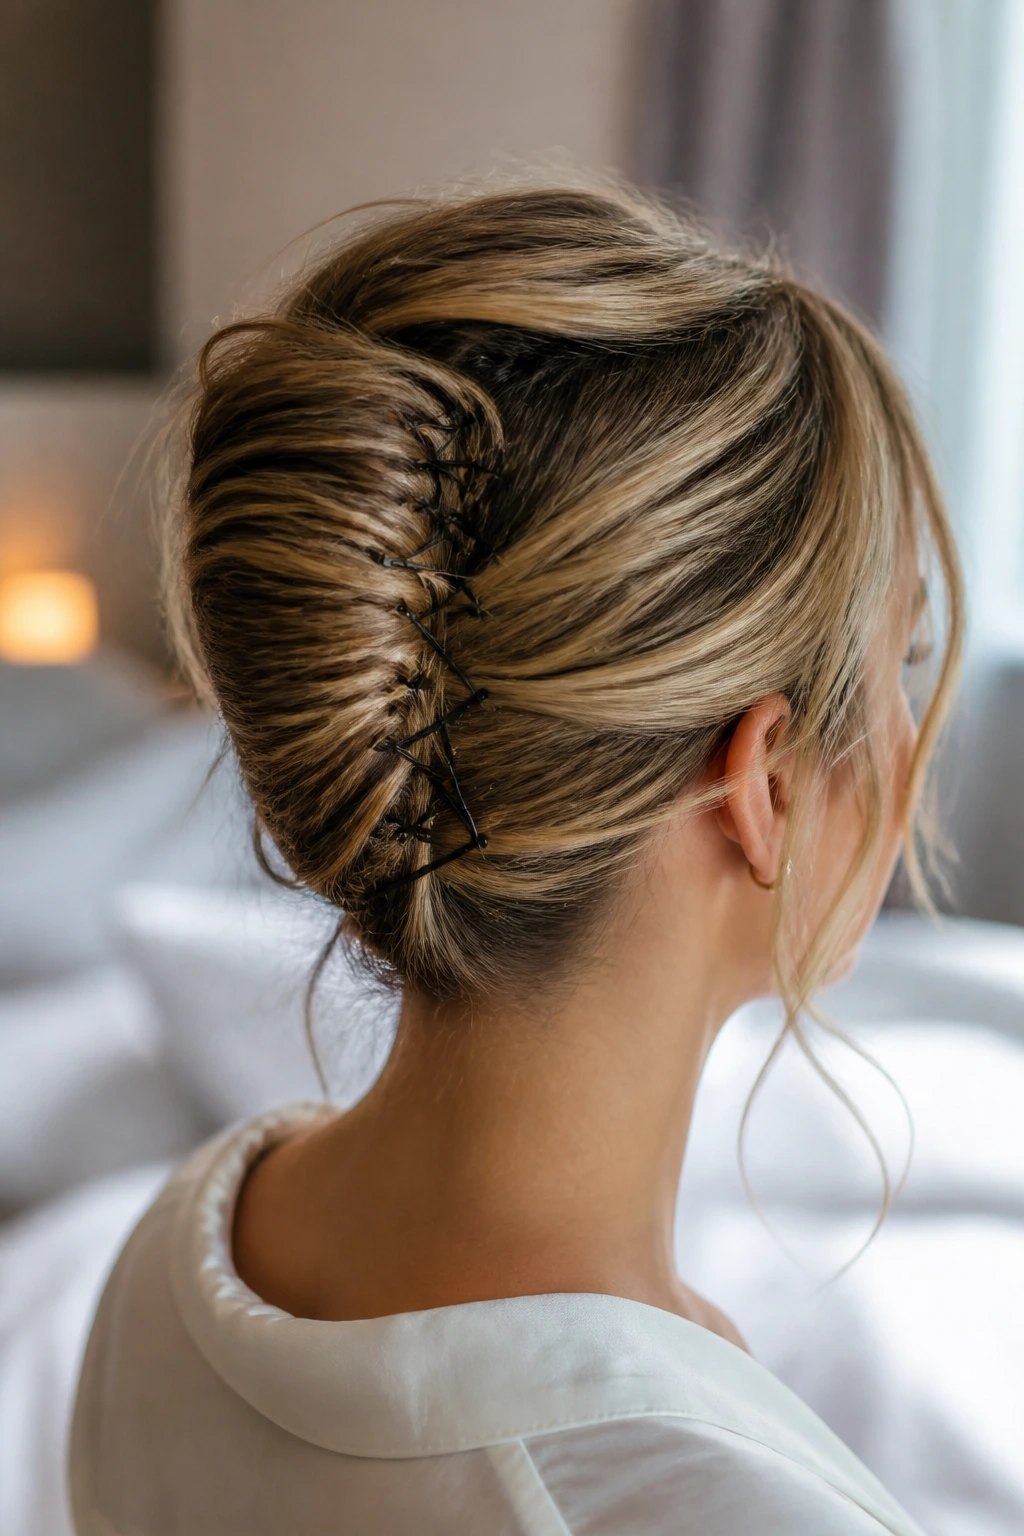
A French twist on medium hair is smaller than the classic version, and that’s exactly why it works. Instead of trying to build a towering shell, you roll the hair inward and up, letting the length disappear into the twist at the nape. The result feels refined without looking like you borrowed someone else’s hair.
This style depends on pins placed in a real pattern, not shoved in at random. Anchor the twist with crossed bobby pins along the seam, then tuck the ends up into the center with U-pins. If the hair is freshly washed and slippery, it will fight you. A bit of grit solves half the problem.
I like this shape for formal dresses with structured backs. It keeps the neck open and makes earrings and neckline details easier to see.
7. Rope-Braid Half-Up
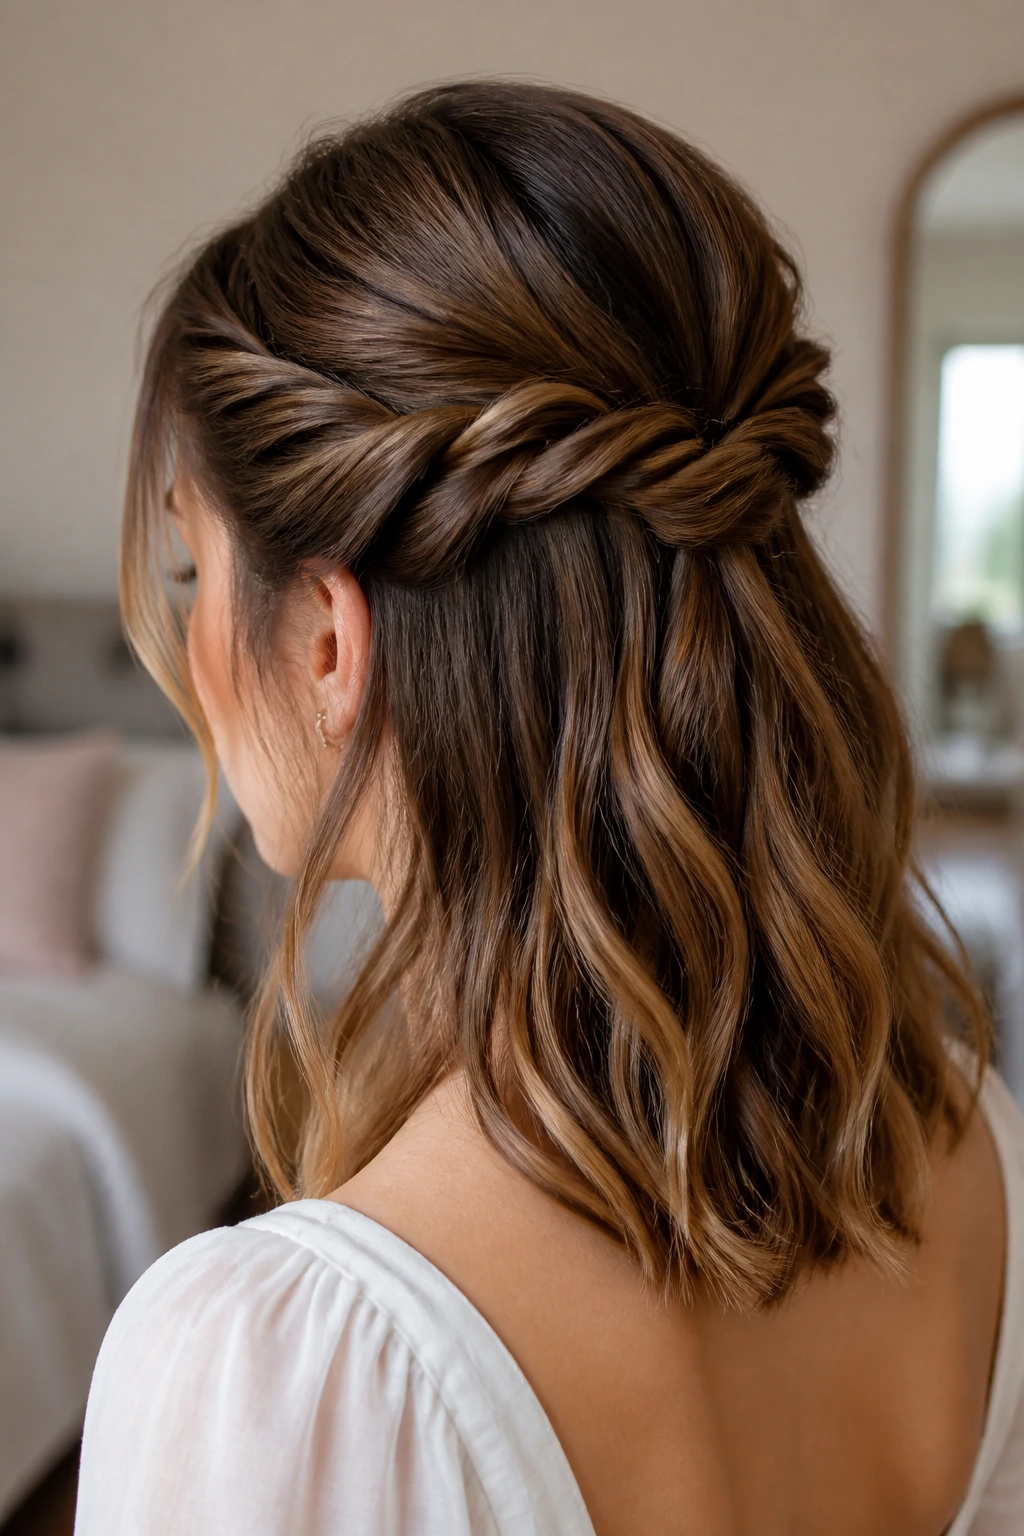
Rope braids bring a cleaner, more modern feel than a regular three-strand braid. On medium-length hair, two rope twists pulled back from the temples create a neat half-up shape that still lets the lower layers fall freely. The finish looks intentional, not busy.
The braid itself is simple: split each side into two sections, twist them in the same direction, then wrap them around each other in the opposite direction. That reverse motion is what keeps the braid tight. Pin the joined section at the back just under the crown so the shape stays balanced.
This one is a good fit for hair that won’t hold a lot of volume at the root. Rope braids naturally add a little structure without asking the crown to do all the work. A tiny sprinkle of powder at the roots helps, but don’t go heavy. You want grip, not chalk.
8. Sleek Low Ponytail with a Wrapped Base
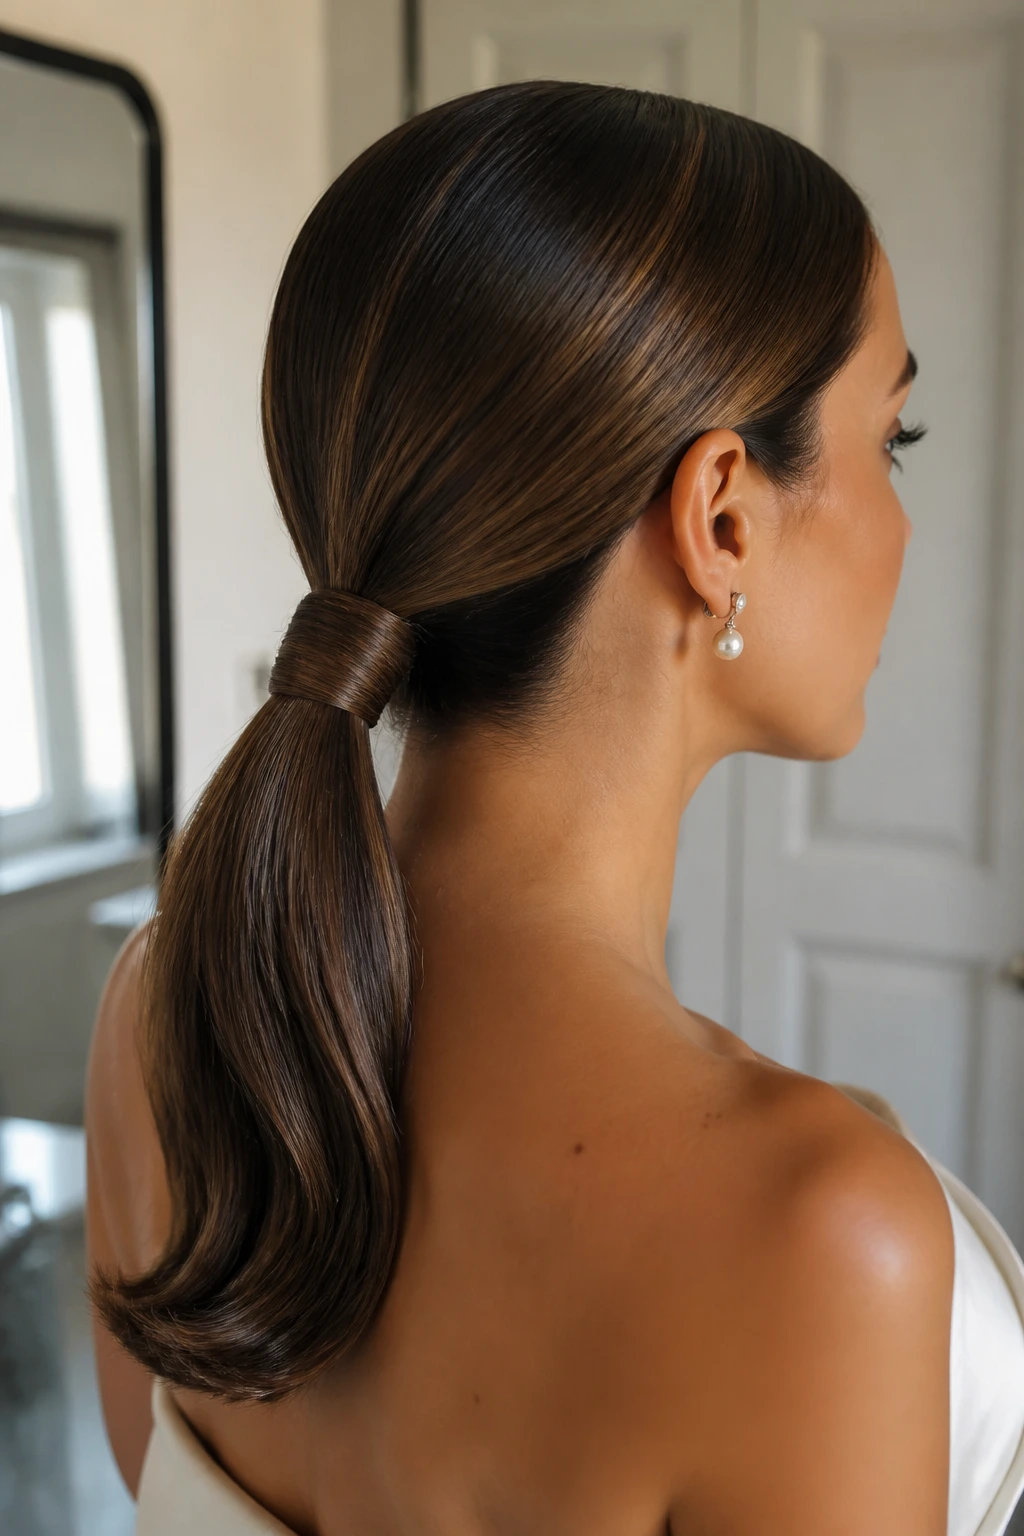
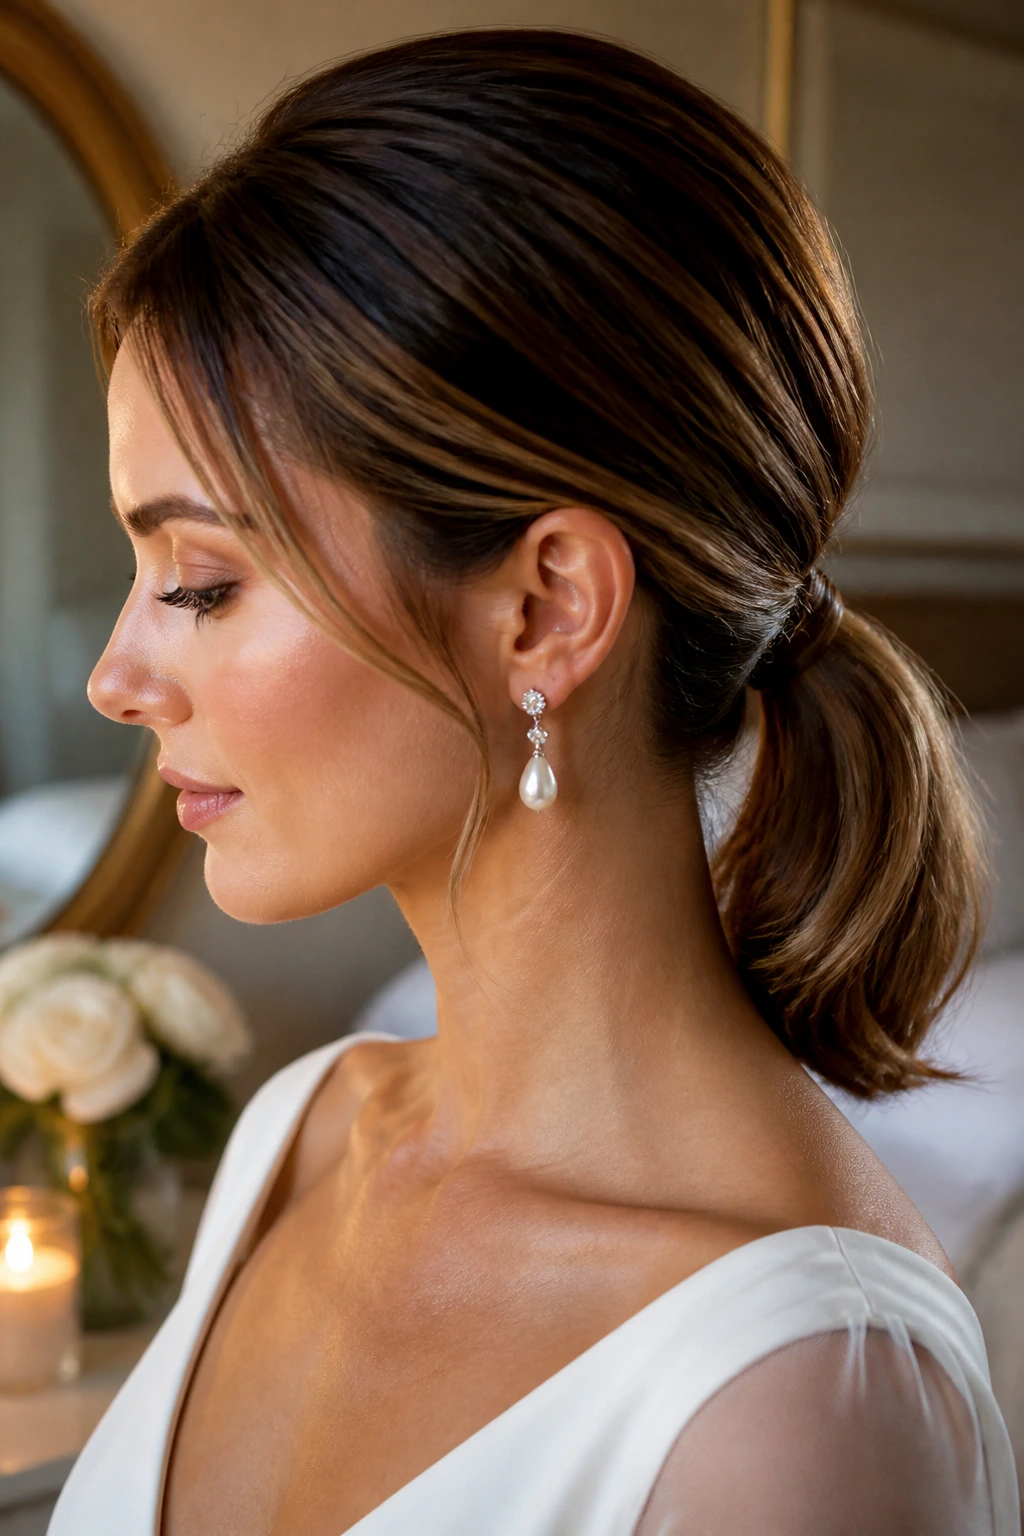
A low ponytail can absolutely count as a wedding style if the finish is clean enough. The wrapped base turns it from office hair into something much more deliberate. Medium-length hair gives you enough tail to create a smooth line over the back and shoulder without dragging the pony down.
Flat iron the hair first if your texture is wavy or prone to puffing. Then gather it at the nape and wrap a small section of hair around the elastic so the base disappears. Secure the wrap underneath with a pin, not on top where it shows.
This style is especially useful when the dress already has lace, beading, or a busy back. The ponytail keeps the silhouette simple. That simplicity is the point. It lets the dress do more of the talking while the hair stays tidy all day.
9. Bubble Ponytail for Shoulder-Length Hair
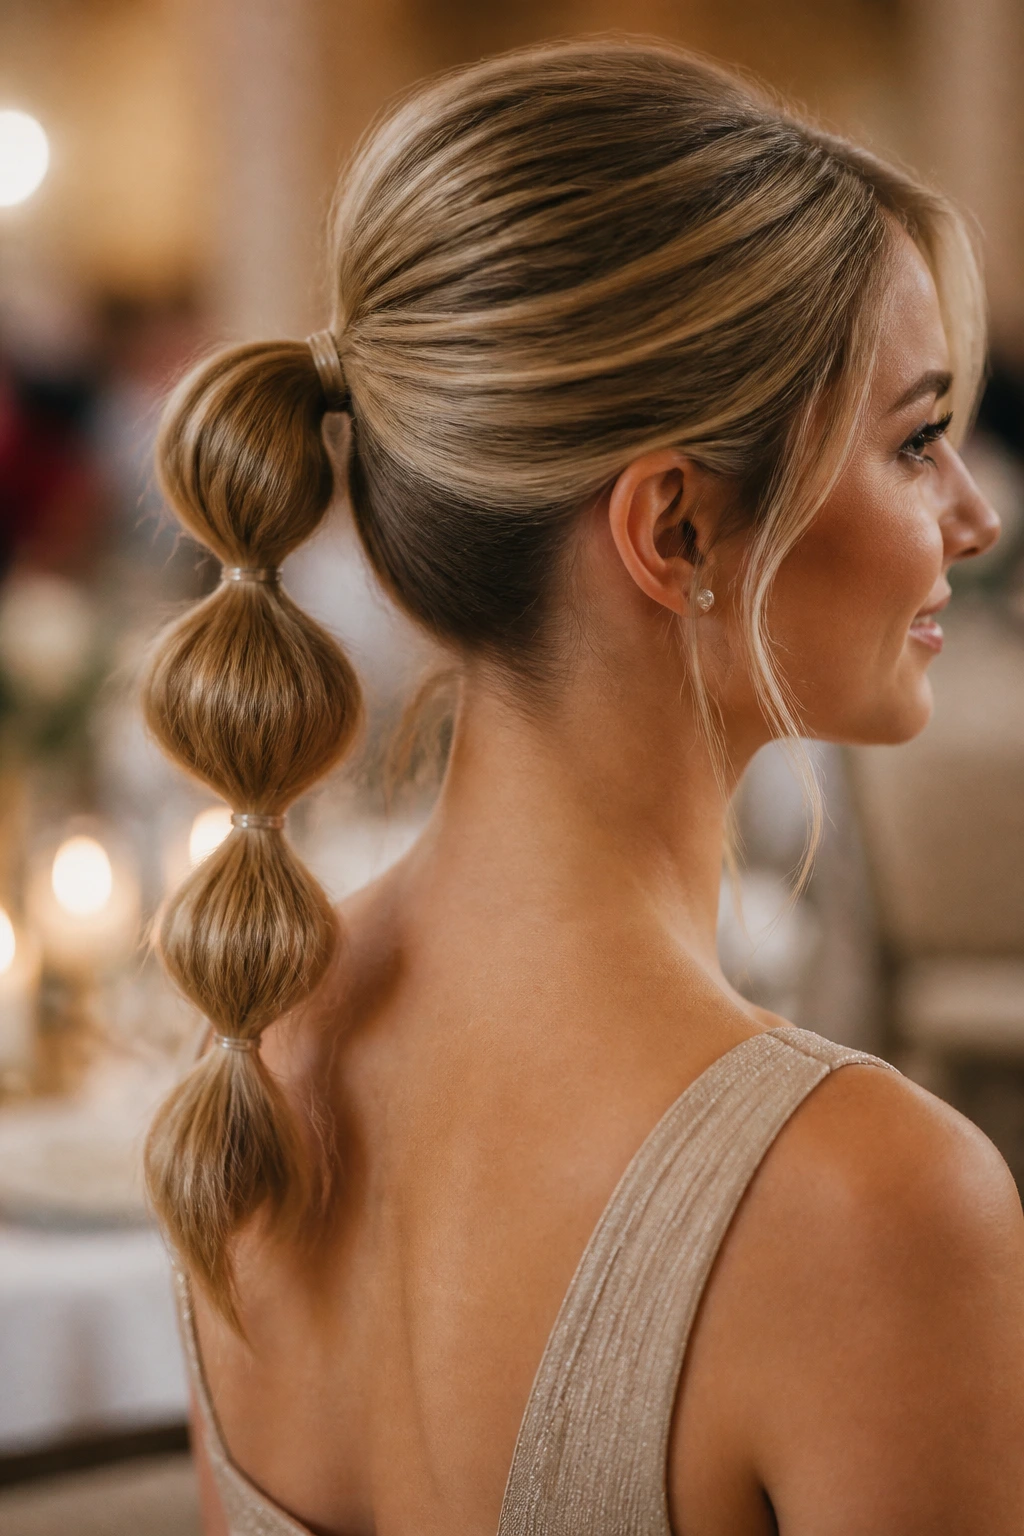
A bubble ponytail sounds playful, and it is, but it can still read polished if you keep the spacing even. That makes it a strong choice for medium-length hair, where the ponytail length is enough to create a few visible bubbles without sagging.
Start with a smooth low or mid-height ponytail. Add clear elastics every few inches, then gently pull at each section to round it out. The key is restraint. If you tug too hard, the bubbles go lopsided and the style loses its shape. A light mist of shine spray keeps the finished ponytail from looking dry or stiff.
This is a smart option for a second look at the reception. It feels a little less formal than a bun, but it still keeps hair off the neck when the dancing starts.
10. Waterfall Braid with Soft Waves
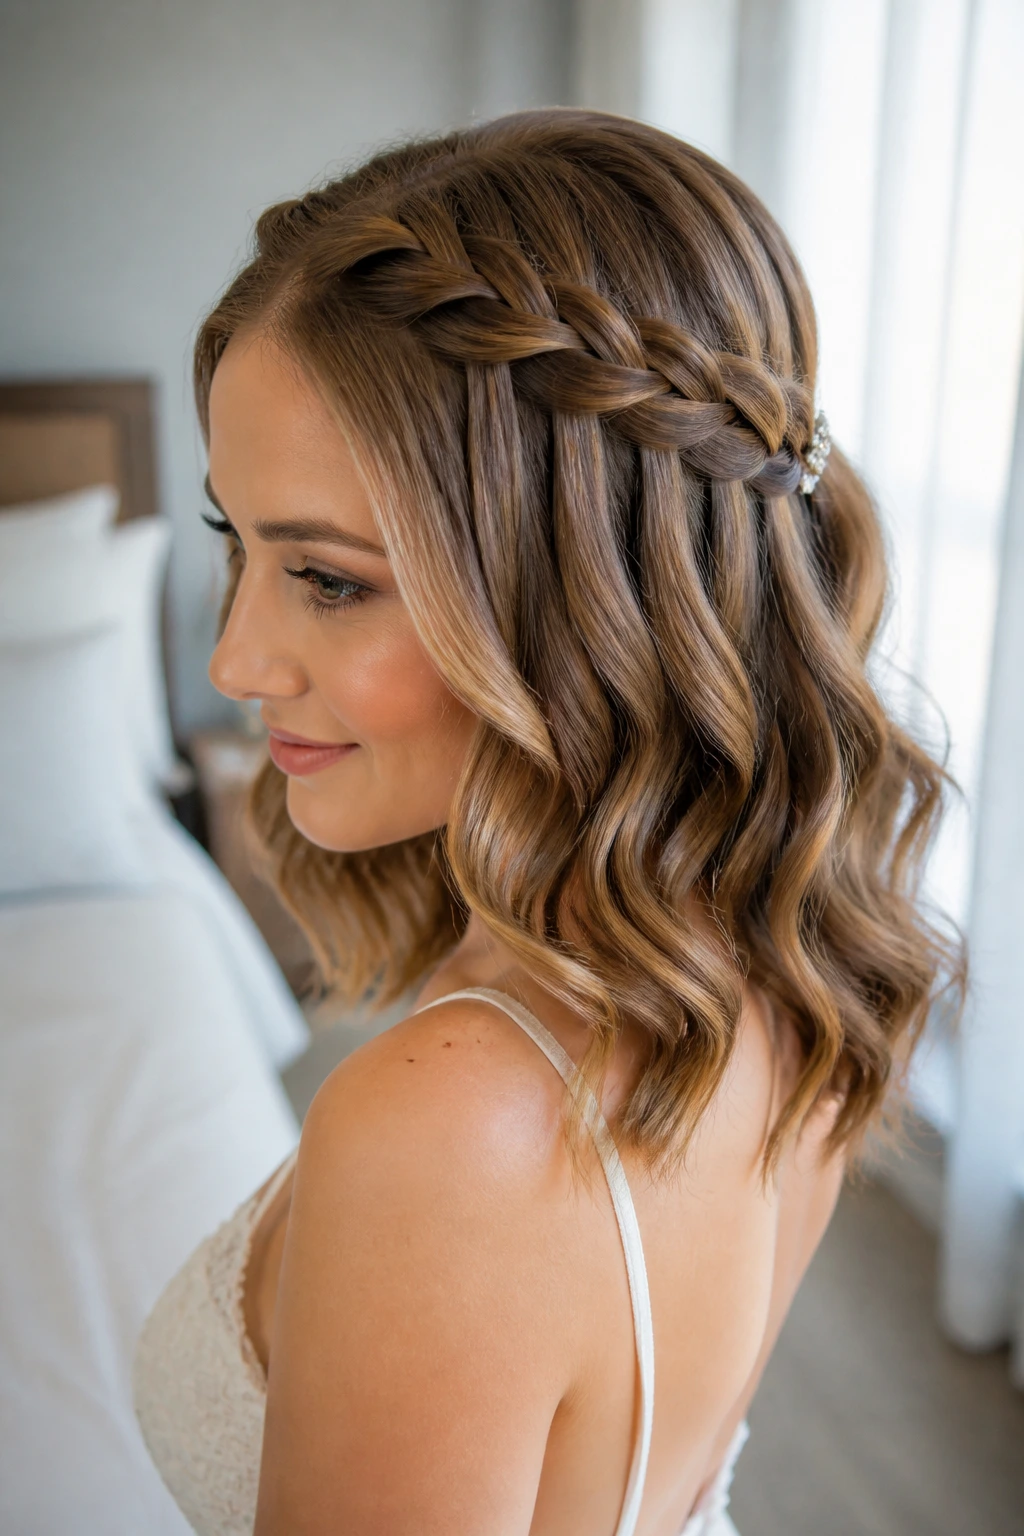
Does your hair have layers that always seem to slip out of updos? A waterfall braid handles that problem well. The braid holds the top section in place while the dropped pieces blend into loose waves below, which is exactly the kind of structure medium-length hair likes.
The waterfall effect looks best when the curl pattern underneath is gentle and brushed apart a little. Tight ringlets fight the braid. Soft S-waves make it feel fluid. Keep the braid narrow so it doesn’t eat too much of the head; one thick waterfall braid can overwhelm medium hair fast.
A tiny jeweled pin right where the braid ends can give the whole style a finished point. Without that anchor, the eye wanders. With it, the braid feels like part of a plan.
11. Vintage Pin-Curl Waves
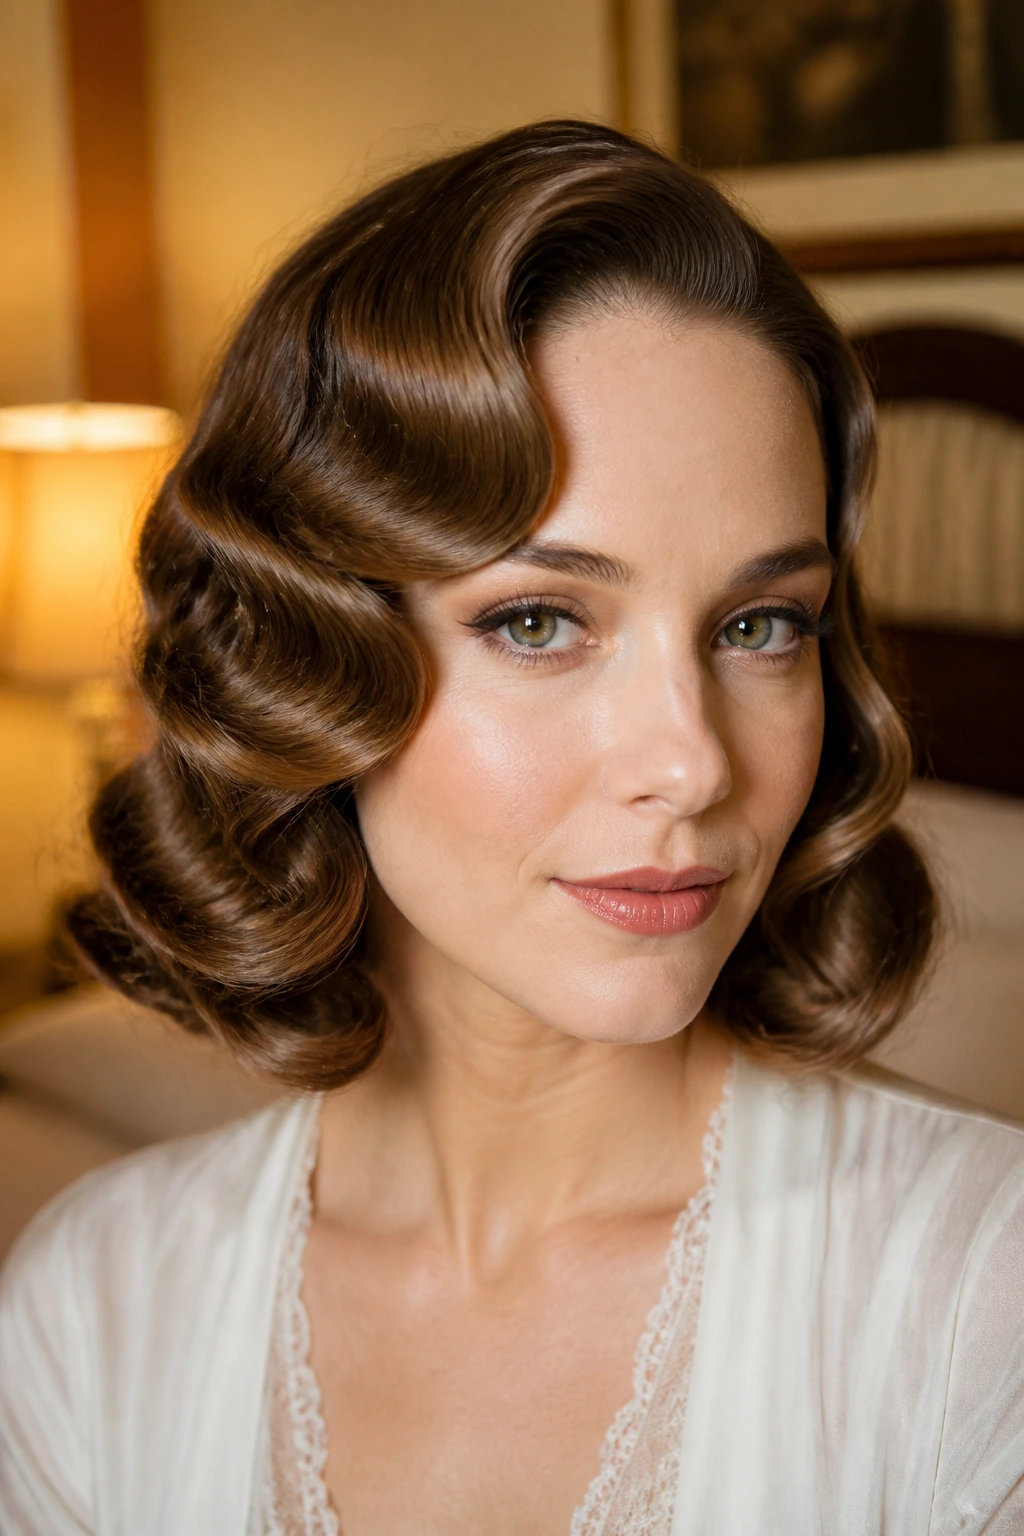
Pin-curl waves bring a crisp, sculpted finish that sits somewhere between retro and formal. On medium hair, they can look especially polished because the shorter length makes the wave pattern more visible. You see the shape. That’s half the fun.
Set the hair in small sections around a curling iron or with finger waves if you have the patience. Clip each section flat while it cools, then brush the pattern into a smooth bend. The front pieces should frame the face in a soft arc, not hang straight down like side bangs unless that’s the exact look you want.
This style likes strong-hold spray, but not a helmet. Use it in layers: a little before setting, a little after brushing, and a final mist once the shape is in place. That keeps the wave defined without making the hair look crunchy in photos.
12. Twisted Halo Bun
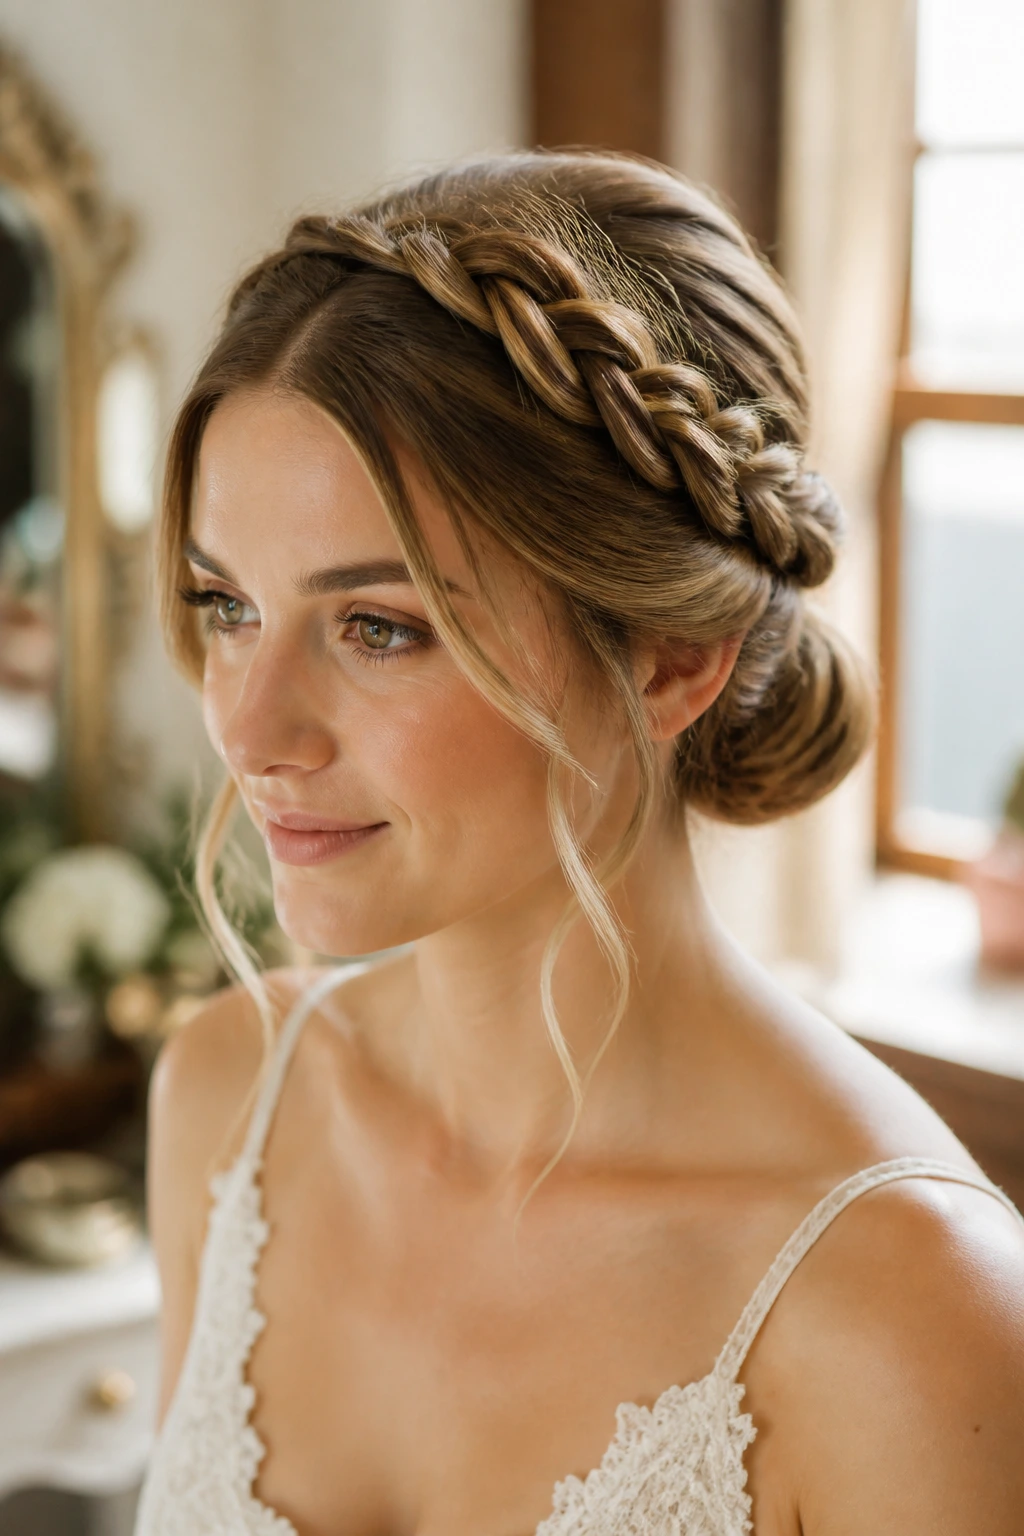
A twisted halo bun gives medium-length hair a fuller-looking crown without needing extra extensions. The front sections are twisted back from each side and wrapped around into a low bun or knot at the nape. The line around the head creates a halo effect, but it feels less fussy than a full braid crown.
The hairstyle works because the twists add width where medium hair sometimes feels narrow. They also hold much better than loose side pieces. If the hair has a touch of wave, the twist gets even easier, since the strands grip each other instead of sliding apart.
I would choose this for a dress with open shoulders or a square neckline. It frames the face and the upper body at the same time, which is a good move when the rest of the outfit is clean.
13. Double Mini Buns with Soft Tendrils
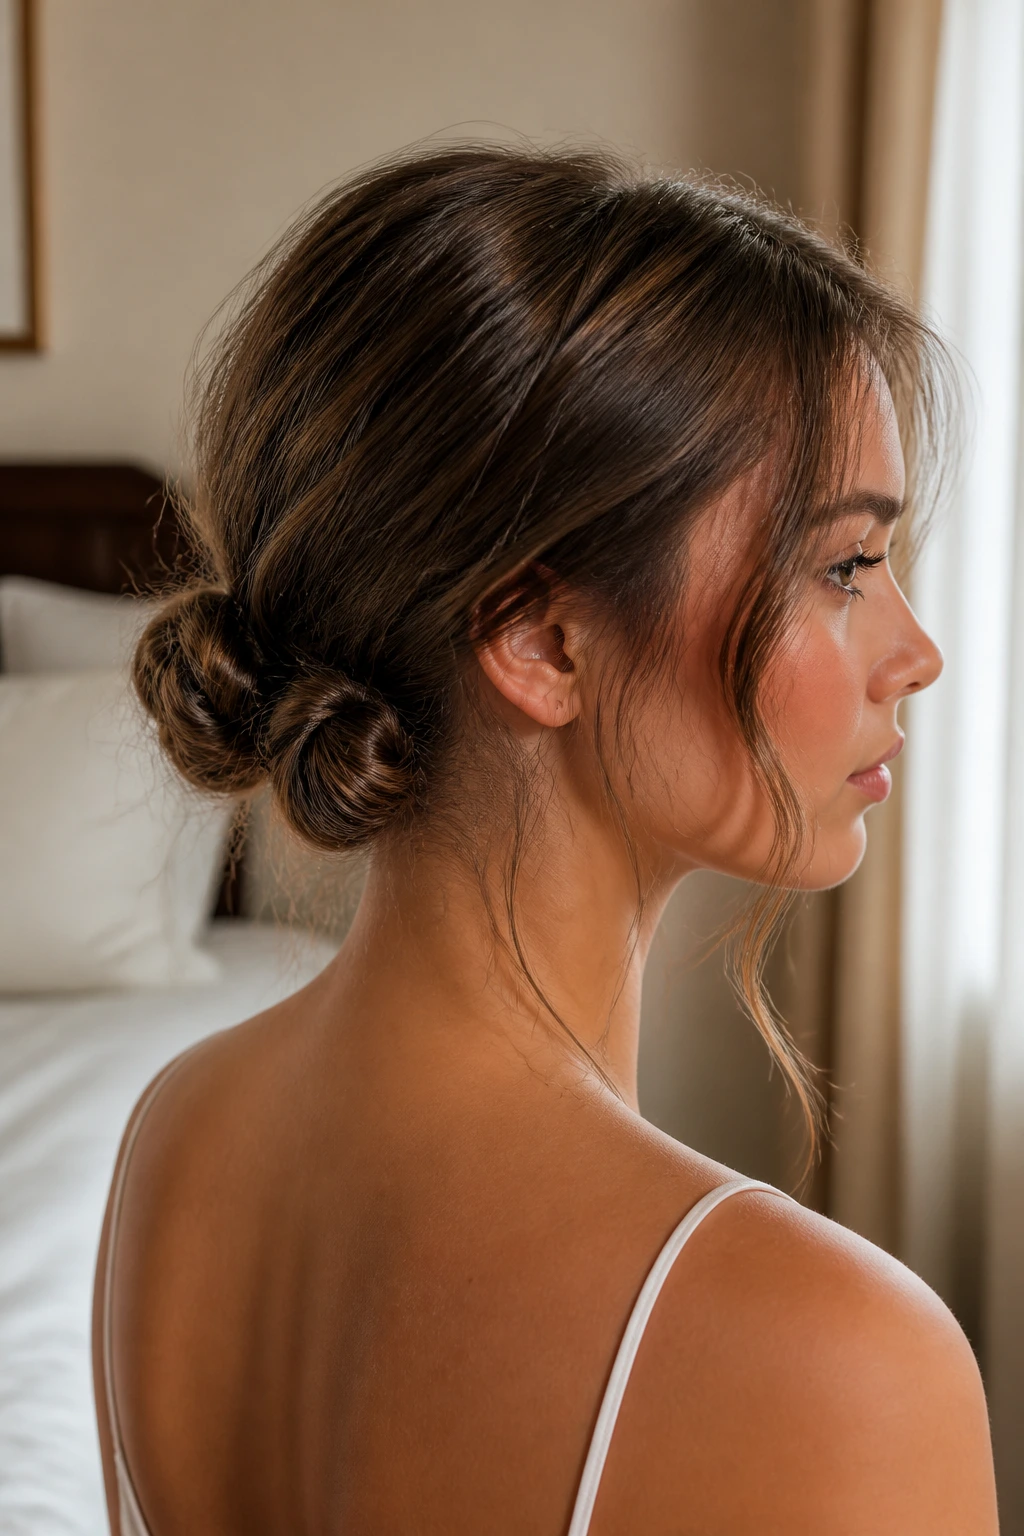
This one has more personality. Two small buns sit low at the back of the head, either side by side or slightly offset, while a few tendrils stay loose around the ears and jawline. On medium-length hair, the buns stay compact and don’t need a huge amount of length to look balanced.
Keep the buns small on purpose. If they get too large, the style starts to feel bulky and loses the charm. A few crossed pins in each bun help them stay tight, especially if the hair is layered.
- Best pairing: modern dresses, jumpsuits, or a reception outfit with clean lines.
- Accessory idea: tiny pearl pins scattered near the buns, not all over the head.
- Mood: playful, polished, and not trying too hard.
It’s the kind of style that feels fresh in photos without looking trendy in a way that will age badly.
14. Side-Swept Old Hollywood S-Waves
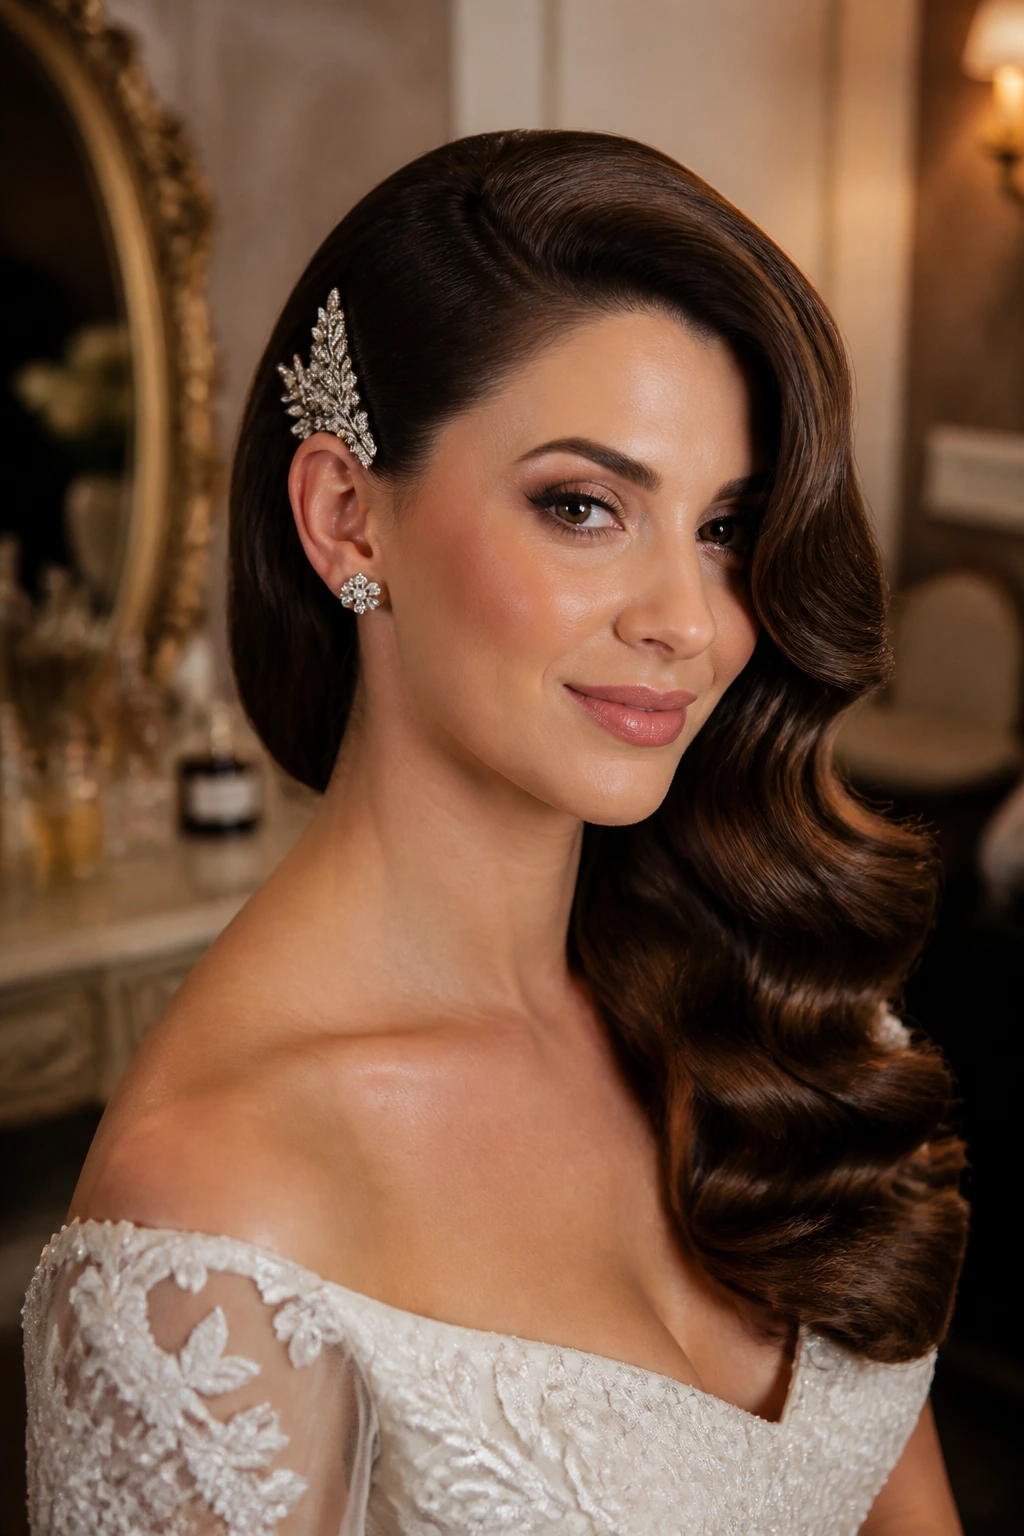
A deep side sweep with sculpted S-waves is a little more exacting than loose Hollywood waves. The curl pattern needs to be smoother, flatter, and more continuous from root to end. On medium hair, that tighter control can look especially sharp because the length doesn’t weigh down the wave.
The side sweep should start at the part and travel in one broad curve across the forehead, then open into waves that fall over one shoulder. Use a flat iron or a marcel-style motion with a curling iron if you know how to control it. The main thing is not to break the wave pattern with too much brushing.
This hairstyle works when you want the hair to feel formal, but not overly stiff. It looks expensive without needing a lot of decoration. A single crystal comb tucked behind the ear is enough.
15. Boho Fishtail Half-Up
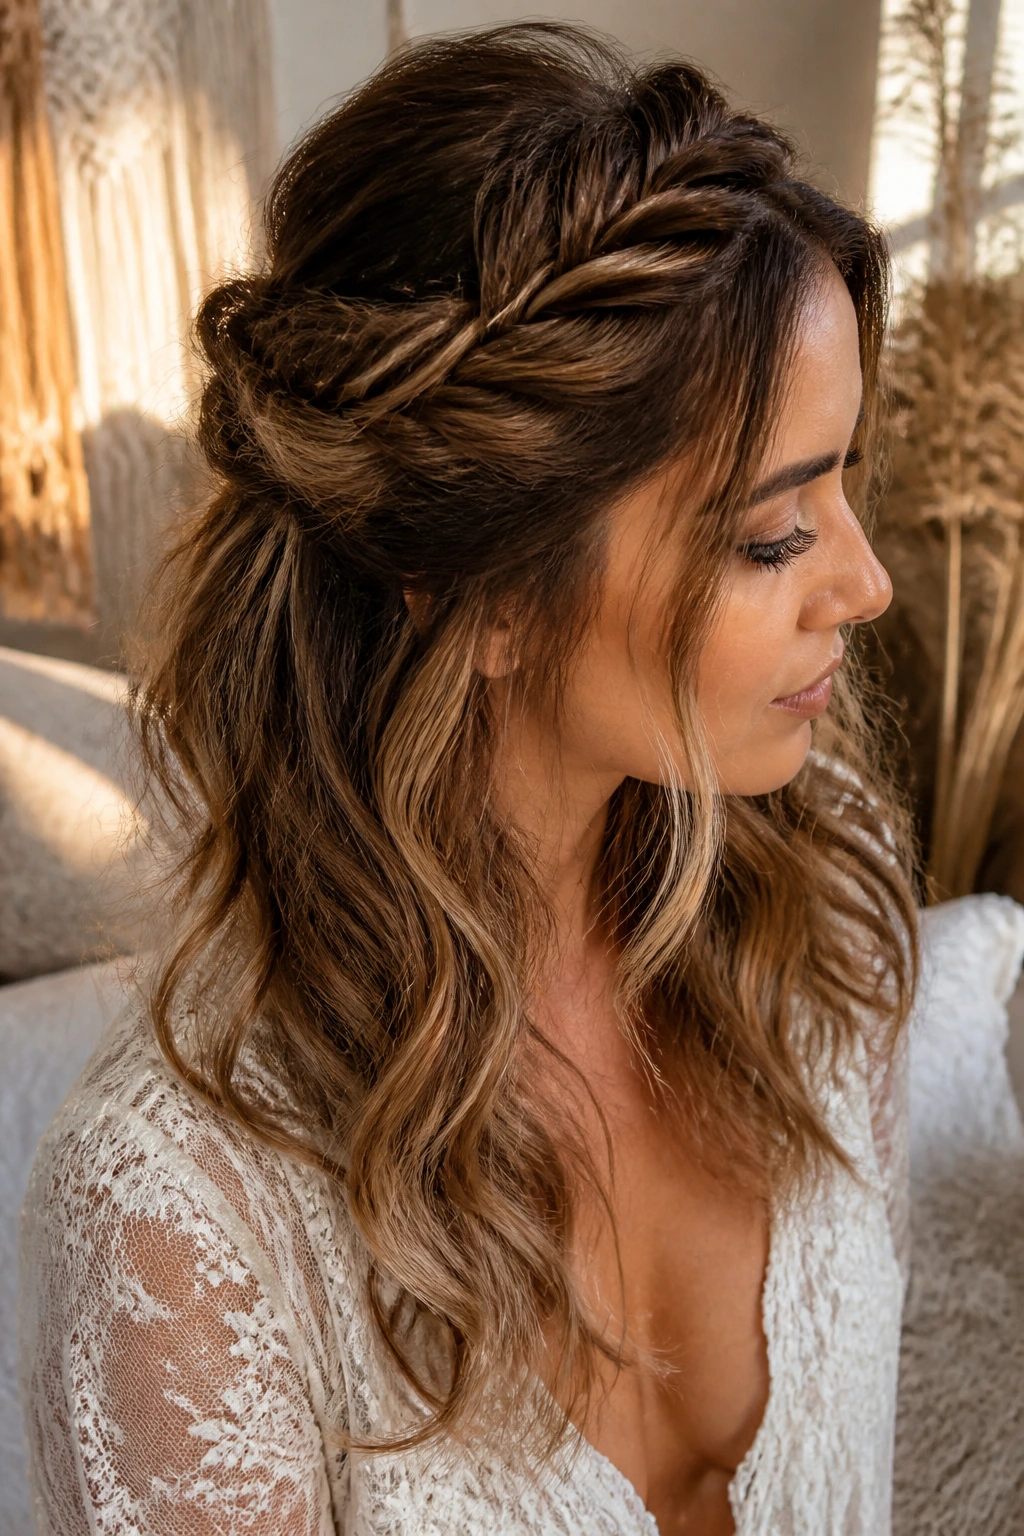
Best When the Dress Has Texture
A fishtail half-up leans airy and relaxed, but it still has enough detail to look deliberate. Medium-length hair gives the braid a nice scale; it’s long enough to show the woven pattern, short enough that the braid doesn’t drop into the back like a rope.
Start the fishtail at the sides or just under the crown, then pull it apart lightly once it’s tied off. That loosened edge is what gives the braid its softer shape. If you skip that part, the fishtail can look too tight and a little severe.
A few loose waves underneath keep the braid from looking too neat. I like this one with lace, chiffon, or anything with a little movement in the dress. It mirrors the fabric instead of fighting it.
16. Knotted Low Bun
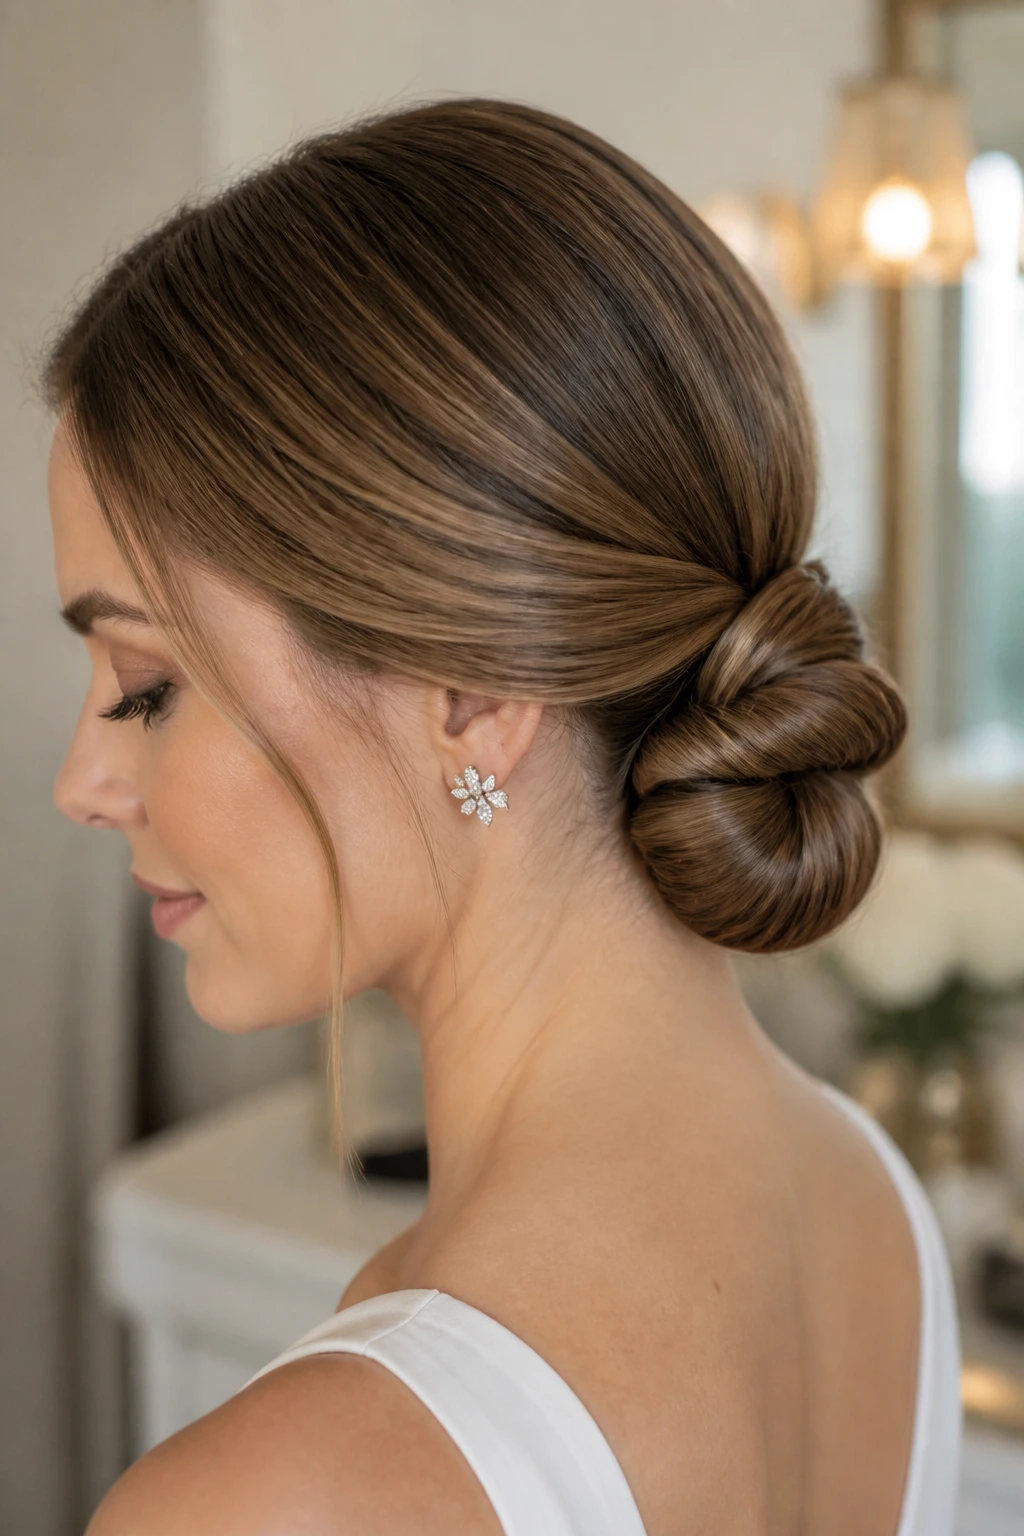
A knotted low bun has a clever little structure to it: the hair is divided, crossed, and tied into a knot-like shape before the ends are tucked under and pinned. On medium hair, that knot shows clearly because the length isn’t so long that it disappears into itself.
This is one of those styles that looks more complicated than it is. The cleanest versions are made with smooth, brushed hair and a light mist of smoothing spray. Too much texture makes the knot fuzzy. Too little, and the pins slip.
It’s a strong match for a dress with a tailored silhouette. The bun has shape, but it doesn’t steal attention. That balance matters on a wedding day, where the hair should support the look instead of swallowing it.
17. Pinned-Back Curl Cascade
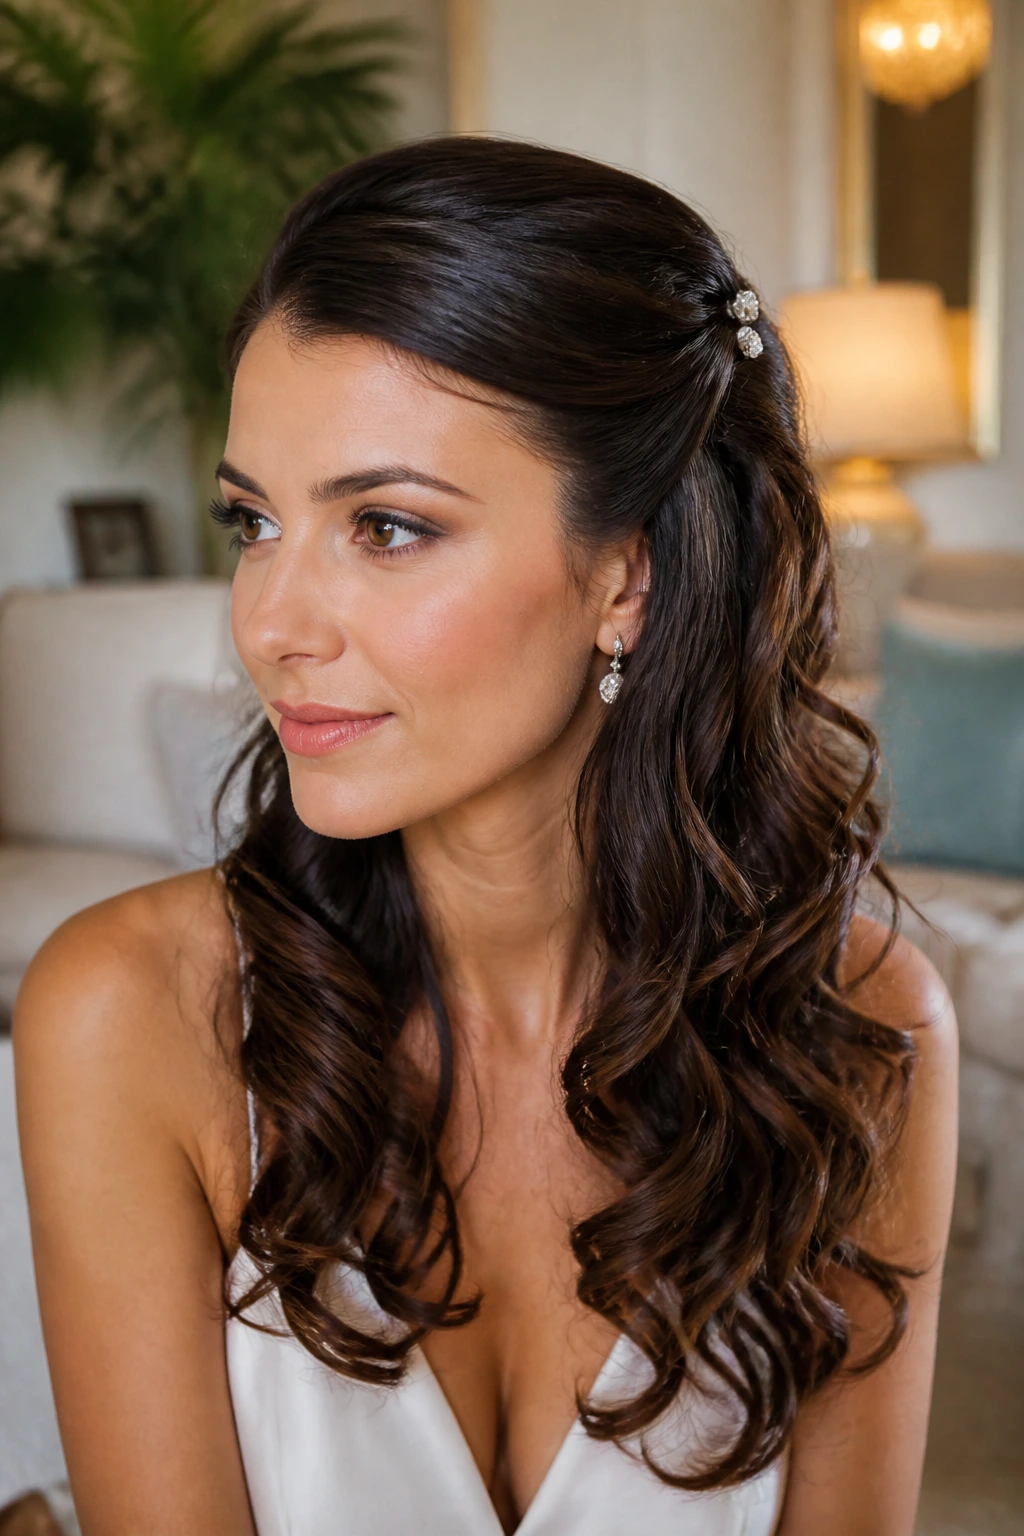
Imagine soft curls flowing over the shoulders, with one side pinned back just enough to reveal the cheekbone and the earrings. That’s the gist here. It’s simple, but not plain, and medium-length hair gives the curls enough weight to fall nicely without going flat.
This style shines when the curls are varied, not identical. Some pieces should curve more tightly near the face, while the ends stay loose and airy. Pin the front section back with two or three discreet pins or a small decorative comb. One large clip often looks heavy.
A pinned-back cascade works in almost any setting, but it’s especially useful if you want hair down without constantly brushing it off your face. You get comfort and shape at the same time. Rarely do styles give both.
18. Velvet-Ribbon Ponytail
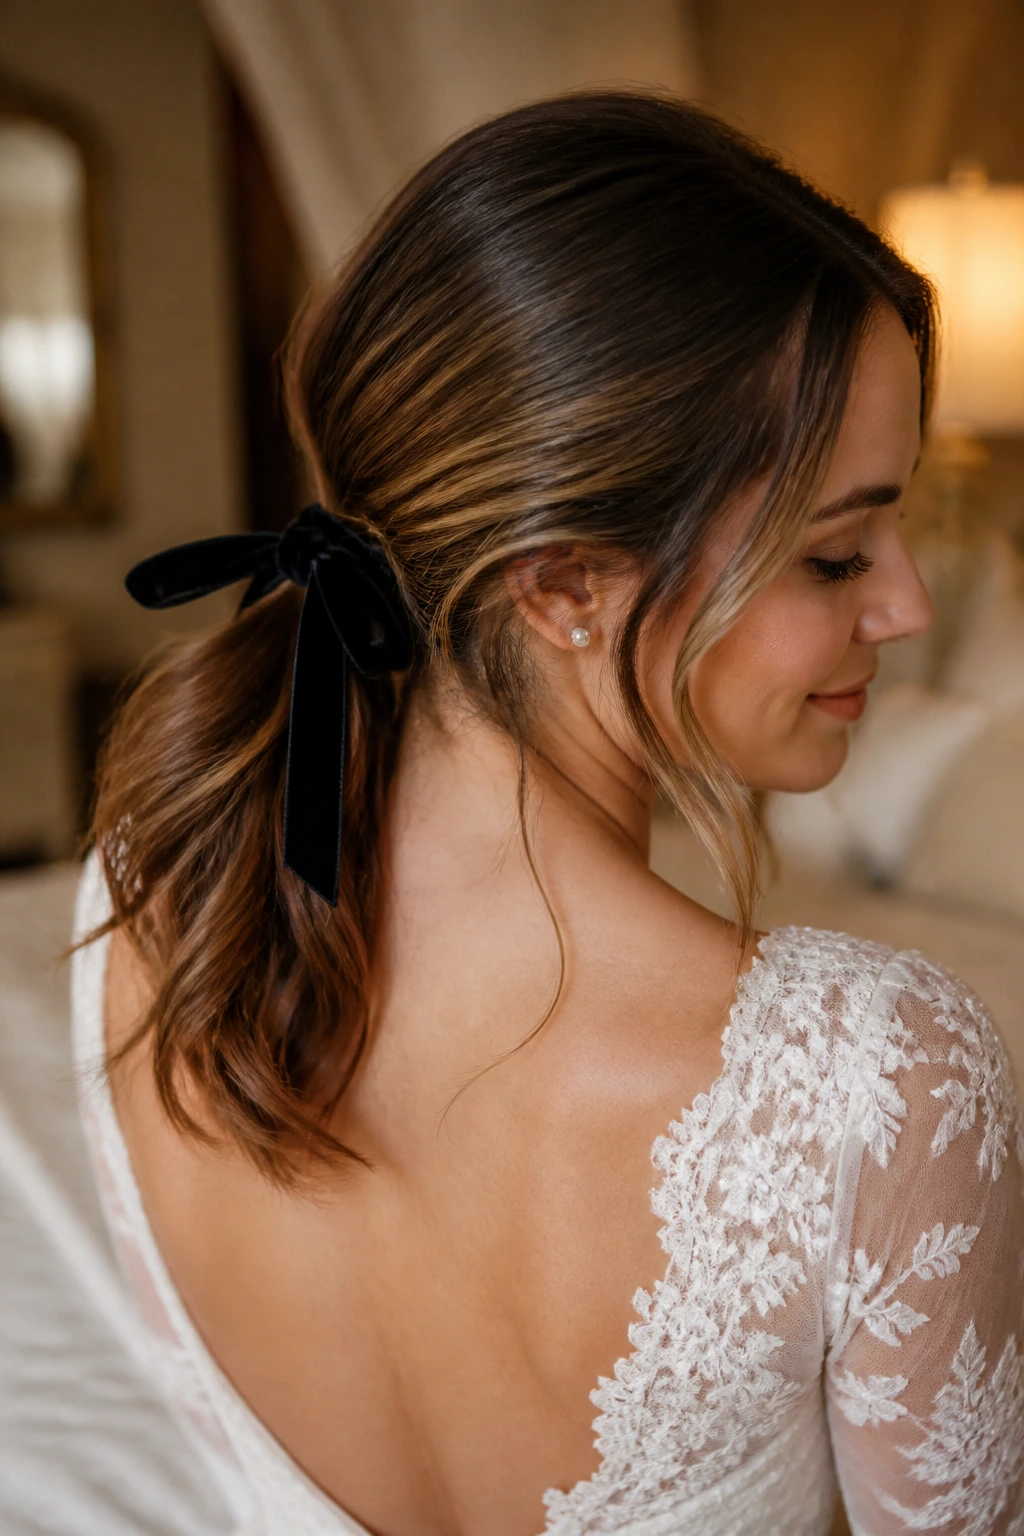
A velvet ribbon can turn an ordinary low ponytail into something romantic fast. Medium-length hair gives the ponytail enough swing to show off the ribbon ends without making the whole style too long or too heavy. A dark ribbon looks rich. A pale ribbon feels softer. Choose the one that matches the dress fabric, not the flowers.
Keep the pony smooth at the crown and tie the ribbon around the elastic after the hair is secured. Let the tails hang a few inches below the pony; trimming them too short makes the detail look accidental. If the hair is a little wavy, the tail can stay soft. If it’s straight, lightly bend the ends with a flat iron.
This style has a nice advantage: it feels dressed up, but it takes less time than a full updo. That matters when the schedule is already packed.
19. Pearl-Studded Twists
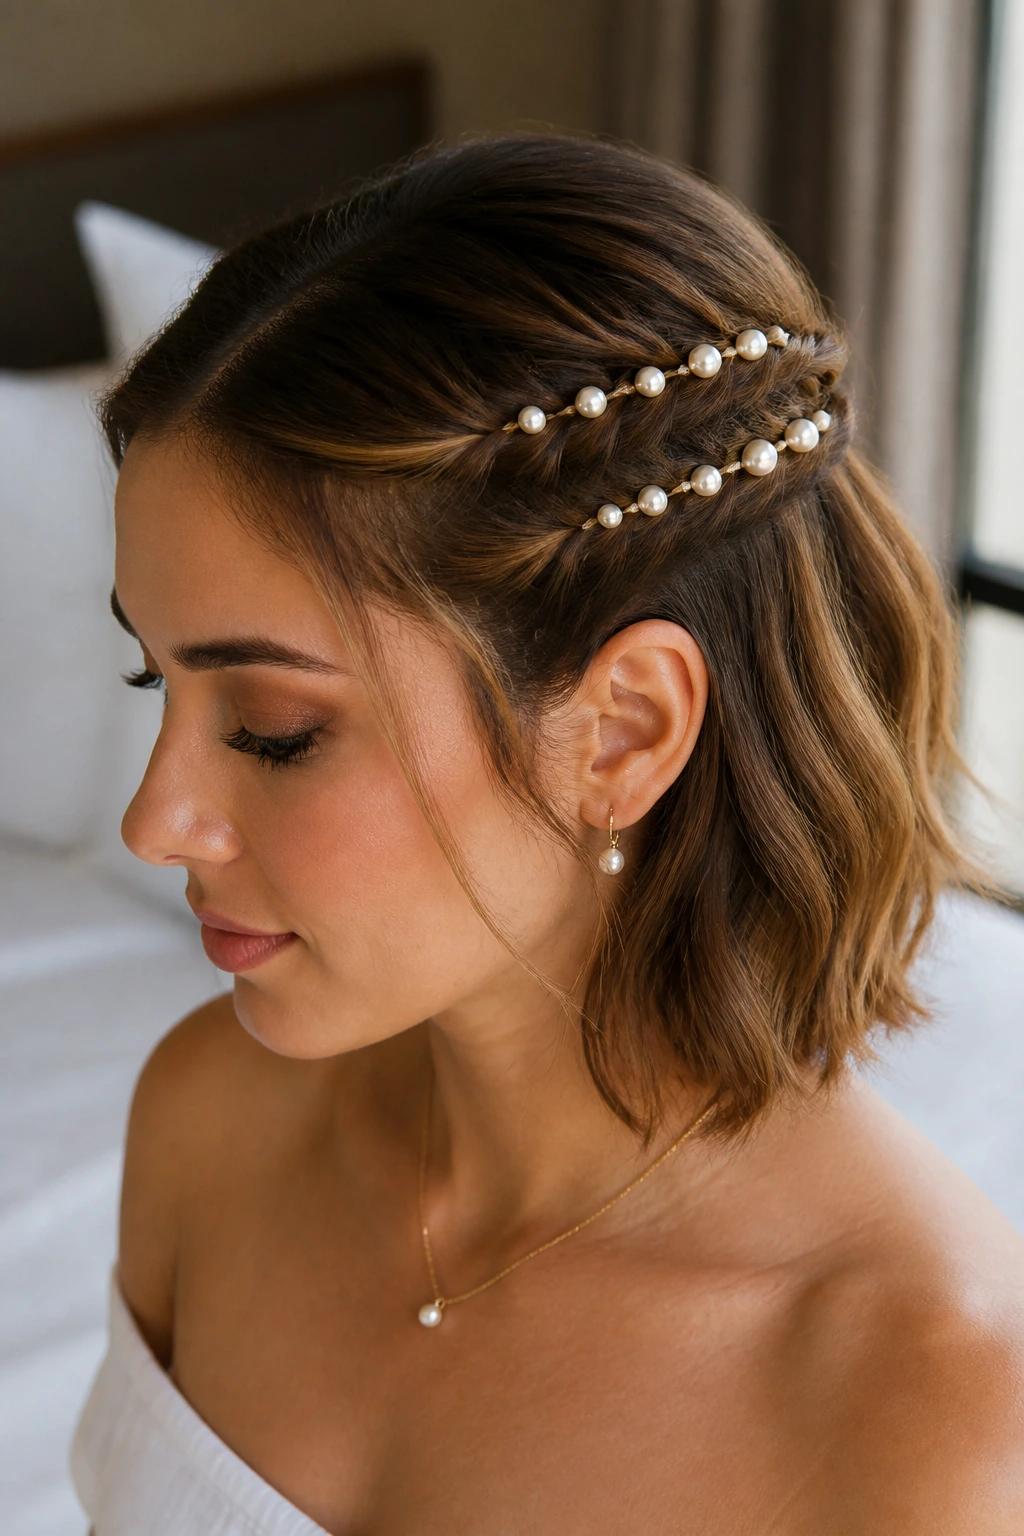
Can a simple twist really carry a bridal look? Yes, if the finishing detail is right. Pearl pins or a pearl comb turn small twisted sections into something bridal without making the hair too busy.
Work with two or three narrow twists on each side, then pin them back in a staggered line. The pearls should follow the curve of the twist rather than sit in one straight row. That keeps the style from looking stiff. Medium-length hair handles this well because the twists are short enough to stay visible and neat.
This option is good when the dress already has texture or embellishment and the hair needs to echo that without competing. It’s subtle from a distance, and the close-up detail is what makes it interesting.
20. Clean Center-Part Low Bun
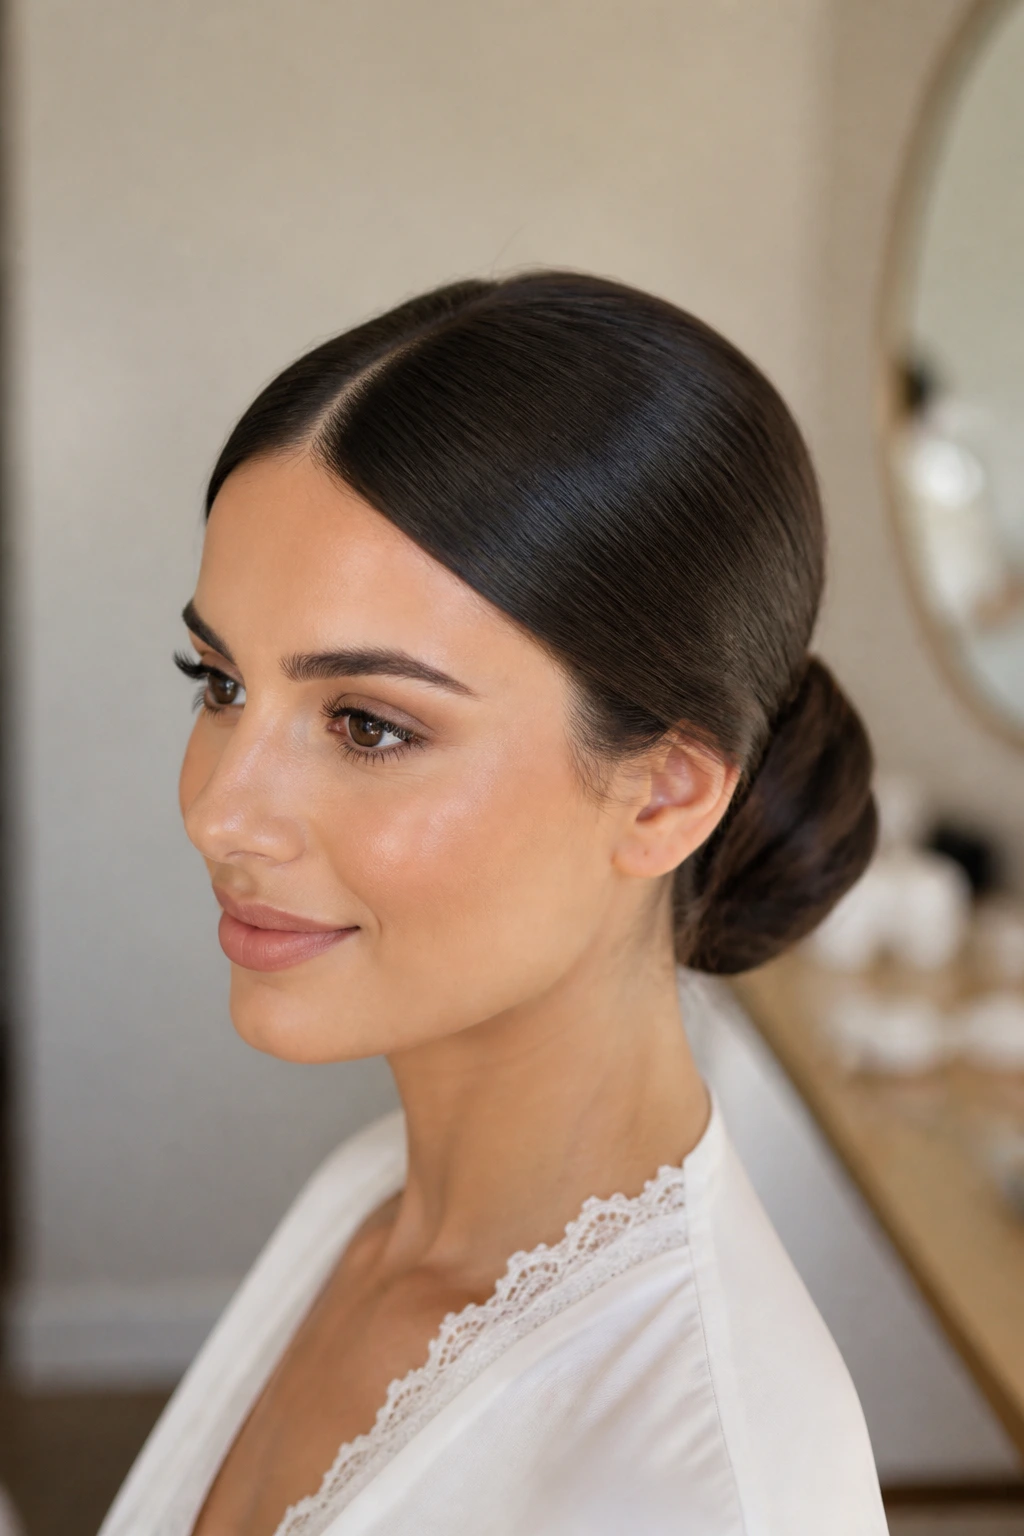
A center part changes everything. It gives a low bun a precise, modern edge that feels calm and confident, not fussy. On medium-length hair, the style usually lands in a sleek knot or wrapped bun at the nape, with the ends tucked so tightly that the silhouette stays compact.
The middle part has to be straight. Not almost straight. Straight. Use a tail comb and mirror check both sides before you pin anything. Once the part is set, smooth the hair back with a light cream or serum and build the bun low and even. A bun that sits too high ruins the line.
This is the style I’d choose for a minimalist dress or a ceremony where the clothes already have a lot of structure. It gives the face room and looks composed from every angle.
How to Prep Medium-Length Hair So the Style Actually Holds
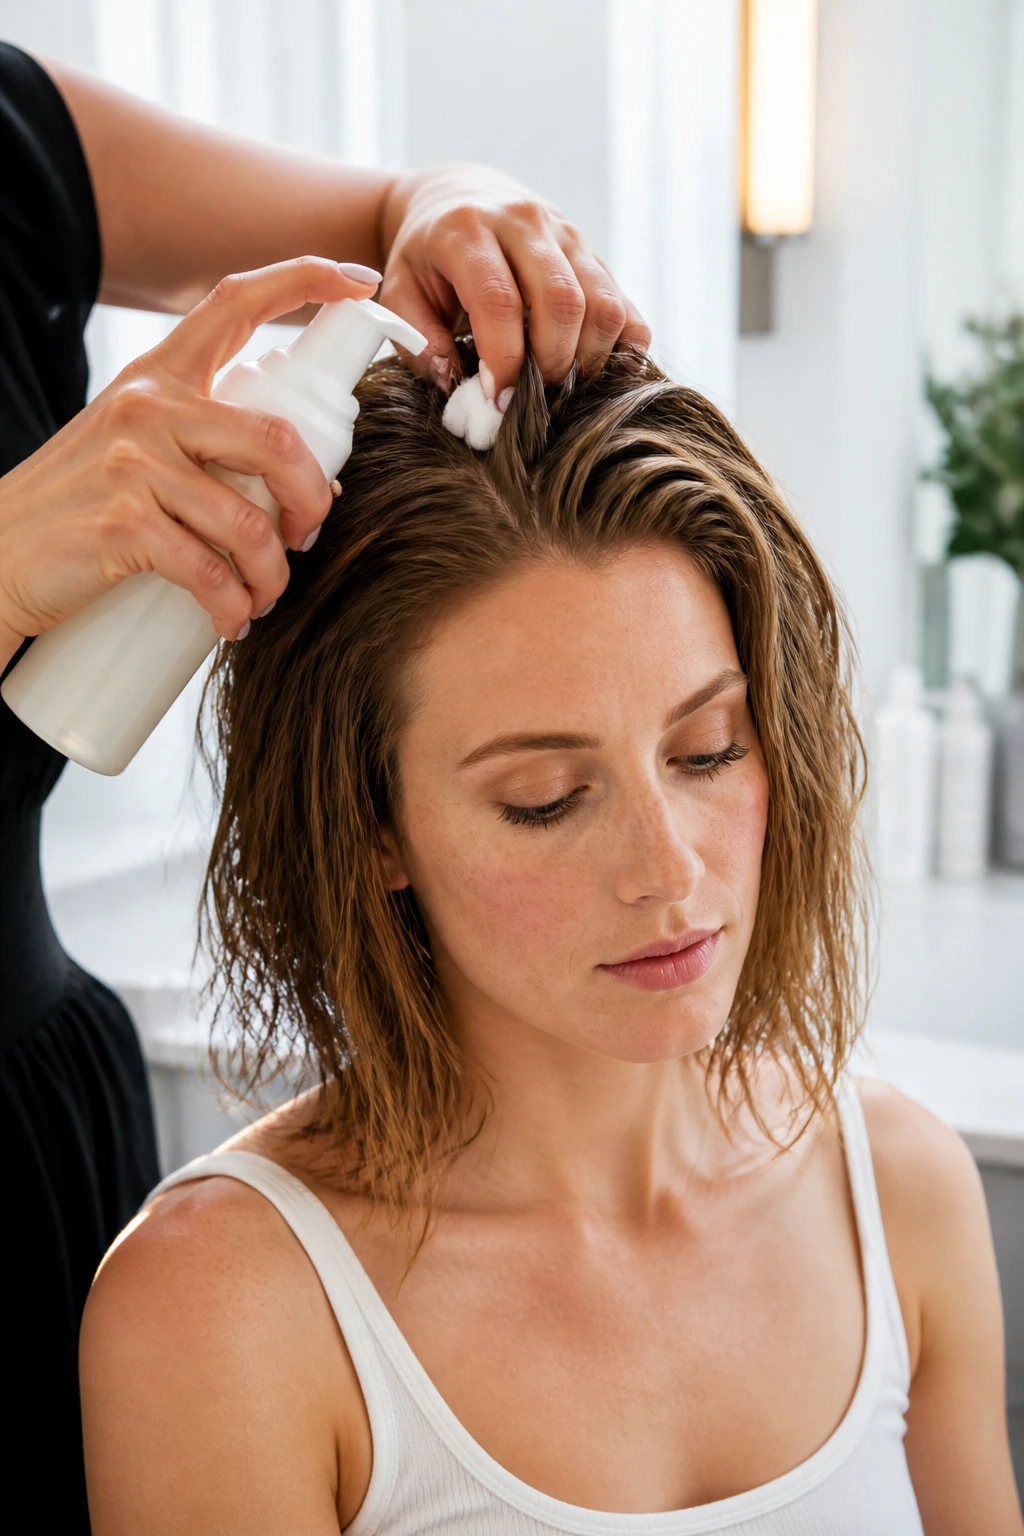
Start with the right amount of grip. Freshly washed hair can look clean, but it often slips out of pins and collapses faster than day-old hair. If you need to wash on the morning of the event, add mousse at the roots and blow-dry with the nozzle pointing down so the cuticle lies flatter.
Build shape before decoration. Curls, twists, and buns need a base first. That usually means setting the hair with a 1-inch or 1.25-inch iron, letting each section cool completely, and only then brushing or pinning it into place. If you pin hot curls, they flatten as they cool and the style loses its body.
Match the finish to the neckline. Low buns and tucked styles sit well with high necklines, halters, and dresses with a lot of back detail. Half-up styles and soft waves pair better with open shoulders or simpler fabrics because they give the eye something to follow without filling every inch of space.
Carry a small repair kit. Six bobby pins, four U-pins, a travel spray, and a slim comb can save a style that starts to loosen after the ceremony. Put them where someone can reach them fast. Nobody wants to hunt through a clutch bag for a pin while the photographer waits.
Let the style settle before you touch it. After the final spray, wait ten minutes before putting on a veil or moving around a lot. The shape sets better when it has a chance to cool and dry in place.
Essential Tools for These Looks
-
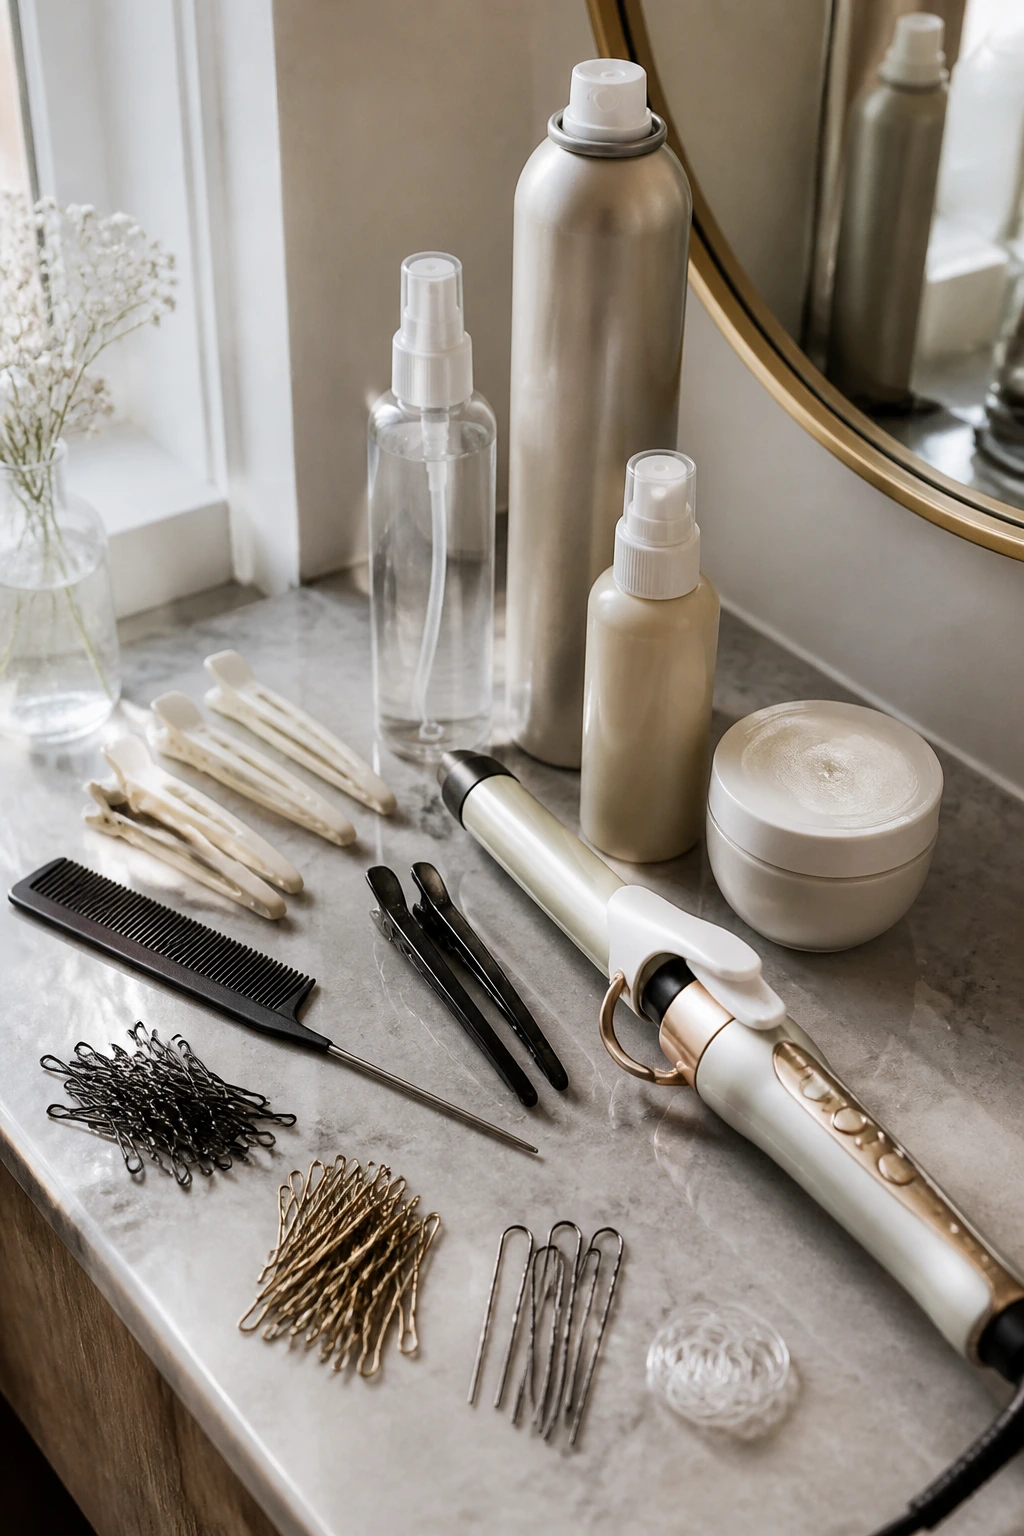
1-inch curling iron or wand: Best for medium hair when you want waves, curls, or soft bends that still brush out cleanly.
-
Tail comb: Useful for clean parts, sectioning, and lifting the crown without dragging through the whole style.
-
Sectioning clips: Keep layers out of the way while you curl or pin one area at a time.
-
Bobby pins in two shades: Match the hair color as closely as possible so the pins vanish into the style.
-
U-pins: Better than regular pins for buns and twists because they hold shape without squeezing the hair flat.
-
Clear elastics: Handy for bubble ponytails, half-up styles, and hidden anchors inside braids.
-
Teasing brush or fine-tooth backcomber: Helps create lift at the crown without leaving giant tangles.
-
Texture spray or dry shampoo: Adds grip to clean hair and gives braids and twists something to cling to.
-
Heat protectant: Non-negotiable if you’re using hot tools. Medium-length hair can still burn and dry out fast.
-
Strong-hold hairspray: Use a flexible formula if you want movement, or a firmer one for a bun or sculpted wave.
-
Lightweight smoothing cream or serum: Keeps frizz in check on sleek styles without flattening the crown.
-
Decorative comb, veil, or pearl pins: Choose one focal accessory and let the hairstyle support it instead of stacking too many details.
Common Mistakes That Flatten the Finish
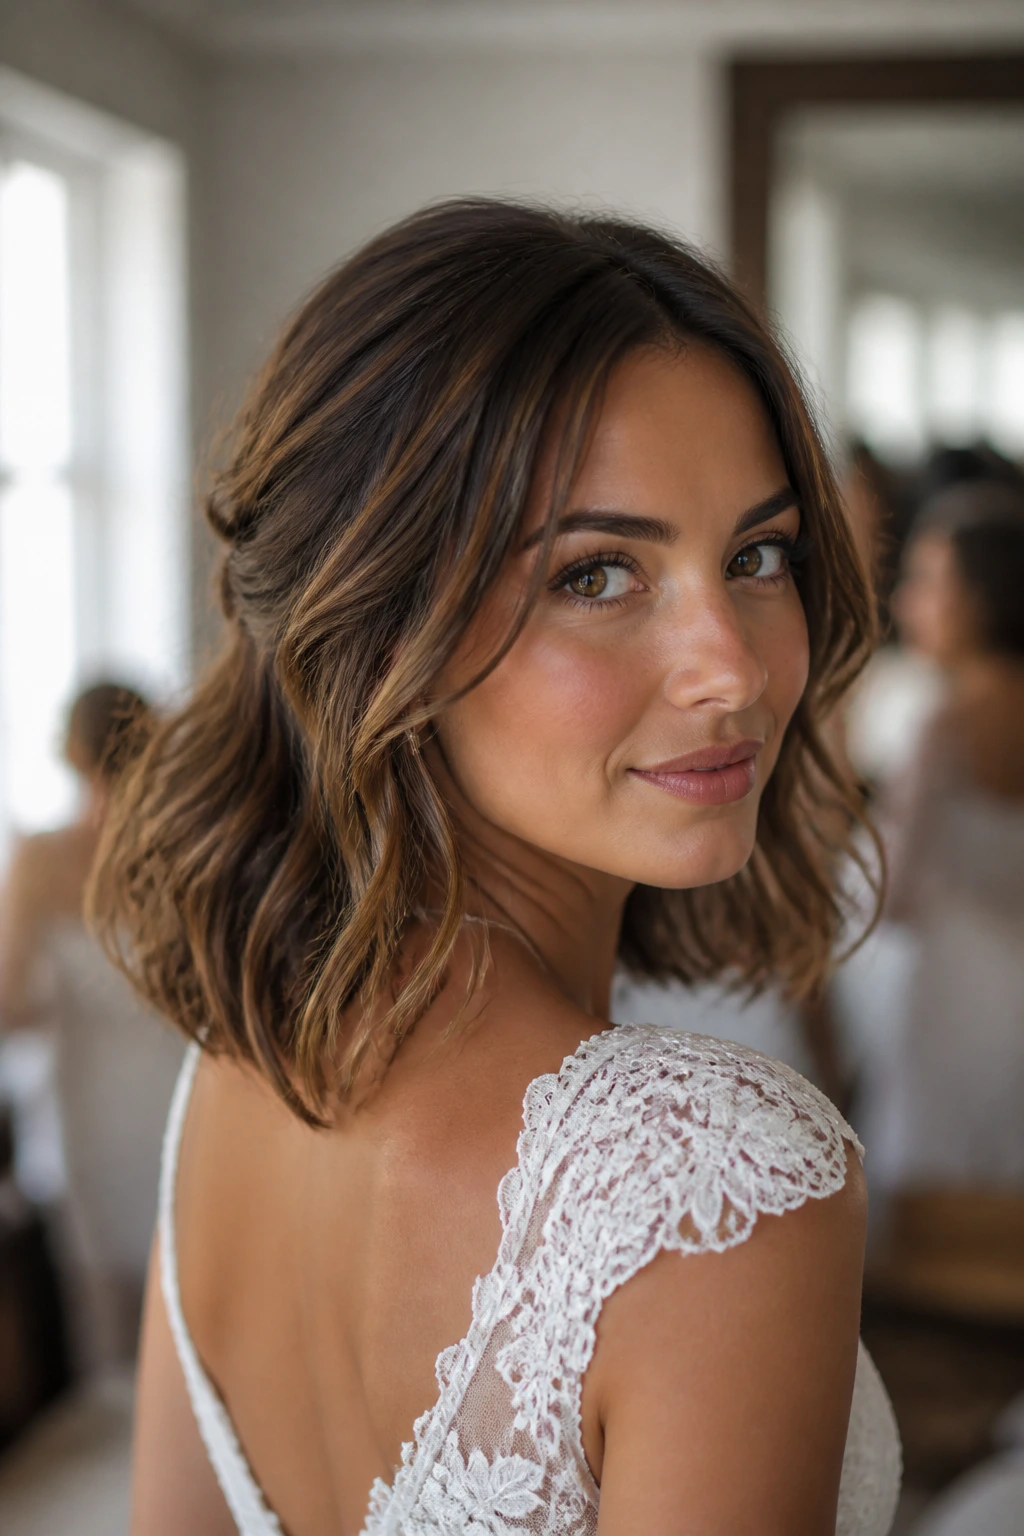
Starting with hair that’s too soft and clean. Freshly washed hair often slips, especially in half-up styles and buns. The fix is simple: add texture with mousse, dry shampoo, or a bit of dry root spray before you start pinning.
Curling everything too tightly. Tiny curls can look pretty for ten minutes and then shrink into a puffy cloud. For wedding hairstyles for medium length hair, looser curls usually read better in photos and hold their shape longer when brushed out.
Pinning without an anchor. If a bun or twist feels loose the moment you let go, it needs a stronger base. Cross bobby pins in an X, hide U-pins inside the seam, and pin into a section that already has tension, not a loose surface layer.
Ignoring the veil or accessory placement. A comb shoved into the wrong spot can flatten the crown or hide the best part of the style. Lay the veil or pin in place before the final spray and check the silhouette from the side and back.
Using too much serum or shine cream. A little polish is enough. Heavy product near the roots makes pins slide, and too much on the mids turns waves stringy. If the hair needs shine, add it in the final inches only.
Skipping the cool-down. Hot curls need time to set. If you brush them out while they’re still warm, they fall faster and the style never gets the body it should have had.
Variations and Adaptations to Try
Fine-Hair Lift Plan
Choose styles that rely on shape rather than bulk: the sleek low pony, side-part tuck, or center-part low bun. Use mousse at the roots, dry shampoo at the crown, and smaller sections for curling so the hair looks fuller without getting fluffy.
Curly-Hair First
Work with natural texture instead of flattening it. A pinned-back curl cascade, twisted halo bun, or soft half-up twist usually behaves better than a fully slicked style, because the curl pattern gives the pins something to hold.
Humidity-Shield Finish
If the weather is sticky, lean toward lower styles. Low buns, wrapped ponies, and structured twists hold better than high-volume waves, and a humidity-resistant spray at the end helps keep frizz from taking over the shape.
Veil-First Layout
If the veil matters most, choose a placement that lets it sit above or below the main bun without crushing the style. Low chignons, clean buns, and tucked twists usually work best because they give the comb a stable anchor.
Minimalist Modern Edit
For a cleaner look, strip away the extra wave and keep one strong line: center part, low bun, low pony, or polished side tuck. Add only one accessory, like pearl pins or a small comb, and stop there. The restraint is what gives the style its edge.
Keeping the Style Fresh from Ceremony to After-Party
A wedding hairstyle is not only about the first photo. It has to survive the walk down the aisle, the hugging line, dinner, dancing, and at least one moment when somebody says, “Let me see the back.” Medium-length hair usually holds up well, but it still needs a little care.
The biggest thing is not touching the style too much. Once the pins are in and the spray has set, keep hands away from the crown and the sides. Every time you rake fingers through the hair, you loosen the structure a little. If a face-framing piece falls, pin it back with one hidden pin instead of rebuilding the whole style.
Carry a small touch-up kit with extra bobby pins, one compact comb, and a travel-size hairspray. That’s enough for most fixes. If you’re wearing a veil, remove it carefully by sliding the comb out in the same direction it went in. Pulling it up and out can rip the whole section loose.
For the next day, sleep with the hair fully pinned down only if the style is meant to stay for a brunch or photos. Otherwise, take out the accessory and pins before bed, then finger-comb the curls lightly. A tiny mist of water on the ends usually refreshes the shape better than trying to restyle everything from scratch.
Frequently Asked Questions
Can medium-length hair really hold an updo for a full wedding day?
Yes, if the style is built with enough anchor points. Low buns, twists, and pinned chignons usually last better than tall styles because the weight sits close to the head instead of hanging off the pins.
Should I wash my hair the morning of the wedding?
Usually, no. Hair that’s been washed the night before or even the day before often has more grip for pins and braids. If you do wash it the same day, add texture with mousse or dry shampoo before styling.
What styles work best if I’m wearing a veil?
Low buns, twisted halos, and clean center-part styles tend to work well because the veil comb has a stable spot to sit. Half-up looks can also work, but the veil placement needs to be planned before the final spray goes on.
How do I keep curls from falling flat?
Let every curl cool fully before brushing it out. That’s the part people skip, and it matters more than the brand of hairspray. If your hair is fine, pin the curls up while they cool so they set with more shape.
Can these hairstyles work on layered hair?
Yes, but layers need extra pinning. Braids, twists, and pinned-back curls usually handle layers better than ultra-sleek styles because the shorter pieces have somewhere to disappear.
Do I need extensions for wedding hairstyles for medium length hair?
No. Extensions can help if you want extra fullness, but they are not required for most of these looks. A good base, a little texture, and the right pin placement usually do the job.
Which styles are easiest for a DIY trial?
The wrapped low ponytail, the side-part tuck, and the textured half-up twist are the most forgiving. They don’t demand perfect symmetry, and if one section sits slightly differently, the style still looks intentional.
What if my hair is very thick and heavy?
Choose a lower style and use smaller sections when pinning. Thick hair often looks best in a knotted bun, a low chignon, or a braid-based half-up because those shapes can support the weight without sagging.
A Finish That Still Feels Like You
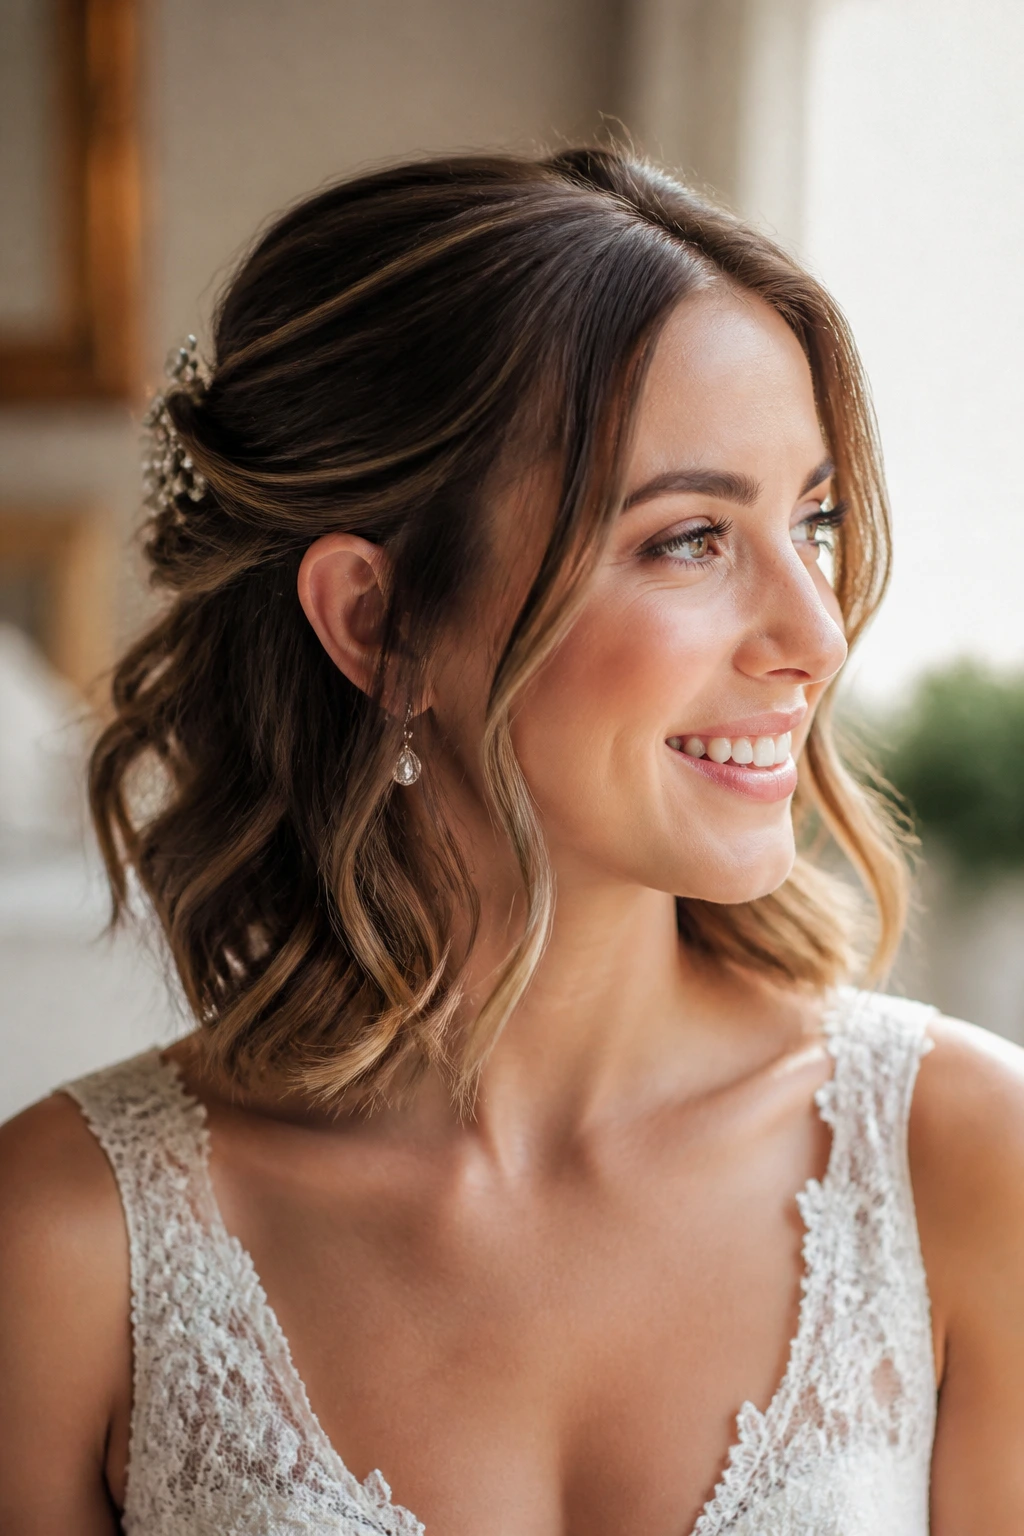
The nicest thing about medium-length hair is that it doesn’t force one answer. It can be soft, sleek, romantic, or clean-lined without pretending to be longer than it is. That honesty matters on a wedding day, when the goal is usually not to look transformed into someone else, but to look finished in a way that still feels familiar.
A good bridal hairstyle should hold through hugs, photos, dinner, and dancing, yes. But it should also suit the dress, the face, and the person wearing it. Pick the style that does that work quietly, and the rest of the day gets easier.
