



A head of medium-length curls can look calm for exactly three minutes. Then one ribbon slips, a front coil escapes, and suddenly the whole style is either in her eyes or hanging in her water bottle. That’s the little balancing act behind curly hairstyles for little girls with medium-length hair: enough length to do something cute, not so much length that every style turns into a production.
Medium-length curls are a sweet spot. They’re long enough for puffs, twists, braids, buns, and clipped-back shapes, but short enough that the style still has bounce. That bounce matters. A lot. A style that looks neat on straight hair can collapse fast on curls if it pulls too hard at the scalp or forgets that curls have their own agenda.
The good styles work with the curl pattern instead of flattening it. They use soft sections, gentle tension, and accessories that don’t rip through the hair when she runs, turns her head, or decides halfway through breakfast that she hates barrettes. The best ones are cute, yes, but they also survive recess, car rides, naps on the couch, and the kind of wild movement that only kids seem capable of.
Why These Curly Styles Earn Their Spot
-
They leave room for the curl pattern: Medium-length curls still have shape at the ends, so styles can show off the texture instead of hiding it under a tight bun.
-
They don’t need a salon setup: A spray bottle, a rat-tail comb, a few soft elastics, and a couple of clips are enough for most of these looks.
-
They help with face-framing hair: When little curls keep slipping into the eyes, these styles move the front pieces without yanking the hairline.
-
They fit busy mornings: Several of these can be done in under ten minutes once the parting is clean and the detangling is finished.
-
They hold up better than “just leave it down”: A loose ponytail, a half-up shape, or a couple of twists often survives school better than loose curls that get touched all day.
-
They’re easy to change midweek: If the first day looks a little too neat or a little too fuzzy, you can shift the part, add a clip, or turn the same set into something new.
How to Choose a Style for Her Curl Pattern and Daily Routine
The easiest place to start is the curl itself. Loose waves, springy ringlets, and tighter coils all behave a little differently, and medium-length hair shows that difference fast. A style that sits nicely on 3A curls may need a looser hand on 4B hair, and vice versa. The trick is not forcing every head of hair into the same mold. It’s choosing a shape that respects what the curls are already doing.
If her curls shrink a lot, styles that sit high on the head — puffs, top knots, space buns — tend to show up better than low styles that disappear into the nape. If her hair is fine and fluffy, smaller sections usually stay put longer than one big heavy ponytail. If she has thick curls that puff out at the sides, side twists or braided fronts help keep the outline cleaner without flattening the whole head.
Routine matters too. School-day styles need faster resets than party styles. Active kids usually do better with soft elastics and anchored sections instead of loose clips that slide out after one cartwheel. And if she hates feeling hair on her neck, low puffs and crown styles will probably feel better than anything that hangs heavy at the back.
1. Half-Up Puff with Defined Ends
This is the style I reach for when the front curls need to get out of the way but the rest of the hair still looks good loose. Gather the top section from temple to temple, leave the bottom curls free, and let the puff sit right where the head starts to curve back. It keeps the face open without making the whole head feel dressed up.
Why it works
The top section gives structure, and the loose back keeps the style from looking stiff. On medium-length hair, the bottom curls still hit enough length to bounce instead of puffing into a cloud. A little curl cream on the free ends keeps the shape clean for the rest of the day.
A satin scrunchie is the quiet hero here. It grips without the ugly crease that tiny rubber bands leave behind.
Quick ways to finish it
- Twist the front pieces before gathering them if she has short layers.
- Leave two curls out by the ears if she likes soft face-framing pieces.
- Add a small bow or clip right above the puff base if you want the style to feel finished.
One small warning: don’t pull the top section too tight. If the puff sits like it’s been “wired” into place, it’ll start looking stiff within an hour.
2. Two Curly Pigtail Puffs
Two pigtail puffs have a sweet, old-school look, but they work because they distribute the hair evenly. Split the hair down the middle, gather each side into a soft puff, and keep the elastics a little higher than you would on straight hair. Curls sit up better when they aren’t dragged down low.
The style is especially useful on days when she’s going to move a lot. Running, climbing, leaning back in the car seat — the puffs hold their own. And because the sections are smaller, they’re easier to refresh if one side gets fuzzy before the other.
If the hair is dense, make the puffs slightly smaller and let the curls bloom outward. If the hair is finer, keep the sections a touch looser so the puffs don’t look flat against the scalp.
3. Side-Part Twist and Clip-Back
A deep side part changes everything. It makes medium-length curls look intentional even when the rest of the style is barely five minutes of work. Take a front section on each side, twist it back along the hairline, and clip it behind the ear with a smooth snap clip or barrette.
This style is for the child who wants her curls down but cannot stand hair brushing her cheeks. It keeps the front calm without taking away the movement in the back. That’s the real win.
A tiny detail matters here: place the clip where the twist finishes, not where you first started it. If the clip is too close to the forehead, it tends to slide. If it’s tucked a little farther back, the twist holds better and looks neater.
4. Bubble Ponytail on Curly Hair
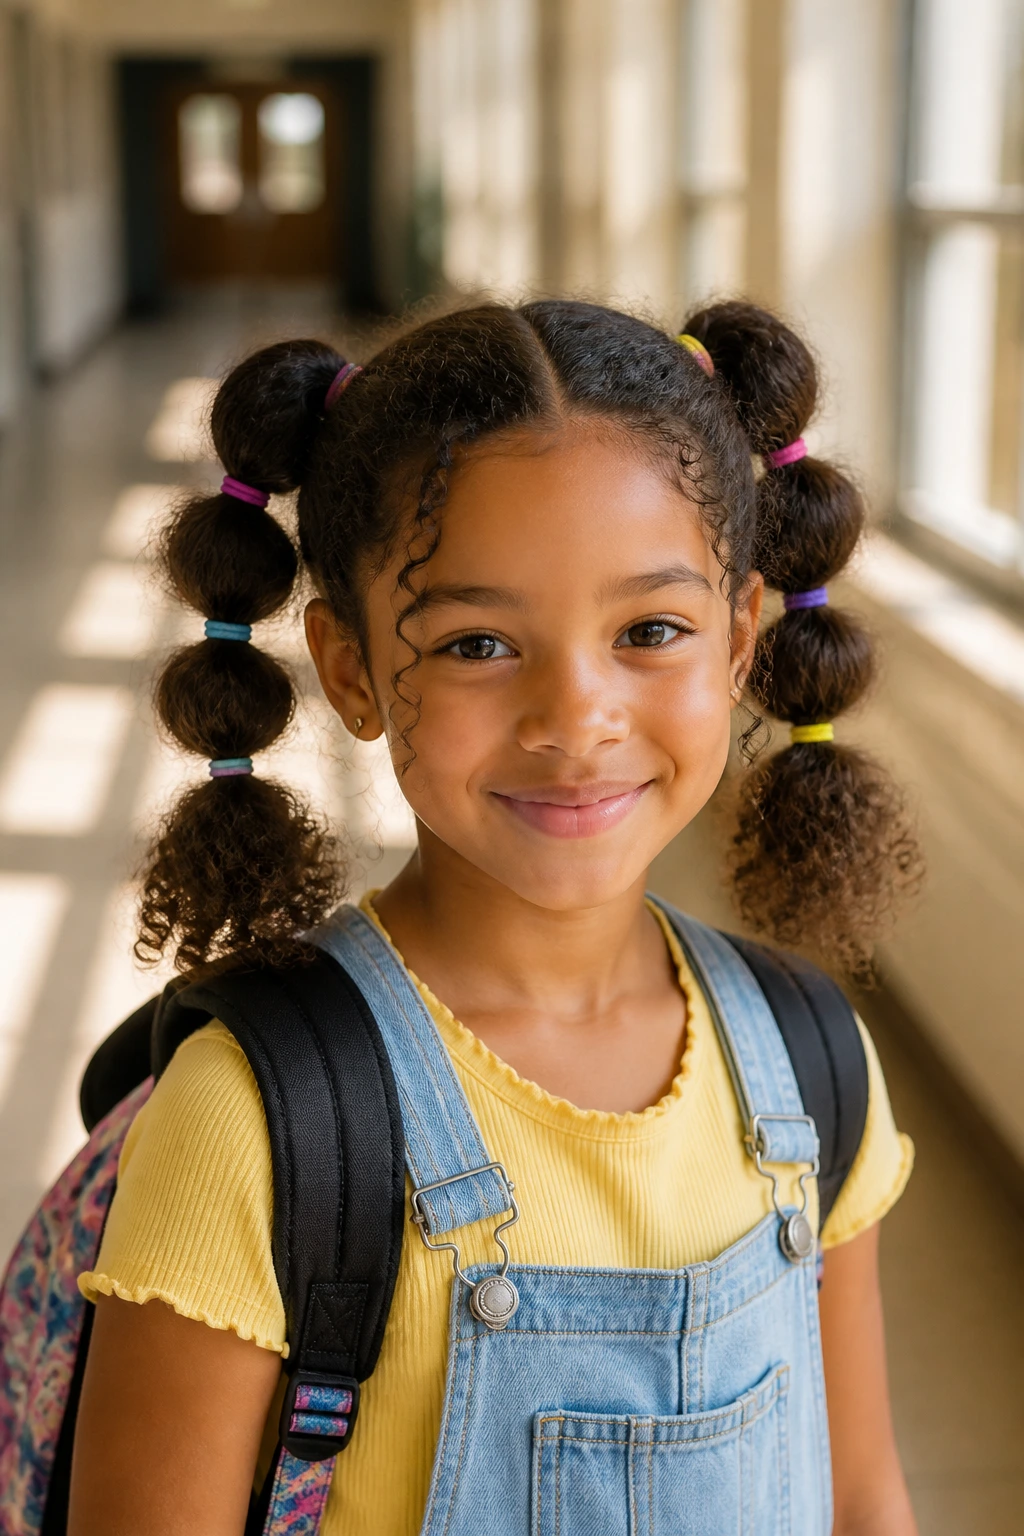
Bubble ponytails look fancier than they are. That’s part of why they work so well. Make one ponytail, usually mid-height on the head, then add small elastics every 1½ to 2 inches down the length. Gently puff each section outward between the ties so the bubbles look round.
Medium-length curls love this style because the texture fills out each bubble. You do not need long hair for this to look good. In fact, shoulder-length curls often give the bubbles a nicer shape because the ends don’t drag everything downward.
Use clear elastics or slim colored bands. Thick rubbery bands can catch curls when you take the style out, and nobody wants that mess before bedtime.
5. Curly Space Buns
Space buns are playful without being fussy, especially on thick curls. Split the hair into two halves, then twist or wrap each side into a bun high on the head. On medium-length hair, the ends may peek out a little. That’s fine. It actually softens the look.
This style does well on days when she wants something bold. It stays put for dance class, birthday parties, or any day when “neat” needs a little personality. A few curls escaping around the hairline make it better, not worse.
If the hair is slippery, give the roots a little grip with a light mist of water and a dab of curl cream before twisting. Dry hair tends to unravel faster, and little buns like this need some cooperation.
6. Twisted Halo with Loose Ends
This one looks more detailed than it is. Take a front section from one side, twist it back along the hairline, pin it, then do the same on the other side so the two twists meet like a soft halo. Leave the back curls loose.
The halo shape is nice because it clears the forehead without flattening the rest of the hair. On medium-length curls, it creates a clean frame around the face and still lets the curl pattern do its thing down the back.
The best part? It works on hair that is a little uneven in length. Shorter front layers can hide inside the twists, and the curls behind them can stay loose and bouncy.
7. Side-Swept Clip-Back with a Barrette
Sometimes the answer is one good clip. That’s it. Make a side part, sweep the larger front section back, and hold it with a strong barrette or a pair of matching clips. The style is quick, polished, and mercifully low on effort.
It works especially well when the hair is already curly but a little fuzzy at the top. The clip gives the hair direction. The curls keep the look from going flat.
A larger clip usually holds better than a tiny decorative one. Tiny clips are cute, sure, but if they can’t stay shut through a playground slide, they’re not doing their job.
8. Four-Section Ponytail Tails
Split the hair into four sections: two in front, two in back. Tie each section into a small ponytail or puff. The result feels neat and playful at the same time, and it keeps medium-length curls from bunching too much in one place.
This is one of those styles that solves the “my hair is everywhere” problem without taking away all the volume. Each section stays light. Each ponytail has enough curl to look full. And if one section gets messy, you only fix one section, not the whole head.
If the parting is done cleanly, the style can look surprisingly sharp. Use a rat-tail comb and small elastics. Rushing the sections makes the whole thing look lopsided, and you can see that from across the room.
9. Mini Braids Across the Front
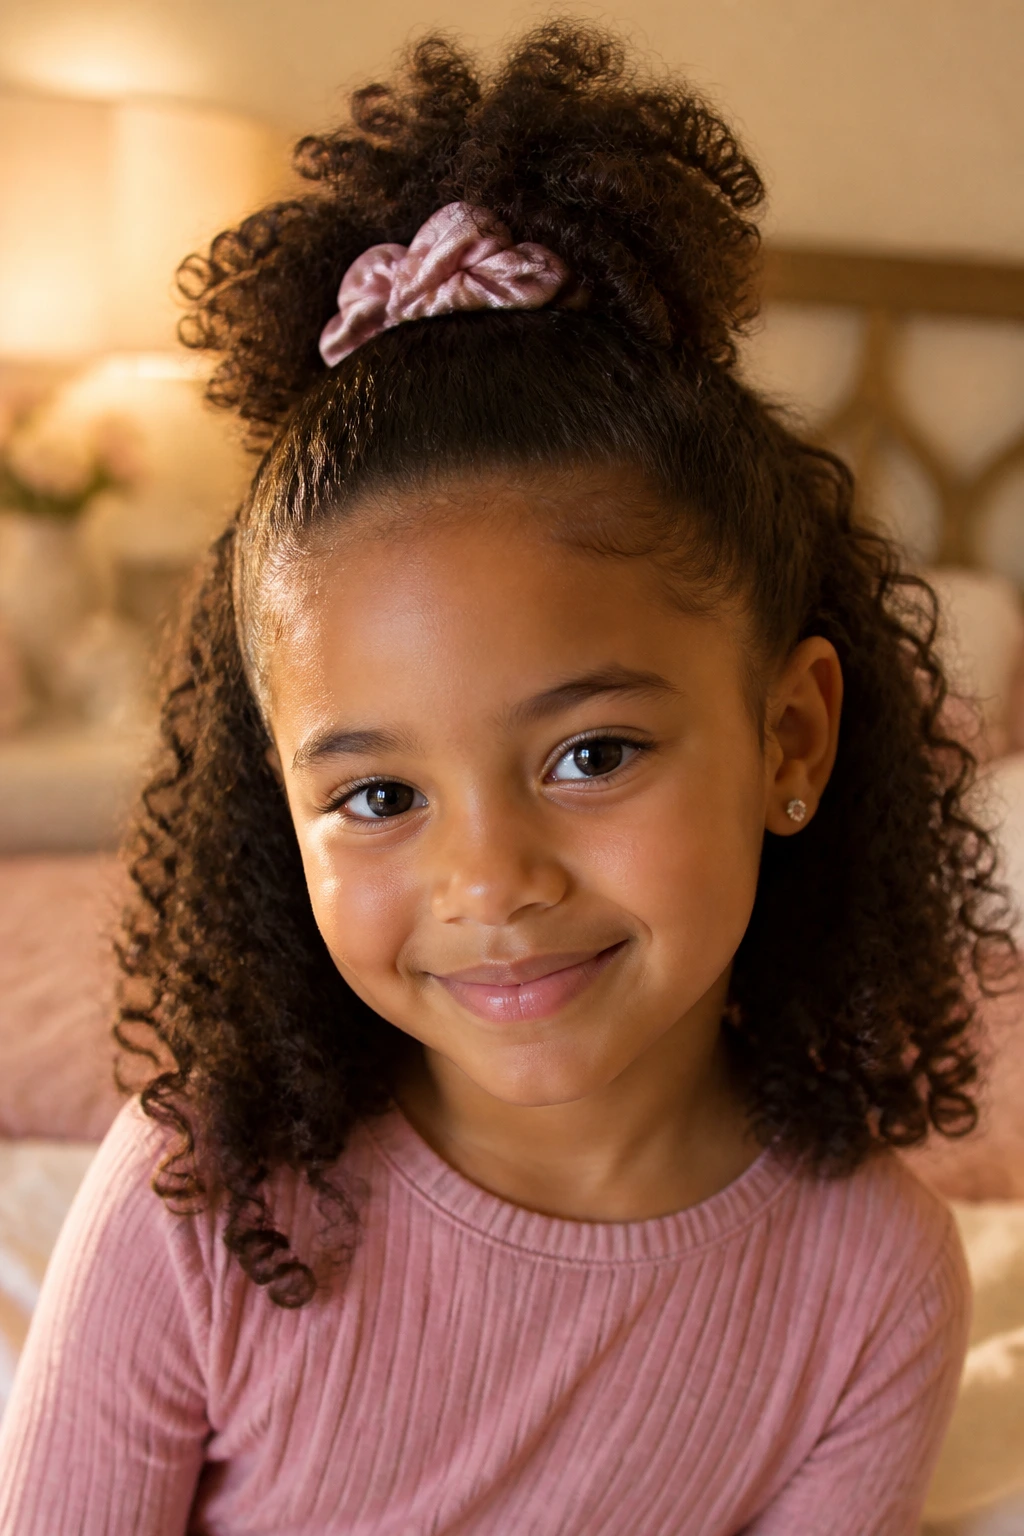
Mini braids across the front hairline are useful when the front curls have a habit of marching into her eyes. Braid one, two, or three small sections near the forehead or temples, then pin them back into the rest of the curls.
This works well on medium-length hair because the braids don’t need to be long. They only need enough length to stay anchored. The curls behind them can stay loose, which keeps the style from looking too serious.
Keep the braids narrow and the tension light. Tight little braids around the hairline may look neat at first, but they start to feel itchy after a while, especially on a child who moves her head a lot.
10. Pineapple Pony with a Satin Scarf
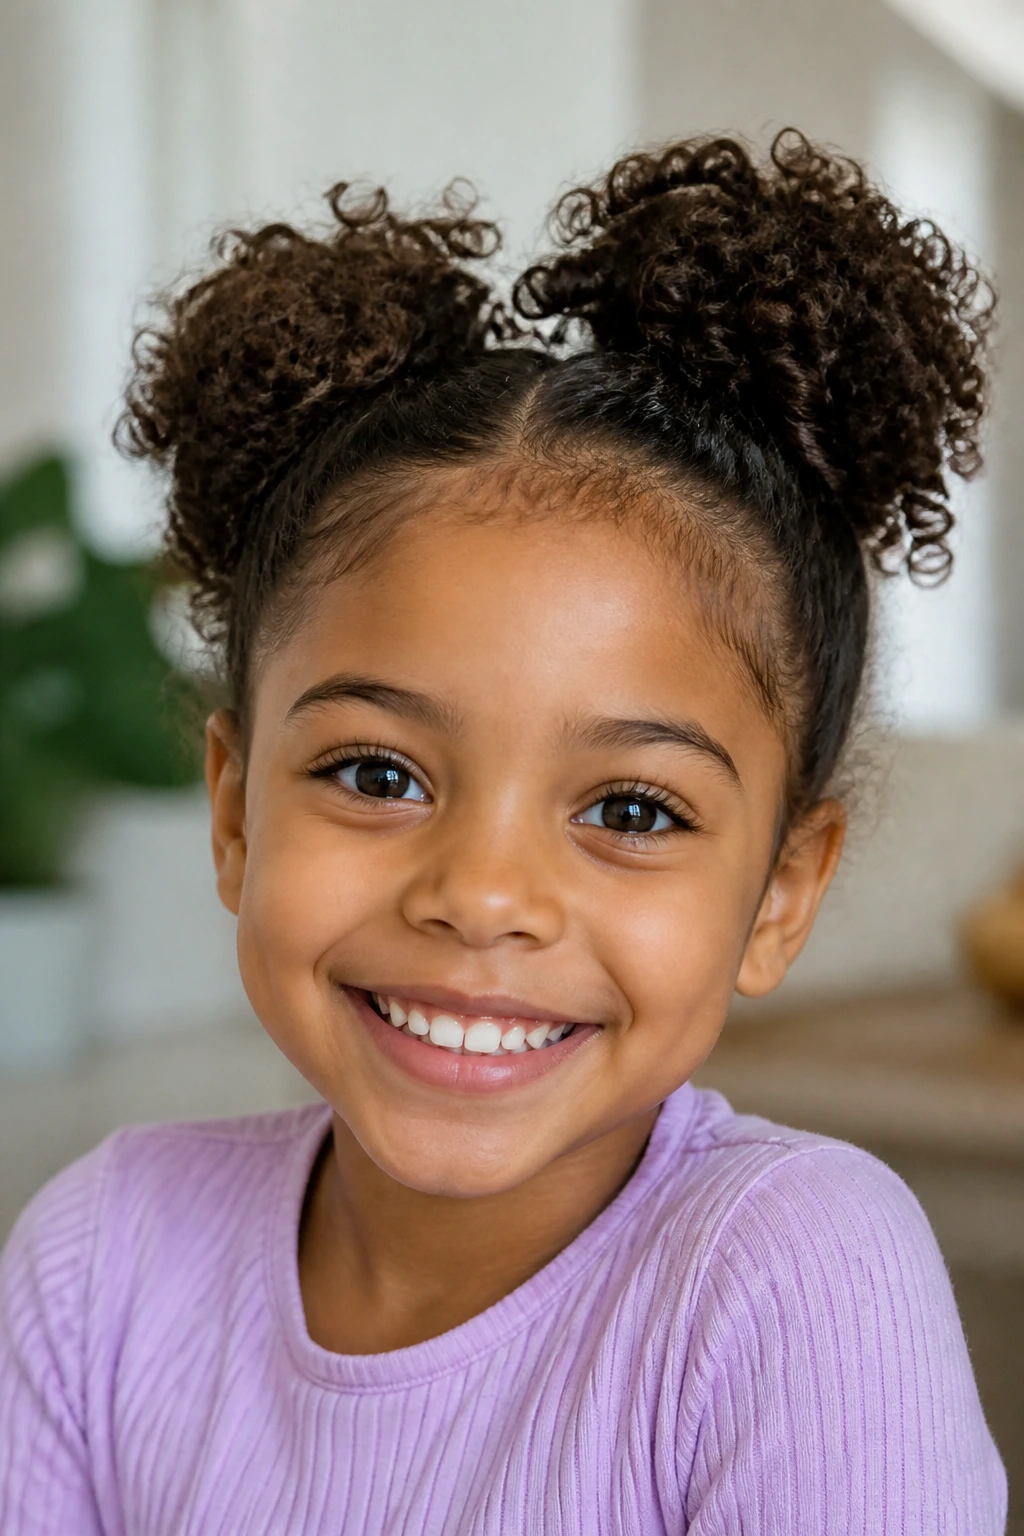
The pineapple pony is usually thought of as a nighttime shape, but it works in daytime too. Gather the curls high and loose on the crown, tie them with a satin scrunchie, then wrap a scarf or ribbon around the base. The curls should sit up and spill forward, not get squeezed flat.
This style is a smart way to keep curl shape intact. The height keeps the ends from getting crushed under jackets, backpack straps, or car-seat headrests. The scarf gives the style a finished look, and it helps smooth the edge around the crown.
Use satin or silk if you can. Cotton ribbon looks cute, but rough fabric can snag when the curls shift around.
11. Half-Up Top Knot
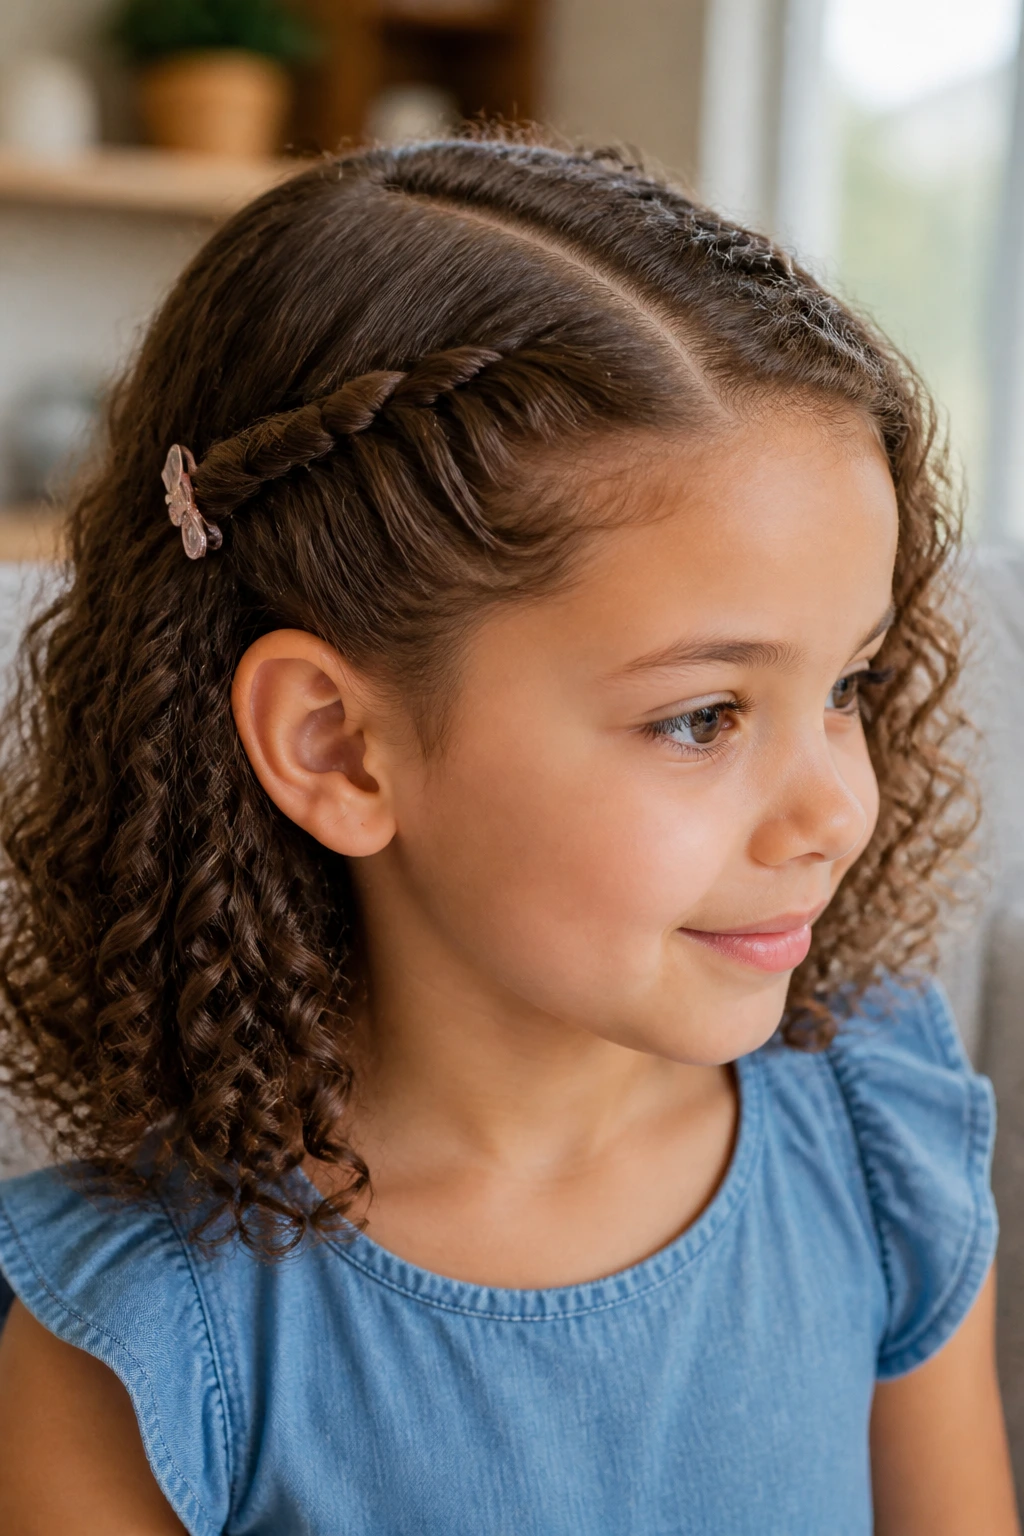
A half-up top knot gives medium-length curls a little lift without locking them away. Take the crown section, twist it into a knot, and leave the lower half loose. The knot should sit high enough to make the style feel playful, not so low that it collapses into the back of the head.
It’s a solid choice when the hair is on the thicker side and the top wants to puff out. The knot pulls that top weight upward. The loose curls underneath keep the whole style soft.
If her hair has layers, twist the section a little before wrapping it. That keeps shorter pieces from slipping out the sides by lunchtime.
12. Dutch Braided Mohawk
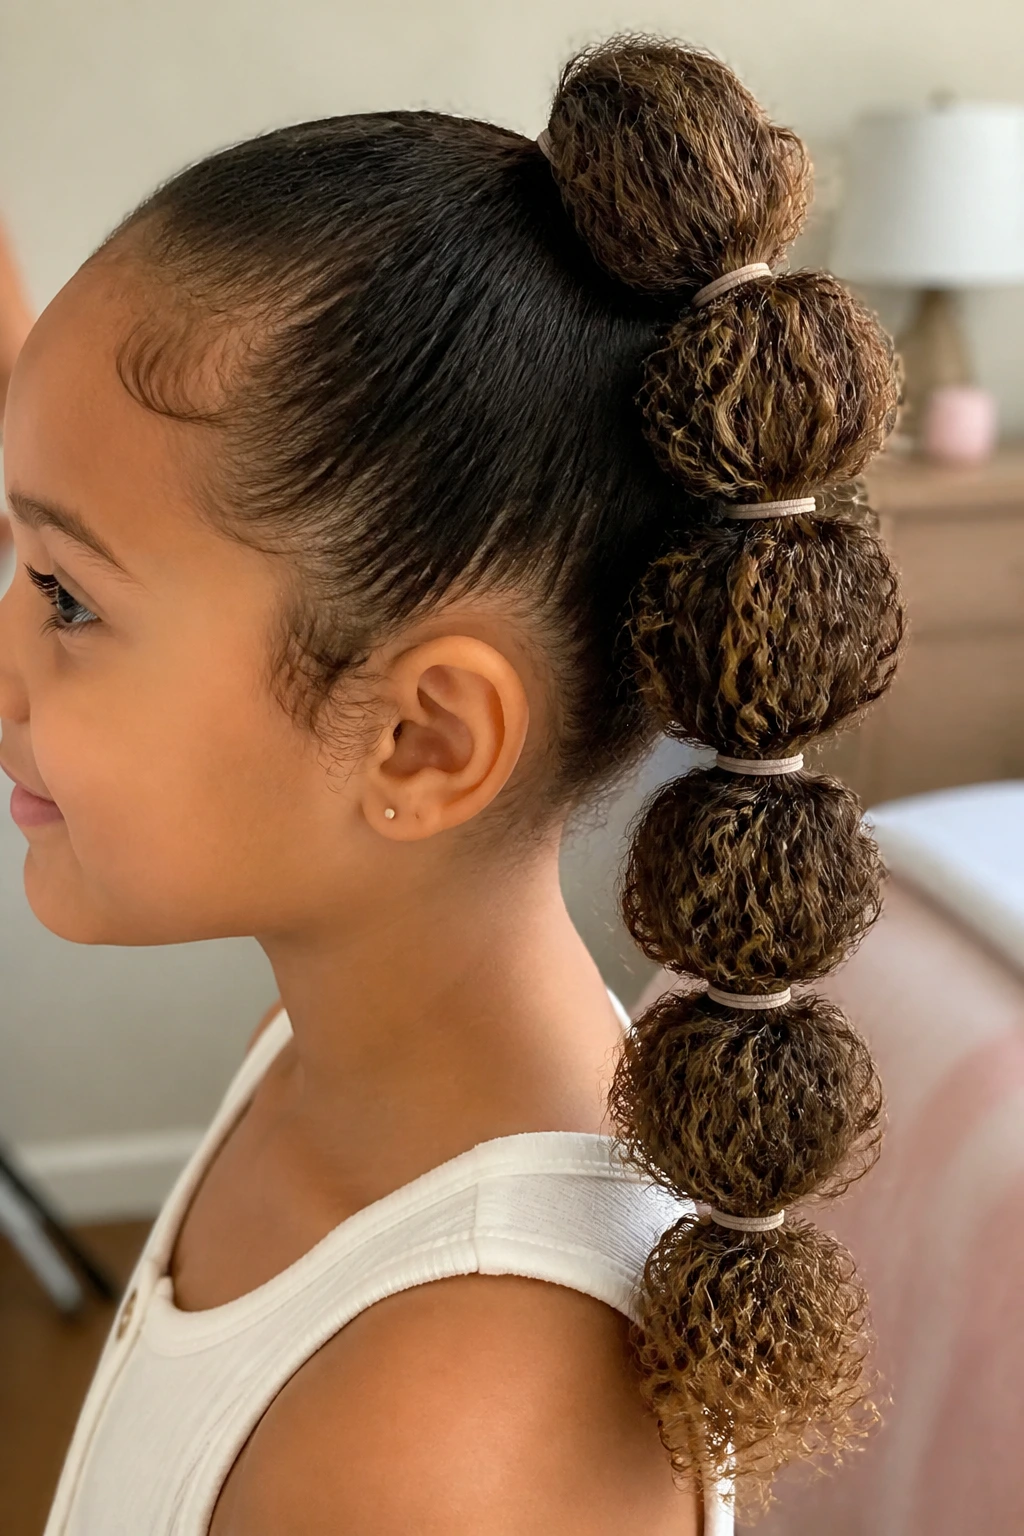
This is one of the more structured looks, and it has a nice edge to it without feeling too grown-up. Create one or two Dutch braids along the sides, or braid from the front toward the crown, leaving the middle section raised like a mohawk ridge.
The style gives medium-length curls a strong shape in the center of the head. That matters when the curls are dense and want to spread outward. The braids keep the sides in check. The middle section stays full and curly.
If the braiding part feels too fiddly, do a fake version with two twists instead. It won’t be the same, but it still creates that lifted center line and saves your patience.
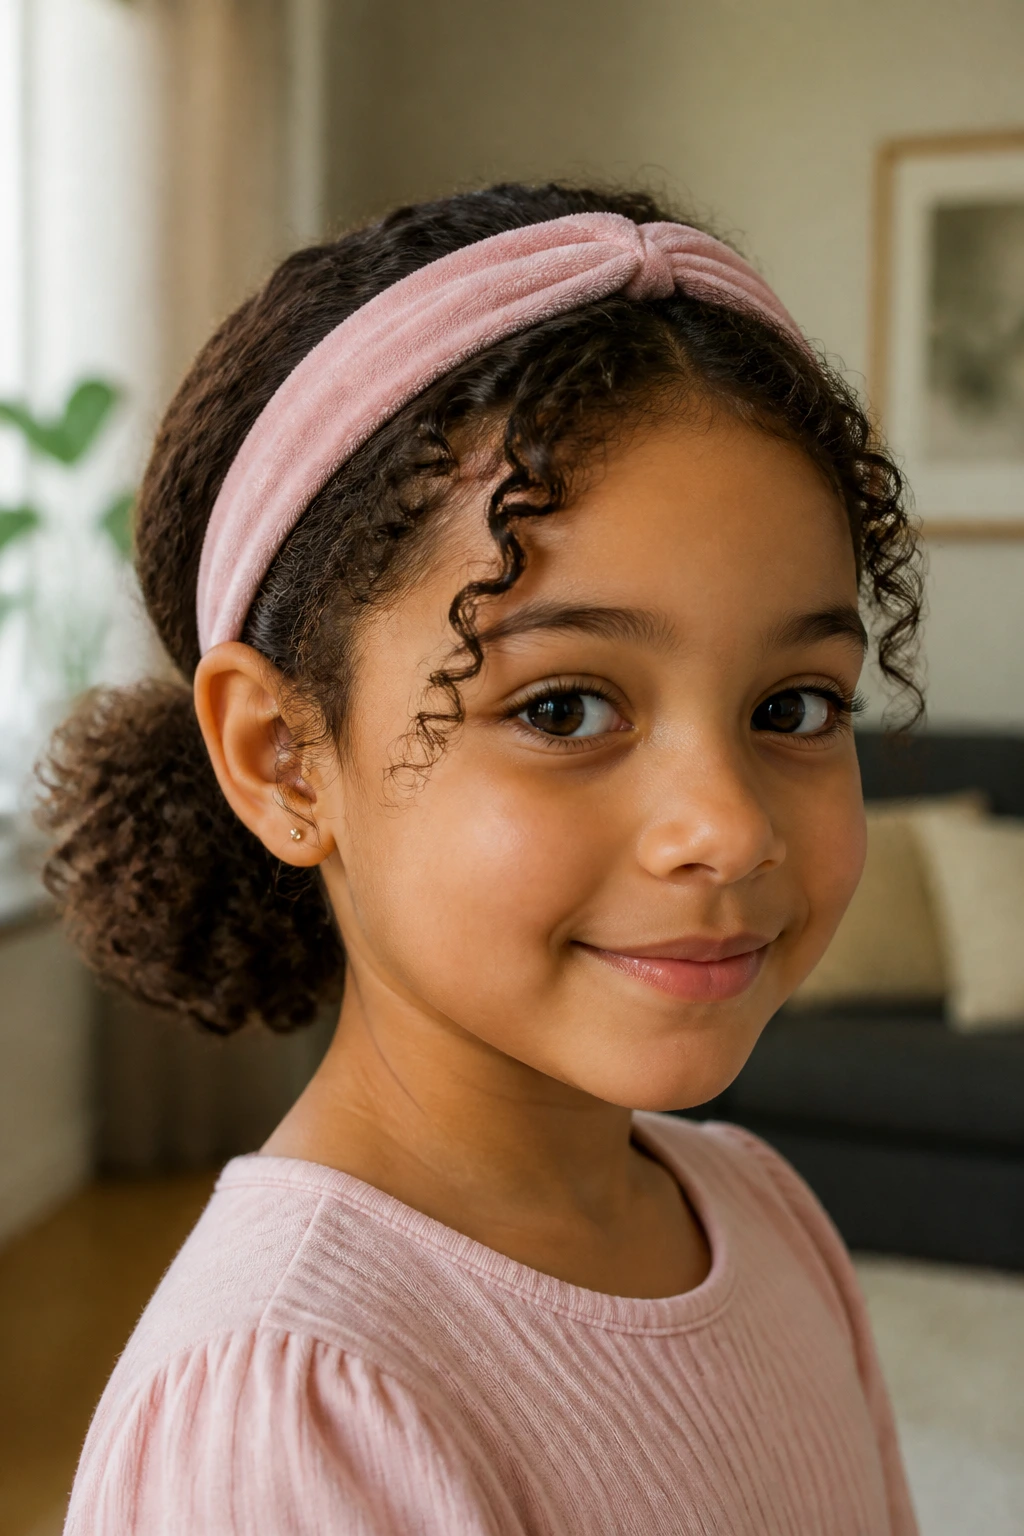
13. Low Puff with a Soft Headband
A low puff sits neatly at the nape and keeps the silhouette calm. Add a soft headband across the front, and the style suddenly feels finished without getting fussy. It’s gentle, simple, and especially useful for kids who don’t want hair in their faces but also don’t like tight high styles.
The low placement means less tug on the crown. That matters on days when she’s already tender from yesterday’s style or when her hairline needs a break. The headband handles the front; the puff handles the rest.
Pick a headband with fabric-covered edges. Bare plastic can press behind the ears and get uncomfortable fast.
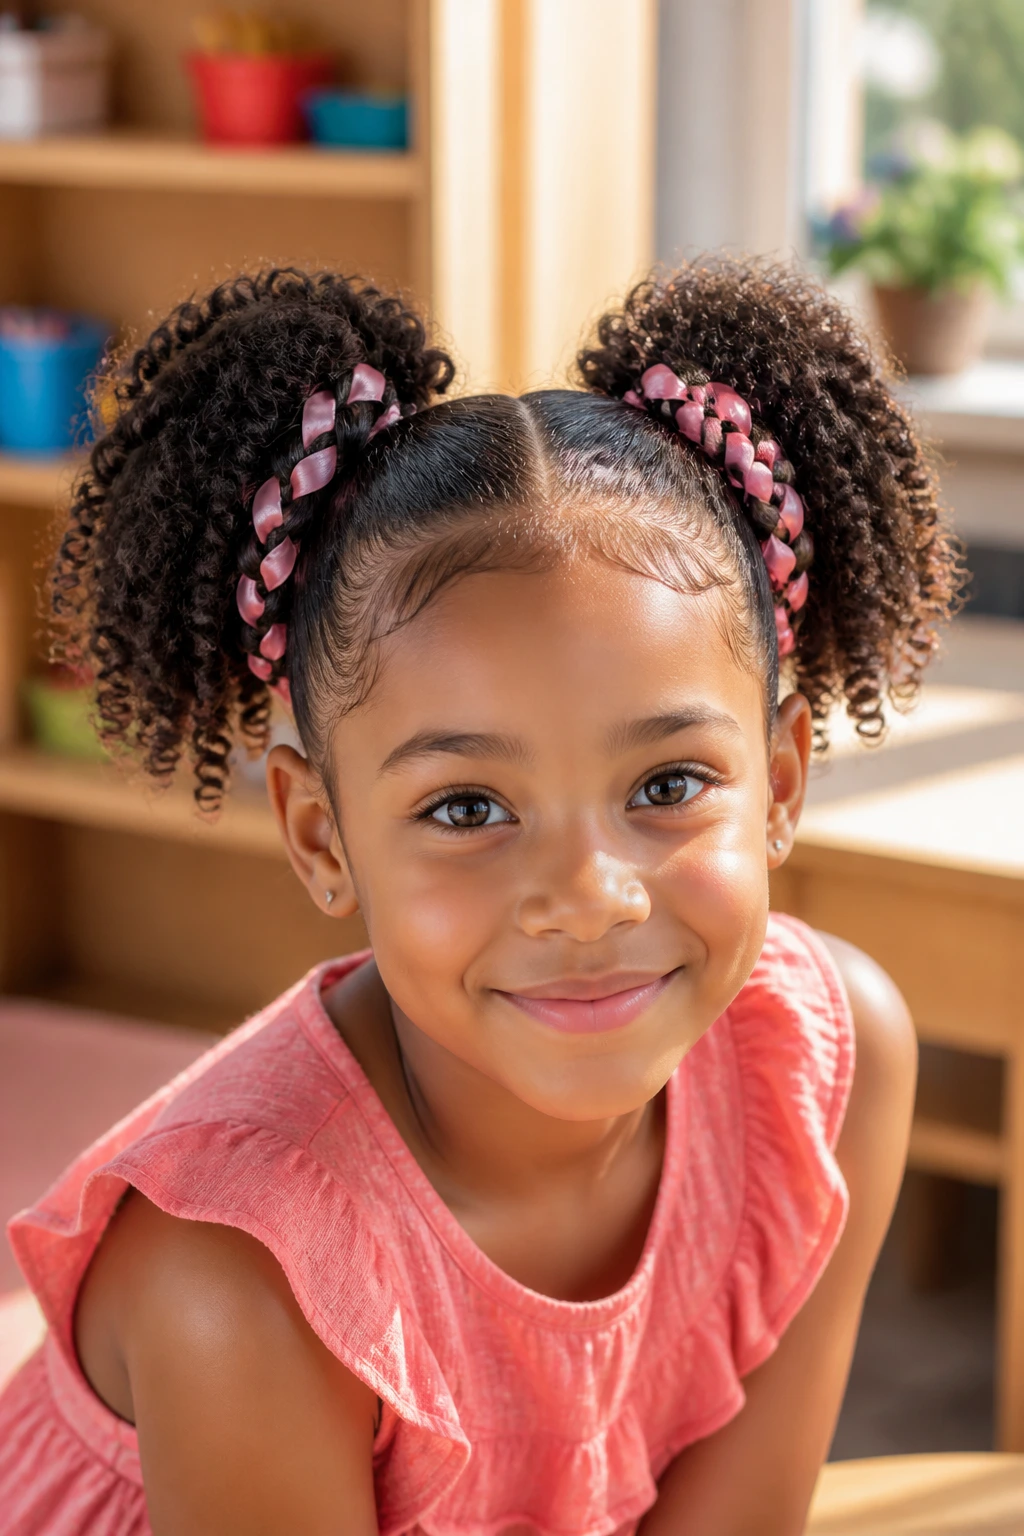
14. Ribbon-Woven Pigtail Puffs
Ribbon adds a lot without adding tension. Make two pigtail puffs, then thread satin ribbon through the elastic or weave it through the section before tying it off. The ribbon gives the style movement, color, and a little ceremony.
This is a nice option for birthdays, school performances, or any day when she wants her hair to feel more special than usual. Medium-length curls keep the pigtails full enough that the ribbon doesn’t overpower them.
Keep the ribbon smooth and narrow. Thick, scratchy ribbon tangles more than people expect, and once it snags in curls, it takes forever to undo.
15. Curly Bun Crown
A bun crown sounds complicated, but it’s really just a ring of small buns or looped sections placed around the head. On medium-length hair, you don’t need a full giant crown. You can make three or four mini buns around the top and sides, leaving some curls free if needed.
This style works when you want something decorative and stable. The hair is distributed all around the head instead of being pulled into one heavy spot. It also gives curls a chance to stay visible instead of disappearing into a single knot.
A little asymmetry is fine. Actually, it usually looks better than trying to make every bun identical. Symmetry sounds nice in theory; in real life, kids move.
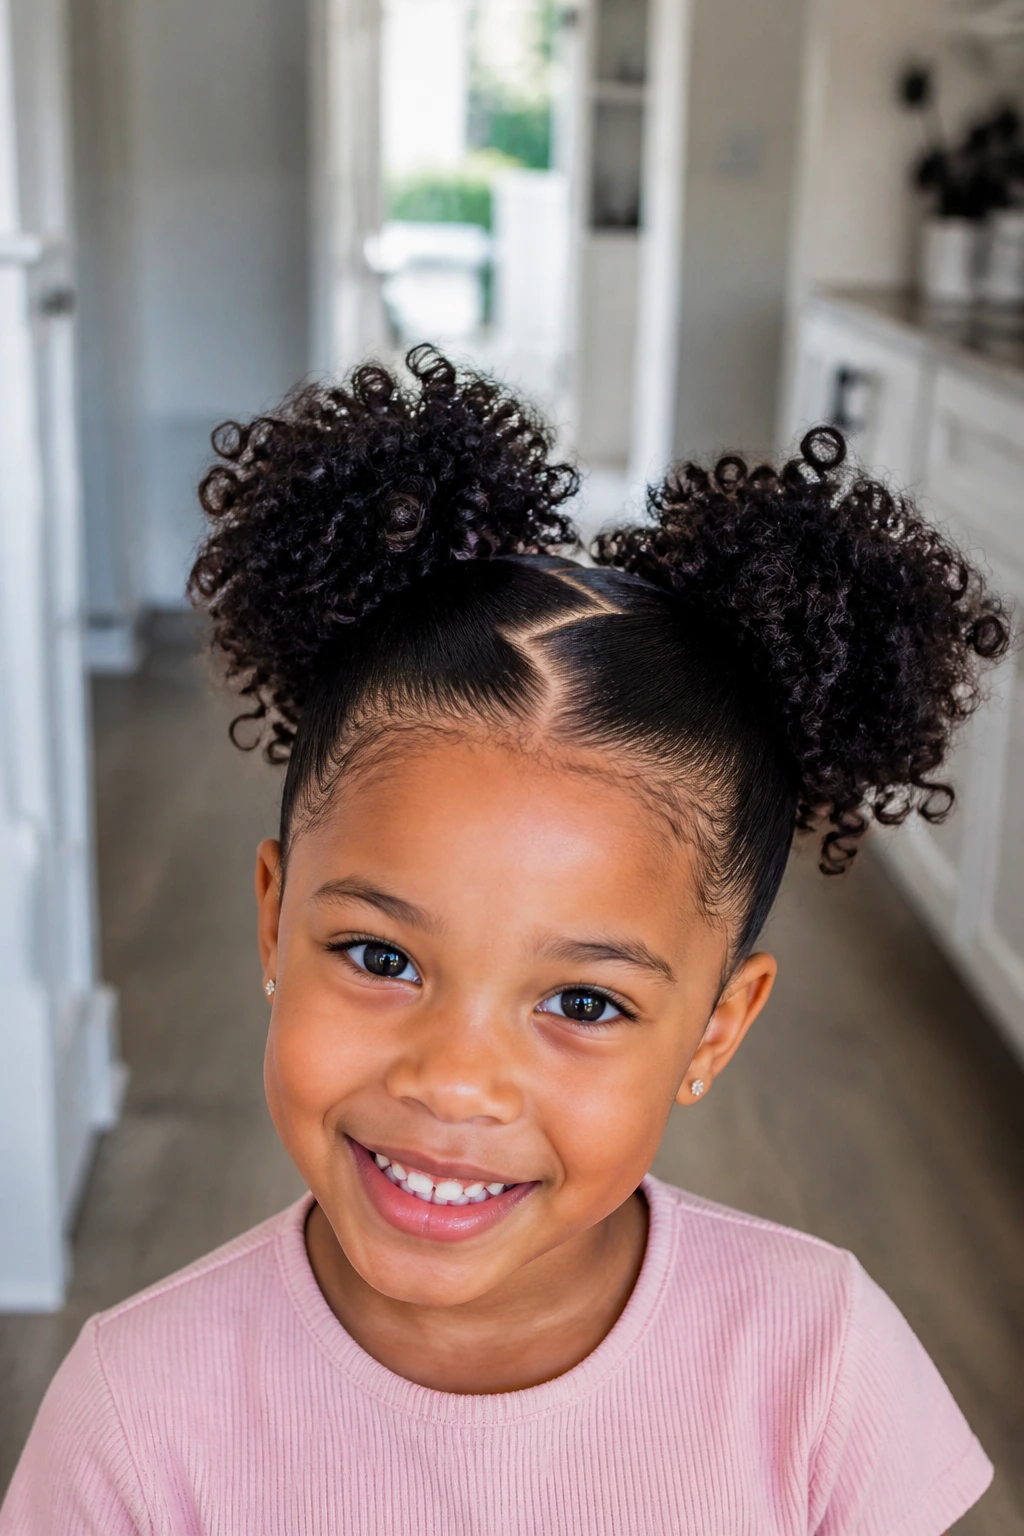
16. Zig-Zag Part Two-Puff Style
A zig-zag part makes even the simplest style look more deliberate. Use the tip of a rat-tail comb to carve the part, then split the hair into two puffs or ponytails. The line of the part does the visual work, so the puffs can stay easy.
This is a good style for a child who likes a little pattern in her hair but does not have the patience for extra braiding. The zig-zag part adds interest without using extra hands. That matters on mornings when no one is in the mood for elaborate styling.
The cleaner the part, the better the shape. Do it on lightly damp hair if you can, because curls separate more neatly before they dry and shrink.
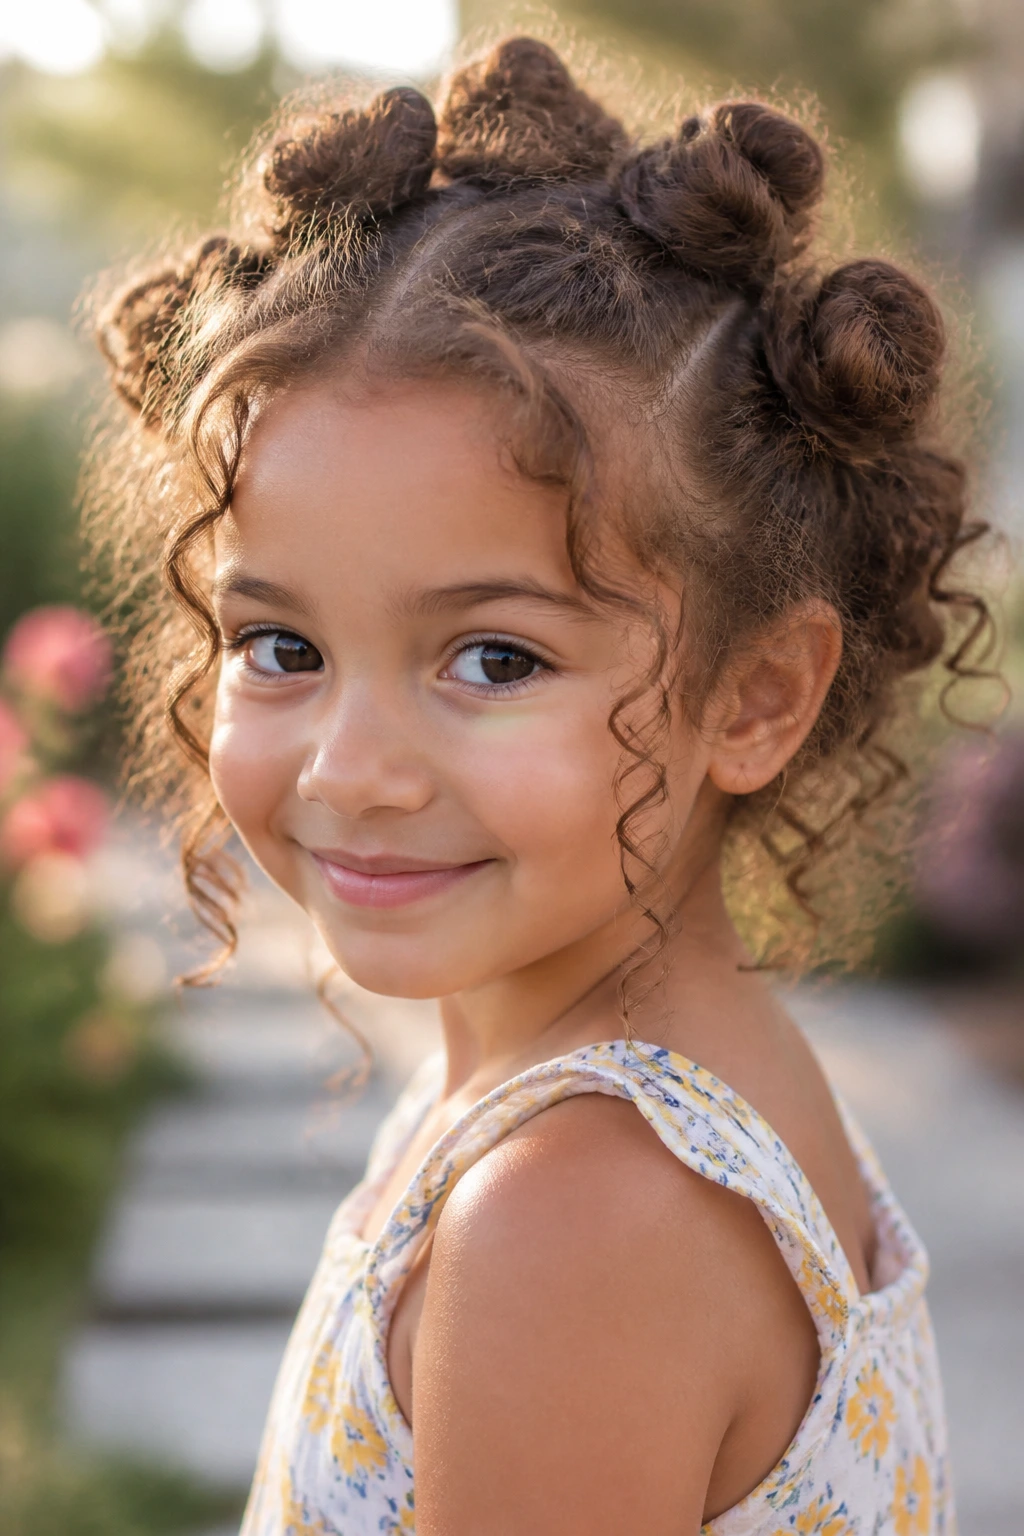
17. Side Bantu Knots with Loose Back
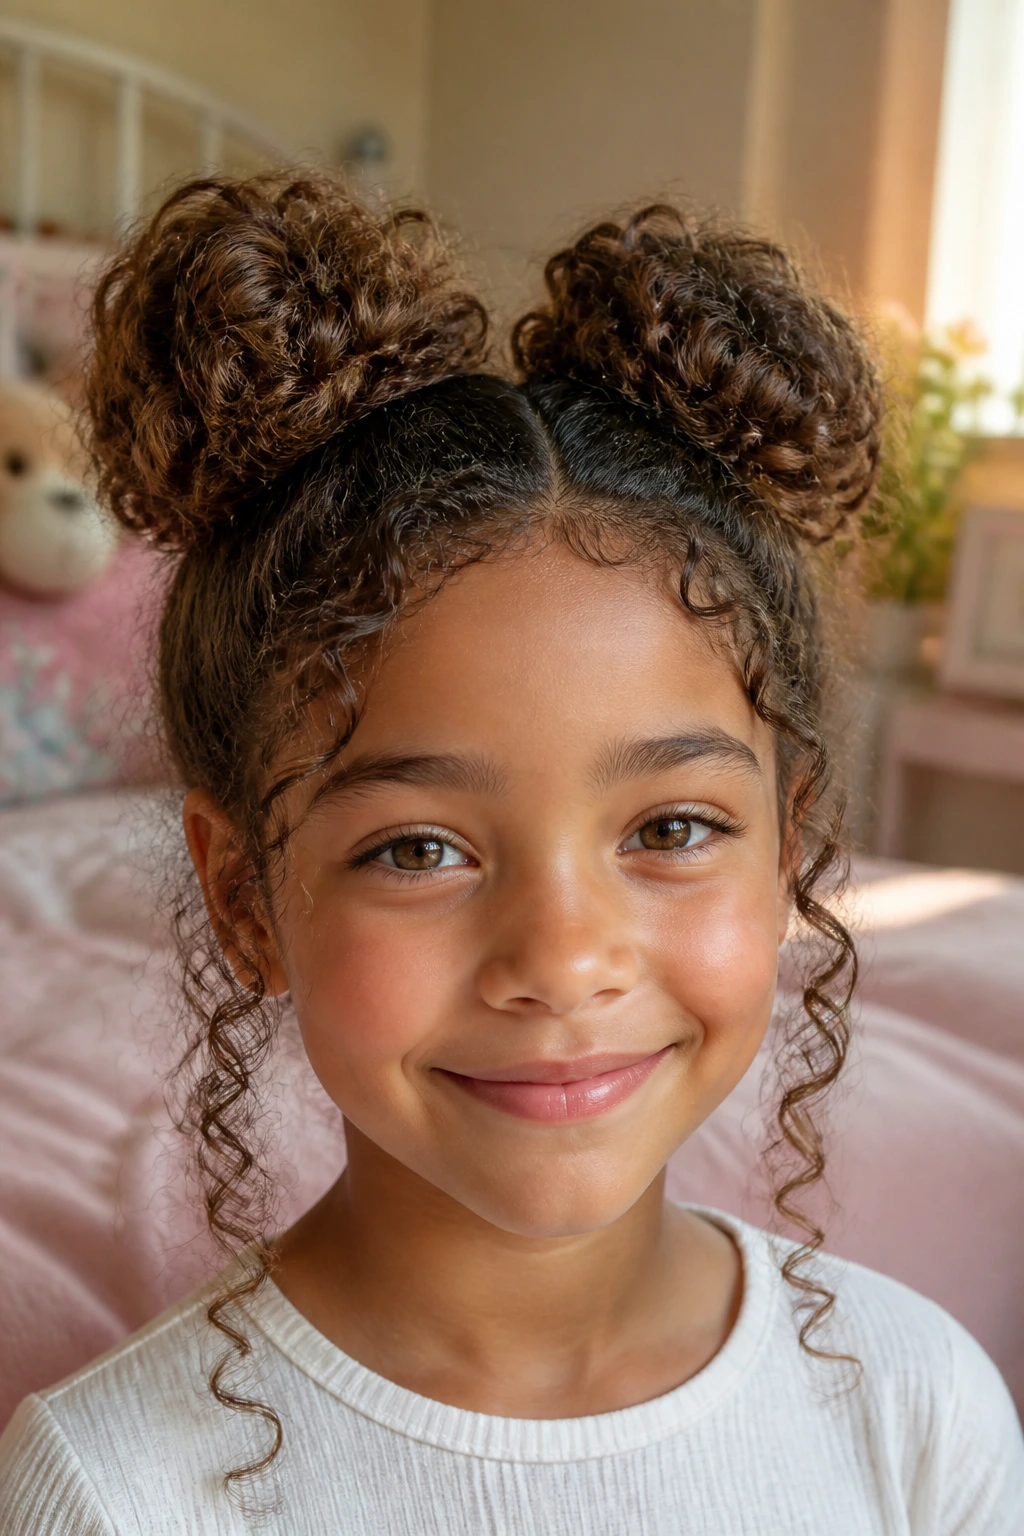
Bantu knots on one side and loose curls on the other give you contrast without needing a lot of sections. Make a few small knots near one temple or along one side of the head, then let the rest of the hair hang free.
The look is bold, but the scale stays kid-friendly. Medium-length hair is long enough to twist into the knots and short enough that they stay compact. That compact shape is useful because it keeps the style from looking heavy.
A moisturizing cream or leave-in helps the knots unwrap later without fighting. Dry, crunchy knots are a pain to take down, and no one enjoys that battle after bedtime.
18. Curly Faux Hawk
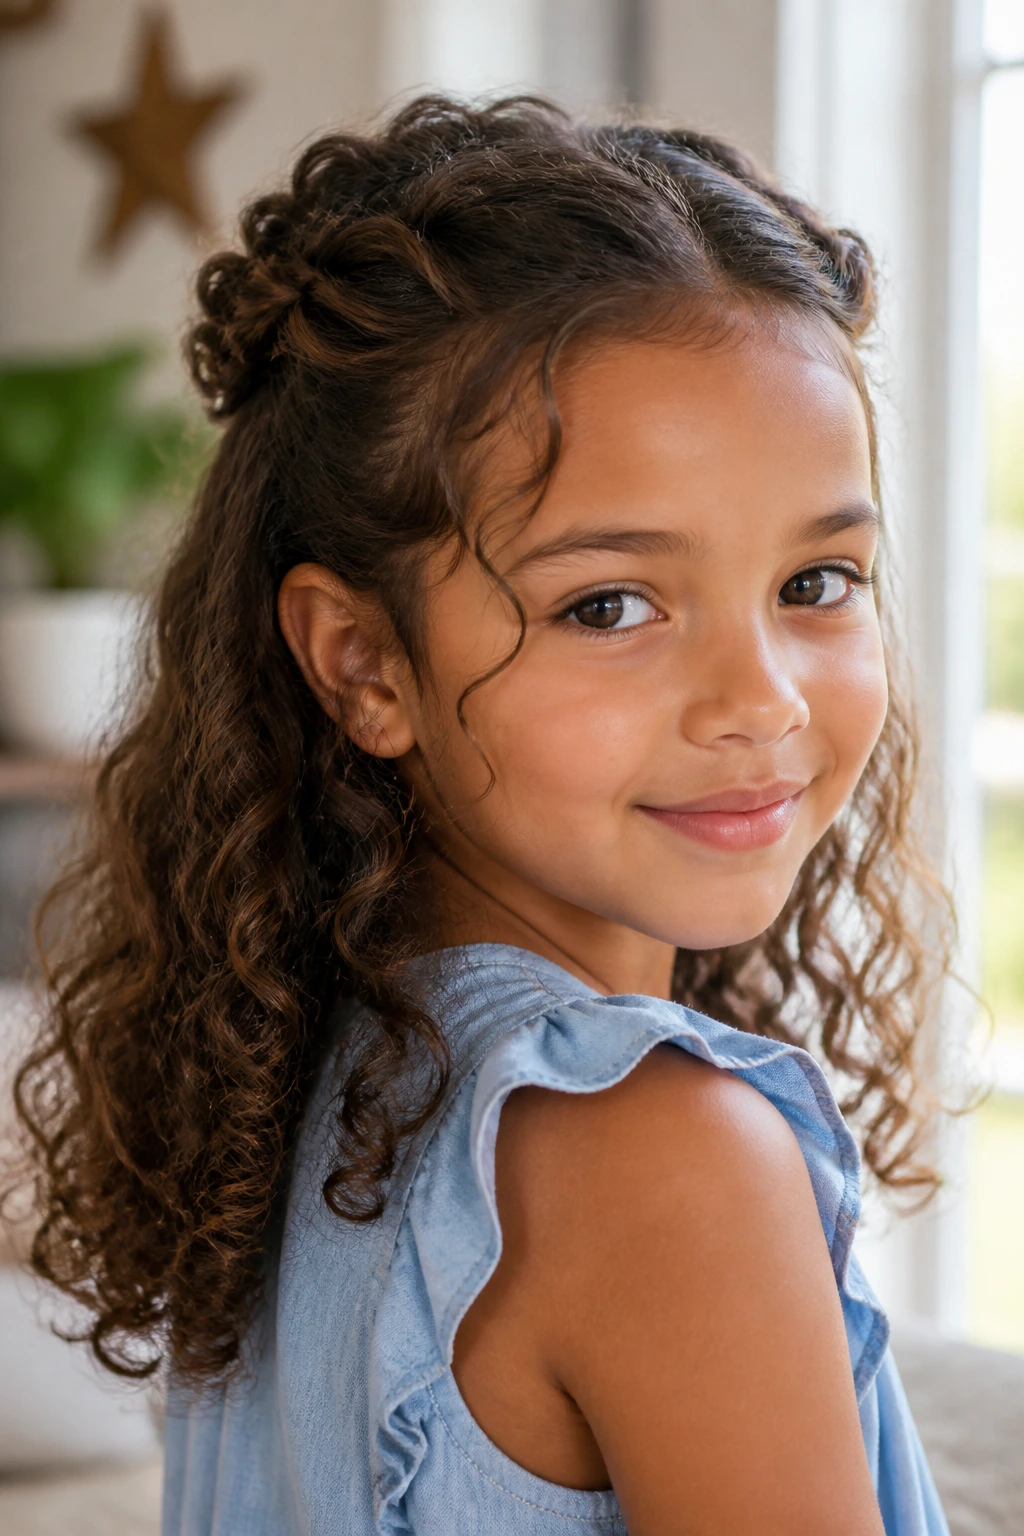
The faux hawk is for the child who likes a little attitude in her hair. Pin the sides back or smooth them with clips, then gather the center section into a line of puffs or one raised curly strip. The middle stays high, and the rest of the hair stays controlled.
This style is useful on thick curls because it manages volume instead of pretending it isn’t there. It also holds up well on active days. The shape is centered, so the style doesn’t drift to one side every time she moves.
A few pinned curls can make the whole thing look sharper. Just do not yank the sides flat. A faux hawk should look lifted, not tight.
19. Crown Braid with Down Curls
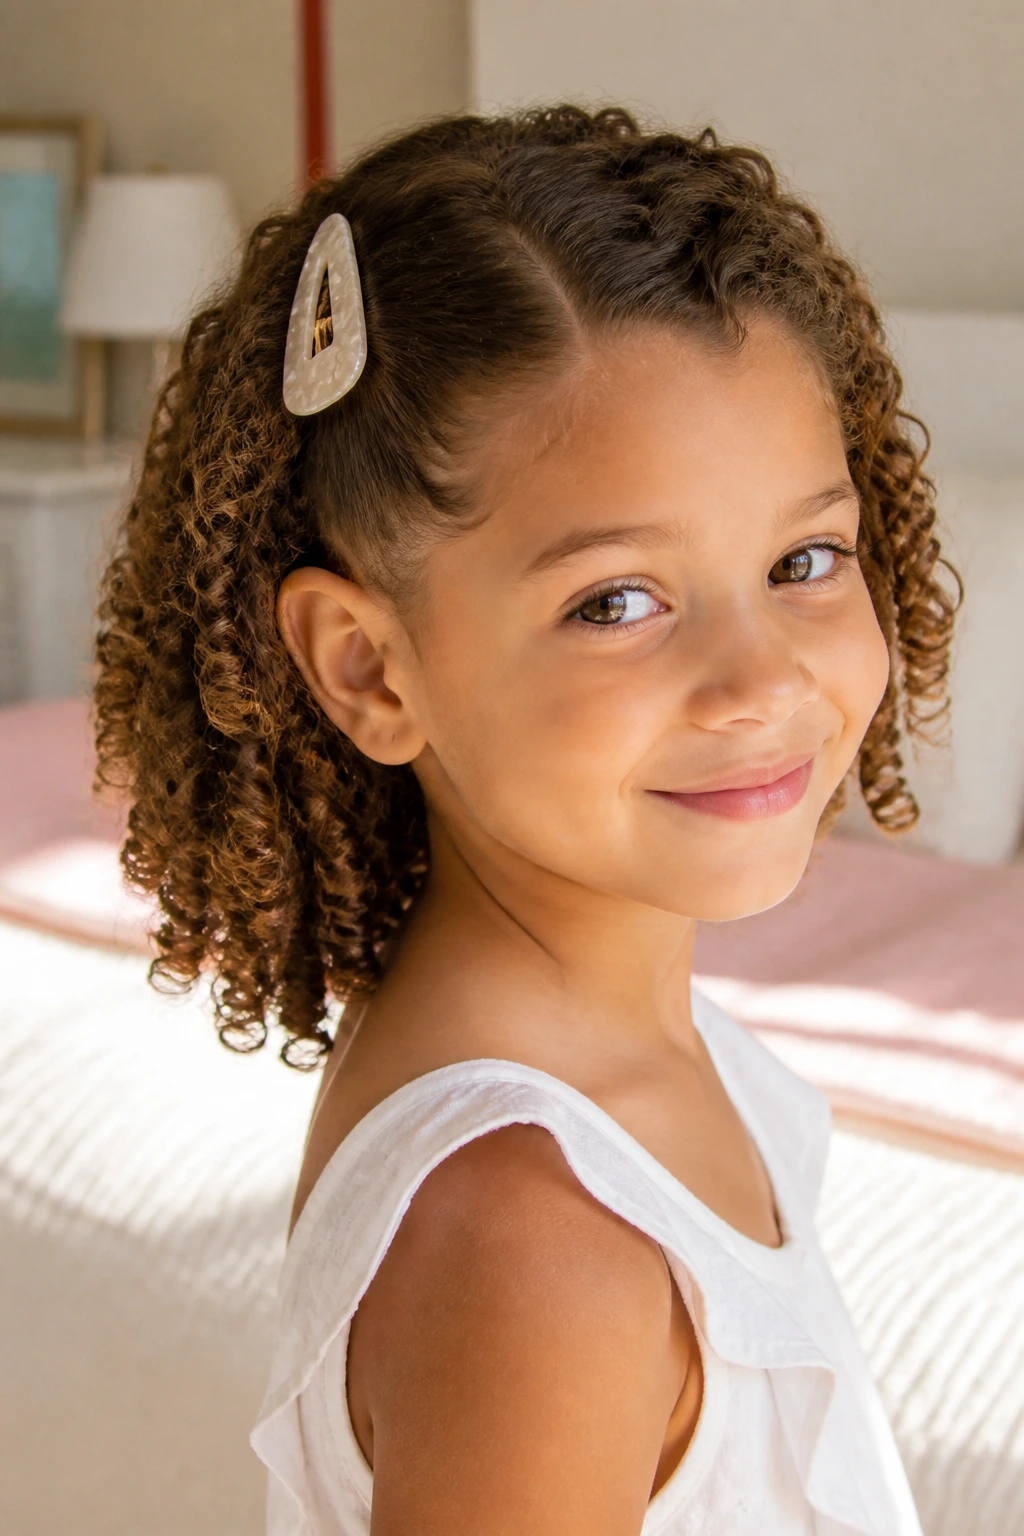
A crown braid across the front hairline is one of those styles that makes people think you spent more time than you did. Braid or twist the front section across the top of the head, then pin it under the curls at the other side. Leave the back loose.
Medium-length hair is ideal here because the braid can wrap without needing extra length to hang. The curls at the back keep the style soft, which keeps it from looking too formal.
If her hair layers out quickly, don’t force the braid too far around the head. Stop where the hair still behaves, then let pins do the rest.
20. Triple Puff Row with Beads
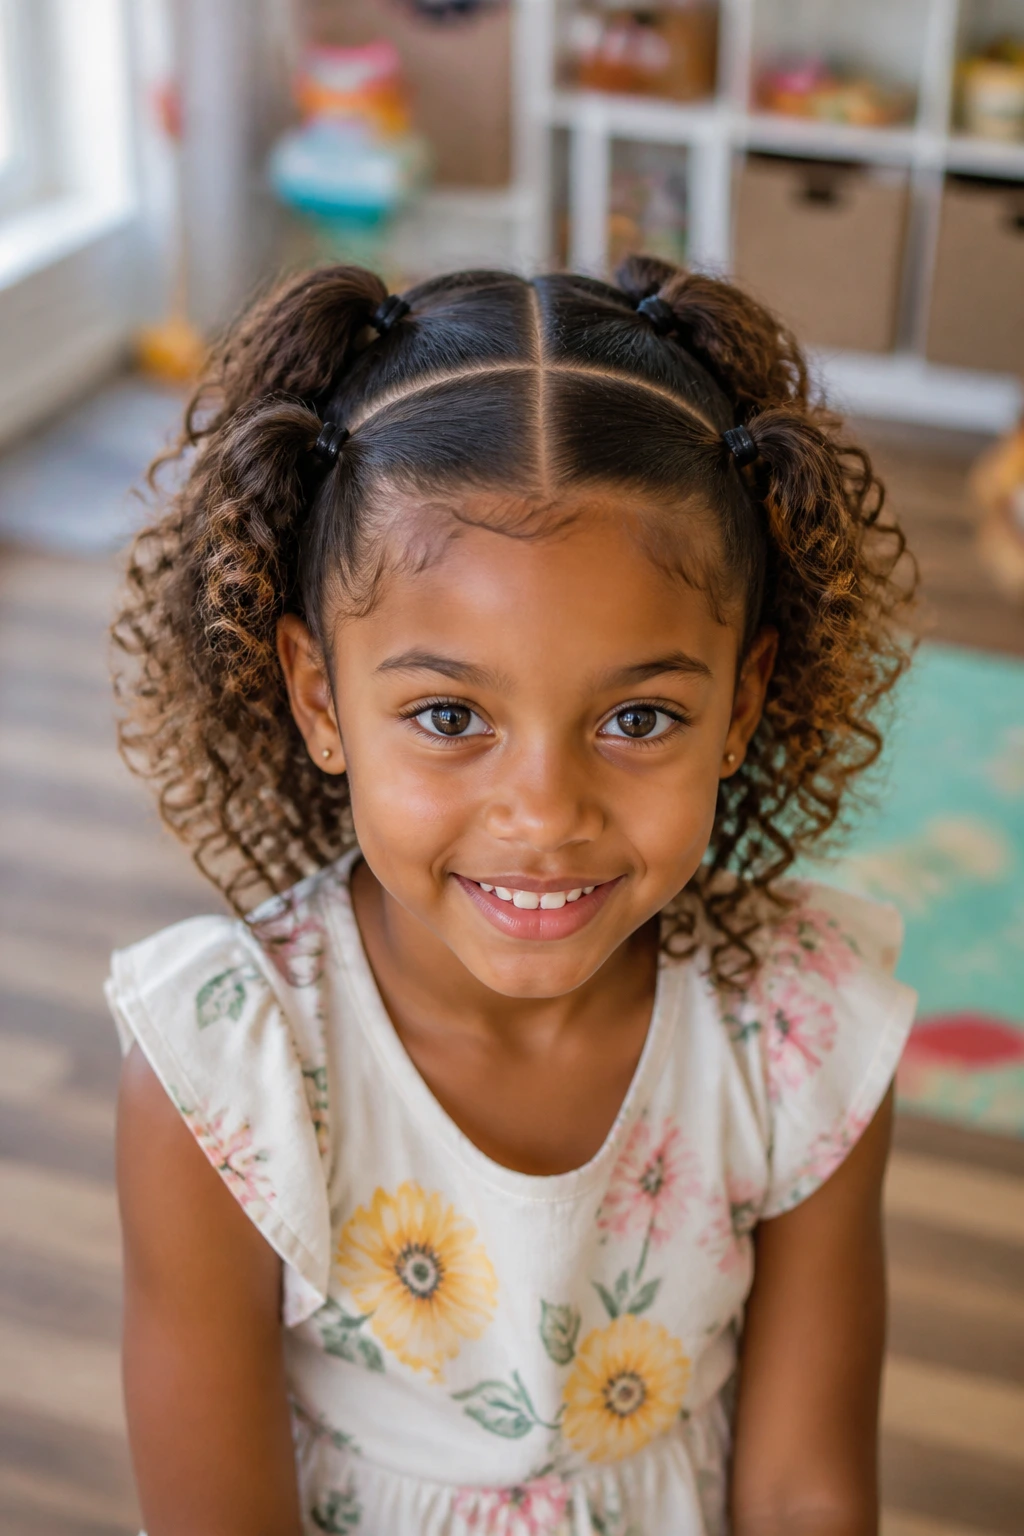
Three puffs in a row look playful and tidy at the same time. Part the hair into three horizontal sections or three center line sections, then secure each one into a puff. Add beads only if she likes them and only if the hair has enough strength to hold them comfortably.
This style is especially useful when the curls are dense and you want each section to sit clearly instead of blending into one big shape. The row keeps the hair off the face and gives the style a strong outline.
Lightweight beads are better than heavy ones. If the decorations pull the hair down, they stop being cute pretty quickly.
21. Twisted Side Bun with Free Curls
A twisted side bun gives the style one focal point and leaves the rest of the curls to do their own thing. Sweep one side back, twist it into a low bun near the ear or just above the neck, and leave the remaining curls loose or half-swept.
It’s a nice balance for medium-length hair because the bun keeps one side tidy while the free curls keep the whole look soft. It also works when she wants something dressier but not stiff. The asymmetry is part of the charm.
Finish with a barrette, a flower clip, or nothing at all if the bun is already sitting nicely. Sometimes the shape itself is enough.
Prep That Makes Every Style Cleaner
The parting gets easier when the hair is prepped well, and that’s where most parents save time without realizing it. Start with hair that has a little slip — not drenched, not bone dry. A spray bottle with water and a few drops of leave-in conditioner is enough for most medium-length curls. The goal is softer separation, not soaking wet strands that take forever to dry.
Detangle from the ends up. That sounds basic because it is basic, but people rush it and pay for it later when the section breaks apart mid-style. Use fingers first if the curls are knotty, then a wide-tooth comb if you need cleaner separation. If the hair is very dense, divide it into four or six chunks before you even think about styling.
The other trick is to start each style from the part line. A clean part makes puffs, braids, and twists look intentional even when the rest of the style is simple. Sloppy parts show fast on curly hair. Clean parts stay hidden under the texture, which is exactly what you want.
Essential Tools and Accessories
-
Spray bottle: A light mist softens curls enough to part and style without frizzing the whole head.
-
Wide-tooth comb: Good for detangling and for pulling parts through medium-length curls without snagging.
-
Rat-tail comb: The pointed handle makes clean parts, zig-zags, and section lines much easier.
-
Leave-in conditioner or curl cream: A small amount gives slip and keeps the finished style from looking dry.
-
Soft scrunchies: Satin or fabric-covered scrunchies hold puffs and ponies without the hard crease.
-
Snag-free elastics: Use these for pigtails, bubbles, and small sections; avoid the rough ones that cut into curls.
-
Snap clips and barrettes: Handy for side-swept sections, twists, and front pieces that need a fast hold.
-
Bobby pins: Best for halo twists, crown braids, and places where a clip would stick out too much.
-
Satin scarf or bonnet: Useful for bedtime, car rides, or protecting the style when the weather turns humid.
-
Microfiber towel or cotton T-shirt: Great for blotting excess water without roughing up the curl cuticle.
Which Styles Fit School Days, Parties, and Active Play
School mornings: Side-part clip-backs, low puffs, half-up styles, and two pigtail puffs make the shortest work of getting out the door. They stay tidy enough for class and do not need constant fixing.
Active play: Bubble ponytails, space buns, faux hawks, and four-section ponytails hold up well when she’s moving a lot. The sections stay separated, which helps the style survive running and climbing.
Special occasions: Ribbon pigtails, crown braids, bun crowns, and twisted side buns bring a little more shape without needing heat or heavy product. They look dressed up even when the texture stays soft and natural.
Tired mornings: One clip, one twist, one puff. That’s the zone for side-swept styles and half-up shapes. If the front is the problem, solve the front and leave the rest alone.
Humid or windy days: Low puffs, pinned twists, and styles that keep the hair closer to the head tend to behave better. The less loose surface area, the less the weather has to mess with.
How to Keep Curly Styles Fresh Through the Week
Curly styles age best when you refresh them at night instead of trying to rescue them after they’ve gone flat. A satin bonnet or pillowcase keeps the hair from rubbing rough while she sleeps. If she hates bonnets, a loose pineapple and a soft scarf around the edges usually works better than nothing.
In the morning, don’t start from zero. Mist the front pieces lightly, smooth with your fingers, and re-secure any section that has loosened. A puff that’s gone flat at the root can often be revived by loosening the elastic, lifting the section, and tying it a little higher. That tiny adjustment does more than people expect.
For styles with twists or braids, a dab of leave-in on the ends helps the curl pattern come back to life. For buns and puffs, re-fluff the root area with fingertips instead of a brush. Brushes can undo the shape fast. Fingers are gentler and usually enough.
If a style starts to feel rough, take it down. That isn’t failure. That’s just the hair asking for a reset.
Little Upgrades That Make the Style Feel Finished
Frizz control: Smooth a tiny amount of curl cream over the surface of the style after parting, not before. Too much product at the root can make the hair look greasy near the scalp.
Accessory swap: Match the accessory to the shape. A wide clip suits a side twist. A satin scrunchie suits a puff. A ribbon works when the style already has a soft, rounded outline.
Parting trick: If a middle part looks too strict, shift it a quarter-inch off center. That tiny move softens the whole style and usually flatters medium-length curls better.
Comfort check: Ask her to move her eyebrows, turn her head, and tilt back. If a clip pokes or a ponytail tugs when she moves, it will bother her later. Fix it before leaving the house.
Make-it-yours: Add one small detail, not five. A bow, one bead, one zig-zag part, one shiny clip. Too much decoration can fight the curls instead of framing them.
Common Mistakes That Make Curls Frizz Faster
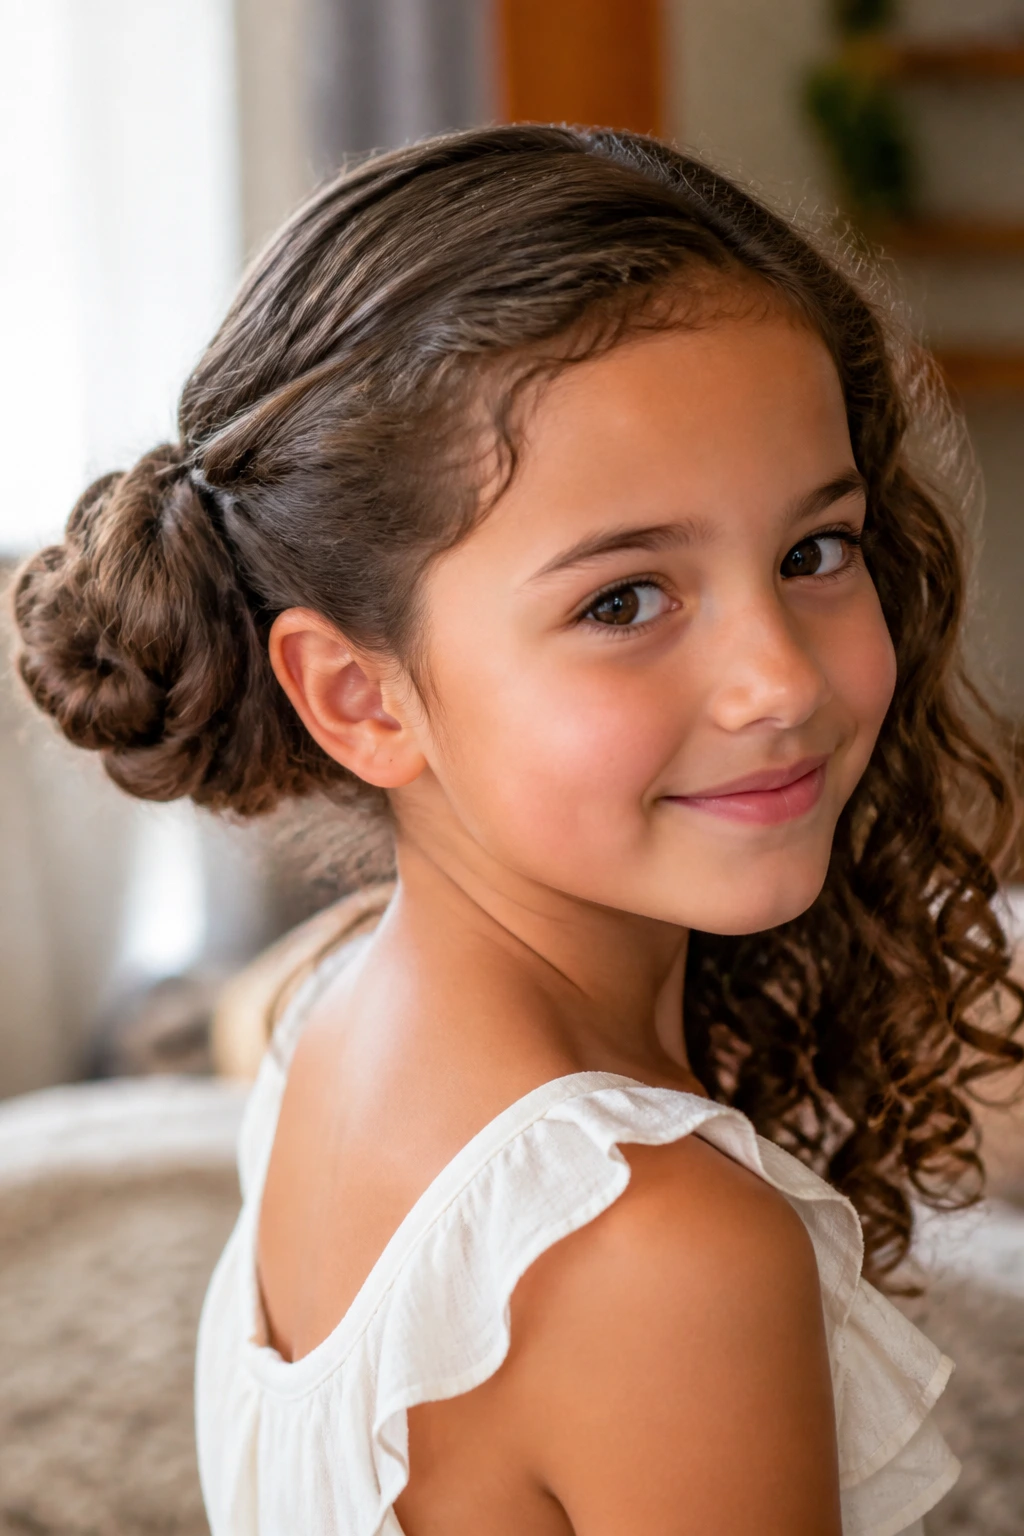
The biggest mistake is starting on hair that’s too dry. Dry curls catch on themselves, and the result is usually puffier sections, uneven parts, and a style that looks older than it is. A light mist fixes more than people think.
Tight tension is the second trap. If the hair is pulled hard at the hairline, the style may look neat for half an hour, then it starts to puff around the edges and feel uncomfortable. Use gentle tension and let the accessories do the work.
Another problem is using elastics that snag. Rough bands break curls when you take them out, and that damage shows up fast on medium-length hair. Soft elastics and fabric ties are safer.
Overloading the hair with product can backfire too. Heavy gel or thick cream near the roots can flatten the style and make the curls clump in odd places. Use a little, then stop. You can always add one more touch later.
Finally, don’t ignore the bedtime reset. A style that looks rough the next morning usually needed protection the night before. Satin matters. So does a quick refresh.
Variations and Adaptations for Different Curl Patterns and Schedules
The Five-Minute Reset: Choose side-swept clips, a half-up puff, or a low puff. These styles take very little time and can be redone quickly if the first attempt slips.
The Soft-Scalp Version: Use looser parts, fewer elastics, and more twists than braids. This is the safer route when her scalp is tender or she’s fresh out of a style that was worn too tightly.
The Extra-Texture Version: If the curls are tight and springy, lean into puffs, buns, and faux hawks. Small sections and high placement help the style stay visible instead of disappearing into shrinkage.
The Fine-Hair Version: Go smaller with the sections. Two tiny puffs, a narrow halo twist, or a side clip often looks fuller than one large style that collapses by noon.
The Party-Detail Version: Add ribbon, a colored barrette, or lightweight beads to one section only. One accent is enough. More than that can start to weigh the hair down.
Frequently Asked Questions About Curly Hairstyles for Little Girls and Medium-Length Hair
What is the easiest style to start with?
A half-up puff or a side-part clip-back is usually the easiest place to begin. Both need minimal sectioning, and both still look deliberate even if the curls are a little uneven.
Do these styles work on day-two curls?
Yes, and some of them work better on day-two curls because the hair has a little more grip. A light mist and a finger-fluff are usually enough to bring the curl shape back before you style it.
How do I keep the front pieces out of her eyes without making the style tight?
Twists, small braids, and soft clips solve that problem well. Pulling the hair back hard is not the answer; it usually creates more fuss around the hairline by the afternoon.
Can I use gel on my child’s curly hair?
You can, but use a light hand. A soft-hold gel on the surface of a style can tame frizz, while a heavy amount at the roots can leave the hair stiff and sticky.
What if her hair is too short for puffs?
Try mini puffs, clips, twists, or braided fronts instead. Medium-length hair still gives you enough room for sectioning, even if it’s not long enough to wrap into a full bun.
How long should a style stay in?
Most of these styles can last a day or two with proper nighttime care, but the scalp and the curl pattern should decide the schedule. If the roots feel tight or the curls start to look rough, take the style down.
Are beads safe for active kids?
They can be, as long as they’re lightweight and securely attached. Heavy beads or sharp-edged decorations can snag or pull, which turns a cute style into an annoying one.
Should I braid curly hair wet or dry?
Slightly damp is usually the sweet spot. Wet hair can take too long to dry inside a braid, while dry hair tends to frizz and fight the parting.
Soft Styles That Hold Their Shape
The best curly styles for little girls with medium-length hair are the ones that keep the curl pattern visible and the hairline comfortable. That’s the real test. Not whether the style looks fancy for five minutes. Whether it still looks good after school pickup, snack time, and whatever happened in between.
A few clips, a soft scrunchie, and a clean part can do more than a whole drawer of complicated accessories. Keep the tension gentle, keep the sections neat, and let the curls stay curls. That’s usually where the prettiest styles happen anyway.
