



Bun hairstyles for little girls have one job: survive the day without turning into a lopsided knot by lunchtime. That sounds simple until you’ve dealt with a child who leans back in the car seat, rubs her head on a sweatshirt, and comes home with one side perfect and the other side puffed out like a dandelion. A good bun has to do more than look neat at the mirror. It has to stay comfortable, stay put, and still look like you meant it.
The nice part is that buns do not need to be stiff or fussy to work. A clean little ballet bun, a pair of space buns, a braided crown, a low ribbon bun — each one solves a different problem. Some keep hair off the face during school. Some make morning detangling easier because the base is simple and secure. Some are there because a child wants bows, shine, and a little drama. Fair enough.
The real trick is matching the bun to the hair and the day. Fine hair needs grip in different places than thick curls. Tender scalps hate yanking around the hairline. Shorter hair often behaves better in two buns than one big one. Once you start thinking that way, bun hairstyles for little girls stop being a guessing game and start becoming a set of tools.
Why These Bun Styles Earn Their Keep
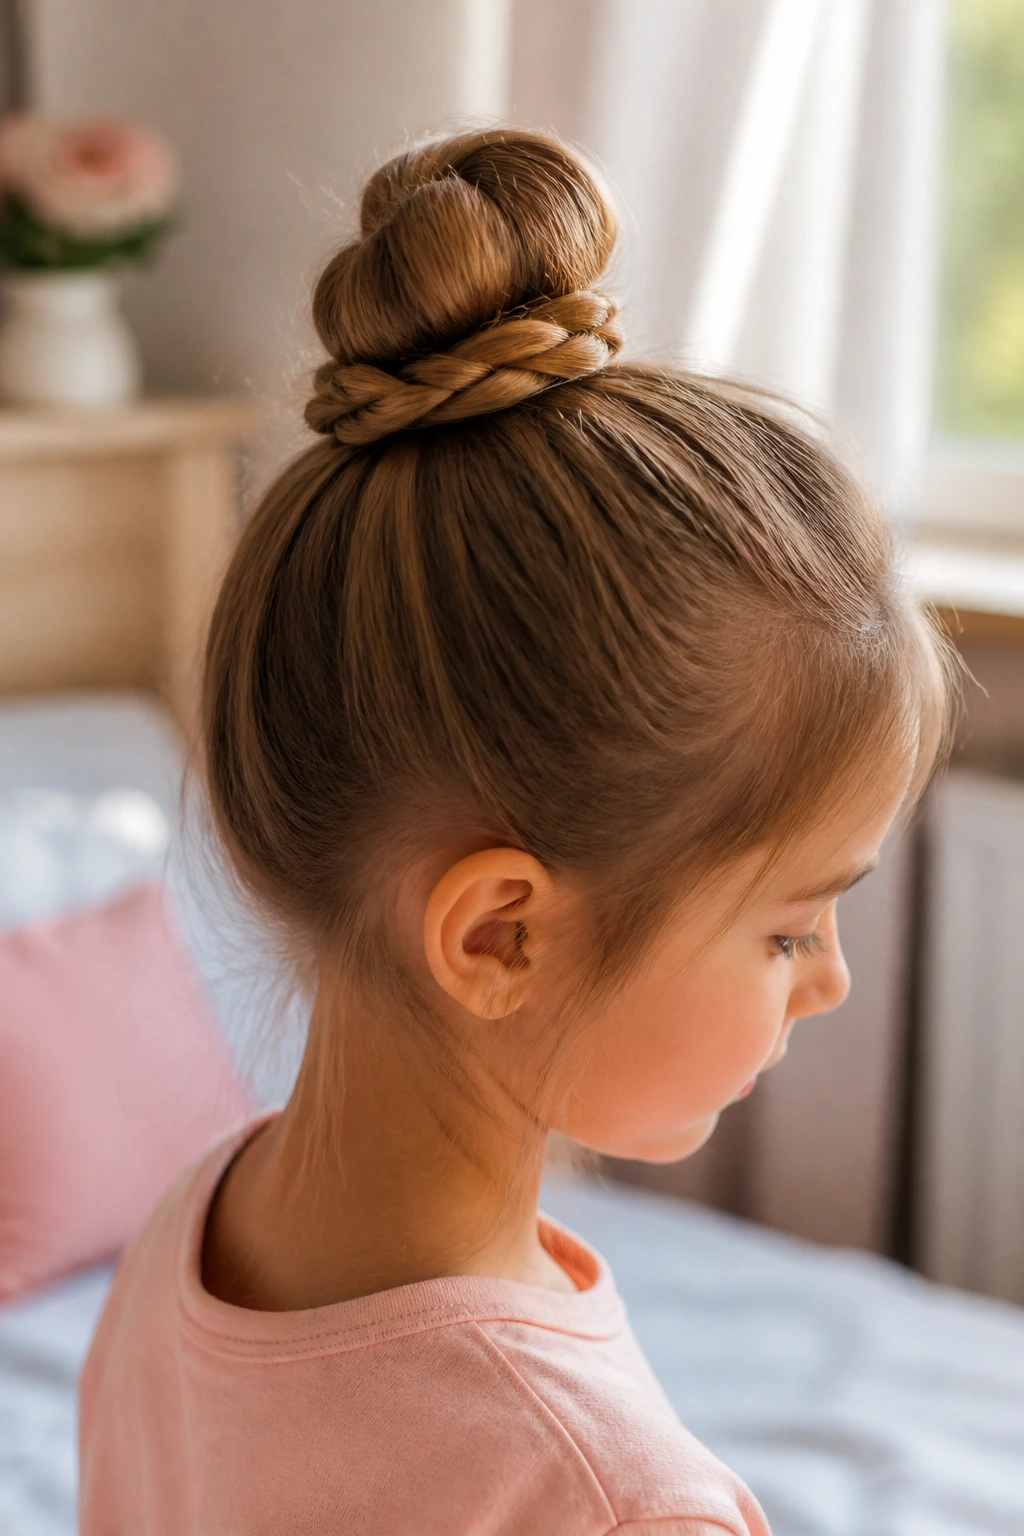
Comfort matters first: A bun that pulls too hard around the temples will not last long, no matter how polished it looks at the start.
They work on different hair types: Straight, wavy, curly, coily, thick, and fine hair all fit into this list when you change the base a little.
They save time on busy mornings: Several of these styles can be done in under 10 minutes once the hair is detangled and sectioned.
They handle movement better than loose styles: Buns stay cleaner through recess, car rides, and nap time because there’s less hair swinging into the face.
They dress up fast: A ribbon, a bow, or a few small pins can change the mood of the same bun without redoing the whole style.
They can be gentle: Loose tension, soft elastics, and smart placement matter more than spray-happy overkill.
1. The Smooth High Ballet Bun
A high ballet bun looks sharp because the shape is simple: one centered ponytail, one wrapped coil, and no stray ends sticking out like a warning sign. I like this style when the goal is clean and calm. It works best on medium to long hair, and it looks especially tidy if the part is straight and the ponytail sits right at the crown.
The part people miss is tension. Do not pull the front hair too hard. A bun can sit high without turning the hairline into a tight line. Smooth the roots with a little water or leave-in spray, gather the hair with a soft brush, then wrap the ponytail around itself and secure with two to four bobby pins crossed in an X. If the hair is slippery, a tiny bit of styling cream on the palms helps the bun hold its shape.
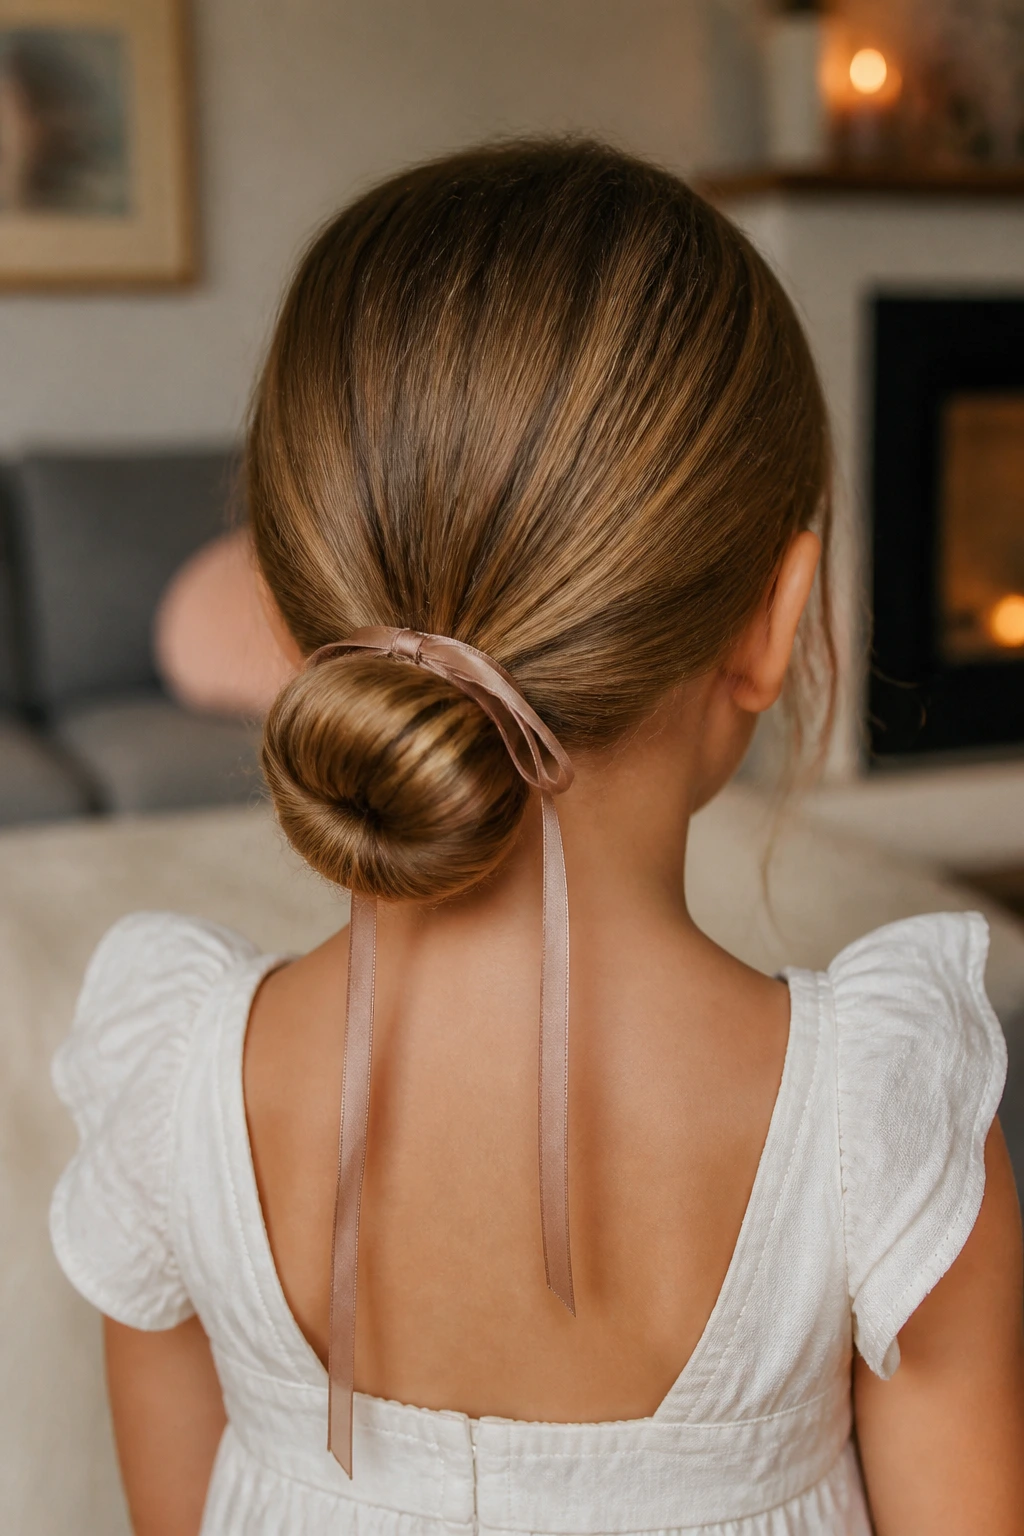
2. The Low Nape Bun with Ribbon
This one has a softer mood. It sits at the base of the neck, which makes it a good choice for children who hate hair touching their face or forehead. A low nape bun also tends to feel calmer on the scalp because the weight sits lower, not all the way up at the crown.
A ribbon changes everything here. Thread it around the bun base or tie it just under the coil so the tails drape instead of poke out. I prefer a narrow ribbon for little heads; wide satin can look stiff unless the rest of the style is very smooth. This bun suits school uniforms, family photos, and days when you want neat without looking overworked. It also plays nicely with straight or lightly wavy hair that needs a little polish but not a full event style.
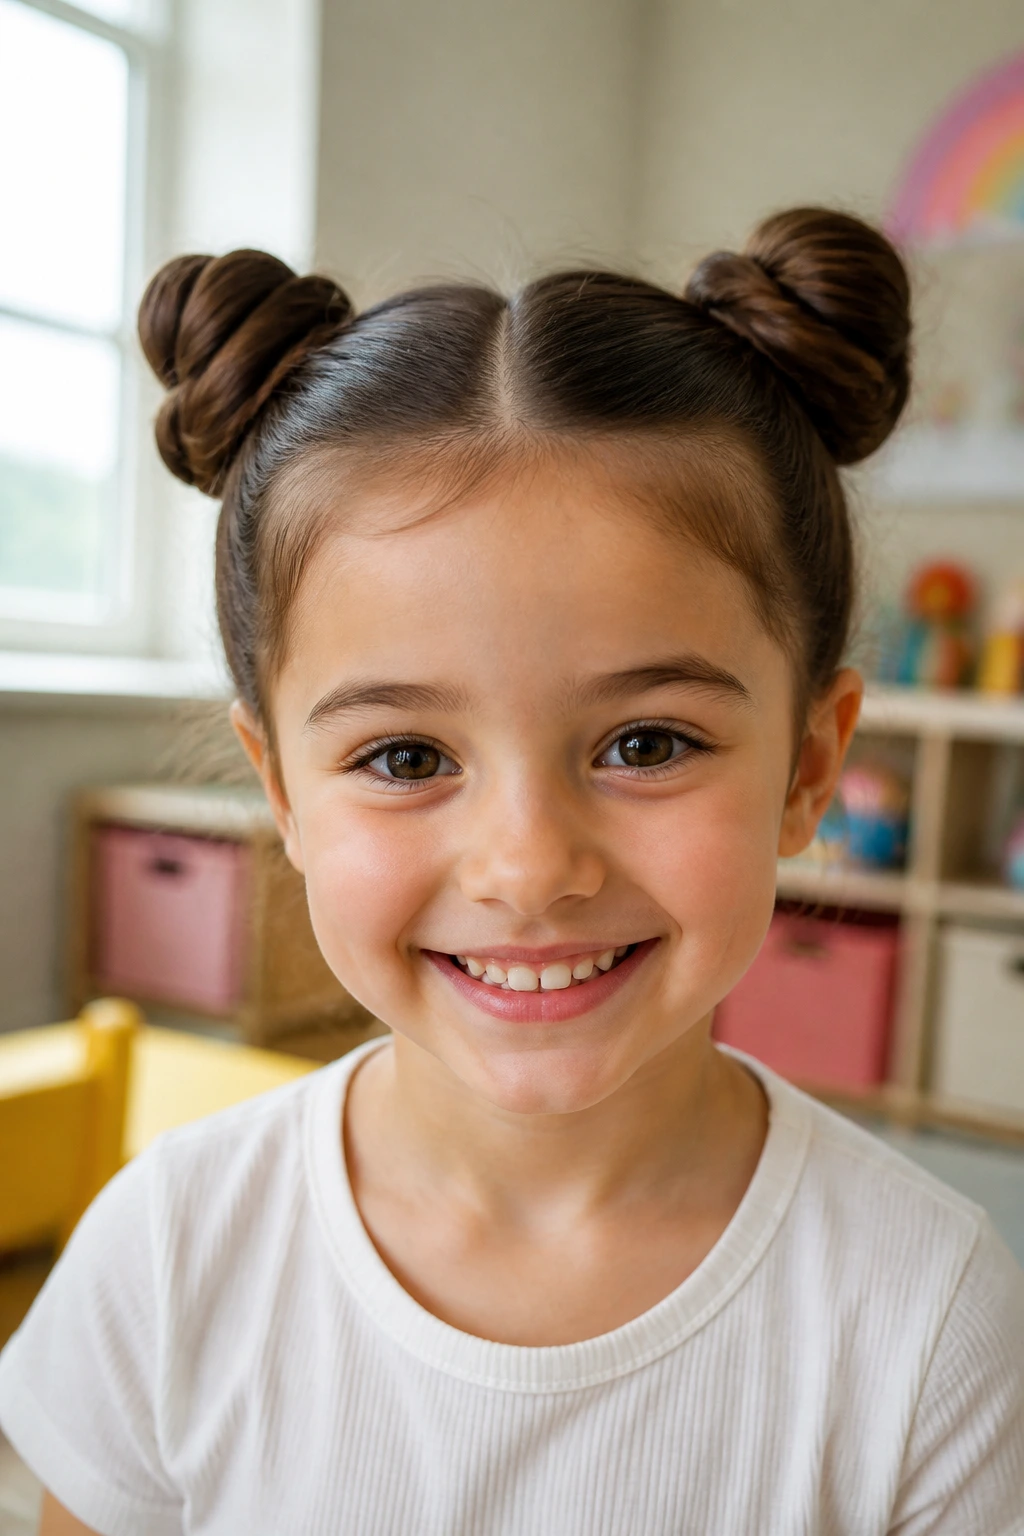
3. Two Clean Space Buns
Space buns are the style kids often request with suspiciously serious faces. Two equal buns on either side of a center part feel playful, but they also solve a practical problem: they break up heavy hair so the weight does not drag straight down. That makes them useful for thick hair and for shorter lengths that won’t gather well into one giant bun.
The key is symmetry, but not perfection. If one side is a finger-width bigger, no one in the playground notices. Part the hair down the middle, secure each side into a high or mid ponytail, then twist each tail into a small bun and pin or elastic it down. If the hair is super thick, make each bun a little flatter so the style does not sit too far off the head. Cute. Portable. Hard to knock loose.
4. The Braided Crown Bun
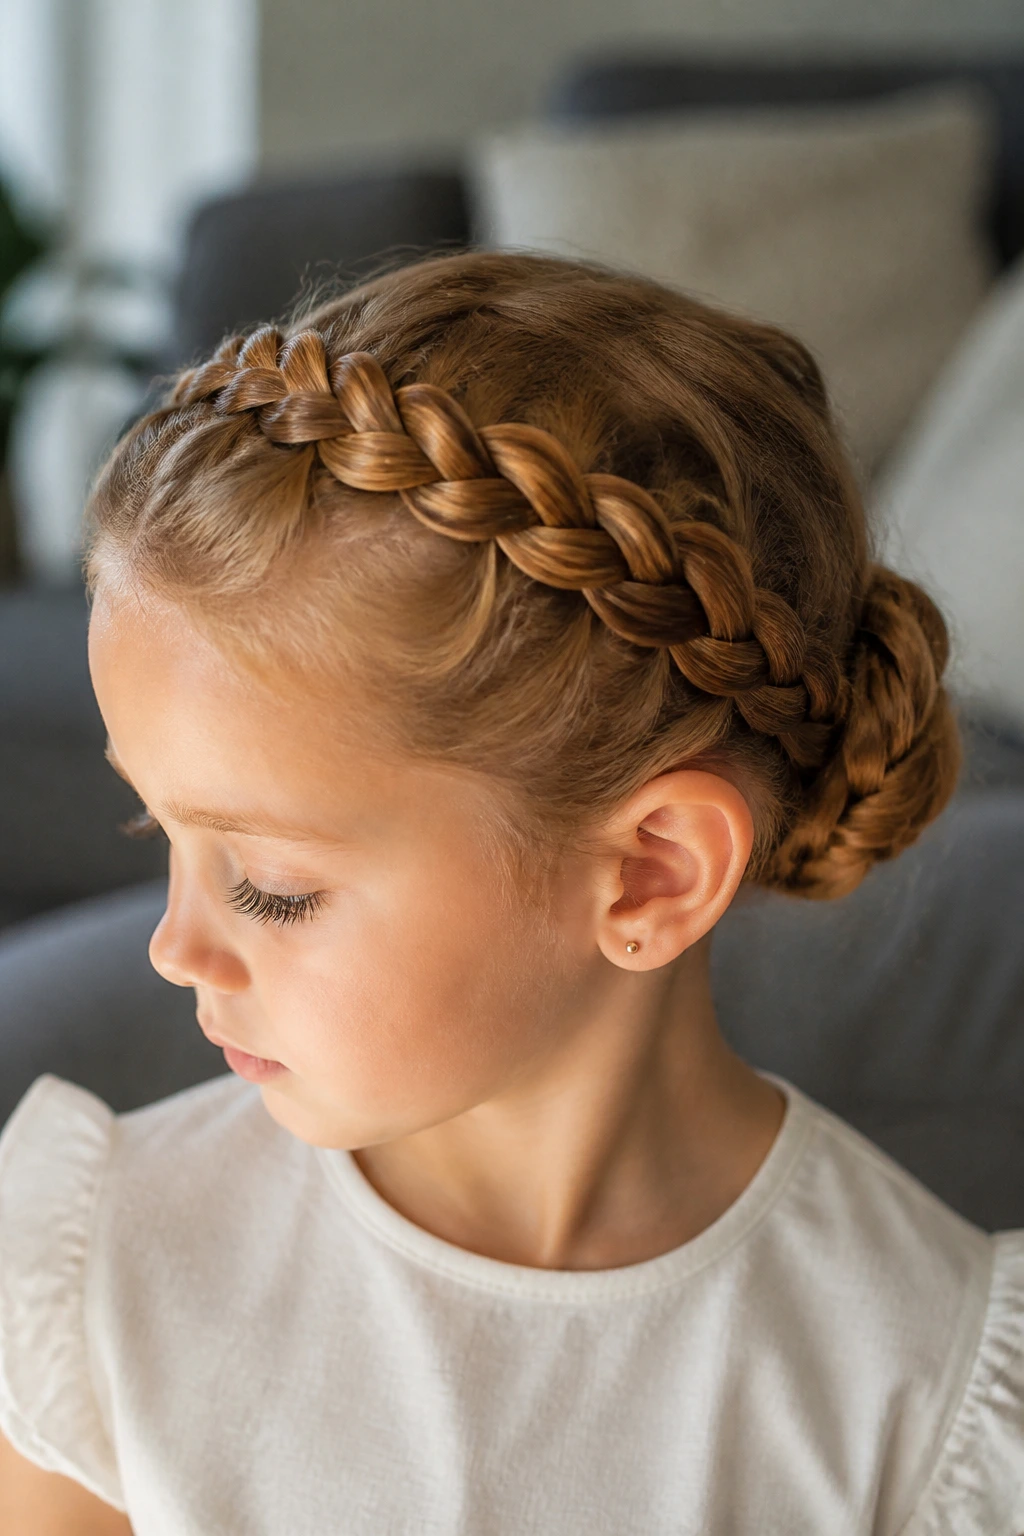
A braided crown bun has a little more structure, and that’s why it lasts. You braid along the hairline or around the head, then gather the braid into a bun at the back or one side. The braid acts like a built-in anchor, which is handy for active kids or for hair that tends to slip out of ordinary buns.
I reach for this when I want hair off the face and away from the neck, but I still want the style to feel finished. Dutch braids make the crown pop a little more, while French braids stay flatter and smoother. If you only know one braid pattern, use it here and wrap the remaining tail into a bun. It looks more complicated than it is, which is one of the few beauty tricks I actually like.
5. The Side Bun with Soft Ends
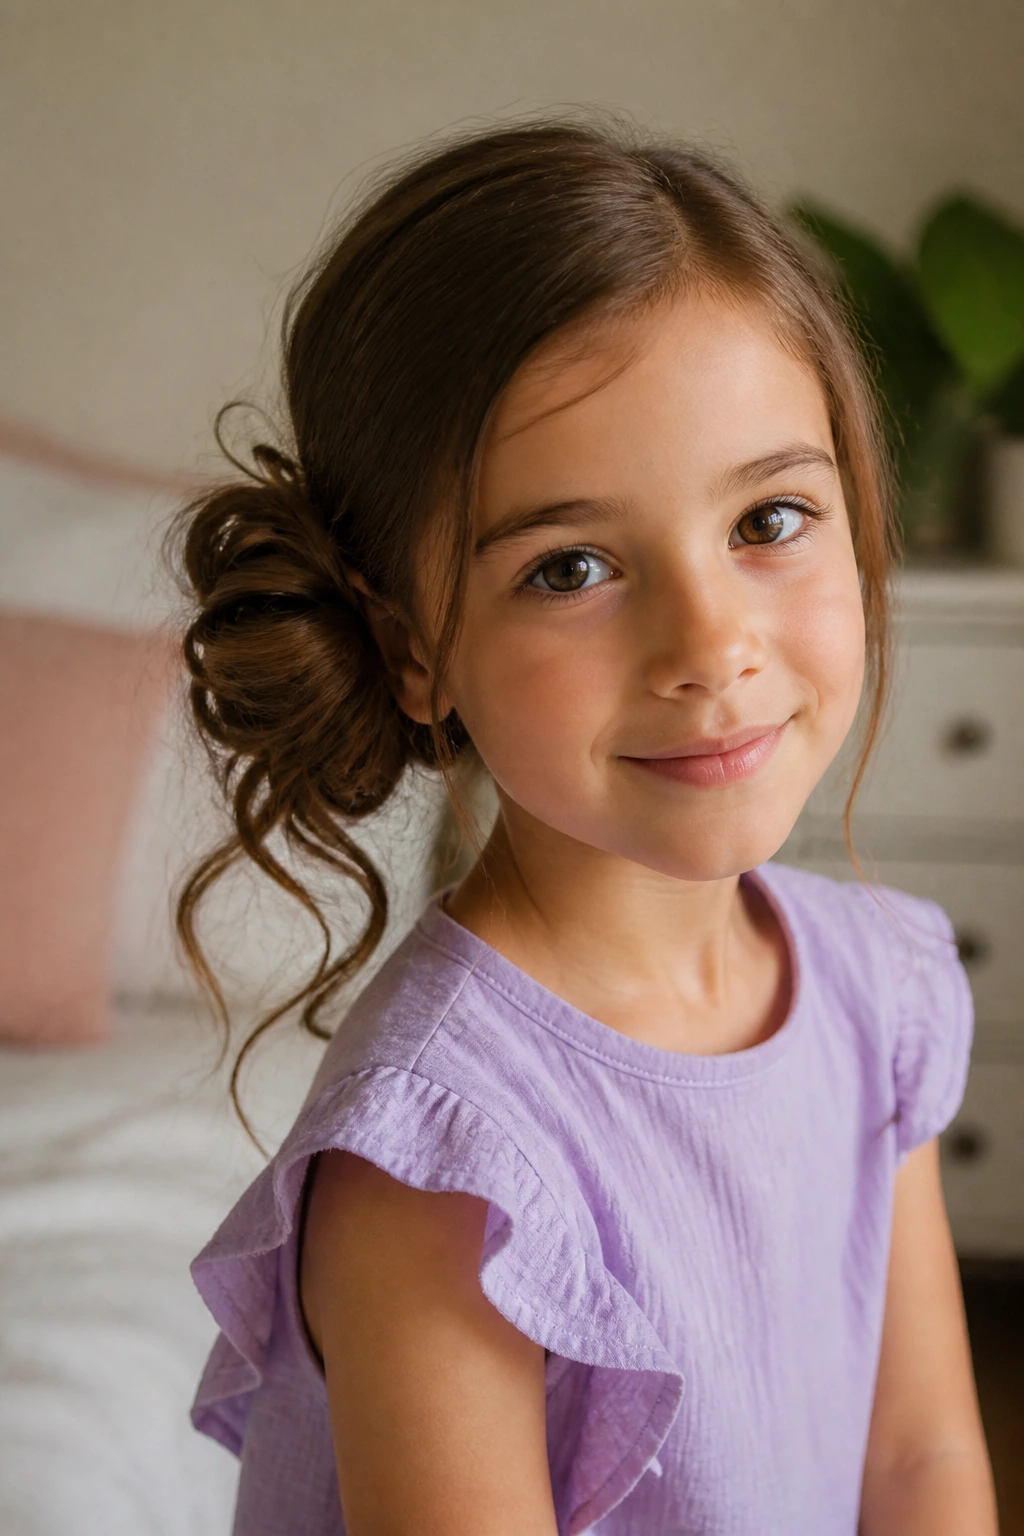
A side bun is a good answer when a child wants something prettier than a basic bun but not as formal as a recital style. Placing the bun just behind one ear gives the face a softer frame, and leaving a few curled or waved ends loose keeps the style from feeling too tight.
This style works best when the bun is not jammed too close to the ear. Leave a little space so the child can lean her head without bumping a pin. If the hair is fine, tease the ponytail base very lightly before wrapping it. If the hair is thick, use a second elastic under the bun so the shape does not slide. It’s a nice choice for birthdays, church, or those odd in-between days when a child wants to look dressed up and still run outside afterward.
6. The Quick Top Knot Bun
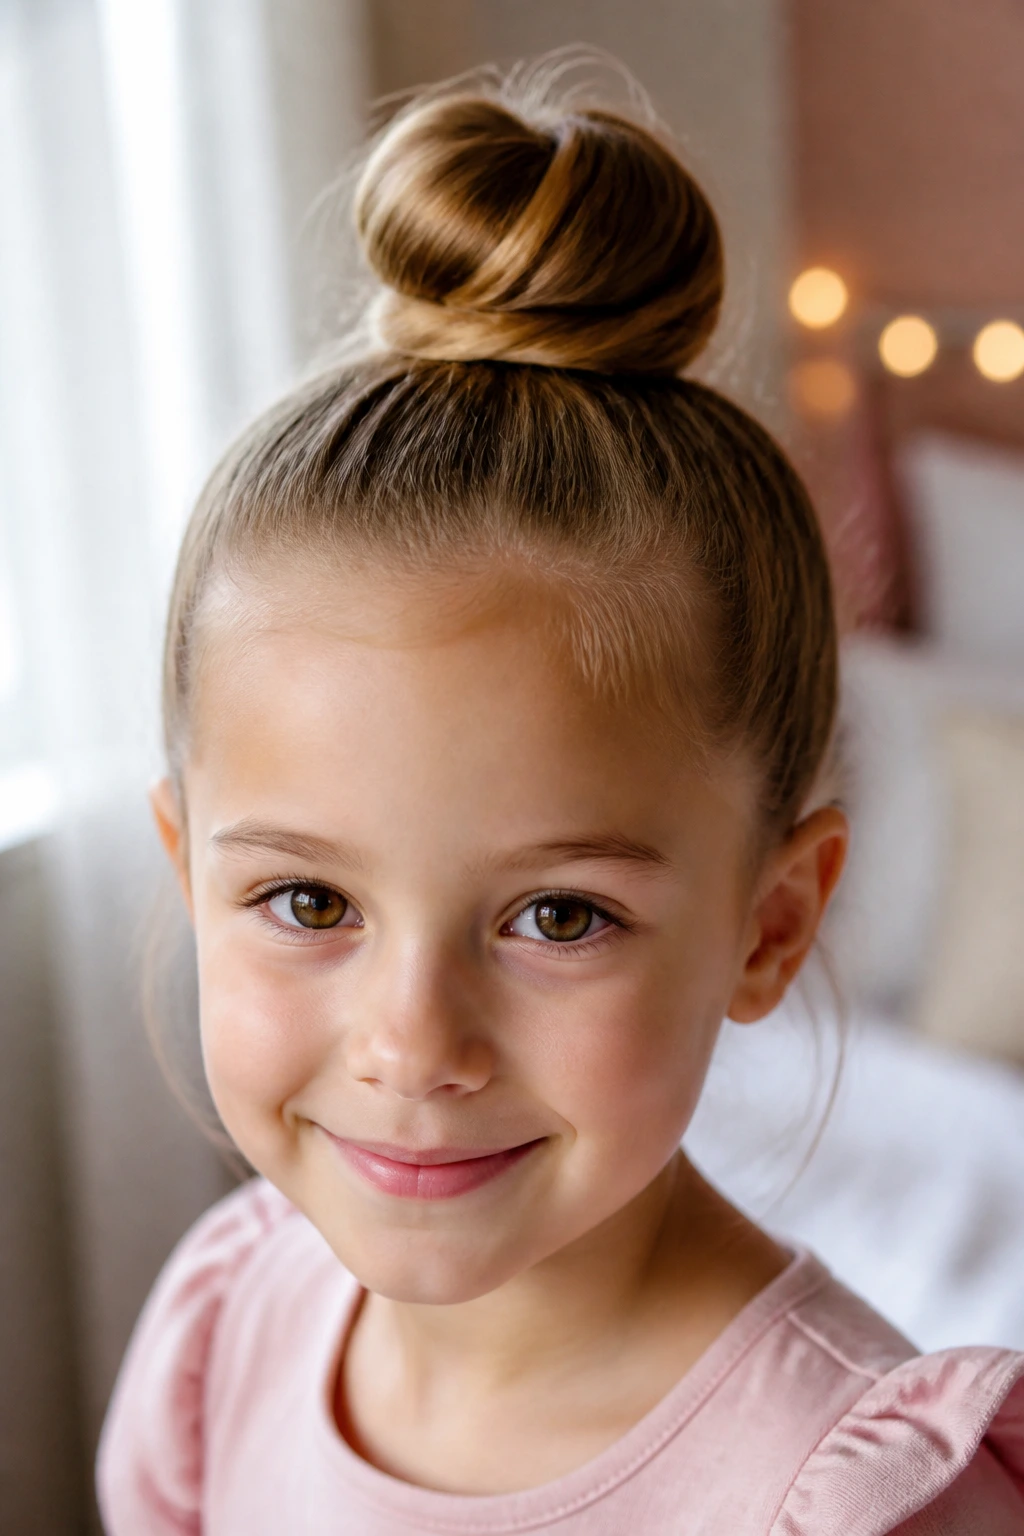
This is the five-minute answer. Maybe less.
The top knot sits high, twists fast, and is forgiving when the hair is not perfectly sectioned. That’s why it gets so much use in real life. Gather the hair at the crown, smooth the front with damp hands or a dab of detangler, twist the tail once or twice, coil it into a small knot, and secure with a strong elastic or a few pins.
If a child has fine hair, make the base ponytail a little tighter and use a second elastic to reinforce it. If the hair is thick, keep the knot a touch looser so the bun does not balloon out. I like this style on mornings when the clock is losing and the child is not in the mood for fuss. Clean, fast, done.
7. The Bubble Braid Bun
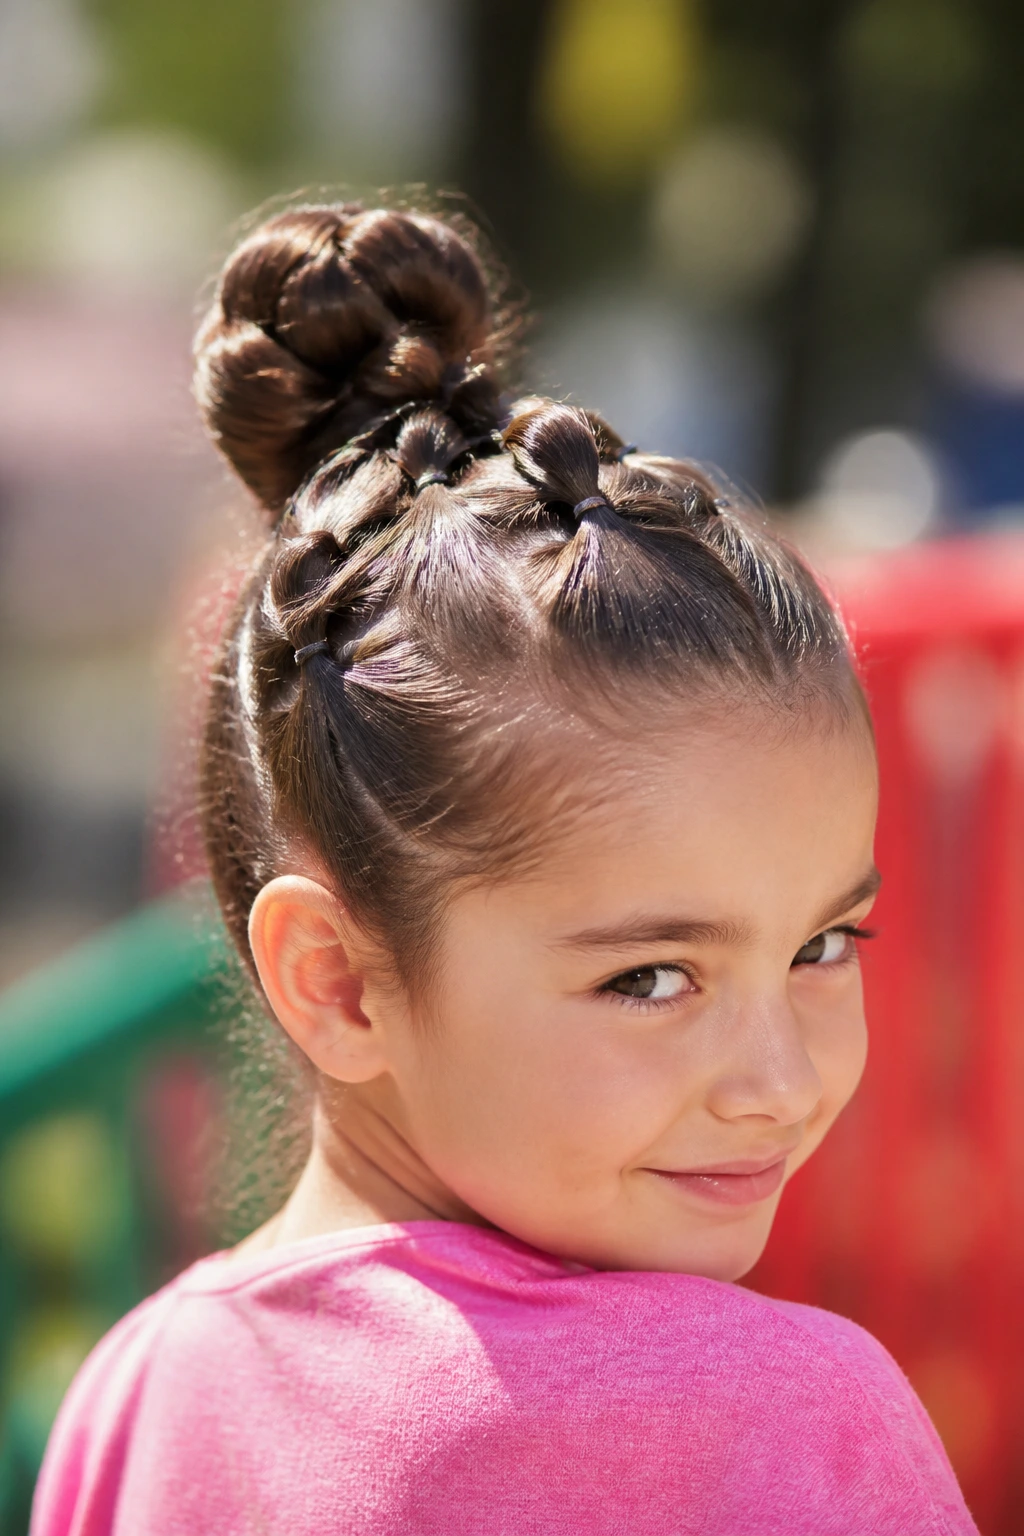
A bubble braid bun has texture before it even reaches the bun stage, which is why it holds so well. Start with a ponytail, place small elastics every inch or two down the length, and puff each section gently into rounded “bubbles.” Then coil the whole thing into a bun.
The bubbles give grip. Plain and simple. That makes this style useful for slick hair that usually slips out of bun bases by noon. It also looks more detailed than it really is, which is a nice trade. Use clear elastics if you want the shape to stay the star, or colored ones if the child likes the look of a line of tiny accents. One caution: keep the elastics snug but not tight enough to tug at the scalp when you remove them later.
8. The Double-Twist Bun
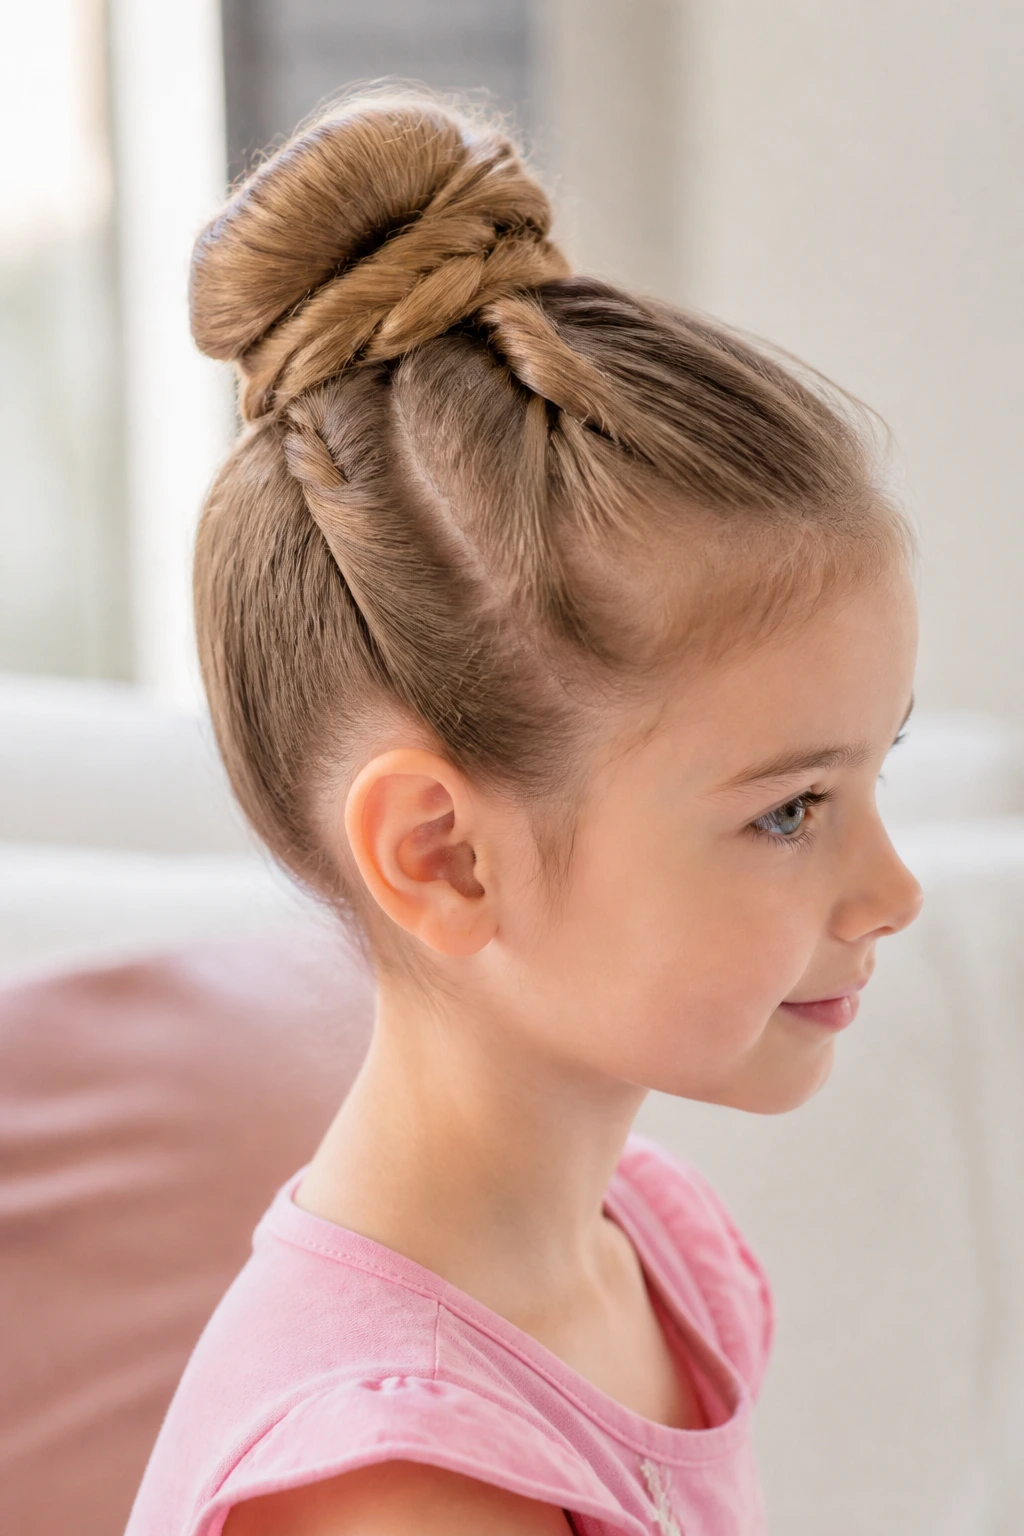
Two rope twists feeding into one bun is one of those styles that looks like a lot of work and is not. Divide the ponytail into two sections, twist each piece in the same direction, then twist them around each other in the opposite direction and wrap the result into a bun. The twist gives the hair enough bite to stay together without needing a mountain of product.
This one is especially nice on medium hair that can feel limp in a straight bun. The twist adds body. It also works well when you want a neater look than a messy knot but do not want the hard shine of a super slick style. If the child has layers, a few short pieces may slip out. Leave them. A tiny halo of texture is better than cranking everything tight until the scalp protests.
9. The Classic Donut Bun
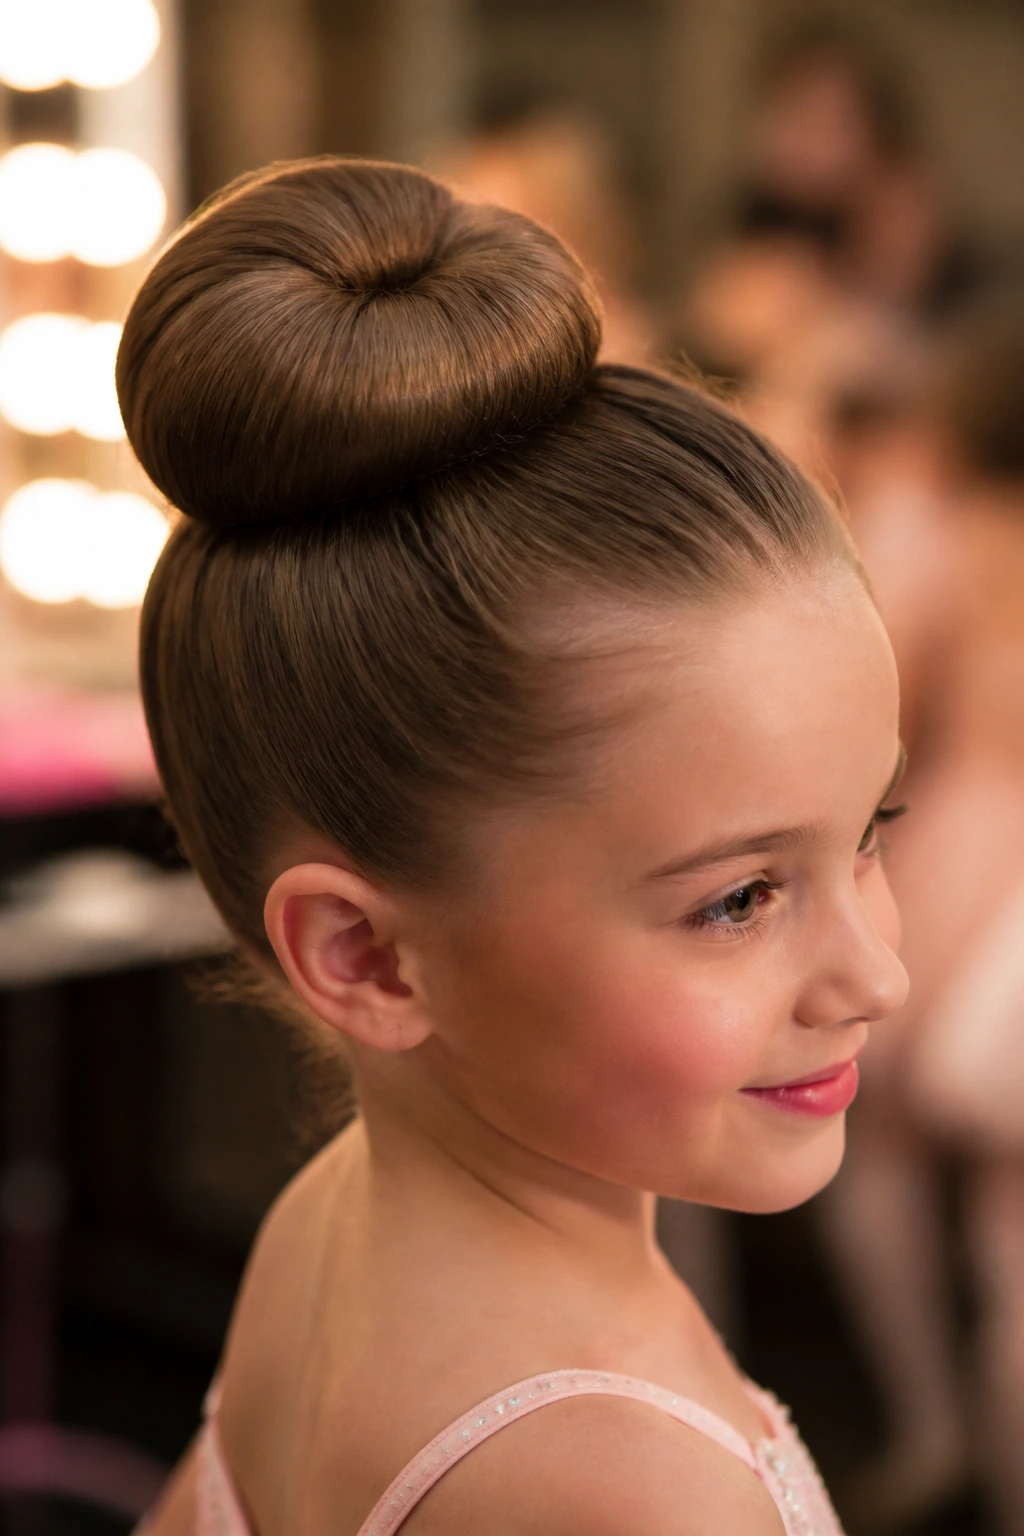
A donut bun gives you that round, full shape people notice from across a room. It is made with a bun shaper or a rolled sock, and it works best when the hair is long enough to cover the form completely. If the hair is too short, the donut peeks through and the whole thing starts looking like a prop, not a hairstyle.
I like this style for recitals, special photos, and dressier days because the shape stays consistent. Brush the ponytail smooth, slide the shaper onto the tail, fan the hair around it, and tuck the ends under with pins. The trick is coverage. No gaps. No thin spots. If your child has thick hair, this can look gorgeous with very little effort. If the hair is fine, add a light mist of texturizing spray so the outer layer does not slide off the form.
10. The Half-Up Mini Bun
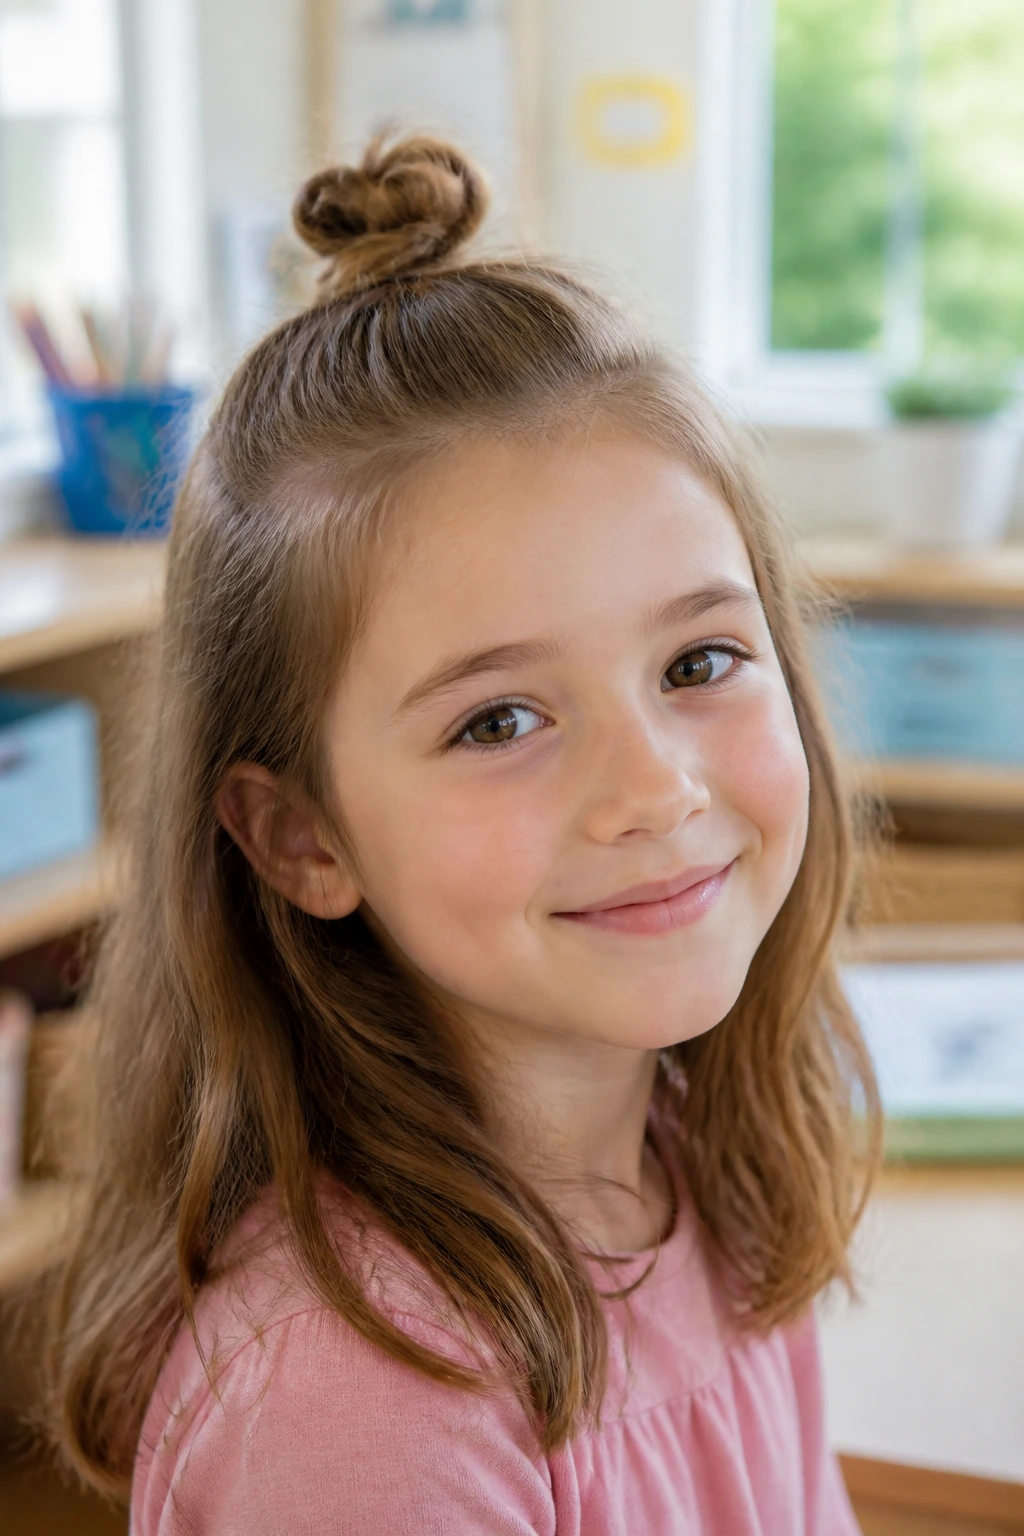
A half-up mini bun is a useful compromise. The top section goes into a small bun, while the rest of the hair stays down. That makes it a good choice when a child wants to keep some length loose but still needs hair out of the eyes. It also works well on shoulder-length hair that cannot quite make a full bun without awkward ends hanging everywhere.
This style looks best when the bun is small and centered, not bloated. Too much volume on top can make the head look crowded, especially on younger children. Keep the base clean, then leave the lower hair soft, brushed, and free. If the child has curls, this style gives the top section structure while letting the curls do their own thing underneath. Nice balance. No hard sell.
11. The Ribbon-Wrapped Bun
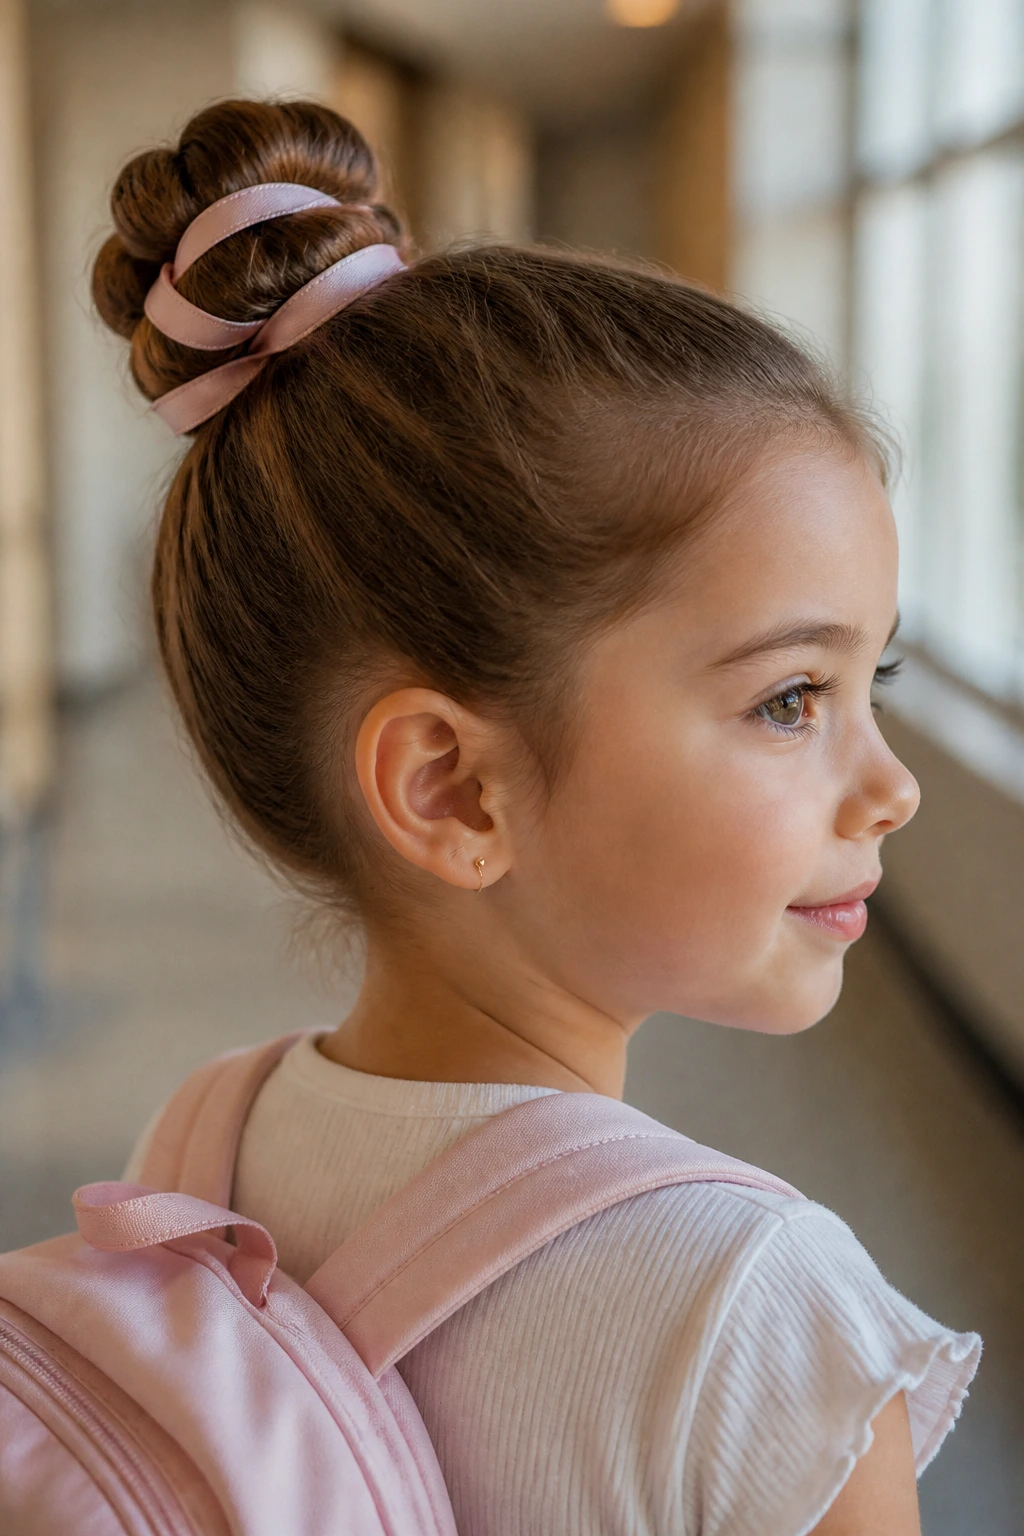
A ribbon-wrapped bun has that neat little finish that turns a plain bun into something more deliberate. Instead of treating the ribbon as an afterthought, weave it through the base or tie it around the bun so it becomes part of the shape. The best versions use a ribbon thin enough to move with the hair, not so wide that it fights the bun.
I usually place this style low or mid-height because the ribbon shows more cleanly there. Match the ribbon to a dress, a school color, or the bun itself if you want the look to stay quiet. Satin slides, so anchor it with a few pins if needed. Cotton ribbons grip better, though they can look a little softer and less shiny. If a child is very young, keep the tails short. Long ribbon ends have a talent for ending up in juice cups.
12. The Cornrow Bun
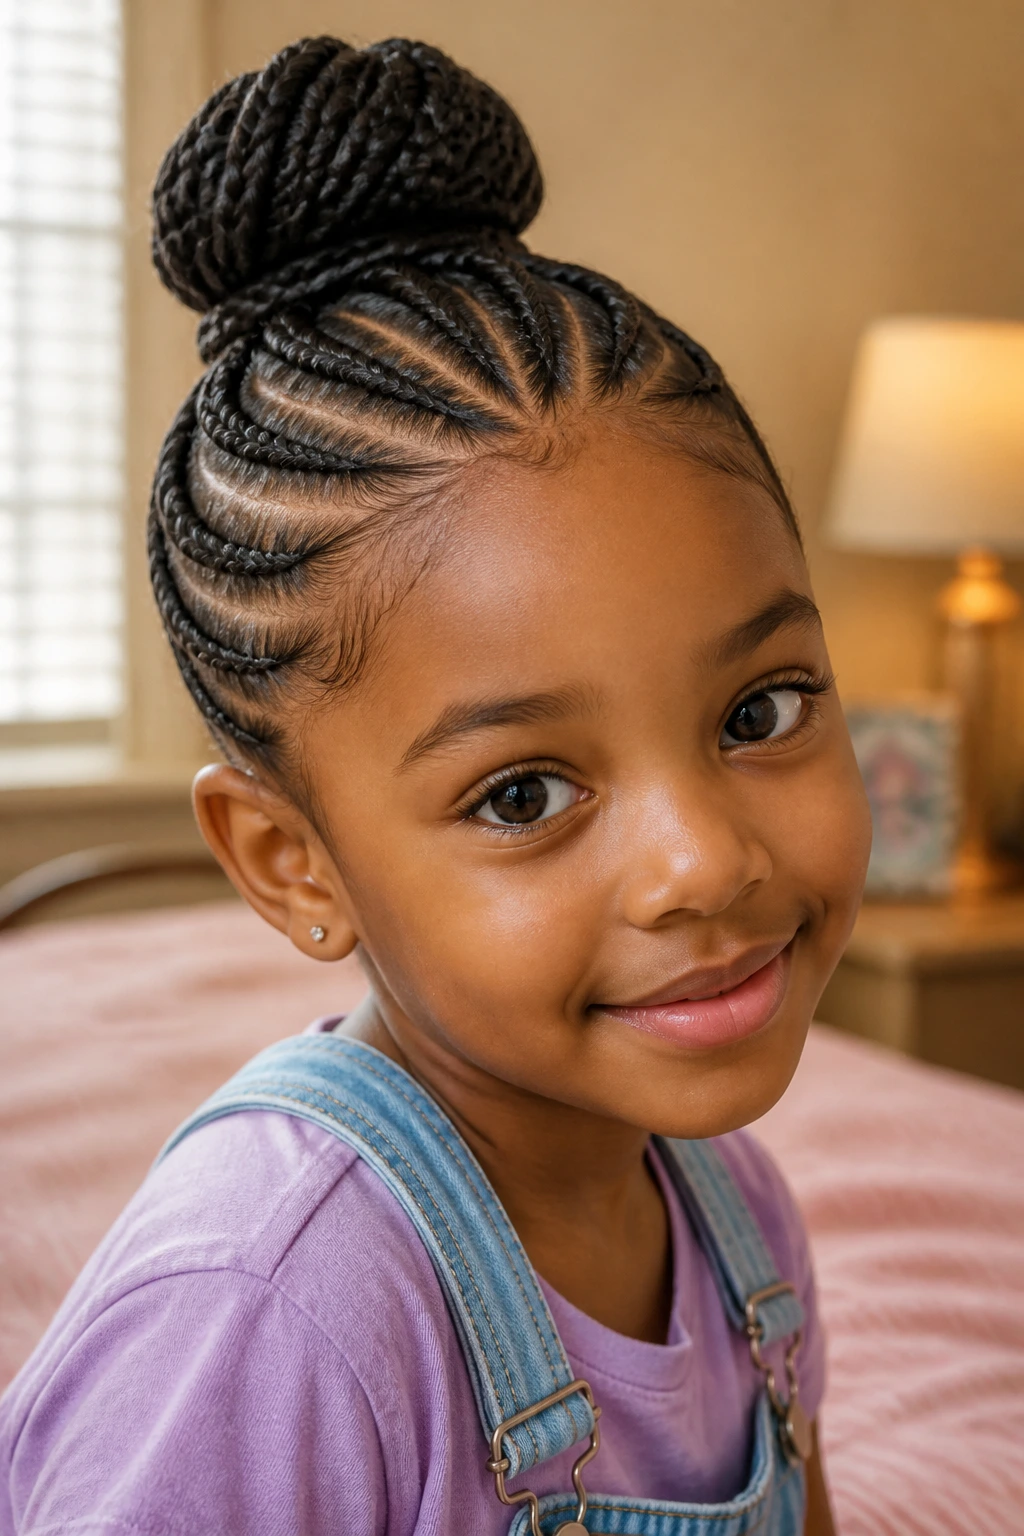
A cornrow bun is one of the best ways to keep textured hair protected and neatly gathered. The hair is braided close to the scalp in rows, then the remaining length or gathered braids are wrapped into a bun. The result is secure, tidy, and much easier to refresh on later days because the base already holds the pattern.
This style shines when you want less daily manipulation. Less combing. Less pulling. Less arguing over the brush. The bun itself can sit high, low, or centered depending on the look you want. Keep the cornrows comfortable and even; tight braids that leave the scalp sore are not worth the neat finish. If you add beads, make sure they are light enough not to tug on the ends. Small detail, big difference.
13. The Heart-Part Bun
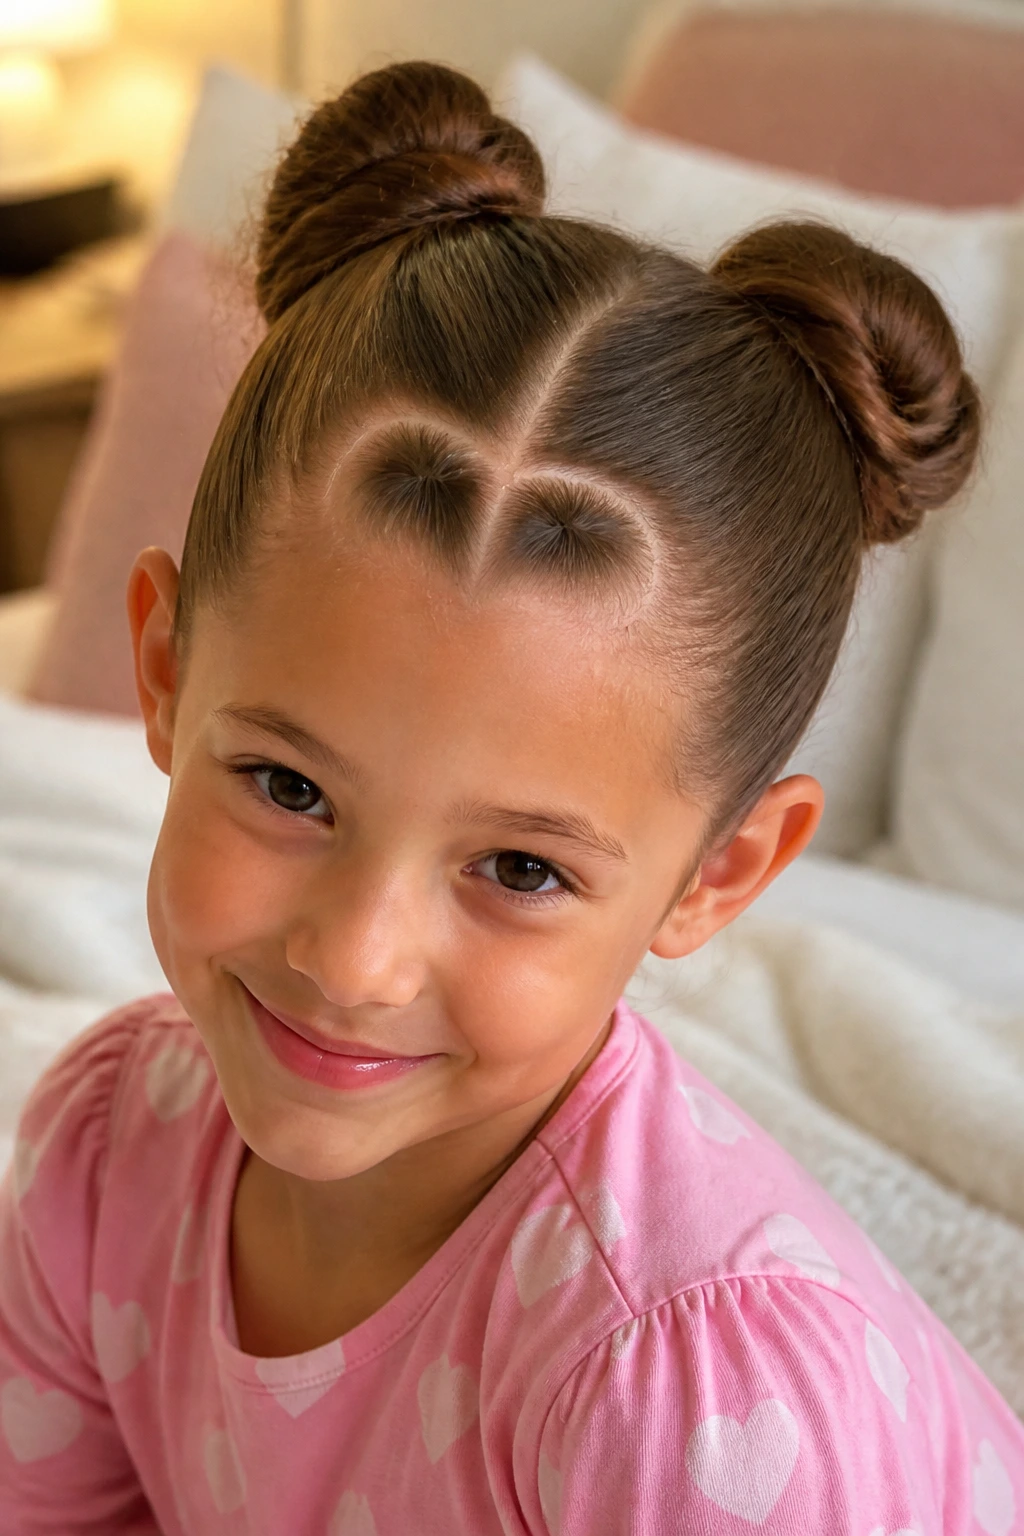
A heart-shaped part brings the fun before the bun even starts. The hair is sectioned into a heart or curved motif near the front, then gathered into one or two buns depending on the shape you want. It takes a little more patience than a straight center part, but the payoff is obvious the second you step back from the mirror.
This style is the kind of thing children remember. Not because it is fancy, but because it feels special. The heart part works best on smooth hair that can hold a clean line, so take your time with the rat-tail comb and clips. Use a little water on the part before drawing the lines. Dry hair frays. Damp hair obeys better. That is not a theory; it is just hair being hair.
14. The Braided Pigtail Buns
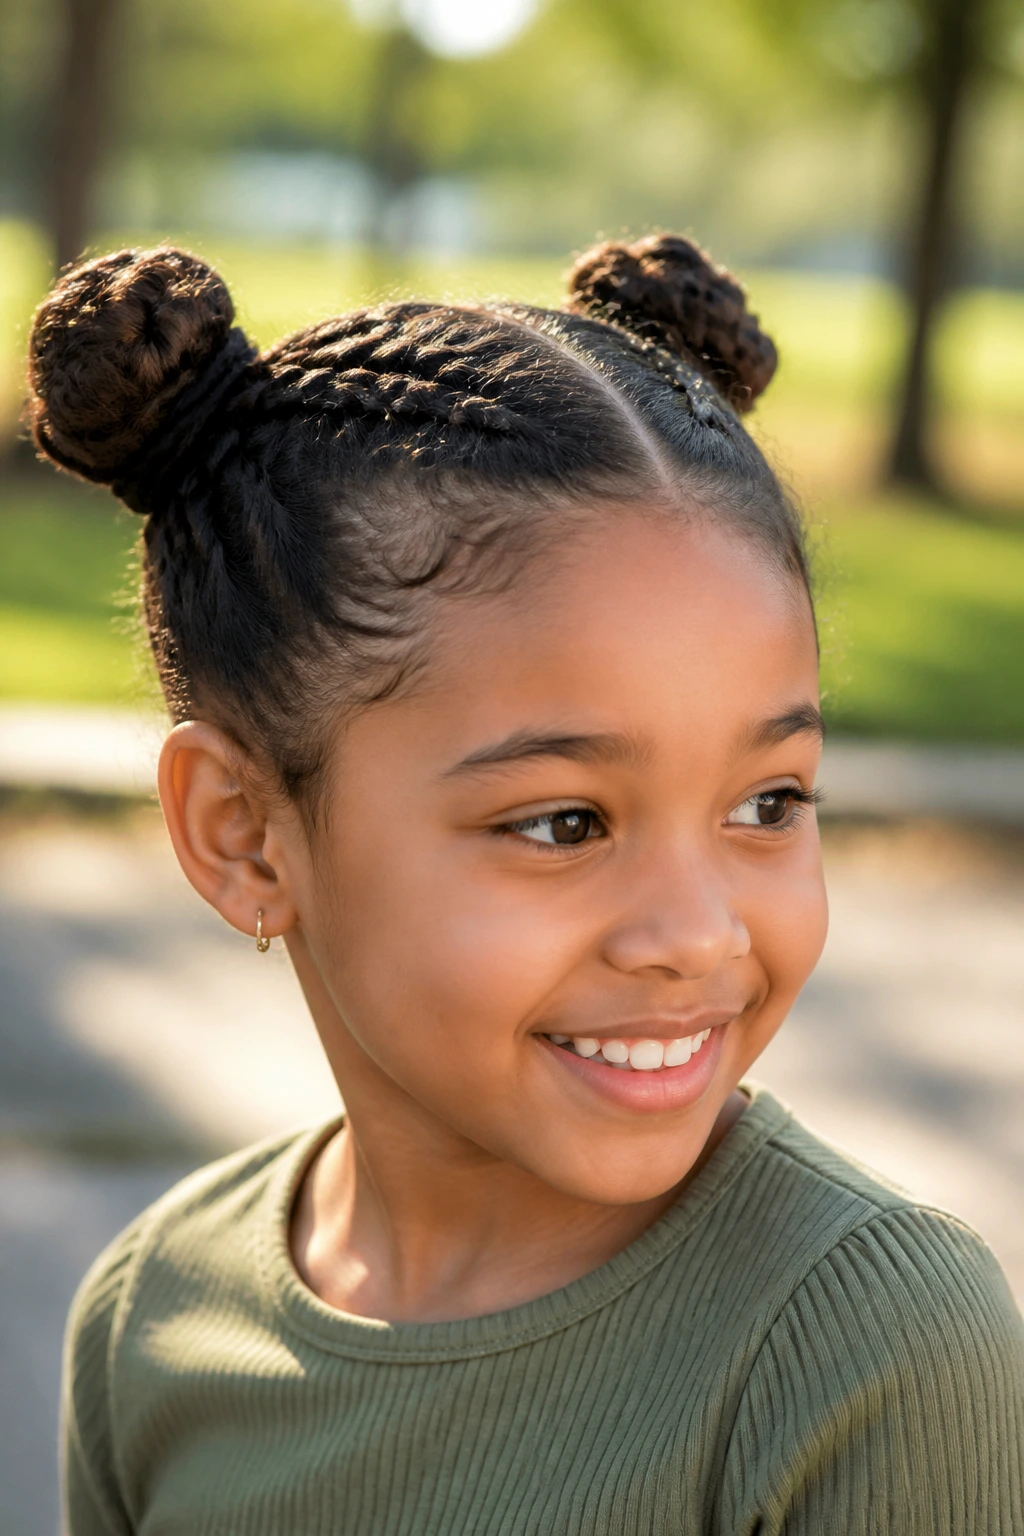
Braided pigtail buns are practical in the best way. Two braids start at the back or sides, then each braid coils into its own bun. The style stays balanced, which helps on children who tilt their heads, toss, and forget they even have hair up. It also spreads the weight out instead of stacking everything on the crown.
I especially like this style for school days and playdates. It looks neat, it keeps the neck clear, and it does not demand much once it is in place. If the hair is layered, braid tighter near the scalp and leave the bun a touch looser so the ends tuck in smoothly. If the child likes color, add matching elastics at the braid base. Small change. Big personality.
15. The Sock Bun
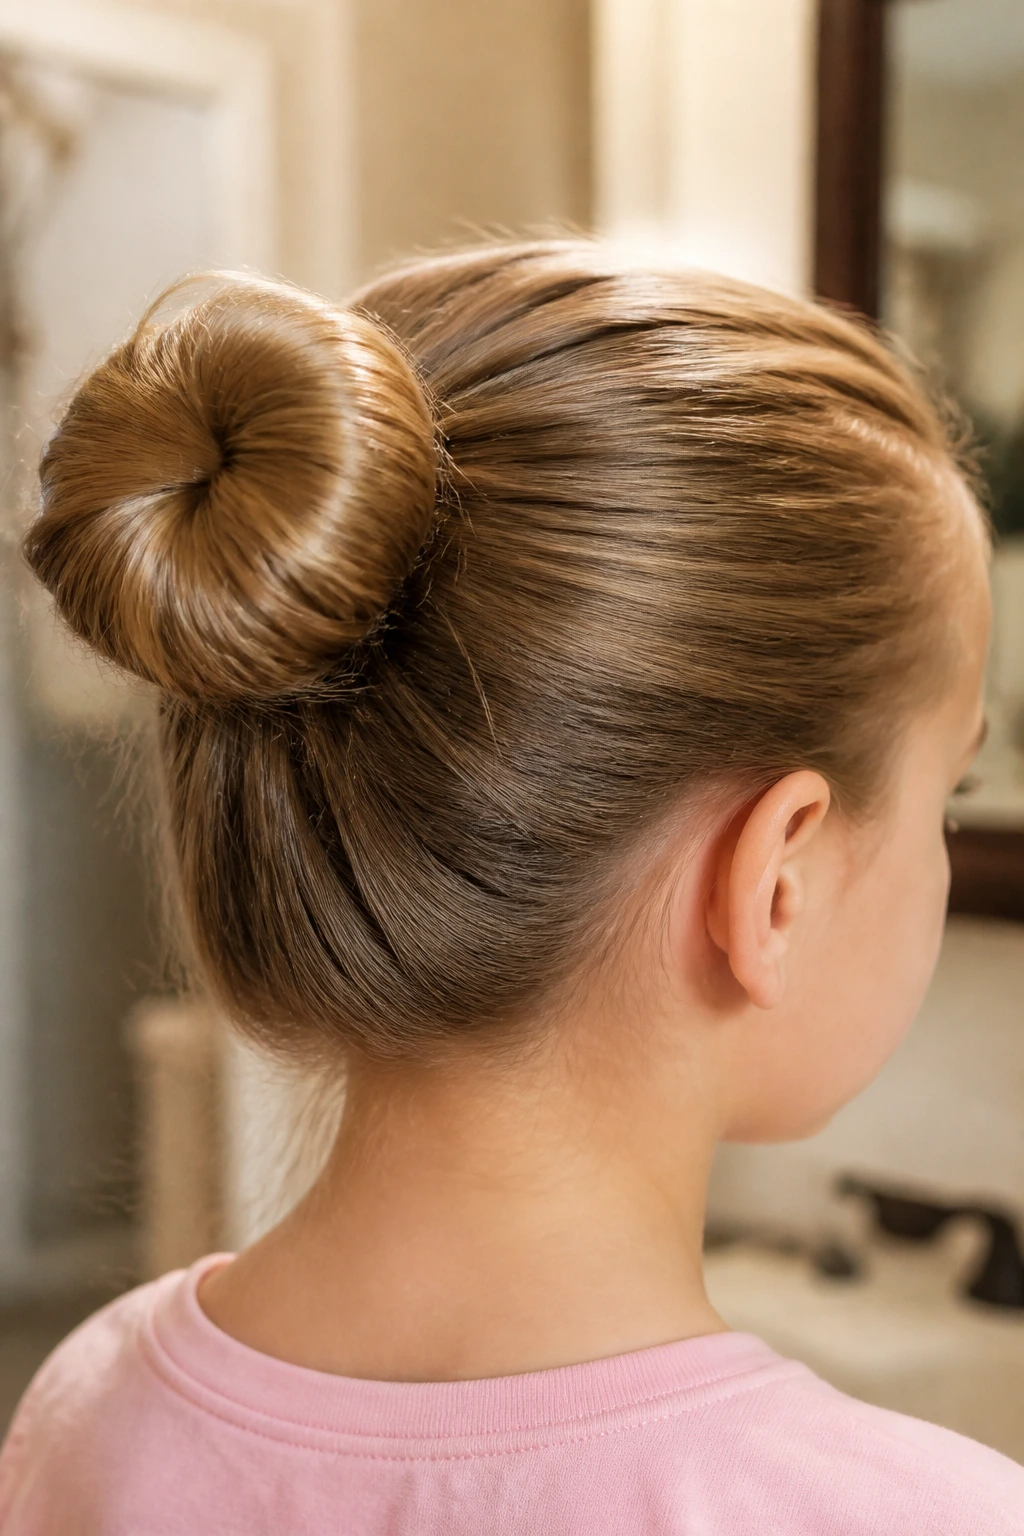
A sock bun gives the most polished round shape with the least guesswork. The sock or bun form creates a consistent circle, which is helpful when the hair itself is fine or uneven in length. Once the ponytail is through the center, fan the hair around the form, tuck the ends under, and pin until the whole thing feels steady.
This is one of those styles where prep matters. If the hair is too silky, the outer layer slides. A little mousse, light spray, or even a faint texture from the previous day can help. Do not soak the hair or it will go limp. The finish should look smooth, not crunchy. A sock bun can read as very formal, so I usually reserve it for occasions when the child wants a dressed-up silhouette and the rest of the outfit can match that level of neatness.
16. The Flower Bun
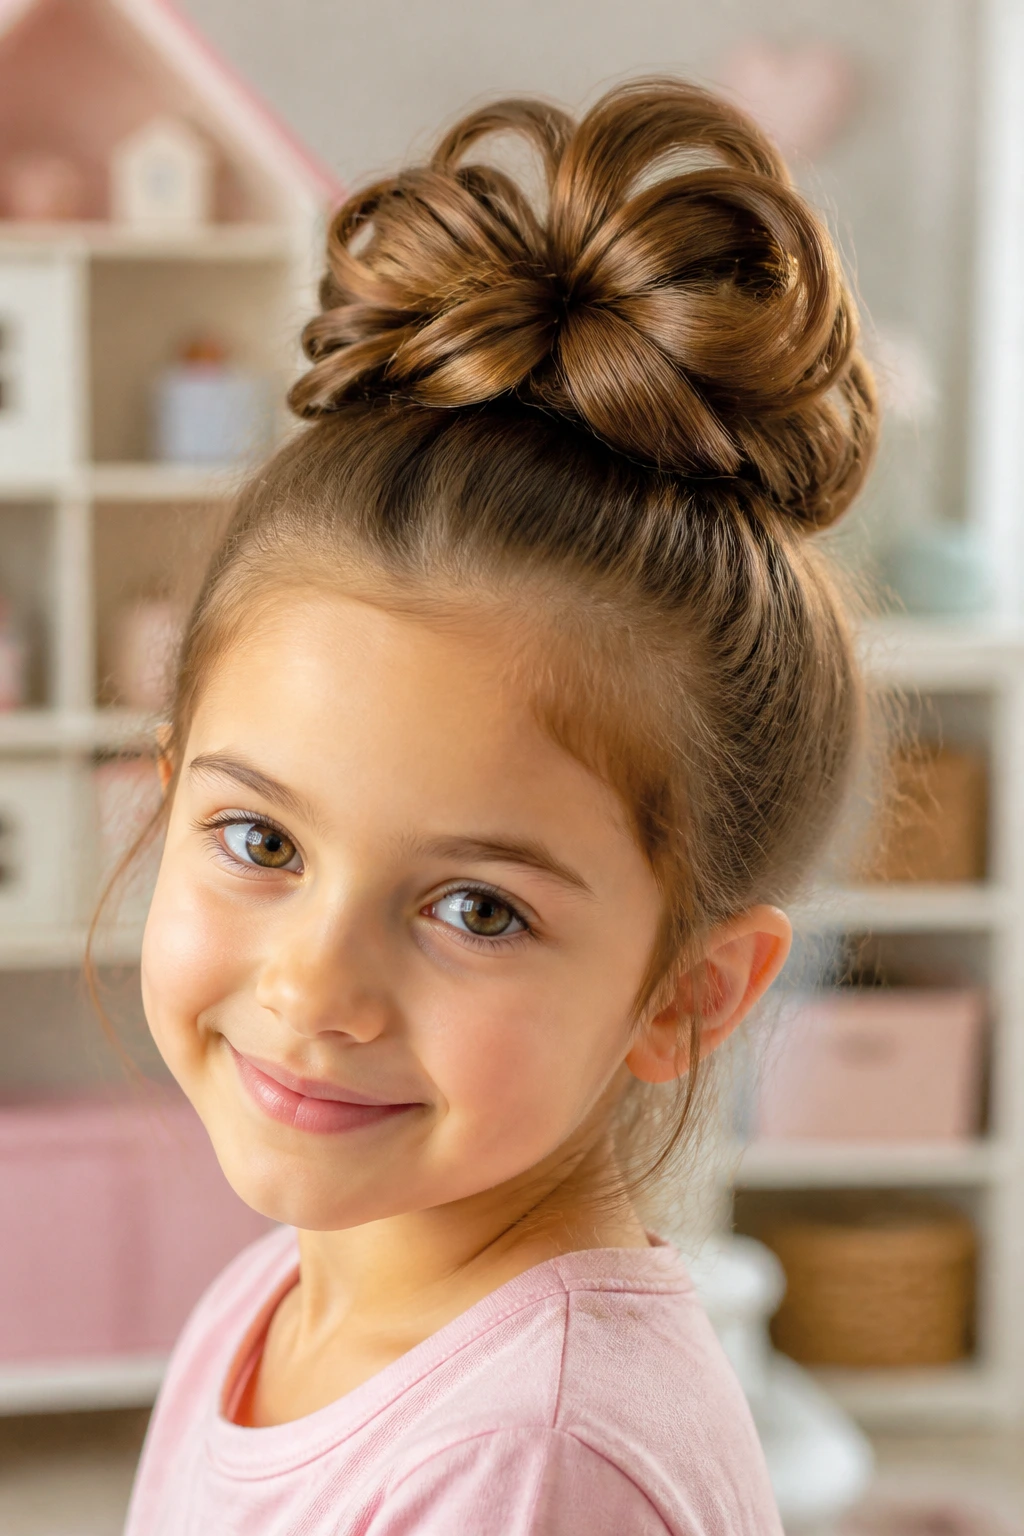
A flower bun looks decorative without needing extra pieces everywhere. The hair is divided into sections around a central base, and each section is shaped to look like a petal. It sounds delicate, but the structure is sturdier than people expect because the petals lock into each other.
This style is lovely for children who like a more whimsical finish. It works best with medium to thick hair because the “petals” need enough body to hold their shape. If the hair is fine, smaller petals work better than one large flower that collapses at the edges. Use pins hidden under each loop, not on top of the petals, or the style will look choppy. One of those buns where the back matters just as much as the front.
17. The Rope-Twist Bun
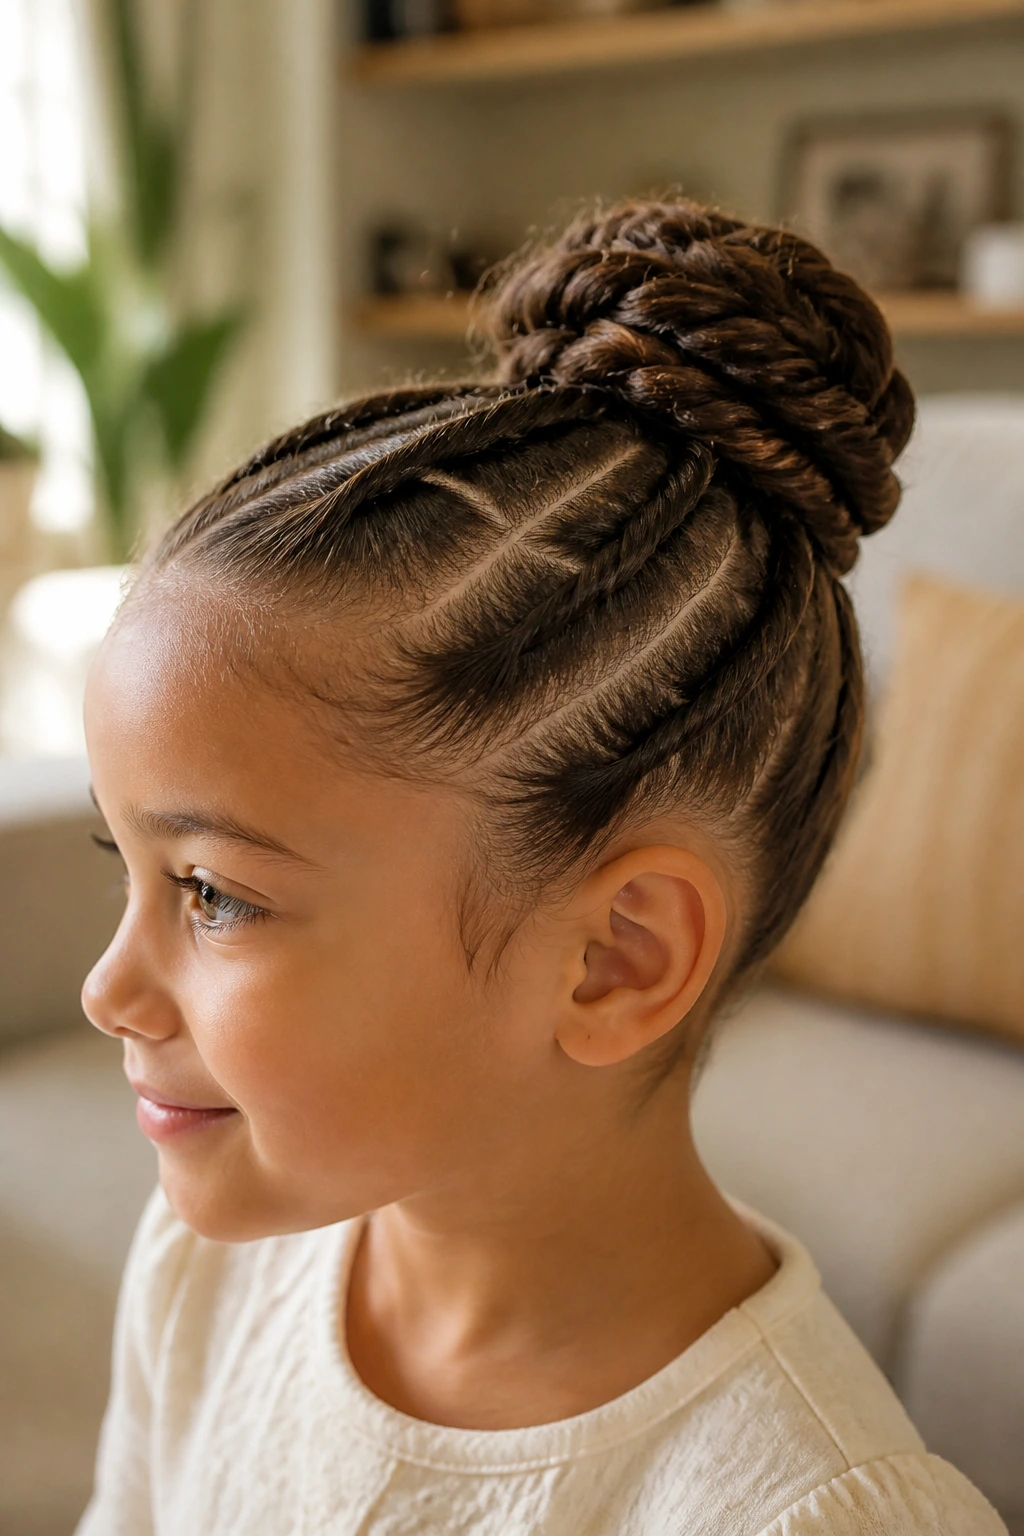
Rope twists give a bun more bite than a straight ponytail wrap. Split the hair into two sections, twist each side, then twist the two strands around each other before wrapping them into a bun. The result has visible texture and a little stretch built into the shape, which helps the style stay together.
I like this one for hair that tends to slip when it’s freshly washed. The twist gives it something to grab onto. It also reads nicely on both straight and curly hair because the twist lines show even when the bun itself is compact. If the ends poke out, tuck them under the base and pin them flat. Do not keep stacking pins on the outside. That makes the bun look overworked, and kids can feel every extra pin.
18. The Crown Braid Bun
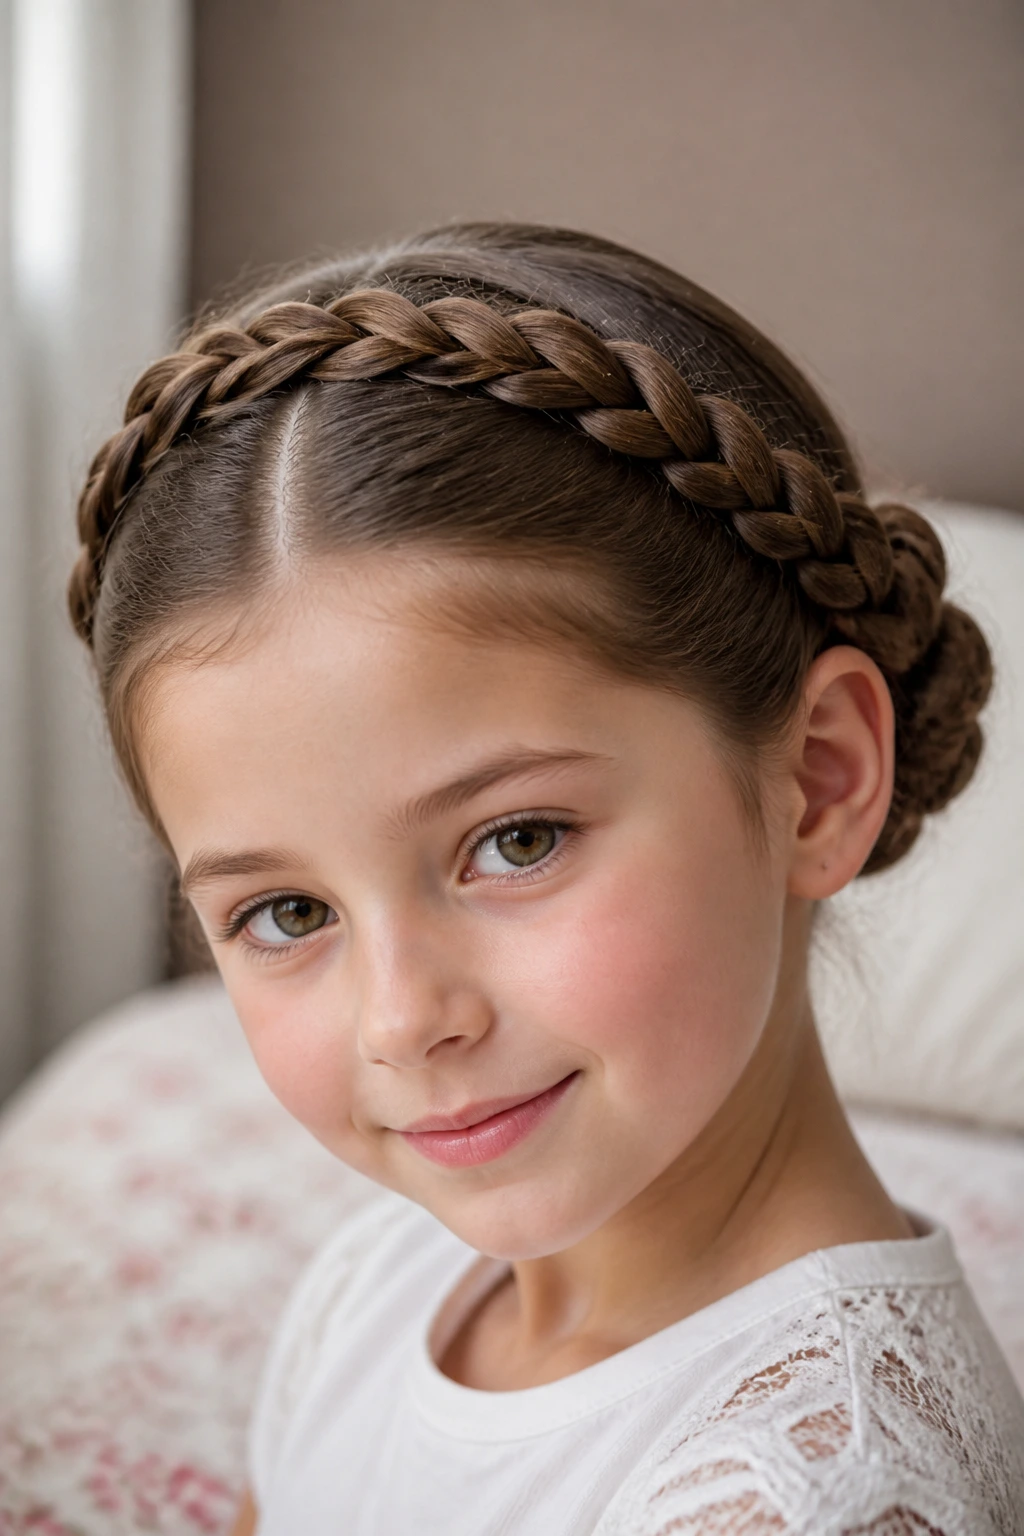
A crown braid bun takes patience, but it pays off. The braid circles the head, then feeds into a bun at the back or side. The effect is neat from every angle, which matters on picture days when a child turns her head and the back view suddenly gets involved.
This style is one of my favorites for medium-length hair that needs both control and shape. A middle part gives it symmetry; a side part gives it a softer curve. Either way, the braid should sit snugly but not tight enough to cause a headache by the end of the day. If the hair is thick, anchor the braid with small elastics before wrapping the bun so the weight does not pull the crown loose. It looks graceful. It also works.
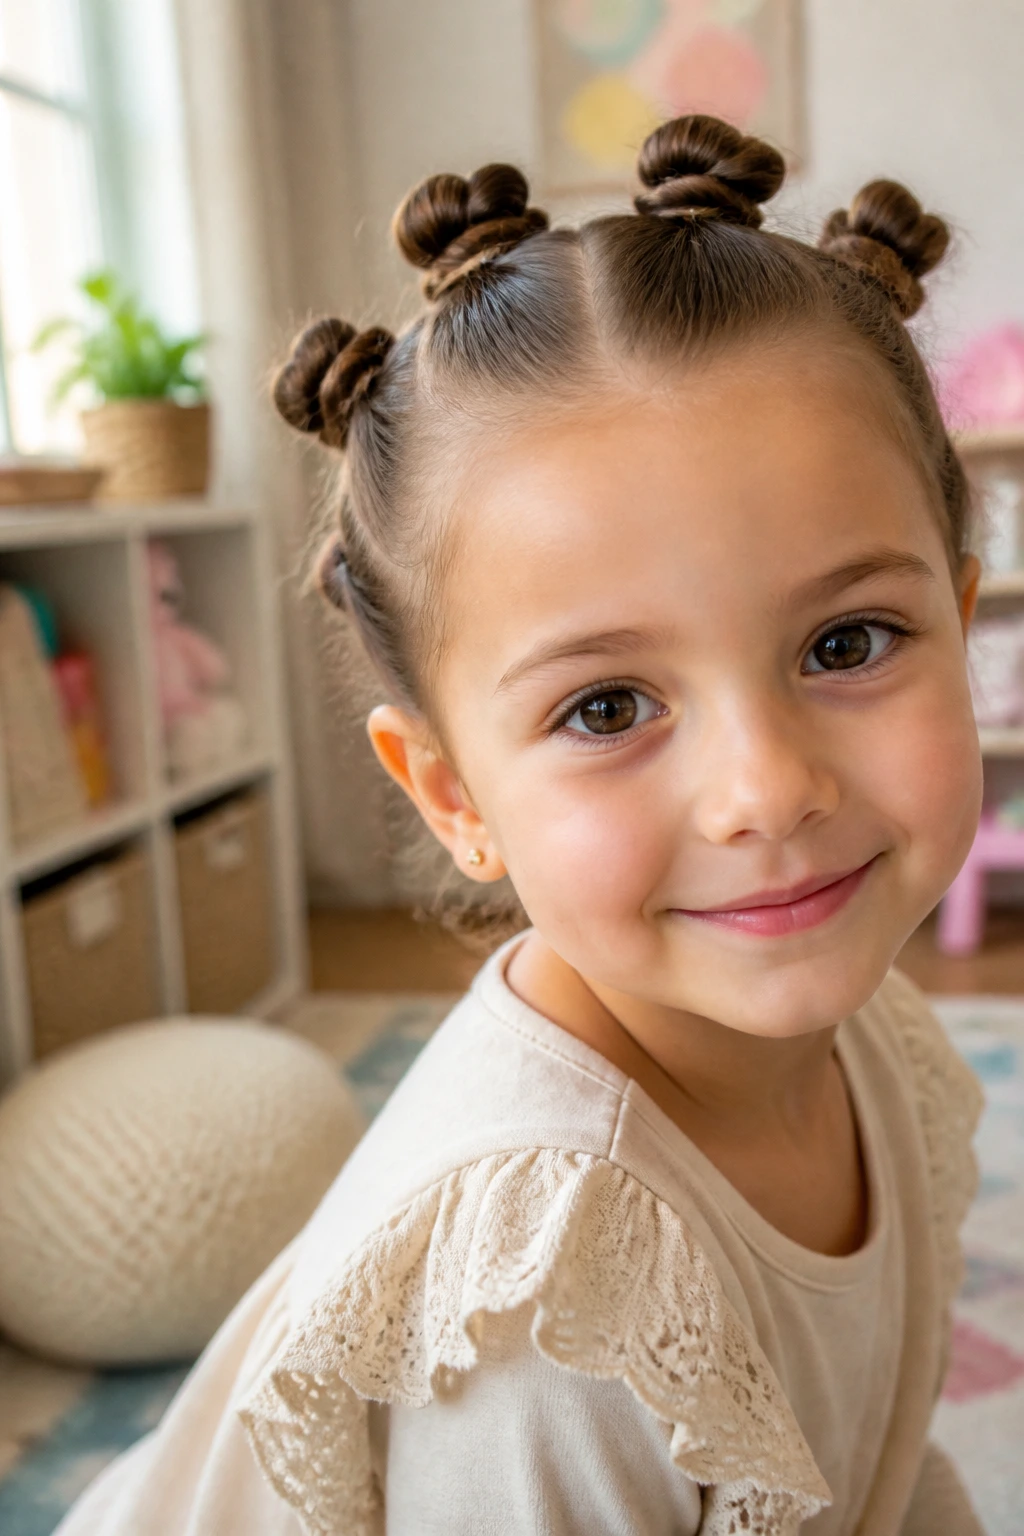
19. The Faux Hawk Bun Row
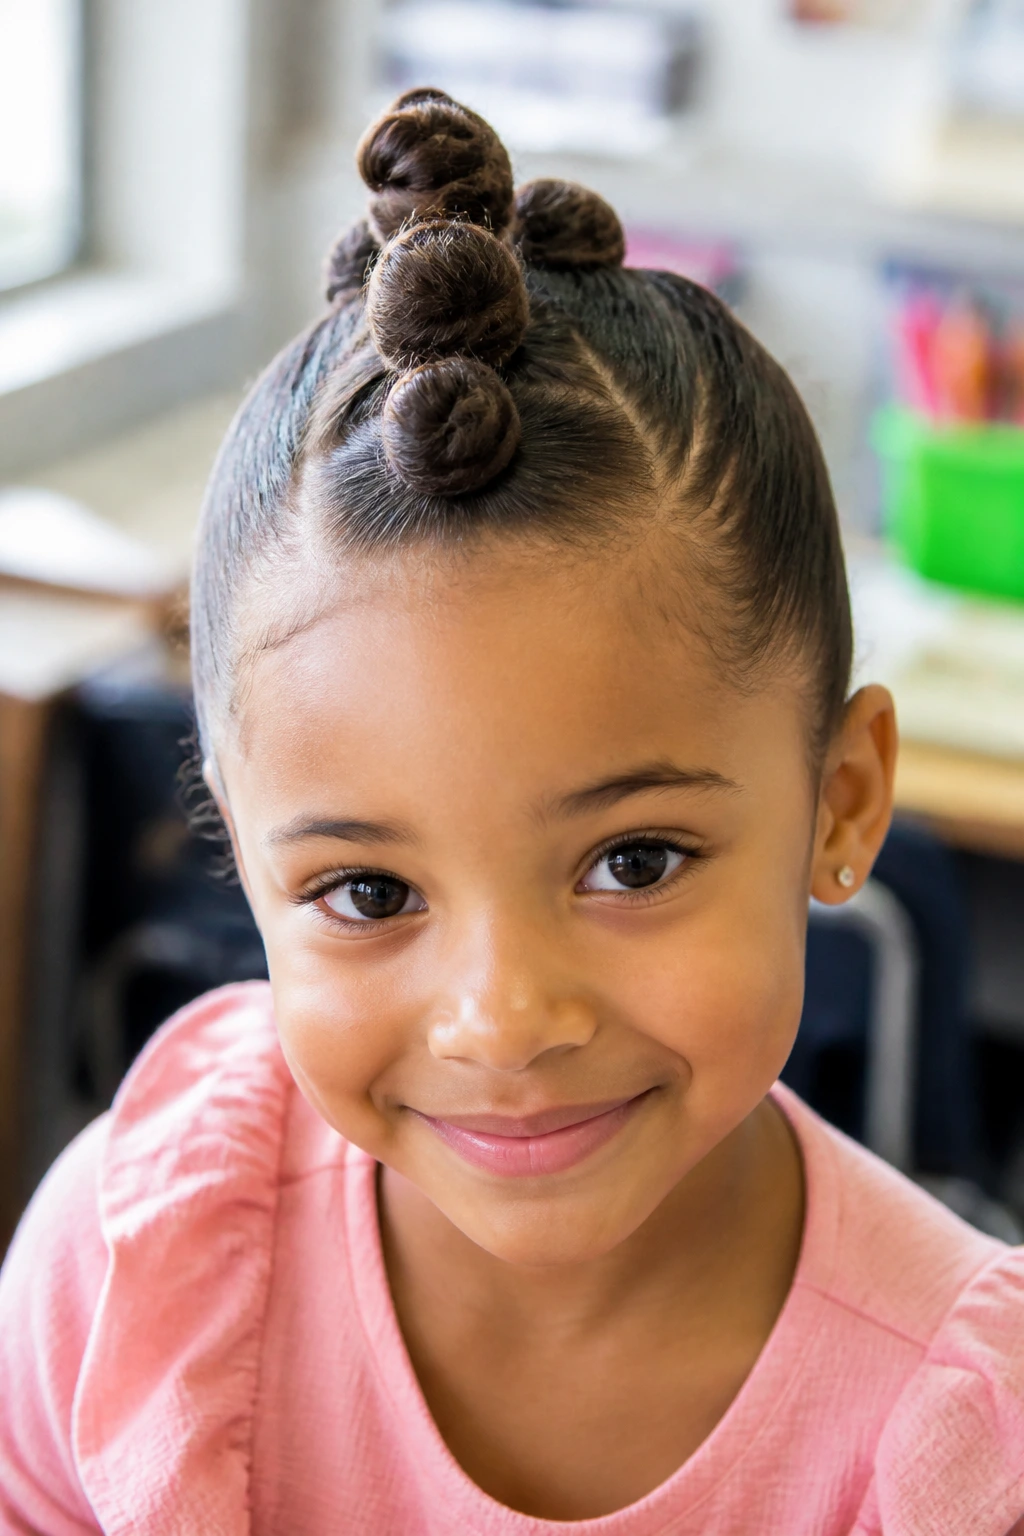
A faux hawk bun row is for the child who likes a bolder look. Small buns run down the center of the head, usually three to five depending on hair length, and the sides stay smooth or lightly slicked back. It sounds playful because it is playful. The style has a little attitude without becoming hard-edged.
The structure here matters more than perfection. Keep the sections even, but do not obsess over millimeter precision. Tiny differences actually help the style feel alive. This is a good choice for shorter hair, active kids, or mornings when one big bun keeps collapsing under its own weight. If the buns are small, use clear elastics and a few hidden pins. If they are bigger, give each one a firm base so they do not flop sideways by lunch.
20. The Side-Swept Twisted Bun
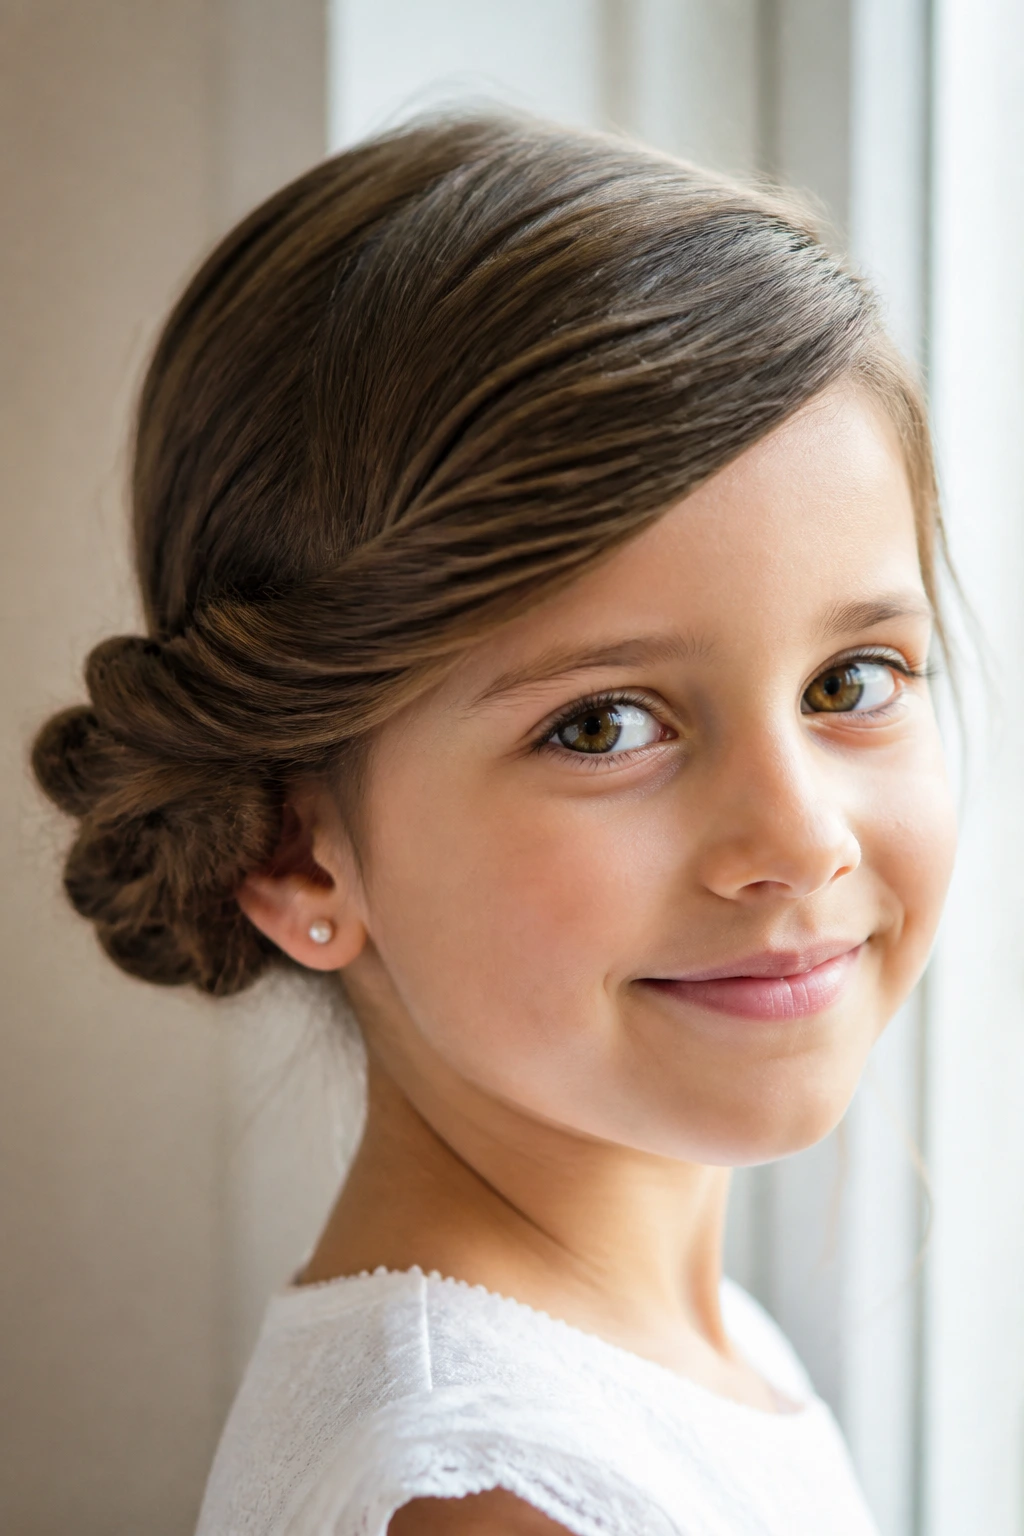
A side-swept twisted bun looks gentle and a bit dressy. Start with a side part, sweep the front section across the forehead or temple, twist it toward the back, and gather the remaining hair into a side bun. The shape frames the face in a way that flat middle parts do not. That alone makes it useful for children growing out bangs.
I like this style when I want soft movement but still need the hair secured. It works especially well on wavy hair because the twist helps direct the shape without forcing every strand flat. Keep the twist smooth and let the bun sit just behind the ear or slightly lower. If you place it too far back, the whole style loses the point. A side bun is about the angle. Get that right and the rest falls into place.
21. The Four Mini Buns
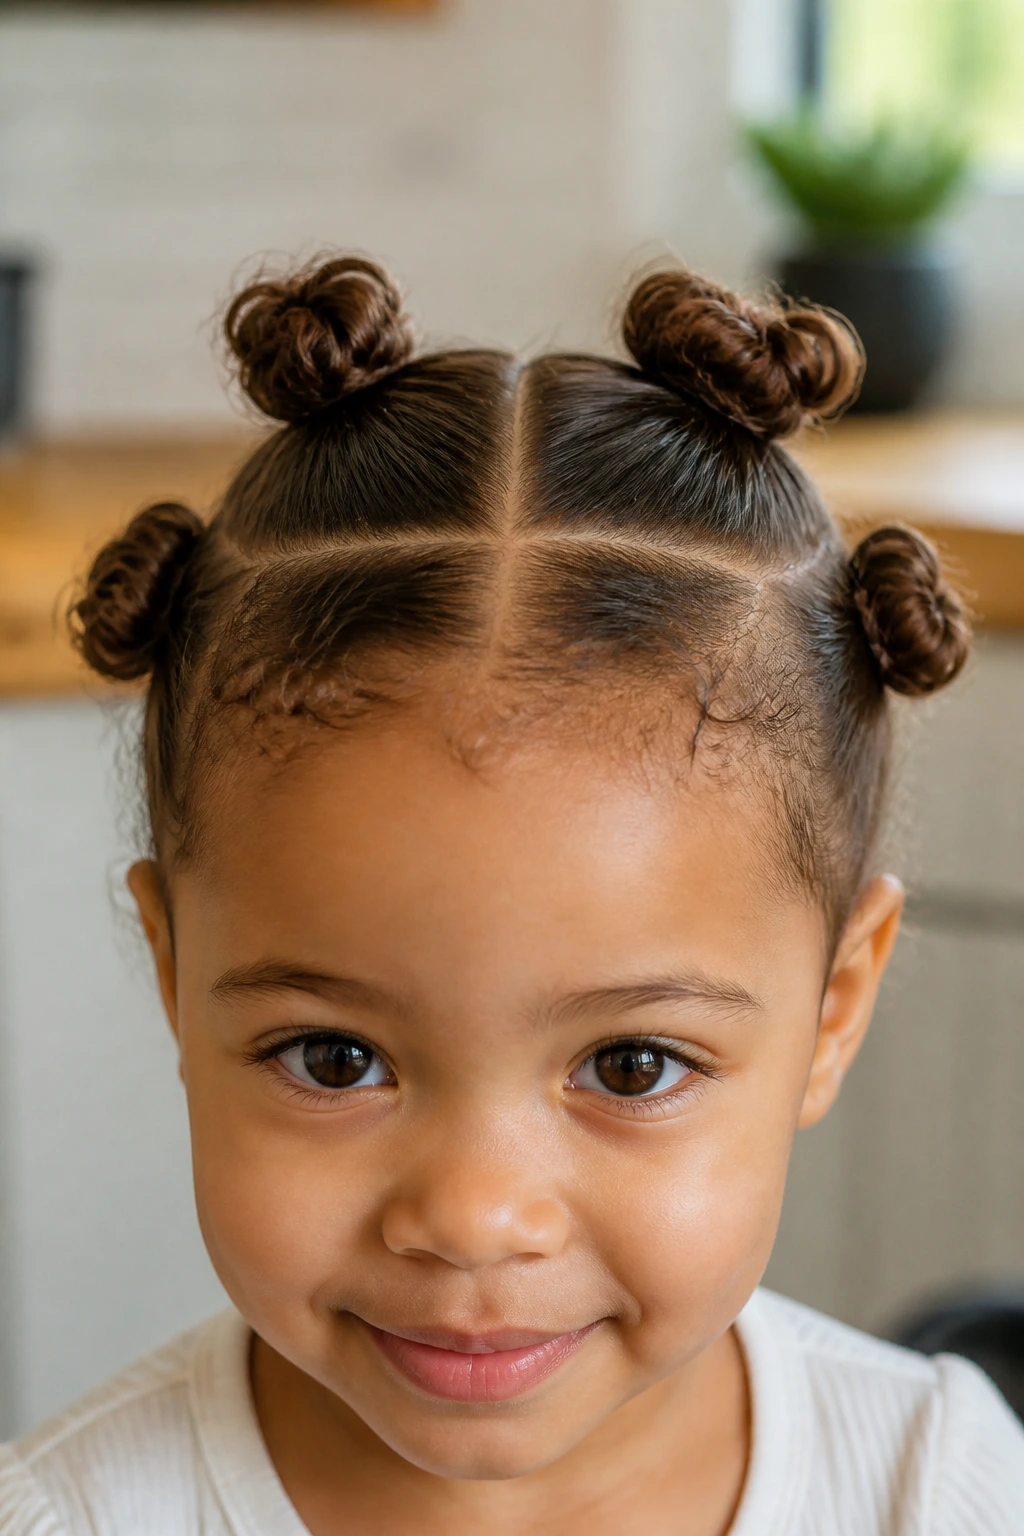
Four mini buns are an answer for short to medium hair that refuses to behave as one unit. Divide the head into four sections — two in front, two in back — and build tiny buns in each square. The result is cute, sturdy, and balanced. It also works well when the hair is still too short for one big bun but too long to leave loose without tangles.
This style is a little playful, a little retro, and very practical. Each bun carries less weight, so the style stays comfortable on small heads. Use soft elastics and keep the parts clean. If the child likes accessories, a tiny clip on one bun is enough. More than that, and the look starts to wobble visually. Four buns already do a lot of talking.
22. The Knotted Bun
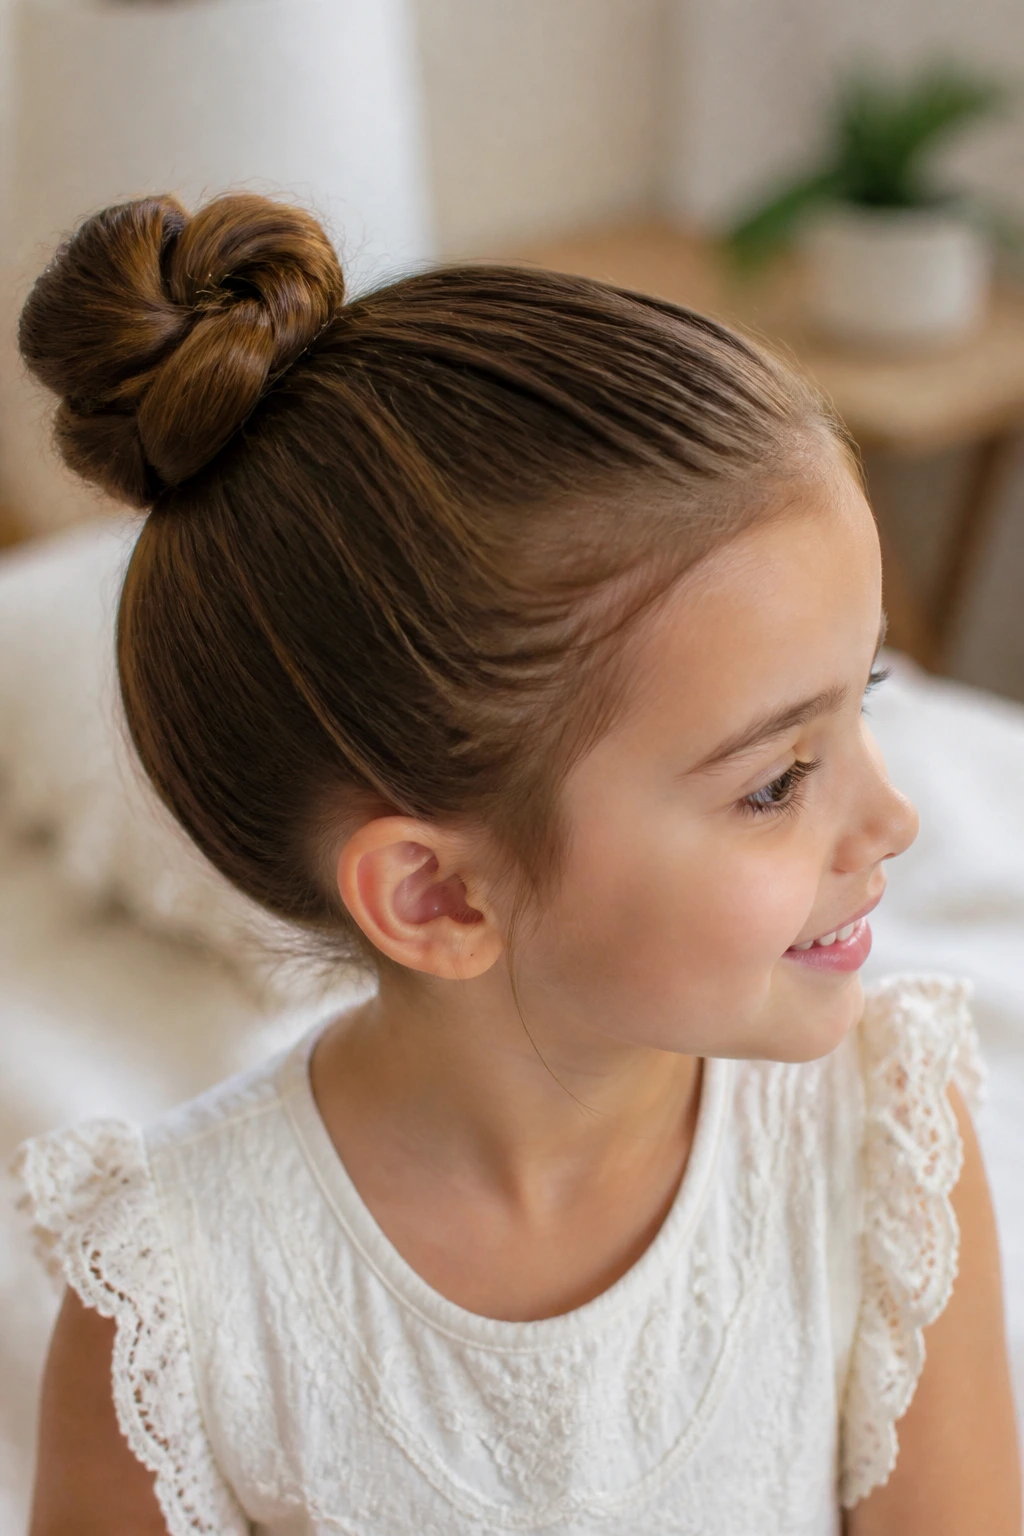
The knotted bun has a bit more texture than a plain wrap, which is why it looks interesting even when it is done quickly. The ponytail is tied or twisted into a knot shape, then the ends are tucked under and pinned. On shoulder-length hair, the knot can look almost architectural; on longer hair, it becomes softer and more rounded.
This is one of those styles that benefits from a little imperfection. If every loop is too tight, the knot loses its charm. If the hair is very silky, prep it first with a light spray or a touch of mousse so the knot does not unravel. The style works well for school days because it is secure without looking overly stiff. It’s neat, but not severe. I like that.
23. The Beaded Braided Bun
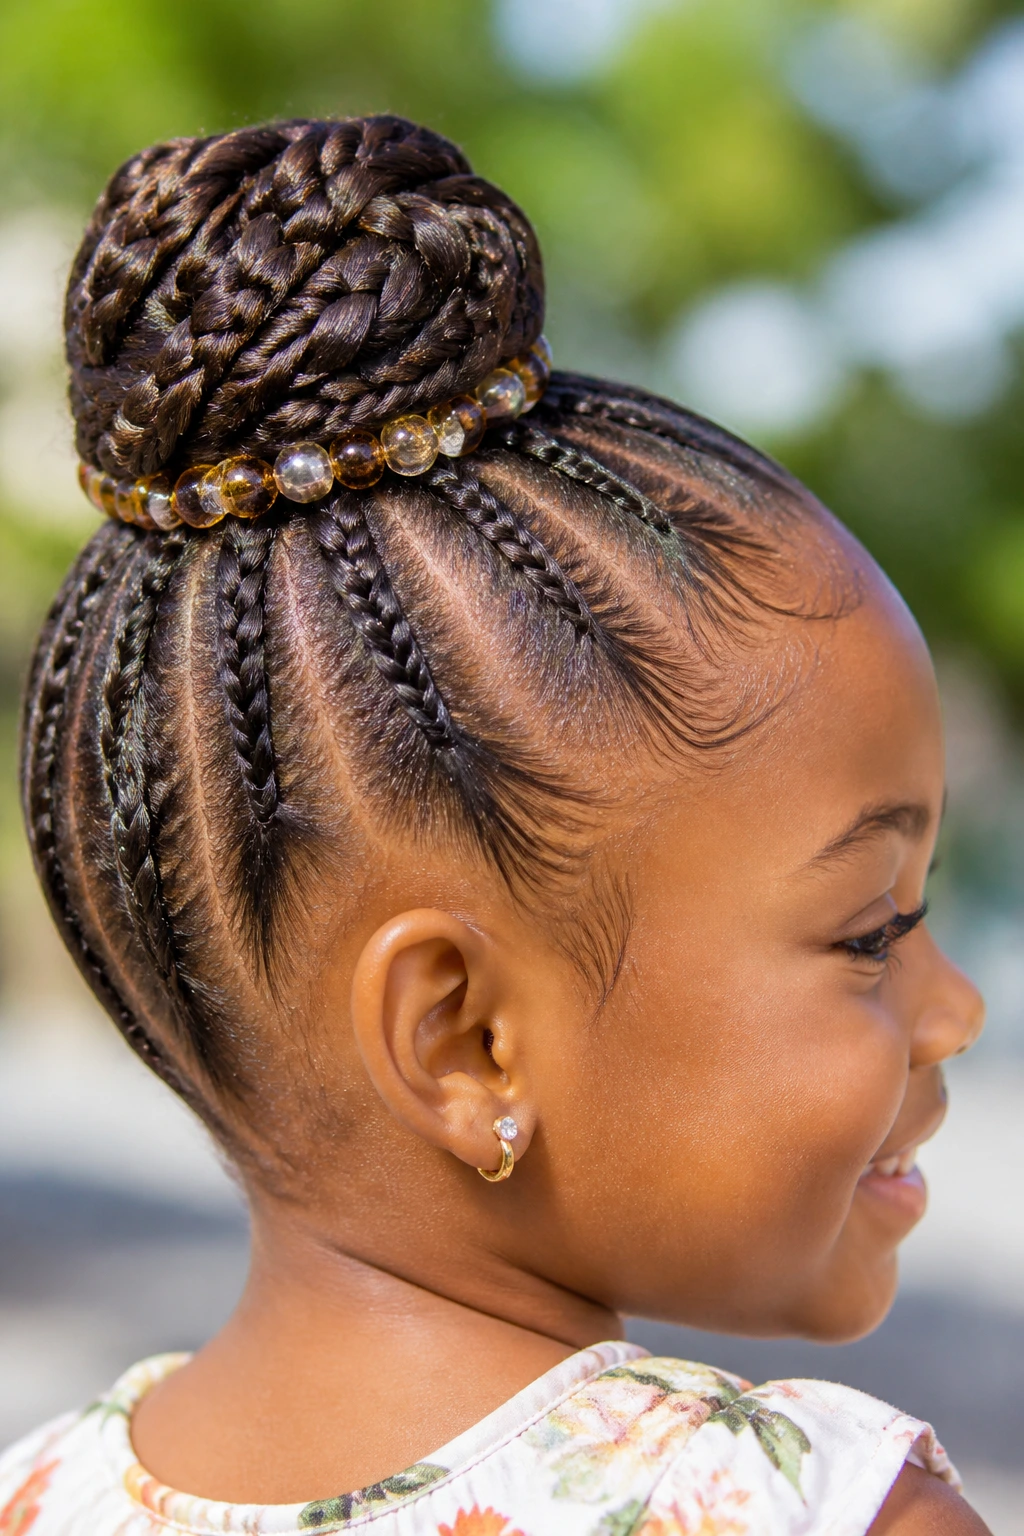
A beaded braided bun carries the most personality of the bunch. A braid is formed first, then wrapped into a bun or tucked beside one, with beads adding weight and movement at the ends or around the base. On textured hair, the beads can become part of the whole silhouette instead of feeling like an add-on.
The important part is balance. Keep the beads light enough not to pull, and make sure they are placed where they won’t bang against the neck during play. This style works well for celebrations, cultural events, or any day a child wants her hair to feel special and noticed. It also gives you room to play with color in a way that still respects the shape of the bun. Bold, yes. Busy, no. That line matters.
How to Make Buns Hold Through School, Play, and Car Rides
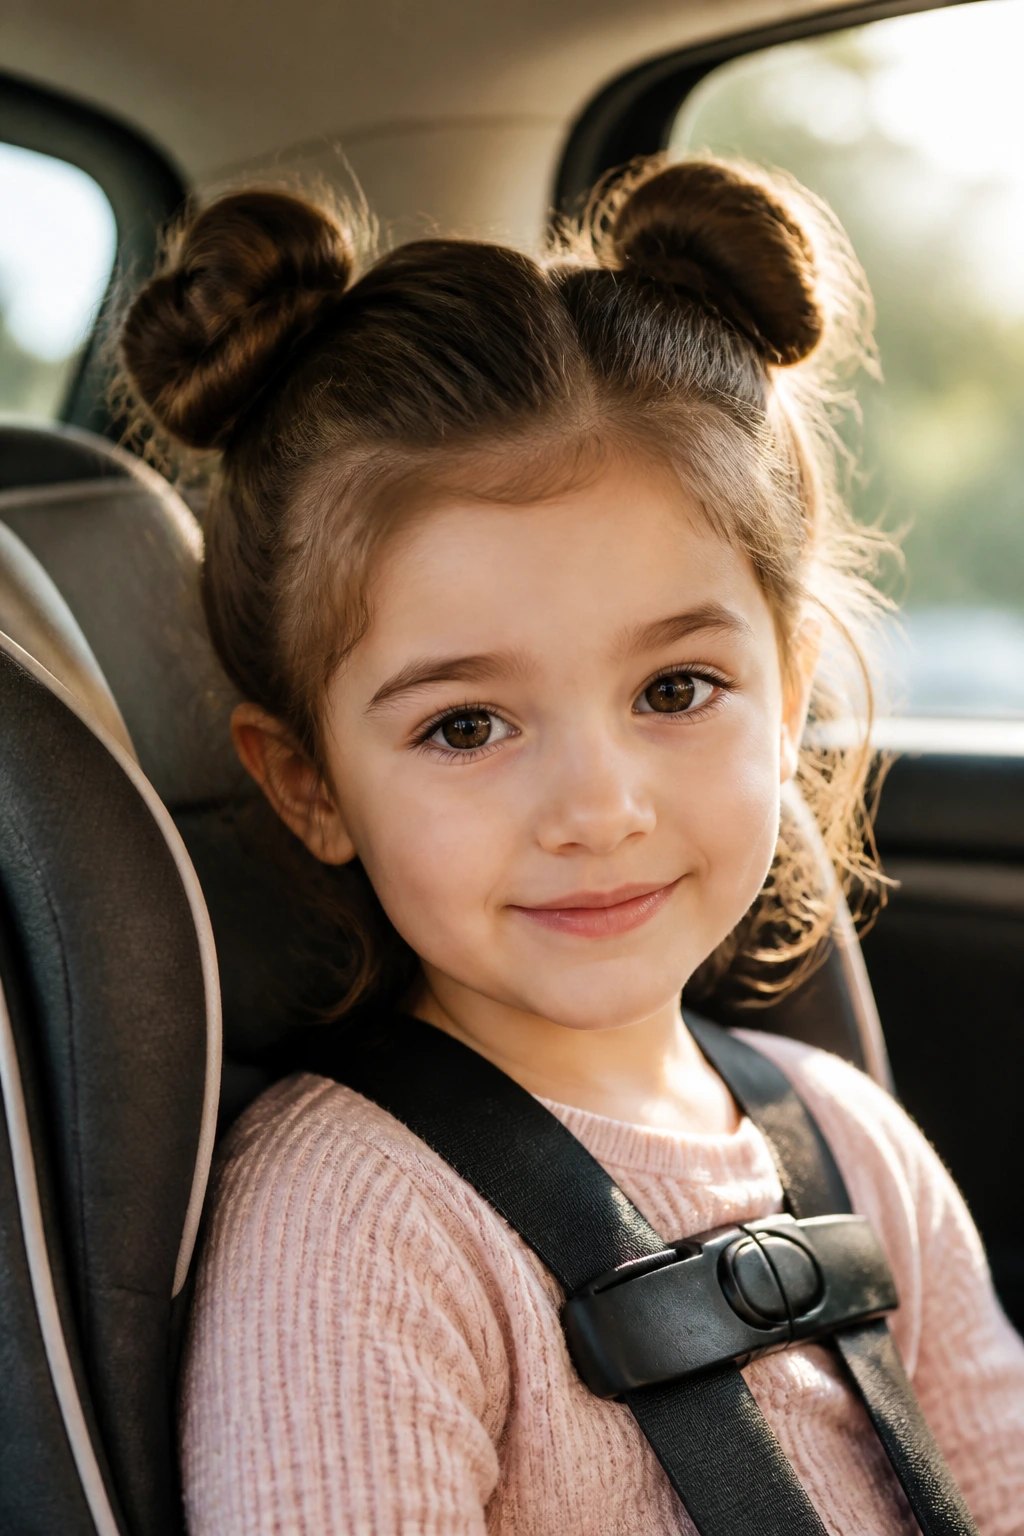
A bun fails for boring reasons. The base was too loose. The part was uneven. The hair went up while still full of tangles. Or the style was built for a still photo and not for an actual child who climbs into car seats and collides with jacket hoods.
The fix is usually at the root, not the finish. Start with detangled hair and a little grip at the base — a light leave-in, a tiny bit of mousse, or a dab of styling cream on the palms. Then choose elastics that match the job. Tiny clear bands are good for detail work. Soft snag-free elastics are better for comfort. Bobby pins should cross, not just sit there like little silver commas.
Anchor the base first
A ponytail that wobbles will make any bun wobble. Hold the hair where the bun will sit, brush the sides toward that point, and secure the base before twisting or wrapping anything.
Tuck the ends fully
Loose ends are the part that catches on sleeves and seat belts. If the hair is layered and shorter pieces pop out, pin them under the bun instead of spraying them down into a hard shell.
Keep one rescue tool nearby
A travel comb, two spare elastics, and a couple of pins solve most mid-day problems. That is usually enough.
Essential Tools for These Hairstyles
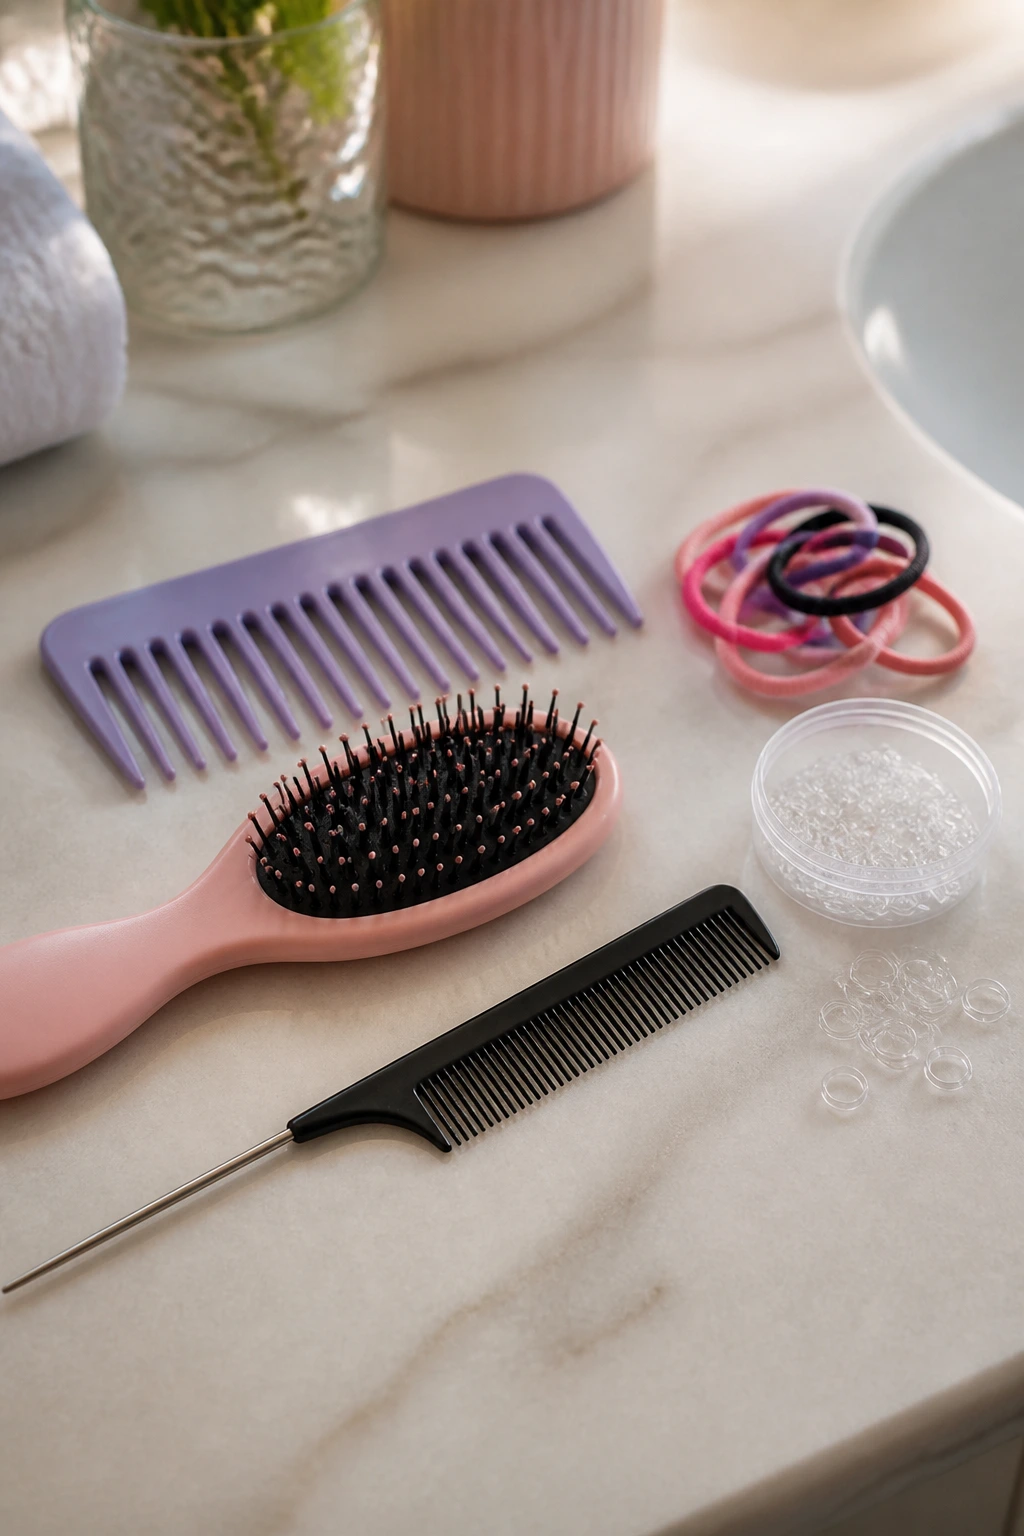
- Rat-tail comb: Best for clean parts, especially for the heart part, crown braid, and neat center lines.
- Soft detangling brush: Use this before styling so the bun starts smooth, not fought over.
- Wide-tooth comb: Better for curls, waves, and hair that tangles when brushed too hard.
- Snag-free elastics: These hold the base without chewing up the hair shaft.
- Small clear elastics: Handy for bubble buns, braids, and sectioning mini buns.
- Bobby pins in two sizes: Small pins secure detail work; larger ones help anchor heavier buns.
- Leave-in conditioner or detangling spray: Use a light mist to calm frizz and make sectioning easier.
- Styling cream or lightweight mousse: A tiny amount gives grip without the crunch that kids often hate.
- Duckbill clips: Keep sections out of the way while you braid or twist.
- Satin scrunchie or ribbon: Nice for finishing touches and gentler than hard elastics on the ends.
Smart Hair Prep and Product Picks That Actually Help
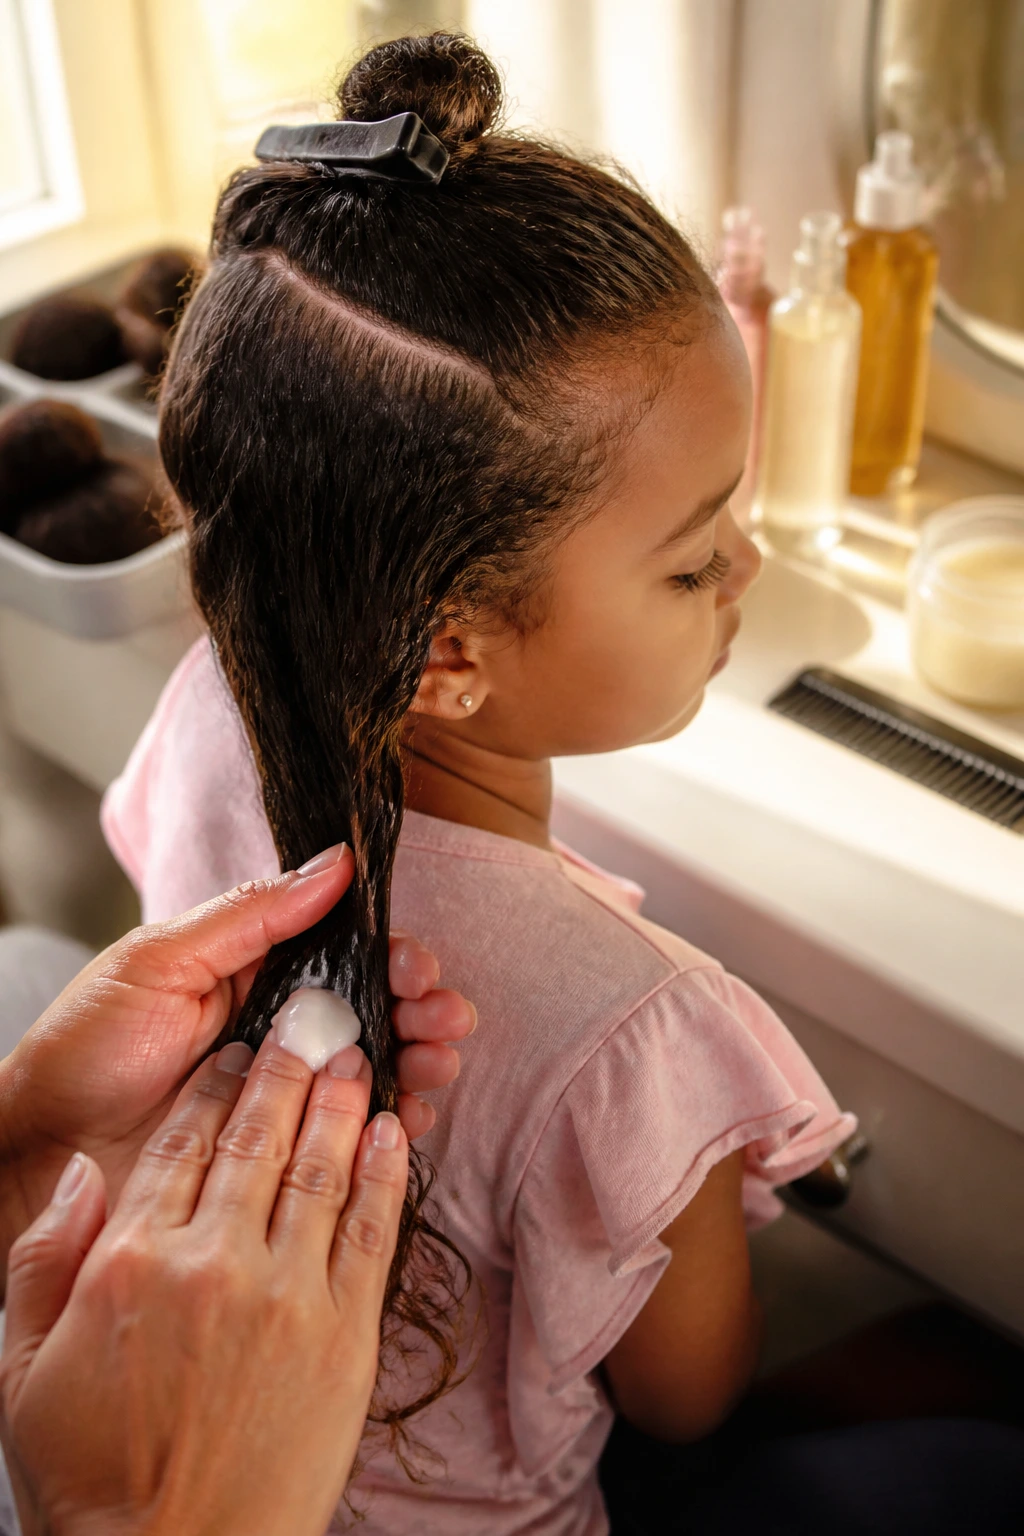
The best bun starts before the elastic goes on. Hair that has been brushed from the roots straight down tends to look smoother, but that is not the same as healthy or comfortable. Start at the ends and work up in small sections. If there’s a knot the size of a pencil eraser, stop and deal with it before you build a bun on top of it. That tiny knot will show up later as a bump or a sore spot.
For product, think light. A dime-sized amount of styling cream can tame flyaways on a child’s hair better than a heavy gel that leaves the hairline stiff. If the hair is very fine, use less product than you think. Fine hair gets weighed down fast. Thick curls usually need a little more moisture and a little more patience, especially around the nape where tangles gather first.
What to choose for each texture
Straight, silky hair often needs grip. Wavy hair usually needs a light hold product plus a smooth brush pass. Curly or coily hair tends to look best when it is detangled in sections and then left with some of its natural shape instead of being scrubbed into a flat shell.
What to skip
Skip anything that stings the scalp, smells sharp, or turns the hair into a hard helmet. Kids notice discomfort faster than adults do, and they should. If a product feels tacky on your own hands, it will probably feel tacky on a child’s hairline too.
How to Wear Them for School, Dance, and Dress-Up
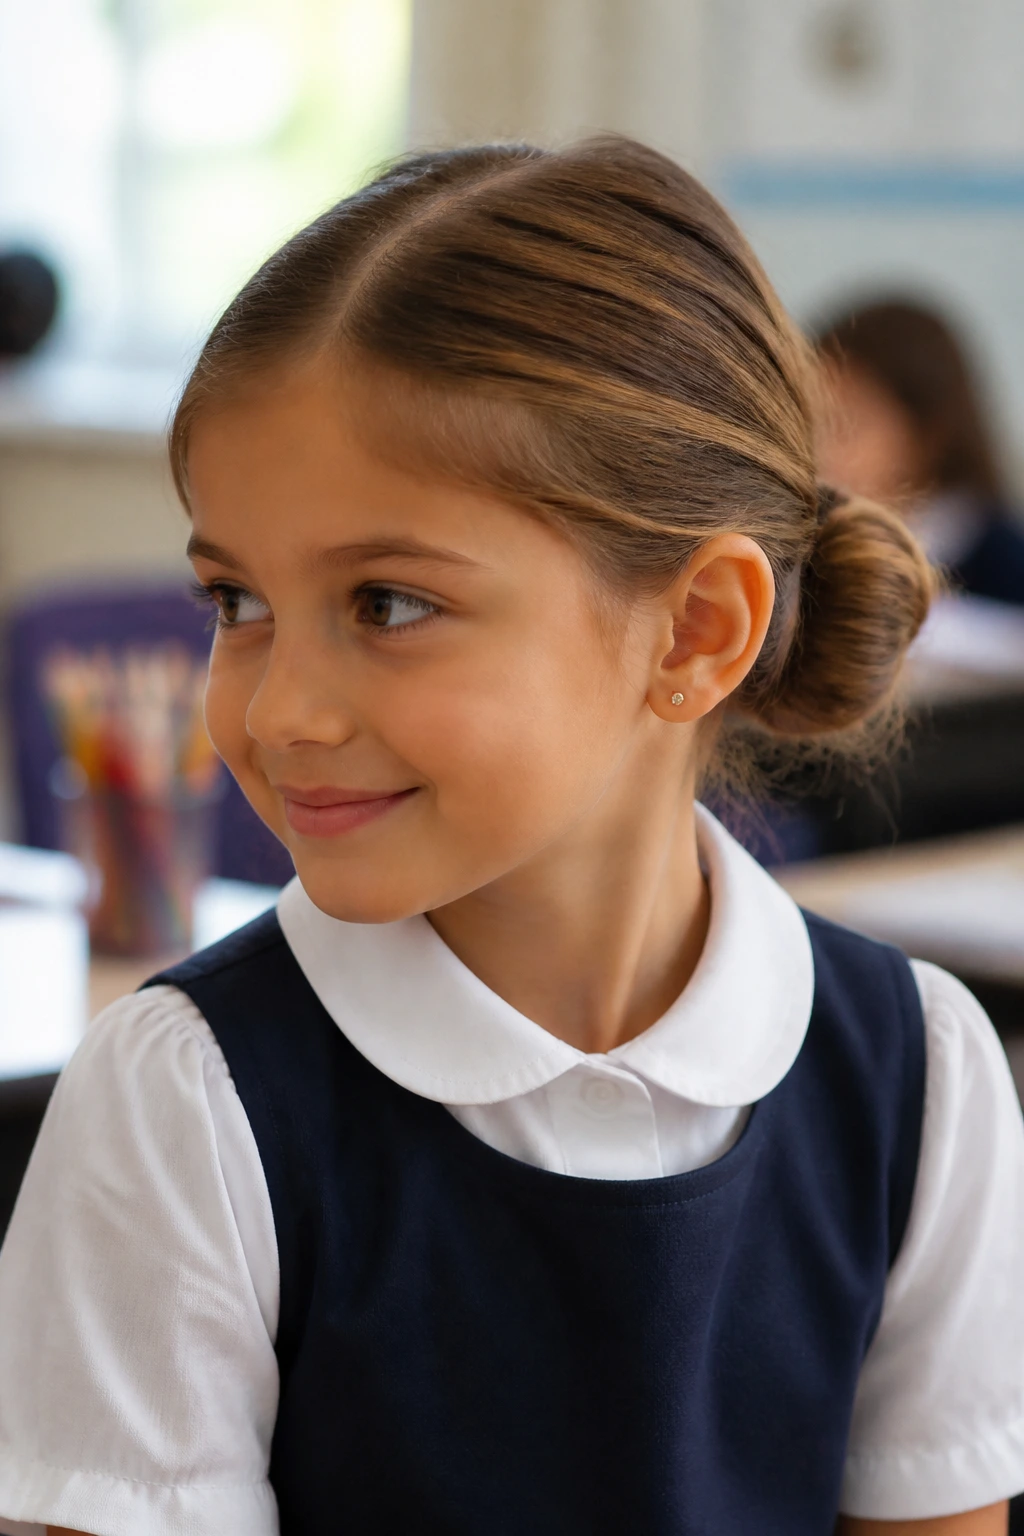
School Morning: Choose styles that sit low enough to stay comfortable in a classroom chair and car seat, like the low nape bun, braided pigtail buns, or a quick top knot with soft edges. Keep decorations small so the child can lean her head back without getting poked by a giant bow.
Dance or recital day: The ballet bun, sock bun, and smooth high bun give the cleanest silhouette under stage lights. Use more secure pins than you would for school, and check the back in a handheld mirror before leaving. The back view matters more than people think.
Dress-up or photos: Ribbon-wrapped buns, flower buns, side buns, and the heart-part bun add detail without needing complicated accessories. Keep the outfit and the hair in the same mood. A very large bun with a delicate dress can feel off-balance.
Busy, active days: Space buns, cornrow buns, and rope-twist buns handle movement better than softer styles. They stay up without needing constant fixing, which is the whole point when the day includes climbing, running, or a long afternoon in the back seat.
Extra Tips for Smoother Parts, Better Hold, and Less Frizz
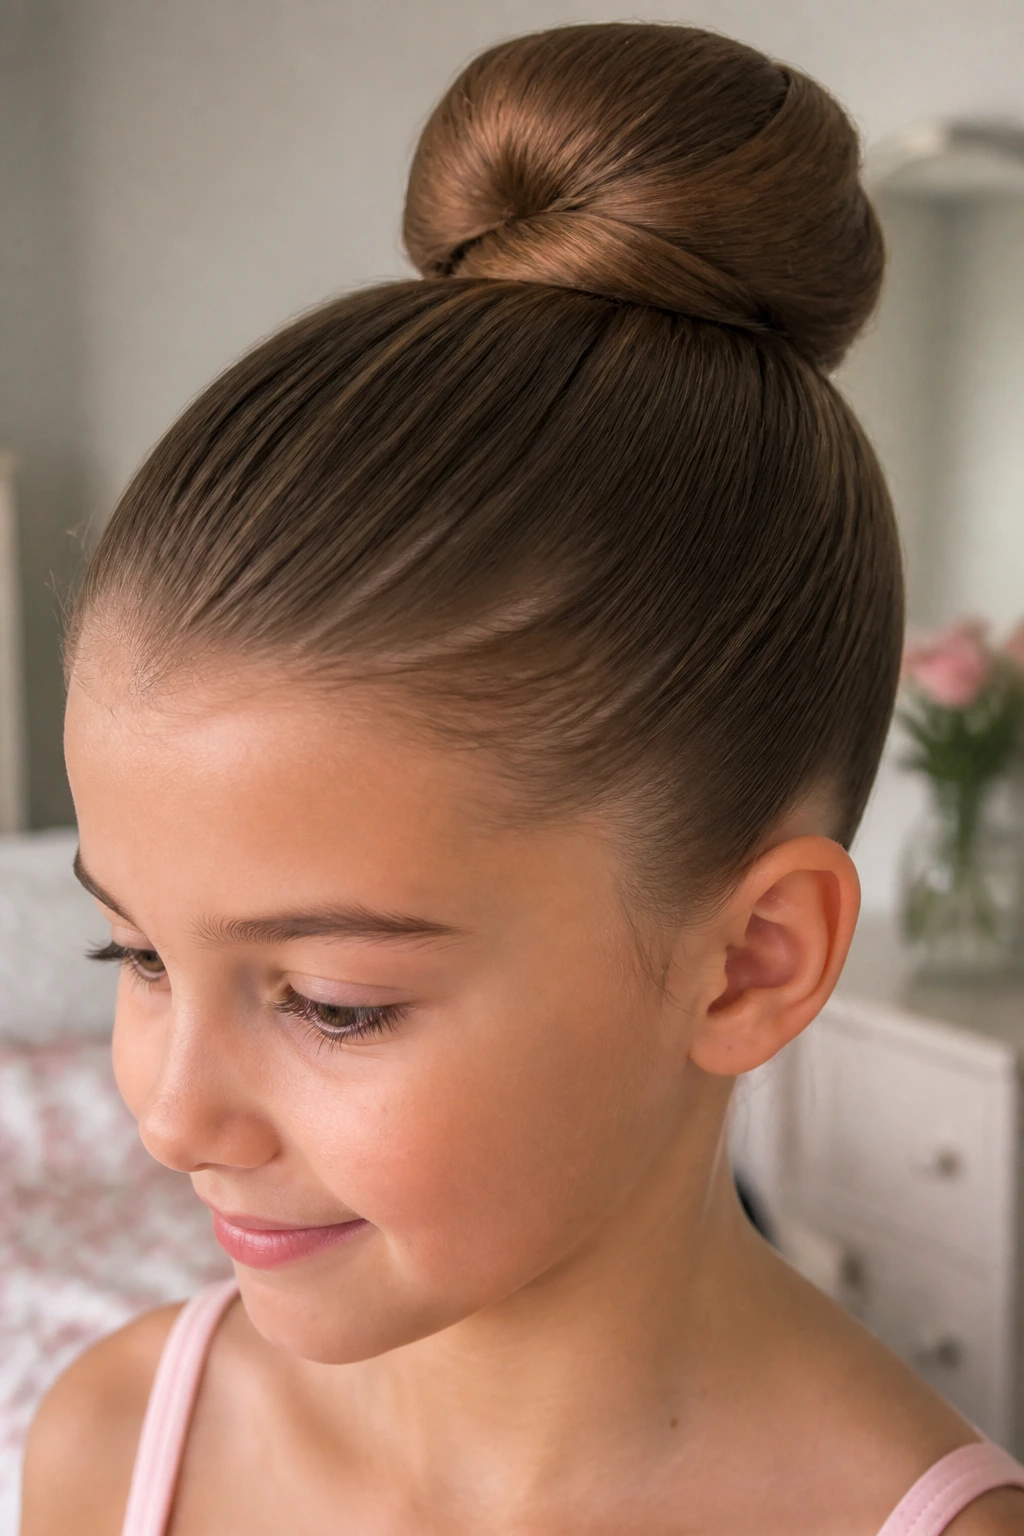
Smoother Parts: Mist the part line lightly with water before drawing it with a rat-tail comb. Dry hair splits and frays, and a clean part goes downhill fast if you keep combing over it.
Better Hold: Wrap a second elastic around the ponytail base before you build the bun if the hair is slippery. That extra anchor keeps the bun from sliding without needing a ton of spray.
Less Frizz: Warm a pea-sized amount of styling cream between your palms and smooth it over the outer layer only. Do not coat the whole head. That is how buns turn greasy by dinner.
Make-It-Yours: Swap in a satin ribbon, a small bow, or a tiny flower clip depending on the day. One accent is enough. The bun should still look like the main event.
Overnight Care and Between-Wash Maintenance
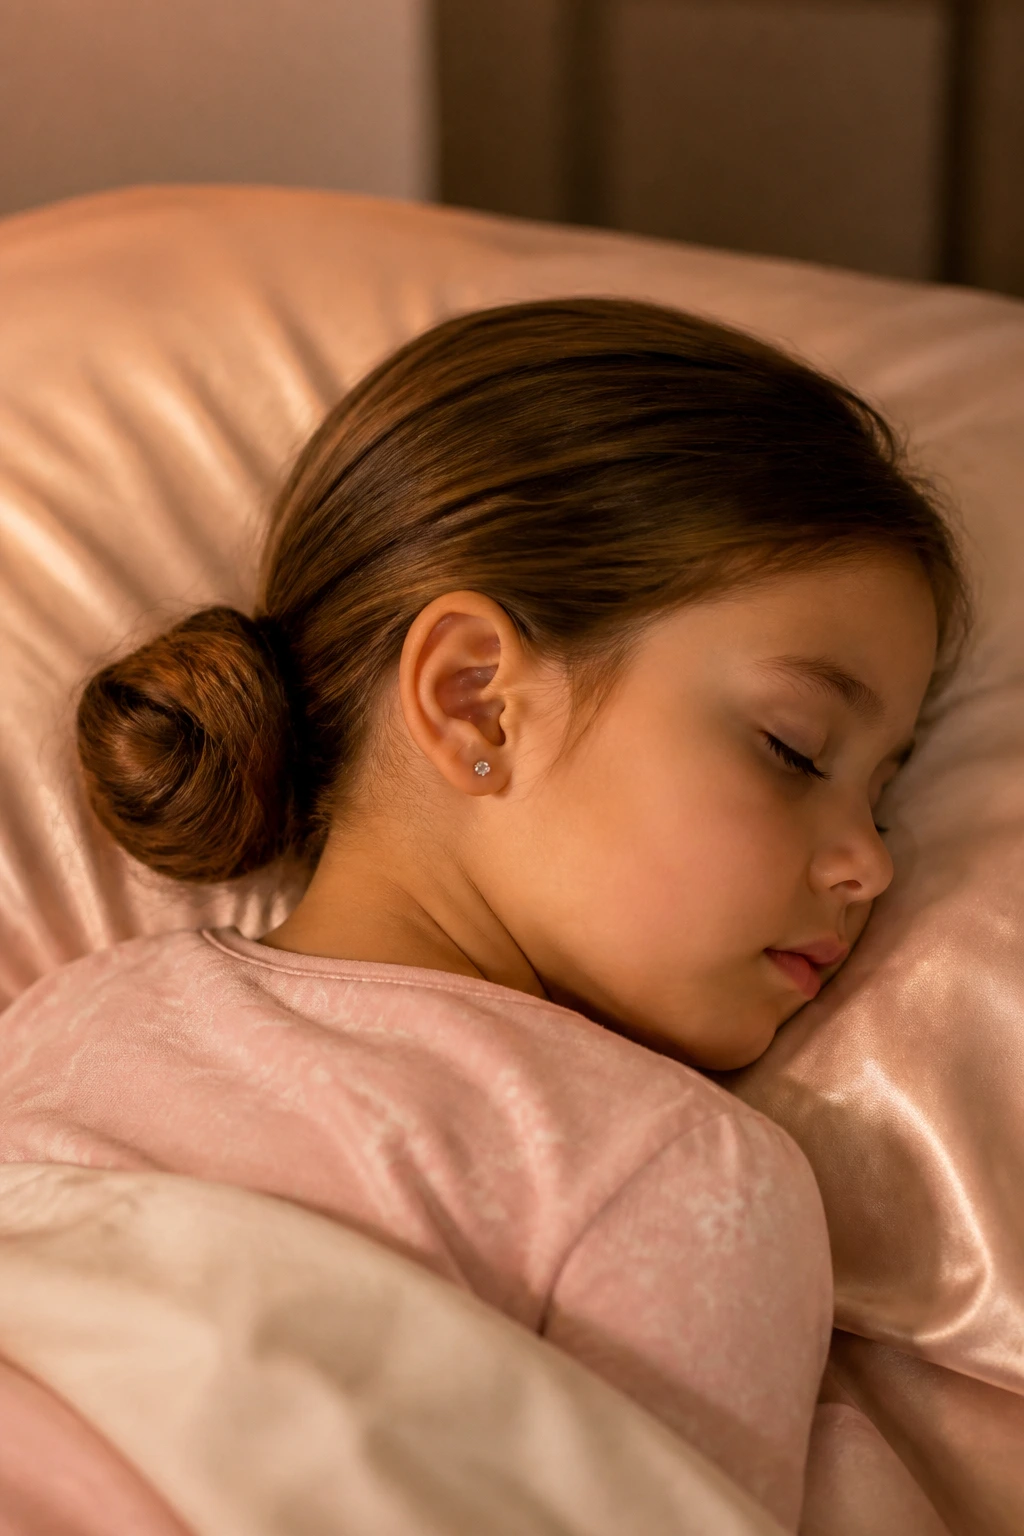
A bun does not always need to be torn down at bedtime. If the style is loose and comfortable — think low bun, soft braid bun, or a gently secured side bun — it can sometimes be worn overnight if the child sleeps on a satin pillowcase. That reduces friction, which helps the bun stay smoother and keeps the ends from puffing up like dry grass.
Tight styles are a different story. A high bun, a slick donut, or anything with firm pins should come out before sleep. Scalp comfort matters. So does the hairline. Leaving a tight style in overnight tends to leave dents and sore spots, and children do not have much patience for that. If you want to refresh the next morning, mist the hair lightly, smooth the front with your hands, and rebuild the bun from the base instead of trying to rescue a flattened one.
Between-wash refresh
If the bun lasts into the next day, a quick finger-comb at the edges is usually enough. Add one new elastic if the original feels stretched. Replace pins that have slipped. That is faster than starting over, and on most school mornings, faster wins.
Variations and Adaptations to Try
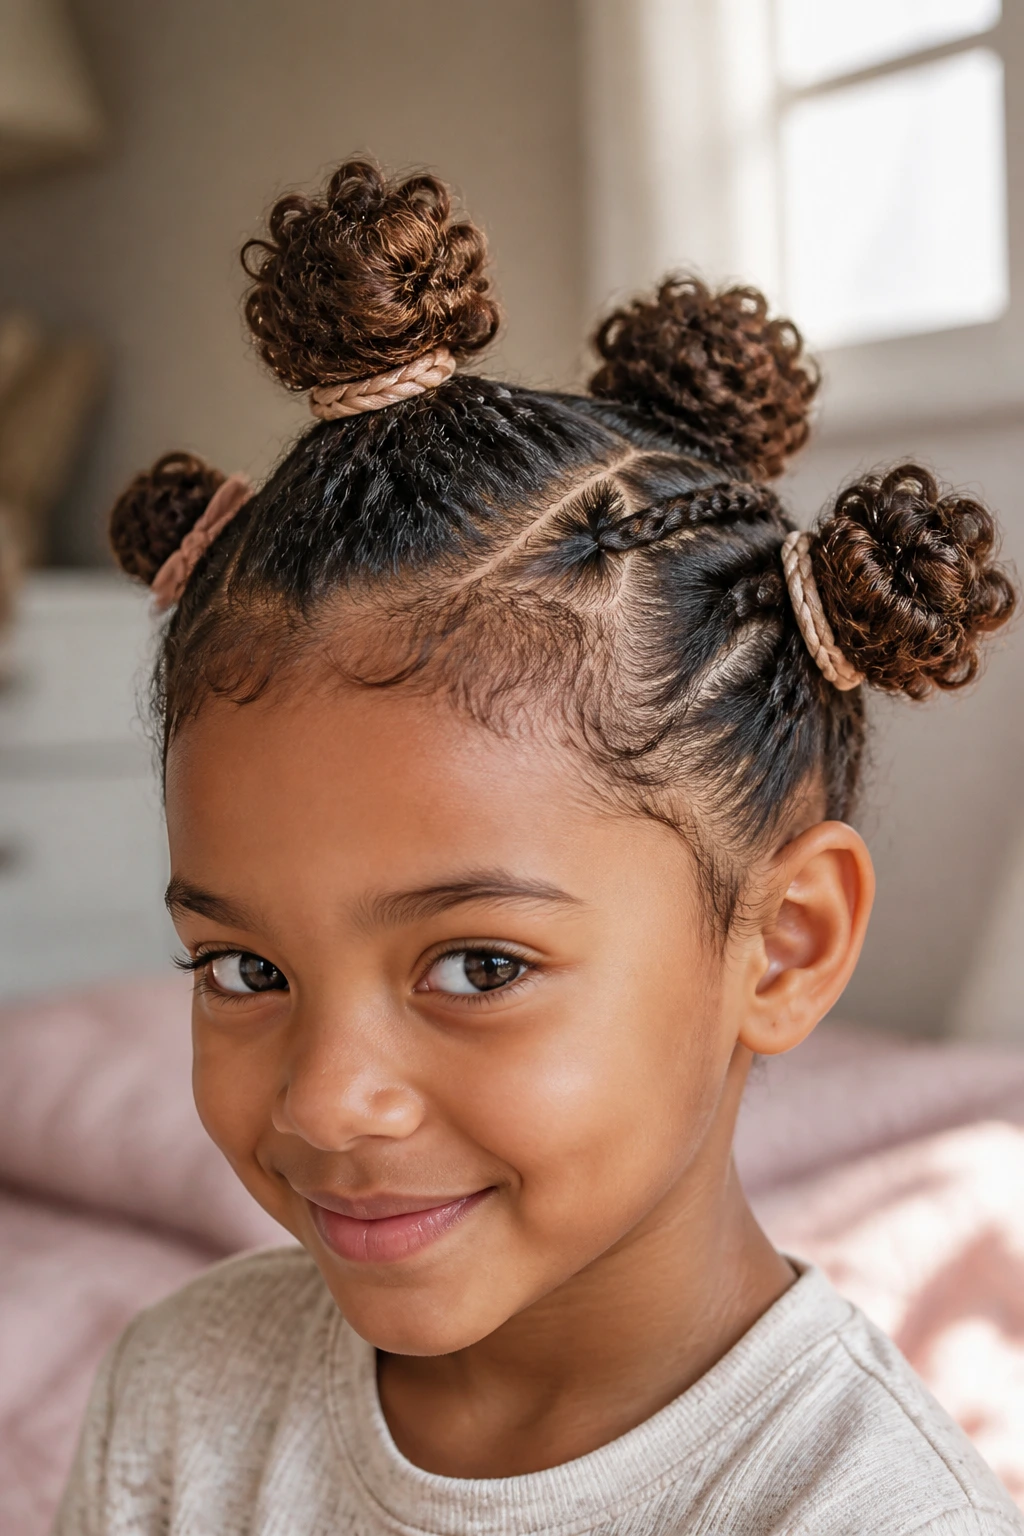
Curly-First Bun: Leave the natural curl pattern intact instead of brushing it smooth. Gather it with your hands, add a little moisture, and build a softer bun that holds shape without fighting the curl.
Fine-Hair Builder Bun: Use a small bun shaper or a tiny sock form to make the bun look fuller. A second elastic at the base helps keep the style from collapsing before lunch.
Sensitive-Scalp Version: Keep the bun low and loose, skip heavy pull at the temples, and avoid piling pins in one spot. This is the version for children who complain the minute something feels tight.
Playground-Proof Braided Version: Add a braid before the bun, then tuck every end under the base. The braid gives the style more grip and better staying power during rough movement.
Dress-Up Ribbon Version: Choose one accent ribbon and one matching bow. That’s enough. The bun should stay soft and the accessory should do the talking, not the other way around.
Short-Hair Mini Bun Version: Break the hair into two, three, or four smaller buns instead of forcing one oversized shape. Shorter lengths usually sit better in smaller sections and come apart less.
Common Mistakes to Avoid
Starting with tangled hair: A bun built over knots turns lumpy fast and hurts when it’s taken down. Detangle first, section by section, starting at the ends.
Pulling the front too tight: A tight hairline might look neat for five minutes, then the child starts touching her temples and shifting around. Use enough tension to hold, not enough to leave a visible dent.
Using heavy product on fine hair: Too much cream or gel makes the hair droop and can attract dust by midday. Use a small amount, then stop.
Making the bun too high for the child’s head shape: On small heads, a bun placed too far up can wobble and tilt. Lower it a little and the whole style tends to settle better.
Leaving pins where a child can feel them: Pins sticking out or pressed hard against the scalp lead to complaints, fidgeting, and eventual collapse. Hide them under the bun and test the style by running your fingers around the edge.
Frequently Asked Questions
How long should a bun last on a little girl’s hair?
A well-built bun usually lasts through school, play, and the car ride home. If the hair is very fine or slippery, expect to do a quick midday fix with one elastic or a pin.
What hair length do you need for bun hairstyles?
Shoulder-length hair can work for mini buns, half-up buns, and braided styles. Longer hair gives you more options, but even shorter lengths can hold two, three, or four small buns.
Are buns safe for everyday wear?
Yes, if they are not pulled too tight. Rotate placement, keep the tension gentle, and give the scalp a break on looser days so the hairline does not get stressed.
How do you keep a bun from slipping out?
Start with a secure ponytail base, use snag-free elastics, and cross your bobby pins under the bun instead of sticking them straight in. A tiny bit of mousse or styling cream can help on slippery hair.
Can curly hair hold these bun styles without getting crushed?
It can, and it often looks better when you work with the curl instead of against it. Leave a little texture, use moisture, and avoid brushing curls flat unless the style really needs that shape.
What if my child hates bobby pins?
Try styles that rely more on elastics and less on pinning, like space buns, pigtail buns, or a braided bun. If you do use pins, hide them well and keep them away from the scalp edge.
How do I make a bun look neat without making it crunchy?
Use a light touch. Smooth the outside with damp hands or a tiny amount of cream, then stop. Crunch usually shows up when you keep adding product after the shape is already finished.
Which bun is best for picture day?
The ballet bun, donut bun, and crown braid bun usually give the cleanest finish in photos. Pick the one that fits the hair texture best; a neat shape that stays comfortable will look better than a stiff style the child keeps adjusting.
Little Buns, Fewer Battles
The bun styles that hold up best are the ones built around the child’s hair, not around some imaginary perfect head. A smooth ballet bun, a soft ribbon bun, or a row of mini buns can all work beautifully if the base is comfortable and the sections make sense for the hair length and texture.
That is the part I come back to again and again: comfort first, shape second, decoration third. Once you get that order right, bun hairstyles for little girls stop feeling like a morning chore and start feeling like a small, repeatable skill. And honestly, that’s the real win — a style that looks cute, stays put, and doesn’t start a battle before breakfast.
