



A good shag haircut does something that very few cuts manage: it gives the hair shape without making it look stiff. That matters even more when you’ve got silver strands, changing texture, a cowlick that never got the memo, or hair that no longer behaves like it did decades ago. Retro shag haircuts for older women work because they don’t fight the hair. They take what’s there — fine, thick, wavy, straight, gray, dyed, stubborn, or airy — and build movement around it.
The best versions have a little swing at the ends, a soft frame near the cheekbones, and enough length left in the right places so the whole cut doesn’t collapse into a puff or a triangle. That’s the line most shag cuts have to walk. Too little weight, and the hair frays. Too much, and it turns boxy. Get the balance right, though, and the result looks easy in the best possible way.
And yes, a shag can be polished. It can be chic with glasses. It can flatter a strong jaw, soften a longer face, and make gray hair look deliberate instead of accidental. The trick is choosing the right version of the cut for the hair you actually have, not the hair you used to have or the hair in a magazine photo with a professional blowout.
Why These Retro Shag Haircuts Earn Their Keep
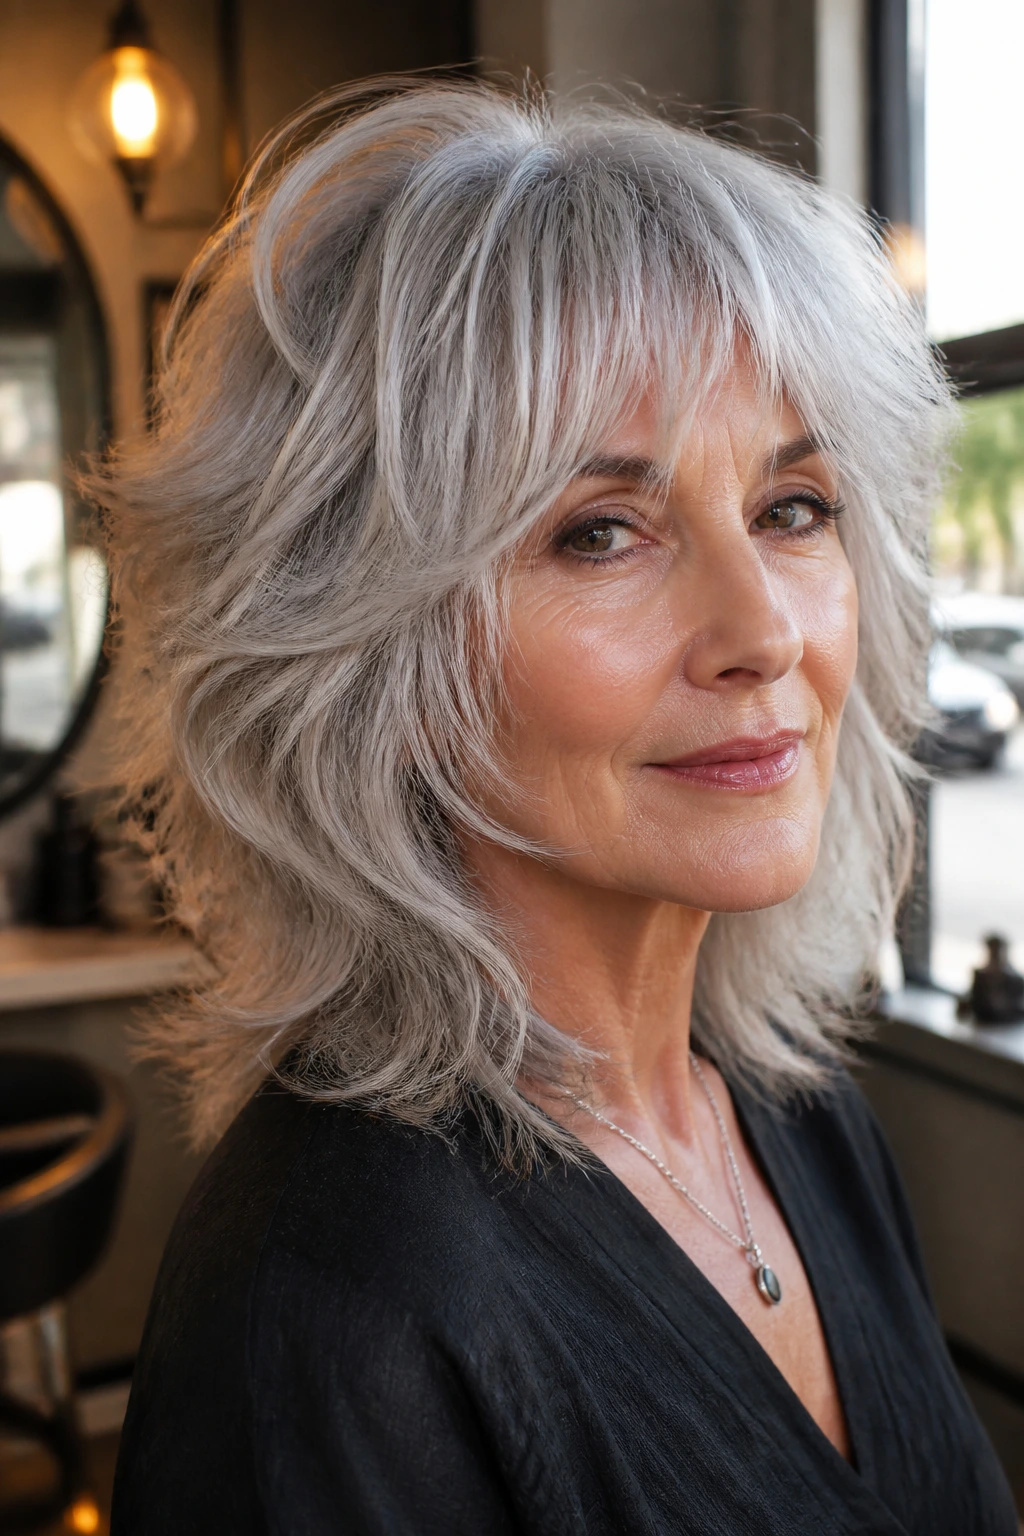
-
They keep movement where older hair often loses it: layers remove dead weight at the ends, so the cut swings instead of hanging like a curtain.
-
They work with gray and silver texture instead of pretending it isn’t there: the broken-up edges keep coarse or wiry strands from looking blunt and heavy.
-
They make bangs useful, not fussy: curtain fringes, bottleneck bangs, and side-swept pieces can soften the forehead without demanding a trim every two weeks.
-
They grow out with less drama than a sharp bob: a shag can look intentional even after a few weeks of growth, which is a gift if salon visits are spaced out.
-
They can be tailored to fine or thick hair without changing the whole vibe: a light internal layer for fine hair and weight removal for thick hair are two very different cuts, even if both are called “shag.”
-
They don’t need a perfect blowout to look finished: a bit of bend, a bit of separation, and a clean neckline usually do more work than a barrel full of hot air.
1. Feathered Collarbone Shag
This is the shag I’d hand to someone who wants softness first and attitude second. The collarbone length keeps enough weight at the bottom so the cut doesn’t puff out, while the feathered layers around the face give you that easy, brushed-through movement that looks especially good on silver or salt-and-pepper hair. It’s tidy enough for everyday wear, but it never feels severe.
Why It Works
The collarbone is one of those lengths that flatters a lot of faces because it doesn’t crowd the jawline. The layers can start around the cheekbone or just below it, which gives the front some lift without making the crown look overdone. That matters on finer hair, where too many short layers can make the top go fluffy and the ends go thin.
Ask for soft point-cut ends, not blunt edges. The goal is a feathered outline, not a chopped one. If your hair has a natural bend, this cut will use it. If it’s straight, a round brush or a large curling iron bend at the ends is enough.
Best For
- Women who want movement without losing shoulder-length versatility
- Fine to medium hair that needs a little body
- Faces that look better with softness around the cheekbones
One thing to ask for: keep the perimeter full enough that the ends still swing. That’s the difference between “feathered” and “wispy.”
2. Silver Razor Shag
Silver hair can look expensive in a razor shag when the cut is done by someone who understands balance. The razor softens coarse strands and breaks up the bulk, which keeps gray or white hair from forming that helmet shape that a lot of blunt cuts produce. Done badly, it looks frayed. Done well, it looks sleek with a little edge.
What Makes It Different
A razor cut isn’t the right move for every head of hair. On silver hair that’s fairly straight or just lightly wavy, it can create airy ends and a soft separation that lets the color do the work. On very fine hair, though, too much razor action can leave the ends looking see-through. That’s not flattering. It just looks overcut.
The smartest version keeps the interior layers gentle and uses the razor mainly at the perimeter and around the face. That way the shape stays clear. You still get movement, but the cut doesn’t fall apart after one wash.
Who It Suits
- Strong silver or white hair with some density
- Straight-to-wavy textures
- Anyone who wants a little sharper silhouette without going full edgy
3. Curly Shag with Soft Bangs

Curly hair and shag cuts have been flirting with each other forever, and for good reason: curls want layers. They need room to spring. A curly shag with soft bangs lets the curl pattern show instead of forcing the whole head into one rounded mass, and the bangs stop short of the forehead in a way that feels gentle, not juvenile.
How It Changes the Shape
If you’ve got curls, the main thing is not to over-layer the crown. That’s how you end up with too much height and not enough control. Keep the layers longer, especially if your curls are tight or springy. Soft bangs should skim the brow or stop just above it when dry, because curly fringe always bounces up more than you think.
This cut looks best when it’s cut with the curl pattern in mind, not against it. Some stylists cut curls dry so they can see the real shape. I like that approach here. Curl by curl, the result is less guessed at.
A Smart Styling Note
Use a light cream or mousse and let the curls dry with space. Scrunching too hard can make the fringe bunch up. So can too much product.
4. Shoulder-Length Shag with Bottleneck Fringe
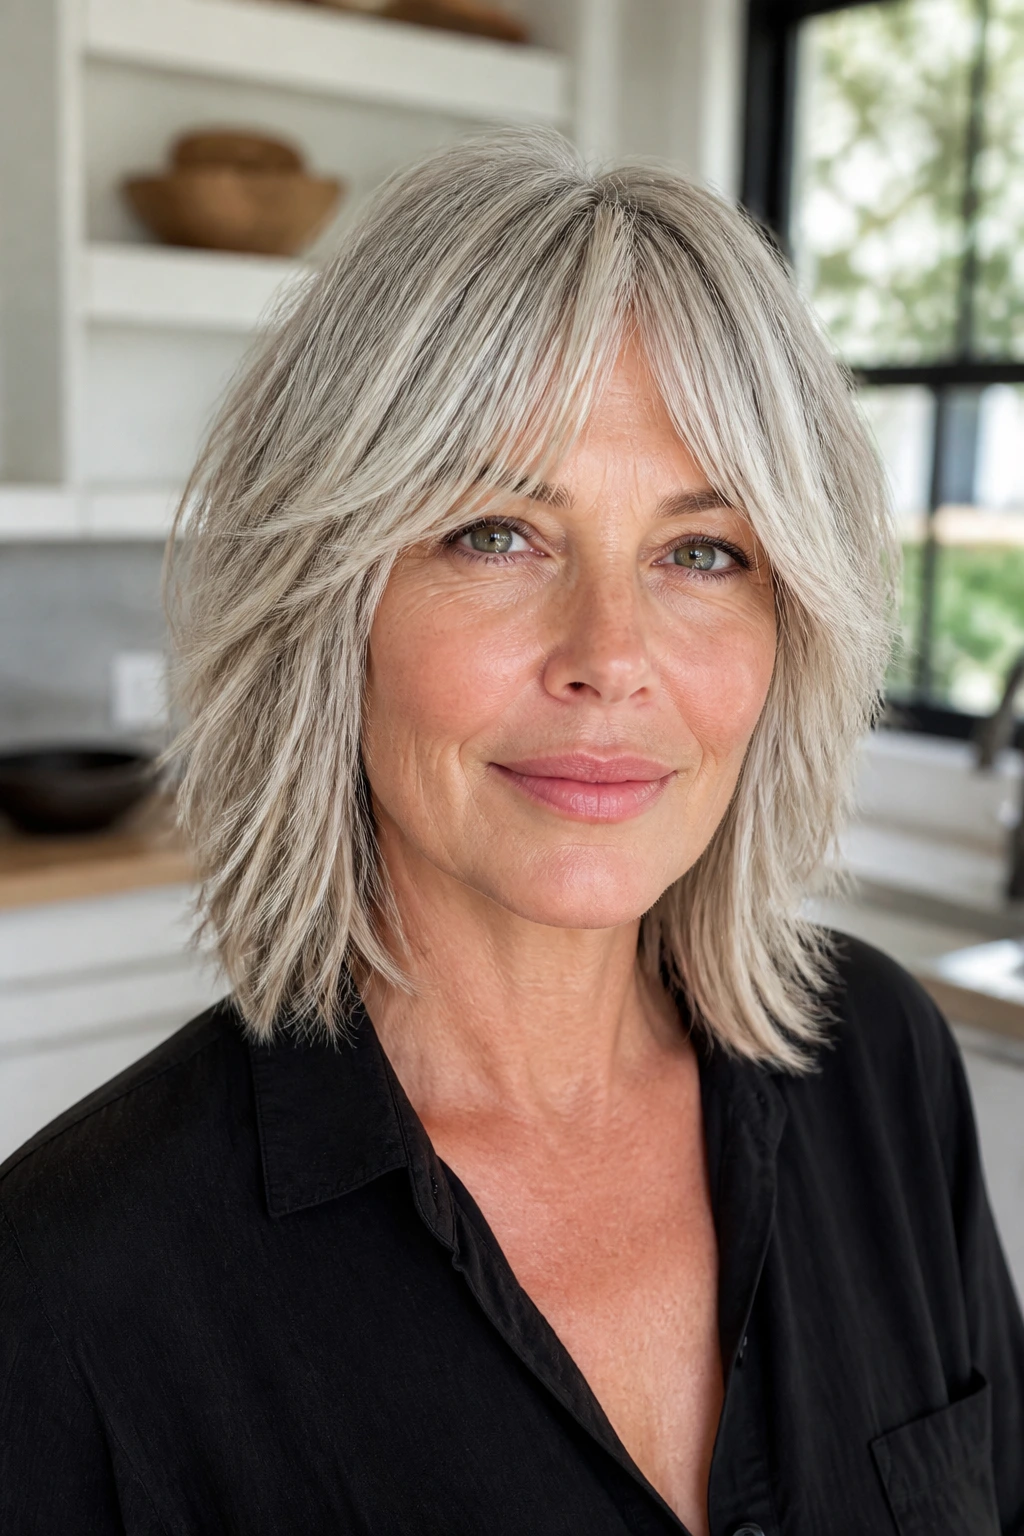
If curtain bangs feel a little too broad for your face and straight bangs feel too heavy, bottleneck fringe is the middle ground I keep coming back to. It’s shorter in the center, longer near the temples, and it gives shoulder-length shag haircuts a neat frame without locking you into one look. On older women, that matters. You want shape, not a wig effect.
This cut is especially kind to glasses. The fringe opens away from the eyes while still softening the forehead, and the shoulder length keeps the whole style grounded. Nothing flops into the face. Nothing feels overstyled.
Why It Works for Daily Life
The shoulder length gives you enough hair to tuck behind an ear or clip back on a busy day, but the layers keep it from hanging flat. Bottleneck fringe also grows out better than a sharp straight fringe, which makes it easier to keep the cut looking deliberate between trims.
If your face is a little wider through the cheeks, this is one of the easiest shag versions to wear. The shape narrows as it falls, rather than expanding sideways. That’s a small thing. It makes a big difference.
5. Chin-Length Micro Shag
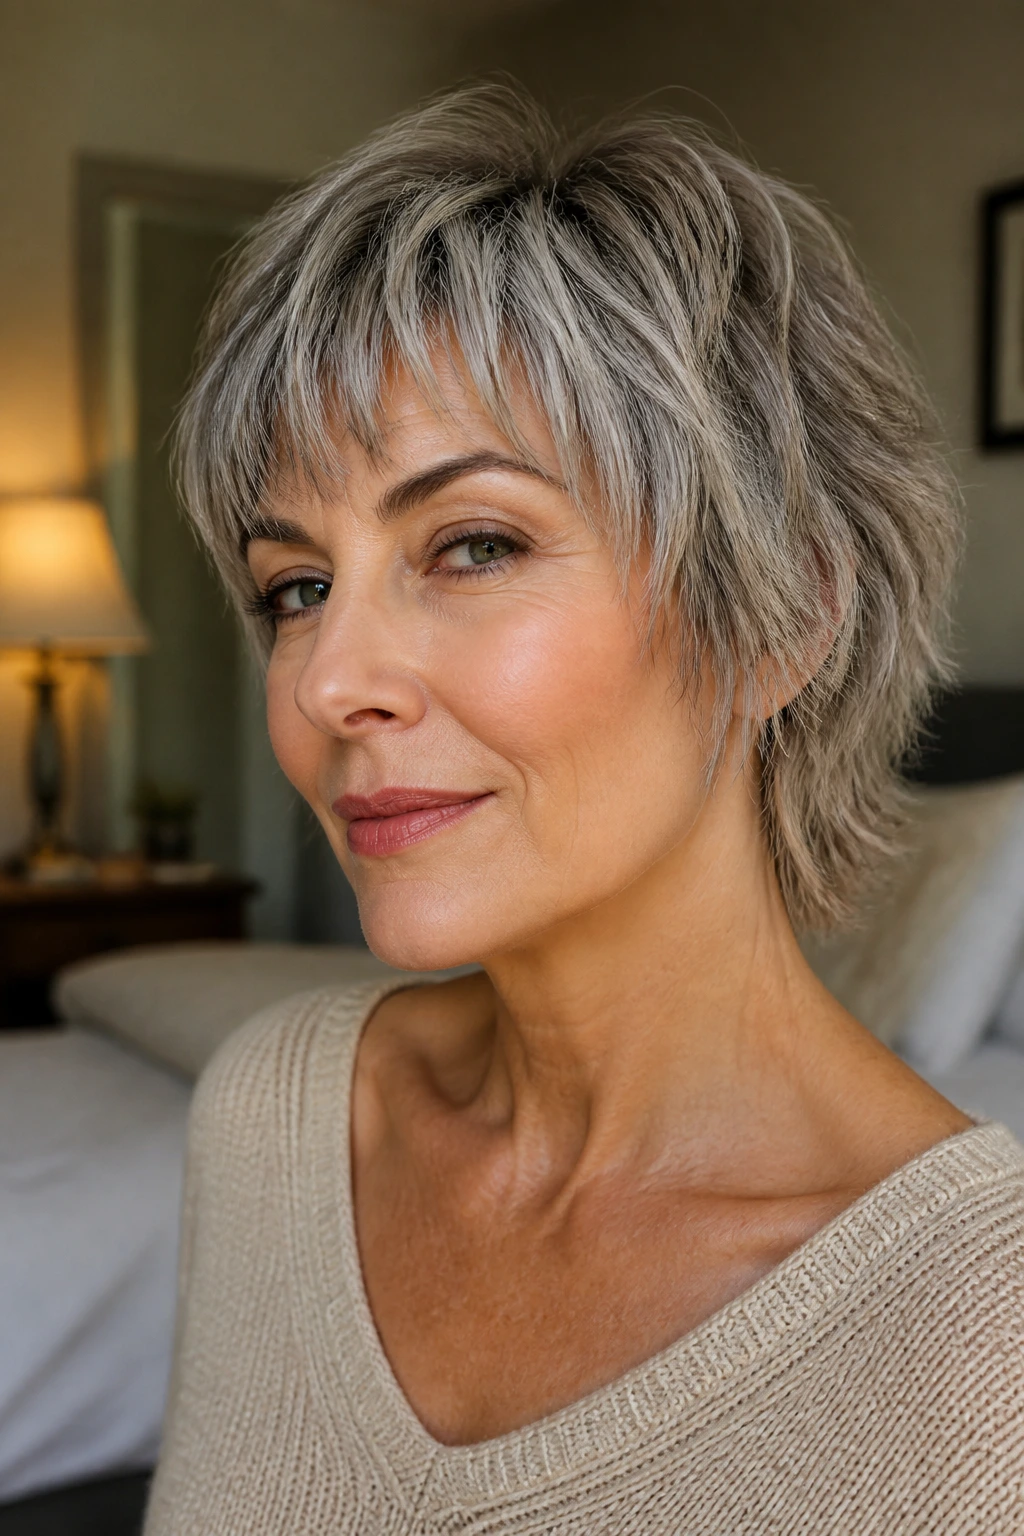
A chin-length micro shag has a little sass built in, but it isn’t loud. The length sits right around the jaw, which can make the neck look longer and the features sharper in a good way. Keep the layers light and broken, though. Too much choppy texture at this length can push the cut into helmet territory.
The Trick Is the Outline
The best micro shag has a clean outer line with texture inside it. That way the cut still reads as a shape, not a cloud. If the neckline is too jagged, the whole thing starts to look rushed. If it’s too blunt, you lose the shag effect entirely. The balance sits in the middle.
This is a strong choice for women with petite faces or smaller features. It can also work when you want a shorter cut without the maintenance of a pixie. The hair touches the jaw, flutters around the ears, and feels tidy without becoming severe.
Use It When
- You want shorter hair but not a cropped look
- Your hair is straight, wavy, or loosely curled
- You like definition around the cheekbones and jaw
6. Long, Layered Wolfish Shag
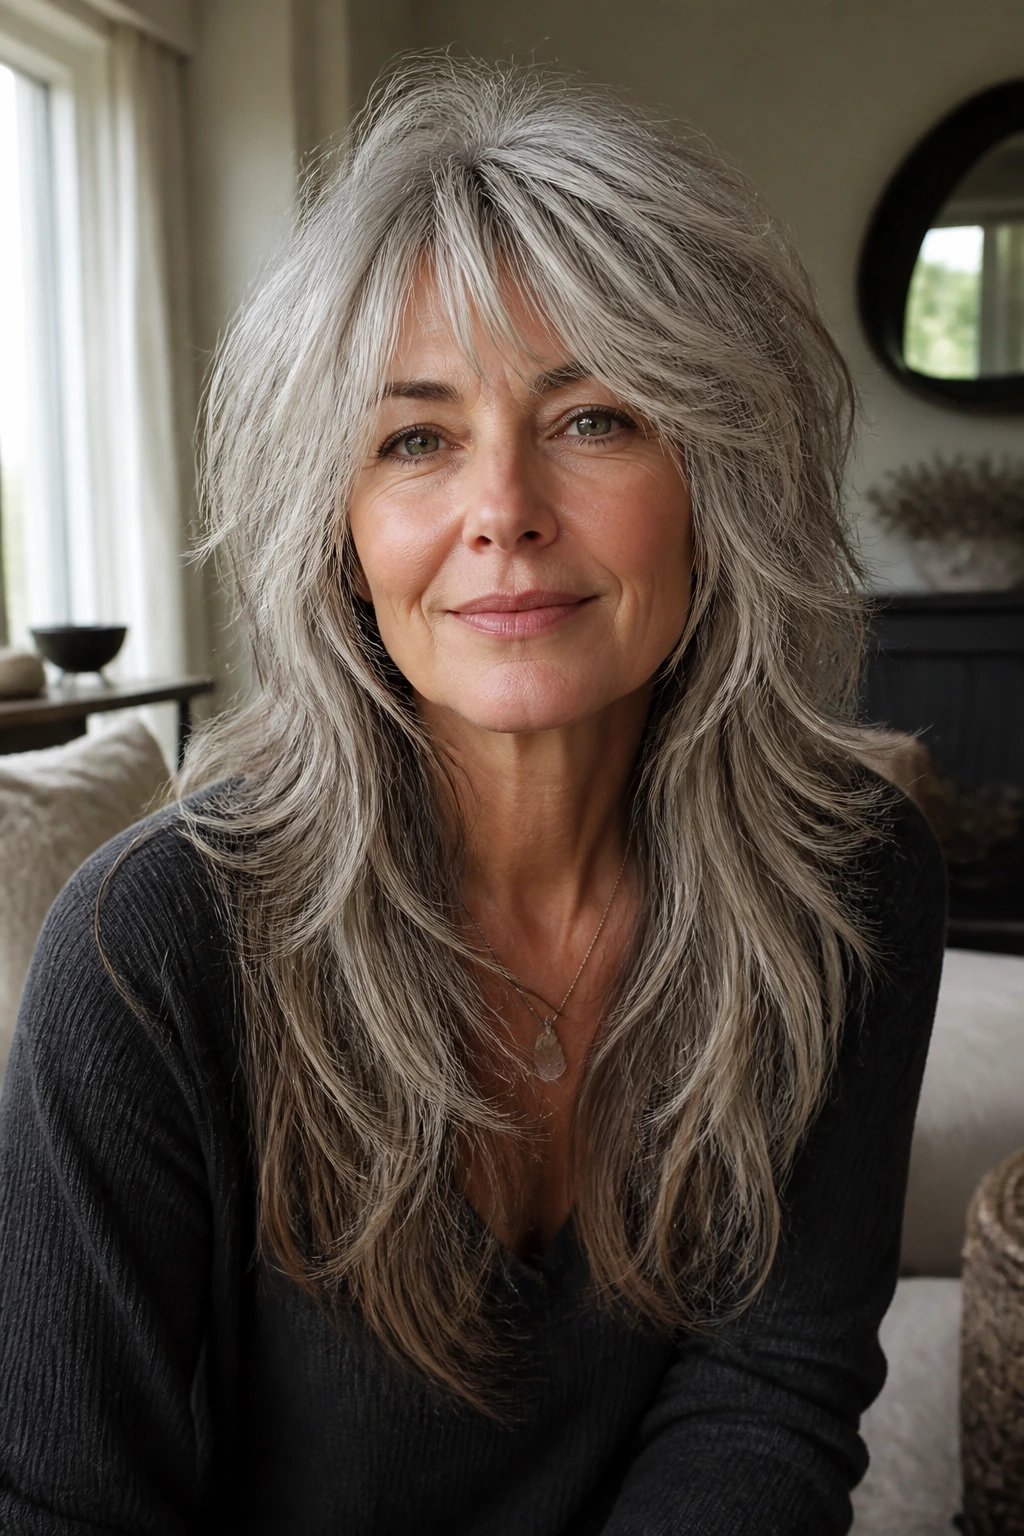
This is the shag for women who aren’t ready to give up length, and I get that. Long hair can still look lively if the layers are handled with some restraint. The wolfish version keeps the ends broken up and the crown lighter, but it leaves enough length through the back so the shape doesn’t become all fluff and no substance.
Why It Feels More Modern Than a Plain Long Cut
A long cut without layers can drag the face down, especially if the hair is fine or flat at the roots. This version lifts the top and opens the face, but it still keeps the ponytail. That sounds trivial until you need a bad-hair-day fix and realize how much you value the ponytail.
Keep the front pieces slightly shorter than the rest, but not so short that they sit awkwardly at the jaw. The trick is to make the shape feel slanted and soft, not chopped. A light wave works best, but even straight hair gets enough texture to feel less heavy.
Best For
Women who like length, need movement, and don’t want the cut to scream for attention.
7. Layered Bob Shag
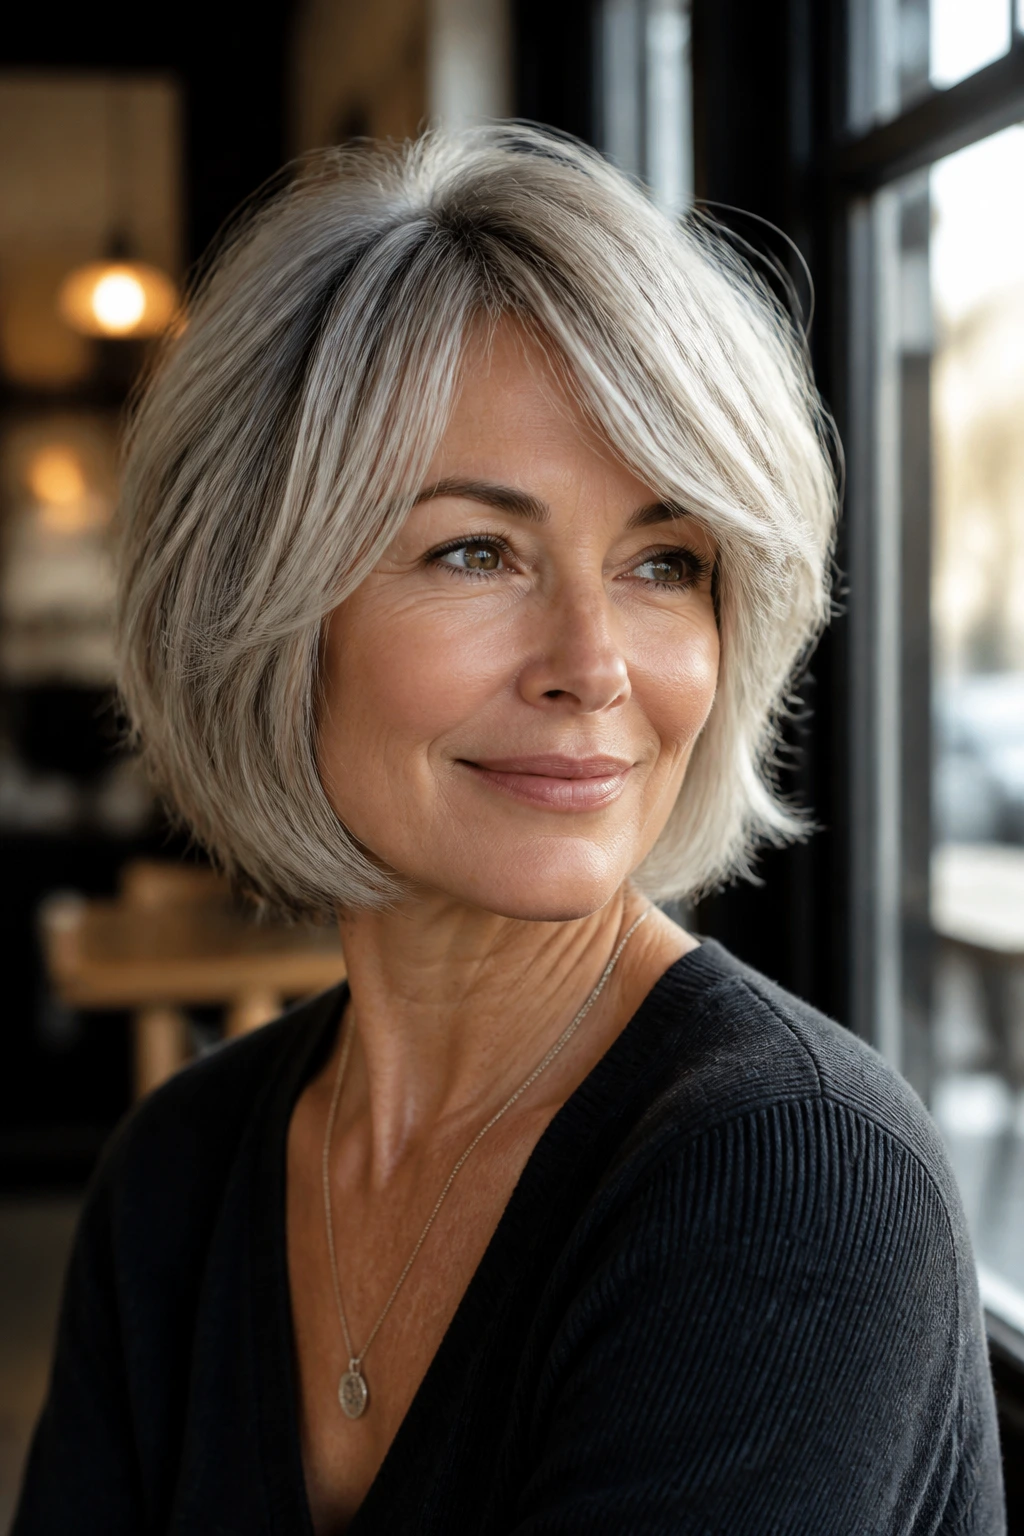
A layered bob shag is the sensible one in the group, but it’s not boring. It keeps the neatness of a bob while adding those shaggy interior layers that stop the shape from turning into a block. If you’ve got fine hair, this version can be a small miracle when it’s cut with a full enough perimeter.
The Secret Is Not Over-Thinning It
A lot of bad bob shags happen because someone gets enthusiastic with the layering. The ends go thin, the crown goes wide, and the whole cut starts to look tired. Instead, ask for soft interior layers and a bob line that still reads clearly from the front and side. The shag part should live inside the haircut, not destroy the outline.
It’s a clean choice for women who like structure but don’t want their hair to feel stiff. A side part adds lift. A bit of root spray adds more. That’s enough.
A Practical Note
If your hair flips out at the ends, this cut can either hide it or make it worse. A slightly longer bob, landing just below the chin, usually behaves better than a super-short one.
8. Piecey Pixie Shag
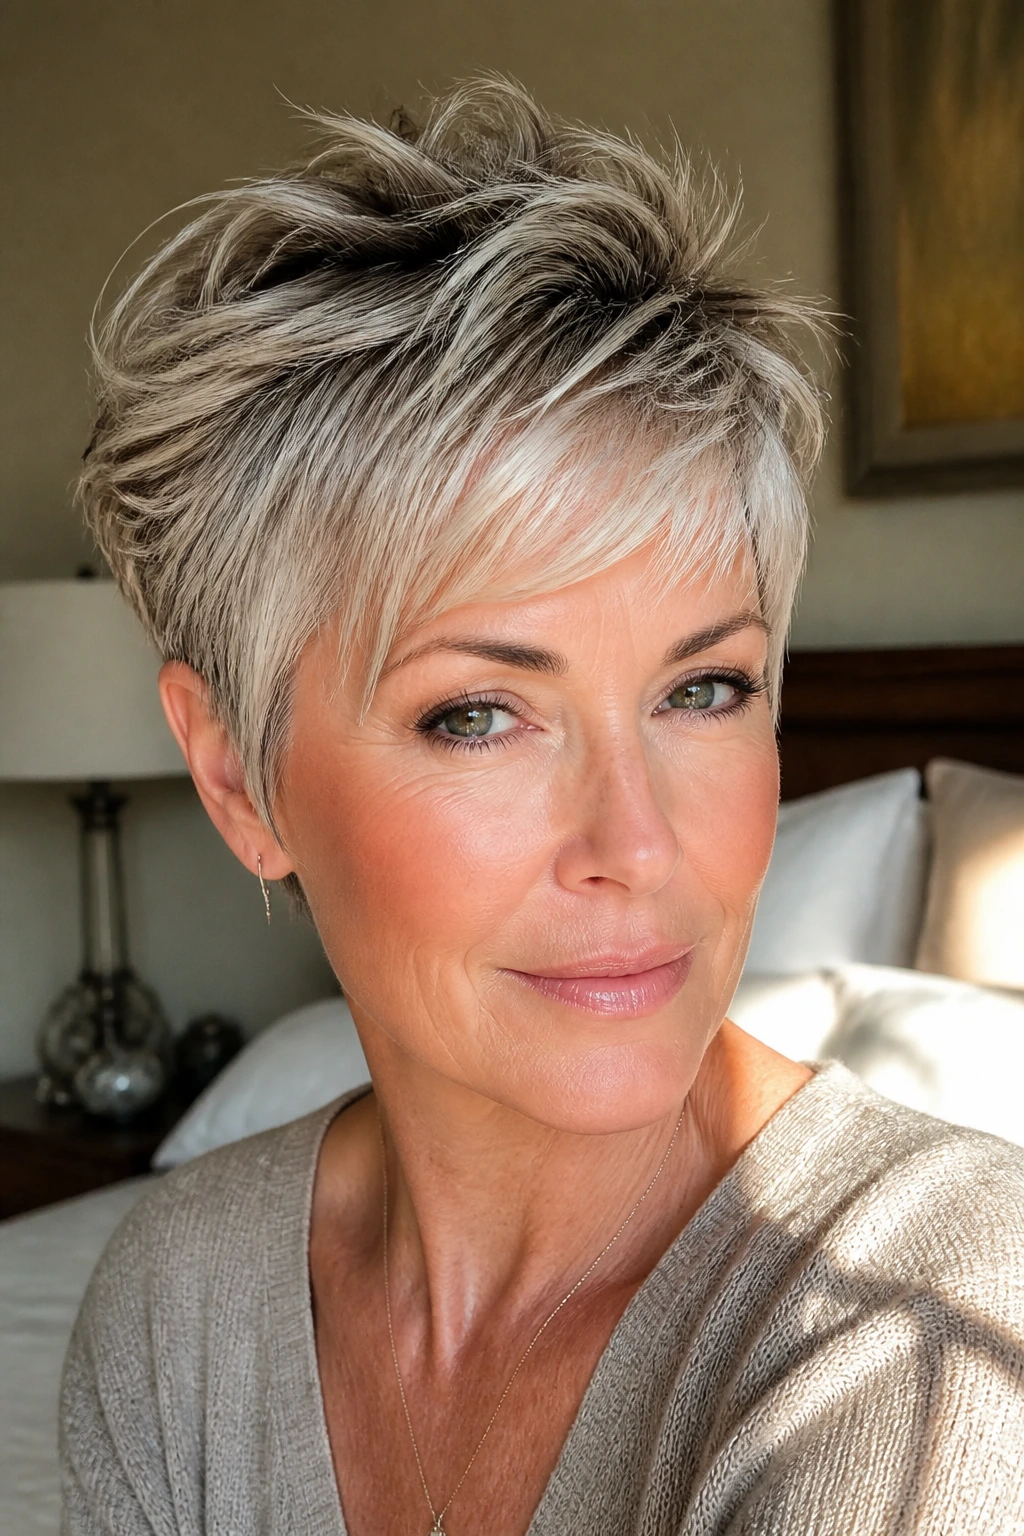
A pixie shag is the shortest cut on this list, and it earns its place because it still carries texture. The pieces at the crown and around the temples keep it from reading as a plain pixie, while the slightly longer top lets you push, sweep, or ruffle it depending on the day. It’s quick. It’s clean. It doesn’t take forever to dry.
Where It Shines
This cut works best when the hair has some natural lift or when you’re willing to use a tiny bit of product at the roots. Women with strong cheekbones or a defined jaw often wear it especially well because the cut opens the face up. It also makes earrings matter, which is a nice bonus if you like a little frame around your face.
The key is keeping the piecey texture soft enough that it doesn’t turn spiky. Too much gel and you lose the point. A pea-sized amount of styling cream or wax is usually plenty. More than that, and the hair starts to clump.
Good For
- Wash-and-go routines
- Summer humidity, because less hair means less battle
- Anyone who wants a shorter shape without a strict crop
9. Soft Mullet Shag
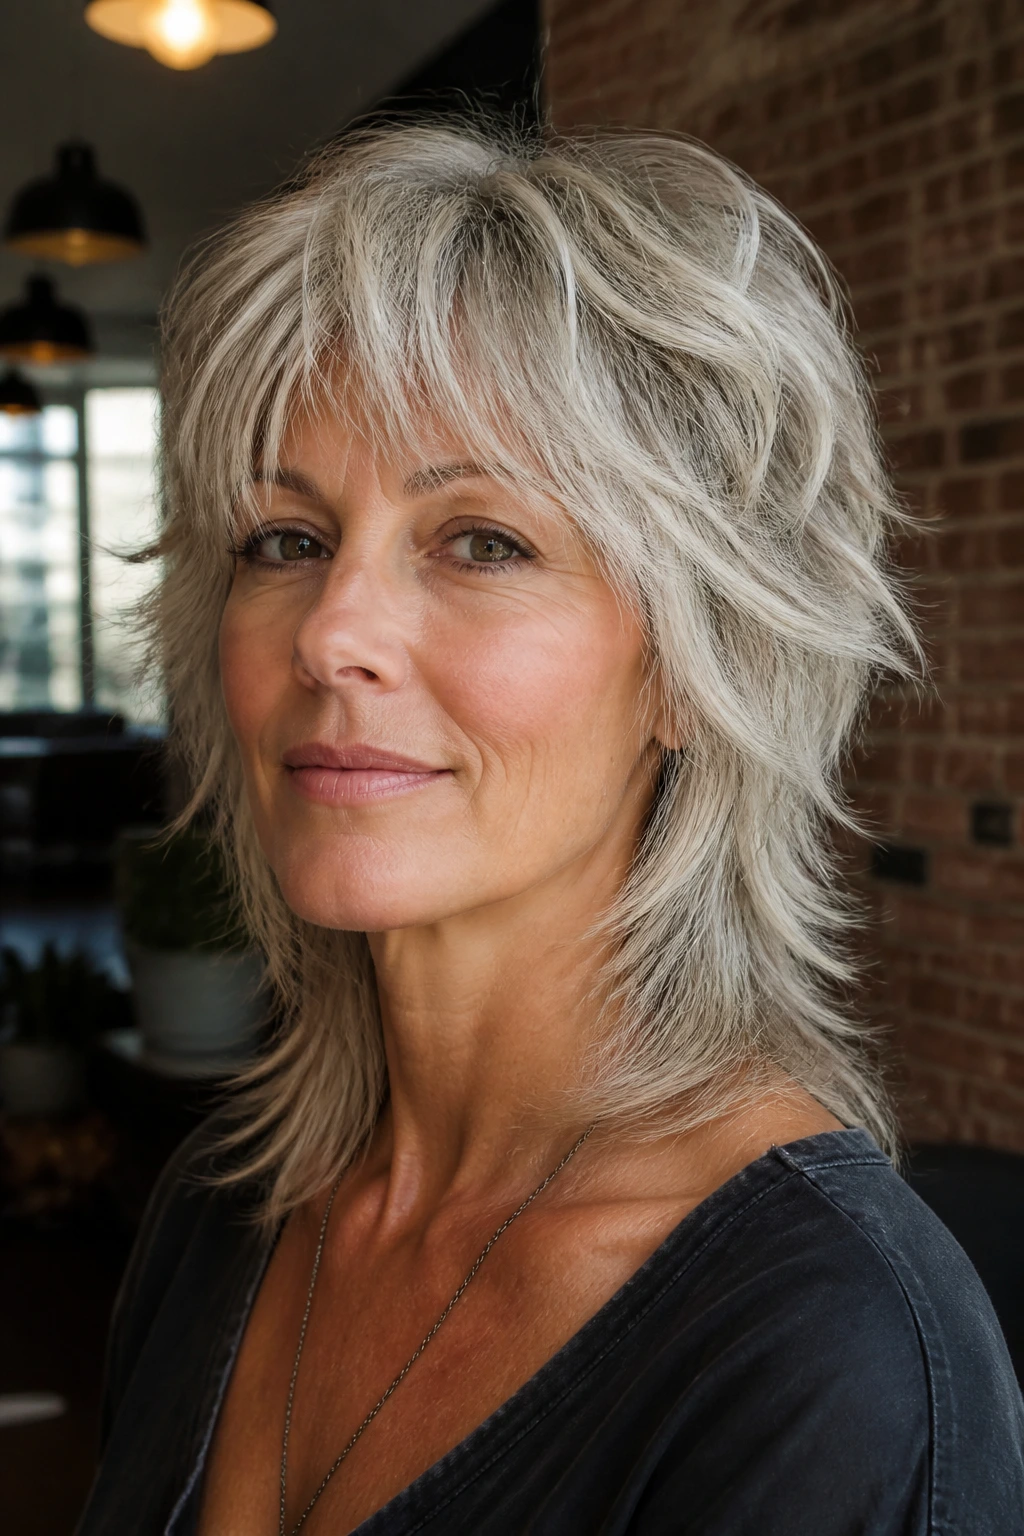
People hear “mullet” and think of a joke, but the soft shag-mullet hybrid is a different animal. The nape stays a little longer, the crown stays light, and the front has enough feathering to keep the whole thing from looking like a dare. On the right face, it’s sharp. On the wrong cut, it’s a mess.
The Shape Needs Restraint
The best version keeps the transition from short to long smooth. No abrupt shelf at the back. No choppy front that looks disconnected. The idea is to get that retro energy without turning the haircut into a costume. A little collar-length length in the back can make the neck look longer, and the front layers can give the cheekbones more presence.
This one suits women who like a little attitude and don’t mind a haircut with some opinion. It tends to look especially good with glasses, bold lipstick, or a strong brow. The cut does not need extra fuss. It already has personality.
A Quick Reality Check
If your hair is very fine, ask for a softened version. Too much removal at the back can leave the ends stringy fast.
10. Curtain-Bang Shag

Curtain bangs are the friendliest fringe in the shag family. They part in the middle, sweep away from the face, and give you the soft frame that older women often want without the upkeep of a blunt bang. On a shag, they help the cut feel open and light.
What I like here is how forgiving it is. If the bangs are a little grown out, they still look intentional. If your forehead is not something you want to spotlight, these bangs soften that area without closing the face off. They also work with round brush styling, air-drying, and low-heat bending.
How to Wear It
The best curtain-bang shag keeps the sides of the fringe long enough to tuck back into the rest of the layers. That’s what keeps the shape from looking split into two separate ideas. Let the shortest pieces land around the bridge of the nose or the cheekbone, depending on your face length and how much lift you like.
This is one of the most flexible cuts in the whole group. It can be sleek or tousled. It can lean retro or almost modern-minimal if you keep the rest of the layers soft.
11. Wavy Air-Dry Shag
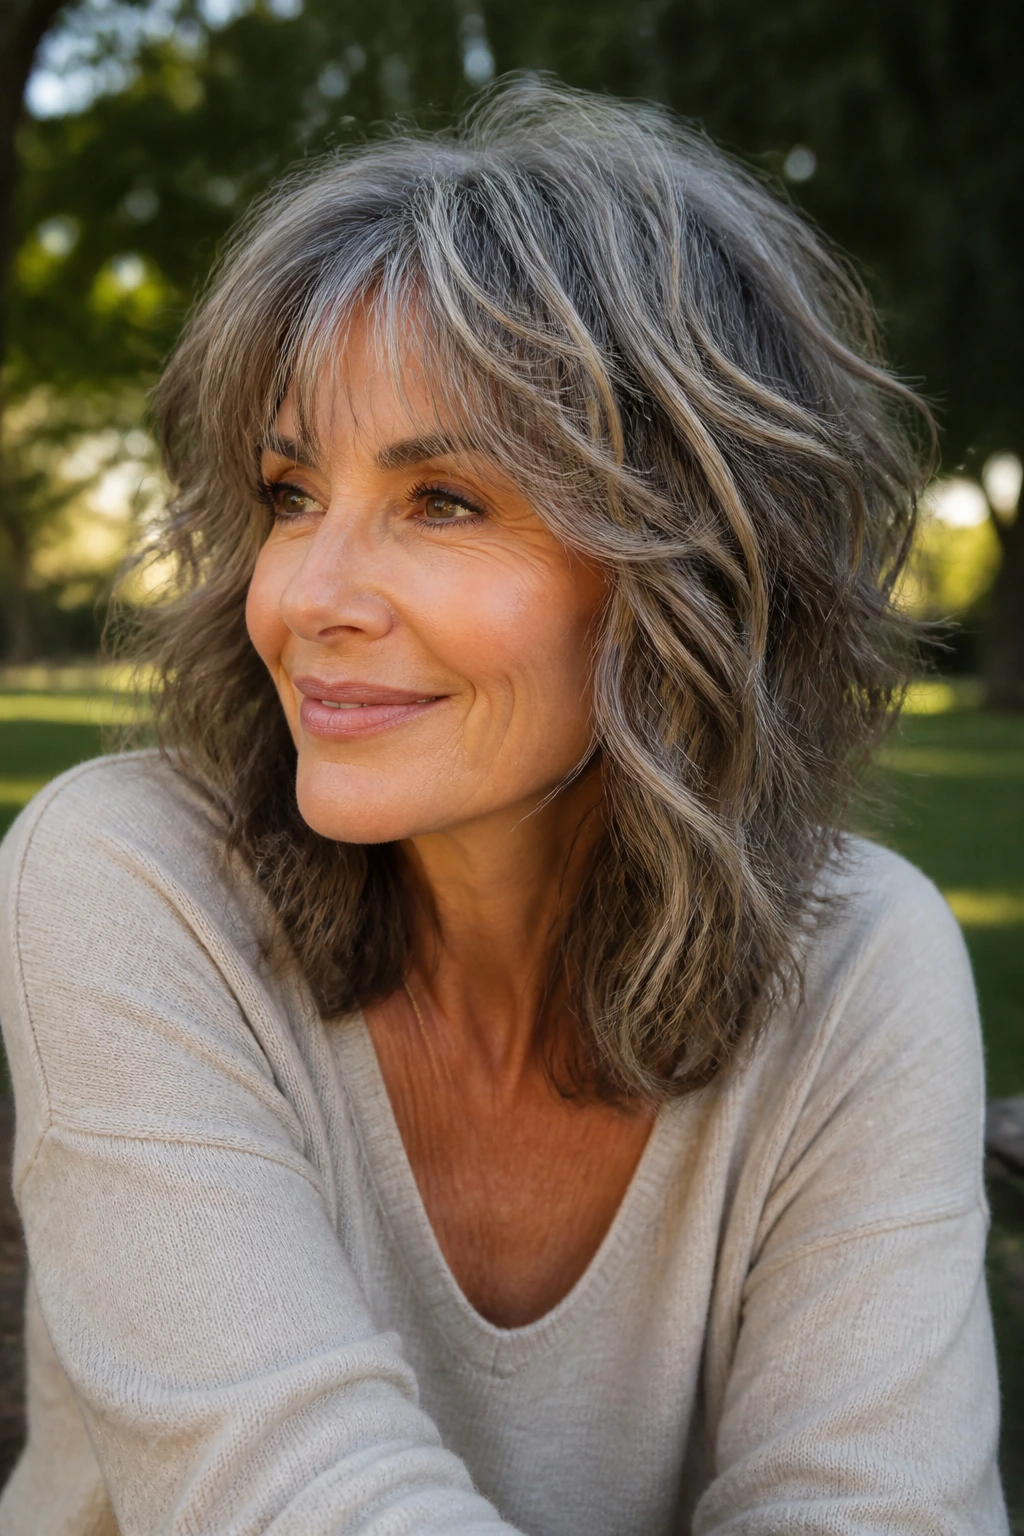
Some hair begs for the diffuser. Some hair would rather be left alone. The wavy air-dry shag is for the second camp. It uses natural bend, a little product, and good layering to do the heavy lifting, which is useful if you want a cut that still looks decent when you don’t feel like wrestling with a blow dryer.
Why It Works Without Heat
Wavy hair usually needs room more than it needs force. A shag gives it that room. The layers let the wave bend in different directions without building into one triangular mass, and the face-framing pieces keep the top half from looking flat. That makes the hair look fuller without making it look puffy.
The product choice matters here. A light mousse or wave cream gives enough grip to keep the bend from falling out, but a heavy cream can kill the movement. If your hair is porous, use less than you think. It drinks product fast and turns limp even faster.
Best For
Women who like a lived-in finish and do not want the ends to look too polished.
12. Full-Bodied Round Shag
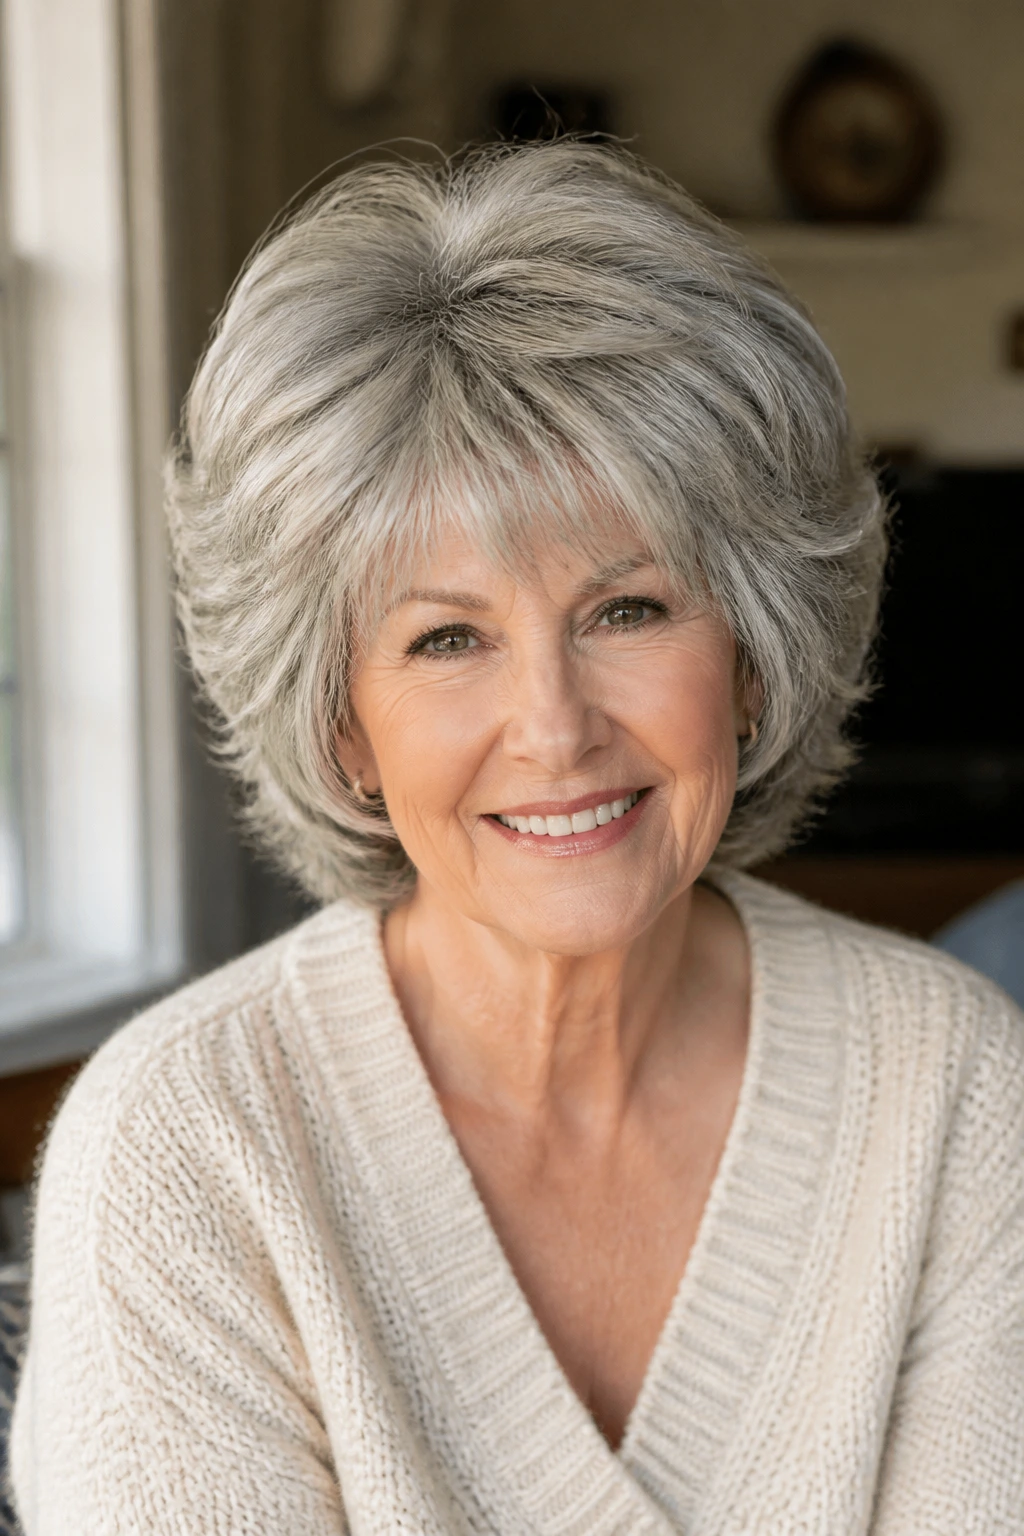
A round shag is a strong answer for thick hair that tends to spread sideways. Instead of building width through the sides, this cut builds a soft dome through the crown and top layers, then lets the outline taper more cleanly around the jaw and shoulders. The result feels lifted, not bulky.
The Shape Problem It Solves
Thick hair often grows into a pyramid if the layers aren’t planned carefully. You know the look. Wide at the bottom, flat on top, and a little too much going on near the ears. A round shag fixes that by redistributing weight. The top gets air. The bottom loses some drag. The whole thing looks more balanced.
This is one of those cuts that really benefits from a stylist who knows how to work with density rather than just attack it with thinning shears. You want the bulk removed in the right zones. Underneath. Around the interior. Not all over.
When It Looks Best
- Hair with natural volume
- Wavy or coarse textures
- Faces that need a little width at the cheekbones and less at the jaw
13. Tapered Gray Shag
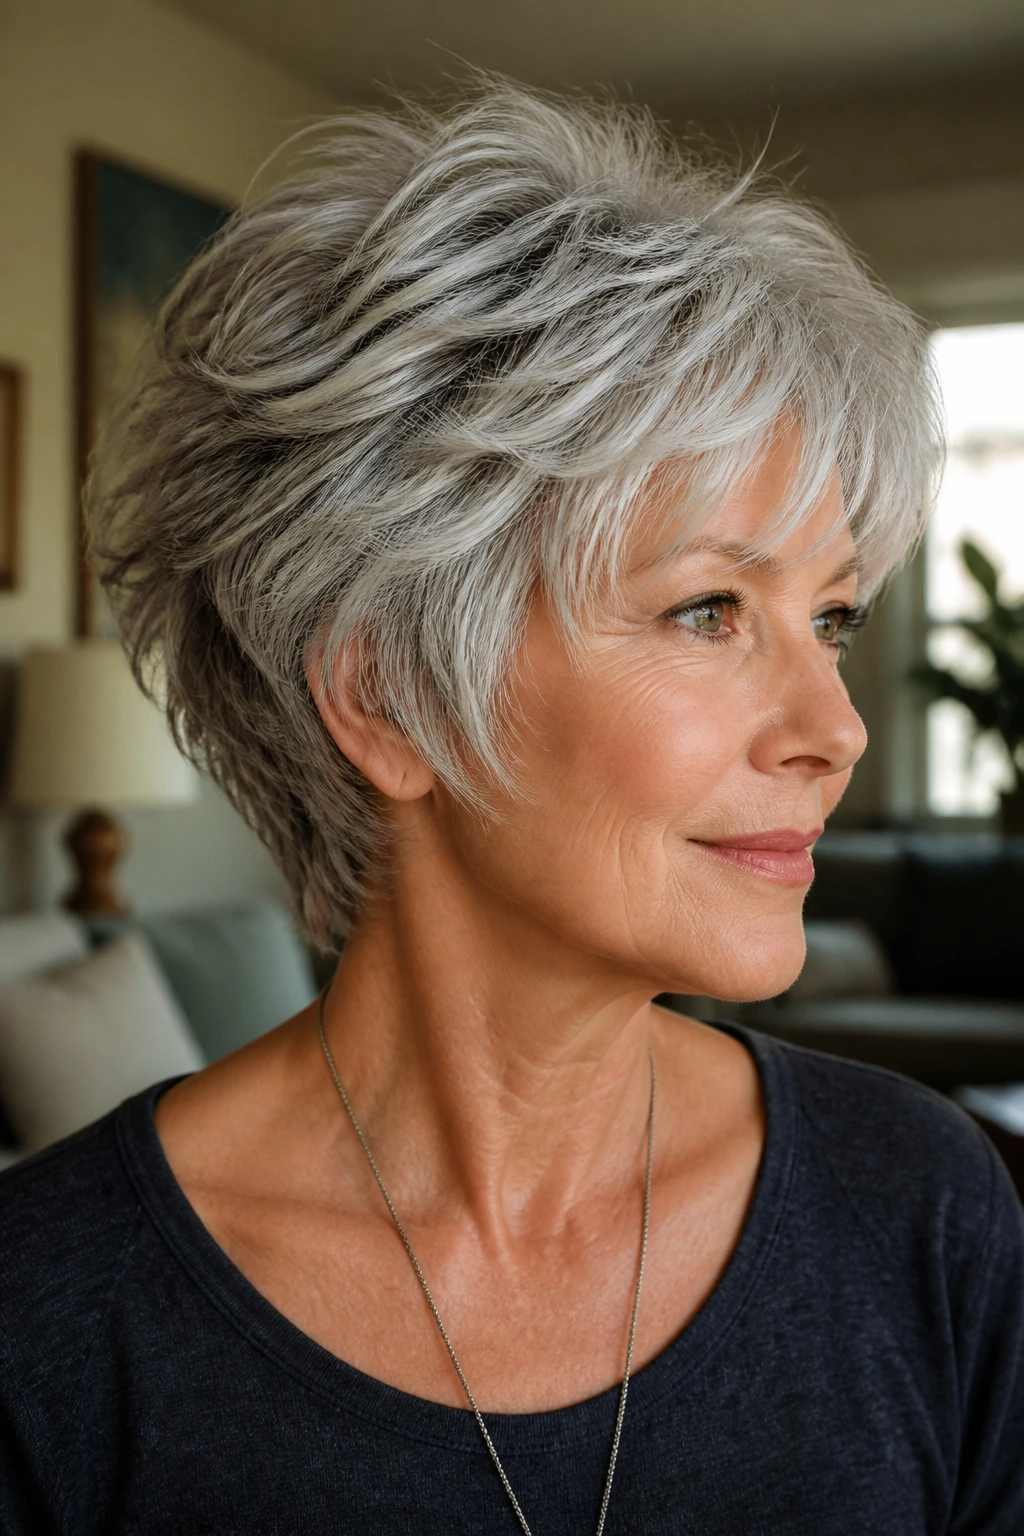
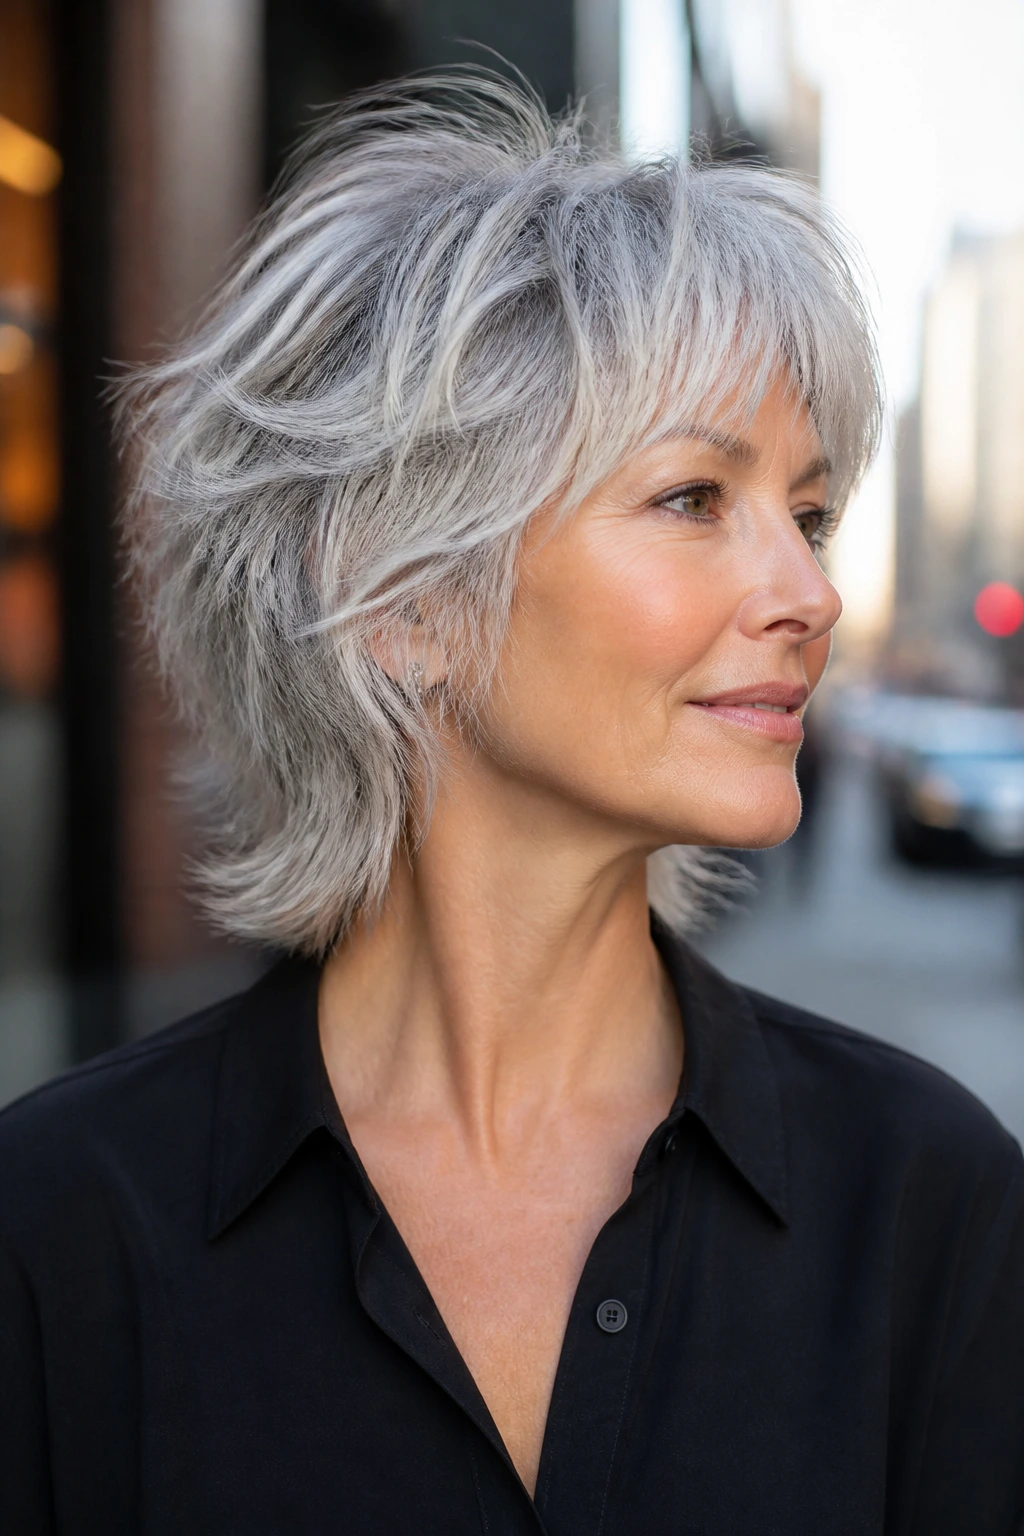
A tapered gray shag has a neatness I like on women who want their hair to look shaped even on a day when they’ve done very little to it. The taper around the nape and around the ears keeps the cut close to the head where it should be close, then the upper layers feather out enough to keep movement alive.
Why Tapering Matters
Gray and white hair often comes in with a different feel than the hair you had earlier in life. It can be wirier, puffier, or more resistant to lying flat. Tapering takes the excess volume out of those tricky spots, especially around the neckline and temple area. That makes the cut look intentional instead of airy in a random way.
This version is especially strong if you like clean necklines and don’t want your hair brushing your collar all day. It also works well with earrings and collars because the shape around the ears stays clear.
My Favorite Detail
Keep the top layers soft, not choppy. The contrast between a neat taper and a feathered top is what gives the cut its polish.
14. Side-Swept Fringe Shag
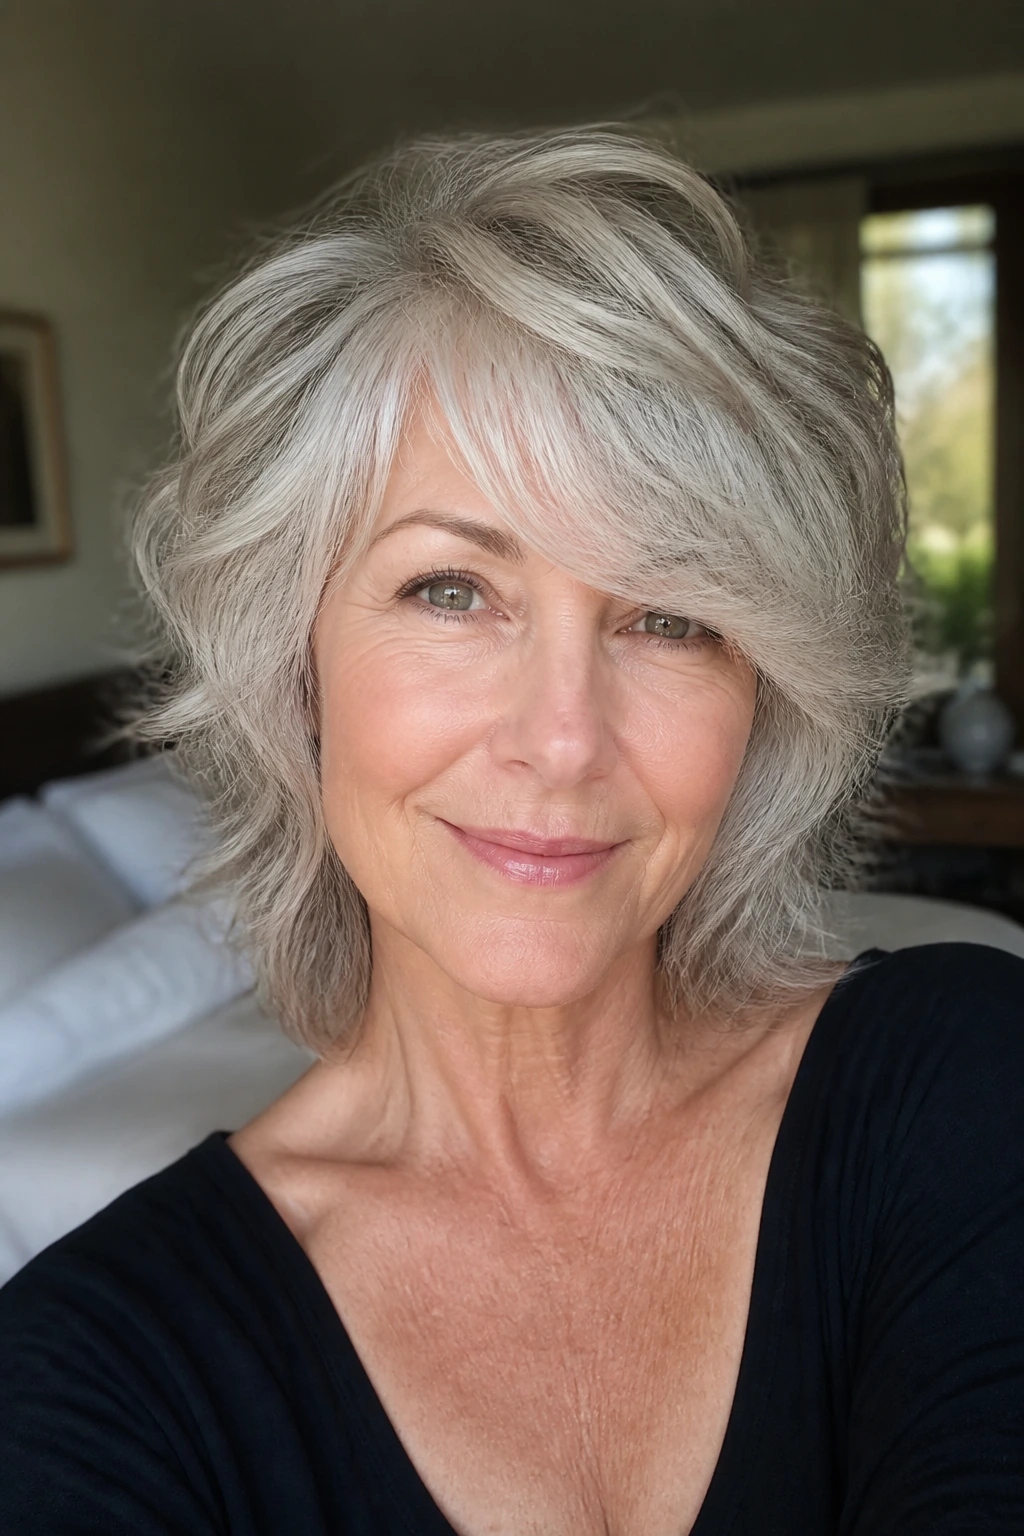
A side-swept fringe can rescue a shag when the front of the face needs a little softness but a center part feels too flat or too severe. It’s especially handy if you have a cowlick or a natural bend that makes center-part bangs annoying to manage. The fringe falls where the hair wants to go. That alone makes life easier.
The Practical Payoff
Side-swept fringe can disguise a higher forehead, soften one side of the face, and balance out stronger features. It also gives the stylist a chance to work with asymmetry instead of pretending every face is a mirror image. Mine is not. Yours probably isn’t either. Hair looks better when it stops pretending.
This is a good choice if you want a shag that feels a little less obvious than curtain bangs. It can be brushed across the brow or tucked back. That flexibility matters when you wear glasses or when the weather makes your hair act like it has opinions.
A Small Warning
Keep the fringe long enough that it doesn’t stab into the eye every time you turn your head. A good side-swept bang should skim, not scratch.
15. Tousled Mid-Length Shag

Mid-length is the workhorse zone for a shag. It gives you enough hair to style, enough length to clip back, and enough movement to avoid that heavy, shoulder-pressing feeling that longer cuts can create. Tousled mid-length shag haircuts are especially useful for women who want a flexible haircut that doesn’t lock them into one finish.
Why It Feels Easy
This cut doesn’t ask for much. A bit of wave, a bit of bend, a bit of body spray — that’s usually enough. The layers keep the hair from sitting like one thick sheet, while the length still allows buns, twists, and low ponytails. That makes the cut practical in a way that a lot of “fashion” haircuts are not.
It also grows out in a friendly way. The extra length gives the layers room to blur a bit before the shape falls apart. That’s helpful if you’re not someone who lives on a six-week trim cycle.
Best For
Women who like options. One day it’s tucked behind the ears, the next it’s loose and textured.
16. Razor-Cut Textured Shag

This is the shag for people who like a little roughness in the finish. The razor-cut version creates separation at the ends, so the layers look piecey and a little undone. On the right hair, that gives the cut a strong, lived-in feel. On the wrong hair, it can look frayed. So the hair has to be able to take it.
Why the Texture Reads So Clearly
Razor cutting lifts some weight from the ends, which makes the strands move separately instead of as one block. That’s useful for straight or lightly wavy hair that tends to fall flat. It’s less useful on already fragile or split-prone hair. If the strands are dry at the ends, too much razor work will make that dryness obvious.
The best version is controlled. The shape still needs a clear frame around the face and a perimeter that doesn’t vanish. Otherwise the texture starts to look accidental, which is the opposite of what you want.
Use It If
You want edge, a bit of irregularity, and a cut that looks better with texture spray than with a polished round-brush finish.
17. Layered Shag for Fine Hair
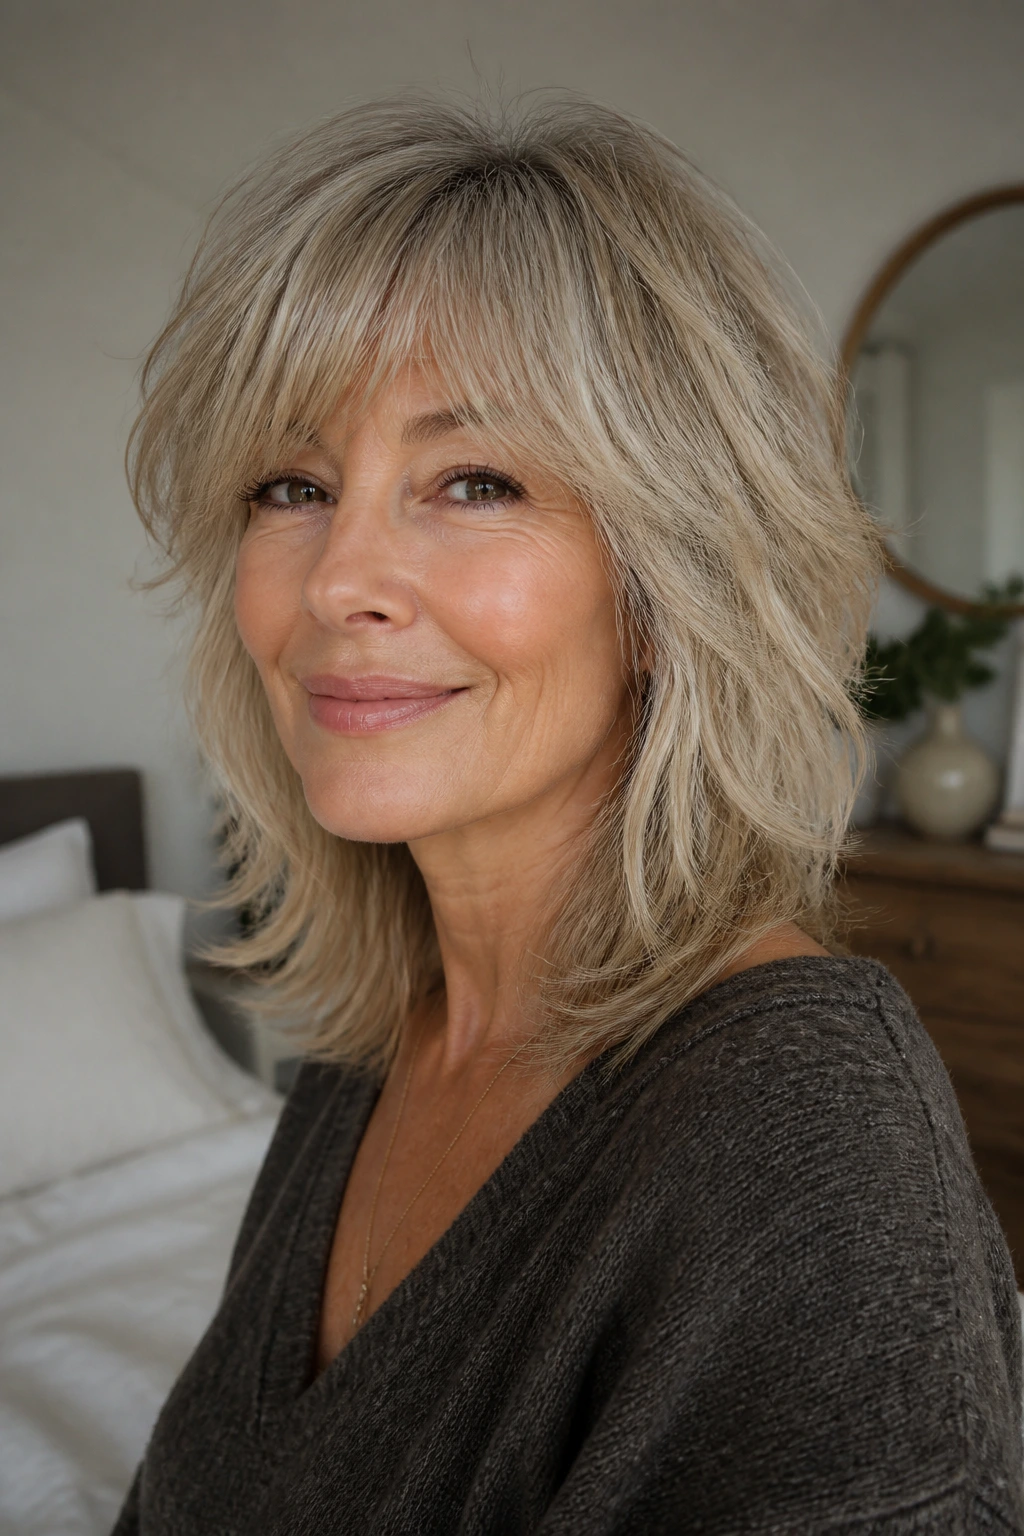
Fine hair is where a bad shag can go wrong fast. Short layers at the crown can make it puffy, and too much texturizing can leave the ends hanging like thread. A good layered shag for fine hair does the opposite. It uses long, gentle internal layers to create lift while keeping the outer shape full enough to look like hair, not mist.
The Main Rule
Do not let anyone thin the ends to death. Fine hair needs a little substance at the bottom so it can anchor the shape. The layers should create movement, not evaporate the perimeter. If you can see too much scalp through the ends, the cut has gone too far.
This version often looks best with a side part or a soft off-center part because that adds a little root lift right away. A lightweight mousse at the roots and a quick blast with a round brush can do a lot here. Not much else is needed.
Good For
- Flat roots
- Hair that loses curl by lunchtime
- Women who want body without short hair
18. Voluminous Shag for Thick Hair
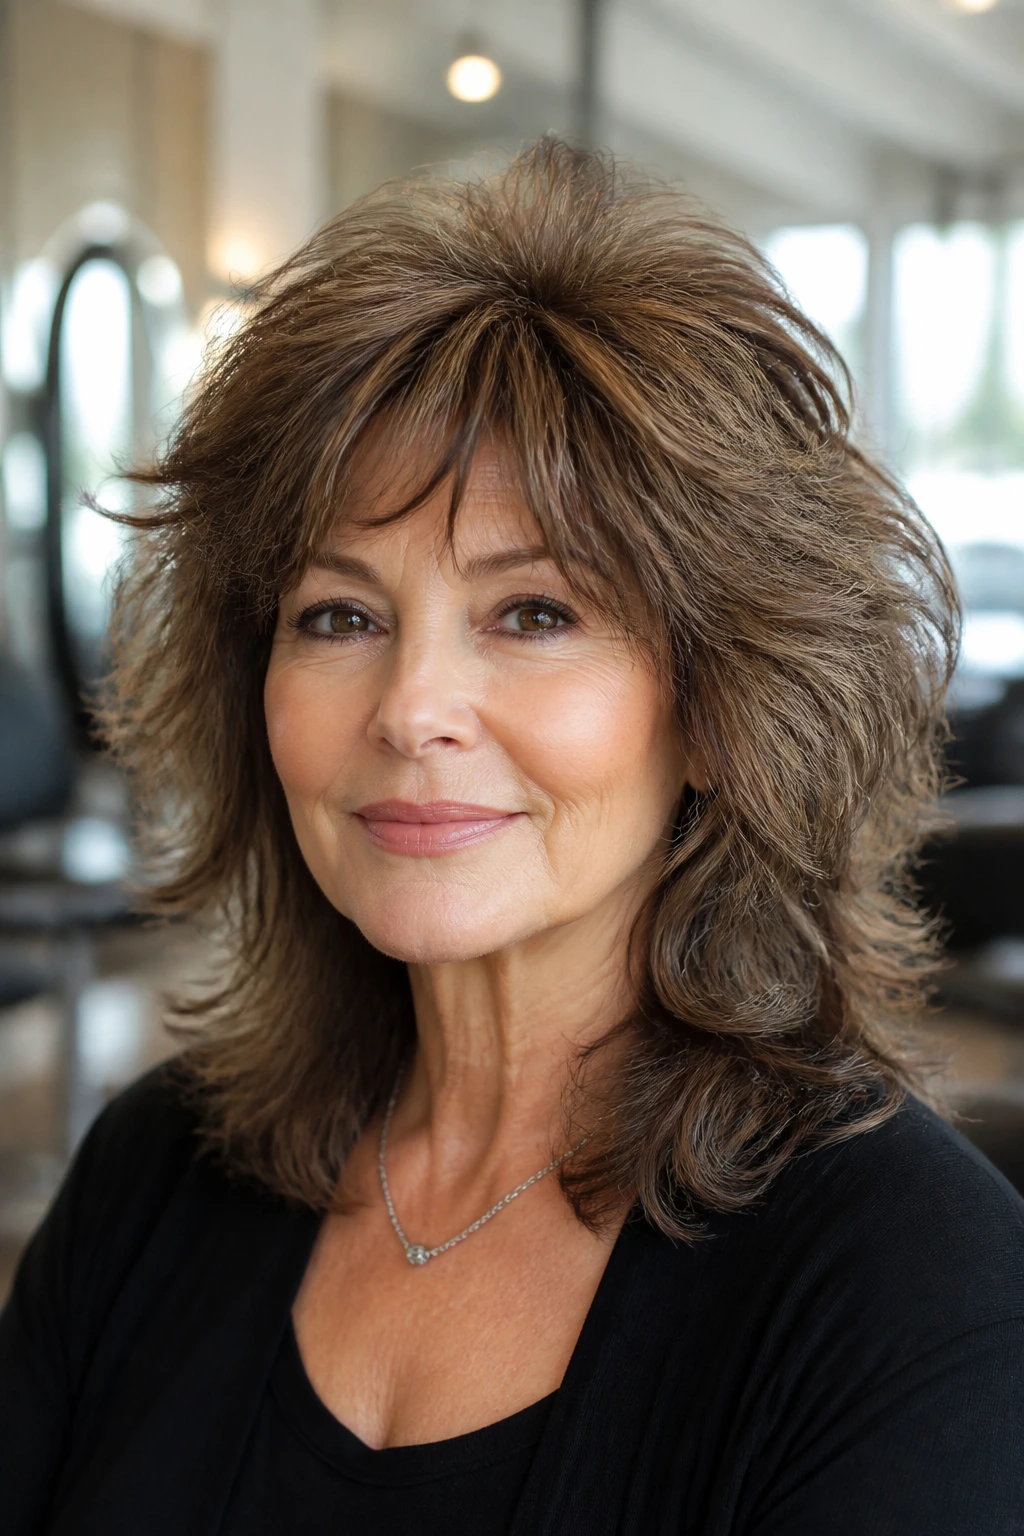
Thick hair gives you material to work with, but it also brings weight. Lots of weight. A voluminous shag for thick hair uses that density for shape instead of letting it become a block. The layers are there to release bulk, but the silhouette still needs enough structure to keep the cut from getting wild at the sides.
How It Avoids the Triangle
The triangle happens when thick hair stays too full at the bottom. Here, the interior weight comes out first. The hair around the crown gets room to rise. The sides are softened so they don’t flare. The end result has body, but it doesn’t take over your whole face.
This is one of those cuts that looks better after a clean blow-dry than after a rough dry, especially if your hair is coarse. A round brush or large Velcro rollers at the crown can make the shape sit where you want it to sit.
A Strong Fit For
Women who like big hair in the right way — not teased, not sprayed into place, just supported.
19. Salt-and-Pepper Glam Shag
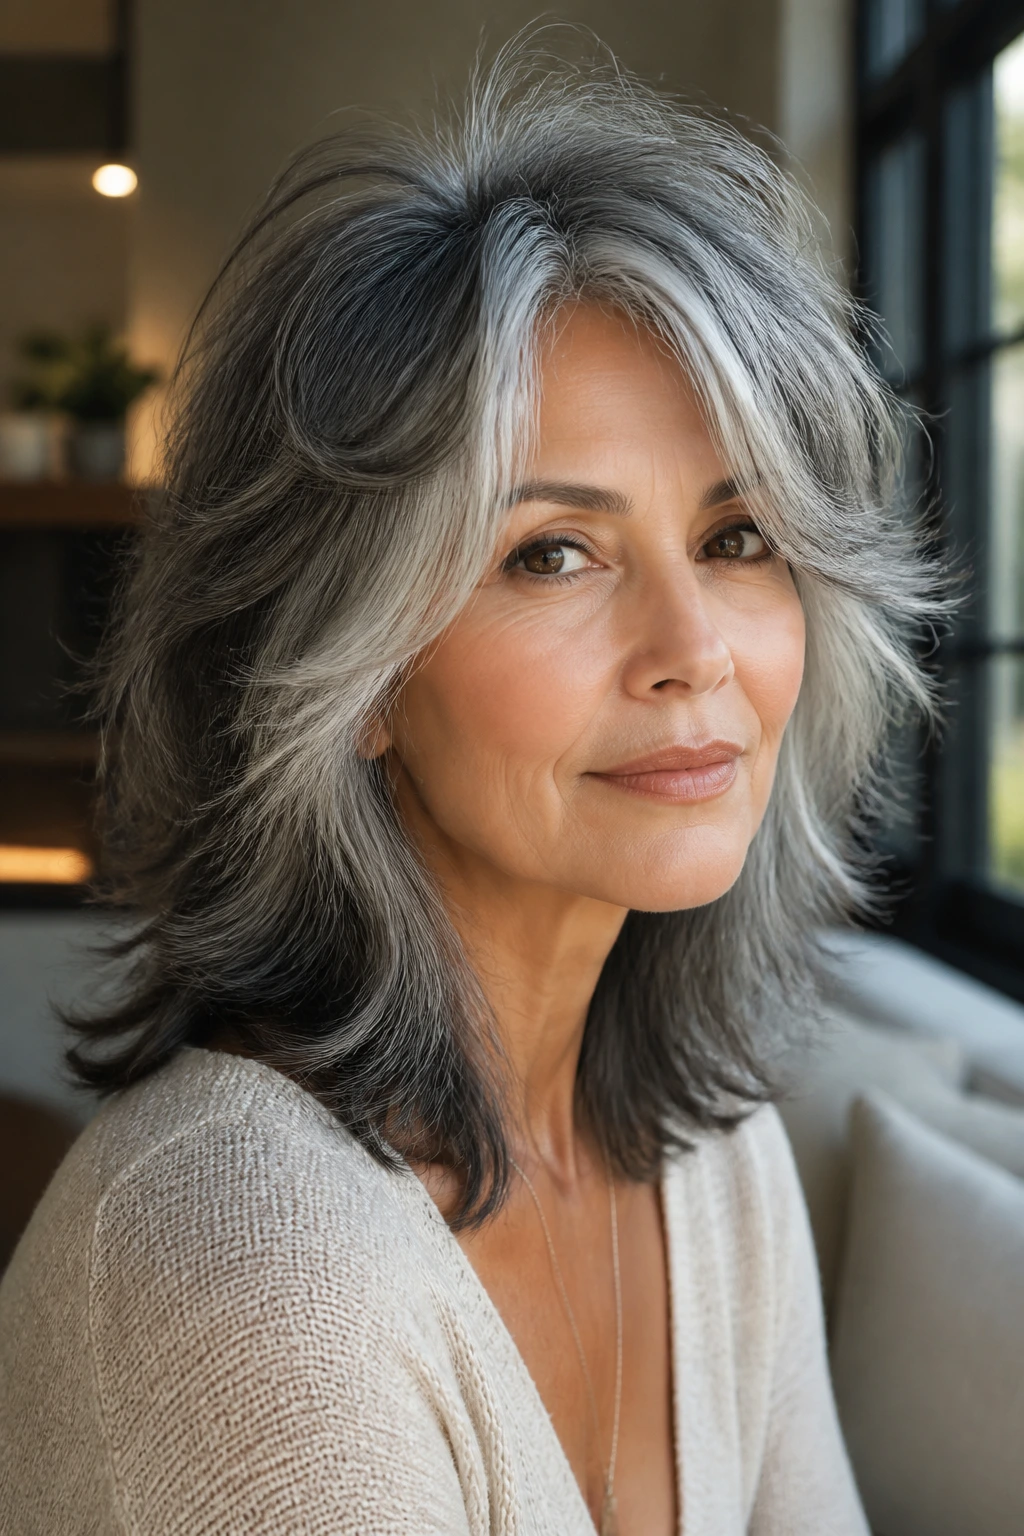
Salt-and-pepper hair has one advantage that people sometimes miss: the color pattern already adds depth. A glam shag makes that pattern the star. The layers catch the light, the fringe softens the face, and the dark-to-silver mix does a lot of visual work without needing a complicated cut.
Why It Reads So Well
The contrast in the hair creates motion all by itself. A shag builds on that by breaking the shape into sections rather than leaving one flat surface. That means the silver pieces near the front can brighten the face, while the darker lowlights underneath keep the cut from washing out.
This style looks especially strong with a side part or a loose center part and a bit of lift at the crown. Think of it as a more polished shag, not a fussy one. It should still move when you shake your head. If it doesn’t, it’s too stiff.
A Nice Side Effect
Salt-and-pepper hair can look striking when the layers are placed near the cheekbones. The cut frames the color instead of hiding it.
20. Minimalist Low-Maintenance Shag
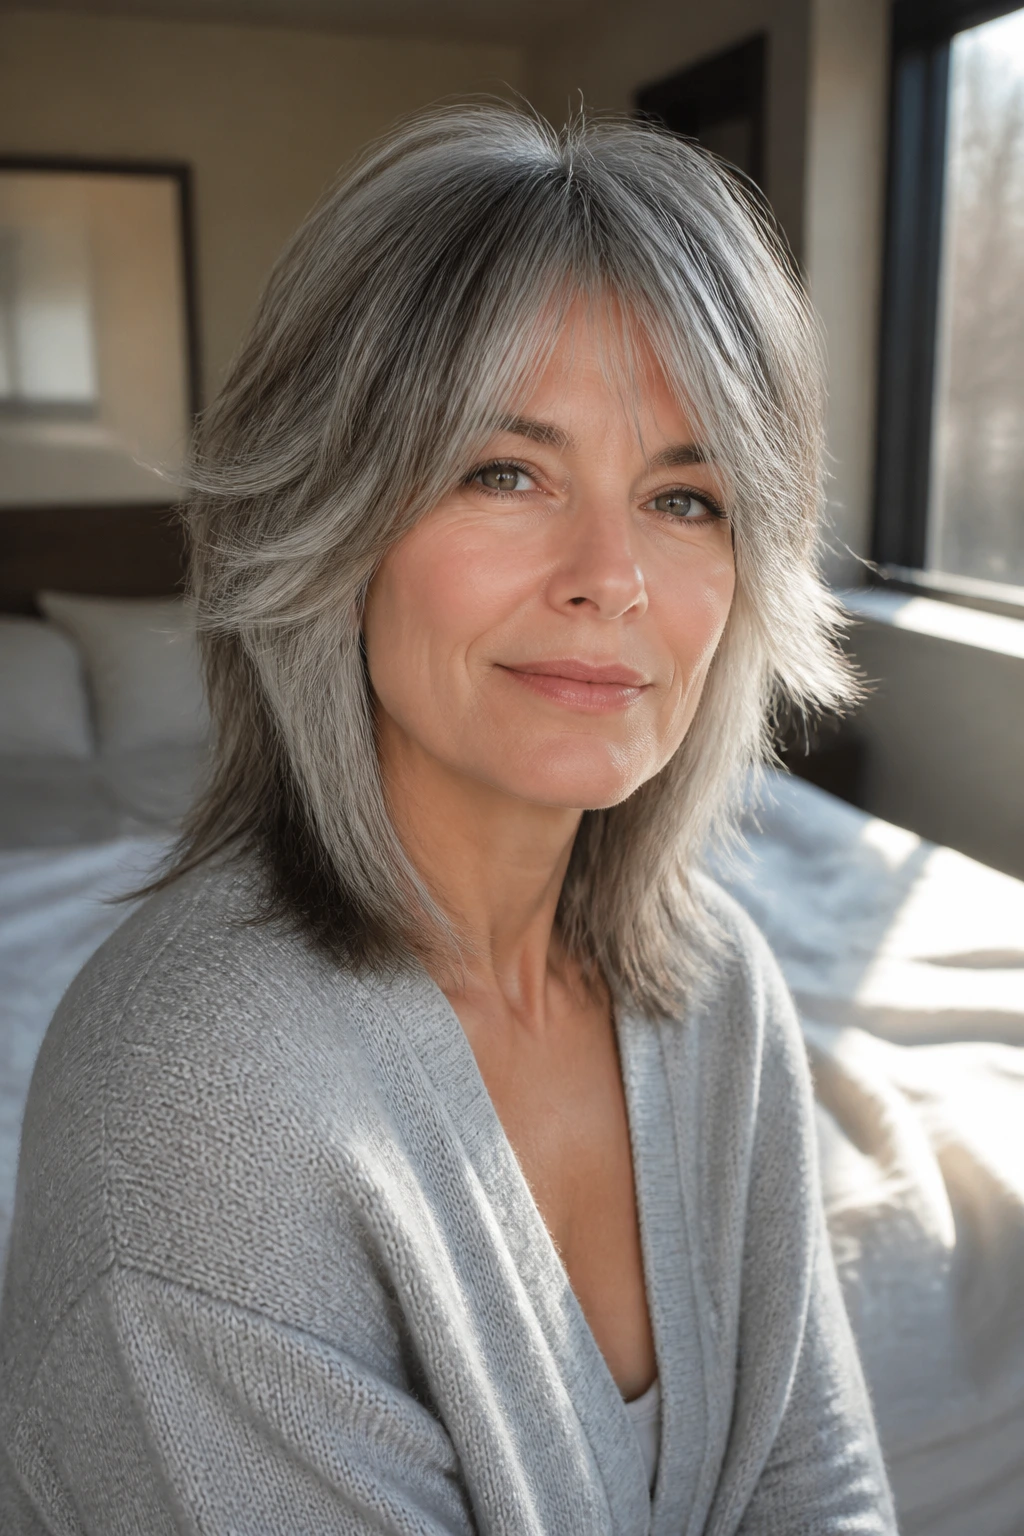
Not everyone wants a shag with strong fringe or lots of obvious choppiness. The minimalist version keeps the layers quieter and the overall shape simpler. It still has movement, but it doesn’t ask to be styled in five different ways. That’s a relief for anyone who likes a haircut to behave in the background.
What Makes It Low-Maintenance
The layers are longer and more discreet, so the cut grows out smoothly. The outline stays soft, which means you can air-dry it, rough dry it, or bend the ends a little and go. It also pairs well with a natural side part or center part because it doesn’t rely on one exact placement to work.
This is the shag I’d choose for women who want a shape, not a statement. It’s especially good if you’re trying shag layers for the first time and don’t want to jump into something heavily textured. There’s less to manage. Less to explain. Less to regret.
Best For
Women who prefer clean lines with just enough movement to keep the haircut from feeling flat.
21. Statement Shag with Choppy Ends

This is the boldest version in the bunch. The choppy ends create a more visible texture, and the shape can lean a little more dramatic through the crown and fringe. If you like a haircut that shows up in the room before you do, this is the one. If you want something quiet, skip it.
Why It Works When It Works
The statement shag relies on contrast. Softer layers near the face, stronger separation at the ends, a shape that looks deliberately irregular rather than accidentally rough. It’s strongest on hair that can hold texture and on women who actually like a little edge in their look. Add bold glasses or a strong lipstick and the cut has even more presence.
The one thing to watch is overdoing the choppiness. If every layer is aggressively broken, the cut can look tired fast. The better version leaves a few longer pieces in the mix so the hair still moves as a whole instead of fragmenting into pieces.
Who It Suits
- Women who like a more fashion-forward shag
- Hair that holds wave or bend
- Anyone who wants the haircut to feel a little bit rebellious
Why the Shag Needs a Weight Line, Not Just Layers
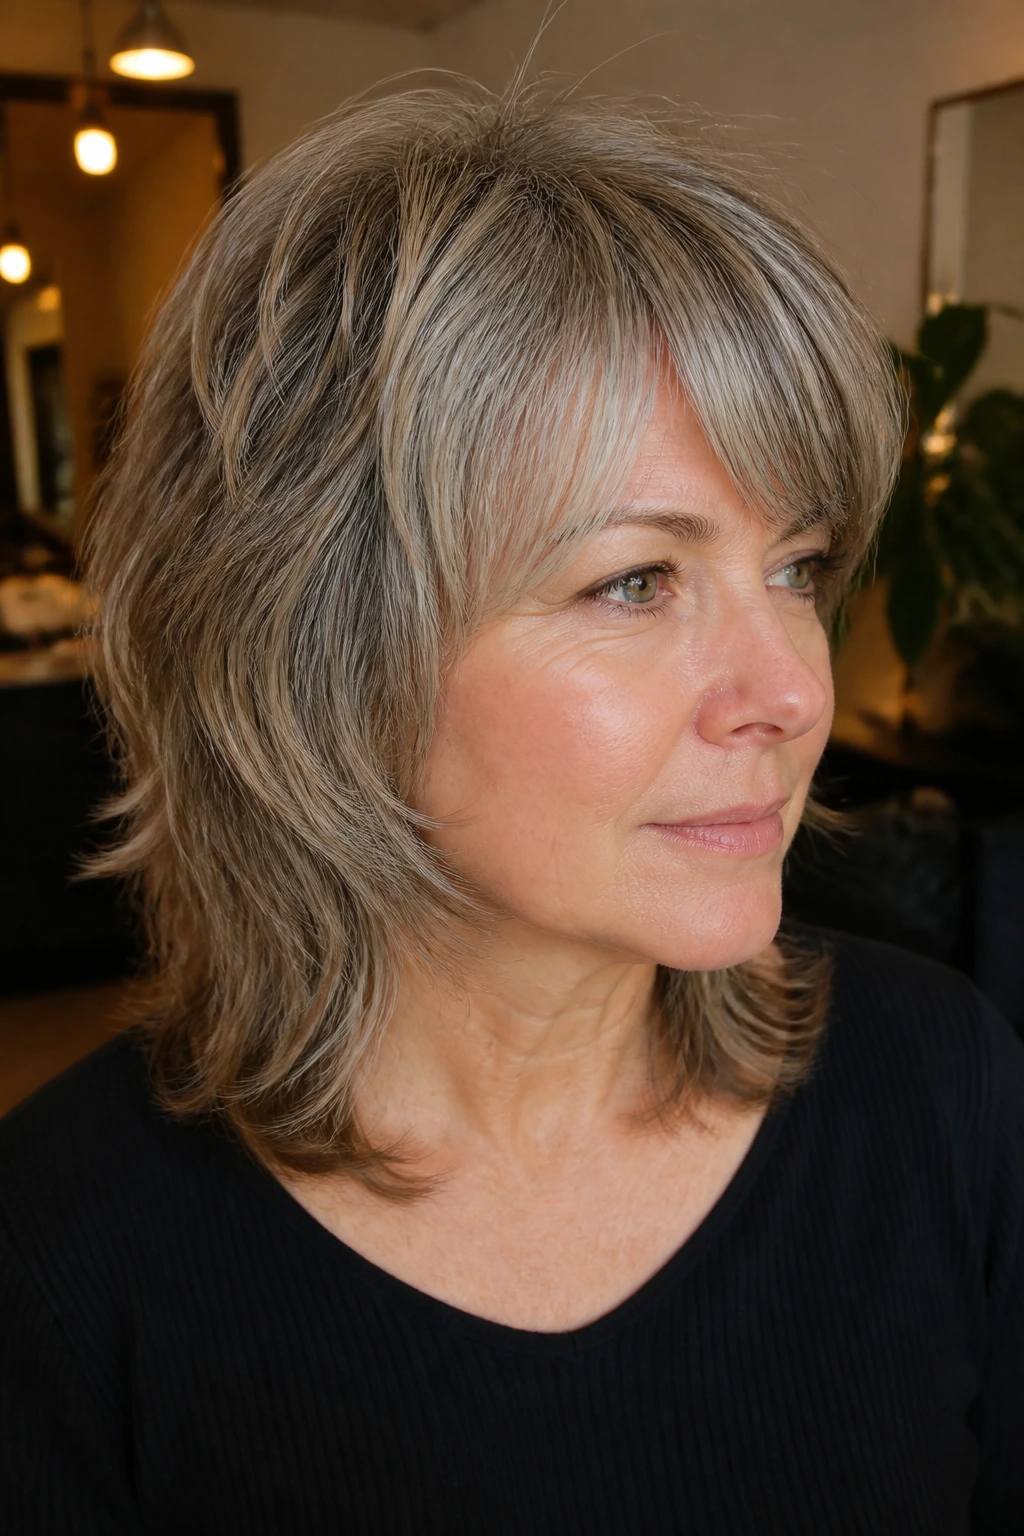
A shag lives or dies on balance. That sounds boring until you’ve watched a promising cut turn into a triangle, a puffball, or a stringy mess because someone removed weight in the wrong place. The best retro shag haircuts for older women keep enough length at the perimeter to anchor the shape while using layers to open up the top, soften the face, and let the hair move when you do.
That weight line is the quiet part of the haircut. You may not notice it in a photo, but you’ll feel it when the hair falls in a way that still looks like hair after a windy walk or a long day. Without it, the style can get too airy around the crown and too thin at the ends. With it, the cut looks deliberate even when you’ve barely touched it.
Bangs and fringe matter too, but only if they’re cut to work with the rest of the shape. Curtain bangs, bottleneck fringe, and side-swept pieces all help because they break up the face without creating a hard wall across the forehead. That little break is what gives the style its softness. It also makes gray and silver hair look richer, because the layers create shadows and highlights instead of one flat sheet.
And then there’s growth. A shag that grows out nicely is half the point. If the perimeter still has shape after several weeks, you’re not trapped in salon panic mode. That freedom matters more than people admit.
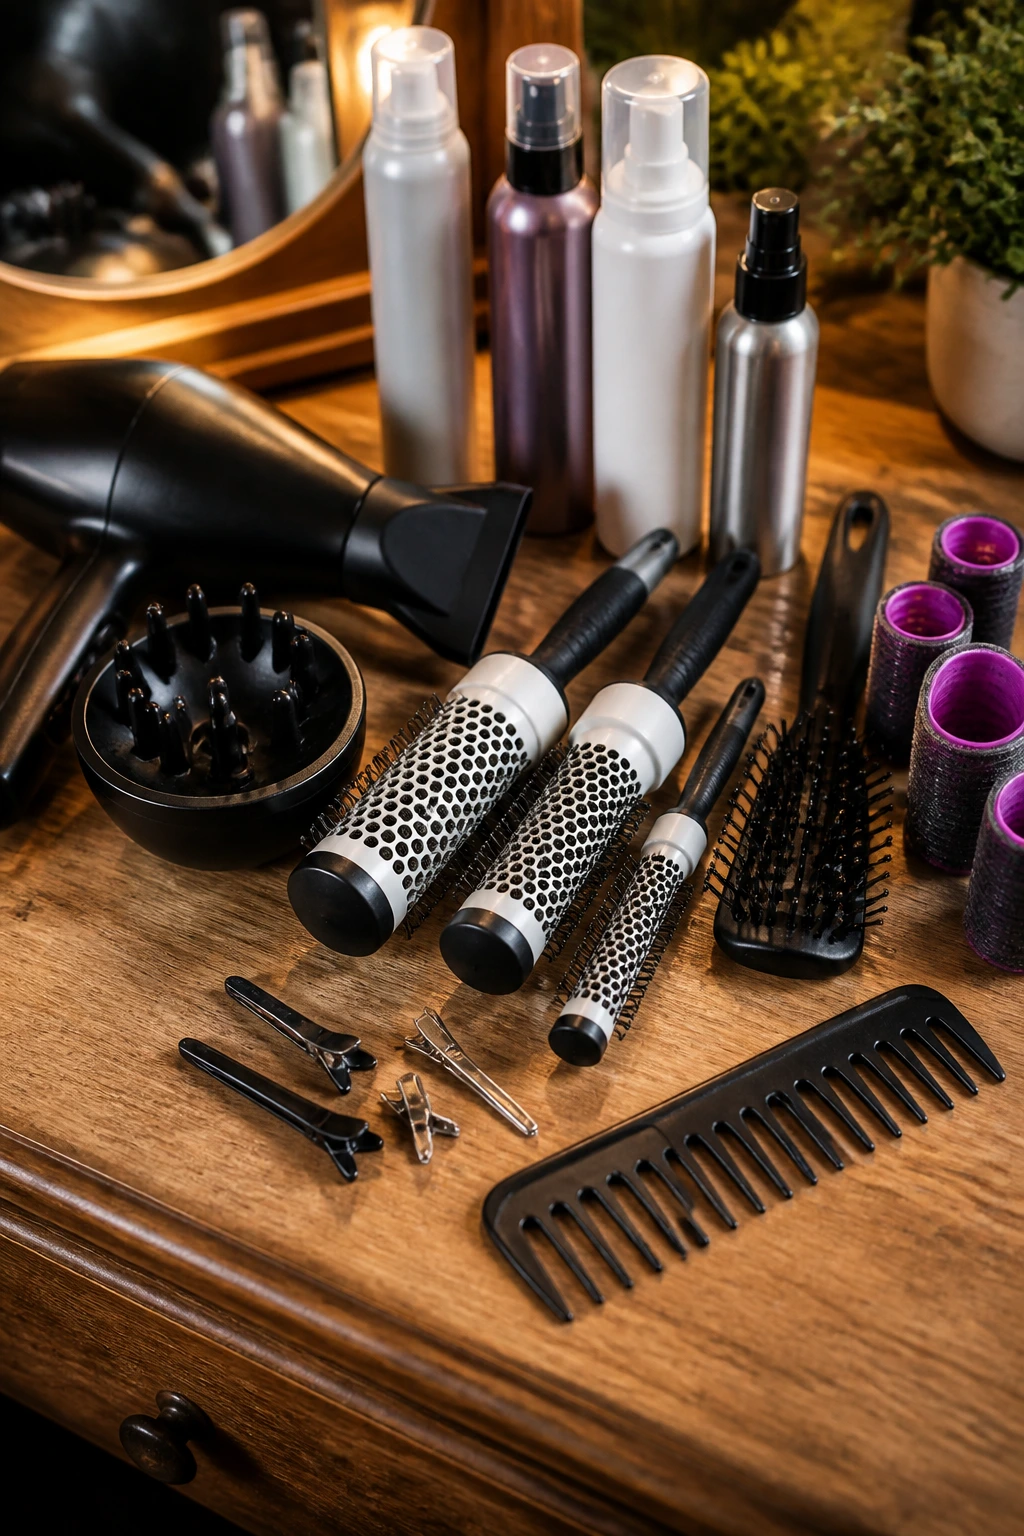
Tools, Brushes, and Styling Gear That Make These Cuts Behave
-
Blow dryer with a concentrator nozzle: Directs air where you need it, which helps the crown lift without blasting the layers apart.
-
Diffuser attachment: Worth having if your hair waves or curls; it lets the texture dry with less frizz and less collapse.
-
1 to 1.5-inch round brush: A smaller brush for shorter shag layers, a bigger one for shoulder-length cuts; both help bend the ends under or out on purpose.
-
Vent brush or skeleton brush: Good for quick root lift on fine hair and for rough-drying a shag without flattening it.
-
Lightweight mousse: Especially useful on fine or wavy hair because it adds hold without making the cut sticky.
-
Texturizing spray: Helps separate the ends and keep layers from clumping together after the hair is dry.
-
Heat protectant spray or cream: Non-negotiable if you use a blow dryer, hot brush, or curling iron. Fine silver hair can look crisp fast if it’s overheated.
-
Clips for sectioning: Makes a real difference when you’re blow-drying face-framing layers or setting the fringe.
-
Wide-tooth comb: Gentler than a brush for curls and waves, especially when the hair is damp.
-
Velcro rollers: Optional, but excellent for crown lift and a soft bend through the top layers when you want volume without a full blowout.
Choosing the Right Length, Layers, and Fringe for Your Hair
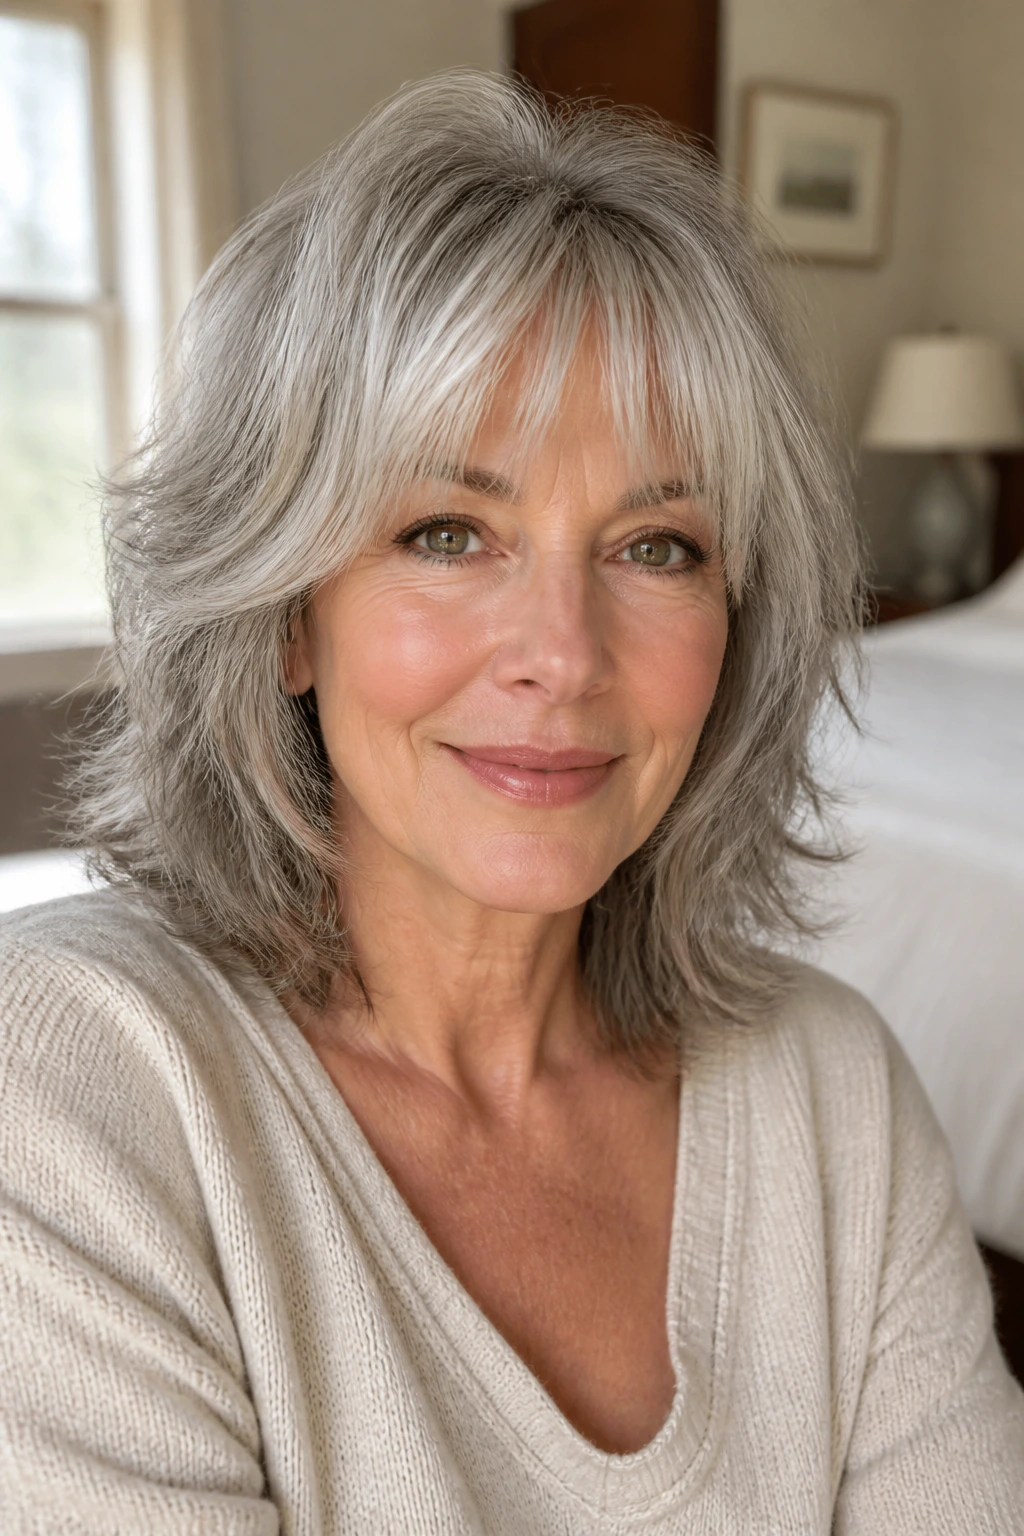
The smartest shag starts with one honest question: how much styling are you willing to do? If the answer is “not much,” then the layers should be softer, longer, and less aggressive. If you like a brush and a dryer, you can get away with more shape around the crown and more visible fringe. The haircut should match the routine, not the fantasy.
For fine hair, keep the perimeter fuller and the layers longer. That’s the rule I’d write in a neon marker if I could. Short layers can create lift, sure, but they can also leave the ends too sparse, which makes the whole haircut look older fast. For thick hair, the conversation flips. You want strategic weight removal, especially underneath and around the interior, so the shape doesn’t sprawl outward.
Fringe is its own decision. Curtain bangs are the easiest to live with. Bottleneck fringe gives a little more face framing. Side-swept fringe is useful when a cowlick keeps fighting the middle. Full bangs can work, but they demand more trims and more attention than most women actually want. I’d rather see a longer fringe that can be tucked into the cut than a too-short bang that starts acting up after two weeks.
Bring photos to your stylist, but bring the right kind. Show one photo for the fringe, one for the length, and one for the texture. That saves a lot of arguing with a picture that only worked because the model had six hours, a curling iron, and no wind.
How to Wear a Shag So It Looks Intentional
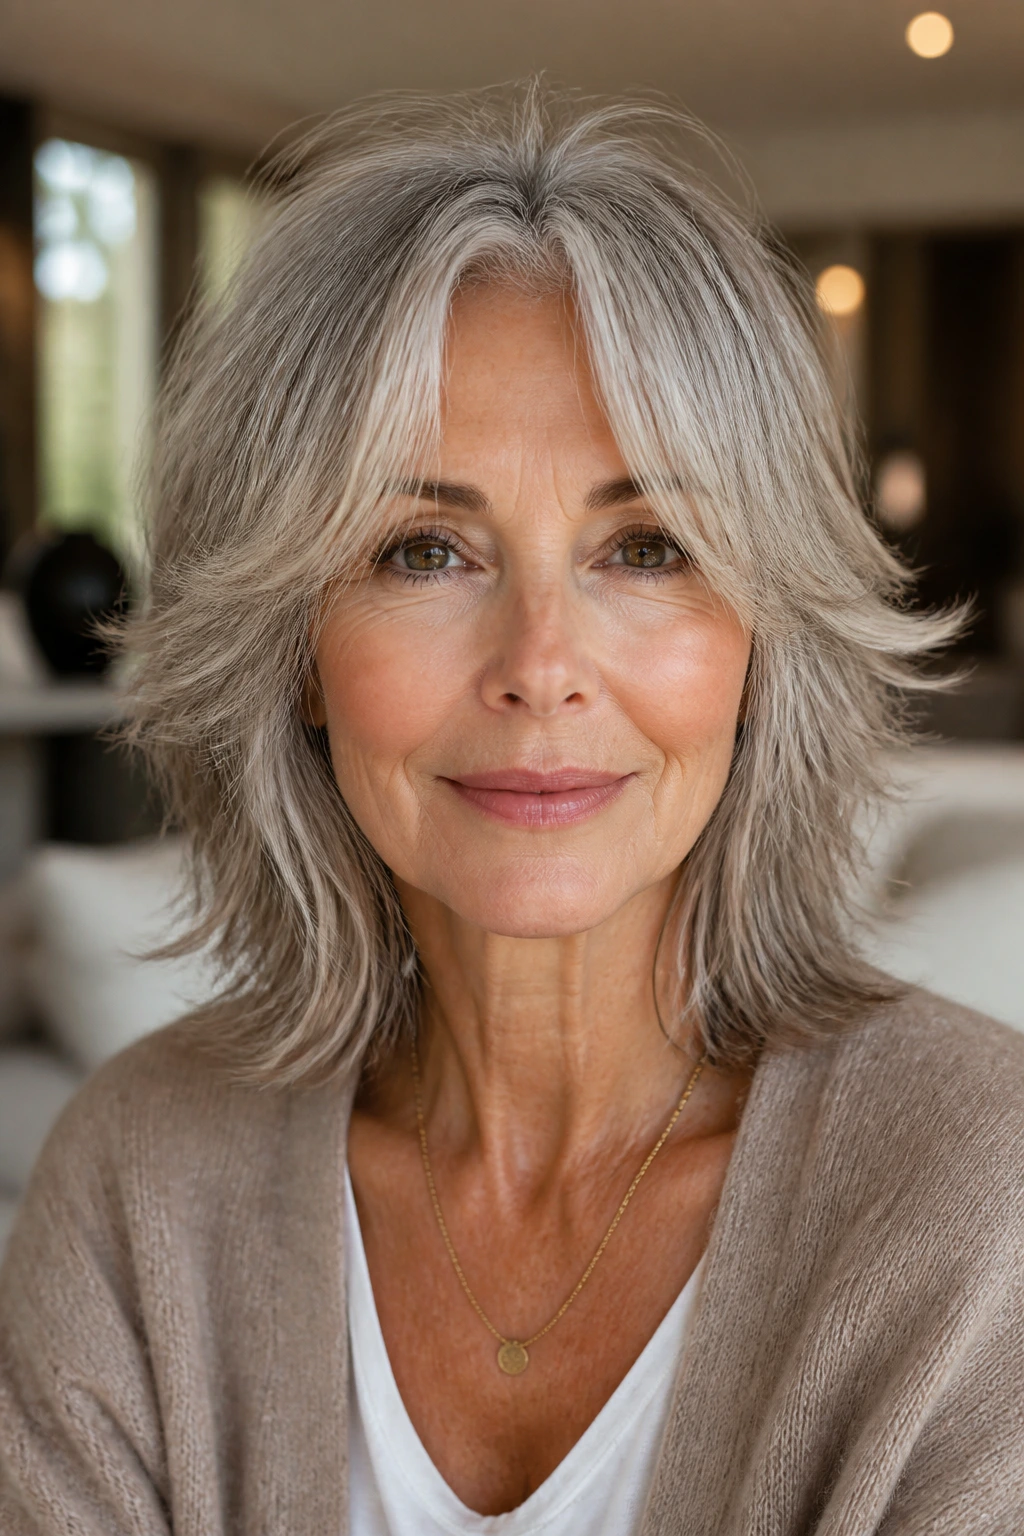
Parting: A center part gives some shag cuts a softer, calmer feel, while a side part can lift the roots and break up symmetry around the face. If your hair has a cowlick, don’t force a part that keeps fighting back.
Drying: Rough-dry first, then refine the front and crown. That little order matters. If you start with the fringe and ends before the roots are dry, you usually end up flattening the top again.
Products: Fine hair usually likes mousse or root spray more than cream. Thick or coarse hair often needs a light smoothing product at the ends so the layers don’t puff outward. Keep the amounts small. Shags look better with less product than most people think.
Finish: A shag should have a touch of separation, not wet shine. Use texturizing spray or a light wax on the ends, then stop touching it. Too much fuss smooths out the very texture you’re trying to keep.
Glasses and jewelry: This sounds secondary, but it matters. A shag with shorter fringe and clear cheekbone layers pairs well with frames and earrings because the cut isn’t crowding the face. The neckline stays visible. The eyes stay framed. That’s the whole point.
Styling Tricks That Add Lift Without Teasing It to Death
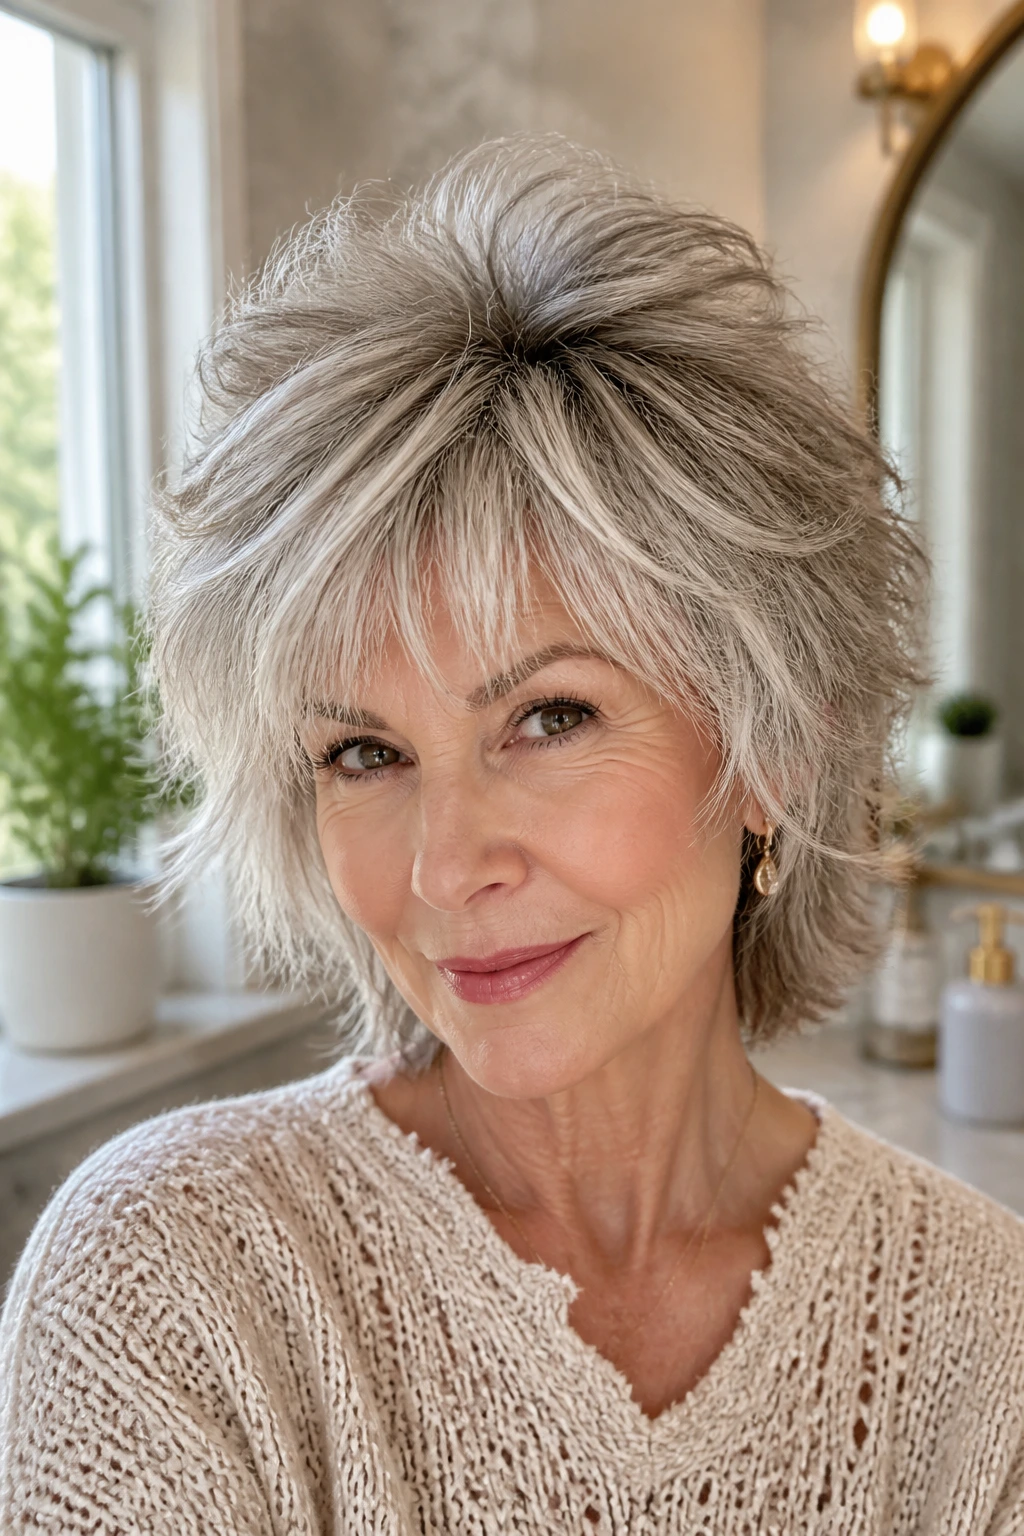
The fastest way to ruin a shag is to treat it like a pageant blowout from the wrong decade. Teasing the crown into a little cloud is not the same thing as lift. Real lift comes from root direction, the right product, and a clean drying pattern.
Start with mousse or root spray at the base, especially on damp hair. Then lift sections with a brush or your fingers while drying the roots first. When the top is half-dry, bend the front layers away from the face instead of forcing them under. That slight outward motion keeps the cut from looking helmet-like.
Root Lift: Velcro rollers at the crown for 10 to 15 minutes can change the whole shape, especially on fine hair that collapses fast. You don’t need a full set. Two or three placed at the top can be enough.
Texture Boost: A little texturizing spray at the mid-lengths and ends gives the layers separation. Spray lightly, wait a minute, then scrunch or pinch the ends. Don’t soak the hair. That just makes it sticky.
Fringe Control: Fringe always looks better after it cools in the shape you want. If you blow-dry bangs, let them cool on the brush for a few seconds before releasing them. That small pause helps them stay put.
Common Mistakes That Make a Shag Look Tired Fast
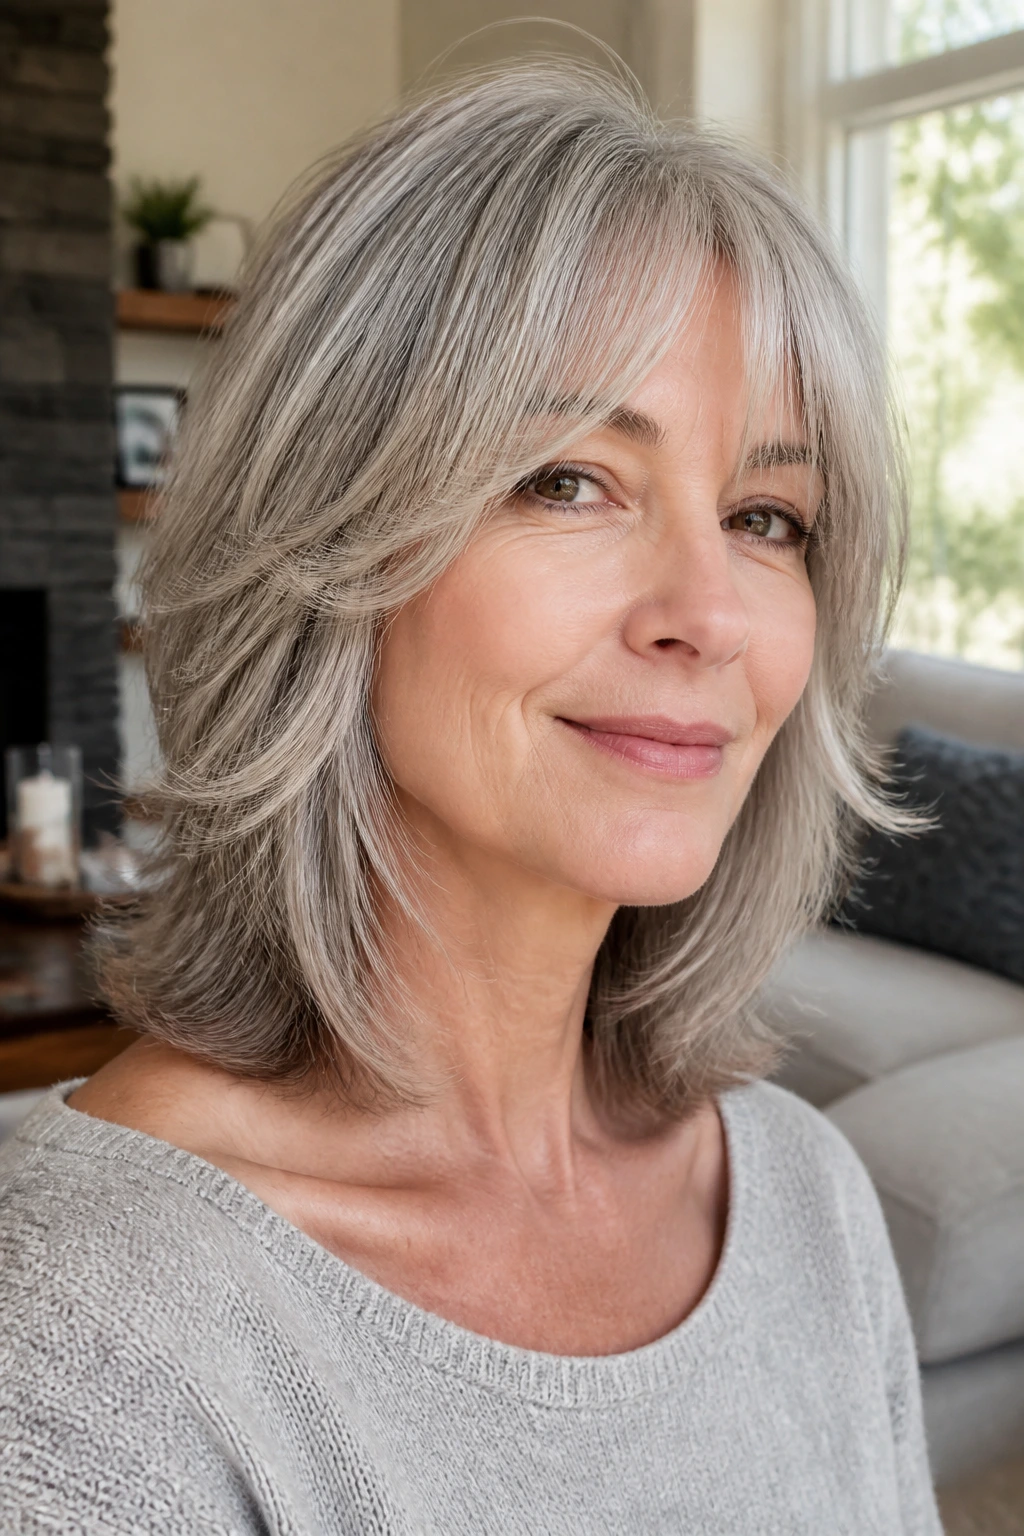
The first mistake is over-layering the crown. You can spot it when the top puffs up and the ends look thin. The fix is simple in theory and annoying in practice: keep the top layers longer and preserve weight at the perimeter. A shag needs shape, not a mushroom cap.
Another common one is cutting the fringe too short. Short bangs can be cute on the right face, but they age quickly if they sit too high or split against a cowlick. If you’re unsure, keep the fringe long enough to sweep or tuck. You can always shorten it later. Growing it out is the miserable part.
Too much thinning shear work is a third problem. Fine or gray hair can go fuzzy when it’s over-thinned, and thick hair can lose its clean edge. What you want is targeted weight removal, not random abrasion. If the ends feel wispy right after the cut, that usually gets worse at home.
The fourth mistake is using the wrong styling cream. Heavy creams and oils can flatten a light shag and make the layers stick together. That’s especially true if your hair is fine or naturally soft. Use the least amount that gives control, then add a touch more only if the ends still feel dry.
And here’s the one people forget: letting the haircut grow too long between trims. A shag can tolerate growth better than a blunt bob, but it still needs a reset. Once the fringe starts falling into the eyes and the layers lose their separation, the shape begins to blur. That’s the moment to book the appointment, not six weeks later when everything has gone limp.
Variations and Adaptations to Try
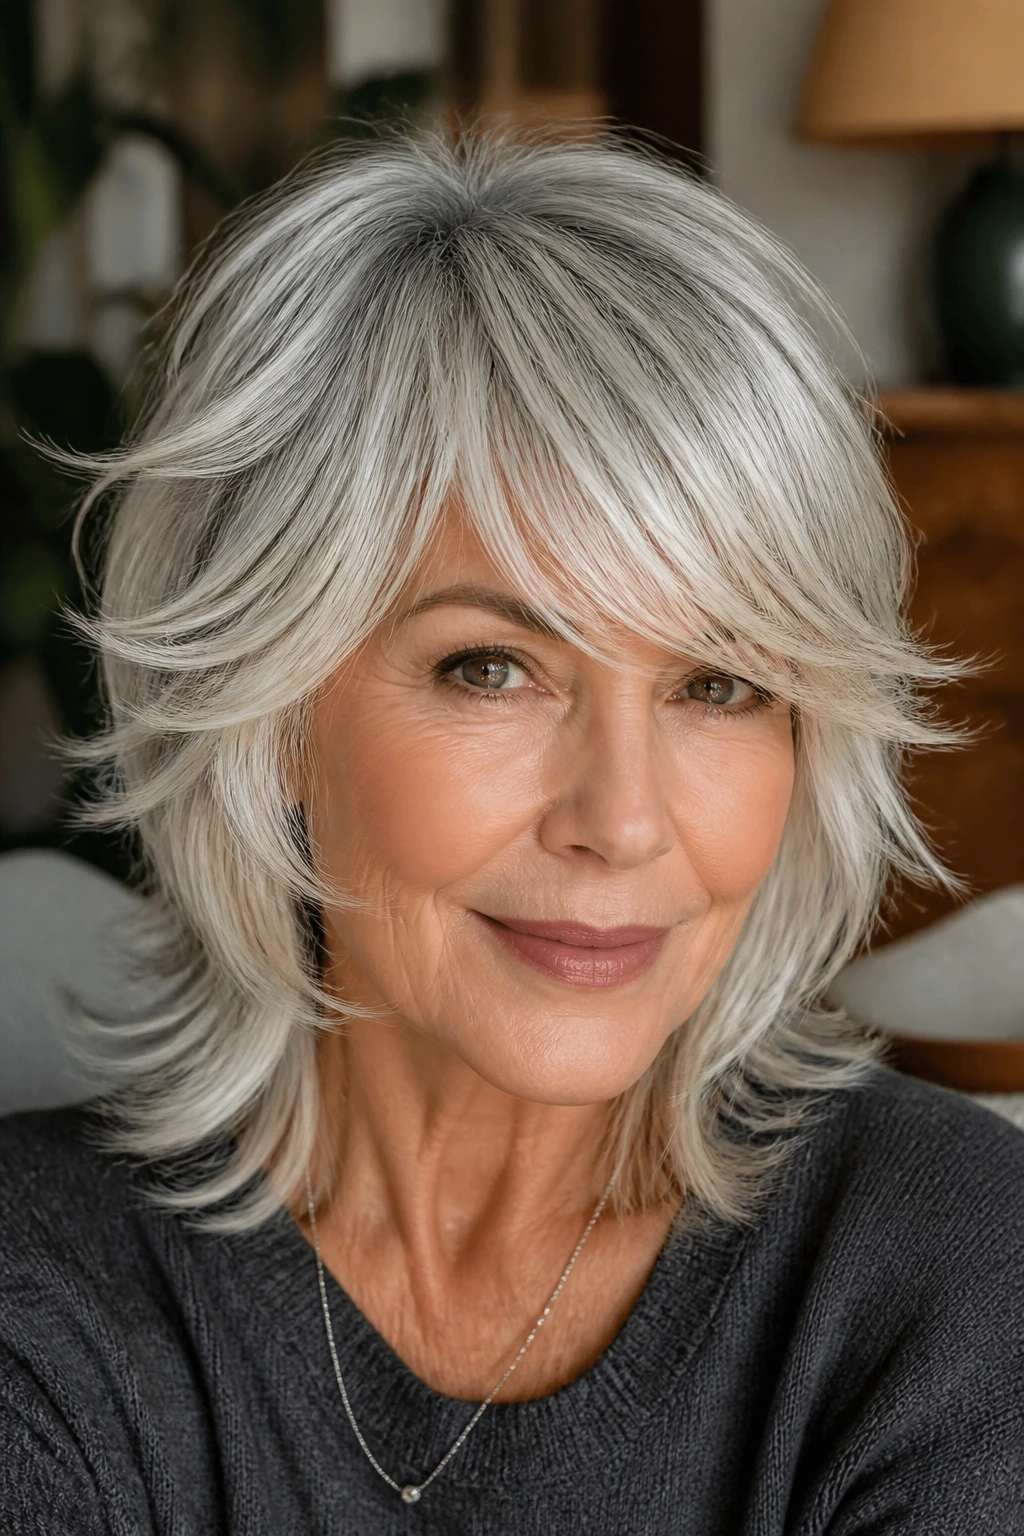
Soft Silver Sweep: Keep the fringe long and side-directed, then add gentle feathering around the face. This is a good choice if you want your gray or silver hair to look polished without losing movement.
Curly Crown Lift: Ask for longer layers through the top and sides, then let the curls keep their natural spring. This version works best when the stylist cuts to the curl pattern instead of flattening it.
Glasses-Friendly Fringe: Build the fringe around the frame line, with softness at the temples and no hard shelf across the forehead. It’s practical, and it avoids the constant push-up-the-bangs problem.
Air-Dry Shag: Keep the layers soft, use a lightweight mousse, and let the texture do the work. This is the low-effort option for wavy hair that looks better when it isn’t overhandled.
Thick-Hair Debulk Shag: Remove weight from the interior and underneath, but keep enough outer length to hold the silhouette. This version behaves better in humidity and doesn’t balloon at the sides.
Fine-Hair Lift Shag: Use longer internal layers, a fuller perimeter, and a small root-lifting product. The goal is body without see-through ends.
How to Keep the Shape Between Haircuts
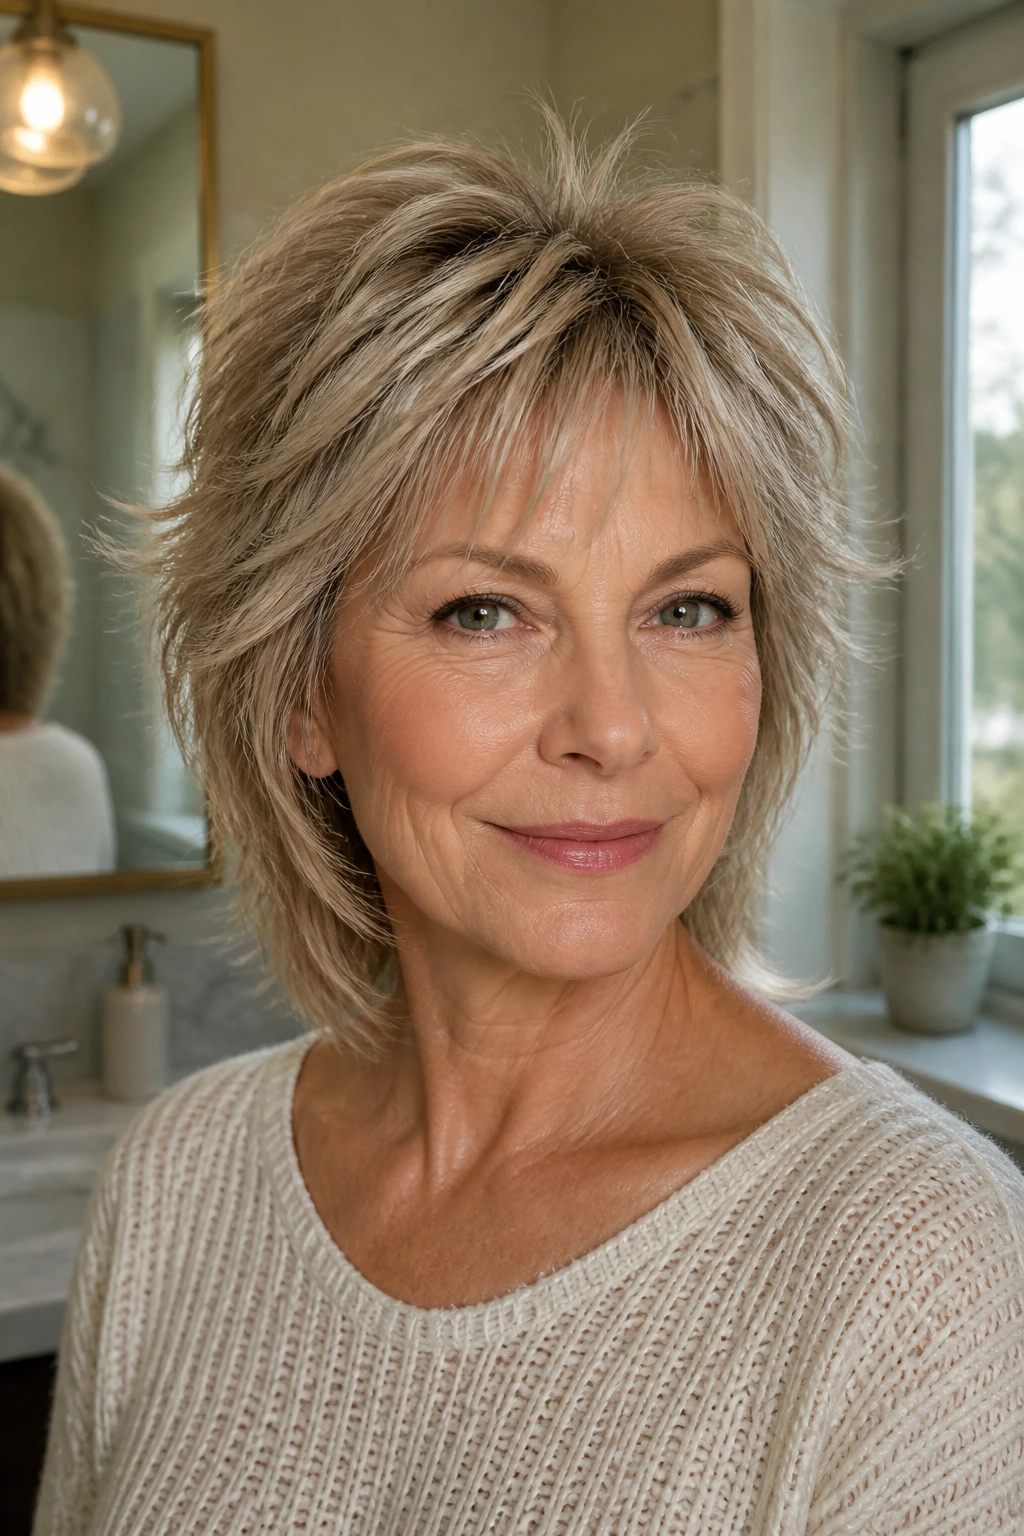
A shag doesn’t need constant babysitting, but it does need a little maintenance if you want the layers to keep their bite. For most women, a trim every 6 to 10 weeks keeps the fringe from wandering into the eyes and the ends from blurring into one long shape. If your hair grows quickly or your bangs are the whole reason the cut works, stay closer to the 6-week mark.
At home, the easiest way to preserve the shape is to avoid over-washing and over-brushing. A shag usually looks better on day two or day three when the texture has a little memory. Dry shampoo at the roots can buy you another day, but use it lightly. Too much turns silver hair chalky and fine hair gritty.
Sleep matters too. A loose topknot, a soft clip, or a silk pillowcase can keep the fringe from getting bent into bad angles overnight. If your layers tend to flip out, lightly mist them with water in the morning and reshape just the front pieces. You do not need to rewash the whole head because one side got wild.
If the haircut starts feeling flat between appointments, a quick reset at the crown usually helps more than blasting the whole style with more product. Lift the roots, bend the face frame, and leave the ends alone unless they’re truly frayed. A shag is built to be a little imperfect. That’s not a flaw. It’s part of the charm.
Questions People Ask Before They Get the Cut
Will a shag work on thinning hair?
Yes, if the layers are handled carefully. Thin hair usually needs longer layers and a fuller perimeter so the ends don’t look see-through. Too many short pieces around the crown will make the scalp more visible, which is the opposite of what you want.
Do I need bangs with a shag?
No, but a fringe often helps the cut feel complete. Curtain bangs, side-swept bangs, and bottleneck fringe all soften the face without requiring a strict blunt line. If you hate bangs, you can still do a shag with face-framing layers only.
Can gray or silver hair take a shag?
Absolutely. In fact, gray hair often looks better with a shag because the layers create movement around the color instead of letting it sit in one flat sheet. Just be careful with over-thinning, since gray strands can get fuzzy if they’re cut too aggressively.
Is a shag good for curly hair?
Yes, and curly hair often benefits the most. The layers let curls stack in a better way and reduce the “triangle” shape. The trick is to cut for the curl pattern and keep the top layers long enough to avoid a frizzy crown.
How do I explain the cut to my stylist?
Bring photos that show the front, side, and fringe separately. Then say where you want the length to sit, how much styling you’re willing to do, and whether you want softness or edge. That conversation is worth more than vague words like “choppy” or “modern.”
What if my hair is very straight and won’t hold texture?
Then ask for a shag with a little more structure and plan on using a round brush or hot rollers for bend. Straight hair can wear a shag well, but the cut needs some help from product or heat to keep the layers visible.
How often should the bangs be trimmed?
Usually every 3 to 5 weeks if the fringe is short, or every 6 to 8 weeks if it’s longer and swept to the side. The exact timing depends on how fast your hair grows and whether the bangs fall into your eyes when they lose their shape.
The Cut That Still Moves
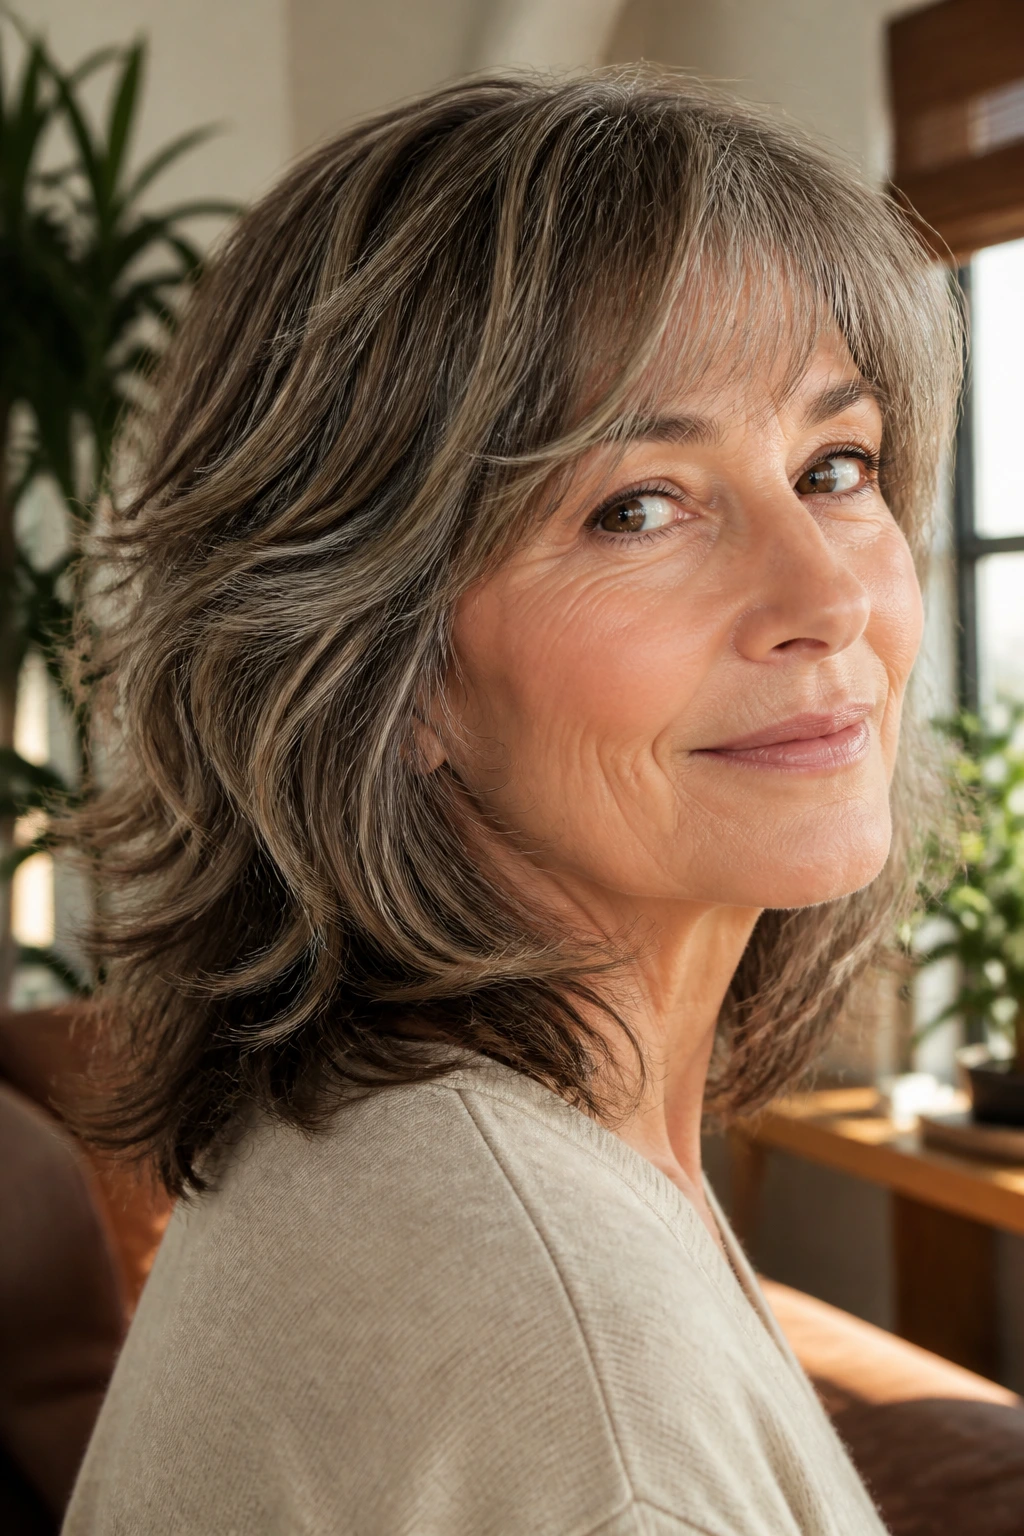
A shag haircut earns its keep when it makes the hair feel lighter without making it feel flimsy. That’s the real test. For older women, that usually means enough face framing to soften the features, enough weight left in the right places to keep the shape honest, and enough texture to keep the whole thing from going flat by noon.
The nice part is that there isn’t just one way to wear it. You can go soft, sharp, curly, silver, short, shoulder-length, low-maintenance, or a little rebellious. The haircut adjusts. That flexibility is why the shag keeps coming back. It doesn’t ask the hair to be younger. It asks it to move.
If you’re ready for a cut that has personality but doesn’t need a full production every morning, this is the lane to stay in. Get the layers right, keep the fringe honest, and leave a little room for the hair to do what it already wants to do.
