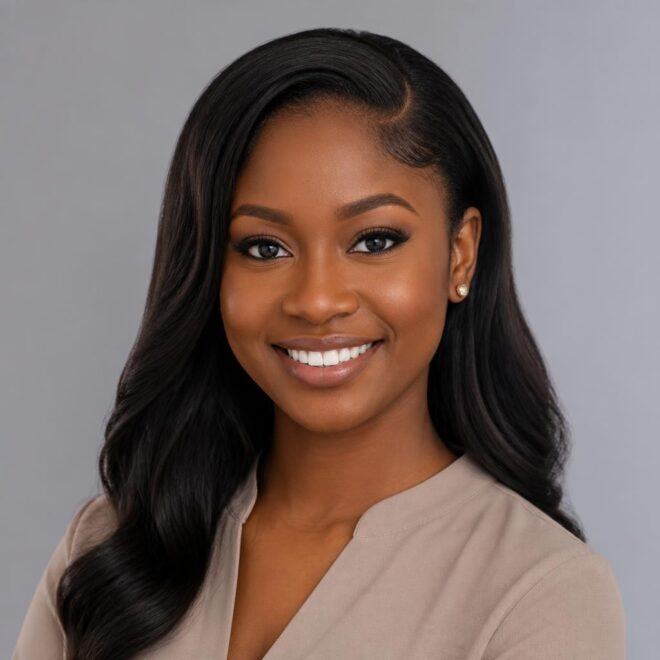


A round face does not need more roundness. It needs edges — not harsh ones, not cartoonish angles, just enough shape at the jaw, the collarbone, or the fringe to make the width of the face feel intentional instead of dominant. That is the whole appeal of squared-off shag haircuts for round faces: the cut still has swing, still has texture, still has that undone shag energy, but the outline knows where to stop.
A soft shag can drift into puffball territory on a round face if every layer lands at the cheeks. A squared-off version changes the math. The bottom line is cleaner, the crown gets lift, and the face-framing pieces do the work where they should — usually at the cheekbone, lip line, or just below the jaw. That cleaner perimeter is what keeps the cut from collapsing into fluff.
I keep coming back to the blunt edge because it matters more than people realize. A shag is not only about choppy layers; it’s about contrast. When the ends are a little straighter, the whole cut reads sharper, and that sharpness gives round features a frame without making the style look stiff.
Why These Cuts Earn Their Keep
-
Jawline structure: A blunt or semi-blunt hem creates a visible stopping point right where round faces usually need it most, which helps the silhouette feel longer and less circular.
-
Lift without side bulk: The crown layers add height, but the squarer perimeter keeps the volume from spreading sideways at cheek level.
-
Fringe control: Bangs can shorten the forehead, but the right fringe — blunt, bottleneck, curtain, or micro — changes the balance instead of smothering the face.
-
Low-drama grow-out: The shag shape survives a trim that grows out by a half-inch or so; the square outline keeps it looking deliberate instead of frayed.
-
Works across textures: Straight hair shows the line, wavy hair shows the movement, curly hair shows the shape. The cut changes with texture, but the geometry still holds.
1. Chin-Length Boxy Shag with Blunt Micro Fringe

A chin-length shag with a blunt micro fringe is not shy, and that’s the point. The cut lands exactly where a round face often wants a little interruption — right at the jaw — and the tiny fringe keeps the eye moving upward instead of running in a neat circle around the cheeks.
Why it flatters the face
The short length gives you a clean edge around the lower third of the face, which makes the jaw look more defined than a soft, chin-skimming bob would. The micro fringe, kept just above the brow or grazing it by a few millimeters, adds a hard visual line. That line is useful. It breaks up softness fast.
- Ask for the bottom layers to hit at or just below the chin, not above it.
- Keep the fringe short but textured at the center if your hairline swirls or splits.
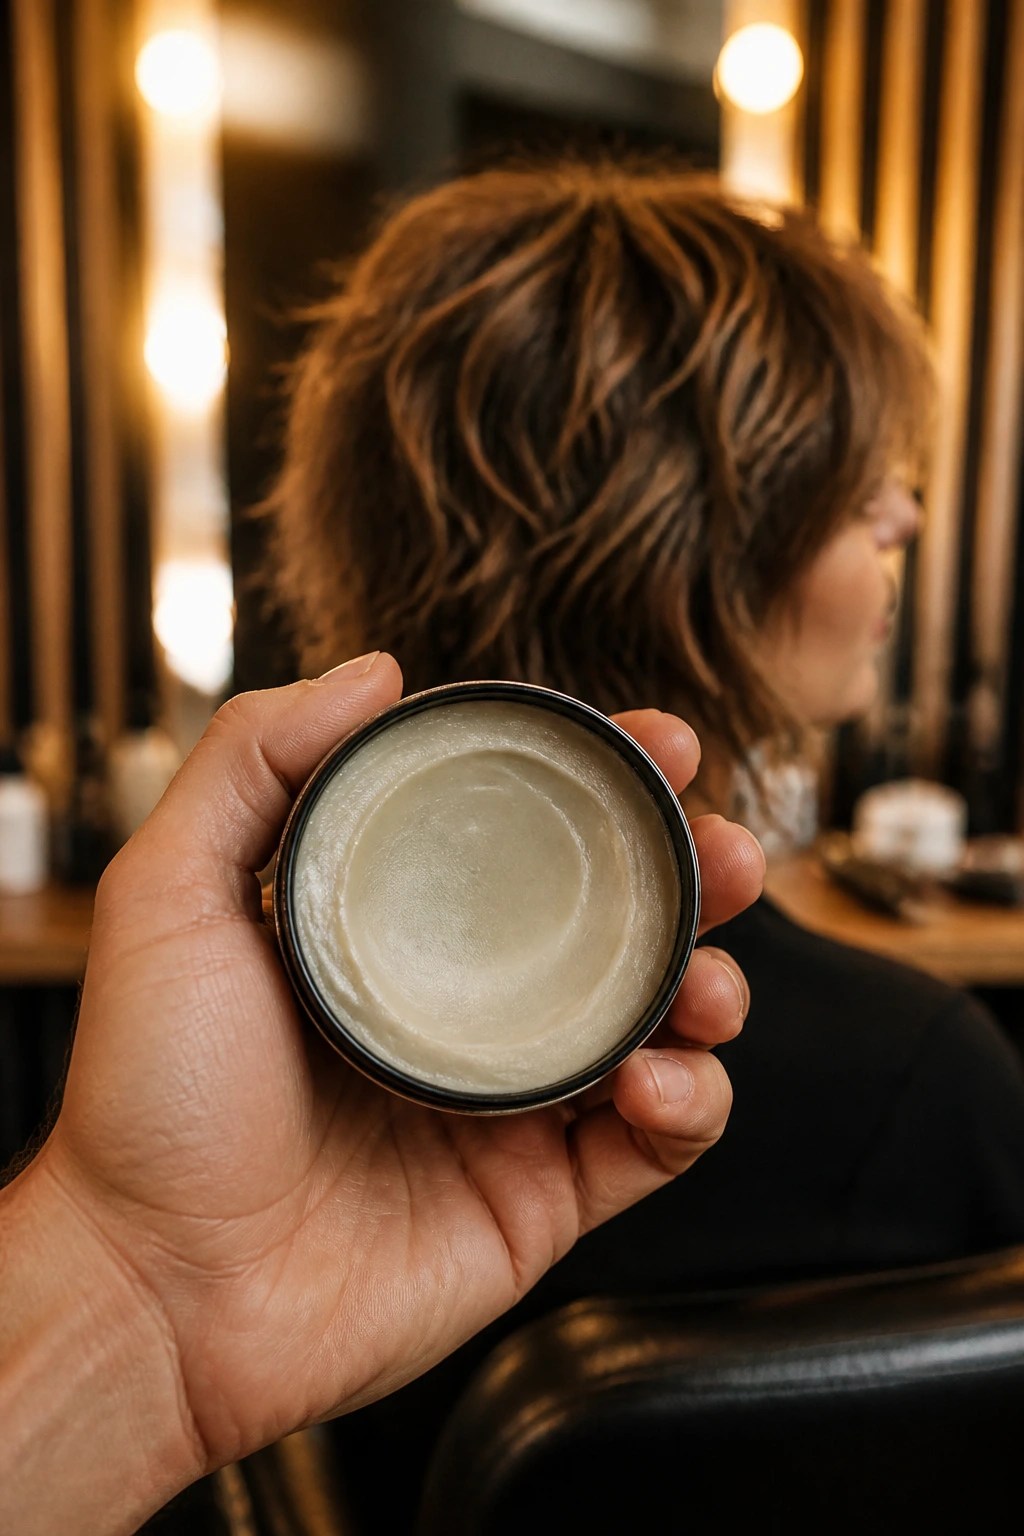
- Style with a pea-sized amount of matte paste so the ends stay piecey, not fuzzy.
- A little side bend in the fringe helps if your forehead is shorter; keep it centered if you want more symmetry.
Best for: straight to slightly wavy hair that can hold a crisp outline without fighting the shape.
2. Collarbone Shag with a Clean Hem

The collarbone length is one of those cuts that behaves better in real life than it sounds on paper. On a round face, that extra inch or two below the jaw gives the eye somewhere to travel, and the cleaner hem stops the hair from blooming outward at the cheeks.
It’s a good middle ground if you want shag texture but not a full-on tousled mess. The layers can start around the cheekbones, then graduate downward, while the ends stay blunt enough to keep the whole thing from turning airy in the wrong places. That contrast is the whole trick.
Why this length works
The collarbone is long enough to stretch the face visually, but short enough that you still get shape without sacrificing movement. If your hair is medium thick, this cut can hold a rounded movement through the crown while the perimeter stays firm. If your hair is fine, that blunt end gives the illusion of density.
A lot of people ask for “layered, shoulder-grazing hair” and end up with a shape that widens their face. This one avoids that. The line ends below the widest part of the cheek, and that makes a big difference.
3. Longline Shag with Straight Ends

If you love length and you’re not ready to give it up, this is the safer bet than a wispy shag that disappears around the face. The longline version keeps the layers inside the shape, not on the outside of it.
The silhouette matters more than the amount of layering here. I’d keep the bottom line blunt at the chest or just below the collarbone, then place the shorter pieces high enough to show movement without building width at the cheeks. It’s a controlled shag. Not precious. Controlled.
What to ask for
- A straight bottom edge with soft internal layers.
- Face-framing pieces that begin around the lip or chin, not the cheek width.
- A bit of crown lift so the top isn’t flat against the head.
- Texture at the ends, but not so much that the hem goes see-through.
This cut works especially well if you wear your hair down a lot and want the shape to look good after a quick brush, not only after a 30-minute styling session.
4. Curtain-Bang Shag with Square Sides

Curtain bangs on a round face can be excellent or annoying, and the difference is usually the side length. When the curtain pieces stop too high, they puff right out beside the cheeks. When they’re cut a little longer and dropped into squarer side layers, the whole face looks calmer.
The curtain fringe should open from the center, then fall toward the cheekbones in a controlled diagonal. Not fluffy. Not too short. The side pieces should skim toward the jaw, almost like they’re drawing a frame around the face instead of outlining the cheeks too closely.
That’s the useful part.
Styling note
Blow-dry the fringe forward first, then bend it away from the face with a round brush or your fingers. If the ends kick out too much, wrap the side sections around a larger brush for 5 to 8 seconds and let them cool before touching them again. That cooling step matters. It locks the bend.
5. Cropped Shag with a Heavy Crown
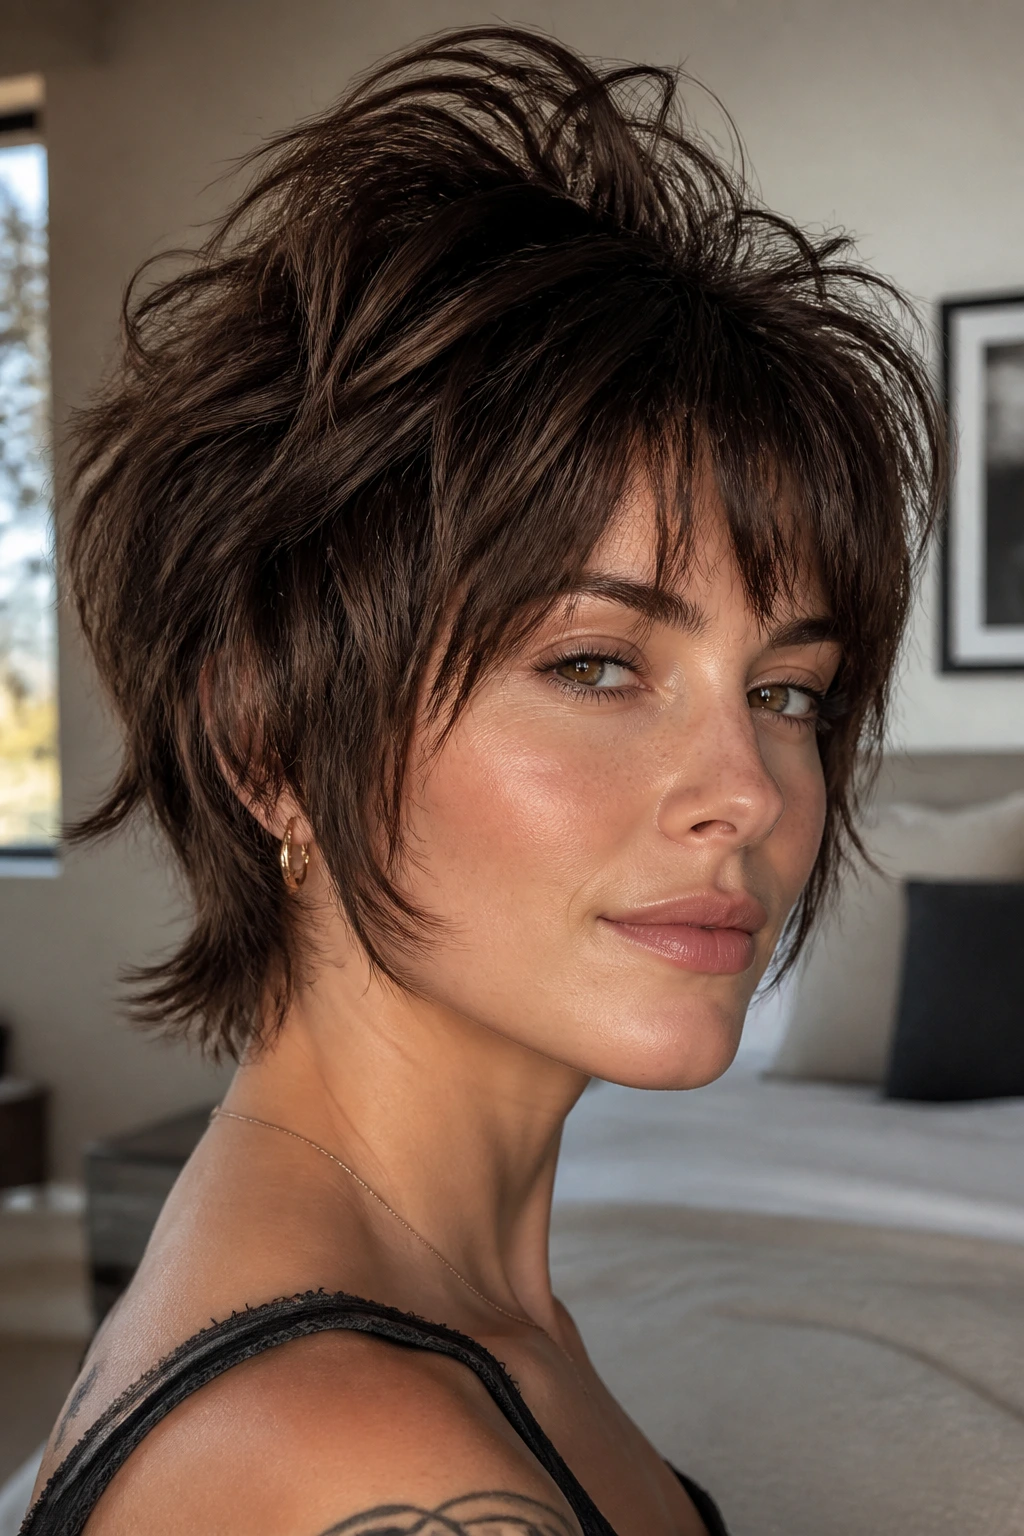
Can a short shag work on a round face? Absolutely — if the crown has enough height to keep the cut from sitting like a helmet.
Quick facts
- Best if the top layers are 2 to 3 inches longer than the side pieces.
- Keep the perimeter around ear to upper-jaw level.
- Use a light foam or root spray at the crown, not heavy cream.
- Let the fringe sit slightly forward for a little length through the face.
This version looks best when the top is messy on purpose and the bottom edge stays tidy. The square outline keeps the cut from ballooning out at the temples, which is the main danger with shorter shags on fuller cheeks.
A cropped shag does not need a lot of surface texture to work. It needs direction. Give the top some lift, keep the sides a little narrower, and let the hem stay crisp. That combination changes the face shape faster than another inch of length ever will.
6. Jawline Razor Shag
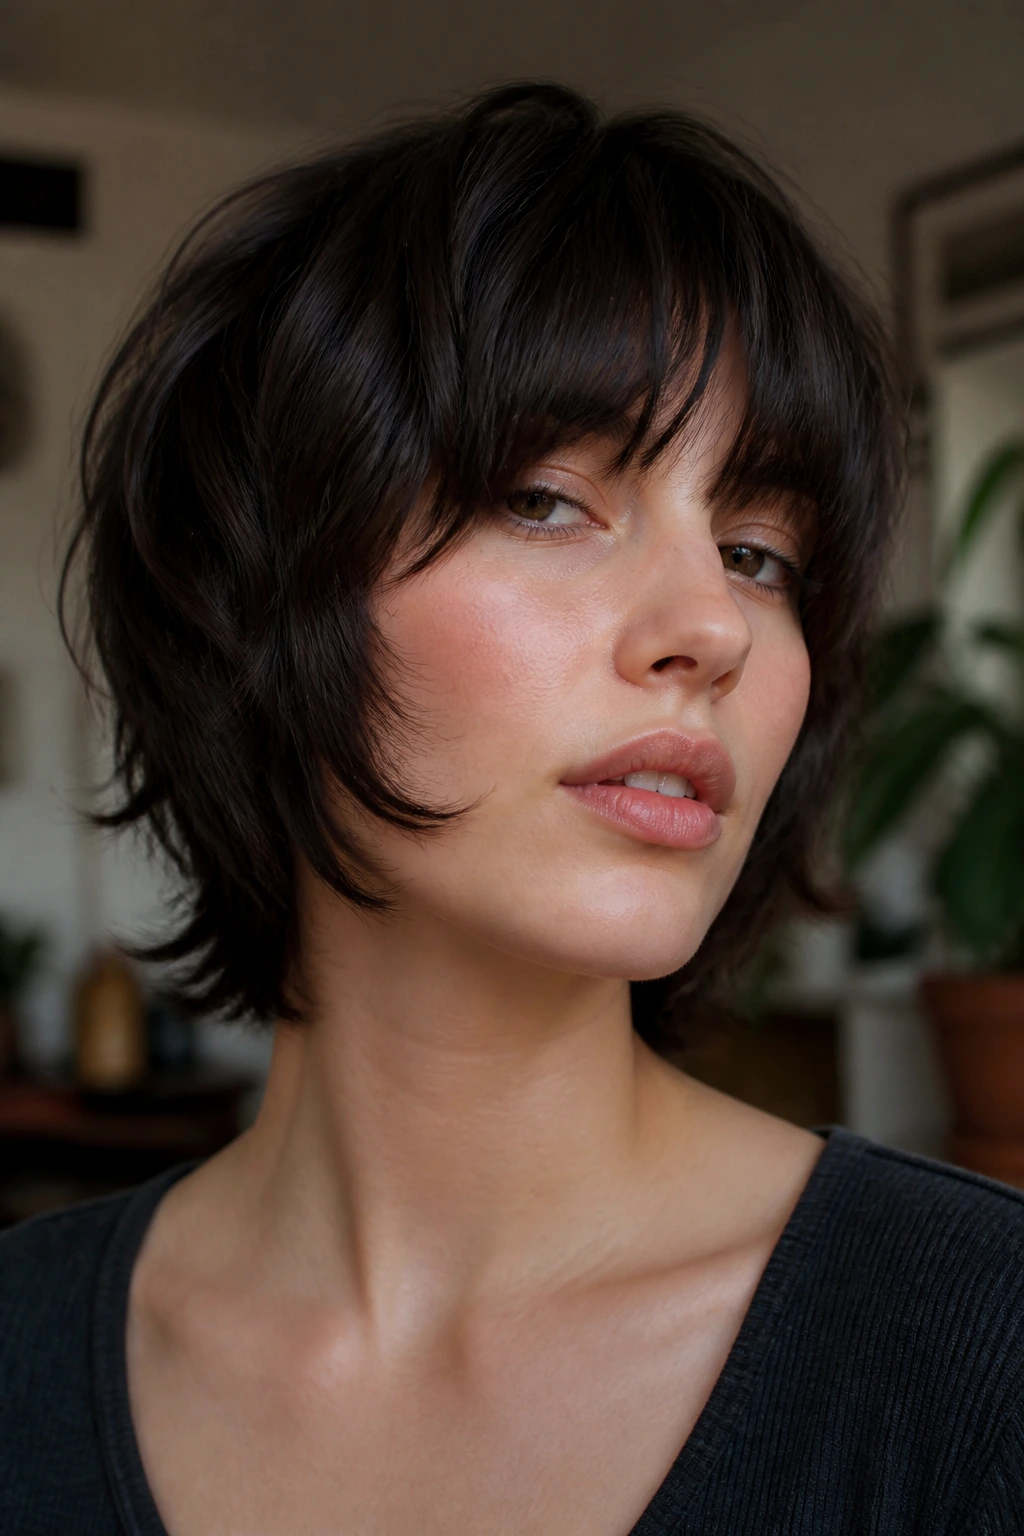
This is the shag for someone who wants the haircut to feel sharper than soft. Razor-cut layers around the jaw can be excellent on round faces if the stylist keeps the density intact and doesn’t go wild thinning the sides.
The reason it works is simple: razor texture gives movement, but the jaw-length placement gives structure. A few sliced pieces around the cheekbone can break up width without adding bulk. If the cut is done badly, though, the ends fray and the face looks wider. So this one needs a steady hand.
A good razor shag should still have a visible perimeter. You want the ends to look airy, not shredded.
7. Shoulder-Length Shag with Internal Weight Removal

Shoulder length is where a lot of round-face shags go wrong. If every layer starts at the shoulder, the hair can puff at the exact width of the face. The smarter move is to keep the outside line solid and remove weight inside the shape.
That gives you movement without side expansion. The outer edge can skim the shoulders in a cleaner line, while the interior layers keep the ends from feeling bulky. It’s a better choice for thick hair than for fine hair, because the density gives the cut something to hold onto.
If you like a cut that looks neat when tucked behind one ear but still messy when you shake it out, this length has that built in.
8. Wavy Shag with a Clean Bottom Line

Wavy hair can turn a shag into a cloud if the layers are too short. A squared-off version keeps the wave pattern, but the bottom line stays steady enough that the face doesn’t vanish into texture.
The trick is to keep the lower perimeter at the collarbone or a touch below, then let the waves do the rest. I prefer this cut when the waves are loose and S-shaped rather than corkscrewed, because the line stays visible. The result is softer than a blunt cut, but not as scattered as a classic shag with lots of broken ends.
This is one of those cuts that looks best when air-dried halfway and finished with a diffuser for 2 or 3 minutes. Too much heat, and the waves go puffy. Too little, and the shape collapses.
9. Curly Box-Shag with Sculpted Halo
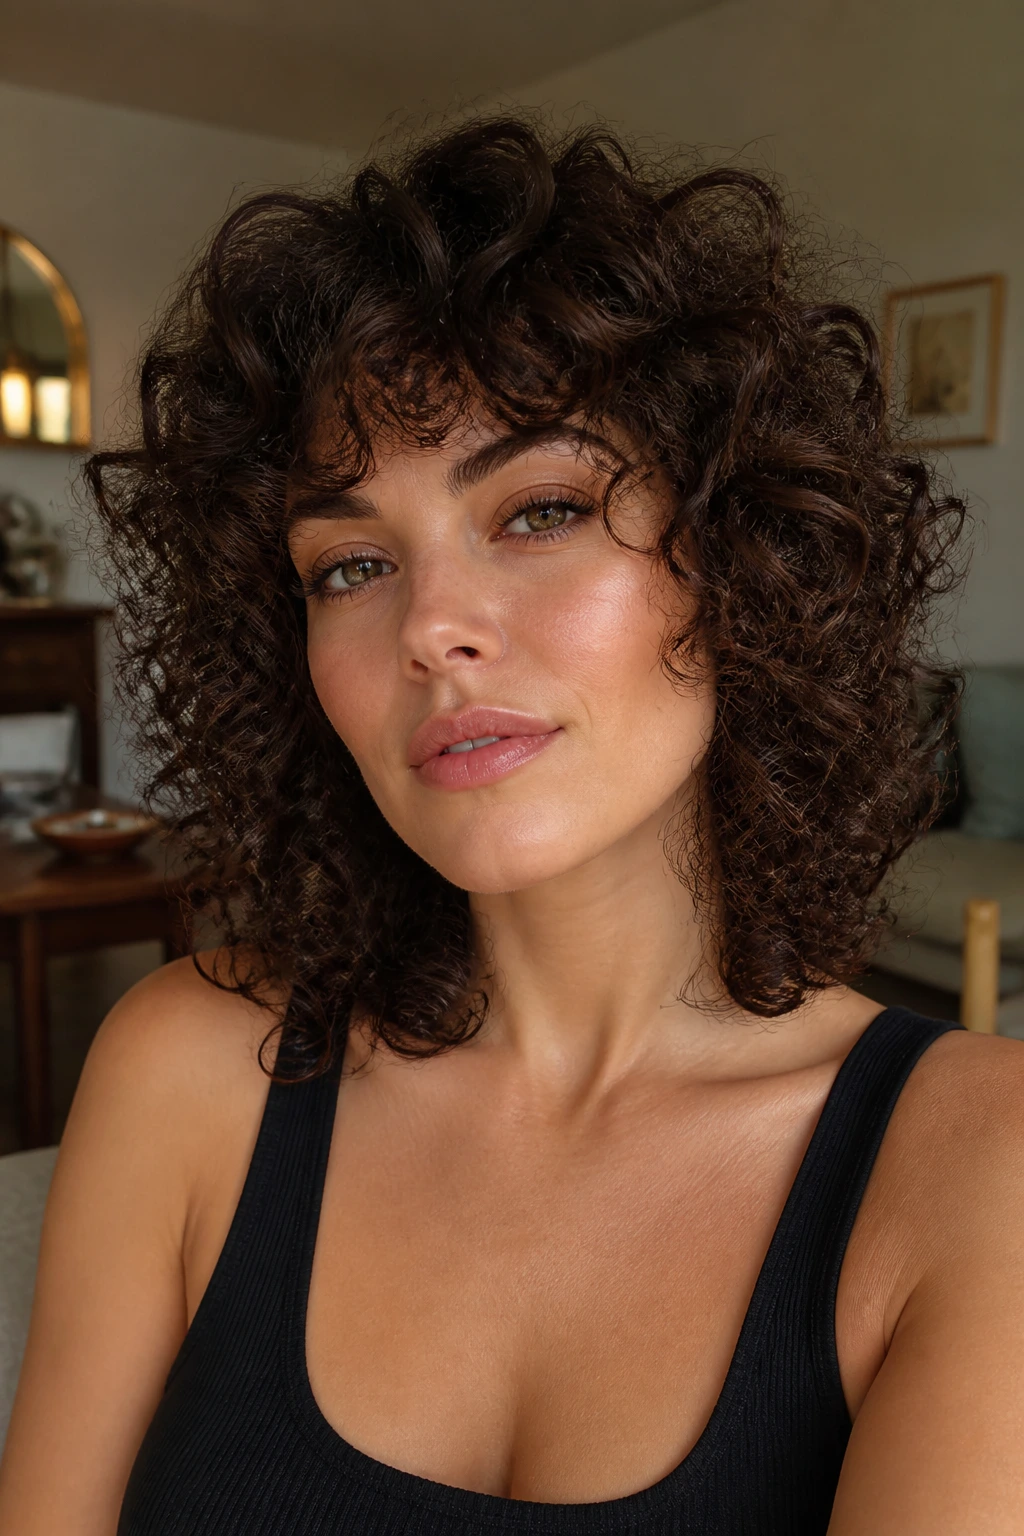
Yes, curls can absolutely wear a square shag. They just need the perimeter to be planned with the shrinkage in mind.
Why it works for round faces
The “box” part comes from the outer silhouette. You’re not trying to make curls behave like straight hair. You’re asking the shape to sit in a cleaner frame, usually around the jaw or collarbone, while the internal curl pattern adds lift and movement above it. That means the face gets some vertical energy instead of a round halo that widens outward.
- Ask your stylist to cut curls dry or mostly dry so the shrinkage is visible.
- Keep the longest pieces at jaw to collarbone length.
- Let the crown layers be shorter, but not so short that the top puffs into a triangle.
- Use a curl cream plus gel if you need a firmer outline.
If your curls are dense, this cut can look sculpted and expensive without trying too hard. If they’re looser, the square base keeps the silhouette from disappearing.
10. Fine-Hair Shag with Minimal Layering
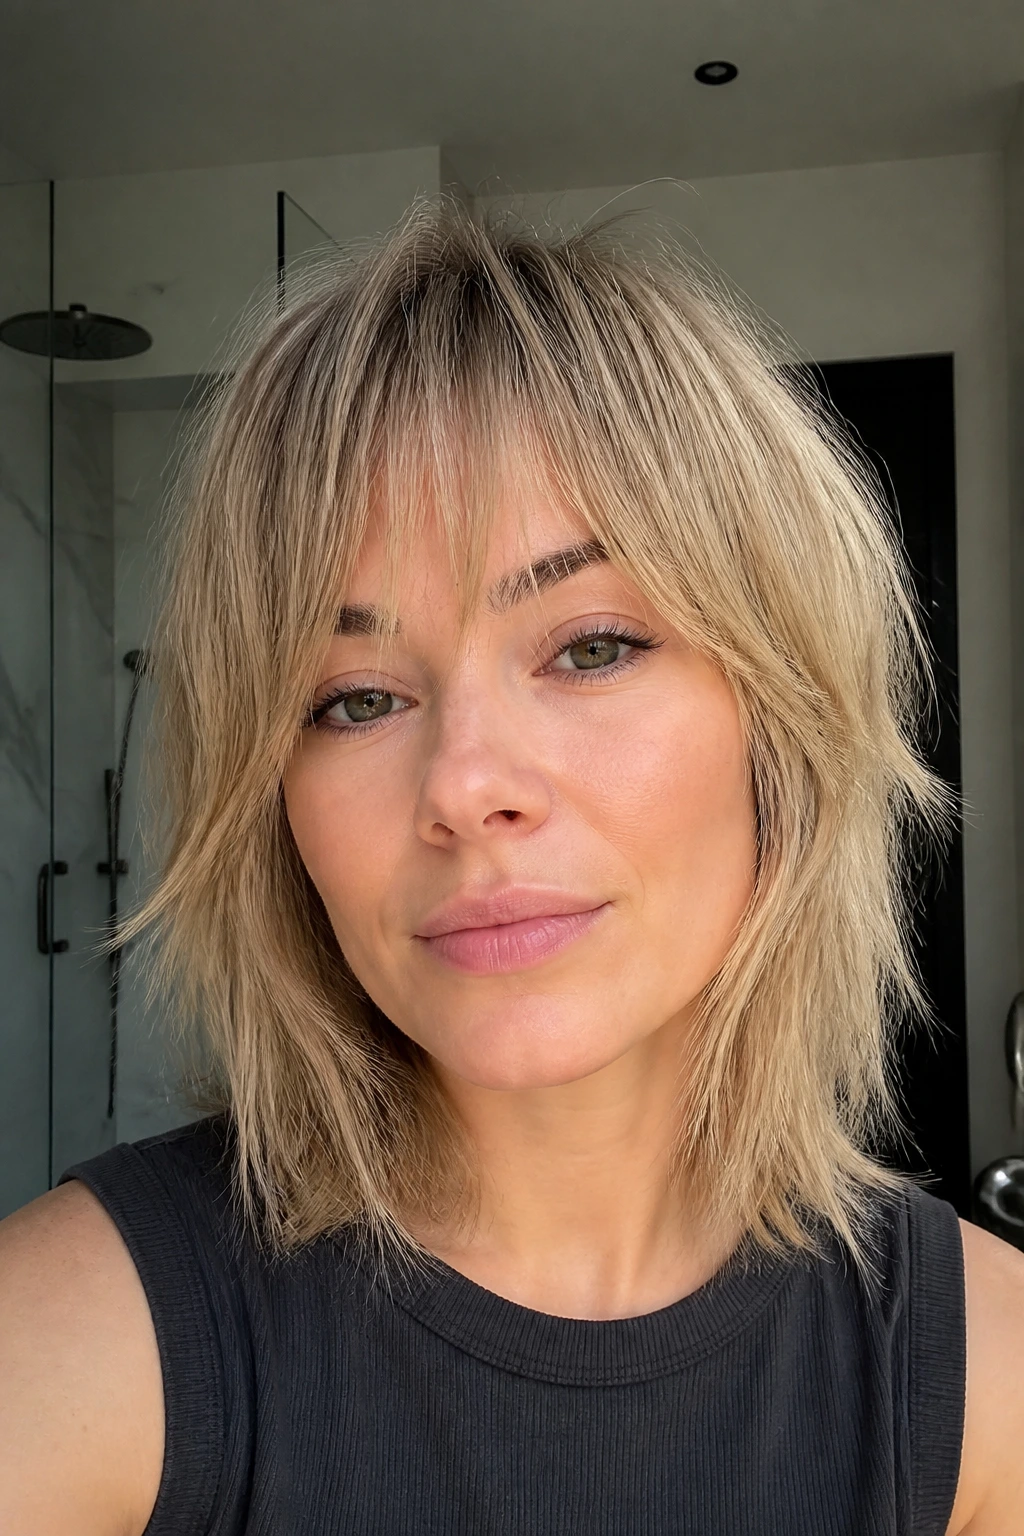
Fine hair and heavy shag layers are not friends. The hair gets wispy at the ends, the cheeks look wider, and the whole shape loses its backbone. A better answer is a barely layered shag with a blunt-ish base and a few strategic pieces around the face.
This cut depends on restraint. Shorter layers can still work, but they should be sparse and placed high at the crown. Leave the ends denser than you think you need. Fine hair usually looks better with the illusion of fullness at the bottom and movement only where the eye needs it.
A root spray and a small round brush can do more here than any amount of texturizing cream. Too much product just weighs fine hair down and makes the ends look see-through.
11. Thick-Hair Shag with Chunky Panels

Thick hair can carry a bigger shag without losing the shape, which is a gift. The trick is not to shred it into nothing. Instead, the cut should be built in chunky panels that remove bulk from the inside while keeping enough weight on the perimeter.
That gives you movement without that mushroom effect thick hair sometimes gets at the cheeks. Ask for the front pieces to angle down toward the jaw and the back to stay slightly heavier. The weight at the bottom helps the cut sit square instead of floating.
Thick hair also benefits from a bit of longer styling time. A rough blow-dry and then a few passes with a round brush at the ends usually beats over-layering every single time.
12. Grown-Out Shag with Bottleneck Bangs

If you hate frequent trims, this is one of the smarter options. Bottleneck bangs start narrow at the center, open a little through the middle, and then taper into longer side pieces. They grow out with less panic than blunt fringe.
On a round face, that matters because the fringe can stay useful for weeks without turning into a blunt line that shortens the face too much. The rest of the shag should stay square at the hem, which keeps the shape grounded as the bangs soften.
This is the kind of cut that looks better on day three than day one. The fringe settles, the sides drop a little, and the whole thing gets easier.
13. Side-Part Shag with Strong Corners

A side part can be a lifesaver on a round face, especially when the layers are kept sharp around the perimeter.
What to watch for
- The part should sit off-center, not at the outer edge of the head.
- The heavier side should fall past the cheekbone or jaw, depending on length.
- Keep the shorter side tucked slightly behind the ear if you want more face opening.
- Avoid too much fluff at temple level.
A strong side part creates asymmetry, which is a useful tool on softer face shapes. It interrupts the symmetry of the face without needing dramatic length changes. And if you like your hair to feel a little less sweet and a little more deliberate, this version has that built in.
14. Deep Side Sweep Shag
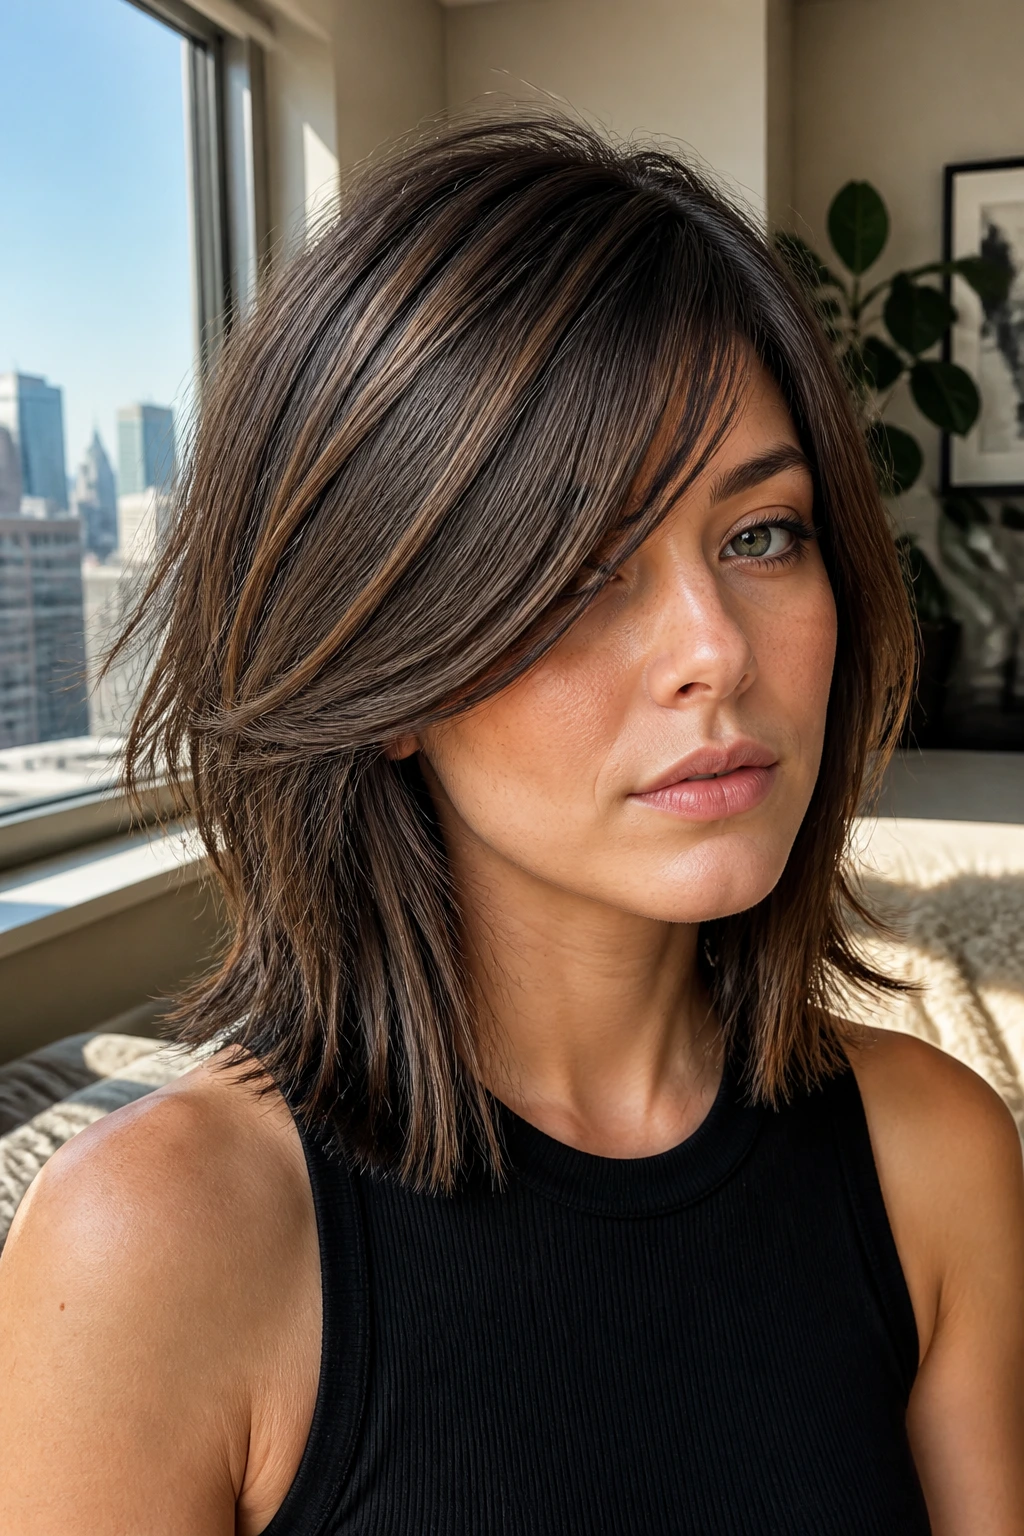
The deep side sweep is the dramatic cousin of the side-part shag. It gives round faces a long diagonal line across the forehead and cheek, which stretches the face in a way a center part sometimes can’t.
This version works especially well if your hair has some bend. The sweep should fall across the forehead without collapsing into a curtain over one eye. Keep the lower layers firm and the ends a little blunt so the cut doesn’t wander into soft, shapeless territory.
It’s a good choice when you want the shag to read polished enough for work but still have that loose, lived-in texture by the end of the day. The shape carries itself.
15. Bob-Length Shag with a Piecey Nape

A bob-length shag can be extremely good on a round face if the nape is kept tidy and the front pieces are a touch longer than the back. Otherwise, the cut balloons at the sides and loses the point.
I like this version when the ends are sliced into little pieces rather than shredded all at once. It keeps movement alive around the neck, where a blunt bob could look heavy, but the nape still has enough structure to prevent the face from looking wider.
It’s small, smart, and easy to wear with earrings. That matters more than people admit.
16. Collarbone Lob Shag with Face-Opening Corners
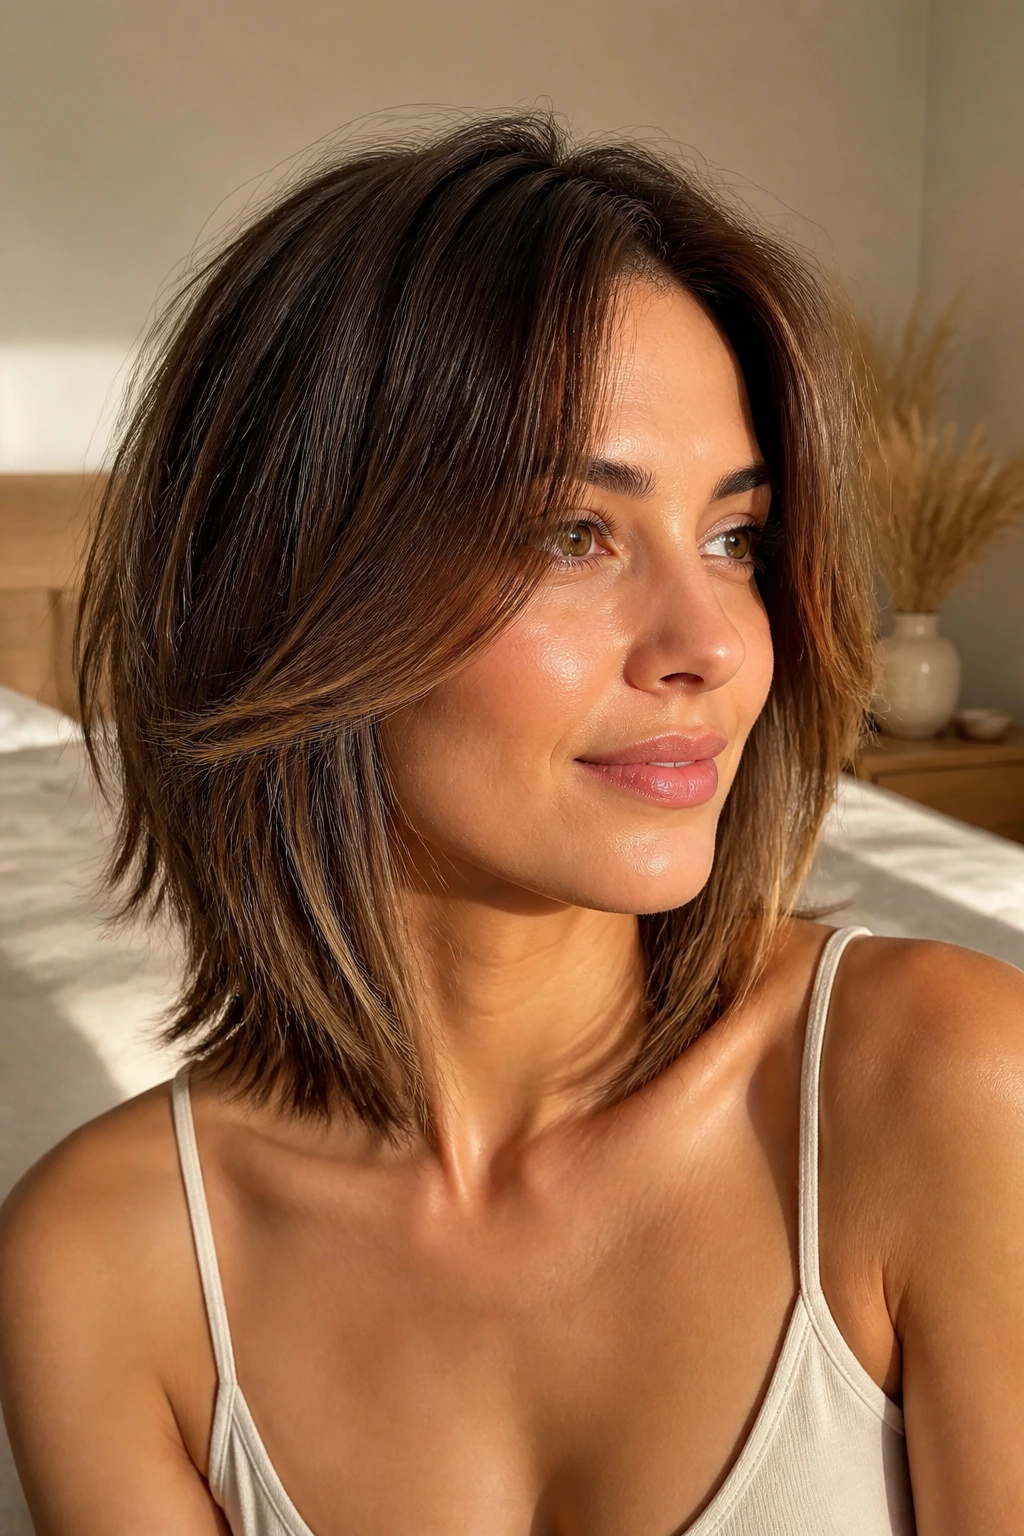
This is one of the safest places to start if you’re nervous about the shag shape. A lob gives the face length, and the square corners at the front keep the style from feeling too sweet.
The key is the front angle. The shortest front piece should not hit at the widest part of the cheeks. Let it drop closer to the jaw or lip line. The back can stay slightly shorter to keep the shape moving forward, which helps the face read longer.
This cut looks especially strong when the ends are blown smooth and only the mid-lengths carry the texture. A lot of people go too wild with the styling and flatten the face frame. Keep the front clean. The rest can be messy.
17. Cropped Shag with Shorter Sides
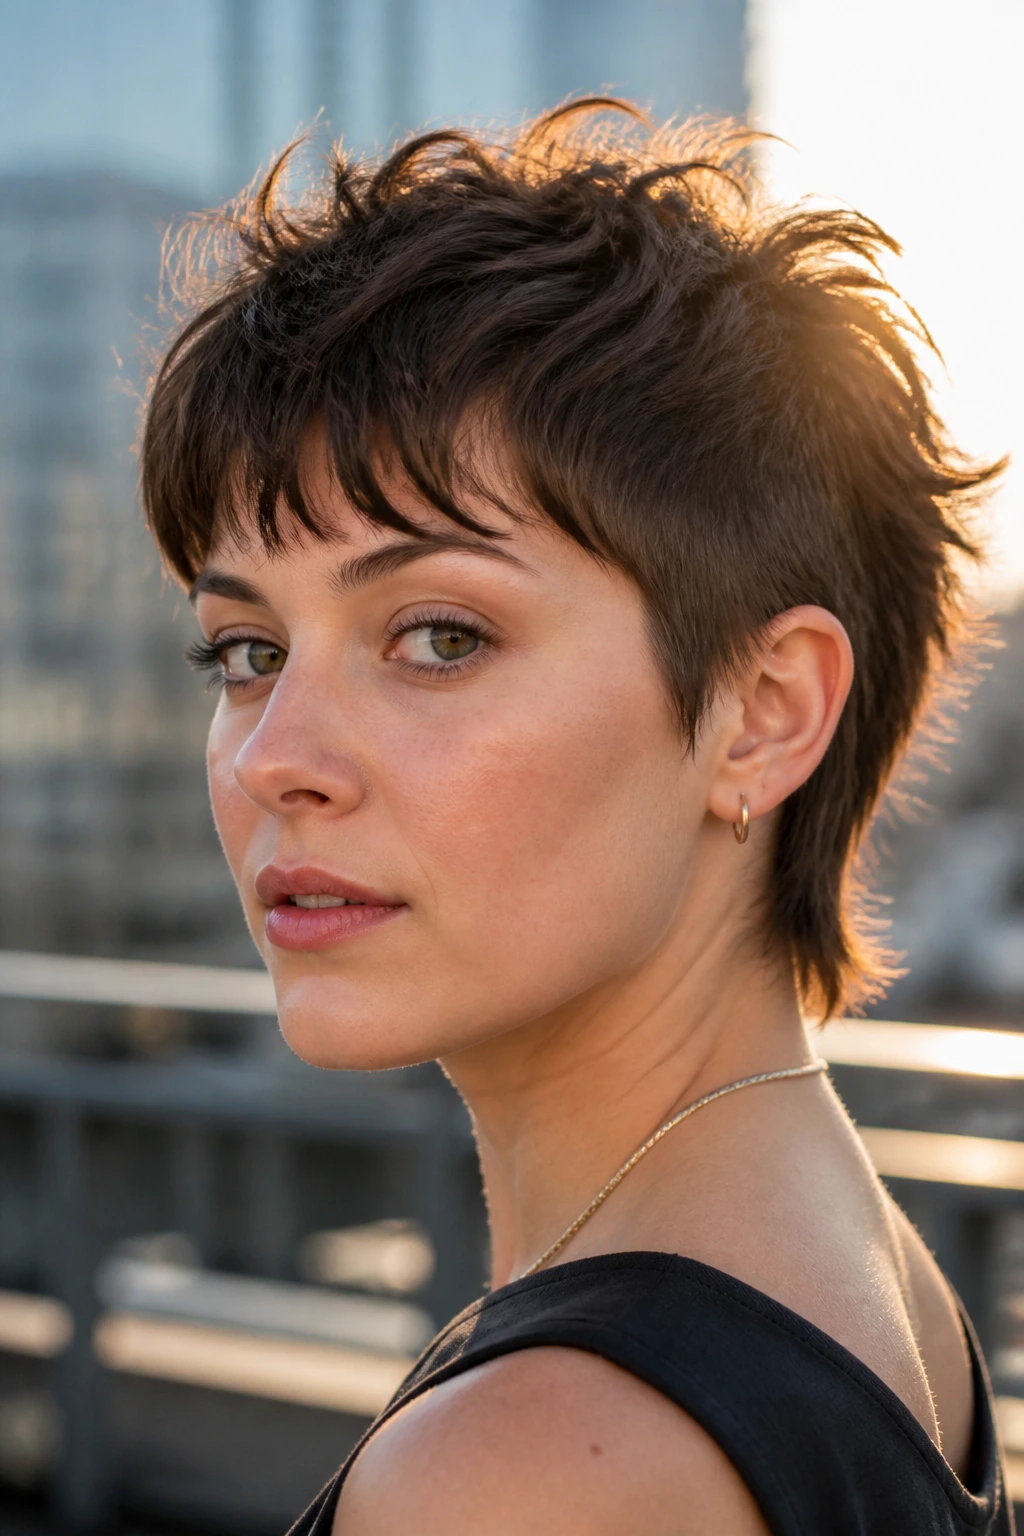
Can a short haircut slim a round face? Yes, if the sides are shorter than the crown and the bottom edge stays tidy.
The shape rule
- Side pieces should taper around the ear and upper cheek, not sit full at the cheekbone.
- The crown needs enough lift to keep the face from looking compressed.
- A little fringe helps, but the fringe should not sit as a dense curtain.
- The nape should stay neat, or the cut starts looking boxy in the wrong way.
This version has attitude. It works best on people who like a little edge and don’t mind using their fingers to push the top into place. If you’re the type who hates hair that needs a brush every hour, skip the super-cropped version and keep the sides a touch longer.
18. Graphical Black Shag with Sharp Ends

Dark hair shows line better than almost anything else, which is why a black shag with a sharp hem can look so striking on a round face. The outline reads first. The texture comes second.
That’s useful if you want the haircut to do the face-framing without needing a lot of color or styling tricks. A clean edge at the bottom, a few sliced layers around the cheekbone, and a fringe that doesn’t swallow the brows — that’s enough. Because the hair is dark, even a small angle looks stronger than it would on lighter hair.
This cut can go goth, sleek, or edgy depending on how you finish it. But the shape should stay disciplined. Sharp ends. Soft movement. No fluff.
19. Copper Shag with Cheekbone Slices

Warm copper makes layers look more visible, which is a gift and a warning. If the cut is too broken up, the face can widen. If the slices are placed well, the color makes the angles look deliberate.
I like copper shags when the face-framing pieces start at the cheekbone and angle down toward the jaw. That route gives the eyes something to follow. It also keeps the hair from blooming outward at the widest part of the face, which is the mistake a lot of wavier cuts make.
A copper tone also makes a square outline read softer without losing the structure. That balance is the sweet spot.
20. Blonde Shag with Shadow Root

Blonde shag haircuts can look expensive or fuzzy depending on how the root area is handled. A shadow root gives the crown depth, which helps the top avoid looking flat and bleached-out, while the blunt edge keeps the ends from floating away.
On a round face, blonde can sometimes make everything feel lighter and wider. The shadow root fixes that by adding a little visual weight near the scalp, especially if the layers are cut to fall below the cheekbones.
Keep the toner cool enough to stay crisp, but not so icy that the cut feels brittle. The shape should still feel touchable.
21. Salt-and-Pepper Shag with Air Around the Crown

Salt-and-pepper hair has built-in dimension, and a squared-off shag makes that dimension read like a feature instead of an accident.
Why this shape is smart
- The natural color variation shows the layers without needing heavy styling.
- The cleaner perimeter keeps the cut from looking fuzzy as it grows.
- A little lift at the crown draws the eye upward, which helps round faces more than side volume does.
- The face frame can stay soft while the hem stays clear.
I like this version when the wearer wants something modern but not overworked. The hair can be brushed, finger-styled, or left to dry with a small amount of cream. The cut carries the rest.
22. Air-Dry Shag for Natural Waves

Some hair wants heat. Some hair wants to be left alone. If yours falls into the second category, an air-dry shag with a square outline is the cut to ask about.
The layers should be cut so they collapse into shape as the hair dries, not explode into a triangular halo. That means keeping the outer line relatively blunt and putting the texture inside the shape. A round face benefits from that because the silhouette stays controlled even when the waves do their own thing.
A tiny amount of leave-in cream is enough for most people. Too much, and the waves get stringy. Too little, and the ends puff.
23. Round-Brush Shag with a Square Base
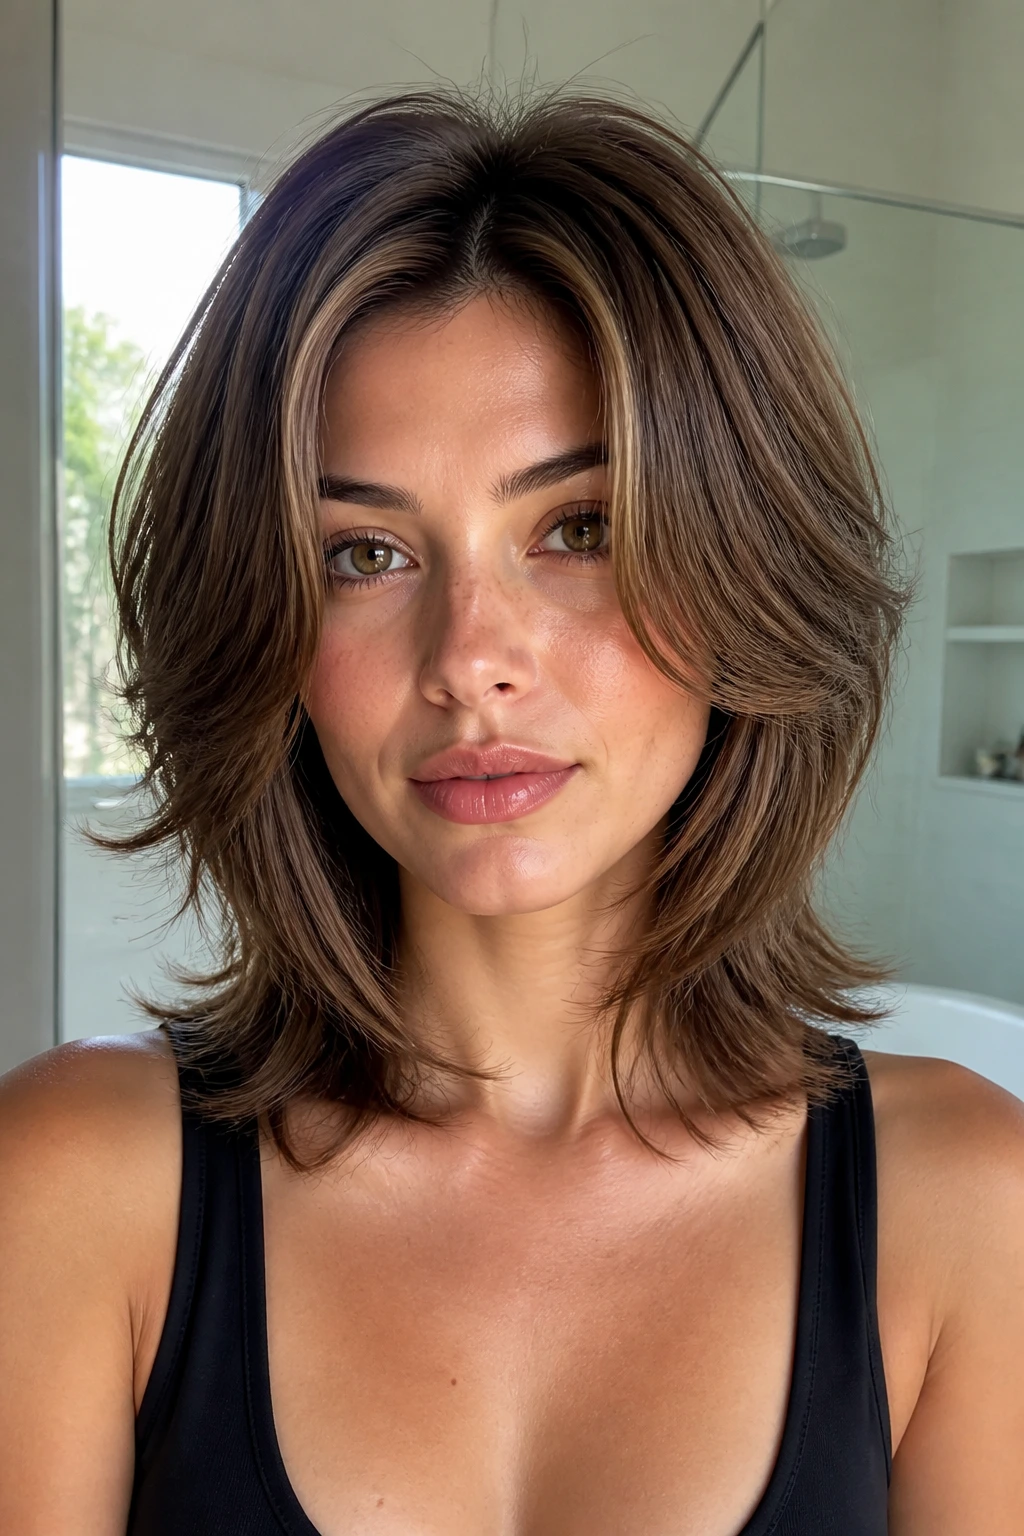
This one is for people who don’t mind a little styling. The blowout finish gives the layers a polished bend, but the square base keeps the face from getting swallowed by fluff.
Use a medium round brush and direct the top layers up and away from the scalp. Then bend the side pieces back toward the face just enough to create a frame, not a curtain. The perimeter should stay visible at the collarbone or jaw. That’s the whole point.
It’s a strong look when you want the shag to feel a little more finished. Not stiff. Finished.
24. Wet-Texture Shag with Defined Clumps

A wet-look finish can work on a round face if the cut has enough shape underneath it. Without a firm perimeter, the style becomes all shine and no structure.
The key is to let the product define the ends into separated clumps while keeping the shape square at the bottom. A shine cream or gel can help, but use less than you think. Too much product makes the face look flatter, not sleeker.
This cut reads modern, slightly sharp, and a little editorial. It is not the one I’d pick if you want soft and airy. It’s the one you pick when you want the hair to feel deliberate.
25. Feathered Shag with a Blunt Curtain

Feathering can be a problem on round faces when it gets too fluffy at cheek level. The fix is to keep the feathering only in the internal layers and let the outer curtain stay blunt enough to anchor the face.
What to ask for at the chair
- Feather the interior, not the perimeter.
- Keep the curtain fringe long enough to reach past the brow when dry.
- Make the side pieces land near the lip or jaw, not mid-cheek.
- Skip aggressive thinning shears unless the hair is very dense.
This version has movement, but it doesn’t feel weak. If your hair tends to puff in humidity, the blunt curtain gives you a better chance of holding the shape.
26. Heavy-Fringe Shag with Tapered Neck
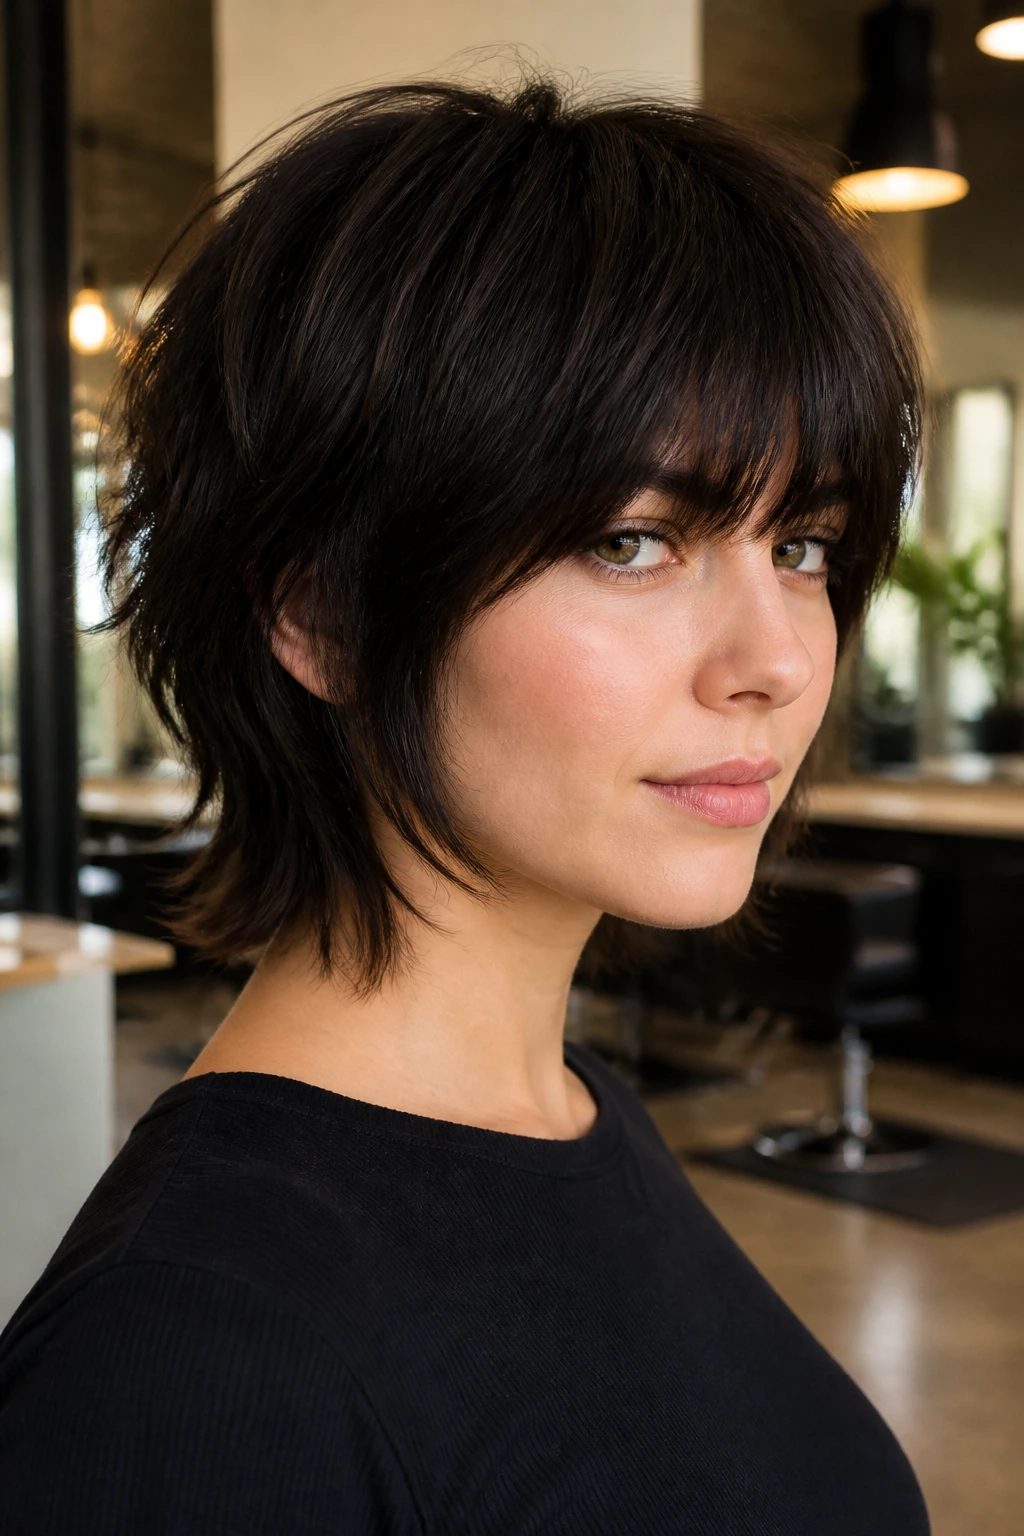
A heavy fringe can be excellent on a round face when the rest of the cut is disciplined. The fringe shortens the forehead, which can be useful, but the neck and lower sides need tapering so the cut doesn’t end up boxy in the wrong places.
The best version keeps the fringe dense through the center and a little softer at the temples. That gives the eyes a place to rest without letting the fringe overwhelm the face. The neck area should stay close and neat, which makes the jawline look cleaner from the side.
This is one of my favorite choices for people with strong brows or glasses. It frames the features instead of fighting them.
27. Center-Part Shag with Jaw-Grazing Layers

A center part on a round face is not banned. It just needs help. The help comes from the layers.
If the front pieces start at the jaw or just below it, a center part can look balanced and clean, not wide. The straight line down the middle creates symmetry, while the side pieces pull the eye downward. That’s the trick. The cut should not flare at the cheeks.
This style works well when you want something calm rather than dramatic. It has a little 1970s air to it, but the squared-off base keeps it from getting too floaty.
28. Off-Center Shag with Long Cheekbone Pieces

An off-center part is a small move that changes the whole face shape. Shift the part a little to one side, and the longer front piece takes over the visual work while the shorter side keeps the cut from feeling symmetrical.
On a round face, those long cheekbone pieces matter because they create a diagonal line. Diagonals are useful. They break up the circle. Keep the pieces long enough to graze the top of the cheek or slip toward the jaw, and the cut gains shape without needing extra volume.
This is a good compromise if you’re bored of center parts but don’t want a full side sweep.
29. Underturned-End Shag

Can the ends curve under and still keep the shag feeling sharp? Yes, if the turn is subtle.
What matters here
- The ends should bend under by half an inch to an inch, not curl into a full blowout.
- The layers should stay visible through the mid-lengths.
- The base should still feel square when the hair is down.
- Use a soft brush, not a tiny barrel, or the curve gets too rounded.
This cut is useful if you like a softer finish but still want the outline to help a round face. It looks tidy, not fussy. That’s a good place to live.
30. Boxy Lob Shag
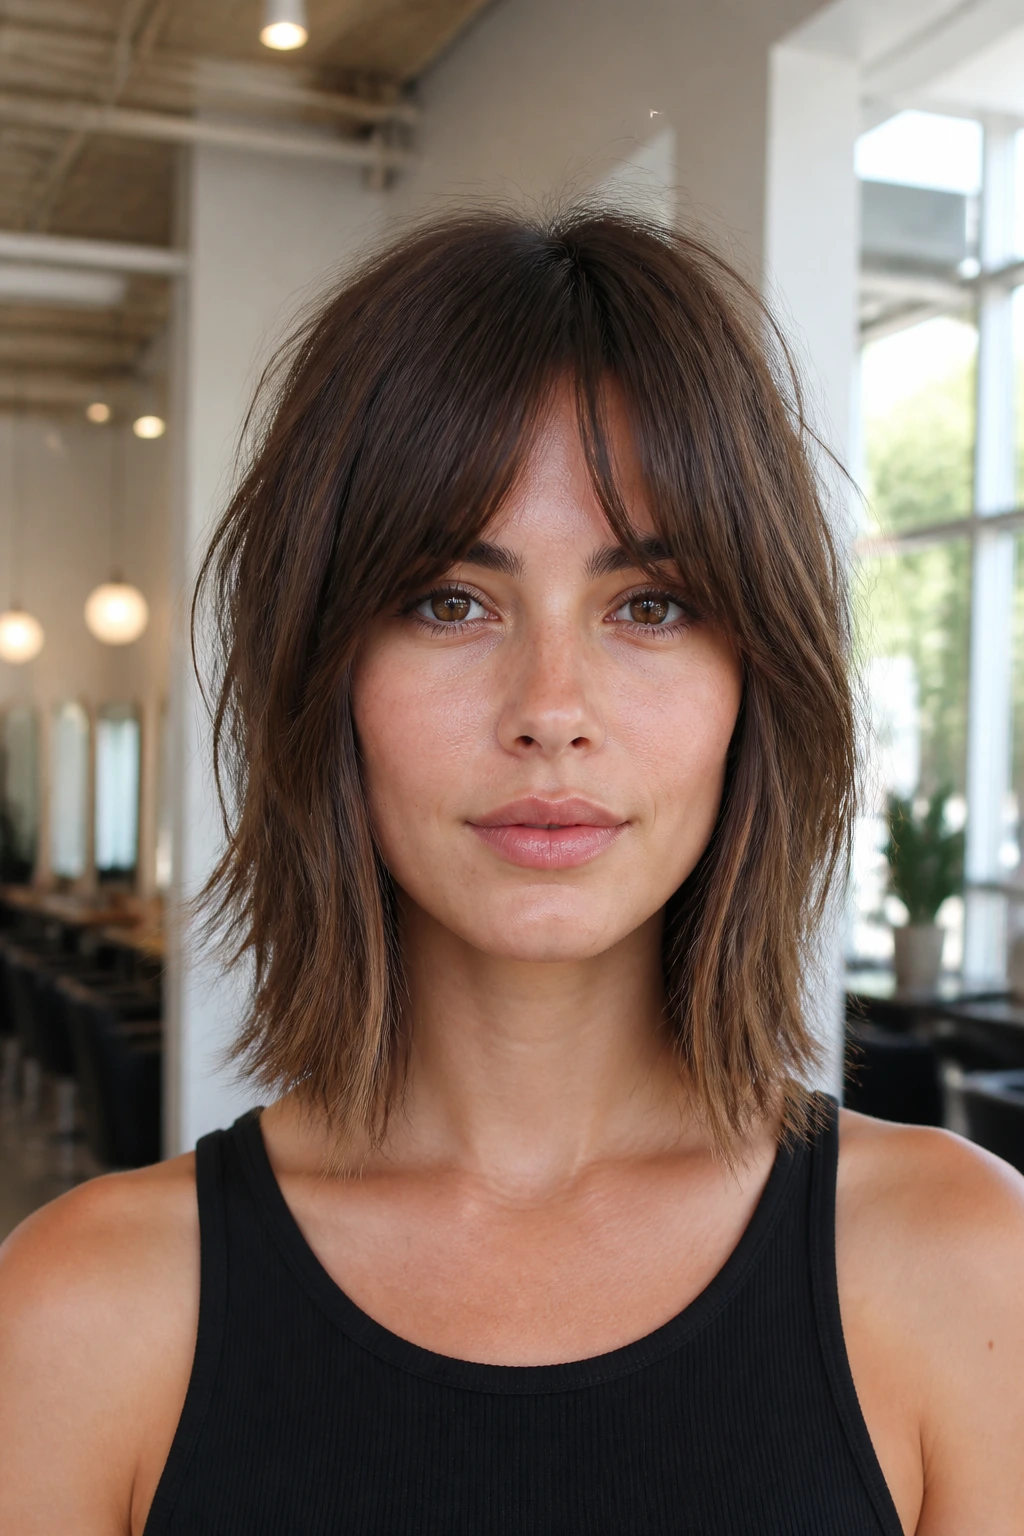
A boxy lob shag gives you the safety of a lob with the attitude of a shag. The square base does the work at the jawline and collarbone, and the layers keep the cut from feeling heavy.
I like this version when the front corners are left slightly longer than the back. That small angle stretches the face. The interior can be choppy, but the outline should remain visible in a mirror from across the room. If the shape only shows up when you stand close, it’s not square enough.
This is one of the easiest cuts to wear with minimal styling. A bend at the ends and a little root lift go a long way.
31. Root-Lift Shag
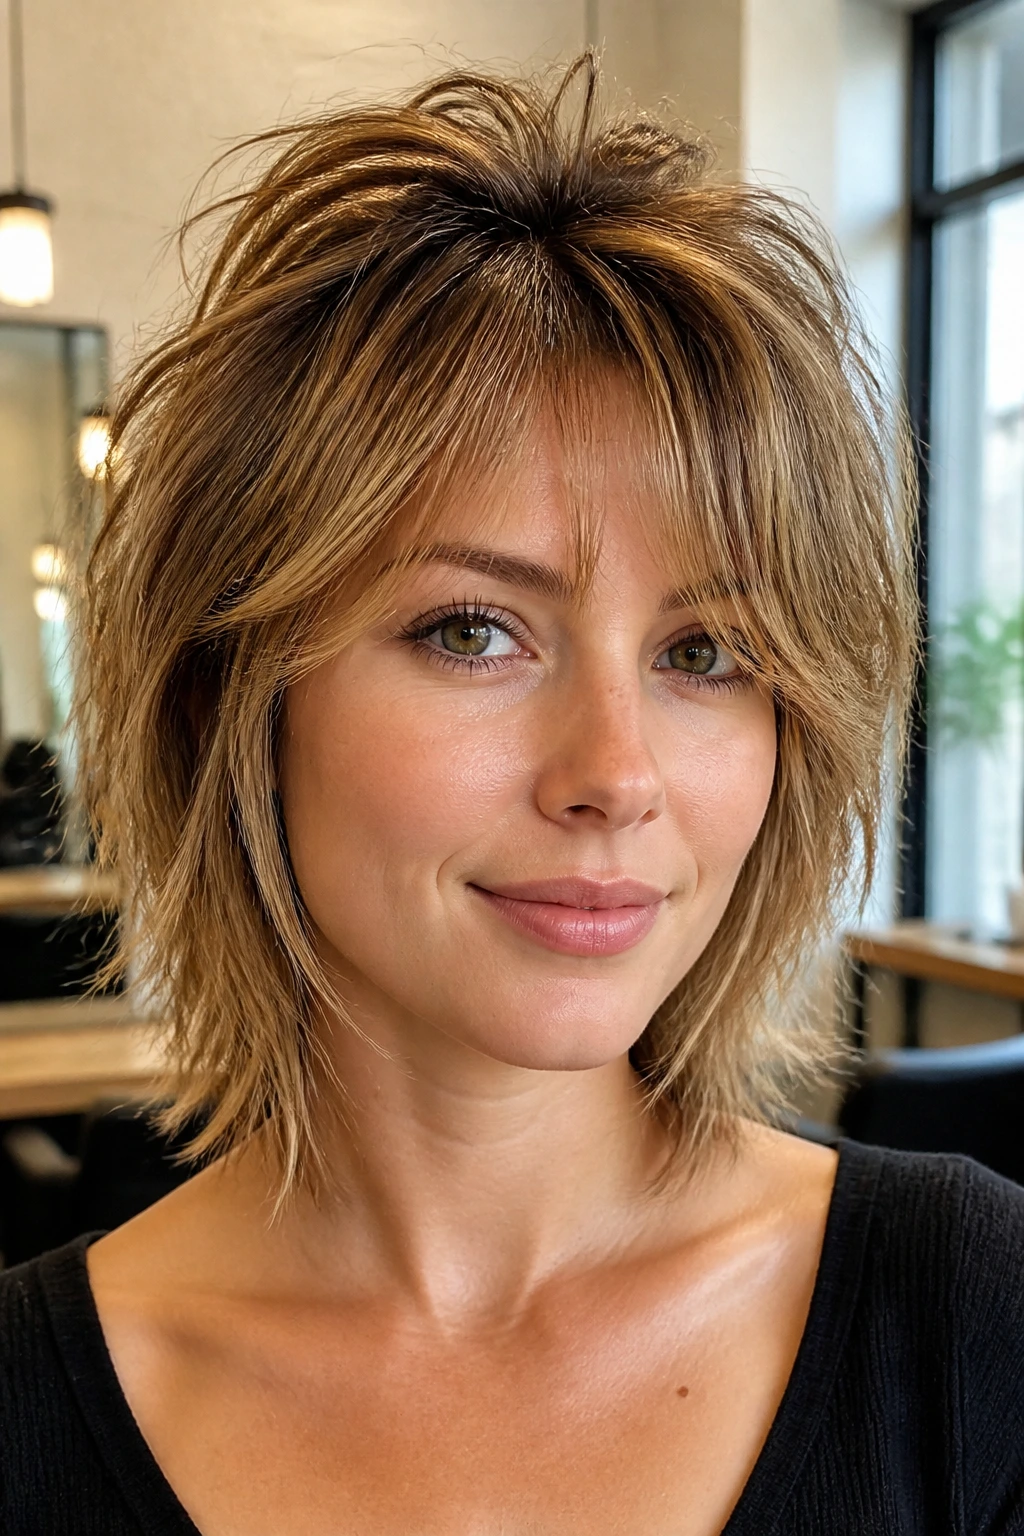
Some shags need more lift at the crown than length at the ends. This version is built around that idea. The top layers are cut to stand up a bit, while the lower outline stays controlled.
That balance helps round faces because it adds height where the face needs it most. Too much volume at the sides widens everything. Volume on top stretches the silhouette. It sounds small. It is not small.
A root-lift shag works best with a mousse or root spray before blow-drying. Use a nozzle attachment if you have one. It keeps the airflow focused and stops the sides from turning into a cloud.
32. Razor Lob Shag for Straight Hair

Straight hair can look lifeless in a shag unless the cut has enough internal movement. A razor lob solves that by carving in texture while keeping the outer line blunt enough to hold the shape.
The cut should glide past the jaw and land around the collarbone, with a few sharper slices around the face. That gives round faces a longer line and keeps the hair from hugging the cheeks. Because straight hair shows every line clearly, this cut looks especially crisp when it’s freshly brushed and lightly bent at the ends.
If your hair gets oily fast, this is a forgiving shape. The blunt base keeps it from looking stringy too soon.
33. Shag for Glasses Wearers with Shorter Sides

Glasses change a haircut more than people expect. A shag that sits too full at the temples fights the frames and makes the upper face feel crowded.
Good signs at the chair
- The side layers should sit behind or just beside the frame, not directly on top of it.
- Fringe should either skim above the frames or split cleanly around them.
- Keep the sides narrower than the crown.
- Ask for enough space around the temples so the hair and glasses do not compete.
This version is practical and kind to your face. The frames become part of the look instead of a collision point.
34. Big-Crown Shag for Nights Out
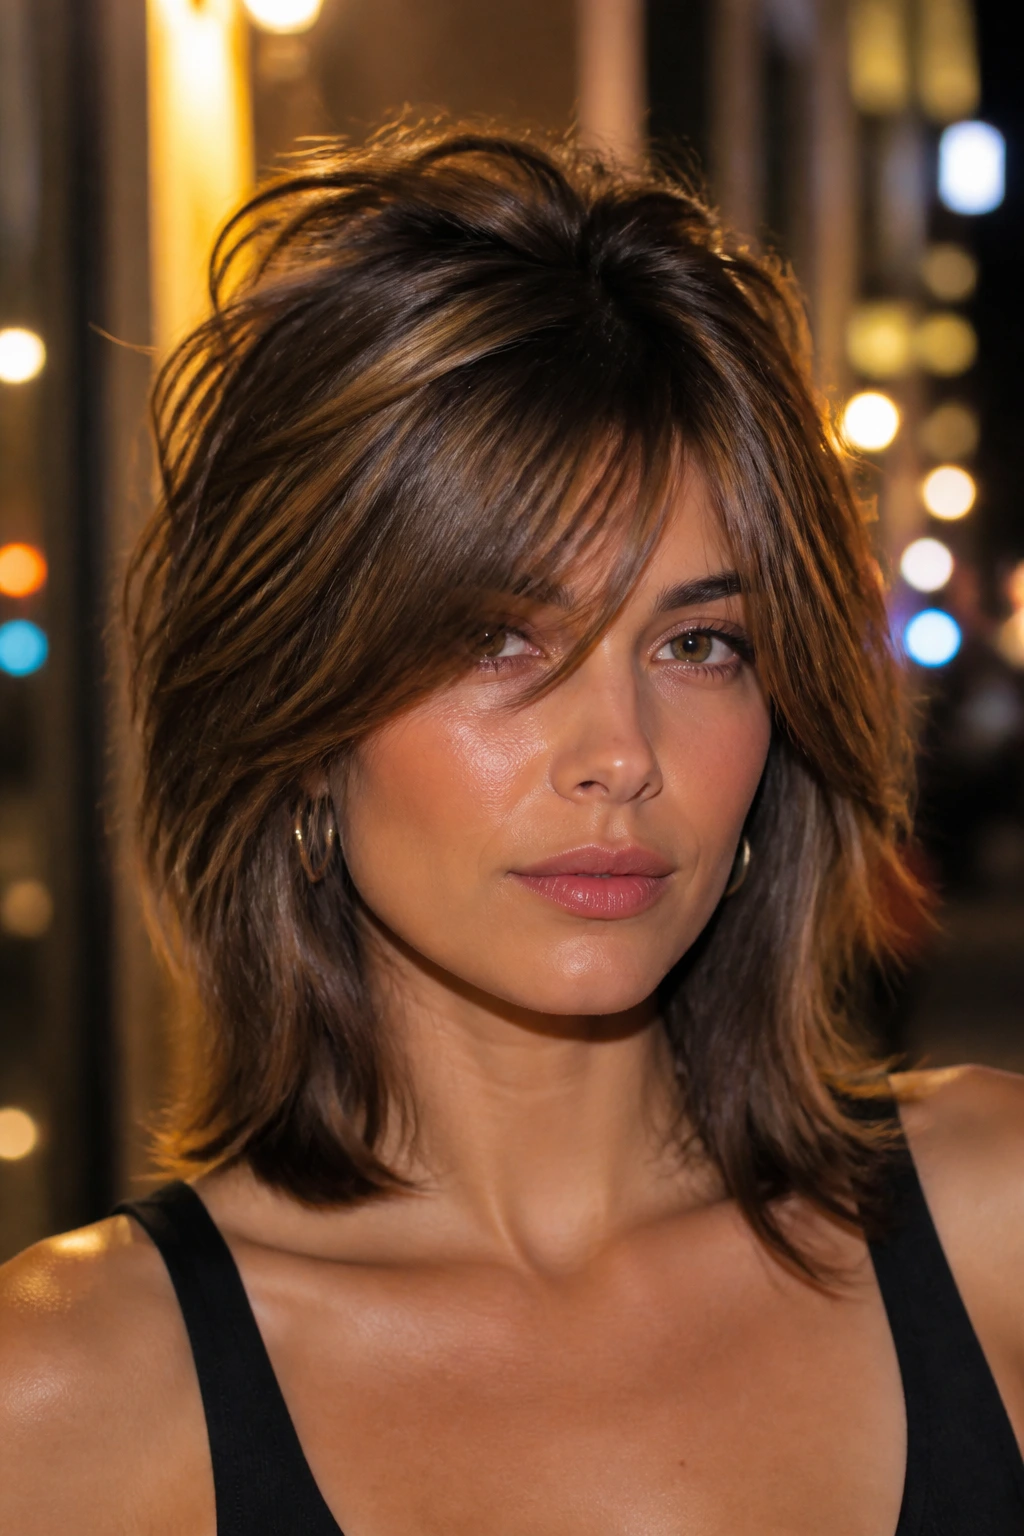
If you want more drama, put it at the top, not the cheeks. A bigger crown gives you height and shape while the square perimeter keeps the face from feeling overloaded.
This is the version to wear when you want the shag to look a little more styled and a little less casual. The roots should have lift, the fringe can be pushed off-center, and the ends can stay smooth enough to anchor the whole thing. Too much side volume kills the effect. Keep the bulk above the widest part of the face.
A teasing comb can help, but you do not need to backcomb the whole head. A small lift at the roots is enough.
35. Low-Maintenance Square-Outline Shag

This is the one for people who want the haircut to behave without a fight. The outline stays square, the layers are soft enough to grow out, and the styling can be as simple as a quick rough-dry and a finger comb.
The key is moderation. Not too many short layers. Not too much thinning. Enough shape at the bottom that the face looks framed, not swallowed. On a round face, that means the cut still has a clear edge even on a lazy day.
If you want one shag that works with air-drying, blow-drying, ponytails, and second-day hair, this is the safest bet in the whole list.
What Makes the Squared-Off Shape Work on Round Faces
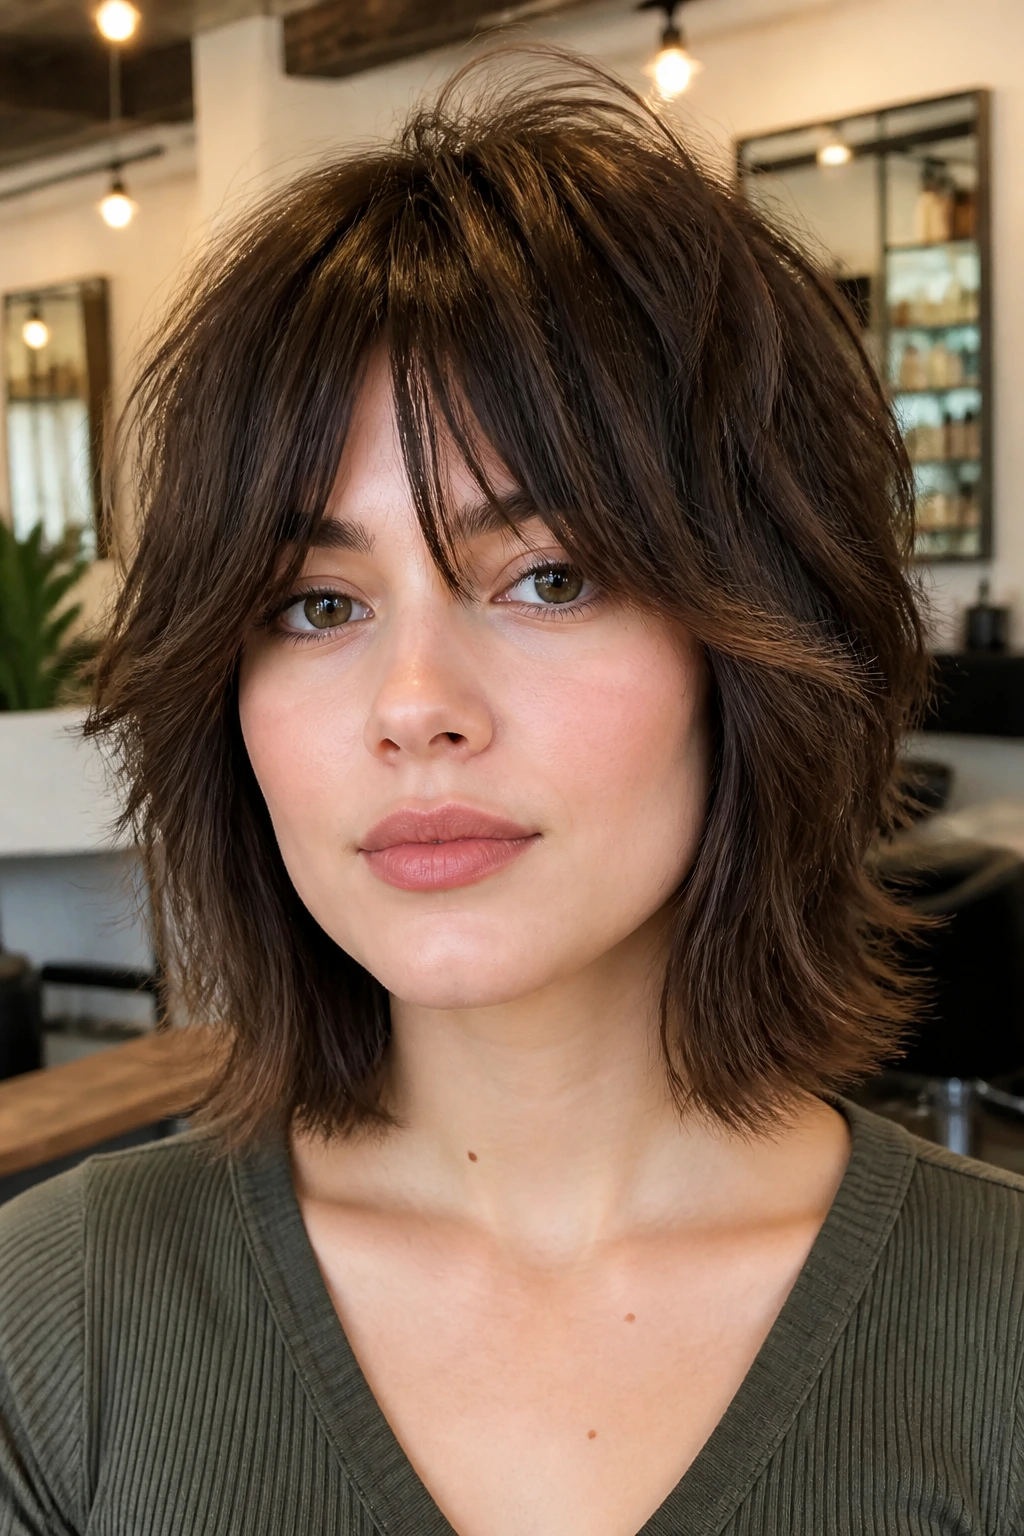
A square-ish shag is not about making the face look severe. It is about giving round features some structure to lean on. The best versions create an outline that feels a little straighter at the bottom, a little stronger at the sides, and a little taller at the crown.
That changes the proportions. A round face often reads widest at the cheeks, so a haircut that adds side bulk right there works against you. A squared-off shag avoids that trap by moving the visual weight either upward, downward, or both. The face looks framed instead of surrounded.
The other thing it does well is survive real life. Soft layers can look lovely in a salon mirror and then melt flat by lunchtime. A cleaner hemline holds its own when the weather turns humid, when you tuck hair behind one ear, or when you skip a full blowout. That practicality is why these cuts keep getting asked for by people who are done babysitting their hair.
What to Tell Your Stylist Before the First Snip
A good reference photo matters, but the words you use matter too. If you ask for “lots of shaggy layers,” you may get exactly that — and it may not be the shape you wanted. Be specific about where you want the cut to hit and where you do not want extra width.
Tell your stylist you want a squared-off shag with a cleaner perimeter, not a fluffy all-over shag. Mention whether you want the shortest face-framing pieces at the cheekbone, lip, jaw, or collarbone. Say how much fringe you can live with. Those details change the whole outcome.
If your hair is fine, say you want to keep density at the ends. If it’s thick, say you want weight removed inside the shape, not shredded off the outside. If it’s curly, ask how much the curl will shrink and whether the cut should be done dry. That conversation saves a lot of weird grow-out later.
Styling Tools and Products That Keep the Shape Honest
You do not need a drawer full of stuff, but a few tools make this haircut much easier to wear. The cut relies on shape, and shape is easier to keep when the styling is controlled.
- Blow dryer with a nozzle: Directs airflow so the ends don’t blow outward like a fan.
- Medium round brush: Good for bending the front pieces and lifting the crown without turning the cut into pageant hair.
- Diffuser: Best for wavy and curly versions when you want the outline to stay intact.
- Root spray or mousse: Gives height at the crown without weighing the sides down.
- Light texturizing spray: Adds separation to the ends after drying; use a little, not half the bottle.
- Matte paste or styling cream: Helpful for blunt fringe or shorter shags that need piecey definition.
- Small clips: Useful for setting bangs while they cool.
- Wide-tooth comb: The safer choice for curls and waves when you don’t want to break up the natural clump pattern.
A flat iron can help refine a blunt hem, but it should be used sparingly. You want bend and direction, not poker-straight severity.
How to Wear These Cuts With Glasses, Earrings, and Necklines

Presentation: Keep the shape visible around the face. Tuck one side behind the ear if you want to show the jawline, or let the front pieces rest over the cheekbone if you want the face to look longer. A little asymmetry usually helps more than perfect symmetry.
Accompaniments: Round faces often look good with frames that have a little angle, and squared-off shags behave well with them because the cut echoes that line. Hoops, small studs, and open necklines can all help the haircut feel less crowded. High necks are fine, but they work better when the fringe or front pieces are long enough to create a gap.
Proportion: If your hair is short, keep the top layers taller than the sides. If it is long, keep the ends cleaner than the mid-lengths. That proportion is what makes the cut feel intentional instead of over-layered.
Finish: Matte texture gives a more casual shape, while a smoother finish makes the lines read sharper. Choose based on what the rest of your look needs. A wool coat and a fluffy shag can fight each other a bit; a crisp jacket and a square shag can look excellent together.
Small Styling Moves That Keep the Cut Sharp
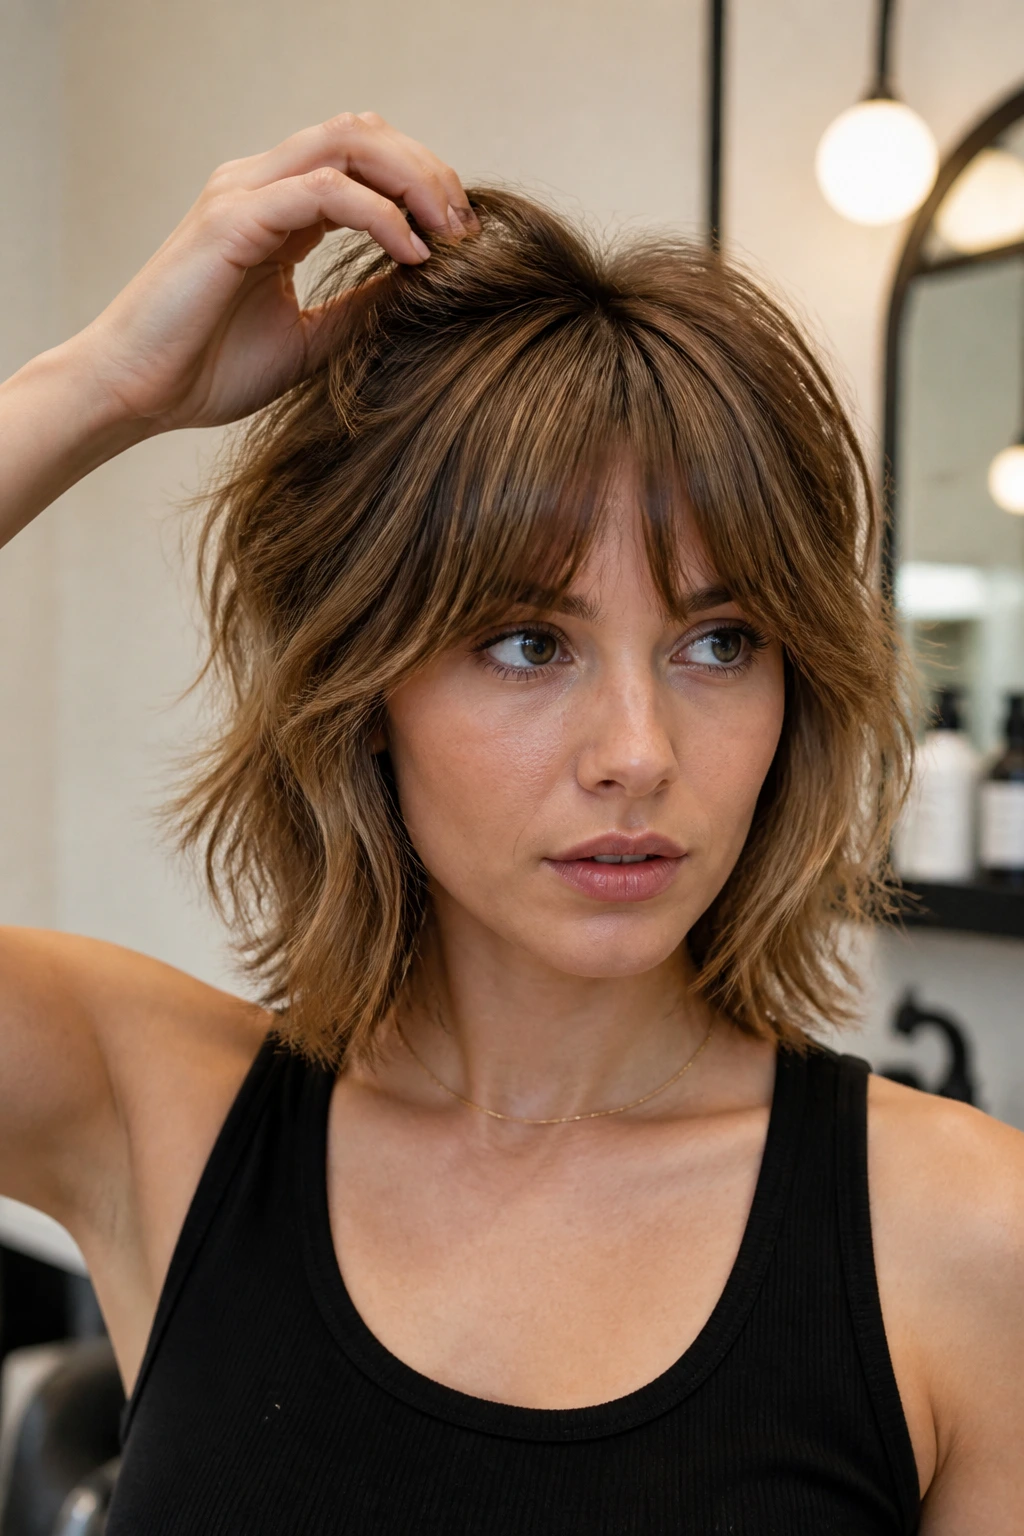
Root Lift: Set the crown first. A little lift at the roots changes the whole cut, because it prevents the sides from doing all the work. Even 10 to 15 seconds of heat at the top can keep the face from feeling too wide.
Texture Control: Use texturizing spray only on the mid-lengths and ends. If you spray near the cheeks, the hair can puff sideways, which is the opposite of what you want. A light hand wins here.
Fringe Direction: Blow-dry bangs from side to side before setting them. It helps them land with a softer bend and stops them from splitting in weird places. That matters more than buying the fanciest brush.
Edge Cleanup: If the bottom starts looking frayed, use a small amount of smoothing cream on the last inch only. Too much product at the root flattens the cut; a little on the ends gives the perimeter back.
Mistakes That Make a Shag Wider Instead of Sharper
One of the easiest mistakes is asking for too many short layers at cheek height. The result looks lively in the chair and puffy three hours later. Fix it by keeping the shortest layers either higher at the crown or lower at the jaw, where they can help shape the face instead of widening it.
Another common problem is making the fringe too dense. A heavy bang can work, but if it’s cut too short or too boxy, it shortens the face and makes the cheeks feel fuller. The safer move is to leave a little air at the temples or let the fringe open slightly in the middle.
Over-thinning is another one. Fine hair especially can look stringy if the stylist removes too much weight from the ends. The line needs density. Without it, the shag loses the squared-off part and turns wispy.
Humidity can also ruin the shape if the cut depends on perfect blow-drying. If your hair frizzes fast, ask for enough length in the face frame and enough weight at the hem to hold the outline when the air gets sticky. A good shag should forgive you a little.
Variations and Adaptations to Try

The Soft Square Shag: This version keeps the blunt perimeter but softens the internal layers. It’s a good choice if you want the face-framing benefits without looking too sharp. The line still helps round faces, but the finish feels gentler.
The Curly Halo Shag: Here, the outline stays controlled while the curls are cut to stack upward a bit more through the crown. It works best when the lower layers are long enough to avoid a triangle shape. Ask for the shrinkage to be considered at every step.
The Office-Ready Shag: Keep the fringe longer, the texture lighter, and the ends cleaner. This is the version that looks neat enough for a blazer but still has enough movement to feel like a shag. A round face benefits from the length and the restrained width.
The Statement Fringe Version: If you like bangs, go bolder. A blunt or micro fringe paired with a square hem gives a round face a stronger frame than a softer curtain bang does. This one has more personality, so it suits people who do not mind being noticed.
How to Keep the Shape Sharp Between Trims
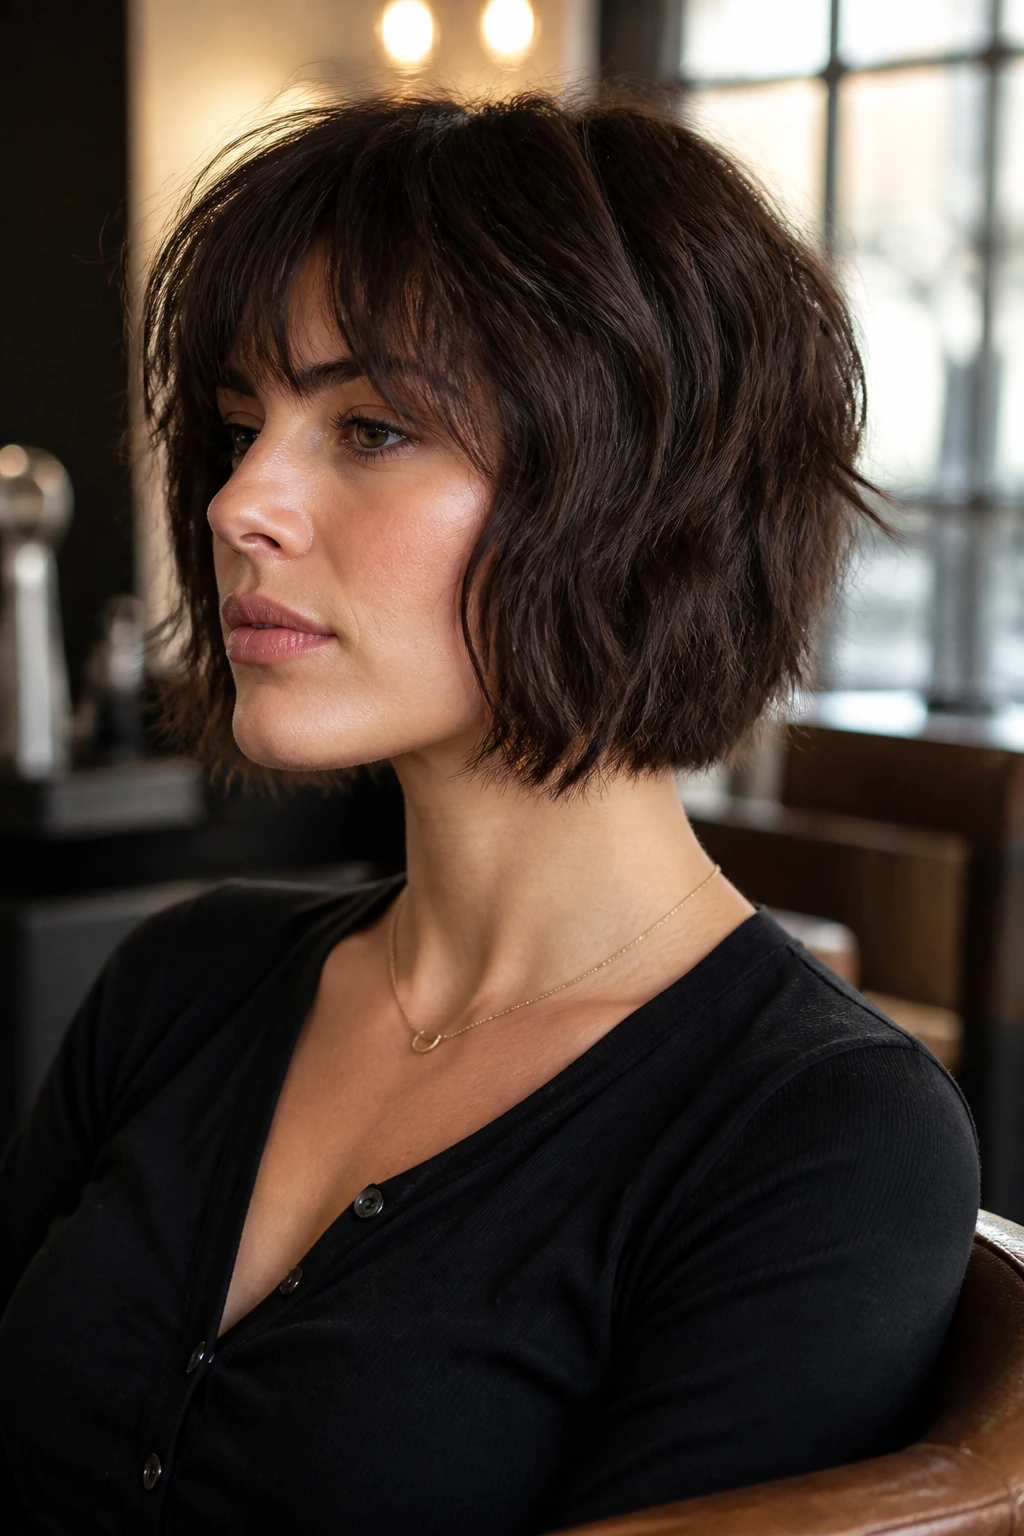
A squared-off shag holds its shape better than a wispy one, but it still needs maintenance. Most people do well with a trim every 6 to 8 weeks if they have bangs, or every 8 to 10 weeks if the fringe is longer and the shape is more forgiving. If you wait much longer, the ends start to flip out and the square outline gets muddy.
At home, the biggest job is keeping the perimeter from looking scraggly. A satin pillowcase helps if your hair frizzes easily. Dry shampoo can buy you a day or two of lift, but use it at the roots only; if it lands on the ends, the cut can look chalky and dull. For curls, refreshing with a mist of water and a small amount of curl cream is usually better than trying to fully restyle dry curls with heat.
If you’re growing the cut out, ask for dusting, not a full reshaping every time. The point is to keep the corners of the cut visible. Once those corners disappear, the whole thing slides back into a softer shag and the face-framing effect weakens.
Frequently Asked Questions
Can a shag really make a round face look slimmer?
Yes, if the cut is built with a cleaner perimeter and enough height at the crown. The slimming effect comes from the shape around the face, not from layers alone. A fluffy shag with side volume can do the opposite, so the outline matters.
Are curtain bangs a good choice for round faces?
They can be, but only when they’re cut long enough to fall past the cheekbone and into the jaw area. Short curtain bangs tend to widen the face. Longer ones that open at the center are much safer.
What if my hair is fine and flat?
Keep the layers light and the ends dense. Fine hair usually looks better with fewer short layers and more root lift. A mousse at the crown and a blunt-ish hemline will do more for the shape than extra razor texture.
Can curly hair wear a squared-off shag?
Absolutely. The cut just needs to account for shrinkage, which means the stylist should check length and shape with the hair dry or mostly dry. The outer silhouette can still be square even when the curls are bouncy.
How short is too short for a round face?
Short hair is not the problem. The problem is width at the cheekbone. If the cut sits above the jaw and flares outward, it can make the face look wider. Keep the crown lifted and the sides narrower if you want shorter length.
Should I avoid a center part?
Not necessarily. A center part works when the front pieces are long enough to fall below the cheeks. If the layers are short and full at the sides, the part can make the face look rounder. The haircut matters more than the part itself.
What if my shag puffs out on the sides?
That usually means the layers start too high at the cheeks or the styling is pushing volume outward. Try smoothing the sides while adding lift only at the roots. If the cut keeps puffing no matter what you do, the perimeter probably needs to be cleaner.
How do I grow this cut out without losing the shape?
Keep trimming the fringe and the front corners while letting the back lengthen a little. That preserves the square outline even as the cut gets longer. Ask for small maintenance cuts instead of resetting the whole shape each time.
The Shape That Does the Work

A good shag on a round face does not try to hide the face. It frames it. That is a better job, and a more honest one. The squared-off versions in this collection do the useful thing: they keep movement in the hair while giving the silhouette a line the eye can follow.
The nicest part is that the cut does not have to be fussy to work. A clean hem, the right fringe, and a little height at the crown can change the whole read of the face. Once those pieces are in place, the rest is just maintenance — and maybe a bit of attitude when you shake it out in the mirror.