



An Edgar cut lives or dies on the forehead line.
Get that line right, and the whole haircut snaps into place: the fringe sits forward with intent, the sides drop clean, and the face looks sharper before anyone has even noticed the fade. Get it wrong, and the cut turns boxy in the awkward way people complain about online — too much weight in front, too little shape at the temples, and a hairline that looks more drawn than styled.
That’s why Edgar cuts are more interesting than they get credit for. The blunt front is only the beginning. Change the fade height, soften the corners, add texture, keep the top heavy, or let the curl pattern breathe, and the haircut shifts from harsh to clean, from street-heavy to office-ready, from high-contrast to almost understated. Same family. Very different mood.
The 22 versions below cover the range I’d actually trust in a barber chair: the crisp, the soft, the curly, the color-forward, the low-maintenance, and the ones that only work if you respect your hair’s natural direction. Some read tough. Some read tidy. A few sit right on the edge of being too much — which is exactly why they’re worth knowing.
Why These Edgar Cuts Hit Hard
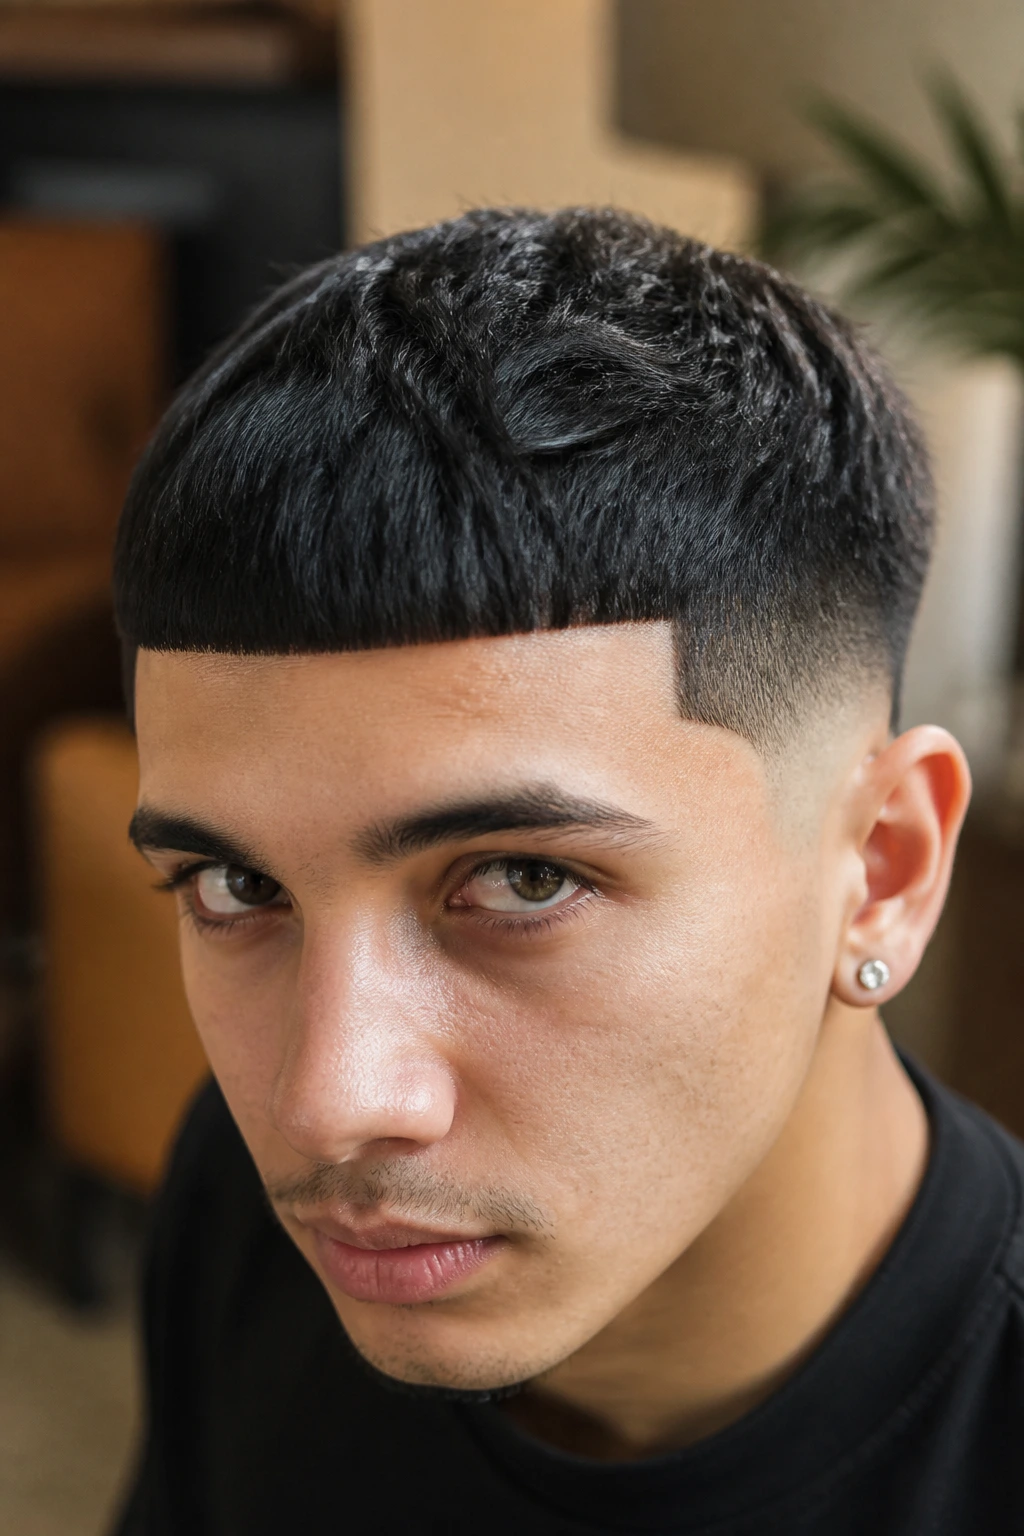
-
The fringe does the heavy lifting: The forward edge at the forehead changes the whole face shape, so even a small tweak in length can make the cut look sharper or softer.
-
The fade height changes the mood: A low fade keeps the cut grounded and wearable, while a skin fade pushes the contrast up fast and makes the fringe look more dramatic.
-
Texture keeps it from looking flat: When the top is point-cut or lightly choppy, the haircut moves better and doesn’t sit like a stiff helmet.
-
Hair type matters more than the photo: Straight, wavy, curly, thick, and fine hair each take the Edgar shape differently, and the right version works with the grain instead of fighting it.
-
A clean outline matters more than extra product: The edge at the temples and across the brow can make a cheap cut look expensive; heavy pomade won’t fix bad geometry.
-
There’s a version for almost every setting: The same core shape can read school-safe, office-safe, or loud enough for a night out just by shifting the fade, fringe, and finish.
1. Classic Blunt Edgar Cut
The classic blunt Edgar is the version people picture first: a straight, square fringe with the front cut flat and the sides kept tighter so the top line reads as one clean block. It’s a bold shape, but it works because the geometry is simple. No fluff. No soft little compromises.
What makes it hold up is the balance between the heavy front and the clean side taper. If the fringe is too long, the cut starts swallowing the eyebrows. If it’s too short, the whole point disappears. The sweet spot is usually somewhere just above the brows, with enough weight to show a sharp line but not so much that the hair falls into the eyes every ten minutes.
Best for a clean, direct look
- Straight or slightly wavy hair
- Strong brow lines
- Short growth cycles, because the shape needs regular resets
A classic blunt Edgar looks best when the outline is fresh and the corners at the temples are squared on purpose. Ask for the front to sit even across the forehead and the side length to stay tight enough that the fringe stays the star.
2. Low Fade Edgar Cut
The low fade Edgar is the version I’d hand to someone who wants the cut without the full blast of contrast. The fade starts low around the ear, which keeps the haircut grounded and stops the sides from looking clipped into nothing too quickly. That low start makes the blunt fringe feel more controlled.
This version is especially good if your hair is thick. A low fade removes bulk where it tends to puff out, but it doesn’t chop the whole side panel away. The result feels cleaner, and the grow-out is less annoying than with a high fade. You’ll still need a shape-up, but the haircut doesn’t fall apart after one week.
If you want the Edgar shape to read modern without shouting, this is the one. It keeps the front square, but the overall profile is easier to wear in daylight, under bad fluorescent office lights, or with a little beard stubble.
3. Mid Fade Edgar Cut
A mid fade changes the energy fast. The fade starts higher than the low version, usually around the middle of the head’s side profile, so the top feels more lifted and the line at the forehead stands out harder. The haircut gets a little more attitude without crossing into full skin-fade drama.
This is the version I’d pick when the hair is dense and the face can handle contrast. Rounder faces often look better with that extra lift at the sides, because the fade builds vertical space and keeps the front from feeling too flat. Square or angular faces can wear it too, but the barber needs to keep the fringe shape honest. Don’t let the top get puffed into a dome.
It also photographs well under overhead light — which matters more than people admit. A mid fade shows the line work clearly, and that line work is half the appeal.
4. Skin Fade Edgar Cut
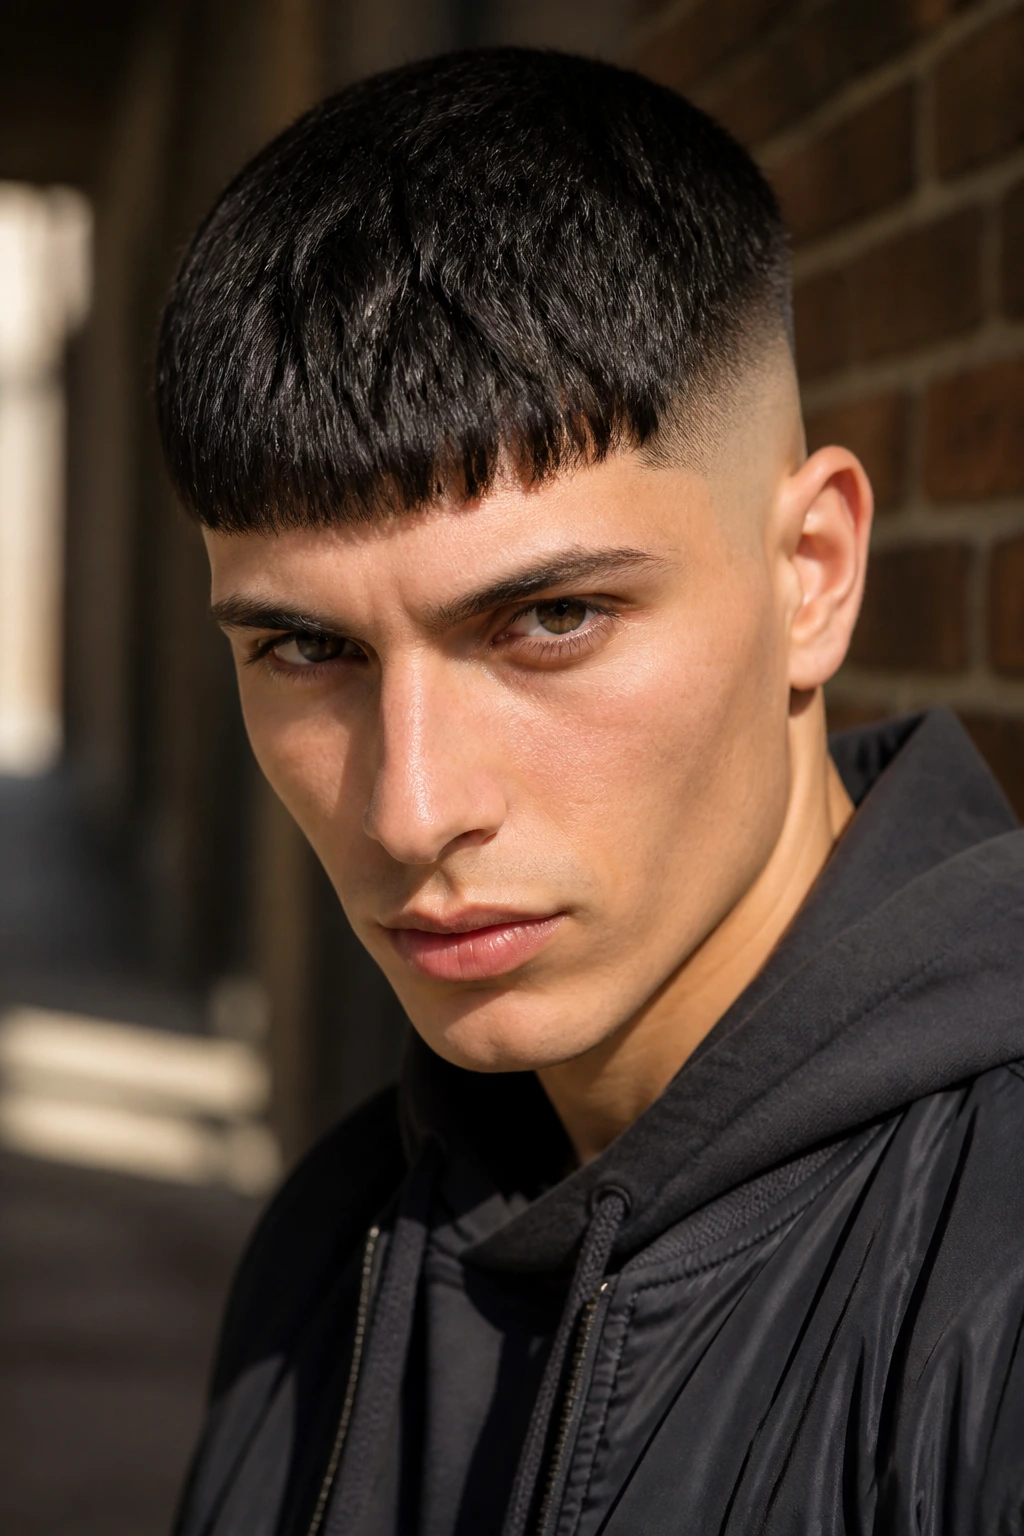
The skin fade Edgar is sharp enough to feel almost architectural. The sides are taken down to the scalp, which throws all the attention onto the fringe and the exact outline across the forehead. It’s high-contrast, clean, and a little ruthless. That’s the point.
This cut works best when the top is kept dense enough to stand on its own. A weak fringe with a skin fade just looks unfinished. A solid fringe, though, becomes the whole event. The scalp-level fade also makes the head shape more visible, so the barber needs to be careful around bumps, cowlicks, and uneven growth at the temples.
If your hair grows fast, be ready for maintenance. A skin fade doesn’t age gracefully the way a taper does. It looks best in the first 7 to 10 days, then the outline softens and the contrast drops off. Still. For sheer impact, it’s hard to beat.
5. Taper Fade Edgar Cut
A taper fade Edgar is what happens when someone wants the shape but doesn’t want the sides aggressively erased. The taper stays tighter around the sideburns and neckline, then gradually blends into the top instead of plunging straight into scalp-level contrast. It’s the calmest-looking version of the group.
That calmness is useful. A taper lets the fringe do the talking while keeping the haircut flexible enough for school, work, or anyone who doesn’t want to look like they’re trying too hard. The front can stay blunt, but the sides feel more traditional, which makes the whole thing easier to live with.
It’s also one of the best choices for people growing into the Edgar cut. If you’re unsure how square you want the fringe or how much contrast you can actually wear, start here. A taper leaves room to adjust on the next appointment.
6. Textured Edgar Cut
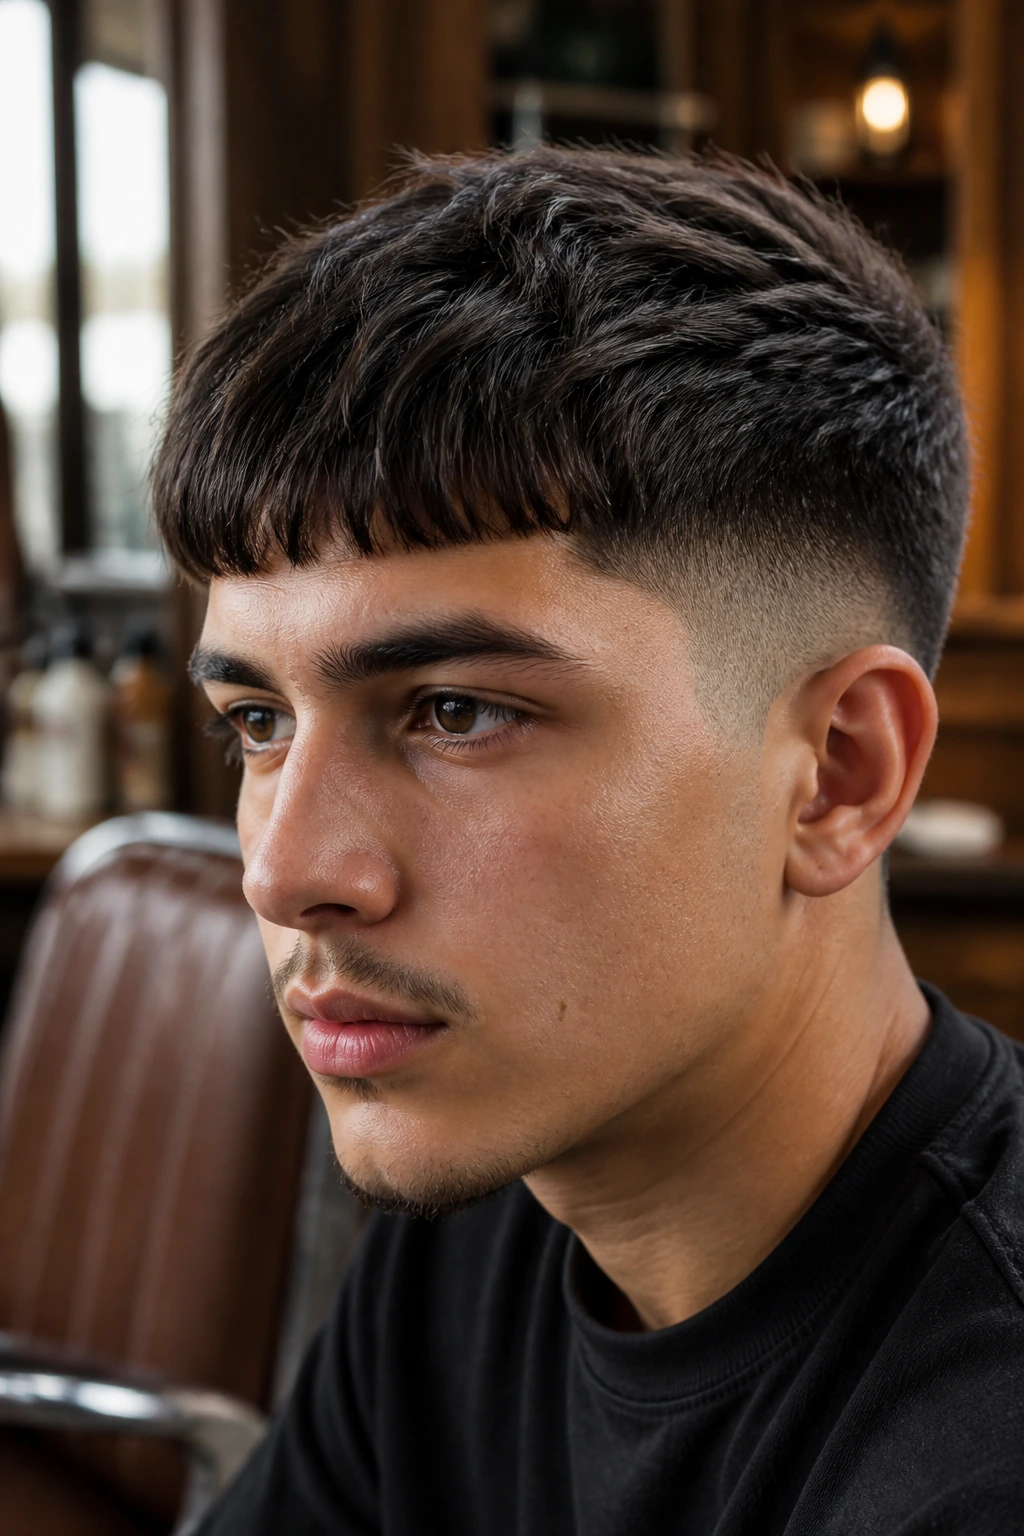
A textured Edgar cut is where the haircut stops looking like one solid slab and starts moving. The fringe is still forward, still controlled, still recognizably Edgar — but the barber cuts into the top with point-cutting or light slicing so the ends don’t sit in one hard sheet.
That texture changes the whole mood. Instead of a heavy block across the forehead, you get tiny variations in length that break up the line just enough to feel less severe. On thick hair, it helps the cut breathe. On straight hair, it keeps the fringe from looking pasted down. On slightly wavy hair, it gives the natural bend somewhere to land.
Why it works
- Softens the blunt edge without losing the shape
- Cuts down on the “helmet” look
- Works well with matte clay or a touch of styling cream
If you’ve ever liked the idea of an Edgar cut but hated how rigid some versions look, this is the one to ask for. It has edges, but not the kind that make the cut feel frozen.
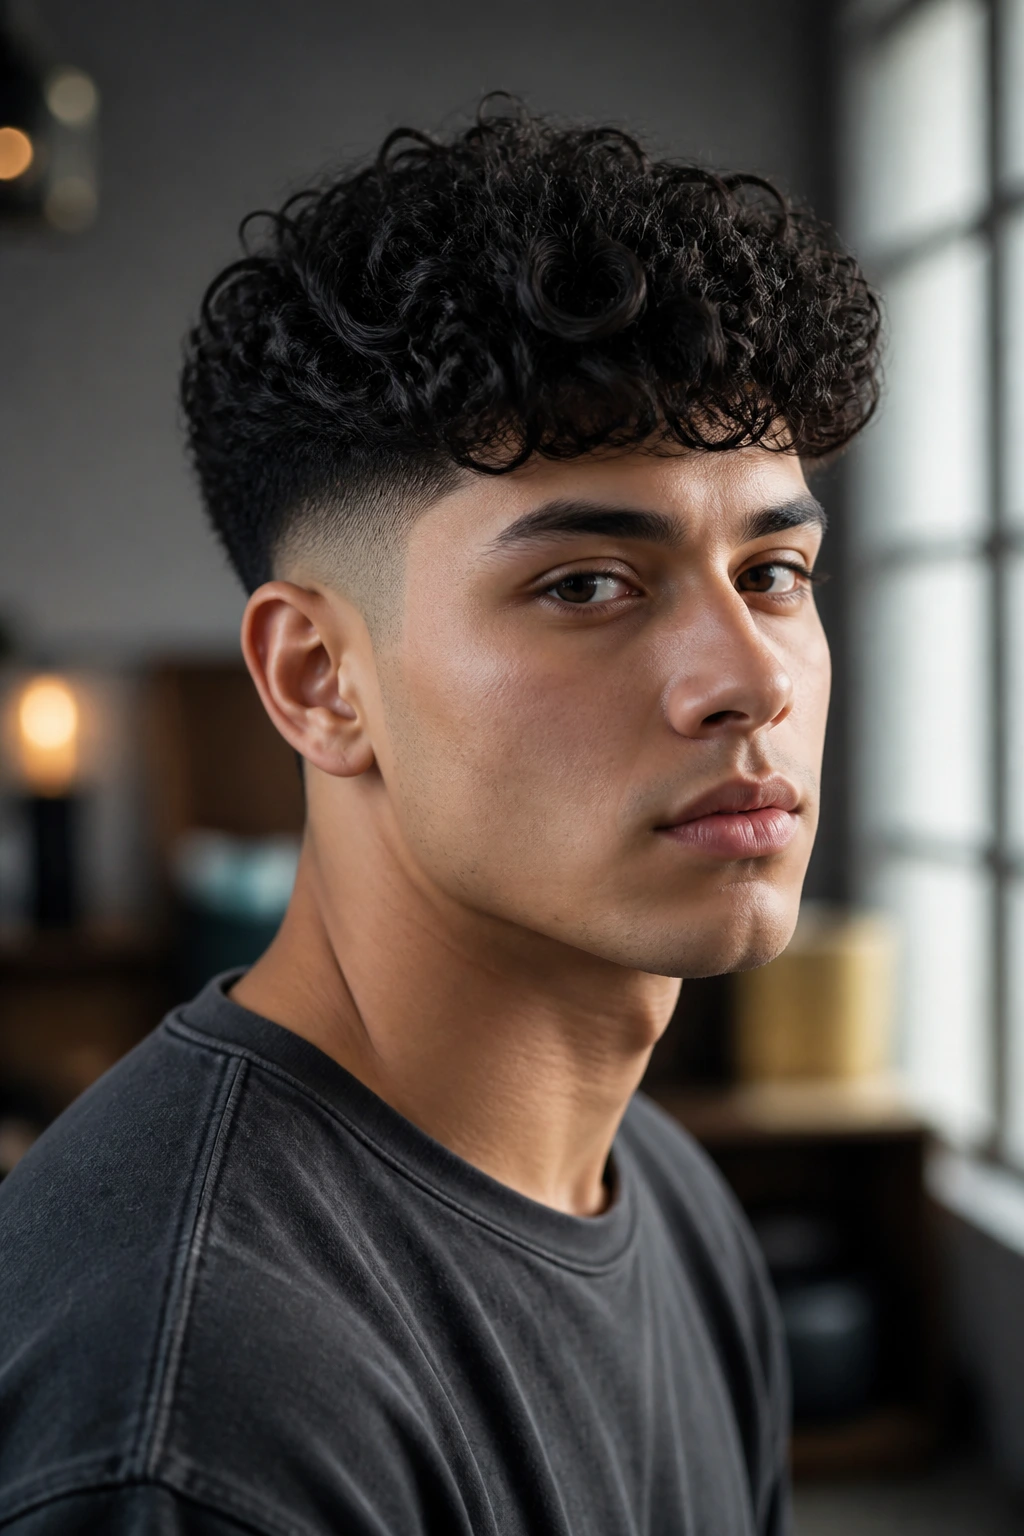
7. Curly Edgar Cut
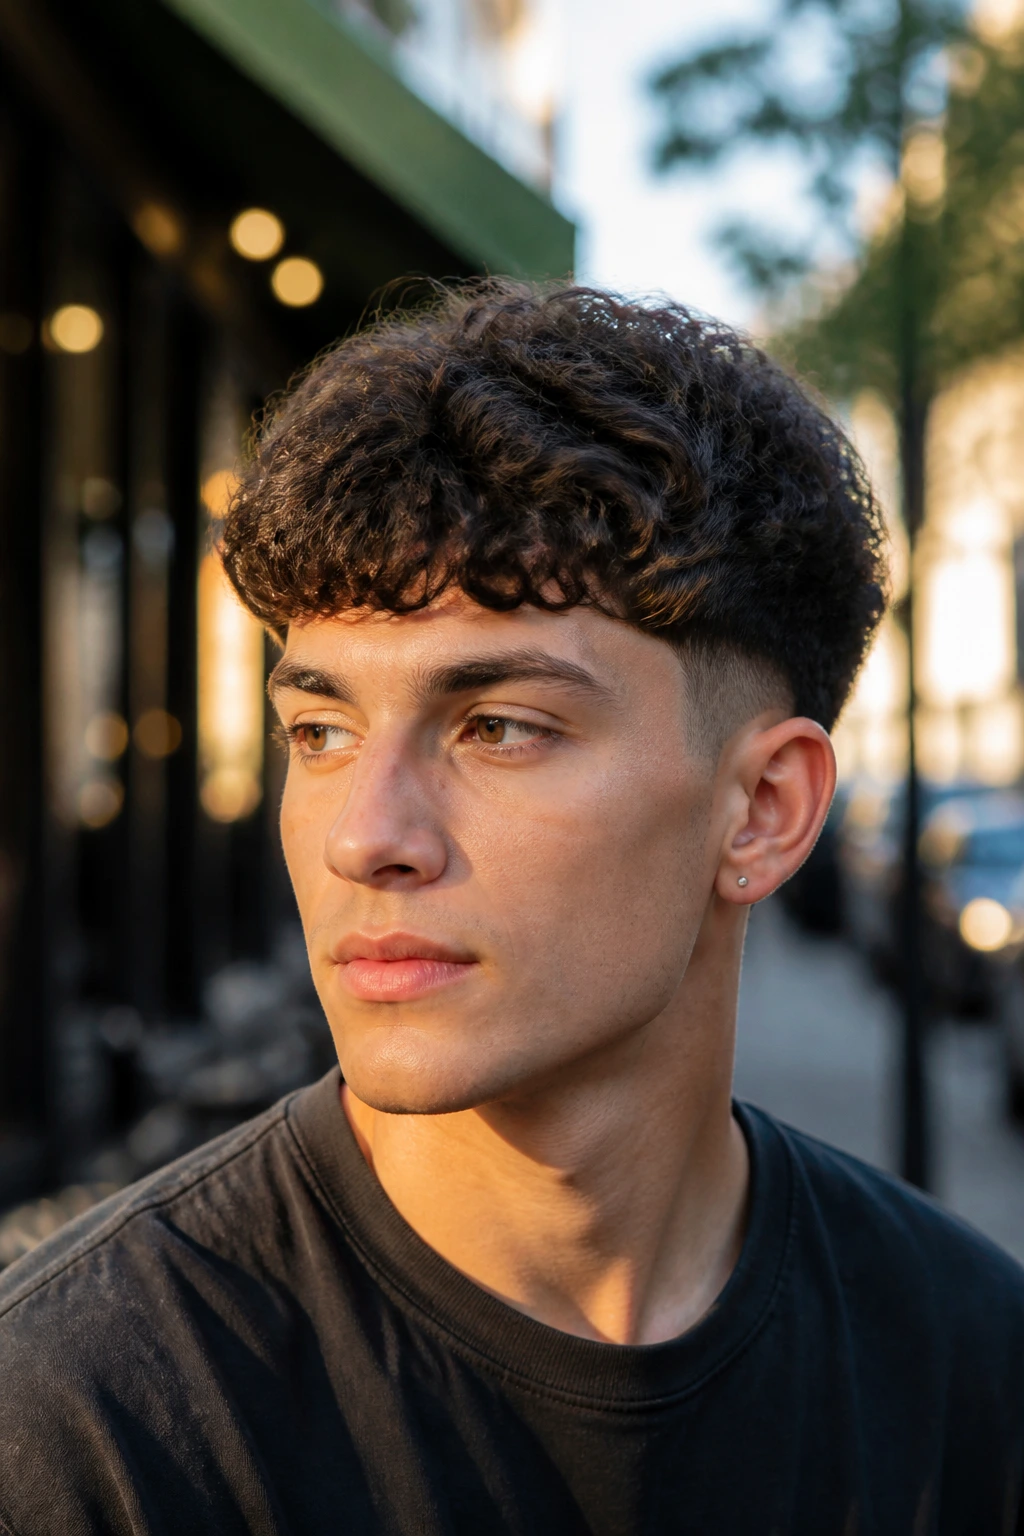
Curly hair changes the Edgar cut in a good way, because the fringe picks up movement on its own. The trick is not forcing the curl pattern flat. That’s where people go wrong. If the barber crushes the curls into a dead square, the shape gets bulky and loses the snap that makes the style interesting.
A curly Edgar usually needs a little extra length through the front so the curls can sit forward instead of springing back too far. The sides should be cleaned up tightly, but not so tight that the top looks disconnected from the rest of the head. The silhouette matters more here than the exact line being ruler-straight.
Use a diffuser if the curls puff after washing. A small amount of cream or light mousse helps the fringe hold its shape without turning crunchy. And yes, a curly Edgar can look extremely sharp. It just needs a barber who understands that curls have their own edge line.
8. Wavy Edgar Cut
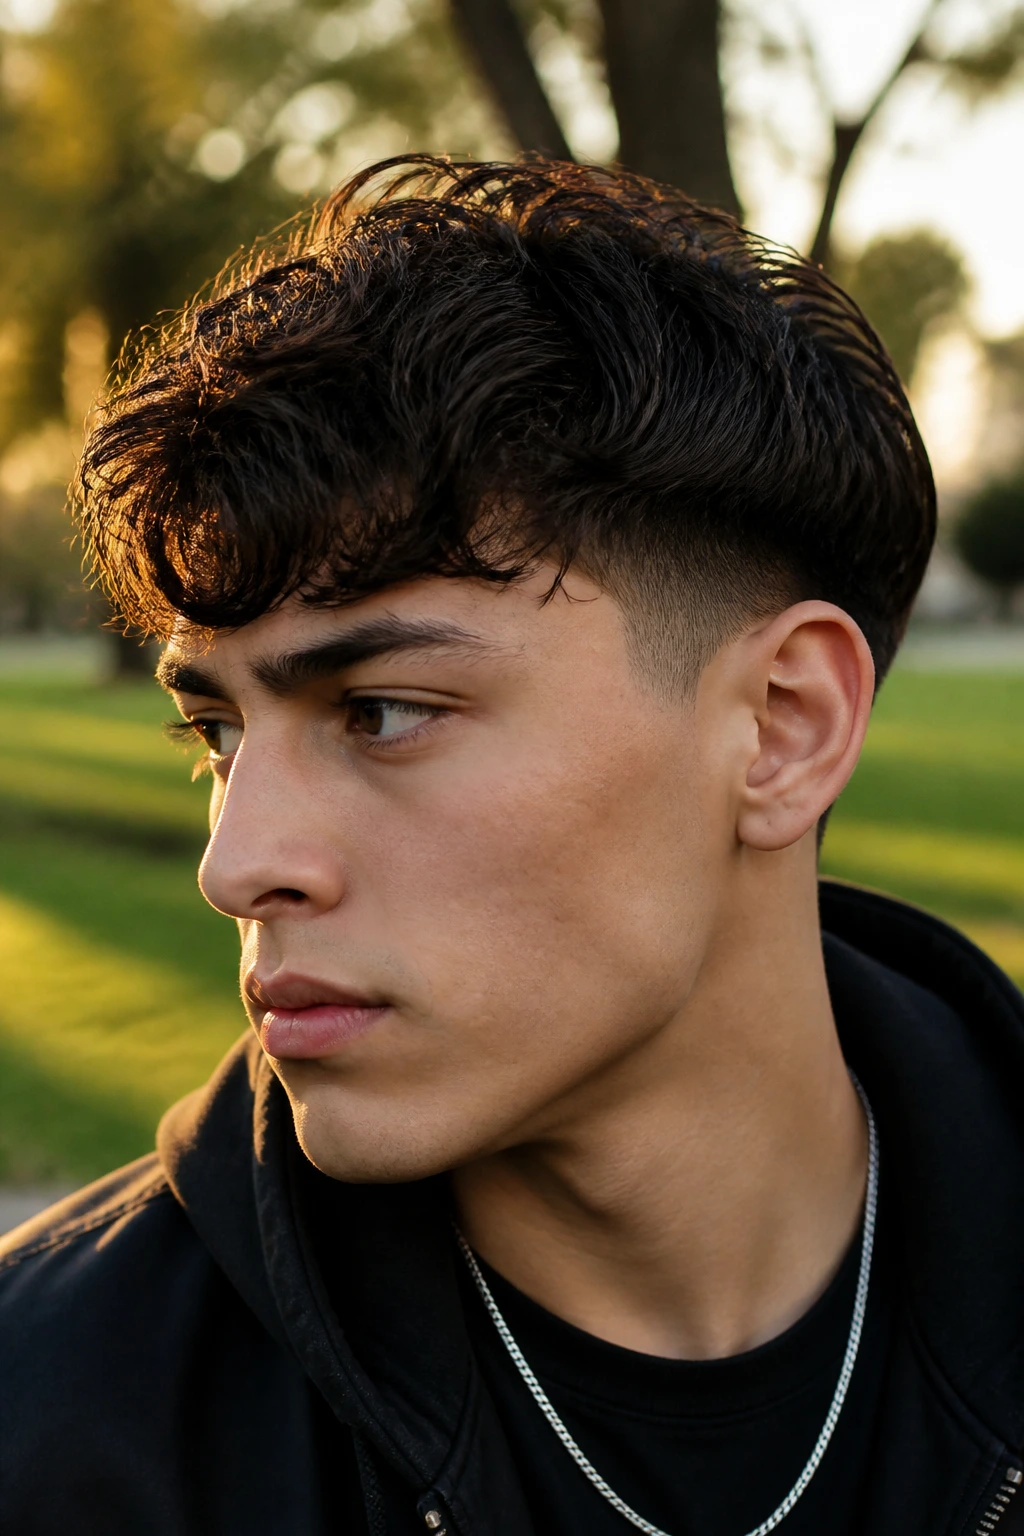
Wavy hair gives the Edgar cut a built-in looseness that straight hair has to fake with product. The front still comes forward, but the waves create tiny bends through the fringe, which makes the cut feel less severe and a little more lived-in. That’s the version for guys who want structure without stiffness.
The key is length. Too short, and the waves collapse into random bumps. Too long, and the fringe starts looking shaggy instead of intentional. Somewhere in the middle, the cut hits a nice groove: the front sits forward, the texture shows, and the sides stay tight enough that the shape stays readable.
A wavy Edgar looks best with a matte finish. Shine tends to exaggerate the bends in the wrong way and can make the hair look damp when it should look controlled. Blow-dry the front forward with your fingers, not a brush, if you want the wave pattern to keep its life.
9. Straight-Hair Edgar Cut
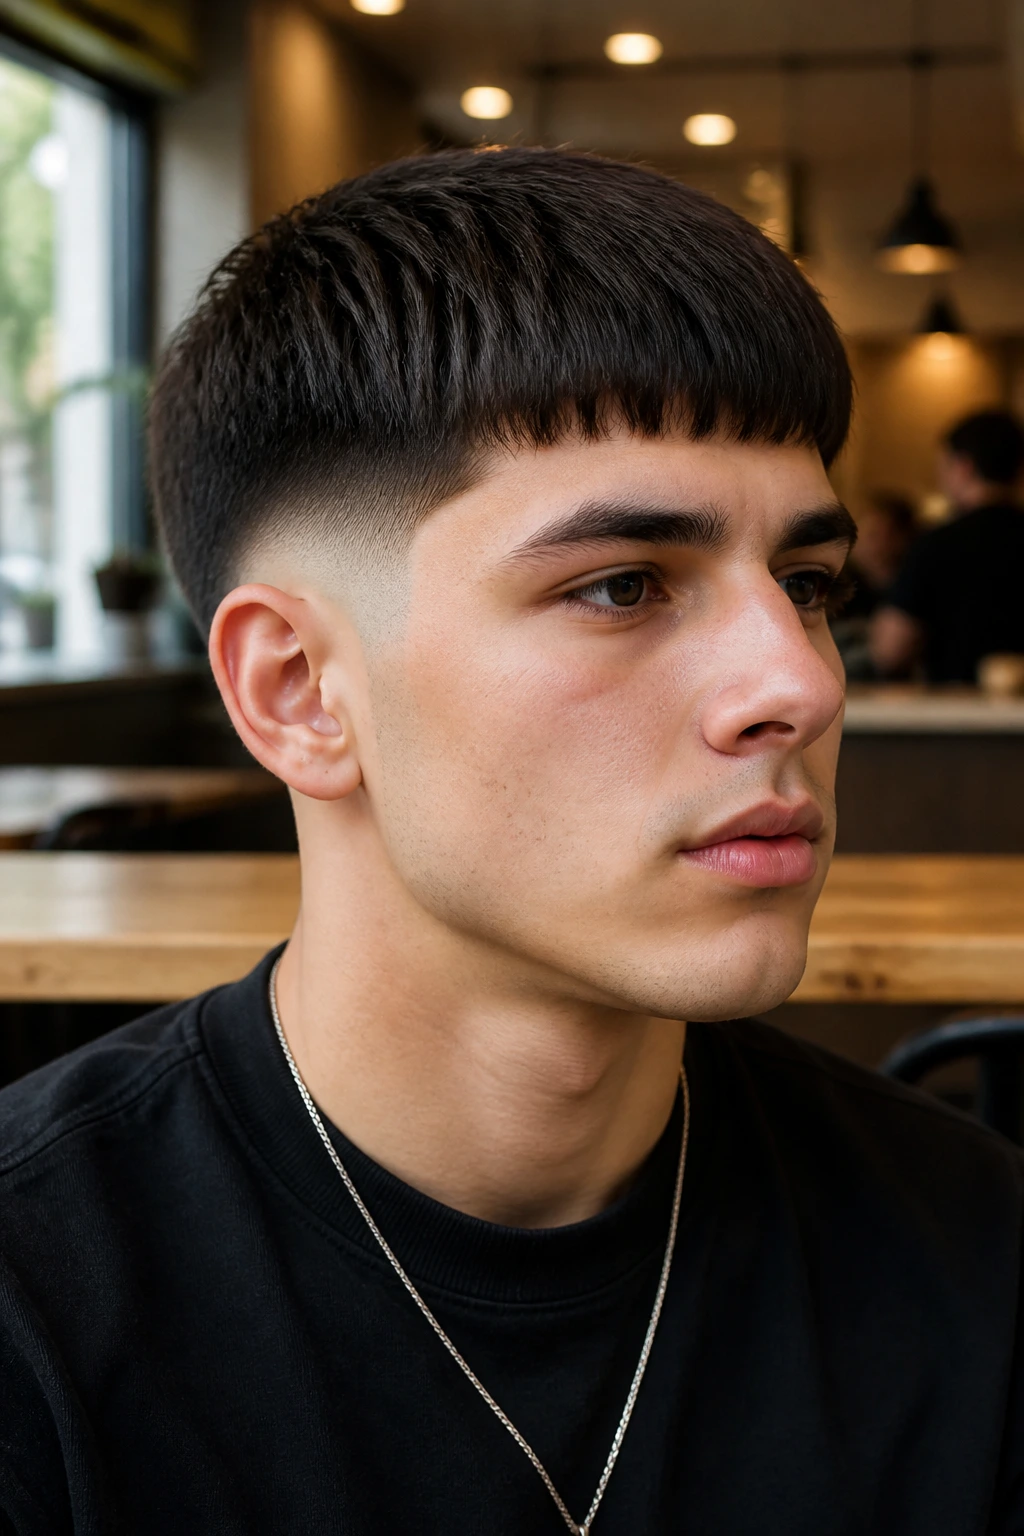
Straight hair is probably the easiest canvas for an Edgar cut, which is both a blessing and a trap. The blessing: the fringe lays flat and clean with very little effort. The trap: if the barber gets the weight line wrong, the whole front can look heavy in a bad, blunt-bang kind of way.
What straight hair does well is show shape. Every corner is visible. Every imbalance is visible too. That means the fringe needs a careful, even line and the side transition has to be deliberate. Don’t let anyone rush this one with a buzzer and call it done. Straight hair makes lazy cutting obvious.
This is a good choice if you want the cut to look crisp all day without much product. A fingertip of matte paste or a light cream usually does the trick. More than that often looks greasy, and straight hair shows grease faster than almost anything else.
10. Thick-Hair Edgar Cut
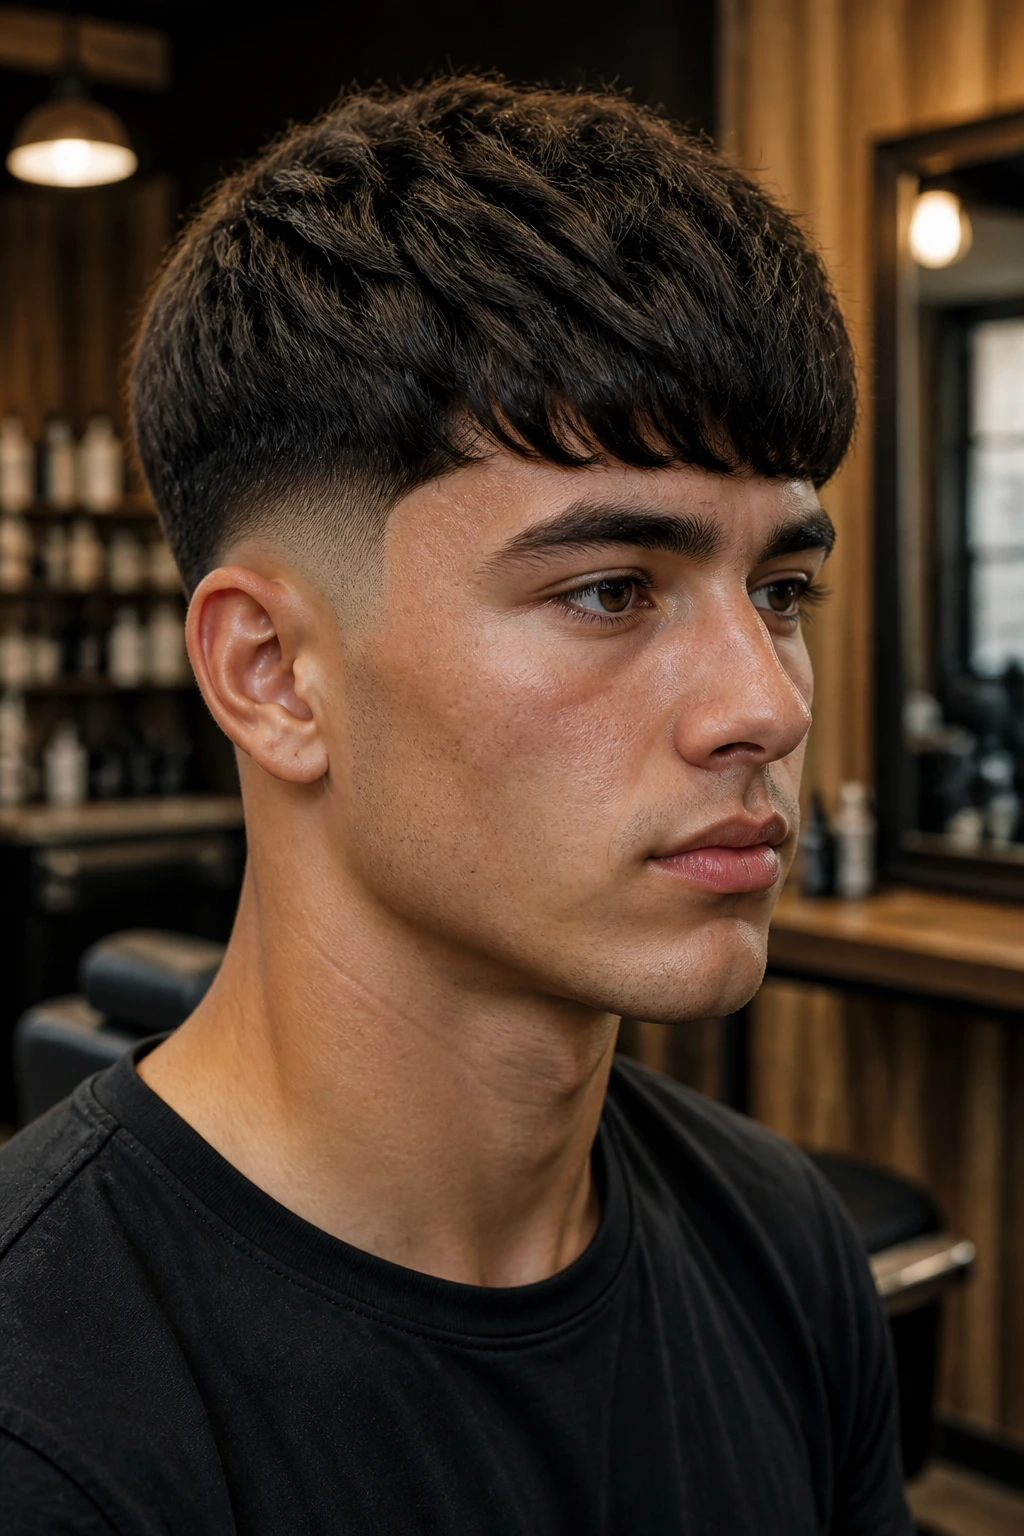
Thick hair can make an Edgar cut look rich and full, or it can make it look like a brick sitting above the eyes. The difference is bulk removal. If the barber leaves all the density in the front, the fringe pushes forward too hard and the cut loses shape. If they thin it properly, the style looks controlled and heavy in the good way.
The best thick-hair Edgar usually has internal debulking — not so much that the front goes wispy, but enough to let the hair fall forward without fighting itself. The sides need cleanup too, because thick hair expands around the ears and can make the head look wider than it is.
Ask for point-cutting or light texturizing on the top if your hair tends to swell after washing. That little step can mean the difference between a fringe that sits and one that balloons. Thick hair has attitude. You just need to aim it.
11. Fine-Hair Edgar Cut
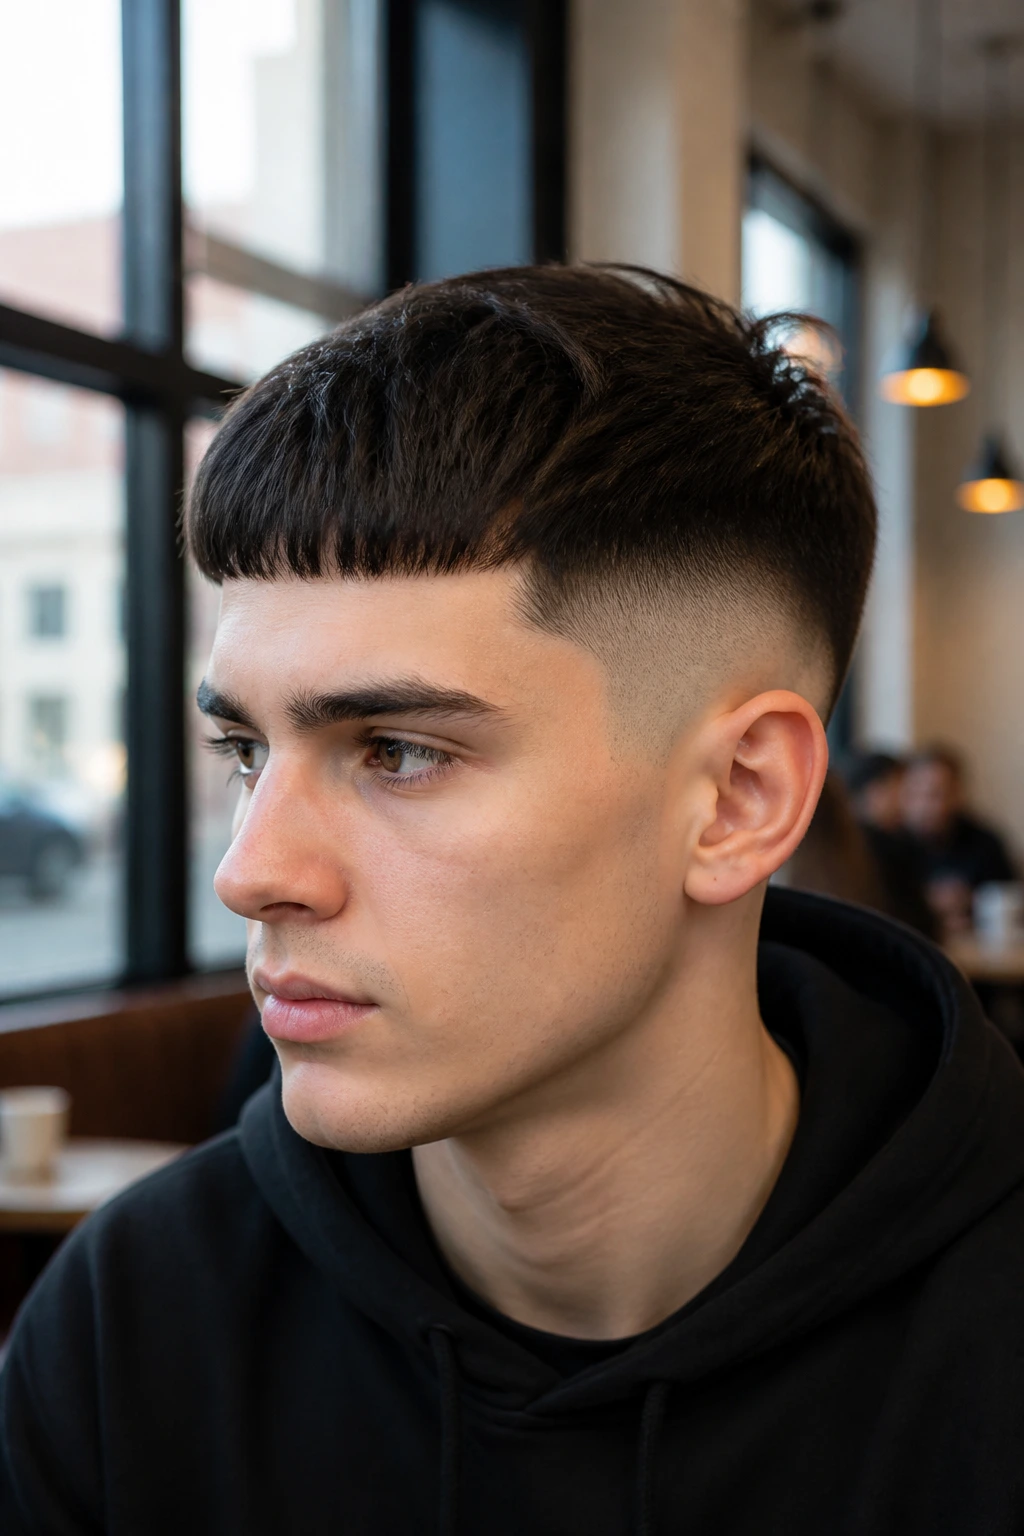
Fine hair needs a lighter hand. A heavy blunt Edgar can look thin and limp if the barber leaves too much space at the front or tries to build weight that isn’t there. The smarter version keeps the fringe a touch shorter, preserves density through the front, and avoids over-thinning the top.
That dense front line is the whole trick. With fine hair, you want the eye to read one solid shape before it notices the individual strands. Matte products help because they grip the hair and stop it from separating into soft, see-through pieces. A dry texture spray can also give the fringe some body without making it stiff.
12. French Crop Edgar Cut
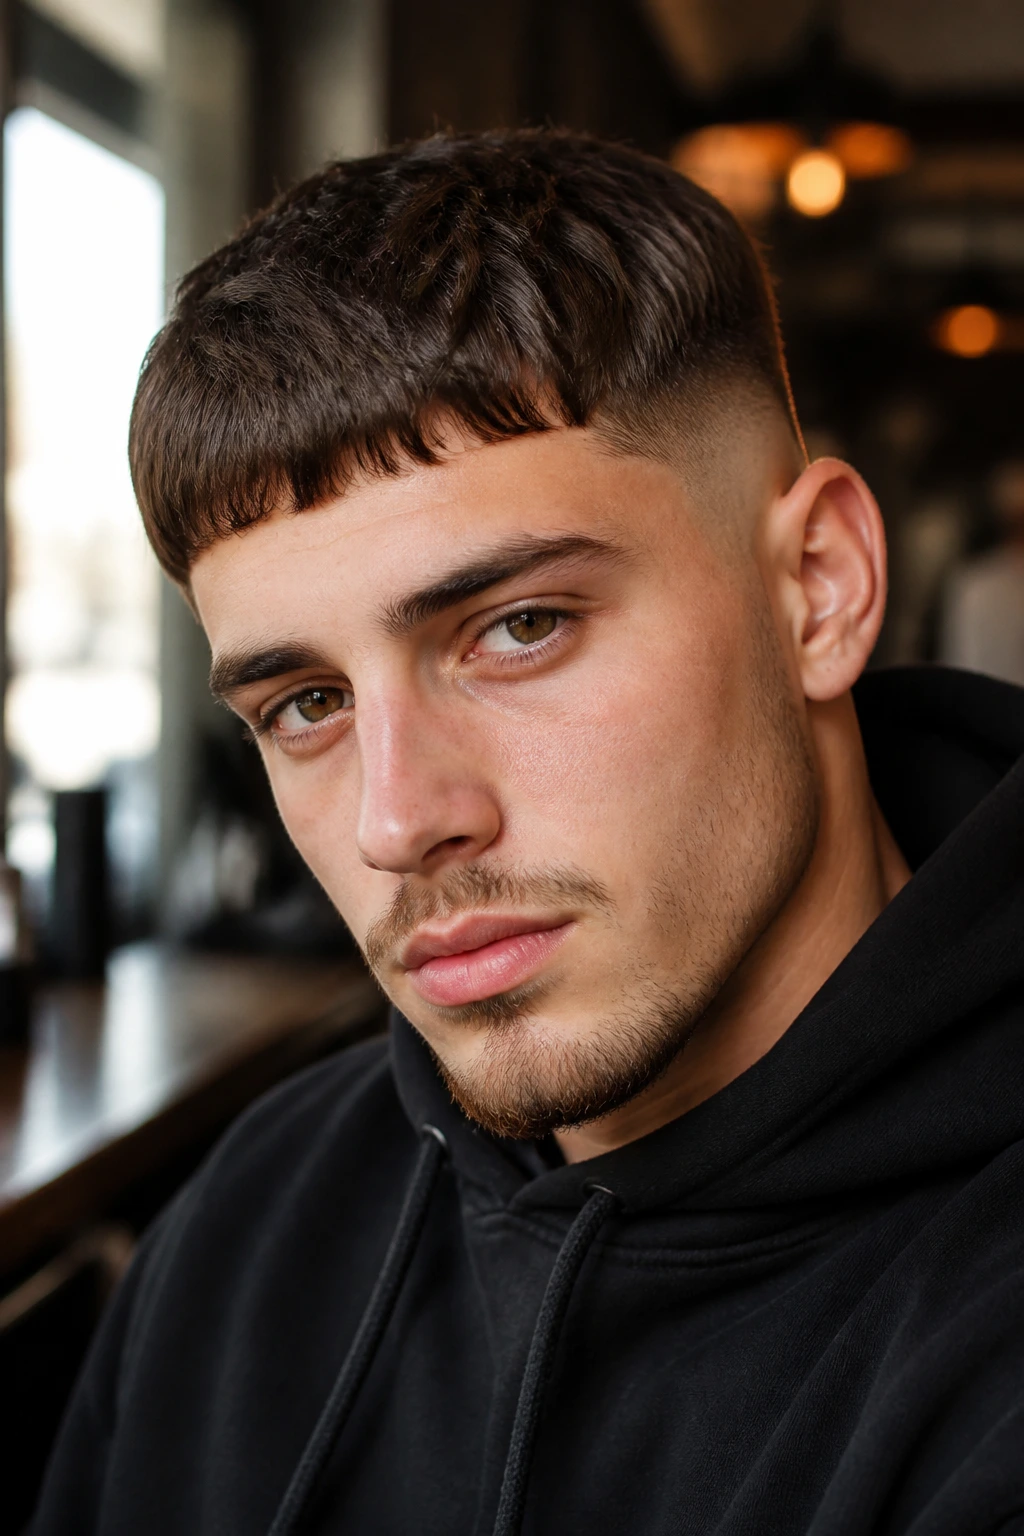
The French crop and the Edgar share the same blunt-fringe DNA, but the crop tends to feel softer at the corners and a little less square across the temples. That makes this hybrid easier to wear if you want the general Edgar shape without the full hard-box front.
I like this version for guys who need a cut that can move between casual and polished. The fringe still sits forward, but the side outline usually curves more naturally into the head instead of stopping on a sharp line. It’s a subtle difference, and it matters a lot.
If you’re worried the Edgar cut will feel too aggressive for your face, this is the safer bridge. You still get the strong frontal line. You just lose some of the edge that can make the classic version feel confrontational.
13. Messy Fringe Edgar Cut
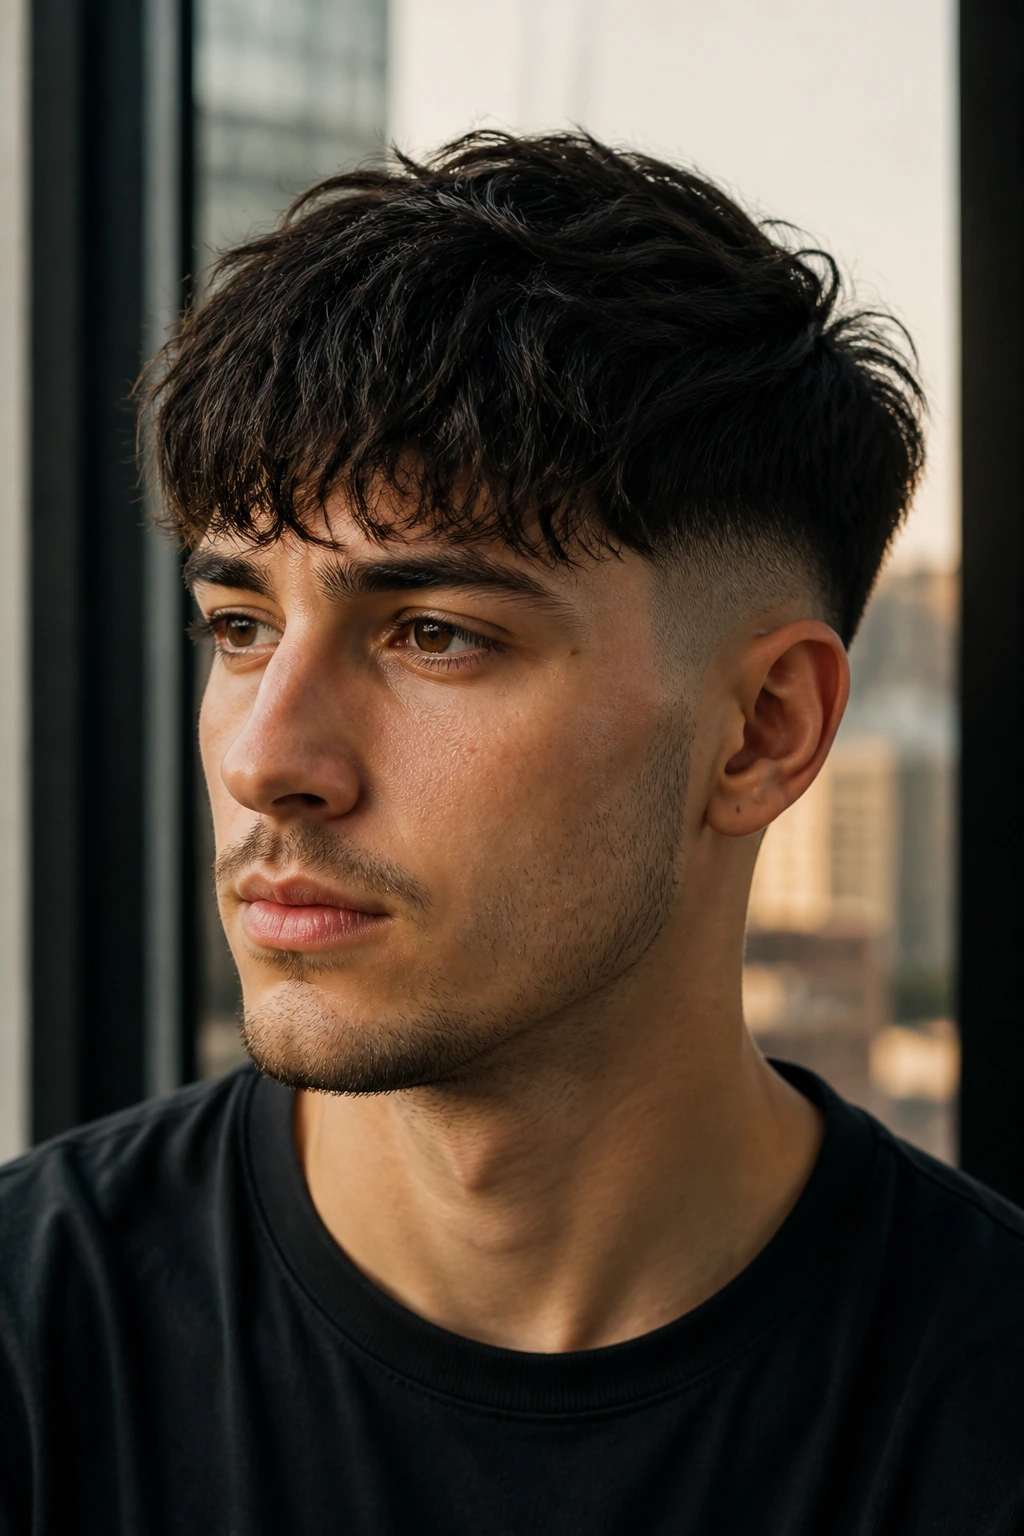
A messy fringe Edgar is for the person who likes the shape but refuses to wear it perfectly combed. The front still comes forward, but the ends are chopped looser and the styling is finger-first, not brush-first. It reads less like a uniform and more like a haircut with some movement.
This one is useful when your hair has natural bend or when you hate the idea of rebuilding the fringe every morning. A bit of texture powder or matte clay worked through dry hair gives enough separation to keep the front from sitting like one hard wall. Don’t overwork it. That’s how it turns stiff.
The messy version also grows out more kindly than the strict blunt cut. The line softens, but the shape still has enough structure that it doesn’t fall apart after a week of real life.
14. Burst Fade Edgar Cut
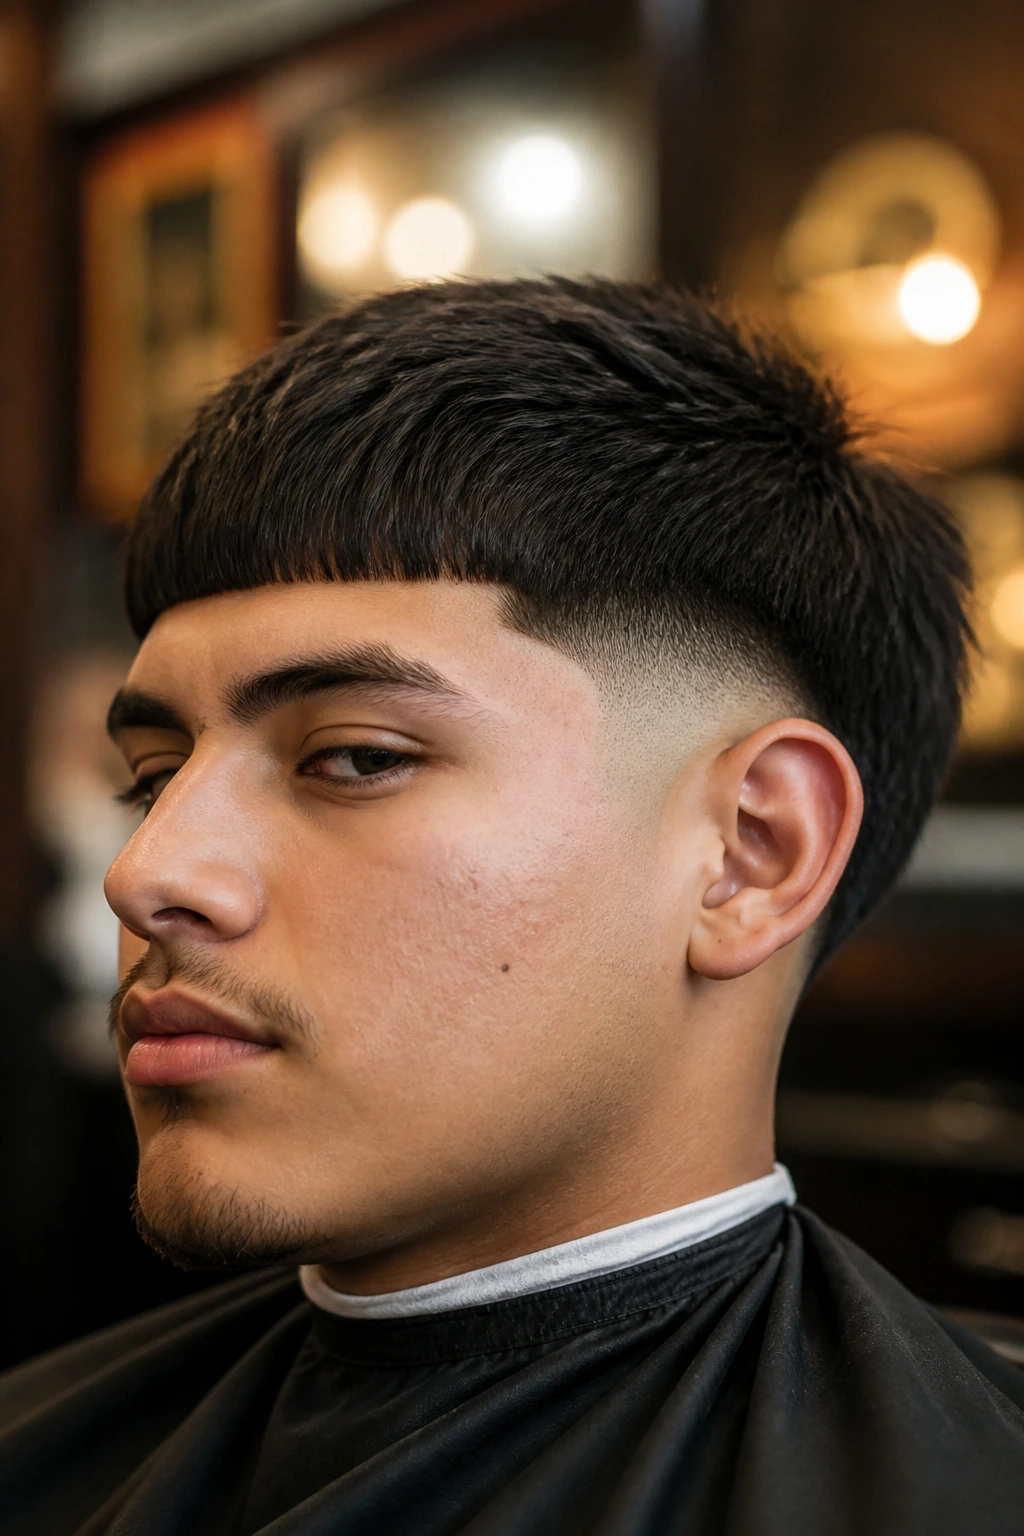
A burst fade curves tightly around the ear and opens the area behind it, which gives the Edgar cut a little more flair than a straight fade. The front still holds the same blunt energy, but the sides have a rounded sweep that makes the haircut feel more dimensional.
This is one of my favorites when someone wants the Edgar shape but doesn’t want the side profile to look flat. The burst fade adds movement near the ear and keeps the silhouette from feeling boxy. On heads with stronger cheekbones or a more angular jaw, it can look especially clean.
What to ask for
- Keep the fringe blunt and forward
- Let the fade arc around the ear
- Leave enough length in the crown so the top doesn’t collapse
The burst fade gives the cut a little personality without needing a shaved design or bright color. That’s a nice trade.
15. Drop Fade Edgar Cut
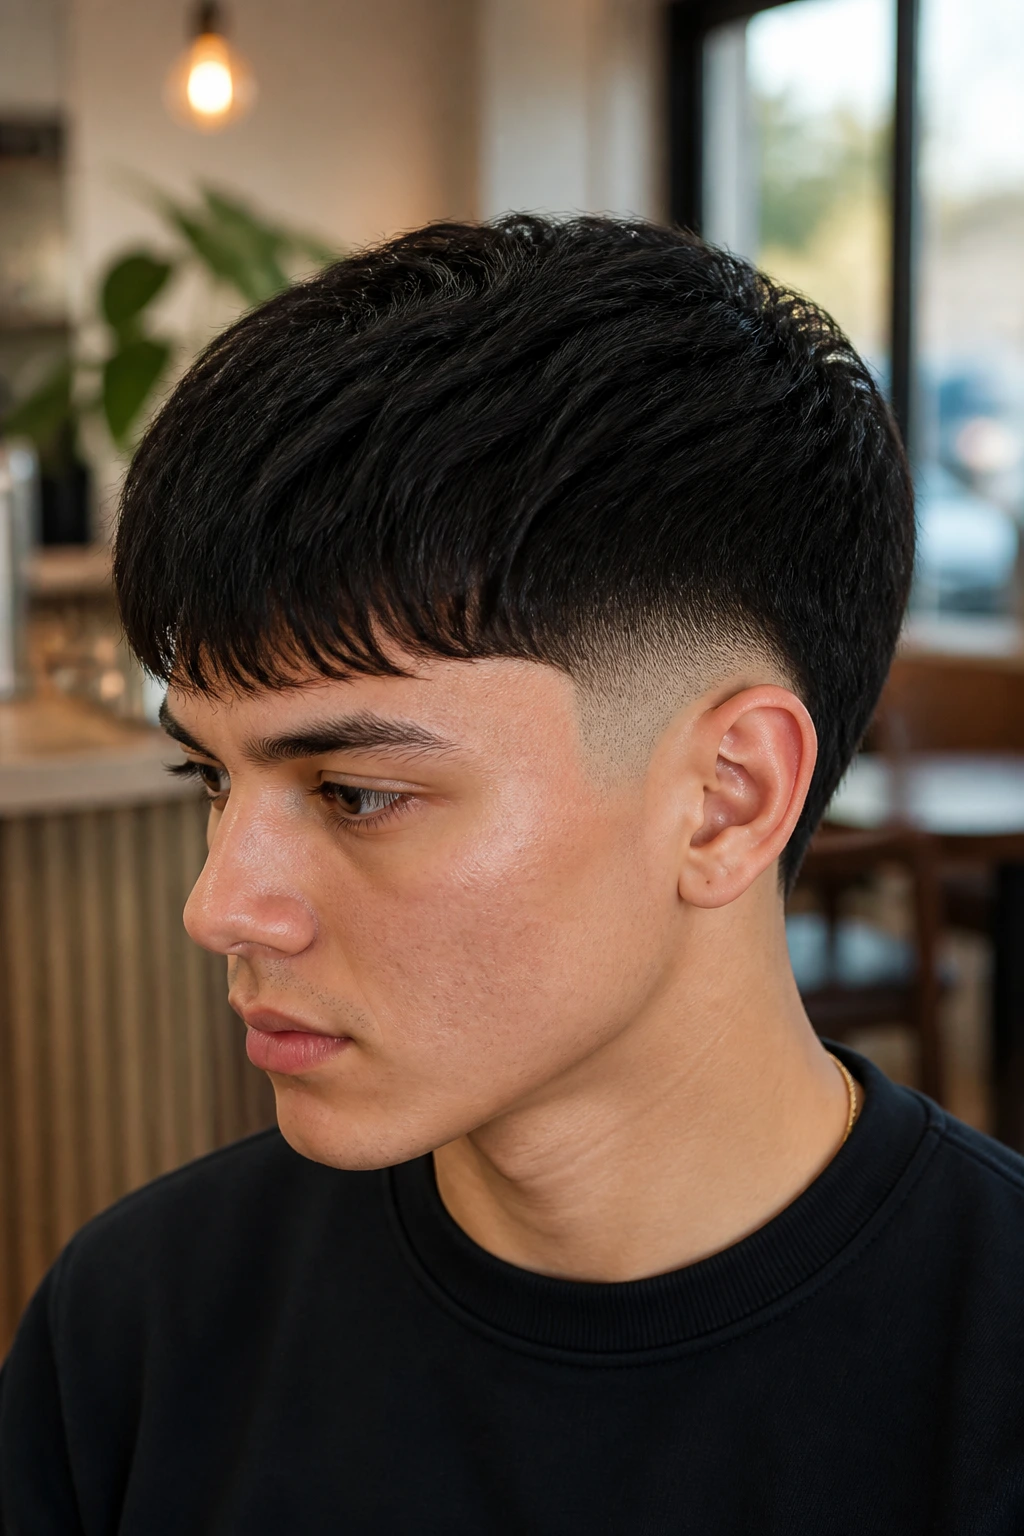
The drop fade Edgar follows the natural curve of the head, dipping lower behind the ear instead of staying level. That drop creates a smoother side profile and makes the top appear more prominent, which works well if you want the fringe to stand out without the haircut looking top-heavy.
It’s a strong option for rounder faces because the curved fade can stretch the silhouette a bit. It also helps if your head shape is more uneven at the sides, since the drop hides some of that and keeps the transition feeling deliberate.
The cut has a cleaner rhythm than a blunt mid fade. There’s a flow to it. Not soft, exactly. Just more controlled. If you want the Edgar cut to look a little less like a rectangle and a little more like it was shaped to your head, this version earns its keep.
16. Temple Fade Edgar Cut
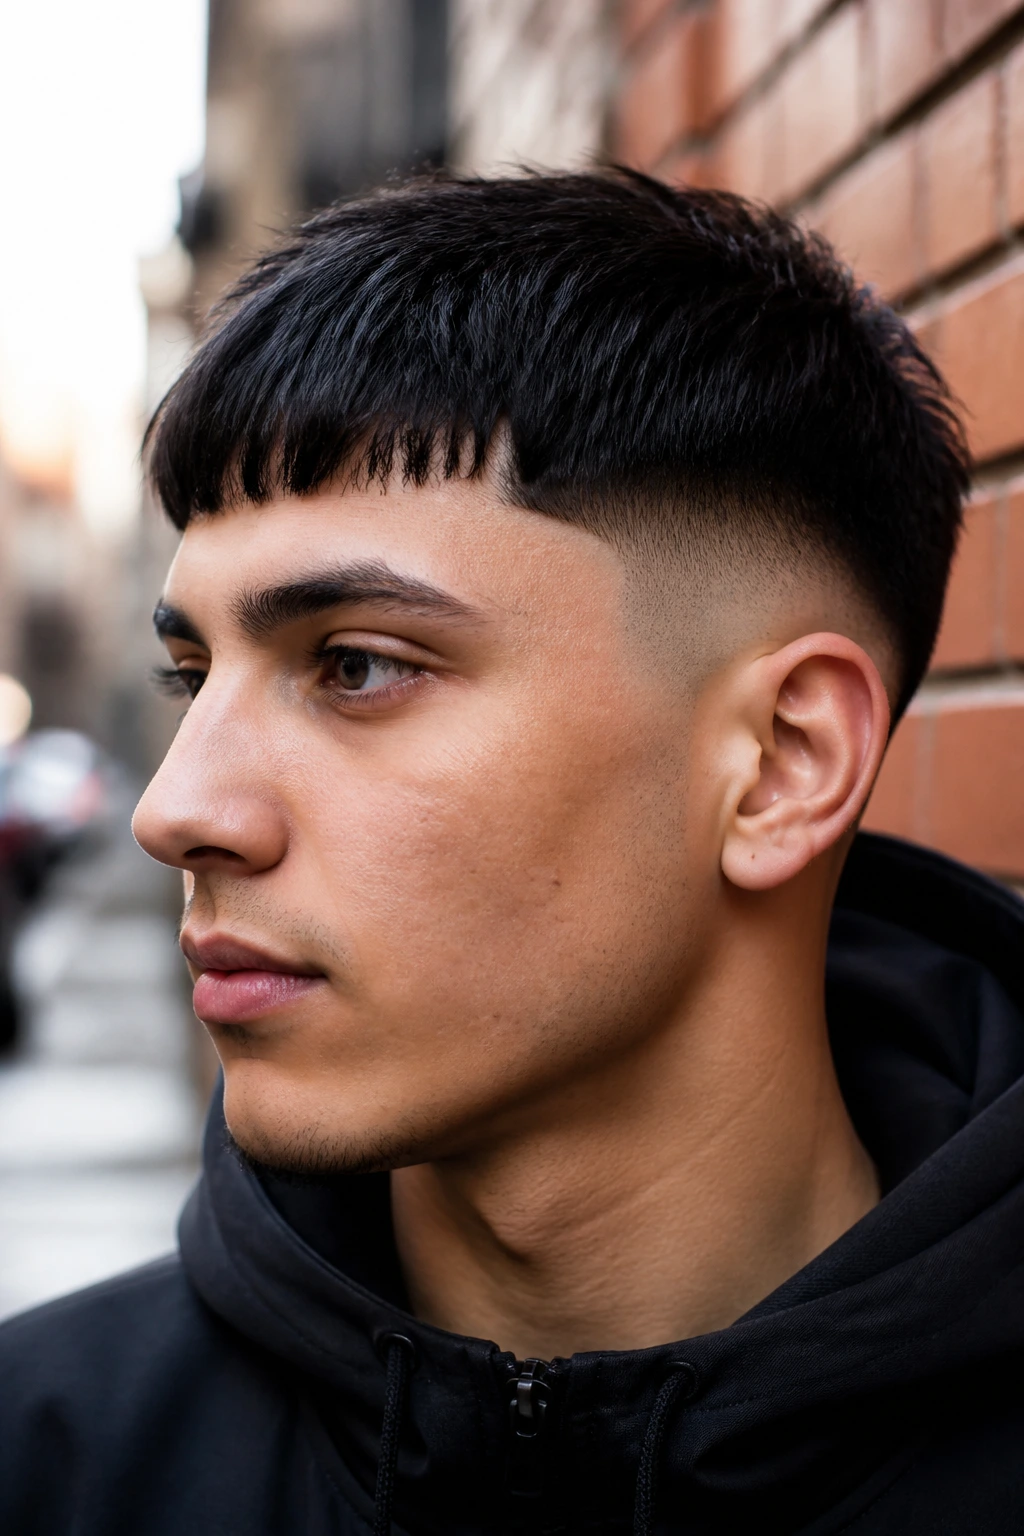
A temple fade keeps the sides neat right where the hair meets the temples, then lets the rest of the side retain more length. That makes the Edgar cut feel sharper at the front without stripping away too much hair through the middle of the side panel.
This is a smart move if you want contrast around the face but don’t want a full skin fade. It also works well with facial hair, because the temple fade can tie the haircut into a beard line without creating a hard disconnect. The transition becomes part of the look, not an afterthought.
The temple fade is one of the cleanest ways to make an Edgar feel grown-up. It still has the fringe. Still has the edge. It just carries less of that heavy, clubby contrast some people worry about.
17. Hard Part Edgar Cut
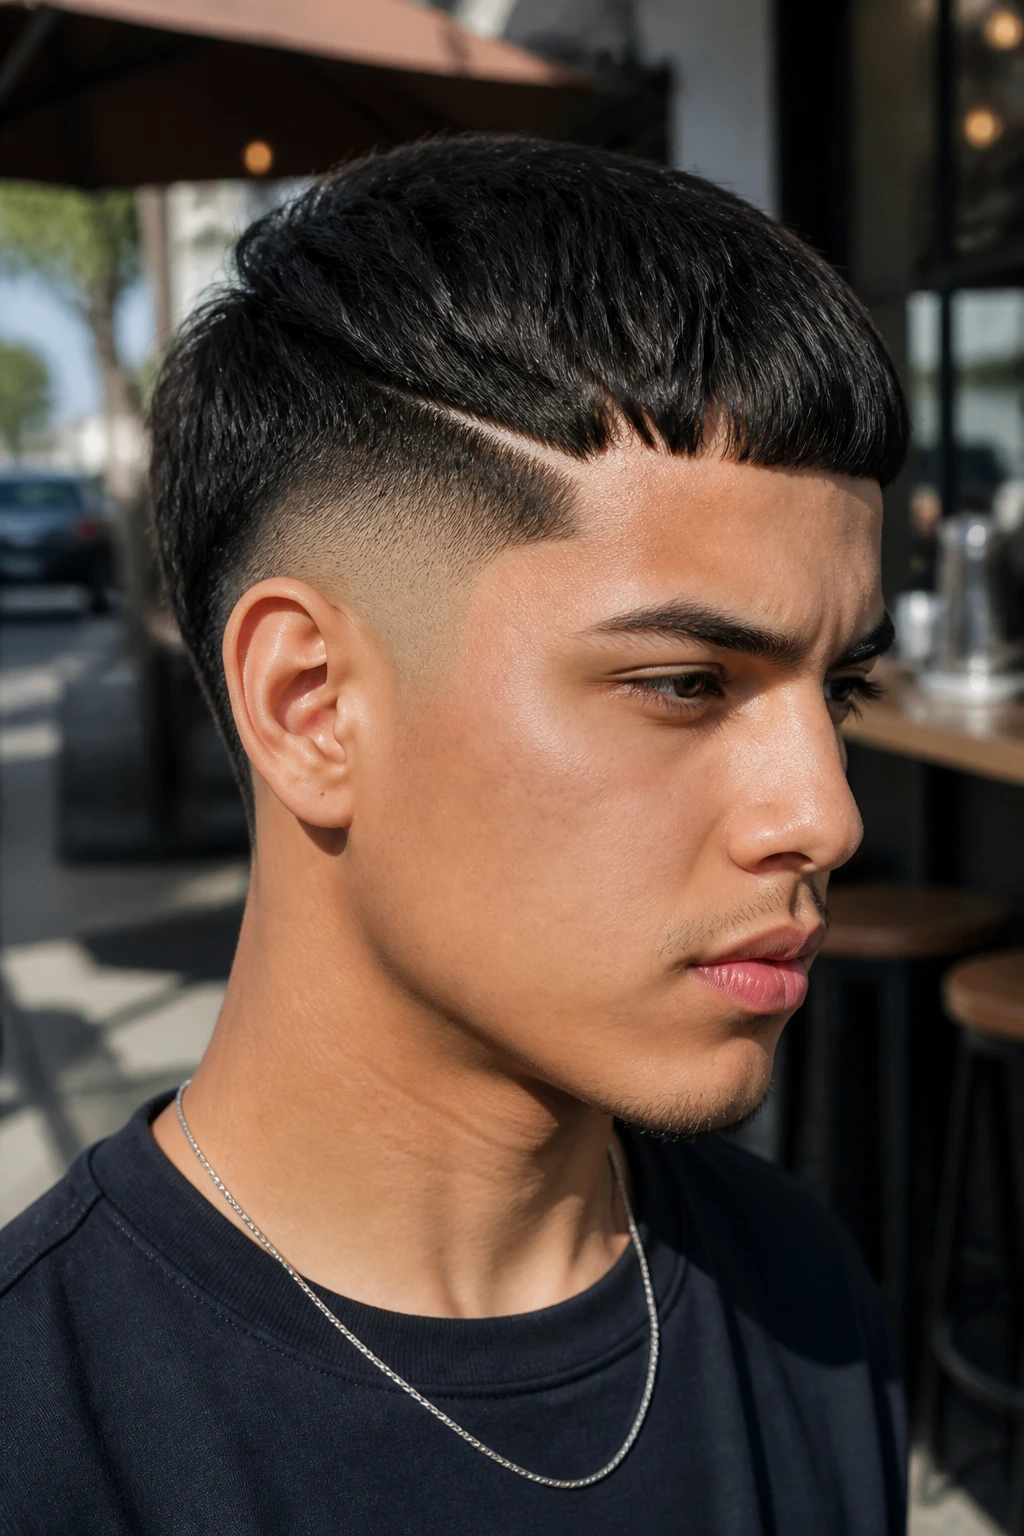
A hard part Edgar adds a shaved line into the side to separate the top from the fade or taper. That line makes the haircut look more deliberate, almost tailored, because the part creates a visual break before the fringe starts pushing forward.
This version works best when the rest of the cut is already neat. If the fringe is too messy or the sides are uneven, the hard part only highlights the problem. But when the blend is tight, the part gives the haircut a crisp graphic edge that feels sharper than a plain transition.
It’s not the quietest option. Good. It shouldn’t be. A hard part is for someone who wants the Edgar shape to look cleaner and more constructed, with a little extra definition on top.
18. Design Line Edgar Cut
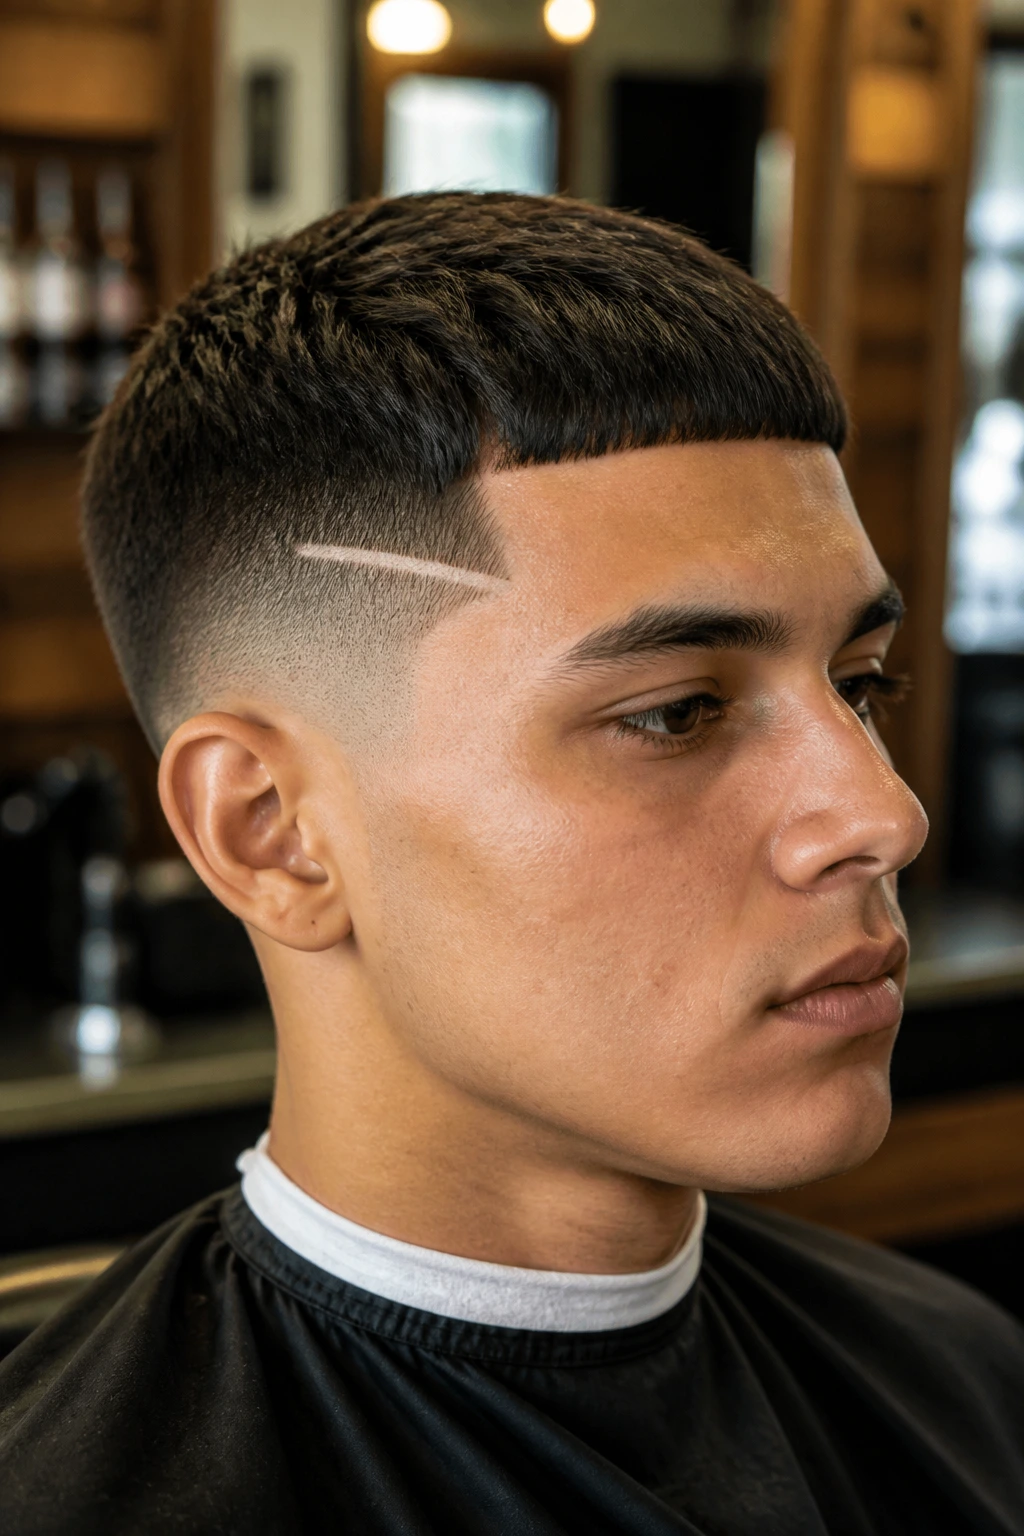
A design line Edgar is where the cut starts flirting with art. One shaved slash near the temple, a double line above the fade, or a small geometric notch can give the haircut a more personal feel without changing the core shape. The front stays blunt. The line work does the talking.
The risk here is overdoing it. One clean line usually says enough. Three lines, zigzags, stars, and extra carving can make the haircut feel dated faster than people expect. A good design line should sharpen the cut, not distract from it.
This is the version for someone who actually likes the barber chair to show. If the rest of your style is simple — plain tees, clean sneakers, minimal jewelry — a single line can carry a lot of weight. Just keep the rest of the haircut disciplined.
19. Bleached Top Edgar Cut
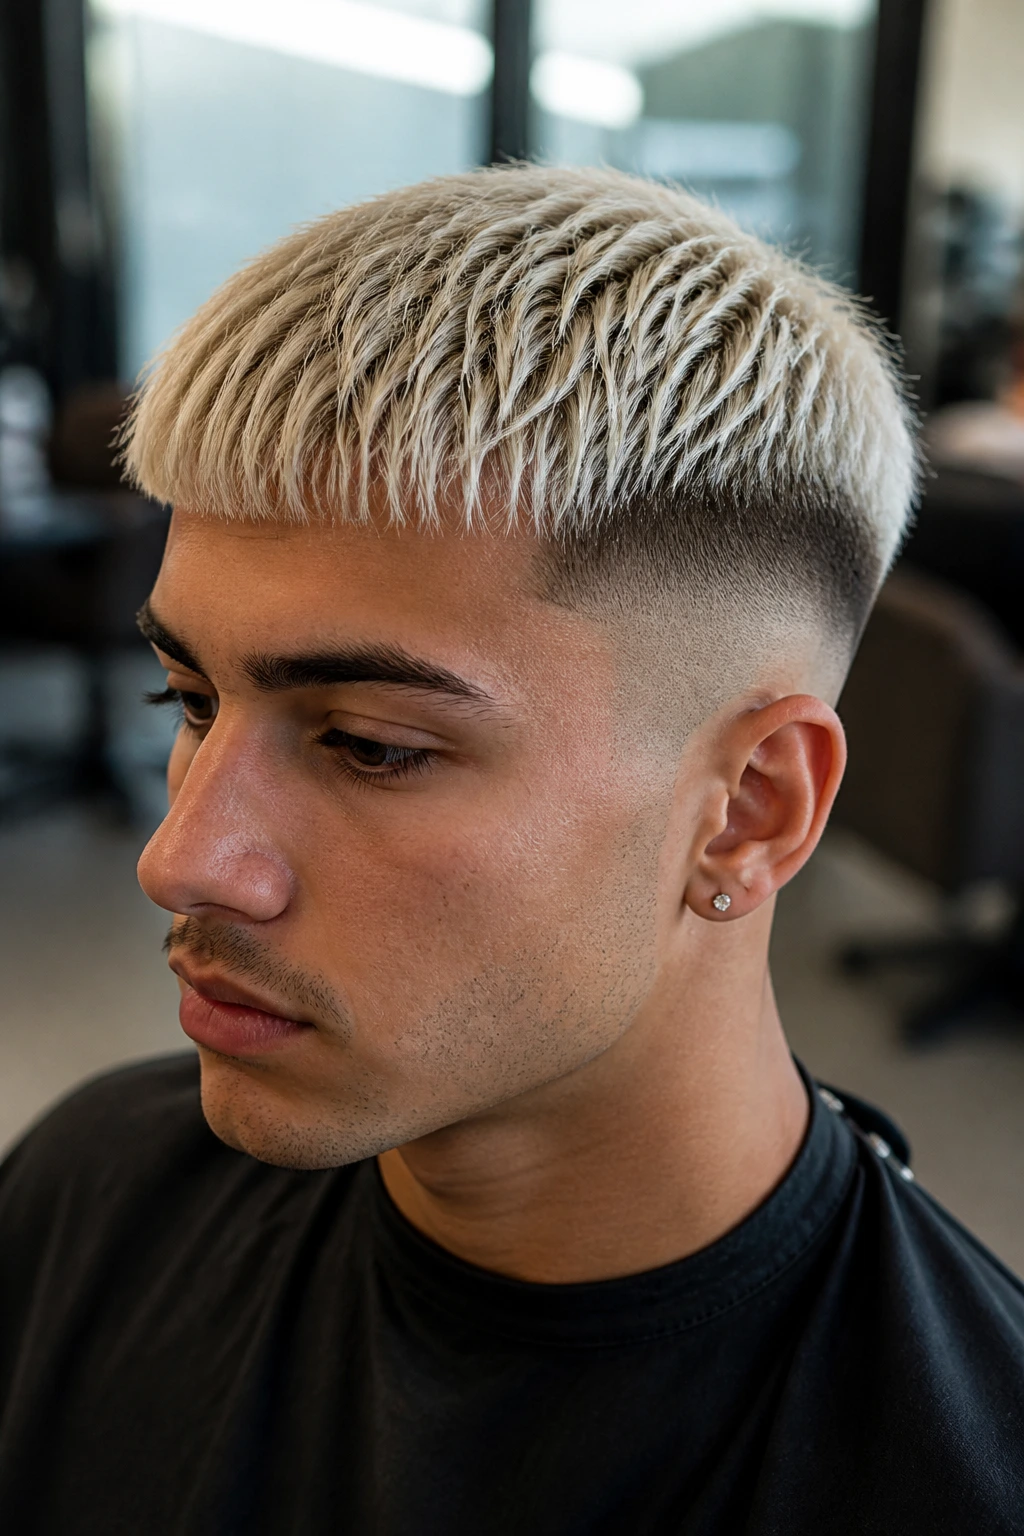
A bleached top Edgar uses color to push the front even harder visually. The lightened fringe sits against darker sides, so the haircut gets instant contrast before you even touch styling product. It can look icy, loud, or surprisingly clean depending on how even the color lift is.
The thing to watch is hair health. Bleach changes the texture, and if the top gets dry or brittle, the fringe can stop lying forward the way it should. You’ll need a conditioner that actually softens the hair, not just a shiny surface product that makes it look cared for from a distance.
Color works best when the cut underneath is already strong. Bleach cannot save a sloppy outline. It only intensifies what is already there. If the shape is good, though, the visual payoff is immediate.
20. Long Fringe Edgar Cut
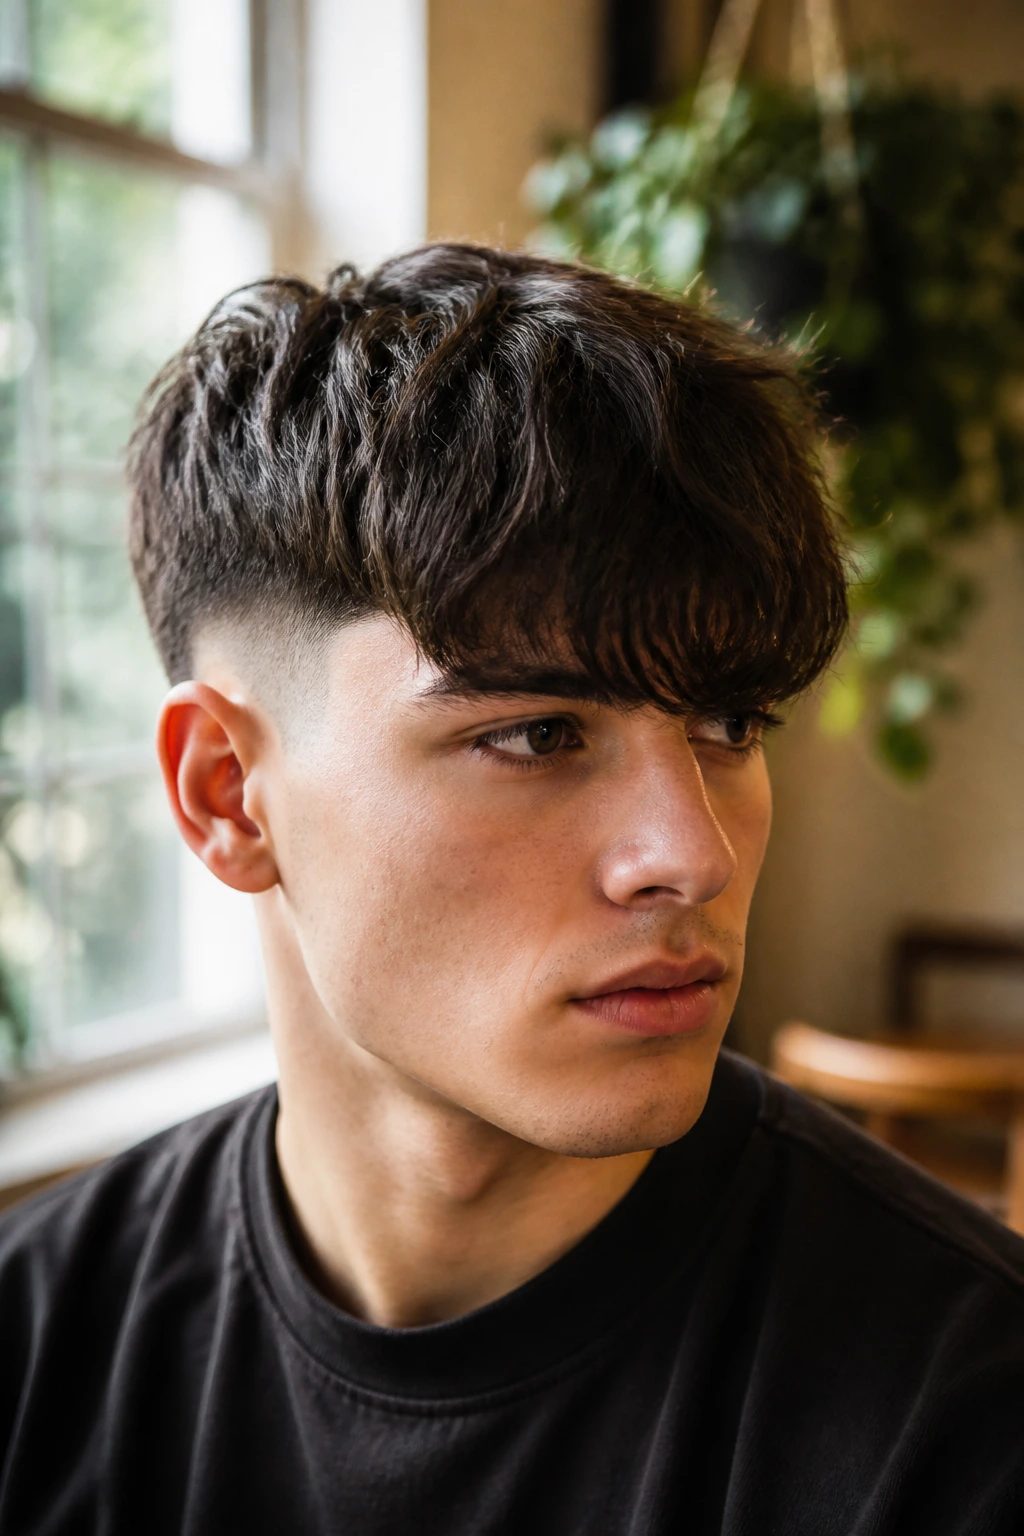
A long fringe Edgar pushes the front lower, sometimes grazing the brows or sitting just over them. That extra length makes the cut feel more dramatic and a little less severe, especially if the sides are kept tight enough that the front stays the focus.
This version needs control. A long fringe can look cool; it can also look like you forgot to get a haircut. The difference is in the shape at the edges and how the hair falls when dry. The ends should still be intentional, even if the line is softer than the classic blunt version.
If your hair naturally wants to fall forward, this is a useful way to work with it. You get more movement, more cover, and a haircut that can bend toward shag territory without losing its Edgar roots.
21. Mini Mullet Edgar Cut
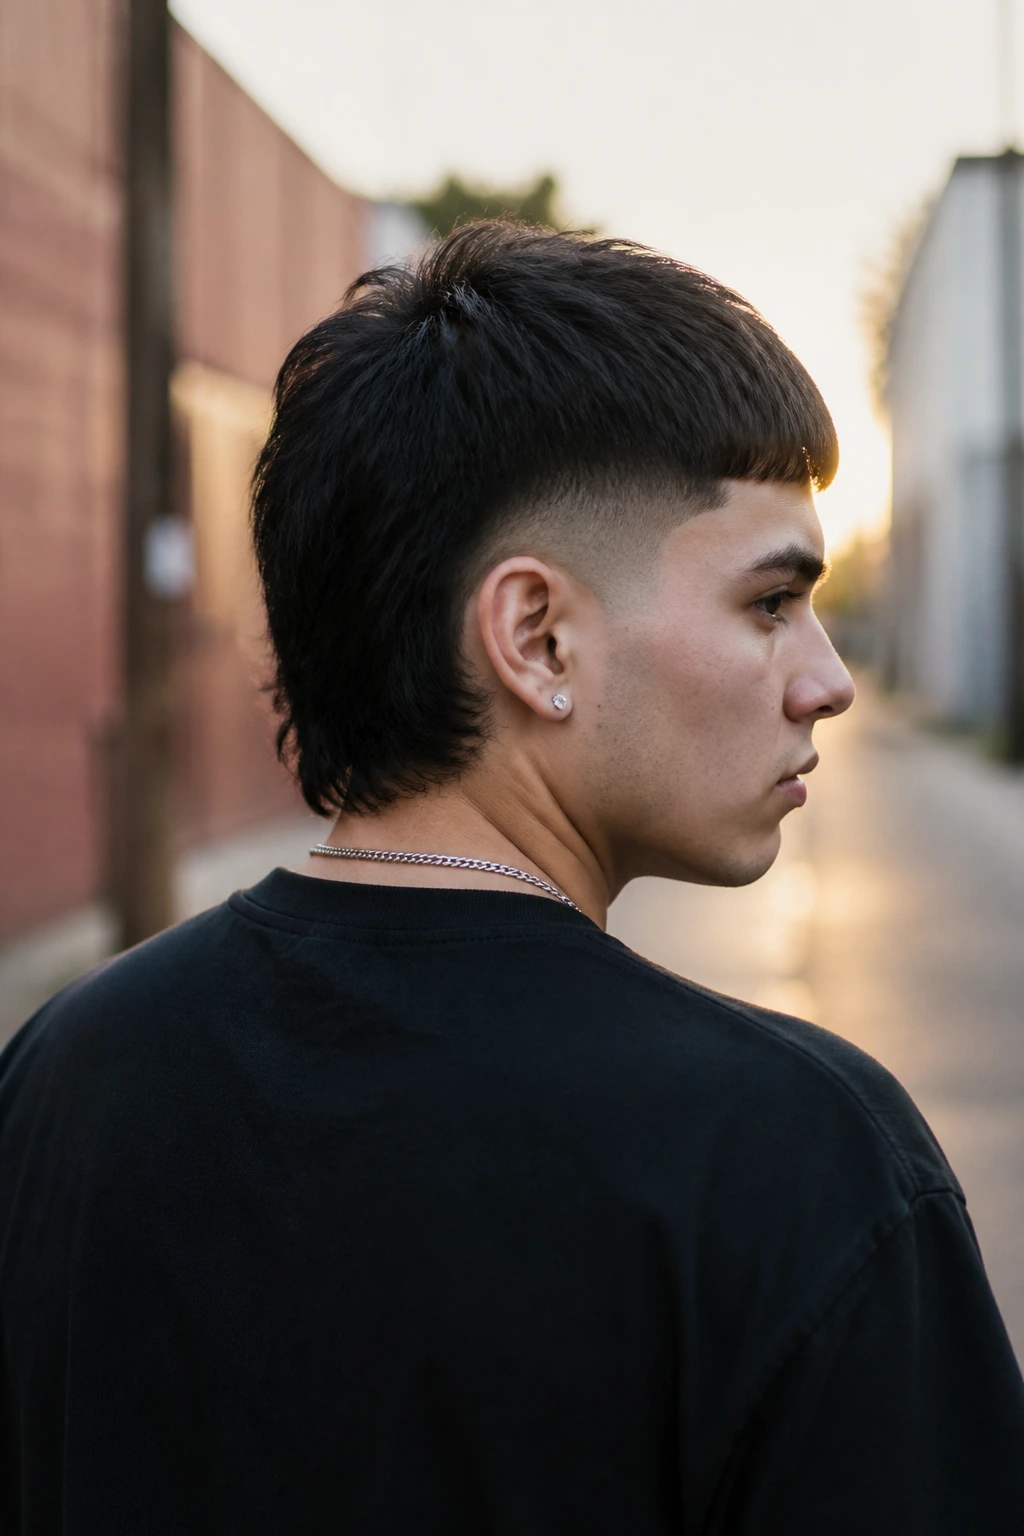
The mini mullet Edgar is the weird cousin people either love or avoid. The front still keeps the blunt Edgar shape, but the back is left a little longer, so the haircut carries a slim tail of length at the neckline. It’s a hybrid with attitude, and it works because the contrast between the sharp front and the softer back creates a clear profile.
This cut looks best when the back isn’t left to wander. It should be longer than the sides, yes, but not so long that it stops looking deliberate. Think of it as a controlled stretch, not a full throwback mullet.
It’s a good fit for someone who wants the front of an Edgar and the movement of a more rebellious cut. If your style leans skate, streetwear, or just plain subversive, this one has teeth.
22. Office-Friendly Soft Edgar Cut
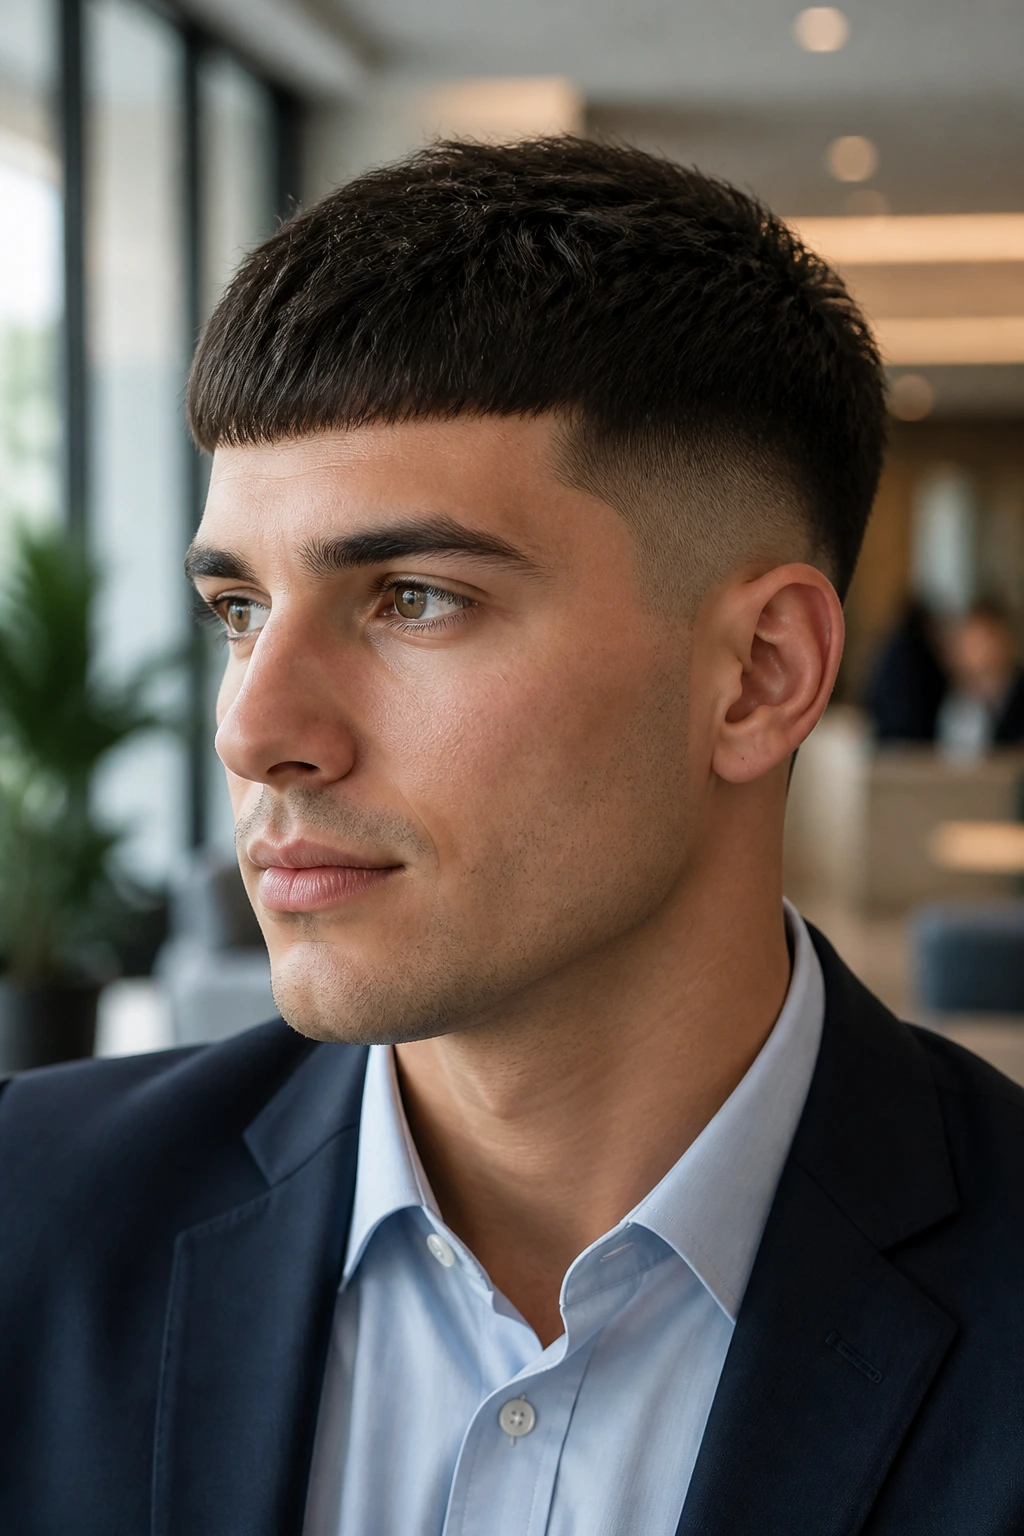
The office-friendly soft Edgar is the version I’d recommend to someone who likes the shape but needs it to behave in daylight meetings. The fringe still comes forward, but the line is softened a bit, the fade stays low or tapered, and the corners avoid that hard block that can feel too aggressive in conservative settings.
What makes it work is restraint. The haircut still has structure, but it doesn’t announce itself from across the room. A little texture on top, a neat taper at the sides, and a subtle front line are usually enough to keep the look polished without making it loud.
This is the cut for the person who wants the Edgar silhouette without the cartoon edge. It reads clean. It grows out sanely. And when you need to dress it up, it doesn’t fight the rest of your look.
Why the Edgar Cut Keeps Working When Other Fringe Cuts Fade Out
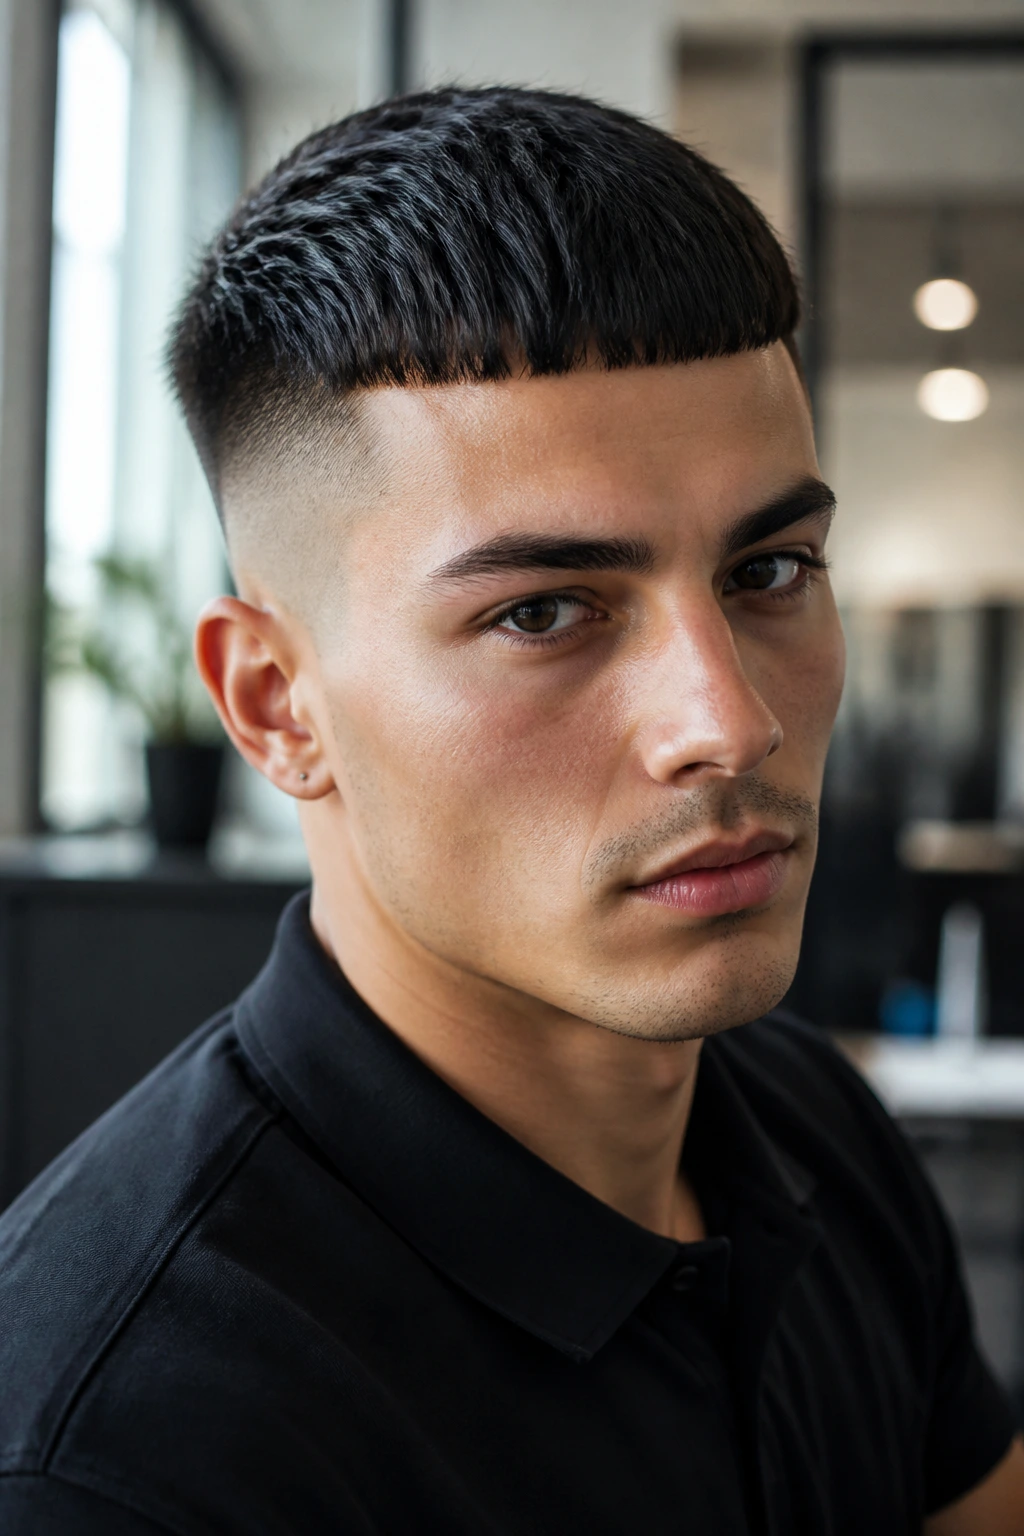
The Edgar cut survives because it does one thing most fringe cuts avoid: it commits. The front is not shy. The line is visible. The shape has an opinion. That can be polarizing, sure, but it also gives barbers something solid to work with, which is why the haircut keeps mutating instead of disappearing.
The real reason it has range is the control you get from three choices: fringe weight, fade height, and texture. Change one of those and the haircut changes mood. Change two and it can shift from hard-edged to soft, from teenage-chaotic to clean enough for a dress shirt. Change all three and you’re not really looking at one haircut anymore — you’re looking at a family of cuts built around the same front line.
It also plays nicely with real hair, which matters more than fashion talk. Thick hair needs debulking. Curly hair needs room. Straight hair needs balance. Fine hair needs density preserved. The Edgar shape gives each one a frame, then lets the barber adjust the rest without losing the core idea.
And that core idea is simple. A strong front line, cleaned-up sides, and enough structure to look intentional.
Essential Tools for These Edgar Cuts
-
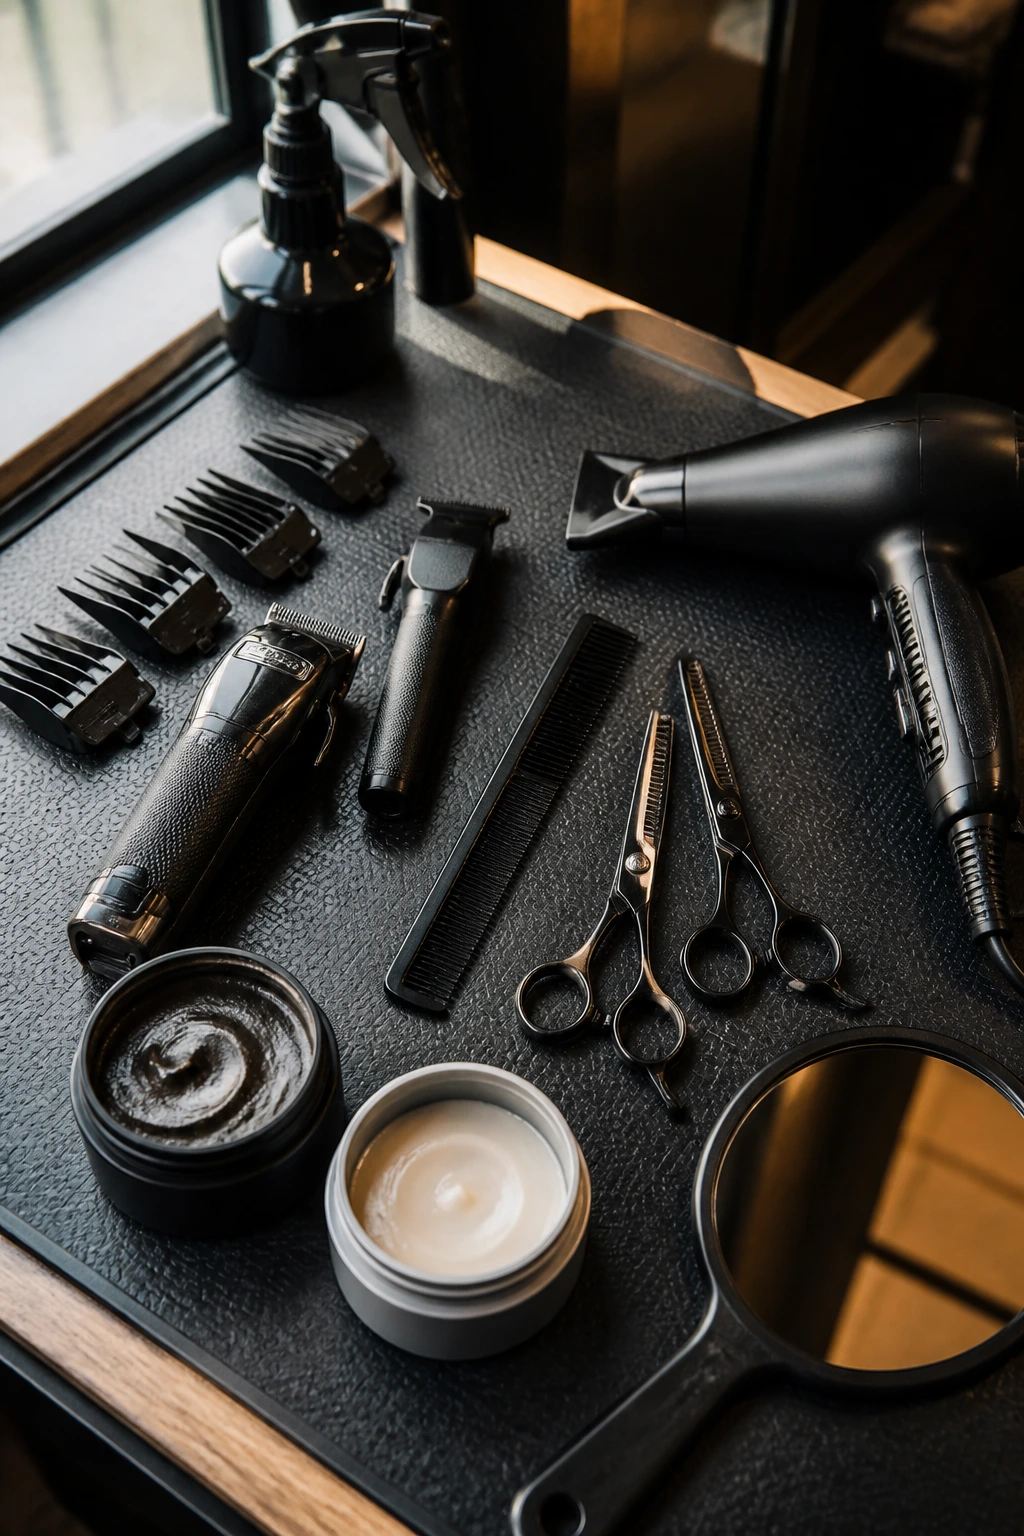
Clippers with multiple guards — A #0.5 through #3 range covers most fade work and makes it easier to keep the transition even.
-
Detail trimmer or edger — This is what sharpens the line at the forehead, temples, and sideburns without chewing up the shape.
-
Barber comb — Useful for lifting the fringe, checking weight, and making sure the top doesn’t sit crooked.
-
Spray bottle with water — Damp hair shows how the fringe falls and keeps the cut from bouncing around while you style it.
-
Texturizing shears or thinning shears — Best for thick hair and textured versions where you want control without bulk.
-
Blow dryer with a nozzle — Helps push the fringe forward and lock in direction before product goes on.
-
Matte clay or paste — Good for most Edgar cuts because it gives hold without shine, which matters when the fringe is the focal point.
-
Light styling cream or mousse — Better for curly, wavy, or fine hair that needs movement more than firmness.
-
Hand mirror — Handy for checking the back neckline and the fade from the side; small errors show up fast on this cut.
Smart Barber Communication and Product Shopping Tips
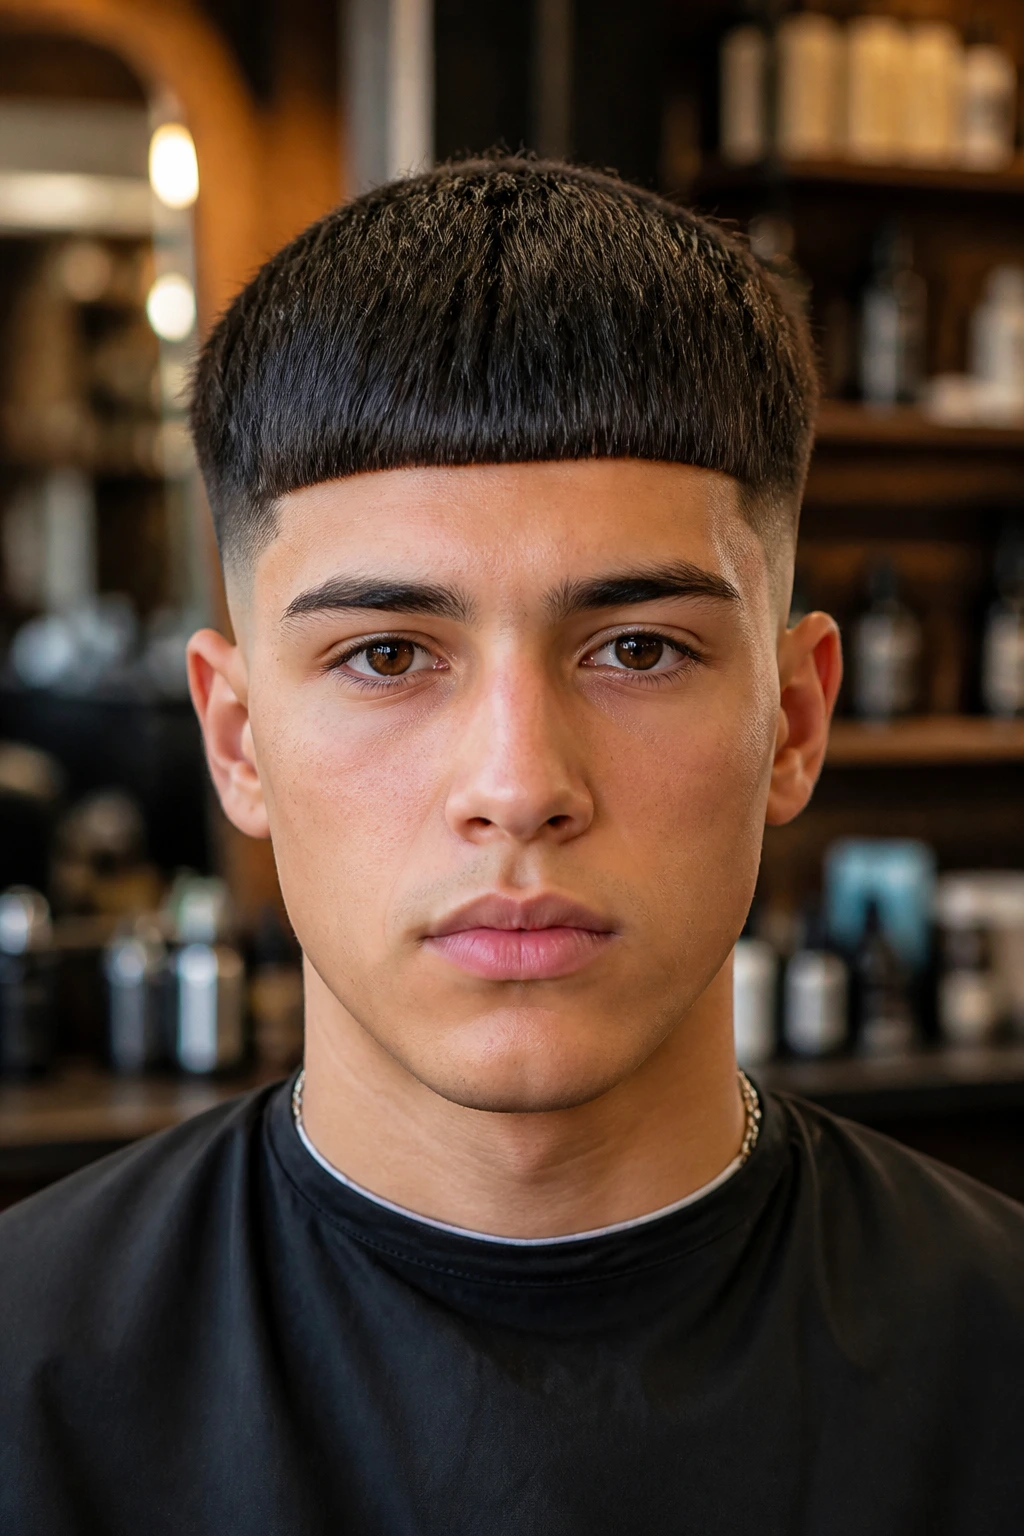
The biggest mistake people make with an Edgar cut is asking for the name and assuming that covers the details. It doesn’t. Tell the barber where you want the fringe to sit relative to the brows, how tight you want the sides, and whether you want a hard, squared front or a softer crop-style edge. That one conversation saves a lot of “it’s not quite what I meant” regret.
Bring a photo, yes, but bring one that matches your hair type. A picture of a straight-hair Edgar won’t help much if your hair is curly and dense. The barber can still borrow the shape, but the length and weight will need adjustment. I’d rather see a reference photo plus a real sentence like, “My hair grows forward and gets bulky at the temples.”
Product shopping is simpler than the internet makes it seem. Matte clay suits thick and straight hair. Light cream helps wavy and curly hair keep movement. Sea salt spray can give a loose Edgar a little grit before blow-drying. Skip glossy pomades unless you’re intentionally going for a wet finish; on an Edgar, shine can make the front look weighed down.
If your hairline sits high or your front hair is sparse, ask for a slightly longer fringe and avoid pushing the line too low. That keeps the cut from exposing more forehead than you wanted. Small detail. Big difference.
How to Wear These Edgar Cuts in Real Life
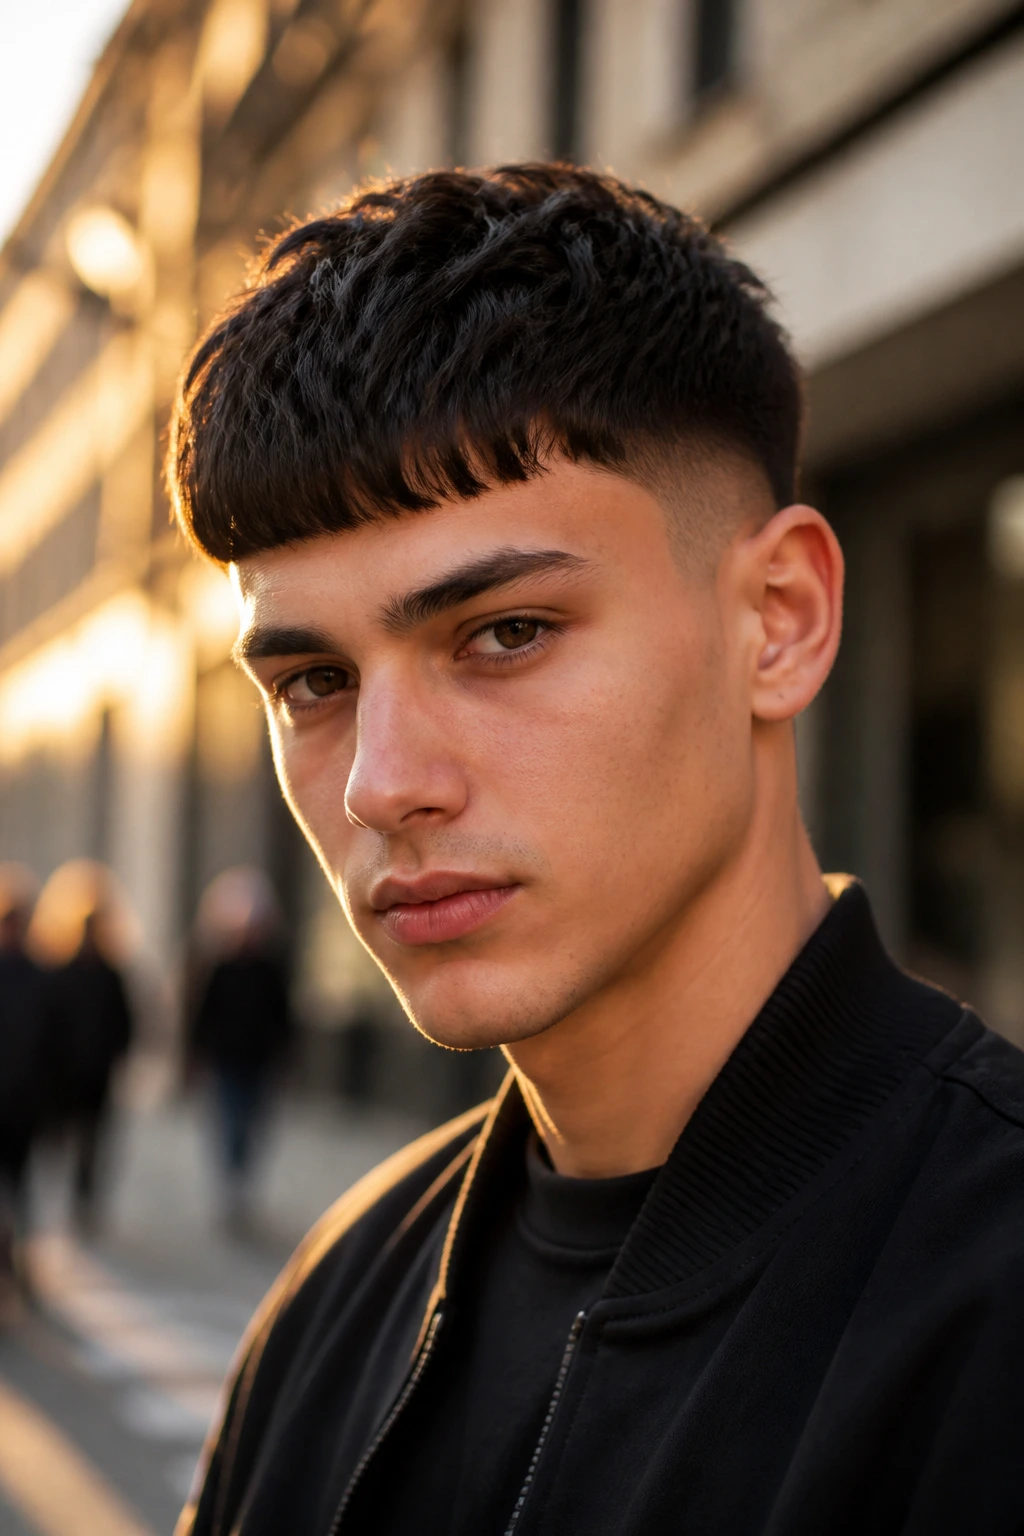
Presentation: Keep the fringe directed forward, but don’t smash it flat unless the style calls for it. A light blow-dry with fingers or a vent brush gives the front shape before product, and that shape is what keeps the cut from collapsing by lunchtime.
Accompaniments: The cut looks strongest with a tidy neckline, clean sideburns, and either a sharp beard line or no beard at all. Thick glasses can work too, but they ask for a more balanced fringe so the face doesn’t get crowded in the middle.
Portions: If you want the cut to read louder, leave more length on top and ask for a higher fade. If you want it quieter, keep the top shorter and the fade lower. A quarter inch at the front can change the whole mood. Seriously. Haircuts are picky like that.
Best Setting: The skin fade and design-line versions suit nights out or bold streetwear. The taper, French crop, and soft Edgar versions fit school, office, and anywhere you need the haircut to behave without disappearing.
Style Boosters That Change the Mood
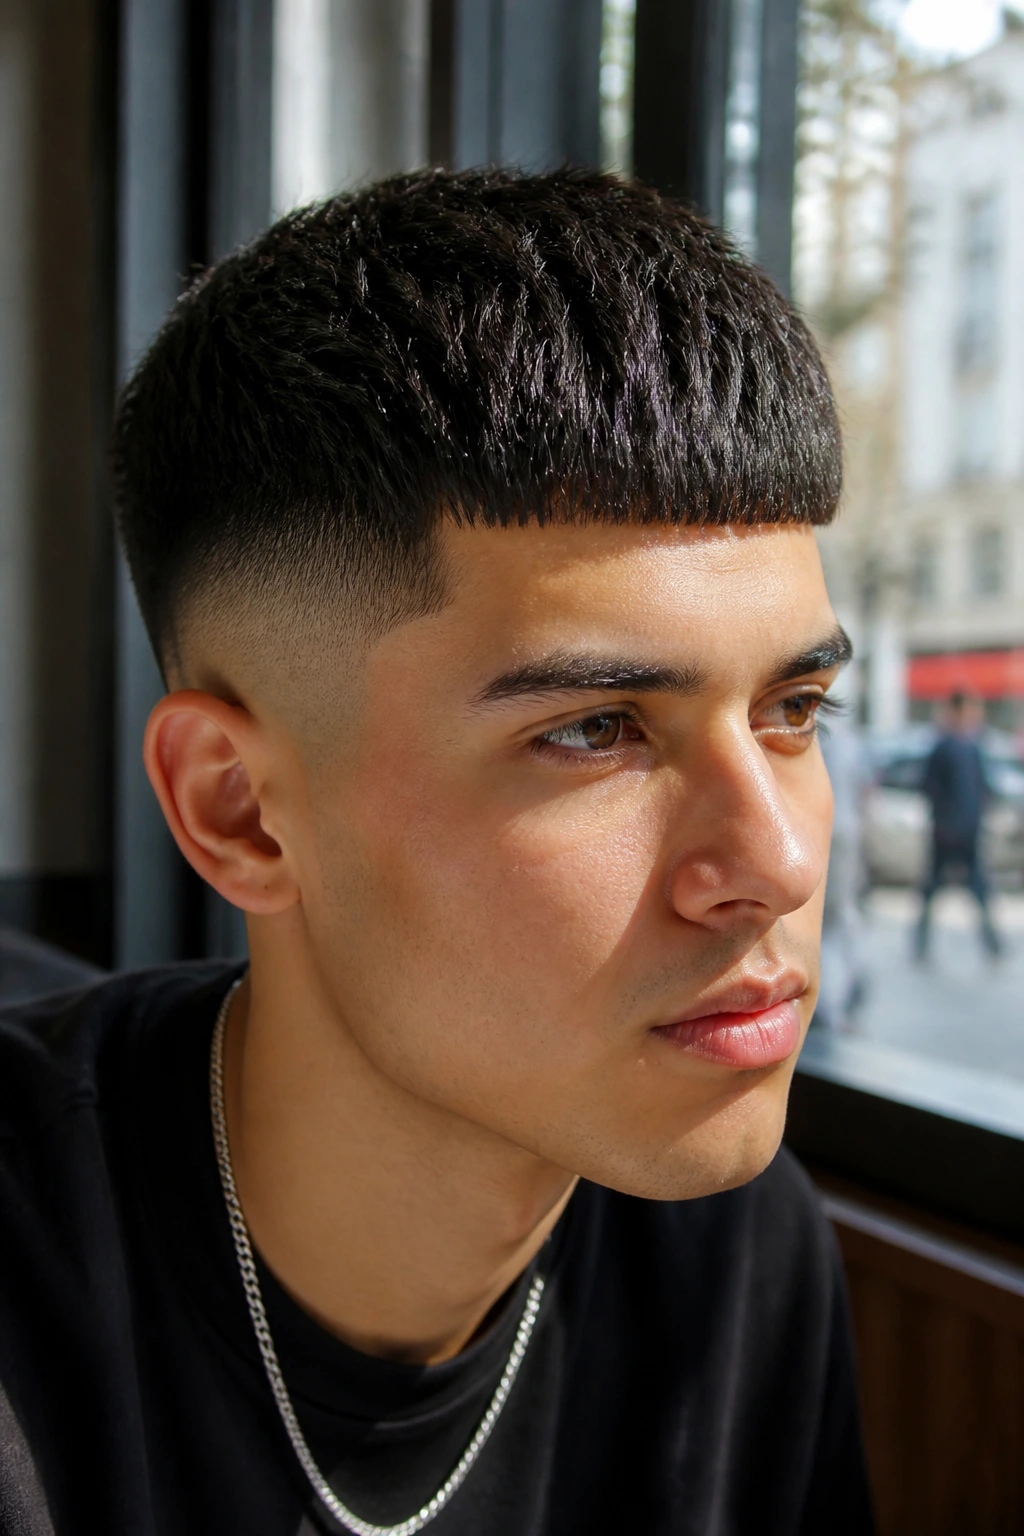
Texture Boost: A puff of sea salt spray at the roots before blow-drying can keep the fringe from lying dead flat, especially on straight or fine hair. Use a small amount. Too much and the hair gets dry, gritty, and annoying to touch.
Customization: Ask for a hard part, a temple fade, or a small design line if you want the cut to feel more personal. Each one changes the silhouette in a different spot, which means you can keep the Edgar front while steering the rest of the look somewhere else.
Finishing Touch: Matte clay gives the front a controlled, dry finish; styling cream makes wavy and curly versions move more naturally. I’d avoid heavy shine unless you’re deliberately leaning into a glossy, vintage feel — which most Edgar cuts are not.
Make-It-Yours: For thick hair, keep the bulk removed through the top. For fine hair, preserve density and avoid over-thinning. For curly hair, leave extra room in the fringe. For a softer look, keep the corners rounded instead of perfectly squared.
Growing It Out, Maintaining It, and Refreshing the Shape
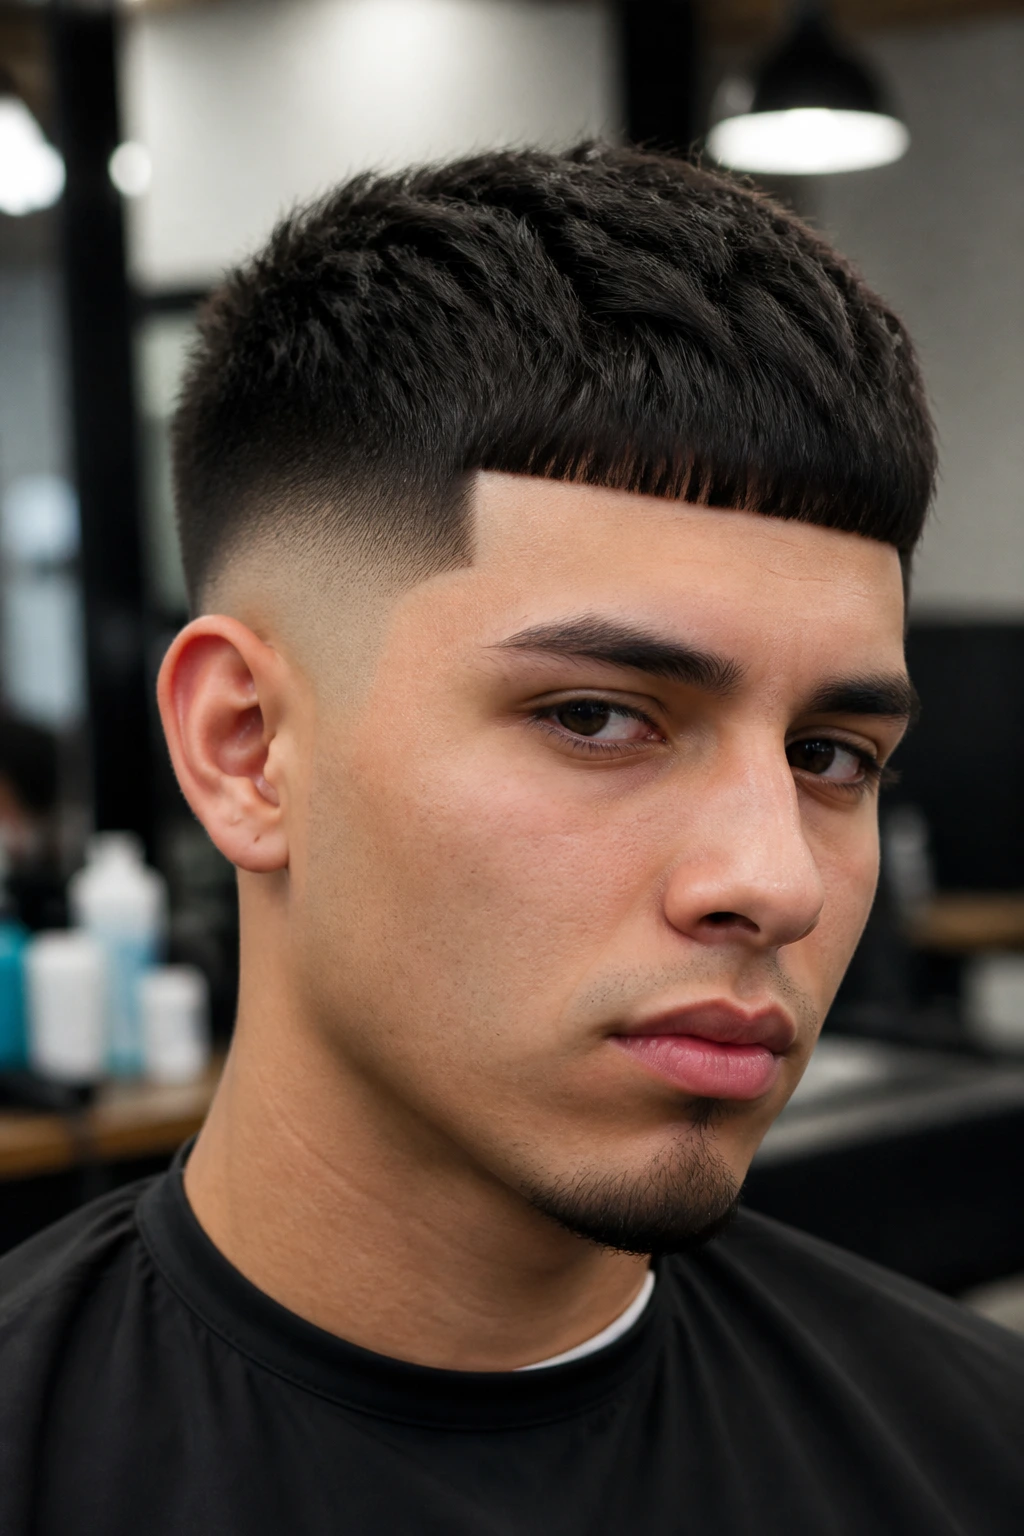
An Edgar cut looks best with regular cleanup, not heroic rescue missions. Most versions need a barber every 2 to 3 weeks if you want the line to stay crisp, and the skin fade or hard-part versions usually show wear faster than the taper or soft crop versions. That’s not a flaw. It’s just the haircut being honest about itself.
The front is the first thing to go soft. When the fringe starts touching the brows in a way that looks accidental, the shape loses its snap. A quick shape-up around the temples and forehead can buy you time between full haircuts, and sometimes that’s all you need.
At home, keep the routine simple. A damp fingertip reset in the morning, a blow-dry if the fringe sleeps badly, and a little matte product on dry hair if the front starts splitting. If you wear a wave cap, durag, or satin pillowcase, you’ll flatten the fringe less overnight. That sounds minor. It isn’t. Sleep does a number on this cut.
For grow-out, ask your barber to leave a touch more length at the front and soften the fade slightly instead of chasing the hardest possible outline. That gives you a cleaner transition as the haircut ages, which means you won’t hate it in week three.
Variations and Adaptations to Try
The School-Ready Soft Edgar: Keep the fringe blunt but not severe, and use a low taper instead of a skin fade. This version keeps the shape without drawing too much attention. It’s the one I’d call safest without being boring.
The High-Contrast Skin Fade Edgar: Push the sides down to the skin and leave the fringe dense. This is the loud version, the one that makes the front line pop immediately. It needs maintenance, but the payoff is clean and hard-edged.
The Curly Crown Edgar: Leave extra room on top for curl pattern, then clean the sides tightly. A diffuser and light cream keep it from puffing out. Good curls make this version look almost sculpted.
The Bleached Front Edgar: Lighten the top or just the fringe for sharp contrast. Keep the haircut underneath strong, because color only makes a weak shape more obvious. Best when you want the cut to feel more graphic.
The Mini Mullet Edgar: Keep the front blunt and the neckline longer than the sides. It’s a little rowdier and works best when the back is controlled, not shaggy. The shape says you meant it.
The Office-Neutral Edgar: Soften the corners, use a taper, and keep the top shorter. This is the cut for people who want the profile without the shout. It still looks like an Edgar. Just one that won’t start fights with a dress code.
Common Mistakes to Avoid
The first mistake is letting the fringe get too heavy. The symptom is easy to spot: the hair starts folding over the brows and losing the squared edge that makes the cut read clean. The fix is a slightly shorter front and a barber who removes some bulk instead of leaving it all up there.
Second, people ask for the fade too high without thinking about face shape. A high fade can make some heads look longer and some foreheads look wider. If you’re unsure, start lower. You can always go higher on the next appointment.
Third, shiny product ruins a lot of Edgar cuts. The hair stops looking crisp and starts looking wet, which flattens the geometry. Matte clay, paste, or a light cream usually gives a cleaner result.
Fourth, ignoring the growth pattern at the front creates frustration fast. If you have a cowlick or a strong forward whirl, the fringe won’t sit flat unless it has enough length and a little training. That means blow-drying in the right direction, not just slapping product on and hoping.
Fifth, some people overline the hairline with a trimmer until it looks fake. The line should sharpen the shape, not erase every natural edge. If the hairline already sits high, keep the line-up subtle and let the cut breathe a little.
Frequently Asked Questions
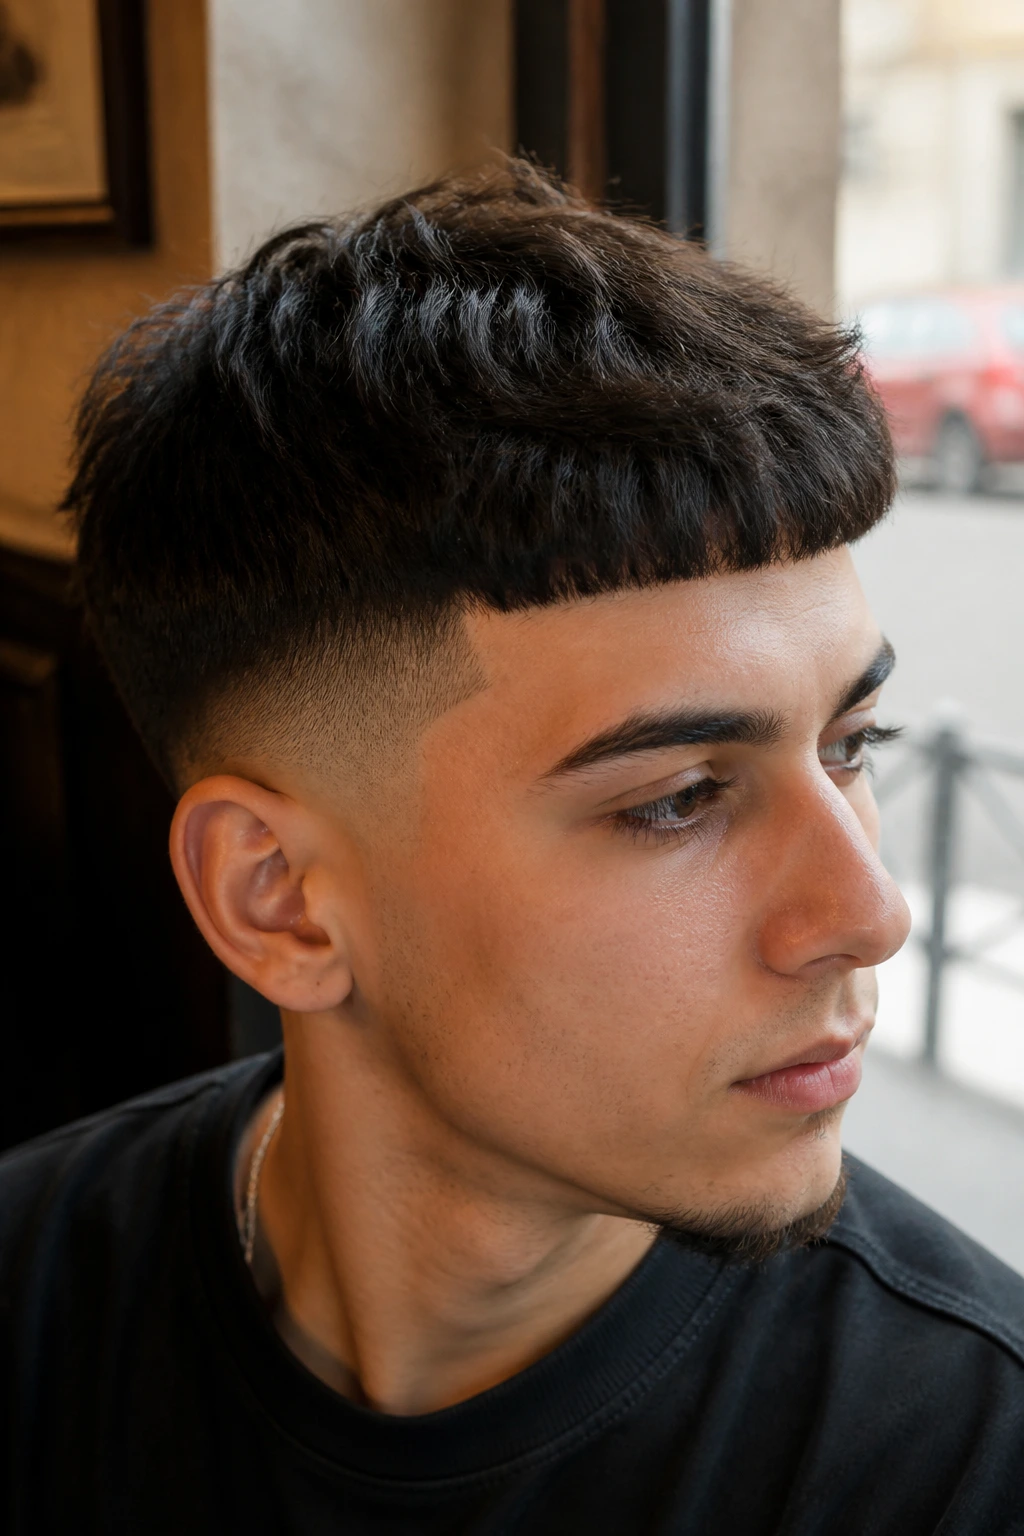
What exactly is an Edgar cut?
It’s a short men’s haircut with a forward fringe, usually paired with a fade or taper on the sides. The top front edge is the defining feature: straight, controlled, and usually cut square across the forehead.
What face shapes work best with Edgar cuts?
Most face shapes can wear some version of it, but the fade height matters. Rounder faces often look better with more height on the sides, while longer faces usually do better with a lower fringe and less dramatic contrast.
How often should I get an Edgar cut cleaned up?
If you want the line to stay sharp, every 2 to 3 weeks is the sweet spot. Skin fades and hard parts need more frequent refreshes than taper versions, which grow out a little more gently.
Can curly hair work with an Edgar cut?
Yes, and it can look excellent if the barber leaves enough length in the front. The curls need room to sit forward, so don’t force them into a flat block. A diffuser and light cream help keep the shape controlled.
What should I tell my barber so they get it right?
Ask for a forward fringe with a specific fade height, then explain whether you want blunt corners or a softer crop-style edge. If your hair grows forward, has cowlicks, or is very thick, say that before the clippers start moving.
Is an Edgar cut office-friendly?
The softer versions are, especially a taper Edgar or a French crop Edgar. Keep the fade low, the line subtle, and the fringe neat rather than aggressively squared. The haircut can behave if you let it.
What do I do if the fringe looks too boxy?
Ask for a bit of texture through the top and soften the corners at the temples on the next cut. In the meantime, use less product and work the front forward with your fingers instead of a comb. That usually takes the blockiness down a notch.
Can I style an Edgar cut at home without much product?
You can, if your hair already falls forward. A quick blow-dry and a pea-sized amount of matte paste is often enough. The cut should carry most of the shape on its own; product is there to clean up the edges, not build the haircut from scratch.
Why This Cut Keeps Getting Repeated
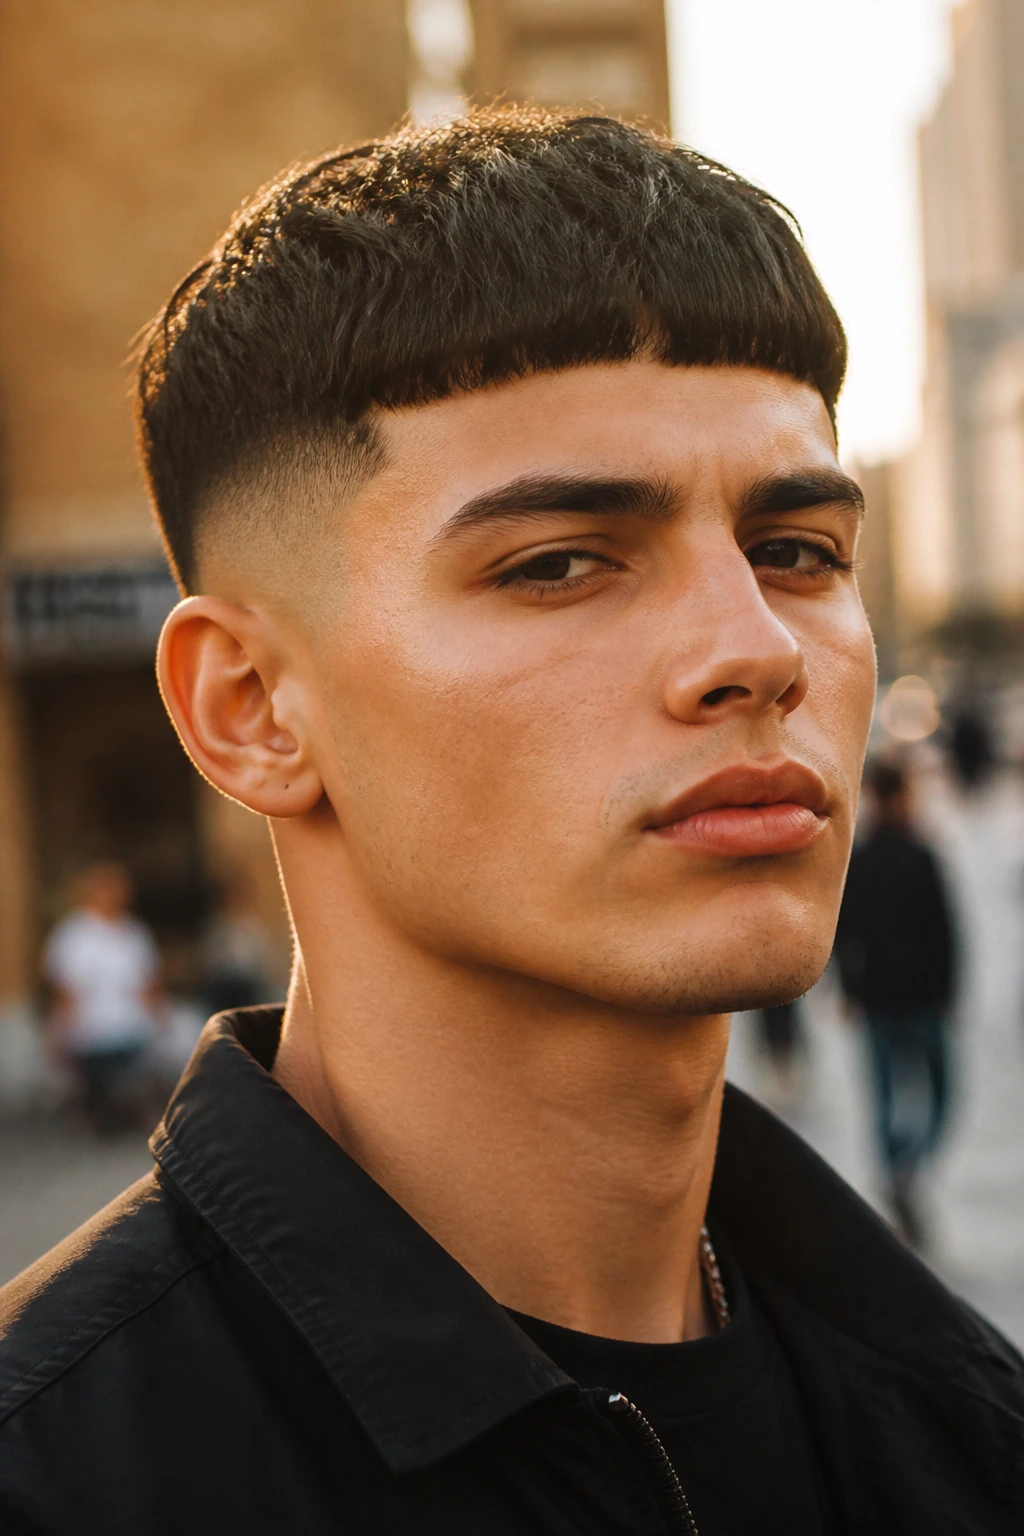
The Edgar cut keeps showing up because it solves a real grooming problem: it gives short hair a front edge. Most men’s cuts fade into the sides and disappear. This one stays present. It frames the face hard enough to matter, then gives you room to turn the volume up or down.
That’s the part people miss. The Edgar isn’t one haircut. It’s a shape system. Keep the fringe blunt and the rest changes around it. So pick the version that suits your hair, your face, and the kind of attention you actually want. Start subtle if you need to. Sharper later is easier than fixing a cut that went too far on day one.
