



Long hair in summer has a way of turning into a neck warmer the minute the air gets sticky. The ends snag on a tote strap, the crown fuzzes up from a little sweat, and by midafternoon you’re fighting your own hair instead of enjoying the day. Braids fix the practical problem first, then they do the pretty part.
The best summer braid styles for long hair don’t all try to do the same job. Some keep every strand pinned tight and neat. Others let a few pieces drift loose so the style feels softer and less severe. A few are built for speed, which matters when you’re standing in front of a mirror with damp hair and no interest in a 40-minute styling session.
I have a soft spot for styles that look deliberate even after a windy walk, a sweaty commute, or a quick dip in the pool. That’s the real test. Not whether the braid looks flawless in a still photo, but whether it still holds shape when the day gets a little messy. Start with the ones that solve your biggest summer headache first.
Why These Braids Earn Their Keep in Hot Weather
- Heat Relief: Braids pull long hair away from the neck, so you stop getting that clammy strip of hair stuck to your skin.
- Humidity Control: Tighter patterns and clean parting keep frizz from spreading faster than it would with loose waves.
- Long-Hair Payoff: Extra length gives these styles more shape, more swing, and more room for wraps, loops, and tucked ends.
- Speed Options: Some braid looks take five minutes and a mirror; others need patience, but you can choose based on the day.
- Accessory Friendly: Ribbons, cuffs, beads, scarves, and pins land better when the braid gives them something solid to hold onto.
- Style Range: The same basic braiding skill can look sporty, polished, romantic, or sharp, depending on how tight you set the sections.
1. Loose Dutch Braid Pigtails
A pair of Dutch braids is what I reach for when long hair feels too heavy to think about. The braid sits on top of the section instead of disappearing into the hair, so you get a raised shape that reads clearly even from the back. It’s practical, but not boring. That matters.
Start with a clean center part, then braid both sides straight back, keeping the first inch near the scalp snug and the rest a little softer. If you want more fullness, gently tug the outer edges of each braid after it’s secured. Don’t yank the center strands. Just widen the braid a touch so it looks thicker and less helmet-like.
Best for: thick hair, humid days, and anyone who wants two braids without the severe look.
Keep in mind: the braids sit comfortably under sunglasses and stay put when you’re moving around.
2. Sleek Single French Braid
A single French braid is the quiet overachiever of summer styling. It keeps the hair contained, it works with almost any outfit, and it looks more polished than a simple three-strand braid without asking much more from you. When long hair is clean but a little slippery, this braid holds its line well.
The key is control at the crown. Take small sections as you feed in hair, and keep the braid centered so it doesn’t drift to one side by accident. A tiny bit of mousse at the roots gives grip without turning the hair stiff. Finish with a clear elastic and smooth the tail with one drop of serum.
I like this style when the day starts active and ends somewhere nicer. It moves easily from errands to dinner.
3. Boxer Braids With Soft Ends
Why do boxer braids work so well in heat? Because they do the hard part first: they flatten the top, keep the scalp tidy, and lock the bulk of the hair into two clean tracks. The trick is not making them look too rigid. If every section is pulled tight like a track athlete’s braid, the style can feel harsh.
Leave the tails a little softer. Curl the ends, crimp them lightly, or wrap each tail around a small elastic so the finish feels less severe. A middle part sharpens the shape, but a slightly off-center part can soften the whole look if your face reads better that way.
How to keep them from looking too severe
A dab of lightweight edge gel at the hairline is enough. You do not need to plaster the whole scalp.
4. Fishtail Side Sweep
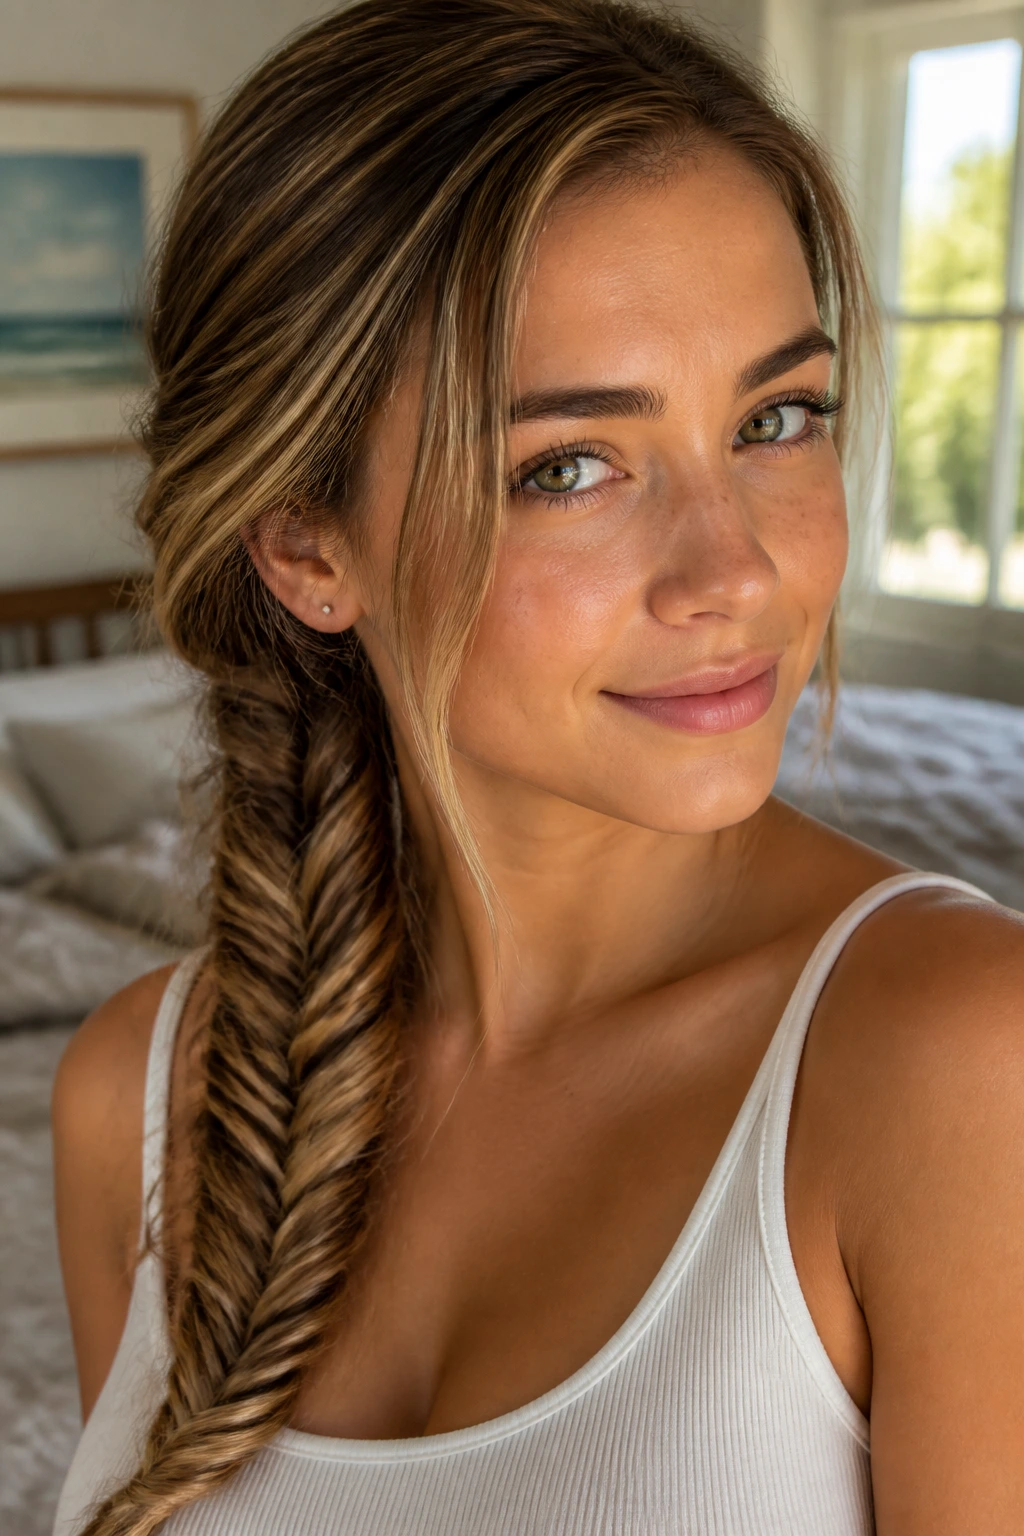
A fishtail braid looks fancier than it is. That’s the part I like. The weave uses tiny outer pieces instead of three big sections, so the finished braid has that tight, woven texture that catches the eye without needing a lot of decoration.
This style works especially well when you want the braid to sit over one shoulder. Long hair gives the tail enough length to show the pattern, which is half the point. The braid can start high at the temple or lower near the ear, depending on how romantic you want it to feel. A little texture spray helps the pieces stay separated.
Best for: straight or softly waved hair, because the pattern shows more clearly.
Skip the heavy cream: it makes the fishtail collapse into a chunky rope instead of staying crisp.
5. Crown Braid Halo
A crown braid is one of those styles that sounds complicated and ends up feeling calm once you start sectioning. The braid wraps around the head like a halo, which keeps long lengths off the neck and shoulders while giving the whole style a neat outline. It’s a good choice when you want hair up without a bun.
I prefer it on second-day hair. Freshly washed hair can be too slippery, and the braid slips around before you finish pinning. A little dry shampoo at the roots adds grip and keeps the scalp from looking shiny. Secure the braid with bobby pins that match your hair color, and tuck the ends carefully so the circle looks continuous.
It’s one of the few braid styles that can look formal with almost no extra effort.
6. Pull-Through Pony Braid
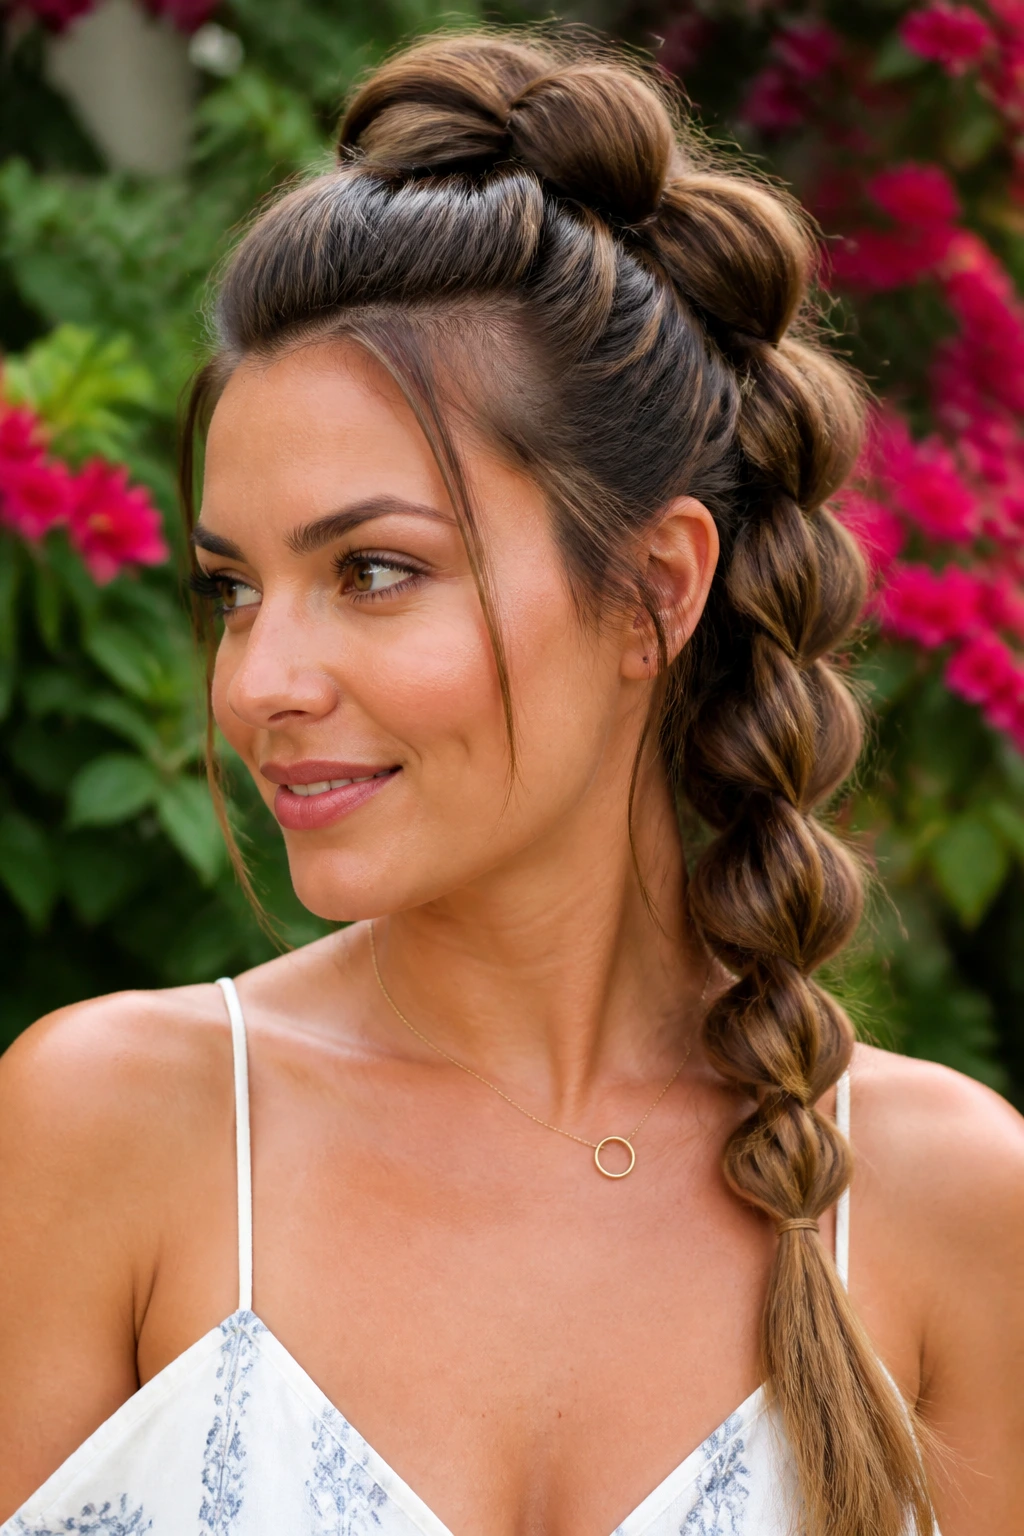
The pull-through braid is what you choose when you want a braid that looks thick from across the room. It uses a stack of small ponytail sections instead of a classic three-strand weave, so long hair gets a lot of visual payoff. More importantly, it’s forgiving. If one section isn’t perfect, the whole braid still works.
Why it reads bigger than a standard braid
The loops create bulk without requiring extra hair, which is handy if your long hair is fine or layered. You’ll need several clear elastics, and you should place them evenly so the braid doesn’t sag in the middle.
Quick fact: the tighter your spacing between elastics, the more polished it looks; wider spacing gives you a messier, fuller shape.
7. Braided Half-Up Top Knot
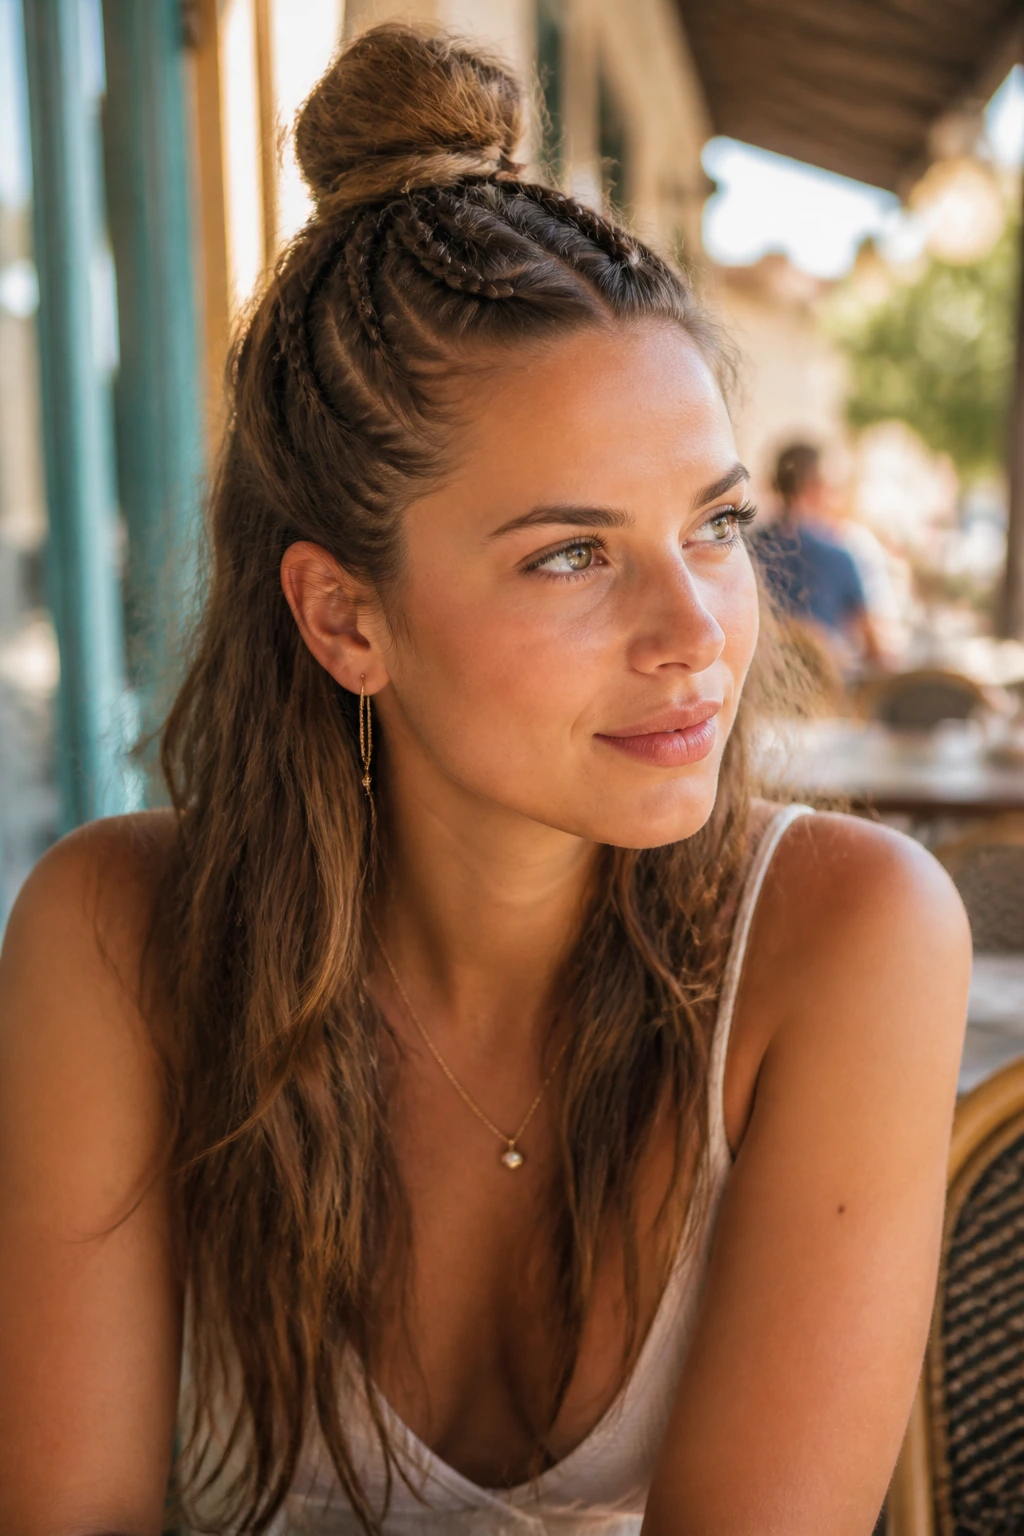
Sometimes the smartest move is not braiding all the hair. A half-up braid into a top knot keeps the crown secured and leaves the length free, which helps if you want movement without the full weight on your neck. It’s the style I’d pick for a hot day that still includes some indoor plans.
Braid the top section back from the temples, then twist or knot the ends into a small bun at the crown. Let the lower lengths stay straight, waved, or lightly curled. The contrast is what makes it work. If your layers pop out too much, smooth them with a touch of cream on the palms before you gather the top section.
This one lives in the sweet spot between casual and put-together.
8. Waterfall Braid on Long Layers
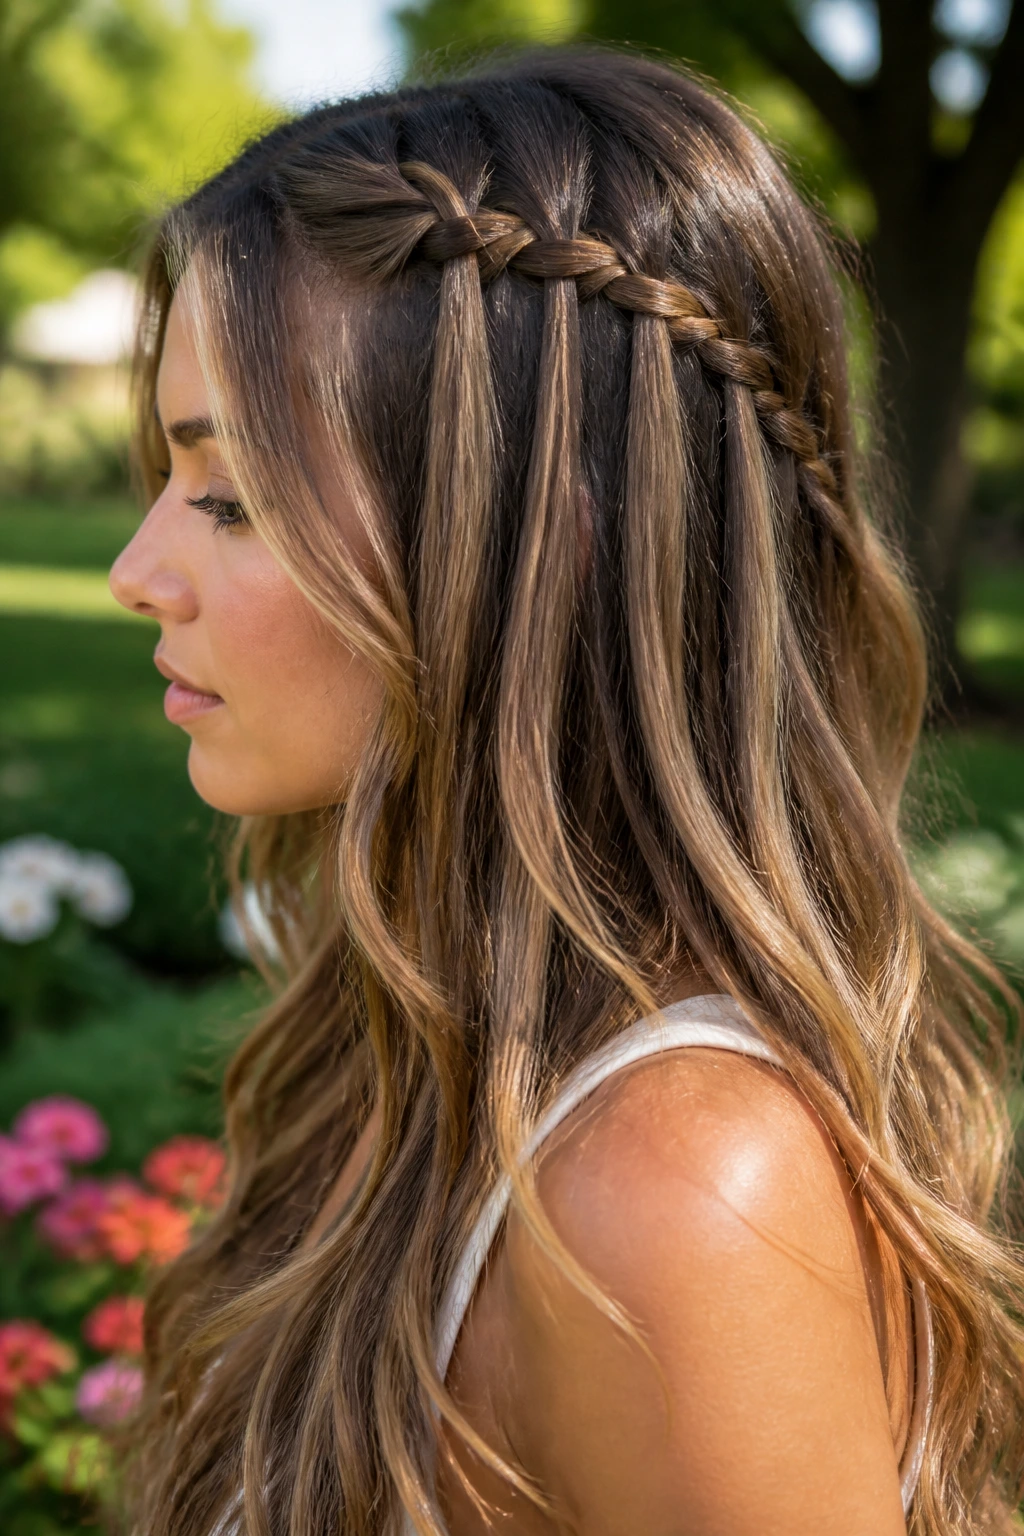
The waterfall braid is all about controlled release. Instead of pulling every strand into the braid, you drop one piece each time and replace it with a new section from above. That lets the hair fall in little curtains through the braid, which looks soft and airy on long layers.
It’s not the best braid for very slippery hair or for a day with heavy wind. The loose pieces can shift. But on smooth, lightly textured hair, it gives a pretty line along one side of the head without trapping all the hair. I like it with long layers because the varied lengths create movement instead of making the style look thin.
A few discreet bobby pins behind the ear keep the shape from slipping.
9. Rope Twist Ponytail
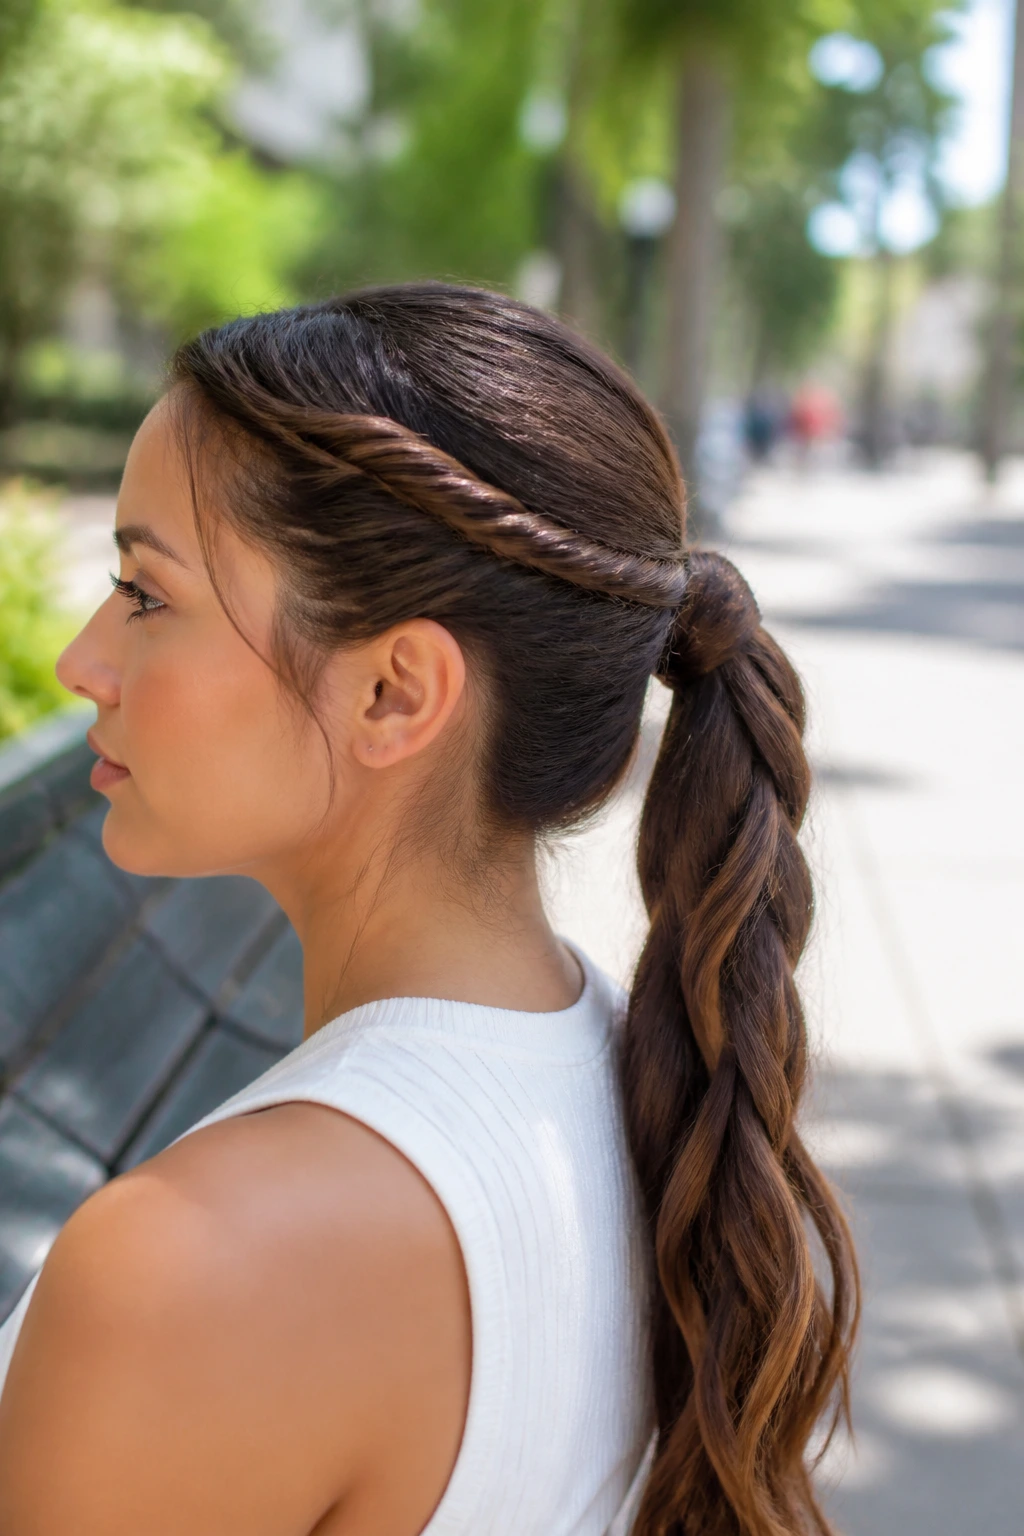
Two sections. One twist. That’s the whole charm of a rope braid, and long hair gives it enough length to show off the spiral. It’s faster than most braids, which makes it useful on mornings when your hands are moving faster than your brain.
Twist both sections in the same direction, then wrap them around each other in the opposite direction. That opposite movement is what locks the rope in place. If you twist both steps the same way, the braid loosens and falls apart. Finish with a tight elastic and smooth the tail if you want a cleaner line.
It’s the braid equivalent of a crisp white shirt. Plain, but not dull.
10. Braided Low Bun
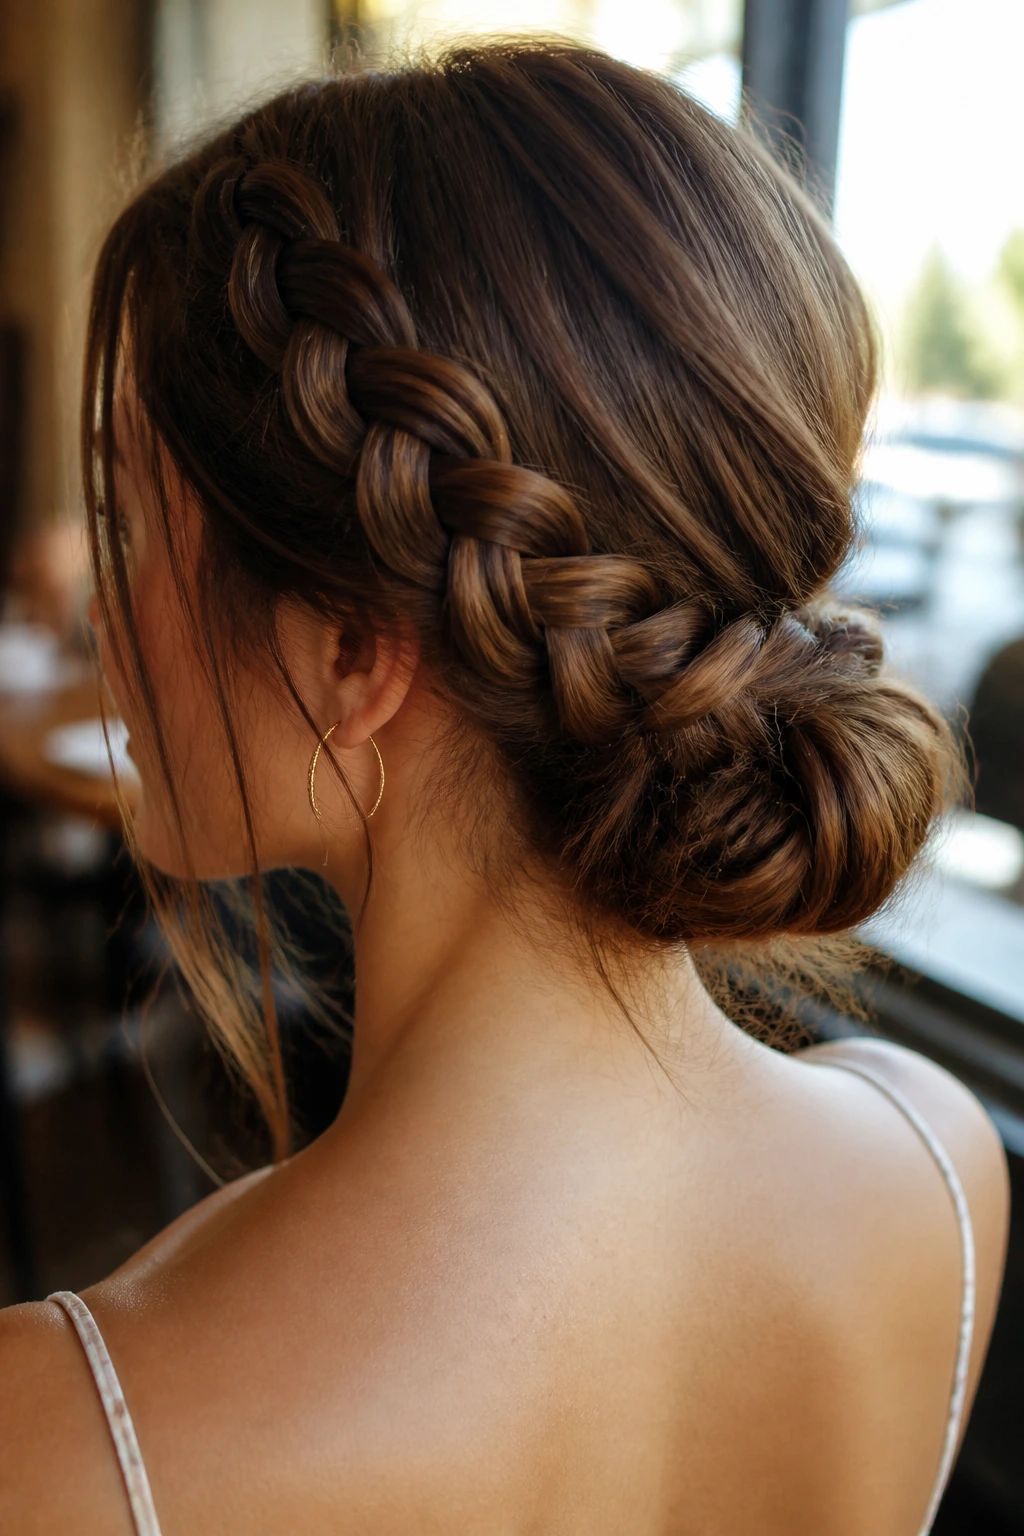
If you need hair off your neck by noon, the braided low bun is the workhorse. Braid the length first, then coil it at the nape and pin it in place. The braid gives the bun texture, and the bun keeps the long tail from swinging around.
I like this style when I know the day will involve heat, walking, and a little bit of sweat. It stays calmer than a loose bun because the braid locks the length into a smaller shape before you tuck it. Use two crossed bobby pins if the bun feels heavy. One pin usually isn’t enough for long hair.
This is not the flashiest option. It is one of the most useful.
11. Knotless Braided Ponytail
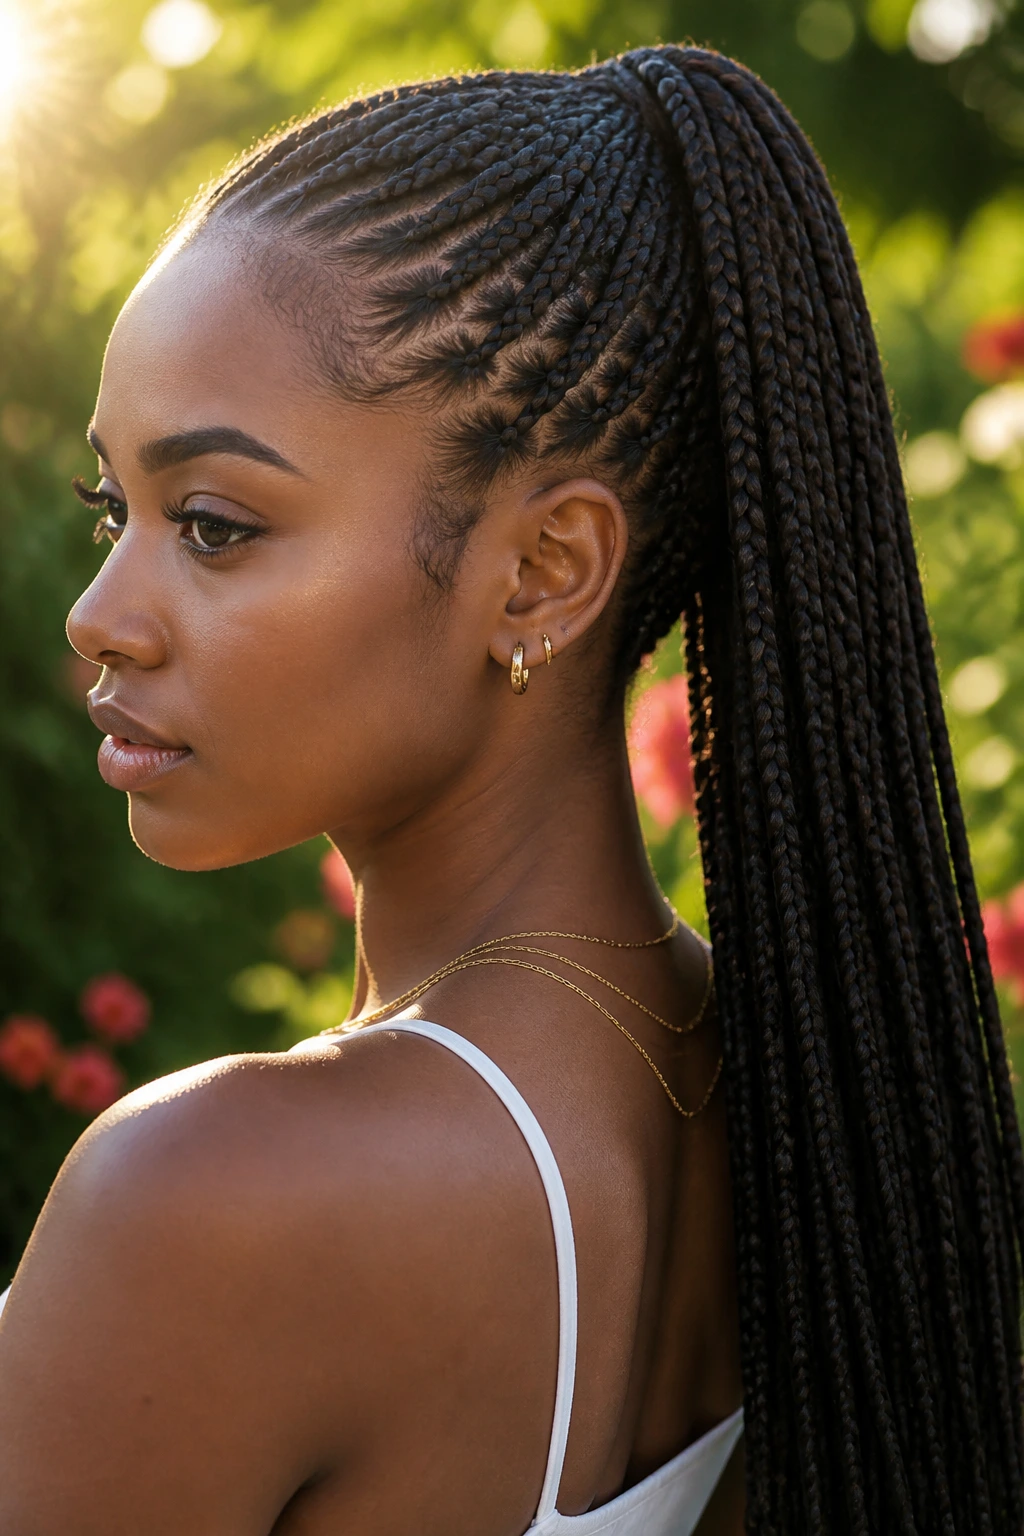
A knotless braided ponytail gives you the sleek root of a protective style without the bulky start you see in older braid methods. The feed-in pattern helps the crown lie flatter, which is a relief when long hair already feels dense. The ponytail tail can hang straight, waved, or curled at the ends.
The cleanest version starts with small sections near the scalp and gradually adds length as you braid down. That keeps tension more even. If you’re doing this on natural long hair without extensions, the same idea still applies: start neat at the base, then braid the length into one solid ponytail that doesn’t puff out halfway down.
It’s a good style when you want hold, shine, and a long line through the back.
12. Boho Braids With Loose Waves
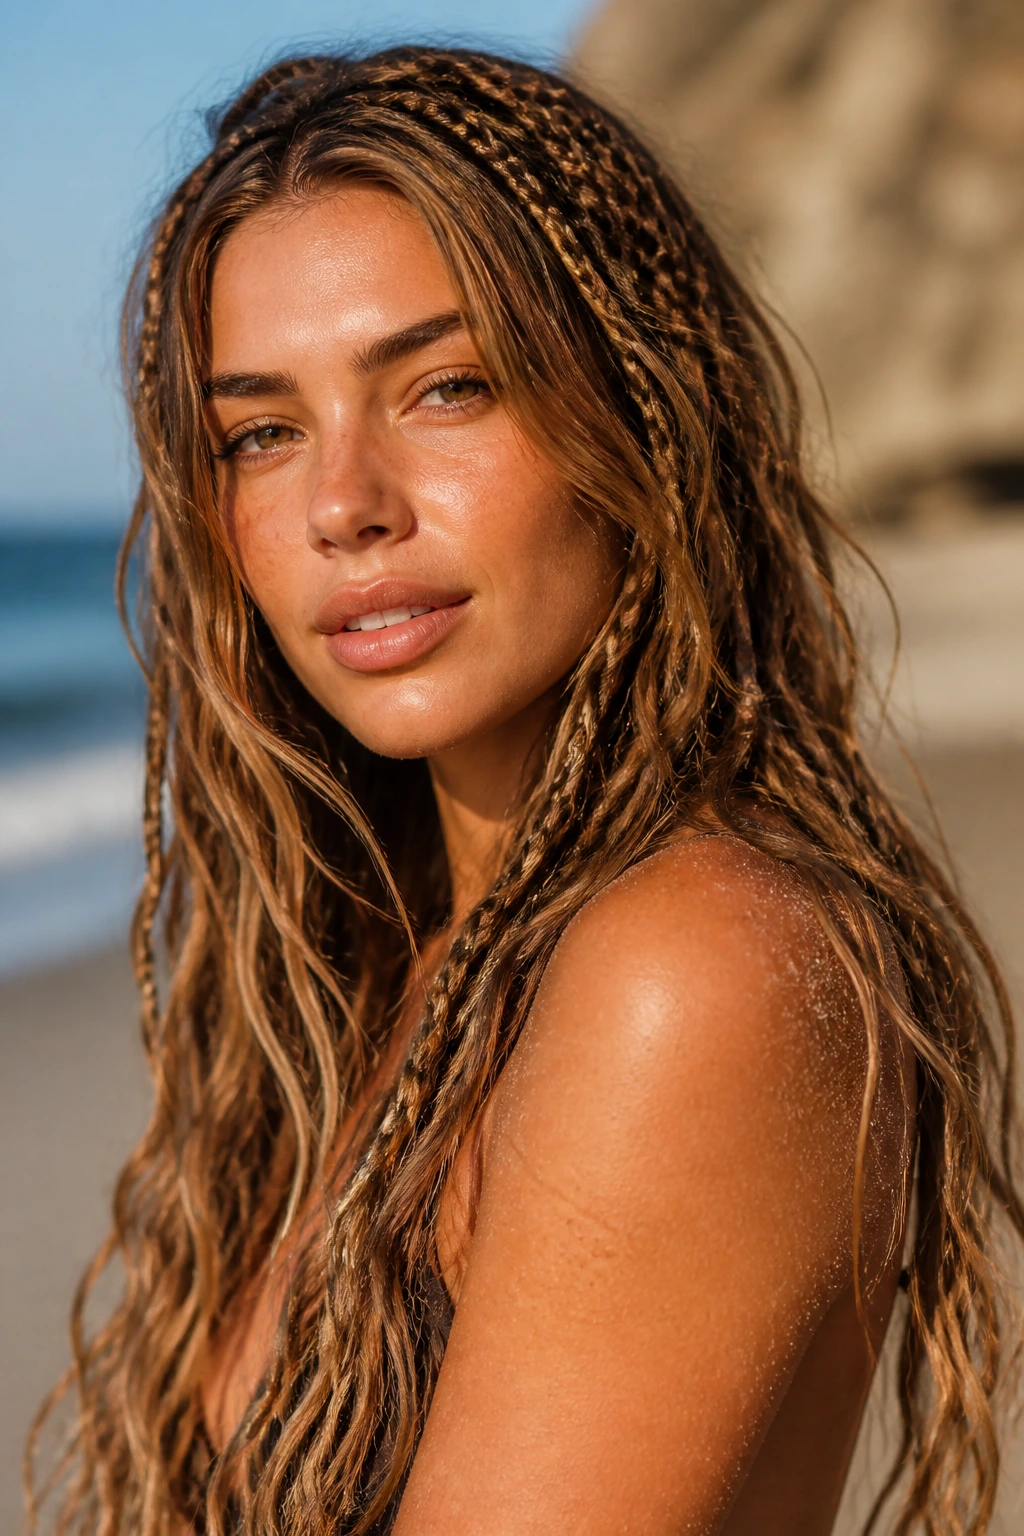
Boho braids work because they don’t try to control every strand. You braid a few sections tightly enough to create shape, then leave the rest in soft waves. That contrast matters. Long hair can look heavy when it’s all one texture, and the loose pieces break it up.
A little wave spray or a few bends from a curling iron helps the free lengths sit nicely. Keep the braids small and deliberate so they don’t swallow the style. The less precise the loose pieces look, the more intentional they need to feel near the roots. That’s the balancing act.
This is the braid I’d call beachy without sounding fake about it.
13. Cornrow Side Part Into Bun
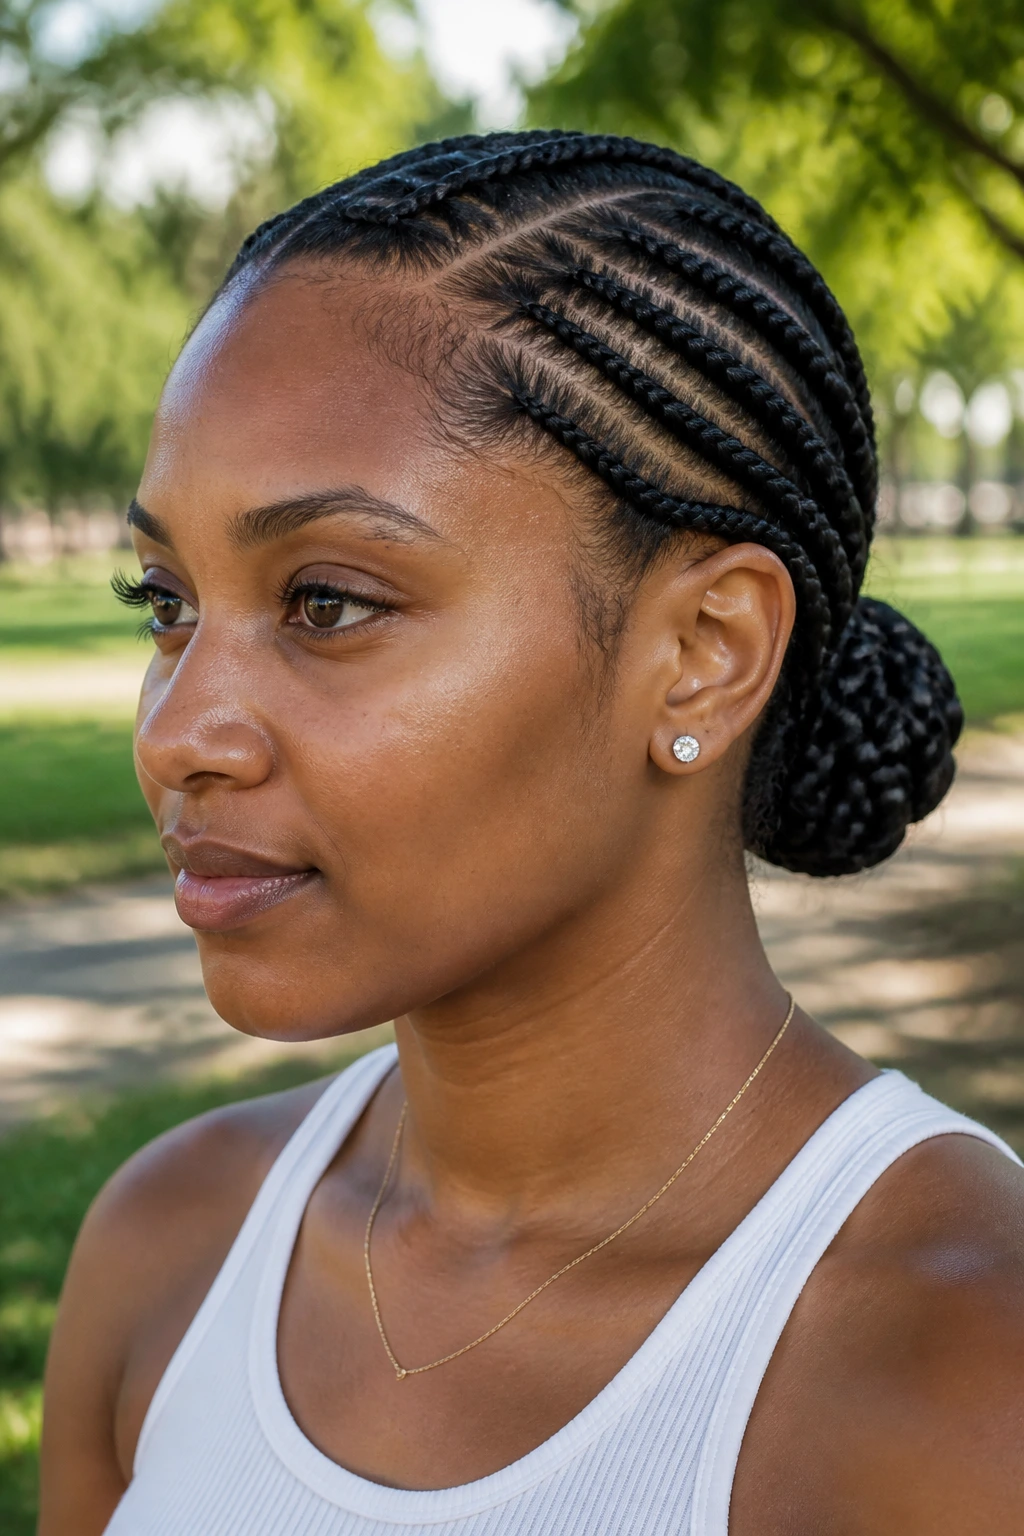
A side part changes the whole mood of cornrows. Instead of a straight, centered grid, you get a shape that feels a little more relaxed and a little less formal. From there, the braids can sweep into a bun at the back or the side, depending on where you want the weight to sit.
The clean parting is the real work here. Use a tail comb and take your time. If the lines are shaky, the whole style looks rushed, and long hair makes that easier to notice because there’s so much surface area. Once the braids are set, gather the ends into a low bun and pin the shape securely.
This style keeps the scalp cooler than loose hair and tends to stay tidy for days.
14. Side-Swept French Braid
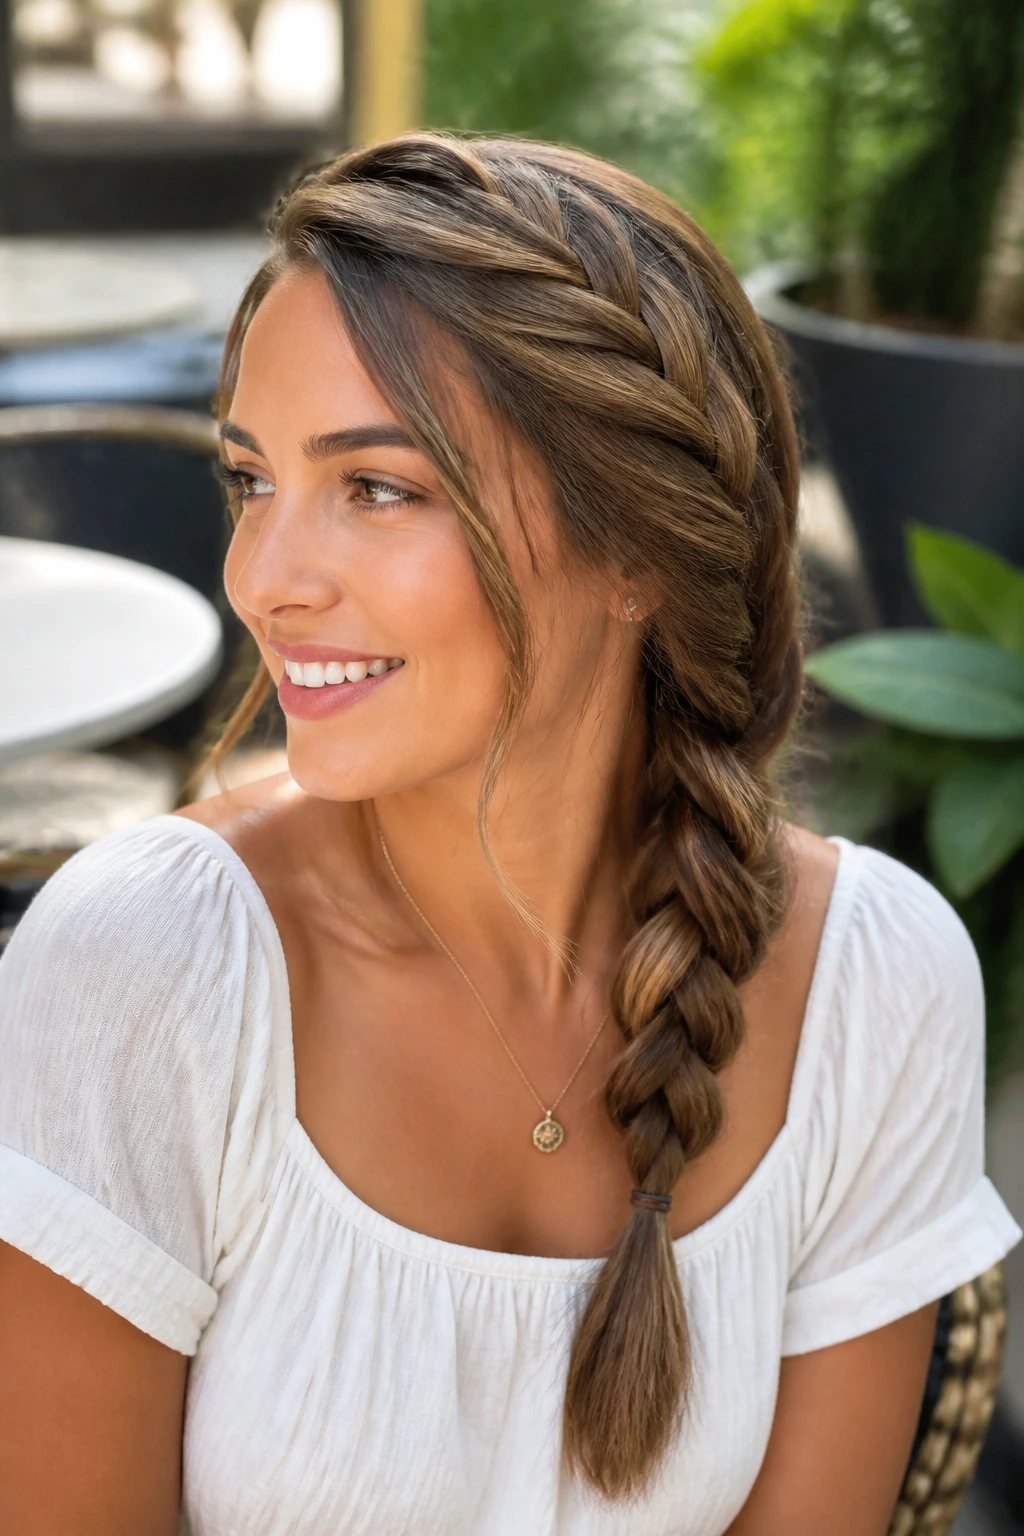
A side-swept French braid is a little less severe than the centered version, which is why I like it on days when you want polish but not structure that feels too stiff. Starting near one temple lets the braid drape over the shoulder, where long hair can actually show off the length.
The angle does the styling for you. You do not need much extra product beyond a small amount of mousse or smoothing cream. Keep the feed-in sections even so the braid doesn’t thin out halfway down. If you want a softer edge, pinch a few strands loose around the face after the braid is secured.
It feels more romantic than sporty, which is a nice change when summer outfits get simple.
15. Four-Strand Statement Braid
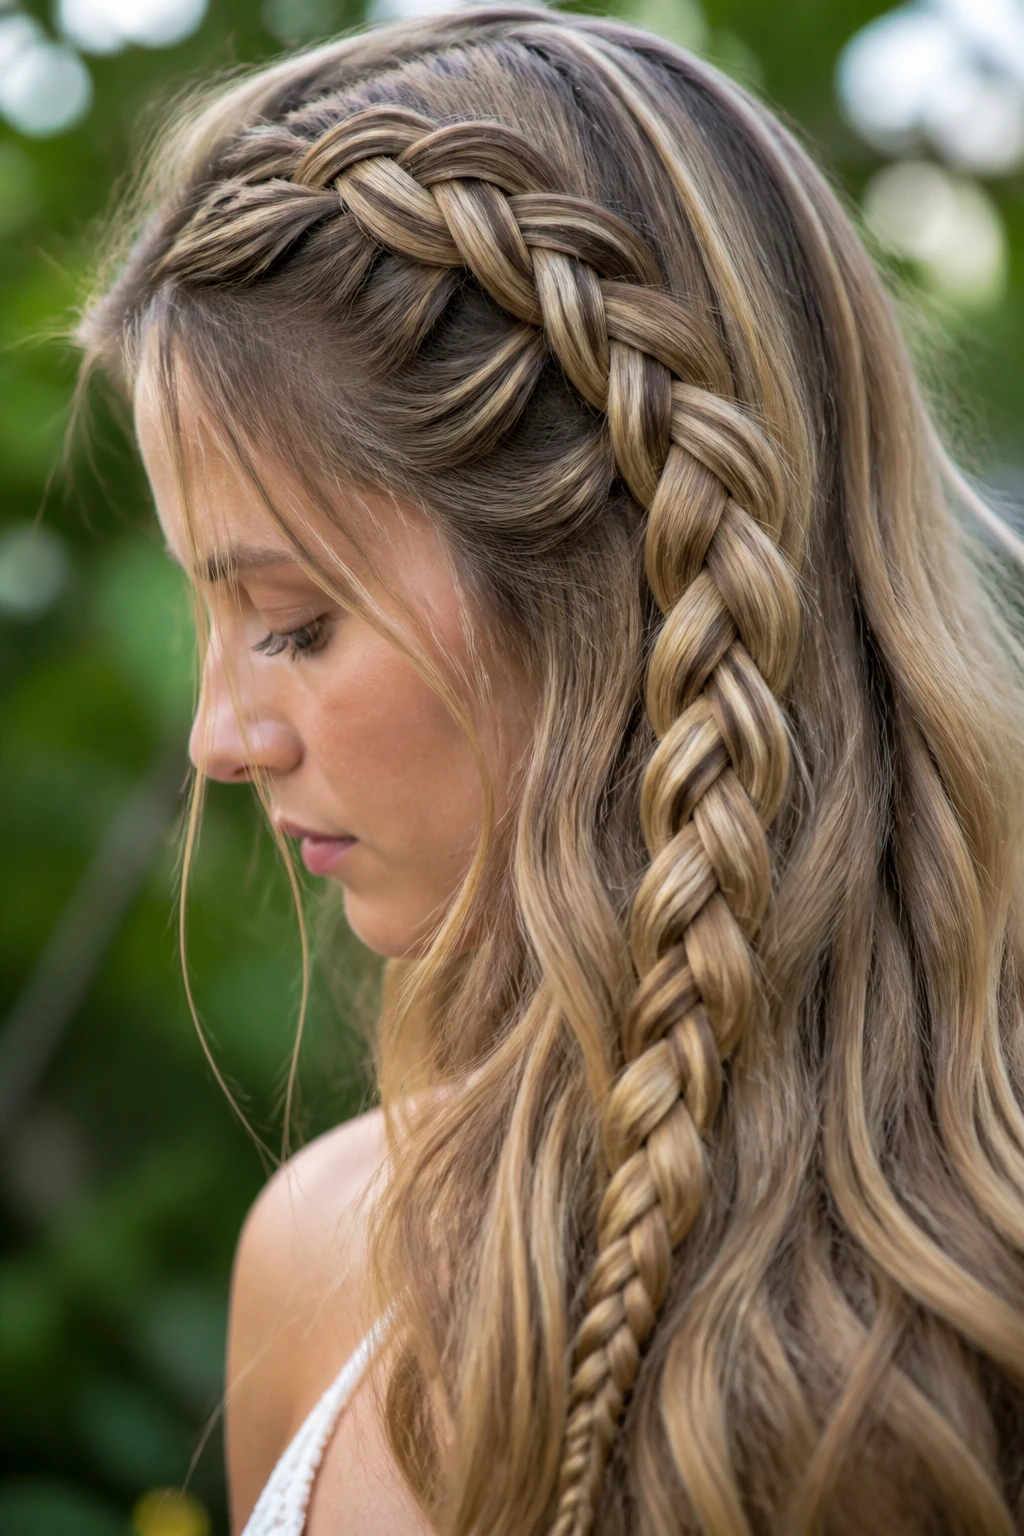
A four-strand braid looks more complicated than a standard plait because it is. The extra strand creates a flatter, more woven pattern that reads beautifully on long hair, especially when the hair is solid-colored or has subtle highlights. The pattern needs a little practice, but it pays off in texture.
I’d use this braid when the length itself is the selling point. Long hair gives the strands enough room to separate and show the design. Keep your hands steady and your tension even. If one side pulls too tight, the braid starts to twist awkwardly instead of lying in a clean line.
It’s the braid you wear when you want people to notice the braid, not just the fact that hair is tied back.
16. Accent Braids Into a Low Chignon
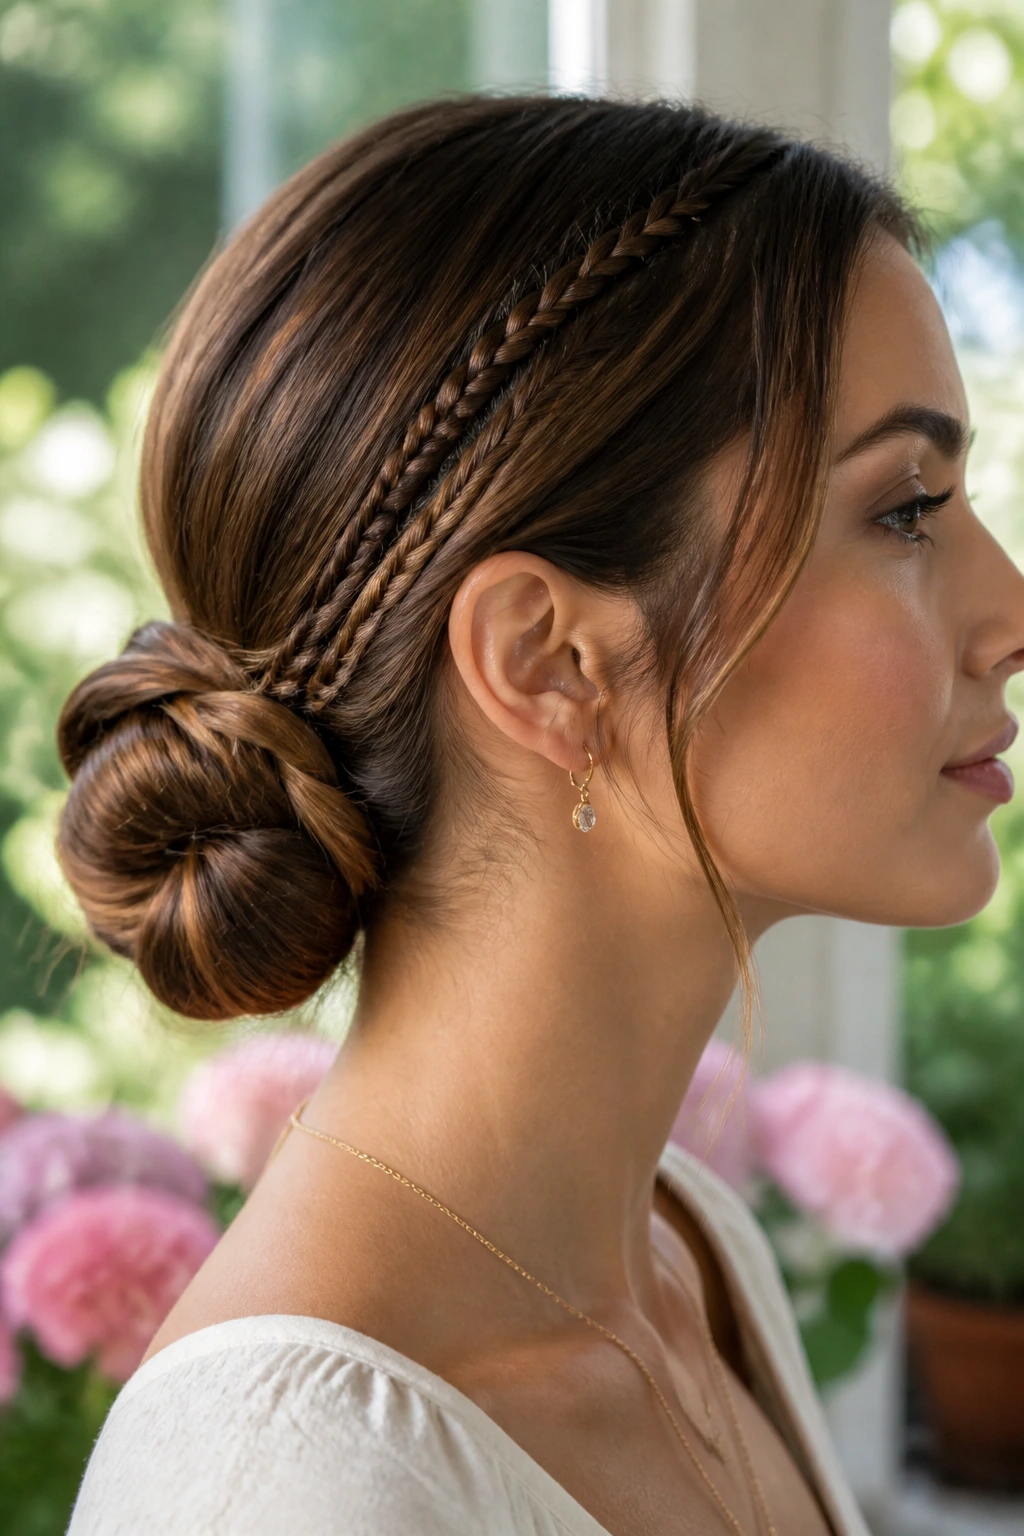
A low chignon gets more interesting when you add two or three tiny accent braids at the sides. They don’t have to be large. In fact, small braids usually look better because they keep the bun from getting bulky near the ears.
Braid the accent pieces first, then gather the rest of the hair low and twist it into a chignon. Pin the braids into the bun so they disappear into the structure instead of hanging loose. That little detail is what keeps the style from looking like an afterthought.
This works well for weddings, work events, or any day when you want the back of your head to look finished from every angle.
17. Feed-In Braided Ponytail
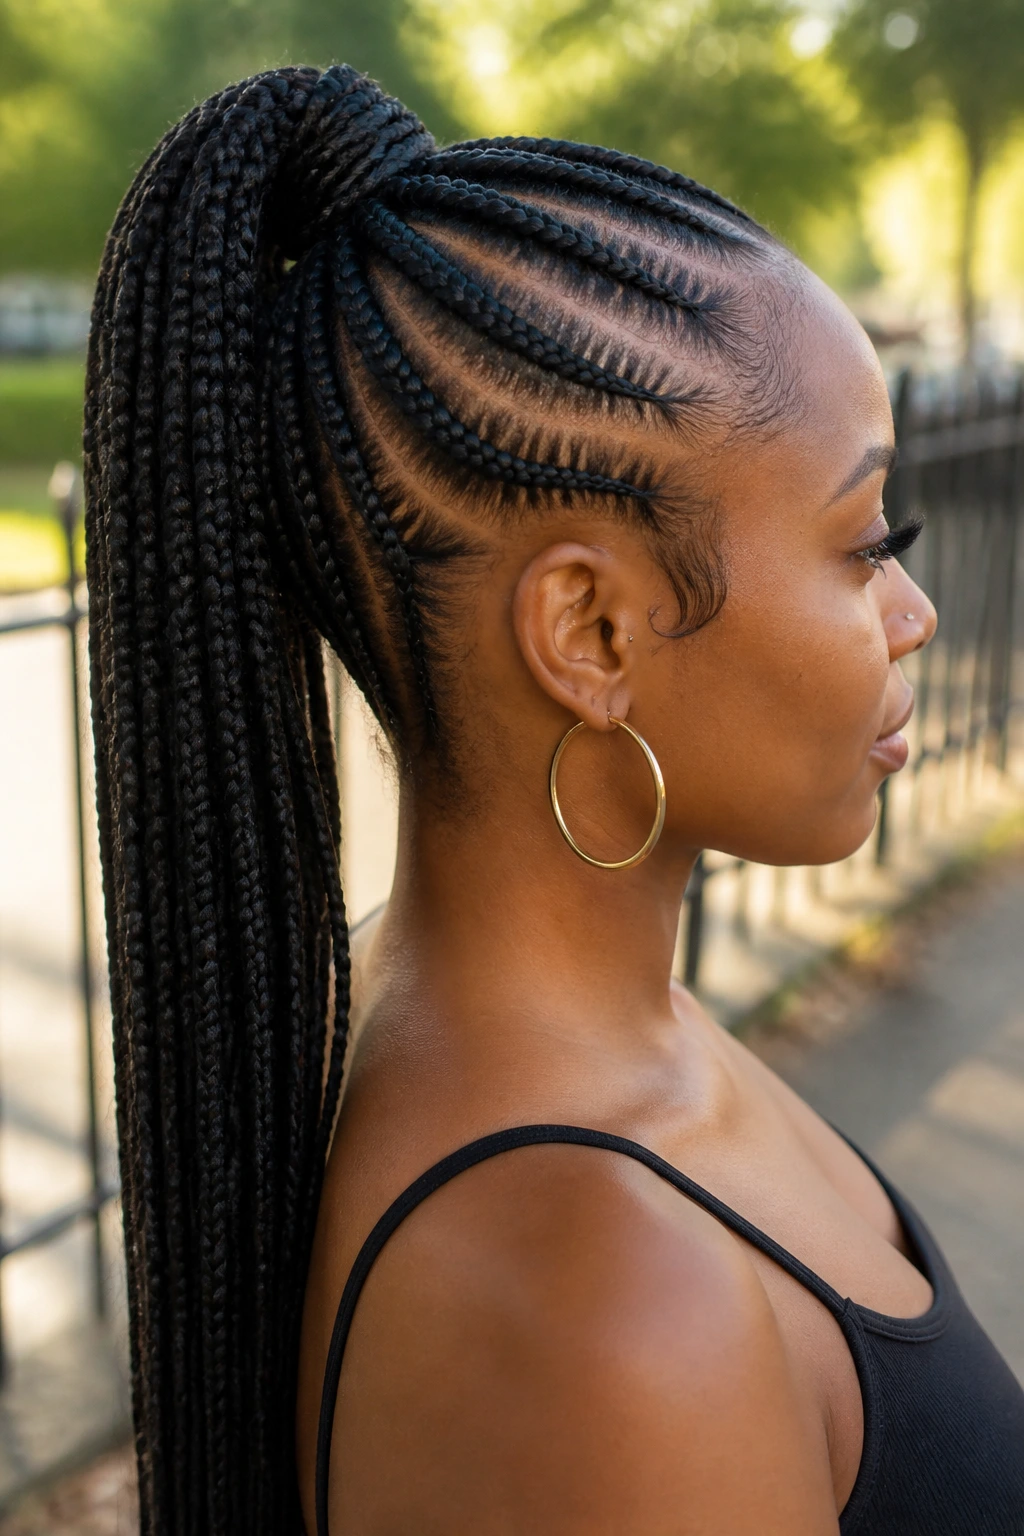
A feed-in braid ponytail gives the long tail all the drama while keeping the base neat. The idea is simple: start small, add hair gradually, and build the braid so it feels like it rises from the scalp instead of sitting on top of it. That smoother start matters on hot days because it reduces bulk at the crown.
The ponytail itself can be straight or curled. I prefer a slight bend at the ends so it doesn’t look too rigid. If your natural hair is very thick, keep the braid pattern centered and use a firm elastic at the base before you start braiding the tail. That keeps the whole thing from sagging.
It’s sharp, clean, and a little athletic in the best way.
18. Zigzag Part Braids
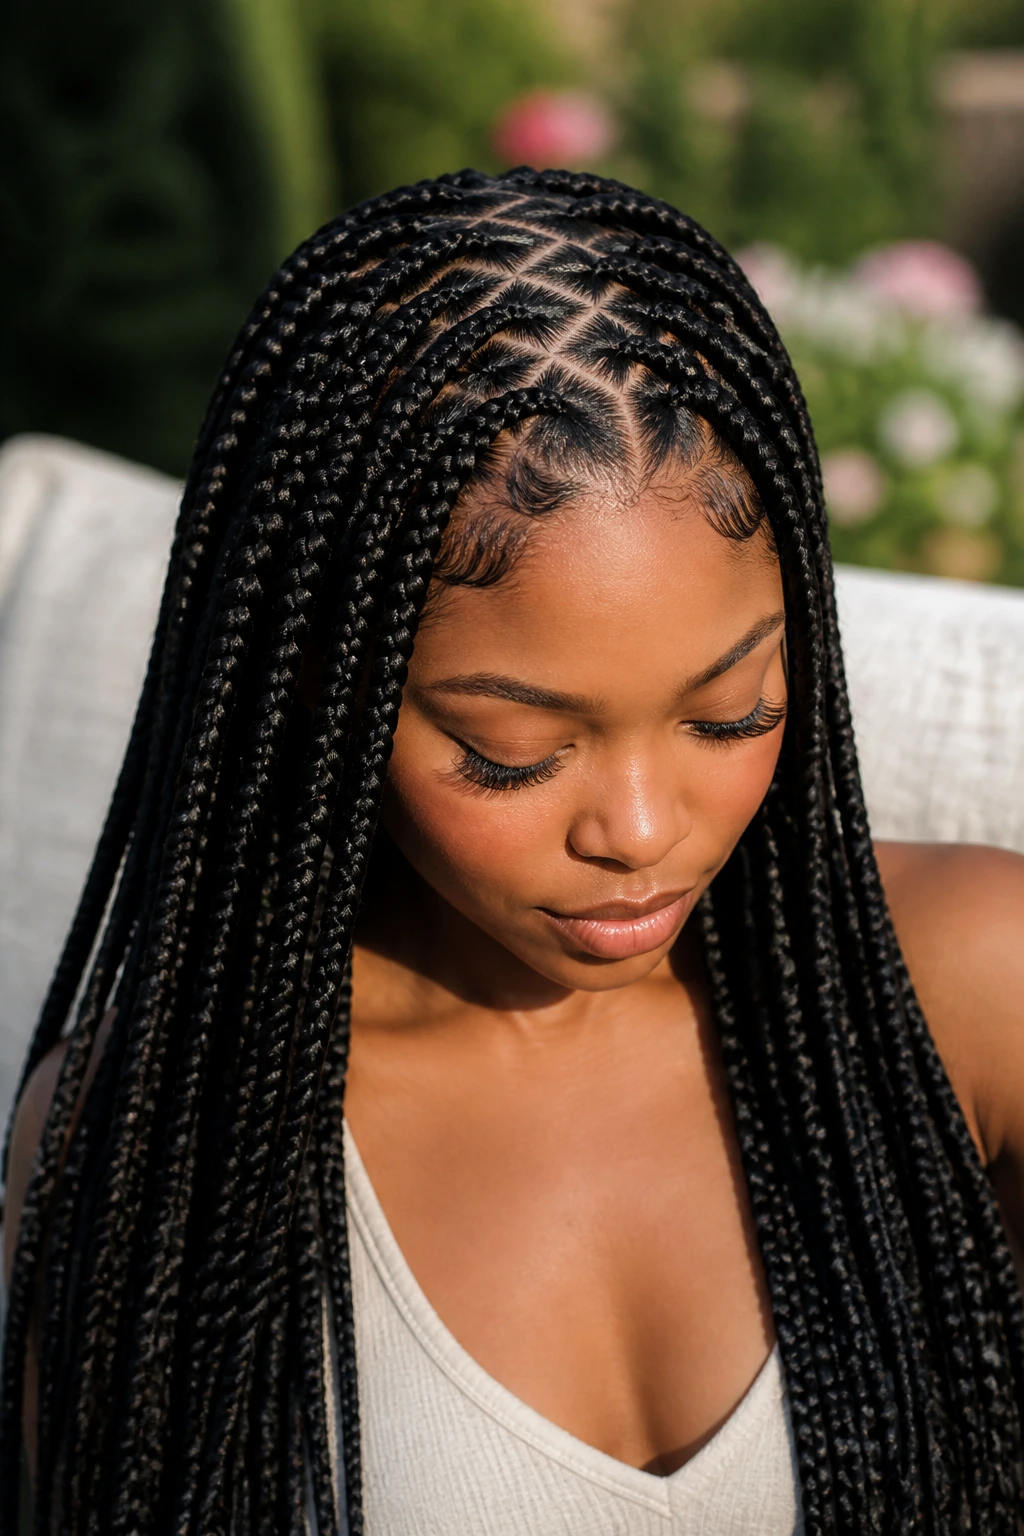
The braid itself is familiar. The parting is what makes it pop. Zigzag sections turn a simple set of braids into something that looks far more styled than the actual braiding work suggests. Long hair shows the pattern well because the scalp design has enough room to move.
Use the tip of a tail comb and draw the zigzags before you braid anything. Don’t try to wing it mid-style. The parting needs to be deliberate or it turns messy fast. Once the lines are set, keep the braids simple so the eye stays on the parting pattern.
This is a good choice when you want something playful but still structured.
19. Goddess Braids
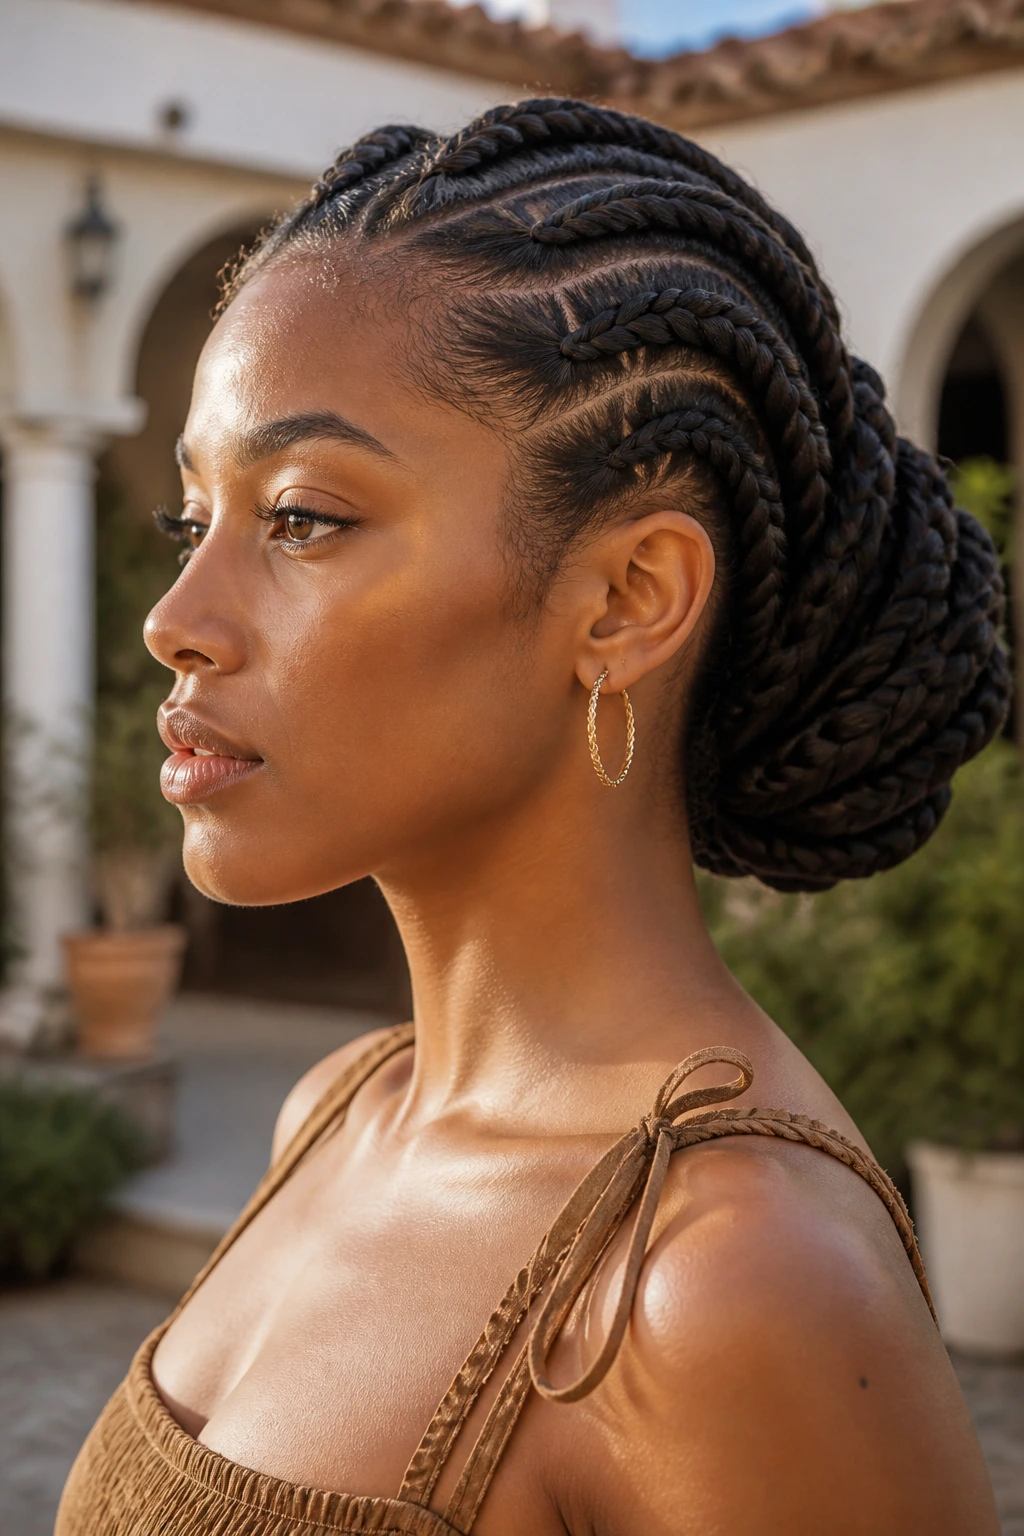
Goddess braids are chunkier, softer cornrows with more visual volume. They sit close to the scalp for control, then often sweep into a bun, ponytail, or long hanging sections. On long hair, they have real presence. The thicker sections make the style look bold without needing a lot of extras.
I like them because they hold shape well while still feeling less harsh than very tight braided rows. A light braiding cream can help the sections glide without frizzing as you work. Keep the parts clean and the tension even, especially near the temples. That’s where the style can go from elegant to uncomfortable fast.
It’s a strong option when you want your hair to look styled, not just contained.
20. Braided Space Buns
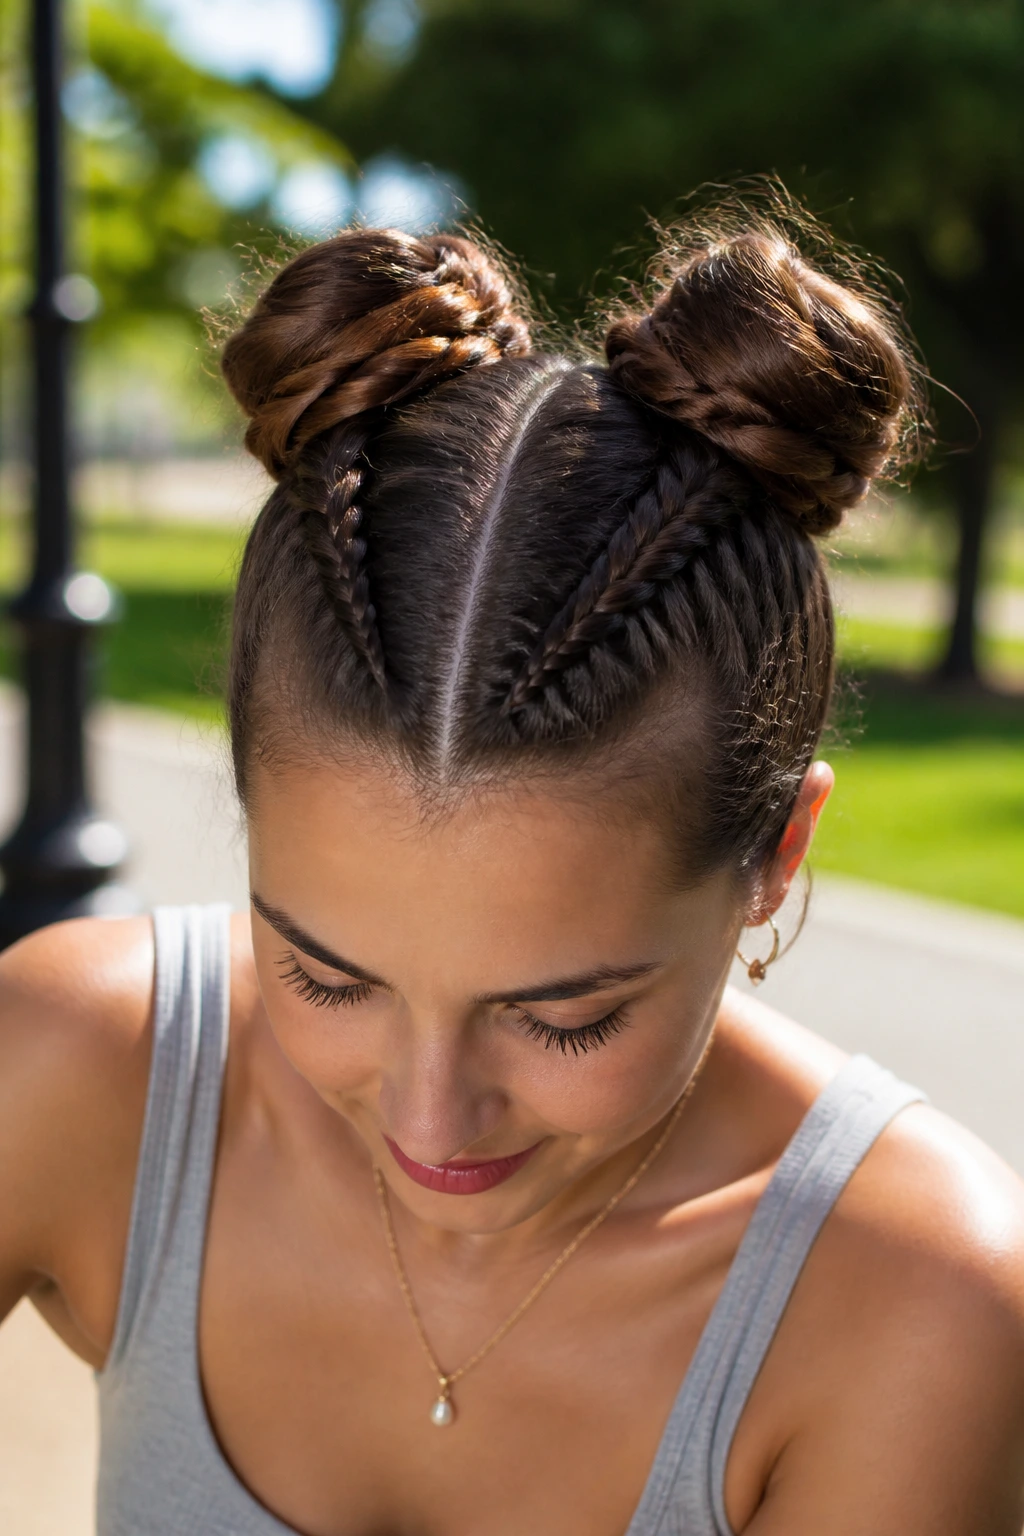
Two braids, two buns, and suddenly the whole style feels playful. Braided space buns are one of the easiest ways to make long hair behave on a hot day while still keeping some personality in the look. The braids feed structure into the buns so they stay compact.
You can part the hair down the middle, braid each side, then coil the ends into buns near the crown or higher on the head. The higher you set them, the more youthful and casual the style reads. The lower you go, the more wearable it becomes for everyday errands. A few tucked pins are usually enough.
This is the braid style for when you want practical hair with a little bite.
21. Mermaid Braid
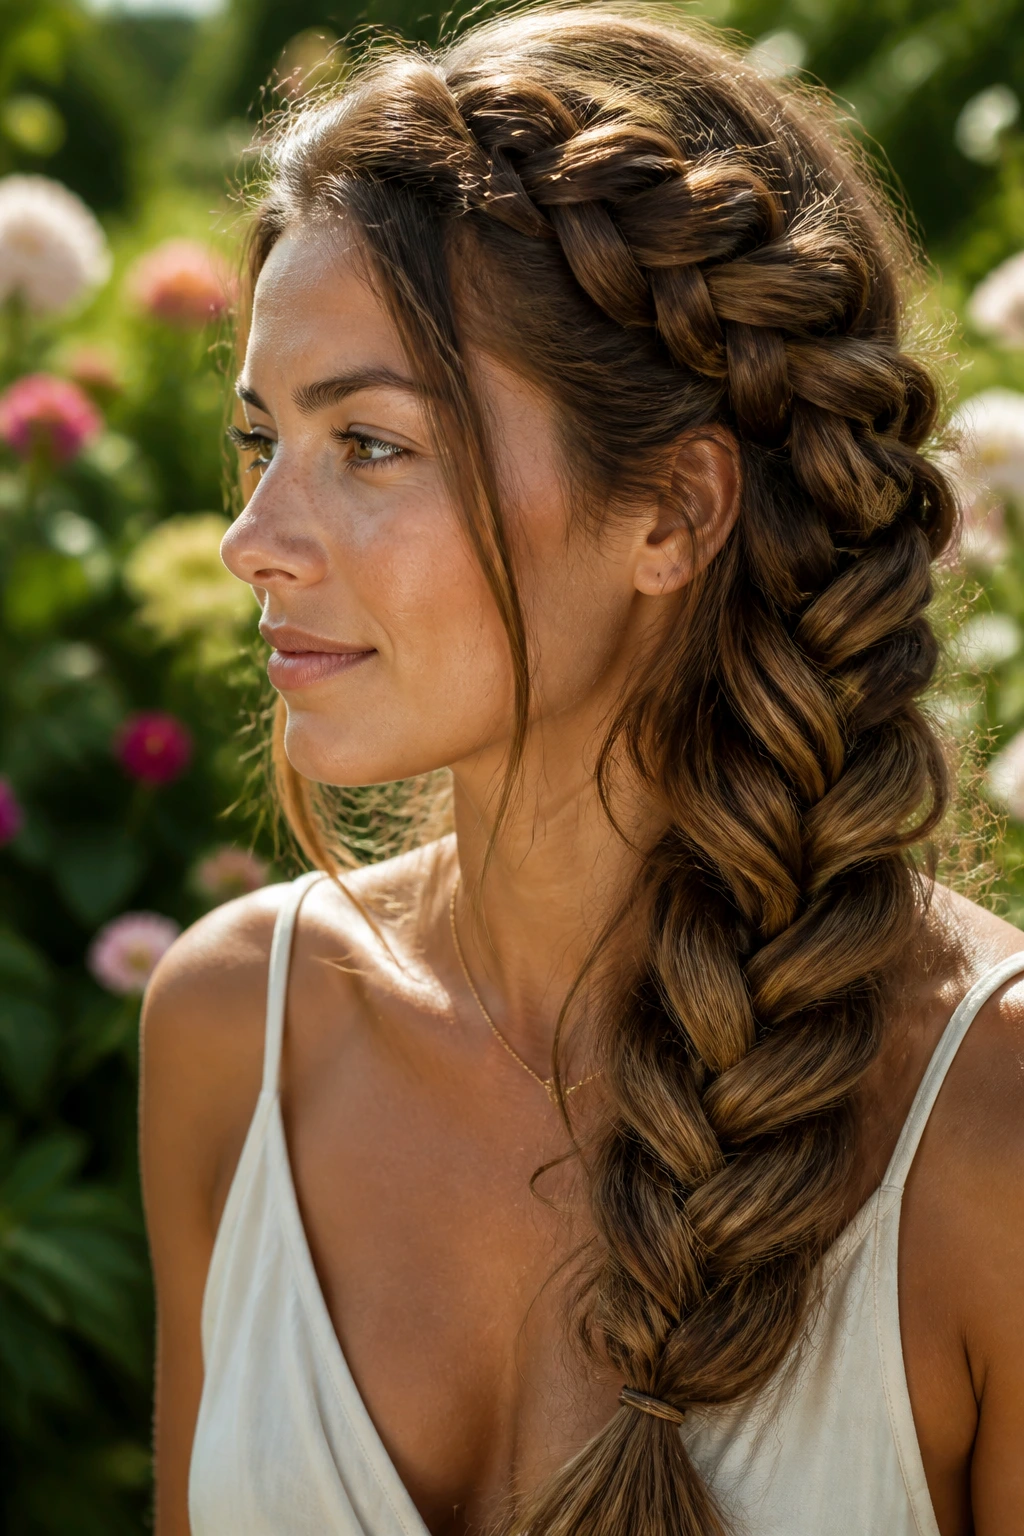
A mermaid braid is essentially a braid with extra fullness and a softer finish. It often uses bigger sections, sometimes with a pull-through base, so the pattern looks thick and layered instead of tight. Long hair gives it the length it needs to show off all that texture.
The style works best when the braid is a little imperfect. That sounds backwards, but it’s true. If you pull every loop too tight, the whole thing loses its softness. Start with a secure base, then gently widen the outer pieces once the braid is finished. The goal is width, not stiffness.
It’s a good braid when you want something that looks like it took longer than it did.
22. Waterfall Crown Braid
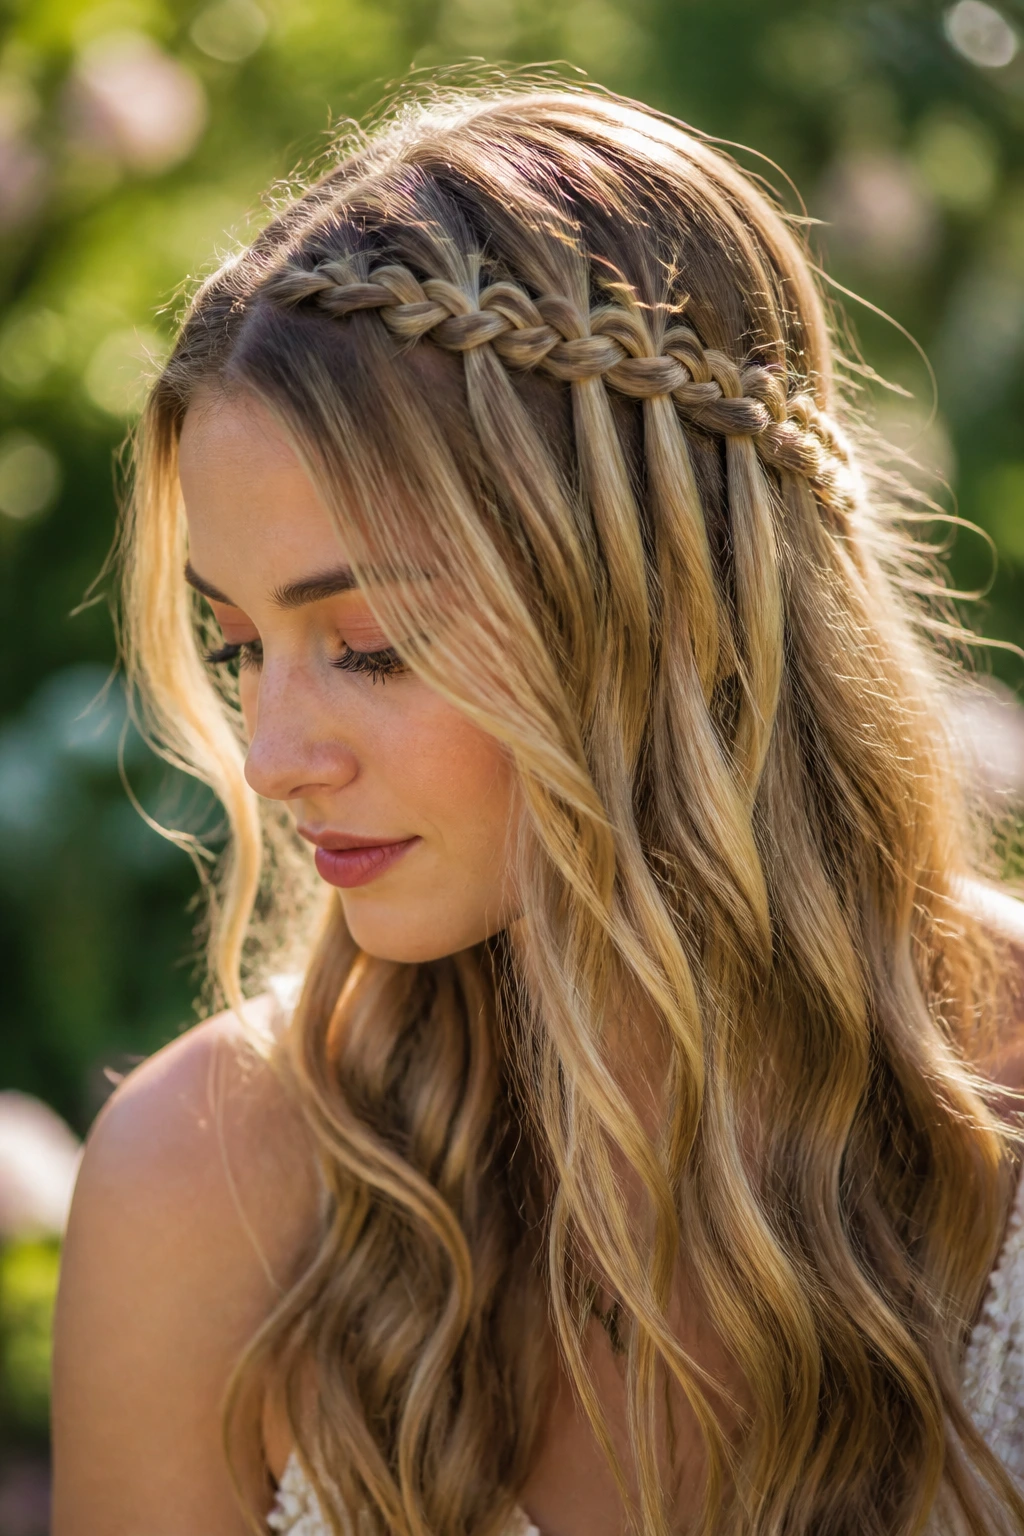
A waterfall crown braid takes the airy feel of a waterfall braid and wraps it around the head. On long hair, the effect is especially pretty because the dropped strands can fall into the lengths below instead of stopping short. It’s a style that depends on balance.
The crown should stay neat while the loose pieces stay soft. That’s the whole game. If the braid is too tight, it loses the floating effect. If it’s too loose, it slides. Pin the braid at the back where it meets itself, then tuck any obvious ends so the seam disappears.
This one suits long layers better than blunt ends, since the moving pieces are part of the design.
23. Micro Braids With Beads
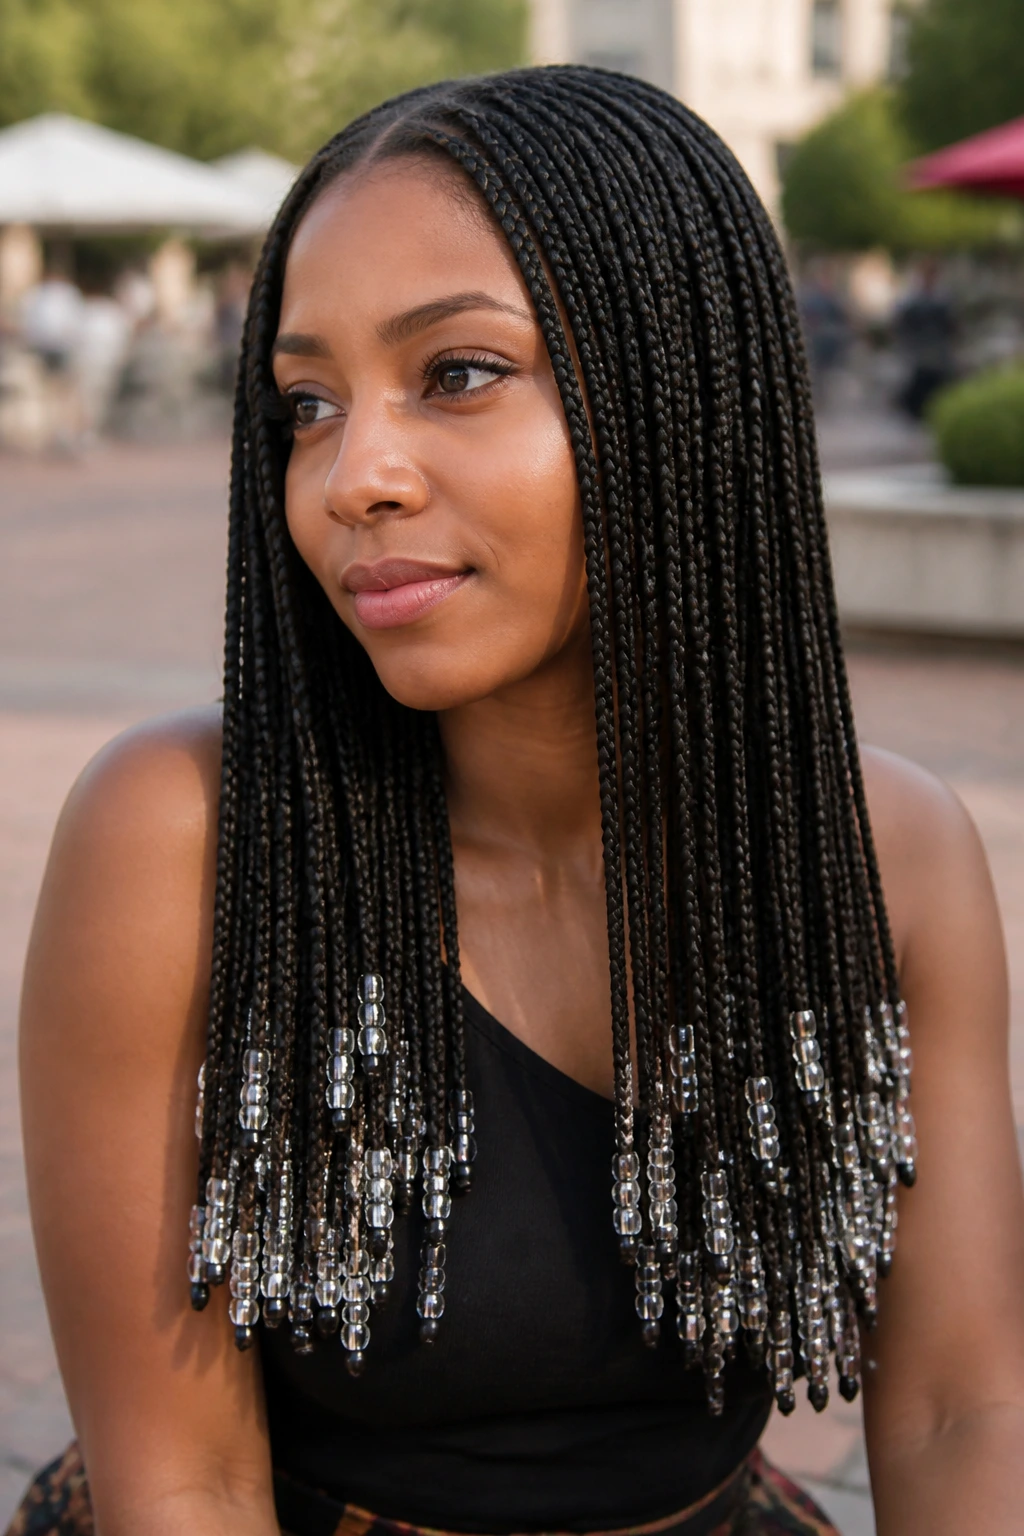
Micro braids with beads are not a quick morning style, and pretending otherwise is a waste of time. They take patience. But once they’re in, they give long hair a lot of movement, and the beads add sound and shine that plain braids can’t imitate.
Keep the beads concentrated near the ends unless you want the roots to feel heavy. Too many at the top can tug. Also, make sure the parts are clean and the braid tension is even, because tiny braids show every wobble. The finish feels best when the bead placement is deliberate, not random.
It’s a choice for someone who wants detail and is willing to sit still for it.
24. Lace Braid With Low Chignon
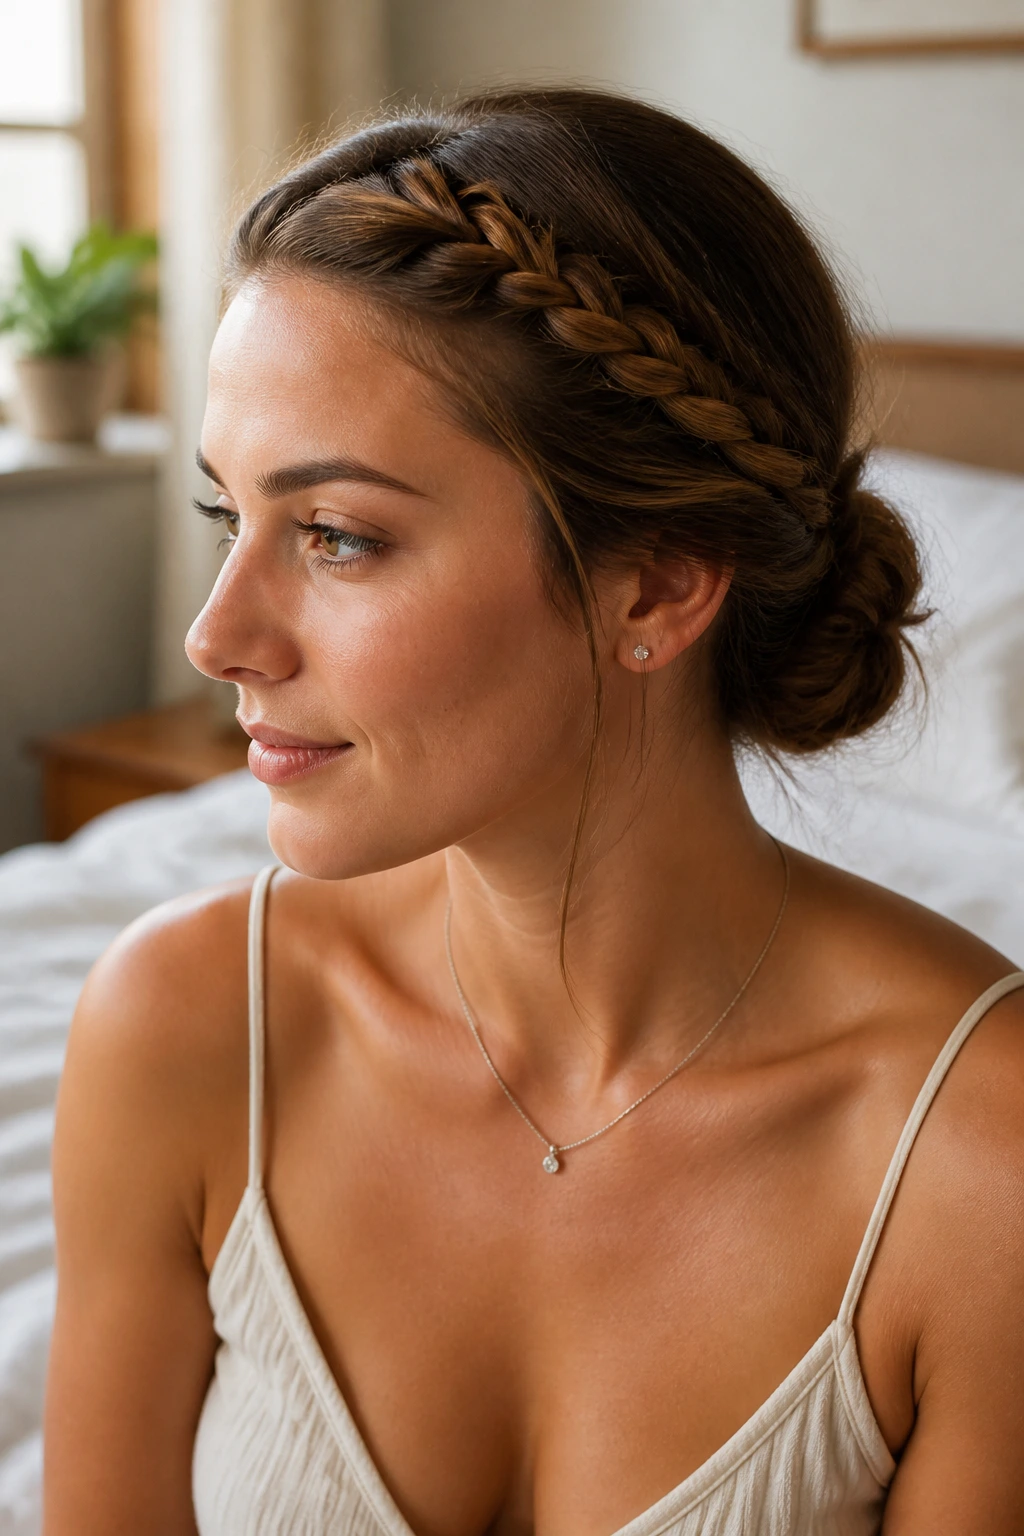
Why does a lace braid look more polished than it should? Because it traces the hairline in a clean curve and then disappears into a bun, which leaves no stray visual clutter. The braid only picks up hair from one side, so the finish feels smoother than a full French braid.
That makes it a strong choice for long hair that you want to keep controlled without losing softness near the face. Start above the temple, follow the curve toward the nape, and tuck the rest into a low chignon. A pair of hidden pins holds the seam better than one pin shoved in deep.
This is a good style when you want the front of your hair to do the talking.
25. Double Dutch Braid Into Ponytail
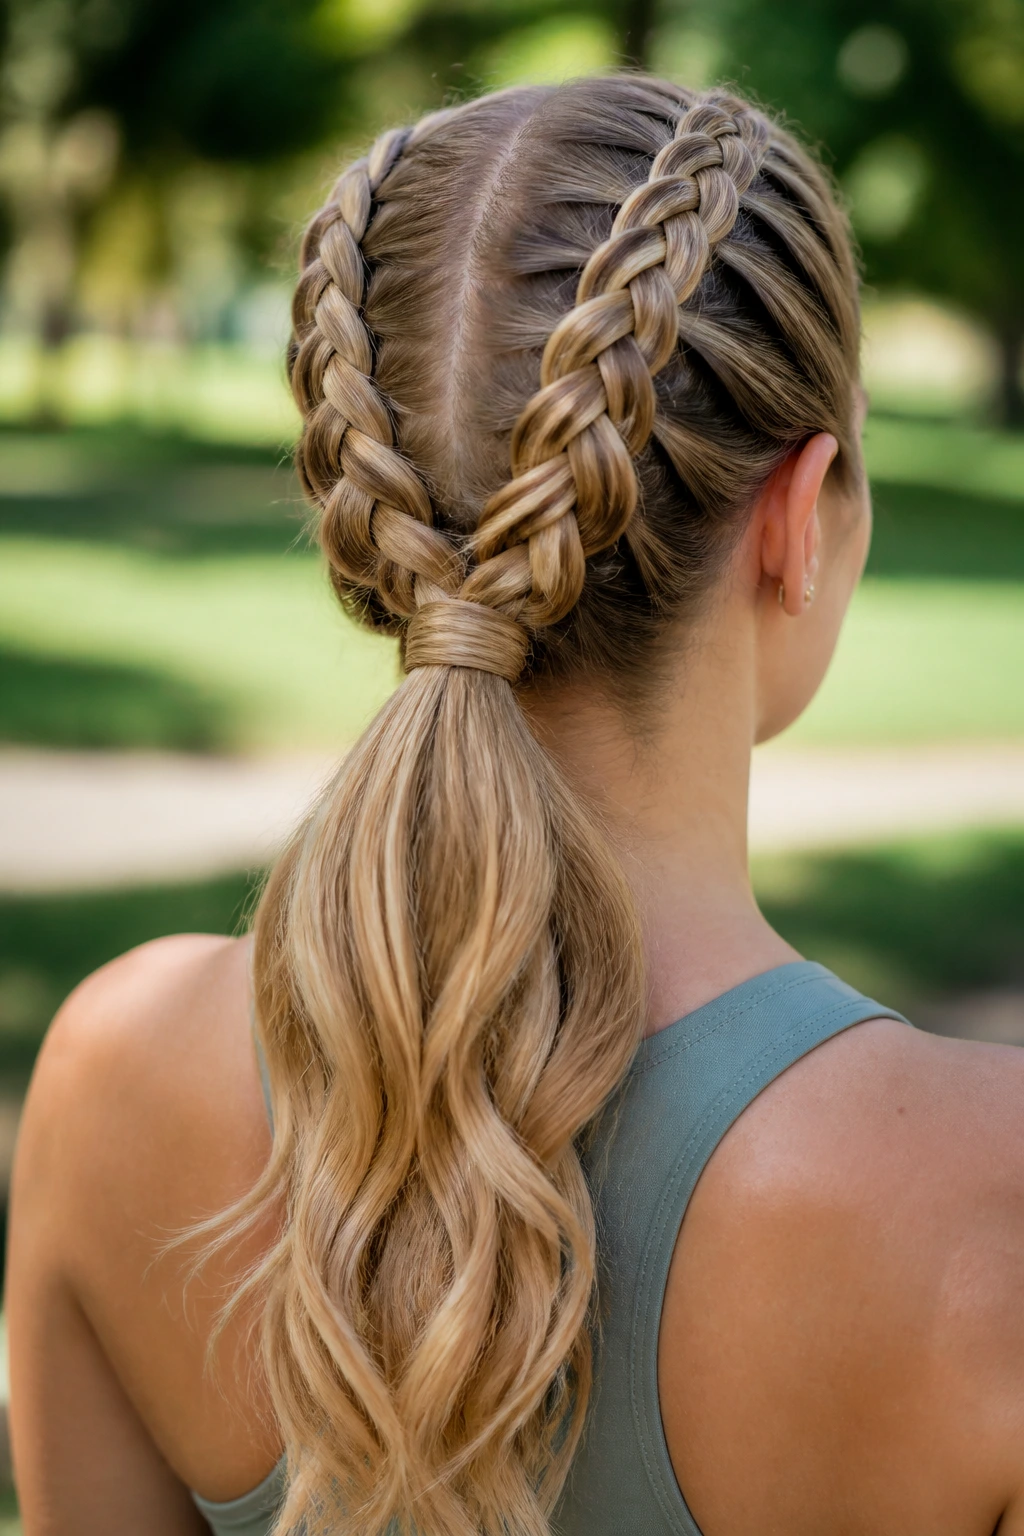
Two Dutch braids can meet at the back and turn into one ponytail, which gives you a clean front and a swingy tail. It’s sporty without looking bare. The raised braid pattern keeps the scalp tidy, and the ponytail at the end gives you length and movement.
Keep the braids tight enough near the roots to stay in place, then loosen the tail after the elastic if you want a fuller finish. If you like a more polished look, wrap a strand of hair around the ponytail elastic. It’s a small move, but it helps the whole style read finished instead of thrown together.
This one is a solid choice for gym days, travel days, and anything involving wind.
26. Braided Headband With Loose Length
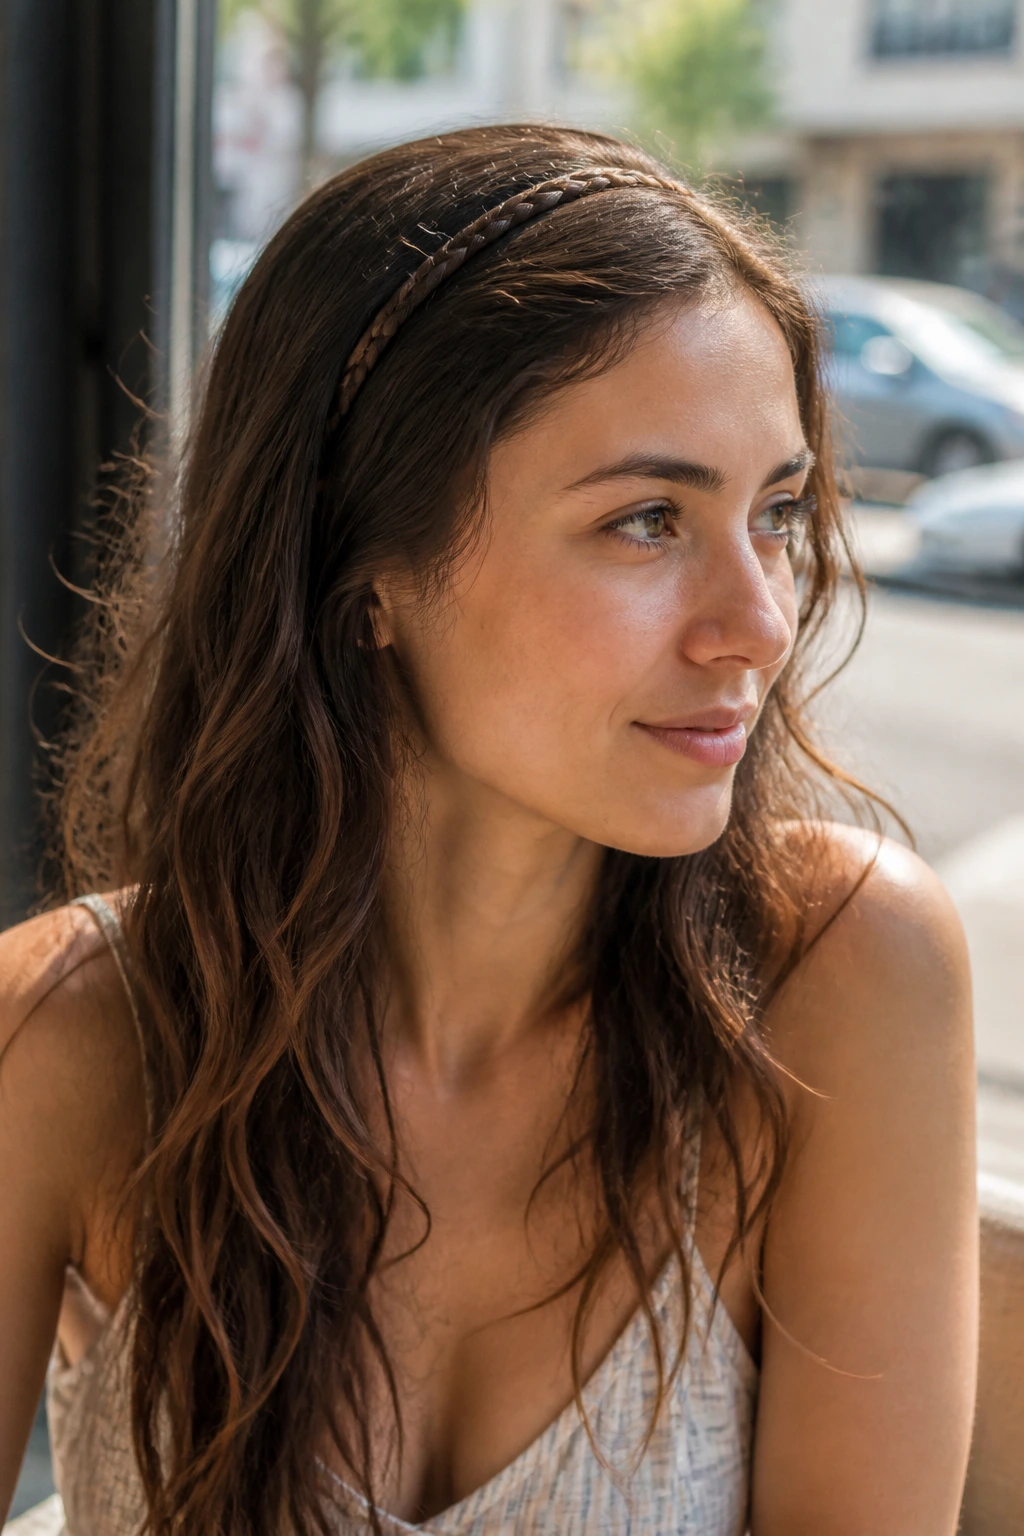
A braided headband is the cheat code for long hair when you want your face free but don’t want to commit to a full updo. A braid runs from one side of the head to the other, pinned like a built-in accessory, while the rest of the hair stays loose. It’s simple and clever.
I like it most when the loose length has a little texture, because pin-straight hair can make the contrast look too sharp. A soft wave or bend helps the style blend. Keep the braid narrow enough to sit flat, or it starts to feel like a strip instead of a headband.
It’s the kind of braid that looks like a style decision, not a rescue mission.
27. Messy Braid With a Scarf
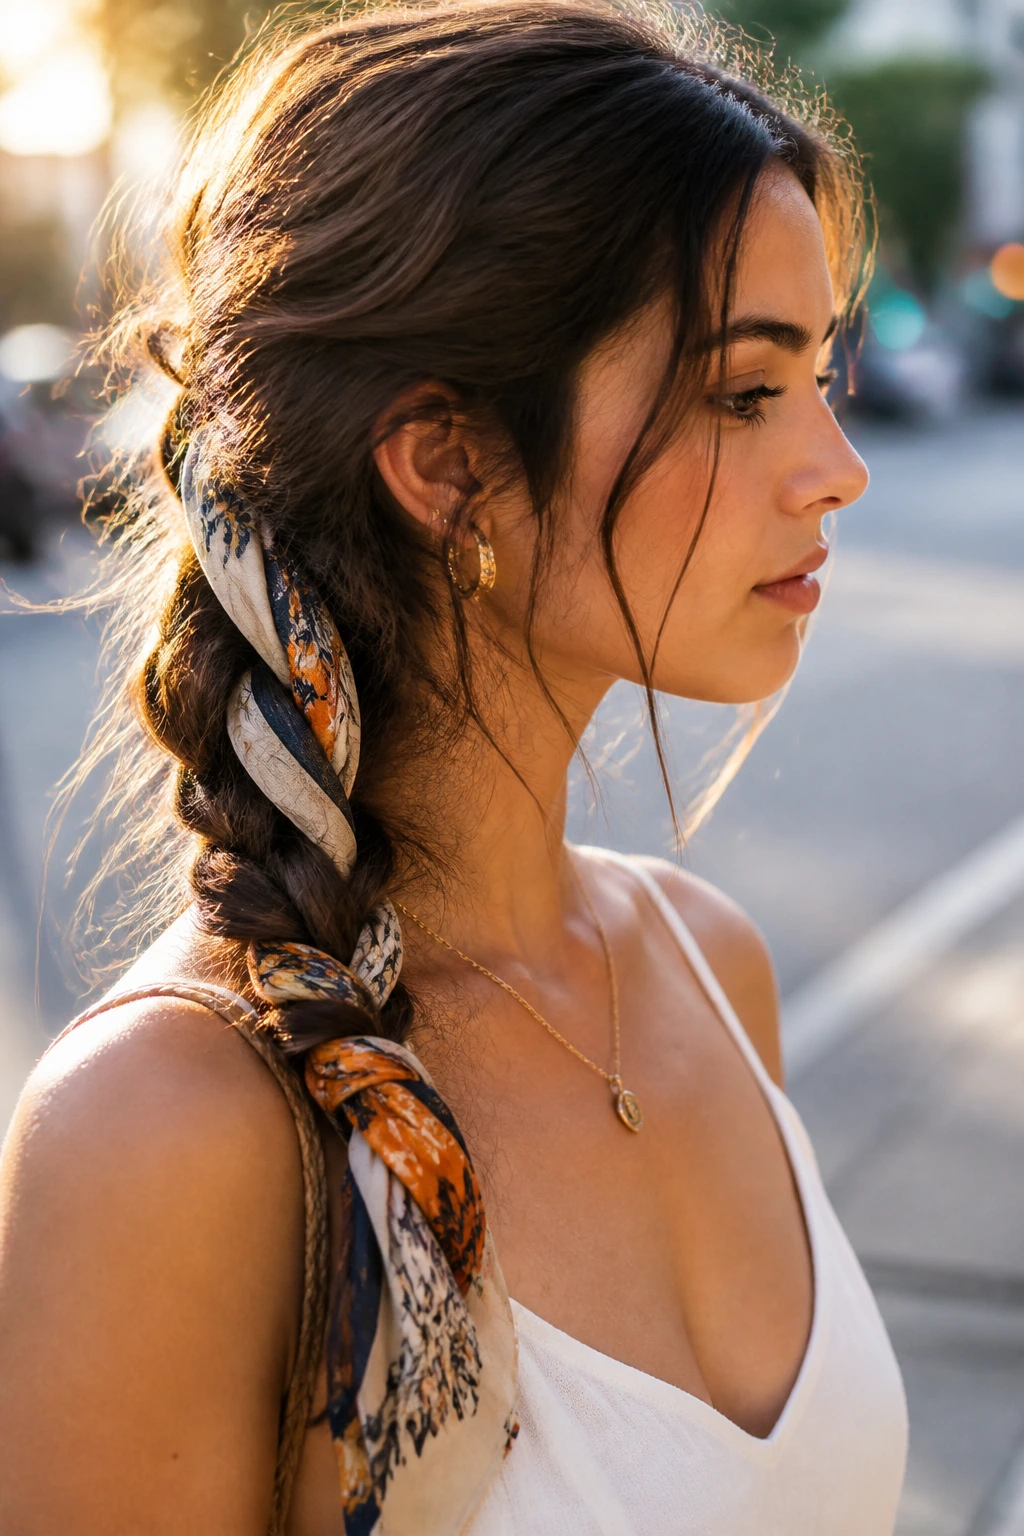
A scarf can save a braid that starts too plain or hair that refuses to cooperate. Tie it near the base, weave it through the length, or knot it at the end so the braid gets a little movement and color. Long hair gives the scarf room to show up without overpowering the whole style.
This is the style I’d pick when second-day hair needs a reset but you don’t want to start from scratch. The braid can be loose and slightly imperfect; the scarf makes it look intentional. Choose a thin scarf if your hair is very thick, because bulky fabric adds too much weight near the braid.
It feels relaxed in a way that still looks thought through.
28. Infinity Braid
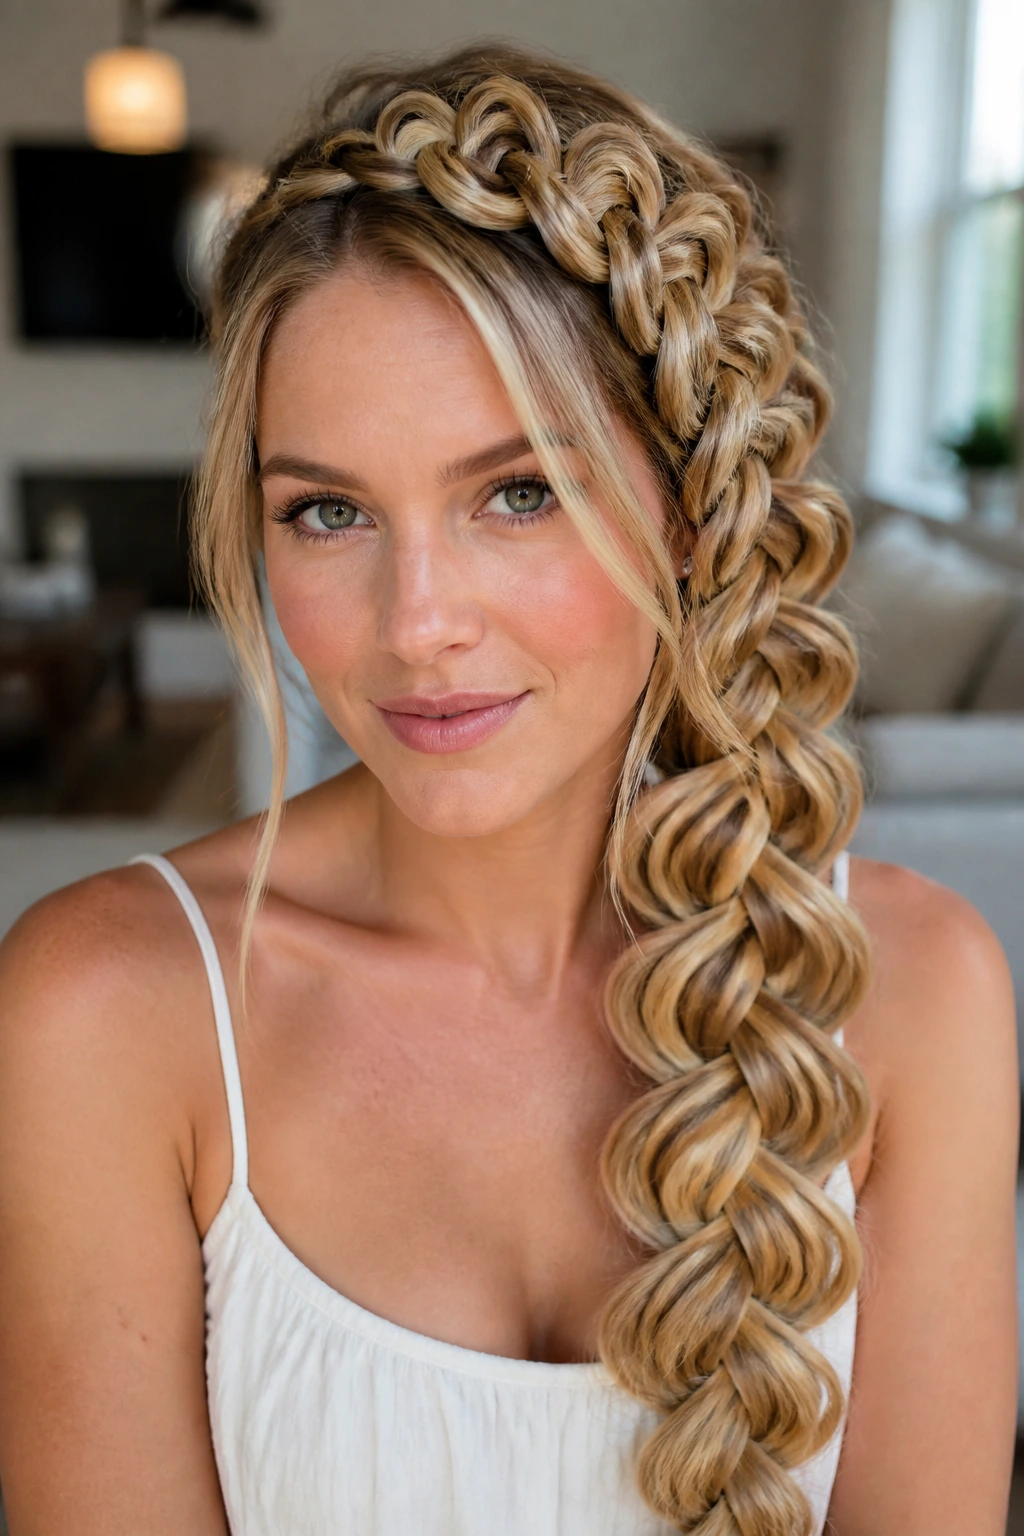
The infinity braid has that looping, figure-eight look that makes people stare at it longer than they expect. It uses repeated looping sections instead of a standard three-strand pattern, so it looks intricate even when the center structure is fairly simple. Long hair gives the loops enough runway to show.
This braid needs neat hands. If the loops are uneven, the pattern loses its shape fast. I’d use a touch of smoothing cream before you start, then keep the tension consistent from top to bottom. Once the braid is secured, gently loosen the outer loops so the design looks fuller.
It’s a little fussy. It’s also worth it when you want the braid to be the main event.
29. Milkmaid Twist Braid Combo
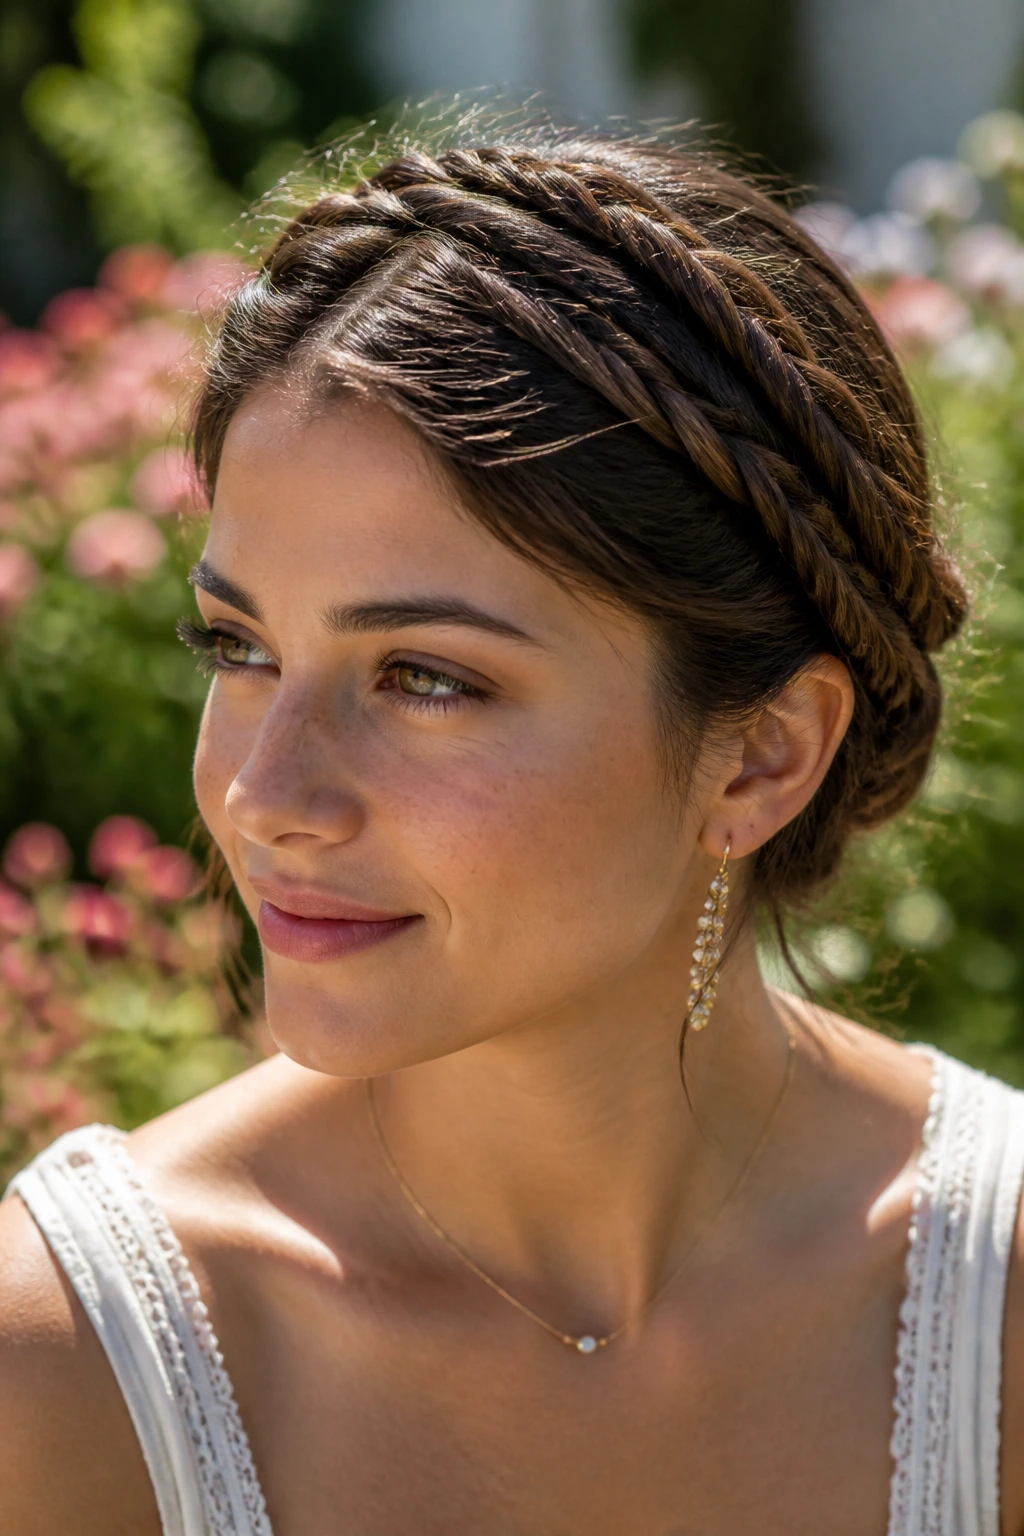
A milkmaid style can be done with twists, braids, or both, and I like the combo because it feels less stiff than a fully braided crown. Long hair wraps beautifully around the head, then the ends tuck neatly under or pin behind the ears. The result is soft but contained.
This version is easier than a perfect halo braid because the twisted sections give you a little more forgiveness. If one side is slightly thicker, it still works. Pin the braid or twist where it meets the opposite side, then smooth the crown with your hands rather than a brush so the shape stays relaxed.
It has a slightly old-fashioned feel, in the best sense.
30. Chunky Braid With Ribbon
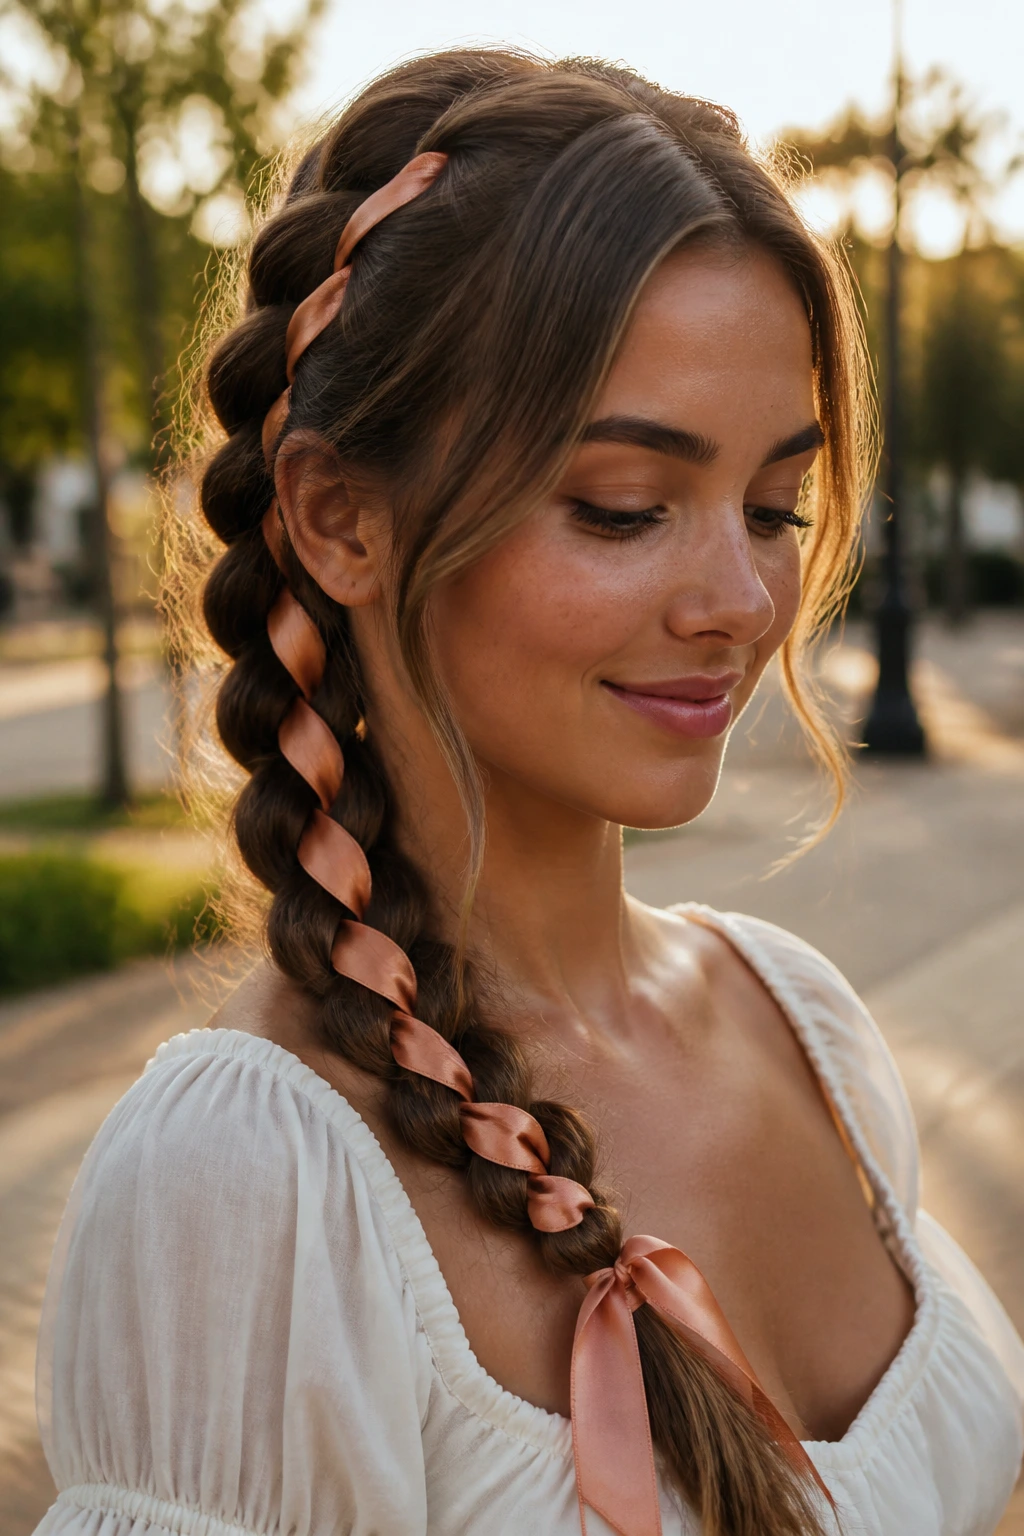
A ribbon woven into a chunky braid changes the whole tone of the style. The braid gets visual color without needing clips or beads, and long hair gives the ribbon enough length to trail. The important part is choosing a ribbon that isn’t so thick that it swallows the braid.
Satin or grosgrain both work. The smoother ribbon slides easier, but the slightly grippier one tends to stay put. I like threading it as a third strand so it feels built into the braid instead of tacked on at the end. Keep the ribbon flat as you weave so it doesn’t twist and fold in strange ways.
This one is easy to dress up without making the hair fussy.
31. Criss-Cross Braided Ponytail
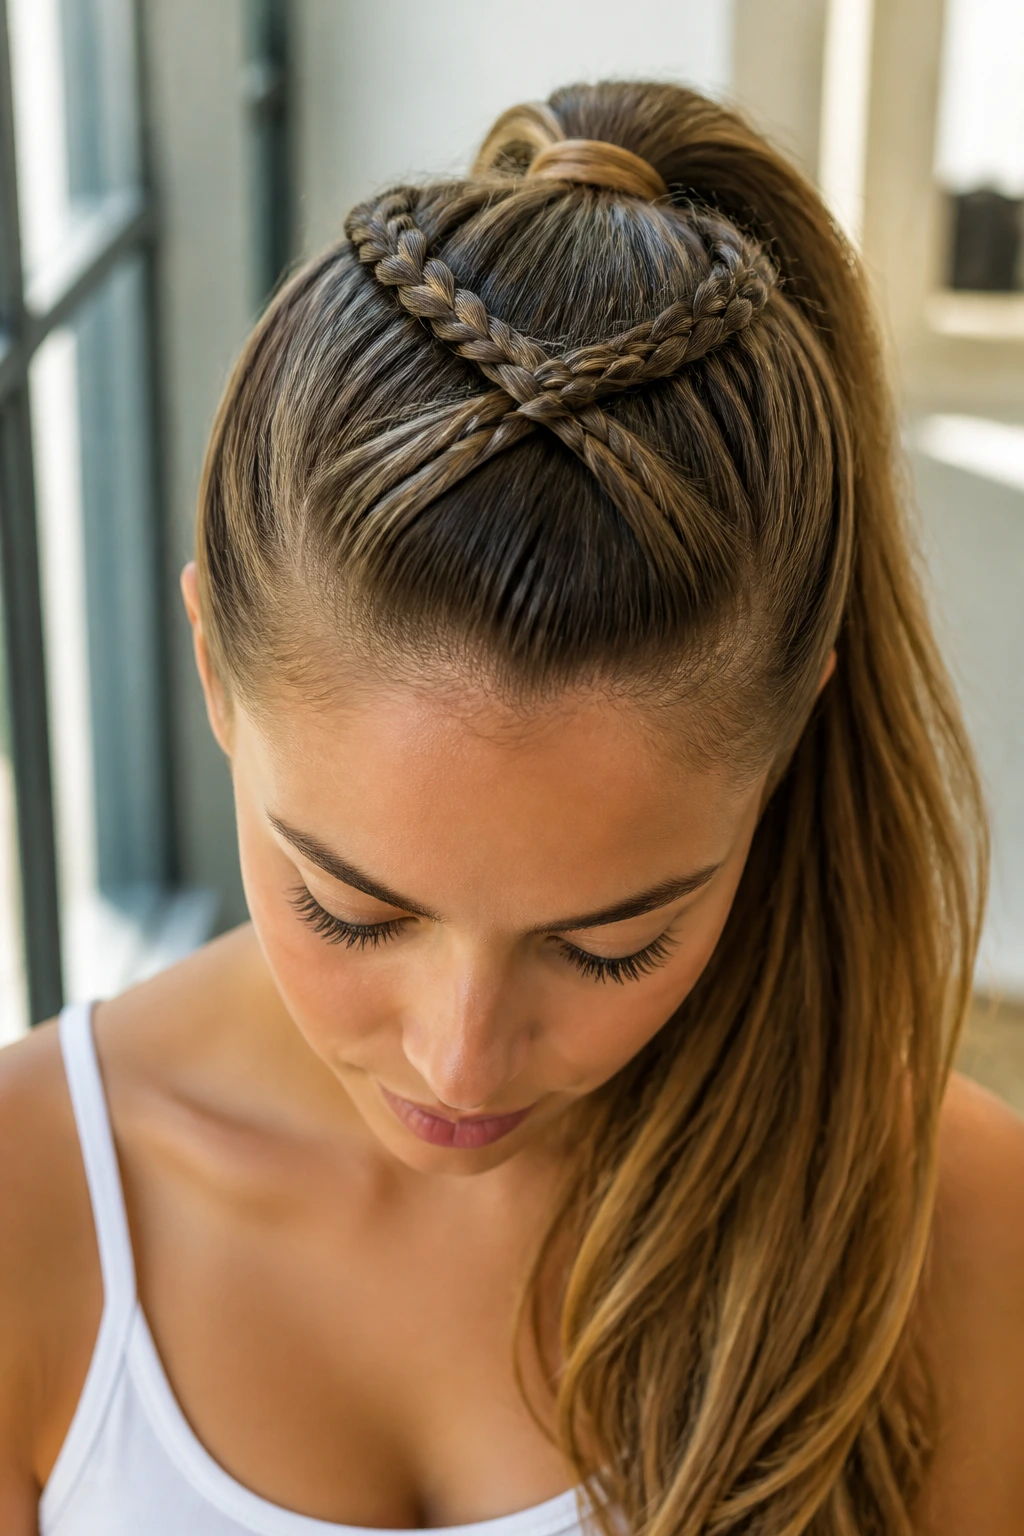
A criss-cross braid gives the front of the head something interesting to do before the length drops into a ponytail. Two small braids, or two sections crossed and pinned, create a lattice effect across the crown. Then the rest of the hair hangs in one smooth tail.
The style works because it moves the eye upward first, then lets the long hair show off once it falls. It’s good when you want some detail near the face but not a fully braided scalp. Keep the crossing sections narrow so they don’t puff out and make the crown look bulky.
It’s a neat compromise between polished and easygoing.
32. Side Cornrow Into Long Tail
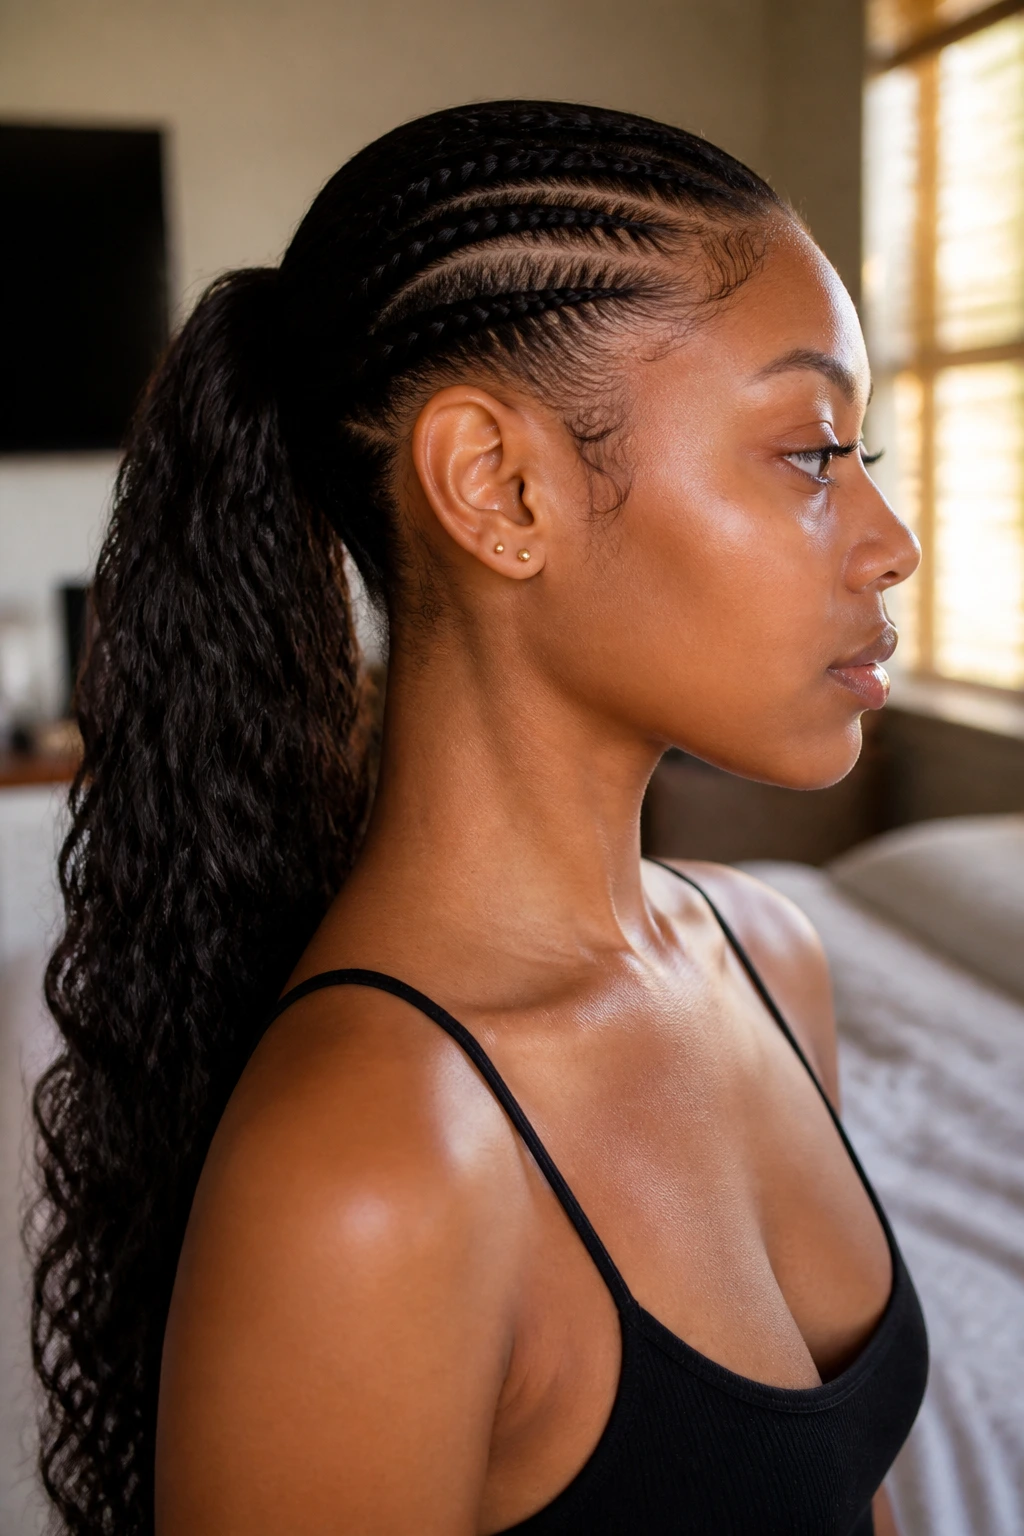
A single side cornrow gives you structure at the front and freedom at the back. The braid sweeps along the hairline or temple, then the rest of the hair gathers into one long tail that can be straight, curled, or braided again. The contrast is what makes it work.
This is a style with edge to it, but not too much. It keeps the hair out of your face on one side and leaves enough length on the other side to feel soft. The key is a clean part and a steady hand near the temple, where uneven tension shows up fast.
I like it when I want one detail to carry the whole style.
33. Bubble Braid With a Braided Base
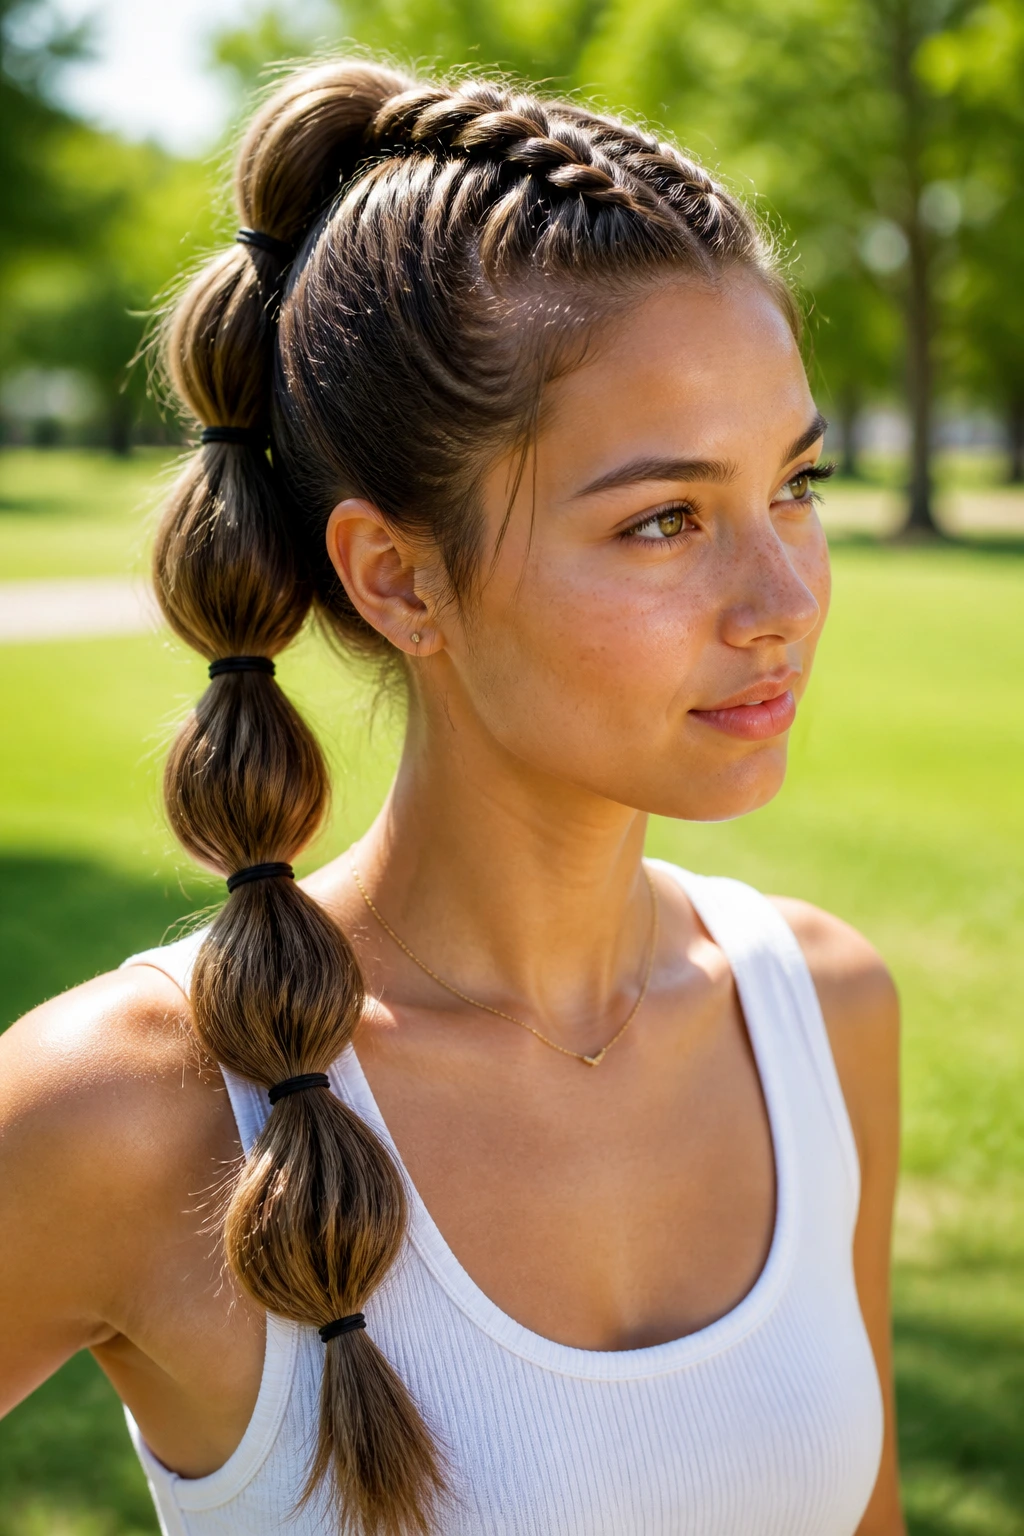
A bubble braid is basically proof that you do not need a complicated weave to get texture. Start with a small braid at the top or along the crown, then secure the rest of the length with evenly spaced elastics and puff each section into a bubble. Long hair is perfect for this because each bubble has room to round out.
Keep the elastics at the same distance apart if you want the rhythm to feel clean. If the spacing changes, the whole braid looks accidental. A small tug on each section after it’s tied gives the bubble shape more body.
It’s one of the fastest ways to make long hair look styled in a way that still feels playful.
34. Braided Faux Hawk
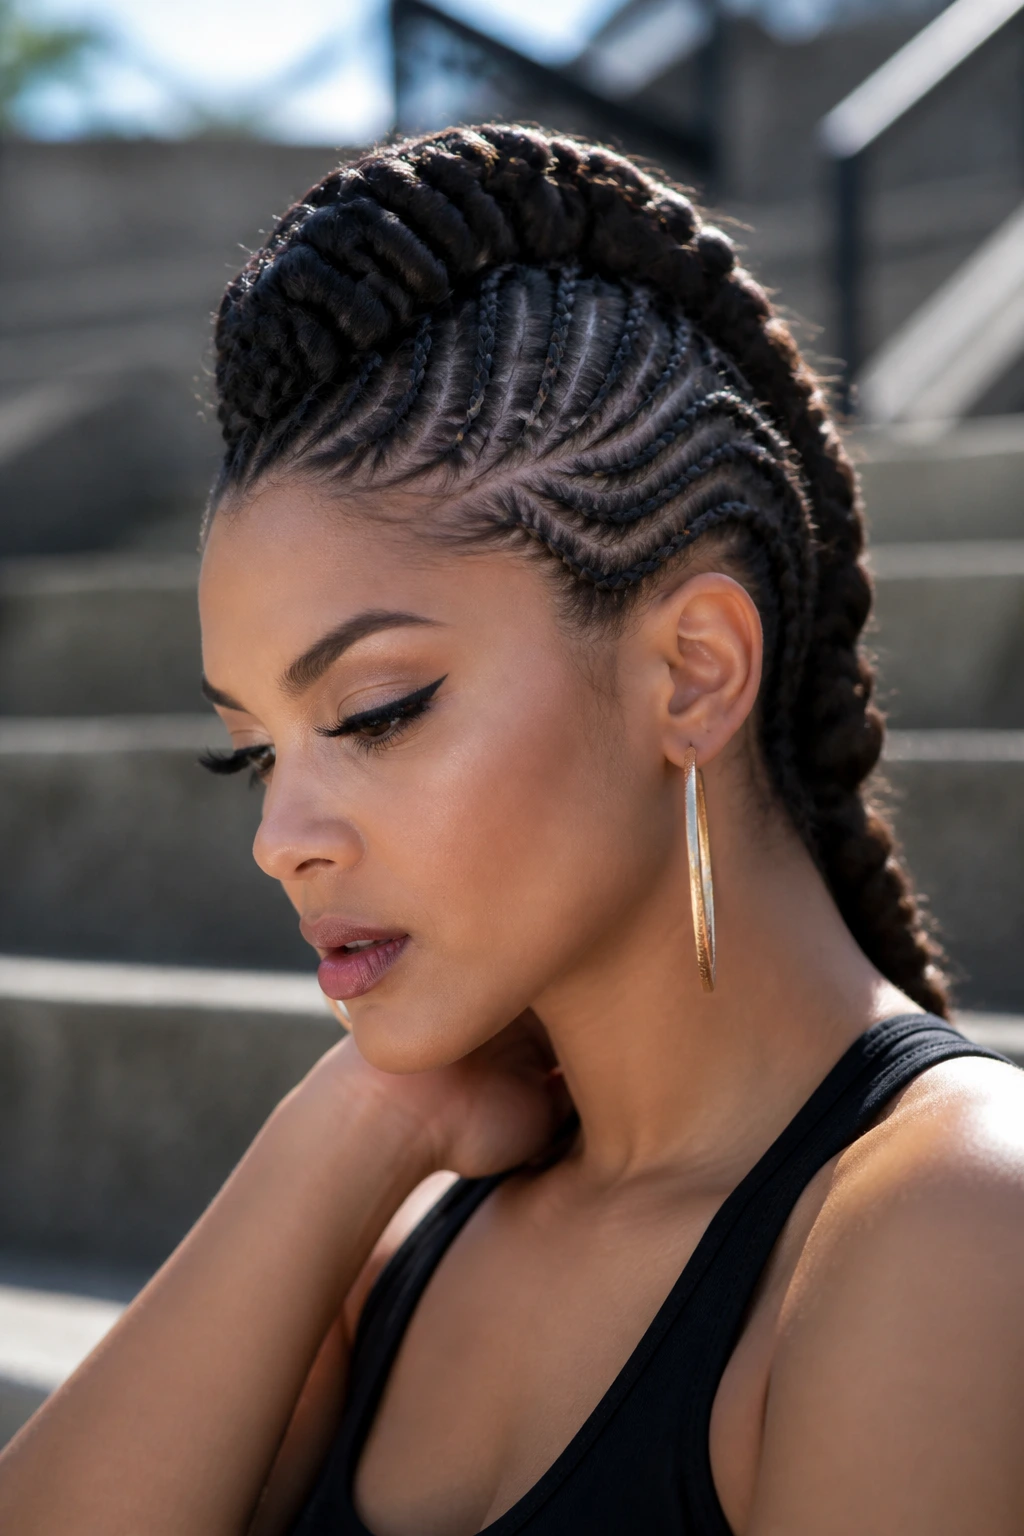
A braided faux hawk gives you all the attitude of a mohawk without shaving a thing. The sides get braided tight or pinned flat, while the center section stays raised and full. Long hair makes the center ridge look dramatic because the length can stack and fold rather than fall flat.
This style works best when you like contrast. Smooth sides. Big center. Clean lines. It can lean edgy or elegant depending on how high you build the middle and whether you curl the ends or tuck them into a roll. If your hair is very fine, tease the center lightly before you pin.
It’s not subtle. That’s the point.
35. Twisted Rope Crown With Loose Ends
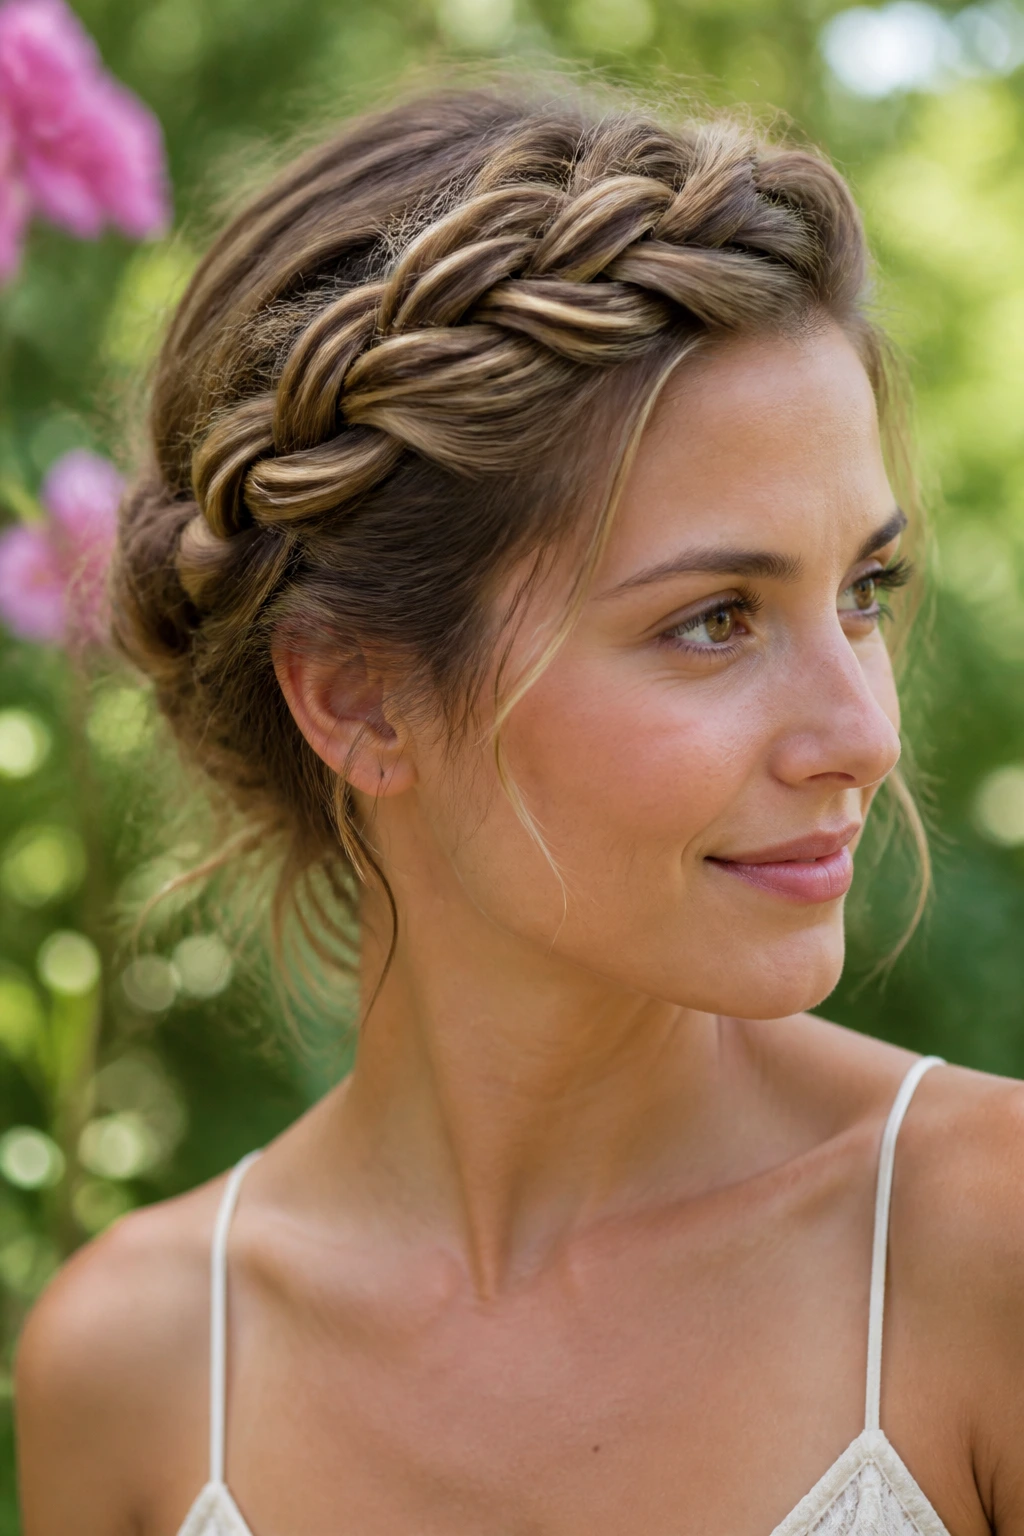
A rope crown braid is like a halo braid with a little more softness and a little less precision. The twisted sections wrap around the head, but the ends can be left loose at the nape or tucked in just enough to stay neat. On long hair, the shape feels full without needing much product.
I like this style because it doesn’t demand perfect symmetry. If one side sits higher, the twist still reads well. Keep the crown smooth and the twists even, then leave the ends soft rather than forcing them into a tight knot. That loose finish keeps the style from feeling too formal for daytime wear.
It’s one of the easiest ways to make a long braid look a little more romantic.
Why Braids Make Sense When the Air Gets Sticky
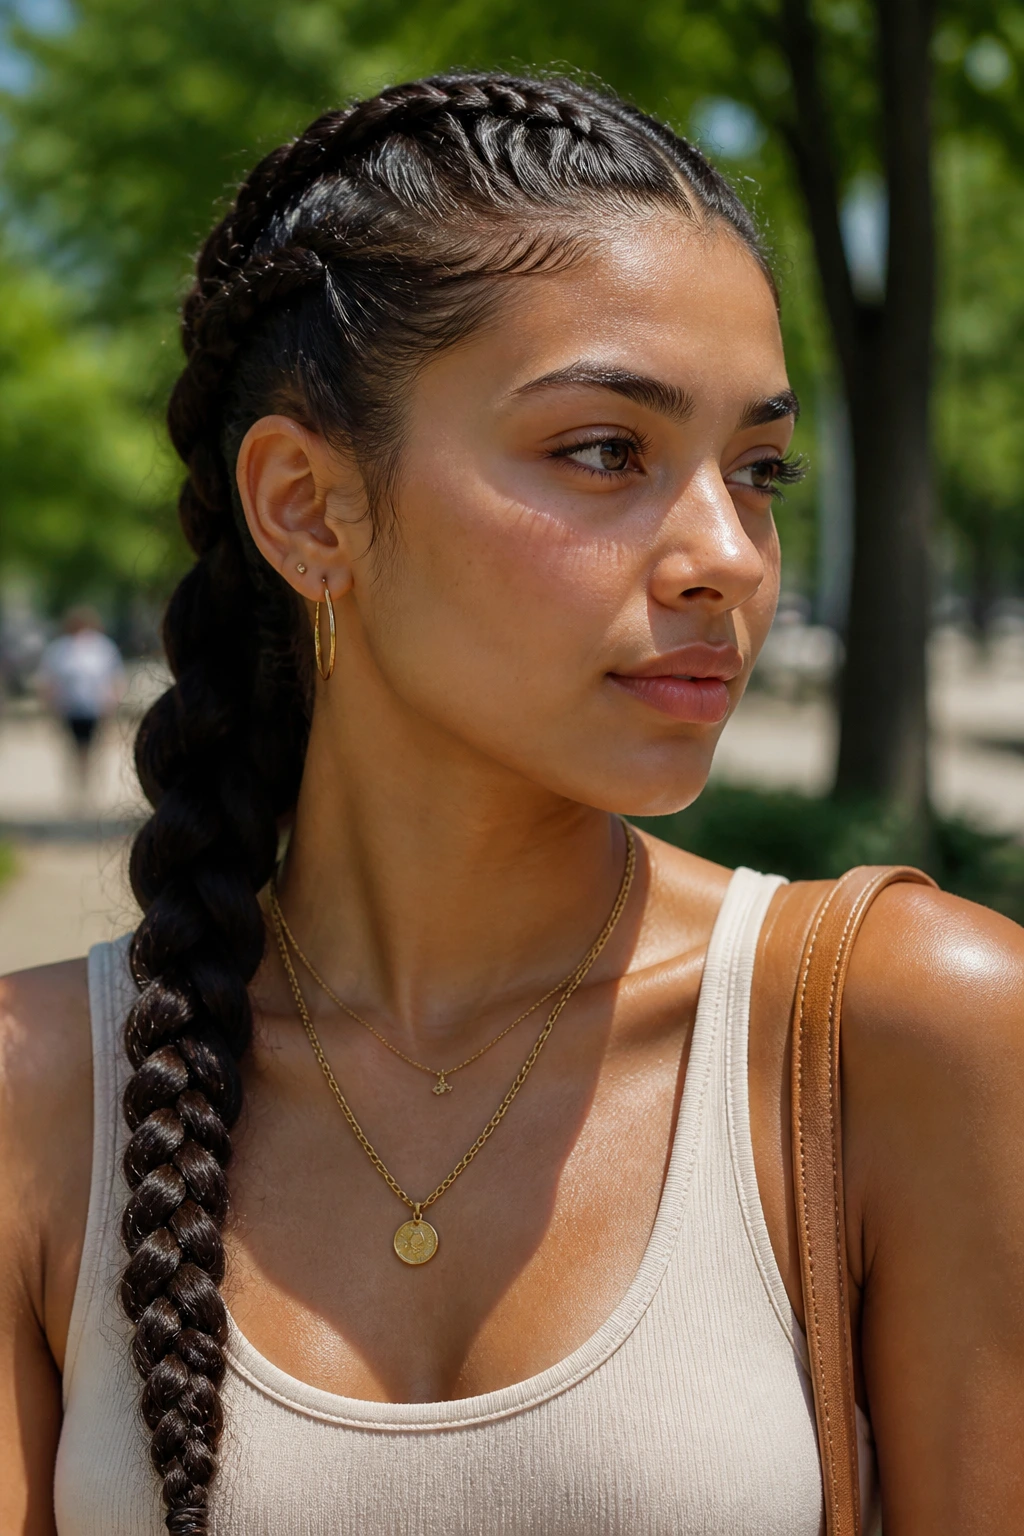
Braids solve a boring summer problem in a very practical way: they reduce the amount of loose hair touching your skin. That sounds small until you’ve spent an hour with damp ends sticking to your collarbone. Long hair holds heat. Braids redistribute it.
They also reduce friction. Hair rubbing against hair is a fast path to tangles, especially if you’re moving between outdoor heat, air conditioning, and a humid car ride. When the strands are gathered into a braid, there’s less surface area to frizz out and fewer loose pieces to knot themselves into trouble.
The other advantage is shape. A braid gives the hair a line. Loose hair in humidity tends to spread, swell, and blur at the edges. A braid keeps the silhouette readable, even if the weather gets rude. That matters more than people think.
And yes, the style range is the fun part. You can go sporty, polished, soft, or decorative without changing the core technique much. That’s the real reason braids keep coming back in hot weather. They do the job, then they still leave room for personality.
Essential Tools for These Styles
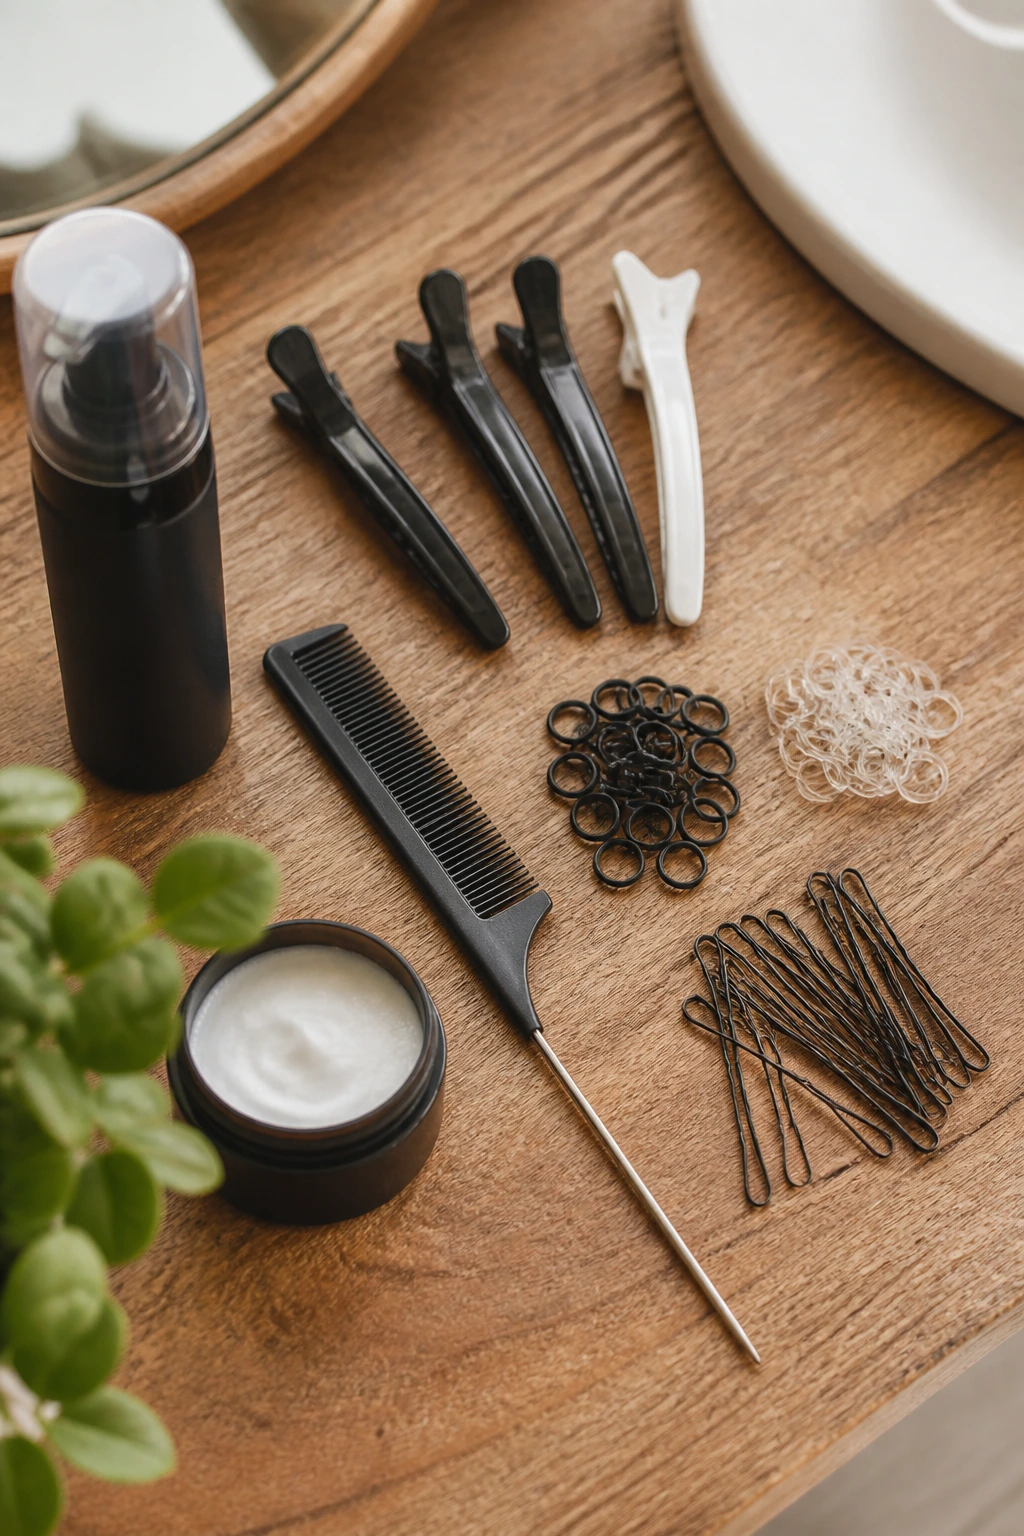
- Rat-tail comb: Clean parting makes a huge difference, especially for cornrows, zigzag parts, and crown styles.
- Sectioning clips: These keep the rest of the hair out of the way while you braid one area at a time.
- Small snag-free elastics: Use them for pull-through braids, pony braids, and bubble styles; the coated kind break less hair.
- Bobby pins: U-shaped pins and regular pins both help anchor buns, crowns, and tucked ends.
- Light mousse or setting foam: A small amount adds grip and keeps flyaways from taking over.
- Flexible-hold hairspray: Useful for smoothing the surface without making the braid crunchy.
- Edge brush or small toothbrush: Handy for softening the hairline and smoothing baby hairs without overdoing it.
- Satin scarf or bonnet: Keeps the braid from frizzing overnight and protects the shape.
- Wide-tooth comb: Better than a fine brush once hair is already sectioned and you want to keep tension gentle.
- Hair oil or lightweight serum: Use sparingly on the ends, not the roots, so the braid stays neat instead of greasy.
Smart Product and Prep Tips for Long Hair
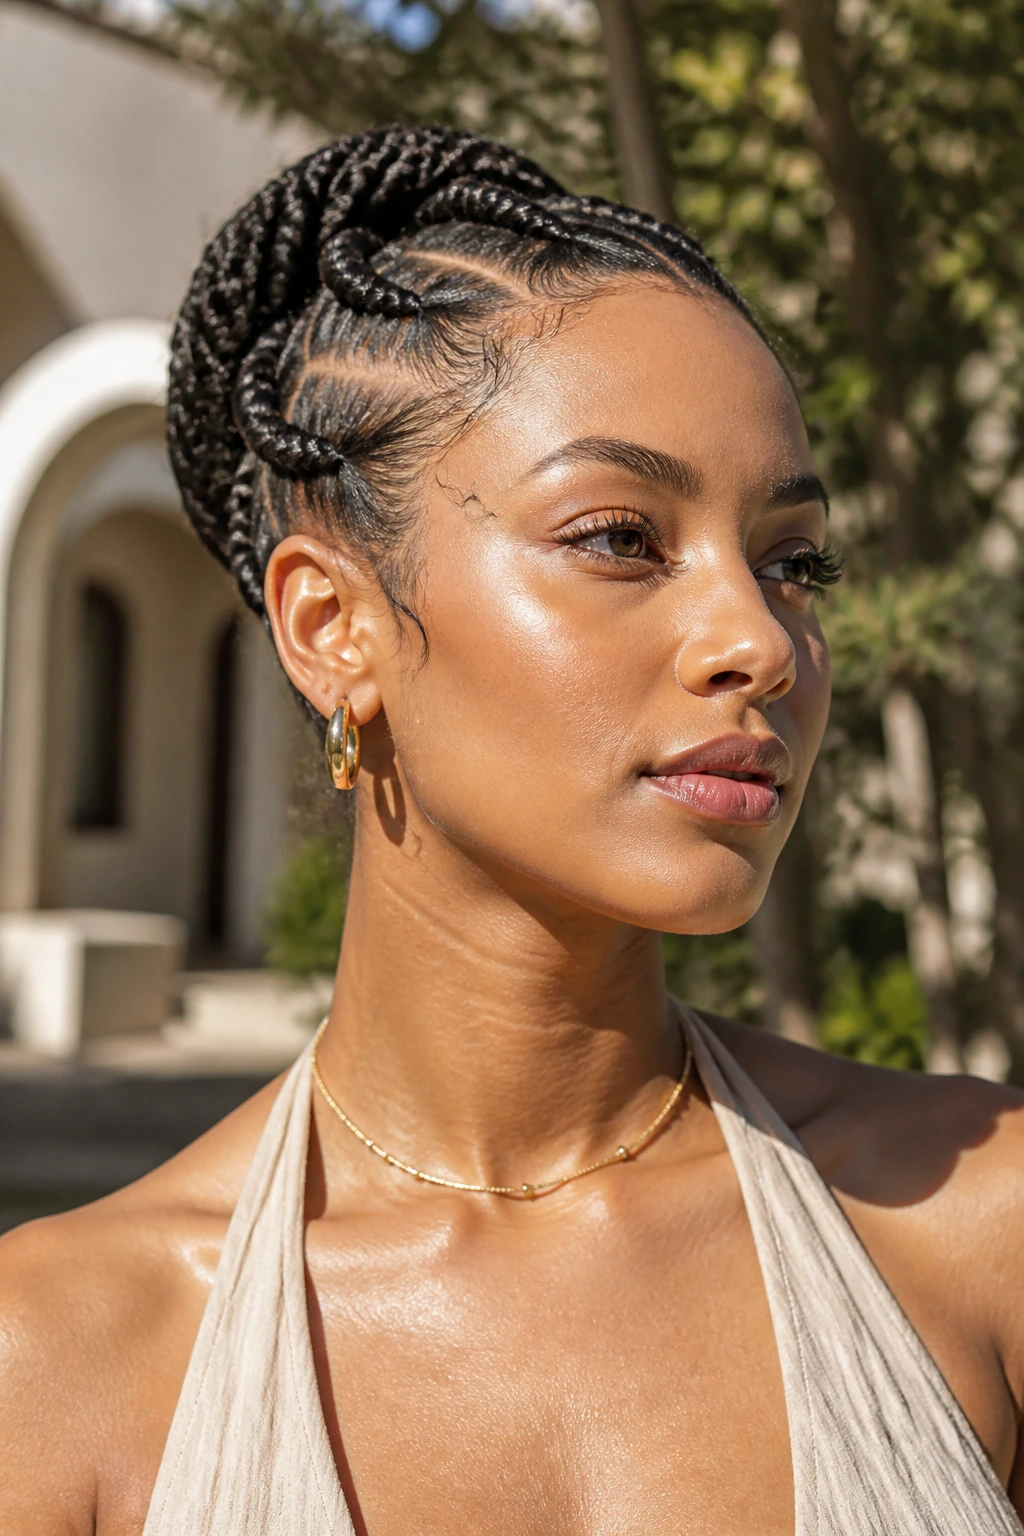
The biggest mistake people make with braided styles is starting with hair that’s either too slippery or too loaded with product. Clean hair can be great, but if it’s freshly washed and silky, the braid may slide apart before you finish the last section. Second-day hair often behaves better because it has a little grip. If the roots feel too flat, a dusting of dry shampoo helps.
Choose products by weight, not by promise. Thick creams sound helpful, but they can make long hair collapse into a soft, fuzzy rope. For most of these styles, a mousse, light gel, or setting foam gives enough control without coating the strands. If you need more hold, add it at the roots and hairline first. That’s where the braid needs structure.
Dryness matters too. If you braid damp hair and leave it that way for hours, the style can set unevenly and sometimes smell stale before you’re ready to take it down. Dry the hair fully unless the style is meant to be set wet. That distinction saves a lot of frustration.
If your hair is layered, use a little extra care around the face. Those shorter pieces love to pop out at the first chance. Smooth them into the braid or pin them down with a tiny clip before you start. That one move can change the whole finish.
How to Wear These Styles Well
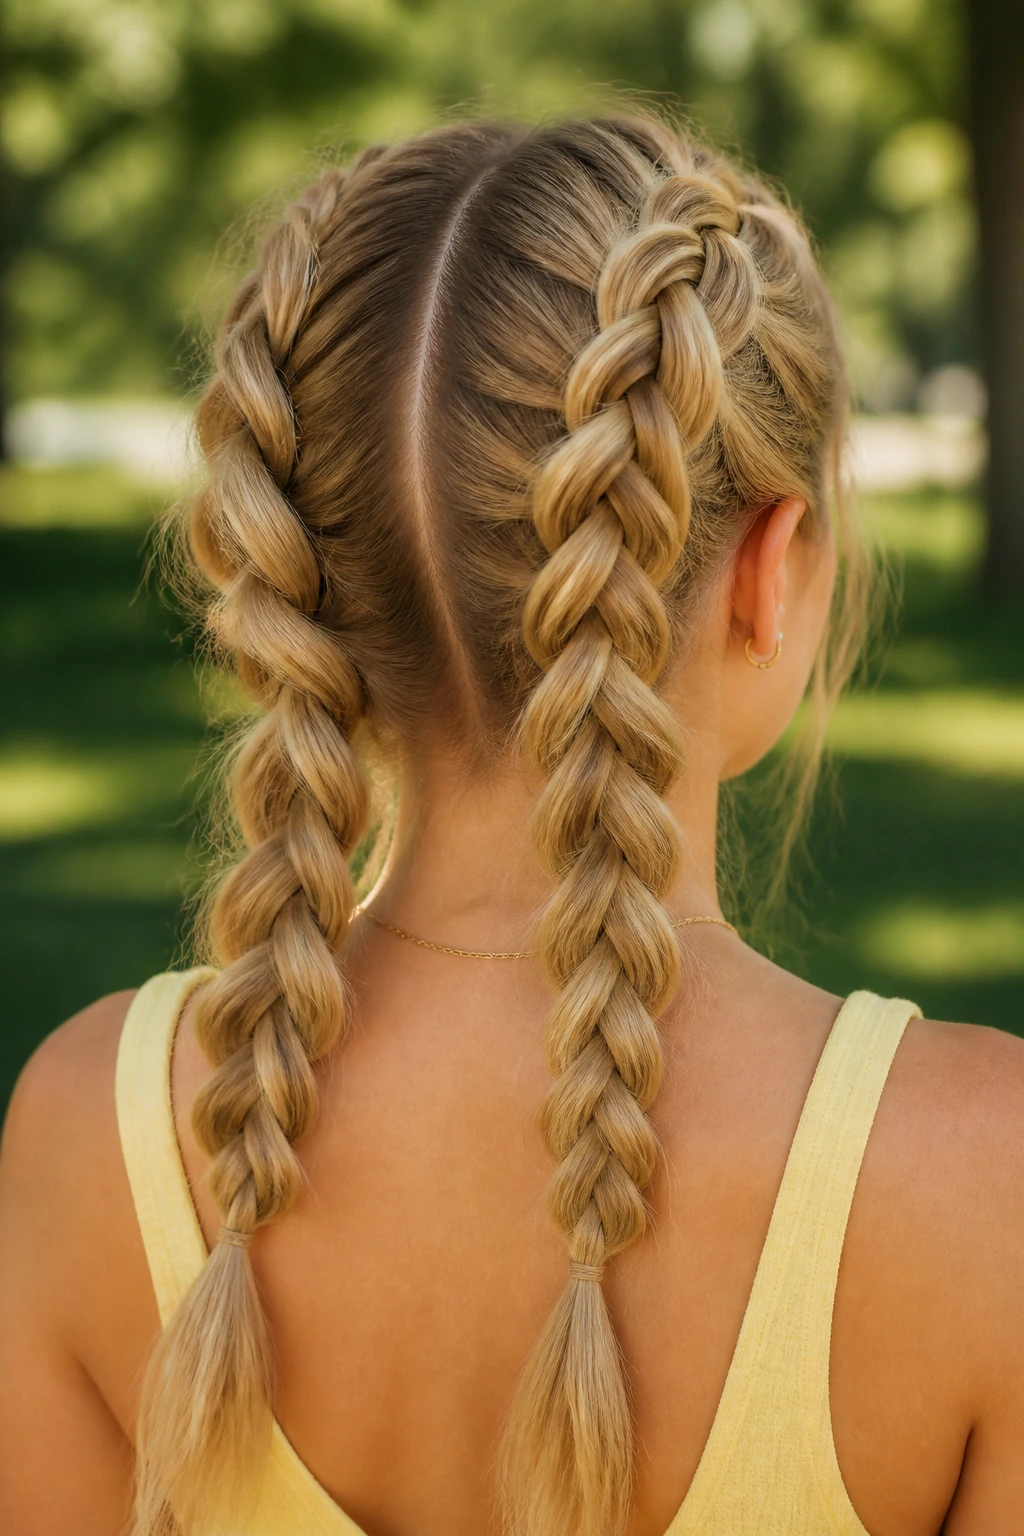
Presentation: The cleanest braid styles are the ones that follow the head shape on purpose. Keep the crown smooth, the parts sharp, and the ends either tucked neatly or finished with one visible accent. A braid that looks half-finished at the back loses its charm fast.
Best Pairings: Sporty double braids work with tanks, tees, and sunglasses. Crown braids, side sweeps, and low buns settle nicely with dresses, button-downs, and open-neck tops. A braided ponytail or faux hawk likes structured clothes because the hair already carries enough movement.
Wear Time: Loose braids and braided ponytails usually look best for one to three days with light refreshes. Installed or tighter protective styles can last longer, but only if the scalp stays comfortable and clean. If your hairline starts to ache, it’s time to loosen or redo the style.
Accessories: Ribbons, cuffs, scarves, and a few pins are enough. Do not pile everything on at once. One scarf at the end or a few gold cuffs near the base usually looks better than a braid trying to wear a whole jewelry box.
Small Tweaks That Change the Whole Look
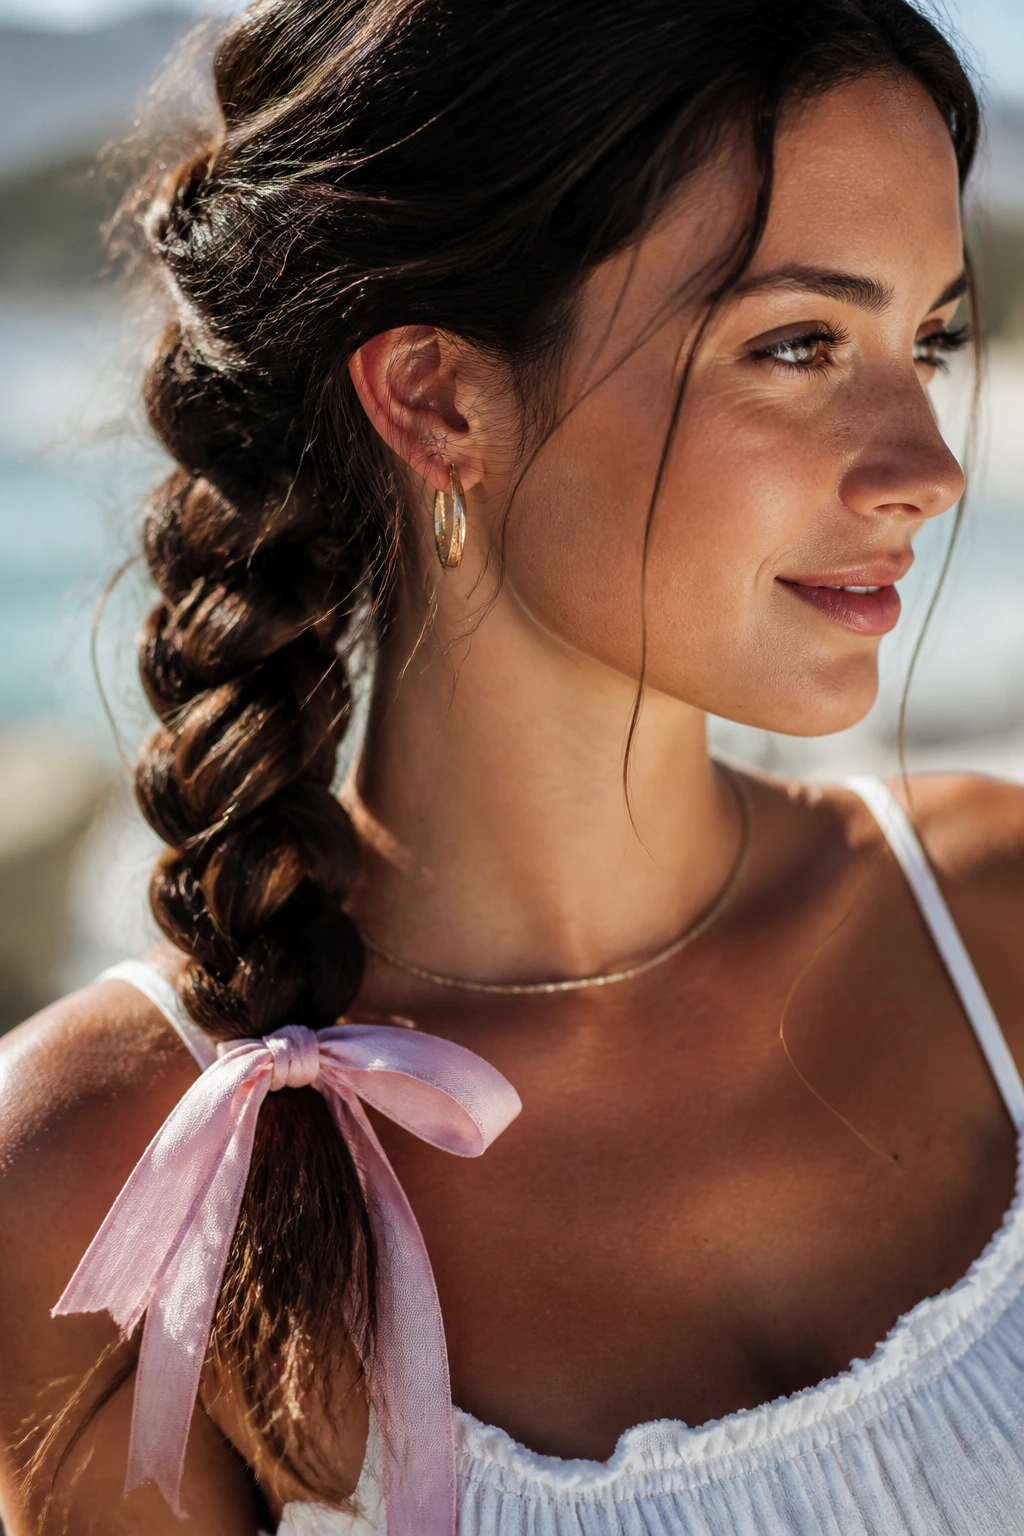
Shape Boost: Pancake the outer edges of thicker braids after they’re secured. That little tug makes the braid look fuller without adding more hair. Do it gently so the center doesn’t split.
Comfort: If a style feels too tight at the hairline, start the braid a half-inch farther back next time and use pins to guide the shape. Your scalp will thank you by hour three.
Finish: A mist of flexible-hold spray or a pea-sized amount of mousse on the palms can calm flyaways without turning the style hard. Keep the product on the surface. Heavy product at the roots makes braids slide.
Make-It-Yours: Add a ribbon for softness, beads for weight and movement, or a side part for a quieter finish. If you want a cleaner look, skip the extra decoration and focus on parting and pin placement instead.
Maintenance, Wash Days, and Sleep Prep
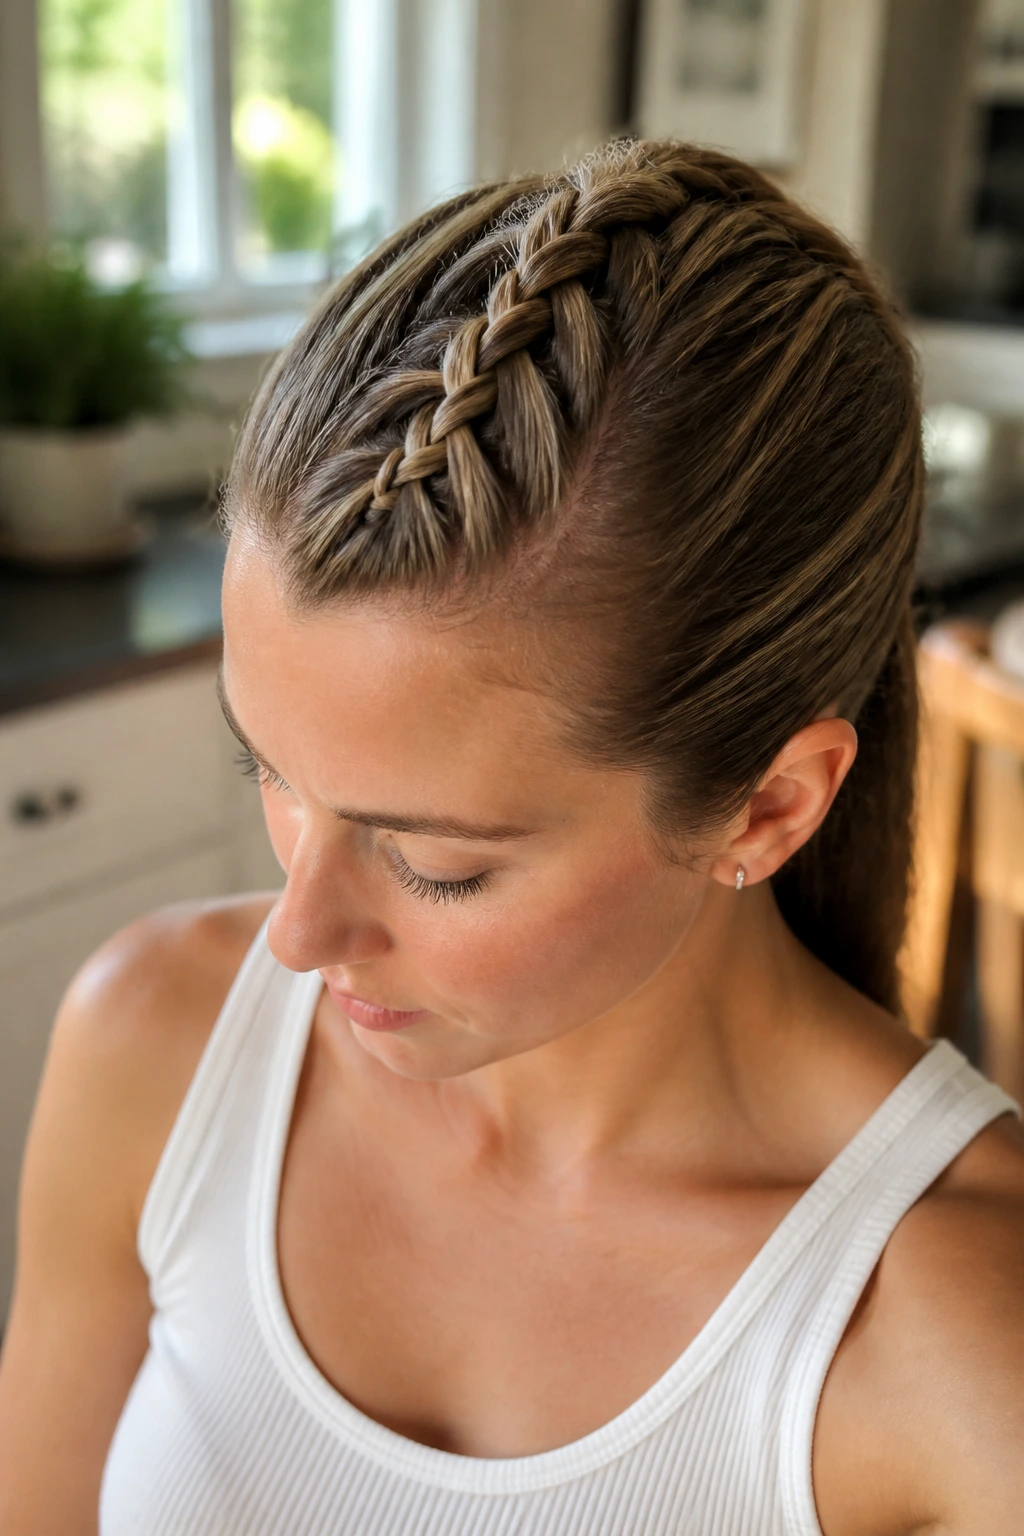
Braided styles stay nicer when you protect them at night. A satin bonnet or scarf keeps the surface from rubbing rough against cotton pillowcases, and that matters more on long hair because there’s more length to frizz. If the style uses your natural hair only, a light refresh every morning with damp hands or a touch of mousse can keep the braid from puffing out.
For loose braid styles, washing every few days usually works fine if your scalp gets oily. Use a diluted shampoo or a nozzle bottle to reach the roots without soaking the whole style. Rinse carefully, then dry fully before bed. Sleeping on damp braids is how you end up with a weird smell and sections that never settle back into place.
Protective styles with extensions need a different rhythm. Keep the scalp clean, but don’t drench the braid every time you want freshness. A careful wash every one to two weeks and a light oil on the scalp in between usually works better than over-wetting the whole style. If the roots start to look fuzzy or the edges lose shape, refresh sooner rather than later.
When a braid starts to feel loose at the nape or the front pieces keep slipping out, do not keep pushing it. Redoing a section takes less time than fighting the style all day.
Variations and Adaptations to Try
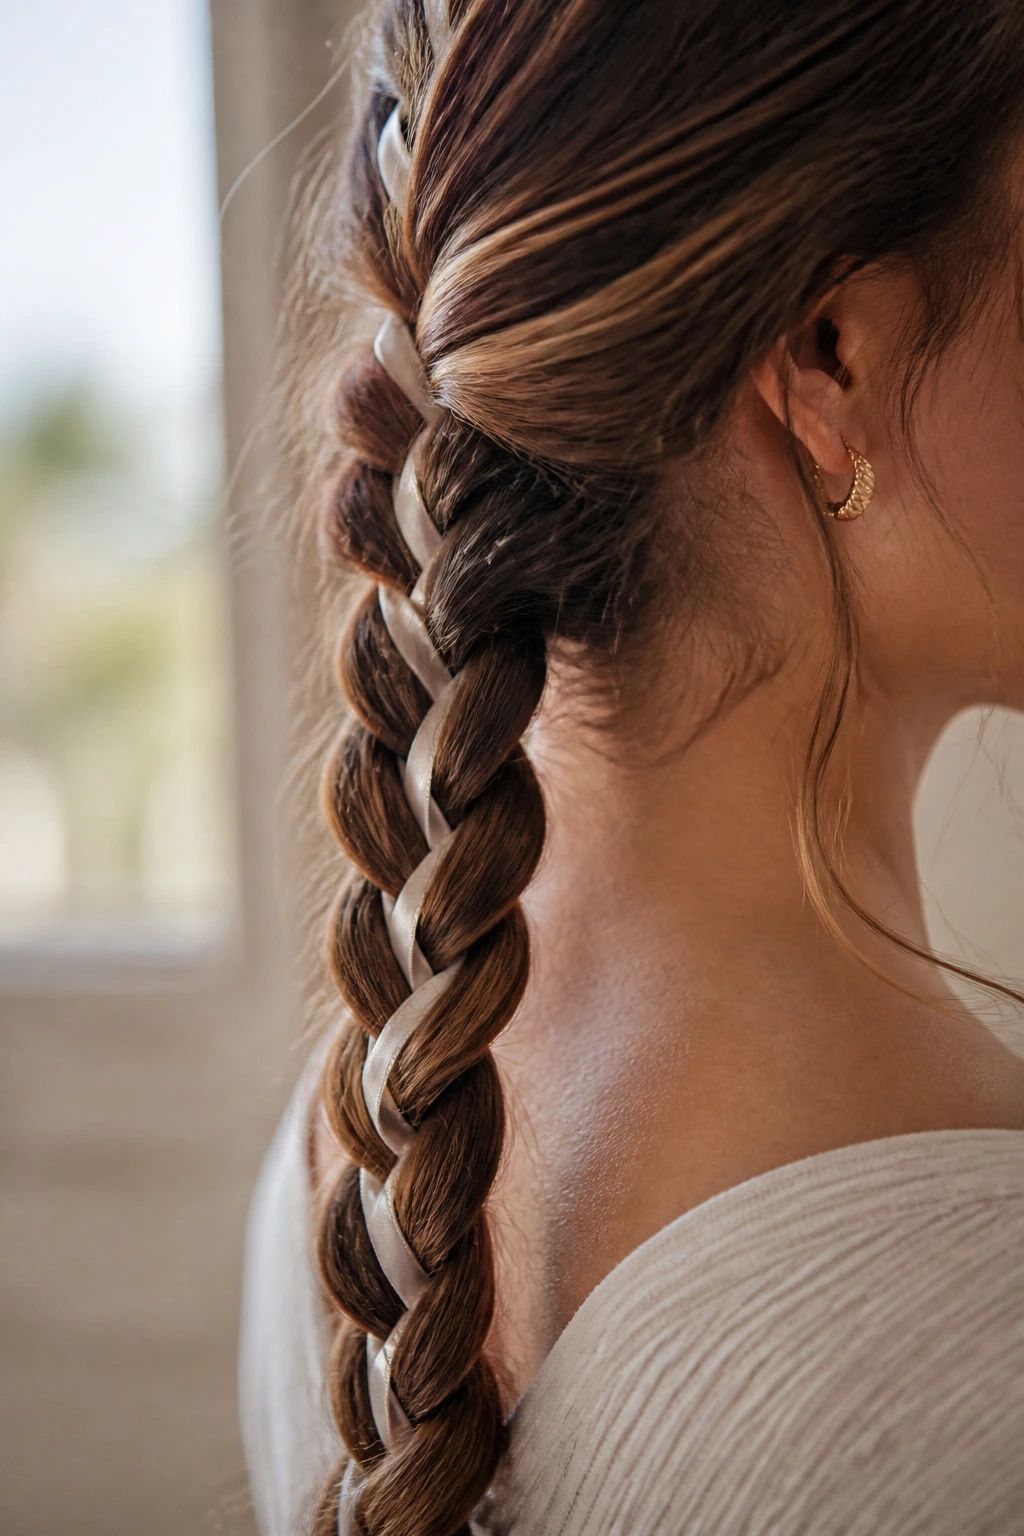
Ribbon-Threaded Finish: Swap one braid strand for a narrow satin ribbon, or tie a ribbon around the base and weave it down the length. It softens the look and works especially well on plain braids that need one focal point.
Beaded Ends, Bare Crown: Keep the crown clean and add beads only near the bottom third. That gives movement without making the roots feel heavy, which is a smart move for fine hair or long wear.
Low-Tension Everyday Version: If your scalp is sensitive, keep the braid looser at the roots and rely on pins or elastics for support. The style will look softer and last longer because you are not fighting tension from the start.
Gym-Proof Finish: Skip loose face-framing pieces and pin everything tightly toward the back or crown. The braid may look a little sharper, but it stays put during movement and sweat.
Polished Event Version: Smooth the surface with a tiny amount of serum, tuck all visible ends, and keep any accessories limited to one metallic cuff or one ribbon. The braid reads cleaner that way, especially under indoor light.
Beach-Ready Loose Version: Leave the braid slightly undone and embrace the texture. Salt air and wind will rough it up anyway, so a softer start usually looks better by the end of the day.
Common Mistakes to Avoid
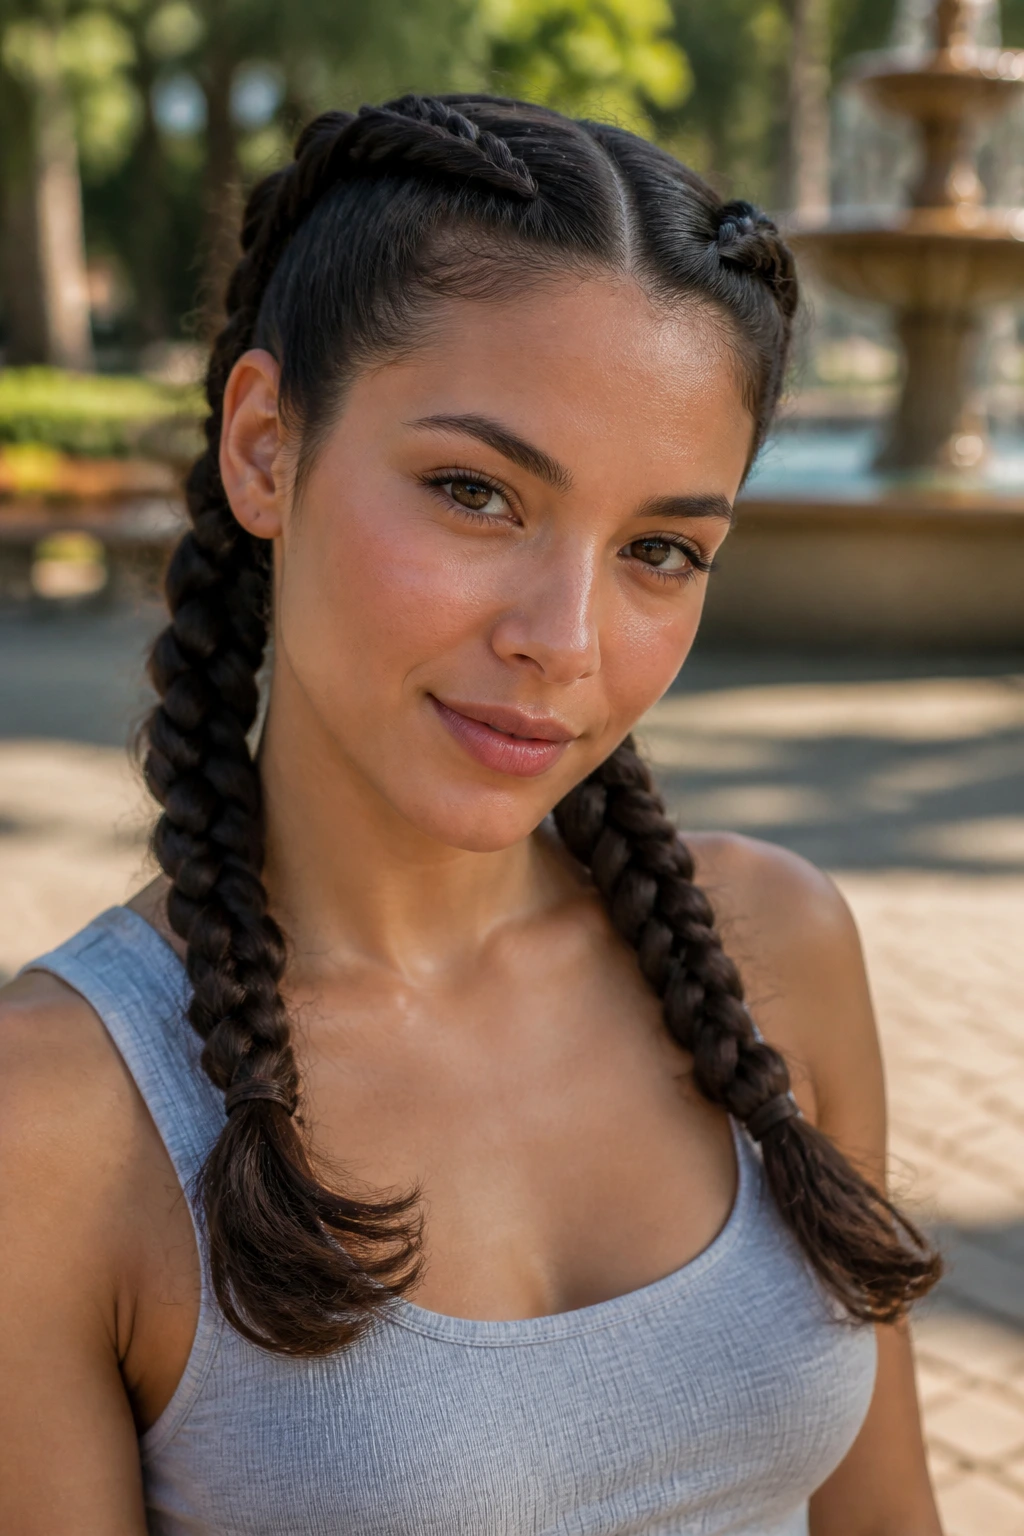
Braiding damp hair and leaving it that way: The braid can dry in a rough, fuzzy shape, and the scalp may feel uncomfortable. Dry the hair fully unless the style is meant to set wet.
Using too much product at the roots: Heavy cream or oil near the scalp makes strands slip and the braid collapse. Use a light mousse or gel at the base, then keep richer products for the ends.
Pulling too tight at the hairline: You might get a sharp look for an hour, then a headache by lunchtime. Keep the tension even and stop the braid a little farther back if your edges are delicate.
Ignoring the parting: Ragged parts make even a good braid look messy. Use a tail comb and section clips; the result is cleaner and faster to shape.
Leaving the ends unfinished: Loose ends can fray, puff, or snag on clothes. Secure them with an elastic, tuck them into a bun, or add a ribbon or cuff so the finish feels intentional.
Overdecorating one braid: Two cuffs, three clips, a scarf, and beads can crowd the style. Pick one accent and let the braid do the rest.
FAQ
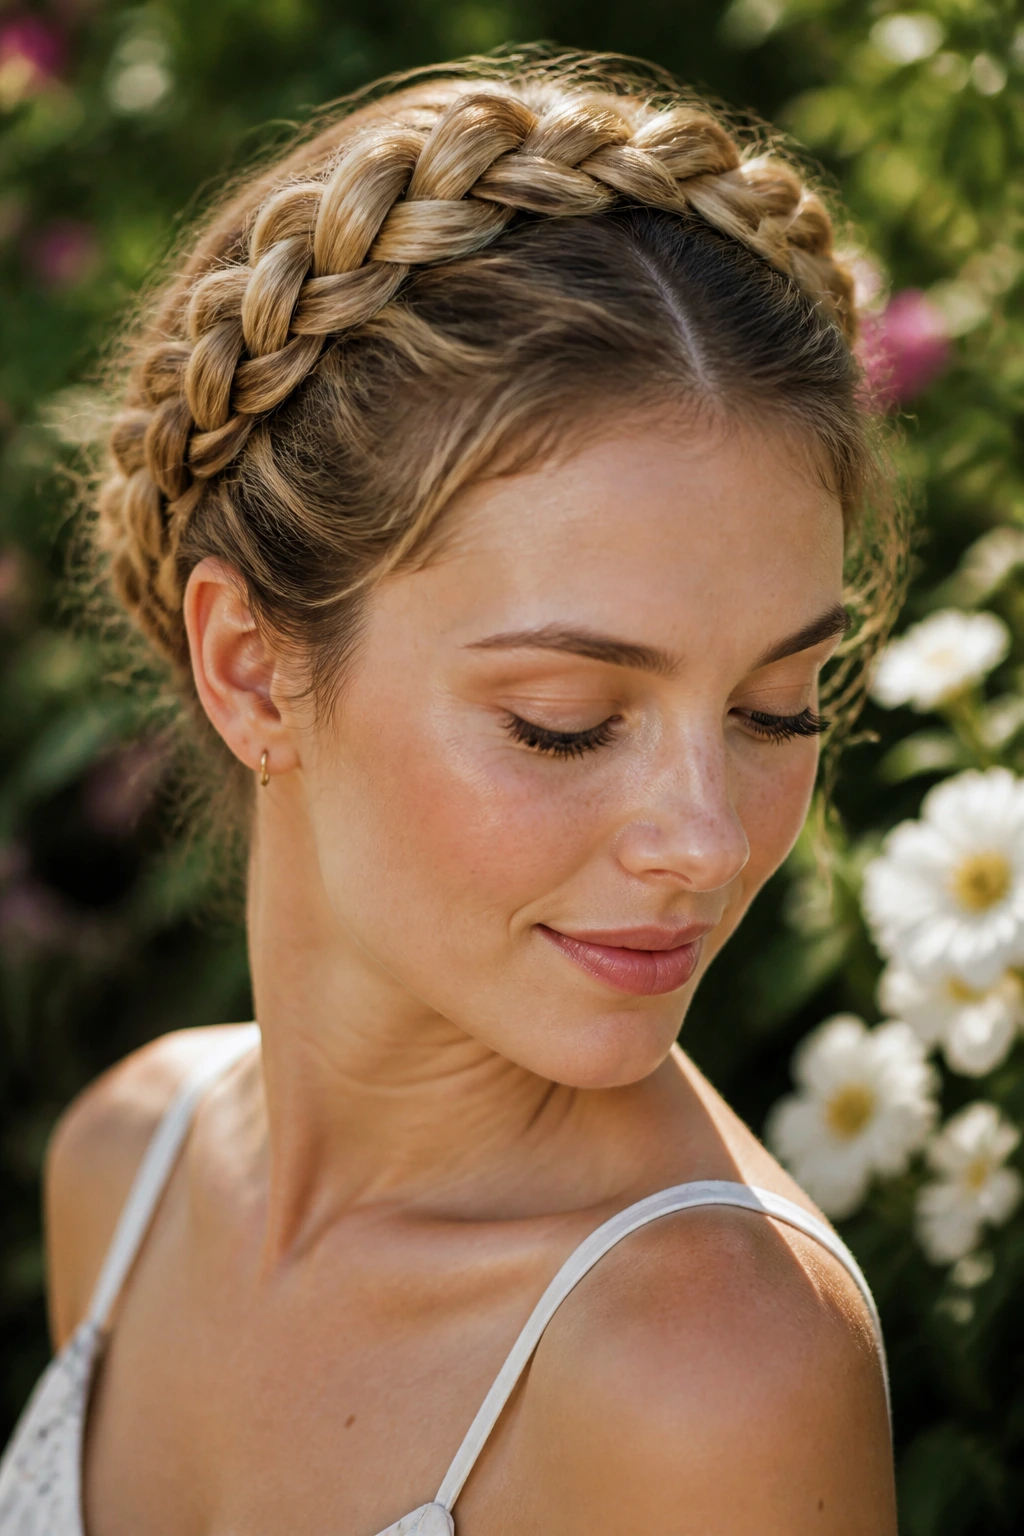
Which braid style lasts longest in summer heat?
Tighter styles like cornrows, goddess braids, knotless braids, and double Dutch braids tend to last longer because they keep the hair anchored close to the scalp. Loose styles can still work, but they usually need more refreshing around the hairline and nape.
What’s the easiest braid to do on long hair by yourself?
A single French braid, a rope twist ponytail, or a bubble braid is usually the least frustrating. They do not require perfect symmetry, and long hair gives you enough length to correct small mistakes as you go.
Can I braid my hair when it’s still slightly damp?
You can, but it’s not the best idea for every style. Damp hair can set in an uneven shape and feel stale if it stays wet too long, so use that approach only when the style is meant to dry into place and you can fully air-dry or diffuse it.
How do I keep braids from frizzing in humidity?
Start with a dry base, keep product light, and finish with flexible-hold spray instead of heavy cream. At night, a satin scarf or bonnet helps a lot more than most people expect.
Do braids damage long hair?
They can if the tension is too tight or the style is left in too long without care. Gentle tension, clean parting, and regular scalp checks keep most braid styles comfortable.
How often should I wash braided styles?
Loose natural-hair braids may need washing every few days, while tighter or installed styles can go longer with careful scalp cleaning. The sweet spot depends on how oily your scalp gets and how much product you use.
What if my layers keep falling out of the braid?
Use a little mousse or texturizing spray before you start, and clip shorter pieces out of the way while braiding. If the layers are very short, styles like crown braids, pony braids, or half-up braids usually behave better than long loose plaits.
Can I wear these styles with a hat or visor?
Yes, but choose braids that sit flat at the crown, like low buns, side braids, or double Dutch braids. Bulky top knots and high buns can fight with a hat brim and get flattened in awkward spots.
What’s the best braid style if I want less tension on my scalp?
A loose French braid, side-swept braid, or a rope twist style usually feels gentler than tight cornrows or very small braids. Keep the roots soft and let pins do some of the work so the scalp is not carrying all the tension.
The Braids I’d Reach For First
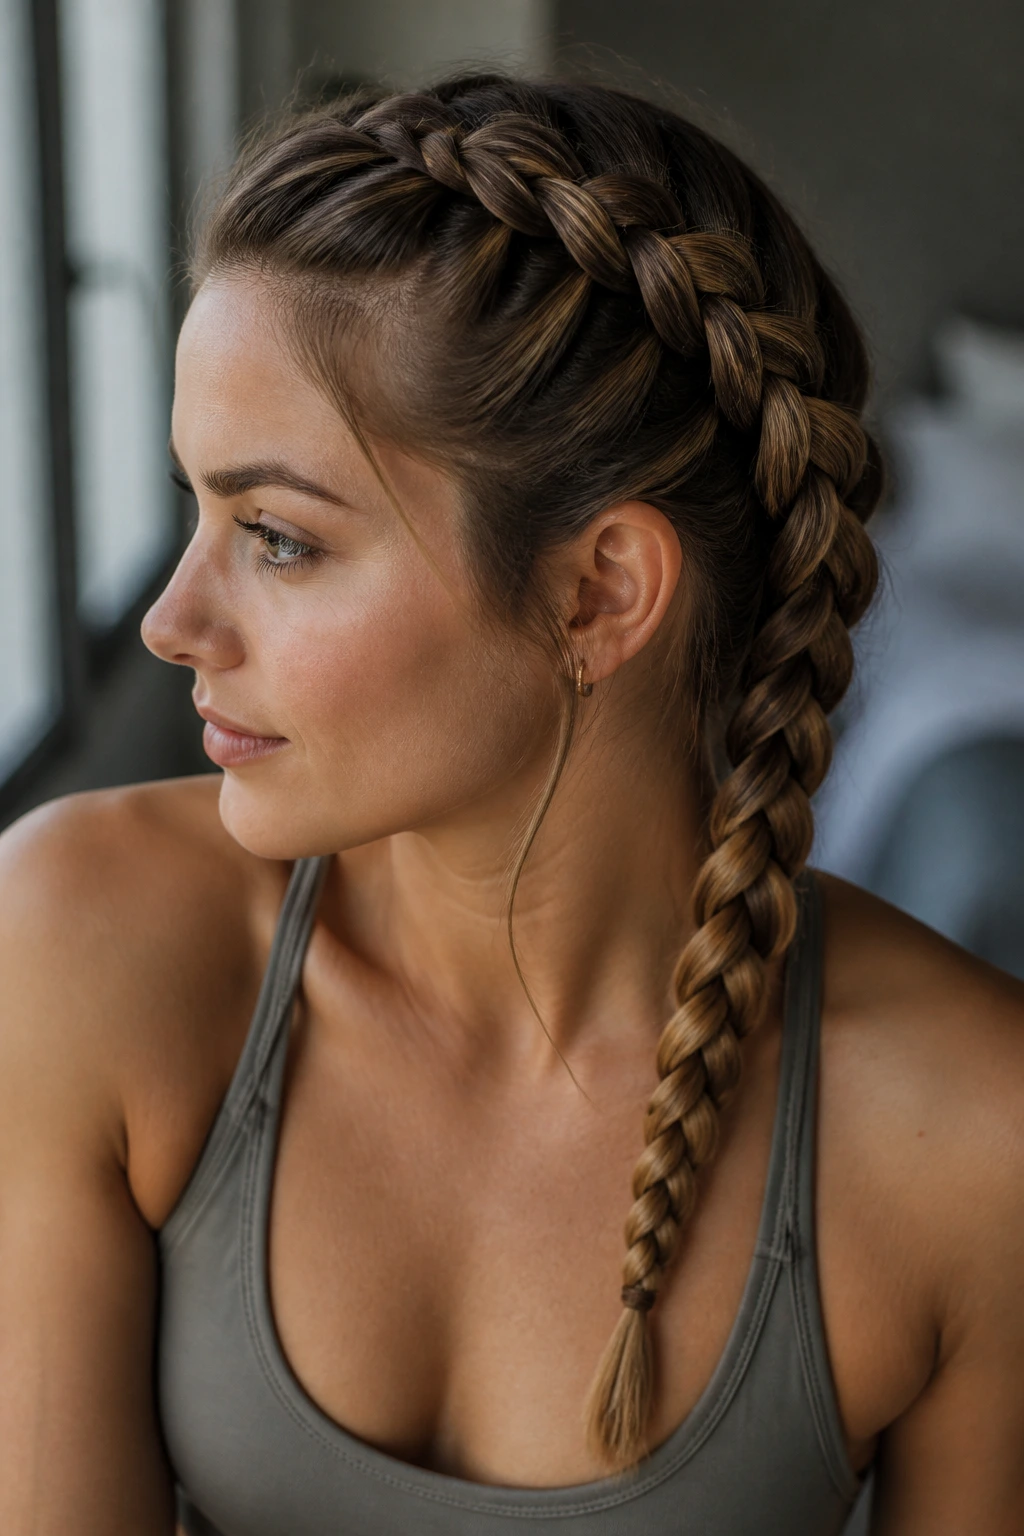
The best braid styles for long hair in summer are the ones that answer a real problem before they try to impress anybody. Heat at the neck. Frizz at the crown. Ends that snag and tangle every time you move. If a braid solves one of those cleanly, it earns a place in the rotation.
I’d start with the styles that fit your actual day, not the fantasy version of it. A Dutch braid or rope twist for speed. A crown braid or low bun when you want hair off your skin. A fishtail, waterfall, or ribbon braid when you want the shape to feel a little more finished. That mix keeps long hair useful instead of annoying.
Once you know which braid patterns hold up best on your hair, the rest gets easier fast. And summer stops feeling like a season you have to style around.
