



Lowlights are the part of soft dimensional color that save hair when highlights start looking too neat, too bright, or too stripped of shadow. A couple of shades deeper, placed in the right spots, can make blonde look fuller, brunette look richer, and curls look like they have more shape instead of one flat halo of color.
I’m picky about lowlights. Too dark, and they turn into stripes. Too warm, and they muddy everything. But when the shade is one or two levels deeper than the base and the placement respects the haircut, the effect is quiet in the best way: hair looks thicker at the ends, the crown gets less glare, and the whole head stops reading like one long sheet of light.
That’s what makes lowlights such a useful color move. They do not need to be loud to do real work. A mocha veil under beige blonde, a mushroom ribbon through a cool brunette, a smoky beige thread through champagne hair — these changes show up in motion, not in a harsh before-and-after line. And that’s the point. The right lowlights should feel like they were always part of the haircut.
Why These Lowlights Ideas Stand Out
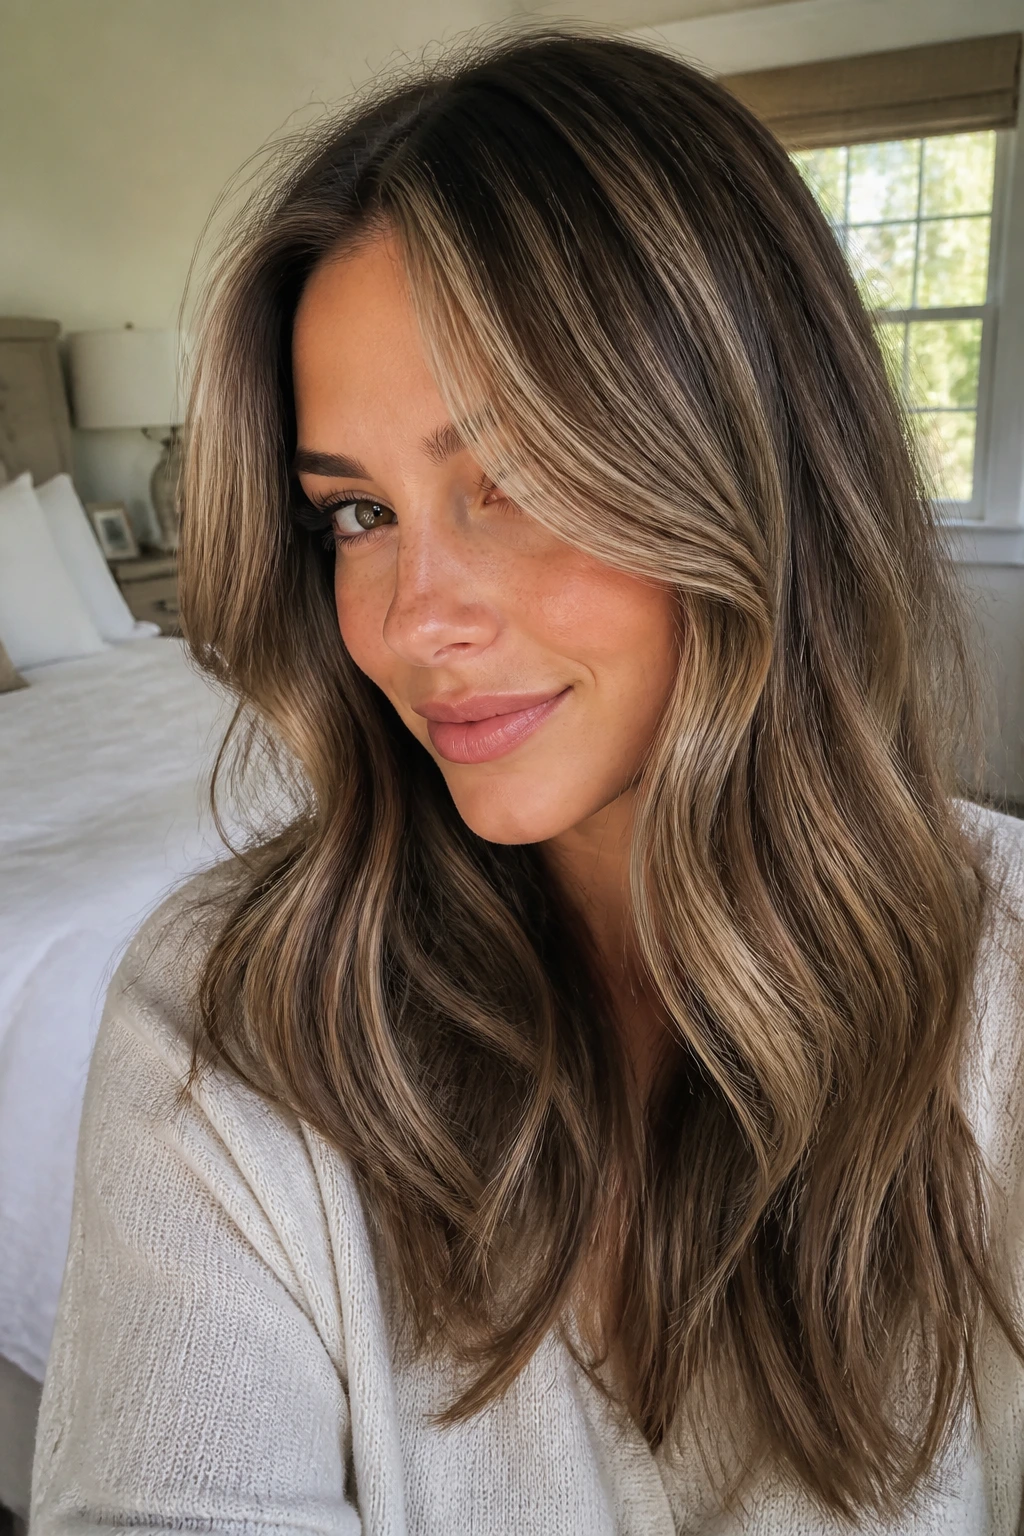
-
They soften brightness instead of fighting it: the best ideas here use depth to calm over-lightened hair, not to bury it under a dark blanket.
-
They solve different problems: brass, flatness, washed-out curls, see-through ends, and root grow-out all need slightly different lowlight placement.
-
They stay believable in real light: these shades are chosen to look good in daylight, bathroom mirror light, office light, and the unforgiving light near a car window.
-
They respect texture: fine hair needs a lighter touch, curls need placement that follows the pattern, and straight hair needs shadow in strategic places or the whole thing goes stiff.
-
They grow out with less drama: a smart lowlight does not leave you staring at a hard line six weeks later. It fades into the haircut instead of sitting on top of it.
1. Mocha Veils Through Beige Blonde
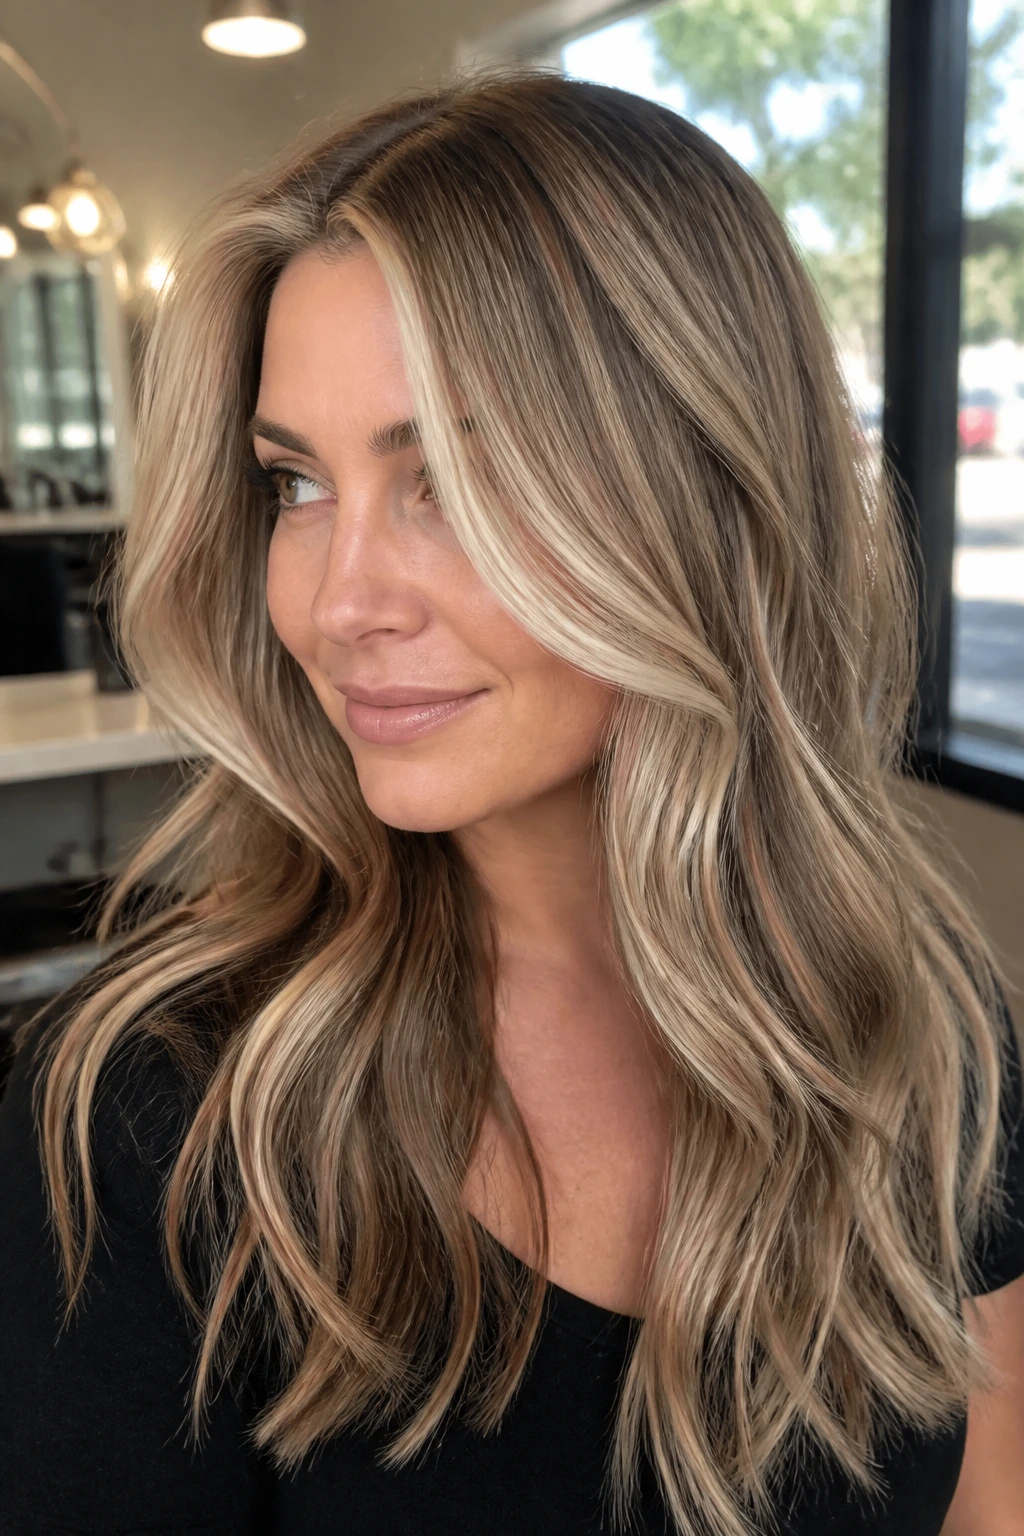
Beige blonde can look airy on day one and strangely hollow a few weeks later. Mocha veils fix that fast. Not with a heavy brown blanket. With narrow ribbons that sit just one shade deeper than the blonde and tuck beneath the brightest surface pieces.
The trick is placement. Keep the mocha under the top layer and through the midlengths, then leave the face frame a touch lighter so the whole head still catches light when hair moves. I like this idea on collarbone cuts and soft layers because the darker threads show up when the hair swings, not when it’s sitting still in a clip.
This is the kind of lowlight that makes blonde look more expensive without screaming for attention. If your blonde has started to feel overexposed, mocha is the safest place to begin.
2. Mushroom Brown Lowlights for Cool Brunettes
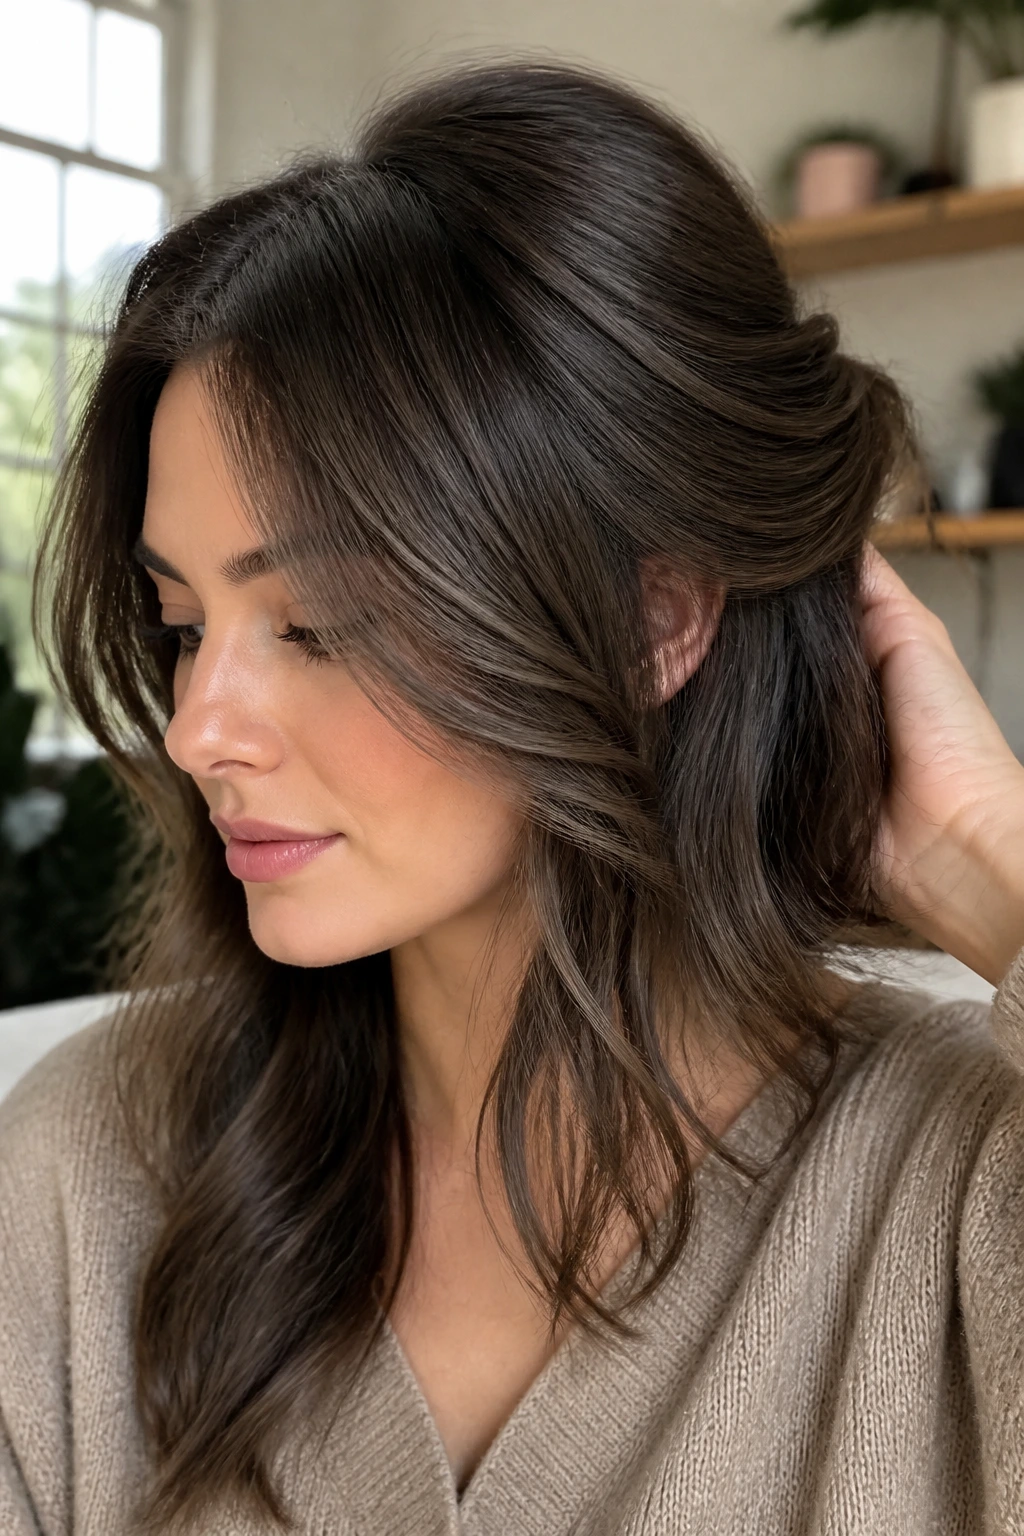
Why does a cool brunette sometimes look flat after a gloss? Because the hair has lost all the tiny shadows that made the shape visible. Mushroom brown lowlights bring those shadows back without tipping into muddy territory.
What Makes Mushroom Brown Work
Mushroom brown sits in that useful middle space between ash and taupe. It cools warmth, but it does not go gray in a way that makes the hair look dusty. That matters on brunettes who already have natural depth and only need a little more contrast around the crown, the underneath layers, and the nape.
Ask for fine weaving rather than chunky panels. The whole point is to break up one solid brown block, not to carve stripes through it. Mushroom lowlights also play nicely with cooler skin tones and glasses frames, since the shade reads clean and soft instead of orange or copper.
A small warning. If the base is already very dark, mushroom can disappear. In that case, ask for a glaze or a slightly lighter neutral brown so the dimension still shows.
3. Espresso Ribbons Woven Into Caramel Balayage
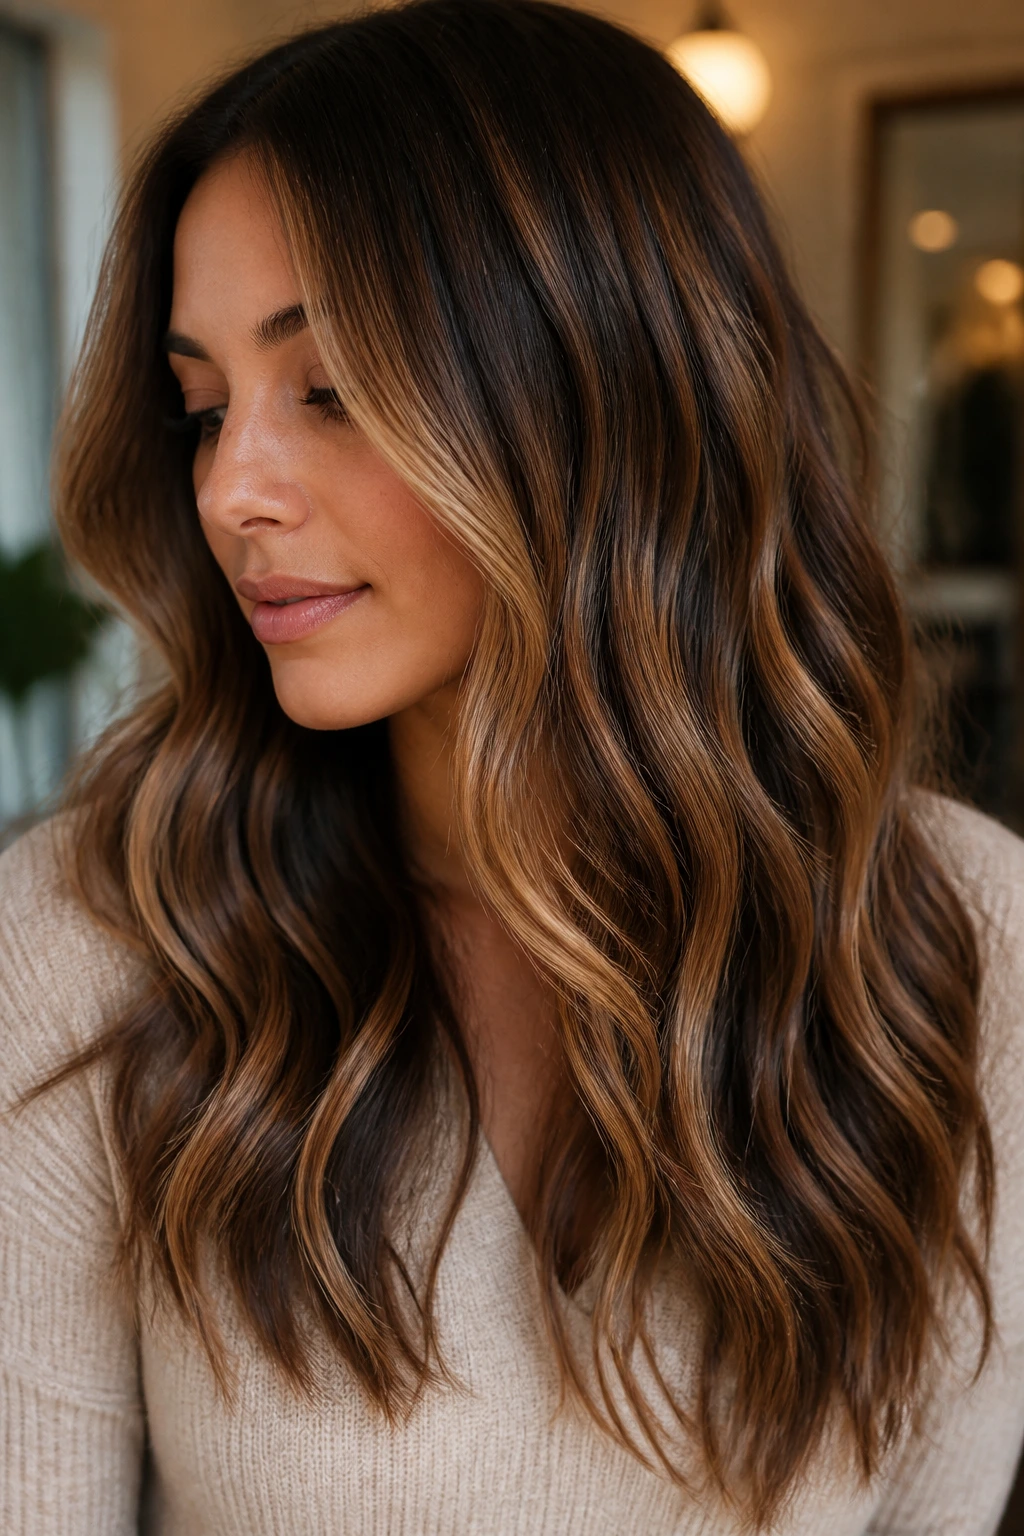
Caramel balayage can get a little too sweet if every piece is bright and glossy. Espresso ribbons give it structure. They are the dark thread running through the lighter weave, the part that stops the color from looking like one long spoonful of sugar.
-
Best placement: keep the espresso pieces underneath the lightest balayage ribbons and through the lower midlengths.
-
Why it works: caramel and espresso sit far enough apart to show contrast, but not so far apart that the blend turns harsh.
-
Best cut: long layers, lobs, and big waves can carry this shade pairing without it looking heavy.
I like this idea most when the goal is movement. When hair is curled or blown out, the espresso pops in the bends and makes the caramel pieces look brighter by comparison. Straight hair can wear it too, but the ribbons need to be finer or you’ll lose the softness.
4. Toffee Threads for Honey Blonde Ends
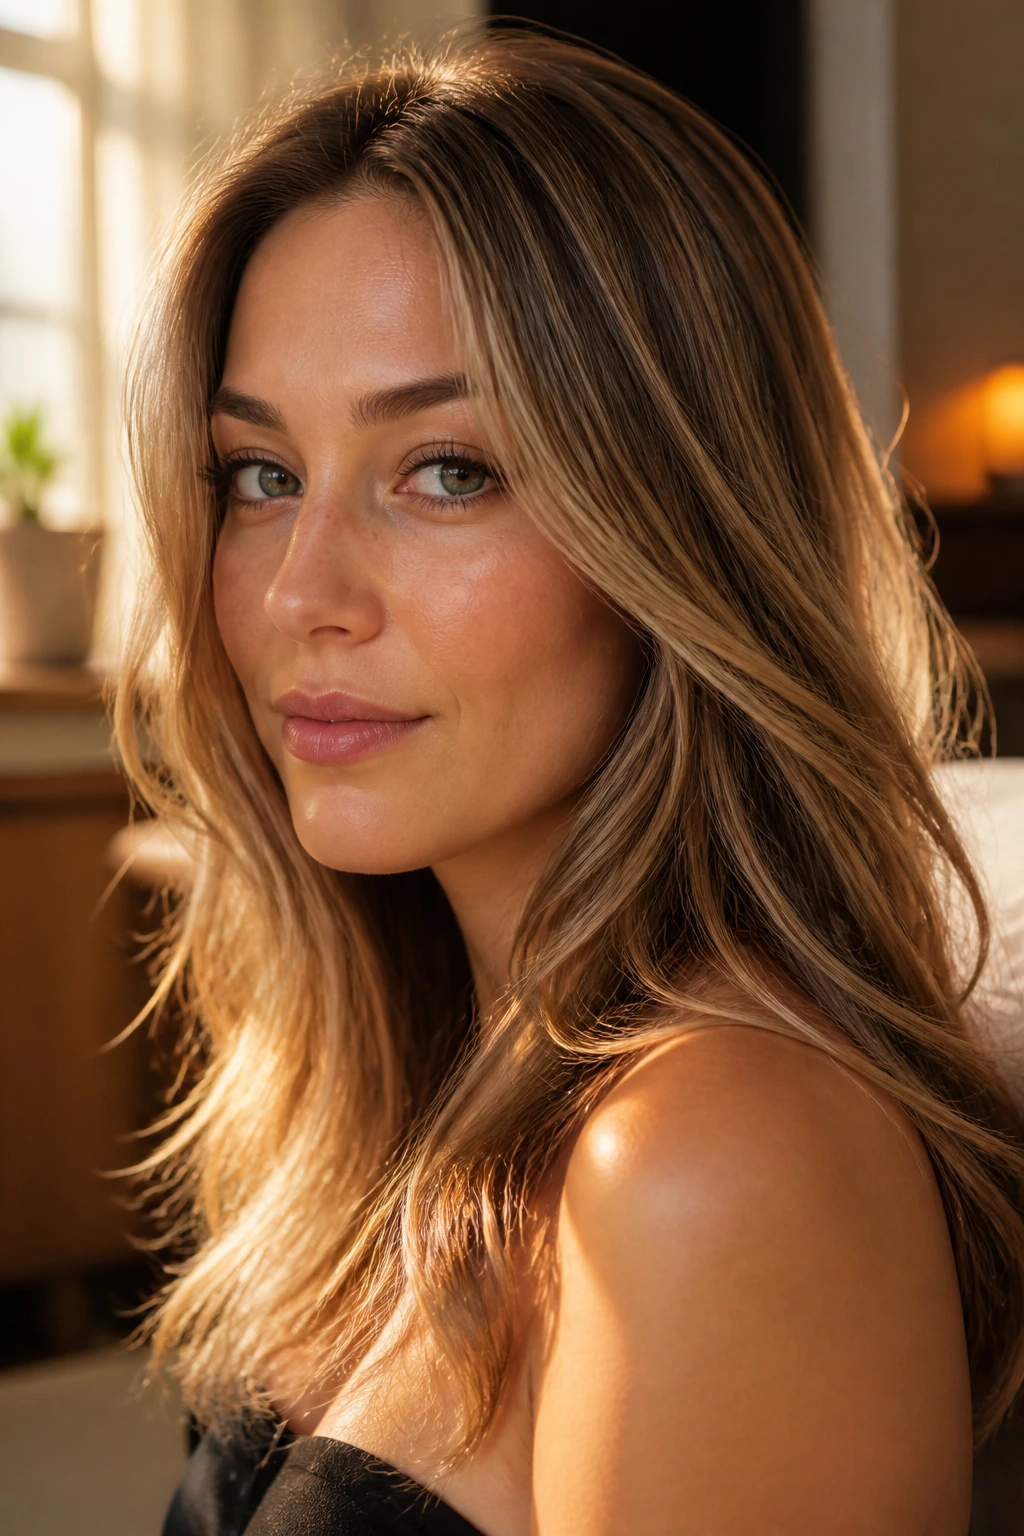
Honey blonde gets tricky near the ends. The color can go see-through, especially if the lighter pieces have been refreshed more than the interior. Toffee threads bring the ends back into the picture.
This version stays warm on purpose. No ash, no smoky coolness. Just a deeper golden-brown thread that sits inside the blonde and gives the ends some substance. It’s one of my favorites for layered blowouts because the hair keeps its sunny feel while the bottom half stops looking wispy.
If you want the result to stay soft, keep the toffee away from the brightest face-framing pieces. Let those stay lighter. The depth belongs a little farther back and a little lower, where the eye needs a place to rest.
5. Chestnut Lowlights for Copper Hair
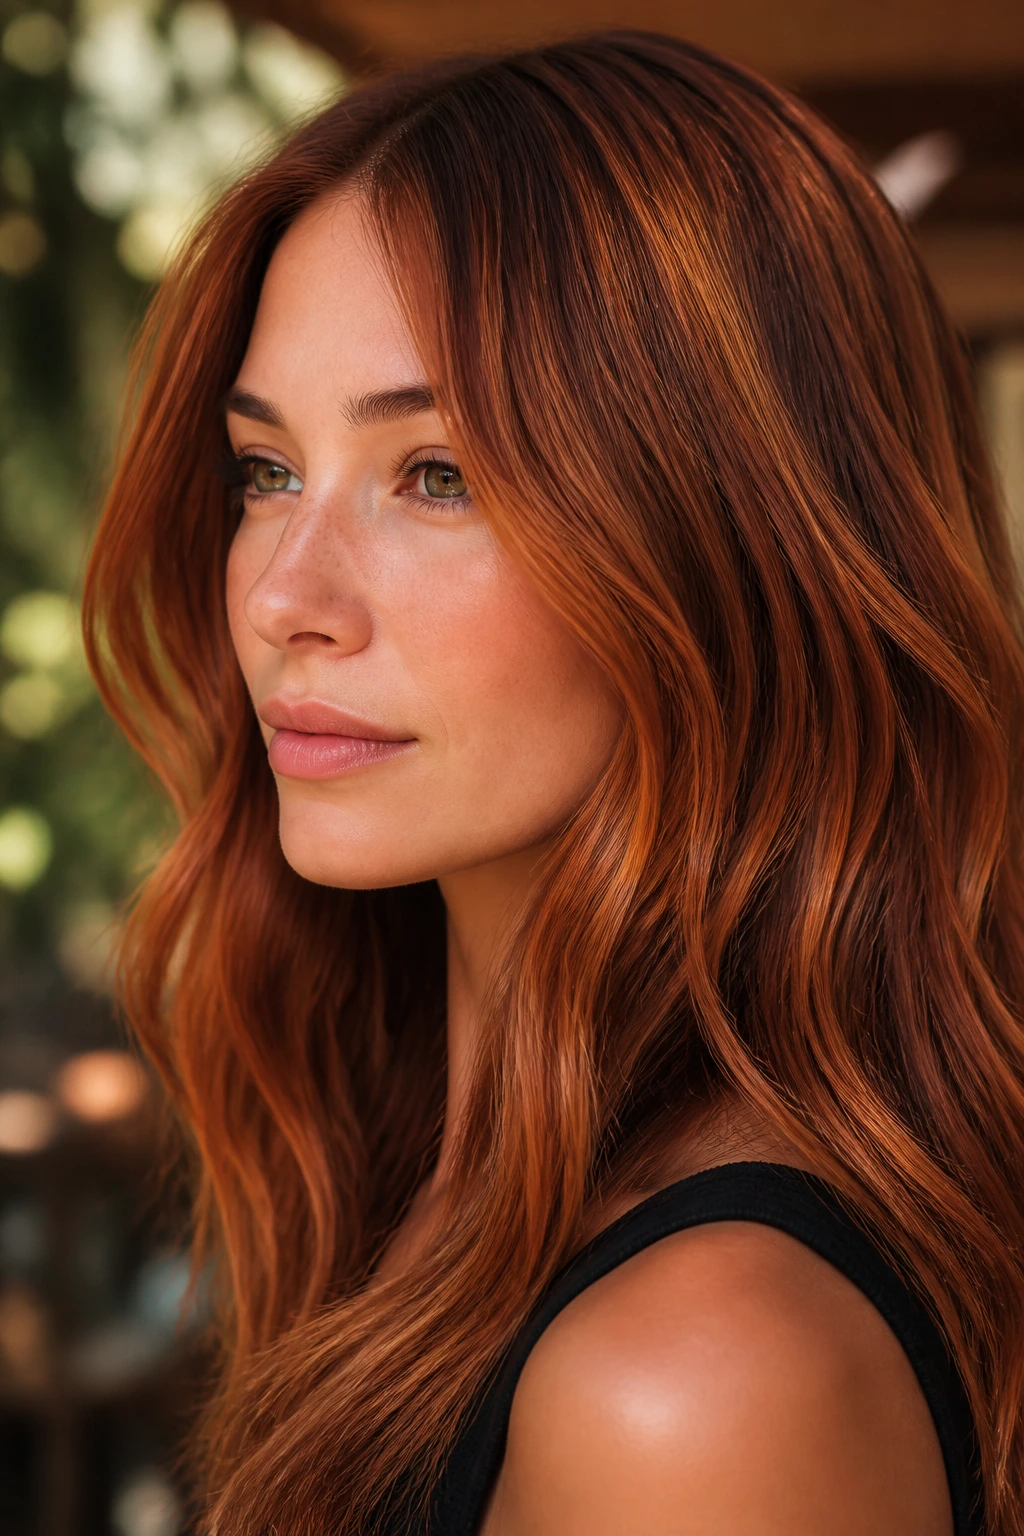
Copper hair loves depth. Without it, the color can veer toward neon or flat orange depending on the light. Chestnut lowlights calm all of that down and make the copper read richer, not louder.
The best version is not brown in a boring way. It’s red-brown, the sort of chestnut that still remembers there’s warmth underneath. I’d place it around the crown, through the interior lengths, and at the nape where copper often gets too bright on its own. The result is less “single-note red” and more burnished, layered color.
This idea is especially good on wavy cuts. Waves catch both the copper and the chestnut, and the movement does half the work for you. On straight hair, the chestnut needs a softer blend so the contrast does not look patchy.
6. Ash Brown Lowlights for Brassy Blonde Hair
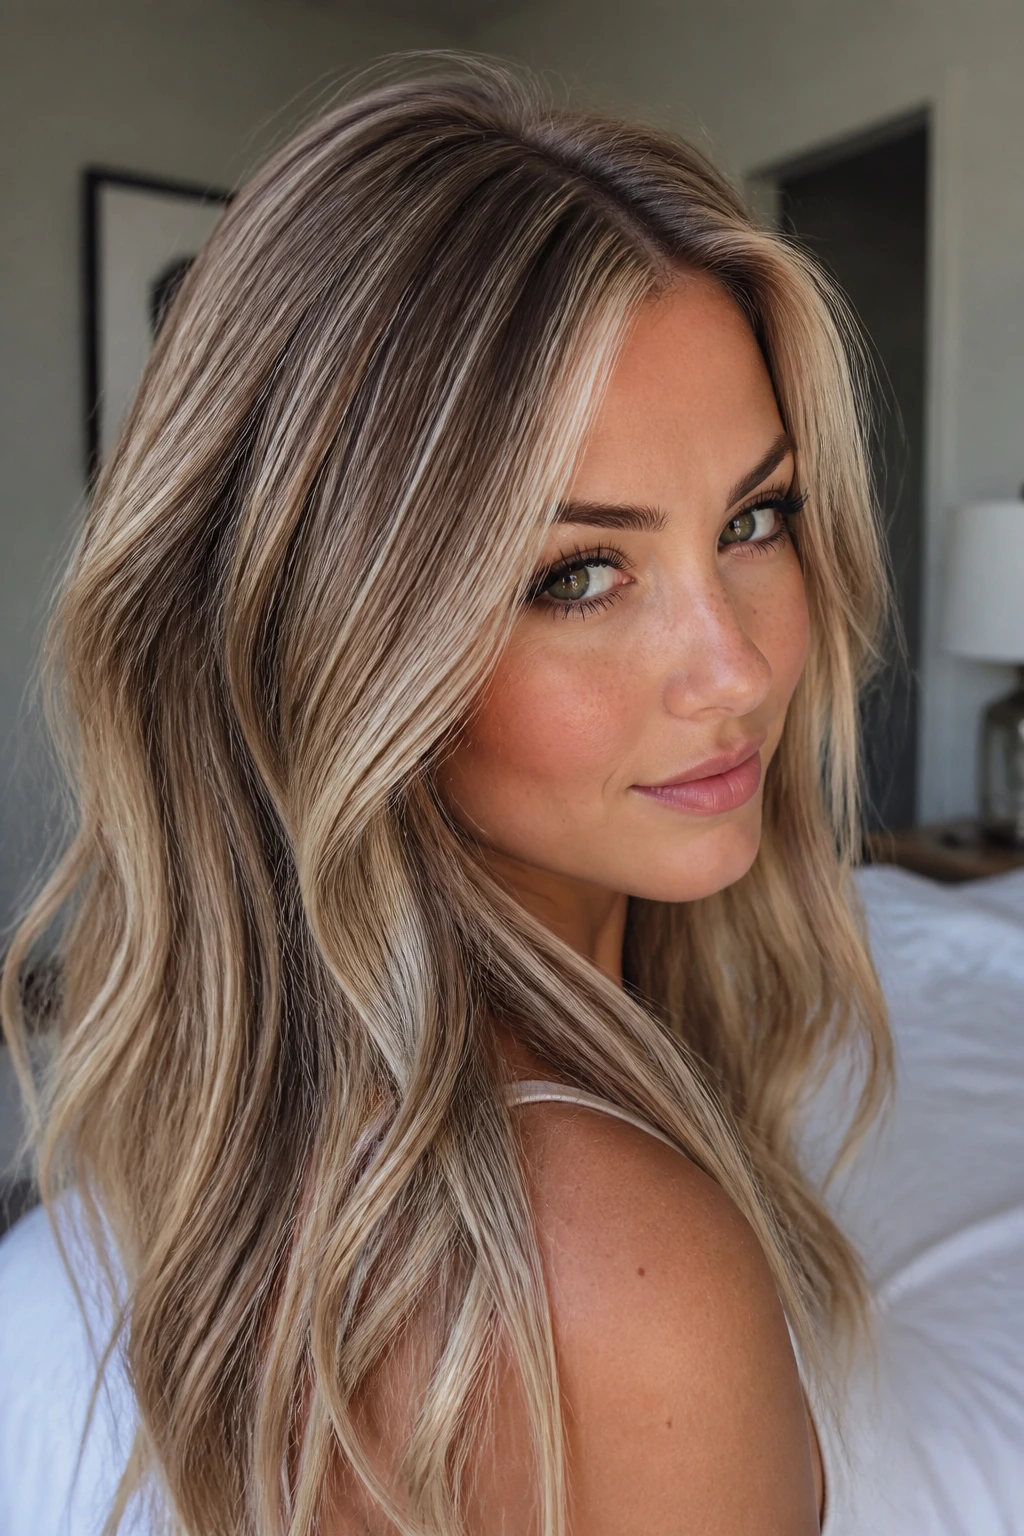
Sometimes toner is not enough. If a blonde has drifted into yellow-orange territory, ash brown lowlights can do more useful work than another round of purple shampoo ever will.
Where Ash Brown Helps Most
Ash brown belongs where brass keeps flashing back through the hair: the crown, the sides around the ears, and the midlengths that pick up the most heat from styling. Those cooler pieces create a smoky frame that makes the brighter blonde look intentional instead of overprocessed.
Do not go too dark here. Ash brown on pale blonde can turn hard fast, especially if the hair is porous from bleaching. One or two levels deeper is enough for softness. Three levels deeper starts looking like a contrast panel, and that is a different look entirely.
I also prefer ash brown when the haircut has a lot of texture. The movement keeps the cooler pieces from feeling flat, and the blonde still gets room to glow between them.
7. Cinnamon Lowlights for Warm Brunette Layers
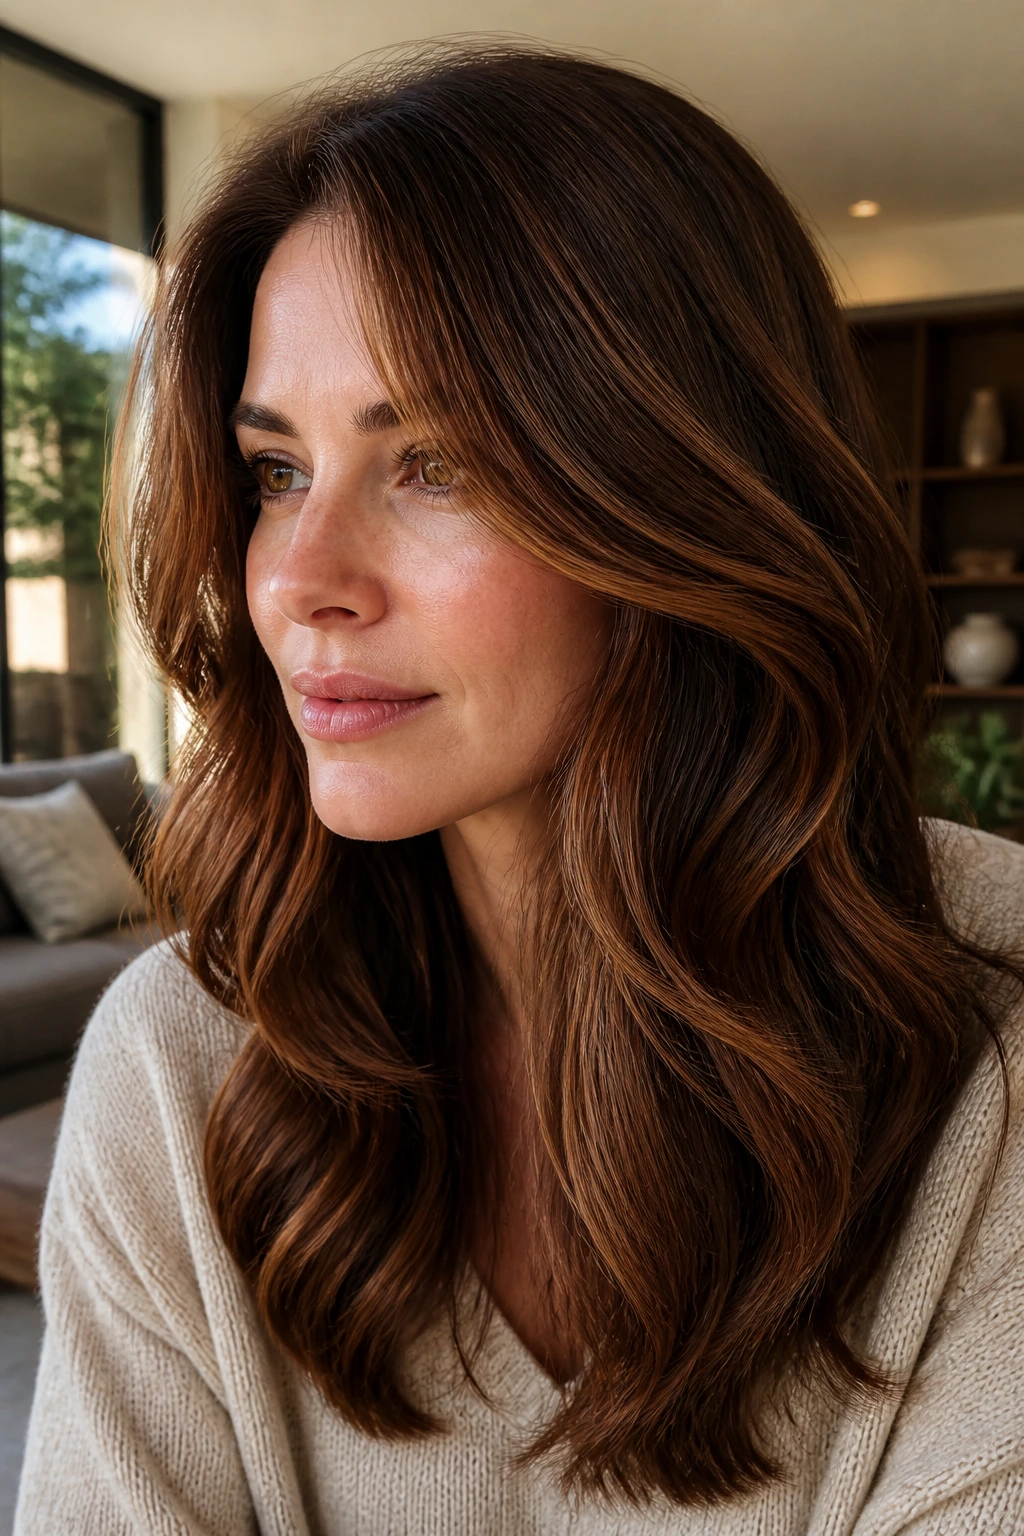
Cinnamon lowlights are for brunettes who want depth but do not want to lose warmth. The shade adds a spiced, reddish-brown note that makes layered hair look richer from root to end.
This is one of those colors that works better than people expect on warm skin and olive skin, because it picks up the natural warmth instead of fighting it. A few cinnamon ribbons around the face, plus a softer sweep through the ends, can make a basic brunette cut look far more finished. Nothing flashy. Just better.
I like cinnamon lowlights on long layers and shaggy cuts, where the ends need a little more color weight. Too much cinnamon on dense, one-length hair can read loud. Keep it woven, not painted in thick blocks.
8. Smoky Beige Lowlights for Champagne Blonde
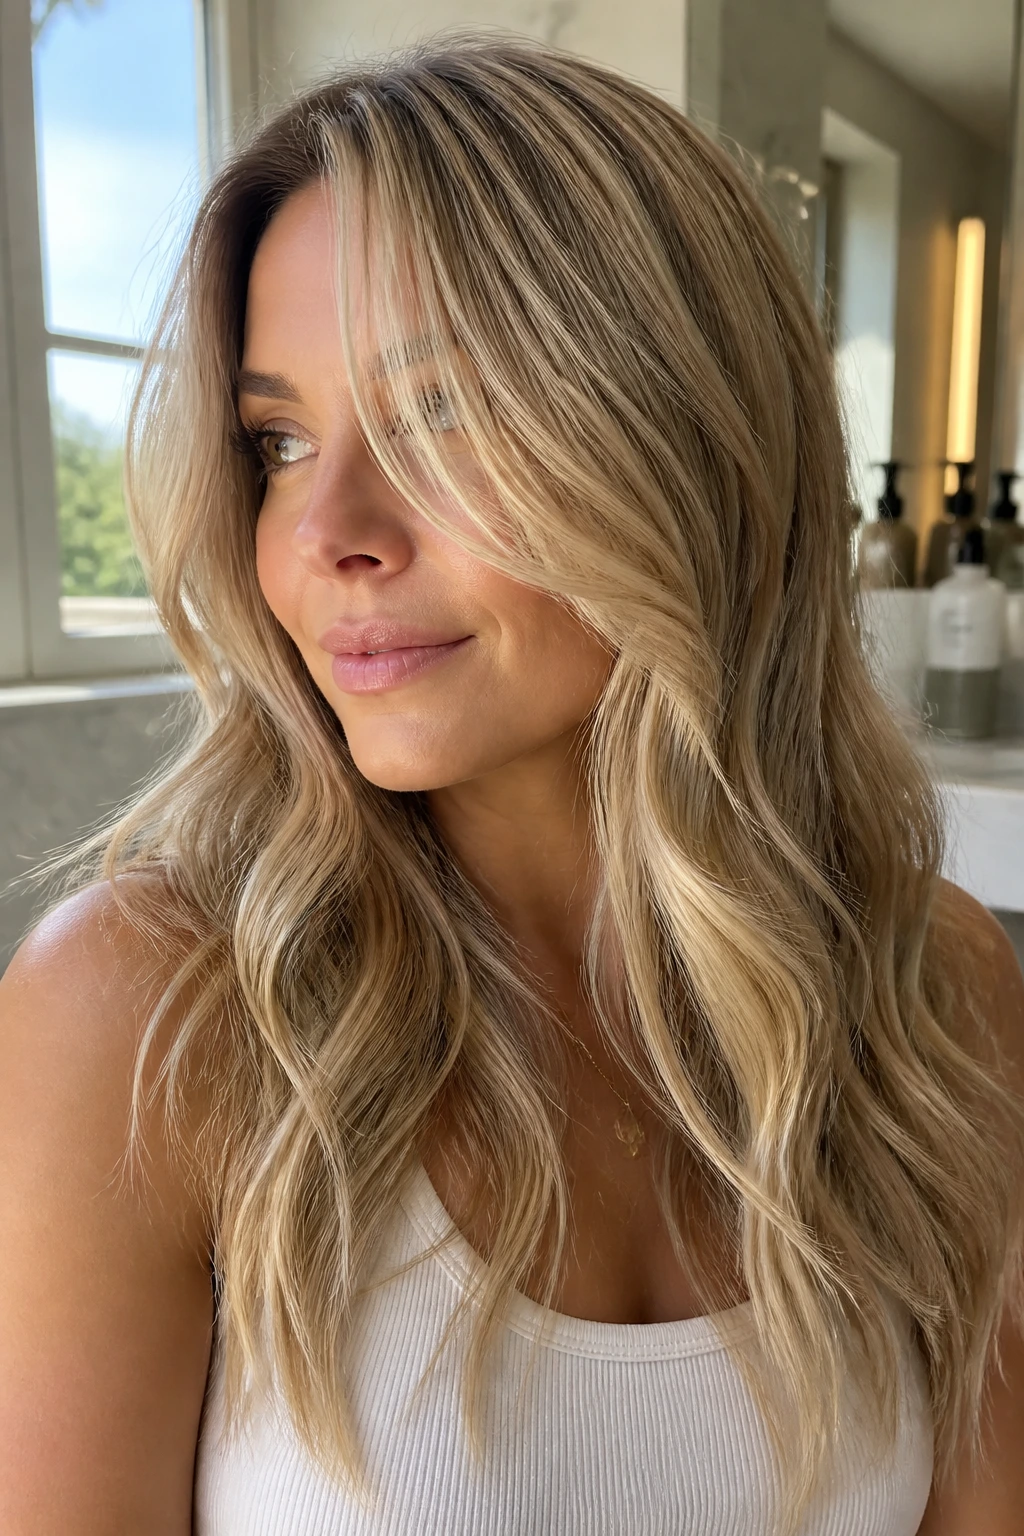
Champagne blonde can go too bright in a hurry. Smoky beige lowlights cool it down just enough to keep it from turning white-blonde or chalky.
How to Keep the Blonde Soft
Smoky beige is useful because it sits between warm beige and pale taupe. That means it adds shadow without making the hair look dark. On finer hair, that matters a lot. Heavy contrast can make the strands look thinner, while smoky beige makes the surface feel fuller without obvious stripes.
Ask for the lowlights to sit mostly under the top layer and through the interior lengths. If the whole crown gets too dark, champagne blonde loses its airy feel. The point is not to mute the blonde. The point is to give it a frame.
This is a smart move for hair that lives in a lot of bright light. It holds onto softness where pure platinum can start looking sharp.
9. Mahogany Lowlights for Chestnut Brown Waves
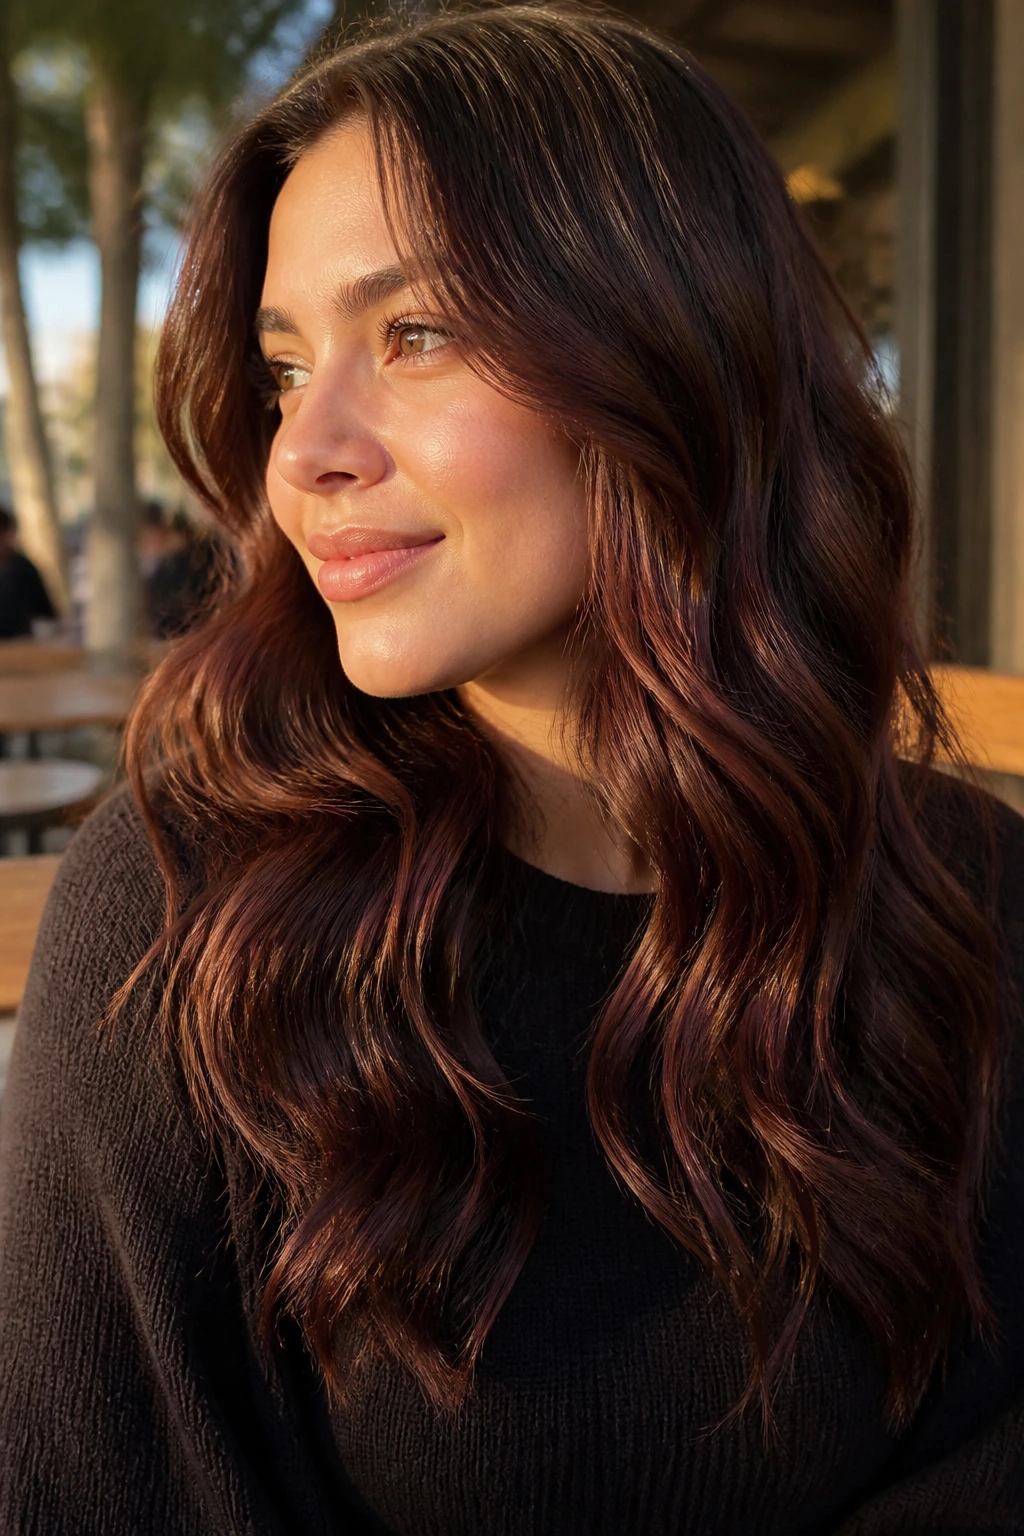
Mahogany lowlights make chestnut brown hair feel deeper, almost wine-dark in the right light. The effect is rich without being red all over, which is exactly why it works so well on waves.
Here’s the thing: waves love contrast. A little mahogany catches on the bends and makes each curve look more defined. On chestnut bases, it adds a hint of burgundy that shows up when the hair moves. On straighter textures, it reads subtler — more sheen than color statement.
I’d keep the mahogany a touch deeper at the nape and softer near the face. That keeps the color from overwhelming the skin and lets the haircut do the shaping. A lot of people think richer shades mean more product. Usually it means smarter placement.
10. Bronze Lowlights for Layered Midlengths
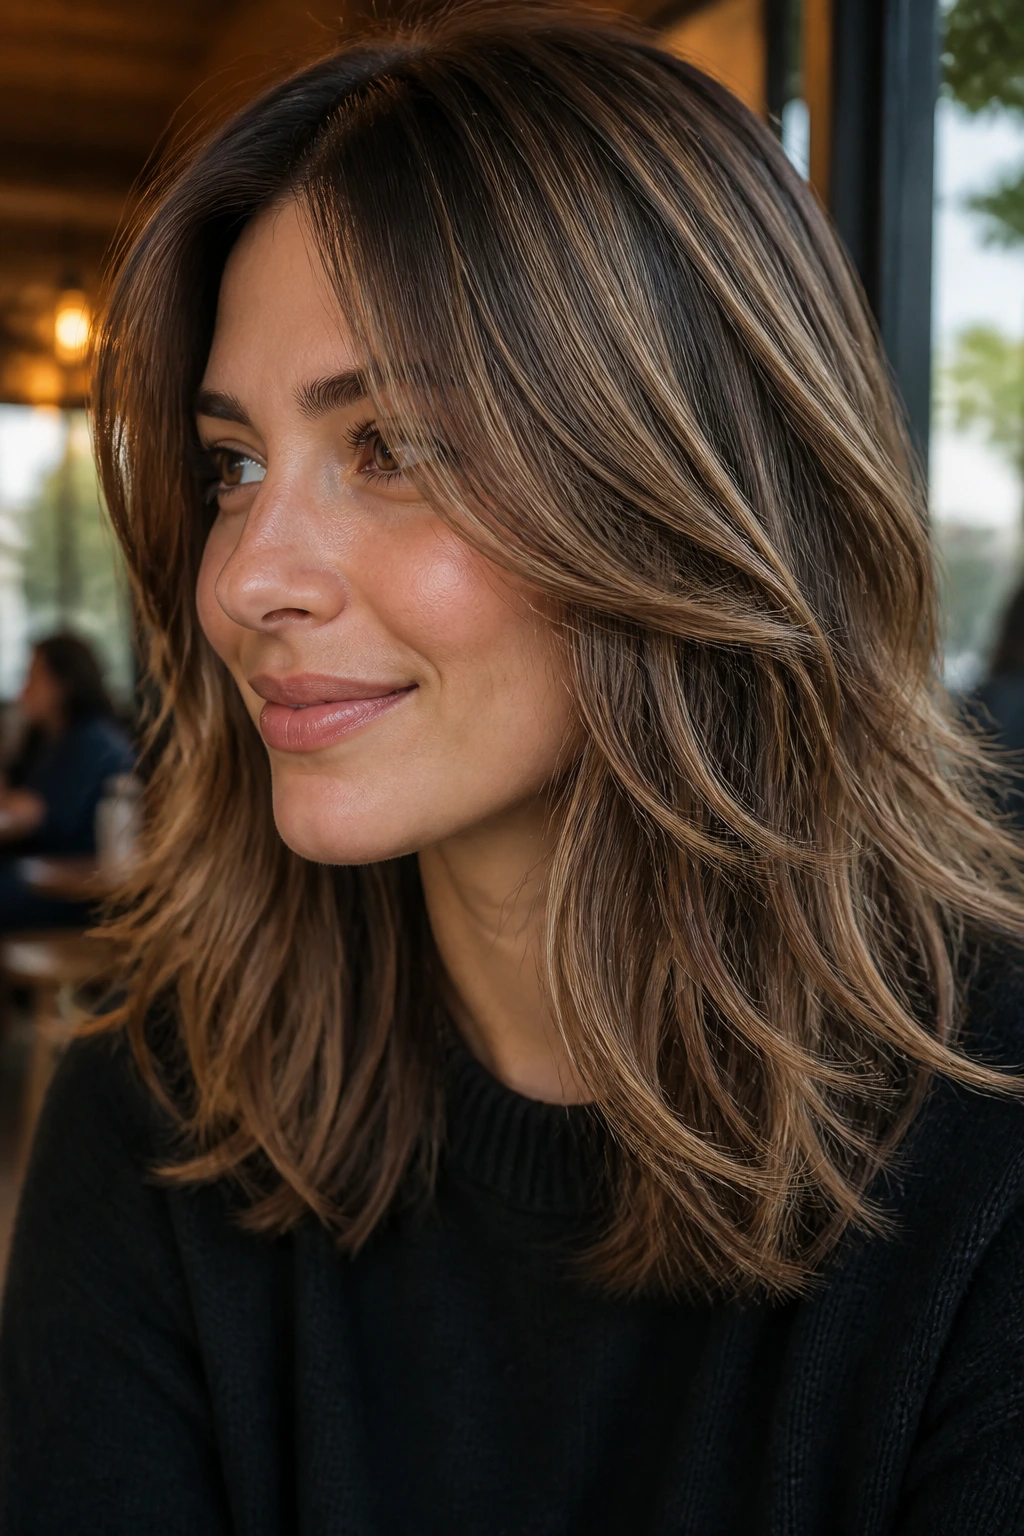
Bronze lowlights do something different from plain brown. They keep a warm glow but add a darker metal-like shadow, so the hair looks polished rather than flat.
This idea makes a lot of sense on layered midlengths, especially if the cut has a lot of movement around the shoulders. Bronze sits beautifully between gold and brown. You get warmth, but the color does not melt into one uniform shade. It flashes when hair turns, then settles back into something deeper when it sits still.
If you’ve ever looked at your hair and thought it needed more shape but not more darkness, bronze is a good answer. It keeps the light-catching part alive. It just gives the brightest areas a place to land.
11. Blue-Black Lowlights for High-Contrast Styles
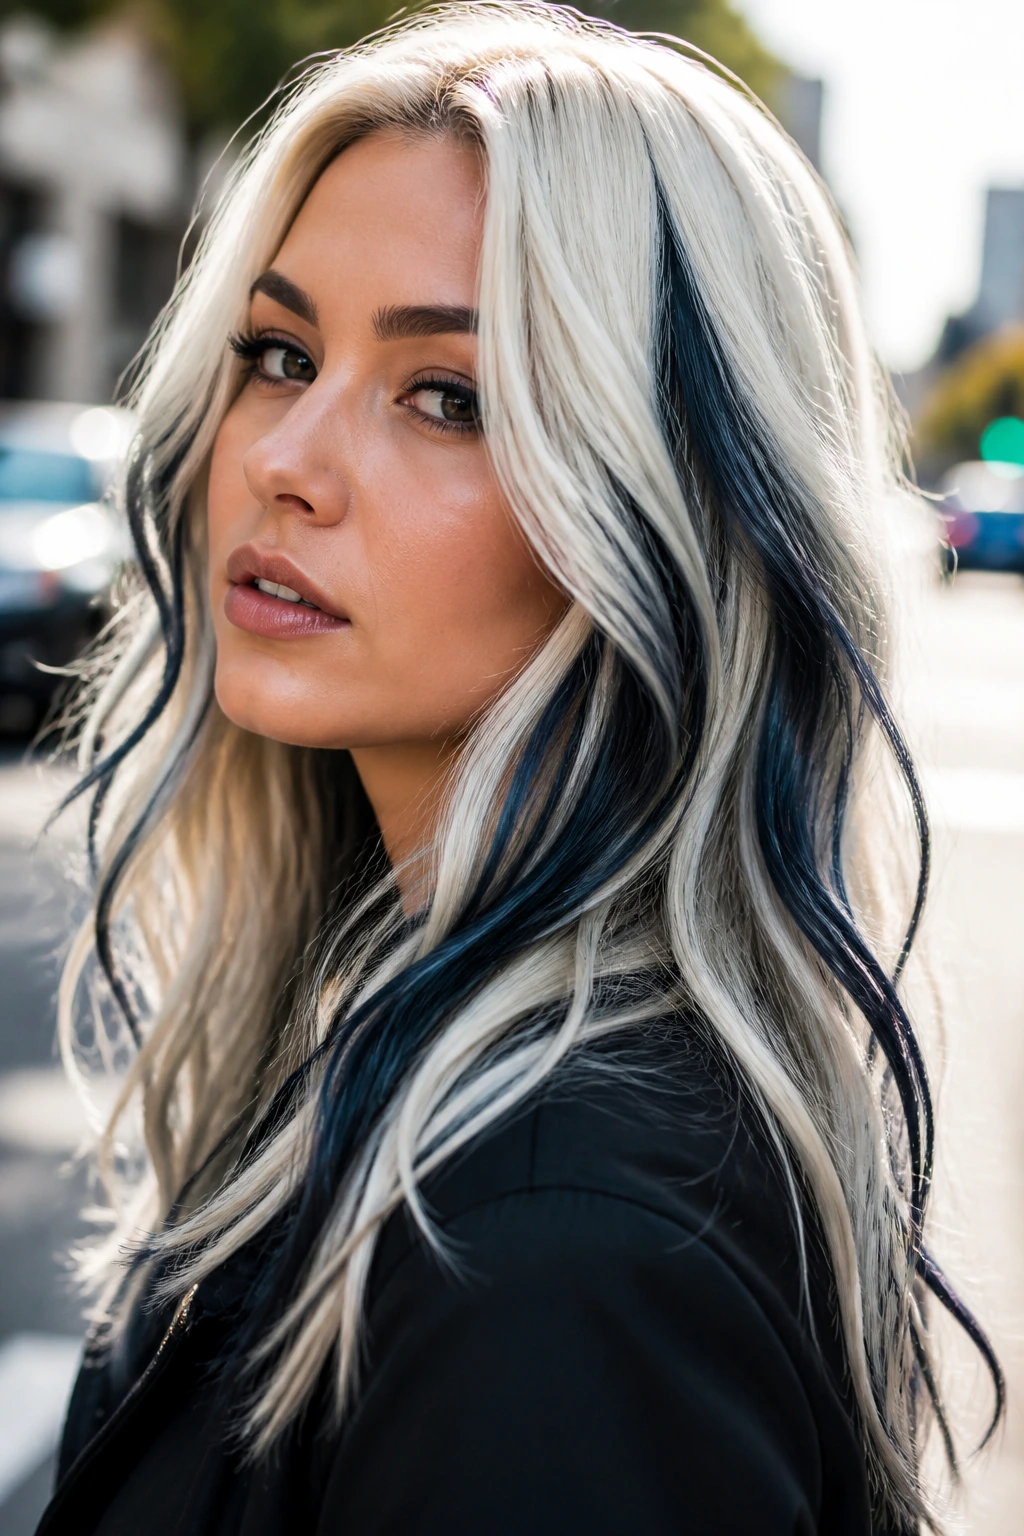
Blue-black lowlights are not subtle, and that is the point. On very light hair, they create a crisp contrast that looks editorial instead of soft. This idea is for someone who wants dimension with attitude.
-
Best on: platinum, silver-blonde, or very pale beige hair.
-
Best placement: hidden interior sections, ends, or chunky panels if the goal is visible contrast.
-
Best warning: porous blonde can grab blue-black fast, so strand testing matters.
I would not use this shade if the brief is “gentle and airy.” It’s too decisive for that. But if the haircut is blunt, the styling is sleek, or the goal is to break up a pale canvas, blue-black lowlights can look sharp in a good way. The key is controlling how much of the darker shade is exposed at once.
12. Plum Lowlights for Neutral Dark Bases
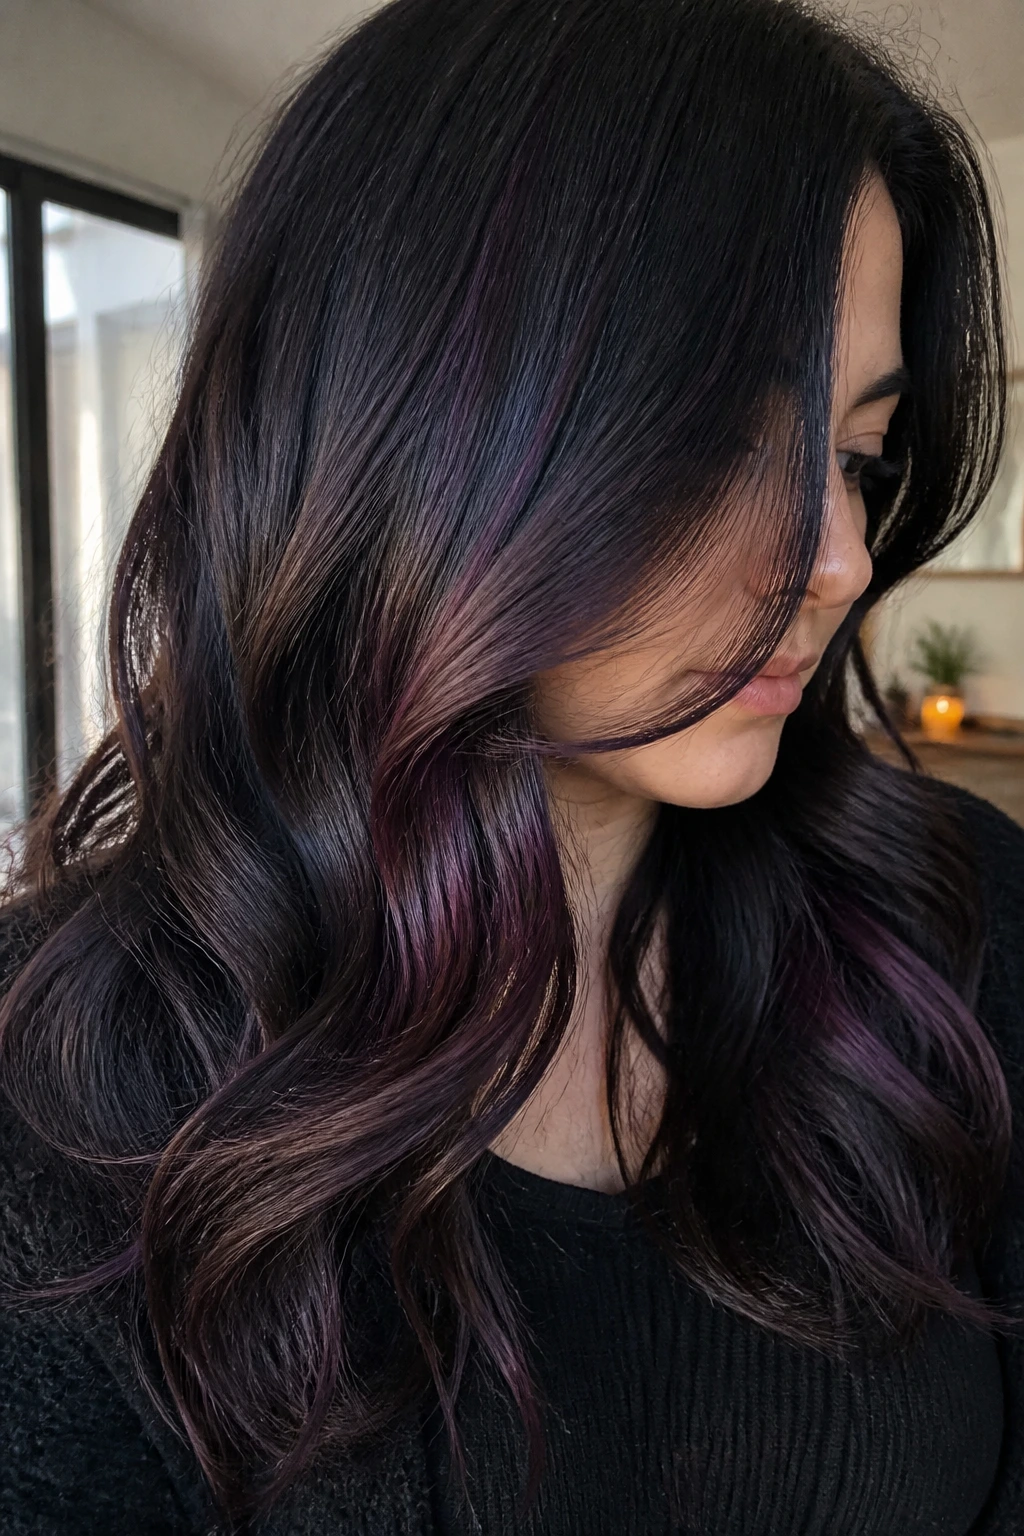
Plum lowlights have a sneaky quality. In some light, they look almost brown. In others, the violet-red tone appears and gives the hair a hidden flash of color.
Why does that work so well on dark bases? Because neutral dark hair can start to feel heavy when it has no movement in the tone. Plum fixes that without forcing the whole head into obvious red. It’s a nice choice for straight styles, ponytails, and half-up looks, where the hidden color peeks through as the hair shifts.
Keep the plum under the top layer if you want it to stay subtle. Put it near the front if you want a little more drama when the hair is pulled back. Either way, it’s one of those shades that feels richer the longer you look at it.
13. Sandalwood Lowlights for Fine Hair
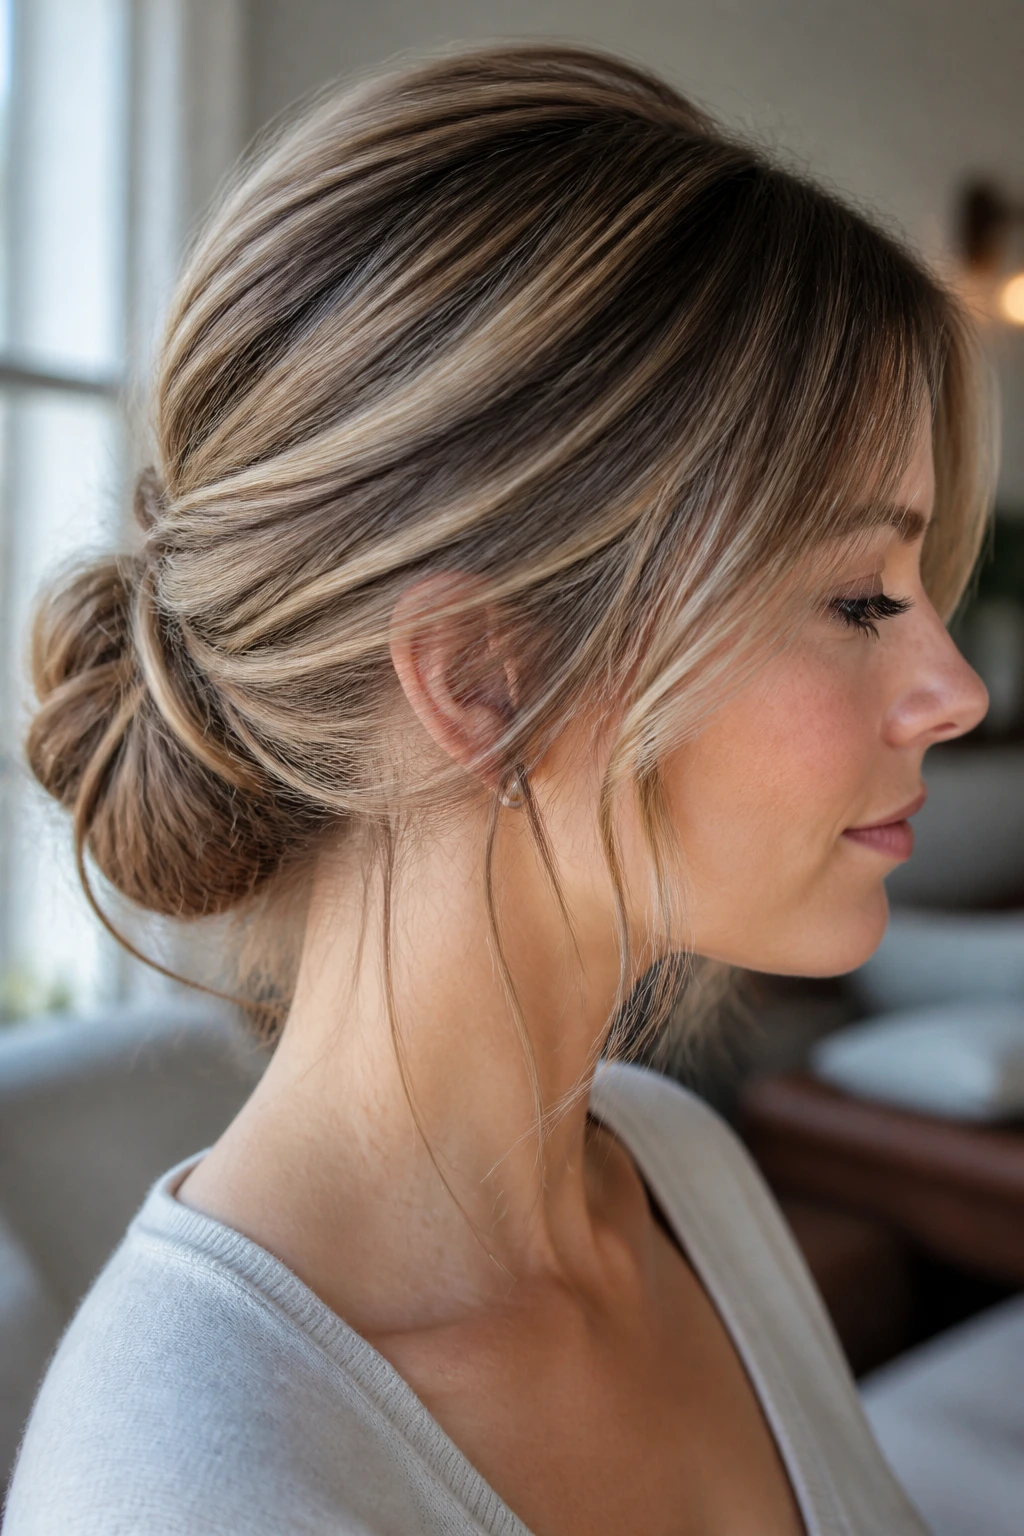
Fine hair does not need heavy contrast to look fuller. It needs carefully placed depth that barely announces itself. Sandalwood lowlights handle that beautifully.
The Fine-Hair Rule
Use thin weaves. Not chunky sections. Fine hair looks thicker when the color changes are soft and numerous, not when there are three obvious dark panels sitting in the middle of the head. Sandalwood works because it’s a muted beige-brown, deeper than blonde but not so dark that it steals body from the cut.
I like this idea near the nape, behind the ears, and under the crown where the hair naturally loses a little light. That creates the illusion of density without making the surface busy. If the hair is very light, keep the sandalwood a warm neutral rather than a strong ash tone, or the contrast can start to look gray.
This is one of the most useful lowlight ideas for people who want fullness without drama.
14. Chocolate Lowlights for Curls and Coils
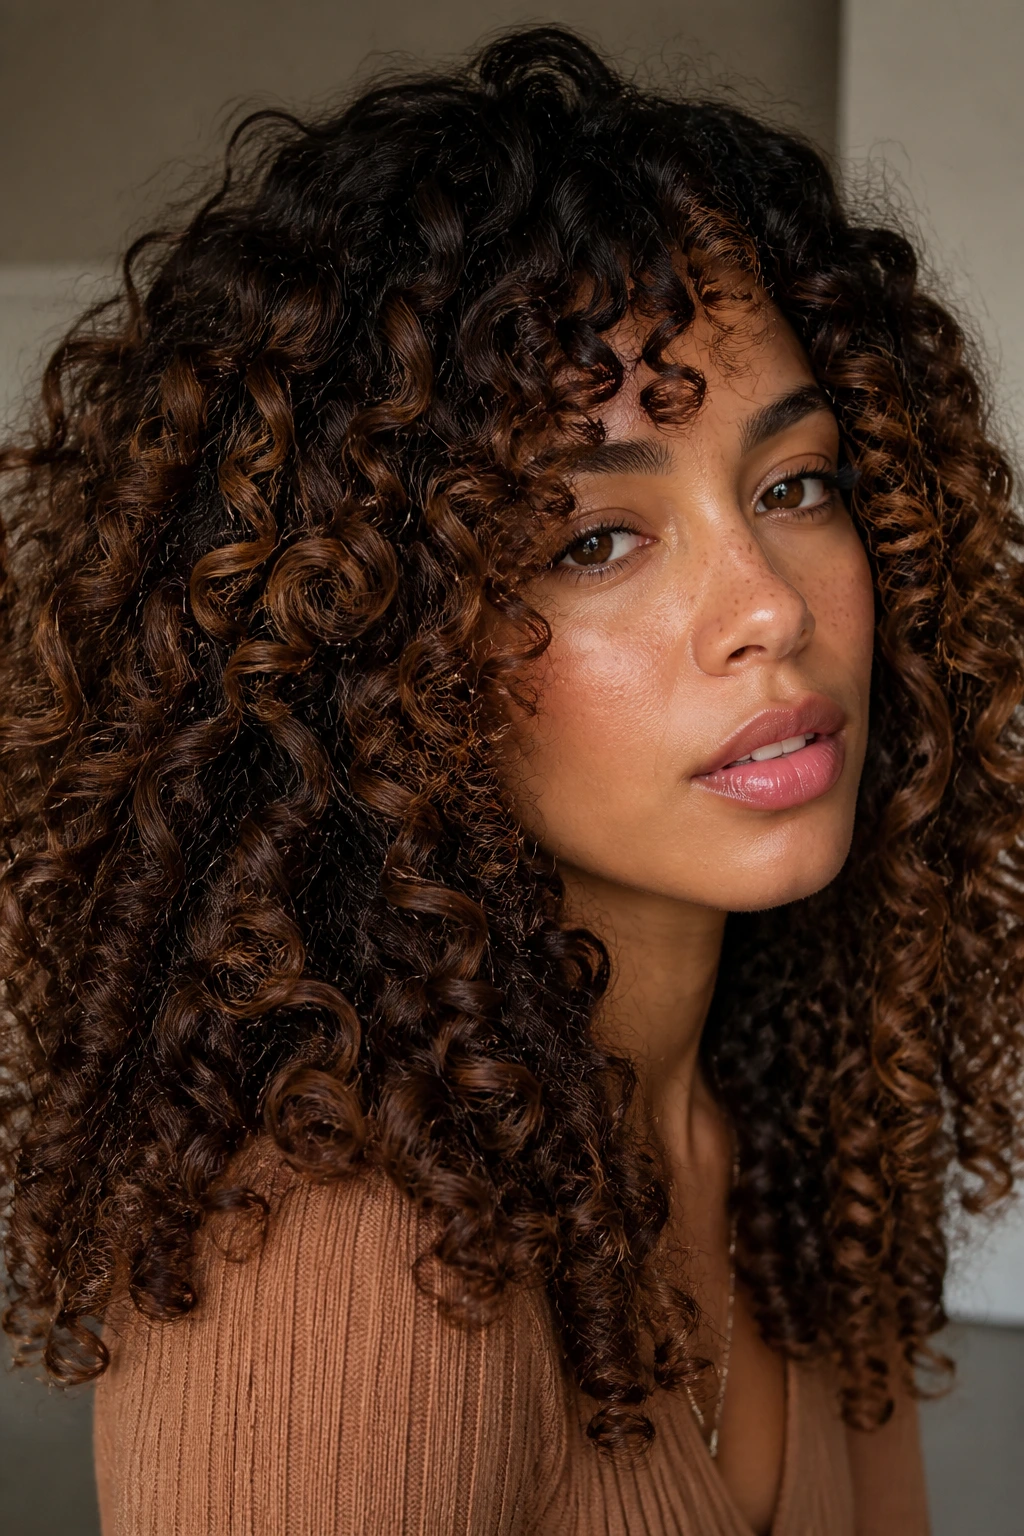
Chocolate lowlights and curls are a very good match. The shade deepens the shadow inside the curl pattern, which makes the ringlets look more defined and less like one fuzzy shape.
Curly hair can hide lowlights in the best way. A dark ribbon under a curl clump shows up when the curl opens, then disappears again as the hair springs back. That movement gives the whole style depth. I like chocolate because it is rich enough to create contrast but not so dark that it flattens the curl.
A few practical notes help here. Place the darker pieces where the curl naturally separates, not only on the outer halo. And keep the gloss soft so the color reflects light instead of looking inked onto the hair. If the curls are dry or porous, a lighter chocolate formula usually looks better than a near-black one.
15. Cool Cocoa Lowlights for Straight Hair
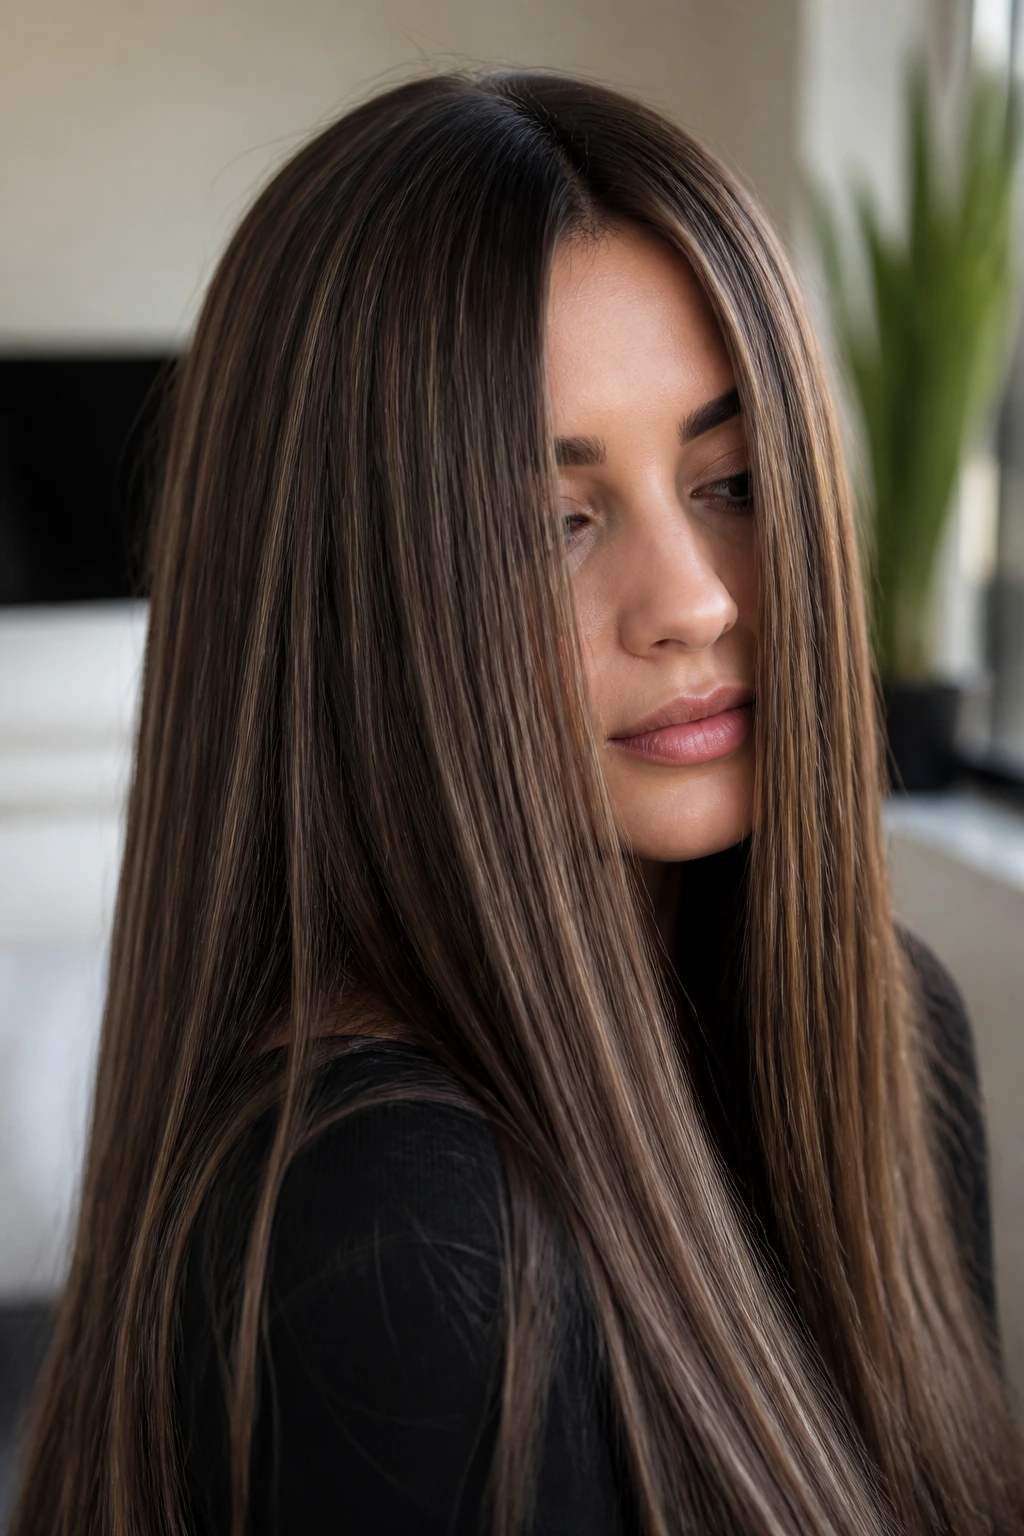
Straight hair shows everything. Every line. Every shade shift. Every mistake. That’s why cool cocoa lowlights need a clean, deliberate placement if you want the result to feel soft instead of striped.
The good version uses diagonal or slightly staggered placement through the midlengths, so the eye does not lock onto one horizontal band. Cool cocoa is deeper than beige blonde or light brown, but it stays neutral enough to avoid the orange cast that can happen when brown pigments get too warm. The finish looks smooth, polished, and a little more expensive in the plain sense of the word — the hair looks like it has actual depth.
I would keep the front softer and let the interior carry most of the cocoa. Straight hair does not need help everywhere. It needs help in the right few places.
16. Bronde Lowlights for Lived-In Layers
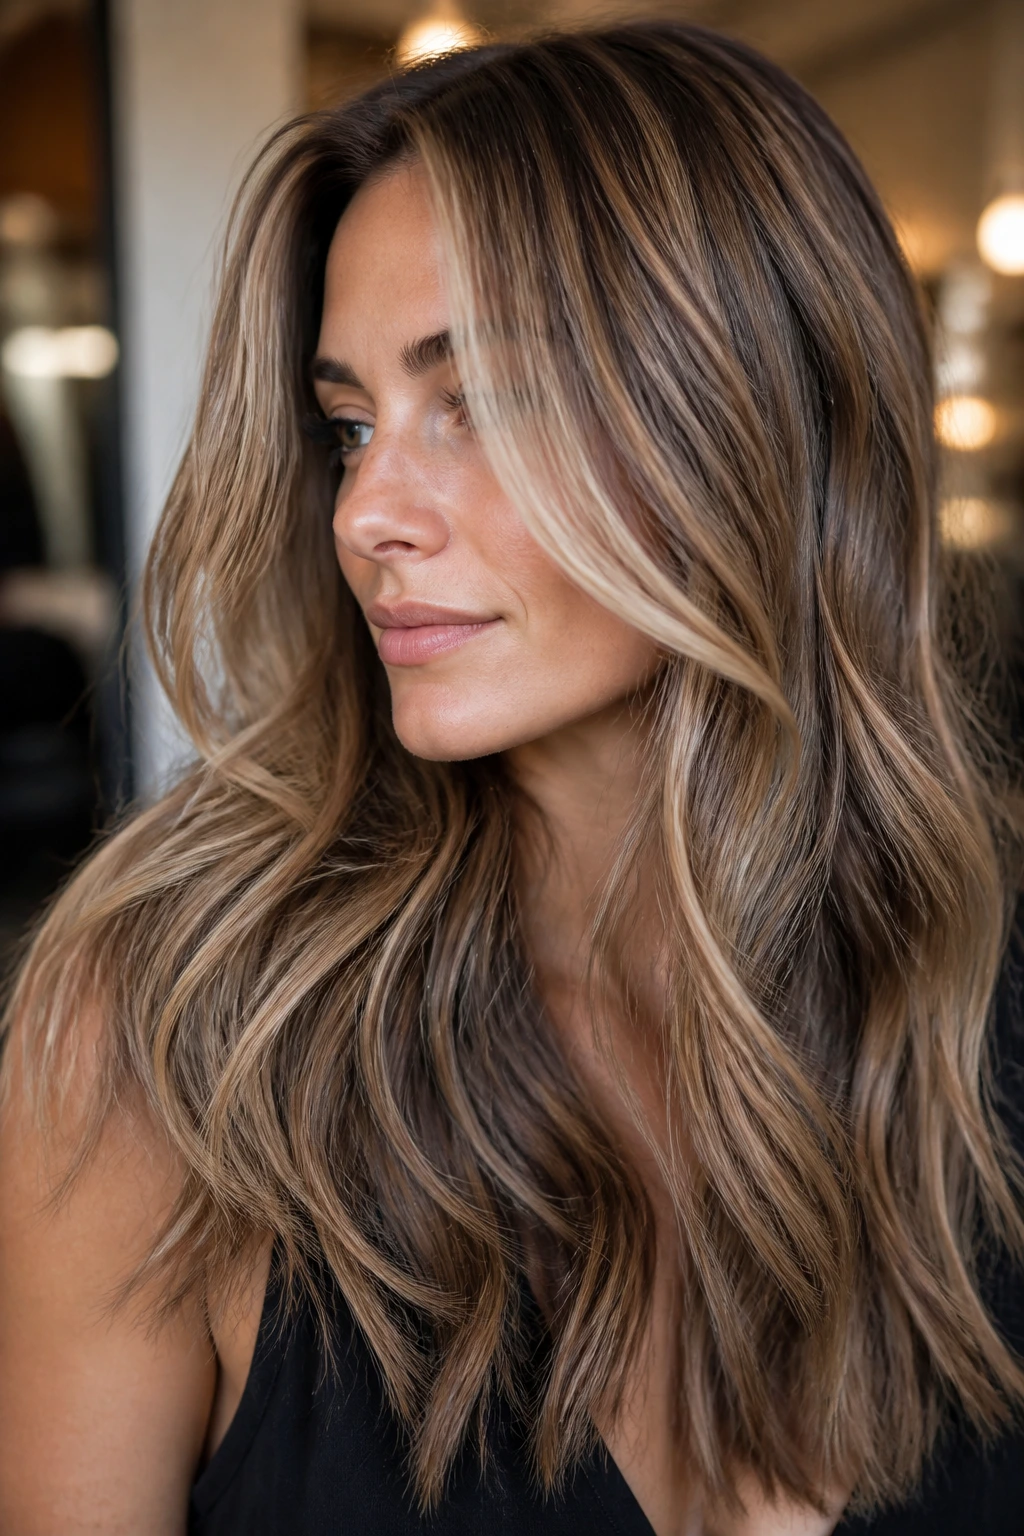
Bronde is the easy answer when someone wants both blonde and brunette notes to stay in the same conversation. The lowlights are what make the mix feel deliberate instead of accidental.
What Makes Bronde Feel Soft
The darker pieces usually live underneath the lighter balayage or around the crown where the hair needs weight. That keeps the blonde visible on top while the brunette shadows hold the shape together. On layered hair, bronde is especially nice because the movement lets the tones separate and blend depending on how the hair falls.
I like this approach when grow-out matters. It is friendlier than a very bright highlight pattern because the darker pieces keep the line from the roots to the ends from looking abrupt. If you want hair that can stretch between appointments without looking forgotten, bronde lowlights are a solid bet.
17. Root Smudge and Lowlights for Seamless Grow-Out
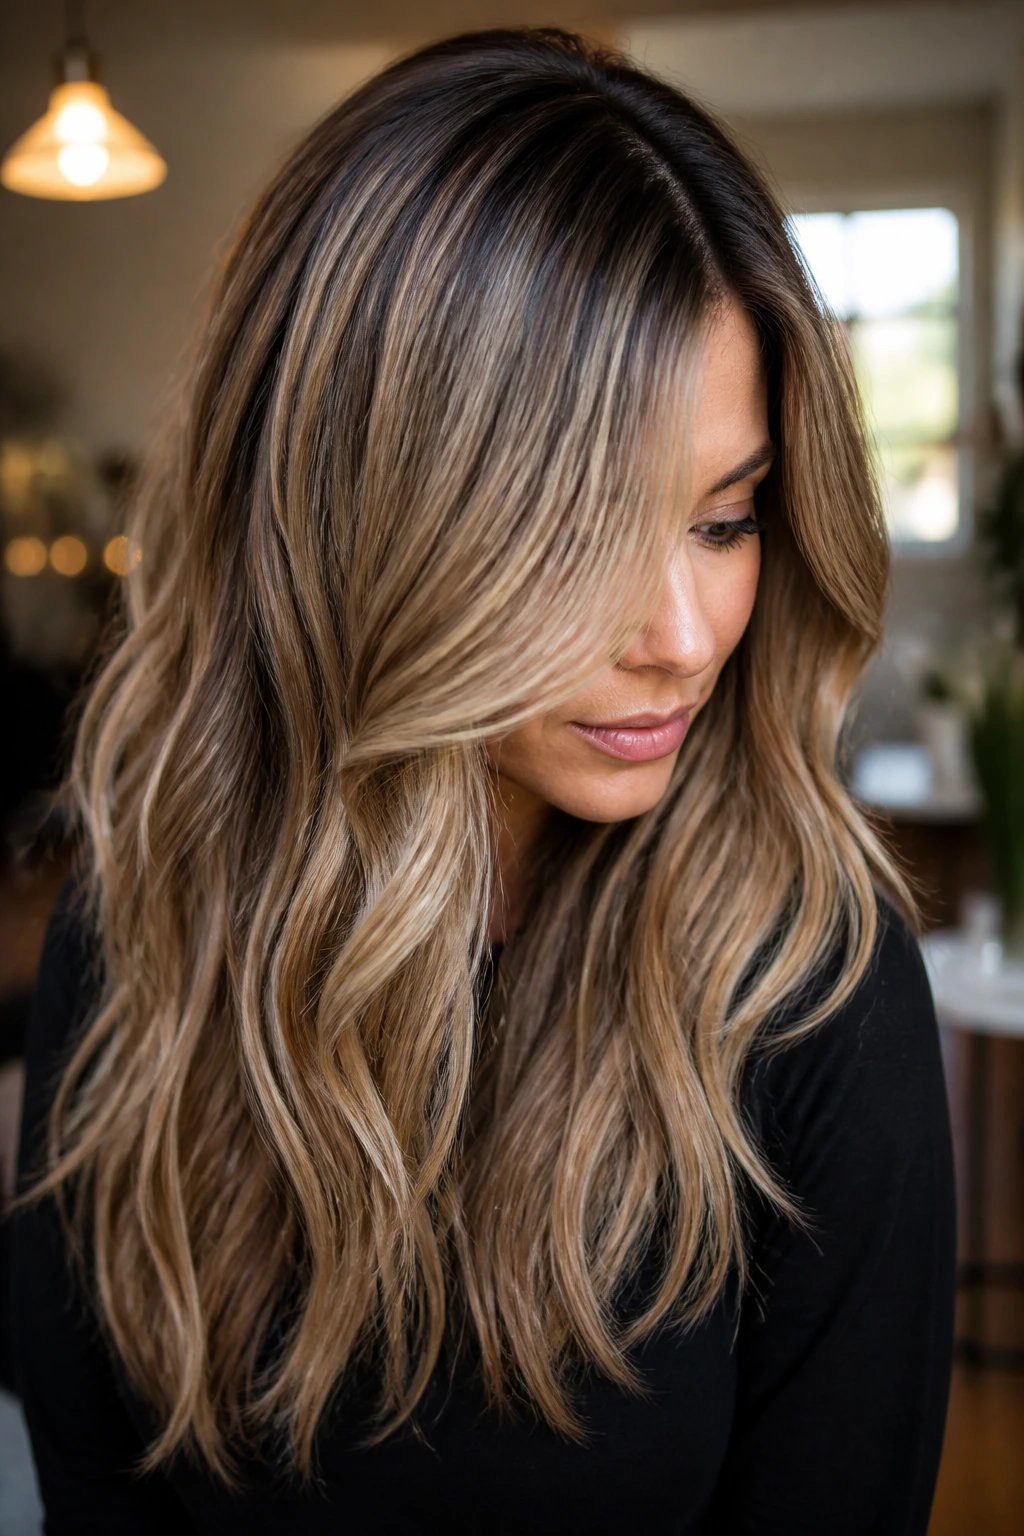
If the problem is a bright root line, lowlights alone are not always enough. A root smudge paired with darker interior pieces can fix the transition so the hair grows out in one softer fade.
This works especially well on hair that has been highlighted a few times and now has too many different temperatures fighting each other. The smudge softens the root. The lowlights give the mids and ends some shadow. Together, they make the whole head look calmer. Not darker. Calmer.
This is one of those color choices that makes more sense in real life than in a quick selfie. It handles a few inches of grow-out with more grace, and the line between natural root and colored lengths becomes much less obvious.
18. Peekaboo Lowlights Under Long Layers
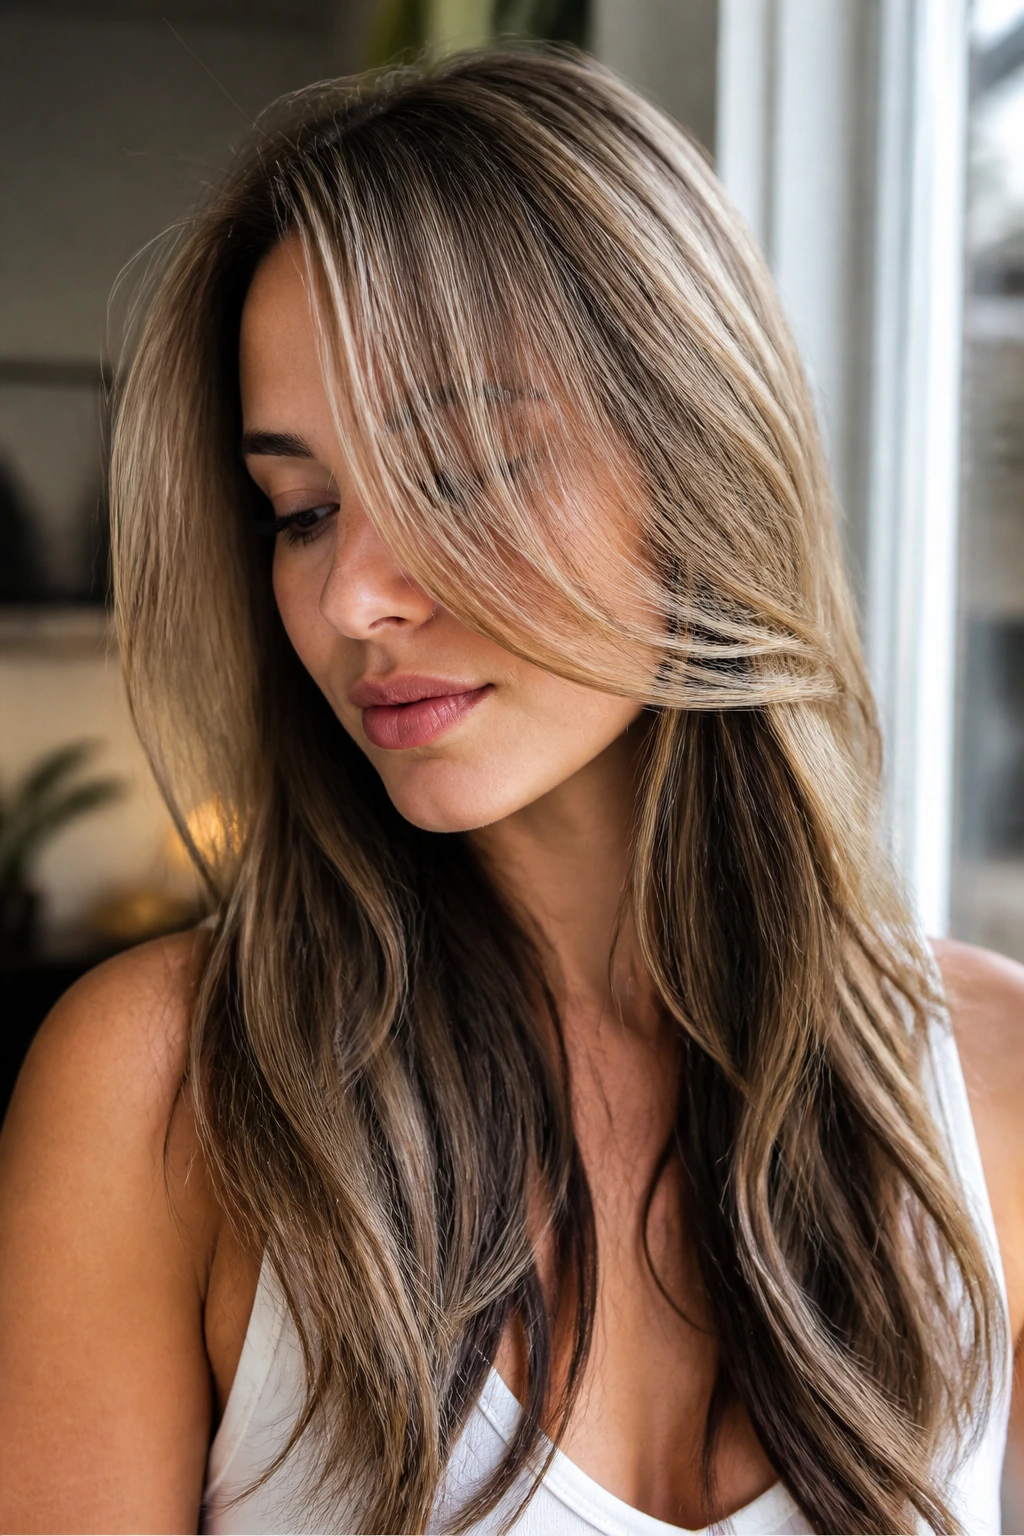
Peekaboo lowlights are for people who want softness with a little secret. The darker pieces sit under the surface, so the hair looks bright from the top and deeper when it moves.
Long layers make this work especially well. Lift the hair, tuck it behind the shoulder, toss it into a loose bun — the hidden dimension shows up and suddenly the color looks far more complex than it did from the front. This is a smart way to add depth without changing the whole look.
I like peekaboo lowlights for clients who are nervous about going too dark. You can keep the visible surface light and airy, then build shadow underneath. It is less obvious than full-panel lowlights, but it still makes the haircut feel fuller.
19. Auburn Lowlights for Golden Brown Hair
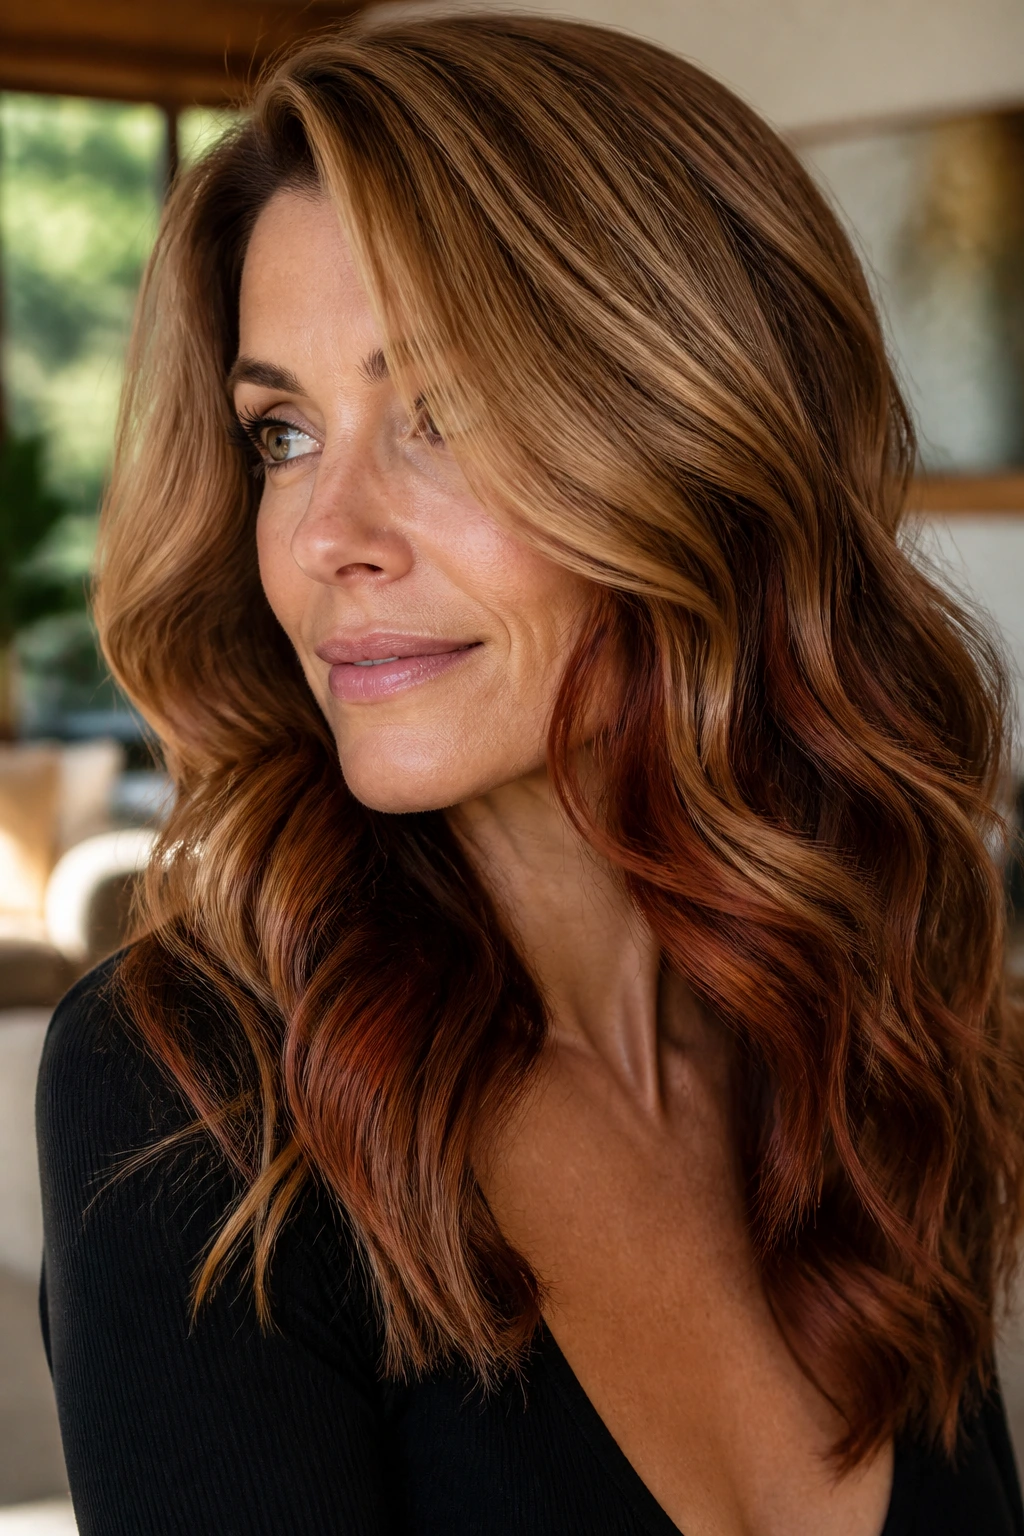
Golden brown can get bright in a way that sometimes flattens the haircut. Auburn lowlights fix that by adding a warm red-brown note that keeps the color lively.
-
Where it shines: around the face, through the ends, and in the lower layers of the cut.
-
Why it works: auburn deepens the brown without pushing it into orange.
-
Best finish: soft waves or a rounded blowout, since both show off the color shifts.
I like auburn most when the hair has a little natural warmth already. It builds on what’s there instead of fighting it. On very cool brown bases, it can look more obvious and less blended. That’s not a flaw. It’s just a different mood.
20. Mulled Wine Lowlights for Deep Bases
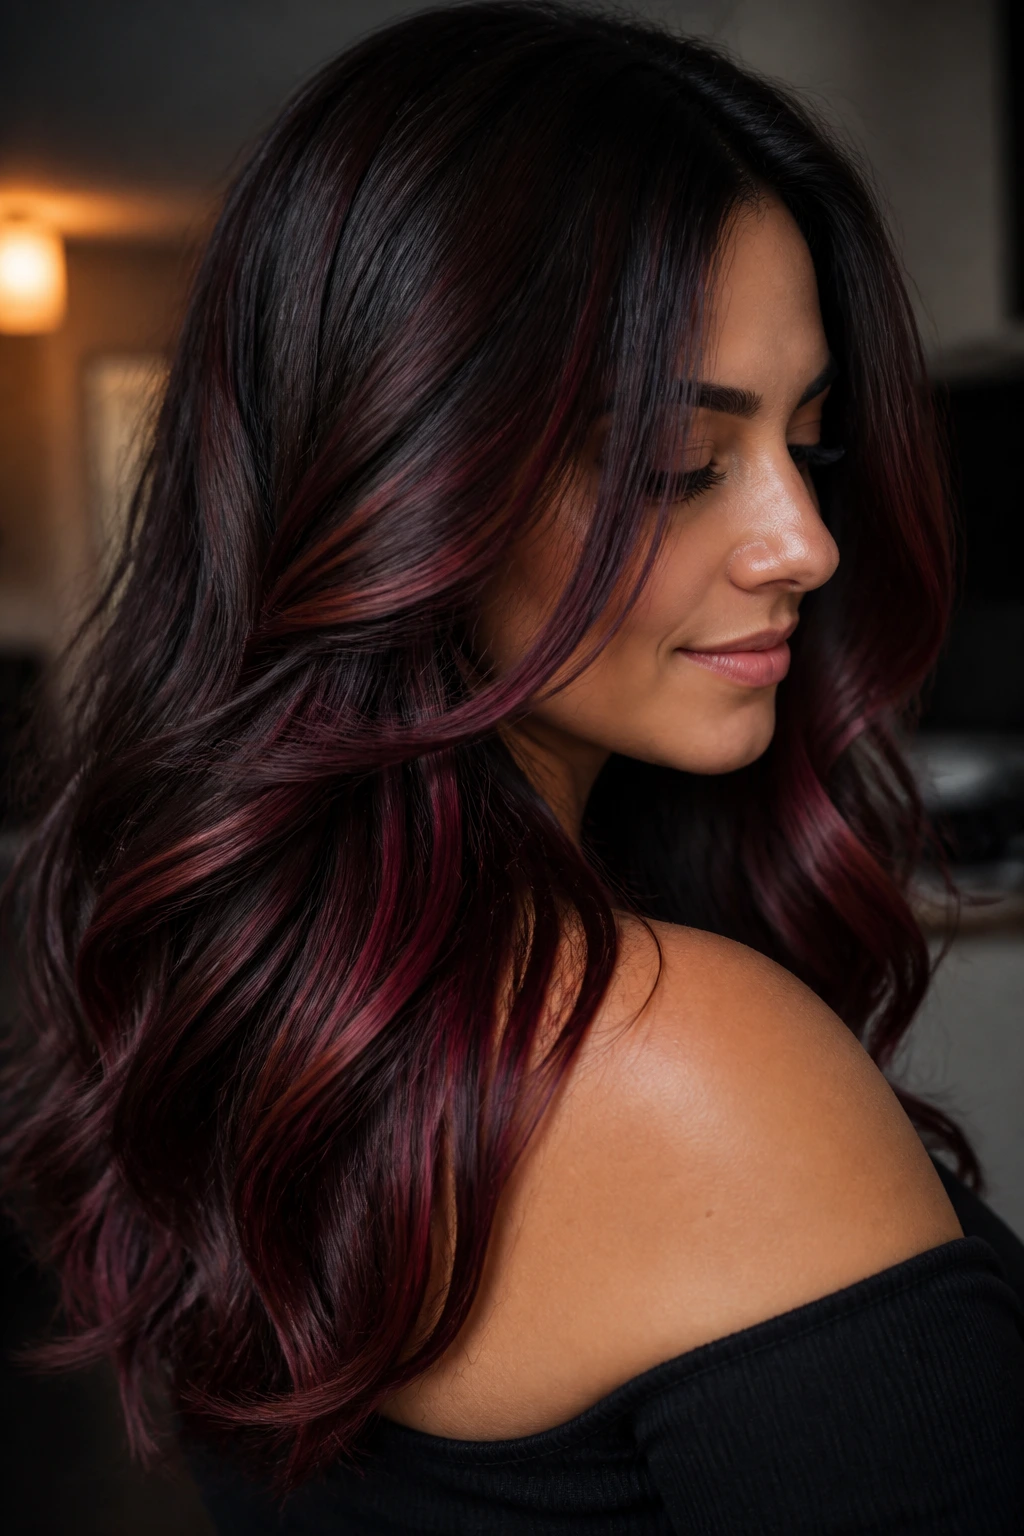
Deep brunettes do not have to settle for plain dark brown. Mulled wine lowlights give the base a hidden red-violet richness that shows up when the light hits from the side.
This is one of my favorite options for darker hair that needs movement but not brightness. The shade reads almost black indoors, then opens up to a wine tone outside or under softer light. It feels moody, but not harsh. And because the lowlights live inside the base, the overall look stays soft.
I would keep the pieces narrow and tuck them through the interior rather than around the whole perimeter. That preserves the depth of the base while giving it a second tone underneath. On long hair, especially, mulled wine can keep the ends from disappearing into one heavy block.
21. Taupe Lowlights for Silver-Adjacent Blondes
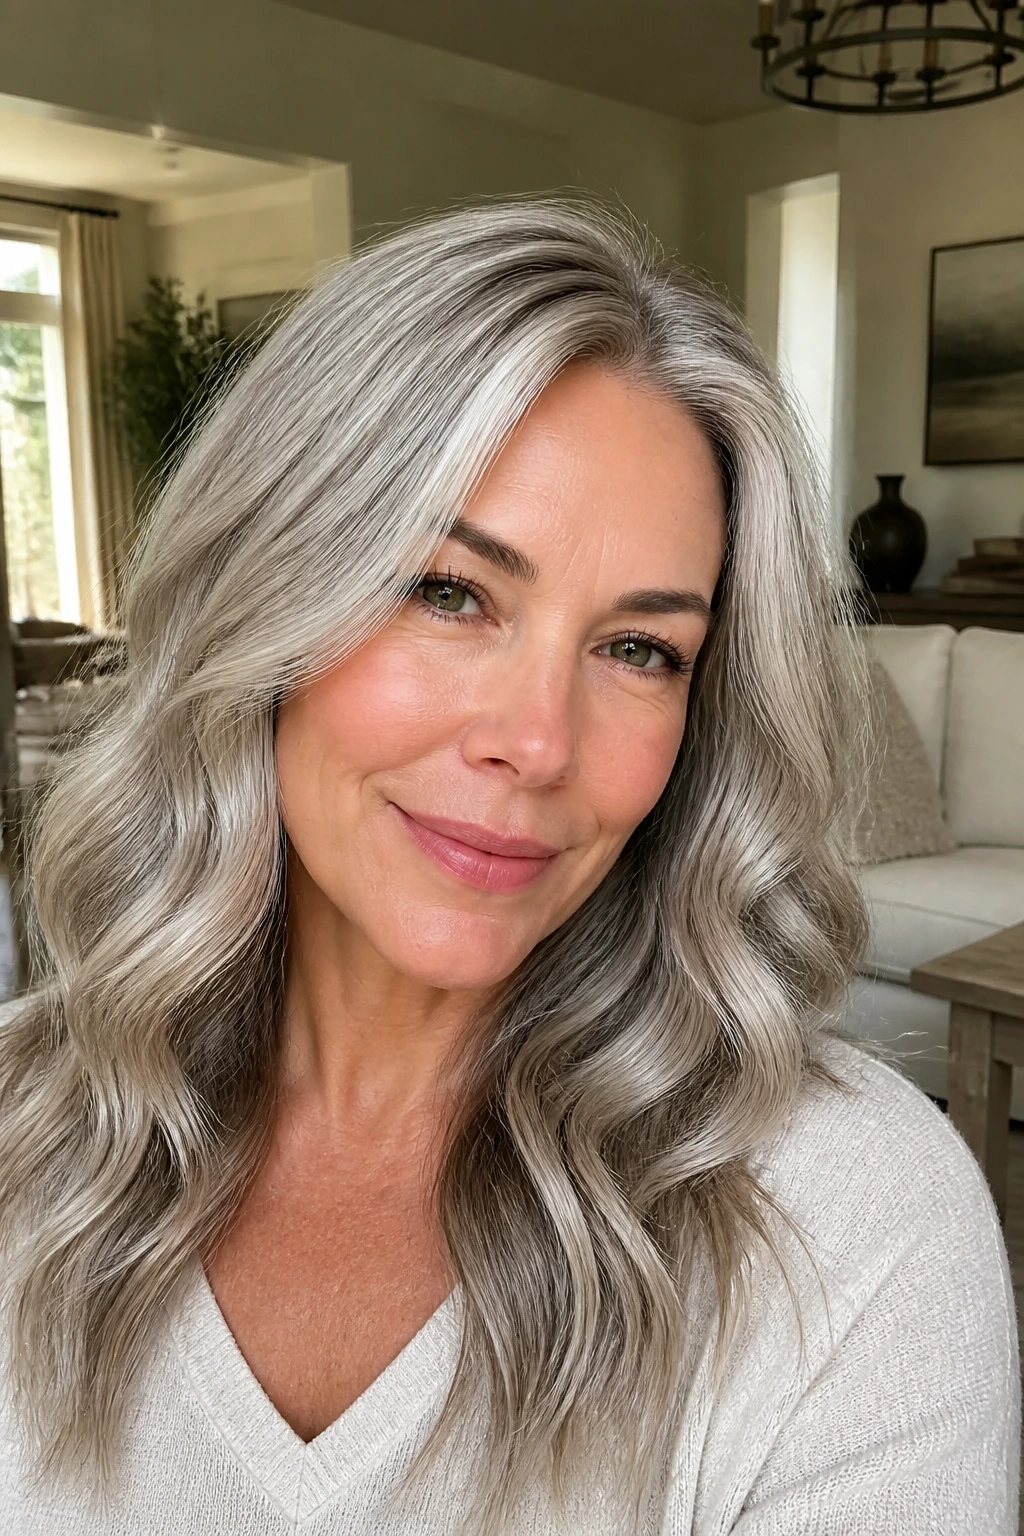
Silver-adjacent blonde is a tricky color. A little too pale and it looks washed out. A little too warm and it starts turning yellow. Taupe lowlights land in the middle and give the blonde a softer, more natural-looking shadow.
Where Taupe Helps Most
Taupe works well around the crown, through the sides, and near the part where silver-blonde can look overly bright. It also behaves nicely on hair with a mix of blonde and gray because the shade bridges the two instead of fighting them. The result is a softer blend that still feels light.
I especially like taupe when the hair has gone a bit dry from lightening. Cool beige or white-blonde can start to show every rough edge, while taupe lowlights create a smoother surface. The key is keeping the formula translucent enough that the hair still looks luminous.
22. Espresso Shadow Lowlights for Drier Ends
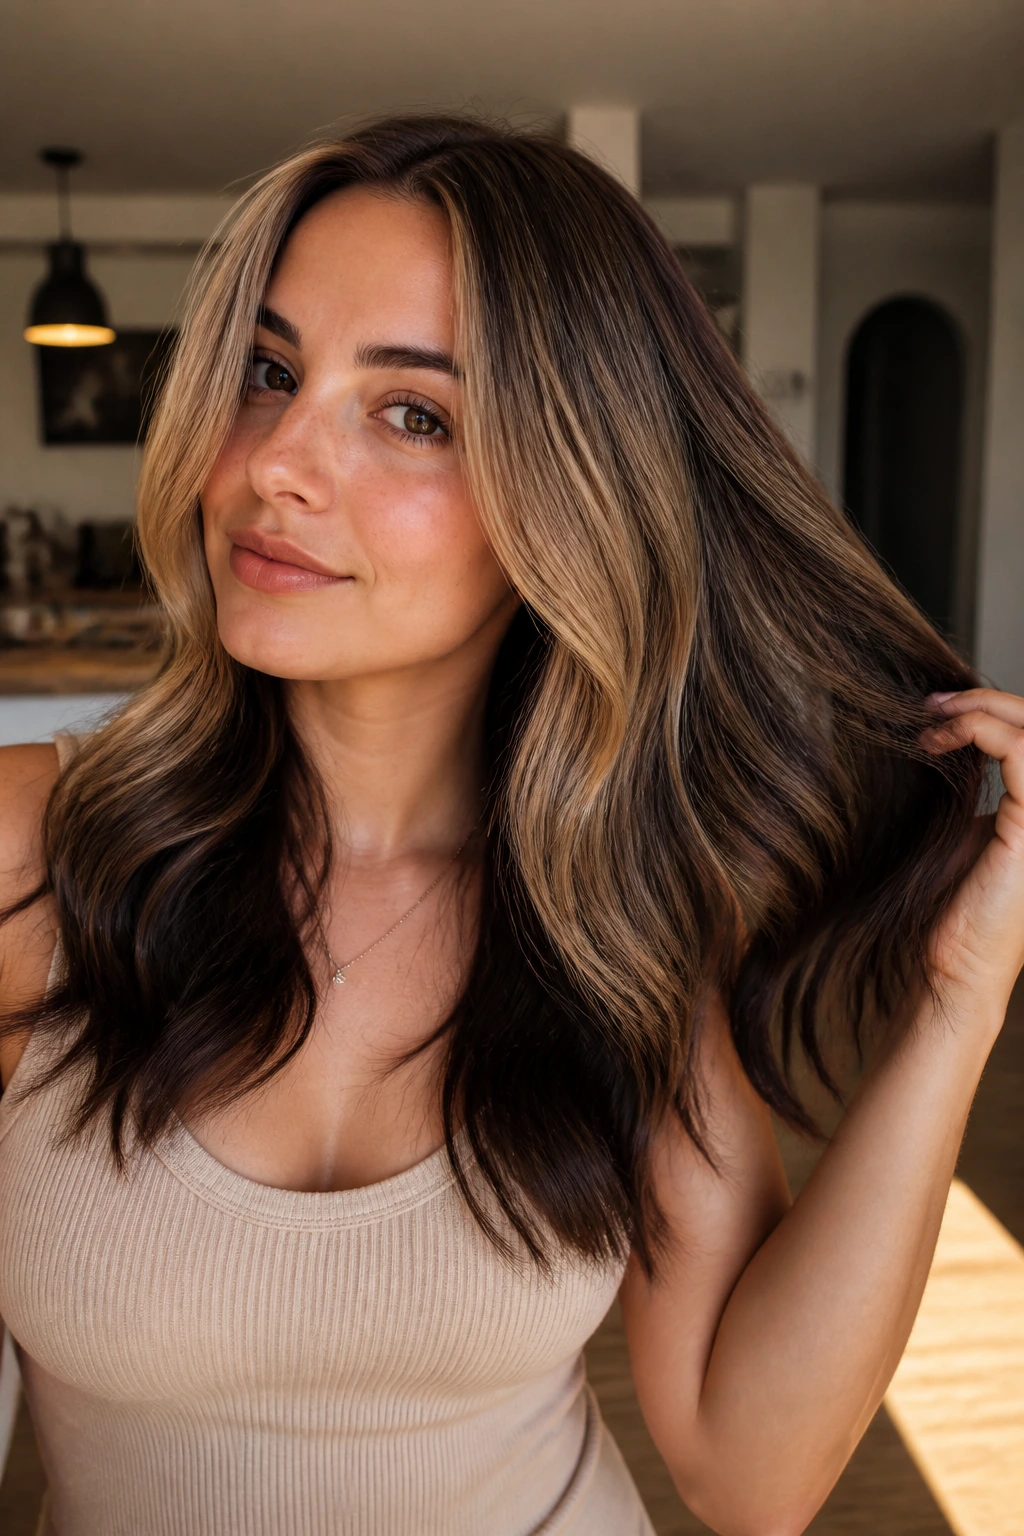
When the ends start to look frayed, espresso shadow lowlights can pull the eye back into the haircut. They add weight at the bottom, which is exactly what long, heavily lightened hair often needs.
This idea works best when the root area is still bright and the problem lives in the last few inches. Put the deeper pieces through the ends and lower mids, not the crown, so the hair looks anchored rather than darkened all over. The contrast makes the perimeter look cleaner, and cleaner ends always look healthier than wispy pale ones.
I like espresso shadow on long layers, long bobs, and balayage that has drifted too light at the bottom. It’s a practical fix, not a flashy one. And sometimes that’s the better move.
Why Lowlights Give Hair That Soft Dimensional Shape
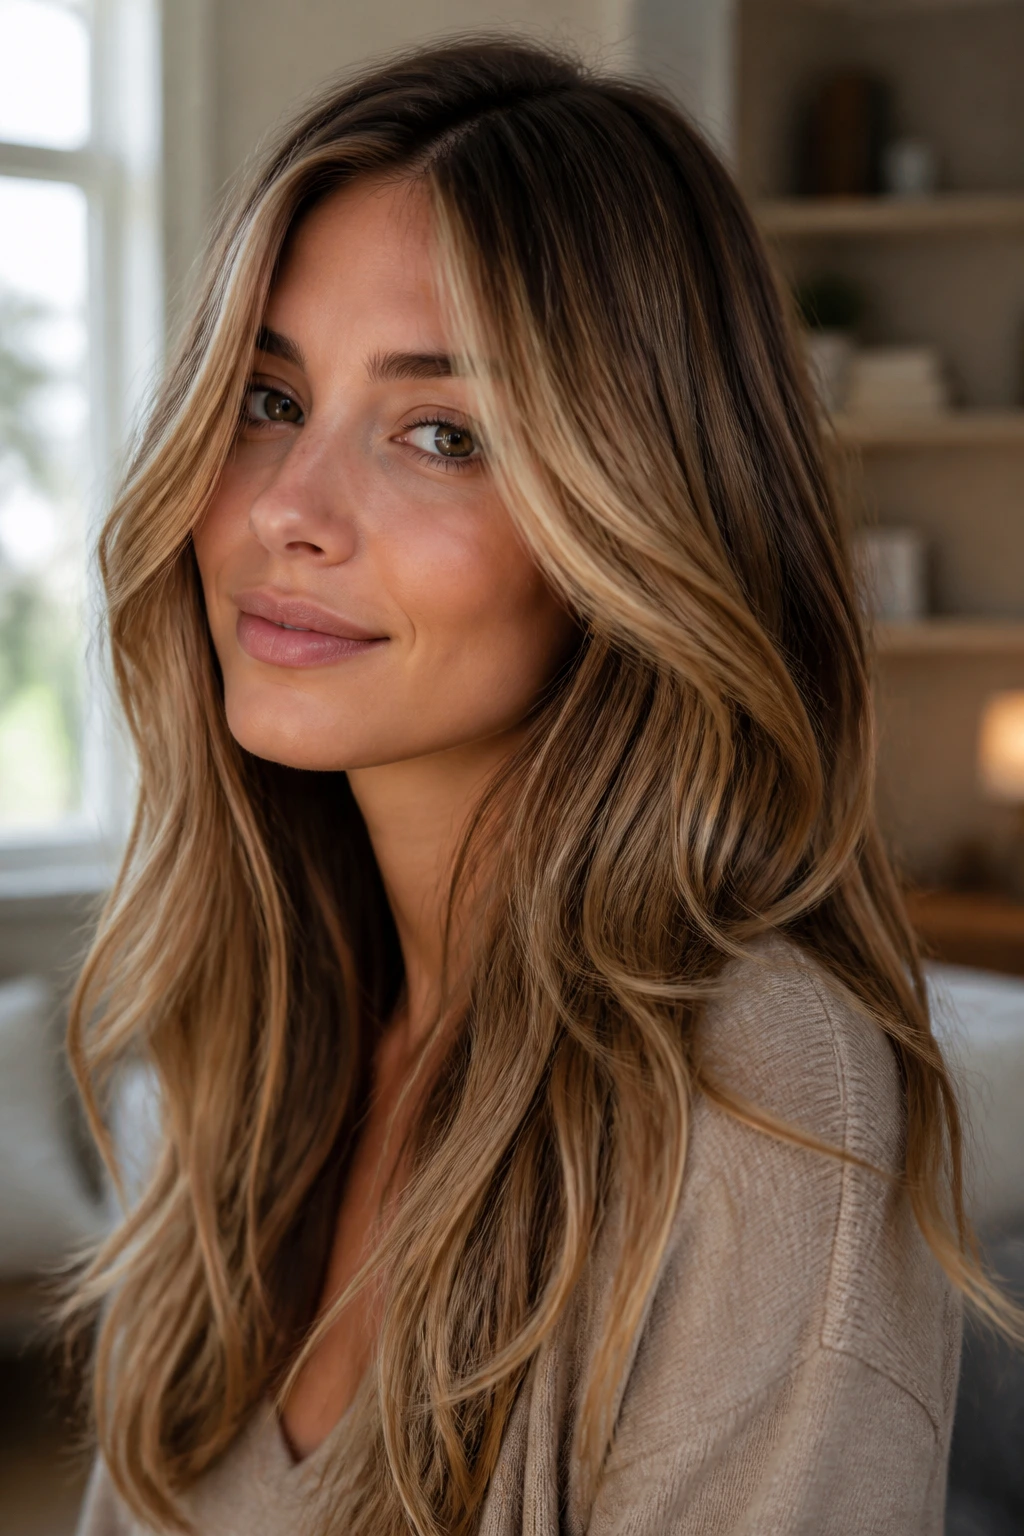
Lowlights work because the eye reads contrast before it reads anything else. A few darker strands next to lighter ones make the lighter pieces look brighter and the haircut look fuller, which is why the best dimensional color always has some shadow in it. Without that shadow, even expensive-looking blonde can go flat under indoor light.
The number that matters most is not “dark.” It’s distance. One level deeper than the base gives a gentle blur. Two levels deeper gives visible definition. Three levels deeper starts changing the mood of the whole head, and that’s fine if you want it, but it is no longer the same soft effect.
Placement matters just as much as the formula. The top layer can stay bright, while the interior, the nape, and the underside carry the darker pieces. That creates depth where the eye needs it, not where the mirror catches the most glare.
Texture changes the read too. Straight hair shows clear ribbons, so the weaving has to be precise. Wavy hair breaks up the contrast on its own. Curly hair softens the edges even more, which is why lowlights on curls often look richer and less obvious than the same formula on a blunt bob. The color is doing less than people think. The movement is doing a lot.
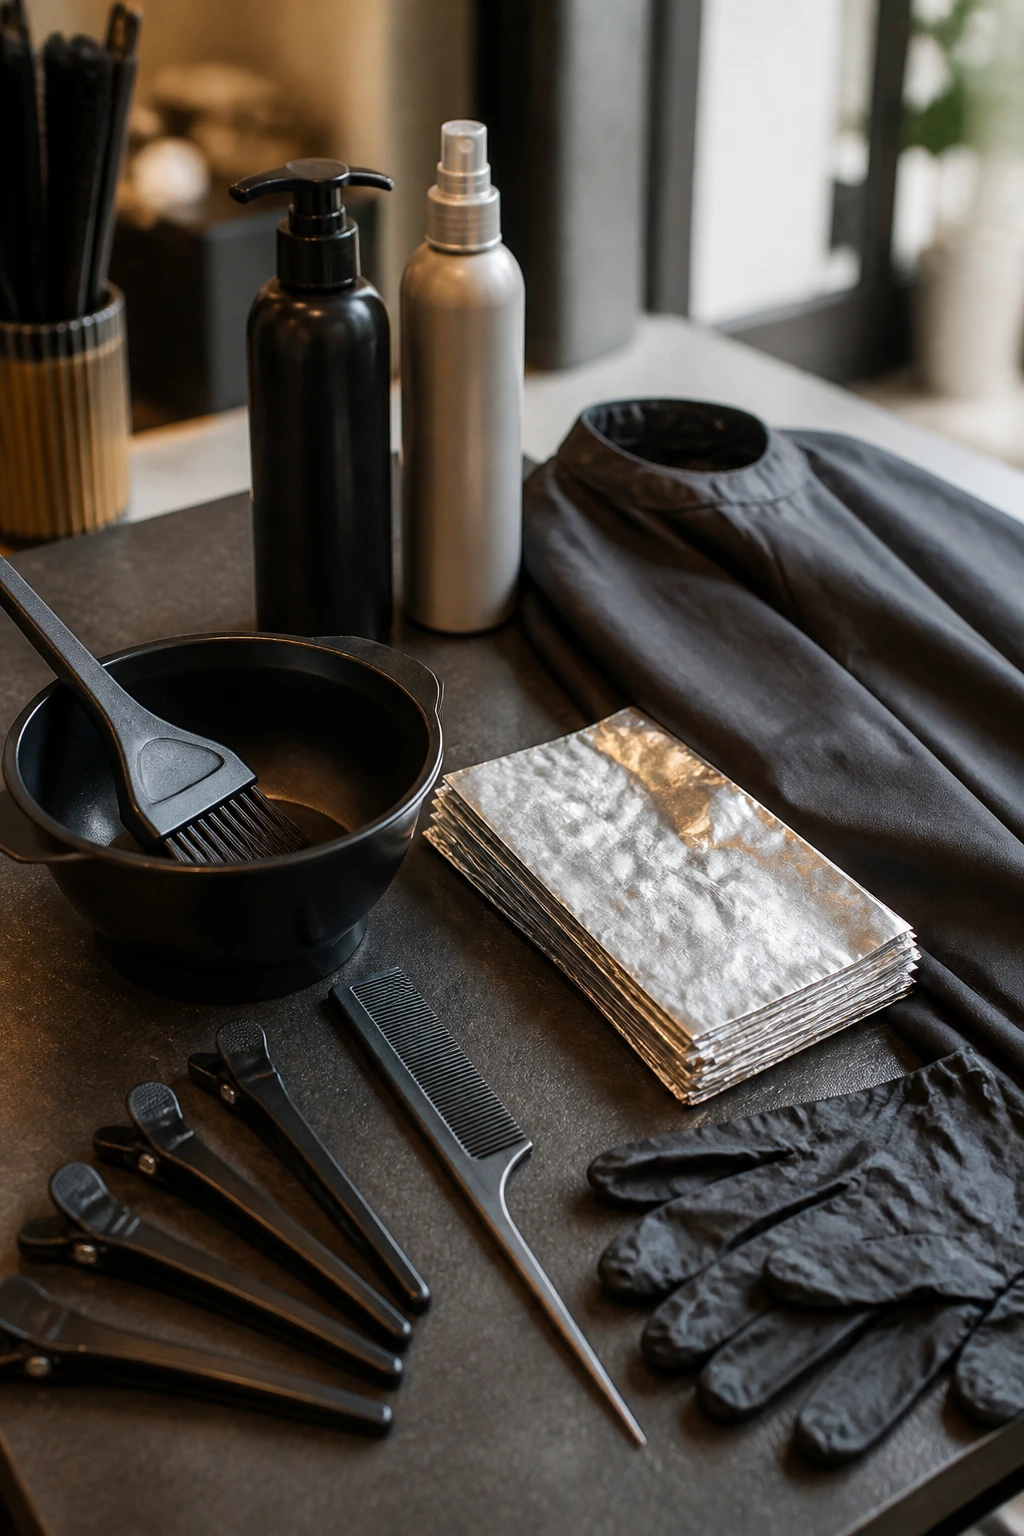
Tools and Products That Make Lowlight Work Cleaner
-
Level chart or color swatch book: helps you judge whether the lowlight sits one, two, or three levels deeper than the base.
-
Tint brush and bowl: useful for precise application when the goal is soft blending instead of chunky blocks.
-
Tail comb: lets you weave fine sections through highlights without grabbing too much hair.
-
Sectioning clips: keep the crown, sides, and nape organized so the color lands where you want it.
-
Foils: keep separate pieces clean and controlled, especially for high-contrast blonde or brunette work.
-
Gloves: protect hands from dark pigments and stop the color from staining nails and skin.
-
Color cape or dark towel: dark pigments can transfer fast, and light towels never forgive you.
-
Timer: helps prevent overprocessing, which matters more on porous blonde than almost anything else.
-
Color-safe shampoo and conditioner: keeps tone from fading too fast and helps the darker pieces stay clean.
-
Heat protectant: especially useful on lightened ends, where hot tools can rough up the cuticle and make lowlights look patchy.
How to Choose the Right Depth and Placement for Your Hair
The easiest way to get soft lowlights is to stay closer to your current base than your instinct tells you. One to two levels deeper is the sweet spot for most people who want softness. Go deeper only if you want the darker pieces to show on purpose.
Depth Rule: if your base is level 8 blonde, a level 6 or 7 lowlight usually reads soft; a level 5 starts looking more obvious. On brunette hair, the same idea applies. You want contrast, not a new head color hiding inside the old one.
Placement Rule: ask for the darker pieces in the interior, around the nape, under the crown, and in spots where the haircut needs weight. If every lowlight sits on the top layer, the hair can look busy and still flat underneath. That is the mistake I see most.
Tone Rule: cool or ash-based lowlights help when brass is the enemy. Warm brown, cinnamon, chestnut, or bronze works better when the hair already has warmth and needs richness. If the hair is porous from bleach, ask for a strand test first. Porous ends can grab pigment fast and go darker than you expected.
Texture Rule: fine hair likes thinner weaves and softer contrast. Thick hair can handle wider ribbons and a little more depth. Curly hair should be colored with the curl pattern in mind, not against it.
Common Mistakes That Make Lowlights Look Heavy
The biggest mistake is going too dark. The result is not soft dimension. It is contrast that sits on top of the haircut like marker lines. If the goal is subtle depth, stay within one to two levels of the base and leave the strongest darkness for hidden sections.
Another problem is putting the lowlights only on the visible surface. The hair may look interesting from the front, but the cut still feels hollow underneath. Push the darker pieces through the interior and lower layers so the depth supports the shape instead of sitting on top of it.
Porosity is the other one that gets people. Lightened ends soak up pigment fast. That can turn a rich brown into a muddy patch by the time the hair is rinsed. A softer formula, shorter processing time, or a quick strand test can save you from that mess.
Skipping a gloss is a mistake too, especially on blonde. Lowlights without a finishing gloss can look raw or dull. A clear or slightly tinted glaze softens the transition and makes the whole color look more blended.
Fine hair needs restraint. Chunky lowlights can make it look thinner, not fuller. Thin weaves, smart spacing, and a shade that stays close to the base do more good than a dramatic dark stripe ever will.
Variations and Adaptations to Try
Ribboned Softness: This version uses very fine lowlights woven tightly between brighter pieces. It works best if you want a hint of shadow but still want the hair to read mostly light and airy.
Smoky Shadow Melt: A root smudge blends into lowlights through the midlengths and ends. The whole color grows out with less of a hard line, which is handy if you do not love frequent touch-ups.
Hidden Interior Depth: Keep most of the dark pieces under the top layer and around the nape. The surface stays bright, but the haircut feels fuller when it moves.
Curly Contour Placement: On curls and coils, place the darker pieces where the curl separates naturally. The lowlights show up inside the curl clump and make the pattern look more defined.
Brighter Face Frame, Deeper Body: Leave the front brighter and add more lowlight depth through the back and lower lengths. This one is smart if you want the face to stay light while the rest of the hair gets structure.
Keeping Lowlights Fresh Between Salon Visits
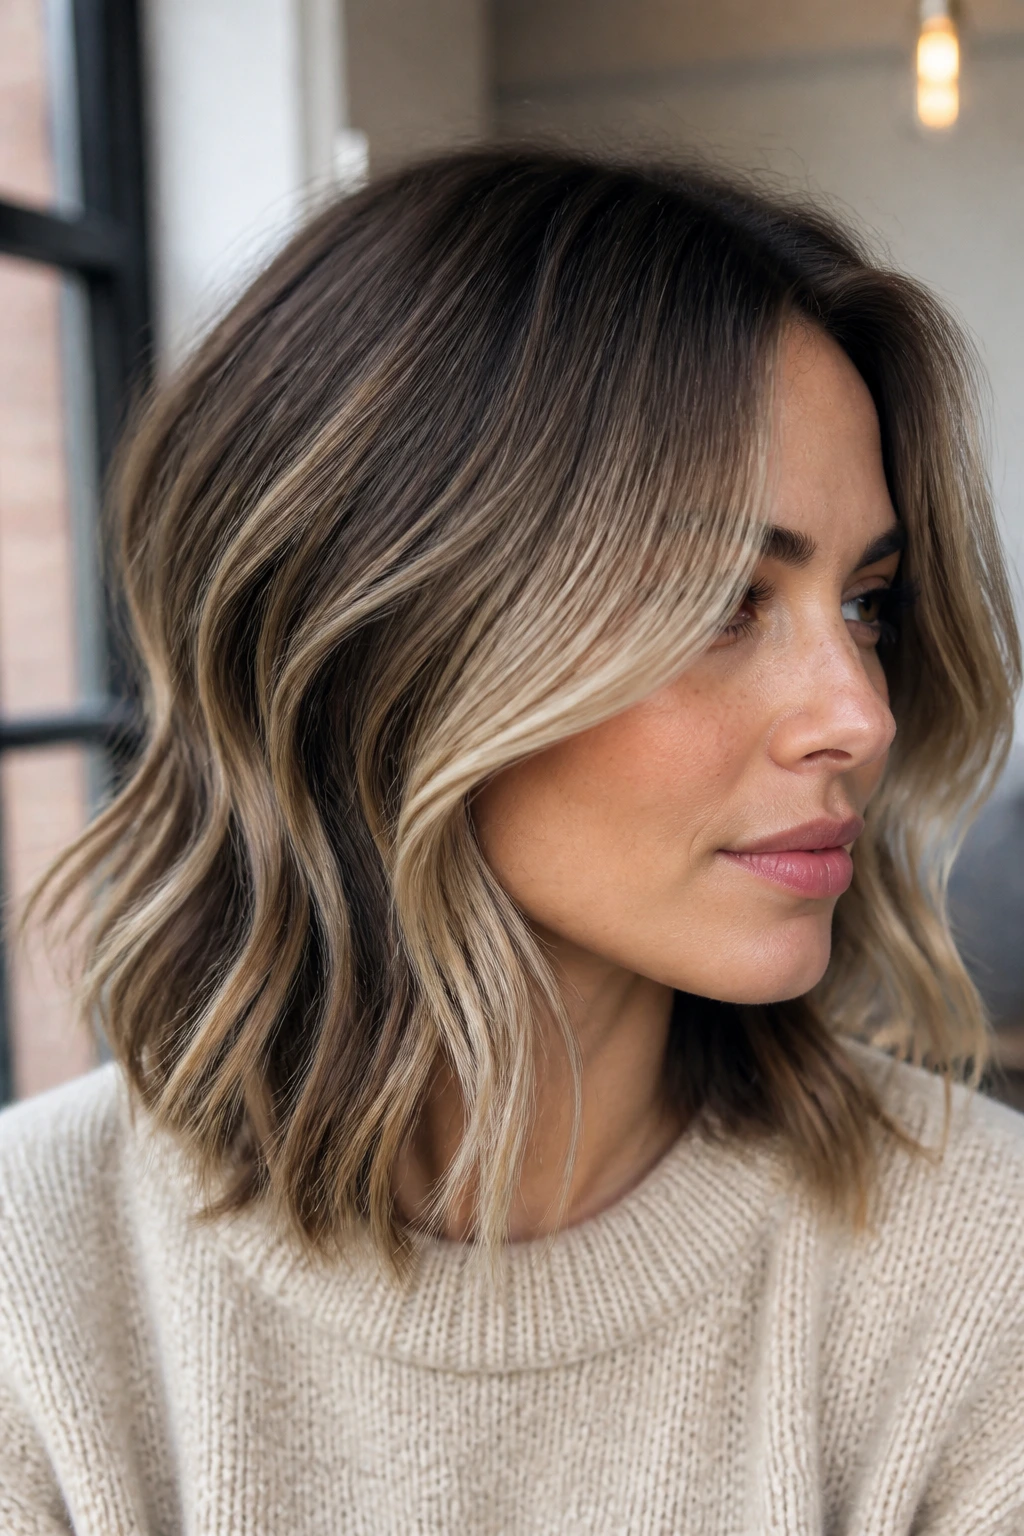
Lowlights last longer than highlights in the sense that they fade more slowly, but they can still warm up, soften, or lose shape over time. If your hair is color-treated, wash it with a sulfate-free shampoo and lukewarm water. Hot water roughs up the cuticle and makes the darker pieces fade faster than they need to.
Try not to shampoo every day unless your scalp demands it. Two to three washes a week is easier on the tone. On the off days, a rinse, dry shampoo, or a quick restyle is usually enough. Heat protectant matters too, especially on lightened ends. Flat irons and curling wands can make the surface look frayed, and frayed ends make lowlights look patchy.
A gloss every 4 to 6 weeks keeps the tone clean. Full lowlight refreshes often land around 6 to 10 weeks, depending on how much contrast you want and how fast your hair grows. If you’ve got very porous blonde, you may need a toner or gloss sooner, because porous hair grabs and releases pigment in uneven ways.
Sleep matters more than people admit. A loose braid or silk pillowcase helps the surface stay smooth, which keeps the color from looking dull in the morning.
Questions People Ask Before Booking Lowlights
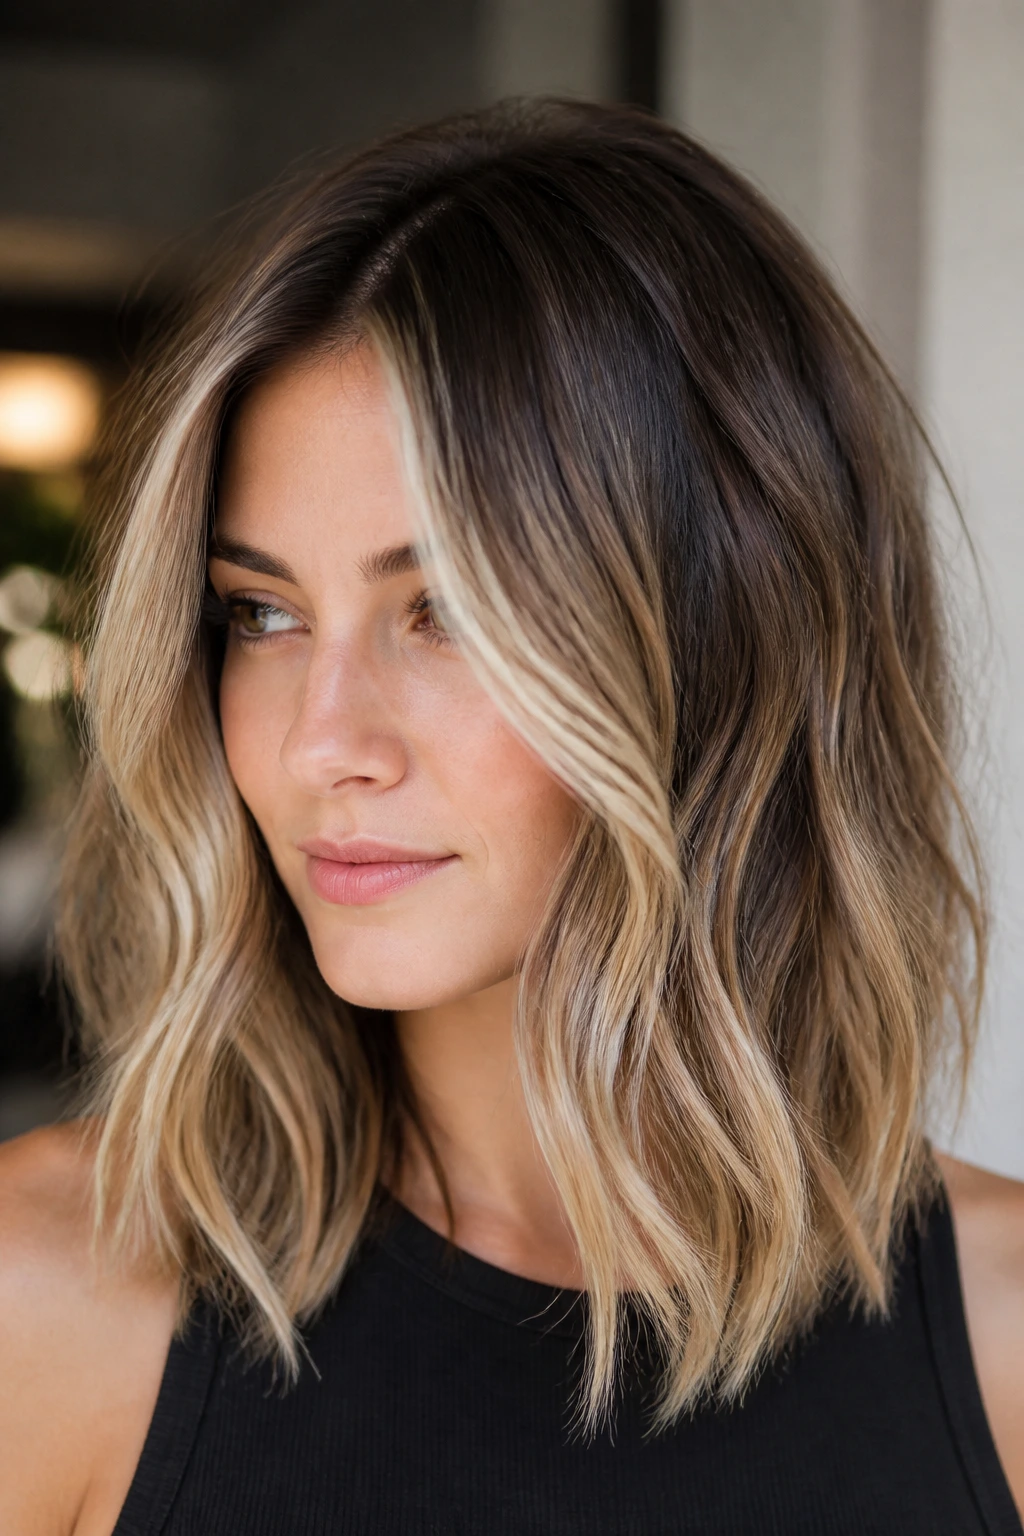
How dark should lowlights be compared with my base color?
Most of the time, one or two levels deeper is enough for soft dimension. Three levels deeper starts moving into visible contrast, which can be beautiful, but it is a different look and needs more careful placement.
Will lowlights make blonde hair look dirty?
Not if they’re placed well and the tone matches the undertone of the blonde. Muddy results usually come from going too dark, using a color that’s too warm or too cool for the base, or putting the darker pieces everywhere at once.
Can lowlights help if my highlights look too stripey?
Yes. That’s one of their best uses. They break up the stripes, add shadow between the light pieces, and make the color look less like separate ribbons and more like one finished head of hair.
Do lowlights work on curly hair?
They do, and curls often make them look softer than straight hair does. The trick is following the curl pattern so the darker pieces sit where the curl naturally opens and closes.
How often do lowlights need a refresh?
A lot depends on the base, the pigment used, and how often you heat-style. Many people can stretch them to 6 to 10 weeks, then refresh with a gloss or partial color service.
Can lowlights cover gray hair?
They can blend gray into the overall pattern, but they do not replace full gray coverage if you need opaque coverage at the roots. They’re better for weaving gray into the color so it looks intentional.
What if the lowlights come out too dark?
A gloss or color wash can soften them, and in some cases the darker pieces will settle after a few washes. If the color is too far off, go back to the salon quickly rather than trying to scrub it out at home.
Are lowlights better than a root shadow?
They solve different problems. A root shadow softens the root line. Lowlights add depth through the mids and ends. The two are often strongest when they’re used together.
Soft Depth That Lasts
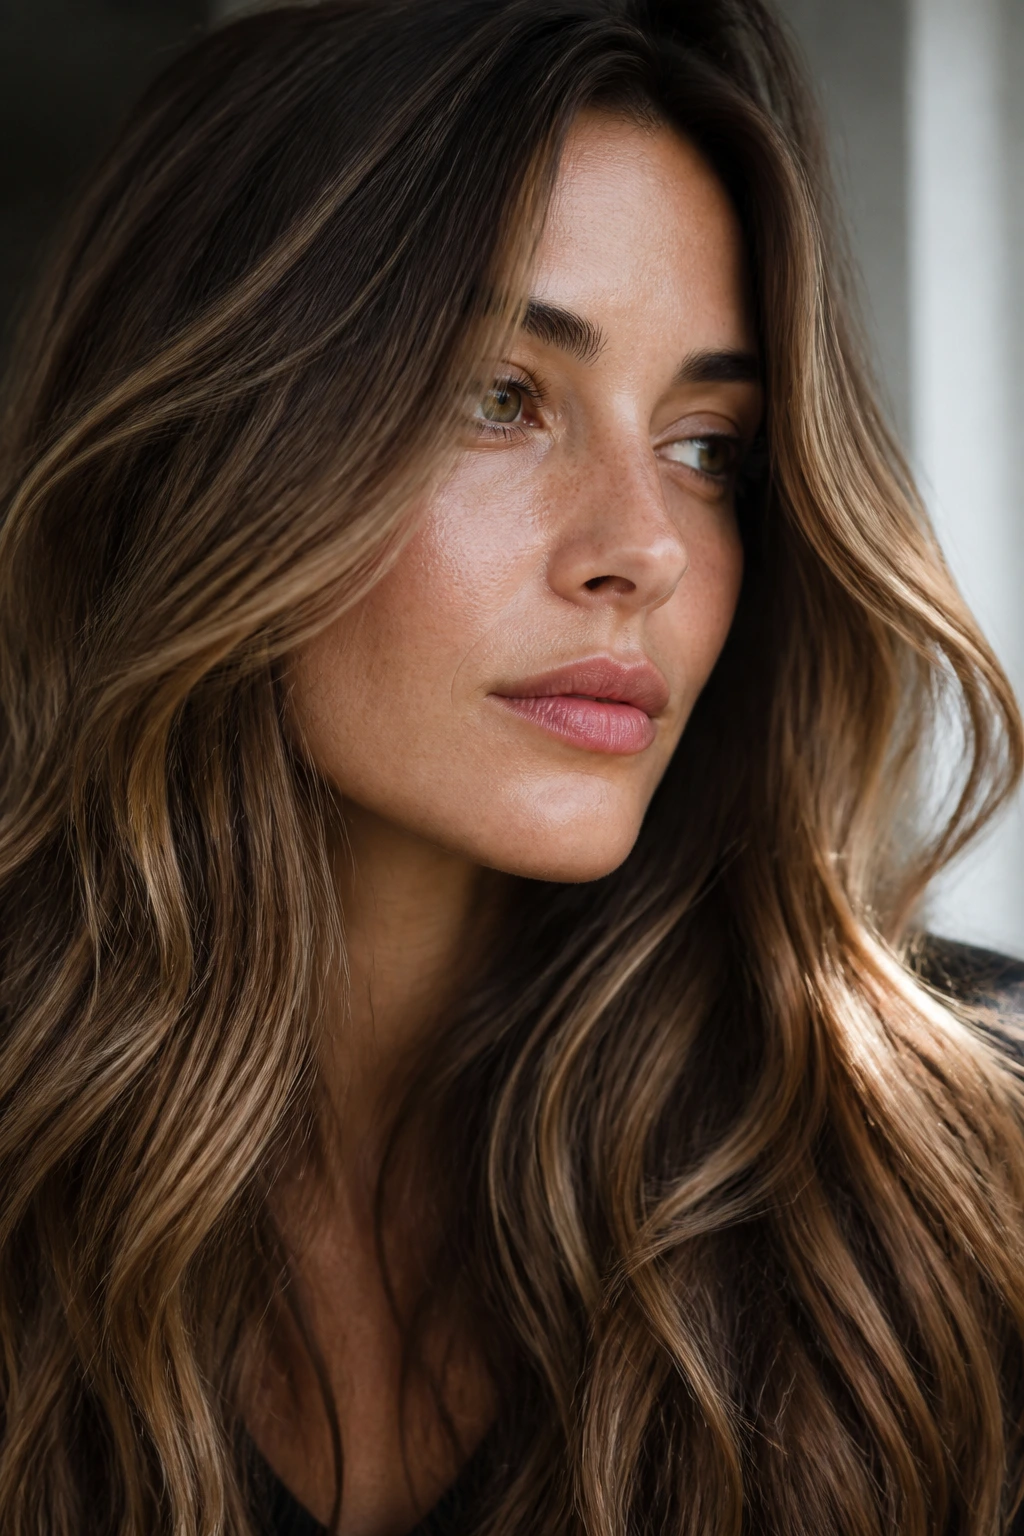
The best lowlights do a quiet job. They make bright pieces look brighter, give flat hair a place to dip and rise, and keep the whole head from feeling overexposed. That kind of color rarely needs to shout. It works because it sits under the surface and supports the haircut from there.
If you’re choosing between more light and more shape, shape usually wins. A few carefully placed lowlights can make hair look thicker, richer, and easier to live with, which is a nicer result than chasing brightness for its own sake. Bring photos, pay attention to the depth of the dark pieces, and keep an eye on placement. That’s where the softness lives.
