



A good morning hairstyle for busy moms has one job: look intentional after a backpack battle, a coffee refill, and a race to the front door. That is the whole test. If it survives sticky fingers, wind at the car door, and a last-minute change of shirt, it earns its place in the rotation.
The best hairstyles for busy moms that look modern usually share the same DNA. Clean lines. Soft texture. One smart detail — a center part, a claw clip, a wrapped elastic, a face-framing piece that was placed on purpose instead of left behind by accident. You do not need a salon finish. You need a style that holds its shape and still looks like you meant to leave the house.
Second-day hair helps more than people admit. So does a little texture spray, a sharp part, and the willingness to stop fussing before the style starts looking stiff. That is where these looks live: practical, polished, and fast enough to fit into the part of the day where someone is asking for a lost shoe.
Why These Hairstyles Work on Real Mornings
- Fast Hands-On Time: Most of these styles take 5 to 10 minutes once your hair is dry, and several get faster on day-two texture.
- Modern Shape: Low buns, claw clips, soft bends, and crisp parts keep the look current without needing a full blowout.
- Flexible for Real Hair: Fine hair, thick hair, curls, coils, and shoulder-length cuts all have options here.
- Mess-Friendly: A little frizz or bend doesn’t ruin these styles; in several cases, it helps them look better.
- Low Tool Count: You can do a surprising number of them with a brush, a few pins, and one good elastic.
- Day-to-Night Useful: A lot of these styles still look fine at pickup, at dinner, or at a quick errand stop.
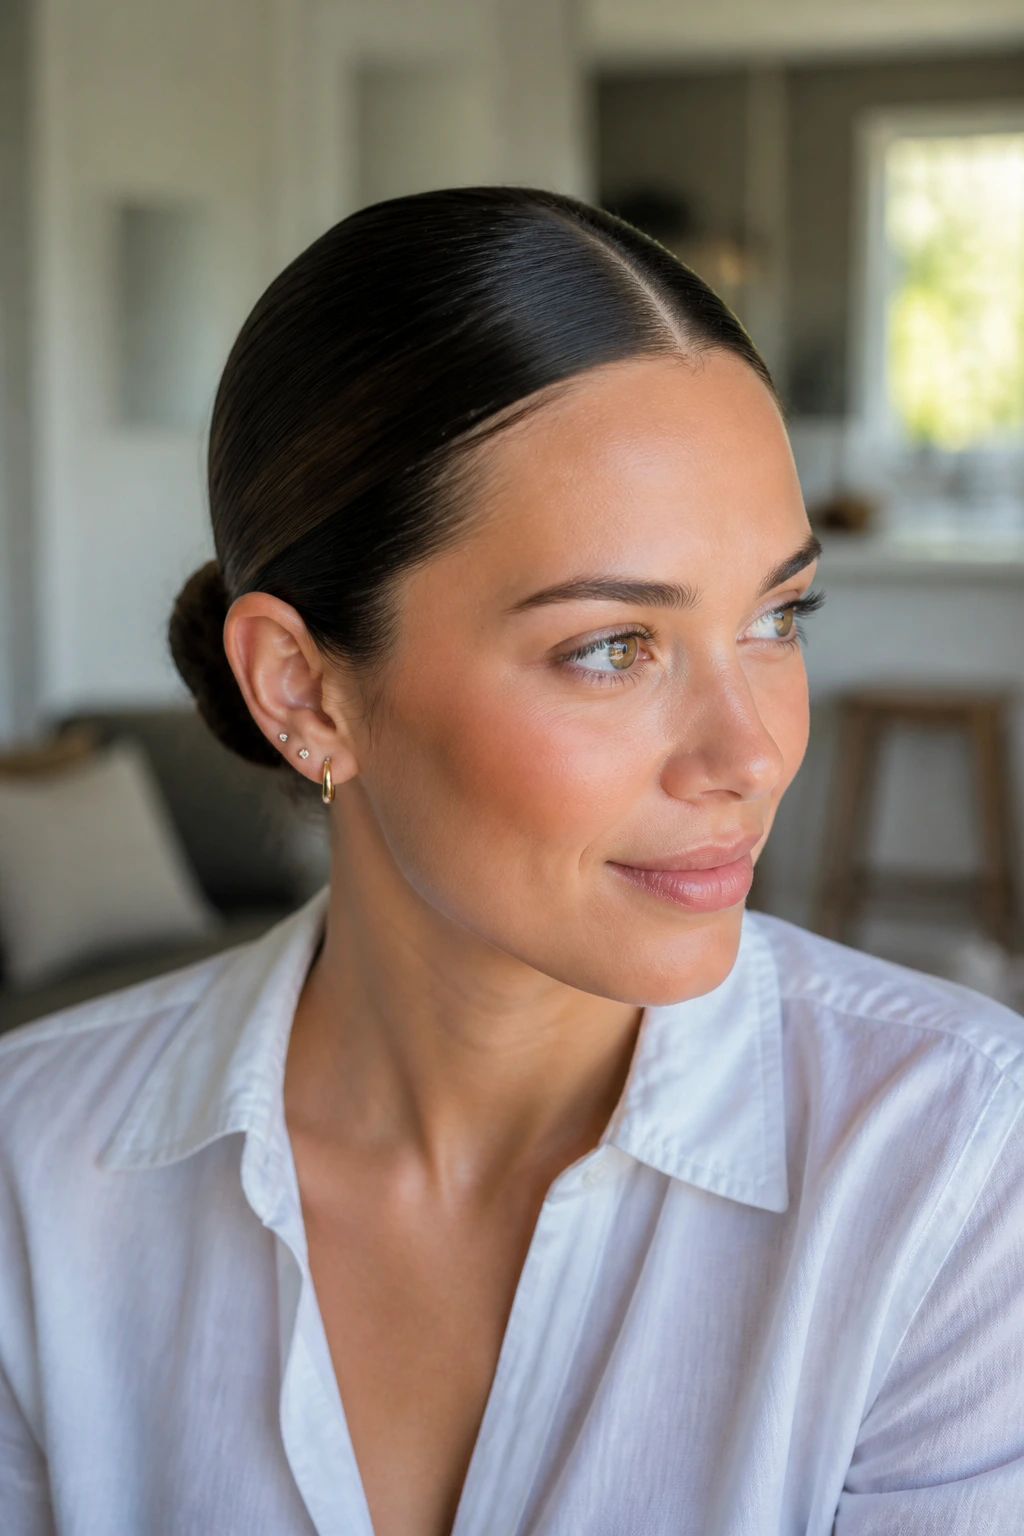
1. Sleek Low Bun with a Clean Middle Part
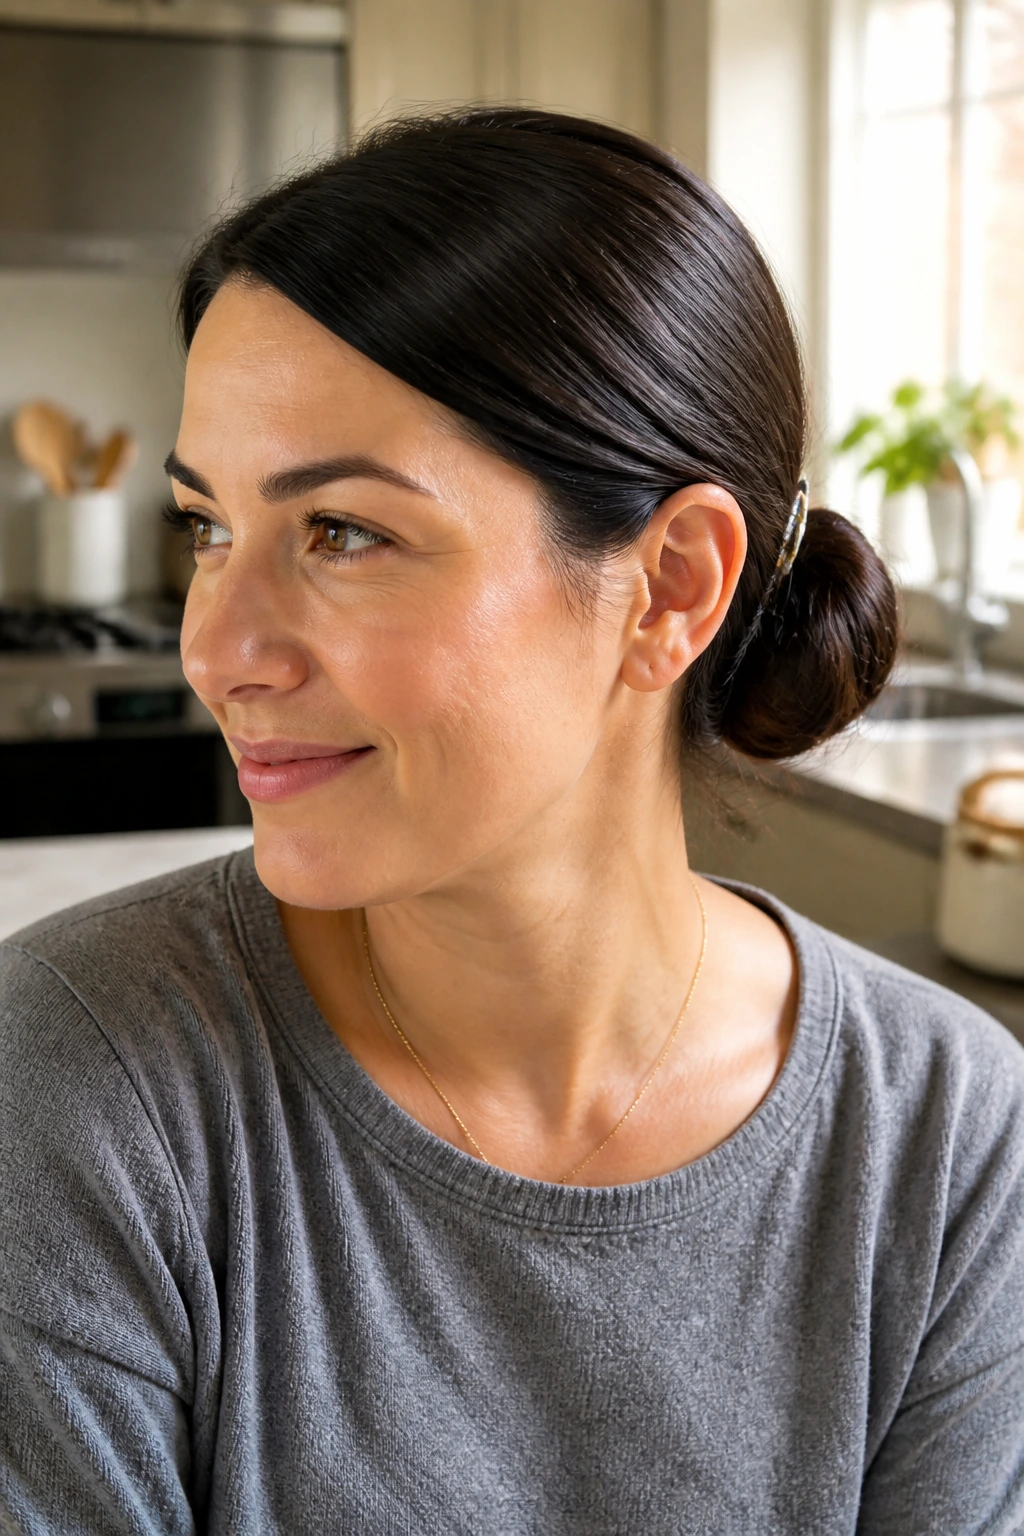
A low bun sounds plain until you give it a sharp center part and keep the surface smooth. Then it suddenly looks deliberate, modern, and a little sharper than the usual rushed knot at the nape. This is one of those hairstyles for busy moms that works because it removes the guesswork: everything is tucked, secured, and out of the way.
The trick is the balance. Pull the hair back tight enough that the part stays clean, but not so tight that the whole head looks drawn back into a helmet. A dime-size dab of smoothing cream on the top layer and a soft-bristle brush are usually enough. If you want a cleaner finish, twist the bun low and pin it flat instead of building a bulky coil.
Best for: straight, wavy, and fine-to-medium hair.
Time: about 4 minutes once you know the motion.
Watch for: flyaways around the crown; smooth them before the bun goes in, not after.
2. Claw-Clip French Twist
This is the style I reach for when I want hair off my neck but do not want the severe look of a tight bun. A claw-clip French twist gives that easy, slightly undone shape that keeps showing up in modern hair looks because it is fast, useful, and not fussy. The clip becomes part of the style instead of something you hide.
Start by gathering the hair at the back of the head, twist it upward, and fold the length down into the clip. Leave the ends a little loose if your hair is long; that slight spill at the bottom keeps it from looking too formal. A medium or large matte claw clip usually holds better than the glossy, slippery kind.
The best versions have a little movement at the sides. Pull out a few face-framing strands if you want softness, or keep the front sleek if your hair falls into your face all day. Either way, it looks more intentional than a rushed ponytail, which is why it keeps getting pulled back into rotation.
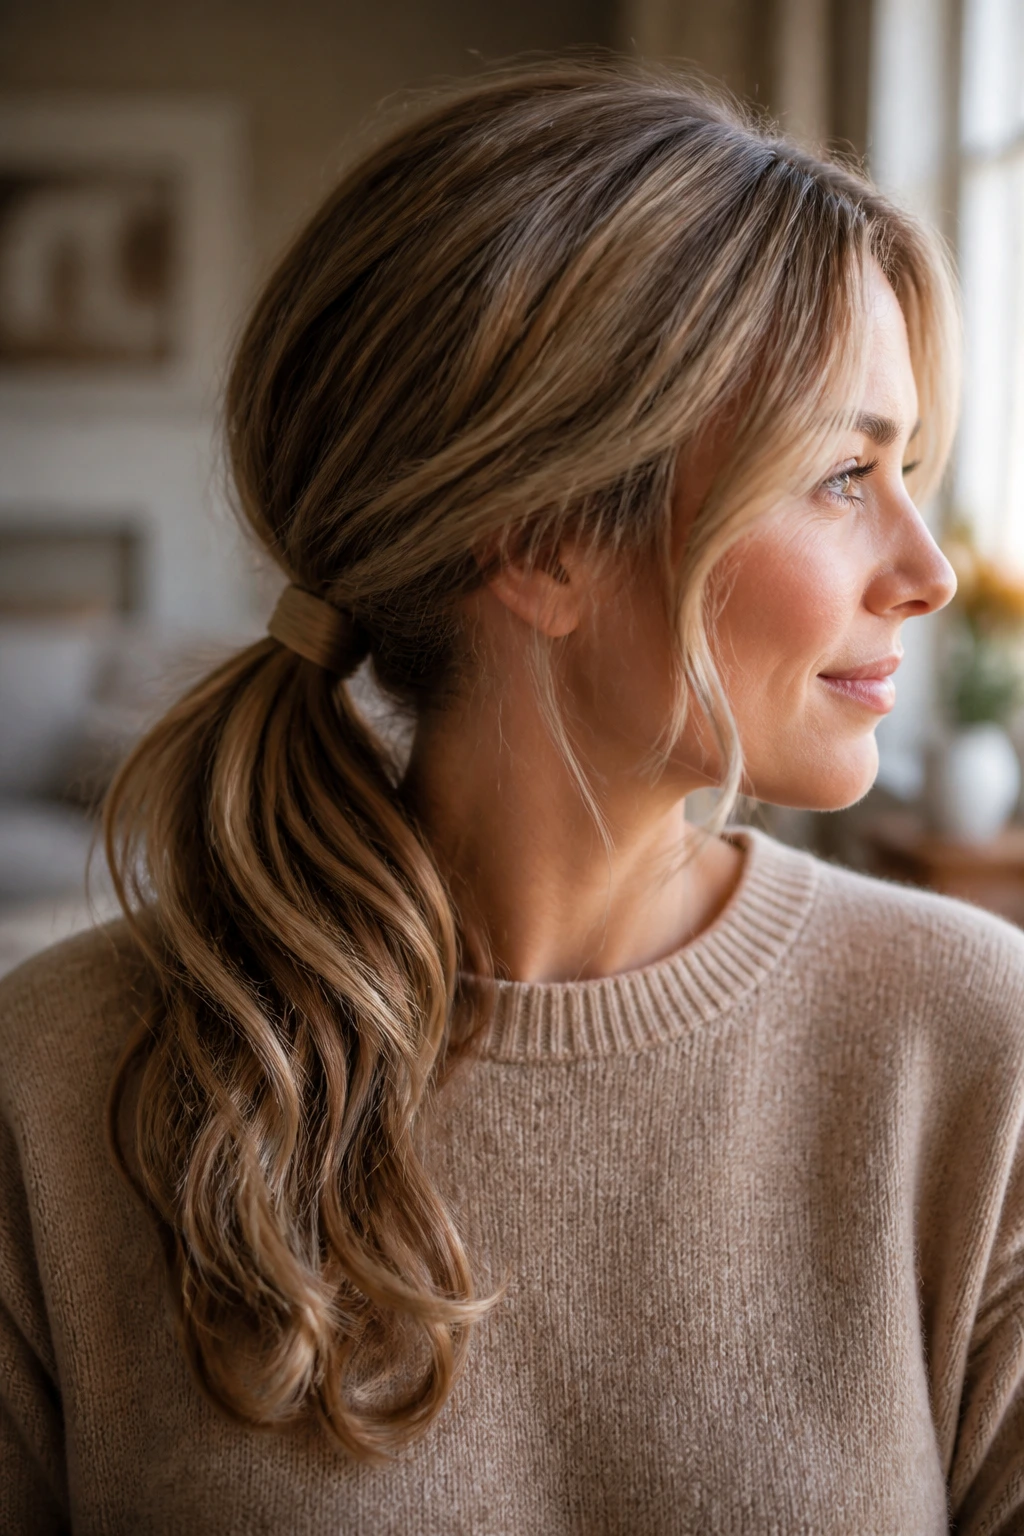
3. Soft Waves Pulled into a Low Ponytail
A plain low ponytail can look sleepy. Add a bend through the lengths first, and the whole thing changes. The waves catch light, the ends look fuller, and the ponytail reads as styled instead of accidental.
You do not need to curl every inch. Two or three loose bends with a 1-inch iron, or a quick pass with a flat iron to create an S-wave, is enough. Then gather the hair low at the nape, leave the crown smooth, and wrap a small strand around the elastic. That tiny wrap matters more than people think. It hides the rubber band and gives the finish a cleaner line.
This one is especially useful if your hair has grown-out layers or the ends tend to look thin. The wave adds body where the ponytail needs it most. A little texture spray at the ends keeps them from collapsing by lunchtime.
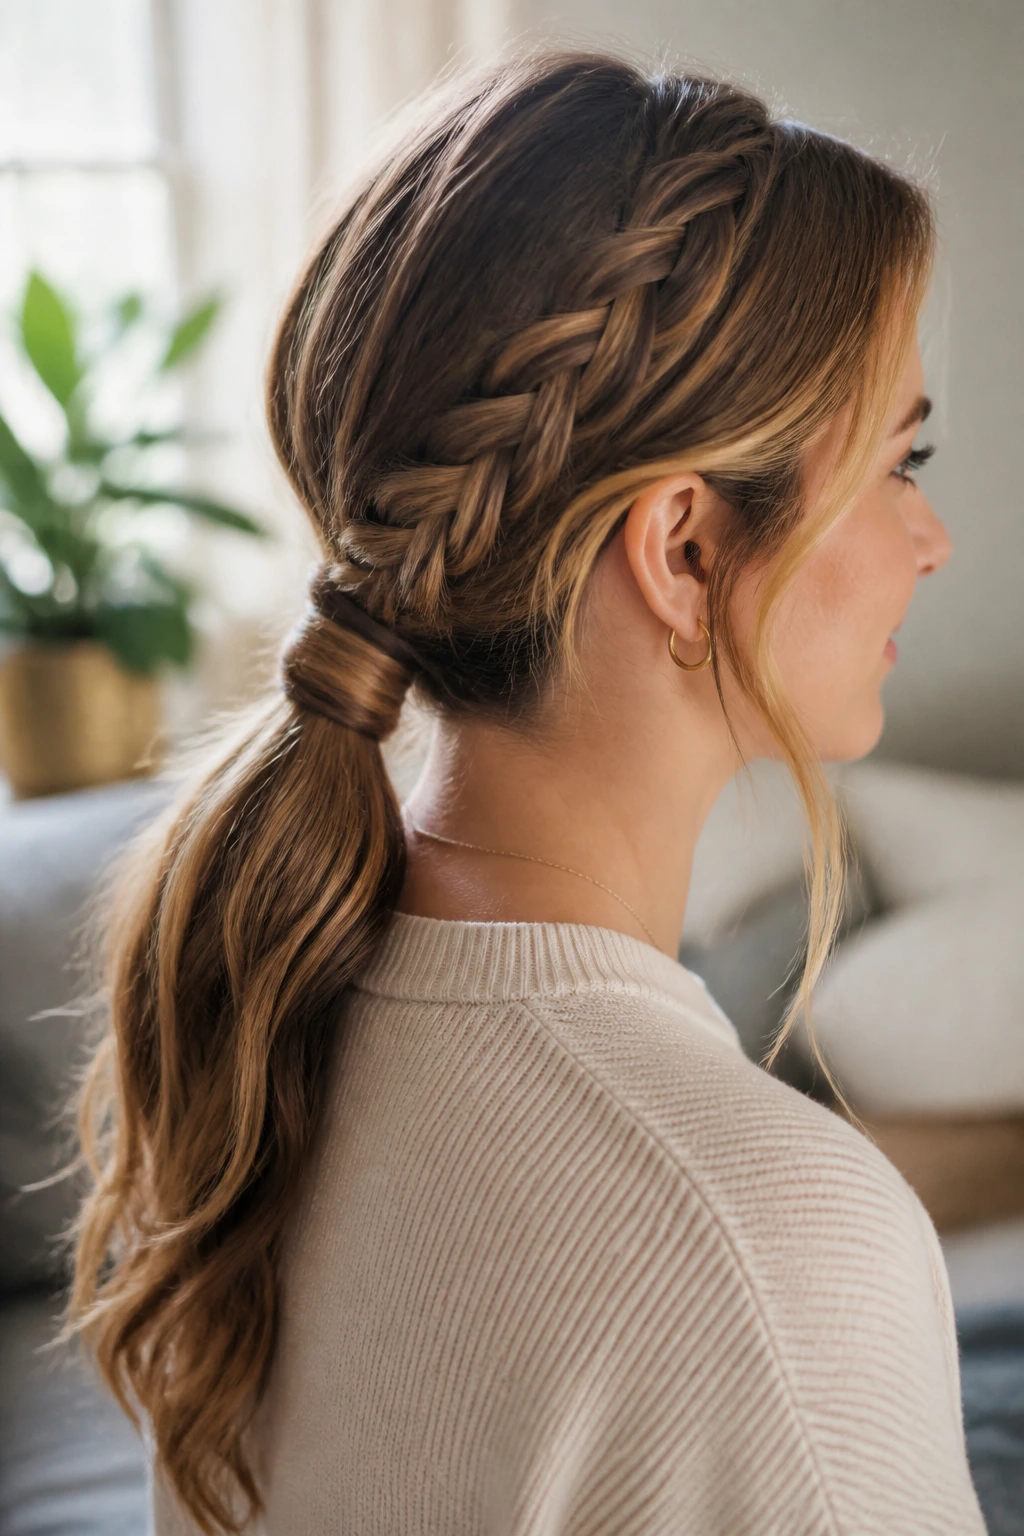
4. Braided Low Ponytail
A braid turns a low ponytail into something with shape, and that shape is what keeps it from looking dated. This version is practical when your hair is long enough to swing around but not long enough to stay neat on its own. Braided lengths also help on windy days, which is a bigger deal than most people admit.
Build a low ponytail first, secure it, then braid the tail loosely and tie it off with a small elastic. If the braid looks too tight, tug the edges slightly so it widens. That softer braid pattern is the part that feels current. A stiff, skinny braid can read a little too school-portrait.
Quick cues:
- Works best on second-day hair with a bit of grip.
- Fine hair benefits from texturizing spray before the braid.
- Thick hair usually needs a stronger elastic under the ponytail.
One small move makes this style better: wrap a tiny piece of hair around the base before braiding. It cleans up the start line and makes the whole thing look finished.
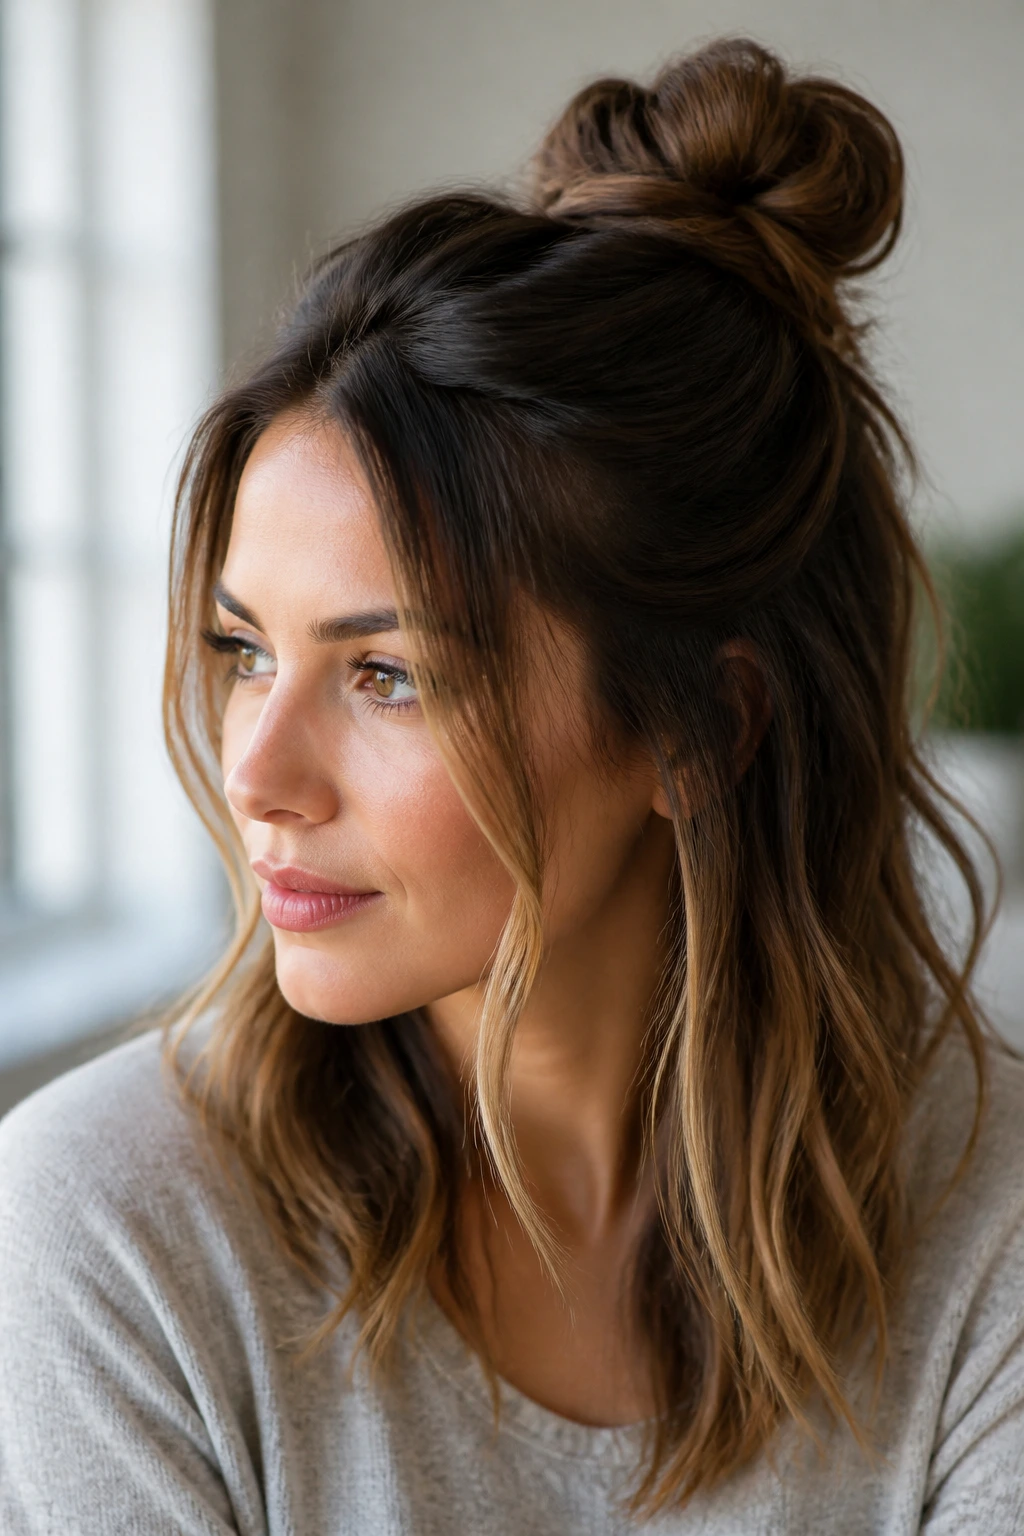
5. Half-Up Knot with Face-Framing Pieces
There is a reason the half-up knot keeps showing up everywhere. It clears the face, keeps the top section under control, and leaves enough length down to soften the look. For busy mornings, that combination is hard to beat.
Take the top third of the hair — not too much, not too little — and twist it into a small knot at the crown. Secure it with two bobby pins or a tiny elastic, then pull out two slim face-framing pieces. Those front pieces should be placed on purpose. Too much hair left out and the style turns messy; too little and it starts looking stiff.
This one works especially well with shoulder-length cuts and grown-out layers. It also hides roots better than a fully slicked-back style. If your hair is flat at the crown, tease the top section once before twisting. Once. More than that starts looking puffy in the wrong way.
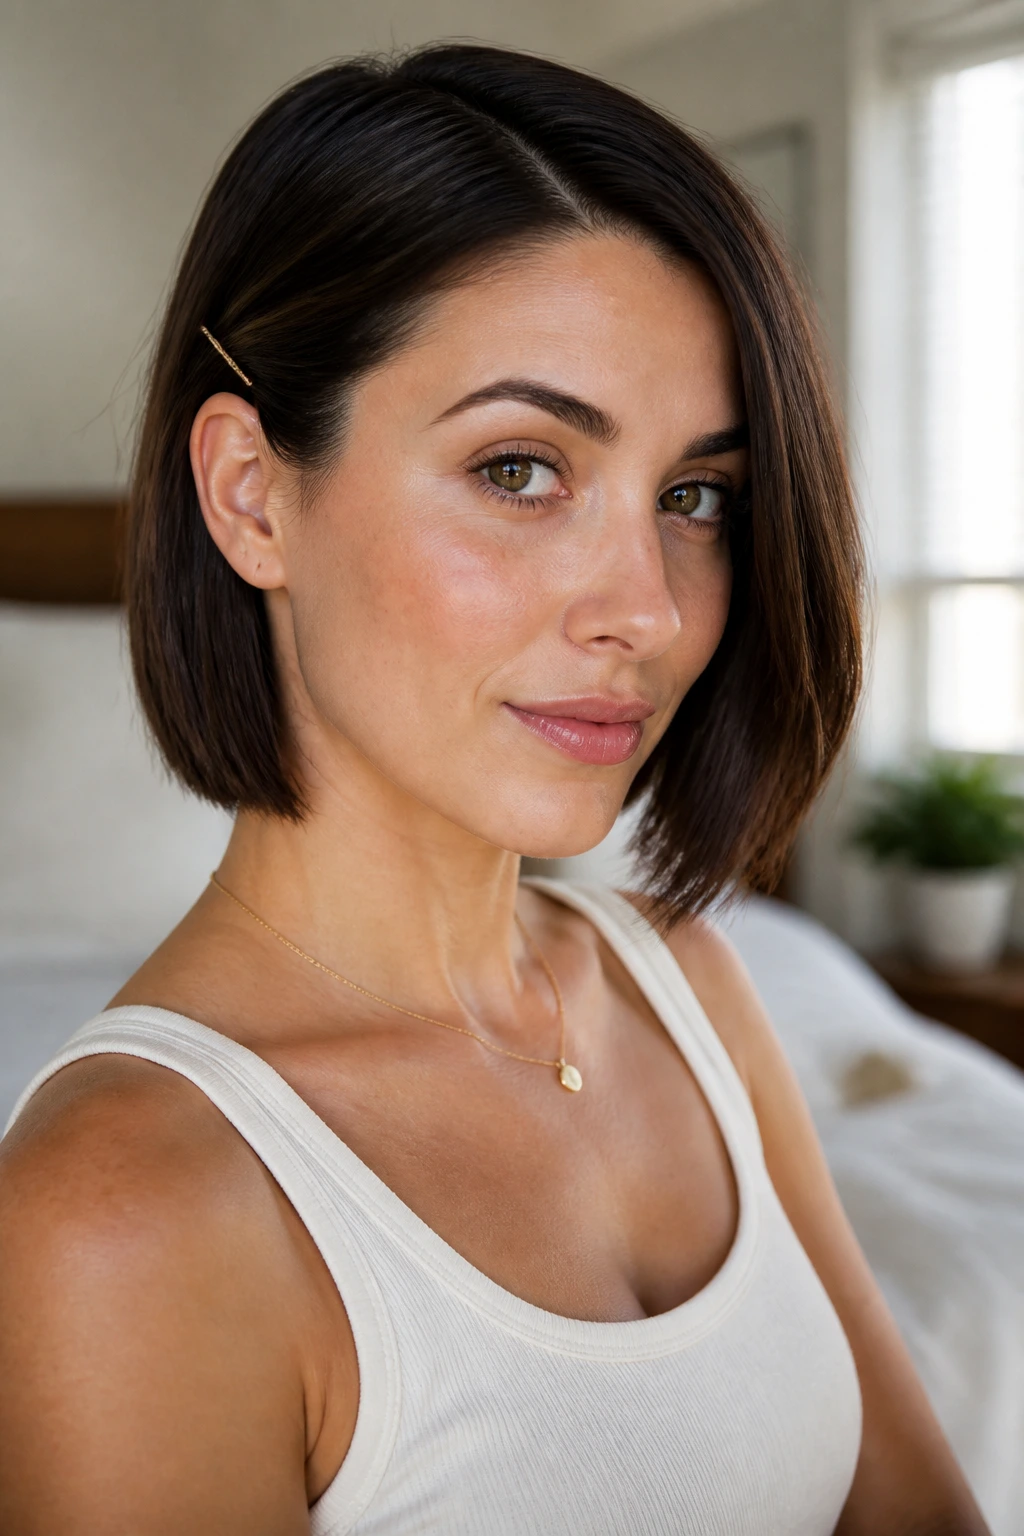
6. Blunt Bob Tucked Behind One Ear
Short hair can feel like the easiest thing in the room or the most annoying, depending on the day. A blunt bob tucked behind one ear lands on the good side of that split. It is fast, clean, and modern because it uses asymmetry instead of trying to make short hair act longer than it is.
A small amount of smoothing cream on the ends keeps the shape neat. Tuck one side behind the ear and pin it with a slim barrette if your hair slips out easily. The other side stays loose, which gives the cut movement. That contrast — one side controlled, one side soft — is what keeps it looking fresh.
If your bob is chin-length, add a slight bend through the ends with a flat iron. Not a curl. A bend. The line should look relaxed, not overworked. This style is one of those rare cases where less really does read better.
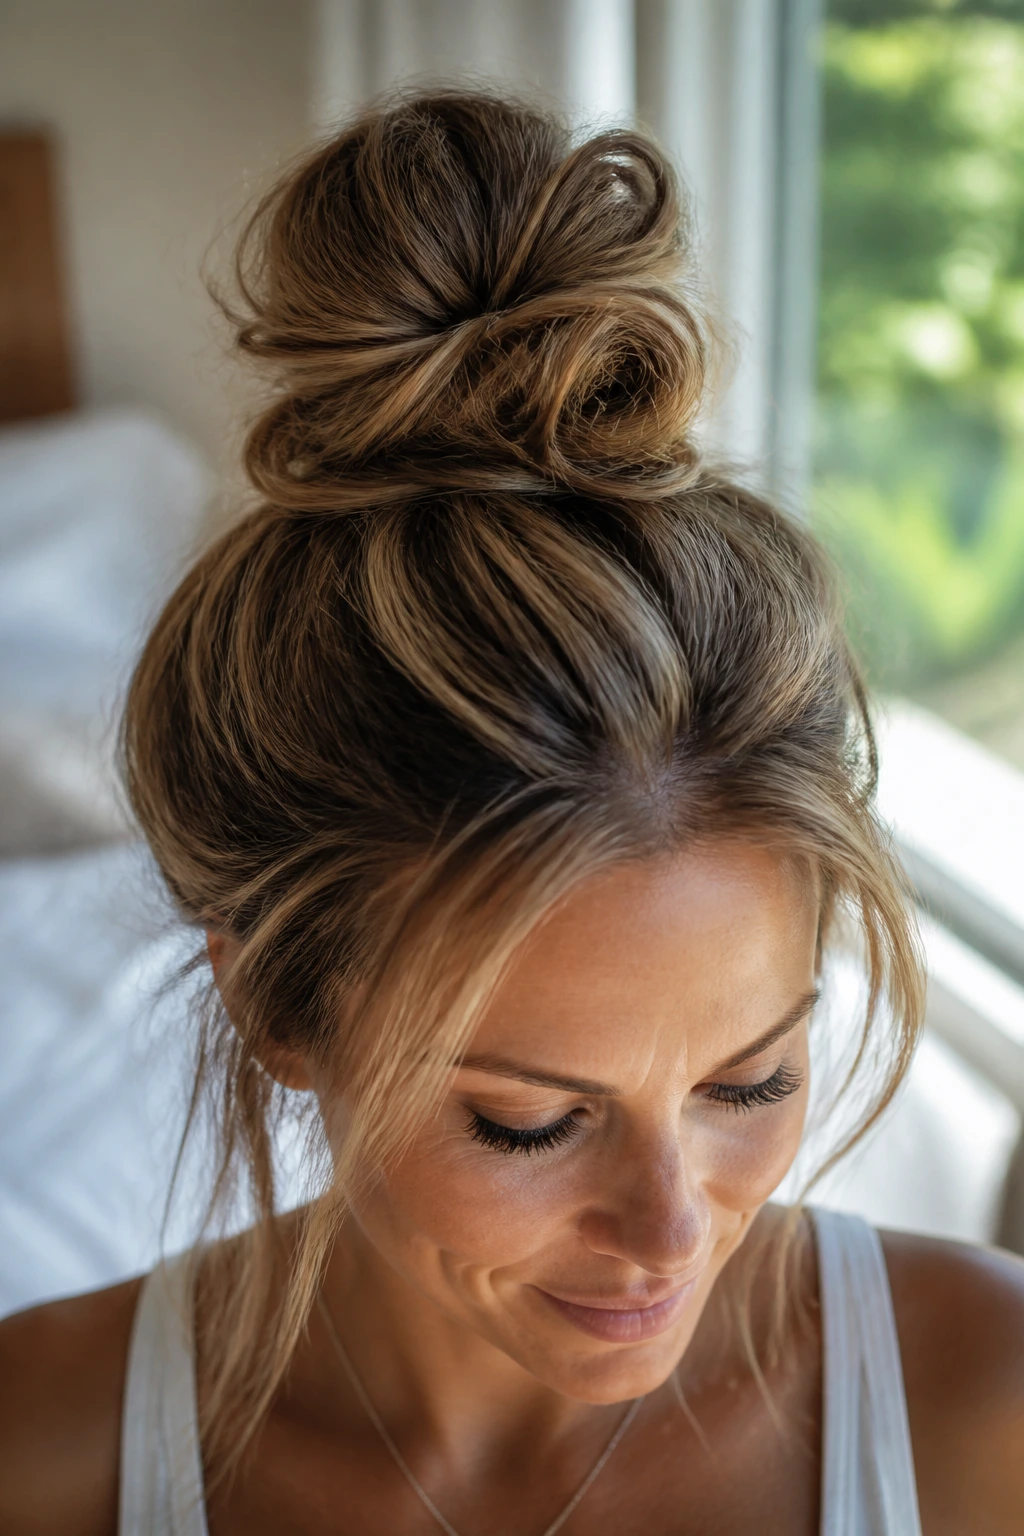
7. Textured Top Knot
A top knot works best when it stops trying to be perfect. The modern version is high enough to feel lifted, but not so slick that every strand looks lacquered down. A little texture at the roots, a little softness around the face, and the whole thing stops feeling like a gym fallback.
Flip the hair forward, gather it high, twist it once, and secure it with an elastic. Wrap the tail around the base and pin it in place. Then tug the bun slightly so it looks fuller from the front. That last part matters. A tight little knot can read older than a looser one with a bit of shape.
Use this when the clock is ugly and the hair is not cooperating. It hides a lot. Greasy roots, odd cowlicks, a layer that refuses to lie flat. If you need the style to look more polished, leave two slim pieces near the temples and smooth them with a tiny drop of cream.
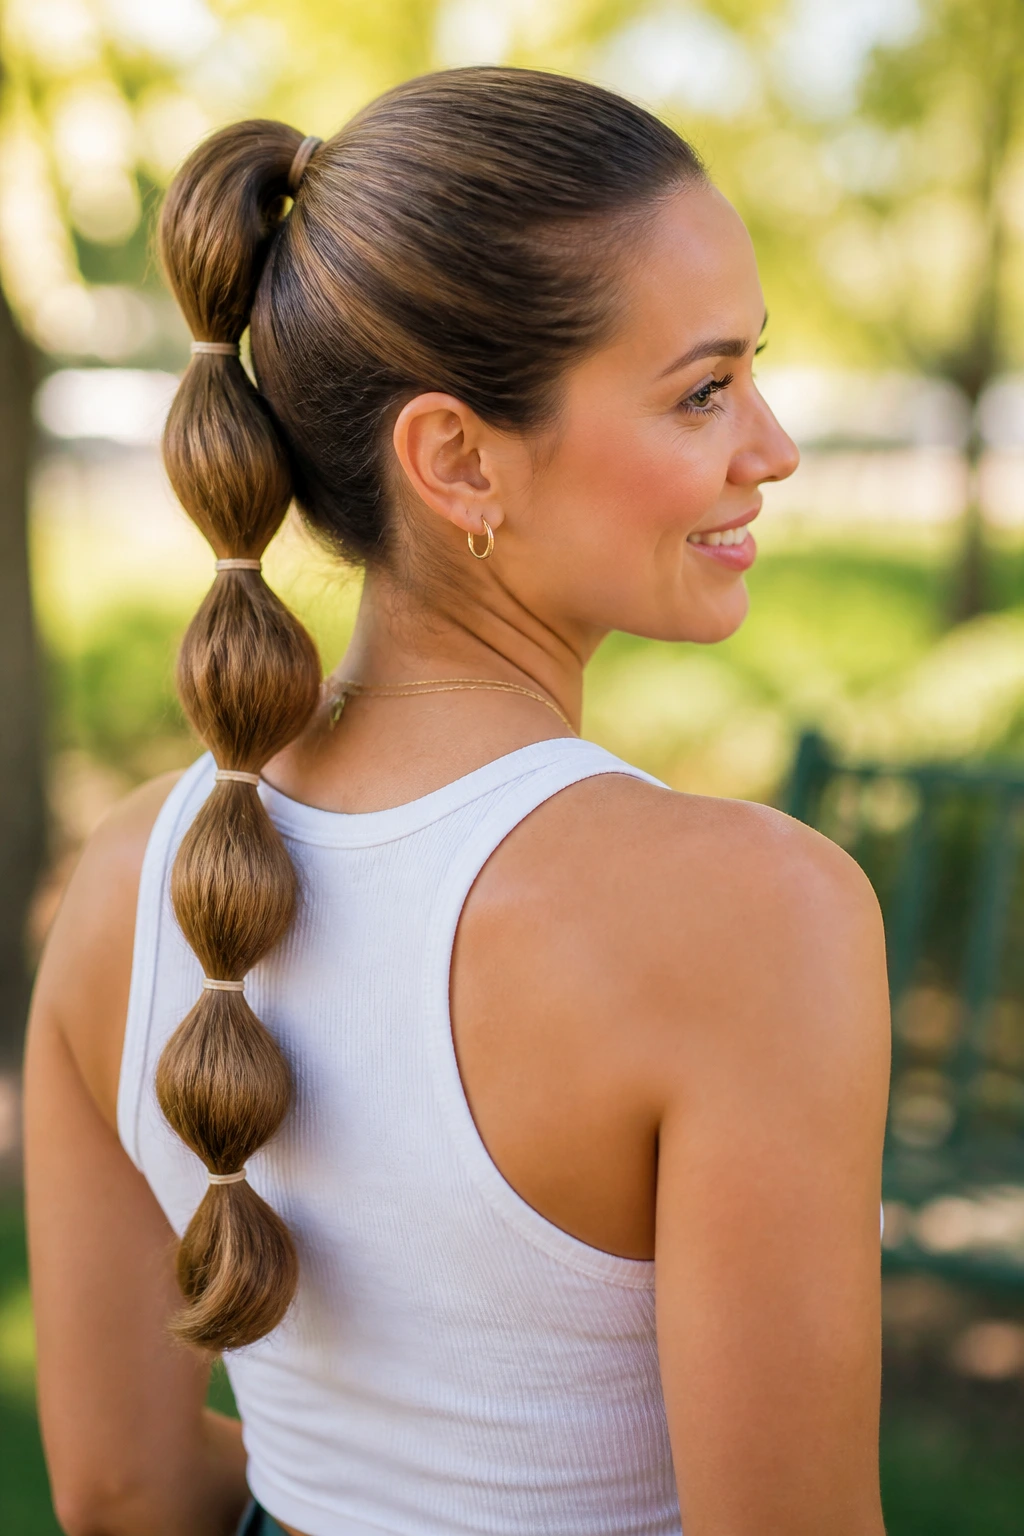
8. Bubble Ponytail
A bubble ponytail sounds playful, but when you keep the sections clean and the bubbles even, it looks modern enough for school drop-off and a lunch meeting. The structure is the whole point. You get the swing of a ponytail without the plainness that can make it feel unfinished.
Start with a regular ponytail, then add small elastics every 2 to 3 inches down the length. Gently puff out each section between elastics to create the “bubble.” If your hair is fine, backcomb each section a little before puffing. If it is thick, the bubbles form on their own with less effort.
This style is especially good for long hair that gets stringy in a standard ponytail. The sections create visual breaks, so the length looks fuller. A ribbon or matte elastic at the top makes the whole thing feel more deliberate. Skip the bright, chunky bands unless that is the look you want; they can tip it into costume territory fast.
9. Side Braid into a Low Bun
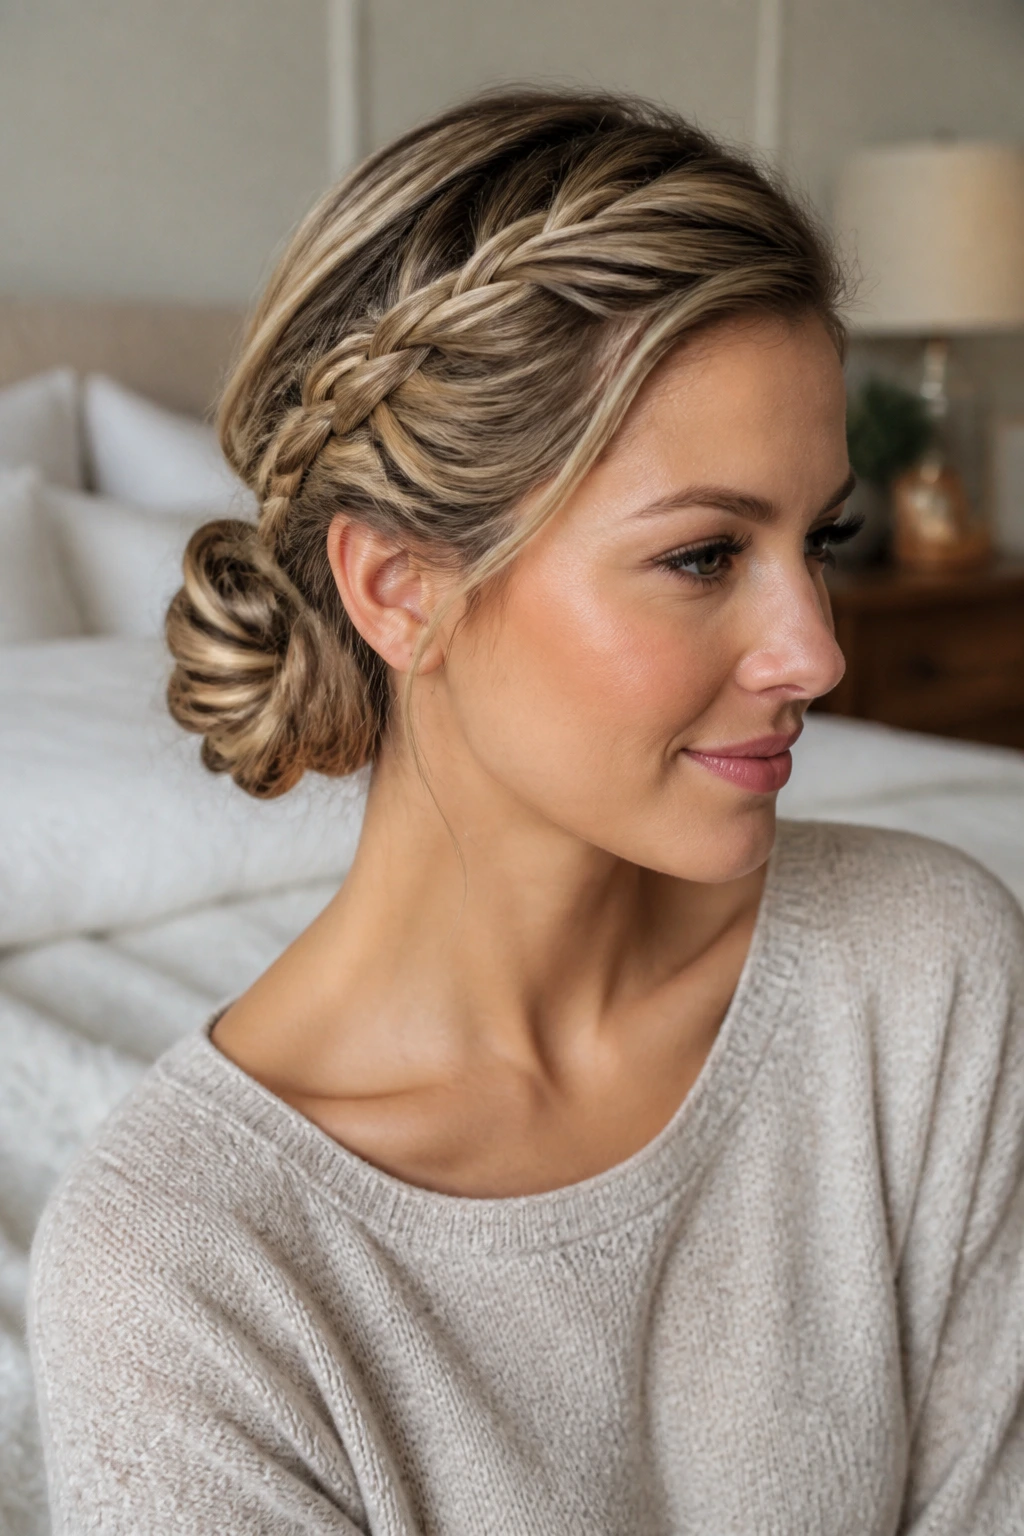
A side braid folded into a low bun gives you detail without the fuss of a full updo. It is one of those styles that looks like you had more time than you actually did, which is probably why it keeps surviving hairstyle cycles. The braid gives the eye somewhere to go, and the bun keeps everything secure.
Part the hair slightly off-center, braid one side from the temple or just behind the ear, then gather the rest at the nape and twist it into a bun. Pin the braid into the bun instead of leaving it hanging loose. That keeps the shape tidy and keeps little ends from poking out by lunchtime.
It works especially well on layered hair, where a simple bun can look too airy. The braid adds weight. If you want the finish softer, pull a few strands loose around the face and nape. If you want it sharper, smooth the crown with a tail comb before you start braiding.
10. Air-Dried Lob with Bent Ends
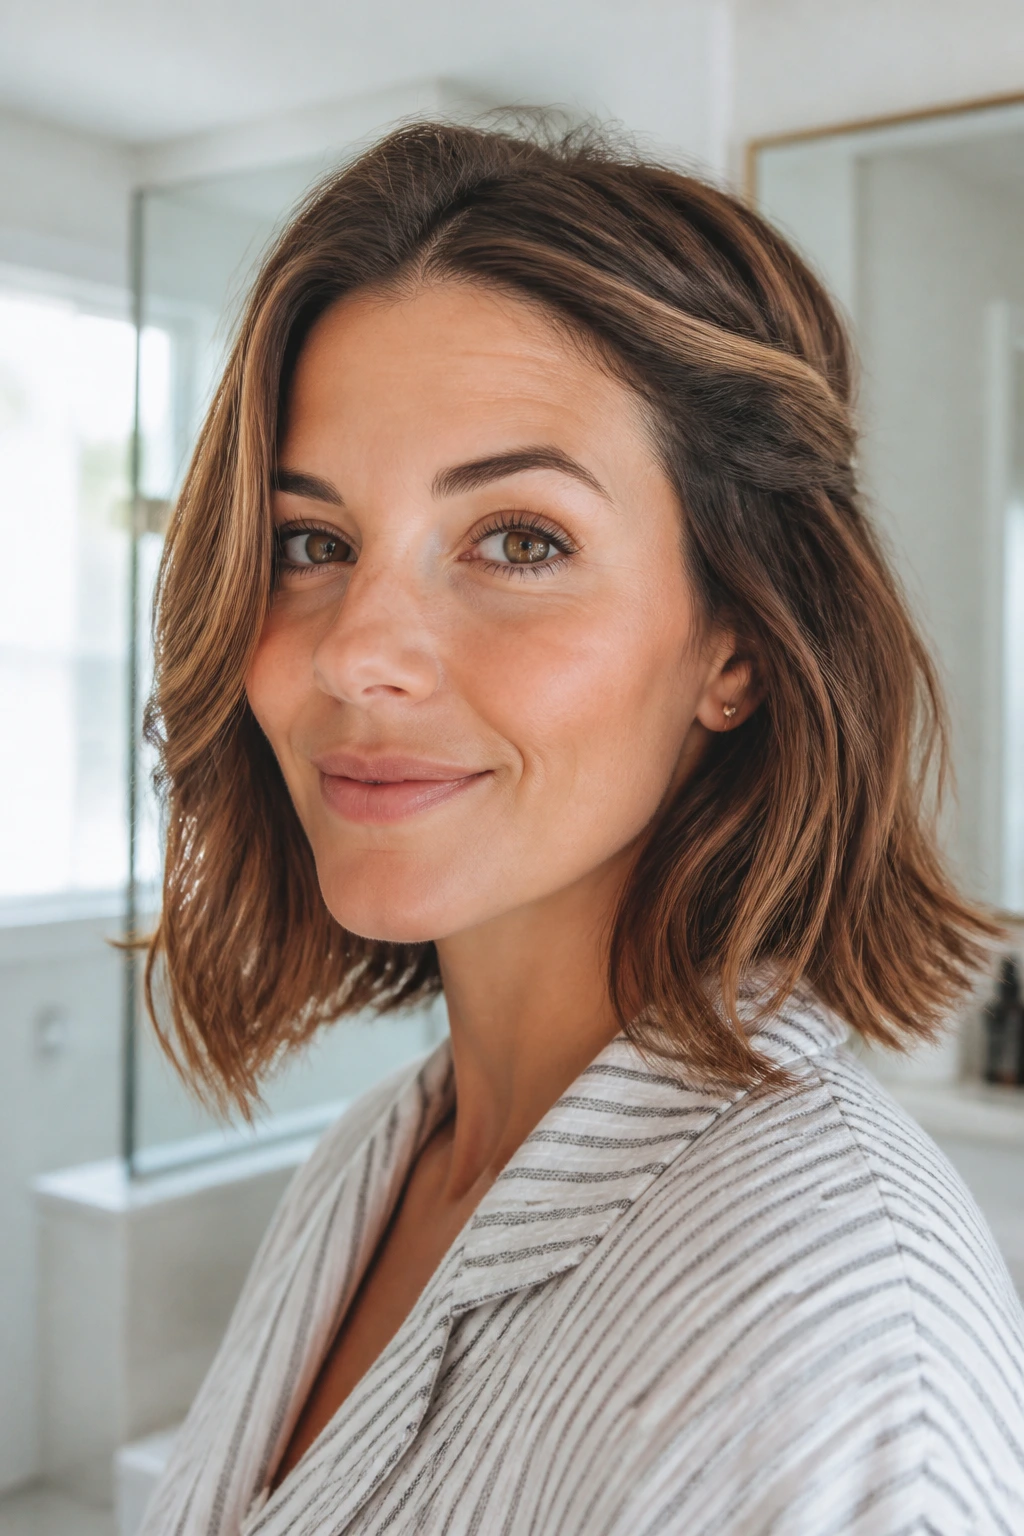
A lob that has been air-dried with a little bend at the ends can look more modern than a perfectly curled style. The reason is simple: it looks lived-in. Not messy. Lived-in. That subtle difference matters.
Scrunch a light mousse or wave cream into damp hair, then twist the front pieces away from the face and let the rest dry as it is. If the ends dry flat, give them a quick pass with a flat iron or a round brush just at the last 1 to 2 inches. You do not need symmetry here. In fact, a touch of unevenness often makes the cut look better.
This style is great when you want to look finished without putting heat all over your head. It also lets a mid-length cut move instead of sitting in one heavy line. A little texturizing spray at the roots keeps the crown from collapsing. No drama. Just shape.
11. Curly Pineapple with Polished Edges
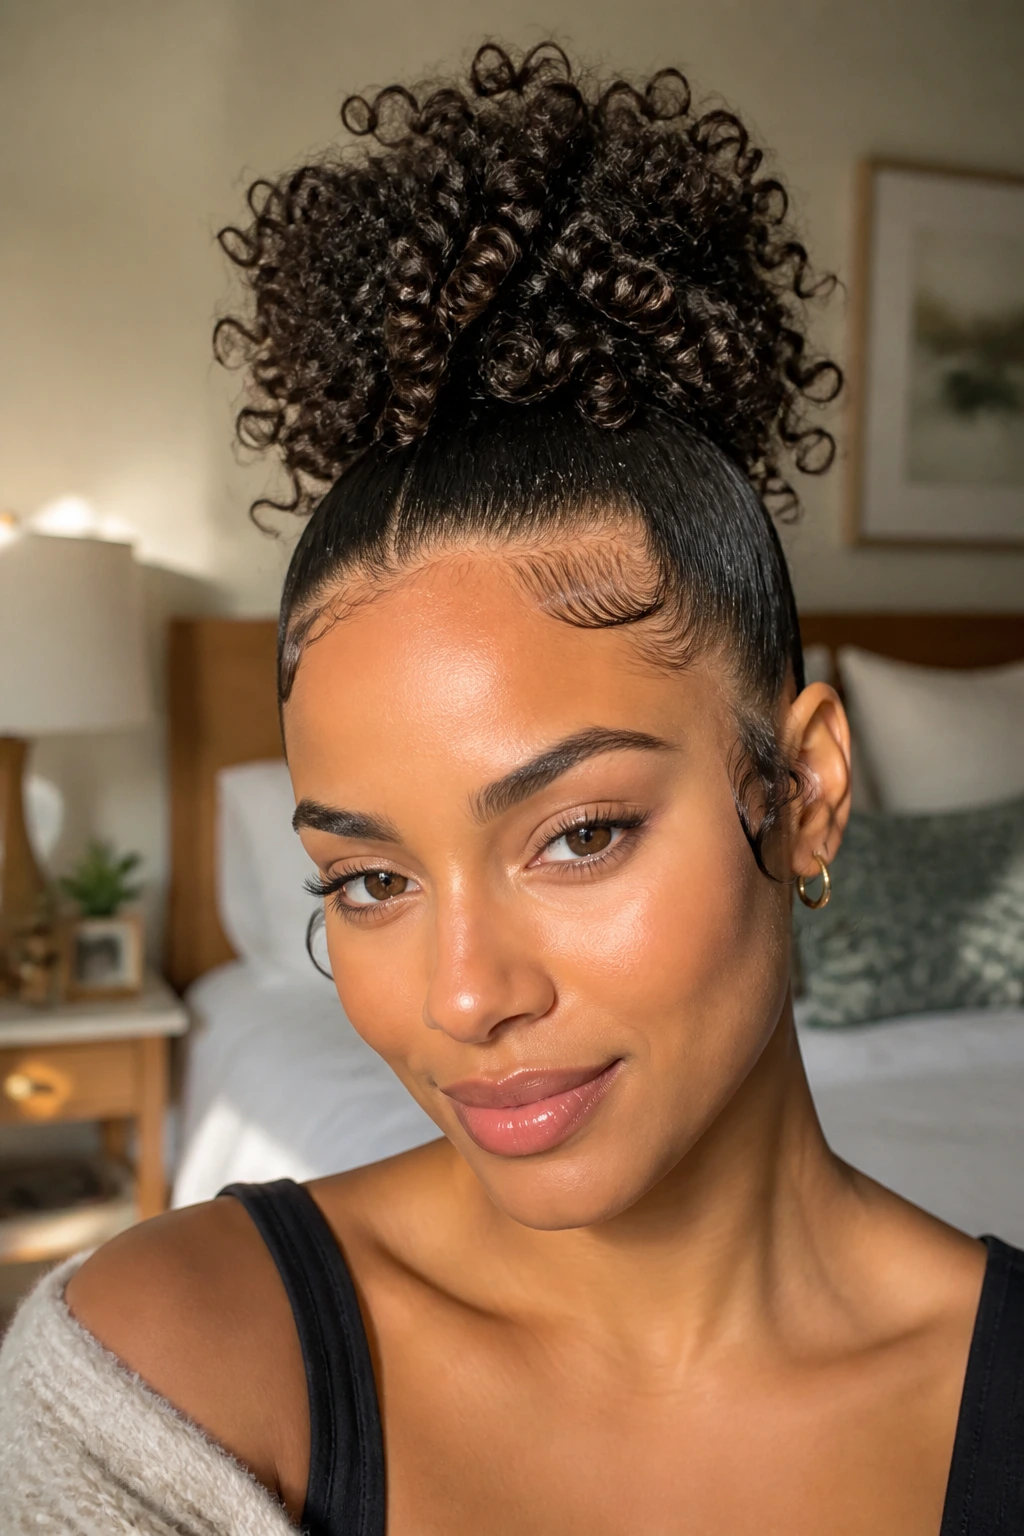
Curly hair has its own version of fast and modern, and the pineapple is one of the best examples. Gather the curls high and loose, let the lengths sit at the crown, and keep the hairline smooth enough that the style reads intentional. When it is done well, it has height, texture, and a clean frame around the face.
The finish depends on restraint. Use a satin scrunchie or a soft elastic so the curls are not crushed. Smooth the front edge with a light gel or edge brush if that is part of your routine, but do not overdo it. Too much product makes the hairline look stiff, and that throws off the whole style.
This works especially well on day-two curls or coils that already have some shape. It takes the pressure off the lengths and keeps the style protective. If you want it lower and looser, let a few curls fall near the temples. If you want it neater, pin the sides back with a couple of small clips.
Best-for notes
- Great for curly and coily hair that needs a fast reset.
- Useful after a wash day or on the morning after.
- Works with scarves, satin scrunchies, and a little gel at the hairline.
12. High Ponytail with a Wrapped Base
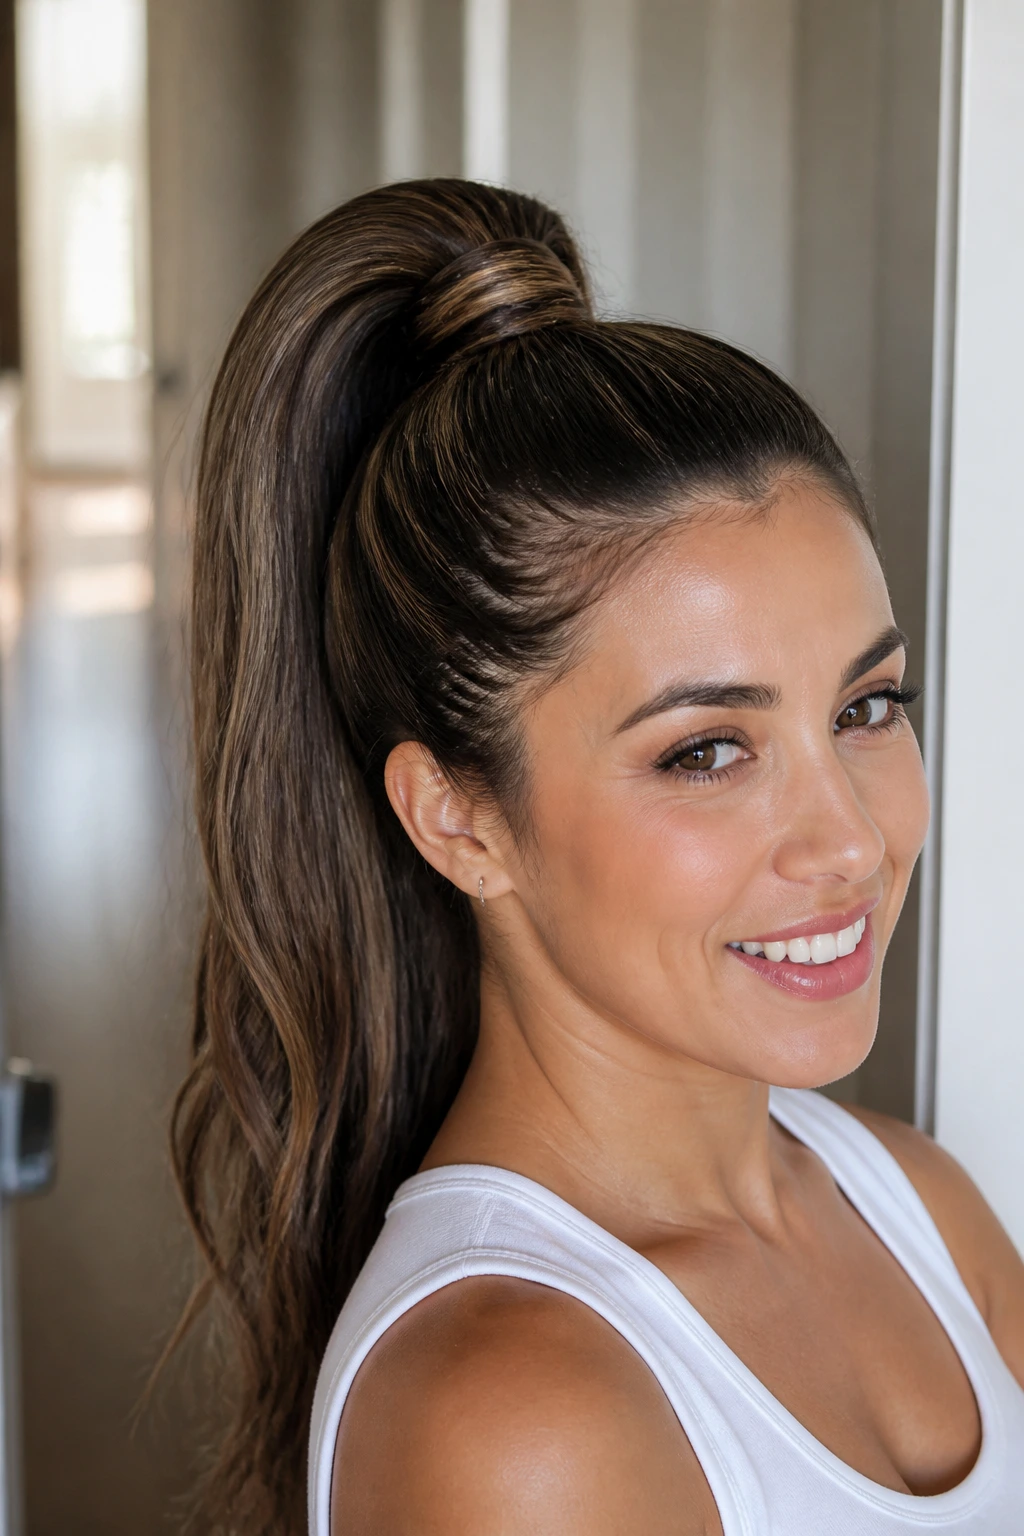
A high ponytail can look sporty or polished. The difference is in the details. A wrapped base, a smooth crown, and a little tension at the roots push it toward polished without making it stiff.
Brush the hair up toward the crown and secure it high. Then take a small strand from the underside of the ponytail, wrap it around the elastic, and pin the end underneath. That one move instantly cleans up the look. If your hair is thick, use a strong elastic underneath and a bobby pin that matches your hair color for the wrap.
This style gives a lifted shape that works well when your face needs a little opening up. It is also useful on days when the lower half of your hair is not cooperating. Keep the ends sleek with a drop of serum if they frizz easily, or let them stay textured if that fits your hair better. A high ponytail that looks a little alive reads better than one that looks frozen in place.
13. Dutch Braid Crown
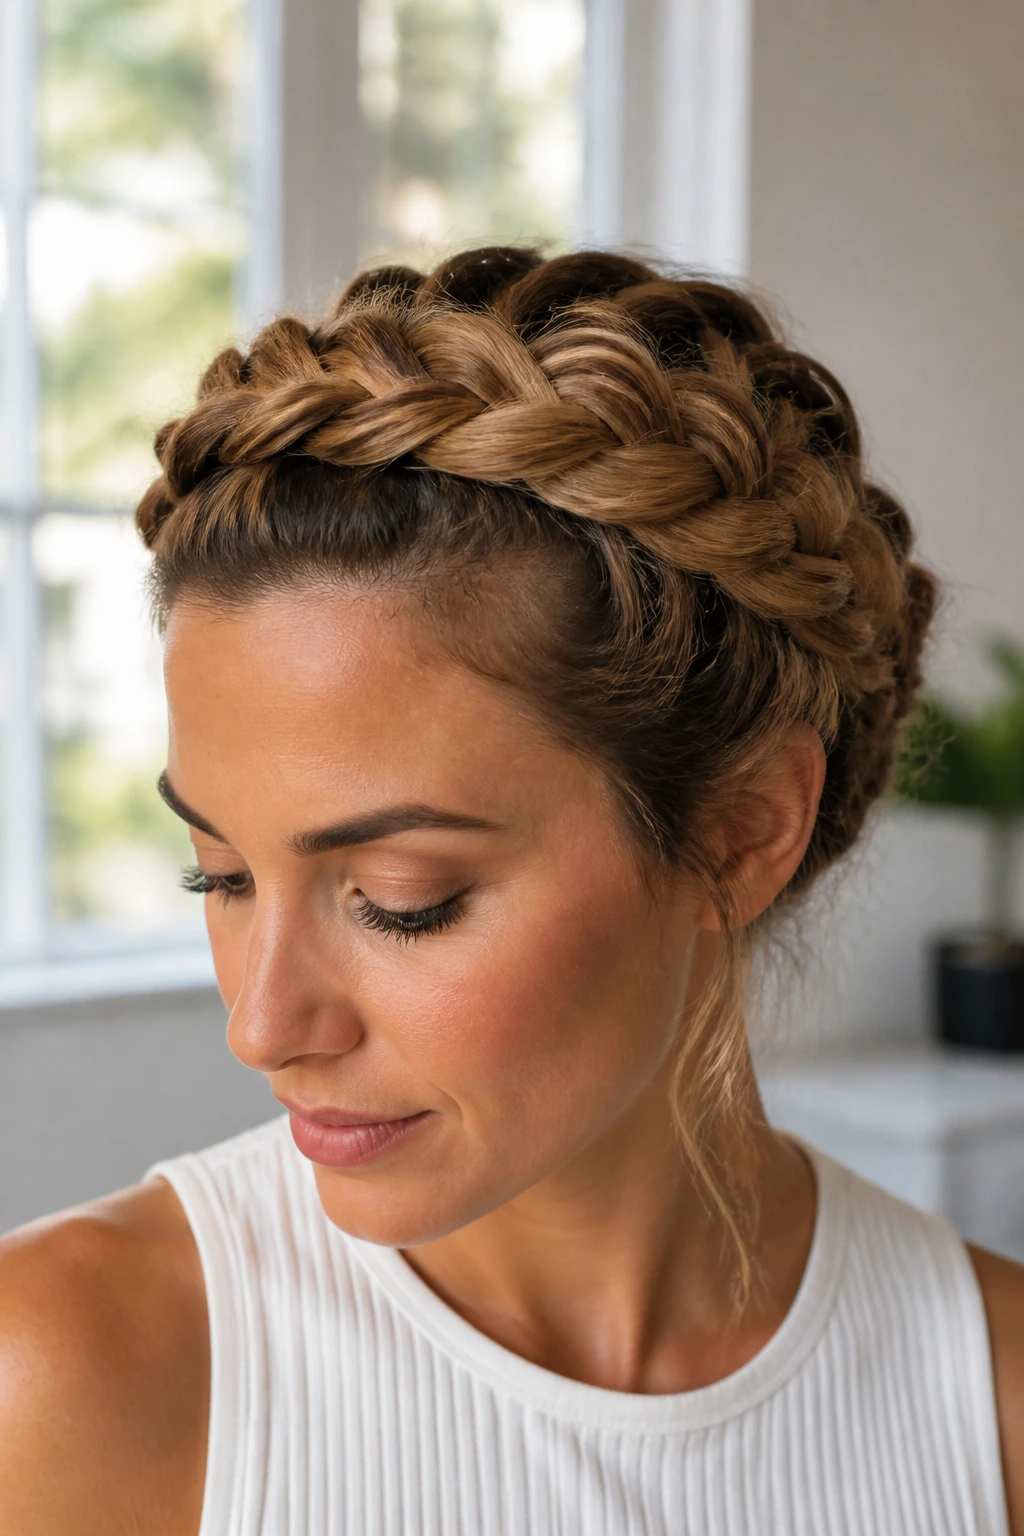
A Dutch braid crown is the sort of style that sounds more involved than it feels once your hands know the pattern. It frames the head with structure, keeps hair secure, and gives you a little drama without adding much extra time once the braid is familiar.
Start near one temple and braid close to the scalp, crossing sections under instead of over so the braid sits raised. Work it around the hairline toward the other side, then pin the tail under the remaining hair or tuck it into a bun. The raised braid is what makes this look stand out. It has shape even from the back.
Use a bit of dry shampoo or texturizing spray first if your hair is silky. That grip helps the braid stay put. Fine hair can slip if it is too clean, and that is usually where the frustration starts. A crown braid should feel secure, not slippery.
14. Twisted Half-Up on Shoulder-Length Hair
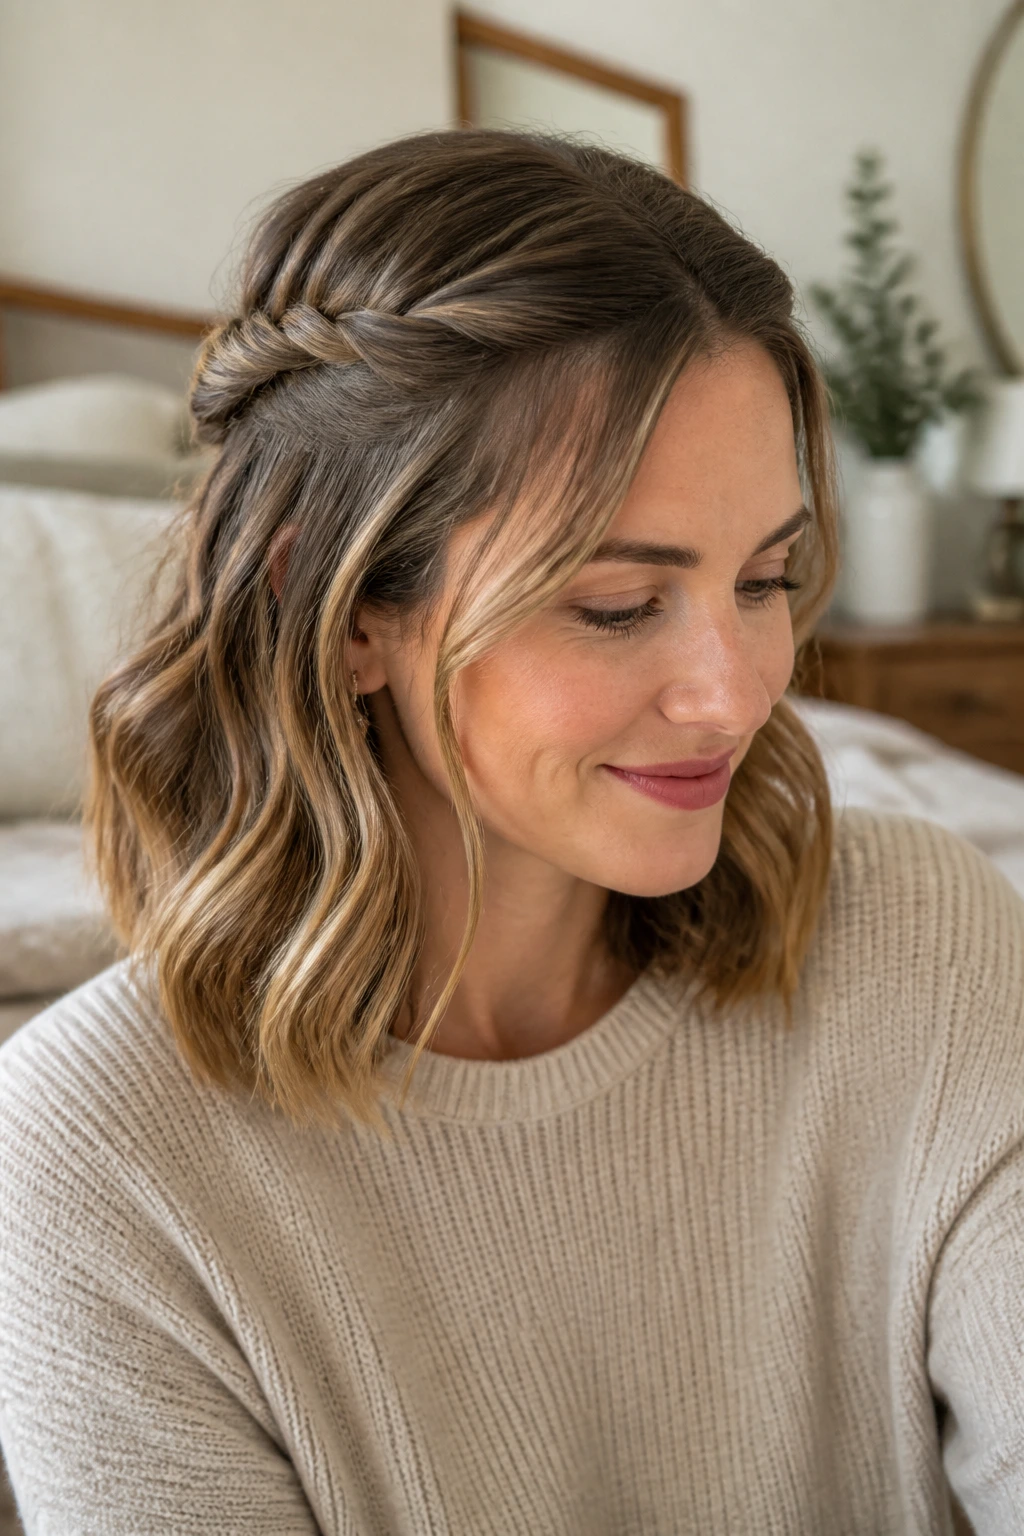
Shoulder-length hair is tricky in the best way. It has enough length to style, but not always enough to stay neatly tied back. A twisted half-up solve that problem without demanding a full updo. It’s one of the easiest ways to look put together when the cut is in that in-between stage.
Take two sections from the front, twist each section back toward the crown, and pin them where they meet. That’s it. Leave the rest down with a little bend at the ends or a natural wave if that’s what you have. The twist gives the style some movement, and the open lower half keeps it from feeling too tight.
This works well when you want your hair off your face but still want length showing. If your layers are short, pin the twists a little lower so the ends have somewhere to blend. If you’re dealing with frizz, smooth the twists with a pea-size amount of cream before pinning. Small move. Big difference.
15. Low Double Buns
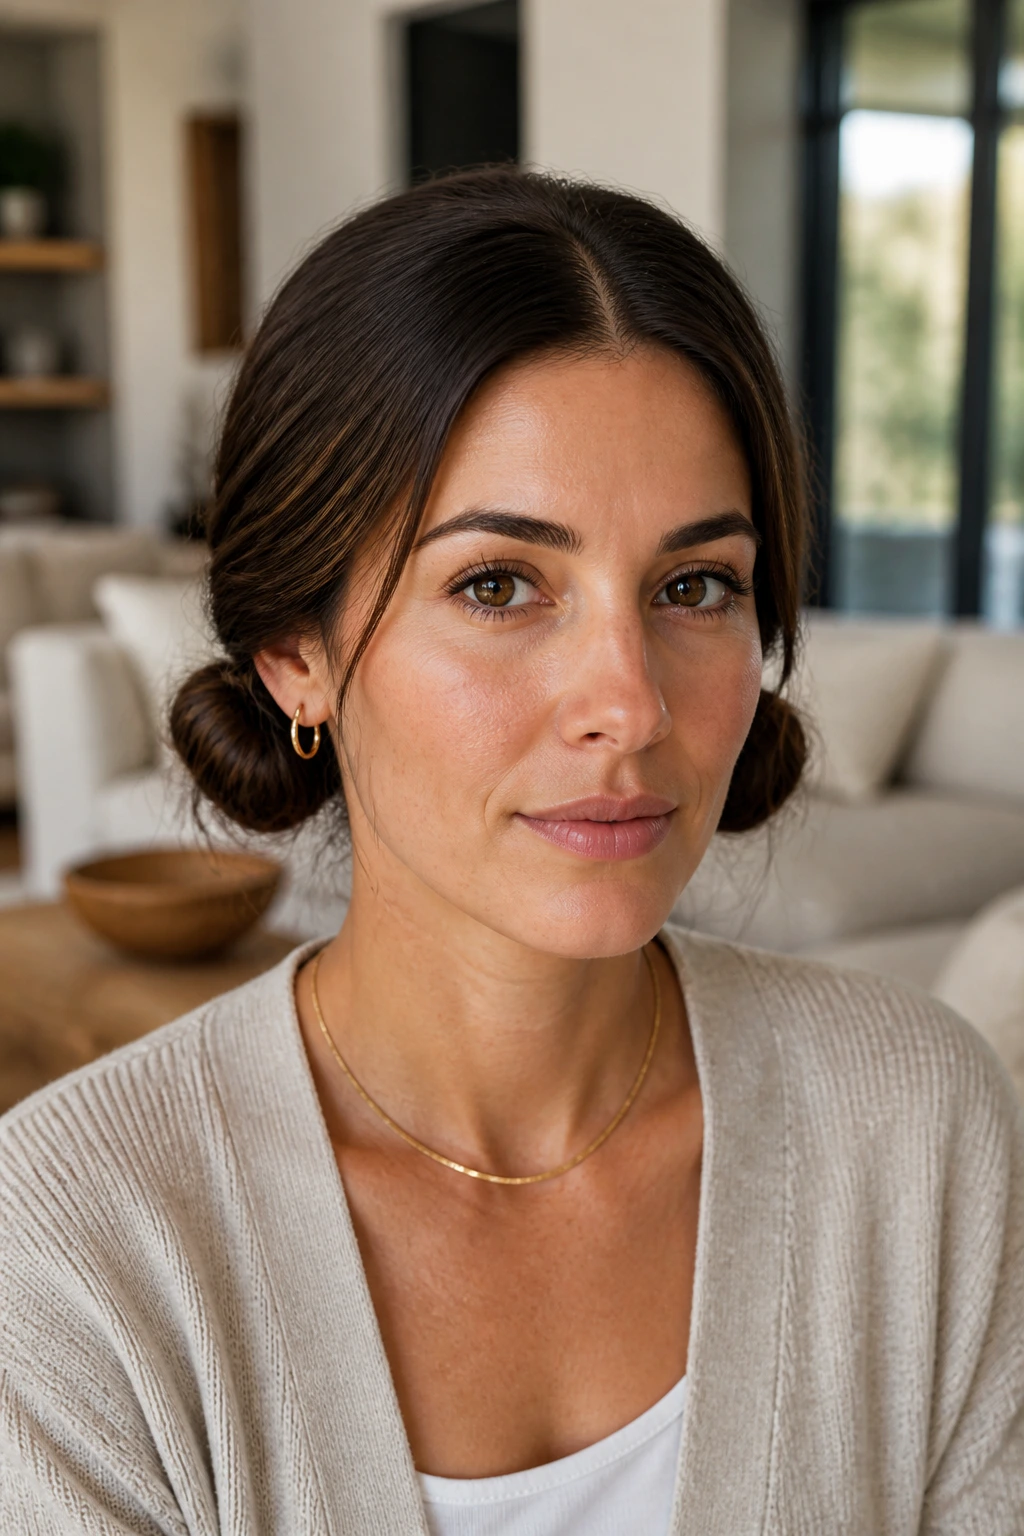
Low double buns sound youthful, but when they’re neat and placed close to the nape, they land in a modern, slightly offbeat place. The trick is keeping them small and controlled. Think tidy, not cartoonish.
Split the hair down the middle, make two low ponytails, twist each one into a bun, and pin them flat. If your hair is thick, the buns will have enough volume on their own. If it is fine, a little backcombing at the base gives the buns more shape. Matte pins usually blend better than shiny ones here.
This style is useful when you want everything off your neck and off your face, but a single bun feels too heavy. It also works well on layered hair because the two shapes distribute the bulk. Add a middle part and smooth the top, and it stops looking cute-for-cute’s-sake. It starts looking deliberate.
16. Wet-Look Side Part Tuck
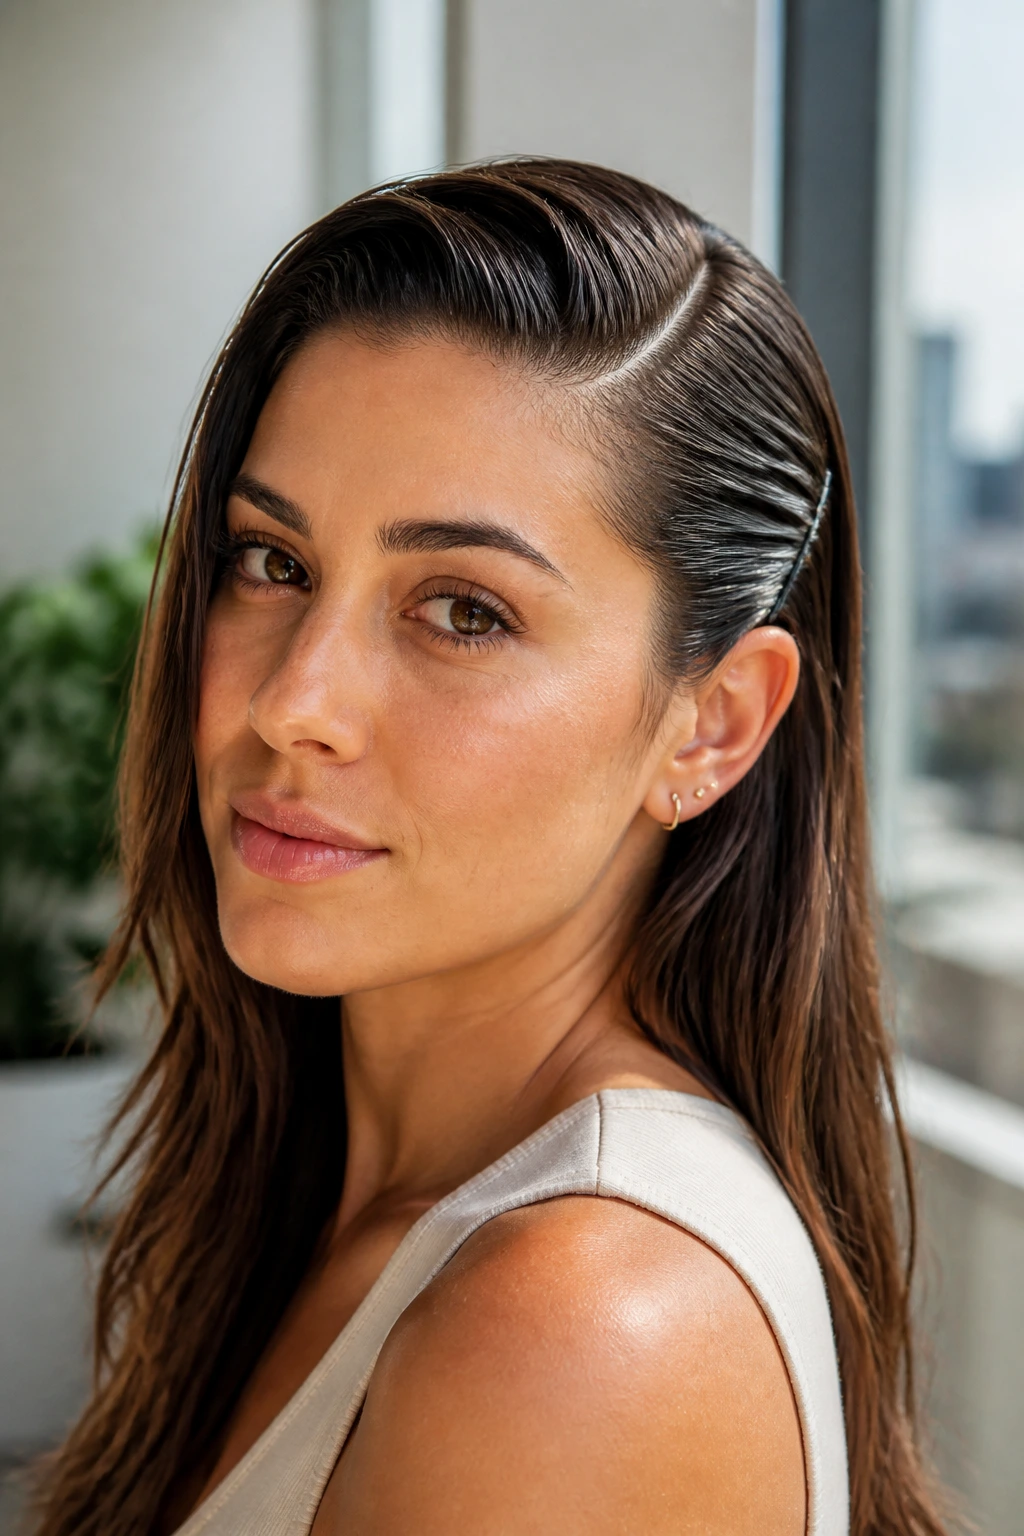
A wet-look side part can feel bold, but when the product is used sparingly, it reads as clean and modern rather than slicked back to the point of severity. This is one of the best options for humid days, oily roots, or mornings when the ends are fine but the top needs control.
Create a deep side part, work a small amount of gel or styling cream through the top layer, and brush it into place. Tuck one side behind the ear and secure it with a simple pin or barrette if needed. Leave the rest either straight, softly waved, or pulled into a low knot. The side part does the styling work here.
This one is not for people who hate product. It needs a little hold. But it pays off because the shape stays put. If your hair is short to medium, let the tucked side be the detail. If it is long, a low ponytail or bun keeps the finish from getting too dramatic.
17. Shoulder-Length Flip with Volume
A soft flip at the ends brings a shoulder-length cut into the modern lane fast. It nods to old-school volume, but with less polish and more movement. That looseness is what keeps it from feeling costume-like.
Use a round brush or flat iron to turn just the last inch or two of the ends outward. Give the crown a little lift with dry shampoo or root spray, then let the rest fall naturally. The style should feel airy, not shellacked. If every strand is stuck in place, it loses the point.
This works especially well on cuts that hit between the collarbone and shoulder. It gives shape to a length that can otherwise sit flat after a few hours. If your hair tends to lose volume fast, spray the roots before you dry them and rough them up with your fingers. The flip itself is small. The effect is not.
18. Scarf-Tied Low Ponytail
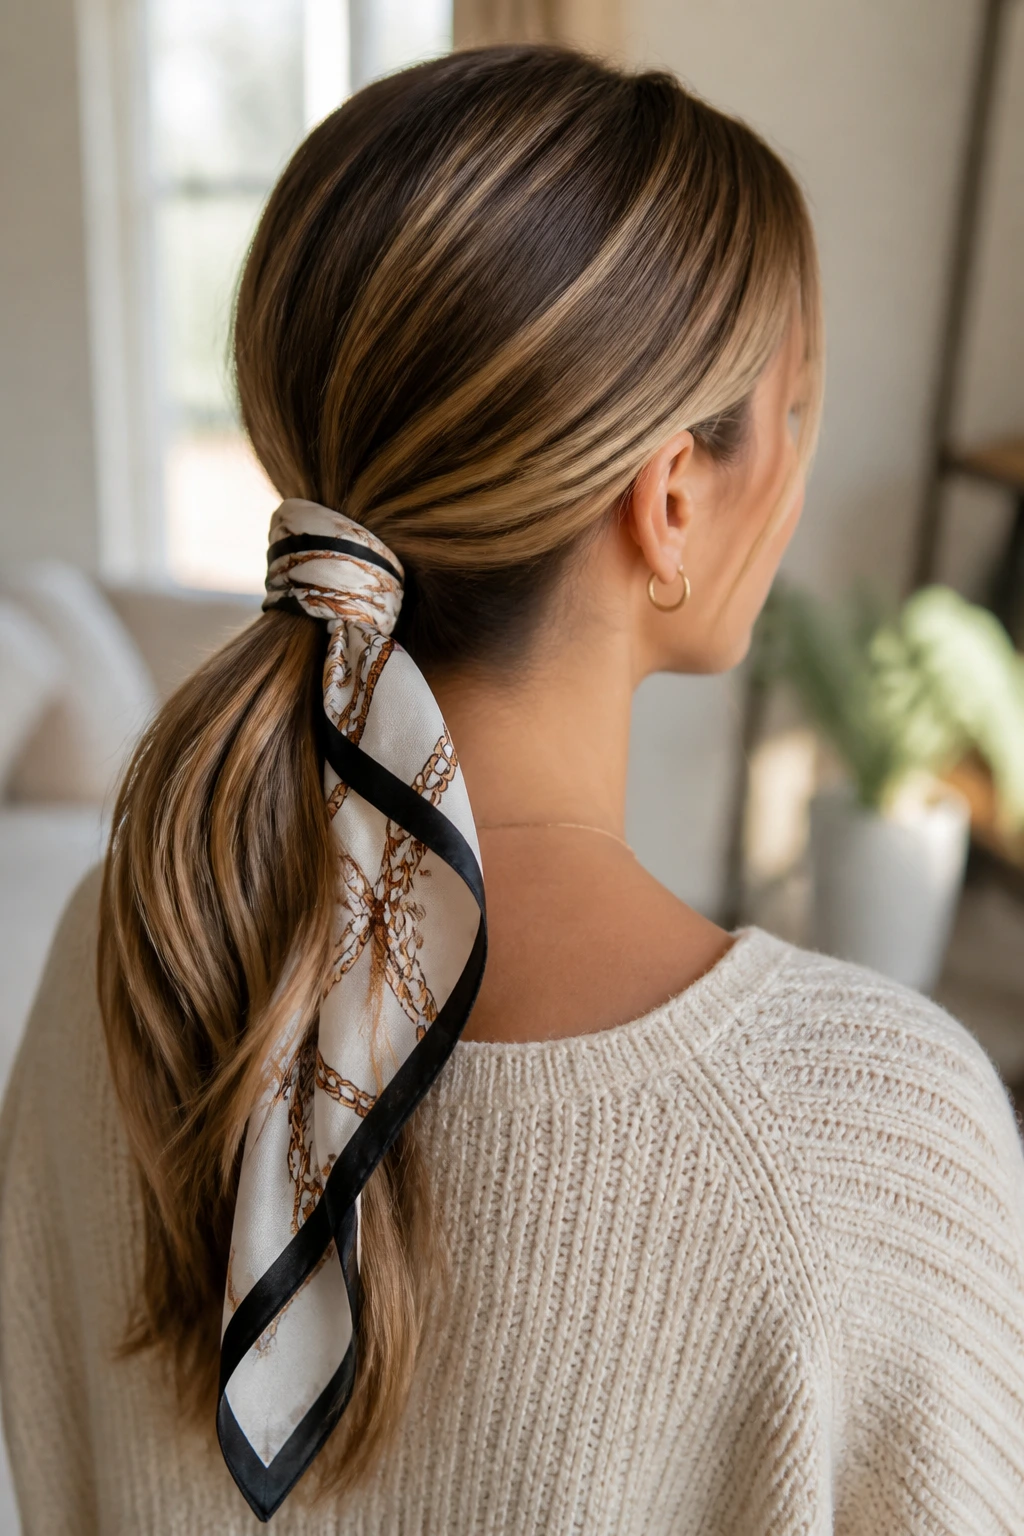
A scarf can do more than decorate. It can hide an elastic, disguise day-old roots at the nape, and make a low ponytail look like you thought about it for more than 20 seconds. That is a useful thing.
Gather the hair low, secure it, and tie a narrow scarf or ribbon around the base. Let the ends trail, or tuck them under if you want a cleaner look. A silk or satin scarf tends to sit better than a stiff one, especially if your hair is fine and slippery. The ponytail can be straight, waved, or braided; the scarf is what gives it the finish.
This style has a nice side effect: it makes simple hair look dressed up without adding heat or extra pins. Use a solid color if you want a sharper line. Use a print if the rest of the outfit is plain and you want a small point of interest. Keep the scarf narrow enough that it doesn’t overpower the hair itself.
19. Rope Braid Bun
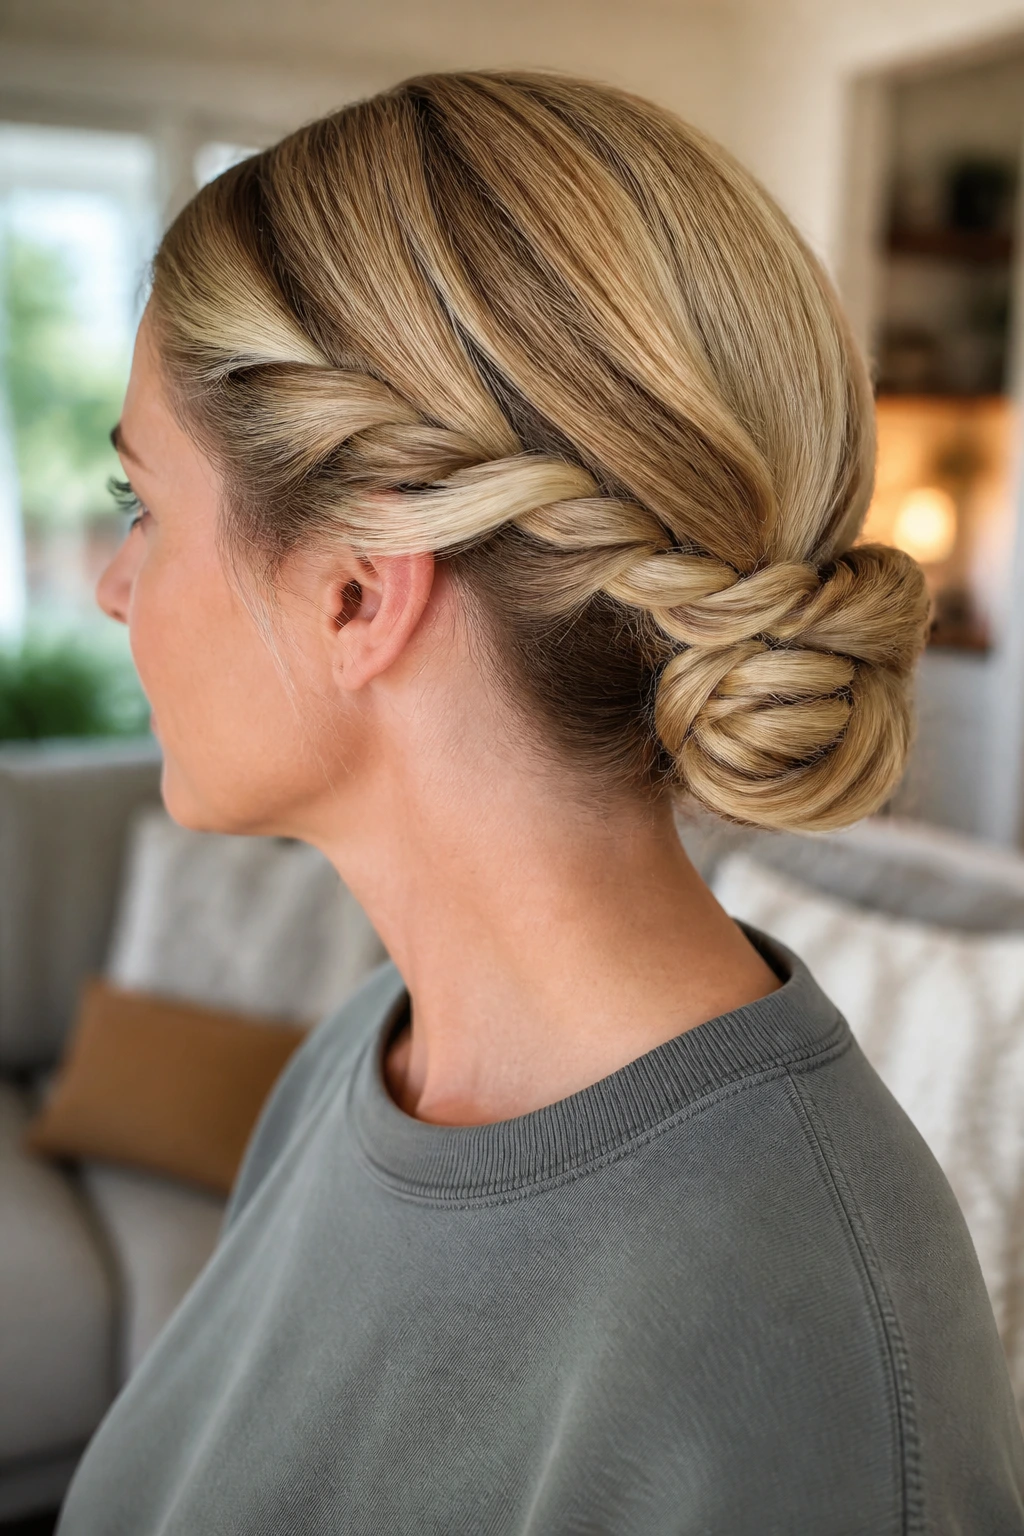
A rope braid bun is one of the most useful options for thick hair because it gives the hair something to do before it gets pinned up. The rope braid creates a firm, tidy base, and the bun sits on top of that shape without fighting it. Less slipping. Less puffing out at the sides.
Split the ponytail into two sections, twist each section in the same direction, then twist them around each other in the opposite direction to form the rope. Coil the rope into a bun and pin it down. If the hair is very long, you may need two pins at the sides and one underneath. Keep the bun low for a calmer look or a little higher if you want more lift.
This style lasts. That is the main selling point. It is good for travel days, crowded rooms, and weather that refuses to cooperate. A tiny bit of hairspray at the end helps seal the outer layer, but the braid itself does most of the work.
20. Pixie with Pieced Fringe
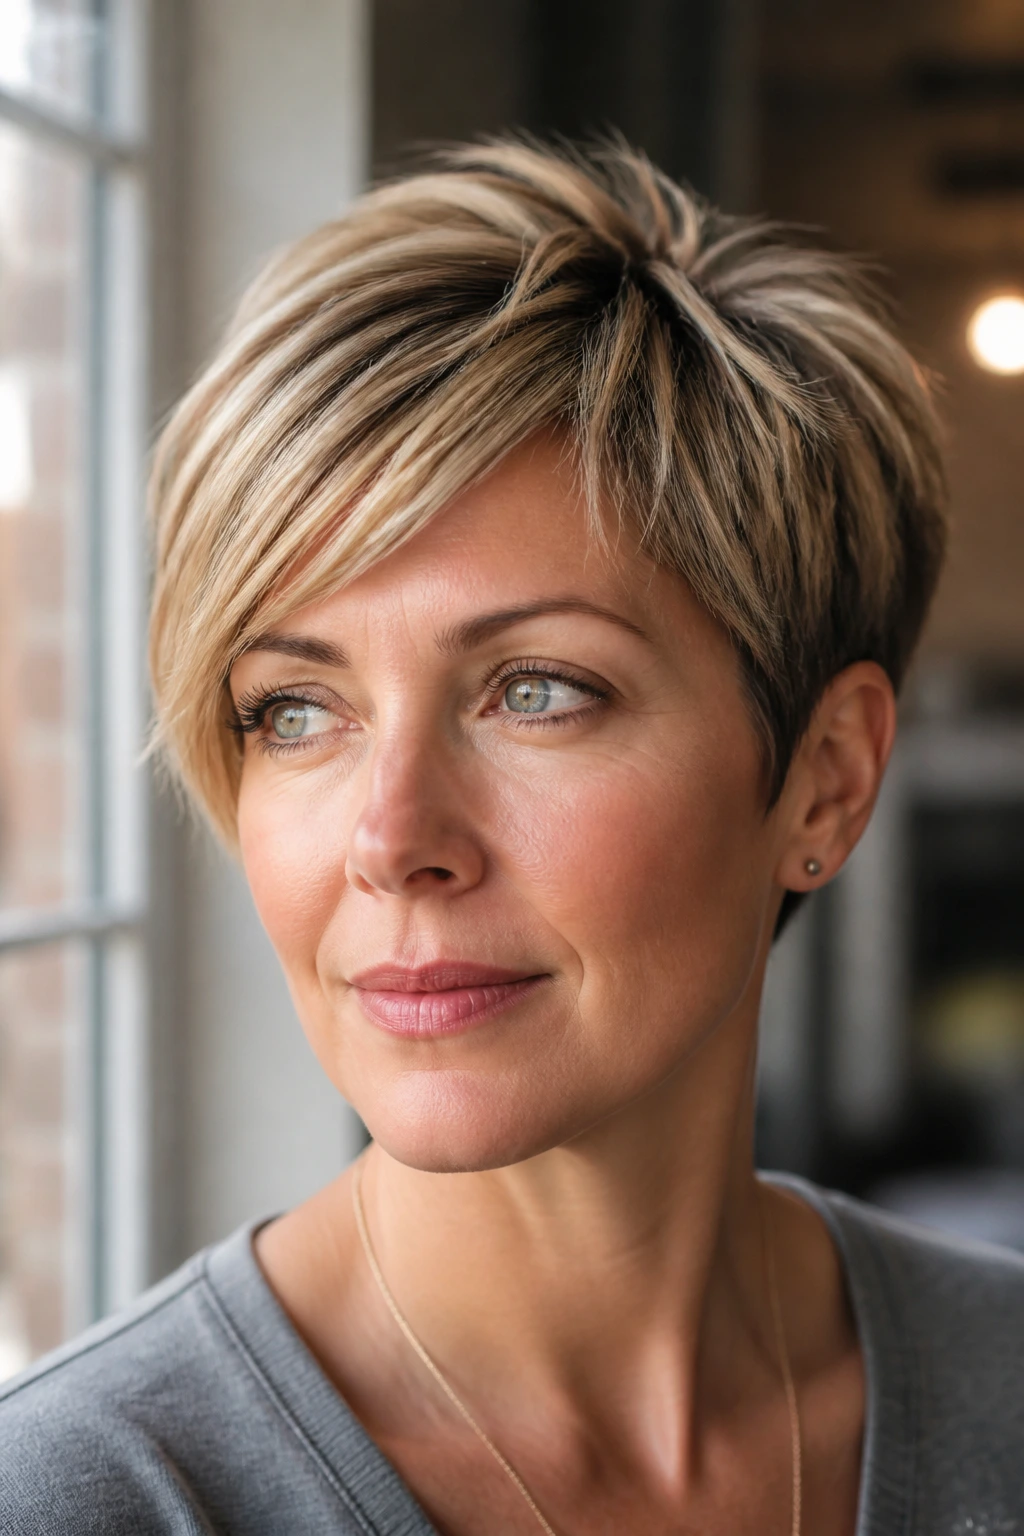
A pixie cut does not need much to look modern. In fact, too much product can turn it heavy fast. Pieced fringe, a little separation at the crown, and a soft sweep at the front usually do more than a full styling routine ever could.
Warm a pea-size amount of styling cream or paste between your fingers and work it through the fringe and top layers. Separate a few sections instead of smoothing everything into one shape. The point is movement. A pixie that looks finger-combed and light on its feet tends to read more current than one that is plastered flat.
This is the shortest hairstyle on the list, but it is not the least versatile. You can make it sharp, airy, or slightly messy depending on how much product you use. If your hair is fine, less product is usually better. If it is coarse, a bit more hold can help the fringe stay where you put it.
21. Mini Twists Gathered into a Puff
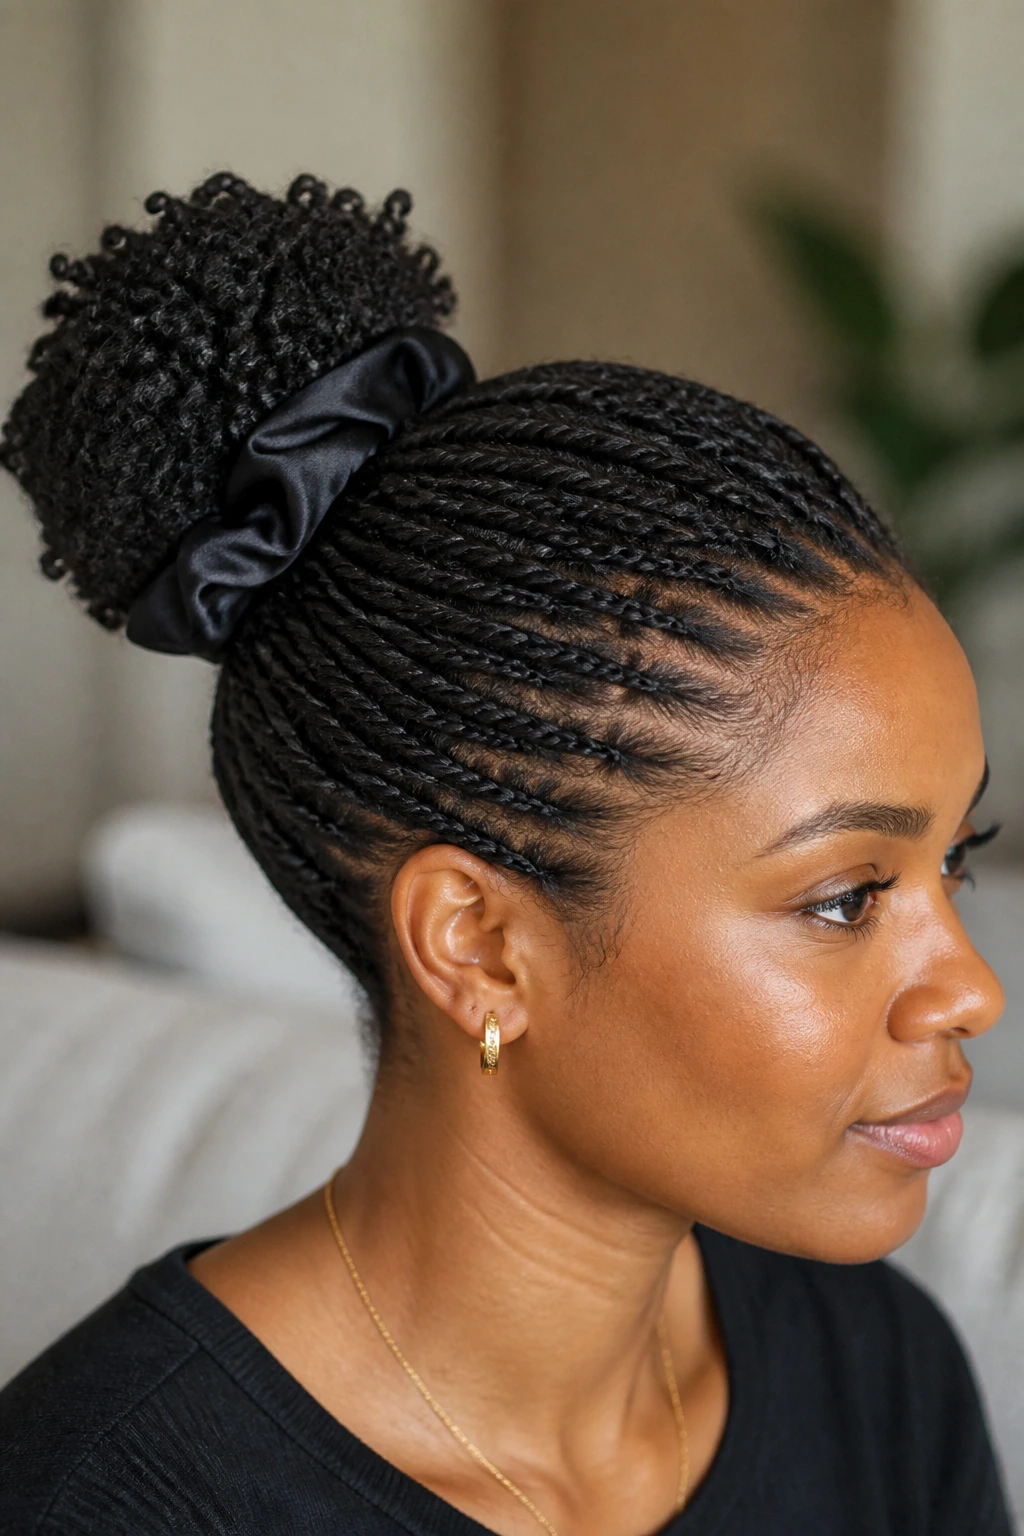
Mini twists are one of those styles that do a lot of heavy lifting without asking for much daily effort. Pulled into a puff, they create shape at the crown while keeping the length controlled. The look feels polished, protective, and practical all at once.
Part the hair as needed, twist the sections, and gather the twists loosely toward the back or crown. Let the puff keep its shape instead of flattening it. A satin scrunchie or soft band holds better than a hard elastic, and it avoids the little dent that can show up in textured hair. If you want a cleaner finish, smooth the hairline with gel or a light pomade before gathering.
This style shines when you need the hair to stay protected and still look done. It also stretches well between wash days. The twist pattern gives the eye texture to read, so the puff does not need to be perfect to look good. That is part of the appeal.
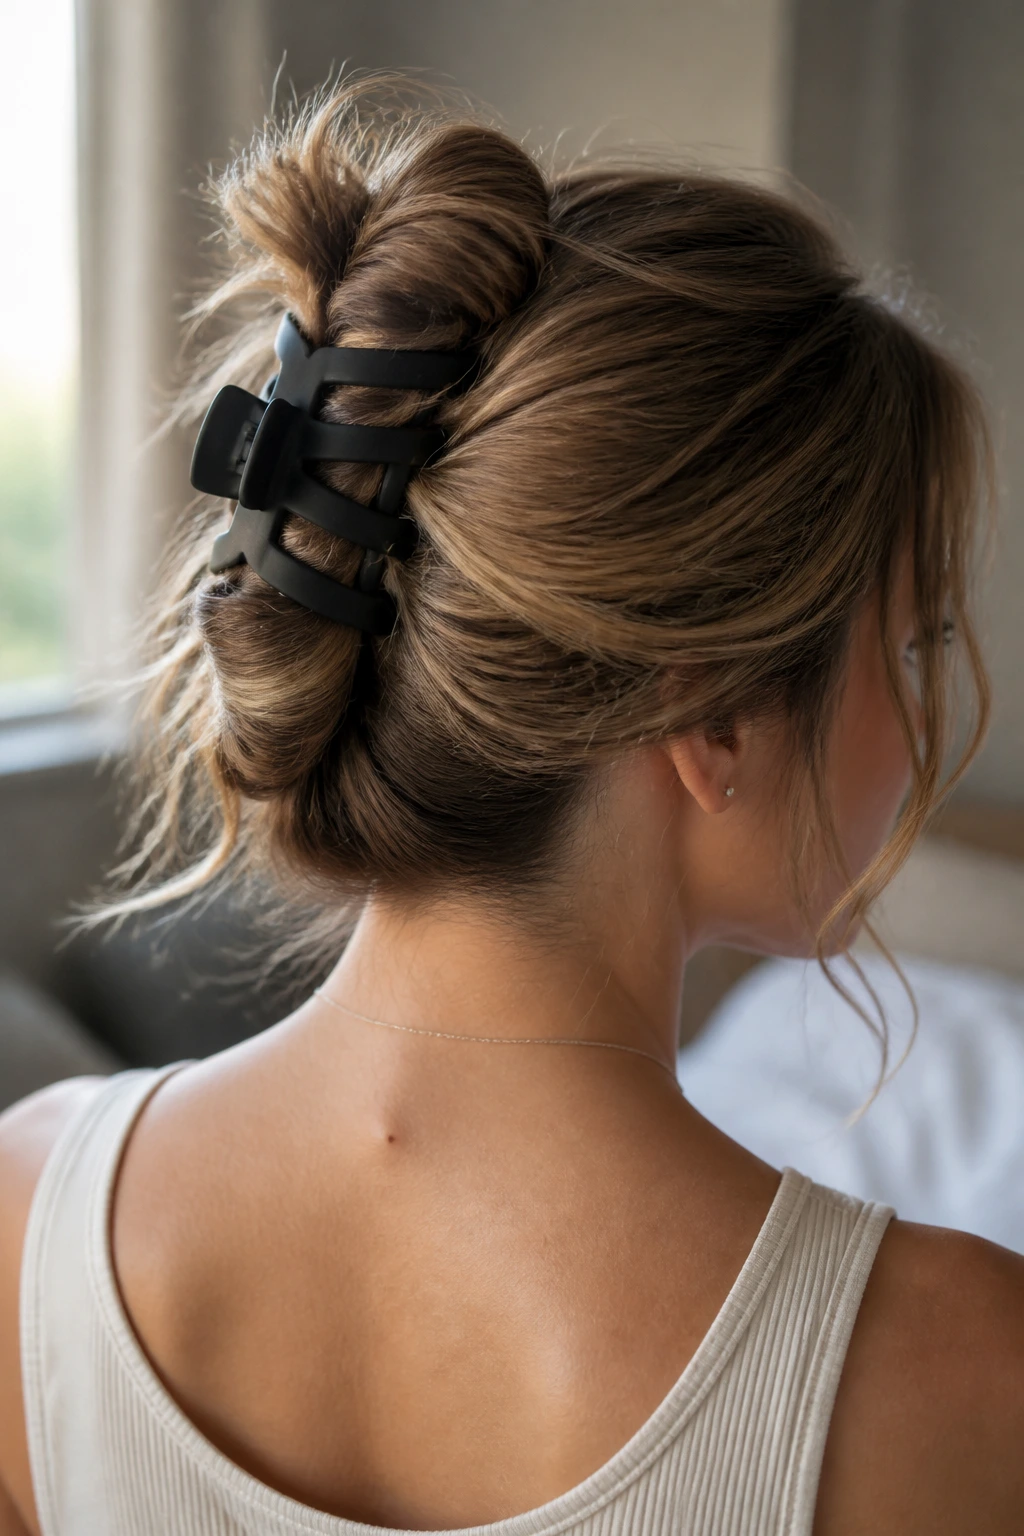
22. Loose Claw-Clip Chignon
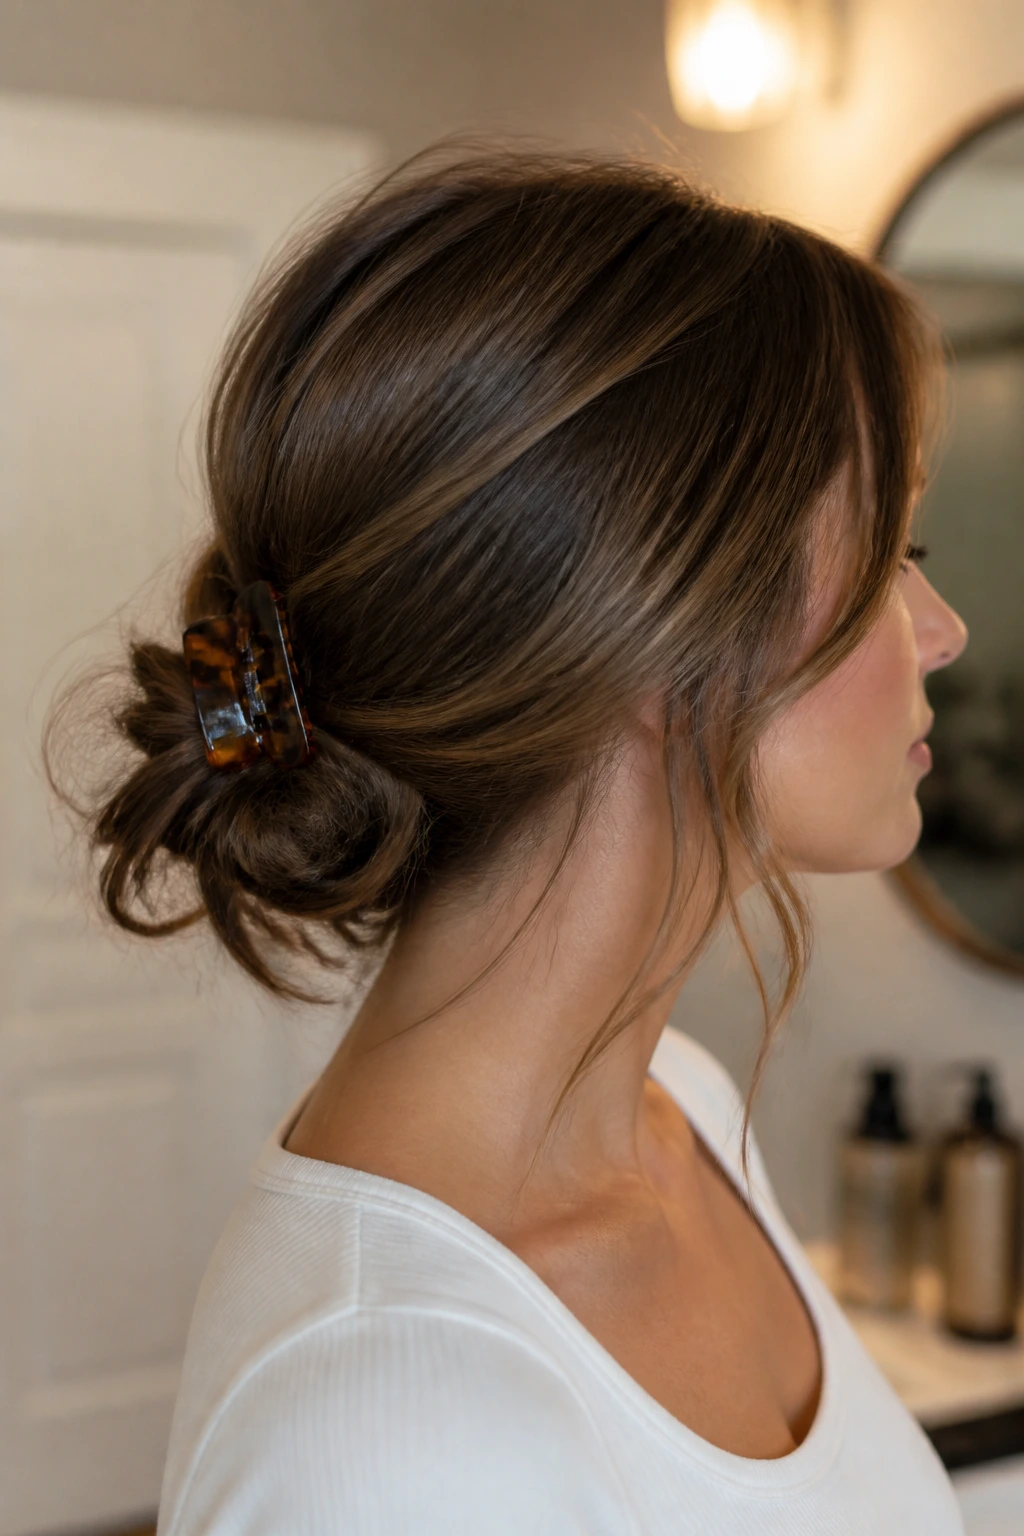
A loose claw-clip chignon is basically the relaxed cousin of the French twist. It sits lower, feels softer, and leaves a little more movement at the ends. If the French twist feels too neat for your day, this is the version that breathes.
Gather the hair at the nape, twist it upward, and fold it into a low chignon shape. Clip it in place with a medium or large claw clip, letting the ends tuck or spill slightly. The goal is a shape that holds but does not look armored. A matte clip helps the style blend into the hair instead of sitting on top like plastic.
This works best when the hair has some texture or second-day grip. Very clean hair can slide out of the clip. A quick spritz of dry shampoo at the roots solves that problem fast. The result feels easier than a bun and more polished than leaving the hair half up, which is exactly the middle ground many mornings need.
23. Braided Crown into a Ponytail
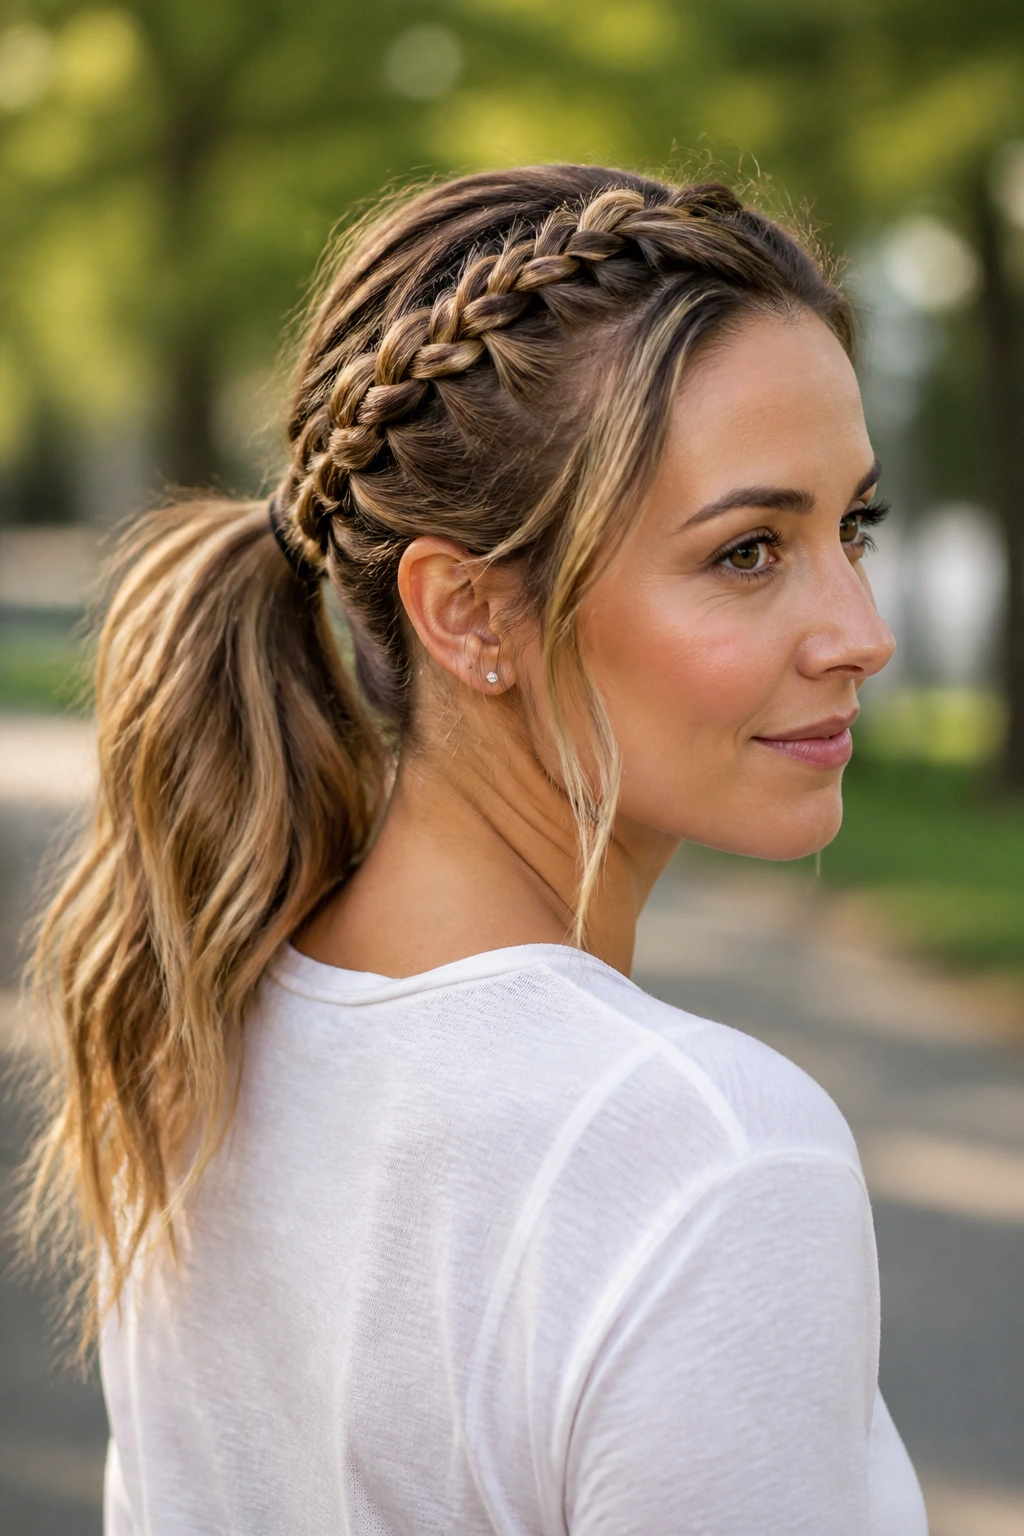
This one gives you the detail of a braid without committing to a full braided style. Start with small braids at the sides or along the hairline, then pull everything into a ponytail at the back. The crown stays neat, the ponytail stays practical, and the whole thing looks like you made an effort without making a project out of it.
Keep the braids slim so they frame the face instead of swallowing it. Two braids are plenty. More than that can start to feel busy. Once the ponytail is secured, wrap a tiny piece of hair around the base if you want the finish cleaner. That small wrap is usually what separates a plain ponytail from one that looks styled.
It is a strong choice for medium to long hair, and it handles layers better than a standard ponytail because the braids control the front sections. If your hair frays at the ends, braid them a little tighter so they do not splay open.
24. Curtain-Bang Ponytail
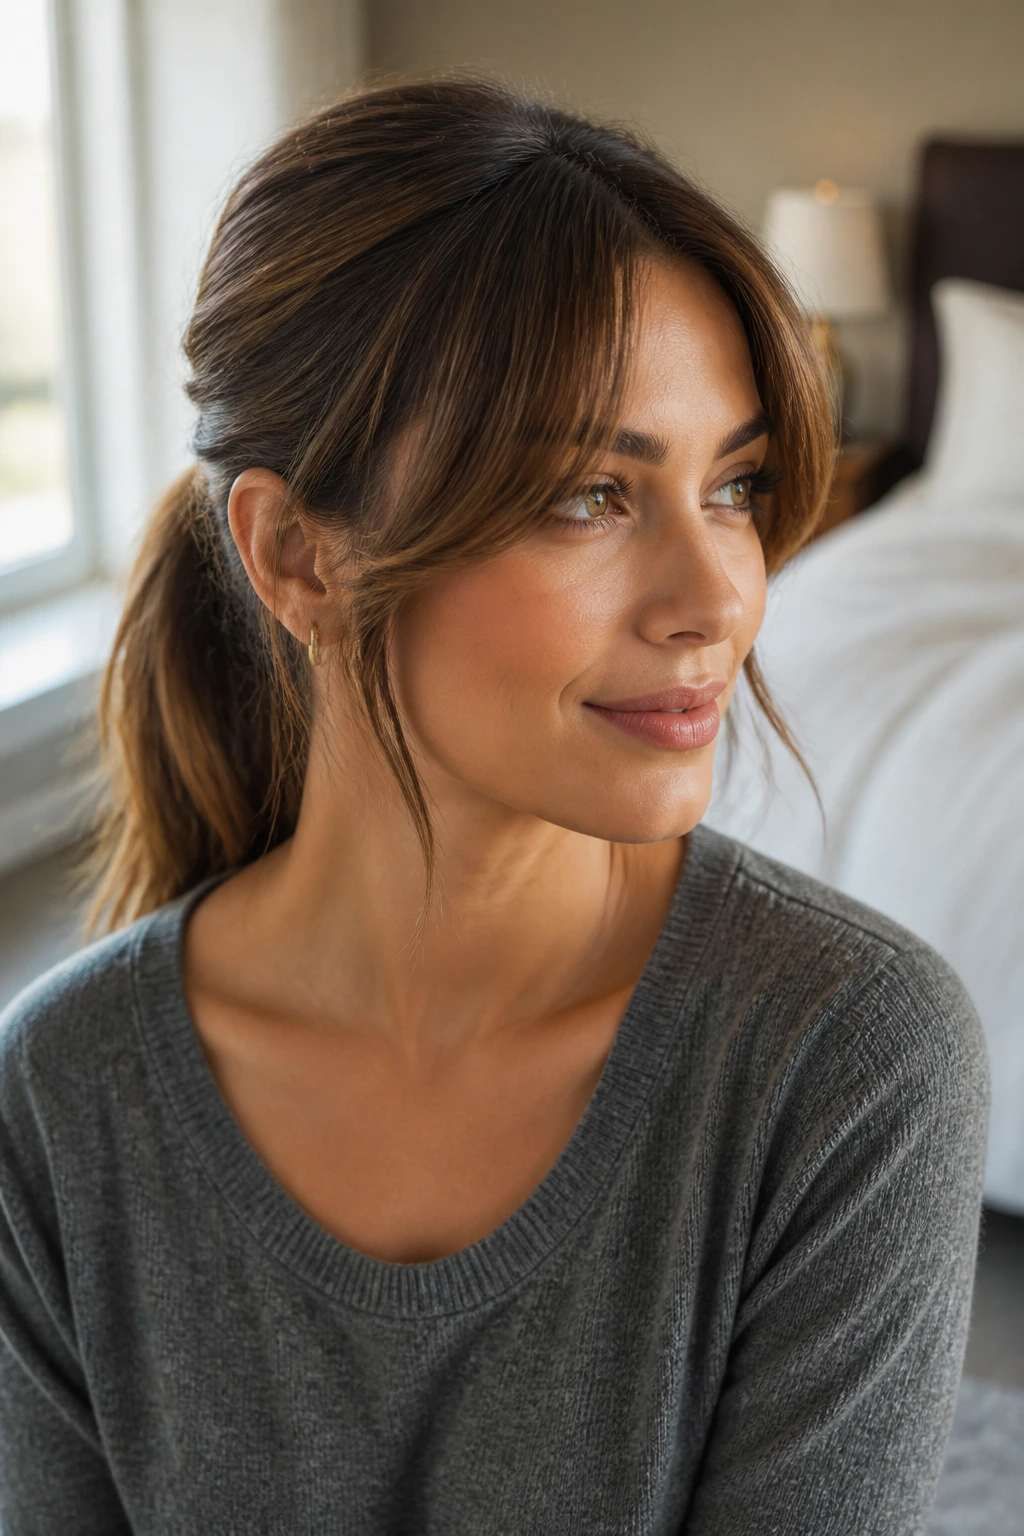
Curtain bangs change a ponytail in a big way. They soften the face, add movement around the eyes, and make a simple ponytail feel more current. If your front layers are already there, this style is almost unfairly easy.
Blow the bangs or face-framing pieces away from the face with a round brush or just a twist of the hand while they’re warm. Then pull the rest into a mid or low ponytail, leaving the bangs loose. The contrast is what gives the style shape. A smooth ponytail plus softer front pieces tends to look better than trying to flatten everything at once.
This is a smart option for hair that needs lift at the crown but still wants some softness around the face. If the bangs are too long, tuck the ends behind the ears on one side. If they are short, a little texture spray keeps them from separating into odd little strings.
25. Low Knot with a Deep Side Part and a Metal Clip
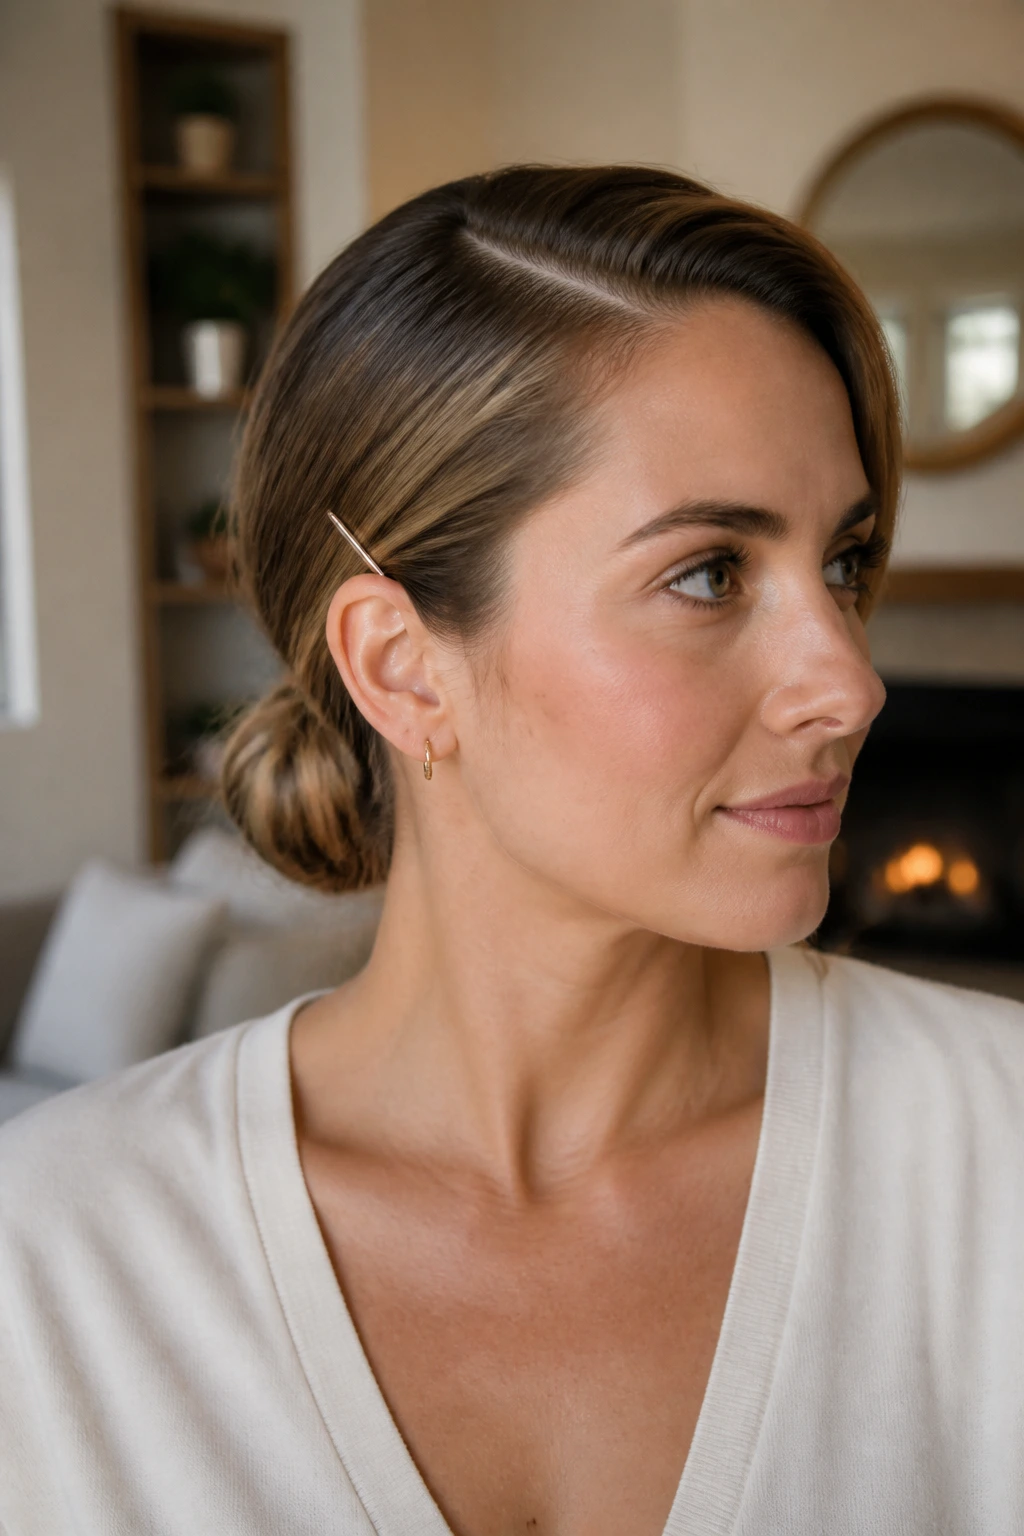
A deep side part changes the mood of a low knot instantly. It shifts the eye, makes the silhouette more interesting, and gives even a simple knot a little attitude. Add a slim metal clip or barrette, and the style stops feeling like a backup plan.
Brush the hair to one side, gather it low and slightly off-center, then twist it into a small knot or roll. Secure it with pins and finish with the clip where the part begins or just above the ear. The metal detail works best when it’s not oversized. A small, clean barrette looks sharper than a giant decorative piece trying to do too much.
This one is useful when your hair is behaving but you still want the style to look deliberate. It works on straight hair, wavy hair, and shoulder-length cuts with some bend. A deep side part also gives fine hair a little more lift than a middle part in some cases, which is why this look earns its keep.
What Makes These Styles Work on a Packed Morning
The styles that last in real life are the ones that do three things at once: hold shape, hide a little mess, and avoid a long setup. That is the formula. Everything else is decoration.
Modern hair has moved away from the over-finished, overly sprayed look that used to flatten every strand into the same behavior. These styles lean into texture instead. A center part that is a little crisp. A bun that sits low and neat but not severe. A ponytail with a wrapped elastic instead of a bright rubber band glaring at you from the back of the head. Small changes, big payoff.
The easiest styles are also the ones that forgive second-day hair. Clean hair can be slippery and hard to control, especially if it is fine. Hair with a little grit stays in place faster, needs less heat, and usually looks fuller once it is tied back. That is why dry shampoo is in so many bathrooms for a reason. It is not a luxury. It is a shortcut.
If you only have one hair thought in the morning, make it this: choose styles that work with the shape your hair already wants to make. Fighting it costs time. Working with it saves time. Simple.
The Small Tool Kit That Cuts Styling Time
- Tail comb: Clean parting matters more than people think, especially for center parts, deep side parts, and braid sections.
- Soft-bristle brush: This smooths the top layer without leaving the crown puffy or over-brushed.
- Dry shampoo: A few sprays at the roots can turn slippery hair into something that grips pins and elastics.
- Texturizing spray: Best for braids, ponytails, and buns that need body without crunch.
- 1-inch curling iron or flat iron: Useful for adding bends to lobs, ponytails, and face-framing pieces.
- Bobby pins: The plain ones hold twists, buns, and tucked sections far better than decorative pins when you need real security.
- Claw clip: Keep one medium and one large clip around; hair length changes which one actually works.
- Small clear elastics: These disappear into braids and half-up styles better than thick bands.
- Satin scrunchie: Gentle on curls, waves, and textured hair, and it avoids the harsh dent some elastics leave.
- Light-hold hairspray: Enough to calm flyaways without freezing the style.
- Edge brush or clean toothbrush: Handy for smoothing hairlines and finishing curly styles.
- Blow dryer with concentrator nozzle: Optional, but useful when you need quick direction at the roots or on bangs.
How to Pick the Right Style for Your Hair Length and Texture
Fine hair usually does better in styles that create shape without asking too much from the length itself. Low buns, side tucks, claw-clip twists, and bubble ponytails all help because they add structure. A little dry shampoo at the roots gives fine hair grip, and that grip matters when you are trying to pin something in place before the school bus gets there.
Thick hair changes the game. The hair has enough body on its own, so the goal becomes control. Braided ponytails, rope braid buns, Dutch braid crowns, and low double buns work because they break up the mass and keep the style from ballooning out. If your hair is heavy, use stronger elastics and do not be shy about one extra pin under the bun.
Curly and coily hair usually looks best when the style respects the curl pattern instead of flattening it into obedience. Pineapples, mini twists, puffs, and high wraps protect the shape and still look polished. If the hairline needs smoothing, use a small amount of gel only where you need it. The rest can stay soft.
Short hair has its own sweet spot. Bobs, lobs, pixies, and tucked styles need clean lines and a little product more than a pile of pins. Long hair gives you braids, wraps, and knots, but it also gets heavy fast. That is why the same style can feel easy on one head and annoying on another. The right choice is the one that matches the amount of hair you actually have, not the one that looks best on a model with two layers and a wind machine.
How to Keep These Styles Looking Fresh After the Morning Rush
A style that falls apart by lunch is not a real shortcut. It is a false promise. The best way to stretch a hairstyle is to plan for the first repair before the first collapse. That means starting with a little grip at the roots, using the right elastic, and not pulling every strand too tight in the first place.
Sleek styles usually look best for one full day, sometimes two if the weather is kind and the hair is not fine enough to slip everywhere. Braids, buns, and claw-clip looks often last longer because the structure does the heavy lifting. If you need to revive them later, loosen the bun slightly, refresh the front with a touch of cream, and re-pin only what has shifted. Do not rebuild the entire style unless you have time to burn.
Dry shampoo helps most at the roots, where oil shows first. Spray it a few inches away from the scalp, wait a minute, then massage it in with your fingers. That pause matters. If you start rubbing immediately, the powder can sit in one spot and look dusty. For curly hair, a mist of water plus leave-in conditioner usually works better than dry shampoo.
Nighttime matters too. A satin pillowcase reduces friction, and a loose silk scarf can preserve smooth styles overnight. Braids survive best when they are not undone and redone every evening. If a look is meant to last, leave it alone until the next morning unless it starts tugging at the scalp.
Practical Tips for Faster, Cleaner Styling
Texture first: Hair with a little grip almost always styles faster than squeaky-clean hair. If your hair is too soft to hold, dry shampoo or texture spray is the quickest fix.
Choose one focal point: A middle part, a wrapped elastic, a barrette, or a braid is enough. Stack all four and the style starts looking crowded.
Pin from underneath: Bobby pins do more when they anchor from below instead of sitting on top like a little X. Slide them into the base of a twist, not the surface.
Keep your products tiny: A pea-size amount of cream, a small spray of hairspray, one light pass of oil on the ends. Overloading the hair makes the finish heavy fast.
Set the front before the back: If the crown and face-framing pieces are smooth first, the rest of the style can be a little looser without looking unfinished.
Common Mistakes That Make Simple Hair Look Fussy
Over-smoothing the entire head: Hair that has been flattened to the scalp can look hard and dated, not polished. Leave a little movement at the ends or around the face.
Using the wrong elastic: Thick, bright, stretched-out elastics make even a good ponytail look rough. Clear, matte, or hair-wrapped bands clean things up fast.
Making the bun too small or too tight: A tiny hard knot can read as rushed and severe. Loosen it slightly and pin it flatter instead.
Leaving face-framing pieces by accident: Random wisps are not the same as intentional softness. If you want pieces out, place them on purpose and keep them even enough to look chosen.
Adding too many accessories: One clip or scarf is enough for most of these styles. More than that can start to feel like a costume instead of a haircut that got dressed up.
Easy Variations and Swaps for Different Hair Types
The Heat-Free Reset: Swap any curled ponytail or lob style for air-dried texture plus a little cream or wave spray. This works when the iron is still cold and your schedule is not.
The Curly-First Version: Use the pineapple, mini twists, or a puff as your base, then add clips or a scarf for shape. Keep the curl pattern visible. That is the point.
The Short-Hair Swap: Replace buns and braids with side tucks, deep parts, or a sharp barrette. Short hair looks better when the shape is clear and the accessories are small.
The School-Event Upgrade: Add a braid to the front of a ponytail or wrap a strand around the base of a bun. One extra detail makes a basic style read more intentional.
The Humidity-Proof Move: Choose braids, twist-based buns, or claw-clip styles and skip the iron-heavy finish. A little texture holds up better than a smooth style that frizzes the second you step outside.
Frequently Asked Questions
What is the fastest hairstyle for a busy mom with long hair?
A low ponytail with a wrapped base is hard to beat. It takes about 3 to 5 minutes, hides the elastic, and stays neat far longer than a loose blowout.
How do I make a simple hairstyle look modern instead of plain?
Use one clean detail: a center part, a deep side part, a claw clip, a braid, or a wrapped strand. Modern hair usually looks intentional in one place and a little loose everywhere else.
Which styles work best on second-day hair?
Braids, low buns, claw-clip twists, bubble ponytails, and textured top knots all benefit from the extra grip. Second-day hair usually holds pins and elastics better than freshly washed hair.
Can these styles work on curly or coily hair?
Yes. The pineapple, puff, mini twists, low buns, and side-tuck styles are especially useful because they respect the hair’s shape instead of flattening it.
How do I keep flyaways from ruining a sleek style?
Use a tiny amount of smoothing cream on the top layer before you tie the hair back, then finish with a light-hold hairspray or a touch of gel on the hairline. Do not soak the whole head. That usually causes more trouble than the flyaways did.
What if my hair is too thin for buns to look full?
Texturizing spray, a little backcombing at the base, and a looser twist usually solve the problem. A smaller bun can also look better than a forced oversized one.
What if my hair is too thick for a claw clip?
Use a larger clip, twist the hair a little tighter before clipping, and let the ends sit lower. Medium clips fail on thick hair because they try to hold too much at once.
How do I keep a ponytail from looking flat at the crown?
Lift the roots with a tail comb before securing the ponytail, or add a little dry shampoo first. A small amount of height at the crown makes the whole style feel more balanced.
Made for Real Mornings
The best hairstyles for busy moms are not the ones that look impressive in a vacuum. They are the ones you can do while someone is asking where their left shoe went. That is a much tougher test, and a much more useful one.
A sharp part, one smart clip, a braid that actually stays put, a bun that holds its shape — those are the details that matter when the day starts early and keeps moving. Pick the looks that fit your hair, not the ones that fight it, and you’ll spend less time fixing your hair in the car mirror later.
