



Twists have a strange little talent: they make natural hair look organized without flattening its personality. That’s why twist hairstyles keep coming back when people want a polished natural look that still shows texture at the root, movement through the lengths, and a little shape around the face. A good twist doesn’t hide the hair. It lines it up.
The parting matters. So does the size of the section, the amount of product, and whether the ends are left blunt, tucked, or curled. Those details sound small until you see them in a mirror. Then they’re everything. Loose, sloppy twists can look sleepy in a hurry; neat ones give you that clean, finished feeling without turning your head into a helmet.
What I like most about twists is that they work in plain sight. You can wear them soft and casual, pin them up for a dinner, stretch them into a bob, or stack them into a bun, and the style still reads as your hair. Not borrowed. Not overworked. Just arranged with enough care to look intentional.
Why These Twist Hairstyles Earn Their Keep
-
Texture Still Shows: Twists keep the coil pattern visible, so the style looks natural instead of smoothed into something unrecognizable.
-
Parting Does the Heavy Lifting: A clean center part, side part, or triangle part can make the whole style look sharper before you even twist the first section.
-
They Flex With Hair Length: You can wear them on a short TWA, collarbone-length hair, or long extension sets without changing the basic method.
-
Easy to Dress Up or Down: The same twist pattern can look quiet with no accessories or look polished with cuffs, beads, or a tucked bun.
-
Less Daily Handling: Once the sections are set, you can stop combing, brushing, and reworking the hair every morning.
-
The Shape Lasts: Unlike a loose curl style that can collapse fast, twists hold a visible pattern even after a full day of movement.
1. Classic Two-Strand Twists
Classic two-strand twists are the baseline for a reason. They give you that neat rope-like shape that reads clean from the front and tidy from the back, especially when the sections are parted with care. On medium to tightly coiled hair, they sit close enough to the scalp to look controlled, but they still move when you turn your head.
Why They Stay So Clean
The structure is simple: two strands, wrapped around each other, no extra fuss. That simplicity is the point. You’re not trying to force the hair into a shape it doesn’t want; you’re just coaxing it into rows that settle neatly once they dry.
- Best on hair that has been stretched a little, not freshly tangled.
- Looks sharp with medium sections, about the width of a pencil or marker.
- Holds for about 1 to 2 weeks before frizz starts showing at the roots.
- Works well if you want a later twist-out, because the parts stay visible.
My favorite detail: leave the ends a little more snug than the middle. If the tips are loose from day one, they fuzz out first.
2. Mini Twists
Mini twists are for people who like a style that looks deliberate from every angle. The smaller sections create a tighter, denser finish, and the overall effect is almost grid-like at the scalp. It’s neat. It’s precise. And yes, it takes longer.
That time investment buys you movement. Mini twists sway more than chunky twists, so they don’t sit stiff against the head. If your hair is fine or you want the style to last longer without looking bulky, this is the version I’d reach for first.
Use a light hand with product. Too much cream between tiny sections makes the hair feel gummy and can cause white residue at the roots. A pea-sized amount for each small section is usually plenty, followed by a little mousse on the finished row if you want the surface to lie flatter.
If your schedule is packed, mini twists can still make sense. They take patience on install day, but they usually give you the longest clean wear before the roots start to puff.
3. Chunky Rope Twists
Why do chunky twists look so polished even when they’re bigger and looser than minis? Because they keep the silhouette strong. The sections are wide enough to read clearly, and that clarity does a lot of the styling work for you.
Best for Dense Hair and Faster Styling
Chunky rope twists are my pick when I want volume without chaos. On dense hair, they sit with a bold shape that doesn’t collapse into the head, and on longer lengths they create a clean column of texture instead of a fuzzy cloud.
They also cut down install time. Fewer sections means less parting, fewer clips, and less time staring at the mirror wondering why the back takes twice as long as the front. That alone makes them useful for long weekends or last-minute plans.
A good chunky twist should feel firm at the root and soft through the length. If the sections are too large, they start looking bulky near the scalp and the style loses its shape. If they’re too tight, the hair can look stretched and stiff. The sweet spot is a twist you can see from across the room, but still move with your hands.
4. Flat Twists Straight Back
Flat twists straight back are the quiet achiever of the whole group. They sit close to the scalp, keep the face open, and make the hairline look clean in a way that feels calm rather than showy. They’re also one of the best options when you want the front of your style to do less and the parting to do more.
A fresh center part can make flat twists look sharper instantly. So can a neat edge line and sections that stay even from temple to nape. If one side is wider than the other, the whole style starts to lean visually. That’s the kind of thing people notice without knowing why.
What Makes Them Work
- They lie flat, so hats and scarves sit on top of them more easily.
- They keep the neck cool, which matters when you want hair off the face.
- They transition well into buns or tucked styles later in the week.
- They look especially clean with a little mousse pressed over the finished rows.
The finish matters here. I like to smooth the top with a soft foam rather than pile on gel. Too much gel turns the rows shiny in a hard, crunchy way. A light mousse gives the twist pattern a neater edge and keeps it from looking plastered down.
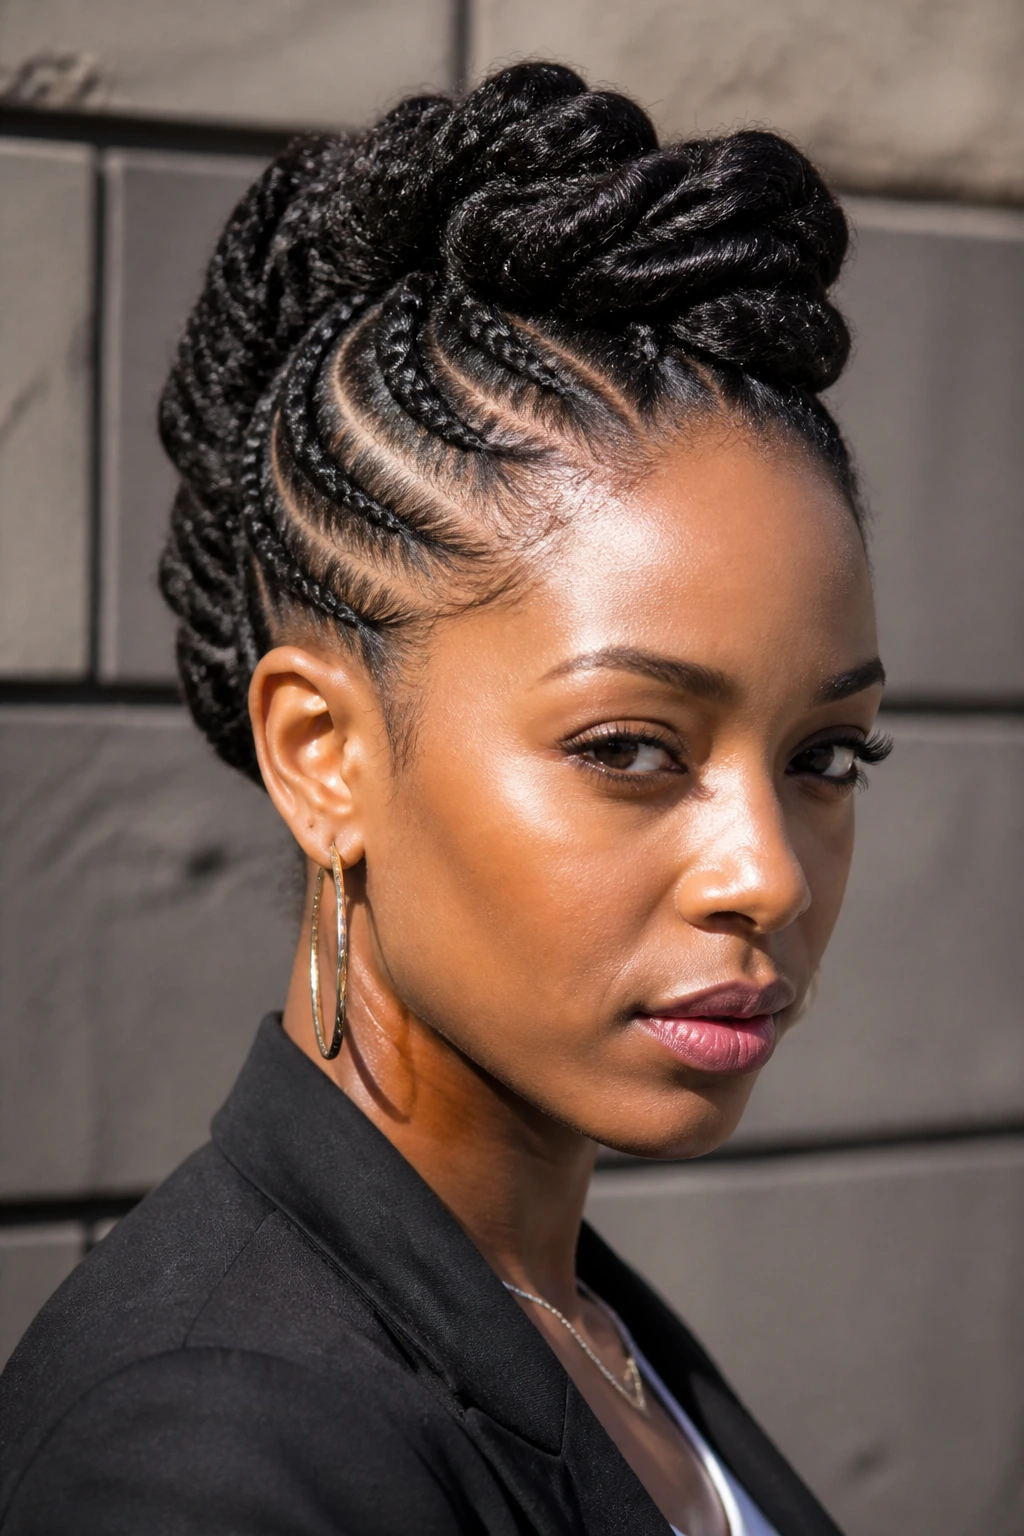
5. Flat-Twist Updo
A flat-twist updo has that quietly formal energy that works for weddings, dinners, interviews, and any day you want your hair to look arranged on purpose. The base rows keep the scalp neat, and the tucked-up back gives the style height without making it feel heavy.
This is one of those styles that looks more complex than it is, which I always appreciate. The trick is to keep the flat twists snug enough to guide the hair backward, then gather the ends into a low roll, a tucked bun, or a pinned coil at the crown. You want shape, not bulk.
The best version has a little looseness around the face. A couple of soft pieces near the hairline keep the style from feeling too severe. If every strand is pulled back tight, the whole thing can look stern, and nobody needs that from a hairstyle.
I’d choose this style when I want clean lines and zero chance of hair falling into my lipstick.
6. Side-Swept Twists
Side-swept twists are the easiest way to make twists feel softer without changing the basic structure. A deep side part shifts the weight of the style, and that asymmetry gives the hair a more relaxed line across the forehead and cheek.
Unlike straight-back twists, this version puts the focus on one side, which is useful if you want to frame one ear, show off earrings, or balance a stronger jawline. It also works well on hair that has a little layering at the front, since the shorter pieces can blend into the sweep instead of sticking out.
If the side part looks too flat, lift the root on the heavier side with your fingers after the twists dry. Don’t over-fluff. A tiny bit of separation near the crown is enough to stop the style from lying too close to the head.
Best for people who like a polished look with less symmetry. Not everybody wants every row marching straight back, and that’s fine.
7. Twists with Curled Ends
Curled ends change the whole mood of a twist style. The body of the hair stays controlled, but the tips soften into a bend or spiral that keeps the finish from looking boxy. It’s one of the easiest ways to make twists feel dressier without adding a lot of extra work.
A Simple Way to Soften the Shape
Set the ends on flexi rods, perm rods, or even small rollers if the hair is long enough. Once they dry fully, the ends come off with a little spring, which gives the whole style movement at the shoulders and lower face.
That movement matters more than people think. Straight, blunt ends can look neat, but curled ends catch the eye in a different way. They break up the long vertical lines and make the hair feel lighter.
A small warning: don’t rush the drying time. If the ends come down even a little damp, they lose their bend fast and you’re left with a half-set finish that looks tired by midday. If you want the curls to last, let them dry completely, then separate them gently with oiled fingers.
8. Twisted Low Bun
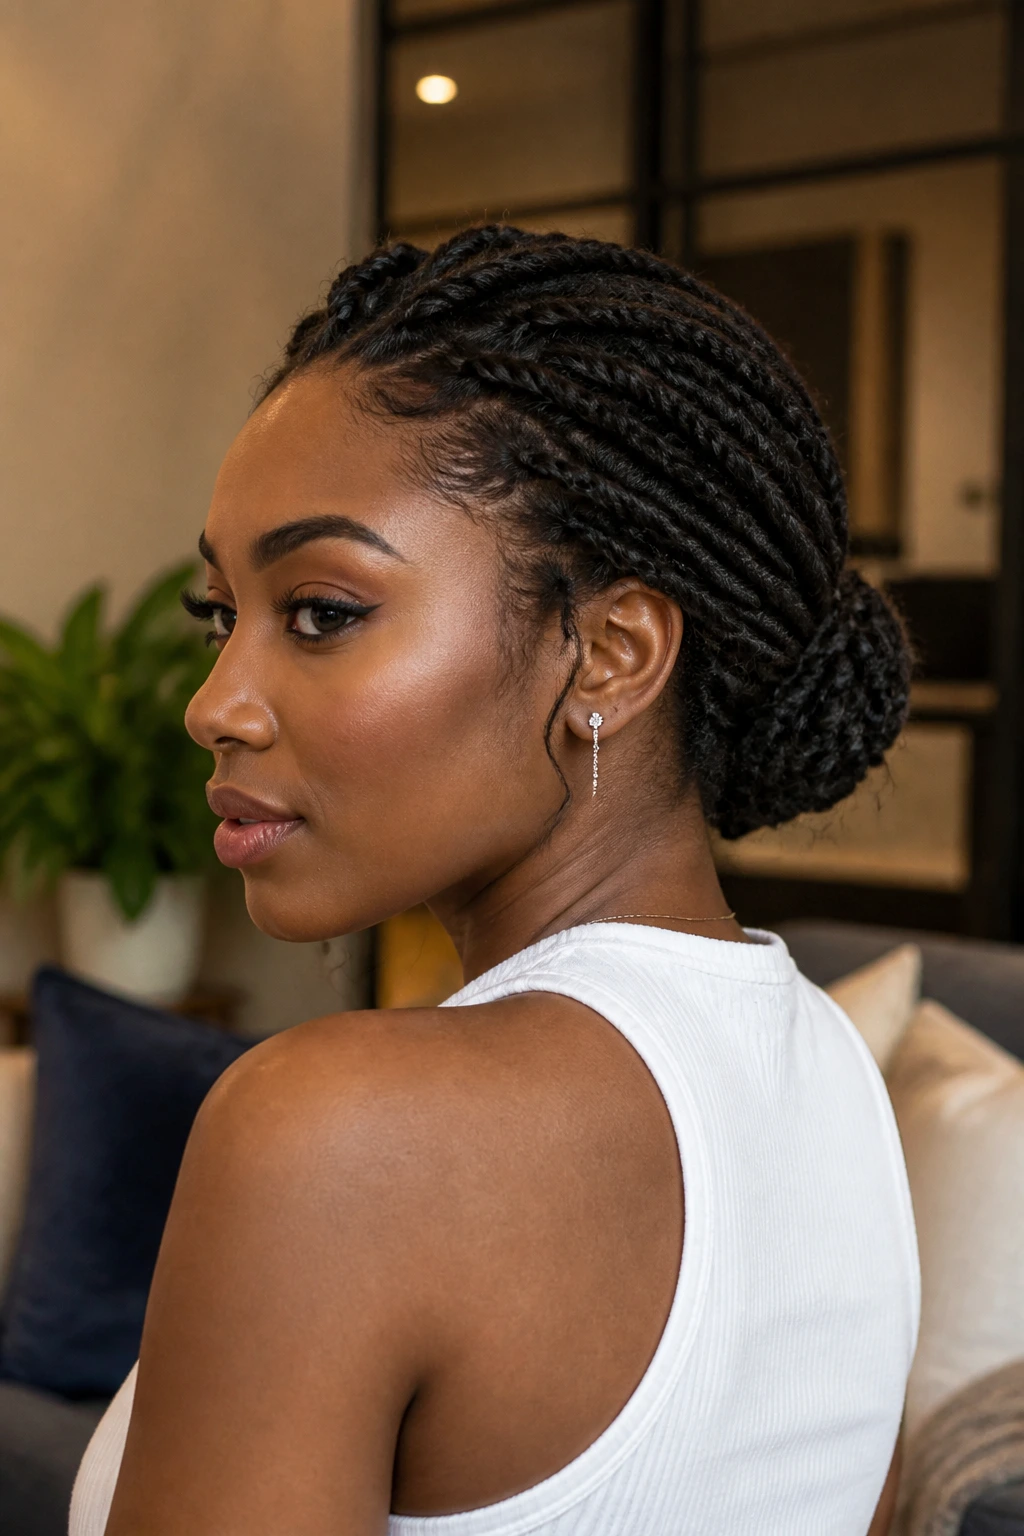
A twisted low bun is the kind of style that makes a person look put together before they’ve said a word. The twists gather at the nape, where the shape stays neat and close, and the bun itself can be sleek or slightly full depending on how much volume you leave at the crown.
I like this style because it keeps the face open and the neck clean. That sounds basic, but it changes the whole feel of the look. The bun can sit tight and minimal for a workday, or it can be padded out a little with a few pinned ends if you want a softer shape.
The real test is the base. If the twists are gathered too high, the bun starts to look like it’s fighting the scalp. Too low, and it can sag. Right at the nape is the sweet spot.
This is also one of the easiest styles to refresh. Smooth the perimeter, re-pin the bun, mist the ends lightly, and you’re back in business.
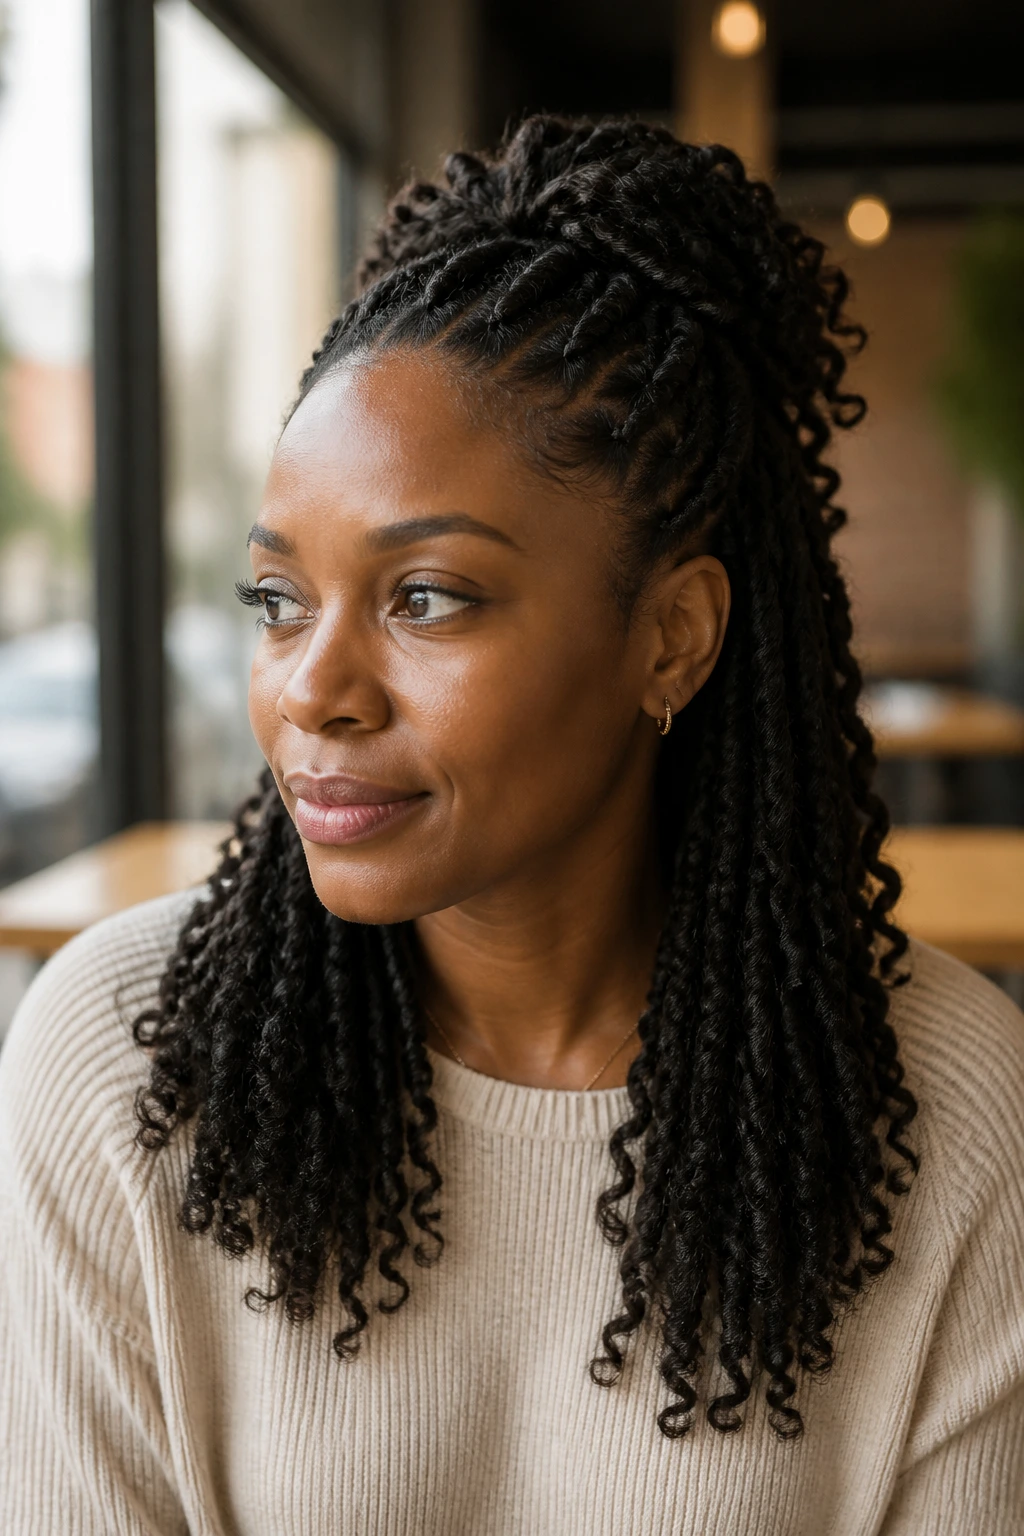
9. Half-Up, Half-Down Twists
Half-up, half-down twists are useful because they give you two moods at once. The top section is pulled away from the face, which cleans up the profile, while the lower length stays visible and keeps the style soft.
That contrast is what makes this style work so well on natural hair. The top half creates order. The bottom half keeps movement. If all of the hair were pinned up, the look would feel firmer; if all of it were down, the shape would depend more on the length and thickness of the twists.
Try a small top knot, a clipped twist crown, or a loose puffed section at the back. Each one shifts the tone a little. A neat top knot reads more polished. A puffier top section feels more casual and easygoing. The lower twists should hang with enough separation that they don’t fuse into one heavy sheet.
If your hair is medium length, this is one of the most forgiving options. Shorter pieces around the crown can be controlled, and the lower lengths don’t have to be perfect to look good.
10. Twist Bob
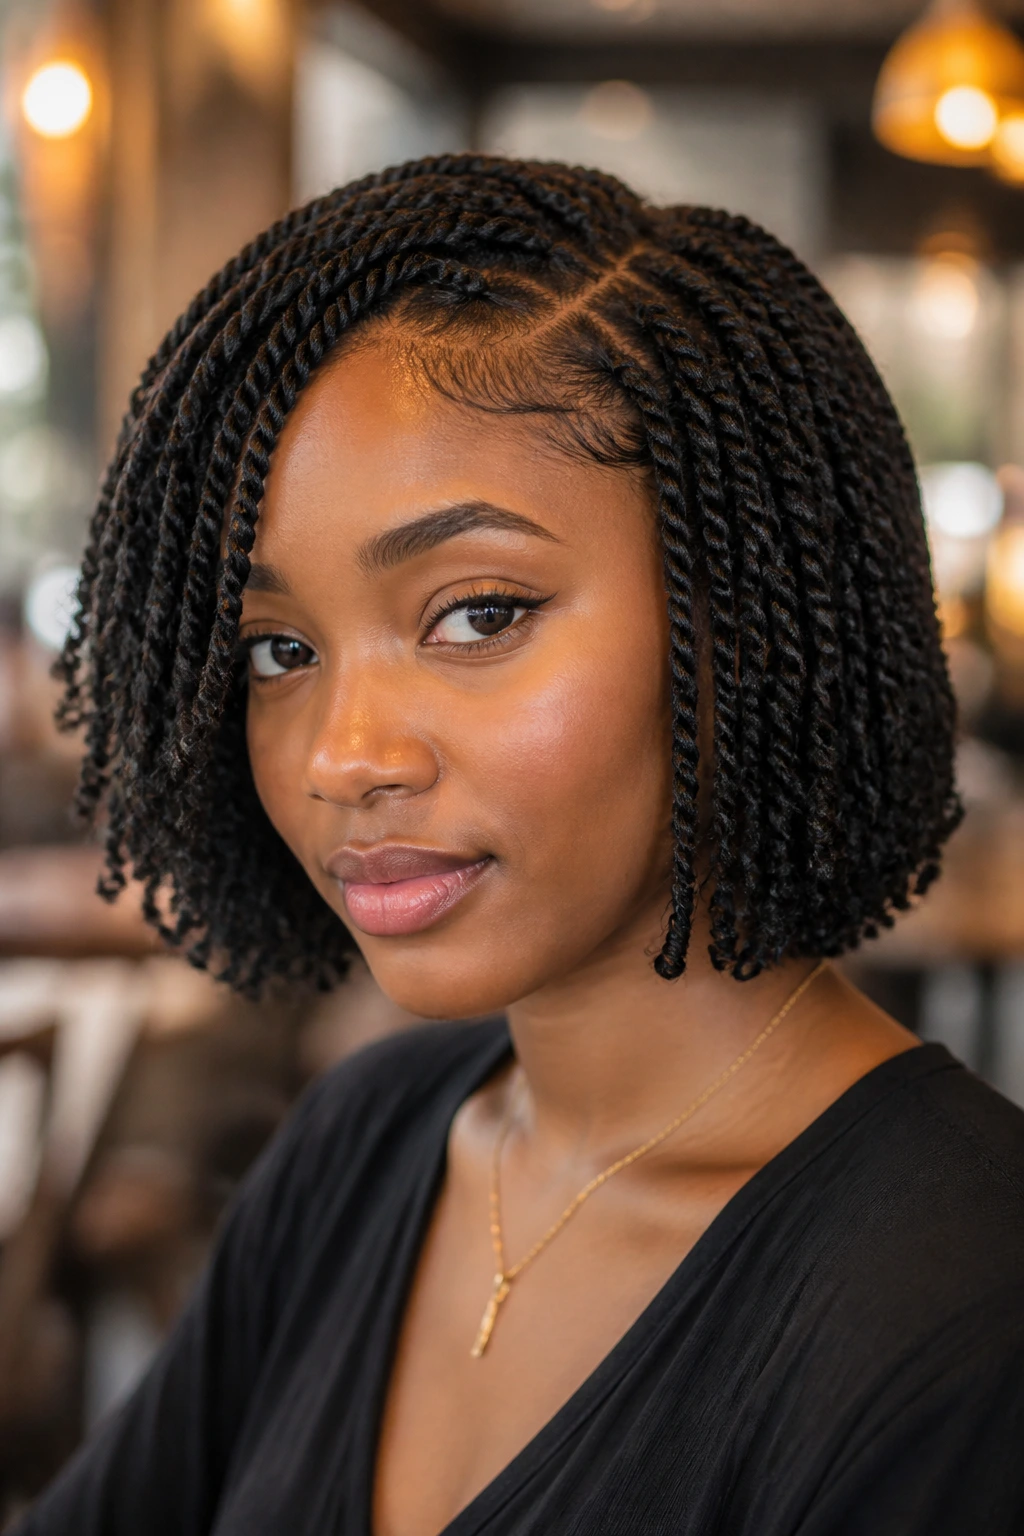
A twist bob has a crisp little confidence to it. The length lands around the chin or just below it, which gives the style shape without too much weight. It’s especially flattering when the ends are blunt or slightly curled inward, because that keeps the outline clean.
The bob works when you want twists that look styled, not simply worn. The shorter length means the line of the haircut or install shows more clearly, so the parts and perimeter need to be neat. A messy bob does not read as carefree the way a long, loose style might. It just looks unfinished.
If you’re using extension hair, make sure the density isn’t too much for the length. Heavy twists at bob length can look boxy fast. Light to medium weight keeps the curve around the jawline sharper.
I like a side part here. It keeps the bob from feeling too square and gives the front a bit of swing when you turn your head.
11. Twist Ponytail
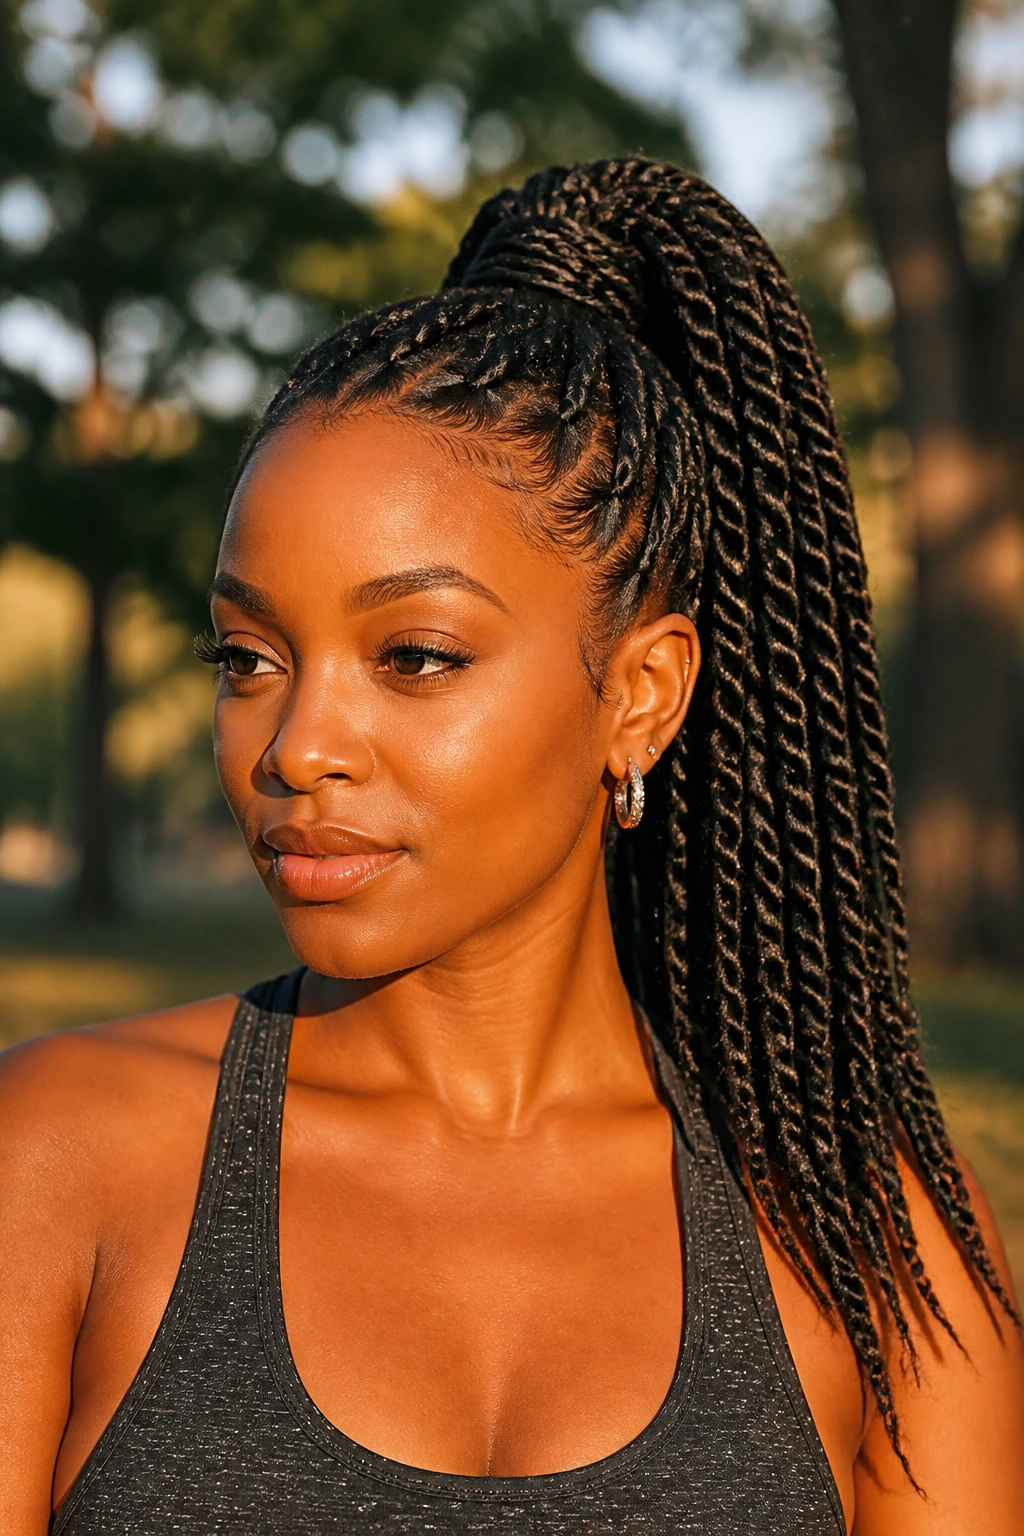
The twist ponytail is one of those styles that looks cleaner than a regular puff because every section already has direction. Pull the twists into a high or mid pony, wrap one twist around the base, and the whole style snaps into place.
What you get is height without the fuzz. The ponytail lifts the face, and the twist pattern keeps the look from turning flat at the crown. It’s also practical when you need the hair up but don’t want to commit to a full bun.
A mid pony feels softer and easier on the hairline. A high pony gives more lift and a sharper profile. If your edges are fragile, don’t yank the base too tight just to make it look sleek; that’s a bad trade. A little loose structure is better than tension that leaves your scalp sore by the afternoon.
This style is at its best when the base is wrapped neatly and the ends are separated just enough to show the individual twists.
12. Crown Twist Halo
A crown twist halo wraps the hair around the head like a soft frame, and I keep coming back to it because it makes a face look finished without a lot of extra styling. The shape sits near the hairline, then travels around the crown and can tuck into itself at the nape or behind one ear.
It has a romantic feel, sure, but it doesn’t need lace or curls or any of the usual dress-up tricks. The structure itself carries the style. That’s the part I trust.
If your hair is very thick, keep the halo a little looser so it doesn’t puff up around the temples. If it’s finer, a tighter pass around the head helps the shape stay visible. Either way, keep the front smooth and the part clean. A halo with crooked rows looks more accidental than graceful.
Best worn when you want your natural texture to read as part of the design, not as something hidden under the design.
13. Feed-In Twists
Feed-in twists start small and build gradually, which gives the root area a smooth, tapered look. The line at the scalp doesn’t jump abruptly from tiny section to thick section, and that softer start is what makes the style feel expensive-looking without needing a lot of decoration.
This pattern is especially nice when you want length and neatness in the same style. The base stays flat, the body of the twist builds evenly, and the full shape lands with enough weight to sit well. It also helps distribute tension, which the scalp will thank you for later.
The key is to add hair slowly and consistently. If you dump too much hair into the feed at once, the twist turns lumpy and loses its clean line. Small additions. Smooth hands. Even tension.
I like feed-in twists for anyone who wants the front and sides to look orderly while still keeping the overall style long and flowing.
14. Twisted Faux Hawk
The twisted faux hawk is for the days when a polished natural look can still have a little attitude. The sides are pinned or twisted close to the head, and the center section rises into a ridge, puff, or row of larger twists that runs from front to back.
The contrast is the whole story here. Tight sides make the center look stronger. The center, in turn, gives the style height and shape. It’s one of the few twist styles that can feel bold without getting messy.
If you want the faux hawk to read clean rather than costume-like, keep the top section structured. That means defined parts, secure pins, and no stray puff at the crown unless you mean to have it. A little edge control at the temples helps, but don’t paint the hairline into a hard shell.
This one works best when the center has enough length to stand up with support. Shorter hair can still do it, but the shape becomes more compact.
15. Side-Parted Medium Twists
Side-parted medium twists are my default “I want my hair to look nice without a lot of drama” choice. The section size sits right in the middle: not tiny, not oversized, just enough body to show the pattern clearly while keeping the style quick enough to install in a sane amount of time.
A side part gives the look some motion. It keeps the style from feeling rigid, and it helps the front section fall in a way that frames the cheekbones rather than hiding them. Medium twists are also easier to refresh because the sections are large enough to separate with your fingers, but not so large that every frizzy spot announces itself.
Where They Fit Best
- Work settings where you want a neat, calm shape.
- Everyday wear when you don’t want to re-style every morning.
- Hair that falls between fine and dense.
- People who like some length but don’t want heavy extensions.
If you have a habit of over-parting the front, stop early. Medium twists look best when the first row around the face is balanced. Too many tiny pieces near the hairline can make the front look overworked.
16. Passion-Twist-Inspired Soft Twists
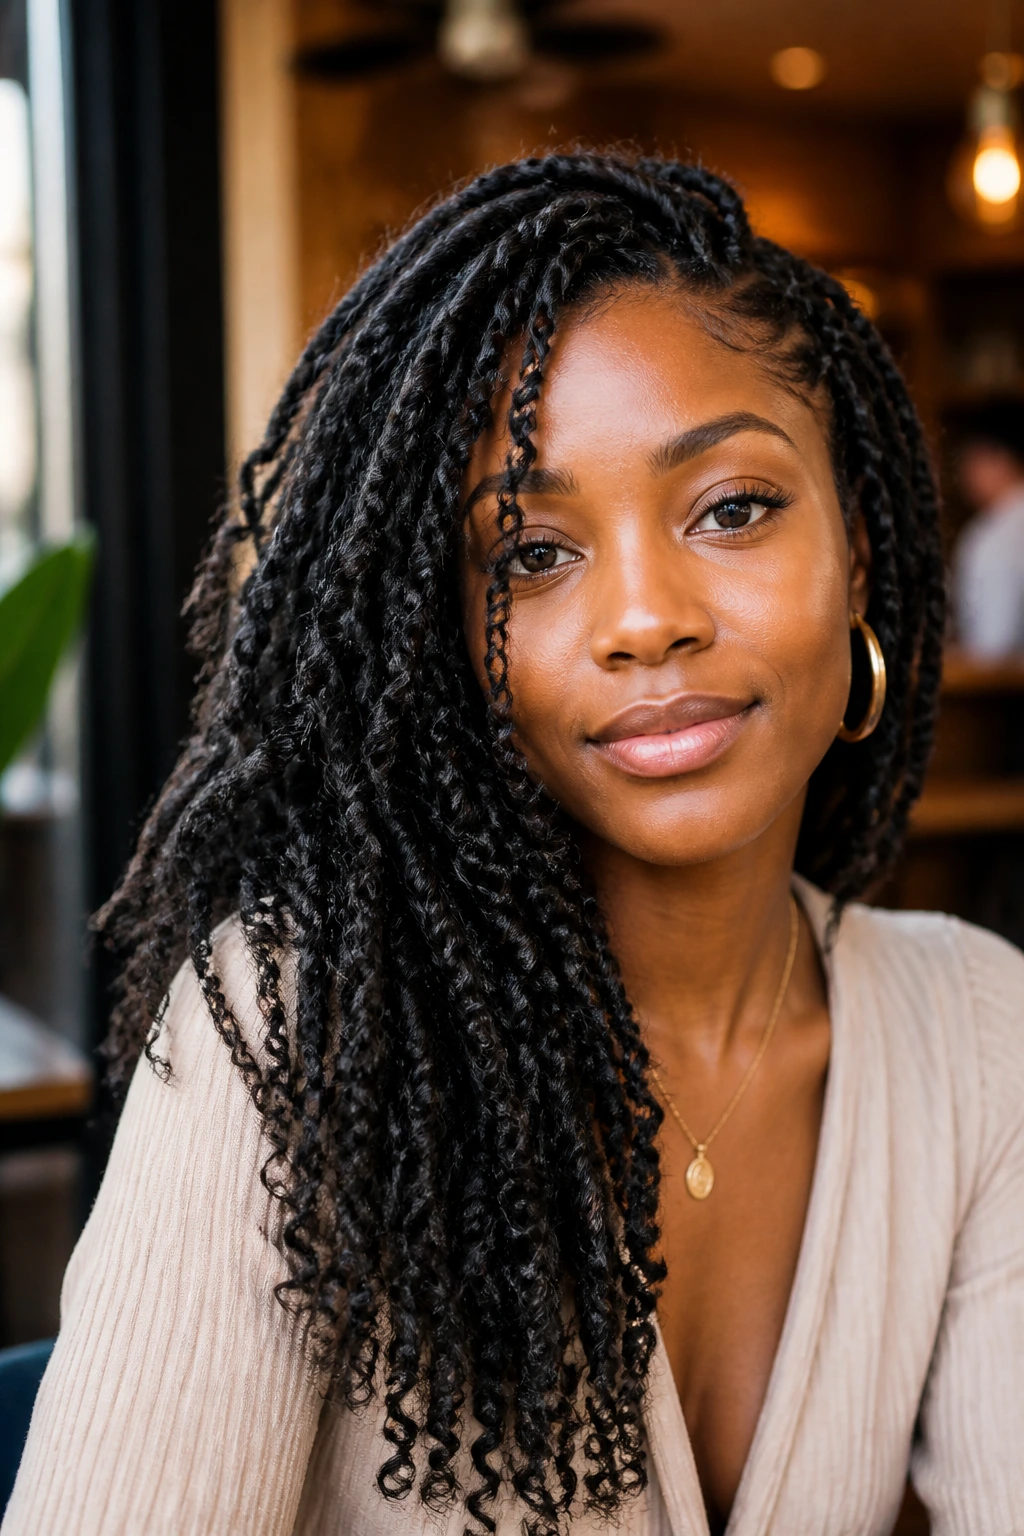
Passion-twist-inspired soft twists feel looser and fluffier than a classic twist set, which gives them a softer outline and a little swing. The texture is usually less crisp at the surface, more airy through the ends, and that makes the style read relaxed while still looking arranged.
This is the style I’d choose when the goal is polished, not severe. The hair moves. The strands separate a bit at the tips. And the whole set has that slightly undone finish that keeps it from looking too formal.
If you use extension hair for this look, choose textured hair with a bit of bend rather than anything too silky. The wrong extension makes the style look slippery and fake fast. The right one gives the twists a softer, lived-in surface.
It’s a good option if you like touchable hair and don’t mind a little frizz at the end of the week. That softness is part of the charm.
17. Tapered Twist TWA
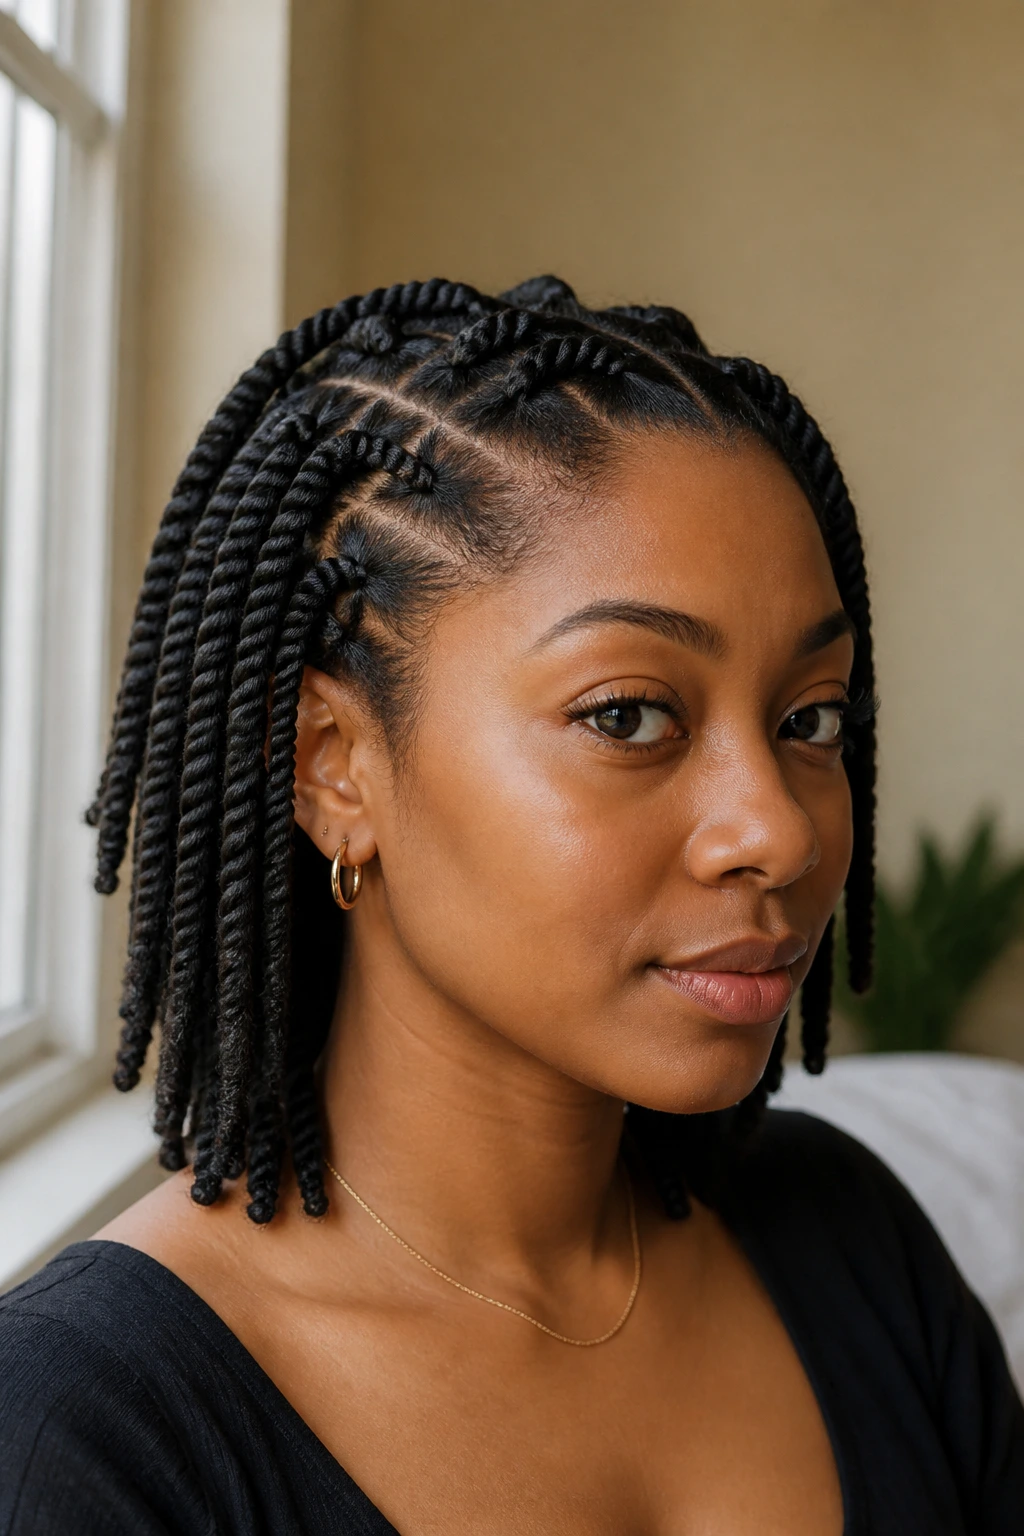
A tapered twist TWA works best when the haircut already has shape at the sides and back. The twists follow that shape instead of fighting it, which is why this style can look so sharp on short natural hair. The crown often gets a little more length, while the perimeter stays tight and neat.
Short hair changes the game. There’s less room for sloppy parting, and product overload shows up faster. That said, the payoff is excellent: the scalp pattern is visible, the twists look crisp, and the silhouette stays close to the head in a clean way.
Keep the sections tiny enough to hold, but not so tiny that the ends unravel before they set. A light leave-in, a bit of styling cream, and a small amount of gel at the very edge is usually enough.
This is one of the few styles where the natural shape of the cut matters as much as the twist pattern itself.
18. Triangle-Part Twists
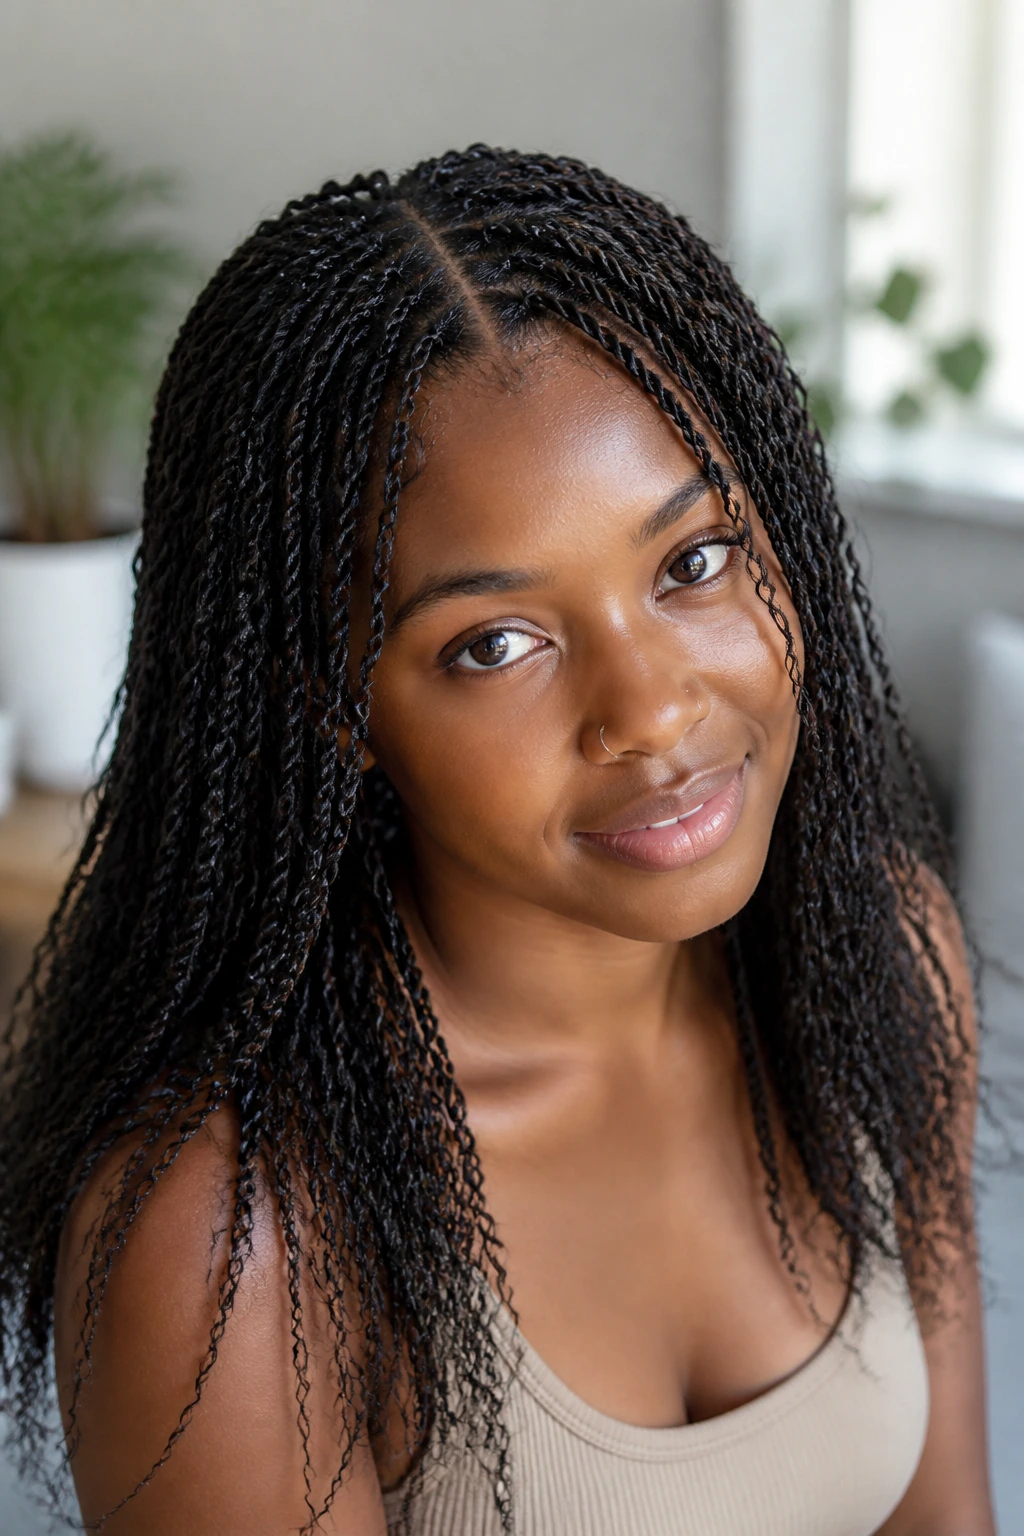
Triangle-part twists are a small change that makes a big visual difference. Instead of straight squares, the parts open into tiny triangles that create a more angular, fashion-forward grid. The style still reads neat, but it has a sharper line to it.
I like this variation because it keeps a classic twist set from looking too routine. The part pattern becomes part of the design, and people notice it even if they can’t explain why. It’s a subtle way to add interest without reaching for color, beads, or a big accessory.
The triangle shape is easiest to see when the hair is stretched and the sections are parted cleanly with the tip of a rat-tail comb. If the parts are fuzzy, the effect disappears. That’s the catch. The parting has to be deliberate enough to show the geometry.
Use this one when you want the whole style to feel a little more tailored.
19. Twists with Beads and Cuffs
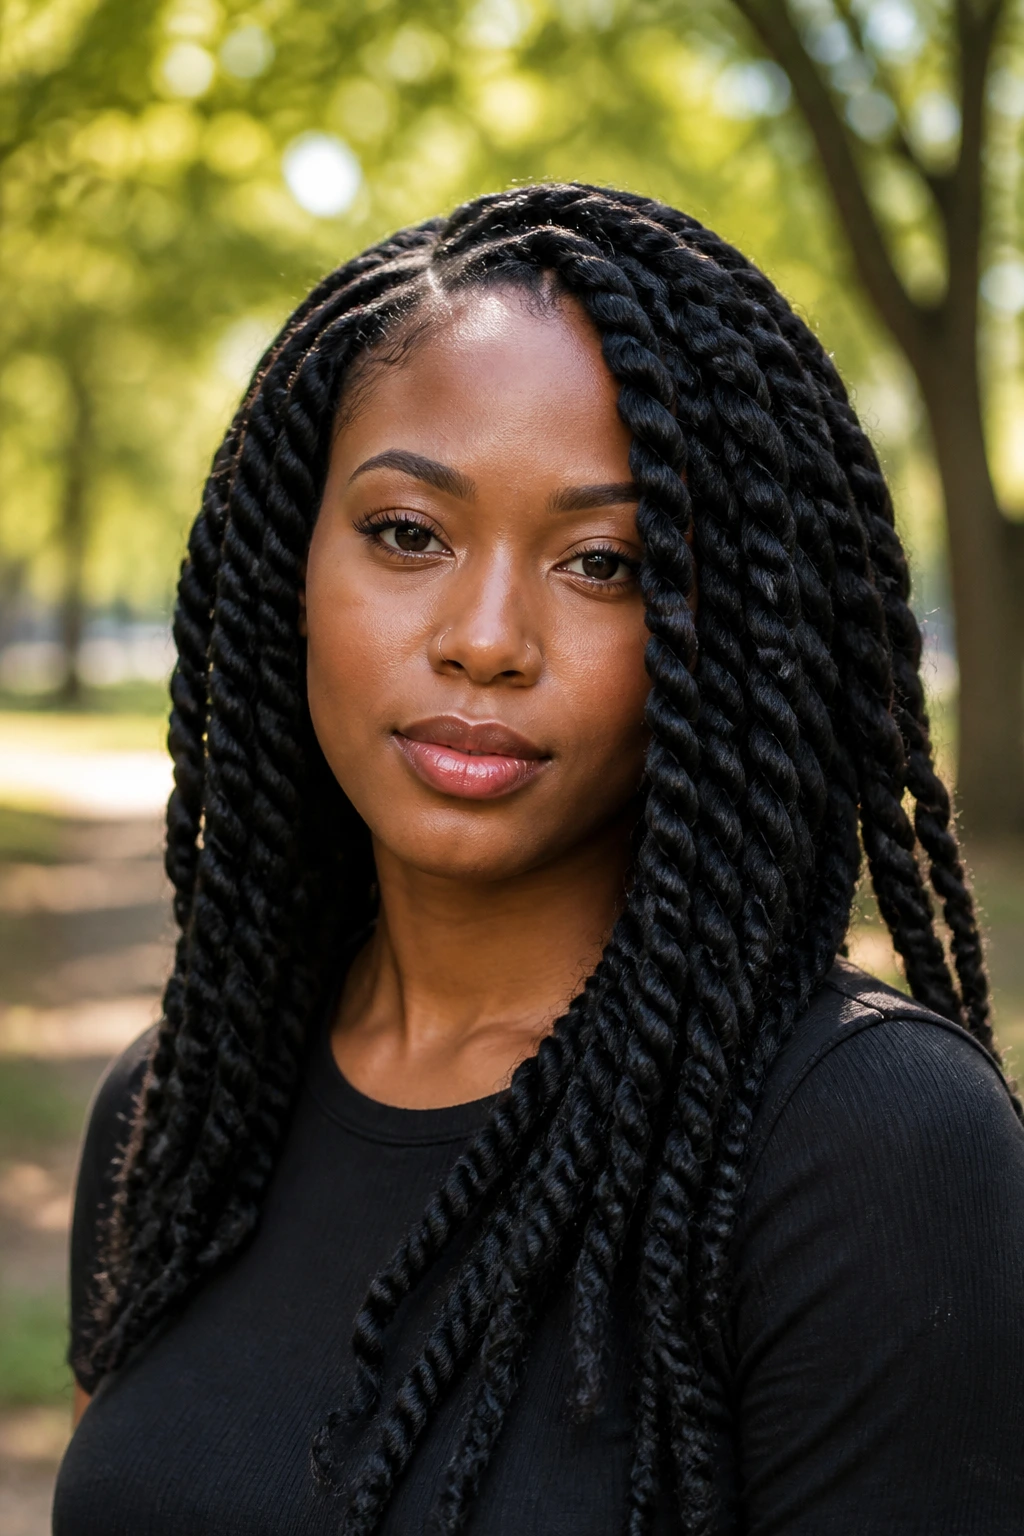
Twists with beads and cuffs are the easiest proof that a small detail can change the whole mood. The twists themselves might be simple, but one row of cuffs or a few beads at the ends turns the style from plain to finished.
The key is restraint. Too many accessories can crowd the look and make the style sound louder than it needs to be. A few metal cuffs on front sections, or beads concentrated on the ends of the lower rows, gives enough shine without making the hair feel weighed down.
Beads work especially well on medium-length or shorter twists where the ends are visible. Cuffs are lighter and better if you like to move quickly or if you don’t want extra clacking at the shoulders. Either way, they should look placed, not scattered.
This is a solid option for anyone who wants the style to feel a little more personal without changing the twist pattern itself.
20. Two-Tone Twists
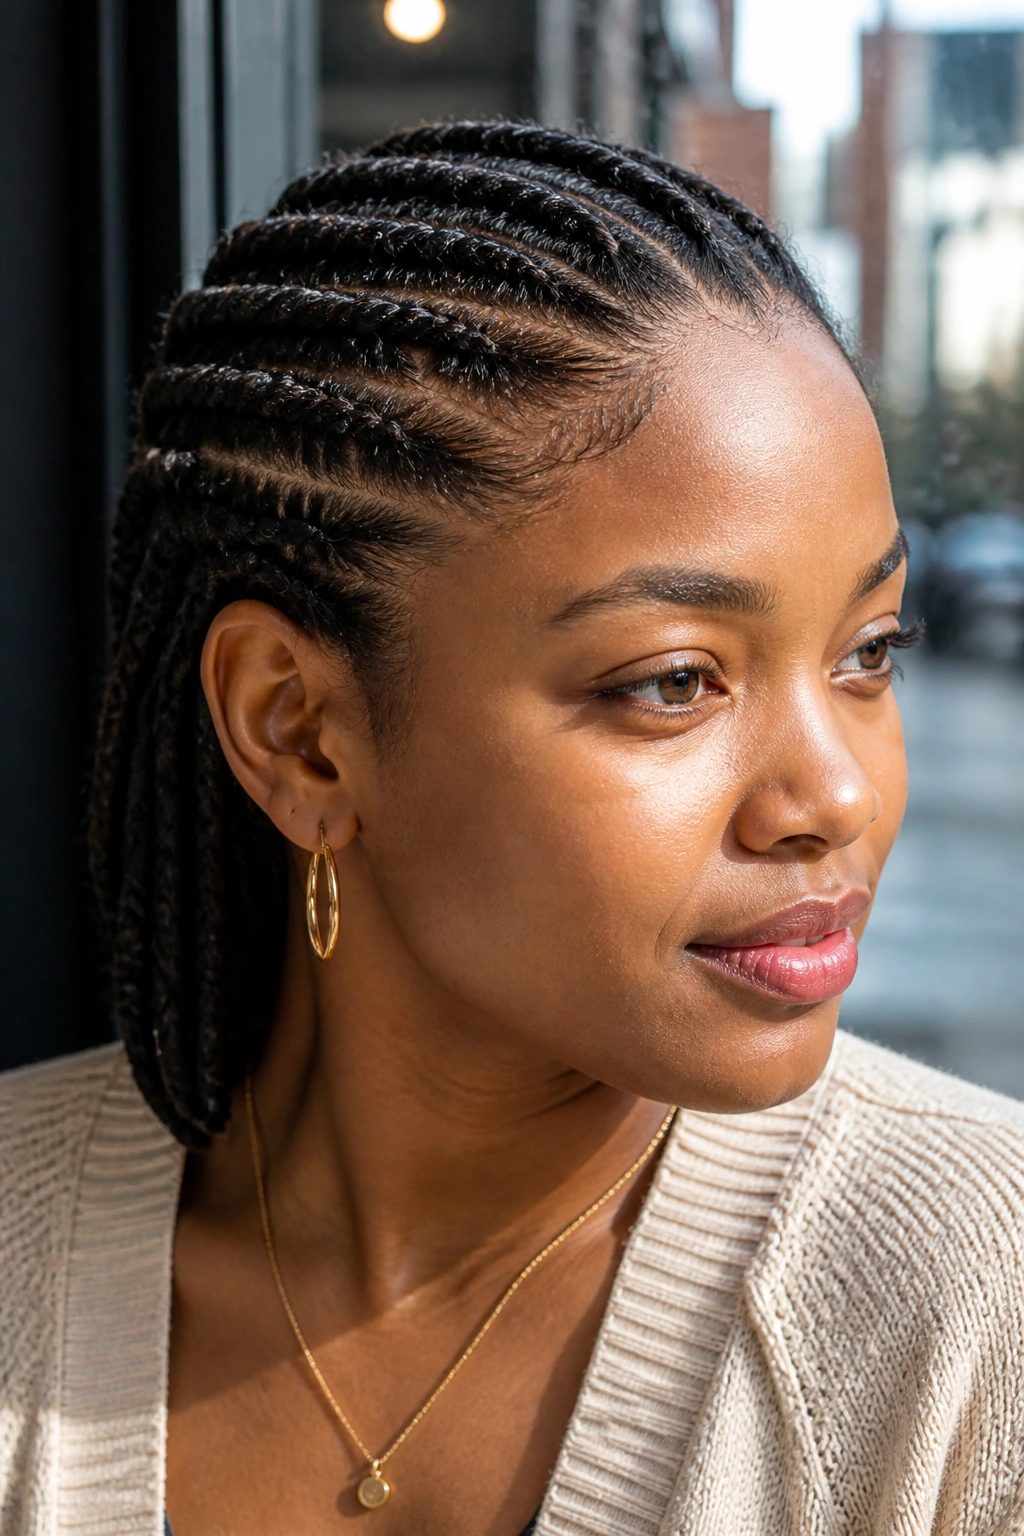
Two-tone twists are for people who want color without committing to full dye on their own hair. You can mix extension shades, blend a darker root into a lighter length, or add a soft accent color through just the outer rows. Done well, the result looks dimensional, not loud.
The trick is to keep the color change believable. A harsh jump from black to blonde on every row can look busy fast. A softer fade, a warm brown through caramel, or even a copper tone tucked under the top layers usually reads cleaner.
This style does a lot of work for the eye, so the parting and tension need to stay simple. If the twist pattern is already busy, the color has nowhere to land. Let the shade be the point.
I like two-tone twists when the outfit is plain and the hair gets to carry a little more of the look.
21. Twisted Space Buns
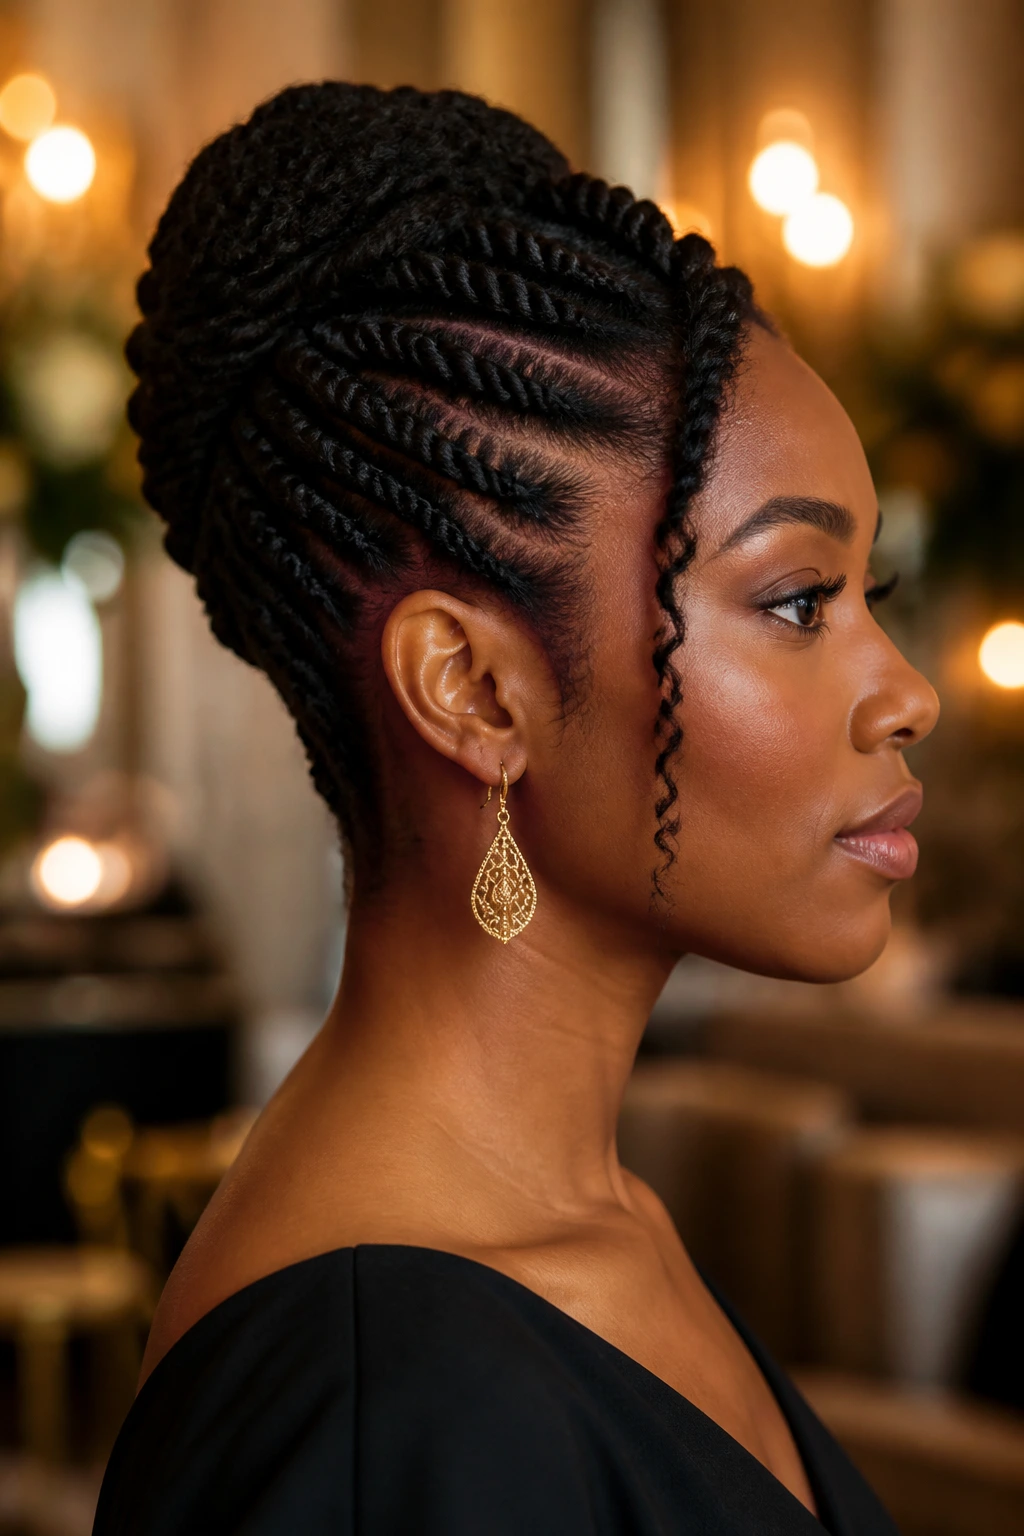
Twisted space buns have a playful shape, but they can still look polished if the parts are clean and the buns sit evenly on both sides. The twists are gathered into two high sections, wrapped or tucked into compact buns, and left with enough symmetry to feel intentional.
The best versions keep the buns a little smaller than people expect. Huge buns can tip the style into costume territory. Smaller, tighter buns keep the head shape neat and let the twists show at the base.
This is one of the better styles for active days because the hair is fully up and out of the way, but it still has enough texture to look styled. If you want a softer finish, leave a thin row of twists loose around the face. If you want it crisp, pull the front back clean and anchor the buns with pins instead of bulky elastics.
It’s a cheerful look, but not a sloppy one. That’s the difference.
22. Scalp-Hugging Micro Twists
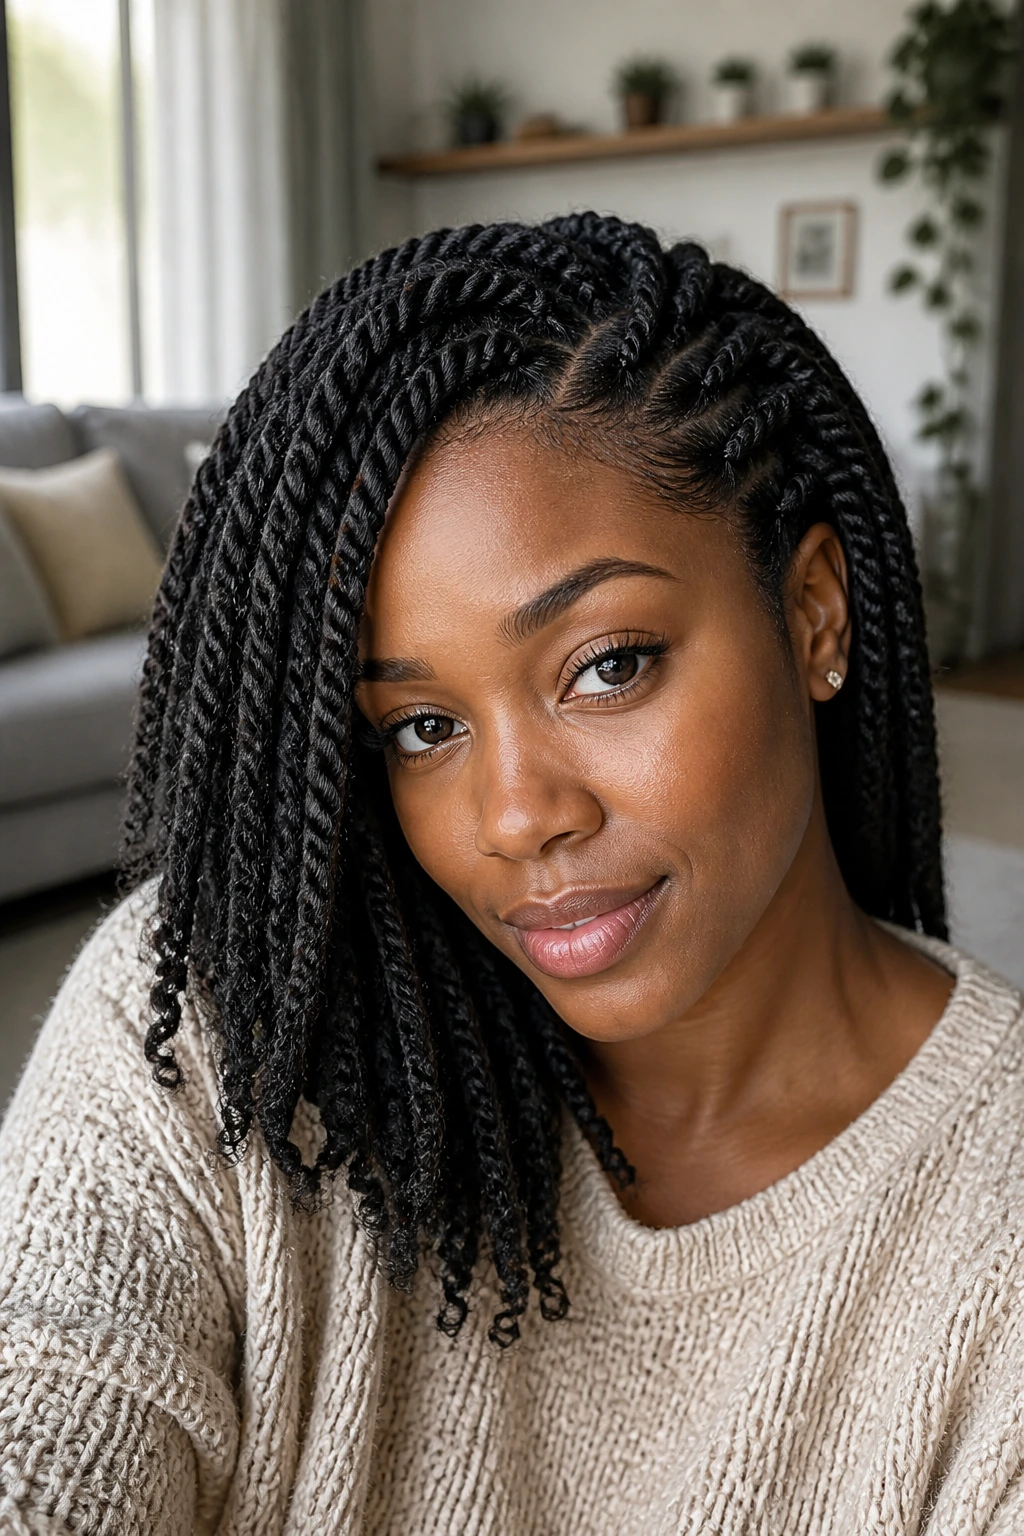
Scalp-hugging micro twists are the most detailed option in the group, and they reward patience. The sections are tiny, the rows lie close to the scalp, and the finished style can look like a fine woven pattern from a few steps away. Up close, it’s all about clean parting and even tension.
They take time. A lot of it. But they also stay neat for longer than larger twists because each section moves less and frizzes more slowly. If you like a style that can go a little longer between full resets, this is the one to study.
The danger is tension. Tiny sections can tempt people into pulling harder than they should just to keep the parts crisp. Don’t do that. A micro twist should sit securely, not feel like a little anchor at the root.
When they’re done right, they have a very calm, refined look. Not flashy. Just exact.
Why Twist Hairstyles Read as Polished Without Looking Stiff
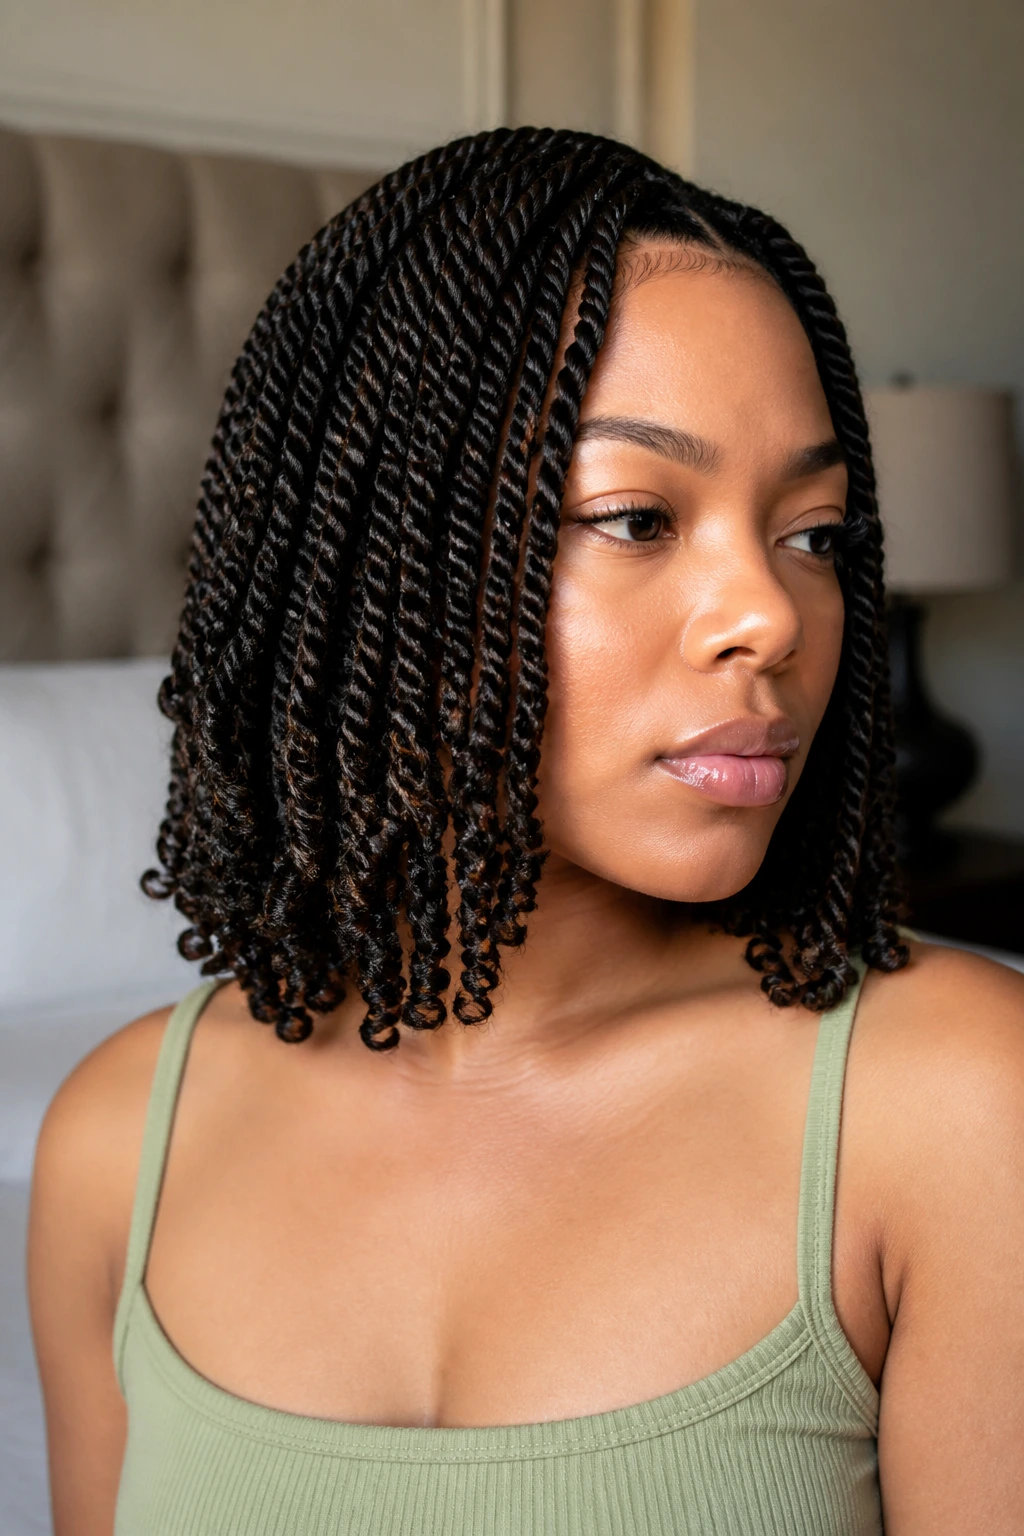
Twists work because they create structure without erasing texture. The hair stays visible, but it gets organized into rows, ropes, or crowns that make the eye settle down. That’s the difference between “done” and “overdone.” You can still see the coil pattern, the density at the root, and the slight variation from strand to strand.
Parting is a bigger deal than people admit. A clean center line, a measured side part, or a triangle grid gives the whole style its shape before the first twist is even started. When the parting is crooked or crowded, the style looks busier than it should. When it’s clean, the twists can be simple and still look sharp.
Product choice matters too. Heavy butters can make the roots look greasy and slow the set. Light cream, a slip-friendly leave-in, and a little foam at the end usually do a cleaner job. The goal is to coat the strands enough to keep them smooth, not so much that they sit sticky and dull.
And then there’s size. Small twists tend to read more detailed and last longer. Larger twists feel softer and faster to install. Both can look polished, but the mood changes fast once the sections change width.
Essential Tools for These Styles
- Rat-tail comb: The metal or fine plastic tip helps make clean parts, and the handle is useful for sectioning.
- Sectioning clips: These keep the hair out of the way so the parts don’t collapse while you work.
- Spray bottle with water: A light mist helps re-soften dry hair before twisting, especially on thick coils.
- Leave-in conditioner: Choose a slippery formula that helps the strands stay pliable without turning the roots heavy.
- Styling cream or twist butter: Use a moderate-hold cream for smoother twists; a thick butter can be too much on fine hair.
- Foam or mousse: Useful for smoothing the finished rows and reducing frizz at the surface.
- Edge brush: Keep one if you like a neater hairline finish, but go easy on the pressure.
- Hair oil or scalp oil: A light oil helps with shine and with removal later.
- Blow dryer with comb attachment, optional: Helpful if you want stretched hair before starting.
- Extension hair, optional: Use for longer styles, feed-in sets, or added fullness when you want a fuller silhouette.
Smart Product and Hair Prep Tips
The best-looking twist styles usually start before the twisting starts. Hair that has been washed, detangled, and stretched a little parts more cleanly and holds its shape better. If the strands are still knotted, the twists can look lumpy at the root and puff up faster than they should.
Product load is where people get into trouble. Use enough leave-in or cream to give slip, but not enough to leave a wet film on the hands. If your fingers feel slick after every section, you’re probably using too much. A good twist should feel smooth and lightly coated, not greasy.
For fine hair, lighter products keep the style from falling flat. For denser or coarser hair, you can use a little more cream, but even then I’d avoid thick layers of butter near the roots. That’s how you get residue, dullness, and twists that feel heavy before the day is over.
If you’re using extension hair, choose texture that matches your own hair’s surface. Too silky, and the twists look fake fast. Too rough, and the sections tangle while you work. The best extension hair blends in rather than trying to steal the scene.
How to Keep Twist Hairstyles Looking Intentional
Start with stretch if your hair shrinks hard. A quick blow-dry on low heat, banding overnight, or a gentle braid-out pattern can make the sections easier to part and twist. That one step changes the final outline more than people expect.
Keep the roots clean and the ends obedient. The root is where the polished look lives, and the ends are where the style either finishes nicely or starts to fuzz. If the ends unravel fast, seal them with a bit of mousse, a tiny dab of cream, or a rod set if the style calls for curl.
Part size: Match the size of the twist to the density of your hair and the amount of time you want the style to last. Tiny sections take longer but usually stay neat longer.
Tension: Snug is enough. If you feel a pulling sensation at the scalp, that’s too much. A style should sit securely without making your temples hurt.
Finish: A small amount of foam on the surface can calm frizz and give the twists a cleaner line, especially near the crown.
Night care: Satin scarf, satin bonnet, or a satin pillowcase. Don’t skip this one and then wonder why the style got fuzzy by day three.
Common Mistakes to Avoid
- Starting on tangled hair: The twist will puff unevenly and catch at random points. Detangle fully first, even if it takes longer than you want.
- Using too much cream: If the hair feels sticky or looks dull at the roots, the product is doing too much. Cut back and smooth with less.
- Making every section uneven: Different-sized parts create a lopsided finish that stands out in photos and under bright light. Keep the rows measured.
- Twisting too tight at the scalp: Sore roots, tiny bumps, and headaches are the warning signs. Loosen the tension and protect the hairline.
- Ignoring the ends: Loose ends unravel early and make the whole style look older than it is. Spend a few extra seconds smoothing them.
- Skipping night protection: Friction against cotton roughs up the surface fast. A satin bonnet or scarf buys you more days of neat wear.
Variations and Alternatives to Try
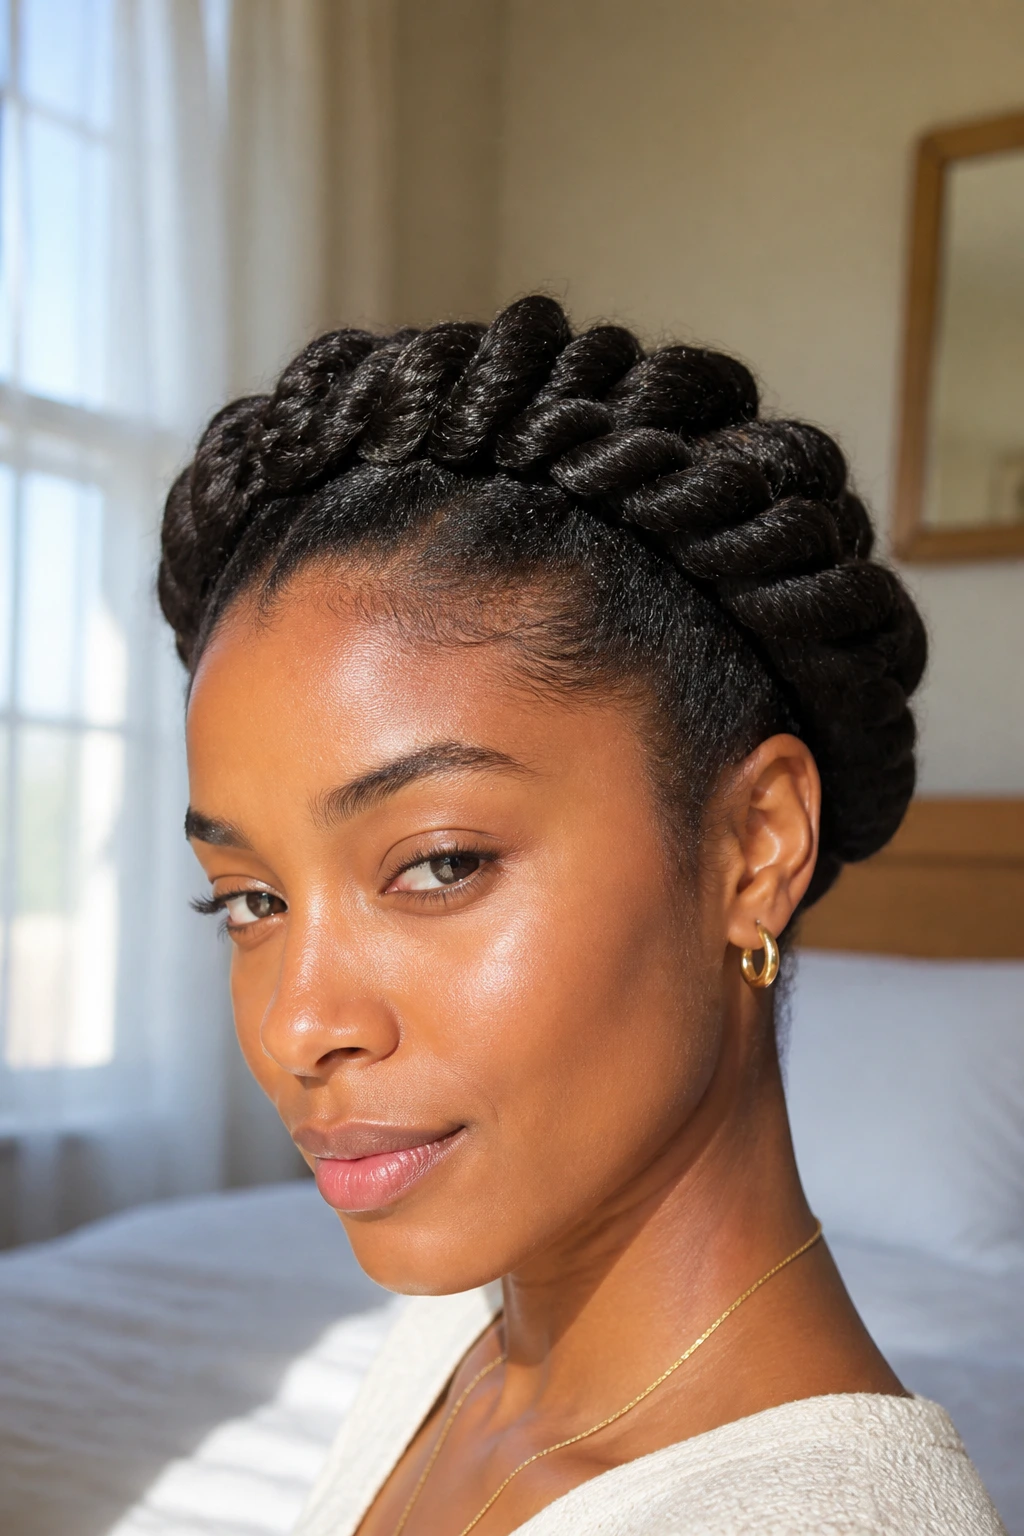
Office-Quiet Side Part: Keep the twists medium-sized, place a clean side part, and tuck the front rows behind one ear. It reads calm and neat, with enough structure to work in a formal setting.
Soft Glam Curled Ends: Set the ends on flexi rods or perm rods before unwrapping. The little bend at the bottom softens the whole style and makes it feel more dressed up.
Low-Tension Mini Grid: Use tiny parts, but keep the roots loose enough to avoid pulling. This gives you the detailed look of mini twists without the scalp strain that can come from over-tight installation.
Accessory-Lite Accent Rows: Add cuffs or a few beads to only the front or lower sections. The style stays polished, but the small bit of shine keeps it from looking plain.
Two-Tone Depth: Blend two shades of extension hair or place a lighter tone under the top layer. The contrast adds dimension while still reading as a controlled, finished style.
Night Care, Refreshing, and How Long Twists Last
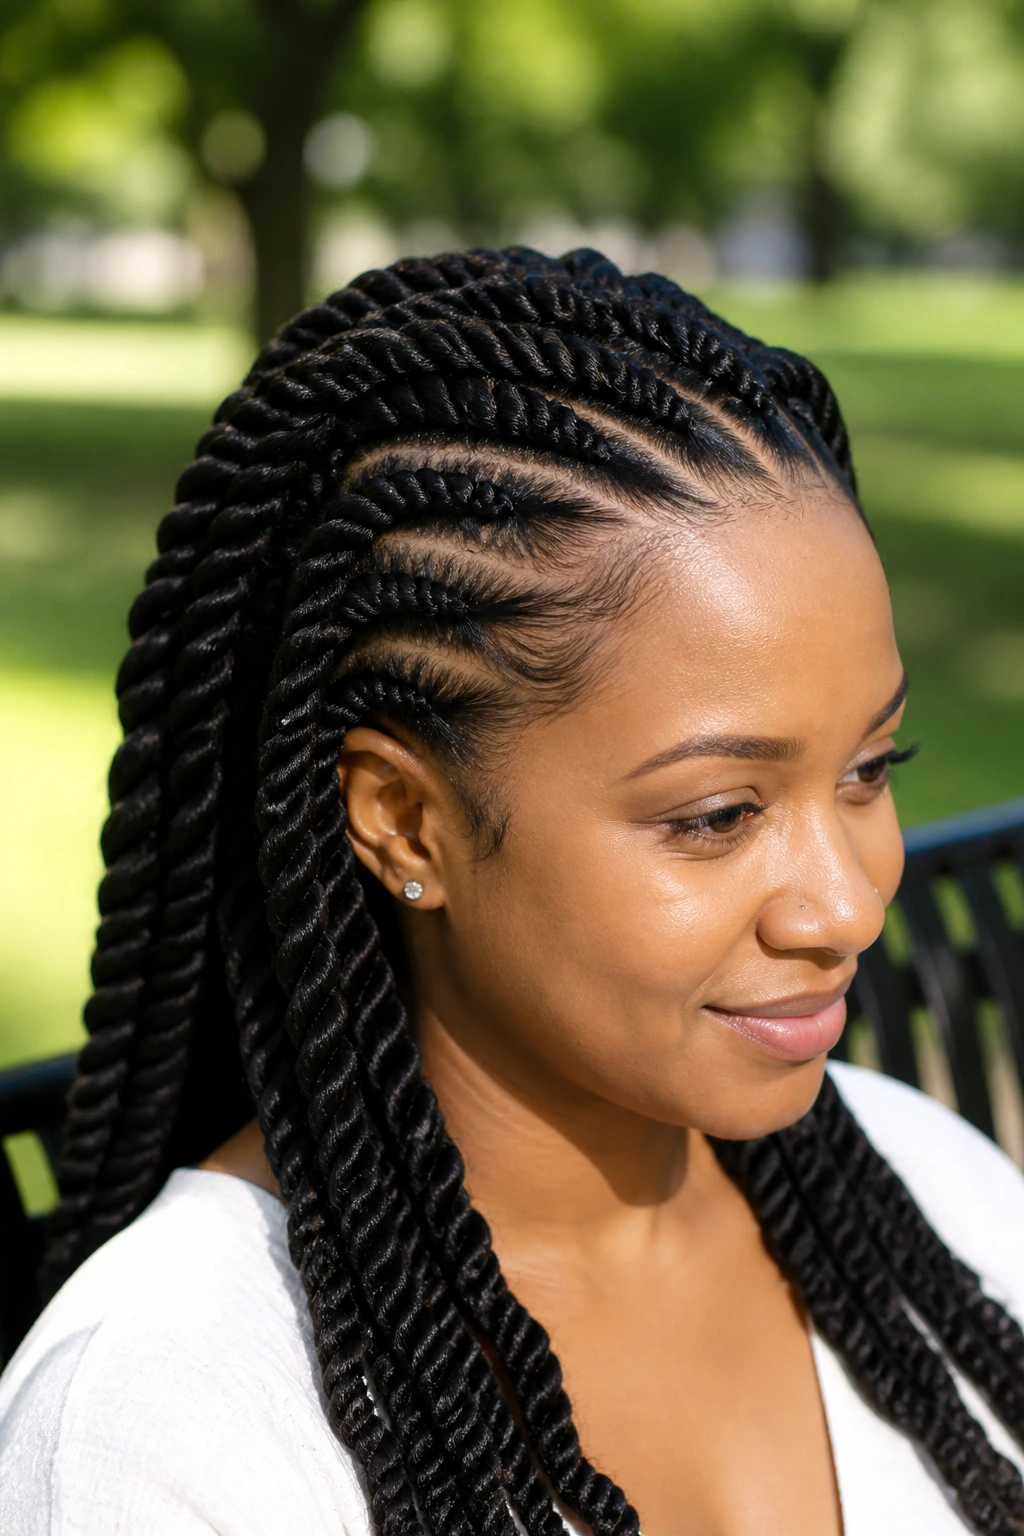
Twists hold best when they’re treated like a style, not like a free-for-all. At night, wrap them with a satin scarf or tuck them into a bonnet that fits the full head without flattening the roots too hard. If the bonnet is too small, the front rows get crushed and the style looks worn before breakfast.
How long they last depends on size and tension. Medium two-strand twists usually look fresh for about 1 to 2 weeks. Mini twists can stretch to 2 to 4 weeks if the scalp stays comfortable. Flat twists tend to stay neat for about 5 to 10 days before the root pattern softens. Extension-based styles can go longer, but only if the scalp and edges are still happy.
Refreshing is simple. Mist the lengths lightly, smooth the outer layer with a bit of foam, and separate only the sections that start to clump. Don’t keep pulling them apart every day. That’s how neat rows turn fuzzy fast.
If you plan to wash your scalp while wearing twists, use diluted shampoo or a gentle scalp cleanser and focus on the roots. Let the water run through the lengths instead of scrubbing the twists themselves. Then dry fully. Damp twists that stay wet under the surface start smelling off in a hurry, and nobody wants that.
Frequently Asked Questions
How long do twist hairstyles usually last?
Most natural-hair twist styles stay neat for about 1 to 2 weeks, while smaller mini twists can last longer. Extension sets often hold for several weeks, but the scalp and hairline should still feel comfortable, not strained.
Can I do twists on short natural hair?
Yes. A tapered TWA or a short two-strand set can look very clean on short hair, especially if the sections are small and the product is light. You may need a bit of grip at the ends so they don’t unravel early.
Should I twist damp hair or dry hair?
Slightly damp or freshly stretched hair usually parts better and accepts product more evenly. Soaking-wet hair takes forever to dry and can leave the roots puffy while the inside is still wet.
How much product is too much?
If the roots look shiny in a greasy way or your fingers feel coated after every section, you’ve used too much. Start smaller than you think, then add only where the hair needs slip.
Can I wash my scalp while wearing twists?
Yes, but keep the water moving through the scalp and don’t rough up the lengths. Use a diluted cleanser, rinse well, and let the hair dry completely so the twist pattern doesn’t go soft and frizzy.
What do I do if my twists puff up fast?
The hair may have been too dry, too tangled, or wrapped with too much tension at the root. Next time, stretch the hair first, use a lighter product layer, and protect the style at night with satin.
Are twists a protective style?
They can be, if they’re installed with low tension and maintained gently. They’re not protective if the hairline is strained, the sections are kept too tight, or the style is left in long after the roots start matting.
Which twist style is easiest for beginners?
Classic two-strand twists are the easiest place to start. The sectioning is straightforward, the shape is forgiving, and a slightly imperfect part still looks intentional once the whole head is done.
A Neater Way to Wear Your Texture
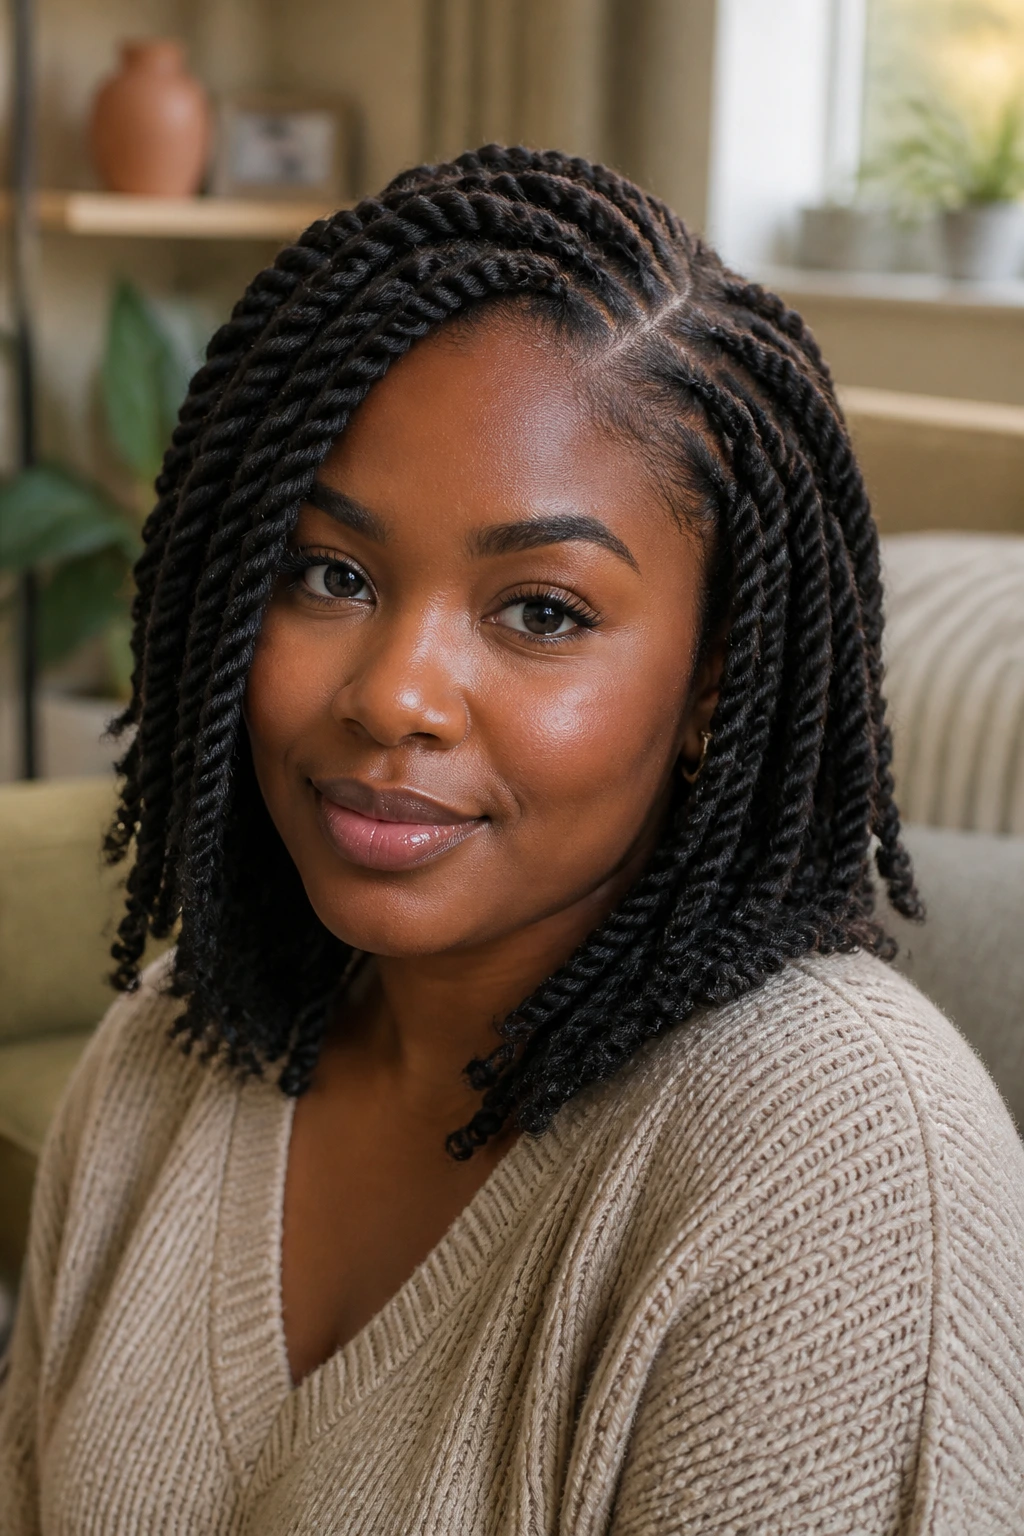
Twist styles do something a lot of hair looks try to fake: they make texture look deliberate. A few clean parts, the right amount of slip, and a shape that fits your hair’s density can turn ordinary coils into something that looks finished from the root to the ends.
The best part is how flexible they are. You can keep the look plain and tidy, or you can add curls, beads, a bun, a halo, or a side part and change the whole mood without starting over. That’s the appeal. The structure stays the same, but the finish can shift from everyday to dressed up with almost no drama.
If you want a polished natural look that still feels like your own hair, twists are one of the smartest places to start.
