



Afro puff hairstyles can look like a quick throw-on style from across the room, then suddenly reveal a whole lot of thought when you get closer: the crisp part, the stretch at the crown, the way the puff sits high enough to frame the face without swallowing it. That’s the charm. A good puff is never “just a puff.” It’s shape control, moisture management, and a little bit of judgment about how much tension your edges can handle before they start sending complaints.
What I like about afro puffs on natural hair is how they respect the hair’s texture instead of fighting it. You can work with shrinkage, stretch it, split it into two, dress it up with braids or a scarf, or keep it bare and soft. And unlike styles that need a whole evening, a steady hand, and a backup plan, puffs reward clean parting, a little product discipline, and bands that do not feel like a tiny fist around your head.
The trick is knowing which puff shape fits your hair density, curl pattern, and mood. Some versions need a slicked base and a firm hold. Others look better with softness at the roots and a fluffy finish. The styles below lean into all of that, from high and sculpted to low and relaxed, so you can pick the version that works with the hair you actually have on your head.
Why Afro Puff Hairstyles Keep Working on Natural Hair
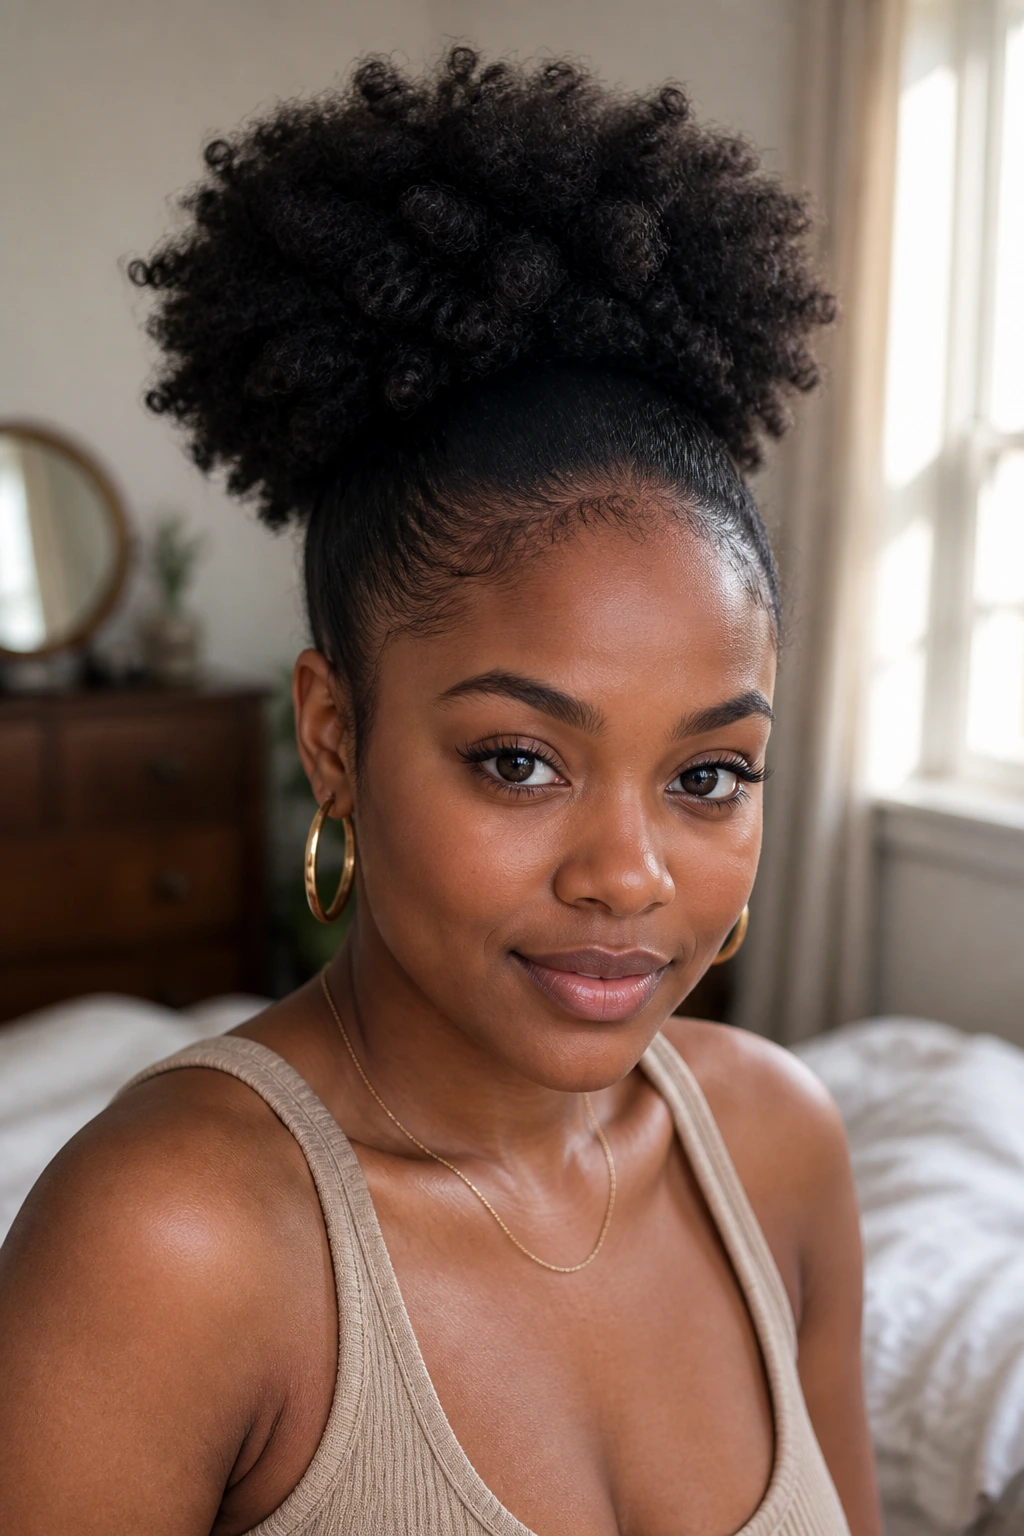
- They work with shrinkage instead of fighting it: Coily hair can spring up and shrink fast, and puffs turn that into shape rather than a problem.
- They’re fast without looking careless: A neat part, a moisturized base, and a clean puff shape can look polished in under 20 minutes.
- They protect the ends: When the ends are gathered and tucked, you’re not leaving them rubbing against collars, zippers, or dry air all day.
- They can be adjusted for tension: A high puff, low puff, or split puff lets you choose where the pull sits, which matters if your scalp is tender.
- They dress up or down easily: Add a scarf, braid a front section, or keep it bare and soft; the same puff can read playful or sharp.
- They suit a wide spread of textures: From loose curls to tight coils, the shape can be scaled up, stretched out, or kept compact.
1. High Cloud Puff
A high cloud puff sits at the crown and gives you that lifted, airy silhouette people notice first. It’s the kind of puff that looks especially good when the hair is stretched just enough to show fullness, not so much that it turns stiff. The root is usually smoothed with gel or cream, then gathered high with a snag-free band so the puff can fan out above the forehead.
Why it works: The high placement makes the face look more open, and it lets dense natural hair show off volume without dragging at the nape. If your hair is thick, this is one of the easiest ways to make it look intentional instead of accidentally big. A satin scrunchie or spiral tie helps avoid a hard dent.
Best for: Oval, round, and heart-shaped faces. Keep the base sleek if you want a sharper finish; leave a little softness around the hairline if you want a gentler one.
2. Low Puff at the Nape
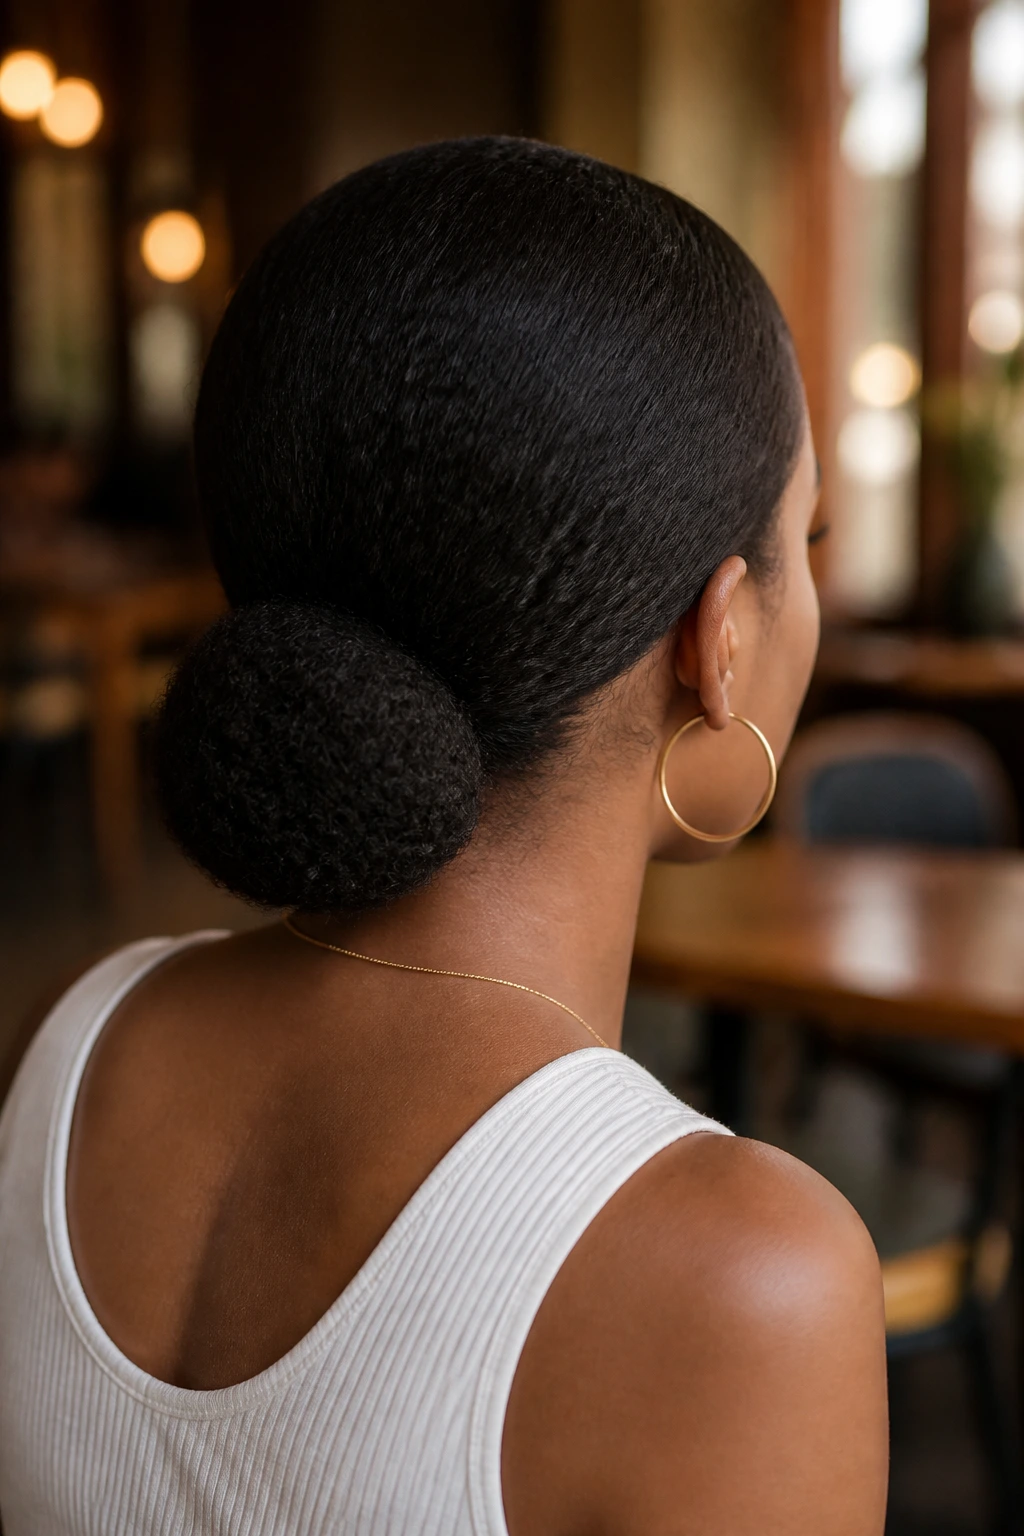
A low puff at the nape has a calmer, more grounded feel. It sits close to the neck, which makes it a smart choice when you want your hair out of your way but you do not want the height of a top puff. It’s also a little kinder on edges because the tension can be spread lower and looser.
The key is smoothness at the sides. If the roots around your ears puff up too much, the style can lose its clean line and start to look unfinished. I like this one with a cream that gives slip, then a light gel on the perimeter only. No need to shellac the whole head.
Best for: Workdays, humid weather, and anyone whose scalp gets tired of high styles. It pairs well with earrings because the puff leaves the ears visible.
3. Side Puff Sweep
Side puffs have more personality than people expect. Shift the gather point off-center, let the puff fall over one shoulder, and you get a shape that feels softer and less symmetrical than the standard center puff. It’s a useful style when you want movement without a lot of extra steps.
A side puff works best when the parting is clean enough to justify the off-balance shape. If the part looks fuzzy, the whole style can feel accidental. Keep the front smooth and let the puff do the talking. One strong hairpin near the base can help the puff stay anchored where you put it.
Why I like it: It gives 4C and 4B hair a little swing. The hair still reads as natural and full, but the angle changes the whole mood.
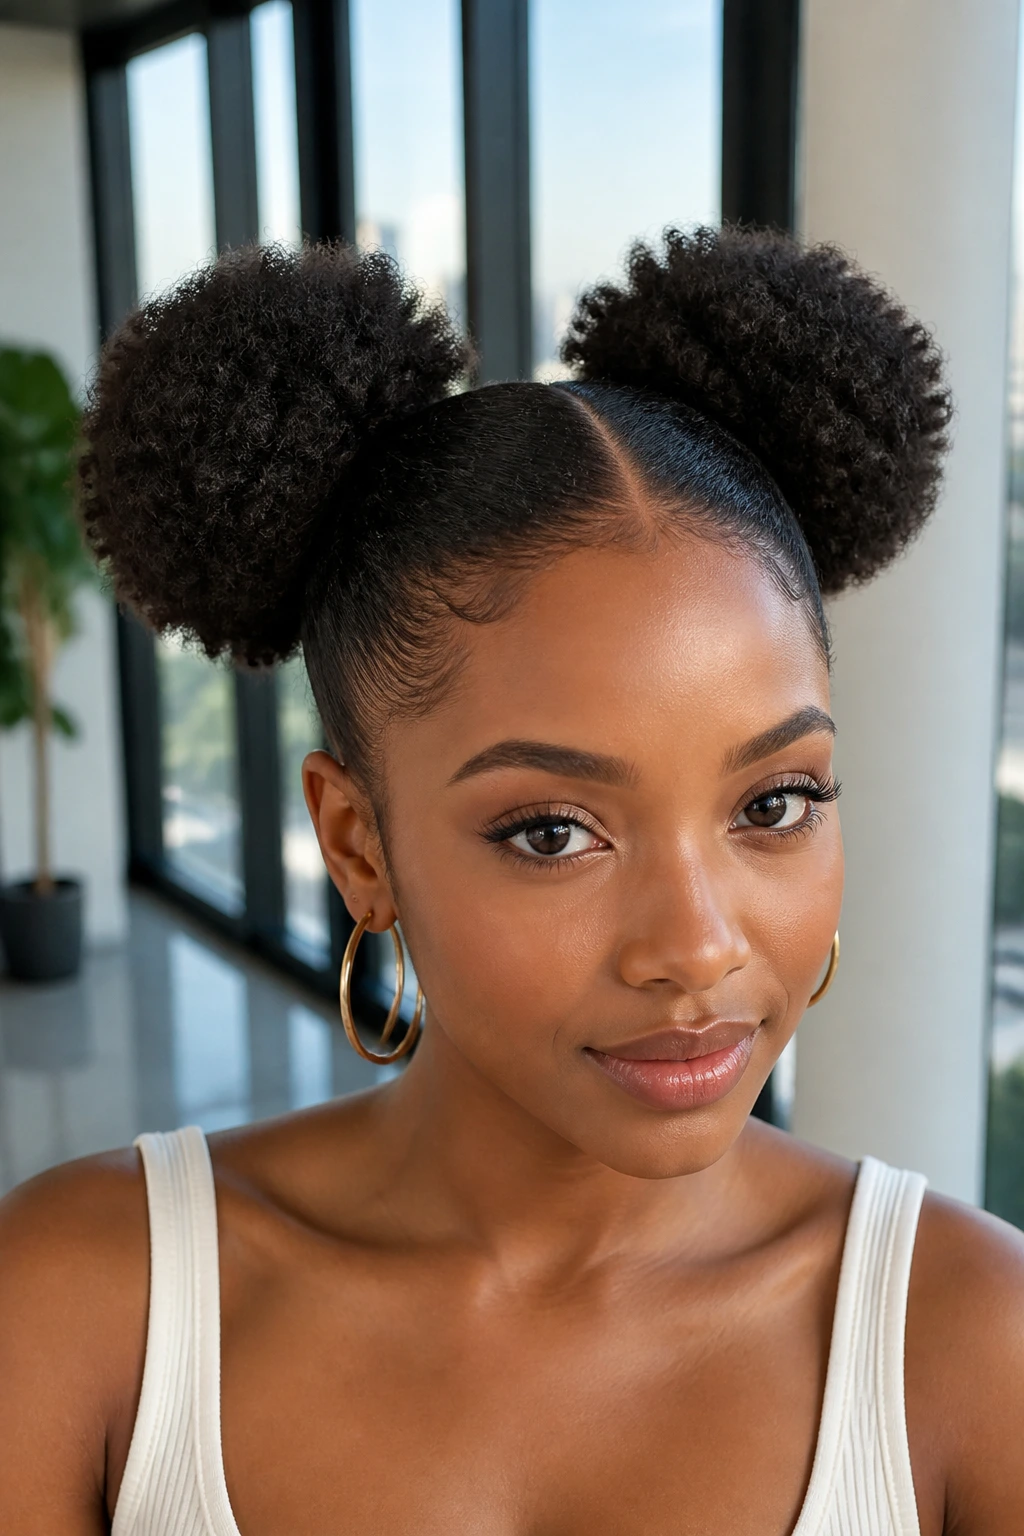
4. Double Puff Pairs
Two puffs split down the middle are playful, but they are not childish if you keep the parts clean and the puffs even. The style works best when each side has enough hair to hold shape without collapsing into two little fuzz balls. On dense natural hair, that’s usually not a problem.
The middle part is the whole style, frankly. Spend time on it. A tail comb, a mirror, and a steady hand matter more here than any product. Once the sections are clean, you can slick the roots lightly and gather each puff high or low depending on the look you want.
How to wear it: Tight and symmetrical reads crisp. Looser and slightly uneven reads more relaxed. Both can work, but they do not say the same thing.
5. Sleek Center-Part Puff
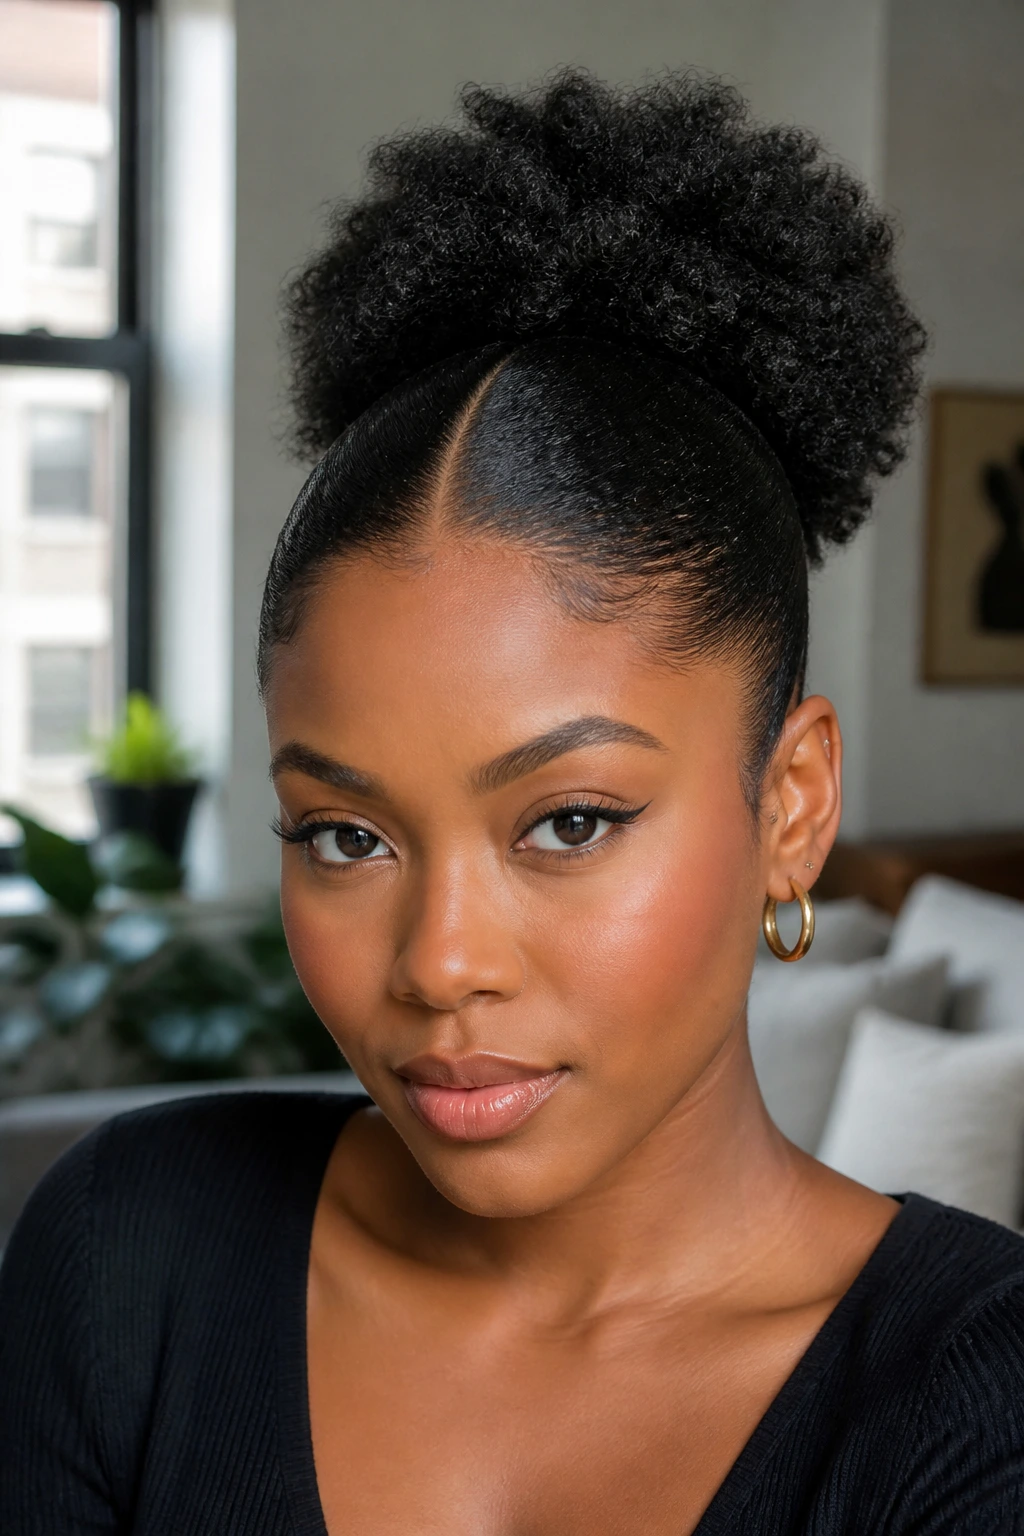
This one is the grown-up cousin of the standard puff. The center part gives structure, and the puff itself keeps the style from looking too rigid. It’s a nice middle ground if you want your hair neat at the front but still big and soft at the back.
The part line should be straight enough to notice, but not so sharp that it looks pasted on. Then smooth the sides back with a brush and a little gel, gather the puff, and stop before it becomes helmet-like. The best version has a visible line and a soft, fluffy puff with movement.
A center-part puff looks especially good when your hair has a bit of stretch. Freshly moisturized, yes. Wet, no. Wet roots will shrink unevenly and make the puff sit lower than you wanted.
6. Deep Side-Part Puff
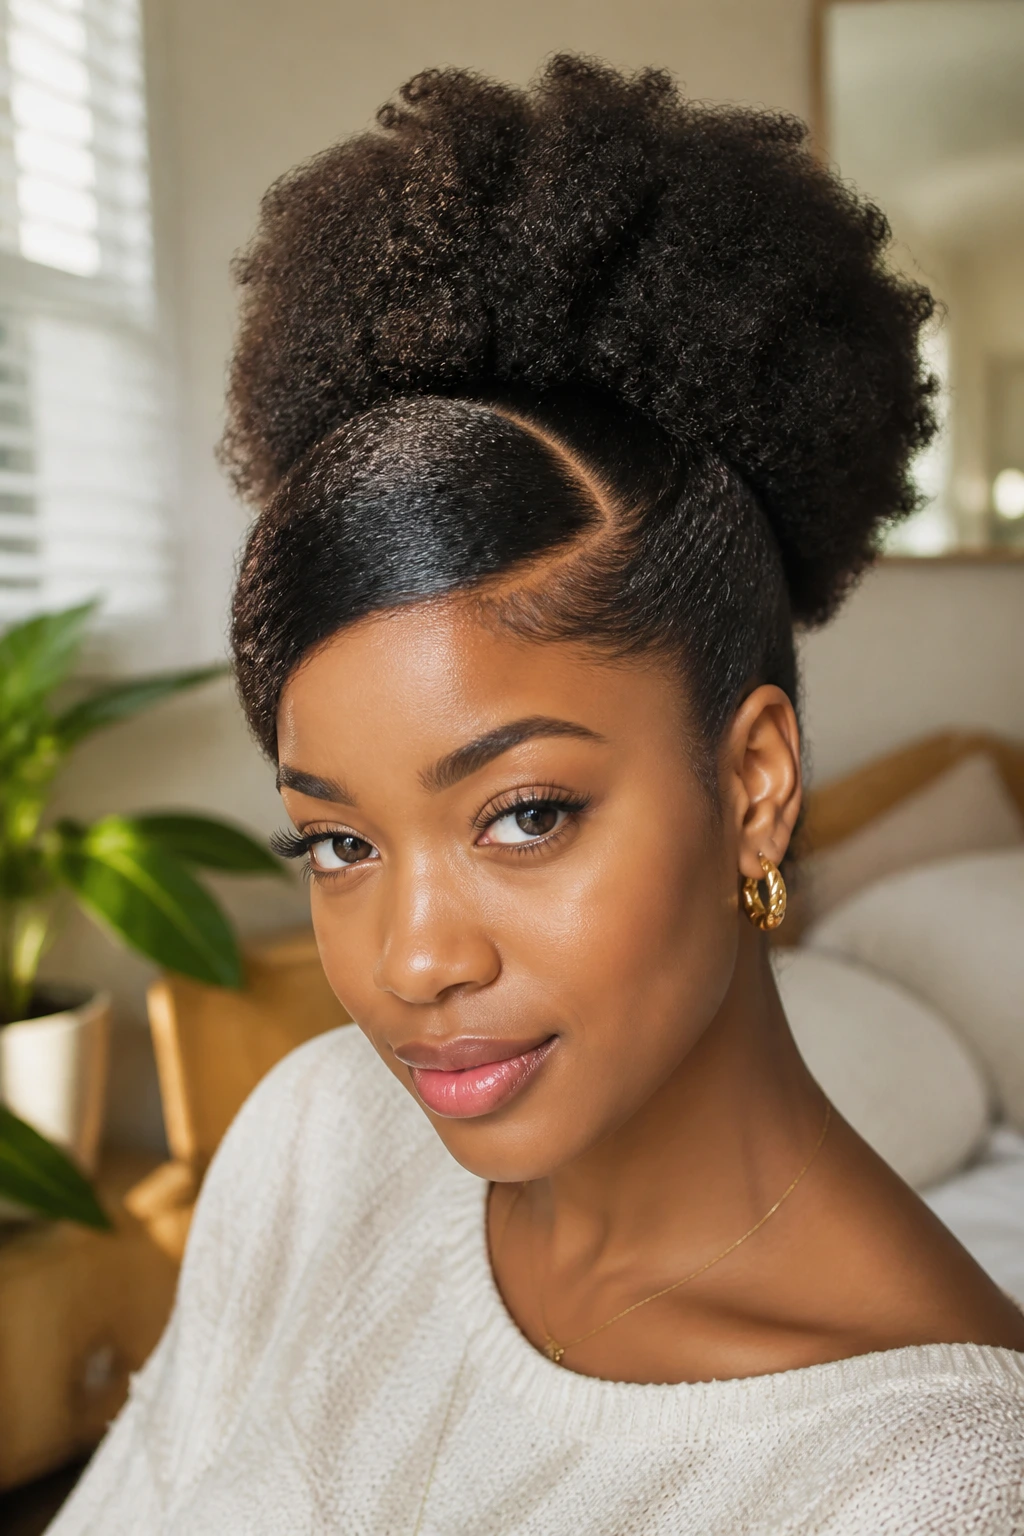
A deep side-part puff shifts the weight of the hairstyle and gives the front a little drama. It’s a simple change, but it changes how the puff frames your face. One side gets a cleaner, more sculpted look, while the other side can stay slightly fuller and softer.
This is one of my favorite choices for natural hair that has a lot of volume at the roots. A deep side part keeps the puff from ballooning in every direction. It gives the style a direction, which matters more than people think. Hair looks “done” when it knows where it’s going.
If your hairline is uneven or you have one side that flattens more easily, the deep part can help balance that out. It’s useful, practical, and less fussy than it sounds.
7. Pineapple Puff
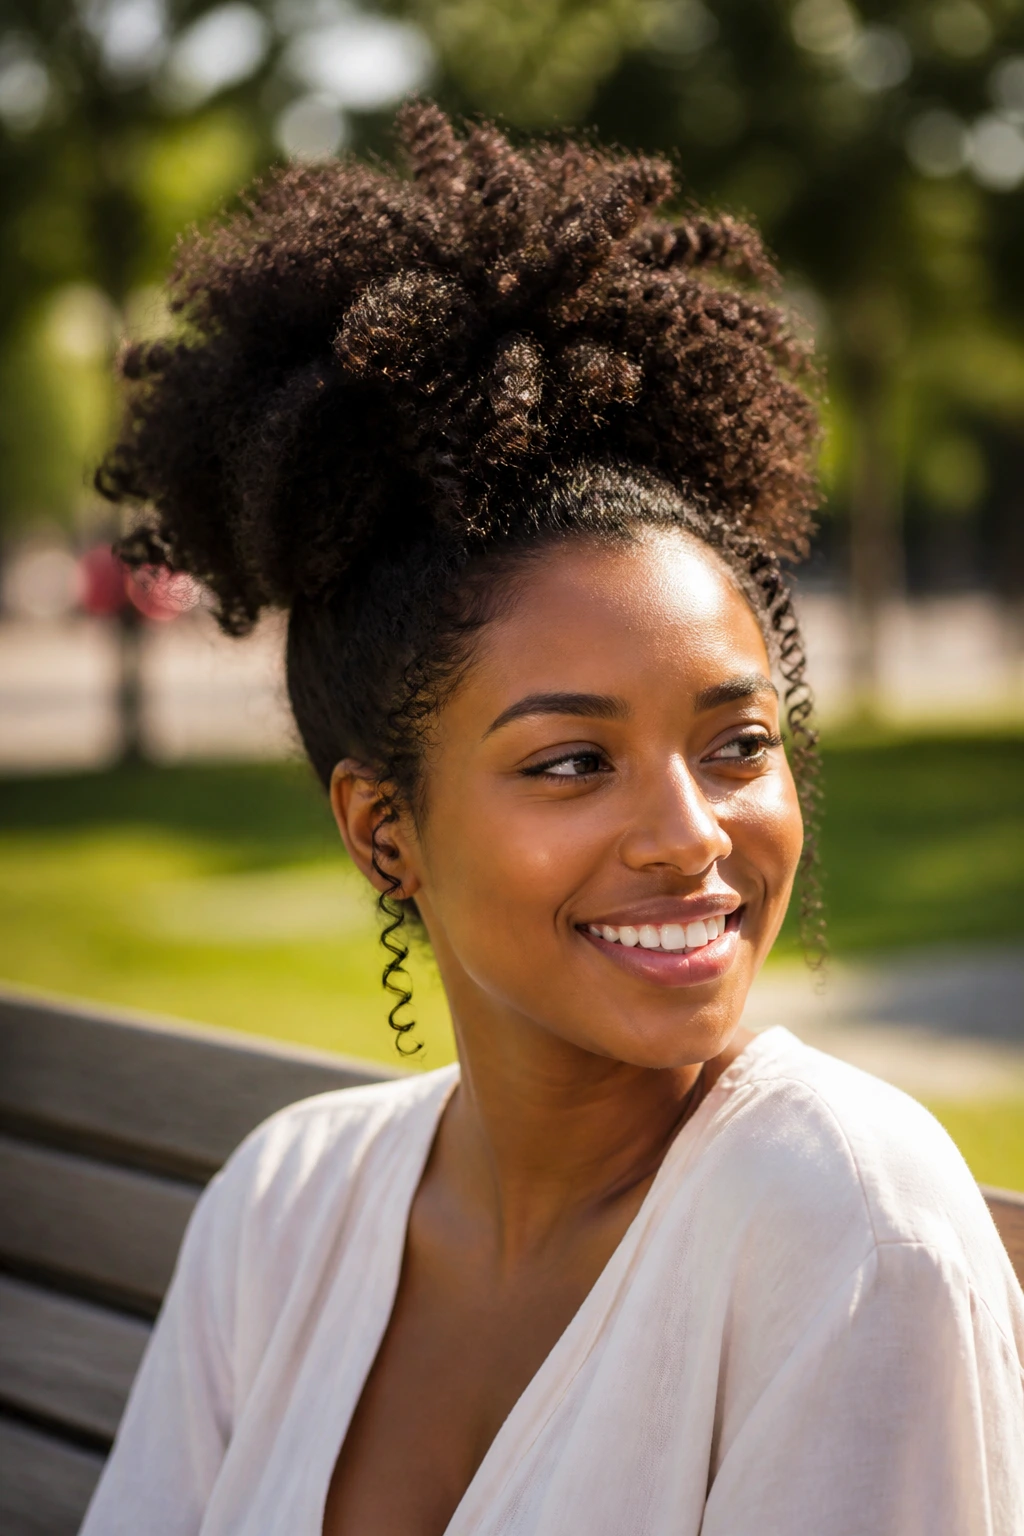
The pineapple puff takes the same lifted energy as a pineapple sleep style and turns it into a daytime look. Hair gathers high and loose, with the curls and coils spilling outward instead of being slicked flat. It’s especially good on stretched curls because the texture can flare out without looking frizzy in a bad way.
What makes this one different is the softness. You are not trying to smooth every strand into obedience. Let some edges stay fluffy. Let the puff feel airier. The shape should look like it was made by hair with opinions.
Tip: A satin or satin-lined scrunchie is better than a tight elastic here. You want support, not a crease that looks angry by lunchtime.
8. Braided Crown Puff
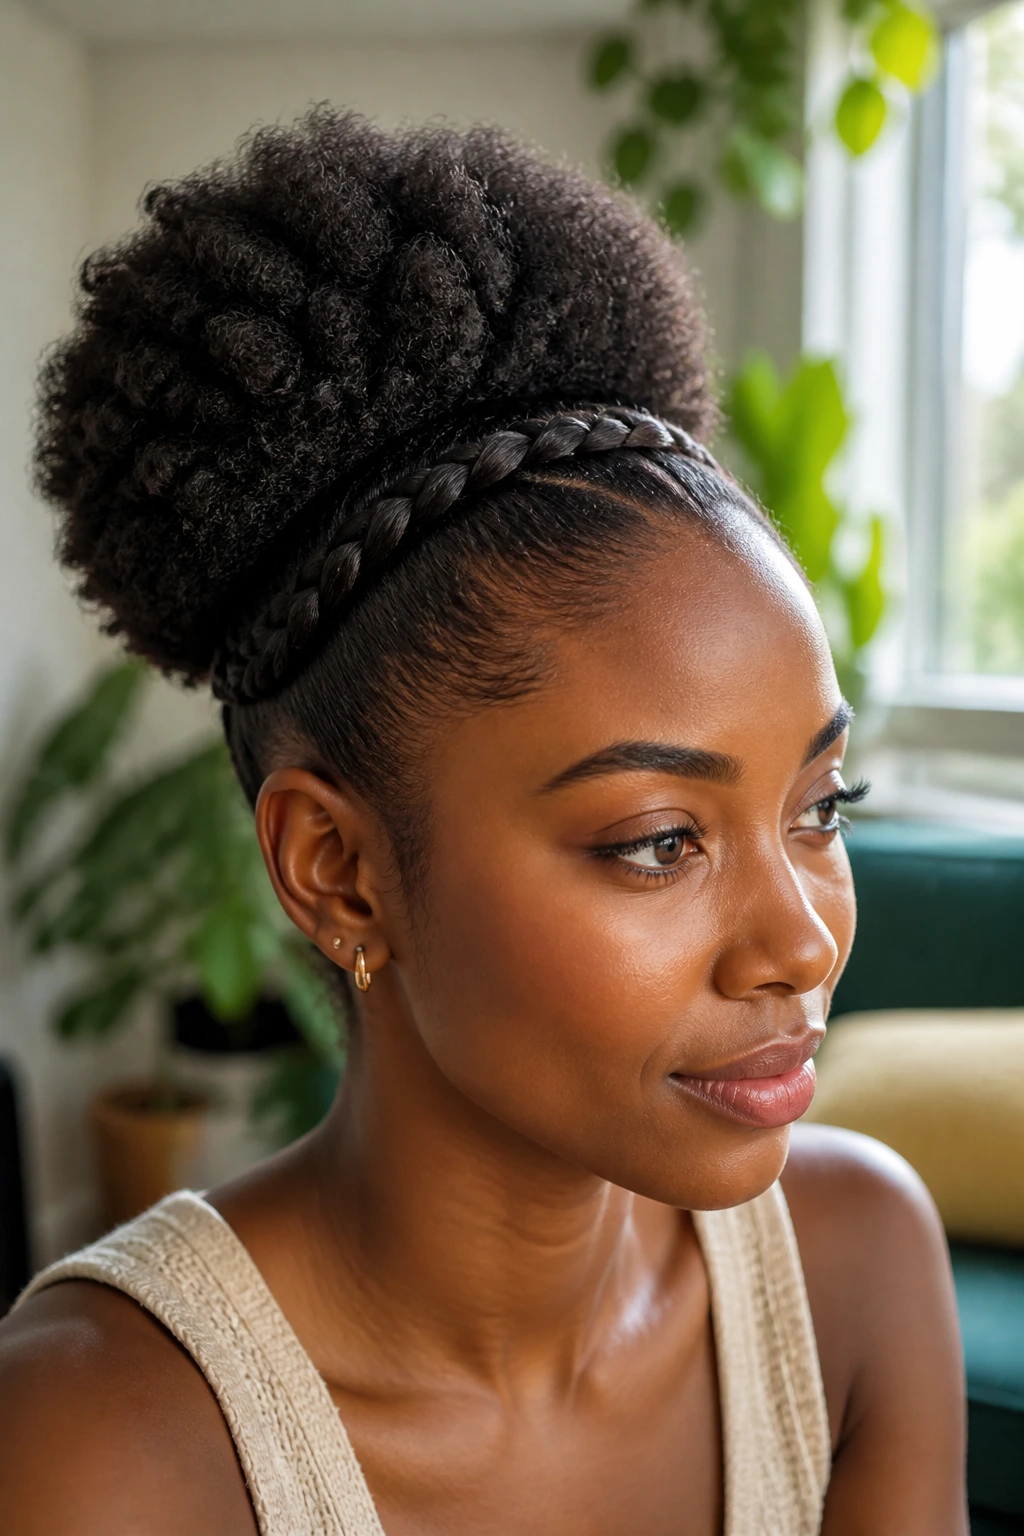
A braided crown puff frames the head with one or two braids across the front before the rest of the hair is gathered into a puff. That braid detail is small, but it changes the whole read of the style. Suddenly the puff feels deliberate, almost styled with a little ceremony.
This is a smart option when the front of your hair needs a bit more control. Instead of fighting flyaways all day, you braid them back once and let them stay put. The puff at the back can be full and soft, which balances the tighter front.
It also works well if you like accessories. A tiny gold cuff or two placed in the braid gives you enough decoration without crowding the rest of the look.
9. Flat-Twist Front Puff
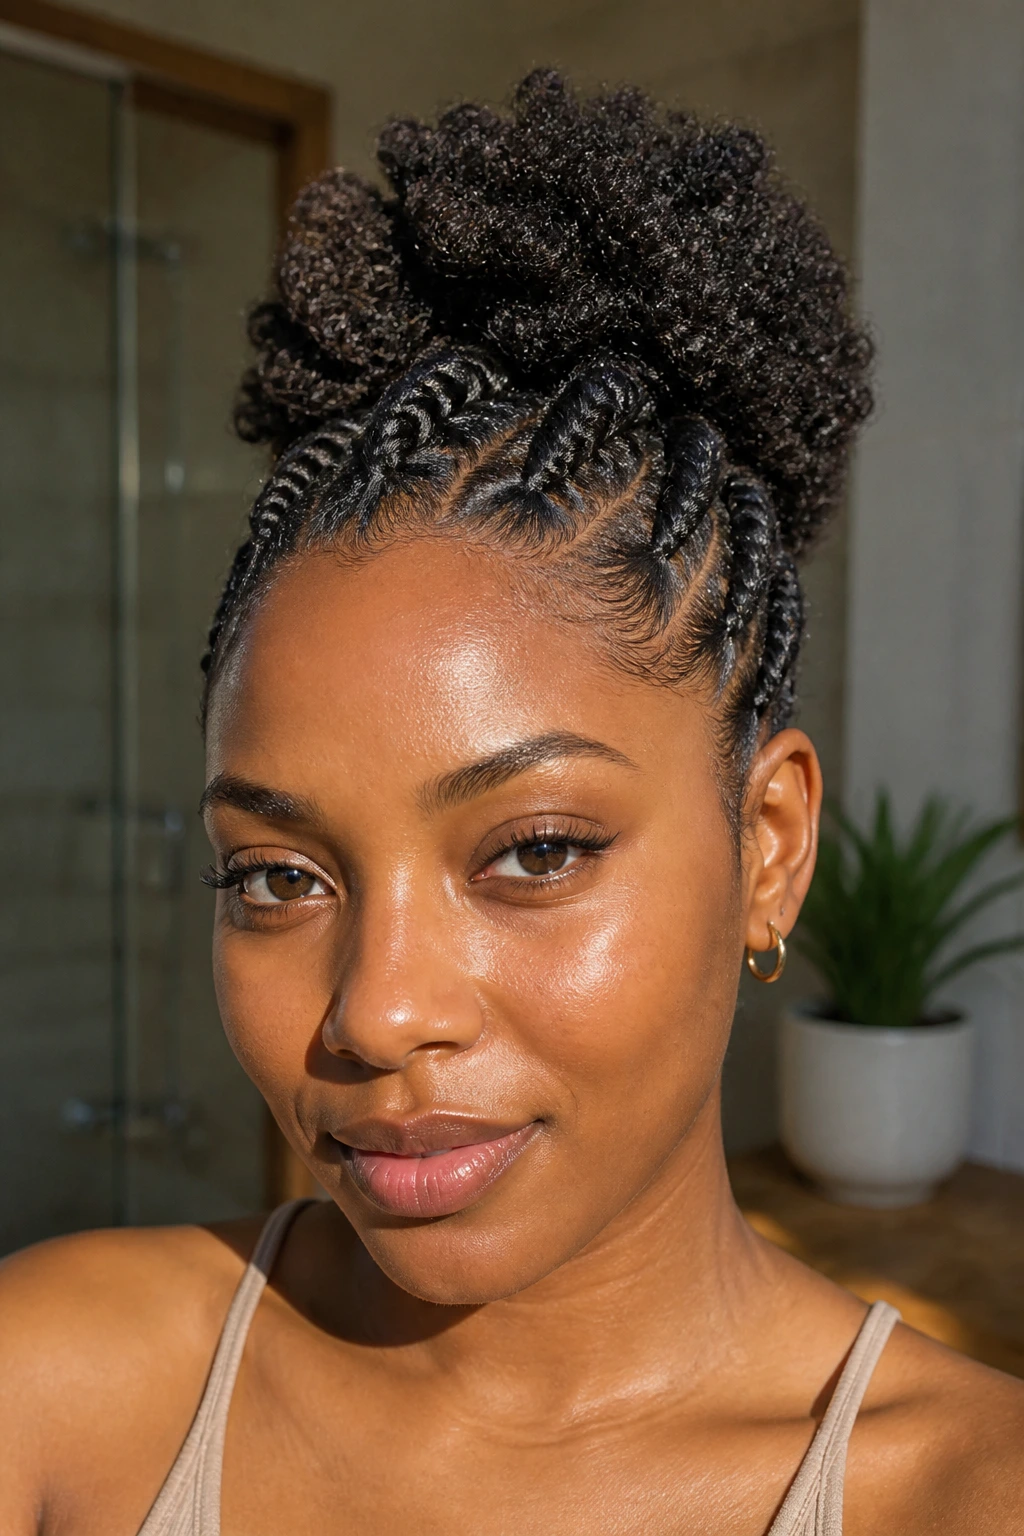
Flat twists in the front give you texture and direction before the puff starts. I like this version when the roots need protection or when the front of the hair is a little drier than the rest. The twists create lines that make the puff behind them look even fuller.
You do not need the twists to be tiny. In fact, medium flat twists usually hold better and look cleaner from a distance. Gather the ends toward the puff base, and keep the back loose enough to keep that round shape. If the twists are too tight, the whole style can pull hard on the scalp.
The nice thing here is flexibility. A couple of flat twists can be practical, but they also add enough visual structure to make the puff feel dressed up.
10. Cornrow-Front Puff
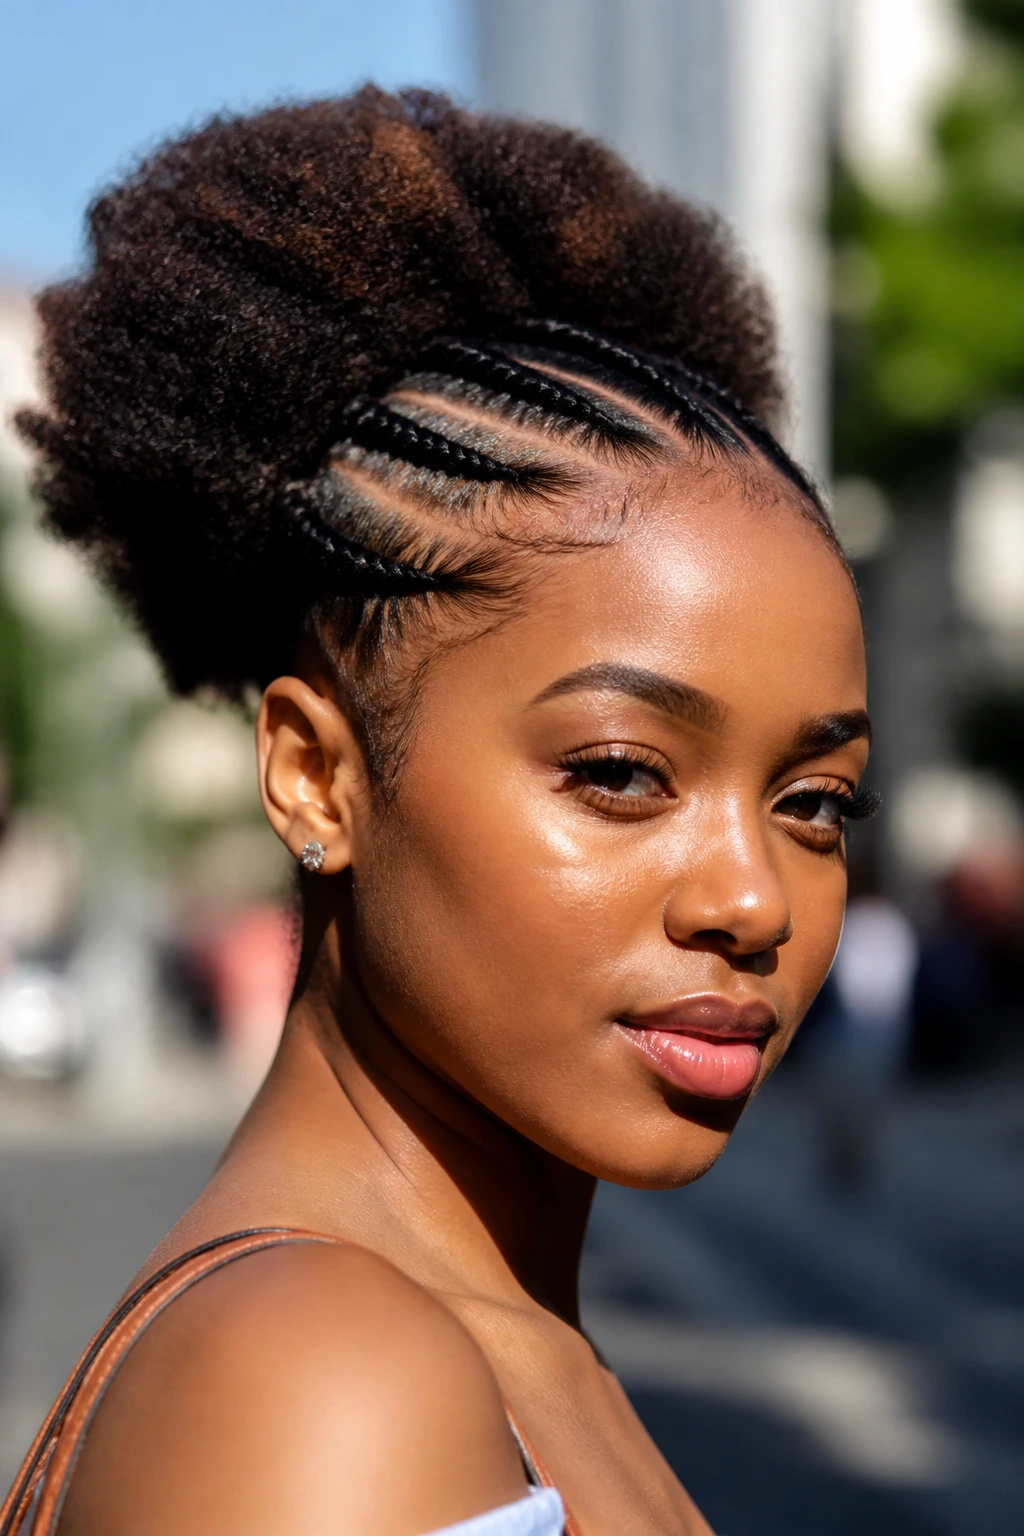
Cornrows at the hairline give the puff a more athletic, defined edge. The front stays neat, the puff stays soft, and the contrast does a lot of the work. This is the style I’d pick when I want the hair away from the face but still want the puff to be the main event.
The rows don’t need to cover the whole head. Two to four clean cornrows at the front are enough to anchor the style. Keep the tension gentle at the scalp; if the braids sting when you move your head, they’re too tight. That pain is not a badge of honor.
This one loves shine. A little sheen on the cornrows and a fluffy puff behind them gives the style a crisp front and a lived-in body.
11. Tapered-Sides Puff
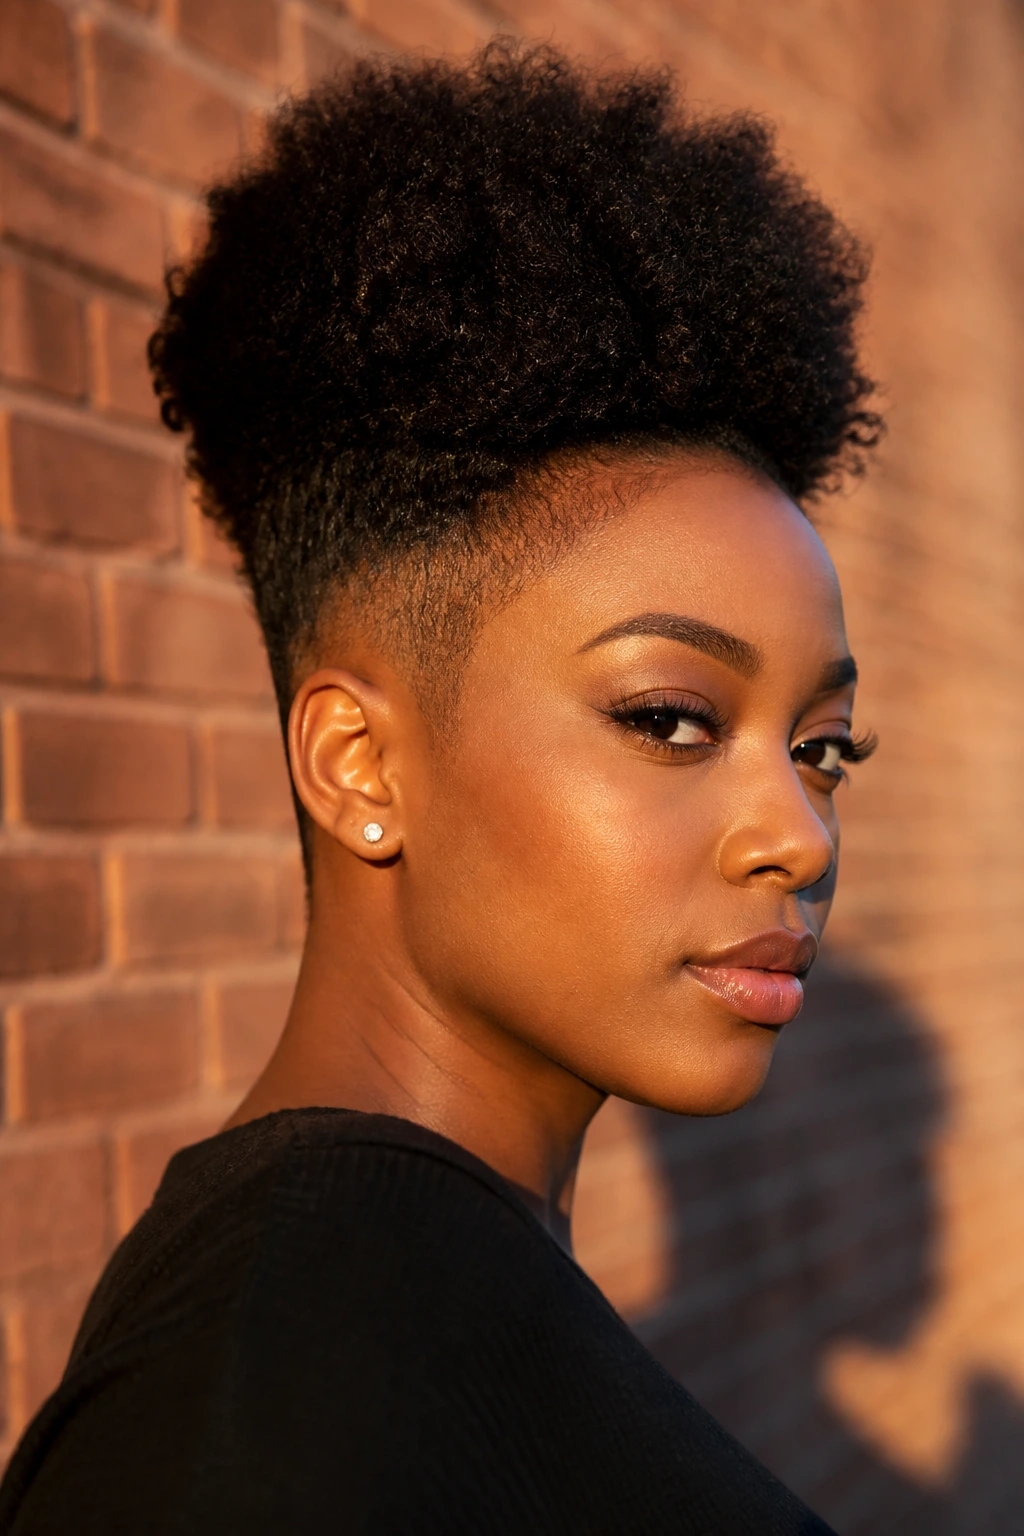
A tapered-sides puff is a smart choice for hair that’s cut shorter around the ears or back and fuller on top. The shape naturally guides the eye upward, and it keeps the style from feeling bulky around the sides. If your haircut already has tapered edges, this puff can look almost tailored.
The thing to watch is proportion. Because the sides are shorter, the puff needs enough body at the top to balance them. Don’t underbuild the crown. Stretch the top a bit, gather it securely, and let the volume sit where the taper can support it.
It’s a strong option for people who want low maintenance with a sharp outline. The haircut does some of the styling for you. Nice when hair is cooperating. Rare, but welcome.
12. Puff with Curly Bangs
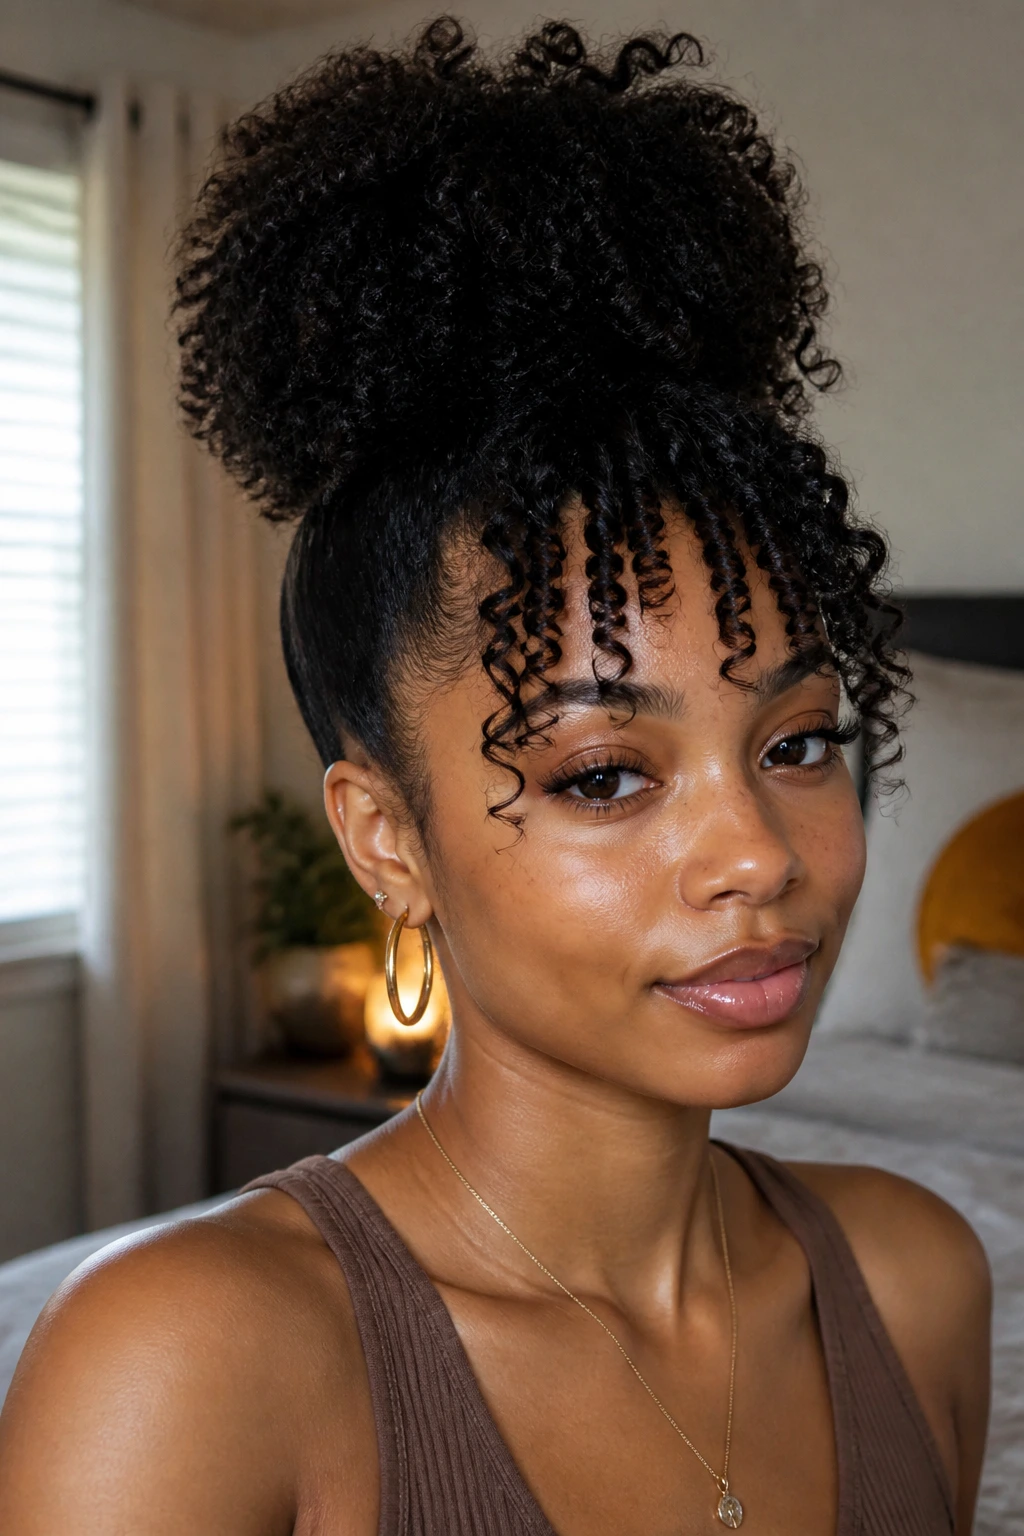
Curly bangs soften the forehead and make the puff feel younger and looser without turning sloppy. Leave a front section out, define it lightly, and gather the rest into a puff. The bangs can be a few curls, a larger fringe, or just a piece that falls forward in a controlled way.
The trick is keeping the bang section separate enough that it does not get swallowed by the puff. If it blends in too much, you lose the face-framing effect. A bit of curl cream or a wet brush helps the front curl sit where you want it, though I would avoid drowning it in product. Heavy bangs look stringy fast.
This is one of those styles that looks especially good on humid days, when perfectness is impossible anyway. The soft front makes the whole puff feel easier.
13. Scarf-Wrapped Puff
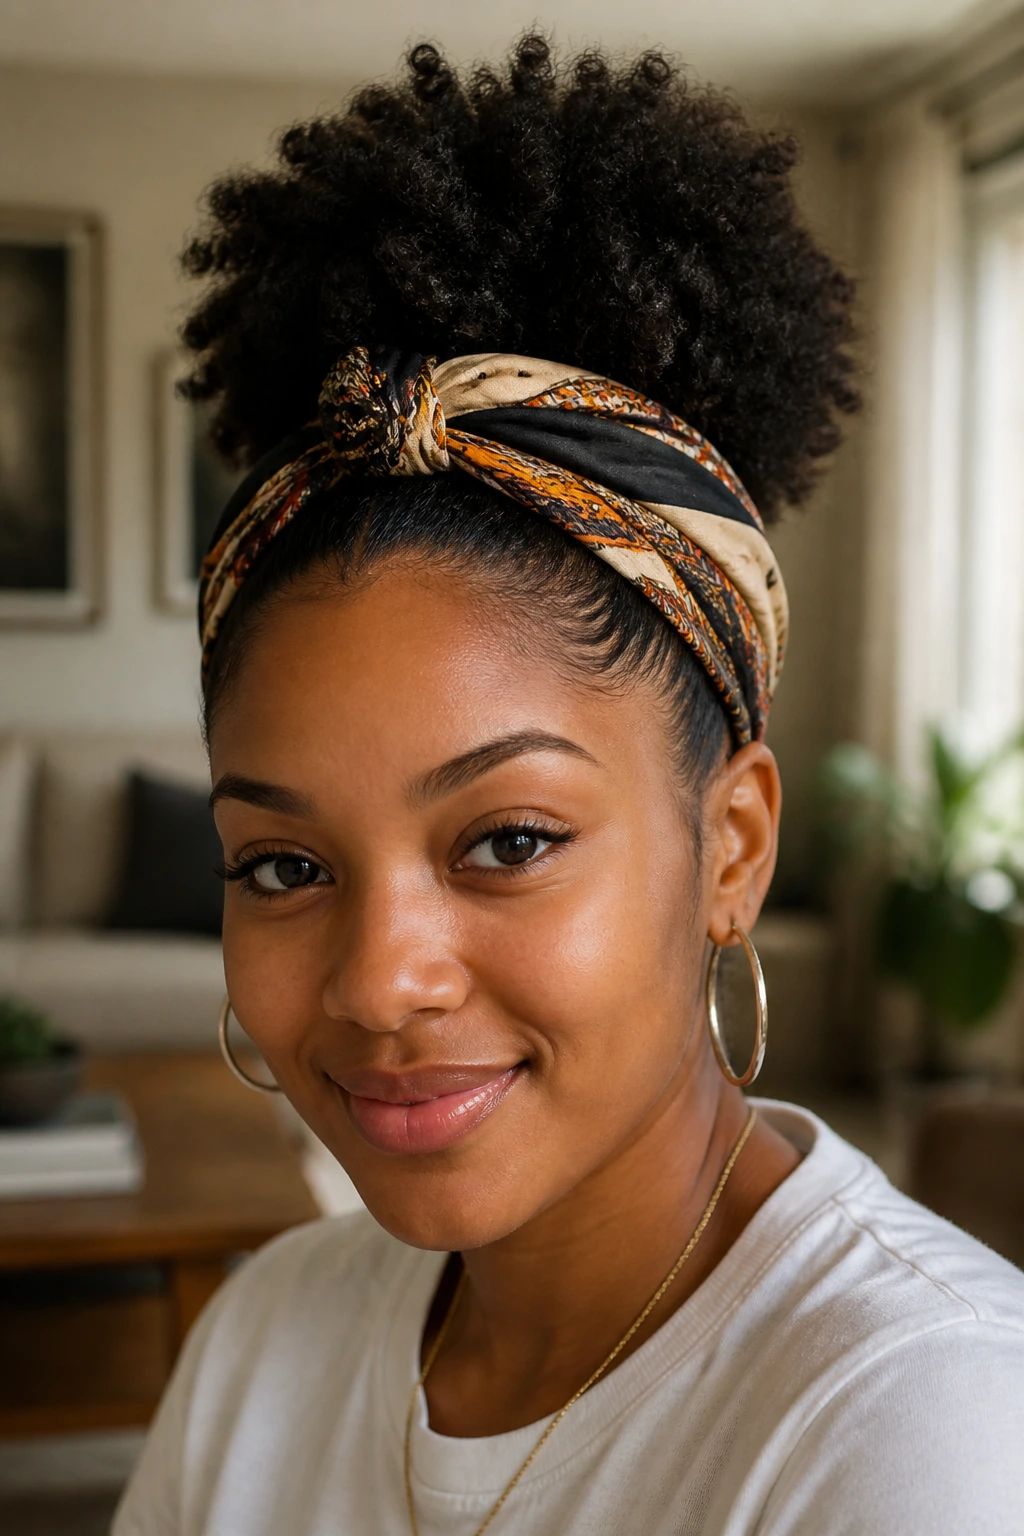
A scarf-wrapped puff is a lifesaver on days when the roots are doing their own thing. Wrap a printed scarf around the base of the puff or over the front hairline, and the style instantly feels more finished. The scarf can hide an uneven part, tame a puff that’s too loose, or just add color.
The scarf should support the style, not crush it. If you tie it too tightly, the puff loses shape and the front gets flat. I prefer a folded scarf with a knot placed slightly off-center so the look has a little movement. Silk or satin is easiest on the hairline.
This is also a handy style when you want to stretch an old wash day. A scarf can make day-three hair look intentional instead of tired.
14. Headband Puff
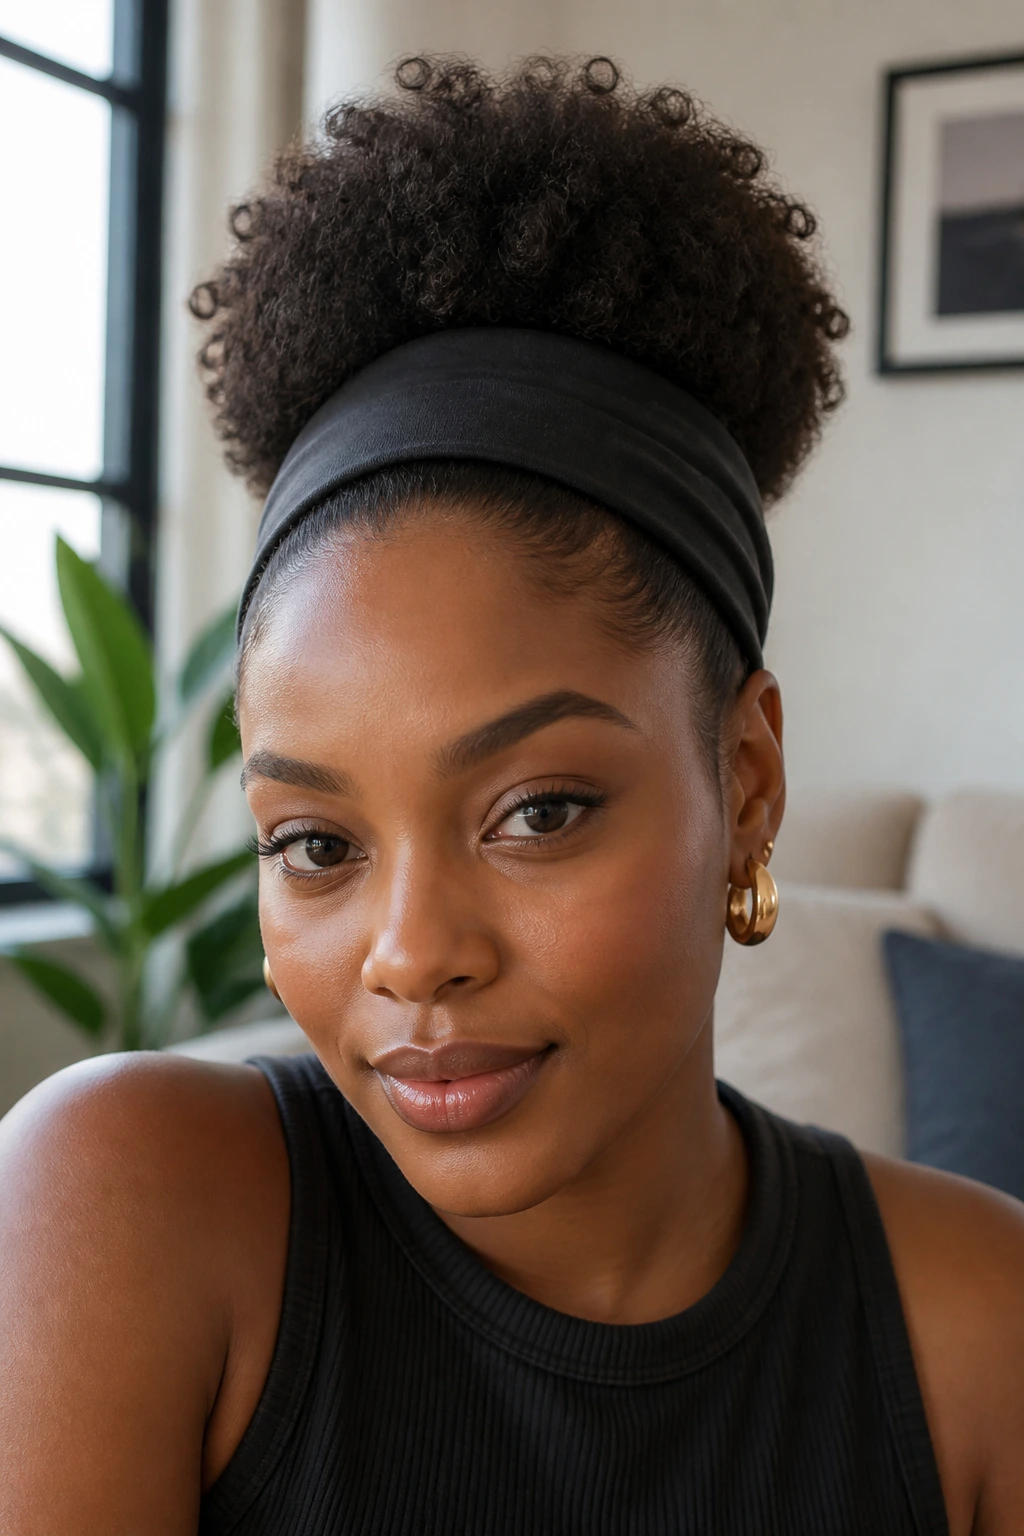
The headband puff is probably the easiest way to make a simple puff feel styled. Slide on a wide headband, smooth the front if needed, and let the puff keep its fullness. Wide bands tend to work better than skinny ones because they control more of the front without digging in.
Pick the band based on what your roots are doing. If the front is frizzy, choose a structured band. If the hair is already smooth, a softer fabric band will do the job without flattening the puff too much. That balance matters. Too much pressure makes the crown look squashed.
It’s a style that can take you from errands to dinner with almost no extra work. And yes, that’s the appeal.
15. Twisted Halo Puff
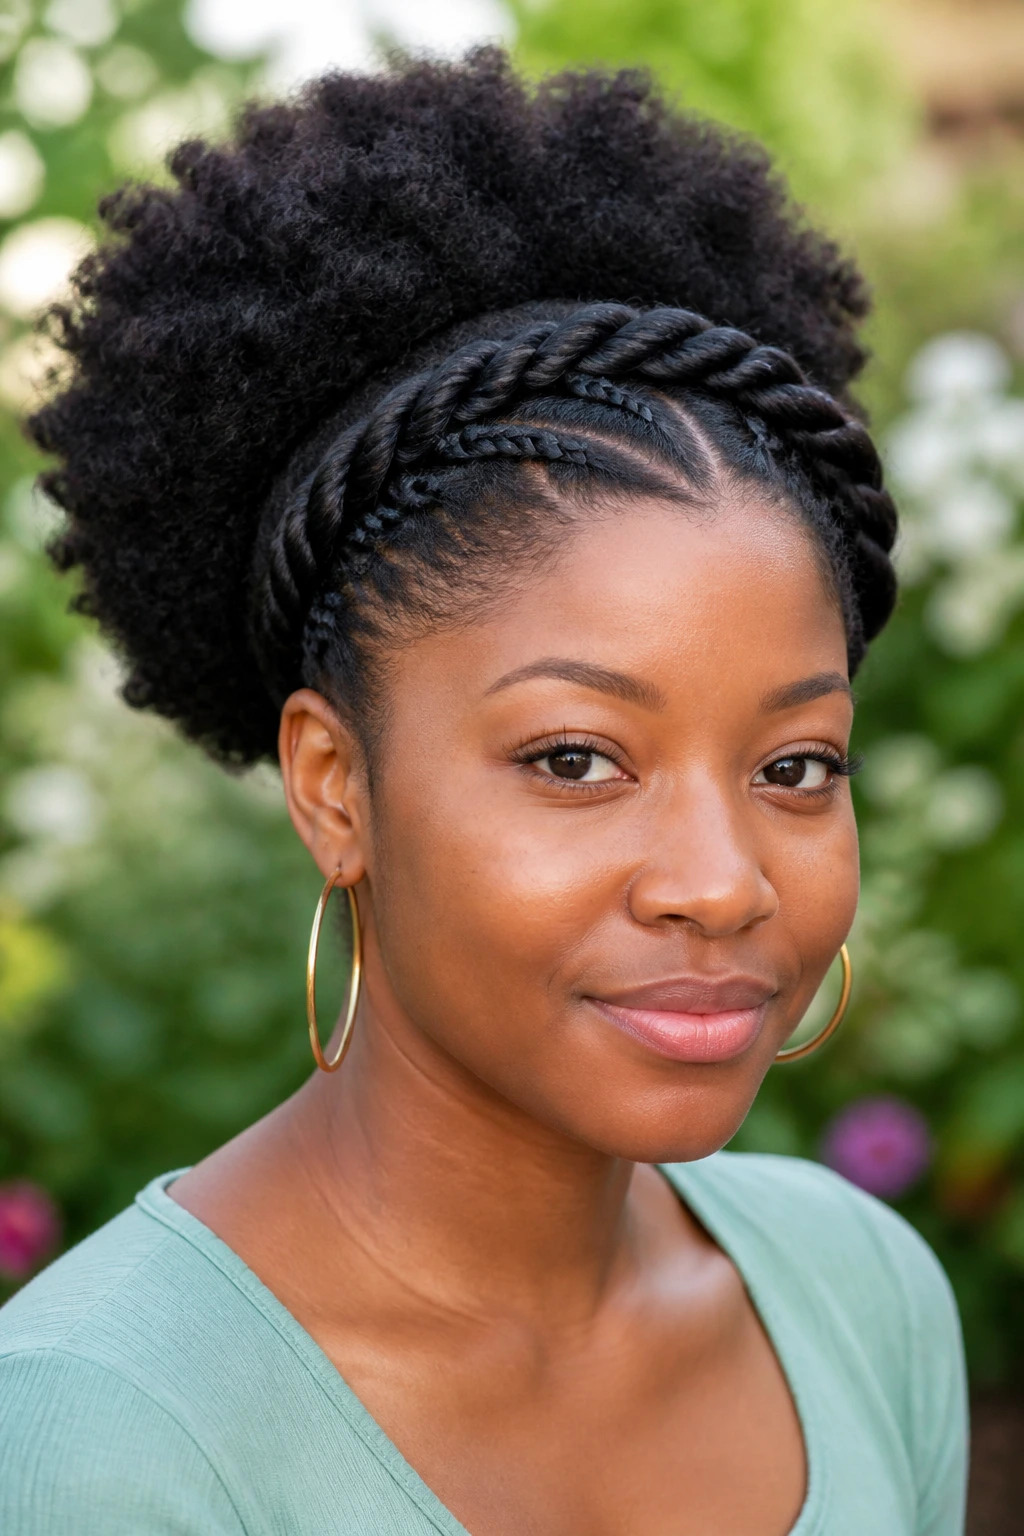
A twisted halo puff circles the front or sides of the head with flat twists or two-strand twists, then gathers the rest into a puff. The halo gives shape around the face, which makes the puff feel more framed and less like a single mass of hair.
This works especially well when you want the puff to look intentional from every angle. The twists add detail around the perimeter, and the puff fills in the back. If your hair is very thick, keep the halo section narrow so the puff still has enough volume.
I like this for special days when you want detail without spending hours on your hair. It looks more complex than it is.
16. Stretch-Blowout Puff
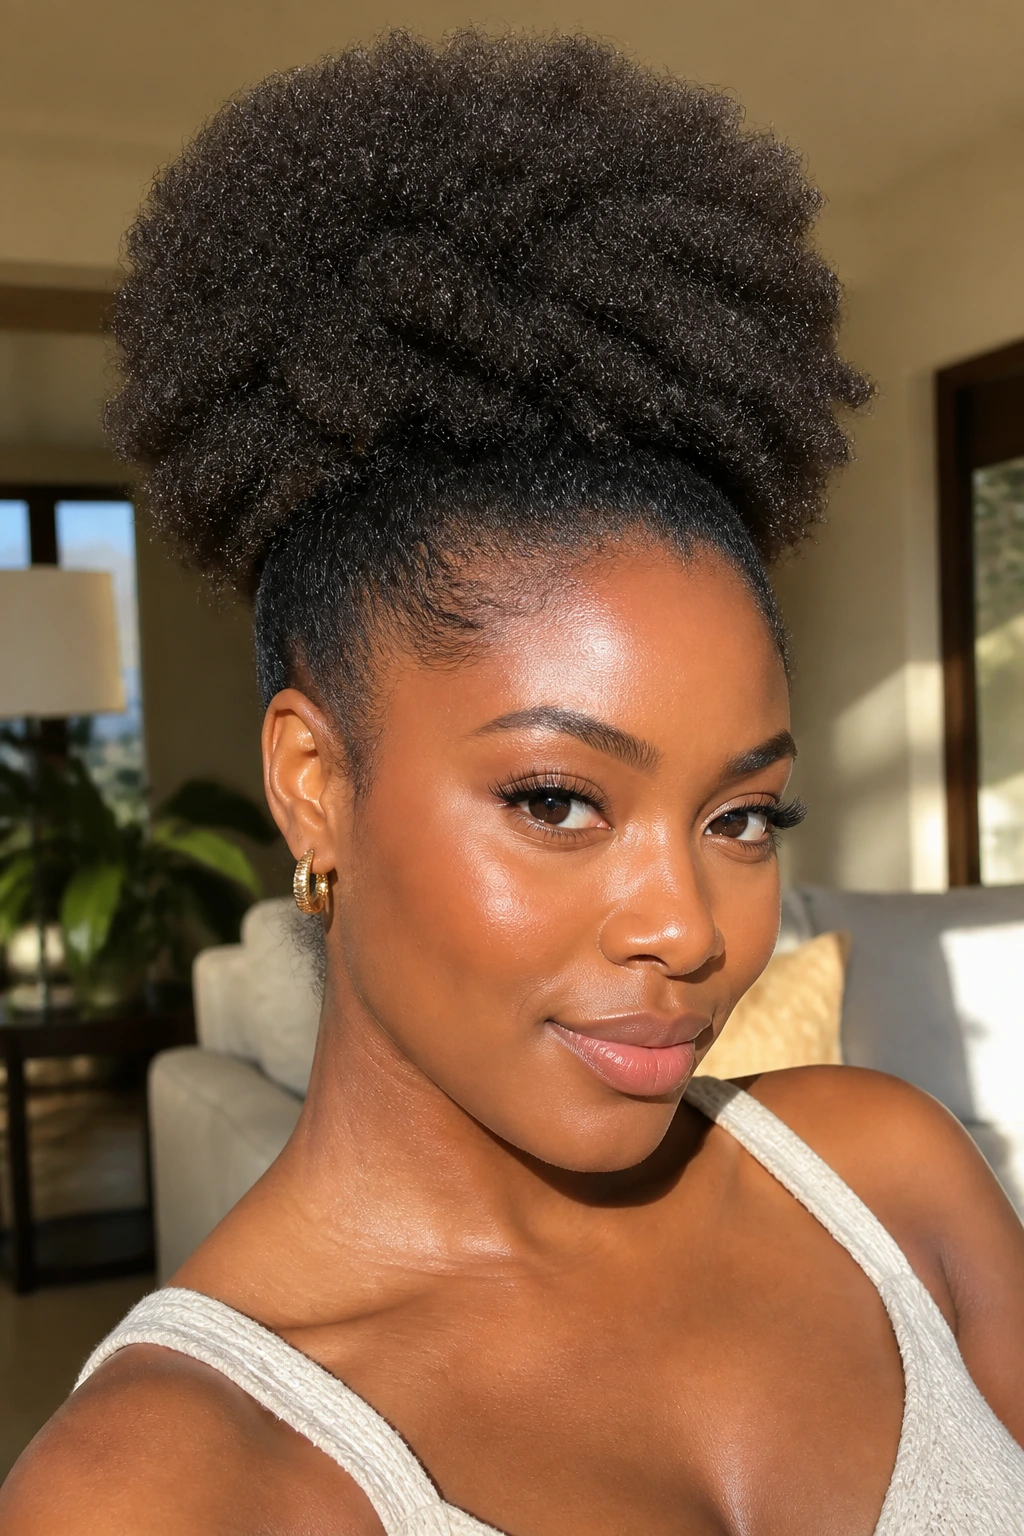
A stretch-blowout puff uses hair that has been blown out or stretched so the puff sits longer and fuller rather than super compact. The shape is elongated, and the texture shows more length. It’s a good pick if you want the puff to look bigger and less round.
The blowout does not need to be bone straight. In fact, too much straightness makes the style lose its natural texture. Stretch the hair just enough to reduce shrinkage, then gather it softly. You want volume, not a flat ponytail pretending to be a puff.
Heat should be used carefully. If your ends are fragile, a heatless stretch method gives you a similar look with less risk. Slightly more effort, yes. Worth it? Usually.
17. Defined Coil Puff
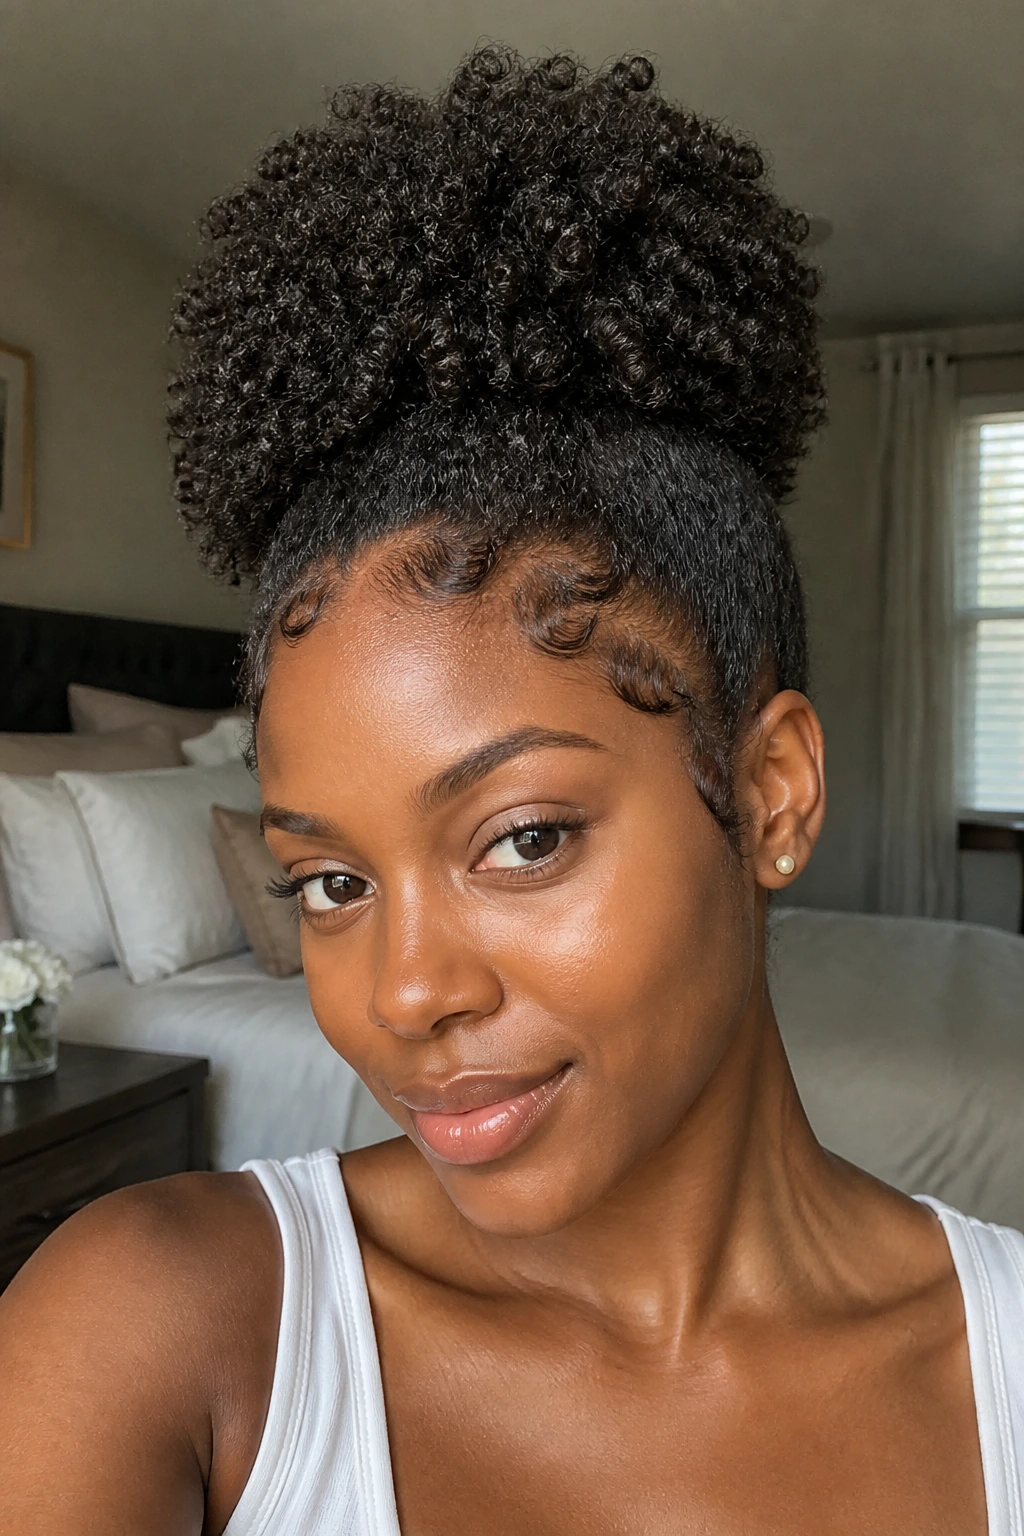
A defined coil puff keeps more curl pattern visible around the edges and in the puff itself. Instead of brushing everything until it becomes one cloud, you preserve individual coils and let them show. The result feels textured and rich, not over-smoothed.
This style benefits from a light touch. A curl cream, a little gel where needed, and fingers instead of a heavy brush can keep the coil definition intact. If you brush too hard, the coils separate and frizz in a way that looks tired by midday.
If your hair naturally clumps into coils, this one is almost cheating. The texture does the styling for you.
18. Mini Puff with Shrinkage
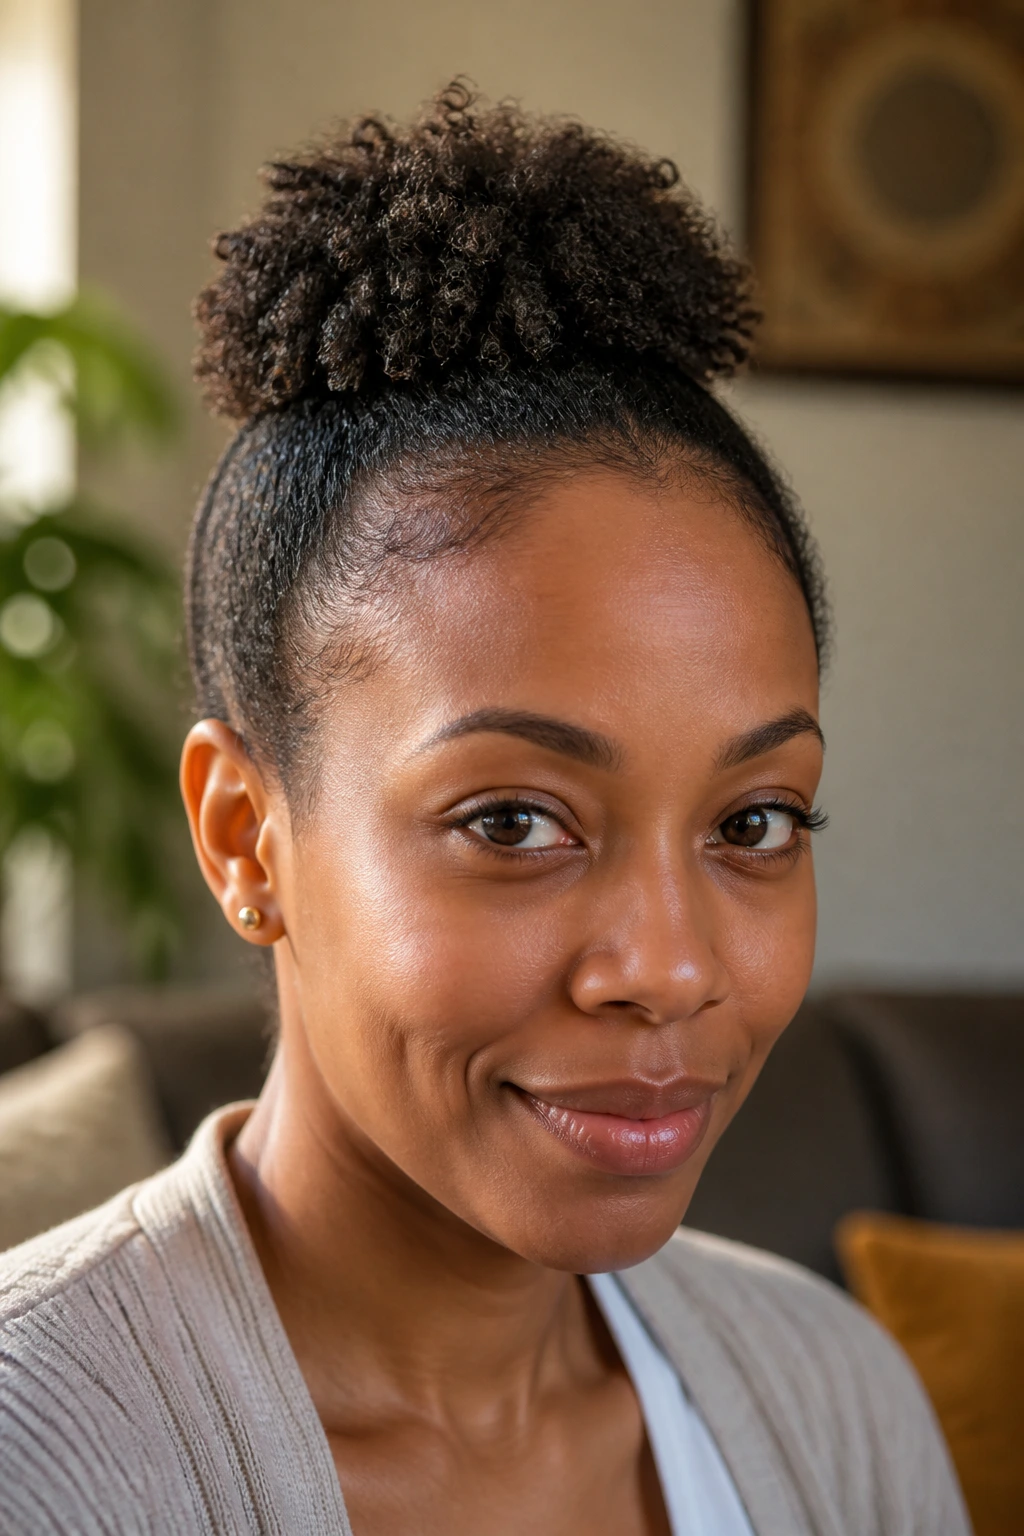
A mini puff works when the hair is short, highly shrunken, or freshly cut and still filling in. It gathers a smaller section at the crown or back, leaving the rest to show off texture close to the scalp. It’s neat, compact, and honestly underrated.
People often assume a puff has to be big to count. Nope. A mini puff can look sharp and very deliberate, especially on tightly coiled hair that holds shape well at shorter lengths. Keep the base clean and let the puff sit snugly.
This style is useful in the awkward in-between stage when your hair is too short for a full puff but too long to ignore. It makes the growing-out phase look on purpose.
19. Two-Strand Twist Base Puff
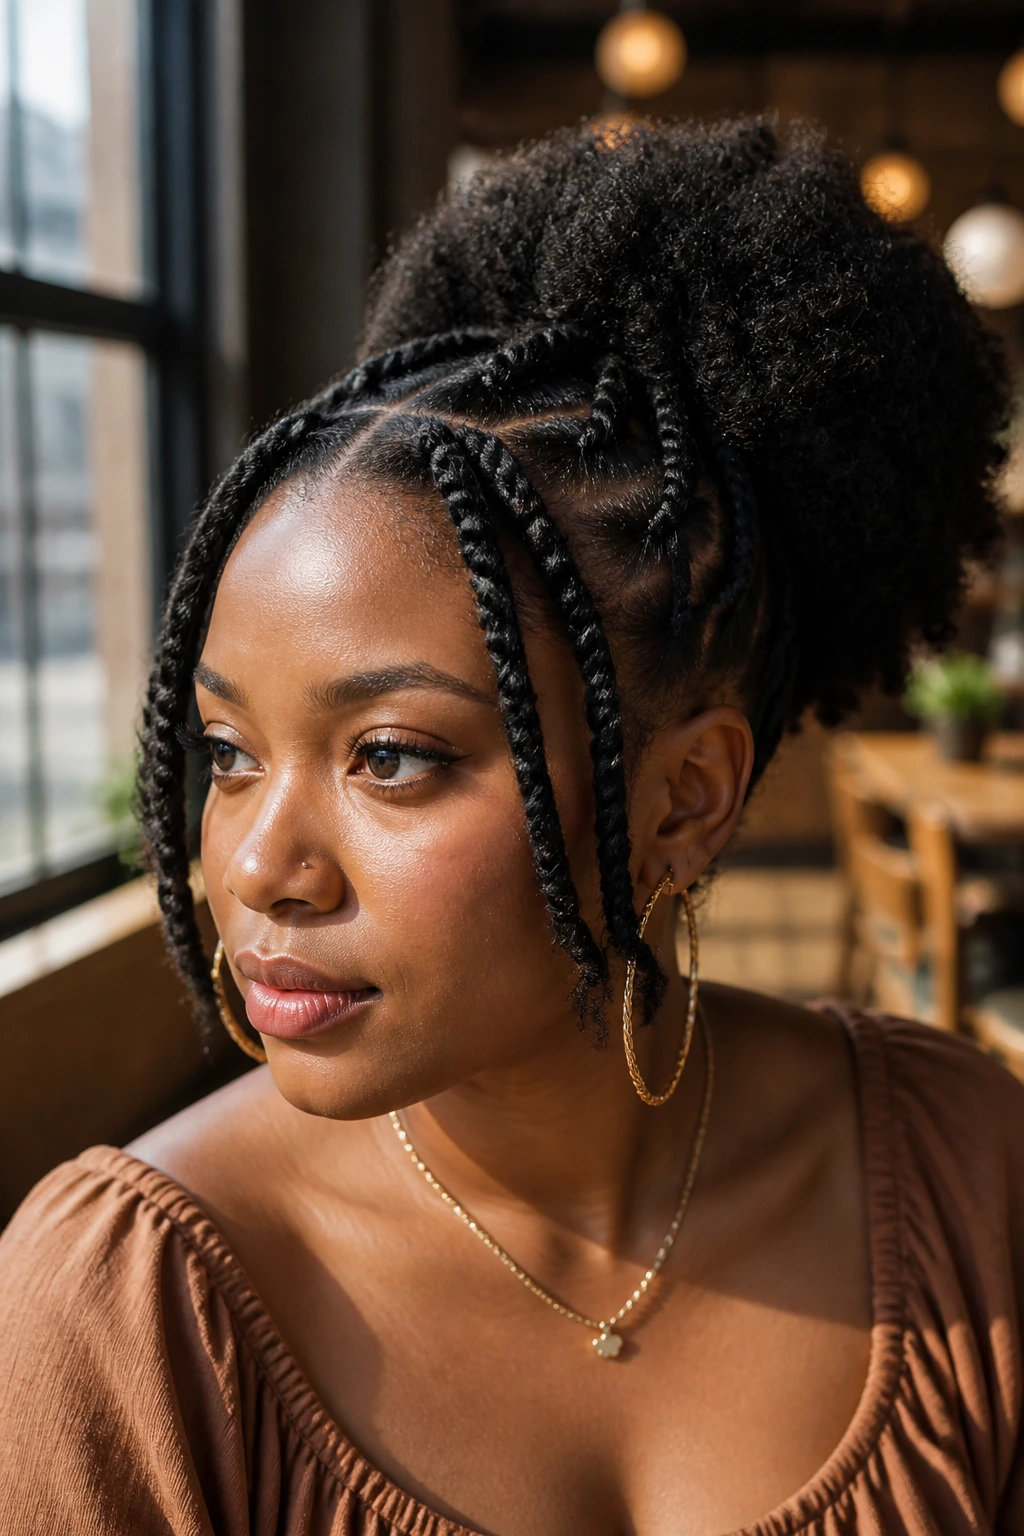
Two-strand twists leading into a puff give the front and sides texture before the puff starts. The twists can frame the face, hold moisture, and help keep the roots stretched. That matters when the hair tends to shrink fast and swallow the whole shape.
This style takes a bit more time, but it pays off in longevity. The twists stay put better than loose styling on many natural textures, and they make the puff base look neat without requiring heavy gel. If you want the puff to last more than a day, this is a good way to build it.
I like the contrast here: textured twists in front, one full puff behind. It keeps the style from looking one-note.
20. Clipped-Back Puff
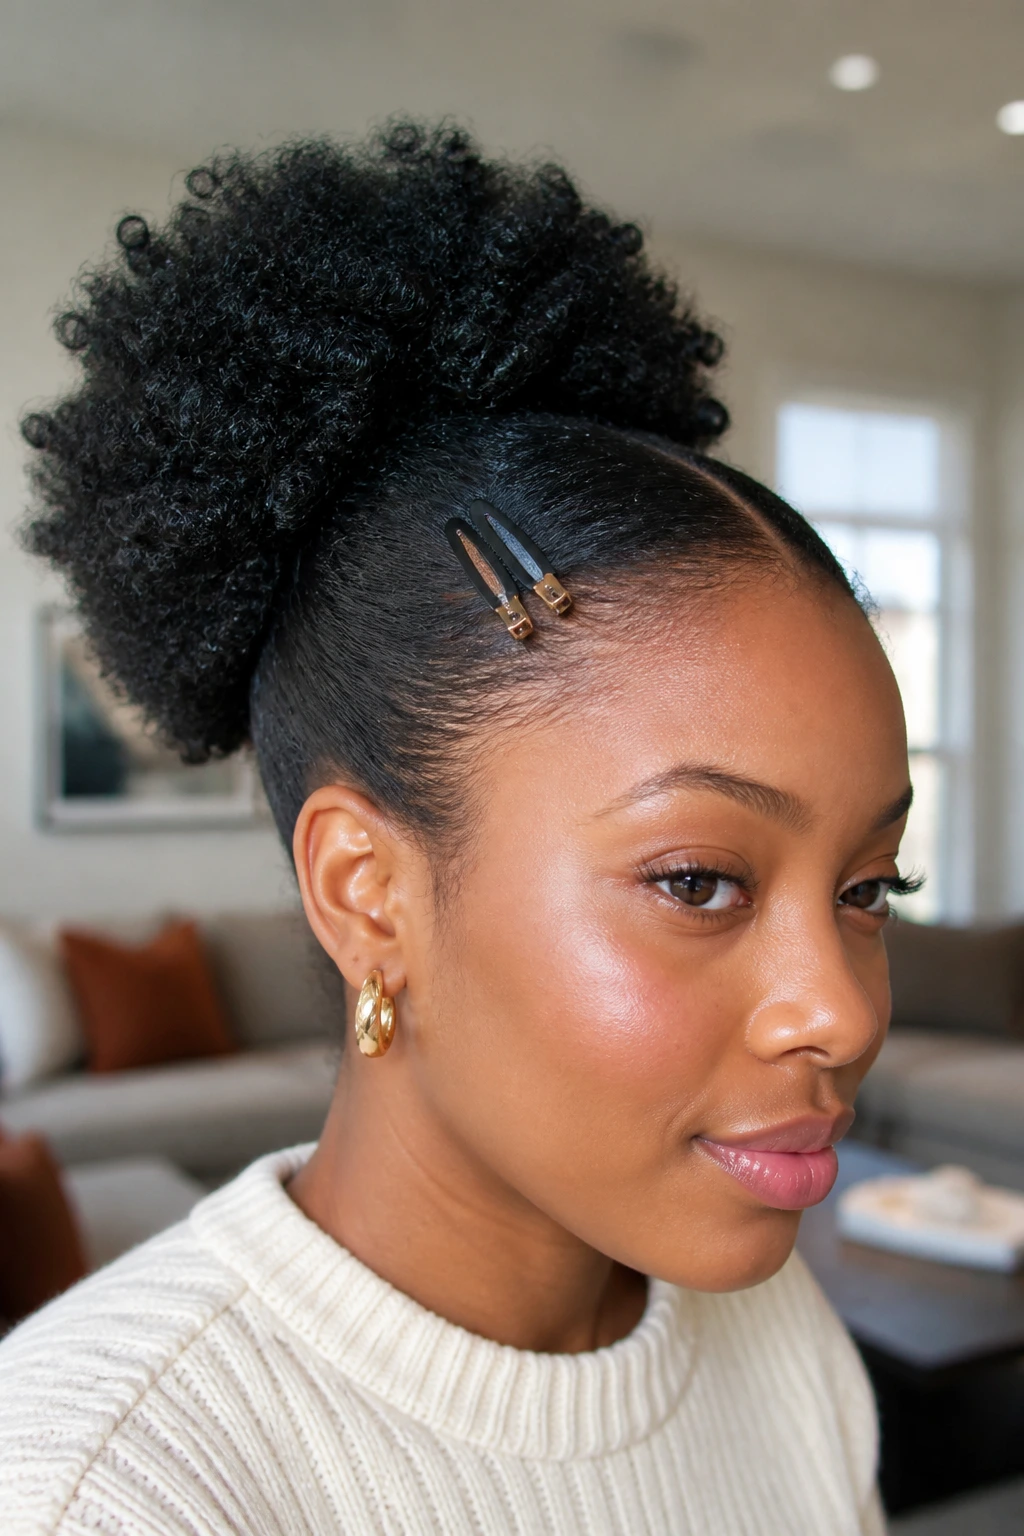
A clipped-back puff uses small clips to pin away front sections before the puff is gathered. The clips can be decorative, but they should also actually hold hair. Pretty clips that slide out are just jewelry with a bad attitude.
This style is useful when you want a puff but do not want to fight every baby hair. Clip the front back in two or three sections, then gather the rest. The clipped pieces can be smooth, twisted, or lightly fluffed, depending on how neat you want the finish.
It’s a nice choice for medium-length natural hair because the clips help manage shorter layers that would otherwise stick out and annoy you all day.
21. Beaded Puff Ends
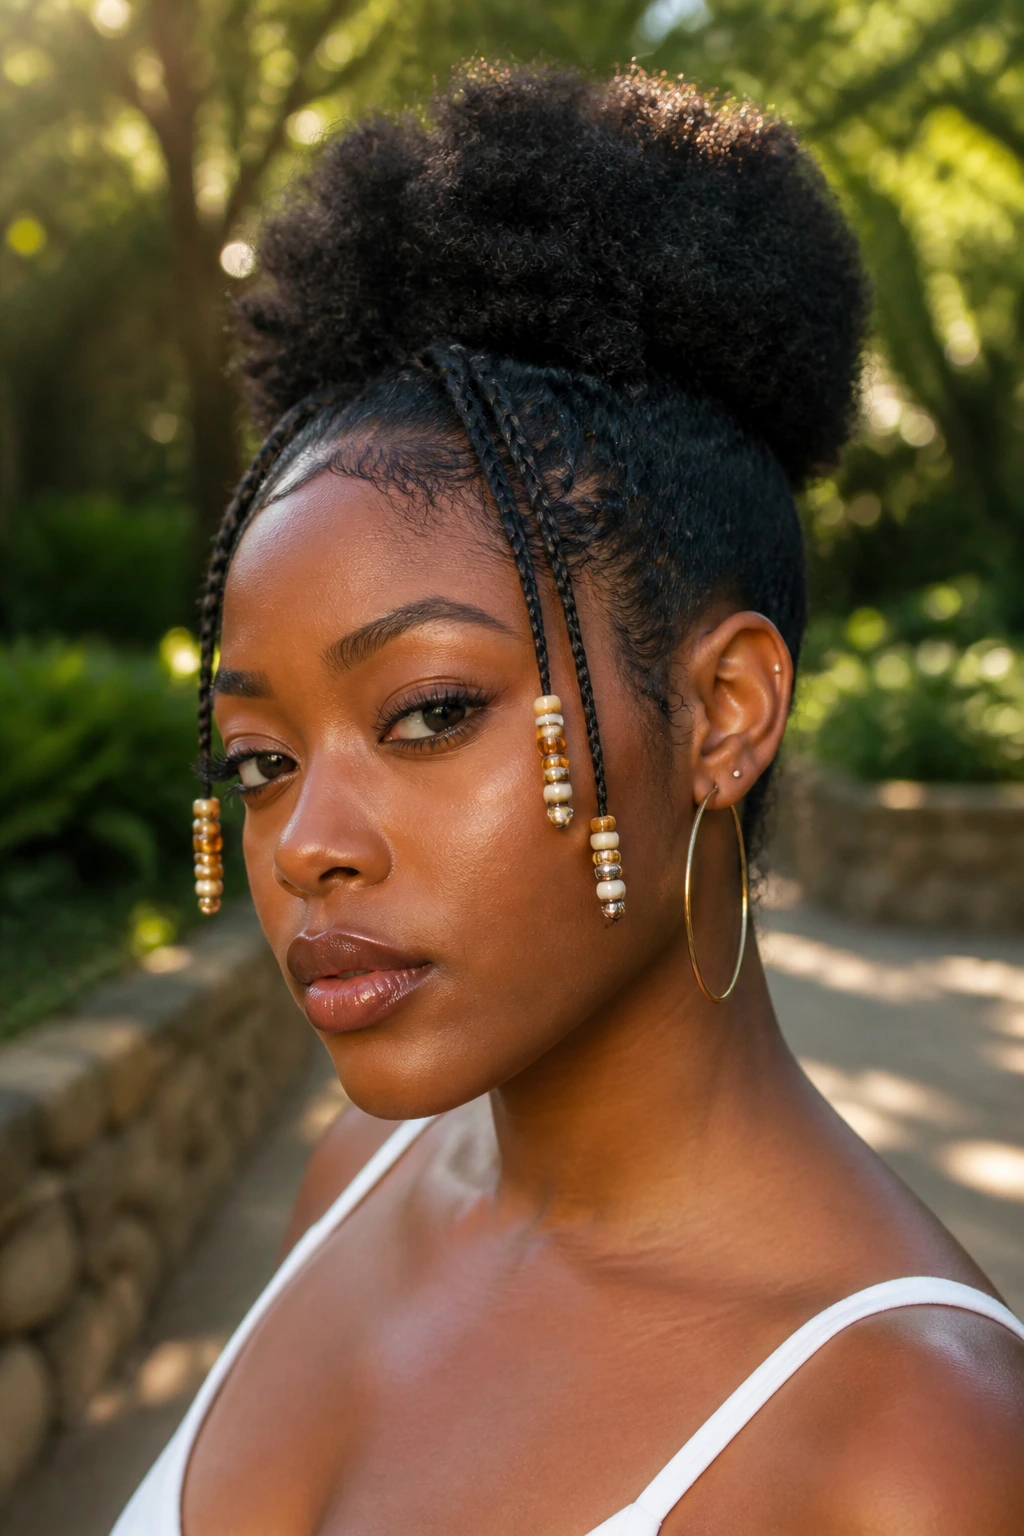
Beads on the front or side sections of a puff add movement and a little sound, which sounds minor until you see how much character they bring. This works best when the base puff stays simple, because the beads already do the decorating.
Use beads sparingly. A few at the ends of braids or twists is enough; too many can weigh the hair down and make the style feel busy. Wooden or lightweight plastic beads are easier on the hair than heavy metal ones, especially if the sections are fine.
This is the kind of style that feels personal. It can be playful, polished, or both, depending on the bead color and the outfit.
22. Feed-In Braid Accent Puff
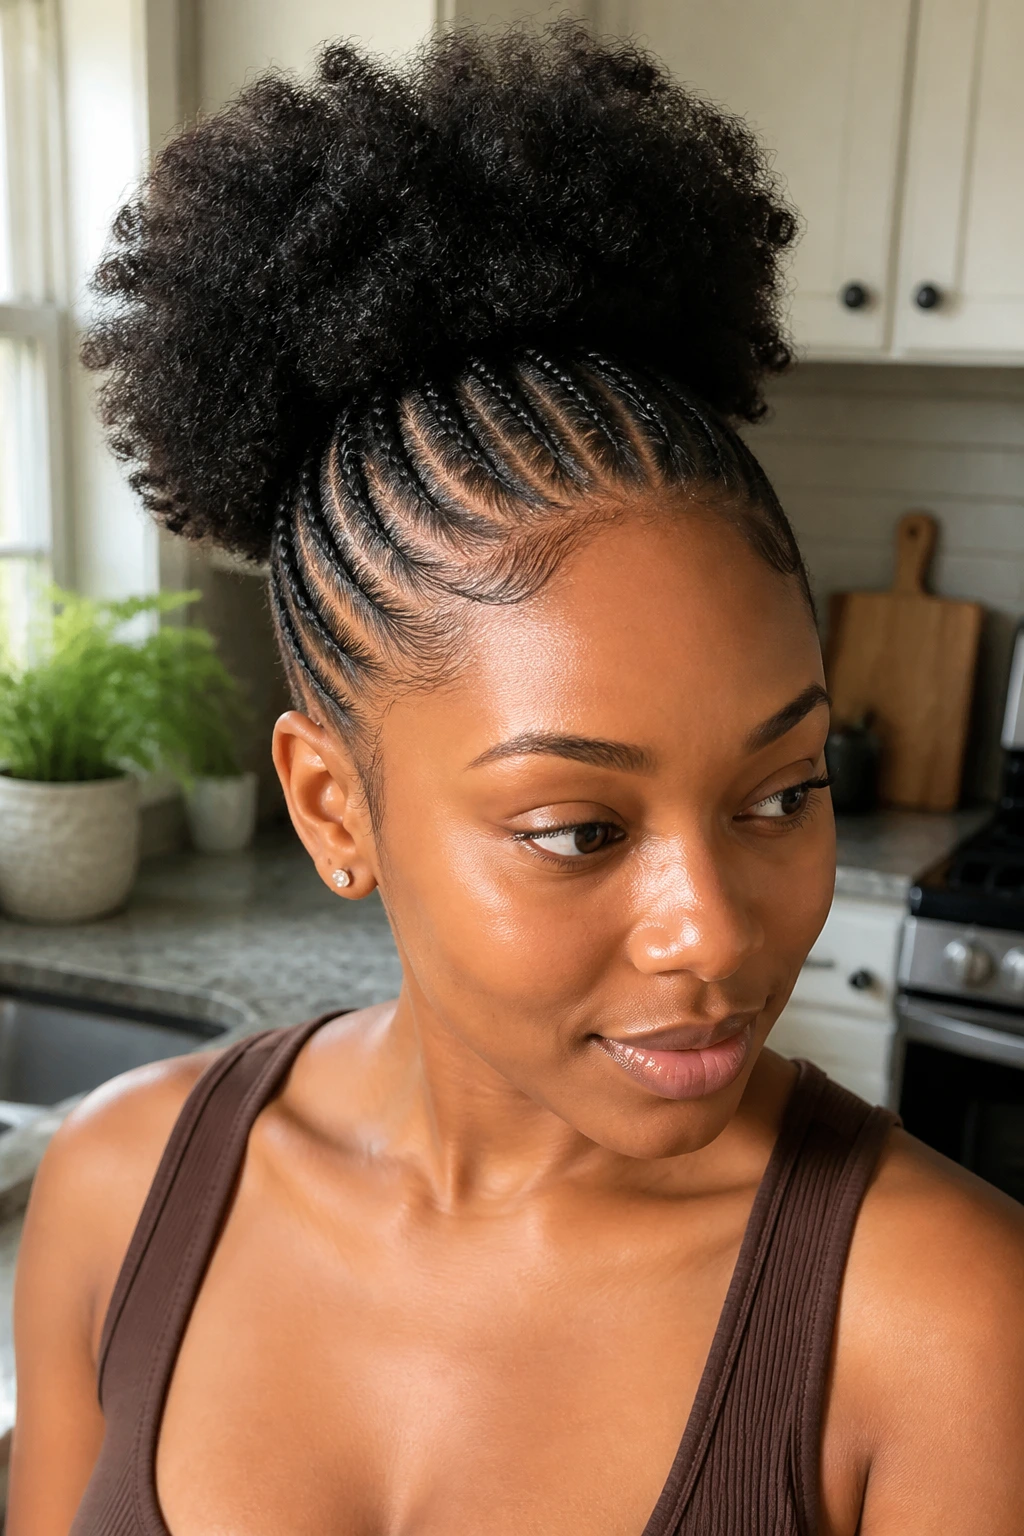
Feed-in braid accents create a smooth transition from the hairline into the puff. The braids can be narrow or medium-sized, and they keep the front clean while letting the puff remain the volume point. The “feed-in” part gives the braids a gradual, flatter start, which makes the style sit neatly against the scalp.
This is one of the better options when you want protection at the front without a full braided style. The braids reduce daily manipulation where hair is most fragile, and the puff gives the style softness. If you’re prone to frizz around the temples, this can save you from constantly redoing the front.
It also photographs well in person, though I’d rather say it simply holds its shape neatly. That’s more useful.
23. Half-Up Puff with Loose Back
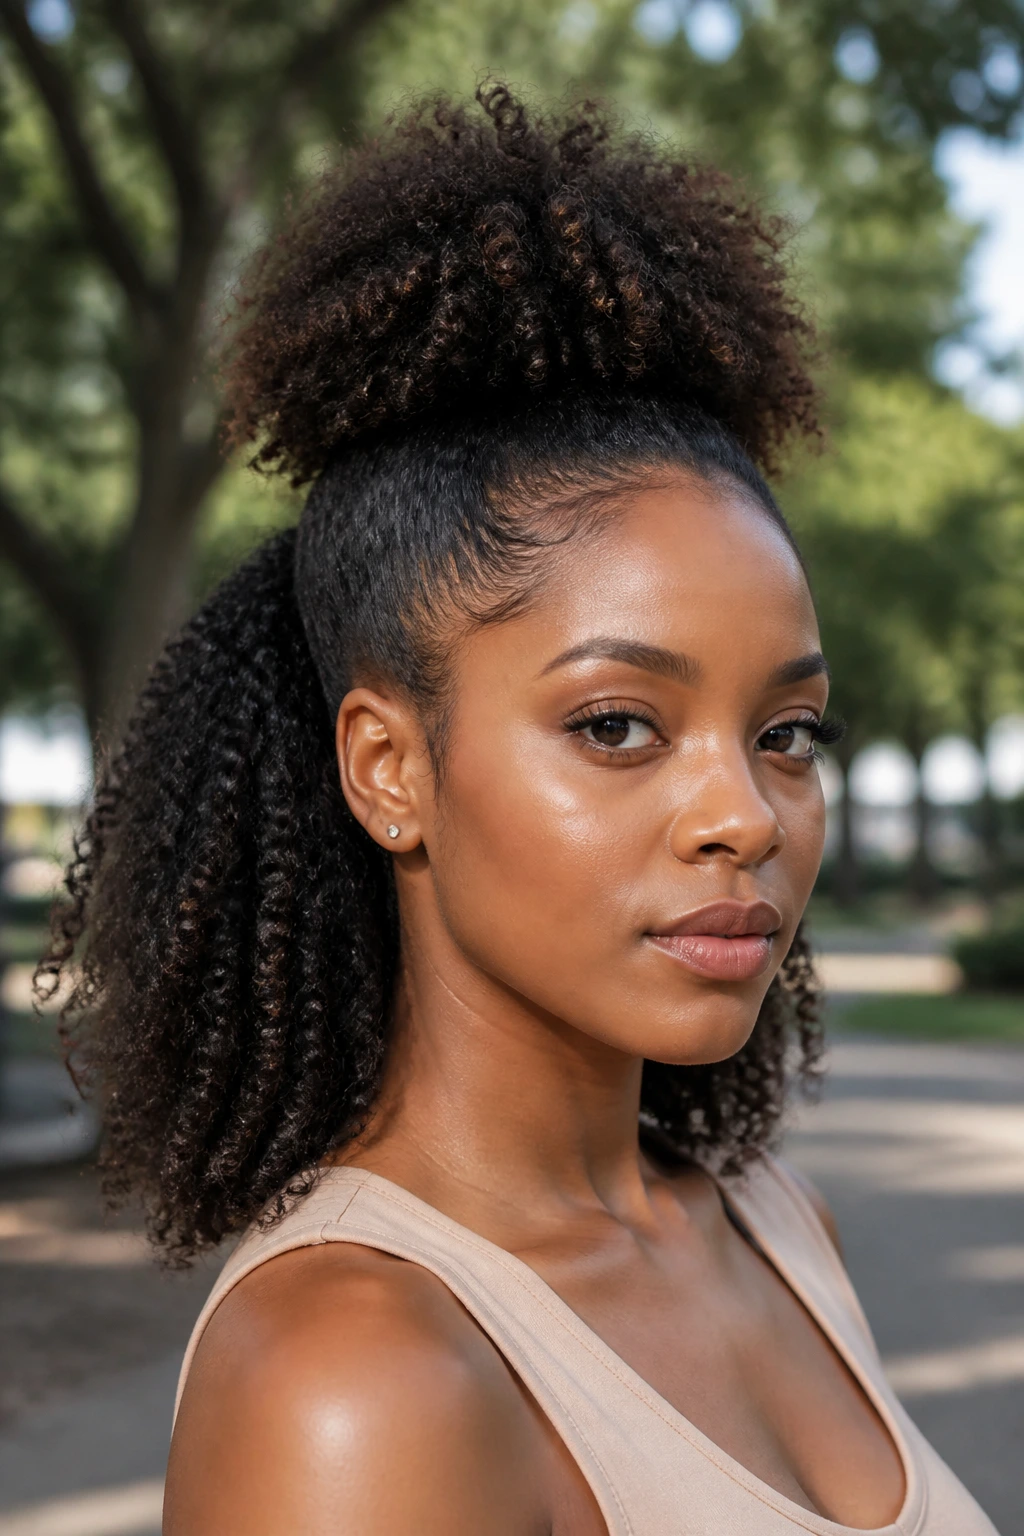
A half-up puff leaves the lower half of the hair loose, so you get volume at the crown and texture underneath. It’s a strong option for long natural hair, stretched curls, or twist-outs that still have movement left in the ends. The style feels fuller than a single puff because the loose back adds another layer of shape.
The line between the gathered top section and the loose length should be clean. If the top is too small, the style looks accidental. If the top is too large, it starts to swallow the rest. Aim for balance, then stop tweaking. That part is harder than it sounds.
This is the style I’d pick when I want hair up, but not all the way up. There’s a difference.
How Afro Puff Hairstyles Hold Their Shape Without Snapping the Hairline
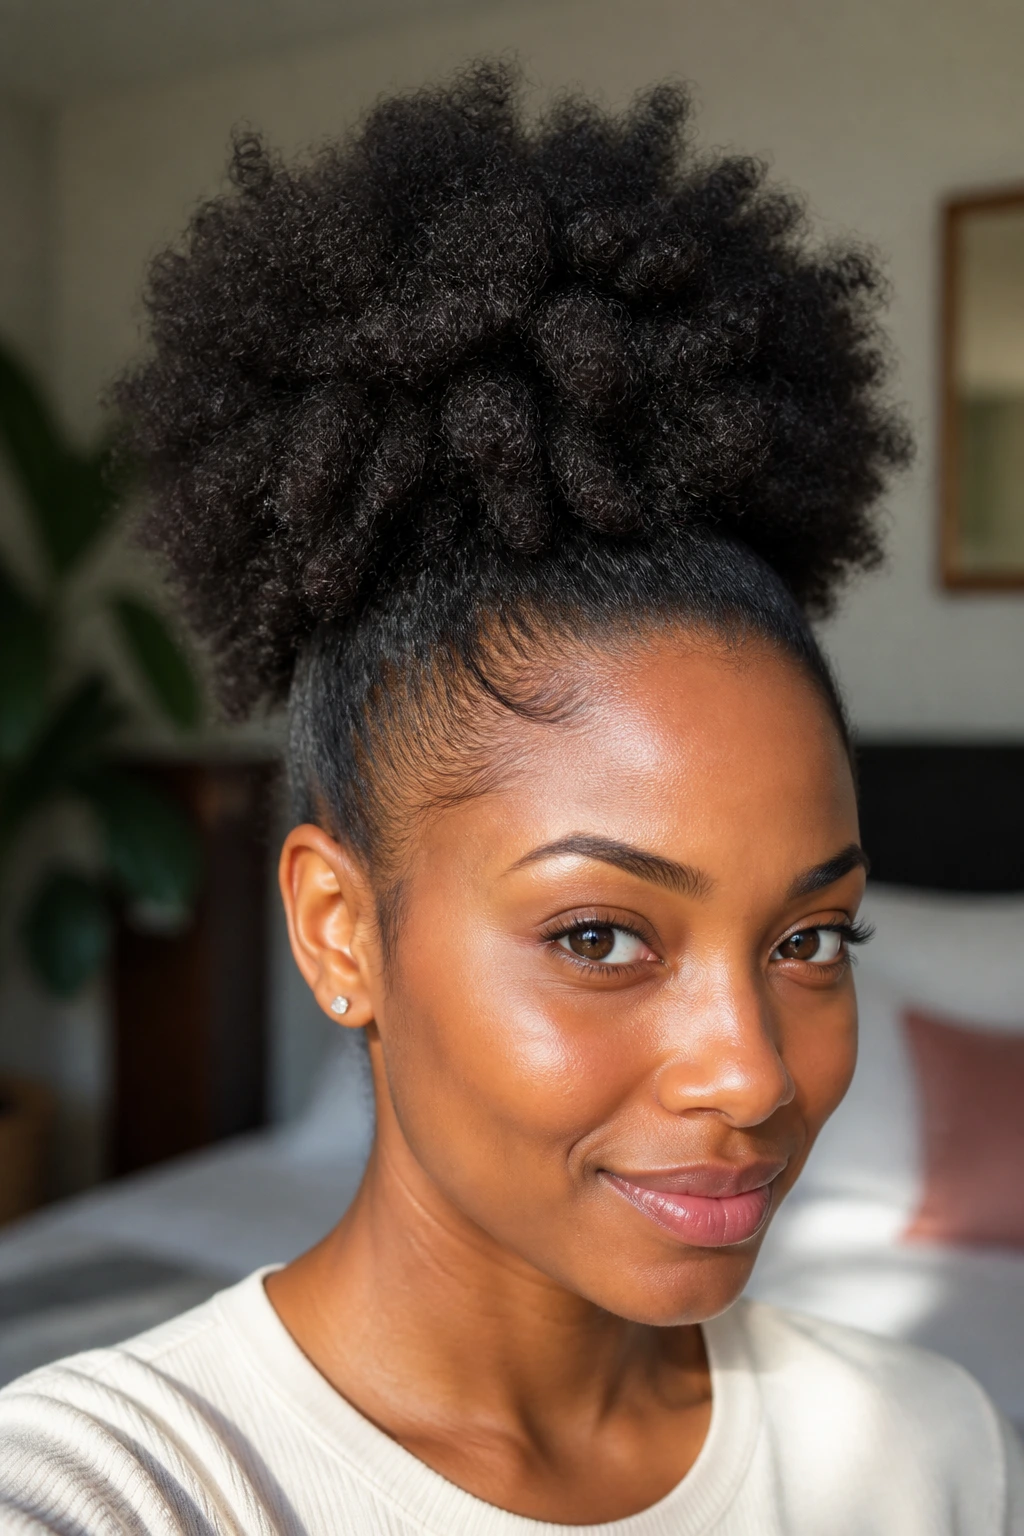
The best puffs are built on tension that feels secure, not stubborn. A puff should sit where you place it, but it should not make your scalp feel tight after ten minutes. If your edges are sore, the style is too tight, even if it looks neat.
A lot of people chase a super-slick finish and end up using too much gel or pulling too hard at the base. That gives you a clean first hour and a rough second day. A better approach is moisture first, then a small amount of hold at the perimeter, then a band that grips without biting. If your hair is very dense, use two bands instead of one tight one. That spreads the pressure out.
Stretching matters too. Hair that is slightly stretched before gathering tends to form a puff with more visible shape and less shrinkage around the root. You can do that with twists, braids, banding, or a careful blowout. The goal is not straight hair. The goal is shape control.
Essential Tools for Puff Styling
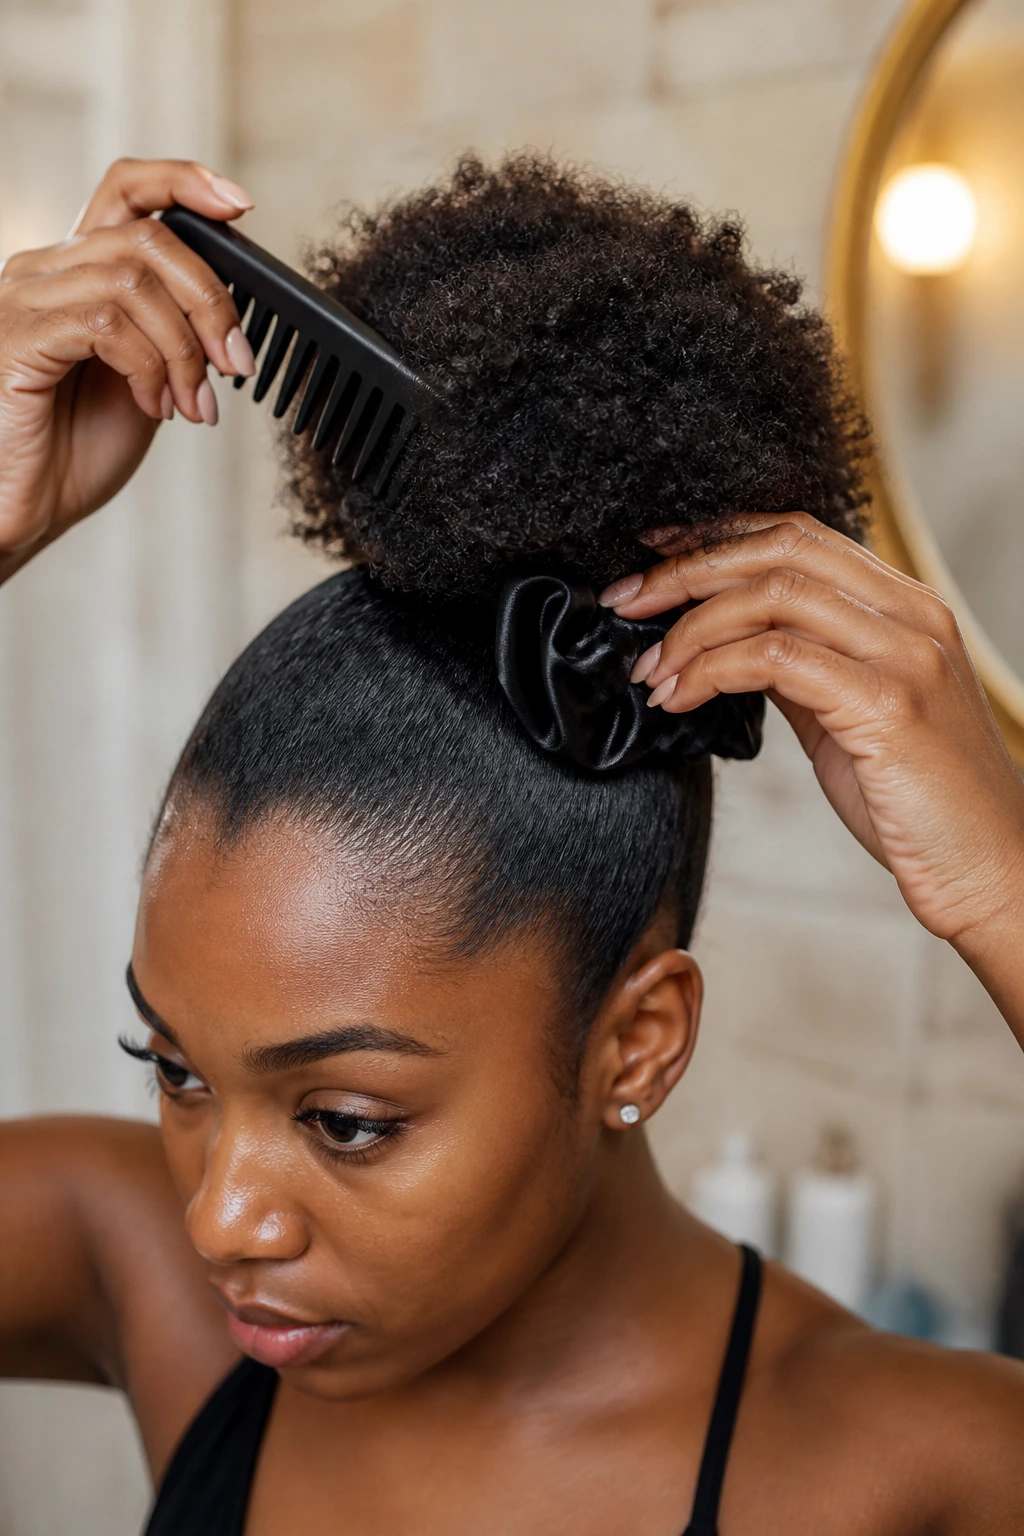
- Wide-tooth comb: Good for detangling without shredding curl clumps.
- Tail comb: Best for part lines that actually look straight.
- Boar-bristle or paddle brush: Helps smooth the base, but use it gently.
- Satin scrunchies or spiral hair ties: These hold the puff without leaving a hard crease.
- Edge brush: Handy for smoothing hairline fuzz without overbrushing.
- Light-hold gel or styling cream: Use one that gives control without drying the hair stiff.
- Leave-in conditioner: Keeps the base from feeling dry under the gel.
- Hair clips: Useful for sectioning or for clipped-back styles.
- Satin scarf or bonnet: Keeps the puff base from frizzing overnight.
- Moisture spray bottle: Helpful for refreshing day-old styles without soaking them.
Smart Product Picks and Ingredient Notes
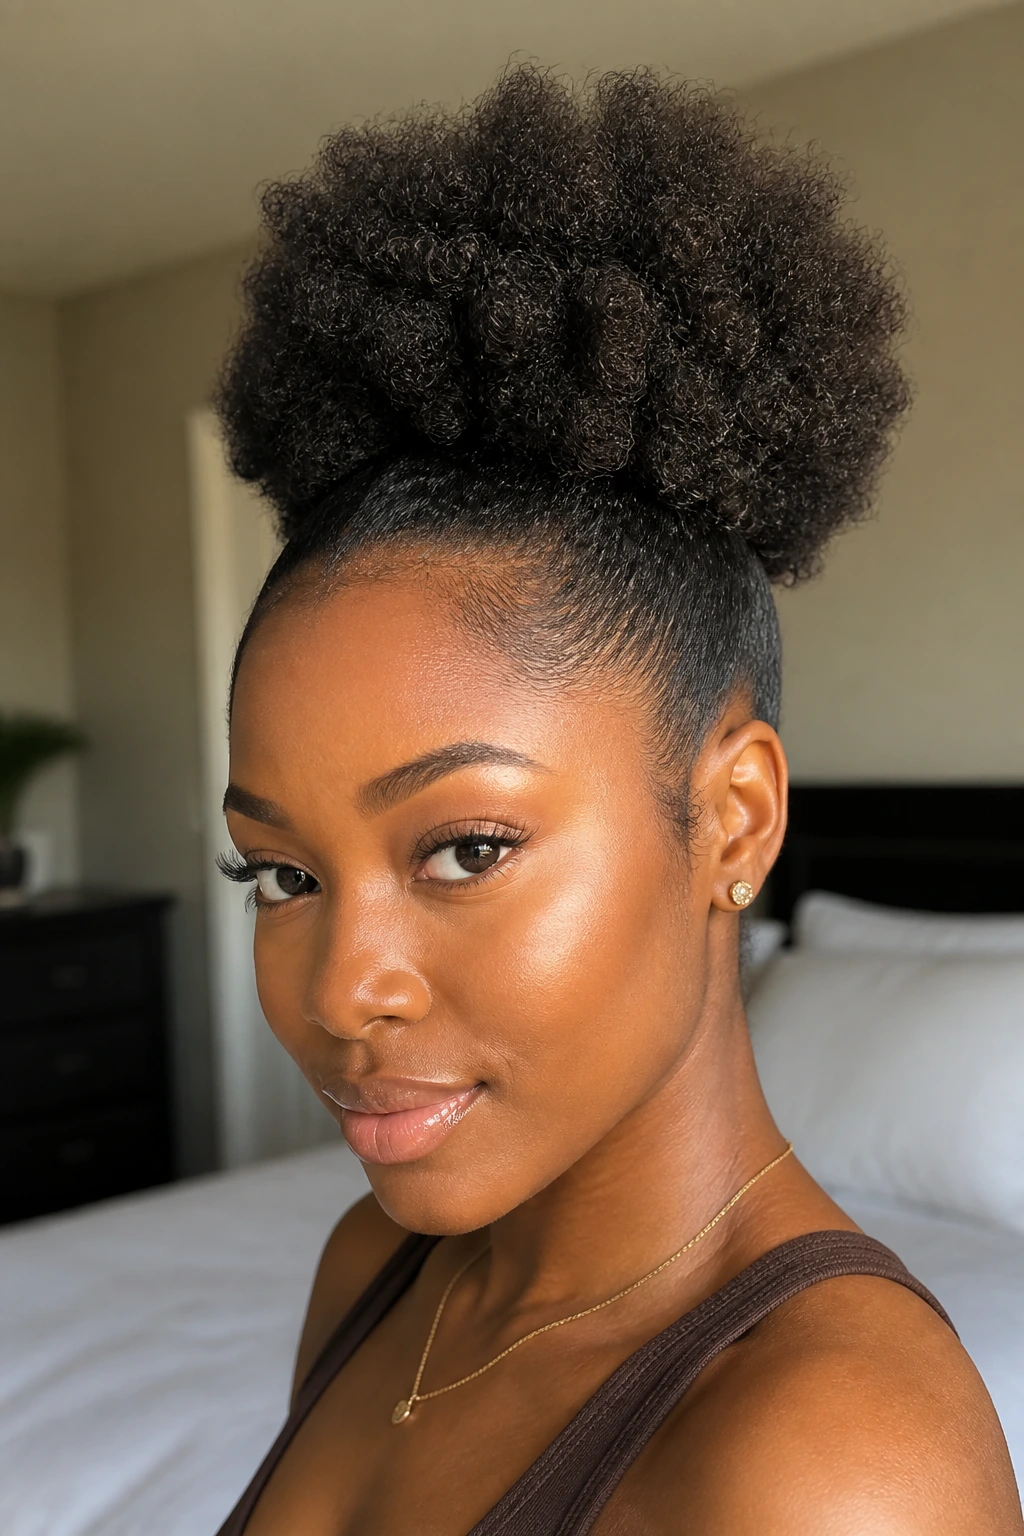
A puff starts looking better when the hair underneath is moisturized, not when it’s loaded with products. A leave-in with slip gives you a softer base, and a gel with actual hold helps the roots stay where you put them. If a product flakes when it meets another one, stop layering it so heavily. That dust on your shirt is not a style.
For edges, I prefer a gel or cream with enough hold to smooth the hairline but not enough to leave a crunchy shell. If your hair is very coarse, a thicker cream under the gel can keep the puff from drying out in the middle of the day. If your hair is finer, go lighter. Heavy products can flatten the roots faster than humidity can.
Bands matter more than people think. A cheap elastic that snaps at the wrong time can yank out strands near the nape or edges. Satin, silk, or covered bands are kinder, and they tend to slide less once they settle. That tiny upgrade pays for itself fast.
How to Wear Afro Puff Hairstyles With Outfits and Accessories
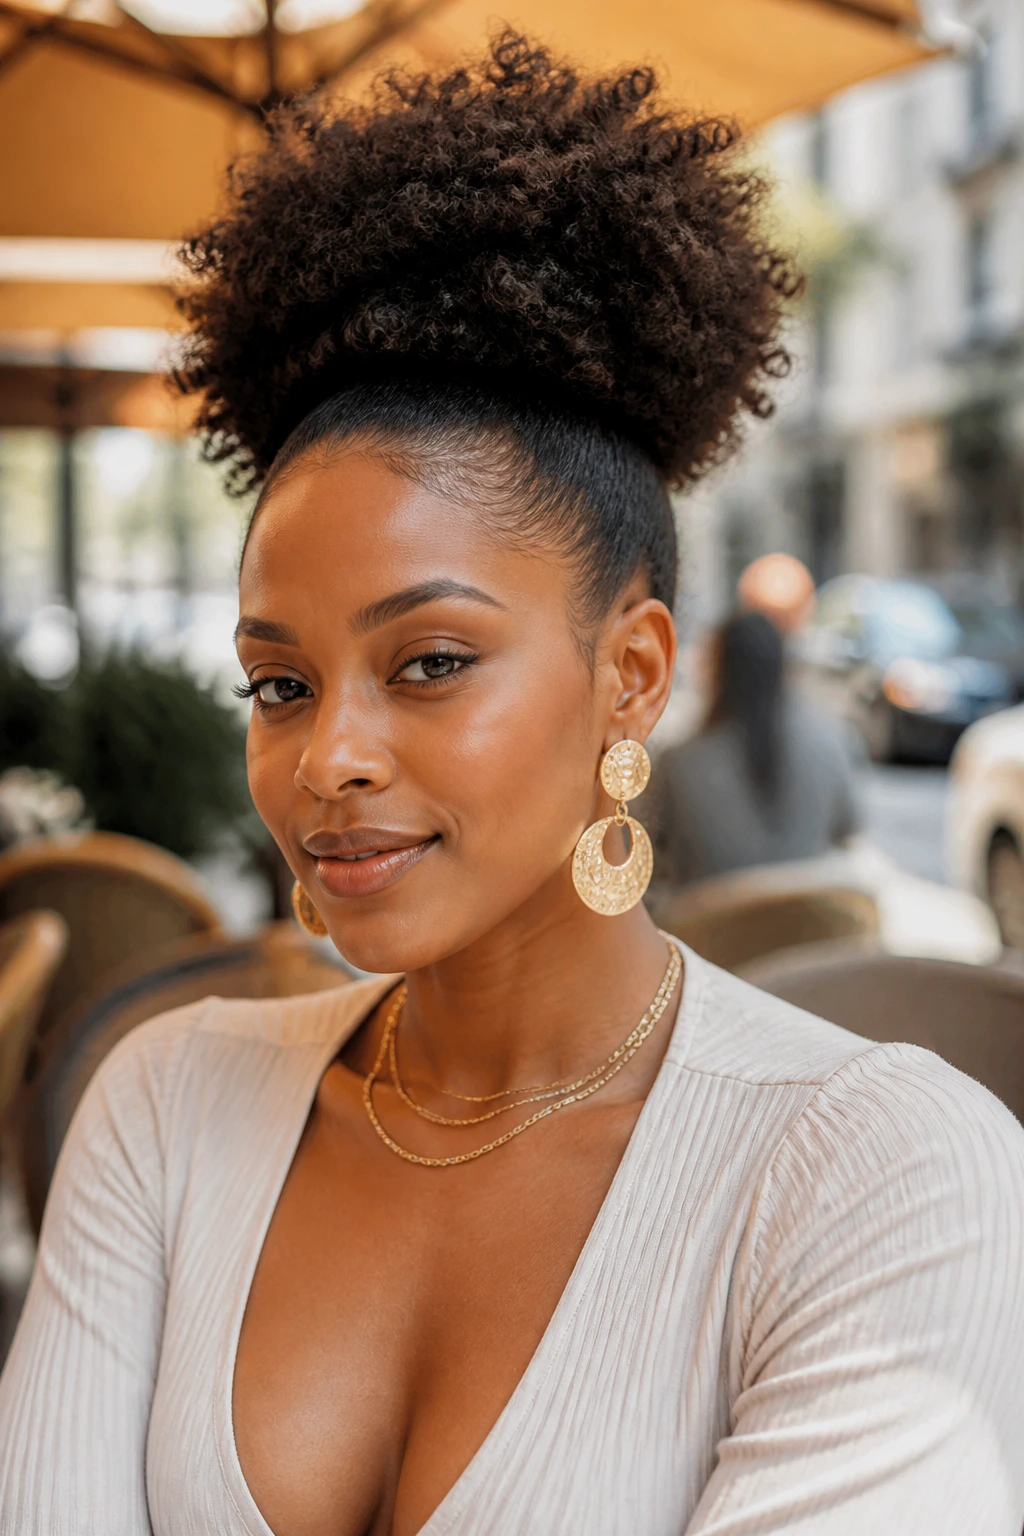
Shape: High puffs work with open necklines and statement earrings because they keep the face visible and the silhouette tall. Low puffs look good with collared shirts, turtlenecks, and anything that already brings structure to the top half of the outfit.
Accessories: Scarves, clips, cuffs, and headbands should support the puff, not fight it. One strong accessory is usually better than three small ones. The puff already has volume. It does not need clutter.
Best moments: A sleek center-part puff feels right for meetings, events, and days when you want the style to read neat before anything else. A side puff or scarf puff feels looser and more playful. Same hair, different mood.
Face framing: If you like earrings, choose a puff that leaves the jaw and ears visible. If you prefer a softer frame, let a little curl fall around the temples or add bangs. The outline matters more than people admit.
Additional Tips and Style Boosters
Flavor Enhancement: A tiny amount of shine serum on the puff itself—not the roots—can make older natural hair look more hydrated. Use less than you think. Too much turns the surface greasy.
Customization: If your puff feels too flat, flip your head forward before gathering and shake the roots loose a little. If it feels too big, use a wider band placement and smooth only the top section rather than the whole head.
Serving Suggestions: A neat part, one accessory, and clean edges are usually enough. I’d rather see one sharp detail than four competing ones. That’s where the style starts to feel finished.
Low-Tension Move: If your scalp runs tender, anchor the puff with a soft scrunchie first, then a second one a half-inch above it. It looks small, but it can reduce the pull at a single point.
Common Mistakes That Make Puffs Sag or Hurt
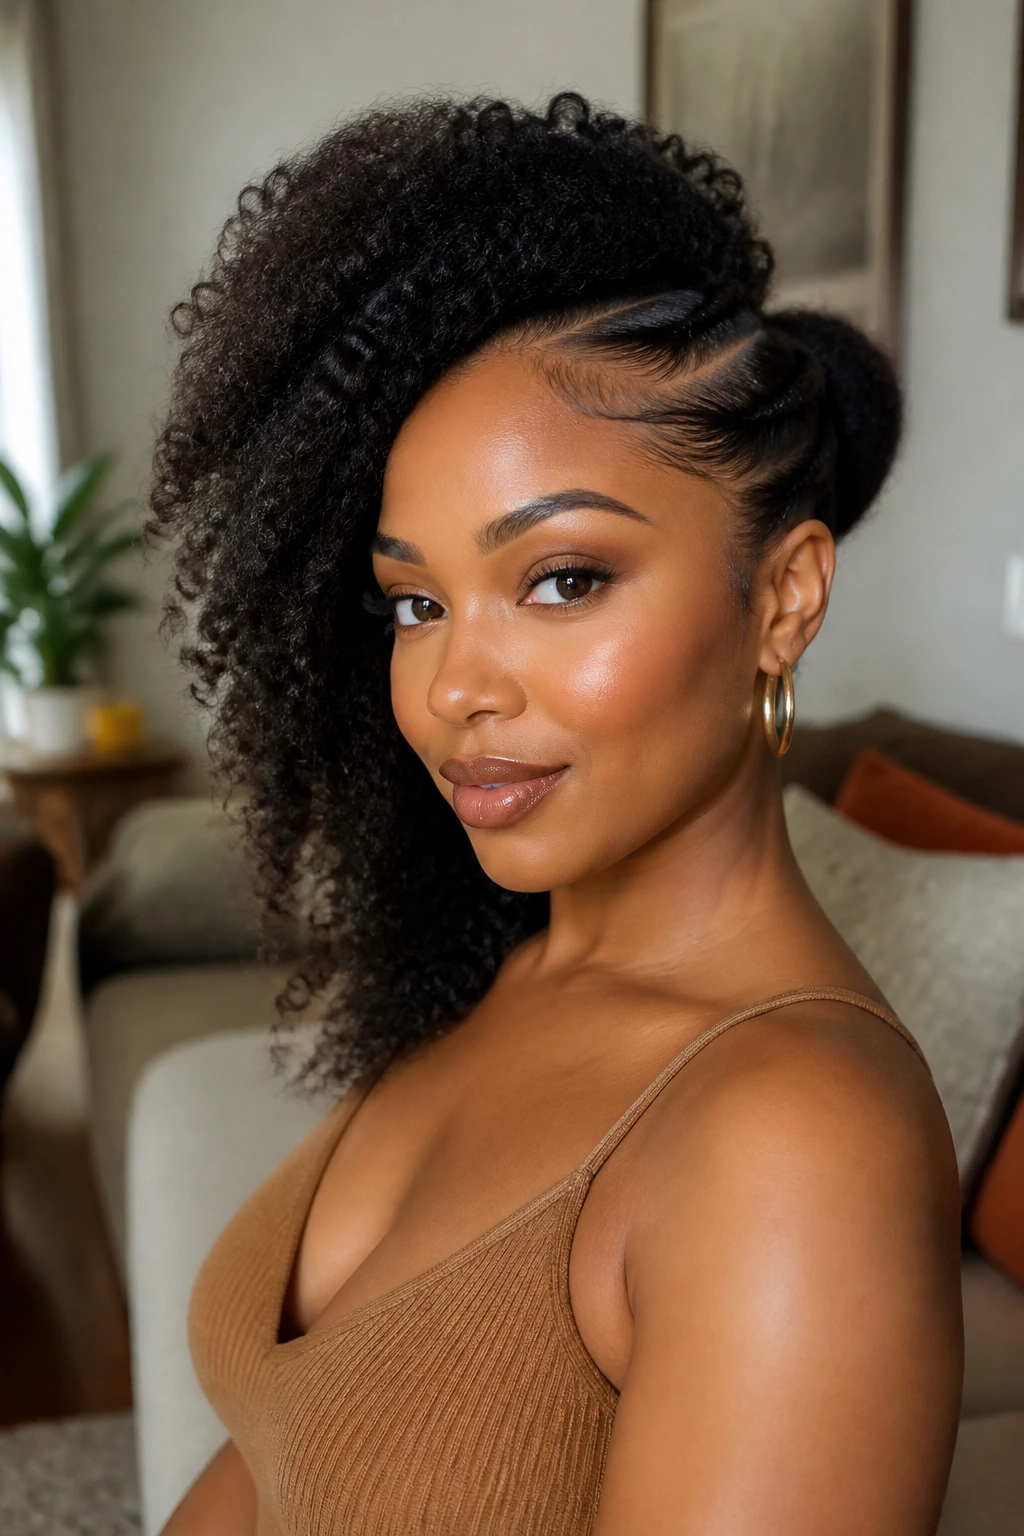
The first mistake is over-smoothing the whole head. If every strand is packed down with gel, the puff loses body and your hairline starts feeling stiff. Smooth the perimeter, not the soul of the style. The puff itself needs room.
The second mistake is using a band that is too tight or too narrow. Those skinny elastics can dig in and create a dent that stays long after you take the style down. A wider, covered tie holds better and does less damage. If you hear snapping while you gather the hair, stop and loosen up.
Another problem is starting with dry, tangled hair. That gives you a puff that looks frayed at the base and feels rough when you touch it. Detangle first, add leave-in, then gather. Skipping that order is how you end up with a puff that looks like it has been through a small fight.
And one more: making the part too perfect while the rest of the hair is still frizzy. The contrast can be harsh. If the part is crisp, the surrounding hair should be controlled enough to match it.
Variations and Adaptations to Try
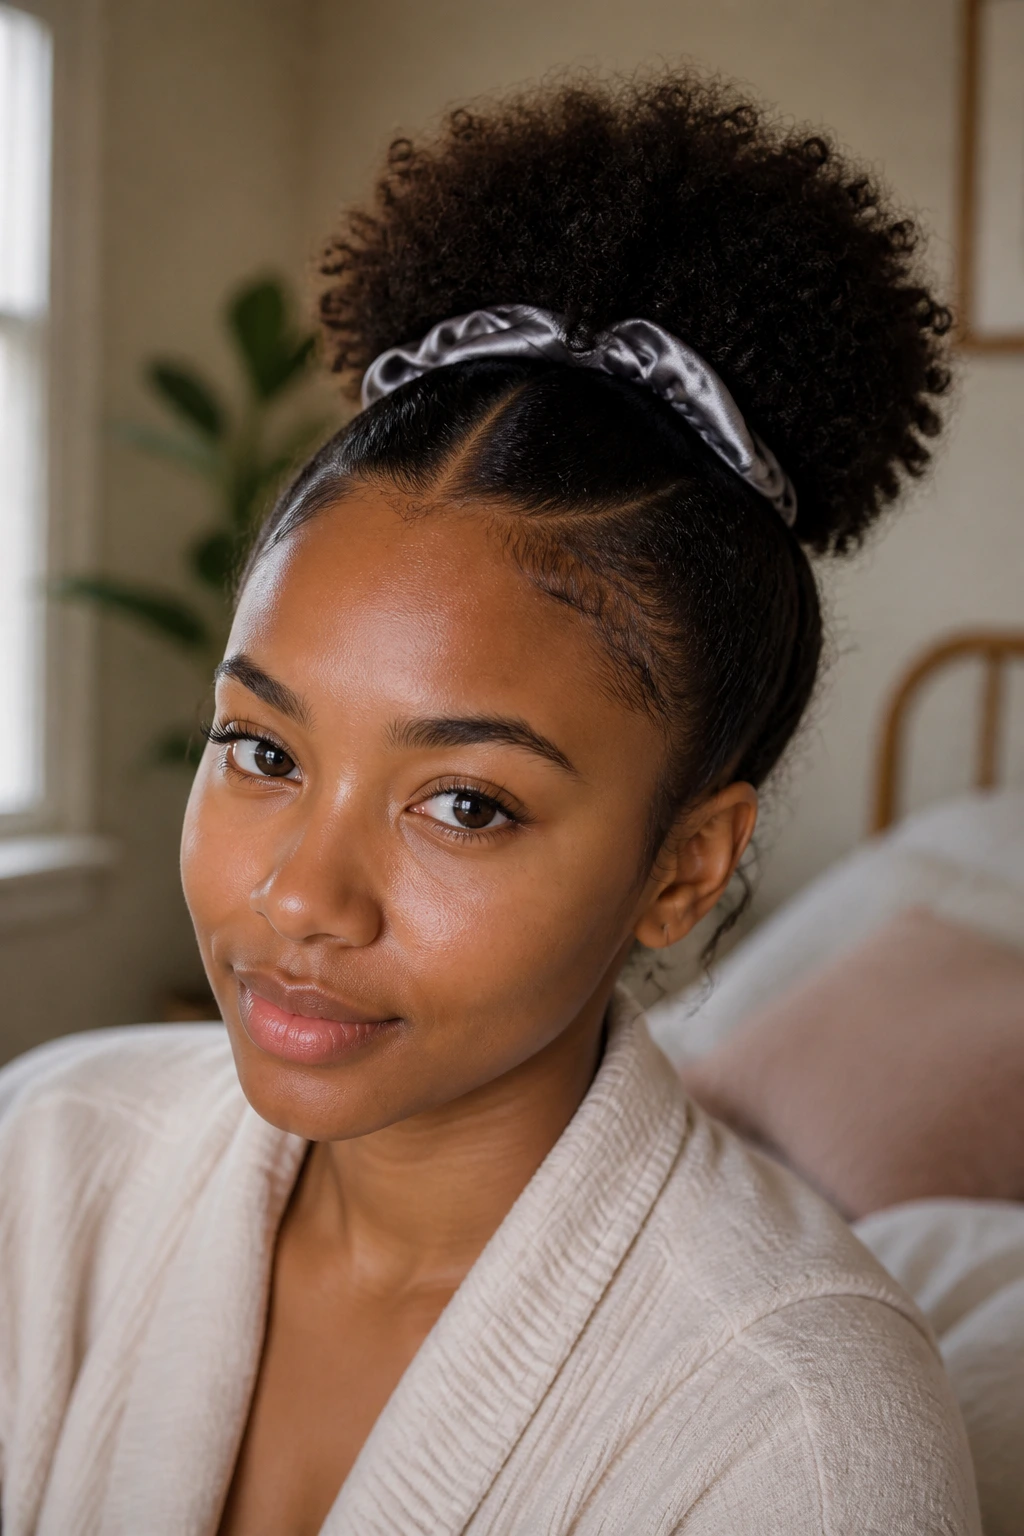
The Soft School-Run Puff: Keep the part loose, use a satin scrunchie, and leave the edges only lightly smoothed. This is the version for days when speed matters more than precision.
The Braided Edge Puff: Add two or three small braids along the front hairline before gathering the puff. It brings structure to fine or short front sections that would otherwise slip out.
The Stretch-and-Go Puff: Band the hair or do a quick twist-out first, then gather it once it has stretched. The puff looks longer, and the shrinkage is less dramatic.
The Dress-Up Puff: Use a scarf, one clip, and a little shine on the puff surface. That’s enough for events, dinners, and photos without turning the style into a whole project.
The Kid-Friendly Puff: Keep tension low, skip heavy gel, and use soft bands that come out easily. Children notice the pulling faster than adults do, and they are usually right about it.
Make Afro Puff Hairstyles Last Longer Without Rebuilding Them From Scratch
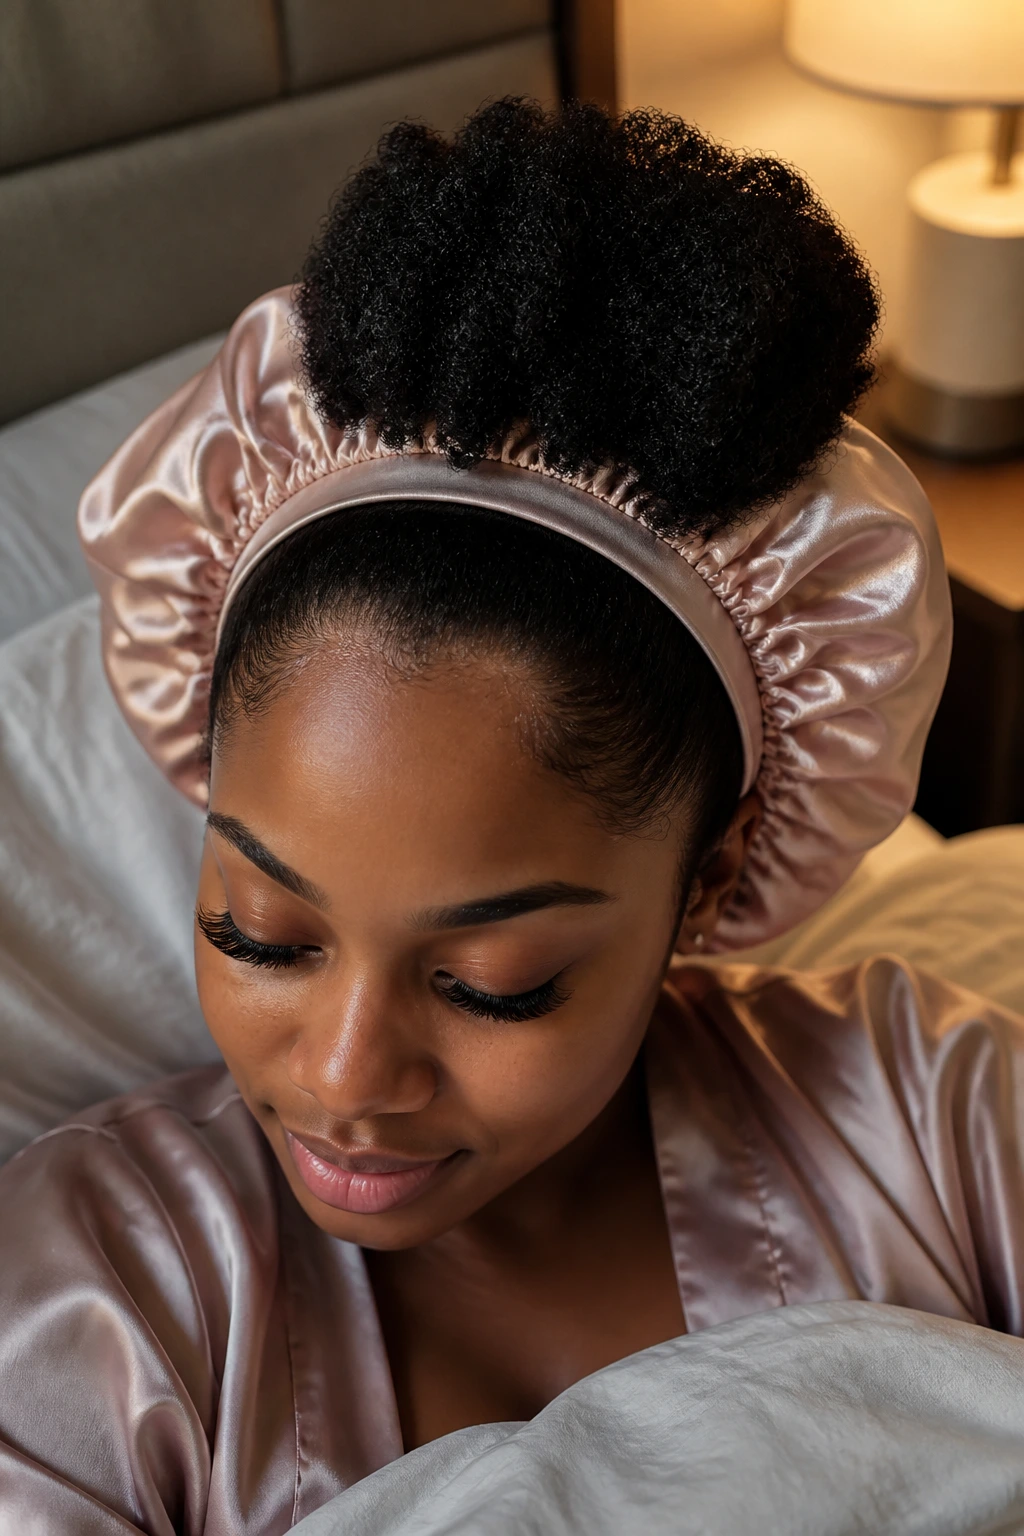
Night care is where a lot of good puffs get rescued or ruined. If you want the style to last, wrap the roots with a satin scarf or sleep in a bonnet that does not crush the puff flat. High puffs usually need a looser wrap than low puffs because the crown wants to keep its shape.
In the morning, do not soak the hair just to wake it up. A light mist at the roots, a little edge smoothing, and a quick re-tie usually does the job. If the puff itself has gone flat, fluff it from the outside with dry fingers before adding any moisture. Once the hair gets damp in the wrong places, it can shrink in weird directions.
Most puffs wear best for one to three days, depending on your texture, weather, and how much you move around. If the base starts snagging, the band is too old or the hair underneath needs a reset. Sometimes the smartest move is not to stretch a style beyond its useful life. Let it go. Start fresh.
Frequently Asked Questions About Afro Puff Hairstyles
How do I keep my puff from looking flat by midday?
Start with hair that has a little stretch, then gather it with a scrunchie that grips without squeezing. If the puff sits flat because the roots are too slick, skip heavy gel on the whole head and save hold for the perimeter only.
Can afro puffs work on short natural hair?
Yes. A mini puff, clipped-back puff, or pineapple puff can work beautifully on short coils and growing-out cuts. The trick is using the length you have instead of forcing a large puff that needs more hair than you own.
What’s the best way to protect my edges with a puff?
Keep the base loose enough that your scalp feels calm, not tight. Use a soft tie, avoid repeating the exact same gather point every day, and give the hairline a rest between styles that pull in the same direction.
Do I need gel for every puff style?
No. Some puffs look better with cream and a brush, especially when you want softness instead of a lacquered finish. Gel helps with clean parts and edges, but too much can make the style hard and flaky.
How do I make the puff look bigger?
Stretch the hair first, then fluff the puff after it’s secured. Picking at the puff lightly from the outside adds shape without disturbing the base, and a higher placement usually makes the whole style read fuller.
Can I wear a puff after a twist-out or braid-out?
Absolutely, and that texture is often the best starting point. Twist-outs and braid-outs give the puff visible definition, which keeps it from collapsing into one flat shape as the day goes on.
Why does my puff keep slipping out of the band?
Usually the hair is too smooth, the band is too loose, or the base section is too small for the amount of hair you’re trying to hold. A slightly wider tie, a second anchor, or less product at the roots usually fixes it.
A Style That Never Needs Apologizing For Itself
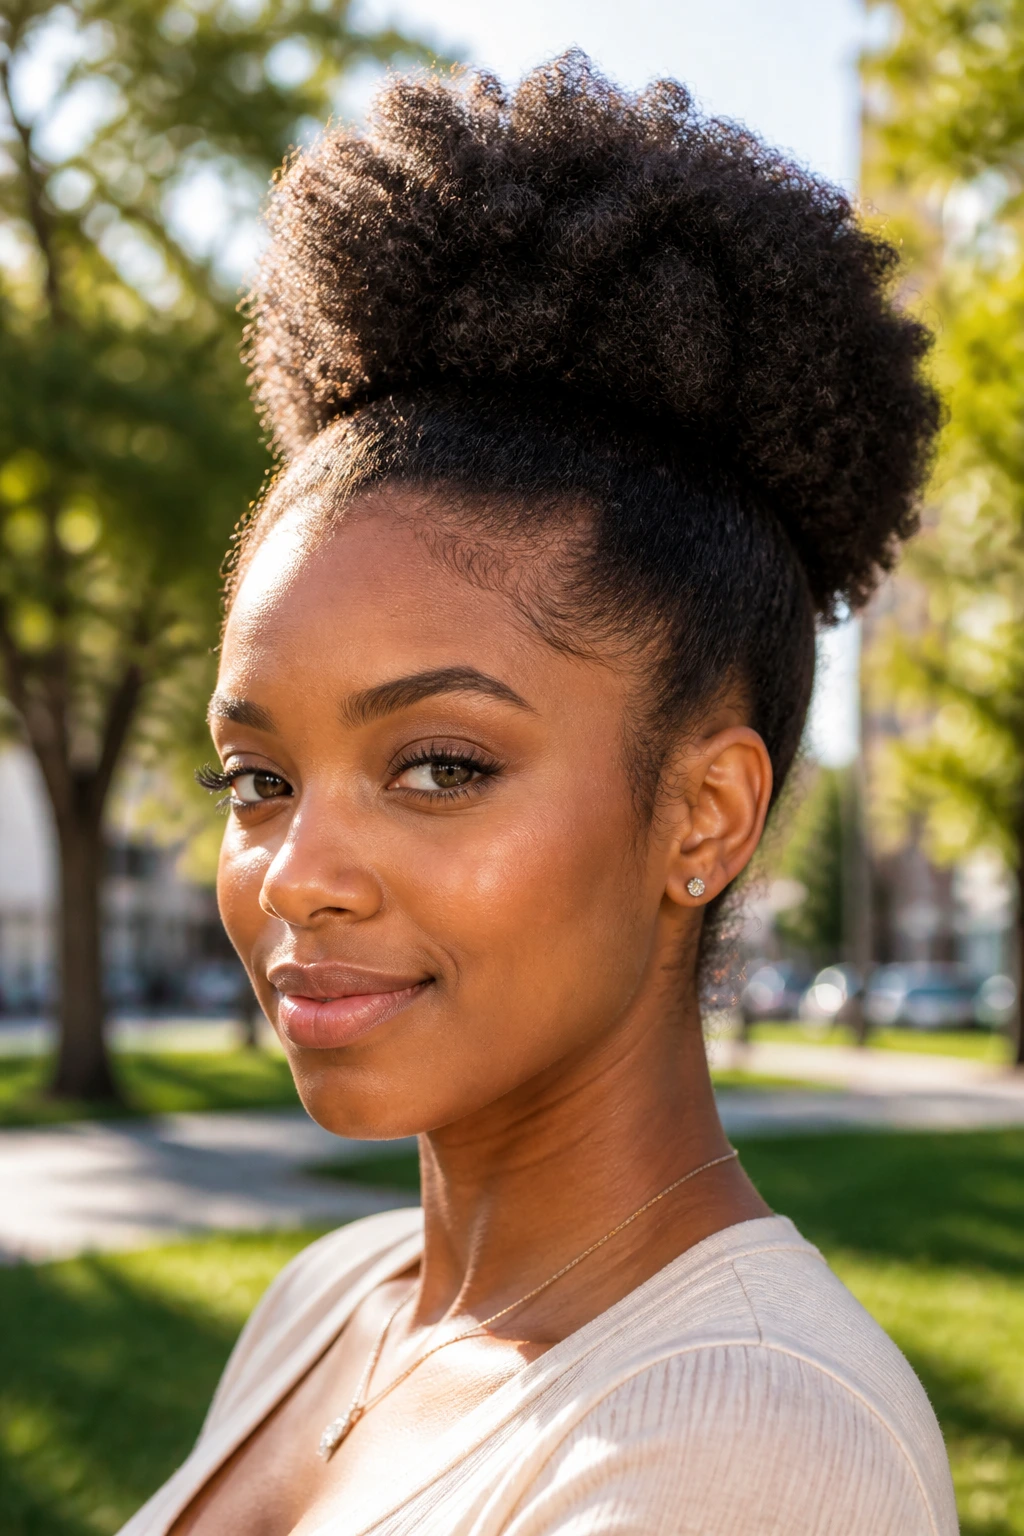
Afro puff hairstyles stay useful because they leave room for your hair to be itself while still shaping it into something that feels intentional. That balance is hard to beat. A puff can be soft, sharp, playful, clean, or a little messy on purpose, and it still reads as a real style rather than a compromise.
The best version is the one that fits your texture, your scalp, and the time you actually have. Some days that means a high cloud puff. Some days it means a low nape puff with a scarf and no drama. Either way, the shape is there, and the hair gets to keep its texture.
