



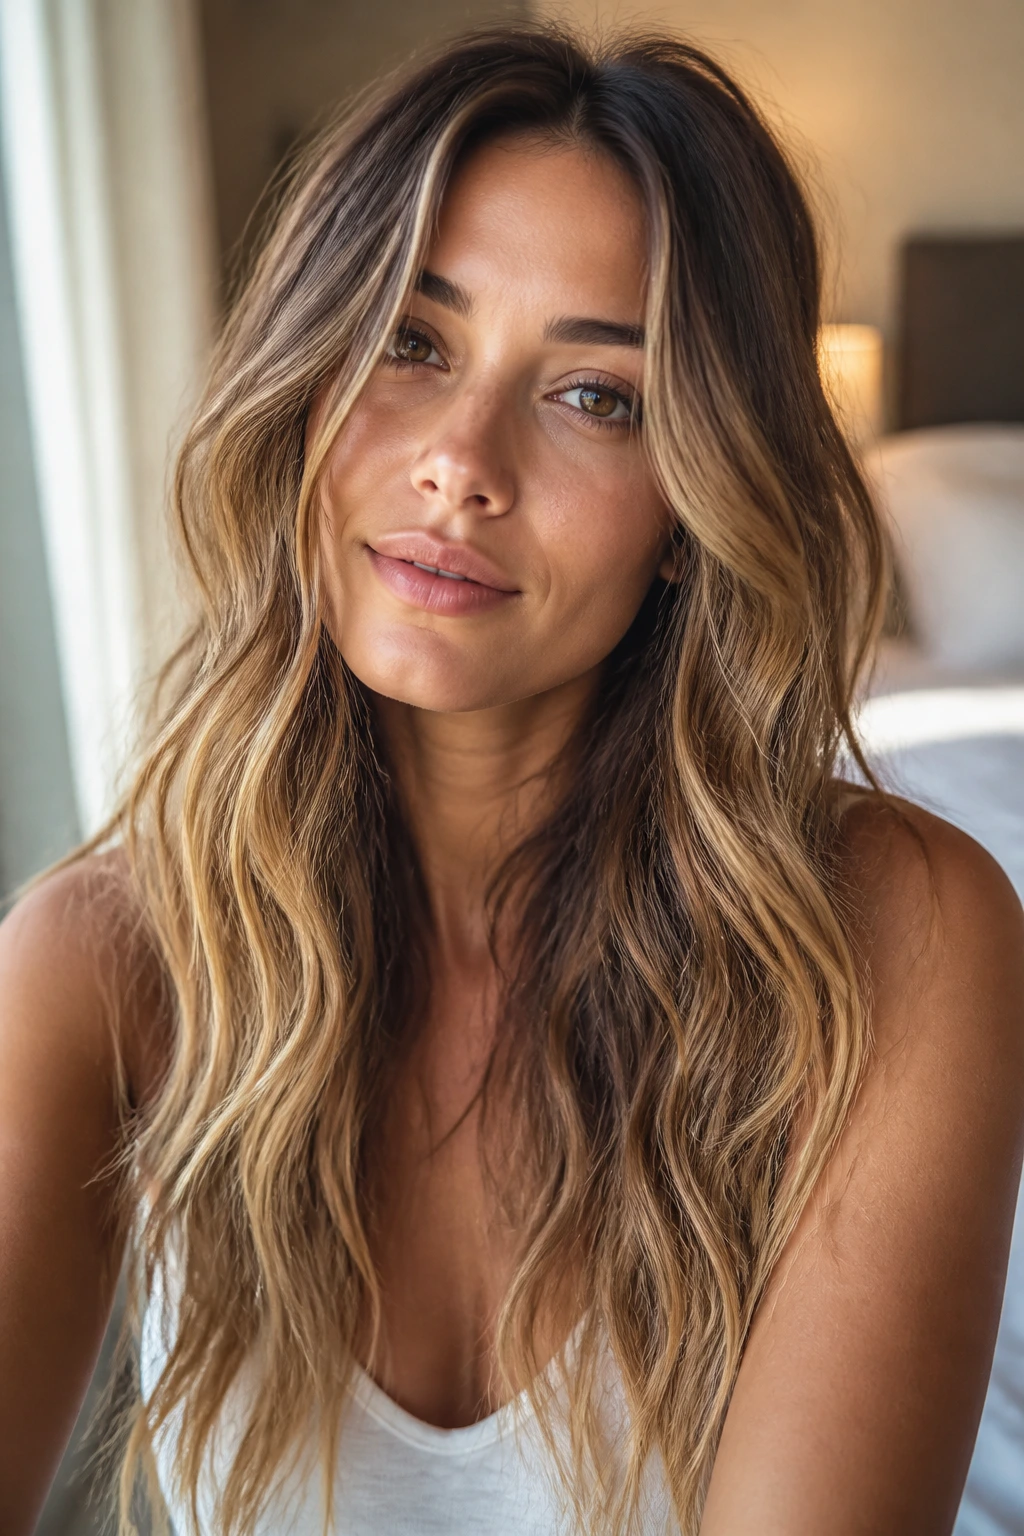
Beachy wave hairstyles for long hair can look lazy in the best way—or flat, frizzy, and overworked if you fight the length instead of letting it help. Long hair has weight. That weight is useful, but only if the wave pattern is built with it in mind. A tight curl from root to tip usually reads as too neat. A soft bend with a little stretch at the ends reads as lived-in, soft, and expensive-looking without trying so hard.
The trick is that long hair doesn’t need one single wave recipe. It needs a few different ones. Sometimes you want lift at the crown and loose movement through the lengths. Sometimes you want a polished bend for dinner, or a heatless braid-out that still looks intentional when you wake up. And sometimes you just want your hair to stop sticking to your neck while still looking like you made an effort.
Hair this long also tells on you. If the sections are too big, the wave disappears by lunch. If the product lands too close to the roots, the top goes limp and the ends look dry. If you curl every strand in the same direction, you get tube curls instead of that broken-up, salty texture that makes beach waves work. The details are small. They matter a lot.
Why These Beachy Wave Hairstyles Feel So Easy on Long Hair
-
Built for weight: Long hair pulls waves down, so these looks focus on crown lift, mid-length movement, and ends that don’t need to be curled into submission.
-
Heat and no-heat options: Some styles use a wand or flat iron, while others rely on braids, headbands, or twists that can dry overnight without frying the ends.
-
Flexible finish: You can wear these waves with a middle part, a side part, clips, braids, scarves, or a plain tuck behind the ear and they still read as intentional.
-
Works on day-two hair: A lot of these looks get better after the first wash day, which is good news if your roots are a little flatter and your ends need less work.
-
Less product, better shape: Long hair usually needs product placed with care, not piled on. A light mist at the mid-lengths and a touch at the roots beats a heavy coat every time.
-
Dressy or casual by design: The same wave pattern can look beachy with a T-shirt or sharp with a blazer; the part, polish, and accessory choice do most of the heavy lifting.
1. Classic Center-Part Waves That Fall in Soft Ribbons
There’s a reason this is the version most people picture first. Long hair with a clean center part and loose, brushed-out waves has a calm, unfussy shape that never looks like it fought the mirror. The middle part gives the length a straight visual line, and the wave breaks that line just enough to keep the hair from looking heavy.
The trick is in the wrapping. Use a 1-inch or 1.25-inch curling wand, take sections no wider than 1.5 inches, and leave the last inch or so out for that softer, bent finish. Wrap away from the face on the front pieces, then alternate directions through the back so the ends don’t stack into perfect spirals. Once the hair cools, run your fingers through it or use a wide-tooth comb. A single mist of flexible hairspray is enough.
This version works best when your long hair already has some shape through the ends. If the cut is one blunt curtain from top to bottom, the waves can look too round. Long layers help. So does a little texture spray at the mid-lengths, not the roots. Too much at the scalp and the whole thing starts to feel dusty.
2. Deep Side-Part Waves with Crown Lift
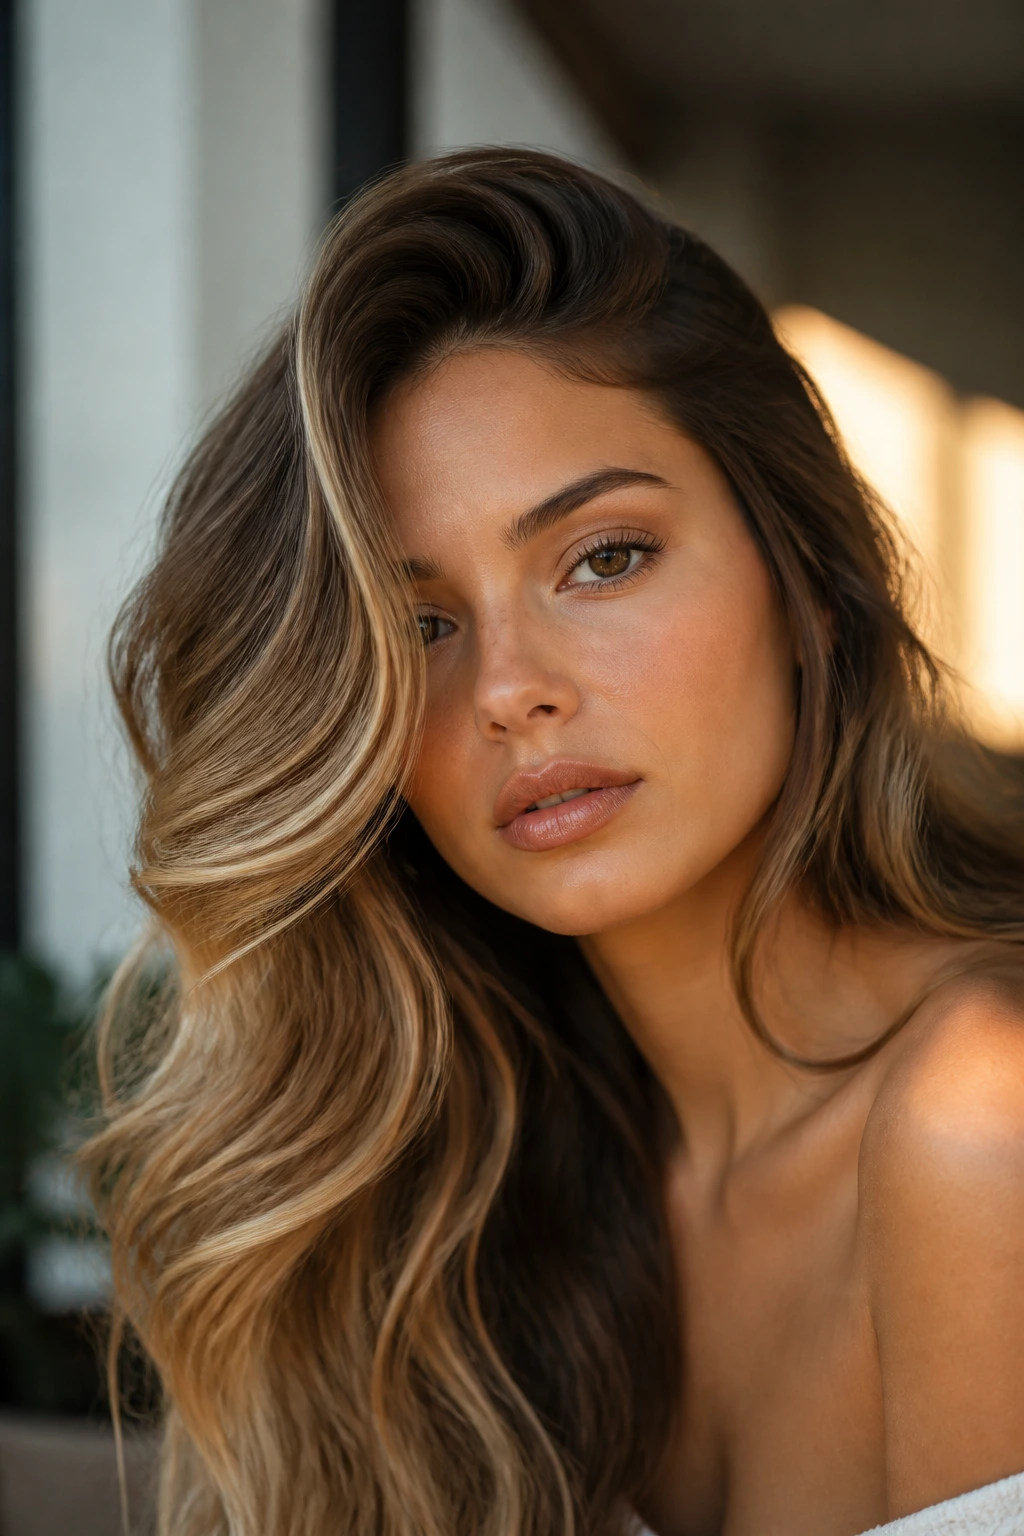
A deep side part changes the whole mood fast. It gives long hair height on one side, a little drama over the eyebrow, and a softer drop through the opposite shoulder. On round or heart-shaped faces, it also shifts the eye line in a way that feels flattering without being fussy.
Why the Part Matters
With a deep side part, the crown needs support before you even touch the lengths. Blow-dry the roots in the opposite direction of the final part, then flip the hair back and set the side with a low-heat blow-dryer or a few minutes clipped at the root. That tiny prep step matters more than another pass with the iron. If the crown is flat, the whole style collapses.
For the wave itself, keep the sections loose and the bend wide. A 1.25-inch wand works well here because you want movement, not tight spirals. The front pieces should be wrapped away from the face, then brushed into a soft swoop after they cool.
A side part also loves earrings. Big hoops, small drops, even a plain stud can change the read of the style. One side tucked behind the ear. One side left loose. Done.
3. Face-Framing Curtain Waves for Long Layers
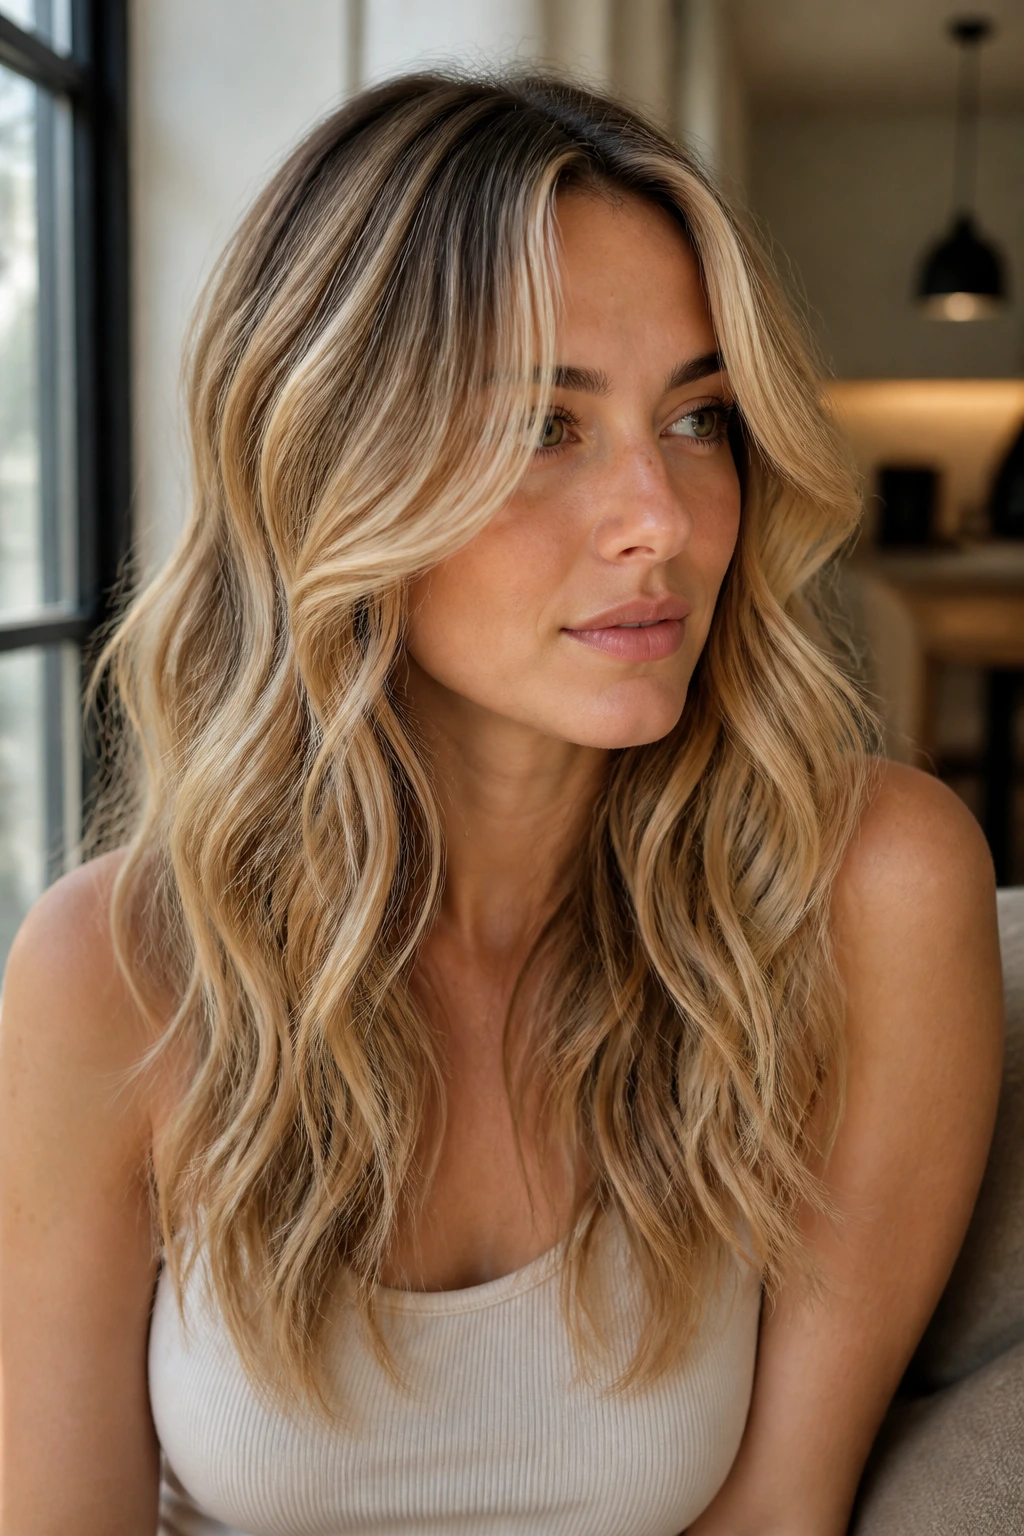
Why do face-framing pieces matter so much on long hair? Because they stop the length from becoming one heavy sheet. A pair of softly waved curtain pieces at the front breaks up the weight, opens the face, and gives the haircut a little movement near the cheekbones where people actually notice it.
This look is all about the front two sections. Keep them a touch more polished than the rest. Wrap them away from the face, let them cool fully, then comb them so they drape instead of curl. The back lengths can be a little looser and more relaxed. That contrast is what makes the style feel modern rather than over-curled.
If your hair has long layers, this is one of the easiest ways to show them off. If your layers are minimal, the front bend becomes even more important. I like a quick mist of shine spray on the front pieces only, because they sit closest to the skin and catch frizz first. Keep the back matte and piecey. The contrast looks better than making the whole head shiny.
4. Half-Up Twist Waves That Keep Hair Off the Neck
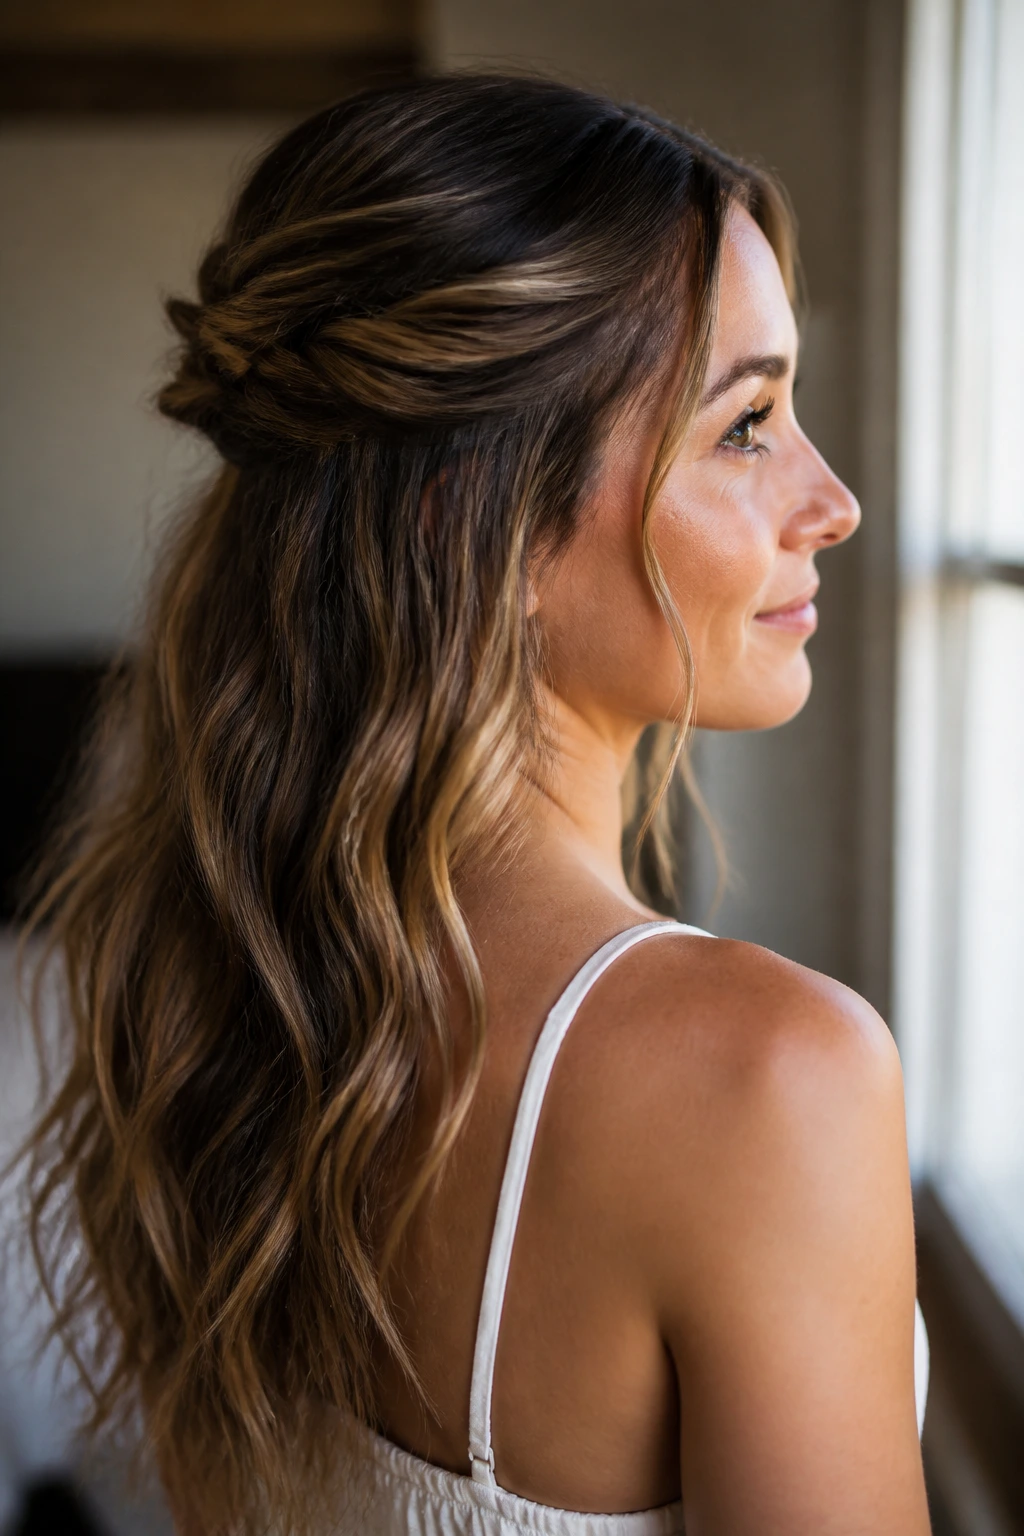
This is the style I reach for when long hair feels like a blanket. Pulling back just the top half gives you air at the neck without losing the wave pattern through the lengths. It’s neat enough for errands, but it doesn’t slide into formal territory unless you tighten the twist and polish the crown.
Start with hair that already has a soft bend, heatless or styled. Take two sections from the temples, twist them loosely toward the back, and secure with a small clear elastic or two pins. The twist should sit low enough that the wave lengths still show beneath it. If you pull too much hair into the half-up section, the look turns stiff. Keep it airy.
A tiny spritz of texture spray at the roots helps the twist stay put, especially if your hair is slippery. And if you want the style to feel less sweet, pull a few narrow strands loose around the face. Those little wisps matter. They keep the half-up shape from looking like it belongs in a school photo.
5. Braided Crown Waves with Loose Lengths
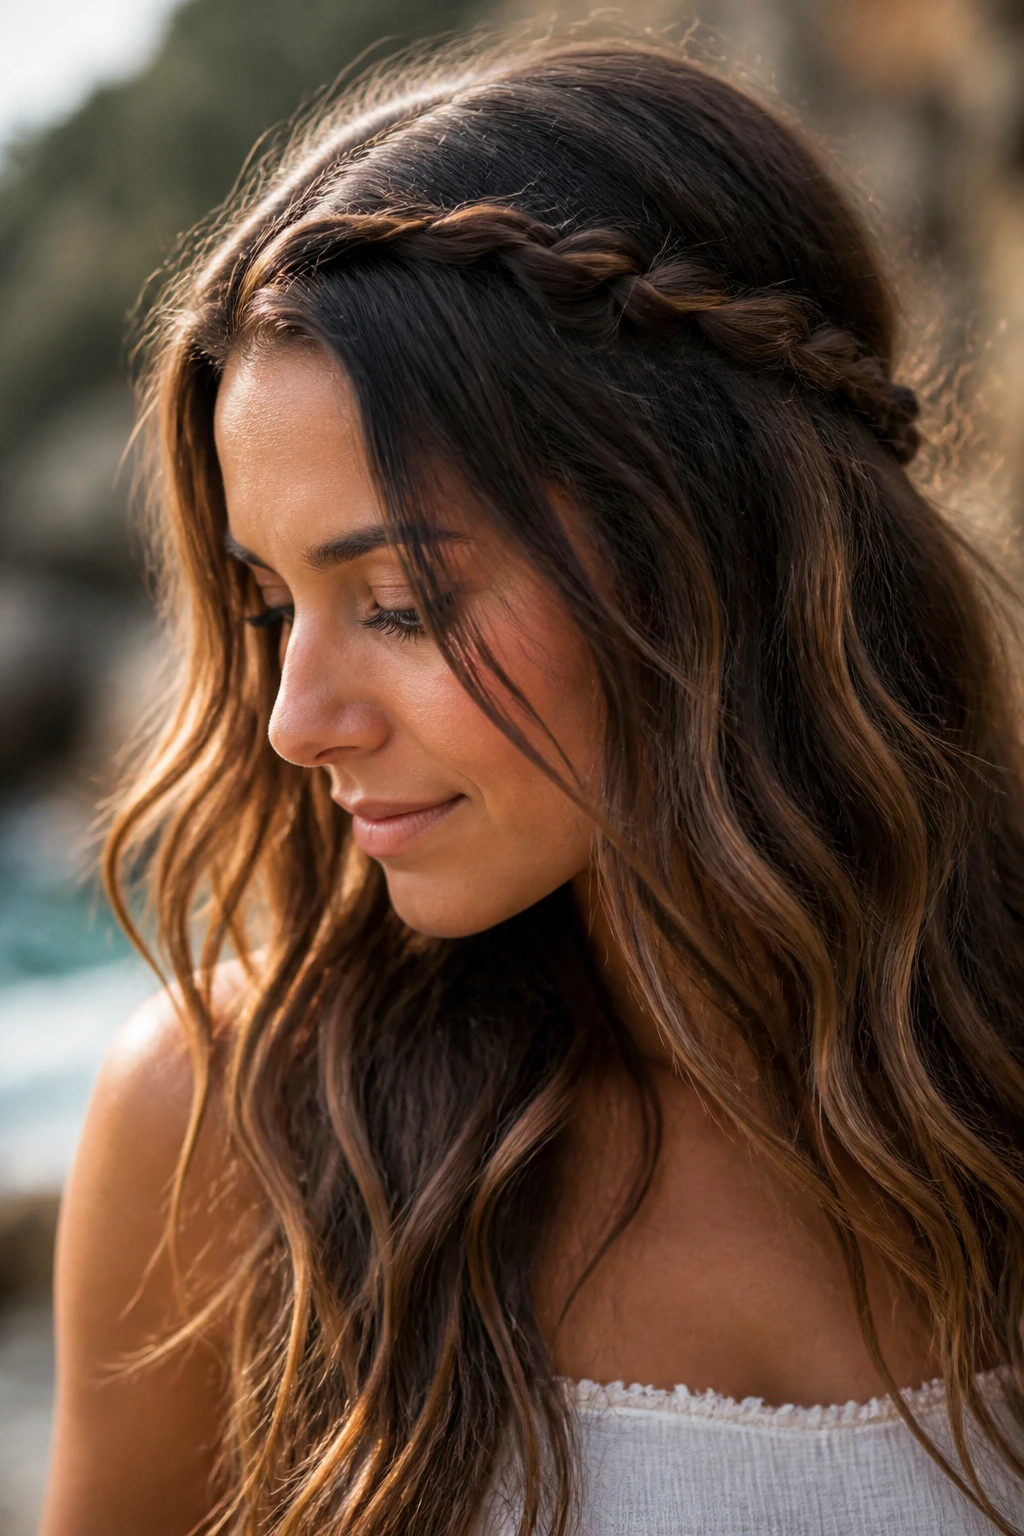
A braided crown gives you the face framing of a pulled-back style without sacrificing the long wave trail down your back. It’s a good trade. The braid itself can be thin and tight, or thicker and softer, depending on how much of the front you want to control.
The best version for beachy texture is usually a small braid along one side, crossing over the top, and disappearing behind the ear. You can do a second braid on the other side if you want symmetry, but I usually prefer one. It looks less precious. Once the braid is in, rough up the lengths with your fingers so the waves underneath still move.
What Makes This Different from a Full Braid-Out
A full braid-out creates a stronger zigzag pattern from top to bottom. This version doesn’t. It leaves the long hair open and uses the braid as a frame, not the whole show. That makes it easier to wear with waves that were created by a wand, a flat iron, or even air-dried texture. The braid adds structure where the hairline needs it and softness everywhere else.
6. Mermaid Waves Made with a One-Inch Wand
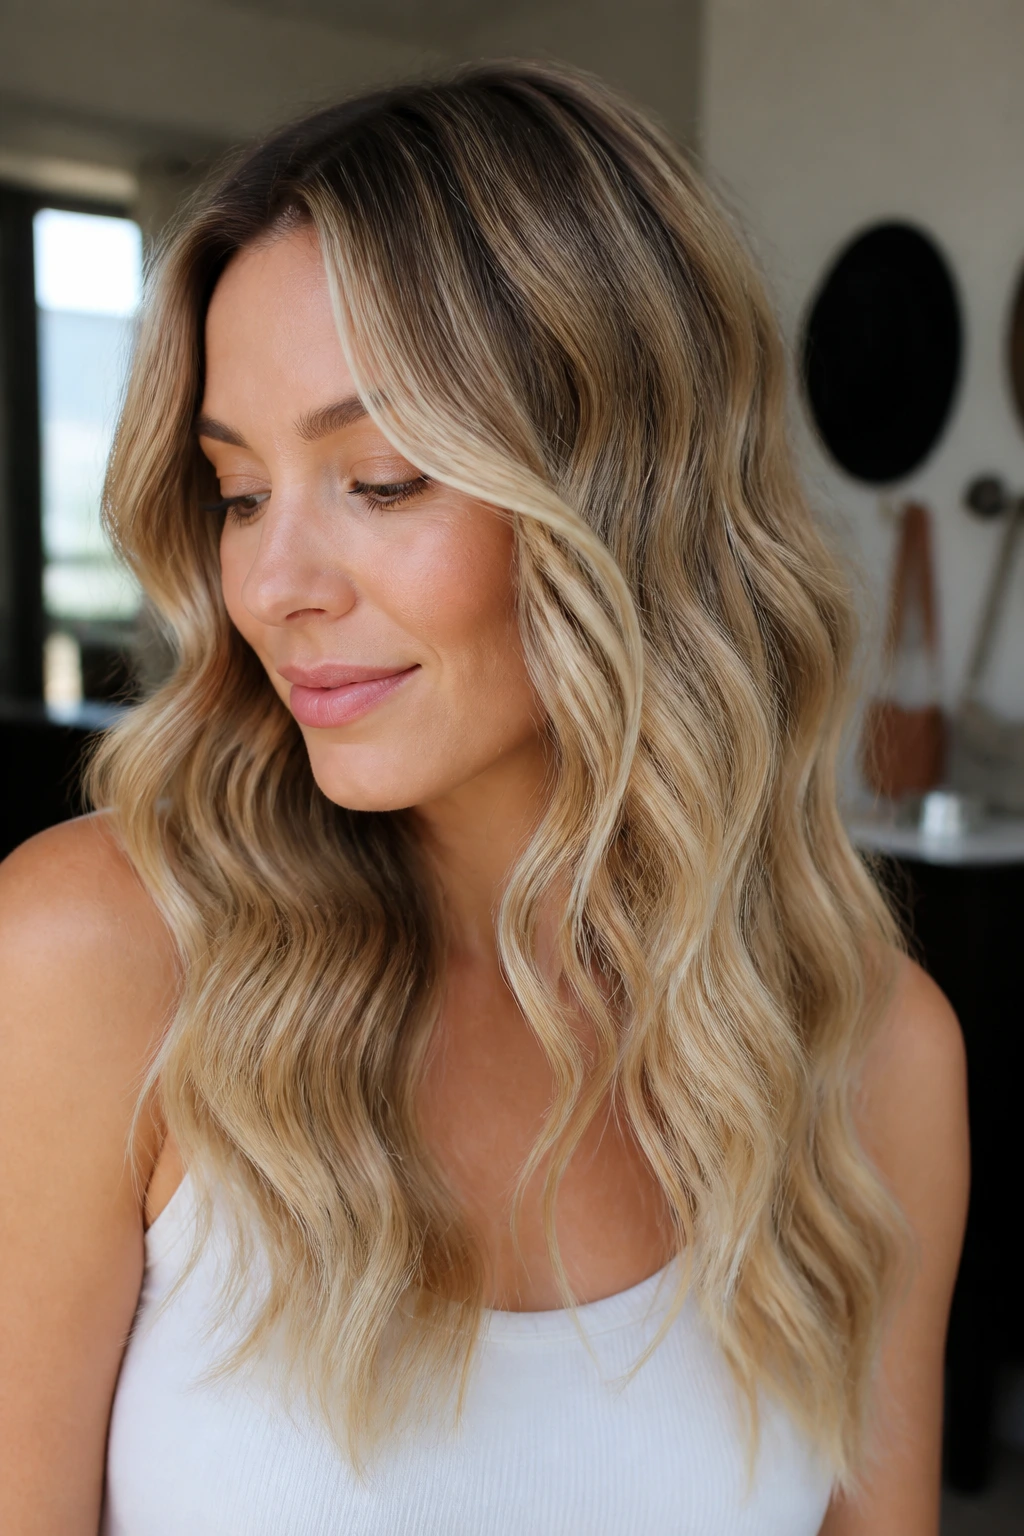
Mermaid waves look best when they have a long, stretched-out bend rather than a tidy curl. A 1-inch wand gives you enough curve to hold, but not so much body that the style turns into ringlets. On long hair, that size creates the kind of ribbon effect that falls in pieces instead of one heavy sheet.
Wrap each section around the barrel, but don’t lock your ends on for the full ride. Leave the last 1 to 2 inches out so the shape feels softer and more modern. Alternate direction every other section, especially below the ears. That stops the wave from forming one giant uniform pattern, which is where a lot of long-hair styling goes sideways.
This is one of the better choices if your hair is straight and stubborn. Smaller barrels often make long hair look too curly at the top and too limp at the bottom. A 1-inch wand gives you enough bend to survive gravity. Finish with a dry texture spray, then separate only the bigger clumps. Don’t over-finger it. The best mermaid waves still look a little piecey.
7. Soft S-Waves That Look Air-Dried
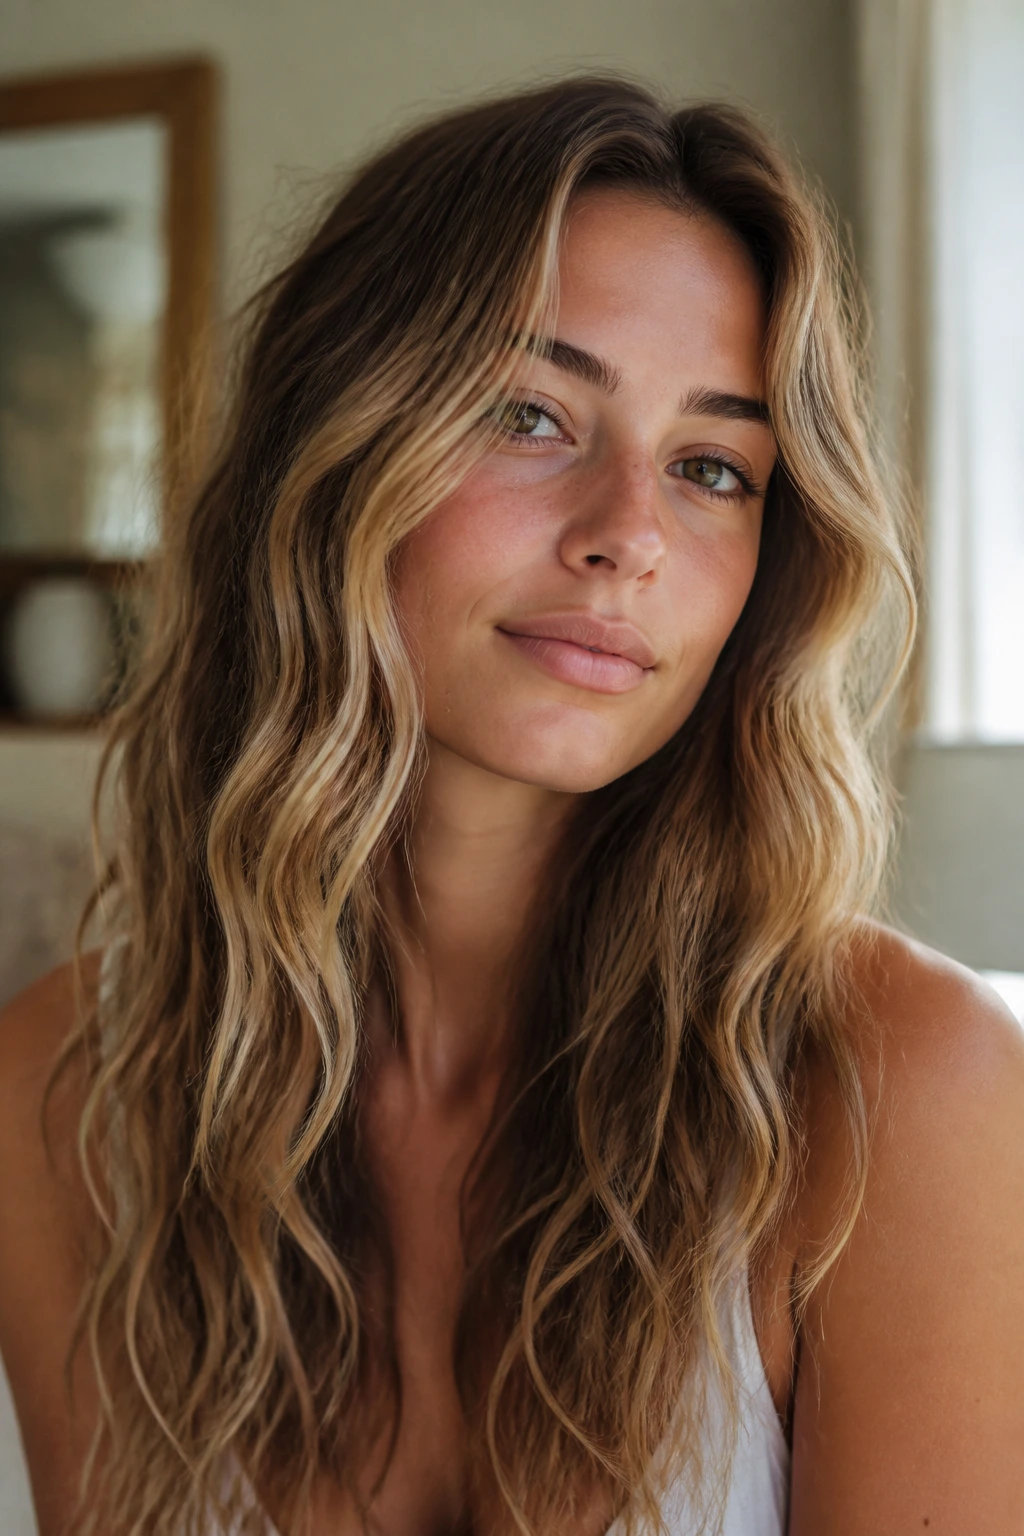
Soft S-waves are the quiet version of beach waves. The line of the hair moves in broad bends, not tight curls, which makes the style feel airy on long lengths. If your hair is naturally fine or slips out of curl fast, this shape tends to hold better than a round curl that falls flat by noon.
Use a flat iron or a larger wand and think in bends, not wraps. Clamp mid-shaft, rotate halfway, glide a few inches, then turn again. The goal is a loose S-shape down the strand, with the ends staying relaxed. That little gap at the bottom keeps the style from feeling too set.
How to Get the Most From It
This works especially well if your long hair already has a subtle wave or bend from being air-dried. Add a pea-sized amount of lightweight cream through the mid-lengths before styling, not after. Then finish with a mist of flexible spray from about 10 inches away. If the hair starts to look too neat, break a few pieces apart with your fingertips and leave the rest alone.
8. Rope-Braid Waves You Can Sleep In
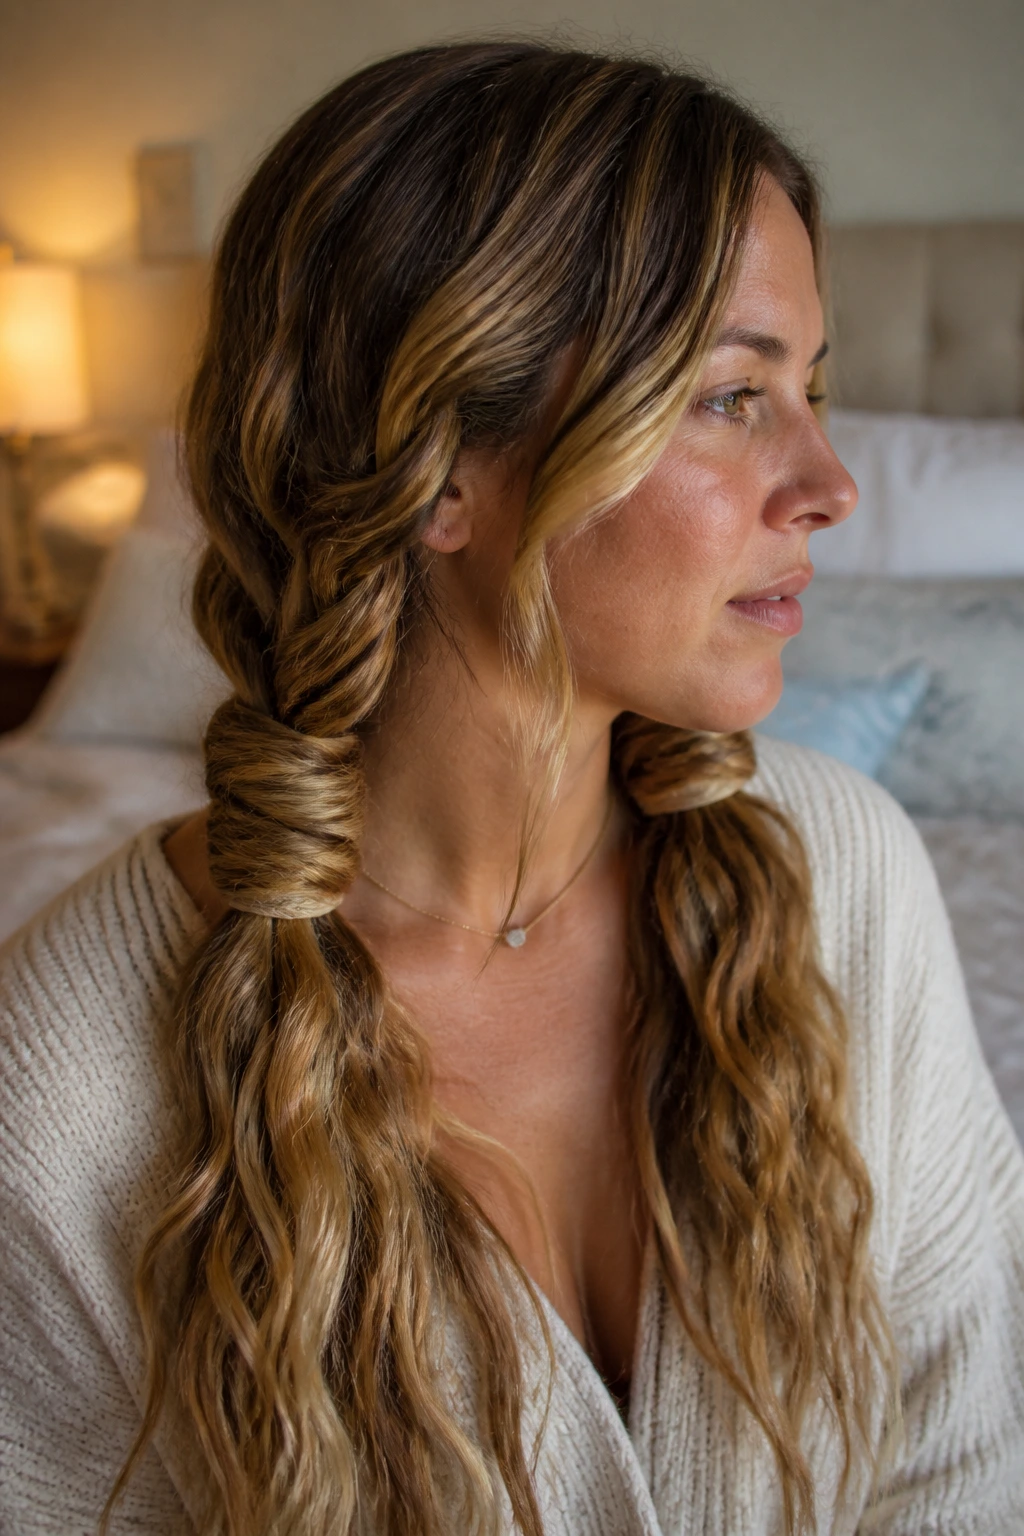
Rope-braid waves are a good answer when you want movement without heat, clips, or a complicated bedtime setup. Long hair is actually useful here because the length gives the twist something to hang from. The result is a softer, slightly irregular wave that looks better when it’s not too perfect.
Split the hair into two or four sections, twist each one tightly in one direction, then coil the rope back on itself and secure it low. If the hair is damp, it should be only slightly damp, not soaked. Wet hair takes forever to dry and can leave you with an odd, puffy bend near the roots. That’s not the point.
In the morning, undo the twists only after the hair is fully dry. If there’s any coolness left in the center, give it more time. The wave pattern will be strongest through the mid-lengths and softer at the ends, which is exactly what makes this style feel casual. A little leave-in spray on the ends helps if they tend to get crunchy overnight.
9. Headband Waves for a Heat-Free Morning
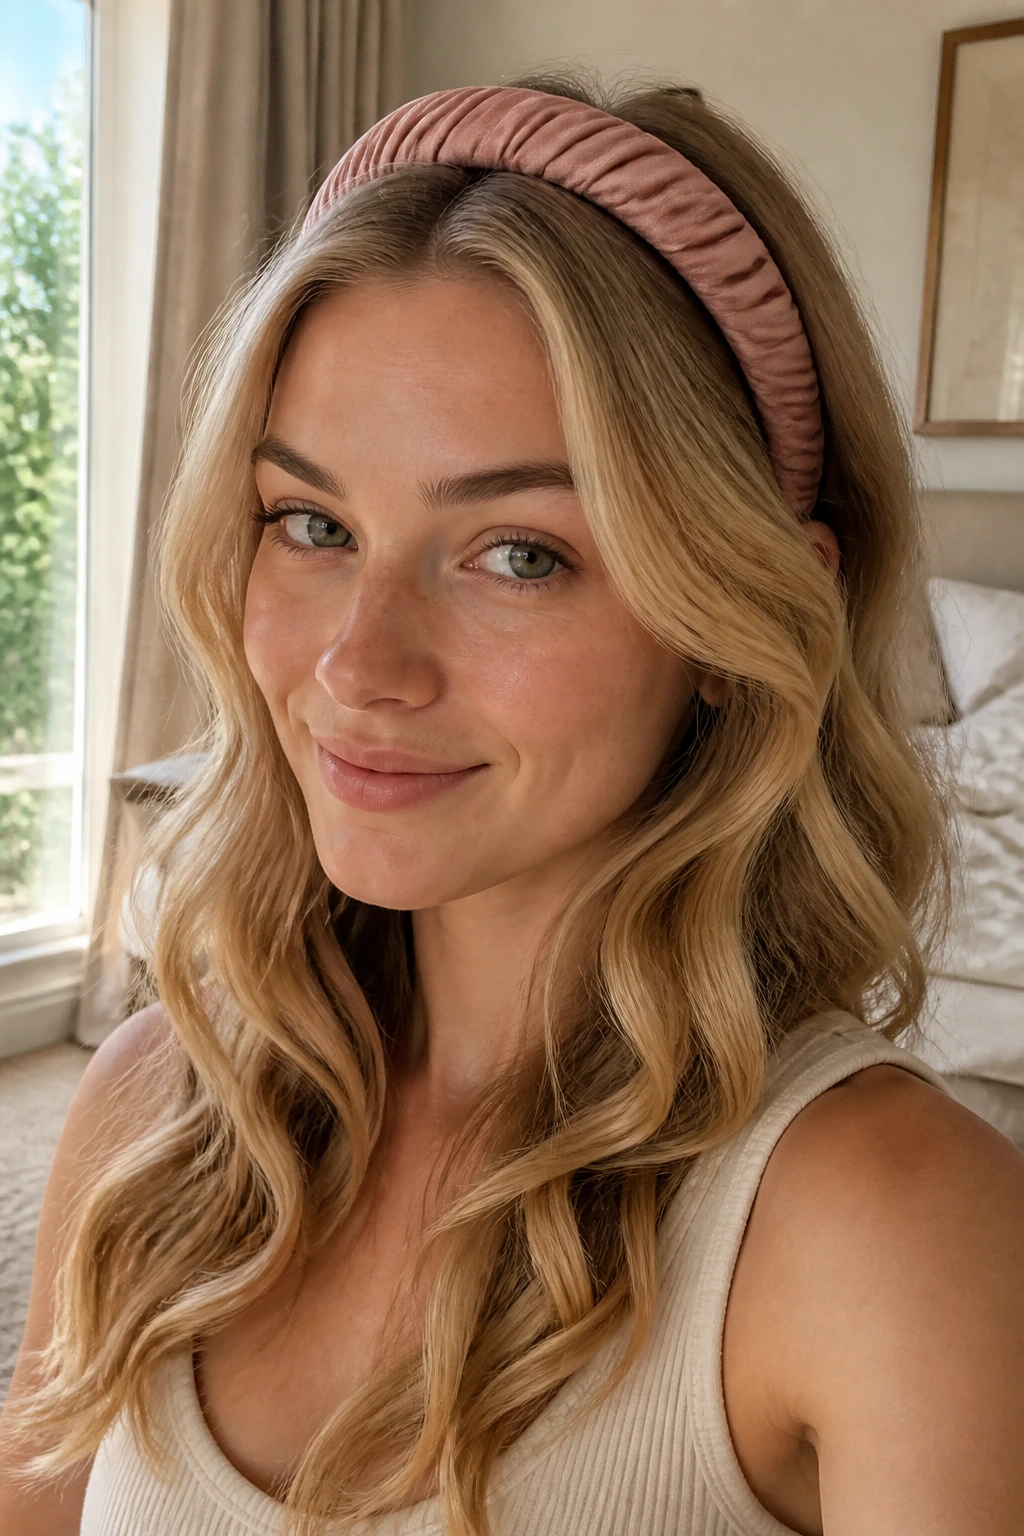
Headband waves have a gentle, old-school feel that works surprisingly well on long hair. A soft headband, a few wrapped sections, and a quiet night of drying can give you bend without the hot-tool drama. The method is calm. The result isn’t fussy.
What Makes the Headband Method Different
The headband sits where the wave begins, so the top stays smooth while the lengths get more movement. That balance matters on long hair. If the roots are already flat, you don’t want to make them flatter by over-saturating the crown with product. Keep the hair slightly damp, place the band, and wrap 1-inch sections around it away from the face.
In the morning, remove the band only after the hair feels dry all the way through. If it’s still cool near the nape, wait. A few extra minutes is better than half a day of limp bends. This style pairs well with a center part and soft front pieces, but it can also work with a side part if you want more lift on one side.
10. Glossy Polished Beach Waves for Dressier Days
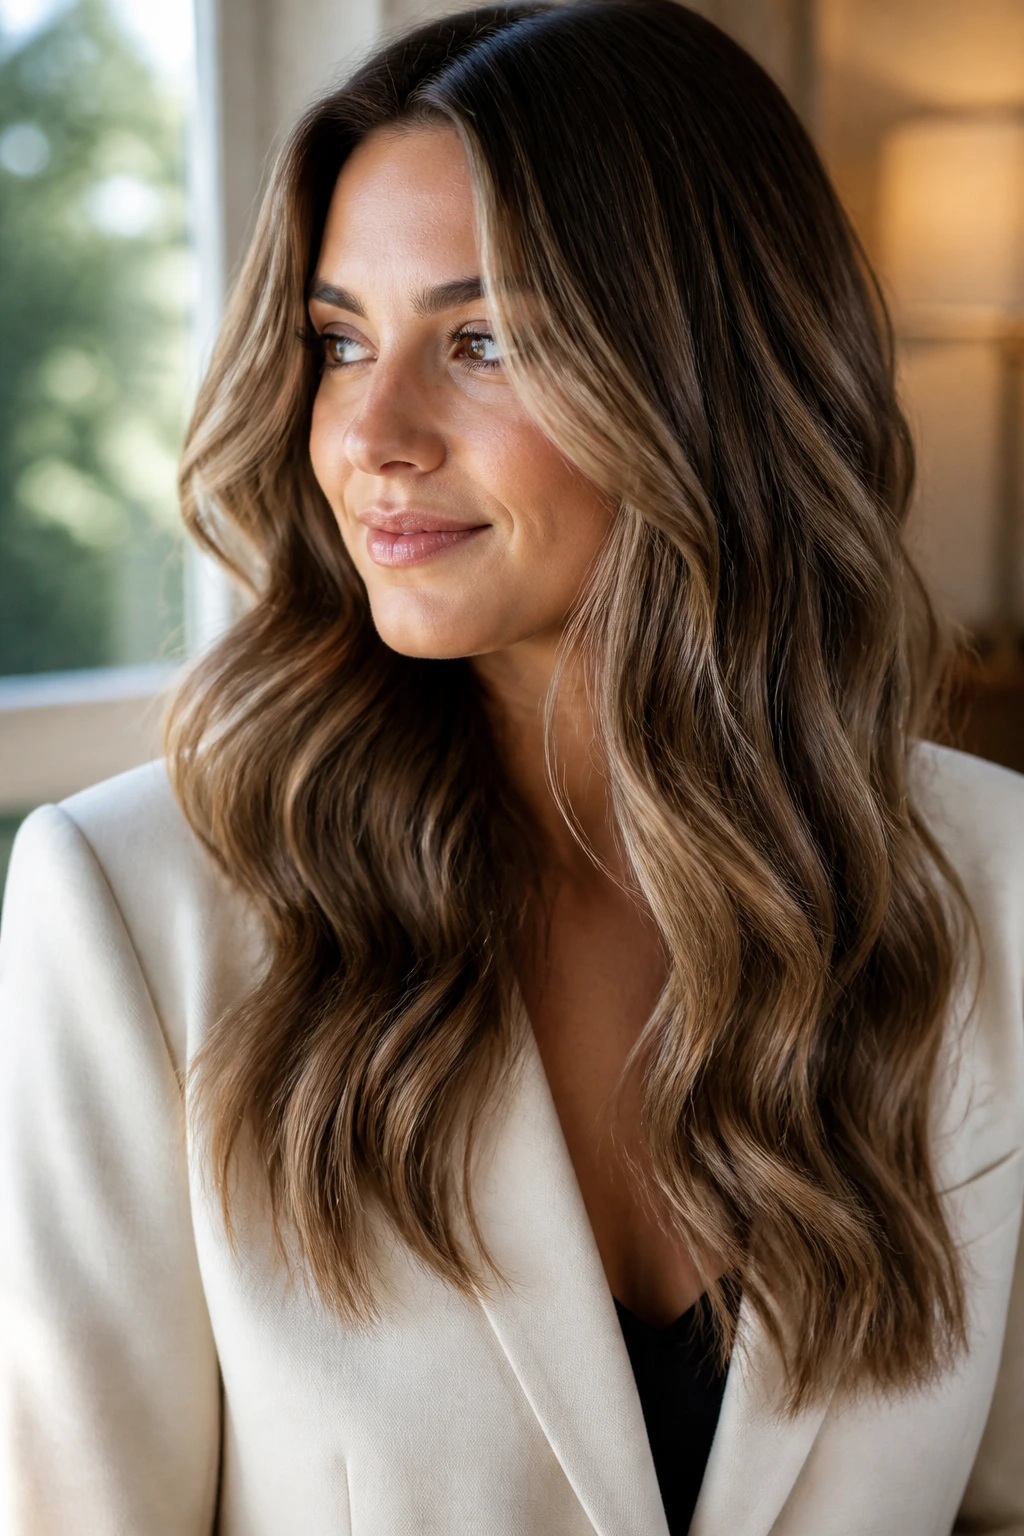
Not every beach wave has to look windblown. Sometimes long hair looks better with a smoother finish, a little shine, and waves that line up in a cleaner pattern. This version keeps the texture, but trims the rough edges. It’s the one I’d wear with a blazer, a slip dress, or a sharp neckline that needs a little control around it.
Use a 1.25-inch wand or curling iron and keep your sections very even. Wrap from mid-length down, hold for a short count, then release and let every piece cool before you brush. Brush with a boar-bristle brush or a paddle brush, not a fine comb, because you want the wave to stretch rather than frizz open.
A drop of serum on the ends is enough. Not the roots. Never the roots. If the roots look slick, the whole style loses its shape and starts to read heavy instead of polished. This version is best when you want the wave pattern to feel deliberate, almost like a salon blowout that relaxed a little on the way out the door.
11. Low Ponytail Waves with a Messy Wrap
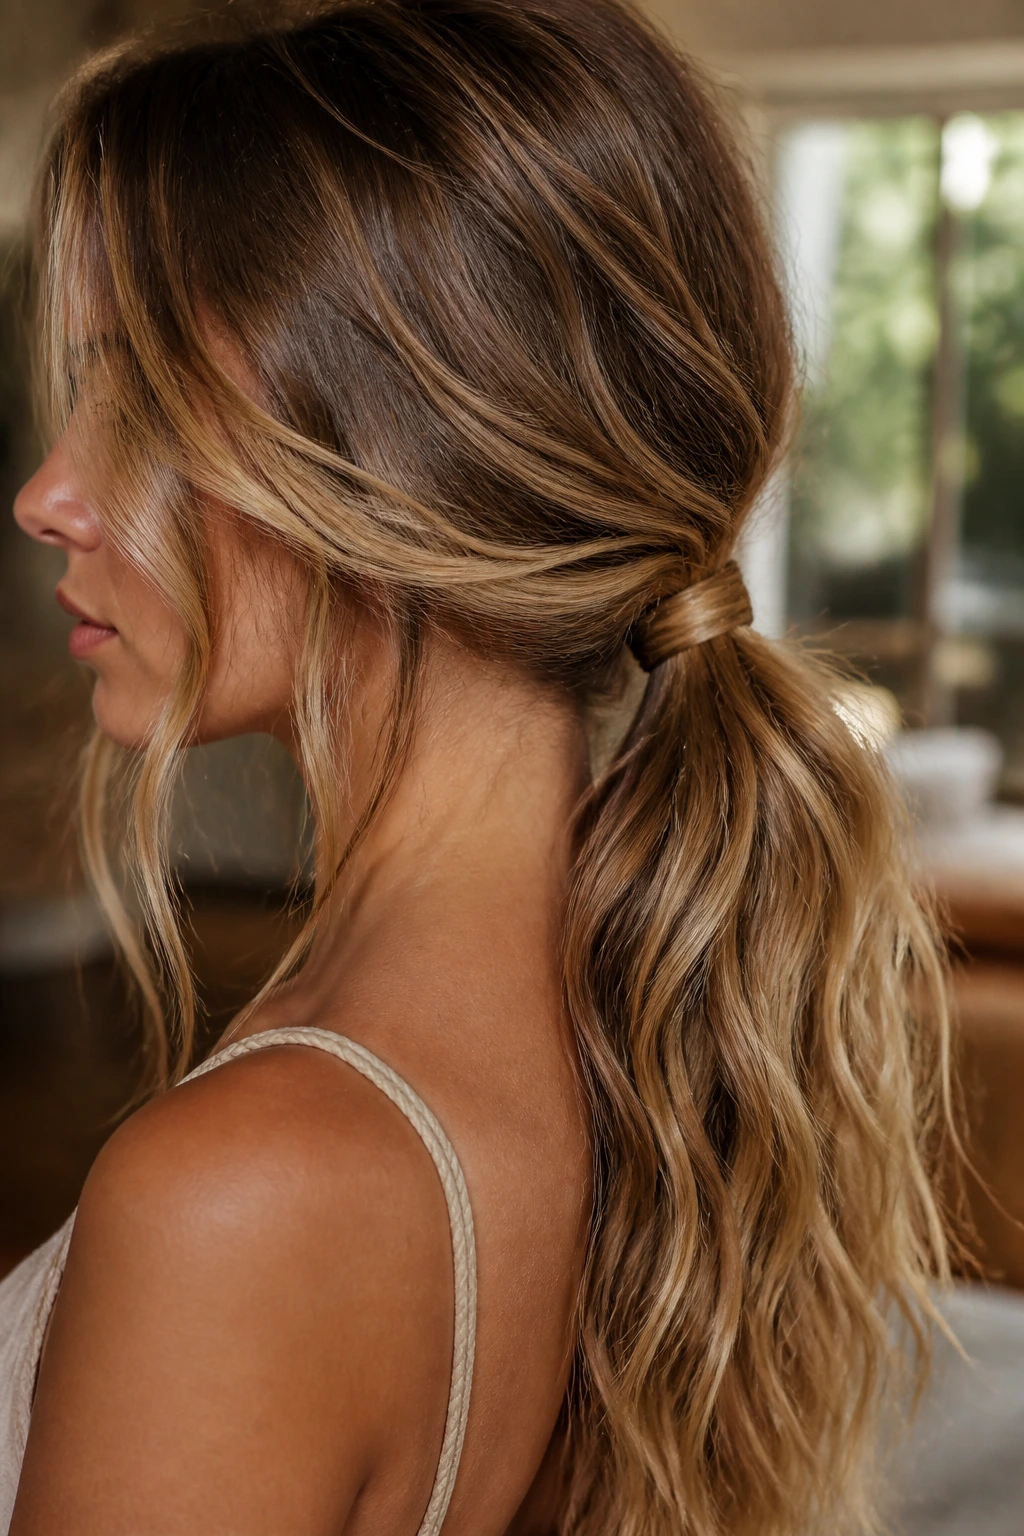
A low ponytail gives long wavey hair a different job. The texture becomes the star, not the shape of the cut. That matters if your ends are long enough to show off in the ponytail and your crown needs a break from being out all day.
Pull the hair into a low pony at the nape, leaving two face-framing pieces loose. Keep the tie low and soft so the wave pattern through the tail doesn’t get crushed. Then take a small piece of hair and wrap it around the elastic. That one move makes the style look considered, even if the rest of it took five minutes.
If your hair is very thick, secure the pony with a snag-free elastic first, then the wrap. Trying to force one thin band around all that length is a good way to end up with a headache by lunchtime. This look works especially well on day-two waves, when the roots are a little calmer and the tail has more grip.
12. Claw-Clip Half-Up Waves That Feel Easy
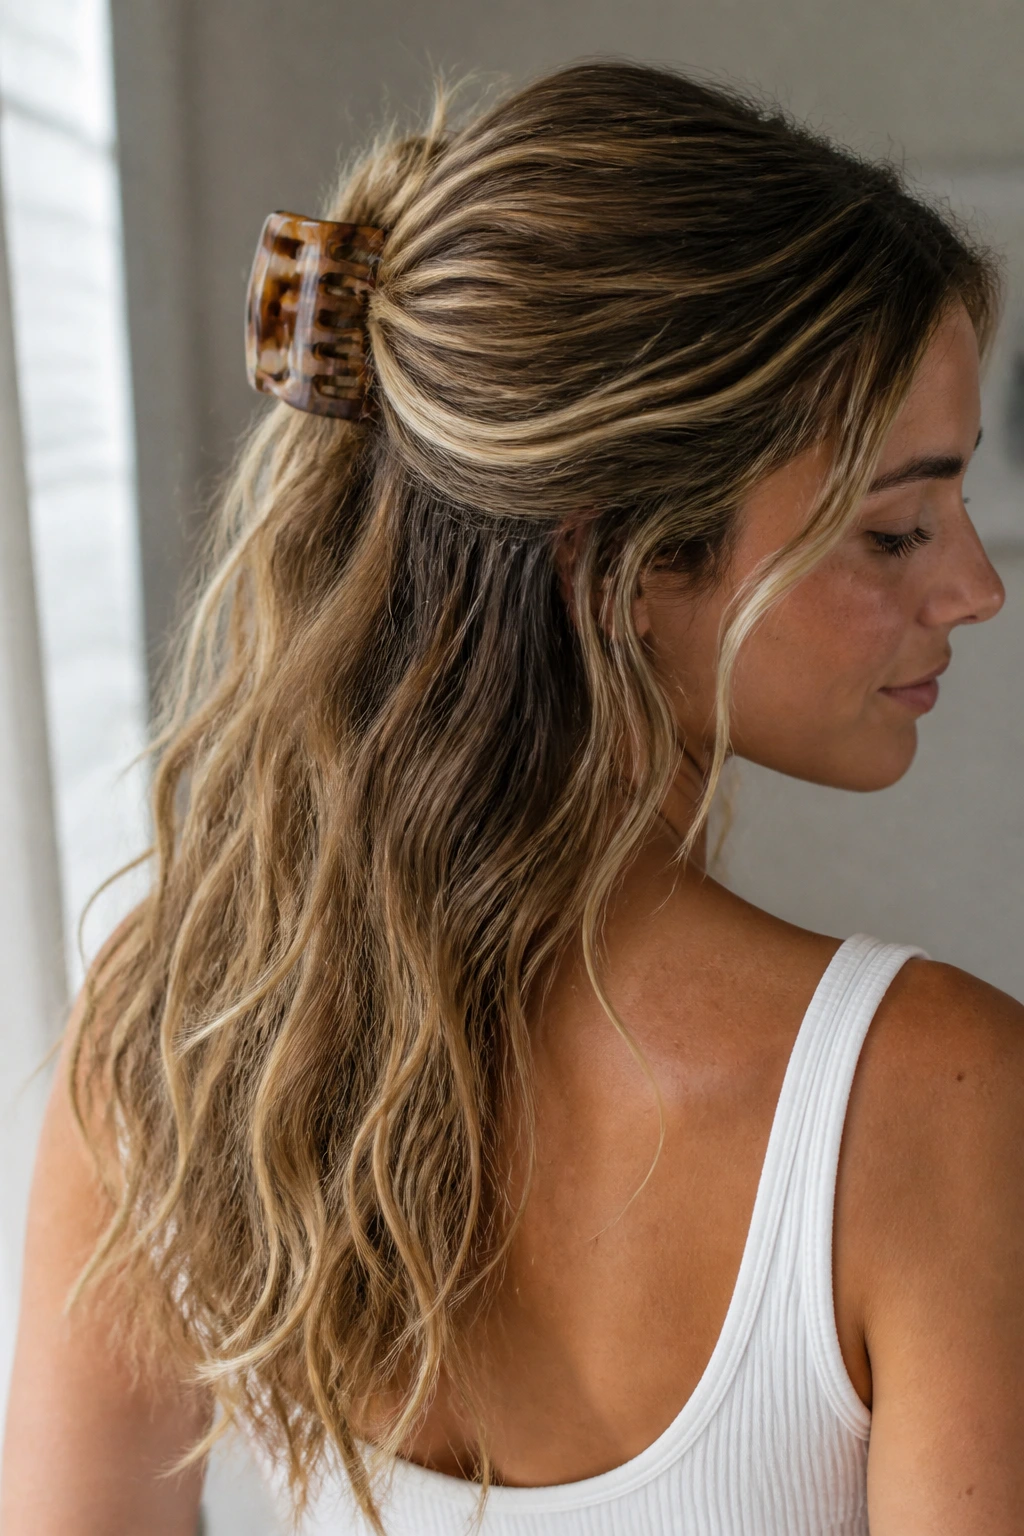
The claw-clip half-up is the laziest-looking hairstyle on this list, and I mean that as praise. It’s quick. It’s useful. It stops long hair from swallowing your face while keeping the wave pattern visible down the back.
Gather the top third of the hair, twist once or twice, and clip it at the crown with a large clip that can actually hold the weight. Small clips slide. Every time. Leave the bottom section loose and break it up with your fingers so the waves don’t hang in one flat curtain. If your hair is layered, a few front pieces will naturally spill out. Let them.
This is a good style for hair that’s a bit too good at sliding out of ponytails. The clip gives you grip without tension. A tiny bit of dry shampoo at the roots before clipping helps the hair stay lifted instead of collapsing over the clip teeth. And if the clip is visible, make it part of the look. Tortoiseshell, matte black, or a simple metal finish all work.
13. Boho Braid Accent Waves Along the Temples
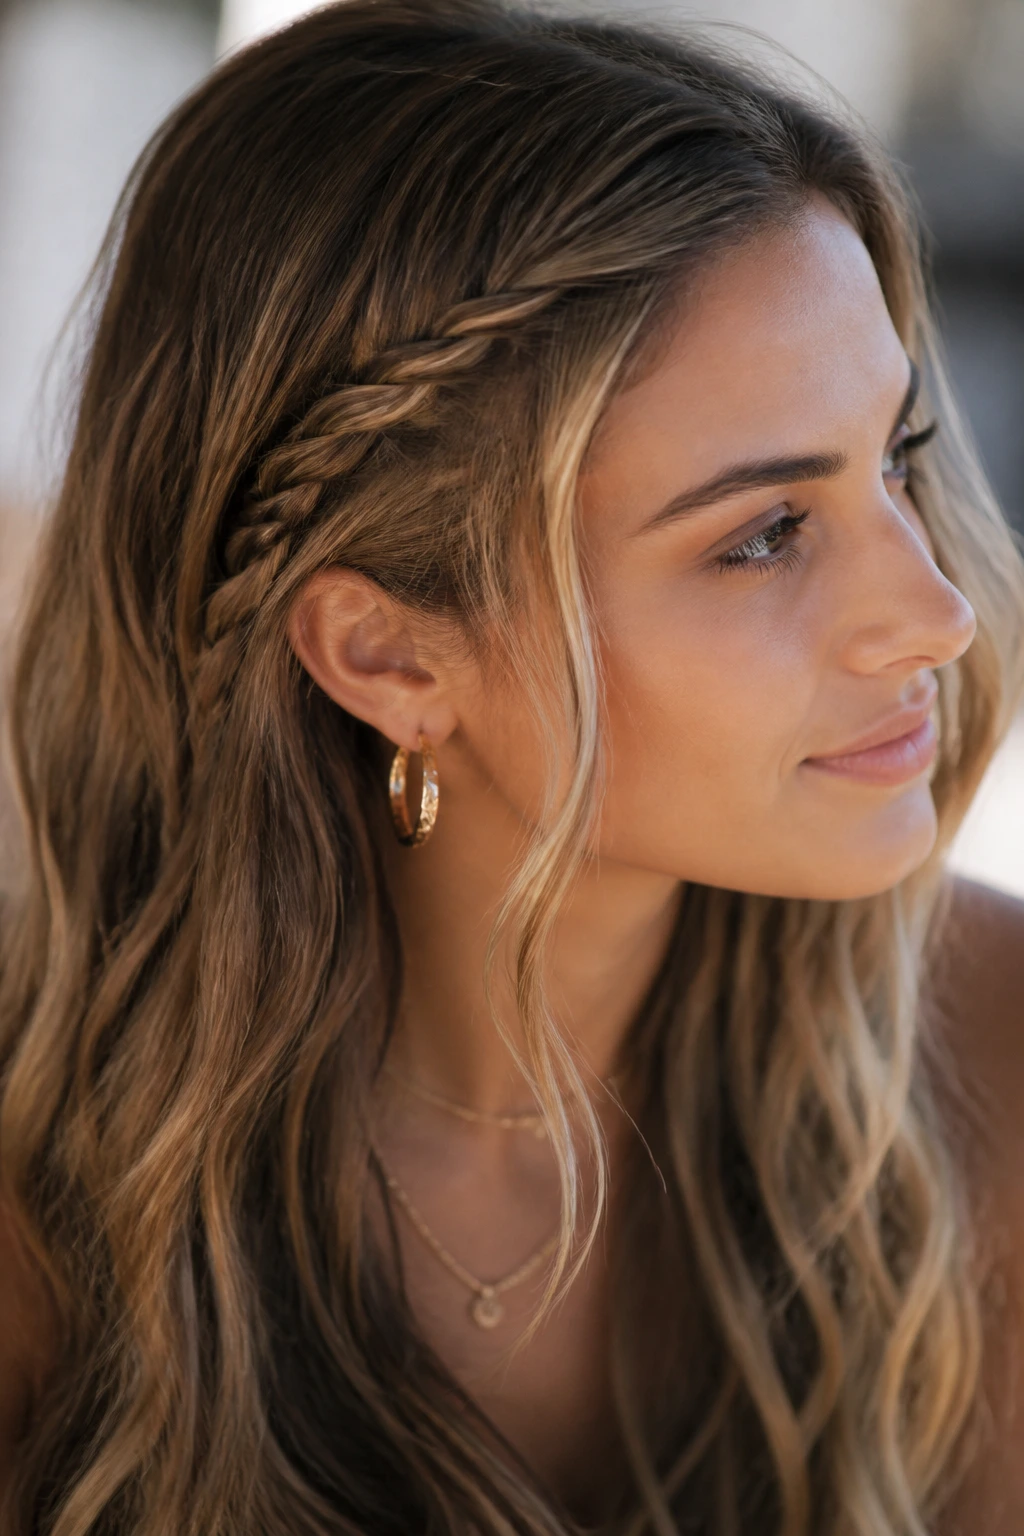
If a full braided style feels too busy, tiny braid accents are the cleaner answer. A thin braid at each temple, or even just one side, adds a touch of texture at the face while leaving the long wave lengths free. That’s the sweet spot for beachy hair that needs a little detail but not a lot of structure.
Tiny Braid, Big Payoff
The braid should be narrow enough to disappear into the rest of the style, not shout at it. I like to start just above the ear, braid back toward the crown, and pin it under the top layer. The visible part is short, maybe 2 to 3 inches. That keeps the look relaxed. Anything longer starts pulling the eye too hard.
This is one of the easiest ways to make second-day waves look intentional. The braid takes attention away from flat roots and gives the front of the hair a bit of shape. If you want it to feel softer, tug the braid very gently once it’s secured. Just a little. You want width, not fray.
14. Undone Blowout Waves with Bouncy Ends
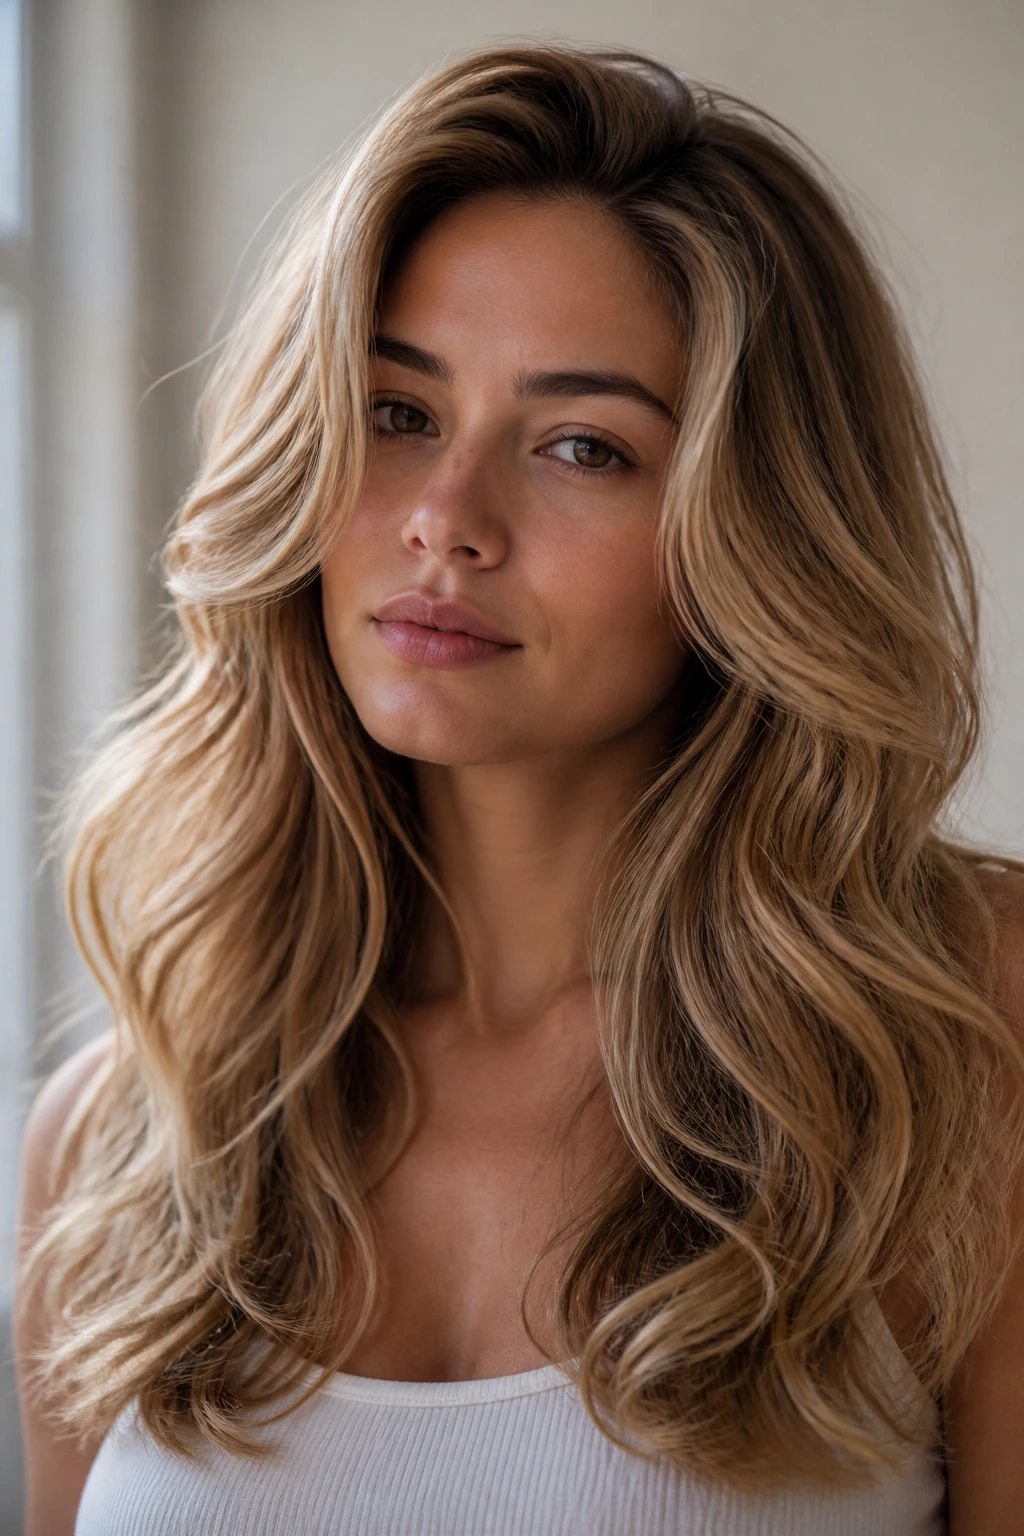
Undone blowout waves sit between a salon blowout and a beach wave. The root has a bit of lift, the mid-lengths bend softly, and the ends still move. It’s a good choice when you want long hair to look smoother than a tousled wave, but not as rigid as a full curl set.
Blow-dry with a round brush or a blowout brush first, lifting the roots and smoothing the mids. Then add only a few bends with a large-barrel iron, mostly around the face and through the lower half. You do not need to curl every section. In fact, that’s how this style loses its shape. The point is a little bend, a little shine, and enough softness that the wave doesn’t look staged.
This works especially well on thick or coarse hair because the blow-dry removes puff before the wave goes in. If your long hair gets wide at the ends, this is one of the neatest fixes. Finish with a brush-through and a light mist of hairspray from underneath, so the top stays touchable.
15. Crimped-Base Waves with Soft, Straight Ends
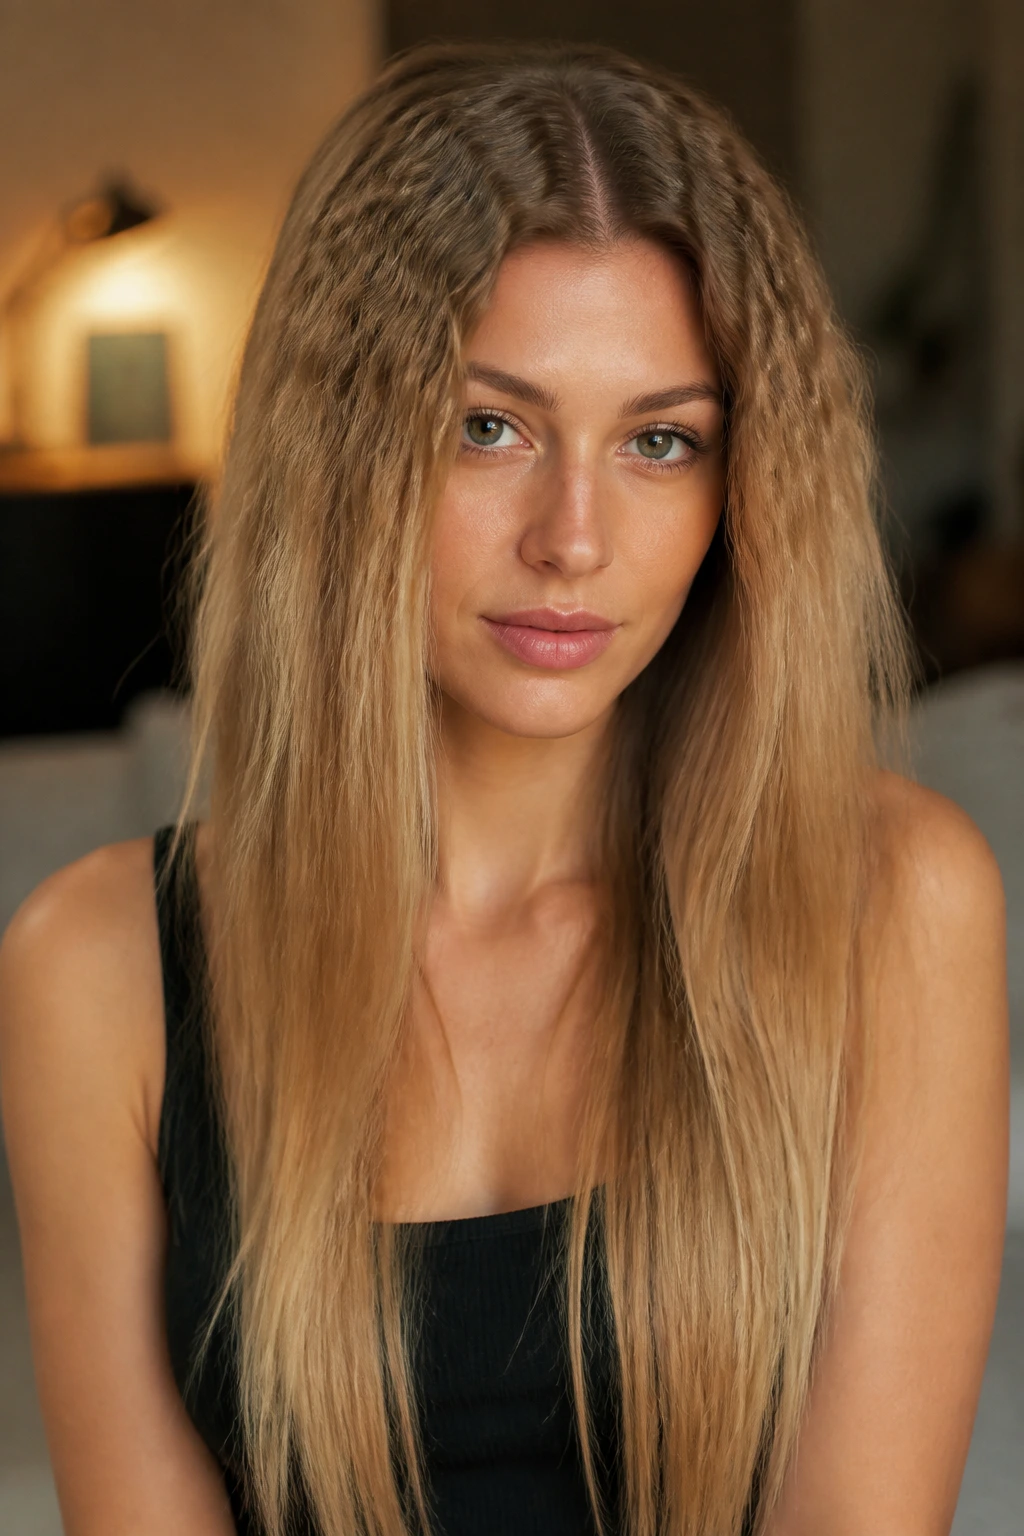
This one sounds louder than it is. A crimped base doesn’t mean full-on throwback texture from scalp to tip. Used lightly, it gives long hair grip at the root and just enough roughness to keep a loose wave from slipping flat. Leave the ends soft or even straight. That contrast keeps the style from looking dated.
Use a mini crimper or a flat iron with a very gentle, shallow bend on the first few inches under the top layer. Don’t chase the pattern all the way down. The crimp should disappear into the lower hair, not dominate it. A little texture at the crown can also help if your hair is fine and clean and too slippery to hold a wave.
The reason this style works on long hair is simple: length needs support at the top. If the base is too smooth, everything slides. If the base has a bit of hold, the wave pattern above it lasts longer. Just keep the crimp hidden enough that it reads as volume, not texture for texture’s sake.
16. Tucked-Behind-Ear Waves with a Clean Side Sweep
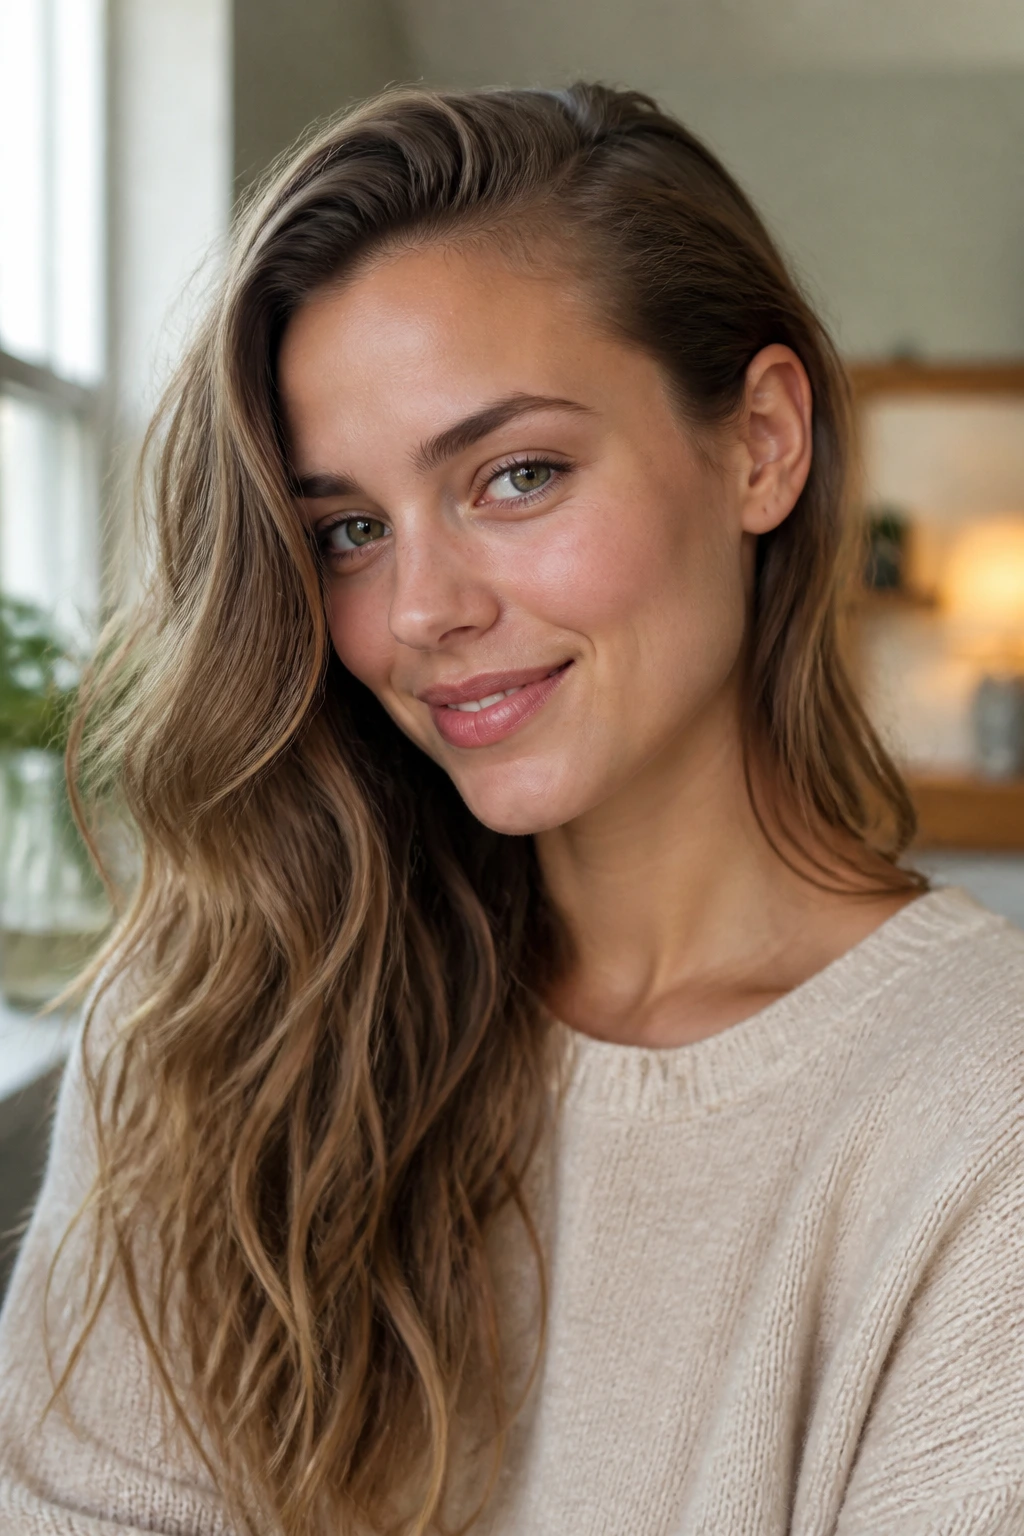
There’s something nice about one side tucked and the other left loose. It shows the shape of the wave, clears the face, and lets earrings or collar lines do their job. On long hair, the tuck keeps the length from swallowing your features.
Take the heavier side and tuck it gently behind the ear, then secure it with a hidden pin if the hair won’t stay. A tiny touch of pomade or cream at the temple keeps flyaways from sticking up in the wrong direction. The rest of the hair should stay soft and unforced. The wave pattern can be brushed out a little more on the loose side so the contrast is obvious.
This style is good when you want to look tidy without looking formal. It works with center parts, side parts, and wave patterns that are more polished than messy. And if you want a little more edge, leave the tucked side slightly damp-looking near the roots while keeping the lengths dry and matte. That contrast gives the whole style a sharper line.
17. Messy Top Knot Waves with Long Face-Framing Pieces
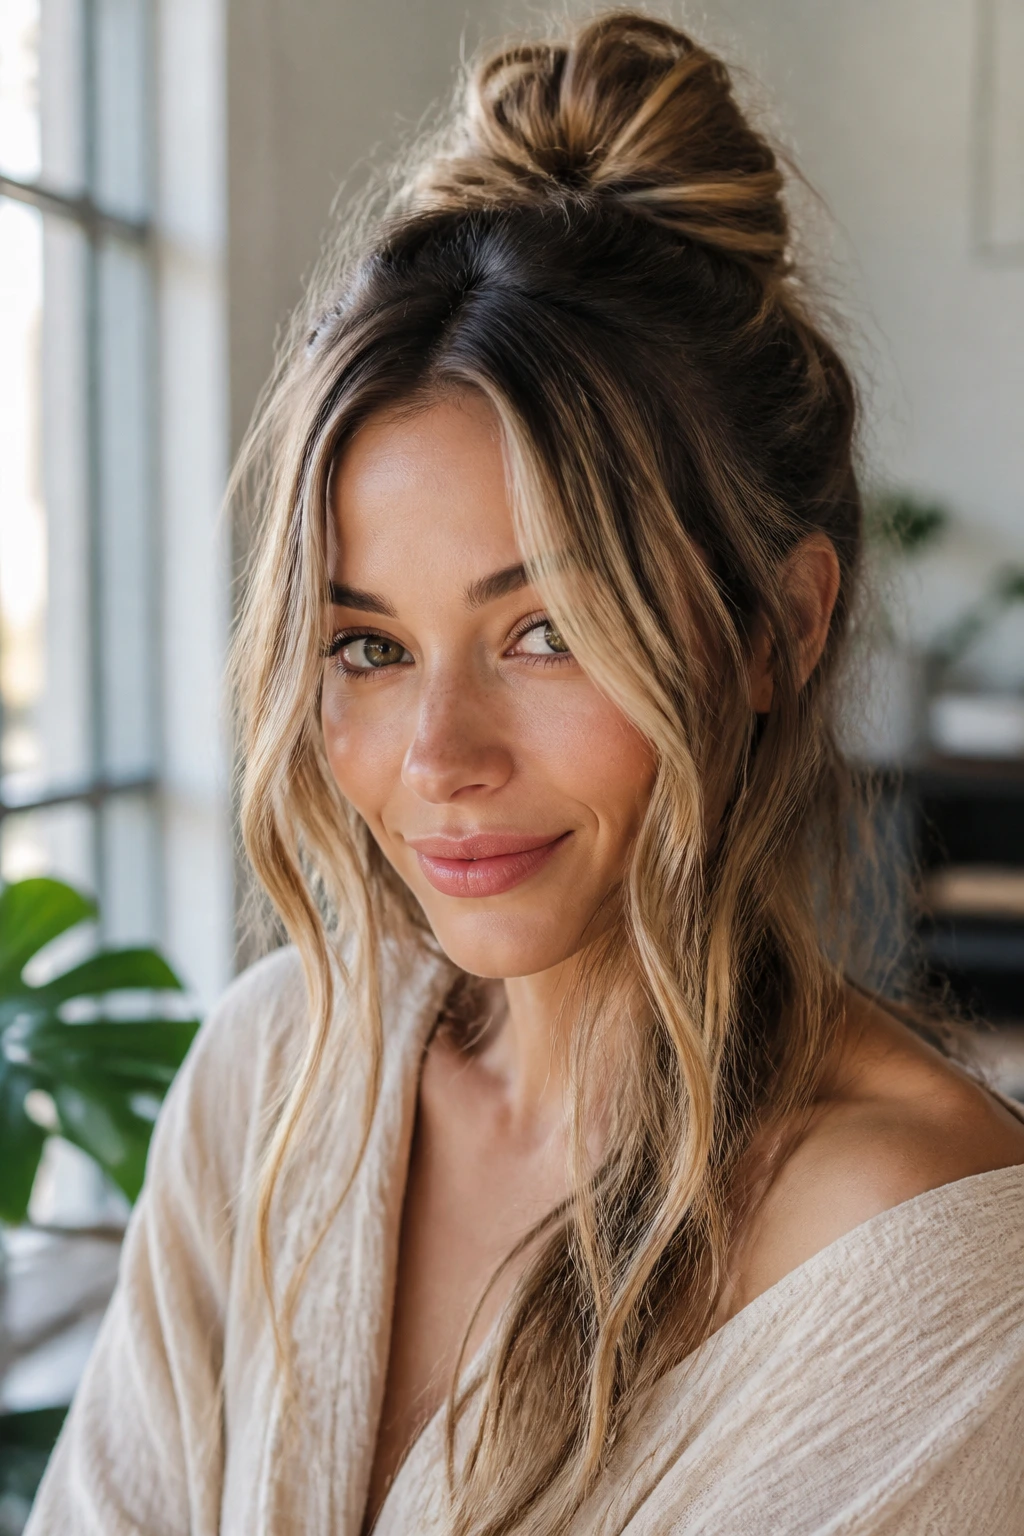
A top knot can be a shortcut, but it doesn’t have to erase your long waves. The version I like keeps the knot loose and small, then leaves the lower lengths and front pieces to move freely. That way, you get the convenience of having hair up without giving up the wave story.
Gather the top section, twist it into a soft knot, and pin it with two bobby pins instead of one elastic if your hair is heavy. The knot should sit high enough to open the face, but not so high that it feels like a ballet bun. Let the front pieces drop. Let the lower lengths stay loose. That tension between tidy and undone is what makes the look work.
If your waves are already a little rough from day two, this style turns that into a feature. The messy knot at the top takes the pressure off the rest of the hair. You don’t need every strand polished when the overall shape is this relaxed.
18. Side-Swept Shoulder Waves with a Strong Part
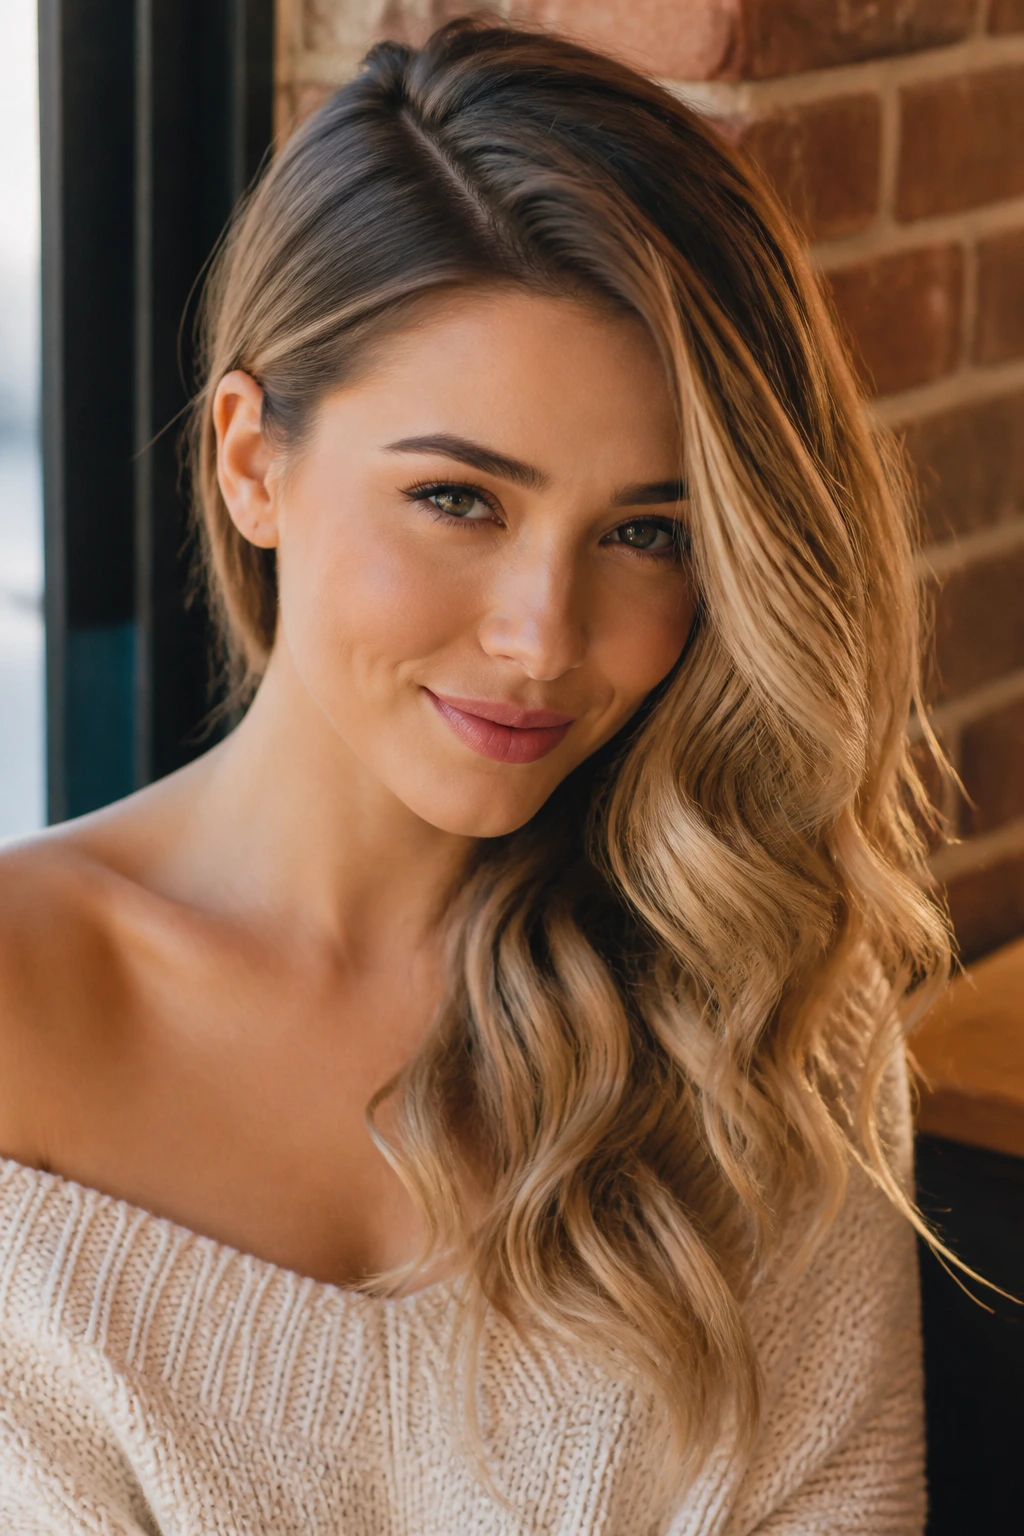
Sweep everything over one shoulder and the long hair suddenly looks more dramatic. The wave length becomes visible as a single line, which is useful if the cut has layers you want to show off. It also works well with off-shoulder tops, structured necklines, or anything that needs the hair to stay out of the way.
Why One Shoulder Changes the Shape
Long waves spread out when they sit evenly across the back. On one shoulder, they stack and fall in a way that feels more deliberate. That’s the visual trick. You can pin the opposite side behind the ear, then bring the longer section forward and let it settle naturally. A light mist of spray at the nape helps keep the sweep in place without freezing it.
This is one of the easiest ways to make beachy texture look a little dressier without changing the wave itself. You’re not re-styling the hair. You’re changing where it lands. That’s often enough.
19. Hollywood-Soft Beach Waves with a Smooth Finish
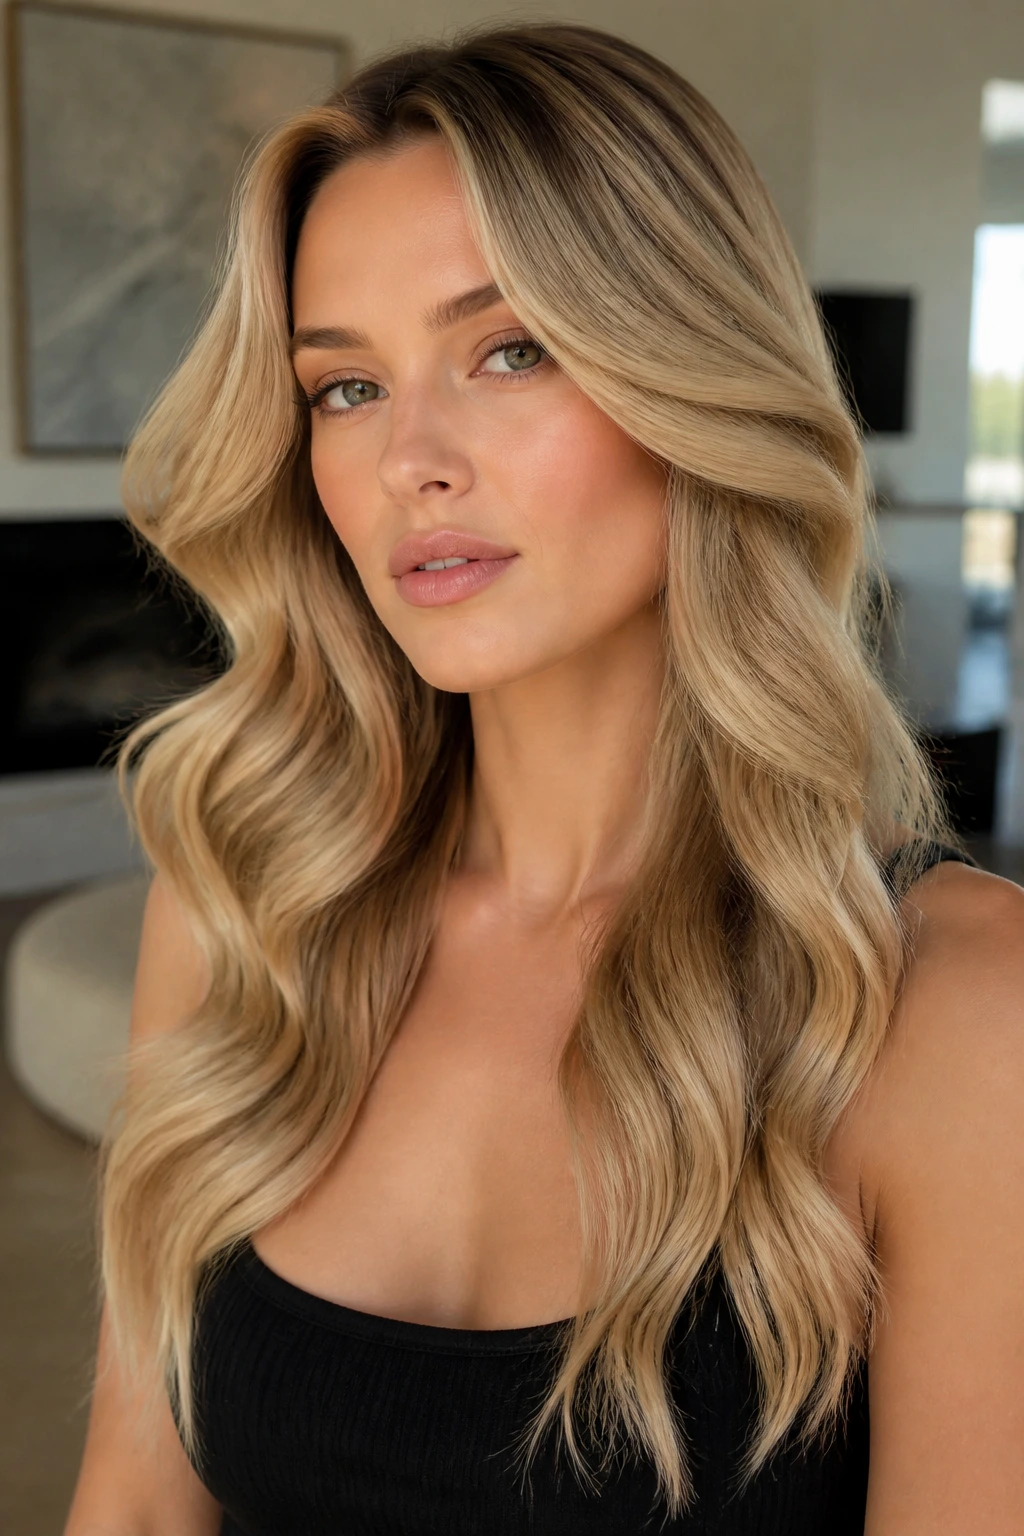
Hollywood waves and beach waves are cousins, not twins. This version sits in the middle. The wave is smoother and more unified than a casual beach bend, but the ends still stay soft enough to avoid that stiff red-carpet shell. On long hair, the result is clean and graceful, not fussy.
Curl every section away from the face with a 1.25-inch iron, then let the hair cool completely before brushing into one soft line. The brush matters here. Use one with enough give to stretch the curl into an S-shape without tearing it apart. Keep the part clean and the crown smooth.
This style is best when you want the wave to look intentional from every angle. It doesn’t rely on piecey separation or messy texture. It relies on shine, symmetry, and a smooth bend that holds its shape. A touch of shine spray on the ends helps, but use it sparingly. Too much and the hair loses that soft, flowing movement.
20. Wet-Root Texture Waves with Matte Lengths
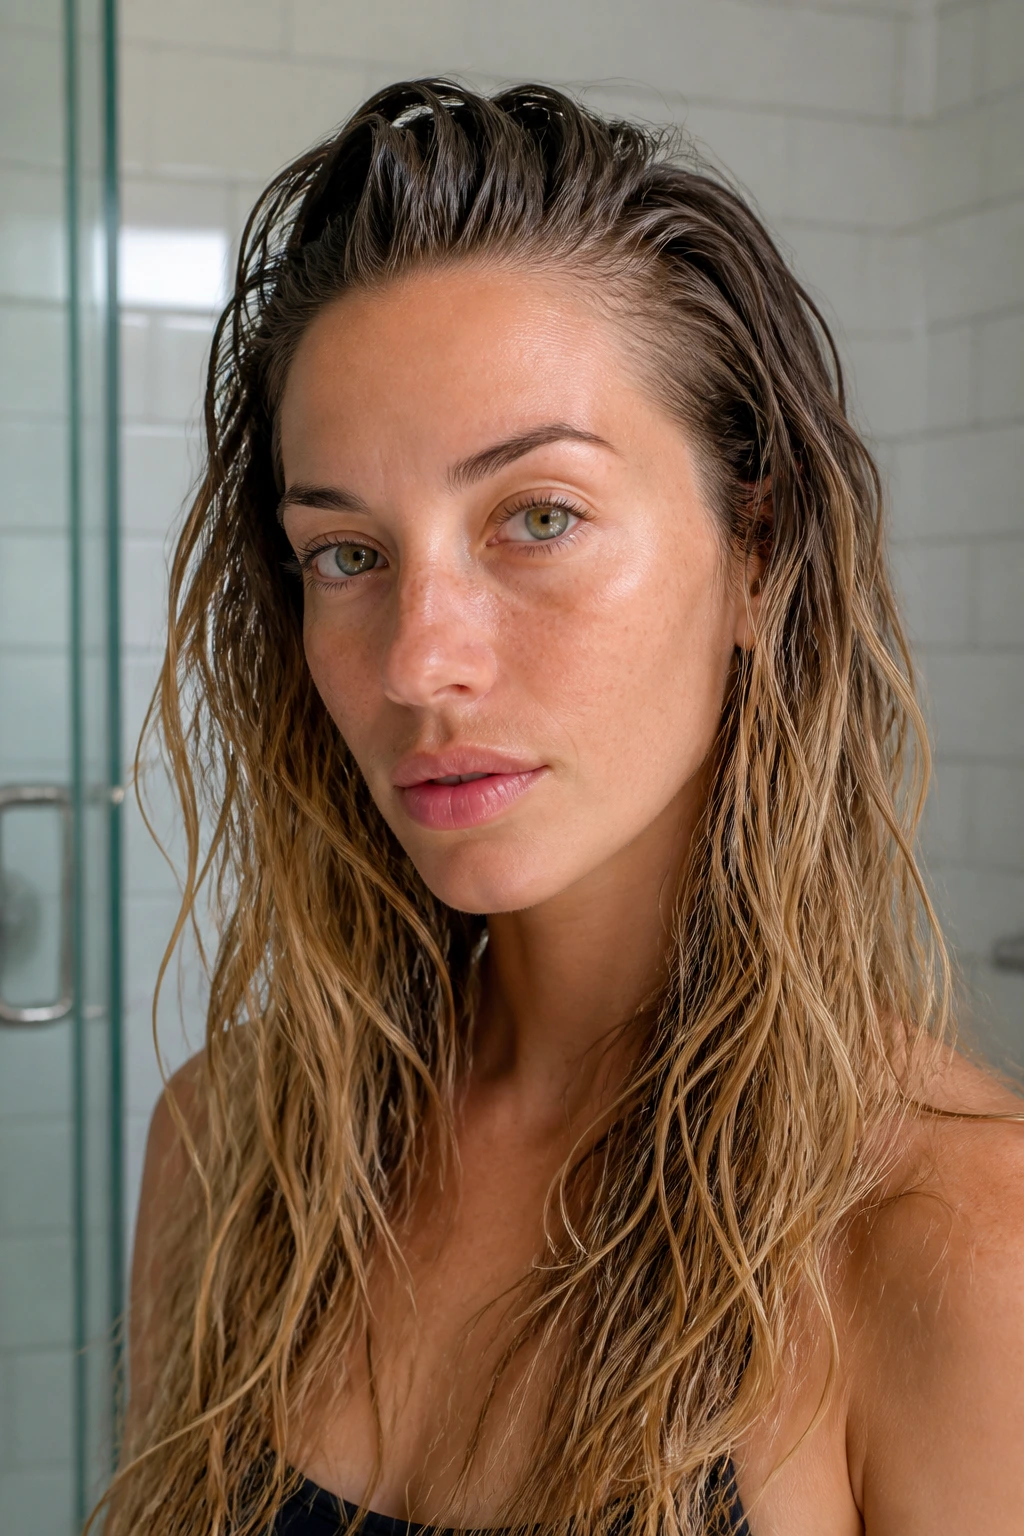
Wet-root waves are the opposite of polished, and that’s the point. The roots stay flatter, denser, and slightly slick-looking while the lengths stay loose and matte. On long hair, that contrast can look sharp in a good way, especially if your scalp tends to puff while the ends fall limp.
Apply a small amount of mousse or lightweight gel to the roots before blow-drying, then leave the mid-lengths and ends freer. Use a diffuser or a gentle air-dry if your natural wave is strong, or add a few bends with a wand once the top is set. The finished look should have a quieter crown and more visible movement below.
This style is not for people who want fluffy volume everywhere. It’s for people who want shape and a little edge. Keep the product off the lower lengths unless they are very frizzy, because the whole idea depends on that root-to-end contrast. Too much product through the mid-lengths and the hair goes stringy fast.
21. Scarf-Tied Waves for a Soft Bohemian Finish
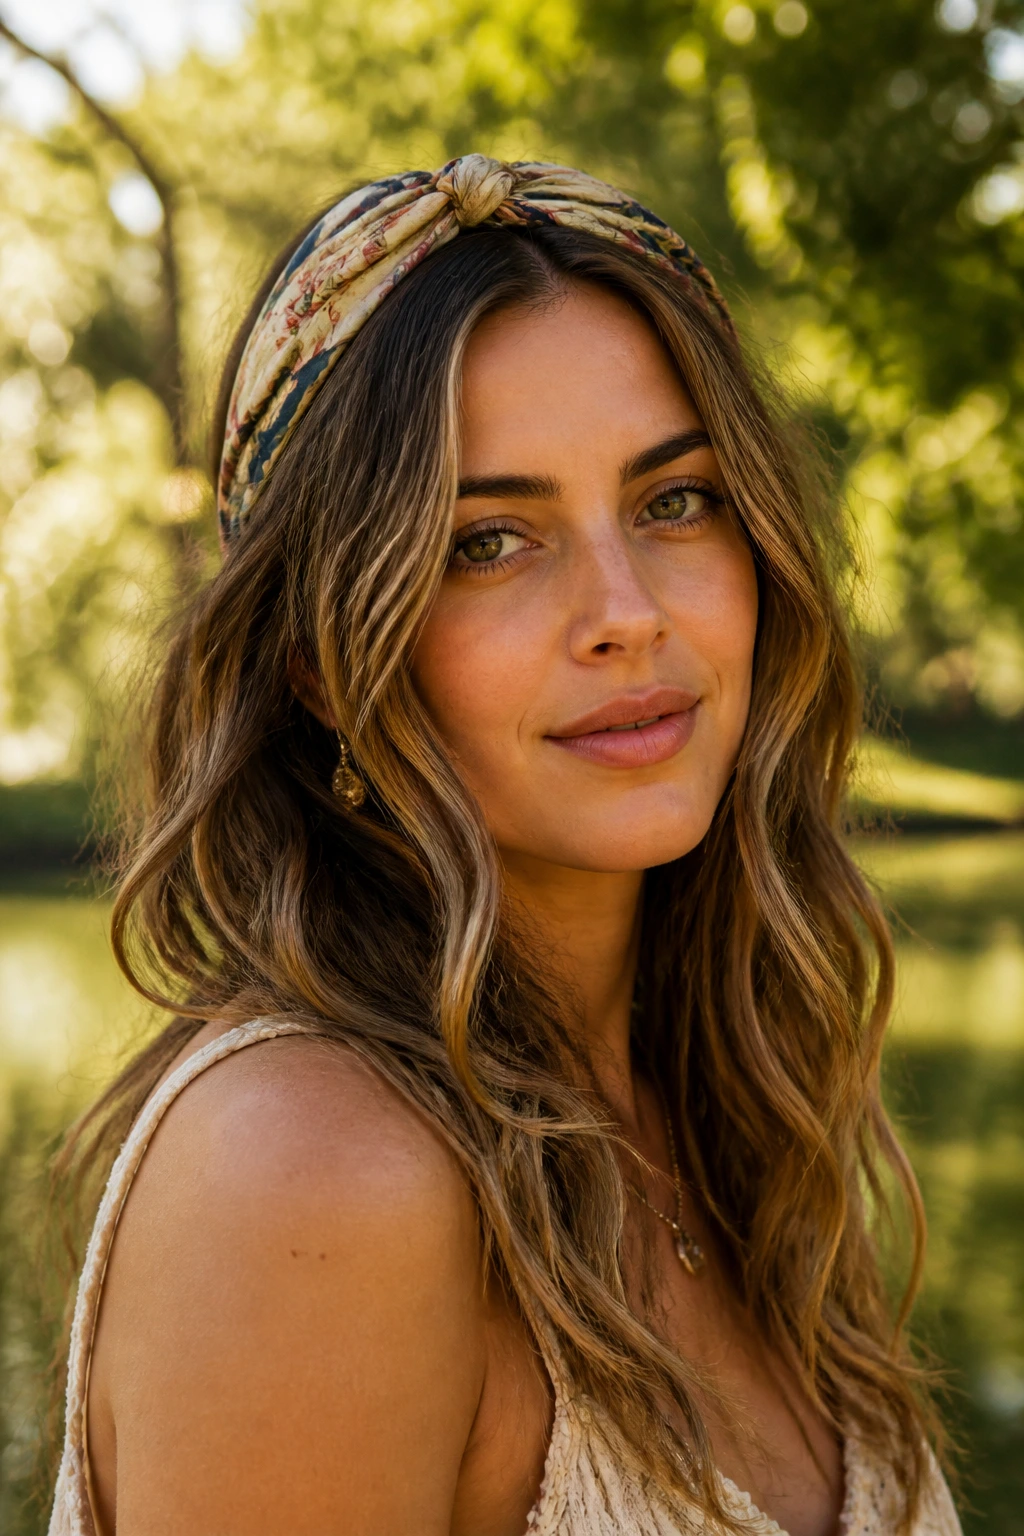
A scarf changes the whole mood without asking much from the hair. Wrap one around a low pony, a half-up knot, or even just the crown if you want the wave pattern to peek out underneath. On long hair, a scarf adds shape at the top and color near the face, which is often all the style needs.
Where the Scarf Sits Matters
If the scarf sits too high, it can flatten the crown. Too low, and it disappears into the lengths. The sweet spot is usually just above the half-up section or around the base of a low ponytail. Silk is gentler than cotton, and it slides less against the hair, which matters if your waves are already a little dry from styling.
The scarf does not need to match the outfit exactly. A muted print, a narrow solid ribbon, or even a textured neutral can work. The point is to break up the long line of hair and give the wave something to orbit around.
22. Salt-Spray Scrunched Waves for Gritty Texture
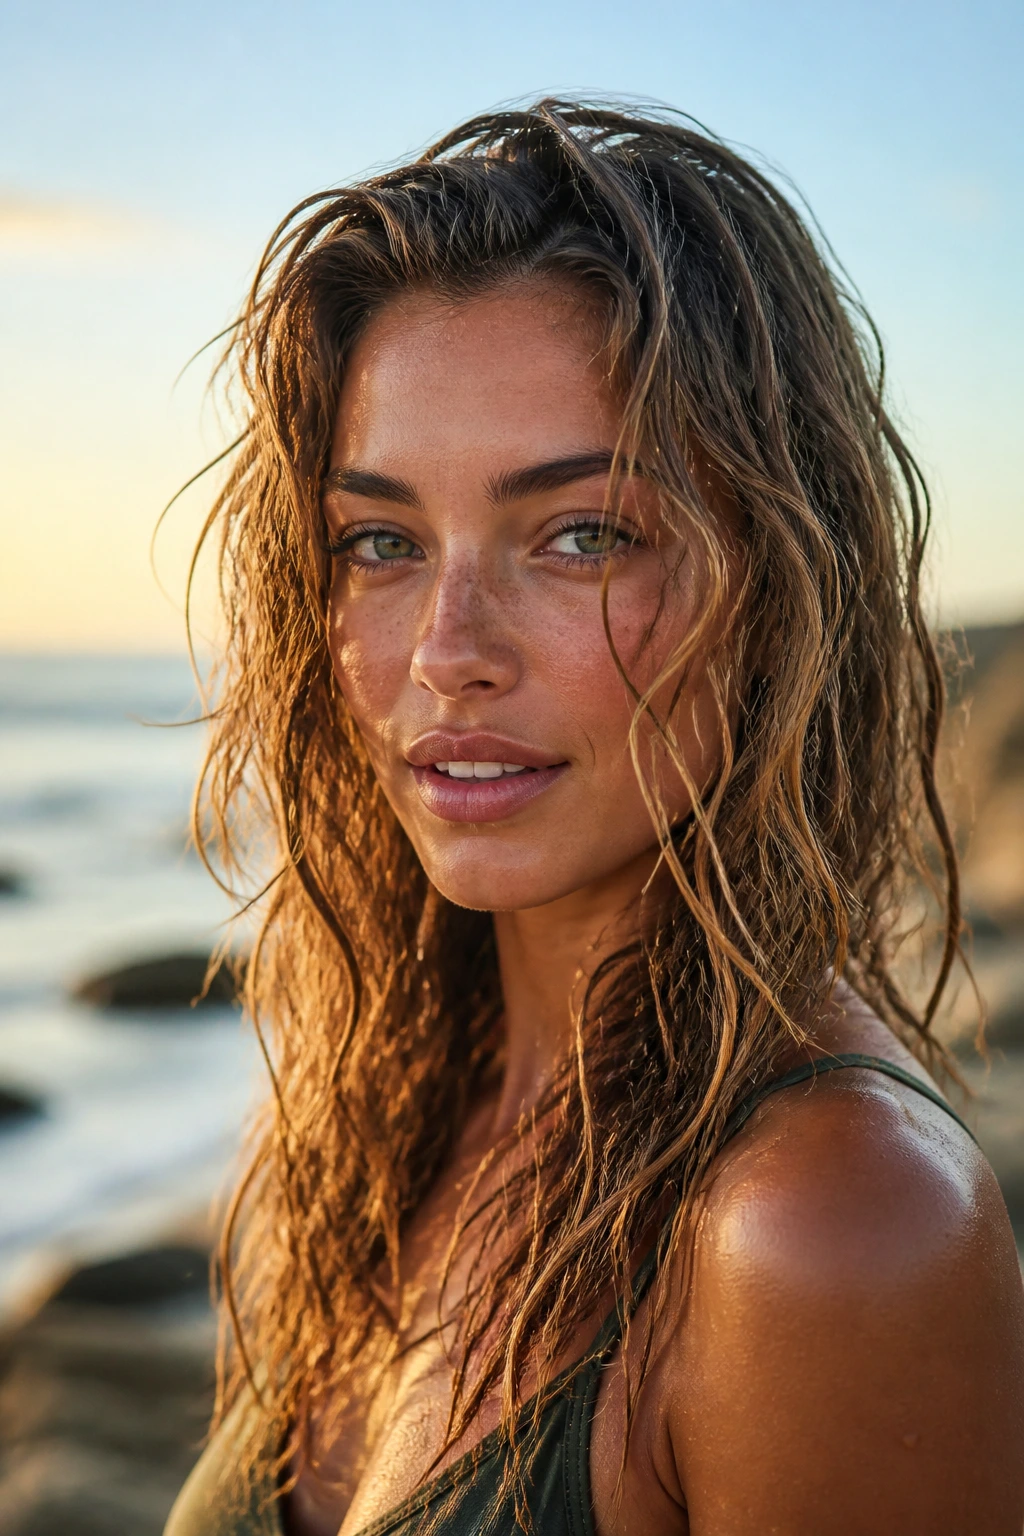
Salt spray does one thing well: it makes hair feel rougher so the wave can stand up. On long hair, that can be useful, because the extra grip helps the lengths stop sliding into one flat curtain. But the product needs a light hand. Too much and the ends feel dry in the wrong way.
Mist salt spray onto damp hair, not soaked hair, then scrunch from the ends upward. If your hair is naturally wavy, air-dry or diffuse until it’s 90 percent dry, then stop touching it. If it’s straighter, add a few bends with your fingers while it dries. Don’t keep re-spraying once it starts to set. That’s when the texture turns sandy instead of soft.
This style looks best when it’s slightly uneven. A few bends are stronger than others. One side may fall differently. Good. That’s the point. Real beach texture isn’t symmetrical, and long hair usually looks better when the movement has a little irregularity instead of a copied-and-pasted curl pattern.
23. Barely-There Bend Waves with Straight Ends
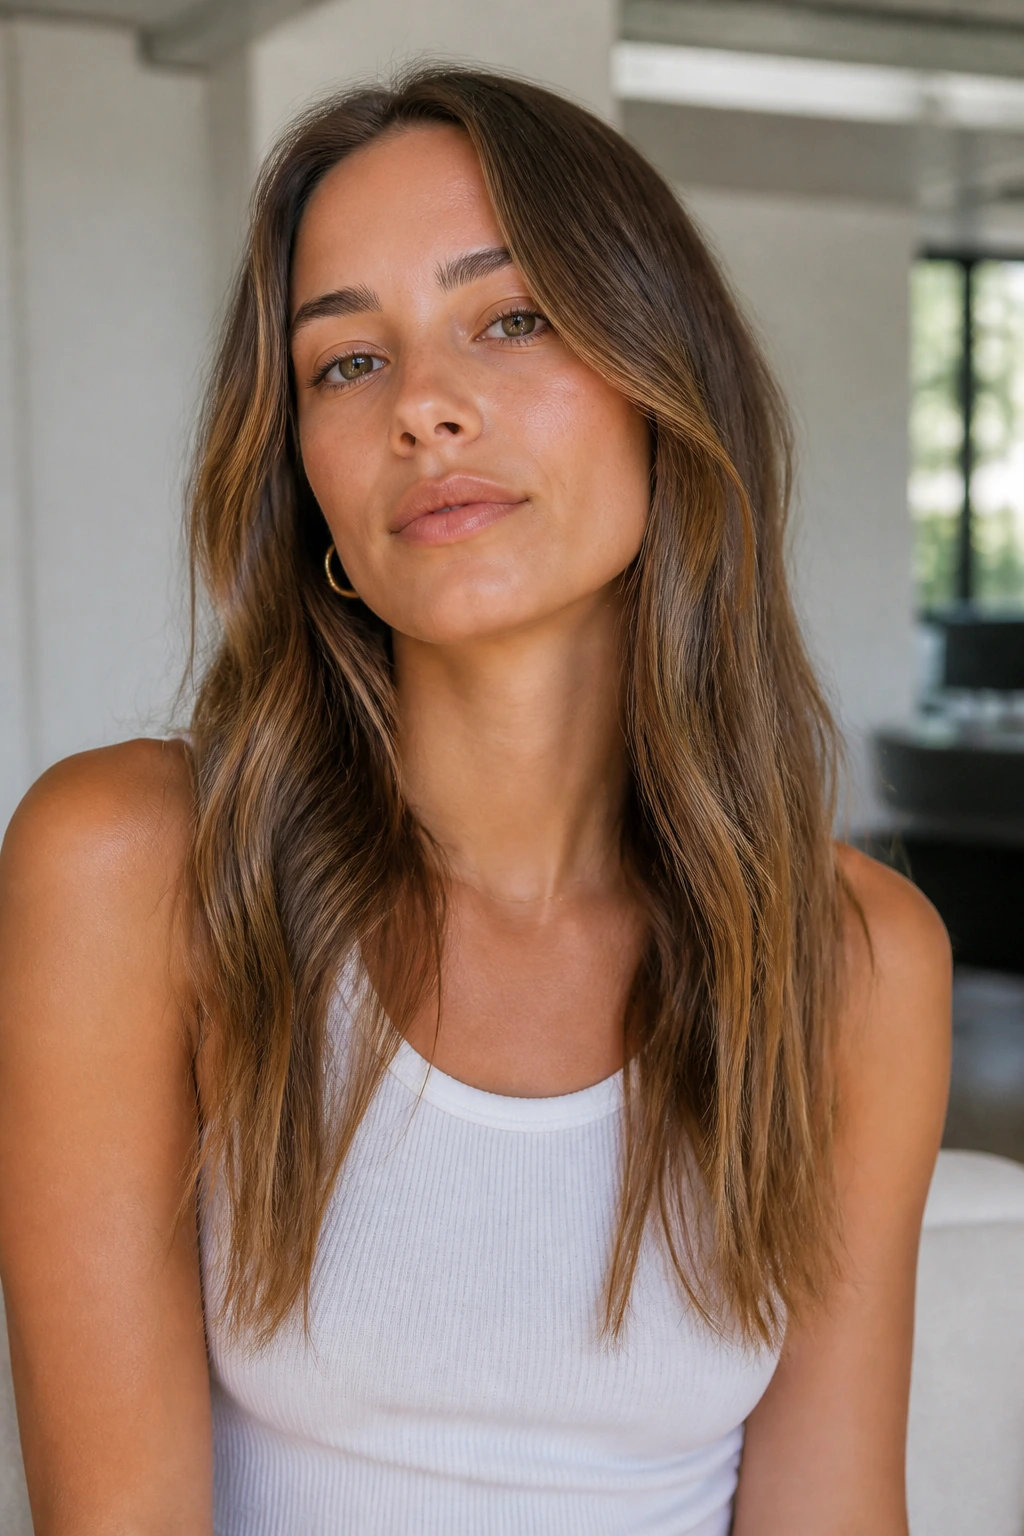
If you like long hair but hate the feeling of over-styled ends, this is the one to keep. Barely-there bend waves leave the bottom inch or two straighter, which makes the whole look feel lighter. It’s a small choice, but on long hair it changes the silhouette a lot. The hair moves more. It sways instead of hanging.
Start the wave around ear level or just below it, then stop short of the tips. Use a wand or flat iron, but don’t force the ends into the barrel. Let them stay loose and slightly blunt. That keeps the style modern and keeps the ends from puffing in humidity.
This is also a smart style for very long hair that tends to go triangle-shaped when curled all the way down. Straight ends remove some of the bulk at the bottom. The look feels cleaner, the wave sits higher, and the whole thing is easier to refresh the next day. A little dry shampoo at the roots and a quick twist through the front pieces is often all it needs.
How to Make Beach Waves Hold on Long Hair
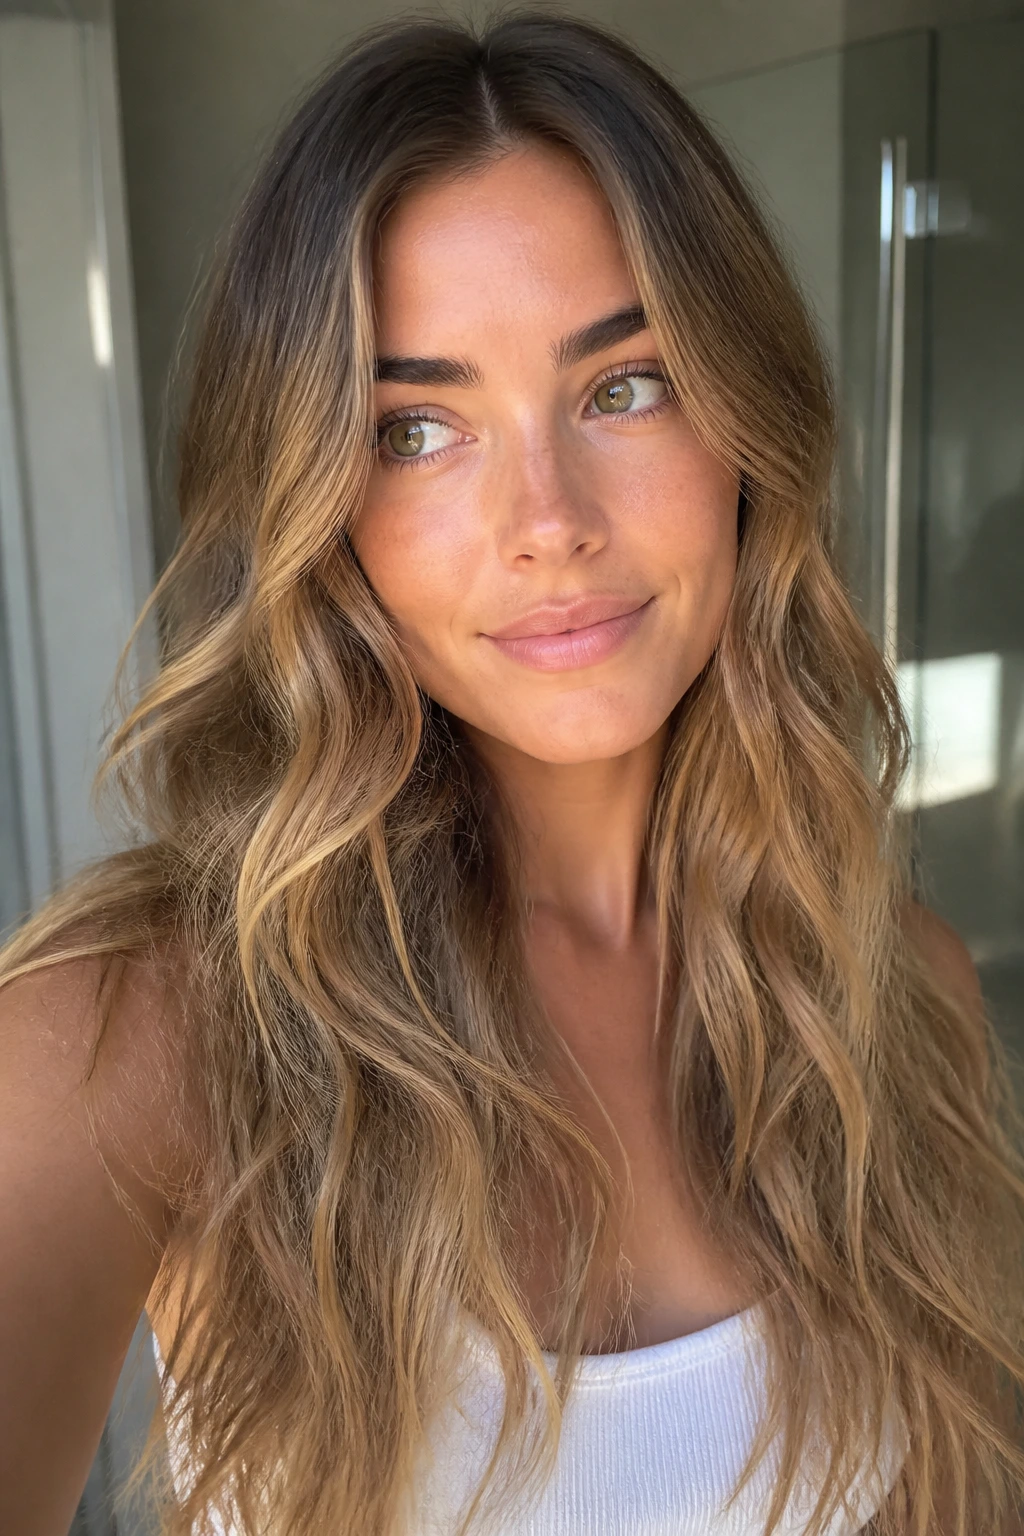
Long hair needs hold in the right places, not a helmet of product. Start with clean, fully dry hair if you’re using heat. If there’s moisture hiding near the nape or the crown, the bend drops fast and the ends get frizzy before you’ve even left the house.
Clip the sections you’re not working on, and keep the ones you are working on narrow. One to 1.5 inches is the sweet spot for most long hair. Wider sections look easier, but they cool into a bigger, weaker bend. And let each piece cool before touching it. That part is boring. It also matters more than one more spray of hairspray.
The finish should depend on the style. For messy waves, scrunch a texture spray through the mid-lengths and stop. For polished waves, use a light flexible spray and brush only once. For heatless styles, sleep with the hair fully dry and break the wave apart in the morning with your fingers, not a comb. Comb first, and you’ll flatten the work you just did.
Tools and Products That Earn Their Keep
-
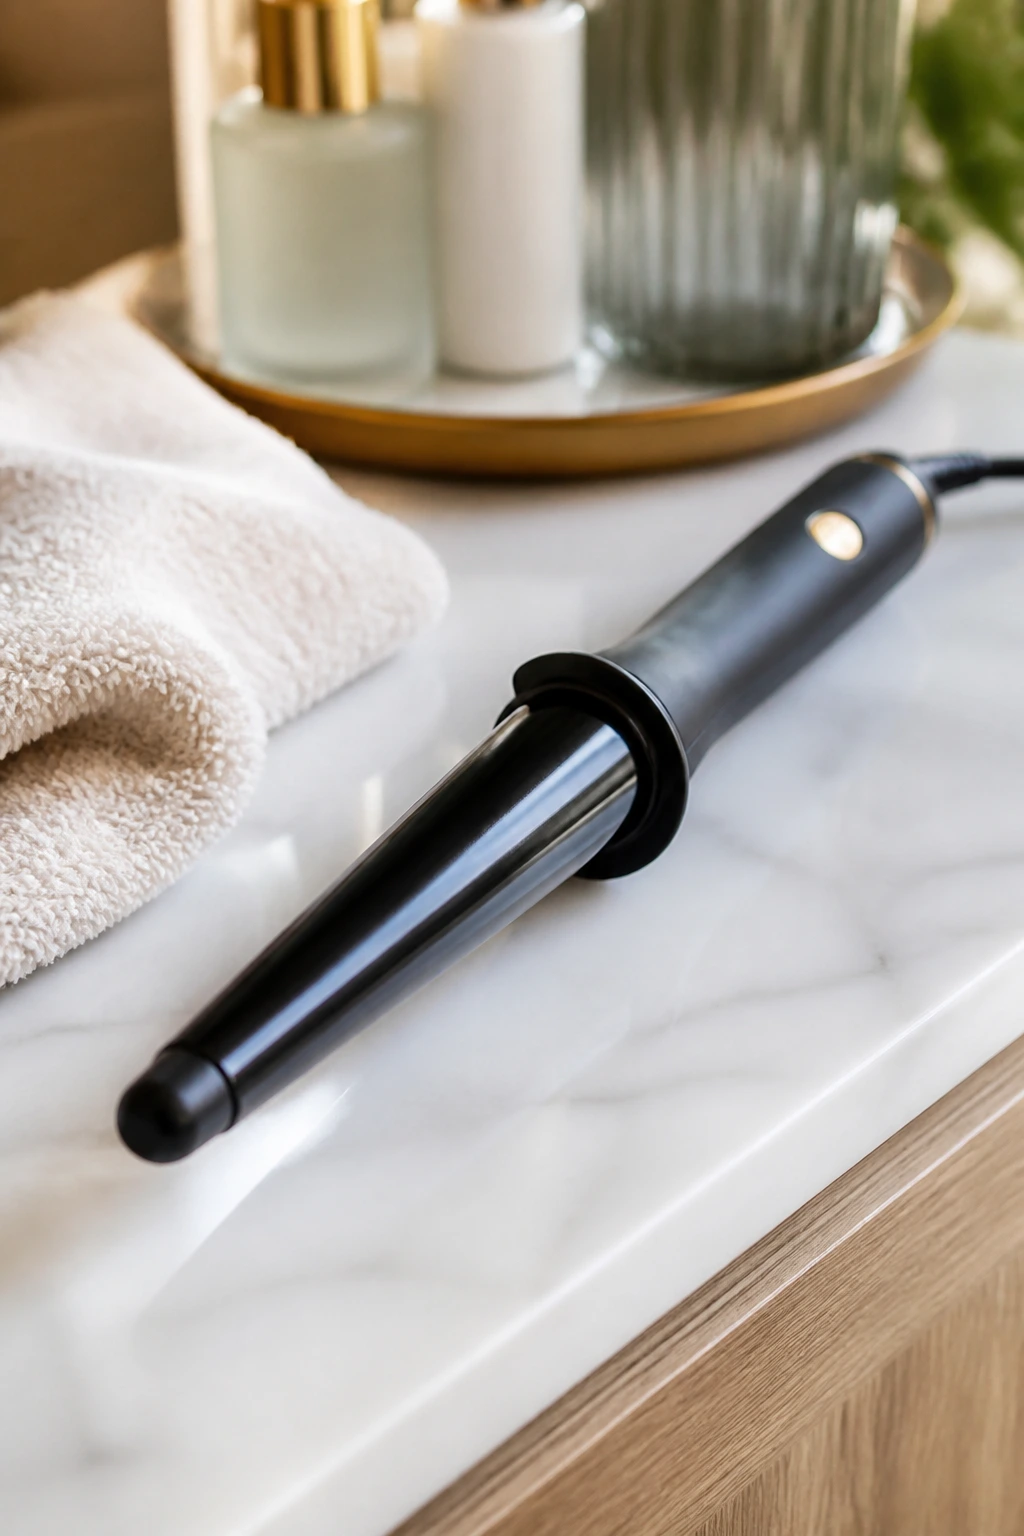
1-inch curling wand: Best for mermaid waves, tighter bend patterns, and long hair that won’t hold a larger barrel.
-
1.25-inch curling iron: Better for softer, dressier waves that need movement instead of curl.
-
Flat iron with smooth plates: Useful for S-waves, polished bends, and the straighter ends that keep long hair from looking too round.
-
Heat protectant spray: Use it on dry hair before any hot tool; a lightweight spray gives protection without making the roots greasy.
-
Flexible-hold hairspray: Keeps waves in place without turning them stiff, which matters when you want to brush them out later.
-
Texture spray: Adds grip through the mid-lengths and helps waves hold their piecey shape.
-
Sea salt spray: Works on damp or slightly dry hair to rough up soft textures, but use it sparingly on long ends.
-
Dry shampoo: Useful at the roots, especially on day two or three, when the crown needs lift more than the lengths need more product.
-
Large claw clip: Good for half-up styles and quick texture fixes on heavy hair.
-
Duckbill or sectioning clips: Small, boring, and worth it; they keep long hair separated while you work.
-
Silk scrunchie or ribbon: Better than a tight elastic when you want a ponytail or braid to keep its wave shape.
How to Pick the Right Barrel, Spray, and Part for Your Hair
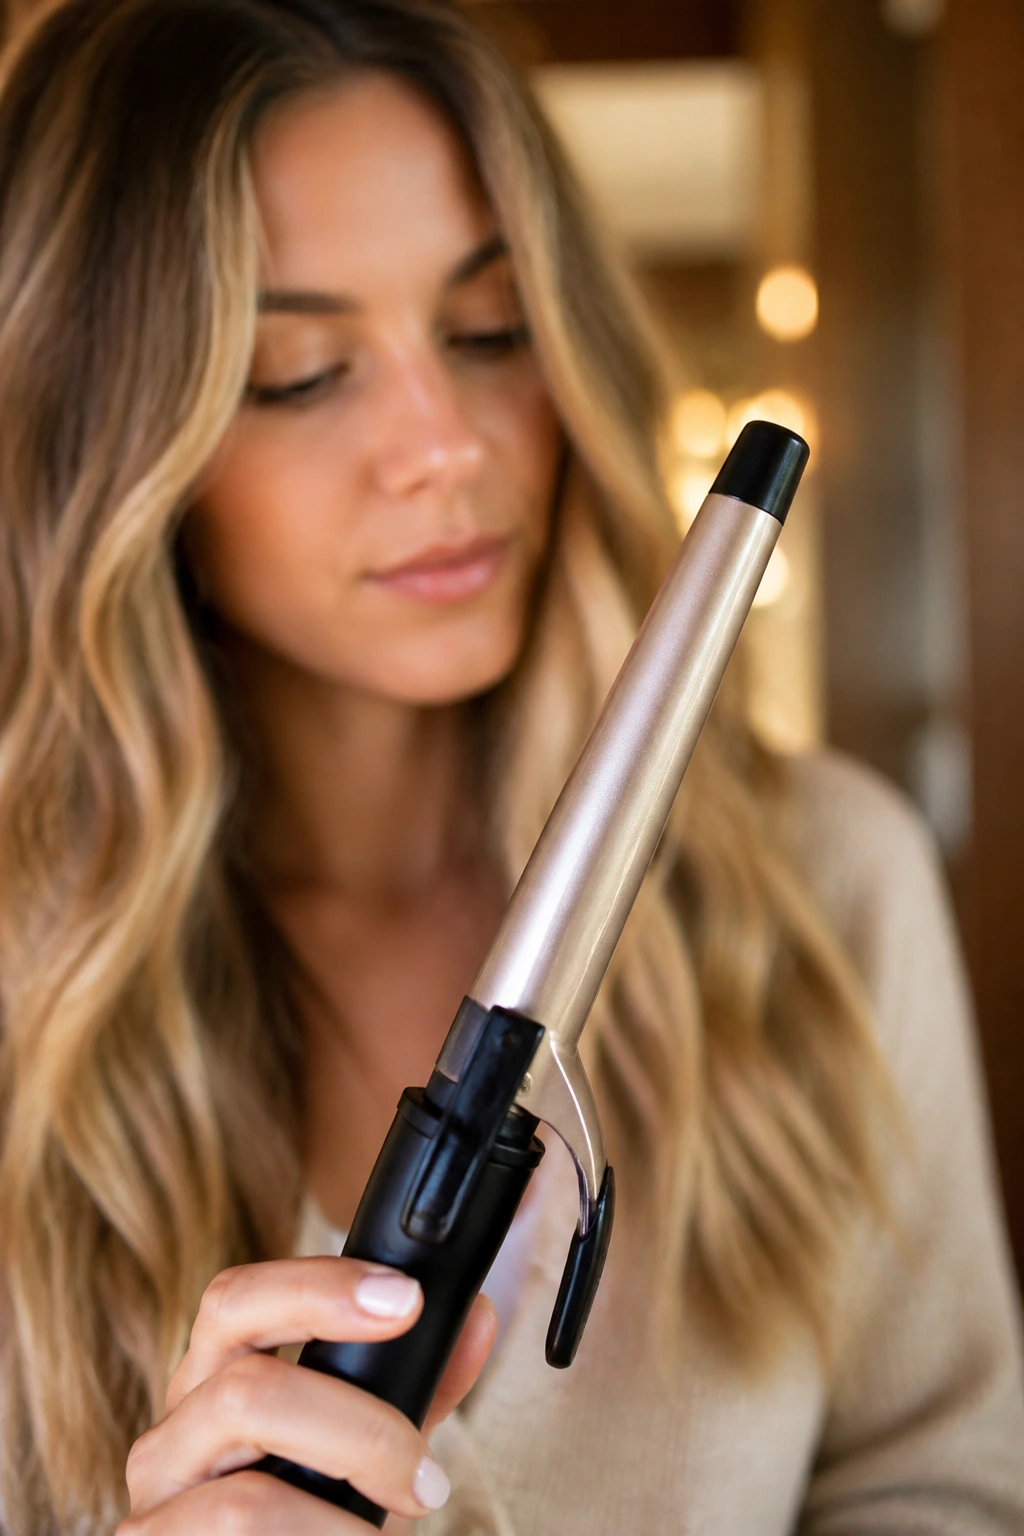
Long hair can make a barrel look smaller than it is, so don’t choose by instinct alone. If your hair is fine or straight, a 1.25-inch barrel usually gives a better-looking wave than a tiny wand, because the result stretches into a softer bend instead of a tight coil that drops in an hour. If your hair is thick, coarse, or very heavy, the 1-inch wand often holds better because it creates a stronger curve from the start.
Product choice matters just as much. Fine long hair usually likes mousse at the roots and texture spray through the ends, with very little oil. Thick hair usually wants smoothing cream on the mid-lengths before heat, then a flexible spray after styling. Sea salt spray can help both, but it should never be layered on top of a dozen other products. That’s how long hair ends up dry and sticky at the same time. Ugly combo.
The part changes the whole read of the hairstyle. Center parts make the waves look balanced and sleek. Deep side parts add lift and shape. Slight off-center parts are underrated, especially if your hair has a cowlick or your face likes a little asymmetry. Small choice. Big visual difference.
How to Make Long-Hair Beach Waves Last Without Crunch
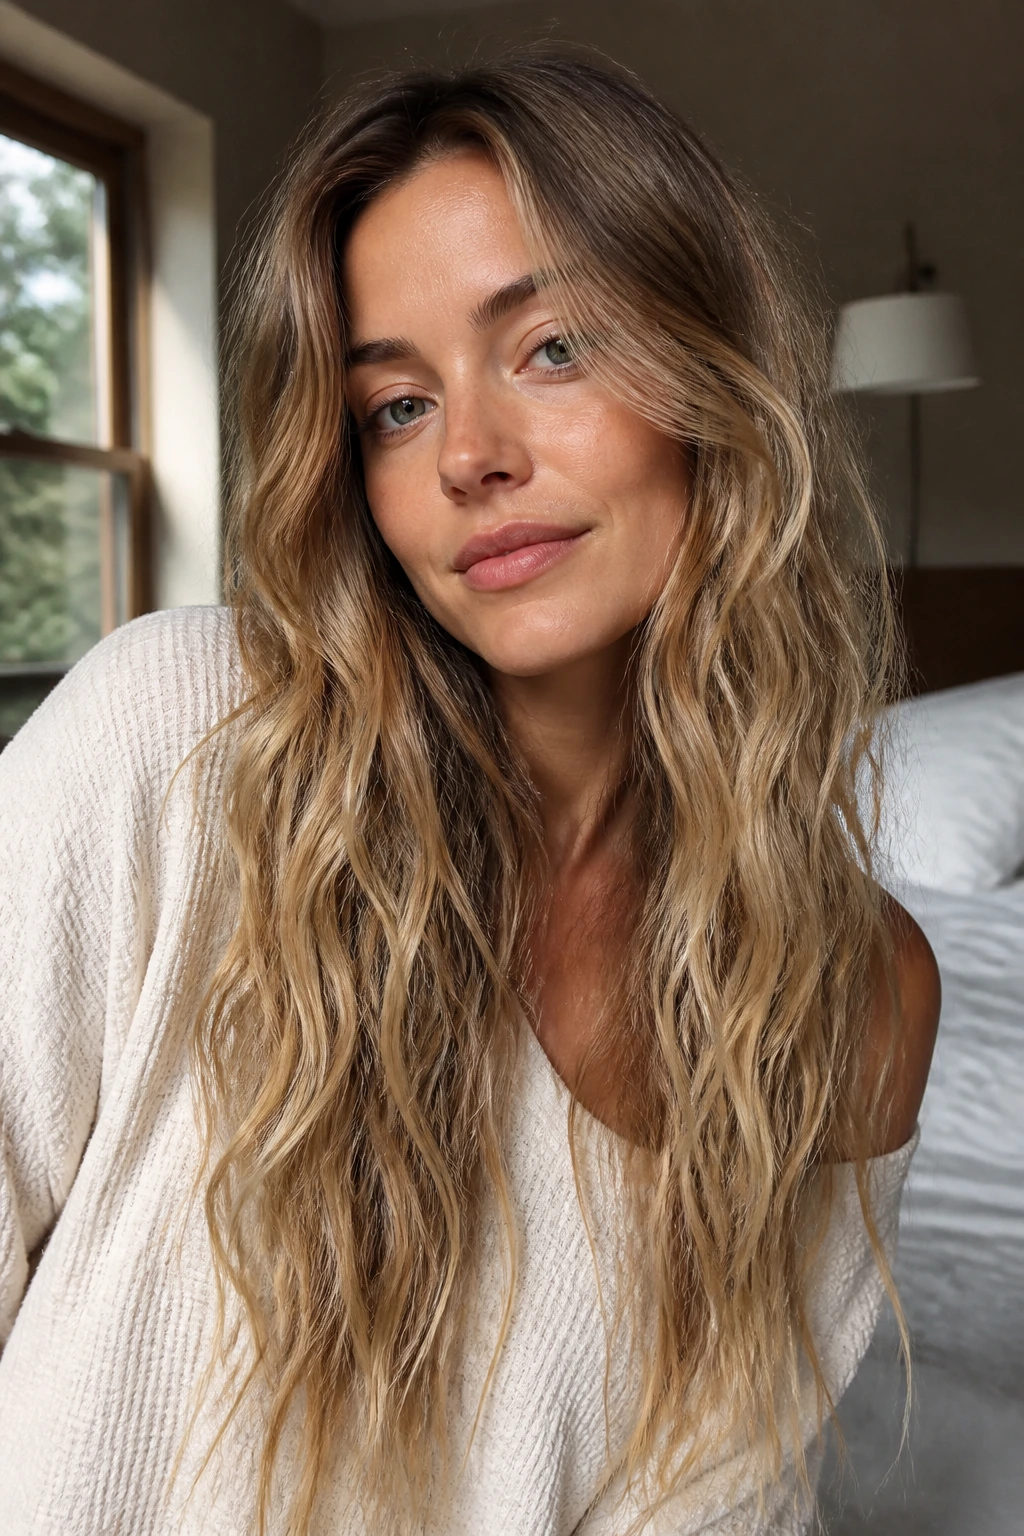
The longest-lasting waves start before the iron even heats up. Dry the hair completely, protect the ends, and don’t load product near the roots unless you need lift there. If your hair is slippery, a light mousse at the crown and a texture spray through the mid-lengths gives the bend something to grab.
Set the wave, then leave it alone. After each section comes off the barrel, cup it in your hand for a few seconds or clip it flat against the head until it cools. That cooling step locks in shape better than extra heat does. It also keeps long layers from stretching out before they’ve had time to set.
Use less touch than you think. The first finger rake is enough for many styles. If you keep combing through the hair, it starts to separate in an ugly way and the wave collapses into frizz. For a more lived-in look, brush once, then stop. For a piecey finish, separate only the front sections and the layers around the face.
Refresh in small sections. On the next day, don’t re-wet the whole head. Twist 1-inch front pieces around your finger, mist with water or a wave spray, then hit them with cool air for a few seconds. The crown usually needs dry shampoo more than it needs heat. The lengths need less attention than the roots. That’s the whole game.
Common Mistakes That Flatten Long-Hair Waves
-
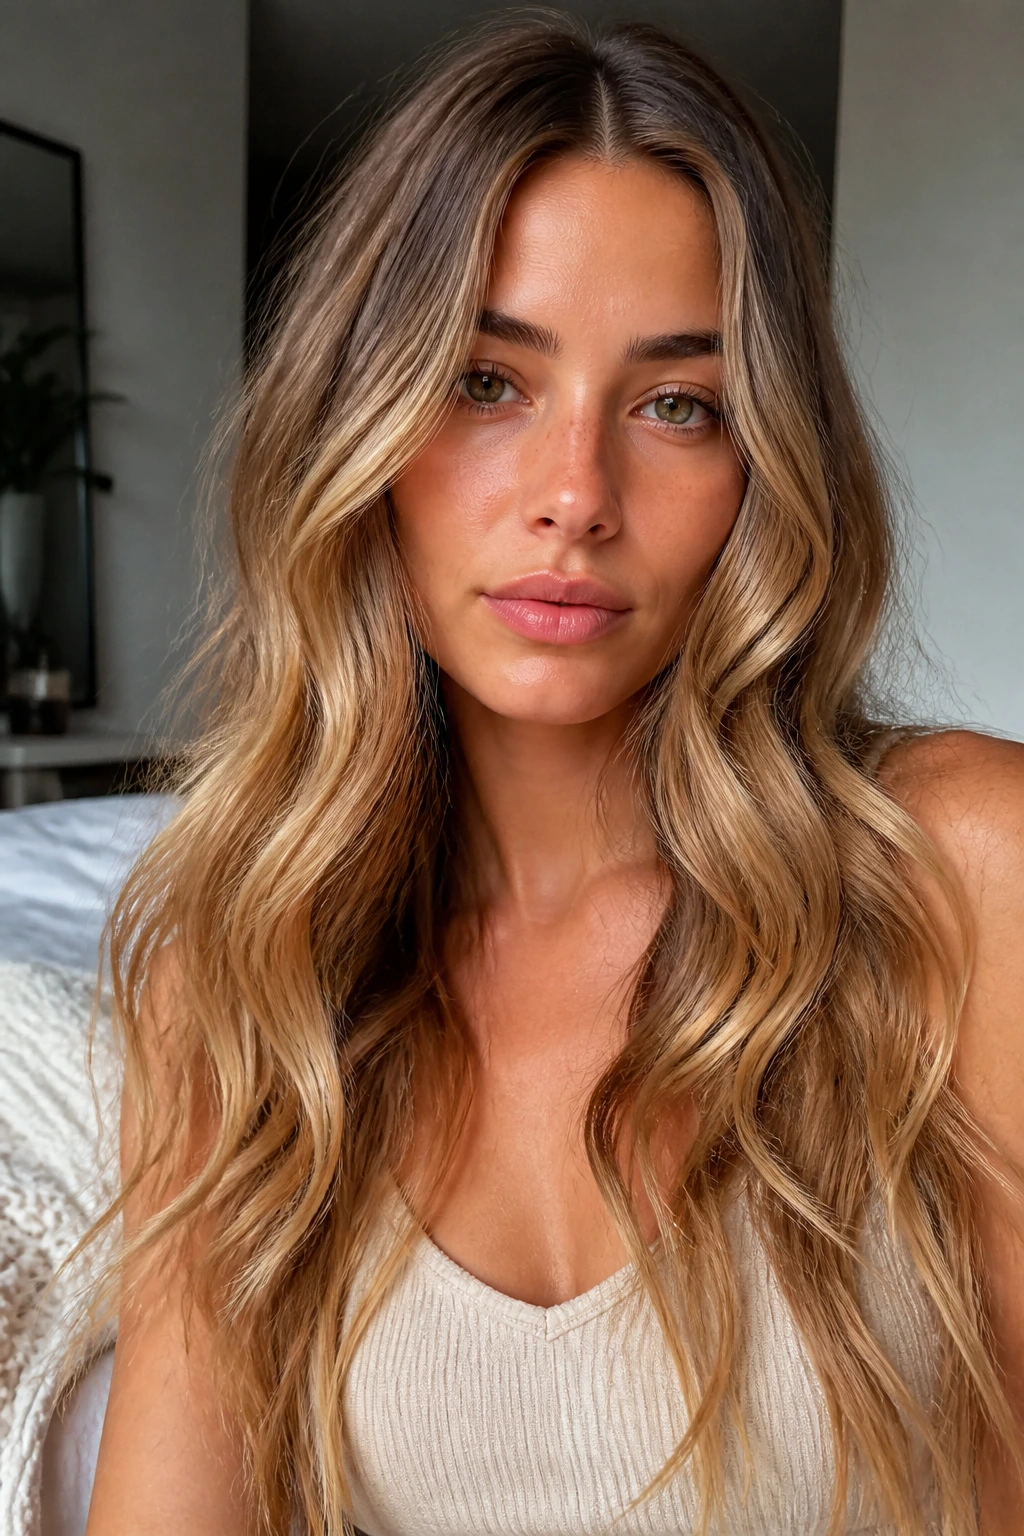
Curling sections that are too wide: The wave looks fine when it leaves the iron, then disappears by the time you’re done getting dressed. Keep sections narrow enough that the heat reaches the middle.
-
Starting every curl in the same direction: That creates a tidy, tube-like pattern that looks more prom than beach. Alternate directions, especially through the back and lower layers.
-
Loading product at the roots: Heavy spray or cream at the scalp drags long hair down and makes the top look greasy. Keep most of the product through the mid-lengths and ends.
-
Brushing too early: If the hair hasn’t cooled, the wave hasn’t set. Brush too soon and you get a puffy cloud instead of texture.
-
Ignoring the haircut: One-length long hair can hold waves, but it needs a softer hand. Long layers and face-framing pieces make the style easier to shape and keep it from looking like a thick curtain.
-
Using the wrong barrel size: Tiny barrels can make long hair look over-curled at the top and flat at the bottom. Bigger isn’t always better, but the tool has to match the length.
Variations and Alternatives That Change the Mood Fast
-
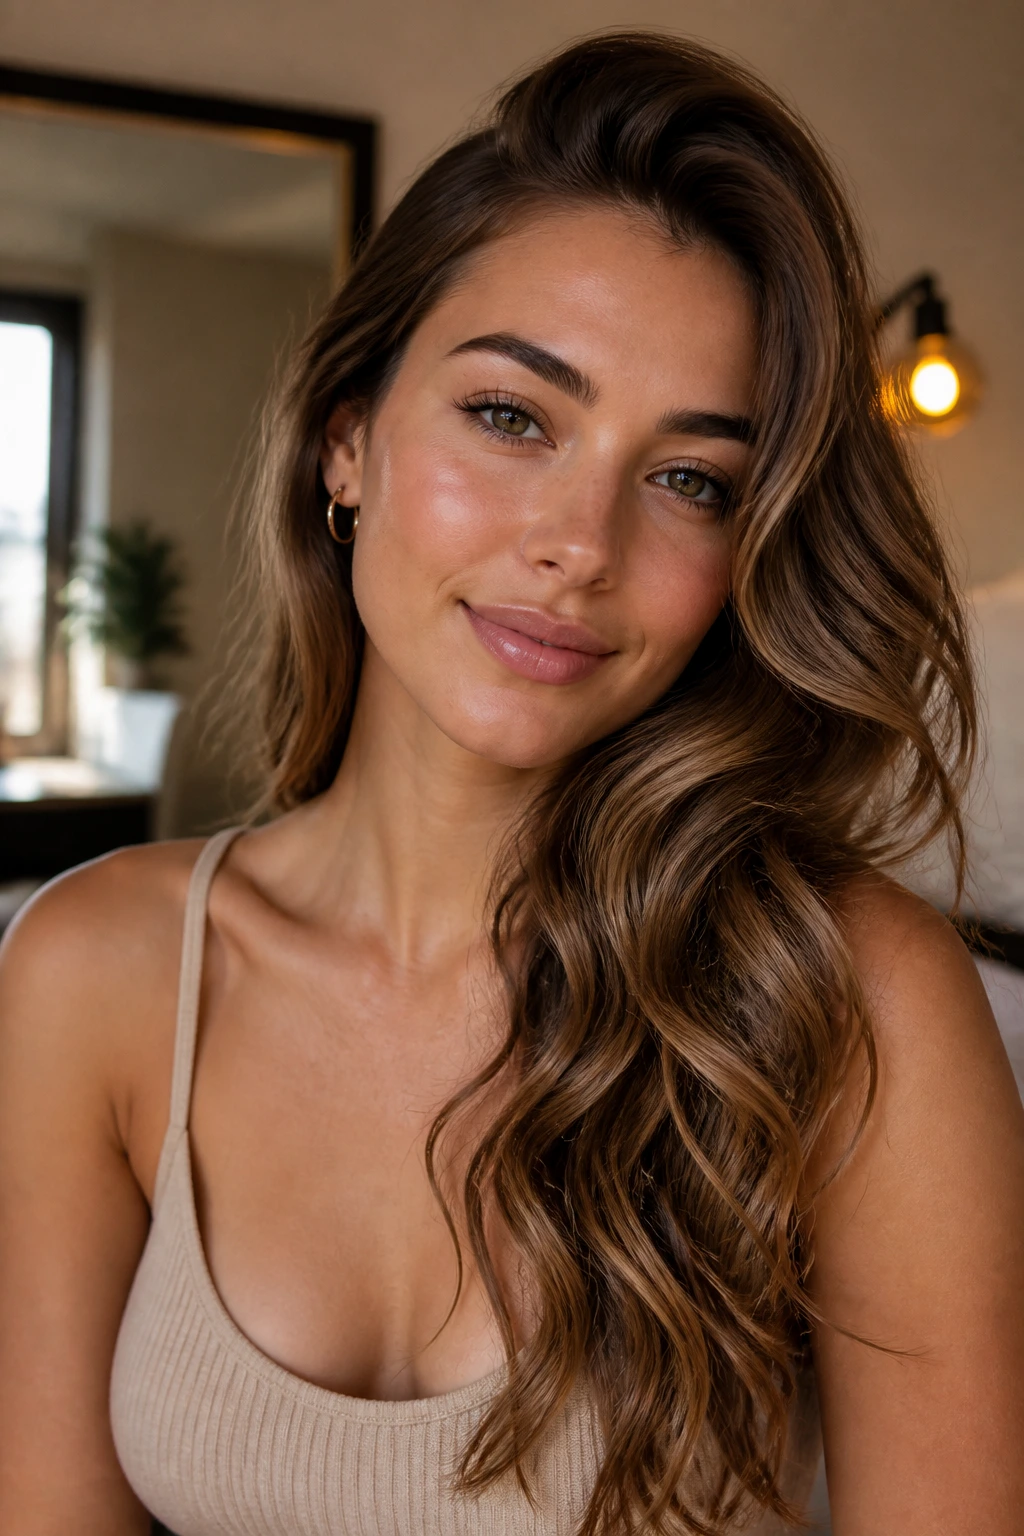
Soft Glam Side Sweep: Take the classic side-part wave and make the finish smoother, shinier, and more uniform. This one works well for weddings, dinners, or any time you want the texture to look deliberate rather than messy.
-
Heatless Rope Weekend Waves: Swap hot tools for two rope twists or braids before bed. The bend comes out softer and a little irregular, which is useful if your hair hates heat or your ends are dry from styling.
-
Accessory-First Waves: Add a scarf, claw clip, or a line of pins and let the accessory dictate the shape. This is a good move when the hair itself is simple but you want the whole look to feel finished.
-
Humidity-Ready Matte Waves: Use mousse, a diffuser, and a flexible spray with very little oil. The texture will stay softer at the ends and less puffy near the crown, which is the part that usually gives up first in damp air.
-
Polished Office Waves: Keep the wave pattern soft, the crown smooth, and the front pieces tucked neatly behind the ears. It’s a cleaner version of beach texture, and it doesn’t fight a structured outfit.
How to Keep the Texture Fresh Between Washes
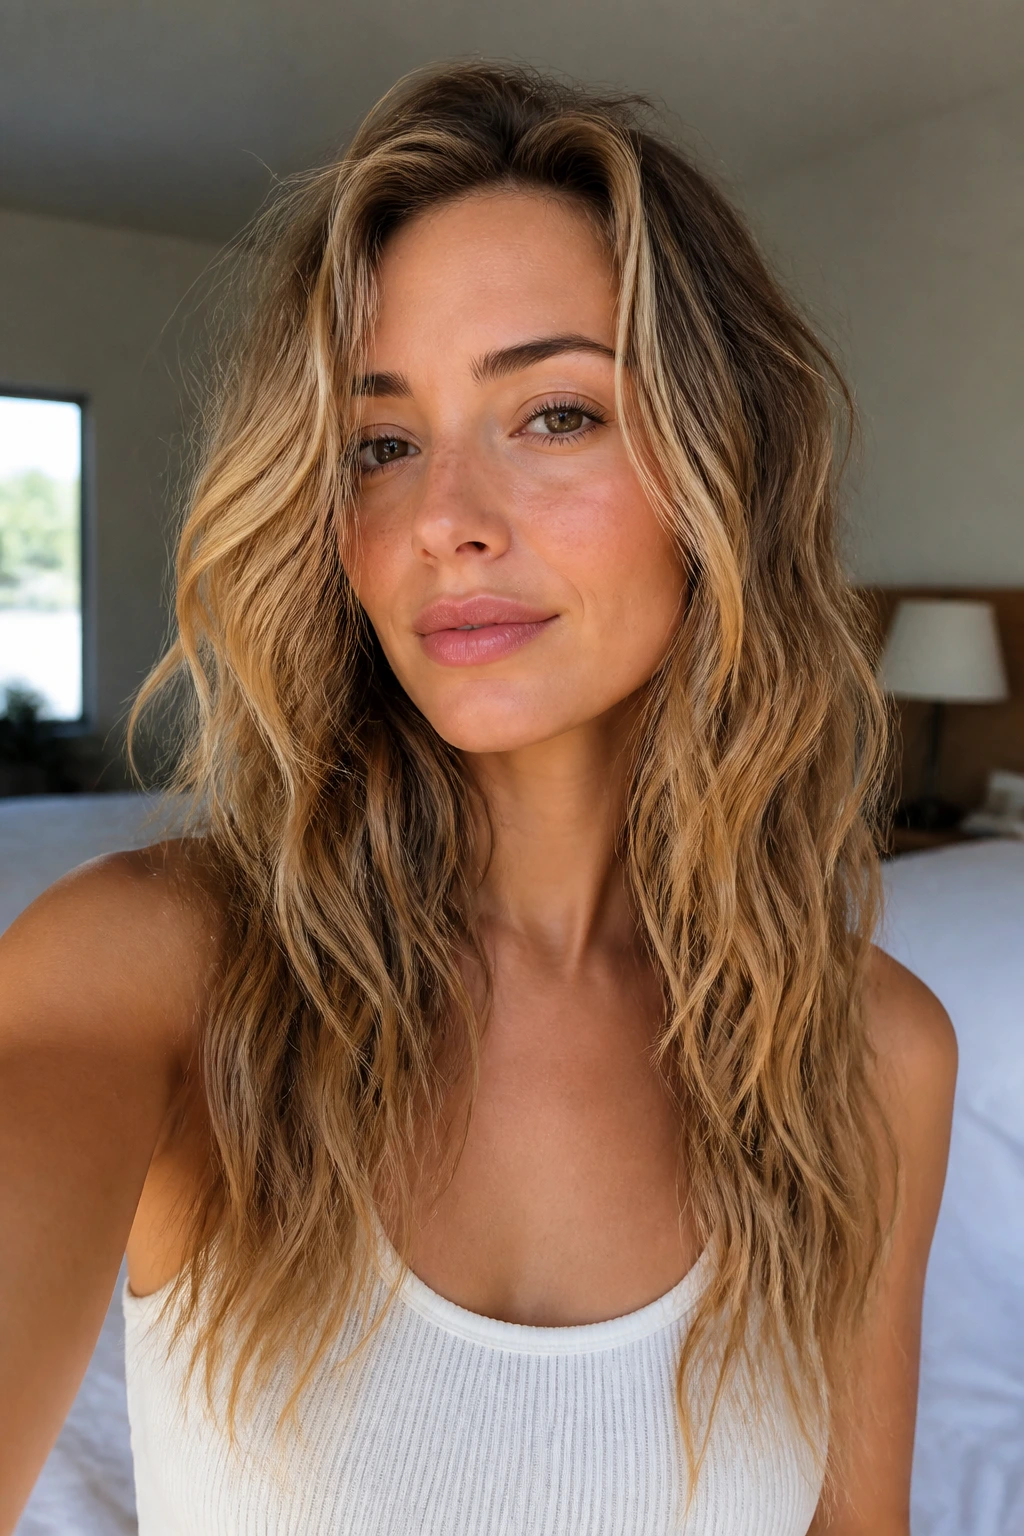
Beach waves on long hair often look better on day two, provided you treat the roots and ends differently. The roots usually need dry shampoo at the crown and around the part. The lengths usually need nothing more than a light mist and maybe one or two finger-twisted pieces near the face. Don’t flood the whole head with water unless you’re ready to restyle from scratch.
Sleep matters. A loose silk scrunchie, a soft top knot, or two low braids can stop the lengths from tangling while you sleep. A silk pillowcase helps too, but the hairstyle itself should do some work. If you wrap the hair too tightly, the next morning brings dents instead of waves.
When the style starts to droop, revive only the sections that matter visually: the front pieces, the crown, and the top layer around the shoulders. The hidden hair underneath can stay a little imperfect. No one sees it. That’s not laziness. That’s strategy.
Beach Wave Hairstyle Questions People Actually Ask
What barrel size works best for beachy wave hairstyles for long hair?
A 1-inch barrel gives more hold and a stronger bend, while a 1.25-inch barrel gives a softer, looser finish. For very thick or very long hair, I usually reach for the smaller barrel first because gravity is already doing enough work on its own.
Do I need layers for beach waves to look good on long hair?
No, but layers help a lot. They stop the length from looking like one heavy block and make the wave pattern show up at different heights instead of hanging in a single line.
How do I keep the waves from falling flat by noon?
Use narrower sections, let each one cool completely, and keep product off the roots unless you need lift there. If the style starts dropping anyway, the issue is usually section size or barrel choice, not a lack of hairspray.
Can I make beach waves without heat?
Yes. Rope braids, headband wrapping, and loose overnight twists all work on long hair. They tend to look softer and more irregular than hot-tool waves, which is part of the charm.
What if my hair is thick and frizzy?
Start with smoothing cream on the mid-lengths, then use a slightly smaller section size and a stronger hold spray. Thick hair usually needs more structure at the start and less touching at the end.
Should I curl the ends of long hair too?
Not always. Leaving the last inch or two straighter often makes the style look lighter and keeps the ends from puffing out. That detail matters more on long hair than on shoulder-length cuts.
Can beach waves still look polished enough for formal outfits?
Absolutely. A cleaner side part, smoother crown, and brushed-out finish can push the style in a dressier direction fast. Add shine sparingly and skip the heavy texture spray.
Why does my long hair look stringy after using sea salt spray?
Usually because there’s too much product or too much product layered with oil or cream. Sea salt spray should add grip, not wetness. Use it lightly on damp hair, then stop once the texture appears.
The Shape You’ll Reach For Again
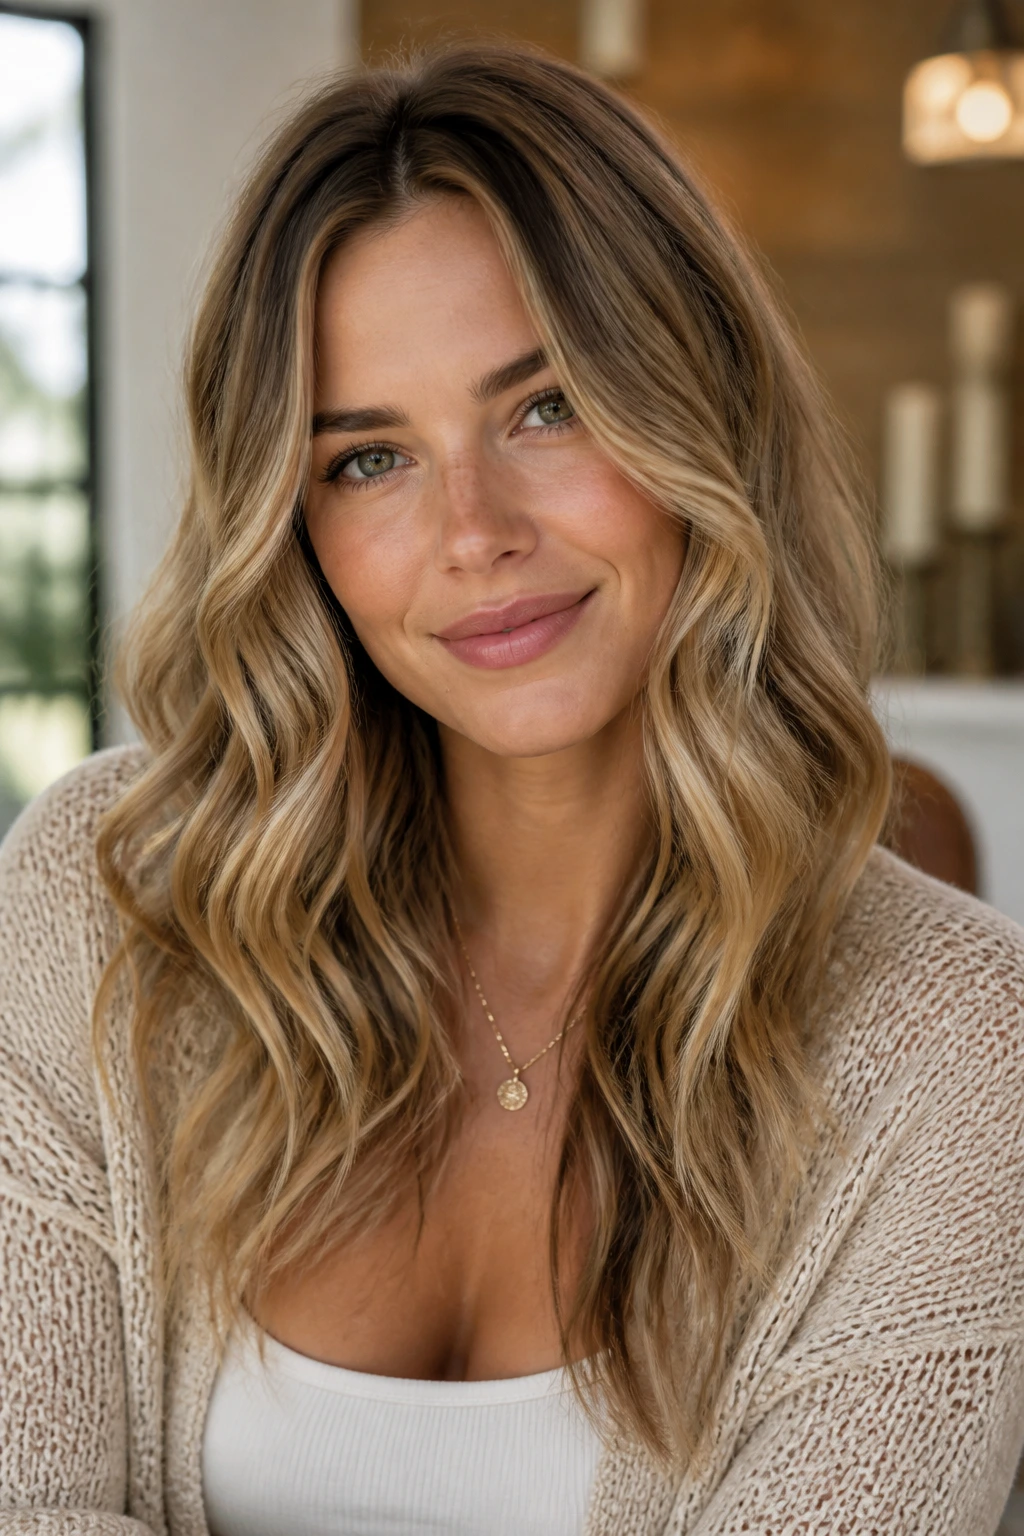
Long hair doesn’t need to be wrestled into place to look good. It needs a shape that respects the weight, the length, and the way the ends behave after a few hours of movement. That’s why beachy wave hairstyles for long hair can be so useful: they give you room to choose between soft, glossy, messy, heatless, or dressed-up without changing the basic idea.
The small details are what make the difference. A deeper part. A smaller section. One inch left out at the end. A clip at the crown while the hair cools. Those tiny decisions are what stop the style from sliding into either too-perfect curls or a flat, frizzy mess.
Pick the version that fits your hair’s mood that day, then leave a little room for imperfection. That’s where the best long-hair waves usually live.
