



The quickest way to make hair look finished without making it look stiff is a wave. Not a tight curl. Not a helmet of spray. A soft bend, a loose S-shape, a little movement at the ends — the sort of texture that looks like it happened on a good hair day and not under fluorescent bathroom lights with five tools on the counter.
That’s why easy wavy hairstyles for women keep showing up everywhere they actually need to work: school drop-off, office days, dinner plans, weddings, airport runs, and those in-between moments when your hair is clean enough to behave but not clean enough to feel flat. Waves are forgiving. A section that’s a little wider than the last one? Fine. A front piece that bends more than the back? Fine. Hair that refuses to hold a perfect curl? Also fine. That’s the charm. Waves don’t ask for precision in the way pin-straight looks do.
And if you’ve got layers, bangs, a lob, a blunt bob, thick ends, fine roots, or that slightly stubborn texture that falls somewhere between straight and curly, waves tend to meet the hair where it is. They soften grow-out. They hide awkward lengths. They make second-day hair look intentional instead of desperate. The trick is choosing the right wave pattern for the length, density, and amount of time you actually have in the morning.
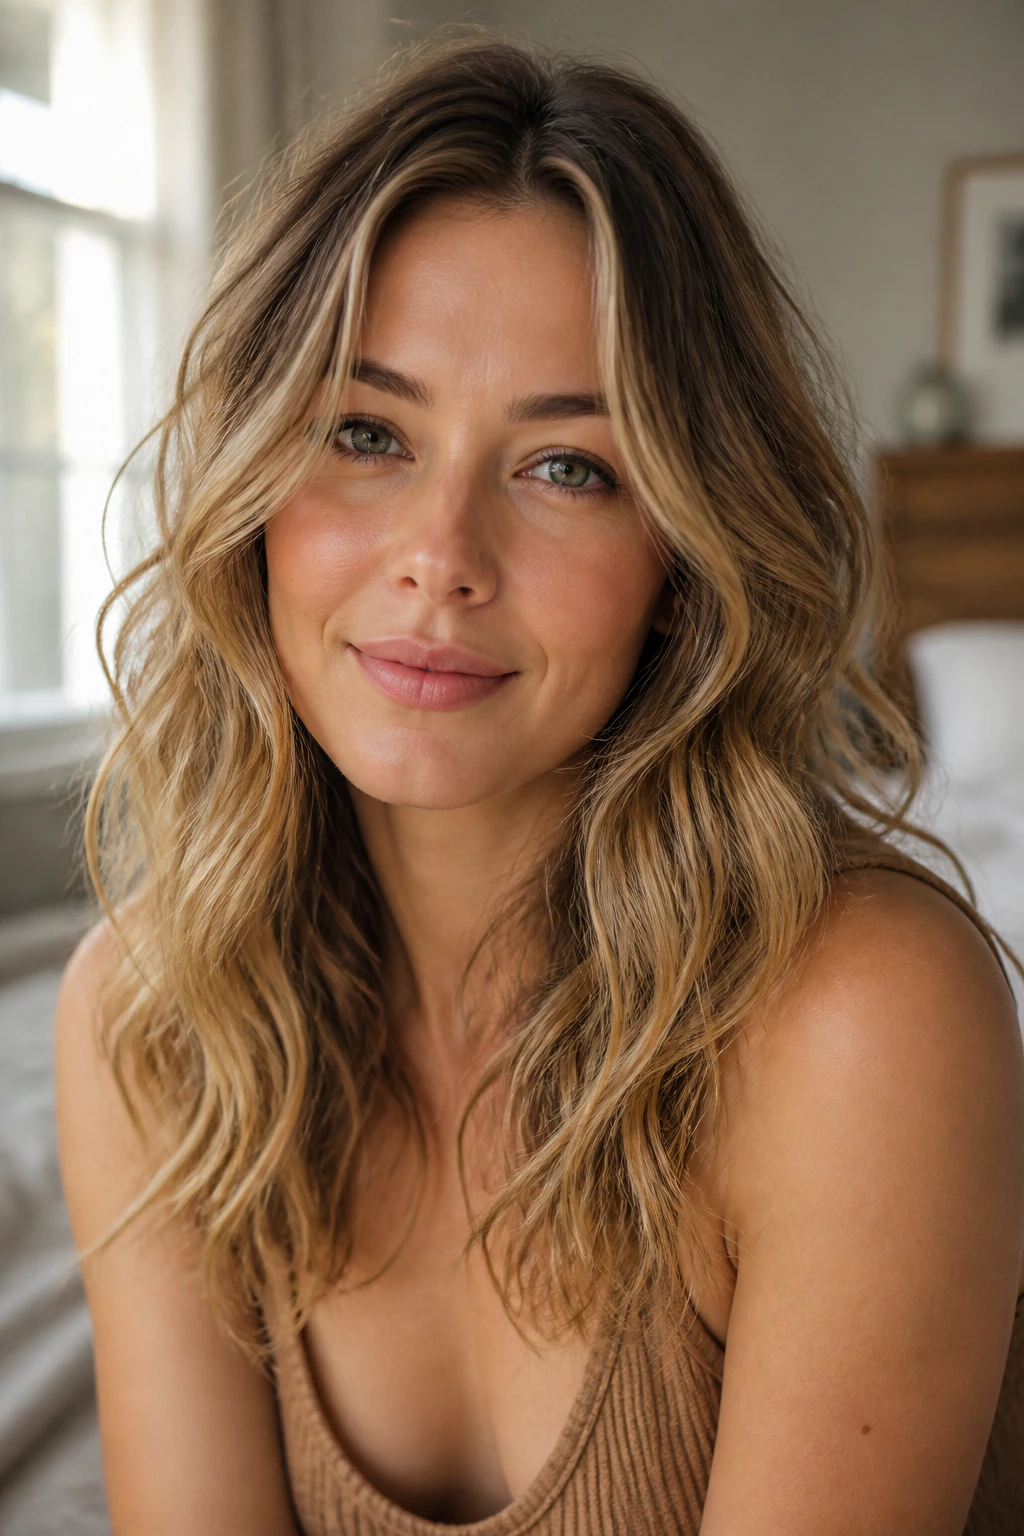
Why These Waves Earn Their Keep
-
They forgive uneven sections: A 1-inch difference in your parting disappears once the hair bends and breaks up into texture.
-
They work on more than one hair type: Fine hair gets lift from bend and root movement; thick hair gets shape without needing a full blowout.
-
They stretch a style across the week: Most of these looks can start with freshly washed hair, then get revived with dry shampoo, water mist, or a quick iron touch-up the next day.
-
They fit real life accessories: Clips, scarves, barrettes, ribbons, and pins all look better against soft texture than against stick-straight hair.
-
They hide awkward stages: Growing out bangs, layers, or a blunt cut is far less annoying when the ends are bent or tucked.
-
They don’t need a perfect finish: A few flyaways are part of the look here. Too much polishing kills the whole thing.
1. Easy Loose Side-Part Waves
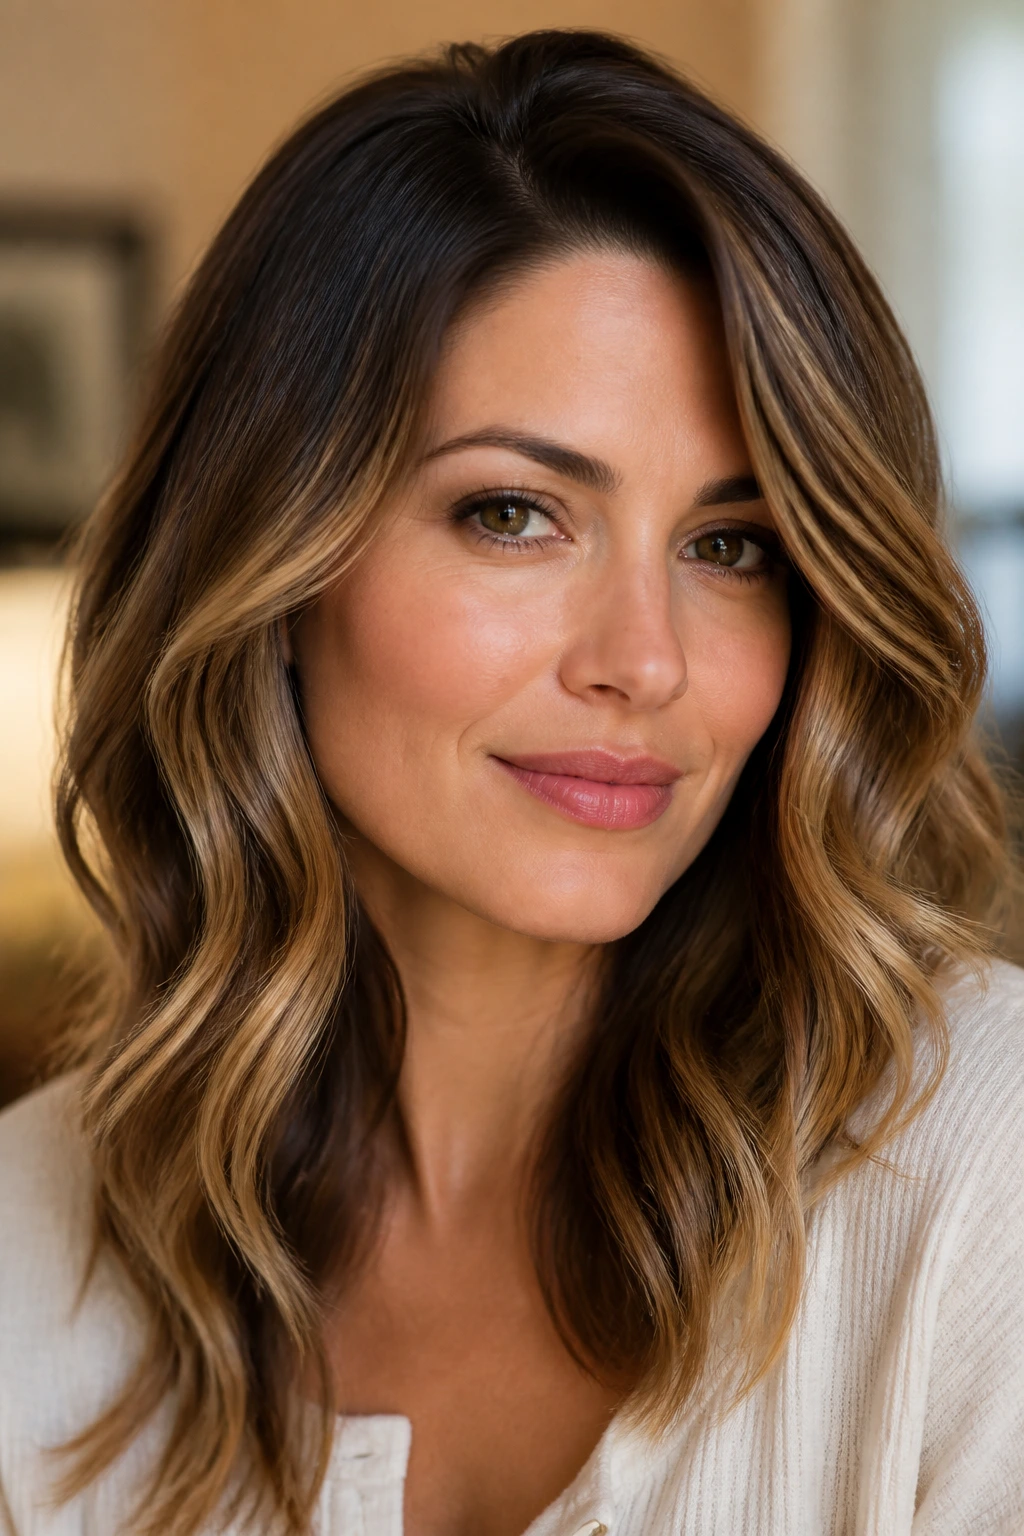
A deep side part makes this style feel fuller at the crown, which is why it’s such a useful move for women with fine hair or anyone whose roots flatten by lunch. The wave pattern stays soft, with the front pieces bending away from the face and the ends sitting just a little undone. It reads polished, but not uptight.
Why the Side Part Does So Much Work
A side part changes the whole mood of the wave. One side gets more lift, the other side drops a little lower, and the hair ends up with shape before you’ve even touched a curling iron. If you want the easiest version, wrap 1-inch sections away from the face on one side and toward the face on the other, then rake through with your fingers once the curls cool.
Best for: medium to long hair, especially if the top layer likes to collapse.
Quick note: keep the front section slightly looser than the back. That little bend near the cheekbone matters more than people think.
My favorite finish: a mist of light hairspray at the roots, not the ends. The ends should move when you turn your head.
2. Middle-Part Beach Waves
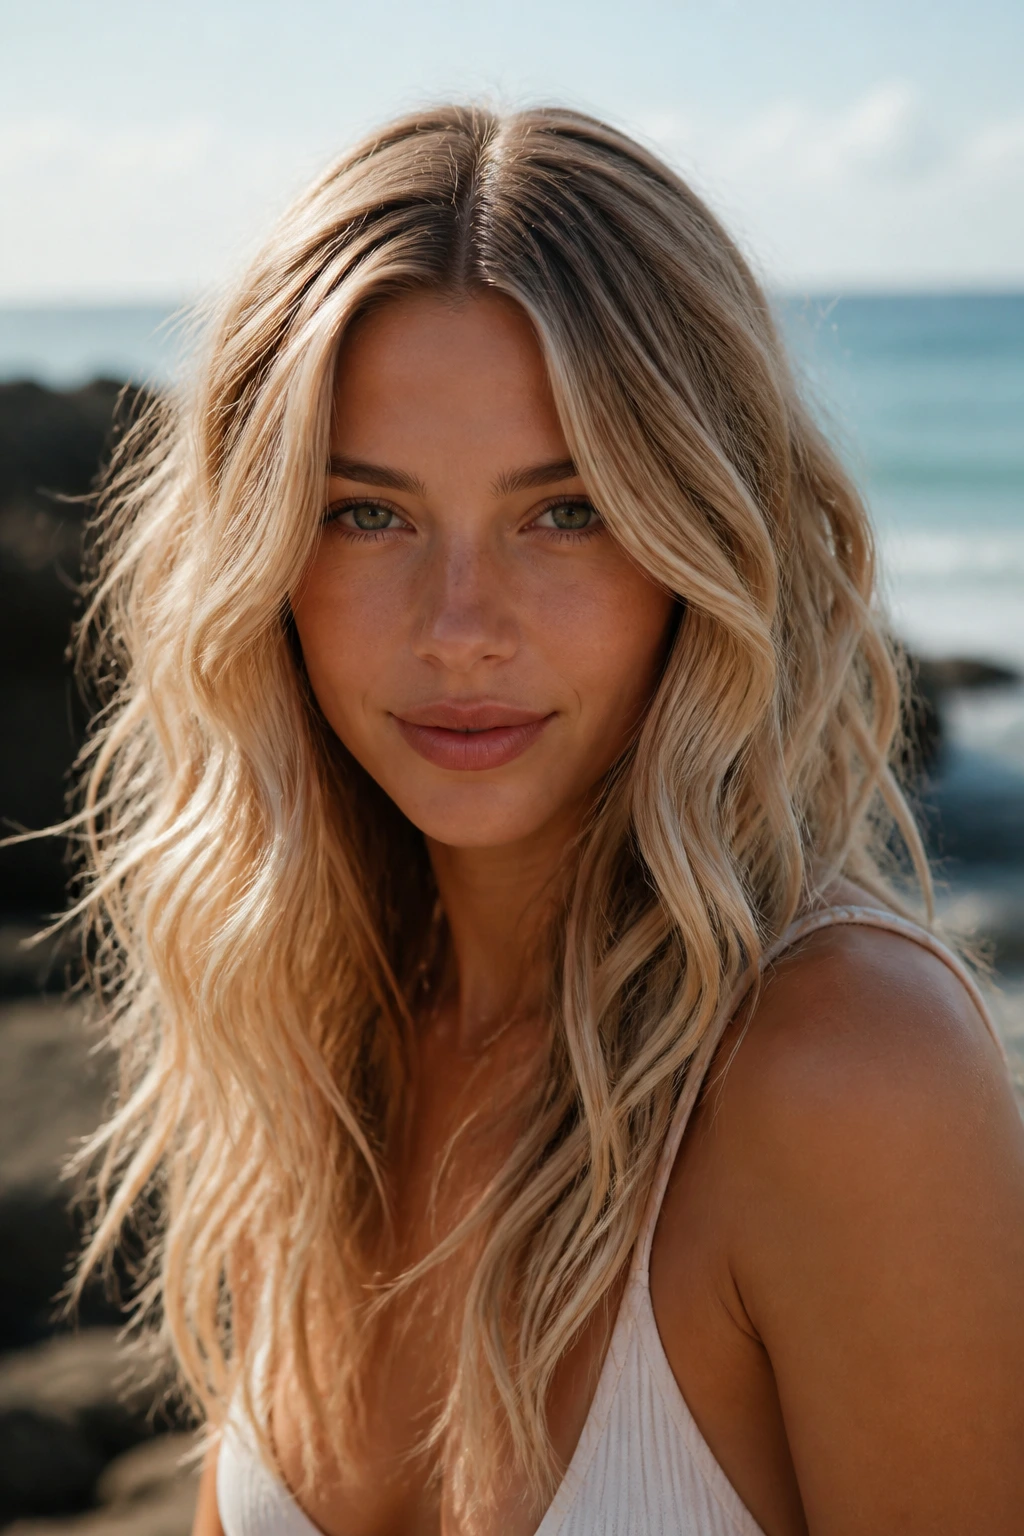
If you want the least fussy wave in the bunch, this is the one. A clean center part and loose, broken texture give you that relaxed beach wave look without needing sea air, sand, or a vacation you can’t justify. The symmetry of the part keeps it modern, while the roughness of the wave keeps it from looking overstyled.
The key is to alternate direction as you curl. One section wraps forward, the next back, and so on. That keeps the hair from clumping into one giant pattern, which is what makes waves look too set. After the curls cool, I like to bend the last inch of the hair straighter with my fingers. It makes the result look less like a spring and more like hair.
This style is especially good if your hair is shoulder-length or longer and you want movement without too much body at the crown. It also plays nicely with second-day hair, because a little natural oil at the roots helps the center part lie flat instead of puffing out.
3. Half-Up Twist with Soft Waves
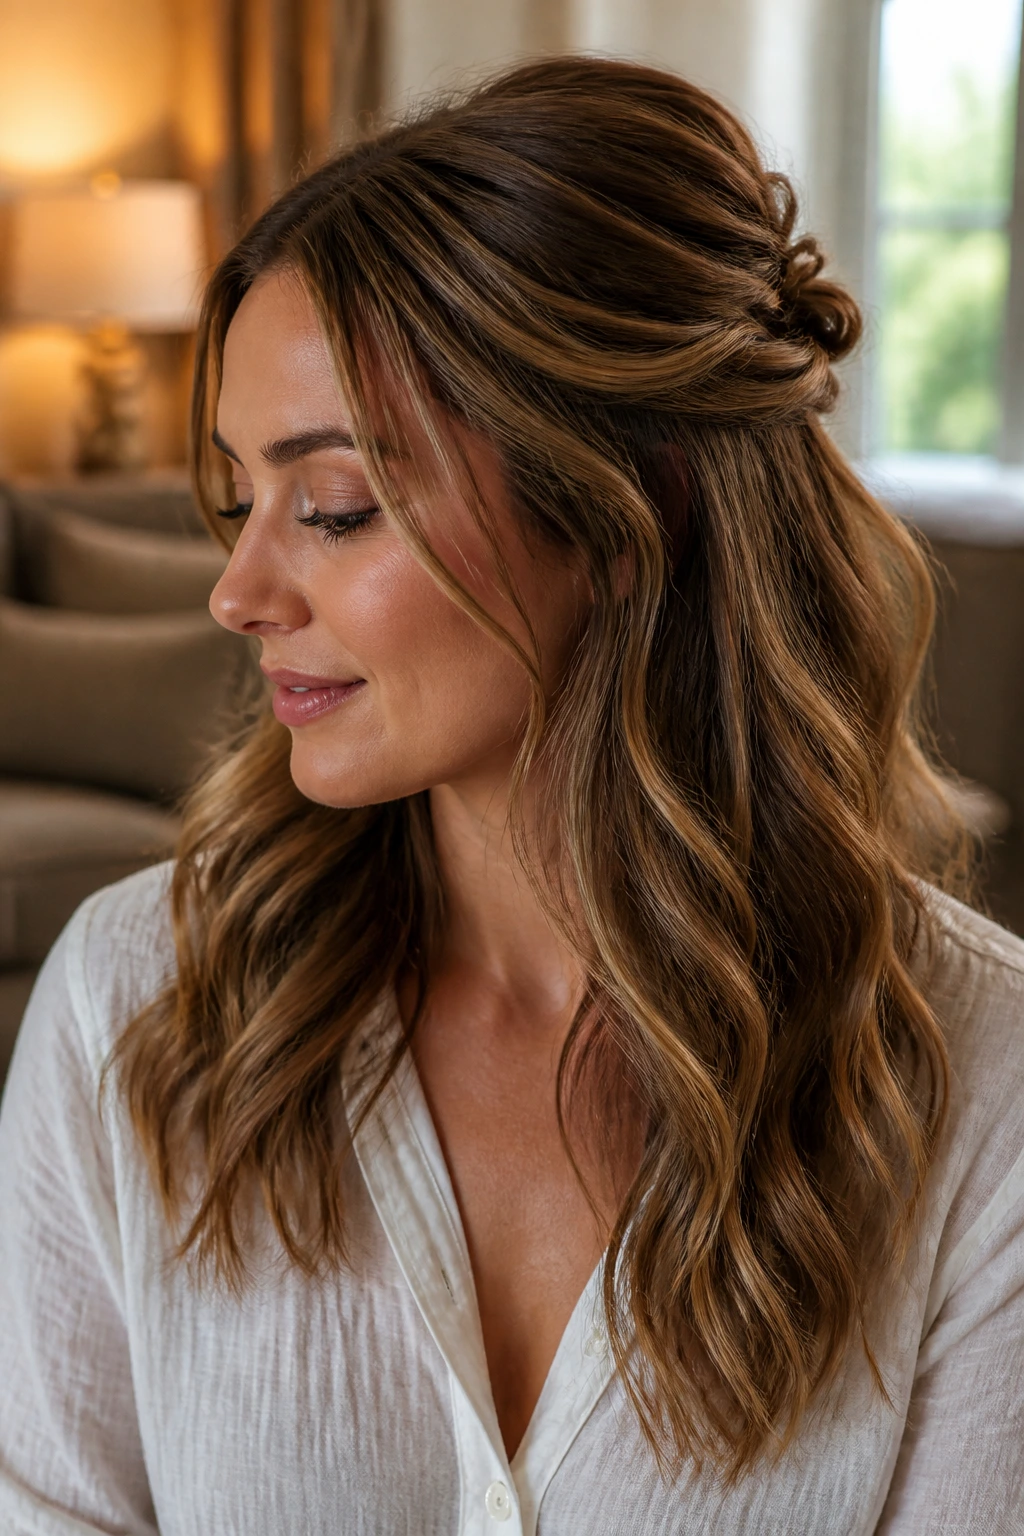
Why does a half-up twist work so well with waves? Because it solves the “what do I do with the front?” problem fast. You keep the hair around the face controlled, but the length still swings free, which means you get shape and softness at the same time.
Twist back two sections from the temples, pin them just above the back of the head, and leave the rest in loose waves. That’s the whole move. If you want it to look less school-picture and more grown-up, pull a few tiny pieces loose around the ears and at the nape. Tiny pieces. Not a curtain of hair. The difference is huge.
How to Wear It Without Making It Fussy
A half-up twist looks best when the wave underneath is not too perfect. The texture below should have enough bend that the top section doesn’t look disconnected from it. I also like this one on hair that’s growing out layers, because the twist holds the shorter pieces in place while the longer pieces do their own thing.
4. Low Ponytail with Face-Framing Waves
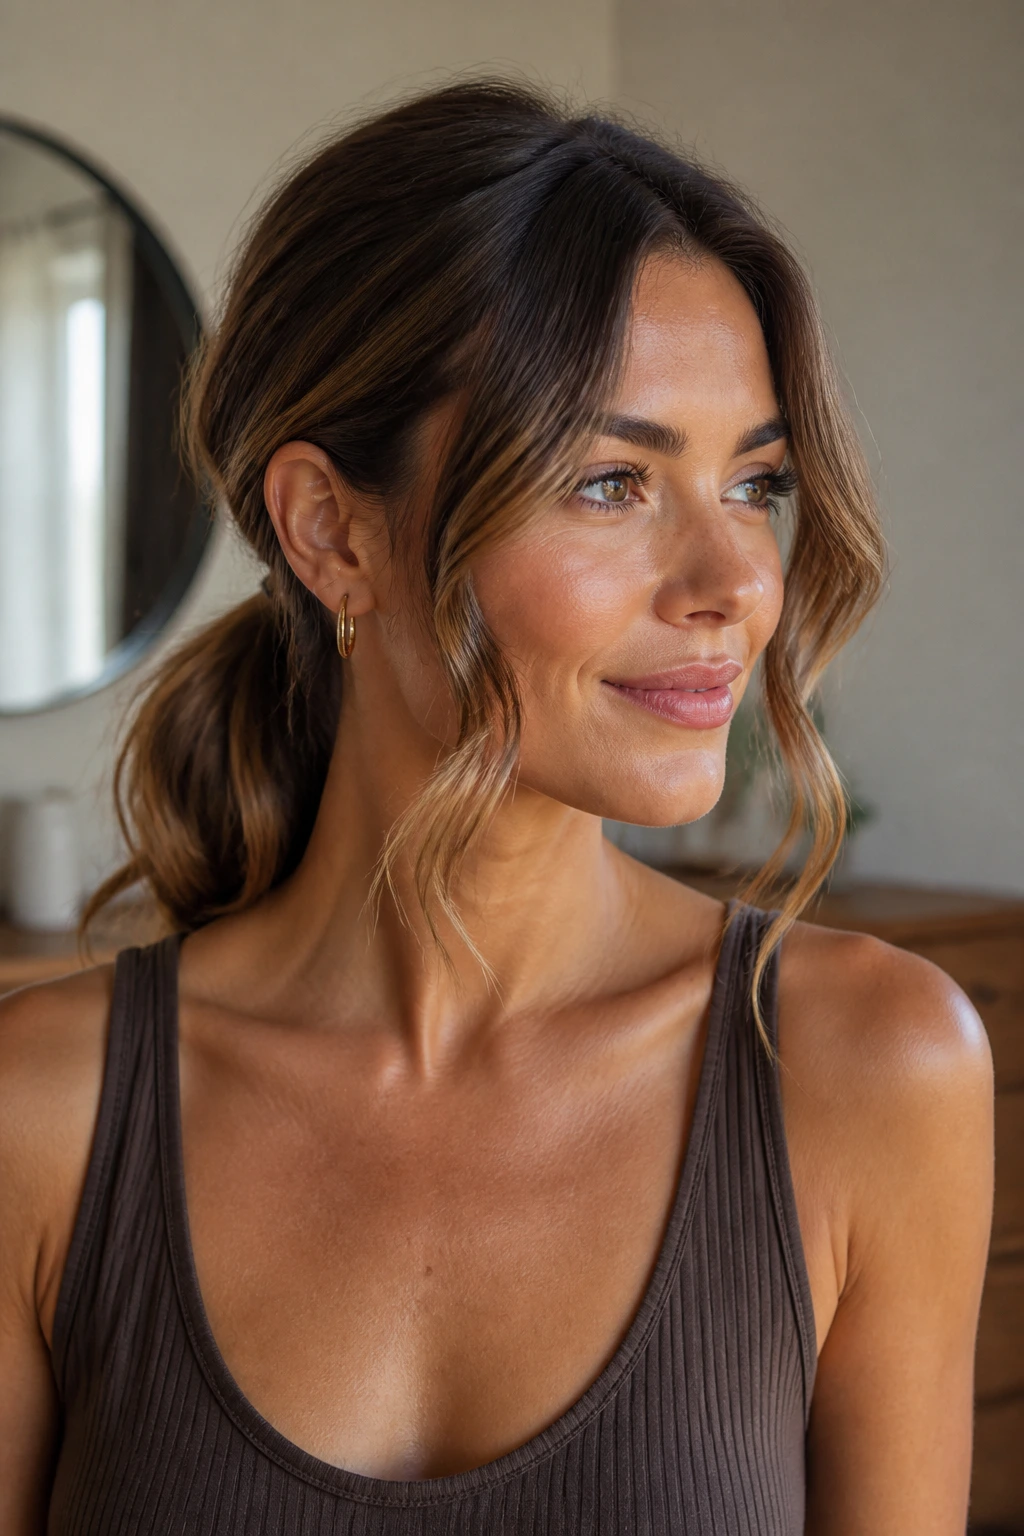
A low ponytail sounds plain until you add face-framing waves, and then it suddenly has shape. The pony sits at the nape, smooth enough to look intentional, while the front pieces fall in soft bends around the cheekbones and jaw. It’s one of those styles that looks like it took longer than it did.
The trick is to keep the crown lightly smoothed and the front loose. Don’t overbrush the wave out of the face-framing pieces. You want movement, not a sleek curtain. If your hair is thick, secure the pony with two elastics stacked one over the other so it doesn’t sag halfway through the day.
This is one of my favorites for collar-heavy clothes — crew necks, button-downs, short jackets. The ponytail clears the neck, and the waves keep it from looking severe. If you wrap a small strand around the elastic, even better. It hides the rubber band and makes the whole thing look more finished.
5. Claw-Clip Waves with a Loose Back Section
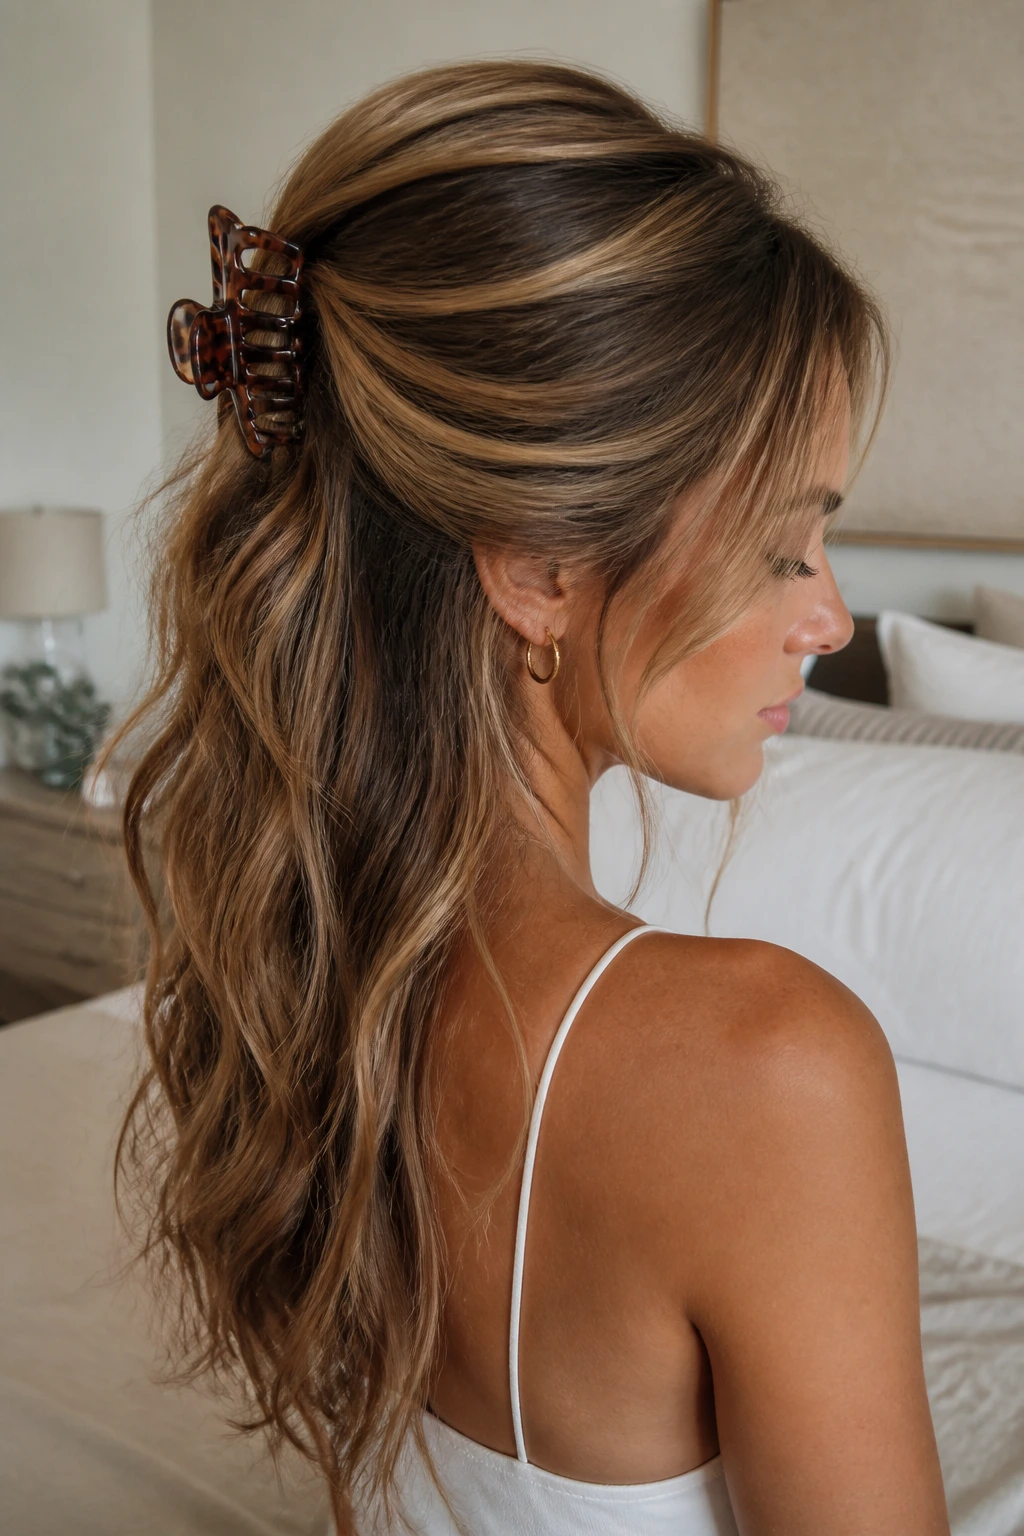
The claw clip saved a lot of people from bad hair days, and honestly, it deserves the reputation. With waves, it works because you can lift the top half of the hair, twist it once, clip it, and let the lower lengths hang loose. You get shape at the back of the head without pinning everything flat.
This style is especially good when your hair is a little too soft to stay in a ponytail, or when you want to show off a wave pattern on the ends without dealing with every strand. Use a medium or large clip if your hair is shoulder-length or longer. Small clips tend to slip if there’s too much hair weight hanging below.
Keep the twist loose. That’s the whole point. If you crank the hair too tightly into the clip, the front goes flat and the ends lose their bounce. A few loose tendrils around the temples make the style look lived-in instead of rushed.
6. Overnight Braided Waves
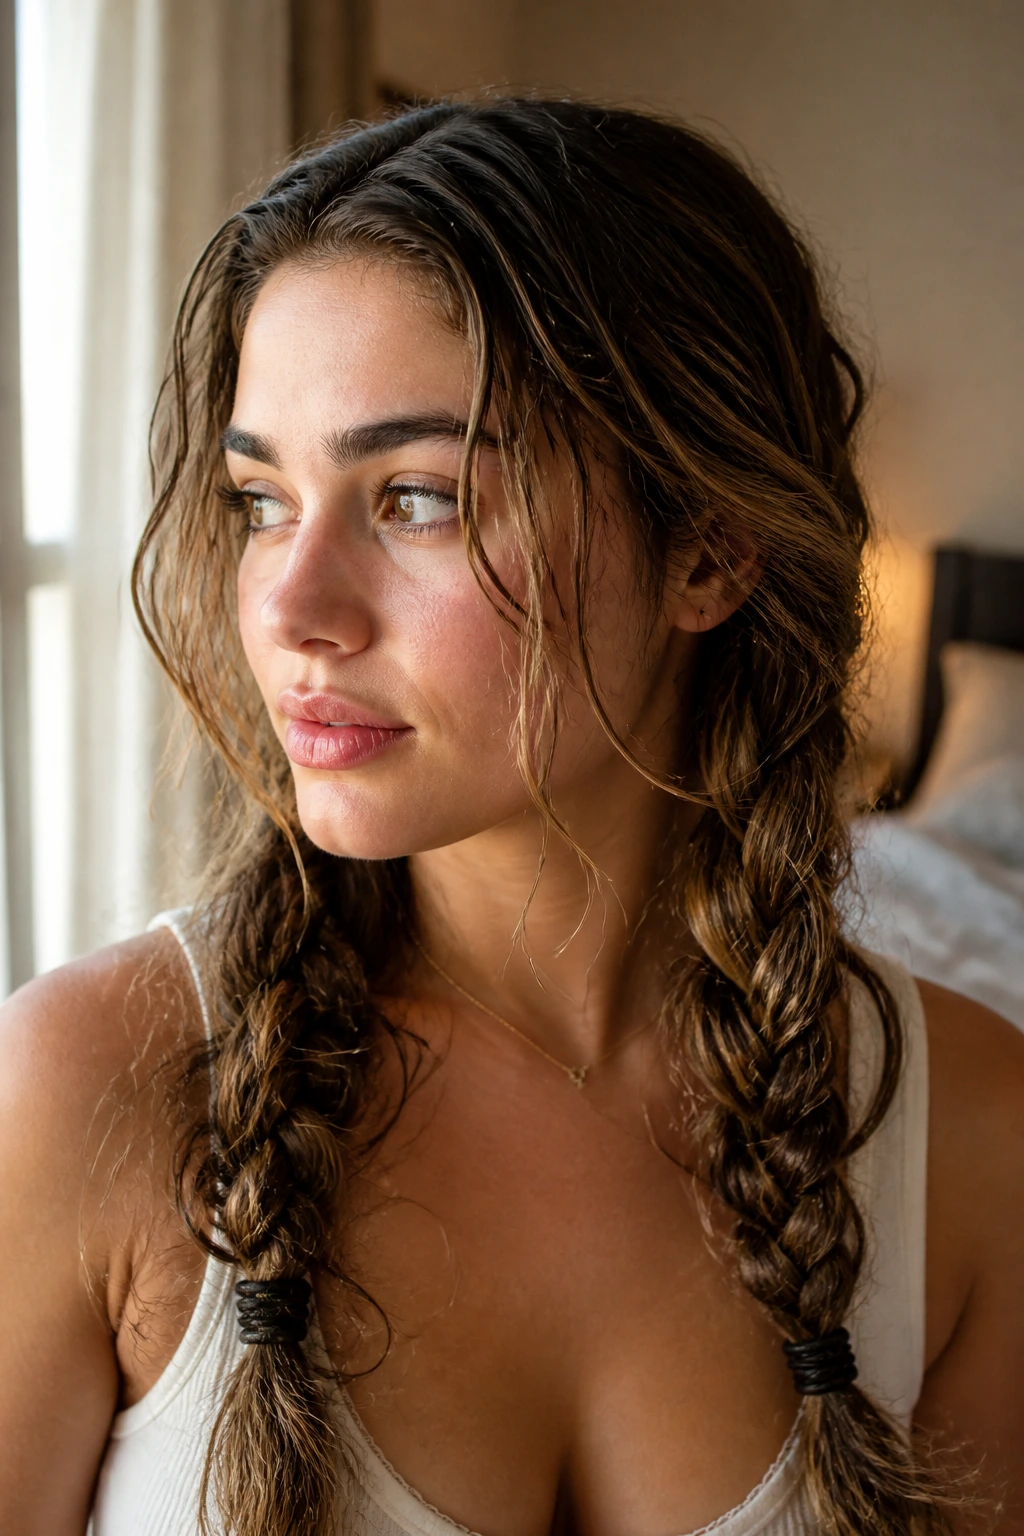
Braided waves are what I reach for when heat is not happening. Damp hair, a little mousse, two loose braids, sleep, unbraid in the morning. Simple. The texture that comes out is softer than curling-iron waves, with a little more body through the mids and less polish at the ends.
The braid size changes the result. Two big braids make broader waves. Four smaller braids give you tighter texture and more volume. If your hair is fine, I’d start with two braids and a dab of lightweight mousse near the roots. Too much product will make the braid crunchy, and that’s a bad trade when you want movement.
What to Watch For
If the hair is too wet when you braid it, the middle can stay damp by morning. That’s a mildew-smelling mistake nobody needs. Aim for damp, not dripping. And if your ends usually stick straight out after a braid, twist the last inch around your finger before securing the elastic. That small move makes the wave pattern carry farther down.
7. Brushed-Out Hollywood Waves
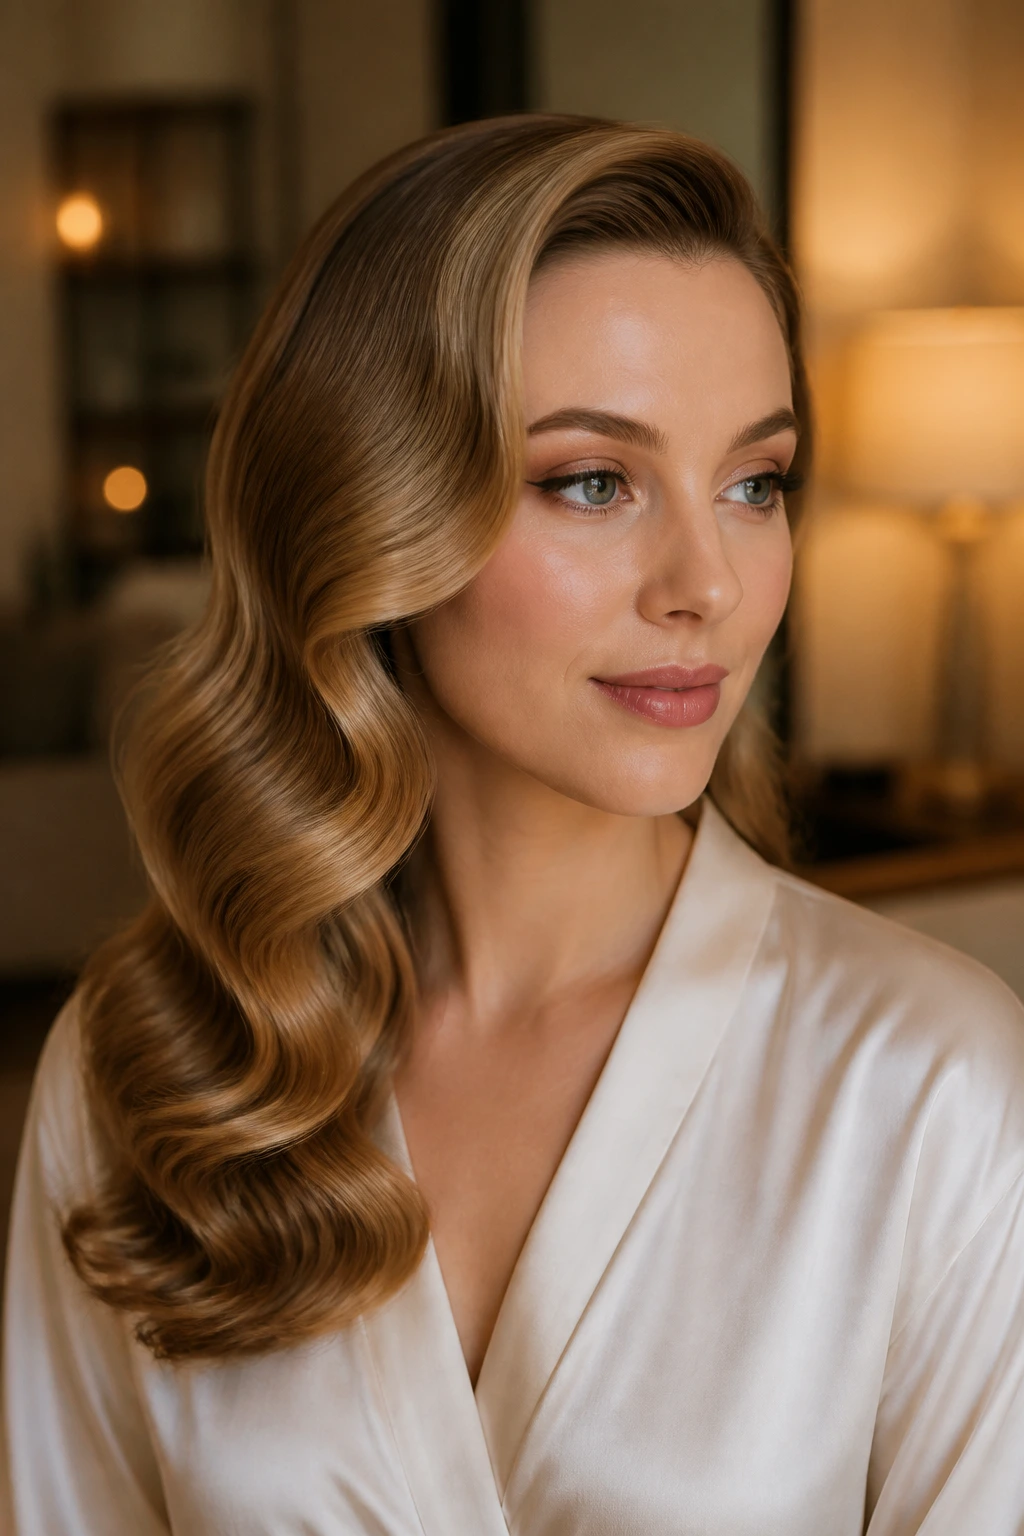
These waves start with bigger curls and end with a brush. That matters. The brush softens the separate curls into one flowing wave line, which is what gives the style that old-screen-star look without needing every strand to behave like a statue.
Use a 1.25-inch curling iron or a hot roller set if your hair is long enough. Wrap sections in the same direction, let them cool completely, then brush gently with a boar-bristle brush or a wide paddle brush. Don’t rush the cooling part. Warm curls collapse into weird frizz when you brush them too soon.
This style asks for a little more effort than the others, but not much. The result is smooth, glossy, and tidy at the surface with enough bend to keep it modern. It’s the easiest formal wave, in my opinion, because the shape does so much of the work on its own.
8. Textured Lob Waves
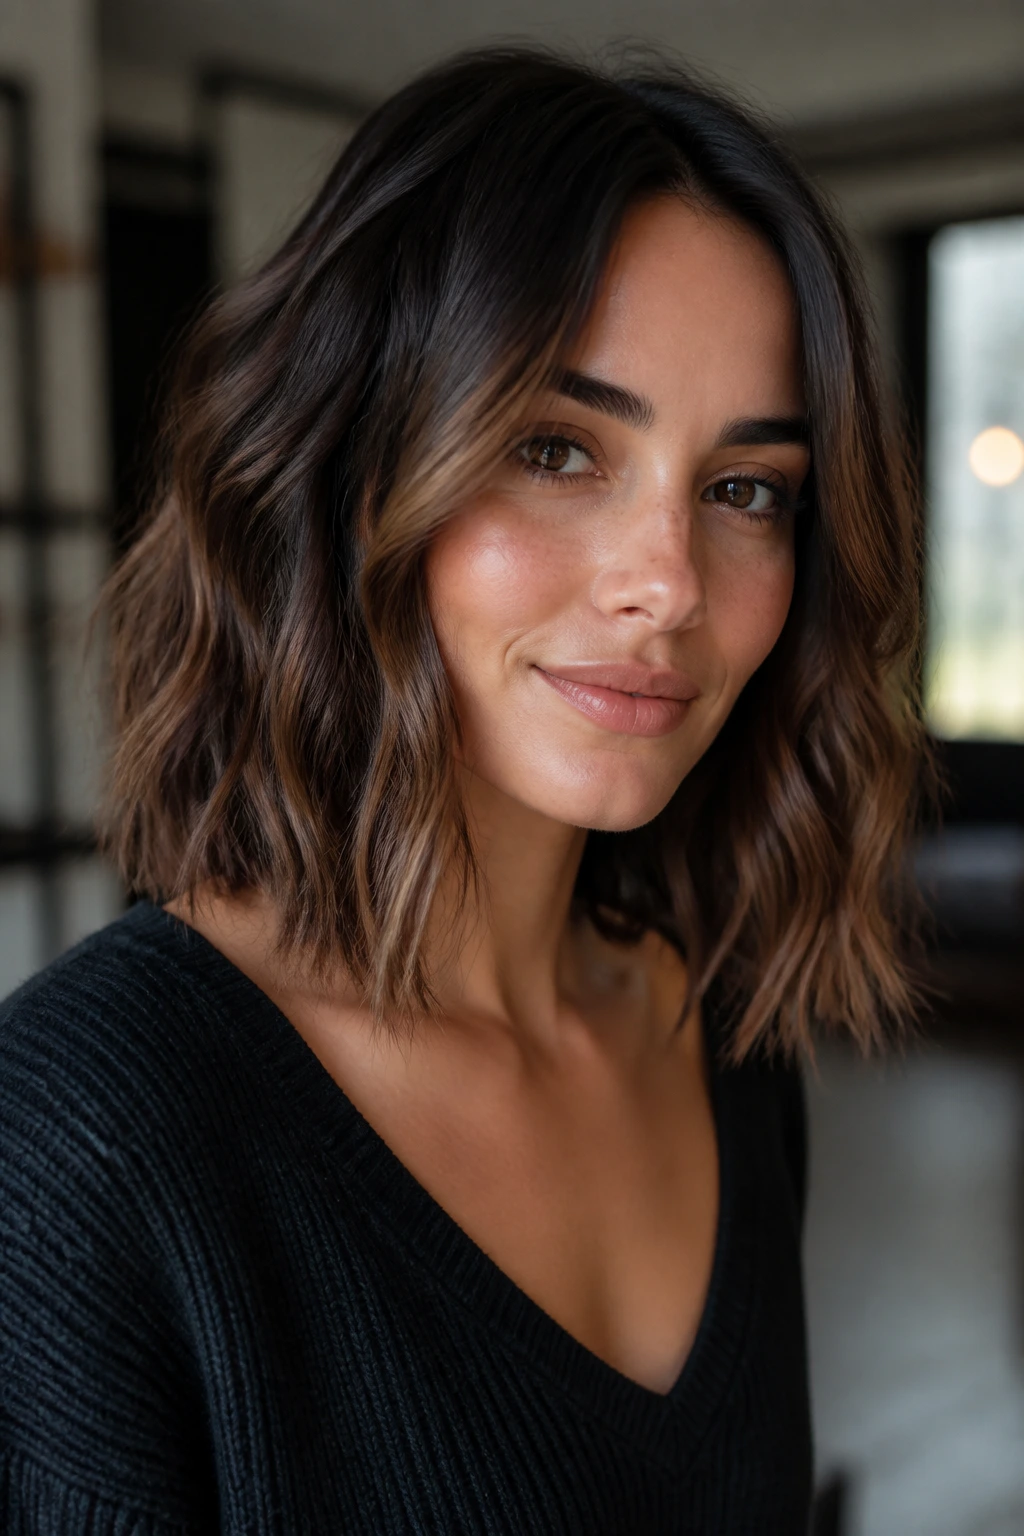
A lob gives waves a very specific job: make the cut look full, not puffy. Shoulder-grazing length needs bend, not bulk, and that’s where textured waves shine. They add movement without making the ends flip out like they’re trying to leave the room.
For this length, I prefer a flat iron or a small wand because it’s easier to control the bend around the jaw and collarbone. Keep the wave loose and stop a little before the ends if you want the haircut to look crisp. If you curl all the way down, the style can turn into an awkward hybrid between wave and ringlet.
How to Wear It
A lob looks best when the front pieces are slightly longer and a little more polished than the back. That contrast makes the cut feel intentional. Tuck one side behind the ear with a small clip or barrette if you want a sharper line. Leave both sides down if you want softness. Either way, the texture should feel airy, not dense.
9. Messy Bun with Wavy Ends
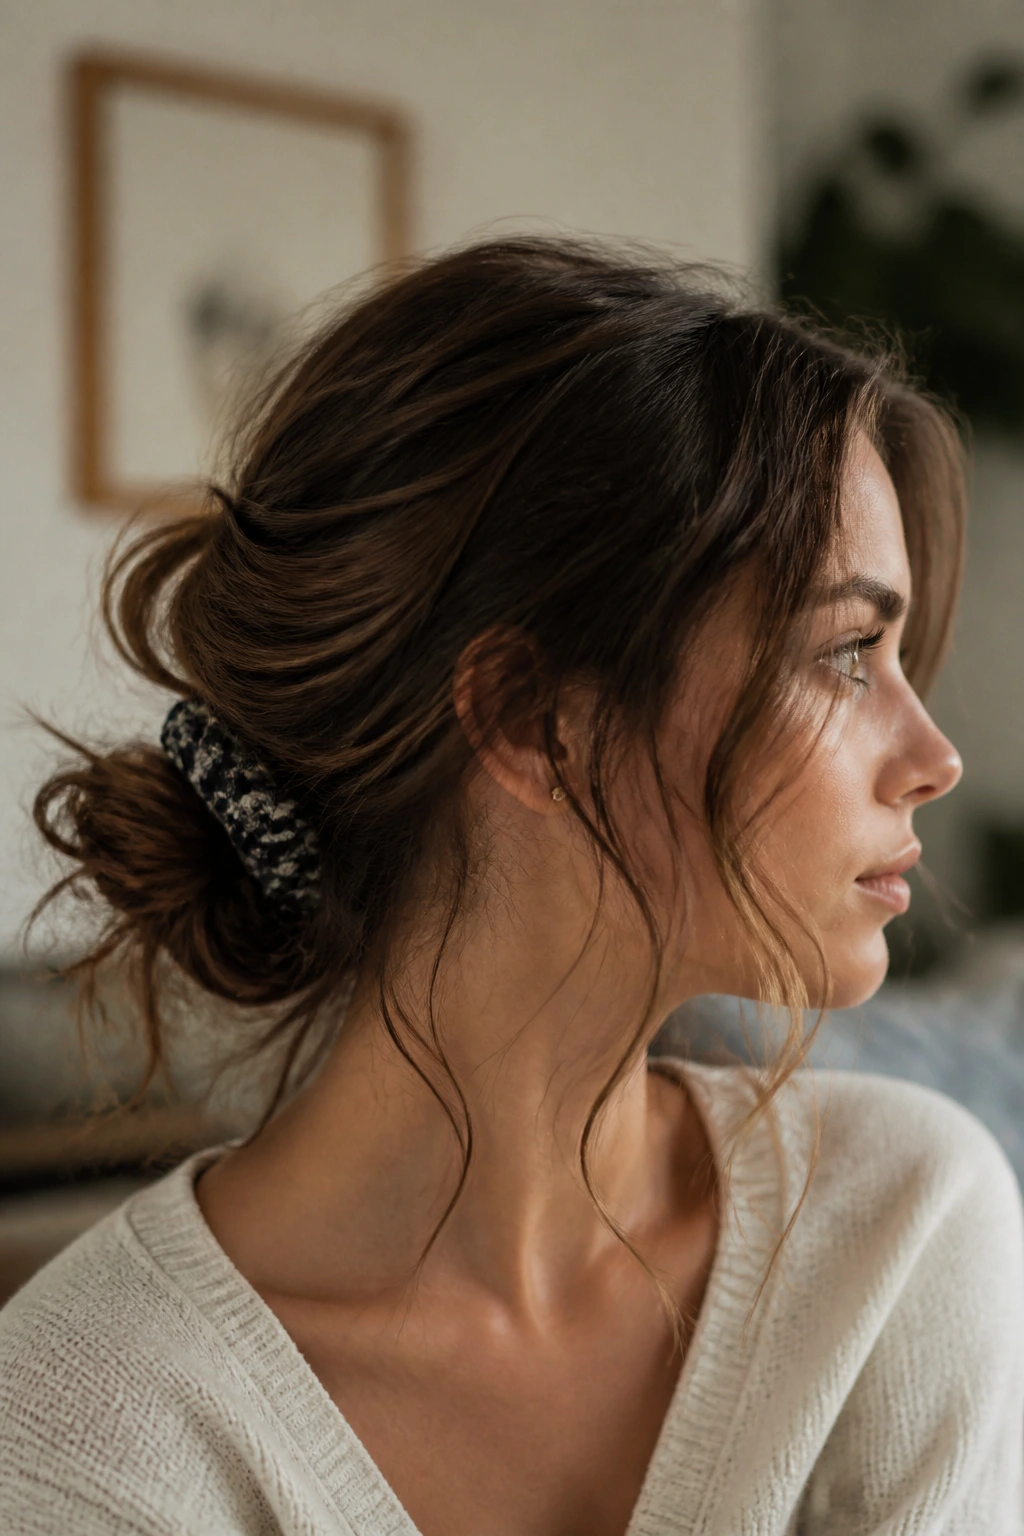
This one lives on the line between put-together and “I needed my hair off my neck five minutes ago,” and that’s exactly why it works. Gather the hair into a low or mid bun, leave the ends poking out, and let the wave pattern in those ends do the decorating for you. It’s less about symmetry and more about the soft shape the loose pieces create.
If your hair is long, don’t force every strand into the bun. Leave a few face-framing pieces out and maybe one thicker section at the back if the bun needs a little imperfection to avoid looking too small. For medium hair, a slightly messy bun with wavy ends gives you enough visual interest without needing any extras.
Use a silk scrunchie or a soft elastic if your hair tends to snap under tension. And keep the bun low if the waves are heavy. High messy buns can slump faster than people expect.
10. Side-Tucked Bob Waves
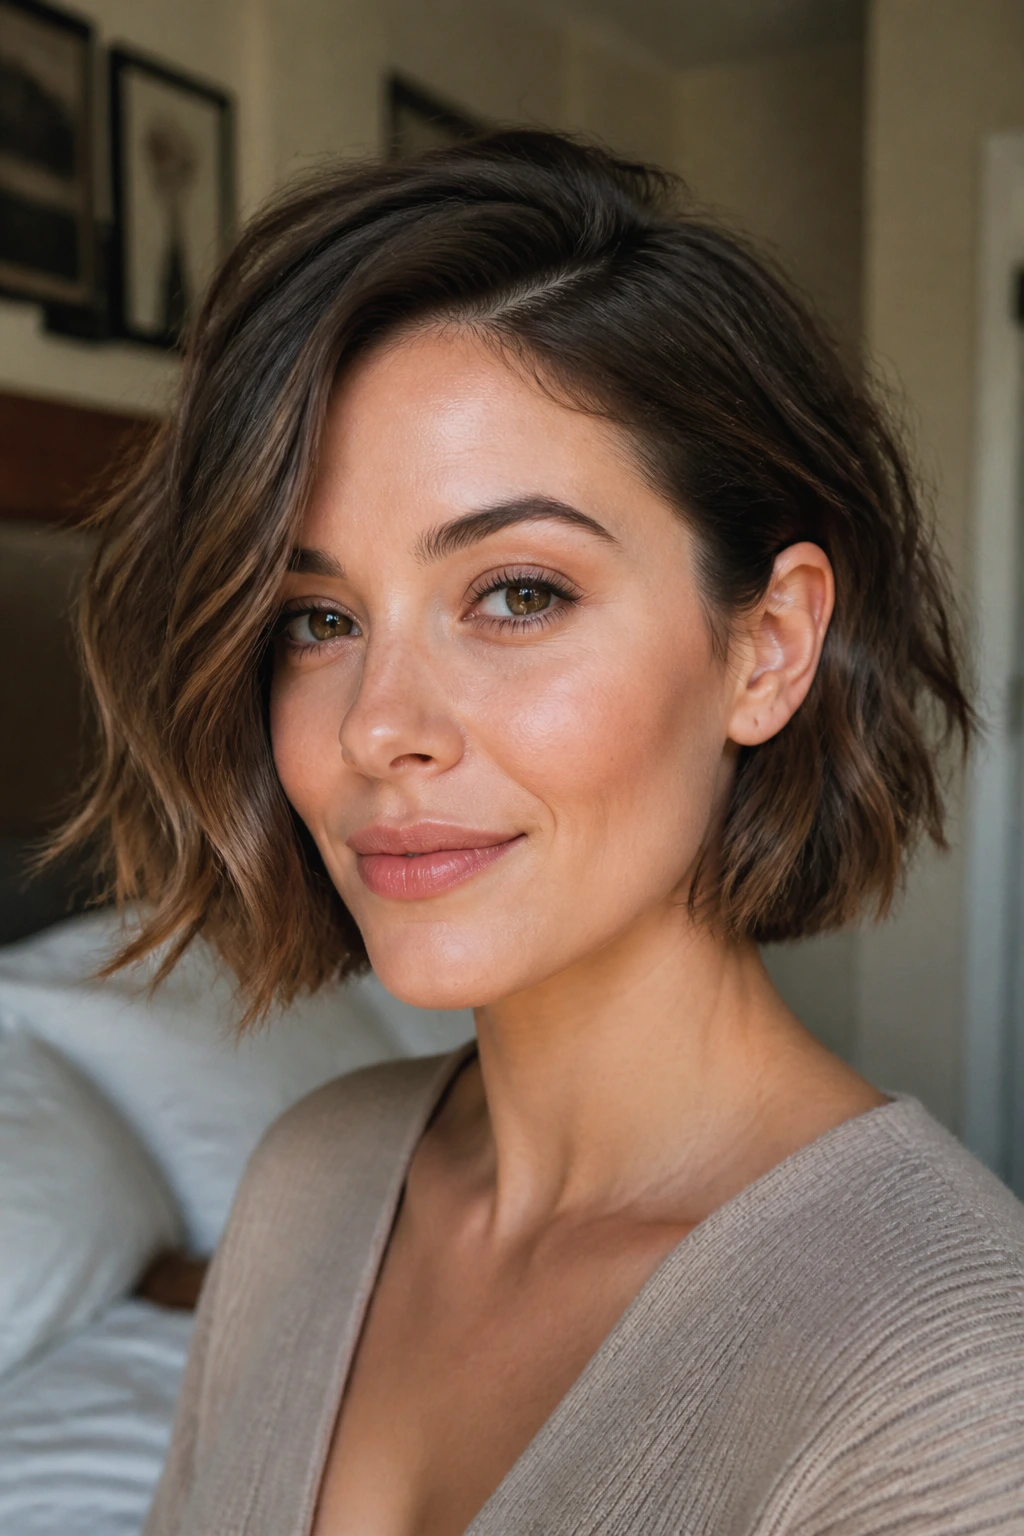
A bob with waves looks especially good when one side is tucked behind the ear. It opens the face, shows off the jawline, and keeps the cut from looking too round. If you’re wearing a barrette or a tiny clip, this is where it earns its keep.
The wave itself should stay close to the head, not balloon out. Think bends, not spirals. A flat iron is often easier than a curling iron here because bob lengths can be awkward around a barrel. You only need a slight lift and a bend at the ends to create movement.
Short hair gets a bad rap for being limited, but a wavy bob can change mood fast. Tucked behind one ear, it feels neat. Untucked, it feels softer. Add a side part and it gets a little more attitude. That flexibility is the real win.
11. Crown Braid with Loose Waves
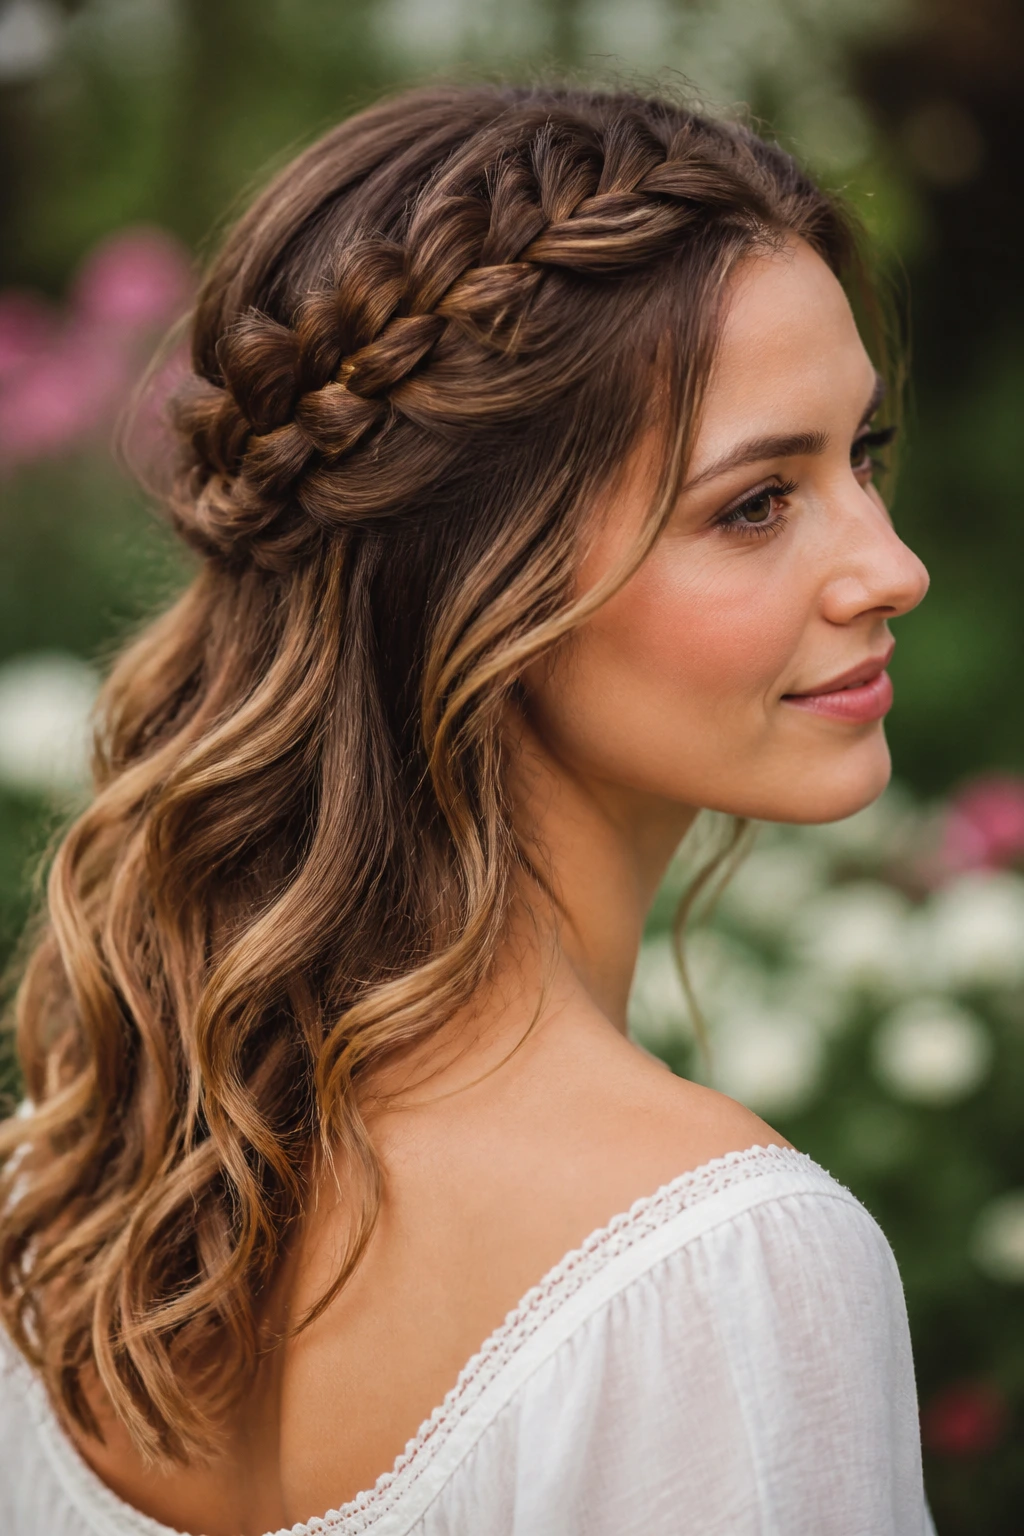
A braid across the crown does two things at once: it keeps the front under control and gives the loose lengths something to contrast against. That contrast matters. Without it, waves can feel too loose and shapeless. With the braid, the style suddenly has structure.
You do not need a tight braid. In fact, a too-tight braid steals the softness from the whole look. Keep the braid broad and gently pulled apart once it’s pinned in place. Then let the remaining hair fall in waves that start around the mid-lengths. If the ends are extra straight, give them a quick bend with the iron so they don’t feel left out.
This works well for weddings, brunch, or any day when you want hair off your face but not fully up. It also helps if your front layers are at that annoying length that neither stays back nor stays down. The braid makes them behave.
12. Deep Side-Swept Waves
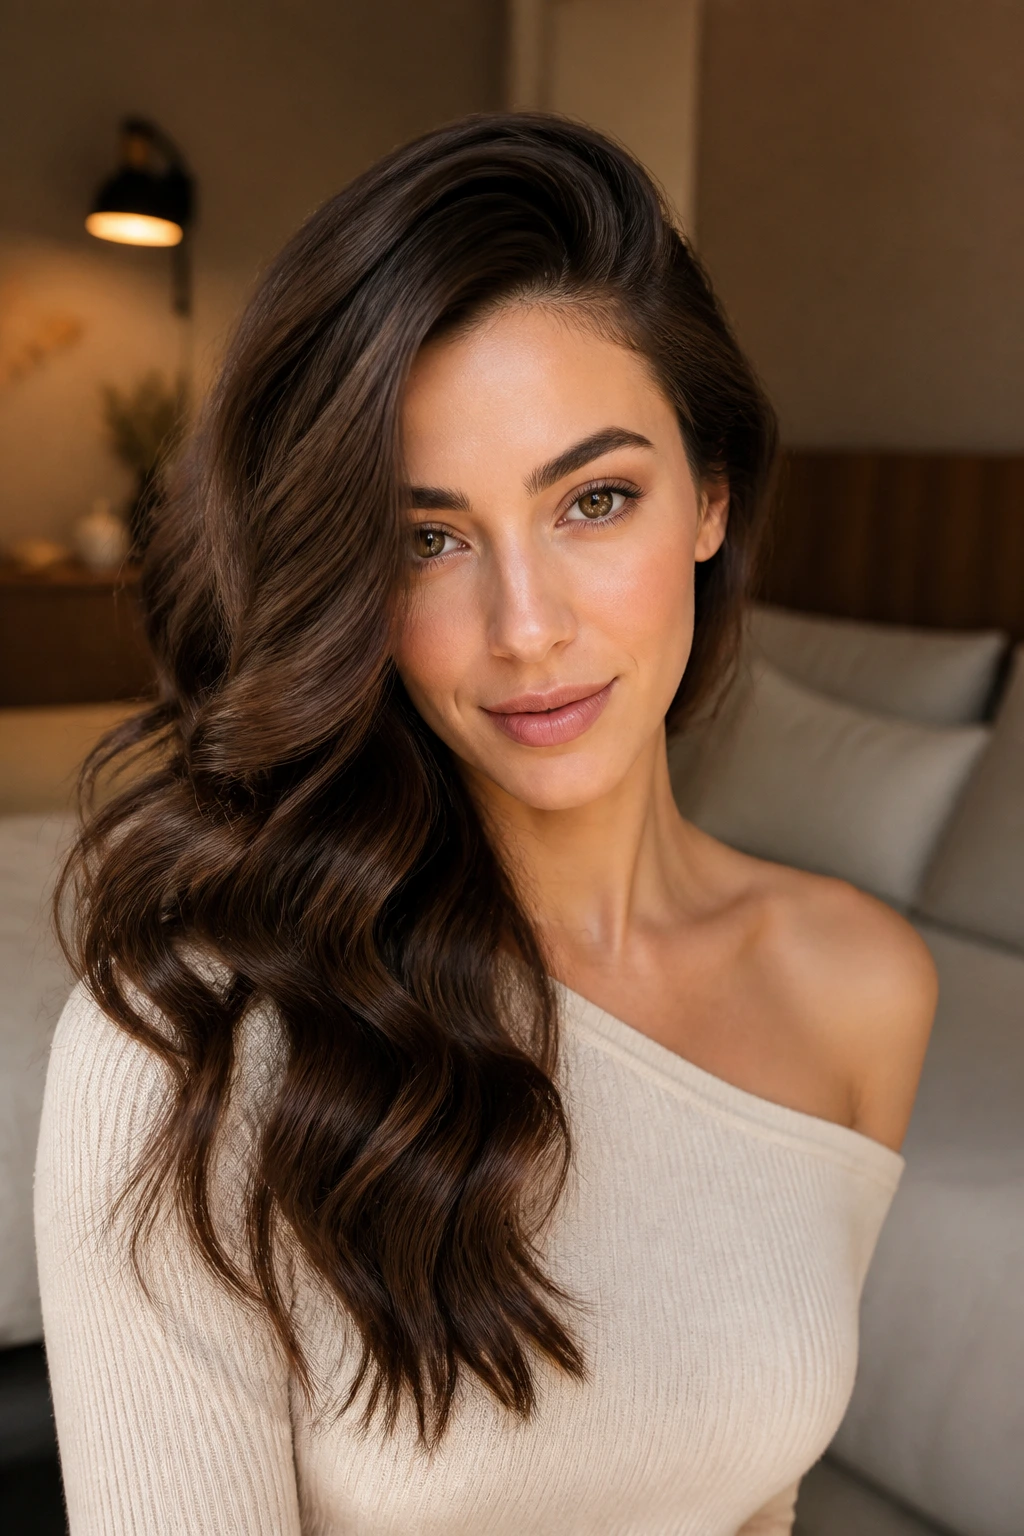
A deep side part and a sweep of waves over one shoulder can change the entire shape of your face in the mirror. It adds instant drama, but not the loud kind. More like controlled movement with a clear direction. The waves fall in a single flow, which makes the style feel cleaner than it sounds.
Start with a more extreme side part than you normally wear. Curl the hair away from the face, then pin the heavier side for a few minutes while the hair cools. That helps it stay swept instead of bouncing back to center. Once you release the pin, a light mist of spray at the roots will keep the part from drifting.
This style loves earrings. Big hoops, small studs, a single ear cuff — all of them show up better when one side of the hair is tucked back and the other side drops forward. It’s a simple trick, but it changes the whole balance.
13. Low Chignon with Soft Wave Pieces
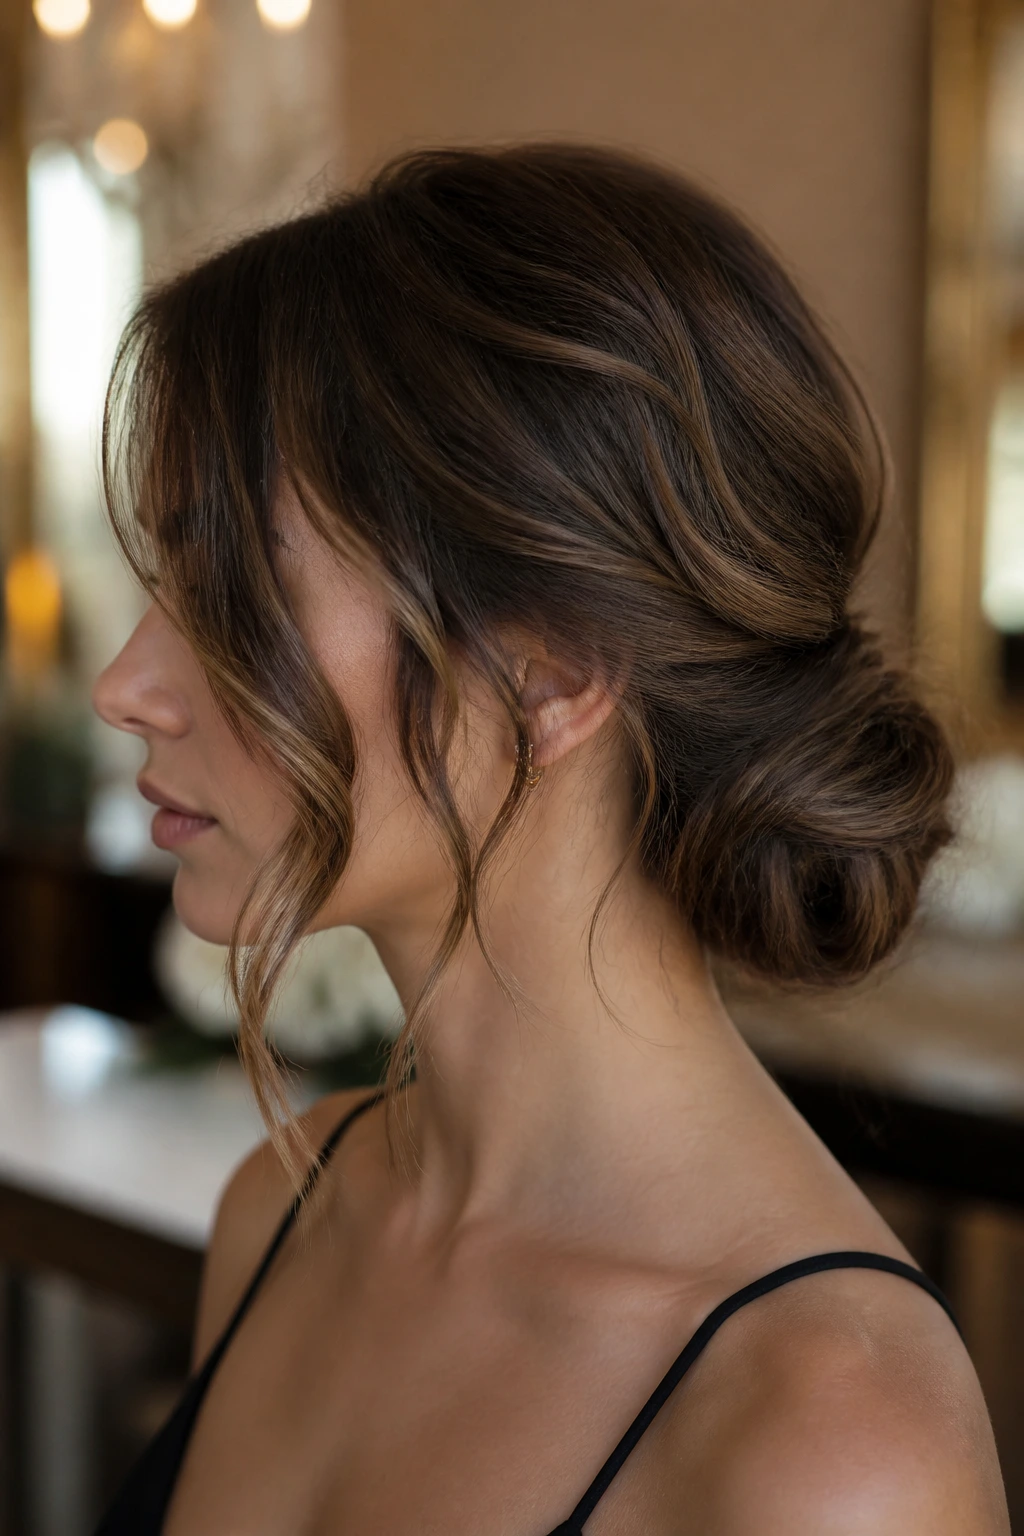
A low chignon can look severe if it’s too clean. Waves fix that. Leave a few front pieces out, keep some texture at the nape, and let the bun stay slightly loose around the edges. The result is a smooth shape with enough softness that it doesn’t feel stiff.
I like this style when hair is freshly washed but not slippery. A tiny bit of grip helps the pins stay put. If your hair is fine, tease just the roots at the crown before twisting the chignon. If your hair is thick, pin in sections instead of trying to force the whole knot into one move. That only leads to headaches and crooked buns.
A soft chignon works for formal events, but it also works for the kind of day when you want your hair off your neck and out of the way without looking like you gave up. The wave pieces around the face are what keep it human.
14. Air-Dried Scrunched Waves
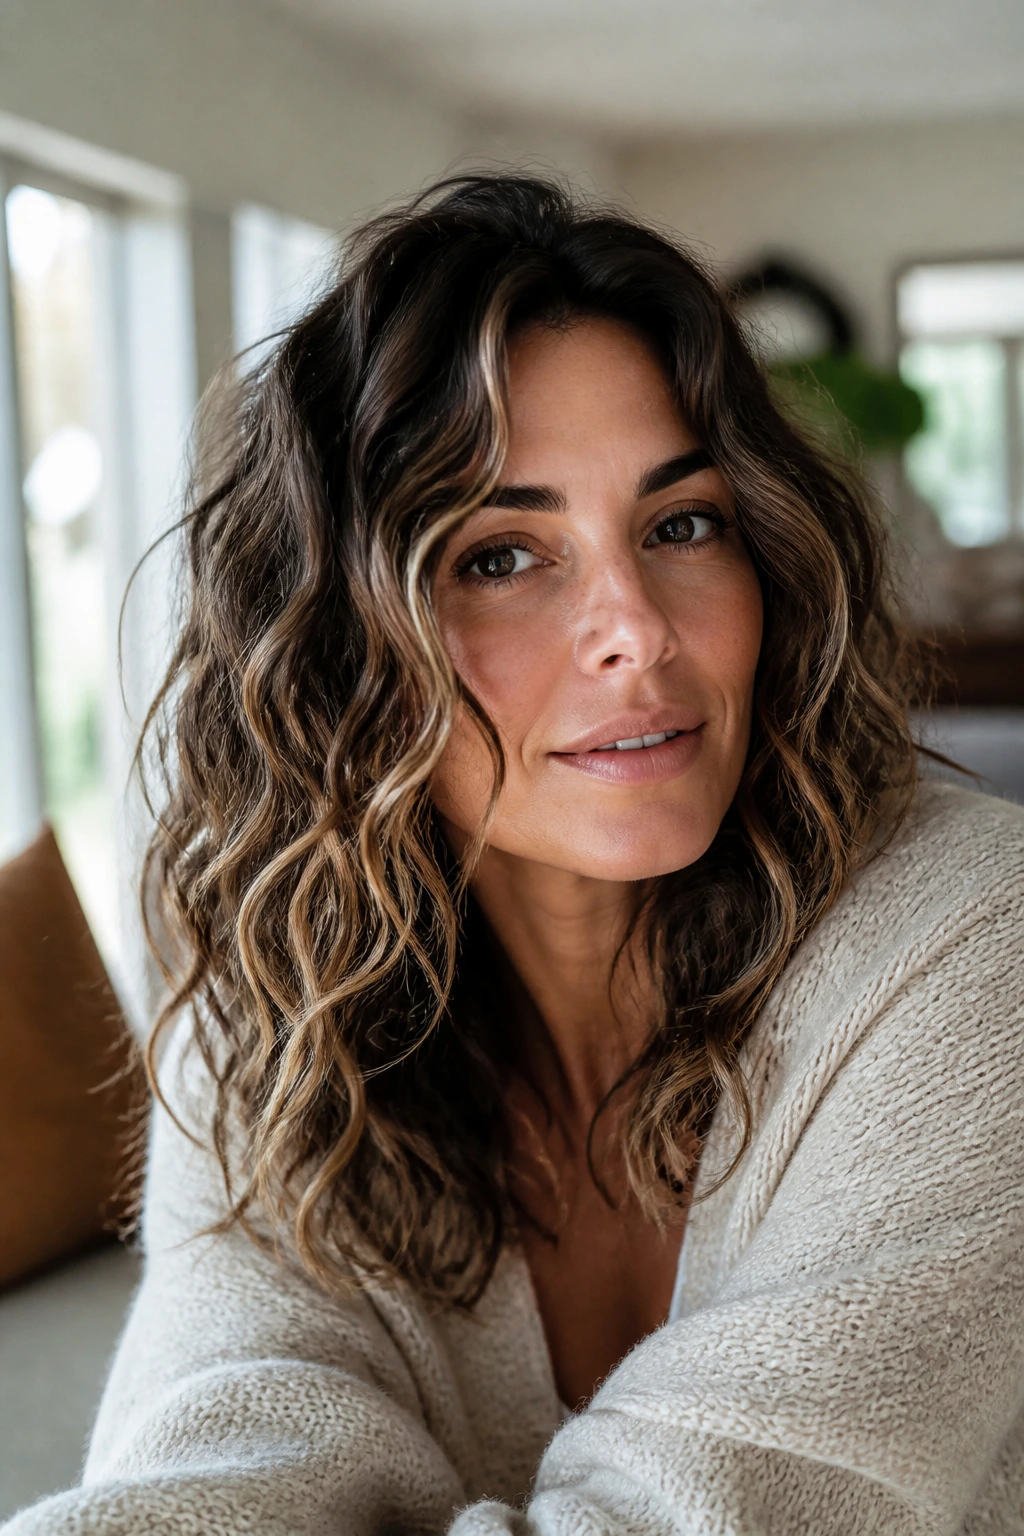
This is the no-heat answer for women whose natural texture already wants to bend a little. Scrunching builds on what’s there instead of fighting it. Work a light mousse or cream through damp hair, scrunch upward with a microfiber towel or T-shirt, and leave it alone more than you want to.
The hardest part is not touching it. Seriously. Every time you rake through air-dried waves while they’re still damp, you flatten the curl pattern and raise the frizz. Let the hair set, then break it up with your hands once it’s dry. If the roots stay too flat, clip them up at the crown while the hair dries.
This style can look very casual or surprisingly polished depending on the product and the part. A side part gives it more lift. A center part keeps it calmer. Either way, it’s one of the most honest wave styles around, because you’re working with the hair instead of pretending it’s something else.
15. Ribbon-Tied Half Pony Waves
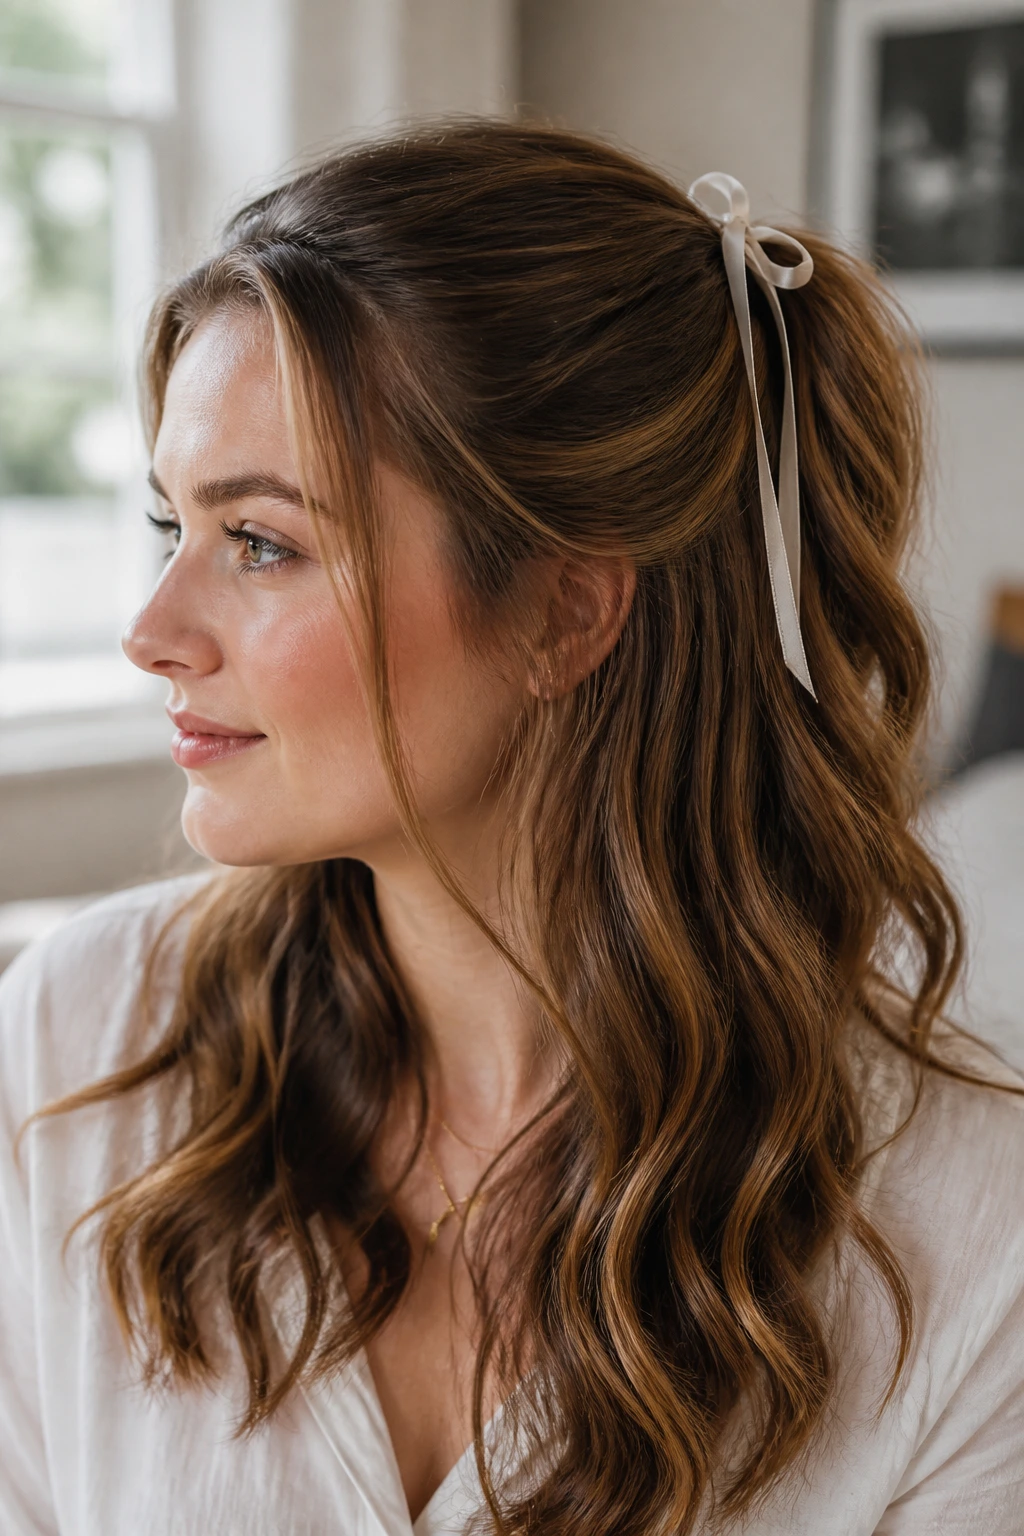
A ribbon changes the whole tone of a half pony. Without it, the style can read school-day simple. With it, the hair feels deliberate and a little softer around the edges. The ribbon sits at the gathered point and gives the waves below something graceful to drop from.
Use a thin satin ribbon if you want the look to stay light. Use a wider ribbon if you want the bow to be part of the outfit. Either way, keep the half pony low enough that the ribbon isn’t fighting the crown shape. A half pony placed too high tends to split the hair in a way that makes the waves underneath feel disconnected.
This style is especially nice on long layers. The top section stays tidy, while the bottom layers get to show off their movement. If your hair is very thick, secure the half pony first with a small elastic and then tie the ribbon over it. That keeps the ribbon pretty and the hold sturdy.
16. Dutch Braid Ends with Open Waves
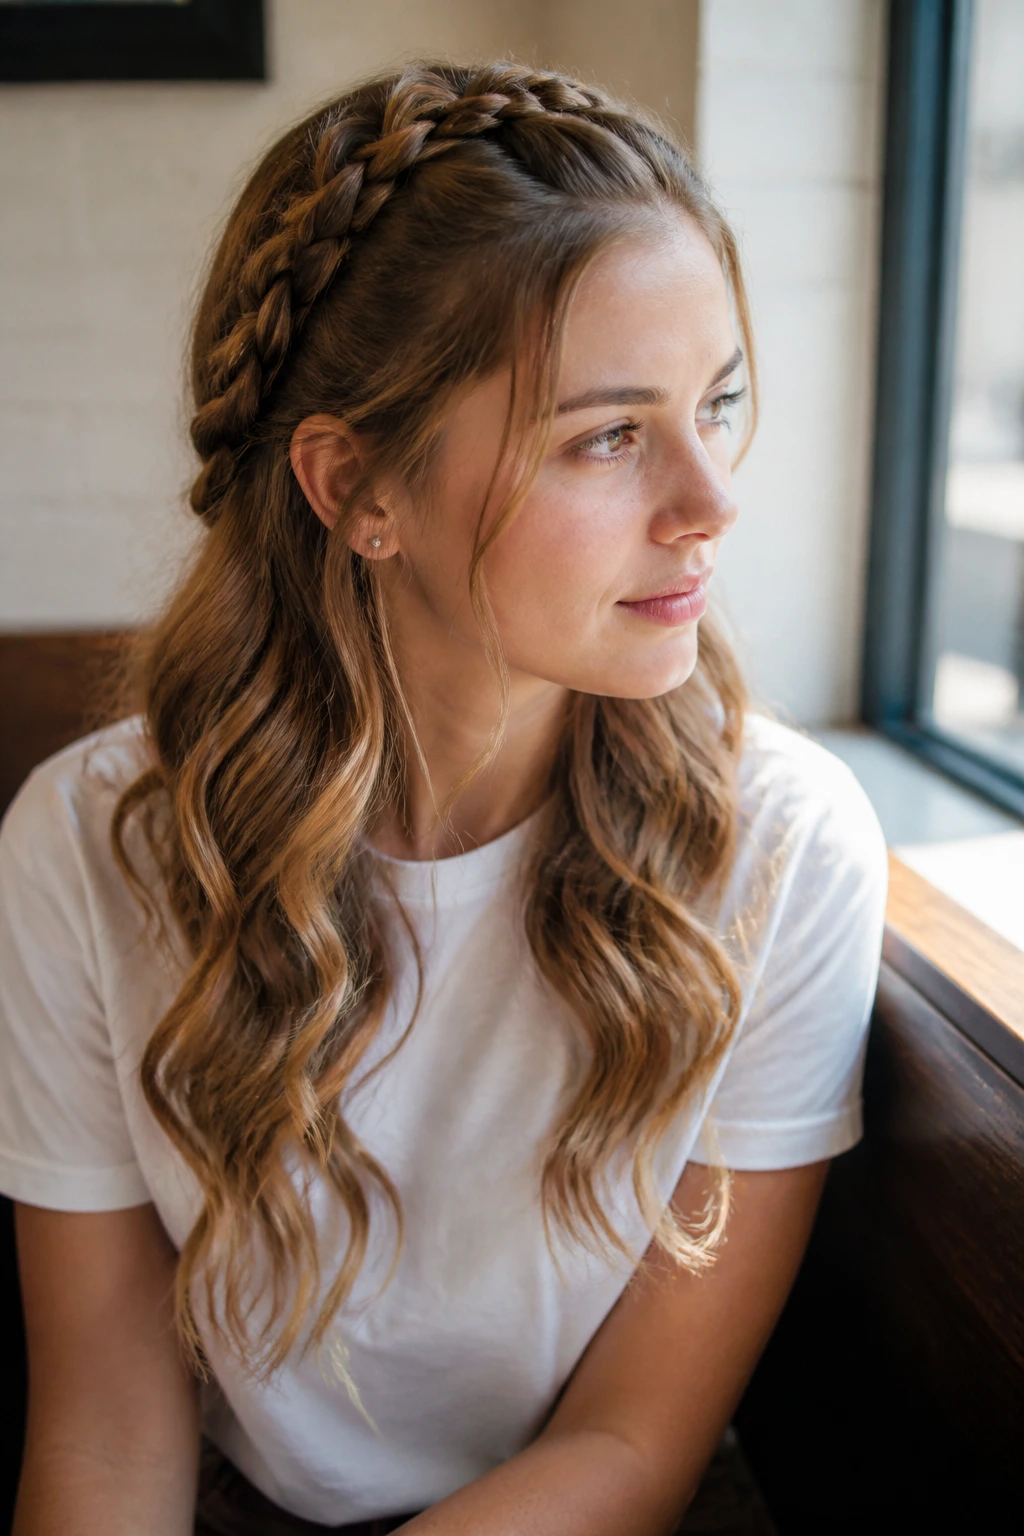
A Dutch braid through the top section gives the style grip and shape, and then the open waves in the rest of the hair keep it from turning sporty in a way you didn’t ask for. That blend is the whole appeal. Braid the crown or just the upper half, and let the remaining hair fall loose in soft bends.
The braid should sit high enough to show, but not so high that it yanks the face upward. Think of it as a frame, not a crown. If the braid ends around the middle of the head, clip it under the loose hair so it disappears cleanly. The open waves do the visual work below.
This one is good for active days, obviously, but it also works for hair that slips out of regular braids by lunchtime. Dutch braids grip more than simple three-strand braids, and the loose waves below keep the style from feeling too rigid. It’s practical without looking practical. Which is the goal, honestly.
17. Blowout Waves with Big Movement
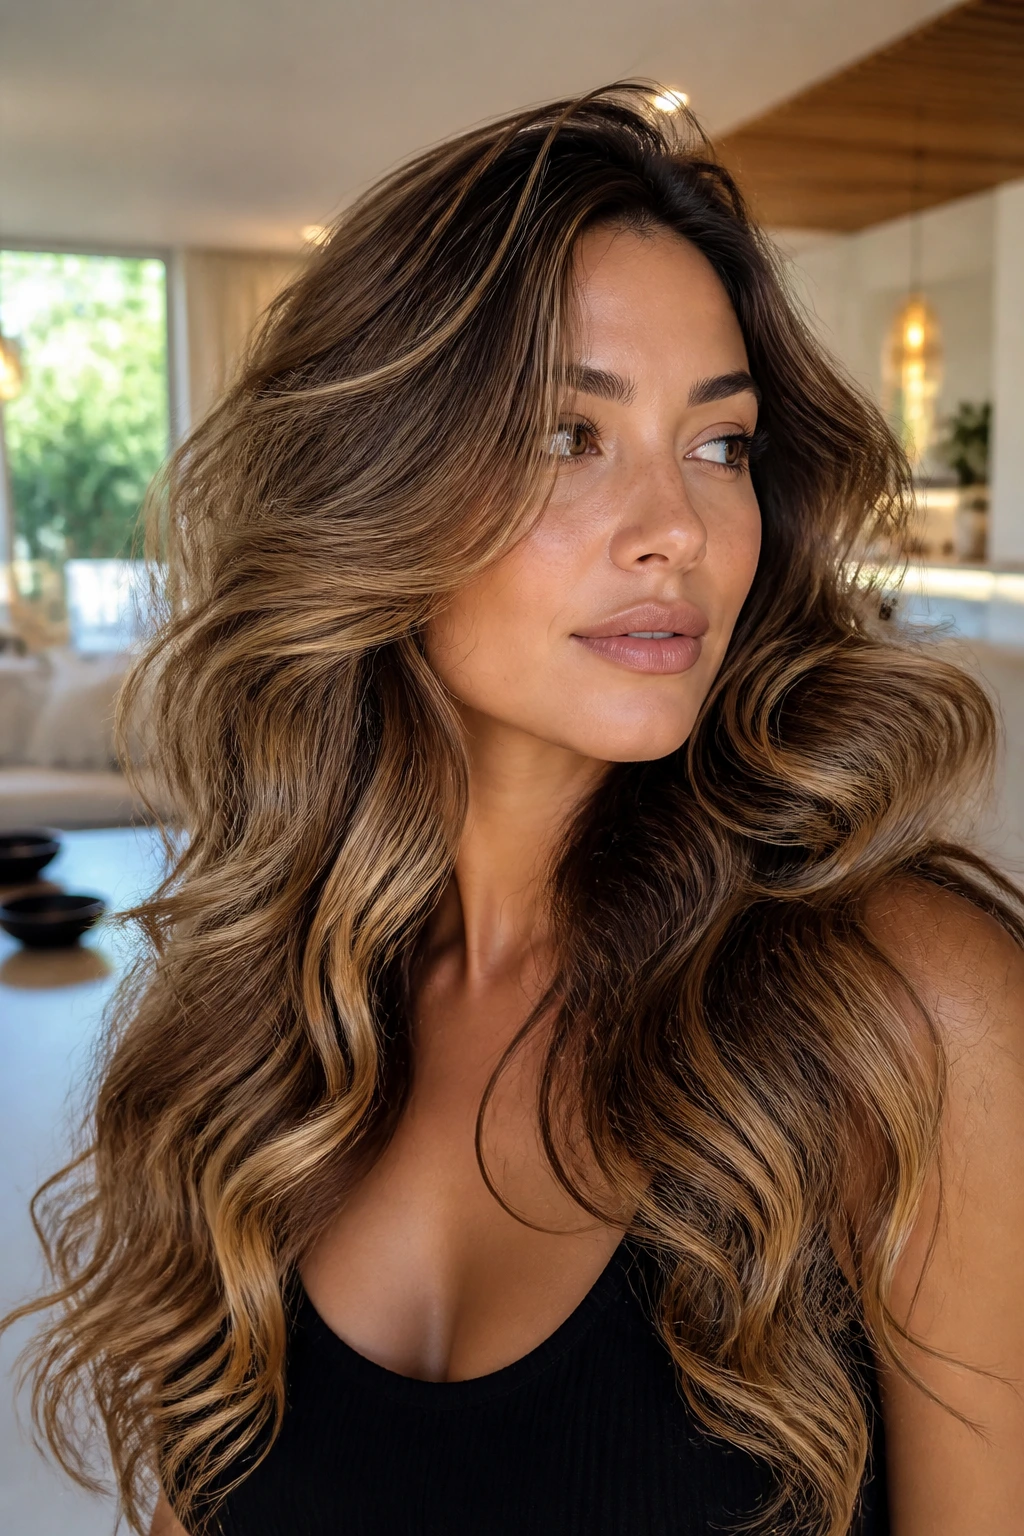
This is the style that looks like you used a round brush for twenty minutes, because you did. The wave sits large and smooth, with plenty of swing through the ends. It’s less “beach” and more “hair has a plan.” Big movement waves are ideal if your hair is medium to long and you want volume without tight curl.
A large barrel brush or a 1.5-inch curling tool helps here. The point is to bend the hair, not coil it. After styling, flip the part slightly and shake the roots with your fingers. That lifts the style without making it messy.
If your hair is heavy, this style benefits from a tiny bit of root product before drying — mousse, foam, or a light volumizing spray. Otherwise the waves can collapse under their own weight. Big movement works best when the ends still have a little separation, so don’t brush them into a single sheet.
18. Mini Space Buns and Waves
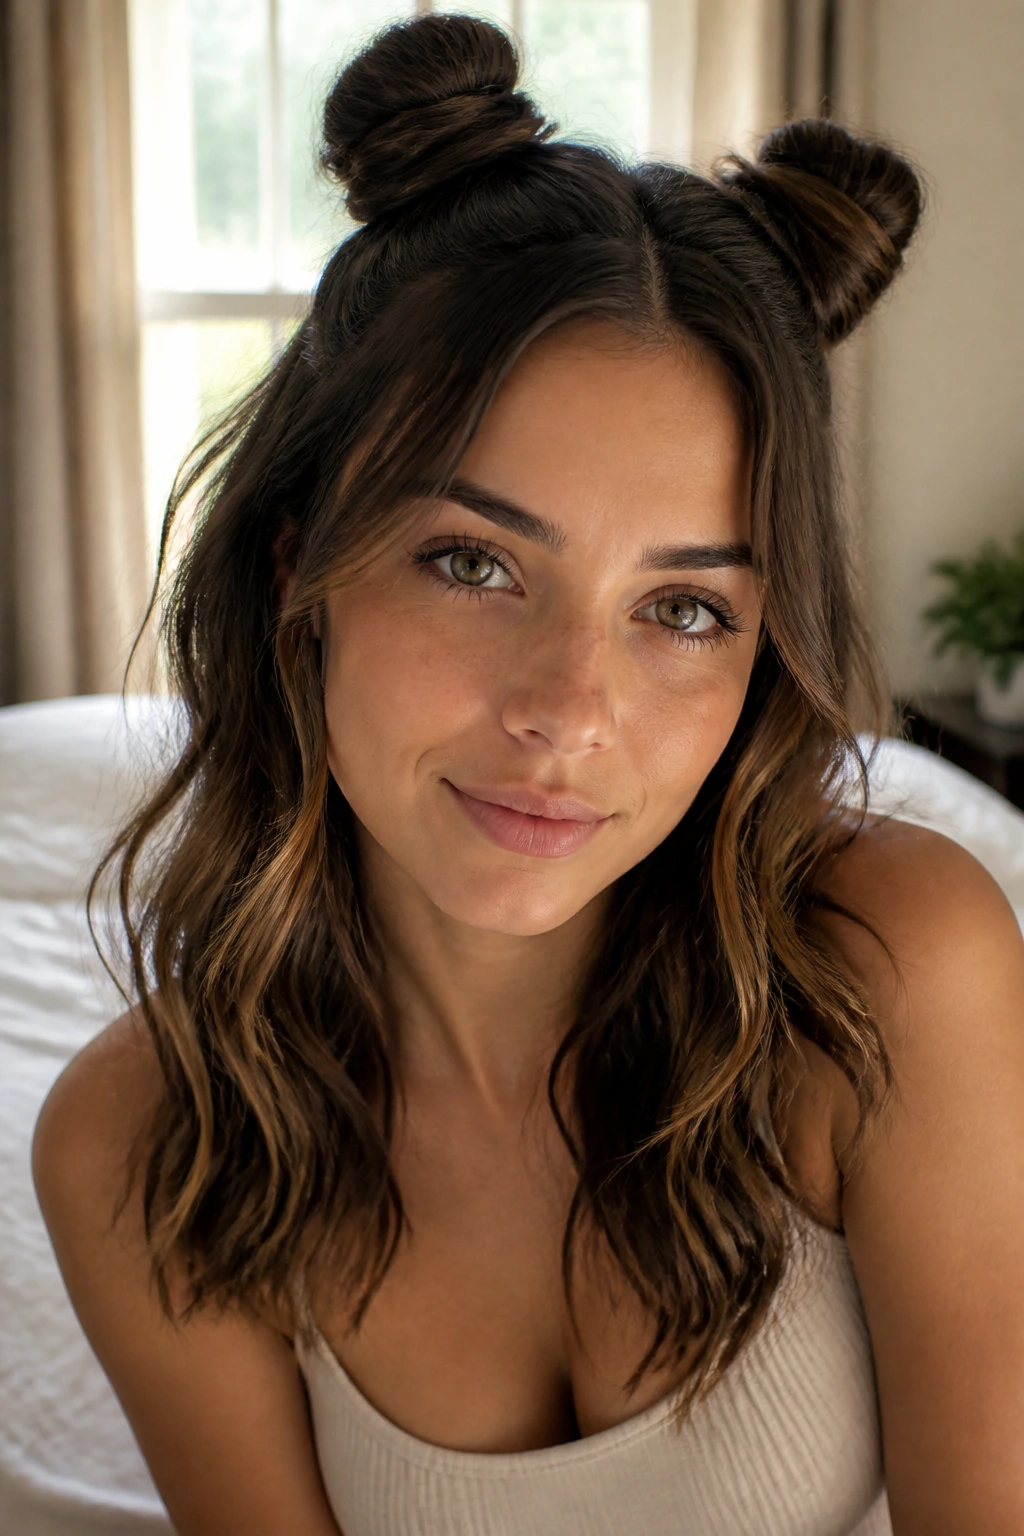
Two small buns up top and waves below sound playful because they are. But there’s a cleaner way to wear them than the festival version people picture. Keep the buns tight enough to hold their shape, then leave the rest of the hair in loose waves that start around the ears or collarbone.
The trick is balance. If the buns are too large, they take over. If the waves are too curly, the whole thing starts to feel costume-y. Soft bends keep it wearable. A little edge around the face helps too. You want the buns to feel like a detail, not the whole point.
This is one of those styles that can turn a basic outfit into something more interesting without extra effort. It also works when your hair is in that awkward “too much hair to leave down, not enough time to fully style it” zone. Two buns, loose lengths, done.
19. Sleek Crown with Wavy Length
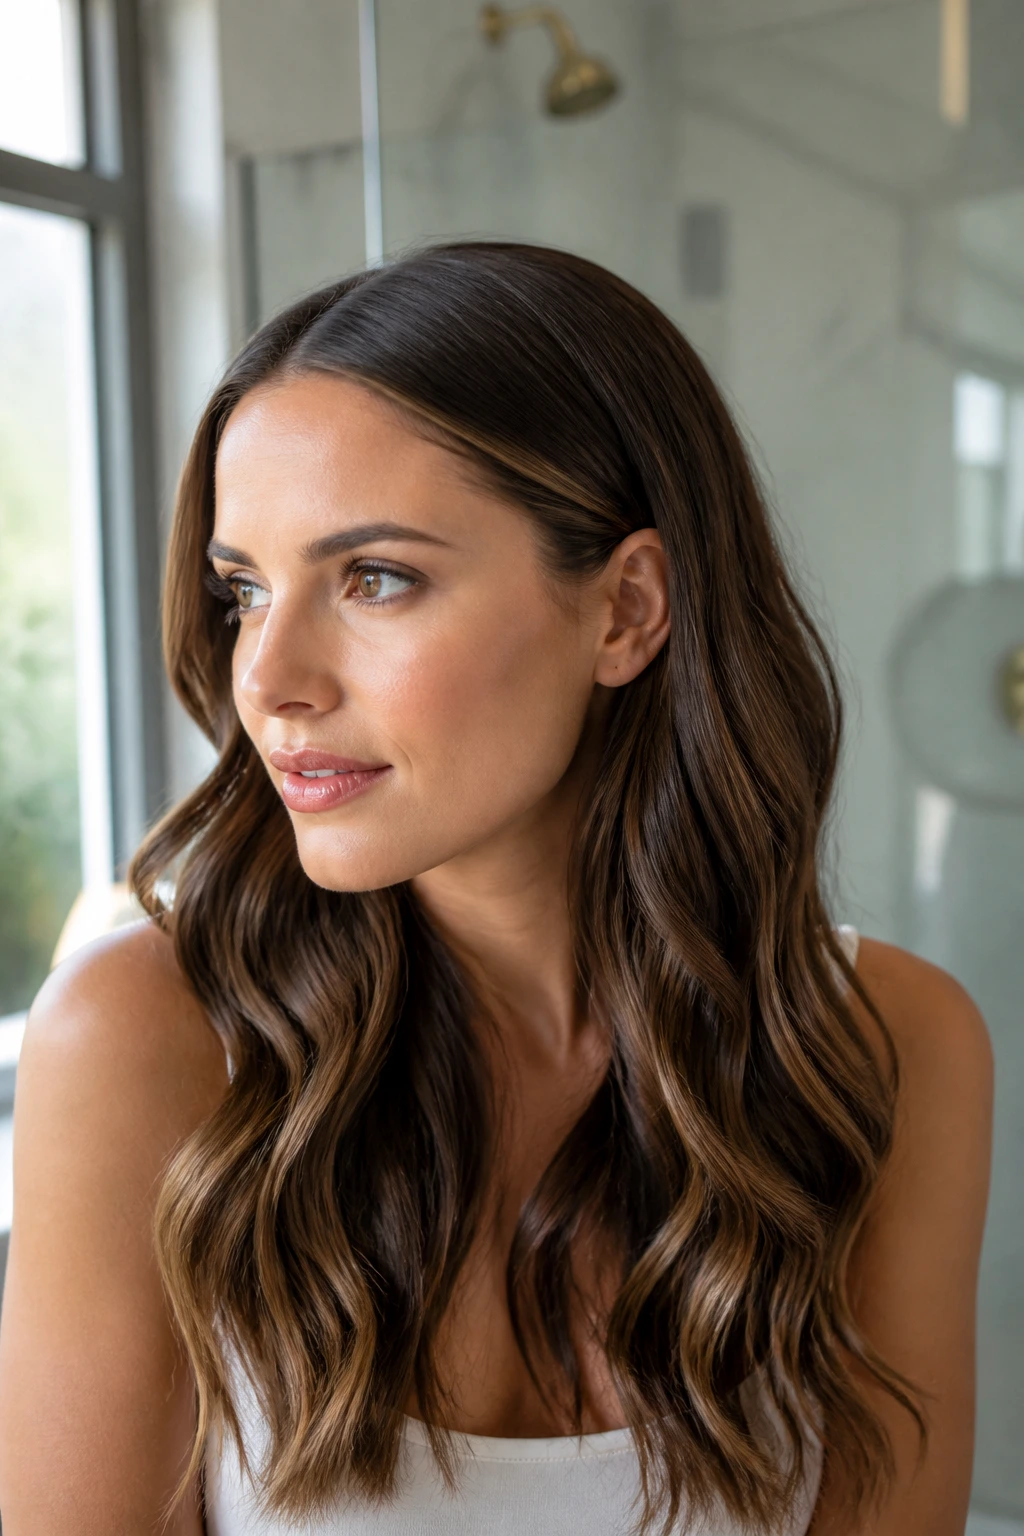
This style is a study in contrast. The crown is smooth, sometimes with a touch of gel or styling cream, and the lengths stay wavy and soft. That contrast gives the hair a cleaner line near the scalp and a more relaxed finish below.
Use a fine-tooth comb to smooth the top back or into a side part, then leave the waves through the lengths alone. If you want more polish, twist the front sections back and pin them under the top layer. If you want more edge, let the texture start a little lower and keep the crown very flat.
The good part about this style is that it keeps roots controlled in humid weather or on oily hair days, while still letting the rest of the hair look lived in. It’s a practical trick dressed up as a style choice. I appreciate that. No drama at the crown, all the movement at the bottom.
20. Shaggy Shoulder-Length Waves
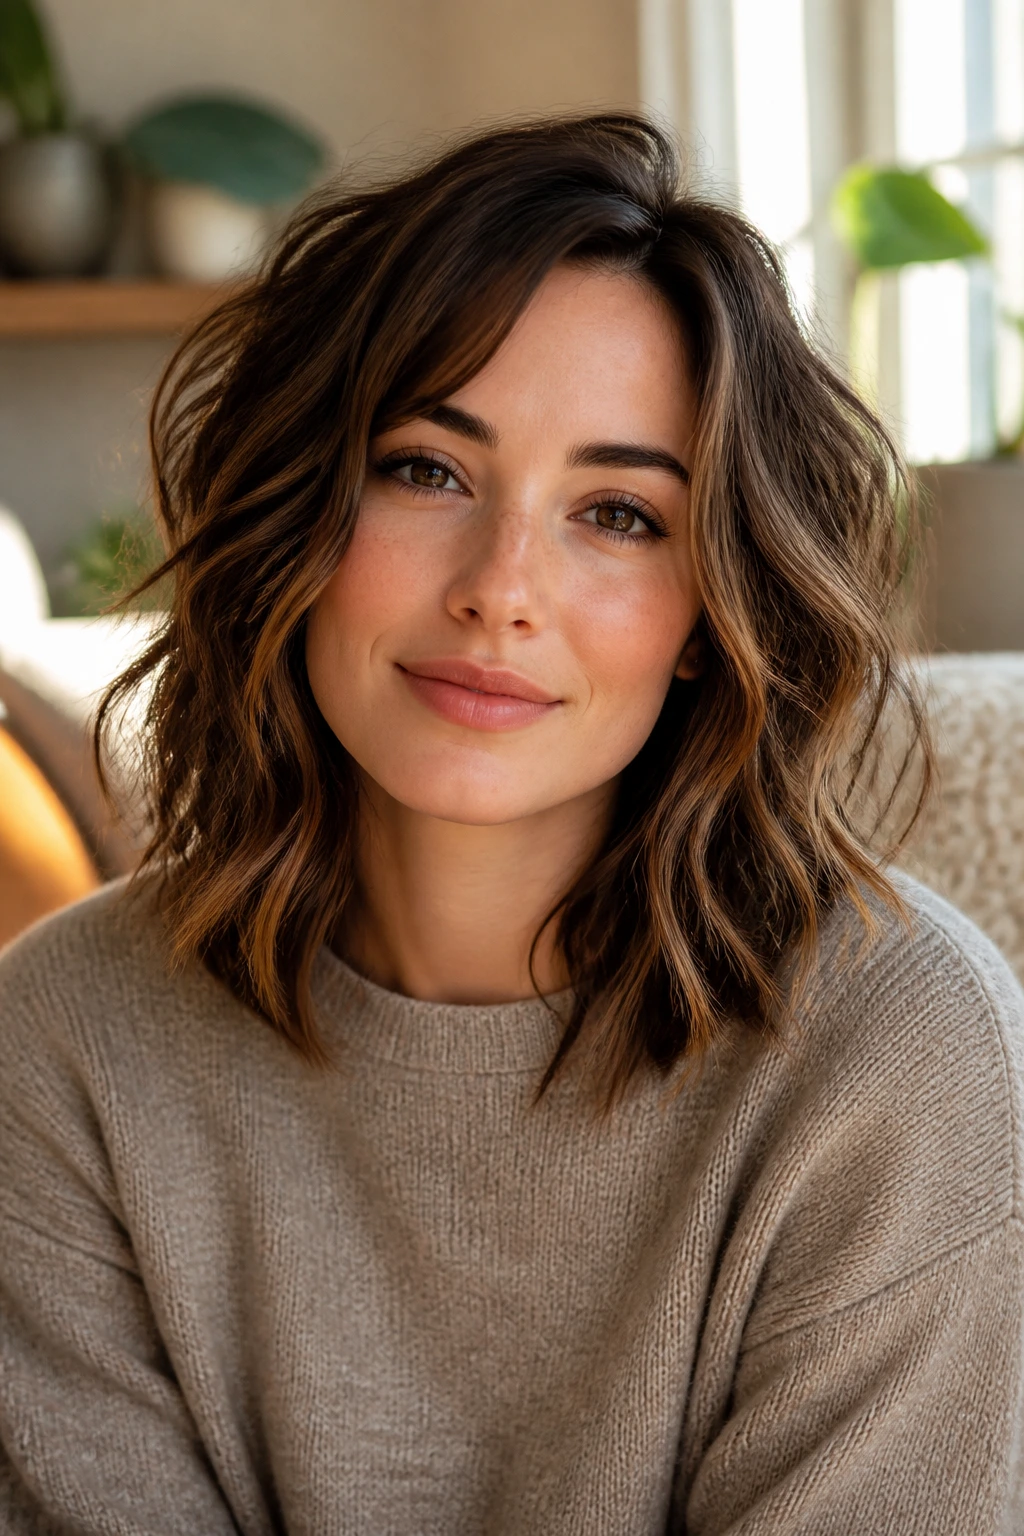
A shag with waves already comes with personality baked in, so the job is mostly to keep the texture from getting fuzzy. Shoulder-length layers should fall into loose bends that separate the pieces instead of blending them into one thick shape. That separation is what gives the cut its edge.
Air-dry with a diffuser if your natural wave pattern likes to come forward on its own. If the layers need help, wrap random sections around a wand, but keep the ends soft. A shag should never look too “done.” It’s a style that gets worse when overworked.
This is one of the best easy wavy hairstyles for women with naturally textured hair, because it respects the cut’s structure. You’re not flattening it, and you’re not forcing a curl pattern that doesn’t belong there. You’re just nudging the layers into place and letting them move.
21. Scarf-Wrapped Waves
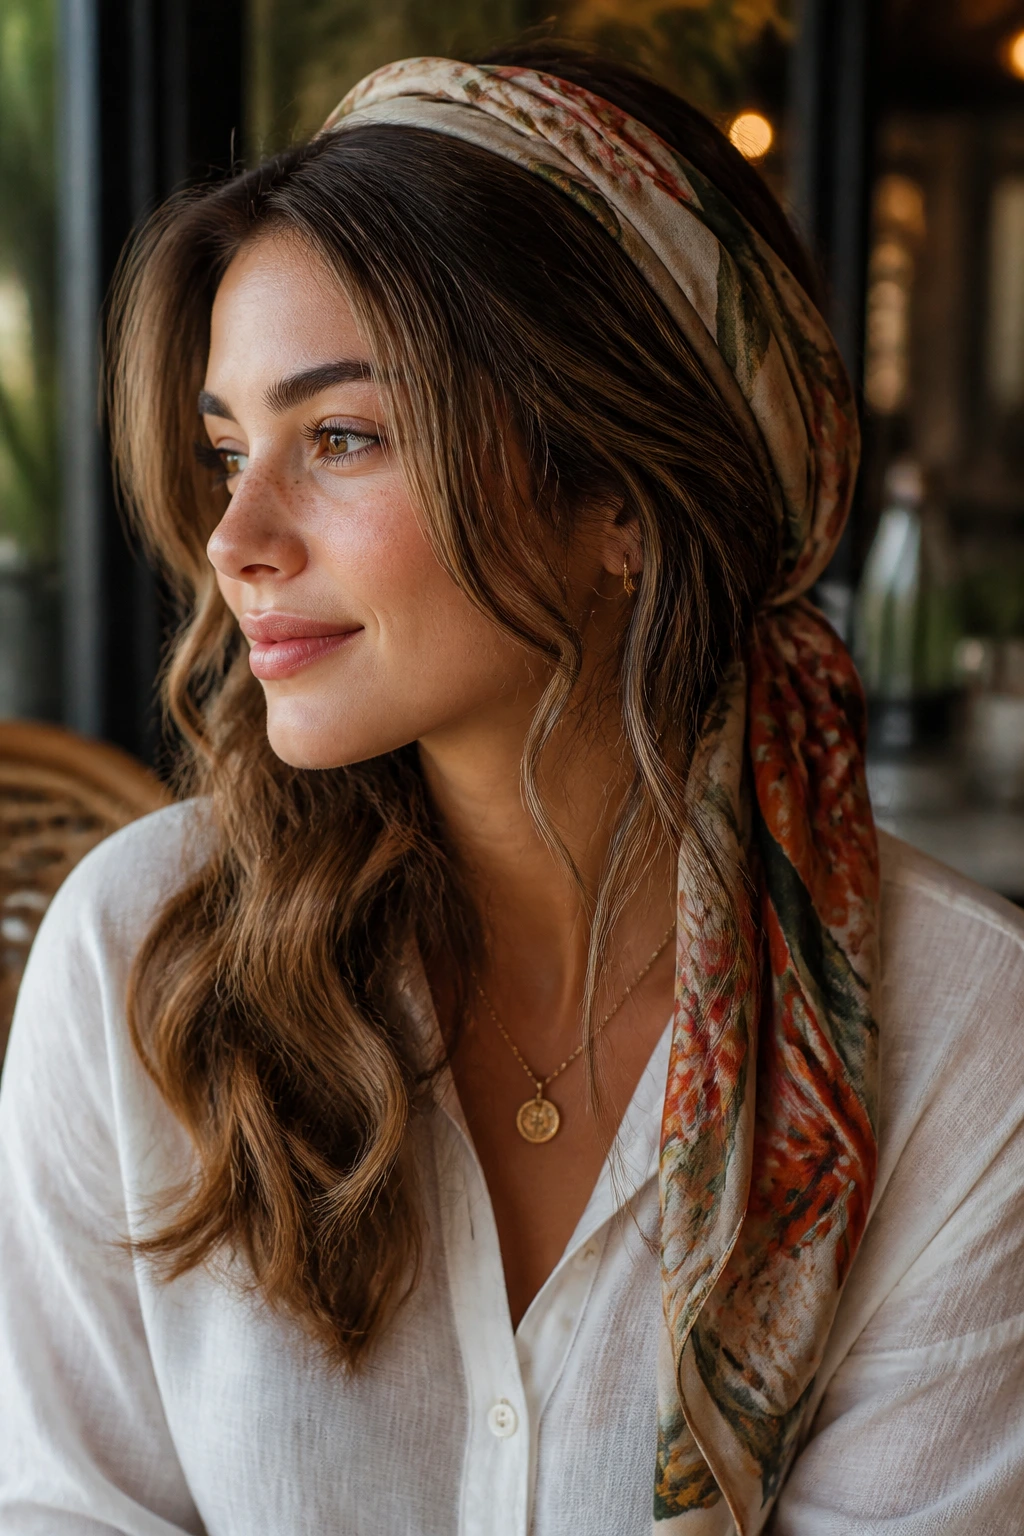
A scarf can save a style that’s almost there but not quite behaving. Wrap it around a ponytail, tie it around a half-up section, or use it as a headband that pushes the front wave pattern back from the face. The fabric adds softness, and the waves underneath keep it from looking too styled.
Use a scarf that isn’t too stiff. Cotton stays casual. Silk slides more, but it also looks smoother. If your hair is thick, keep the scarf knot small and secure the section underneath with an elastic first. Otherwise the whole thing loosens faster than you expect.
This look works especially well when your waves need a visual anchor. Hair alone can feel plain. Hair plus scarf feels like a choice. And that’s the difference people see. Not “she did her hair,” more “she thought about it for five minutes.” Which is often all you’re trying to say.
22. Twisted Front Pieces and Wavy Hair
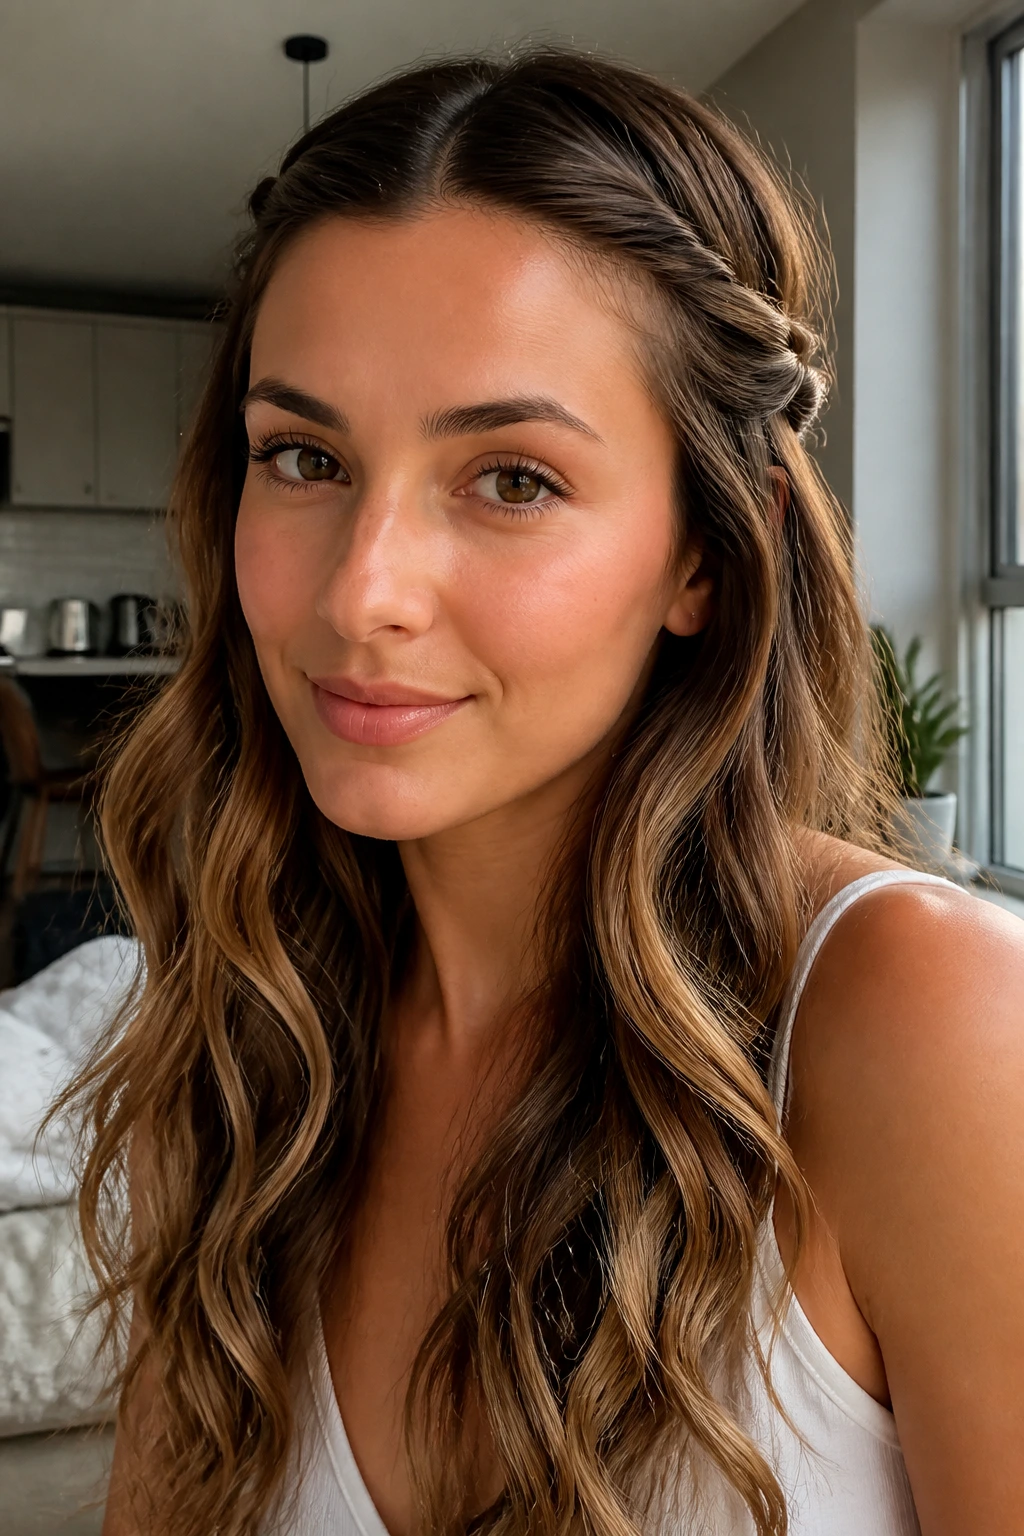
Sometimes the smallest change makes the biggest difference. Twist two front pieces away from the face, pin them behind the ears, and leave the rest in loose waves. That tiny bit of structure pulls the style together without taking away the softness.
It’s a good fix for grown-out bangs, face-framing layers, or fringe that won’t sit still. The twists should be loose enough to look casual and secure enough to stay in place. If the hair at the hairline is slippery, mist the section with a little dry shampoo before twisting. It gives the pins something to grab.
I like this style when I want my hair to feel open but not in my eyes. That’s the whole point. Not every look has to be a big one. Some of the best wavy hairstyles are the ones that remove one small annoyance and leave the rest alone.
23. High Ponytail with Wavy Length
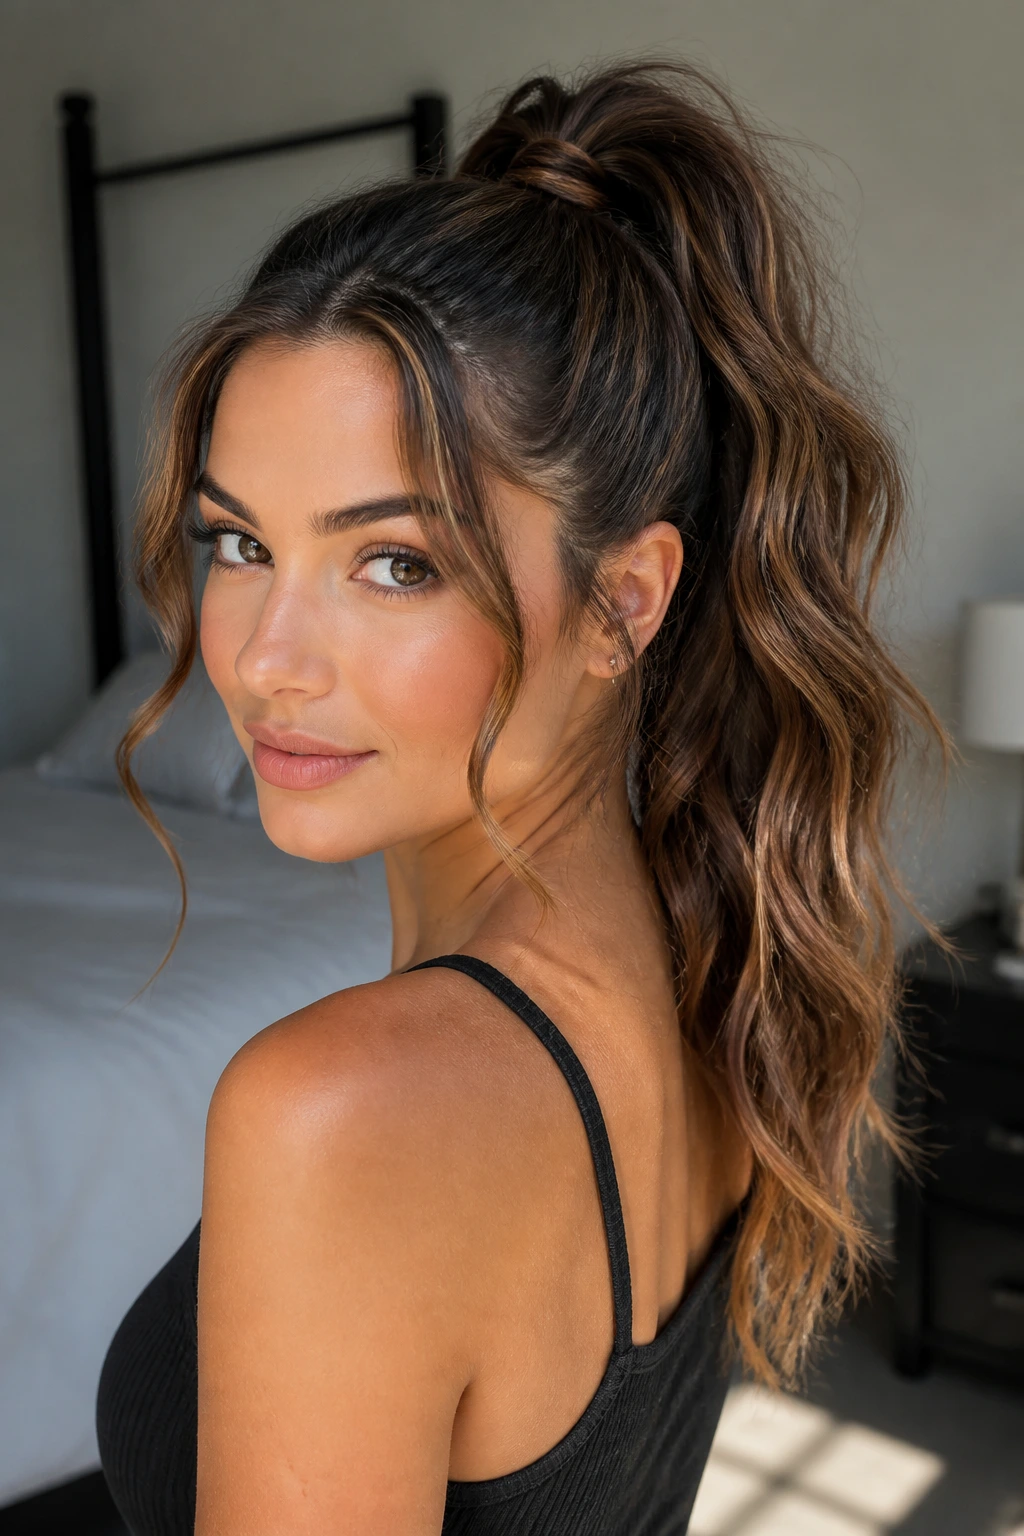
A high ponytail gets a softer edge when the lengths stay wavy instead of iron-straight. The height gives lift and energy, while the waves keep the ponytail from feeling gym-only. Wrap a strand around the elastic if you want the base to look cleaner.
The crown should be smooth enough to pull upward without bunching, but not so tight that it starts to look sharp. A gentle brush-through at the top is enough. The length below can be curled in large sections or left with natural bend if the hair already holds wave well.
This style is good for long hair that you want off your neck but not hidden. The pony sways. It has movement. And if you leave one thin wave around the face, the whole style feels less severe. That little detail matters more than the ponytail itself.
24. Pin-Back Wave Flip
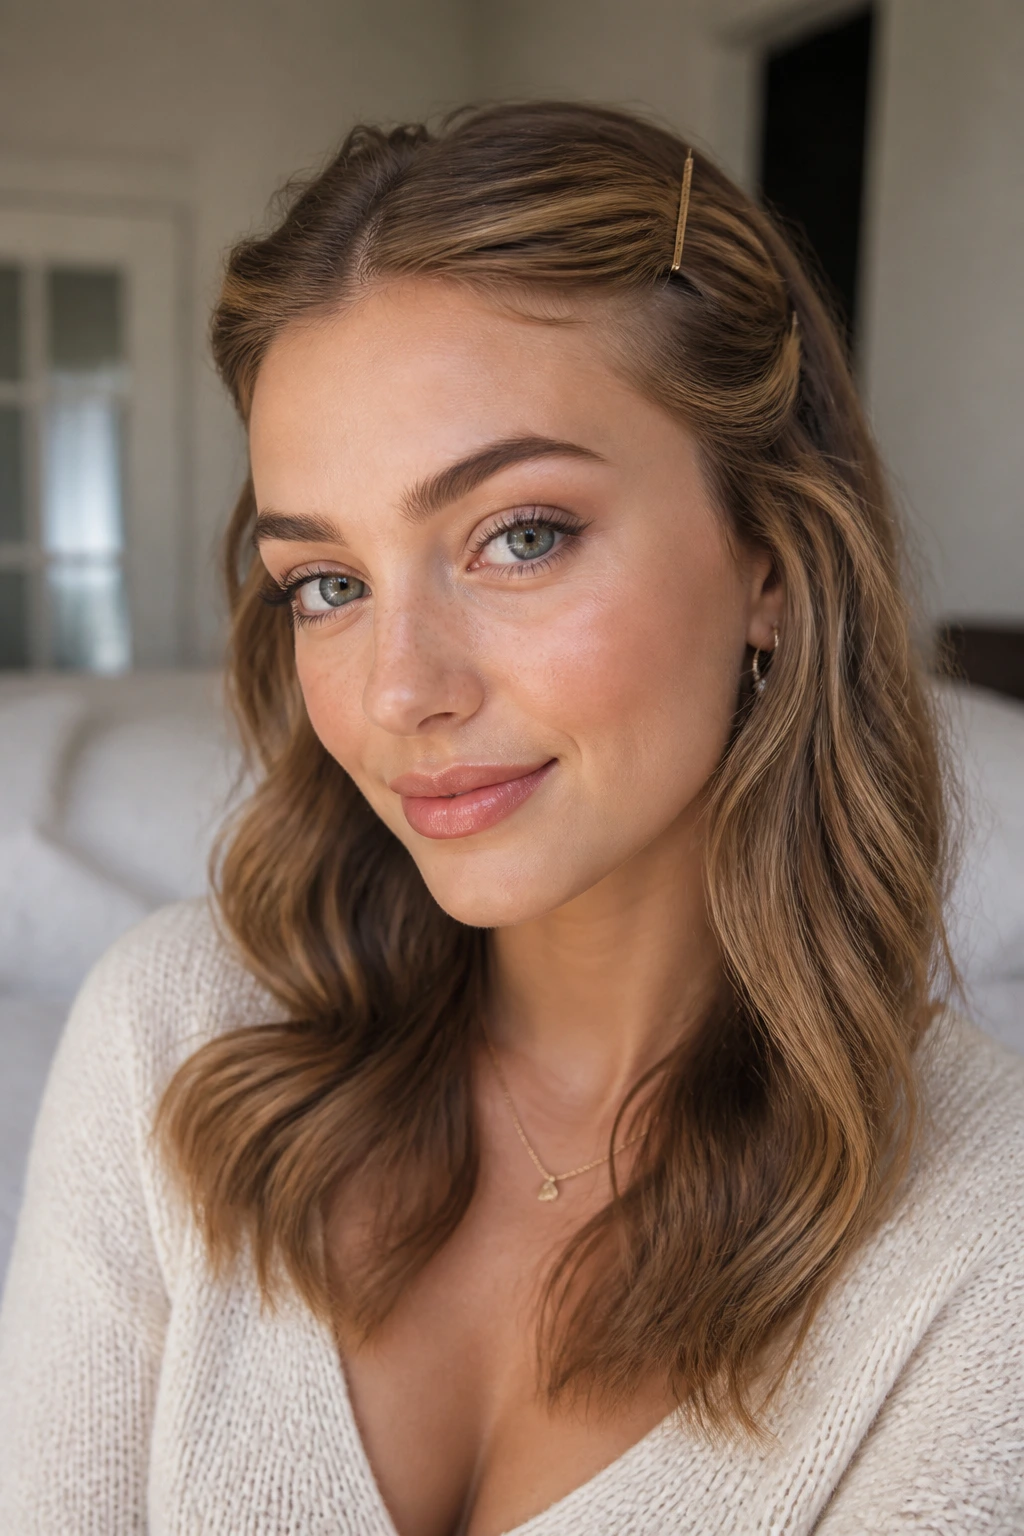
This is the low-effort style with a sneaky amount of payoff. Take the front sections, flip them back, and pin them at the temples or just above the ears. Leave the lengths wavy and loose. It’s half-open, half-controlled, and very fast.
The flip keeps hair away from the face, which is useful when the front layers are short or when the wind is doing rude things. Use flat clips, small barrettes, or bobby pins hidden under the top layer. If you pick matching pins, the style reads cleaner; if you use decorative pins, the accessory becomes part of the look.
It’s one of the easiest ways to make a basic wave feel styled without actually changing much. And that’s why I like it for late mornings. You keep the texture, lose the hassle, and move on.
25. Long Mermaid Waves
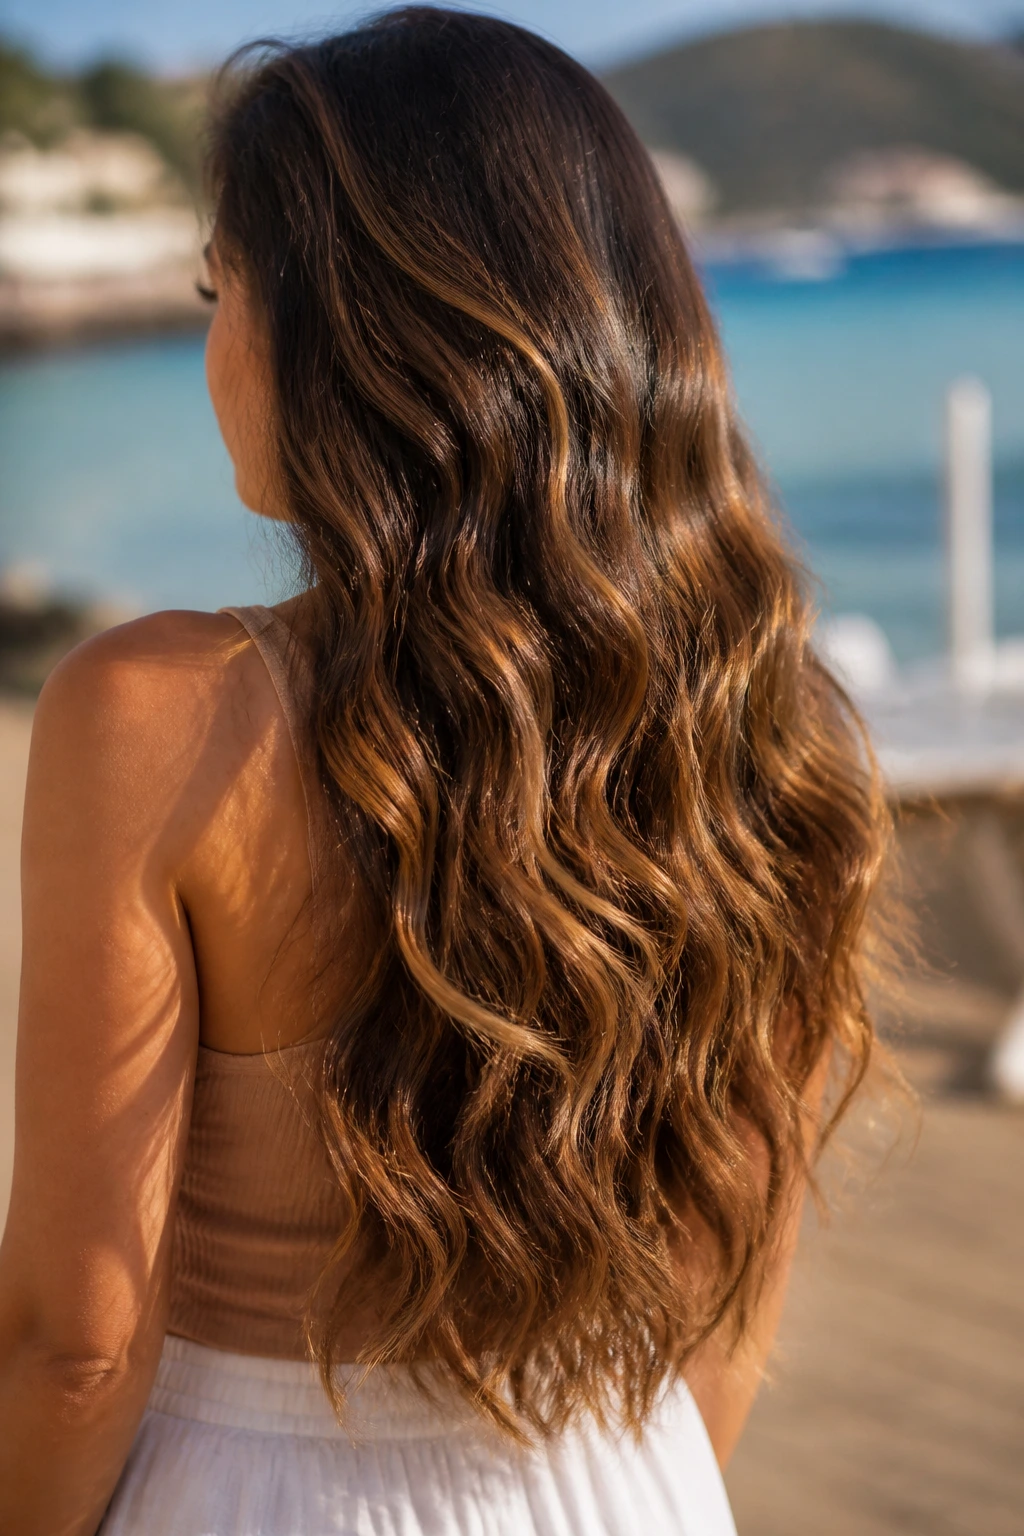
Long waves need more than shape. They need direction. Mermaid waves use broad, flowing bends that travel down the hair in long lines, not tiny curls. The result is soft, glossy texture with a lot of length left visible.
A large-barrel wand or a braid-and-release method can both get you there. If the hair is very long, section it into fewer, larger parts so the wave pattern doesn’t become too busy. The goal is movement that follows the length of the hair, not a bunch of separate curl heads sitting on top of one another.
This style looks best when the ends are not too perfect. A tiny bit of bend, a little separation, and some face-framing softness keep the hair from feeling like a costume wig. The longer the hair, the more important that looseness becomes.
26. Asymmetrical Part Waves
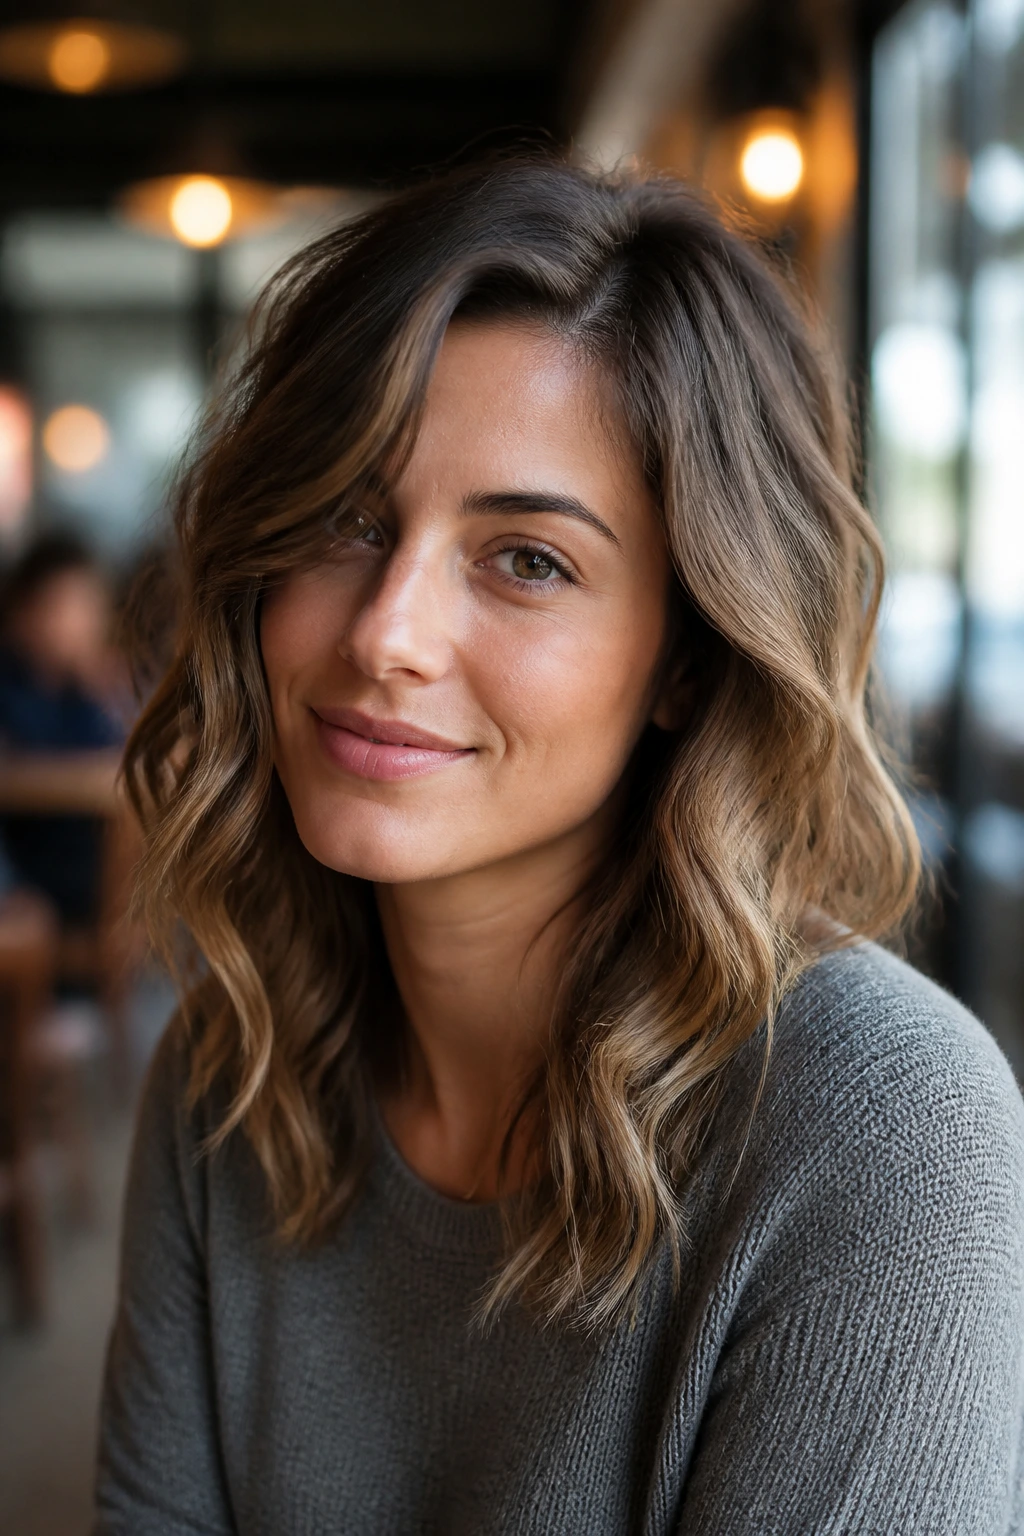
An asymmetrical part is a small change with a big visual effect. It shifts the balance of the waves and makes the hairstyle feel less expected, even when the curl pattern itself is plain. If a middle part feels too neat and a deep side part feels too dramatic, this middle-ground option is a nice fix.
Set the part slightly off-center, then let the waves fall in whatever direction the hair wants. You’ll get a softer frame on one side and a bit more lift on the other. It’s particularly useful when one side of the face photographs better with more hair near it — everyone has one of those sides, whether they admit it or not.
The asymmetry keeps the waves from feeling too rehearsed. No need to do much else. Sometimes the part itself is the style.
27. Bubble Ponytail with Wavy Sections
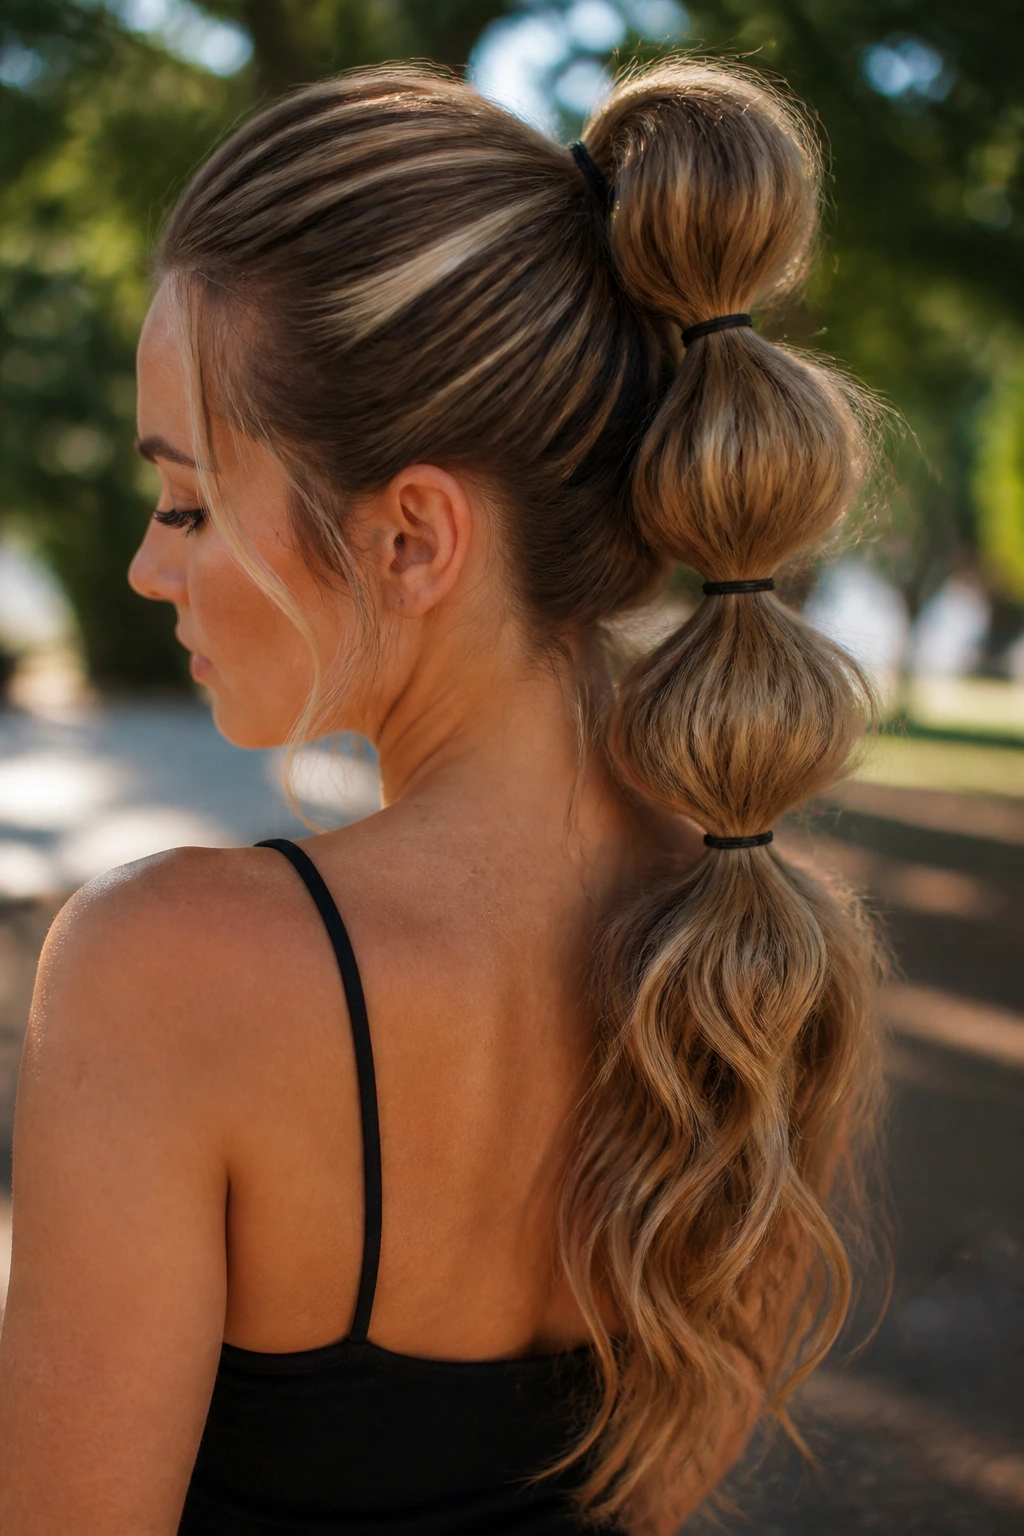
A bubble ponytail sounds playful because it is, but the waves underneath stop it from looking juvenile. Put the hair into a high or mid ponytail, add elastics every few inches, then gently tug each section into a soft bubble. If the lengths are already wavy, the bubbles sit with more texture and less stiffness.
The best part is how adaptable it is. Thicker hair gives bigger bubbles. Fine hair gives more delicate ones. You can keep the bubbles close together for a more sculpted look or space them out for a looser, casual finish.
This works especially well when you want something beyond a plain pony without spending fifteen extra minutes on styling. Use small clear elastics or wraps that match your hair color, and leave the ponytail tail slightly bent instead of poker-straight. That’s where the texture lives.
28. Loose French Twist with Waves
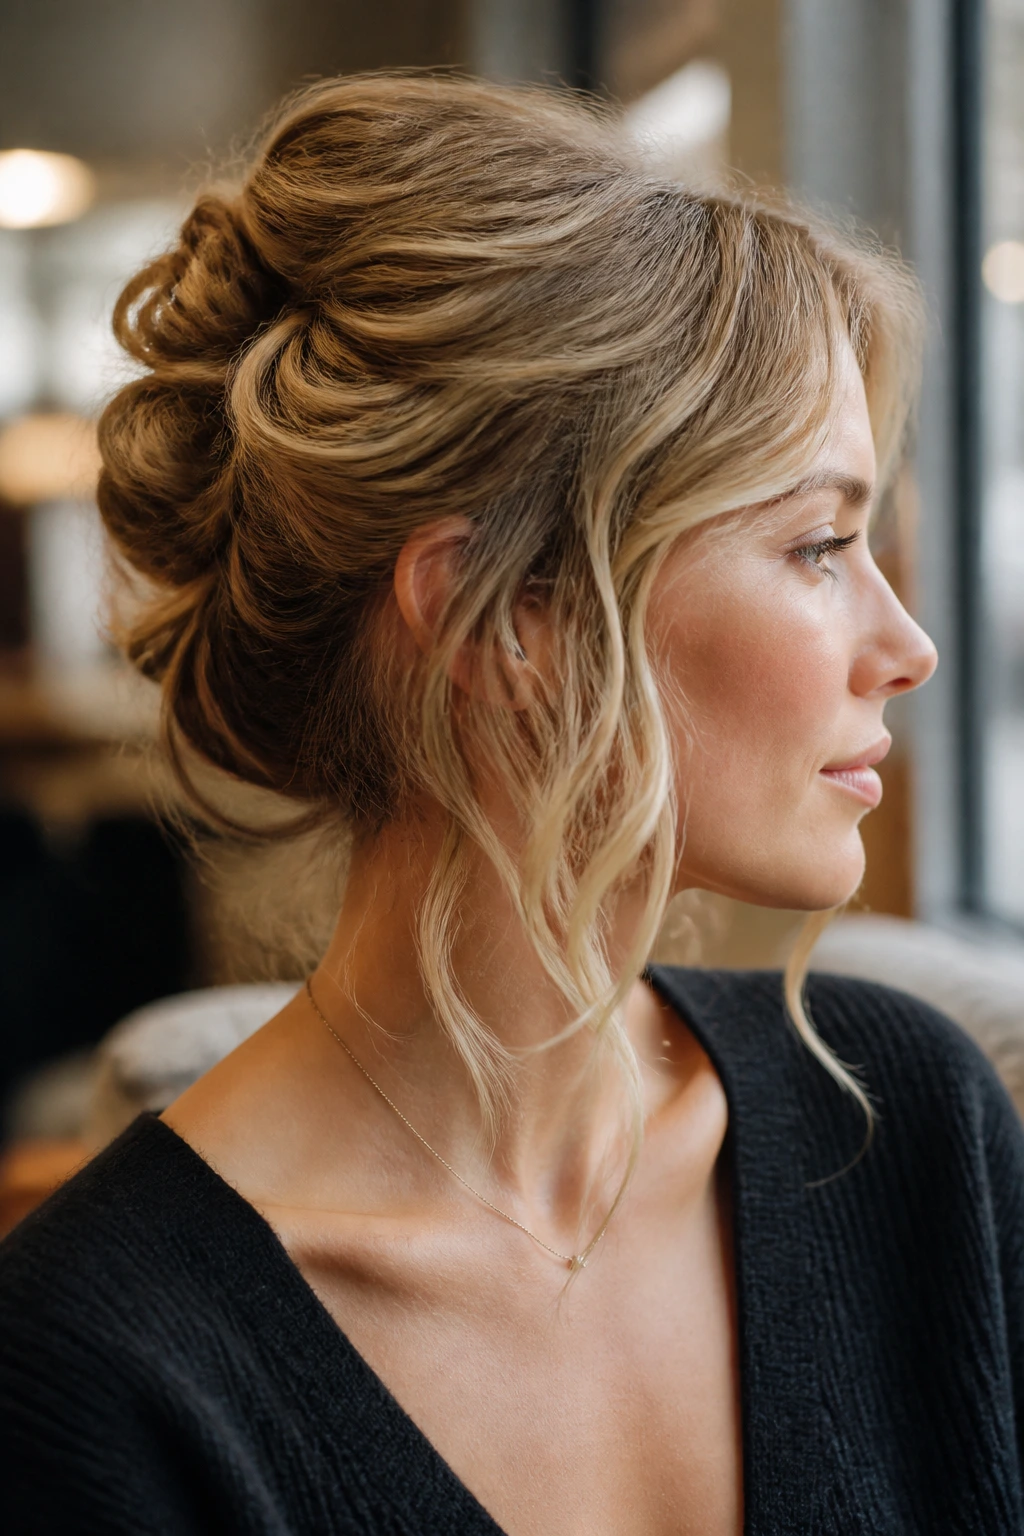
A French twist doesn’t need to be tight and formal. A loose version, with soft wavy pieces left around the face and neck, feels far more wearable. Pin the hair upward, tuck the ends loosely, and let a few wave pieces escape on purpose.
The looser the twist, the more modern it looks. A rigid twist can make the face feel severe. Soft waves around the temple and nape break that up and keep the style from looking older than it should. If the hair is slippery, a little texture spray before pinning helps.
This is one of those styles that turns out better when it isn’t overthought. A neat surface at the back, waves around the front, and a couple of pins that disappear under the twist. That’s enough.
29. Wet-Look Waves at the Crown
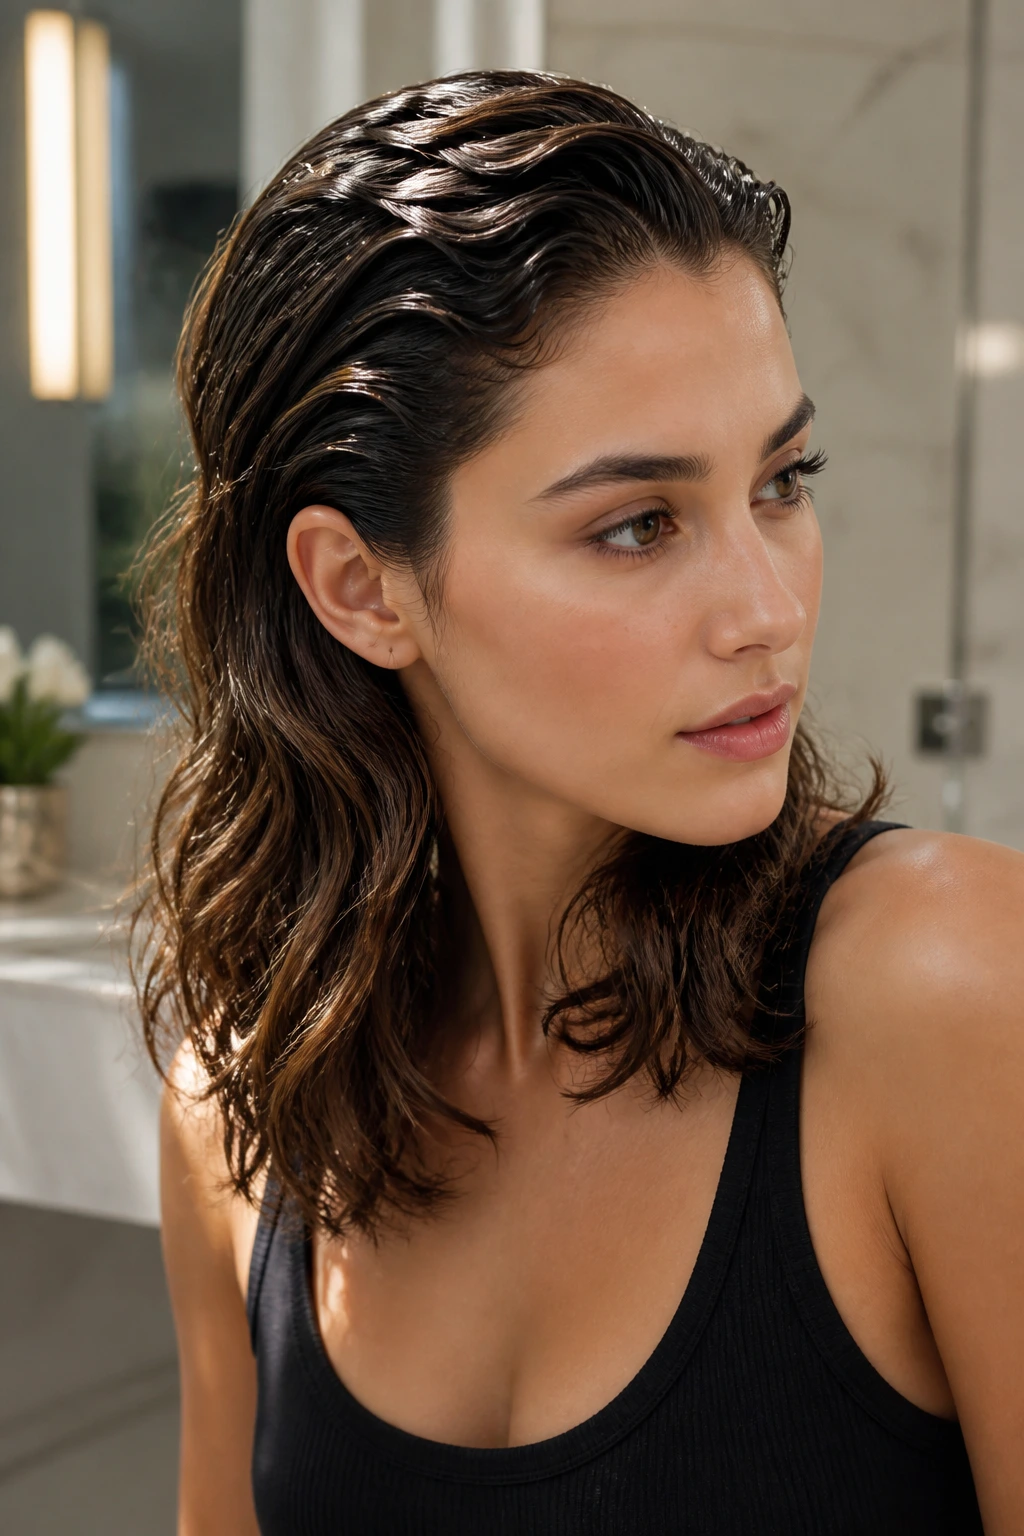
A wet-look crown with wavy lengths gives the style a sharp top and a softer bottom. Gel or styling cream smooths the roots and scalp area, while the mid-lengths and ends stay loose and bendy. It’s a deliberate contrast, and that’s why it reads so clean.
Apply product mainly from the hairline to just above the ears. Keep the lower half lighter so the waves can still move. If you put too much product through the lengths, the style gets greasy fast and the wave definition disappears. That’s not the goal.
This one suits straight-to-wavy hair that wants a little polish without becoming flat. It also works well when you want something editorial-looking but still manageable in real life. The wet crown keeps it sharp. The waves keep it wearable.
30. Center-Part Air-Dried Waves with Clips
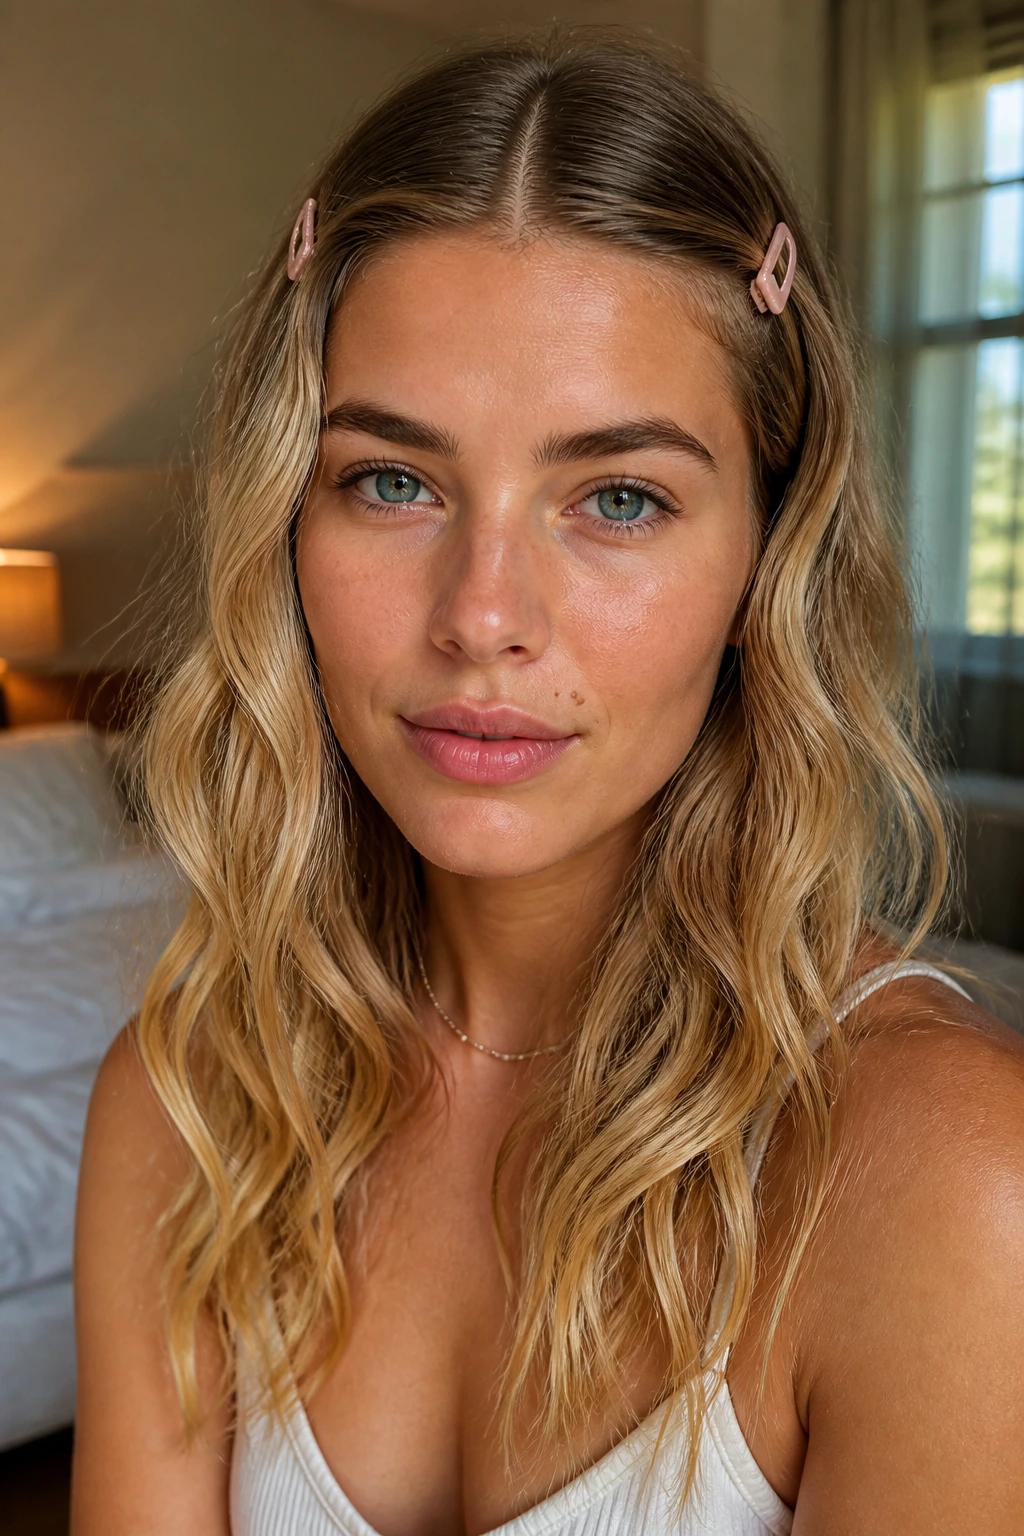
This is the plainest style in the best possible way. A center part, a couple of clips at the temples, and air-dried waves that do their own thing. Nothing complicated. No iron. No brush-out. Just texture, shape, and a small bit of control near the front.
Start with damp hair, add a light styling foam, and part the hair cleanly down the middle. Clip the front sections back or slightly away from the face while the hair dries, then release them once the waves set. The clips help the front pieces keep direction instead of puffing outward in random directions.
This is the style for women who want an easy finish that still looks intentional. It also works well when your hair is already wavy and you’re trying to preserve the pattern instead of reshaping it. The clips are not decoration here. They’re the quiet part that makes the whole thing land.
The Styling Habits That Make Waves Look Better
The difference between decent waves and the ones people keep asking about usually comes down to three small habits: section size, cooling time, and where the product lands. If your sections are too thick, the hair bends unevenly and the wave falls apart by noon. If you brush too early, the shape collapses before it sets. And if you spray product all over the ends, the movement disappears.
Section size matters more than most people think. Keep each piece around 1 inch wide for a curling iron or wand. Slightly smaller if your hair is thick and stubborn. Slightly larger if your hair is fine and you want a looser finish. The goal is even heat, not speed.
Cooling time is not optional. Pin the curl or let it sit in your hand for a few seconds before releasing it. That little pause helps the wave hold its bend. If you’re in a hurry, clip the curl in place while you work on the rest of the head. It’s boring. It works.
Product placement changes the whole finish. Mousse goes on damp roots and mids. Heat protectant goes before styling, always. Texture spray goes near the middle and ends, not at the scalp unless your hair needs grit. And hairspray should miss the hair from about 8 to 10 inches away so you don’t freeze the style into a shell.
Choosing the Right Tools Without Buying Everything
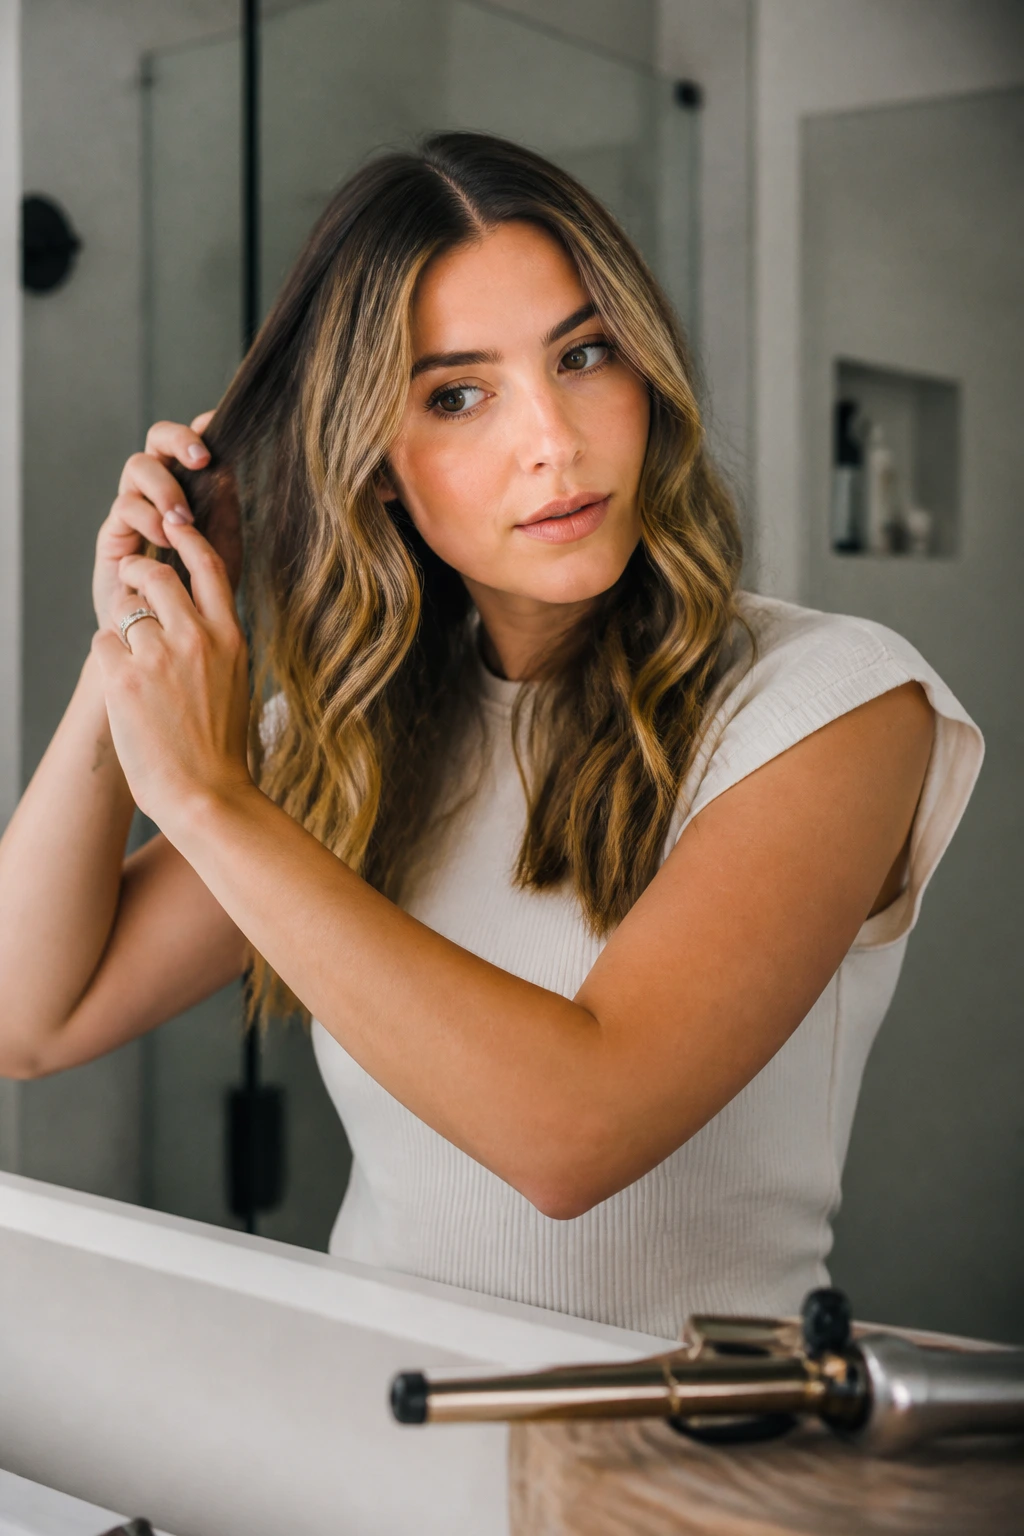
You do not need a drawer full of gadgets to make great wavy hairstyles. You need the right barrel size, a comb that can part hair cleanly, and one or two products that suit your texture. That’s it. The rest is optional, useful, or nice to have on hand.
What Matters Most
-
A 1-inch curling iron or wand: Best for shoulder-length hair and tighter, more defined waves.
-
A 1.25-inch iron: Better for softer, looser waves on medium to long hair.
-
A flat iron: Handy for S-waves, bob lengths, and wave flips near the ends.
-
Heat protectant spray: Non-negotiable if you use hot tools; look for even spray, not a sticky mist.
-
Light mousse or foam: Gives fine hair some grip before styling and helps air-dried waves keep their shape.
-
Texturizing spray: Useful on clean hair that needs a little roughness so pins and clips stay put.
-
Dry shampoo: Keeps second-day roots from separating in odd, oily strips.
-
Bobby pins and small clips: Better in matte finishes if your hair slips easily.
-
Claw clip, scarf, ribbons, and soft elastics: These are the simple extras that change the style without changing the cut.
Smart Product Picks for Softer, Longer-Lasting Waves
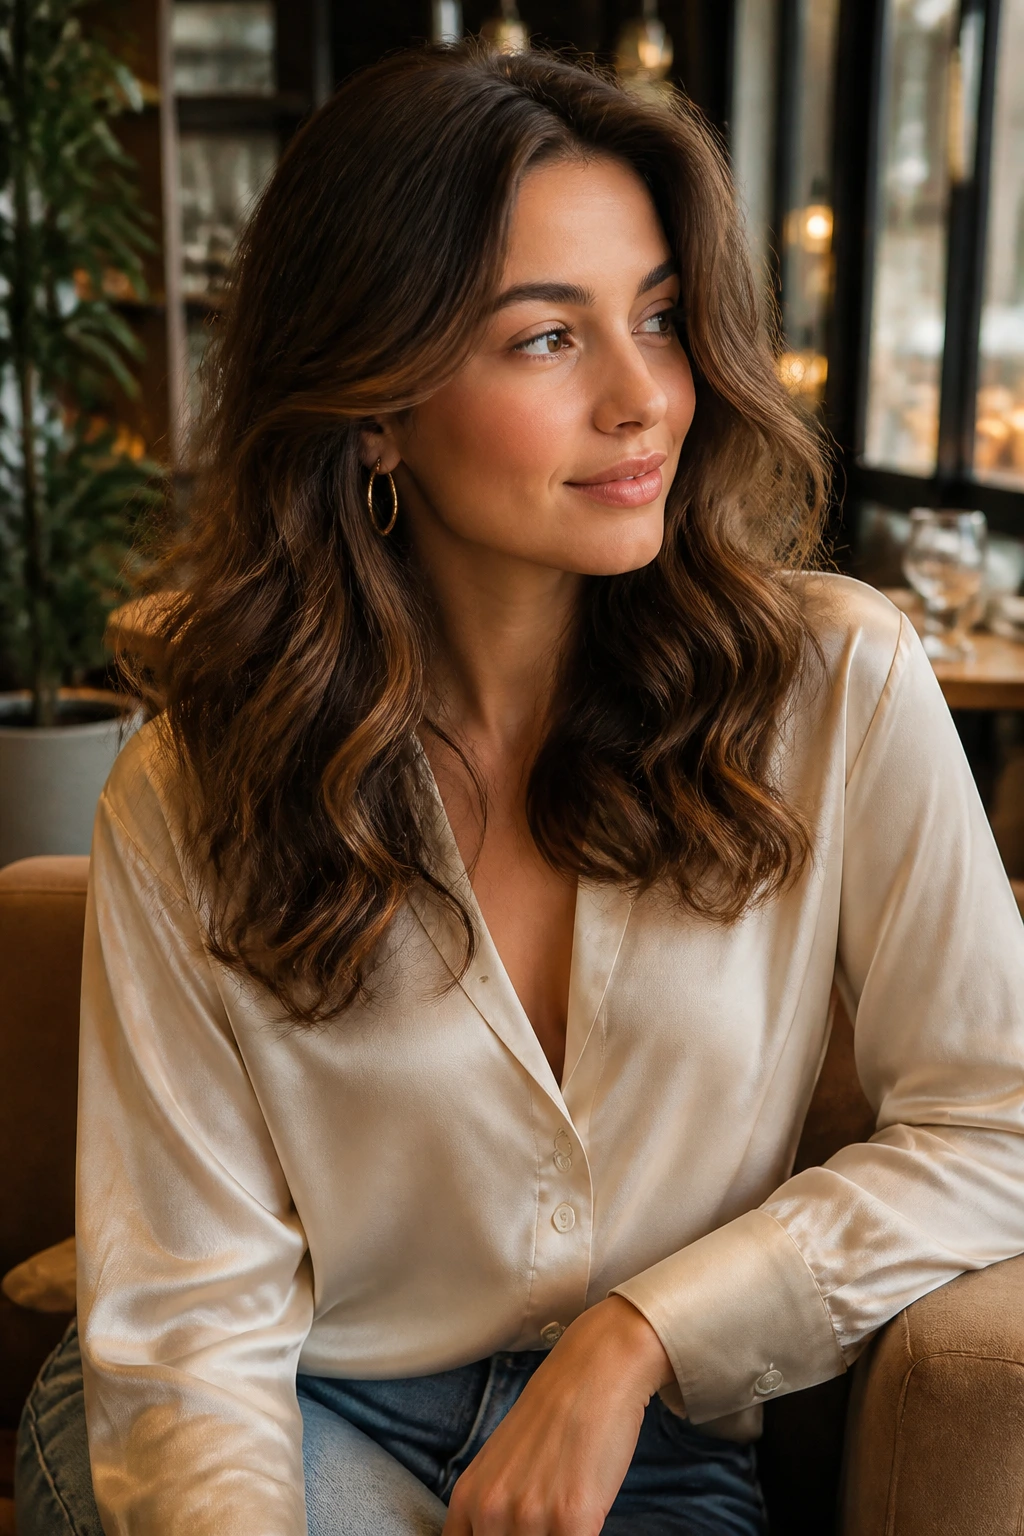
Hair product shopping gets messy fast because most bottles promise the same thing in different fonts. Ignore the noise. Look at texture, hold level, and how heavy the product feels in your hand. For easy wavy hairstyles for women, lighter is usually safer than richer.
If your hair is fine or falls flat, choose a mousse or foam with flexible hold. It should support the wave without making the roots feel wet or sticky. If your hair is thick, look for a stronger texturizing spray and a heat protectant that leaves a little grip behind. Thick hair usually needs help holding shape, not extra softness.
Dry or color-treated hair is a different story. Heavy salt sprays can rough it up too much, and rich creams can make waves droop. I’d use a light leave-in, then go in with heat or braids, depending on the style. If you prefer no-heat waves, a soft styling lotion works better than a crunchy sea-salt spray on drier strands.
Accessories matter more than people admit. Flat clips hold better than glossy ones. Silk scrunchies snag less than hard elastics. Satin ribbons slide less than stiff cotton if your hair is very smooth. Small details, yes. But those details decide whether the style lasts past lunch.
How to Wear These Waves With Real Clothes and Accessories
Presentation: Pick one clear focal point. That can be a side part, a tucked ear, a ribbon, or a bit of crown volume. Don’t crowd the whole head with details. Waves look best when one or two parts of the style are doing the talking and the rest stays relaxed.
Accompaniments: Soft waves pair especially well with earrings, headbands, scarves, collars, and clips because the texture gives those accessories something to sit against. A high neckline feels less heavy when hair is waved and moved off the shoulders. Big hoops look cleaner when one side is tucked. A scarf looks more deliberate when the wave pattern isn’t too tight.
Density: Fine hair often looks best with a looser wave and a little lift at the roots. Thick hair usually needs more sectioning and slightly stronger product so the style doesn’t balloon. If your hair is long and heavy, keep the wave broad and the ends soft. If your hair is short or blunt, work the bend closer to the face and crown.
Occasion Pairing: Some of these styles are built for errands and coffee runs. Others belong near a blazer, a dress, or a pin that keeps a twist in place. The point is not to make every wave formal. The point is to keep one wave style in your back pocket for the setting you’re walking into.
Common Mistakes That Flatten Wavy Hair
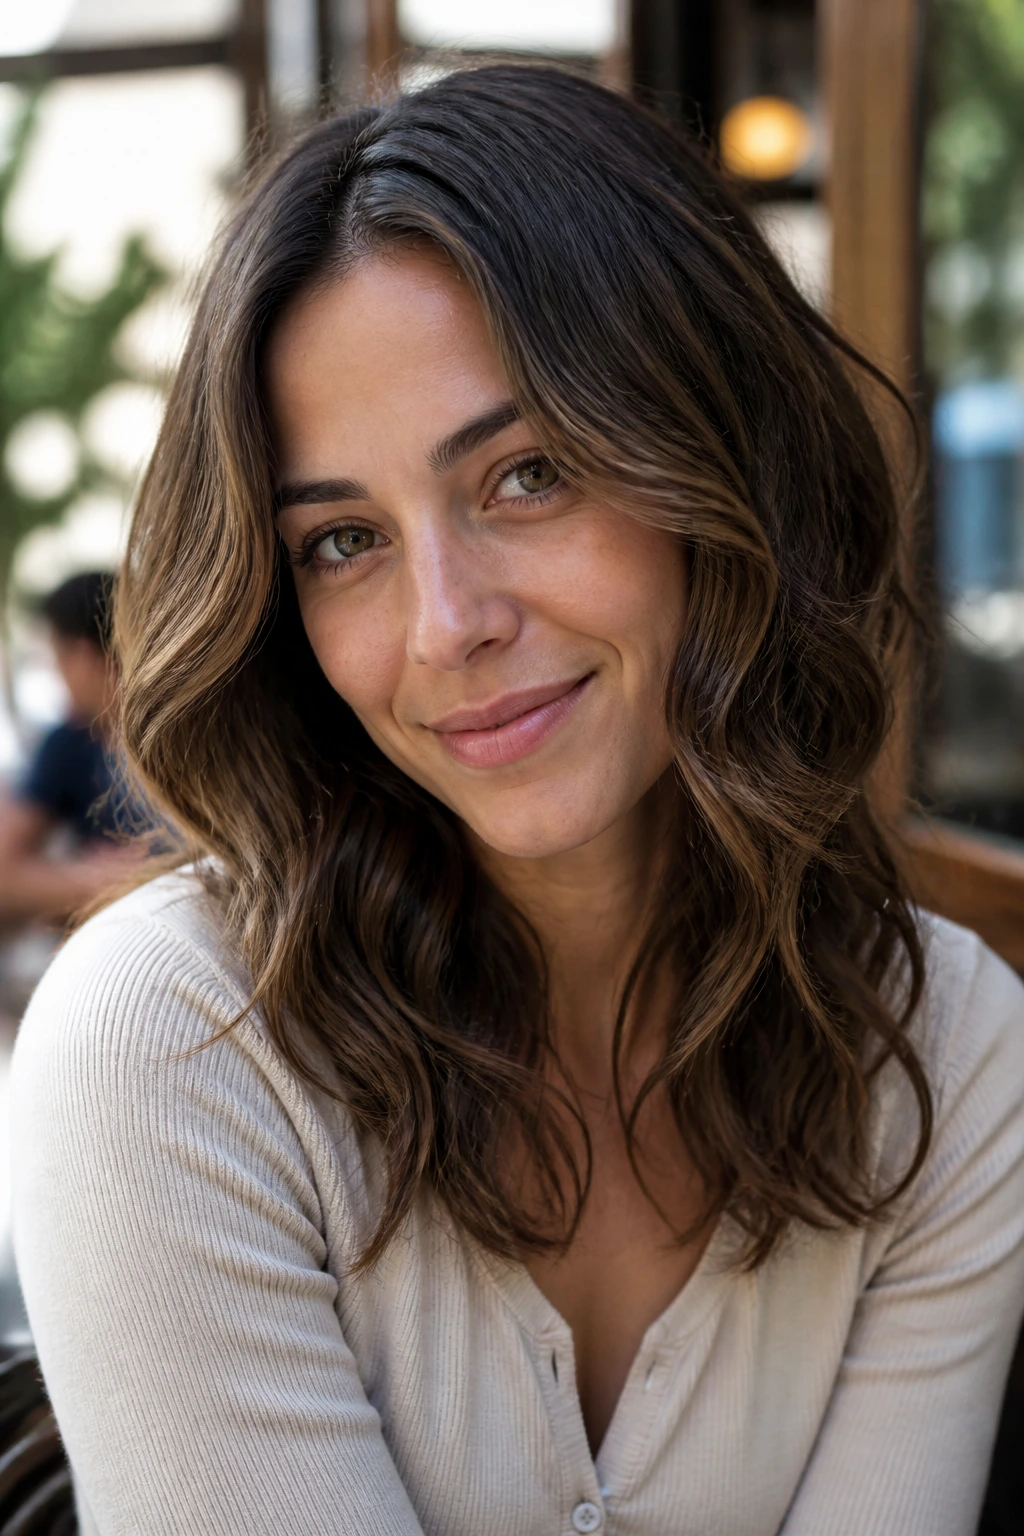
The easiest mistake is over-curing the shape into a curl. That sounds backwards, but it happens all the time. If you wrap every section too tightly, the result looks springy instead of soft. Leave the ends a little straighter, or brush the curls out once they cool, and the wave reads more natural.
Too much product is another trap. A heavy cream or a thick oil through the mids makes waves fall early and separate weirdly at the ends. Use the smallest amount that gets the job done. For fine hair, that might be a pea-size amount of serum on the tips only. More is not better here.
Brushing hot waves is a classic way to lose the pattern. Let the hair cool first. Then use fingers, a wide comb, or a soft brush depending on how polished you want the result. Hot hair is still setting. Treat it gently.
A fourth mistake: using section sizes that are all over the place. The style still works if a few are different, but wildly uneven sections make the finish lopsided. Keep your sections mostly consistent, and the wave pattern will look far more intentional even if you’re moving fast.
Sleeping on waves without protection ruins more styles than heat tools do. A silk pillowcase or a loose pineapple saves the shape overnight. A cotton pillowcase does the opposite. It rubs the cuticle, adds frizz, and leaves the roots mashed down. Frustrating. Also avoidable.
Variations That Change the Mood Fast
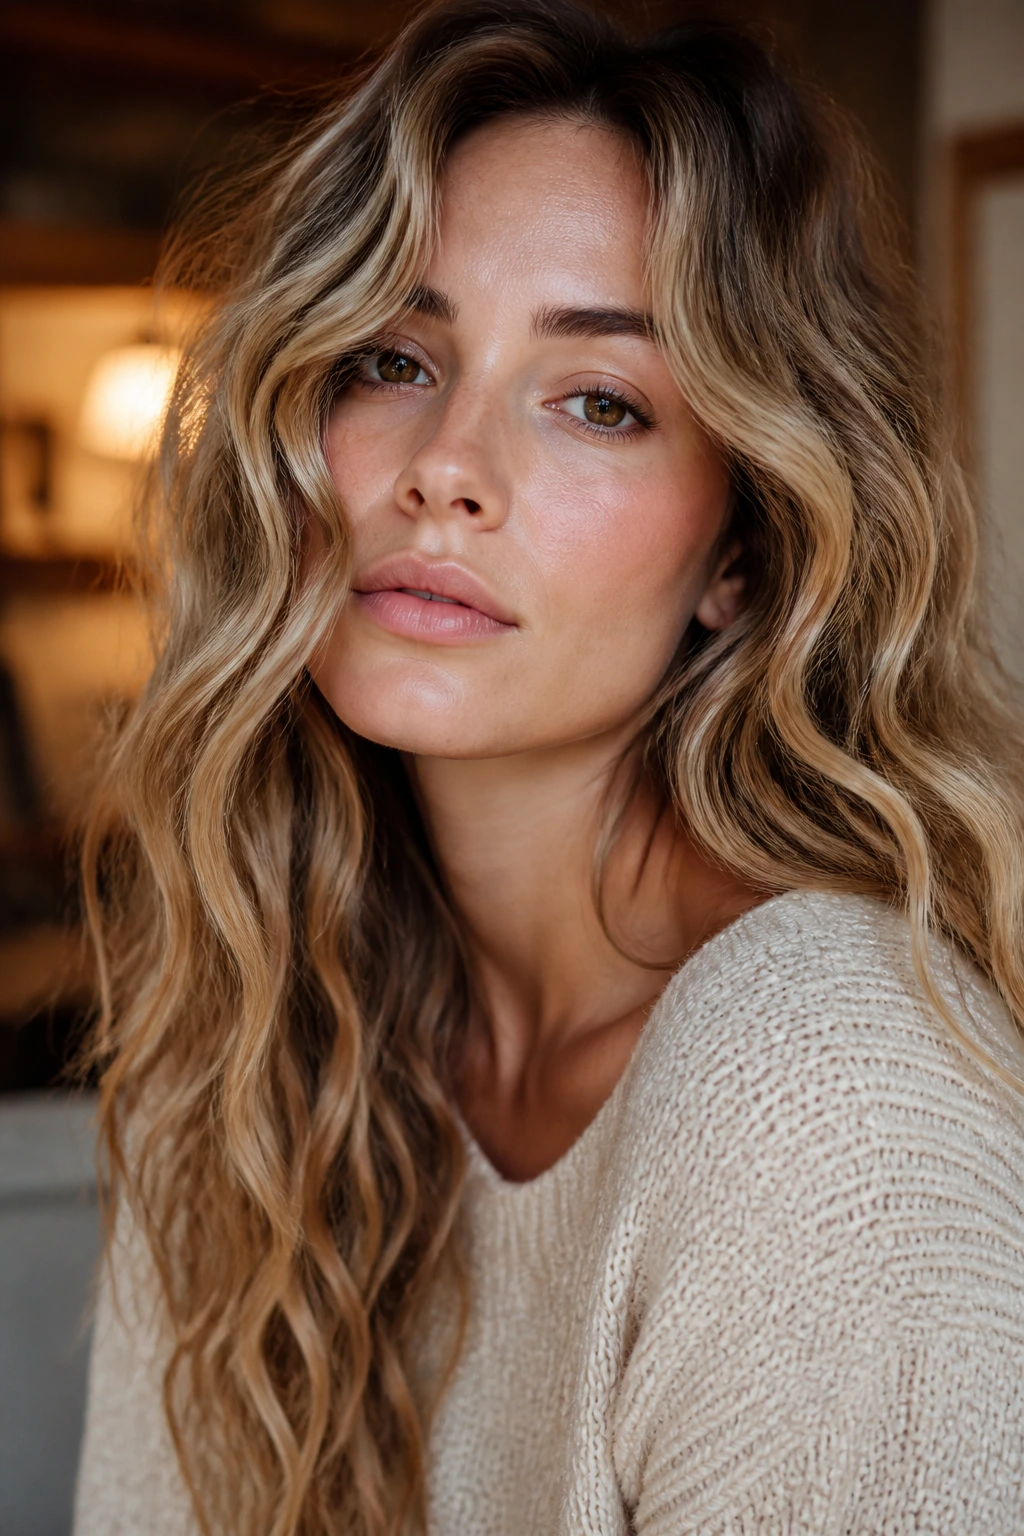
Heat-Free Rope Waves: Twist damp hair into two or four rope twists, let it dry, then shake it out. This gives a softer, more irregular wave than braids and works well when you want less obvious pattern.
Fine-Hair Lift Waves: Use a light mousse at the roots, a smaller barrel, and a side part. Fine hair needs more structure near the scalp, not more oil, so keep the ends light and skip heavy creams.
Thick-Hair Control Waves: Section the hair more carefully, use a slightly stronger hold spray, and pin the curls to cool before releasing them. Thick hair often looks best when the surface stays smooth and the movement is placed, not scattered.
Short-Length Wave Fix: For bobs and lobs, keep the bend close to the ends and the front pieces slightly looser. Shorter hair can flip into odd angles if you over-style it, so a few clean bends usually beat a full curl.
Event-Ready Shine Waves: Finish with a light gloss spray or a drop of serum on the tips. Keep the roots touchable. The goal is shine, not grease, and the difference shows fast under indoor light.
Lazy-Day Clipped Waves: Take one of the simpler styles — side part, center part, or loose air-dried bends — and add a couple of barrettes or clips at the temples. That one move makes low-effort hair look deliberate without demanding a full restyle.
Keeping Waves Fresh Between Washes
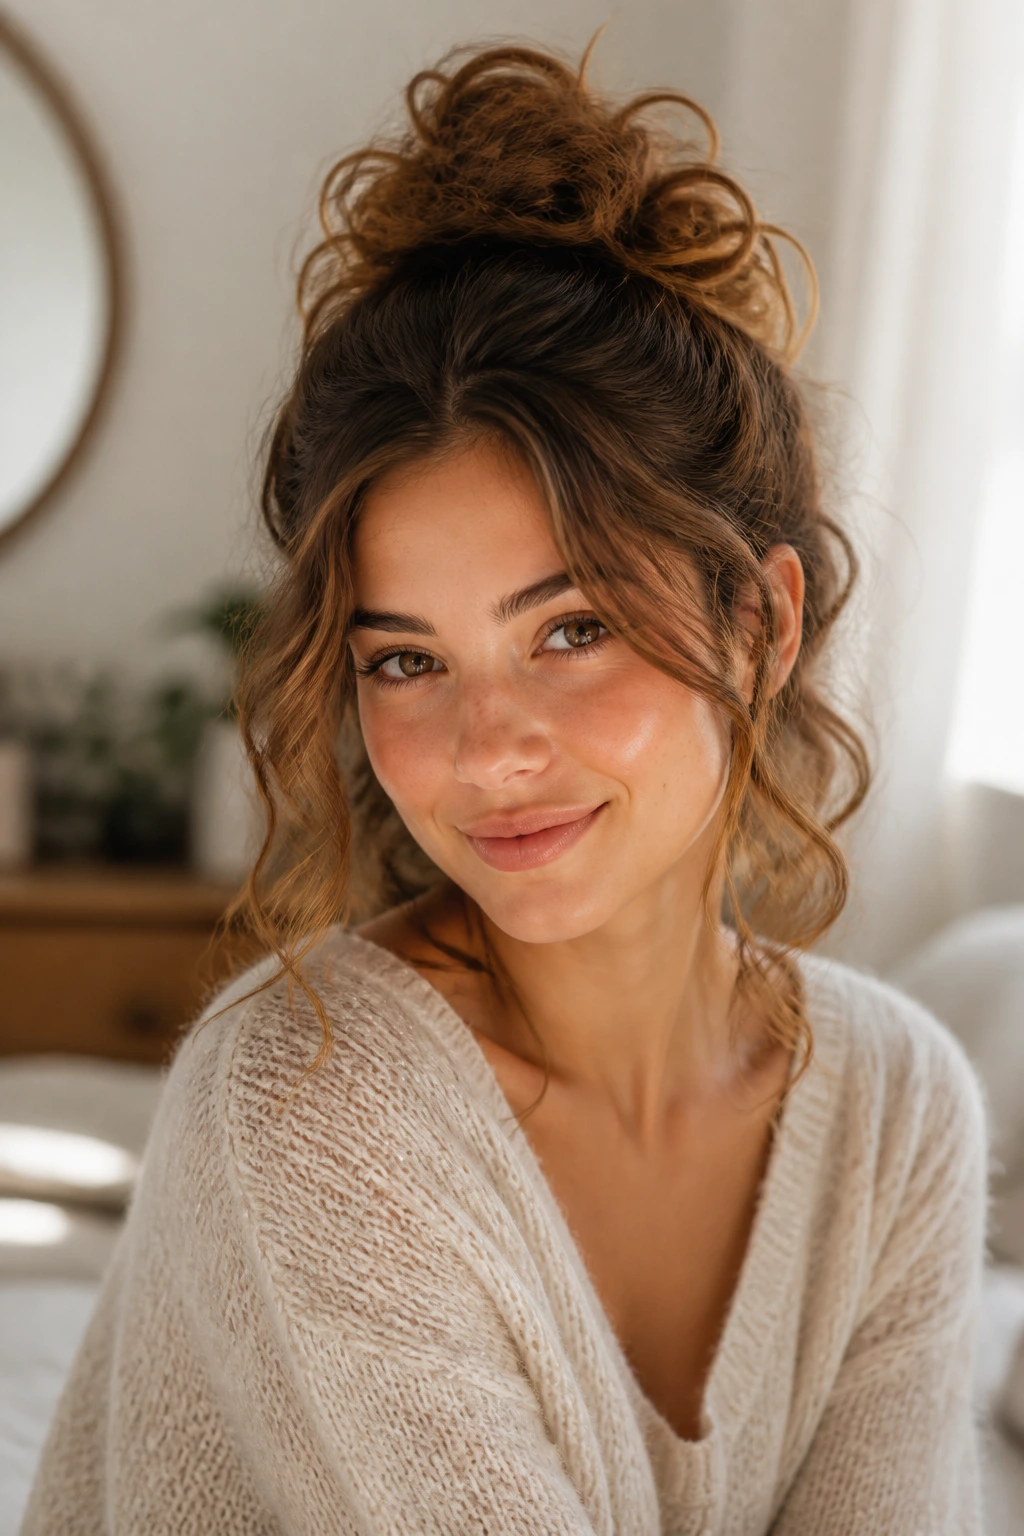
Most wavy hairstyles look best on day one and still look useful on day two. By day three, you’re usually refreshing, not restyling from scratch. That’s normal. Waves were built for a little wear and tear, which is one reason they’re easier to live with than perfectly straight hair.
At night, the simplest move is a loose pineapple or a soft twist secured high enough that the lengths don’t get crushed. If the style is short, a silk pillowcase matters more than the hair tie. Less friction means less frizz in the morning. If you wake up with flat roots, flip the hair over and mist the roots lightly with water or a very light refresher spray, then scrunch or finger-lift the crown.
Dry shampoo works best when you apply it before the roots get greasy-looking, not after they’ve already collapsed. Use it at the roots, let it sit for a minute, then massage it in. For the mids and ends, a tiny bit of texturizing spray can wake the wave back up. Don’t drench the hair. You’re refreshing shape, not starting over.
If you slept on a braid or a half-up style, take it down in sections and let the hair settle for five to ten minutes before deciding it needs more product. A lot of the time, the wave just needs air and a finger-comb. That’s the whole story.
Frequently Asked Questions About Easy Wavy Hairstyles
What’s the fastest way to make waves look intentional?
Pick one clear feature: a side part, a clip, a half-up twist, or a tucked side. If everything is loose at once, the hair can look unfinished. One decision is enough to make the texture read as a style.
How do I keep waves from falling flat at the roots?
Use mousse or root lift on damp hair before styling, then let the curls cool fully before touching them. A clip at the crown while the hair cools helps more than most people expect. Heavy oils near the roots usually make this worse.
Can I make these styles without heat?
Yes. Braids, rope twists, scrunching, and clipped air-drying all create wave patterns without an iron. The result is softer and less uniform, which is useful if you like hair that looks relaxed rather than sculpted.
What if my hair is very straight and never holds a wave?
Start with smaller sections, use heat protectant plus a light hold mousse, and let each piece cool in your hand or a clip before you let it go. Straight hair usually needs more setting time than more textured hair. The wave can hold — it just needs a better setup.
Is salt spray safe for dry or color-treated hair?
Use it carefully. Salt spray gives grip, but it can make dry hair feel rough fast. If your hair is already thirsty, a mousse or light texturizing spray is usually kinder and easier to manage.
Which styles work best for short hair?
Side-tucked bob waves, pin-back wave flips, and soft textured lob waves are the easiest choices. They use bend and direction instead of length, so the style still has shape even when there isn’t much hair to work with.
How do I keep a waved style from looking frizzy?
Don’t brush it while it’s warm, and don’t overload it with product. Use just enough heat protection and hold, then stop. Frizz usually comes from too much handling, not from the wave itself.
Are clips and barrettes just decoration, or do they help the style last?
Both. A good clip can hold the front away from the face, keep a twist in place, or stop a section from falling flat while it cools. Pretty hardware is nice, but grip is what matters.
Can these looks work on layered hair?
Yes, probably better than on blunt hair in a lot of cases. Layers give the wave more movement and help the style avoid that heavy curtain look. You just need to keep the shortest layers controlled so they don’t stick out.
What should I do if one side of the style falls faster than the other?
Touch up only the flat side, not the whole head. A few seconds with a wand or a clip at the crown usually brings the balance back without making the rest look overworked. Rebuilding one side is faster than starting over.
A Softer Way to Wear Hair
Waves are useful because they sit between polished and relaxed without asking you to choose one camp forever. That middle ground matters. Some days you want hair that looks done. Some days you want hair that stays out of your face. The best easy wavy hairstyles do both, and they do it with a lot less drama than people expect.
The cleanest trick is also the quietest one: pick a wave pattern that suits the length you have, not the length you wish you had. Once you stop fighting the cut, the styles start making sense fast.
