



Long hair and a mohawk-shaped style are a better match than most people expect. The length gives you something useful to work with — braids, loops, knots, teased lift, glossy curls — so the final shape can land sharp, soft, or somewhere in the middle instead of getting stuck in one punk-rock lane.
Mohawk styles for women with long hair do not need shaved sides to read clearly. What makes the silhouette work is the contrast: a clean, controlled edge at the temples and a raised center line that the eye follows straight back. Once you get the sectioning right, the rest is a matter of texture, tension, and how much hair you let carry the drama.
Some versions look polished enough for a blazer and boots. Others lean messy, sculptural, and a little theatrical. The styles below cover both ends of that spectrum, plus the awkward middle where a lot of tutorials fall apart: slippery roots, heavy lengths, layered cuts, and hair that looks great for ten minutes and then goes limp.
Why These Styles Belong in Your Hair Rotation
- No shaving required: You get the mohawk silhouette without touching the clippers, which makes these styles easy to wear for a night out, a photo shoot, or a normal Tuesday.
- Long hair does the heavy lifting: Braids, bubbles, knots, and stacked buns all need length; this collection uses that length as the shape itself instead of fighting it.
- Texture changes the mood fast: The same base can look sleek, romantic, tough, or festival-ready depending on whether you smooth it, curl it, or rough it up.
- Most of them hold better than loose hair: Pins, elastics, and a little product keep the center from collapsing the way loose waves do by the third hour.
- They work with different hair types: Fine hair needs grip, thick hair needs sectioning, curly hair needs curl-friendly shaping — there’s a version here for each of those realities.
- You can scale the attitude: Tighten the sides and add shine for polish, or pull pieces loose and build volume if you want a softer frohawk feel.
1. Sleek Dutch-Braid Spine
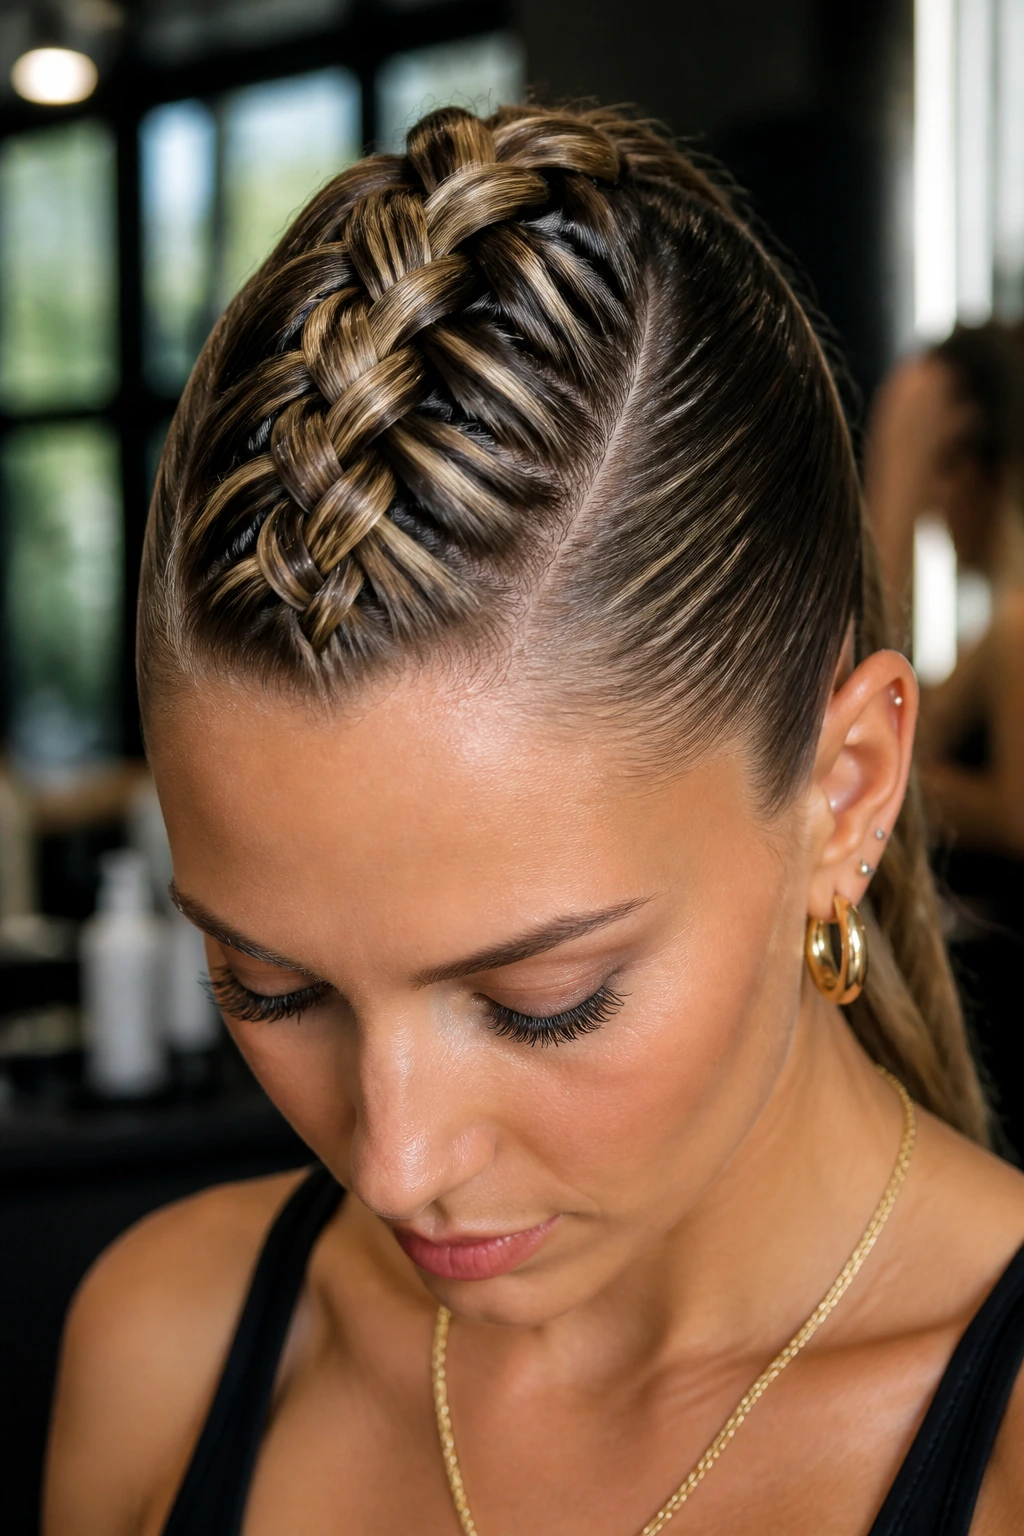
A single Dutch braid down the center gives the mohawk shape a crisp, readable line from forehead to nape. The sides stay slicked back, almost glassy, so the braid becomes the whole point — not a detail hiding in the hair.
Why It Works
The braid creates height without needing a lot of teasing, which is why it behaves so well on long hair that tends to sag under its own weight. Keep the center section around 2½ to 3 inches wide at the hairline, then braid it tight enough that the plaits sit proud of the scalp.
A light gel or styling cream on the sides keeps flyaways from blurring the shape. Once the braid is secure, pancake it gently with your fingers to widen it just enough that it reads as a spine, not a skinny rope.
- Best on day-old straight or blow-dried hair.
- Secure with clear elastics at the ends.
- Use 6 to 8 bobby pins to flatten the sides.
- Finish with a mist of flexible hairspray, not shellac.
Pro tip: Don’t widen the braid before it’s pinned. It’s easier to loosen the plait after the base is locked down.
2. Bubble Pony Mohawk
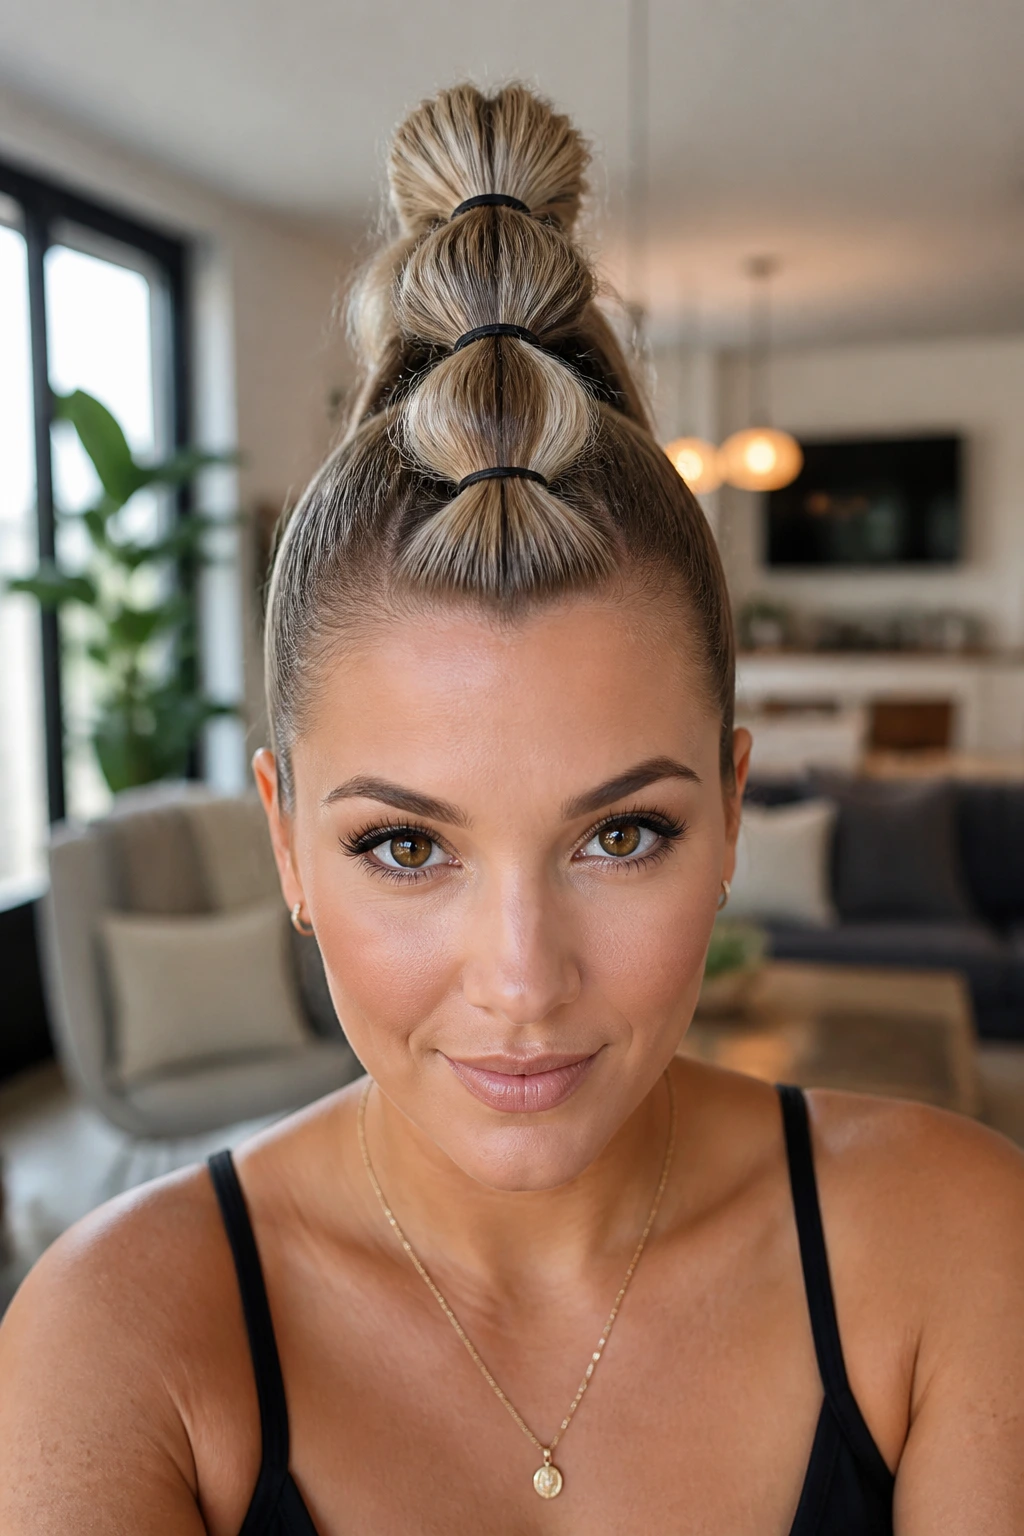
Bubble ponytails make long hair look intentional in a way that plain ponytails rarely do. The center line becomes a chain of rounded sections, and the spaces between the elastics create the mohawk shape all by themselves.
The trick is clean placement. Pull the center strip into a high pony at the crown or midhead, then add clear elastics every 2 to 3 inches down the length. After each elastic is set, tug the hair between bands outward until each section becomes a tidy bubble.
This one loves thick hair, but it can work on finer strands too if you mist the pony with texturizing spray first. Too much polish makes the bubbles slide into one another. Too much product makes the whole thing feel tacky. Keep it balanced.
3. Soft Curly Frohawk
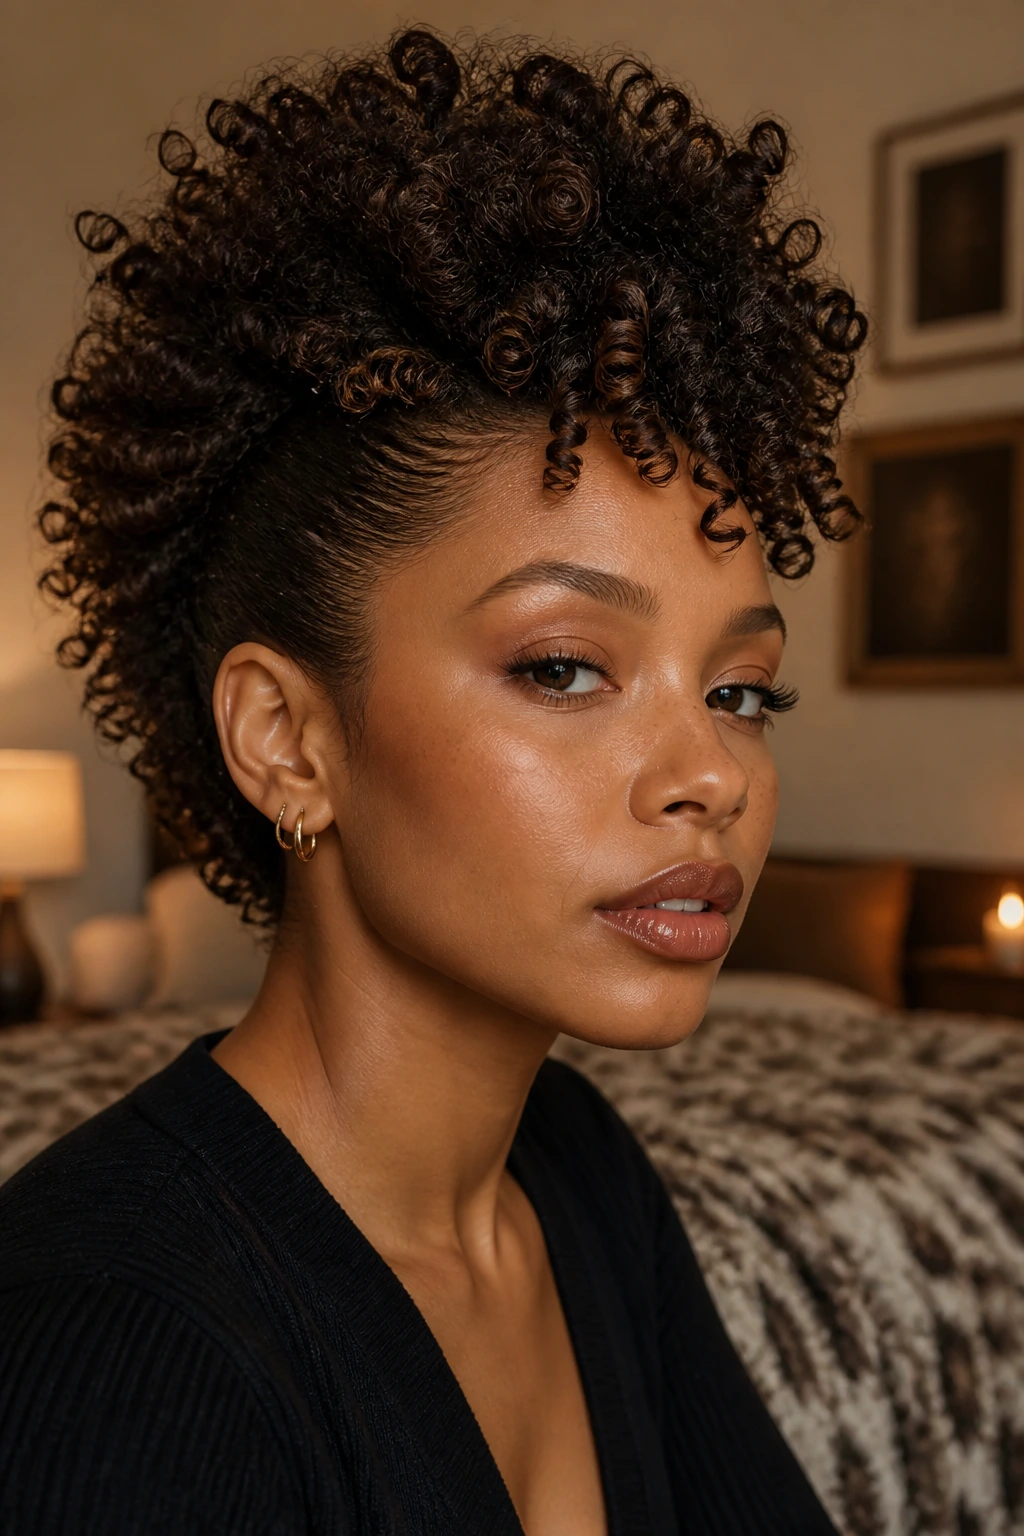
What if your curls already know how to do this better than any braid could? A curly frohawk keeps the texture intact and lets the natural bend make the silhouette look full without forcing it into a hard shape.
Sides are pinned back or slicked with a small amount of gel, but the center stays curly and lifted. Use a diffuser to dry the roots upward, then pick the crown gently with a wide-tooth comb or your fingers. If your curls are dense, pin small side sections in overlapping rows instead of trying to flatten the whole side at once.
How to Style It
Start with curl cream on damp hair, then scrunch in a light mousse for hold. Dry upside down for a few minutes to get lift at the roots, then flip back and shape the center ridge with your hands.
Leave one or two curls loose near the temples if you want it softer. Clean edges matter here, but the point is not perfection. It’s shape.
4. Double Dutch Faux Hawk
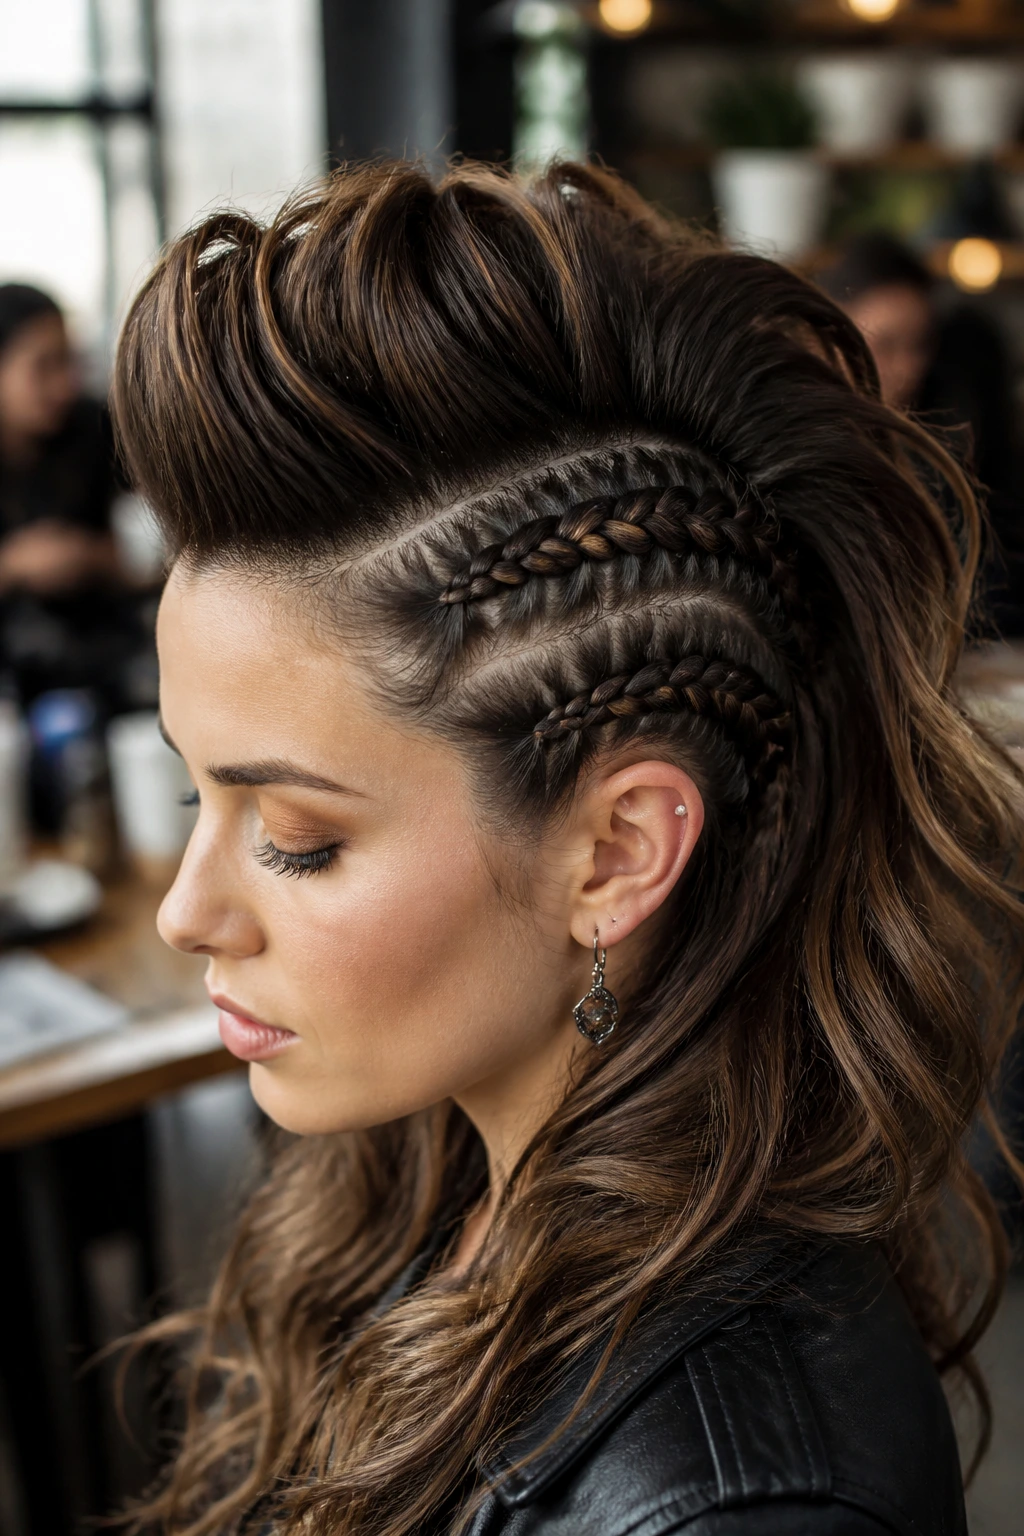
For a day that needs polish at noon and attitude at night, this is the version I reach for. Two Dutch braids hug the sides of the head and leave a thick strip of hair standing up in the middle, which gives you that mohawk outline without losing length.
The braids should begin near the temples and run back toward the crown, then stop where the center section has enough room to puff and curve. Long hair is a gift here, because the loose middle can be curled, waved, or left smooth depending on how sharp you want the finish.
- Best when the hair is fresh enough to hold a braid but not so clean that it slips.
- Works especially well on layered hair because the braids corral the shorter pieces.
- Add a few discreet pins under the ridge if the crown starts to lean.
- If you want more drama, curl the loose center section with a 1-inch iron.
5. Rope-Twist Mohawk
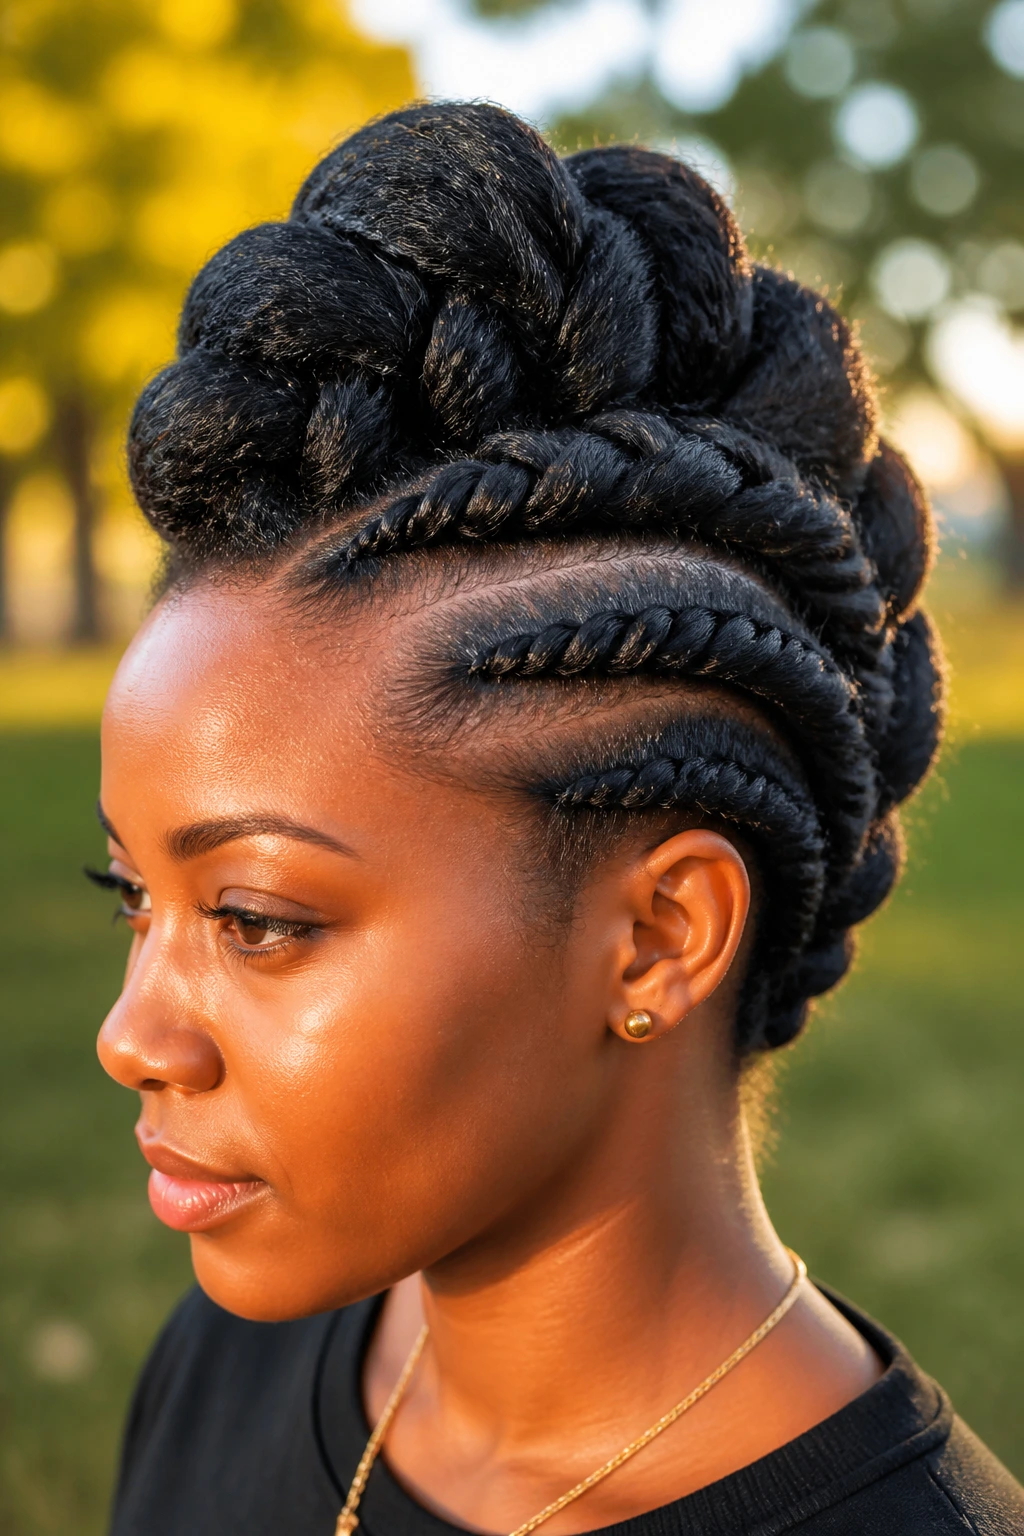
Rope twists have a different feel from braids — tighter, cleaner, and a little more architectural. They’re especially useful when the hair is silky and the usual three-strand braid keeps loosening before you leave the mirror.
Take two sections from each temple, twist them in the same direction, then wrap them around each other in the opposite direction so the twist holds. Pin the finished twists toward the back of the head and let the center section stand higher than the sides. The result is compact and sharp without looking severe.
This style does not need a lot of product, but it does need grip. A little mousse at the roots and a light mist of dry shampoo through the midlengths makes the twists hold their shape instead of peeling apart.
6. Teased Crown Hawk
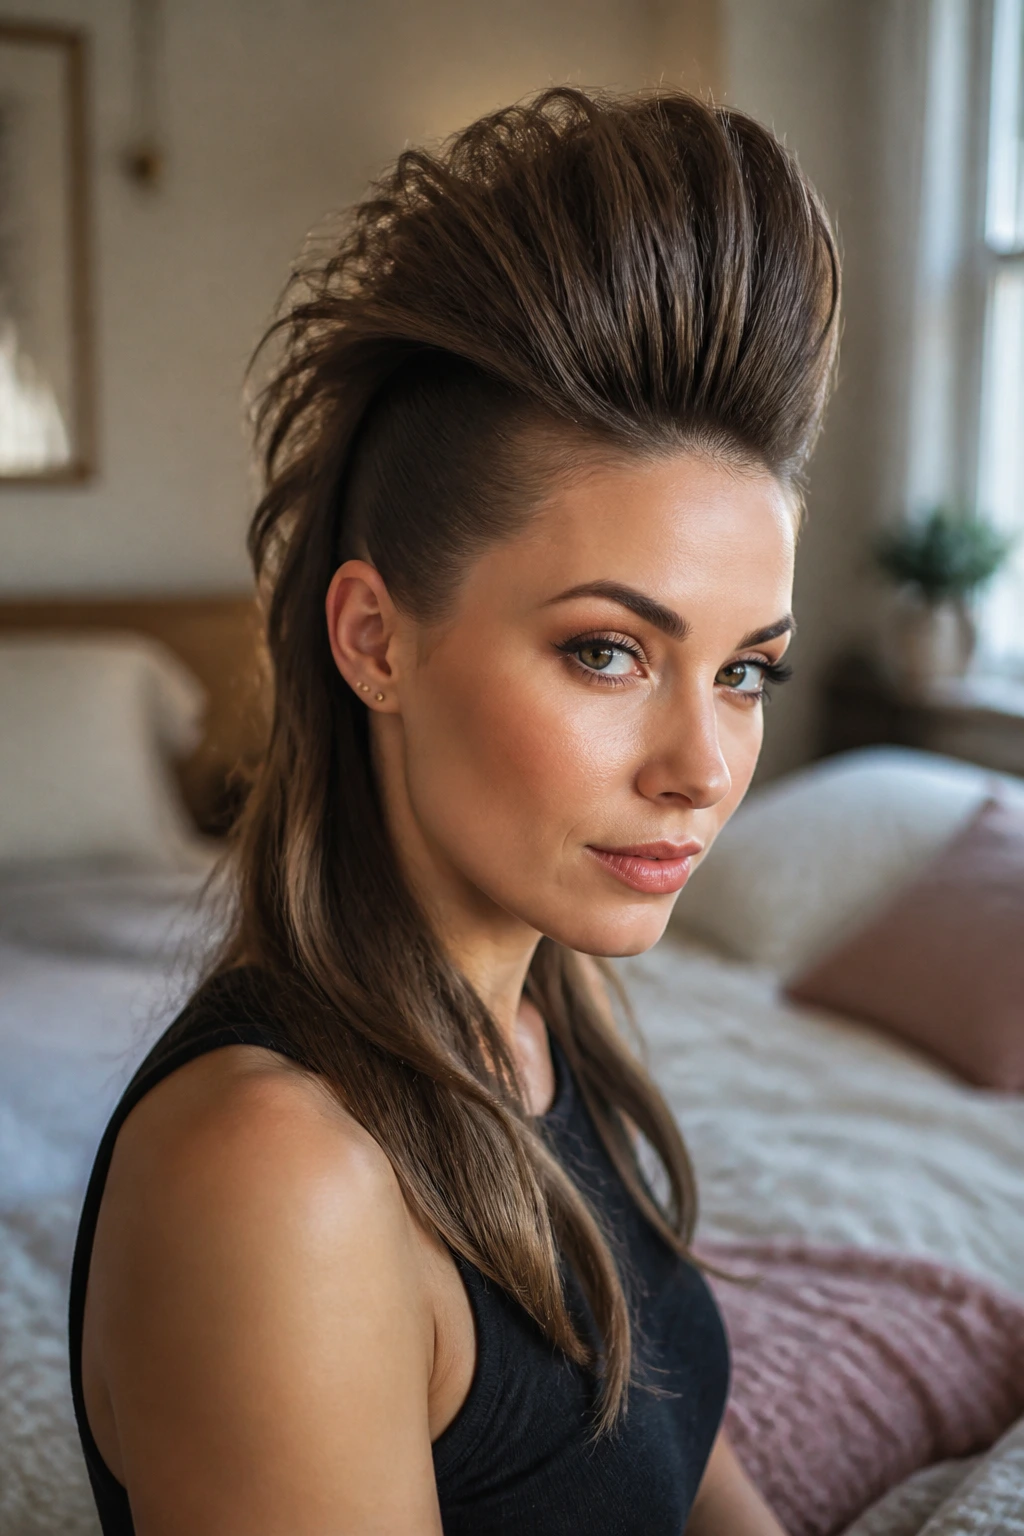
Unlike braid-based versions, this one lives or dies on root lift. If your hair is fine, soft, or too slippery for elaborate plaits, teasing the underside of the crown gives you the height you need without adding a single extra piece.
The move is simple but fussy in the right way: section the center strip, backcomb the underside in small strokes, smooth the top layer over it, and pin the sides flat. Don’t drag the teasing brush through the visible surface. That’s how you get the frizz halo that no amount of spray can save.
A flexible-hold spray set at arm’s length is enough. You want the shape to stay put, not lock into cardboard. This version looks best when the crown is high and the sides are clean enough that the lift feels deliberate.
7. Mini Space-Bun Mohawk
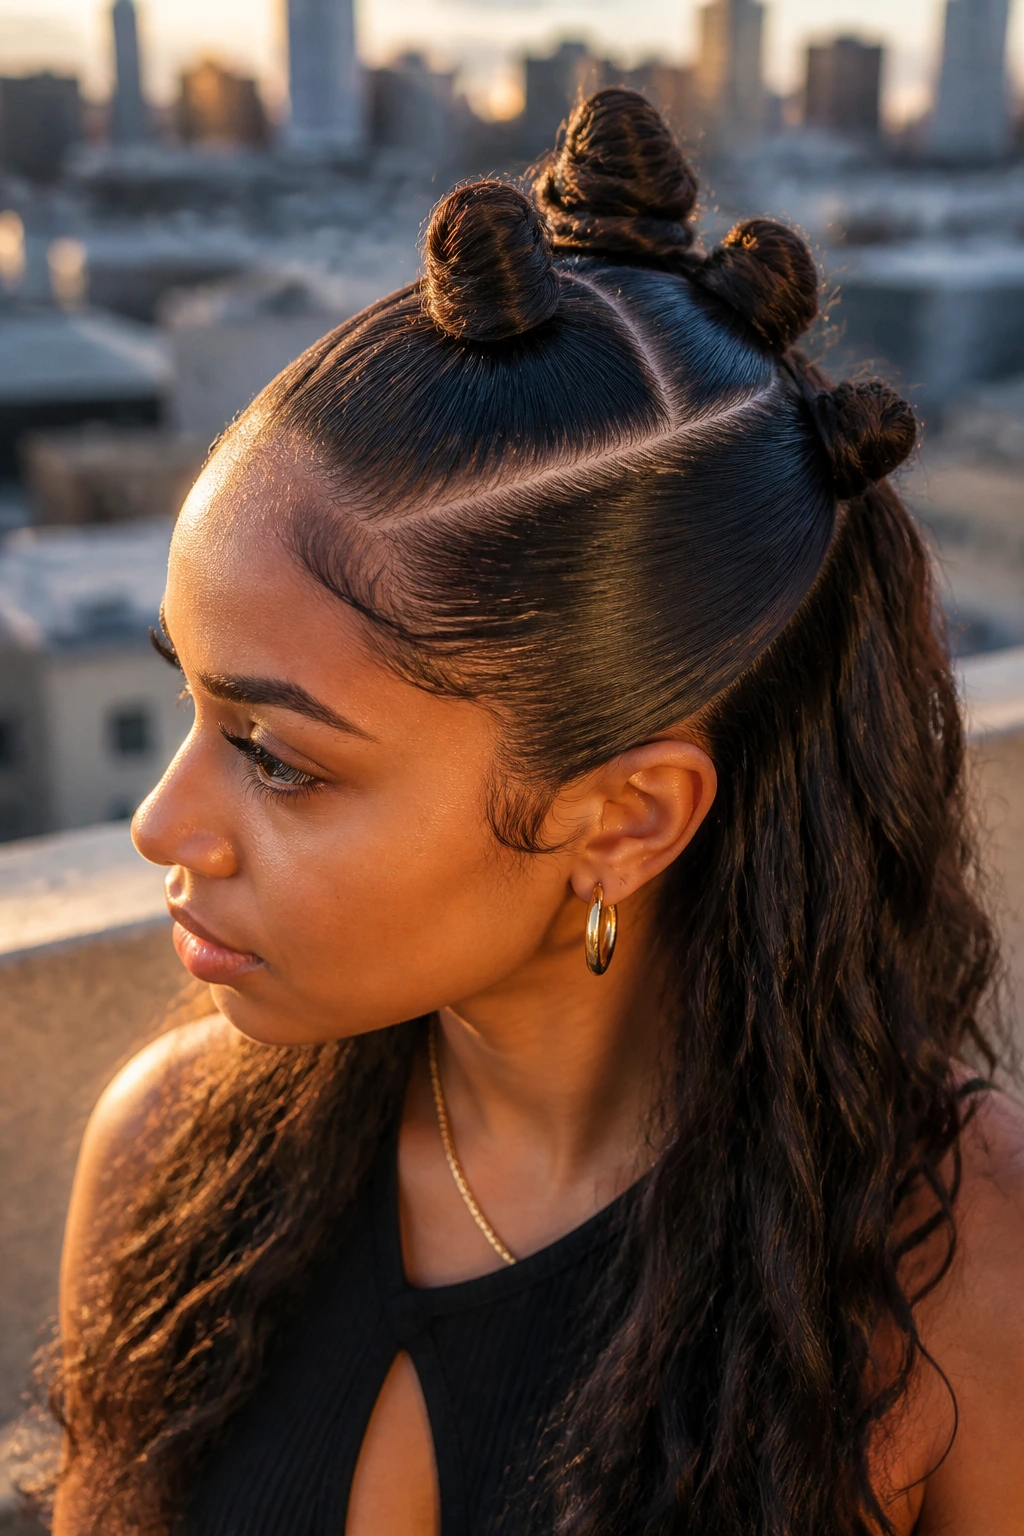
Three or four tiny buns down the center of long hair can look playful, but they also solve a practical problem: weight. Instead of asking one giant bun to hold all your length, you divide the center line into smaller anchors and let each one do a little work.
Start with a narrow center part and tie each section into a small ponytail before twisting it into a bun. Space them about 2 to 3 inches apart so the shape reads as one continuous ridge, not a random row of knots. Long ends can be tucked under the buns or left out on purpose if you want the style to feel a little looser.
Best for: thick hair, music nights, and days when you want the mohawk shape to feel playful rather than sharp.
Watch for: buns that sit too low. If they drop past the crown, the whole silhouette gets dragged downward.
8. Cornrow-to-Knot Hawk
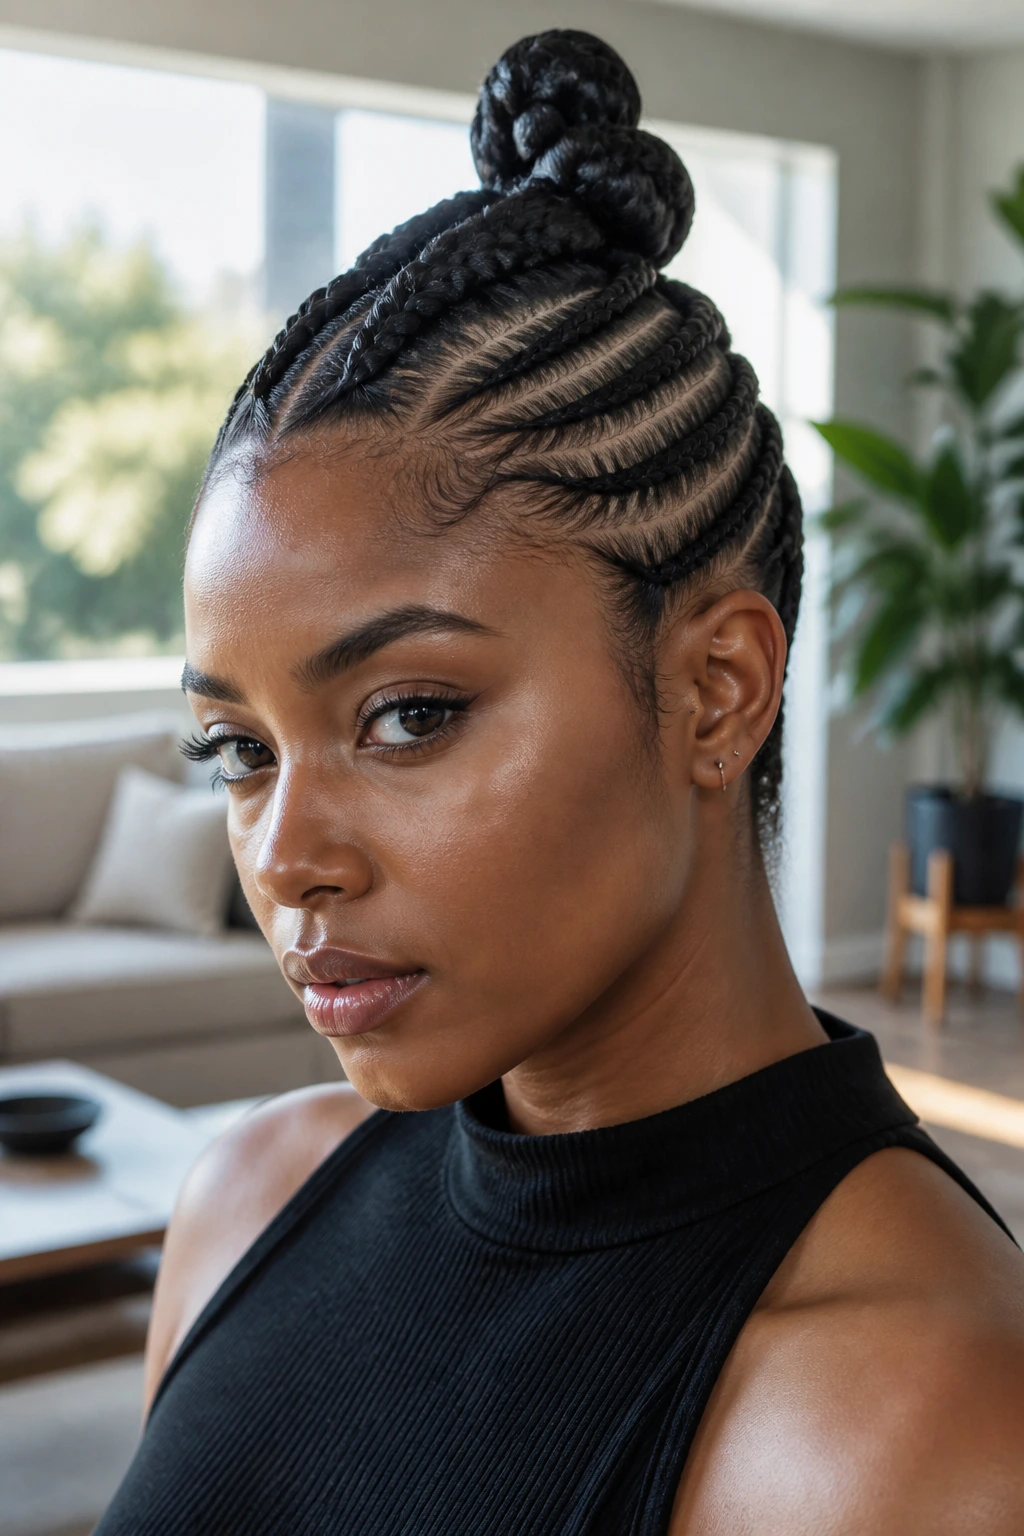
If you know how to cornrow, this is one of the cleanest ways to build a long-hair mohawk that stays put. Flat braids on the sides pull the hair down tight, and the center can be gathered into knots, a braided ridge, or a puffed finish depending on how much texture you want to show.
The real win here is control. Cornrows hold the hairline in place and keep short layers from escaping, which makes the style feel secure for hours. Just keep the tension sensible. Too much pull at the temples shows immediately, and the line around the ears should look smooth, not stretched.
I like this version for active days or long events because once the braids are in, the shape does not wander. The only thing to watch is scalp comfort. If it feels tight before you’ve even left the house, it’s too tight.
9. High Pony Hawk
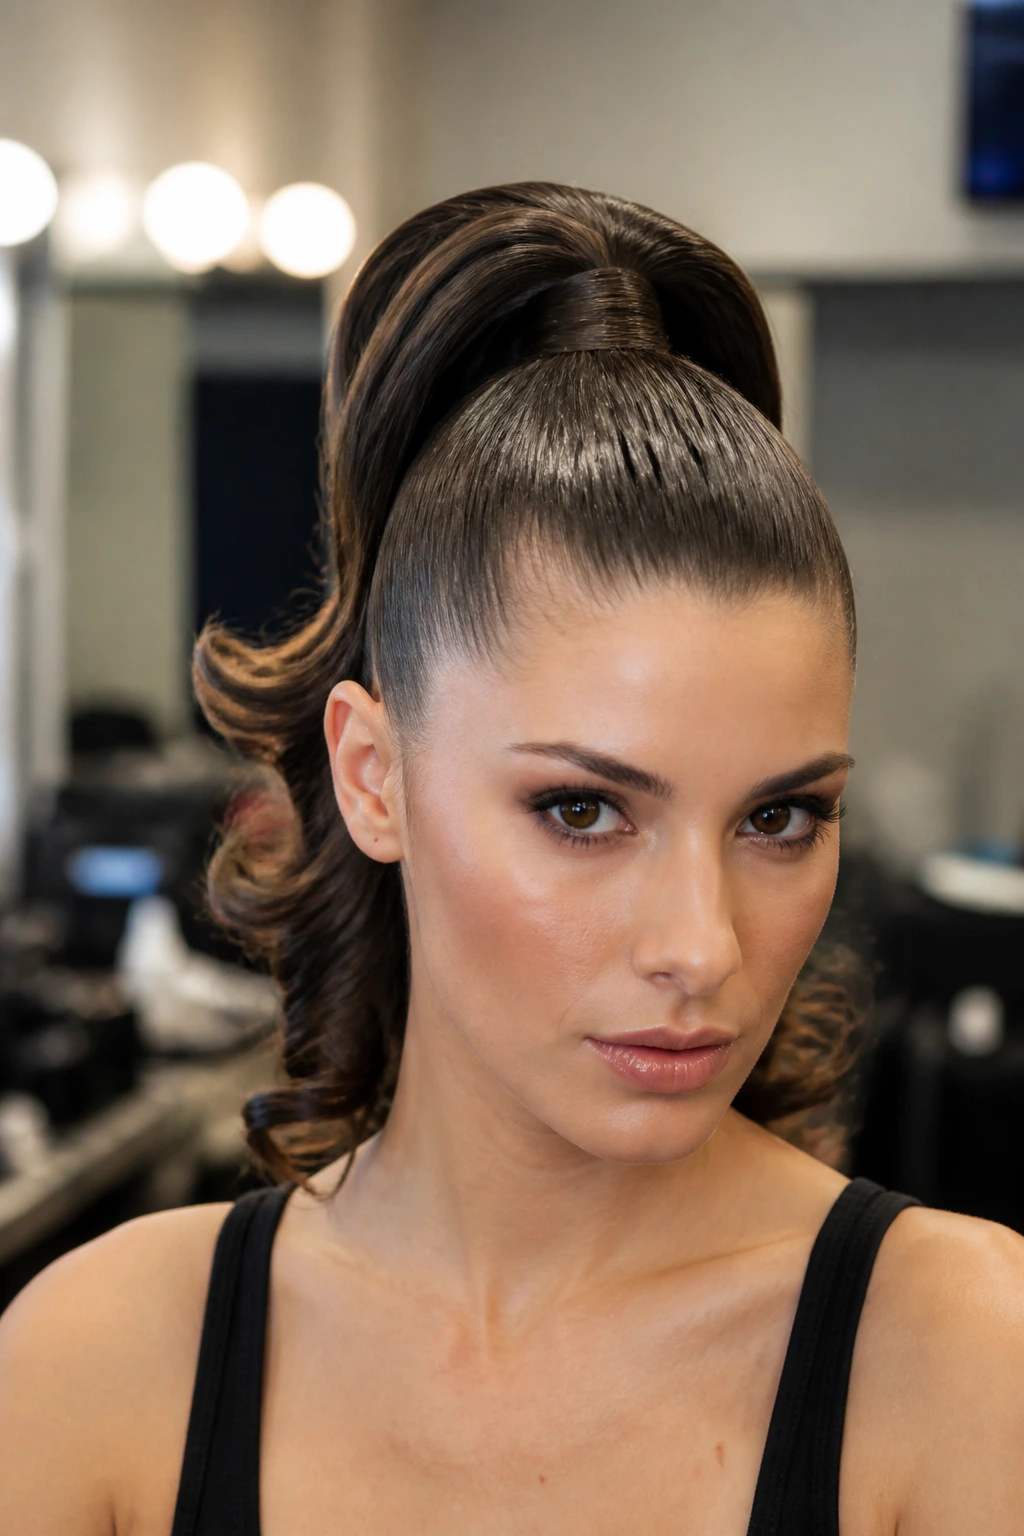
A high pony can absolutely count as a mohawk if the sides are controlled hard enough. The difference is in the placement: the pony sits high enough to lift the face, while the hair around it is slicked or pinned close so the center reads as the main event.
Use a strong elastic at the crown, then wrap a small strand around the base to hide the band. If you want more shape, split the pony into two or three sections and curl the ends so it falls in stacked curves rather than a single heavy curtain.
This one is a good answer when you need speed. It takes fewer pins than a braided version, but the profile still looks intentional. Clean roots, a firm anchor, and a little shine at the base make it read polished instead of rushed.
10. Ribbon-Woven Mohawk
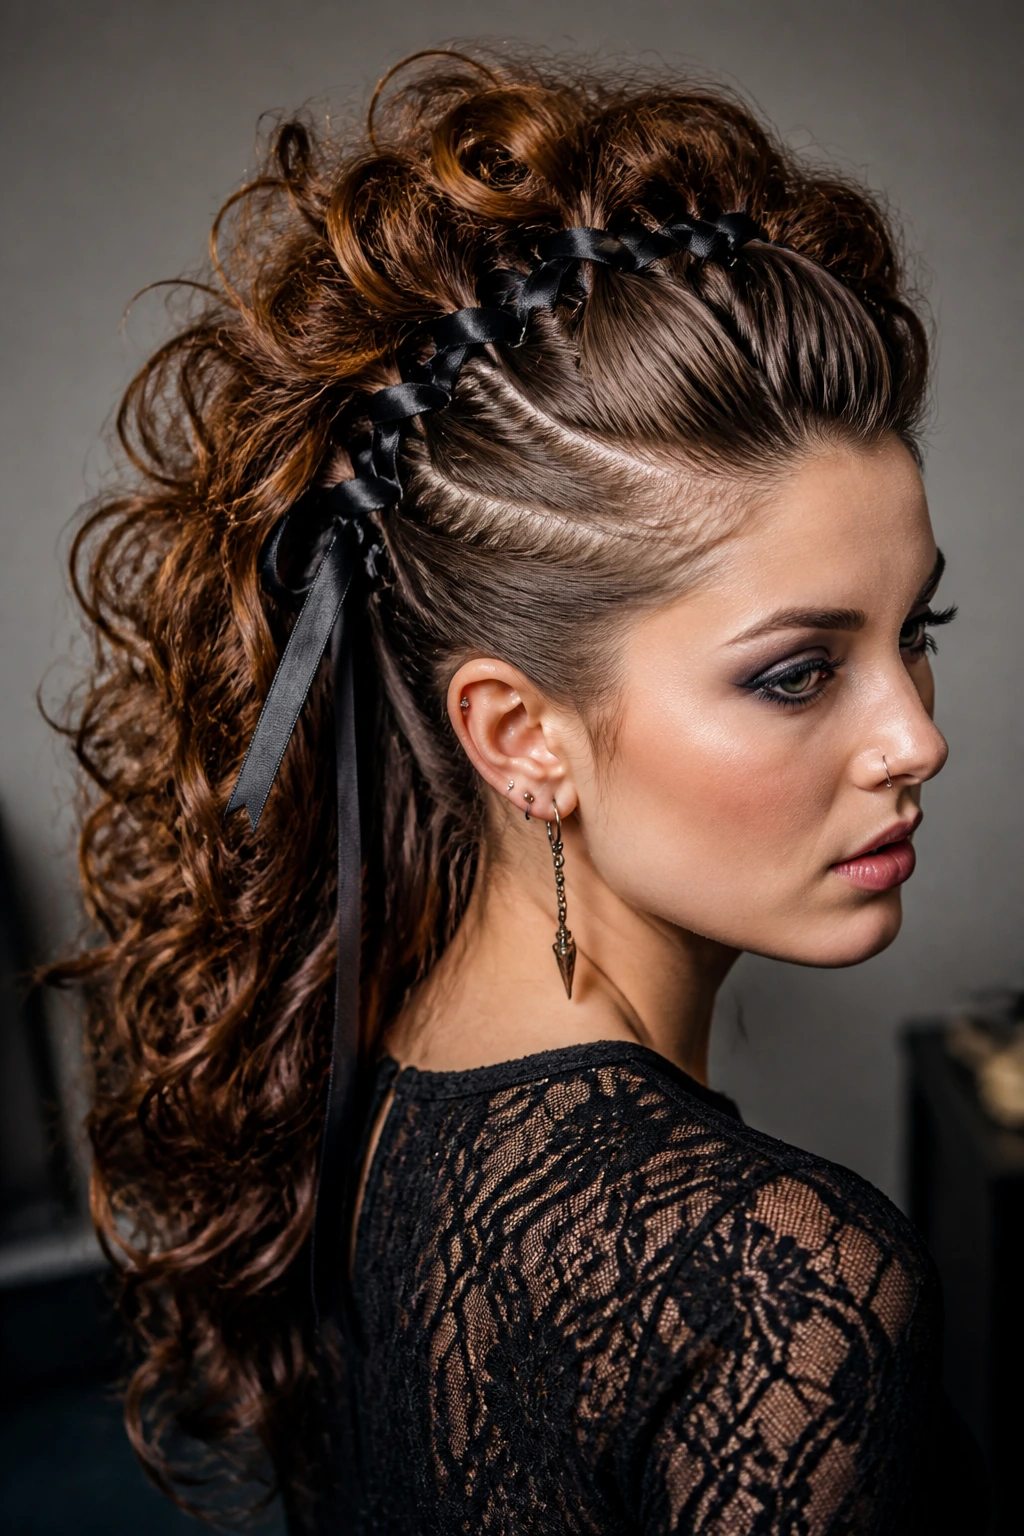
Ribbon changes the mood fast. A simple braid or bubble ridge turns sharper and more decorative the second you thread in a strip of satin, velvet, or grosgrain that matches the outfit or deliberately clashes with it.
A ½-inch ribbon is usually enough for long hair. Wider than that, and the braid starts to feel bulky in the wrong way. Feed the ribbon into the center section before you begin braiding, or tie it around the first elastic if you’re working a bubble pony. Keep the ribbon snug but not tight enough to twist the hair out of place.
This style has a bit of built-in drama, so it does not need much else. A clean side panel and one bold ribbon can carry the whole look.
11. Side-Swept Wave Hawk
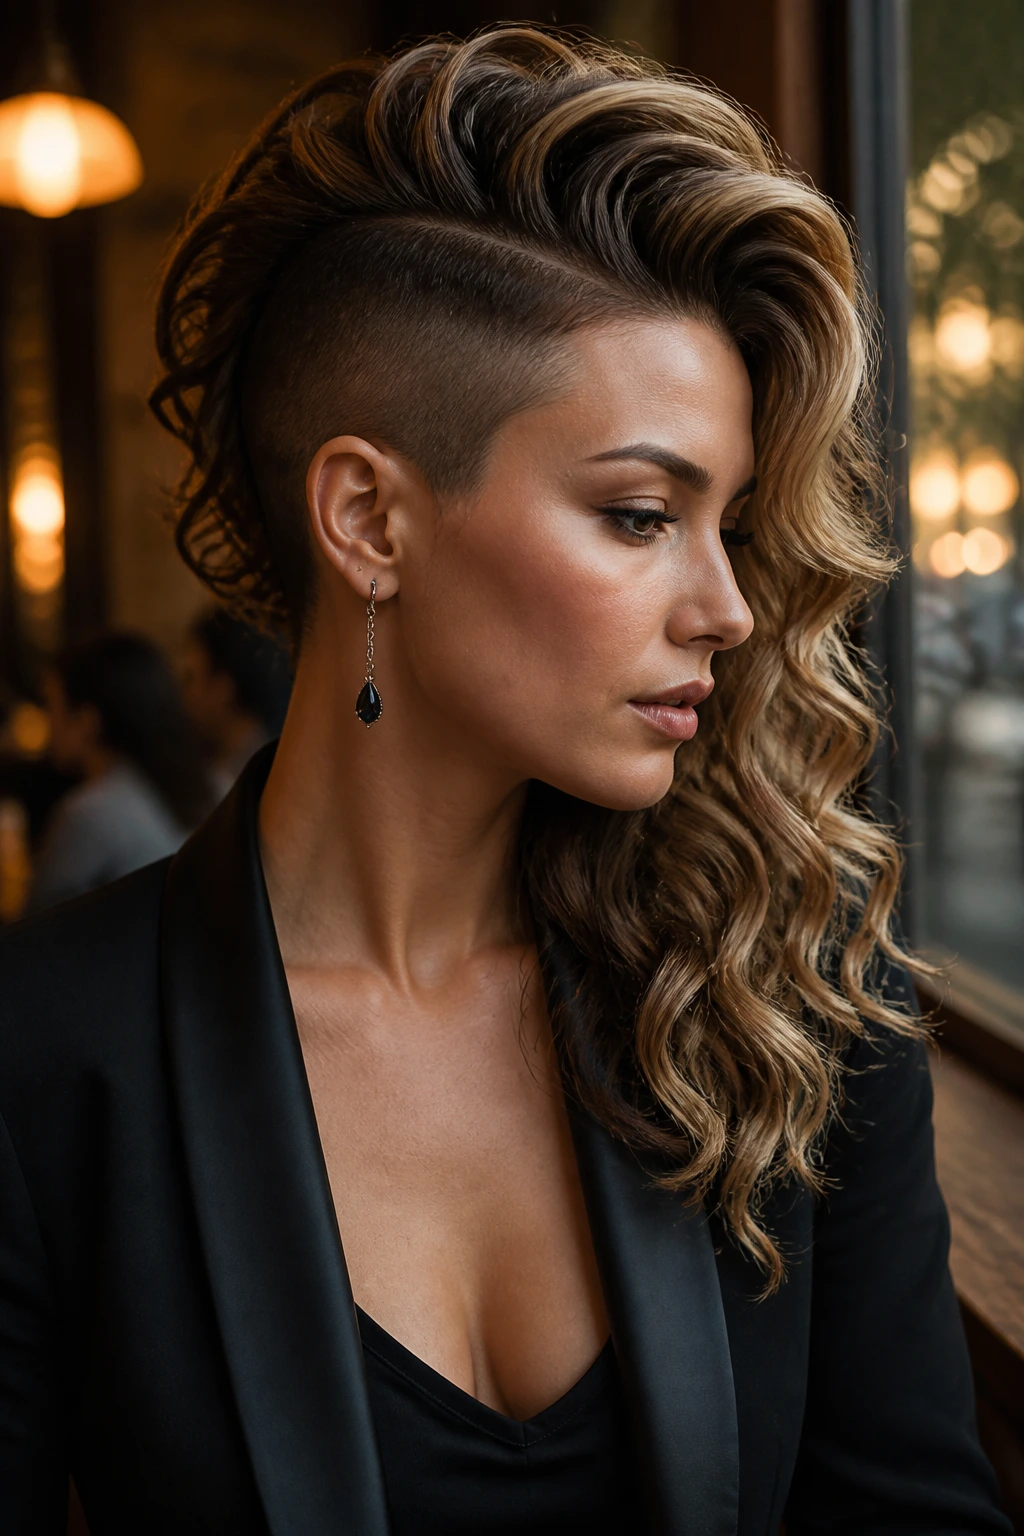
This is the softest version in the lineup, and that’s exactly why it works. Instead of hard edges and severe pinning, the hair is swept back in one direction with a lifted crown and a long, wavey ridge that feels more evening than punk.
The shape starts with a side part or a deep off-center part. Pin the heavier side smoothly toward the back, then create a gentle bend through the center section with a curling iron or large barrel wand. The point is not ringlets. It’s movement with enough structure that the silhouette still reads as a hawk.
If you want a version that plays nicely with dresses, silk tops, or a little extra jewelry, this is the one. It keeps the mohawk idea but removes the sharpest edges.
12. Curly-End Hawk
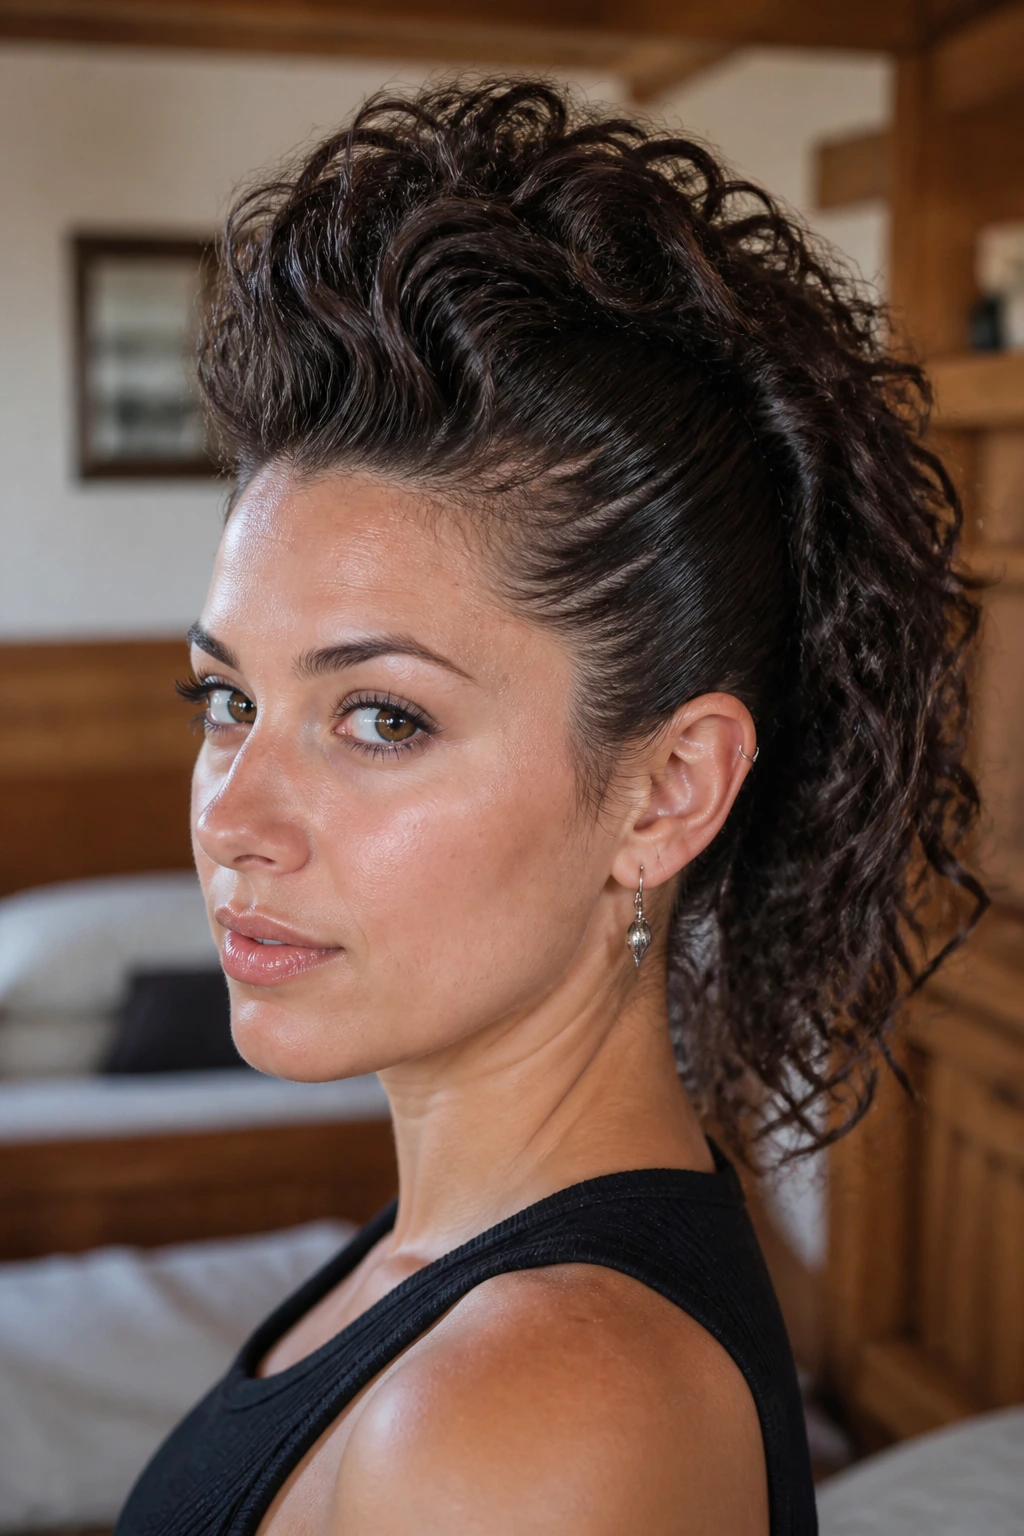
Want the clean outline without sacrificing movement? Keep the roots smooth and let the ends stay loose and curly. That contrast gives you a center ridge that feels controlled at the crown and soft where the hair falls.
Pin the sides back first, then build the center section into a small braid, twist, or pony through the top half of the head. Once you reach midlength, stop and let the last 5 to 8 inches curl naturally or with a 1-inch iron. The ends become the release valve, and the whole style looks less rigid.
It’s a smart choice when you like the mohawk shape but don’t want the all-or-nothing intensity of a fully pulled-back style. A little bend at the bottom keeps the look from feeling too severe.
13. Halo Braid Hawk
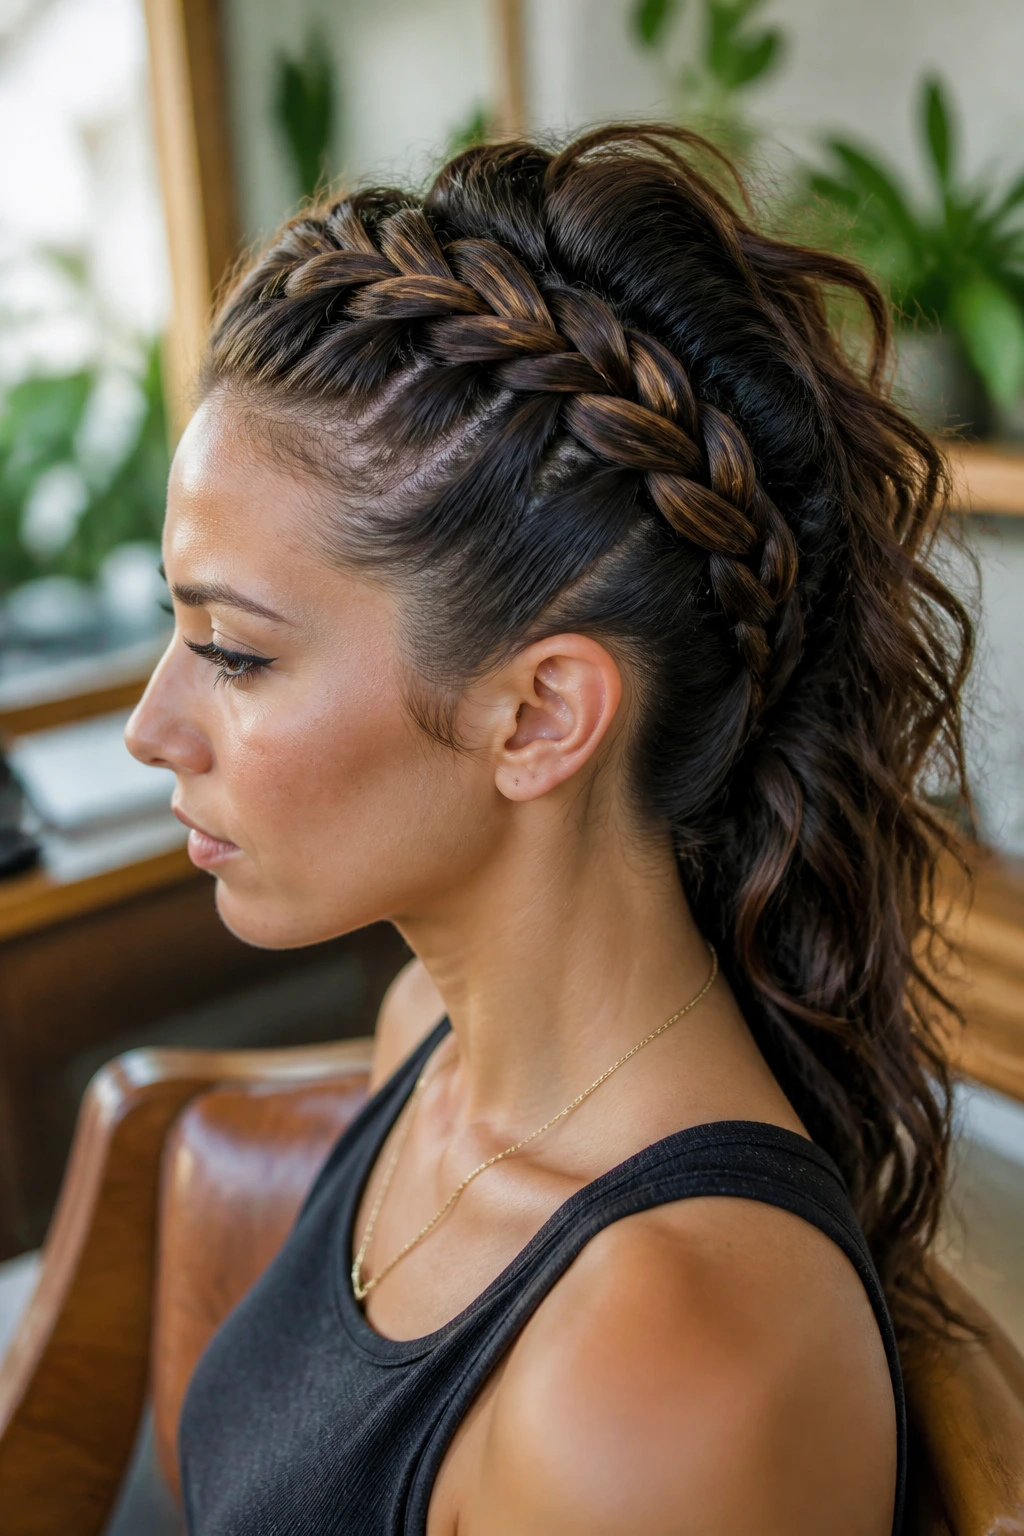
When you want the front to stay put, a halo braid earns its keep. The braid wraps around the hairline like a tidy frame, then feeds into a lifted center ridge that gives the style its height.
This works beautifully on long hair because the braid has enough length to travel around the head without looking strained. Keep the halo close to the scalp and let the back section loosen into a bigger center shape. If your hair is layered, tuck any short ends under the braid with small pins before they poke out and break the line.
The halo braid makes the style feel secure from every angle. That matters more than people admit. A mohawk that looks good from the front but falls apart at the temples loses its shape fast.
14. Mini Bun Spine
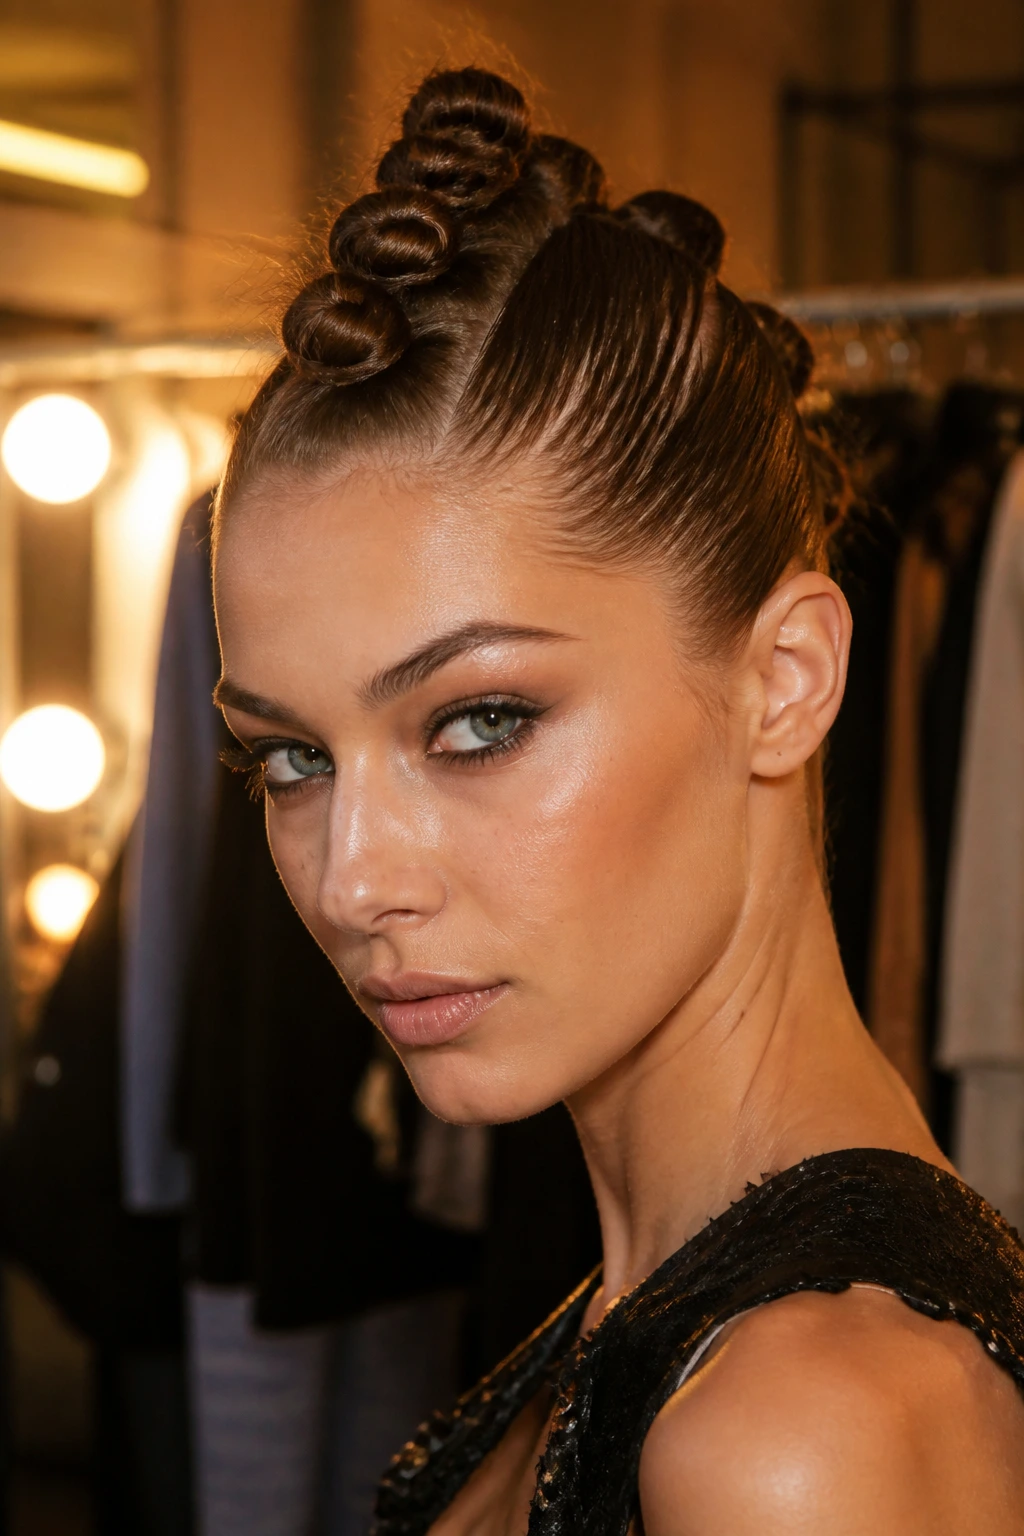
Tiny buns make the style read sculptural. Instead of one big center roll, you build a line of small knots or buns that sit close together and create texture all the way down the head.
Use narrow sections, twist them into little buns, and anchor each one with bobby pins or spin pins. The spacing should be tight enough that the eye connects them into one shape. If your hair is very long, the ends can wrap twice; if it is layered, tuck the ends under so the buns stay clean.
This is one of those styles that looks more complicated than it is. The secret is consistency in size. If one bun is twice the size of the others, the rhythm breaks and the whole spine looks accidental.
15. Crimped Ridge Hawk
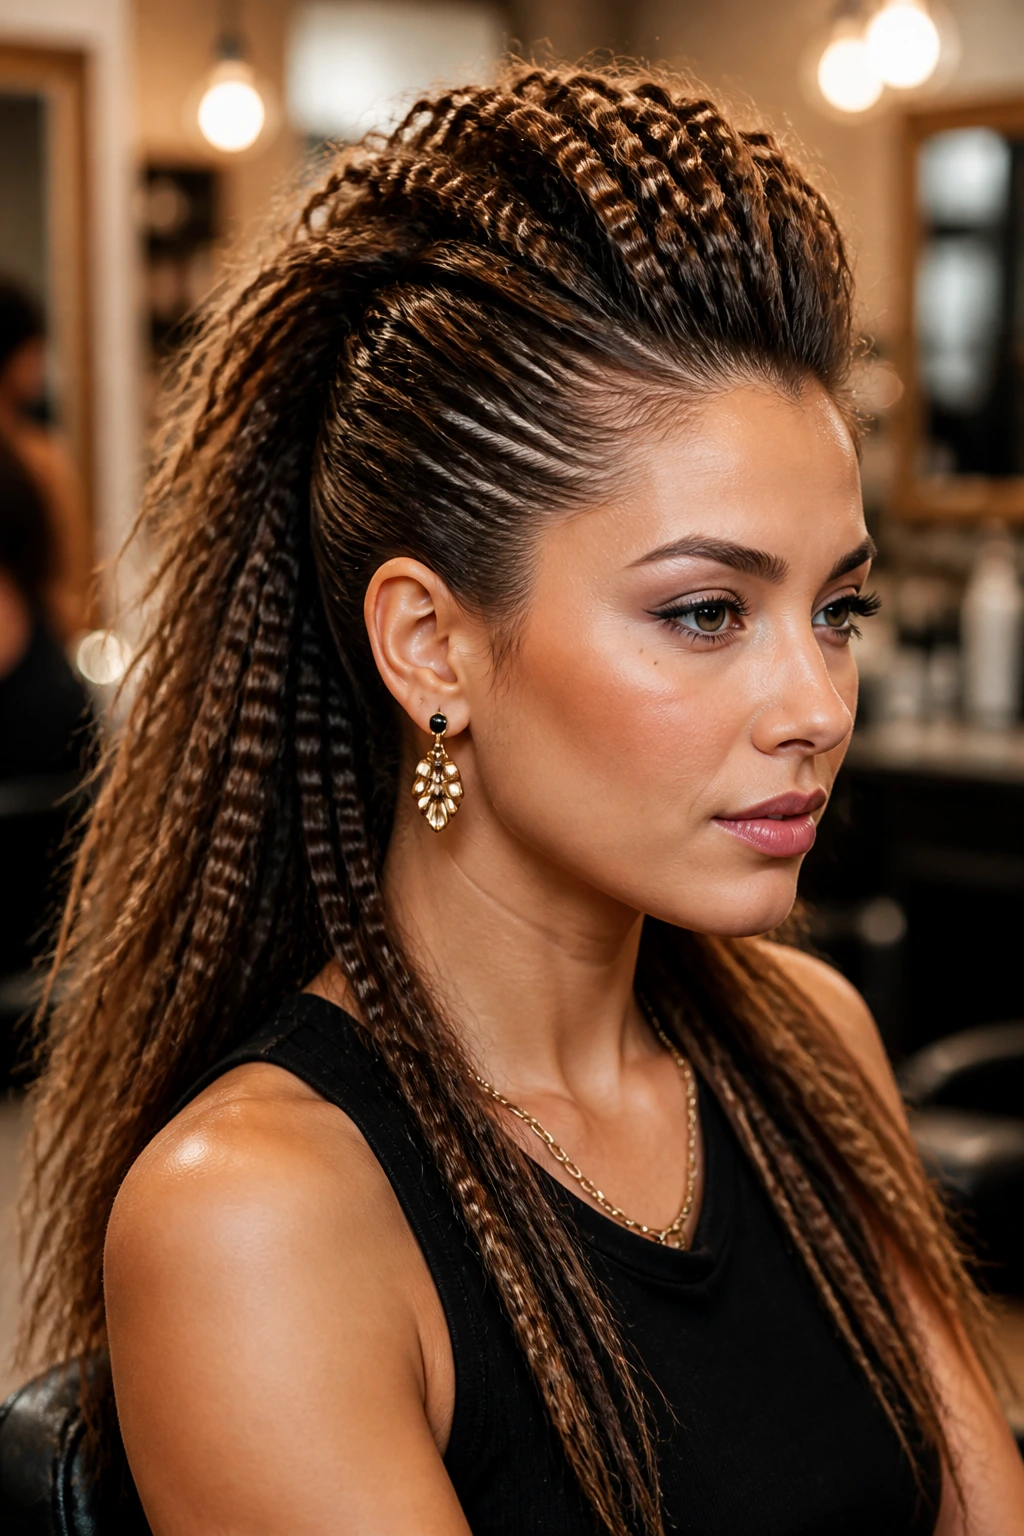
Need volume without teasing for twenty minutes? Crimp the center strip and leave the sides sleek. The texture from the crimper gives the ridge a built-in lift, and long hair benefits from that extra air between the strands.
Work in small sections through the top strip only — usually from the hairline to just behind the crown. Leave the outer surface smoother if you want the style to still look polished. The crimped part should sit underneath like hidden scaffolding, not scream for attention on the visible top layer.
This version has a little 90s energy, which I happen to like. It also keeps the ridge from collapsing on thick, heavy hair, where teasing alone can flatten out before dinner.
16. Wet-Look Hawk
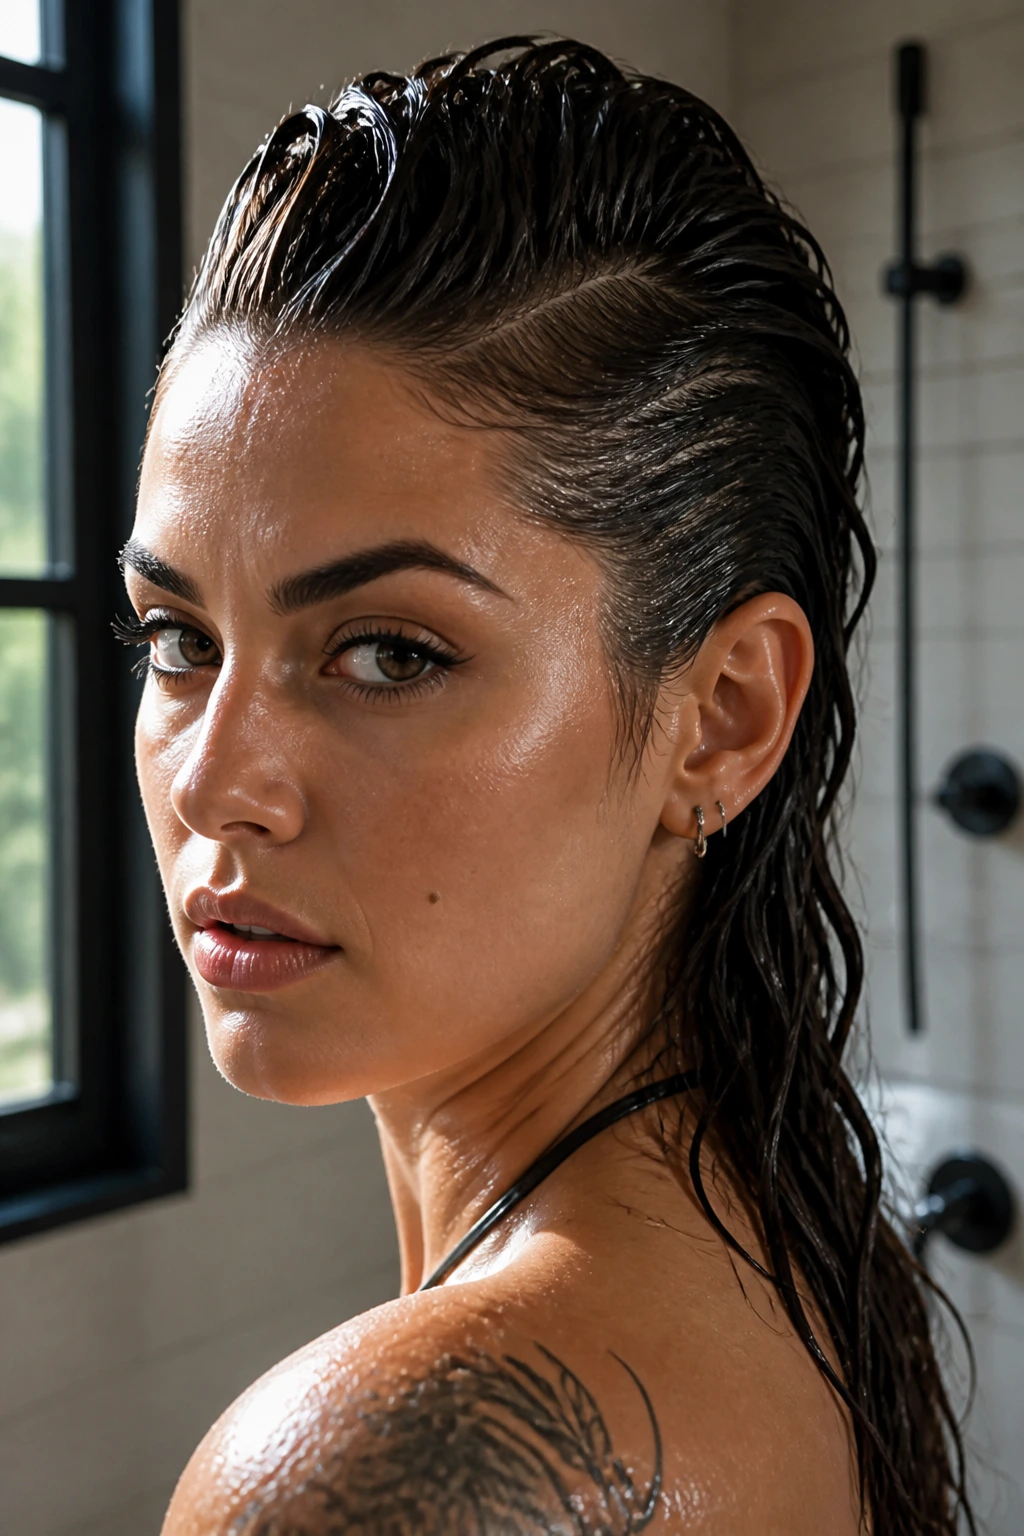
A wet look makes the shape look harder and cleaner. The shine sharpens every line, and the slicked sides give the center ridge a more dramatic outline than matte styles usually manage.
Start on damp hair, then work gel or strong styling cream through the sides and roots. Comb everything back with a fine-tooth comb so the part lines are crisp and the crown stays smooth. If you’re leaving the center loose, do not drown it in product; just add enough to keep flyaways quiet.
This version is not forgiving of overuse. Too much gel and the style starts to flake or feel heavy. Too little and it loses the whole point. The sweet spot is a glossy finish that still feels like hair, not lacquer.
17. Face-Framing Tendril Hawk
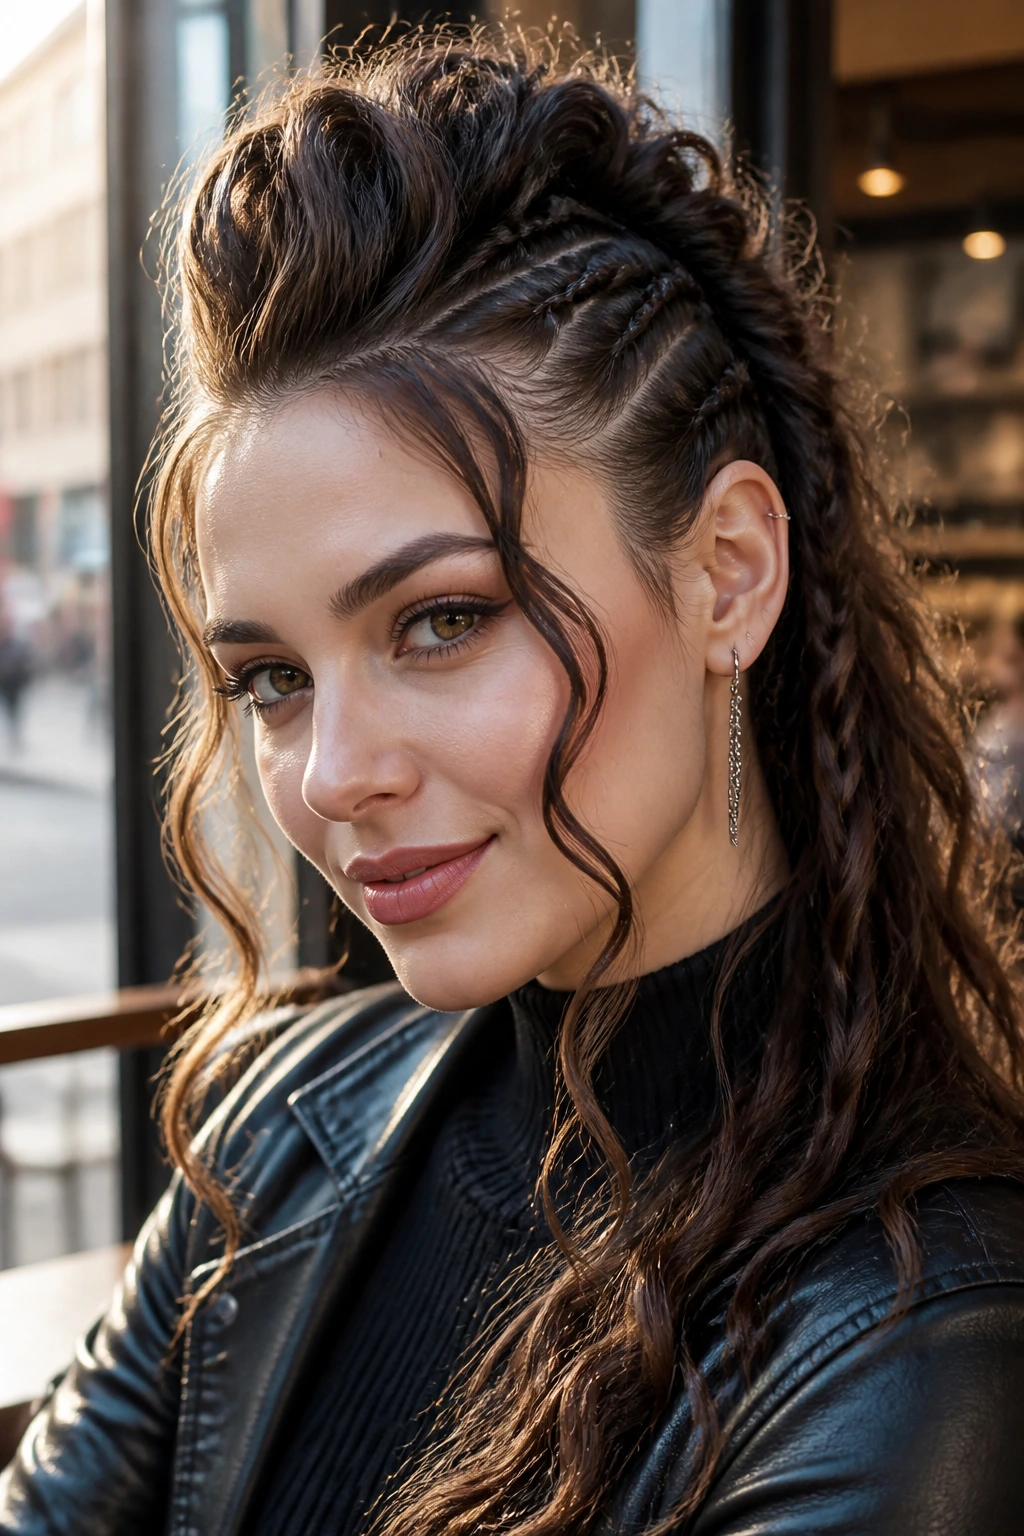
Some days call for structure, not severity. Leaving two curled tendrils around the face softens the mohawk shape and makes it feel less hard-edged without giving up the lifted center.
Pin the sides back, but leave one narrow strand on each side near the temples. Curl those pieces away from the face with a small iron so they hold a loose bend instead of falling flat. The center can be braided, twisted, or pulled into a pony depending on how much height you want.
This is the style I’d pick if the full mohawk feels like too much but you still want the profile. It gives the eye a little movement at the cheekbones, which matters more than most people think.
18. Fishtail Spine Hawk
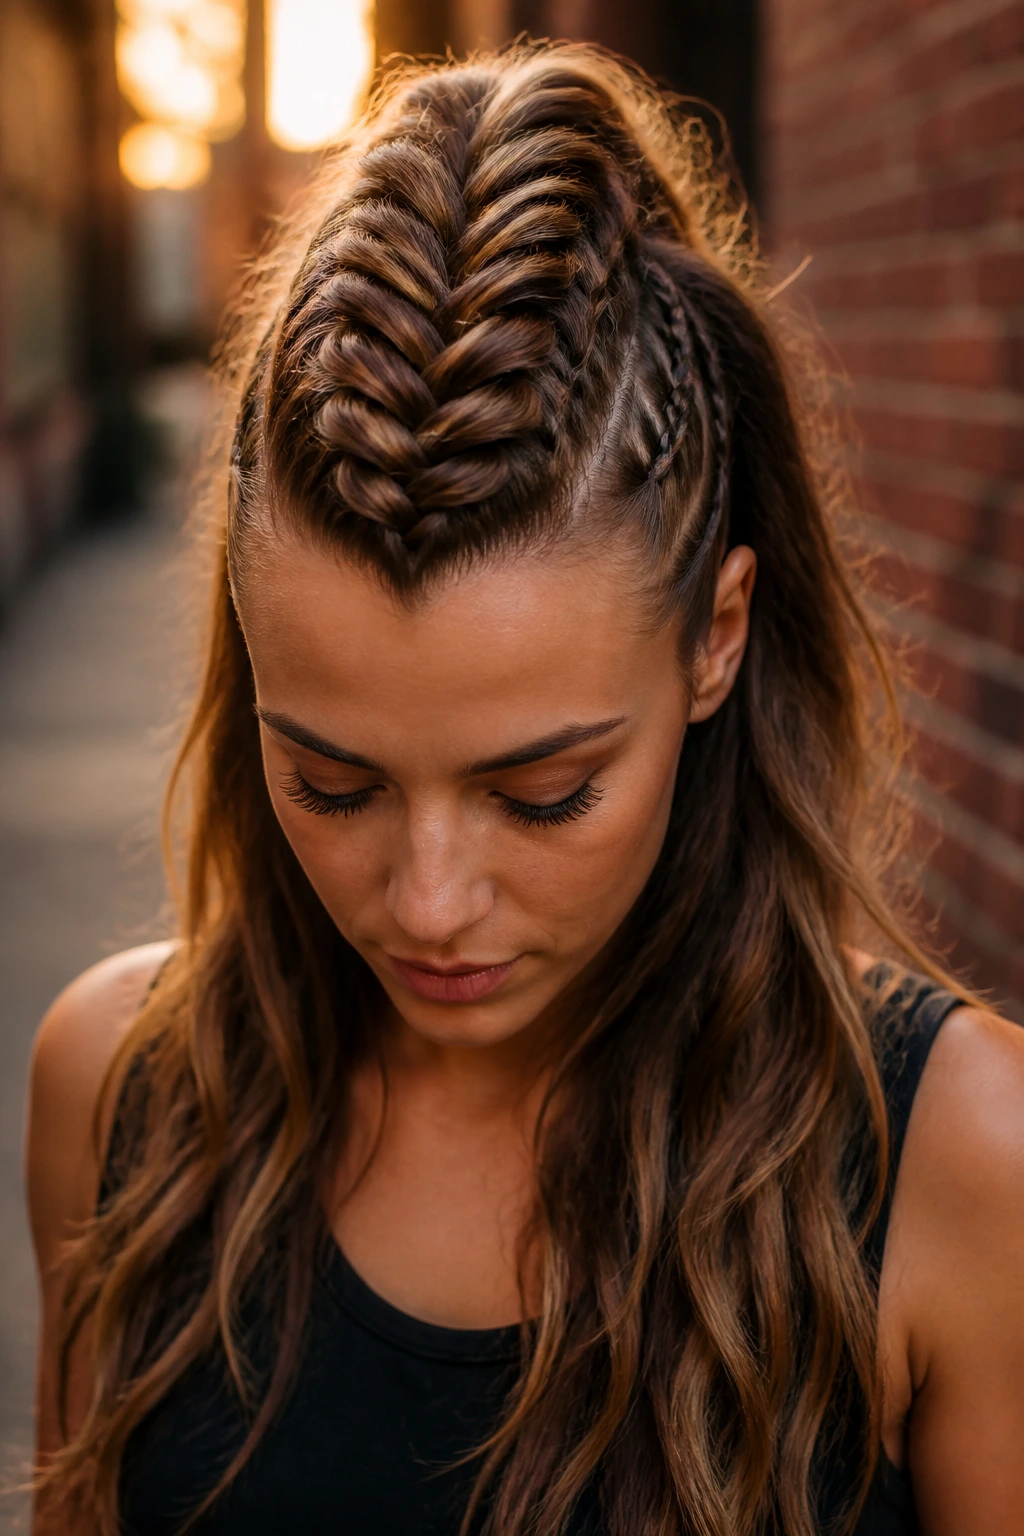
A fishtail braid reads more intricate than a regular braid, especially on long hair where the sections have room to swell and show detail. Down the center of a mohawk shape, that texture becomes the whole mood.
The braid should be tight at the crown and gently pulled apart once it’s secured. Long hair helps here because the fishtail can look small on shorter lengths; on longer strands, it gets that chunky, woven look that feels deliberate. Slick the sides clean so the braid has a clear frame.
This one leans a little more romantic than punk. If you want the mohawk idea with a prettier edge, fishtail is the move.
19. Claw-Clip Faux Hawk
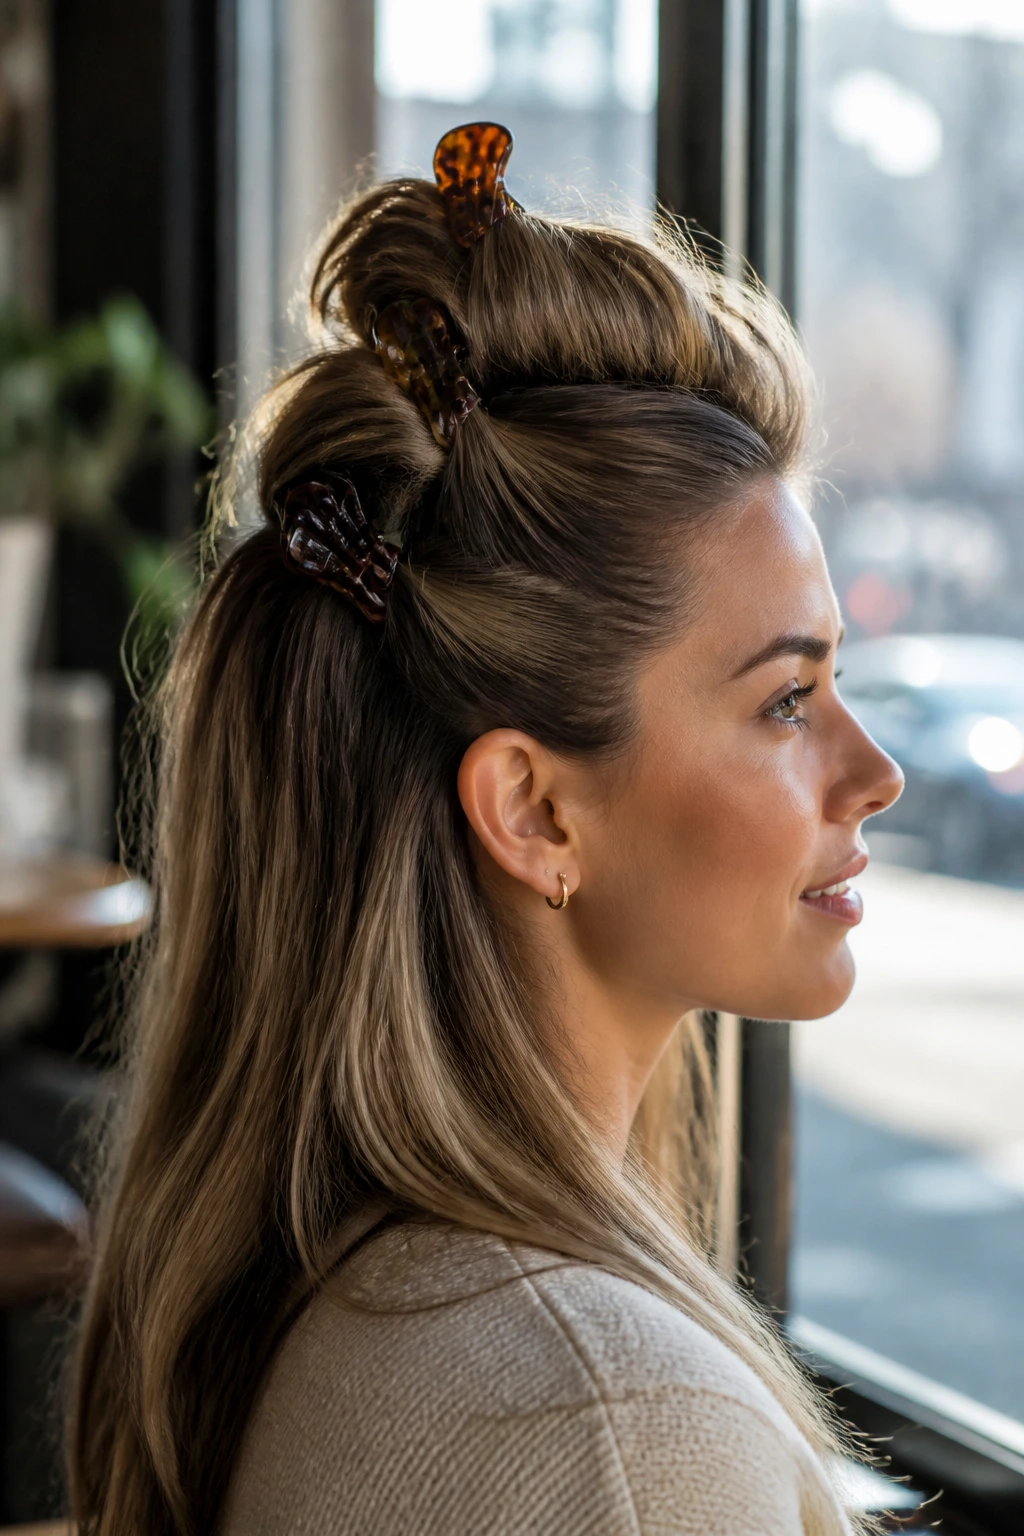
Need a mohawk in under ten minutes? Three claw clips can fake the whole thing. It’s one of the easiest ways to build height on long hair without committing to a full braid or ponytail.
Take the center strip, twist it loosely upward, and secure it with a clip near the crown. Add one or two more clips down the length, spacing them so the hair stacks rather than hangs. The sides get pinned flat or smoothed behind the ears, and the clips themselves become part of the shape.
This style works because the clips do what elastics can’t: they create volume without creating a hard dent. It’s quick, it’s forgiving, and it’s the best answer for hair that looked better five minutes ago than it does right now.
20. Knotted Hawk
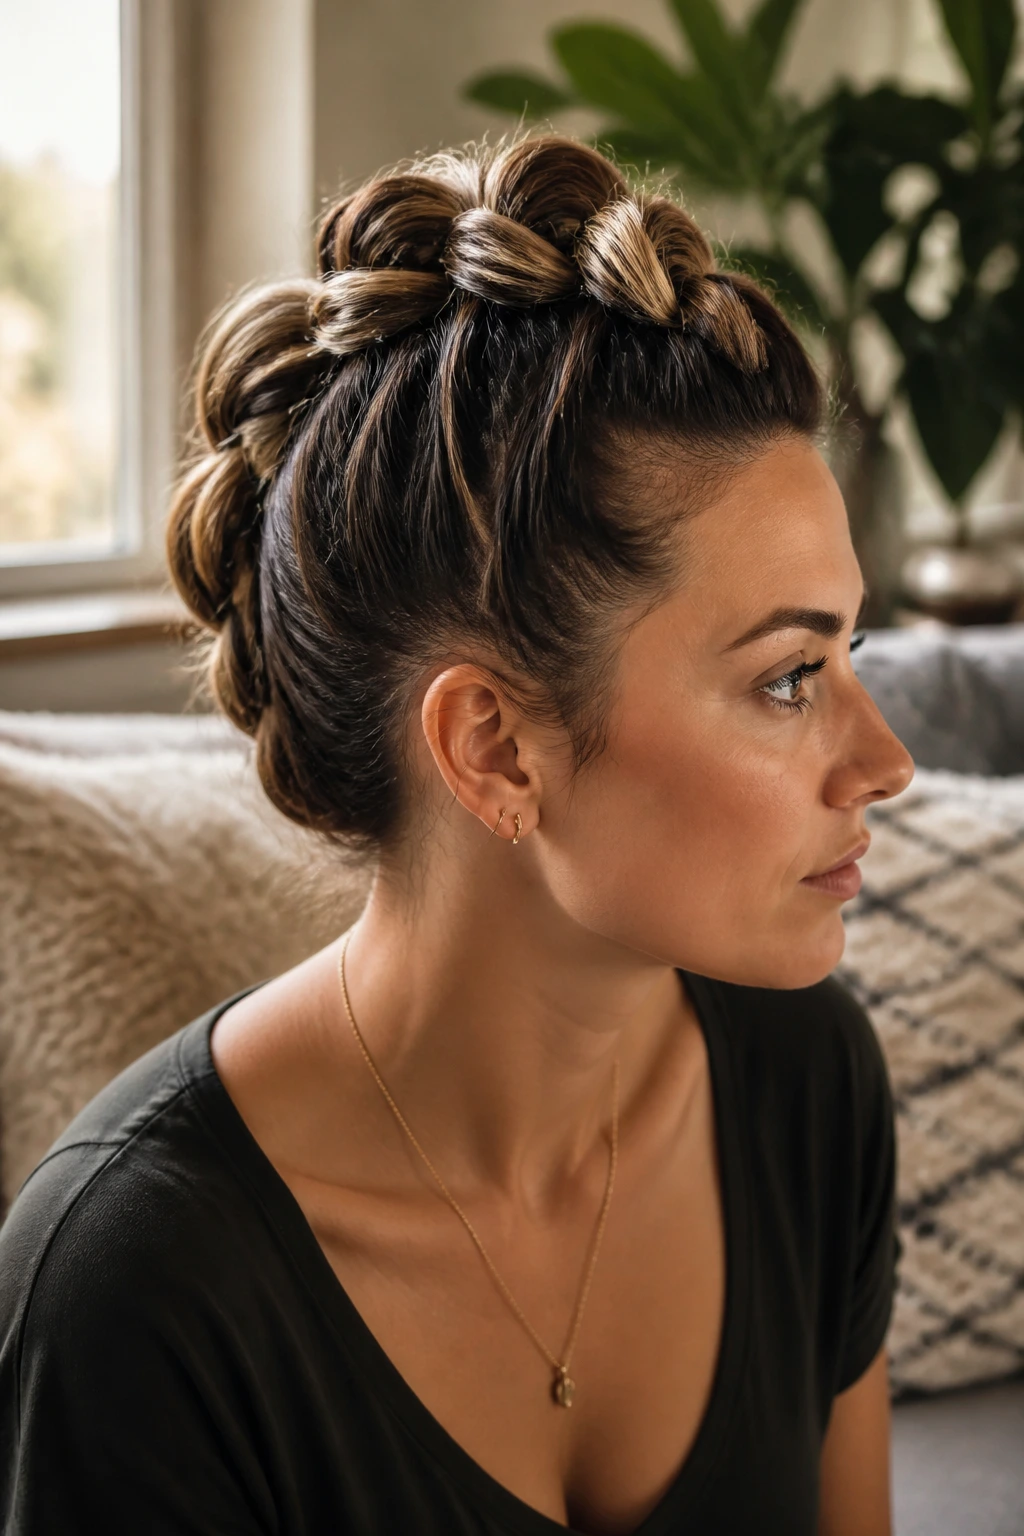
Knots give the mohawk shape a little attitude without needing tight braiding. The center line becomes a chain of soft knots that you pin underneath, which makes the style look handmade in a good way.
Split the middle section into 3 or 4 vertical pieces, tie each one into a loose overhand knot, and pin the tails flat beneath the knot. Long hair makes this easier because there’s enough length to tie, tuck, and secure. Just don’t pull the knots tight enough to distort the scalp or create bumps where you don’t want them.
This version has a slightly undone feel, which I like. It’s not as precise as a braid, and that’s the point. The shape is still controlled, but it doesn’t look like it spent an hour being engineered.
21. Pull-Through Braid Hawk
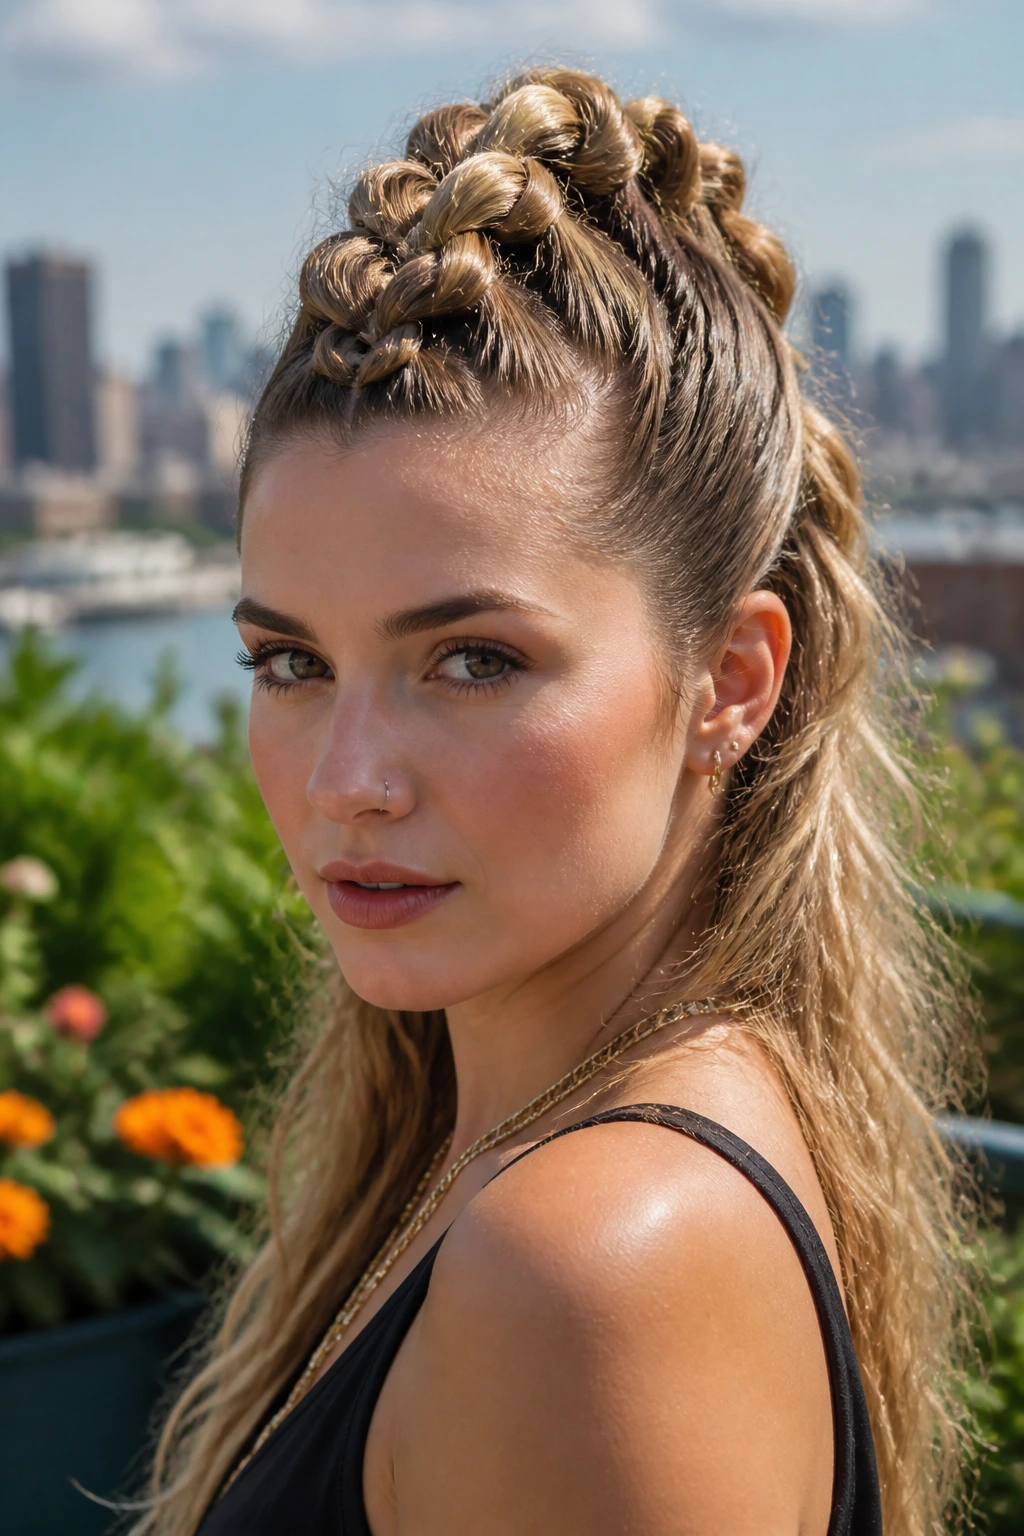
A pull-through braid gives you the look of a big, thick braid without requiring actual braiding skill. On long hair, it creates chunky, rounded sections that feel perfect for a mohawk spine.
Tie the center section into a series of small ponies, then split and loop each section through the one above it. The structure builds fast, and the volume stays plush because the hair is stacked rather than woven tight. If your hair is very fine, this is one of the easiest ways to fake fullness.
It’s also a good option when you want the braid to look soft and wide instead of narrow and tidy. The result is less severe than a Dutch braid, but it still reads clearly as a mohawk silhouette.
22. Double Dutch Open-Back Hawk
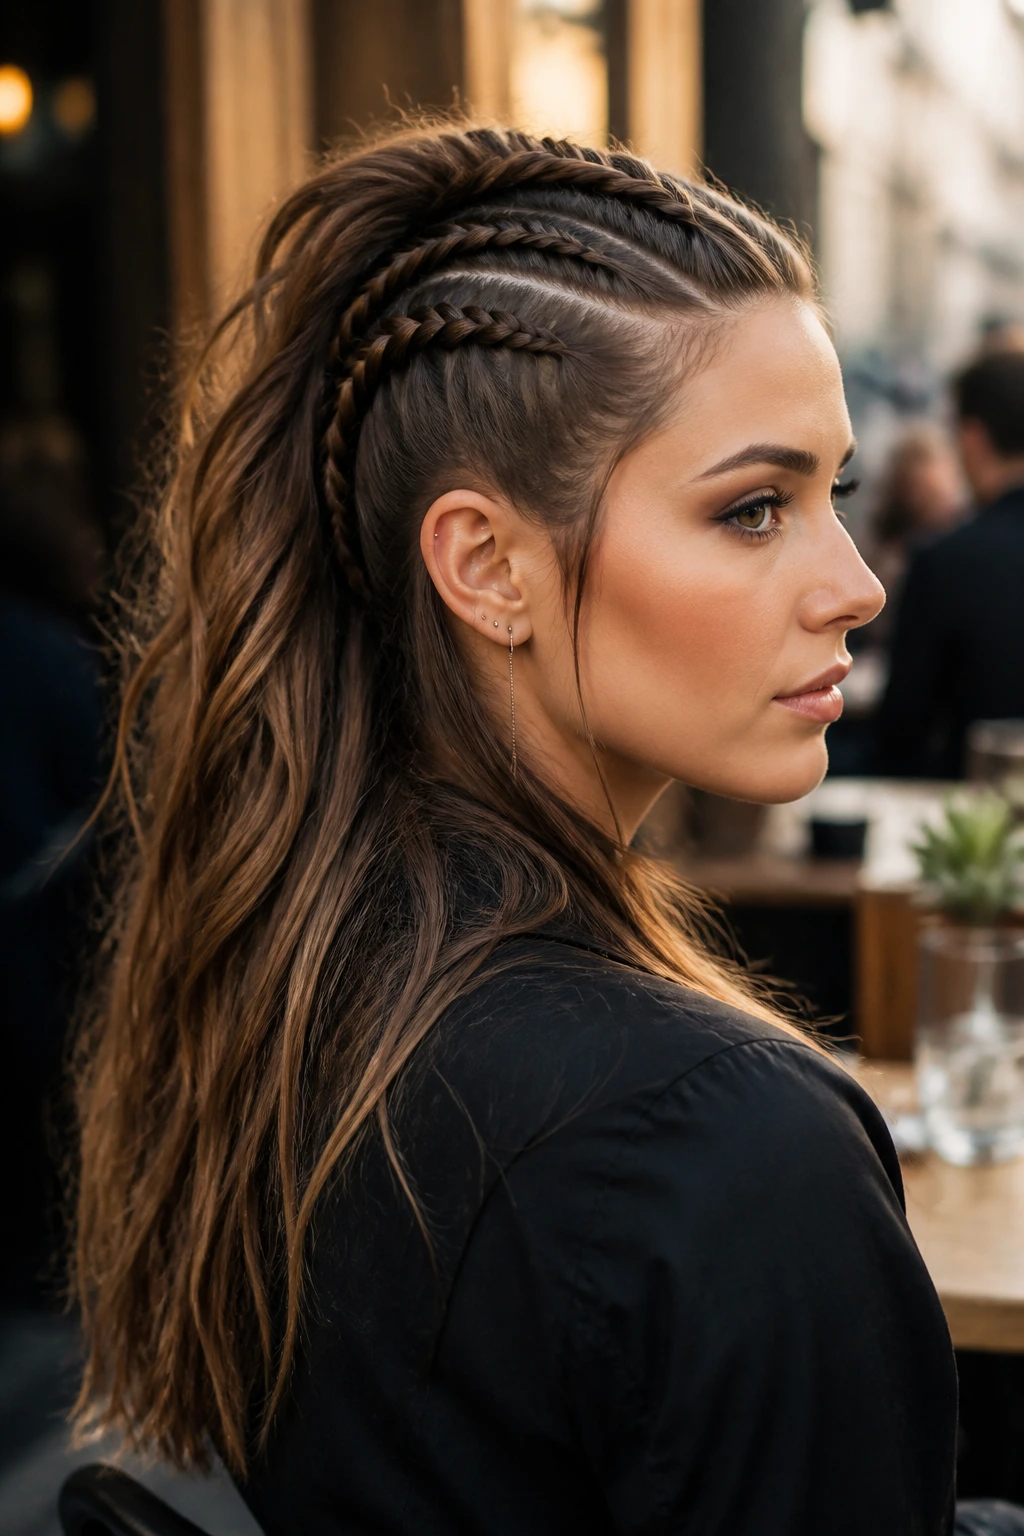
If you like braid detail but still want your length showing, stop the braids early and leave the back free. Two Dutch braids start at the temples or just above them, then end around the crown so the lower length falls open behind them.
That open back keeps the style from feeling too locked in. It’s especially useful on long hair because the loose lengths still move when you walk, which gives the whole shape some life. The front and sides stay controlled, but the rear isn’t trapped under a dense braid.
This is a good compromise style. You get the mohawk outline, you keep some softness, and you don’t have to commit every inch of your hair to the structure.
23. Side-Twist Layer Hawk
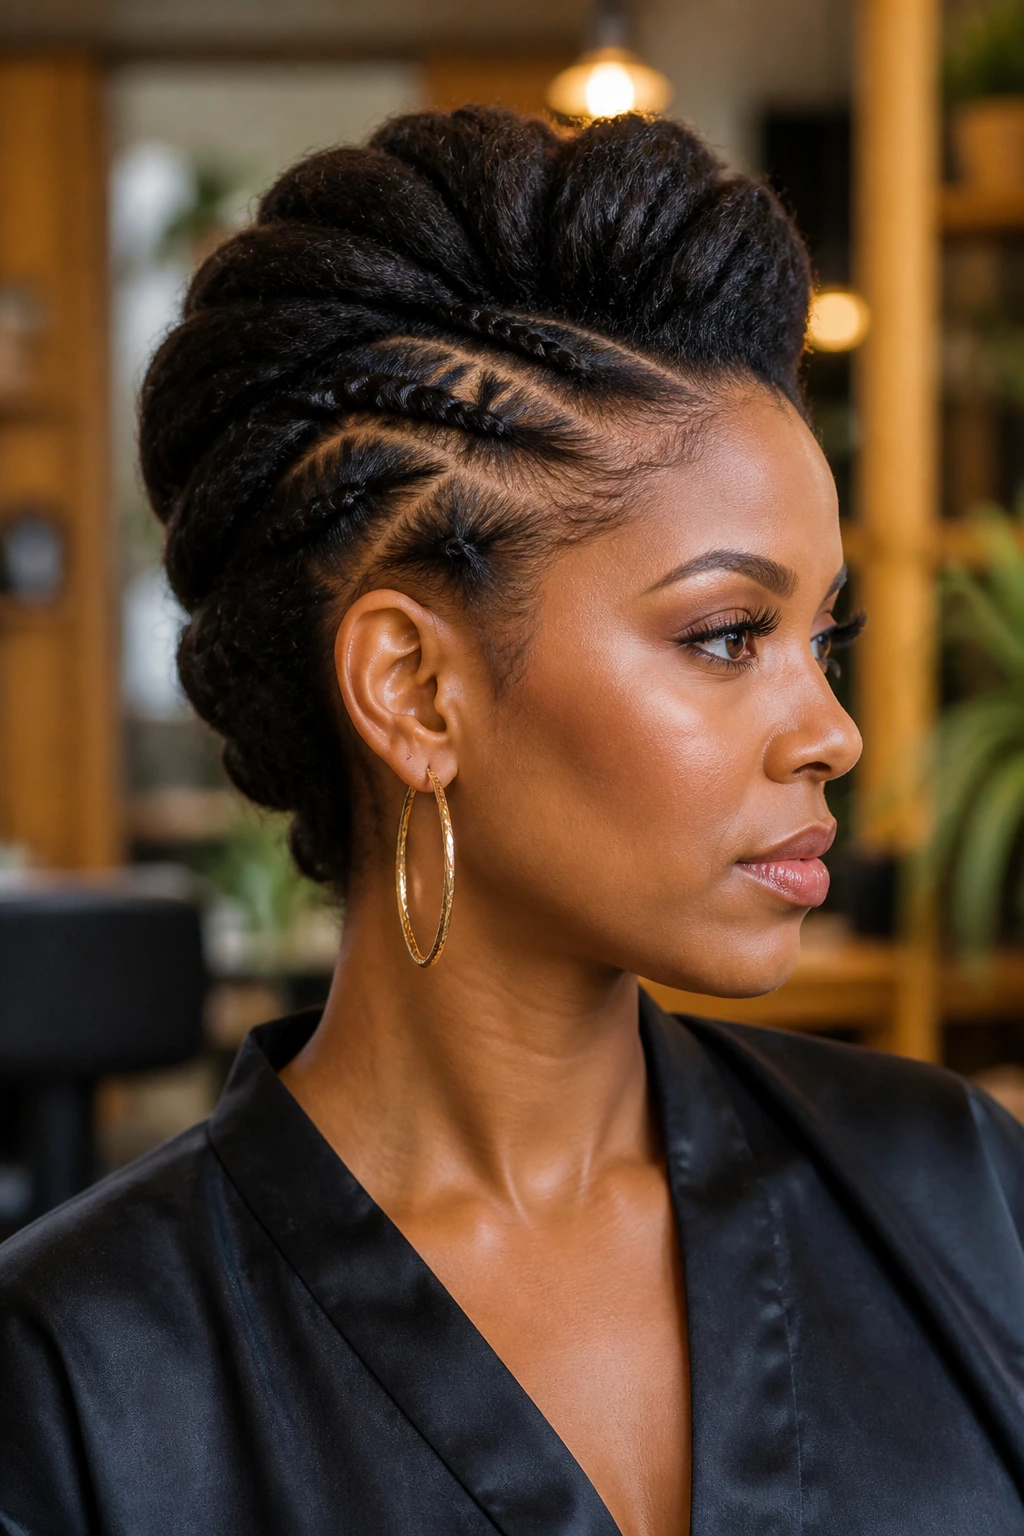
Layers can be annoying in a braid and brilliant in a twist. If your ends escape easily, flat twists from each side into the center are often easier to manage than trying to force a perfect plait.
Take small sections from the temples, twist them back, and pin them into the center strip as you go. Use more pins than you think you need around the nape and behind the ears; layered hair likes to shift once you move. The center can stay smooth, curled, or lightly teased depending on how much height you want.
This one is forgiving. When the hair won’t sit neatly in a single braid, the twist gives you enough structure to keep the shape without exposing every loose layer.
24. Pearl-Pin Hawk
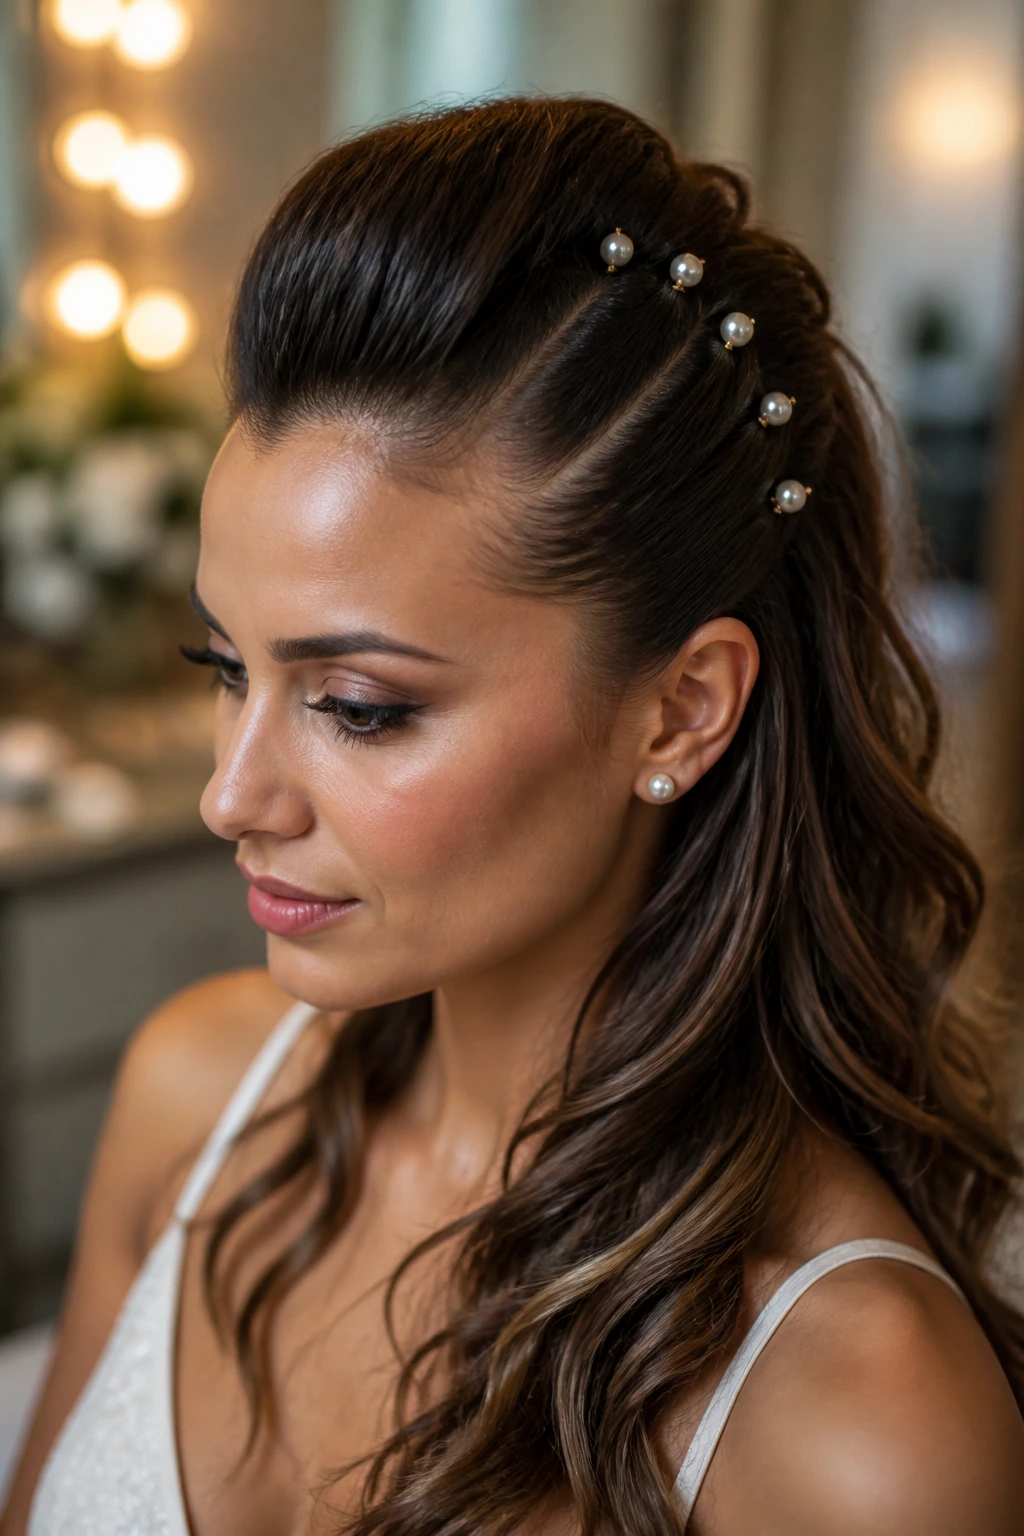
Pearl pins turn a simple ridge into something event-ready almost immediately. The mohawk shape stays the same, but the decoration changes the whole mood from tough to polished.
Keep the center section sleek or softly waved, then place pearl pins along one side of the ridge or in a staggered line near the crown. You do not need many — five or six usually go far on long hair. Too many and the effect starts to feel crowded, which defeats the clean line the style depends on.
This version works well for weddings, dinner parties, and any setting where you want the shape to feel dressed up rather than aggressive. The contrast between the sharp silhouette and the soft pearl detail is the fun part.
25. Wrapped-Base Pony Hawk
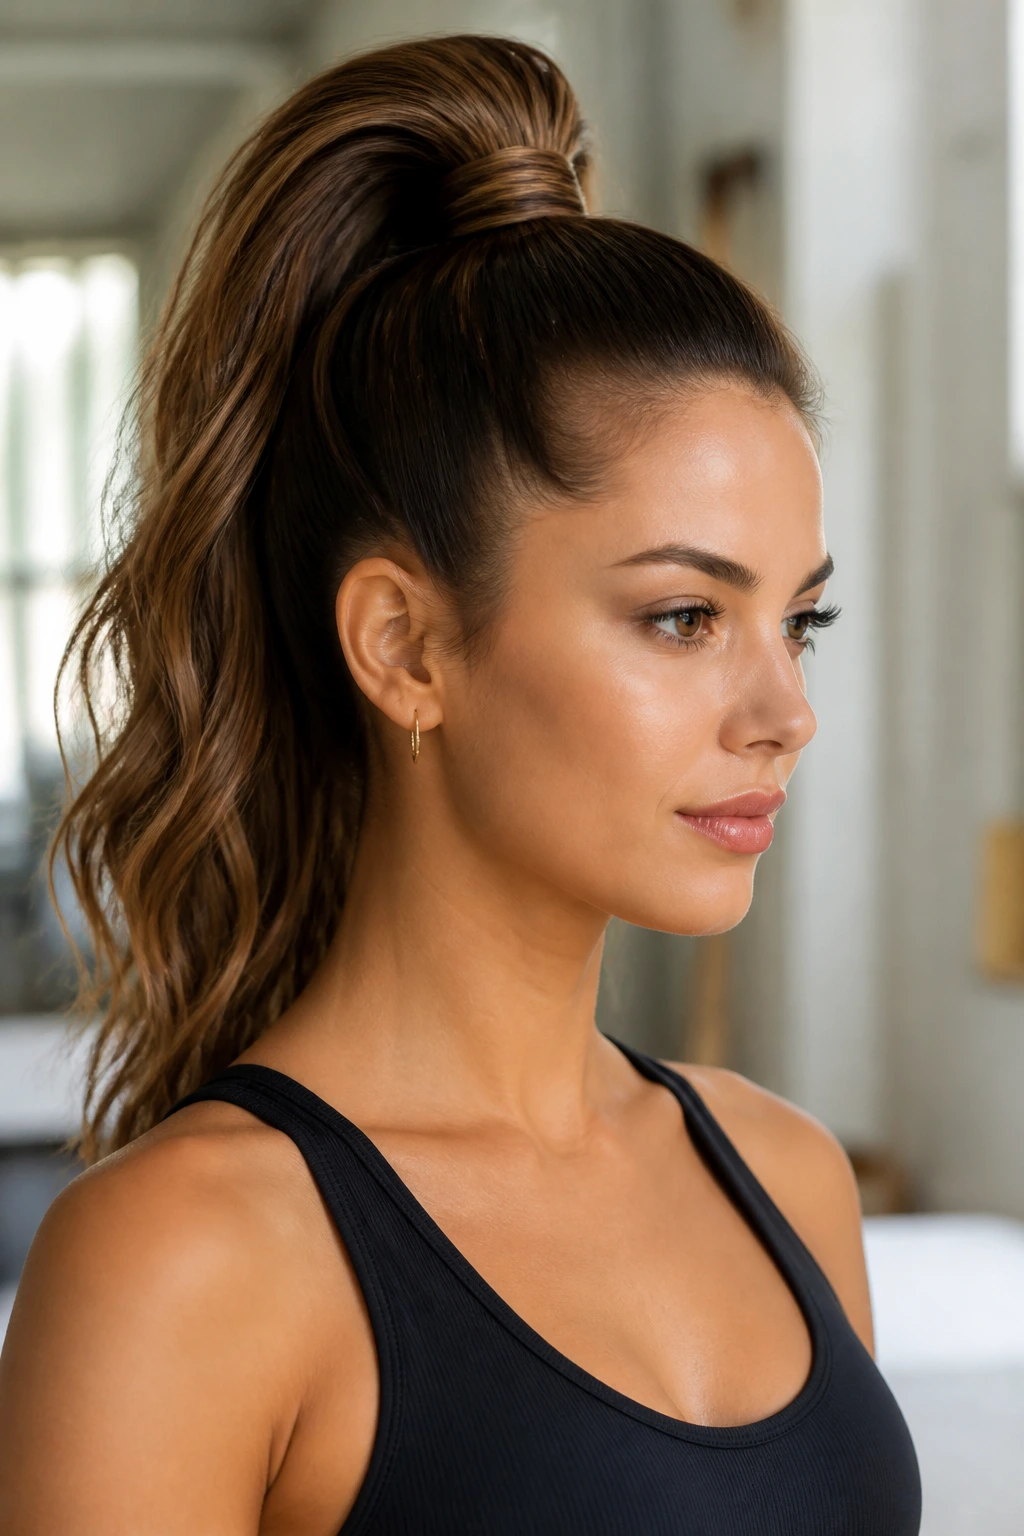
Cleaning up the base changes everything. A wrapped ponytail hides the elastic, sharpens the crown, and makes the center ridge look more finished even before you add curls or texture.
Pull the center section into a high pony, then take a small strand from underneath and wrap it around the band until the elastic disappears. Pin the wrap underneath the pony. If you want more height, lightly tease the hidden underside of the crown before smoothing the top layer over it.
This is one of the most useful styles in the set because it works with almost everything else. You can wear the pony straight, curl the ends, or turn it into a bubble tail, and the base still looks clean.
26. Full-Volume Curly Mohawk
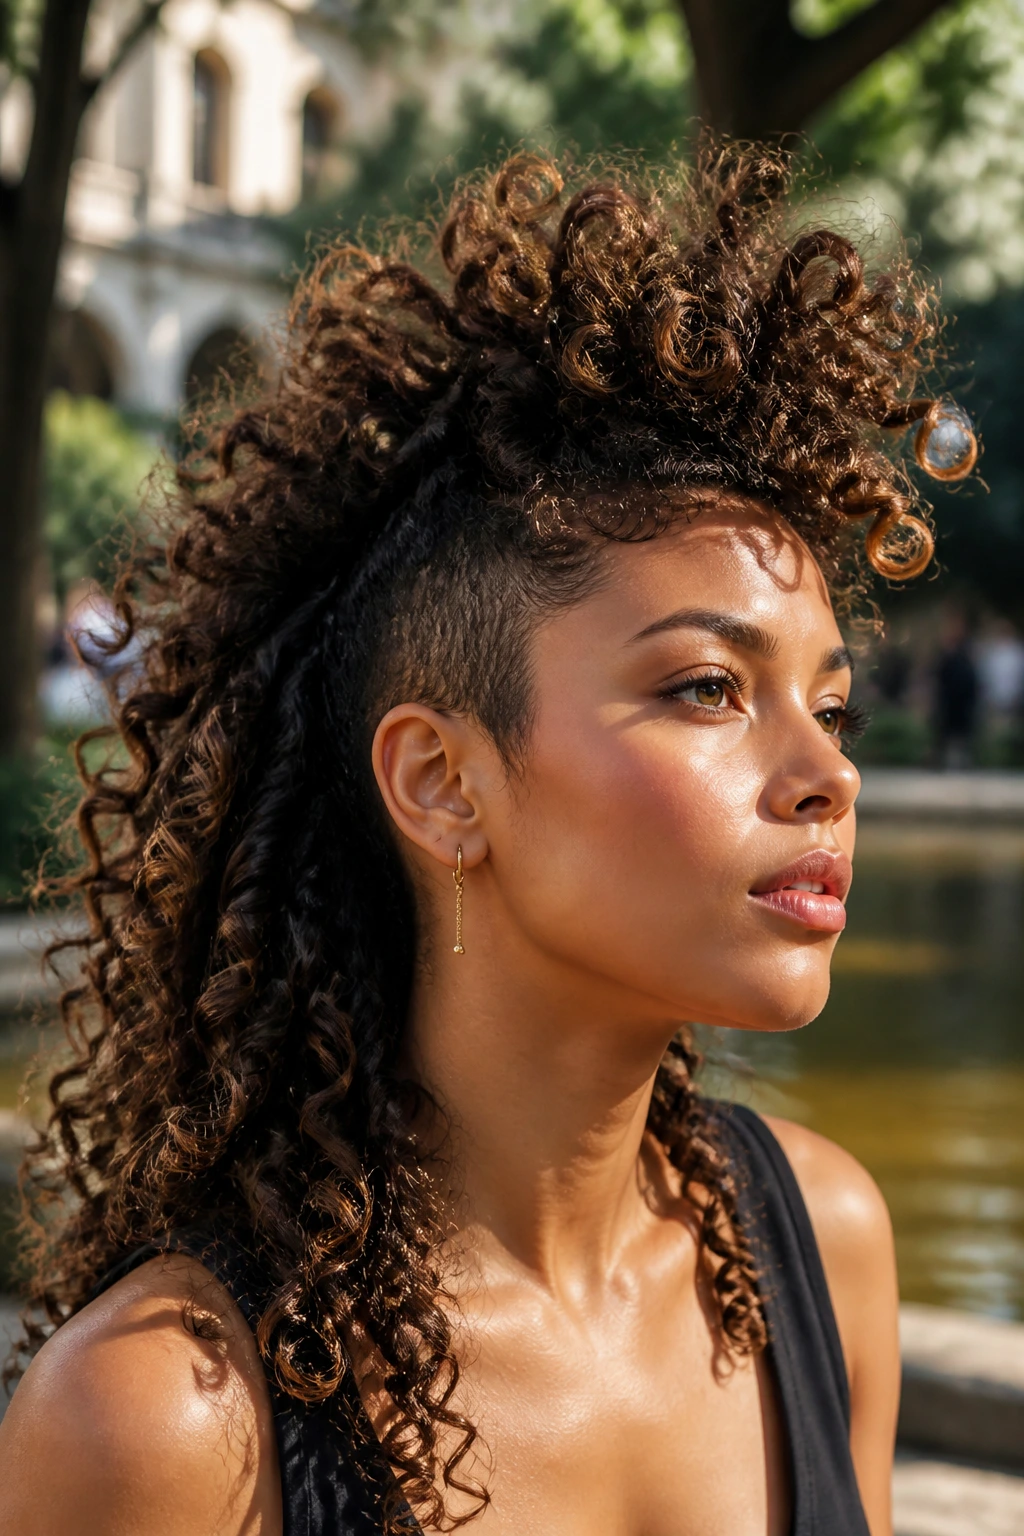
This is the loudest, loosest version in the lineup. Instead of flattening the curls, you lift them, separate them, and let them build the center ridge into a full, airy shape that does most of the talking on its own.
Diffuse the roots upward, pin the sides high but not slick, and let the center stay big. If the curls are long, shape them with a little leave-in cream and a pick so they don’t clump in one heavy curtain. The silhouette should feel tall and buoyant, not compacted.
It’s a good fit when you want the mohawk idea but don’t want to iron out the texture that makes your hair yours. A curl-heavy frohawk has presence. It doesn’t need much help.
27. Festival-Ready Multi-Braid Frohawk
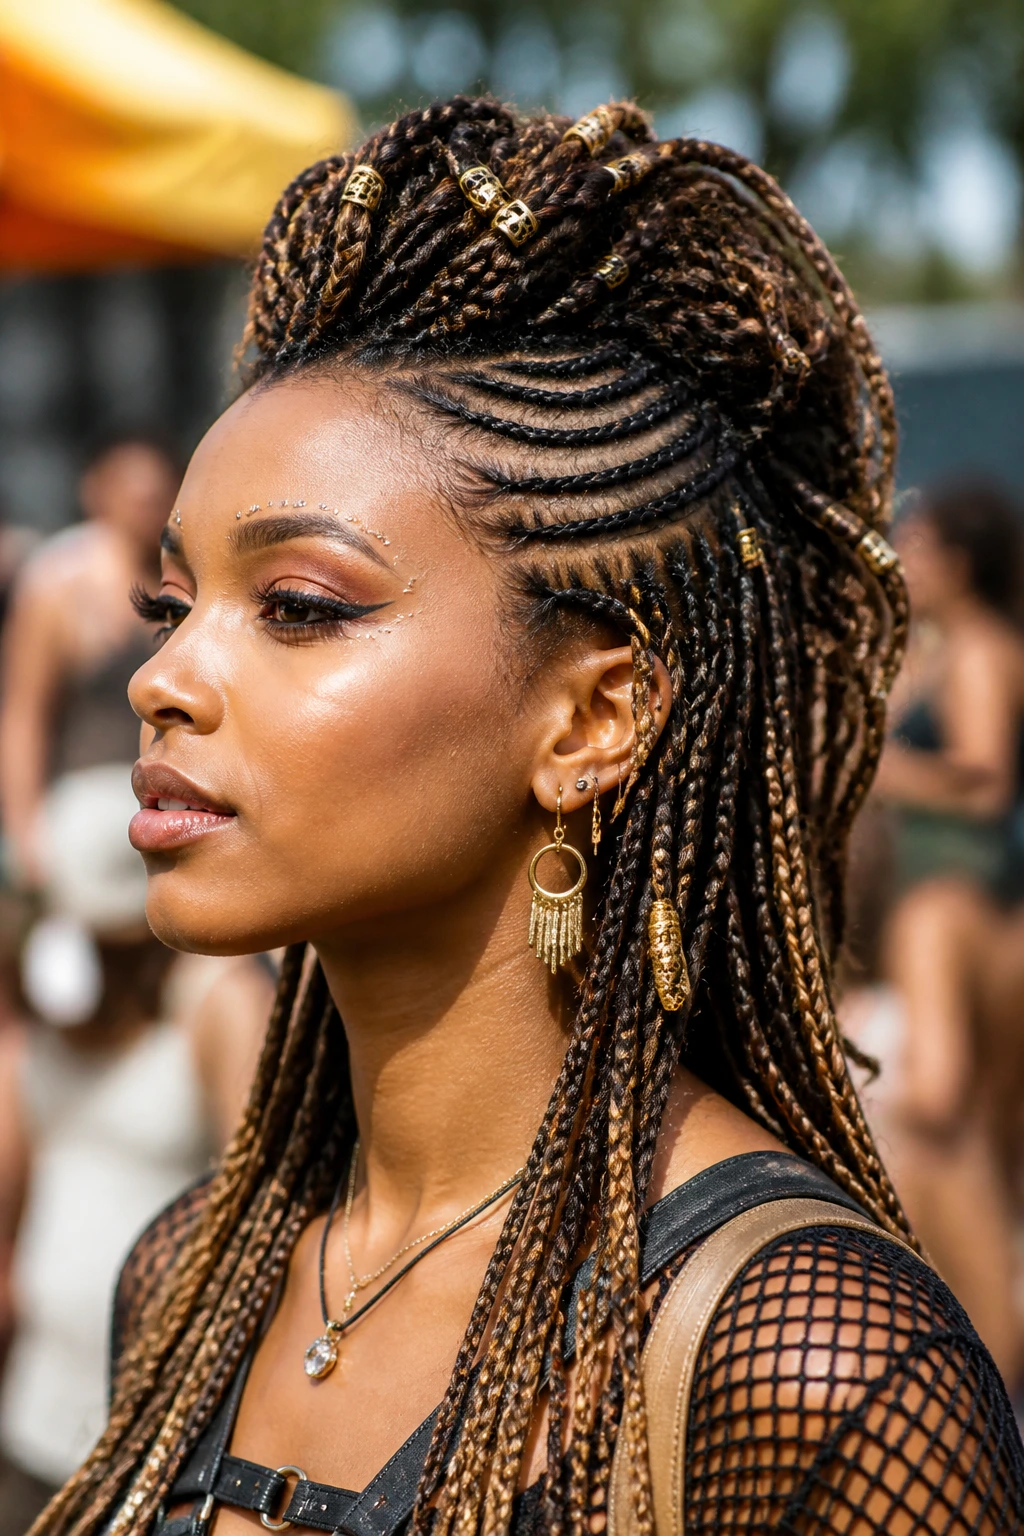
This is the style that looks like it took a team, even when it didn’t. A few microbraids, one or two twists, and a big central puff or ridge give the hair enough layers of detail that it reads instantly from a distance.
Keep the sides tight, then build the center from different textures so it doesn’t feel too uniform. Add beads, cuffs, or colored thread if you want a little extra sparkle, but don’t overload it. The point is contrast: tight sides, busy center, and enough height to catch the light in motion.
This one belongs at the end of the list because it’s the most expressive. It can be loud without being messy, and on long hair that balance is the whole trick.
Why Mohawk Styles for Women With Long Hair Give You More to Work With
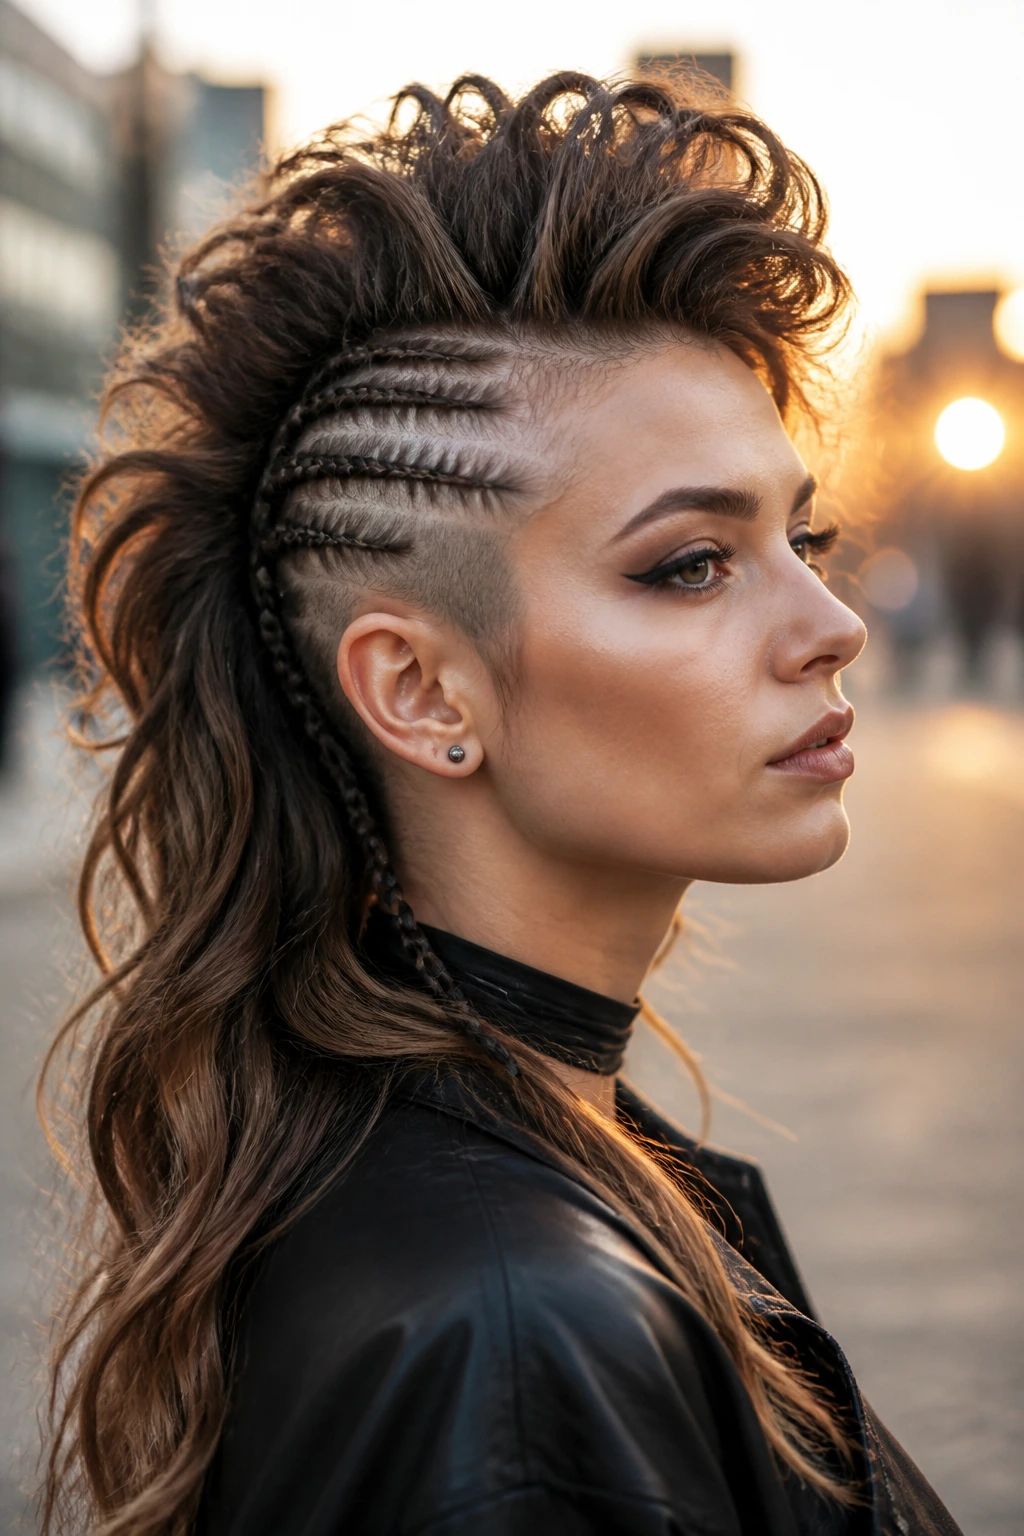
Long hair changes the rules. A mohawk on short hair is mostly about contrast — shaved or clipped sides next to a strip of length — but on longer hair, the center line becomes a structure you can actually build. That means the style can be braided, bubbled, twisted, curled, knotted, or pinned into place instead of being forced into one shape.
The other advantage is hidden support. Long hair gives you anchor points. You can tuck elastics into the middle of a ponytail, pin the ends under a twist, wrap a strand around a base, or use the weight of the loose length to help one section counterbalance another. Sounds small. It isn’t. That’s the difference between a style that looks good in the mirror and one that survives dinner, wind, and a long ride in the car.
The ridge is doing most of the visual work
Your eye reads the center ridge first. If the sides are neat and the middle has a clear line of lift, the style registers as a mohawk even when the ends are soft or the shape is relaxed.
Long ends are a feature, not a problem
People treat long hair like it needs to be hidden in a mohawk. I think that’s backwards. The ends are what let the style become a braid, a ribbon, a knot, or a curled tail instead of a flat imitation of a shorter cut.
Essential Tools for These Styles
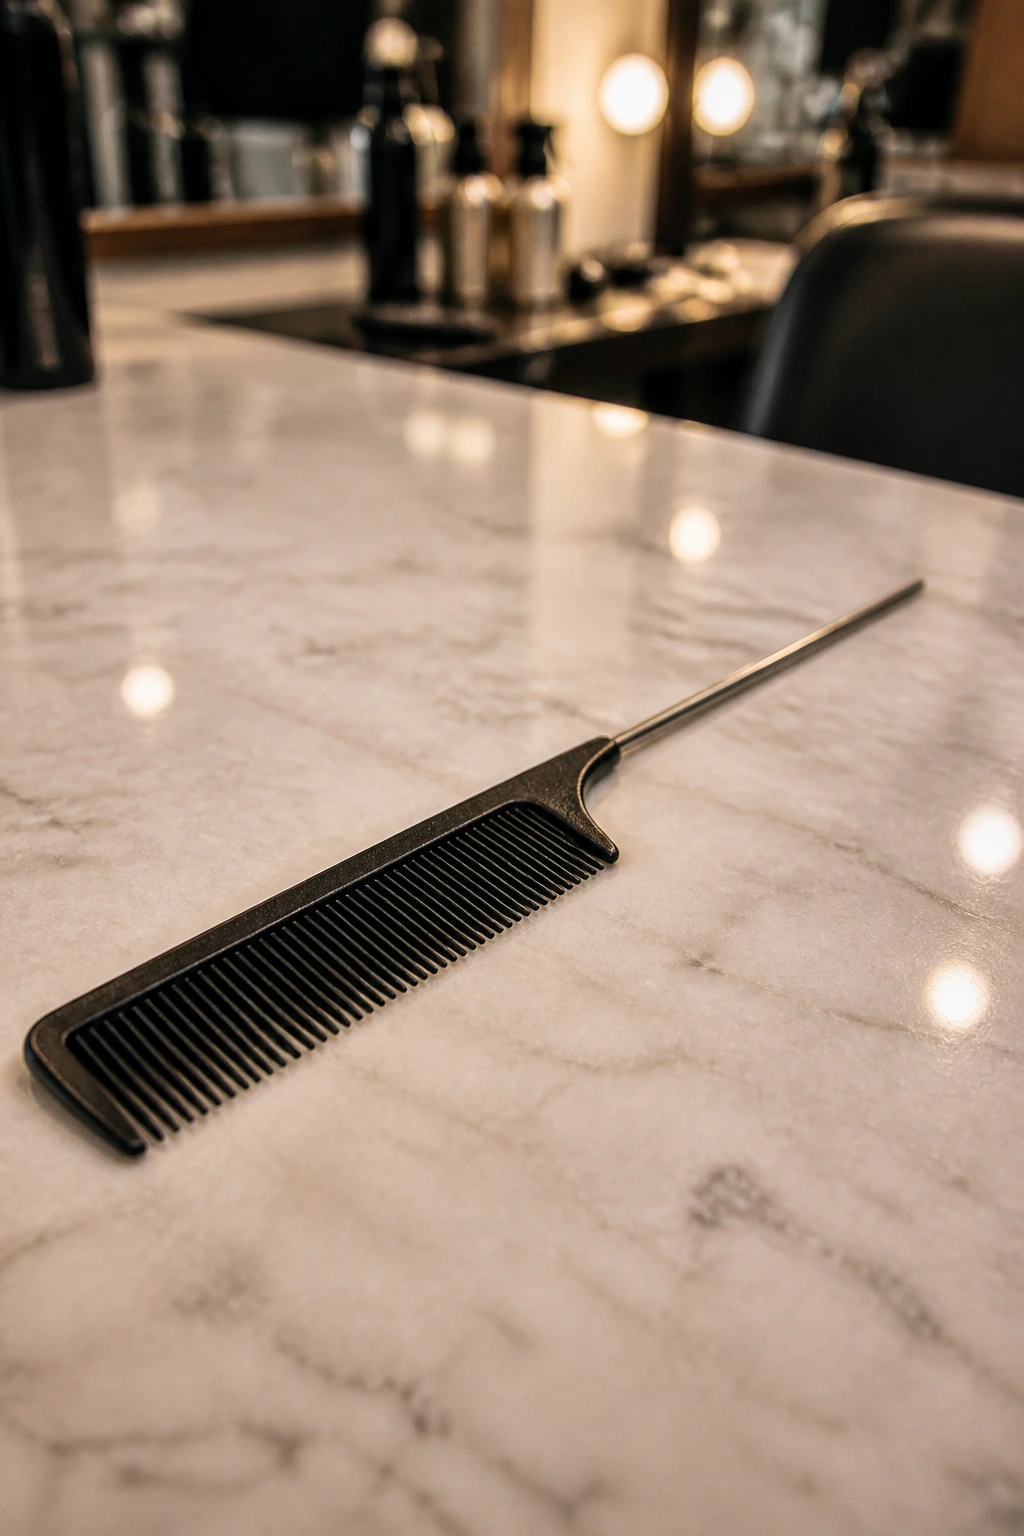
- Rat-tail comb: The pointed end makes clean part lines and narrow center sections much easier to manage.
- Sectioning clips: These keep side hair out of the way while you build the ridge, braid, or twists.
- Clear elastics and snag-free bands: Best for bubble ponies, pull-through braids, and any style where the ties need to disappear.
- Bobby pins: The workhorse of this whole category. Cross two pins if one keeps slipping.
- U-pins or spin pins: Helpful for buns and knotted styles because they hold long hair without bulky dents.
- Texturizing spray or dry shampoo: Gives slippery hair something to grab before you braid or pin.
- Flexible-hold hairspray: Sets the final shape without turning the hair stiff.
- Edge brush or soft toothbrush: Smooths the hairline and tames baby hairs at the temples.
- Teasing brush: Use lightly on the hidden underside of the crown if you need extra lift.
- Blow dryer with a concentrator nozzle or diffuser: Smooths straight hair and protects curl shape.
- 1-inch curling iron or flat iron: Useful for tendrils, soft bends, and the ends of a looser frohawk.
- Decorative pins, ribbon, or cuffs: Optional, but they change the tone fast when you want the style to feel dressed up.
Smart Prep for Grip, Volume, and Hold
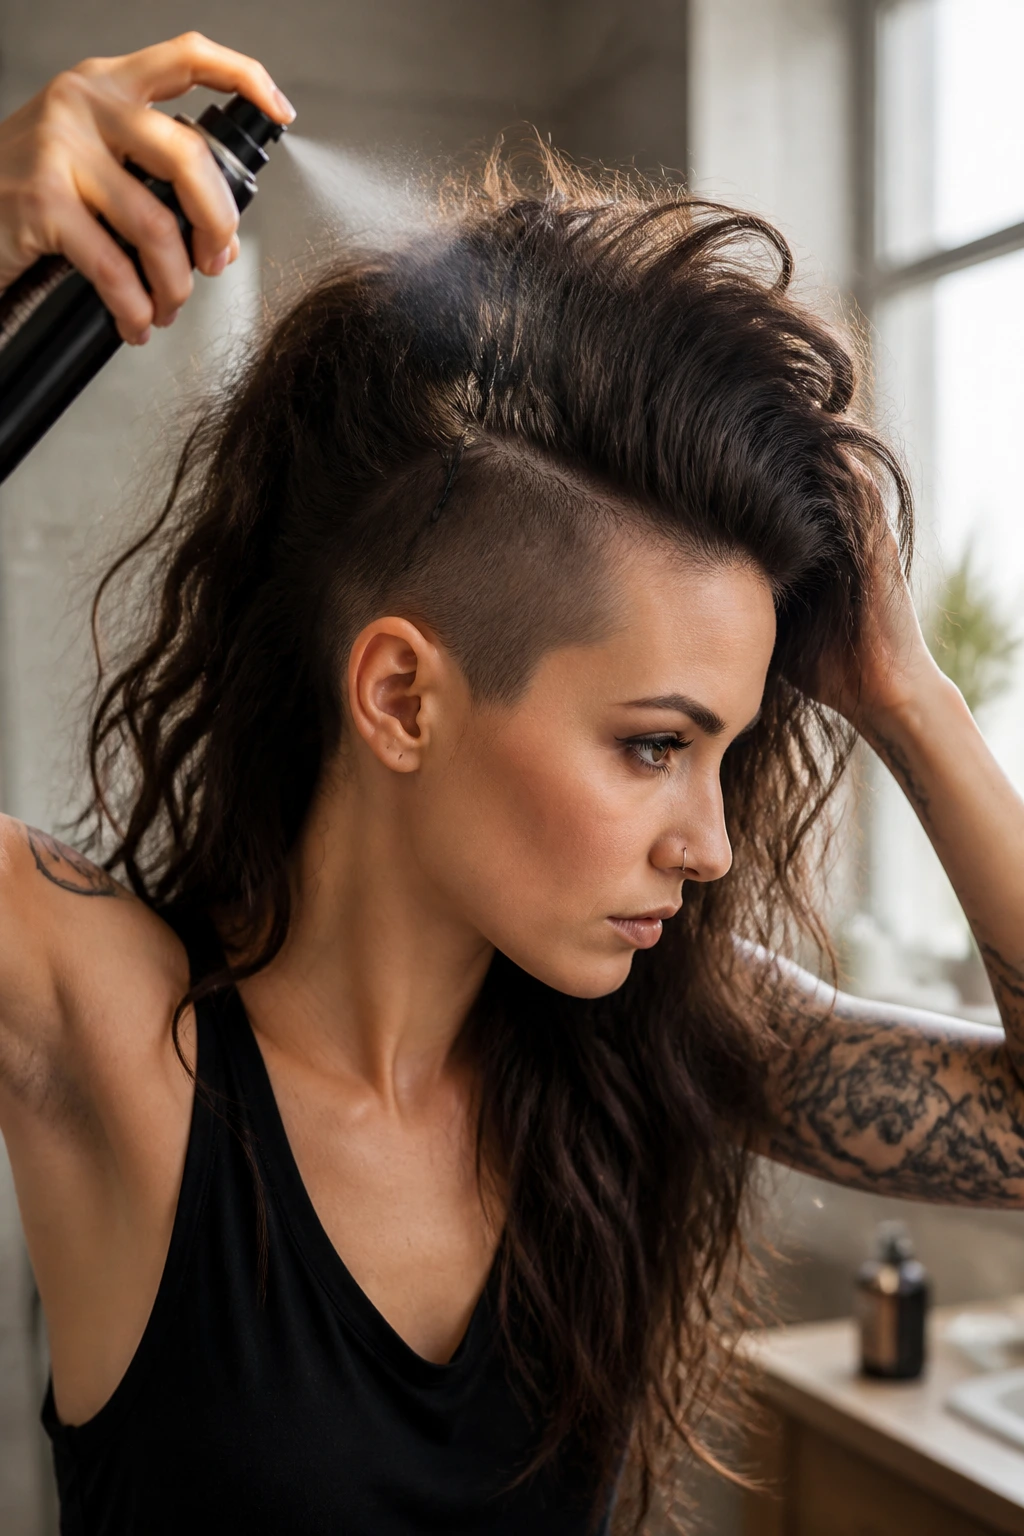
Mohawk styles for women with long hair hold best when the base has a little friction. Day-old hair is often easier than freshly washed hair because the natural oils have settled, the roots are less slippery, and pins stay where you put them. If your hair is squeaky clean, dry shampoo at the roots and a light mousse through the midlengths will save you from a style that starts sliding before lunch.
Section width matters more than people think. A center strip that is too wide turns into half-up hair, not a mohawk. Too narrow, and the style looks skimpy. For most long hair, a ridge around 2½ to 4 inches wide at the hairline is enough, widening slightly at the crown if you want more drama.
Where the product should go
Product belongs at the roots, the hairline, and the anchor points — not drowned through the whole head. A pea-size bit of smoothing cream on the sides is enough if you’re aiming for sleekness. On curly hair, keep the curl cream and gel focused where the shape needs support, then let the rest stay flexible.
Start with structure, not volume
Build the side control first. Once the temples and nape are pinned down, the center can be teased, braided, bubbled, or looped without fighting the rest of the head. If you try to shape the ridge first, the sides will keep springing loose and you’ll end up doing the same section twice.
How to Wear These Styles With Different Outfits and Settings

Presentation: Keep the ridge narrow and clean at the hairline if you want the mohawk shape to read sharper; widen it slightly at the crown if you want softness and more height. A clean part and tidy sides matter more than a perfect braid.
Outfit Pairings: Sleek versions pair well with a blazer, a fitted tee, or a simple dress because the hair becomes the focal point. Braided, ribboned, or pearl-pinned versions can carry a more dressed-up outfit without needing much jewelry. The louder frohawks like stacked buns, crimped ridges, or multi-braid styles fit well with leather, denim, or anything that can stand up to a little hair drama.
Face Shape Notes: Higher crowns add length to rounder faces, while softer tendrils and lower buns help balance longer faces. If your face is narrow, keep some width through the center section so the style doesn’t turn into a vertical line that feels too severe.
Wear Time: Sleek styles usually look best for one long day or one evening because the gel and pins can loosen. Braids, twists, and bubbles hold longer, especially if you start with textured hair. If you need the style to last past a full event, choose a braid-based version over a loose teased one.
Accessories: Small pins, cuffs, and ribbons work best when the shape is already strong. Accessories should underline the style, not patch over a shape that isn’t holding.
Additional Tips and Style Boosters
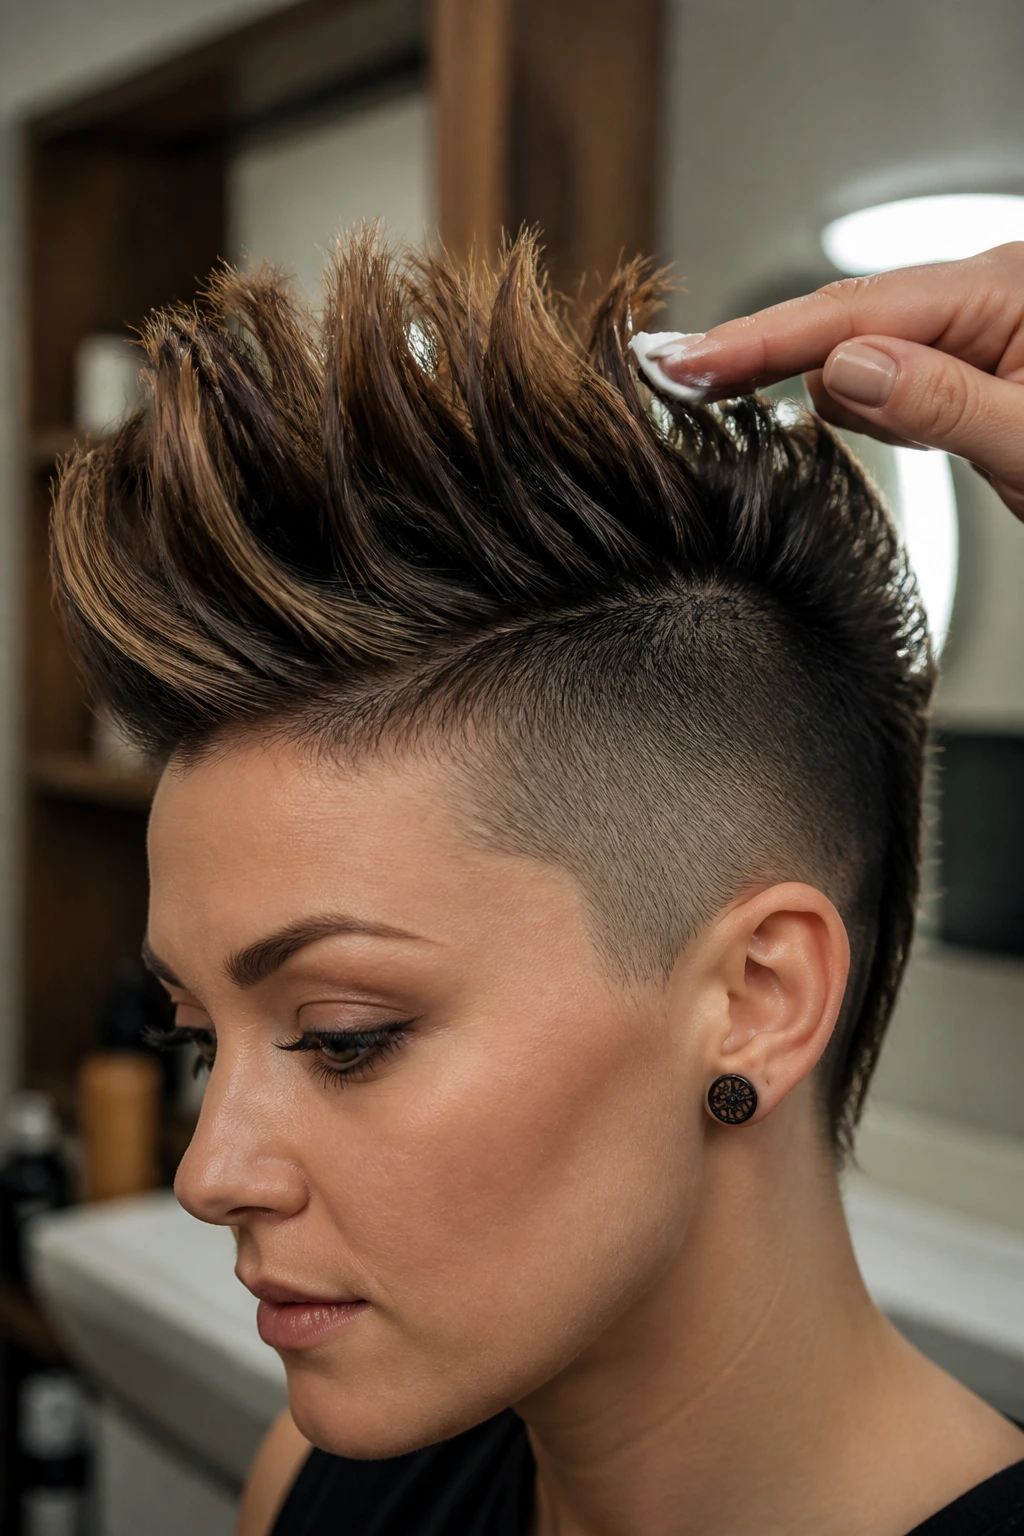
Texture Booster: If the hair is too smooth, mist the roots with dry shampoo before you section anything. You are trying to create grip, not turn the hair dusty, so keep the spray close to the scalp and work it in with your fingertips.
Height Booster: Tease only the hidden underside of the crown or ridge. Smooth the top layer over it afterward with a soft brush or your hands so the shape still looks clean from the outside.
Shine Move: Put serum on the last few inches of the loose length, not the roots. That keeps the ends from looking frayed while the top stays firm enough to hold its shape.
Accessory Play: A row of pearl pins, two metal cuffs, or one bold ribbon can shift the whole mood. Place them where the ridge bends or where a braid changes direction so they look built in, not slapped on.
Make-It-Yours: For fine hair, use smaller sections and more pins. For thick hair, split the center ridge into stacked layers so the style doesn’t feel like a helmet. For curly hair, keep the curl pattern visible instead of forcing the whole head smooth.
Make-Ahead, Overnight, and Day-Two Refreshing
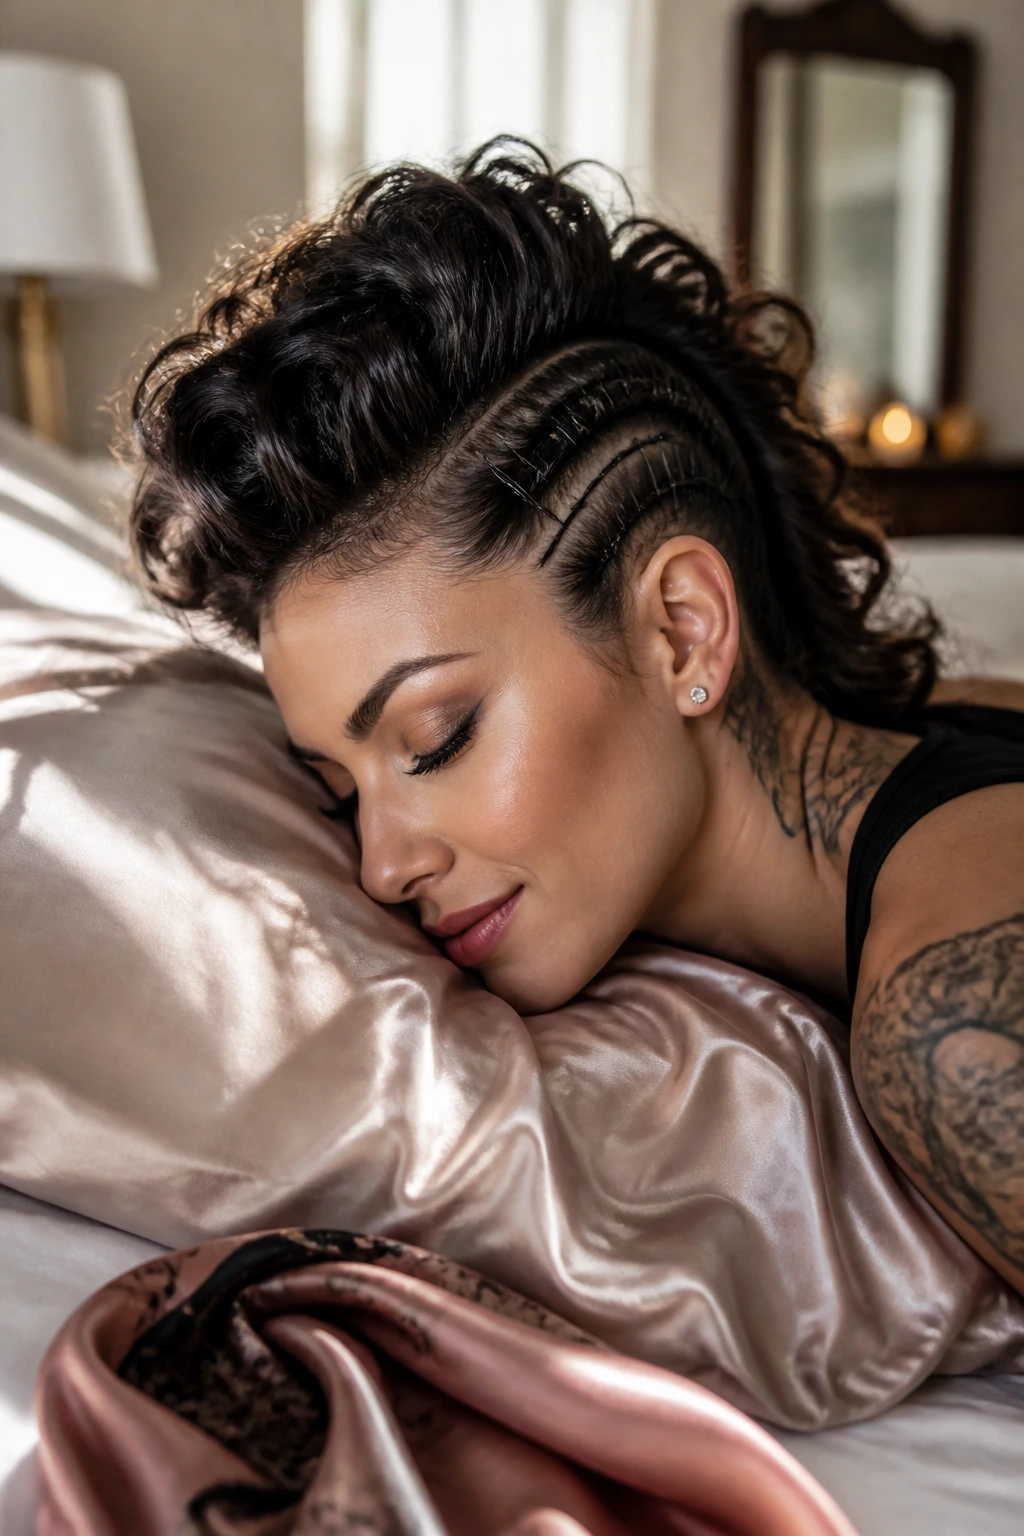
Some of these styles are better the second you finish them. Others get better after they’ve sat a bit. Braids, twists, bubble ponytails, and pull-through styles can often be prepped the night before, then touched up in the morning with a light mist of water and a quick squeeze of styling cream on the frizzier ends. Sleek wet-look versions and heavily teased crowns are different; those are usually best done the same day because sleep and pillow friction flatten them fast.
If you’re styling tonight for tomorrow
Do the structural work first: braid, twist, or pin the center ridge, then secure the ends with a soft tie or satin scrunchie. Sleep on a silk pillowcase or wrap the style in a silk scarf so the sides don’t puff out. If the style includes curls, pin-curl the loose ends before bed and release them in the morning.
How to bring it back fast
In the morning, smooth the hairline with a tiny bit of water or leave-in, then re-pin only the places that lifted. Do not start from scratch unless the shape has collapsed entirely. Most mohawk styles need a quick reset at the temples and crown, not a full rebuild.
How long they usually last
Braided or twisted versions can stay neat for 1 to 3 days if you sleep carefully. Bubble ponytails and claw-clip styles tend to need a refresh after one long day. Protective cornrow-based versions can last longer, but only if the scalp feels comfortable and the tension stays mild. If your head aches, that style is done.
Common Mistakes to Avoid
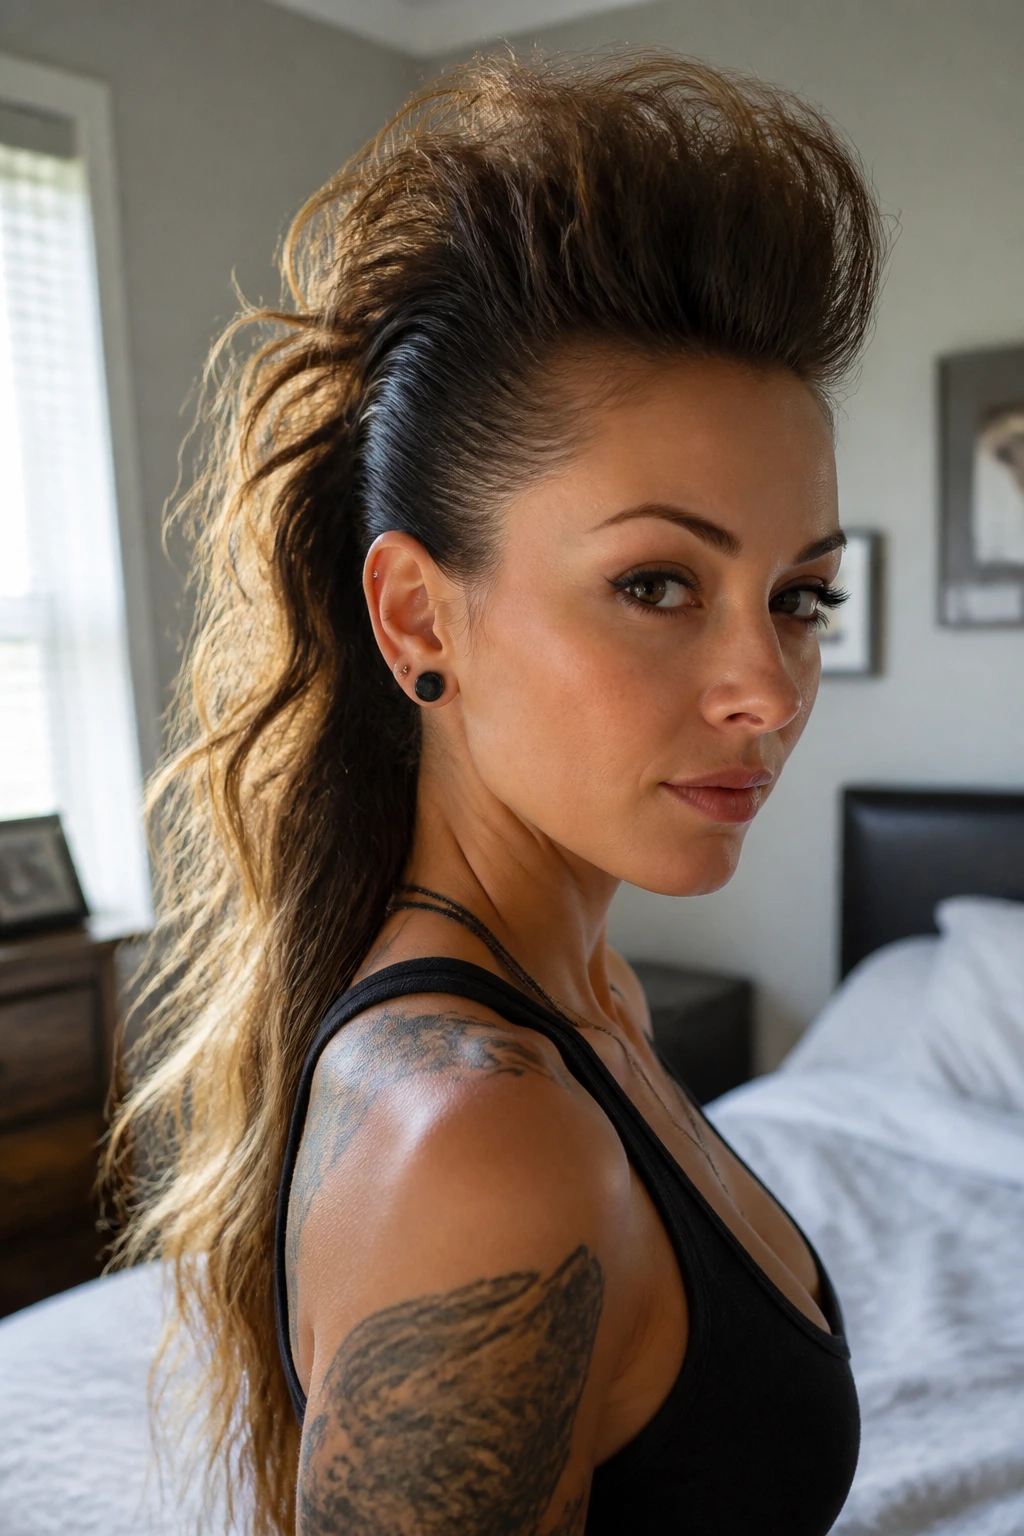
- Making the center strip too wide: The style starts reading as regular half-up hair instead of a mohawk. Keep the front section narrow and let the width build higher on the head if you want more drama.
- Starting with hair that is too silky: Freshly washed, product-free hair slips. Add dry shampoo, mousse, or texture spray before you pin or braid.
- Using too much oil at the roots: Shiny roots are nice; slippery roots are not. Save oils for the ends, and use them sparingly.
- Teasing the visible surface: That creates a fuzzy top layer that is hard to smooth later. Tease underneath, then brush the top over it.
- Ignoring the temples and nape: Those are the spots where the shape falls apart first. Pin them firmly, then check them again after you finish the center ridge.
- Pulling too tightly: A mohawk should feel secure, not painful. If the front hairline aches, loosen it and rebuild the tension.
Variations and Adaptations to Try
Fine-Hair Lift: Use dry shampoo at the roots, choose bubble sections or pull-through braids, and keep the ridge narrow. Fine hair often looks better with several smaller anchors than with one giant tease that collapses by afternoon.
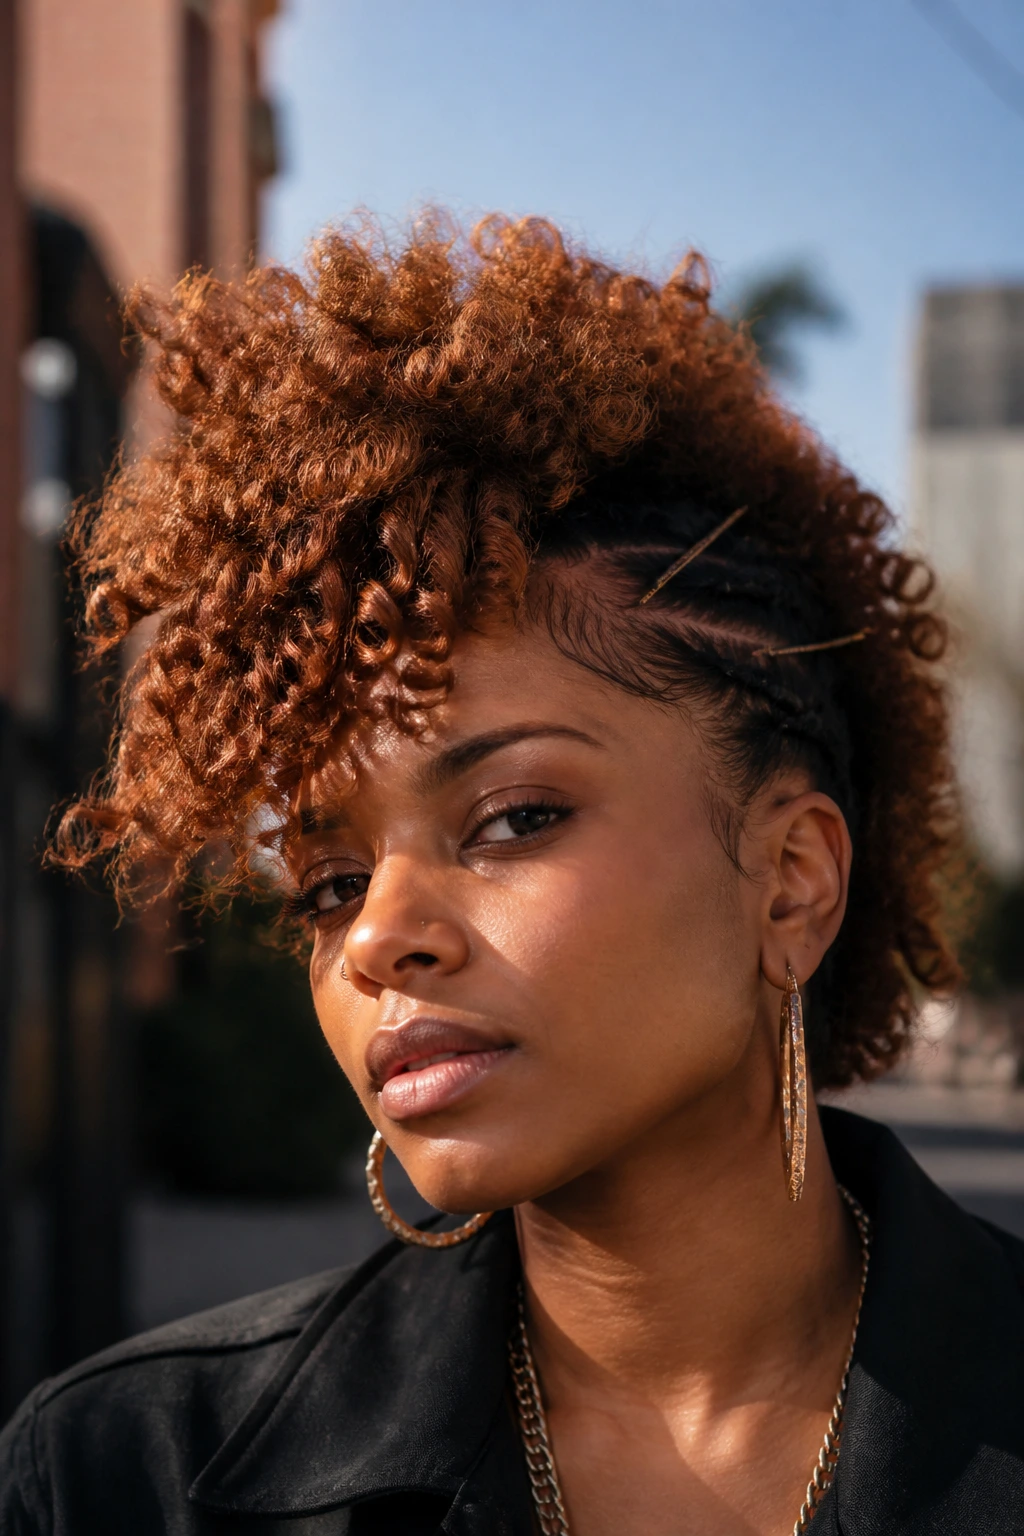
Curly-First Frohawk: Leave the curls in charge and only pin the sides up. This keeps the texture rich and avoids the flat, overbrushed look that can happen when curly hair is forced into a straight silhouette.
Protective Braided Hawk: Flat twists or cornrows along the sides protect the hairline and keep layers contained. If your scalp is sensitive, keep the tension low and skip any style that makes the roots feel stretched.
Formal Gloss Hawk: Smooth the sides with gel, wrap the pony base, and add pearl pins or a narrow ribbon. This version reads clean enough for dinner, photos, or a dressier event without losing the mohawk edge.
No-Heat Weekend Hawk: Twist damp hair, let it dry, then pin the shape into place. It is slower to set, but you skip hot tools and still get texture that looks deliberate.
Frequently Asked Questions
How do you make a mohawk on long hair without shaving the sides?
You fake the shaved effect with tight side control. Smooth or braid the sides close to the head, then build height through the center strip with braids, twists, bubbles, buns, or curls. The eye only needs to see a clean edge and a lifted ridge for the style to read correctly.
What hair type holds these styles best?
Thick hair has a natural advantage because it gives the center ridge more body, but fine hair can hold beautifully when you use dry shampoo, mousse, and enough pins. Curly hair is often easier than people expect because the texture adds grip and volume on its own.
Can layered hair do these styles, or will the shorter pieces escape?
Layered hair can absolutely wear a mohawk shape. Braids, twists, and halo styles tend to trap short pieces better than a smooth pony, so if your layers are stubborn, start there. A few hidden bobby pins at the temples usually keep the stray ends in check.
How long do mohawk styles for women with long hair usually last?
Sleek versions often last through a full day or evening if you keep the sides pinned and avoid touching them. Braided, twisted, or bubble styles can last longer, sometimes into the next day, if you sleep carefully and refresh the front line in the morning.
What if my hair is too slippery to stay up?
Work in dry shampoo or texturizing spray before you section anything. If it still slips, switch to a braid-based or pull-through style because those create more friction than a simple slicked-back pony.
Do I need braiding skills for these looks?
No. Bubble ponies, claw-clip hawks, wrapped-base ponies, and some twisted styles need almost no braiding skill at all. If you can section hair cleanly and place pins with a little patience, you can manage several of these.
Can I wear one of these styles to work or a formal event?
Yes, but choose the mood carefully. Sleek Dutch braids, wrapped ponies, side-swept waves, or pearl-pinned versions read more polished, while crimped ridges, mini buns, and festival frohawks lean louder and more playful.
What’s the fastest fix when the crown starts falling flat?
Lift the top layer, spray the hidden underside with a little texture spray, and repin the center closer to the scalp. If the style is already heavy with product or the base is loose, a fast reset is usually better than trying to rescue the same structure for another three hours.
Strong Shape, Soft Length
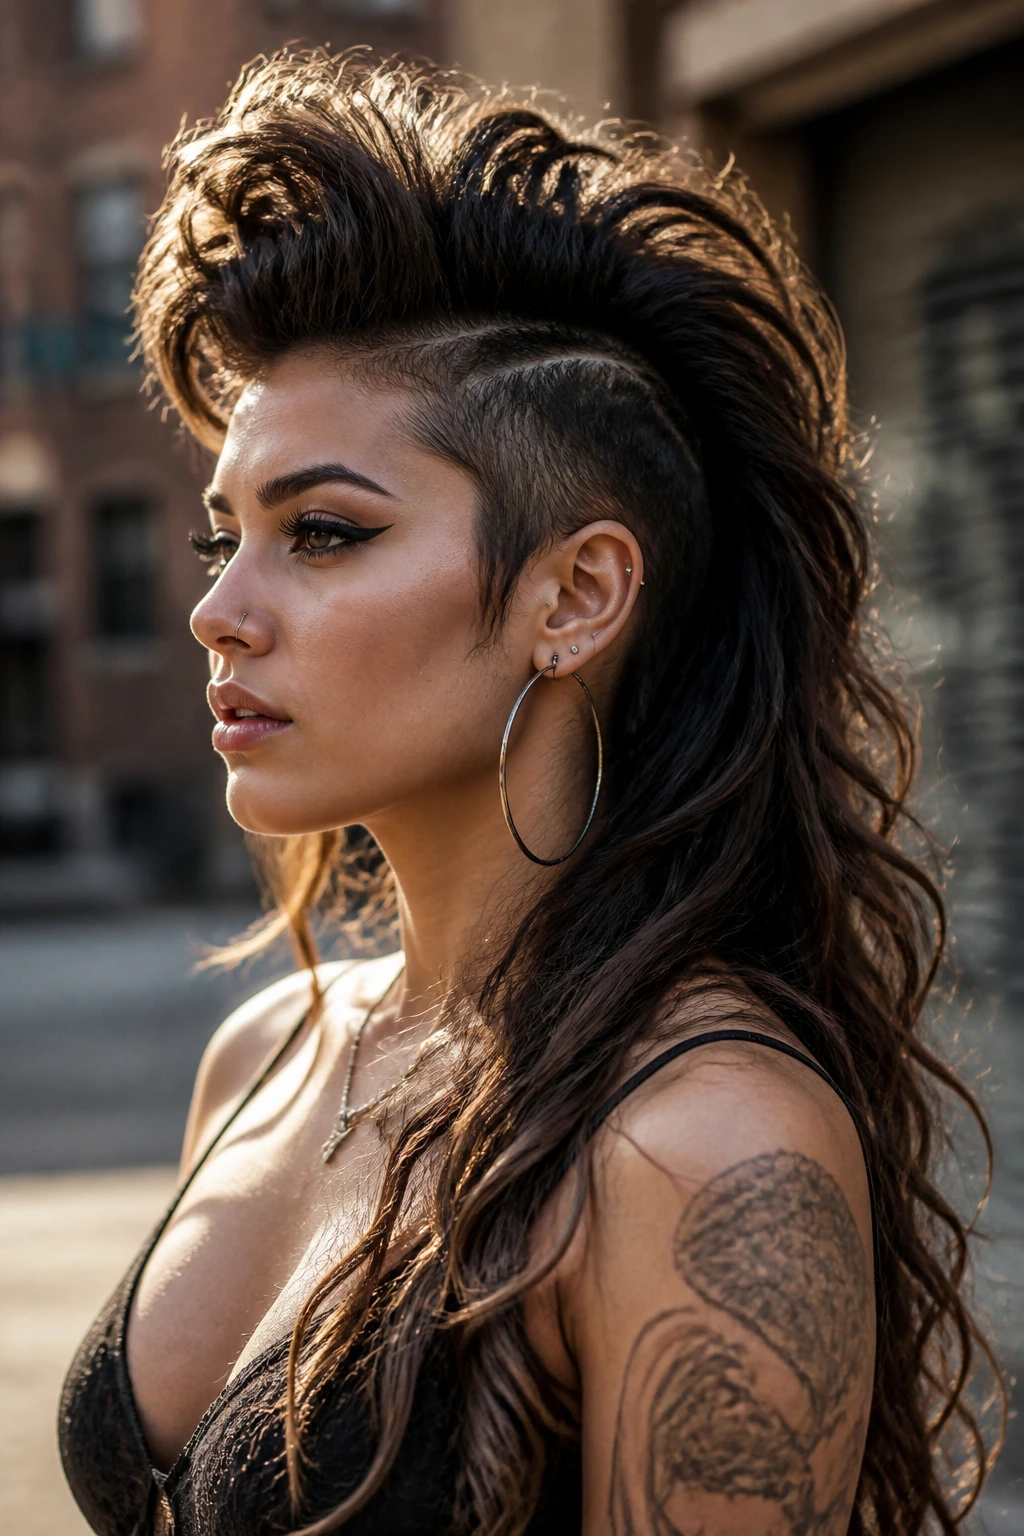
The best thing about mohawk styles for women with long hair is that they are not locked into one personality. You can make them sleek, curly, braided, knotted, glossy, or decorated, and the long length gives you enough room to keep changing the mood without changing the basic silhouette.
That’s the real appeal here. The shape is bold, but the hair remains yours — length intact, texture visible, and the center ridge built the way you want it. The next time your hair feels too long to behave, treat that length like the material it is and build the shape around it.
