



A braided mohawk on natural hair does something most styles never bother attempting: it turns shrinkage, density, and texture into the shape itself. That’s why braided mohawk hairstyles for natural hair can look sharp one day and still hold their structure after a bonnet, a commute, and a full afternoon of humidity.
What I like about this family of styles is how little it asks your hair to pretend to be something else. The sides can be tight cornrows, soft flat twists, or sculpted feed-ins. The center can sit high and dramatic, or stay low and sleek. Either way, the silhouette gives you lift without flattening the character of the hair underneath.
There’s also a practical side people miss. A good mohawk braid pattern keeps the perimeter controlled, spreads tension across the scalp, and gives you a style that can read polished without needing a blowout every single time. Some versions are clean enough for a formal dinner. Others are the kind you wear to sleep, wake up in, and still step out the door with. The trick is choosing the version that matches your length, your density, and how much parting you’re willing to tolerate.
Why These Braided Mohawks Keep Working
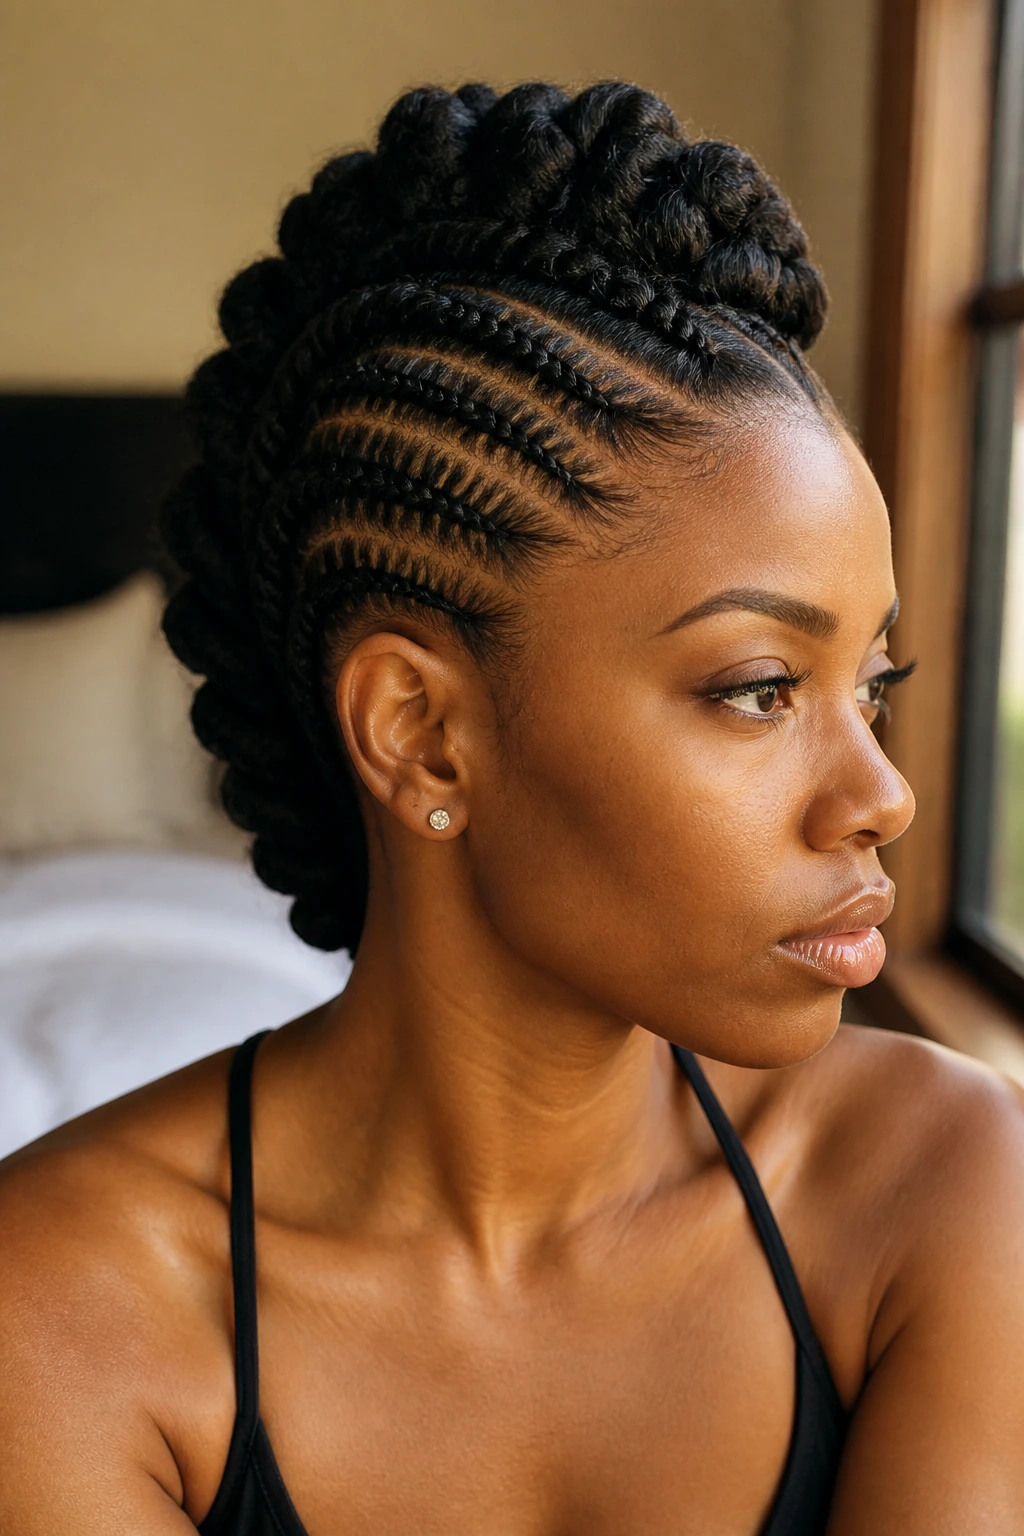
- They use natural volume instead of fighting it: The center ridge looks fuller on coily hair, so the mohawk shape stands up faster and needs less teasing or padding.
- They give the sides a job: Close braids, twists, or sculpted rows keep the perimeter neat and make the center section look intentional rather than accidental.
- They stretch the wear time: A well-done braided mohawk usually lasts longer than a loose style because the braids lock the shape in place while the loose pieces, if any, can be refreshed.
- They work at different lengths: Short hair can handle mini versions, shoulder-length hair can hold medium rows, and longer hair can carry bigger, more dramatic shapes.
- They can go soft or sharp: Leave out curls and you get a softer frohawk feel. Pull everything taut and the whole thing reads cleaner and more structured.
1. Classic Center Cornrow Mohawk
A clean row of cornrows feeding straight into a center ridge is the style most people picture first, and it earns that spot. The sides stay close to the scalp, the middle gets lifted, and the whole shape reads crisp without needing a lot of extra hair or decoration. On medium to long natural hair, it has a nice balance: neat at the temples, bold at the crown, and easy to wear with hoops or a strong lip.
This version works because the braid map is simple. Nothing is competing with the silhouette. If your hair is dense, the center section looks fuller. If it’s finer, the rows still create enough structure to hold the shape. It’s the braided mohawk I’d hand to someone who wants the style to speak for itself.
2. Feed-In Braided Hawk with Curved Sides
Want something with a little more movement? Feed-in braids make the shape feel drawn on, almost like the hair was sculpted with a pencil before it was braided. The curves along the sides soften the look, which helps if you don’t want the mohawk to feel severe.
Why the curves matter
The braid size starts slim near the hairline and grows fuller as it moves toward the center. That gradual change keeps the style from looking blocky. It also lets the crown carry more weight without putting all that tension at the temples.
This version is a good pick when you want clean parting but don’t want the top to look too stiff. A little curve changes everything.
3. Chunky Goddess Braid Mohawk
This one has more air in it. The braids are larger, the center ridge sits higher, and the added curly pieces give the style a softer edge that reads a little more romantic than rigid. If you like the look of goddess braids but want the mohawk shape to stay obvious, this is the sweet spot.
The curly pieces do two jobs. They break up the heaviness of the braids, and they keep the center from looking flat in photos or in motion. Just don’t overload it. One or two well-placed curly sections around the crown are enough. Too many, and the braid work disappears.
4. Double Dutch Braided Faux Hawk
Two Dutch braids pulling inward can mimic a mohawk without the sharper, more sculpted finish of cornrows. The effect is less formal and easier to do on hair that has been stretched or lightly blown out. It’s also one of the most forgiving versions if your braiding skills are still warming up.
The appeal is in the height. Because the braids sit on top of the hair instead of lying flat into it, they build a ridge fast. I like this style for weekends and casual events because it looks done, but not fussy. And yes, the “faux hawk” part is fair here; it gives you the silhouette without asking for a full row-by-row install.
5. Side-Swept Braided Mohawk
A side-swept mohawk shifts the braid line off center, and that small change makes the whole style feel more editorial. Instead of a straight spine, you get a diagonal sweep that can lean from one temple to the opposite nape. It’s sharper than a standard hawk and more flattering than people expect.
This shape especially helps if one side of your face tends to get lost in symmetrical styles. The diagonal line draws the eye up and across, not just upward. It also gives you room to play with earrings on the open side. That matters. Hair and jewelry should talk to each other a little.
6. Curly Puff Center with Braided Sides
Braided sides plus a curly puff in the center is one of those combos that just makes sense on natural hair. The braids keep the perimeter controlled, and the puff does what textured hair does best: it adds height, softness, and a bit of attitude without a fight.
This version is especially useful if your hair shrinks a lot or if you want the style to stay in the natural texture family instead of getting too polished. The puff can sit high, low, or slightly forward. If your coils are tight, a little pick at the root will give you enough lift. Keep the sides snug and the whole look stays balanced.
7. Flat-Twist Mohawk for Stretched Hair
Flat twists give you a softer edge than cornrows, and that softness is the point. They sit nicely on stretched natural hair, hold shape well, and create a mohawk that feels a little more relaxed around the hairline. If your scalp gets irritated by tighter braids, this is the version I’d try first.
Best when you want less pull
The twist pattern puts less stress on the base than some tight braided styles. It also works well when your hair has been banded or blown out just enough to make the sections cooperate. The finish is smoother than a puff hawk and less rigid than feed-ins.
It’s a nice middle ground. Not plain. Not overworked. Just neat, controlled, and easy to live in.
8. Box Braid Mohawk Updo
A box braid mohawk updo takes pre-braided hair and redirects it upward, which saves time and gives the style a bigger, more dramatic finish. The center ridge can be pinned high, wrapped into a roll, or stacked into a sculpted line of braids that sits above the head like a crown with better attitude.
What makes this version useful is the structure you get from the braids themselves. Once they’re in, the style holds its shape well, and you can switch the mood just by changing the placement of the ends. Leave a few hanging for softness. Pin every last one for something sharper.
9. Lemonade Braids into Mohawk
Lemonade braids usually sweep in one direction, but when you redirect that sweep toward the center, the result feels fresh without being hard to wear. The side-bias gives the mohawk a little motion, and that matters if straight-back braids look too stiff on your head shape.
This style works best when the braids stay clean at the parting and the center ridge has enough density to carry the visual weight. It’s a good choice for longer natural hair or for added hair that can handle the diagonal pull without slipping. If you like a style that looks like it’s moving even when you’re standing still, this one does that.
10. Zigzag Part Mohawk
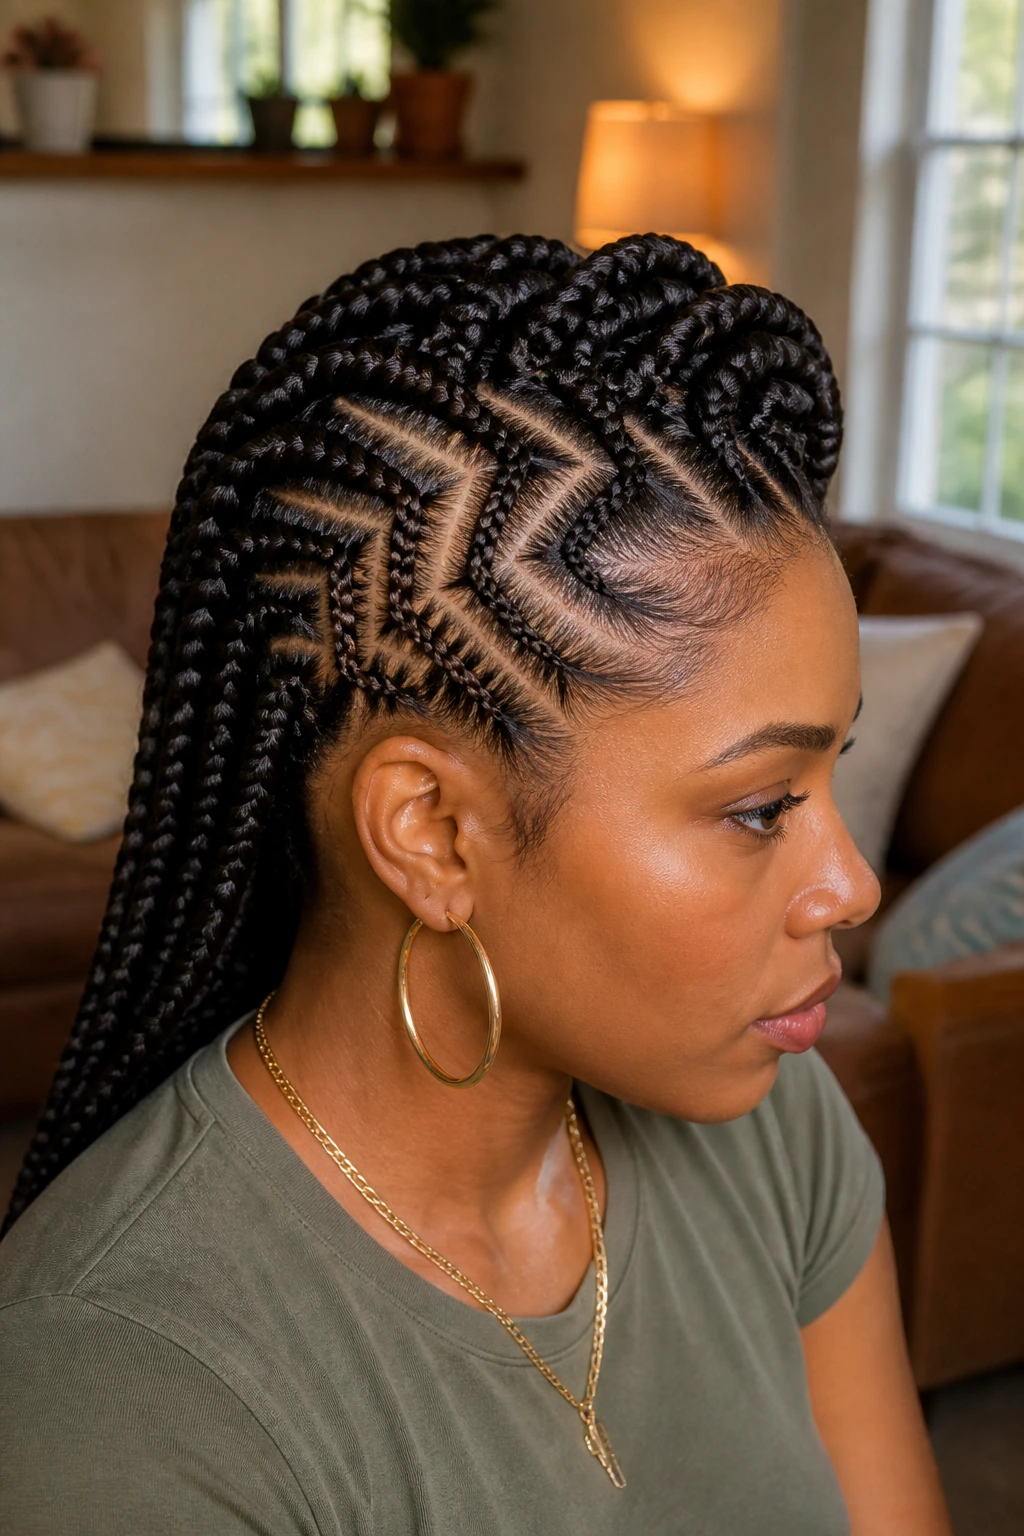
A zigzag part turns the scalp itself into part of the design. Instead of a plain line, you get angular sections that break up the braid pattern and make the whole look feel more graphic. It’s one of the better choices if you want the mohawk to look custom rather than standard.
The zigzag matters more than people think. On natural hair, texture already gives you visual interest; the parting just sharpens it. This style is especially good when the braids are medium-sized, because tiny braids can make the part pattern disappear and jumbo braids can crowd it. A medium row lets the shape breathe.
11. Low-Profile Protective Hawk
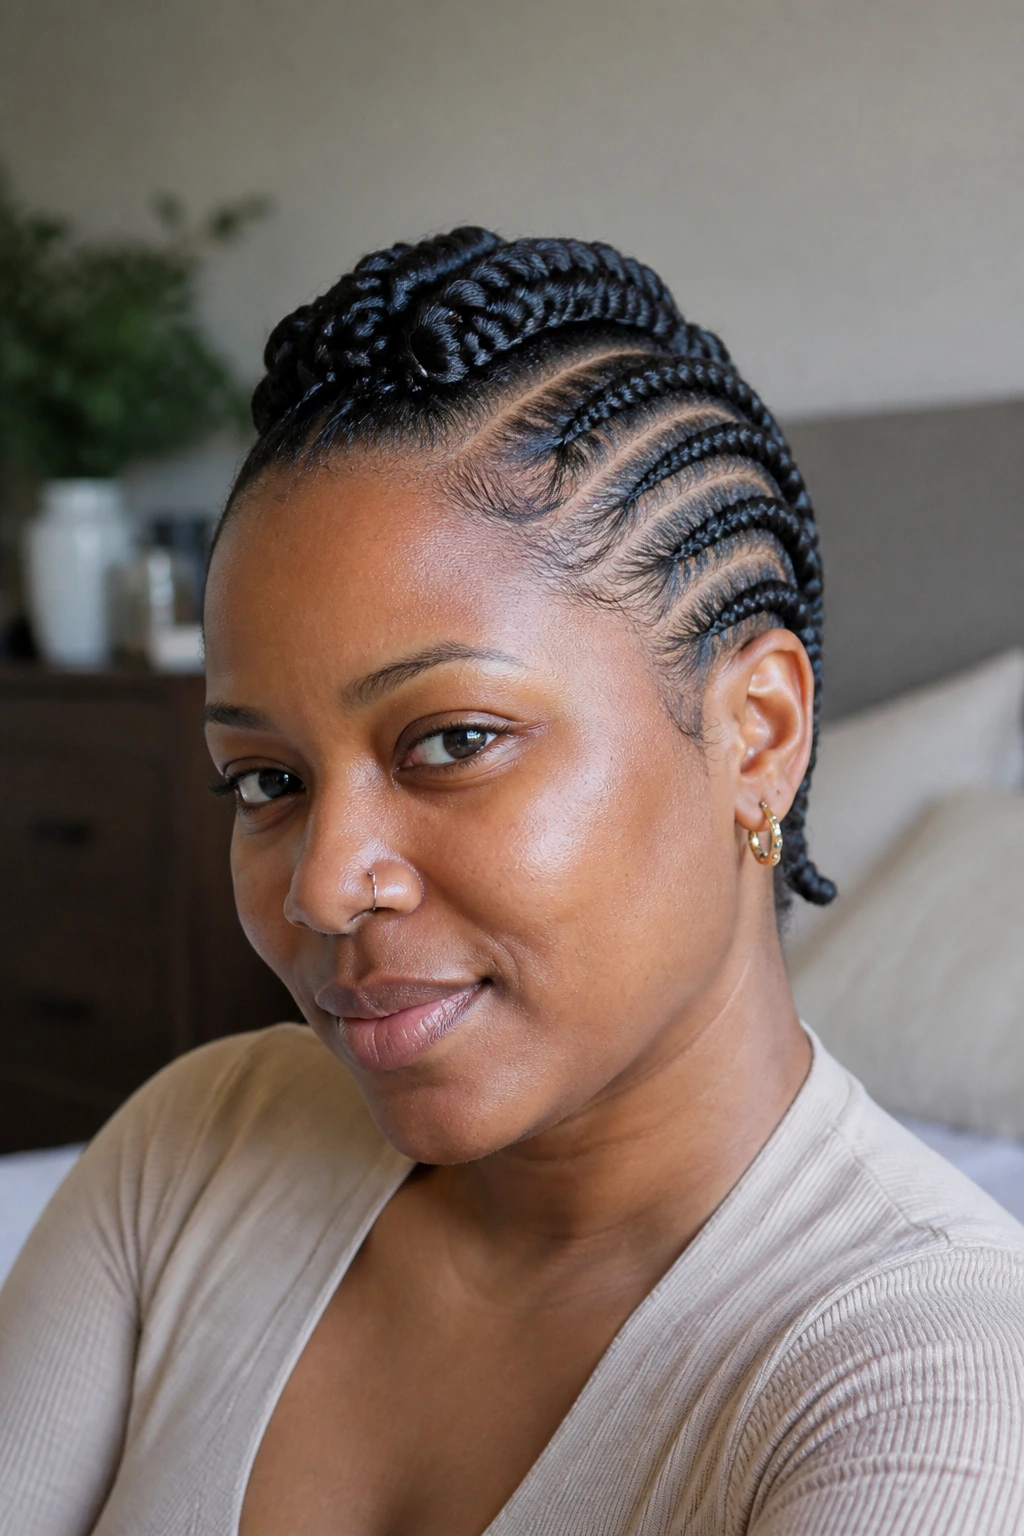
Not every braided mohawk needs to be tall. A low-profile version keeps the center ridge close to the head, which makes it calmer, lighter, and easier to sleep in. The shape still reads as a hawk, but it doesn’t shout.
That makes it a smart protective option if your scalp wants less tension or if you need a style that can survive a long week with minimal retouching. The sides should be smooth, the center should stay compact, and the ends should be secured well so the silhouette doesn’t split apart by day three. Quiet styles have their own kind of polish.
12. Halo Braid into Mohawk
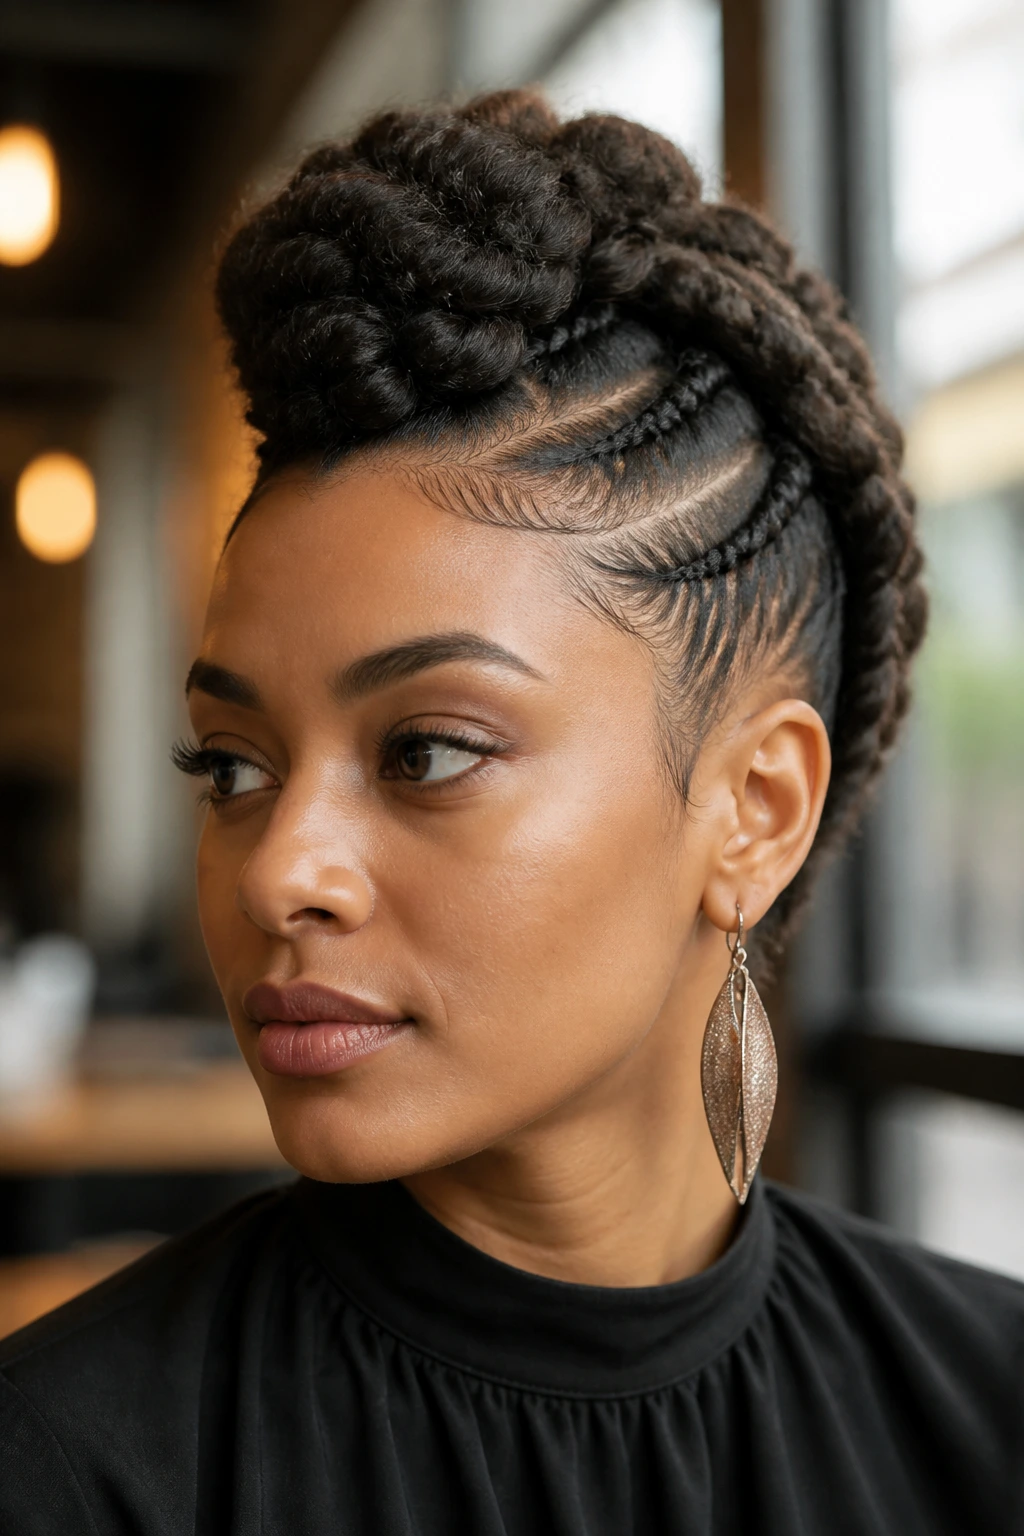
A halo braid around the perimeter with a lifted center is a neat trick. The halo gives the style a finished frame, and the middle keeps the mohawk spirit alive. It works well when you want something that feels formal but still has that vertical lift.
What makes it different
The halo softens the edges of the face while the center adds height. That combination is useful if your features look best with a little framing around the forehead and temples. It also keeps flyaways under control because the outer braid acts like a built-in border.
I like this version for events where you want your hair to look deliberate from every angle. Side view matters. Back view matters too.
13. Mohawk with Bantu Knot Ends
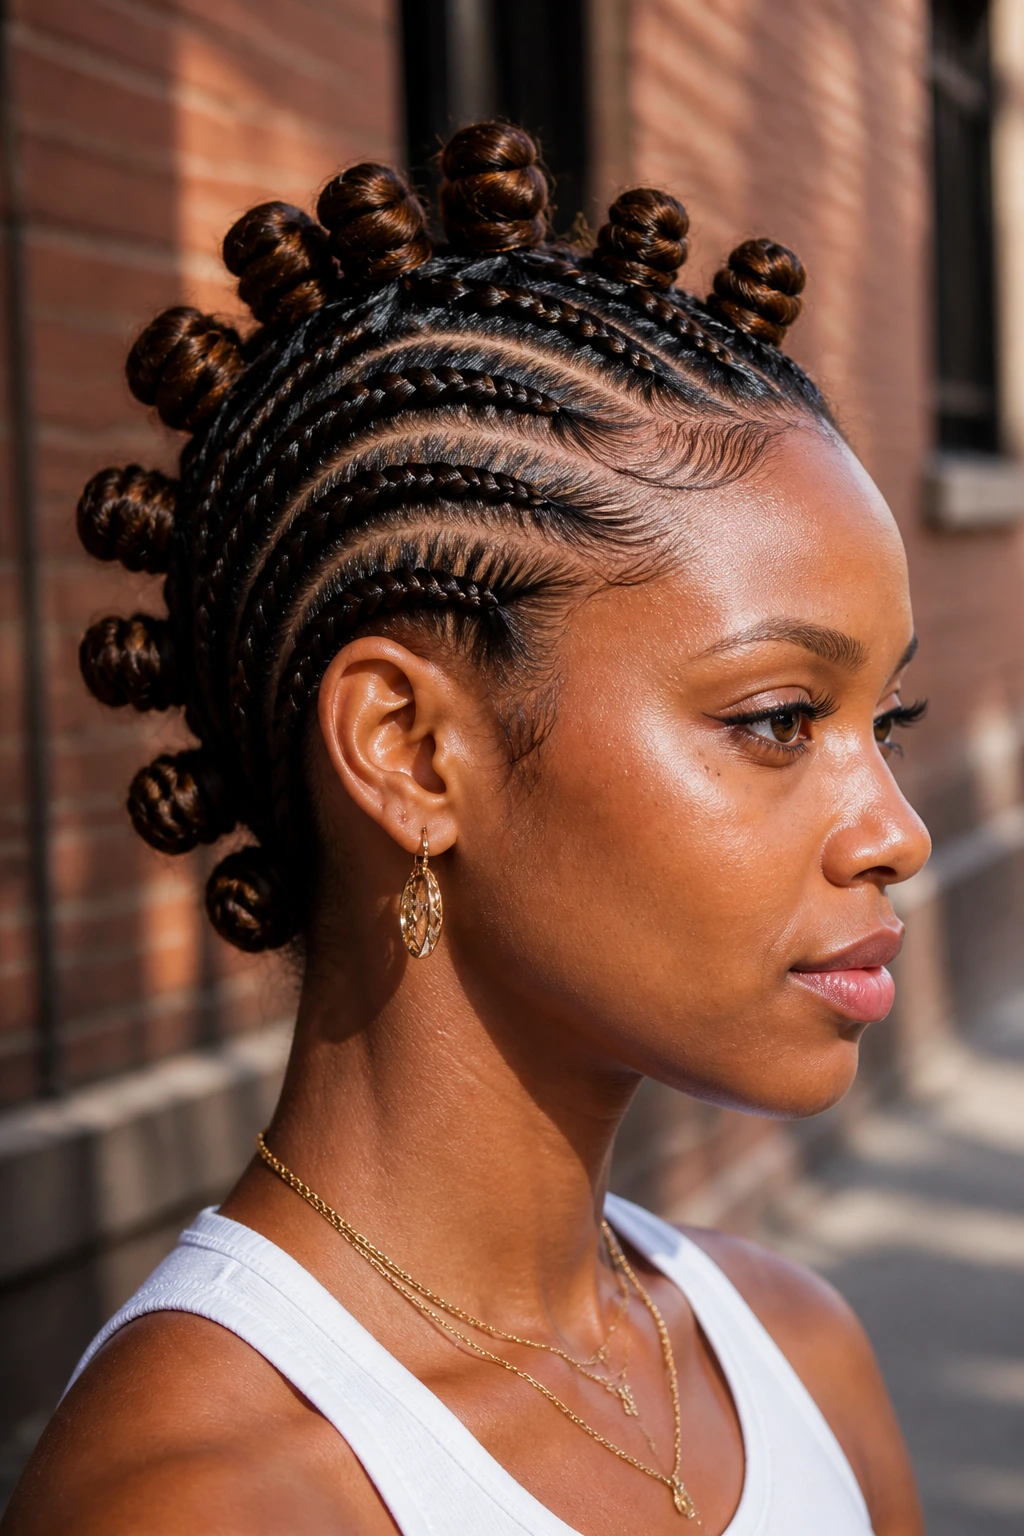
Braids that end in Bantu knots bring a playful edge to the mohawk shape. The knots give the ends a sculptural finish, and they keep the style from ending in a plain loose tail. That small detail changes the whole mood.
This is one of the better styles for medium-length natural hair because the knots don’t need a huge amount of length to read clearly. They also hold up well if you want the style to last through a couple of days. Keep the knots balanced, though. Uneven knot sizing can make the ridge look lopsided, and once you notice it, you cannot unsee it.
14. Triangle-Part Feed-In Hawk
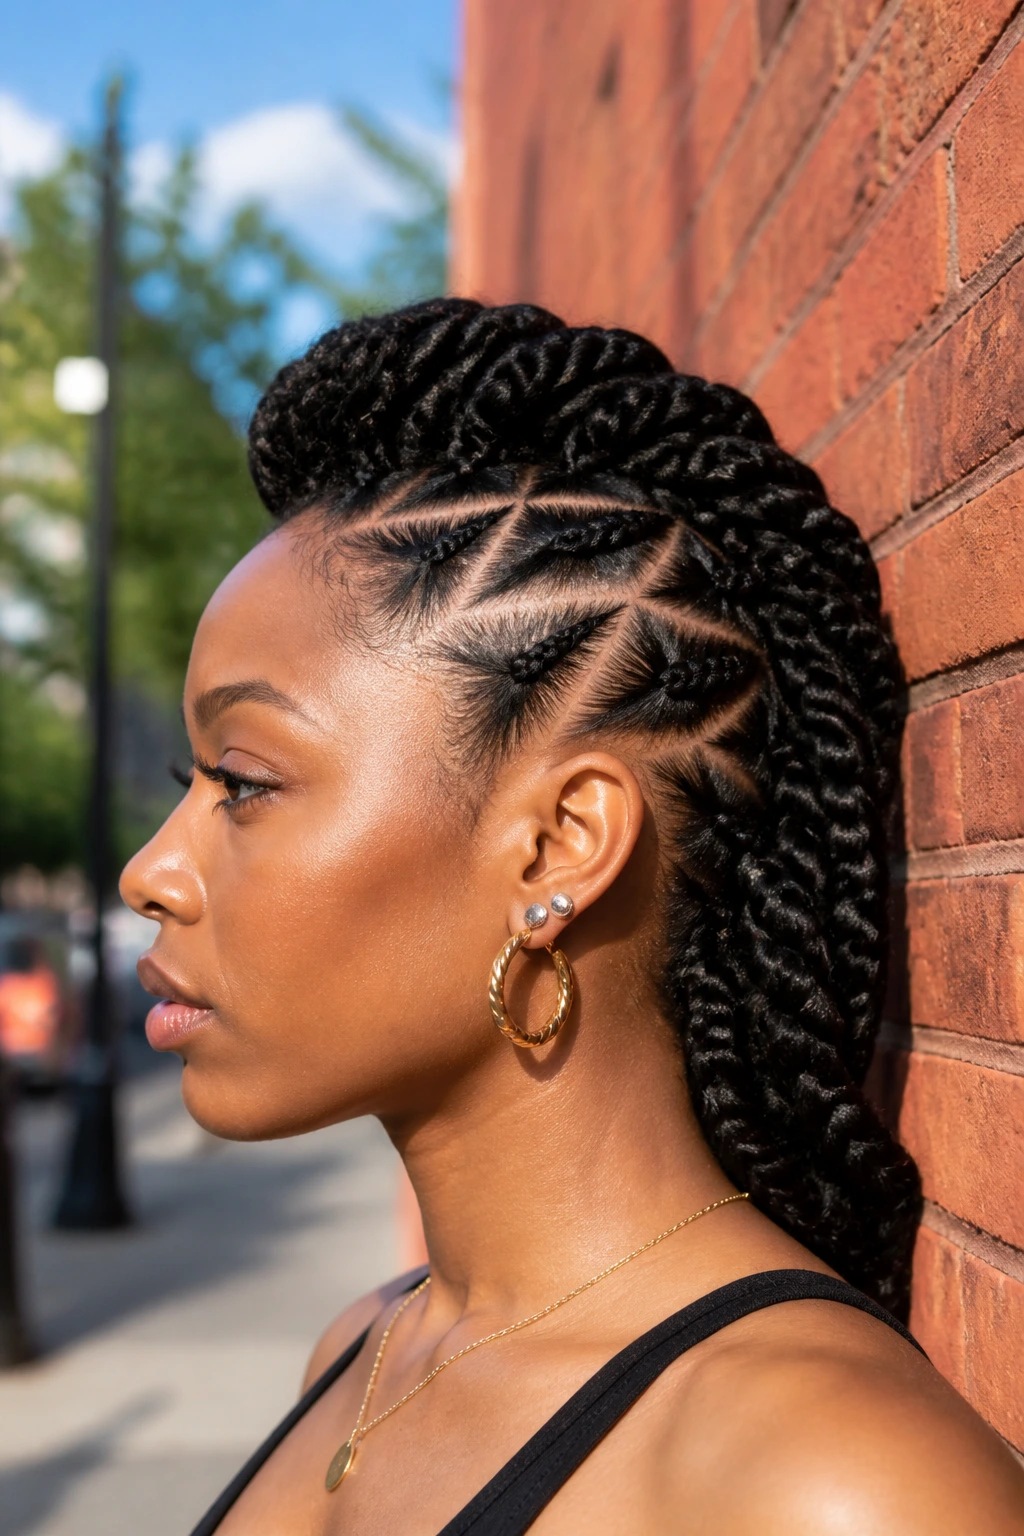
Triangle parts are a small detail with a big payoff. They break away from the standard square or straight sectioning most people expect, so the mohawk immediately looks more custom. Feed-in braids work especially well with this because the gradual braid build keeps the geometry clean.
This style has a slightly more fashion-forward feel without becoming hard to wear. The triangles should be crisp, not crowded. If your parts are too close together, the scalp pattern gets noisy and the mohawk loses focus. I’d keep this one in medium braids unless the hair density is very high.
15. Rope-Braid Mohawk
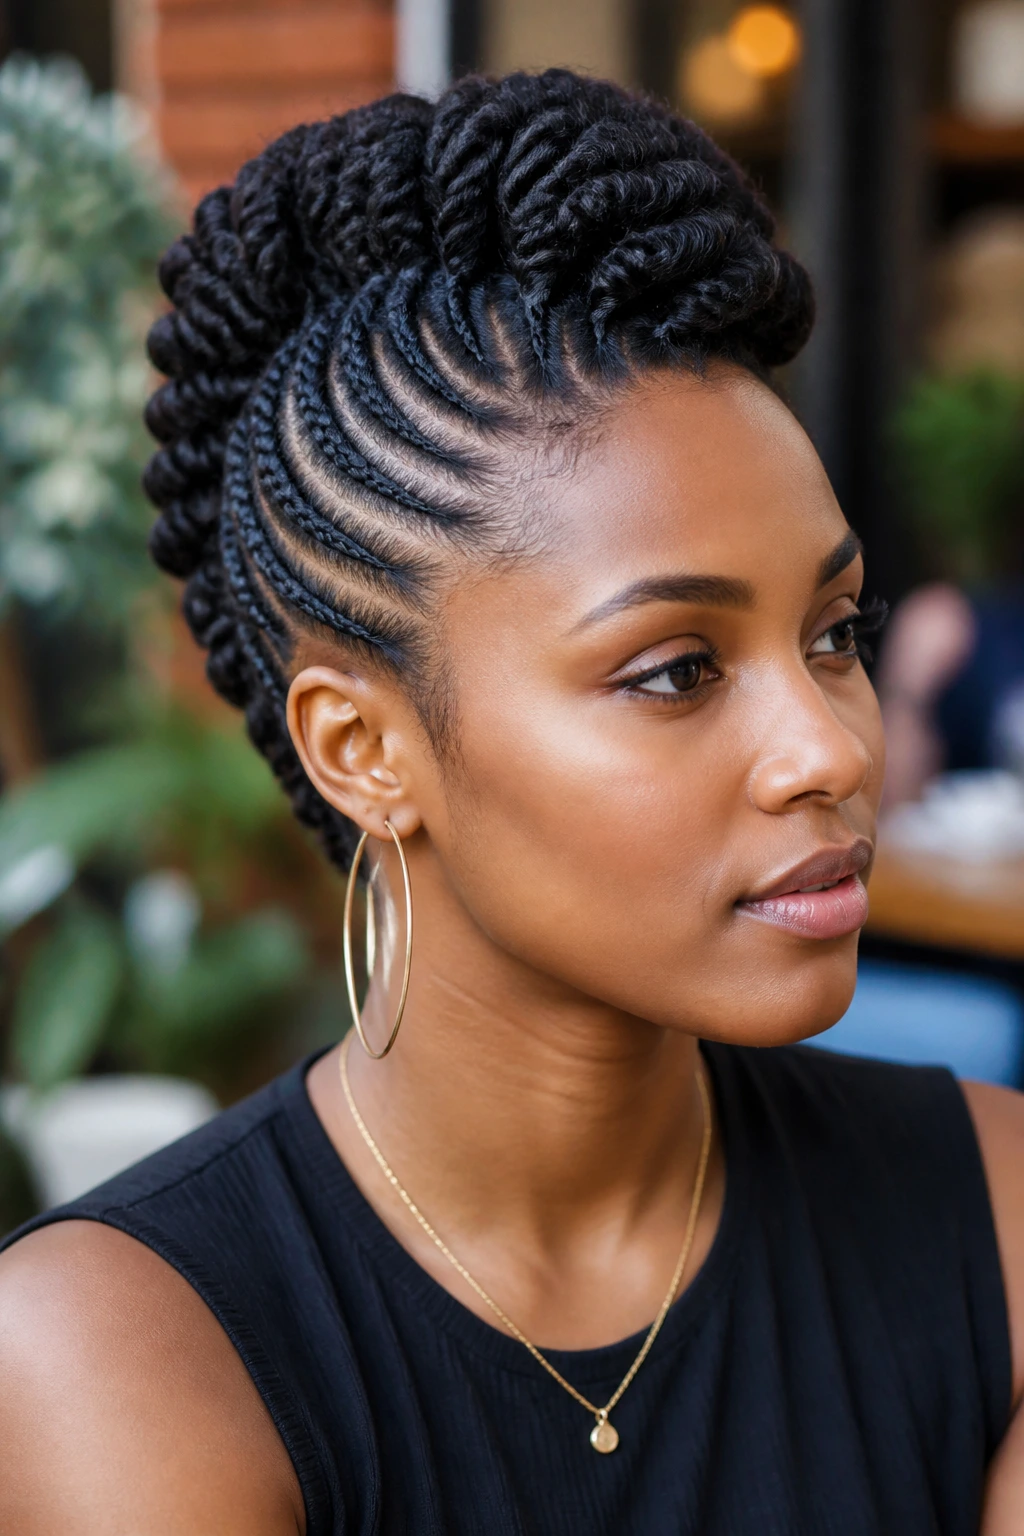
A rope-braid mohawk uses two-strand twists or rope-like plaits to build the center line. The look is softer than cornrows and a little more ropey in texture, which can be a nice break if you’re tired of the usual braid finish. It also gives the style a bit of roundness.
The best part is how quickly rope braids can move from casual to dressed-up depending on how tight the parting is. With clean rows and a smooth base, they look tidy. With a few loose ends or a puffier crown, they lean relaxed. That flexibility is handy when your calendar is doing too much.
16. Cornrow and Twist Combo Mohawk
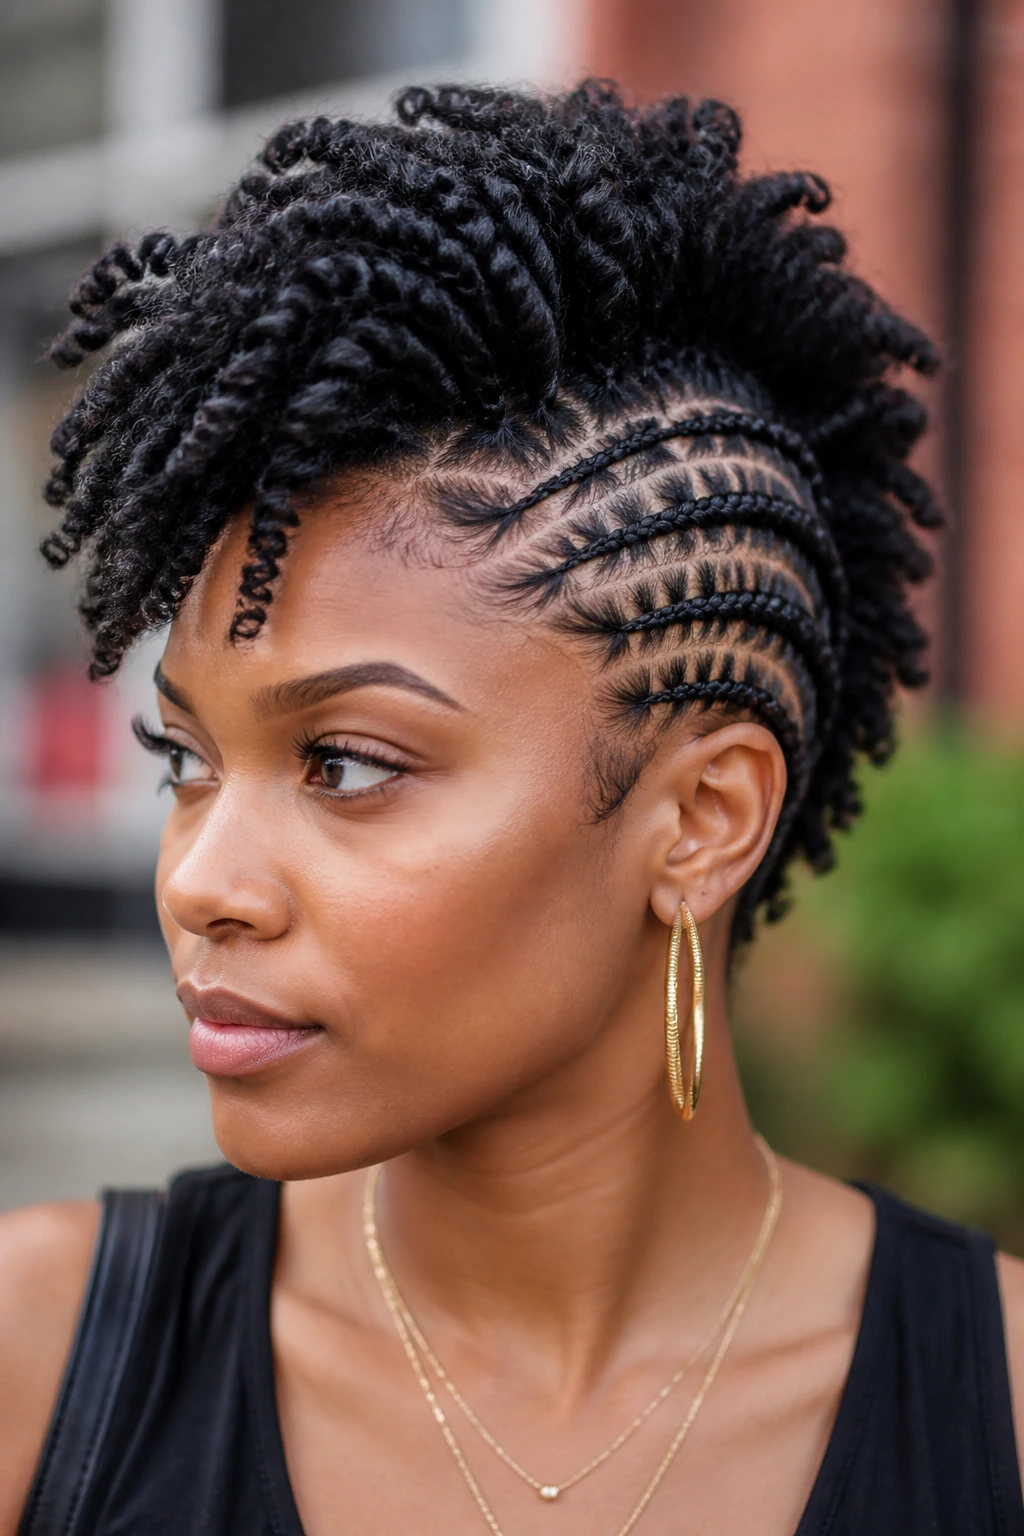
Mixing cornrows with twists is one of my favorite ways to keep a mohawk from feeling too predictable. The cornrows give you control at the base, while the twists add texture and a softer finish up top. It also helps if different sections of your hair respond differently to tension.
That mixed approach is practical, not just decorative. Fine sections can be twisted instead of braided to reduce stress. Denser sections can stay cornrowed for hold. The final style ends up looking layered, which is exactly what natural hair often wants: a little structure, a little softness, and room for the texture to show itself.
17. Braided Mohawk with Loose Curls
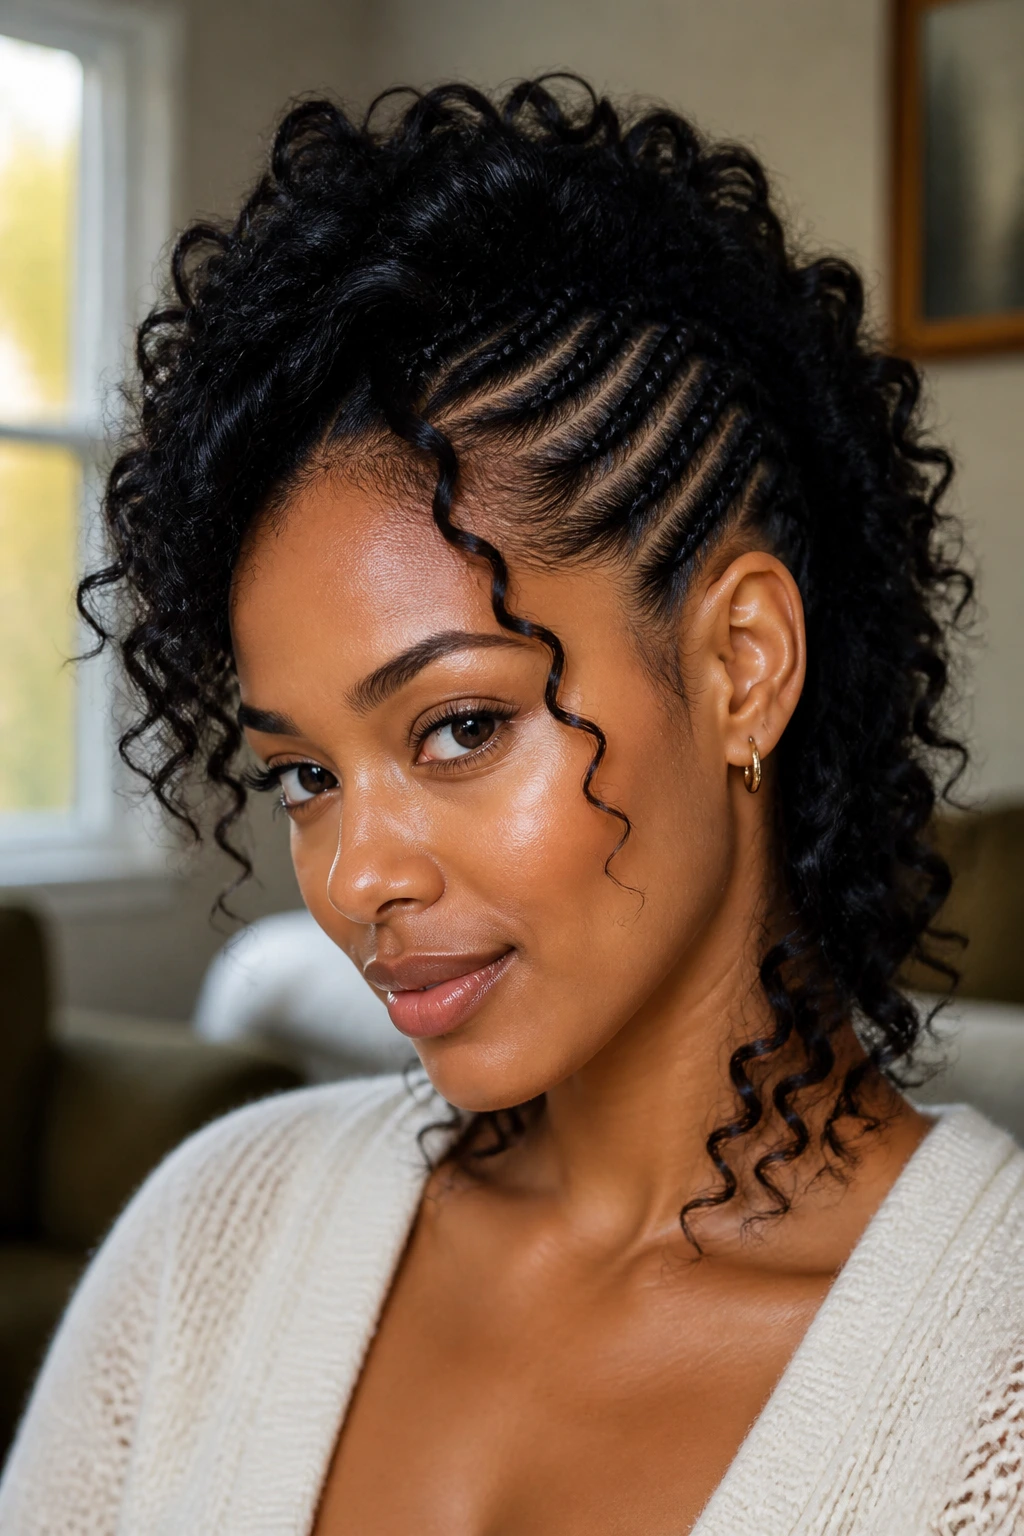
A braided mohawk with loose curls lets the braid work do the framing while the ends keep some movement. The result is less severe than a fully tucked style and easier to soften with your fingers in the morning. Loose curls also catch light in a way the tight braids can’t.
This version is good if you want the mohawk shape, but you don’t want every strand pinned down. The curls can sit at the crown, fall from the back, or hang from selected braid ends. Keep the curl sections hydrated and separated. Once they clump in a bad way, they drag the whole style down.
18. Beaded-End Braided Mohawk
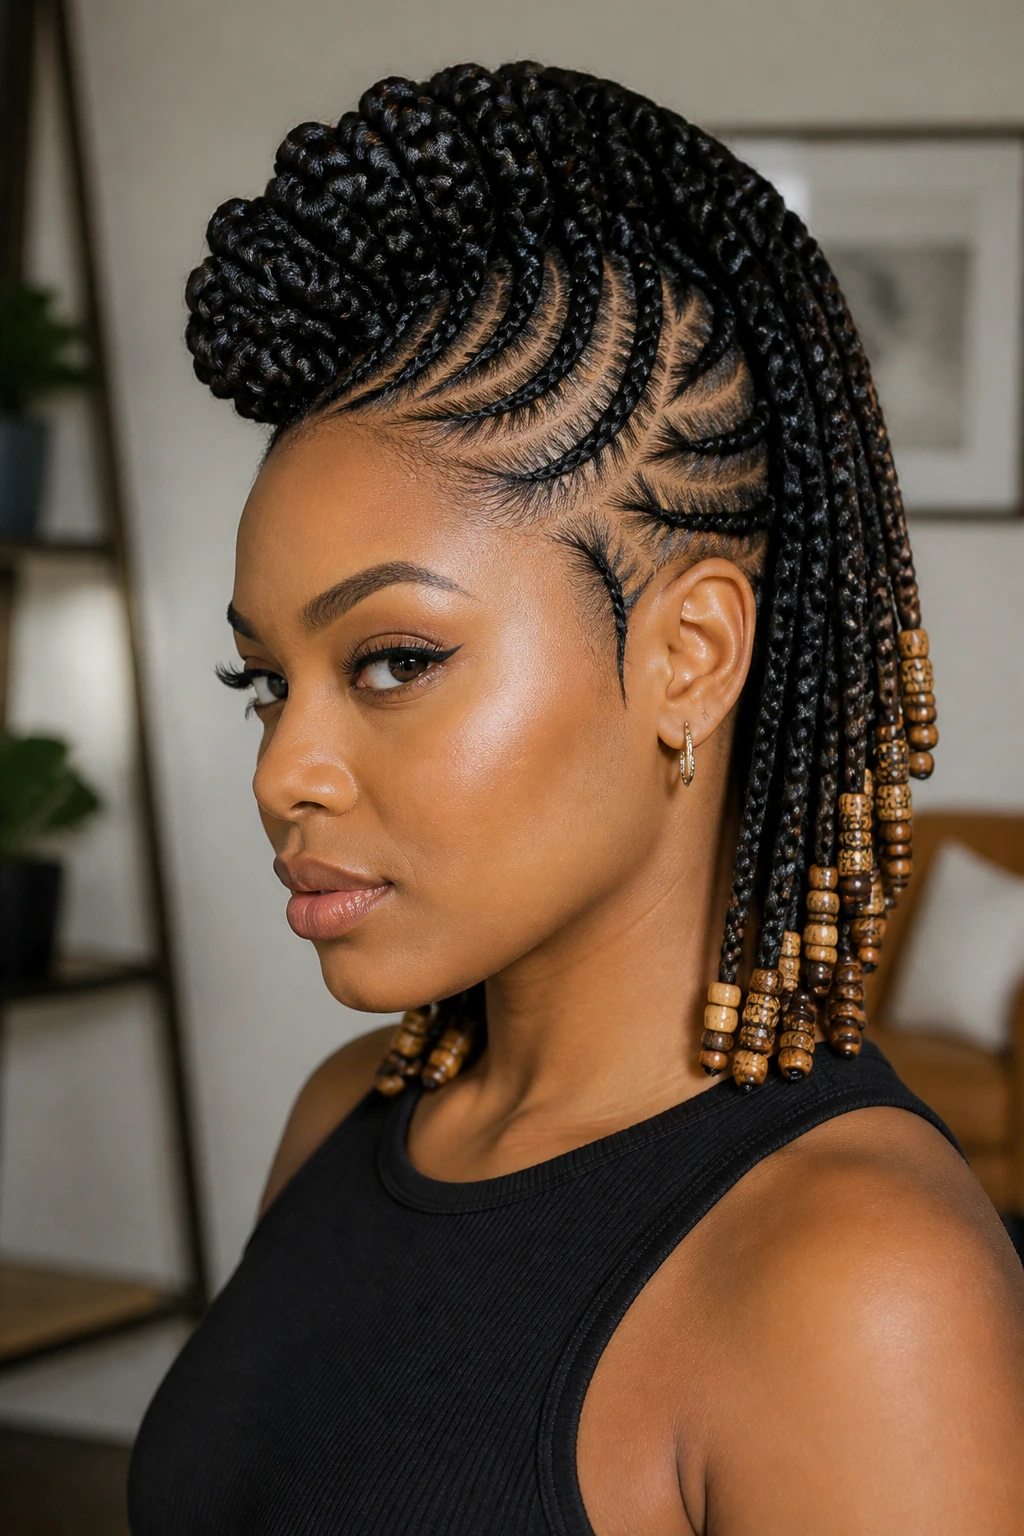
Beads at the ends change the sound and the silhouette. That matters more than people admit. The style suddenly has weight at the tips, which draws the eye downward and makes the braid rows up top feel even more elevated.
A good match for statement days
Beaded ends work best when the rest of the braid pattern stays clean. If the parts are messy, the beads won’t save it. They’ll just add more noise. Use them on medium or long braids where the ends have enough length to move without looking cramped.
I’d keep the bead count controlled. Three well-placed sections usually say more than ten crowded ones.
19. Kids’ Soft-Edge Braided Mohawk
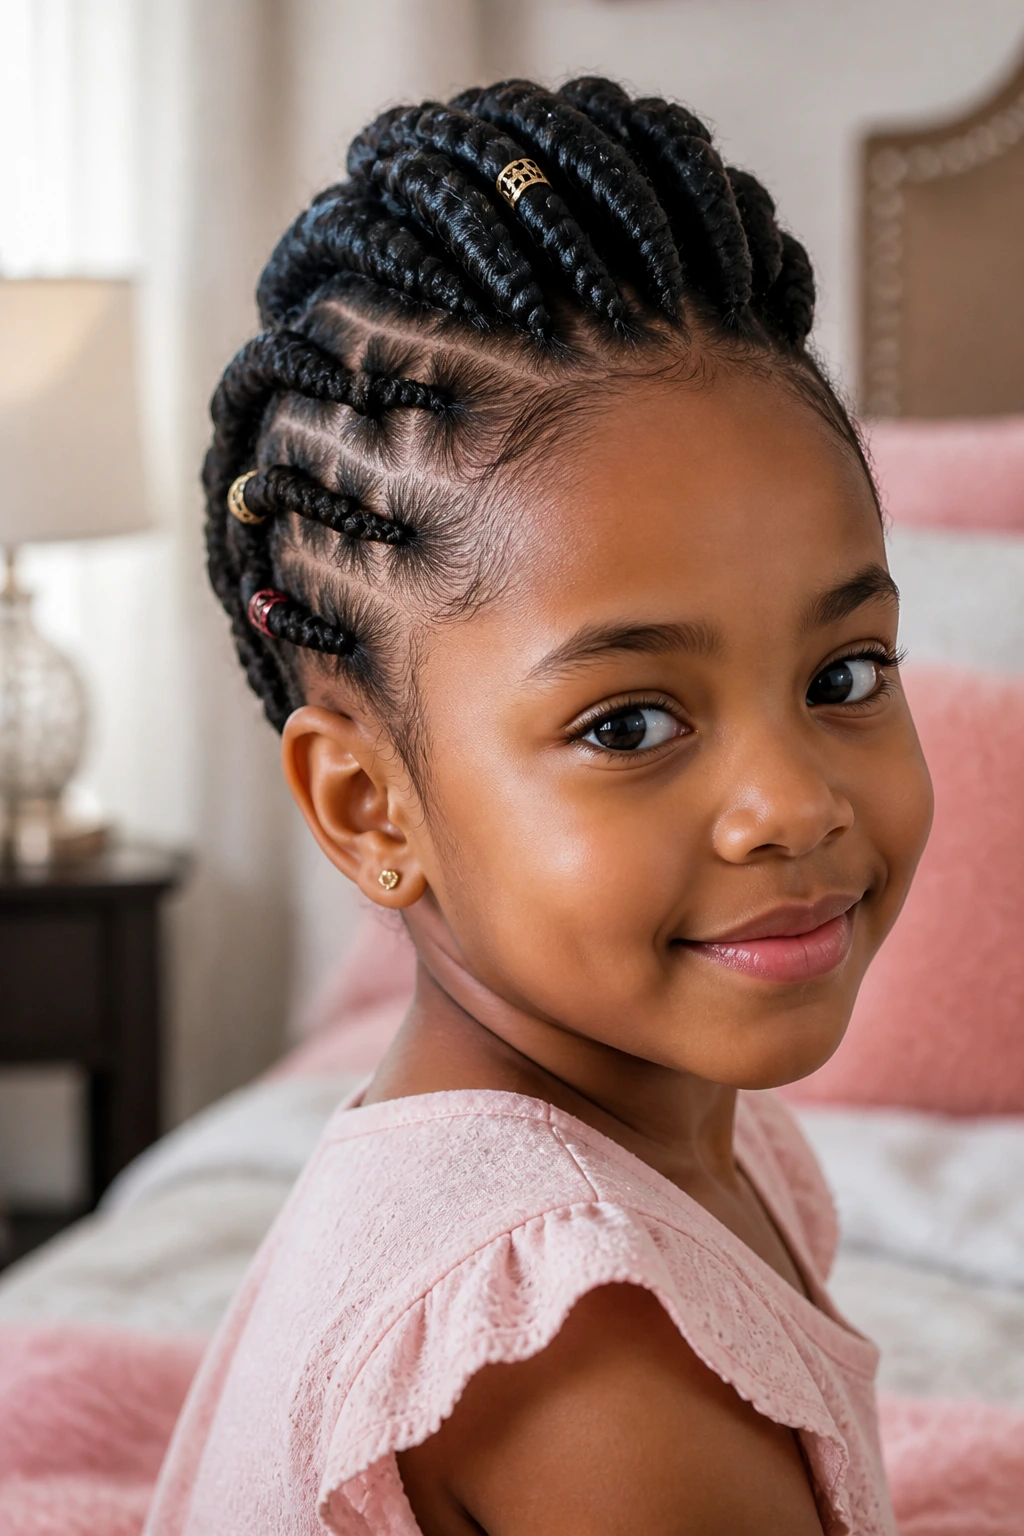
A kids’ braided mohawk should stay soft around the edges, both visually and physically. Rounded parts, light tension, and smaller accessories make the style easier to wear and easier to keep on for a full day without complaints. Kids notice pull fast. So does their scalp.
This version can still be fun. Tiny cuffs, one or two colored beads, or a puff at the center give it personality without turning it into a heavy install. The shape should stay clear, but the lines should not look sharp enough to grate. That’s the whole balance.
20. Micro Braid Mohawk
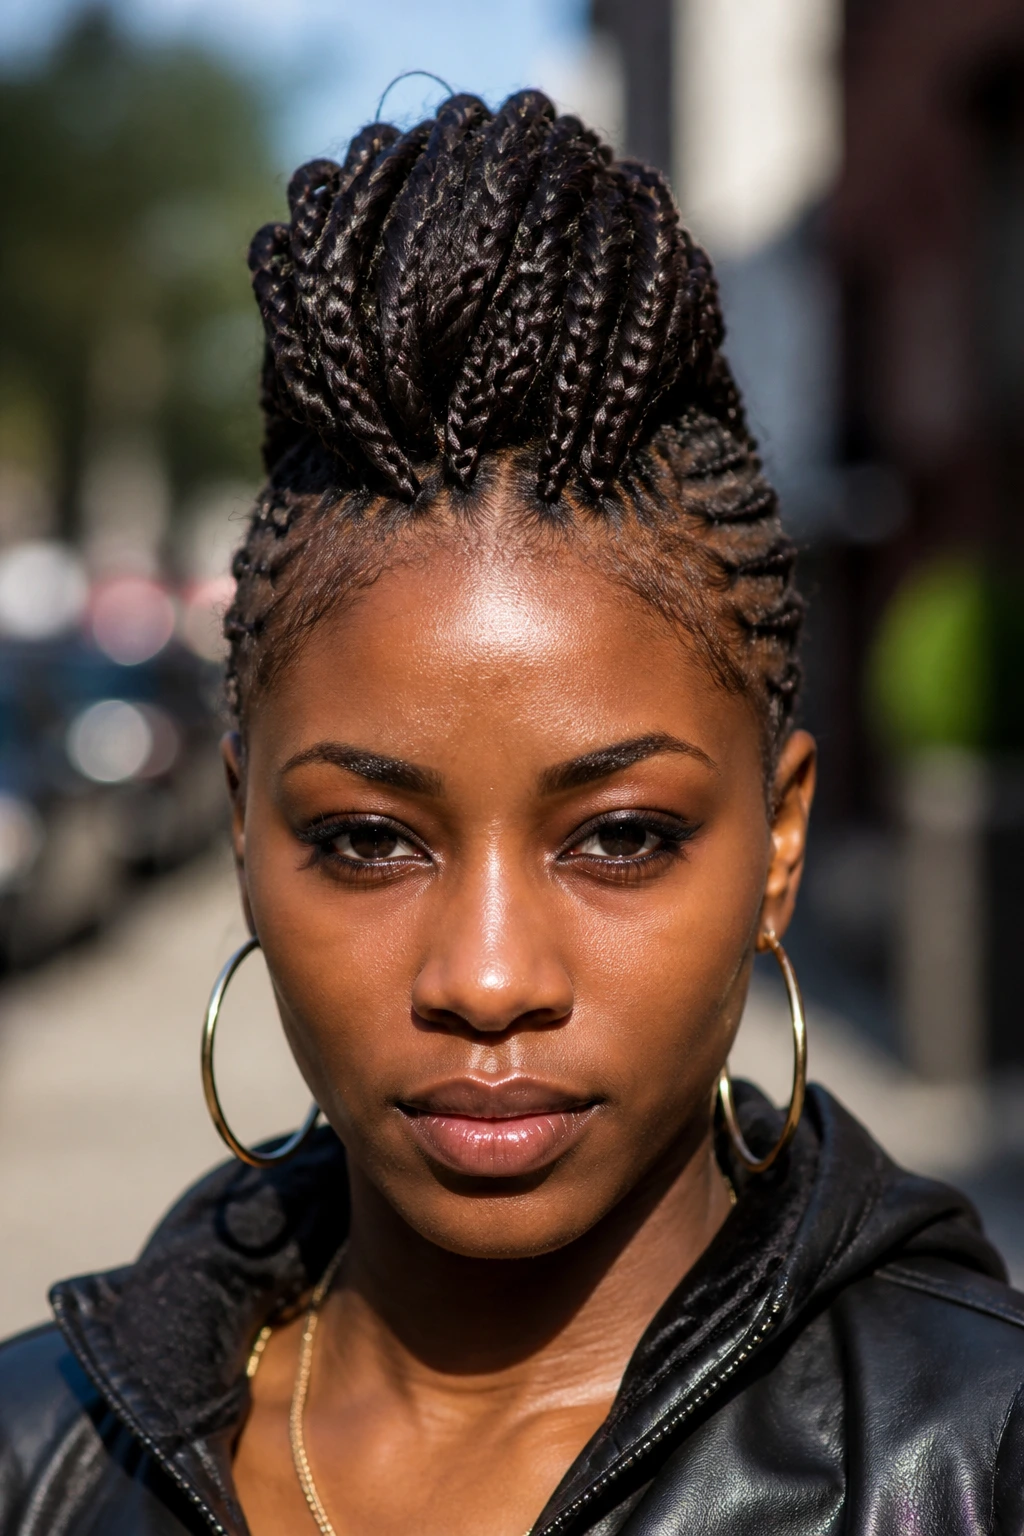
Micro braids give the mohawk a lot of texture and movement, but they ask for patience. A lot of it. The payoff is a sleek, detailed ridge that can be styled high, tucked, or swept to one side. On dense natural hair, the effect can be striking because the tiny plaits stack so neatly.
The downside is weight and install time. If the braids are too tight or too many, the style stops being protective and starts being a burden. Keep the first rows lighter and make sure the center has enough support. Micro braids reward precision. They punish rushing.
21. Loc-Friendly Braided Mohawk
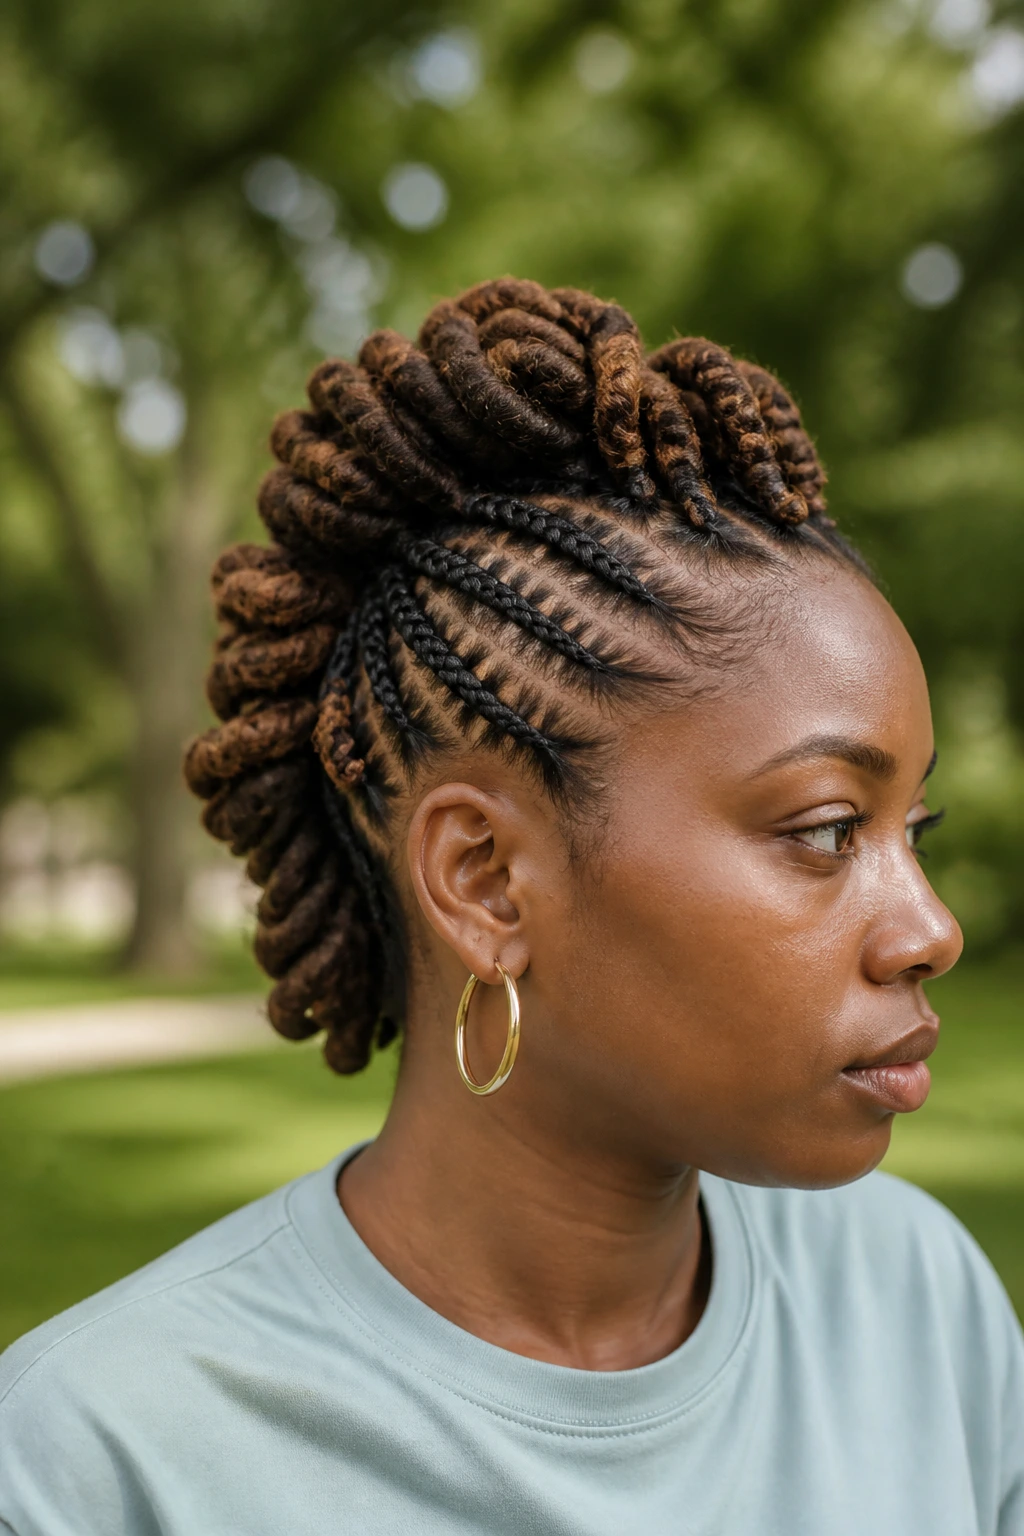
If you wear starter locs or mature locs, a braided mohawk can still make sense. The sides can be cornrowed or pinned close, while the locs in the center are gathered into a ridge, a roll, or a lifted bun. It keeps the look clean without asking the locs to flatten themselves.
This is especially nice when you want a hybrid style that respects the shape of the locs instead of hiding them. A few wrapped locs at the crown can give the mohawk more height, and a smooth perimeter keeps the silhouette tidy. The key is balance. Heavy center. Calm sides.
22. Knotless Braid Mohawk
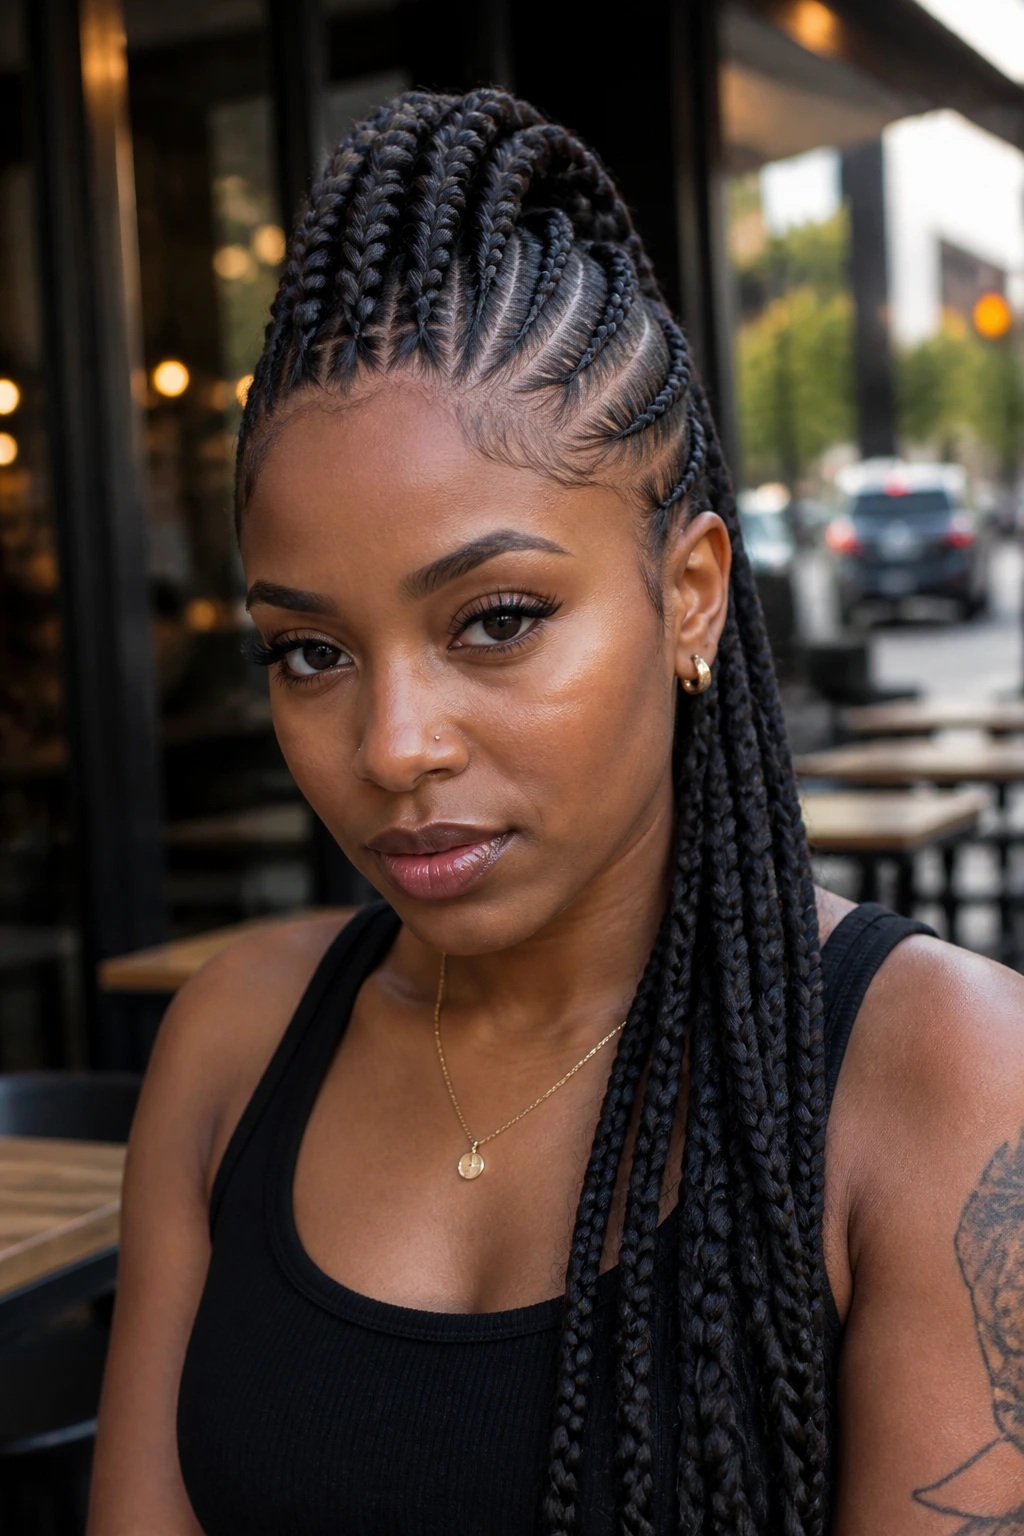
Knotless braids are easier on the scalp than older braid installs because the hair feeds in gradually at the base. That matters in a mohawk, where the sides and crown can already carry a lot of visual weight. The smoother base also makes the whole style look cleaner.
This version is a smart choice if you plan to wear the style for more than a few days and don’t want the first inch to feel bulky. It photographs neatly, holds a polished line, and can be styled into a center ridge without the hard bumps some braided styles create. Quiet at the base. Strong up top.
23. French Braid Mohawk with Laced Sides
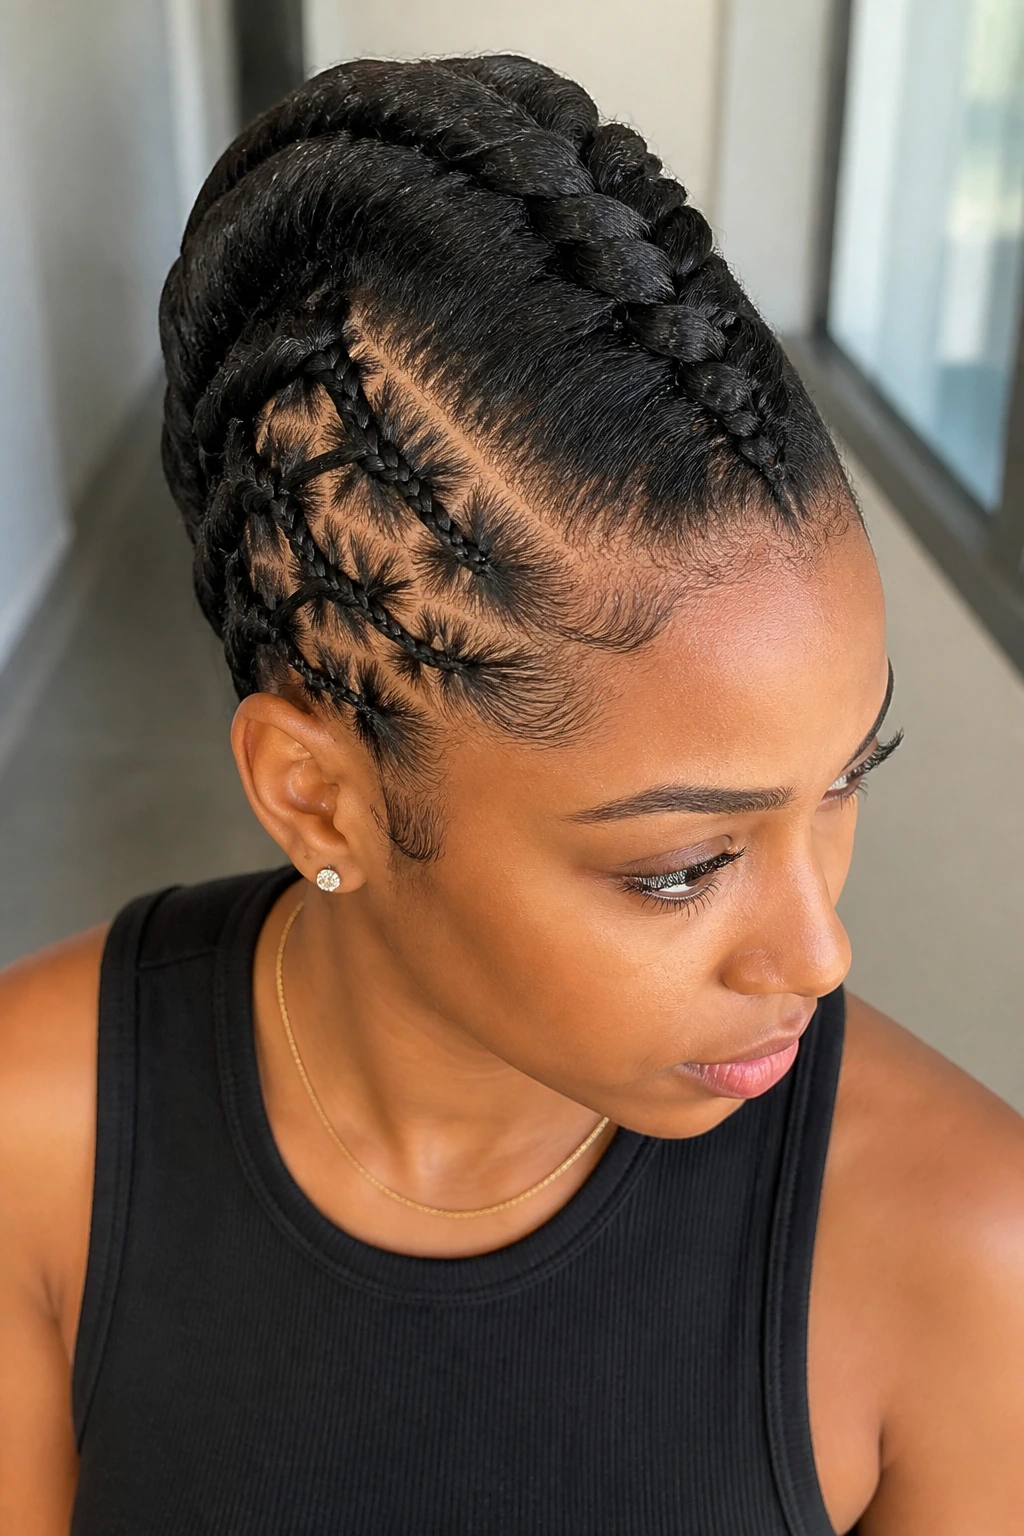
A French braid down the center of the head gives the mohawk a continuous spine, while laced side sections make the profile more detailed. It’s a neat option when you want the hairstyle to feel structured from front to back instead of only dramatic at the crown.
The braid line stays visible the whole way, which is the appeal. You can tighten the center for a sharper finish or leave it a little fuller for softness. Either way, this one suits longer natural hair best because the braid needs enough length to stay readable all the way to the nape.
24. Criss-Cross Braid Hawk
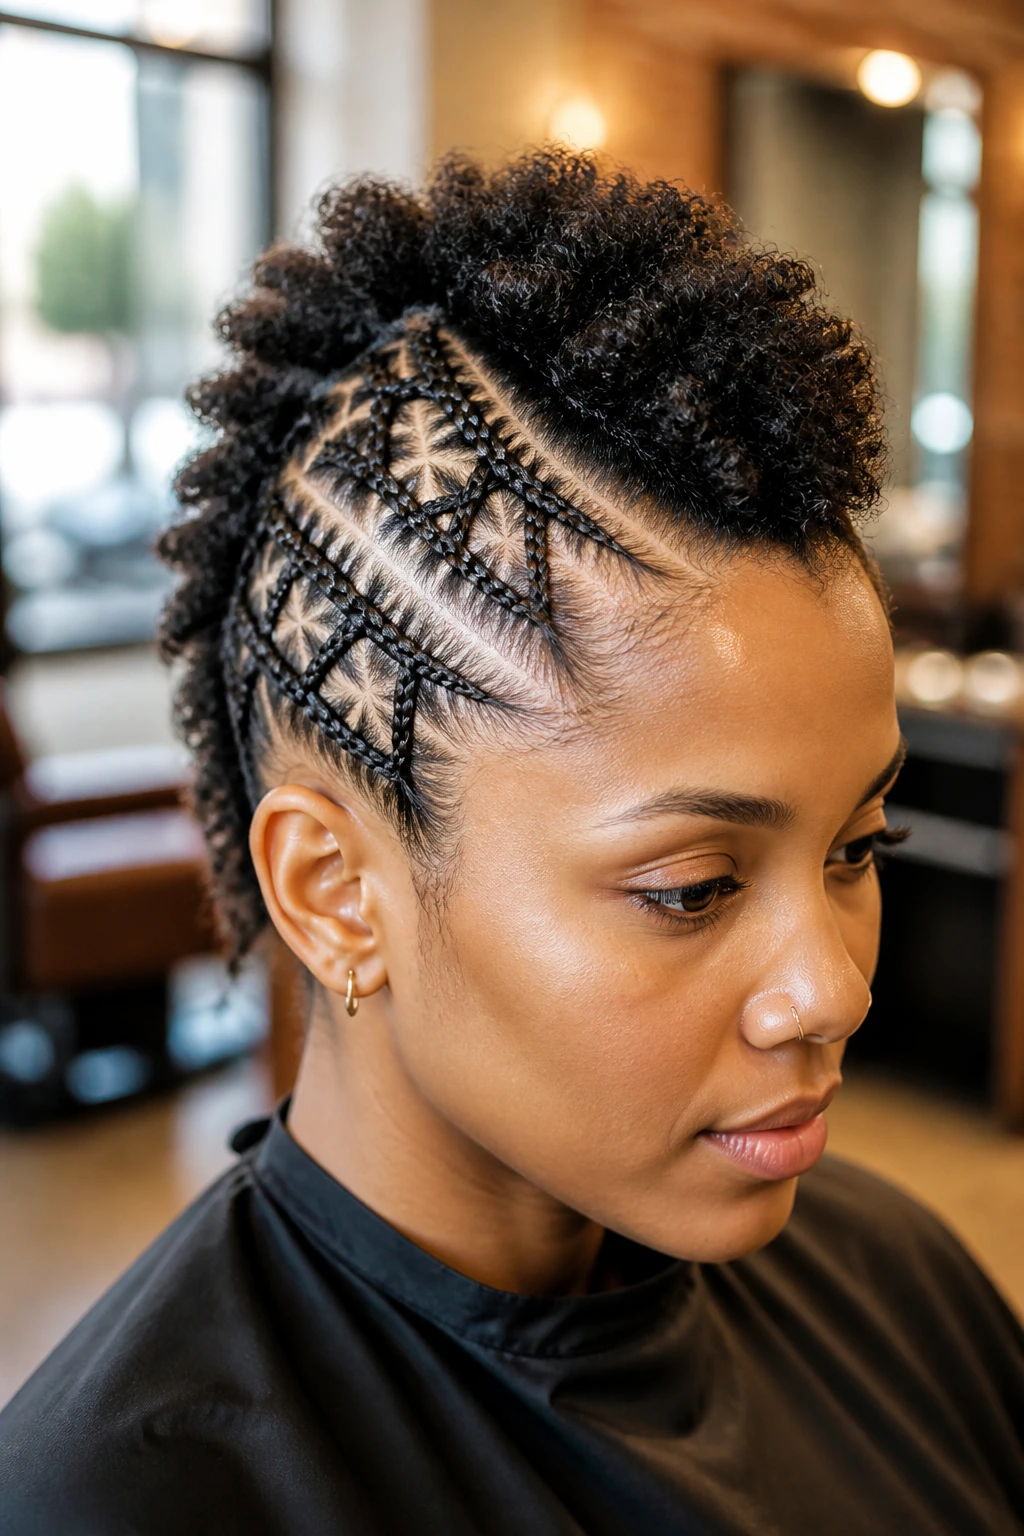
Criss-cross sections make the scalp pattern itself part of the design, which is useful if you want the mohawk to feel more intricate without piling on accessories. The intersecting braids create movement before you even reach the center ridge.
Best for medium to thick hair
Thicker hair holds this design well because the lines stay visible and don’t collapse into one another. If the hair is finer, keep the braids a little wider so the crosswork doesn’t disappear. This style has enough geometry on its own. No beads are needed unless you want them.
It’s one of those looks that rewards a steady hand more than speed. Rushing the parting ruins the whole point.
25. Curly Tendril Crown Mohawk
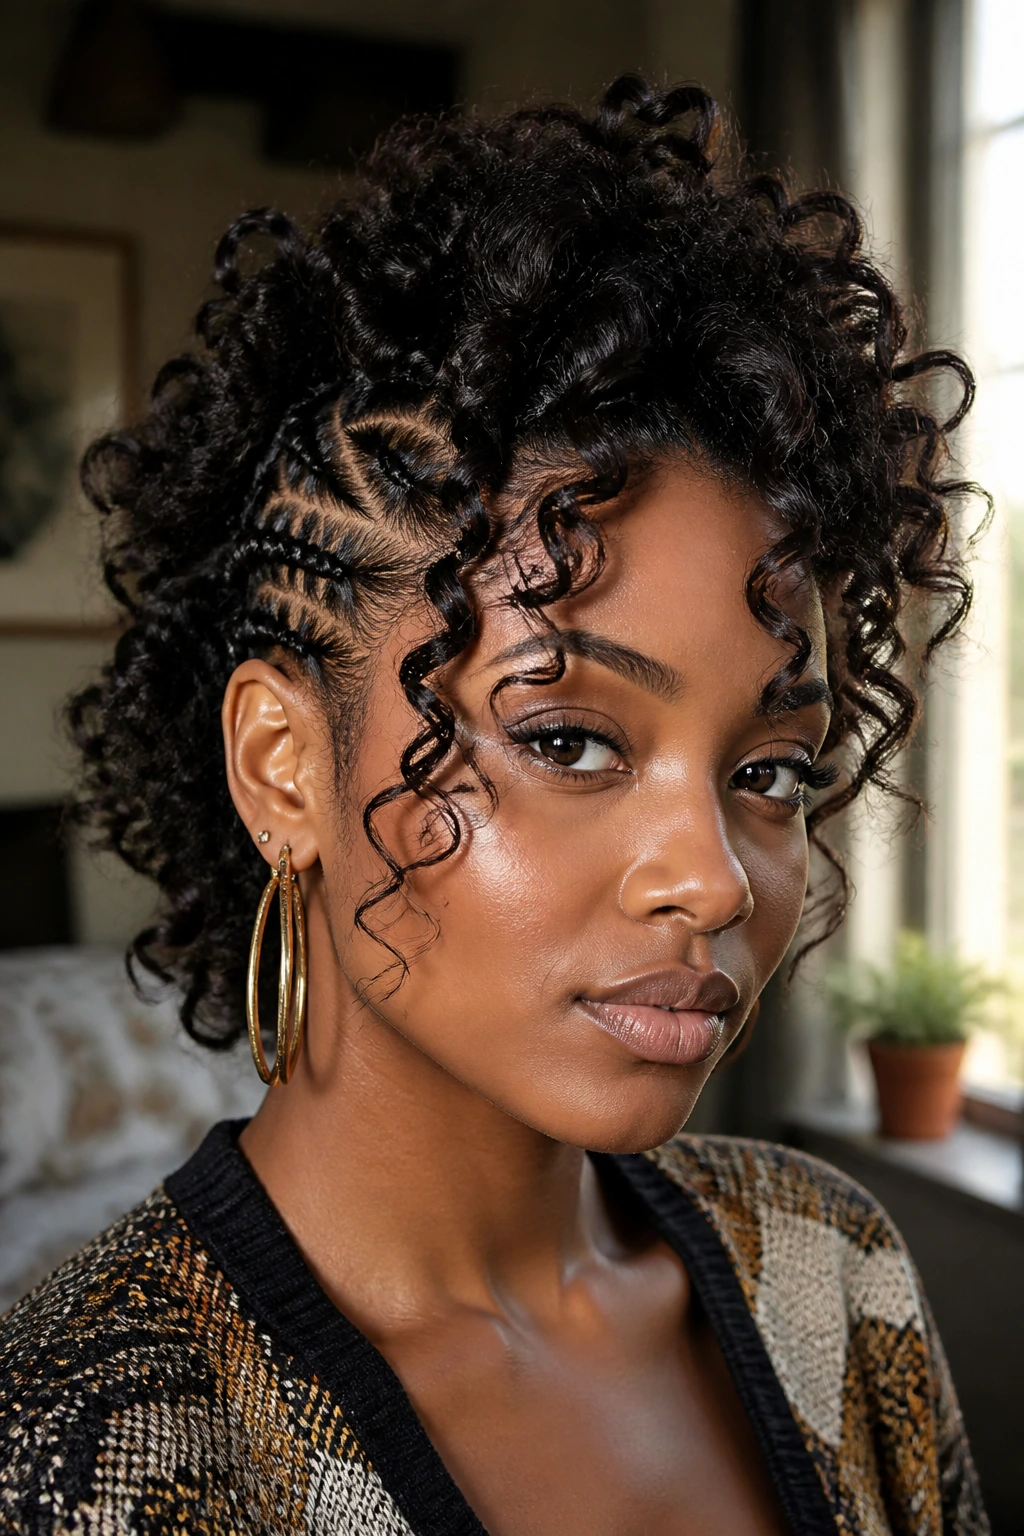
A few carefully placed tendrils around the crown can soften a braided mohawk without making it messy. The tendrils frame the face, break up the top line, and give the braid pattern some breathing room. That little bit of looseness makes a difference.
I like this style when the hairline is the part you want to show off. It keeps the center lifted, but it doesn’t harden the face. Keep the tendrils hydrated and defined, or they’ll frizz out in a way that looks accidental instead of soft. There’s a line between lived-in and undone. This style sits right on that line.
26. Cornrow Hawk with Side Designs
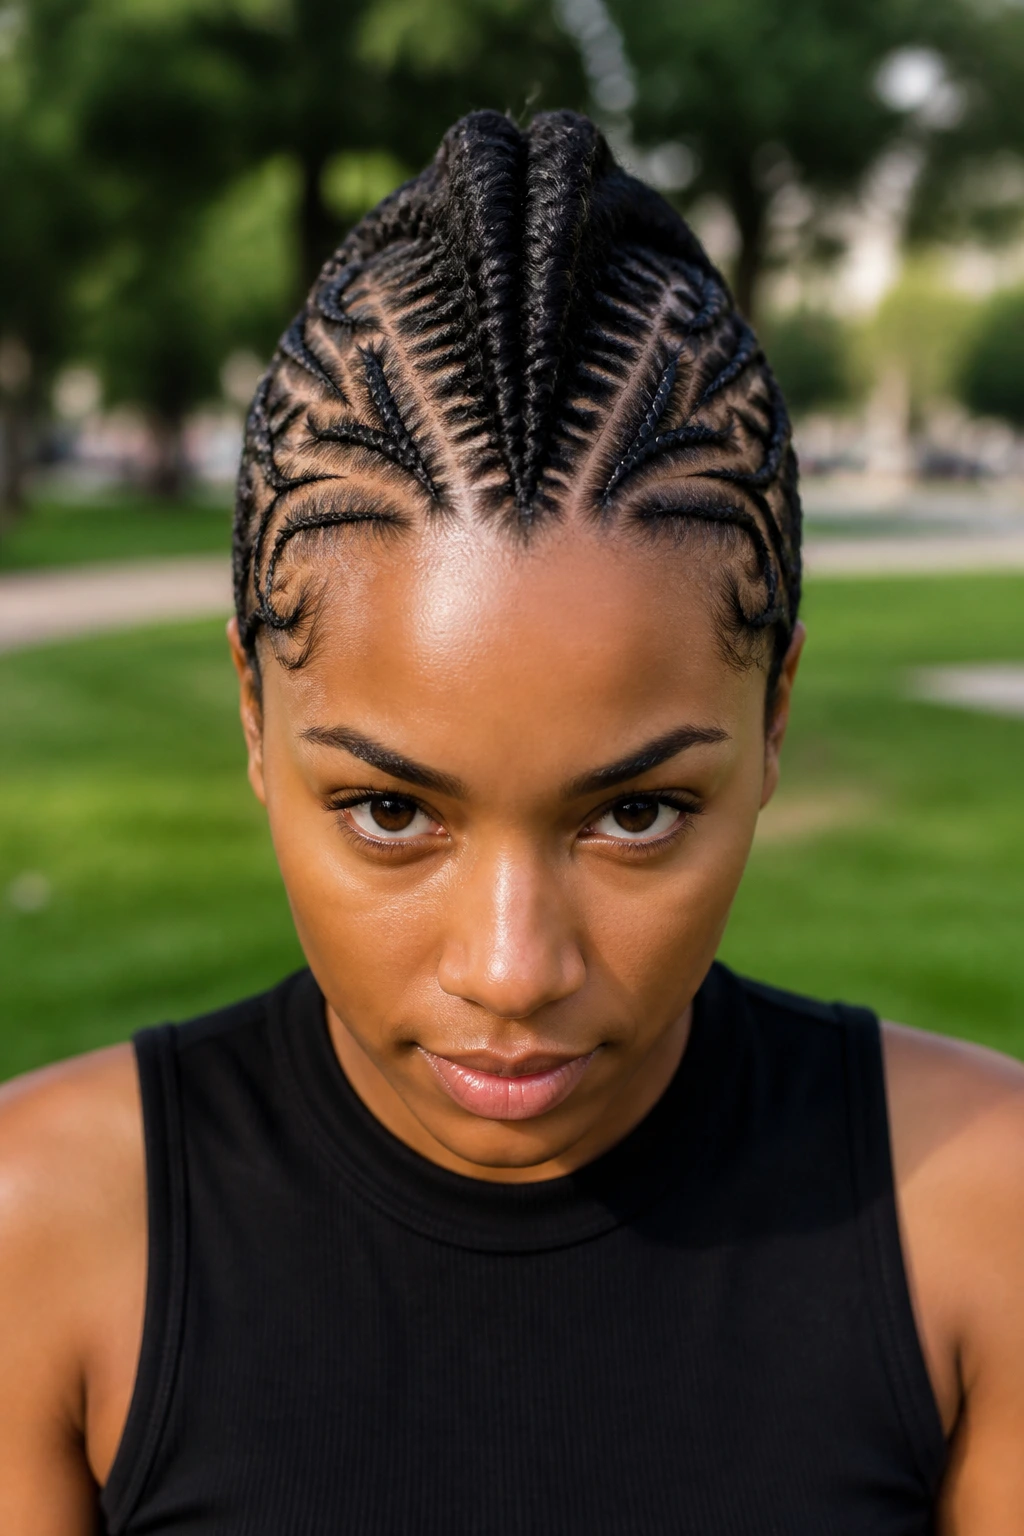
Side designs turn the temples into the main event. Swirls, arrows, curved lines, and parting shapes all work here, as long as the center ridge still has enough space to breathe. If the sides get too busy, the mohawk gets lost.
This one is for people who want detail to be visible even when the hair is pulled back. The side designs are the hook. The ridge is the anchor. Keep one side pattern mirrored or intentionally offset, but don’t crowd every inch of scalp with lines. Negative space matters.
27. Fulani-Inspired Braided Mohawk
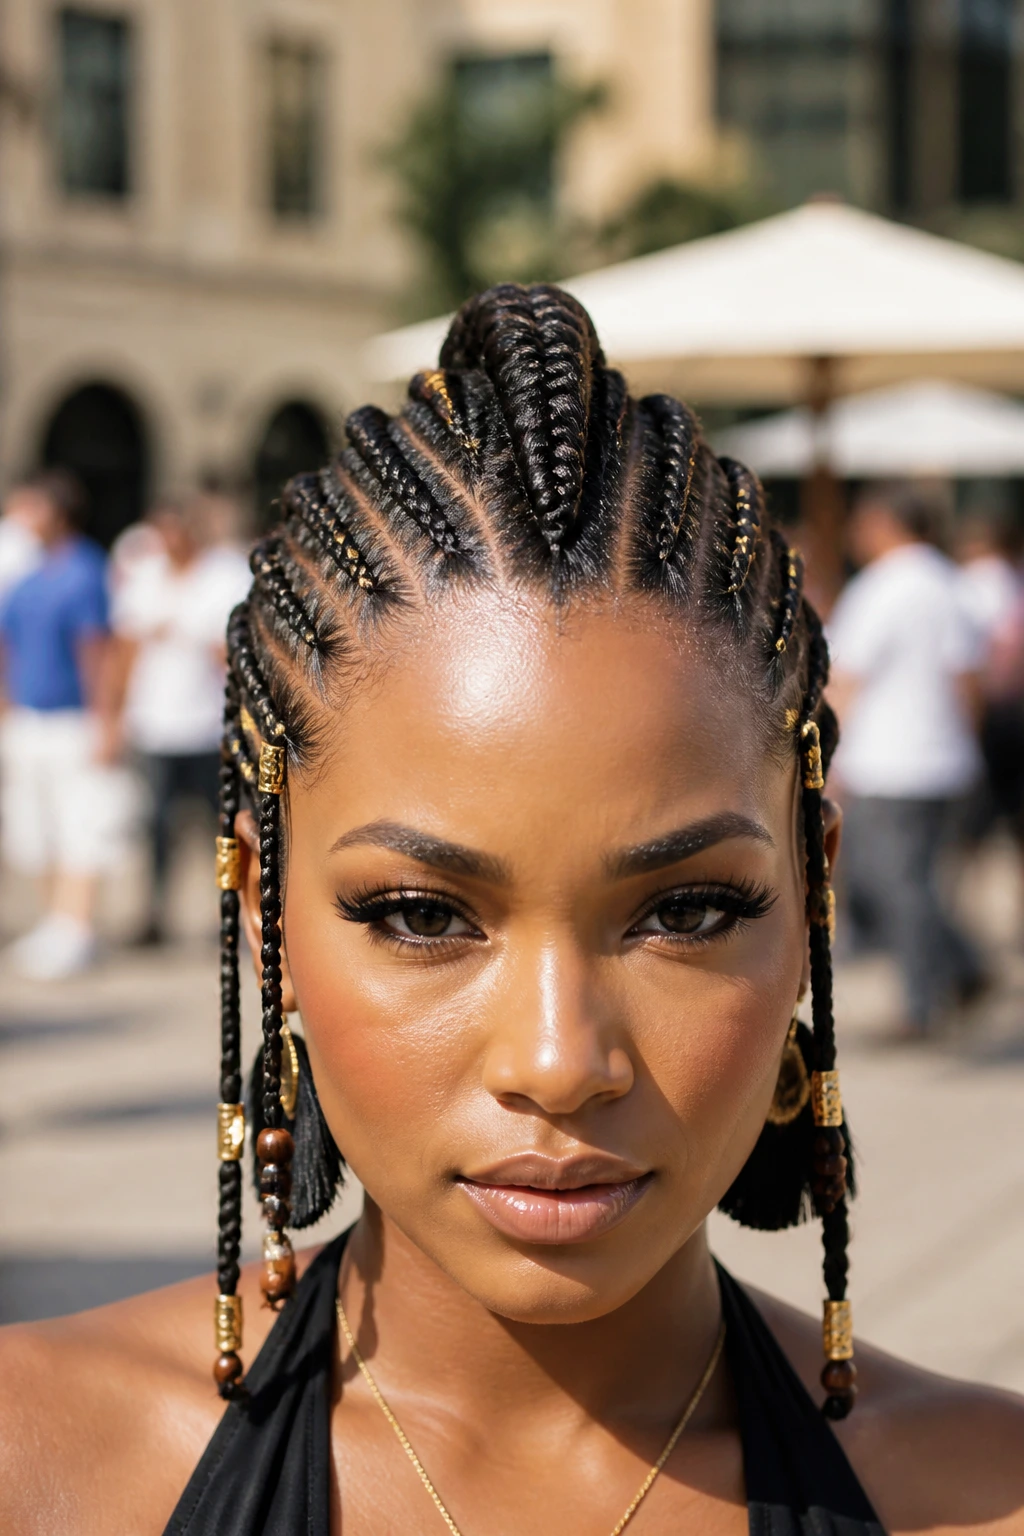
Fulani-inspired braiding usually brings a center braid, side rows, and decorative details like beads or narrow accent braids. Translated into a mohawk, it gives you a style that feels rooted and ornate at the same time. The profile is clean, but not plain.
The beauty of this version is the rhythm. The repeated lines guide the eye toward the center, which naturally strengthens the hawk shape. Add accessories sparingly so the structure stays readable. Too many decorations and the braid map turns into clutter. A few bead sets go a long way.
28. Mohawk Bun with Braided Sides
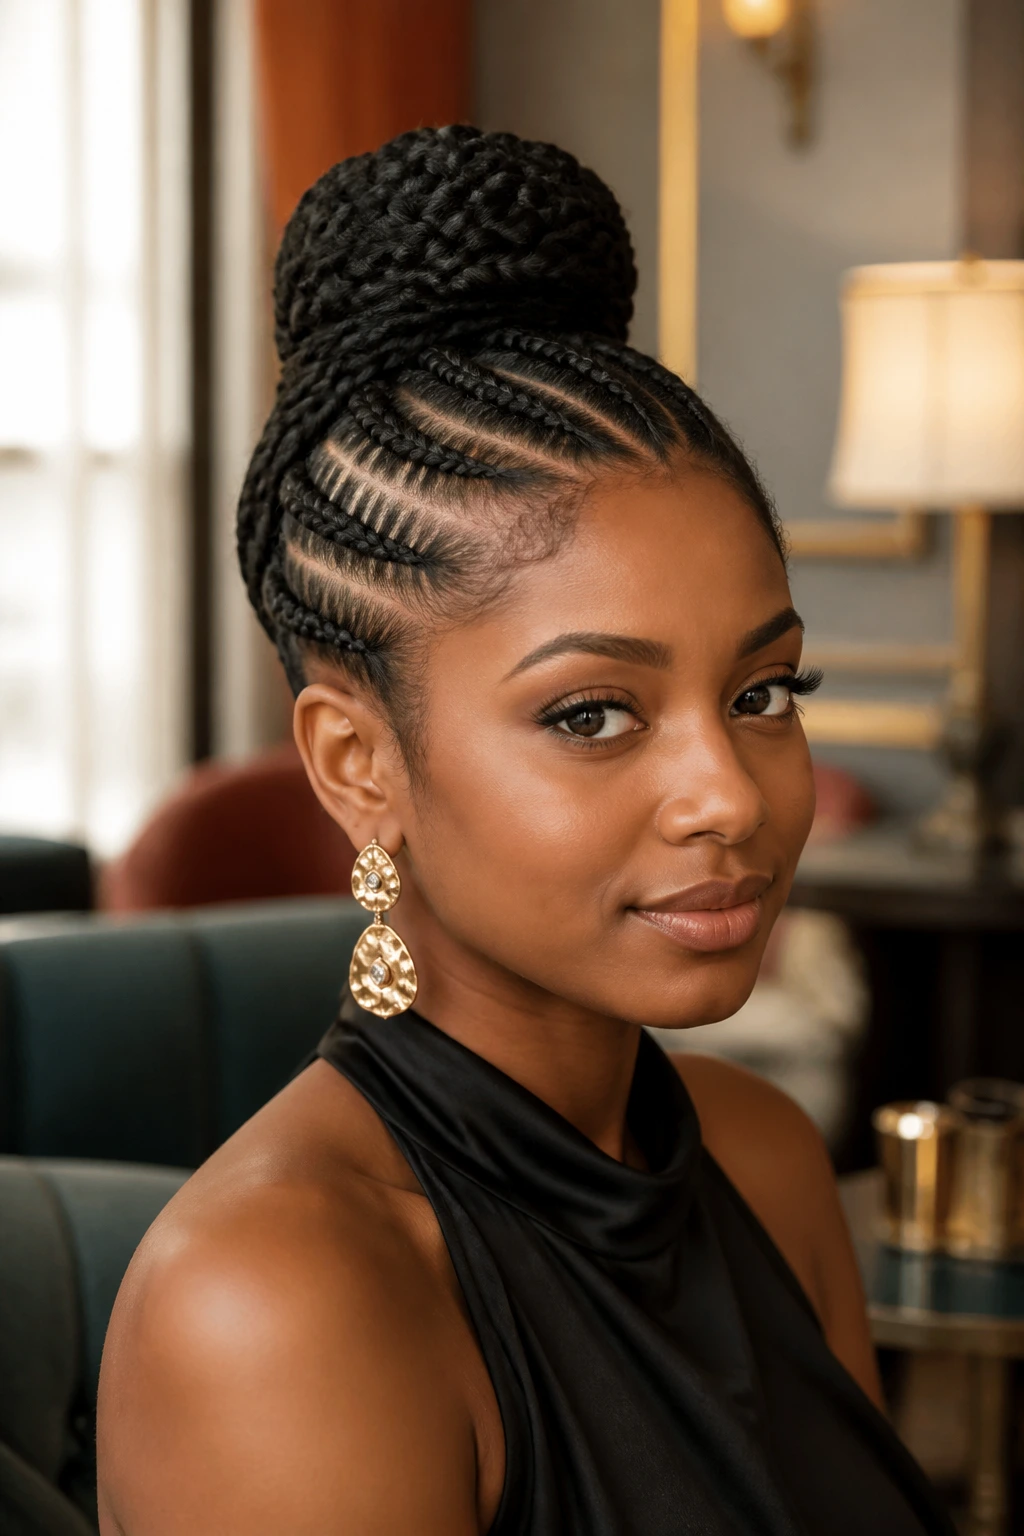
A braided mohawk that ends in a bun is one of the cleanest ways to give the style a formal finish. The sides stay tucked, the center climbs up, and the bun closes the shape with a tidy knot of hair right where the eye expects a finish line.
This is a strong pick for long natural hair or braids with enough length to gather neatly. The bun can sit high for a sharper silhouette or lower for a softer one. Either way, pin it well. A loose bun changes the whole style from “planned” to “slipping.”
29. Half-Up Braided Mohawk
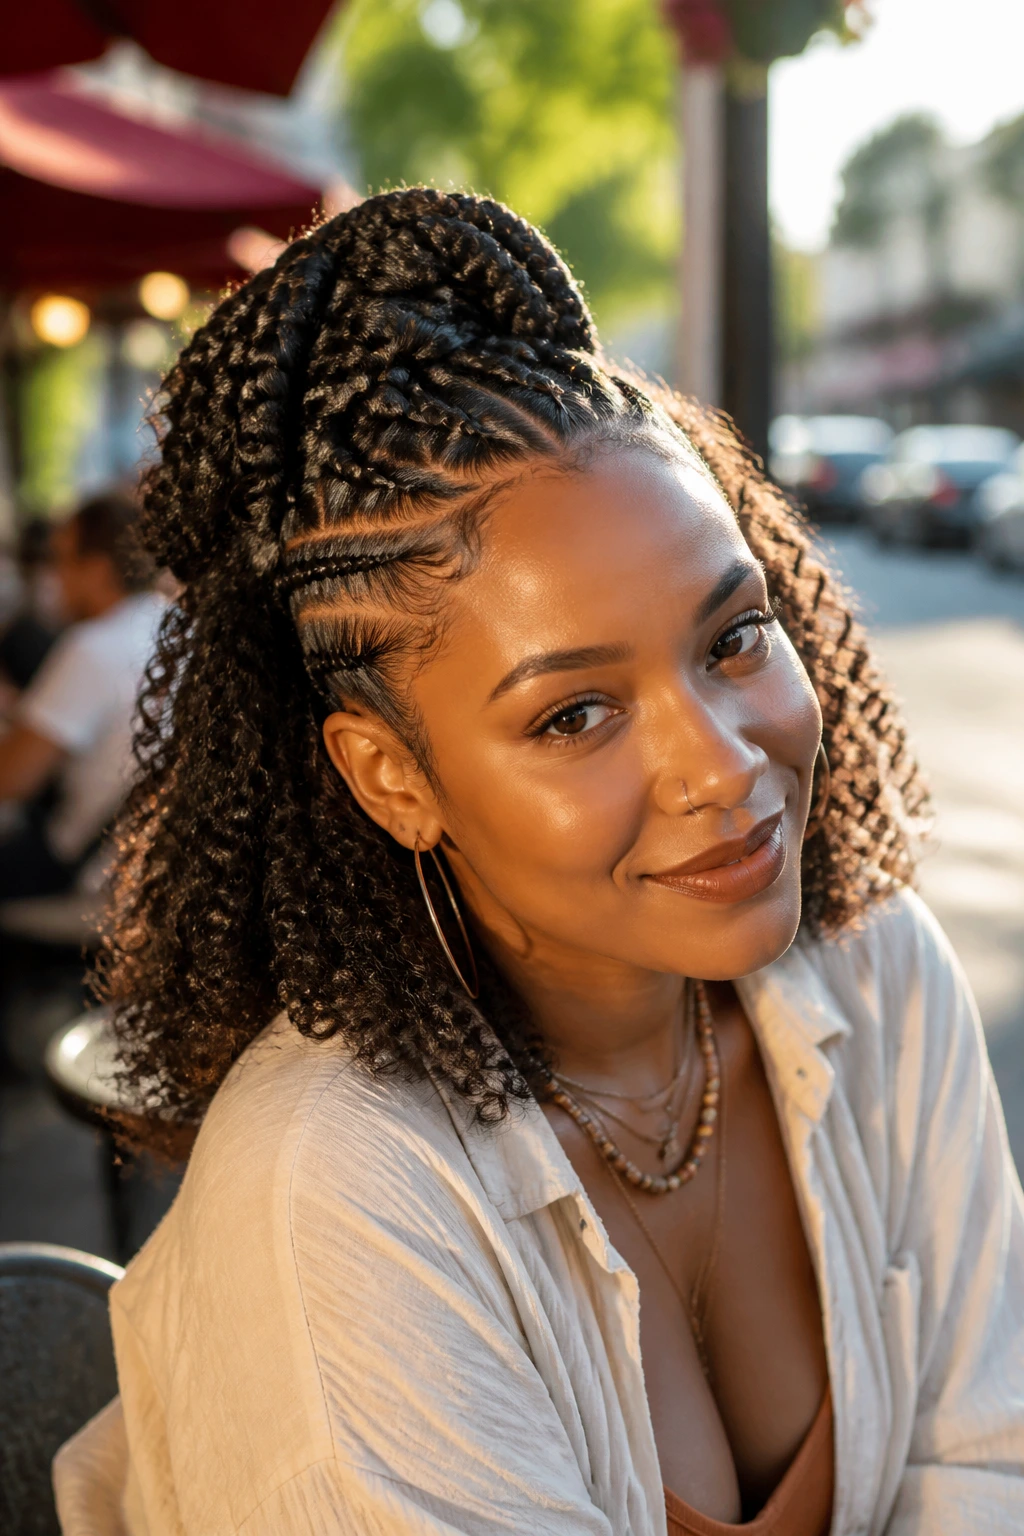
Half-up mohawk styles are the relaxed cousin in this family. Part of the hair gets braided and lifted, while the rest hangs loose, curly, twisted, or stretched. That contrast gives you the mohawk shape without boxing in the whole head.
A good compromise style
If you like volume around the face, this is a smart move. The loose hair keeps the look soft, and the braided top section keeps it from collapsing. It’s also easier to wear when you don’t want a full install.
The trick is to make sure the top section is tall enough. If it sits too low, it reads like a half-up style, not a mohawk. Height is the difference.
30. Feed-In Front Crown Mohawk
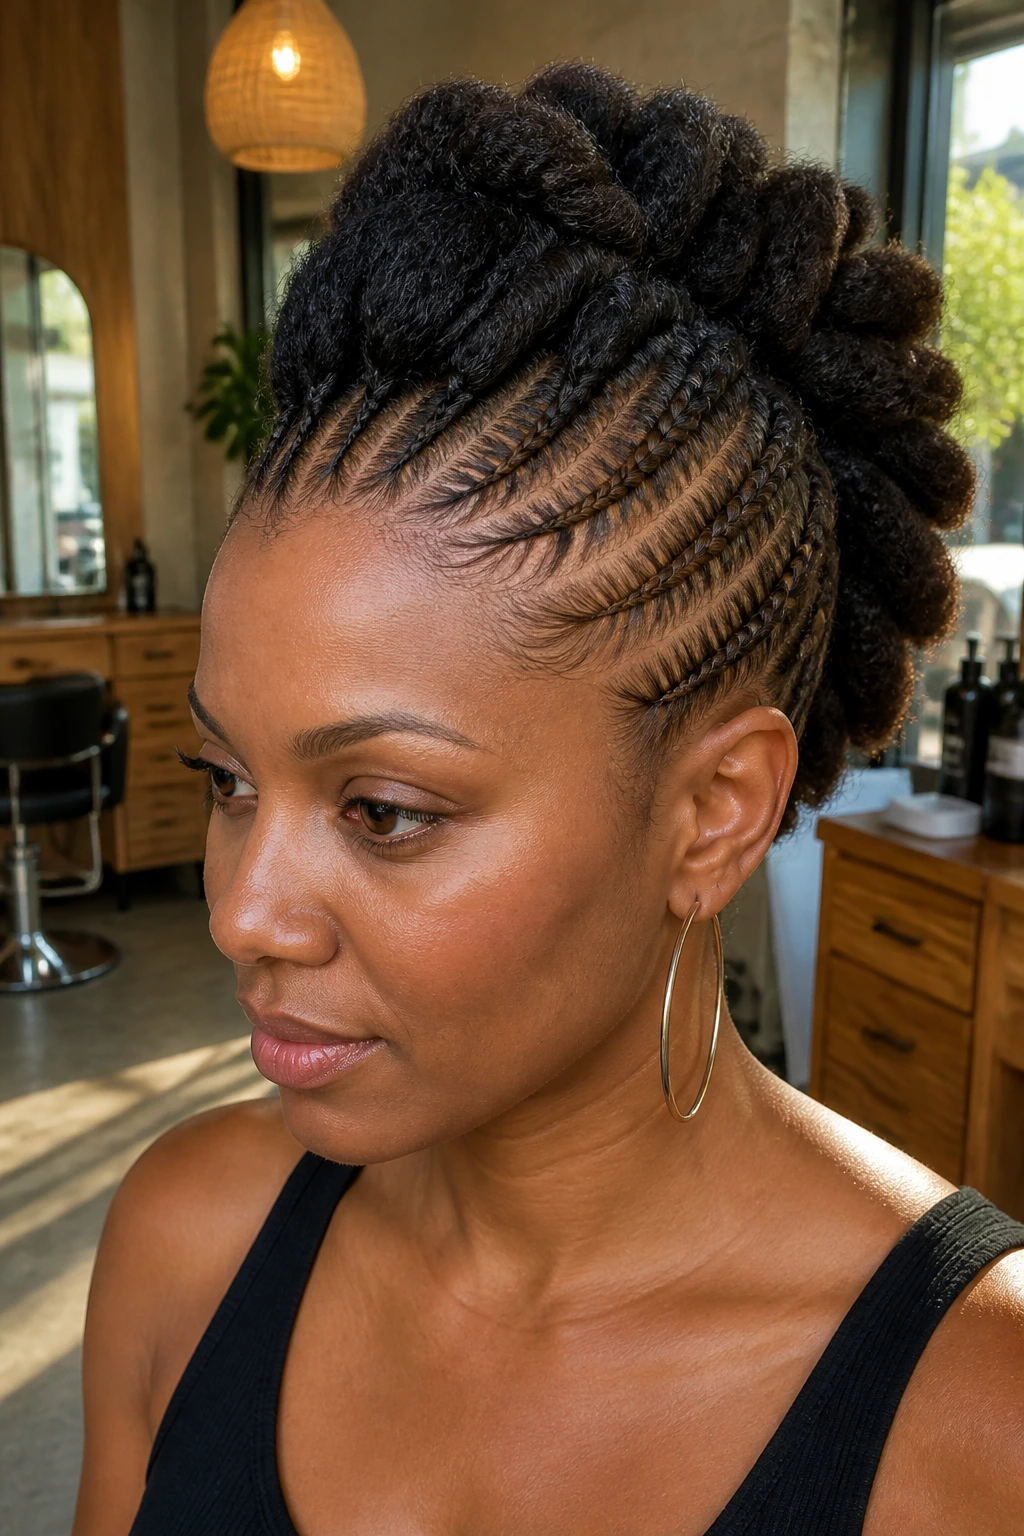
Feed-in braids at the front crown can give the illusion of a halo that funnels straight into the mohawk ridge. That visual line from forehead to crown is strong. It pulls the eye where you want it.
This style shines when the front hairline is neat and the center ridge is slightly fuller than the front. It suits oval and round faces especially well because the lift helps lengthen the profile. Keep the feed-in sections smooth and the transitions even. Choppy transitions are the fastest way to lose the effect.
31. Sculpted Swoop Braided Mohawk
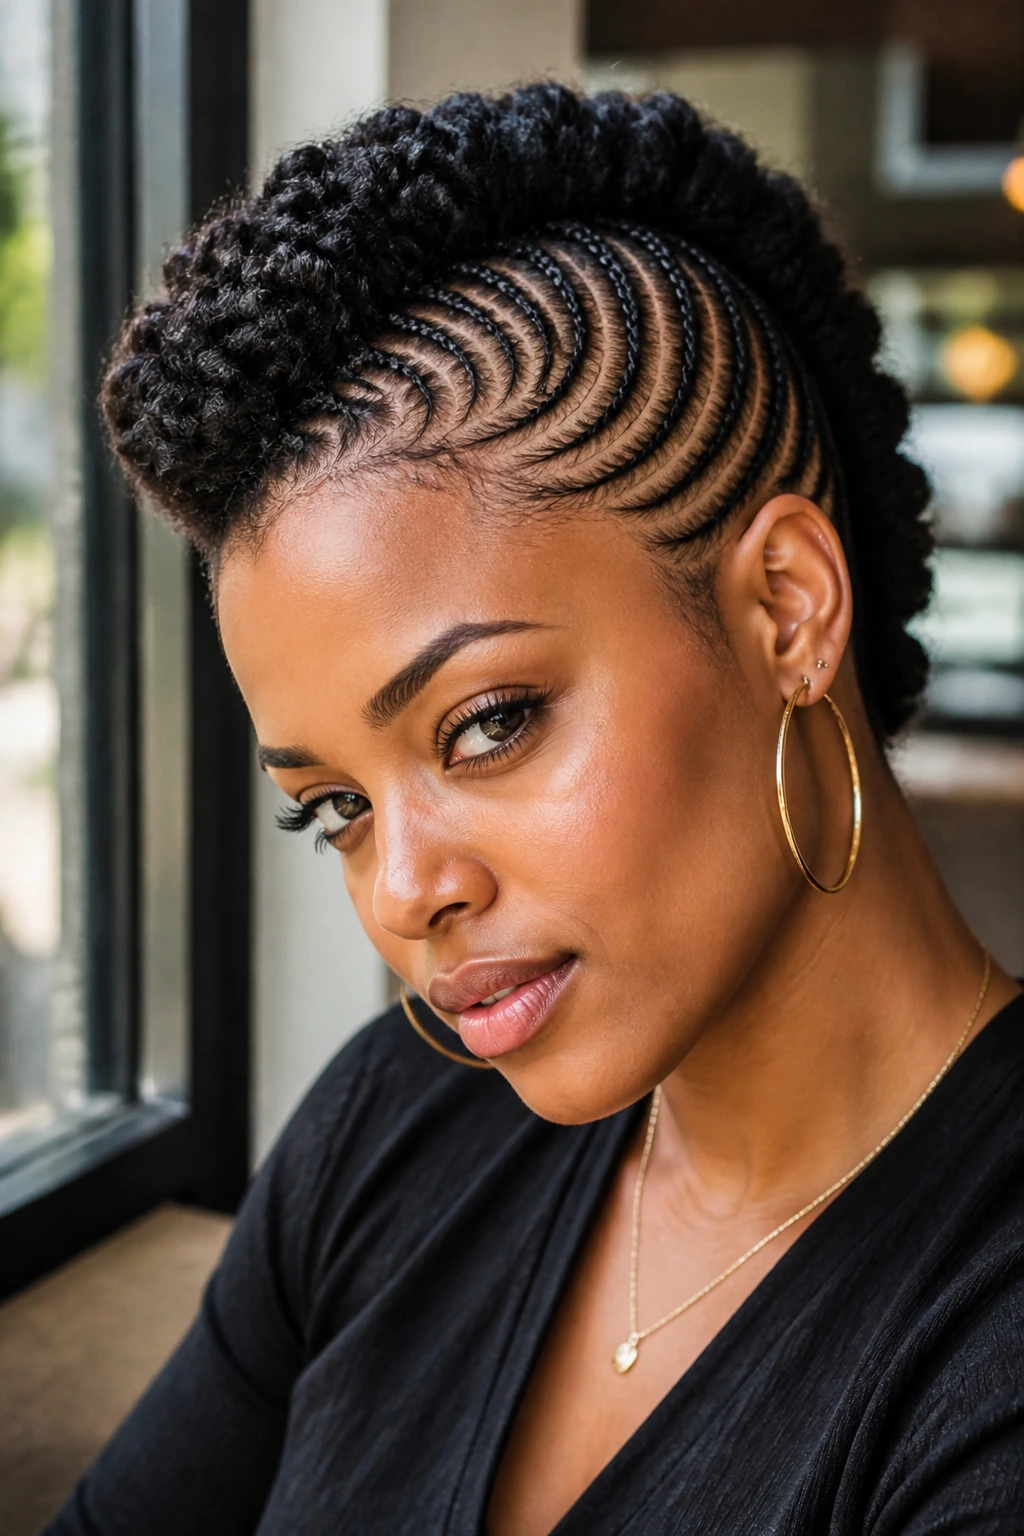
A swoop at the front changes the whole tone of the style. Instead of coming straight back, the braids curve in a soft arc that can flatter the forehead and make the mohawk feel less severe. It looks shaped, almost carved.
This version works best if you want a little drama without full-on sharp lines. The swoop can be mirrored on both sides or left slightly uneven for more motion. Either way, it needs clean parting. A swoop that’s fuzzy at the base loses its edge fast.
32. Mini Mohawk Braids for Short Natural Hair
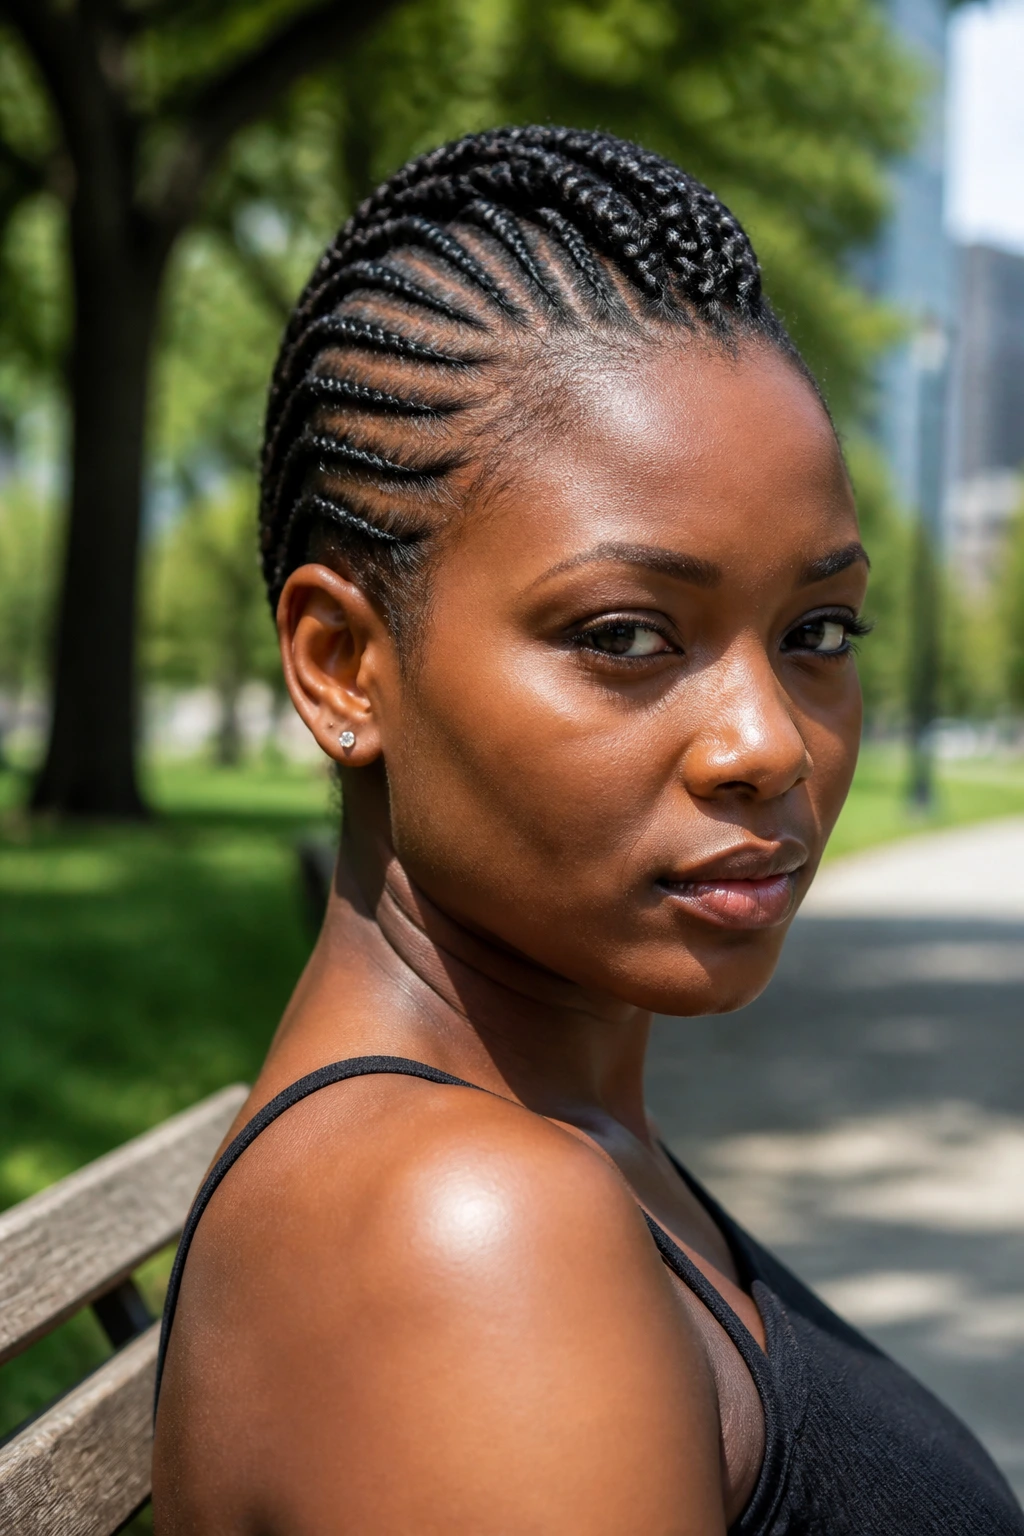
Short natural hair does not rule out a braided mohawk. Mini braids or tiny cornrows can build the silhouette without needing a lot of length. In some ways, short hair makes the shape easier to see because the height at the center stands out faster.
The key is restraint. Keep the rows small enough to control the hair, but not so small that the install drags on forever. If the ends are too short to hang, pin them into small rolls or tuck them back into the center ridge. Short hair can carry a sharp mohawk very well when the lines stay clean.
33. Jumbo Braid Mohawk
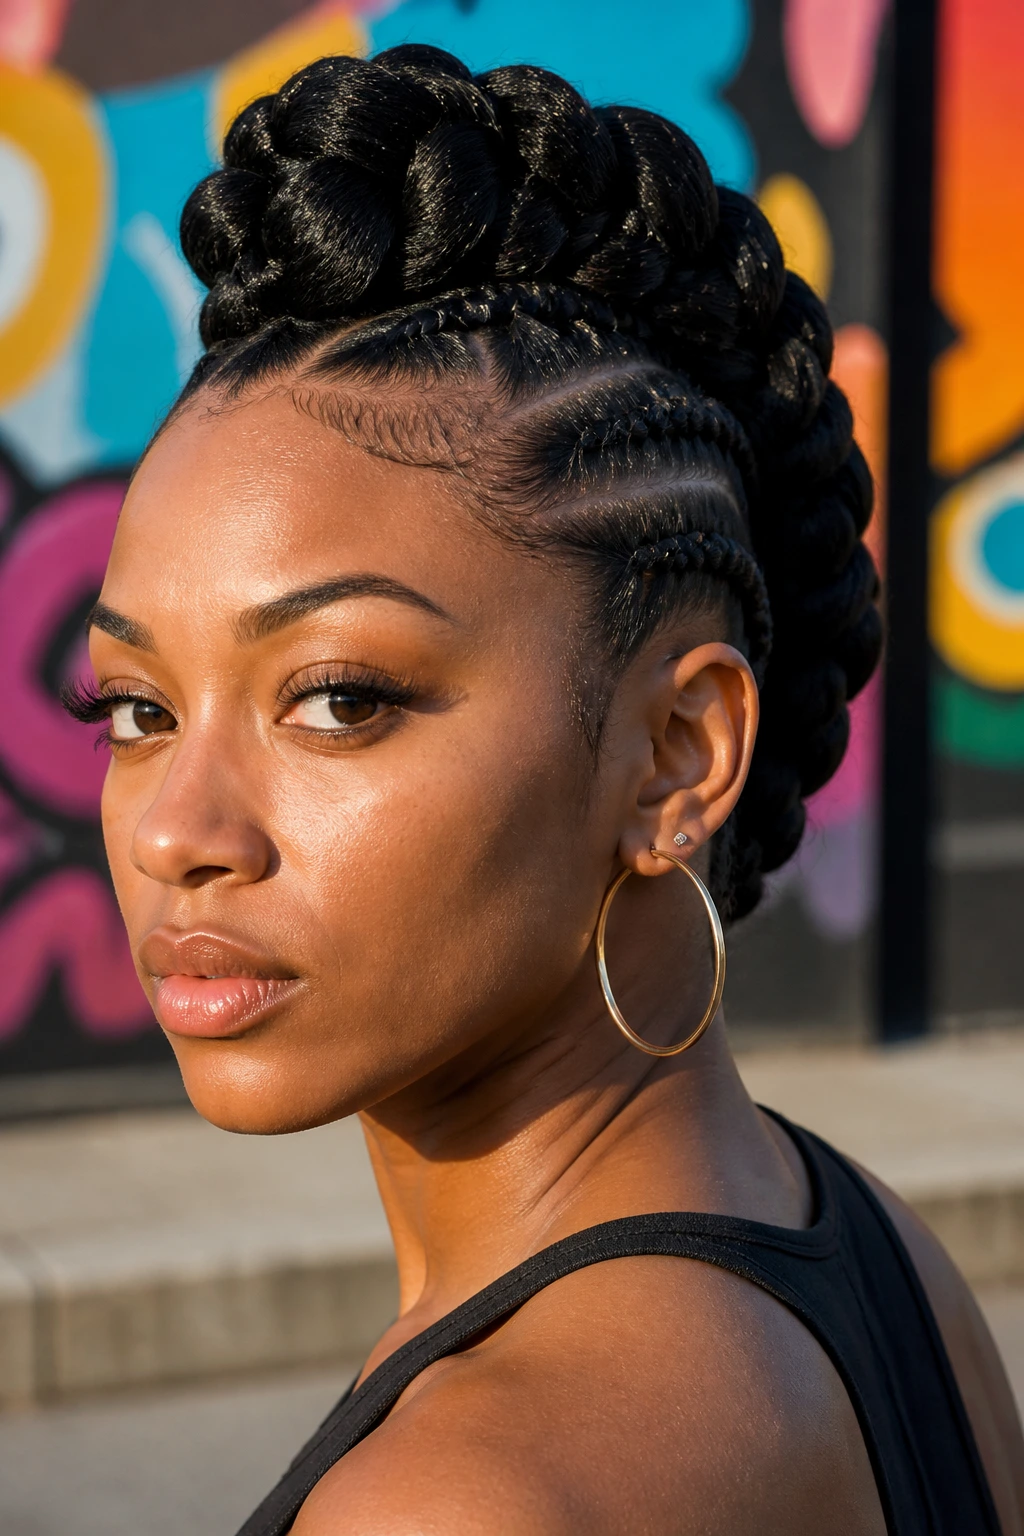
Jumbo braids give the mohawk a bold, graphic finish. Fewer braids mean less install time, and the larger size makes the shape read from across the room. That can be a win if you want height without spending all afternoon in the chair.
The downside is weight. Big braids can pull if they’re packed too tightly or if the center section is overloaded. Keep the base comfortable, especially near the temple. A jumbo mohawk should feel substantial, not like your scalp is doing extra work.
34. Asymmetrical Braided Mohawk
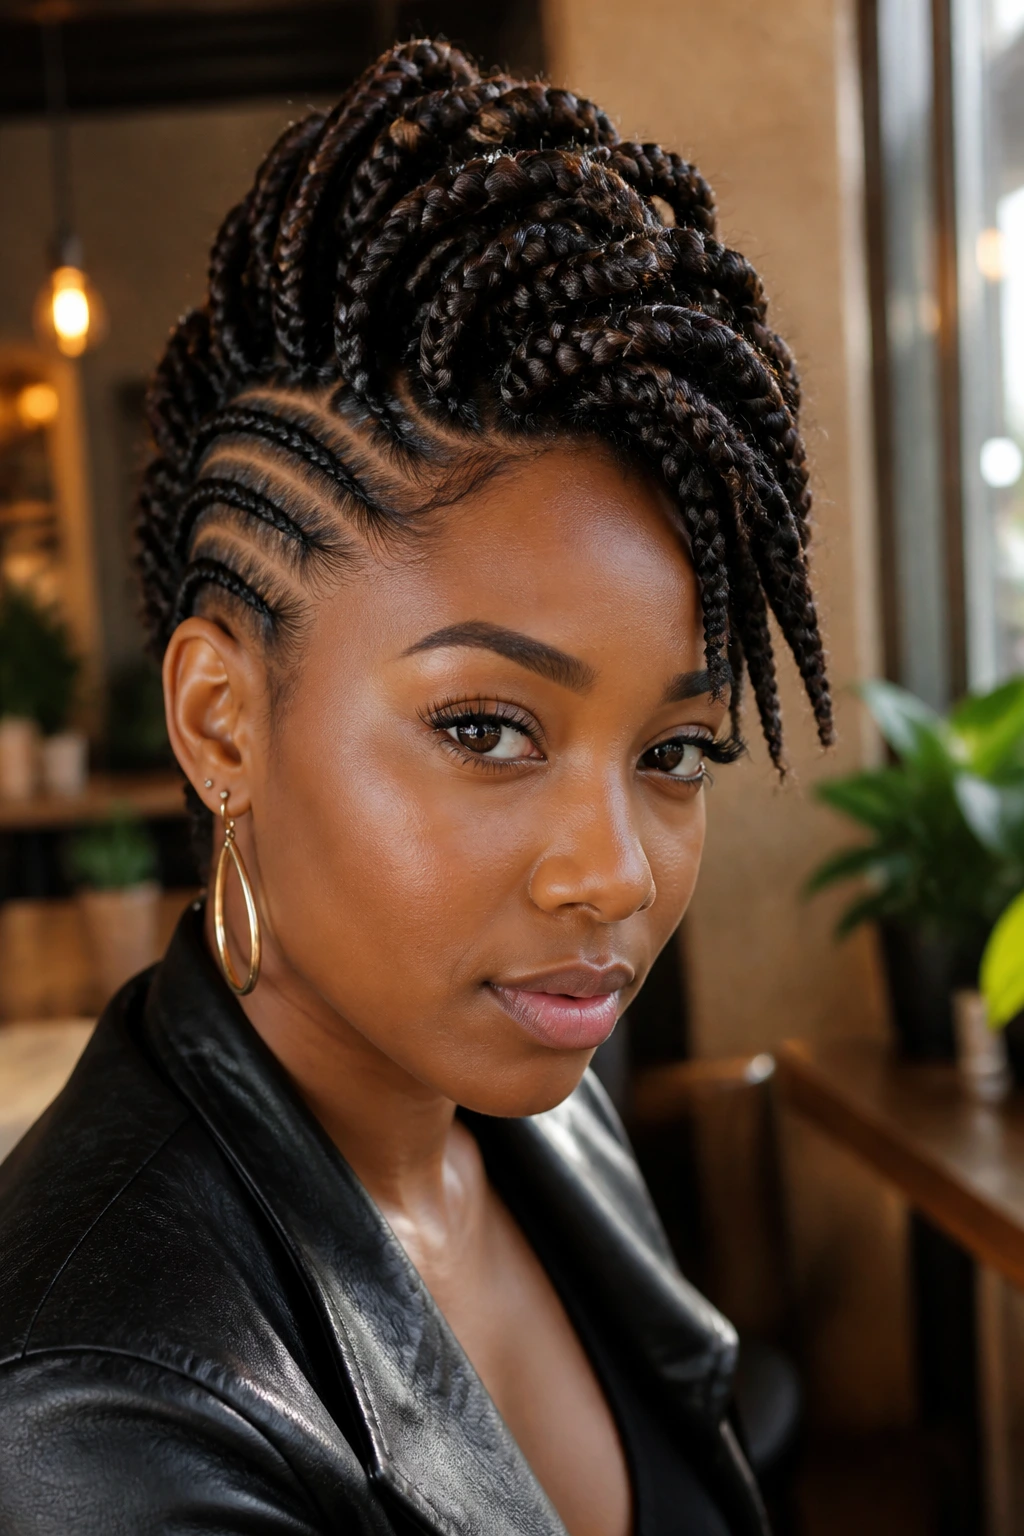
An asymmetrical mohawk leans into imbalance on purpose. One side may be tighter, the other more open; one braid ridge may sit higher than the other. That slight off-center feel makes the style look deliberate and modern.
This works well for people who don’t like fully symmetrical styles because symmetry can sometimes make natural hair look overcontrolled. The asymmetry gives you movement. It also helps if one side of your face has a stronger part or a preferred profile. Don’t force both sides into sameness. Let the shape have a little attitude.
35. Colored-Extension Braided Mohawk
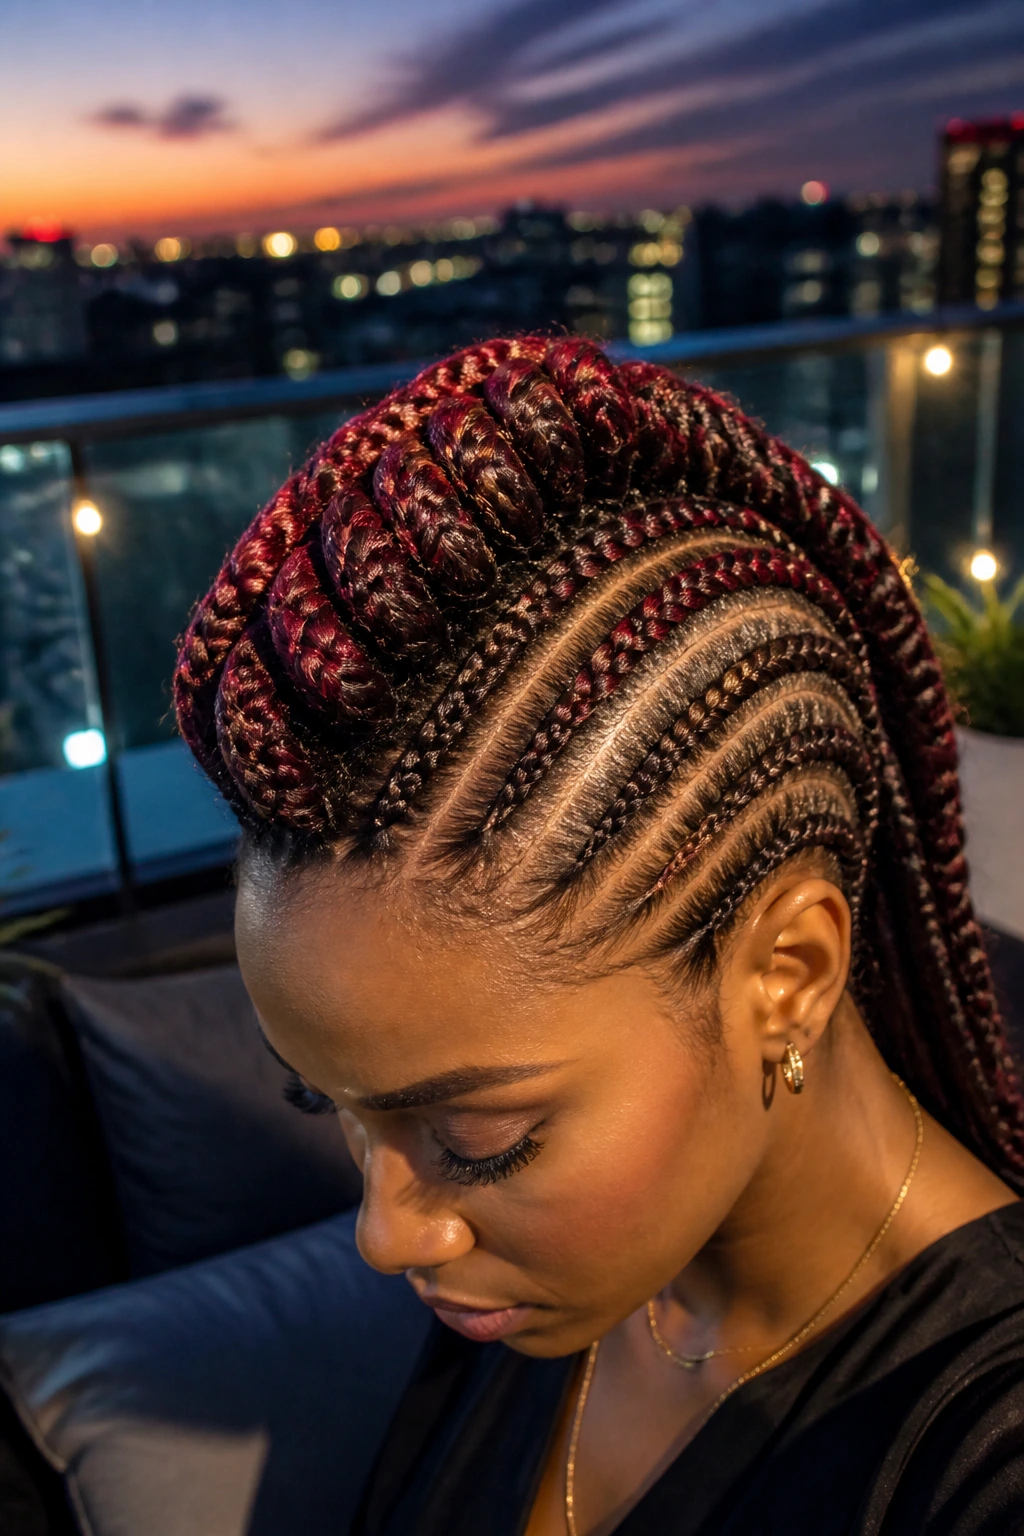
Color changes the whole read of the braid hawk. Auburn, burgundy, honey brown, copper, and even deeper plum tones can make the center ridge stand out without needing extra styling. The color should support the braid pattern, not bury it.
Use color where it makes sense
If you want the mohawk to stay wearable, choose one accent tone rather than three or four. A single color story keeps the style from looking busy. It also makes the parts and ridge easier to see, especially in low light.
I’d keep the roots close to your natural shade if you want the install to blend smoothly. That way the color feels like a highlight, not a costume.
36. Thread-and-Cuff Braided Mohawk
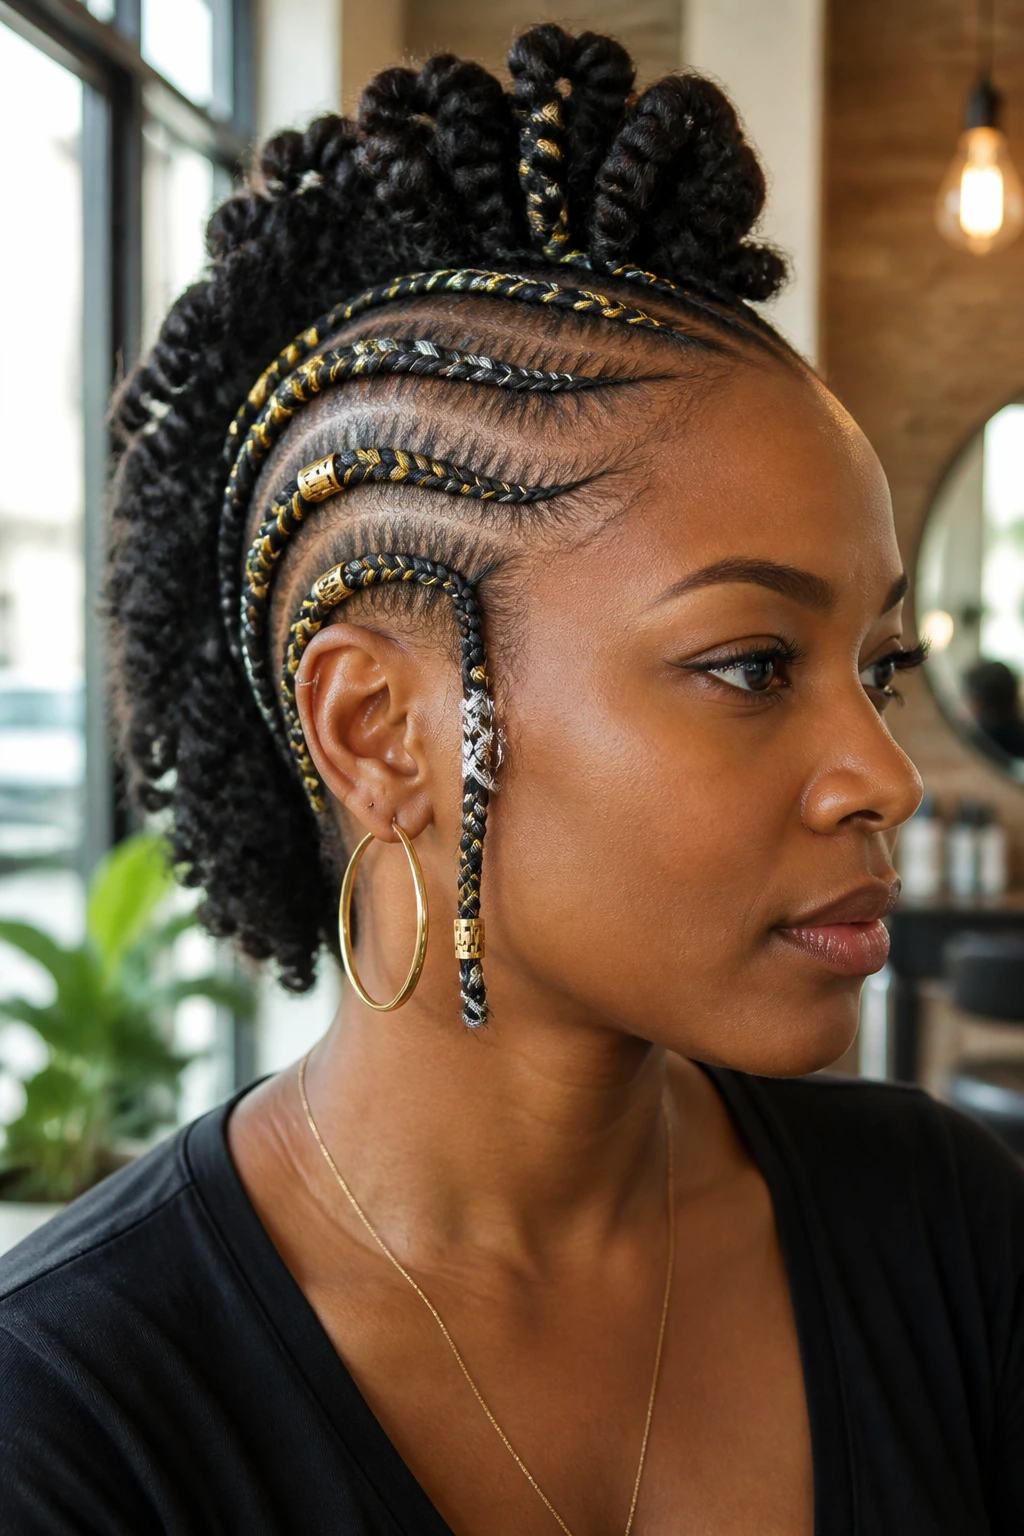
Thread wrapping and braid cuffs can turn a simple hawk into something sharper without changing the braid pattern itself. A little metallic cuff at the ends or a section of thread wrapped around a few braids adds texture and rhythm. Small details. Big effect.
The trick is not to decorate every braid. Pick the rows that sit highest or the pieces closest to the face. That’s enough. Too much hardware starts to weigh the style down visually. One or two accents can make the whole thing feel finished.
37. Formal Braided Mohawk Updo
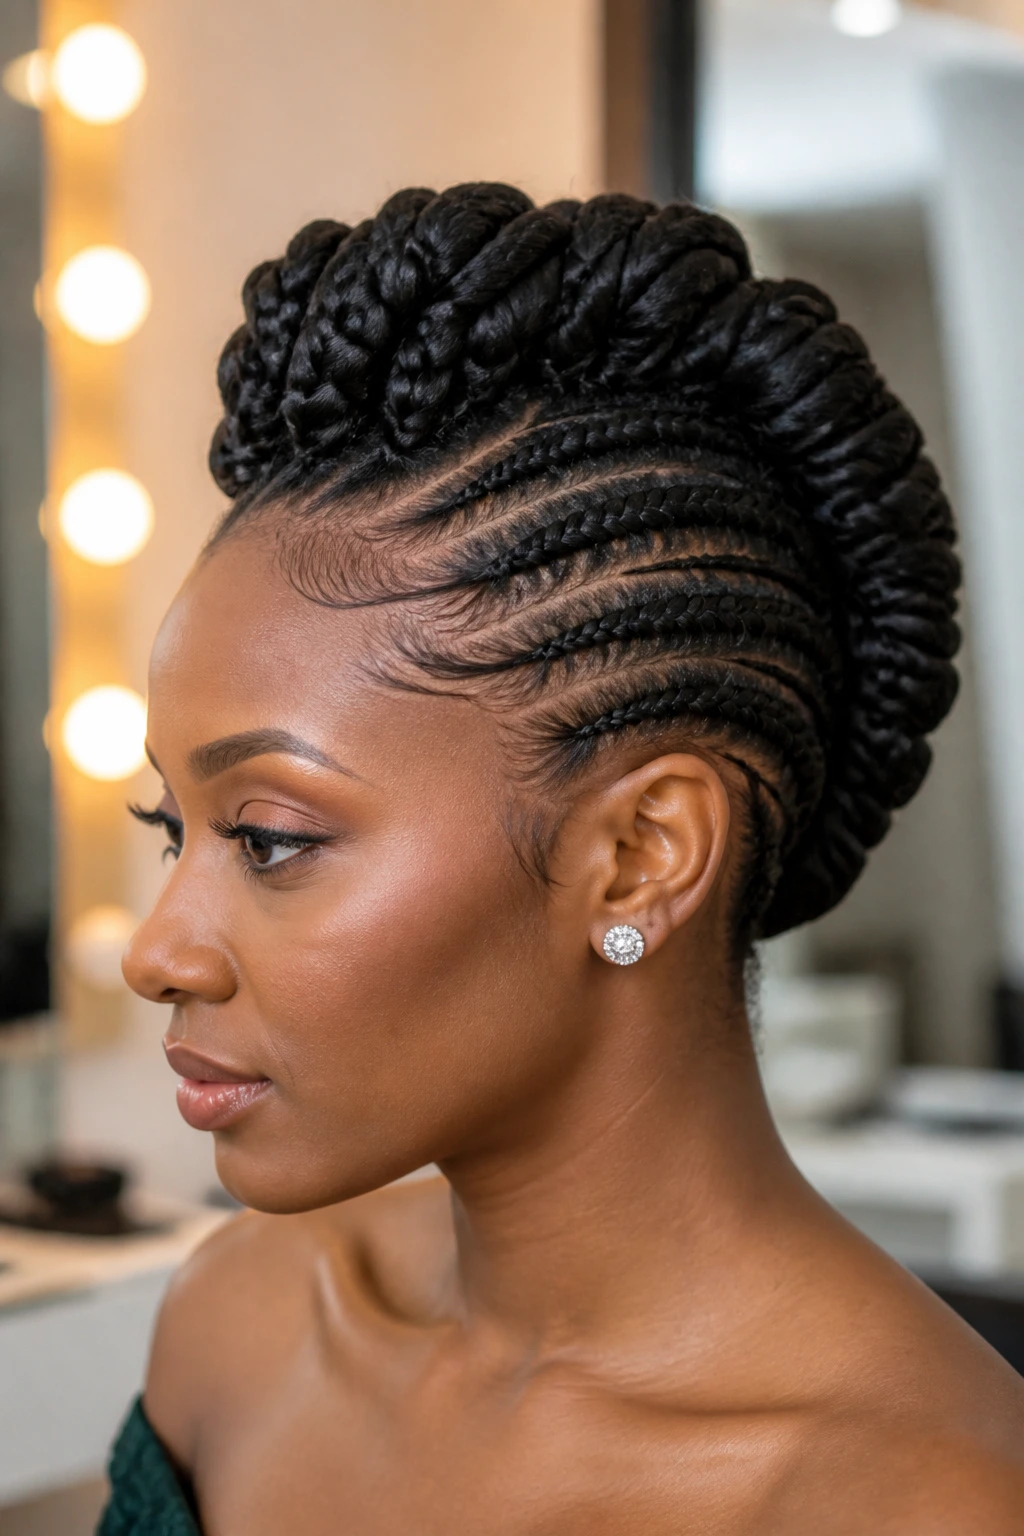
A formal braided mohawk updo is all about tightening the shape and tucking the ends in. The result is elegant in a structured way, not a delicate way. Think clean profile, lifted crown, and no stray ends fighting for attention.
This version is great when you want the mohawk shape to survive a dressy setting. It reads well from the front and side, which matters more than people think once you’re in a room full of photos. Keep the finish smooth and pin the loose pieces where they won’t shift. A formal style should hold its line when you turn your head.
38. Stretch-and-Braid Mohawk with Defined Ends
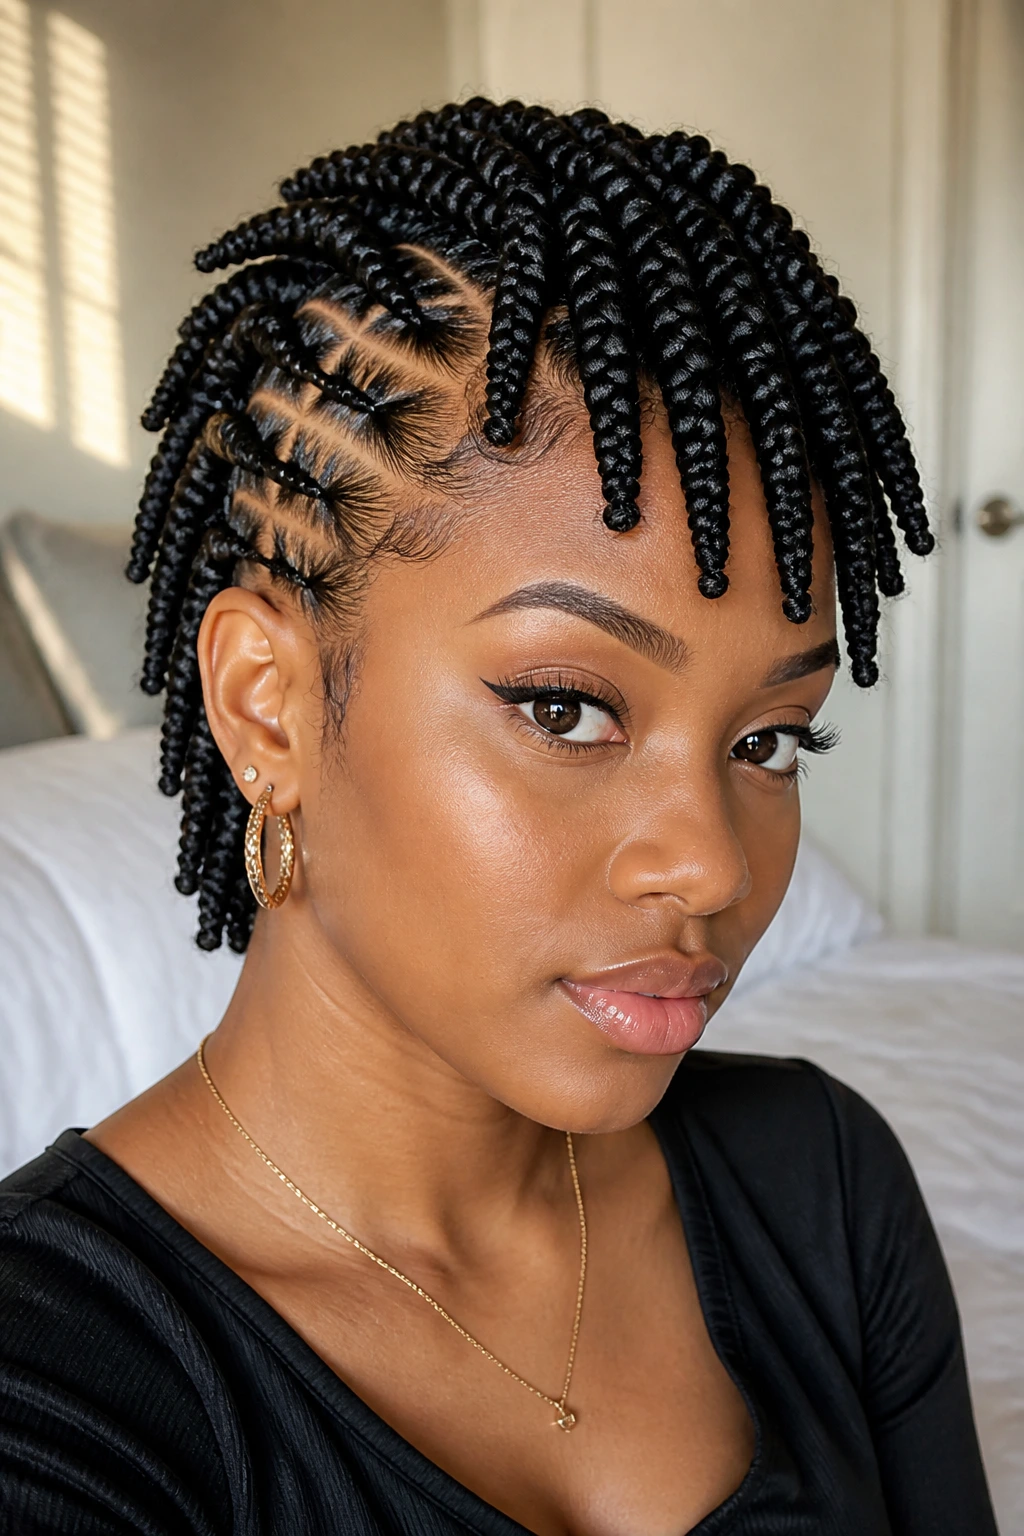
Stretched hair gives the mohawk a different kind of control. The braids sit cleaner, the parts stay visible longer, and the defined ends keep the style from puffing into a cloud before you’re ready. If your hair shrinks fast, stretching first can make the whole install look more precise.
This version is one of my favorites for natural hair that wants to cooperate, not fight. Use banding, a blow-dryer on low, or a light stretch method that leaves the hair soft enough to braid. Then keep the ends defined with a little mousse or wrapping. The shape stays sharper, and the crown doesn’t lose its line by morning.
Why Braided Mohawks Suit Natural Hair So Well
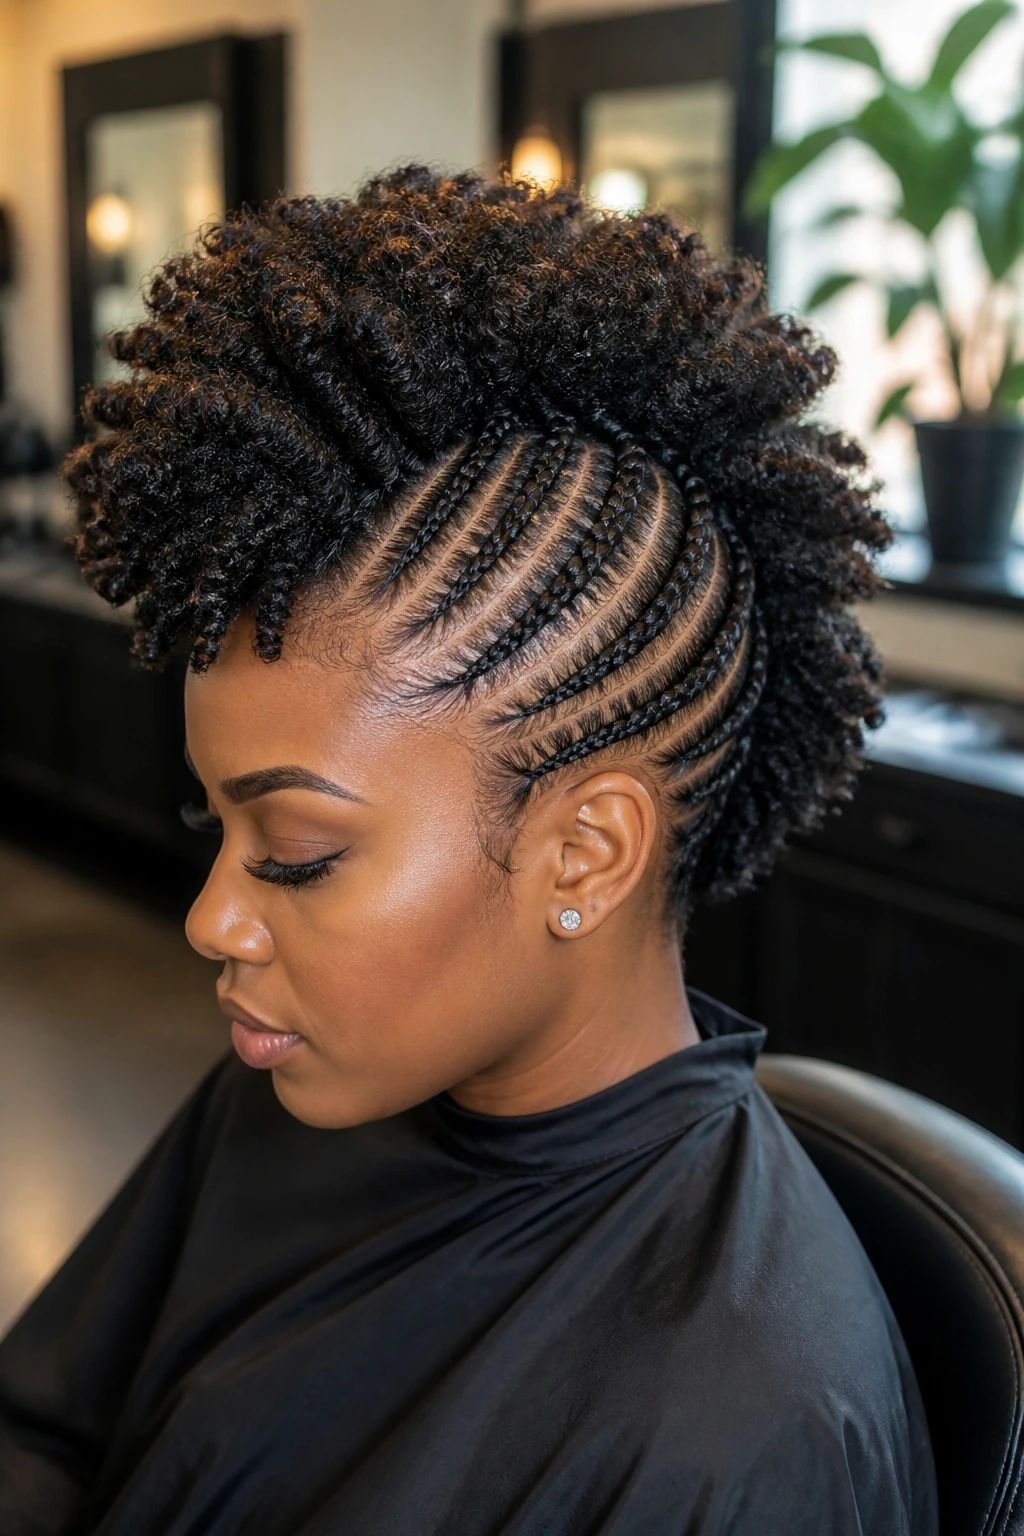
Natural hair gives a braided mohawk two things many textures have to work harder for: grip and shape. Coils and curls hold parting in place, so the braids tend to stay where you put them. That matters when the whole style depends on a strong center ridge and clean sides.
The other advantage is shrinkage. Most styles try to hide it. A mohawk leans into it. The center can rise naturally, the sides can stay controlled, and the overall silhouette gains height without needing a ton of teasing or extra hair. That’s a useful shortcut, and it’s one the style earns honestly.
There’s also a protective angle here. The better the parting and the gentler the tension, the more the style keeps your hair tucked away while still looking deliberate. A mohawk braid pattern can do that better than a loose style because it spreads the hair across rows instead of asking one ponytail point to carry everything. Less tugging. Less daily fuss. More structure.
Choosing Braid Size, Length, and Tension
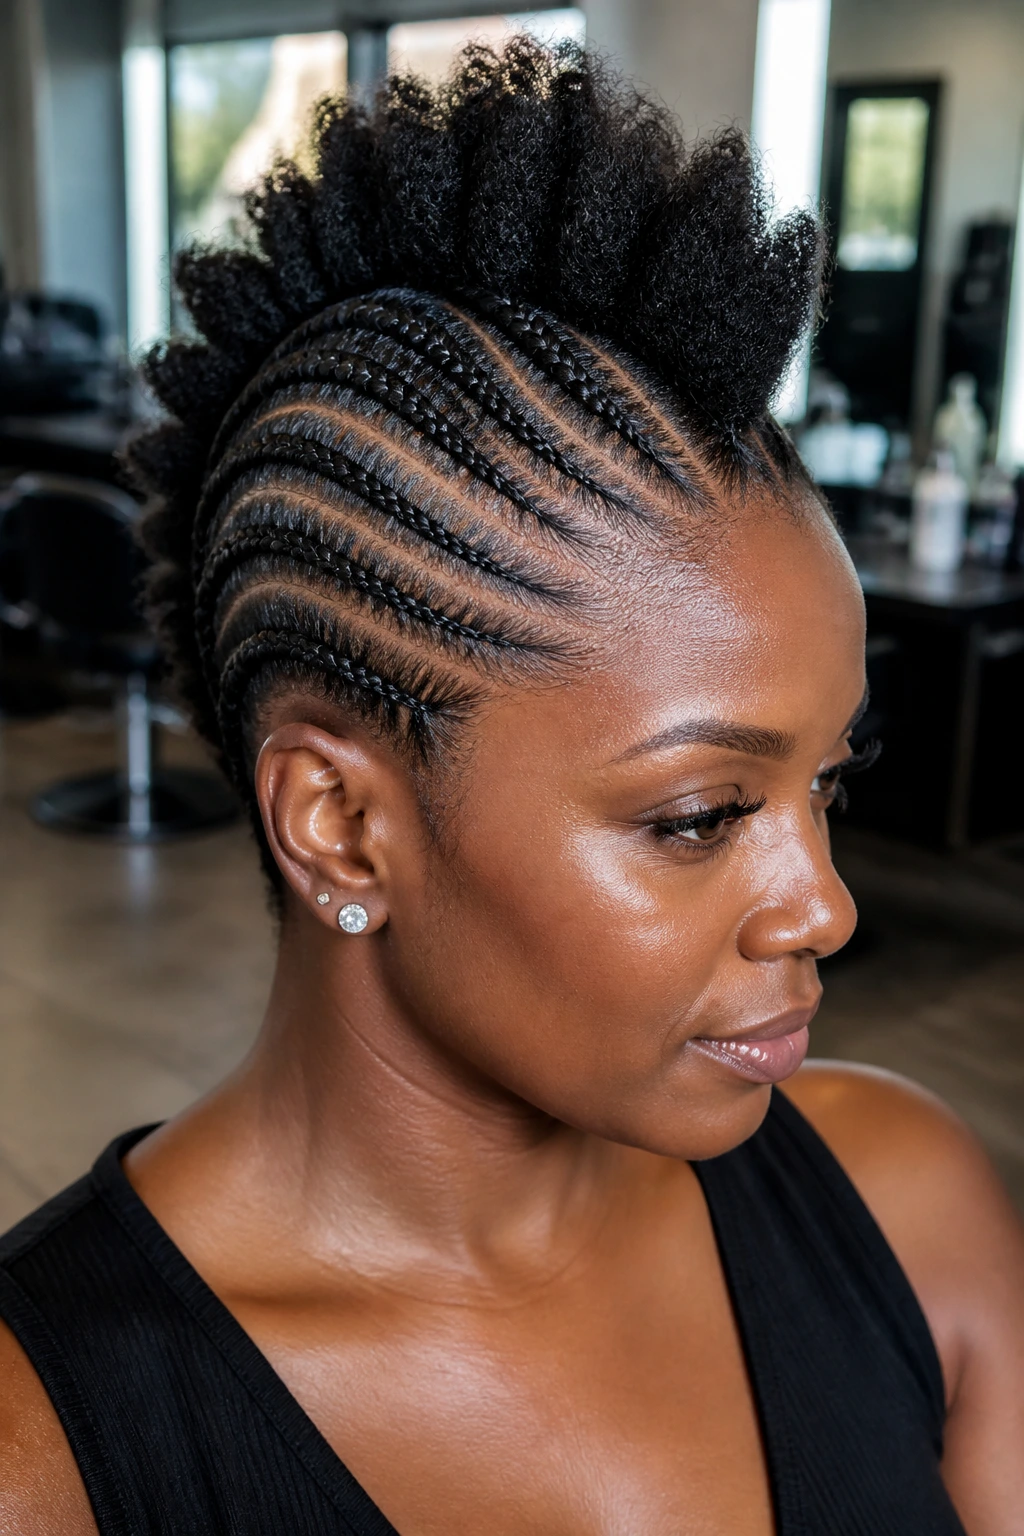
Braid size changes the whole personality of the style. Small braids give you finer detail and longer wear, but they take longer to install and can feel busy if the parts are too close together. Jumbo braids finish faster and read from a distance, but they need enough hair density to hold the shape without sagging.
Tension deserves its own rule: the first inch at the hairline should never feel tight. Ever. The temple and nape areas are where people pay for impatience later. If your scalp feels hot, prickly, or sore during the install, the braid is too tight and the style is already asking too much.
Length matters less than people think, but only up to a point. Short natural hair can handle mini hawks and close cornrows. Mid-length hair can carry most of these styles. Long hair gives you more bun options, more pinned-up shapes, and more dramatic height. Pick the braid map based on the hair you have, not the style you saw on a head with twice the length.
Tools That Save Time at the Parting Table
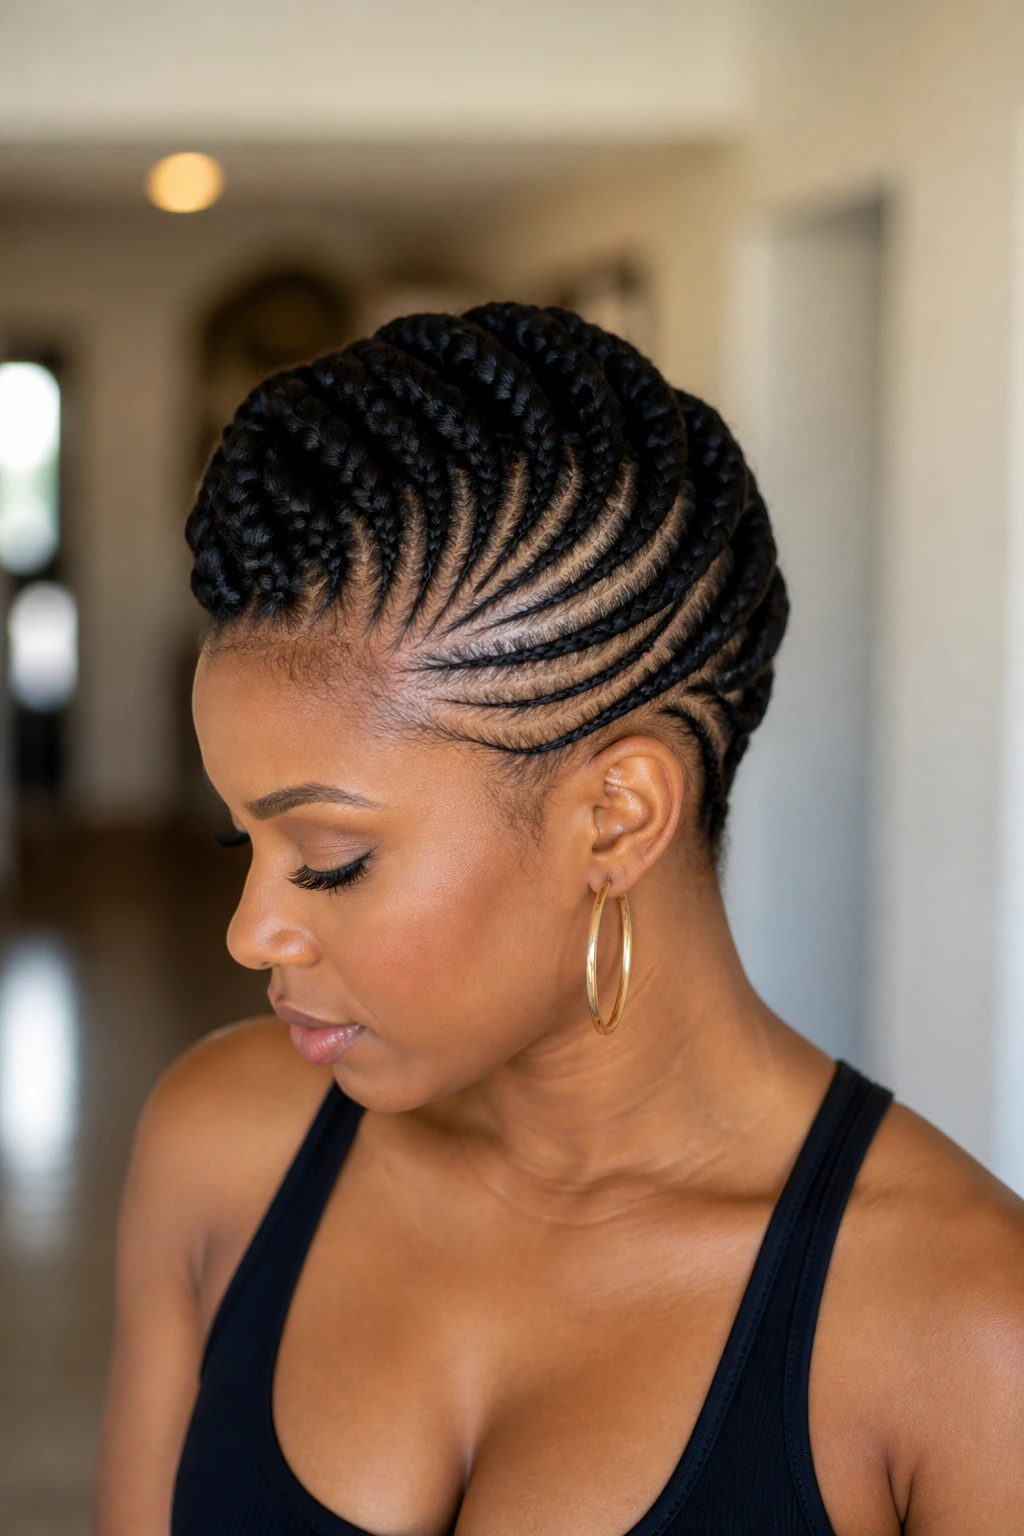
- Rat-tail comb: The pointed end makes clean parts and sharp curves easier, especially for cornrows, feed-ins, and zigzags.
- Duckbill or alligator clips: Sectioning clips keep the rest of the hair out of your hands while you braid one row at a time.
- Spray bottle with water and leave-in: A light mist helps thirsty natural hair cooperate without getting soaked and slippery.
- Braiding gel or edge control: Use a small amount near the base for grip and neatness; too much can turn the roots sticky.
- Soft-bristle edge brush: Handy for smoothing the hairline and keeping fine baby hairs from frizzing out of the design.
- Mousse or setting foam: Good for finishing the whole style once the braids are in place, especially if you want flyaways to settle down.
- Hand mirror: Necessary if you’re checking the back yourself. Guessing never ends well.
- Satin scarf or bonnet: Not a styling tool in the usual sense, but it’s the one thing that protects all the other work you just did.
What to Buy Before You Start Braiding
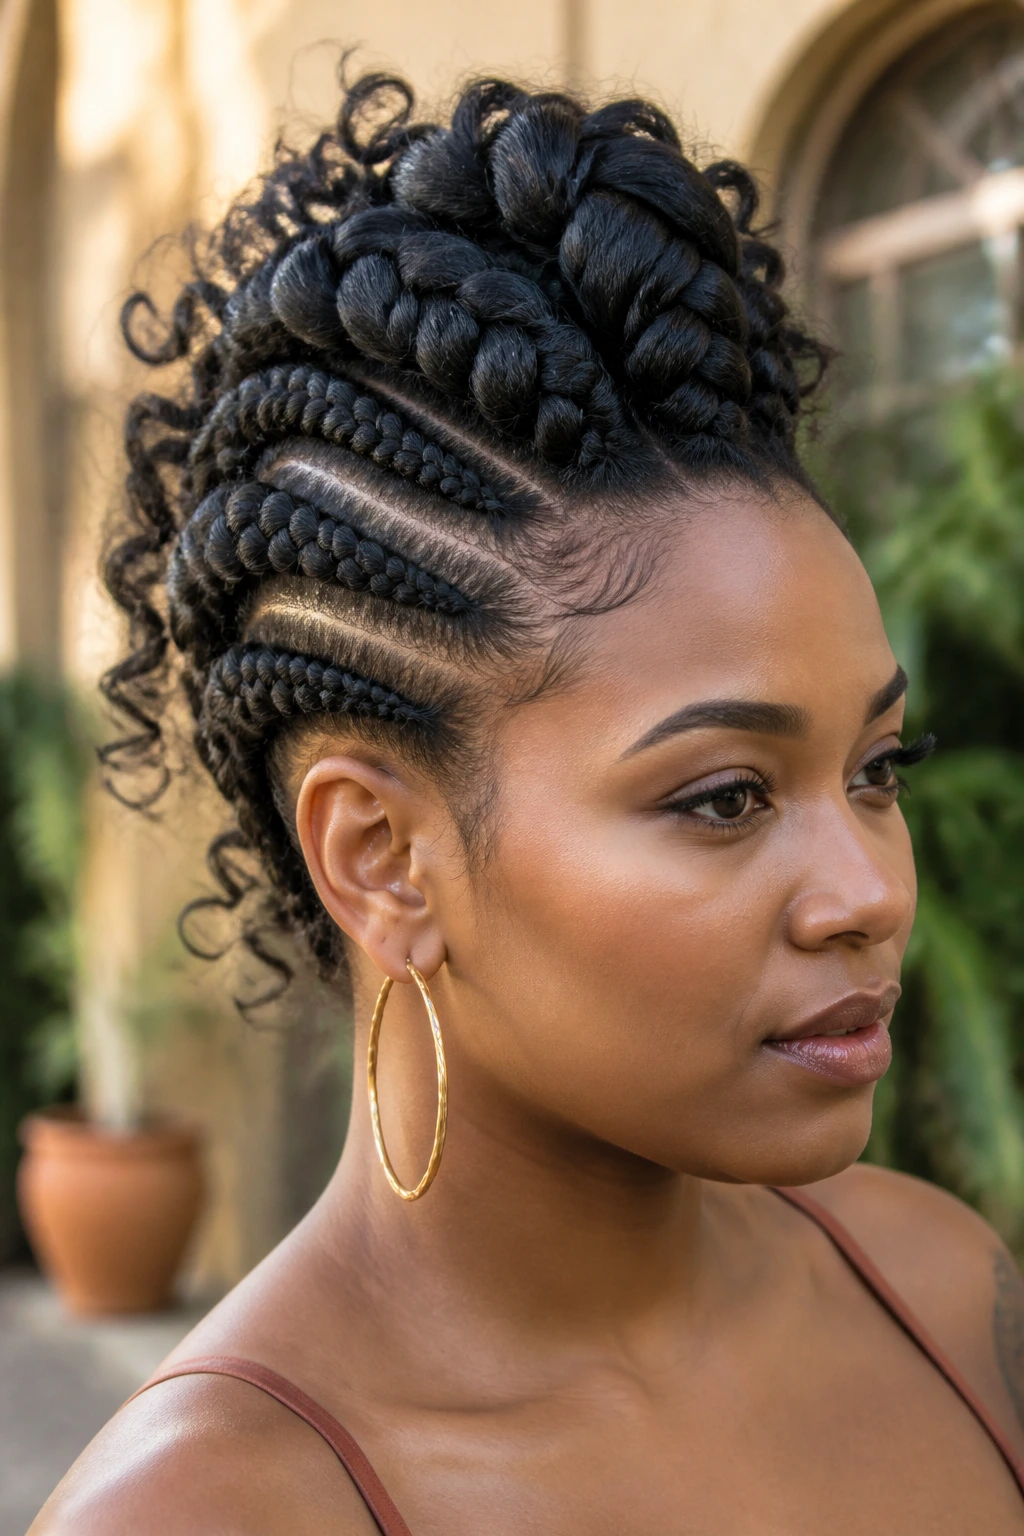
If you’re adding hair, pre-stretched braiding hair is easier to work with than a bulky bundle straight from the pack. The ends are smoother, the braid feeds more evenly, and you spend less time fighting stray fibers. For softer styles, a lighter texture can help the mohawk sit less rigidly.
Your product choices matter too. A non-flaky braiding gel, a lightweight mousse, and a leave-in that doesn’t leave a greasy film will save you more trouble than any “miracle” product. Heavy creams can make the scalp feel coated, and coated scalps get itchy fast. If your hair is naturally dry, bring moisture in through the prep step, not by layering product onto finished braids.
Accessories are worth buying with intention. Gold cuffs, wooden beads, thread, and small rings each change the mood of the style, but you do not need all of them. Pick one accent family and let the braid pattern do the rest. When in doubt, buy fewer extras and better hair ties. The style will thank you.
How to Wear the Shape Without Fighting It
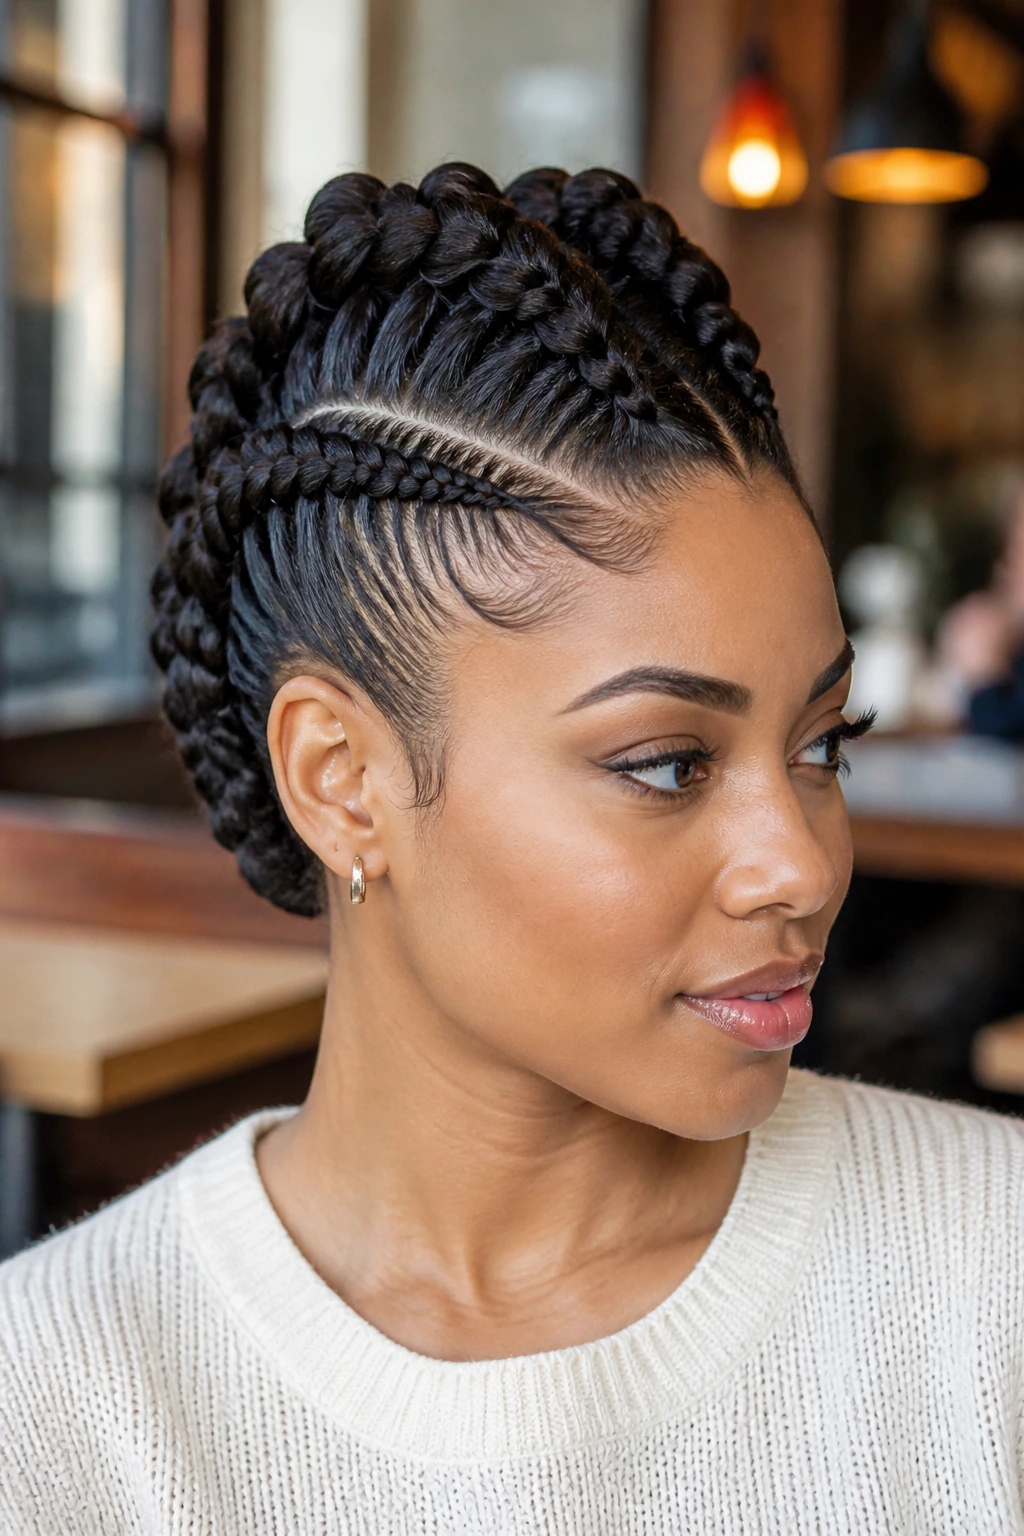
Face Shape: Taller mohawks help round faces look longer, while a lower, softer ridge works nicely on long faces that already carry a lot of vertical line. If your forehead is the feature you like most, a swept-forward crown keeps the shape balanced instead of pulling everything upward.
Occasion: Clean cornrow hawks and knotless versions fit formal settings better because the lines stay crisp. Curly puff centers, beads, and loose tendrils lean more casual. That doesn’t make them less polished; it just changes the mood.
Accessories: Large hoops, sculptural studs, and necklines that leave room around the collar help the braid work stand out. Heavy collars can crowd the silhouette. Sometimes the hair needs space to be seen.
Outfit Balance: A mohawk already brings height, so you do not need oversized sleeves, a dramatic hat, and a giant necklace fighting for attention. Pick one loud thing. Let the braid pattern be the rest.
Extra Tweaks That Make the Style Sharper
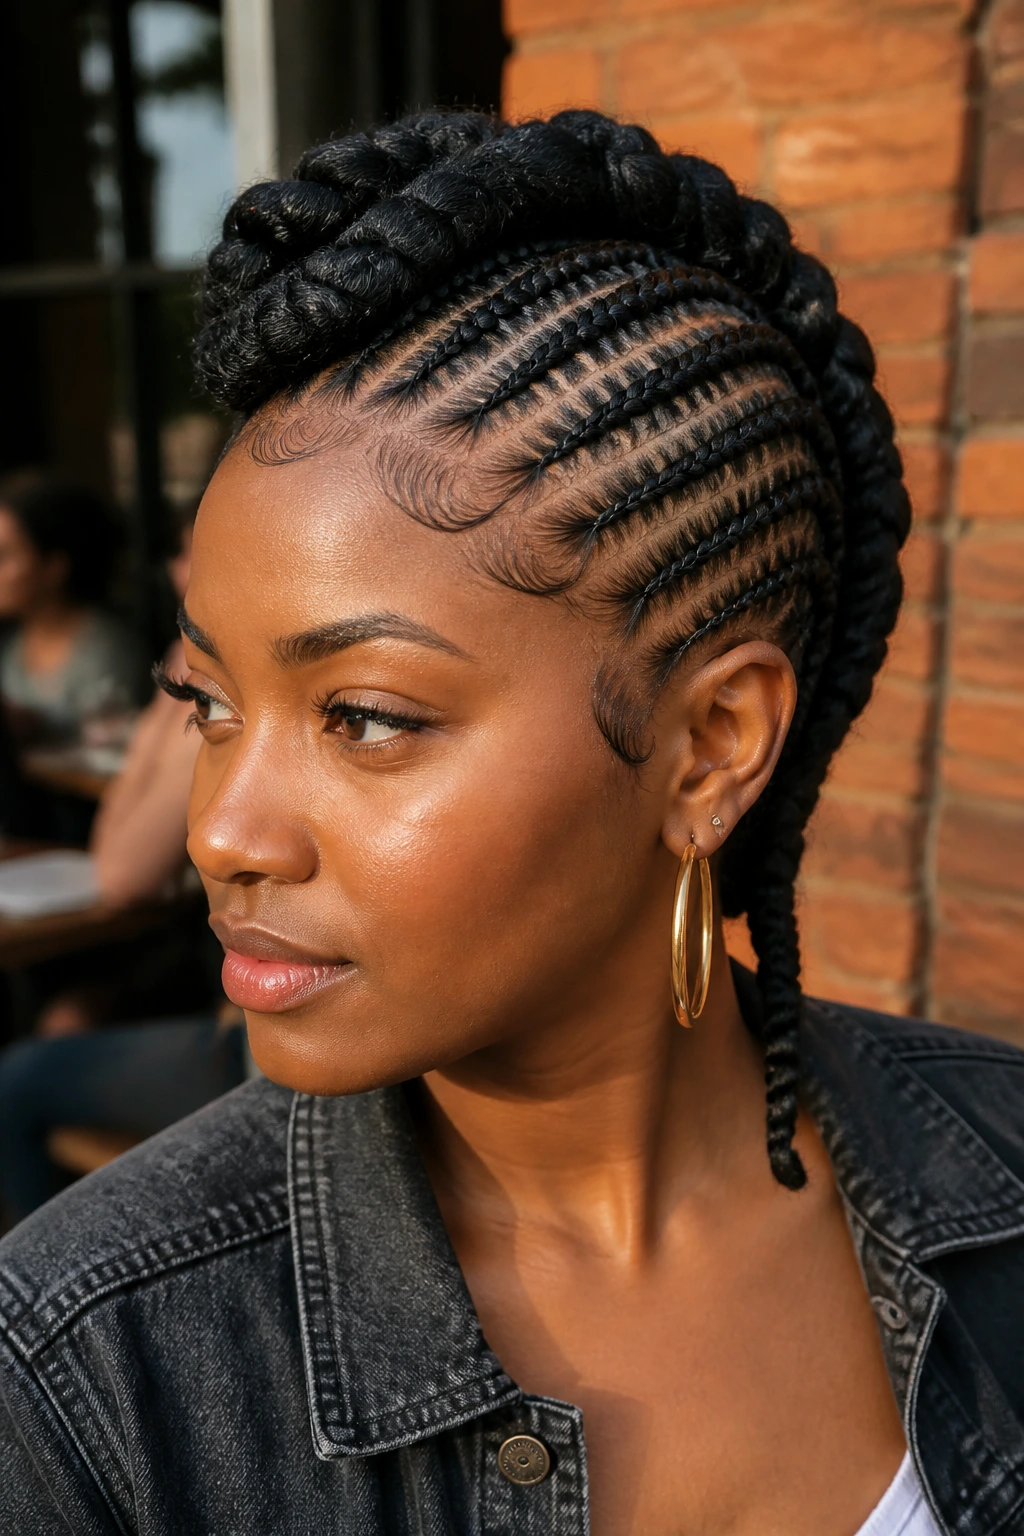
Parting Precision: Clean parts are the backbone. Wipe the comb between rows if product starts building up on the teeth, or the sections start looking fuzzy before you even finish the first side.
Texture Play: A little contrast helps. Sleek sides with a curly center. Flat twists with a braided ridge. Jumbo rows next to finer accent braids. One texture can carry the look, but two textures make it richer.
Finish: A light mousse set and a satin wrap overnight can calm flyaways without turning the hair stiff. That stiffness is what makes some braid styles look fake. You want control, not plastic.
Accessories: A few cuffs near the center line, or beads only at the ends of the front rows, usually looks better than decorating everything. Restraint gives the design room to breathe.
Keeping the Style Fresh for Days, Not Hours
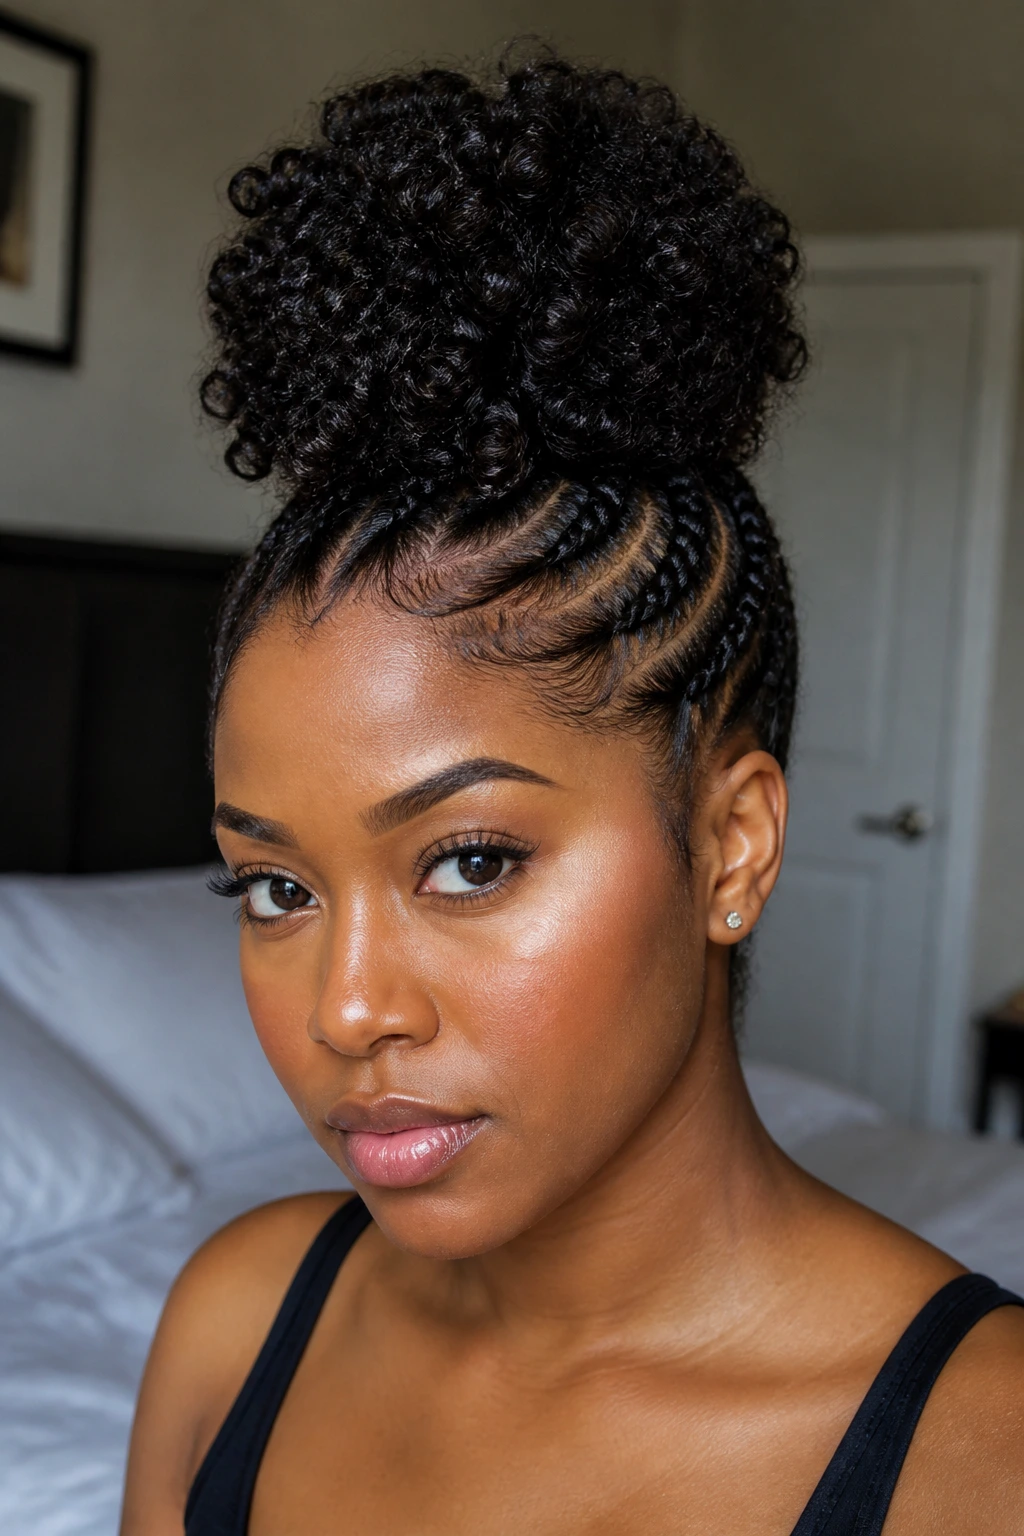
Sleep with a satin bonnet or scarf every night. If the style has loose ends, tuck them gently so they don’t rub apart at the pillow. A satin pillowcase helps too, but it does not replace the wrap; it just backs it up. If you toss a lot, you need both.
For the scalp, a light refresh every 3 to 5 days is usually enough. Use a nozzle bottle or a clean applicator tip to place diluted cleanser or a small amount of scalp oil only where it’s needed. Don’t drench the braids. Wet roots under braids dry slowly, and slow drying brings odor and buildup with it.
If the front rows start lifting after a week or so, that doesn’t mean the whole style is failing. Re-smooth the edges with a tiny bit of gel or mousse and pin the shape while it sets. If the style includes loose curls, mist those ends lightly and finger-coil the sections that get fuzzy first. Most braided mohawks can be revived more than once if you catch the puffing early.
Easy Variations for Different Hair Lengths and Lifestyles
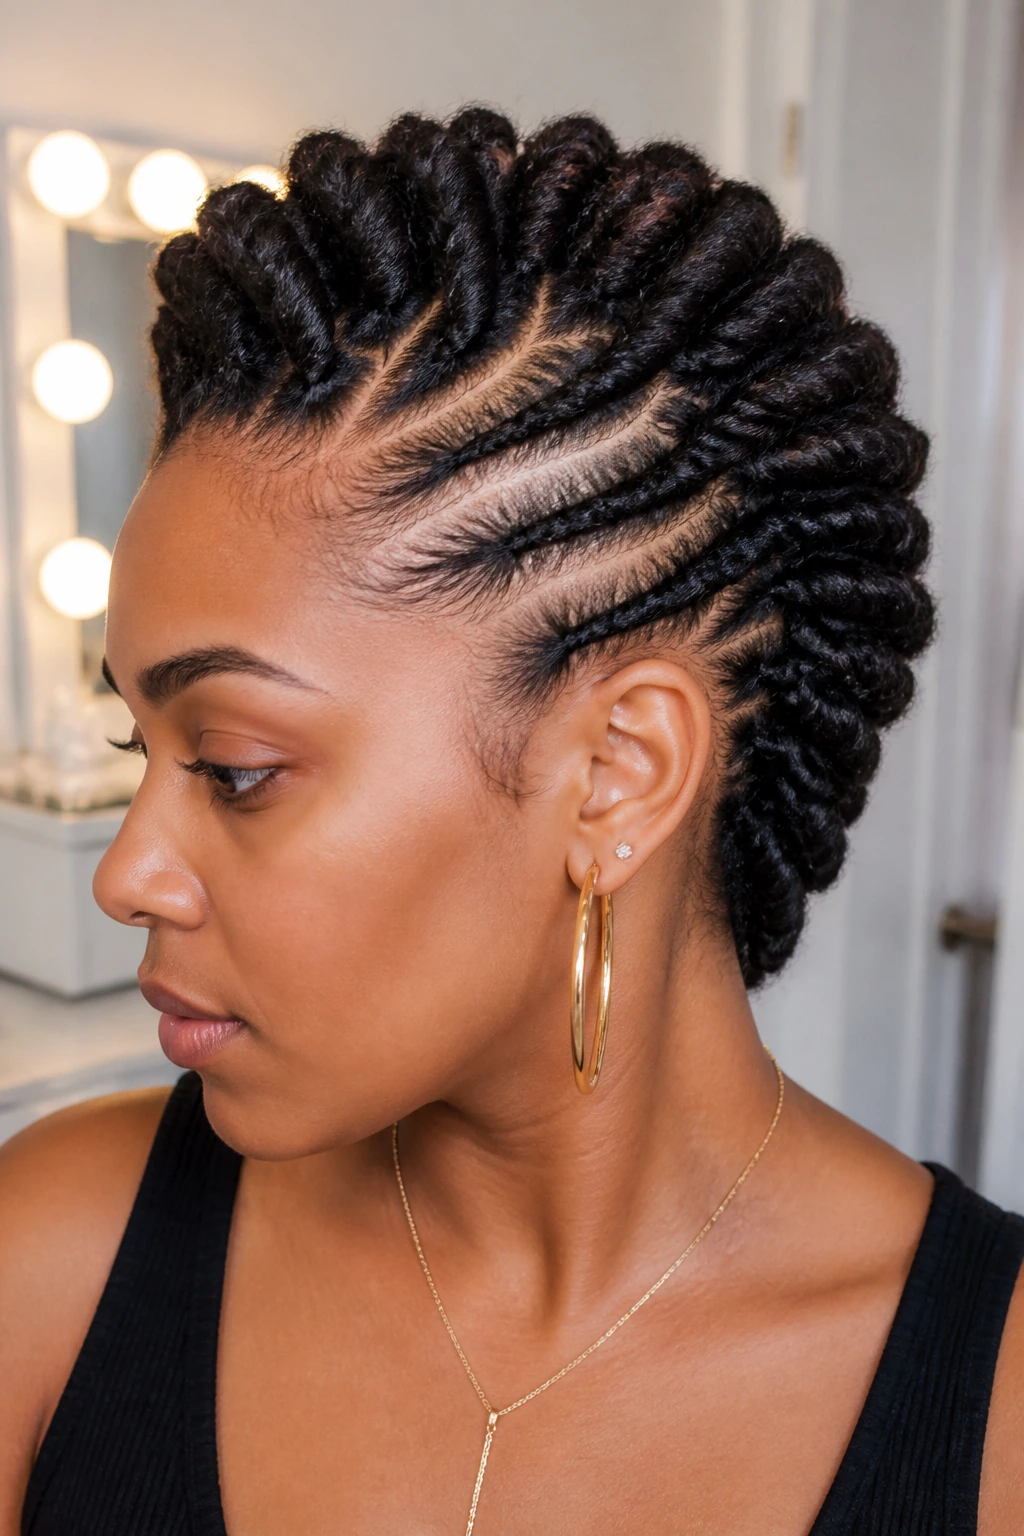
No-Extension Hawk: Skip added hair and build the style entirely from your own strands. This works especially well for flat twists, short natural hair, and low-profile cornrow hawks where the silhouette matters more than length.
Soft Office Hawk: Keep the ridge low, the parts straight, and the accessories minimal. It still looks styled, but it won’t pull too much attention in conservative settings.
Event-Ready High Hawk: Add a little height at the crown, use feed-ins or a bun at the center, and finish with cuffs or beads. This version reads more dramatic from the side and back.
Kid-Friendly Hawk: Choose rounded parts, light tension, and soft ends. Small colored beads or a single accent braid can make it fun without making it heavy.
Short-Hair Hawk: Use mini cornrows, pinned twists, or a compact ridge shape. The goal is control, not length.
Loc Hybrid Hawk: Let the locs do the volume in the center while the sides stay braided or twisted down. It keeps the shape clean and respects the texture you already have.
Common Mistakes That Flatten the Look
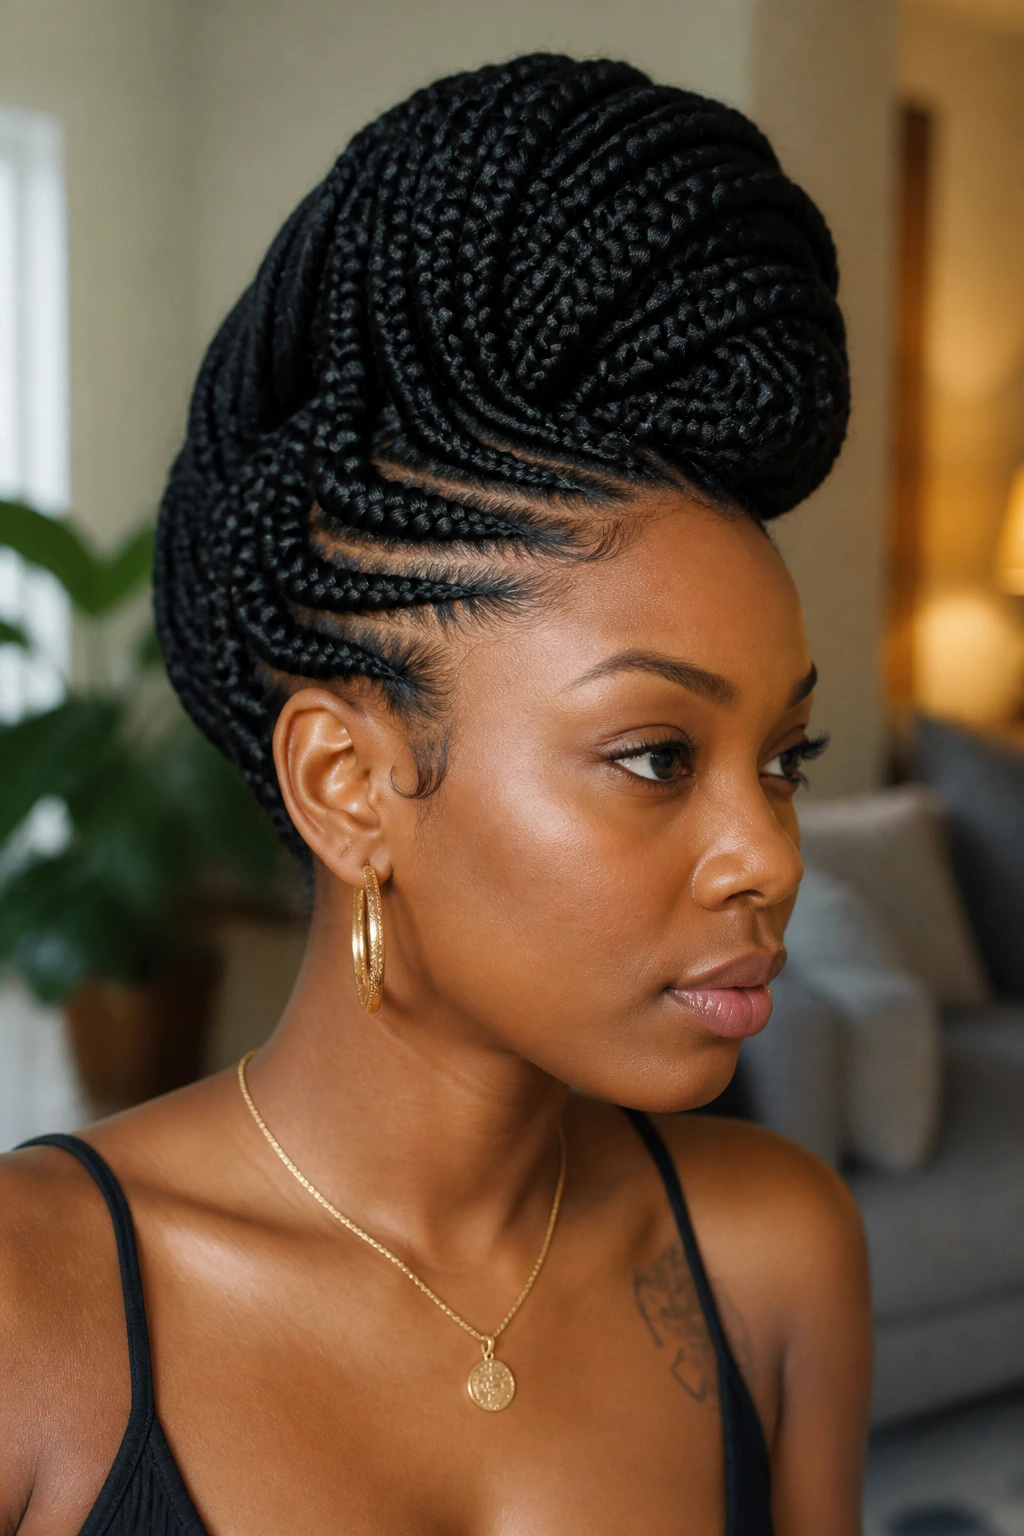
- Pulling the first rows too tight: The style may look sharp for an hour, then the scalp starts complaining. The fix is simple: loosen the base, especially near the temples and around the ear.
- Letting the parting wander: If the rows drift, the mohawk loses its spine. Use clips, check both sides in a mirror, and slow down near the crown.
- Choosing braids that are too heavy for the density: Jumbo extensions on fine hair can make the ridge sag. Match the braid size to the hair’s strength, not your mood that day.
- Overloading with product: Thick buildup at the roots makes the scalp itchy and the parts dull. Use just enough gel to grip, then stop.
- Skipping sleep protection: One rough night can blur crisp braids into a fuzzy mess. A bonnet or scarf keeps the work intact.
- Leaving the style in too long: Buildup, itch, and tension creep in quietly. Once the hairline looks strained, take the style down and give the scalp a break.
Questions People Ask Before Braiding
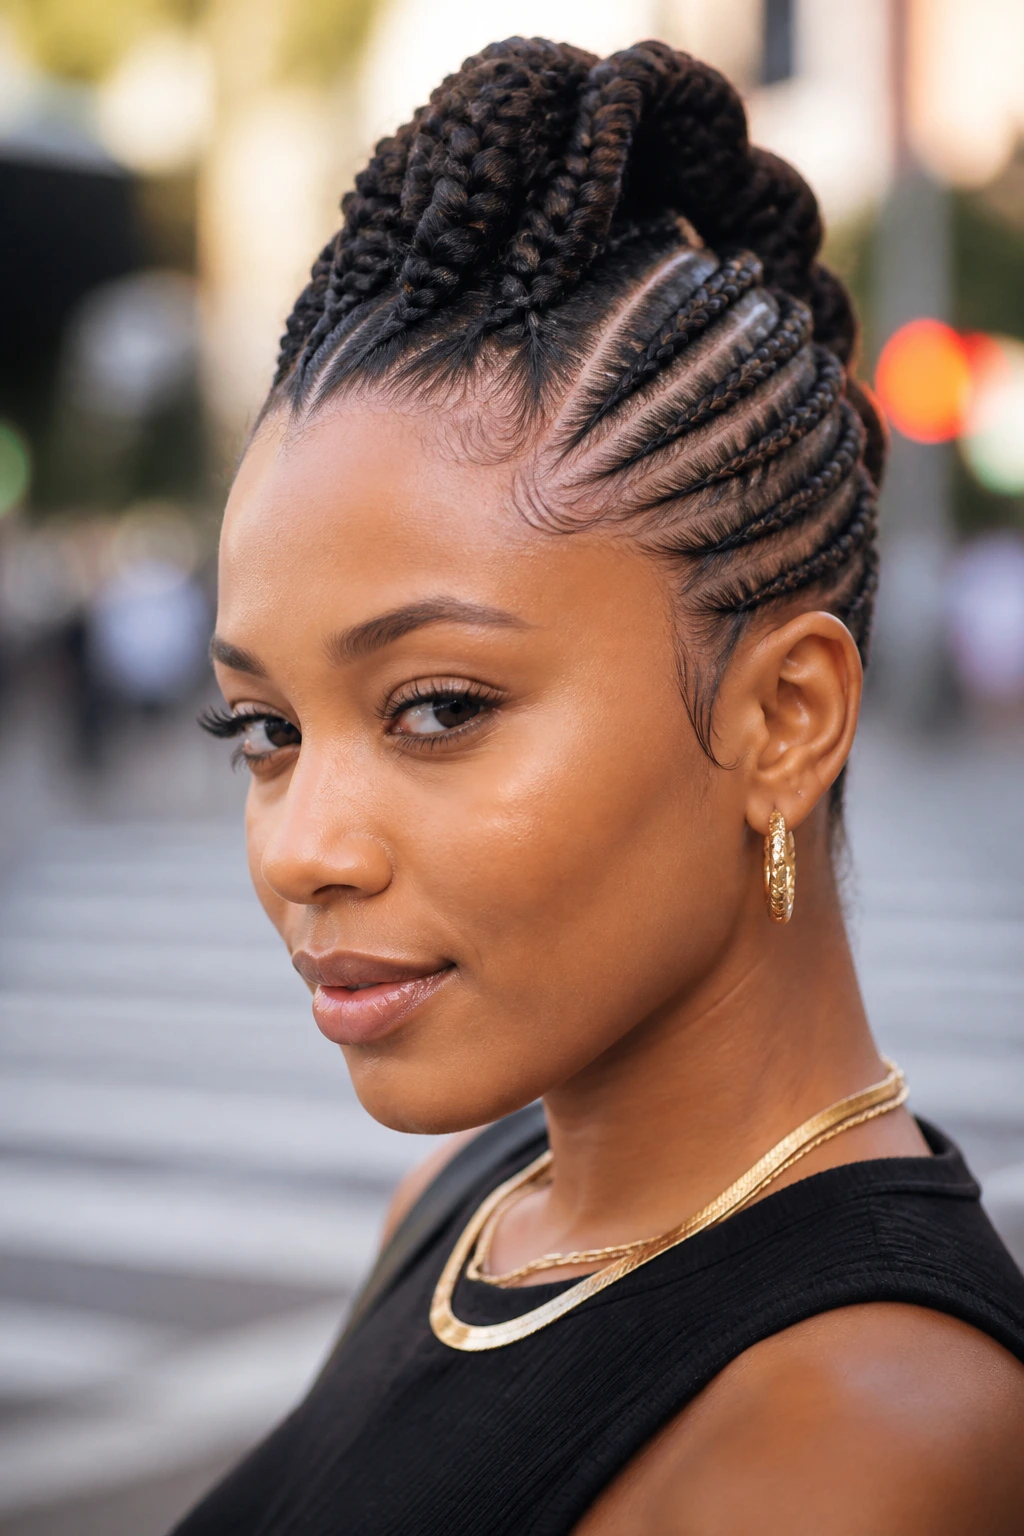
How long does a braided mohawk usually last on natural hair?
Most versions hold for one to three weeks, depending on braid size, product use, and how fast your hair grows. Smaller braids and knotless styles tend to last longer than loose curly versions.
Can I do a braided mohawk on short natural hair?
Yes. Mini cornrows, flat twists, and pinned center sections can all create the shape on shorter lengths. You may not get big hanging braids, but the silhouette can still look sharp.
Do I need to blow-dry my hair first?
Not always. Stretched hair makes parts cleaner and the style easier to control, but a full blowout is not required. Banding, threading, or gentle stretch methods can get you close enough for most versions.
What if my scalp is sensitive?
Choose low-profile styles, knotless bases, or flat twists, and keep the first inch along the hairline loose. Sensitive scalps do better when the braid pattern spreads the weight instead of concentrating it.
Can I wash my scalp while wearing the style?
Yes, with care. Use a nozzle bottle or applicator tip to place diluted cleanser directly on the scalp, then blot and dry thoroughly. Don’t soak the braids unless you have time and heat-free conditions to dry them all the way.
Which style is easiest if I’m new to braiding?
A classic center cornrow hawk, a double Dutch faux hawk, or a low-profile twist version is a good start. They’re easier to section cleanly than more detailed patterns like zigzags or criss-cross designs.
How do I keep the center from puffing up overnight?
Wrap the hair snugly with a satin scarf and use a bonnet over it if the ends move around. A little mousse before wrapping can help the braid line settle back into place by morning.
Can I add color without dyeing my own hair?
Yes. Colored extension hair gives you burgundy, brown, copper, or honey tones without changing the hair underneath. It’s the easiest way to shift the mood of the style for one install.
The Shape That Stays
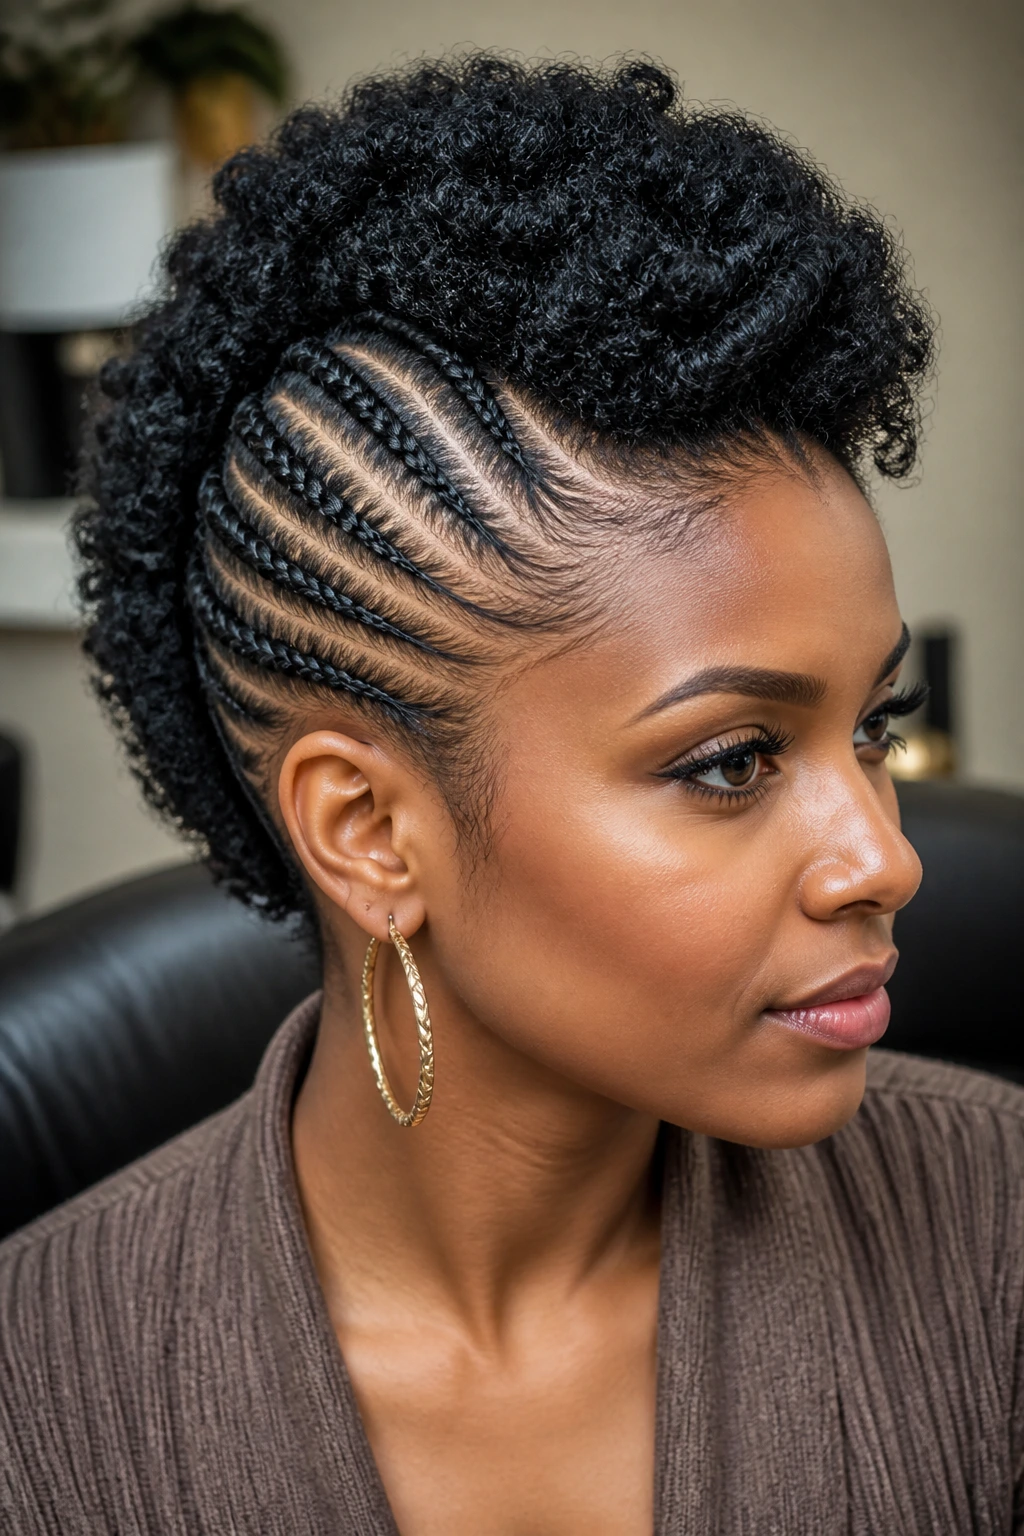
A good braided mohawk on natural hair has a satisfying kind of logic to it. The sides are controlled, the center carries the story, and the texture never has to disappear to make the shape work. That’s why these styles keep coming back: they let natural hair do the heavy lifting instead of flattening it into something safer and less interesting.
The best version is the one that fits your hair’s density, your scalp’s patience, and your actual life. Pick the braid map that gives you lift without pain, detail without clutter, and enough staying power to make the install worth the time. Once you find that balance, the style stops being a novelty and starts being a reliable part of your rotation.
