



Straight hair is picky about shape. Give it too much blunt weight and it hangs like a ruler; remove too much and the ends start looking thin before you’ve even left the salon.
That’s why fairy shag haircuts for straight hair have such a loyal following. The good versions keep the softness people want from a shag, but they do it with a lighter hand — cheekbone-skimming fringe, internal layers, and those little broken edges that move when you turn your head. Not every shag can survive straight hair. Some cuts need bend and wave to look finished. These don’t.
I keep coming back to this family of cuts because they solve a real problem: straight hair often needs movement without losing its clean line. The best fairy shag versions do that by controlling where the weight sits, where the fringe opens, and how much texture gets taken out near the face. The result can look airy, slightly dreamy, and still polished enough that you don’t feel underdressed the second you put on a blazer.
Why Fairy Shag Haircuts for Straight Hair Work So Well
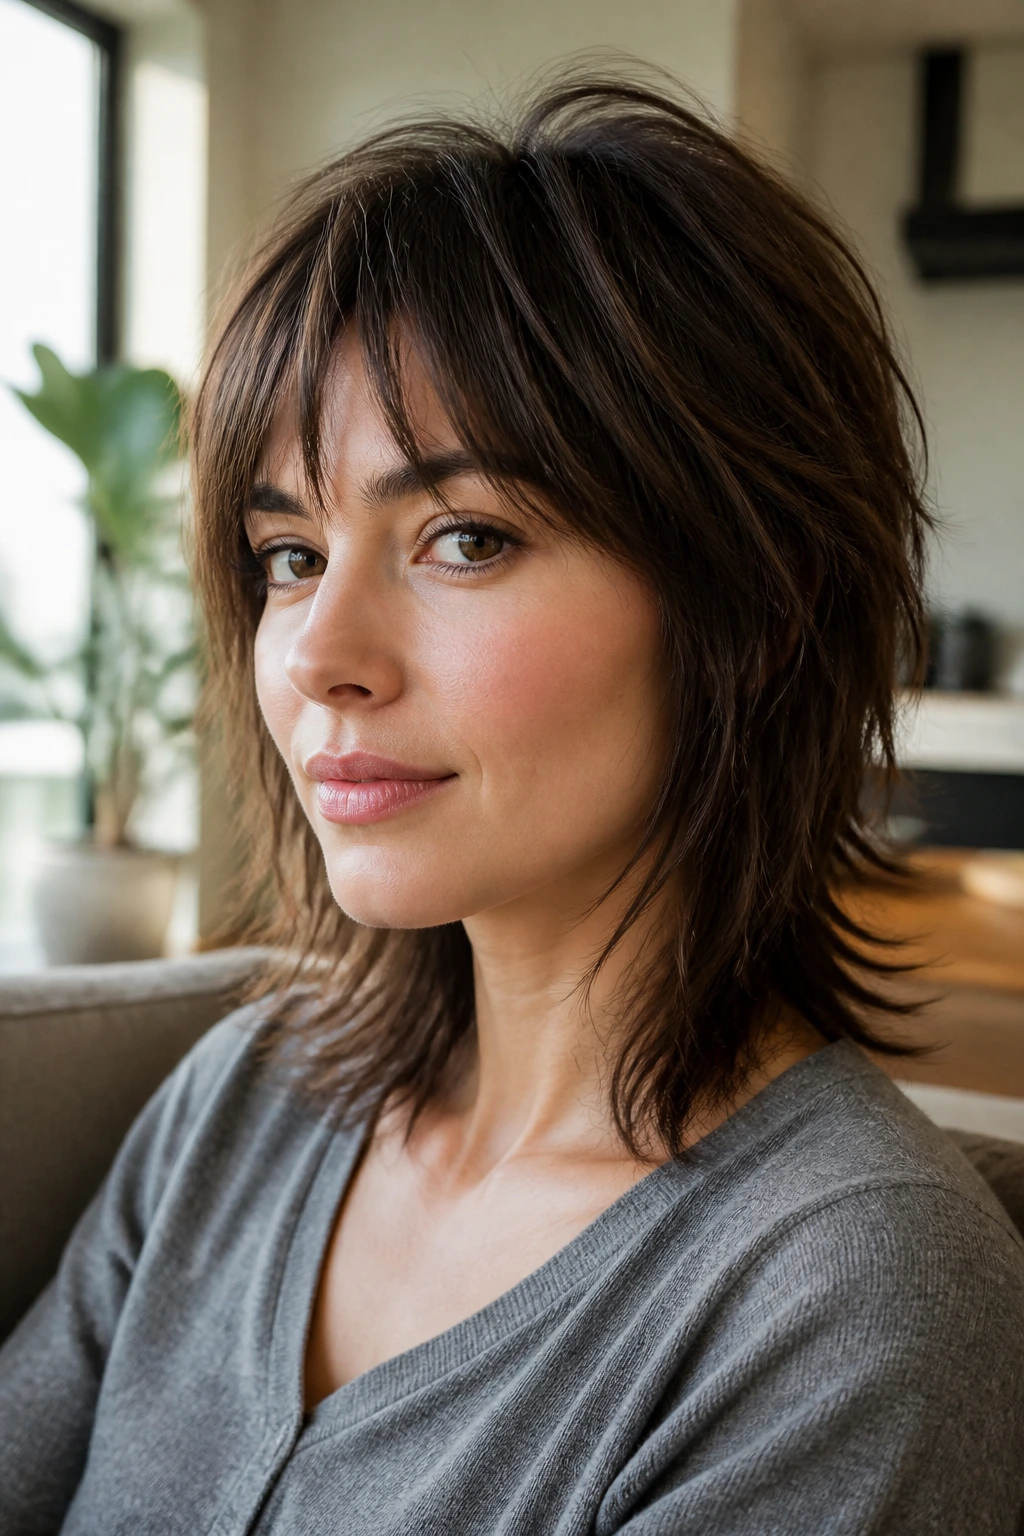
- The ends stay readable: Straight hair shows every cut line, so wispy ends and soft point-cutting keep the shape from turning into one hard block.
- The crown gets a lift without teasing: Shorter internal layers near the top can create movement that reads as volume, not as backcombed drama.
- The fringe does a lot of the heavy lifting: Curtain bangs, bottleneck bangs, and long split fringe pieces give straight hair a face frame that feels deliberate.
- The grow-out is kinder: A good fairy shag softens as it grows, which matters because straight hair often looks harsh when a cut grows out badly.
- The style works with minimal texture: You don’t need curls or beach waves to make the cut make sense; a blow-dry bend or even a tucked-behind-the-ear finish is enough.
- It dodges the helmet effect: Straight, one-length hair can look heavy at the jaw. Strategic layers remove that weight without making the whole head look chopped up.
1. Feathered Curtain Fairy Shag
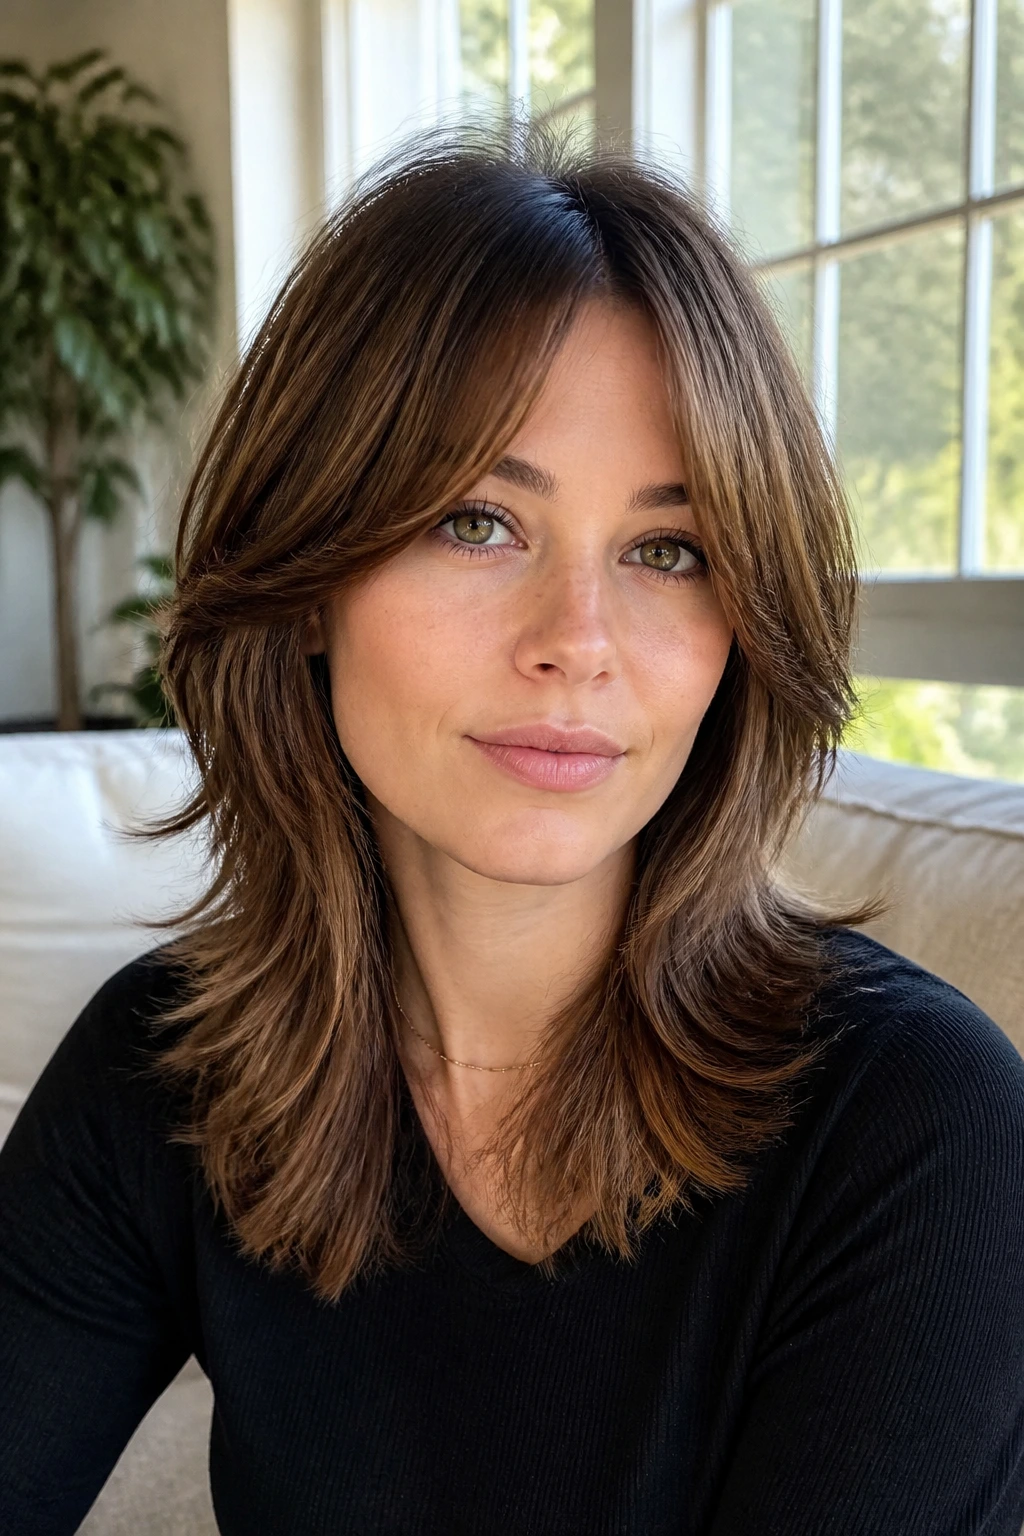
The softest place to start is a curtain-fringe shag with feathered layers through the mid-lengths. On straight hair, this shape looks almost like it’s been brushed by wind. The front opens away from the face, the cheekbones get a little frame, and the ends stay light instead of blunt.
Why it works: Straight hair takes curtain bangs well because the parting naturally creates two lines that can be styled with almost no fuss. If your hair tends to fall flat by lunch, this cut gives the roots a reason to lift without demanding a full round-brush blowout every day. Ask for the shortest face-framing pieces to hit around the cheekbone, not higher. Higher than that, and the effect gets sharp fast.
Ask for this
- A soft center-part fringe that blends into the sides
- Feathered layers from the chin down
- Point-cut ends instead of a hard line
One blow-dry with a medium round brush is enough. That matters. You want bend, not curl.
2. Micro-Bang Cloud Shag
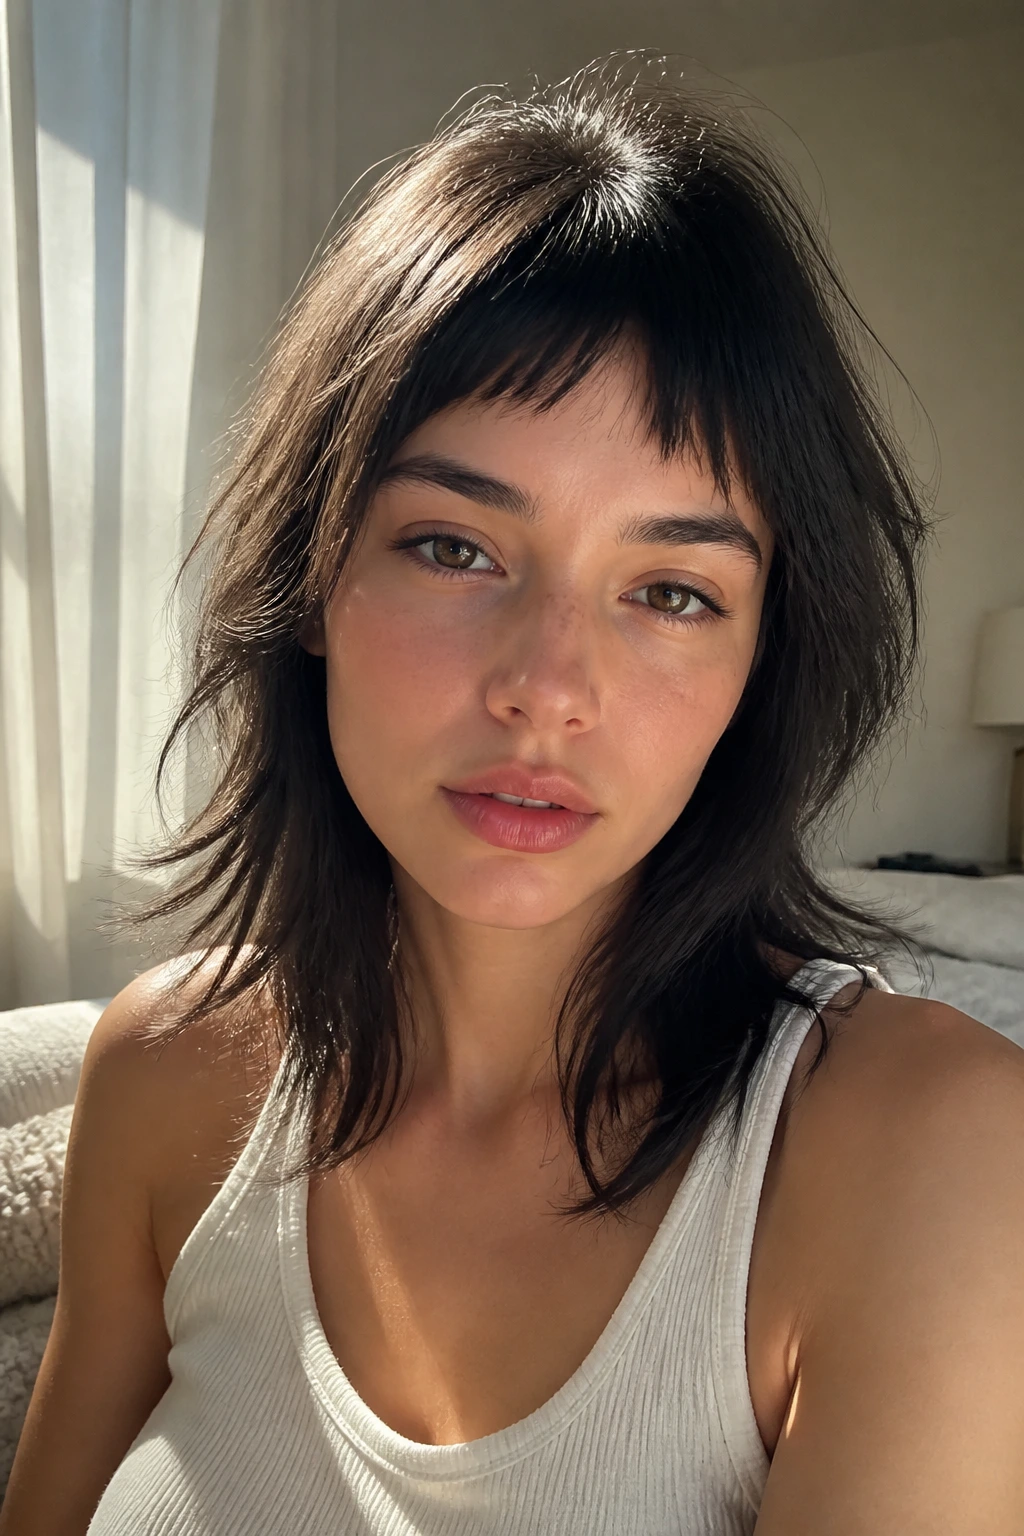
Short bangs sound risky because they are risky. Still, on very straight hair, a micro-bang shag can look delicate rather than severe if the rest of the cut stays light and cloudy. The trick is contrast: tiny fringe, airy body, no bulky perimeter.
Why it works: The short fringe gives the cut a fashion edge, while the shag layers keep it from reading as one flat block. This is best if your straight hair is fine to medium and you do not mind upkeep, because micro bangs ask for trimming more often than the rest of the cut. They show growth fast.
If you like a little attitude with your softness, this one lands in a sweet spot. It’s less “princess” and more “slightly mischievous.” Which, honestly, is the fun part.
3. Collarbone-Length Airy Shag

Why does collarbone length work so well on straight hair? Because it leaves enough weight to keep the ends from fraying visually, but it’s short enough that the layers can move. That balance matters. Too long and the shape drags; too short and the line can feel piecey in a bad way.
This version sits right at the collarbone, with soft layers that start around the jaw and open out through the lower half. It’s a good choice if you want something that still tucks into a coat collar without getting swallowed by it.
How to style it
- Blow-dry the top flat at the root.
- Bend only the first 2 inches of the ends.
- Finish with a pea-size amount of lightweight cream on the tips.
That’s all it needs on most days. The cut is doing the work, not the product.
4. Razor-Edged Wispy Wolf-Shag Hybrid
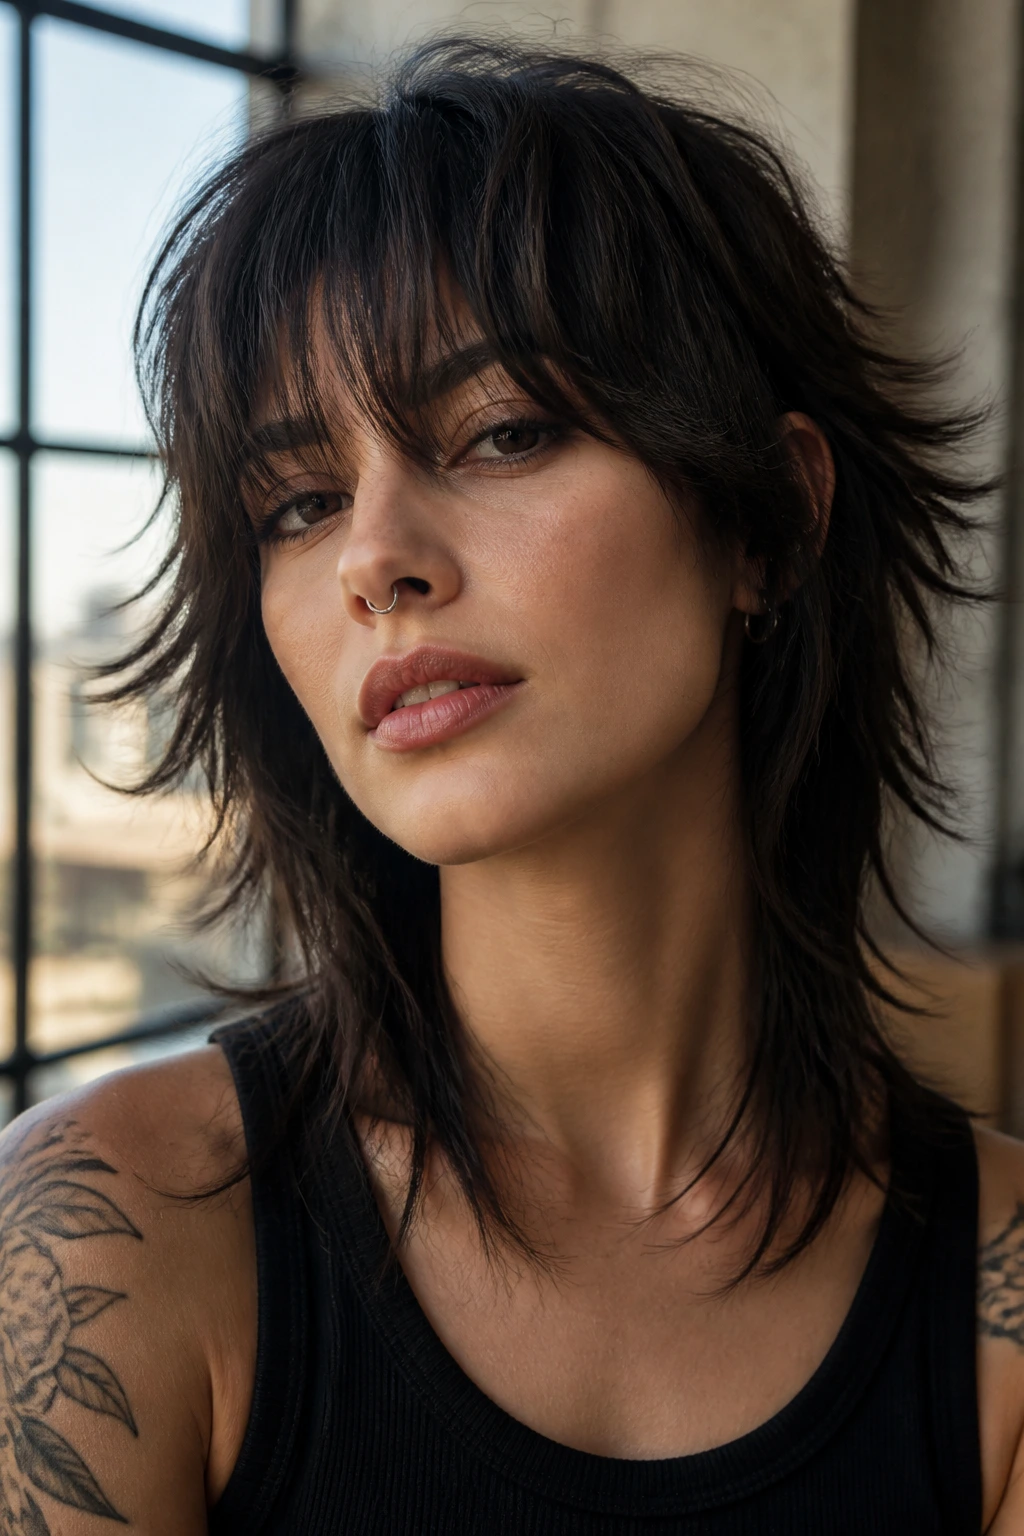
This one is for people who like their straight hair with a little bite. A wolf-shag hybrid keeps the shag softness but leans more angular at the bottom, so the silhouette feels a touch messier and a touch cooler. If you’ve got dense straight hair, this shape can remove enough bulk to stop the sides from ballooning.
Why it works: The razor or point-cut finish creates separation in the ends, which is what keeps the shape from looking heavy. On thick hair, that separation is gold. On fine hair, though, it can get too sparse too quickly, so I’d keep this one for medium to dense textures.
The best version still leaves a clean face frame. The goal is not chaos. It’s movement with a little edge.
5. Chin-Grazing Pixie Shag
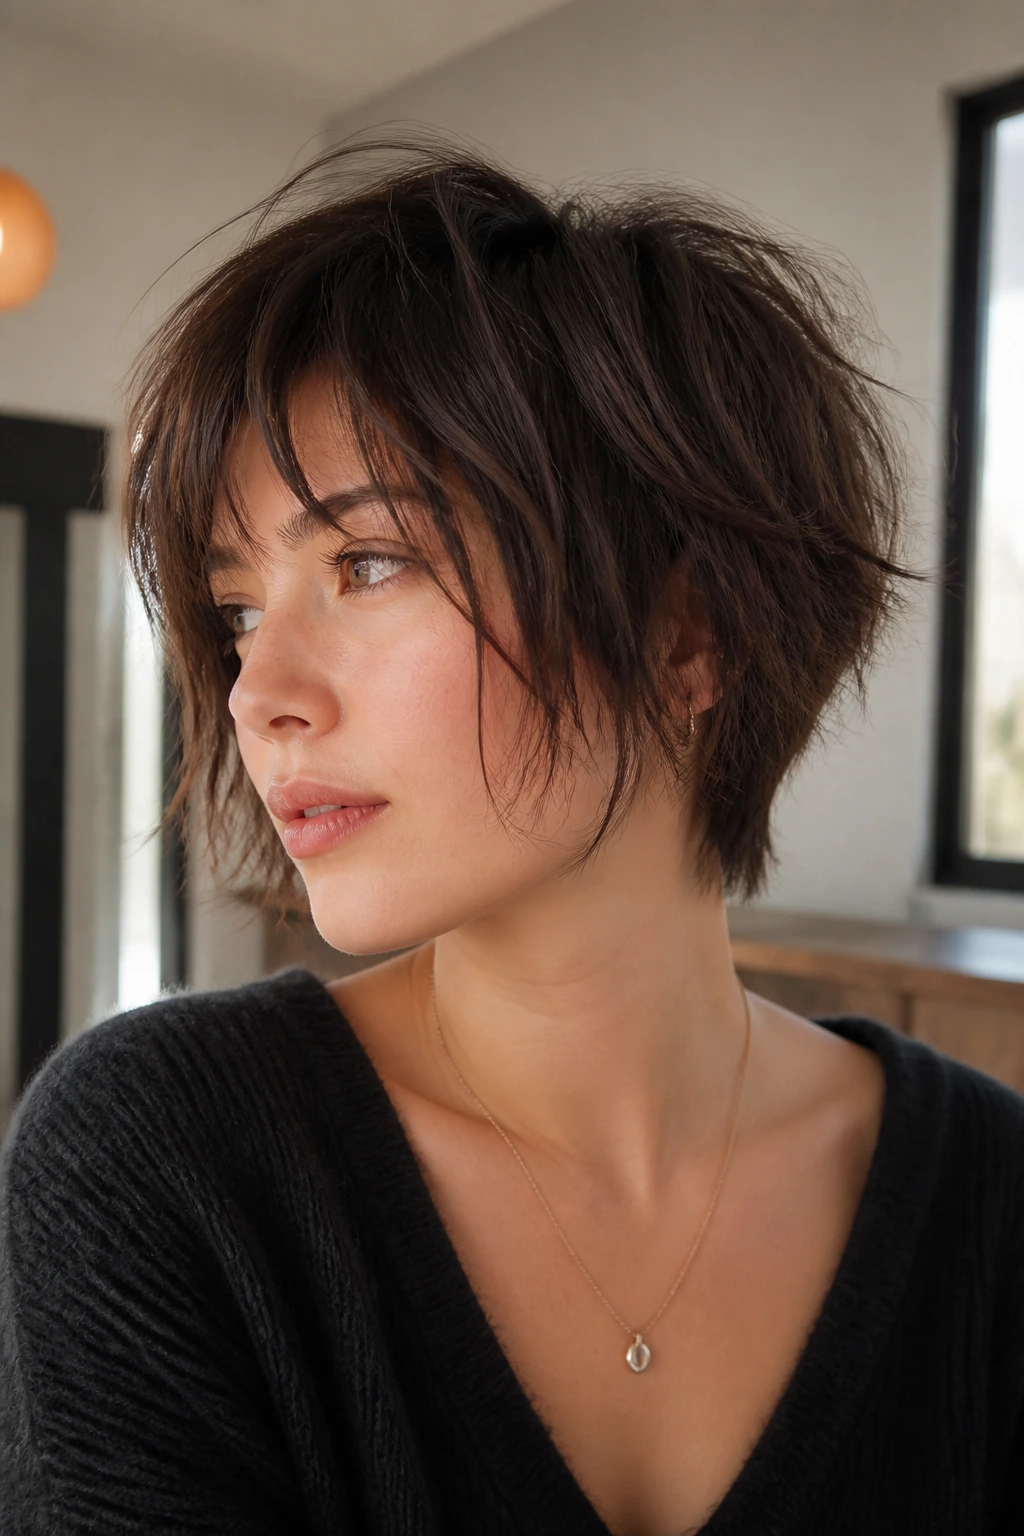
Short straight hair can look either crisp or choppy, and this cut walks that line on purpose. A chin-grazing pixie shag keeps the nape light, pushes softness around the ears, and uses tiny layered pieces at the front so the whole thing doesn’t harden into a bowl.
I like this on people who want a short cut but can’t stand the stiffness of a classic pixie. It feels softer. Less sharp corners, more little wisps that stick out after a towel dry in a way that looks meant to happen.
Good to know: if your hair has a stubborn cowlick at the front, tell your stylist before they cut the fringe. Short shag shapes amplify whatever the hair already does.
6. Long Layered Storybook Shag
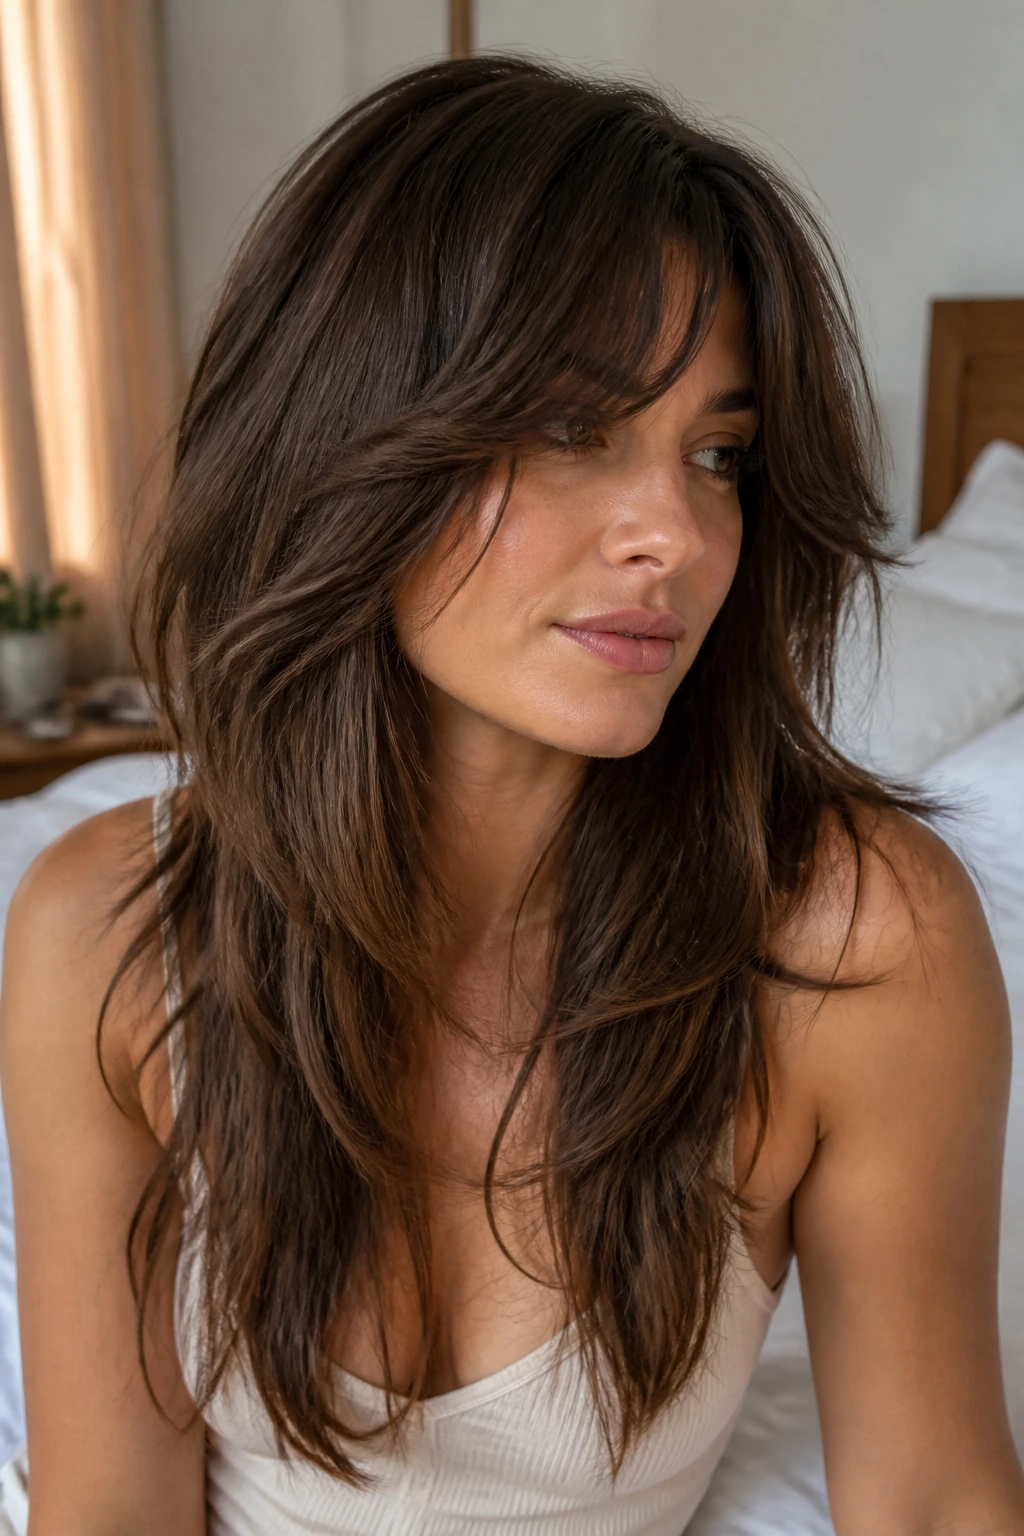
Long hair and shag layers can get awkward if the layers start too high. Here, the best move is to keep the longest lengths intact and cut the texture lower, mostly around the cheek, chest, and lower ribs. That keeps the hair romantic instead of thin.
The shape feels almost old-fashioned in the nicest way. There’s movement around the face, a soft sweep through the ends, and enough length left that you can still put it in a low ponytail without it collapsing into a sad little nub.
If your straight hair is fine, this is one of the safer ways to wear a fairy shag. You get softness without giving up the look of fullness.
7. Bottleneck Bang Fairy Shag
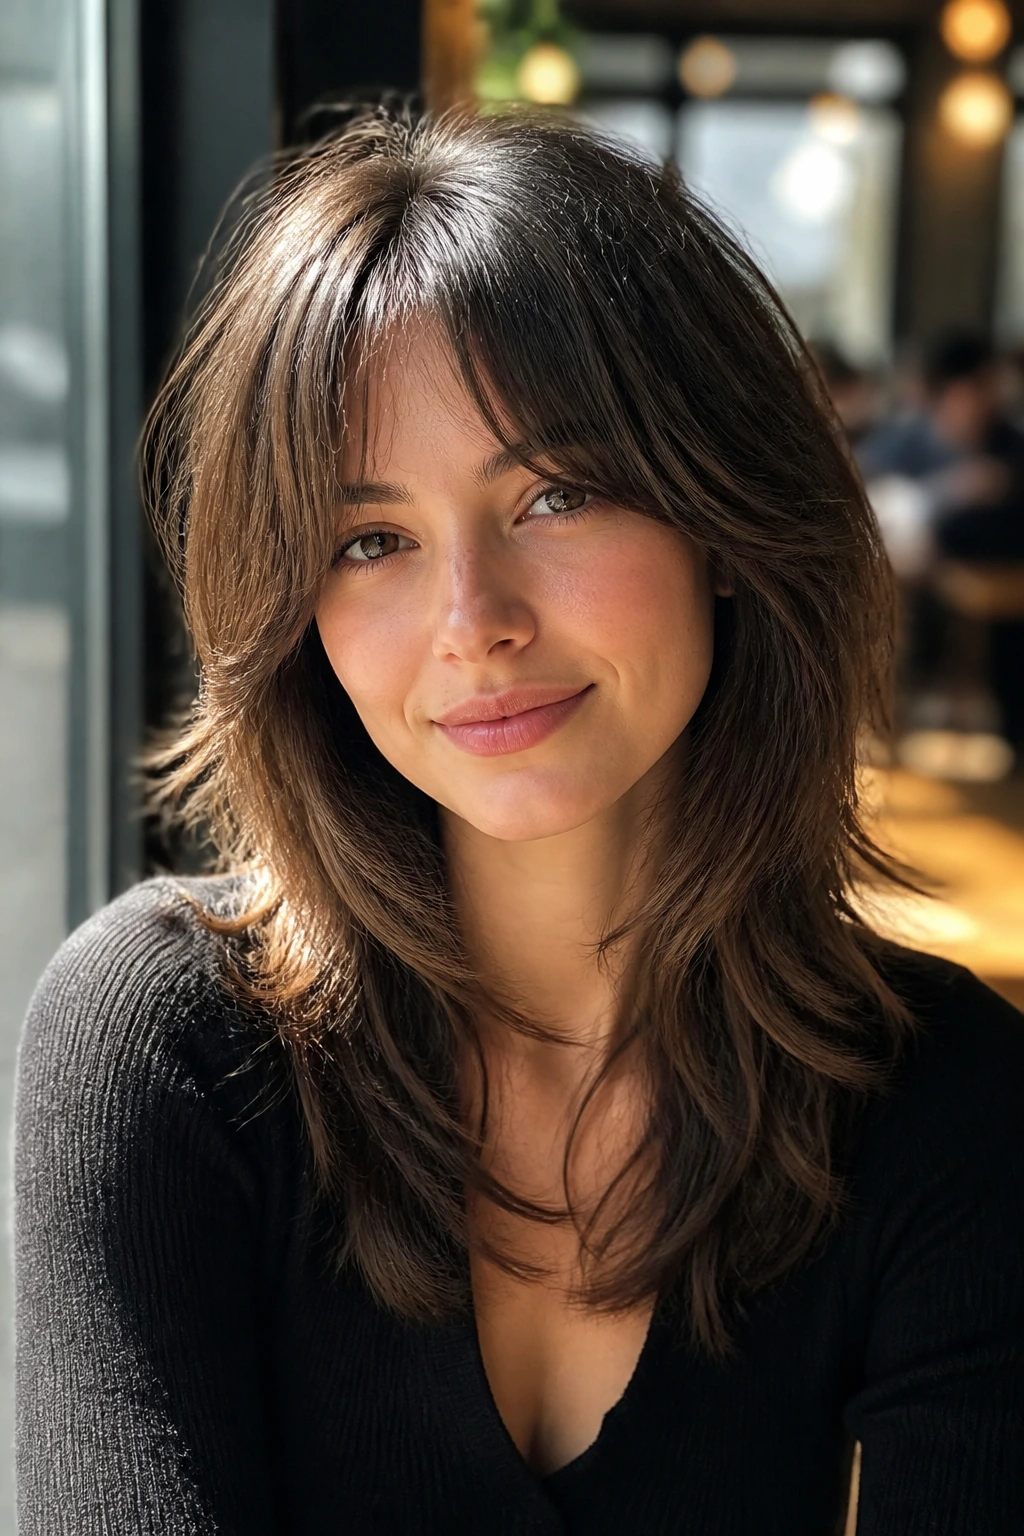
Bottleneck bangs are one of the smartest fringe choices for straight hair because they give you a small, fitted opening at the center and a wider sweep at the sides. The effect is tidy, but not hard. Paired with a shag, it can look almost hand-drawn.
This cut flatters stronger cheekbones and a slightly broader forehead especially well. The fringe narrows the center, then opens just enough to blend into the rest of the layers. That opening is what keeps it from feeling helmet-like.
A tiny round brush and 30 seconds on each side are enough to shape it. Don’t overwork the fringe. The whole point is that it should look soft, not carved.
8. Soft Mullet Shag With Straight Ends
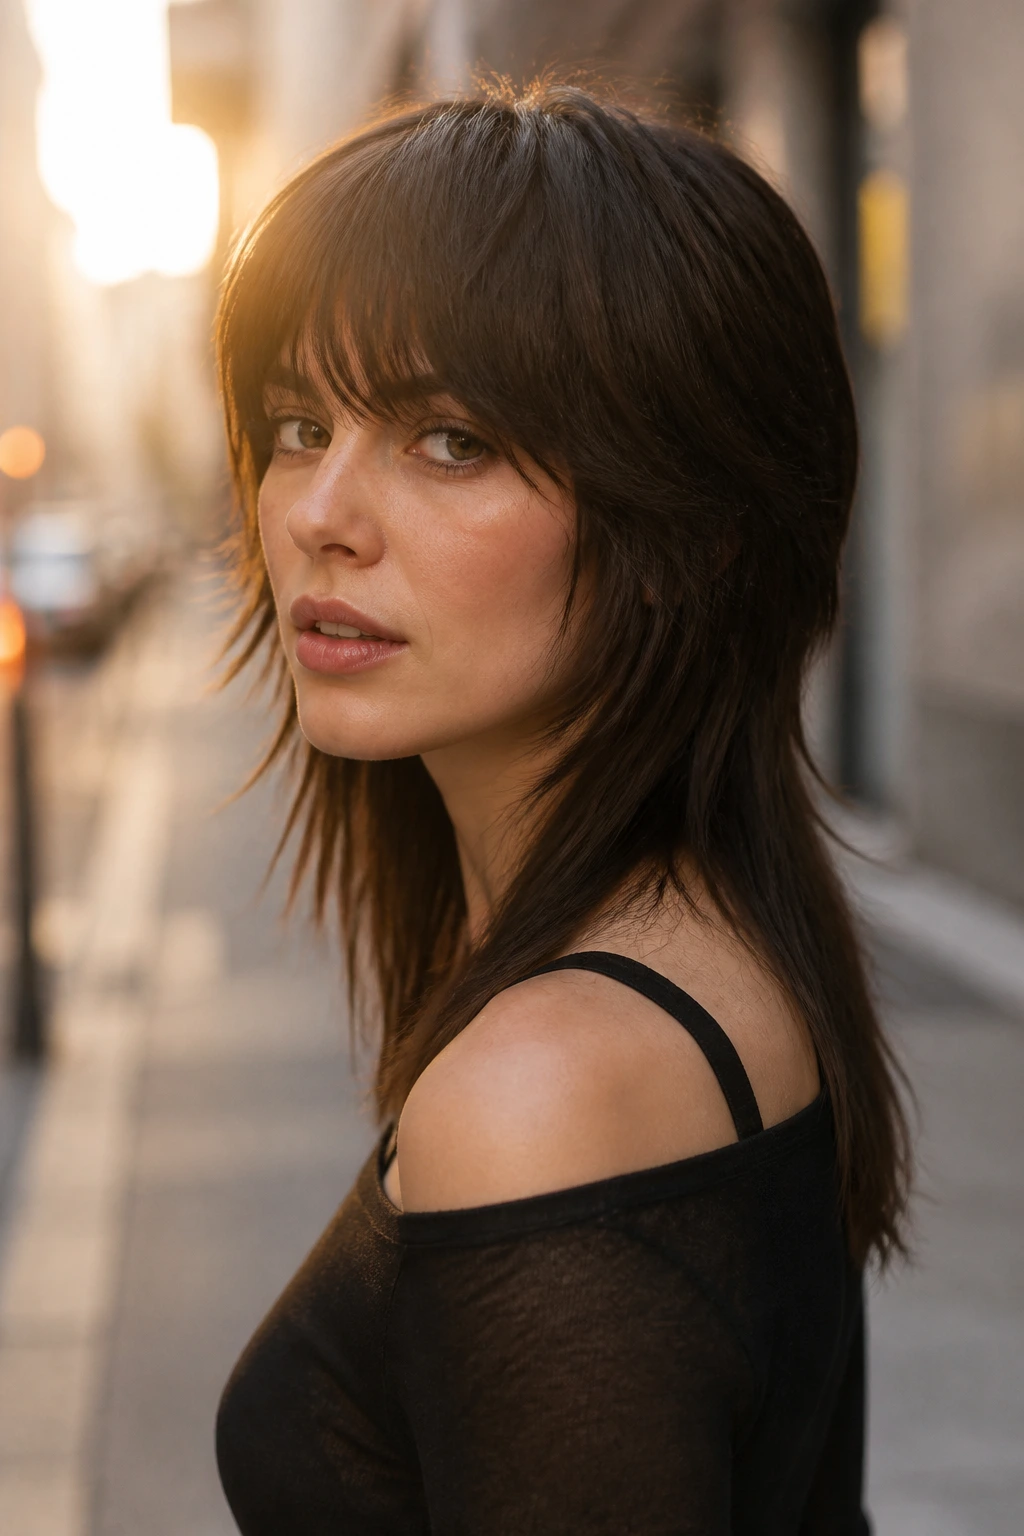
This is the edgier cousin in the group. The back is left a little longer, the front stays light, and the ends aren’t curled under into politeness. On straight hair, that contrast can look sharp in a good way, especially if you like a cut that feels a bit undone.
Why it works: Straight hair makes the difference between short layers and long layers visible right away, which is exactly what this shape needs. It creates a clear top-to-bottom change without relying on texture spray or hot tools to fake one.
If you’re nervous about the word “mullet,” ignore the word and look at the silhouette. A soft mullet shag can be surprisingly graceful when the layers are blended well. The wrong version is too obvious. The right one just looks cool.
9. Shoulder-Skimming Shag With Hidden Crown Layers
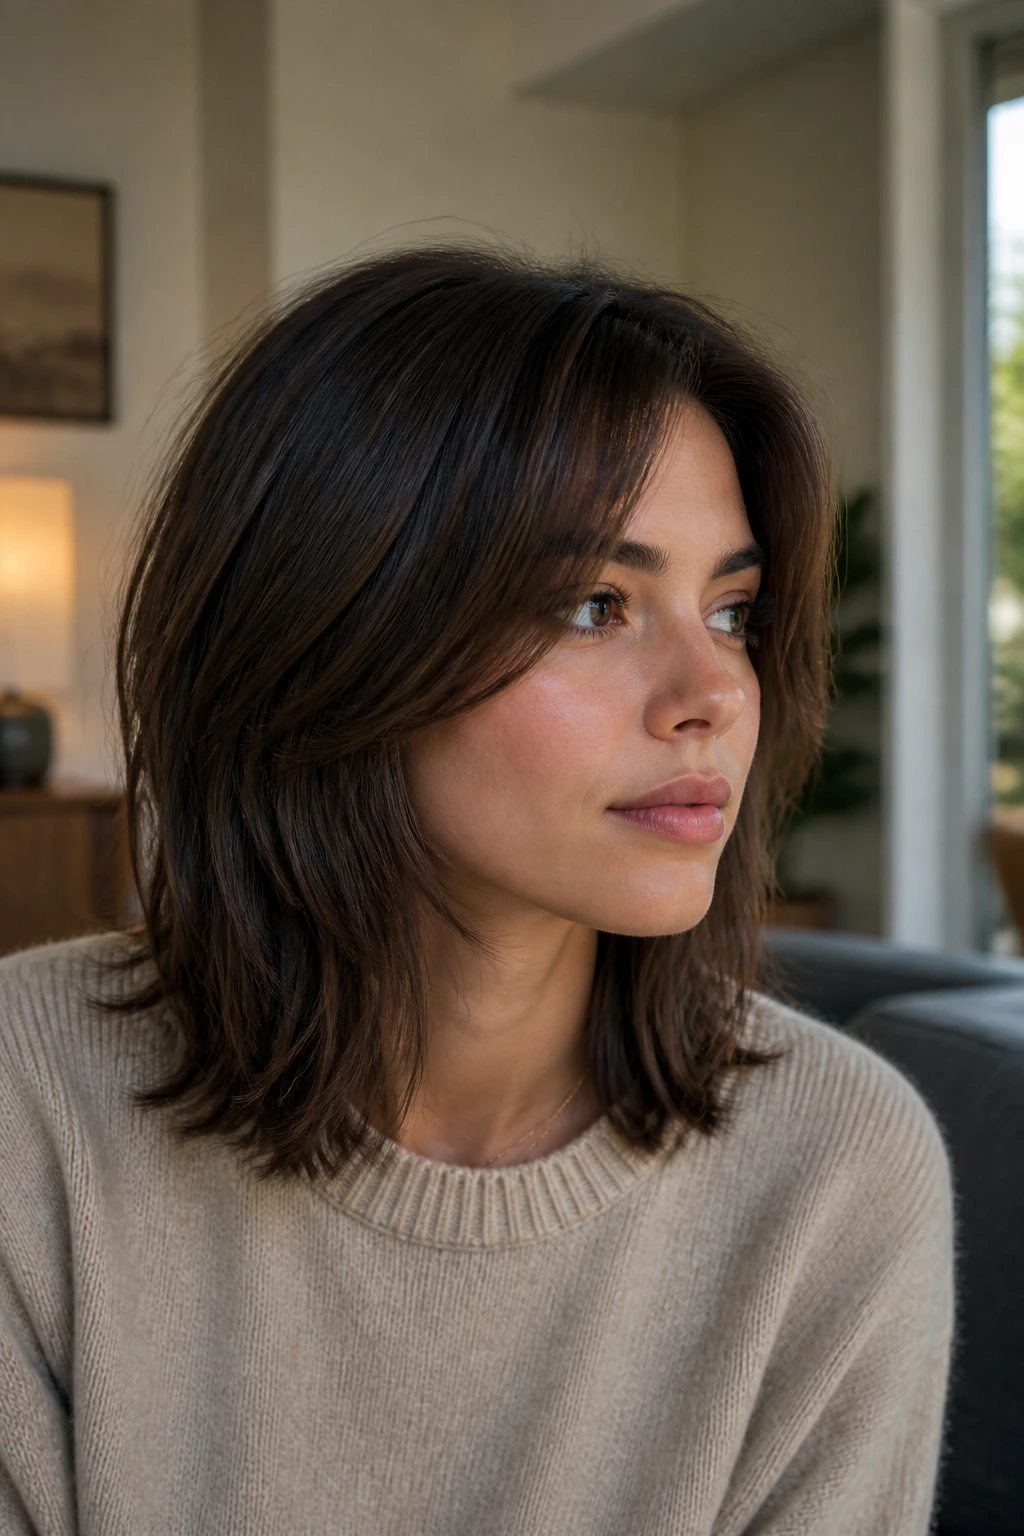
Sometimes the best shag is the one nobody notices immediately. Shoulder-skimming length with hidden crown layers keeps the surface smooth but gives the top enough internal movement that straight hair doesn’t collapse by midday. That hidden structure is what keeps the cut from looking like a basic trim.
This one works well if you wear your hair down a lot and want lift at the top without visible short bits everywhere. The layers should be tucked inside the shape, not stacked on the outside like steps.
A lot of stylists go too heavy with the top layers on straight hair. Don’t let them. Hidden layers are quieter, and quieter is often better.
10. Center-Part Glassy Shag
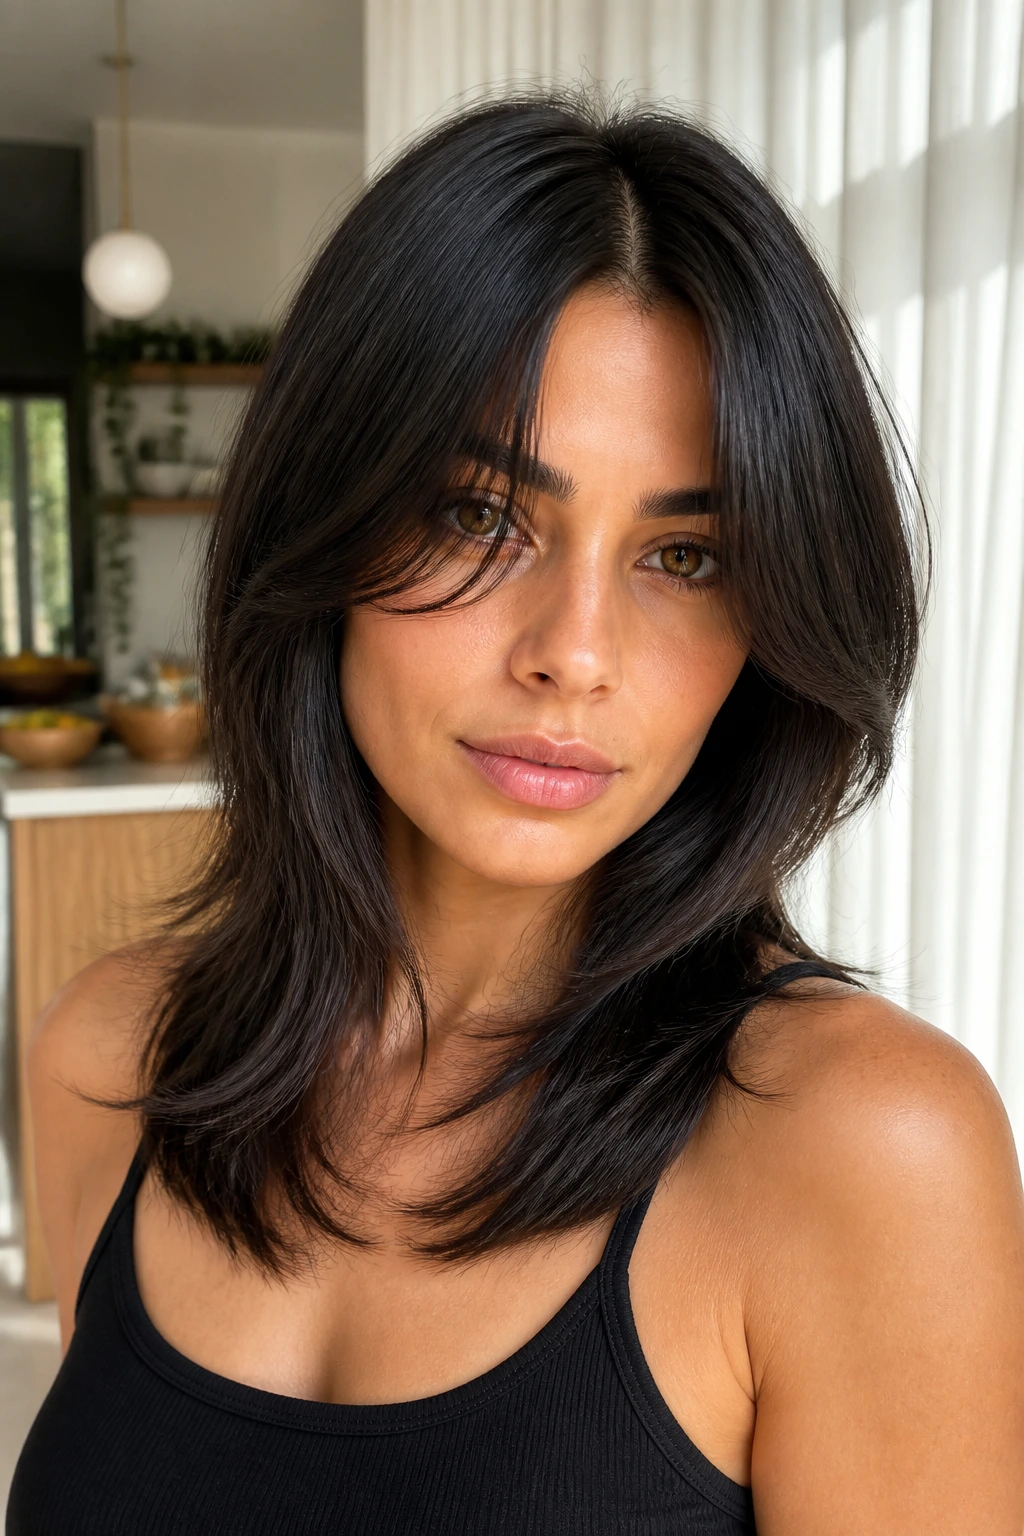
Here’s the contradiction: a shag can look sleek. It just needs the layers to be soft enough that the shine can still travel down the hair shaft without interruption. A center-part glassy shag does exactly that. The fringe opens in the middle, the face frame stays narrow, and the whole thing feels controlled.
This is the one I’d pick for straight hair that already has a smooth, glossy finish. It doesn’t fight that texture. It uses it.
The haircut is at its best when the ends have a tiny bit of separation, not a lot. Think silk ribbon with movement, not shattered pieces everywhere. That’s the target.
11. Face-Framing Butterfly Shag for Straight Hair
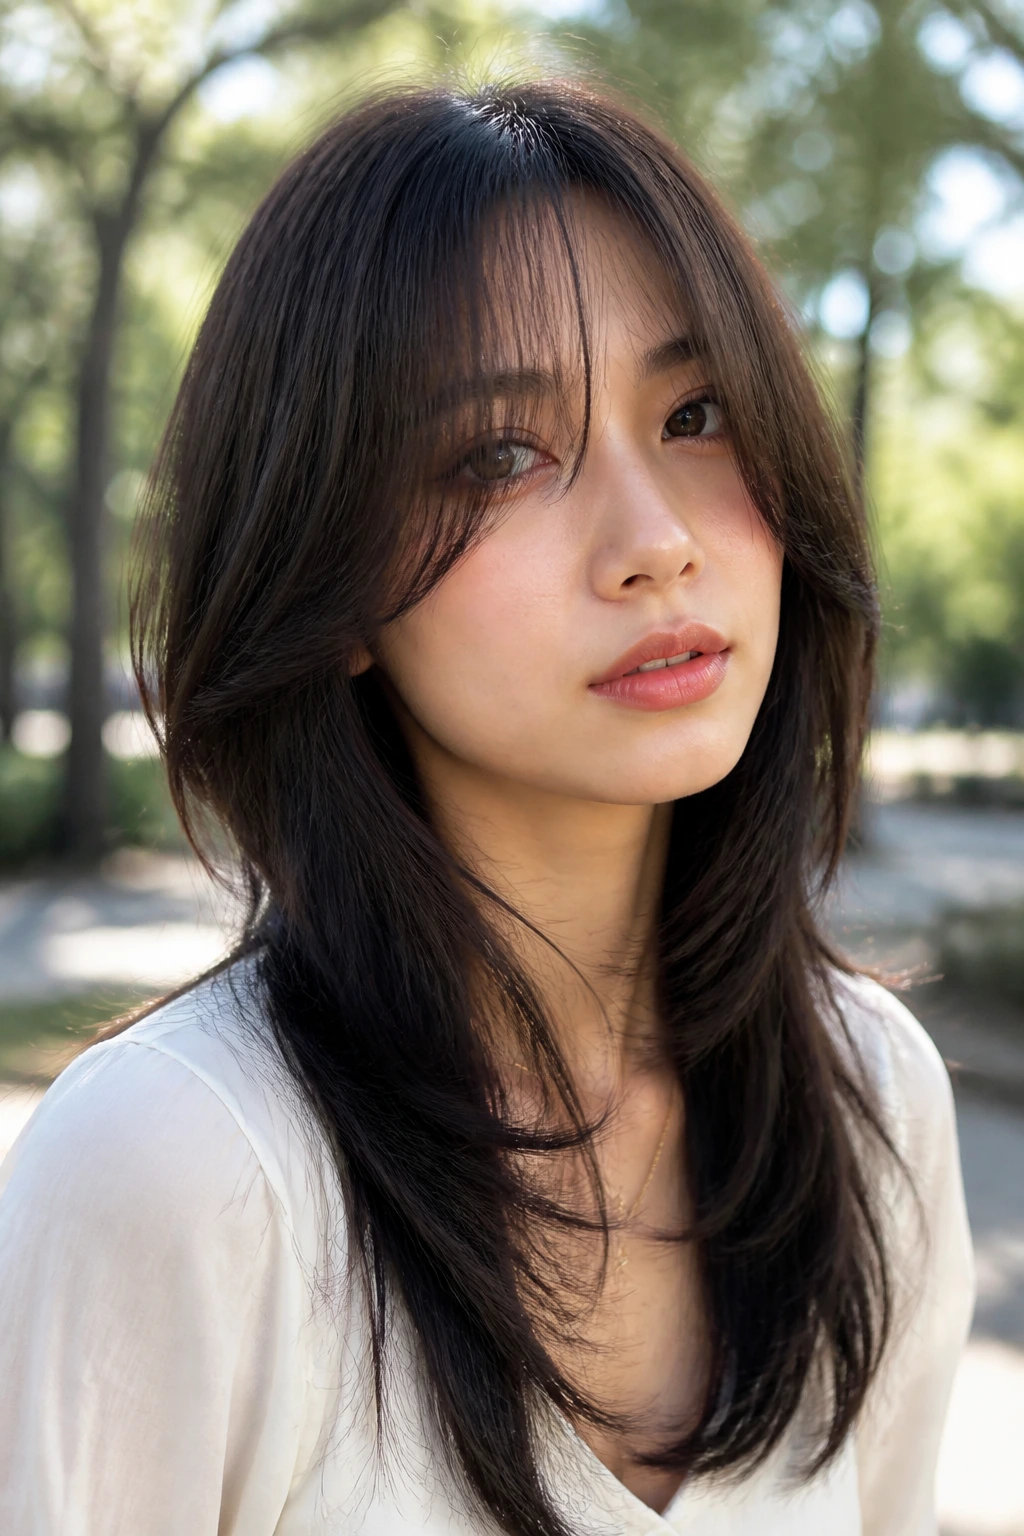
What happens when a butterfly cut gets a shag attitude? You get something long, light, and still easy to wear with straight hair. The short face-framing pieces bring the focus forward, while the longer lengths keep the bottom from feeling thin.
This version is good if you want visible shaping without sacrificing length. The shortest pieces usually sit around the chin or upper chest, then the rest falls away in longer layers. Straight hair likes that because the front gets a job to do.
Ask for the face frame to blend gradually. If the jump from short to long is too steep, the whole cut can look disconnected. That’s the line between airy and choppy.
12. Piecey Midlength Shag With Split Fringe
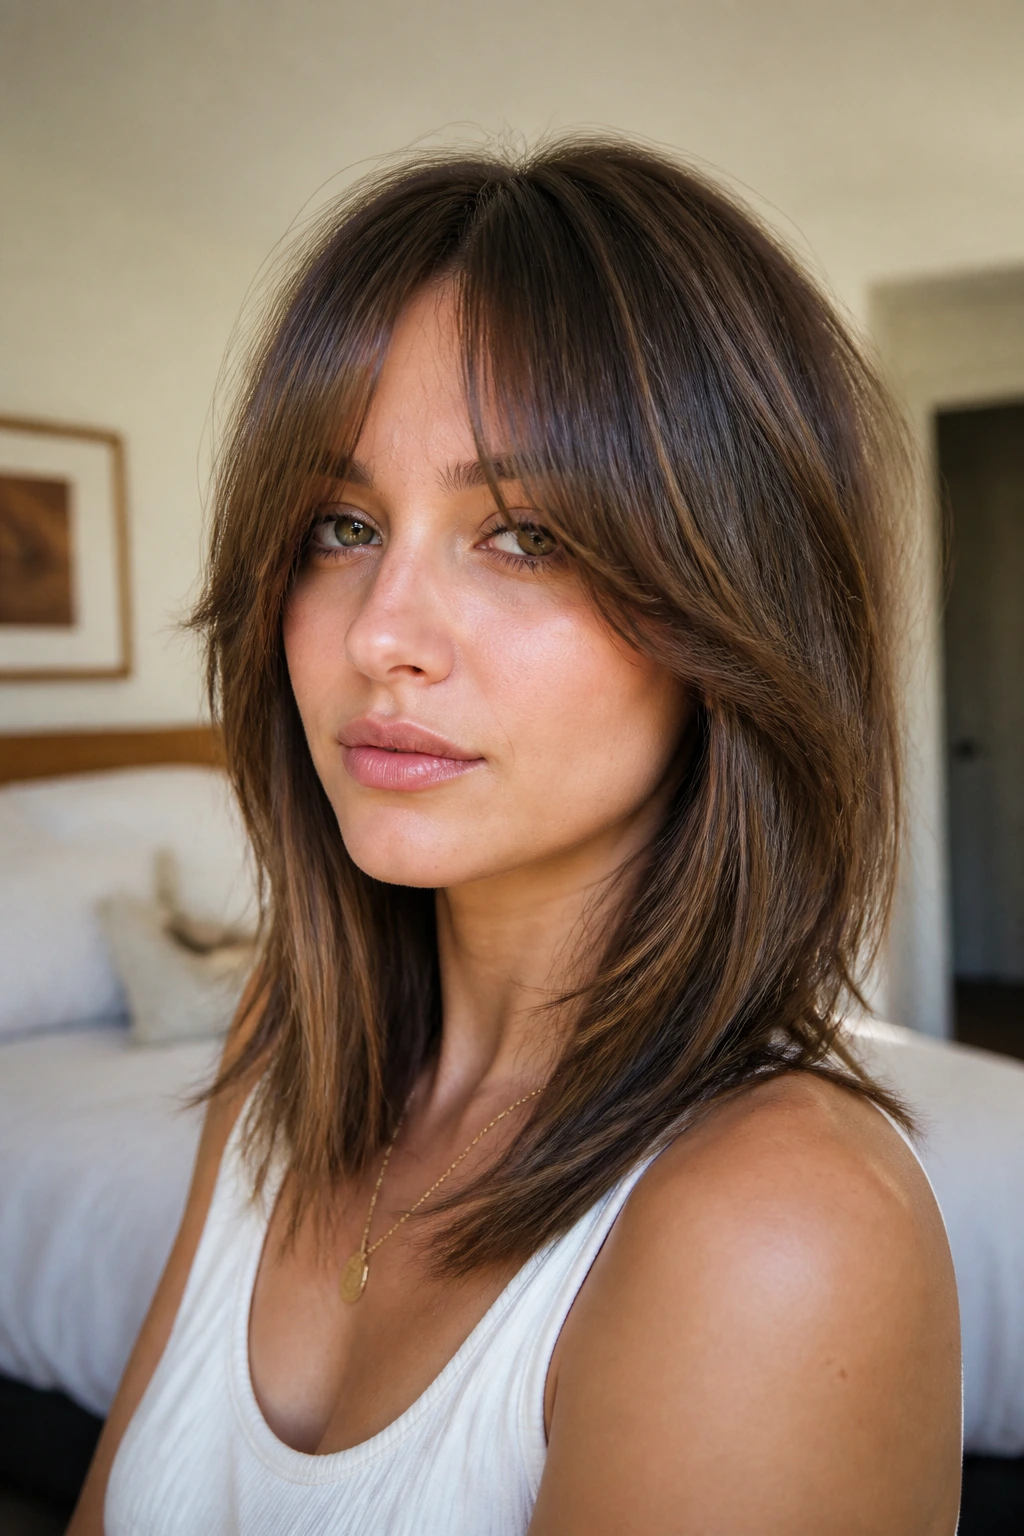
Midlength straight hair can get boring fast if the cut is too polite. This version fixes that by breaking the fringe into two soft pieces and cutting the layers so they land in distinct, readable sections. The result is piecey, but not messy.
Why it works: The split fringe opens the face, while the midlength keeps enough weight to hold the shape. On straight hair, that extra weight matters. If you cut too high into the layers, the ends can look like they’ve been thinned out by mistake.
This is one of those cuts that looks even better on day two. The fringe settles, the layers separate a little, and the shape gets more interesting. That’s the kind of grow-in behavior people actually like.
13. Deconstructed Bob Shag
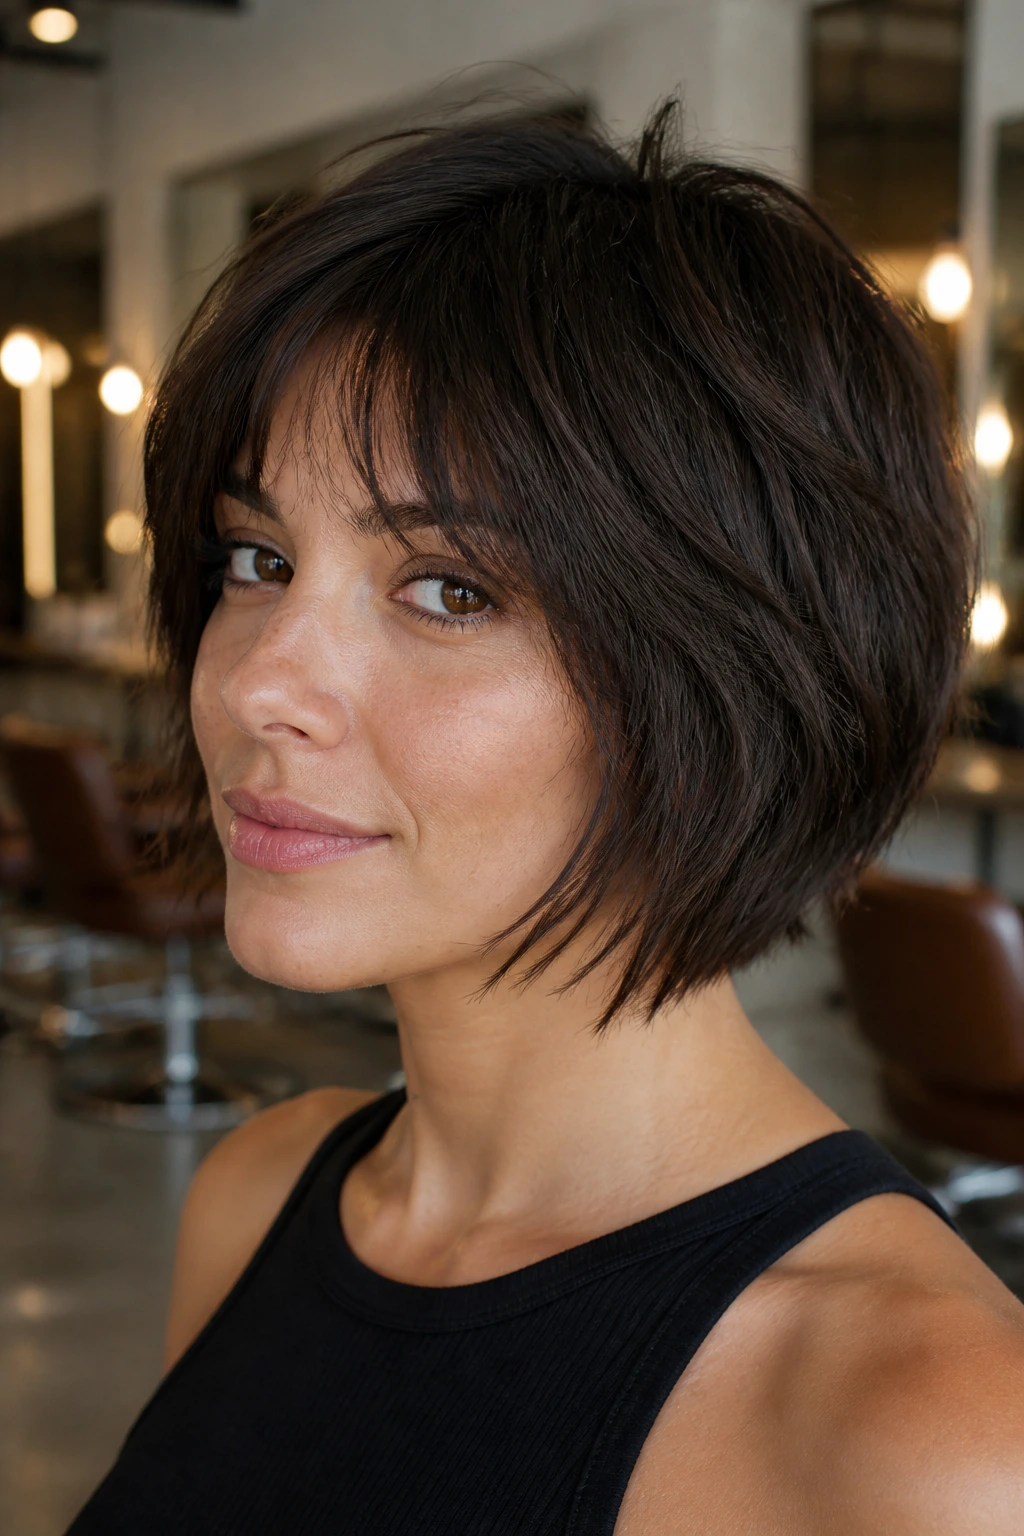
A bob that’s been softened into a shag can be far more forgiving than a hard-line one-length bob. The deconstructed version keeps the perimeter around the jaw or just below it, then breaks the inside shape so it doesn’t sit like a helmet.
It’s a smart choice if you want a shorter haircut but don’t want the bluntness that often comes with straight hair. The tiny internal layers keep the line alive. They also stop the ends from turning into a single shelf.
If you like wearing one ear tucked and one side loose, this cut is especially good. It changes shape depending on where you put your hands. That’s half the charm.
14. Long Fringe Whisper Shag
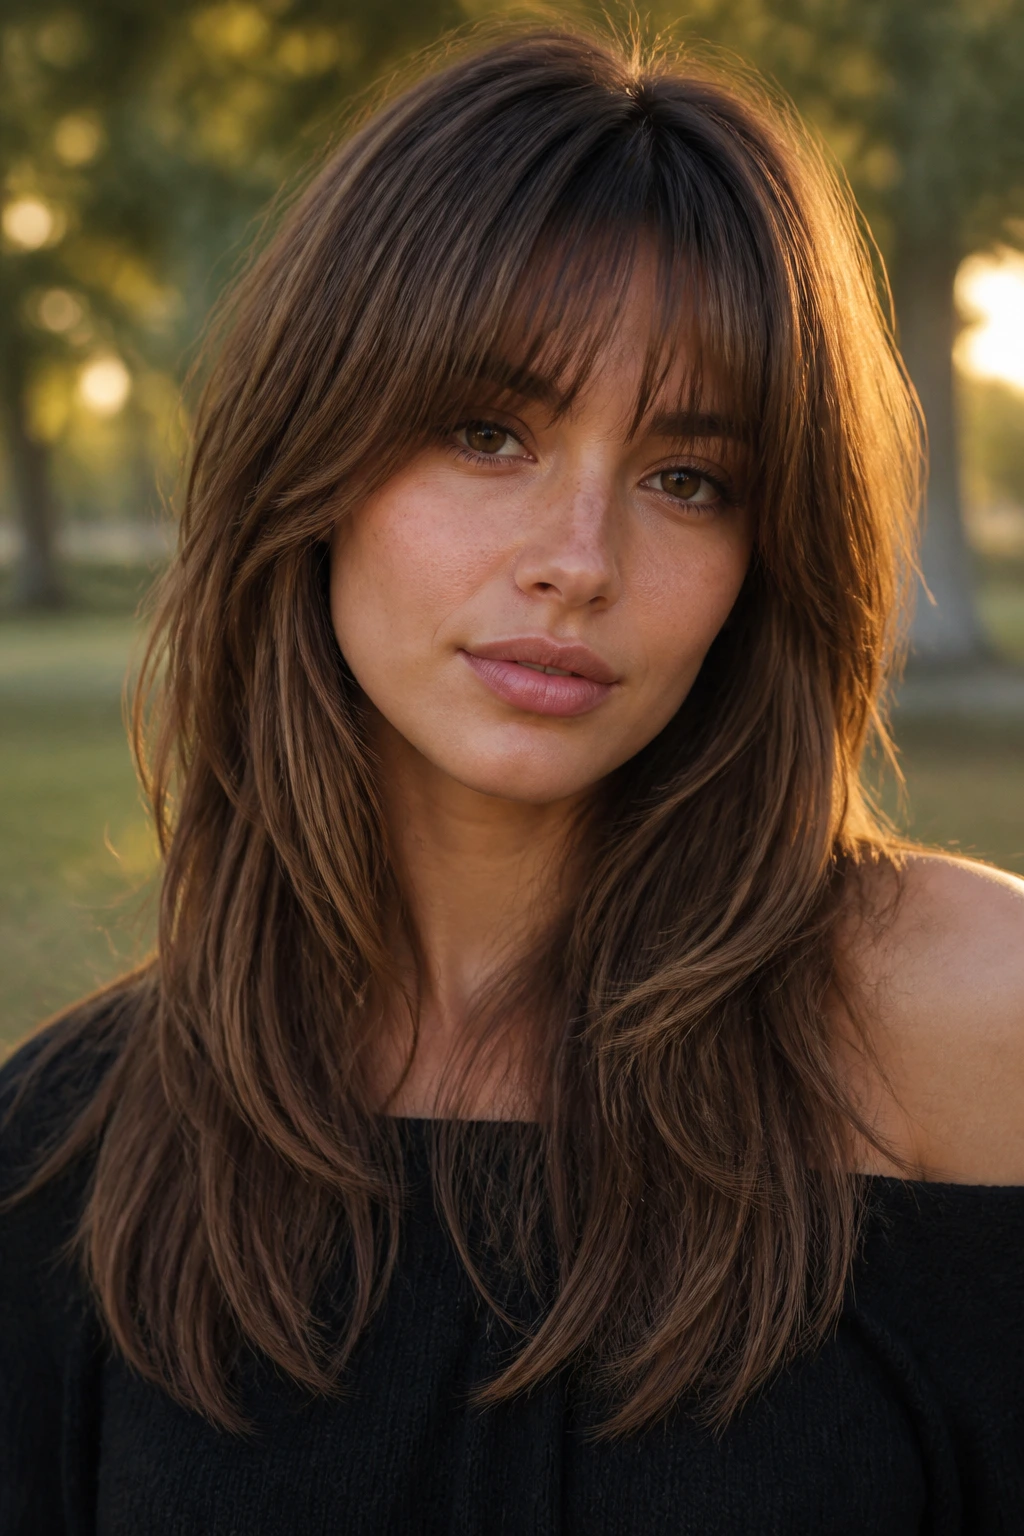
This one is almost shy. The fringe is long enough to brush the brows or eyes, the layers are light enough to disappear into the rest of the haircut, and the overall effect is more whisper than statement. Straight hair makes that softness visible because there’s nowhere for the shape to hide.
I like this on people who want a little face frame but hate the maintenance of a strong bang. It can be swept off the face, split down the middle, or tucked behind one ear and still read as intentional.
No heavy product here. A light spray or a dab of cream is enough. Anything more and the fringe starts looking sticky, which kills the airy effect.
15. Air-Dried Minimal Shag
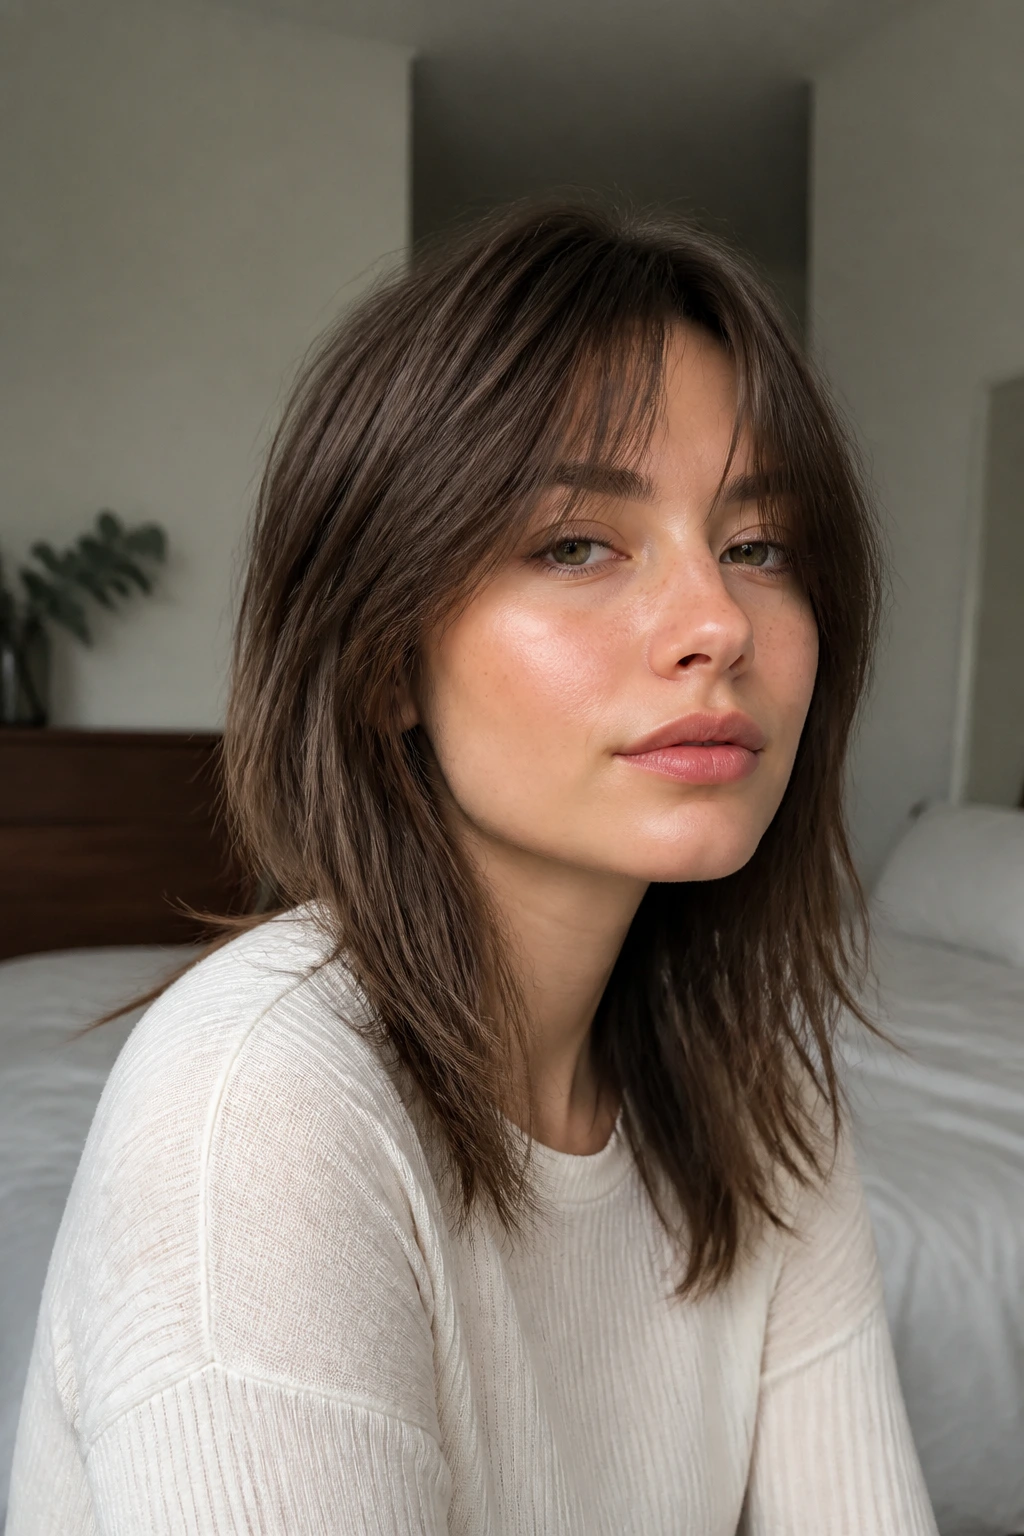
Some shags need heat. This one doesn’t. An air-dried minimal shag keeps the layering subtle enough that your natural straight texture does the styling on its own. You get a soft outline, a little separation at the ends, and just enough movement that the hair doesn’t look pasted to the head.
The cut has to be clean for this to work. If the layers are sloppy, air-drying straight hair usually exposes the problem. But if the shape is right, this is one of the easiest versions to live with.
Best result? Scrunch a light leave-in into the mids, twist the front pieces once while damp, and let it go. Don’t keep touching it. That’s how it loses the softness.
16. High-Crown Volume Shag
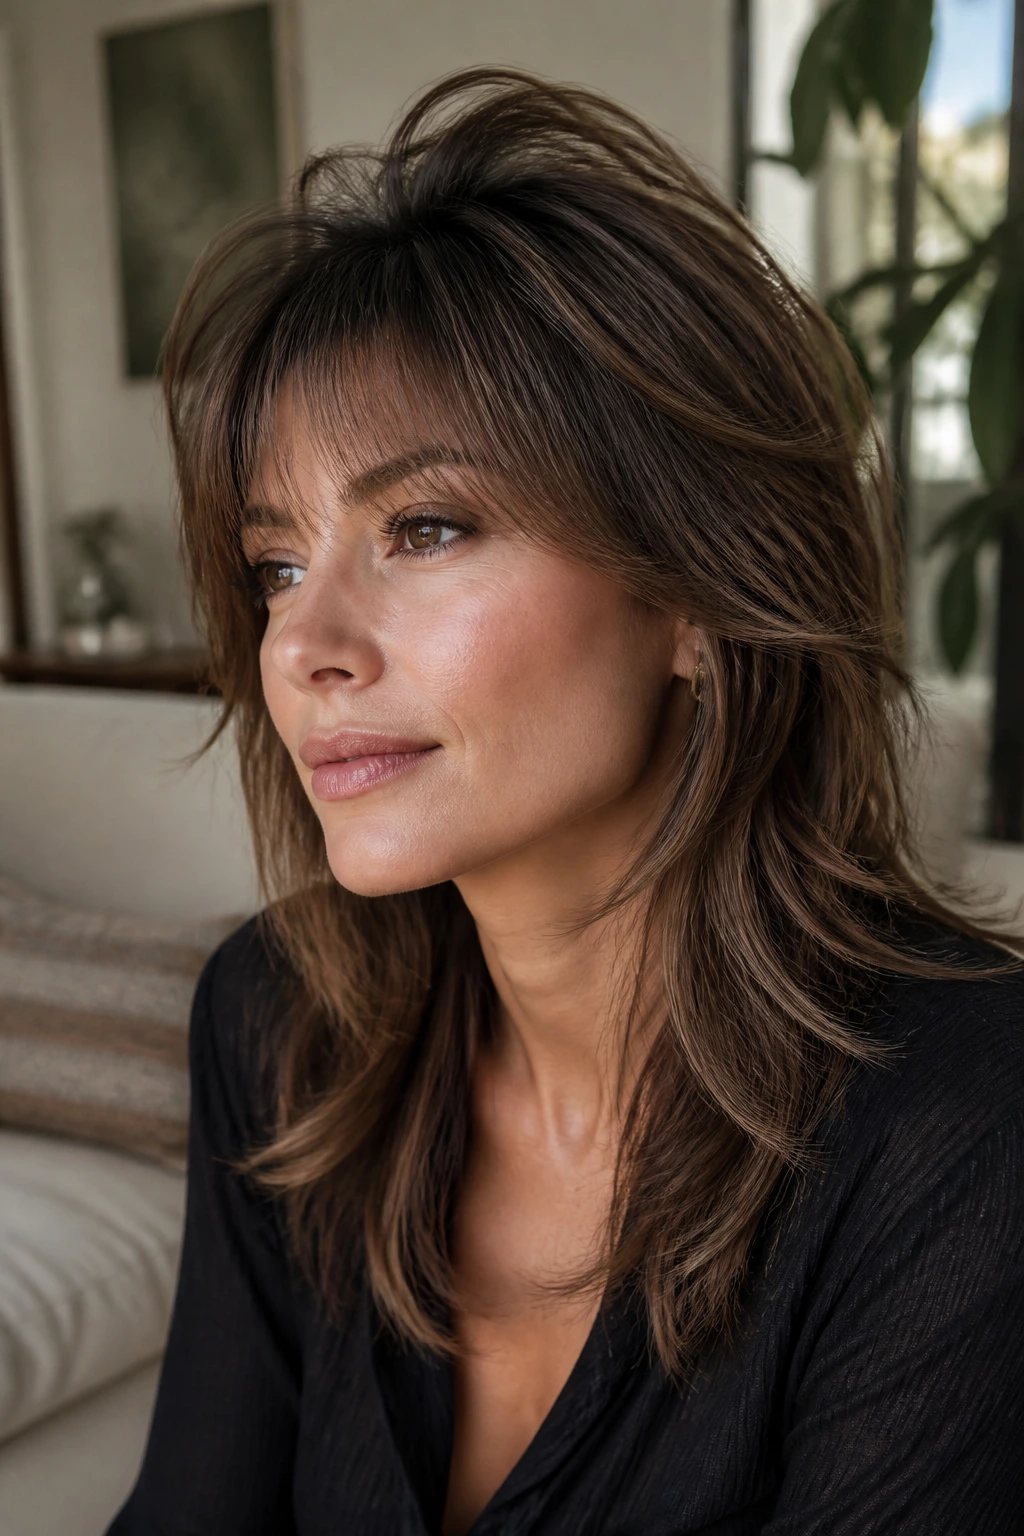
Flat crown, meet your match. A high-crown volume shag uses shorter internal pieces at the top to lift the root area while keeping the outer outline fairly soft. On straight hair, that matters because the whole head can fall flat if the weight is left too low.
This one is especially useful if your hair lies close to the scalp and refuses to keep a bend. A bit of crown layering, done carefully, can create the illusion of more body without turning the haircut into a pile of short bits.
Ask for the crown layers to be blended into the sides, not stacked on top of each other. That keeps the finish from looking chopped. Volume should feel like it rises, not like it was built from separate blocks.
17. Soft-Rounded Shag With Tapered Ends

A soft round shape can be a relief if you’re tired of sharp angles around the face. This cut curves gently from the crown down through the jaw and finishes in tapered ends that flick slightly outward on straight hair. It feels almost vintage, but cleaner.
The rounded silhouette is especially kind to angular faces. It softens the outline without losing structure. And because the ends taper rather than stop bluntly, the whole style looks calmer when it grows out.
I’d keep the layer spacing subtle here. Too many short layers ruin the roundness. You want a shape that glides, not one that splinters.
18. Layers-Between-The-Ears Shag
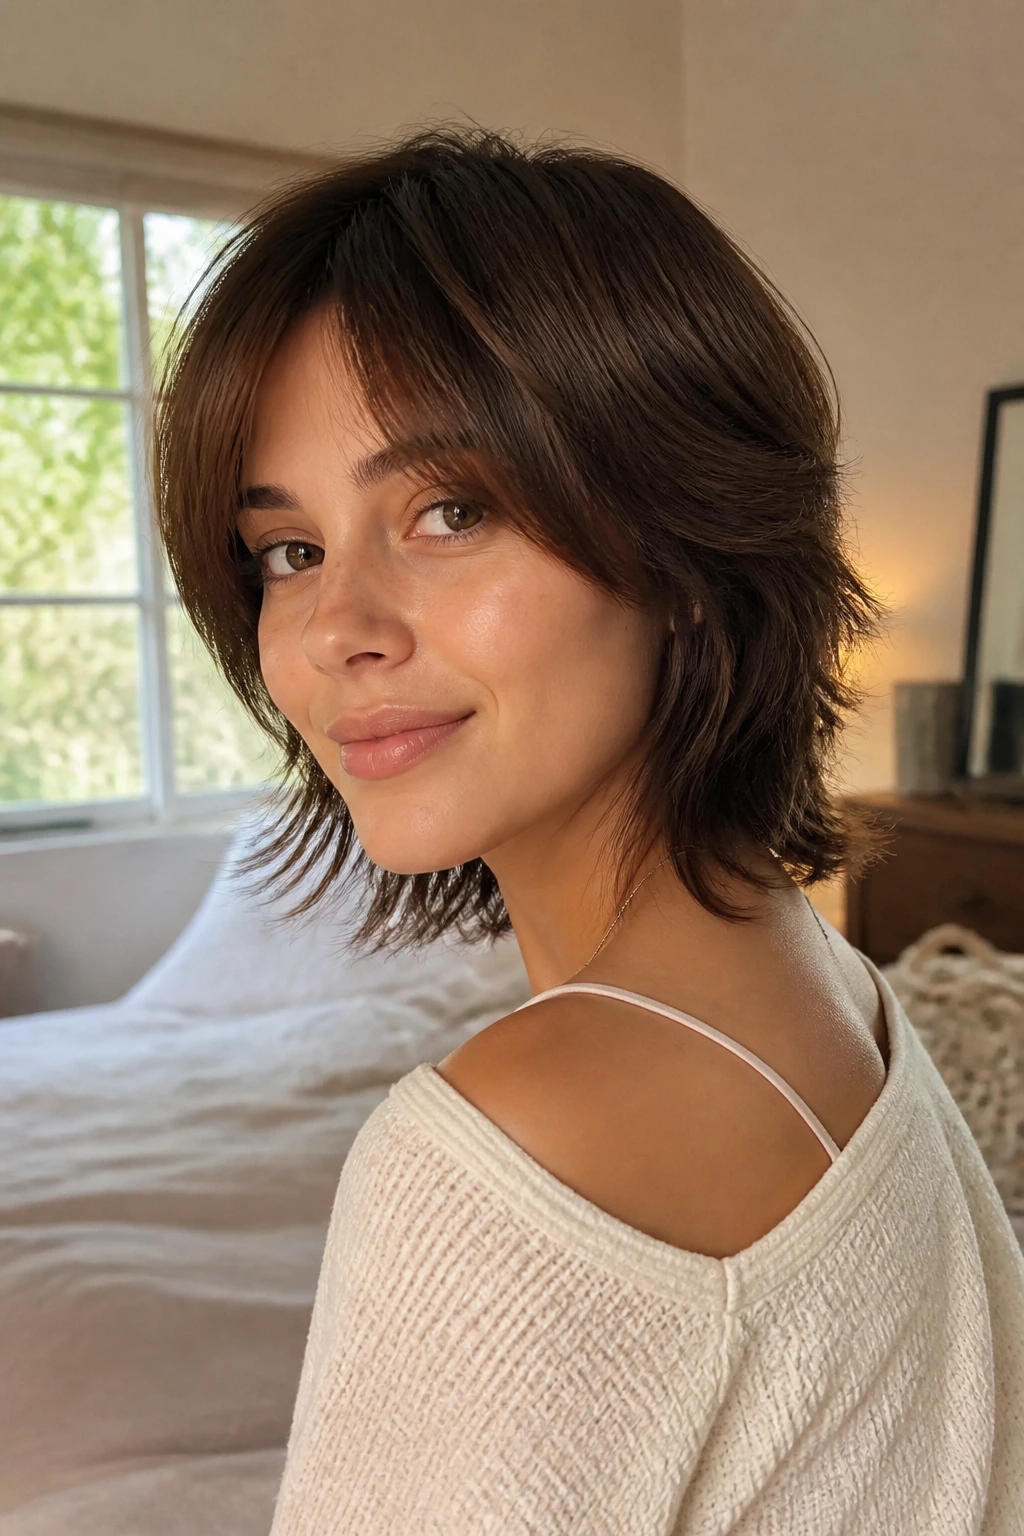
This is one of the sneakiest cuts on the list. Most of the texture lives between the ears and the jawline, where it can frame the face without changing the overall length too much. Straight hair loves that kind of restrained drama.
What makes it different: the top stays smooth, the middle gets the movement, and the ends stay intact. That means you get shape without sacrificing the feeling of density at the bottom.
If your hair is fine and you’re nervous about losing fullness, this is a strong option. The eye catches the movement near the face first, so the rest of the hair can stay more grounded. Quietly clever. That’s the appeal.
19. Sleek French-Girl Fairy Shag

This version leans polished instead of tousled. The fringe is a little longer, the layers are soft and deliberate, and the finish should look like you spent ten minutes on it, not forty. Straight hair gives this look a clean edge that wavy hair sometimes muddies.
The haircut works best when the front pieces sit close to the cheek and the rest falls in smooth, broken lines. No harsh steps. No chunky separation. Just a gentle, expensive-looking lift at the front.
If you’re someone who likes a good red lip and a simple shirt, this is your cut. It has enough personality to stand on its own.
20. Grown-Out Bang Shag
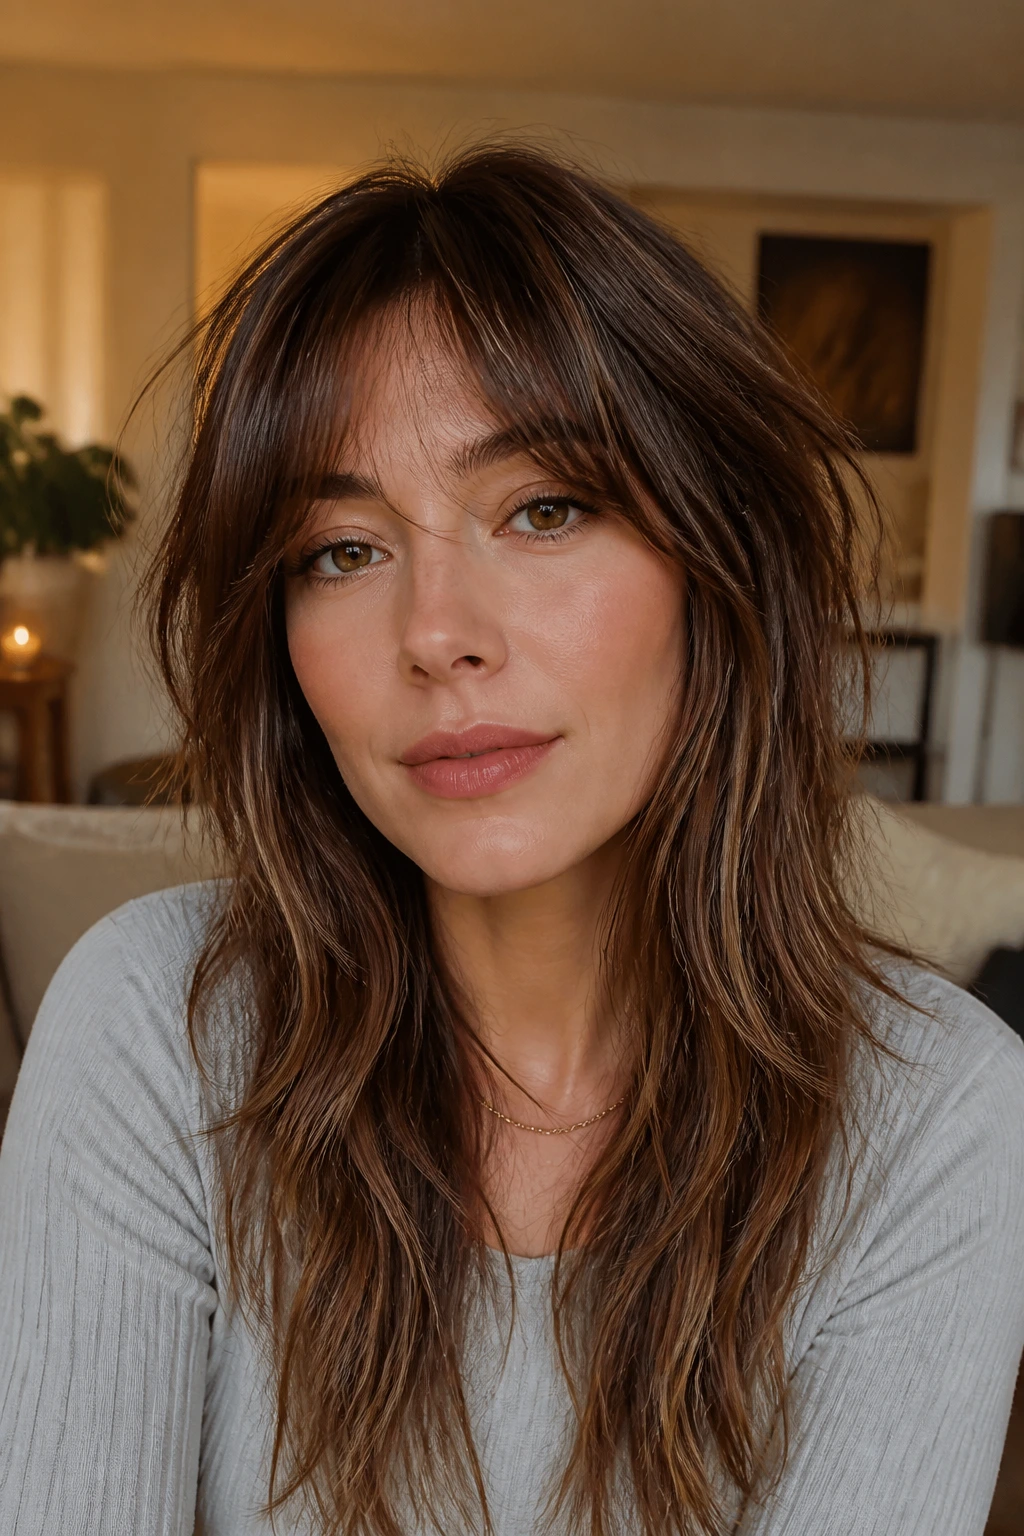
Some people get bangs and then forget to maintain them. This cut turns that reality into a plan. A grown-out bang shag uses fringe that’s already a little longer, so it can part, tuck, or sweep away without looking accidental.
On straight hair, this is a smart compromise. You still get a frame around the face, but the fringe won’t feel like a daily obligation. The layers around it should be soft and somewhat longer too, so the whole front can move as one.
That flexibility matters more than people admit. A cut you can wear three ways is far more useful than a cut that only looks good on the day you left the salon.
21. Razored Ends With Invisible Layers
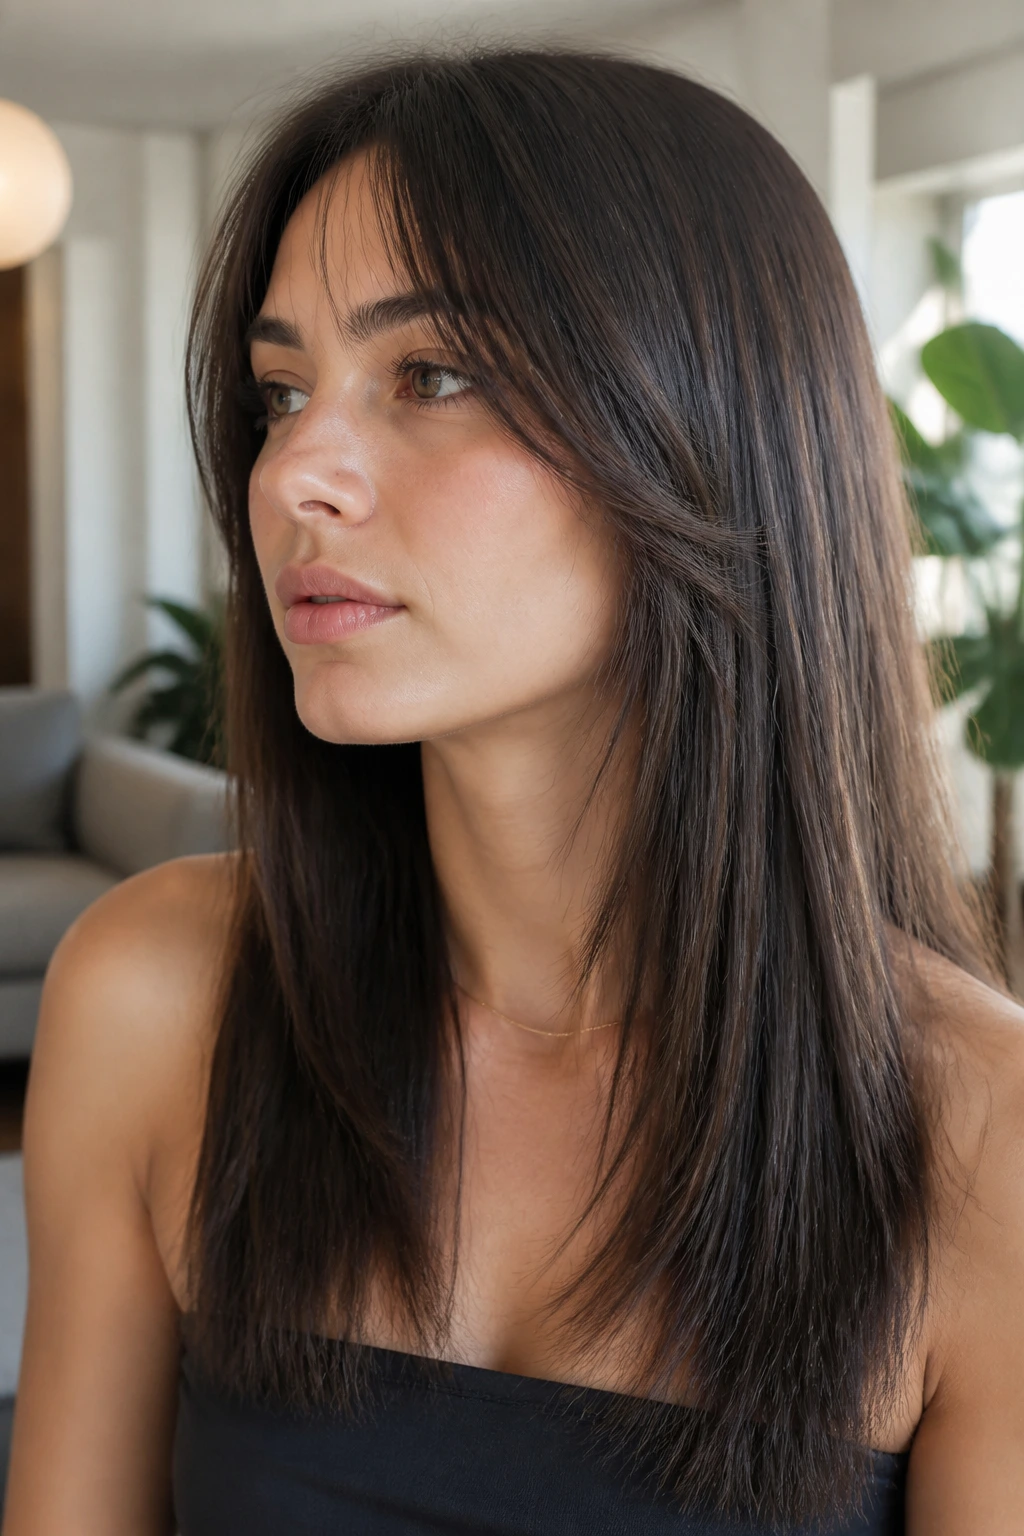
Invisible layers are the unsung hero of straight-hair shags. They let the haircut move without advertising every single cut line. Paired with softly razored ends, the finish feels light and a little broken up, but the shape still reads as full.
This is one of the best options if your hair is straight, medium density, and prone to hanging in one piece. The layers are there. You just don’t have to shout about them.
It’s also a good pick if you hate the look of obvious layering in photos. Some straight haircuts need their architecture to be seen. This one doesn’t. The effect is quieter, which is often more flattering.
22. Romantic Length Shag for Fine Straight Hair
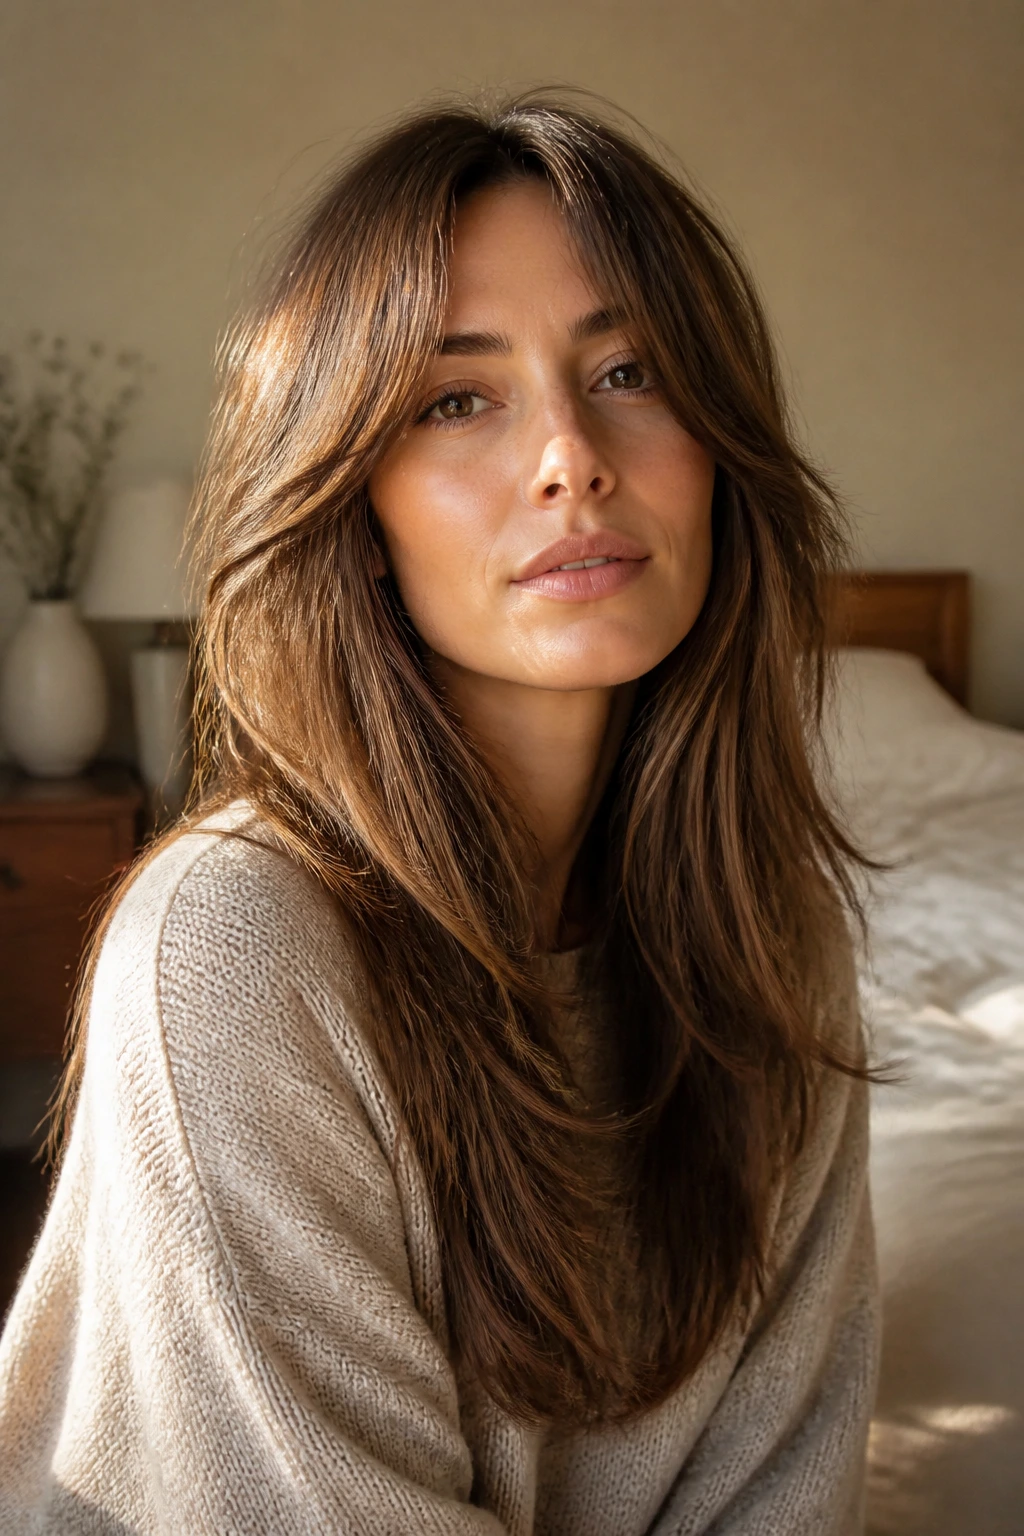
Fine straight hair can be tricky with shag cuts because too much layering creates see-through ends. This version keeps the length generous, then adds romance through soft shaping around the face and only a modest amount of internal movement.
The goal is fullness first, texture second. I’d keep the shortest layer below the chin and avoid aggressive thinning near the bottom. Fine hair already gives up density fast when overcut.
If you want your hair to still look like hair and not a cloud of ends, this is the one to save. It keeps the softness without taking the structure apart.
23. Dramatic Face-Frame Shag With Tucked Back Layers
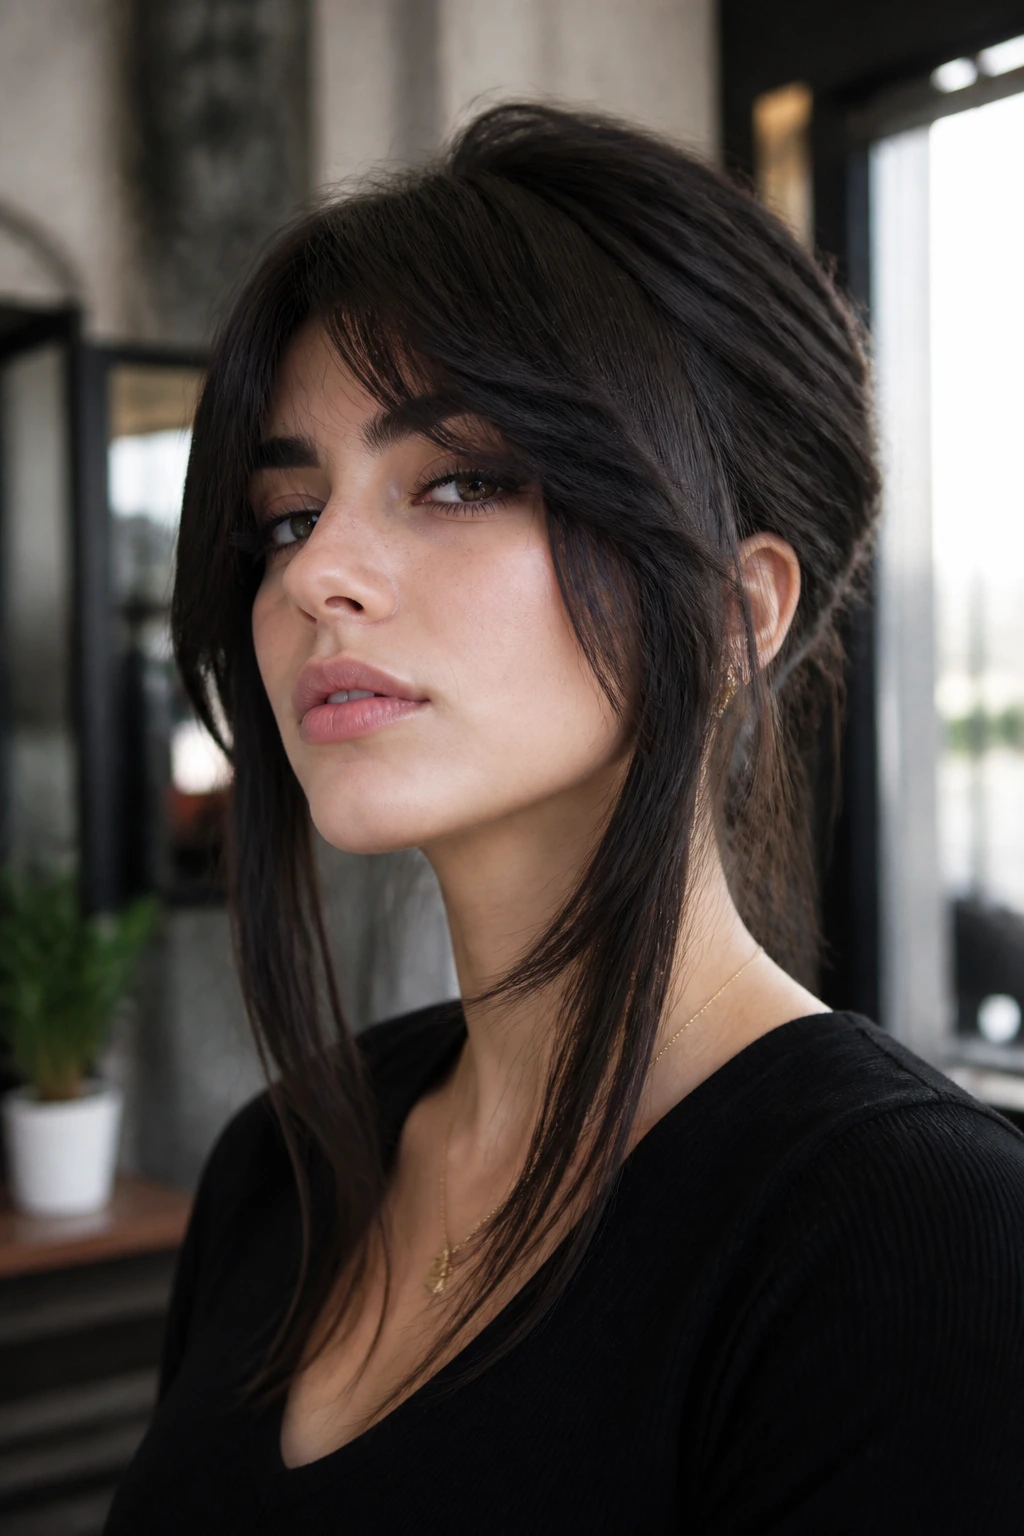
The last one is for people who want a little theatre. The front gets the drama — longer face-framing pieces, a pronounced fringe sweep, maybe even a bit of asymmetry — while the back layers stay tucked and restrained so the shape doesn’t spiral into chaos.
Straight hair can carry this cut beautifully because the clean texture makes the front frame look sharp in a good way. The back stays calm. The front does the talking.
If you like pulling pieces behind your ears, this cut is especially fun because it changes the silhouette instantly. It’s one of those styles that looks more intentional the more casually you wear it.
Why This Shape Feels Soft Instead of Choppy
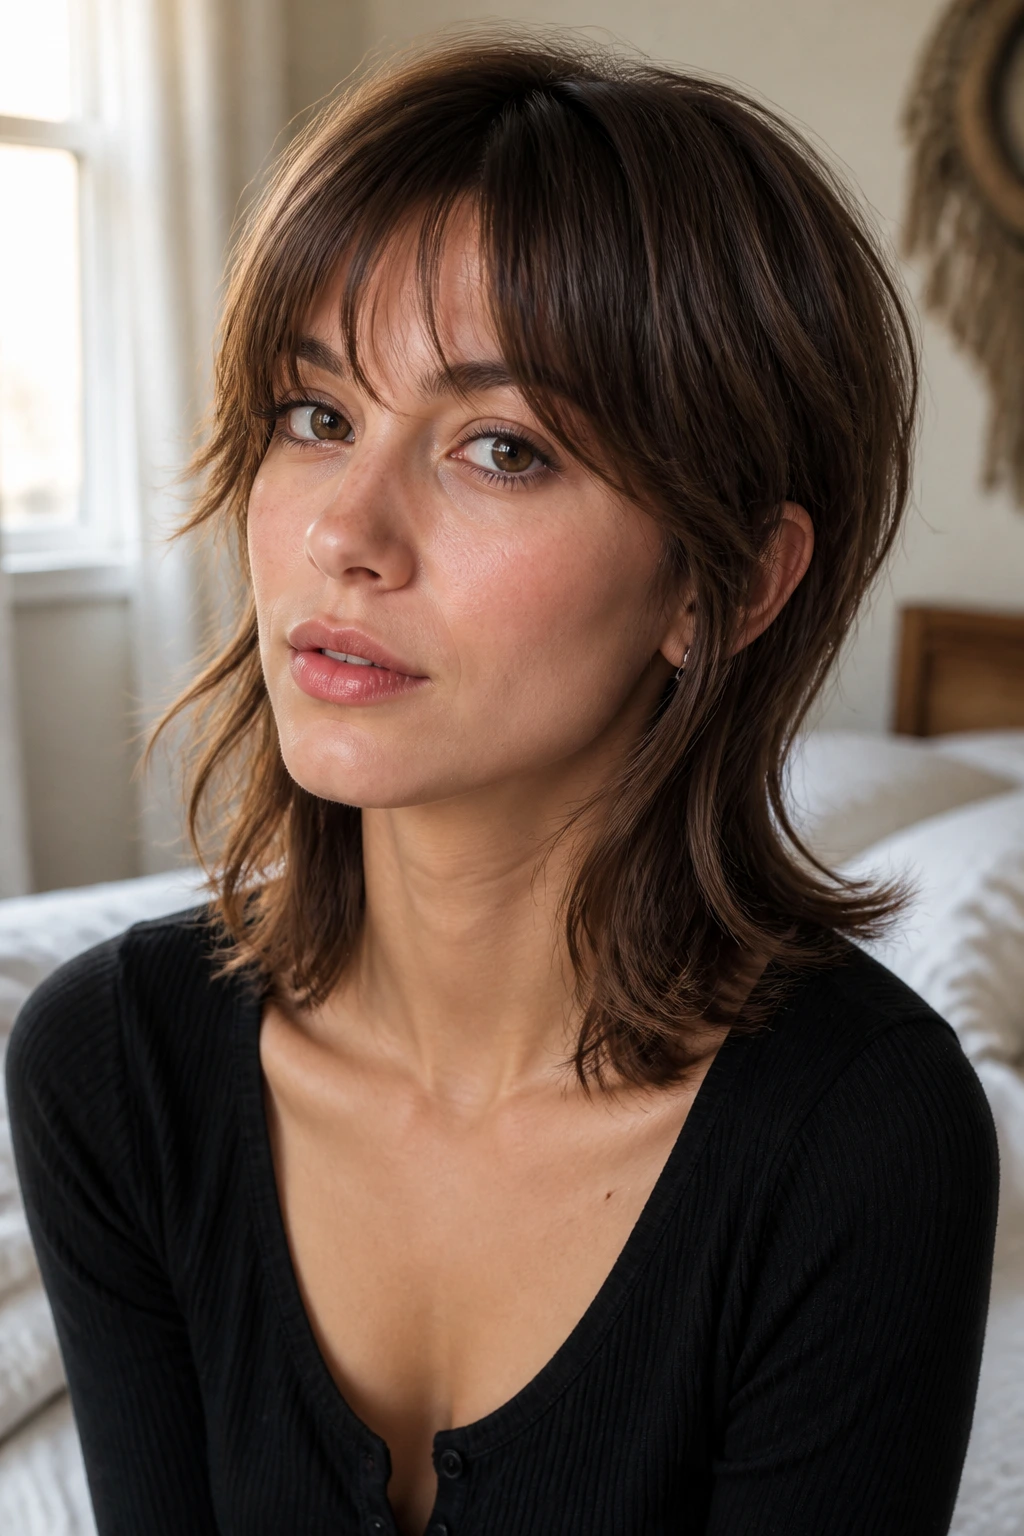
Straight hair does not forgive sloppy layering. It shows every line, every notch, every overzealous scissor pass. That’s exactly why the fairy shag version has to be built with restraint. The best cuts use internal removal, not just surface layers, and they keep the perimeter clean enough that the hair still looks like it belongs together.
The difference between soft and choppy usually comes down to where the shortest pieces land. Around the cheekbone or chin, the face frame can look airy. Too high, and the cut starts shouting. Too low, and straight hair can flatten the whole thing into a long sheet. I like stylists who check the shape dry, then adjust the balance with a few careful snips. Wet hair lies.
The other piece is the ends. On straight hair, blunt ends can make a shag feel heavy, while over-thinned ends can make it look stringy. The sweet spot is a broken edge that still feels full enough to brush into place in one pass.
What to Ask Your Stylist Before the First Snip
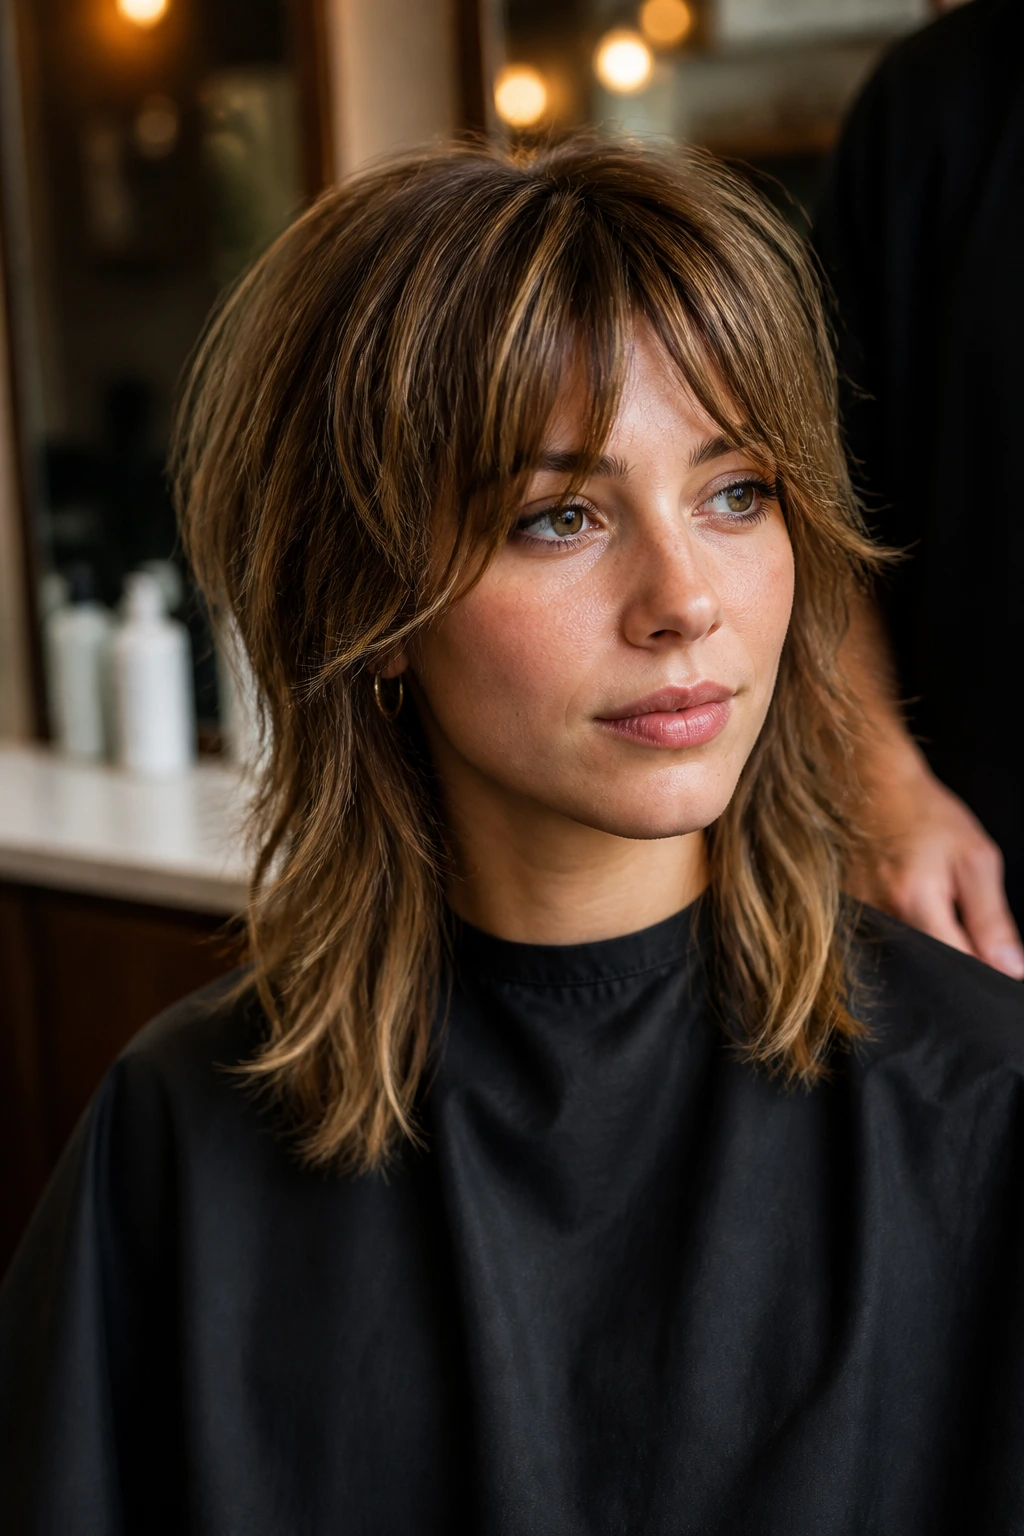
Straight hair needs clearer instructions than a lot of people think. Bring photos, yes, but bring comments too. Say where you want the shortest layer to sit, whether you want the fringe to split in the middle, and how much effort you want to spend styling it in the morning.
- “Keep the perimeter soft, not chopped.” That tells your stylist you want movement without losing the line.
- “Start the face frame around the cheekbone or chin.” This keeps the shortest pieces in a flattering zone for most straight hair.
- “Use point cutting or slide cutting instead of heavy thinning.” Fine straight hair in particular can look sparse if too much is removed.
- “Leave enough length for the hair to bend, not spike.” That one matters if your hair lies very flat.
- “Check the shape dry before you finish.” Straight hair changes a lot as it settles, and the dry check catches mistakes early.
If your stylist only talks about texture in the abstract, press for specifics. Ask how the cut will look on day one and on day fifteen. That’s where the real answer lives.
Tools That Keep the Shape Soft at Home

You do not need a suitcase full of styling gear. You need the right few things, and you need to use them lightly.
- Blow dryer with a concentrator nozzle: Directs airflow so the fringe and crown don’t frizz apart.
- Medium round brush: Good for bending the face frame and flipping the ends just enough.
- Small vent brush: Faster on short shags and better for lifting the root without too much curl.
- Heat protectant spray: Keeps the ends smooth if you use a dryer or flat iron.
- Lightweight mousse or root foam: Helps straight hair hold shape near the crown without feeling sticky.
- Texture spray: Best on mid-lengths and ends, never soaked into the roots.
- Mini flat iron: Useful for making soft bends in the front pieces only.
- Wide-tooth comb or detangling brush: Gentle enough for wet hair so you don’t stretch the cut out of shape.
A heavy serum can work for shine, but keep it to the very ends. Straight hair gets greasy fast, and fairy shags lose their airy feel the moment the roots are weighed down.
How to Style These Cuts Without Making Them Stiff
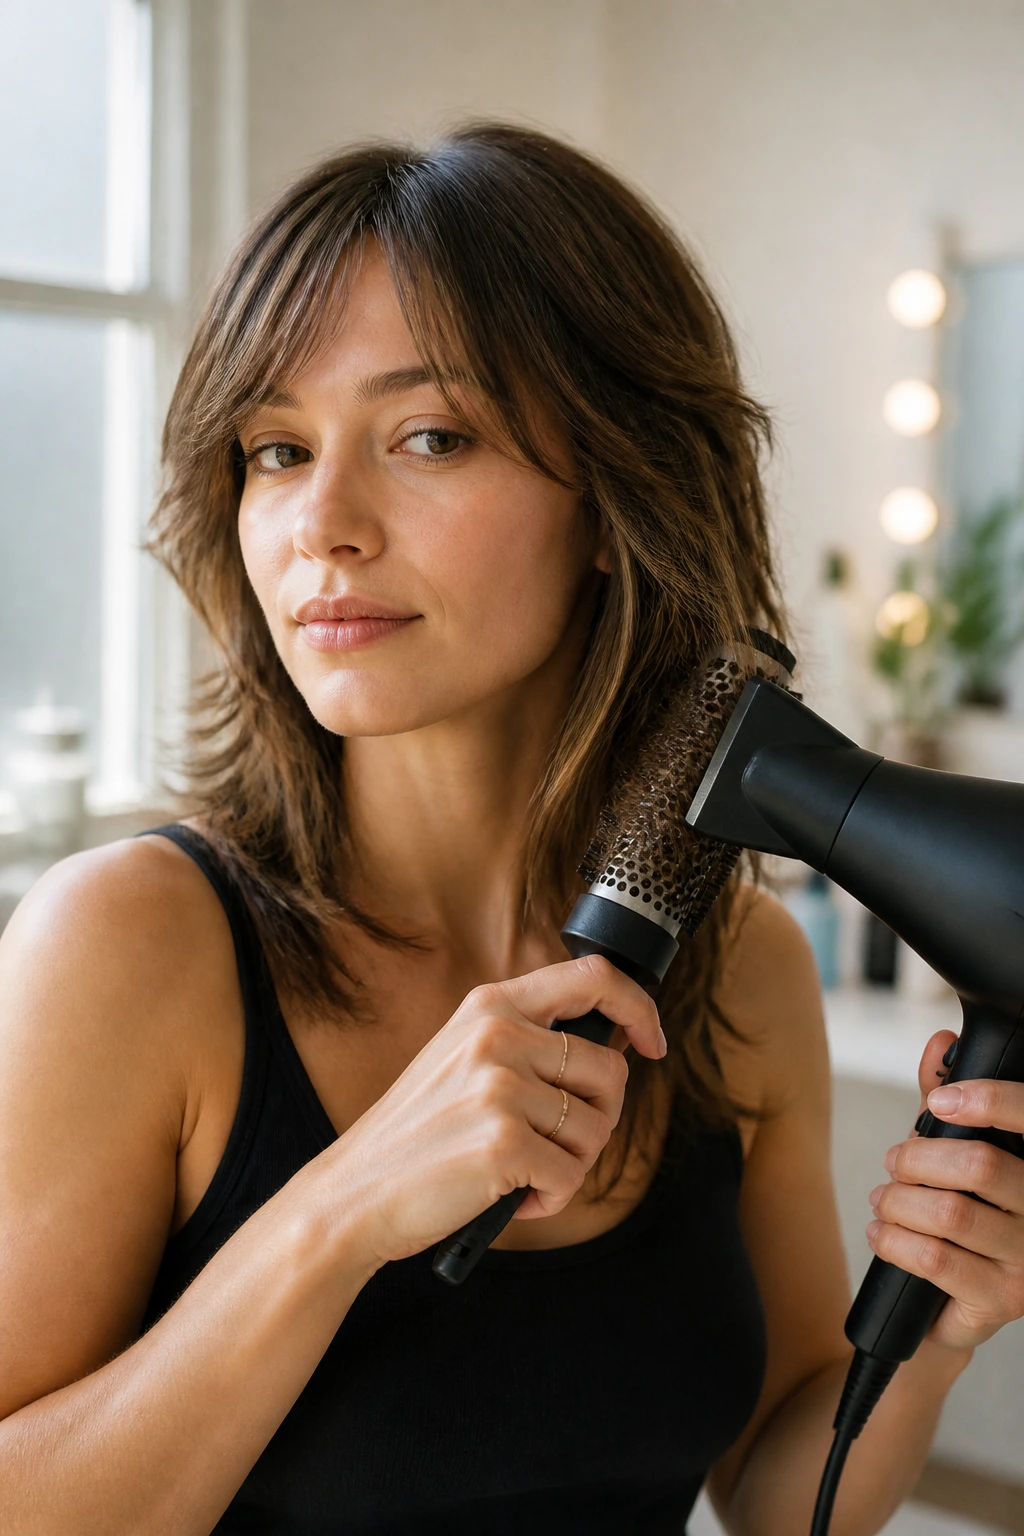
The safest styling move is to think in bends, not curls. Straight hair in a fairy shag usually looks best when the front has a soft sweep and the ends have just enough direction to show the cut. A full round-brush blowout can work, but it’s easy to overdo. Then the hair looks puffy instead of light.
Air-Dry Days: Use a leave-in conditioner only on the mids and ends, then tuck the front pieces behind your ears while they set. That creates a natural bend without heat.
Blowout Days: Lift the roots with the dryer nozzle, wrap the front around a medium round brush, and roll the brush only once or twice. You want a curve, not a flip.
Flat-Iron Days: Clamp the iron halfway down the strand and add one soft bend toward the face, then one away. Keep the movement loose. Sharp waves fight the cut.
Finish: Use a mist of texture spray through the mid-lengths, then rake it apart with your fingers. A comb makes it too neat and can erase the airy bits.
Small Shape Boosters That Make a Big Difference
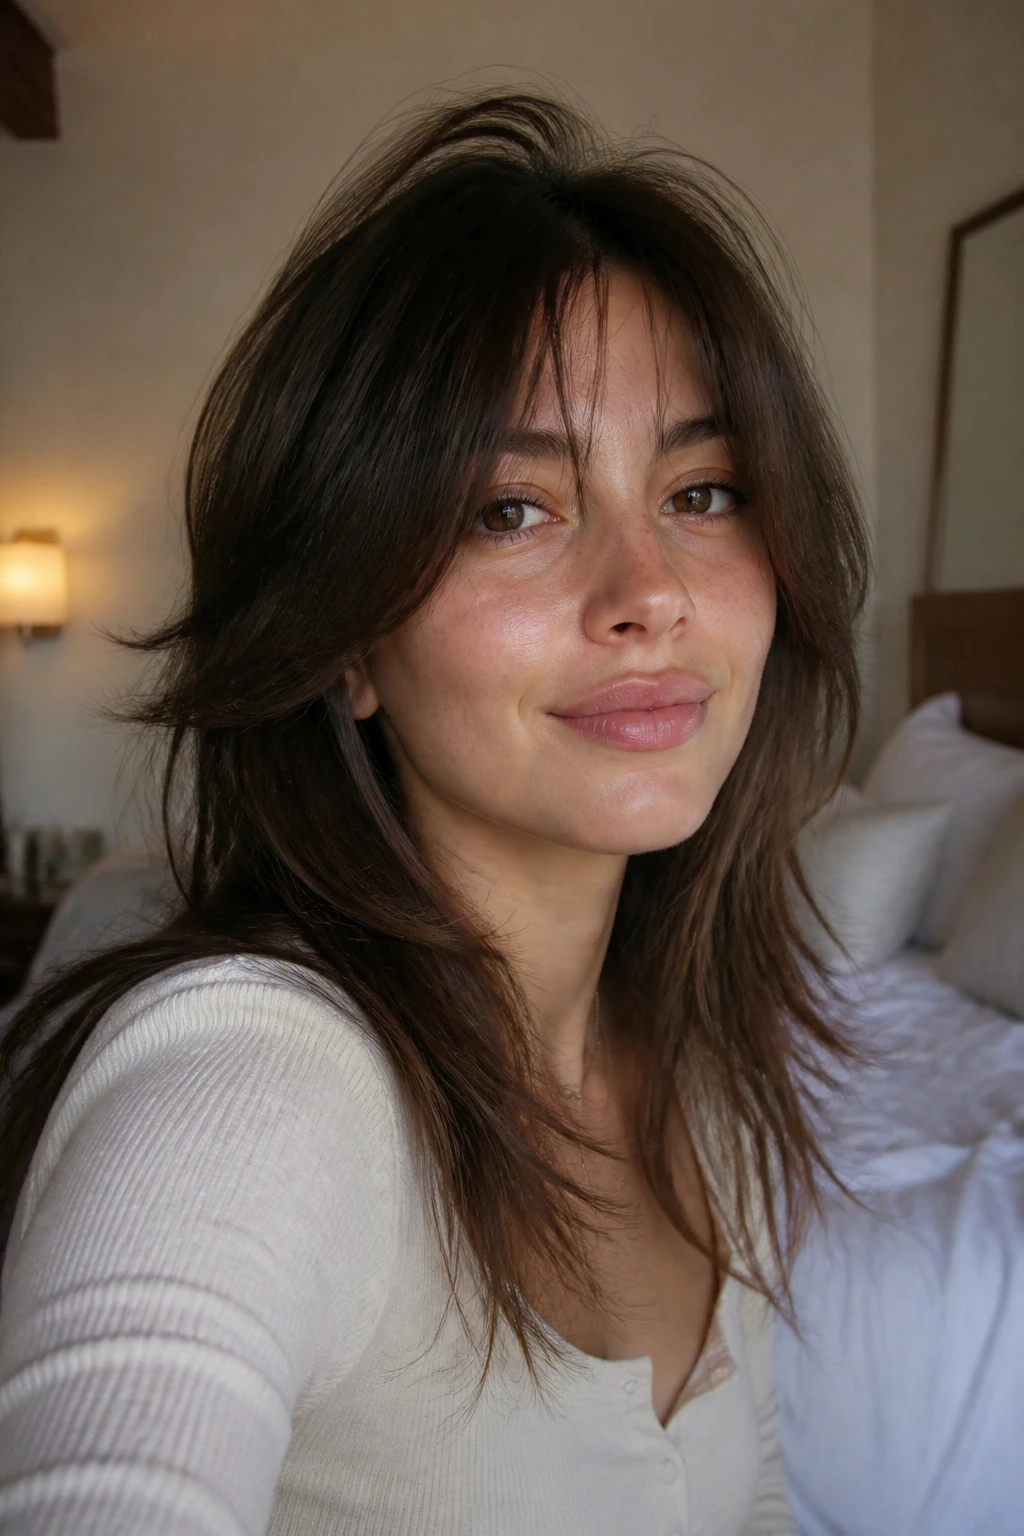
Sometimes the haircut is right, but the finish is missing one little thing. That’s where tiny adjustments help.
Crown lift: Clip the top section up while you do makeup or get dressed, then let it fall. Even ten minutes can stop straight hair from clinging to the scalp.
Face-framing separation: A tiny bit of cream between your fingertips, rubbed onto the front pieces only, keeps them from turning fuzzy.
Part changes: A middle part gives the cut a softer, more delicate look. A shallow side part makes the front feel fuller. Try both. The same haircut can look like two different styles.
Tucked-back styling: One tucked side and one loose side can make a fairy shag feel less precious and more lived-in. I like this trick on second-day hair.
The Mistakes That Flatten a Straight-Hair Shag
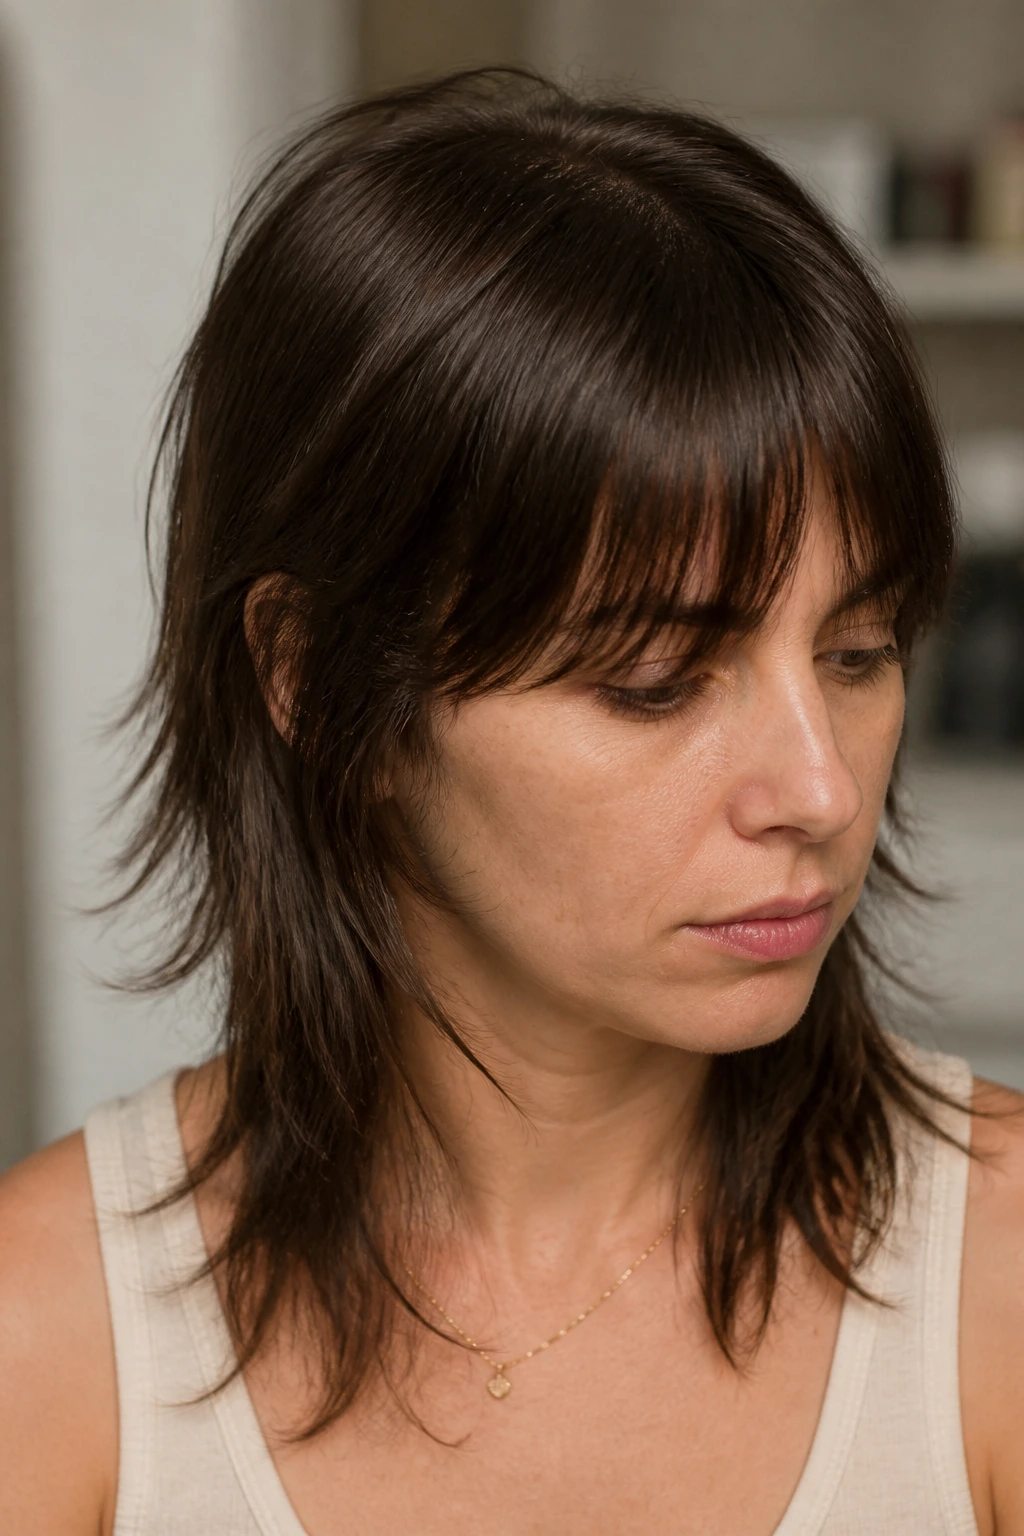
The first mistake is too many short layers at the crown. On straight hair, that can create a little puff on top and a stringy bottom underneath. The fix is to keep the short layers more internal and let the face frame do the visible shaping.
The second mistake is thinning the ends too aggressively. You’ll know it happened if the bottom looks see-through when the hair is dry. Straight hair needs some weight to keep the silhouette together, so ask for point cutting instead of a heavy thinning-shear pass.
The third mistake is cutting the fringe too high too fast. A short fringe can look charming, but if the opening is too abrupt, the whole cut feels abrupt. Keep the shortest part of the fringe within a flattering zone for your face, then let it blend.
And one more: styling with too much product at the root. Mousse is fine. Heavy cream at the scalp is not. Straight hair collapses fast when it gets coated.
Variations and Adaptations to Try
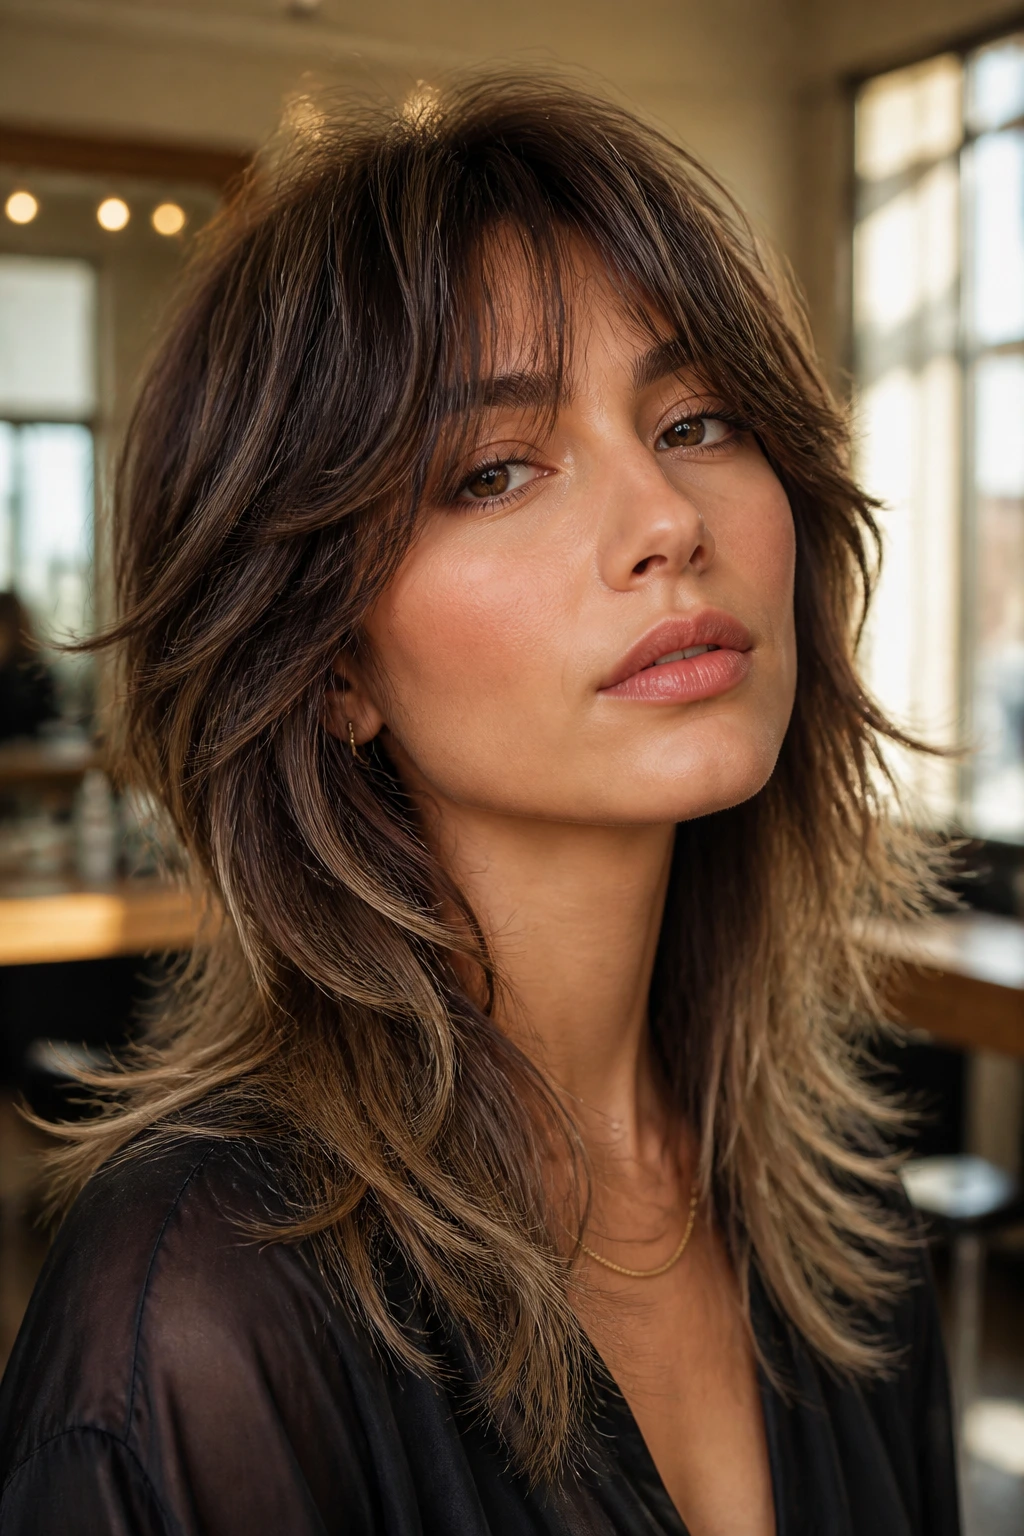
The Fine-Hair Feather Edit: Keep the layers long and soft, and stop the shortest face frame around the chin. This keeps density at the bottom while still giving movement up front.
The Thick-Hair Debulked Shag: Ask for more internal removal through the mid-lengths and a slightly stronger perimeter. This stops straight, dense hair from growing into a bulky triangle.
The Bang-Free Version: Skip the fringe and build the shape through the face frame only. It works well if you want the shag mood without the maintenance of bang trims.
The Short Crop Fairy Shag: Go closer to a chin-length bob shag with soft layers around the ears. It gives you the airy feel in a smaller silhouette, which is useful if your hair tangles fast.
The Long Romantic Version: Keep the layers low and the face frame gradual. Great if you like length but want it to move when you walk.
How to Keep the Cut in Shape Between Trims

Straight hair shows growth quickly, which is both a blessing and a nuisance. The fringe tends to be the first thing that loses its shape, so most people with bangs need a trim every 4 to 6 weeks. The full shag shape usually needs a refresh every 8 to 12 weeks, depending on how fast your hair grows and how precise the layers are.
Between appointments, dry shampoo can help, but don’t bury the roots in it. A light pass at the crown is enough. If the ends start feeling rough, use a drop of serum only after the hair is dry. Wet-product overload is what makes straight hair lie limp and heavy.
If you wear the cut a lot in one part, switch the part occasionally. Straight hair can set itself into a groove, and that groove makes the layers look flatter than they are. A small change in direction buys you a few extra good hair days.
Questions People Ask Before They Chop the Hair

Does a fairy shag actually work on straight hair?
Yes, if the layering is done with restraint. Straight hair needs softer internal movement than a wave-heavy shag, but the shape can be beautiful when the face frame and ends are handled carefully.
Will this cut make fine hair look thinner?
It can, if the layers are too short or too aggressive. Fine straight hair usually does better with longer layers, a gentle fringe, and a perimeter that keeps some weight.
Can I wear it without bangs?
Absolutely. A shag can be built around the face frame alone. The fringe is optional, not mandatory, though it does add a lot of the fairy feel.
How do I ask for it if my stylist usually cuts wet hair?
Ask them to leave a little more length than they think they need, then refine it dry. Straight hair contracts less than curl, but dry checking still catches too-sharp lines.
What if my hair goes flat after a few hours?
Focus on root lift, not more product. A light mousse at the crown and a quick re-bend of the front pieces usually helps more than adding another round of spray.
Can I grow this into a bob or longer cut later?
Yes, and that’s one of the nicer things about a shag. If the layers are blended well, the cut can grow into softer length instead of a blunt shelf.
Is a razor cut bad for straight hair?
Not always. On thicker straight hair, a razor can create nice separation. On fine hair, it can remove too much weight too fast, so scissors and point cutting are often safer.
What should I save from the salon chair?
A front-facing photo of the finished cut, plus a side view. The side tells you where the layers really sit, and that matters more than people think.
Soft Layers That Grow Out Well

The nicest thing about a good fairy shag on straight hair is that it doesn’t punish you the moment it grows past the salon window. If the layers are balanced, the fringe is placed well, and the ends are broken up rather than shredded, the cut keeps its shape longer than a lot of people expect.
That’s the version worth asking for. Not a random pile of layers. A shape with a plan.
Straight hair can wear this look in more than one mood — delicate, edgy, polished, almost French, almost undone — and the cut still makes sense. Pick the version that matches how much upkeep you’ll actually do, then keep the finish light. That’s where the magic sits.
