



Long hair and a mohawk are not opposites. They’re a better match than most people expect. With length, you can build a sharper ridge, fold in braids, twist the sides flat, or leave the top loose enough to move instead of sitting there like helmet hair. That’s the real appeal of Mohawk styles for long hair: they can look hard-edged, polished, messy on purpose, or a little ceremonial, depending on how you section the hair and where you pin it down.
The trick is not to fight the weight of the hair. Long strands will pull at the crown, the temple area will puff if you skip grip, and the whole shape can collapse halfway through the day if the base is too soft. I’ve always thought the best long-hair mohawks are built like architecture: a clean center line, a few strong anchor points, and one deliberate texture choice. Leave those decisions vague, and the style turns floppy. Nail them, and the silhouette holds with surprising stubbornness.
A good mohawk on long hair also gives you room to choose your level of drama. You can go sleek and sculpted for a formal look, braid the sides for a cleaner finish, or keep the center cloudy and loose for a frohawk that feels lived-in rather than stiff. The styles below range from low-commitment to full-tilt, and the differences are in the details: where the pins go, how tight the side sections are, and whether the top is teased, twisted, braided, or left to fall in soft loops.
Why This Collection Stands Out
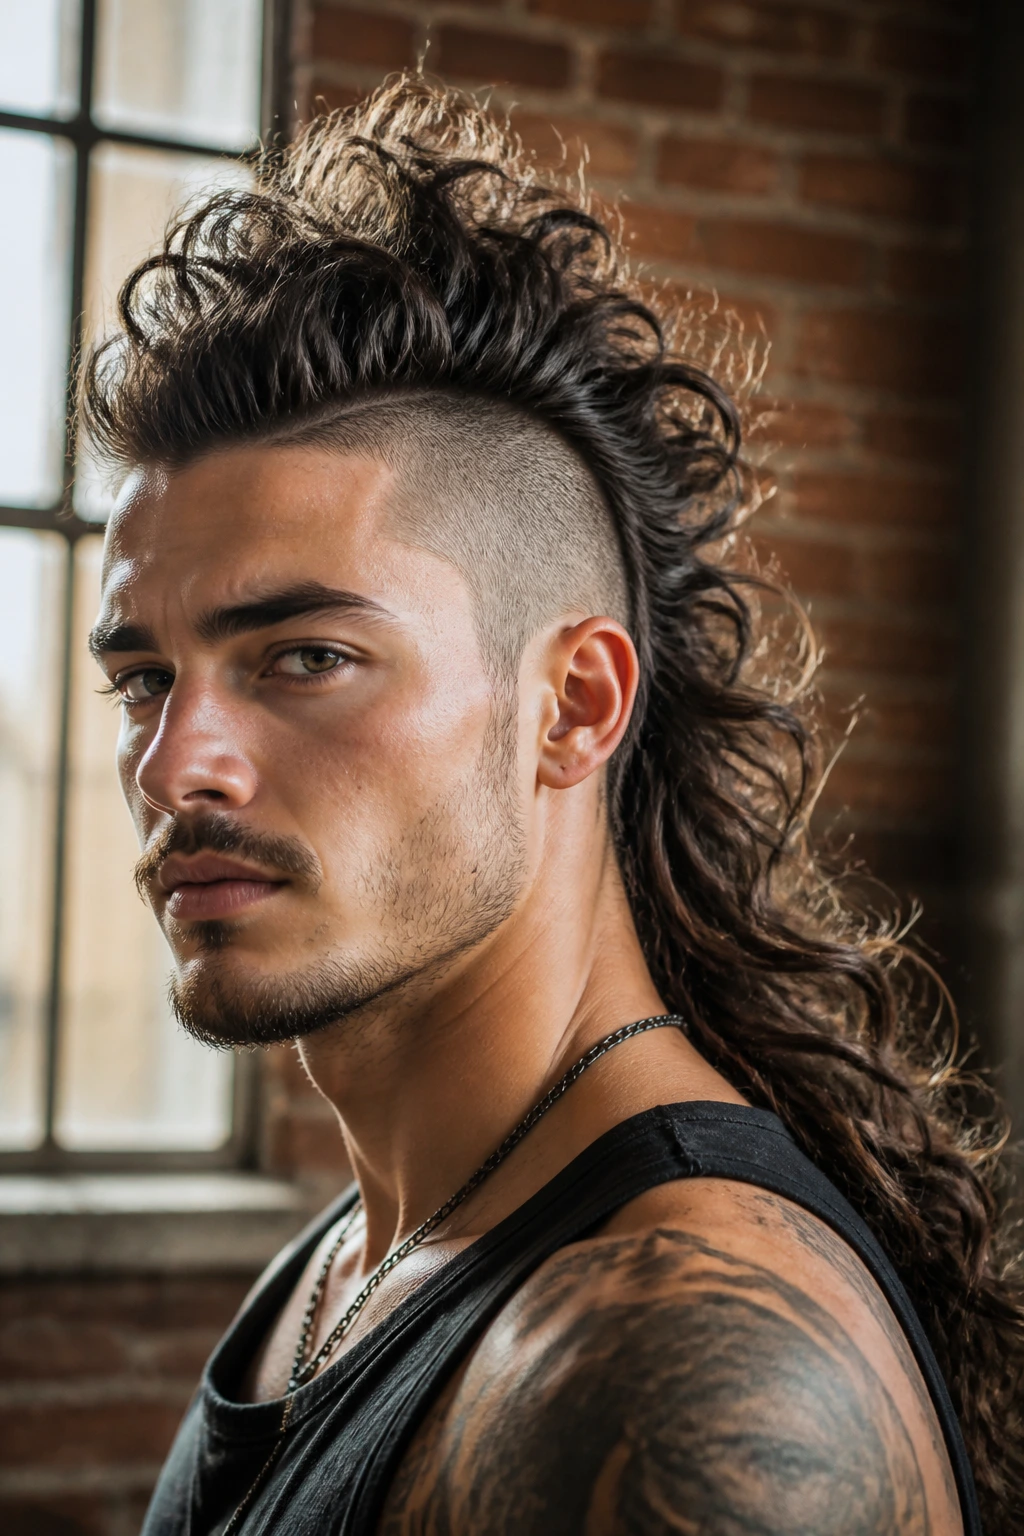
- Length does the heavy lifting: Long hair gives you enough material to build a ridge, stack knots, or braid the sides without the style looking skimpy.
- You can control the mood: The same silhouette can read punk, bridal, sporty, or festival-ready depending on how smooth or textured the finish is.
- Most of these styles avoid shaving: If you like the mohawk shape but not the commitment of an undercut, these versions keep the edge without cutting the sides.
- Texture is your friend here: Second-day hair, mousse, dry shampoo, and a little grit at the roots help more than glossy, freshly washed hair ever will.
- Long hair lets you cheat the shape: Braids, twists, bubbles, and pinned folds create height without needing to backcomb everything into a stiff mound.
- The styles grow with your skill: You can start with a basic faux hawk pony and work up to woven, stacked, and decorated versions once your hands learn the sectioning.
1. The Center-Strip Classic
A classic center-strip mohawk is the cleanest place to start. You leave a strong band of hair from the front hairline to the nape, then slick or braid the sides tight so the middle becomes the only thing the eye sees. On long hair, this shape works because the length adds weight and line at the same time. It looks deliberate, not accidental.
Why it holds up
The center strip gives you a clear silhouette, which matters more than people think. If the ridge is narrow and the side sections are anchored with gel and pins, the style stays readable even when the hair softens a little. That’s why this version works so well for straight or wavy hair that tends to fall flat by noon.
A fine-tooth comb, a strong-hold gel, and a few hidden bobby pins are enough for most heads. If your roots are slippery, mist them with dry shampoo first and let it sit for a minute. That tiny step gives the gel something to grip, and it keeps the sides from crawling loose near the temples.
Best for
- Long straight hair that needs structure
- Wavy hair with some natural lift at the crown
- Anyone who wants the mohawk outline without braids or knots
2. The Dutch-Braid Mohawk
Can a braid look aggressive? Absolutely, and this one proves it. The Dutch-braid mohawk uses raised braids along the sides or center line so the braid sits on top of the scalp instead of sinking into it. That raised shape gives the style its backbone, and on long hair, the plait can run from forehead to nape with enough thickness to read from across a room.
The braid is doing two jobs at once: controlling the side hair and building the ridge. I like this version on hair that’s a little too soft for a slick style, because the braid locks everything in place without needing a gallon of gel. Finish the ends loose, curled, or tucked under, depending on how polished you want it.
How to use it
Start with a center section and two side sections. Braid each side tightly enough that the scalp shows a clean line, but not so tight that the roots lift and look pulled. Once both braids are set, pin their ends beneath the crown or let them trail into one thicker tail at the back.
This one shines when the braids are neat and the loose length is not overworked. A little frizz at the tail is fine. Too much, though, and the whole thing starts to look unfinished rather than rugged.
3. The Rope-Twist Ridge
Rope twists are underrated. They’re faster than braids, they’re easier on the hands, and they create a clean, ropey texture that feels slightly sharper than a soft three-strand plait. For long hair, a rope-twist mohawk can run down the center or along the sides, then gather into one long twisted tail that swings when you move.
Where this style wins
The reason rope twists work is simple: they hold shape without needing perfect symmetry. If one side of the twist is a touch thicker than the other, it still reads as intentional. That makes this style forgiving for people who braid better on one side than the other or who want something quick before a night out.
Use a styling cream or light pomade on the section you’re twisting. Too much slip, and the twist loosens; too little, and the strands fray as you work. For extra hold, secure the ends with a small clear elastic, then wrap a thin strand around it so the tie disappears into the hair.
Quick note
This is one of the best long-hair mohawks for medium-thick hair. Very fine hair can twist beautifully, but it needs a texture spray first or the rope will unravel faster than you want.
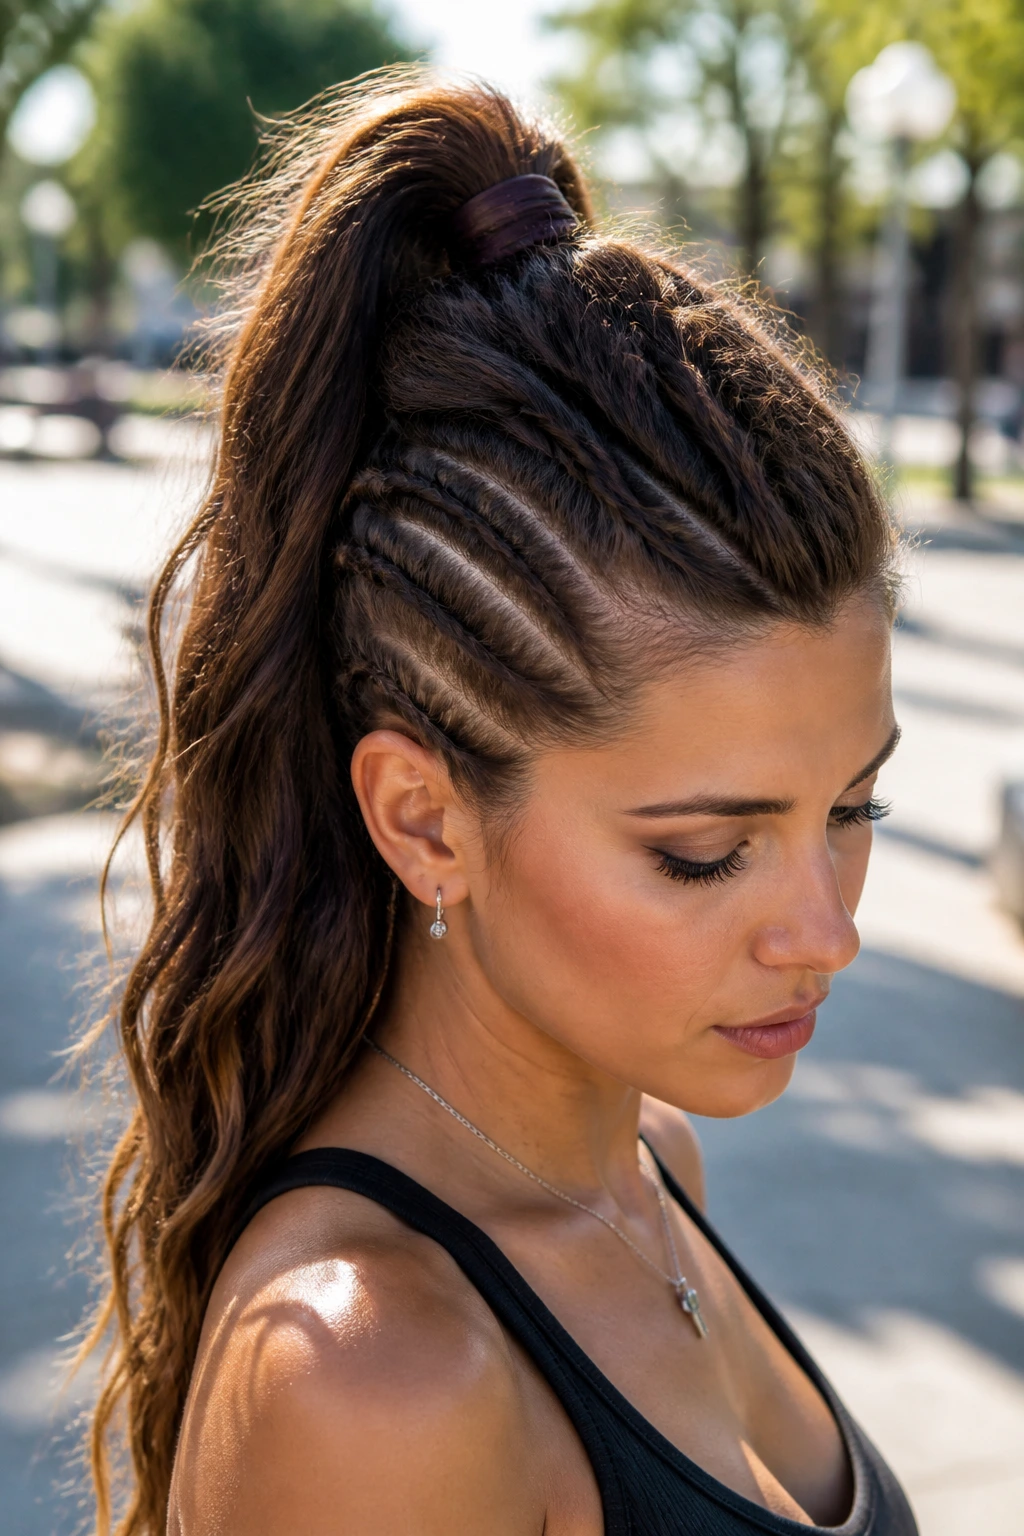
4. The High Ponytail Mohawk
A high ponytail mohawk is all about lift. Instead of forcing the hair flat on the sides, you sweep it back in a series of ponytails or one high section that starts near the forehead and rises toward the crown. The shape feels athletic, sharp, and a little glamorous when the ends stay long and swingy.
The appeal here is the line. Long hair gives the ponytail enough length to trail down the back, so the mohawk profile stays visible even from behind. It’s cleaner than a full braid and less fussy than a stacked bun version, which is why I reach for it when the hair is freshly blown out and I want height fast.
If your crown is flat, tease just the root area under the top ponytail and smooth the outer layer back over it. Don’t over-tease. You want lift, not a bird’s nest. A tiny bit of mousse at the roots before blow-drying gives the style a firmer base and keeps the pony from sagging by dinner.
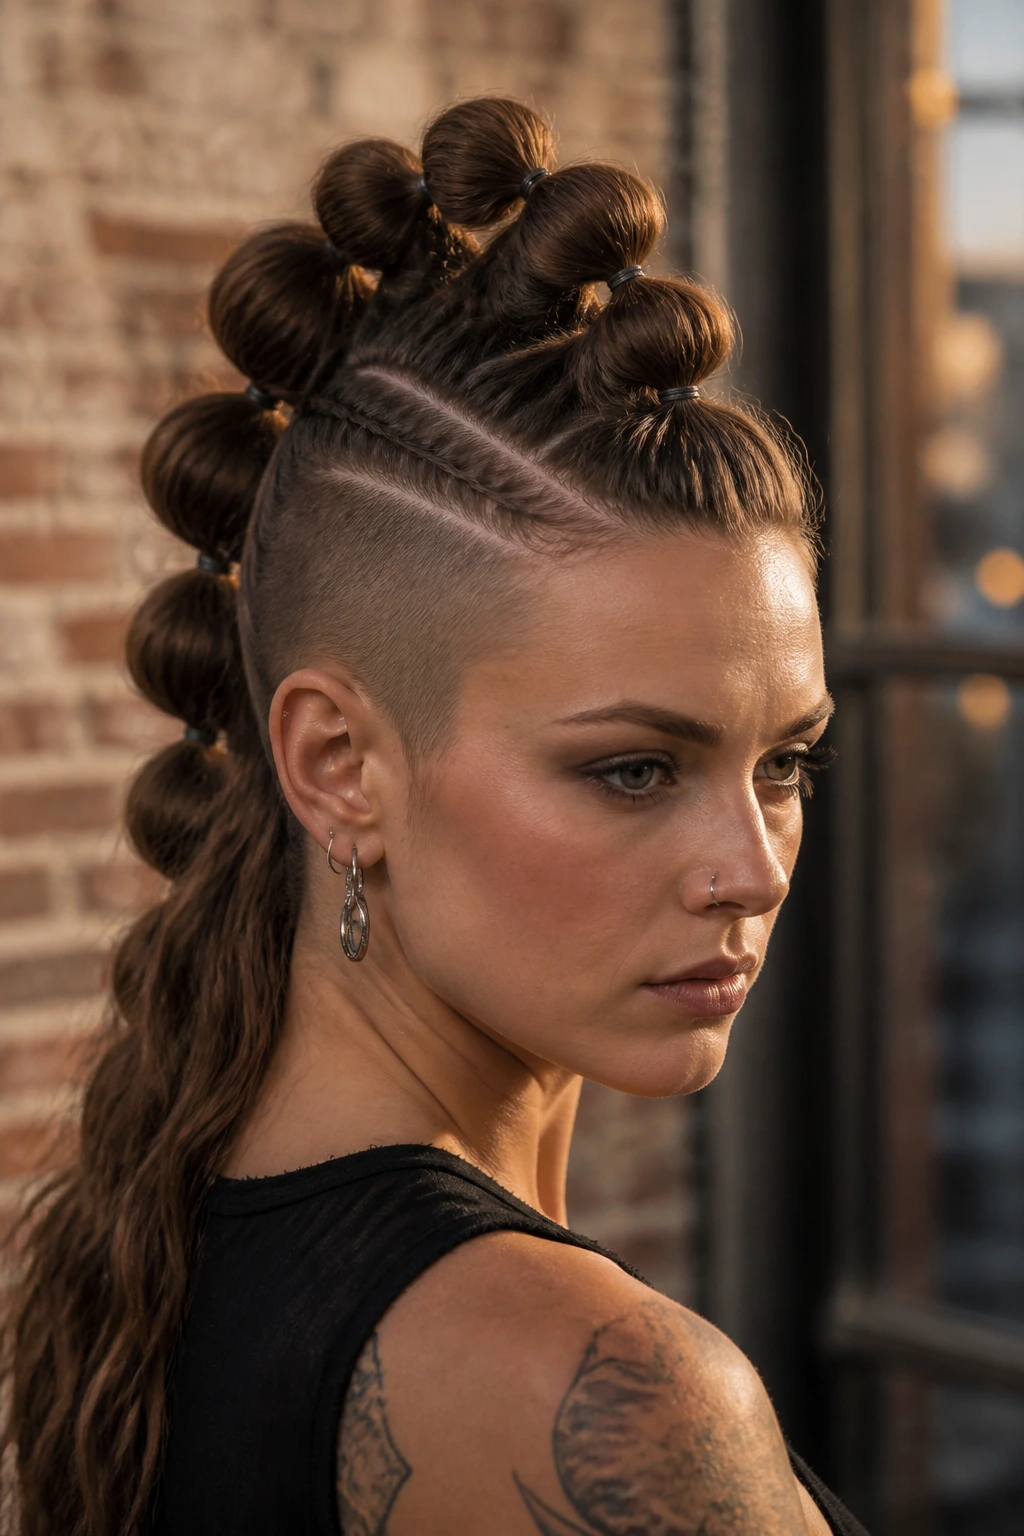
5. The Bubble Mohawk
A bubble mohawk looks playful until you study it, and then you realize how engineered it is. The hair gets sectioned into a central line of ponytails, and each one is banded every few inches so it puffs into rounded “bubbles.” On long hair, those bubbles stack like soft armor. It’s one of the few mohawk styles that looks even better when the hair is very long.
Why it works
The bubbles break up the weight. That’s the whole trick. Instead of one heavy ponytail pulling straight down, the elastics divide the load, so the shape stays lifted longer. It also gives you a built-in texture pattern, which means you don’t need curls or crimping to make the style interesting.
Use clear elastics if you want the hair itself to do the talking. Use small colored ties if you want the bands to become part of the design. For a cleaner finish, tug each bubble outward with your fingers until it swells to the size you want, then mist it lightly with flexible hairspray.
This version is especially good for medium-thick hair. Fine hair can do it too, but the bubbles will be smaller and a little softer unless you prep with texture spray first.
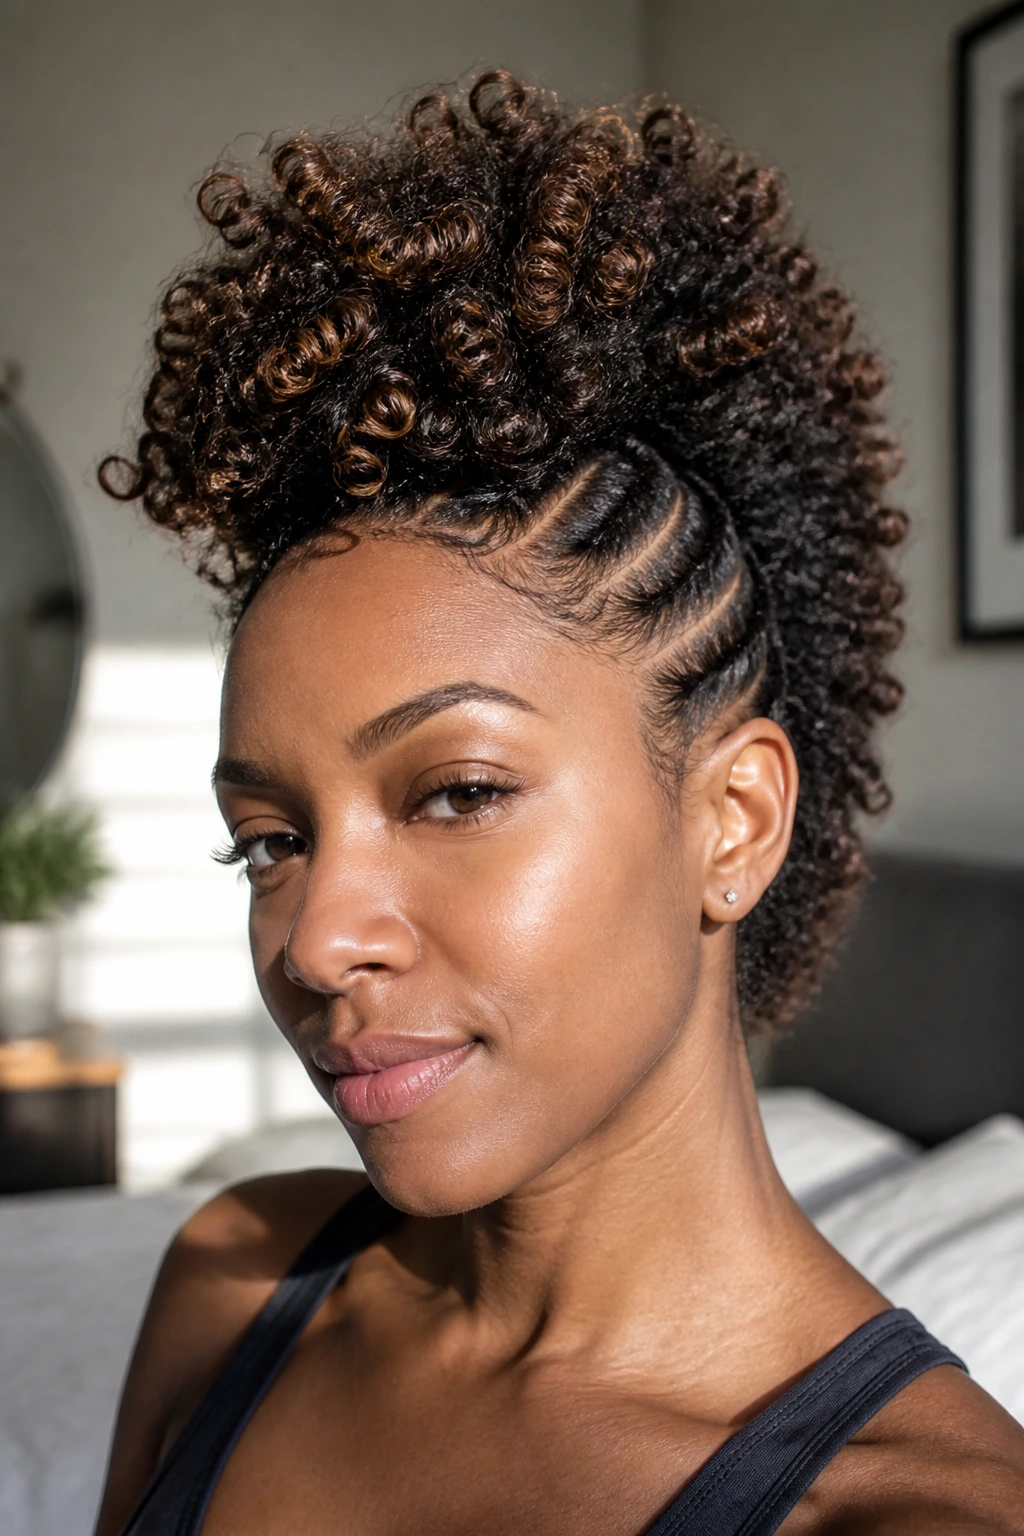
6. The Curly Frohawk
A curly frohawk is where this whole category gets its best personality. Instead of flattening curls into submission, you keep the center high and let the sides sweep or pin away from the face. The result feels airy, not stiff, and the curl pattern does half the styling for you. You’re not building shape from scratch. You’re guiding it.
The smartest move is to style the curls while they still have some dampness. Scrunch in a curl cream, then diffuse with the head tilted forward so the center section lifts at the root. The side sections can be twisted back and pinned low, which keeps the overall look focused without crushing the curl pattern.
If your curls are tight, don’t over-separate them. A little cluster texture is what gives the frohawk its body. If your curls are looser, use a few strategically placed pins under the ridge so the top doesn’t drift sideways as it dries.
7. The Sleek Gel Finish
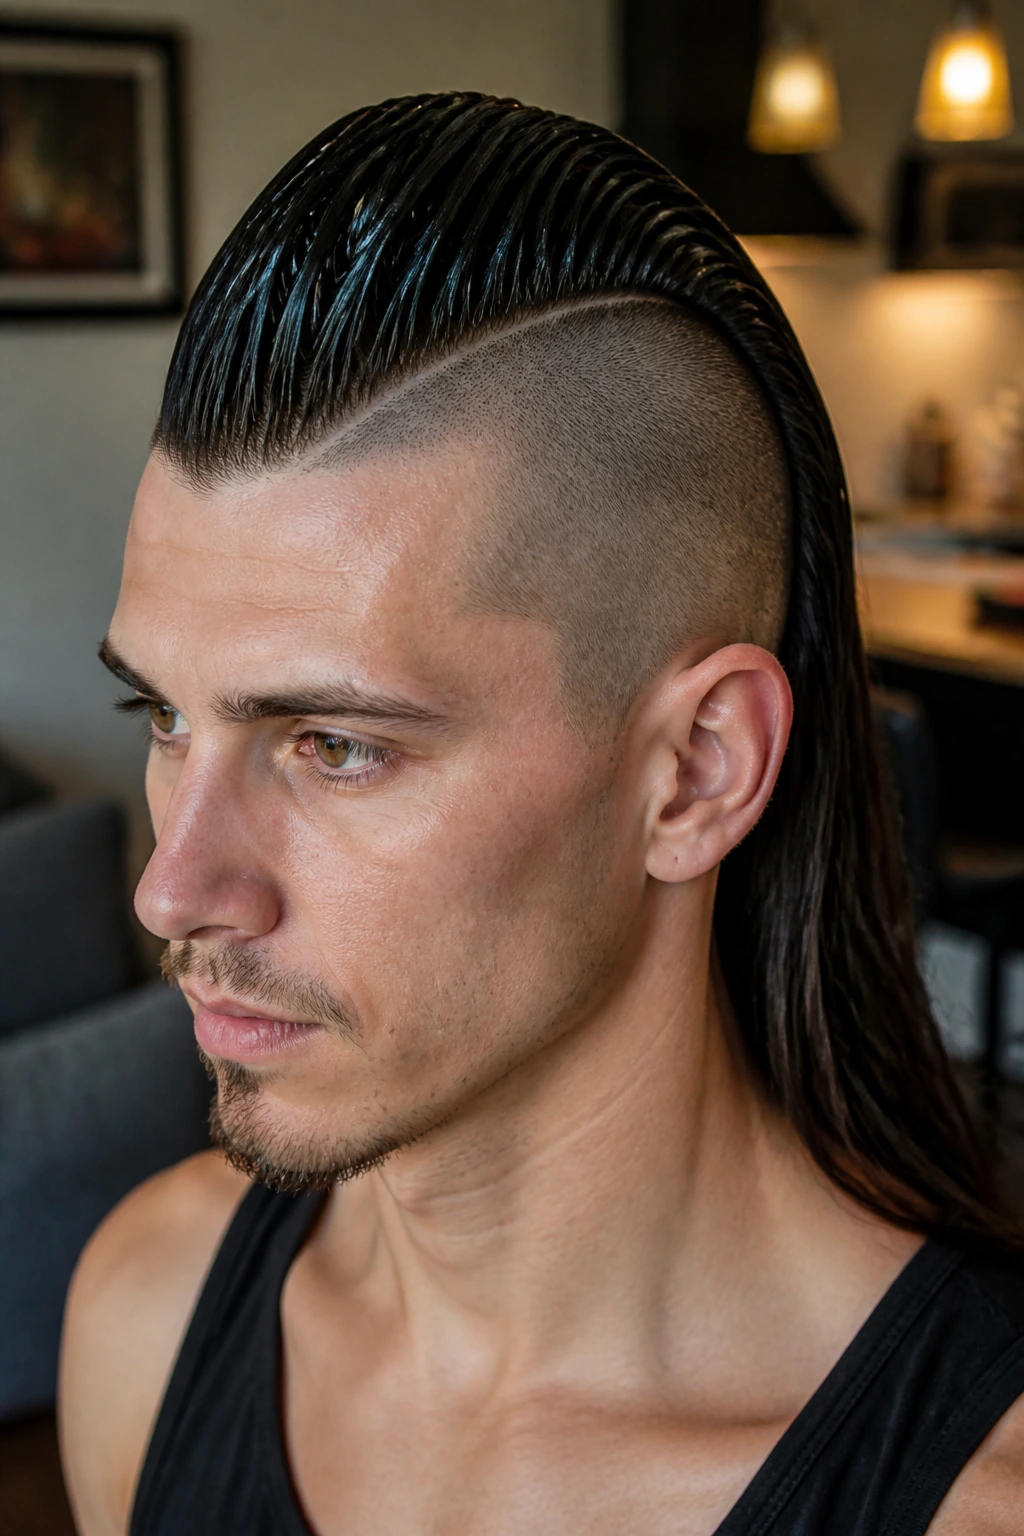
Sleek mohawks divide opinion, and I think that’s part of the fun. Some people want texture; some want a surface so smooth it looks lacquered. The sleek gel version gives you the second one. Long hair gets combed into a narrow ridge or slicked back hard on the sides, and the shine creates a crisp line from forehead to nape.
The science of the look
This style is built on compression. Wet hair plus gel plus tension equals control. If you want it to stay sharp, you need to comb every section in the same direction and let the product set before you start touching it. The biggest mistake is fussing with it while it dries. Don’t. That’s how you get little frizz halos around the hairline.
A strong-hold gel and a tail comb are the main tools. If the hairline tends to puff, smooth a pea-sized amount of styling wax over the edges after the gel dries. That tiny layer cuts the flyaways without making the whole style greasy.
This version suits long hair that’s naturally straight or only slightly wavy. On very curly hair, it can work, but you’ll be fighting the pattern unless you blow-dry first.
8. The Undercut Long-Top Mohawk
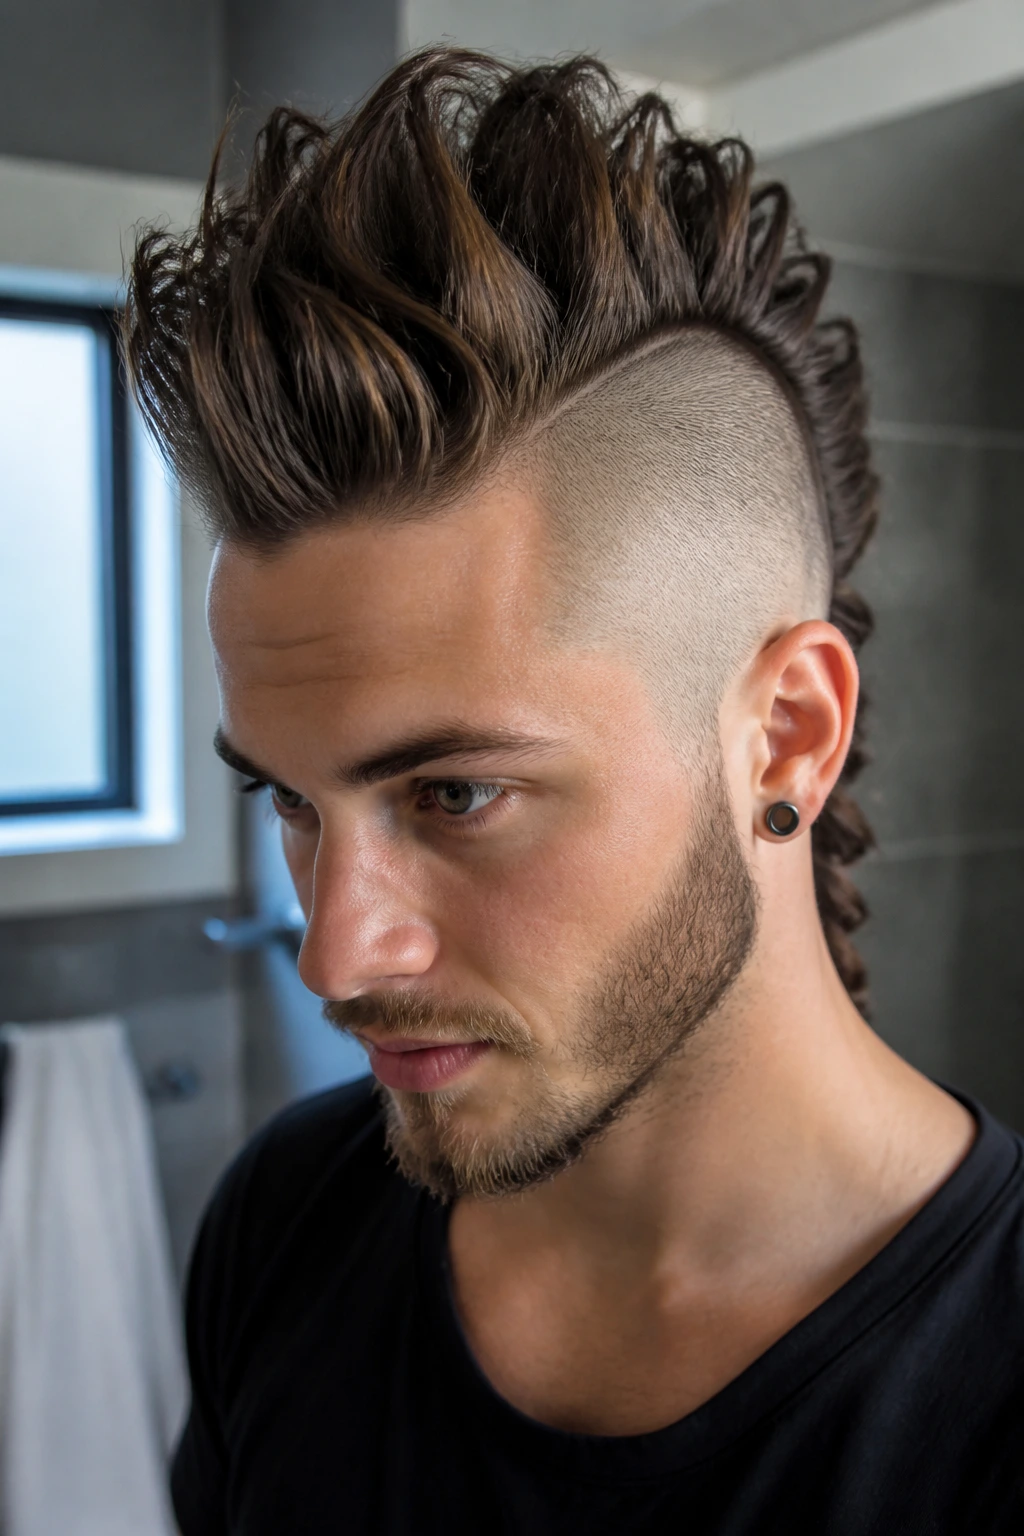
If you already have an undercut, long hair on top opens the door to the most dramatic mohawk silhouettes. The shaved or cropped sides create instant contrast, so the long top doesn’t have to work as hard to look like a mohawk. It just has to stand up, move, or be pulled back with intent.
The long-top undercut mohawk is one of the easier looks to style because the side control is already built in. You can slick the top back, braid it, twist it, or even let it fan out a little if you want something looser. The cut does the framing for you.
What I like most is how little product this version needs once the haircut is doing the heavy lifting. A medium-hold cream for the top, a little texture spray at the roots, and maybe a polish spray on the ends. That’s it. No need to drown it in gel unless you’re chasing a wet finish.
9. The Dreadlock Mohawk
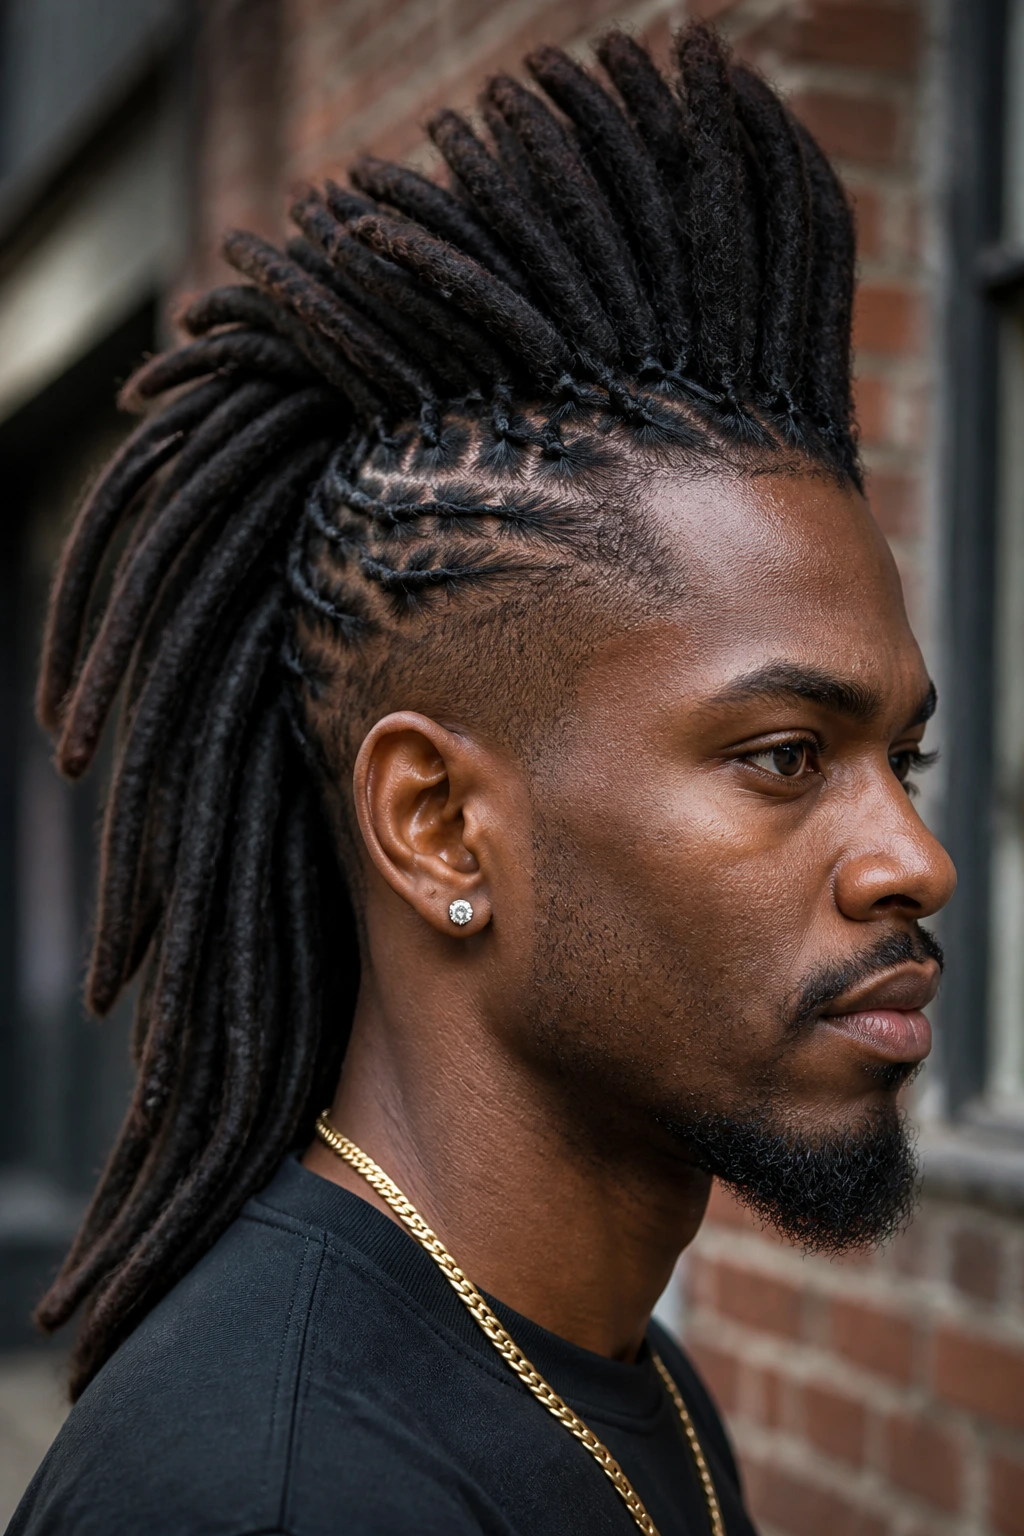
Dreadlocks change the shape of a mohawk in a way that plain hair never quite can. The locs bring built-in density, so the ridge looks full even when the sides are pinned close. Whether the locks are long and loose or gathered into a central run, the silhouette stays bold without needing extra teasing.
The main thing is balance. If the locs are heavy, keep the side sections tight so the style doesn’t slump outward. If the locs are lighter or freshly maintained, you can play with height by stacking them a little more on the crown. A few side locs pinned behind the ear can soften the edge if you want a more wearable finish.
This style lasts longer than most because the structure is already in the hair. Still, the scalp can get dry under tight sections, so avoid pulling the sides like you’re trying to win a tug-of-war. Clean lines are fine. Pain is not.
10. The Cornrow Spine
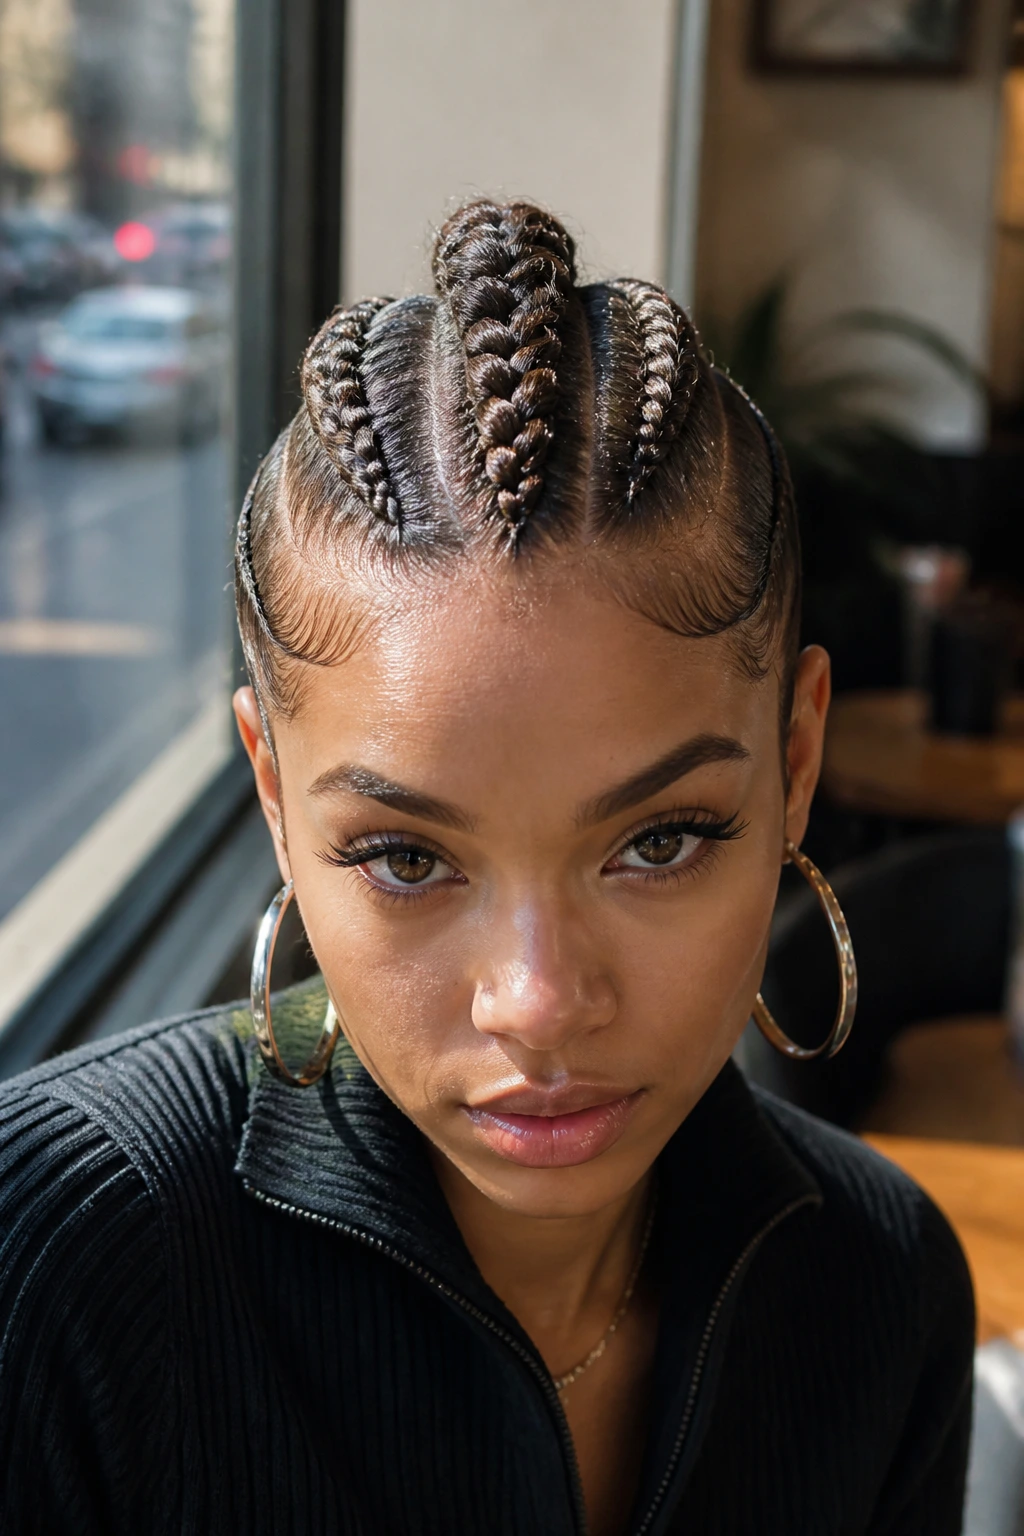
Cornrows are one of the cleanest ways to build a mohawk shape from long hair. The braided rows control the sides and feed the eye straight down the center, where the remaining length can be left loose, braided thicker, or tied into one strong tail. The effect is crisp, almost graphic.
The reason this style looks so good on long hair is that the braids create their own architecture. You don’t need much product on the surface because the plaits hold the pattern. Just make sure the parts are even. Uneven rows show fast, and once you see a crooked line in a cornrow mohawk, you can’t unsee it.
If you want a softer version, leave the back length curled or wavy. If you want something sharper, feed the braids into a single tight pony at the back and let the ends fall straight. Either way, this one loves a neat hairline and a little edge control at the temples.
11. The Viking Braid Mohawk
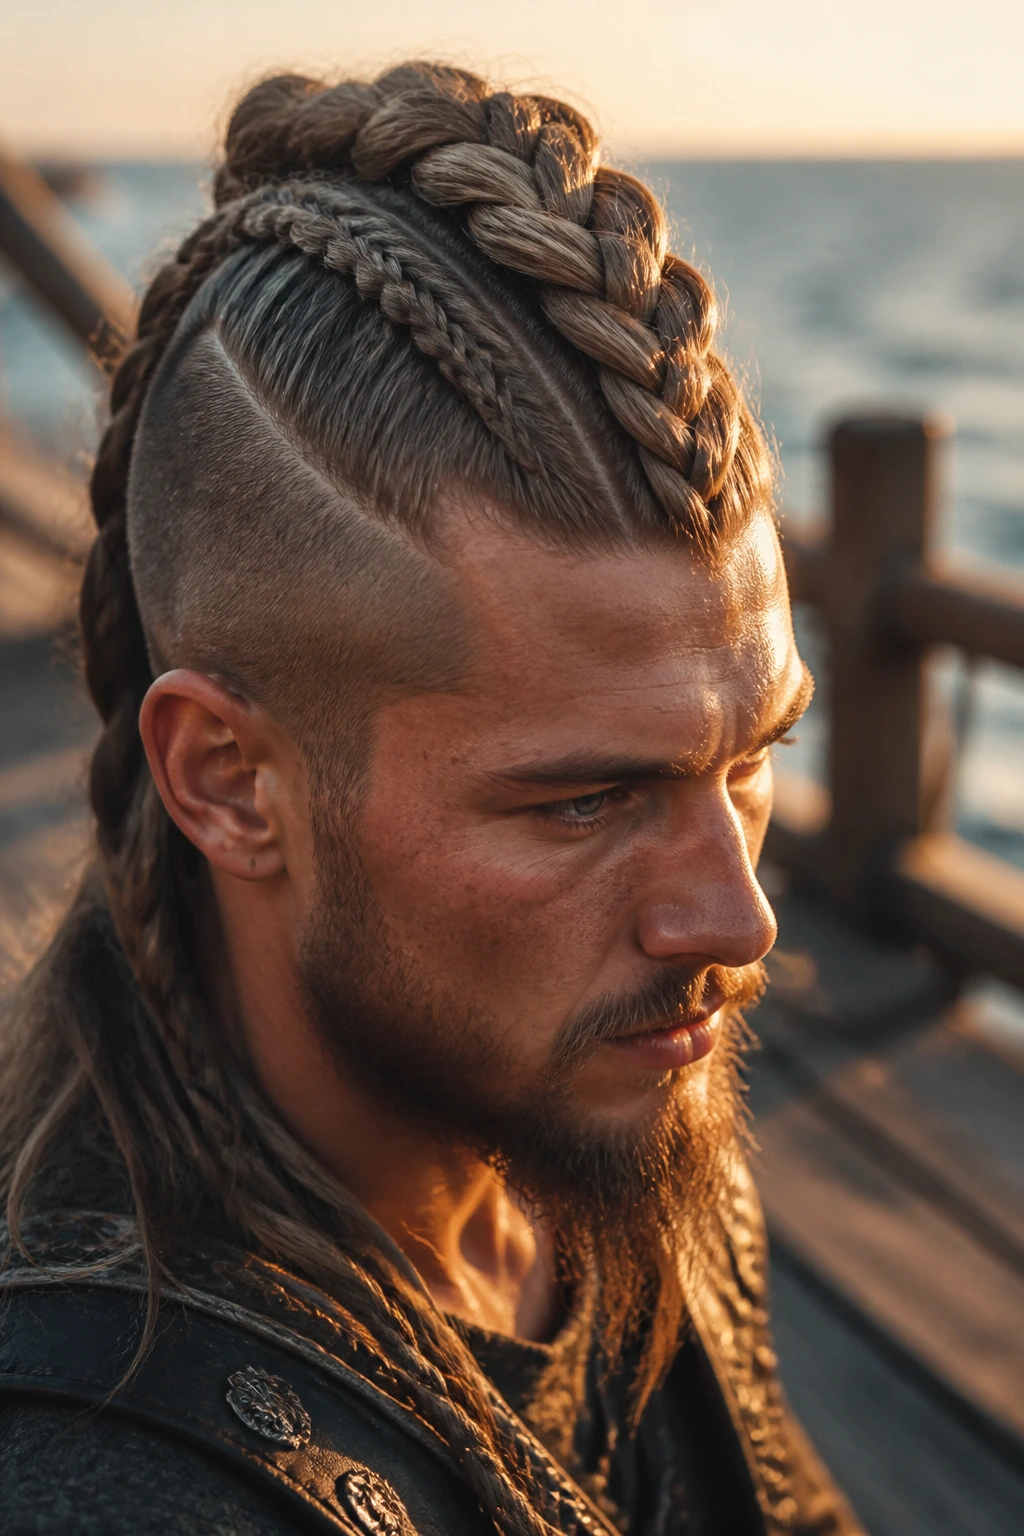
This one has attitude, but it’s a controlled kind of attitude. The Viking braid mohawk keeps a thicker central braid or several paired braids through the ridge, while the sides are slicked back or braided down closer to the scalp. Long hair gives the whole thing a heavier, richer look than the short versions people usually picture.
The style works best when the top braid is chunky. Tiny braids can get lost in all that length. Go thicker, let the plait breathe a little, and secure the end with a wrap or a hidden tie. If you want more edge, pull out a few face-framing pieces. If you want more polish, keep the front clean and let the braid do the talking.
This is one of the few mohawks that can lean romantic if you keep the braid soft and the ends loose. Same structure, different mood. That’s the fun part.
12. The Half-Up Knot Stack
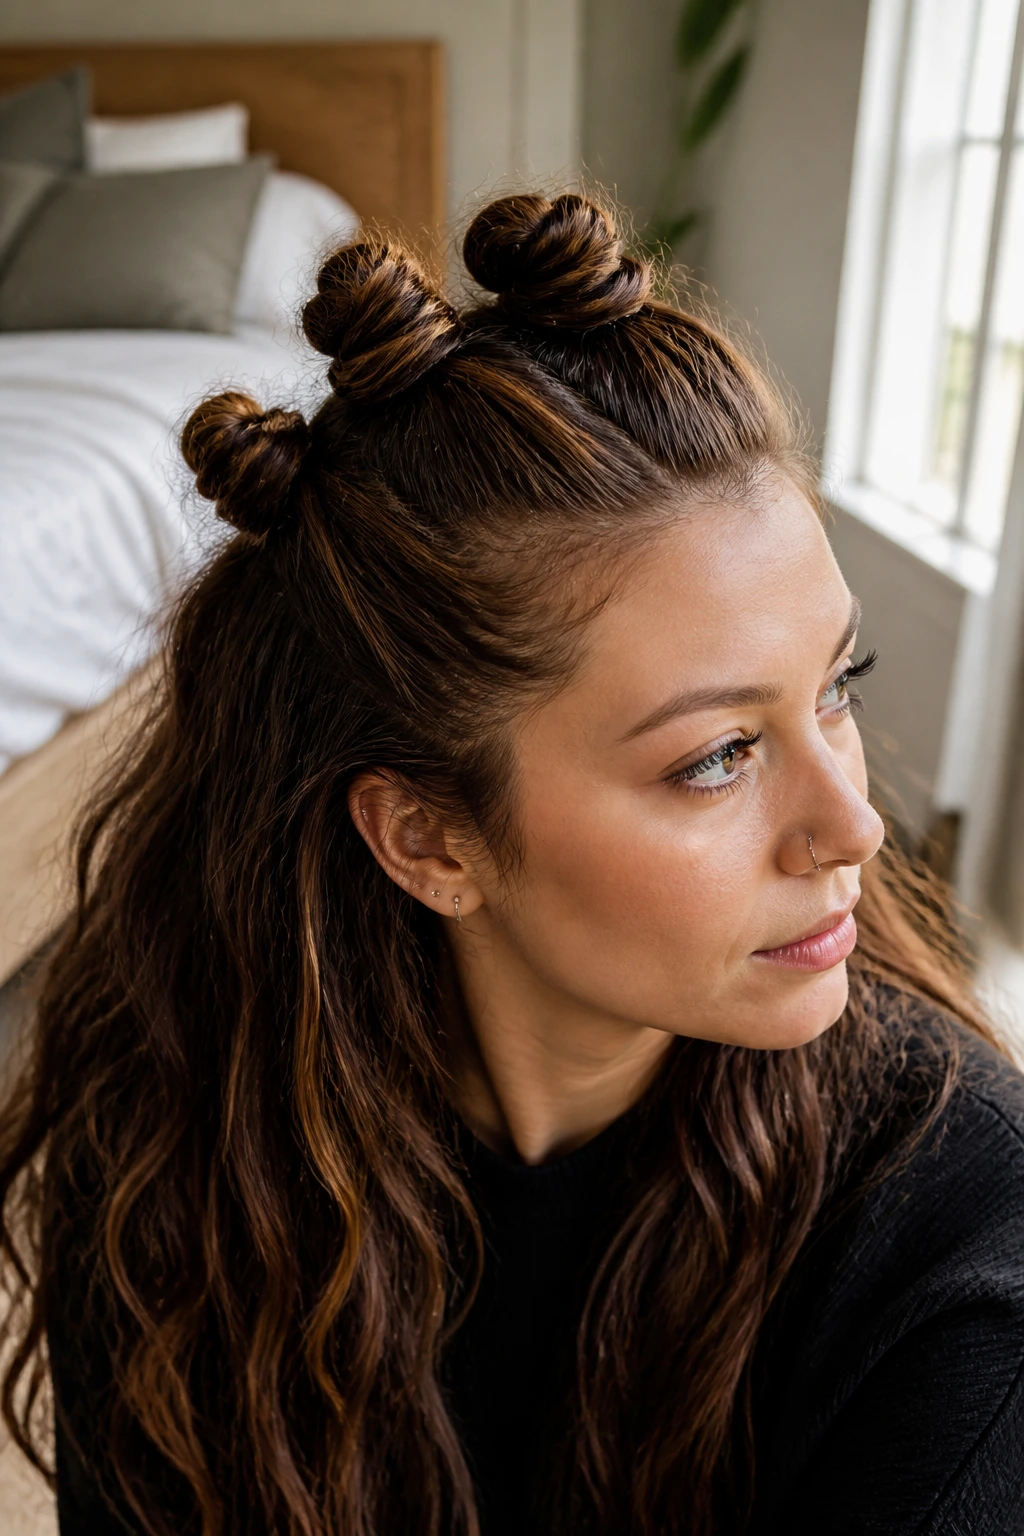
A half-up knot stack turns long hair into a row of little height points. Instead of one long ridge, you create several knots or mini buns from the top section, then leave the rest of the hair down. It’s playful, but it still gives the mohawk line because the eye follows the raised center from front to back.
How to place the knots
Start with a narrow top section and divide it into three or four smaller parts. Twist each one into a knot, pin it flat, then tug gently at the edges so the little buns look full instead of tight and pinched. The loose hair underneath should stay smooth or softly waved; too much texture everywhere muddles the shape.
This version is a favorite when you want the mohawk idea without a fully committed updo. It also works on hair that’s just past the shoulders, as long as there’s enough length to anchor the knots cleanly. A strong set of bobby pins and a tail comb make life easier here. So does patience. The first knot usually takes the longest.
13. The Fishtail Ridge
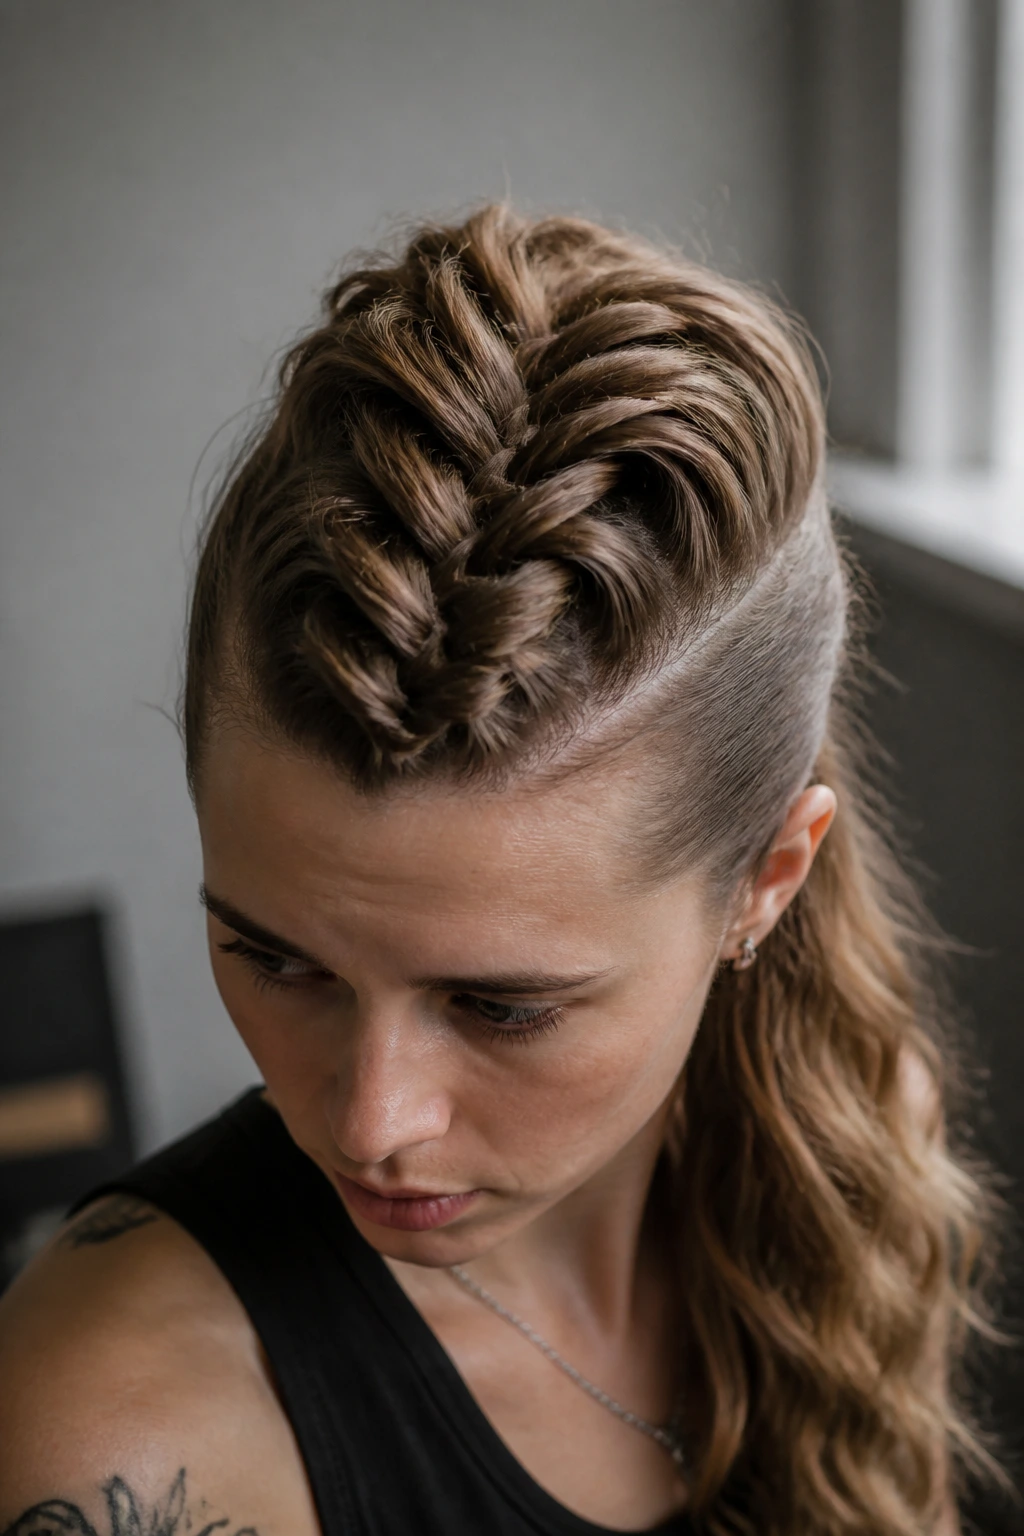
A fishtail mohawk has a denser, woven look than a standard braid, which makes it a good fit for long hair that needs a little visual weight. The fishtail can sit right down the center or run as the raised middle section while the sides stay smooth. Either way, the weave reads as intricate without getting fussy.
The style looks best when the weave is not too tight. A fishtail braided hard against the scalp can look stiff, and that robs it of the soft texture that makes the pattern interesting. Pull the braid apart slightly after it’s secured so it widens and gets that fuller, almost rope-like shape.
I’d call this a good middle-ground mohawk: more polished than a messy frohawk, less severe than a slicked-back style. If your hair is thick, it holds its shape with almost no help. If it’s fine, braid it after a little texture spray and let the ends stay a bit piecey.
14. The Side-Swept Faux Hawk
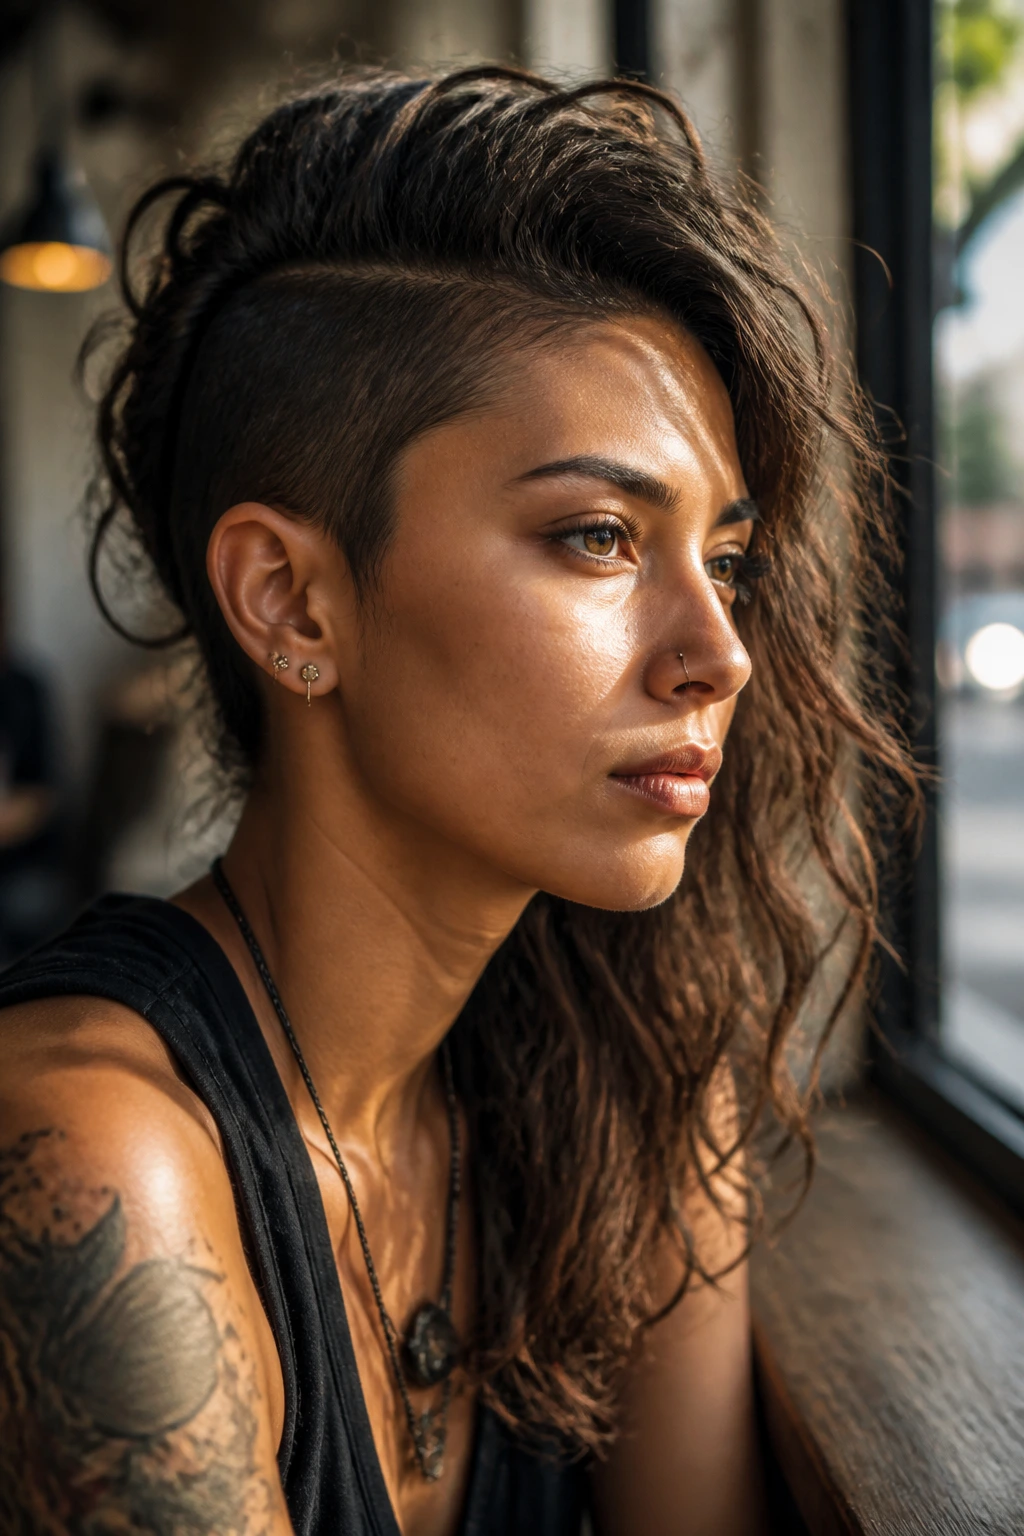
Not every mohawk needs perfect symmetry. The side-swept faux hawk leans the hair over one shoulder or angles the top section diagonally so the ridge looks softer and less direct. Long hair makes this easy because you have enough length to shift the weight instead of locking it dead center.
This style is one of the easiest ways to wear the mohawk shape when you want it to feel less costume-like. Sweep the front up and back, pin the side that feels too flat, and let the length fall with a deliberate curve. A little asymmetry keeps it from looking overly engineered.
The best part is how wearable it is with everyday clothes. You can put this style next to a blazer, a denim jacket, or a dress with a high neckline, and it won’t fight the outfit. It just sits there with a bit of edge.
15. The Crimped Texture Hawk
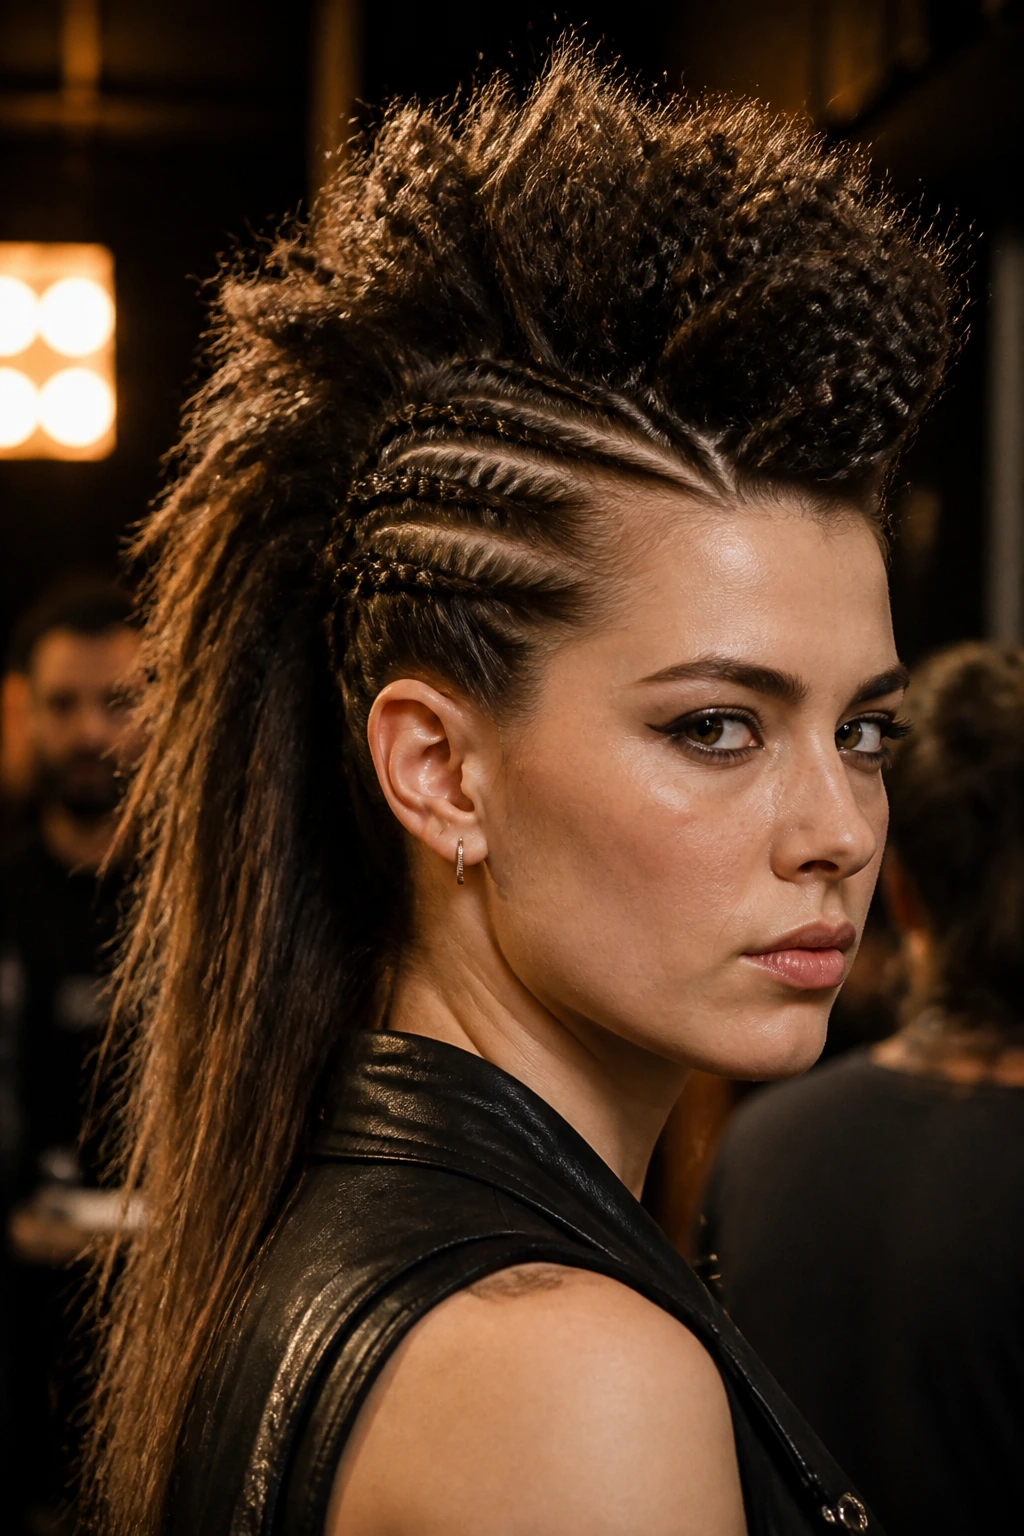
Crimped hair has a strange superpower: it makes long hair behave like it has twice the body. That matters here because a crimped mohawk gets fullness at the crown and a rough, grippy texture that holds pins better than clean, slippery strands ever will. The finished look feels energetic, almost jagged in a good way.
If you’re using a mini crimper, work only on the top strip and maybe the side roots, not the whole head, unless you want maximum volume. Crimped texture under a mohawk ridge gives the style lift without needing huge amounts of teasing. It also makes the shape last longer because the hair doesn’t glide back down as easily.
This is a smart style for very straight hair that refuses to stay where you put it. The crimping adds the friction the style needs. A light mist of spray after styling is enough; too much product will weigh the texture down and make the crimp collapse into a fuzzy sheet.
16. The Fan-Back Shape
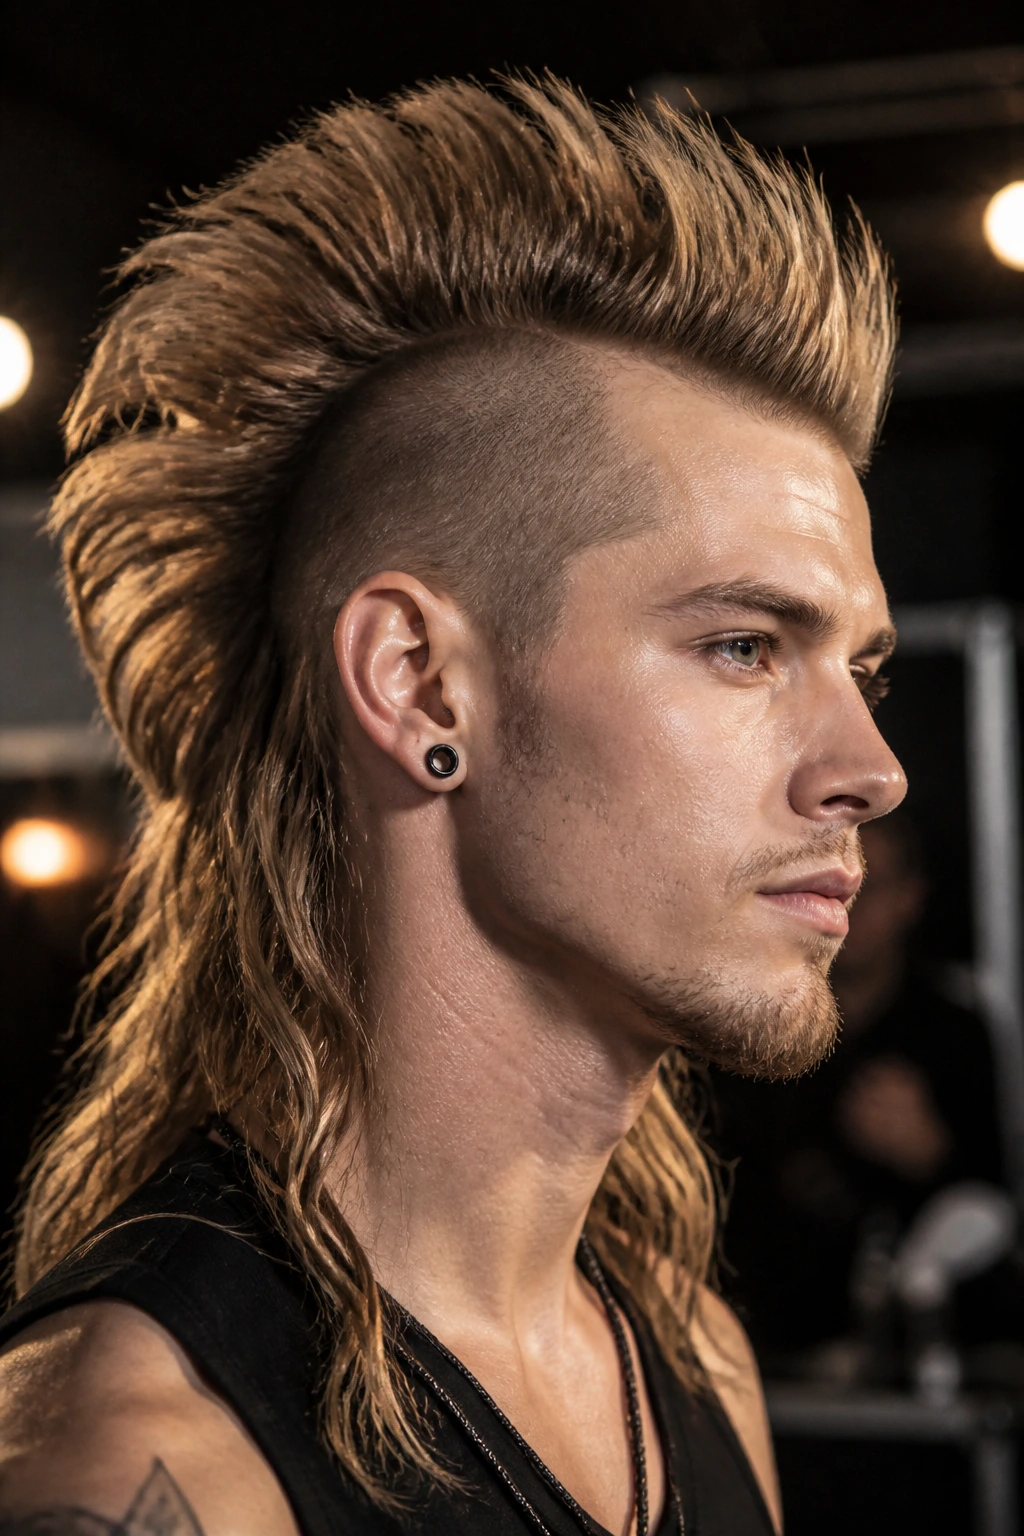
The fan-back mohawk opens up like a plume from the crown toward the nape. Instead of narrowing everything into a tight strip, you lift and spread the top section so it fans slightly before being pinned or tied back. Long hair helps here because the length gives the fan a broader surface to work with.
It’s a dramatic look, but not in a harsh way. The visual line is wide at the crown and narrower near the ends, which softens the shape a little. That makes it good for people who want a mohawk silhouette without the harsh center ridge of the classic version.
Best use case
This one shines for photo-heavy events, performances, or any moment when you want the hairstyle to be read from a distance. Use a root-lifting mousse, blow-dry the top section upward, then set the shape with pins from underneath so the fan stays open instead of folding down. A strong-hold spray at the roots will keep the top from settling flat.
17. The Ribbon-Wrapped Mohawk
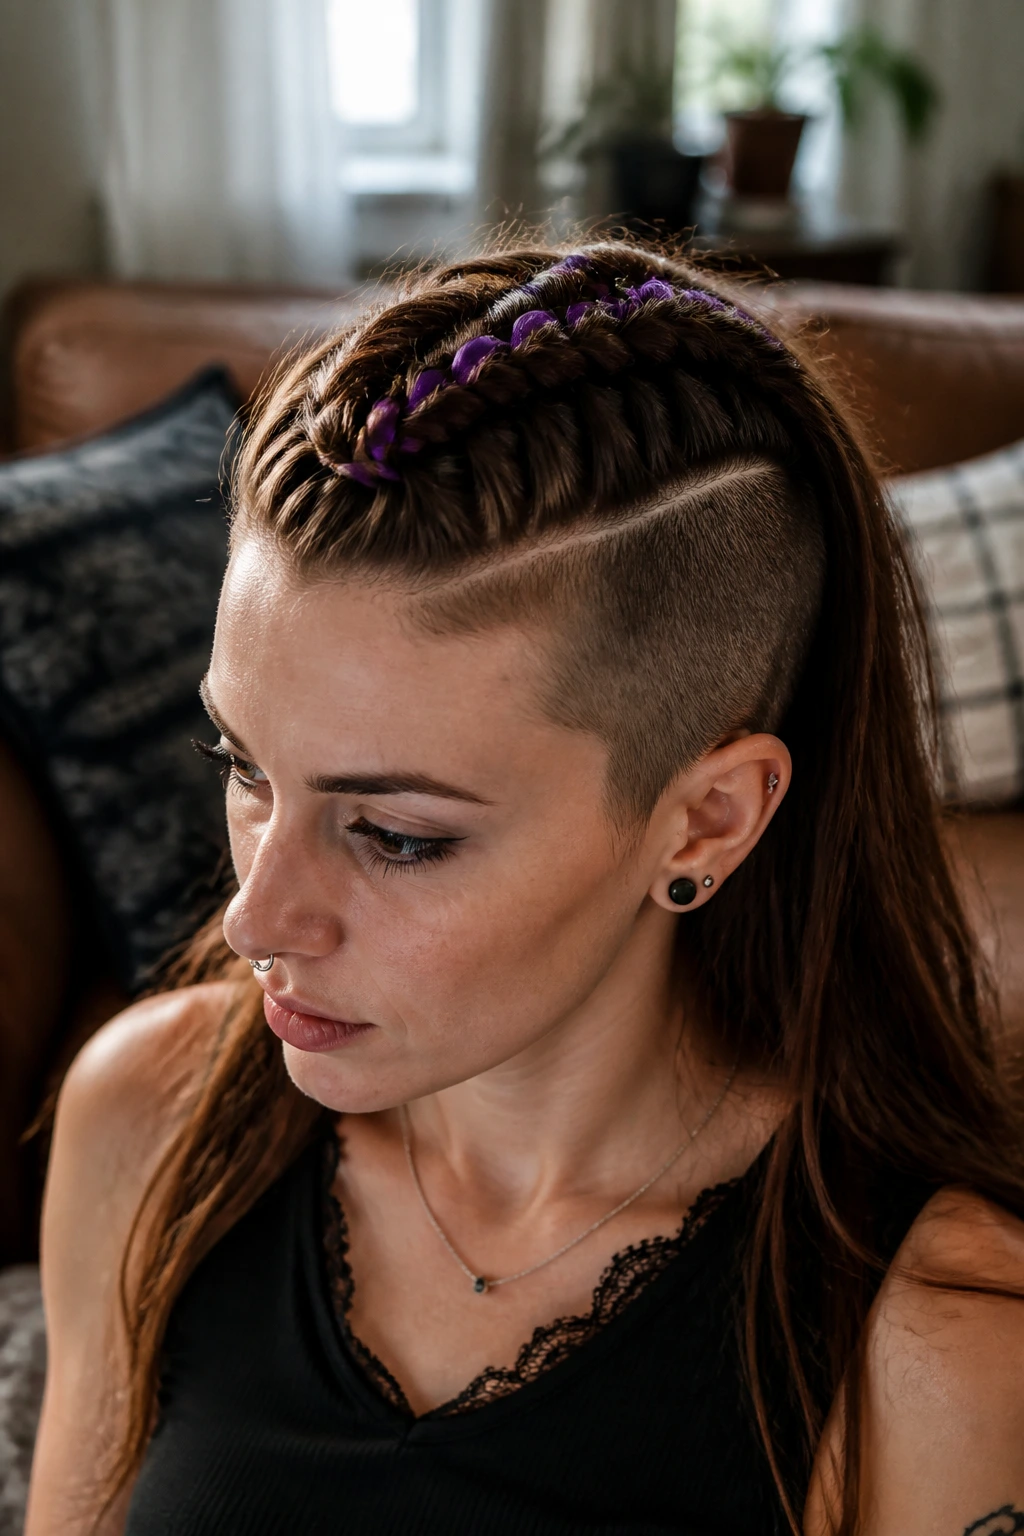
A ribbon-wrapped mohawk turns the hairstyle into a piece of clothing almost. You braid or twist the center section, then weave a ribbon, strip of velvet, or thin leather cord through it so the color and texture show between the strands. Long hair makes the wrap more visible because there’s more length for the material to travel.
I like this version when the hair itself is fairly simple and the accessory does the decorative work. It’s cleaner than scattering clips everywhere. It also gives you an easy way to match the outfit without overthinking it. Black ribbon keeps the look sharp. Satin softens it. Leather gives it teeth.
The trick is to keep the wrap snug but not yanked tight. Too much tension distorts the braid. A little slack lets the ribbon sit naturally and keeps the hair from looking squeezed.
18. The Low Pony Crown
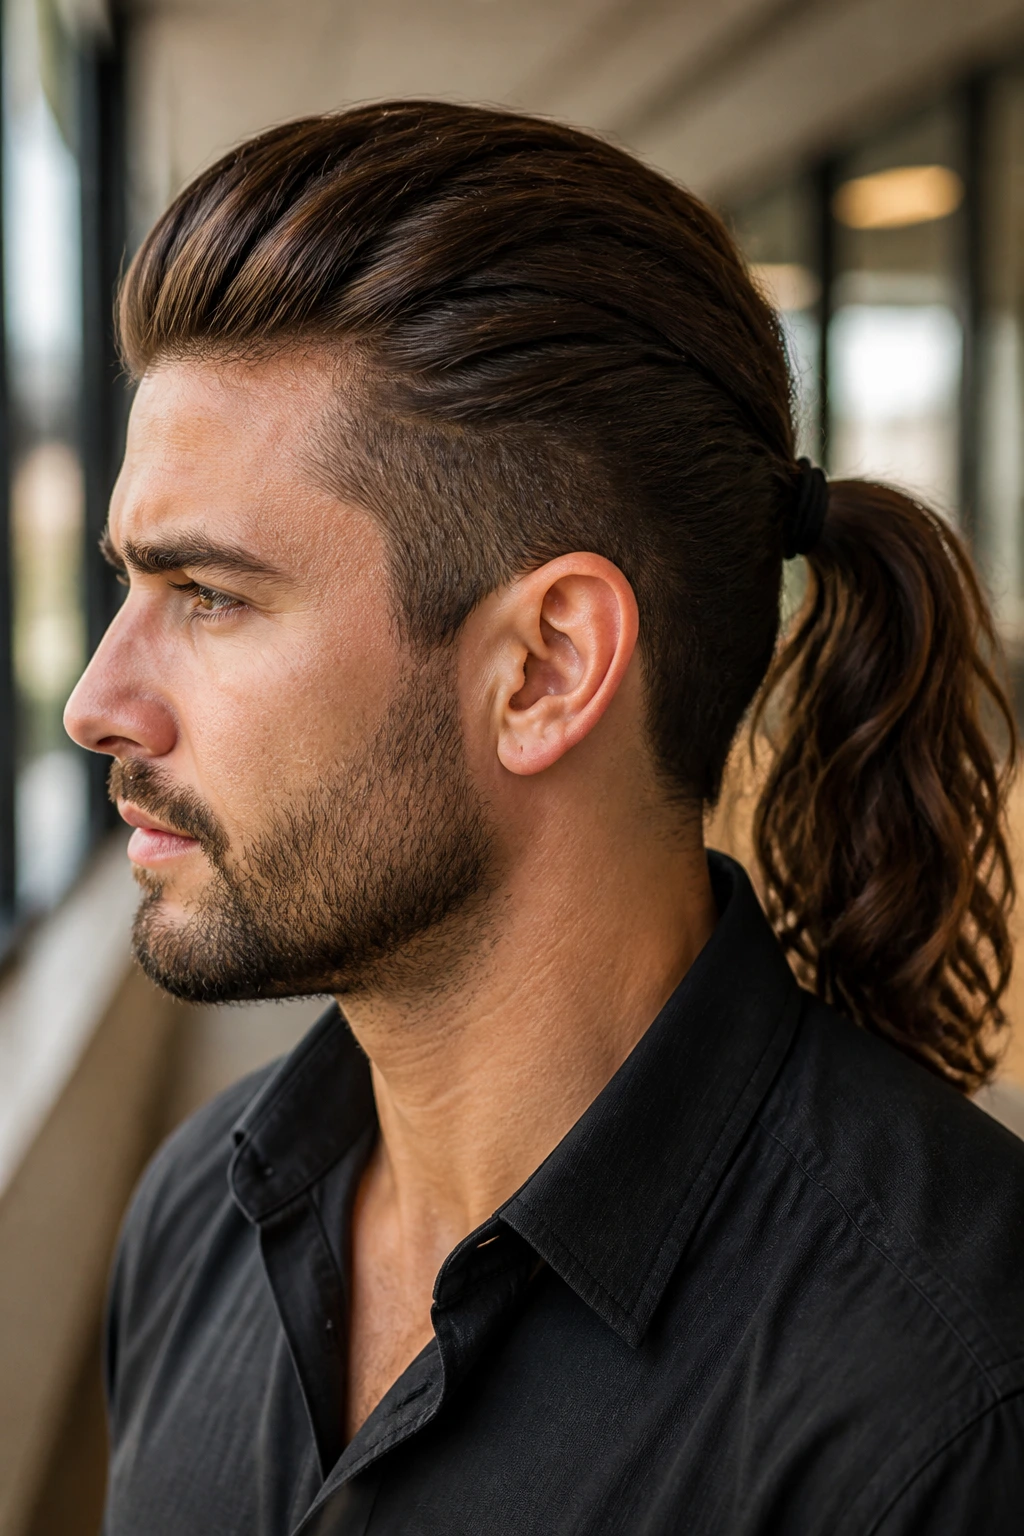
A low pony crown mohawk is one of the sneaky good ones. Instead of placing the height at the very top, you build a lifted crown that starts a bit lower and sweeps back into a ponytail or looped tail. It feels less severe than the classic mohawk, but the shape still reads as one because the sides are controlled and the center line is emphasized.
The style works well for long hair that wants to droop at the crown. By moving the lift lower, you let gravity help instead of fighting it. That small shift can make the difference between a style that holds and one that starts collapsing the second you leave the house.
It’s a good candidate for office days, weddings, or any setting where you want the mohawk shape without the full blast of a punk look. A soft edge, not a soft idea.
19. The Mohawk Bun Stack
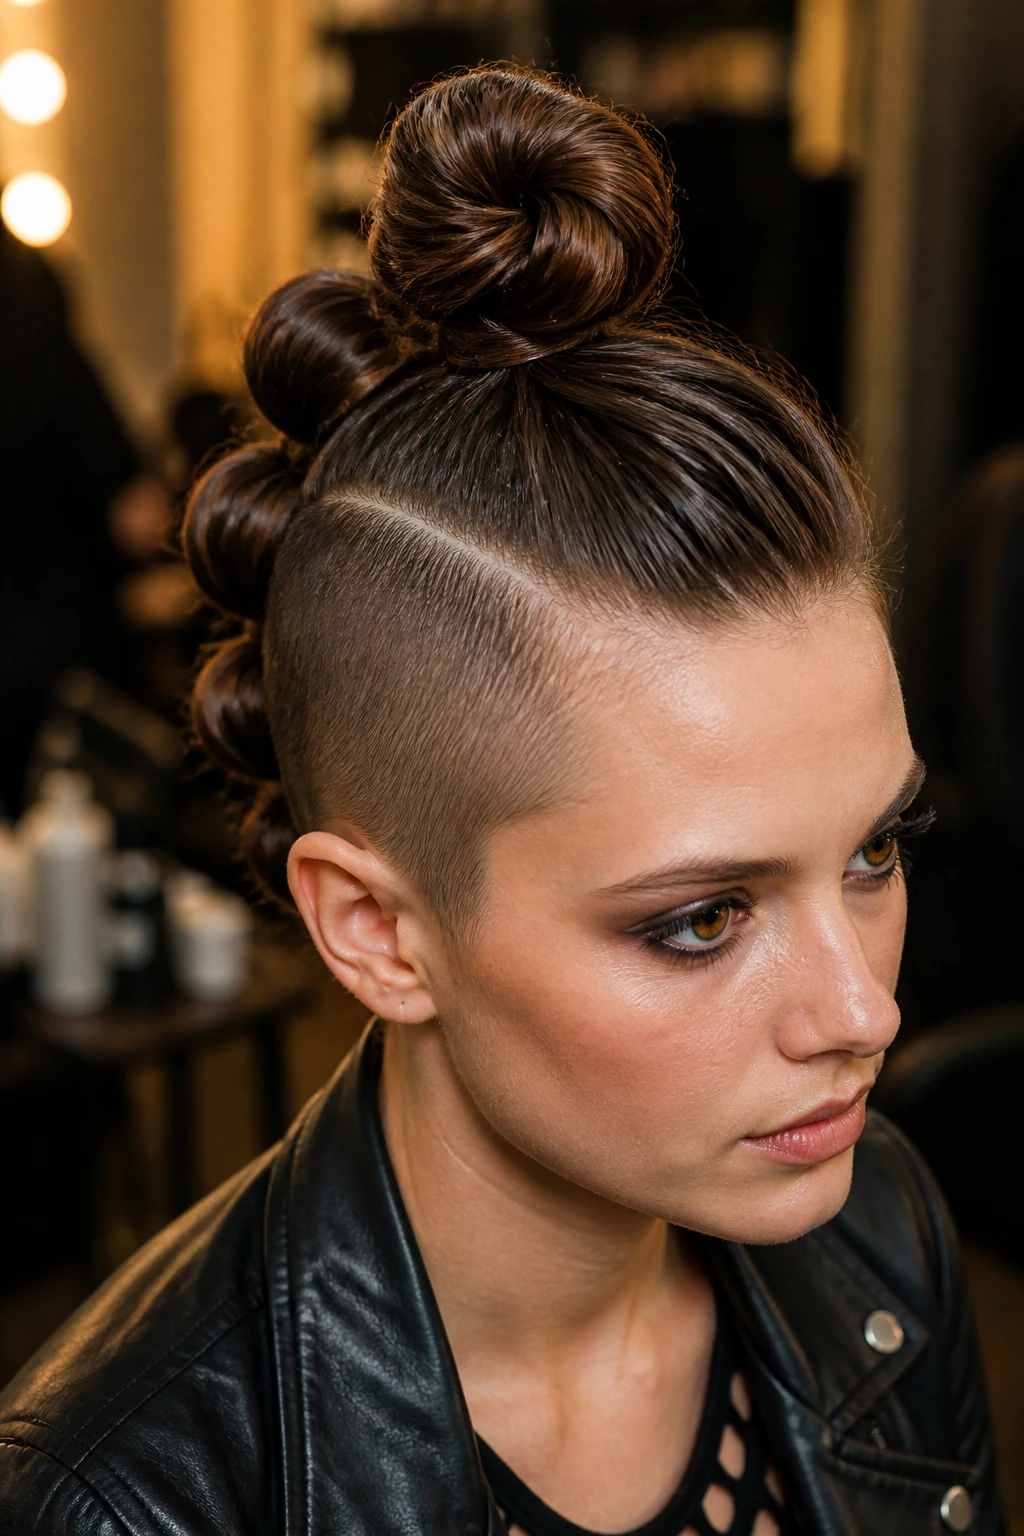
A bun stack mohawk is exactly what it sounds like: a line of buns or knots running from front to back, each one anchored to the next. Long hair gives the buns enough bulk to look intentional, and the stacked shape creates a strong center silhouette even when the sides are tucked flat.
Why it’s worth the time
This style has one of the best texture-to-effort ratios of the whole bunch. You’re using the hair’s length to create repeated shape, so each bun becomes part of the ridge. It can look strict, even futuristic, when the buns are small and tight, or softer if you leave the edges a little loose.
Use clear elastics under each bun and pin the loop from the underside. If your hair is slippery, make the buns from second-day hair or add dry shampoo first. Freshly washed hair tends to slide apart here, and you’ll spend too much time re-pinning the same knot.
20. The Crown-to-Mohawk Hybrid
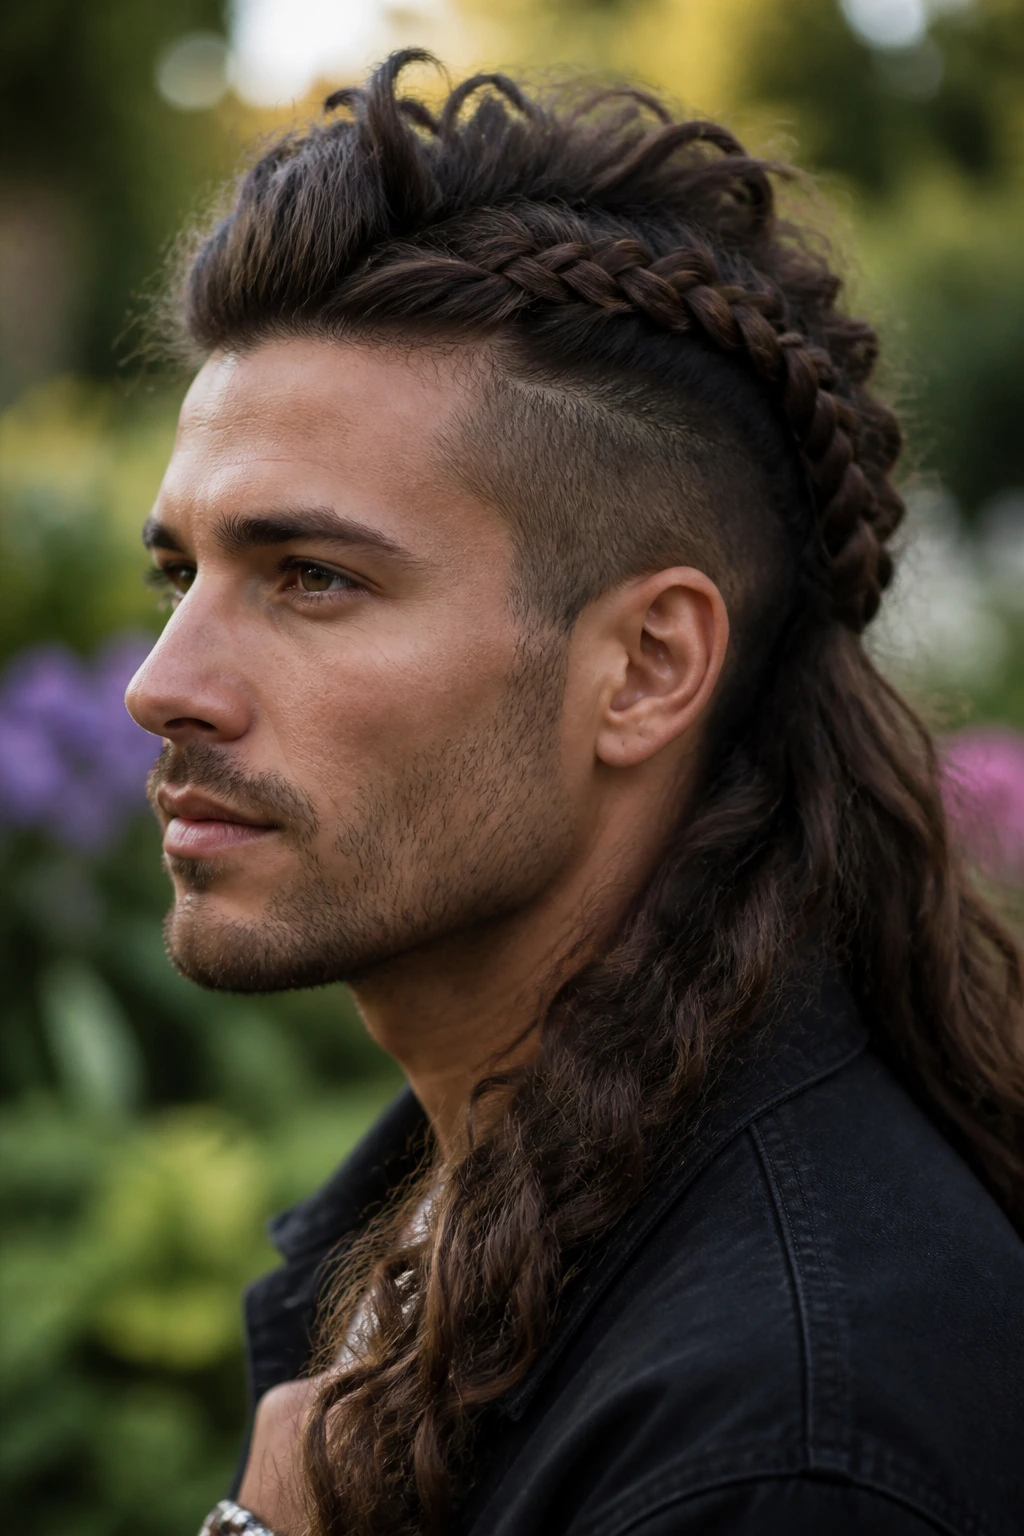
Some styles don’t bother choosing between a mohawk and a halo braid. This one mixes both. The braiding starts around the crown, frames the head, then feeds into a raised center section that keeps the mohawk feel alive. Long hair makes the transition smooth because there’s enough length to braid, tuck, and lift all in the same style.
What makes this version useful is the shape around the face. The crown braid softens the edges near the temples, while the center ridge keeps the profile sharp. That combination works especially well if you like the mohawk idea but want something that won’t look too harsh with softer clothes or makeup.
If your hairline is uneven or your temples frizz first, this style is a friend. The braid hides a lot. Sometimes that’s the whole reason to wear one.
21. The Spiky Texture Hawk
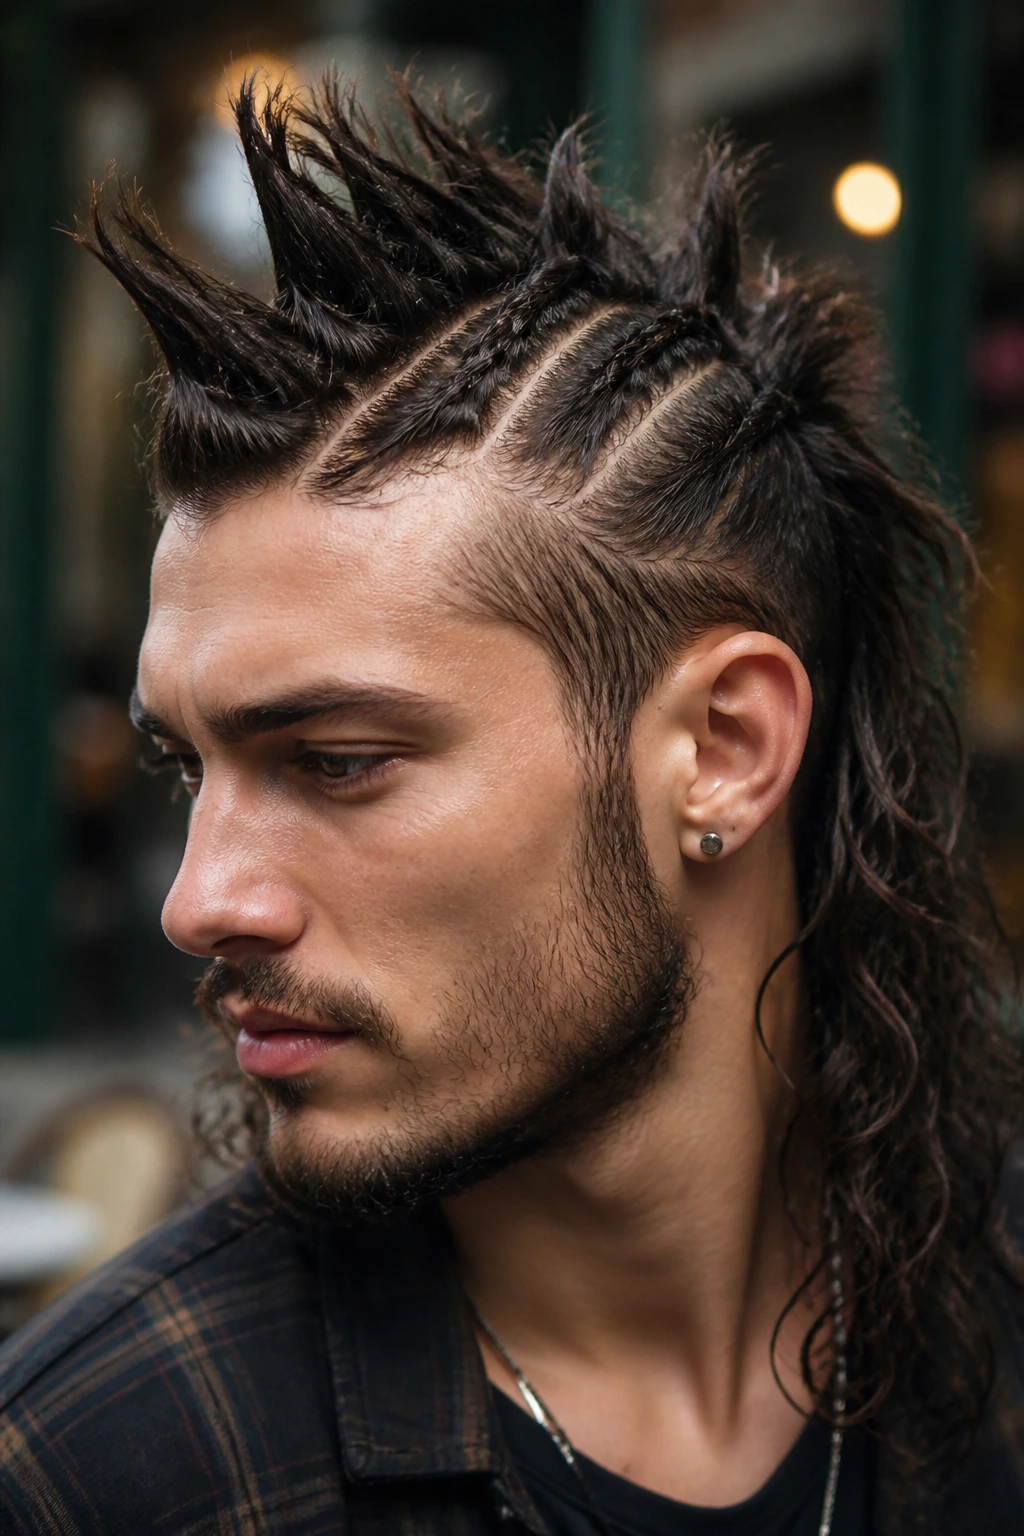
Spiky doesn’t have to mean glued into hard little points. On long hair, a spiky texture hawk can still move. You use product to separate the ends and give the center ridge piecey edges, then shape it so the hair has direction without becoming stiff. It’s the hair equivalent of a sharp jacket with soft lining.
How to get the texture right
Work a small amount of paste through the top while the hair is still slightly damp. Then pinch small sections upward with your fingers instead of combing everything smooth. If the hair is too clean, the spikes fall flat. If it’s over-loaded with product, they turn clumpy and dull.
This style is best for medium-thick straight or wavy hair. Curly hair can do a softer version by pulling the curls upward at the center and leaving the ends defined. The point is not perfect spikes. The point is separation.
22. The Loose Festival Frohawk
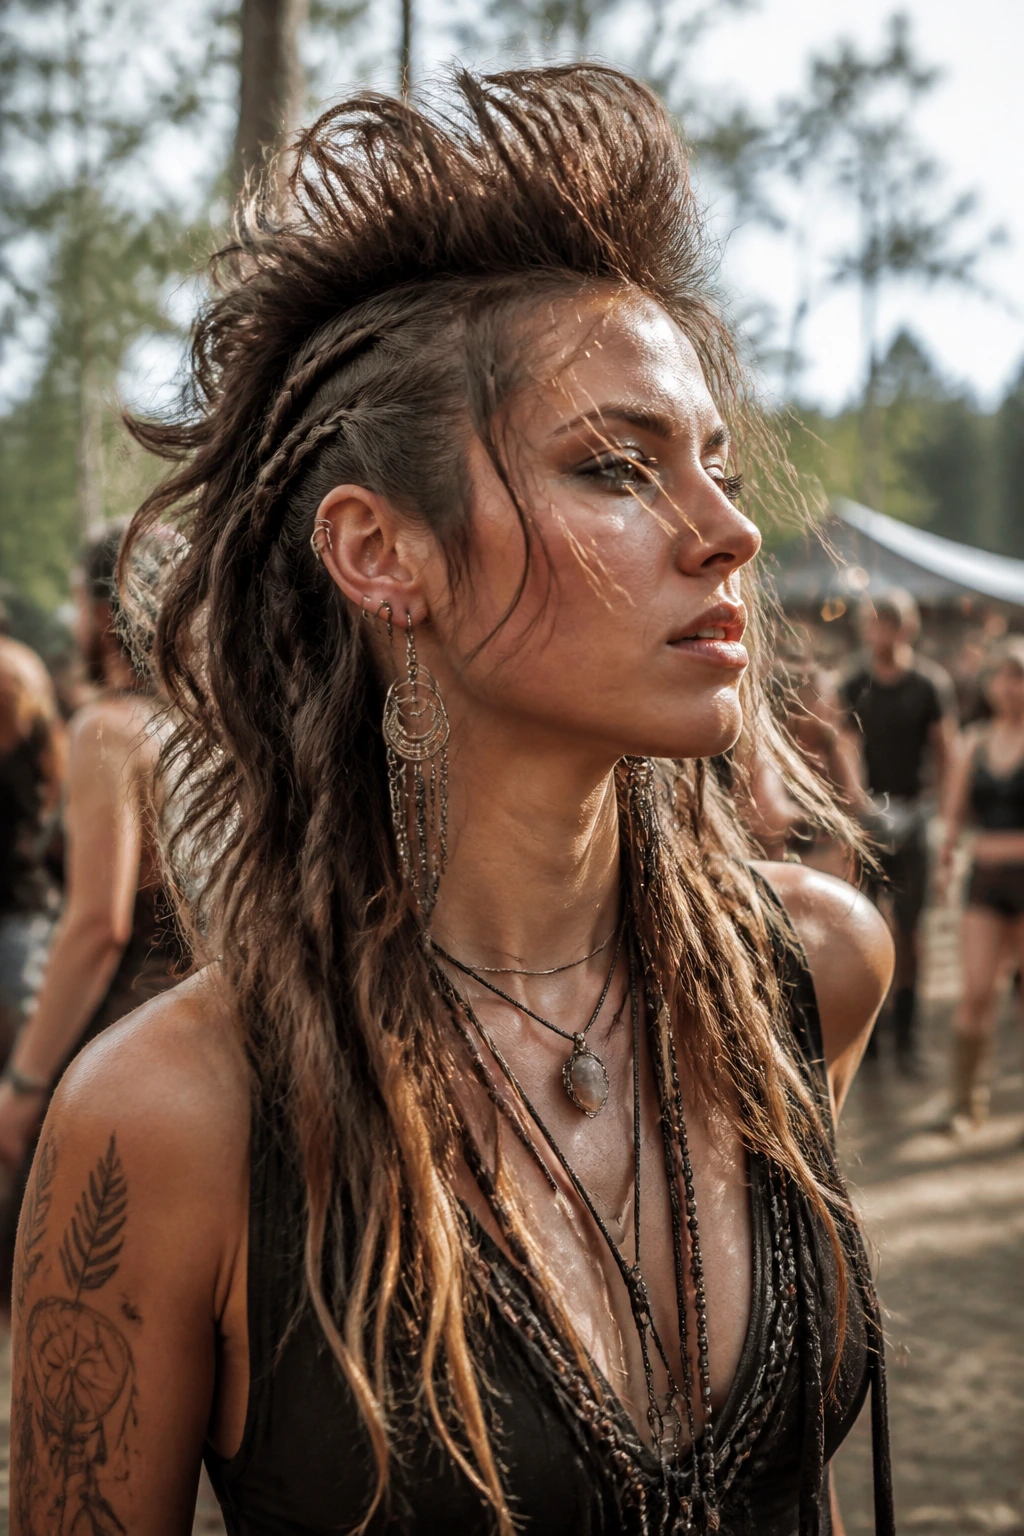
The loose festival frohawk is the least strict style in the lineup, and that is why it gets worn so much. The sides get pinned back or lightly braided, the center stays big and touchable, and a few pieces are left free around the face and neck. Long hair makes the finish feel airy instead of bulky.
This is a style for movement. A little frizz is part of the charm. A little asymmetry too. If you try to iron out every flyaway, you lose the thing that makes it good in the first place. I’d use this version when the goal is to look styled, not sealed in place.
Add beads, clips, or a scarf if you want the style to lean festive. Leave it plain if the shape itself is enough. Either way, this is the mohawk that feels most at home with wind, heat, and a long day.
23. The Halo-Braid Mohawk
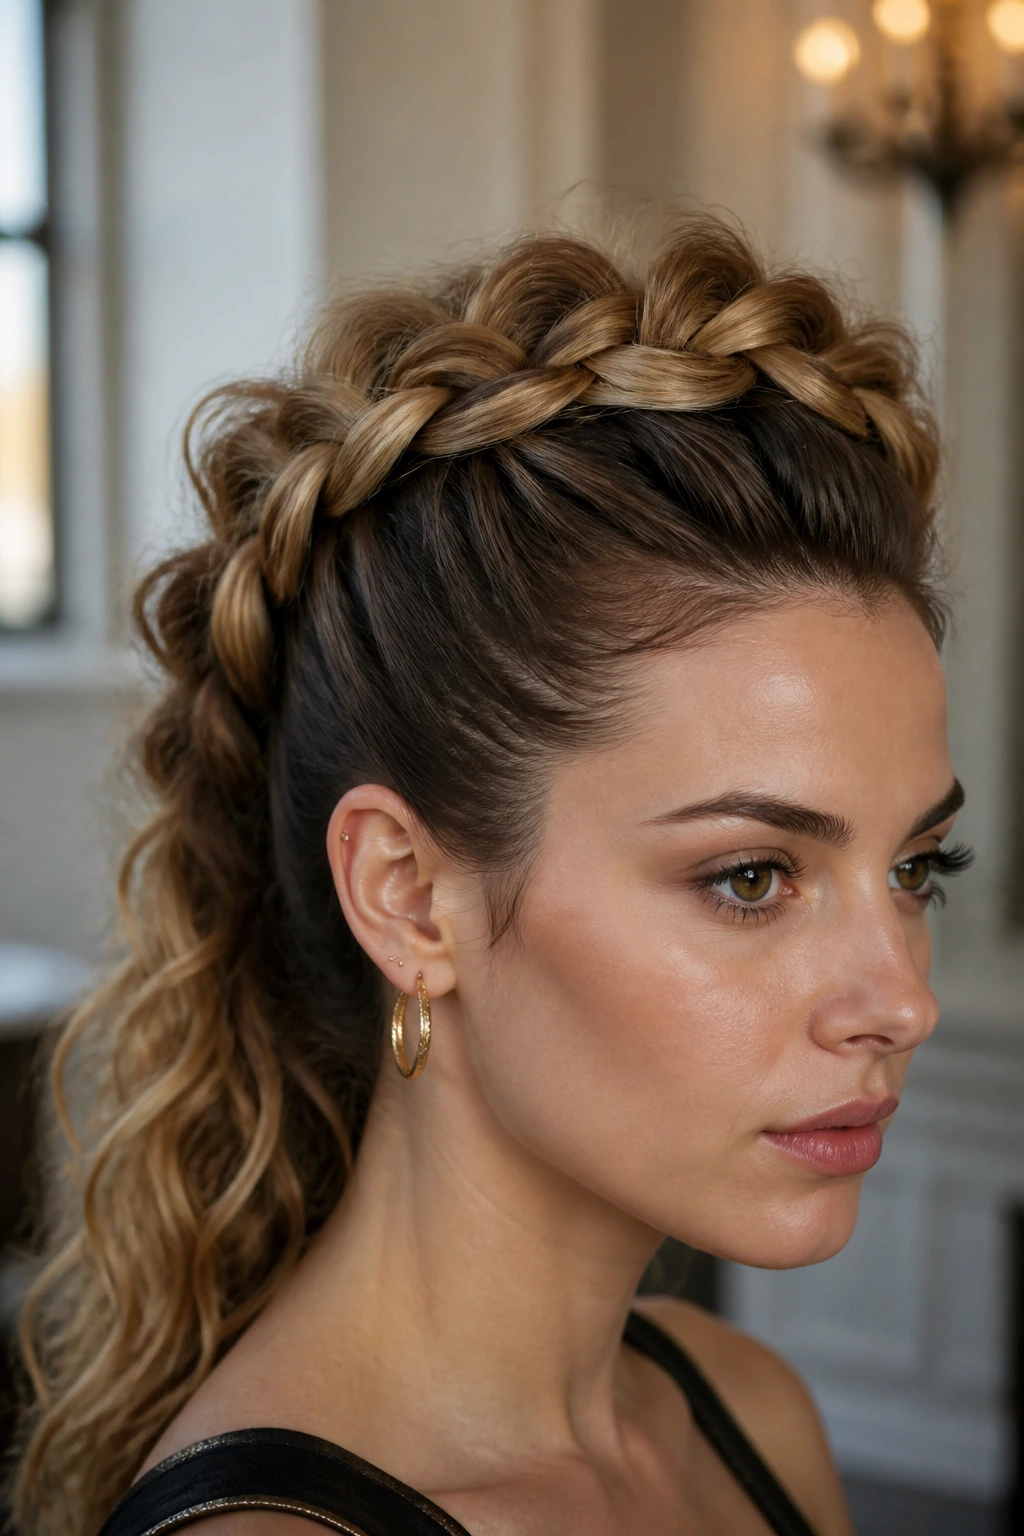
The halo-braid mohawk takes a familiar braid shape and pushes it into the center so the braid acts like a raised ridge around the top of the head. Long hair gives the braid enough thickness to stand out, and the halo shape can be as clean or as loose as you want. It has a softer edge than a shaved mohawk, but the silhouette still lands in the same family.
The reason I like it is the control around the face. The braid keeps the sides close and neat while leaving the center high enough to read as a mohawk. If you want something formal, keep the braid tight and smooth. If you want something more casual, pull a few loops loose after it’s secured so the braid looks broader and fuller.
This is also one of the most forgiving styles for long hair that’s a little layered or uneven. Braids hide length differences well. That alone makes it worth trying.
What Makes Long-Hair Mohawks Hold Their Shape
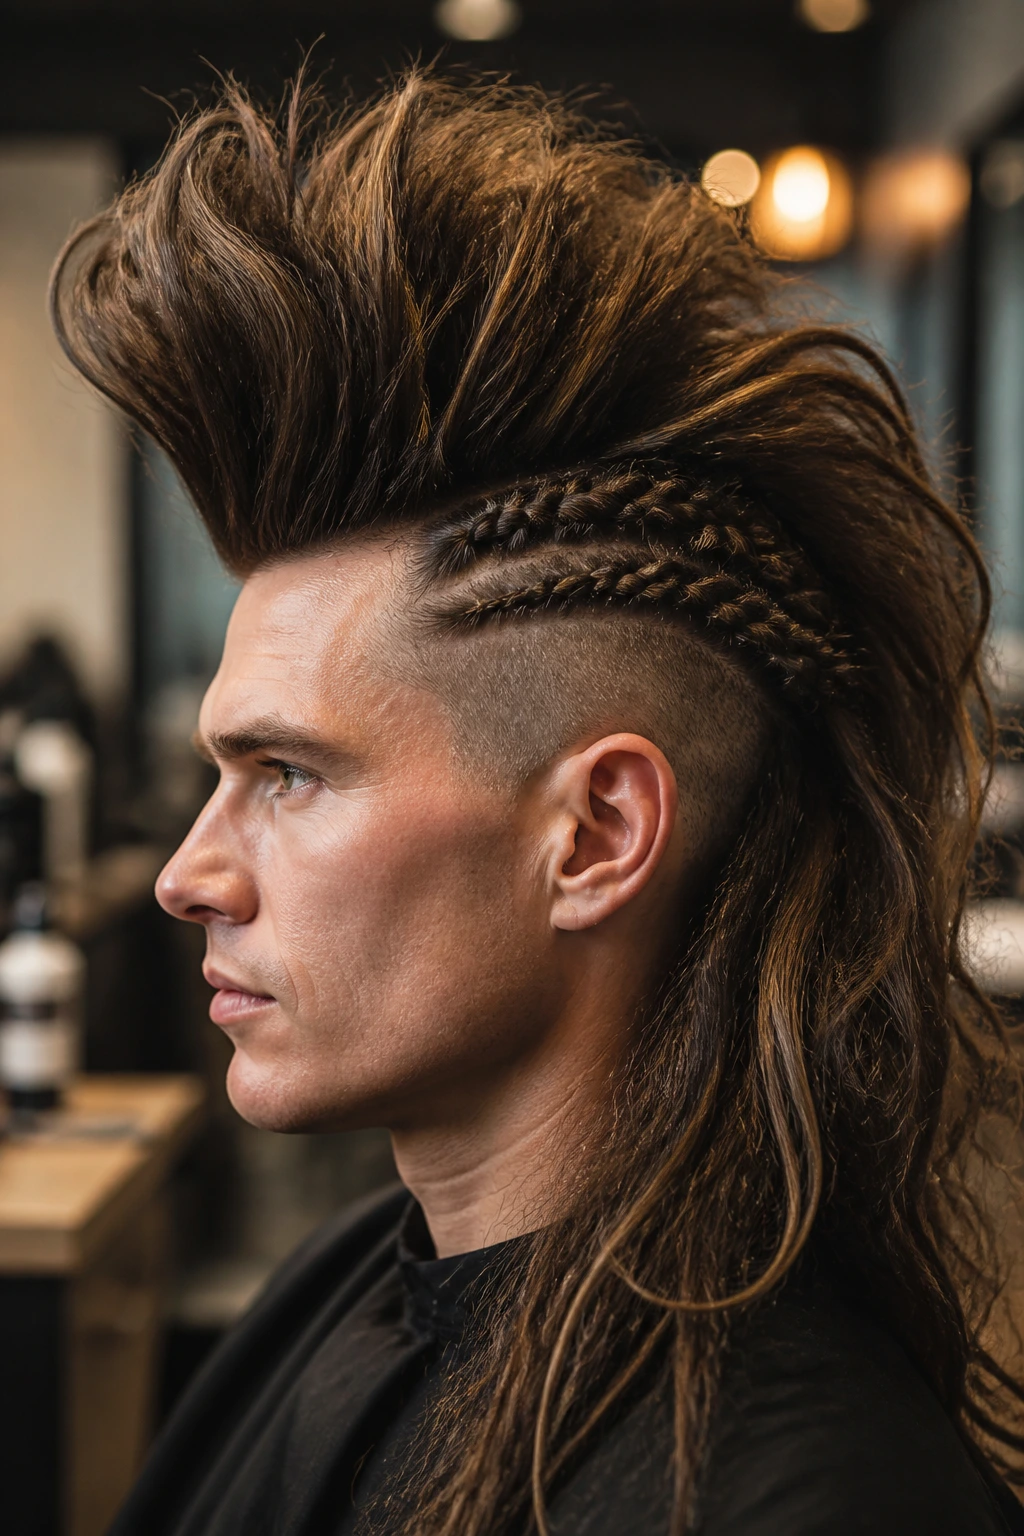
Long hair changes the mechanics of a mohawk in a useful way, but it also creates drag. The more length you have, the more the style wants to fall toward the shoulders. That’s why the best versions use anchor points: braids near the scalp, tight side sections, pinned folds under the crown, or elastics placed every few inches along the ridge. Without those anchors, the style looks right for ten minutes and then starts sagging in slow motion.
Root lift matters more than people admit. If the top is flat at the scalp, the whole mohawk reads weak, even when the ends are styled well. A little mousse at the roots, blow-dried in the direction you want the hair to stand, does more than a mountain of hairspray later. Texture at the base is what gives the style its posture.
Root lift is not optional
Teasing can help, but I’d use it sparingly. Backcombing too much turns the top into a snaggy mess that’s miserable to brush out later. A better move is to rough-dry the crown upside down, then smooth just the surface layer. That keeps the shape cleaner and saves you from the kind of knots that make you regret the style the next morning.
Anchor points beat endless product
If the sides are slipping, more spray won’t fix a bad sectioning pattern. Better to reset the parts, braid or twist the side hair, and pin underneath where the pins won’t show. On long hair, the hidden support is the whole game. The pretty top is just the part everyone sees.
Essential Tools for Styling These Looks
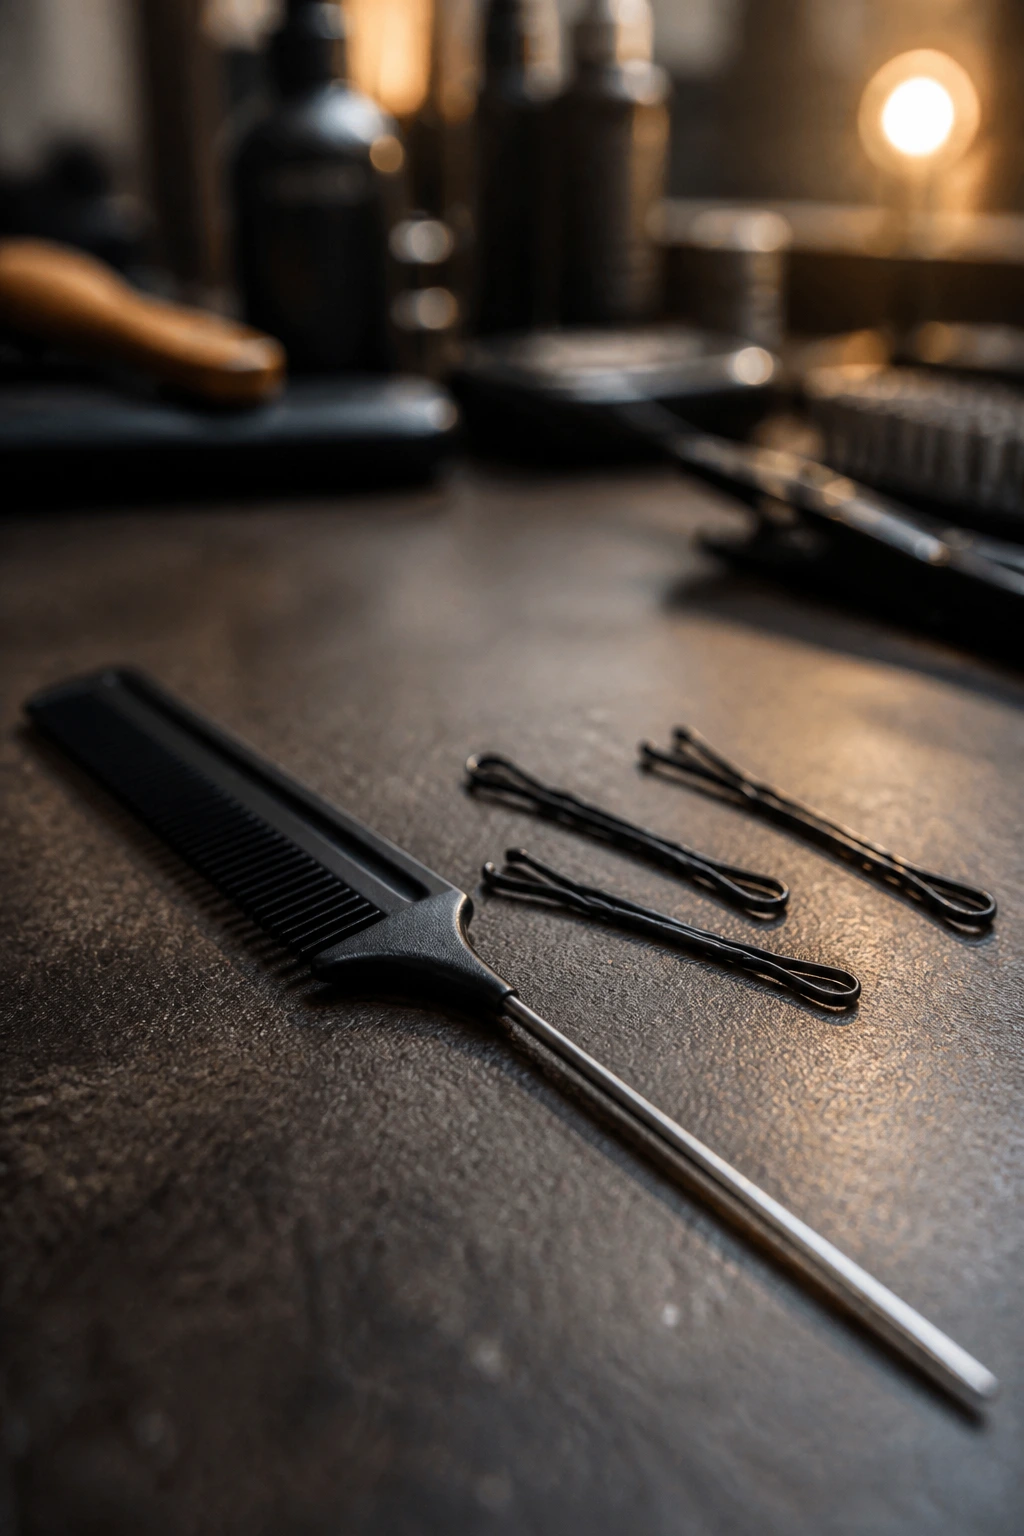
- Rat-tail comb: Clean parting is half the battle, especially for center strips and braid-based styles.
- Sectioning clips: Keep the side hair out of the way while you build the ridge.
- Bobby pins and U-pins: Use bobby pins for pressure, U-pins for loops and buns that need a softer hold.
- Clear elastics: Best for bubble styles, pony ridges, and braid ends that you want to hide.
- Strong-hold hairspray: Use it after the shape is set, not before, or you’ll make the hair tacky too early.
- Texturizing spray or dry shampoo: Adds grip to clean, slippery hair and helps the style hold at the roots.
- Mousse or styling foam: Good for volume at the crown, especially on fine hair.
- Fine-tooth comb: Necessary for sleek finishes and clean edges.
- Blow dryer with nozzle or diffuser: The nozzle helps on straight styles; the diffuser helps curly and frohawk versions.
- Edge brush or small toothbrush: Handy for smoothing hairline fuzz without flattening the whole style.
Smart Prep for Long-Hair Mohawk Styles
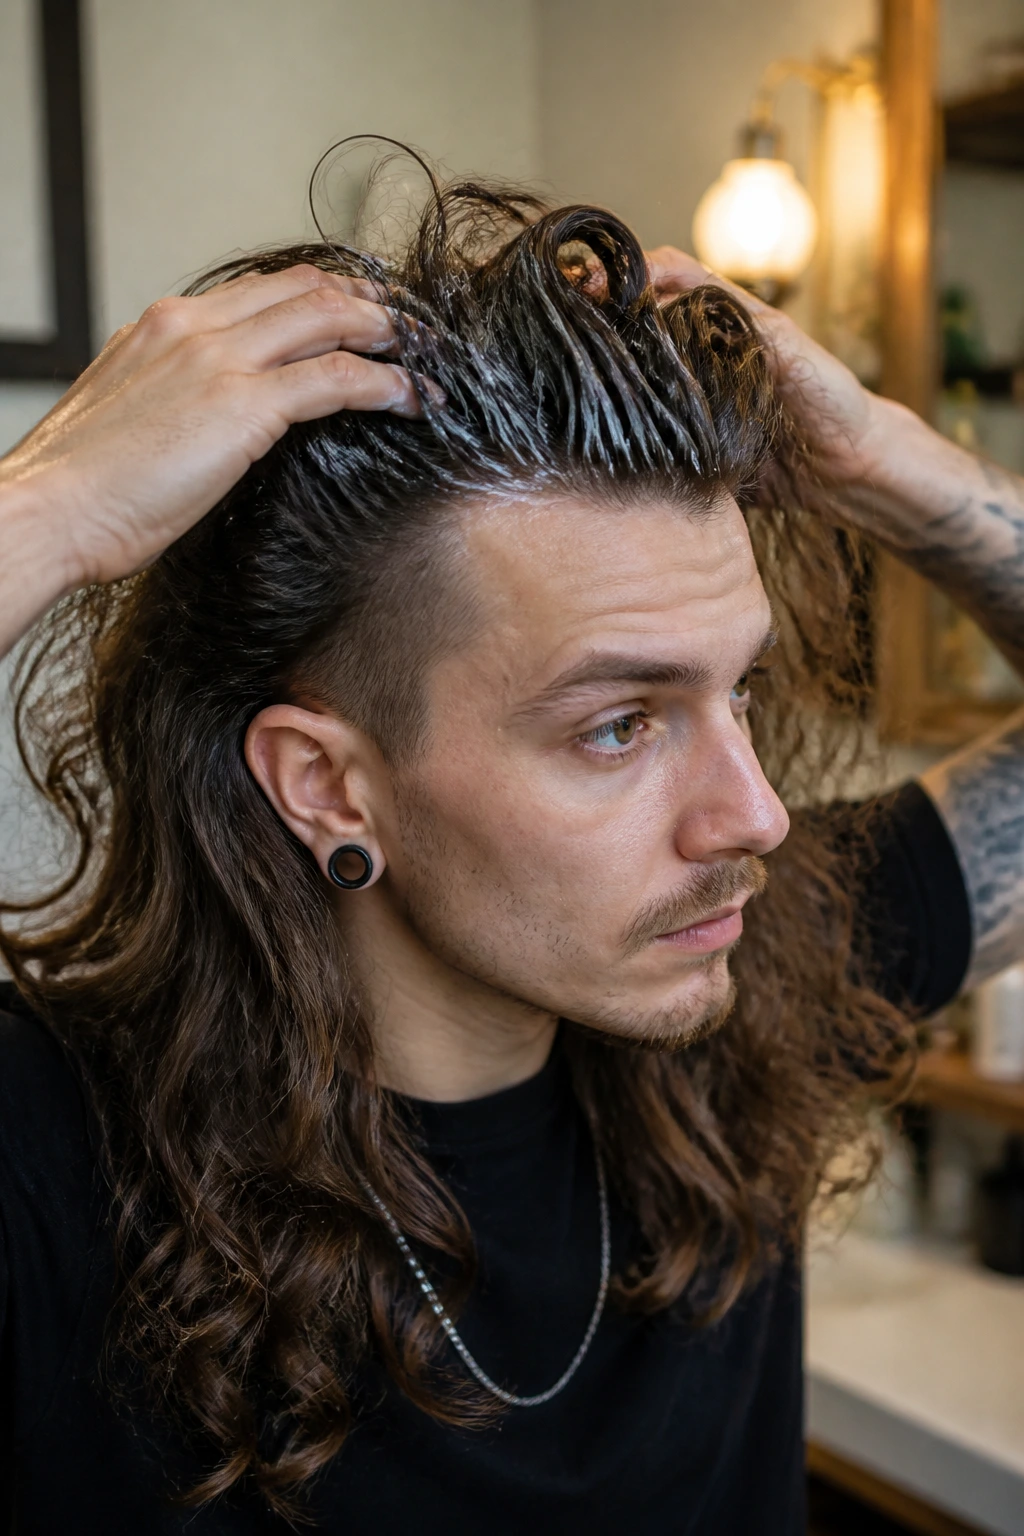
The best mohawk on long hair usually starts before the styling begins. If your hair is freshly washed and slippery, you’re making life harder than it needs to be. One day-old hair often has better grip, especially for braids, knots, and pony-based versions. Clean hair can still work, but it usually needs mousse, texture spray, or a little blow-dried body at the roots first.
For straight or wavy hair, rough-dry the crown in the direction you want it to sit, then cool it for a minute before you touch the top section again. That cooling step matters more than people think. Hair holds shape better once it’s set, and rushing in too early sends it right back to flat. If you’re doing a sleek gel version, work in sections and let the sides dry before you move around too much.
Curly and coily hair wants a different approach. Keep some moisture in the strands, apply a cream or foam that supports the curl pattern, and avoid over-brushing the shape into mush. Your goal is control, not erasure. The strongest long-hair frohawks let the texture live while the sides stay pinned close and neat.
How to Wear These Styles Without Fighting the Rest of the Look
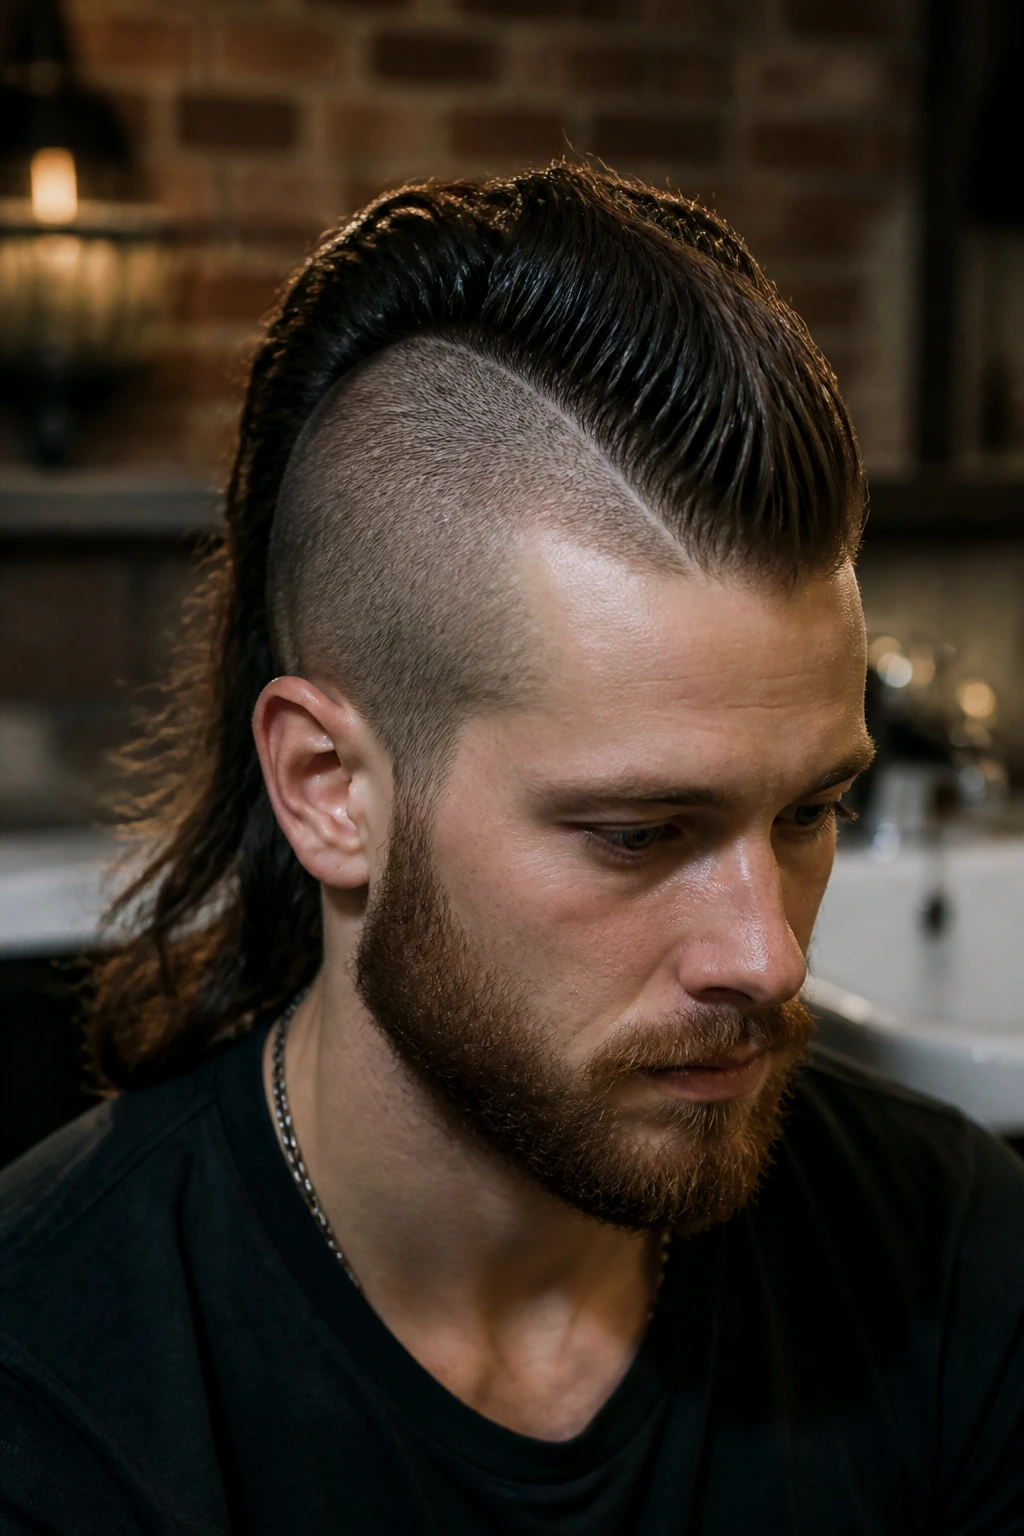
Presentation: A mohawk shape already does a lot of visual work, so the rest of the outfit should either echo that confidence or step back and let the hair take the lead. A sharp braid mohawk likes a clean collar or a jacket with structure. A messy frohawk can handle softer fabrics, loose necklines, and more movement.
Pairings: Leather, denim, tailored blazers, and simple tees all work because they don’t compete with the center line. If the hair is decorated with ribbon, beads, or clips, keep the clothing a touch quieter so the whole thing doesn’t turn noisy. Big prints can work too, but only if the mohawk itself is restrained.
Occasions: Sleek and braided versions fit formal events better than people expect. The spikier and looser versions are more at home in concerts, nights out, and casual weekends. The difference isn’t the haircut. It’s how polished the finish is.
Accessories: Small hoops, ear cuffs, and slim chains usually sit better than oversized earrings, which can fight the height around the temples. Headbands are a mixed bag. Some bury the mohawk shape. Others frame it nicely if they sit low and don’t flatten the crown.
Extra Tips and Style Boosters
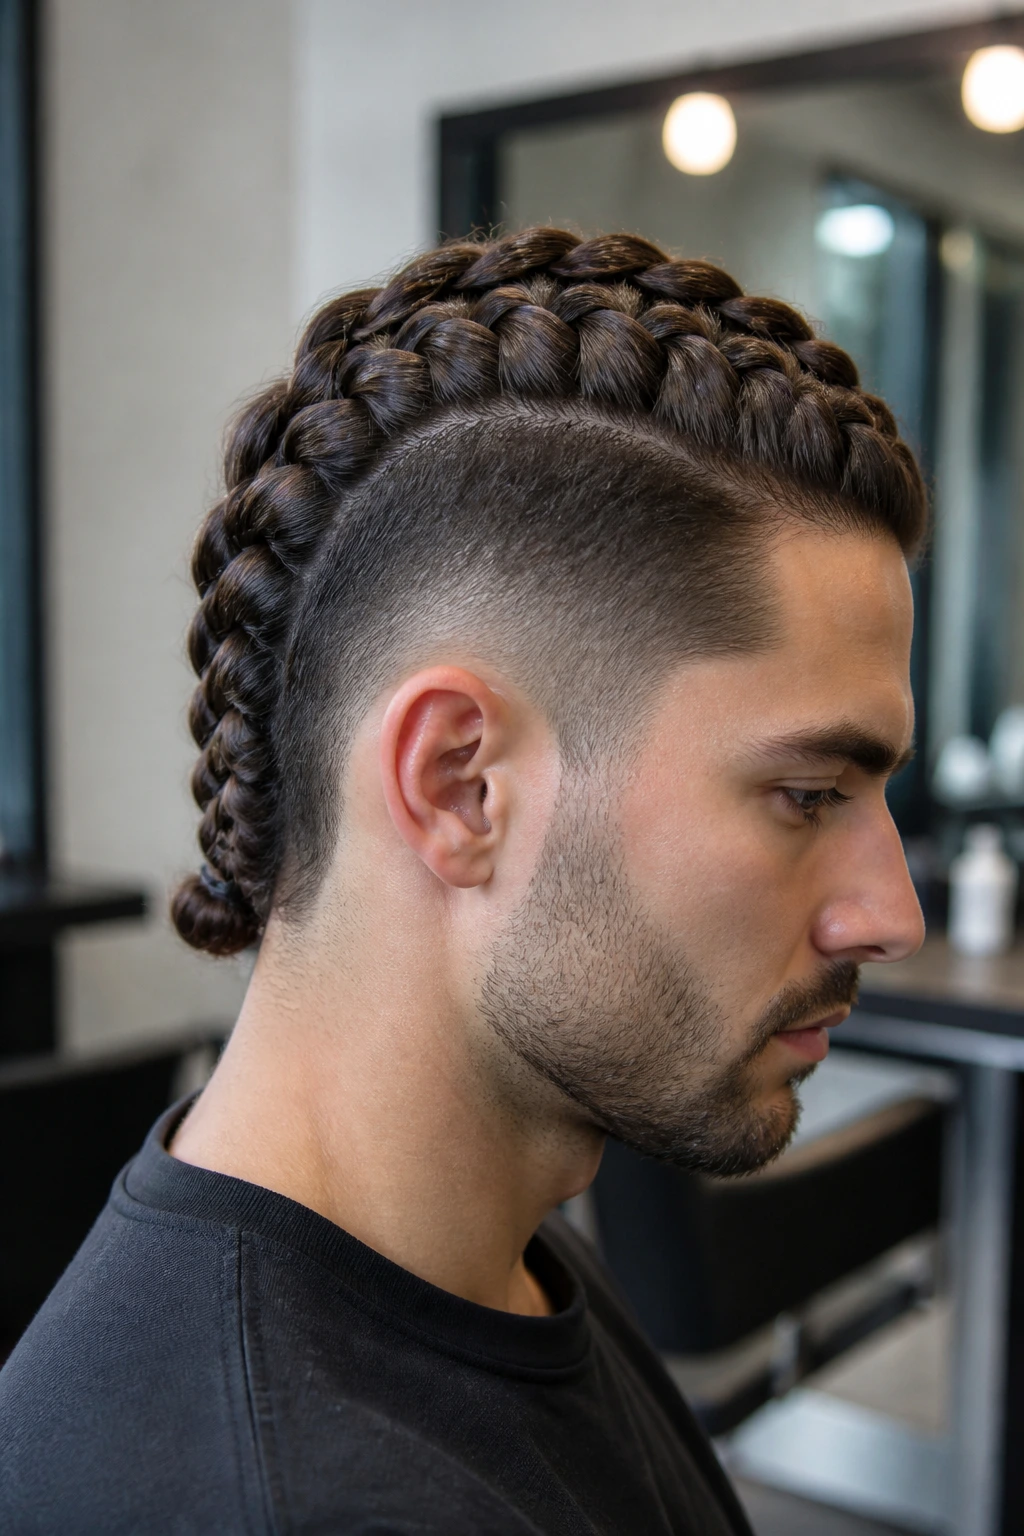
Volume Booster: If the crown refuses to lift, clip a velcro roller or two under the top section while you do your makeup, then remove them right before you head out. It’s an old trick, and it still works because the root gets a little memory before the hair fully settles.
Texture Shift: Want a mohawk that looks less polished? Spray the finished shape with a little dry texture spray and scrunch the ends lightly. That turns a neat braid or pony ridge into something looser, which helps when you want the style to feel less formal.
Hold Trick: Pin the side sections in the opposite direction of how they want to fall. Hair has a memory of its own, and fighting that direction with one pin never works for long. Two crossed pins under tension usually does.
Make-It-Yours: Add a single color streak, a ribbon, or a few clear beads if the outfit needs a focal point. A long-hair mohawk can get crowded fast, so I’d pick one accent and stop there. More is not always better.
Common Mistakes That Flatten the Shape
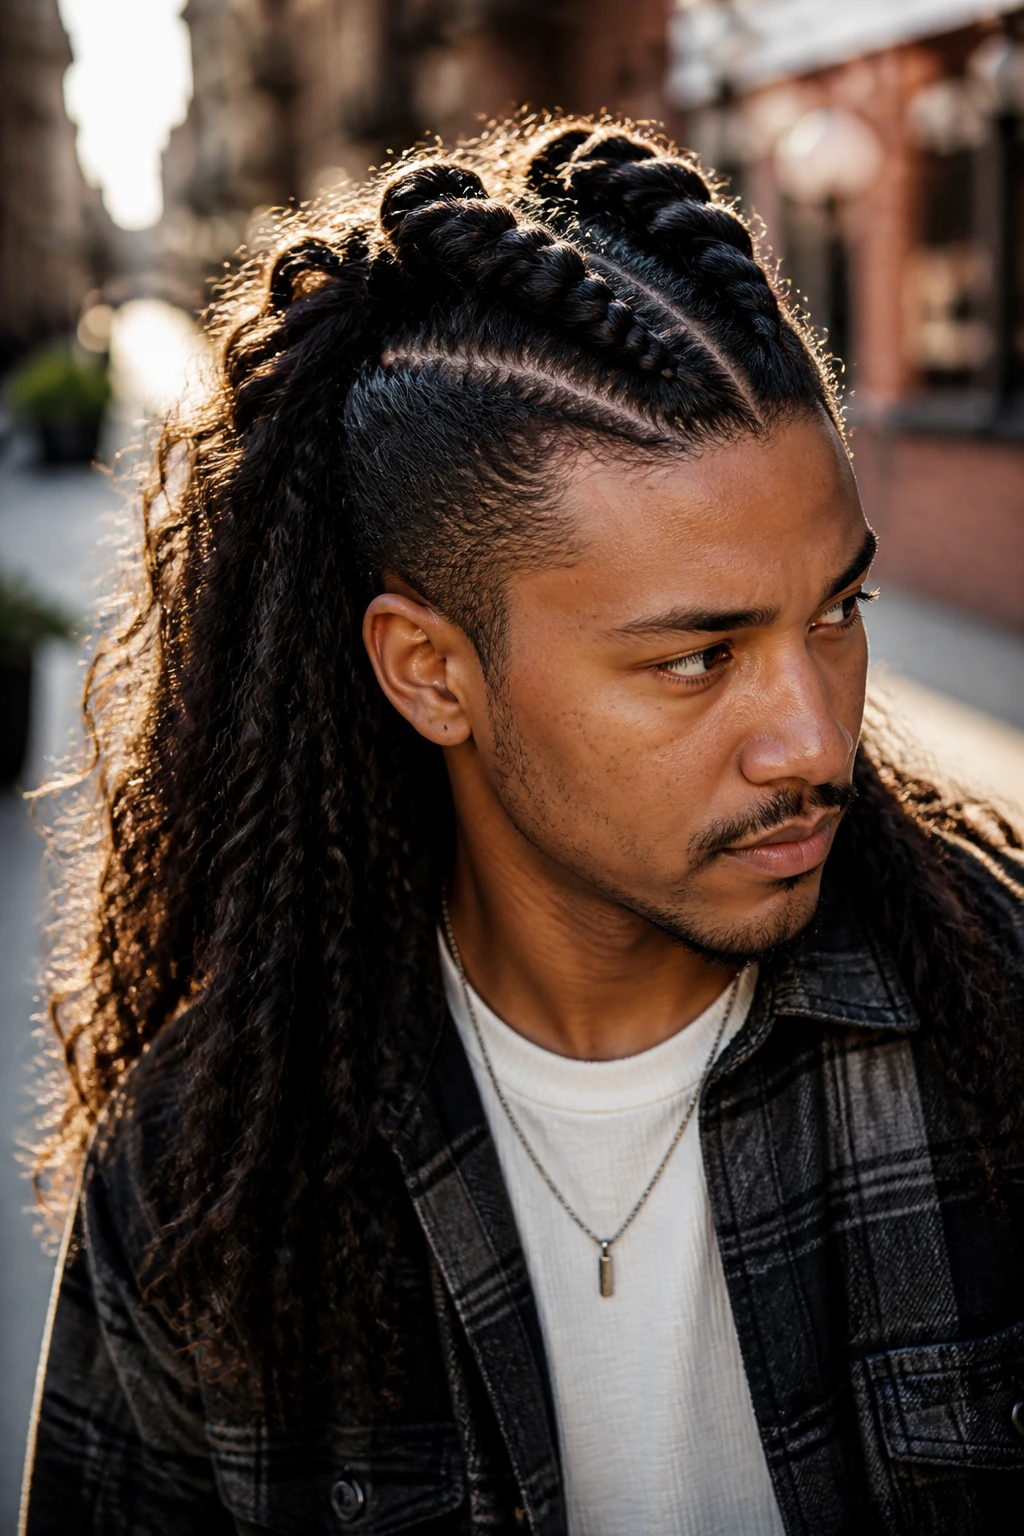
The first mistake is making the center section too wide. A broad ridge sounds dramatic, but on long hair it often looks puffy instead of sharp. The fix is simple: narrow the top section and let the side control do some work. If the mohawk reads as a wide hump, tighten the part and re-pin.
Another common one is overloading the roots with product. Too much gel or cream can make the hair collapse under its own weight, especially if the formula is heavy. The symptom is a shiny top that slides by midday. Use less product at the scalp than you think you need, and save the heavier finish for the outer layer or the ends.
People also skip texture prep on clean hair, then wonder why the pins slip. That smooth, silky surface looks nice in the mirror and behaves badly in real life. Dry shampoo, mousse, or a bit of rough blow-drying fixes that fast.
Finally, don’t ignore the hairline. If the sides are frizzy at the temples, the whole style looks unfinished. Smooth those pieces first, then build upward. The clean edge makes the mohawk look intentional instead of rushed.
Variations and Adaptations to Try
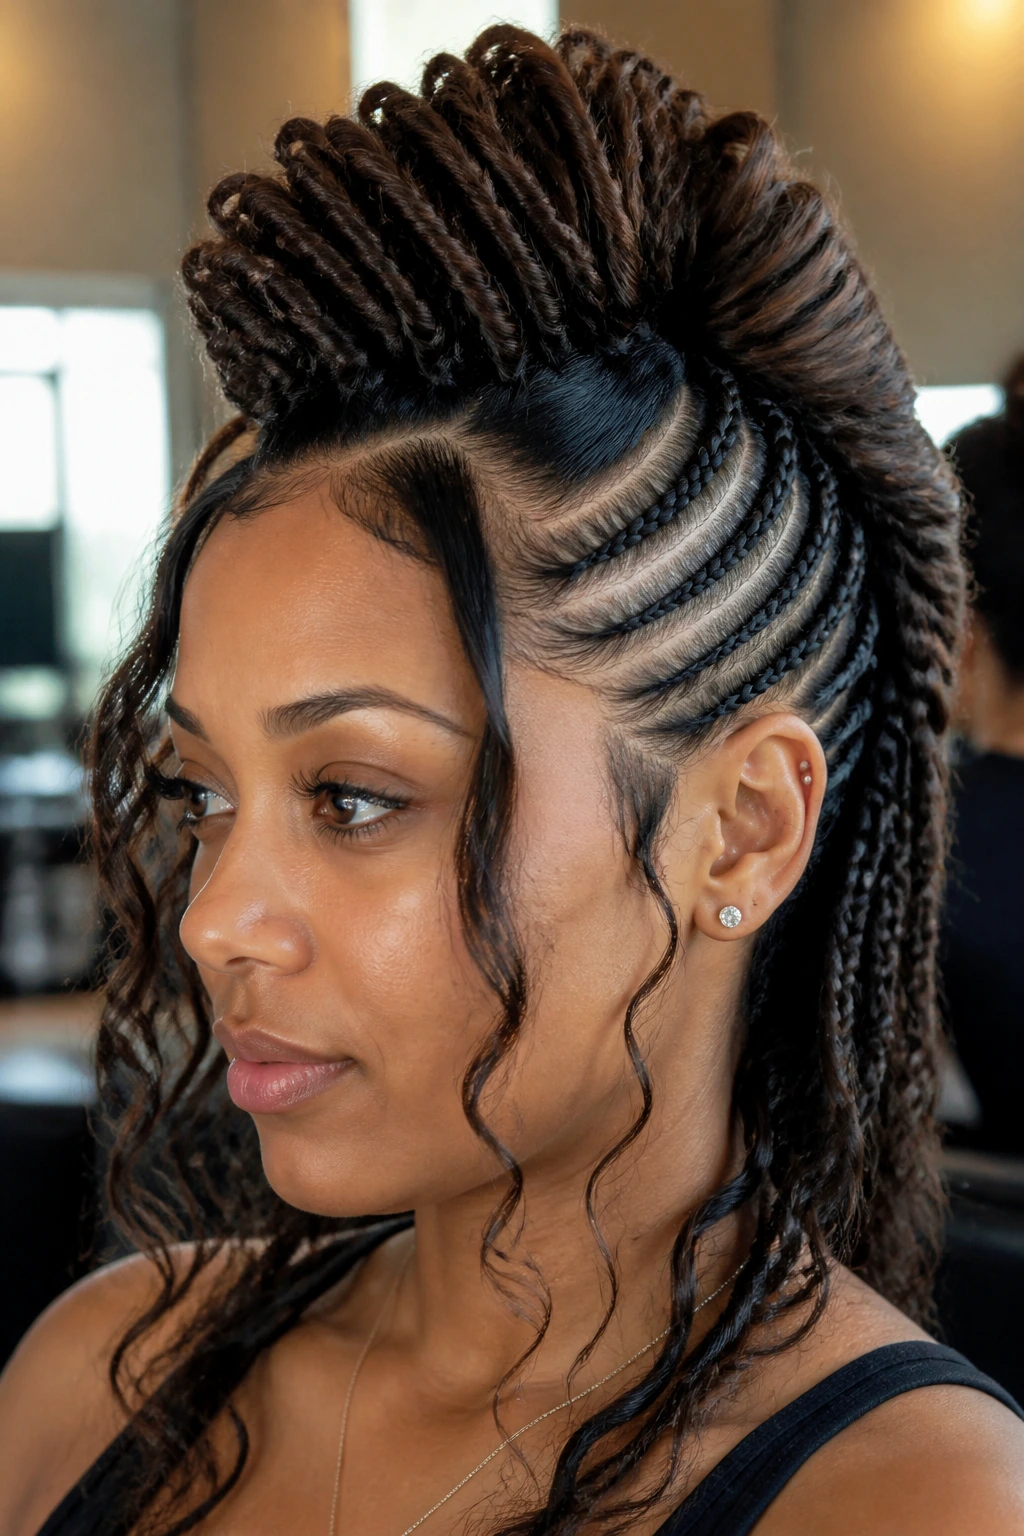
Office-Soft Mohawk: Keep the center lower, use a braid instead of spikes, and leave the sides sleek but not plastered down. This gives you the shape without making the style feel too loud for a work setting.
Heat-Free Twist Hawk: Use damp hair, twist the top section into rope twists, and let it dry pinned in place. It’s a useful option if you’re skipping blow-dry tools and want a style that still has structure.
Protective-Style Hawk: For braids, locs, or twists, let the protective style form the ridge while the sides are neatly pinned or cornrowed. The point is to keep tension low and keep the shape easy to maintain for more than one wear.
Big-Event Sleek Hawk: Tight sides, polished top, strong hold. This version is all about clean lines and shine, and it works best when the hair has been blown out first so the surface sits smoothly.
Soft Festival Frohawk: Leave more face-framing pieces out, loosen the center texture, and add clips or beads. The style reads freer and more relaxed, which is why it suits outdoor events where perfection would look out of place.
Shorter-Length Adaptation: If the hair isn’t truly long, use half-up sections, mini buns, or stacked ponytails to fake the center ridge. The shape still reads correctly, even when the length is working harder for you.
Keeping the Style Fresh Between Washes
Most long-hair mohawk styles hold better on day two than day one, but they still need a little maintenance if you’re wearing them beyond a single evening. Sleep on a silk pillowcase or wrap the style with a silk scarf so the side sections don’t rough up overnight. Braids and twists can usually survive a full night with only a few flyaways in the morning.
If the style gets flat at the crown, mist the roots lightly with water, then re-activate the shape with a touch of mousse or foam. Don’t soak the whole head unless you want to start over. For braid-based styles, a tiny bit of edge control or pomade around the hairline can bring the finish back without rebuilding the entire style.
Sweat and humidity change the game. A sleek mohawk may need a quick comb-through and a reset with spray after a long day, while a frohawk usually needs only finger fluffing. If the style uses elastics, check them before they snap or slide. Replacing one loose band takes thirty seconds. Waiting until the whole ridge comes apart takes much longer.
Frequently Asked Questions
Can you do a mohawk style on very long hair without shaving the sides?
Yes, and that’s actually where most of these styles live. Braids, twists, slicked sections, and pinned sides create the mohawk outline without any cutting, so you can wear the shape for one night or one day and wash it out later.
What holds a long-hair mohawk best: gel, spray, or pins?
Pins do the structural work, gel smooths the sides, and spray locks the finish. If you skip pins, the style often droops; if you skip smoothing, the sides puff out; if you skip spray, the style softens too fast. The three work together better than any one of them alone.
Is a mohawk easier on dirty hair or clean hair?
A little lived-in texture helps. Day-old hair usually grips better, especially for braids, pony ridges, and knot stacks. Clean hair can still work, but it usually needs texture spray or mousse first so the sections don’t slide apart.
How do I keep the crown from going flat during the day?
Build lift at the roots before you pin anything. Blow-dry the top section with the head tipped forward, add a small amount of mousse, and pin from underneath so the support stays hidden. If the hair is very soft, a tiny roller at the crown for ten to fifteen minutes can make a noticeable difference.
Can curly hair do these styles without losing its shape?
Absolutely. Curly hair often makes the best frohawks because the texture gives the ridge body. The trick is to guide the curl pattern instead of forcing it smooth. Use a cream or foam, pin the sides gently, and avoid brushing the curls into a puff that loses definition.
What if my pins keep popping out?
Usually the problem is angle or tension. Slide the bobby pin in with the wavy side down against the scalp, then cross a second pin over it if the section feels heavy. Pins hold better when they catch a bit of hair from the section they’re supporting, not when they sit on a slick surface.
How long do these styles last?
A sleek or braided long-hair mohawk can last through a full day and into the next morning if you sleep carefully. Loose frohawks and textured versions usually look best for one wear and a quick refresh the next day. The tighter the anchors, the longer the hold.
Can I make these styles work for formal events?
Yes, and the polished versions can look cleaner than a standard updo. A braided ridge, low crown mohawk, or sleek center strip with tucked sides fits dressier clothes well, especially if you keep the accessories minimal and the hairline neat.
Final Thoughts
Long hair gives a mohawk more range than people expect. It can be sharp and slick, soft and braided, rough and textured, or wrapped up in little knots that look more styled than stiff. That flexibility is the reason these versions work so well. You’re not locked into one attitude.
The best place to start is the style that matches your hair’s natural behavior. If it slips, braid it. If it puffs, smooth it. If it already has texture, let the texture do the work. The silhouette matters, but the finish is what makes the whole thing believable, and that’s the part worth getting right.
