



A good pixie cut can do more for thin hair after 50 than another inch of length ever will. That sounds backward until you’ve watched a wispy crown suddenly look fuller because the weight is gone, the neckline is clean, and the eye has somewhere better to go than a see-through middle part.
Thin hair doesn’t need to be hidden. It needs shape. It needs a cut that stops fighting the way the hair naturally falls, especially when the strands have gotten finer, drier, or a little more stubborn around the crown and temples. A smart pixie does exactly that. It lifts where the hair wants to collapse, softens where the scalp shows too much, and keeps the whole head looking intentional instead of flat.
And there’s a quiet bonus here that people underestimate: a pixie can make glasses, earrings, jawlines, cheekbones, and silver streaks do some of the visual work. That matters. A lot. The right crop isn’t one single haircut; it’s a whole family of shapes, and the differences between them are the difference between “cute for three days” and “actually easy to live with.”
Why These Pixie Cuts Earn Their Keep
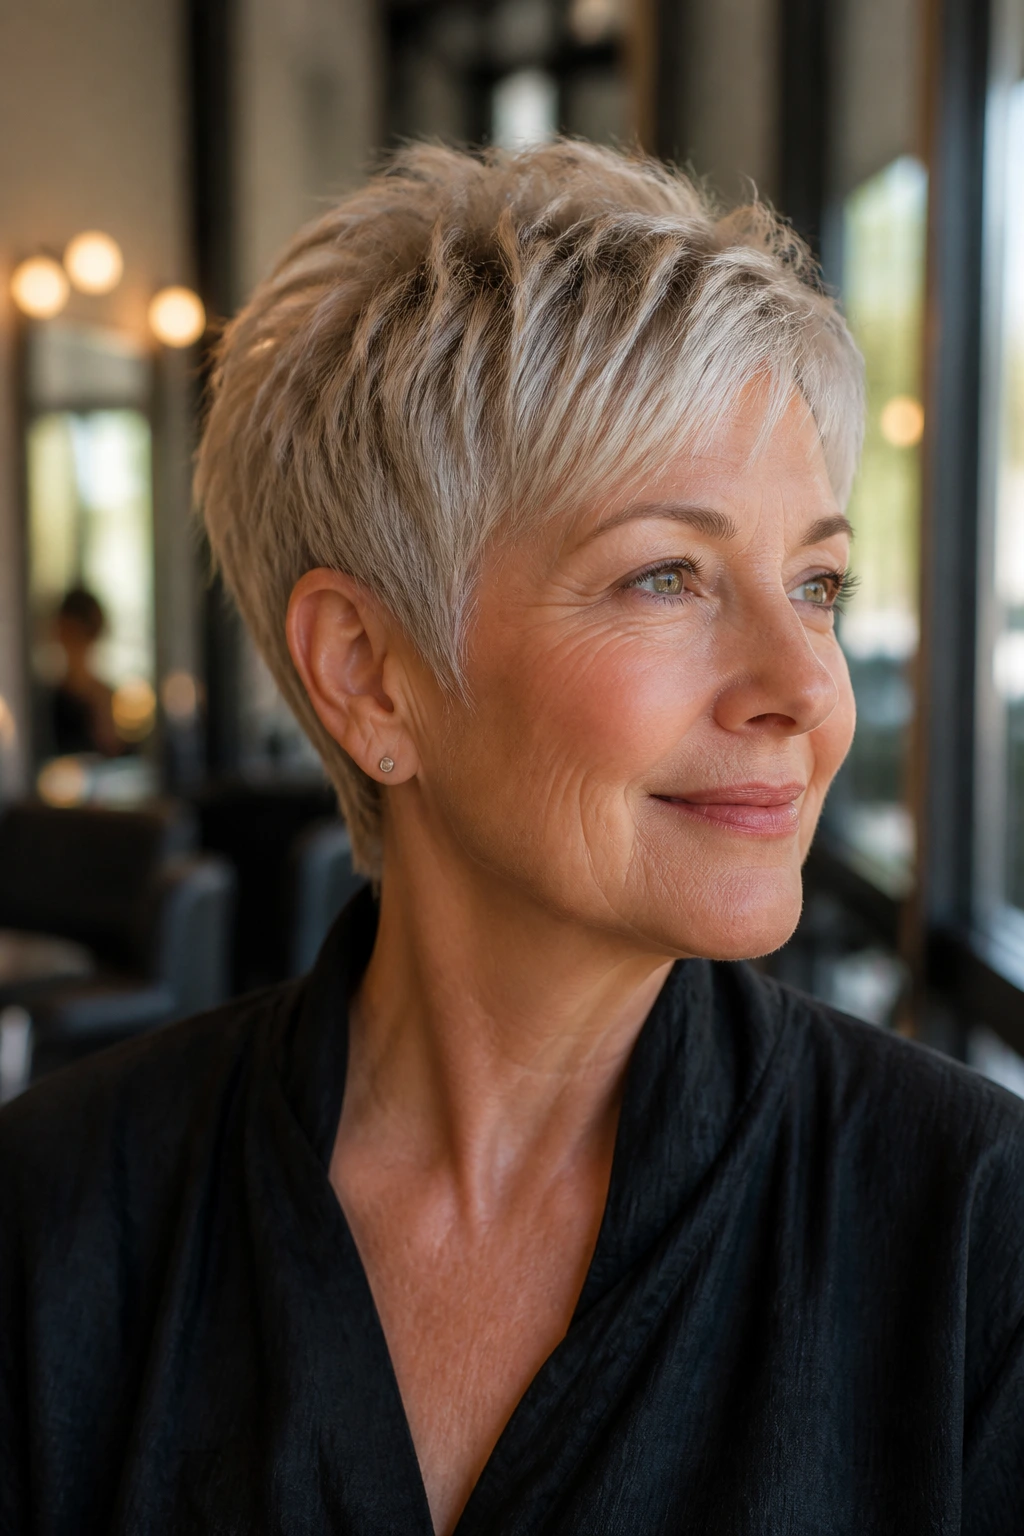
-
Crown lift: The best pixies for thin hair keep enough length on top to bend and rise, rather than shaving the whole head close and exposing every flat spot.
-
Soft edges: Feathered ends and point-cut layers blur the outline of the hair, which helps the cut read fuller without looking bulky.
-
Face balance: Side-swept fringe, temple softness, and longer front pieces redirect the eye away from sparse spots and toward your features.
-
Low styling load: Most of these cuts can be shaped with a palmful of mousse, a light paste, or a quick blow-dry at the roots — no marathon styling session required.
-
Better grow-out: Tapered napes and blended sides keep the shape tidy longer, so the haircut doesn’t turn shaggy the moment it passes week four.
-
Gray-friendly: Silver, white, and salt-and-pepper hair tends to show texture beautifully in short cuts, especially when the layers are clean and not over-thinned.
1. Feathered Crown-Lift Pixie
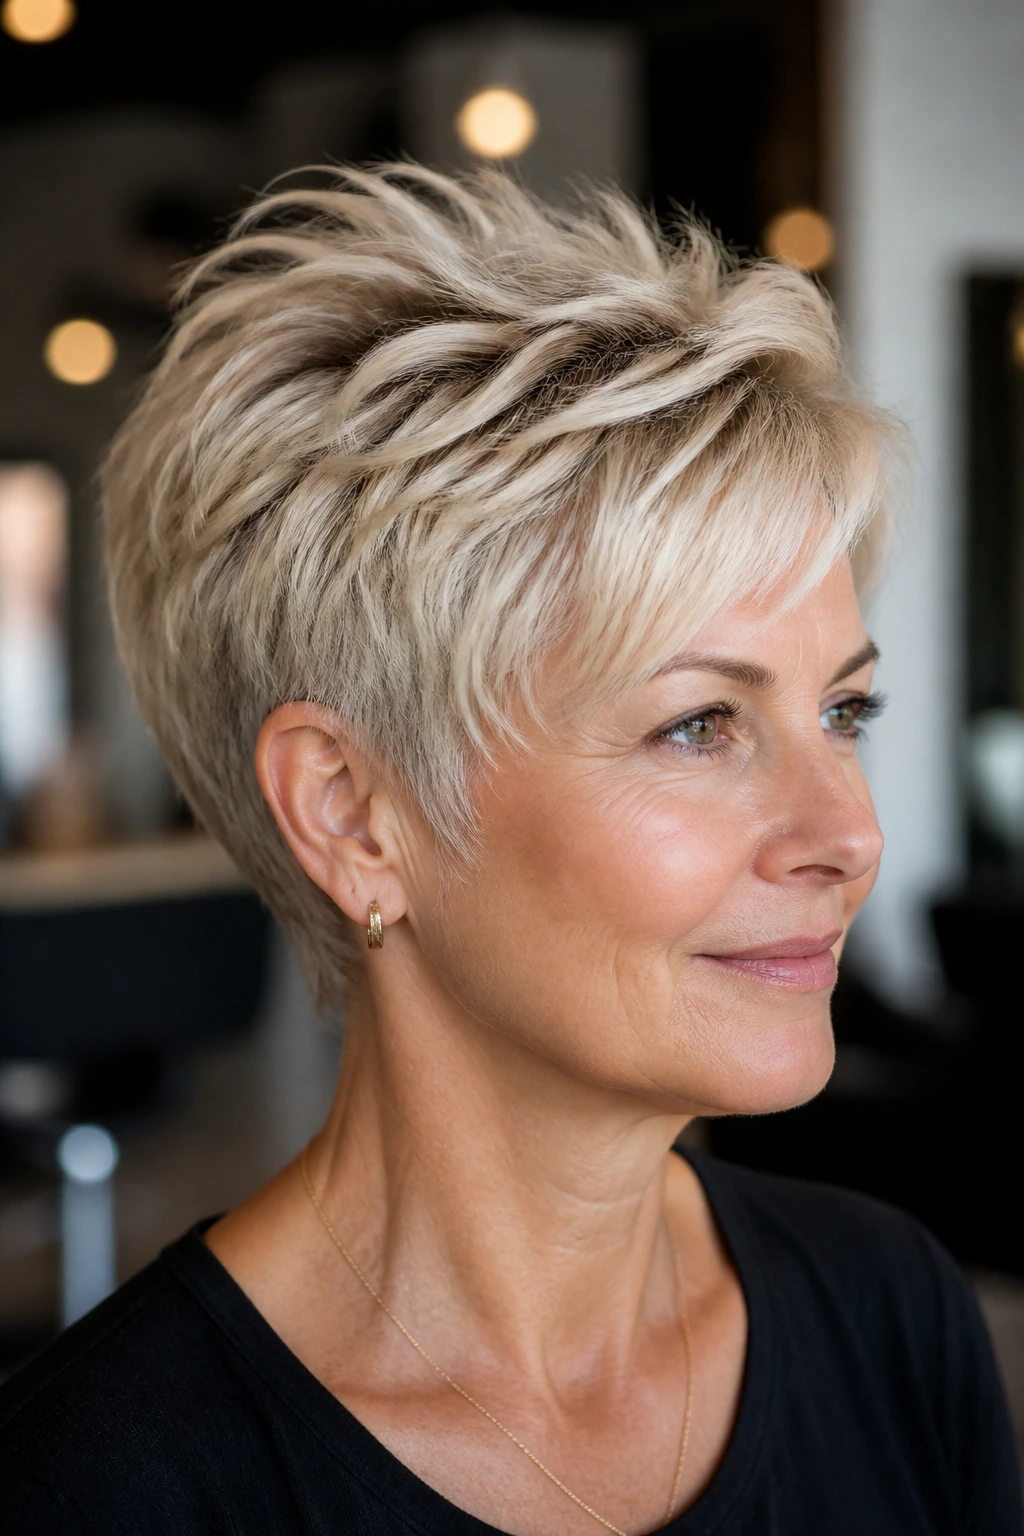
This is the pixie I’d hand to someone whose hair lies down the second the blow-dryer turns off. Keep the top around 2½ to 3½ inches, feather the upper layers, and let the nape sit close so the volume stays where it matters. The cut feels airy, not fluffy. That difference matters.
Why it works on fine strands
The crown gets a little extra height because the layers are stacked to move away from the scalp instead of sitting heavy on it. You still get softness around the face, but the shape has enough structure to stop thin hair from looking pasted down. If your hair is straight and a touch slippery, this one gives it some grit.
A round brush and a dab of root mousse are enough. Blow-dry the top forward, then lift it back with the brush once it’s warm. Don’t overdo the sides. The whole point is to keep the silhouette narrow and let the crown do the talking.
2. Side-Swept Pixie with Long Fringe
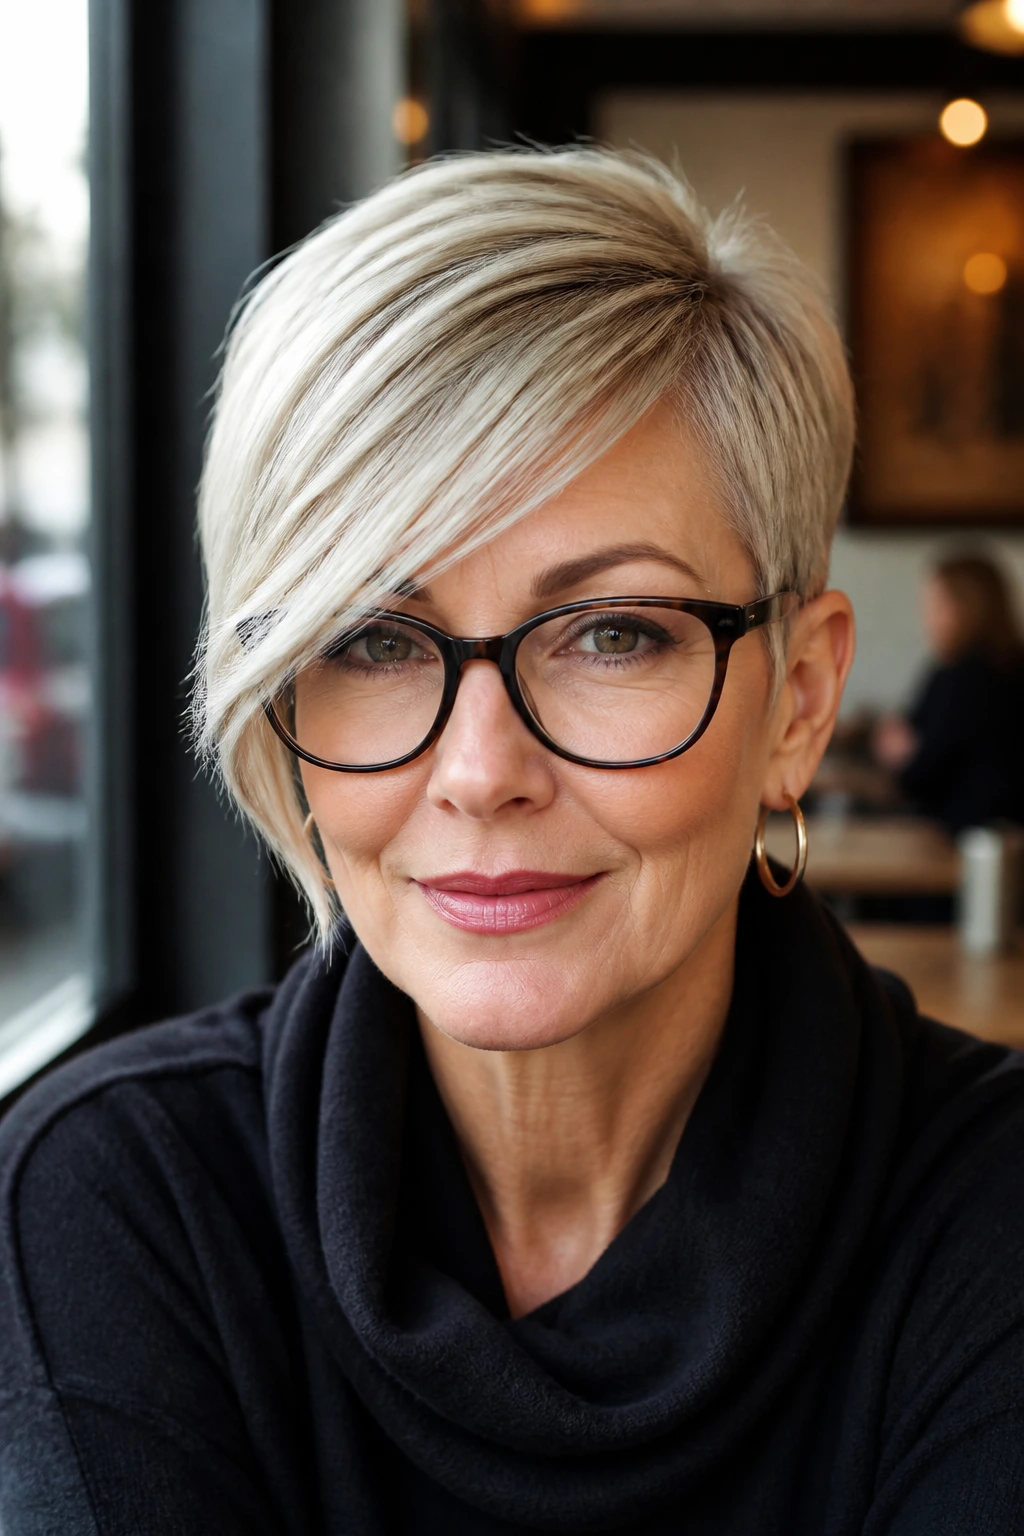
Do you want forehead coverage without a heavy bang? This is the answer. The fringe stays long enough to sweep diagonally across the brow — usually around 3 to 4 inches — while the sides stay trimmed and tidy so the cut doesn’t swallow the face.
The diagonal line does more than hide a forehead. It breaks up the straight lines that can make thin hair look sparse, and it gives the cut movement even when the rest of the hair is fairly short. I like this one for anyone who wears glasses, because the fringe can sit just above the frame or skim it without fighting it.
Use a small round brush or even your fingers and a vent brush. Push the fringe in the direction it naturally wants to go, then mist a light hairspray only on the ends. If you spray the roots, the bang can separate and stick to the forehead. Annoying. Easy to avoid.
3. Tapered Nape Pixie
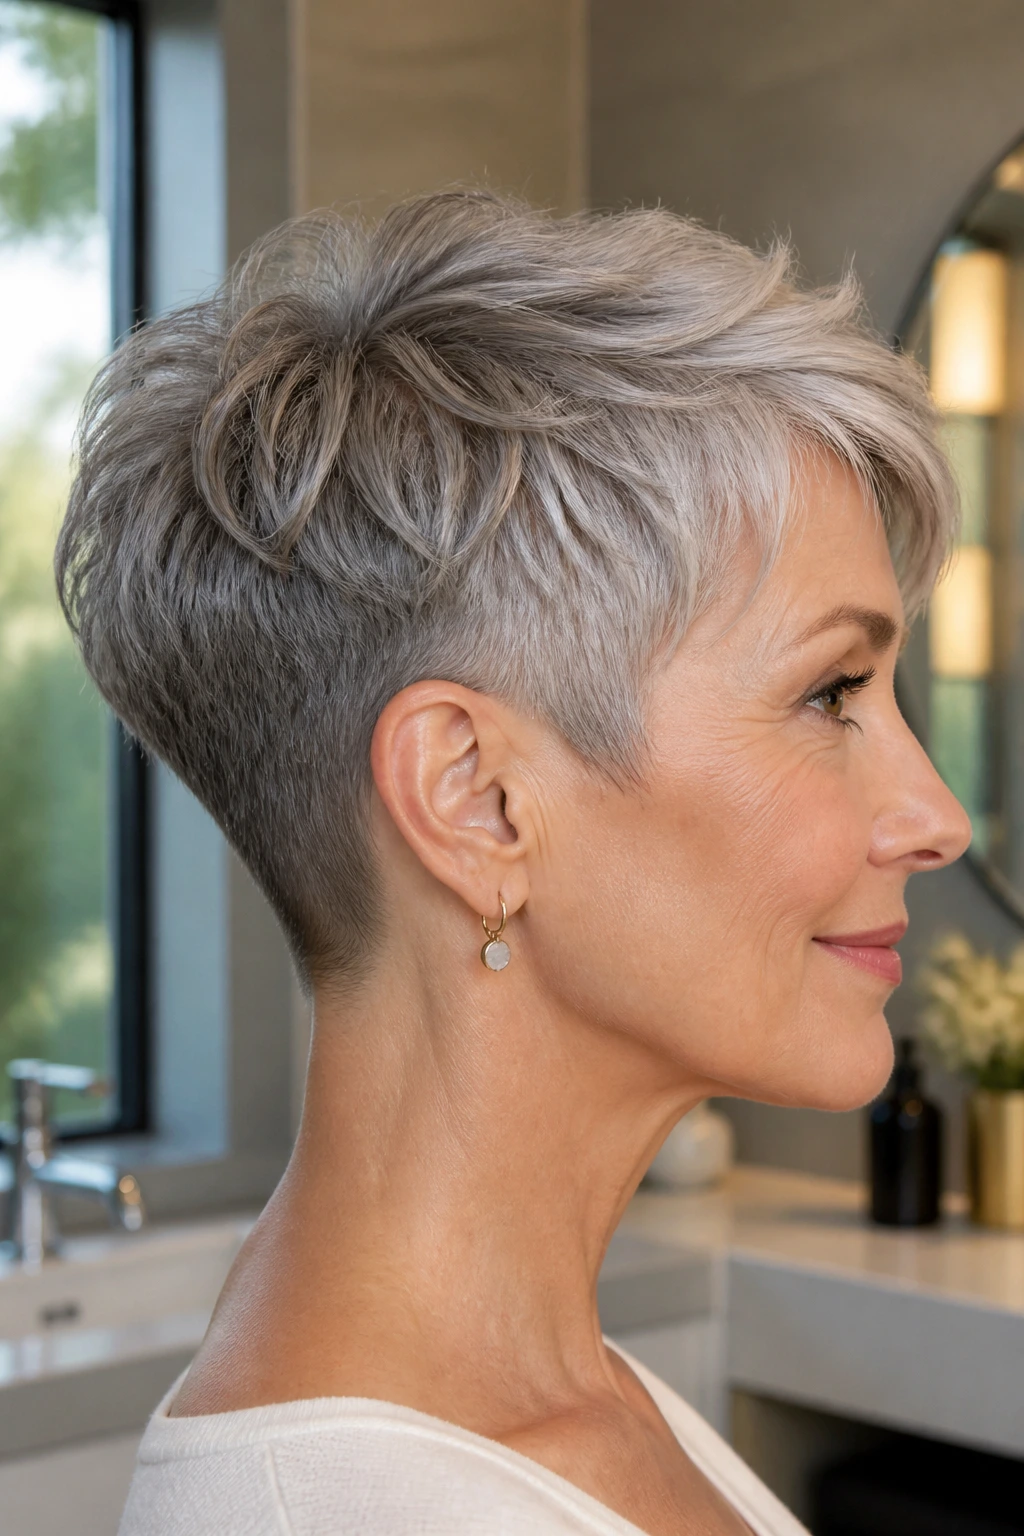
A tight nape is one of the cleanest tricks in short hair. When the neck area is neatly tapered, the eye stops looking downward and starts following the shape up toward the crown, which makes thin hair feel denser without adding one extra strand.
This cut works especially well if your hair puffs out at the back after a couple of days. Keep the nape short — not shaved bare, just trimmed close — and let the top carry a little more length. The contrast between the close neckline and the softer crown gives the haircut its lift.
Ask your stylist to leave enough weight near the upper back of the head so the shape doesn’t collapse. If the back gets over-thinned, the style can start to look patchy when it grows. Clean and crisp is the goal. Not wispy in a bad way.
4. Choppy Textured Pixie
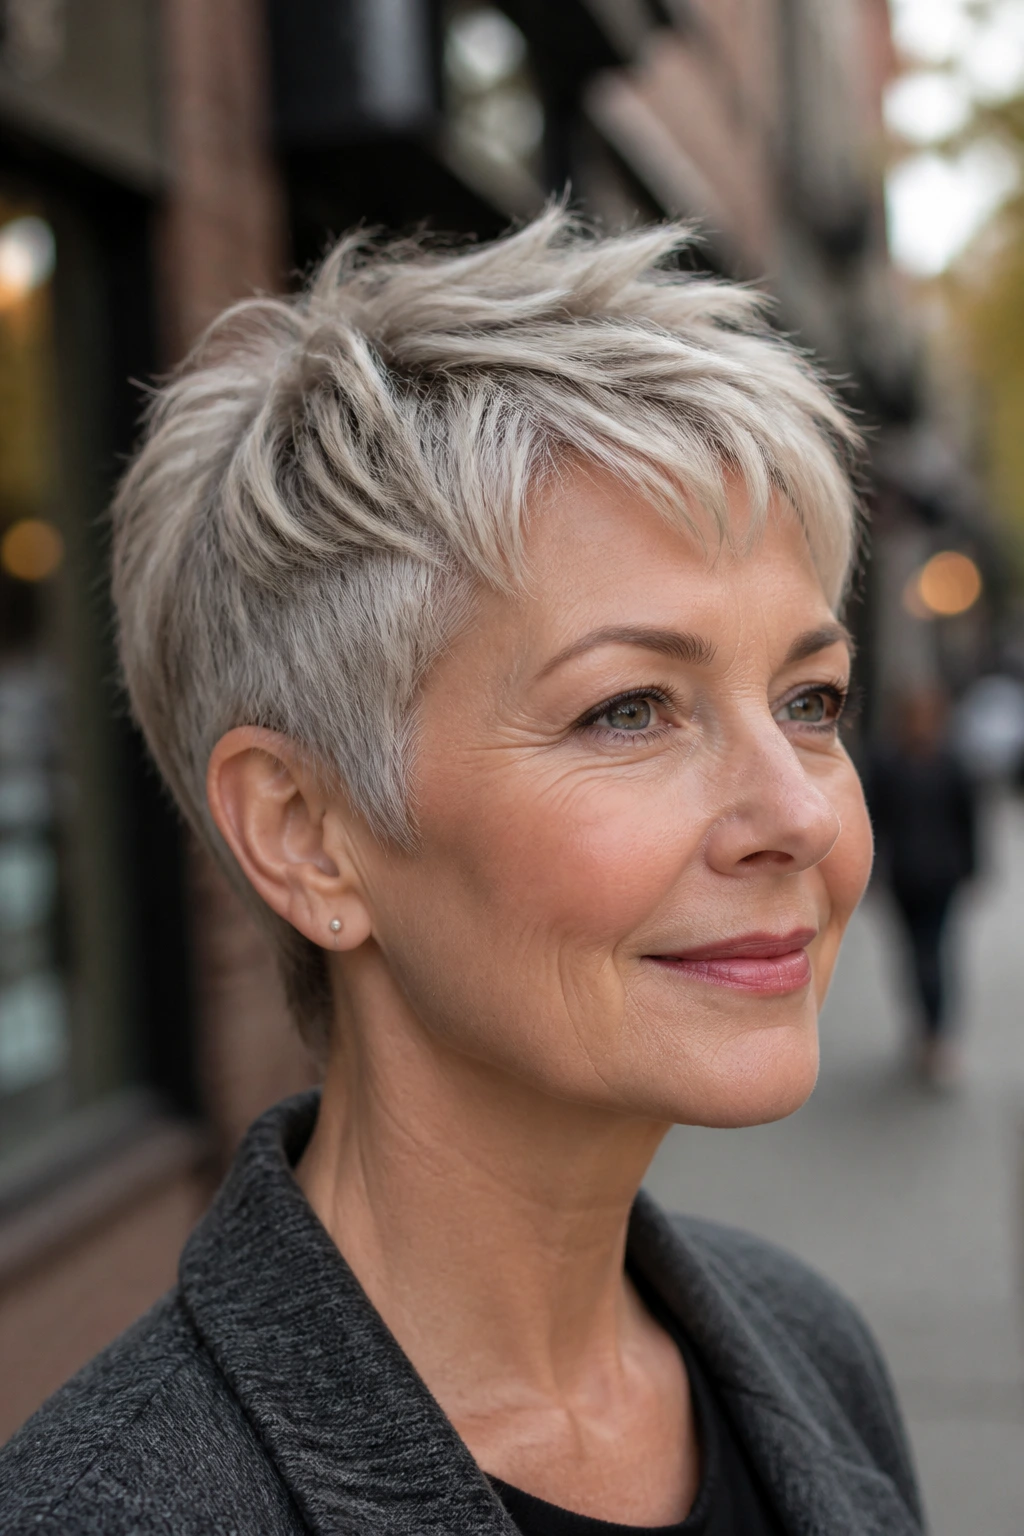
Some hair doesn’t need polish. It needs edges. A choppy pixie uses point-cut ends and irregular layers to make fine strands separate just enough to catch the eye, which gives the impression of more hair than a blunt cut does.
This is one of the best options if your hair is flat, straight, and a little too obedient. The texture breaks up that all-one-length look that thin hair hates. Keep the top piecey, not shredded, and ask for light choppiness around the fringe and crown rather than heavy thinning everywhere.
A matte paste works here better than shine serum. Rub a tiny amount between your palms, then pinch the ends and lift pieces at the front. That little bit of separation is the whole point. If the cut looks too neat, it loses the effect.
5. Bixie with Stacked Back
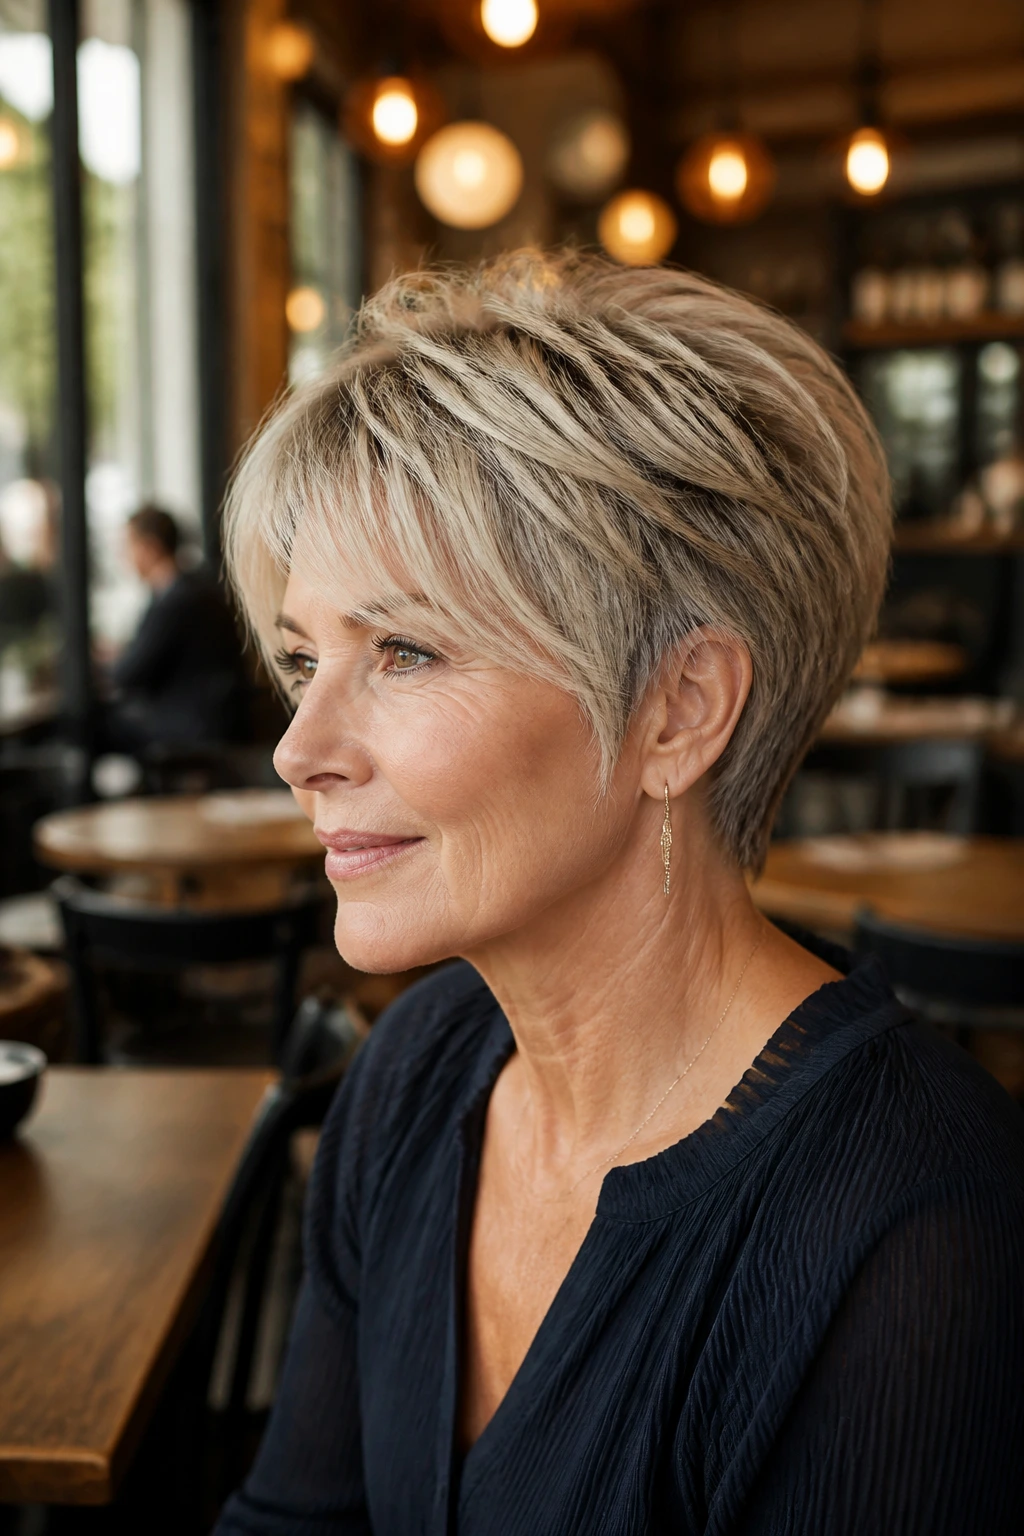
This sits between a bob and a pixie, and that middle ground is useful if you’re nervous about going too short. The stacked back adds body at the crown and occipital area, while the longer front keeps the face from feeling exposed. Thin hair often benefits from that extra bit of length around the perimeter.
The back should be cut with enough graduation to build a soft shelf, not a hard wedge. That small shape change matters a lot. A flat back on fine hair just falls into place and stays there. A stacked back gives the hair a place to lift.
If you like to tuck hair behind one ear, this is a good match. It keeps movement near the cheeks and jaw, which helps the style feel lighter. Ask for the back to be short enough to show the neck, but not so short that the top loses its chance to look full.
6. Curly Pixie with Airy Layers
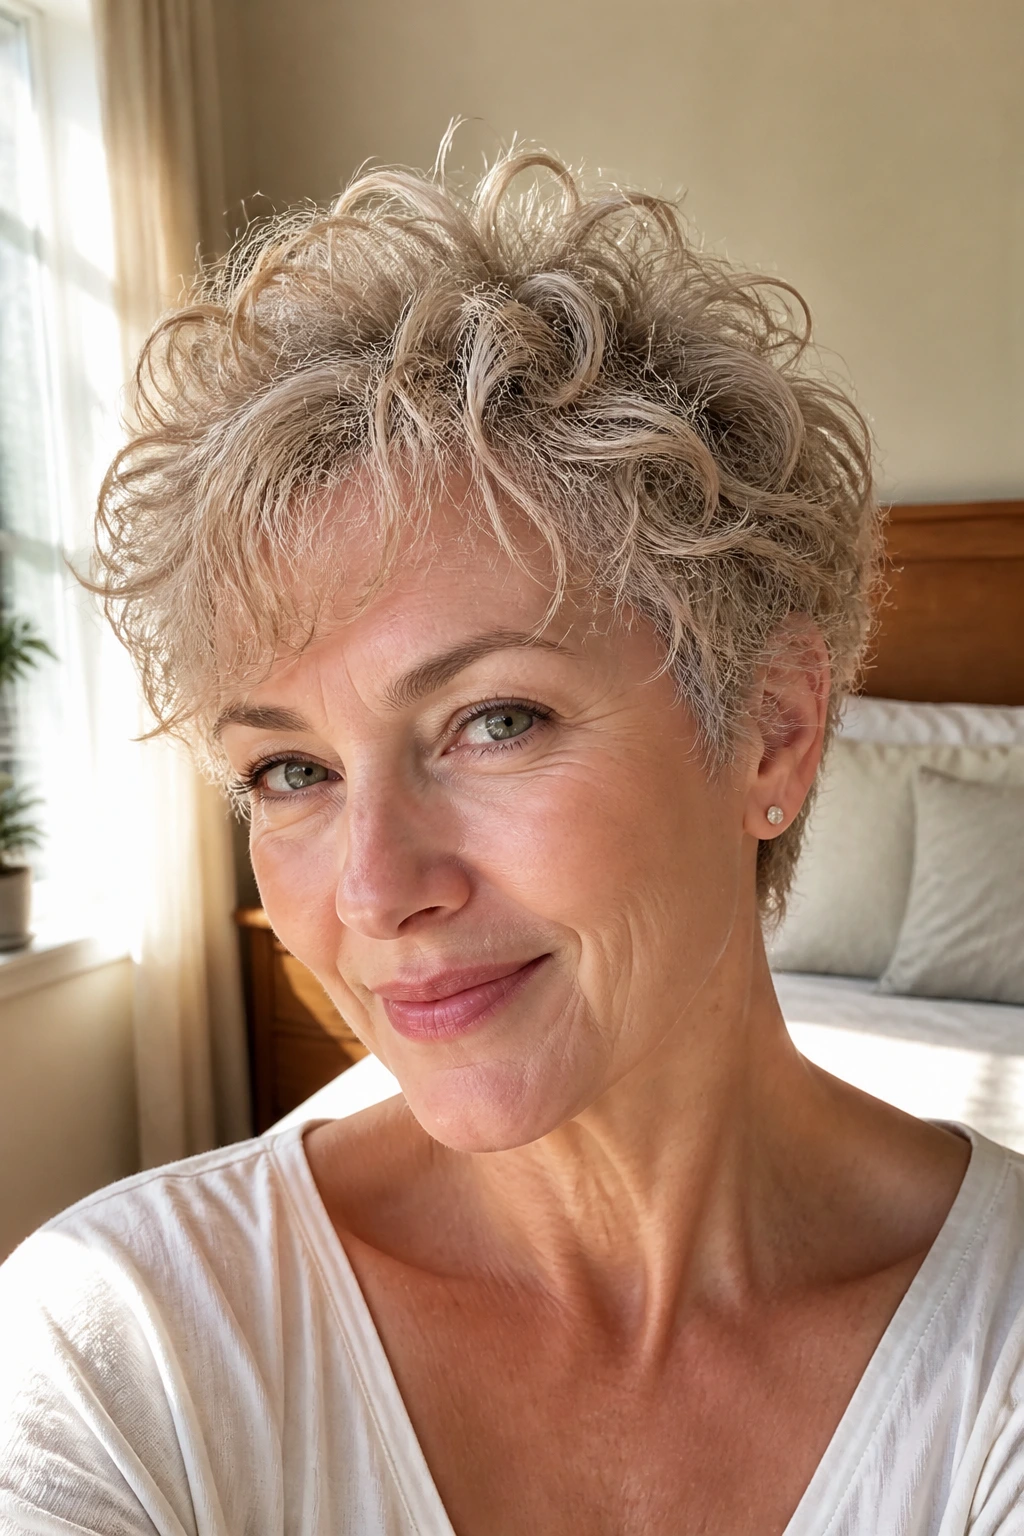
Curly hair and thin hair can live in the same head, and when they do, the cut has to respect both. A curly pixie with airy layers keeps the curl pattern open so the shape doesn’t turn into a helmet or a mushroom. That’s the whole game.
The best version of this cut is usually shaped dry or at least checked dry, because curls spring up in ways wet hair hides. Keep the top a little longer, let the sides soften around the ear, and avoid over-thinning the curl clumps. You want curl movement, not curl confetti.
A diffuser is your friend, but use low heat and low speed. Scrunch in a light cream, then stop touching it until it’s dry. Too much finger-styling breaks the curl and makes the top frizzier than it needs to be. Curly thin hair likes restraint.
7. Asymmetrical Pixie
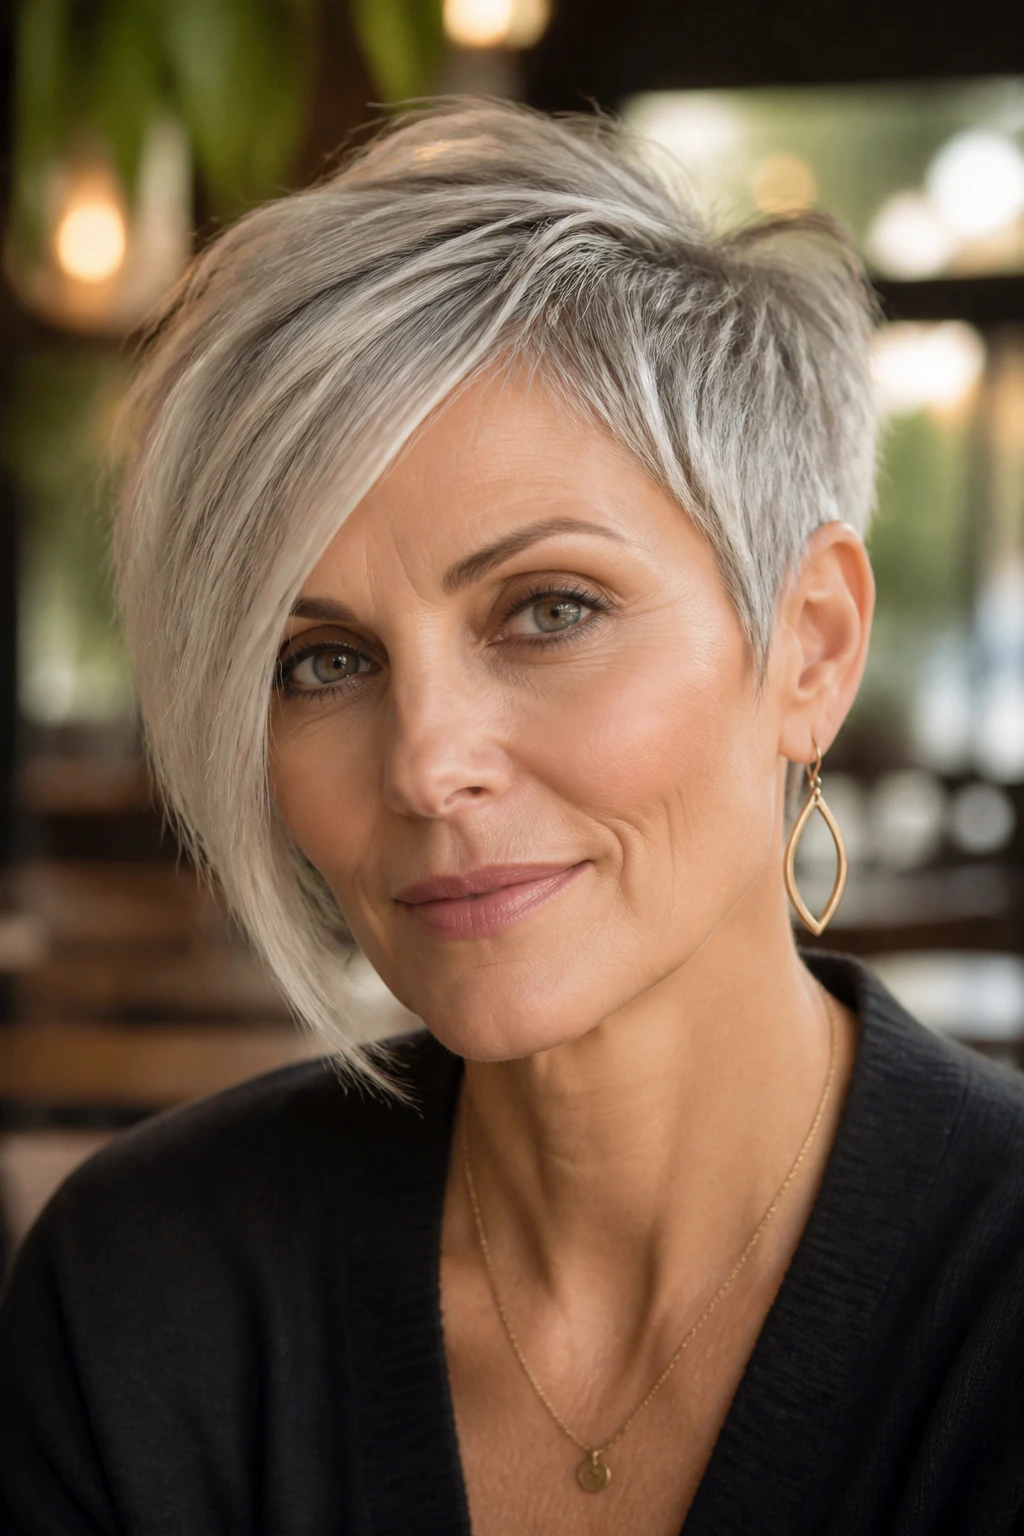
A small imbalance can make a big difference. In an asymmetrical pixie, one side stays longer than the other, and that diagonal line adds motion fast. It’s a smart cut for thin hair because the eye follows the length change instead of lingering on the scalp.
The longer side usually sits around the cheekbone or jaw, while the shorter side opens the face and keeps the overall shape light. That little contrast helps if one side of your hair grows flatter or your part keeps shifting. It also gives the haircut some attitude without needing a lot of volume.
This one works best when the asymmetry is deliberate, not dramatic for the sake of drama. A difference of one to two inches is enough. Too much and the short side can feel disconnected; too little and you lose the point.
8. Swept-Back Volume Pixie
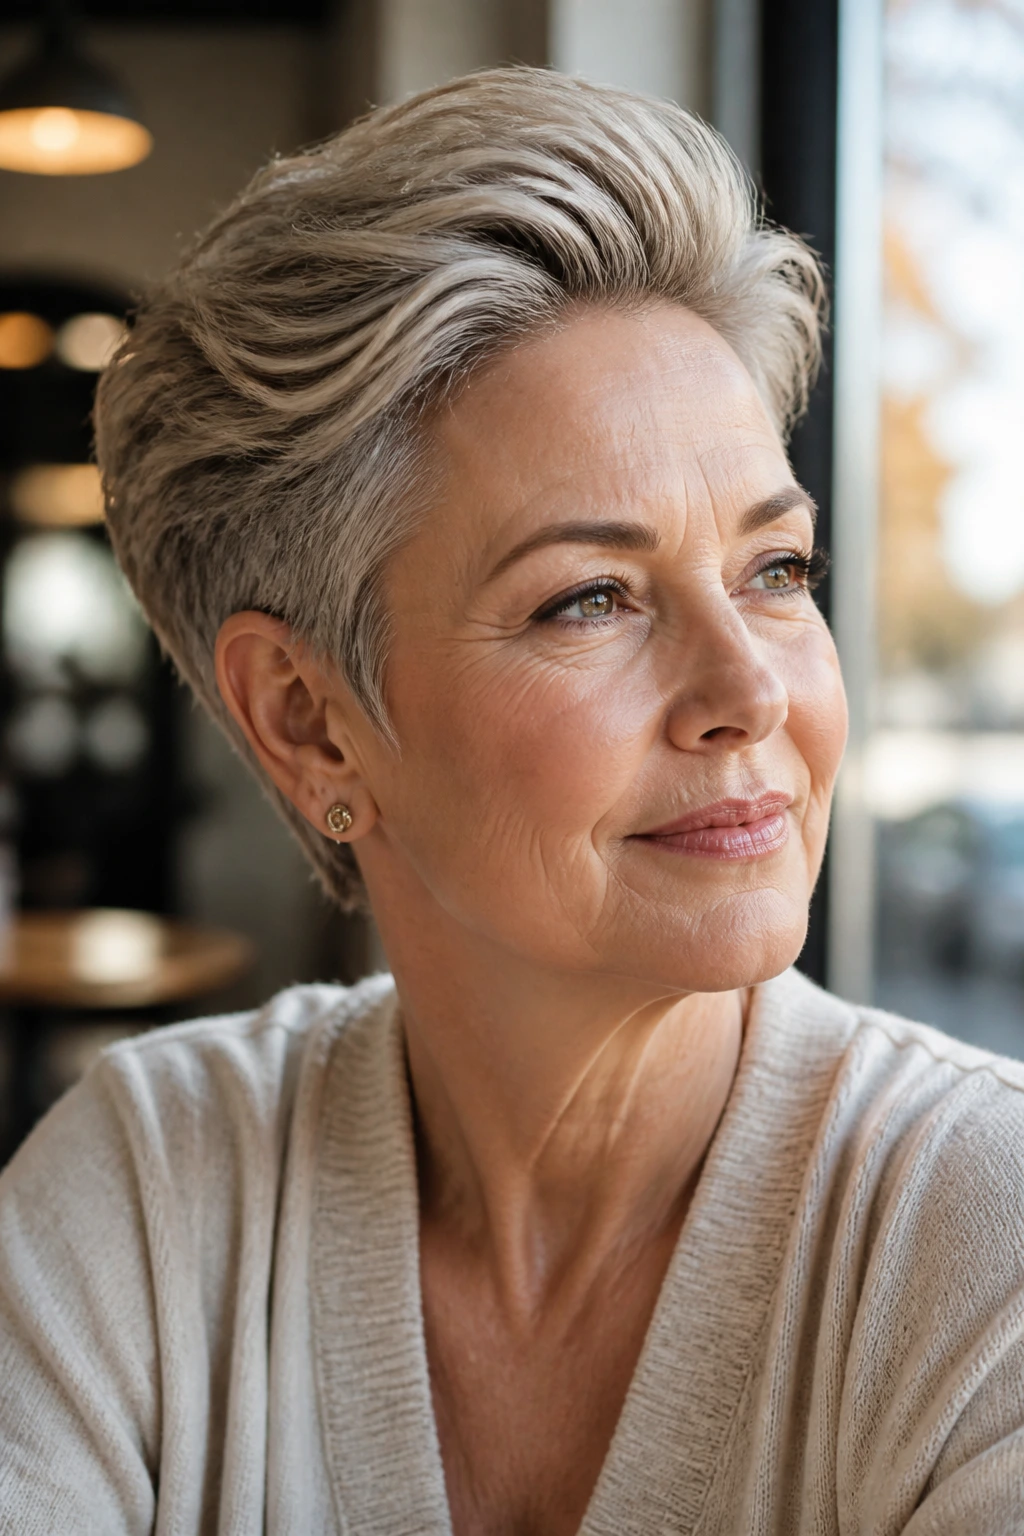
If you like seeing your forehead and you don’t mind a little lift at the front, this cut has real energy. The top stays long enough to sweep back and slightly upward, while the sides are trimmed tighter so the style doesn’t puff out in the wrong place.
It’s a strong choice for fine hair that goes limp around the hairline. The backward sweep creates height where you want it most, and that height makes the crown look fuller. Use a root-lift spray before drying, then push the hair back with your fingers before it cools.
I like this cut with a soft, low-gloss finish. Too much shine can make the hair look flatter than it is. Keep the front lifted and the sides snug. That contrast is what gives the style its shape.
9. Silver Shaggy Pixie
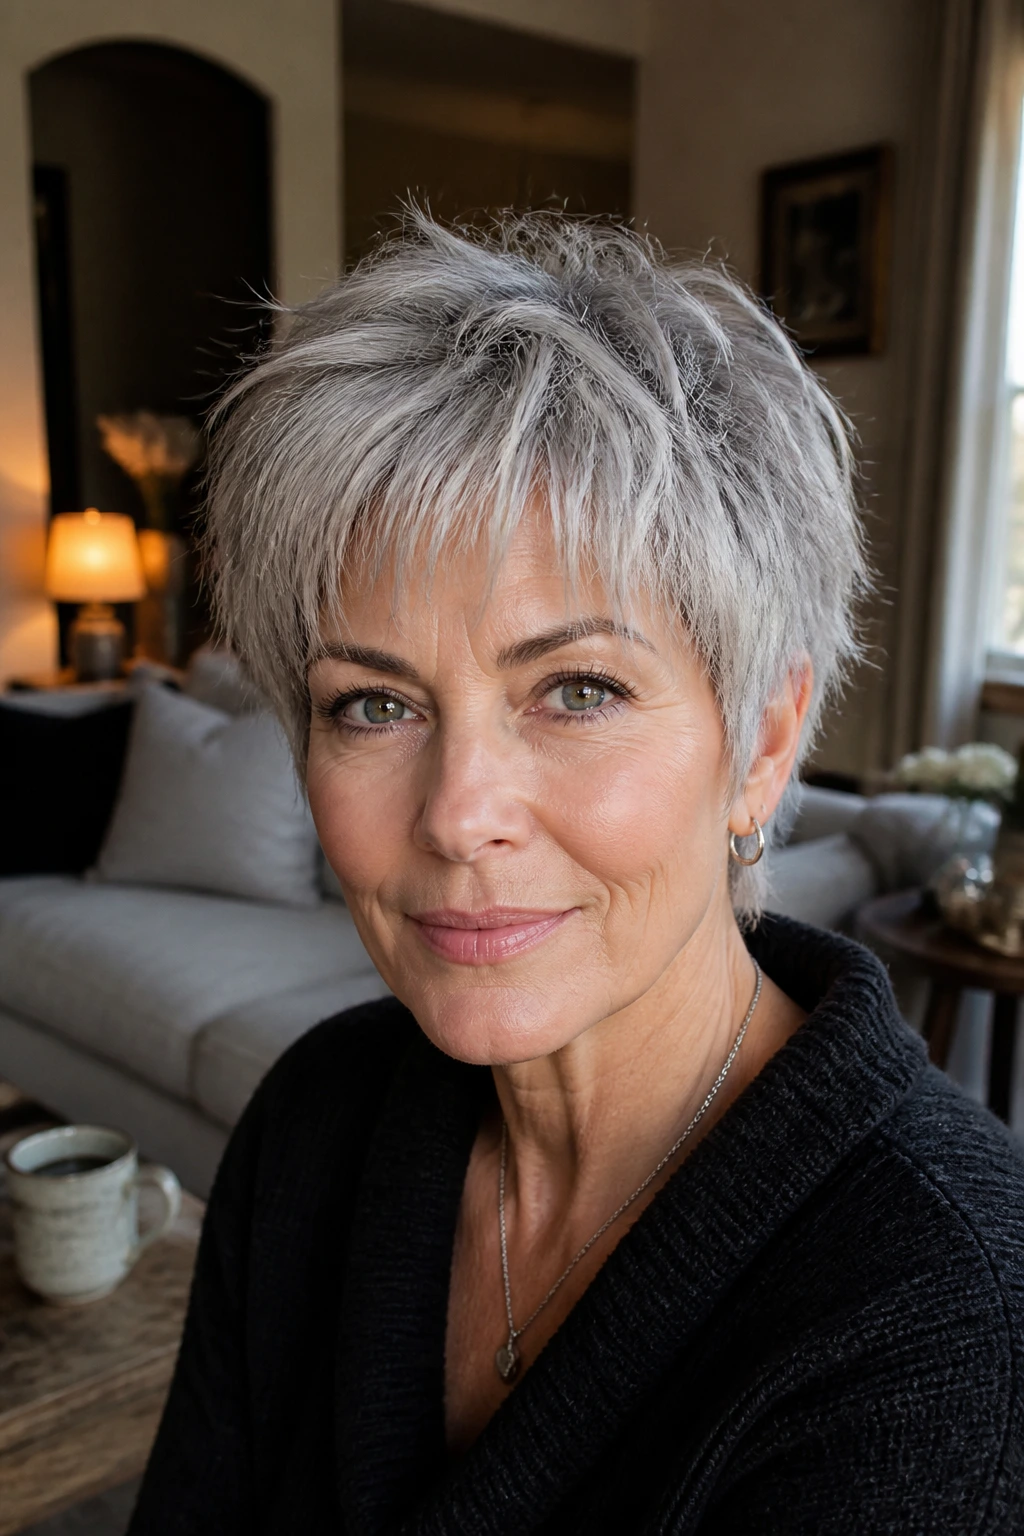
Silver hair takes to texture in a way darker hair sometimes doesn’t. A shaggy pixie lets the natural variation in gray, white, and salt tones do some of the work for you, while the irregular layers stop the cut from feeling too neat or severe.
This shape is especially good if your hair has gotten wirier over time. A little roughness turns into texture instead of chaos. Keep the layers soft around the crown and let the fringe land a bit unevenly, just enough to keep the line from looking stiff.
A light texturizing spray is enough here. Skip the heavy creams that make silver hair look dull or sticky. The best version of this cut looks a touch undone by design, which is a nicer place to be than trying to force polished perfection onto hair that wants to move.
10. Rounded Pixie with Soft Temples
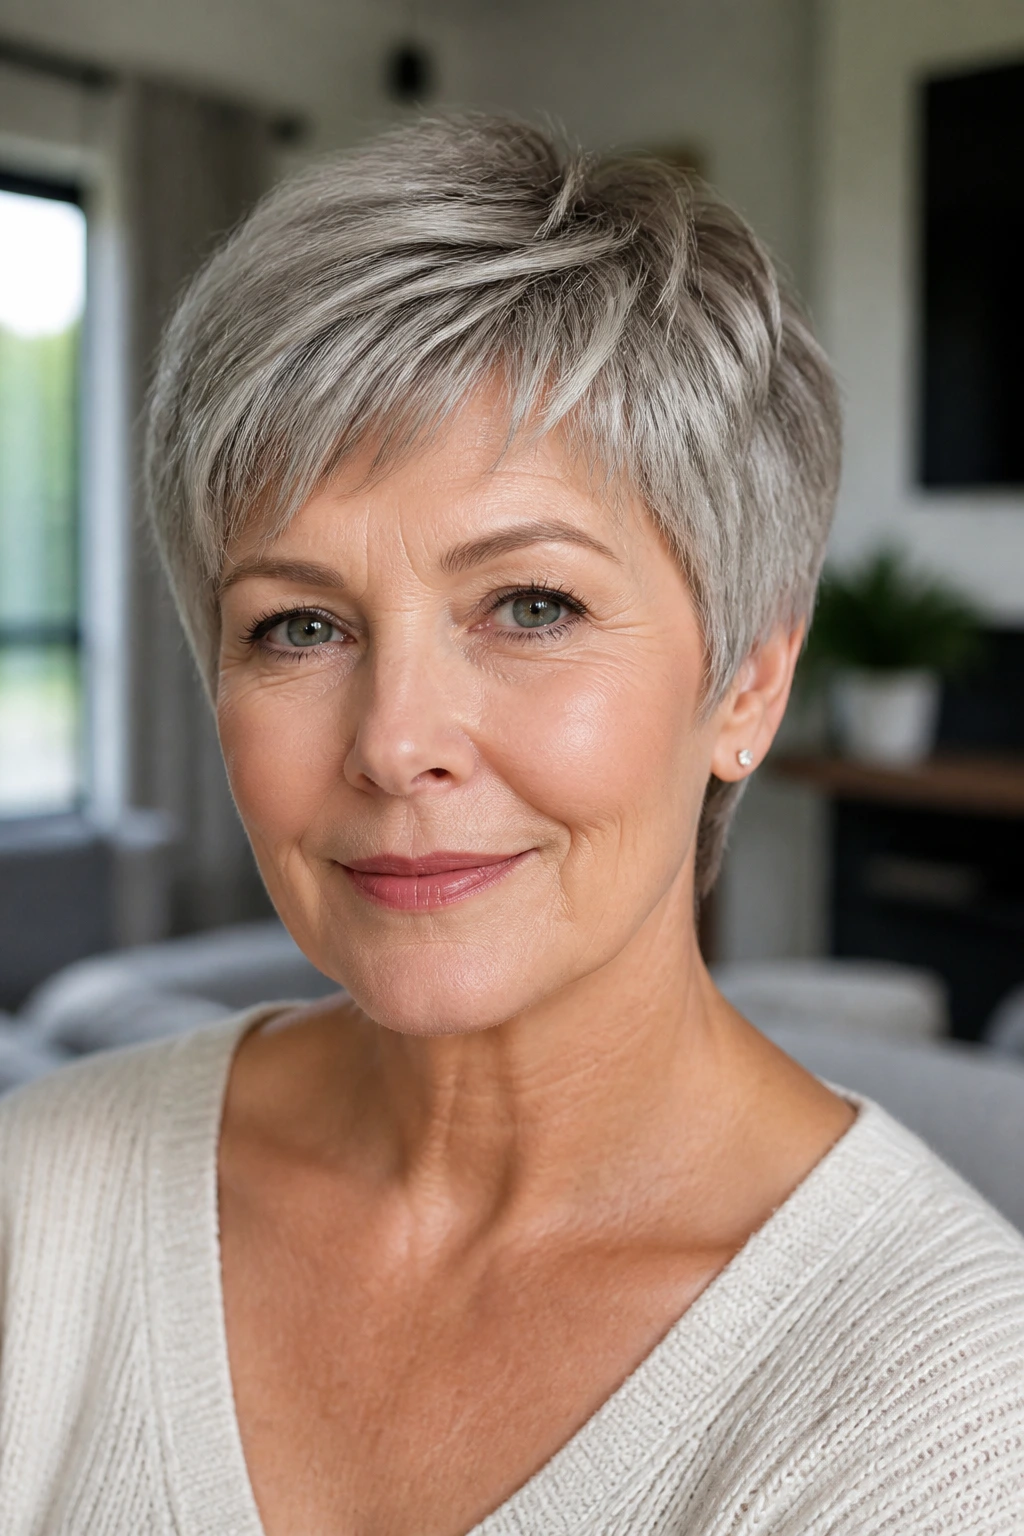
A rounded pixie is about curve, not bulk. The shape follows the head with a gentle bend through the crown and temples, which can be a lifesaver if thin hair tends to expose sparse spots around the edges.
The soft temple area matters more than people think. When the sides are too stripped down, the face can suddenly look too open and the hair looks thinner than it actually is. Leave enough softness around the temple and sideburn area to cushion the silhouette.
This is one of the best cuts for delicate features. It doesn’t shout. It frames. If you like earrings, that little curve around the ears makes them show up nicely without the haircut stealing the whole scene.
11. Undercut Pixie with Longer Top
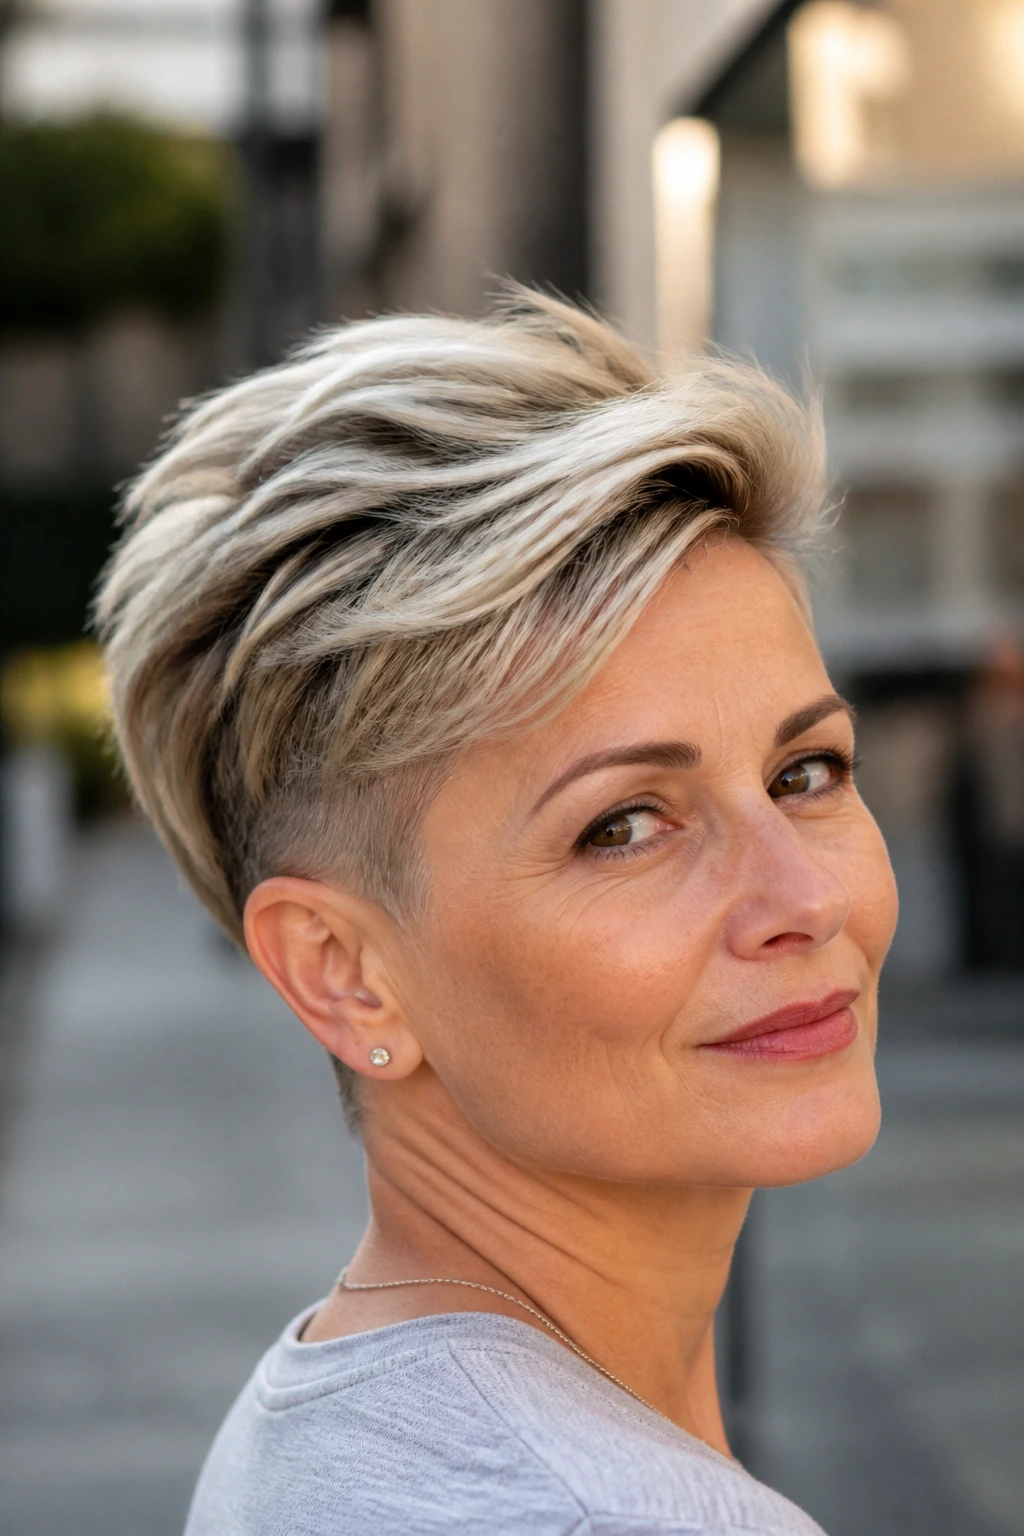
This is the bolder one in the group. Keep the top long enough to flip, sweep, or piece out, then take the sides and nape shorter underneath so the top has nowhere to go except up. Thin hair often needs that kind of direction.
An undercut also removes bulk where you don’t need it, which is handy if your hair gets puffy at the back but stays flat on top. The contrast gives you a cleaner outline and makes the top feel denser. The trick is balance: short underneath, not shaved bare unless that really suits your style.
This cut needs more confidence than maintenance. It’s sharp, modern, and a little cheeky. If you want a pixie that feels unmistakably styled, this is the one that does it.
12. Wispy Baby-Bang Pixie
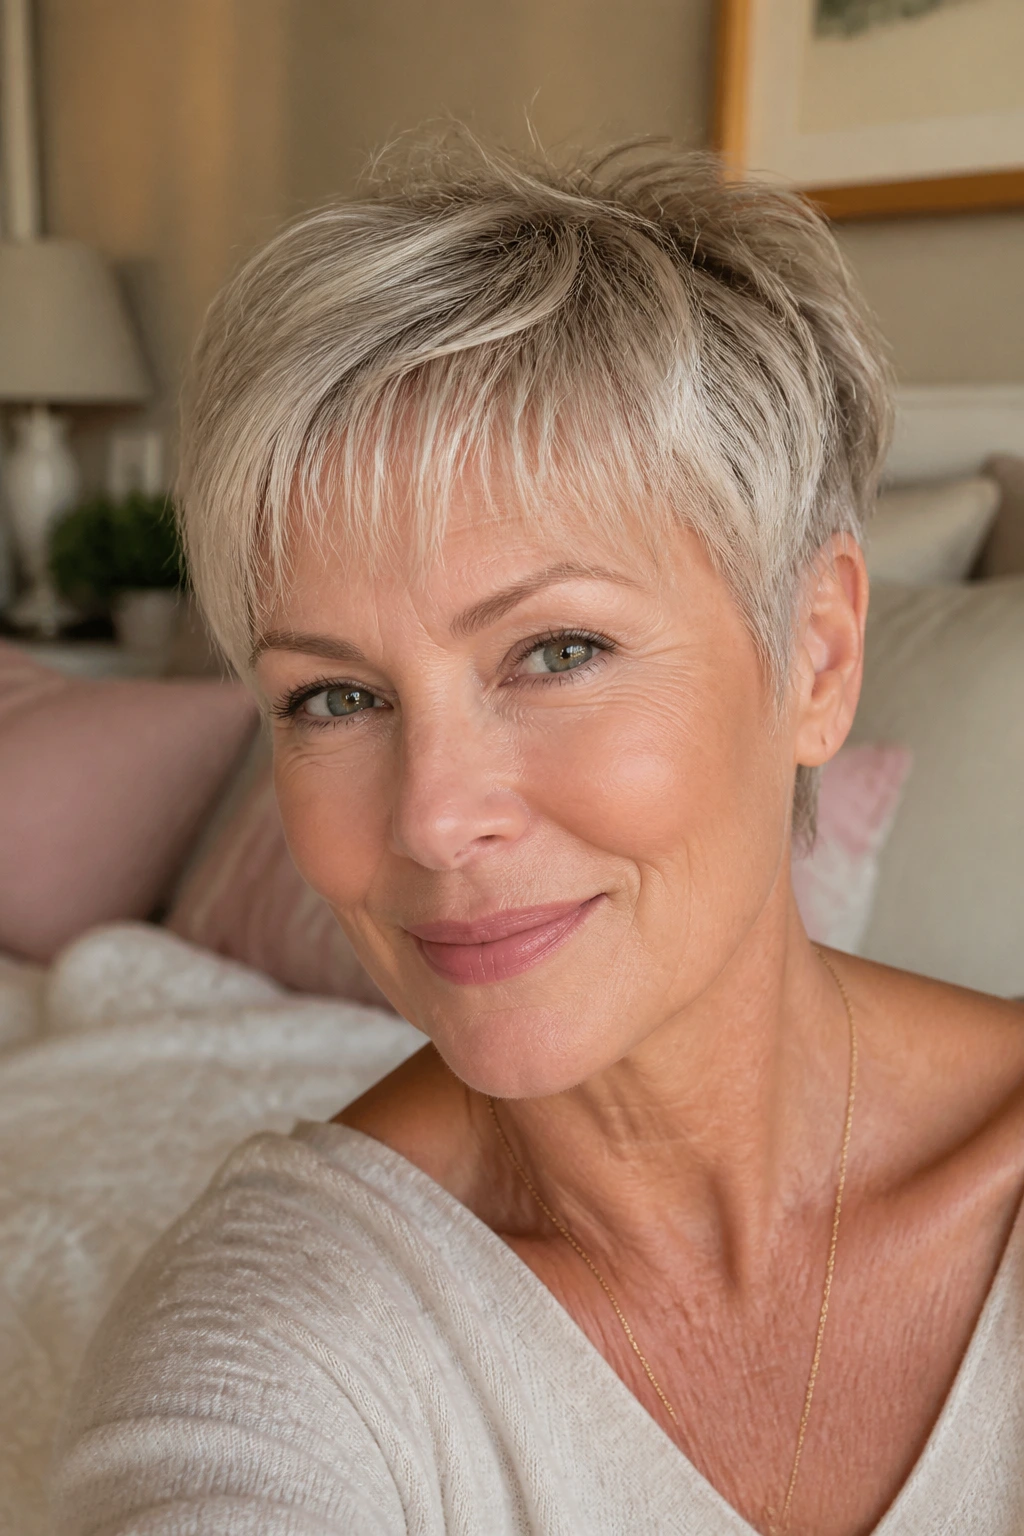
A baby bang can be brilliant on the right face, and a disaster if it’s cut too heavy. The version I like on thin hair is wispy and narrow, with soft ends that barely skim the forehead instead of sitting in one blunt strip.
That little fringe can shorten a long forehead or give the eyes a stronger frame. It also keeps the top from looking too bare, which is useful when the rest of the cut is short. The rest of the pixie should stay airy so the bang doesn’t take over.
Keep the fringe light. That’s the rule. If the hairline is strong or the forehead is very short, ask for a slightly longer, broken-up bang instead of a blunt micro line. A baby bang is a detail, not a curtain.
13. Ear-Tucked Classic Pixie
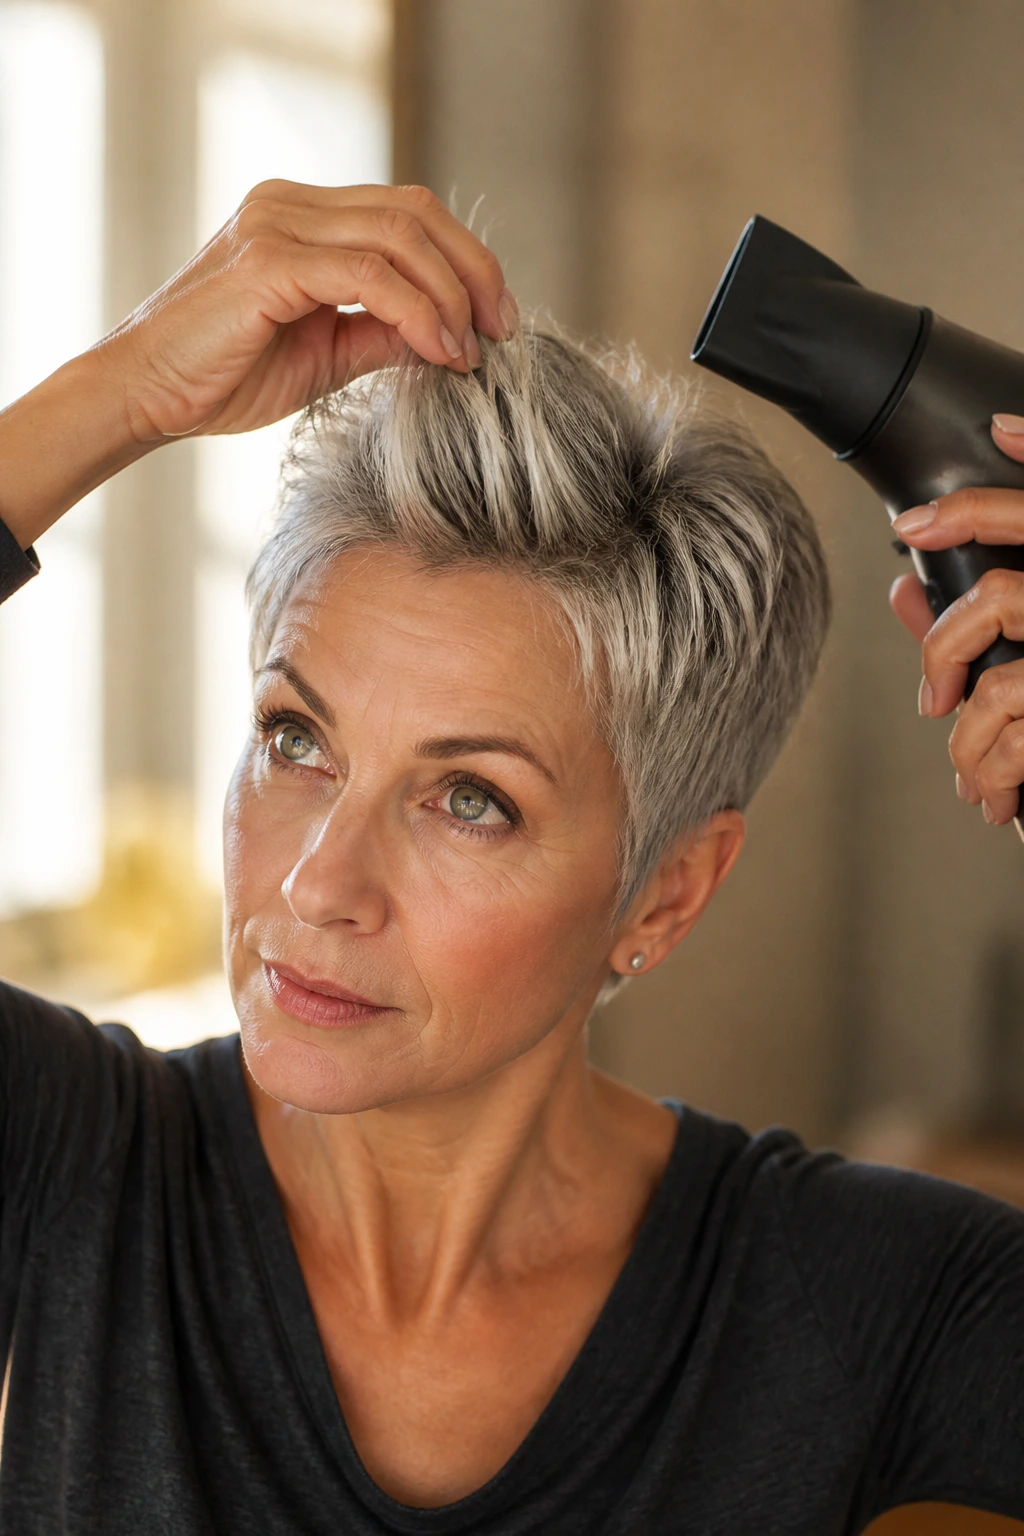
There’s a reason this shape keeps coming back. It’s neat, easy to tuck behind one or both ears, and it doesn’t ask for a lot of daily effort. On thin hair, the key is to keep enough softness on top so the style doesn’t flatten into a close crop.
The tucked sides make earrings and frames look good without competing with them. They also help the haircut feel orderly even when the hair itself is fine and a little flyaway. Ask for a clean outline around the ears, but not a hard cut line. Softness keeps it from looking severe.
This is the pixie for someone who likes structure. Not fuss. Structure. It’s polished enough for a suit jacket and casual enough for a sweater, which is a nice range to have from one haircut.
14. Piecey Crop with Micro Layers
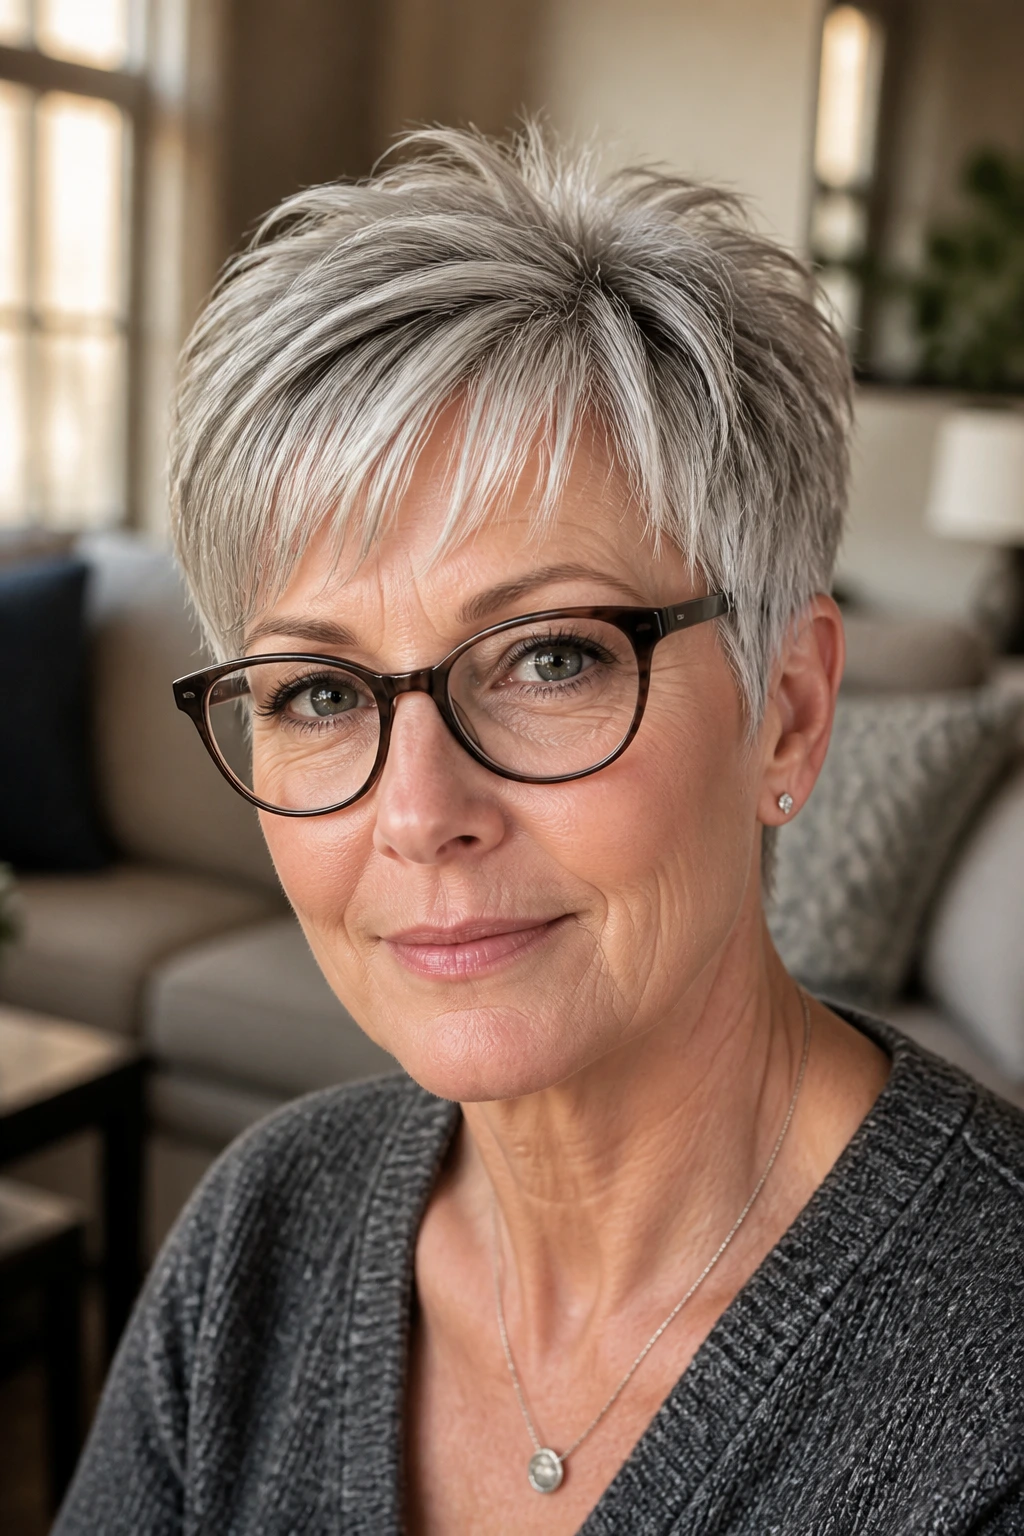
This one is short, cropped, and full of tiny broken-up sections that keep the hair from lying like a single sheet. Thin hair usually looks better when it can separate a little, and micro layers help that happen without making the whole cut fluffy.
The important part is restraint. You want tiny pockets of texture, not a hacked-up surface. Ask for point-cut detailing through the top and around the fringe so the pieces move on their own. A little goes a long way here.
Use the smallest amount of paste you own. Seriously. Warm it in your hands until it almost disappears, then press it into the top and fringe rather than rubbing it in hard. Too much product closes the texture down and turns a lively crop into a sticky one.
15. Faux Hawk Pixie
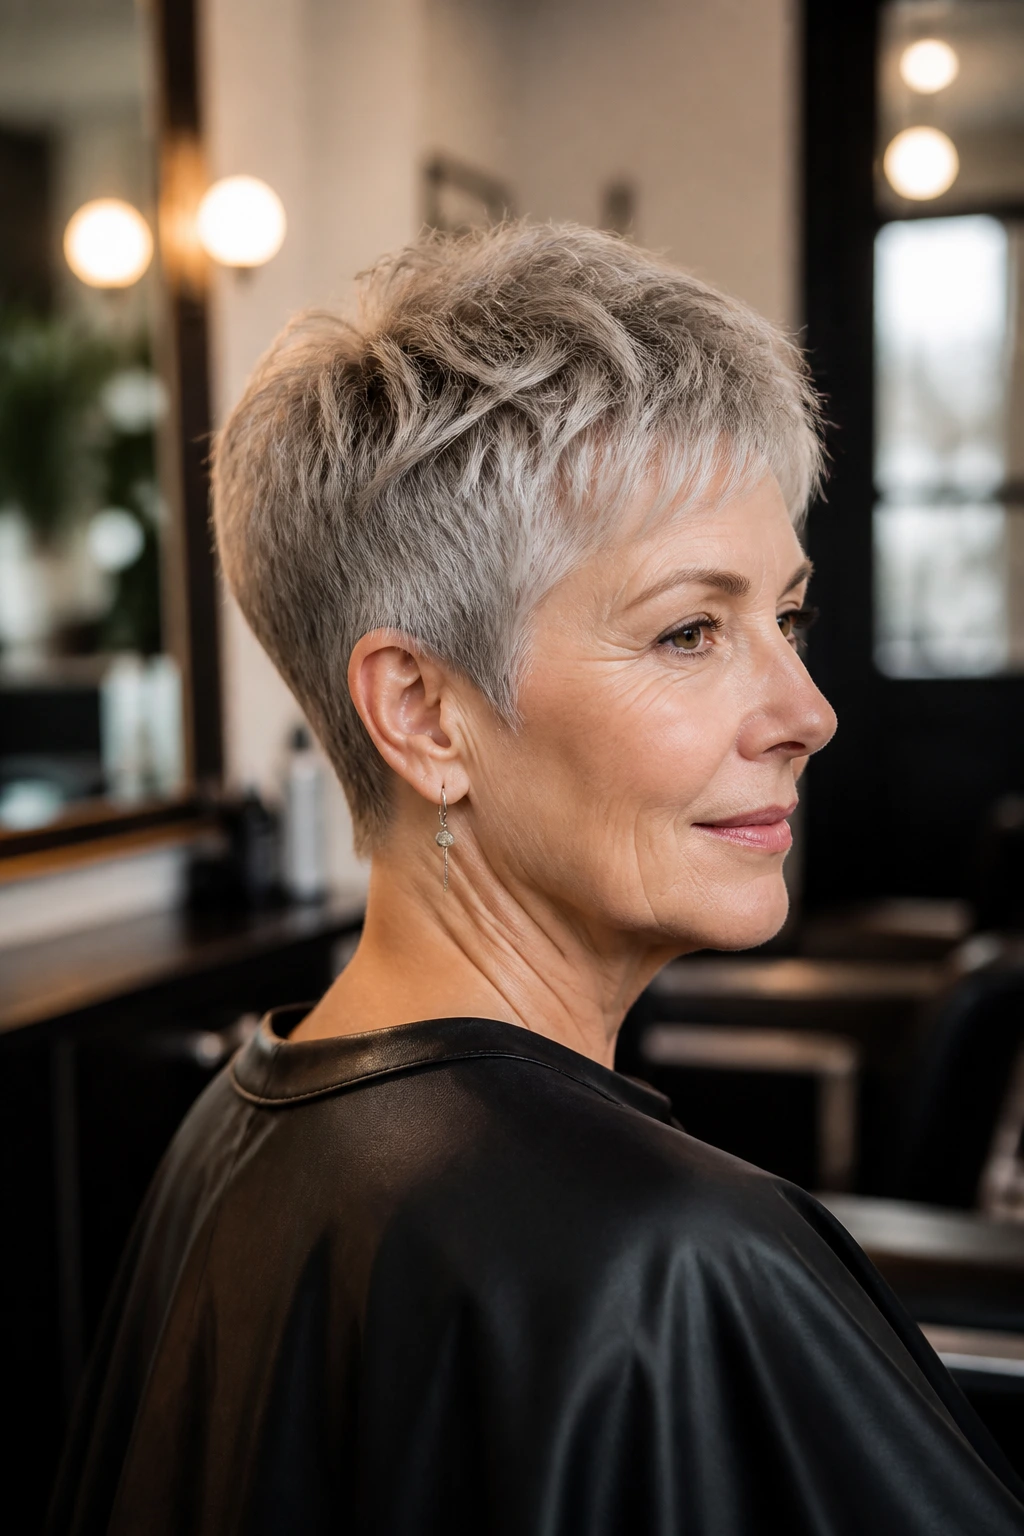
A faux hawk pixie gives you lift without asking for long hair. The center strip stays longer, the sides are tighter, and the result is a vertical line that naturally makes thin hair look more energetic and less flat.
This cut is especially kind to round faces and weak crowns because it pulls the eye upward. You don’t need to spike it like a teenager in a music video. A softer ridge, brushed up and slightly forward, does the job just fine.
The styling is part mousse, part fingers, part nerve. Dry the center section first, pinch it upward, and keep the sides close. If the top falls toward one side, use that to your advantage. A little asymmetry keeps it from looking staged.
16. Face-Framing Bixie
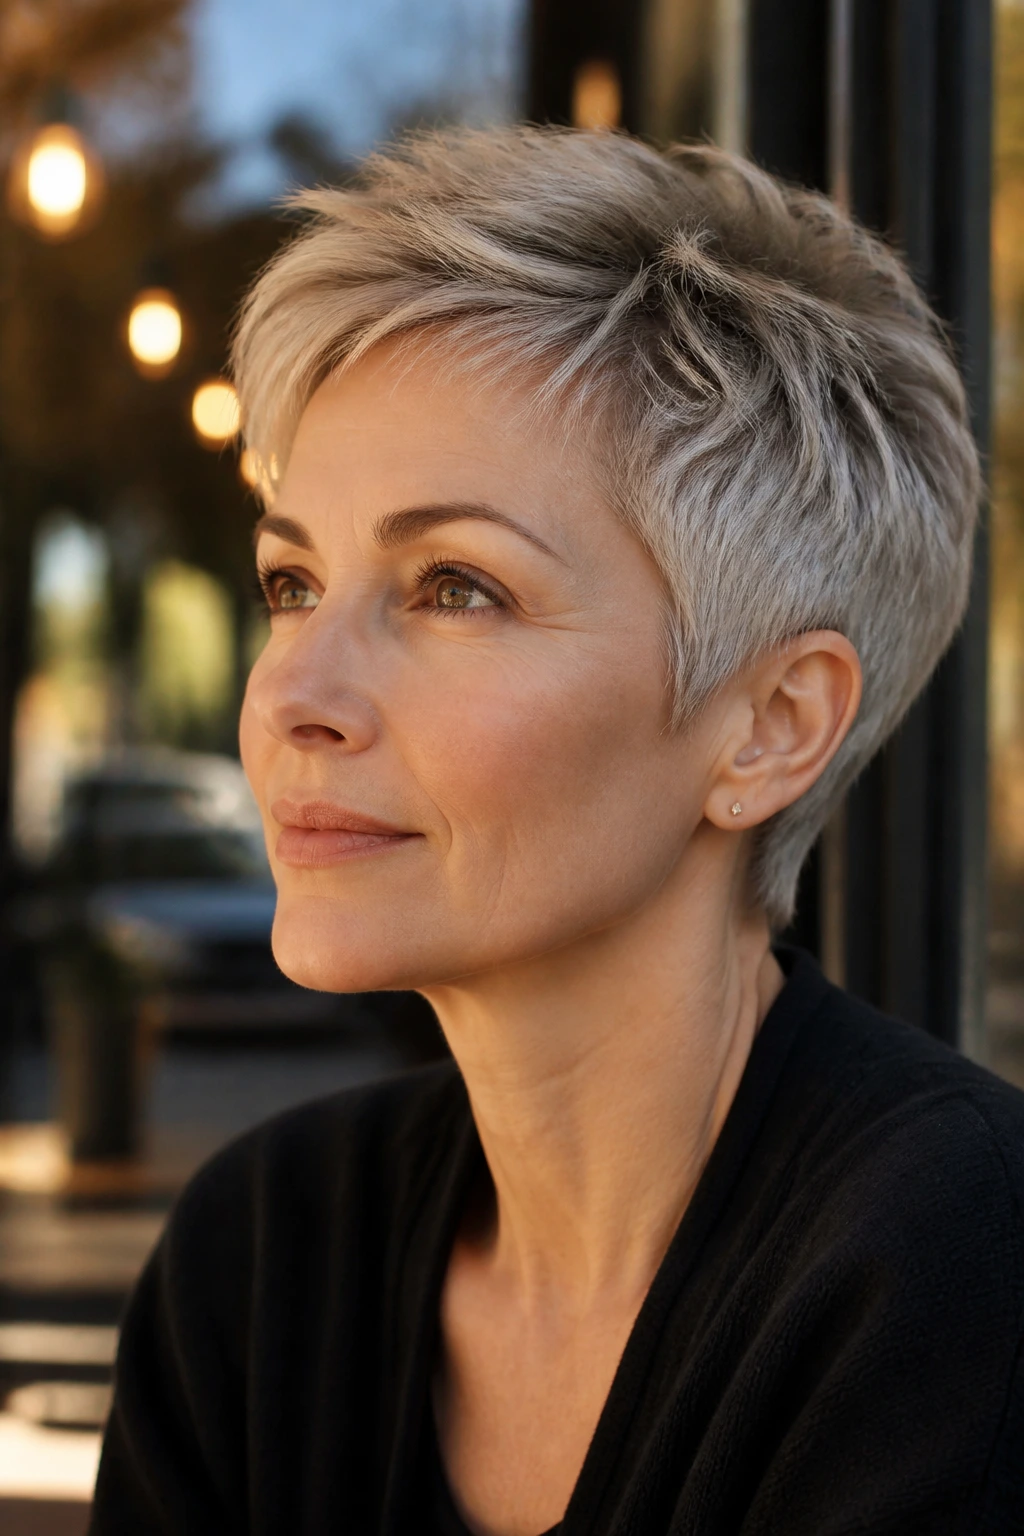
If you want the lightness of a pixie but aren’t ready to give up all the length around your face, the bixie with face-framing pieces is a good compromise. It keeps the crown short enough to avoid drag, then leaves the front a touch longer so the cheekbones and jaw still have softness around them.
This shape is useful when the hair is fine but not flat everywhere. The longer front pieces make the cut feel less abrupt, and the slight layering at the sides keeps it from puffing out. It’s a more forgiving cut than a super-short pixie if you’re growing out a bob.
The best version has a little swing, not a straight line. Ask for the front to angle gently toward the chin, even if it never reaches bob length. That angle keeps the style from feeling boxy.
17. Razor-Soft Layered Pixie

A razor cut can make thin hair feel feathery in the best way, especially if the strands are straight to slightly wavy. The edges come out soft, the layers blend quickly, and the haircut gets that airy movement people keep trying to fake with too much product.
But there’s a catch. Razor work is not a blanket solution. If your hair is fragile, brittle, or frizzy, a stylist can go too far and make the ends look thin in a bad way. In that case, ask for scissors with soft point cutting instead.
Used well, though, this cut has a lovely glide to it. The top doesn’t sit in one block, and the fringe can be broken up just enough to keep the forehead open. It’s light, but not flimsy. That distinction matters.
18. Salt-and-Pepper Tousled Pixie
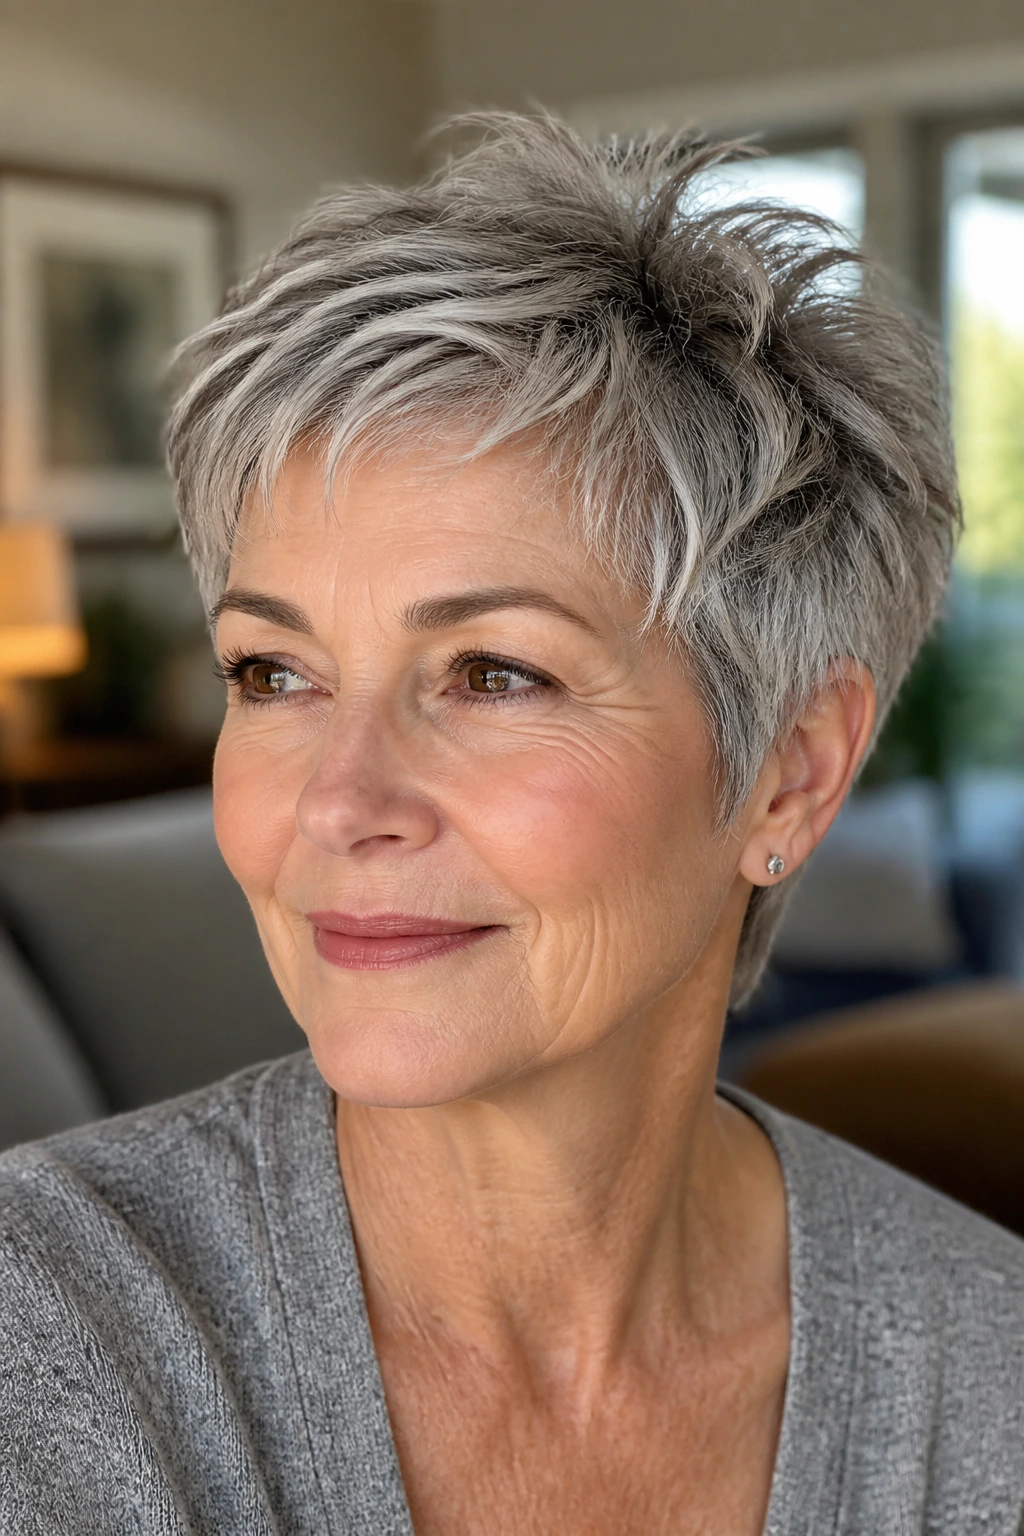
Mixed color can make thin hair look richer than a single flat shade, and a tousled pixie lets those tones show up. The trick is texture. Slightly uneven layers catch the light differently, so the hair reads fuller even when the strands themselves are fine.
This cut doesn’t need to be perfect. In fact, perfect would be the wrong goal. A little unevenness in the top and fringe gives the silver, charcoal, and darker pieces somewhere to live. That visual variation can do a surprising amount of work.
Use a light texture spray, not a heavy balm. Then rough-dry the roots with your fingers and stop before the hair gets too set. The looseness is what makes the color look dimensional. If you over-style it, the charm disappears.
19. Deep Side-Part Tapered Pixie
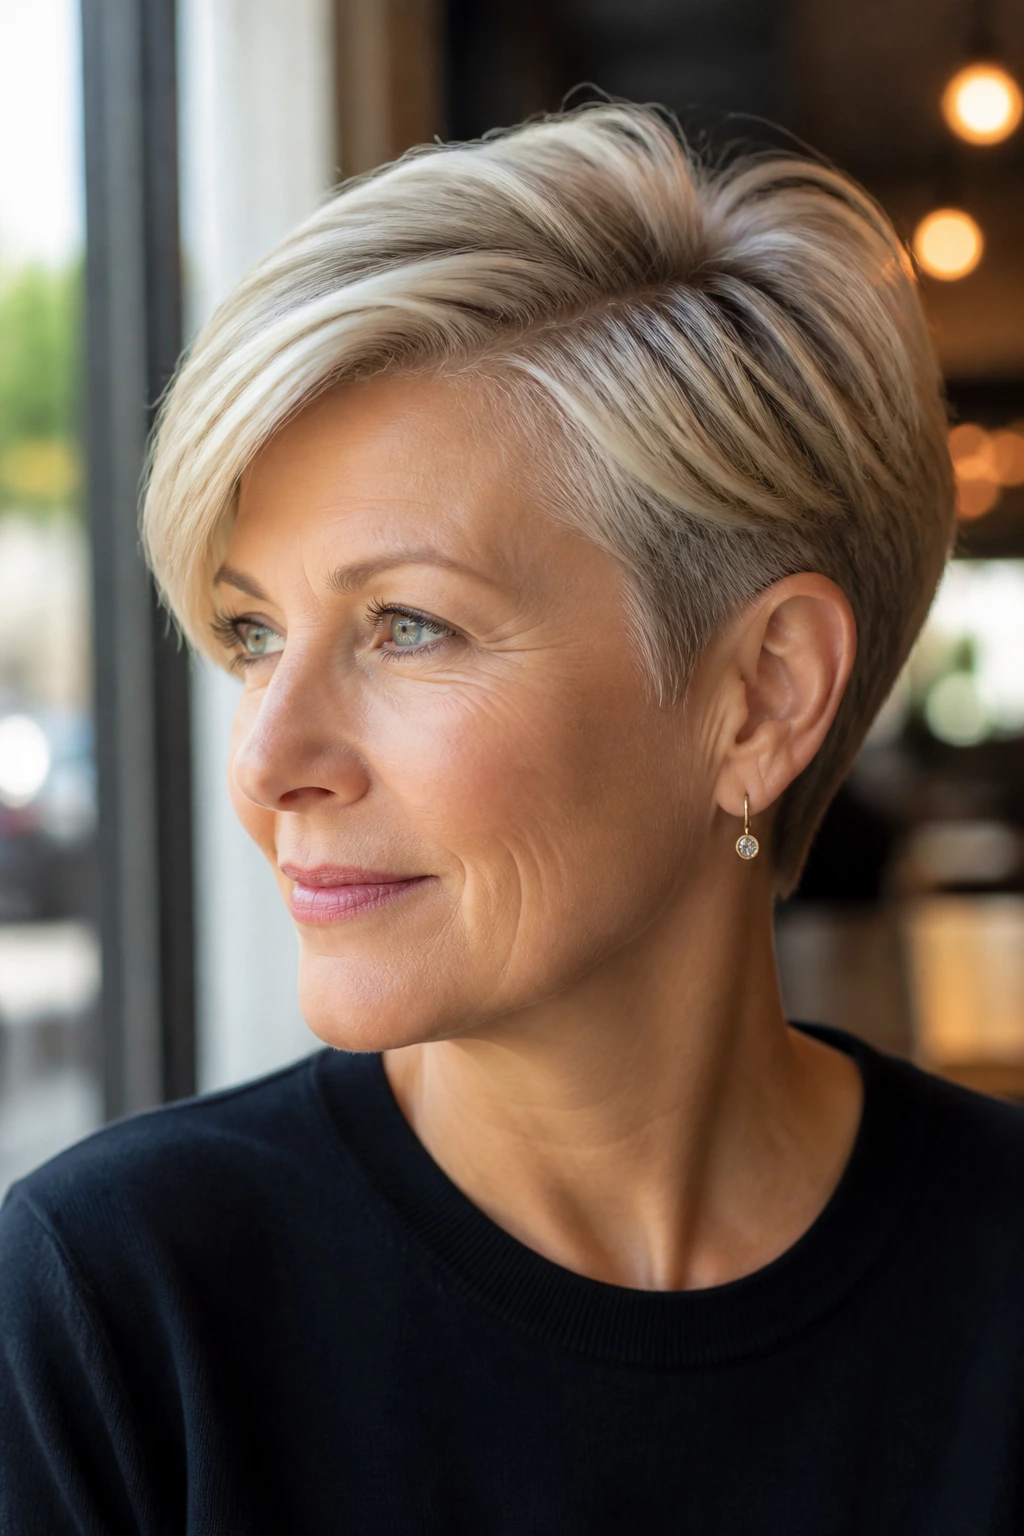
A deep side part is one of the quickest tricks for making thin hair look less obvious at the scalp. Shift the part a little farther over than you normally would — not a dramatic sweep, just enough to create lift — and pair it with a close taper at the sides and nape.
The part creates a clean line of drama. The taper keeps the shape from feeling heavy. Together they give the cut a neat, modern profile that works well when hair is naturally flat at the crown or when one side grows stronger than the other.
This is a good option if your face likes asymmetry but you still want a tame silhouette. The long side can graze the eyebrow, temple, or cheekbone, depending on how much coverage you want. Small adjustment. Big difference.
20. Rounded Cap Pixie
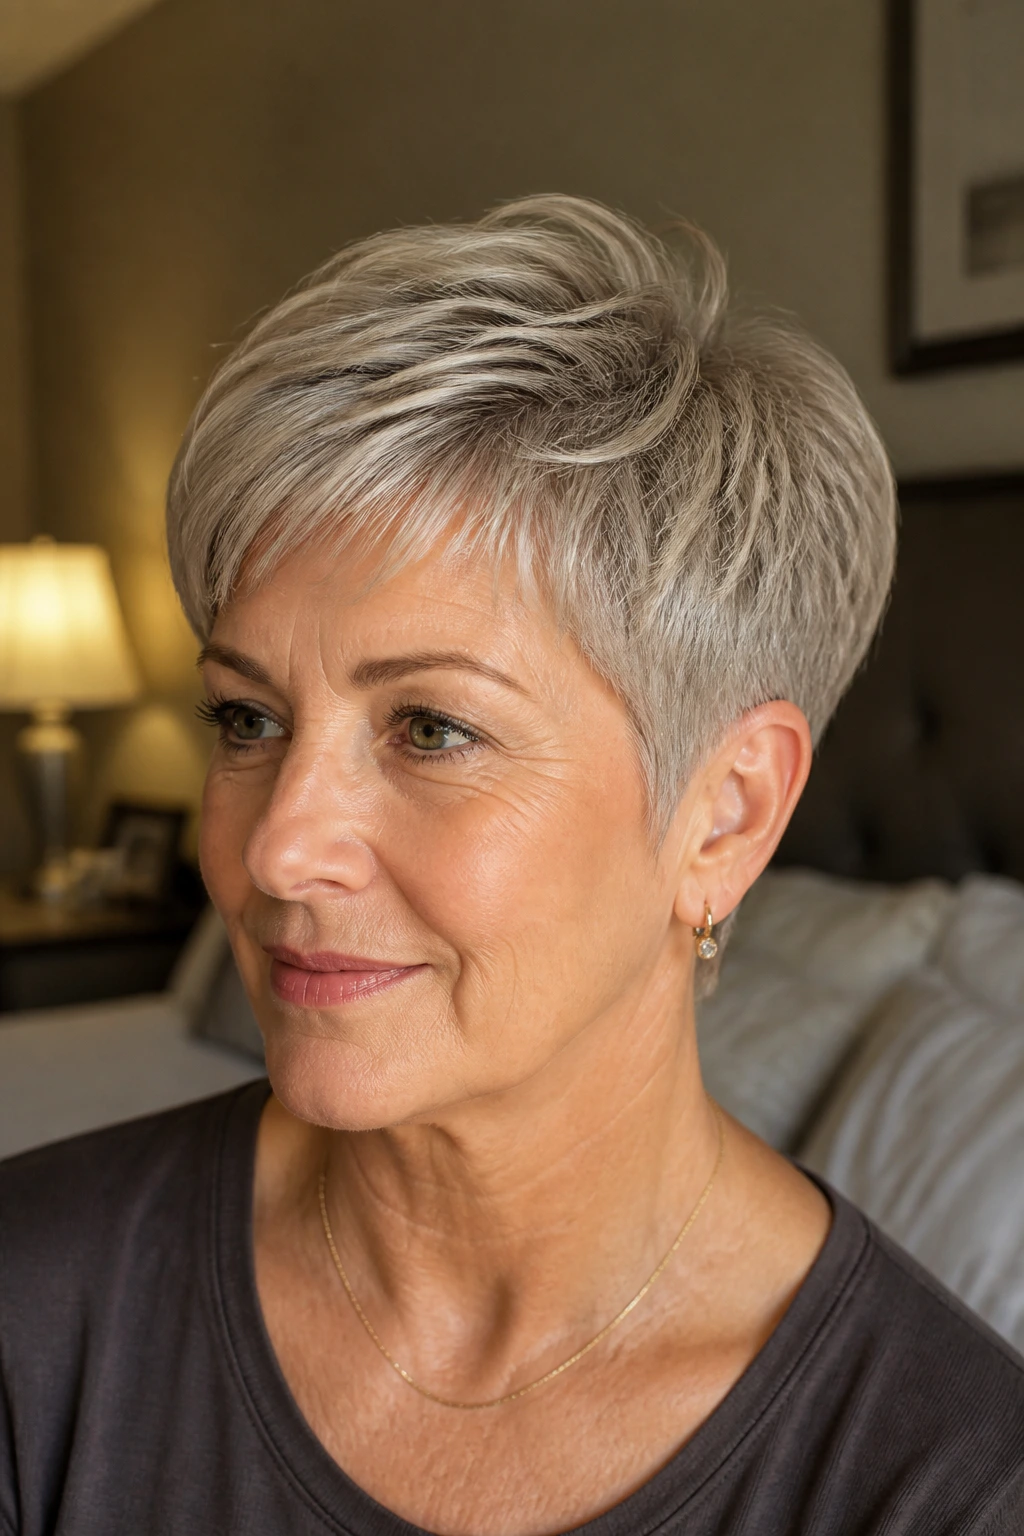
This cut borrows a little from the old mushroom shape, then fixes what usually goes wrong with that idea. The top stays rounded, but the edges are softened so it never turns into a blunt cap sitting on the head. That matters a lot on thin hair.
The rounded crown can make the top look fuller because the shape holds volume close to the head instead of pushing it outward in a puffy cloud. I like this one for people whose hair is fine but not completely sparse. The shape does the work, and the haircut stays tidy with not much effort.
Tell the stylist to keep the perimeter soft around the ears and neckline. If the lower edge gets too crisp, the style can look dated fast. With a little texture, though, it turns into a neat, dense-looking crop that has some real presence.
21. Long-Top, Short-Sides Pixie
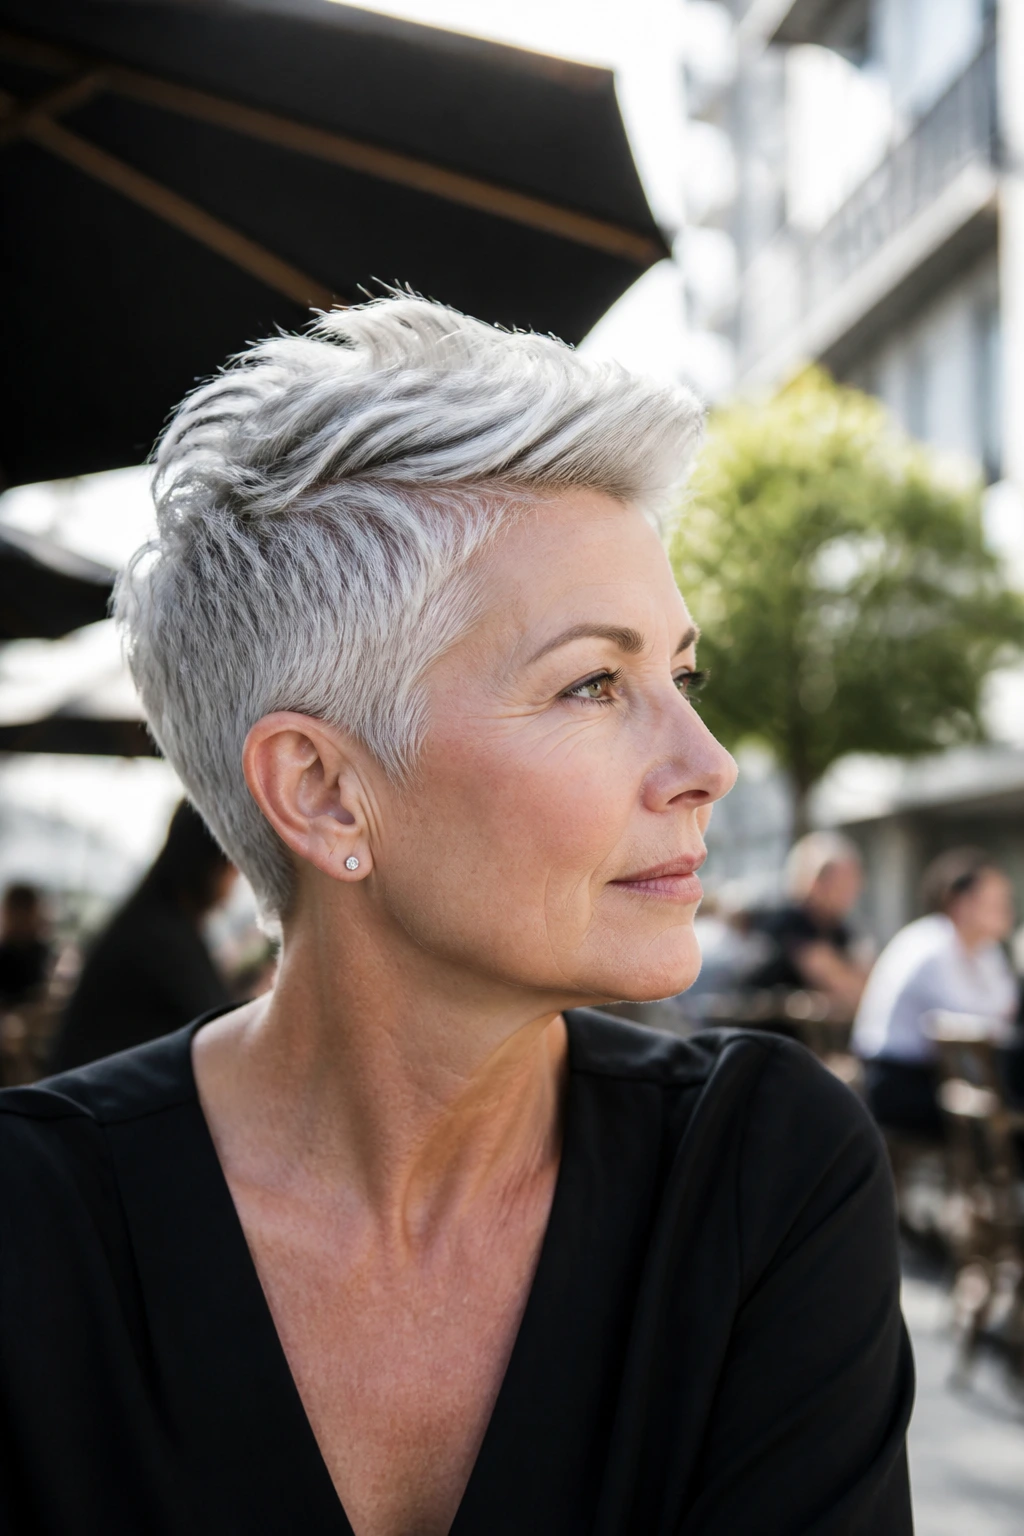
This is the cut when you want obvious contrast. The sides stay short enough to keep the head shape clean, while the top remains long enough to sweep, flip, or push upward. Thin hair often looks better with that kind of directional styling than with an all-over even length.
The long top gives you options. The short sides remove bulk. And because the eye reads the contrast first, the hair feels thicker than it is. That’s the trick, and it’s a good one.
Keep the top around 3 to 4 inches if you want movement, or a little shorter if your hair stands up quickly. A touch of mousse or a matte cream is usually enough. Don’t drown it in gel unless you’re aiming for a very slick finish.
22. Contour-Hugging Pixie
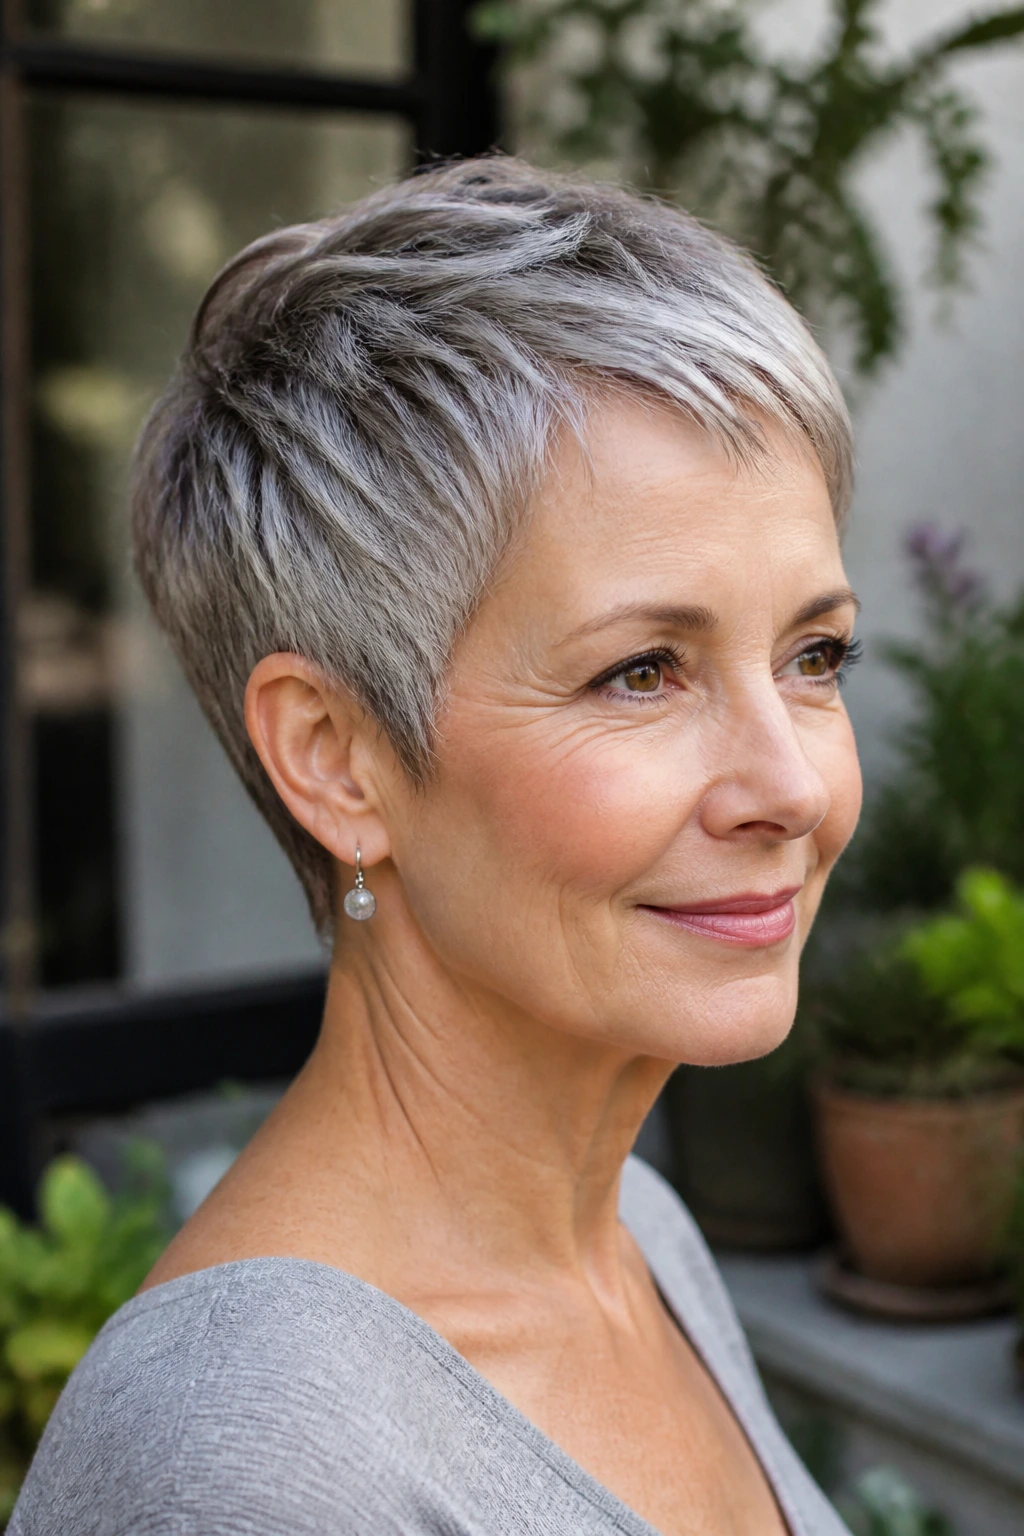
This is the quiet achiever. A contour-hugging pixie follows the shape of the head with careful graduation, which keeps thin hair from sticking out in awkward corners or going puffy at the back. The cut looks controlled, but not hard.
It works because every section has a job. The crown holds a bit of height, the sides lie close without collapsing, and the nape stays neat. Nothing is wasting space. That sounds technical, but in practice it just means the haircut sits better on the head.
If your hair tends to spring away from the scalp in humid weather, this one helps. The closer outline takes some of the drama out of the frizz and makes the whole style easier to manage. It’s a very good choice for people who like order.
23. Sleek Brushed-Back Pixie
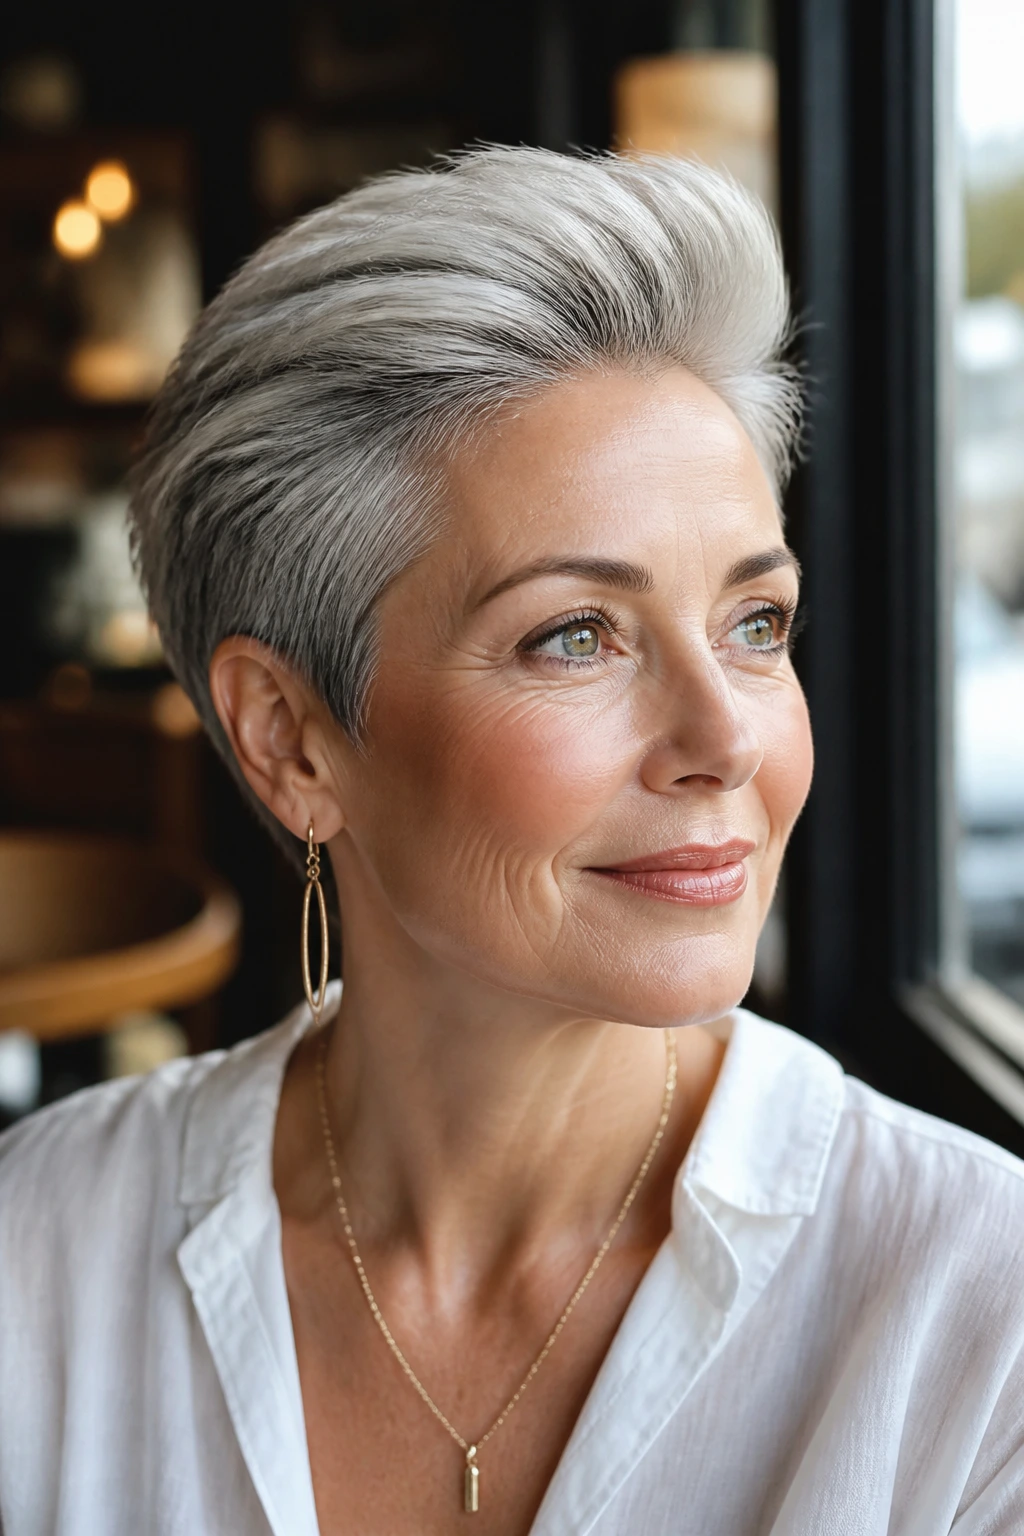
A brushed-back pixie can look elegant without feeling stiff, which is a nice balance when hair is fine and you don’t want to pile on products. The top is kept long enough to go back from the hairline, while the sides stay neat so the shape doesn’t spread outward.
Use a light cream or soft styling lotion, not a wet-looking gel. Fine hair gets weighed down fast, and then the whole point is gone. A little lift at the roots before the hair cools is what keeps this from turning flat and shiny in the wrong way.
This cut suits anyone who likes a cleaner face and a polished finish. It also plays well with bold earrings and glasses. The hair steps back; the features step forward.
24. Grow-Out-Friendly Pixie with Soft Neckline
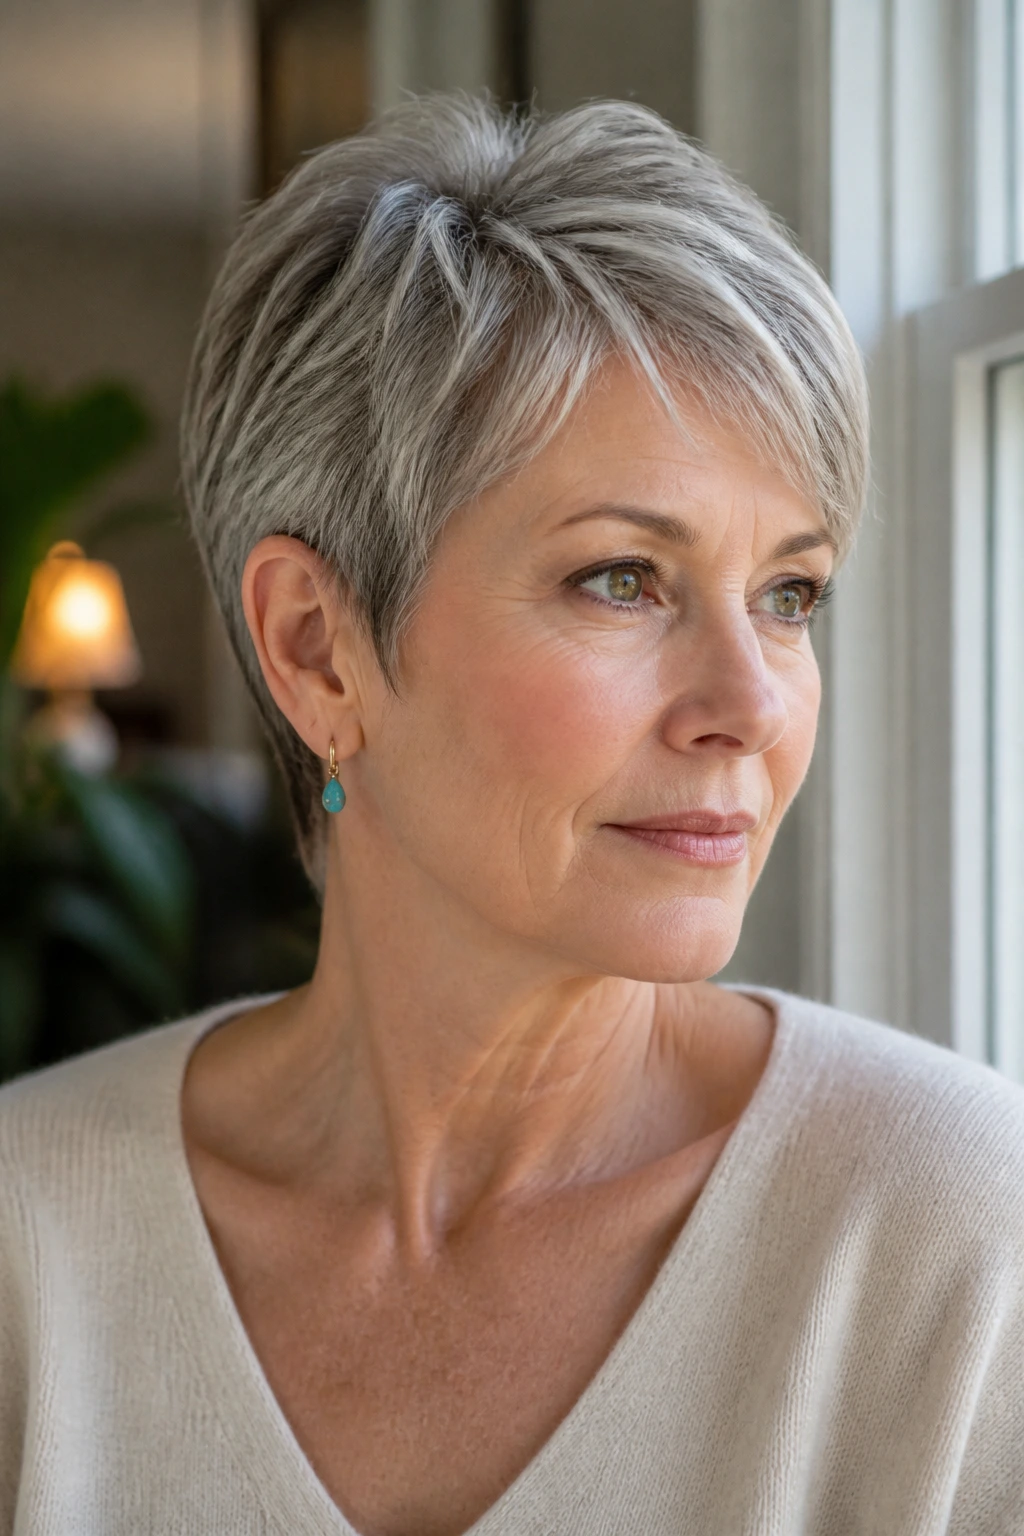
This is the one I recommend to anyone who wants a pixie but doesn’t want a hard monthly commitment. Keep the neckline soft, leave the top long enough to shift partings, and let the sides grow into the shape instead of carving them razor-short. The cut still looks deliberate at five or six weeks, which is no small thing.
That softer grow-out matters on thin hair because harsh edges can make regrowth look scruffy fast. A gentle neckline and slightly longer side pieces give you a little more runway. You can tuck it behind the ears one day and wear it forward the next.
If you’re nervous about going short, start here. It gives you the pixie feeling without the instant shock of a crop that’s too severe. And if you decide you want it shorter later, the shape is already on your side.
What Makes a Pixie Cut Work on Thin Hair Over 50
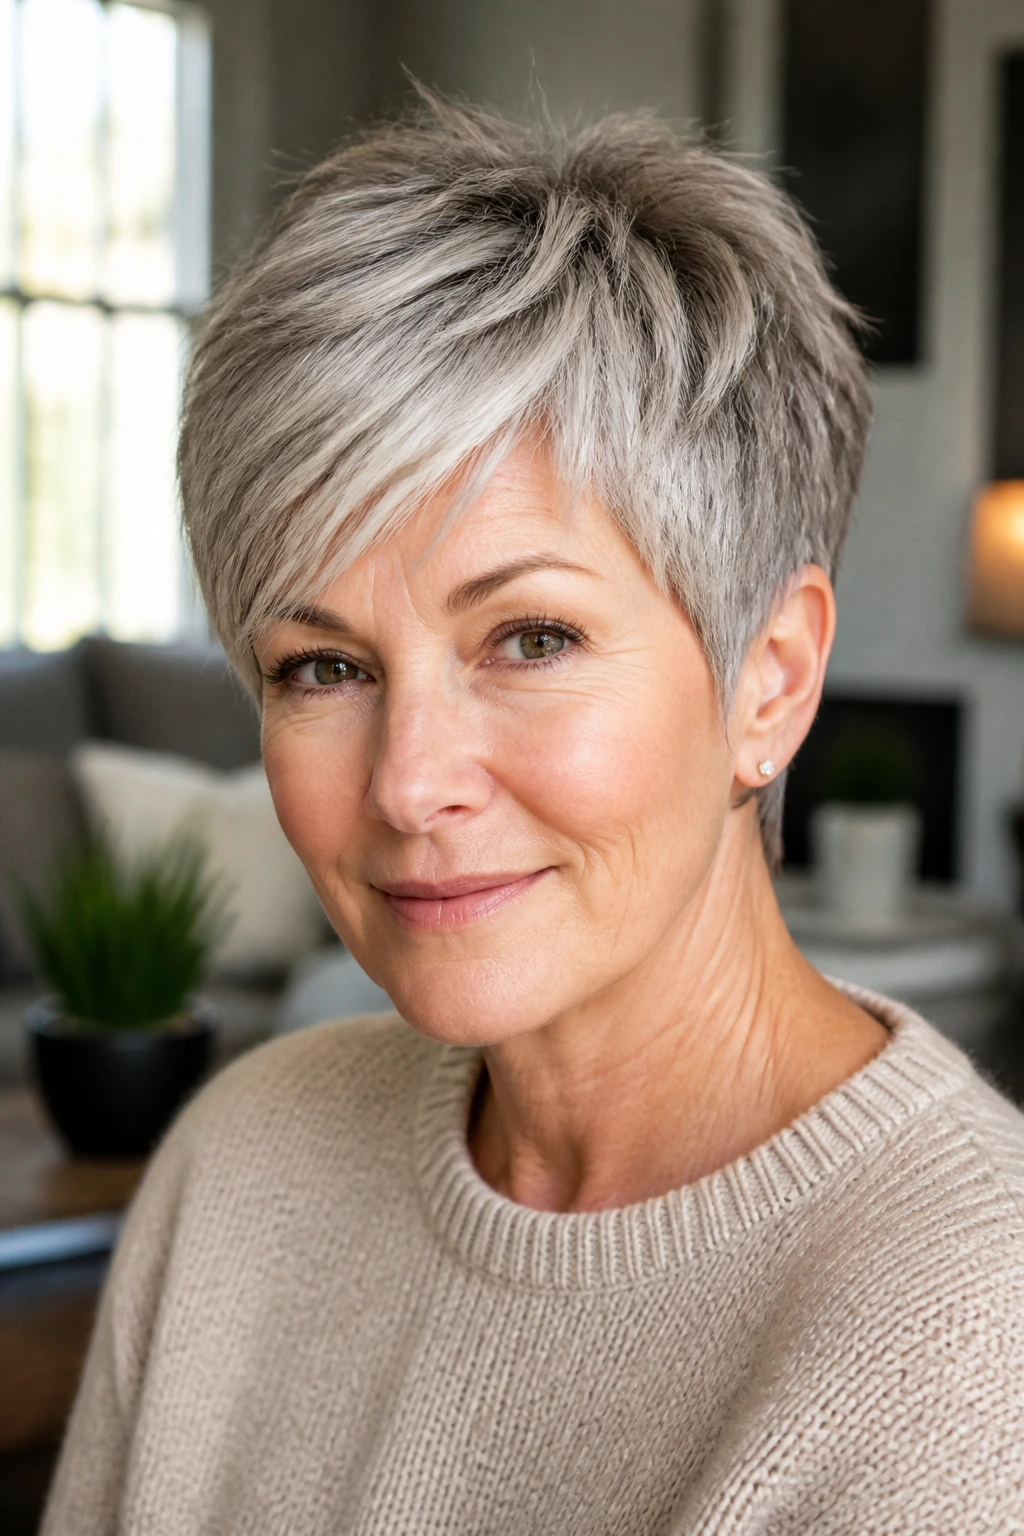
The haircut has to do two jobs at once: create lift where the hair falls flat, and keep enough softness at the edges that the scalp doesn’t become the main event. That balance is why some pixies look rich and others look fussy. The good ones are not overloaded with layers. They’re placed with a little restraint.
Keep the crown roomy
A crown that’s cut too short leaves nowhere for volume to live. Leave enough length on top — often around 2½ to 4 inches, depending on texture — so the hair can bend upward when it’s blown dry. That small bit of extra length is often the difference between “flat cap” and “lifted crop.”
Taper the edges instead of flooding the whole head with layers
A clean nape and soft temples make thin hair look denser because they reduce visual clutter. Over-layering every section can expose too much scalp and leave the haircut looking hollow. Short hair needs shape, not shredding.
Think in diagonals, not straight lines
Side-swept fringe, asymmetry, and off-center parts all help break up the eye line. Straight lines can be harsh on fine hair. A diagonal gives the cut motion and makes the face feel softer.
Let texture help, but don’t drown the hair in product
Dry shampoo, mousse, and light paste can rough up the surface enough to make thin hair look fuller. Heavy oils and thick creams do the opposite. They flatten the cuticle and drag the top back down. A little grit is useful. A sticky helmet is not.
What to Tell Your Stylist Before the Cut
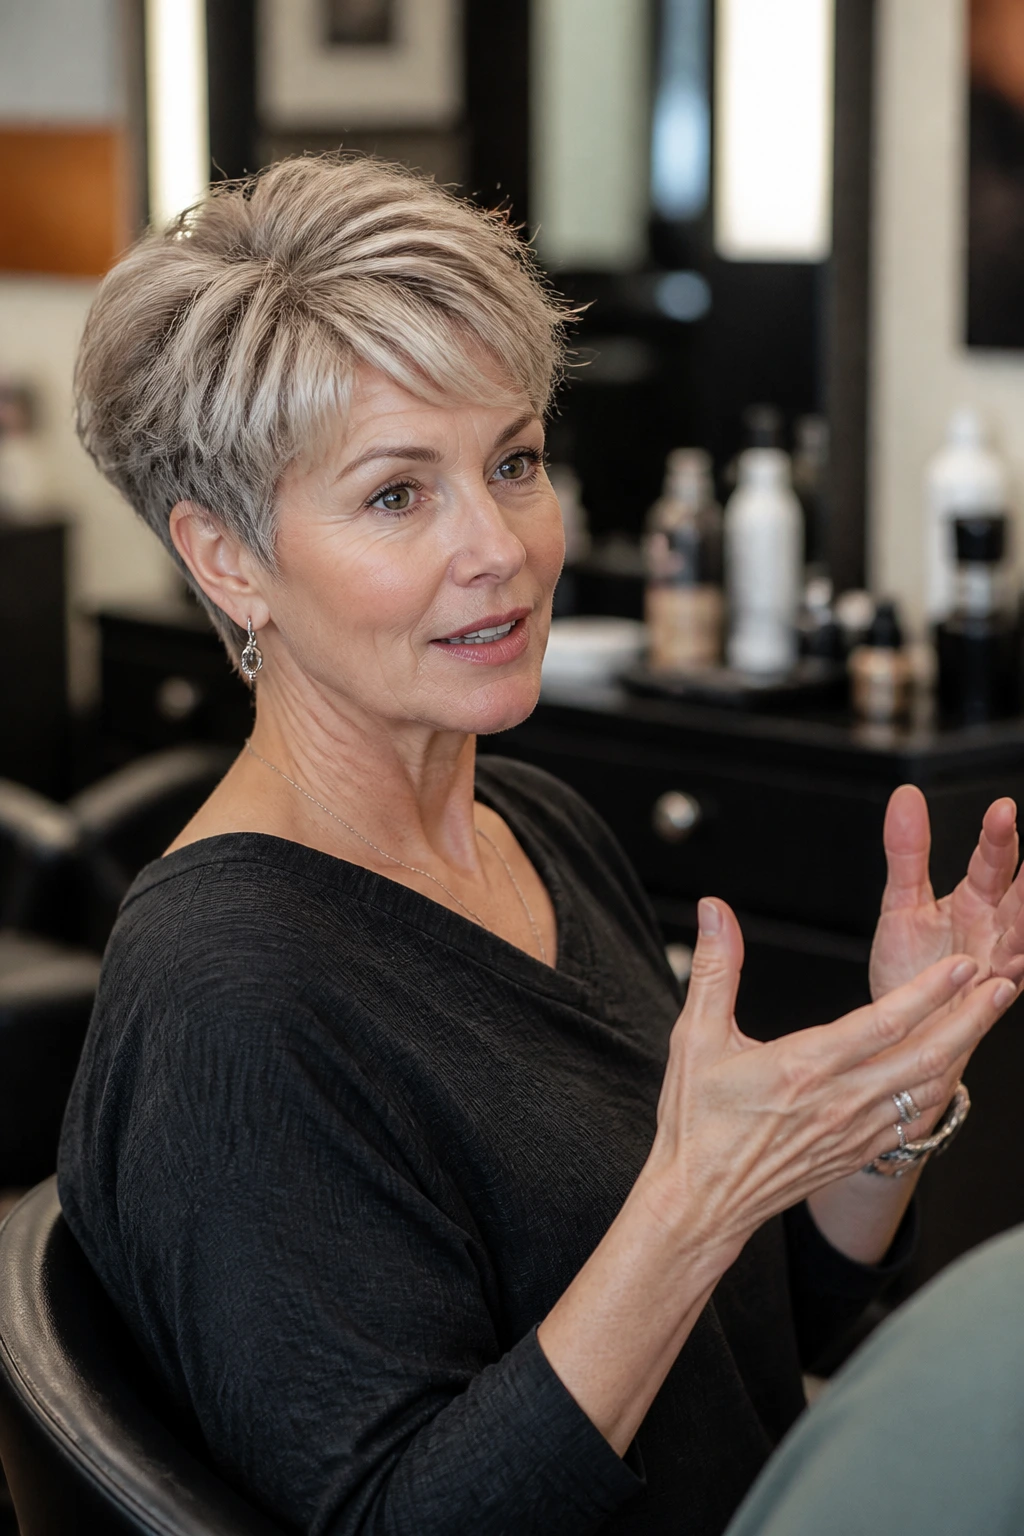
Bring photos. Not one. Three at most. And mark the pieces you actually like — the fringe from one photo, the neckline from another, the crown from the third. That is much more useful than saying you want the “whole look,” because a pixie lives in the details.
Name the trouble spots
Tell your stylist where the hair goes flat, where the cowlick lives, and whether one side grows faster than the other. Thin hair over 50 often has one area that collapses first, usually the crown or temples. If they know that before the scissors come out, they can keep the shape working with your head instead of against it.
Ask how much length you need to keep
A pixie can be short and still full-looking, but there’s a floor. On many heads, the top needs enough length to bend, and the sides need enough softness to avoid a hard outline. If your stylist is planning to cut everything to the same short length, that’s a red flag.
Set the maintenance schedule before you leave
Short hair changes fast. A good pixie often wants a trim every 4 to 6 weeks, sometimes sooner at the neckline. If you know you can’t commit to that, say so. It’s better to build a grow-out-friendly shape from the start than to pretend you’ll enjoy a crisp crop that turns messy in three weeks.
Essential Tools for Styling and Maintenance
-
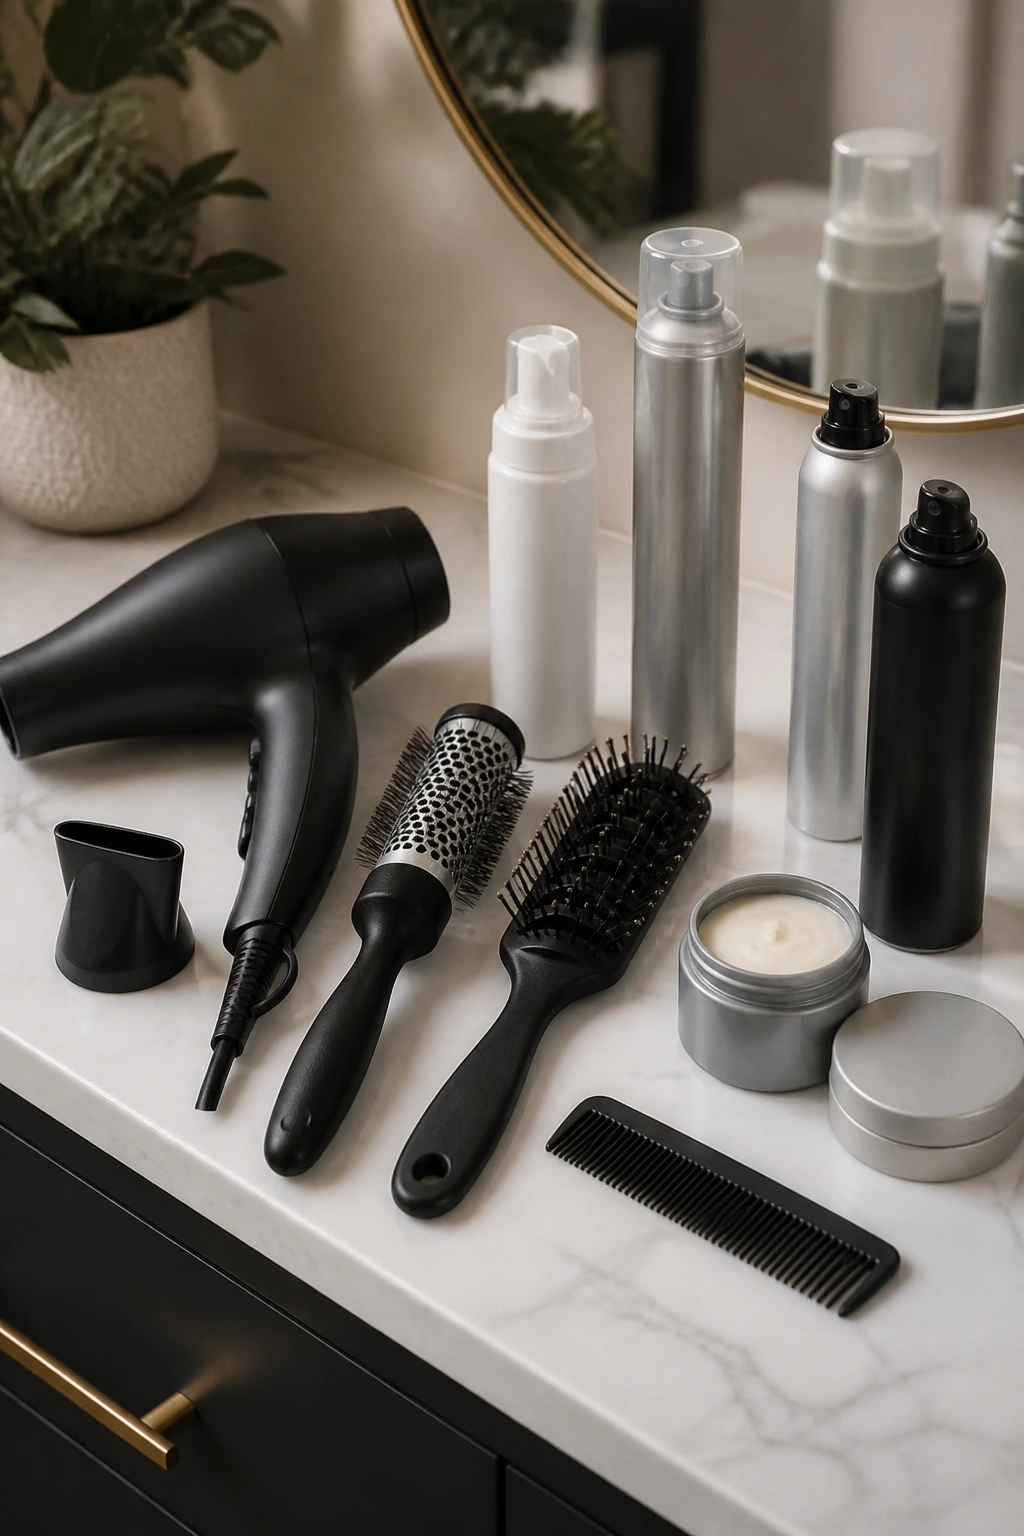
Blow dryer with a concentrator nozzle: Directs air at the roots so you can lift the crown instead of blasting the whole cut flat.
-
Small round brush, 1 to 1.5 inches: Best for bending the fringe, crown, and side pieces without creating too much curl.
-
Vent brush or paddle brush: Good for quick drying when you want shape but don’t want to fuss.
-
Root-lift mousse: Adds a little memory at the scalp so the top does not collapse the minute the hair cools.
-
Lightweight texturizing paste or cream: Helps piece out the ends without turning fine hair greasy.
-
Dry shampoo: Not only for oil; it gives the hair some grip and dulls too much shine when the cut starts to lie too flat.
-
Fine-tooth tail comb: Useful for moving the part a half-inch and checking where the crown is falling.
-
Light-hold hairspray: Keeps fringe and top pieces in place without freezing them into a stiff shell.
-
Hand mirror: Worth keeping near the sink so you can check the neckline and nape between salon visits.
Daily Styling Moves That Keep the Crown Up
Short hair is honest. If the roots are lazy, the whole cut looks lazy. That’s why a pixie usually starts at the scalp, not the ends. Put product in while the hair is damp, especially at the crown and front hairline, and keep the amount small enough that it disappears into the hair.
Dry the top first
Flip the top in the direction you want it to live and dry it there before the rest gets too set. If the crown dries flat, it often stays flat. A quick blast upward with a concentrator nozzle does more than a lot of styling products ever will.
Use fingers before brushes
A brush can over-smooth thin hair fast. Fingers give the cut a little separation, which helps the ends look lighter and fuller. Once the shape is almost there, then use the brush for the final polish on the fringe or side sweep.
Reset on day two
Dry shampoo at the roots, a mist of water on the fringe, and a pinch of paste at the ends can bring a tired pixie back fast. The trick is not rebuilding the whole style. You’re nudging it back into shape. Very different job.
Common Mistakes That Make Thin Hair Look Thinner
-
Over-thinning the crown: If the top feels airy in the chair but looks see-through at home, the stylist took too much density out of the wrong place. Fix it by asking for less texturizing at the crown and more controlled shaping through the ends.
-
Cutting the top too short: When the top is cropped too close, thin hair loses the length it needs to bend and lift. The result is a flat cap effect. Leave enough length for movement, even if that means a slightly longer first version.
-
Using heavy products at the roots: Oils, creams, and thick conditioners near the scalp make fine hair collapse. Apply conditioner from mid-length down, and keep styling creams off the roots unless they’re made for volume.
-
Ignoring the part: A dead-center part can expose scalp in a way that makes thin hair look thinner than it is. Shift the part a little off-center, or change it from side to side so the roots don’t train themselves into one flat path.
-
Waiting too long between trims: A pixie loses its shape fast. If the nape grows out and the sides widen, the cut stops framing the face and starts hiding behind it. Book the trim before it looks desperate.
Variations and Adaptations to Try
Glasses-Friendly Sweep: Keep the fringe just long enough to rest above the frame or skim the top edge. This keeps the haircut from crowding the face while still giving coverage across the forehead. It’s the easiest way to make a pixie feel balanced with glasses.
Cowlick-Calming Crop: If the crown kicks up in one stubborn spot, build the cut around it instead of fighting it. Leave a little extra length where the swirl pushes hardest, then direct the rest of the top to follow that movement. Fighting a cowlick is how people end up with puffiness in one corner.
Gray-Blend Texture: For silver or salt-and-pepper hair, keep the layers soft and the ends piecey. The mixed tones will do some of the visual lifting for you, especially if the haircut has gentle movement around the crown and fringe. Dimension is your friend here.
Curl-Respecting Pixie: For wavy or curly hair, keep the layers longer than you would on straight hair and let the curl pattern decide some of the shape. A pixie that’s cut too short on curls can balloon at the sides. A softer, longer top avoids that.
Low-Maintenance Grow-Out: Choose a shape with a soft neckline, a little length around the ears, and a top that can shift parting. This version looks deliberate a few weeks later instead of half-grown and awkward. It’s the best pick if you know your trim schedule gets loose.
Maintenance, Trims, and Grow-Out Timing
Pixies are not high drama, but they are high attention. The shape changes fast, especially at the nape and around the ears. Most thin-hair pixies hold their line best with trims every 4 to 6 weeks. If the fringe is doing a lot of the visual work, you may want a bang tidy-up even sooner.
Wash rhythm depends on the hair, not the calendar. Fine hair often needs cleansing more often than thicker hair because oils travel faster down the shaft. If your roots get stringy by day two, use a light shampoo at the scalp and keep conditioner away from the crown. If the hair is dry, a tiny leave-in on the mid-lengths can keep the texture from turning brittle.
Sleep matters too. A satin pillowcase or a smooth bonnet can keep the top from getting crushed overnight. It sounds fussy until you wake up to a crown that’s already flattened before coffee. On days when the cut starts to lose shape, a mist of water and a quick dry at the roots usually brings it back better than another round of product.
Frequently Asked Questions
Which pixie cut makes thin hair look the fullest?
Usually the feathered crown-lift pixie, the stacked bixie, or a tapered crop with a longer top. Those shapes keep weight off the sides and give the crown enough length to rise instead of lying flat.
Will a pixie make my face look older?
Not if the cut is balanced. The problem is usually a harsh outline, too-short fringe, or over-thinned sides, not the fact that the hair is short. Softness around the temples and a bit of lift on top usually look fresher than long limp hair.
Should I avoid bangs if my hair is thin?
No, but the bang has to be light. A wispy side sweep or broken-up fringe can hide a forehead and keep the cut from feeling bare. A heavy, blunt bang on fine hair is the version that causes trouble.
What if my crown is very flat?
Choose a cut with longer top layers and ask for root lift in the styling plan. A deep side part, mousse at the roots, and a blow-dry that goes upward first can change the shape more than you’d expect. The key is to keep the crown from drying pasted to the scalp.
Can I wear a pixie cut with glasses?
Absolutely, and some pixies look better with glasses than without them. Side-swept fringe, ear-tucked sides, and soft temple length help the frames feel integrated instead of crowded.
How often do I need trims?
Most pixies need shaping every 4 to 6 weeks. If the neckline grows fast or your fringe carries the style, you may want a touch-up closer to the 3-week mark. Past that, the shape starts to drift.
Is a pixie a bad choice if my hair is very fine and sparse?
Not at all. Very fine hair often looks better short because the weight is gone and the cut can be built around the scalp’s shape. The important part is to avoid over-layering and keep some density at the perimeter.
What should I ask my stylist to avoid?
Ask them not to thin the crown too much, not to cut the top so short it can’t lift, and not to ignore your part and cowlicks. Those three mistakes cause most of the “why does this look flatter at home?” problem.
A Sharp Finish
Thin hair after 50 does not need to be disguised under more length. It needs a shape with a spine. The best pixies use crown lift, soft edges, and a neckline that stays clean long enough to keep the haircut looking chosen instead of accidental.
Pick the version that matches your hair’s habits, not the one that looks boldest in a photo. That one decision saves a lot of second-guessing in the chair. And once the cut starts working with your cowlicks, your fringe, and your part, the whole head reads differently — lighter, neater, and a little more awake.
