



A good shag haircut has a way of making hair look awake again. Not “younger.” Awake. There’s a difference, and it matters more than most salon chatter admits. Shag haircuts for women over 60 work best when they stop arguing with the hair you actually have — the finer crown, the drier ends, the silver strands that bend differently, the wave that shows up on humid mornings and disappears the minute you want it.
That’s why this cut keeps coming back. It’s not nostalgia. It’s physics. Layers change the way hair falls, and a shag can take weight out of the right places without leaving the outline harsh or over-chopped. The better versions keep the neck light, the face soft, and the movement where the eye wants to go: cheekbones, eyes, jawline, collarbone.
The mistake is thinking a shag means the same thing on every head. It doesn’t. A short shag on dense gray hair behaves nothing like a collarbone shag on fine straight hair, and a curly shag needs a totally different hand from a razor-cut version that’s meant to swing. The good news is that the range is wide, and there’s plenty here to work with if you care about shape, easy styling, and hair that still looks like hair.
Why These 24 Cuts Make Sense on Real Hair

- They build movement where hair has gone flat: A well-placed shag layer lifts the crown and breaks up heavy ends, which helps hair look less stuck to the head.
- They play nicely with silver and gray: Coarser white strands can look stiff in one-length cuts; feathered layers soften that edge and show off the shine.
- They grow out with fewer arguments: A shag with soft bangs and blended layers still reads as intentional six to eight weeks later, which is a gift.
- They work with fine, medium, or thick hair: The trick is changing the depth of the layers, not copying the same cut on every head.
- They can be air-dried or styled: A shag can look good with mousse and a diffuser, or with a round brush and ten extra minutes. That flexibility is the point.
- They frame the face without shouting: Curtain bangs, side sweeps, and cheekbone layers do the softening work so the cut doesn’t have to rely on volume alone.
1. Collarbone Curtain Shag
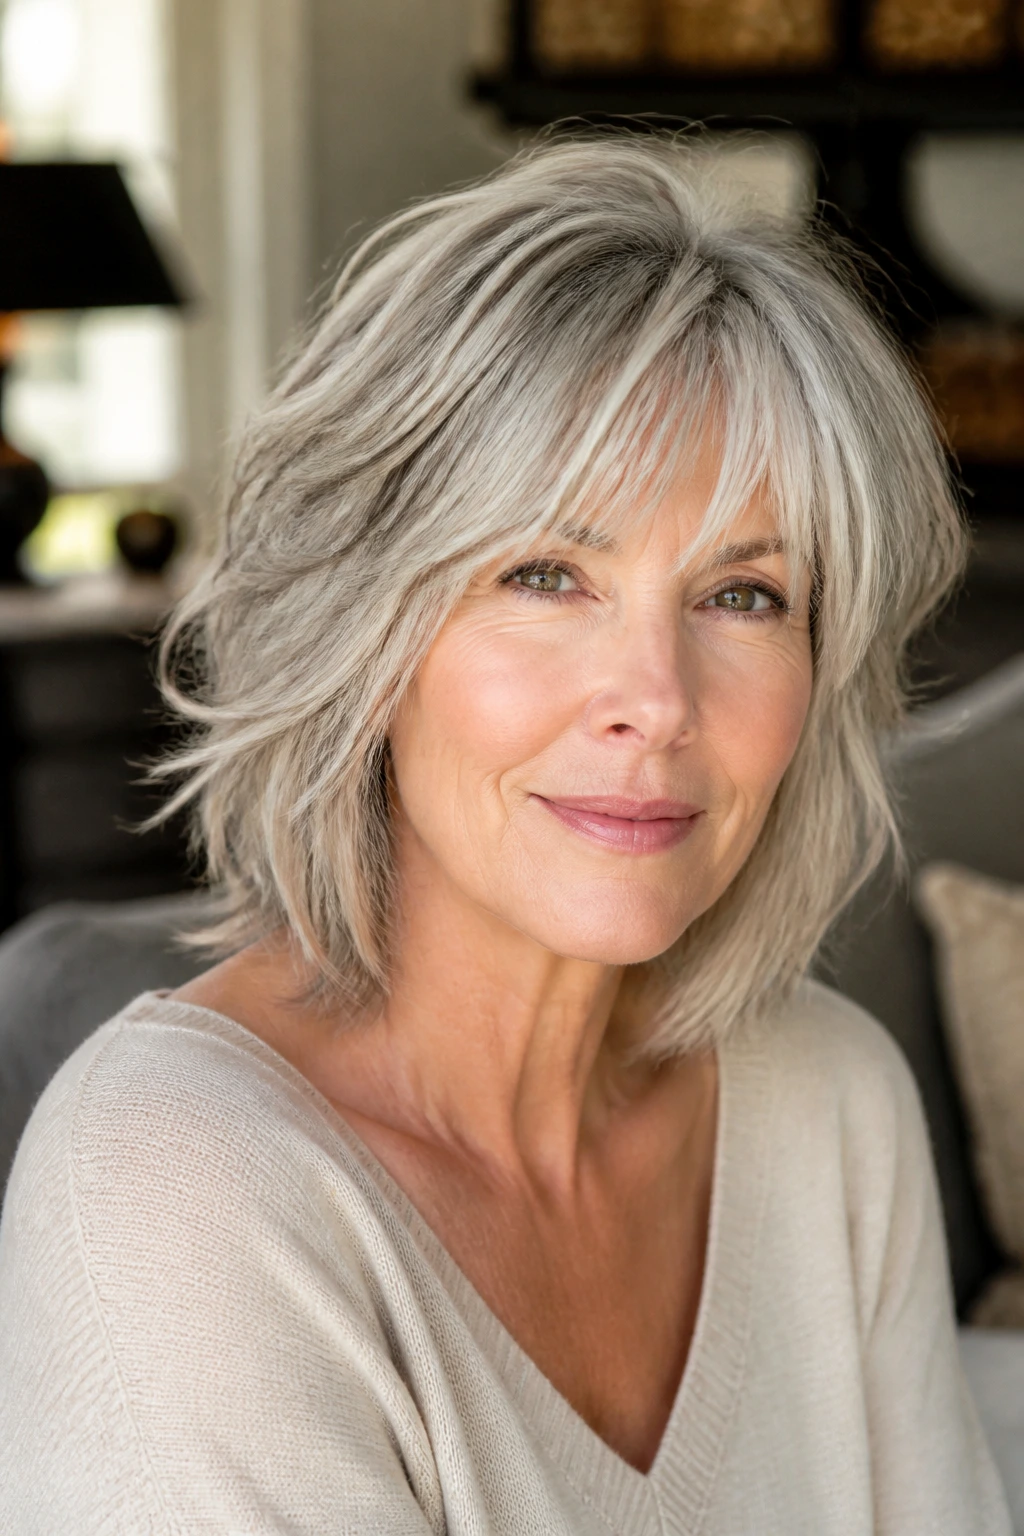
This is the safest place to start if you want movement without committing to a short cut. The length still brushes the collarbone, so you keep swing and a little weight, but the layers around the cheekbones and jaw stop the whole shape from hanging straight down. On hair that has thinned a bit at the crown, that matters more than people think.
I like this version with curtain bangs that begin around the bridge of the nose and open toward the temples. It gives the front enough shape to frame the face, but it doesn’t trap you in a heavy fringe that needs daily babysitting. Ask for internal layers rather than lots of slicing at the ends; that keeps the perimeter looking full, not wispy.
Stylist note: keep the bottom line soft but not shredded. You want movement, not see-through ends.
2. Cropped Silver Shag
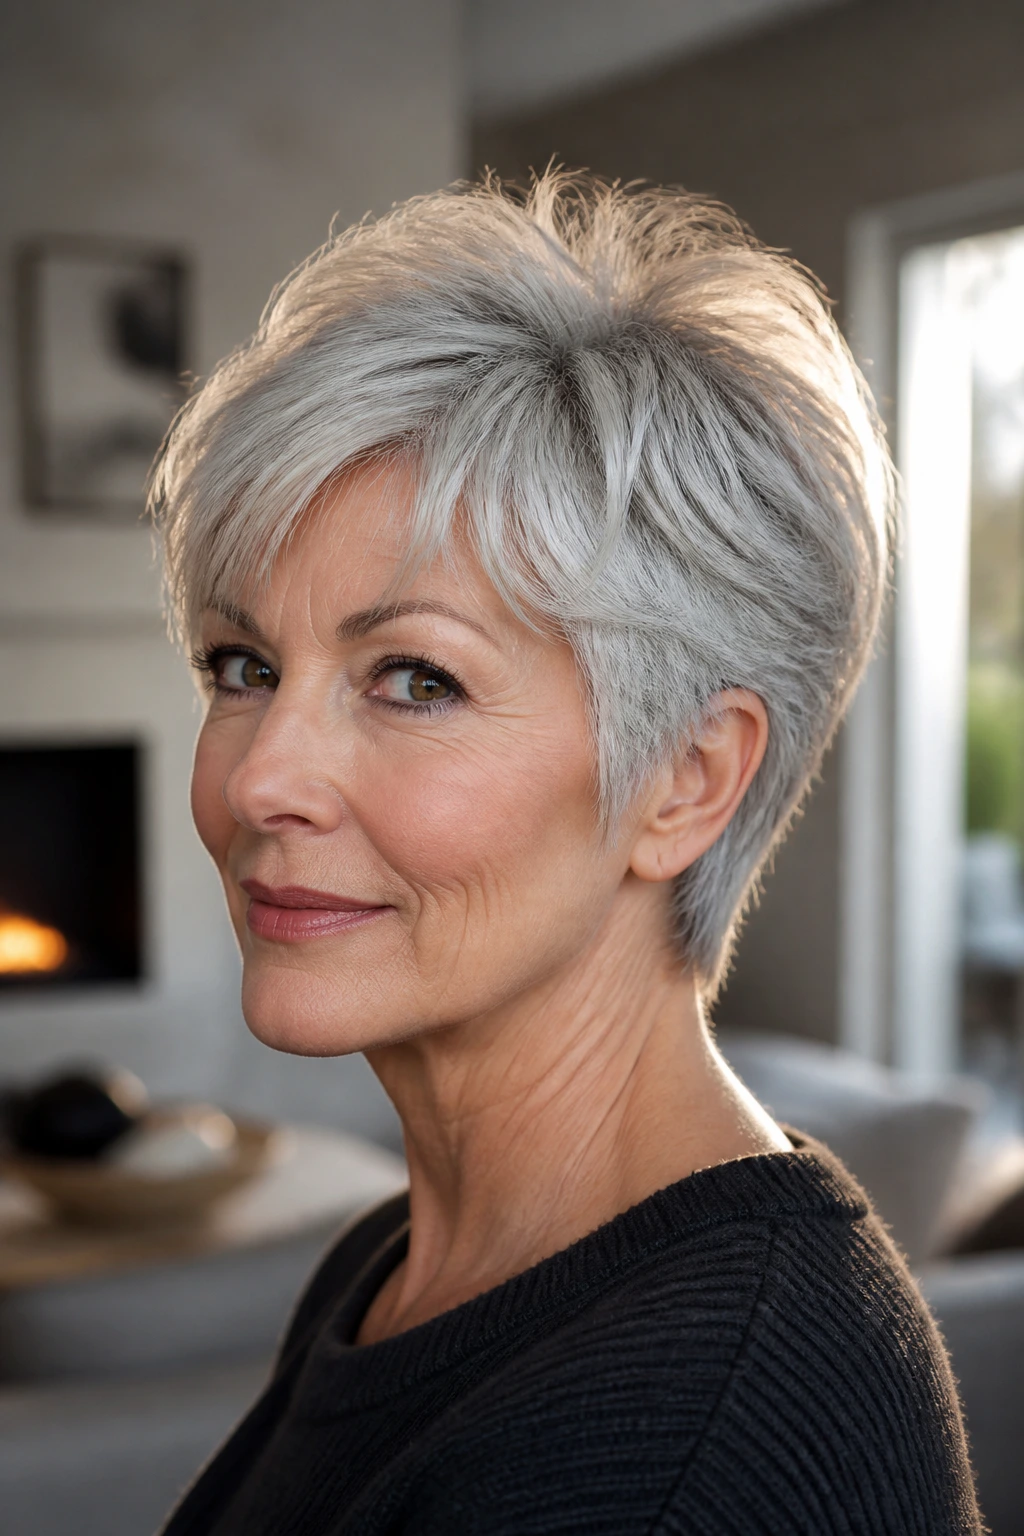
Shorter silver hair can look sharp in the best way when the layers are kept close and thoughtful. This cut sits around the ears and nape, with wisps at the top that lift the crown just enough to stop the silhouette from going flat. It has a clean shape from the back and a softer, broken texture through the top.
Silver strands often reflect light beautifully, but only when the cut gives them room. A cropped shag does that by separating the layers instead of packing them into one block. If your hair tends to puff at the sides, ask for the widest layers to stay above the jawline. That keeps the shape tidy and keeps the ears from getting buried.
It’s especially good if you like quick styling. A dab of mousse, a short blow-dry, and you’re done.
3. Soft French Bob Shag

A French bob and a shag are not the same thing, but they make a lovely compromise when blended carefully. This version hits around the chin, with airy layers that take the blockiness out of a classic bob. The result is neat at the perimeter and loose through the interior, which is exactly why it feels so easy to wear.
What I love here is the balance. You get the polished outline of a bob, but the shag layers keep it from looking helmet-like. If your hair is fine, ask for the shortest layers to stay below the cheekbone so the ends still carry some substance. If your hair is thick, the stylist can remove weight under the surface without making the top look thin.
It’s a smart cut for anyone who wants structure but hates hard edges. Small difference. Big payoff.
4. Feathered Lob Shag

A lob can go sleepy fast if the ends are left too blunt and the top gets no lift. This version fixes that with feathered layers that start around the cheekbones and continue through the mid-lengths. The shape stays long enough to tuck behind the ear, but the ends flick and move instead of hanging like a curtain.
This cut is especially flattering if you wear your hair with a slight bend. A round brush at the last two inches, or even a flat iron turned just a little on the ends, brings out the layers without making the style formal. That tiny bend matters. Straight-heavy lobs often look older than the person wearing them, and that’s a shame because the fix is so simple.
If you want a cut that can live in both casual and polished territory, this one earns its keep.
5. Curly Halo Shag

Curly hair needs a shag that respects the curl pattern, not one that slices it into frizz. The halo shape keeps the length through the bottom while building shorter layers around the crown and upper sides. Done right, it gives curly hair lift at the top and room around the face without turning the whole head into a triangle.
The main rule here: do not over-thin the ends. Curly hair already has its own architecture, and too much removal at the wrong spot can make the curls spring apart in a messy way. Ask for dry cutting if the stylist knows how to read the curl pattern, or at least make sure they cut with the curl’s spring in mind. Wet curls lie.
A little leave-in cream and a diffuser are enough for most days. No need to wrestle it.
6. Pixie Shag with Crown Lift
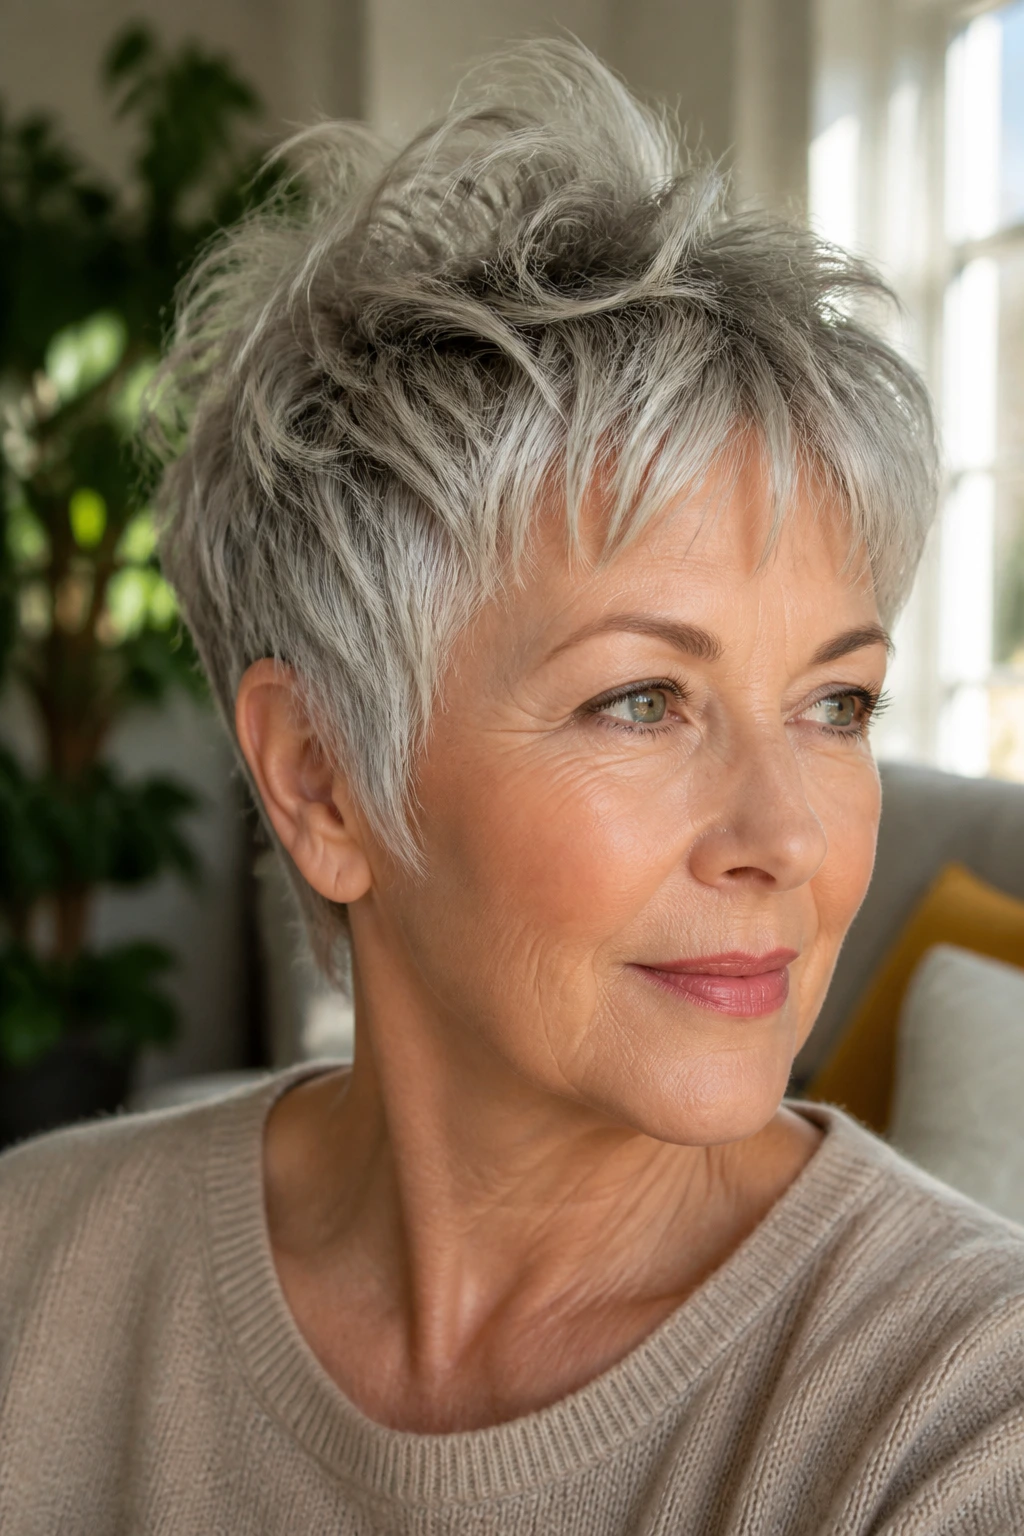
Short hair can still have texture, and this cut proves it. The pixie-shag keeps the sides trimmed close while leaving enough length on top to push the crown upward and forward. It’s airy, not severe. Think lift and softness, not spikes and gel.
This shape works well when the hair at the crown tends to flatten by noon. Short, choppy top layers can be blown up with a round brush or raked forward with matte paste, depending on the day. The nape should stay neat so the style doesn’t drift into fuzzy territory. That back edge is what keeps the whole thing looking deliberate.
If you like short cuts but hate the “done” look, this one has enough movement to stay interesting without turning fussy.
7. Razor-Cut Shoulder Shag
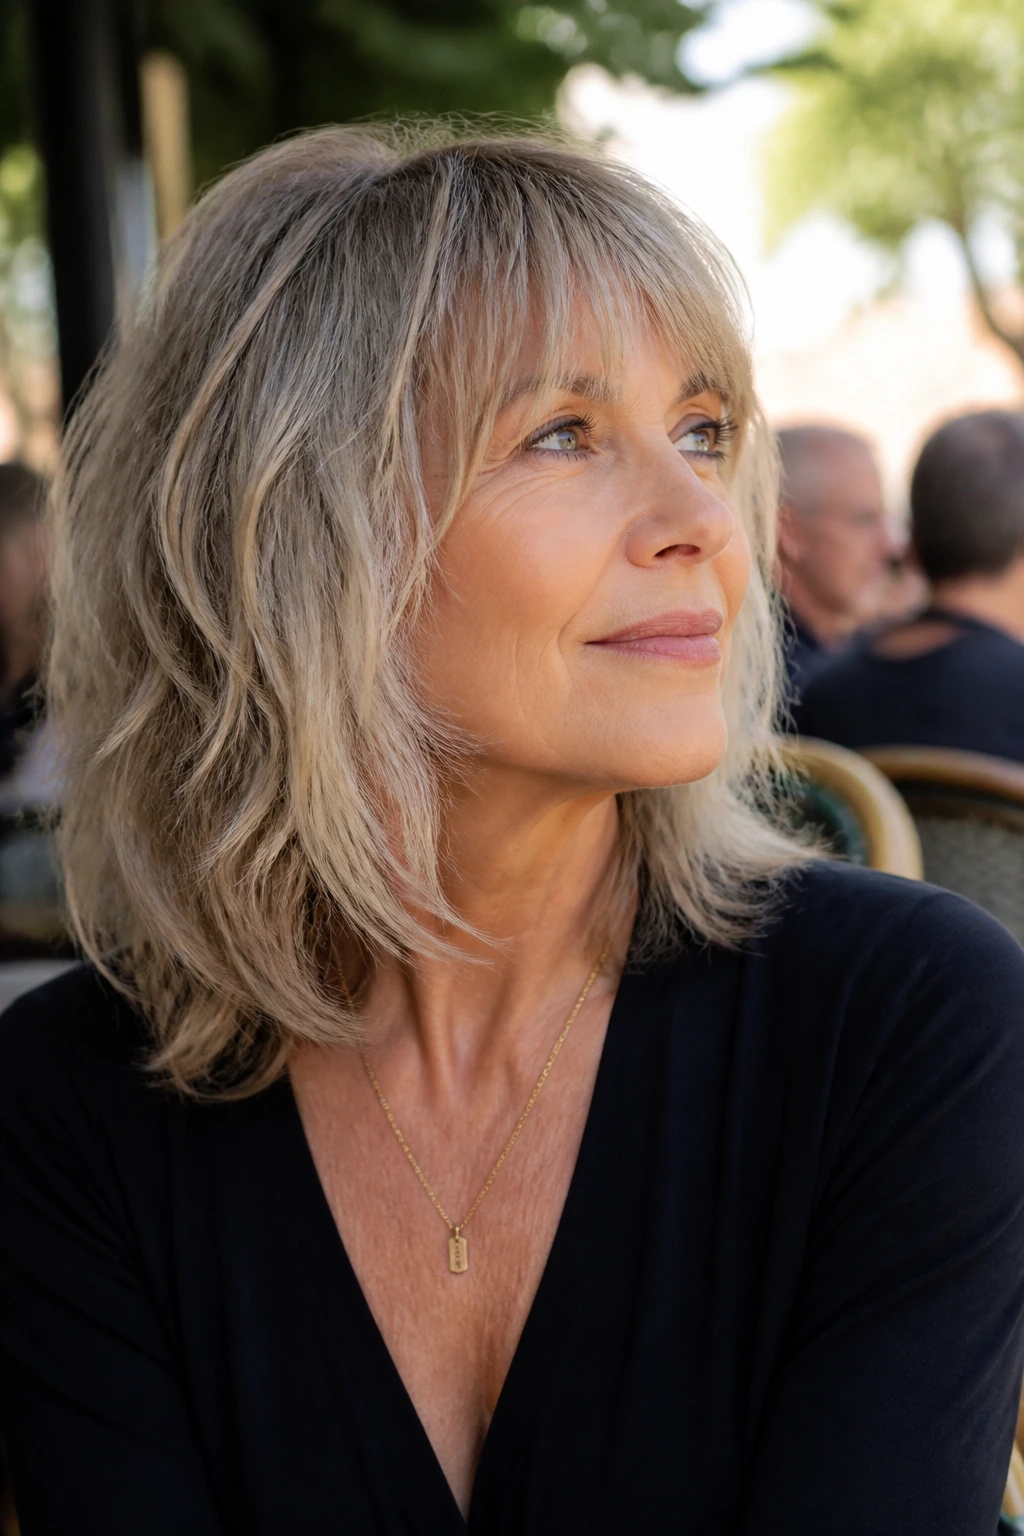
A razor cut gives the ends a slightly airy, broken feel, which can be lovely on shoulder-length hair if the density is right. The shoulder shag keeps enough weight to feel full, then removes bulk through the mid-lengths so the shape doesn’t sit like a block. It moves when you turn your head. That’s the whole point.
I’d choose this for hair that is medium to thick and naturally straight or wavy. On very fine hair, a heavy razor hand can make the perimeter look thin fast, and nobody wants that. If your stylist uses a razor, ask how much is coming out of the ends versus the interior. You want controlled softness, not shredded edges.
A small amount of styling cream through the ends keeps the texture from looking frayed. Tiny amount. Not a palmful.
8. Side-Swept Fringe Shag

Some faces look best when the front never sits dead center. A side-swept fringe shag solves that with a long, diagonal fringe that crosses the forehead and melts into the top layers. It’s a good option if you want forehead coverage without the maintenance of a blunt bang.
This cut is useful for softening a strong part line or balancing one side of the face that feels a little dominant. The sweeping fringe also pairs well with glasses because it avoids the boxy effect you can get when bangs end directly on the frames. Ask for the fringe to start longer than you think; it can always be shortened, and the worst fringe mistakes are made by going too short on day one.
I like this one on hair that likes to fall forward. It gives that habit a shape instead of fighting it.
9. Tapered Nape Shag
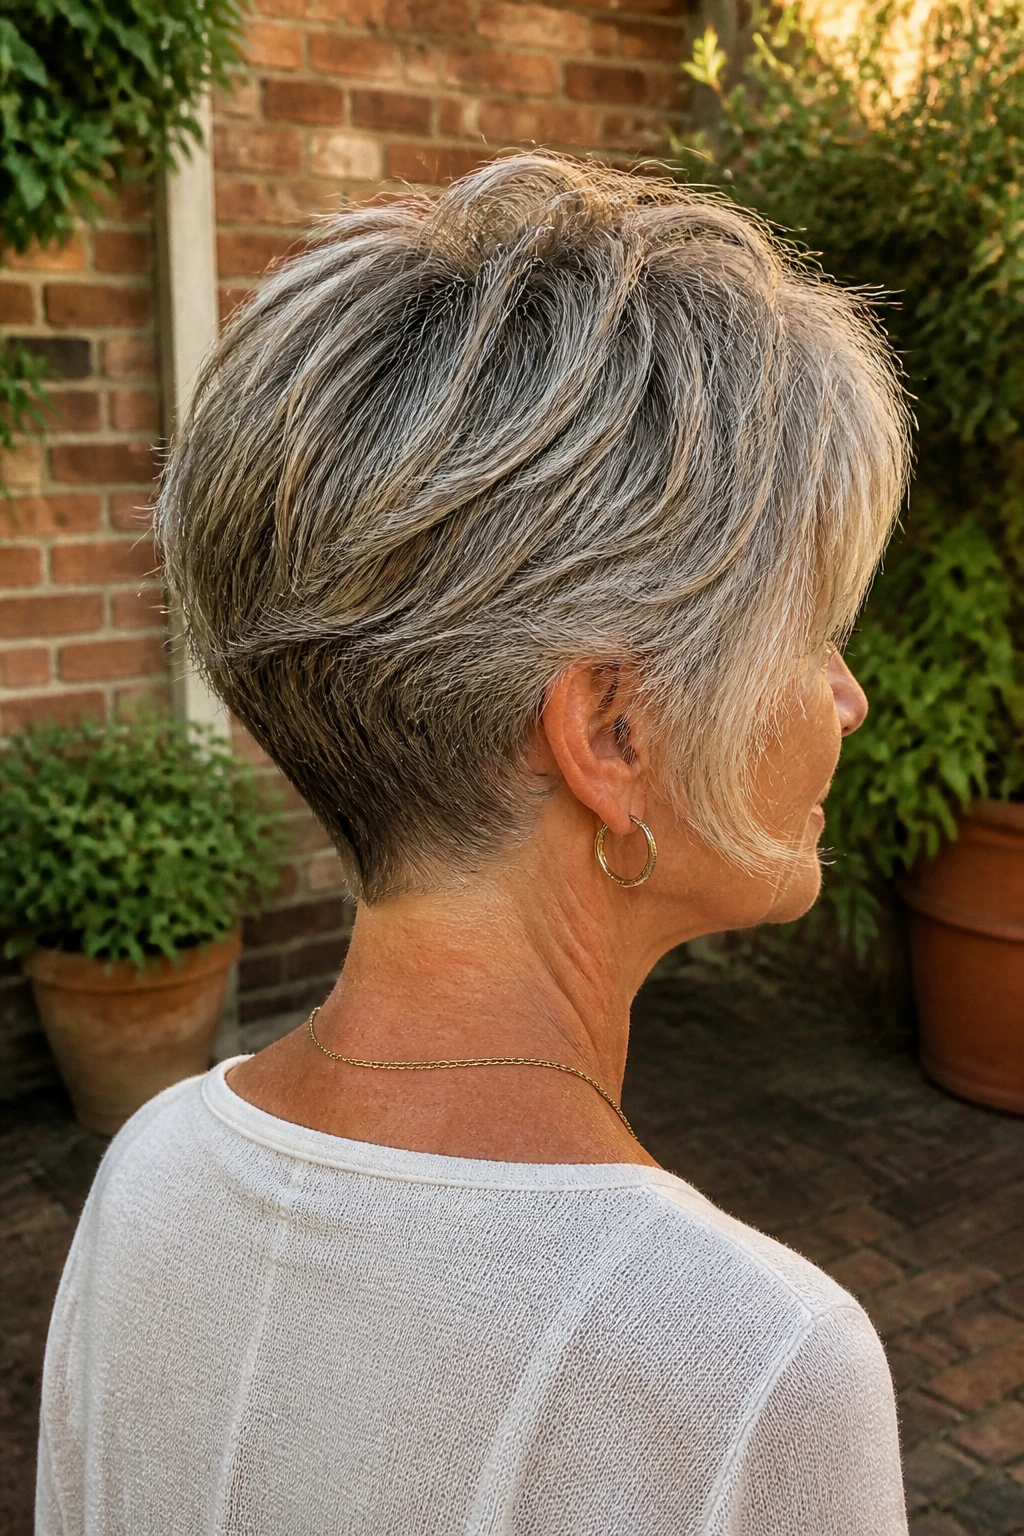
A tapered nape changes the whole mood of a shag. The back is shorter and cleaner, while the length in front stays longer and softer around the jaw. That contrast makes the neckline look tidy and gives the front enough weight to frame the face without dragging the cut down.
This is a smart move for thicker hair, especially if the back tends to kick out or puff at the collar. By narrowing the nape, the cut sits closer to the head and feels lighter. If you wear collared shirts a lot, this shape is a quiet win; the hair clears the fabric instead of getting trapped in it.
It’s neat without being stiff. That’s harder to pull off than it sounds.
10. Bottleneck Bang Shag

Bottleneck bangs start narrow at the center and widen as they reach the temples, which gives them a softer version of a curtain bang. On a shag, that shape helps the front stay light while still offering forehead coverage. It’s a very good choice if straight-across bangs feel too blunt but you still want a little frame.
The bang length should sit somewhere between the lashes and the cheekbone, depending on how much face you want to reveal. What matters more than the exact line is the transition into the layers. You want the fringe to flow into the rest of the cut, not sit on top of it like a separate piece.
This style suits hair that has a bit of bend or can be taught one with a quick round-brush pass. The fringe does need a little attention, though not much. A five-minute morning is enough.
11. Soft Wolf Shag
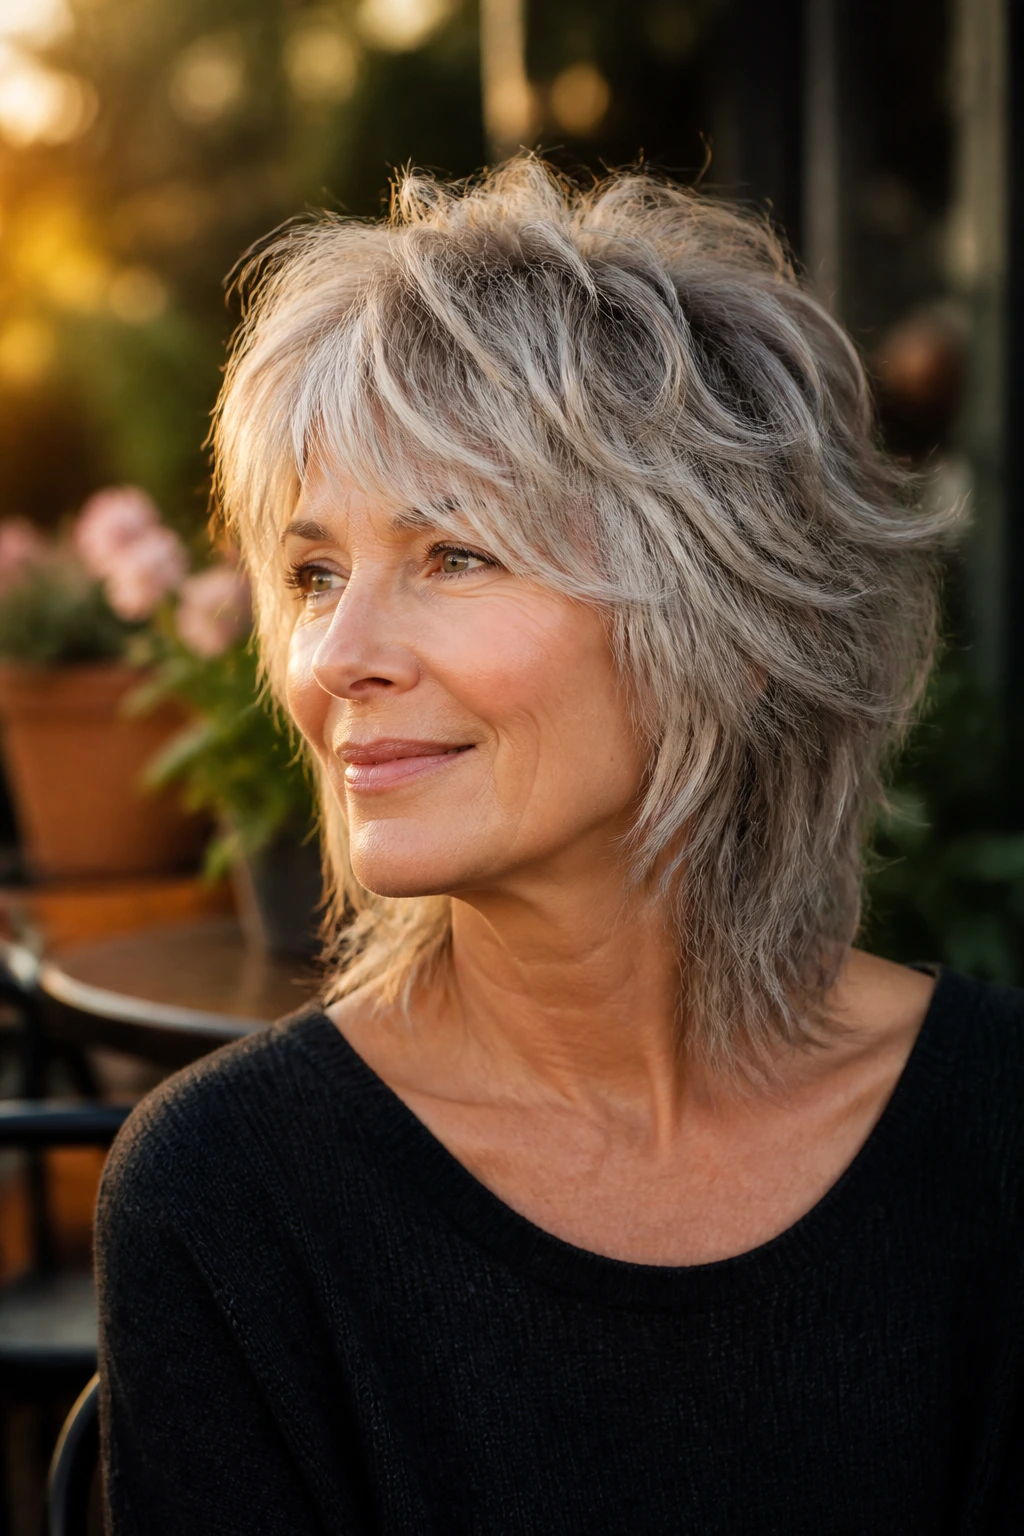
A wolf cut can look too aggressive on some faces, so the soft wolf shag sands down the edges. The top still has lift, the layers still stack, but the lengths are blended more gently, and the nape is left a little longer. It gives you the attitude without the sharpness.
This version is useful if you want something current-looking but not severe. The face-framing pieces should graze the cheek and jaw, not carve into the cheek. That’s the line between edgy and awkward. And yes, there is a line.
I’d steer this one toward hair with some natural movement. On pin-straight hair, it can look a little too deliberate unless you spend time adding bend.
12. Rounded Thick-Hair Shag

Thick hair needs shape more than it needs more layers. That sounds backward, but it’s true. A rounded shag keeps the silhouette soft and slightly dome-shaped through the top, while removing bulk from the interior so the hair doesn’t fan out at the sides.
The danger with thick hair is over-cutting the perimeter and leaving a halo of short pieces that refuse to lie down. Better to keep the bottom line controlled and work weight out underneath. Ask for long internal layers and a little shorter movement around the crown and temples. That keeps the head shape flattering instead of mushroomy.
This cut behaves well in a blowout, but it also looks good on second-day hair, which is where most real life happens.
13. Air-Dry Beach Shag

If you’d rather not build your morning around hot tools, this is the cut to look at. The layers are placed so that waves can dry into their own shape, with enough piece-y separation to avoid the helmet effect. It’s looser at the ends and a touch shorter around the face.
The key is to cut it with the way your hair dries in mind. If your wave bends away from the face, the front pieces should be long enough to respect that. If the wave bends forward, the fringe may need a little extra length so it doesn’t spring into your eyes. One of the most common styling mistakes is fighting the dry pattern. Don’t.
A bit of mousse on damp hair, then a scrunch and leave-alone approach, is usually enough. Touching it too much is how you get frizz.
14. Piecey Silver Shag

Piecey layers and silver hair are a strong combination because they show off the reflective quality of gray and white strands. The cut uses separated ends around the face and through the top, which gives the style movement without asking for heavy blow-drying. It can look polished or casual depending on how much product you use.
What I like here is the way the silver catches different shapes in the haircut. A one-length silver style can flatten out under daylight, but a piecey shag gives the eye something to follow. Ask for soft texturizing, not aggressive chipping. Aggressive texture on silver hair can make the ends look dry faster than they already do.
A little shine cream on the mid-lengths helps. Skip heavy oils at the root unless you enjoy flat hair by lunch.
15. Sleek Straight Shag
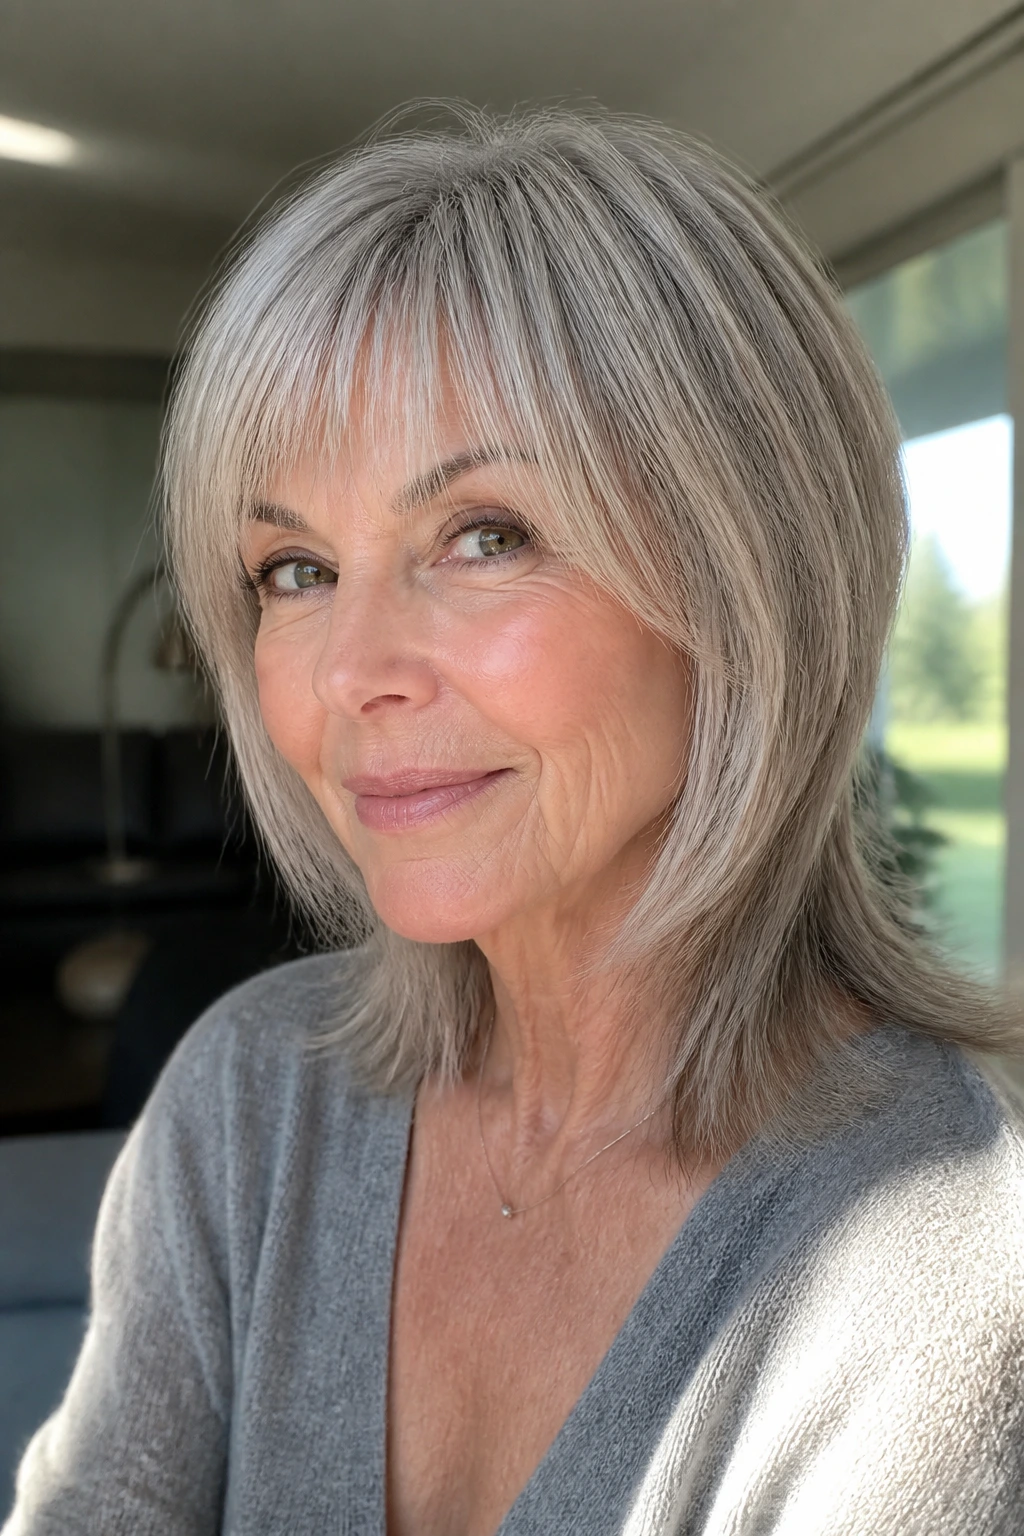
Straight hair is often the hardest to cut well into a shag because every line shows. That’s exactly why a sleek straight shag needs careful internal layering and a perimeter that still feels strong. The layers should create bend, not random jumps. If they’re placed badly, the cut can look choppy in the wrong way.
This version is good for hair that resists curl but needs a break from blunt one-length styles. The front pieces should begin around the cheekbone or jaw, depending on your face shape, and the crown should get just enough lift to avoid a flat top. A flat iron is not the enemy here, but it should be used to soften the ends, not iron them bone-straight into a helmet.
A little movement reads better than perfection. Always.
16. Mini Fringe Shag

A mini fringe is a bold little move, and it works best when the rest of the cut stays soft. The fringe sits above the brows, usually lightly feathered, with shag layers that keep the top from looking too heavy. It can be charming, sharp, and unexpectedly youthful in the plain sense of lively, not in the silly sense people use when they talk about hair.
This cut asks for maintenance. No way around that. If you hate bang trims, skip it. But if you like seeing your eyes and brows framed in a clear way, the mini fringe gives the face a crisp edge that longer bangs can’t mimic.
I’d pair it with textured sides and a slightly longer neckline so the whole style stays balanced. Short fringe plus long, blunt sides can look disconnected. Keep it soft.
17. Retro Flip Shag

This one has a little bit of old-school swing in it, and I mean that as a compliment. The layers are cut so the ends naturally flip out or can be coaxed outward with a round brush. Think a touch of retro energy, not costume hair. The result is lively around the collar and cheek.
A flip shag can be a nice answer for hair that feels boring when it’s straight. You are not trying to create giant curls. You’re giving the ends enough shape to turn under or out depending on the brush. It looks especially good on shoulder-length hair that has a little density left in it.
If the ends feel dry, use a tiny amount of cream just from ear level down. The flip should look airy, not crispy.
18. Wash-and-Go Shag

A wash-and-go shag is built around the idea that hair should behave after one quick routine, not after a ten-step battle. The layers are kept soft enough to fall into place with a little product and time, while the shape stays interesting even when you do very little. That’s the appeal.
This cut works for hair with a natural wave, a loose curl, or some bend from previous styling. The trick is not to over-layer the crown or the sides. Too much removal and the shape gets fuzzy. Too little and it becomes a long, dull shape that doesn’t read as a shag at all. There’s a middle lane, and it’s worth finding.
If you air-dry, scrunch lightly and walk away. If you blow-dry, use low heat and stop before the hair turns poofy.
19. Face-Lifting Short Shag
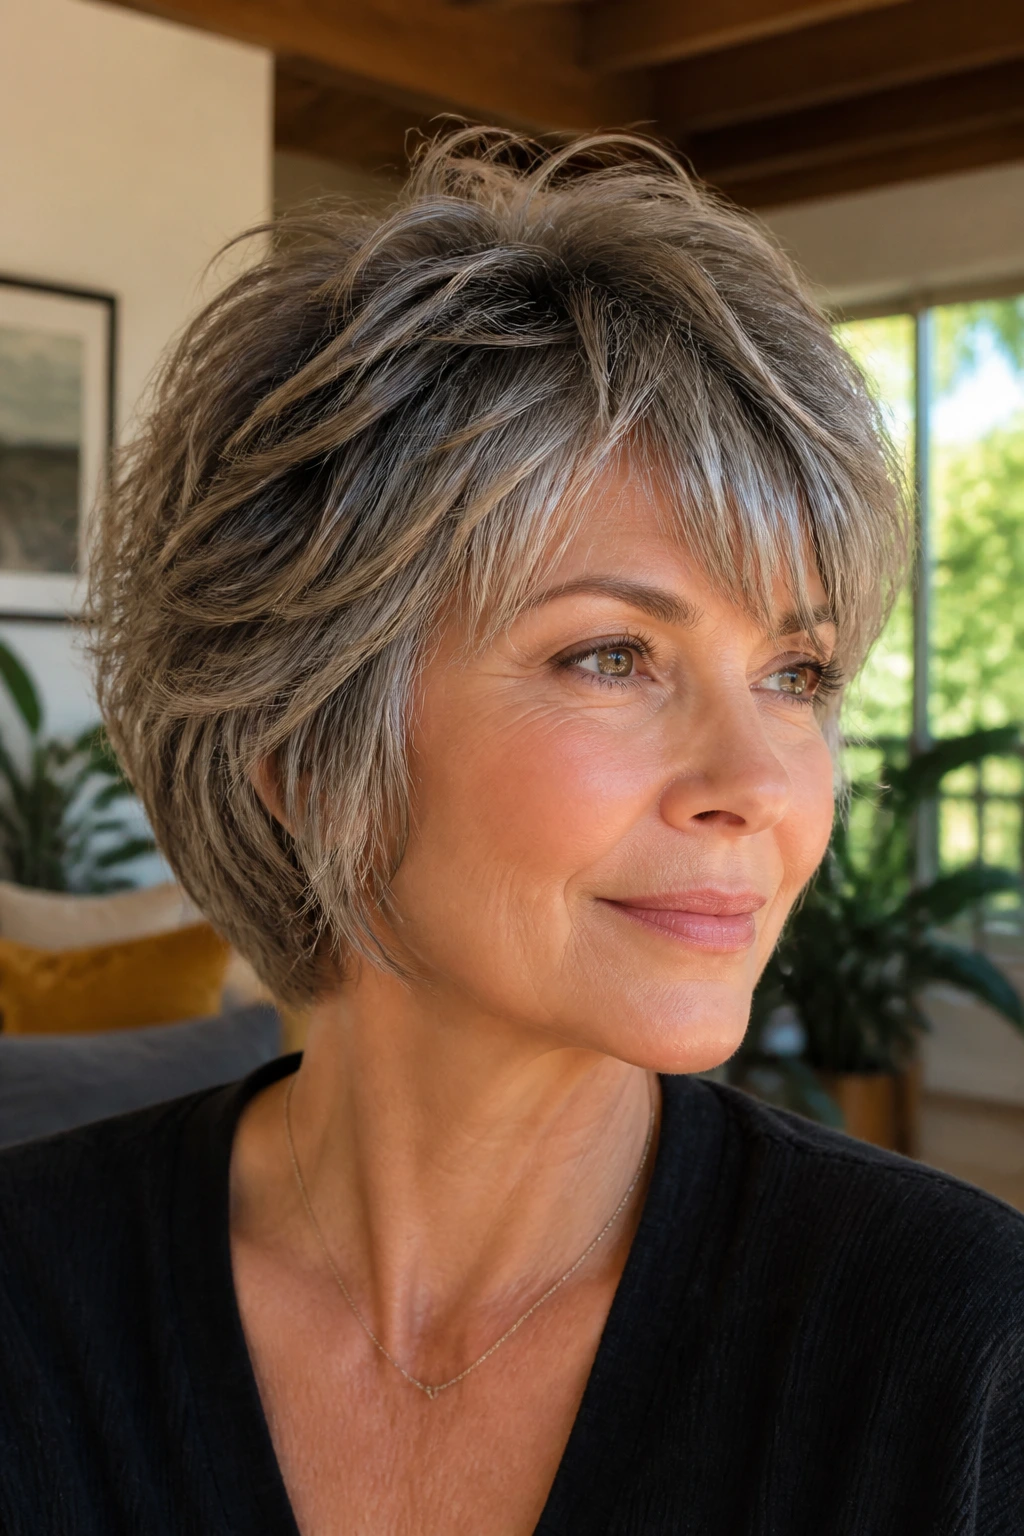
Short shag haircuts for women over 60 often work best when the front pieces are cut to lift the face upward instead of pulling it down. That means cheekbone-length layers, a little height at the crown, and enough softness around the temples to keep the shape from feeling severe. It’s a bright, clean cut.
This one is especially good if the jawline has softened and you want the cut to echo that without going into mushy territory. The layers should angle back from the face, not hang straight beside it. Ask your stylist to look at your profile, not only the front view. The side view tells you whether the cut has lift or just shortness.
It’s quick to style and easy to keep neat. Short does not have to mean harsh.
20. Classic Medium Shag
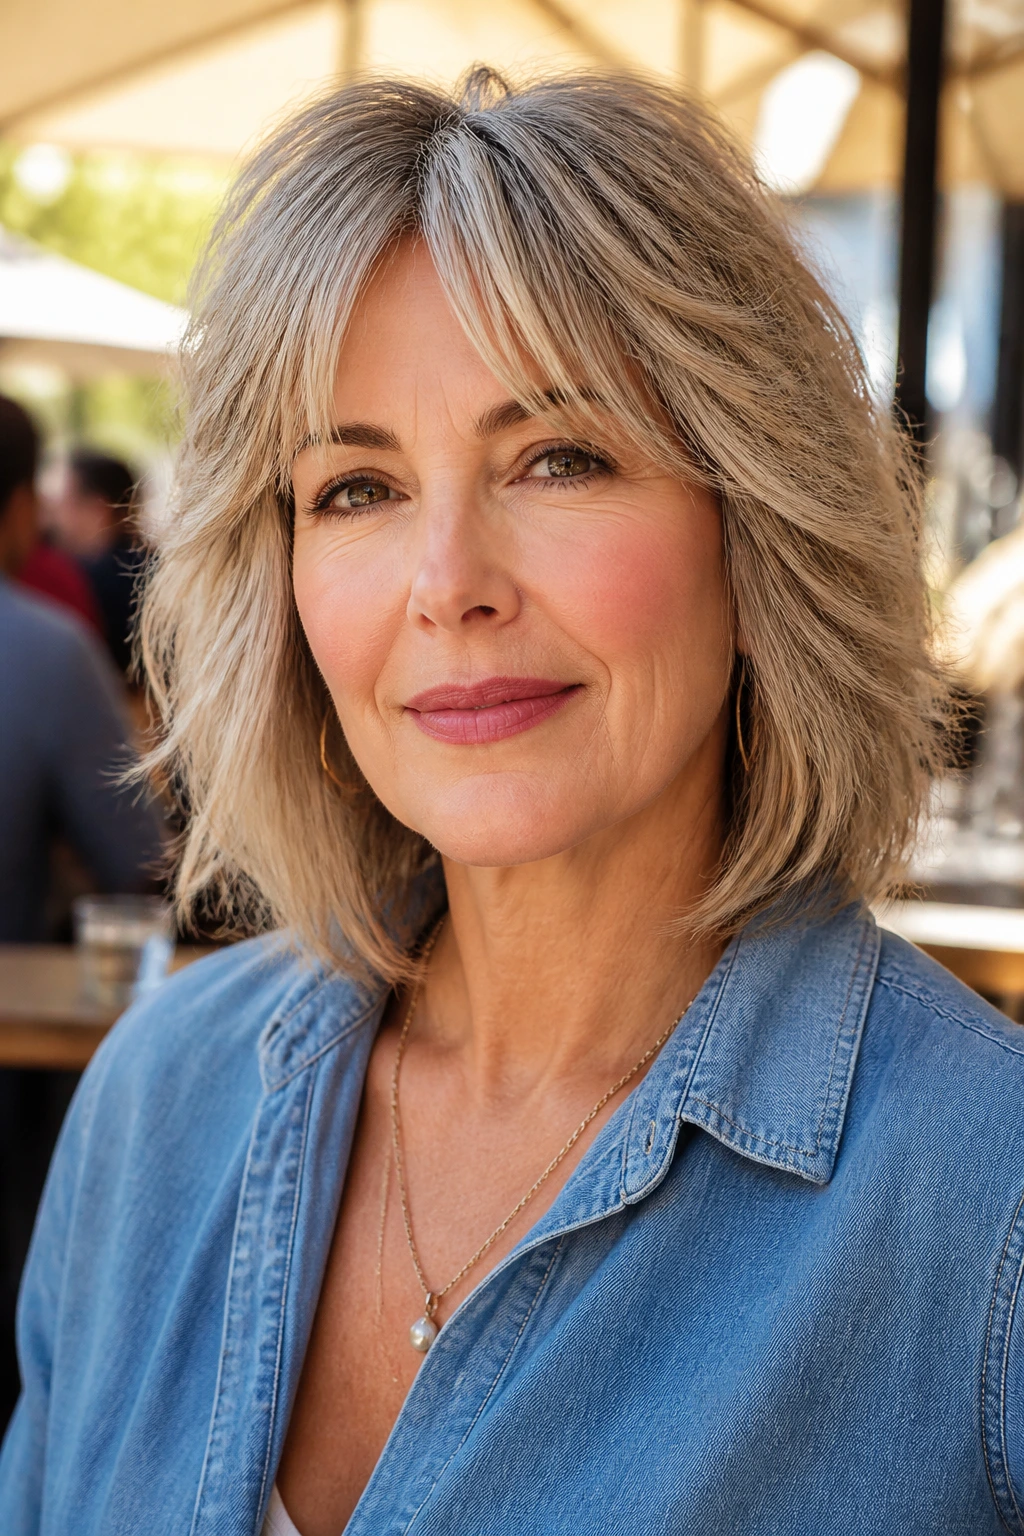
There’s a reason the medium shag keeps showing up. It gives you enough length to tuck, pin, or twist, but the layering keeps it from sitting heavy at the shoulders. The shape usually lands somewhere between the chin and collarbone, with face-framing pieces and a lighter crown.
This is the cut I’d pick for someone who wants flexibility above all else. You can wear it blown smooth, air-dried, or bent with a curling iron. It doesn’t require a dramatic styling identity, and that can be a relief. Some days hair should just behave.
Ask for the layers to be soft enough that the grow-out doesn’t turn into a shelf at the cheek. Shelf layers are the enemy here. Keep them blended.
21. Grown-Out Soft Shag

A grown-out shag can look intentional when the layers are long and the fringe is soft. In fact, that is half the appeal. This version leans into a less-fussy shape, with enough movement to read as styled but not so much that the haircut screams for a trim every three weeks.
It’s useful if you do not want to live at the salon. The front can be cheekbone length, the sides a little longer, and the back left with a gentle taper. It grows into a loose, flattering shape instead of collapsing into one heavy block. That is rare. Appreciate it.
I’d choose this for hair that needs a graceful transition from a previous bob, lob, or layered cut. It buys time, which is a practical kind of beauty.
22. Glasses-Friendly Shag

Glasses change everything. A shag that looks fine on bare faces can suddenly feel crowded once frames are added, especially if the fringe sits too low or the side layers end exactly at the temples. A glasses-friendly shag solves that by keeping the front a little higher and the side pieces a little longer.
The fringe should land above or just at the top of the frame, then curve away from the cheek. That keeps the eyes visible and prevents the face from looking chopped in half. If your frames are bold, this cut softens the visual weight. If your frames are light, it adds enough shape to keep the haircut from disappearing.
Bring your glasses to the salon if you can. That one simple move saves a lot of guessing.
23. Deep Side-Part Shag
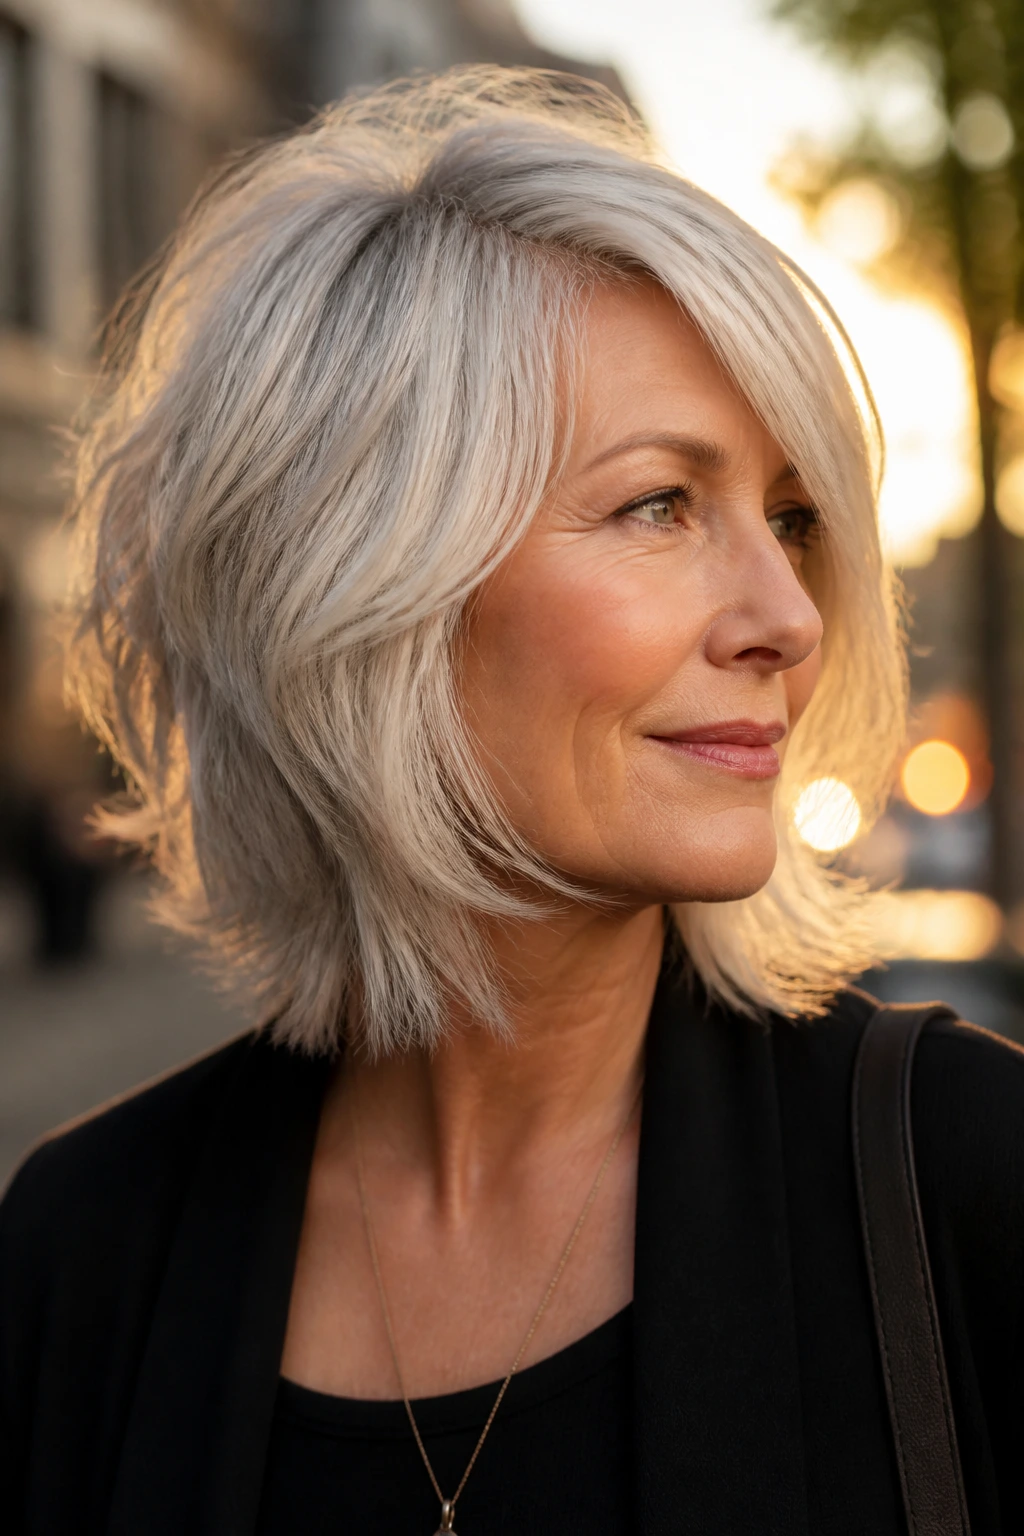
A deep side part can rescue hair that insists on lying flat at the crown. It creates instant lift on one side and gives the face a more diagonal line, which is often flattering on softer features. Paired with shag layers, it feels controlled but not stiff.
This cut is useful if you have a visible cowlick or one side that naturally wants to collapse. Instead of fighting that pattern, the deep part uses it. The heavier side can sit near the cheekbone, while the lighter side gets tucked or swept back. Small change. Big visual shift.
I like this version for days when you want your hair to look like it has structure, even if the styling took ten minutes and no heroics.
24. Polished Blowout Shag

A polished blowout shag gives you the movement of a shag with a little more shine and roundness through the ends. The layers are still there, but the styling is smoother, with the brush turning the front pieces away from the face and adding soft lift at the crown. It reads finished without looking stiff.
This is a good option for dinners, events, or any day you want your hair to look a touch more intentional than air-dried texture. A medium round brush, a nozzle on the dryer, and a light heat protectant are enough. The trick is to stop the blow-dry before the hair gets puffed. You want shape, not volume for volume’s sake.
If you like your hair with a little movement and a little gloss, this one ends the list in the right place.
Why the Shag Keeps Working on Hair That Has Changed Texture

A shag haircut earns its keep because it changes how hair sits without asking the hair to become something it is not. That matters more over 60, when texture often shifts. Hair can get finer at the root, drier at the ends, coarser in the silver strands, or more sensitive to heat and overprocessing. A blunt style tends to expose all of that. A shag lets the hair move around those changes.
The best versions use layers as support, not decoration. That’s the part most people miss. A layer near the cheekbone creates lift where the eye wants it. A softer perimeter keeps the ends from looking shredded. A bit of internal weight removal stops thick hair from swelling out at the sides. Every snip has a job, and if it doesn’t, it probably shouldn’t be there.
There’s also a nice side effect with gray and silver hair. Those strands often show shape beautifully when the cut is not too stiff. The light catches the different lengths, and the whole thing looks deliberate instead of heavy. That’s a better result than trying to force shine or bounce where the haircut itself is fighting you.
How to Choose the Right Shag for Your Texture and Face

Do not pick a shag from a photo alone. Bring the photo, sure, but bring a realistic one. Same density. Same texture. Same length range. A shag that looks airy on thick, wavy hair may turn too thin on fine straight hair, and the reverse happens too. That’s why consultation matters more here than with a one-length bob.
If your hair is fine, look for longer layers and a stronger perimeter. You want movement at the top and around the face, not shredding at the ends. If your hair is thick, ask for internal removal so the shape sits closer to the head. If your hair is curly, the cut needs to respect spring and shrinkage, so the layers should often be longer than they look in the chair.
Face shape is part of the puzzle, but only part. Curtain bangs soften a longer face. Side-swept fringe can balance a strong forehead. Cheekbone layers help widen a narrow face, while a tapered nape keeps a softer jawline from getting swallowed. The right cut is the one that makes your own features easier to see, not the one that turns you into somebody else.
Tools That Make Styling These Cuts Easier at Home
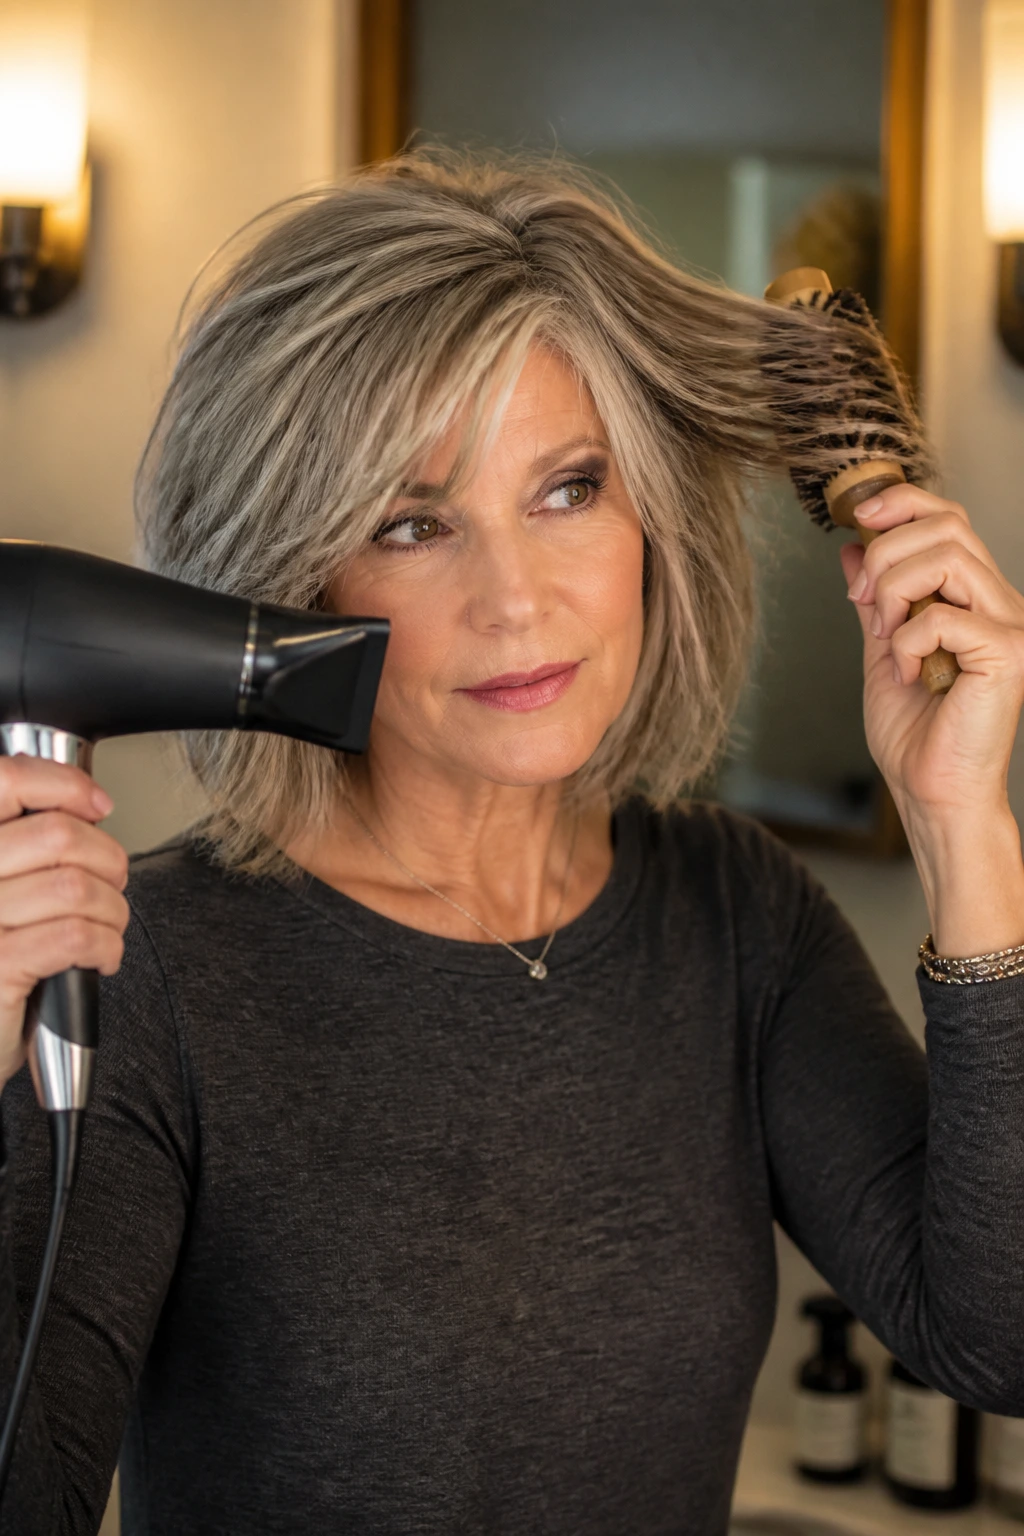
- Blow dryer with a nozzle attachment: The nozzle directs airflow so layers dry where you want them instead of going every which way.
- Round brush, 1.25 to 2 inches: A smaller brush gives more bend; a larger one keeps the finish softer and less curly.
- Diffuser: Use this for wavy or curly shags when you want the pattern to stay intact and the frizz to stay calmer.
- Lightweight mousse: This gives roots a little support without the sticky, crunchy feel heavier creams can leave.
- Heat protectant spray: Essential if you blow-dry or use a curling iron, especially on silver or dry hair that fries fast.
- Dry texture spray: Helpful for piecey ends and second-day lift, but use a light hand. Too much turns into dust.
- Wide-tooth comb: Better than yanking through a shag with a fine comb, especially when the ends are textured.
- Velcro rollers or large clips: Good for setting the crown while the hair cools. Cooling is where shape settles.
- Microfiber towel or old cotton tee: Reduces rough towel friction, which matters if your hair frizzes as soon as you blink at it.
How to Wear These Cuts in Real Life

Front view: The best shag should show some frame around the eyes and cheekbones without swallowing the face. If you wear glasses, keep the fringe a touch higher. If you don’t, a softer curtain or side sweep can bring attention upward and make the cut feel lighter.
Accompaniments: Think about earrings, collars, and necklines. Shorter shags work well with earrings because the hair clears the jaw; medium shags look good with open collars and sweaters that don’t crowd the neck. A dramatic necklace can be nice with a collarbone shag, but heavy fringe and a bulky neckline can compete.
Length balance: Shorter shags make the neck look long and neat. Medium shags give more room for movement and are easier to tuck. Longer shaggy layers suit anyone who wants softness but not a full short cut. The right length is the one you stop thinking about after the second day.
Finish: Air-dried texture feels casual and easy; a brushed blowout feels neater and a little more dressed up. The cut can handle both. That’s why it keeps earning its place.
Texture Tricks That Add Lift Without Making Hair Fussy
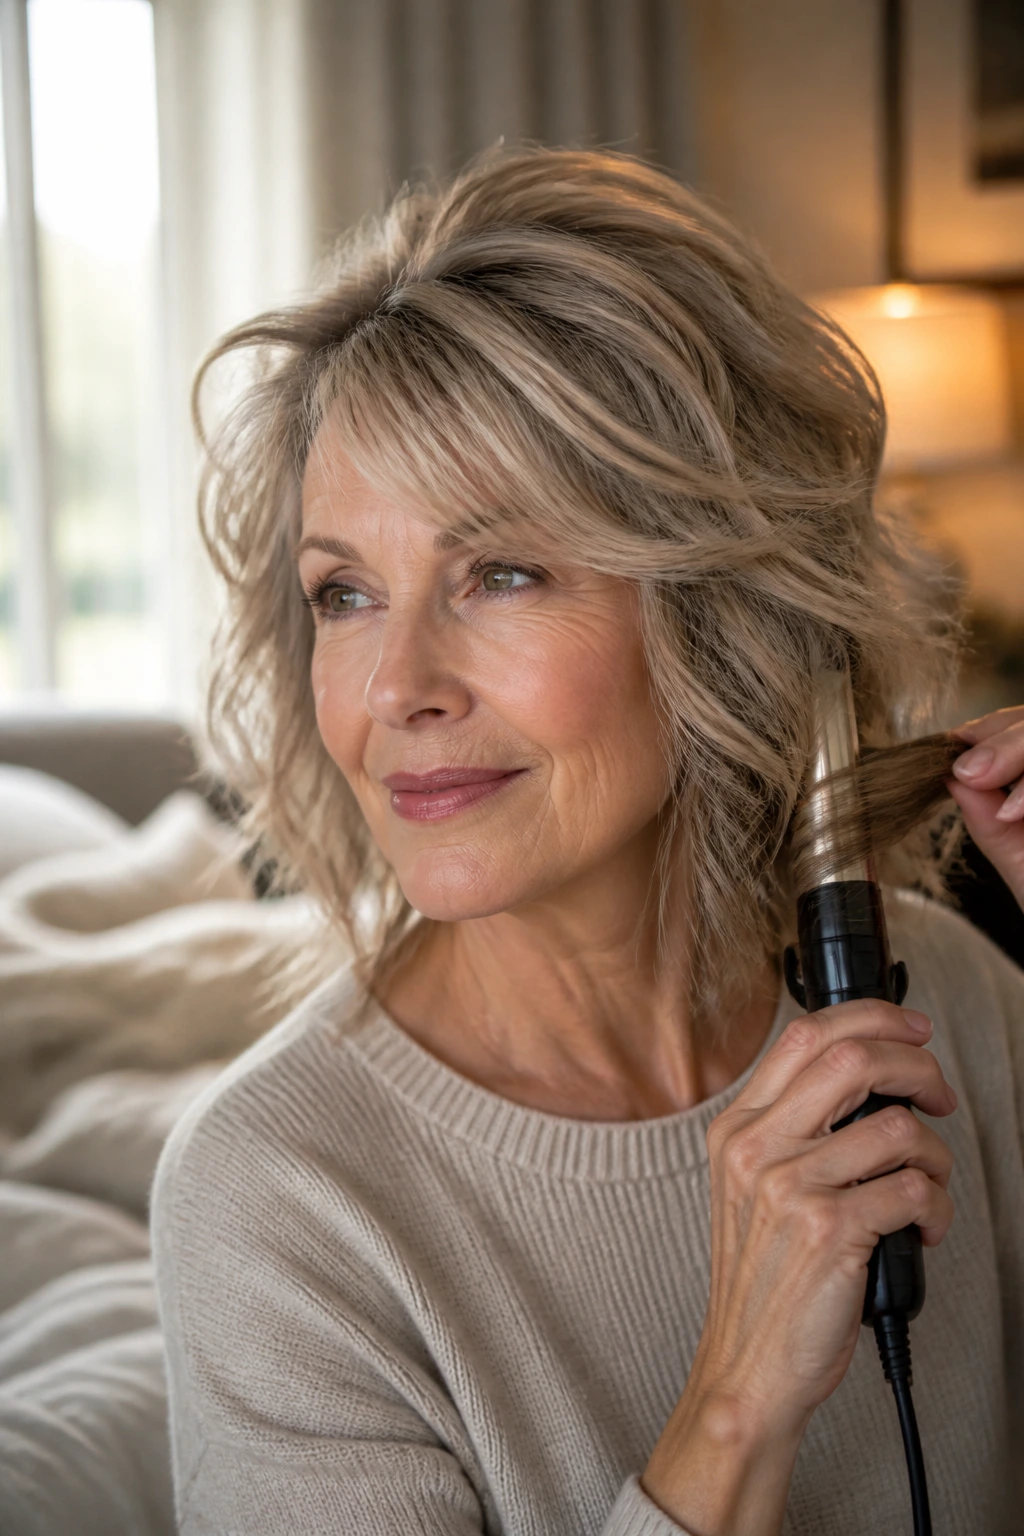
Lift at the crown: Put mousse at the roots on damp hair, then blow-dry the top section first with a round brush. If the crown is flat, clip it up while the rest dries so the root has time to set in the lifted shape. That small habit makes a larger difference than piling on product.
Soft movement: Use a curling iron or wand only on the mid-lengths and ends. Leave the root area alone so the hair doesn’t balloon. For shag layers, one or two turns of the iron is enough. You’re building bend, not curl.
Color support: Silver, white, and salt-and-pepper hair often looks sharper with a little lowlight or gloss. The cut benefits from dimension, and the color can help the layers read more clearly. If the hair feels dull, a clear gloss or gentle shine treatment can change the surface without changing the shape.
Make-it-yours: If you like a bit of edge, ask for more piecey separation through the top. If you prefer softness, ask for blended ends and longer fringe. Same family. Different mood.
Maintenance, Grow-Out, and Between-Cut Care

Shorter shags usually need a trim every 6 to 8 weeks if you want the shape to stay crisp. Medium and longer shags can often stretch to 8 to 10 weeks, especially if the layers are blended instead of choppy. Bangs are their own animal. If you wear a fringe, plan on a quick trim every 3 to 4 weeks or learn to pin it back on the rough days.
At home, keep the routine simple. Shampoo as often as your scalp needs it, but don’t scrub the lengths into straw. Use conditioner from mid-length to ends, and if your hair is silver or white and starting to yellow, a purple shampoo once a week can help tone that down. Not every silver head needs it, though. Use it when the color looks warm, not as a religion.
For overnight care, a silk pillowcase or bonnet keeps the layers from roughing up. The next morning, mist the hair lightly with water, add a pea-size amount of cream or mousse where needed, and revive the shape with your fingers. If the cut was done well, it should come back with surprisingly little effort. That’s the real test.
Common Mistakes to Avoid with a Shag
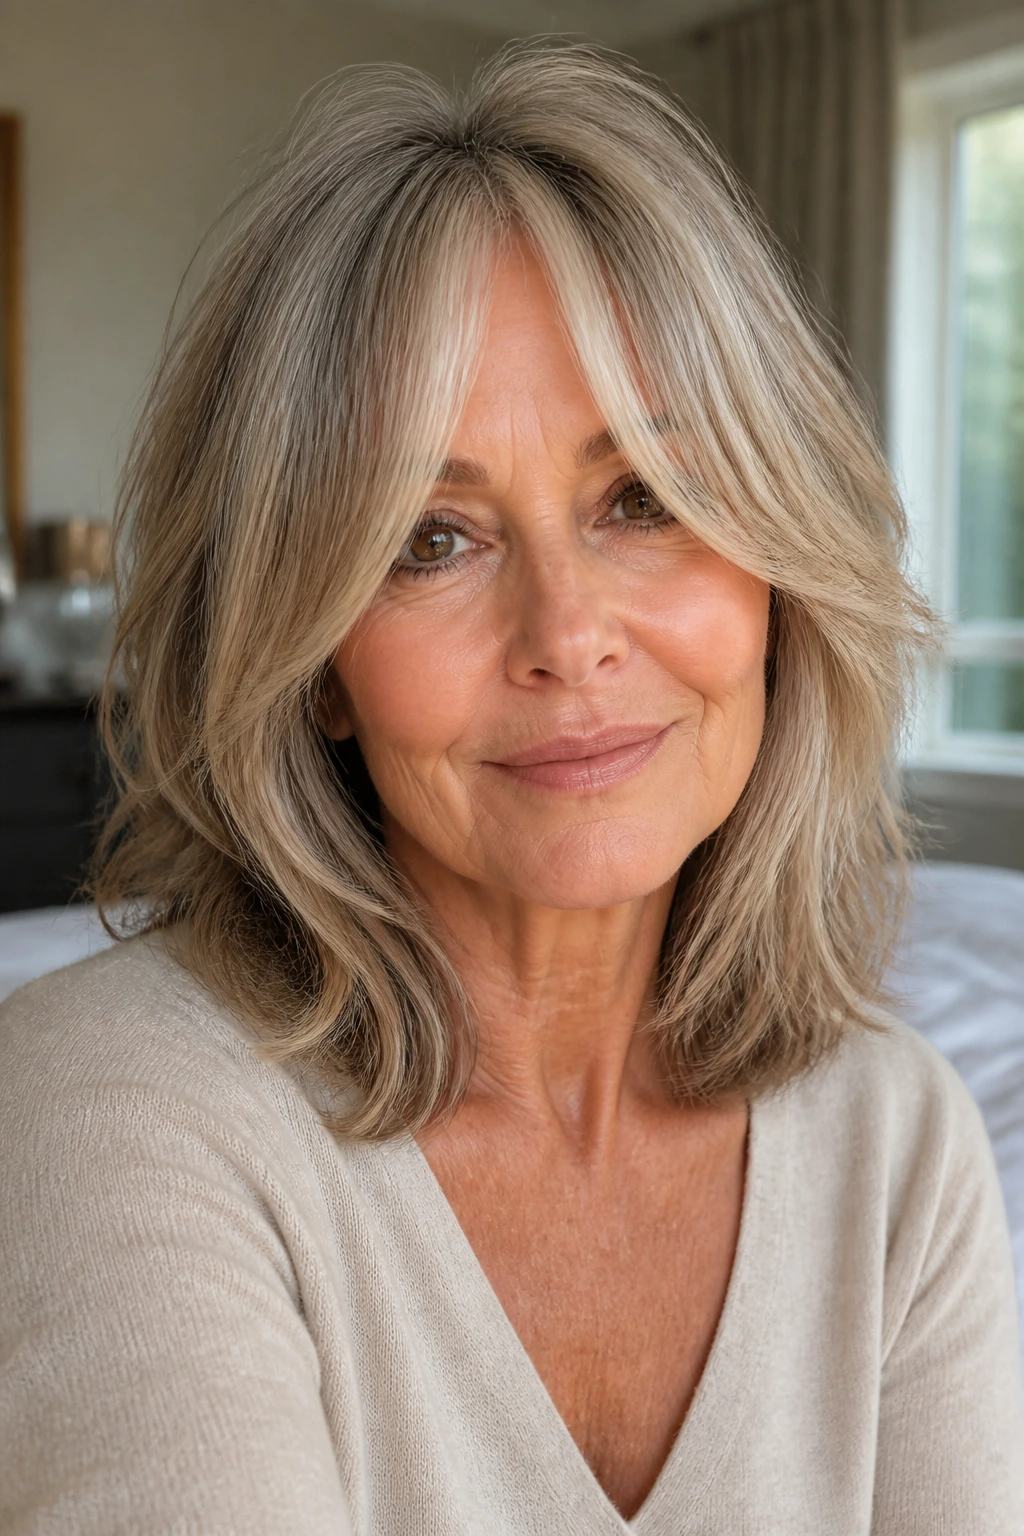
The first mistake is over-layering the crown. The hair may look airy in the chair and then go hollow at home, especially if it’s fine. The fix is to ask for longer internal layers and a stronger outline at the bottom.
The second is cutting the fringe too short on day one. Short bangs can look cute in the salon mirror and brutal once they dry and shrink. Leave more length than you think you need. You can always shorten them later.
The third is using heavy products on fine hair. Thick creams, oils at the root, and rich smoothing balms can collapse the lift you just paid for. If the hair is fine or soft, start with mousse or a light spray and stop before it feels coated.
The fourth is ignoring the part and cowlicks. A shag that fights the natural fall will spend its life looking slightly wrong. Work with the direction the hair already wants to go.
The fifth is forgetting that silver hair can show damage faster. Rough bleaching, high heat, and aggressive texturizing show up immediately on light strands. Gentle cutting and careful drying keep the shape cleaner for longer.
Variations and Adaptations to Try
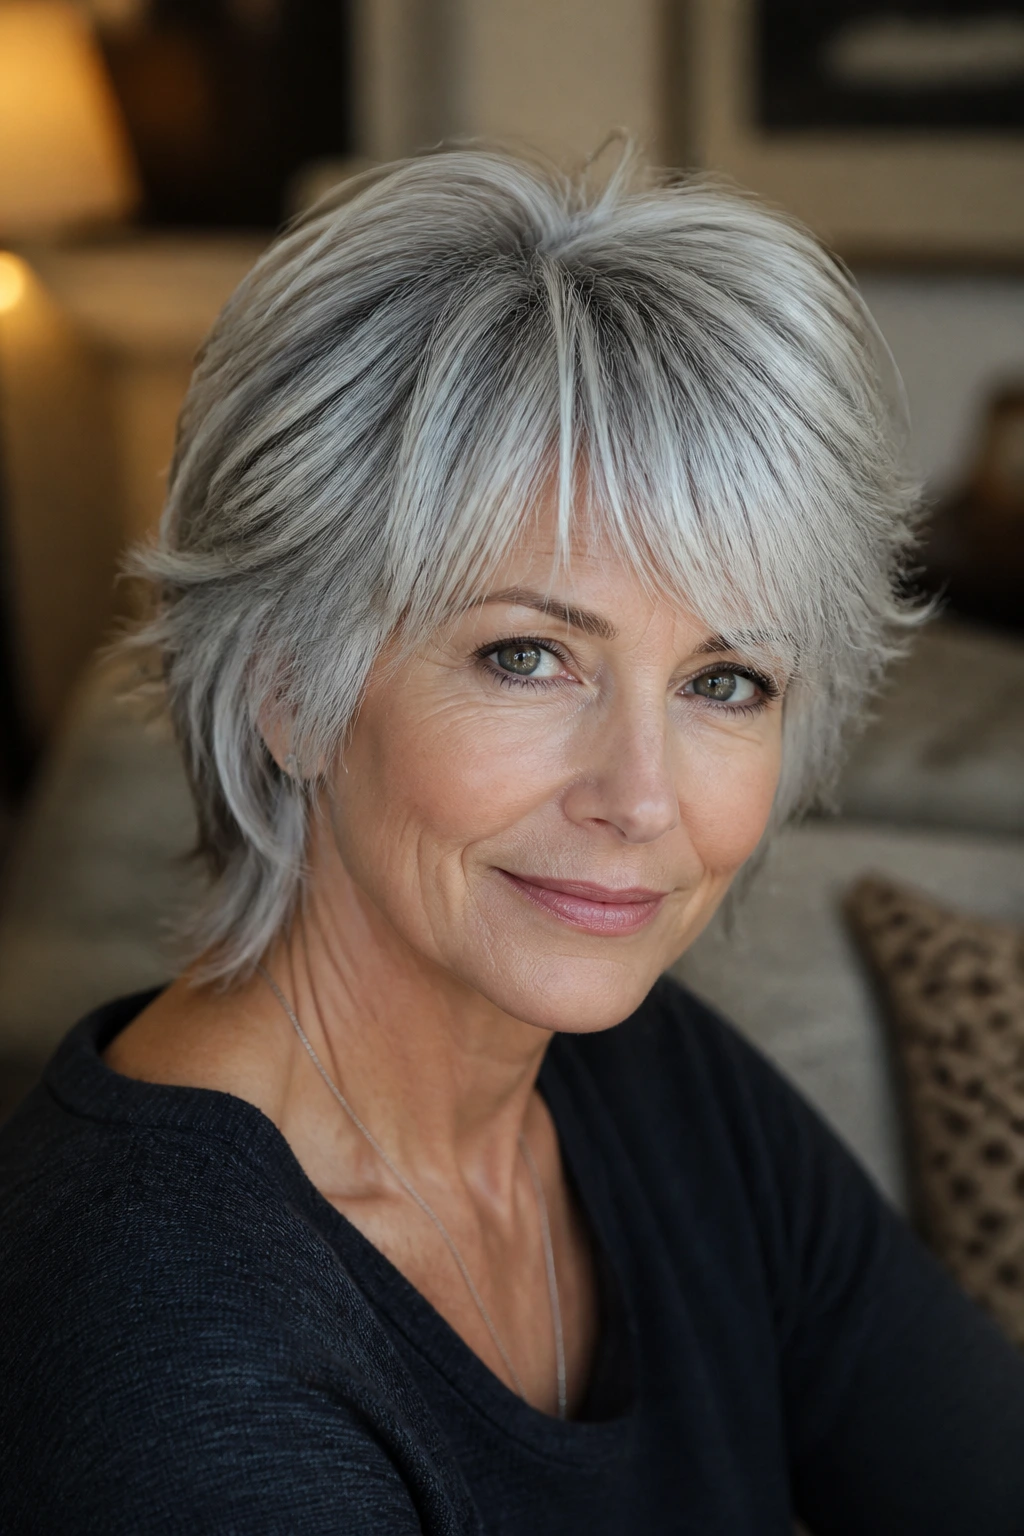
The Soft Silver Shift: Add subtle silver-friendly lowlights or a clear gloss to deepen dimension through the layers. This works well when the cut itself is simple and you want the color to do some of the visual work.
The Fine-Hair Lift Version: Keep the layers longer, the ends fuller, and the crown lightly lifted with mousse. This is the one to choose if your hair lies flat the second it dries.
The Curly Respect Cut: Let the layers follow the curl pattern instead of trying to force symmetry. It’s the right choice when your hair springs up in different places and needs shape rather than control.
The Glasses-and-Bangs Adaptation: Shorten the front just enough to clear the frames, then keep the side pieces longer so the face doesn’t get boxed in. If your glasses are bold, this keeps the whole thing from feeling crowded.
The Low-Maintenance Grow-Out: Ask for long fringe, soft interior layers, and a perimeter that stays strong. This version can drift for weeks without turning messy, which is useful if salon visits are spread out.
The Glam Blowout Version: Keep the cut itself soft, then style it with a round brush and a little extra bend at the ends when you want polish. Same haircut, more finish. No extra drama.
Frequently Asked Questions
Will a shag make fine hair look thinner?
Not if it’s cut properly. The problem is usually too much removal at the ends, not the shag idea itself. Ask for longer layers, a fuller perimeter, and a light hand around the crown.
Are curtain bangs high-maintenance?
Less than blunt bangs, more than no bangs at all. They grow out better than a straight fringe, but they still need a trim now and then, especially if they sit in your eyes. If you hate upkeep, keep them longer and blend them softly.
Can I wear a shag if my hair is straight?
Yes, but the cut has to create bend where your hair won’t do it on its own. Straight hair needs careful layer placement and maybe a round-brush finish so the shape doesn’t fall flat. Otherwise it can turn into a long, shapeless cut with a few short bits on top.
What should I tell the stylist if I want a low-maintenance shag?
Ask for soft, blended layers, a strong perimeter, and fringe that can grow out without looking choppy. Say you want movement without daily hot-tool work. That gives the stylist a clear target.
How often should I trim a shag haircut?
Short versions usually need shaping every 6 to 8 weeks. Longer ones can stretch to 8 to 10 weeks. Bangs may need a touch-up sooner if you wear them forward.
Does a shag work with glasses?
Very well, if the front is cut with the frames in mind. Keep fringe just above the frame line or let it sweep to the side so the lenses don’t get boxed in by hair. Bring the glasses to the appointment if possible.
What if my hair is curly and frizzes easily?
Then the cut should be longer and the layers should be placed to preserve curl clumps. Too much texturizing will only make the frizz louder. Use a diffuser, leave-in conditioner, and hands off once the curls start setting.
Can I grow out a shag into a bob or lob?
Yes, and that’s one of the better things about it. A soft shag grows into a layered bob or lob if the perimeter stays controlled. The key is trimming the bangs and face frame so the grow-out stays tidy.
How do I refresh a shag on second-day hair?
Mist the hair lightly with water, work in a touch of mousse or texture spray, and lift the crown with your fingers or a round brush. Don’t soak it. A little dampness is enough to wake the shape back up.
A Cut That Keeps Its Shape
A shag haircut works when it gives hair room to move and a reason to move in the right direction. That’s the part I keep coming back to. The best versions aren’t trying to erase age or pretend the hair has the same texture it had twenty years ago. They’re better than that. They use what’s there.
That’s why the smartest shags are the ones built around your real hair: the silver that shines, the crown that needs lift, the ends that dry out, the wave that wakes up late in the day. If you get the layers right, the cut starts doing the hard part for you.
Bring a couple of honest reference photos, talk through your hair’s habits, and ask for a shape that can grow a little without losing its line. That’s where the good shag lives — not in the salon mirror, but in the week after, when it still looks like it belongs to you.
