



A clean set of Bantu knot styles can do a lot of work without looking like it tried too hard. The parting gives the hair structure, the knots give it shape, and the whole thing sits somewhere between sculptural and soft — which is exactly why it shows up so often on natural hair when people want something that feels playful but still put together.
The details matter more than people think. A center part reads crisp and almost architectural. A deep side part changes the mood completely. Tiny knots feel meticulous and neat; jumbo knots feel bold and fast; a few cuffs or beads near the front can tip the whole style from plain to memorable. And if your texture is thick, coily, or prone to shrinkage, the way you section and smooth the roots is the difference between a style that lasts and one that starts puffing up before lunch.
Bantu knot styles also have a nice trick built into them: they can be the finished look or the setup for something else. Wear them as they are, or take them down for a knot-out with defined curls and that springy, zigzag texture people chase for hours. Either way, the base has to be clean, even, and a little bit patient. That part is not glamorous. It is the whole game.
Why These Bantu Knot Styles Feel So Wearable on Natural Hair
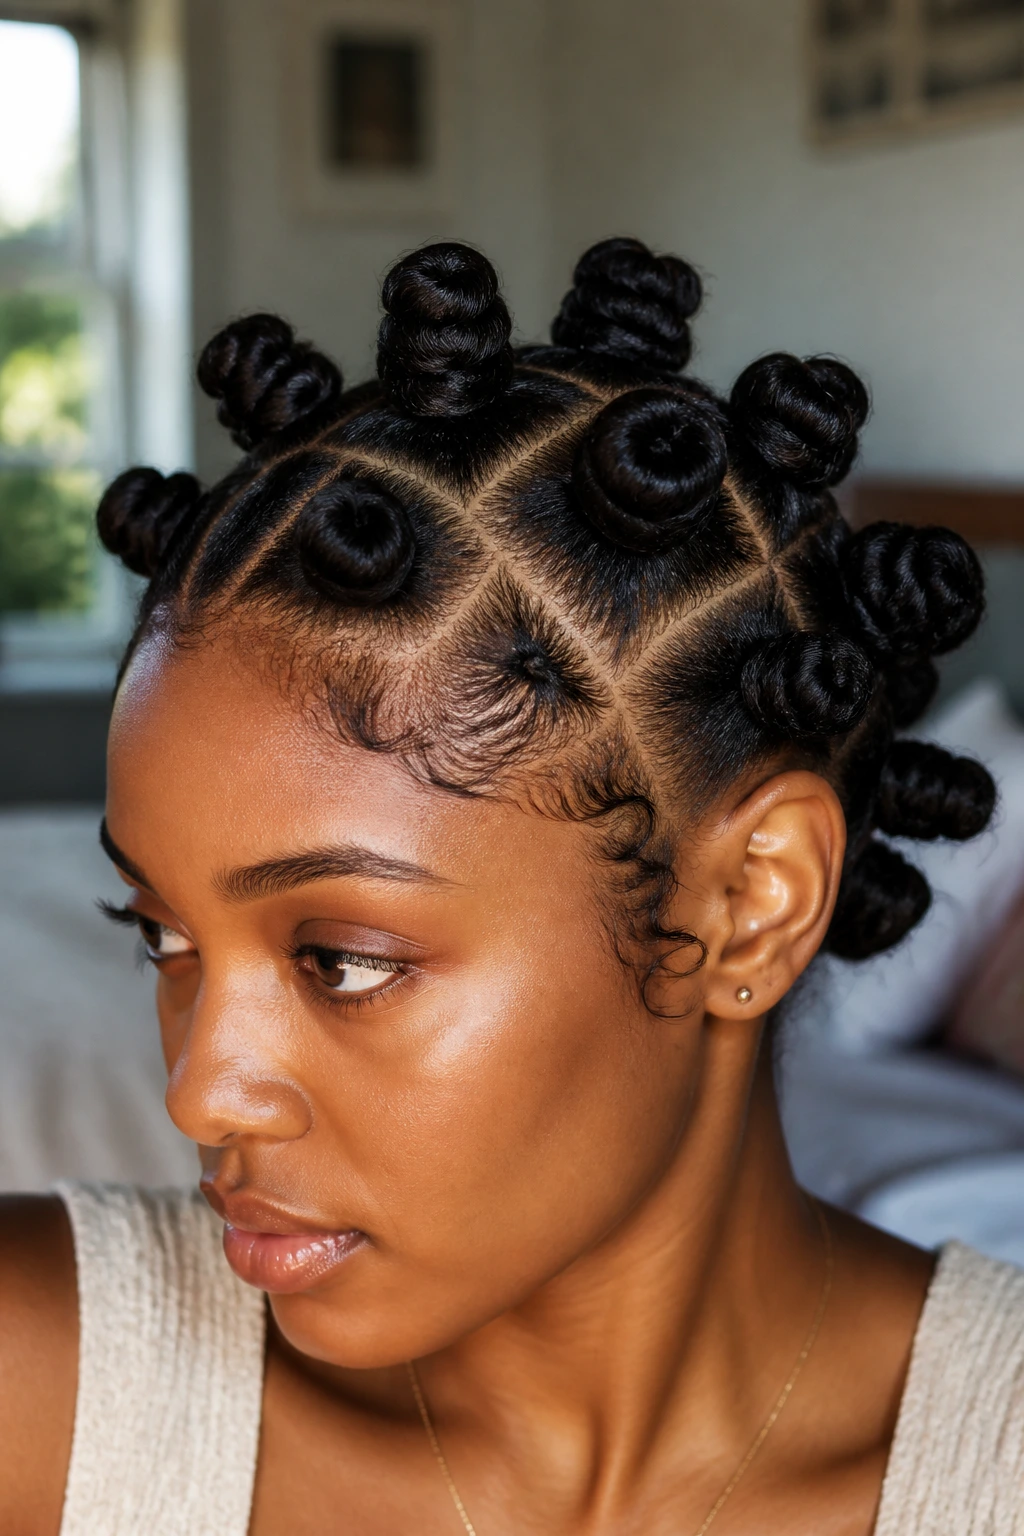
- The parting does half the styling: A clean center, side, triangle, or diagonal grid changes the whole mood before a single knot is twisted.
- Section size controls the look: Small sections create a neater, longer-wearing style; larger sections give you shape faster and feel lighter on dense hair.
- Accessories matter more than you’d think: One gold cuff, a satin scarf, or a few beads can shift the same knot set from casual to dressed-up in minutes.
- They work with shrinkage instead of fighting it: Bantu knots let coils compress on purpose, which is one reason they look neat on tightly curled textures.
- The style can do double duty: Wear it as a protective look now, then take it down later for a defined knot-out when you want a second hairstyle.
- You can scale them to your schedule: A small set on the crown takes less time; a full-head mini set takes patience, but it pays off with a finer finish and more wear time.
1. Center-Grid Bantu Knots
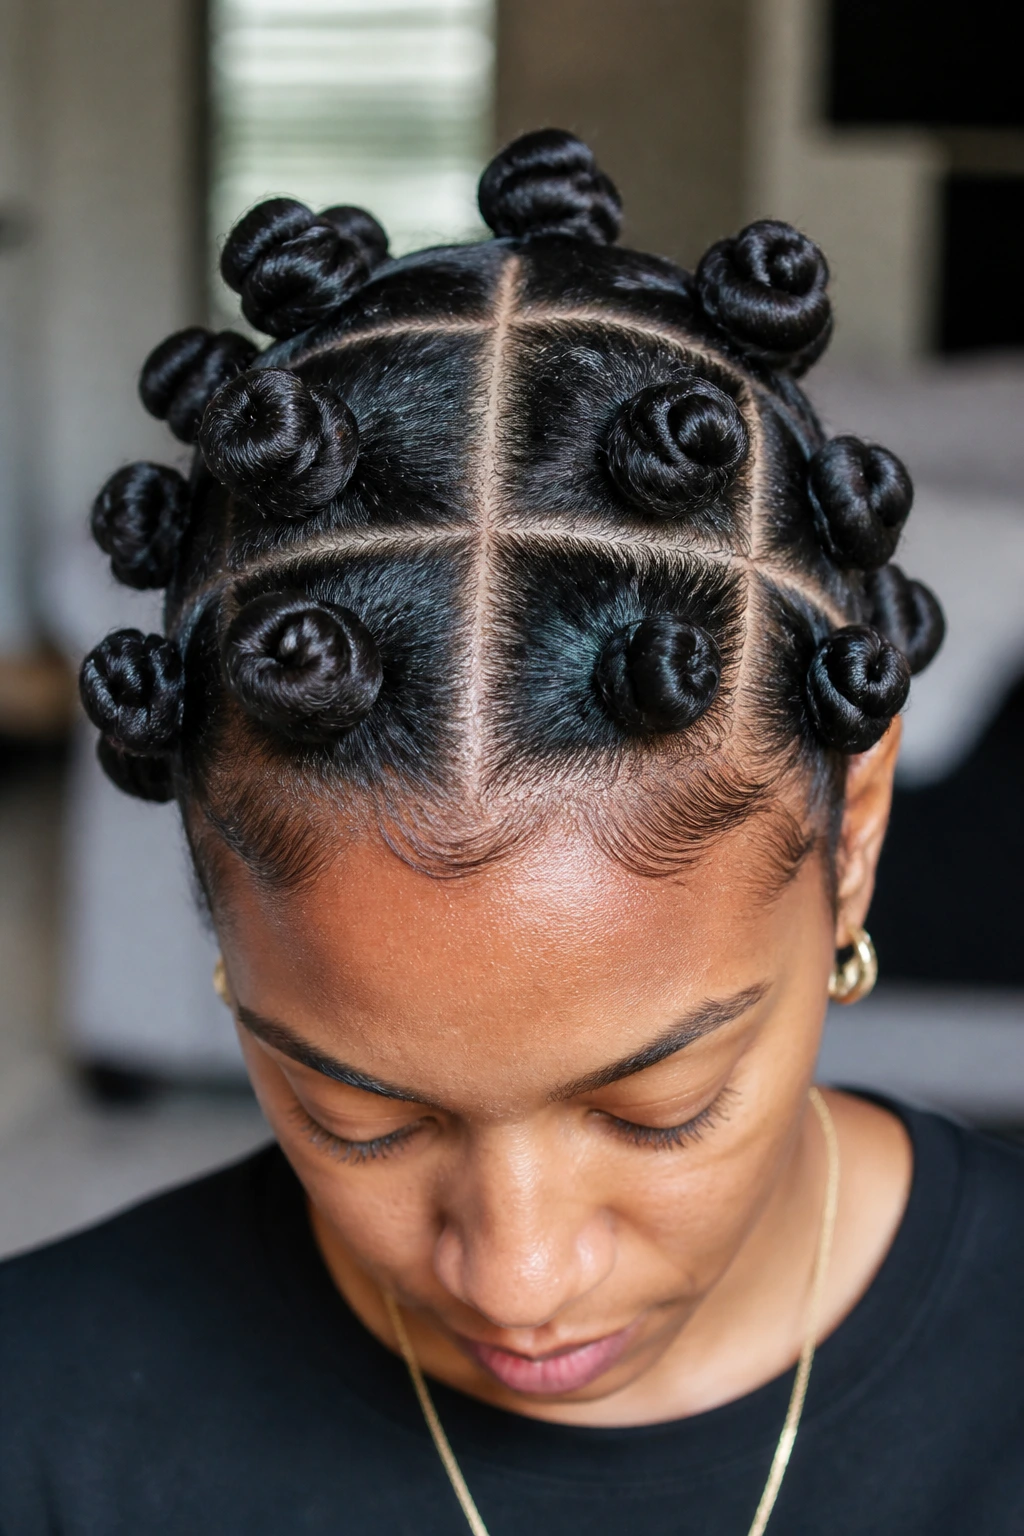
A center-grid set is the version I reach for when I want the hair to look deliberate from the first glance. The straight middle part splits the head into two clean halves, and that symmetry makes even a simple knot pattern look sharper than it really is. On coily hair, the center line also gives the eye a place to land, which matters more than people admit.
Keep the sections even — about 1 to 1½ inches if you want a balanced look. If one side runs bigger than the other, the whole style starts to feel accidental. I like this version on stretched hair because the parts stay visible longer, and the knots sit flatter against the scalp.
The base does not need to be heavy. A small amount of leave-in, a little cream, and a touch of mousse at the roots is enough. Too much product makes the knots look damp and soft in a bad way. Clean, not greasy. That’s the sweet spot.
2. Deep Side-Part Bantu Knots
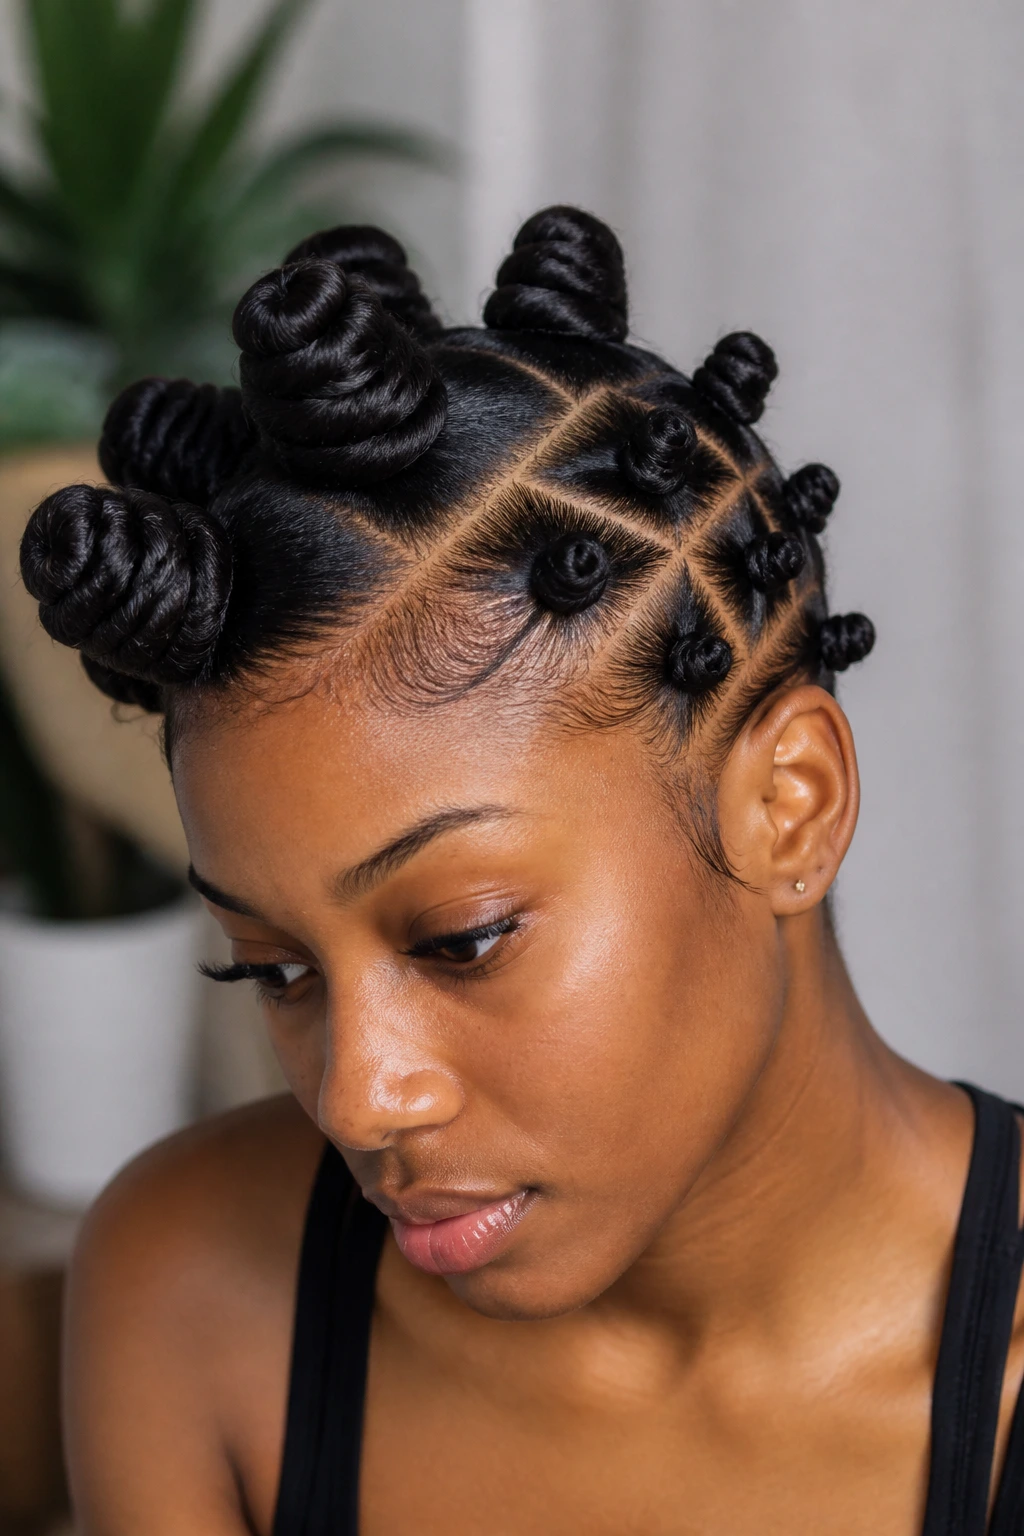
A deep side part softens the whole style without making it less structured. Move the part about 2 to 3 inches off center, and suddenly the knots feel less school-picture and more street-style. It works especially well if you want the front to sweep across one side of the forehead before the knots begin.
The side part also lets you play with size. I like the larger knots on the heavier side and slightly smaller ones on the lighter side so the balance feels intentional, not rigid. If your hairline is a little uneven, this is a forgiving setup because the asymmetry hides tiny parting mistakes better than a center grid does.
Do not overcomplicate the roots. A soft gel or styling foam at the part is enough. If you go in with a thick edge product, the front can look stiff while the knots look fluffy, and that contrast is rough on the eye. Keep the finish smooth, not shellacked.
3. Mini All-Over Bantu Knots
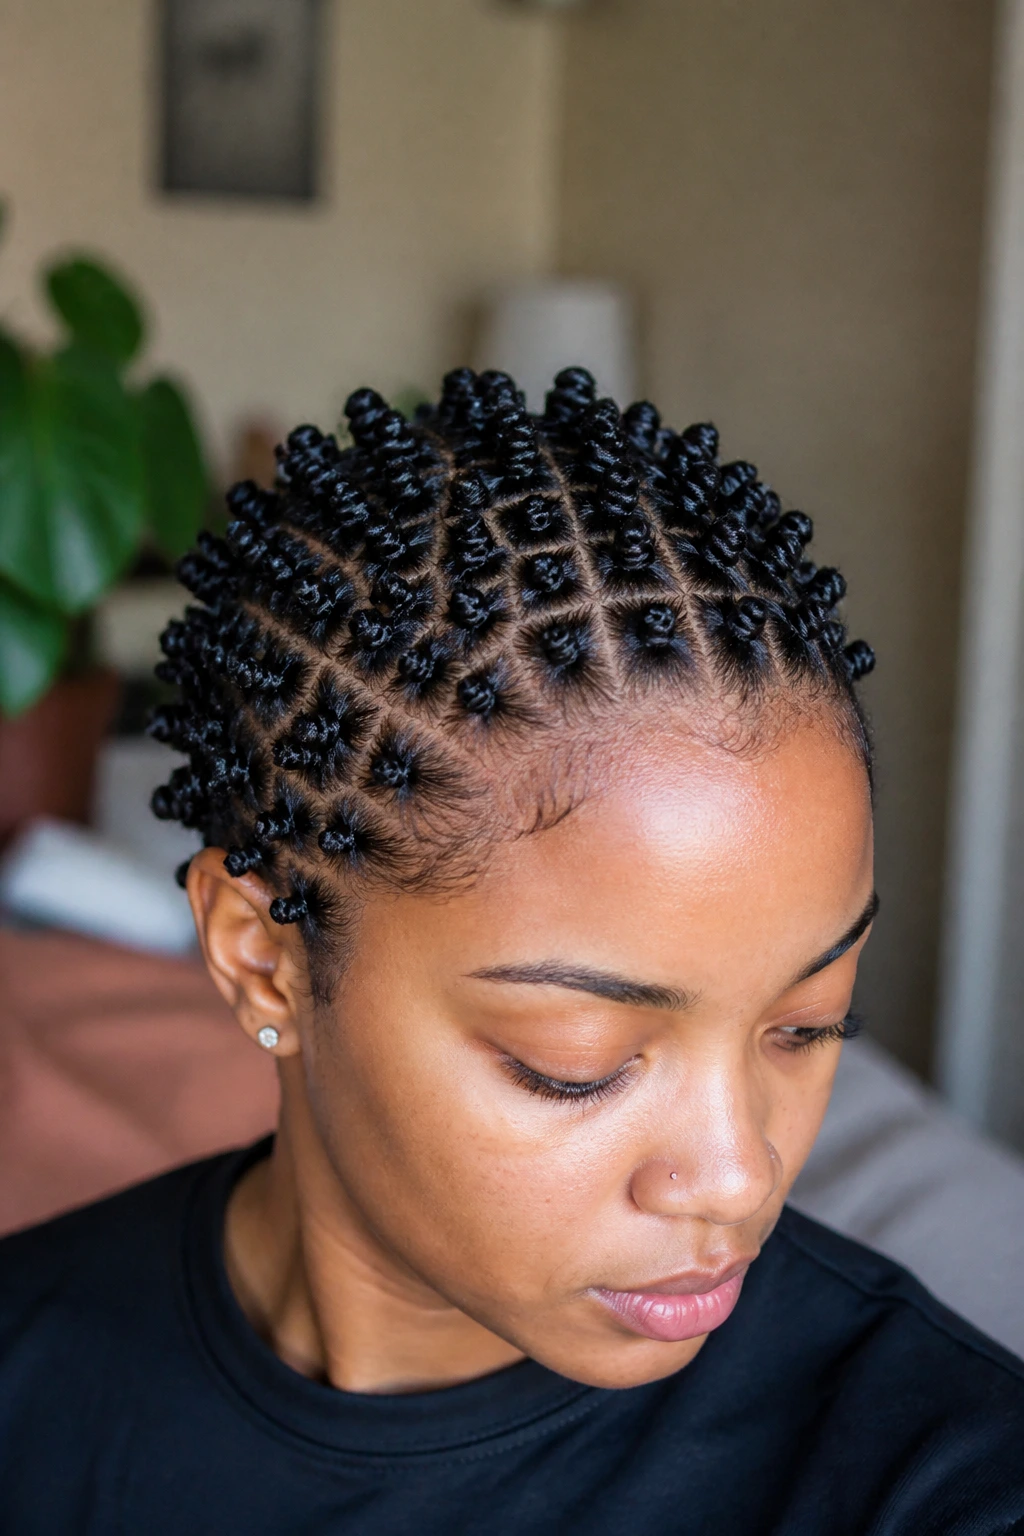
Tiny knots are patient work. They take longer to install, and your fingers will know it by the end, but the payoff is a tight, bead-like pattern that looks especially good on dense natural hair. The grid reads almost like a fabric texture when the parts are clean and the sections are uniform.
Why the tiny version stays neat so well
Smaller sections hold better because each knot has less weight to carry. That means less unraveling at the ends and less puff at the roots, which is why this style tends to keep its shape longer than chunkier sets. It also dries more evenly if you’re doing it on damp hair for a future knot-out.
I like to keep the sections around pencil-width near the front and slightly larger in the back if the crown is denser. That tiny adjustment keeps the style from ballooning at the top. If you want it to last, clip away each section before you touch the next one. Rushing the parting is how mini knots turn messy fast.
4. Jumbo Bantu Knots
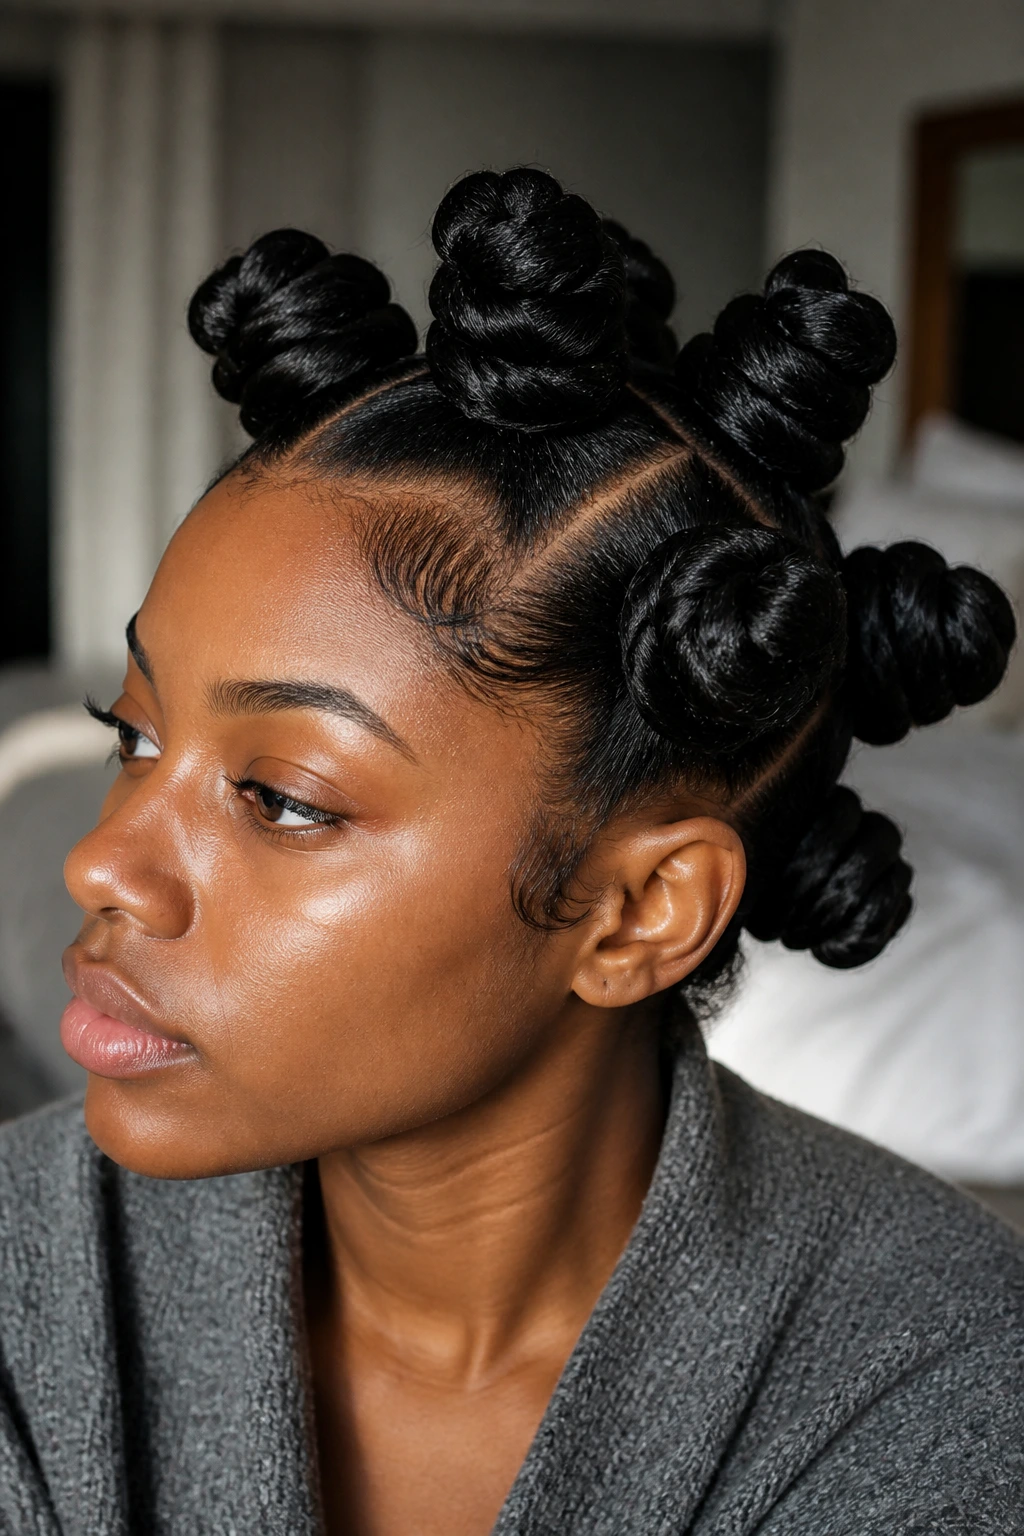
Jumbo knots are the opposite of fussy. They give you the shape without making you spend the whole afternoon parting 30 tiny squares, and they sit beautifully on thick, coily hair that can support a little extra volume. The look is bold, but it is also practical. Fewer sections means less tension and less time.
This version works best when the parts are still clean, even if the knots themselves are large. Think 2 to 3 inches per section, depending on density. If the hair is very layered, smooth the ends well before you start coiling or they’ll stick out like little springs.
My honest opinion: jumbo knots look best when the finish is controlled at the roots. A lightweight mousse or gel at the base keeps the style from feeling fuzzy before it has a chance to settle. They are one of the easiest ways to get a statement look without putting tiny knots all over your head.
5. Half-Up Bantu Knot Crown
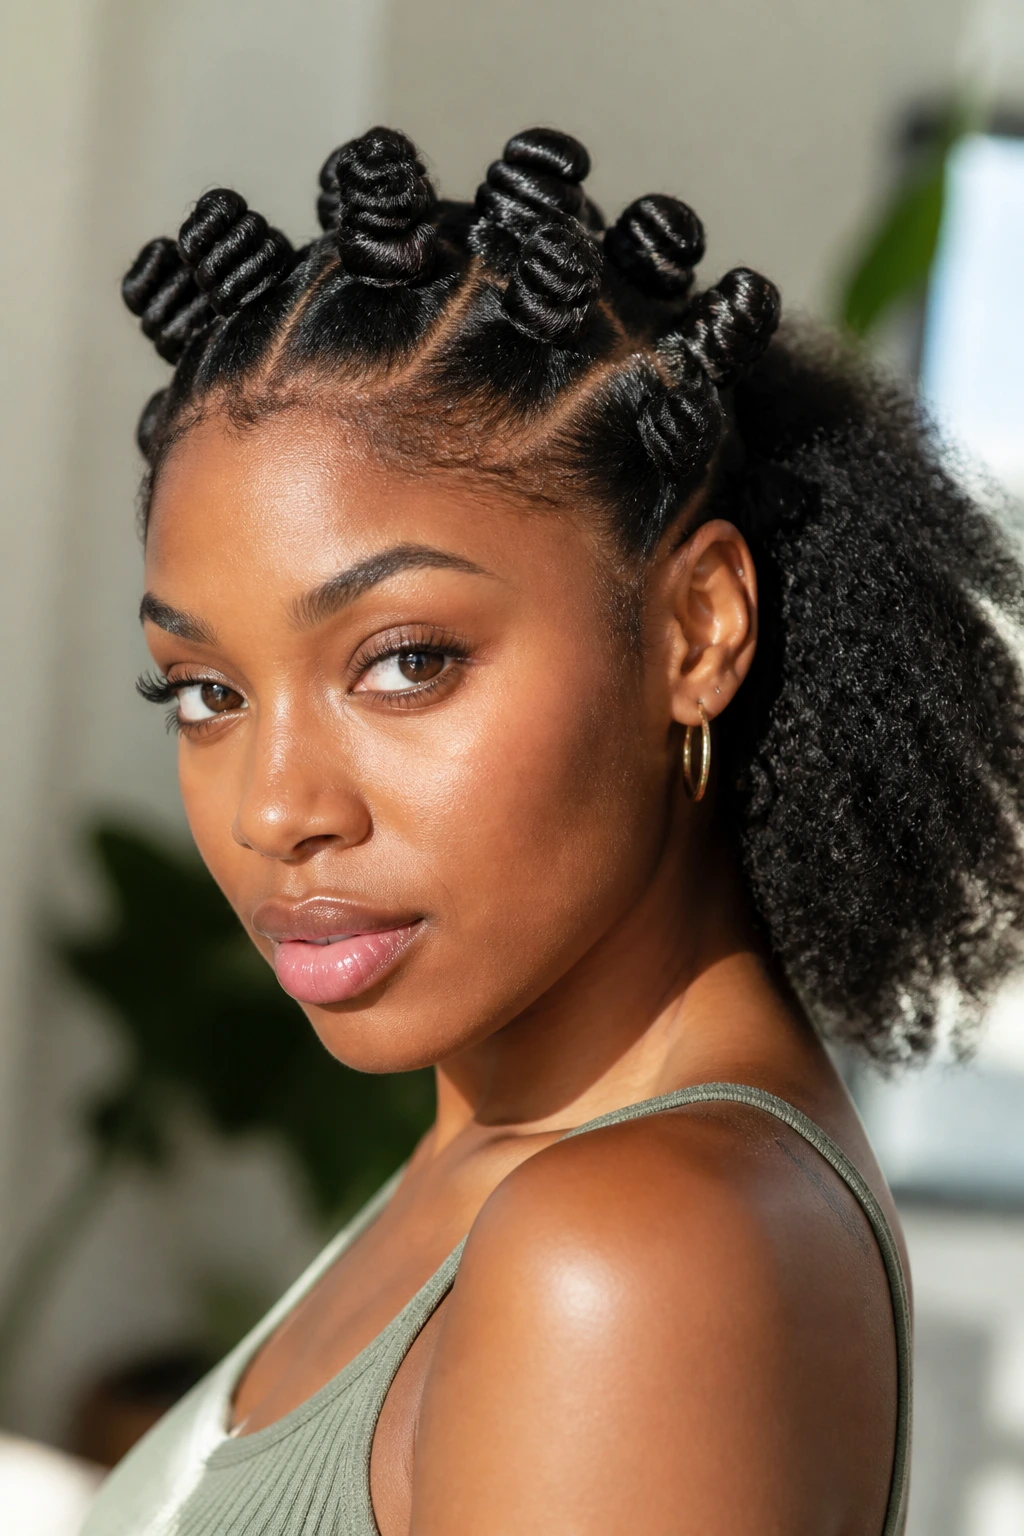
Half-up Bantu knots are a smart move when you want shape up top and movement in the back. You get the visual punch of the knots where people look first, while the rest of the hair stays loose in a puff, braid-out, twist-out, or stretched bob. It’s a nice middle ground.
The crown section usually looks best with 6 to 10 knots, depending on head size and density. Keep the back soft and full, not over-slicked. The contrast is what makes this style work: crisp knots above, free texture below. If both sections are too tight, the style loses that easy, breezy feel.
This is one of the easiest styles to dress up or down. Leave it plain for errands and add a pair of hoops, or pin a small cuff into one front knot and the whole thing reads more polished. It is also one of the better options when you want to preserve length around the nape.
6. Bantu Knot Mohawk
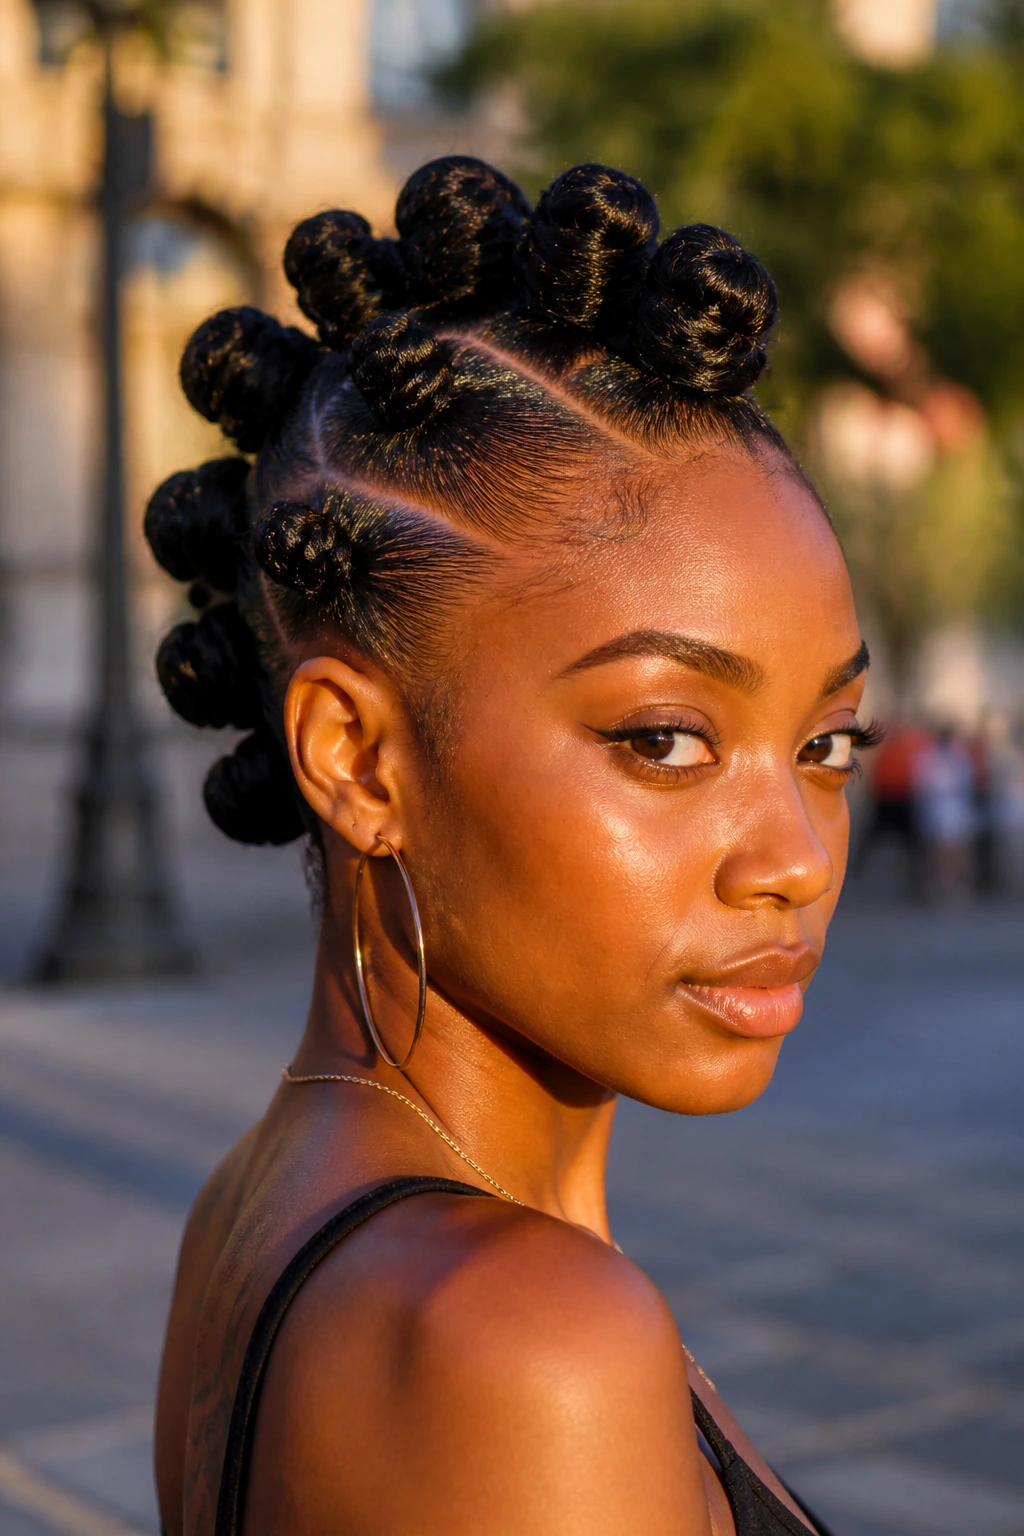
A Bantu knot mohawk has attitude before you even finish the first row. The sides are usually slicked close to the scalp, then the knots run down the middle like a ridge. The shape adds height, which makes it a strong pick if you want the face lifted and the profile sharper.
This style depends on tension control. Keep the sides smooth, yes, but do not yank the hairline flat. A firm hold at the temples is enough. The center strip can hold medium-sized knots or a mix of small and medium ones if you want the ridge to look more textured.
I prefer this look on hair that has been lightly stretched, because the side sections settle cleaner and the knots in the center look more uniform. If your hair is very dense, this is a good time to use duckbill clips while you part. The grid has to stay neat. Once it starts wandering, the mohawk shape loses its edge.
7. Sleek Bantu Knots with Laid Edges
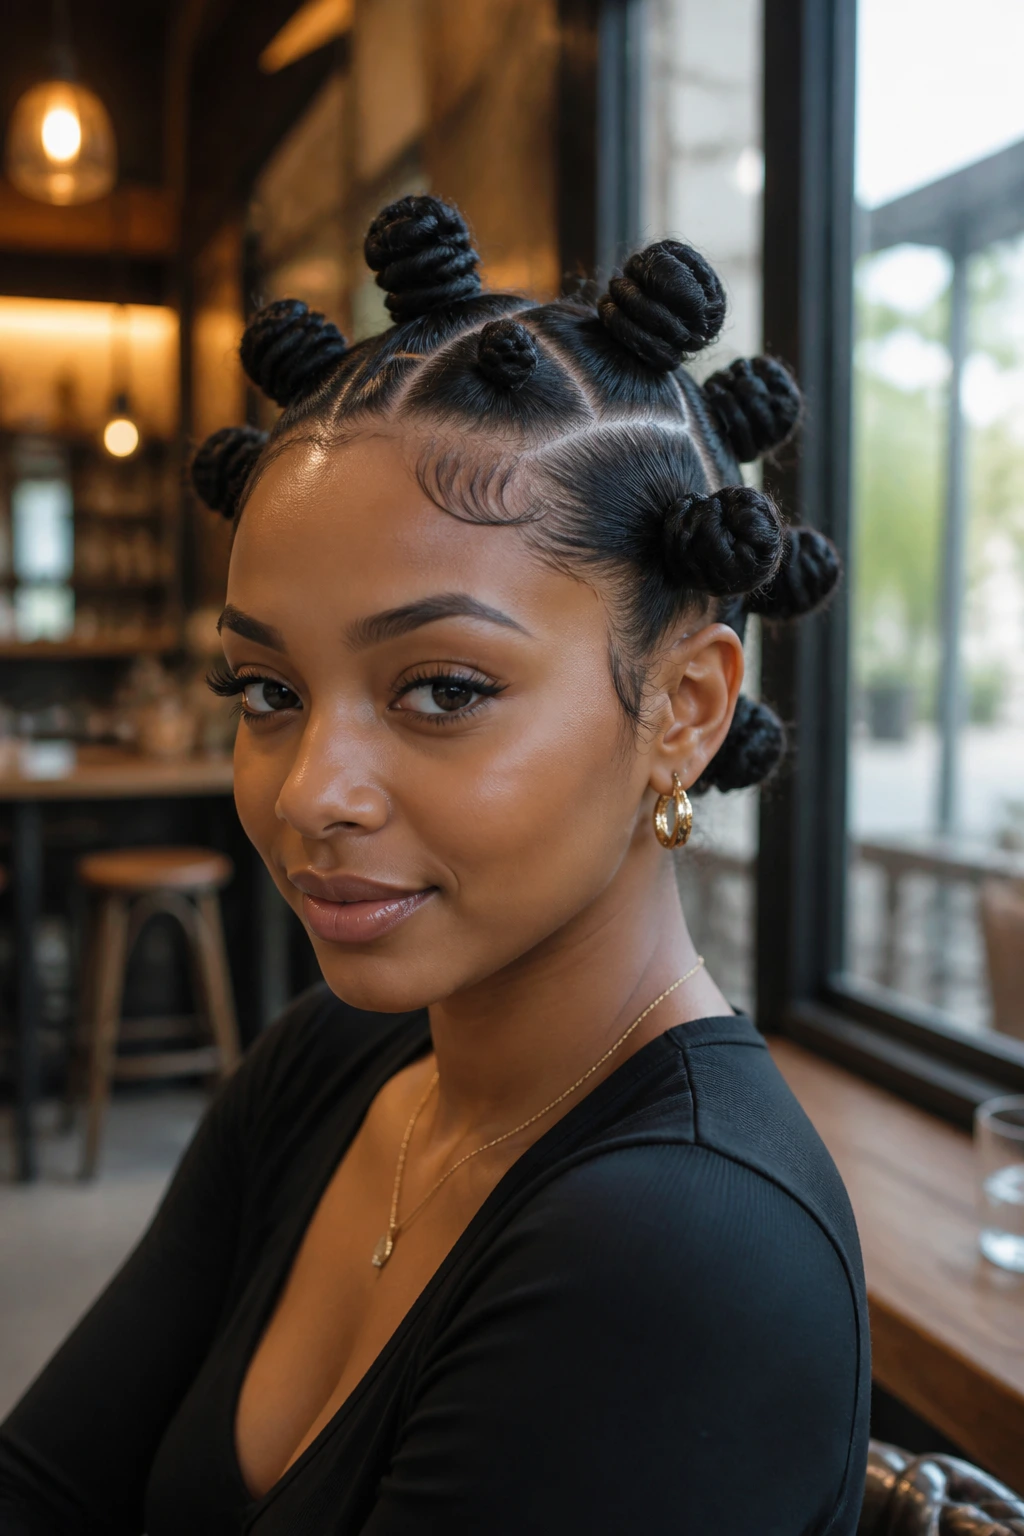
This is the polished version — the one that looks like it was planned around the outfit, not added as an afterthought. The knots themselves can be medium or small, but the hairline stays smooth, the parts stay sharp, and the edges are shaped without being overworked. That line at the front changes everything.
What matters here is restraint. A small amount of edge control goes farther than a thick swipe. Use a soft brush to guide the baby hairs, then stop. If the edges are too sculpted, the style starts to look stiff and dated. If they’re too loose, the front can unravel the look.
The cleanest version usually uses square or diamond parts with very even spacing. This is the set I’d pick for a dinner out, a family photo, or any moment when you want the hair to read intentional without being loud. It has a little shine, a little structure, and no drama from the roots.
8. Braided-Base Bantu Knots
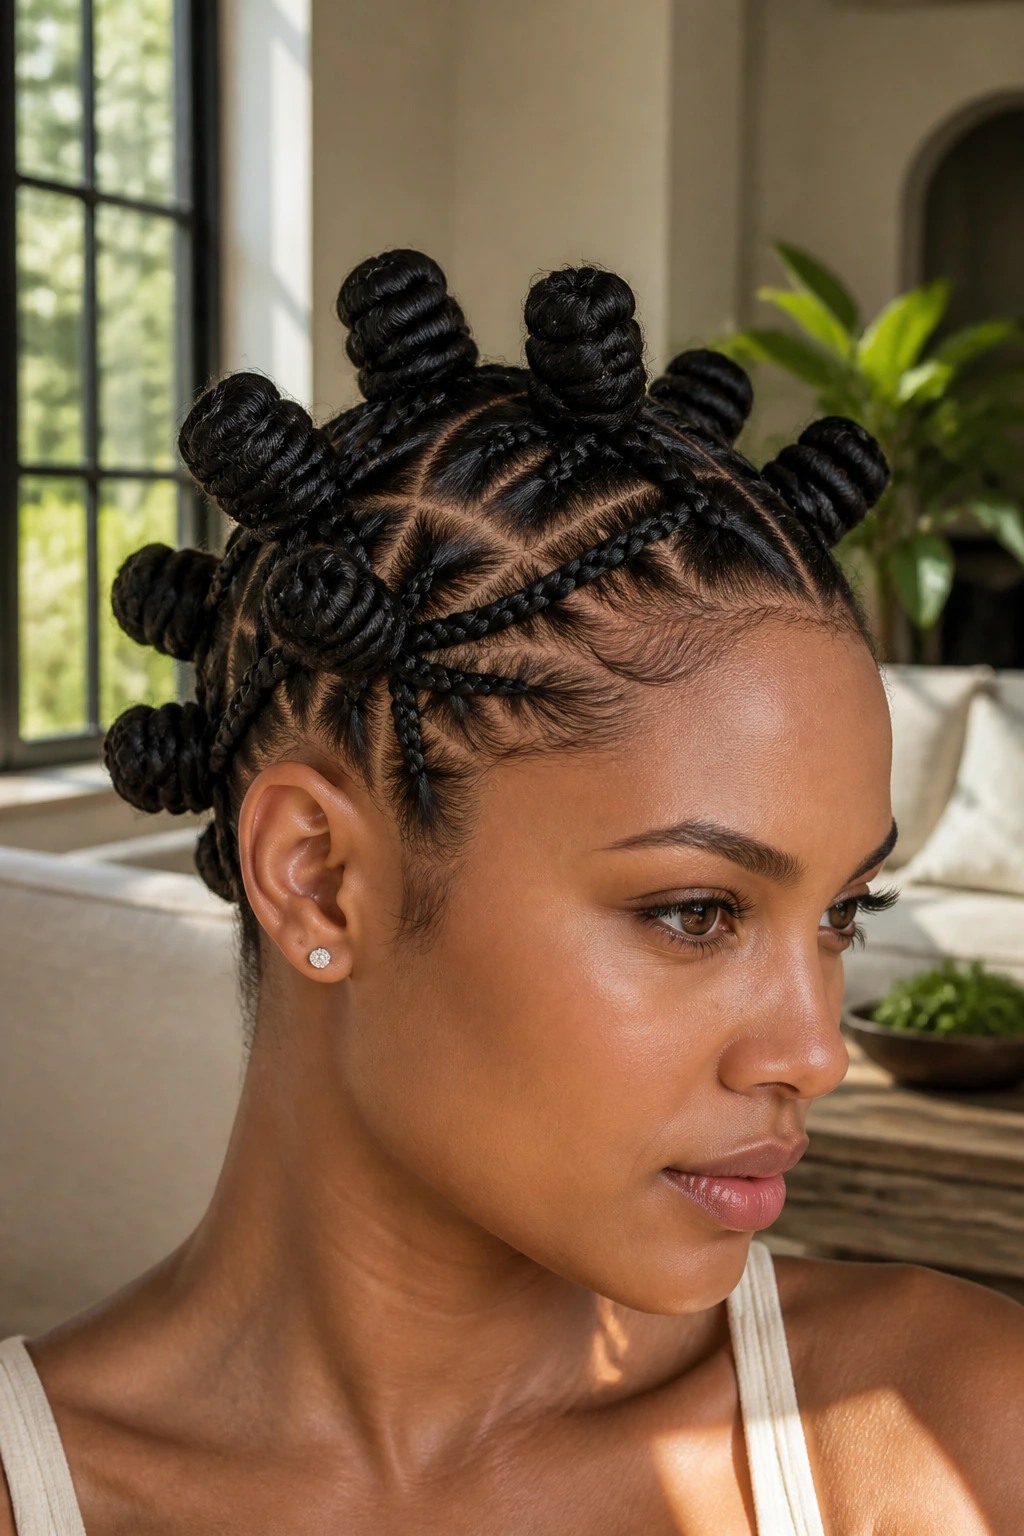
A braided base gives the style more grip and a more detailed finish. Instead of starting each section with a plain twist, you braid the first inch or two, then coil the rest into the knot. That extra step helps the style hold, especially on thick or layered hair where loose ends like to sneak out.
It also changes the silhouette. The braid gives the knot a slimmer base, so the whole style looks more tailored. If the hair is prone to unraveling at the ends, this is the version that keeps things honest. You’ll still get the round knot shape, but the starting point feels locked in.
This is one of my favorite choices for hair that has been freshly washed and stretched. The braid helps anchor the section, and the knot sits with less puff at the root. It’s a small detail, but small details are what make a protective style look finished instead of improvised.
9. Triangle-Part Bantu Knots
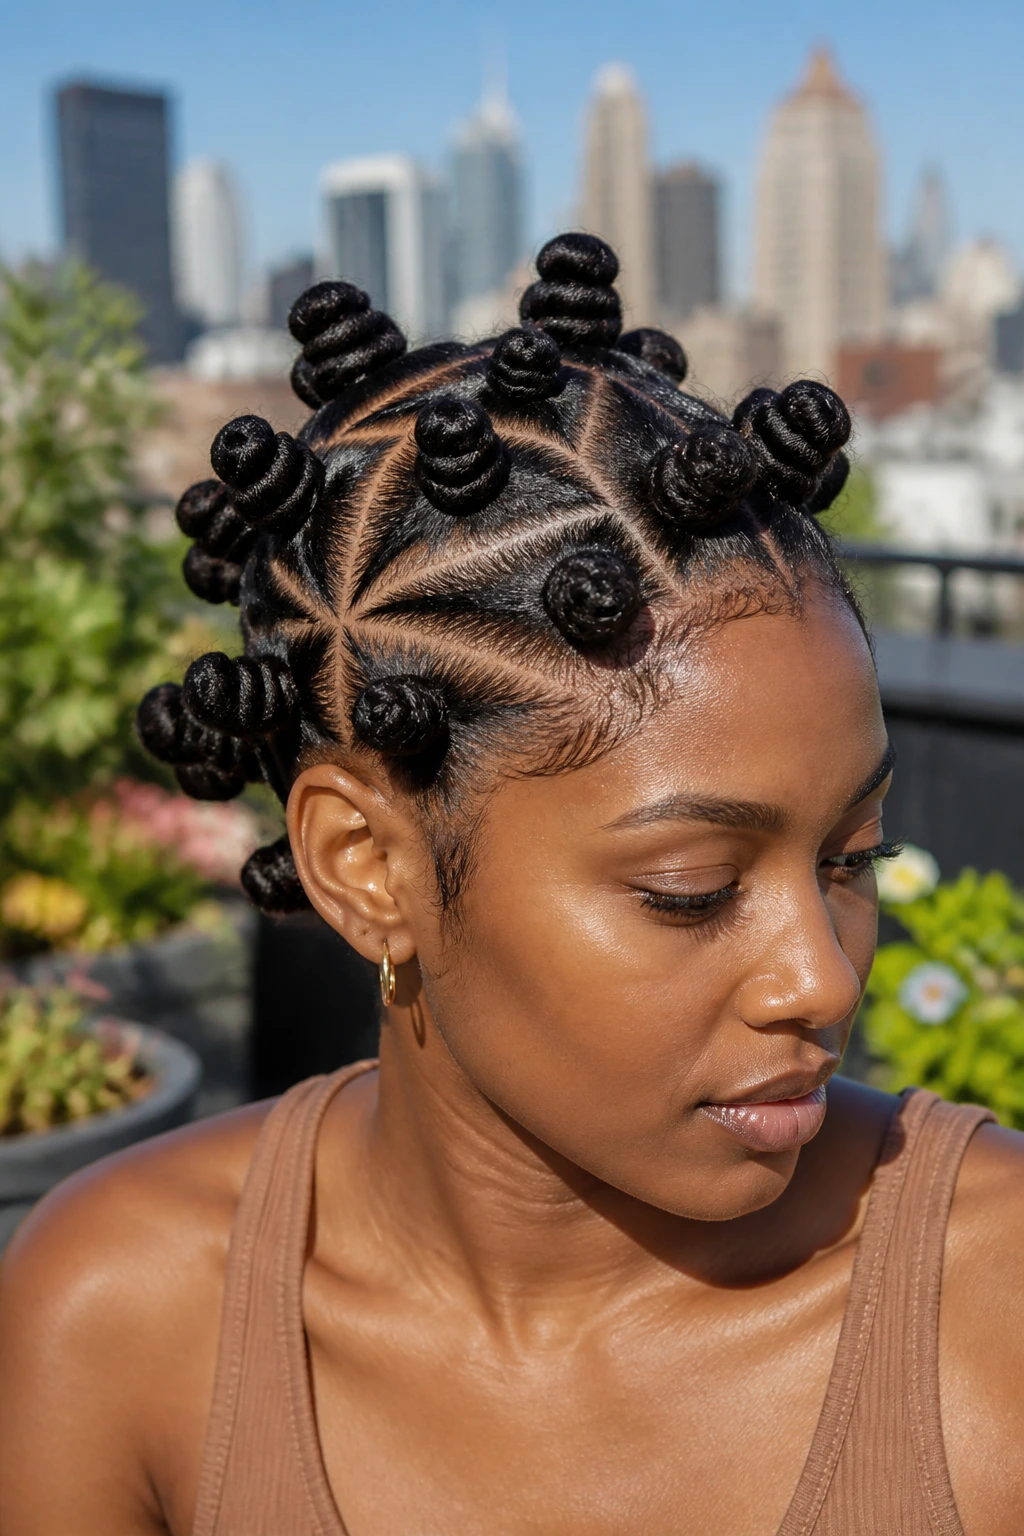
Triangle parts are for anyone who likes the grid to be part of the design. Instead of plain squares, the sections are cut into triangles, which creates a sharper, more graphic pattern across the scalp. The knots still behave the same way, but the parting gives the style a little edge.
The shape works especially well when the hair is worn close to the head. You notice the parting lines more in this version, so clean sectioning matters. If the triangles are uneven, the whole set starts looking lopsided. I’d rather see slightly larger triangles done neatly than tiny ones done in a rush.
This is the kind of style that looks good from above and from the side. The scalp lines create movement before the knots even start, which is useful if you want a style that photographs well from different angles without needing extra accessories.
10. Diagonal-Part Bantu Knots
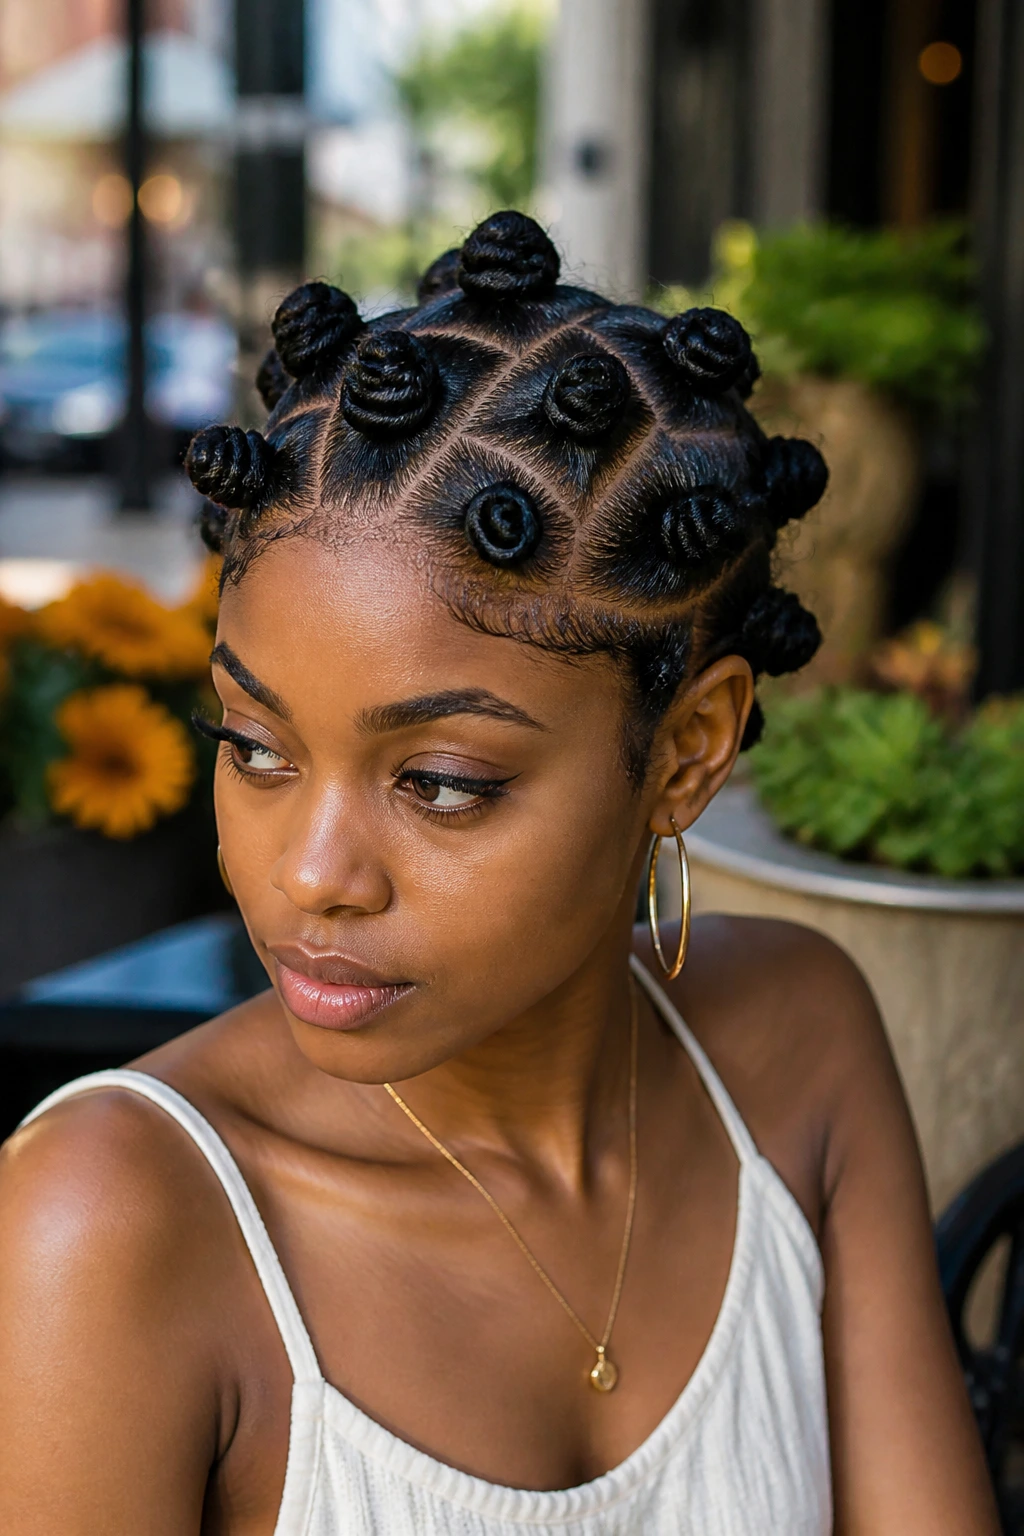
Diagonal parts change the rhythm. Instead of a straight grid, the sections sweep across the head at an angle, and that subtle shift makes the style feel softer and more dynamic. It is one of those details people notice without always being able to name.
The diagonal line works well if you like styles that flatter the side profile. It pulls the eye upward and across instead of straight back. The knots themselves can stay medium-sized, but the angle gives them a little movement. That is the whole point.
I like this version when the hair has a lot of texture at the root and needs a bit of visual direction. Straight rows can sometimes make dense hair look boxy. A diagonal layout breaks that up and gives the style a smoother flow. It is still neat. It just has more swing to it.
11. Chin-Length Bantu Knot Bob
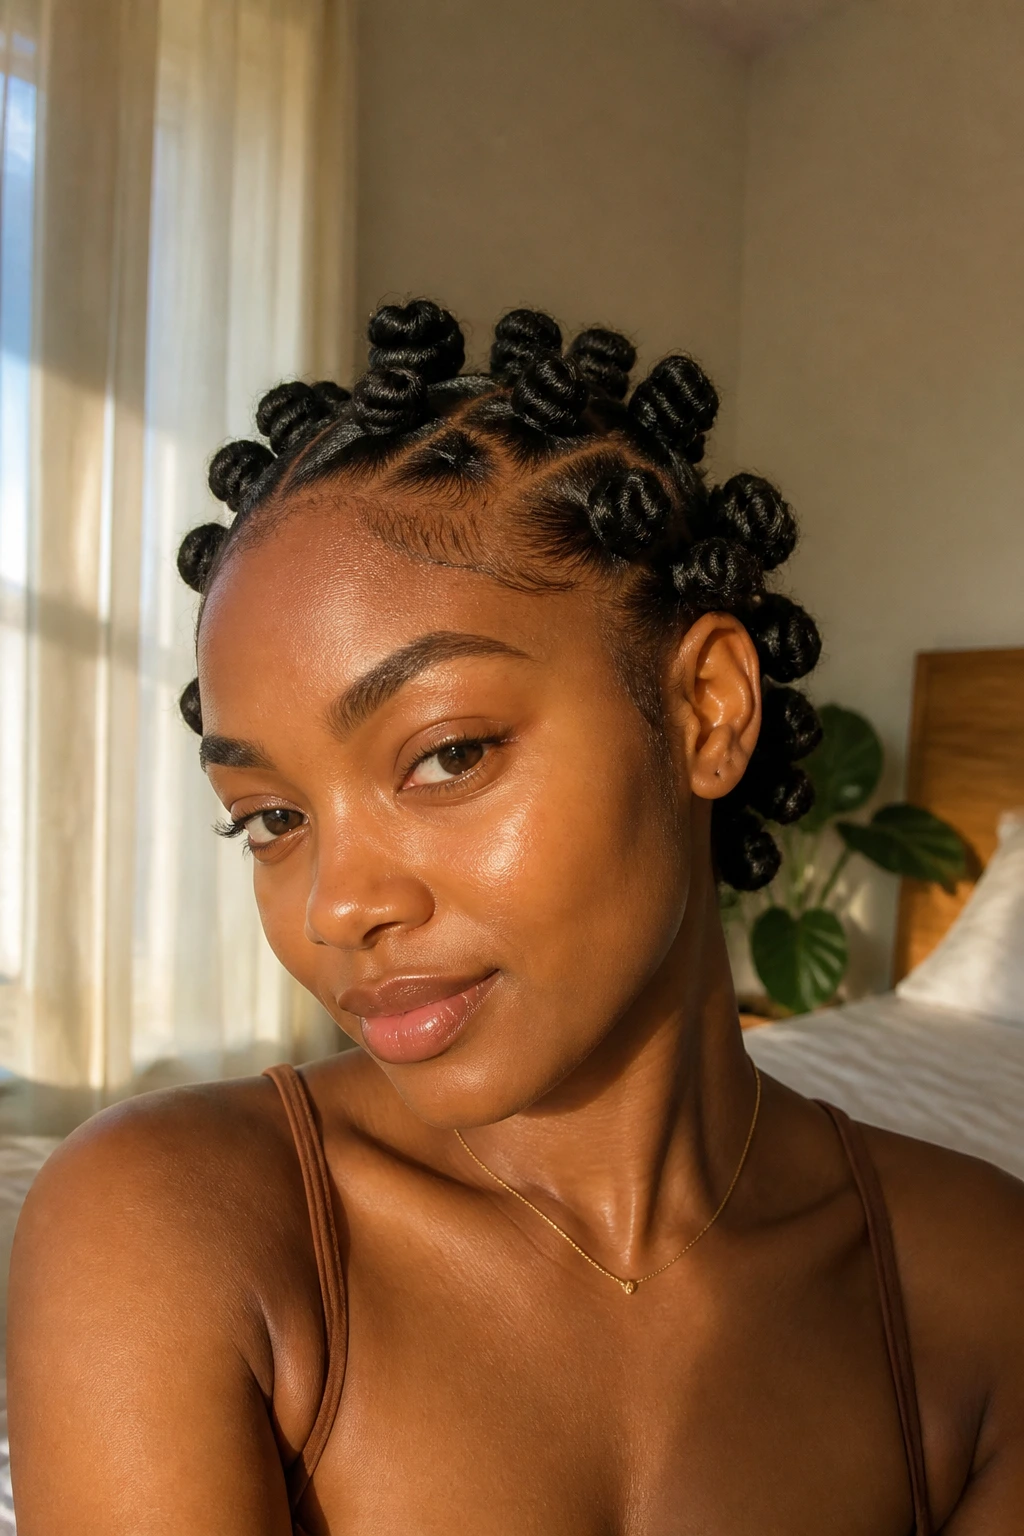
Short natural hair can absolutely do Bantu knots, and this bob-length version proves it. The knots sit close to the head and create a rounded shape that feels fresh instead of bulky. On a tapered cut or a teeny-weeny afro, the result is neat, compact, and surprisingly chic.
The trick is not to force size where the hair won’t support it. Keep the sections small enough that each knot can anchor without pulling at the scalp. If the ends are short, a tiny bit of holding cream at the tips helps them tuck in cleanly. You may also need a couple of bobby pins on stubborn pieces, and that’s fine.
This style looks best when it hugs the natural head shape. Don’t chase height just because you can. A close-fitting bob of knots gives you clean lines and a nice frame around the face, which is often more flattering than trying to build volume where the hair doesn’t want it.
12. Beaded Bantu Knots with Mini Braids
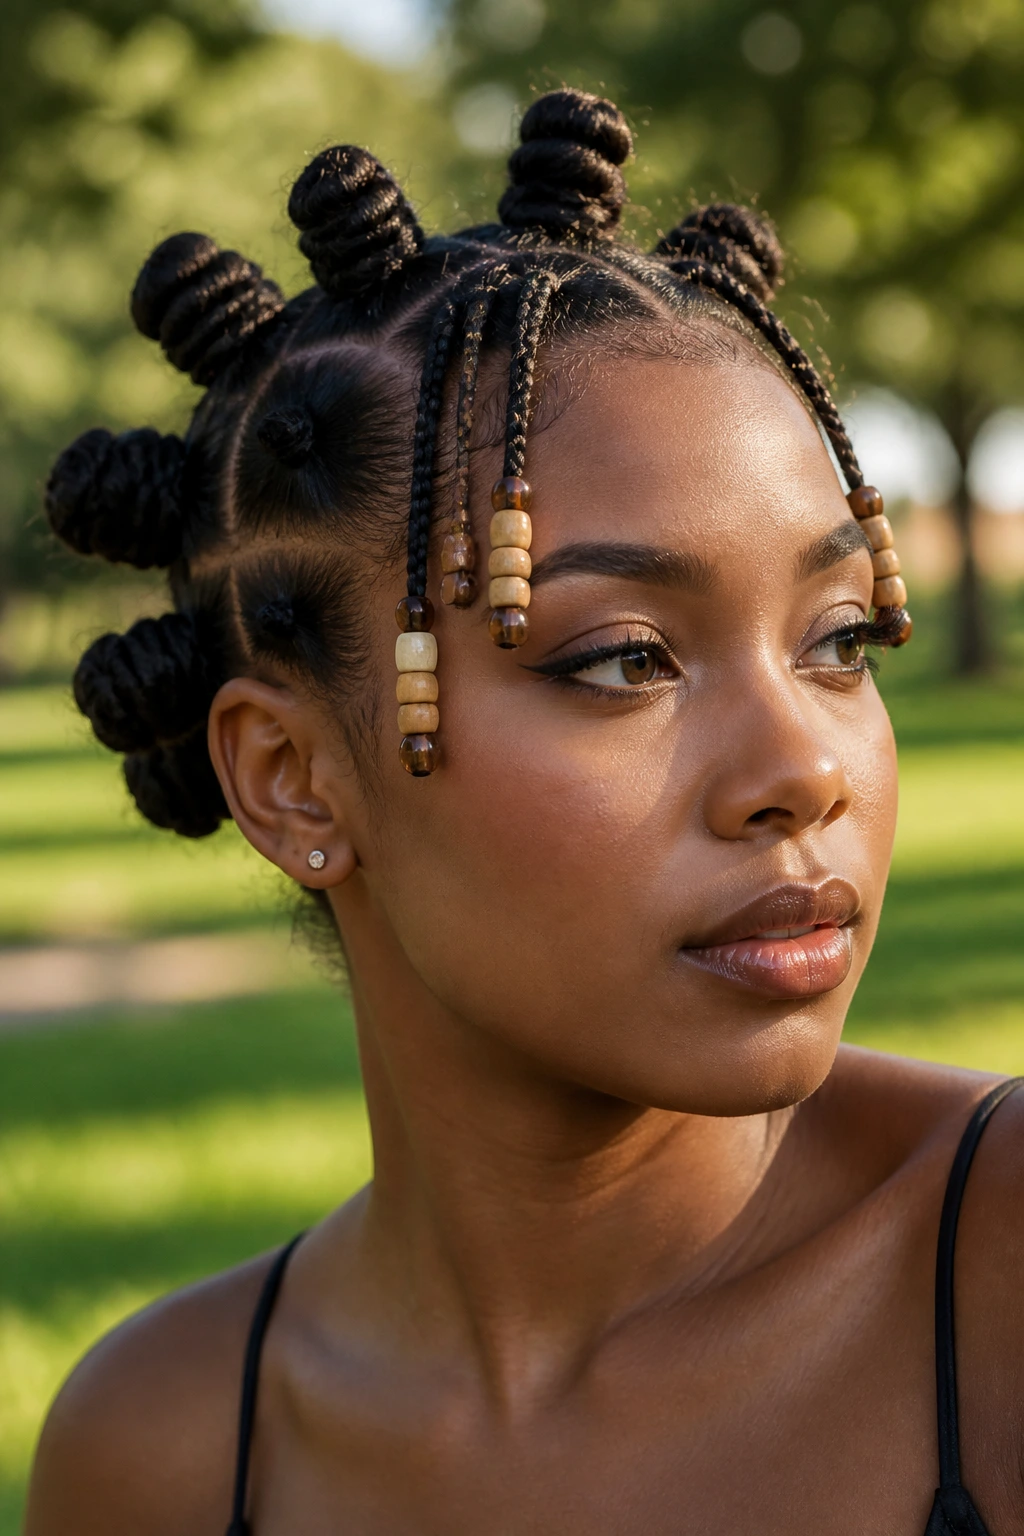
A few beads can change the entire mood, but the key word is few. Put them on mini braids or front accent sections rather than every single knot, or the style starts to feel busy and heavy. The little click of beads against each other also gives the look some movement, which is part of the charm.
This version works well when you want the knots to stay the main event. The beads are the accent, not the headline. A couple of clear or amber beads near the front can brighten the face without taking over the silhouette. If you use too many, the weight can pull down delicate sections and make the roots look tired.
I like this best on medium-density hair with enough length to support the added detail. It’s also a nice choice for festival days, birthdays, or any setting where a plain knot set feels a little too quiet.
13. Gold-Cuff Bantu Knots
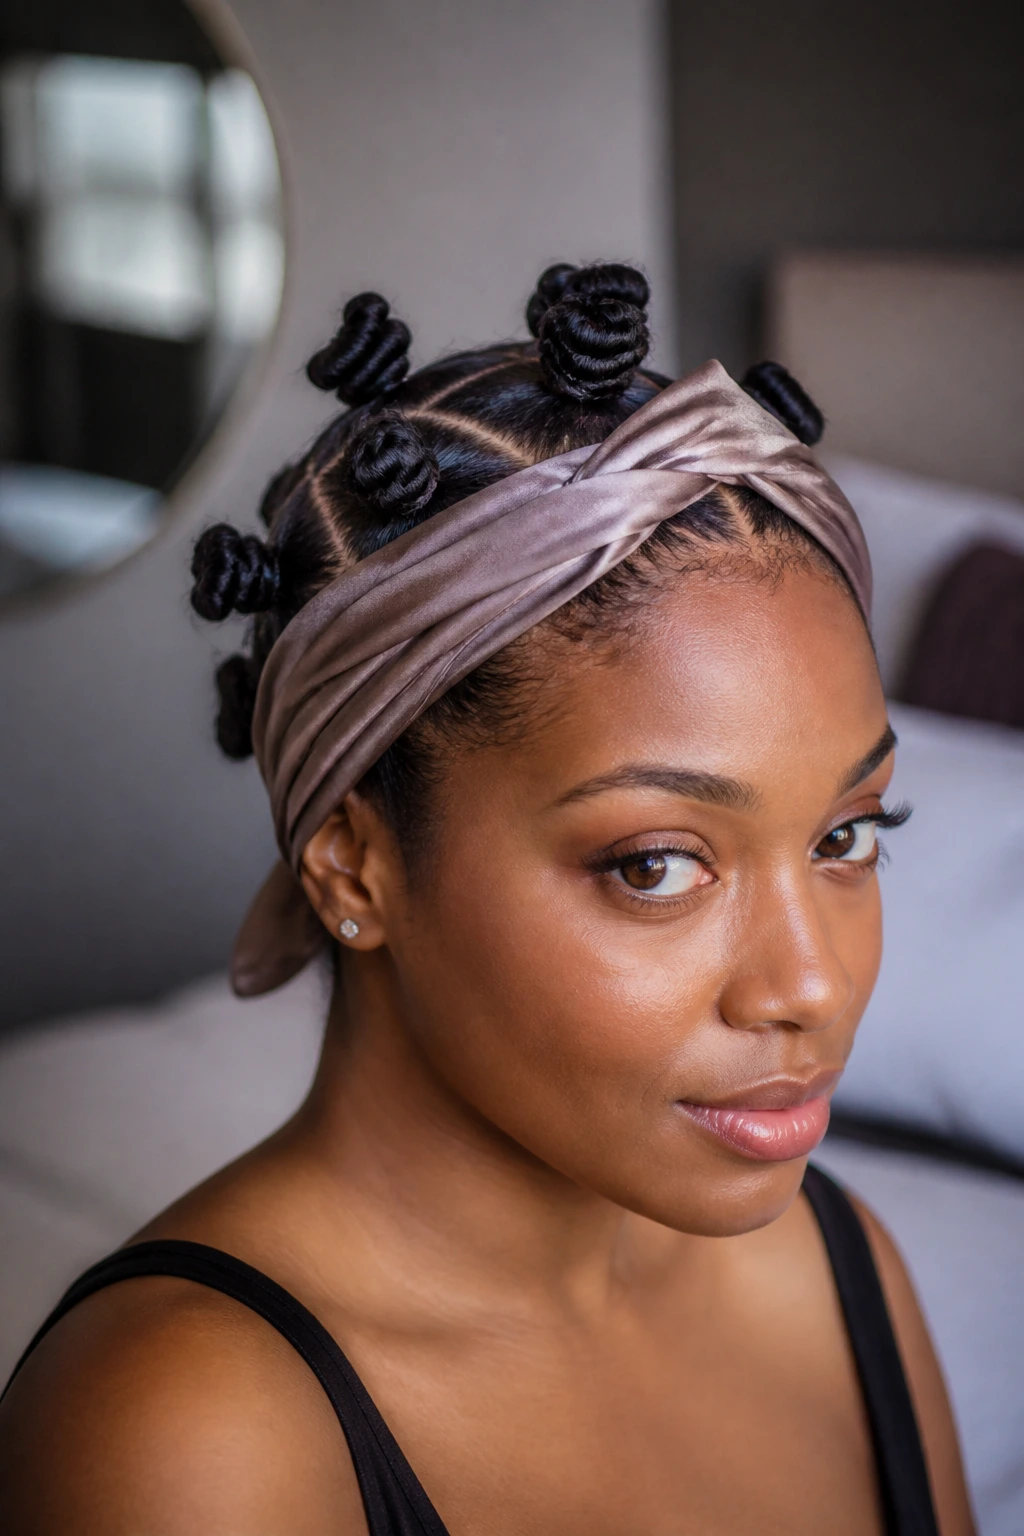
Gold cuffs add a little shine without asking the hair to do anything extra. Slip them onto small accent braids, place them at the base of a few knots, or use them to mark the front row and leave the back plain. That restraint keeps the look clean. A few cuffs go a long way.
This style is especially good if you want the knots to feel dressy without adding bulk. Beads can swing. Cuffs sit still. That makes them useful when you want a polished finish that won’t tangle in collars, scarves, or earrings. The metal catches the light in a subtle way and gives the whole set a more finished outline.
If the hairline is your strongest feature, place the cuffs near the front. If the crown is the shape you want people to notice, keep the metal higher up. Either way, don’t overdo the accessories. The knots should still read as the main design.
14. Flat-Twist Front Bantu Knots
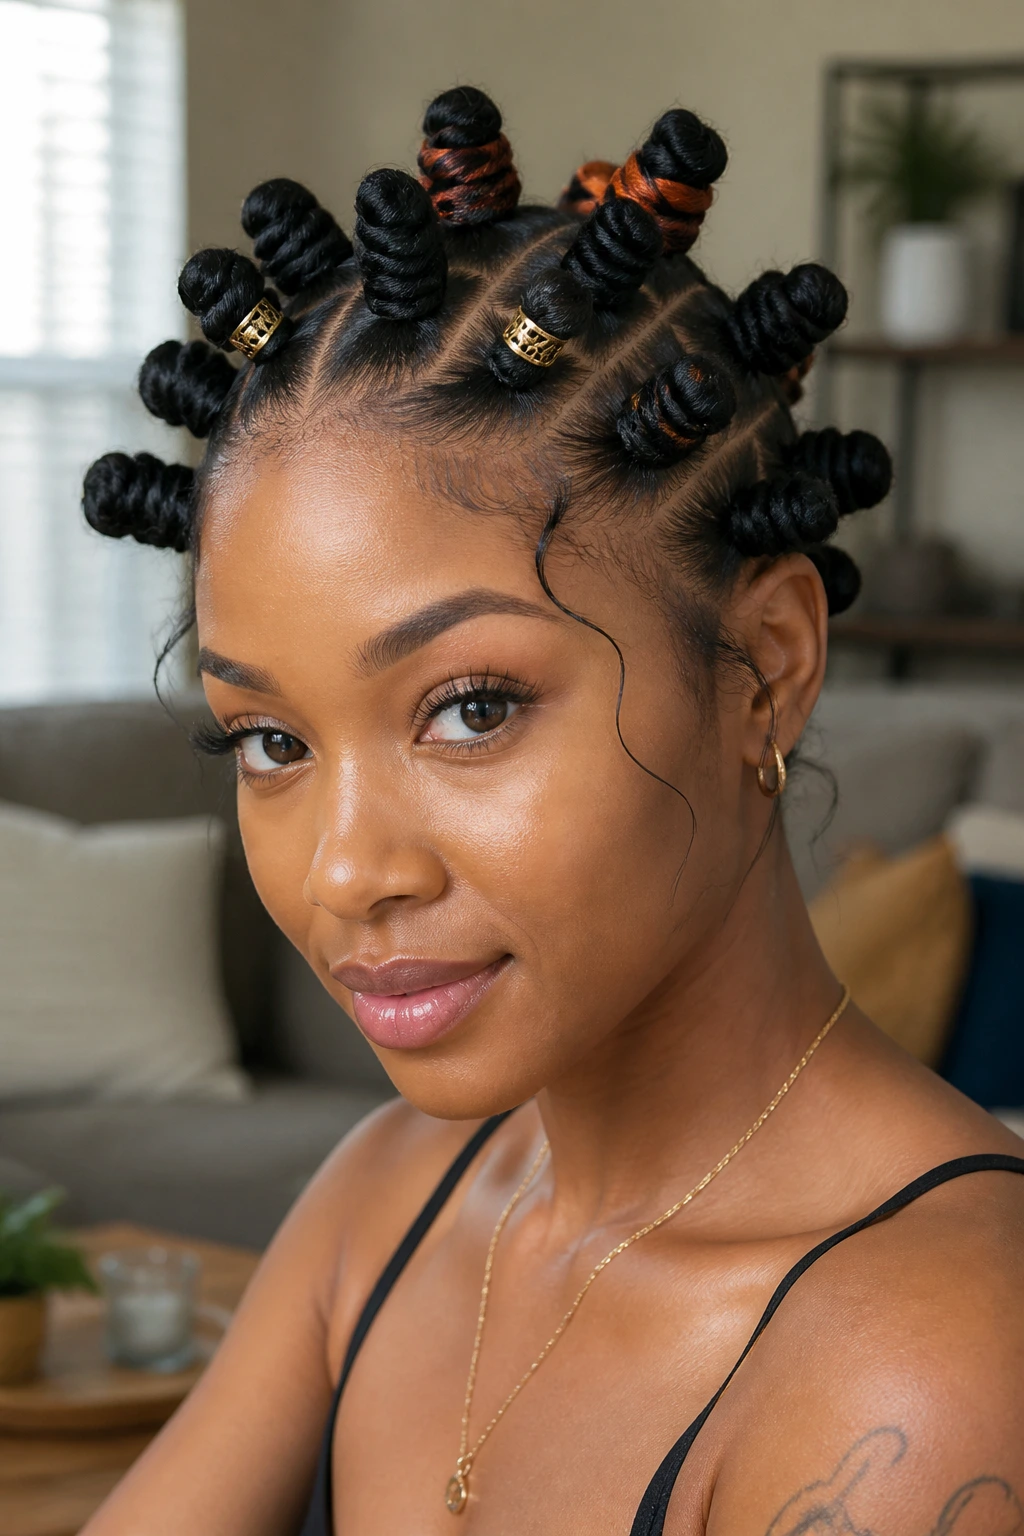
Flat twists at the front solve a common problem: the front of the style can get puffy before the rest of the head settles. By flat-twisting the hairline or the first section or two, you get a smoother start and a cleaner transition into the knot pattern. It looks tailored right away.
This is one of the best options for anyone who likes a little structure around the face. The front lies flatter, which lets the knots behind it stand out more. If you want to show off earrings, this version helps because the front doesn’t crowd the face. It also works nicely if you wear glasses, since the hair stays off the temples.
I’d call this a good “busy day” style. It looks finished fast, and the front tends to stay neat longer than a plain knotted hairline. Use a light foam or mousse on the twists so they dry smooth instead of fuzzy. The contrast between twist and knot is half the appeal.
15. Knot-Out Set Bantu Knots
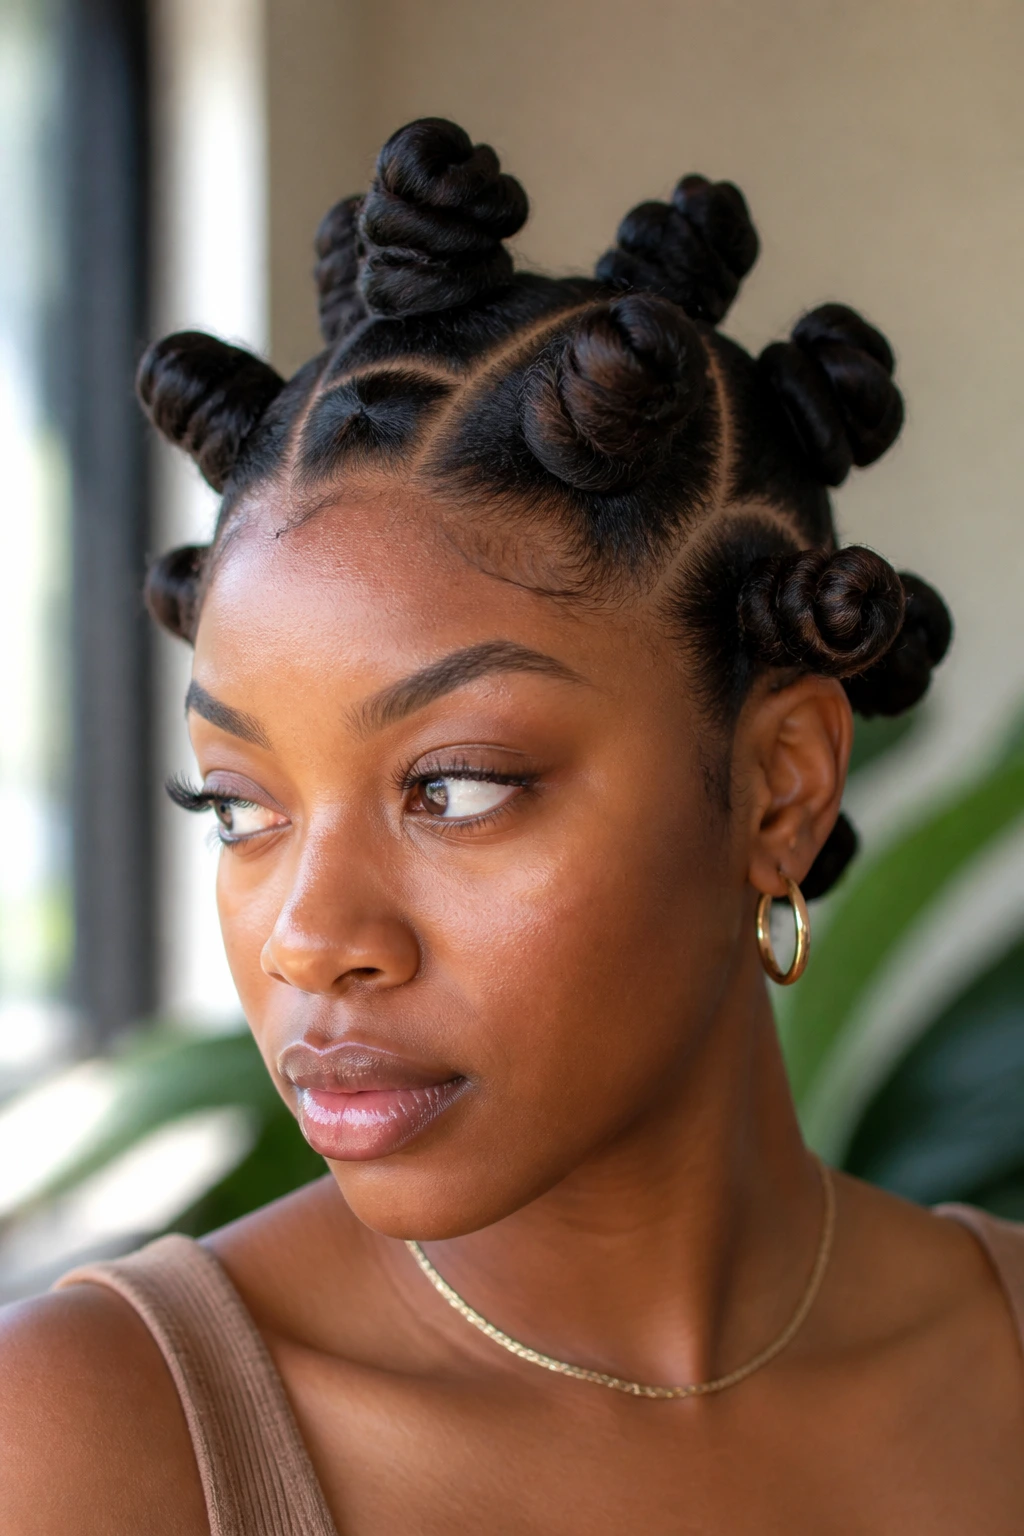
This is the version you choose when you already know the knots are only step one. The goal is a defined knot-out later, so the sections need to be even, the products need to be light, and the hair has to dry fully before you touch anything. If the centers are damp, the takedown goes fuzzy fast.
How to set the curls up properly
Use a leave-in, then a small amount of cream or foam. I would not overload the hair with heavy butter here. It takes too long to dry and makes the curl pattern clump in odd places. The base should feel coated, not slippery.
The size of the knots controls the size of the curls later. Smaller knots mean tighter definition; larger knots create bigger, looser bends. If you want the knot-out to last, sleep with a satin bonnet and keep your fingers out of it until morning. Or longer, if the hair is thick and still holding coolness inside the coils.
16. Low Bun Bantu Knot Hybrid
A low bun hybrid is a nice way to keep the nape calm while still using knots for shape up top. The back can be gathered into a smooth bun or tucked puff, while the crown carries a few knots that give the style structure. It reads neat from the front and stays practical from the back.
This is one of the gentler styles if your scalp is sensitive around the edges. The weight sits lower, and the crown knots don’t have to do all the work. It also plays well with second-day hair, which is often a little softer and easier to shape into a bun without fighting the texture.
What I like here is the contrast: polished at the base, dimensional on top. You can keep the bun plain or wrap it with one of the sectioned tails. Either way, the style feels intentional without requiring a full-head knot set.
17. Asymmetrical Bantu Knots
Asymmetry can be a relief. Not everything has to mirror perfectly, and Bantu knots are one of the few styles where that choice can look sharp on purpose. Try three larger knots on one side and five smaller ones on the other, or let one side sweep lower across the temple while the other stays compact.
The important part is that the imbalance looks deliberate. The parting still needs to be clean, and the knot sizes need to relate to each other somehow — same finish, different rhythm. If the sections feel random, the style will too. But if the difference is clear, it reads creative rather than messy.
This is a good option when you want movement in the silhouette. It suits angled cheekbones, side parts, and outfits that already have a strong line. There’s a little more personality in it than a plain grid, and I’m always happy to see that.
18. Slick-Back Row Bantu Knots
Rowed knots running straight back from the hairline have a strong, tidy look. The front rows are slicked flat, then the knots are stacked in clean lines that follow the shape of the head. It is one of the neatest ways to wear the style if you like scalp detail.
This version asks for good sectioning more than flashy accessories. The rows need to track evenly so the style doesn’t tilt. If your hair is thick at the crown, slightly larger knots in the back help the whole set sit level. The front can stay smaller and closer to the scalp.
I’d choose this for a week when I want the style to last without looking bulky under hats or scarves. The rows keep the shape compact, and the smooth front makes the whole thing feel more finished. It is straightforward, but not boring. That matters.
19. Micro Bantu Knots
Micro knots are the detail lover’s version. They take the longest, and I will not pretend otherwise, but the grid they create is gorgeous when the parts are clean and the sections are the same size all over. On dense natural hair, the finish can look almost woven.
Because the sections are tiny, the style usually stays neat longer and gives you more definition if you plan to take it down. That said, micro knots punish sloppy parting. If one section is even a little bigger than the next, the pattern shows it right away. This is the set where a rat-tail comb and clip discipline matter.
The upside is wear time. The smaller the knot, the less it has to fight gravity. If you want a style that can hold its shape through several days with a bonnet and a little refresh mist, this is one of the strongest bets.
20. Halo Crown Bantu Knots
A halo arrangement circles the head like a crown, which is a nice way to make the shape feel softer and more elevated at the same time. The knots sit around the perimeter, while the middle can stay smooth, puffed, or lightly braided depending on your length and density.
The crown effect works best when the spacing is even. Too few knots and the shape looks sparse. Too many, and you lose the open center that makes the style feel airy. I like this one with medium-sized knots and a neat finish at the front hairline.
If the goal is to frame the face without crowding it, this is a strong choice. It leaves room for earrings, makeup, and necklines with detail. There’s something pleasing about the way the knots trace the head. It feels planned, but not severe.
21. Satin-Scarf Wrapped Bantu Knots
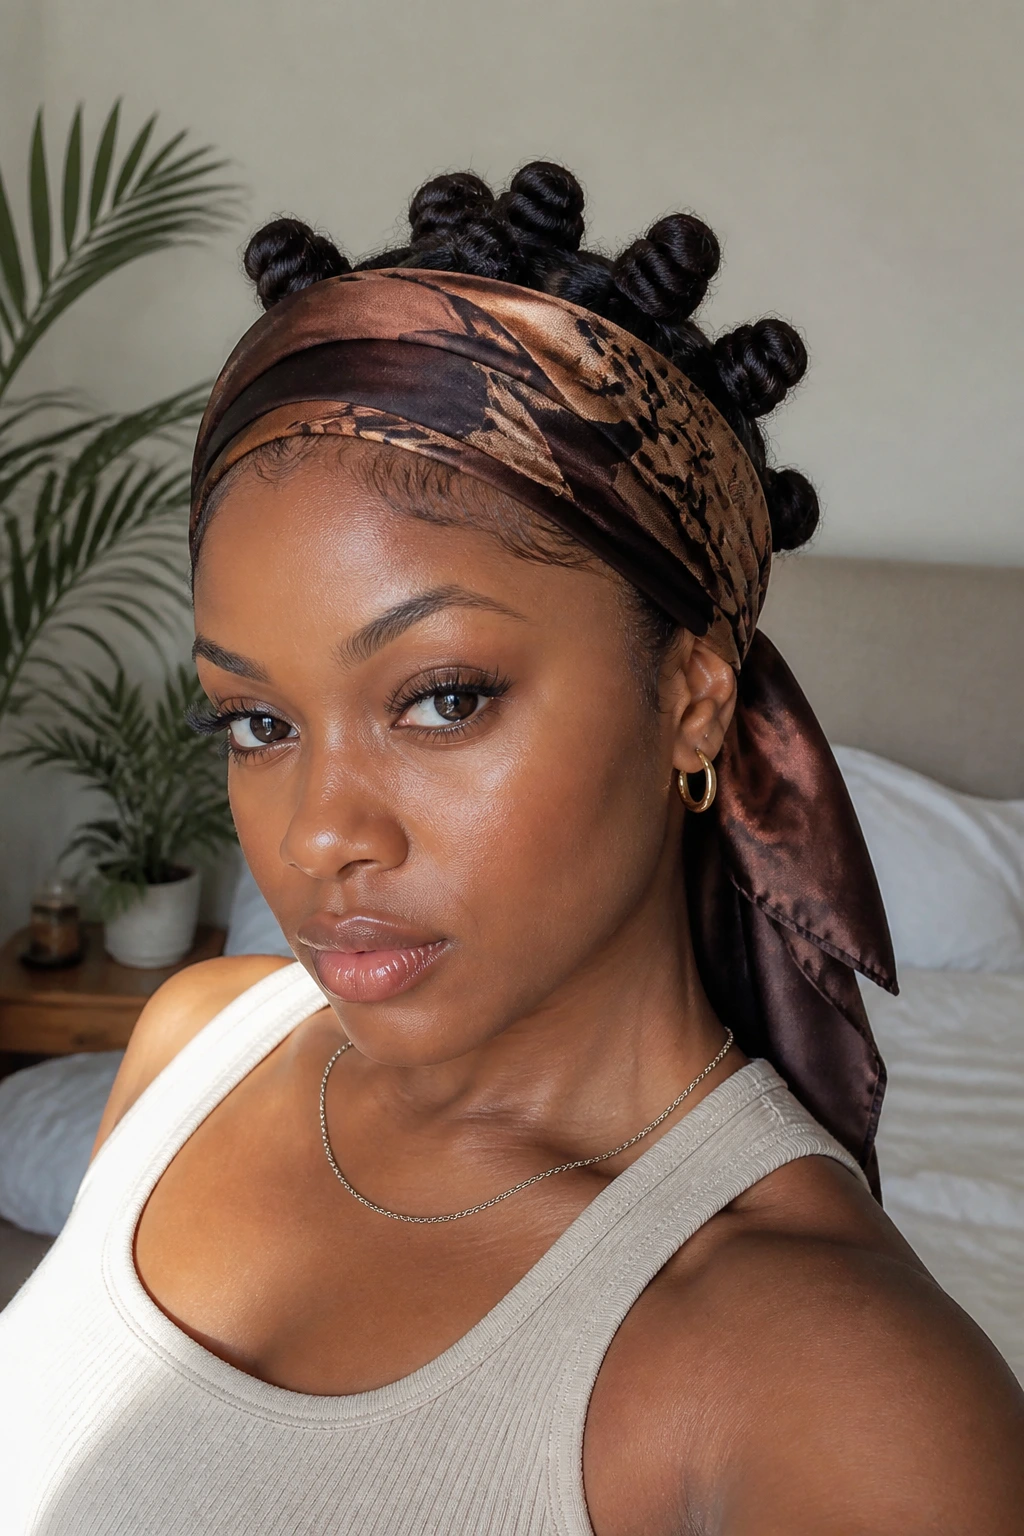
A satin scarf can do more than protect the style at night. Wrapped right, it becomes part of the look. Tie it around the hairline, fold it into a band across the front, or knot it at the top so the fabric sits like a soft accent rather than a cover-up.
Use satin or silk, not cotton. Cotton grabs the hair and roughs up the surface, which is the opposite of what you want with Bantu knot styles. A scarf with a smooth finish helps keep the roots settled and adds a clean line at the forehead. If the knots are small, a scarf can make them look even more intentional.
This is a nice choice when you want a low-effort finish that still looks styled. You do not need much else. The scarf becomes the extra detail, and the knots do the rest.
22. Color-Blend Extension Bantu Knots
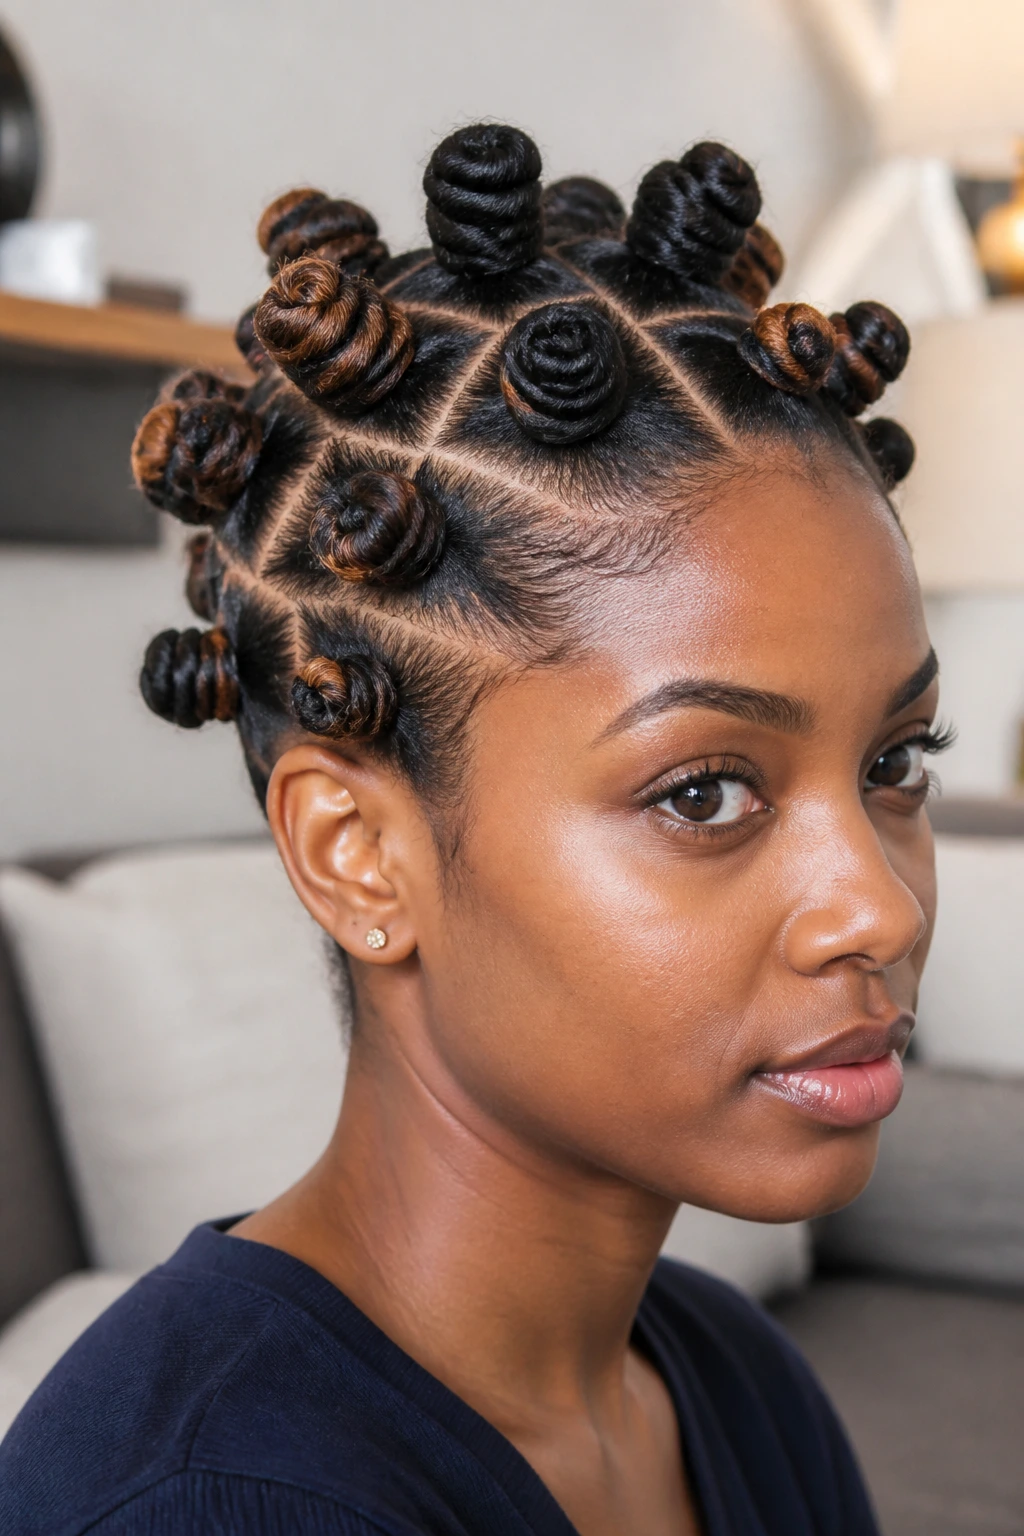
A little color can make Bantu knots feel fresh without dyeing the whole head. Add a few extension pieces in copper, burgundy, honey brown, or a shade close to your own color, and let them peek through the knots just enough to catch the eye. Keep the amount small so the texture still reads as natural hair first.
This version works best when the added hair is blended in with the sectioning instead of dropped on top. If every knot is a different color, the style can turn noisy fast. But if you place the color in a few thoughtful spots — maybe the front row or the crown — the effect is cleaner and more expensive-looking.
I like this for anyone who wants a temporary color shift without touching their natural strands. It is also a smart way to warm up a style that might otherwise feel too plain under neutral clothing.
23. Bridal-Polished Bantu Knots
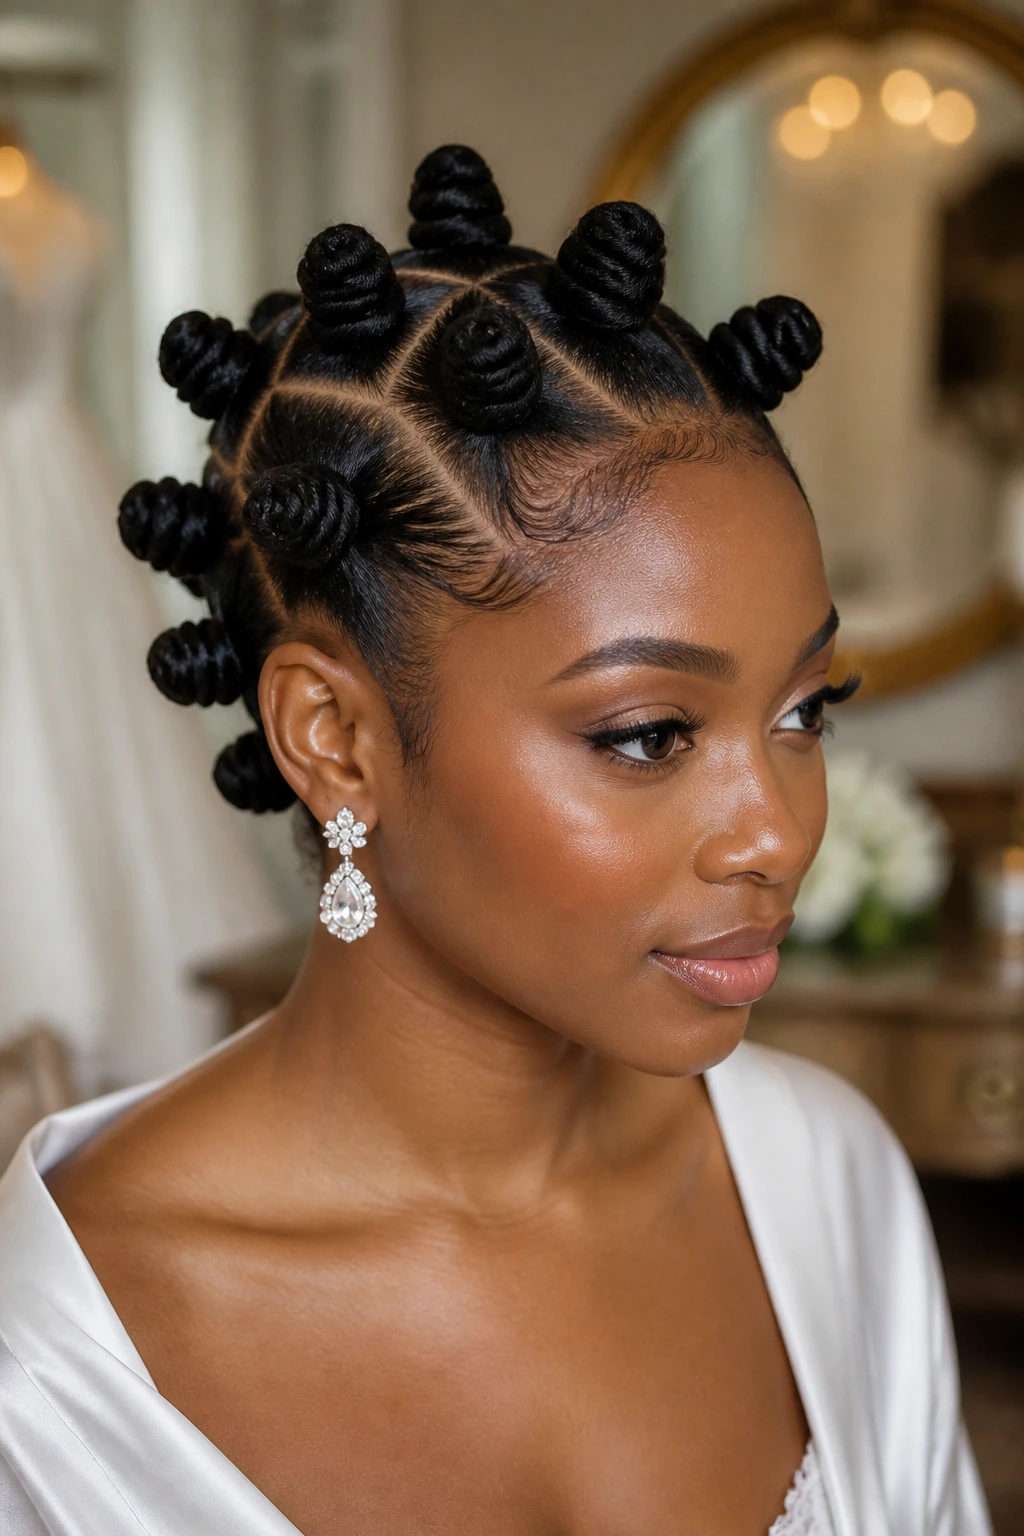
The bridal version is all about smoothness and restraint. The knots are even, the parts are crisp, and the finish stays glossy without slipping into heavy product territory. This is not the place for wild accessories. A few pearls, a jeweled pin, or a thin comb is plenty.
What makes this style work is precision. Keep the sections consistent and the roots controlled, then leave the knots clean enough that the shape itself carries the look. If the face frame is important, soften just the front with a little styling foam or edge brush work. The rest should stay disciplined.
This is one of the few Bantu knot styles that can feel formal without losing texture. It respects the natural curl pattern instead of flattening it, which is part of why it looks so good with a dress or structured neckline.
24. Low-Tension Everyday Bantu Knots
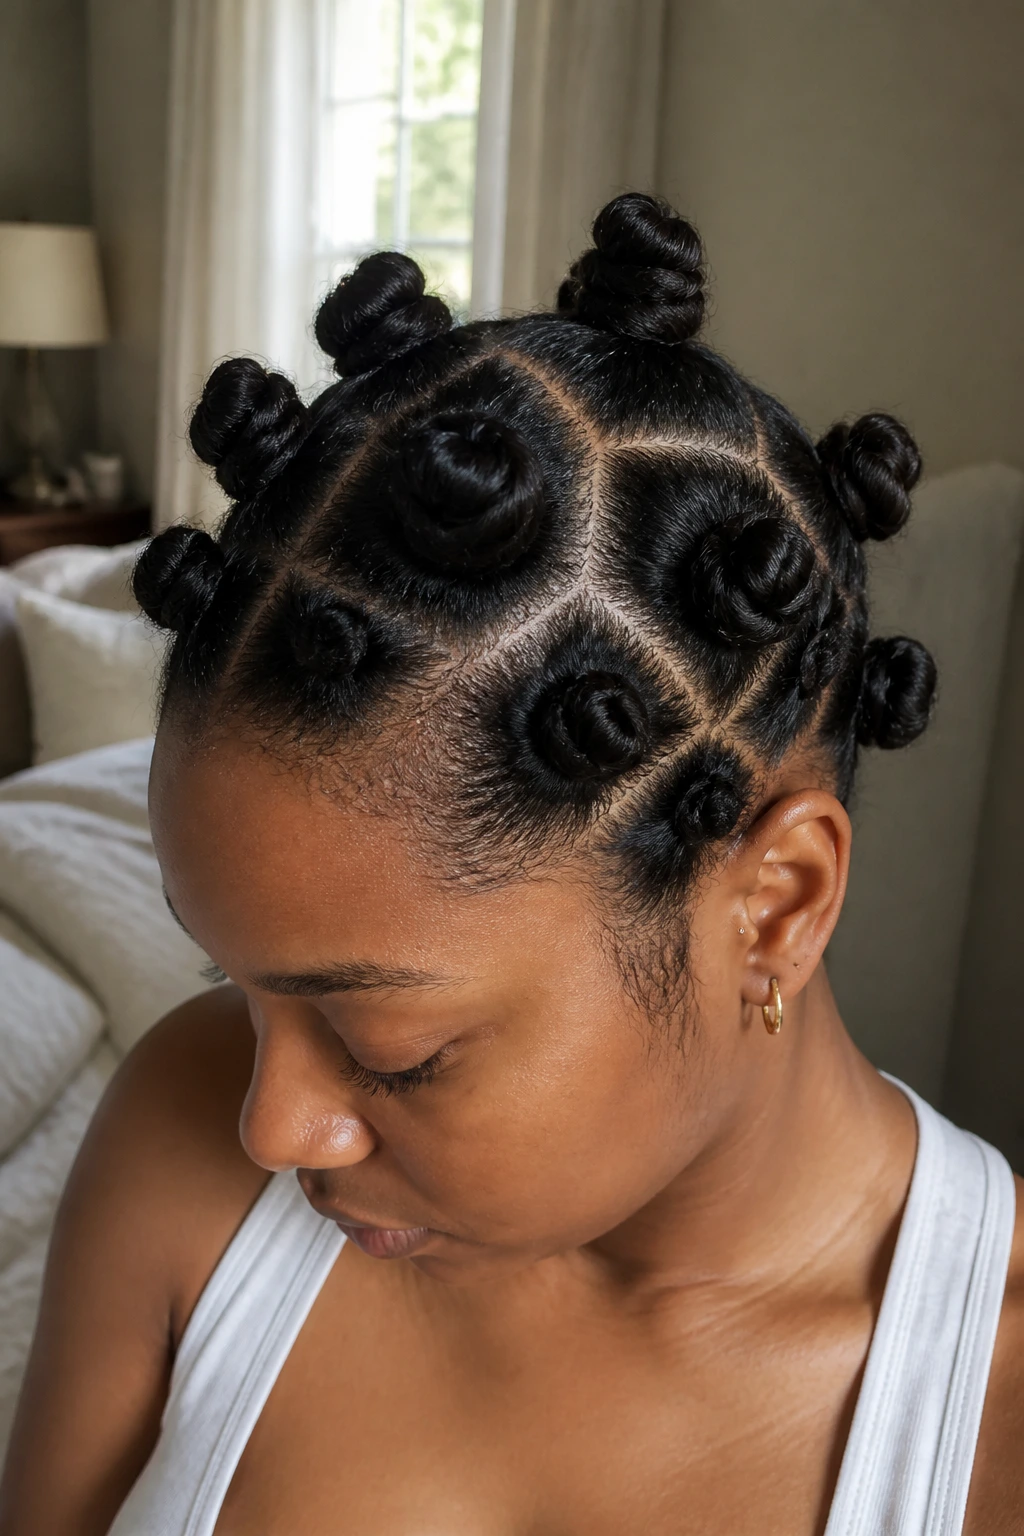
Sometimes the smartest version is the one your scalp can live with. Low-tension knots use slightly larger sections and softer parting, so the look stays neat without pulling too hard at the roots. It is the version I’d choose for a long day, a sensitive scalp, or hair that has already been styled hard recently.
The finish is not as sharp as the tiny-grid versions, and that is fine. You trade a little crispness for comfort and wearability. If you want to refresh this style later in the week, it’s easier to do because the knots are not fighting the hairline.
This is also a good base if you are new to the style. You get to learn how your hair behaves without overcommitting to a high-tension grid. Clean enough to look planned. Soft enough to feel sane.
25. Face-Framing Bantu Knots with Curly Bangs
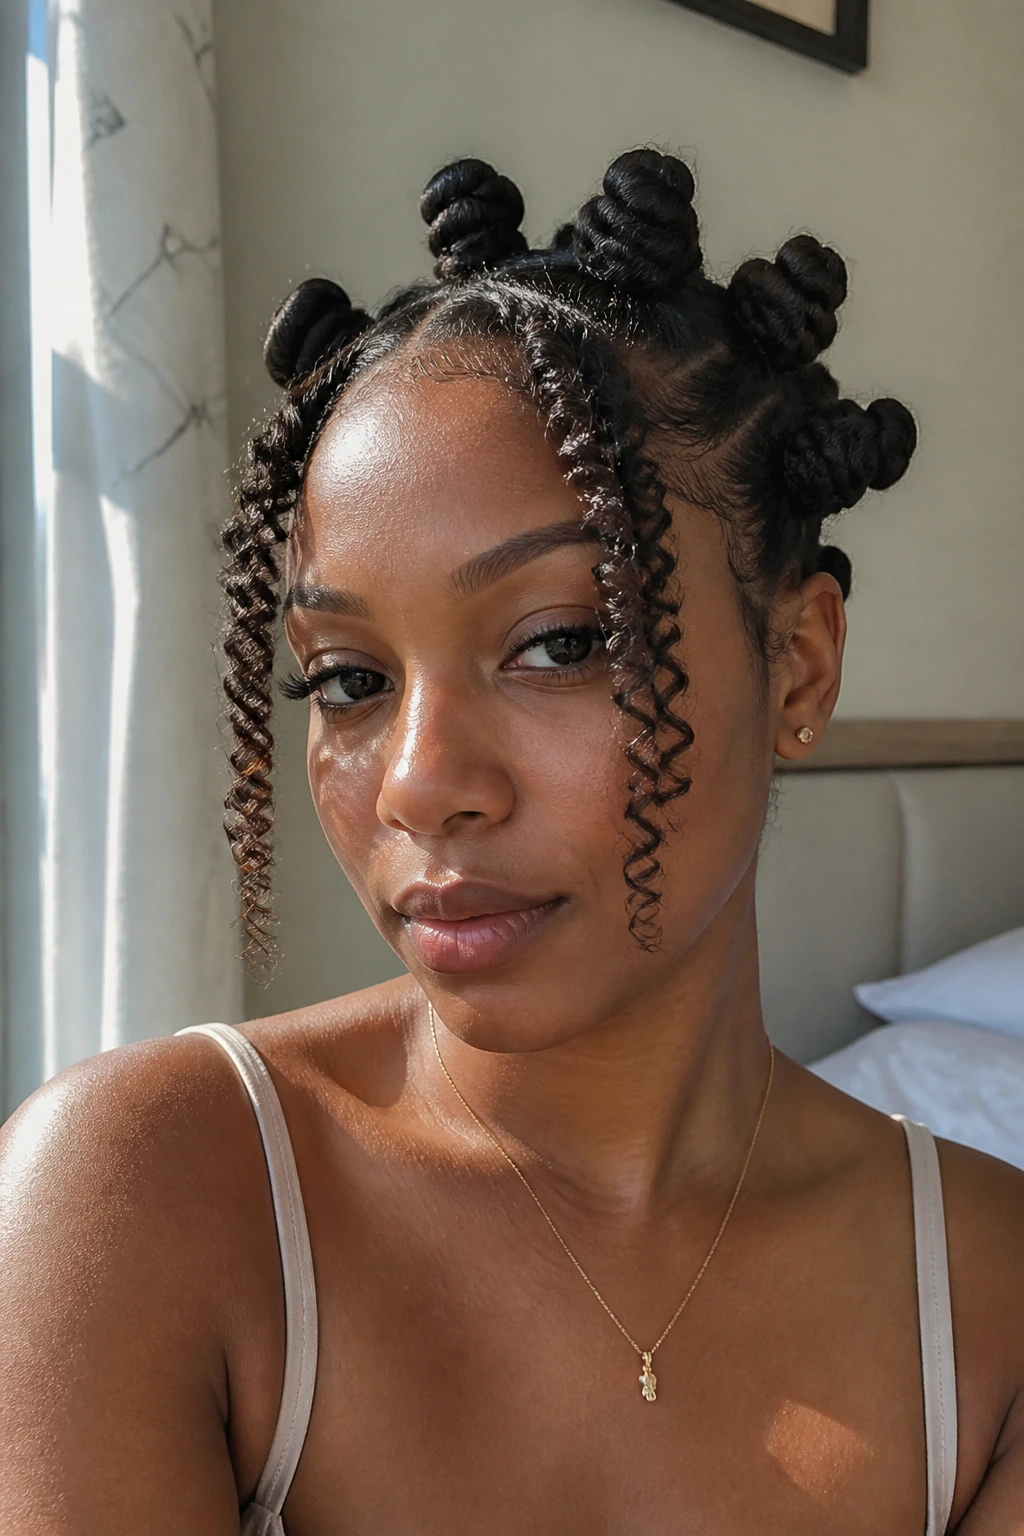
A small front fringe changes the whole look. Leave out a narrow face-framing section — no wider than about 1 inch on each side — and let those pieces sit in soft curls, twists, or a knot-out shape while the rest of the hair stays knotted. The contrast makes the style feel lighter and a bit more playful.
The trick is keeping those front pieces deliberate. If the fringe gets too wide, it stops looking intentional and starts looking like you ran out of hair halfway through. Keep the shape neat, and let the curl pattern fall forward just enough to soften the forehead and temples.
This is the version I’d choose when I want a Bantu knot set to feel less strict. It works well with glasses, softer makeup, and outfits that already have a lot going on around the neckline. The bangs keep the face open while the knots do the structural work.
How to Choose Knot Size, Parting, and Tension Before You Start
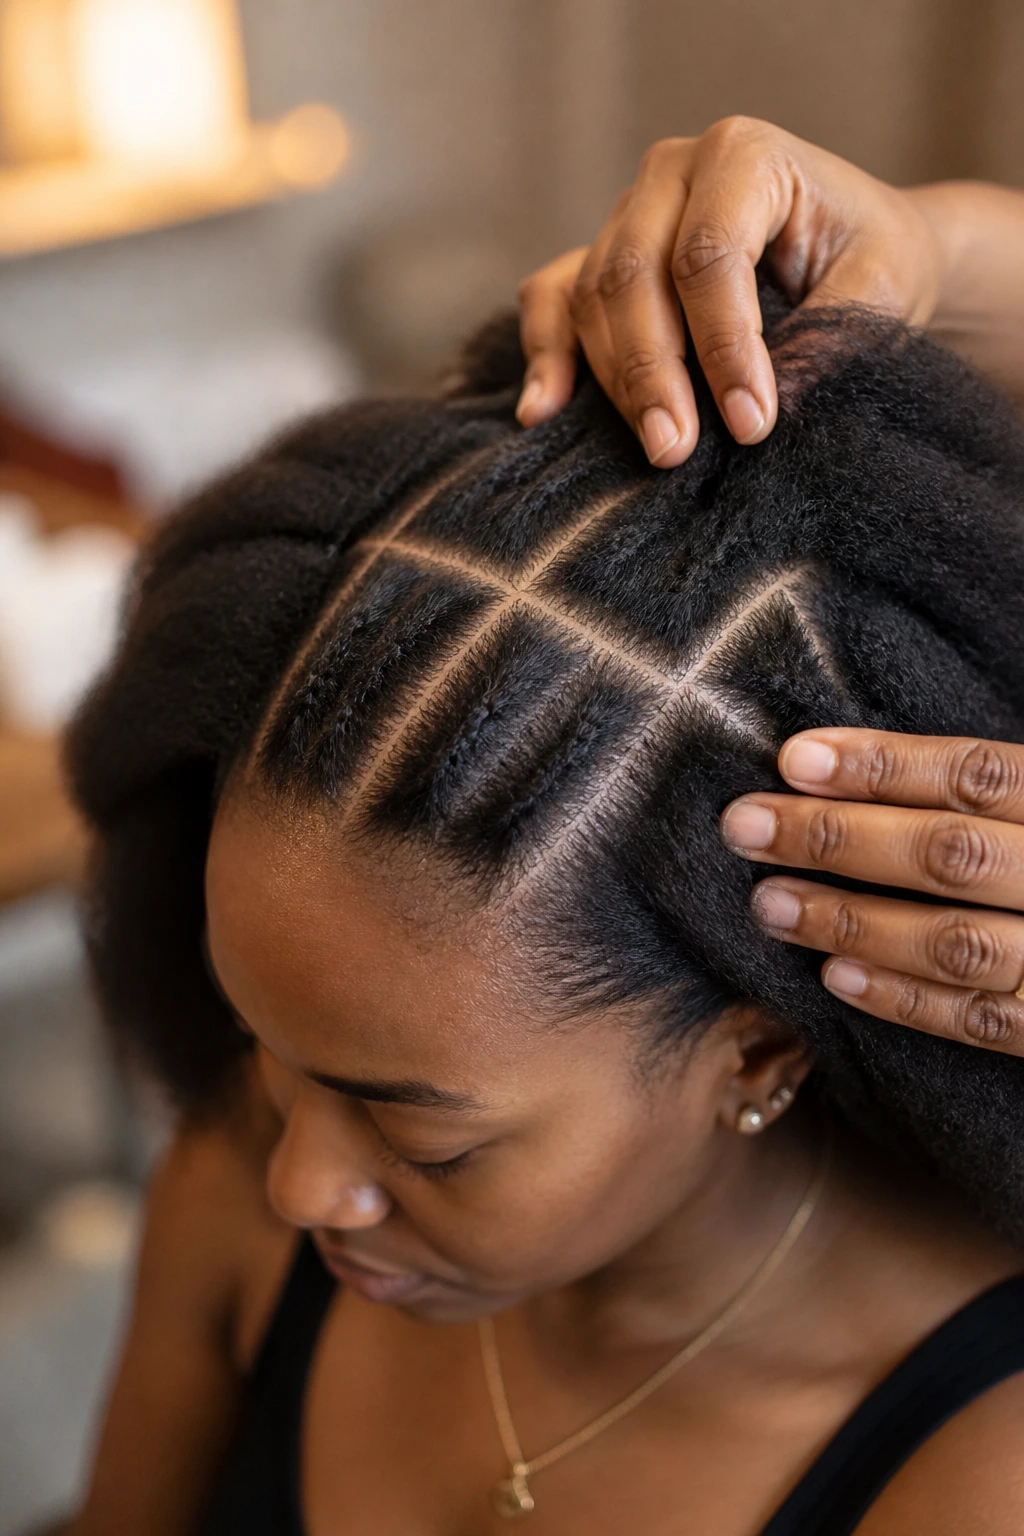
The style looks better when you decide the shape before you start twisting. That sounds obvious, but it is where most uneven Bantu knot styles begin to wobble. Decide whether you want the set to feel neat and compact, or loose and playful, or heavy with definition for a later knot-out. The size of each section should match that decision.
For a clean finish, part on stretched or lightly stretched hair if you can. A blown-out or banded base gives you a clearer grid, and the knots sit closer to the scalp without puffing as much. If you’re working on fully shrunken hair, use smaller sections and accept a softer outline. Fighting shrinkage tends to make the parts look messier, not smoother.
Tension matters more than product. Pull the base just enough to smooth it, then stop. If you hear yourself muttering through the parting, that’s the sign you’re getting too tight. The style should sit snug, not sore. A calm scalp is a better long-term look than one that holds the part like a helmet.
Essential Tools for Clean Bantu Knots
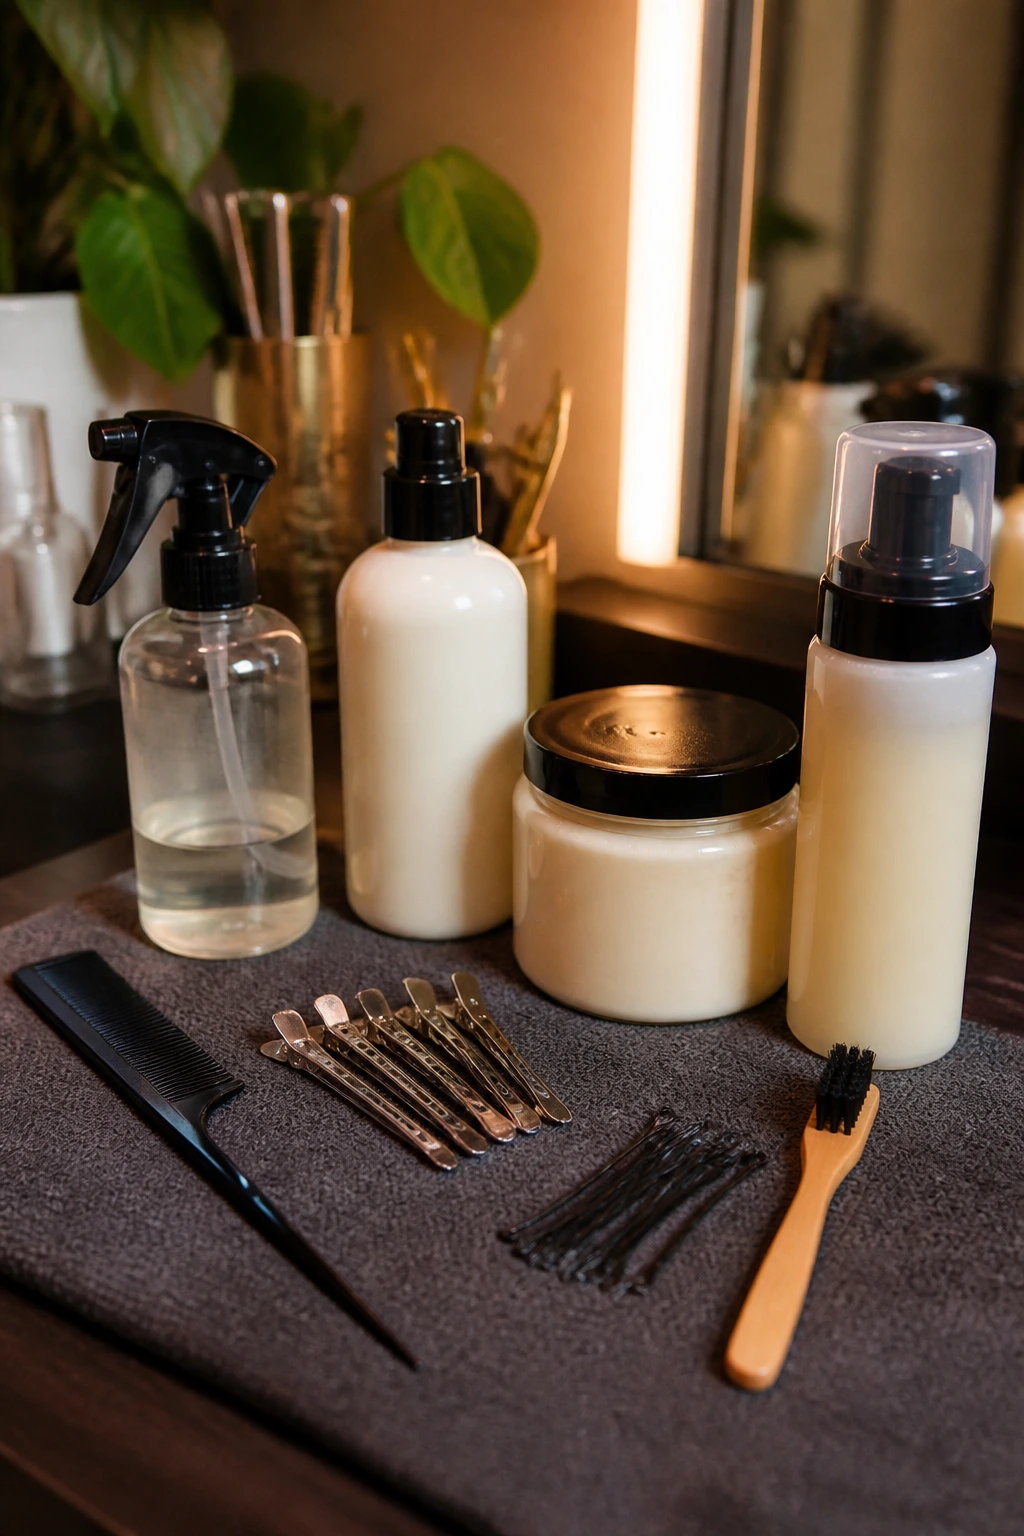
- Rat-tail comb: The pointed end makes clean parts and helps you stay consistent with section size.
- Duckbill clips or small section clips: These keep finished sections out of the way while you work through the head.
- Spray bottle with water or leave-in mist: Use this sparingly to soften dry ends before coiling.
- Leave-in conditioner: A light layer keeps the hair flexible without turning the knots limp.
- Curl cream or styling butter: Use a small amount on the mid-lengths and ends for smoother wrapping.
- Mousse or foam styler: Helpful if you want the surface to dry smoother and keep the roots tidy.
- Edge brush: Handy for shaping the hairline without overloading it with product.
- Satin bonnet or scarf: Protects the parts overnight and keeps friction from fluffing the surface.
- Small bobby pins: Useful for short hair, bob-length sets, or any knot that wants to unravel at the tip.
How to Keep Bantu Knot Styles Neat Between Wash Days
Bantu knot styles hold up best when you leave them alone. That sounds blunt, but it’s true. The more you keep touching the knots, the faster the roots puff, especially around the crown and hairline. Most sets stay neat for about 3 to 7 days, with smaller or braided-base versions usually holding the longest.
At night, wrap the hair with a satin scarf or bonnet. If the knots are bulky, I like to use the scarf first to flatten the sides, then the bonnet over it so everything stays put. Cotton pillowcases rough up the surface and dry out the parts; satin does the opposite. That one switch makes a real difference.
If the front starts to fuzz, refresh it with a very light mist of water or leave-in spray, then smooth the roots with foam or a pea-sized dab of styling cream. Do not soak the hair. If the knots are for a later takedown, make sure the centers are fully dry before you remove them. Damp coils can smell off and separate into weak pieces instead of defined curls.
Common Mistakes That Make Bantu Knots Puff Up Too Fast
The first mistake is starting on hair that is too wet. The knots may look neat at first, but they take forever to dry, and damp centers turn fuzzy faster than people expect. Hair should be dry or only lightly damp, especially if you plan to wear the style for more than a day.
The second mistake is making the sections inconsistent. One knot the size of a grape and the next the size of a walnut will show up immediately, especially on the top row. Use the comb, clip each section, and work methodically. Slow is smoother here.
Too much product is another common mess. Heavy cream or thick gel can make the knots look slippery and attract lint at the roots. You want controlled softness, not a waxy coat. If you can feel product sitting on the hair after twisting, you used too much.
The last mistake I see a lot is tight edges. A style can look neat without pulling the hairline raw. If your temples hurt after finishing, the tension is too high. Loosen the base, give the scalp a break, and choose comfort over a perfect grid that will not last anyway.
Variations and Add-Ons That Change the Whole Mood
Glossy Grid Finish: Use a center or triangle part, smooth the roots with mousse, and keep the knots medium-small. This version is all about clean lines and a polished surface.
Soft Romantic Frame: Leave a few face-framing pieces out at the front or around the temples. Curl them lightly if your texture allows it, or let them fall in their natural bend for a softer outline.
Metallic Accent Set: Add gold cuffs or tiny rings to the front row only. Keeping the accessories in one area stops the style from looking cluttered.
Color Pop Crown: Thread one or two extension pieces in a warm accent shade into the top row. A little color near the crown can wake up the whole style without needing a full-color install.
Comfort-First Low Tension: Use larger sections, skip the tight slicking, and keep the parts soft. This is the one to choose when your scalp wants less pressure but you still want the knotted shape.
Frequently Asked Questions About Bantu Knot Styles
How long do Bantu knot styles usually last?
Most sets stay neat for 3 to 7 days, depending on section size, product use, and how much you touch them. Tiny knots and braided-base versions usually hold better than larger, looser sets.
Can you do Bantu knots on short natural hair?
Yes, but the section size needs to match the length. On a teeny-weeny afro or a bob-length cut, smaller knots or a bob-style set work better because the ends can tuck in without fighting the shape.
Should the hair be wet, damp, or dry before styling?
Lightly damp or fully dry usually works best. Soaking-wet hair takes too long to dry and can leave the center of the knot mushy, which makes the style puff early or smell stale if you leave it too long.
What products help Bantu knots stay smooth?
A light leave-in, a small amount of cream, and a foam or mousse at the roots usually give the best balance. Heavy butters and thick gels can make the knots greasy or sticky, especially on finer sections.
How do you stop the knots from unraveling at the ends?
Keep the section size even, smooth the ends before coiling, and tuck them firmly into the base. On shorter hair, a tiny bobby pin can help, but do not rely on pins alone if the section is too loose.
Can Bantu knots be worn to work or school?
Absolutely. A center grid, a side part, or a low-tension set reads neat enough for most settings, especially when the parts are clean and the hairline is shaped without overdoing it.
Will Bantu knots give me a knot-out later?
If that is the goal, use even sections, avoid heavy product, and let the hair dry fully before unraveling. The finished curls depend more on the quality of the set than on how much twisting you do.
What if one side of the style looks bigger than the other?
That usually means the section sizes drifted or one side of the head has denser growth. You can fix a little of it by redoing the larger knots with smaller sections, but sometimes the better move is to make the asymmetry look intentional with a side part or a deliberate accessory.
A Style That Keeps Finding New Angles
Bantu knot styles work because they give you structure without flattening the hair’s personality. A clean grid, a careful part, and the right knot size can make the same texture look sharp, soft, playful, or polished depending on how you place the sections. That range is the real reason people keep coming back to them.
Start with one version that suits your time and your hair density, then change one detail at a time — the part, the size, the accessory, the tension at the hairline. That’s where the best looks come from. Not from doing the most, but from choosing the one detail that actually changes the shape.
