



Straight hair is brutally honest. If the layers are wrong, it tells on you before you’ve finished your coffee.
That’s why shag haircuts for straight hair live or die by the cut itself. Not the filter. Not the salon mirror. The actual geometry: where the shortest pieces sit, how much weight stays at the perimeter, and whether the front opens the face or just hangs there like a tired curtain. On straight hair, there’s nowhere to hide a bad layer line. Which is exactly why a good one looks so sharp.
The low-maintenance part matters, too. Nobody wants a cut that needs a round brush, a curling wand, a prayer, and twenty minutes of arm work to look decent. A solid shag should dry with a shape already built in, grow out without forming a shelf, and still look intentional when you tuck one side behind your ear. If it’s done well, the haircut does the heavy lifting.
Why You’ll Love These Low-Maintenance Shag Haircuts
-
Air-Dry Friendly: These cuts are built to keep their shape when you let straight hair dry on its own, which means less heat and fewer “fix-it” passes with a flat iron.
-
Built-In Movement: The right layers break up that one-flat-plane look straight hair can get, so the ends move without needing a lot of styling product.
-
Better Grow-Out: Soft shags tend to blur as they grow instead of turning into a hard line at the shoulders, which makes salon stretches easier.
-
Flat-Hair Rescue: Crown layers and face-framing pieces can lift roots that usually lie close to the head, especially around the crown and cheekbones.
-
Easy to Personalize: Curtain bangs, bottleneck bangs, side-swept fringe, blunt edges, or soft internal layers can all change the mood without turning the cut into a high-maintenance project.
Why Straight Hair and a Shag Actually Get Along
Straight hair and shaggy layers are a better match than a lot of people think. The myth is that shags belong to wavy hair only, because waves help hide the seams between layers. But straight hair has its own advantage: it shows line, and line can be beautiful when the cut is precise.
The trick is restraint. A straight-hair shag should not be chopped into confetti. It needs purposeful layer placement. Short pieces near the crown give lift; longer face-framing layers soften the front; the perimeter keeps enough weight so the whole cut doesn’t fly apart. That balance matters more than any styling trick.
The other reason this haircut works is simple. Straight hair tends to lie flat by the second day, especially if it’s fine or medium in density. A shag gives the eye something to follow even when the strands are calm. You don’t need huge texture. You need shape. That distinction gets lost in bad haircut advice all the time.
And one more thing: the best straight-hair shag usually looks better when it’s a little imperfect. Not messy. Not random. Just not overworked. A slight bend at the front, a tuck behind one ear, a bit of separation at the ends — those tiny details make the cut feel alive.
What to Tell the Stylist Before the First Snip

A shag is not one haircut. It’s a family of cuts, and the difference between “cool and easy” and “why did I do this” is usually a few inches. Bring photos, yes, but bring the right photos. The model’s hair should match yours in length, density, and parting habit, or the reference is mostly decorative.
Say Where You Want the Shortest Layer
If you want low maintenance, give a real anchor point: collarbone, cheekbone, jaw, or chin. That tells the stylist how much movement you want without letting the layers creep too high. On straight hair, a shortest layer that starts too far up can make the top look see-through fast.
Ask About Cutting Method
Point cutting and soft texturizing usually behave better on straight hair than aggressive razor work, especially if your hair is fine. Razor cutting can remove bulk beautifully on thick hair, but too much of it on thin strands can leave ends fuzzy and fragile. That difference matters.
Be Honest About Your Routine
If you air-dry, say so. If you never use a round brush, say that too. A cut designed for a 5-minute finger dry is not the same as one meant to be blown smooth at the front every morning. The stylist can’t read your habits from your face.
1. Collarbone Shag with Soft Ends
This is the shag for people who want shape without drama. The length sits around the collarbone, which gives you enough hair to tuck, clip, or pull back, while the soft layers around the face keep it from feeling heavy. On straight hair, that length is a sweet spot: it moves, but it does not bounce around like a short cut can.
The soft ends matter. Instead of choppy, separated points, the layers fade gently into the perimeter, so the whole cut looks deliberate even when you’ve done almost nothing to it. A light leave-in cream and a rough dry with your fingers are often enough.
Best for: medium-density straight hair, people growing out a bob, and anyone who likes a neat outline with a little swing.
Ask for: collarbone length, face-framing layers that start around the cheekbone, and soft internal layering rather than aggressive thinning.
2. Curtain-Bang Shag That Dries in Place
If you want bangs but refuse to spend every morning negotiating them, this is the move. Curtain bangs split at the center and open at the brow, so they grow out more gracefully than blunt fringe. On straight hair, they can sit close to the face without looking stiff, which is the whole point.
The rest of the cut stays relaxed: shoulder-to-collarbone layers, some movement through the front, and not too much removal at the back. The bangs give the haircut personality; the body of the cut keeps it wearable. You only really need a quick bend with a small round brush or a blow-dry brush at the front.
Why it stays low-maintenance
The fringe softens as it grows, and that softness is a feature, not a problem. You can push it apart, pin it back, or let it sit centered. That flexibility is what keeps this from becoming a high-maintenance bang situation.
3. Chin-Grazing Mini Shag
Short shags on straight hair can go one of two ways: chic and airy, or mushroom-shaped. The chin-grazing version stays on the right side because the layers open the jaw instead of puffing out around it. It’s especially good if your hair dries fast and you want a cut that looks like it already has movement built in.
This one usually works best with a softer fringe or a tiny face frame. The important part is not to pile too much texture near the top. Keep the crown light, keep the sides soft, and let the line skim the face rather than box it in.
- Good for fine straight hair: the shorter length makes the strands look fuller without needing a lot of product.
- Good for busy mornings: there’s less hair to heat-style, and the shape settles quickly after a towel dry.
- Less good for very round faces if cut too bluntly: ask for a longer front edge so the sides don’t stop right at the widest part of the cheek.
4. Long Shag with Hidden Layers
This is the cut for people who like their length and don’t want to give it up. The trick is hidden layering: the shortest pieces live deeper inside the haircut, so the outside keeps a long, smooth outline. You get movement without the obvious choppiness that can make straight hair look stringy.
It’s low maintenance because the shape is there even when the hair is pulled back, tucked behind an ear, or left to fall straight. The layers only show themselves when the hair moves. That makes the haircut feel quieter than a classic shag, but not boring.
If you’re nervous about layers, this is the safest place to start. It gives you a sense of texture without forcing a lot of front-end styling. And if you hate seeing split or wispy ends, this version stays cleaner than more obvious shag cuts.
5. Blunt-Perimeter Shag for Extra Shape
Some straight hair needs more outline, not less. A blunt-perimeter shag keeps the edge clean while the inside of the haircut carries the movement. That means the cut still reads as polished from a distance, but it doesn’t sit like one solid slab.
I like this version on thick straight hair because it controls the bulk without turning the ends into feathers. The line at the bottom gives the haircut some backbone. The internal layers stop it from feeling heavy. That’s the part people often miss.
The styling is mercifully simple. A quick blow-dry at the roots, a little smoothing cream through the lengths, and you’re done. The cut itself supplies the energy.
6. Feathered Shag with a 70s Bend
This is the one with soft movement around the face and a little flip through the ends, but none of the stiffness that can make retro cuts feel costume-y. On straight hair, feathering works best when it’s kept airy, not over-cut. You want the front to open like a fan, not split into wisps.
It’s a good cut if you like a bit of motion near the cheekbones and collarbone. The front layers can be styled with a medium round brush or even just rolled under with your fingers while drying. The rest of the haircut can stay loose and easy.
There’s something satisfying about a feathered shag on straight hair. It looks more considered than a flat long cut, but it does not ask for a full styling routine every day. That’s a rare combination.
7. Soft Wolf Cut Lite
A full wolf cut can feel like too much on straight hair if the contrast between the top and bottom is extreme. The softened version keeps the crown lift and the tapered back, but it dials down the disconnect. That makes the cut easier to live with and less likely to spike outward in odd places.
The key is gentle graduation. You want enough separation to create shape, but not so much that the ends start looking thin and overworked. On straight hair, “punky” can turn into “uncooperative” fast, so this cut works best when the edges are still a little rounded.
What makes it easy to wear
It handles second-day hair better than a sharper cut. A bit of dry shampoo at the roots, a finger rake through the front, and the shape comes back. No elaborate reset required.
8. French Shag with Wispy Fringe
The French shag is all about ease that still looks thought-out. The fringe is light and a little broken up, the layers are soft, and the overall shape skims the face instead of sitting heavily around it. Straight hair keeps it crisp, which is part of the appeal.
This cut is especially good if you like the idea of fringe but hate a thick, dense bang line. The wispy edge makes the forehead look open, and the layered sides keep the cut from feeling boxy. It’s one of those styles that looks better when you stop fussing with it.
A tiny bit of texture spray at the front can help separate the fringe on days when it wants to clump. That’s about it. The cut does most of the work.
9. Bottleneck-Bang Shag
Bottleneck bangs start narrow and then widen out toward the brows and temples, which gives them a softer shape than a straight fringe. On straight hair, that shape can be a lifesaver because it frames the face without needing a lot of daily heat or a strict center part.
The rest of the haircut should stay light around the face and a little fuller through the mid-lengths. You want the bangs to lead the eye, then let the layers fall away from the face instead of crowding it. That keeps the whole cut from feeling busy.
If you’ve never worn bangs before, bottleneck fringe is one of the more forgiving entry points. It’s narrow enough to feel tidy, but not so short or full that a bad hair day becomes a crisis.
10. C-Shape Face-Framing Shag
The C-shape shag is built around a curve. The front layers wrap inward, almost like they’re tracing the line from cheekbone to jaw and back into the length. On straight hair, that gentle bend gives you movement without needing curls or a heavy blowout.
This is one of my favorites for people who want softness near the face and less action through the back. It’s neat, but not severe. You get a kind of quiet lift at the front that keeps the cut from drooping.
The practical upside is simple: the front can be styled with a brush, clip, or even a tuck behind the ear, and the rest can dry on its own. It’s a good haircut when you want the shape to appear almost by accident.
11. Straight-Across Fringe Shag

A blunt fringe with shaggy layers sounds like a contradiction, but that contrast is exactly why it works. The bang gives you a strong front line, while the lengths underneath stay loose and broken up. On straight hair, that tension looks deliberate instead of messy.
The catch is maintenance. Fringe needs trims more often than the rest of the cut, and that’s the price of the look. If you’re fine with that one small commitment, the reward is a haircut that looks styled even when you’ve done almost nothing else.
I like this version best when the fringe sits a little longer, grazing the brow rather than sitting high above it. A too-short straight fringe on straight hair can feel severe fast. Leave room. It pays off.
12. Razor Shag Lob

A razor shag lob lives around the shoulders, with textured ends and a little separation through the interior. On dense straight hair, the razor can remove enough bulk to stop the cut from swelling out at the bottom. That’s the whole point.
The shape should stay controlled at the perimeter. If the ends get too shredded, the lob starts looking thin instead of airy. You want a clean edge with movement, not a frayed finish.
This is a good cut if you like your hair to sit off the neck but still want a little swing around the collarbone. It also dries fast. That matters more than people admit.
13. Long Layered Shag for People Who Hate Big Changes
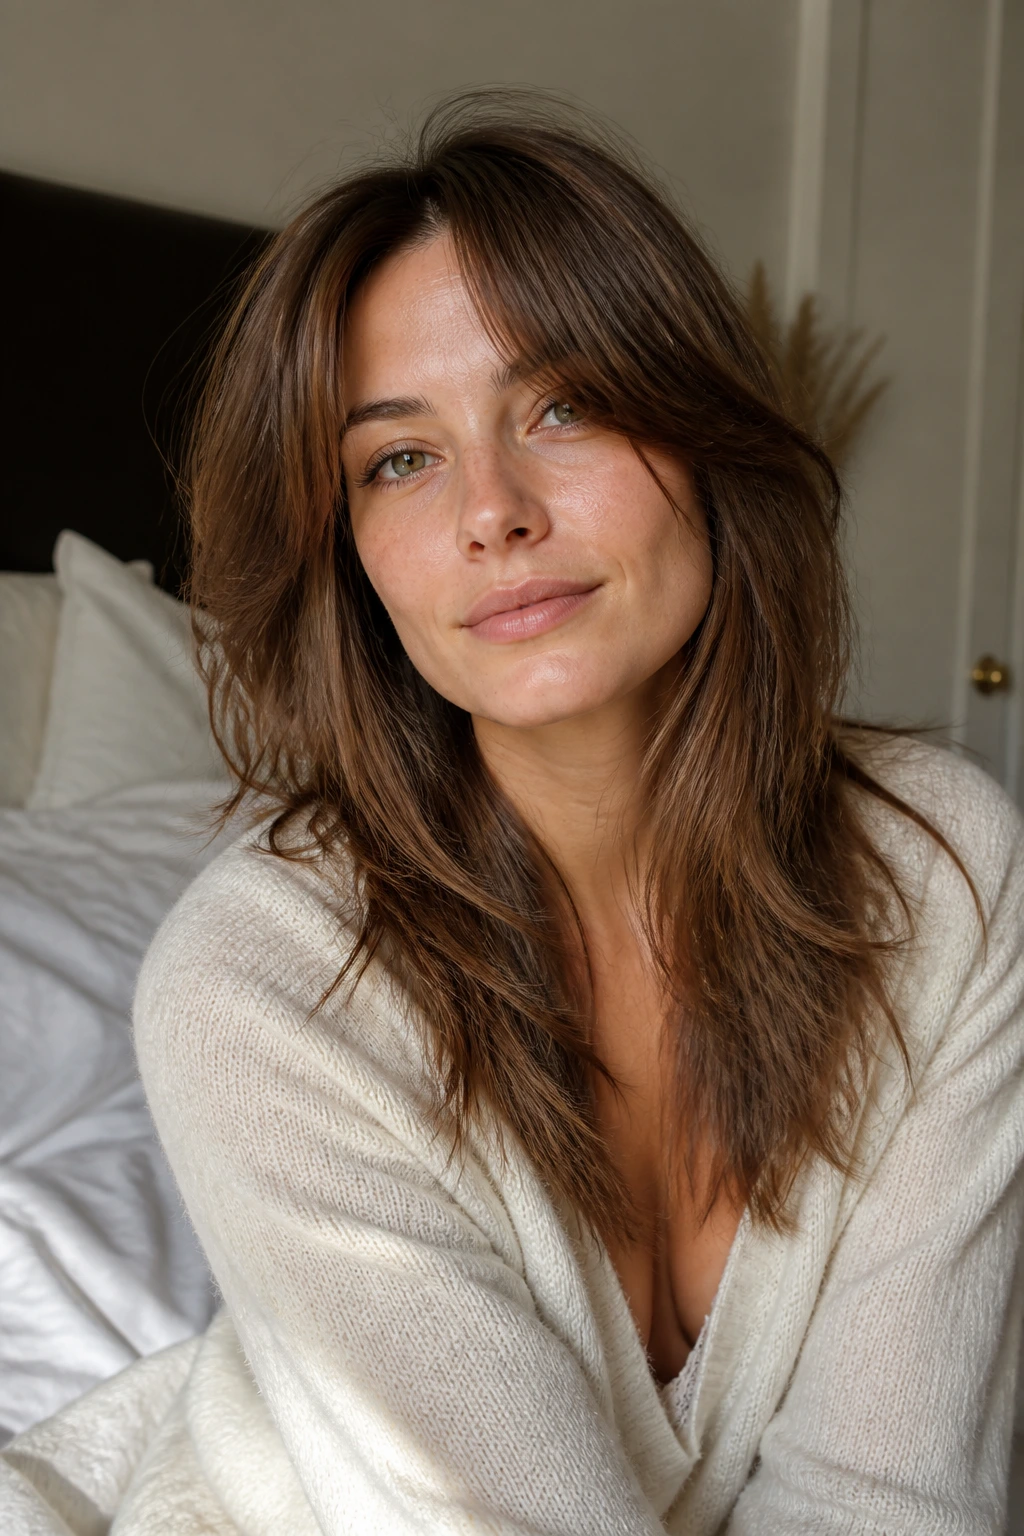
Not everyone wants a haircut that announces itself from across the room. This version keeps the length and adds only enough layering to stop the hair from looking like a single curtain. The shortest pieces may land around the collarbone or chest, depending on density, and that gentler approach makes the cut feel safer.
Straight hair likes this when you’re cautious. There’s still movement, but the outline stays long enough that you can put the hair up without losing the shape completely. It’s the shag version of easing into the pool instead of jumping in.
The grow-out is forgiving, which may be the best part. As the layers slide down, the shape just turns into a soft long cut. No awkward hard line. That’s rare.
14. Air-Dry Shag Built for Straight Hair

This cut is designed for people who do not want to stand over a blow dryer every morning. The layers are placed so the hair falls into a natural bend as it dries, with enough shape at the front to keep the cut from going limp. It’s not about wild texture. It’s about a haircut that lands well on its own.
The biggest mistake with air-dry shags is cutting them too short at the crown. Straight hair can lose lift fast, and if the top is over-chopped, the result is flat roots and fuzzy ends. You want gentle removal, not a hacked-up top section.
The no-heat version
A pea-sized amount of light cream through damp ends, a little mousse at the roots, and a hands-off dry is usually enough. Resist the urge to keep touching it. Straight hair can settle into place if you let it.
15. Piecey Micro-Shag
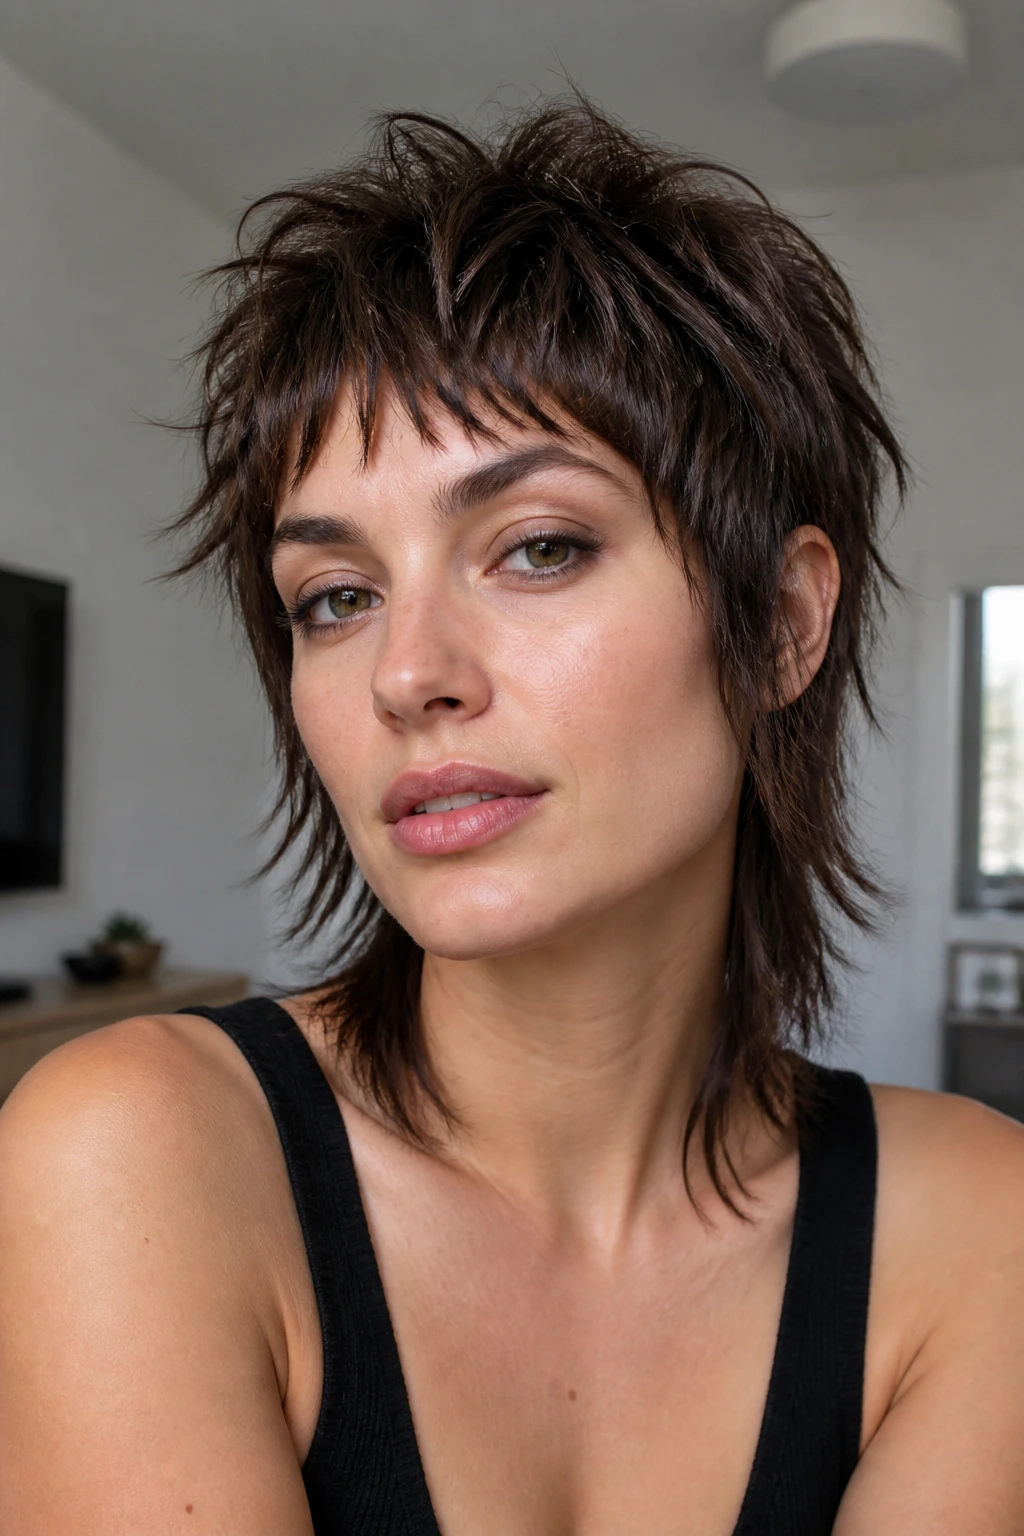
This one is shorter and more separated, with tiny pieces around the face and a lot of movement packed into a small shape. On straight hair, it can look fresh and sharp, but it needs the right density. Fine hair can handle it with less product, while thicker hair may need a bit more thinning to keep the pieces visible.
The maintenance is not zero. It asks for a styling paste or texture mist to keep the ends from lying completely flat. But once that’s in place, the haircut reads fast and clean.
It’s a good option if you like a little edge and don’t mind that the silhouette is more obvious. The effect is crisp rather than soft. That’s the appeal.
16. Layered Lob Shag
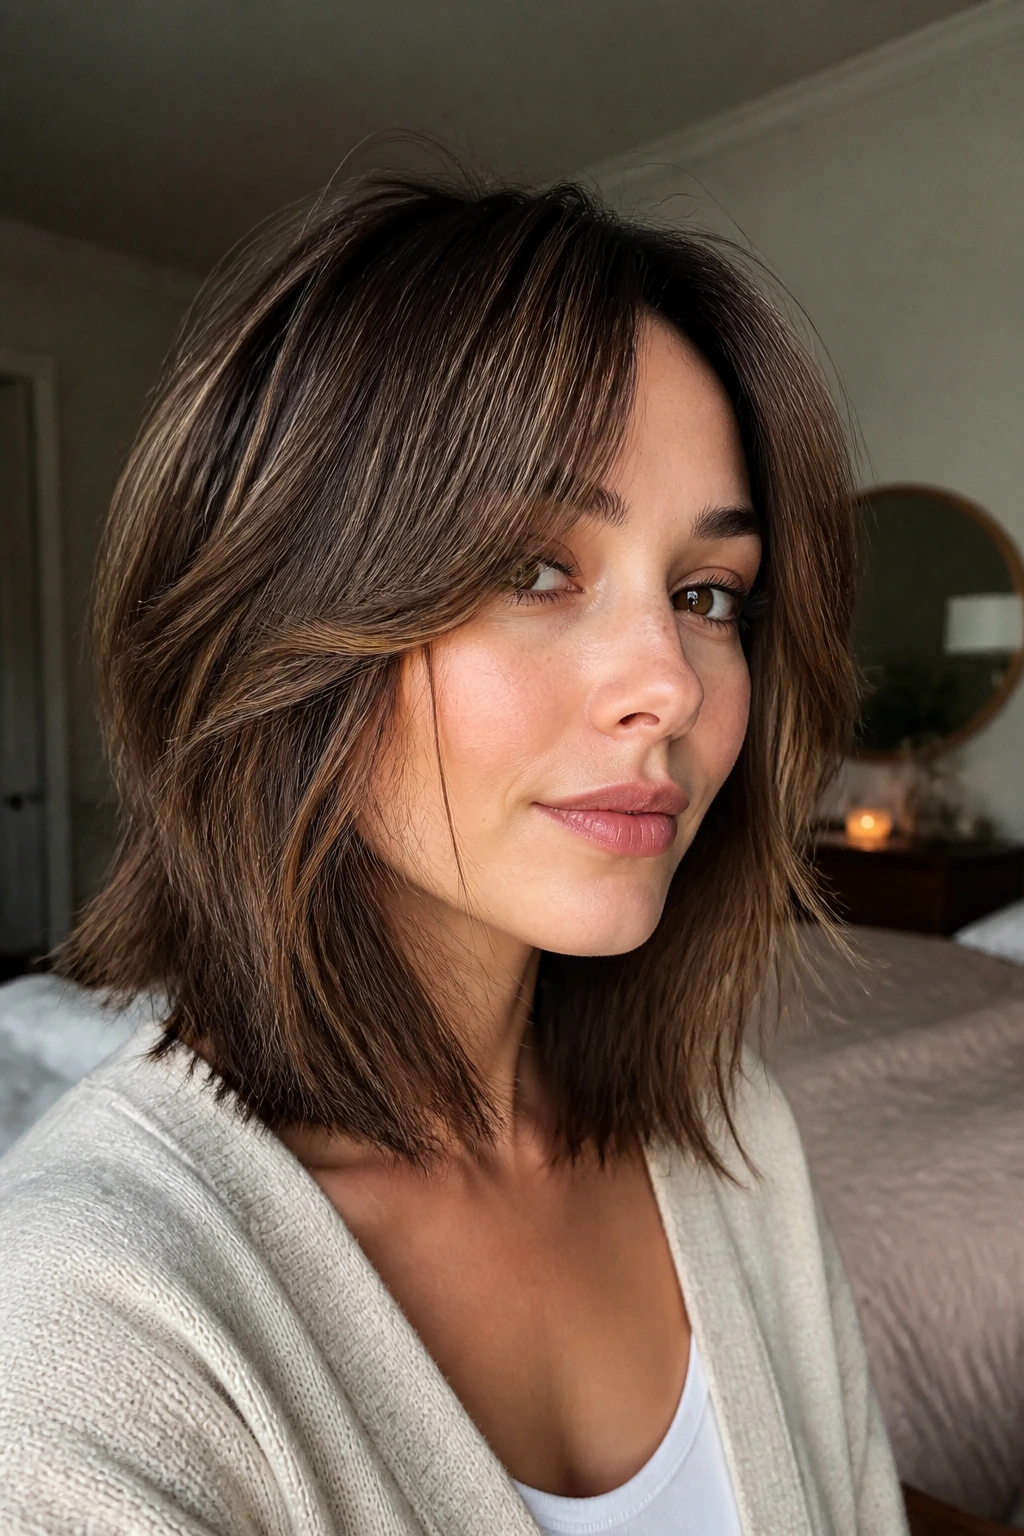
If you want a first shag that won’t scare you, start here. The layered lob lands around the shoulders or just above them, which keeps the outline familiar while the layers create lift underneath. Straight hair benefits from the small amount of lift because it keeps the cut from sitting like a heavy block.
The lob length means you can still wear it straight, pinned, clipped, or tucked. That flexibility makes the haircut easy to live with during the awkward “I’m growing it out” phases too. It’s practical in the best sense.
I’d call this the least fussy shag in the bunch. It gives you the texture people want from a shag, but the clean length keeps it anchored.
17. Heavy Fringe Shag with Light Length

This one puts the personality up front. The fringe is fuller and longer, but the lengths stay lighter and more relaxed around the shoulders. On straight hair, that creates a strong frame without making the whole head look overloaded.
It’s a smart choice if you like bangs but don’t want the rest of the haircut to demand much attention. The fringe can be blown down in a minute or two, and the remaining layers can dry on their own. The silhouette stays tidy.
The only thing to respect here is the bang trim schedule. Heavy fringe grows fast and loses its shape fast. If you wear it, commit to tiny touch-ups between full cuts.
18. Tapered-Ends Shag
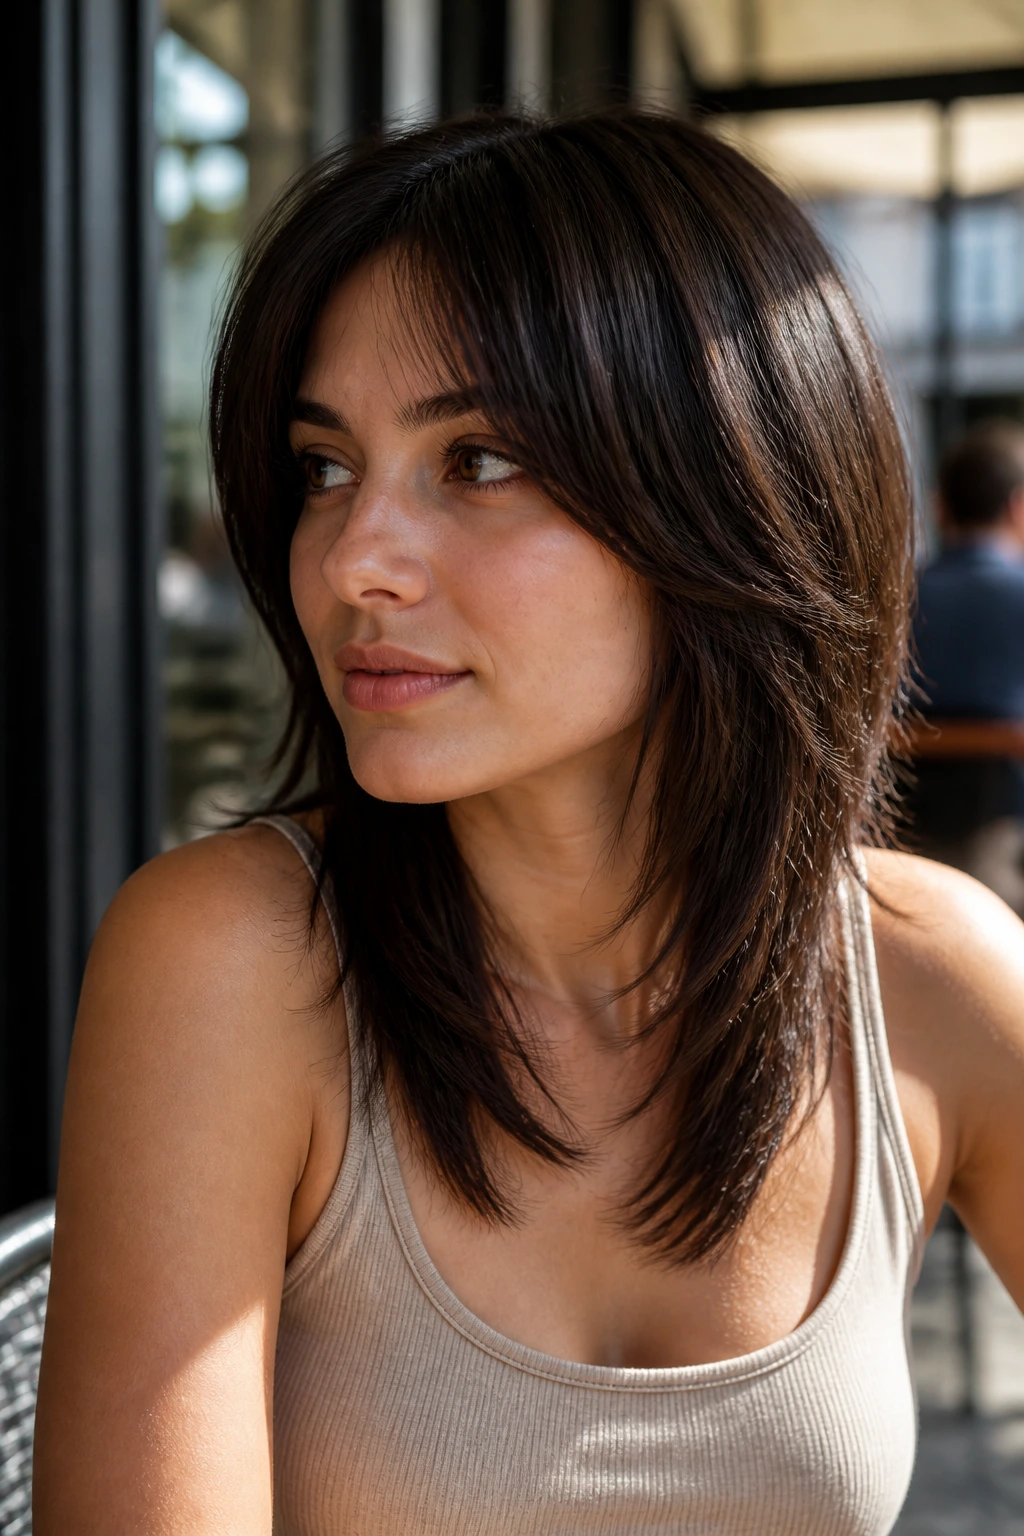
Tapered ends keep the bottom of the haircut from looking thick and blunt, but they stop short of the ultra-piecey finish some shags go for. On straight hair, that taper can make the lengths feel lighter without losing the line entirely. It’s a small adjustment, but it changes everything.
This version works especially well if your hair has a lot of density through the middle and bottom. The taper removes that triangle feeling straight hair can pick up as it grows. You still keep enough fullness to look healthy.
There’s a clean, tidy feeling to this cut. It doesn’t scream for attention. It just behaves well.
19. Cheekbone-Opening Shag
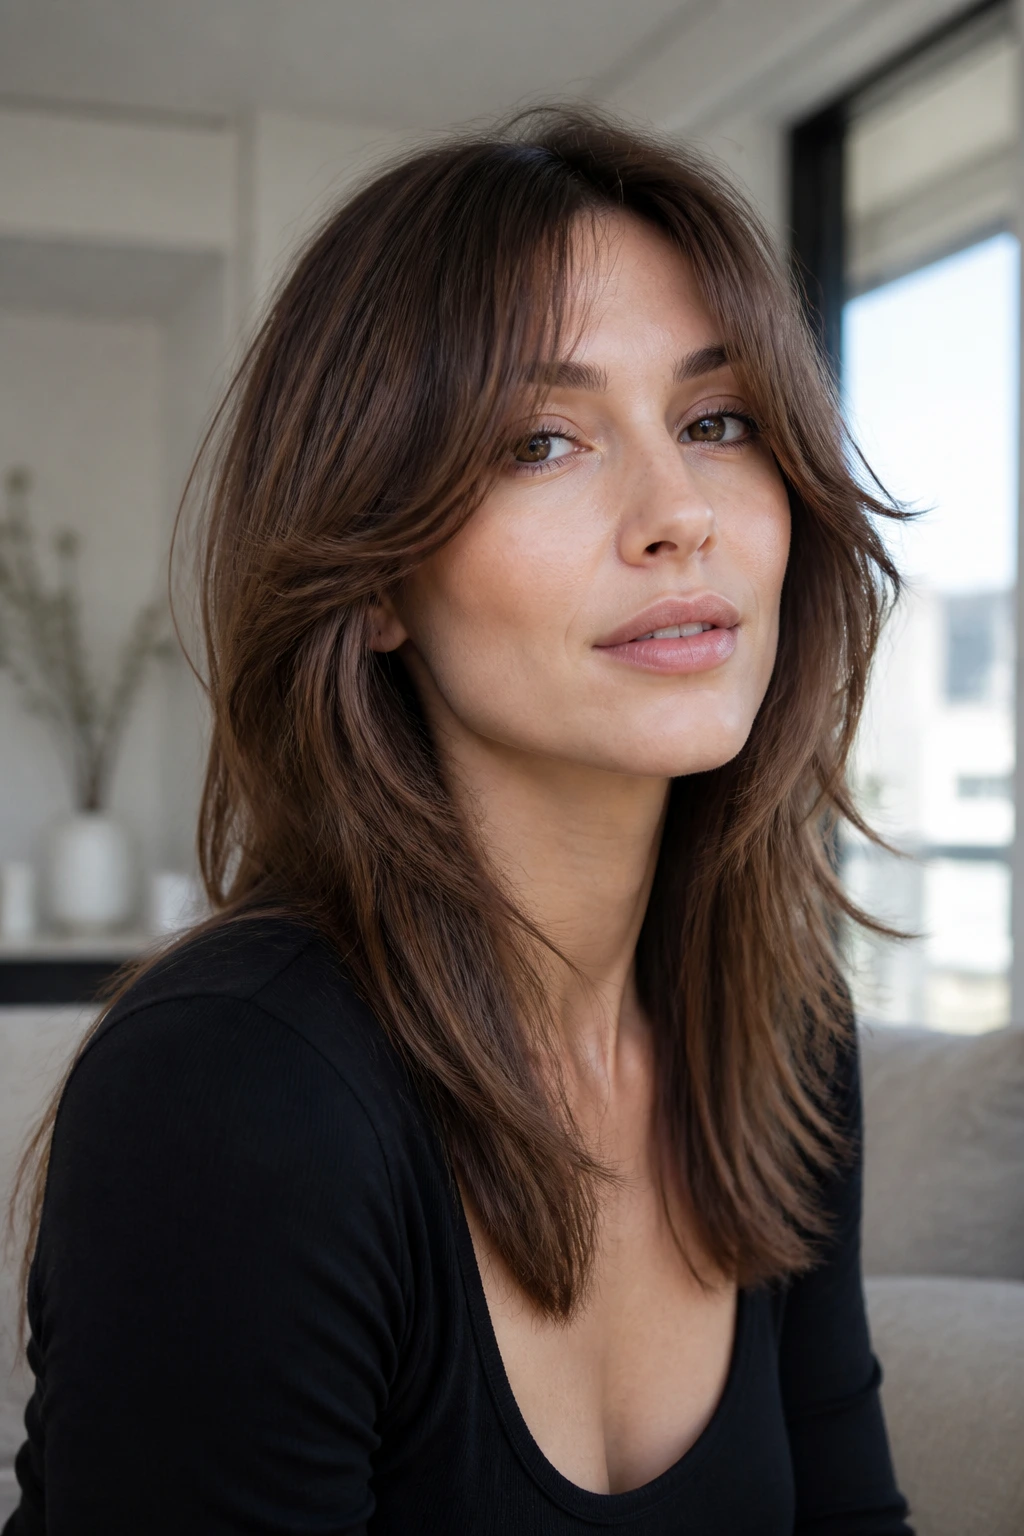
If you want the face to look a little more open, start the layers at the cheekbone. That spot matters. It pulls the eye upward and outward, which keeps straight hair from dragging the face down visually.
The rest of the cut can stay fairly simple. You’re not trying to build a dramatic layer map everywhere. You’re aiming for one smart break point that gives the whole haircut a lift.
This is one of the most flattering straight-hair shag shapes when you want movement but not too much fringe. The cheekbone layers do a lot of the visual work, which means less effort with styling tools later. Nice trade.
20. Octopus-Shag Blend

The octopus cut and the shag live close enough that they borrow from each other easily. This version keeps the crown a little lighter and the ends a little more separated, but it avoids the extreme contrast that can make straight hair look choppy in a bad way. The result is softer, longer, and easier to wear.
It’s a strong pick if you want the illusion of movement without giving up length. The top sits with more shape, while the lower part remains loose and touchable. On straight hair, that combination feels modern without needing much daily effort.
If the stylist goes too hard on the disconnection, the cut can start to look like two haircuts fighting each other. Keep the transition smooth. That’s the difference between cool and awkward.
21. Neck-Grazing Shag
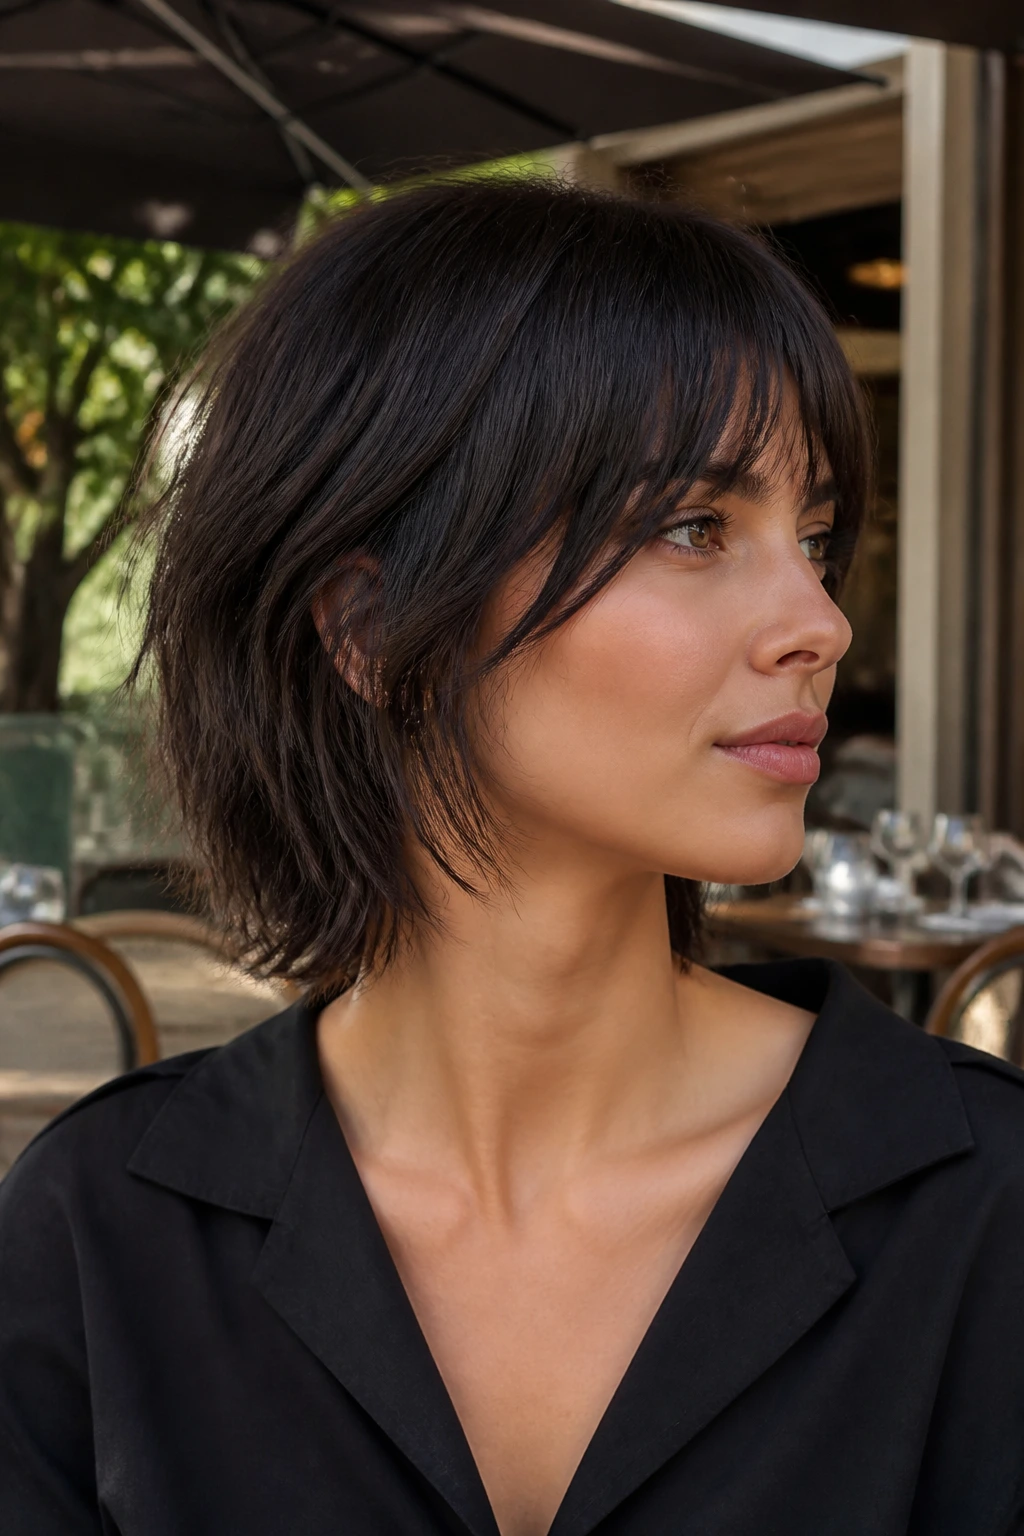
A neck-grazing shag is short enough to feel fresh and long enough to tuck behind the ears. Straight hair loves the length because it dries fast and sits close to the head without looking severe. If you want low upkeep and a clean neckline, this cut gets close.
The layers should stay soft around the edges so the shape doesn’t puff out. That part matters more than the exact length. Too much lift at the sides and the haircut stops looking airy; too little and it turns into a blunt bob with opinions.
This is also a good cut if you dislike spending time with a brush. A quick rough-dry and a bit of finger shaping usually get you there.
22. Crown-Lift Shag
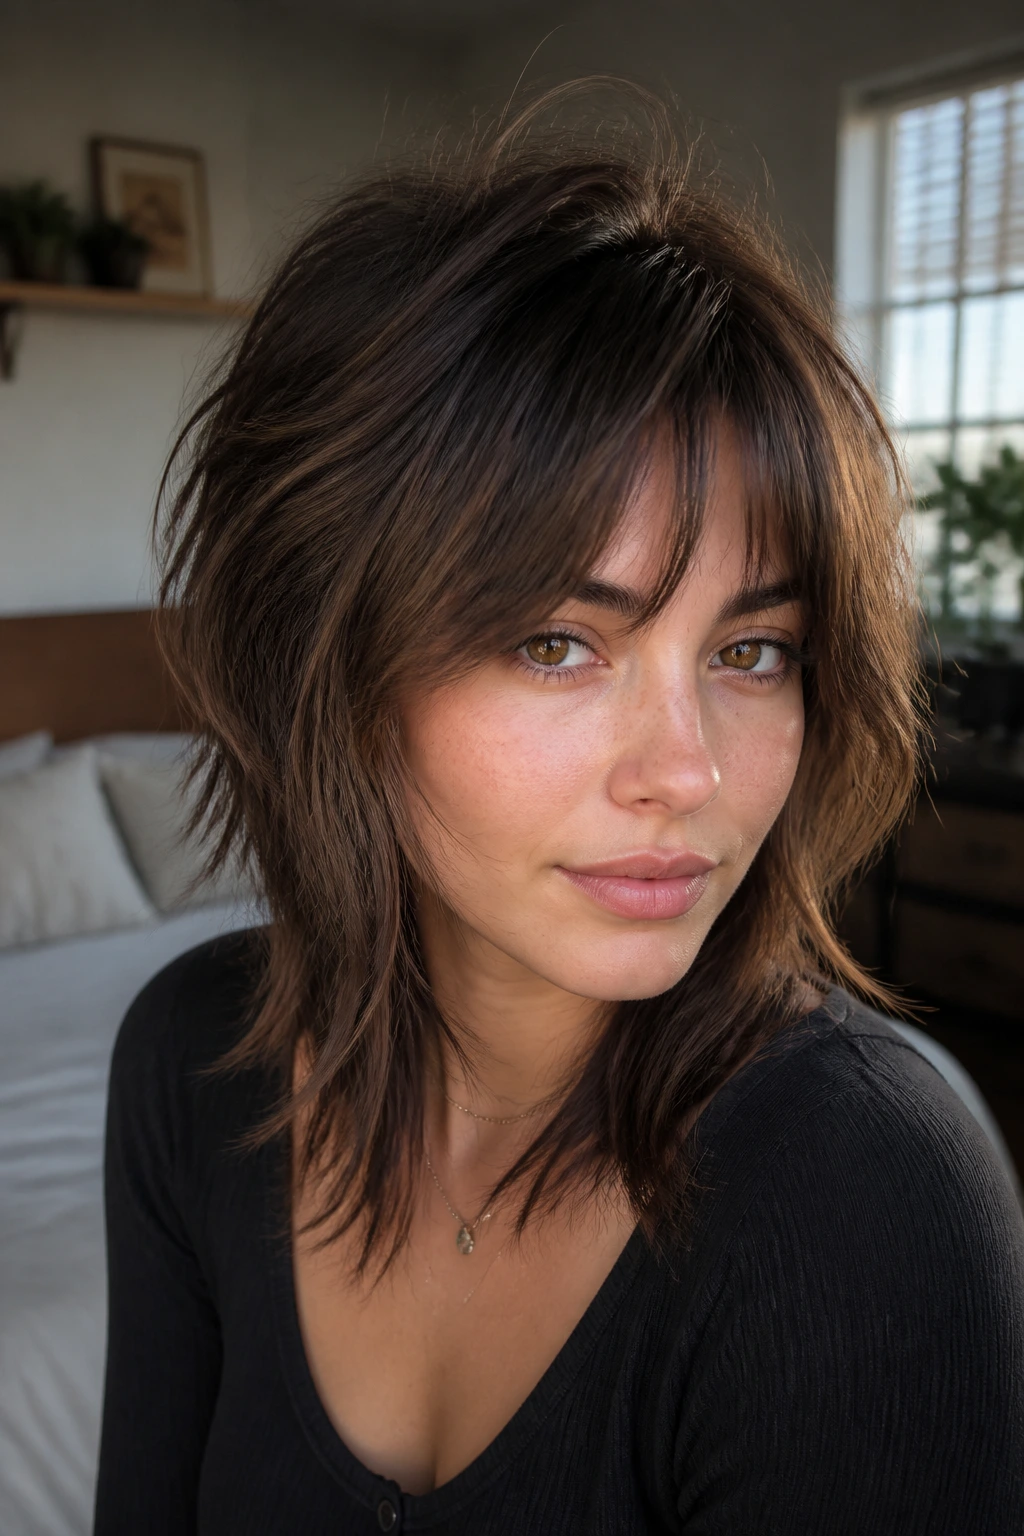
Flat roots are the enemy here, and this cut goes after them. The shortest pieces concentrate around the crown, giving straight hair a little lift where it usually lies most obediently. The rest of the cut stays comparatively calm.
The shape works because the volume is controlled, not random. You’re not creating a giant puff on top. You’re giving the haircut enough structure to stand off the scalp just a little, which makes the whole style feel less sleepy.
It’s especially useful if your straight hair gets limp by lunch. A crown-lift shag can keep the head shape visible even when the ends have settled. That’s the kind of detail you notice in real life, not just in a salon mirror.
23. Side-Swept Shag

Not everyone wants a center part, and this cut makes peace with that. A side-swept fringe or front section gives straight hair a little asymmetry, which can be easier to wear if your natural part sits off-center anyway. It also softens the forehead without committing you to full bangs.
The rest of the haircut can be fairly relaxed. You’re mostly changing how the front falls. That means less fuss, less bang trim anxiety, and an easier grow-out path.
I like this version for people whose hair refuses to cooperate with a middle part. Don’t fight the cowlick. Move with it.
24. Razor-Textured Shag for Thick Straight Hair

Thick straight hair can carry more aggressive texture than fine hair, but the razor still needs a careful hand. The goal is to remove weight so the cut doesn’t balloon outward at the bottom. The right razor work can make the ends swing instead of sitting like a brick.
The danger is over-thinning. That’s where straight hair turns fuzzy, the ends go see-through, and the whole cut loses its shape in humid weather. If your hair is dense, ask for internal weight removal and soft texturizing rather than a wholesale thinning session.
This is one of those cases where the cut should feel lighter, not look chopped to bits. The result should move when you walk, not fray when the breeze hits it.
25. Grow-Out Shag That Still Looks Intentional

This is the shag for people who know they will not be back in six weeks. The layer lengths are staggered so the haircut still reads as shaped even when it has grown a bit past the original line. Straight hair benefits from that because a little extra length can turn a harsh shag into a cleaner layered cut.
The front pieces matter most. If they’re cut too short, the grow-out gets annoying fast. Keep the shortest lengths long enough to blend for a while, and the whole haircut will stay tidy through that awkward in-between phase.
That’s the real appeal of a low-maintenance shag on straight hair. It should not demand constant correction. It should age quietly and keep its outline while you do literally anything else.
Why a Straight-Hair Shag Feels Easier When It’s Cut Right

A good shag on straight hair reduces work by building the shape into the cut, not into your morning routine. The layers create movement, yes, but the real win is that they stop the hair from looking collapsed when it dries. Straight hair often falls flat in a way that feels neat for about an hour and then dull after that. A shag gives it a little lift at the crown and some bend around the face without asking you to curl every section.
The cut also helps with second-day hair. When the perimeter has weight but the interior has movement, the style can still look deliberate after sleeping on it. That’s why a low-maintenance shag often beats a one-length cut for people who do not want a blowout schedule. One-length hair looks polished when it’s freshly done; a shag tends to keep a little life longer.
There is a catch, though. Low maintenance is not the same as no maintenance. Bangs still grow. Crown layers still need occasional balancing. But compared with daily heat styling, a smart shag asks for far less.
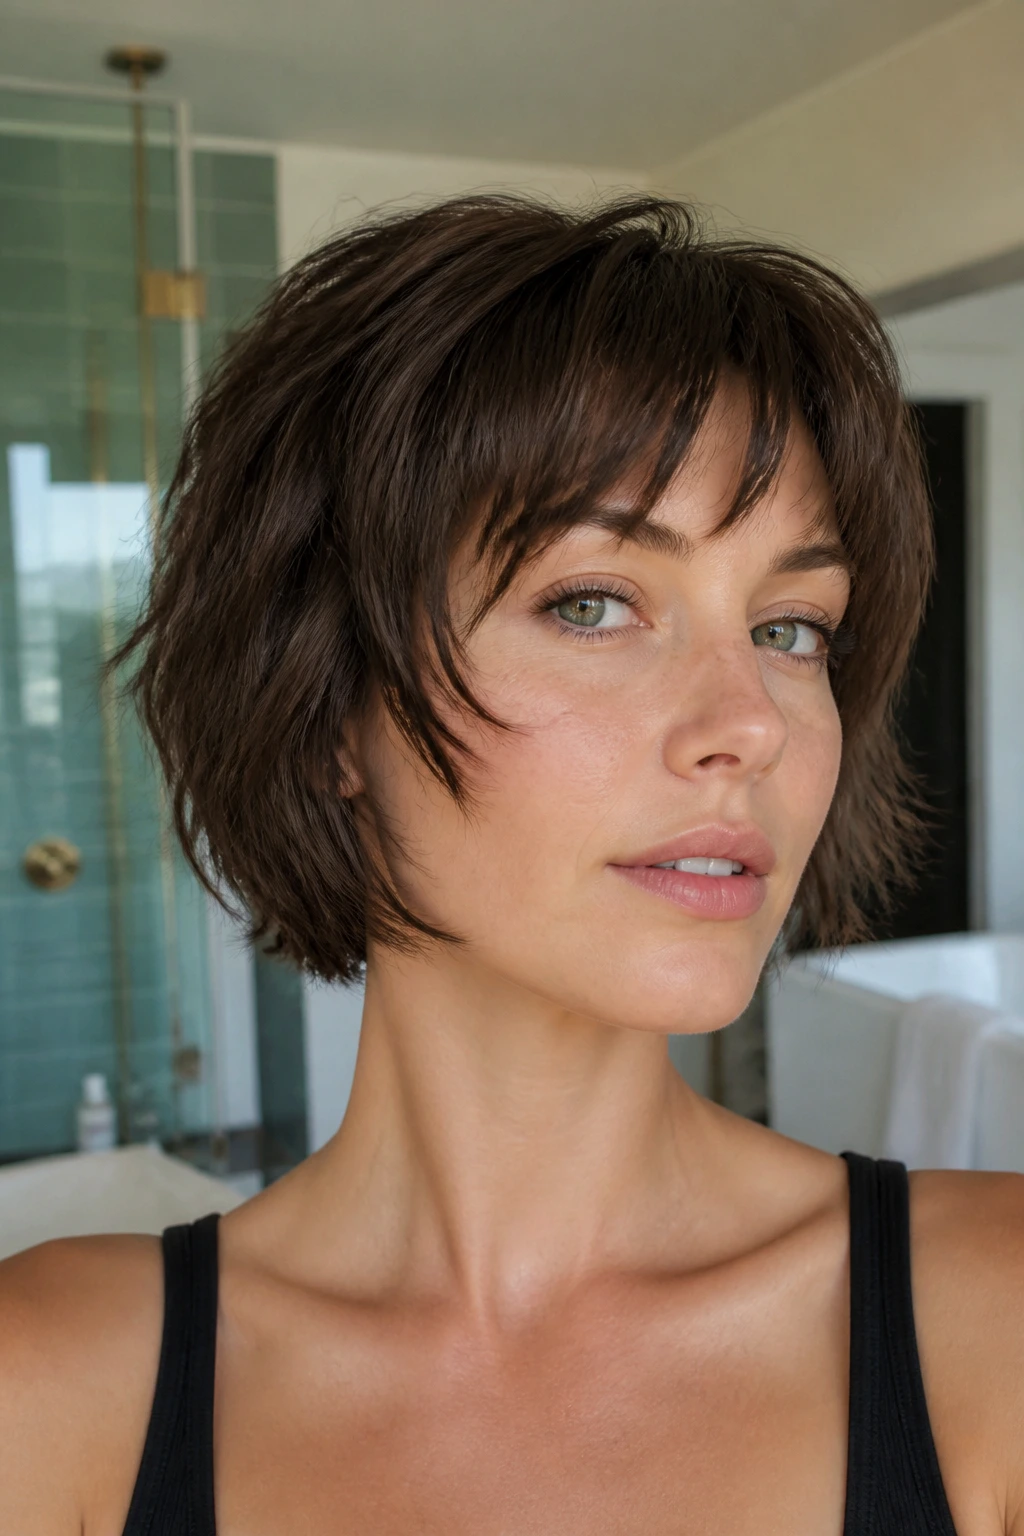
Essential Tools and Products for These Haircuts
-
A good blow dryer with a nozzle: Useful for directing the front pieces and keeping the roots from drying in every direction at once.
-
A medium round brush or blow-dry brush: Handy for the curtain-bang, bottle-neck, and face-framing versions when you want a small bend at the ends.
-
Sectioning clips: These save time when you’re drying just the fringe or fixing the crown instead of redoing the whole head.
-
Lightweight mousse: Gives straight hair a little grip at the roots without turning it stiff or sticky.
-
Texture spray or dry texture mist: Best for piecey layers and micro-shags when you want separation that lasts past lunch.
-
Dry shampoo: Works at the root, not the ends. On straight hair, that’s the difference between lift and chalk.
-
Leave-in cream or light smoothing lotion: Good for collarbone shags, long shags, and blunt-perimeter versions that need the ends to sit clean.
-
Small flat iron: Optional, not mandatory. Keep it for touch-ups around the front, not for flattening the whole cut into submission.
How to Style These Cuts on Busy Mornings
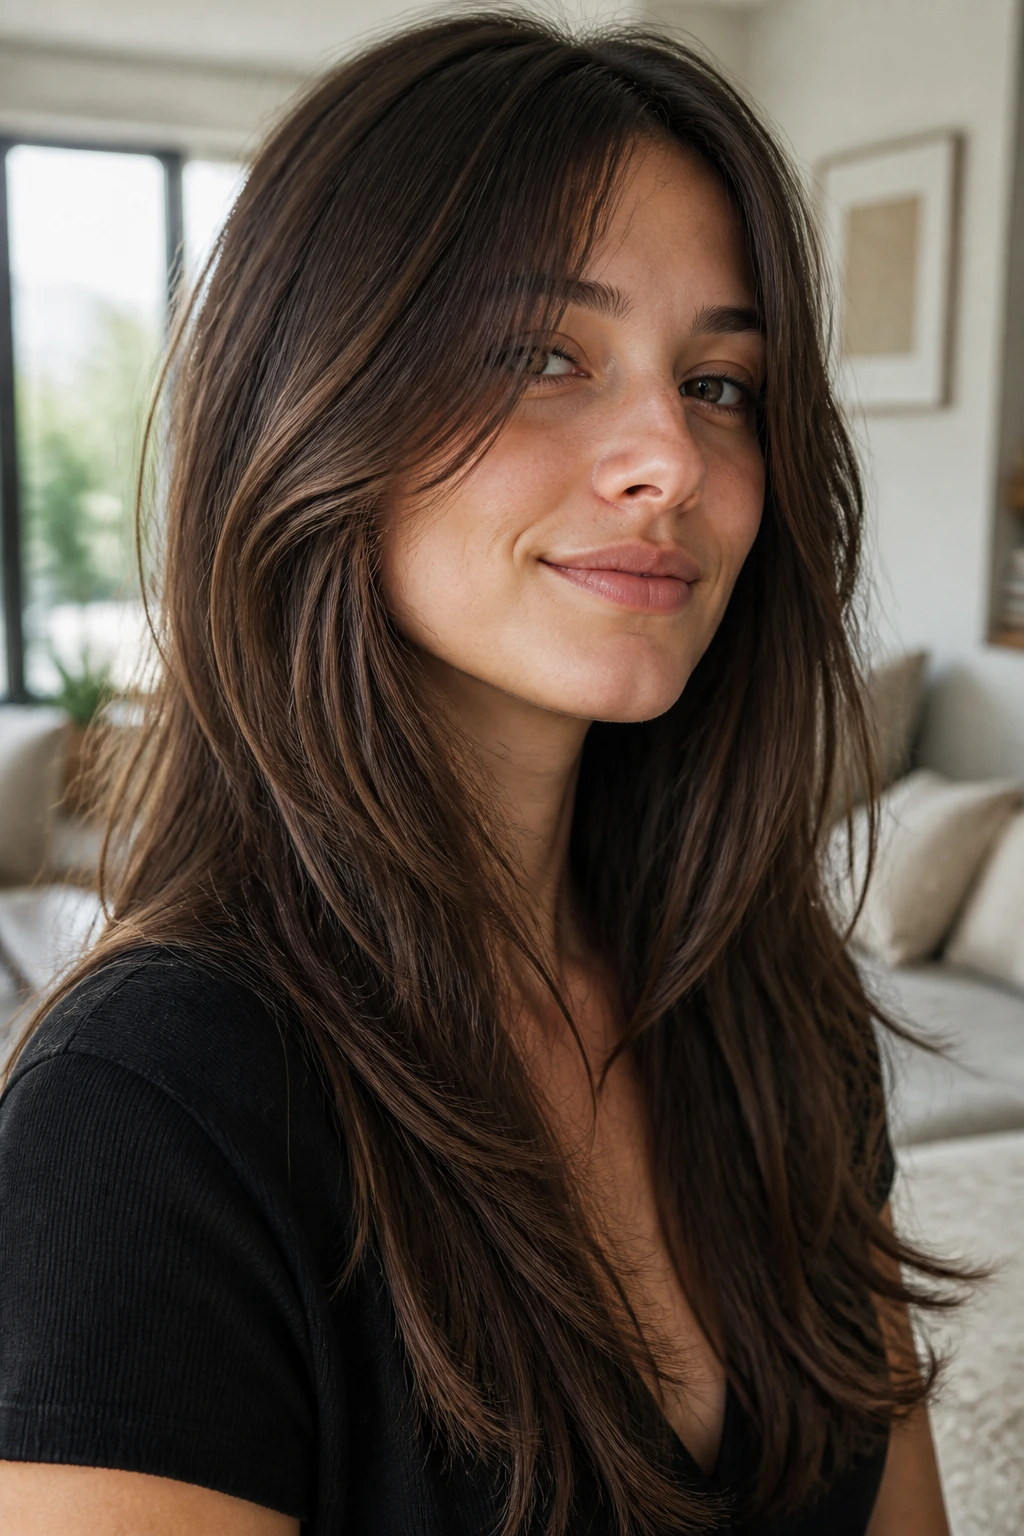
The easiest route is the one that respects your haircut. Straight hair shags usually need less styling than people think, but they do better with a tiny bit of intention at the front. If you’ve got curtain bangs or a face frame, spend your energy there and stop.
The Two-Minute Route
Mist the roots with water or a light spray, work in a little mousse, and rough-dry with your fingers until the roots are dry and the shape is visible. Leave the ends a touch soft. That softness keeps the cut from getting helmet-like.
The Small-Brush Route
If the fringe matters, use a small round brush or blow-dry brush on just the front pieces. One pass under, one pass over, then stop. Do not keep tugging at it until it loses body. Straight hair goes flat fast when overhandled.
The Second-Day Reset
Dry shampoo at the roots. A pea-sized touch of smoothing lotion on the ends if they’ve gotten dry. Then use your fingers to shift the part and break up anything that dried too neatly overnight. That’s usually enough.
Small Tweaks That Make the Cut Work Harder
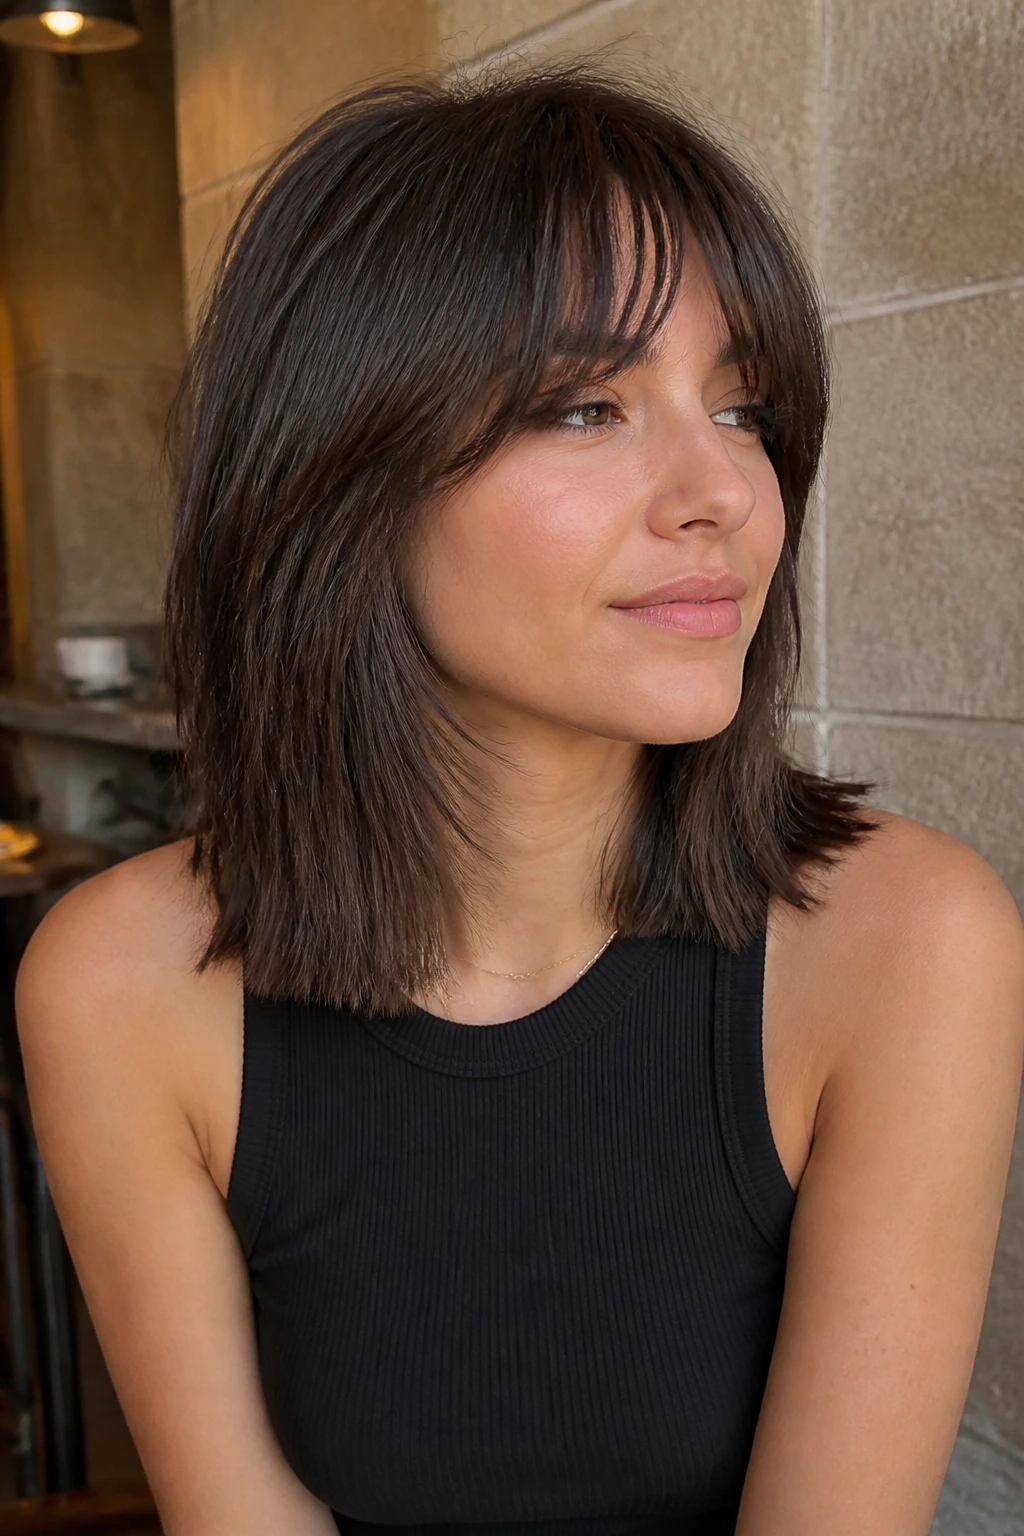
Shift the shortest layer down a little. On straight hair, that one choice can be the difference between airy and stringy. If your hair is fine, keeping the shortest layer lower preserves fullness.
Keep the perimeter a touch blunt. A shag does not have to be shredded to feel textured. In fact, a slightly blunt edge often makes straight hair look healthier and thicker.
Use the part that gives you lift. If a center part makes the roots collapse, don’t force it. A soft off-center part can rescue volume without changing the haircut at all.
Ask for soft face-framing, not a hard chop. The front should open the face, not stop at the jaw like a ruler line. That one detail makes the difference in photos and in person.
Let the ends stay a little imperfect. Straight hair can look too “done” when every piece is ironed flat. A tiny bit of bend or separation keeps the shag from turning sterile.
Common Mistakes That Turn a Straight-Hair Shag Into a Mess
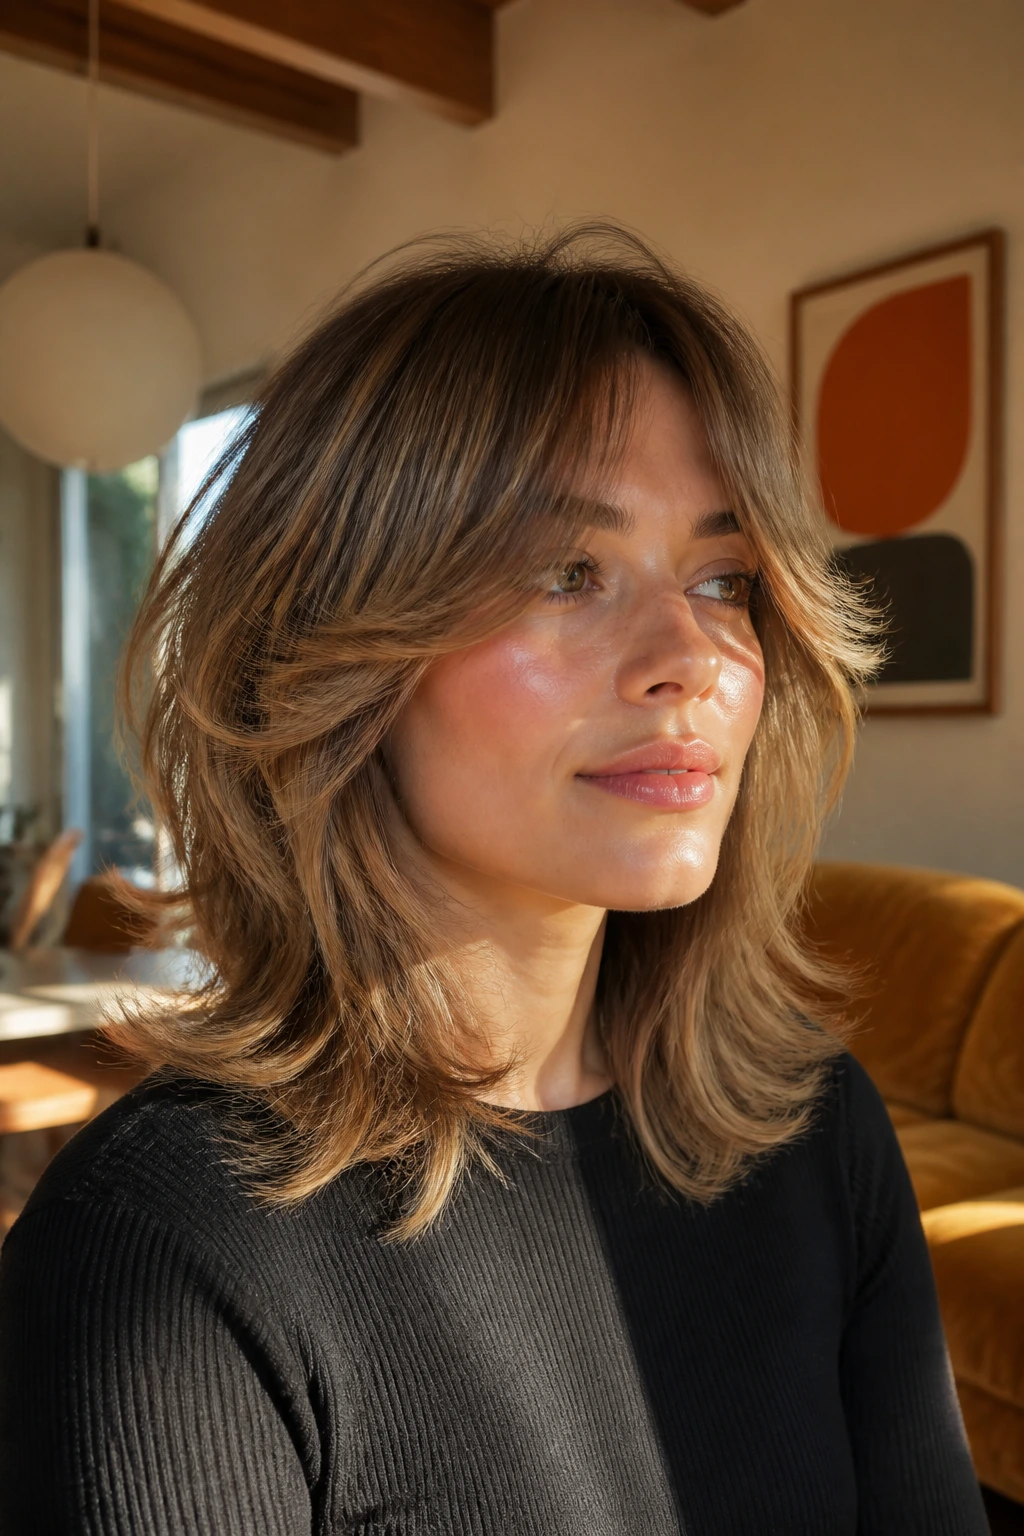
Layers cut too high: The top goes wispy and the bottom hangs heavy, which creates a see-through crown and a shelf at the ends. The fix is simple: keep the shortest layer lower and ask for the transition to stay soft.
Too much thinning on fine hair: The cut starts to look airy in the wrong way, with ends that fray and stick out. Fine straight hair usually needs smarter layering, not aggressive texturizing.
Bangs cut with no grow-out plan: A fringe that looks cute on day one can become eye-level annoyance by week three. If you want low maintenance, keep bangs a little longer than you think and let them slide into the layers.
Styling the texture out of it: If you blow-dry every piece smooth and flat, you erase the point of the haircut. Give the front some bend and let the rest keep a bit of natural fall.
Ignoring density: Thick hair and fine hair do not want the same shag. Thick hair needs weight removed inside the cut; fine hair needs shape preserved. A one-size-fits-all shag usually disappoints.
Variations and Adaptations to Try

Fine-Hair Feather Lift: Keep the layers longer and concentrate lift near the crown instead of shaving away weight everywhere. This keeps the haircut looking fuller and stops the ends from getting see-through.
Thick-Hair Weight Release: Ask for internal debulking and a cleaner perimeter. The goal is movement without puff, which matters when the hair has enough density to stand up on its own.
Bang-Free Frame: Skip the fringe and let the shortest pieces live around the cheekbone or jaw. This gives you the shag shape without the trim schedule that bangs demand.
Heat-Free Wash-and-Go: Build the cut around your natural dry pattern. That usually means softer layers, no harsh disconnection, and a front shape that settles without a brush.
Polished Office Version: Keep the layers subtle, the ends a little blunt, and the fringe soft. It still counts as a shag; it just wears a shirt and answers email.
Edgier Piecey Version: Shorter crown pieces, a bit more separation, and a texture spray finish. This version wants attitude more than shine.
Keeping the Shape Between Salon Visits

Straight-hair shags usually hold their shape longer than people expect, but the fringe and face-framing pieces are the first parts to wander. If you wear bangs, plan on tidying them every 4 to 6 weeks. The full cut can often go 8 to 12 weeks, sometimes longer if the layers are soft and the grow-out is part of the design.
Dry shampoo is your friend, but don’t pile it onto the ends. Use it at the roots, wait a minute, then work it in with your fingertips. For the front pieces, a quick mist of water and a few seconds with a blow-dryer nozzle can bring them back faster than re-washing the whole head.
Sleep helps, too. A silk or satin pillowcase keeps the top from getting rough and bent in weird places. If your hair gets crushed flat overnight, a loose clip at the crown can preserve a little lift.
Frequently Asked Questions
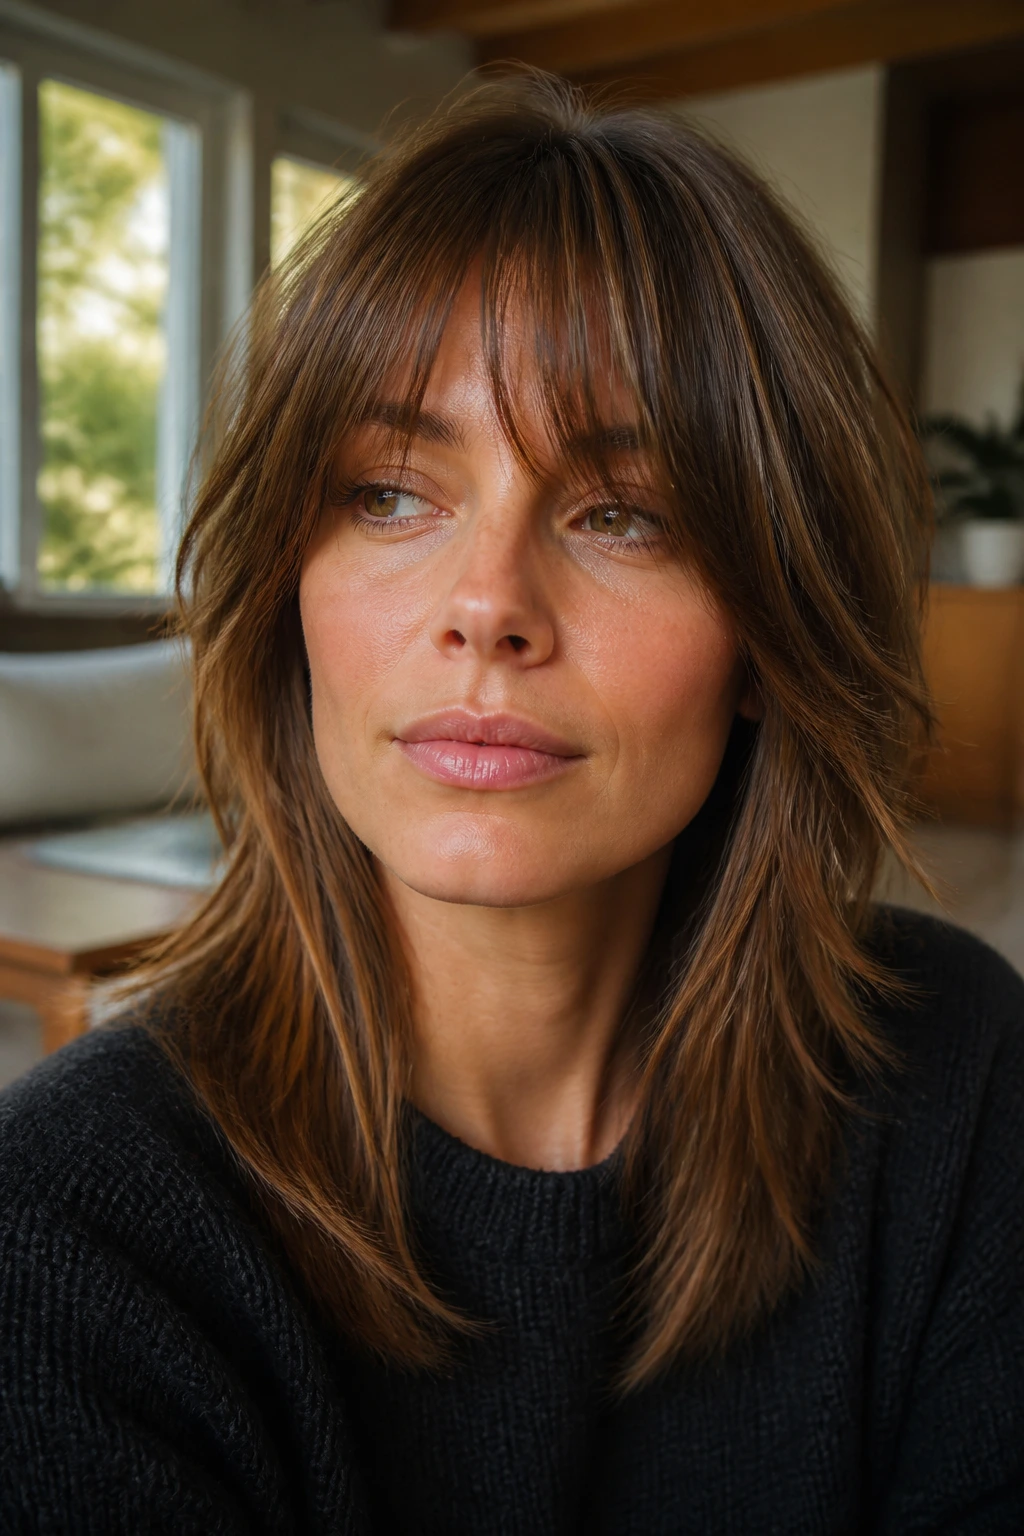
Does a shag haircut work on very fine straight hair?
Yes, if the layers are kept controlled. Fine hair usually looks best with longer layers and a slightly blunt perimeter so the cut doesn’t lose body.
Will a shag make straight hair look thinner?
It can, if the layers start too high or get over-thinned. The safer version keeps weight at the bottom and uses face-framing or internal layering for movement.
Can I get a shag without bangs?
Absolutely. A lot of the best low-maintenance shag haircuts have no fringe at all; they rely on cheekbone or jaw layers to create shape.
What’s the difference between a shag and a wolf cut on straight hair?
A wolf cut usually has more contrast between the crown and the ends. A shag is often softer and more blended, which tends to suit straight hair better if you want less drama.
How often should I trim it?
Bangs need the most frequent touch-ups, usually every 4 to 6 weeks. The rest of the cut can often stretch to 8 to 12 weeks depending on how soft the layers are.
Can thick straight hair wear a shag without puffing out?
Yes, but it needs weight removed in the right places. Ask for internal layering and a controlled perimeter rather than lots of shredded ends.
Is a shag hard to style if I never use heat?
Not if the cut is built for air-drying. The front may still need a little finger shaping, but the rest can settle on its own if the layer placement is right.
What if I hate short layers around my face?
Ask for longer face-framing pieces that start lower, around the cheekbone or even the jaw. You can still get a shag shape without the front feeling too chopped up.
The Cut That Doesn’t Need Babysitting
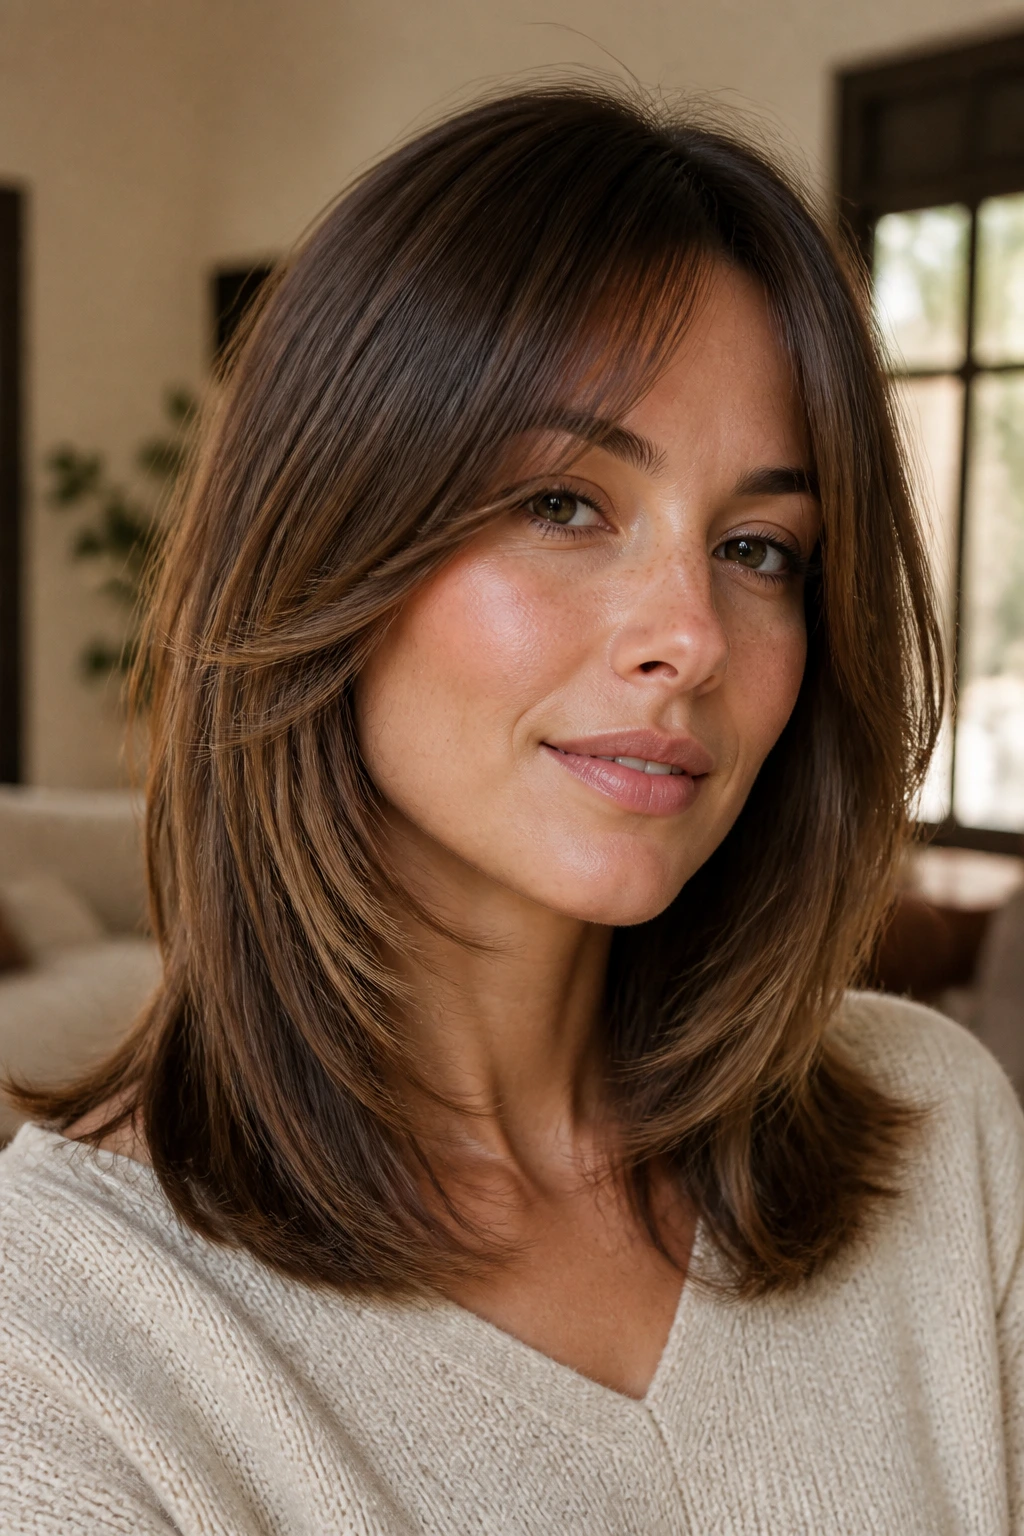
The best shag haircut for straight hair is not the wildest one. It is the one that knows when to stop. Enough layering to keep the hair moving, enough weight to keep the outline clean, and enough softness around the face that you don’t need a fresh blowout to feel put together.
That’s the real appeal here. A good straight-hair shag gives you shape on a busy morning, shape on day three, and shape after it grows out a little. If you bring one or two honest reference photos and tell the stylist how much heat you actually want to use, you’re already halfway there. The rest is just choosing the version that fits your hair, your face, and your patience.
