



Sleek straight hairstyles have a funny reputation. People see a smooth blowout or a bone-straight ponytail and think, fine, but simple. That’s usually because they’re looking at the surface and missing the architecture underneath: the part, the edge, the tension at the crown, the way the ends are cut, and the tiny choices that keep straight hair from falling flat or frizzy by lunch.
The good versions of this look are not boring at all. A razor-sharp bob can make fine hair look fuller at the line. A tucked side part can soften a strong jaw in a way layers sometimes overcomplicate. A wrapped ponytail, done right, looks cleaner than most updos because it hides the scruffy part people usually leave exposed. Straight hair gives you a blank, glossy surface — and that means the silhouette has to do the work.
What makes these sleek straight hairstyles for women worth saving is that they solve different problems without losing that polished finish. Some are low-effort and office-safe. Some are crisp enough for a formal dinner. Some are the sort of styles that make second-day hair look intentional instead of tired. And yes, a few of them need a good iron pass or a careful blow-dry. That’s the trade. Worth it, in my view.
Why These Sleek Straight Hairstyles Stand Out
-
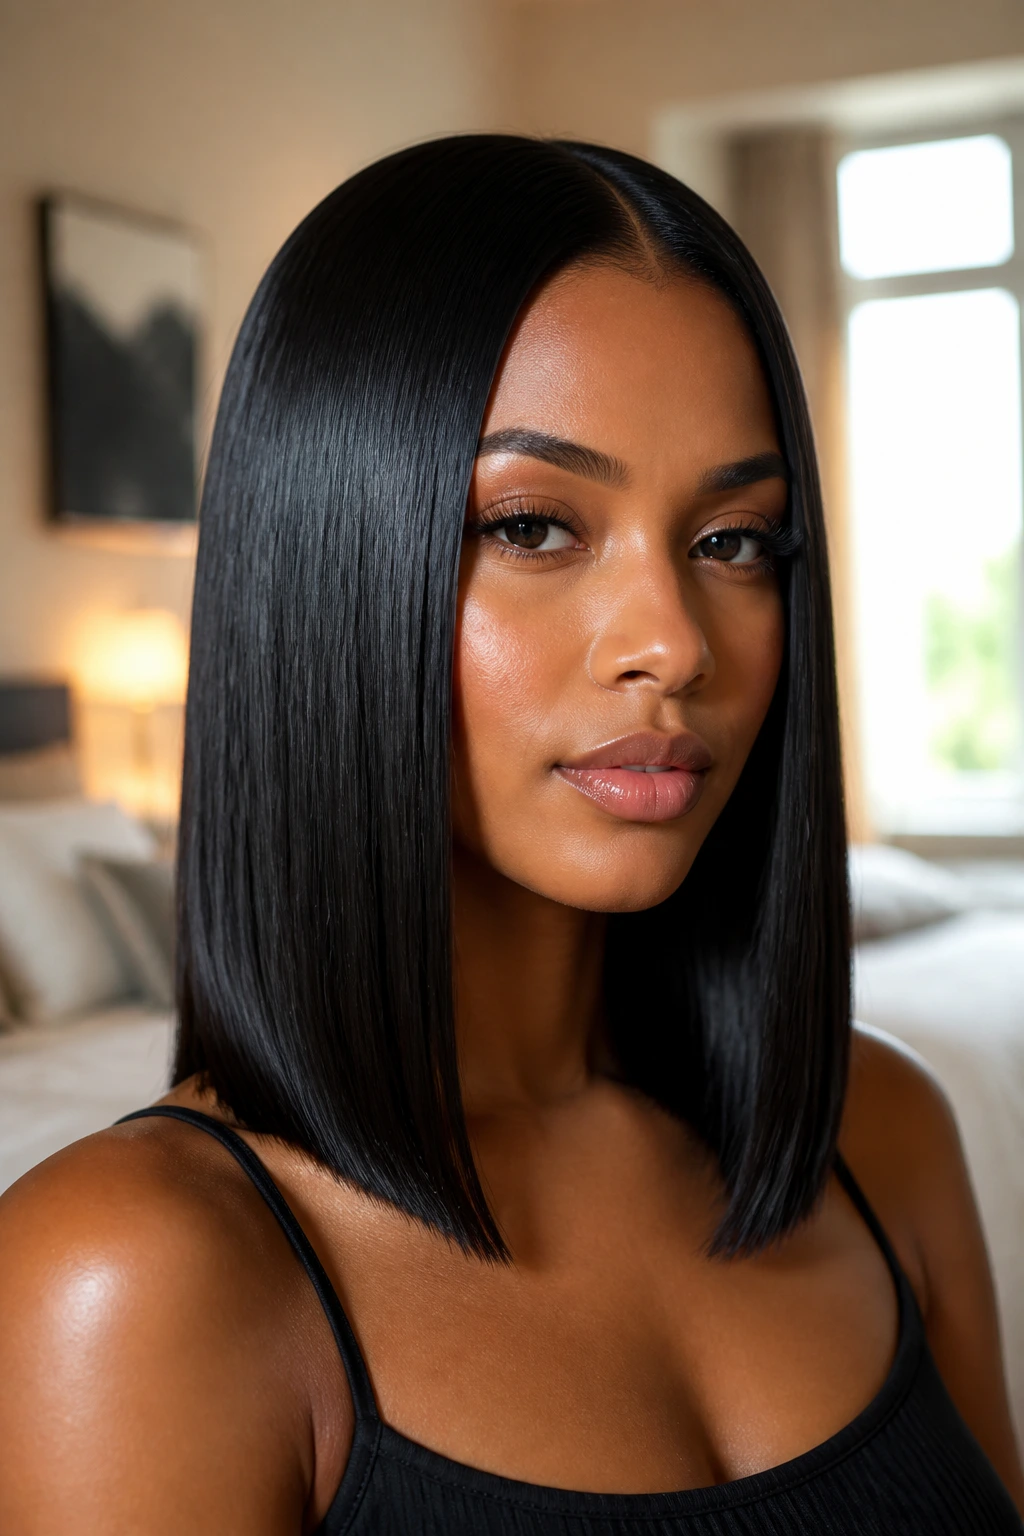
Clean lines do the heavy lifting: Straight hair shows every cut edge, so a blunt bob, a sharp lob, or a tucked ponytail reads clearly even from across the room.
-
Part placement changes the whole face: A center part, deep side part, or soft off-center part can make the same cut look calm, dramatic, or a little more lifted without changing the length.
-
These styles work on day two, not just day one: A touch of natural oil at the roots often helps straight hair behave better, especially in low ponytails, buns, and tucked styles.
-
You do not need a complicated routine: A paddle brush, heat protectant, and one good smoothing product can carry a lot of these looks if the cut is already doing its job.
-
They move from casual to formal fast: Swap a hair tie for a wrapped base, add a barrette, or tuck the ends under, and the mood changes in minutes.
-
They make accessories matter: Earrings, collars, and makeup show up more clearly when the hair is smooth and the outline is deliberate.
What Makes Sleek Straight Hairstyles Read as Polished
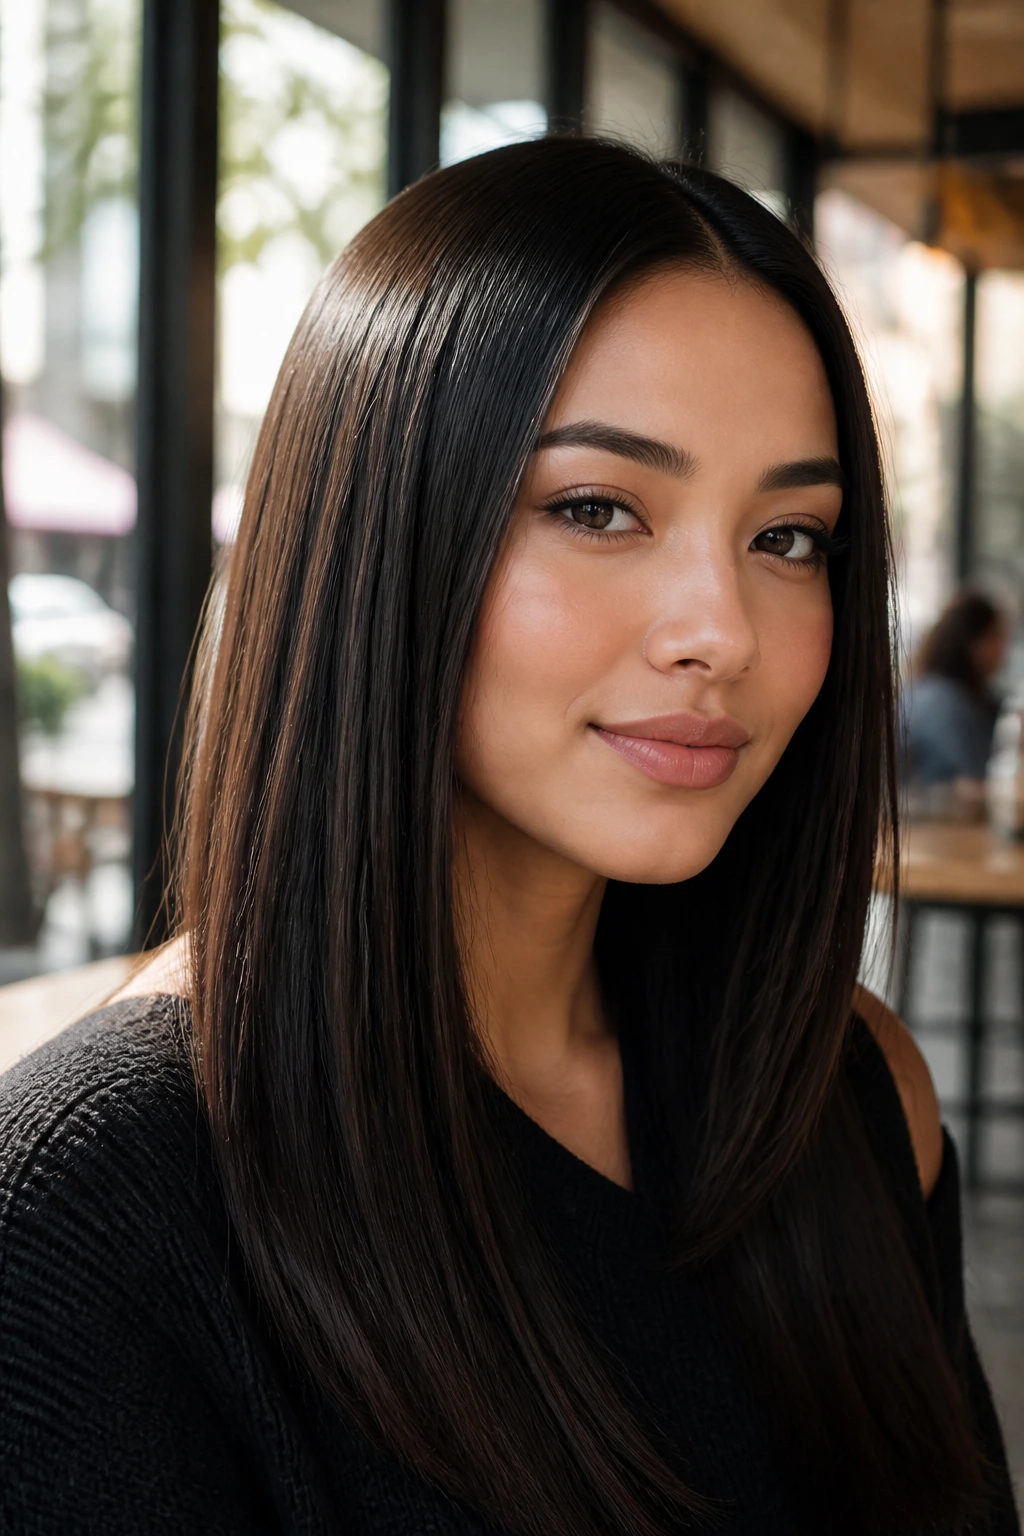
Straight hair can look luxurious or limp. The difference is usually not the flat iron. It’s the shape.
The most reliable sleek looks have a strong perimeter, even tension at the roots, and a finish that reflects light without looking greasy. That means the ends should be sharp enough to define the cut, but not so thin they look wispy. It also means product belongs mostly on mids and ends. If the roots are coated, the style starts to collapse.
Part lines matter more than people admit. A center part creates symmetry and a bit of tension. A deep side part gives the hair direction and can lift the front section without teasing it to death. A slightly off-center part is the quiet compromise for anyone who likes balance but wants a little movement near the face.
One more thing people miss: straight styles need a little air around them. Not volume in the big, round, blowout sense. Just enough space at the crown and around the face so the hair does not cling like a sheet. That tiny bit of lift is what keeps sleek from sliding into lifeless.
1. Glass-Flat Center Part
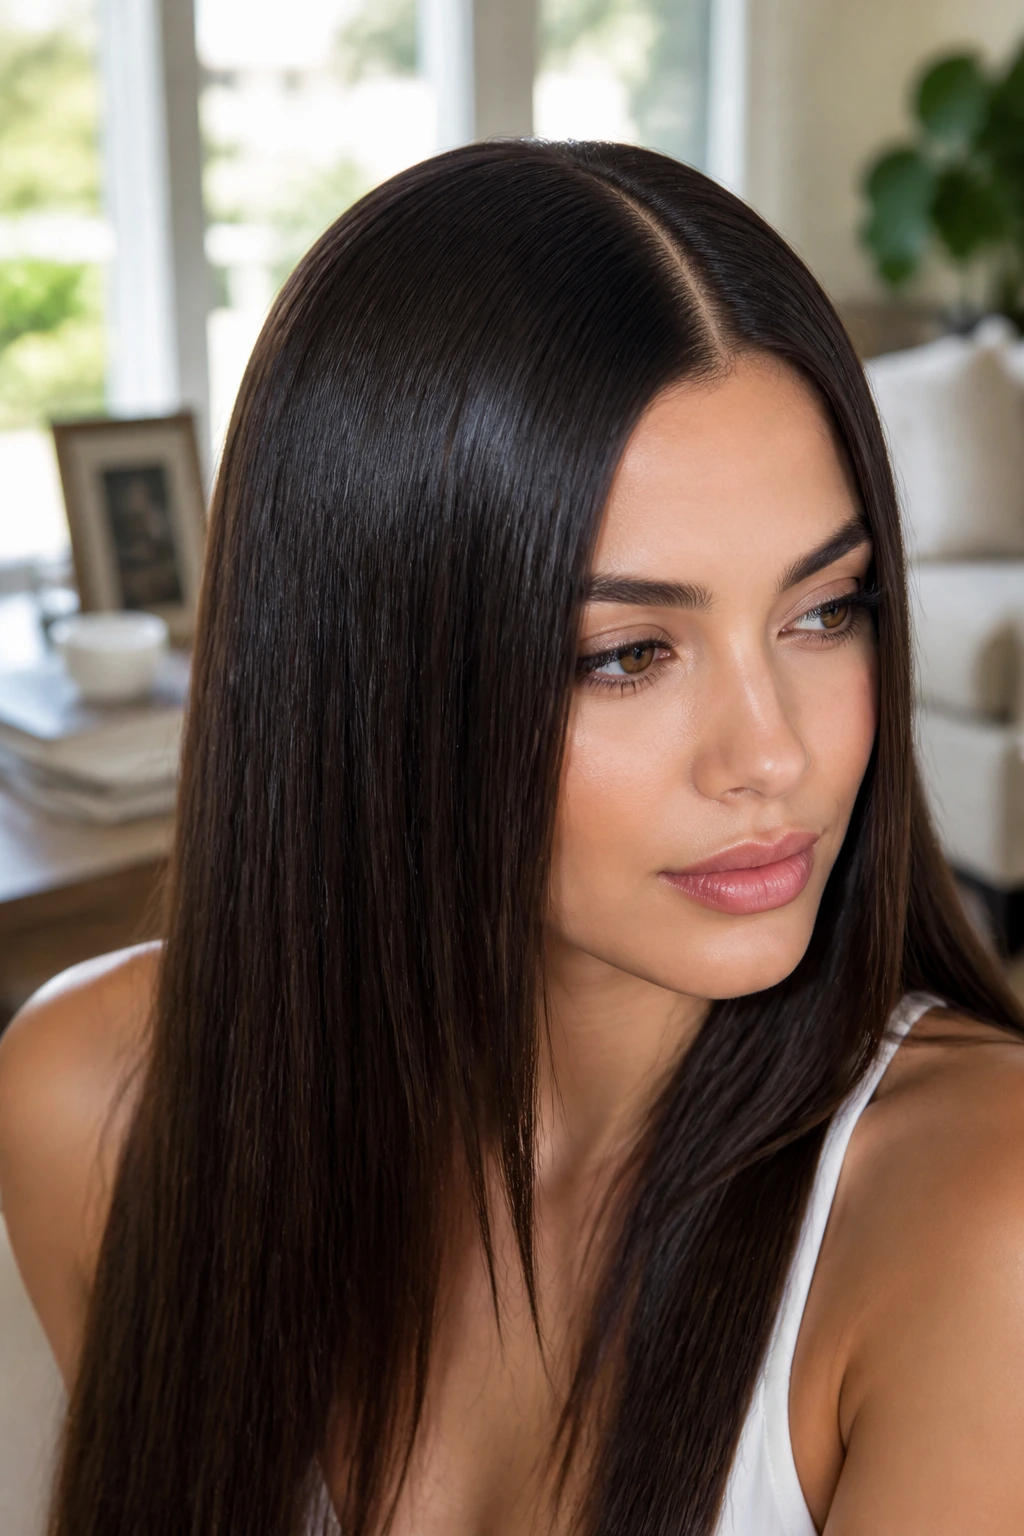
A glass-flat center part is the purest version of straight hair at its sharpest. The line runs dead center, the surface stays smooth from roots to ends, and the whole look has that mirror-like finish that catches attention without needing extra movement.
Why it works: The symmetry makes the face look deliberate and calm, which is why this style lands so cleanly on oval, heart, and long faces. It also works especially well when the hair is very straight or has already been blow-dried smooth, because the part becomes a feature instead of a fight.
- Best on: Fine to medium hair that lies flat without much effort.
- Ask for: A center part, a blunt or softly trimmed perimeter, and no chunky layers near the front.
- Watch the finish: A pea-sized amount of serum on mids and ends is enough; too much and the roots start looking slick in the wrong way.
If you like hair that looks expensive without being fussy, this is one of those styles that keeps paying off. The line at the top does most of the visual work, so even a simple black top or bare neckline suddenly looks more intentional.
2. Deep Side Part With Tucked Ends
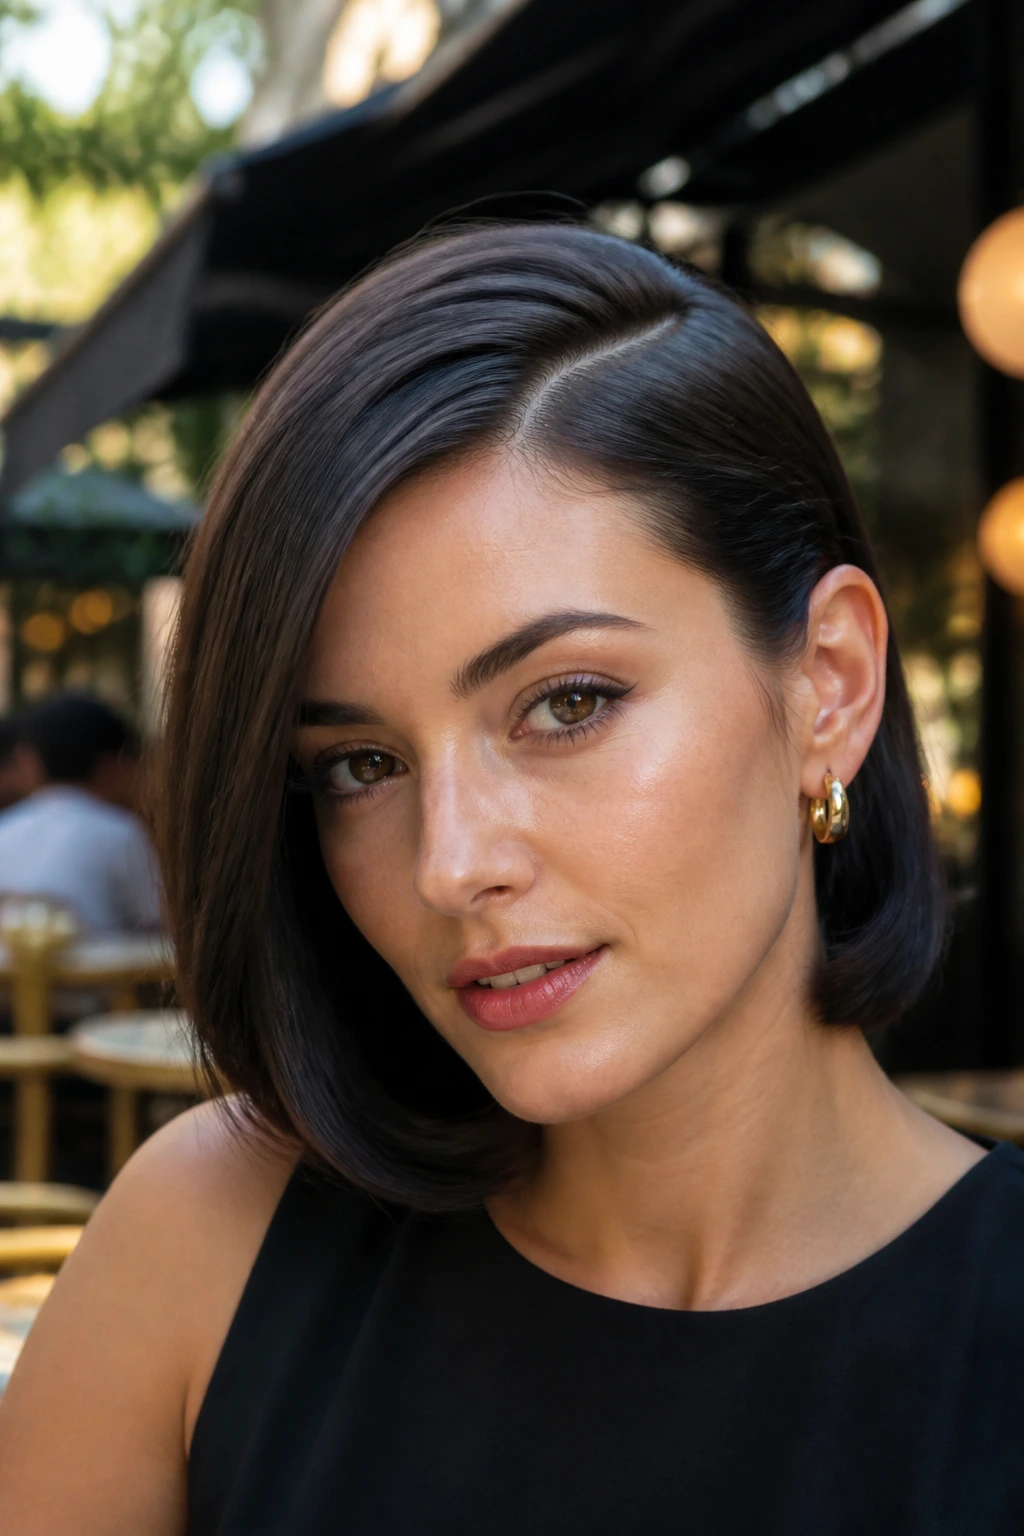
If you want a straight style that softens the face a little, a deep side part with the ends tucked behind one or both ears is a smart move. It gives you the polish of straight hair without the severe front line that a center part can create.
The tucked ends matter more than people think. They show the jaw, the cheekbone, and the ear — all of which add shape to a look that might otherwise hang straight down. When I see this done well, it’s usually because the hair is smooth at the crown and the tuck is secure but not crushed.
- Good choice for: Strong jawlines, round faces, or anyone who wants a little lift at the front.
- Styling note: Aim the blow-dryer nozzle down the hair shaft and finish with a flat brush so the front section doesn’t puff up.
- Small detail, big effect: Leave one side behind the ear and let the other fall forward if you want it to feel less formal.
This one is deceptively easy. The trick is making the front section smooth before you tuck it. If the ends flip randomly, the whole thing loses its clean line.
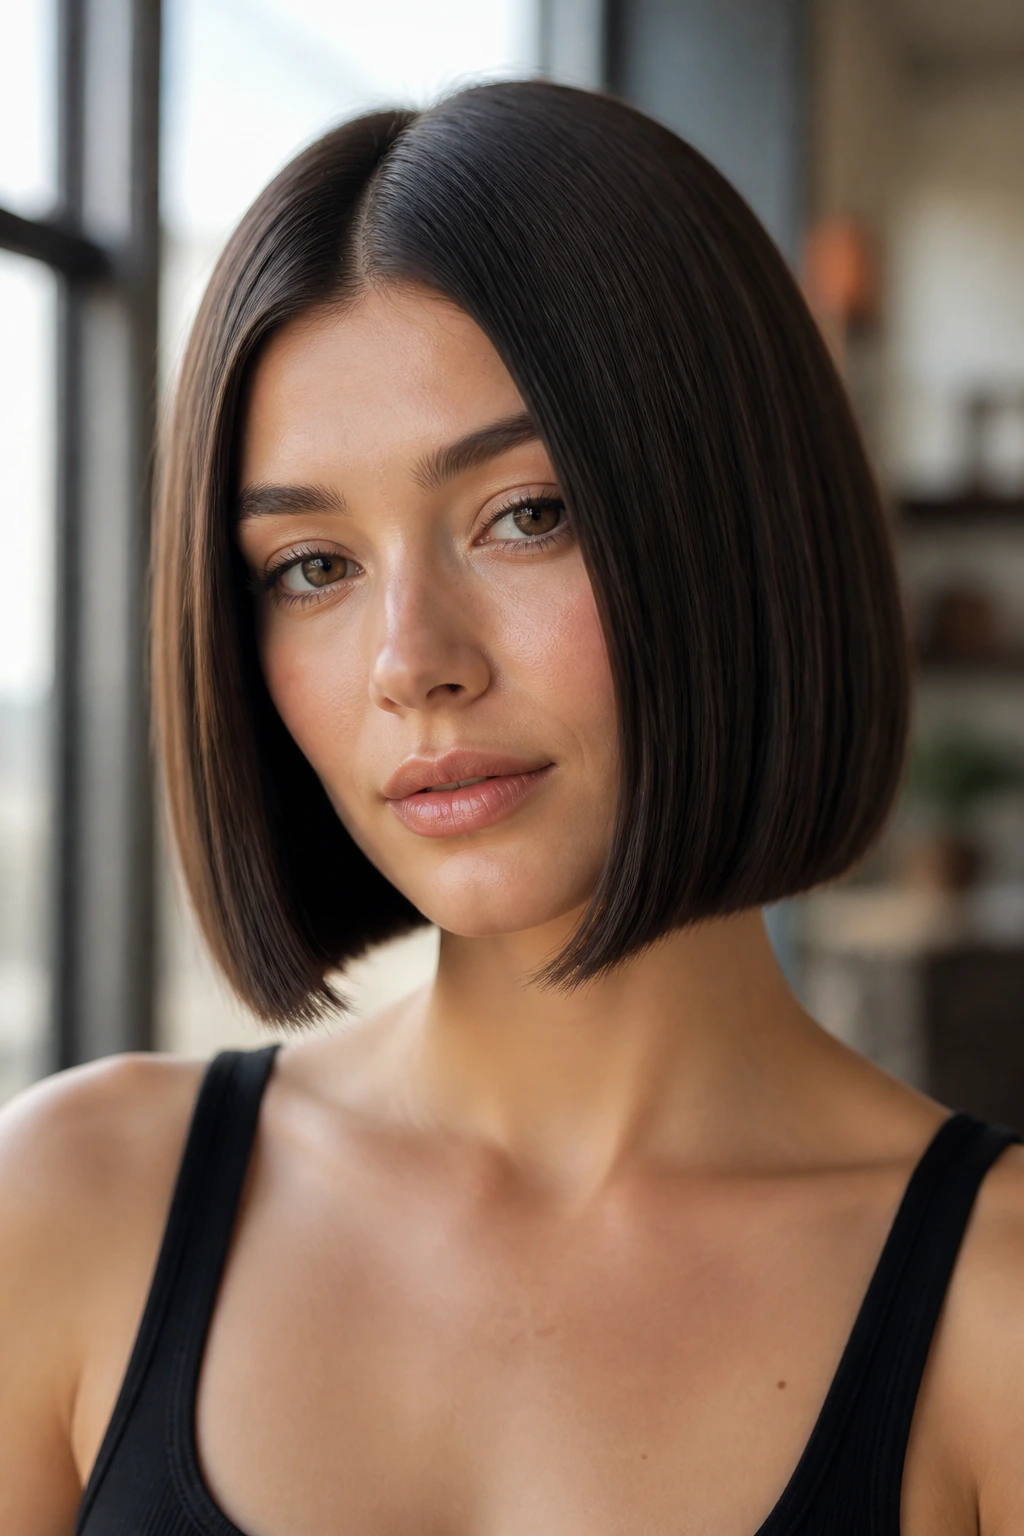
3. Blunt Chin-Length Bob
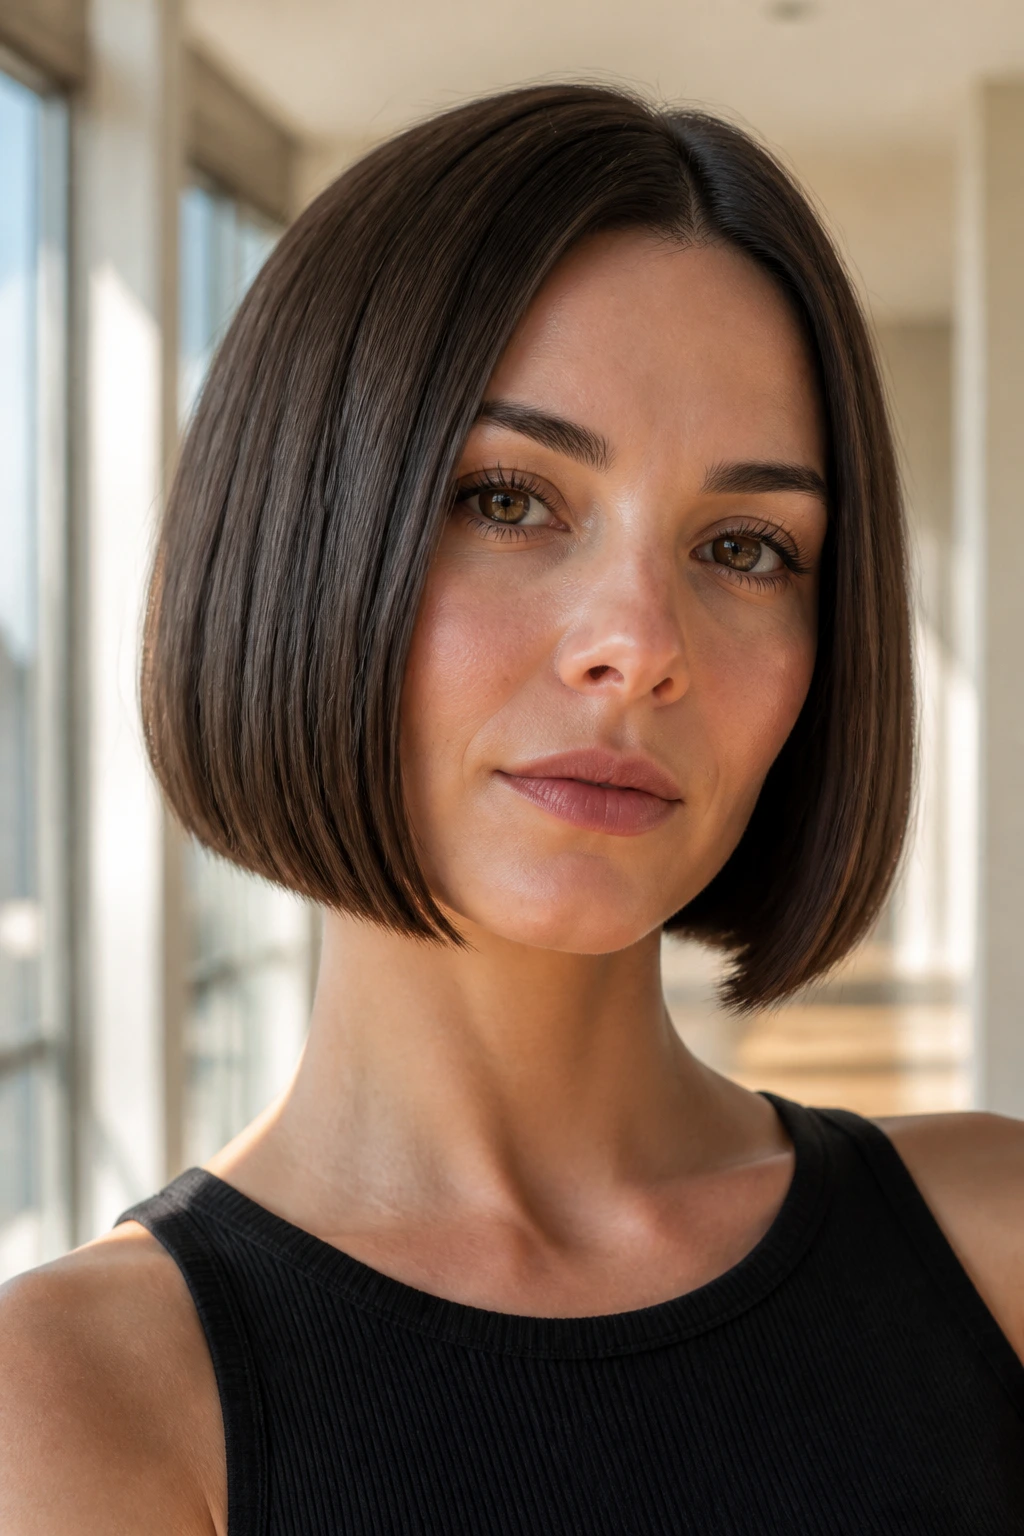
A blunt chin-length bob is the haircut version of a clean sentence. No extra words. No extra layers. Just a strong line that lands right around the jaw and makes straight hair look denser than it may actually be.
It’s one of the best shapes for fine straight hair because the ends hit in a solid block. That creates the impression of fullness, especially if the hair is cut with a crisp edge and kept slightly beveled under the chin. I like this cut when the goal is polish with almost no styling drama.
- Best on: Fine hair, narrow faces, and people who want their neck and jawline to stay visible.
- Ask for: A blunt perimeter with minimal internal layering.
- Maintenance note: Plan on trims every 6 to 8 weeks if you want that line to stay sharp.
A chin-length bob can go chic or severe fast, so the balance matters. A soft bend under the ends keeps it from feeling boxy, and a side part can loosen it up if the center line feels too strict.
4. Collarbone Lob With Sharp Ends
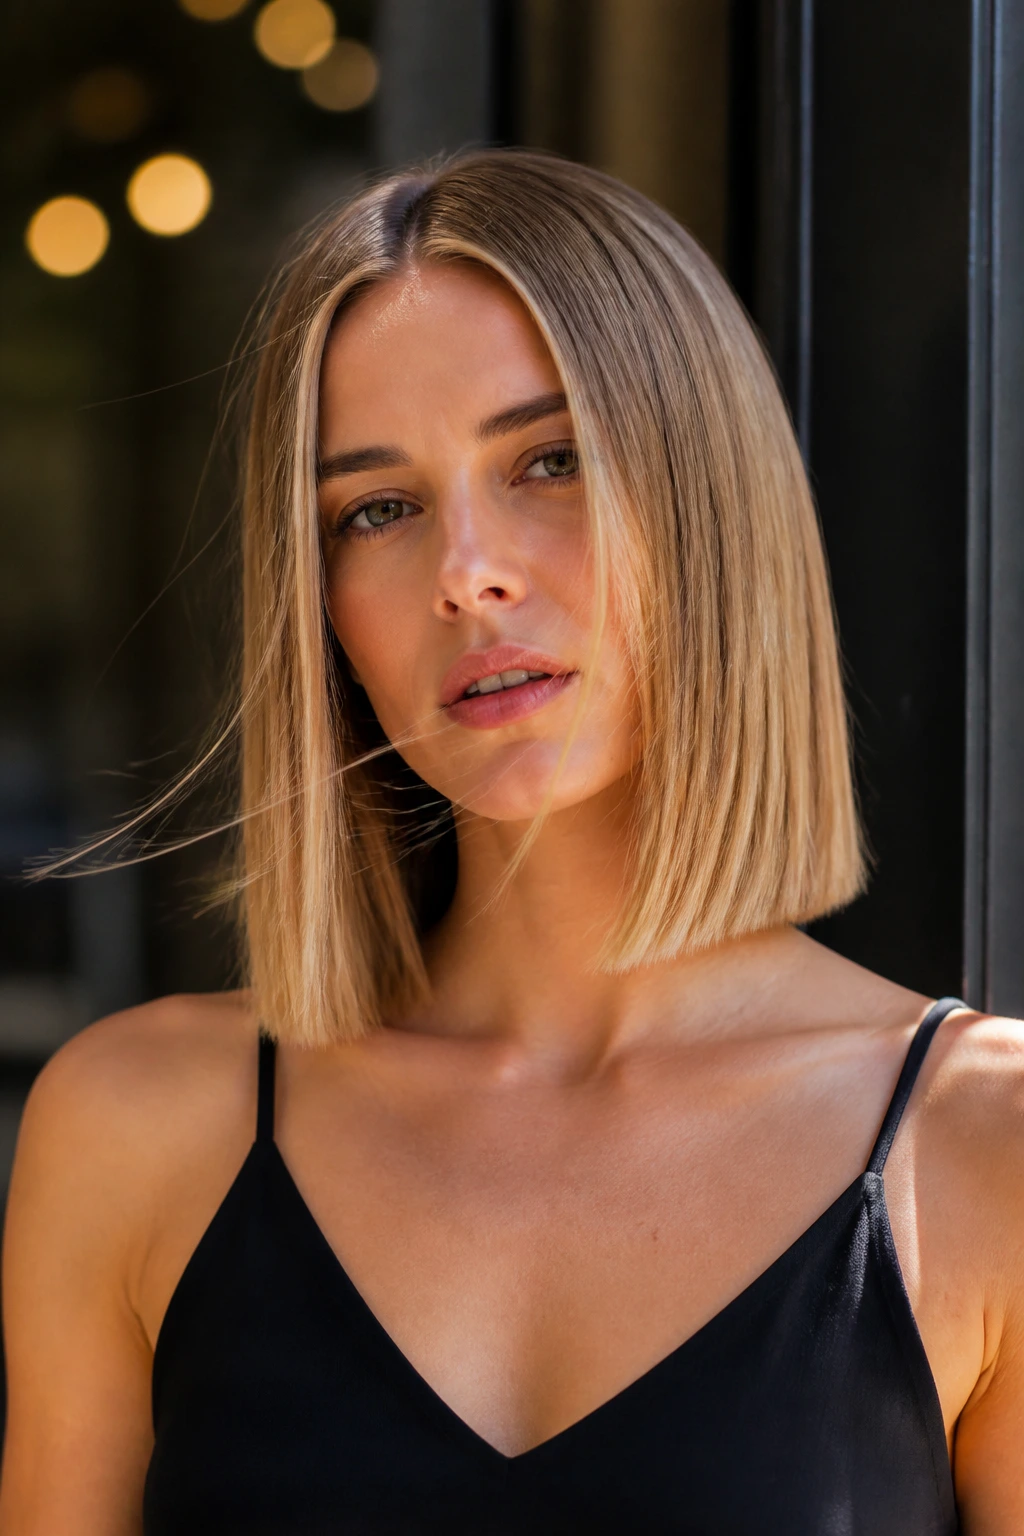
The collarbone lob sits in that useful middle ground where hair still feels long, but the shape has enough edge to look finished. On straight hair, it’s especially clean because the ends can sit flat against the shoulders without turning mushy.
What makes this cut better than a longer all-one-length style is the way it handles movement. A collarbone length gives the hair somewhere to stop, which helps the silhouette stay readable. It’s long enough to tuck behind the ears or pull back, but short enough that the shape doesn’t drown your face.
- Best on: Women who want length but don’t want the drag of waist-length hair.
- Styling note: Blow the ends under with a paddle brush or flat iron for a polished bend.
- Good to know: A slight face frame can help if the lob feels too boxy at the front.
This is one of those cuts that looks expensive even on a normal weekday because it doesn’t need a lot of help. The outline alone gives it structure.
5. Long Bone-Straight Layers
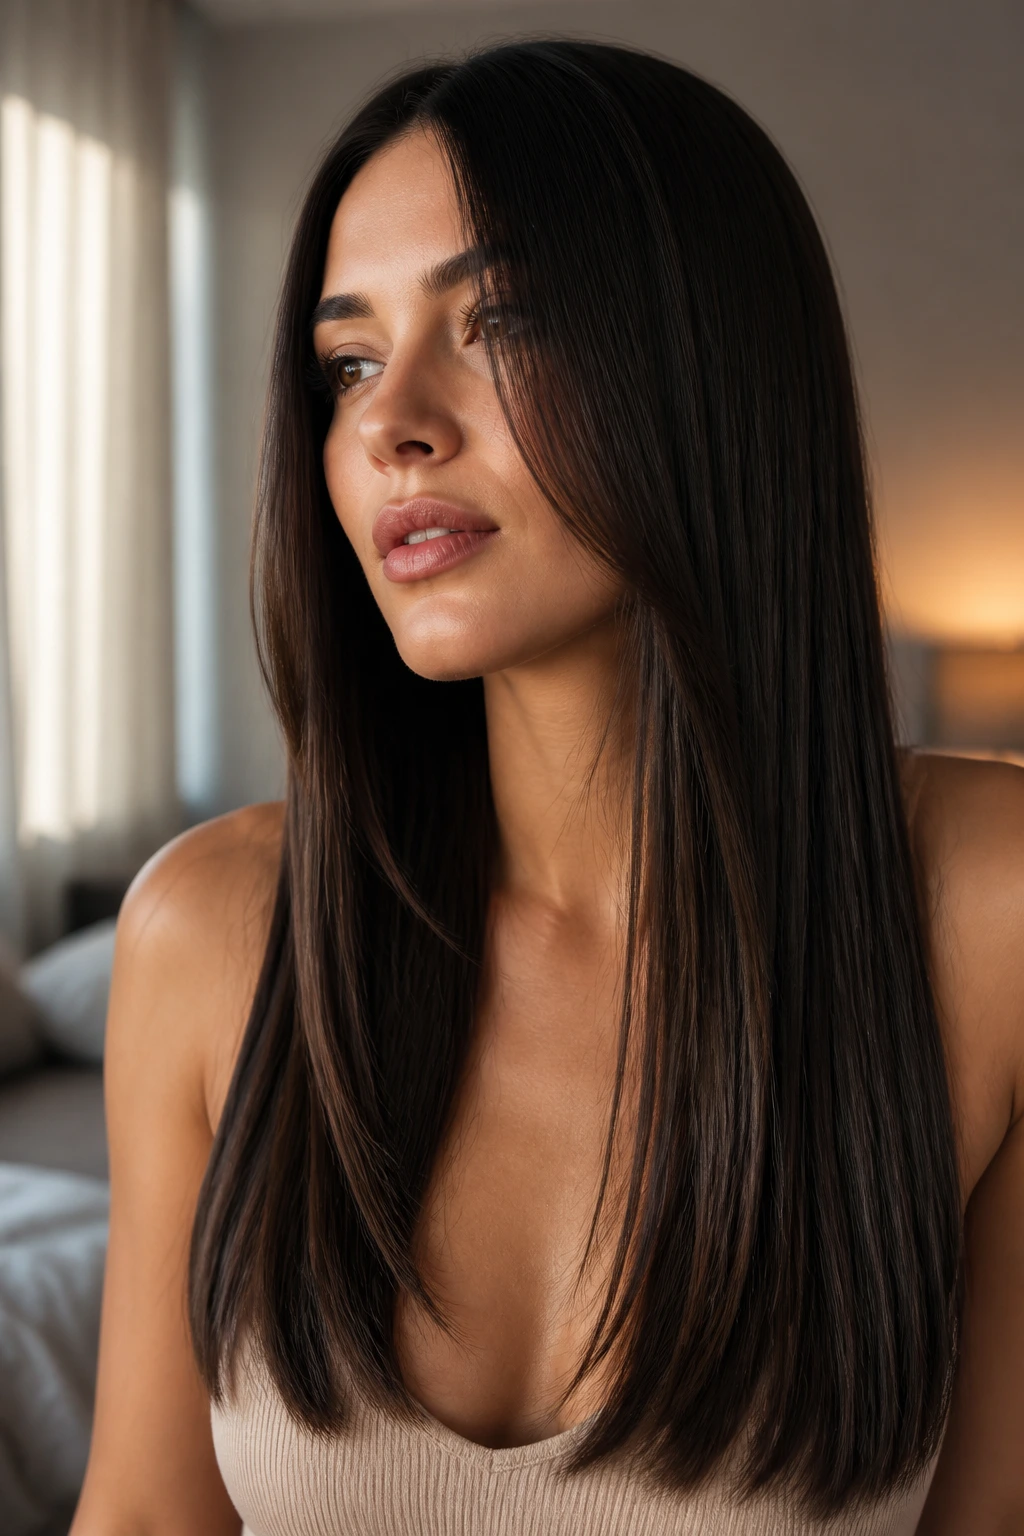
Bone-straight hair gets heavy fast if the cut is all one weight. Hidden layers solve that by taking out bulk where you don’t see it, so the length still falls in a clean line but doesn’t look like one heavy panel.
The best version of this style keeps the front pieces long enough to frame the face and the interior layers subtle enough to avoid choppiness. You want movement when the hair moves, not obvious steps in the cut. That distinction matters.
- Best for: Thick straight hair that feels too heavy at the ends.
- Ask for: Invisible layers, not short pieces that pop out around the face.
- Tip: A smoothing cream before blow-drying helps the layers lie together instead of separating into sections.
This style is for people who want length, but with a little more life in it. It reads sleek, not flat. And that’s the whole game.
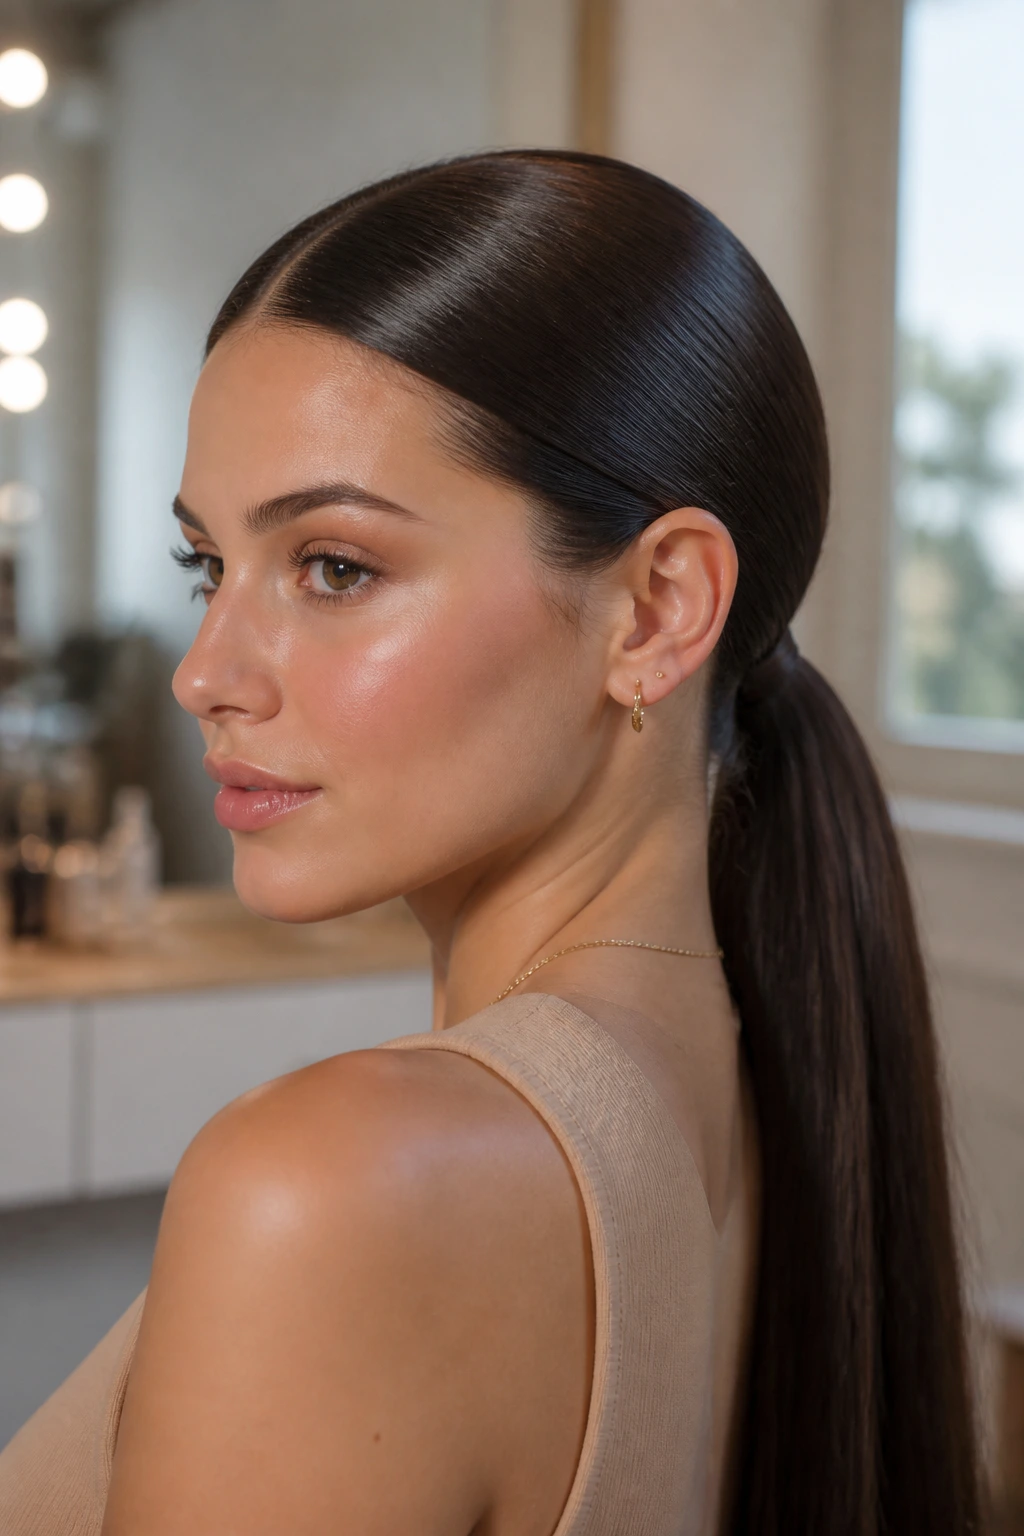
6. Sleek Low Ponytail
A sleek low ponytail is one of the easiest straight hairstyles to make look expensive if you keep the crown smooth and the base tight. It sits close to the nape, so the hairline matters. If the top is puffy, the whole thing loses its polish.
Use a boar-bristle or mixed bristle brush to pull the hair back, then secure it low and tight. I like this style because it works on hair that’s freshly blown out or on hair that’s already a little lived-in. Either way, the finish should look controlled, not stiff.
- Best on: Medium to long hair, especially when you need something quick and neat.
- Ask for: A low placement at the nape and no volume at the crown unless you want a little lift on purpose.
- Finish move: Smooth a tiny bit of serum over the ponytail itself, not the roots.
This is the kind of look that makes a plain T-shirt look sharper. That’s not a small thing.
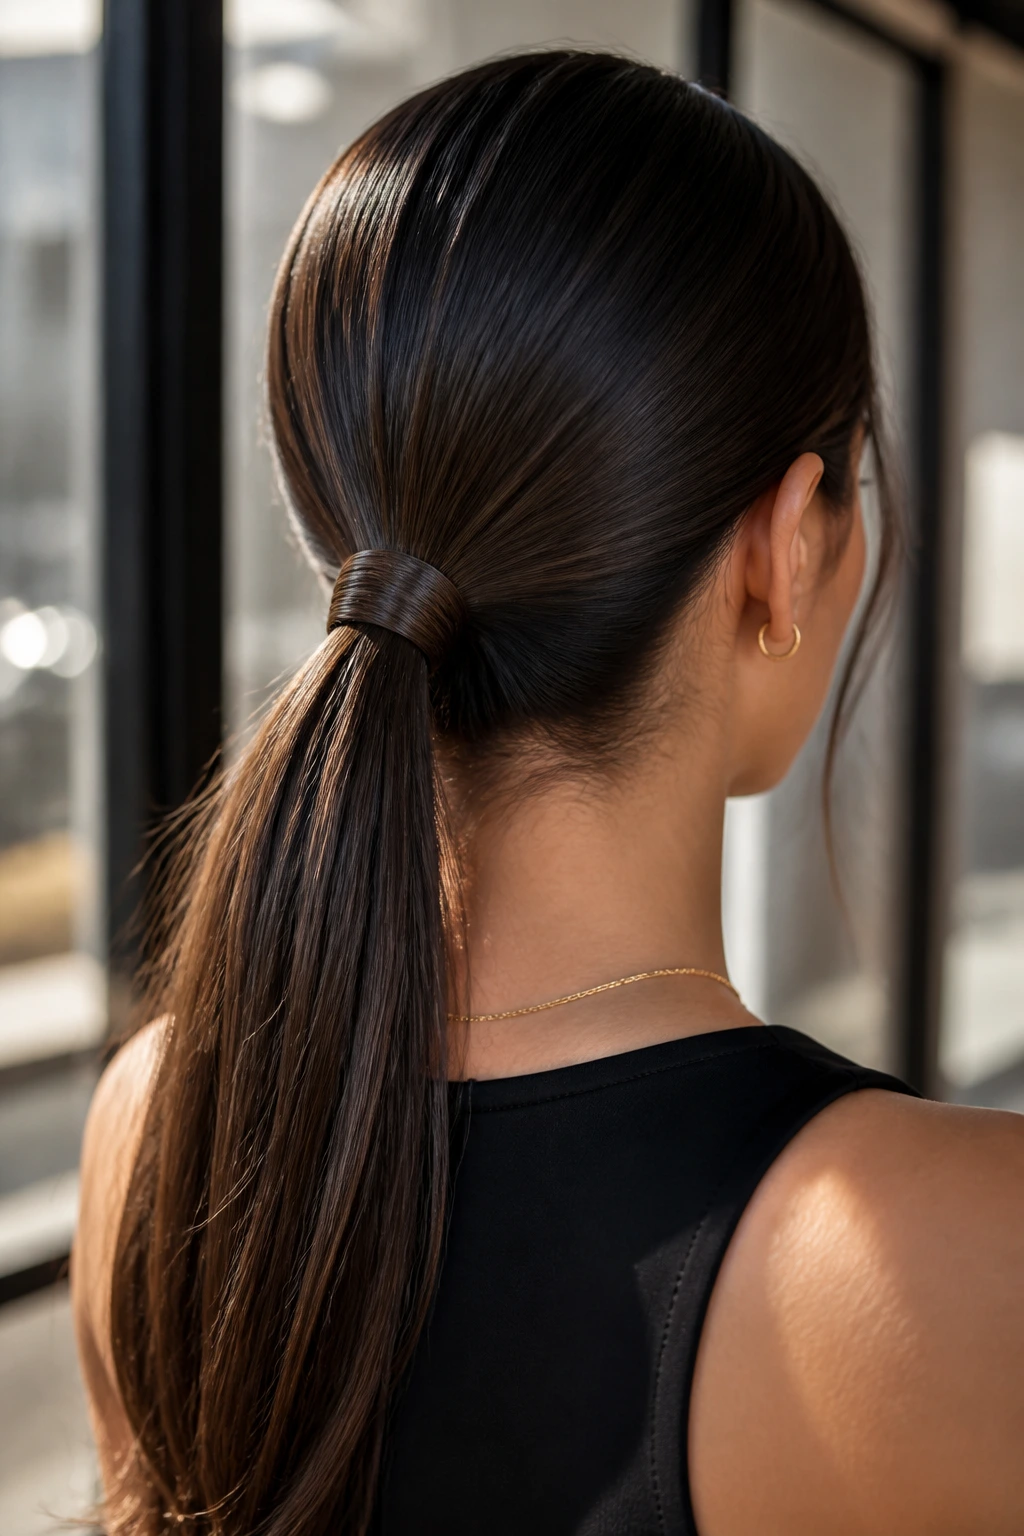
7. Wrapped Ponytail With Hidden Elastic
The wrapped ponytail is the low ponytail’s more finished cousin. Instead of leaving the elastic exposed, you hide it with a narrow strand of hair, which instantly cuts down on the “I grabbed this in a hurry” feeling.
The wrapped base gives the ponytail a cleaner profile, especially when the rest of the hair is very straight. It looks neat in daylight and still holds up under evening lighting, where ordinary elastics can look sloppy. That little wrap is doing more work than people give it credit for.
- Best for: Events, work dinners, or any day when you want a neat profile.
- How to style: Take a small section from under the ponytail, wrap it around the elastic, and pin the tail underneath with a bobby pin.
- Pro detail: Keep the wrap slim. Thick wraps start to look bulky and defeat the point.
This one is all about restraint. Don’t over-accessorize it. Let the clean line do the talking.
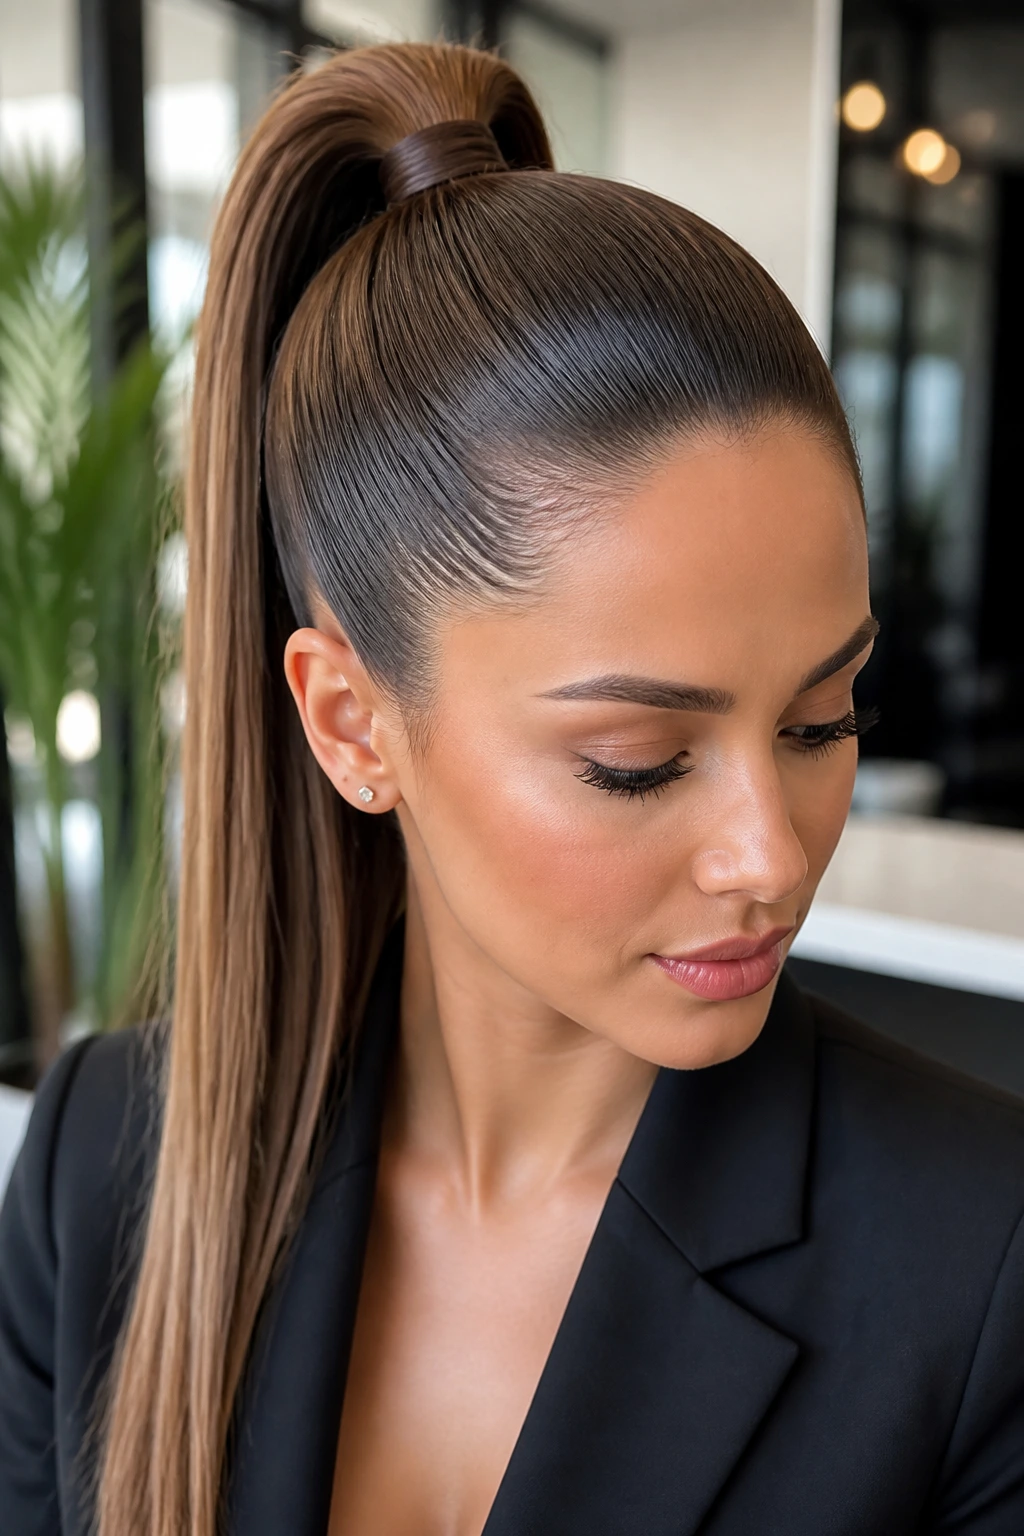
8. High Ponytail With Polished Crown
A high ponytail on straight hair has a different energy entirely. The lift at the crown changes the face shape, and the tightness pulls attention upward in a way a low ponytail never will.
The sleek version is not about teasing or big volume. It’s about brushing the roots up and back so the top stays smooth, then securing the ponytail high enough to open the face. If you keep the base glossy and the tail straight, the style looks sharp instead of sporty.
- Best on: Oval and heart-shaped faces, or anyone who wants more lift near the cheekbones.
- Styling note: Use a lightweight gel or smoothing cream at the crown before brushing back.
- Watch out for: Pulling too hard can leave dents. Keep tension even, not brutal.
It’s a good style when you want straight hair to look energetic rather than quiet. One of the few sleek looks that can feel a little bold without getting messy.
9. Low Chignon With Clean Middle Part
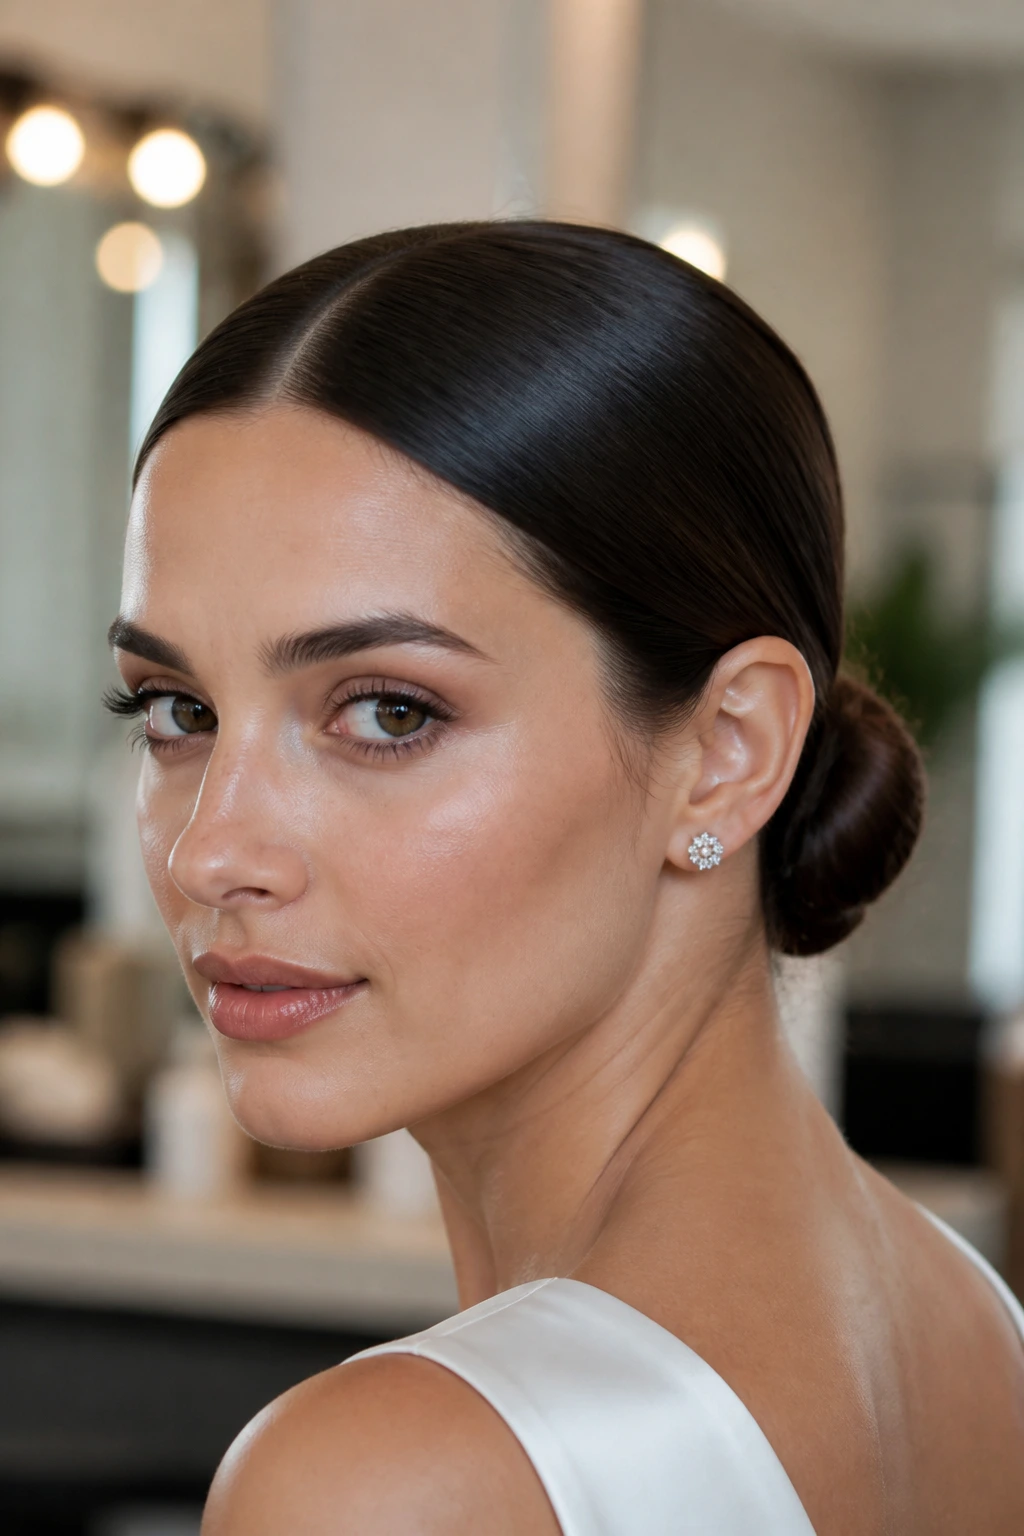
A low chignon makes straight hair feel formal without looking stiff. Add a center part first, and the whole style becomes even more precise because the front sections frame the face with a straight line before disappearing into the knot.
This is the kind of style that works because every piece has a job. The top stays smooth. The sides stay flat. The bun sits low and compact, not bulky. If the chignon is too large, it starts to fight the straightness of the rest of the hair.
- Best on: Formal events, weddings, or settings where you want the hair out of the way.
- Ask for: A low placement and a smooth crown with no visible bumps.
- Finishing tip: Mist the surface lightly with hairspray, then press flyaways down with a soft brush or your palm.
I prefer this style on hair that already lies straight or has been blown out with a round brush. It keeps the lines crisp. No fuss. No extra drama.
10. Straight Hair With Blunt Bangs
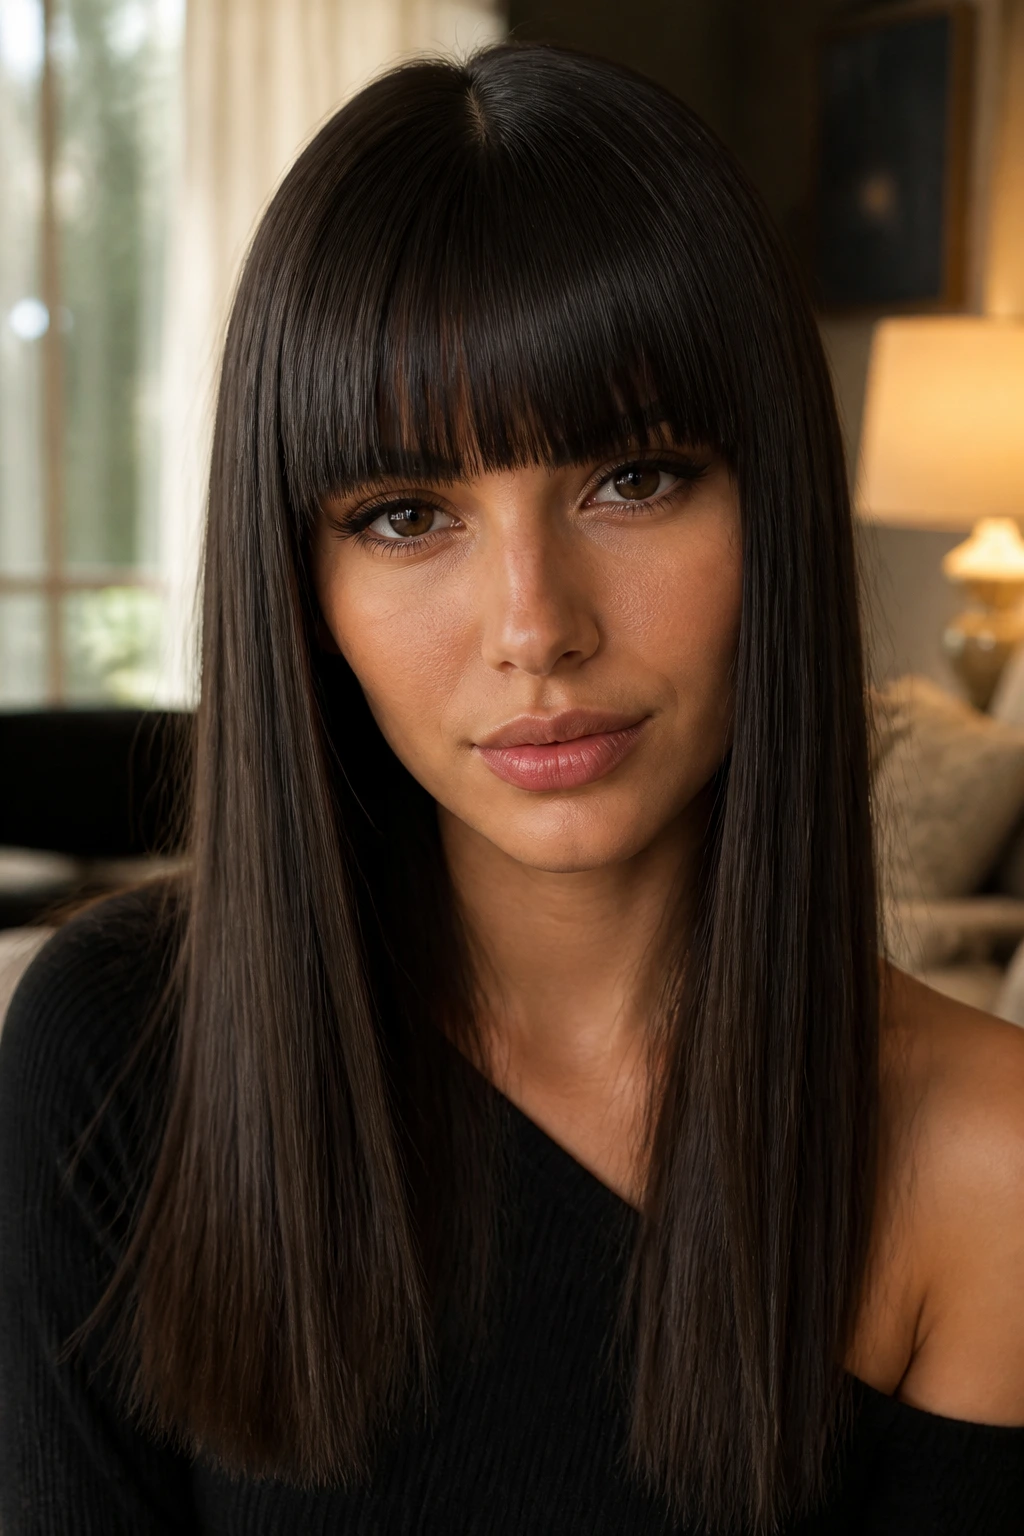
Blunt bangs on straight hair are a statement. They cut a strong horizontal line across the forehead, and when the rest of the hair is smooth, the fringe becomes the whole point of the look.
The trick is length. Bangs that sit right at the lashes or just above them feel intentional; bangs that are too short can read harsh. The rest of the hair should stay sleek and not too layered, so the fringe doesn’t compete with everything else.
- Best for: Longer faces, thick straight hair, and people who don’t mind regular trims.
- How to keep them neat: A tiny round brush or flat brush plus a quick pass of the blow-dryer is usually enough.
- Reality check: Bangs grow out fast. If you like them, schedule trims before they start poking into your eyes.
This style is not low-maintenance, and it should not pretend to be. But the visual payoff is strong. Very strong.
11. Curtain Bangs on a Sleek Base
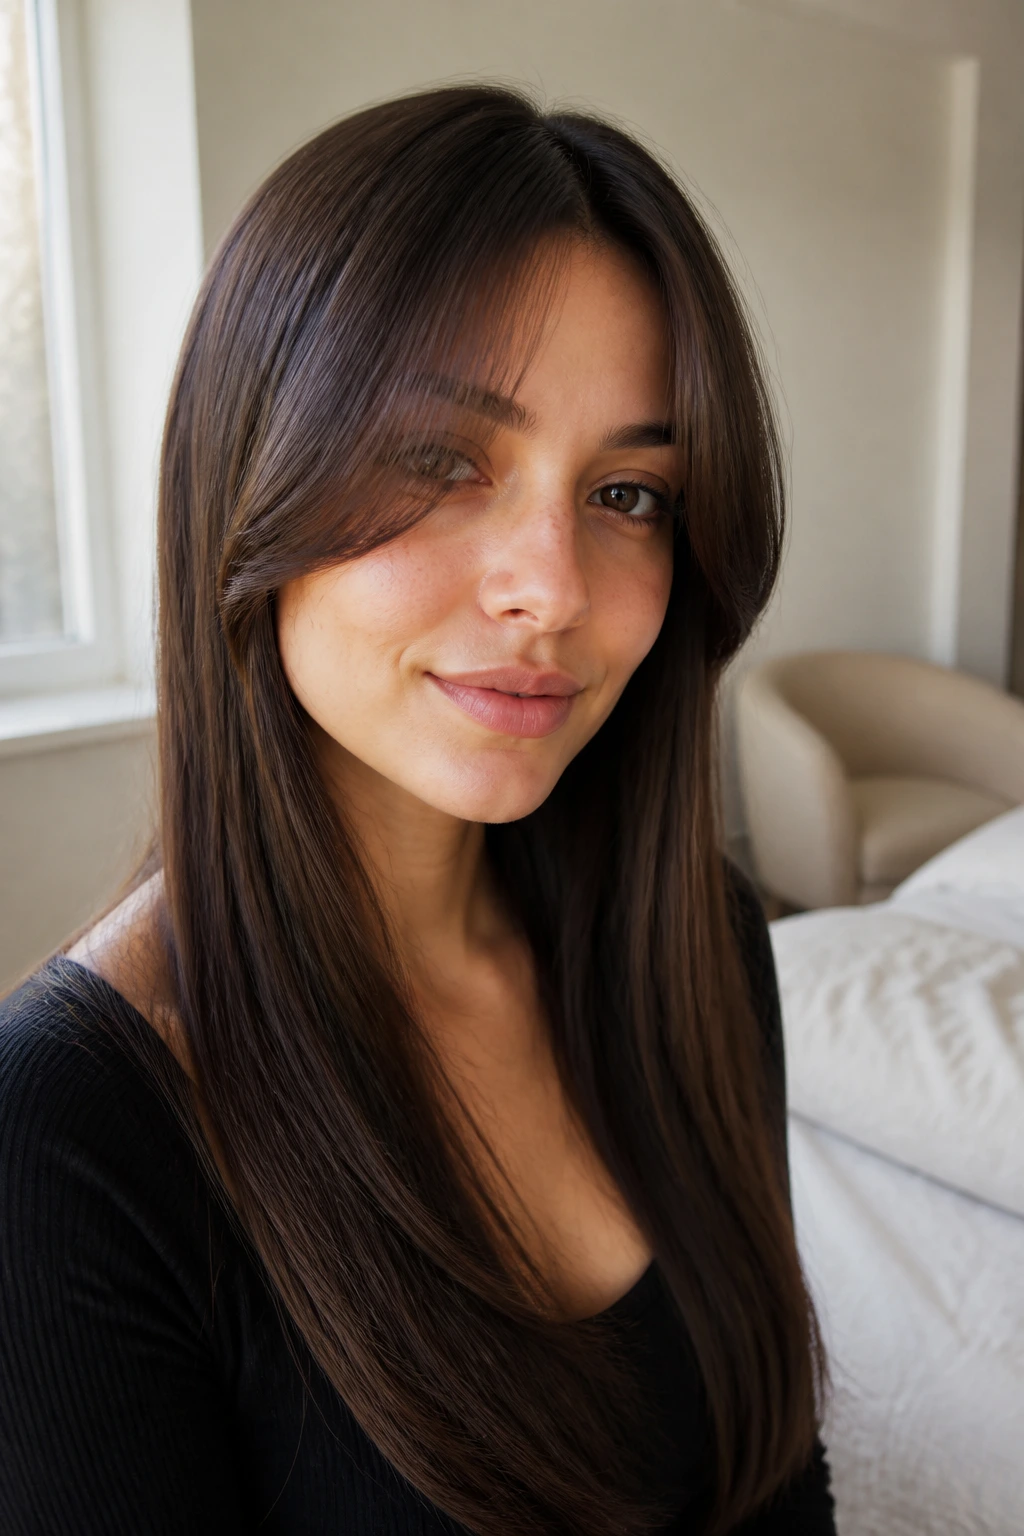
Curtain bangs are the softer way to break up a straight look. They open from the center and fall to either side of the face, so the hair still reads sleek but not severe.
What I like here is the balance. The fringe adds motion near the eyes and cheekbones, while the length stays smooth and controlled. That mix keeps straight hair from looking too rigid, especially when the rest of the cut is long or medium-long.
- Best on: Round, square, and heart-shaped faces.
- Styling note: Blow-dry the bangs away from the face with a round brush, then let them cool before touching them.
- Small caution: If the face frame is cut too short, the style can suddenly look more retro than soft.
Curtain bangs are the least committed way to have fringe. That’s why people keep coming back to them.
12. Asymmetrical Bob
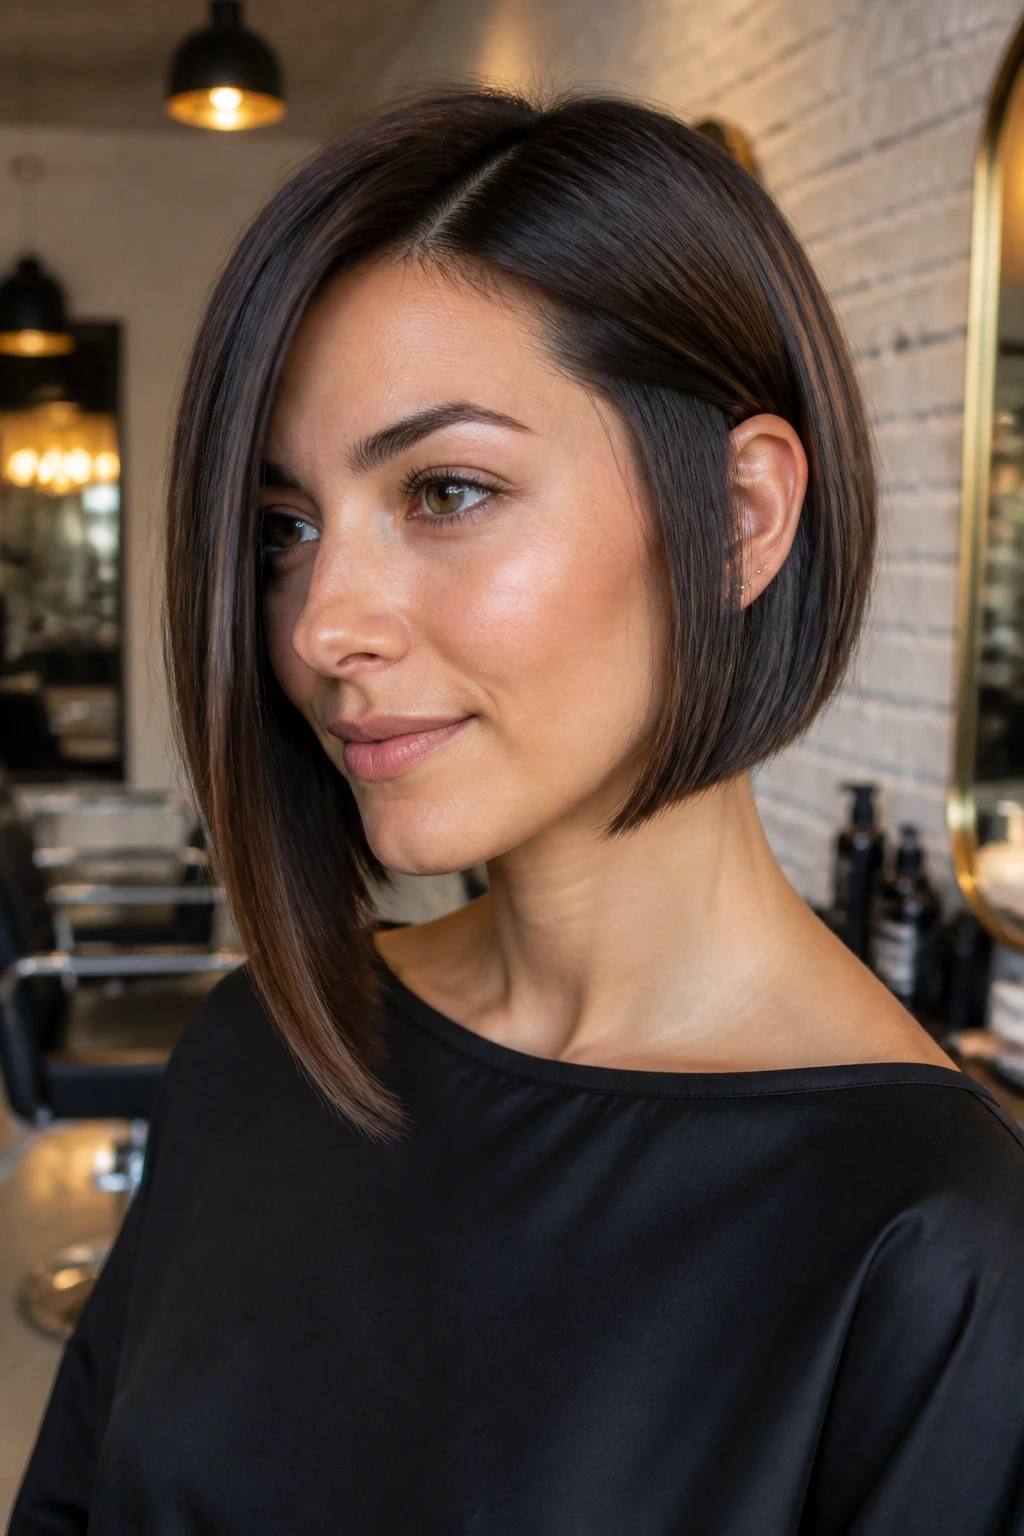
An asymmetrical bob gives straight hair a built-in angle. One side sits a little longer than the other, which means the cut has motion even when the hair itself is lying flat and smooth.
This works especially well when you want a sleek style with a bit of edge. The difference in length doesn’t need to be huge; even a subtle tilt changes the silhouette. I’d choose this cut when the blunt bob feels too tidy and the lob feels too safe.
- Best on: Straight hair with enough density to hold a crisp line.
- Ask for: A controlled difference between sides, not a dramatic swing unless that’s the whole point.
- Styling note: Keep the shorter side smooth around the jaw so the asymmetry reads clearly.
A good asymmetrical bob looks like someone made a decision. That’s the appeal.
13. Tucked-Behind-Ears Lob

Tucking the front pieces behind the ears sounds like a tiny move, but on a collarbone lob it can change the whole profile. The face opens up, the line of the jaw shows more, and the length suddenly feels lighter.
This is a great example of a style that depends on restraint. The hair stays straight and polished, but the ears break up the curtain effect that long straight hair can create. If you like showing off earrings, this one is especially useful.
- Best for: Lob lengths, oval faces, and anyone who wants a little more openness around the face.
- How to wear it: Tuck both sides for a neat look, or only one side for a softer line.
- Product note: Keep the tucked section light on serum so it doesn’t slide out immediately.
I use this style as a shortcut when the hair is clean but not freshly styled. It makes the whole cut feel intentional in five seconds.
14. Half-Up Sleek Knot
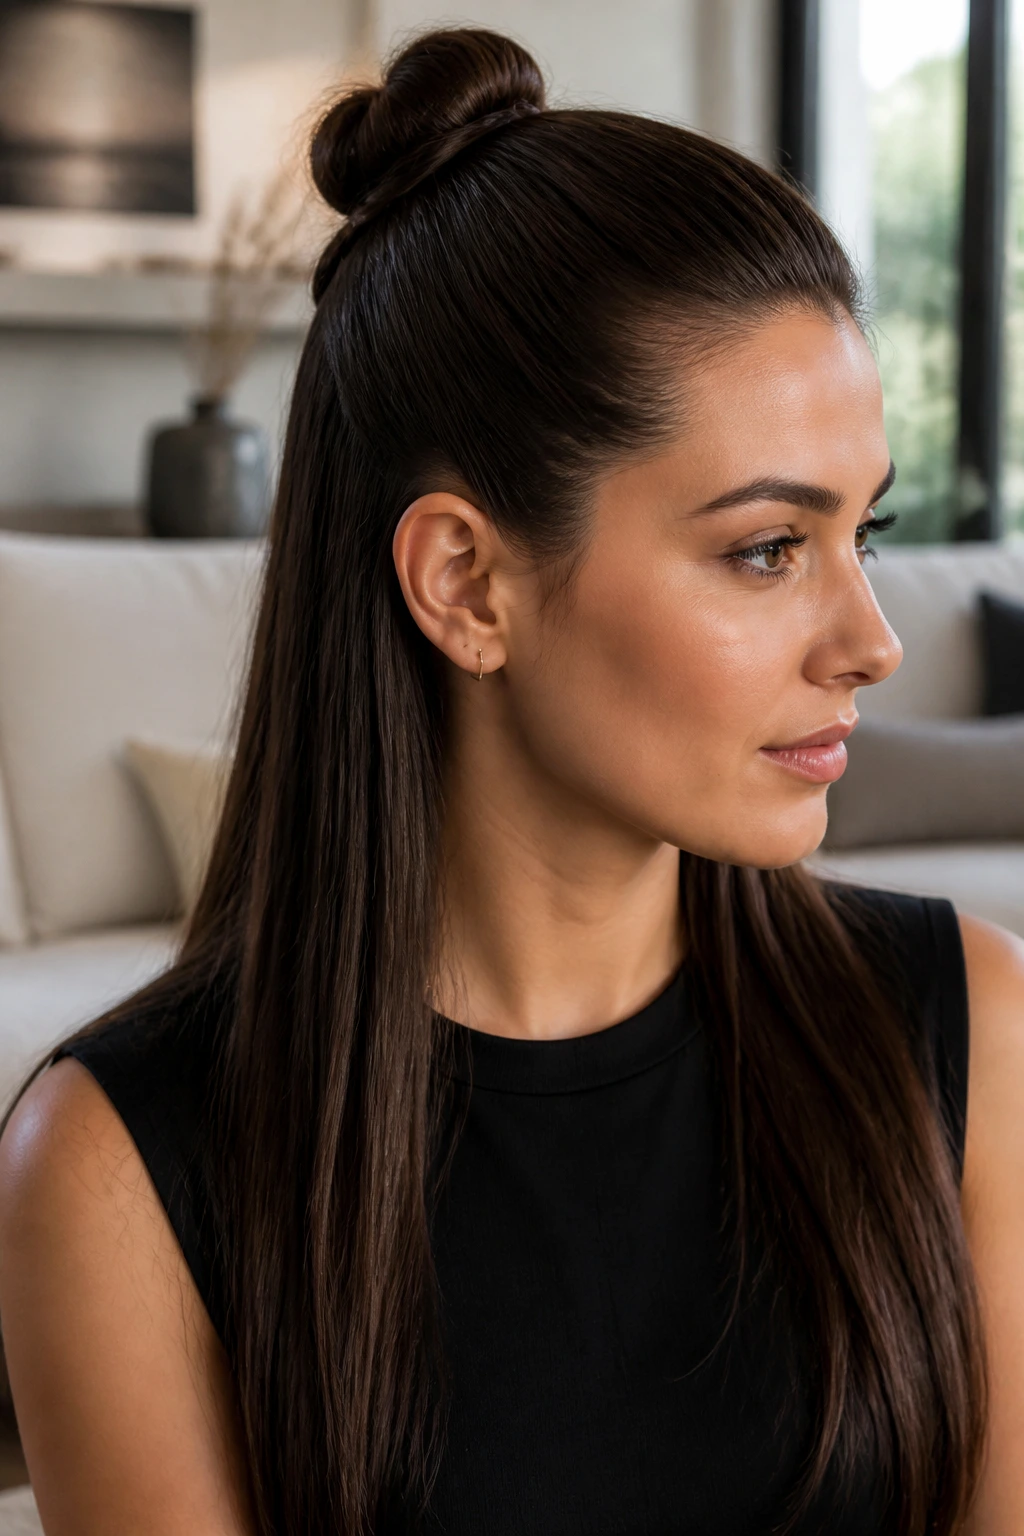
A half-up sleek knot is what happens when you want the top of the hair under control but still want the length visible. It sits somewhere between casual and dressed-up, which is why it works so well on straight hair.
The knot should stay small and neat. If it gets bulky, it fights the smooth base. I prefer this style when the hair is long enough to fall straight underneath but not so long that the half-up section gets lost in the rest of it.
- Best on: Medium to long hair with enough density to support the knot.
- Styling note: Smooth the top section back with a fine-tooth comb before twisting it.
- Keep it clean: Anchor the knot with two pins instead of one if your hair is slippery.
This one is useful when you’re trying to look pulled together without doing a full updo. It has enough structure to feel planned.
15. Bubble Ponytail on Straight Hair
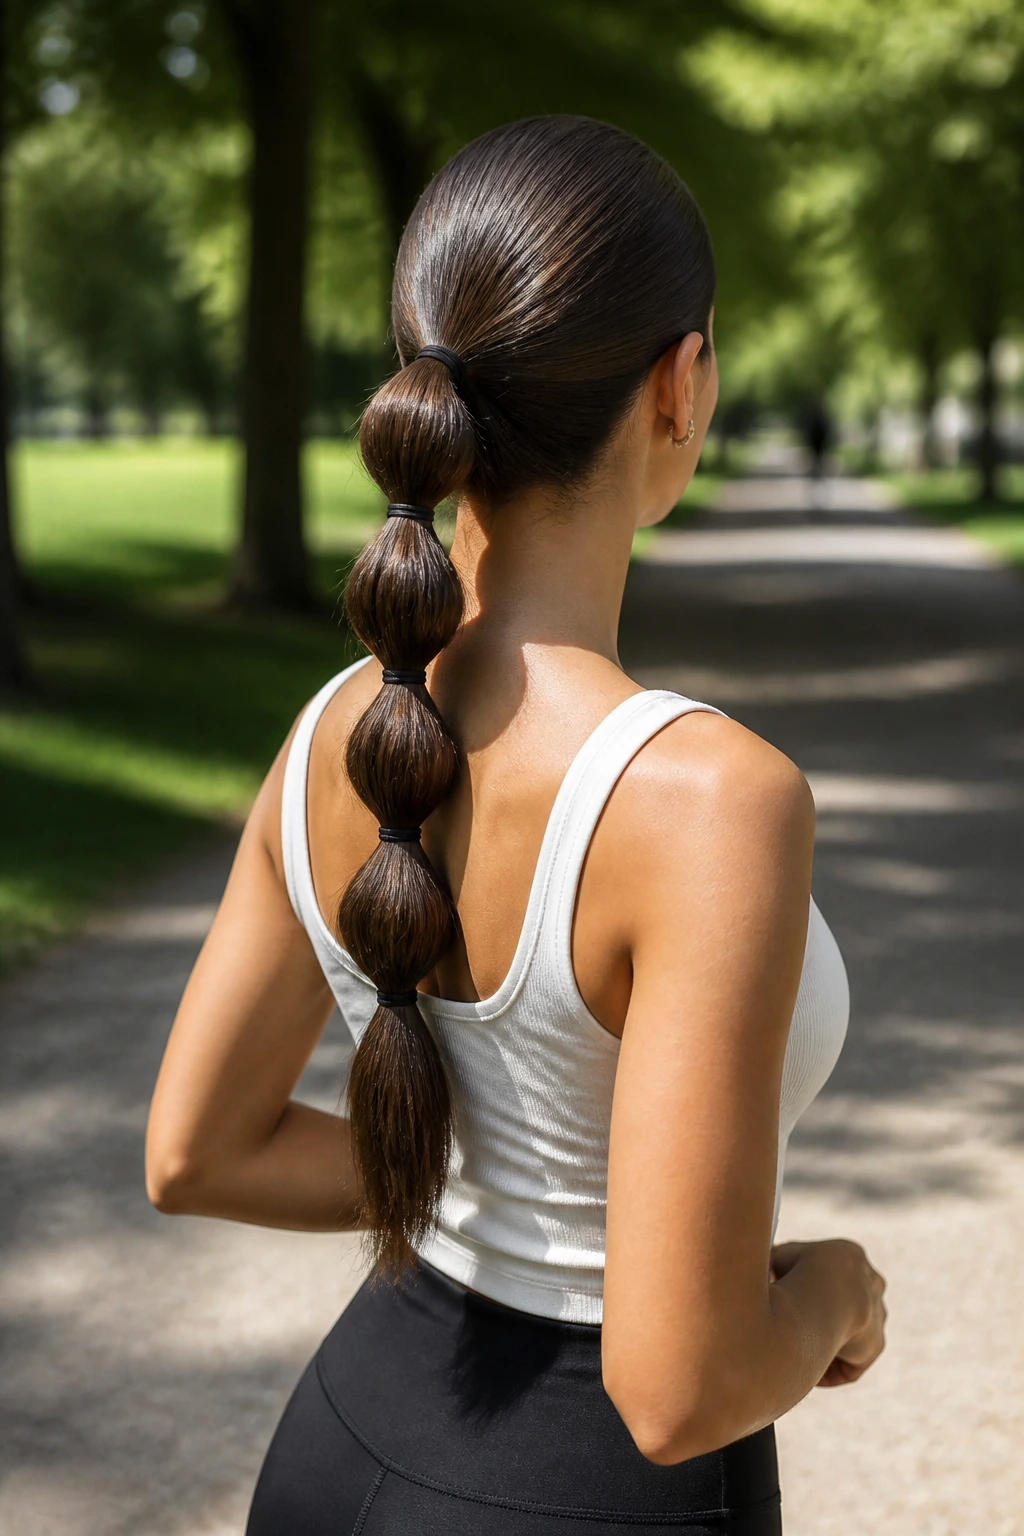
Bubble ponytails can look playful, but on pin-straight hair they also look graphic and neat. The smooth base gives the ponytail a cleaner outline, and the elastic sections create the “bubble” shape without any need for texture.
The spacing matters. If the elastics are too close together, the bubbles disappear. Too far apart, and the ponytail starts looking loose. The best version keeps each section gently puffed, then smooths the outside with a brush or your fingers.
- Best on: Longer straight hair that holds elastic sections well.
- How to do it: Add clear or matching elastics every few inches down the tail, then tug each section outward a little.
- Style note: Keep the crown polished so the ponytail looks deliberate, not sporty.
This is one of the few sleek styles that can feel a little fun without losing the straight-hair polish. A nice change of pace.
16. Straight Hair With Micro Braids
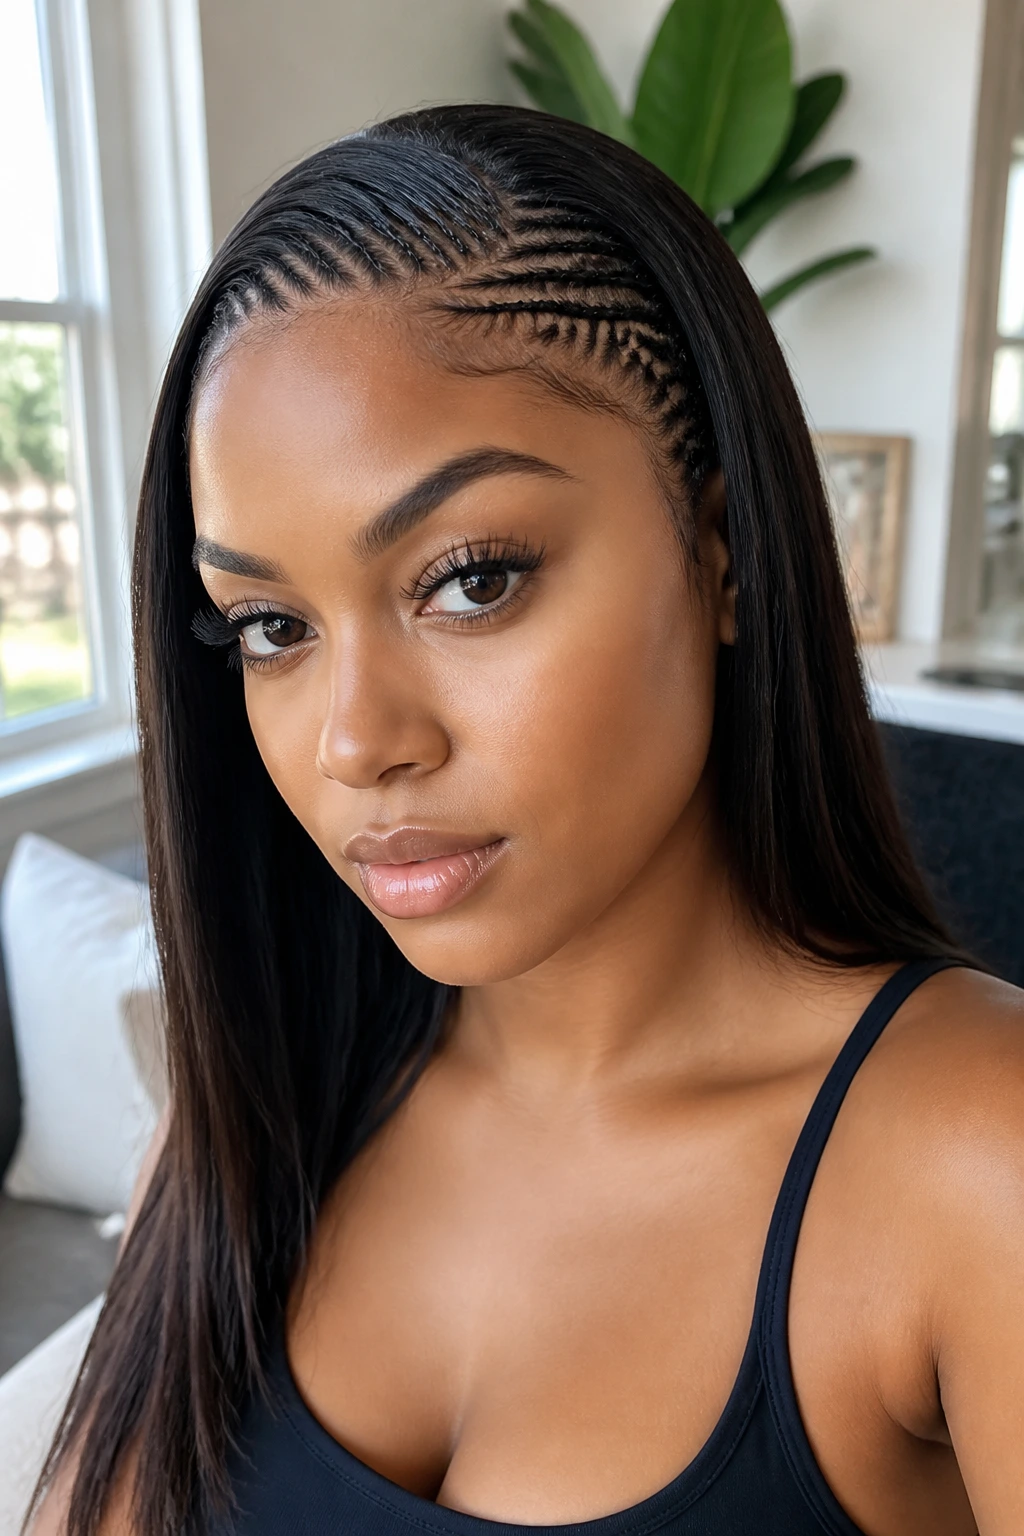
Tiny braids at the hairline or through a few front sections can rescue long straight hair from looking too plain. They add a small layer of detail without changing the overall straight finish.
I like this as an accent, not a full braided style. Two or three micro braids near the temple, or one narrow braid tucked under a layer, is enough. Anything more starts to compete with the sleekness instead of supporting it.
- Best on: Long, straight hair that needs a little visual break.
- Styling note: Keep the rest of the hair smooth and glossy so the braids stand out.
- Good to know: A fine braid holds better if the hair has a touch of grip from second-day texture.
This is a nice option when you want the hair to look styled, but not overdone. Tiny detail. Big difference.
17. Wet-Look Straight Finish
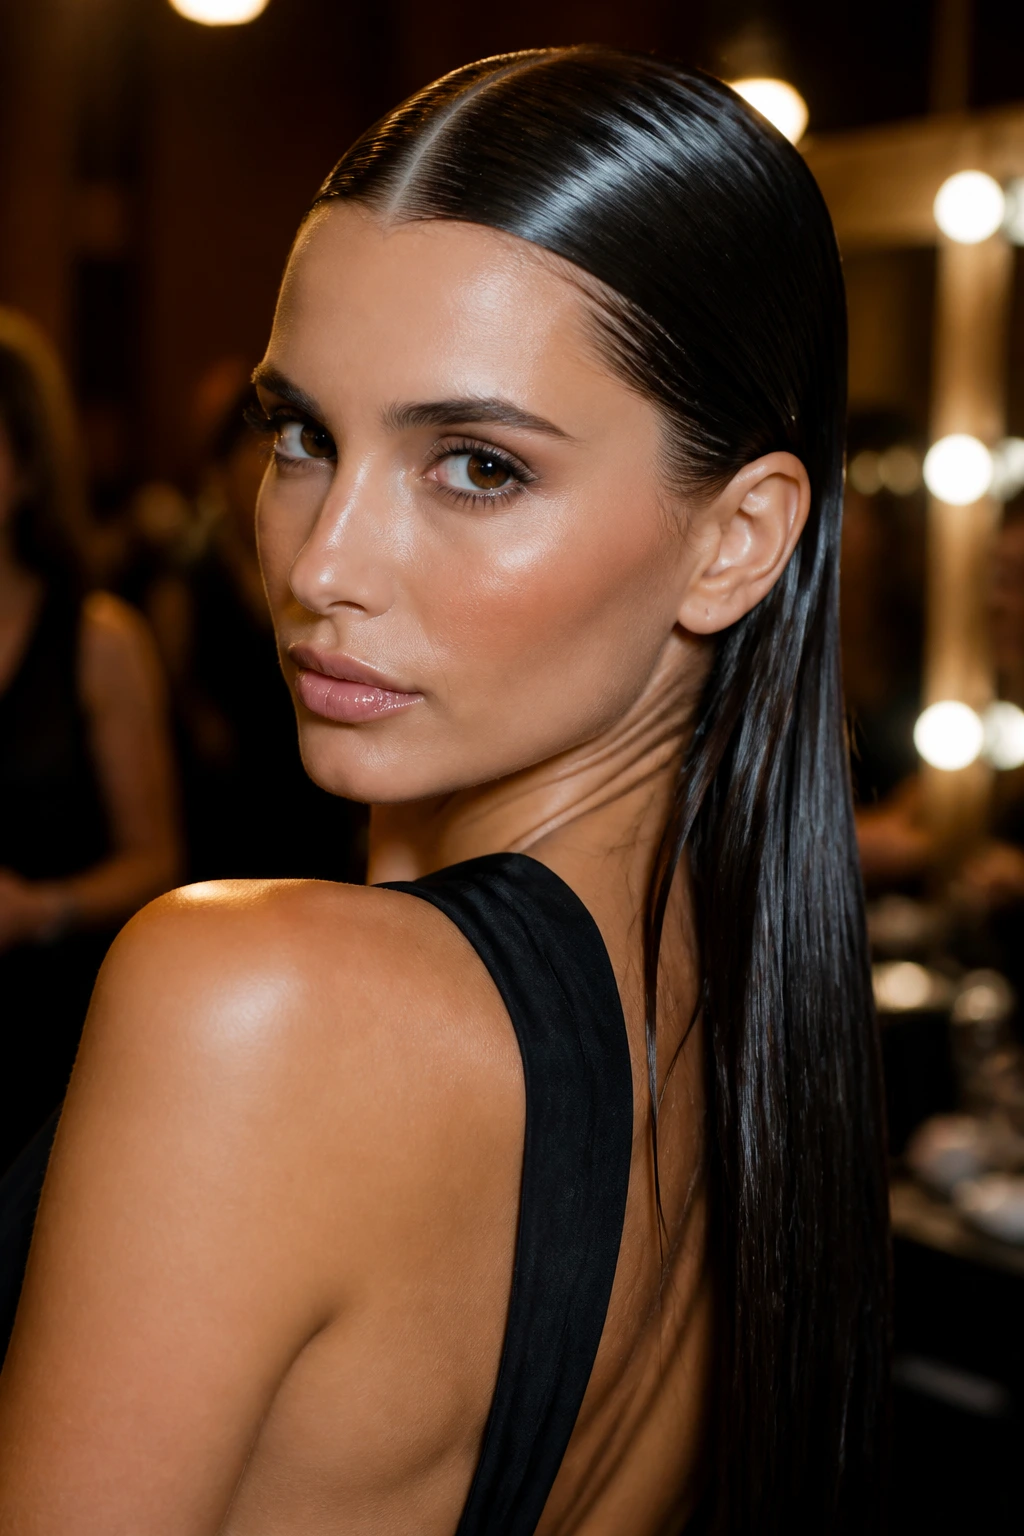
Wet-look straight hair lives in its own category. It’s glossy, tight at the scalp, and deliberate in a way that ordinary straight hair isn’t. The finish is closer to editorial than everyday.
The best version uses gel or a strong styling cream on damp hair, then combs everything into place before it dries. The look depends on shine and control, so flyaways aren’t a flaw here — they’re just something to eliminate before the product sets.
- Best for: Evening events, fashion-forward outfits, or short-to-medium lengths.
- How to style: Work product from roots to mid-lengths, comb it through, and keep the shape tight while it dries.
- Caution: Too much product can make the hair look greasy instead of wet.
This is not a casual school-run style. It’s a specific choice. And when it works, it works hard.
18. Straight Hair With Face-Framing Pieces
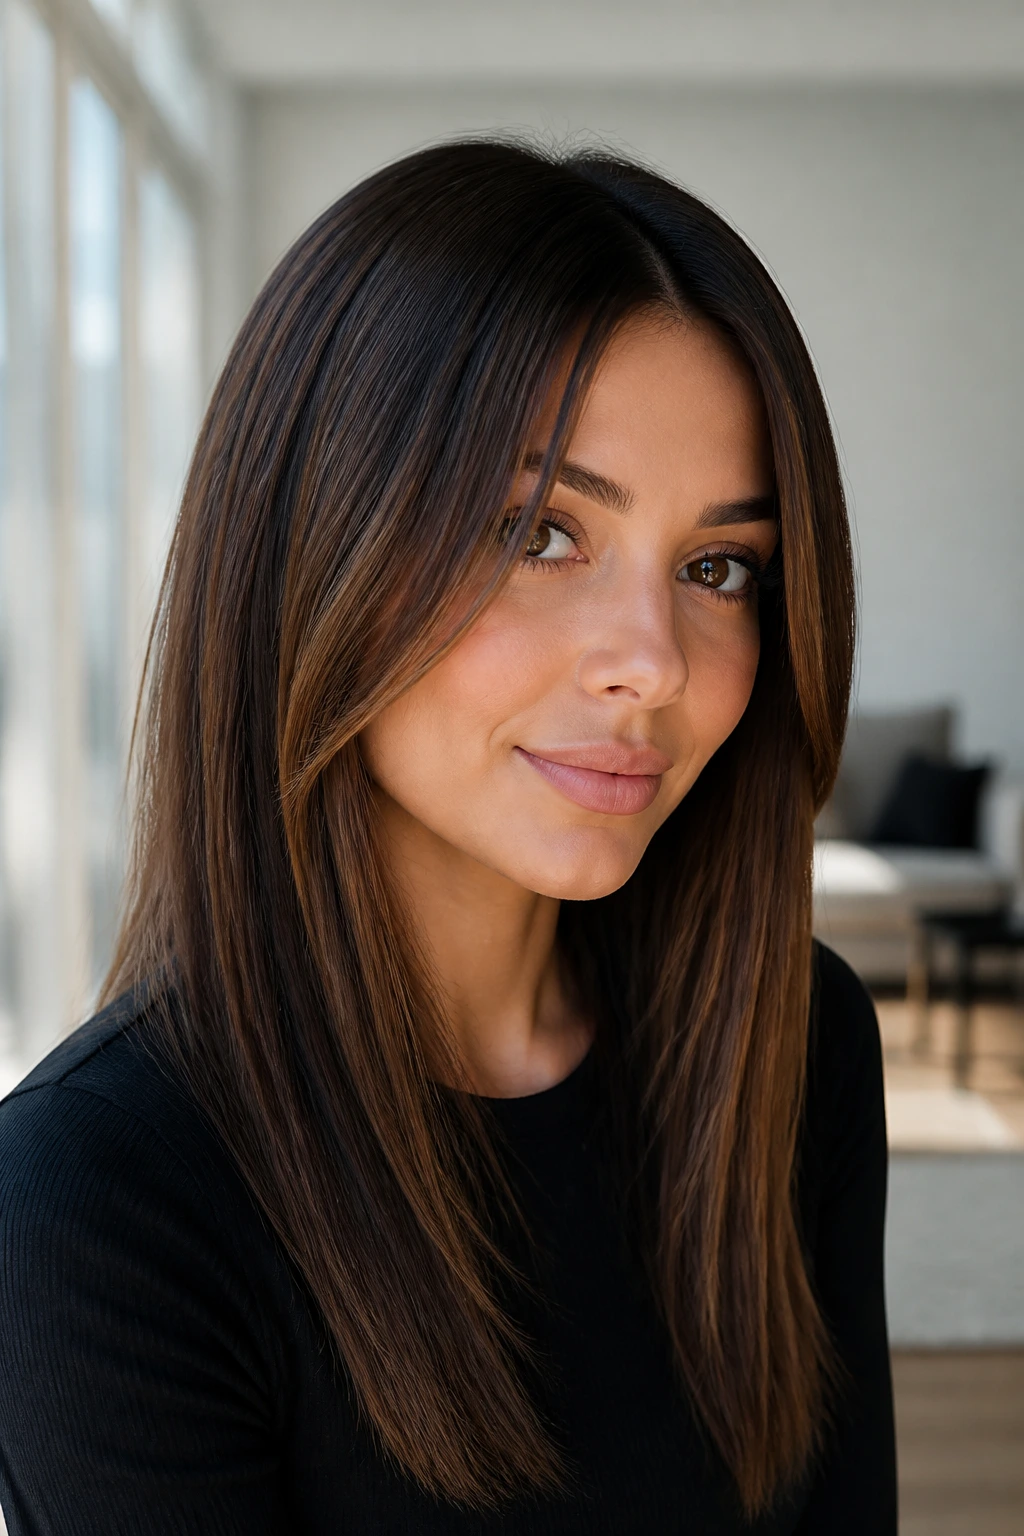
Face-framing pieces are the quiet way to shape straight hair without introducing obvious layers. They sit near the cheekbones or jaw, soften the outline, and keep long straight hair from turning into one continuous sheet.
The best face frame is subtle. You want enough length to move, but not so much that it disappears into the rest of the cut. This is especially useful if your hair is long and very straight, because a little frame near the face gives the style some dimension without disrupting the clean line.
- Best on: Long hair that feels too heavy around the face.
- Ask for: Long pieces that start around the chin or cheekbone, depending on where you want the focus.
- Styling note: Bend the pieces slightly under or away from the face, but do not curl them into obvious waves unless that’s the look you want.
It’s the kind of detail people notice without always naming it. That’s usually a sign it’s working.
19. Sharp Pixie-Bob
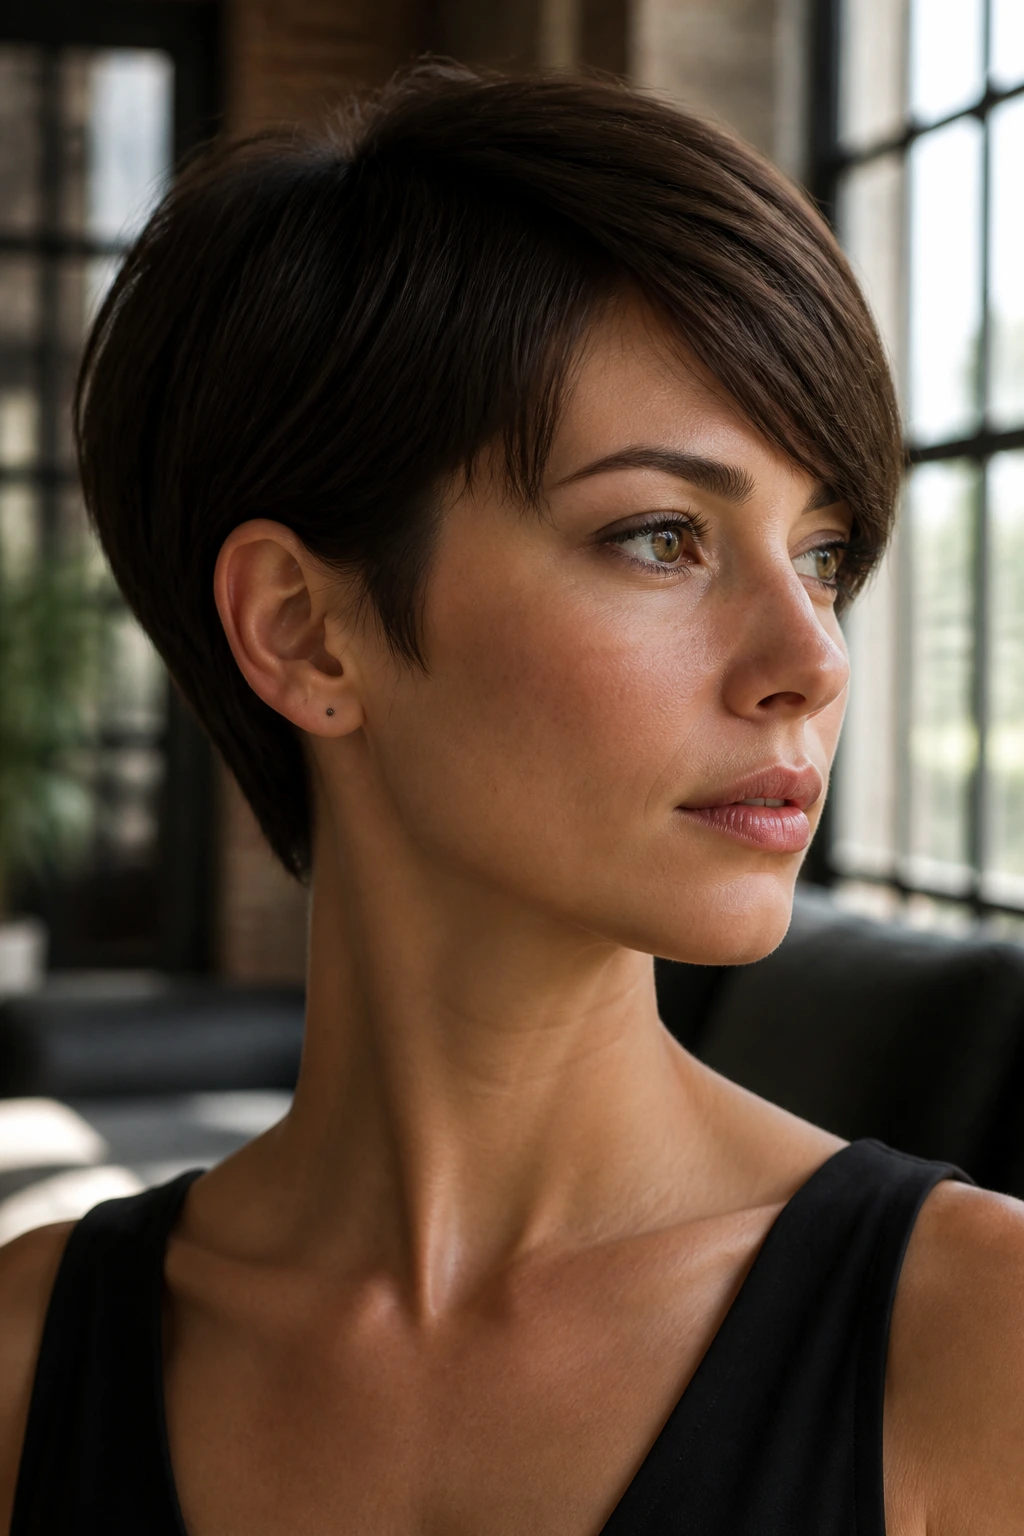
A pixie-bob has the neatness of a short cut with just enough length to stay versatile. On straight hair, the edges can be very crisp, which makes the whole shape feel modern and clean.
This cut needs maintenance more often than a longer bob, but the payoff is a clear line around the ears, nape, and jaw. If the shape is right, it looks neat even with almost no styling. If the shape is off, straight hair exposes that quickly, so the cut has to be precise.
- Best on: Women who want a short shape without going fully cropped.
- Ask for: Clean sideburns, a tidy nape, and a perimeter that doesn’t break apart at the ends.
- Style note: A tiny amount of cream or wax on the ends can help keep the cut from puffing out.
This is one of my favorites for straight hair because the cut itself becomes the style. No filler. Just line.
20. Long Hair With Invisible Layers
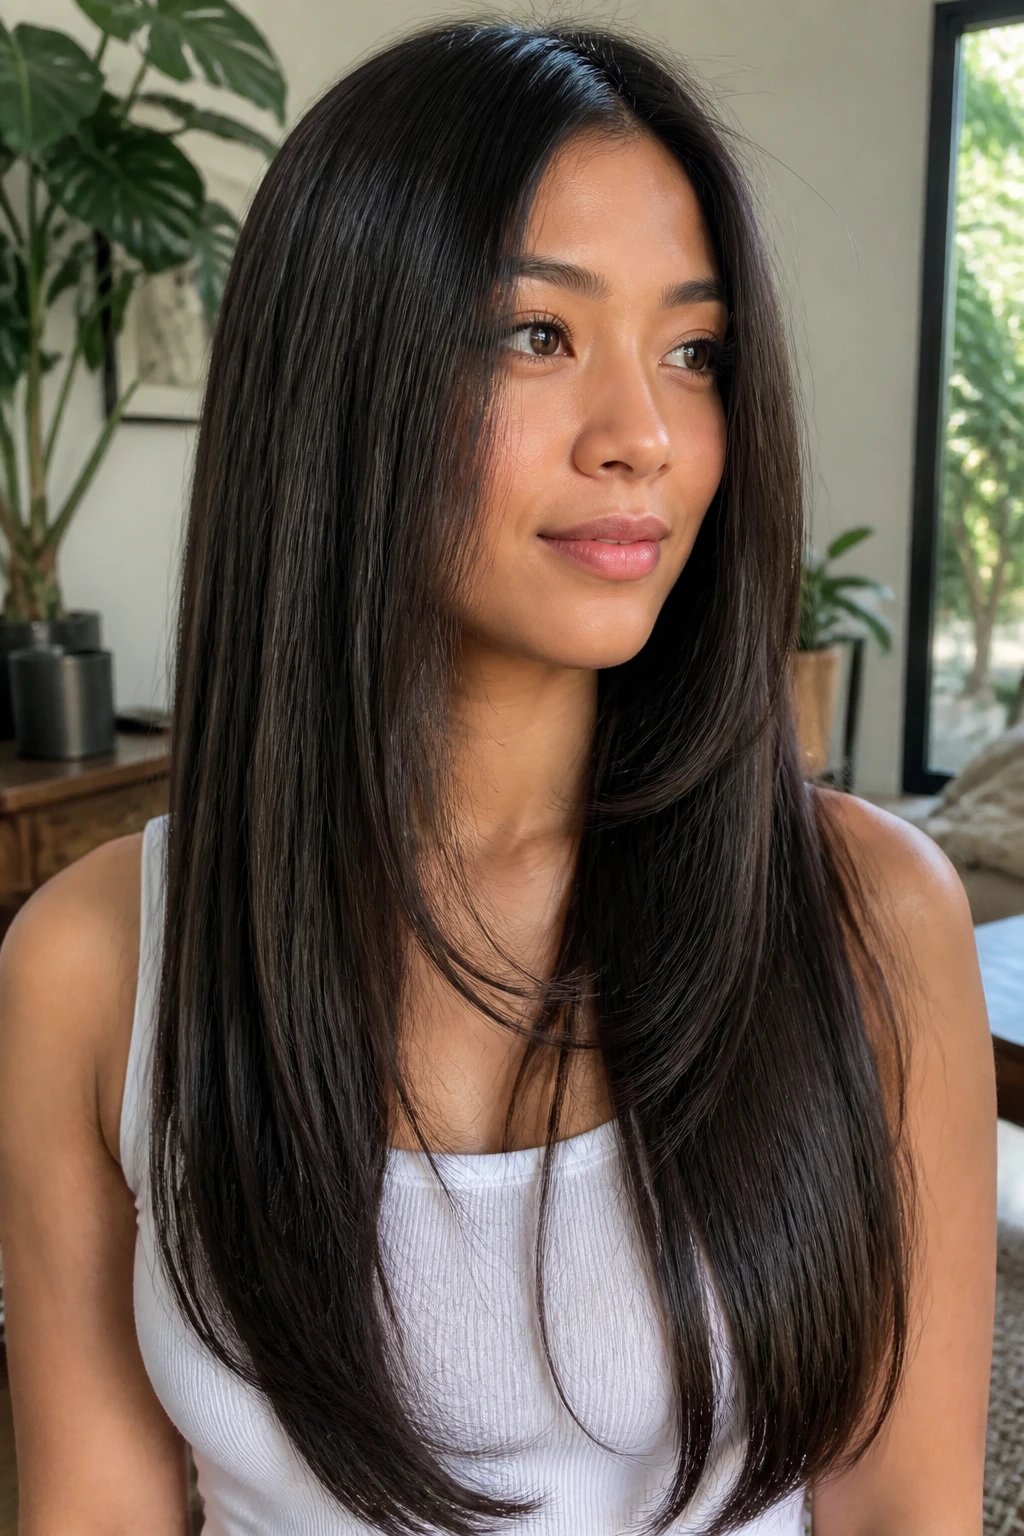
Invisible layers are the answer when you want long straight hair to move, but you do not want the layers to shout. They remove weight from the inside of the cut, which helps the hair lie flatter and swing better.
The point is control. A heavy one-length cut on dense straight hair can feel draggy, especially at the ends. Invisible layers keep the hair from looking like a single thick panel while preserving the long, smooth outline that makes straight hair so striking.
- Best for: Thick, long straight hair that feels too heavy.
- Ask for: Internal shaping or subtle long layers that do not break the perimeter.
- Styling note: A paddle brush and blow-dryer nozzle pointed downward help the layers settle together.
This style is for people who want the drama of length without the weight of it. The cut does the work quietly.
21. Side-Swept Straight Blowout
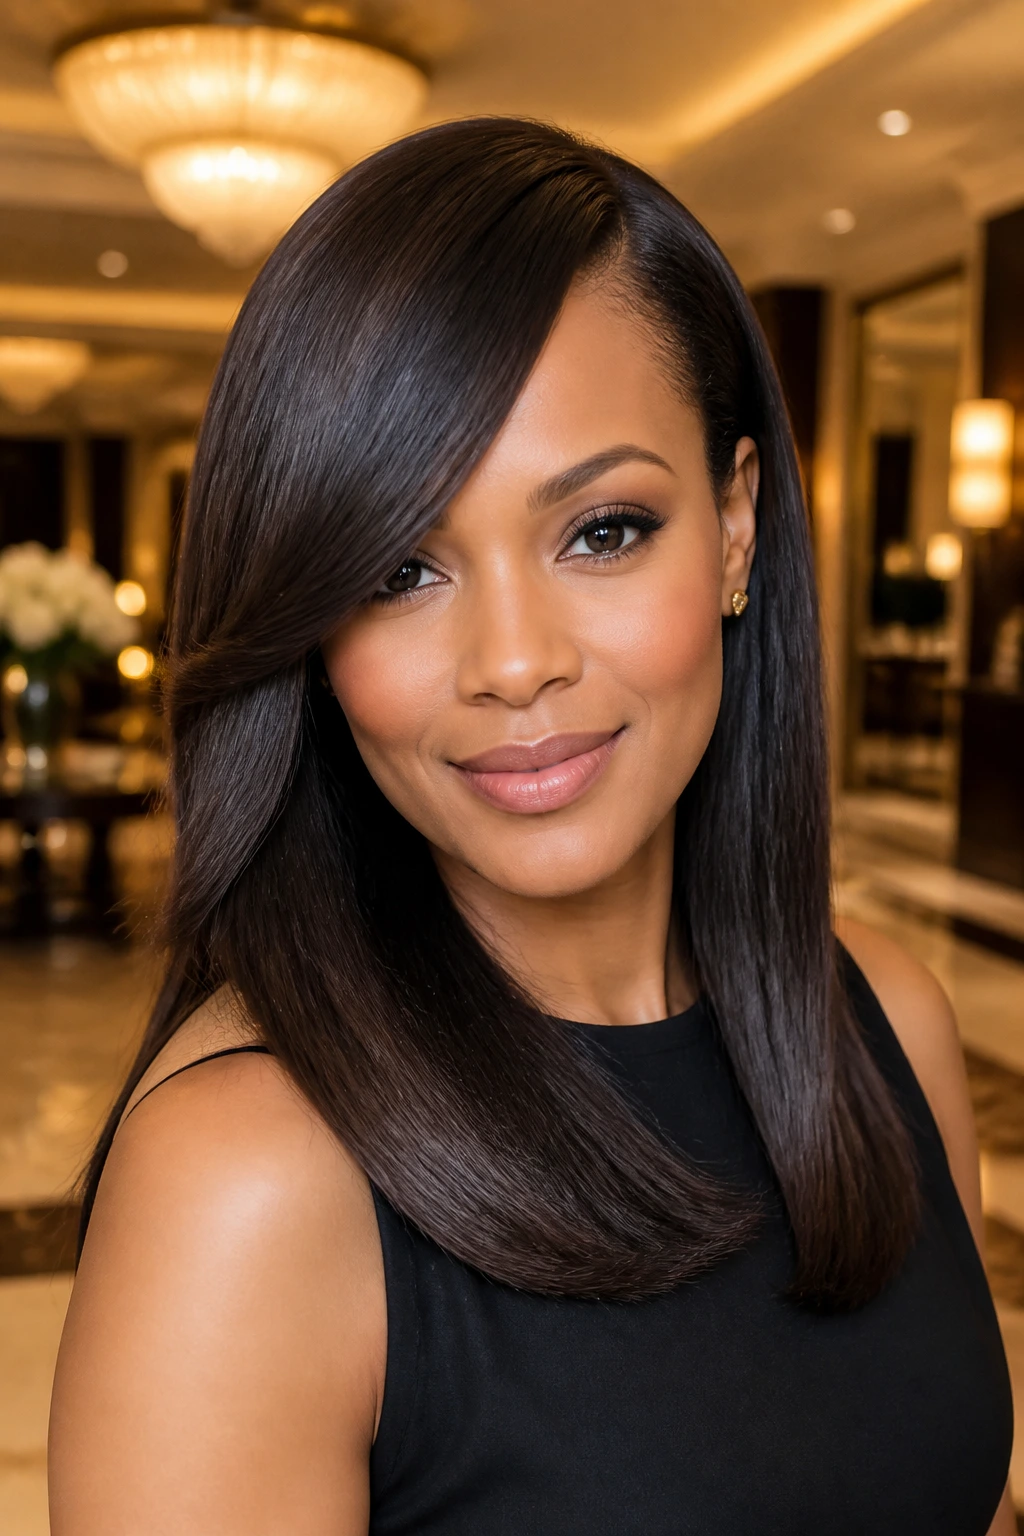
A side-swept blowout gives straight hair movement without curls or waves. The front section sweeps across the forehead, and the rest of the hair stays sleek, which creates a soft diagonal line across the face.
This works because it breaks the symmetry just enough. The style has lift at the root, direction through the front, and a smooth finish everywhere else. It’s a good choice when you want straight hair to feel a little more dressed up than a center-part look.
- Best on: Medium to long hair with some natural body.
- How to style: Direct the front section away from the face with a round brush, then set the direction with a cool shot.
- Tip: A light hairspray at the roots keeps the sweep from falling flat too early.
It feels classic without looking stiff. That’s the sweet spot.
22. Straight Hair With Barrette Rows
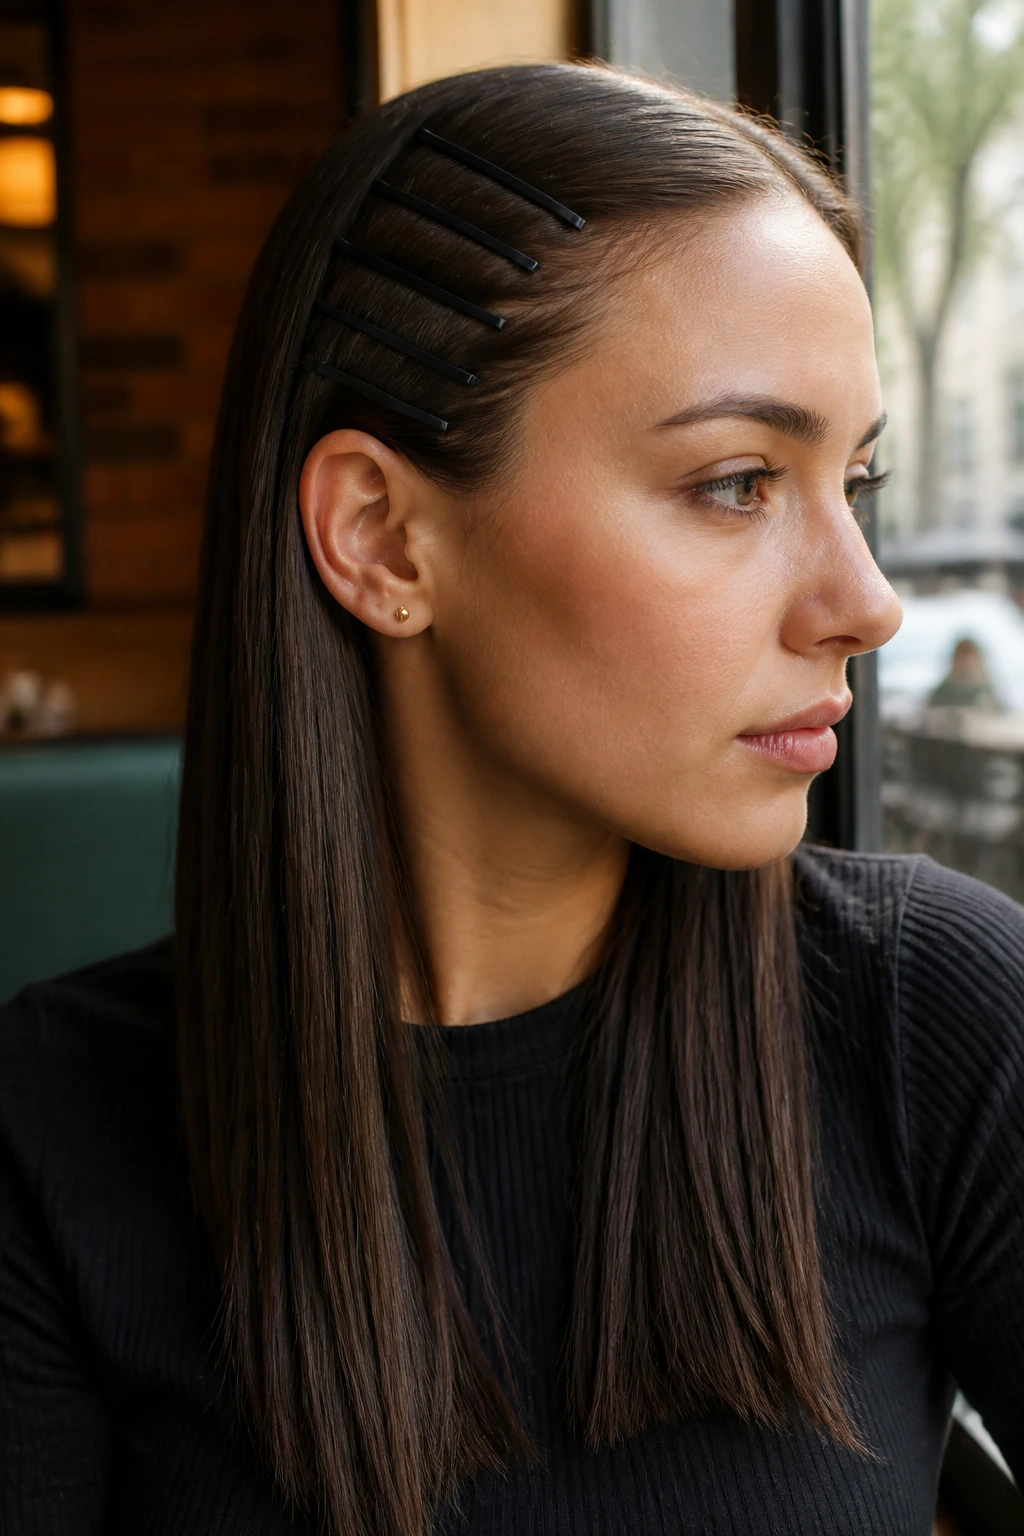
Rows of barrettes can turn a plain straight style into something more graphic. The hair stays smooth, but the accessories give it structure, almost like punctuation marks along the side of the head.
Placement matters here. Two or three barrettes in a clean line work better than a chaotic cluster. Keep the hair itself very straight and polished so the clips feel intentional, not like they were added because the style was missing something.
- Best for: Lob and shoulder-length straight hair.
- How to wear it: Pin one side back with matching barrettes, or create a neat row above the ear.
- Accessory note: Matte metal or simple resin clips usually look cleaner than oversized novelty pieces.
This is a good one when the cut is simple and you want to change the mood without touching the length.
23. Sleek French Twist
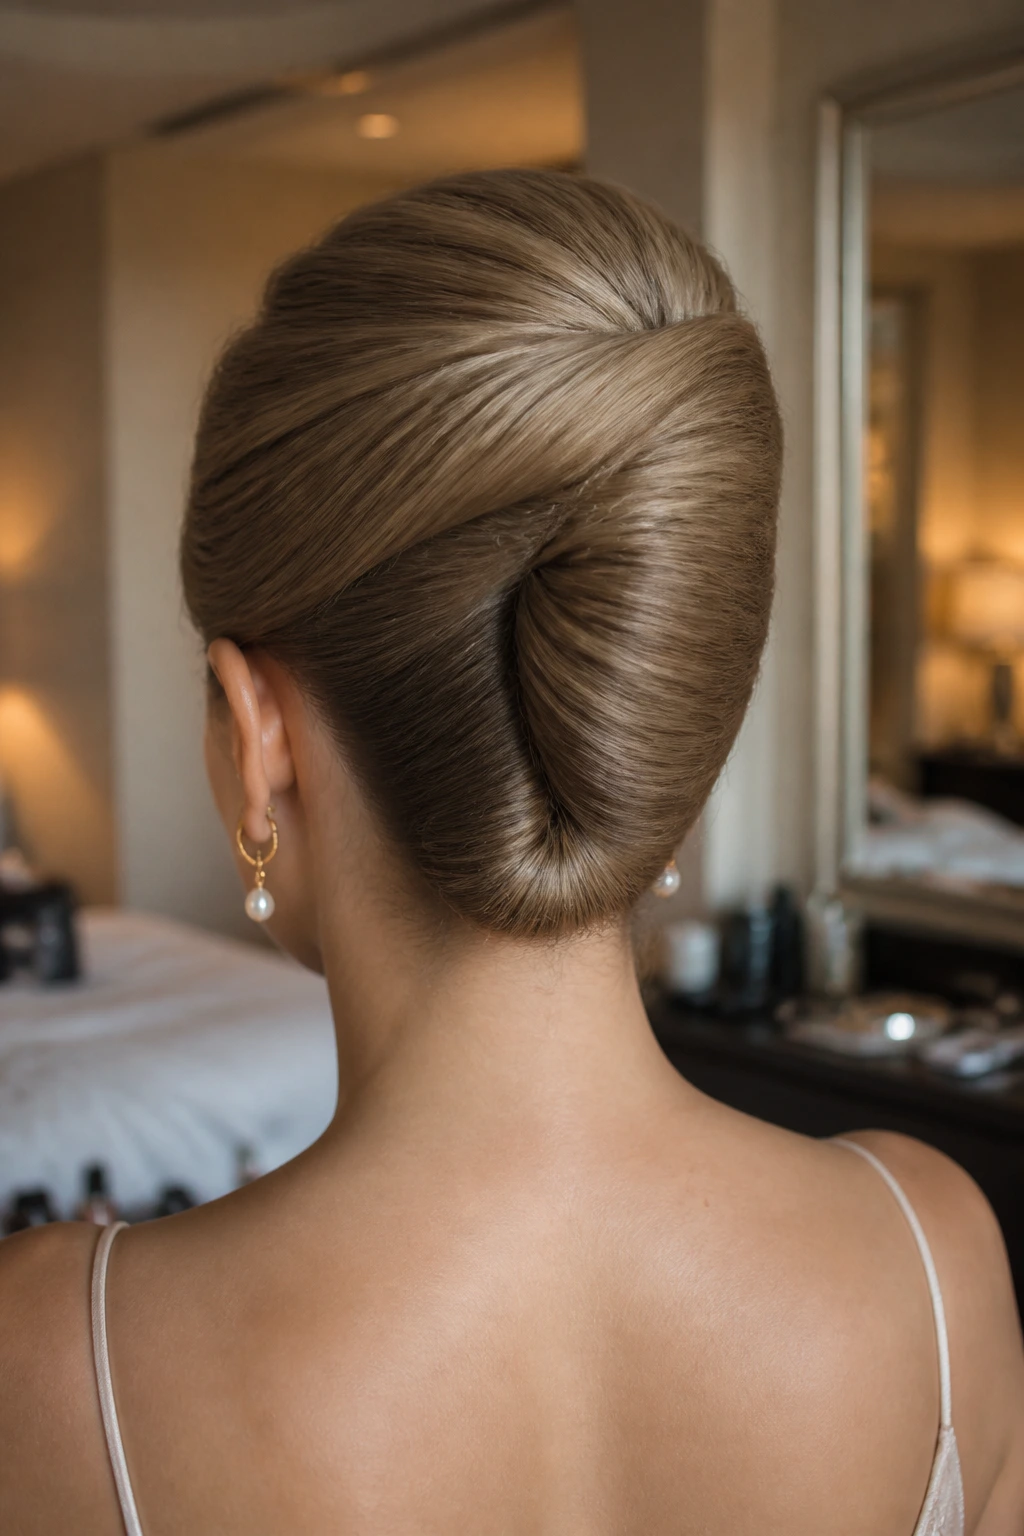
The French twist is one of those styles that looks more complicated than it is, mostly because straight hair lets the lines stay visible. A smooth twist at the back of the head gives you a formal shape with a clean, narrow profile.
The trick is control at the crown and a secure base at the nape. Straight hair can slip, so pins matter. The finished twist should feel tucked in, not puffed out. If a few ends stay hidden inside the roll, that’s exactly what you want.
- Best for: Events, evenings, and hair that is long enough to twist securely.
- Styling note: A little grip at the roots — from dry texture spray or second-day hair — helps the twist hold.
- Keep in mind: Don’t make it too perfect. A tiny bit of softness keeps it from looking severe.
This is one of the strongest sleek styles when the occasion calls for something cleaner than loose hair.
24. Straight Hair With Ribbon Tie
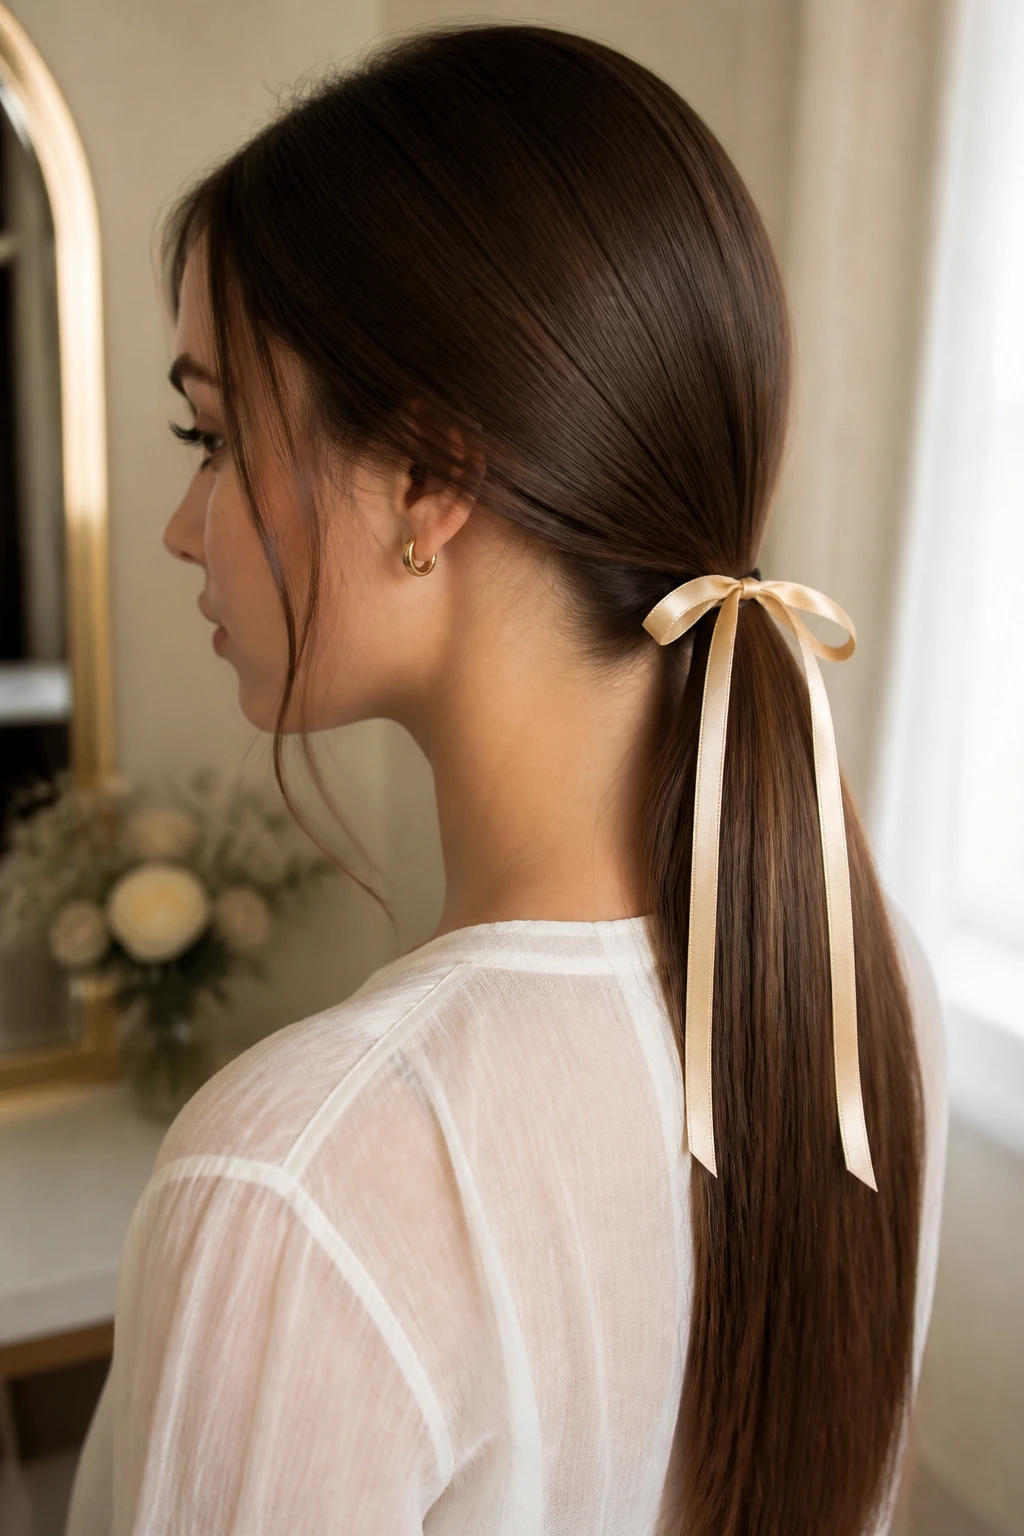
A ribbon tie softens straight hair fast. One simple ribbon at the base of a ponytail or braid changes the tone from strict to gentler without interfering with the hair’s straight line.
The ribbon works best when the rest of the style stays minimal. A low ponytail, a half-up section, or even a loose straight tail can all take a ribbon well. Choose a narrow ribbon if you want the look to stay clean; wide satin can start to dominate the style.
- Best on: Medium to long straight hair.
- How to style: Tie the ribbon over a low ponytail or around the base of a half-up section, then let the ends trail a little.
- Style note: Keep the hair smooth underneath so the ribbon feels like a choice, not a cover-up.
This one is quietly pretty. No fuss. Just one small change.
25. Straight Hair With Flip-Under Ends
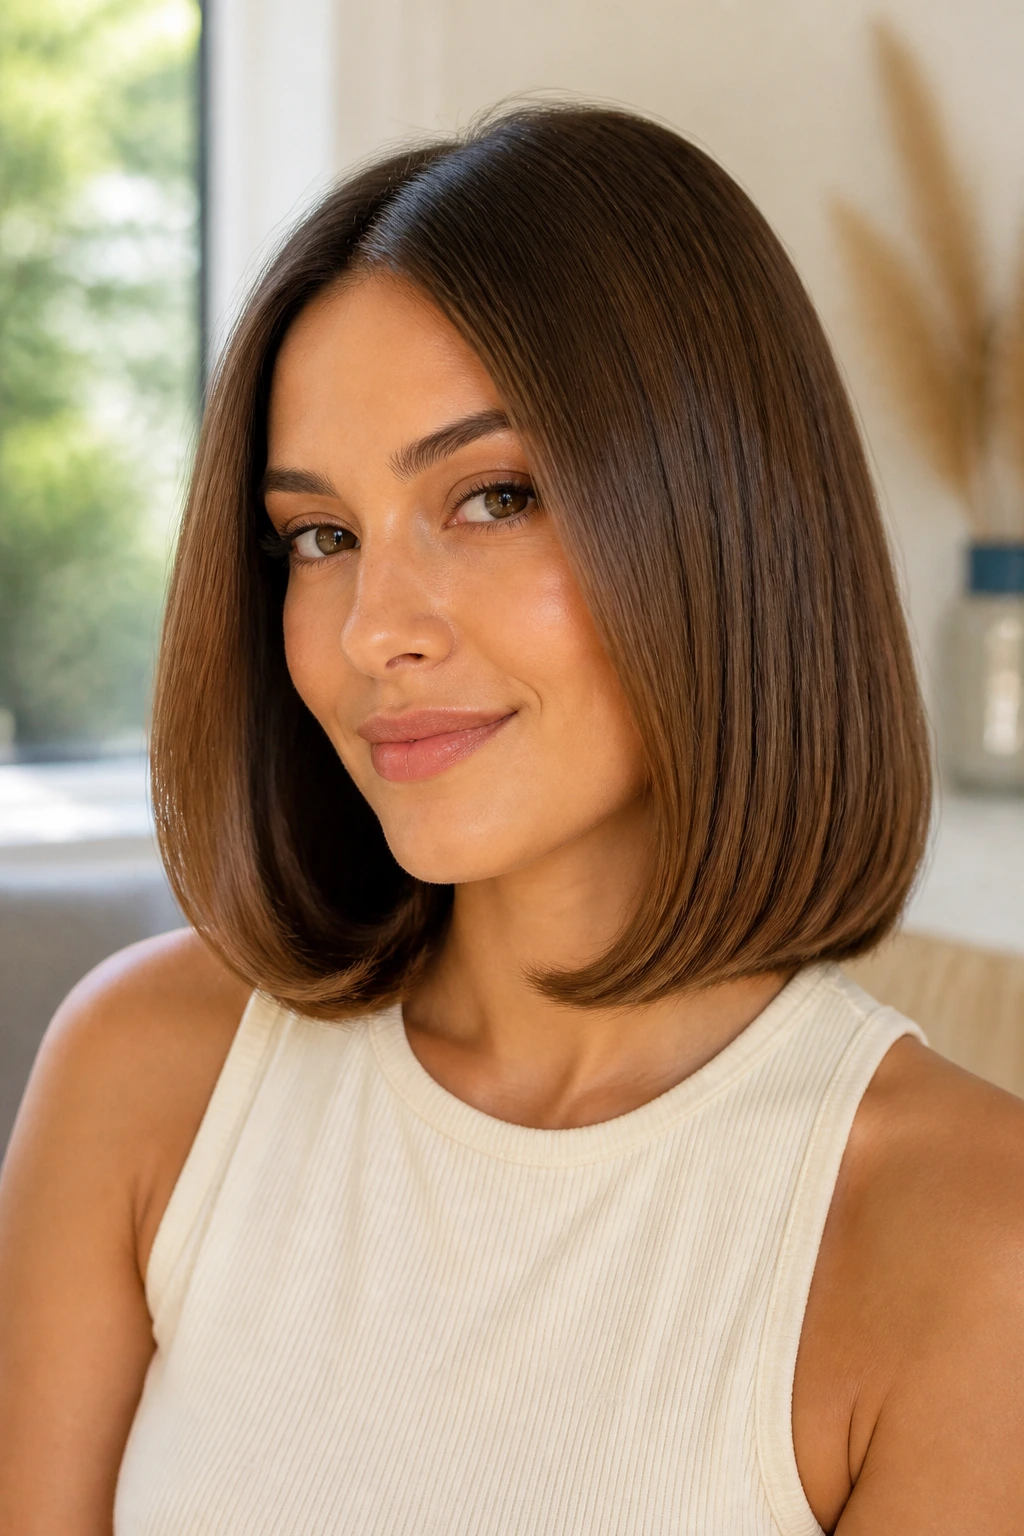
Flipping the ends under is the easiest way to make straight hair look edited instead of accidental. It gives the cut a finished edge, especially on bobs, lobs, and shoulder-length hair that could otherwise hang too flat.
The bend should be gentle. You want the ends to curve in enough to create a shape, not so much that they look curled. I like this most on polished blowouts because it makes the hair feel neat around the jaw and shoulders.
- Best on: Chin-length bobs, lobs, and shoulder-length cuts.
- How to style: Use a round brush or flat iron to curve the last inch or two under.
- Good detail: A light mist of flexible hairspray keeps the bend from collapsing without turning it stiff.
It’s a small move, but it changes the entire line of the hair. Sometimes that’s all straight styles need.
The Tools That Keep the Finish Smooth
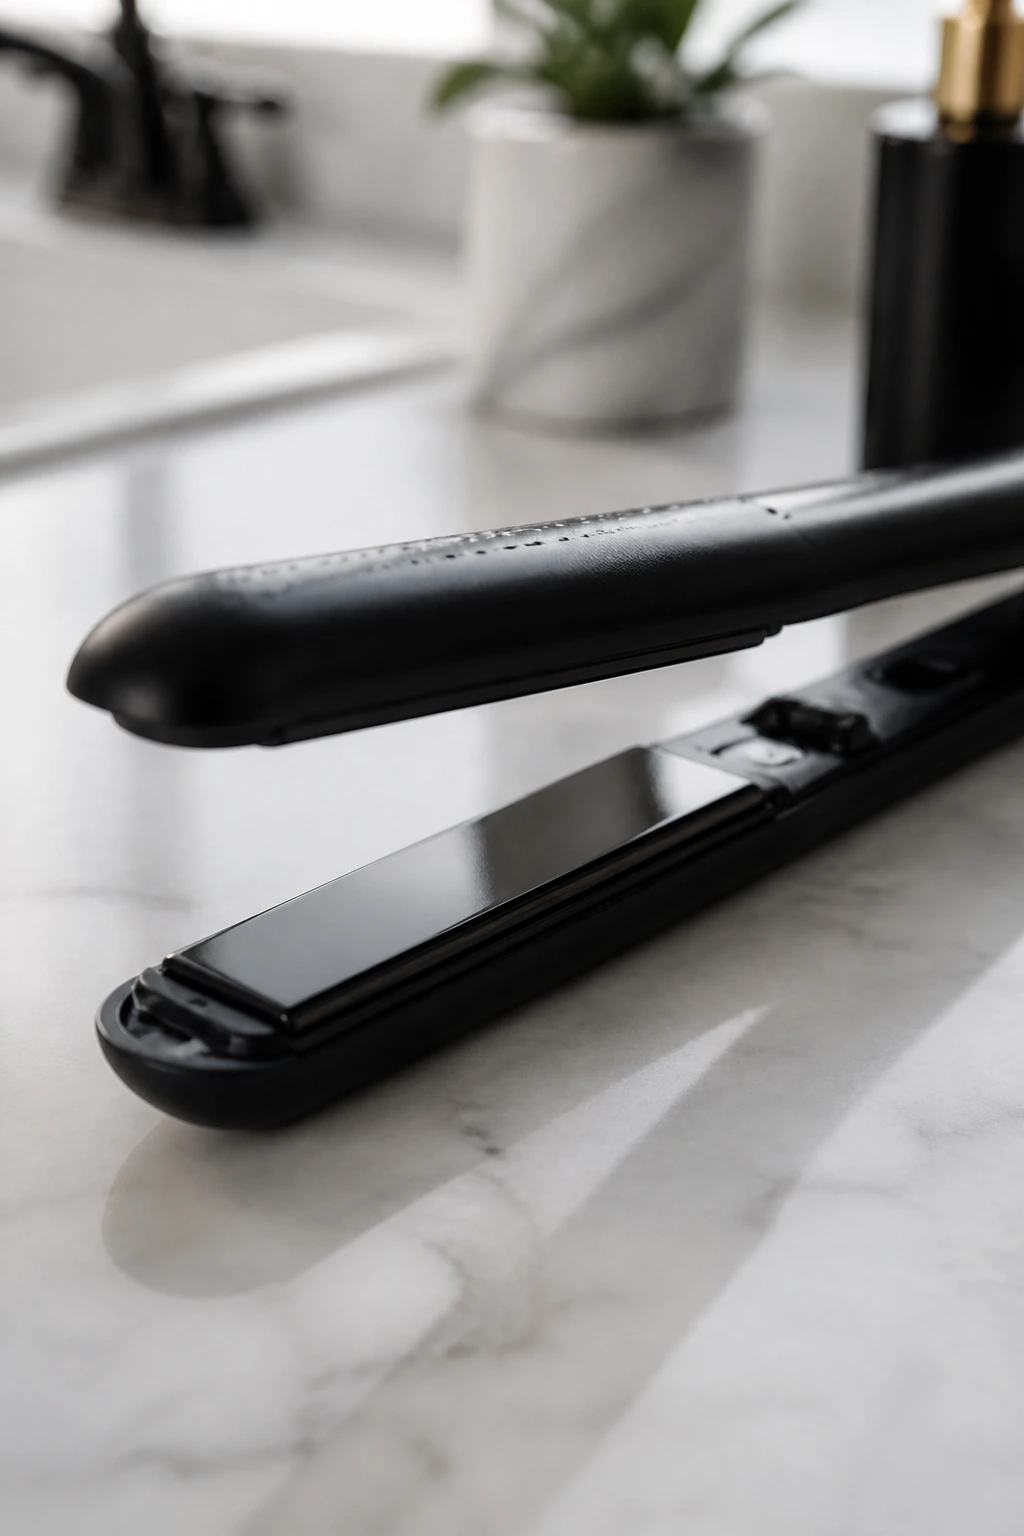
You do not need a drawer full of gadgets to pull off sleek straight hairstyles. A few tools do almost all the work if they’re the right ones.
- Flat iron with adjustable heat: A 1 to 1.25-inch iron is the most useful range for most women’s straight styles; narrower plates help with bangs and short cuts.
- Blow dryer with a nozzle attachment: The nozzle keeps air moving in one direction, which matters when you want the cuticle to lie flat instead of puffing up.
- Paddle brush: This is the everyday workhorse for long straight hair and low ponytails.
- Fine-tooth comb: Best for clean part lines, slicked-back sections, and smoothing product through the crown.
- Boar-bristle or mixed bristle brush: Great for polished ponytails because it moves hair without leaving a lot of broken-up texture.
- Heat protectant: Non-negotiable if you use hot tools; spray or cream versions both work, but the coating should feel light, not sticky.
- Smoothing serum or oil: Use a tiny amount on mids and ends only. If it touches the roots, the style starts to collapse.
- Strong-hold but brushable hairspray: The best versions hold flyaways down without turning the hair crunchy.
- Sectioning clips: These save time and help you keep the crown from overheating while you work on the lower sections.
- Satin pillowcase or scarf: Not glamorous, but it makes a huge difference overnight.
Smart Product and Shopping Tips for Straight Hair
If your goal is a sleek finish, shop for products that help the hair lie flat instead of loading it with weight. That’s the whole trick.
For heat protectant, look for something that says it guards against hot tools and feels light in the hand. Heavy creams can be fine on coarse hair, but on fine hair they tend to flatten the root and make the style collapse by lunchtime. If your hair gets frizzy fast, a product with silicone ingredients like dimethicone or amodimethicone often helps smooth the cuticle without making the hair rough.
Choose your smoothing product by texture, not by hype. Lightweight serum for fine or medium hair. Creamier formula for thicker hair or natural texture that wants more control. If the bottle says “shine” but gives the hair a slippery, coated feel after one pump, that’s too much for most sleek styles.
For hairspray, buy one that stays brushable. The point is to tame flyaways, not to freeze every strand in place like plastic. A heavy shell of spray can crack if you move the hair later, and that ruins the finish.
One more shopping note: if you only buy one hot tool, buy the one you’ll actually use. For a lot of people, that’s a flat iron with rounded edges and adjustable temperature. It handles bangs, flips, bends, and smooth passes better than a tool that only does one thing.
How to Brief Your Stylist Without Guessing
A good straight style starts in the chair, not in your bathroom mirror. The words you use matter because “straight” can mean four different things to four different stylists.
Say what you want the perimeter to do. If you want it blunt, say blunt. If you want movement but not obvious layers, ask for invisible layers or internal shaping. If you want the front to frame the face, name where you want that framing to begin — chin, cheekbone, or jaw.
Bring two photos if you can. One front view and one side view. The side view matters more than people realize, because a sleek cut lives or dies by the line at the nape, the crown, and the ends. A picture from only the front can hide a lot of bad shape.
If you want a ponytail style to feel cleaner, ask for softness around the hairline and tell your stylist whether you like a strong middle part or a side part. If you want a bob, ask whether the edge should sit straight, tucked under, or slightly beveled. Those words sound small, but they change the whole result.
The Little Habits That Keep Straight Styles Sharp
Root control matters more than end shine. That’s the part a lot of people miss. A style can have glossy ends and still look messy if the crown is lifted in the wrong places or puffed with too much product.
Use less product than you think. One pump of serum can turn into three in a hurry, and then the hair starts looking greasy rather than sleek. Put the product on your palms first, warm it up, and press it into the mids and ends.
Work in sections. Straight hair may look simple, but the smoothest results usually come from smaller passes, not huge sloppy ones. Whether you’re flat ironing bangs or smoothing a ponytail, sectioning keeps the line even.
Respect the temperature. Fine hair does not need the same heat as coarse hair. Too much heat gives you that fried, fuzzy end texture that looks dry even when the hair is clean. Use the lowest temperature that gets the job done.
End with a cool pass. After heat styling, let the hair cool in place. That tiny pause helps the shape hold instead of collapsing the second you move.
Common Mistakes That Flatten the Line
-
Using too much oil at the roots: The hair starts separating and looking heavy instead of sleek. Fix it by keeping shine products on the mids and ends only.
-
Ironing hair that’s still damp: It smells wrong, sounds wrong, and damages the cuticle fast. Dry the hair fully first, then flat iron.
-
Skipping the part-line prep: A messy part makes even a good cut look unfinished. Use a tail comb and clean it before you do anything else.
-
Choosing too many short layers for a blunt style: The silhouette turns choppy and the ends lose that strong line straight hair needs. Ask for subtle shaping instead.
-
Over-teasing the crown: You get lift, sure, but you also get that clouded texture that fights the whole sleek idea. If you need height, create it with blow-drying and direction, not backcombing.
-
Ignoring nighttime friction: Cotton pillowcases rough up the cuticle fast. A satin pillowcase or wrap keeps the style cleaner for the next day.
Variations for Different Hair Textures and Schedules
Fine-Hair Glass Finish
Use lightweight heat protectant, a little root-lifting spray, and a lower serum dose than you think you need. Fine hair looks sleek fastest, but it also gets weighed down fastest, so product restraint matters.
Thick-Hair Smooth Sheet
Section the hair into smaller panels and use a paddle brush with the flat iron. Thick straight hair often needs more passes, but the answer is not hotter heat every time; it’s cleaner sectioning and slower movement.
Curly-Hair Stretch Version
Blow-dry with tension first, then flat iron only the last pass. This keeps the finish smoother without spending forever on the hot tool, and it helps the style last longer in humid air.
Short-Hair Clean Crop
Swap the big iron for a smaller one and focus on the perimeter. Short straight styles live or die by the edges around the ears and nape, so those spots deserve more care than the top.
Low-Heat Night-Out Version
If you don’t want to style from scratch, refresh the hair with a mist of water, a touch of smoothing cream, and a quick pass with a brush and blow-dryer nozzle. It is faster than redoing everything and usually looks fresher.
Keeping the Style Smooth Between Washes
Straight styles often hold better on day two than day one, which is one reason I like them so much. The roots have a little grip, the hair moves less, and the shape can settle into something cleaner.
At night, protect the hair with a satin pillowcase or a loose wrap. If the style is a ponytail or bun, use a soft scrunchie instead of a tight elastic so the hair doesn’t develop a dent that takes forever to smooth out. For loose styles, tuck the ends gently behind you rather than sleeping on them twisted.
Dry shampoo can help, but use it with some discipline. Aim it at the roots from 8 to 10 inches away, let it sit for a minute, then brush it through. If you spray too close, you get a chalky patch instead of lift.
Most sleek straight styles are best worn for 1 to 3 days, depending on texture and weather. After that, the roots usually need a refresh, especially if you’ve used serum or hairspray. The good news is that straight hair often resets quickly with a quick brush-out and a small touch of heat.
Questions People Actually Ask About Sleek Straight Hair
How do I keep straight hair from looking flat at the roots?
Start with the part and the blow-dry direction. Lift the roots slightly while drying, then let them cool before you touch them. If you add product, keep it off the scalp.
What flat iron temperature should I use?
Fine hair usually behaves around 300°F to 325°F, while thicker or coarser hair may need 350°F to 375°F. Go lower first and only increase if the hair isn’t smoothing in one or two passes.
Can I wear sleek straight styles if my hair is naturally wavy or curly?
Yes, but your prep matters more. A tension blow-dry first cuts down on extra flat-iron passes, which keeps the hair smoother and reduces the dry, puffy ends that come from overworking it.
Why does my straight hair frizz after I style it?
Usually one of three things: too much heat, too much humidity, or too much product near the root. Check your section size and product amount before you blame the cut.
Are blunt cuts or layers better for sleek styles?
Blunt cuts look sharper and denser, while invisible layers help thick hair move without losing the smooth outline. If your hair is fine, blunt often wins. If it’s heavy, subtle layers can save the shape.
How do I stop flyaways without making the hair greasy?
Use a light hairspray on a brush or a clean toothbrush, then smooth the flyaways down. A tiny amount of serum on the palms can help too, but keep it away from the crown.
Do these styles hold up in humidity?
Some do better than others. Ponytails, buns, and bob-length cuts usually stay neater than long loose hair, but the real difference comes from anti-humidity spray and not overloading the hair with oil.
How often should I trim straight hair to keep it crisp?
Short bobs may need trims every 6 to 8 weeks if you want the edge to stay clean. Longer cuts can stretch farther, but once the ends start looking see-through or ragged, the sleek effect goes missing.
A Clean Line That Still Feels Like You
The best sleek straight hairstyles for women are not about making hair look severe or over-styled. They’re about line, balance, and restraint. A clean center part, a crisp bob edge, a ponytail that sits where it should — those small choices do more than a pile of product ever will.
What I like most about straight styles is how honest they are. If the cut is good, they reward you. If the part is clean, they show it. If the ends are ragged, they show that too. There’s nowhere to hide, and that’s part of the appeal.
Pick one shape that matches how you want your hair to fall, keep the finish controlled, and don’t crowd it with too many extras. A sharp straight style can be quiet and still feel finished. That’s the whole point — and it’s a good place to start the next time you want your hair to look deliberate without trying too hard.
