



A good messy bun for little girls has to survive toast crumbs, backpack straps, and a last-minute declaration that the bow is “wrong.” Neatness matters less than comfort here. If a style looks polished but gets yanked out at lunch because the crown feels tight, it has failed the only test that counts.
That’s why the best messy buns are a little sneaky. They start with a clean section, a soft elastic, and enough looseness around the hairline to keep the scalp happy, then they get tugged and pinned until they look like they were done in a hurry on purpose. On a child, that balance matters more than any fancy braid. Too smooth and the bun slips. Too tight and you hear about it all morning.
These 27 messy buns for little girls cover the whole range: quick school-day knots, ribboned party buns, curly-hair versions, short-hair shortcuts, and a few styles that look fussy but are really one or two extra twists. The useful part is not the prettiness. It’s knowing which shape matches which hair type, which one holds through recess, and which one lets you fix the flyaways without starting over.
Why These Messy Buns Earn Their Keep
-
Fast enough for real mornings: Most of these styles can be built in 3 to 8 minutes once the hair is brushed and lightly misted.
-
Kinder on small scalps: The bun shapes rely on soft tension and a few anchoring pins, not the hard pull that makes kids complain by second period.
-
Better on imperfect hair: Slightly lived-in hair, second-day hair, or hair with a little texture often grips better than freshly washed, slippery strands.
-
Easy to dress up or down: The same bun can stay plain for school and then get a ribbon, bow, or sparkly clip for a birthday after lunch.
-
Works across hair types: Straight, wavy, curly, thick, and fine hair all have a version here that can hold without turning into a battle.
1. The Classic Topknot Messy Bun
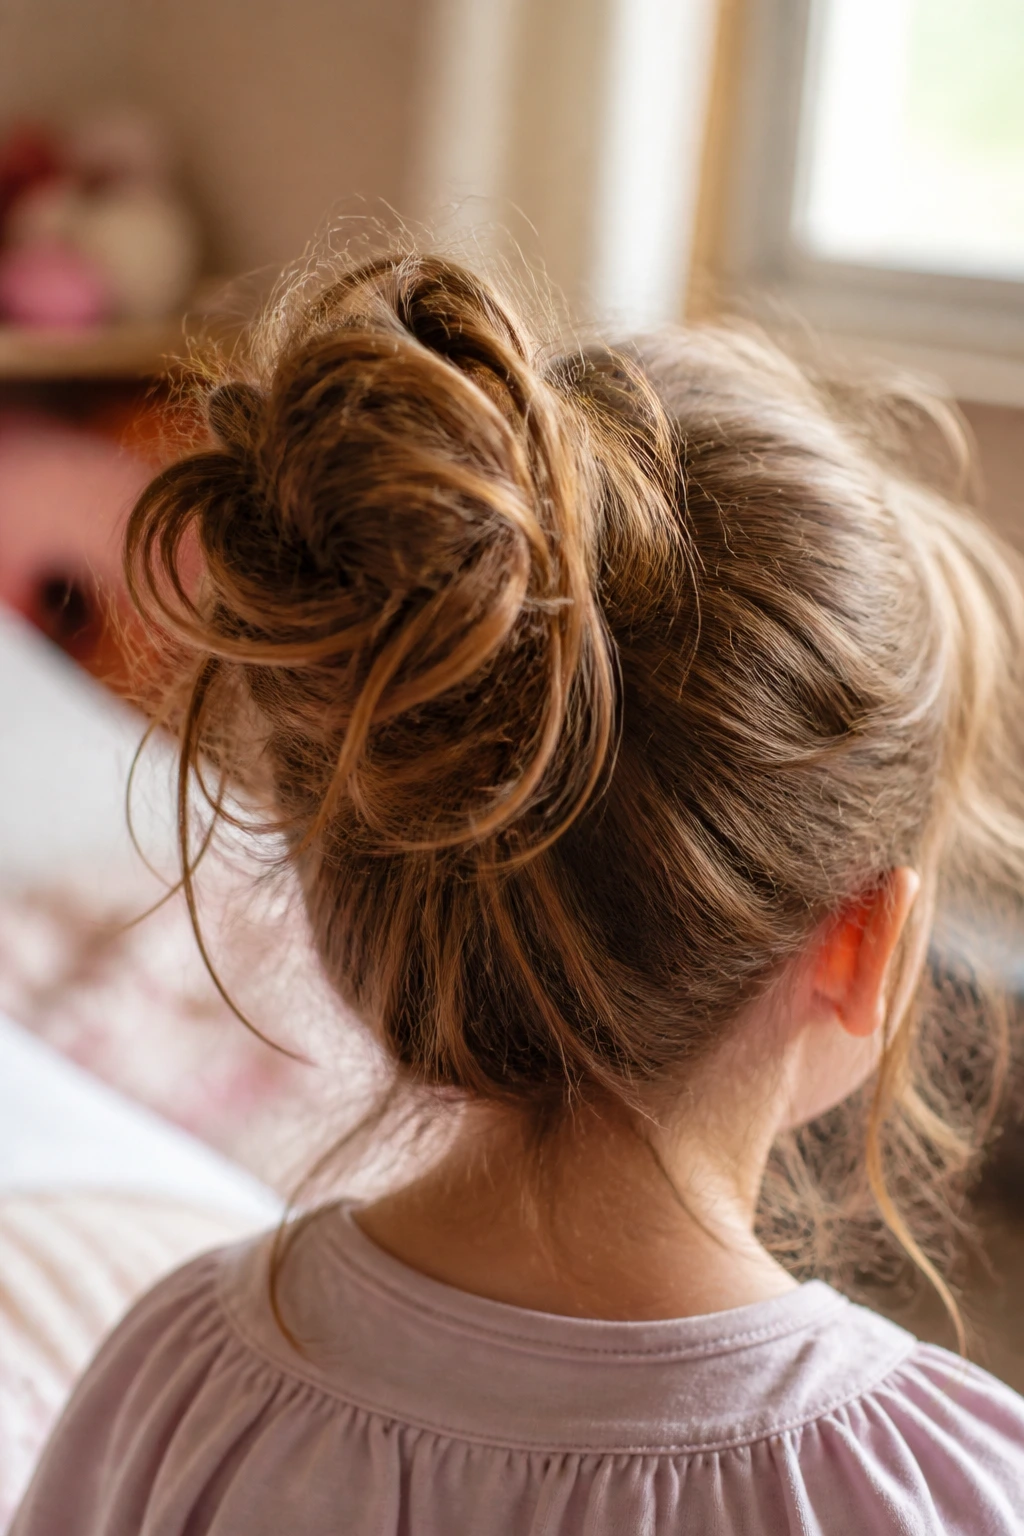
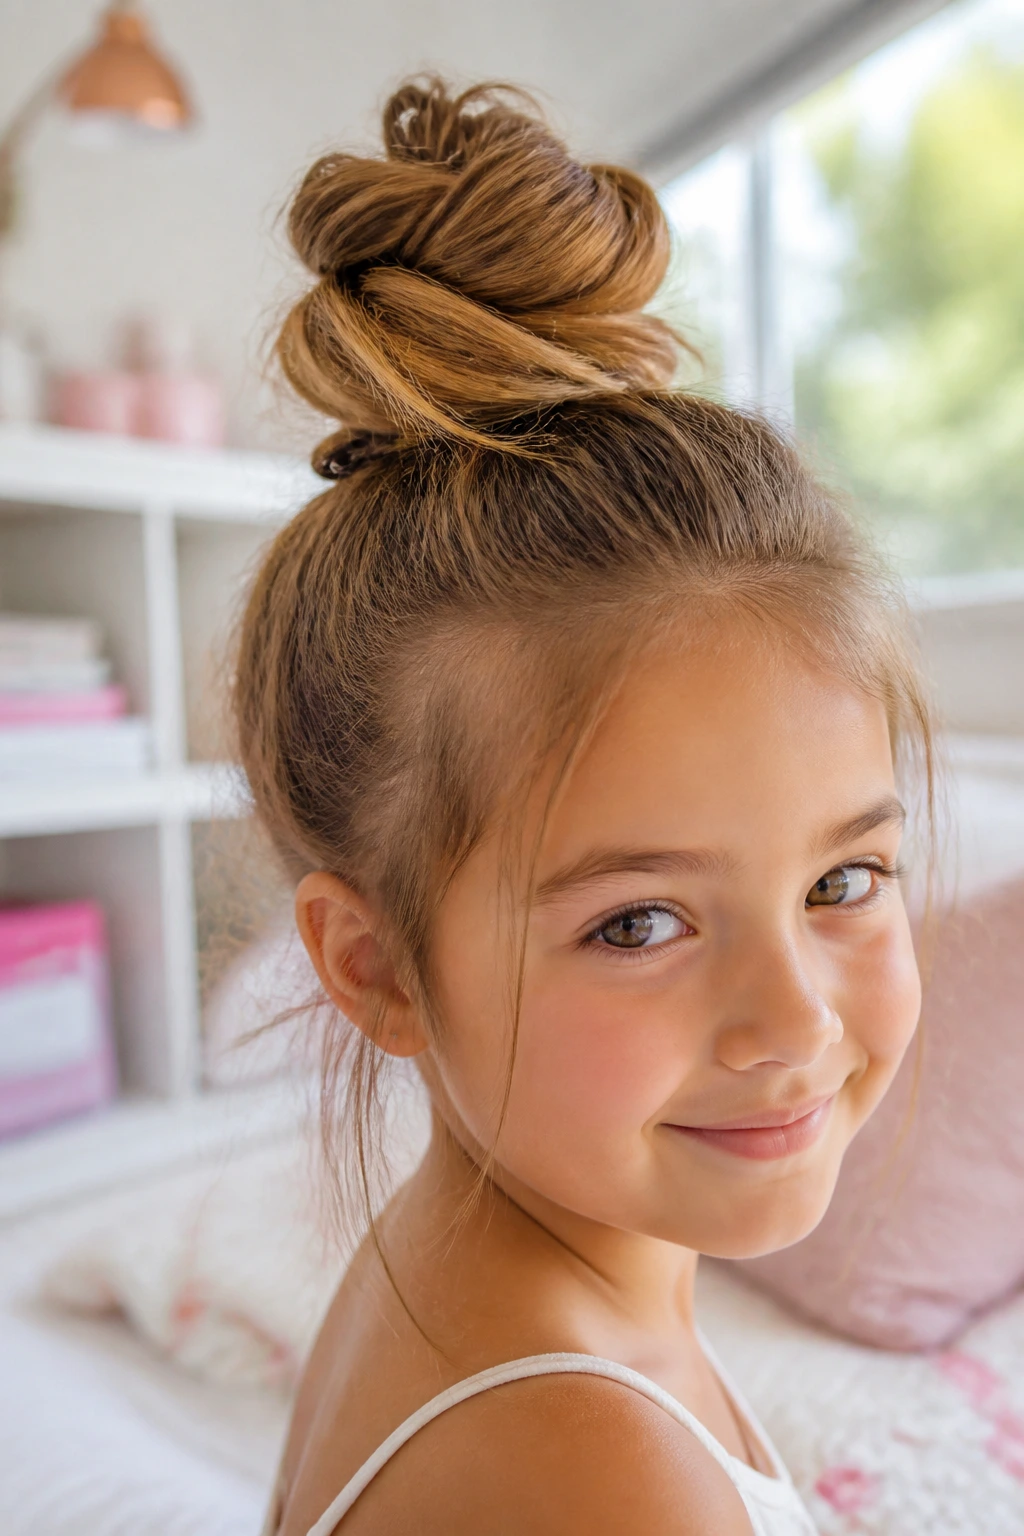
A high topknot is the first messy bun most parents reach for, and for good reason: it keeps hair off the face, sits high enough to stay clear of collars, and still looks a little playful when the ends stick out on purpose. On little girls, I like it best with a soft crown and a few loose pieces near the temples. Hard, scraped-back topknots can look severe.
Why It Works:
The high placement keeps the bun away from jacket hoods, car-seat straps, and little hands tugging at the nape. A slightly loose twist gives the bun that soft, airy shape instead of a tight little ball.
Key Ingredients:
- 1 soft elastic
- 2 to 4 bobby pins
- 1 spray bottle with plain water or detangling mist
- 1 small bow or clip, optional but useful
Quick Steps:
- Brush hair upward toward the crown and mist the top half lightly if the hair is dry or frizzy.
- Gather the hair as if making a high ponytail, but stop a finger-width above the crown so the style doesn’t sit painfully tight.
- Twist the ponytail once or twice, wrap it around the base, and tuck the ends through the elastic or pin them in place.
- Tug the outer edge of the bun with both thumbs to make it look fuller, then smooth the hairline with your palms.
Equipment for This Style:
- Soft-bristle brush
- Spray bottle
- Small mirror
- Rounded bobby pins
How to Wear It:
This sits nicely for school, errands, and family photos if you keep the crown smooth. Let a few wisps fall free for a softer look, or tighten the shape with one extra pin for a neater finish.
Pro Tips for This Style:
- Use a second elastic if the hair is thick and the first loop feels loose.
- Put the bun slightly off-center for a less stiff look.
Variations on This Style:
- Ribbon-Crown Finish: Wrap a skinny ribbon around the base after the bun is pinned.
- Low-Drama Topknot: Sit the bun one inch lower than the crown for a softer profile.
Common Mistakes to Avoid with This Style:
- Pulling the ponytail too tight: The bun may hold, but the child will notice. Leave a little give at the hairline.
- Skipping the final tug: A flat topknot looks like an accident; loosen the outer loops so it looks intentional.
2. Two Mini Space Buns
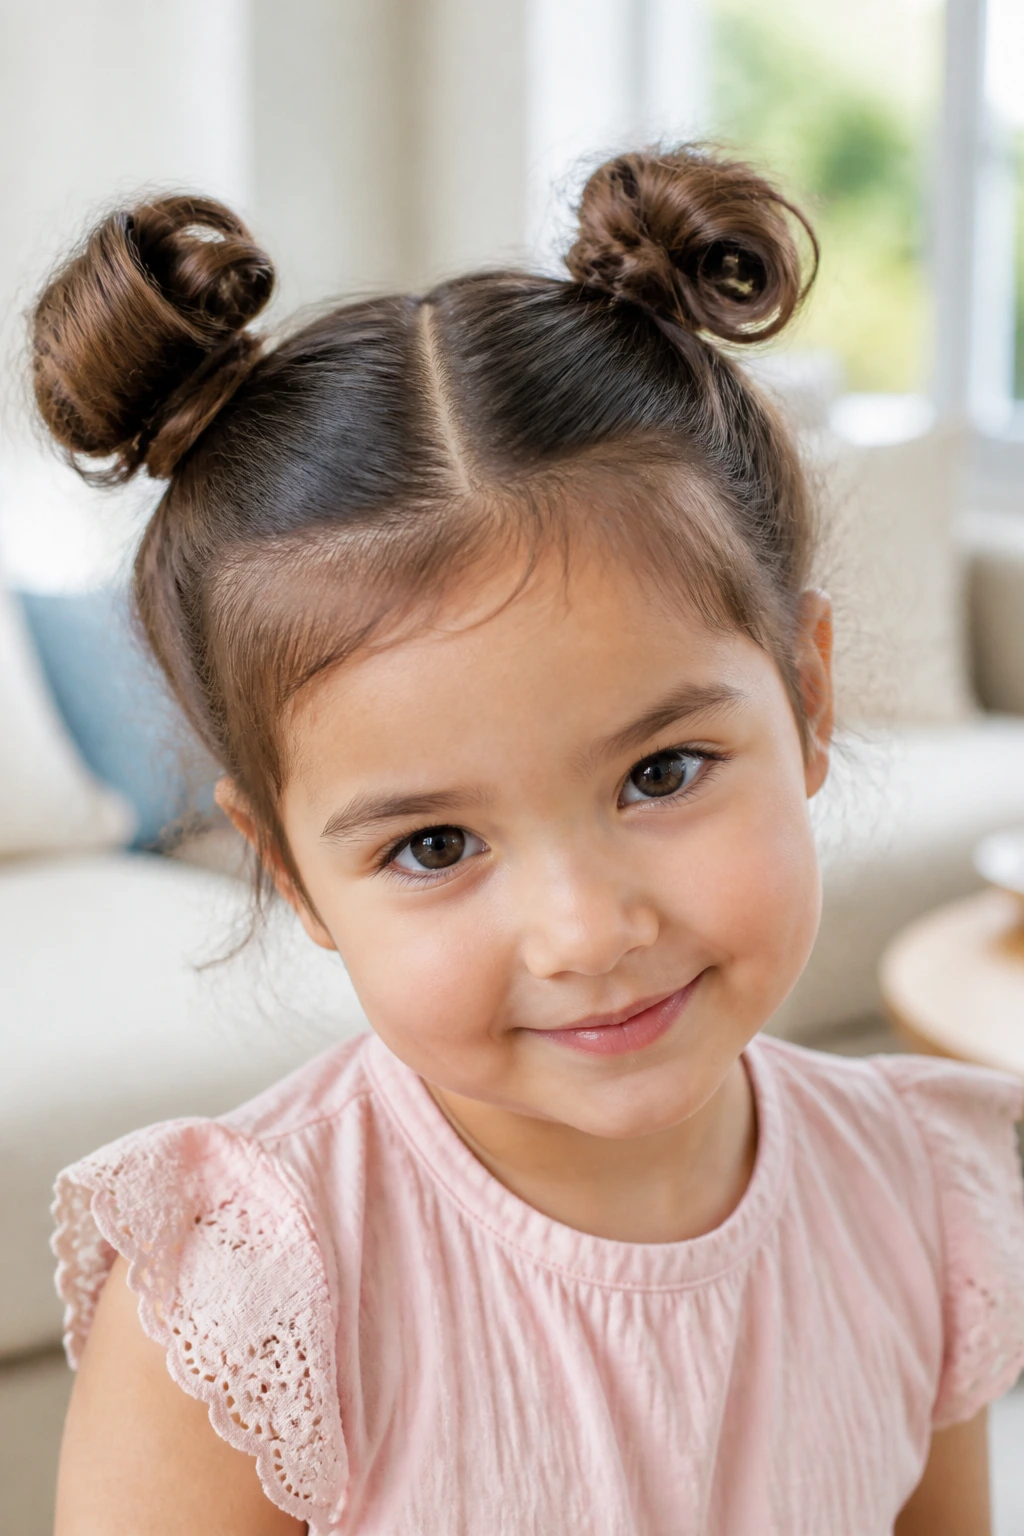
Space buns are the style little girls usually grin at before you even finish the first part. They feel playful, they balance out short layers well, and they stay put because each bun has less hair to hold. I like them best when the part is clean but the buns themselves are soft and a little uneven.
Why It Works:
Dividing the hair into two sections reduces weight, which helps fine hair and shoulder-length cuts stay secure. The symmetry also makes this style forgiving; if one bun is a touch larger, the look still reads as deliberate.
Key Ingredients:
- 2 soft elastics
- 4 to 6 bobby pins
- 1 rat-tail comb for a clean center part
- A few tiny clips or bows, if the child wants sparkle
Quick Steps:
- Part the hair straight down the middle from forehead to nape.
- Brush each side up to the place where you want the buns to sit, usually just above the ears.
- Twist each side into a small bun, secure with an elastic, and pin the loose ends flat.
- Pull each bun outward slightly so it looks puffy rather than tight.
Equipment for This Style:
- Rat-tail comb
- Soft elastics
- Bobby pins
- Small hand mirror
How to Wear It:
This is a good pick for playdates, dance class, and any day that needs a little extra energy. Add tiny bows at the base if you want the buns to read more polished than sporty.
Pro Tips for This Style:
- Make the part before brushing the hair up; clean sections are easier when the hair is still still.
- If one side slips, anchor it with a crossed pair of pins instead of adding more tension.
Variations on This Style:
- Curly Space Buns: Leave the curls intact and gather by hand instead of brushing through them.
- Ribbon-Tied Twins: Tie each bun with a different ribbon color for a cheerful, mismatched look.
Common Mistakes to Avoid with This Style:
- Making the buns too high on very short hair: They can sit awkwardly and stick out. Lower them a little and let the buns stay compact.
- Overfilling each bun: Stuffing in too much hair creates bulk that pushes the pins loose.
3. Half-Up Crown Messy Bun
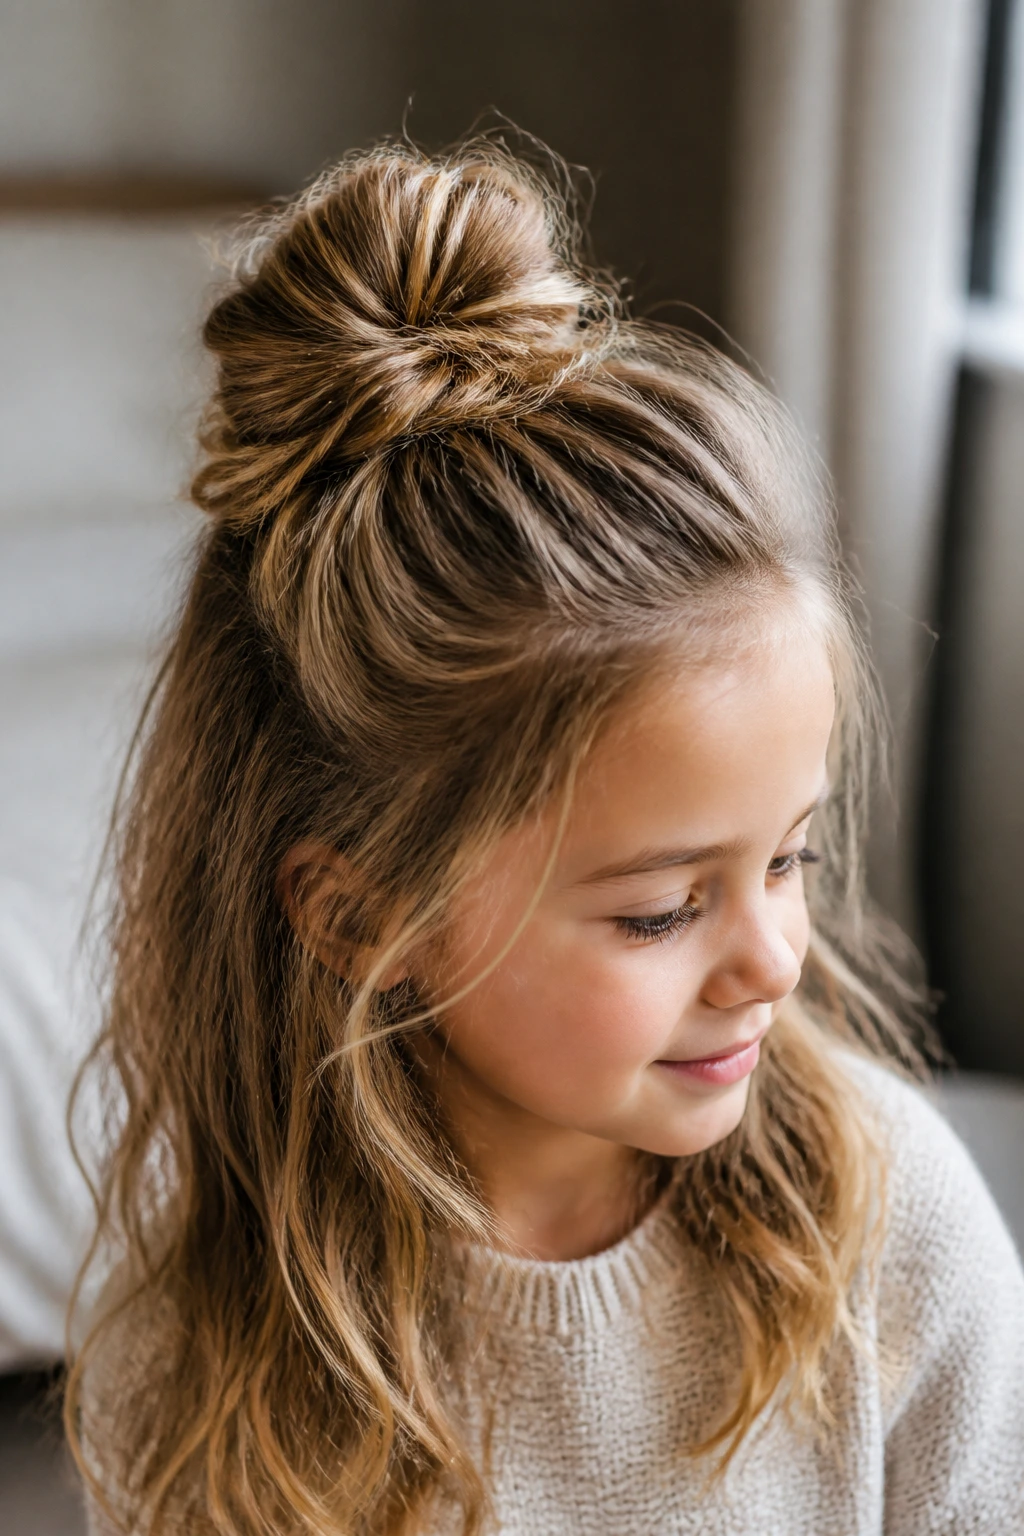
A half-up messy bun is the one I reach for when the hair is clean, the ends are good, and nobody wants all of it tied back. It leaves movement in the lower hair, which softens the whole look. On a little girl, it tends to feel less “done” and more like the hair is cooperating.
Why It Works:
Only the top section is gathered, so there’s less pull on the scalp and less weight hanging from one elastic. That makes it comfortable for kids who don’t like full buns but still need hair off the face.
Key Ingredients:
- 1 mini elastic or soft scrunchie
- 2 bobby pins
- A light mist of water
- Optional: small bow, clip, or ribbon
Quick Steps:
- Section off the hair from temple to temple and gather only the top half.
- Twist that section into a loose knot and secure it with the elastic.
- Pin the ends so they sit flat and don’t poke out sharply.
- Leave the lower hair loose and finger-comb the top section to soften it.
Equipment for This Style:
- Comb
- Mini elastic
- Two pins
- Spray bottle
How to Wear It:
This one is especially nice for school pictures, family lunches, or any day the child wants hair down but not in her eyes. It also works well with waves or curls, because the loose bottom section keeps the style from looking stiff.
Pro Tips for This Style:
- Lift the bun slightly after securing it so the shape sits above the loose hair instead of sinking into it.
- If the top section is slippery, rough it up with a tiny bit of dry shampoo or texture spray at the roots.
Variations on This Style:
- Braided Crown Half-Up: Braid the top section before twisting it into the bun.
- Bow-Back Half-Up: Put the bow at the back of the bun instead of the front for a softer finish.
Common Mistakes to Avoid with This Style:
- Taking too much hair for the top section: The style turns into a full bun and loses its softness.
- Leaving the top twist too loose: It may droop by lunchtime, especially on silky hair.
4. Low Nape Messy Bun
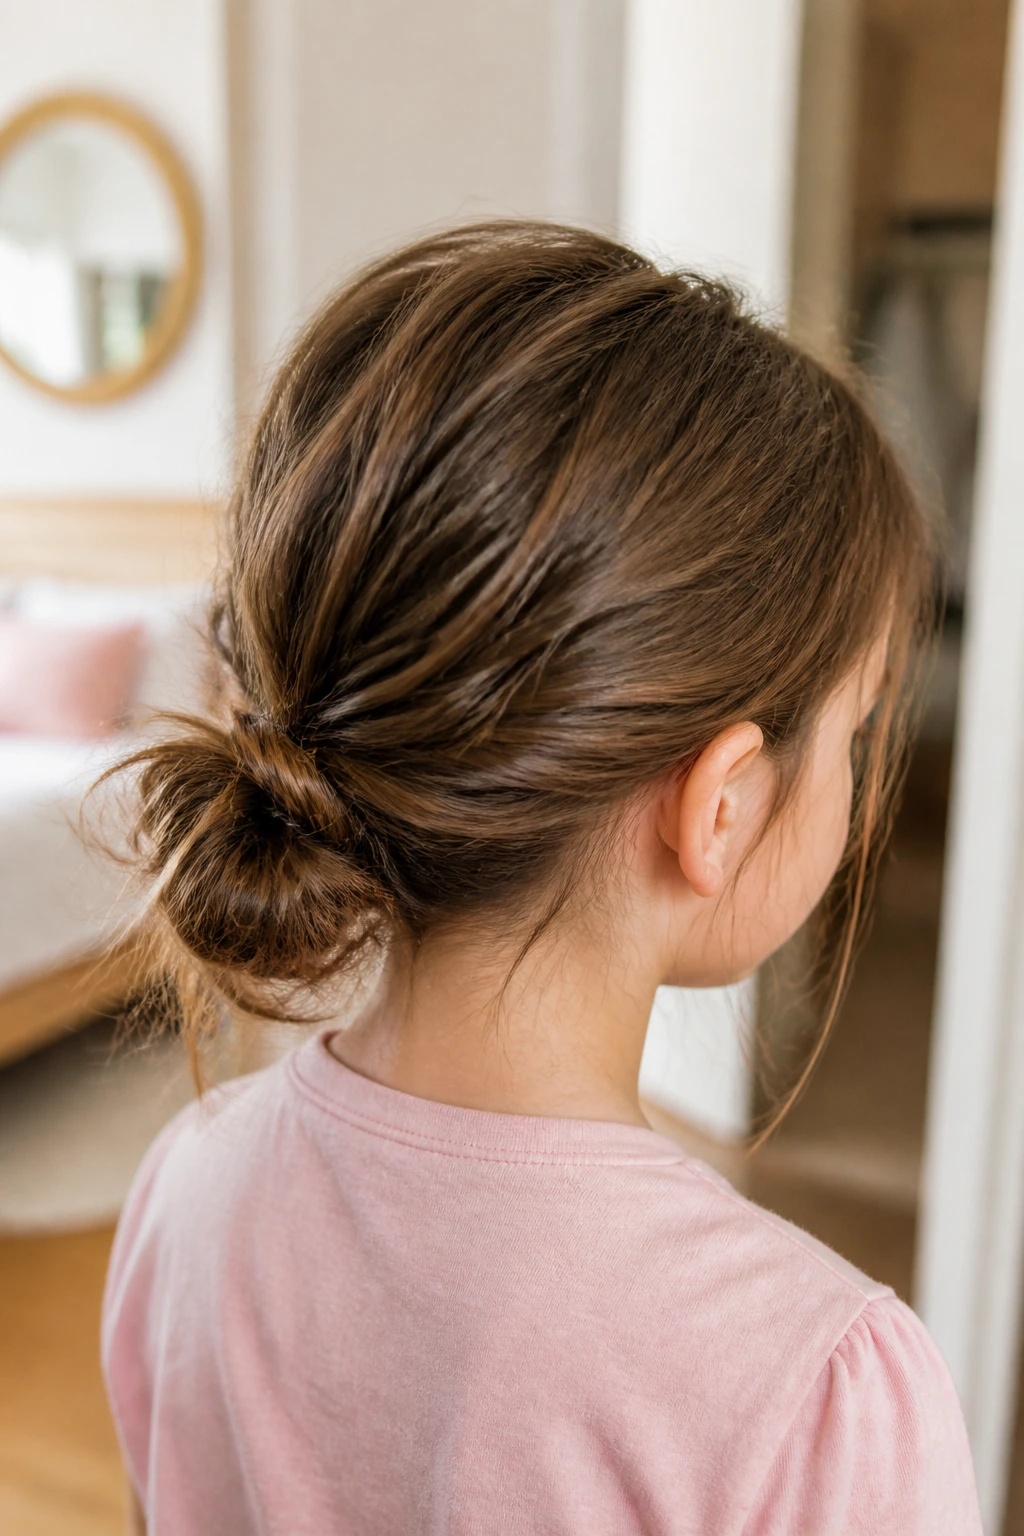
A low messy bun at the nape is my quiet favorite for younger kids because it stays out of the way without feeling serious. It works under hats, hoodie hoods, and winter coats, and it’s one of the easiest buns to sleep out of if you don’t want a morning fuss. The look is soft, a little rumpled, and oddly tidy all at once.
Why It Works:
The low placement means less tugging, especially on the crown and temples. Hair also has less far to travel, which makes this style a smart option for shorter lengths or layered cuts.
Key Ingredients:
- 1 elastic
- 3 bobby pins
- 1 spray bottle
- 1 tiny clip or ribbon if you want a finish
Quick Steps:
- Brush the hair down toward the nape and gather it where the neck meets the scalp.
- Twist the ponytail into a loose coil and wrap it into a small bun.
- Secure the shape with an elastic or pin it from the base upward.
- Gently pull a few outer strands free so the bun doesn’t look too strict.
Equipment for This Style:
- Soft brush
- Bobby pins
- Elastic
- Mirror
How to Wear It:
This is the style I’d pick for school days, car rides, or any place where a high bun would get mashed flat. It’s also one of the best choices for thick hair because the low position helps the bun sit close to the head.
Pro Tips for This Style:
- Keep the bun slightly loose at the base so it doesn’t press against the neck.
- Use two crossed pins if the bun is heavy; they hold better than one straight pin.
Variations on This Style:
- Ribbon-Nape Bun: Tie a ribbon around the bun base after pinning it.
- Twisted Nape Bun: Split the ponytail into two rope twists before wrapping it.
Common Mistakes to Avoid with This Style:
- Placing it too low on the collar line: The bun gets flattened by clothing. Lift it a little higher.
- Skipping pins on layered hair: The short pieces slip out fast unless you anchor them.
5. Side-Swept Playdate Bun
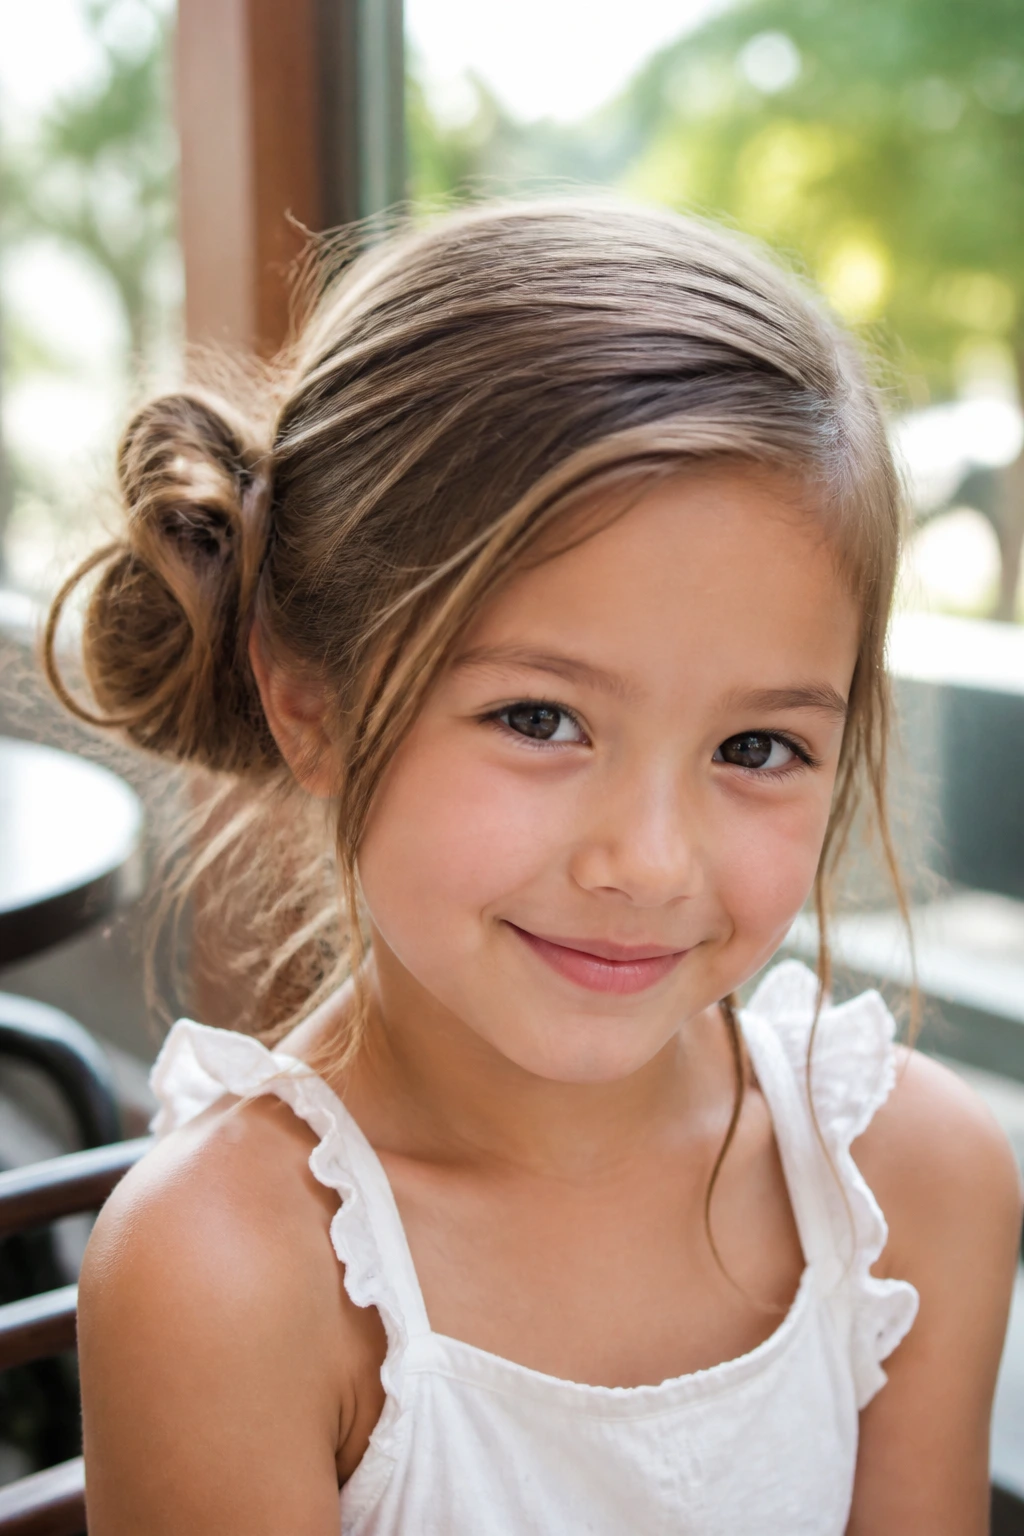
A side bun has a little personality without needing much work. It’s the hairstyle that looks like someone cared, but not in a stiff or fussy way. I like it for kids with layers because the uneven shape hides the shorter pieces instead of fighting them.
Why It Works:
The offset placement keeps the bun visually soft and makes flyaways look intentional. It also gives you room to work with one side of the head if the other side has a stubborn cowlick or shorter fringe.
Key Ingredients:
- 1 elastic
- 3 to 5 bobby pins
- Light mist of water
- Small decorative clip
Quick Steps:
- Gather the hair just behind one ear, leaving the opposite side a little smoother.
- Twist the hair upward and toward the back, then coil it into a small bun.
- Pin it from underneath so the shape feels secure but not rigid.
- Tug out a few face-framing pieces on the loose side to soften the line.
Equipment for This Style:
- Brush
- Comb for side parting
- Pins
- Small clip or bow
How to Wear It:
This works well for birthday parties, family dinners, or school days when a plain ponytail would feel too plain. On little girls, a side bun with a tiny bow can look especially sweet with a dress or a cardigan.
Pro Tips for This Style:
- Start the bun a little farther back than you think; if it sits too close to the ear, it can look lopsided in the wrong way.
- If the bun is slipping, pin one side first, then the other, then the center.
Variations on This Style:
- Low Side Knot: Move the bun down near the jawline for a softer, more casual finish.
- Braided Side Bun: Braid the gathered section before wrapping it.
Common Mistakes to Avoid with This Style:
- Making the side part too dramatic: A deep part can pull the style into costume territory. Keep it gentle.
- Over-smoothing the “loose” side: If every strand is flattened, the bun loses its easy shape.
6. Braided Messy Bun
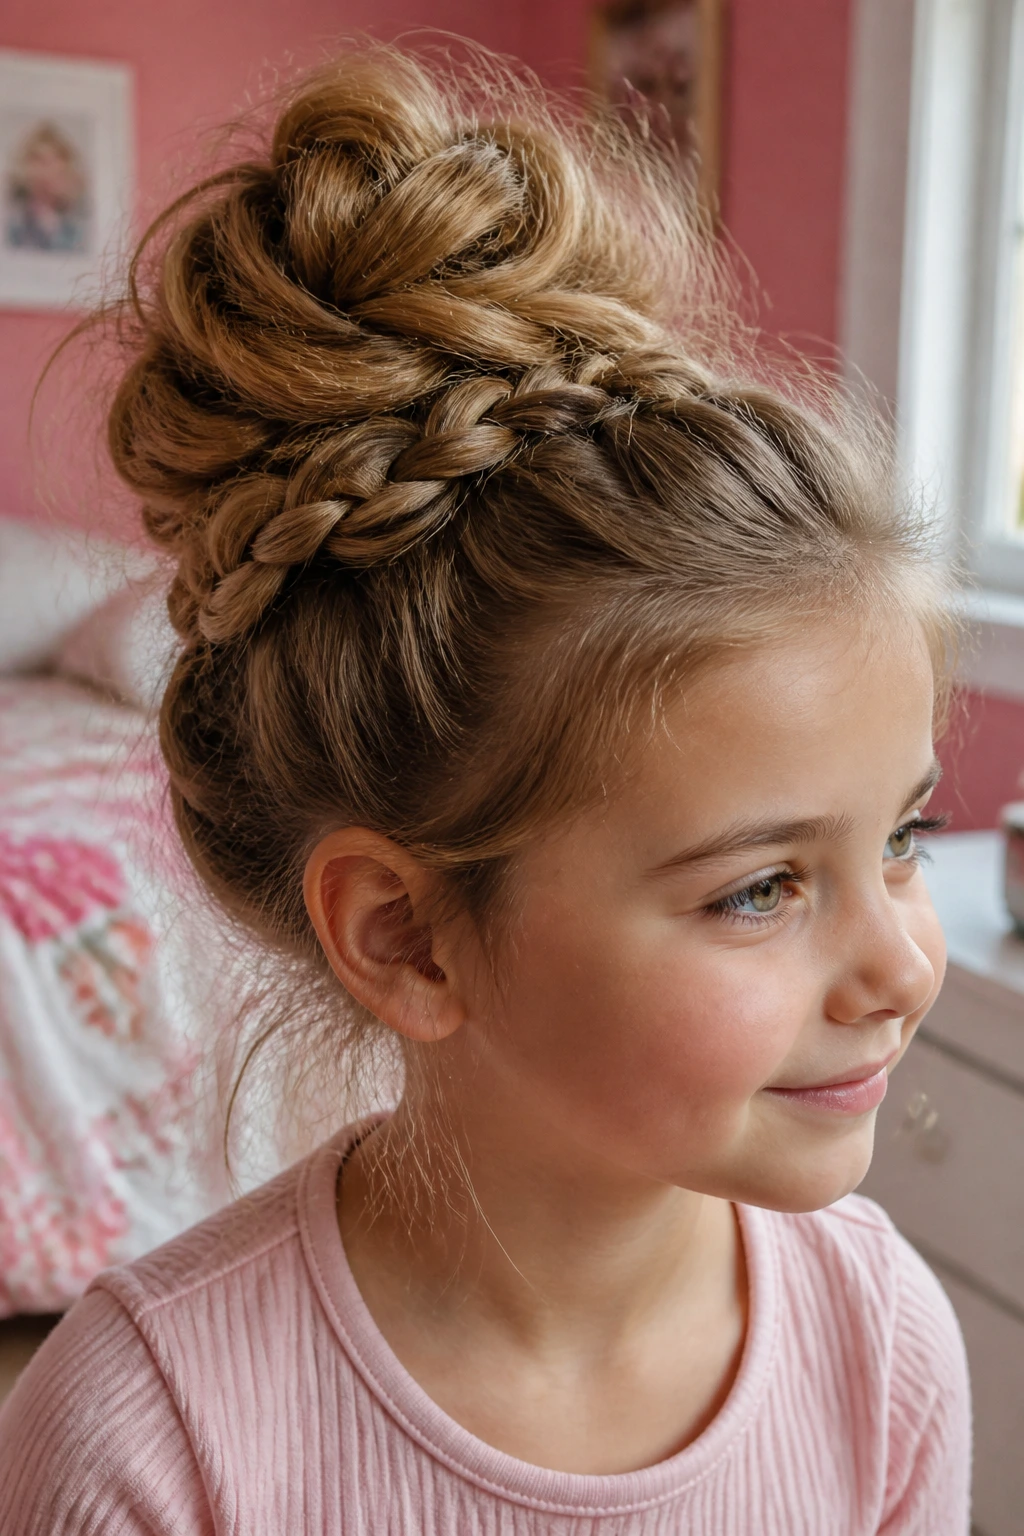
Braids and buns are a good pair because the braid gives the bun grip. On little girls, that matters. Hair that slips straight out of a ponytail will usually behave better once it’s braided first, even if the final bun still looks relaxed and slightly undone.
Why It Works:
A braid adds texture and keeps layers contained before you wrap them. It also gives the bun a better backbone, which helps when the child has fine hair or hair that’s fresh from washing.
Key Ingredients:
- 1 elastic
- 2 to 4 pins
- 1 small comb
- Optional: light mousse or texturizing mist
Quick Steps:
- Gather the hair into a ponytail at the placement you want.
- Braid the ponytail loosely all the way to the ends.
- Wrap the braid around itself and secure the bun with pins.
- Pull the braid slightly apart before pinning so it looks soft instead of tight.
Equipment for This Style:
- Elastic
- Bobby pins
- Comb
- Spray bottle
How to Wear It:
This style works for school, church, dance class, and any day when you want the bun to hold through a long stretch. It looks a touch more finished than a plain twist, which makes it a good middle ground.
Pro Tips for This Style:
- Braid loosely; a tight braid makes the bun feel smaller and harder.
- Pin the braid where it overlaps itself, not just at the outer edge.
Variations on This Style:
- Three-Strand Crown Bun: Start with a side braid and wrap it into a top bun.
- French-Braid Bun: Braid from the front hairline down to the ponytail base first.
Common Mistakes to Avoid with This Style:
- Braid too tight, bun too flat: The finished shape looks stiff. Loosen the braid before wrapping.
- Using a dry, slippery ponytail: A little mist or texture spray helps the braid stay put.
7. Rope-Twist Messy Bun
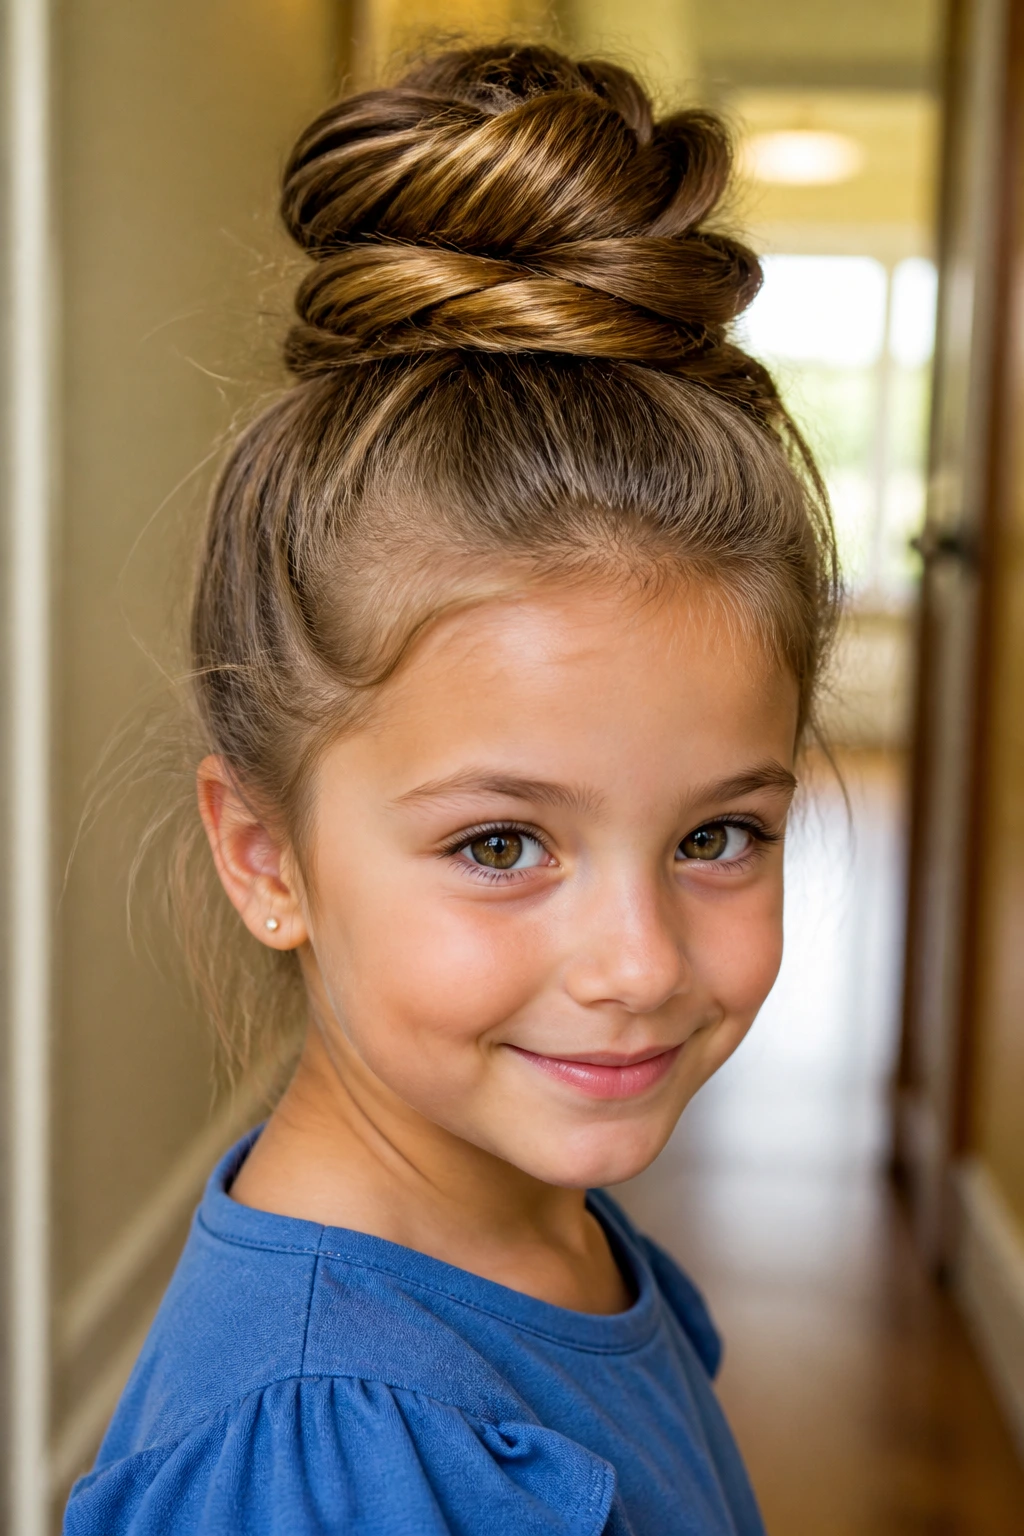
A rope twist gives you a bun with a little more shape than a standard twist, and kids’ hair often holds it well because the two twisted sections grip each other. It’s a nice choice for hair that needs a bit of structure without losing the soft, lived-in feel.
Why It Works:
Twisting two sections around each other creates friction, which helps the bun stay together with fewer pins. That’s useful on silky hair and on hair that doesn’t like to stay in one spot for long.
Key Ingredients:
- 1 elastic
- 3 bobby pins
- Water or leave-in spray
- Small accessory, optional
Quick Steps:
- Gather the hair into a ponytail and split it into two equal sections.
- Twist each section in the same direction, then wrap them around each other in the opposite direction.
- Coil the rope twist around the base into a bun and pin it.
- Pull the outer loops gently so the bun looks fuller and softer.
Equipment for This Style:
- Comb
- Elastic
- Pins
- Spray bottle
How to Wear It:
This is a good everyday bun, but it also looks polished enough for a family event if you keep the part clean. It sits well under jackets and does not puff up as fast as some looser styles.
Pro Tips for This Style:
- Twist both sections in the same direction first; that makes the rope hold better.
- If the bun starts to slide, pin through the base and the middle of the rope, not just the edge.
Variations on This Style:
- Double Rope Bun: Make two rope twists and wrap them together.
- Ribbon Rope Twist: Weave a thin ribbon through one of the twists before coiling.
Common Mistakes to Avoid with This Style:
- Twisting in opposite directions before the rope is formed: The hair unravels faster.
- Pulling the bun apart too soon: Let it settle after pinning, then shape it.
8. Bubble-Section Bun
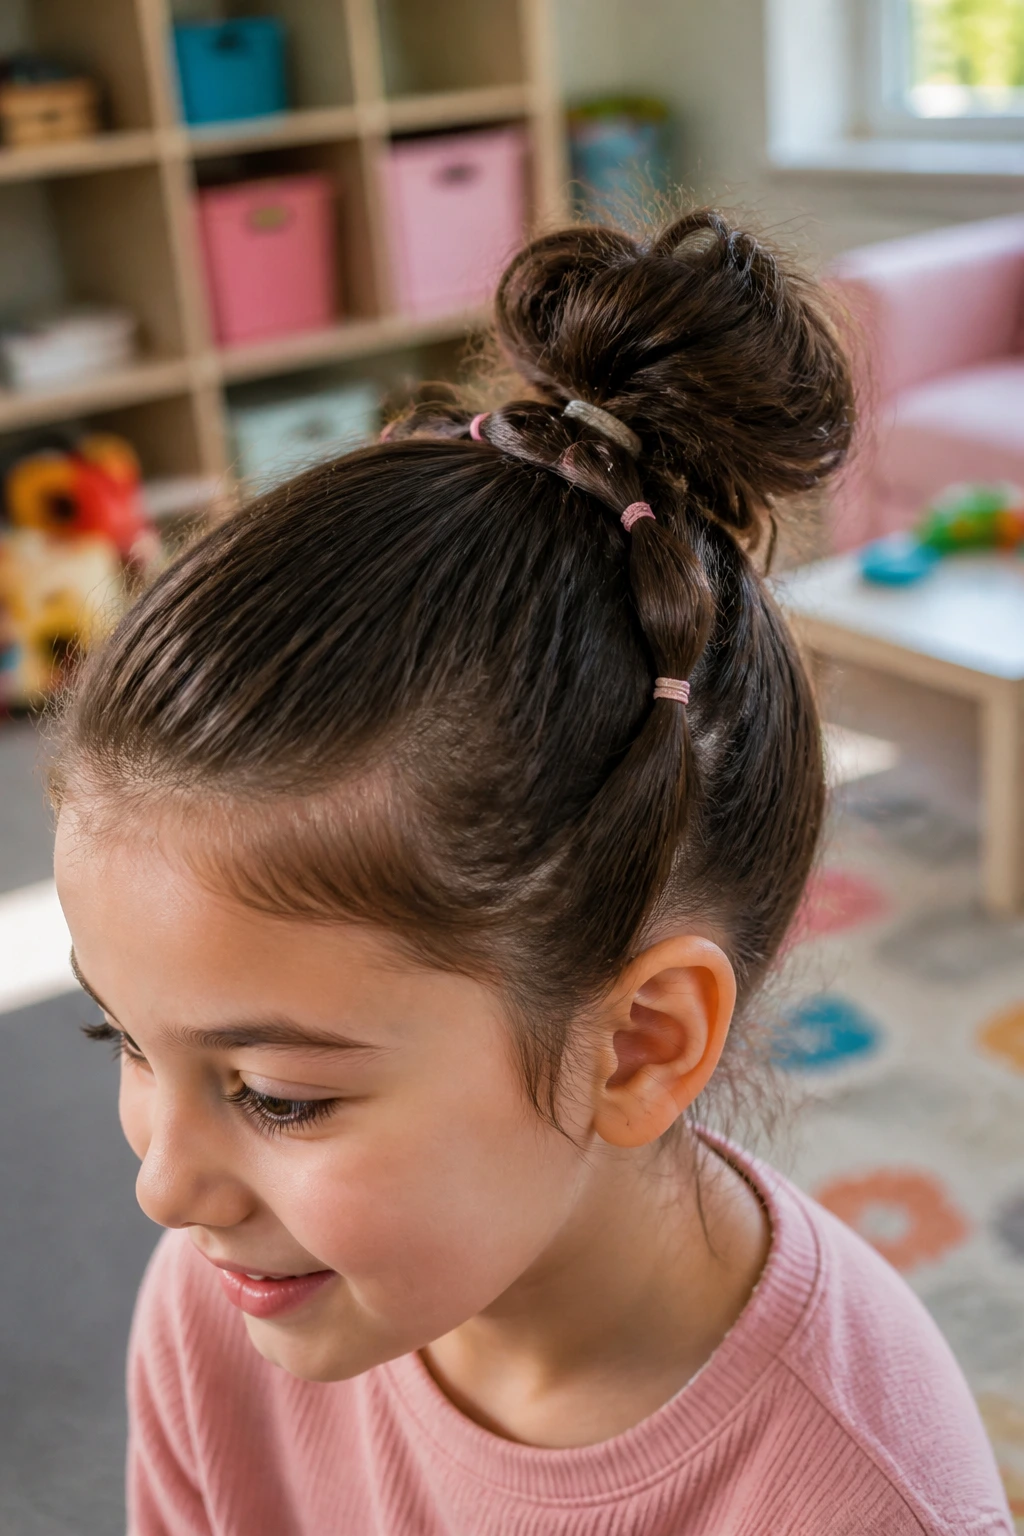
The bubble style is a bit playful and a bit clever. Instead of one smooth ponytail, you add small elastic “bubbles” along the length, which gives the bun more grip and makes thin hair look fuller. It’s one of those styles that looks complicated from across the room and feels very manageable in the bathroom mirror.
Why It Works:
The bubbles break up the hair length so the bun has more texture and less slide. On little girls with fine hair, that extra texture can be the difference between a bun that stays and a bun that sags.
Key Ingredients:
- 3 to 5 mini elastics
- 2 bobby pins
- 1 comb or brush
- Tiny clip or bow, if wanted
Quick Steps:
- Gather hair into a ponytail at the height you want.
- Add small elastics every 1 to 2 inches down the ponytail, puffing each section outward between bands.
- Wrap the bubbled tail around the base into a bun or tuck it under itself.
- Pin the bubbles in place and soften the top with your fingers.
Equipment for This Style:
- Mini elastics
- Bobby pins
- Brush
- Spray bottle
How to Wear It:
This is a fun choice for playdates, casual photos, and days when the child wants something “different” without a big effort. It works especially well with straight or fine hair because the bubbles build shape fast.
Pro Tips for This Style:
- Space the elastics evenly; uneven bubbles can look accidental.
- Use clear elastics if you want the bubbles to be the focus rather than the bands.
Variations on This Style:
- Rainbow Bubble Bun: Use colorful elastics from top to bottom.
- Low Bubble Knot: Make the bubbles low at the nape for a calmer look.
Common Mistakes to Avoid with This Style:
- Puffing only one bubble too much: The bun becomes lopsided. Balance the shape from top to bottom.
- Using bands that snag: Mini elastics with rough seams can pull little hairs when you remove them.
9. Sock-Bun Puff
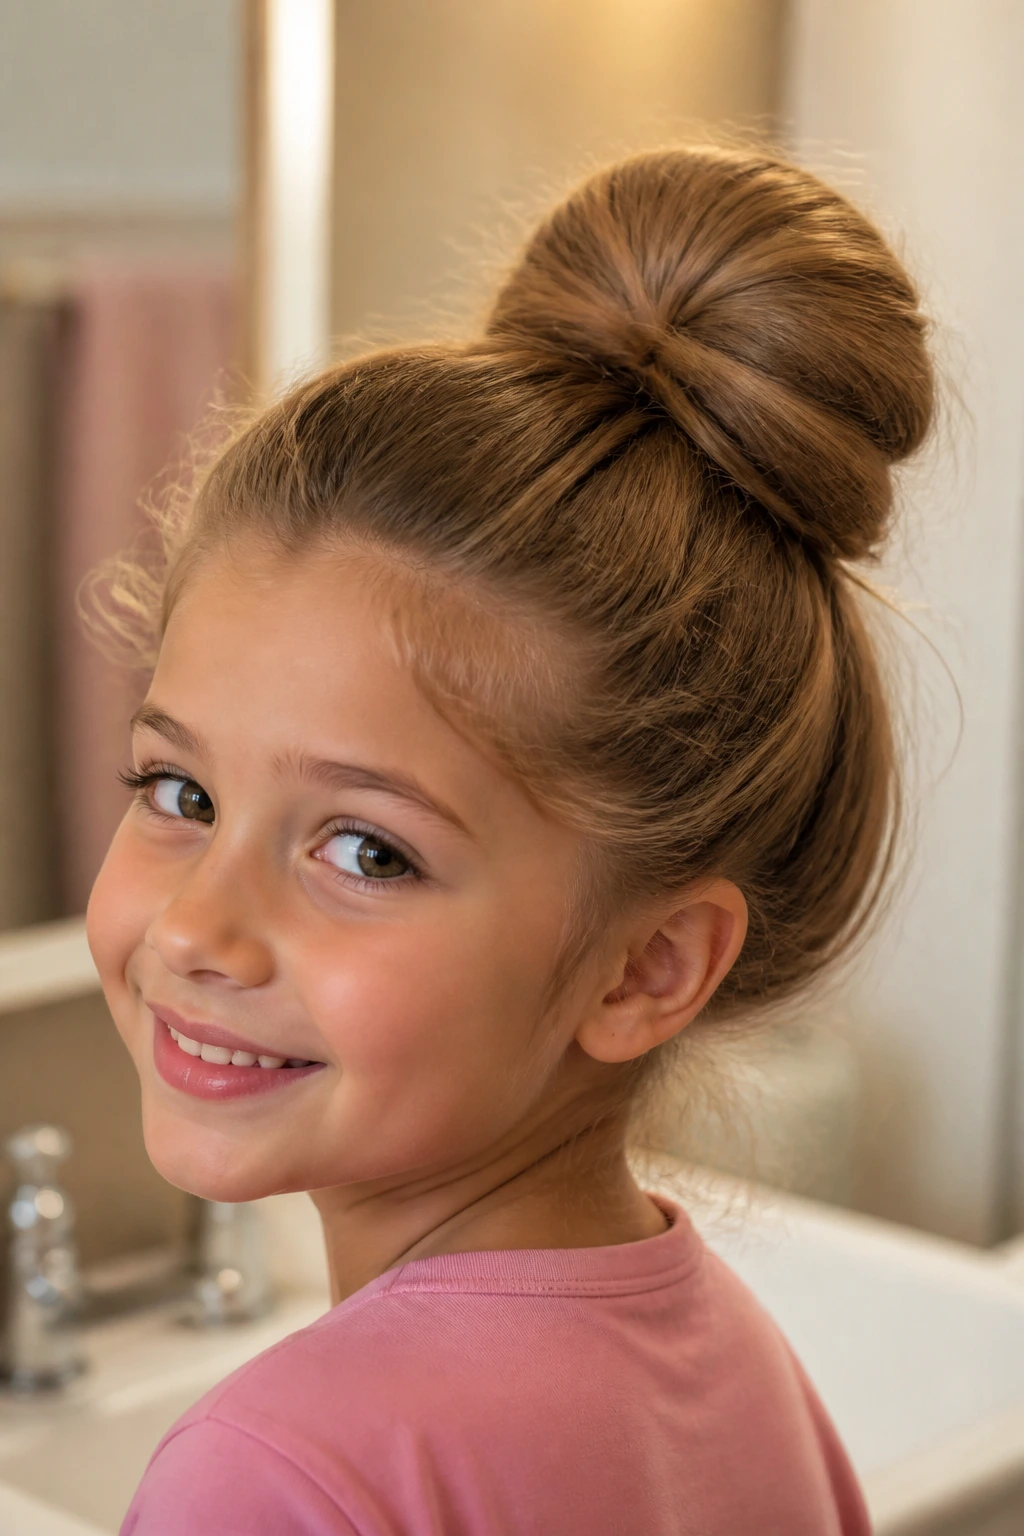
A sock bun gives you the round, donut-like shape of a fuller bun without needing a ton of hair. For little girls, I like it when the finished shape is softened a little, so it doesn’t look too formal or adult. The goal is a puffed bun with a bit of air around the edges.
Why It Works:
The form inside the bun creates volume, which helps fine hair and short layers look fuller. It also keeps the hair wrapped evenly, so the bun holds its shape through the day.
Key Ingredients:
- 1 donut form or rolled sock bun maker
- 1 elastic
- 2 to 4 pins
- Small ribbon, optional
Quick Steps:
- Gather the hair into a ponytail and pull it through the donut form.
- Spread the hair evenly over the form so the base disappears.
- Roll the hair downward and inward until the form is covered.
- Tug the outer edge a little so the bun looks softer, then pin any loose ends.
Equipment for This Style:
- Donut form or sock bun ring
- Elastic
- Bobby pins
- Brush
How to Wear It:
This is a solid choice for photo day, dance class, or any place a round bun makes sense. On a child, I prefer to loosen the shape just a touch so it still feels like a kid’s style, not a recital photo prop.
Pro Tips for This Style:
- Choose a smaller form for younger heads; oversized donuts can look bulky.
- If the hair is thin, lightly backcomb the ponytail tail before rolling it.
Variations on This Style:
- Soft Donut Puff: Pull several tiny sections loose around the bun for a gentler edge.
- Ribbon-Dressed Donut: Tie a ribbon around the base after the bun is rolled.
Common Mistakes to Avoid with This Style:
- Using a donut that’s too big: It overwhelms small heads.
- Leaving the ponytail uneven over the form: Thin spots show through and the bun looks patchy.
10. Ribbon-Wrapped Messy Bun
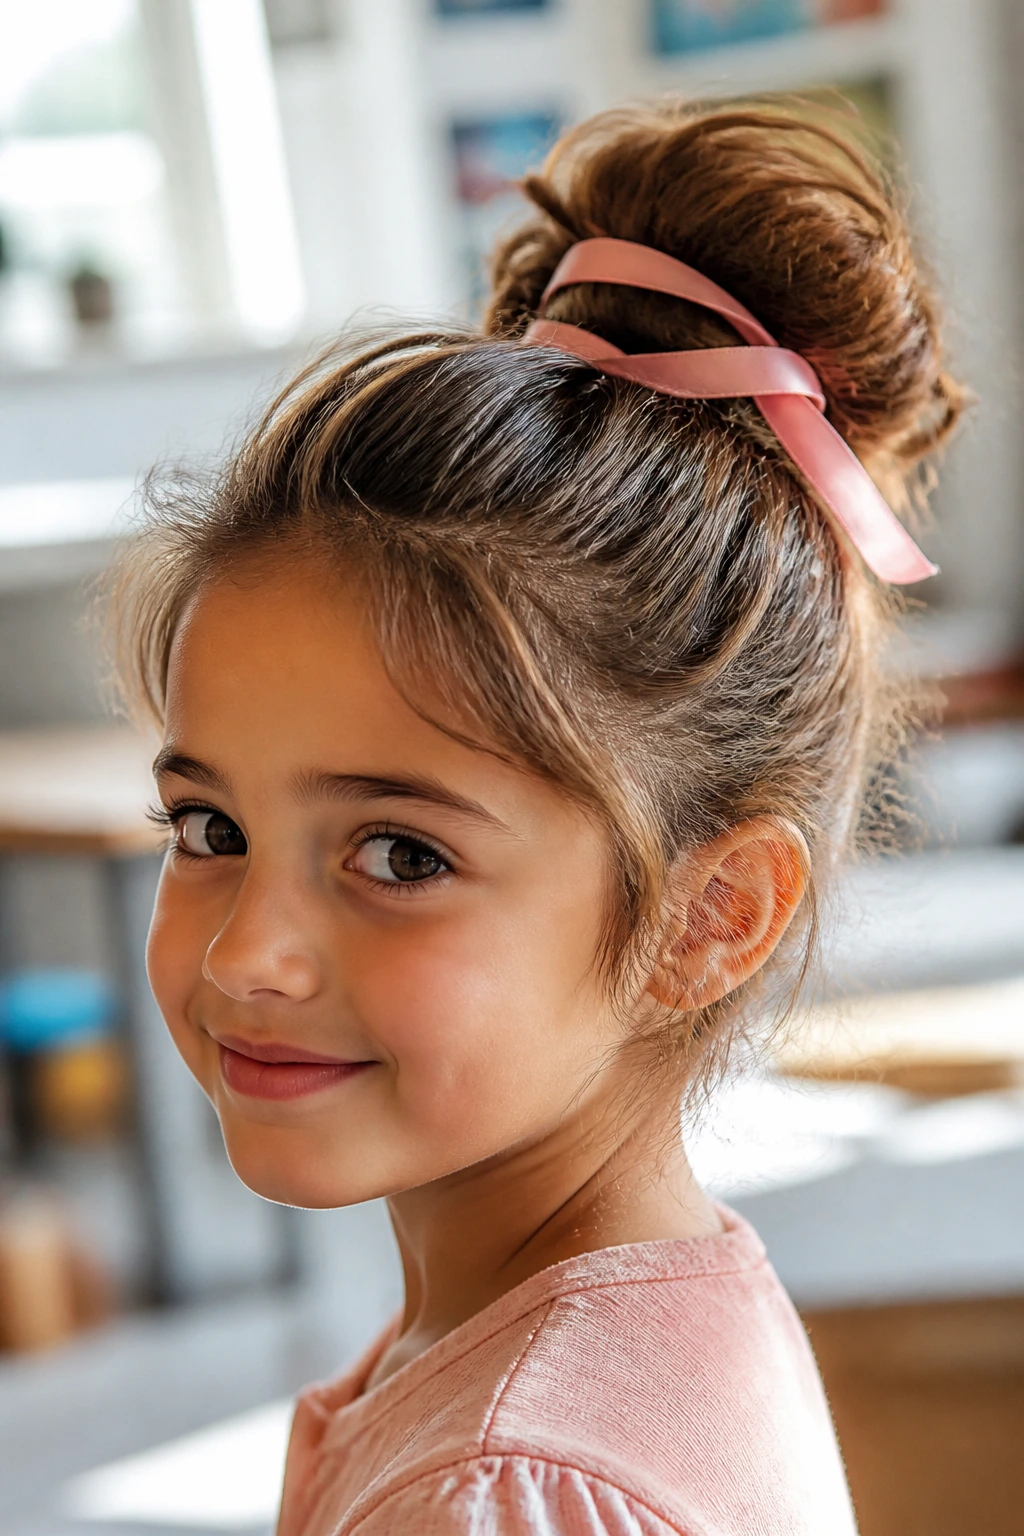
Ribbon makes a messy bun feel a little more finished without turning it into a stiff hairstyle. The trick is to keep the ribbon soft and loose, not wrapped so tightly that it flattens the bun. On little girls, that touch of fabric can be enough to make the whole style feel special.
Why It Works:
Ribbon draws the eye to the shape of the bun and hides the elastic at the base. It also lets you add color without adding much weight, which is kinder than heavy clips or thick embellishments.
Key Ingredients:
- 1 elastic
- 1 ribbon strip, about 18 to 24 inches long
- 2 bobby pins
- Brush or comb
Quick Steps:
- Build a simple messy bun in the position you want.
- Tuck one end of the ribbon under the elastic or pin it near the base.
- Wrap the ribbon around the bun once or twice, leaving it a little loose.
- Tie or pin the ends underneath so they stay hidden.
Equipment for This Style:
- Elastic
- Ribbon
- Pins
- Small mirror
How to Wear It:
This is one of the easiest ways to make a school-day bun work for a birthday lunch or a family picture. It looks especially nice with dresses, cardigans, or any outfit with a matching color in the ribbon.
Pro Tips for This Style:
- Use soft satin or grosgrain ribbon, not wired ribbon that pokes out.
- Keep the ribbon ends short or pin them down so they do not brush the neck.
Variations on This Style:
- Double-Wrap Ribbon Bun: Use two thin ribbons in matching colors.
- Side-Tie Ribbon Bun: Knot the ribbon slightly off to one side instead of in back.
Common Mistakes to Avoid with This Style:
- Wrapping the ribbon too tight: It flattens the bun and can pull at the elastic.
- Choosing a ribbon that’s too thick: The style starts looking bulky fast on small heads.
11. Bow-Top Party Bun
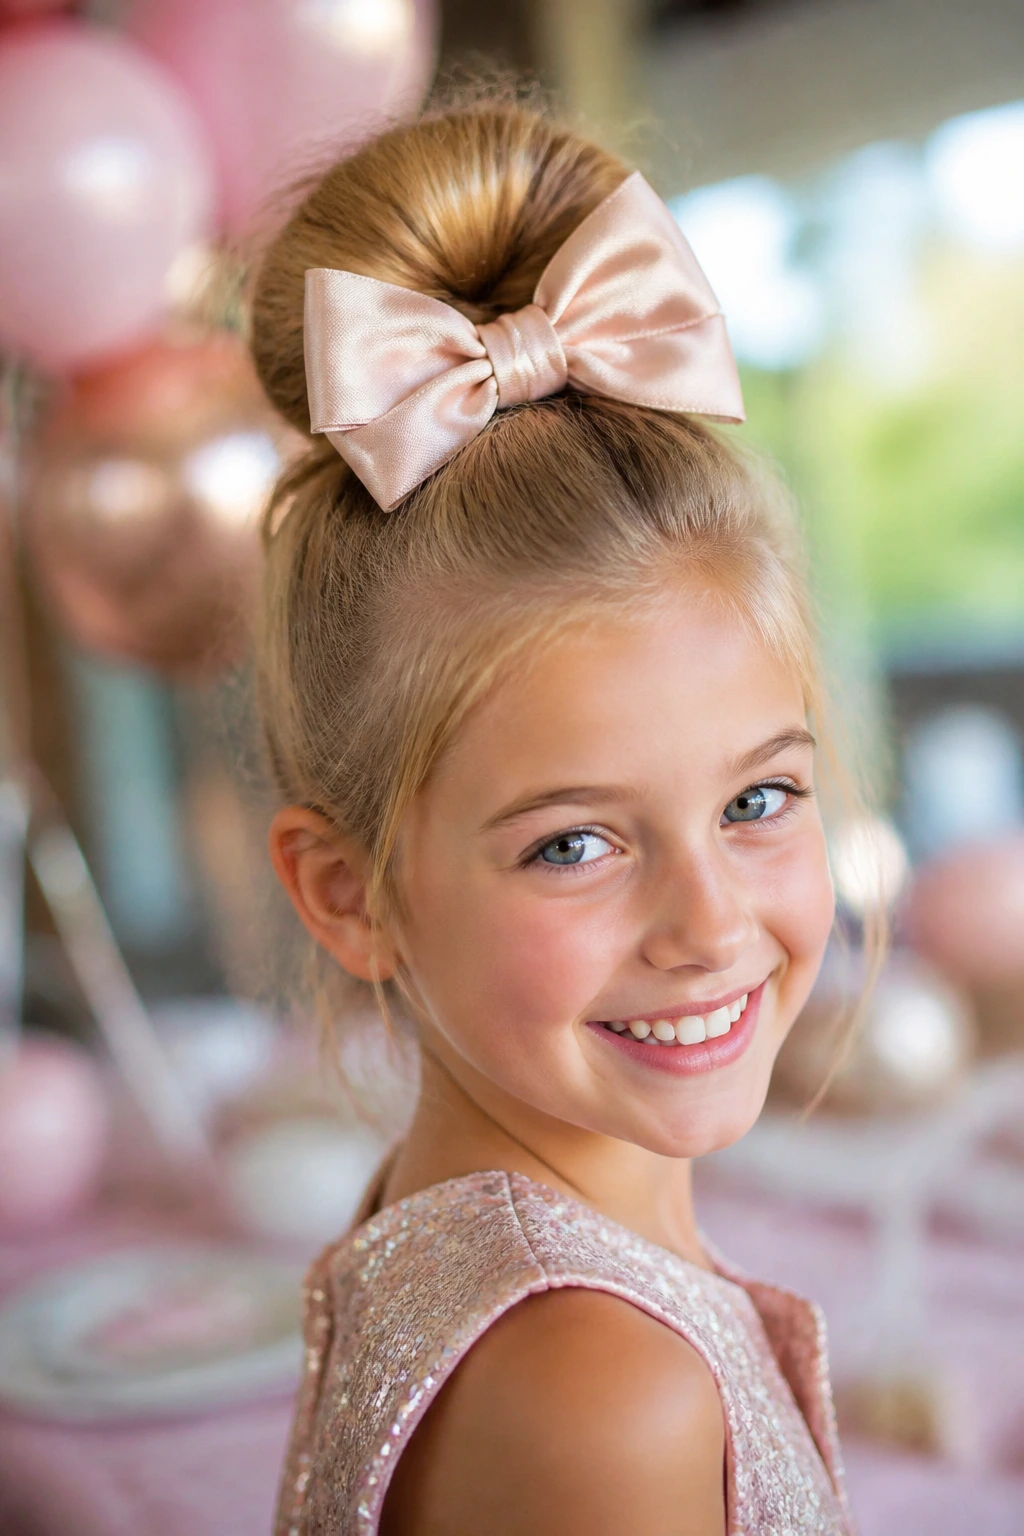
A bow sitting on top of a messy bun changes the whole mood. Suddenly the style looks ready for a birthday cake and not just school pickup. I like this one when the bun itself stays simple and the bow does the talking.
Why It Works:
The bun gives the bow a base, and the bow hides any rough edges around the elastic. It’s a quick way to make a basic bun feel dressed up without spending ten extra minutes on the hair itself.
Key Ingredients:
- 1 elastic
- 1 medium bow clip or bow tie
- 2 to 4 pins
- Light mist of water
Quick Steps:
- Build a plain messy bun at the crown or slightly lower.
- Flatten the top of the bun gently with your palms so the bow has a place to sit.
- Clip or pin the bow right above the elastic.
- Smooth the hairline and let the bun stay a little loose underneath.
Equipment for This Style:
- Elastic
- Bow clip
- Pins
- Comb
How to Wear It:
This is a birthday-party bun, a family-photo bun, and a “we need to look nice in ten minutes” bun. Keep the rest of the outfit simple if the bow is bright or oversized; the hair already has plenty to say.
Pro Tips for This Style:
- Match the bow size to the child’s head; tiny heads disappear under giant bows.
- Use a clip with a strong grip if the bun is soft or layered.
Variations on This Style:
- Mini-Bow Bun: Use a small grosgrain bow for a cleaner line.
- Stacked Bow Bun: Add two small bows in the same color for a playful finish.
Common Mistakes to Avoid with This Style:
- Placing the bow too low: It gets lost in the bun instead of sitting on top.
- Using a heavy clip on fine hair: The bow droops by lunch.
12. Curly Cloud Bun
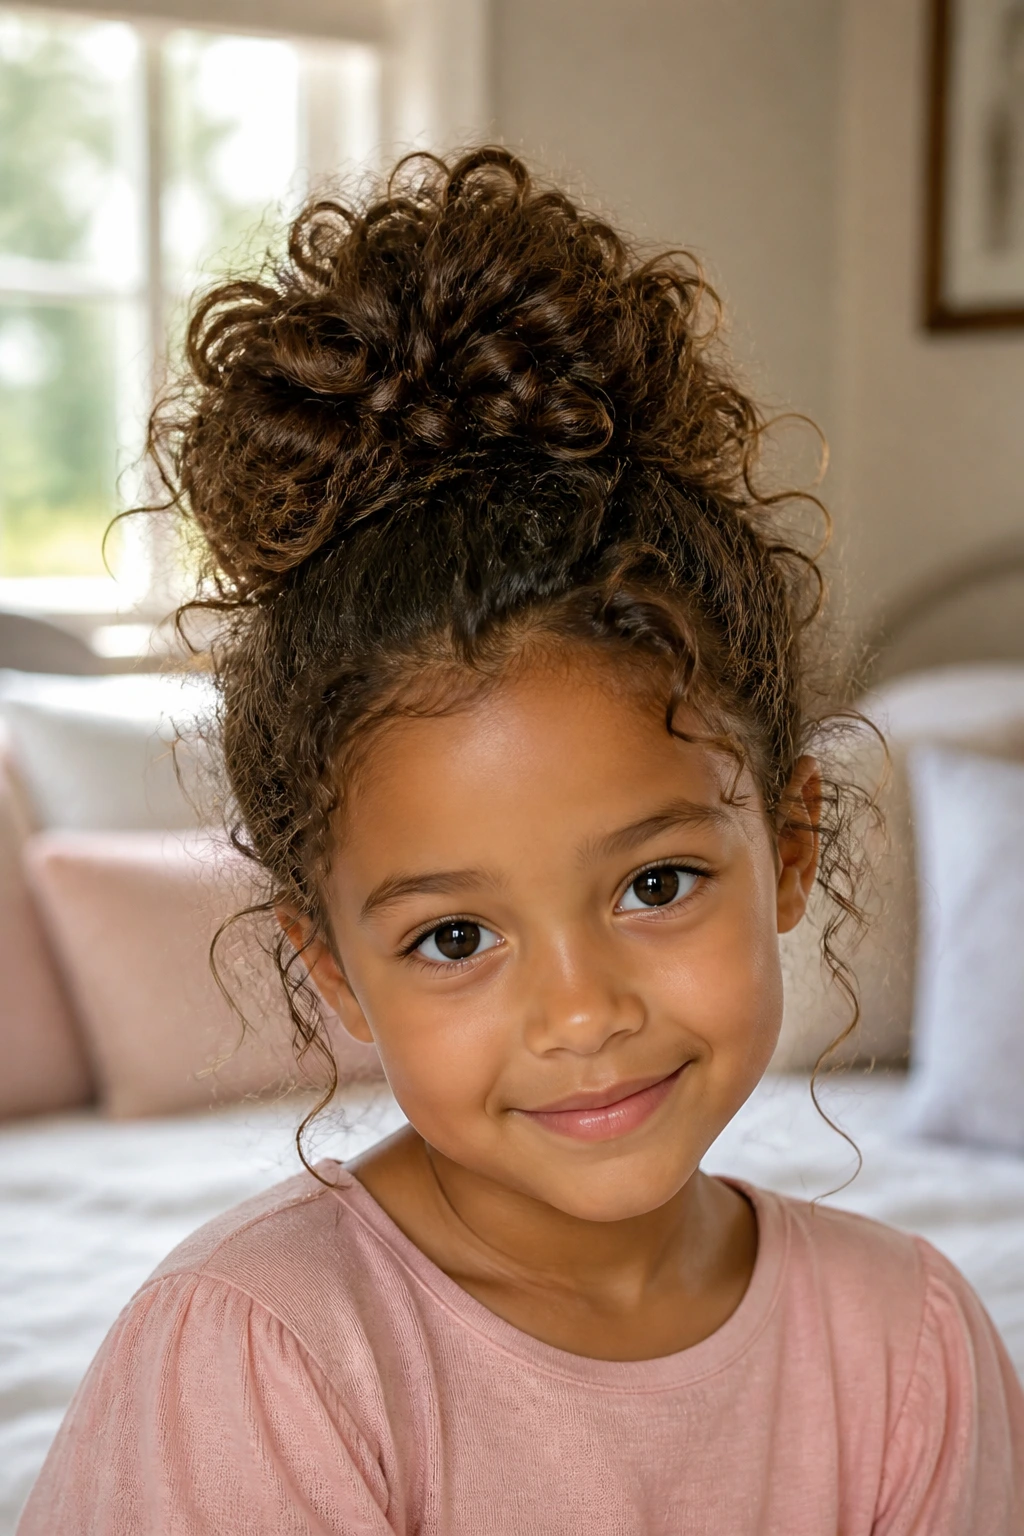
Curly hair does not need to be brushed into obedience here. In fact, the bun gets better when you let the curls keep some of their shape. The finished style should look like a little cloud: soft, round, and full of texture.
Why It Works:
Curly hair already has volume and grip, so the bun can hold with less hardware than straighter hair. Keeping the curl pattern intact also means less frizz later, which is always a nice side effect.
Key Ingredients:
- 1 soft elastic
- 2 to 4 pins
- Water spray bottle
- Small amount of leave-in conditioner, if needed
Quick Steps:
- Dampen the hair lightly and finger-detangle instead of brushing hard through the curls.
- Gather the curls loosely at the crown or mid-back of the head.
- Twist the gathered hair into a soft bun without stretching out the curl pattern too much.
- Pin the bun in place and leave a few curls loose around the face if the child likes that.
Equipment for This Style:
- Wide-tooth comb or fingers
- Spray bottle
- Soft elastic
- Pins
How to Wear It:
This works beautifully for everyday wear, especially when the child wants her curls off her neck but does not want them flattened. It looks sweet with a headband or a little bow, but it does not need much help.
Pro Tips for This Style:
- Use your fingers first and a comb only where needed; curls get frizzier when over-brushed.
- Let the bun sit a little bigger than you think; curls shrink as they dry.
Variations on This Style:
- High Curly Cloud: Put the bun higher and let curls spring outward.
- Low Curl Puff: Keep it low and tuck the ends in softly.
Common Mistakes to Avoid with This Style:
- Brushing curls dry: The bun turns fuzzy fast.
- Pulling the curls flat before pinning: The shape loses its bounce and the style looks stiff.
13. Dutch-Braid Into a Bun
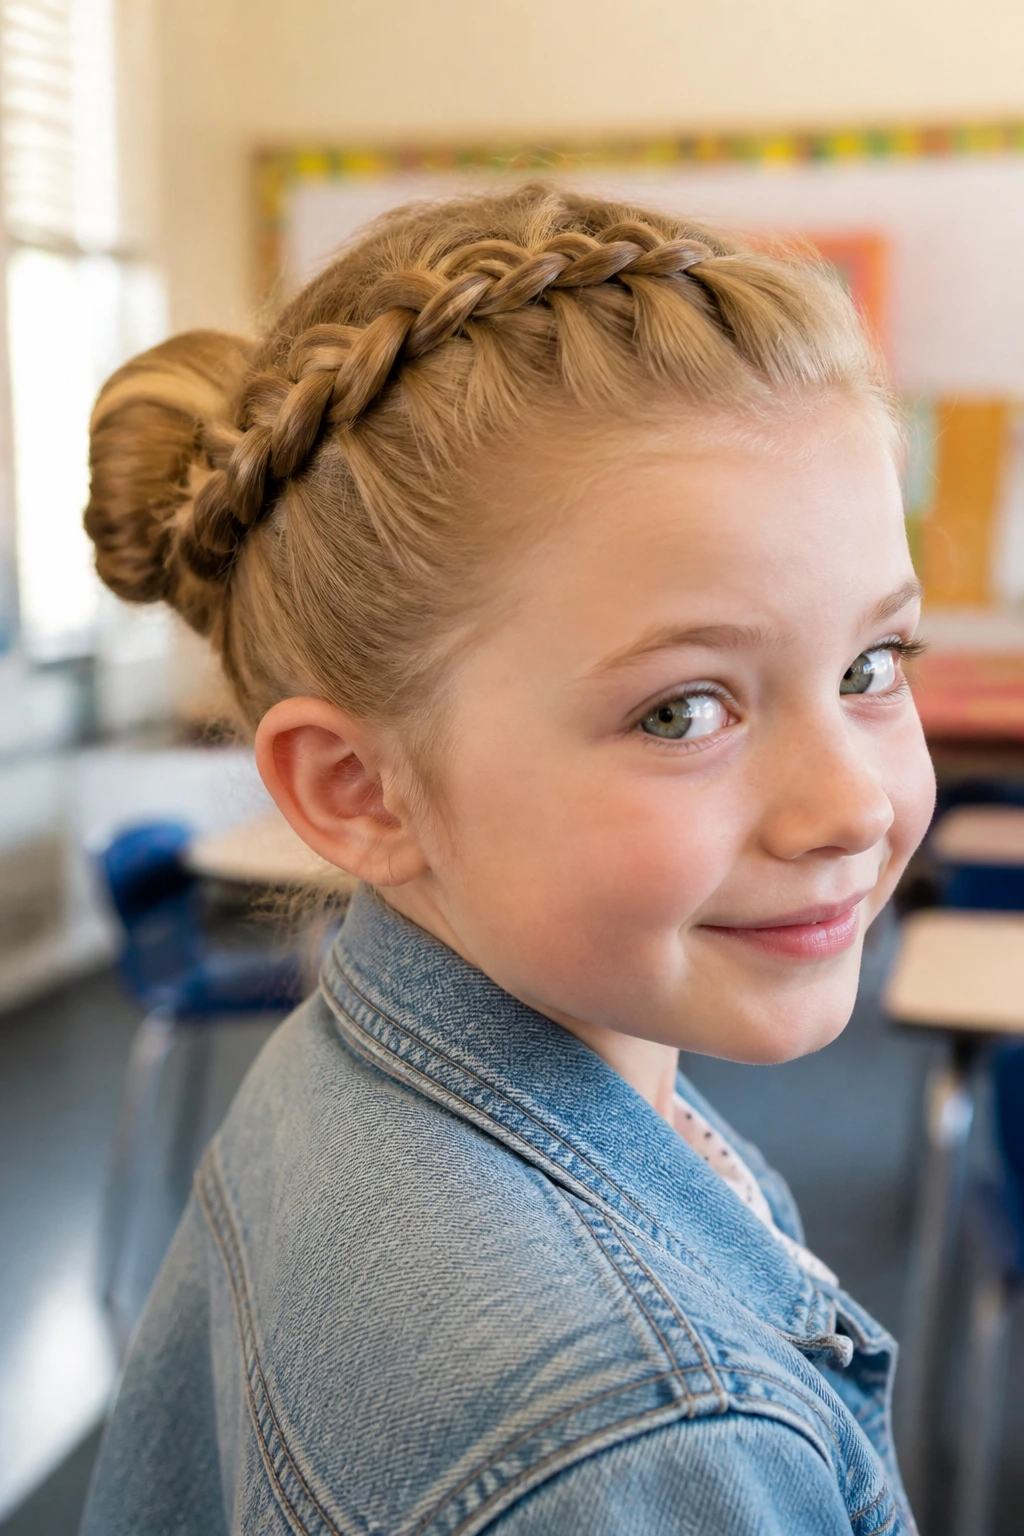
A Dutch braid leading into a bun gives you strong hold and a little bit of pattern at the front, which is a nice payoff for the extra step. It’s one of the more secure options here, so I reach for it when the day is long or the child is especially active.
Why It Works:
The braid sits on top of the hair instead of sinking into it, which adds texture and keeps the front section from slipping. Once the braid is wrapped into a bun, it has a built-in anchor.
Key Ingredients:
- 1 elastic
- 3 to 5 pins
- Comb for parting
- Light mist, optional
Quick Steps:
- Start a Dutch braid from the front hairline, crossing each section under instead of over.
- Braid down to the point where you want the bun to sit.
- Gather the remaining hair and braid into a low ponytail if needed.
- Coil the braid into a bun and pin it securely.
Equipment for This Style:
- Rat-tail comb
- Elastic
- Pins
- Small mirror
How to Wear It:
This is a sturdy school-day style, but it still looks neat enough for events. On little girls, it’s especially useful when hair has lots of layers that like to escape.
Pro Tips for This Style:
- Keep the braid loose enough to widen it a little; that helps the bun look soft.
- If the braid starts to twist unevenly, stop and even it out before you reach the bun.
Variations on This Style:
- Side Dutch Bun: Start the braid from a side part for an angled look.
- Single-Braid Crown Bun: Continue the braid around the head before looping it.
Common Mistakes to Avoid with This Style:
- Braiding too tightly from the scalp: It can feel uncomfortable fast.
- Wrapping the bun without flattening the braid first: The final shape can poke out in odd places.
14. Knotted Loop Bun
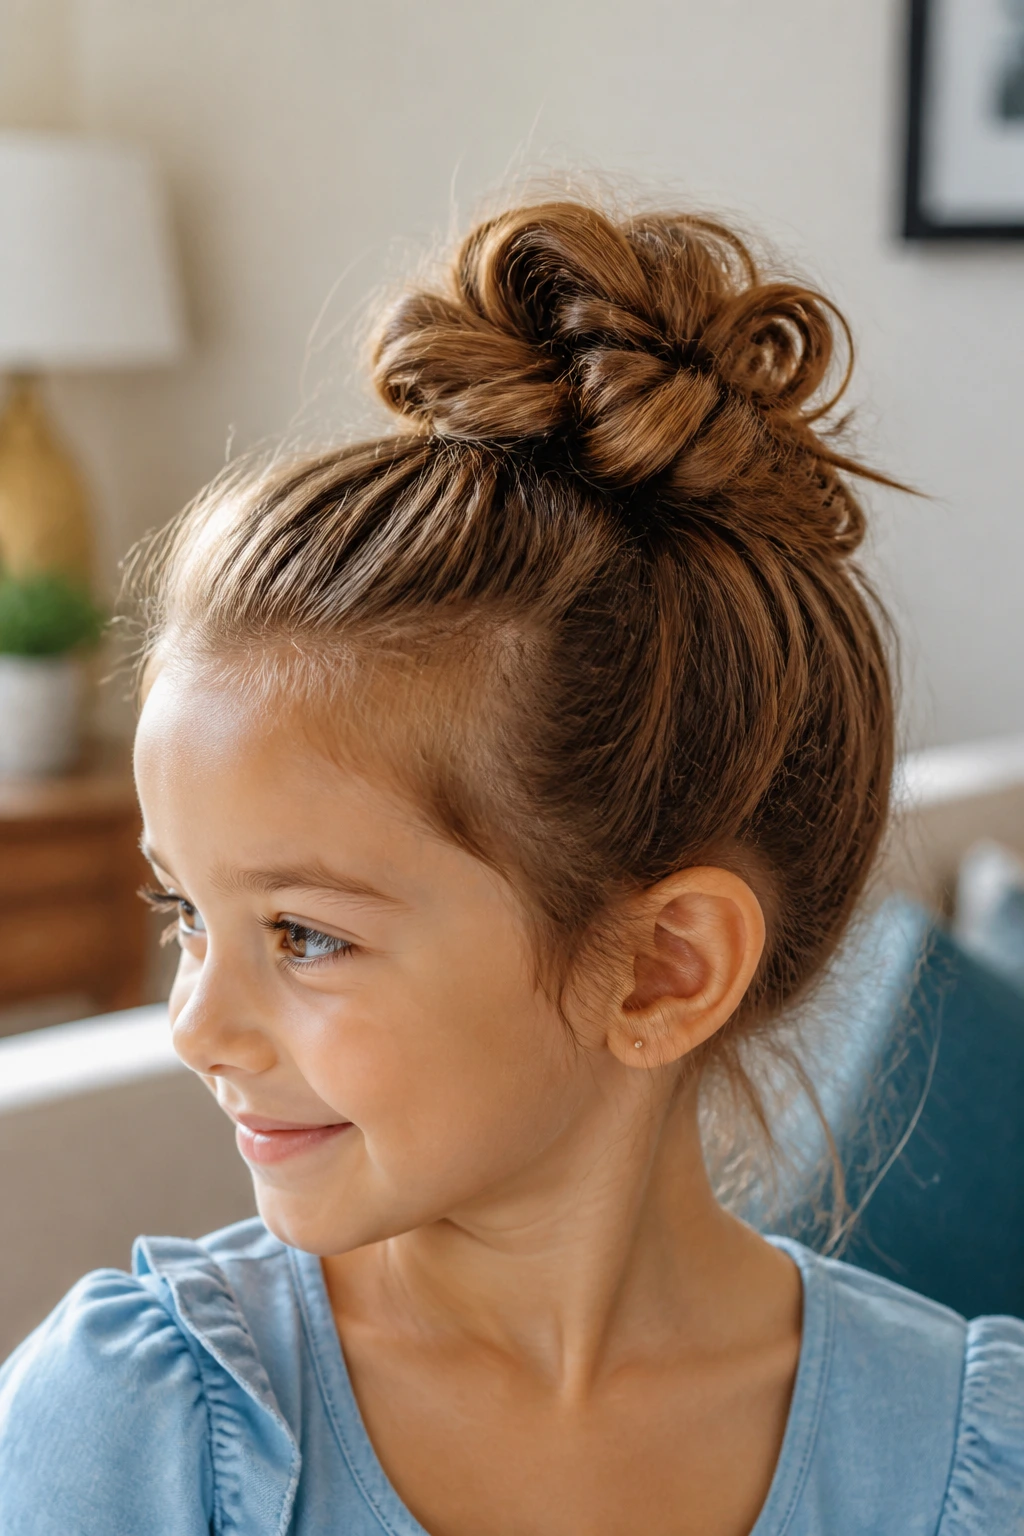
This one is a little more playful and a little less predictable than the standard twist. You create soft loops or knots with the hair before pinning them into a bun, which gives the style a relaxed shape without making it look messy in a careless way.
Why It Works:
Knots create natural hold points, so the bun has more grip than a single twist. That makes it handy on smoother hair or on days when the hair is clean and wants to escape every elastic.
Key Ingredients:
- 1 elastic
- 4 bobby pins
- 1 comb
- Light texture spray, optional
Quick Steps:
- Gather the hair into a ponytail at the crown or nape.
- Split the ponytail into two sections and tie a loose knot or loop with them.
- Wrap the remaining ends around the knot and secure them with pins.
- Shape the loops so they look full but not lumpy.
Equipment for This Style:
- Elastic
- Pins
- Comb
- Spray bottle
How to Wear It:
This works well for days when you want something a little different without a complicated braid. It can look casual with jeans or a bit more polished with a dress and simple clip.
Pro Tips for This Style:
- Don’t pull the knot tight the first time; you need room to shape it.
- Pin through the center of the knot, not just the outer edge.
Variations on This Style:
- Double Loop Bun: Make two loops instead of one knot.
- Low Knot Bun: Move the knot to the nape for a softer profile.
Common Mistakes to Avoid with This Style:
- Making the loops too tiny: The bun disappears and loses its shape.
- Using brittle pins: They slide out and make the bun feel sloppy by lunch.
15. Scarf-Tied Messy Bun
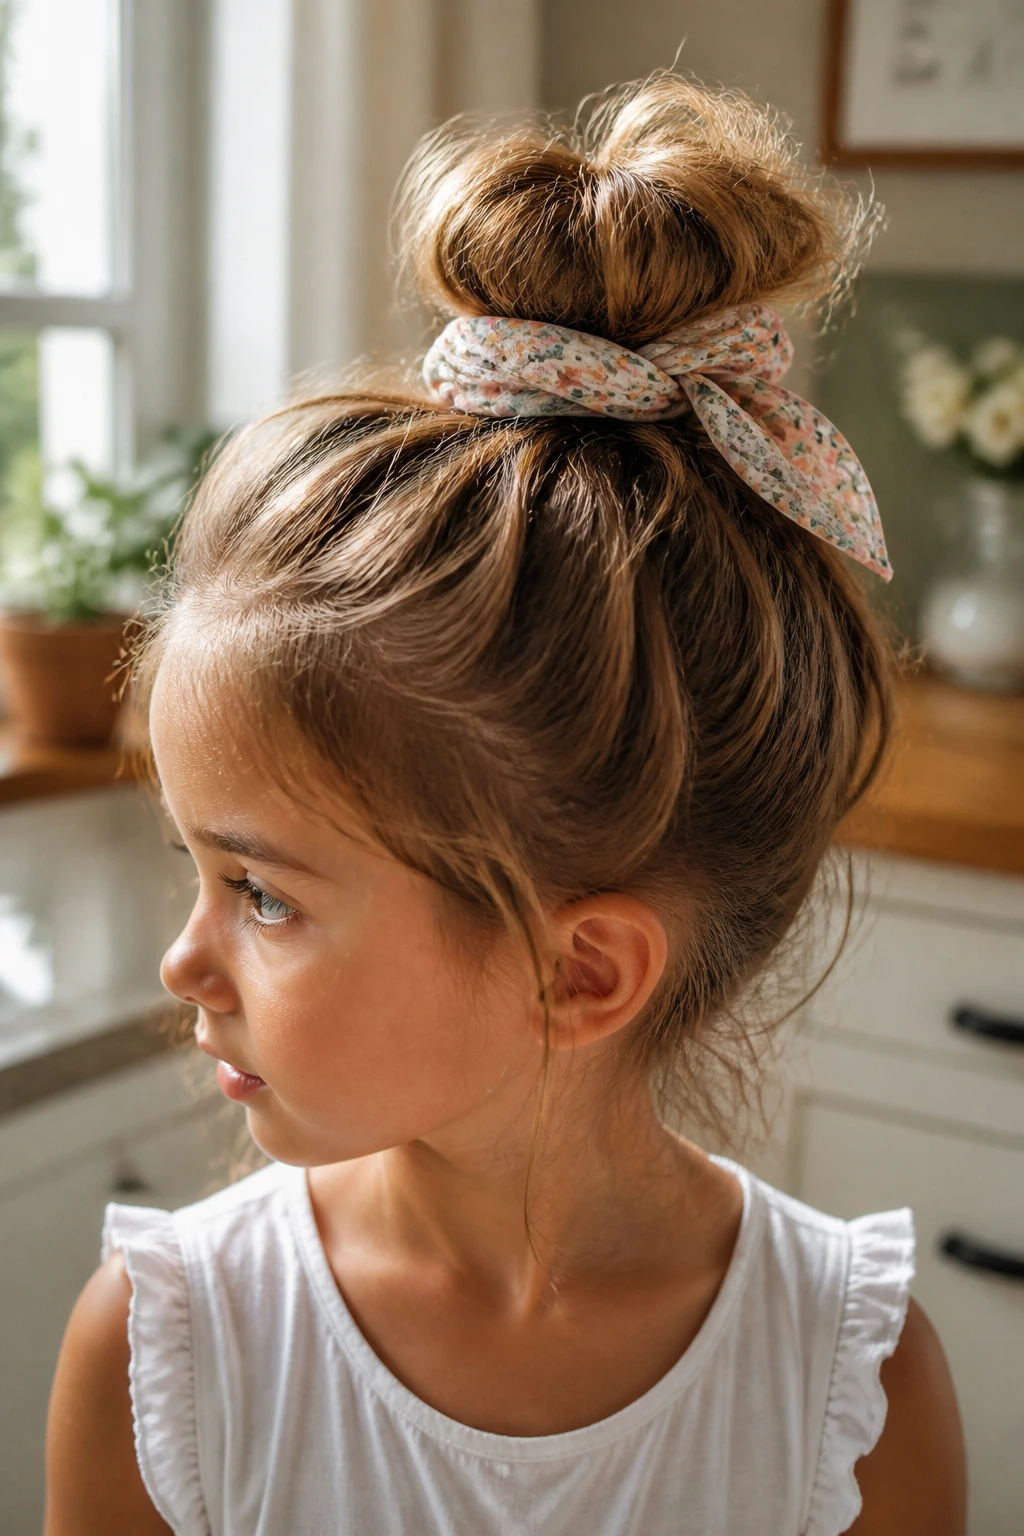
A scarf can turn a simple bun into something with a little story behind it. The trick is to keep the scarf light and not too bulky, so it still feels like a child’s hairstyle and not a wrapped package. A soft cotton or silk scarf works far better than anything stiff.
Why It Works:
The scarf hides the elastic and gives the bun more color and movement. It also helps when you want the bun to look intentional even if the hair underneath is pretty ordinary.
Key Ingredients:
- 1 elastic
- 1 small scarf, folded into a strip
- 2 pins
- Brush or comb
Quick Steps:
- Build a simple bun and secure it first.
- Fold the scarf into a strip and tuck one end under the elastic.
- Wrap the scarf around the bun once or twice, leaving a little drape.
- Pin or knot the ends so they sit flat behind the bun.
Equipment for This Style:
- Elastic
- Soft scarf
- Pins
- Comb
How to Wear It:
This is a sweet option for family gatherings, church, or any day you want the hair to look a bit more thoughtful. It pairs nicely with plain clothes because the scarf adds the color.
Pro Tips for This Style:
- Use a scarf that is narrow enough not to bulk up the bun.
- Keep the fabric ends short so they do not slide around the neck.
Variations on This Style:
- Bandana Bun: Use a folded bandana for a more playful finish.
- Silk-Tie Bun: Use a smooth scarf for a softer, shinier look.
Common Mistakes to Avoid with This Style:
- Wrapping too much fabric around the bun: It becomes heavy and lopsided.
- Choosing a slippery scarf without a pin plan: It will unwind fast unless you anchor it.
16. Fishtail Accent Bun
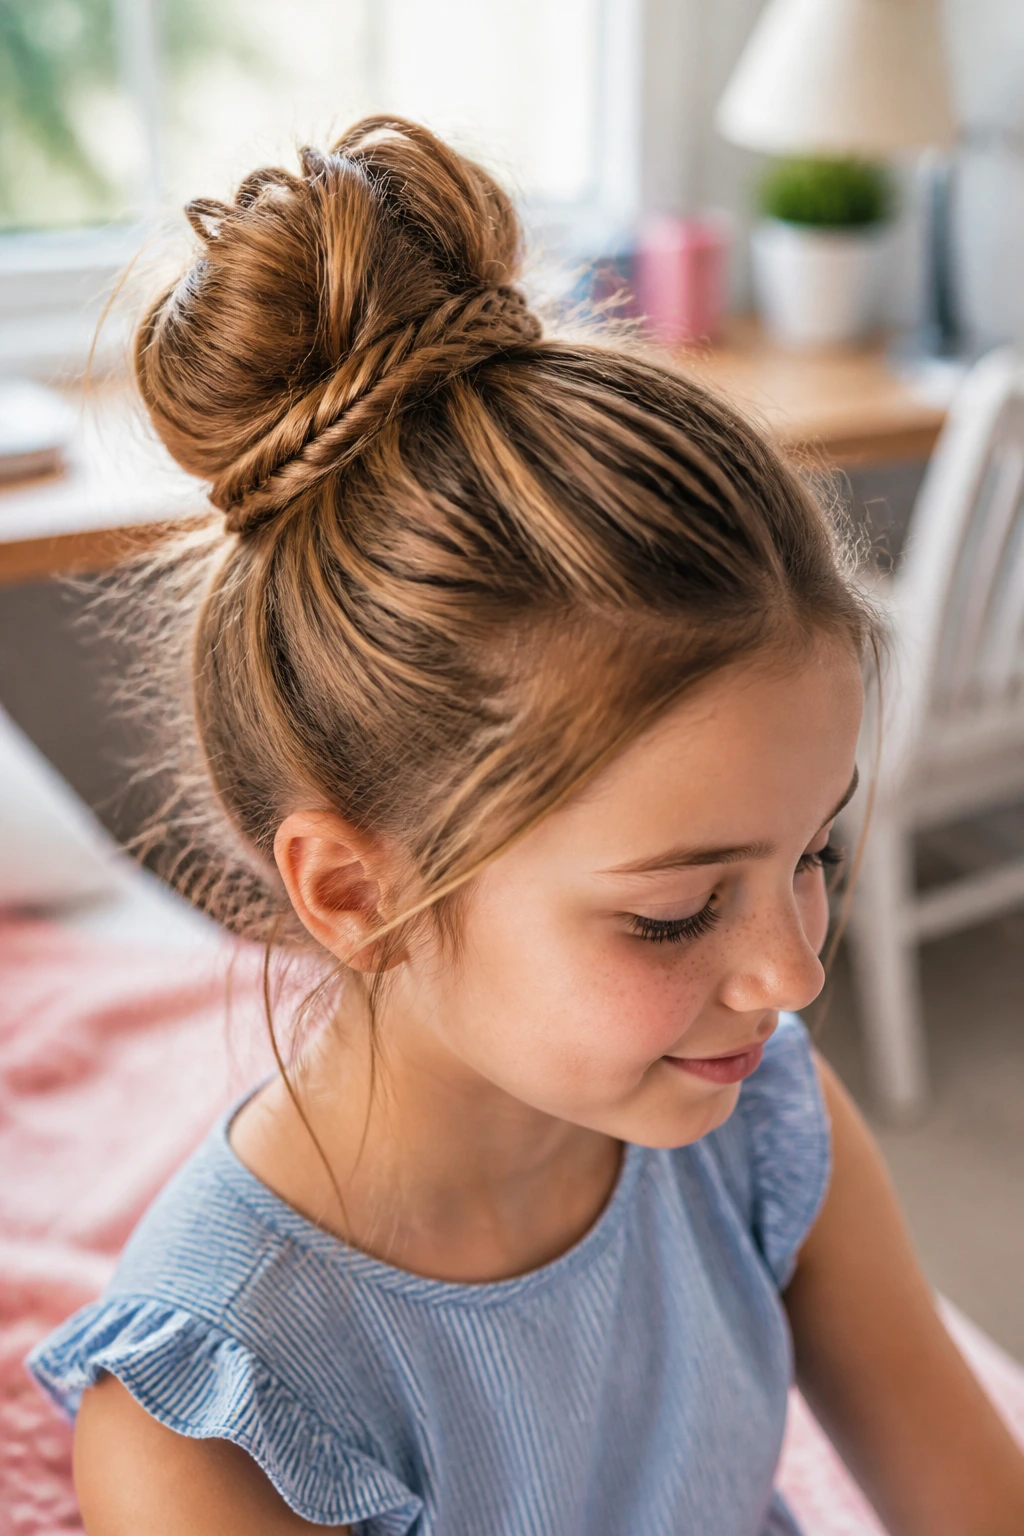
A fishtail braid is one of those details that looks fancier than the effort it takes, especially on small sections of hair. Used as an accent before a bun, it gives the style texture without demanding a full head of braids. I like this for girls who want “something different” but won’t sit still for a long session.
Why It Works:
The braid adds a little visual pattern and gives the bun a stable section to wrap around. Because the braid is small, it doesn’t make the final bun too heavy or stiff.
Key Ingredients:
- 1 elastic
- 2 to 4 pins
- 1 comb
- Optional tiny clip
Quick Steps:
- Take a front or side section of hair and fishtail braid it loosely.
- Gather the rest of the hair into a ponytail.
- Wrap the braid around the base before coiling the rest into a messy bun.
- Pin the braid in place and loosen the edges slightly.
Equipment for This Style:
- Comb
- Elastic
- Pins
- Small clip
How to Wear It:
This is a good choice for birthday parties, school concerts, or any moment that calls for a little more detail. It looks nice with a side part and a neat outfit, but it still has the looseness of a regular bun.
Pro Tips for This Style:
- Braid only a small section; a huge fishtail can take over the whole style.
- Pull the braid apart before wrapping it so the pattern shows.
Variations on This Style:
- Side Fishtail Bun: Braid one side and let the other side stay soft.
- Mini Fishtail Crown: Braid the front hairline and pin it into the bun.
Common Mistakes to Avoid with This Style:
- Making the fishtail too tight: The finished bun looks narrow and fussy.
- Hiding the braid completely under the bun: Let at least part of it show.
17. Five-Minute School-Bell Bun
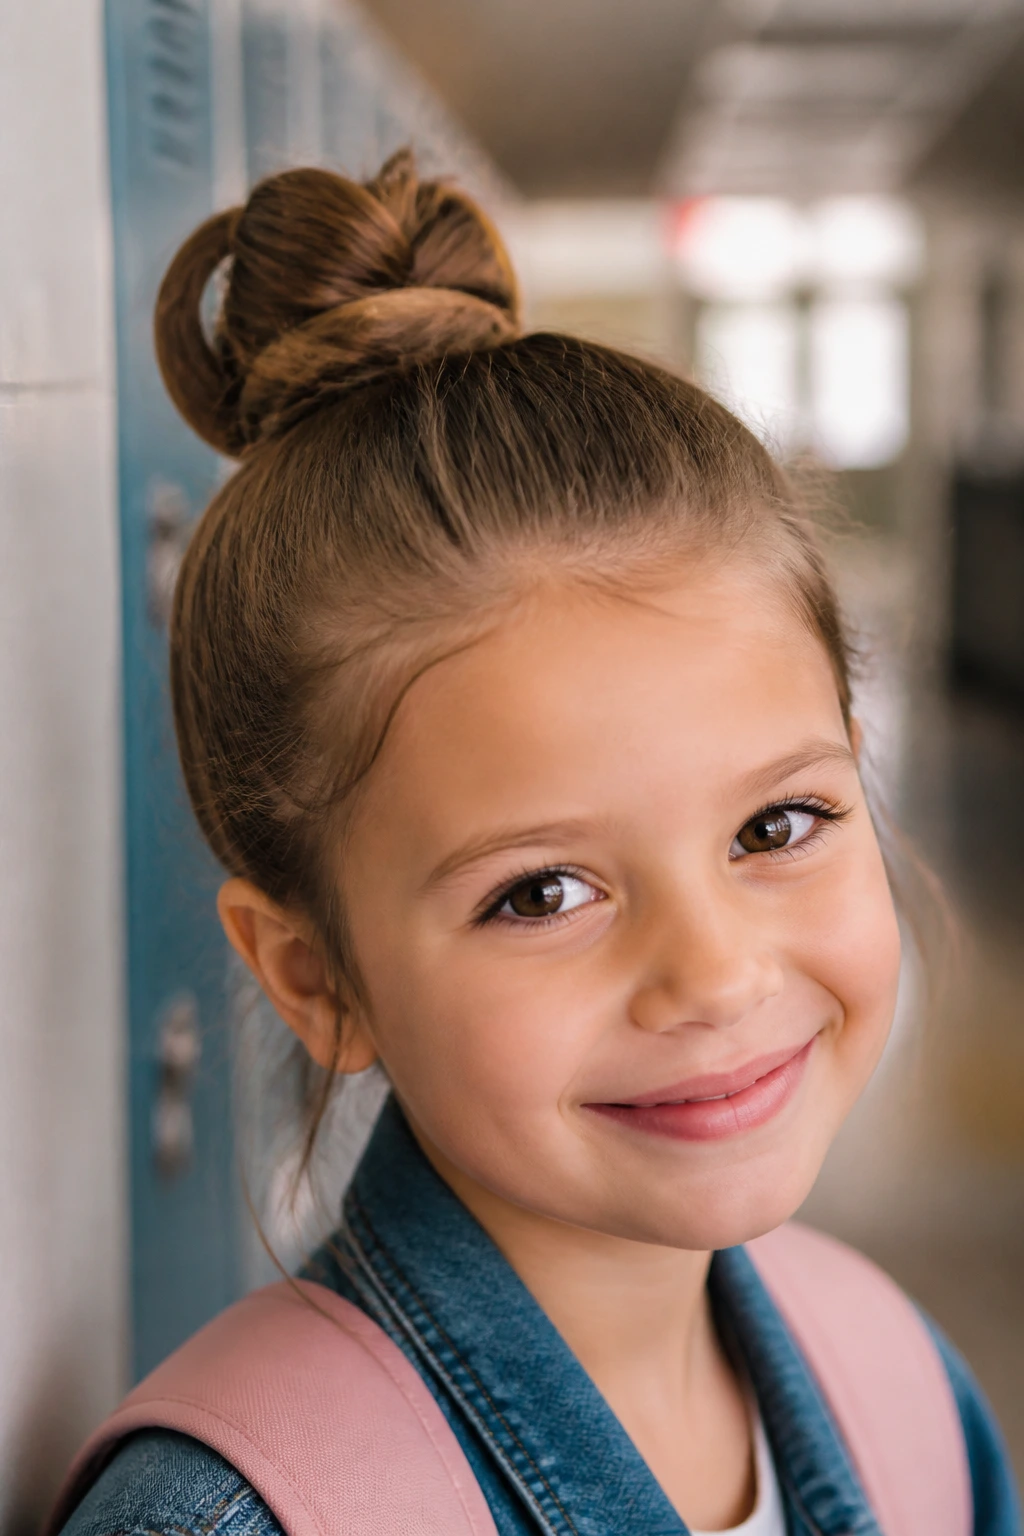
This is the one for mornings when the clock is loud. It’s fast, it holds, and it doesn’t need perfect sections or fancy accessories. The bun should look like the hair got tucked up in a hurry, because that is exactly the point.
Why It Works:
The shape depends on speed and placement, not on elaborate styling. A simple twist with one or two pins is enough for most school days, and the looseness keeps it from feeling overdone.
Key Ingredients:
- 1 elastic
- 2 bobby pins
- 1 brush
- Optional: one small clip
Quick Steps:
- Brush the hair back into a high or mid ponytail.
- Twist once, wrap once, and secure the bun with the elastic.
- Add one pin through the base if the bun feels soft.
- Smooth the top with your hand and stop there.
Equipment for This Style:
- Brush
- Elastic
- Two pins
- Mirror
How to Wear It:
This bun is made for school drop-off, recess, and the kind of morning where everyone is moving too fast. It also works for after-school activities because it is quick to redo if needed.
Pro Tips for This Style:
- Don’t chase perfection; one uneven loop is fine.
- Keep one elastic and one pin in the bathroom basket so you’re not hunting for them.
Variations on This Style:
- Mid-Back School Bun: Place it lower for a calmer silhouette.
- Tiny Bow School Bun: Add a small clip only if the outfit needs it.
Common Mistakes to Avoid with This Style:
- Starting over when the bun is a little uneven: The style is meant to look relaxed.
- Using too many pins: That adds time and makes the bun feel stiff.
18. Donut Bun with Soft Ends
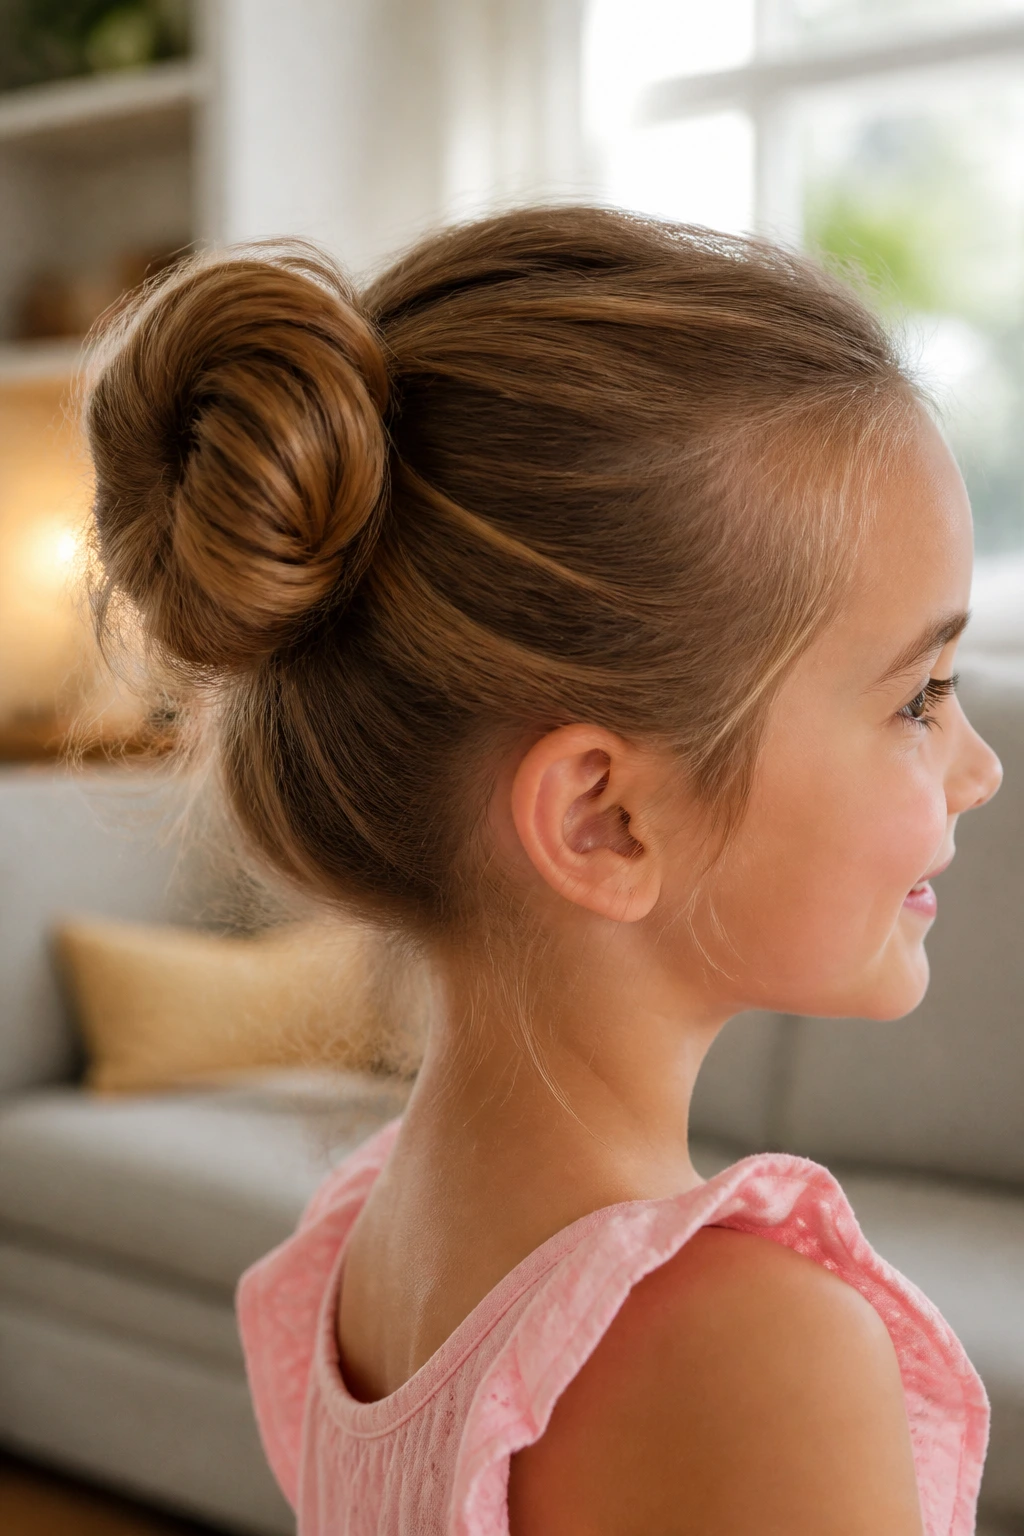
A donut bun can feel polished, but the little girl version should never look too formal. I like leaving a few soft ends peeking out so it reads as playful instead of stiff. That bit of texture keeps the style from looking like it belongs on a ballet poster.
Why It Works:
The donut form gives the bun shape and body, which is especially helpful with thin hair. Soft ends around the edge keep it from looking too smooth or adult.
Key Ingredients:
- 1 donut form
- 1 elastic
- 2 to 4 pins
- Small ribbon or clip, optional
Quick Steps:
- Pull the hair through the donut form and spread it evenly.
- Roll the hair down to cover the form, leaving a few ends loose on purpose.
- Pin any stray pieces that stick out too sharply.
- Tug gently around the bun’s edge so it feels soft.
Equipment for This Style:
- Donut form
- Elastic
- Pins
- Comb
How to Wear It:
This works for photos, dance class, and dress-up days. On smaller children, keep the form size modest; a giant bun can overwhelm the face.
Pro Tips for This Style:
- Use a smaller donut than you think you need.
- Let the hairline stay a little soft so the bun does not look severe.
Variations on This Style:
- Low Donut Puff: Place the donut at the nape for a quieter look.
- Ribbon-Edge Donut: Wrap a thin ribbon around the outside for color.
Common Mistakes to Avoid with This Style:
- Overstretching the hair over the form: Thin patches show through.
- Leaving the bun too perfect: A slight mess is what makes it work here.
19. Pigtail Mini Buns
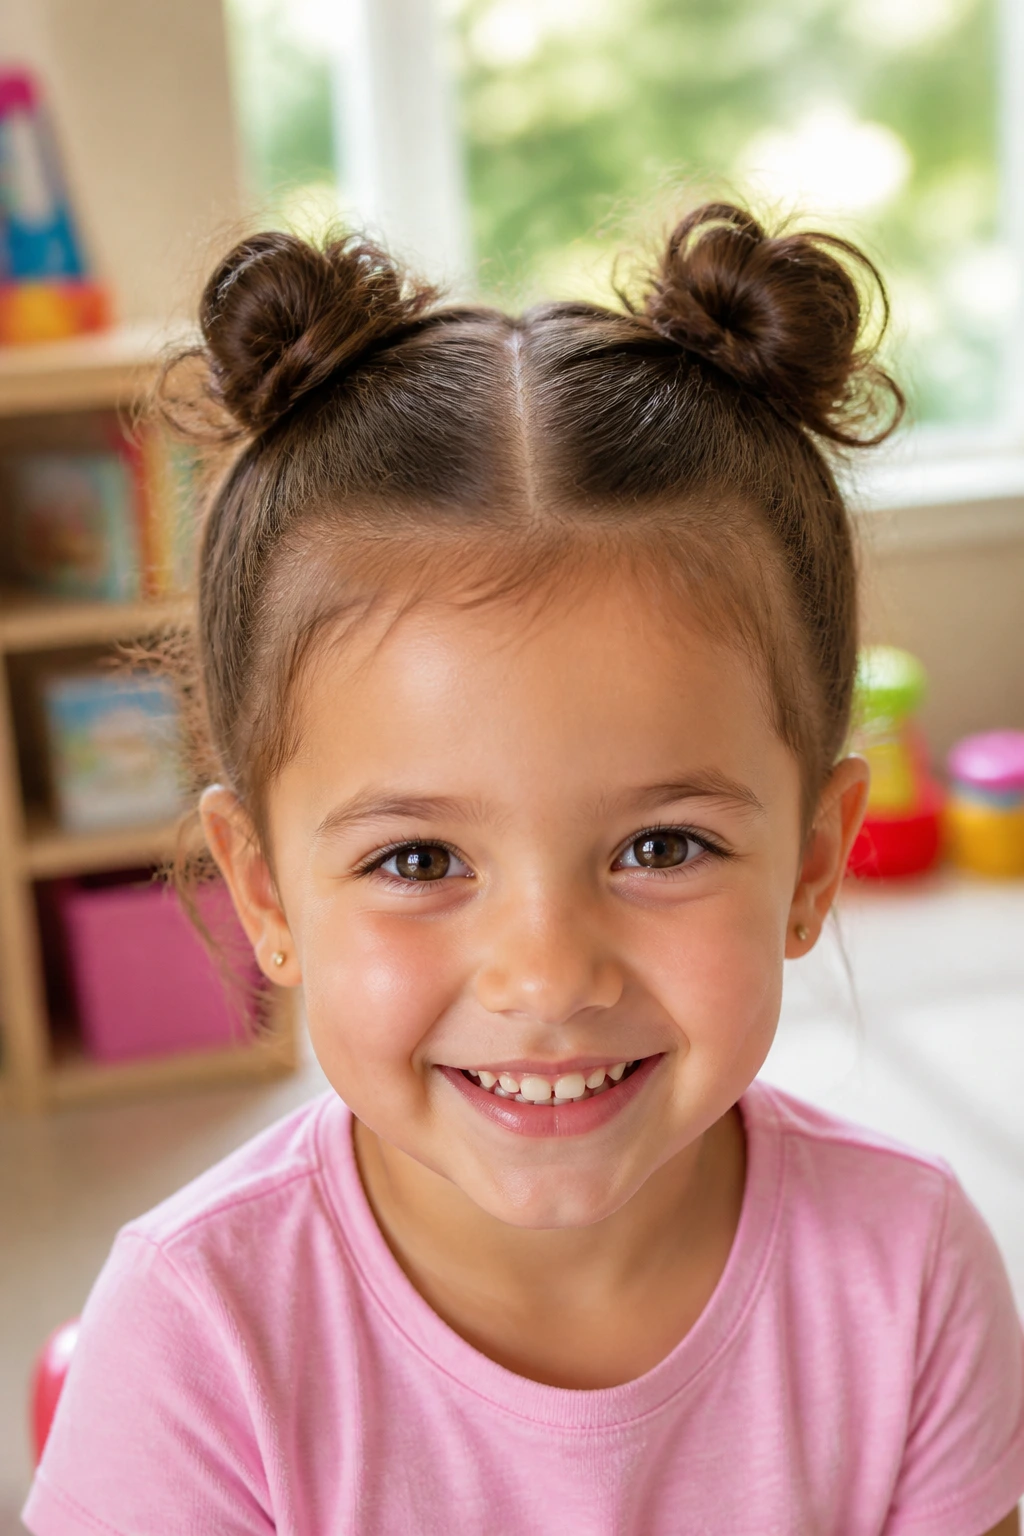
Pigtail buns are cheerful, practical, and very good at making a simple outfit feel more fun. They’re also useful for shorter hair because each bun has less weight to support. I reach for this style when a single bun would look too heavy or when the child wants “two” of everything.
Why It Works:
Splitting the hair into two sections lowers the amount of pull on each side and helps the buns stay balanced. It’s a forgiving style, which matters when the part is not perfectly straight or the hair has lots of little layers.
Key Ingredients:
- 2 soft elastics
- 4 bobby pins
- 1 comb
- Optional bows or small clips
Quick Steps:
- Make a center part or side part, then divide the hair into two sections.
- Gather each section into a small pigtail and twist it into a mini bun.
- Secure each bun with its own elastic and one or two pins.
- Loosen each bun a touch so they read as soft, not tight.
Equipment for This Style:
- Comb
- Elastics
- Pins
- Small mirror
How to Wear It:
This is one of the best playdate styles on the list. It stays cute even when it gets a little fuzzy, which is a useful quality when the day involves climbing, swinging, or pretend tea parties.
Pro Tips for This Style:
- Keep the buns even in height, even if the sections are not perfectly equal.
- Use tiny bows for a sweet finish without crowding the style.
Variations on This Style:
- High Pigtail Buns: Move the buns above the ears for a more energetic look.
- Low Pigtail Knots: Sit them lower for a softer, calmer feel.
Common Mistakes to Avoid with This Style:
- Making one bun much larger than the other: The imbalance stands out fast.
- Tightening the center part too much: It can pull the style into a strict look.
20. French Twist Mini Bun
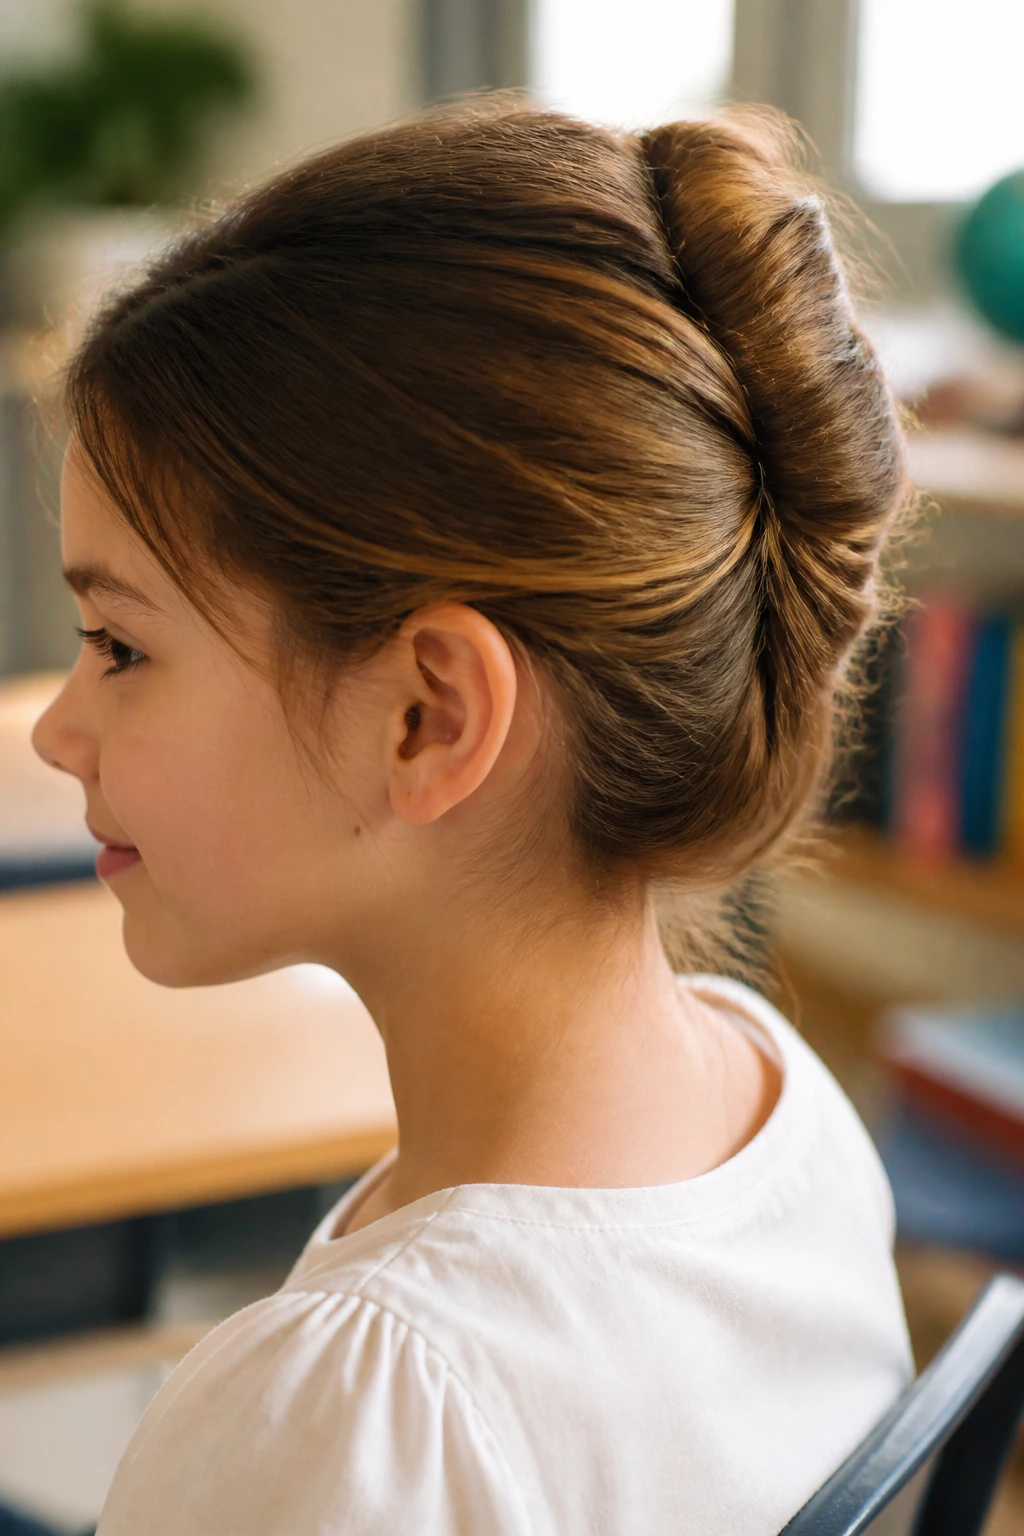
A French twist is usually thought of as grown-up, but the little-girl version can be surprisingly sweet when you keep it loose and small. The hair rolls upward instead of out, which creates a neat line with just enough softness at the edges.
Why It Works:
The vertical roll keeps the style snug without needing a bulky bun shape. That makes it a good choice for medium hair that needs to stay close to the head.
Key Ingredients:
- 1 elastic
- 3 to 5 pins
- 1 comb
- Light smoothing mist, optional
Quick Steps:
- Brush the hair back and gather it low at the nape.
- Twist the hair upward against the head, tucking the ends inward as you roll.
- Pin the twist along the side and base so it stays upright.
- Pull a few pieces loose around the front if you want softness.
Equipment for This Style:
- Brush
- Pins
- Elastic
- Comb
How to Wear It:
This can look neat enough for special events without feeling too formal if you leave the shape relaxed. It’s a good option for straight hair that needs a little structure.
Pro Tips for This Style:
- Make the roll slightly loose before pinning; a tight twist can look harsh on a child.
- Use pins in pairs for better hold along the side seam.
Variations on This Style:
- Side French Twist: Angle the roll to one side for a softer line.
- Loop-Back Twist: Leave one end looped out for a messier finish.
Common Mistakes to Avoid with This Style:
- Rolling the hair too tightly: The style loses its softness fast.
- Using pins that are too long for small heads: They can poke and shift.
21. Side-Braid Into a Bun
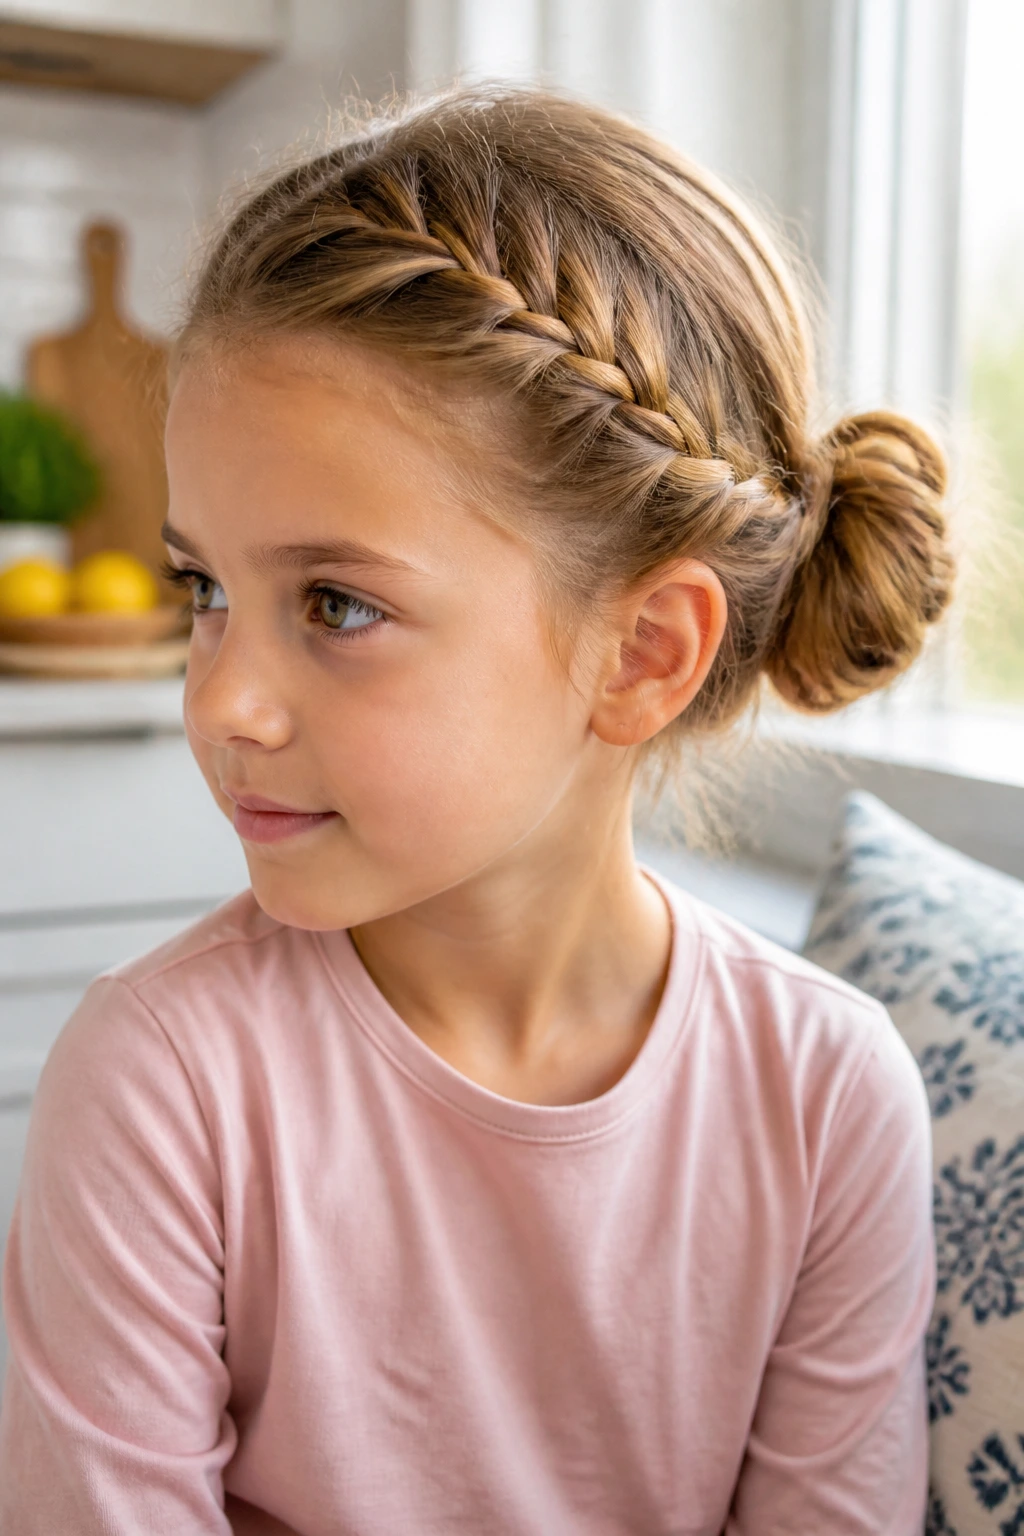
A side braid into a bun gives you a little bit of ornament up front and a compact bun at the back or side. It’s useful when a child has a deep side part or one side of the hair keeps escaping. The braid acts like a guide, which makes the bun easier to control.
Why It Works:
Starting on the side pulls the eye away from any uneven layers and turns them into part of the design. It also creates a more secure base than a plain ponytail on slippery hair.
Key Ingredients:
- 1 elastic
- 3 bobby pins
- 1 comb
- Optional clip
Quick Steps:
- Part the hair to one side and braid the heavier side down toward the ear or nape.
- Gather the braid and the rest of the hair into a low or mid ponytail.
- Wrap everything into a bun and pin it securely.
- Loosen the braid slightly so the pattern shows.
Equipment for This Style:
- Comb
- Elastic
- Pins
- Brush
How to Wear It:
This is a smart pick for school photos, birthdays, or days when one side of the hair is stubborn. It feels a little more detailed than a plain bun without adding much time.
Pro Tips for This Style:
- Keep the braid soft so it can feed smoothly into the bun.
- If the side part is dramatic, leave a small face-framing piece loose on the lighter side.
Variations on This Style:
- Single Side Braid Bun: Braid one side only and leave the rest smooth.
- Double Side-Braid Bun: Braid both sides and meet them at the back.
Common Mistakes to Avoid with This Style:
- Braiding too close to the scalp with no slack: It can pull uncomfortably.
- Forgetting to pin the braid tail: Loose ends stick out and fray the shape.
22. Twisted Nape Bun
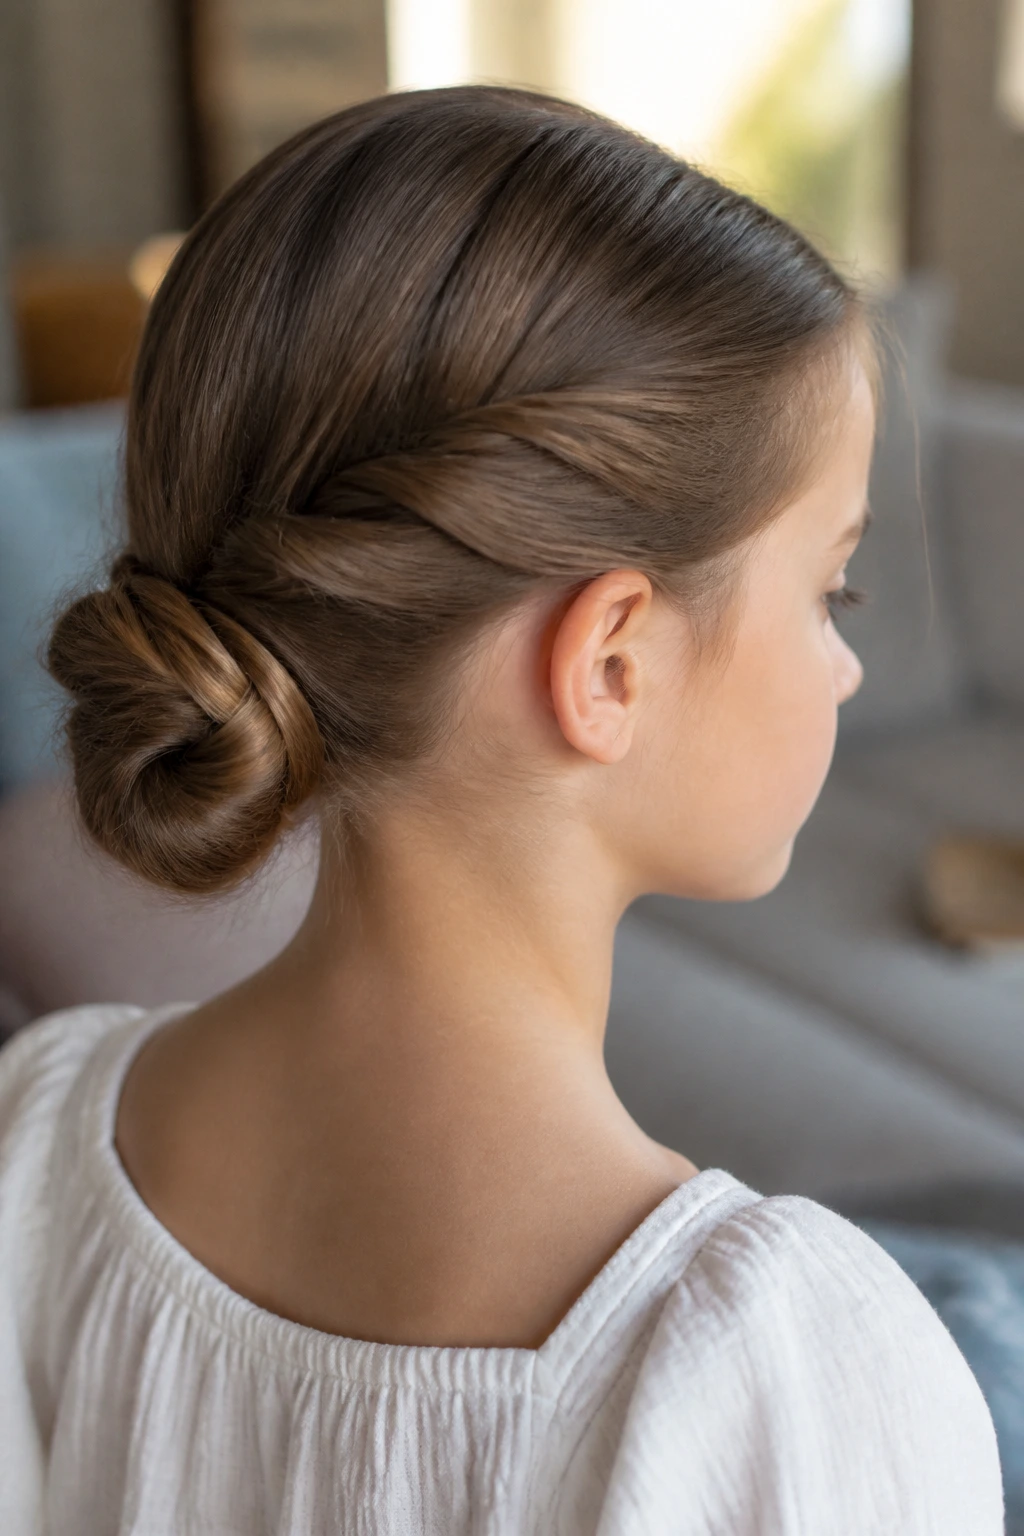
The twisted nape bun is one of those quietly useful styles that never gets much attention and always earns it. It sits low, keeps the neck clear, and stays comfortable for long stretches. On little girls, the low placement makes it feel calm instead of dramatic.
Why It Works:
Twists at the nape give you structure without the bulk of a high bun. The hair stays tucked close to the head, so it’s less likely to get bumped or pulled during the day.
Key Ingredients:
- 1 elastic
- 4 bobby pins
- 1 brush
- Optional silk ribbon
Quick Steps:
- Gather the hair low at the nape and split it into two sections.
- Twist each section inward, then wrap them around each other.
- Coil the twist into a small bun and pin it at the base and sides.
- Shape the bun with your fingers so it stays soft around the edges.
Equipment for This Style:
- Brush
- Elastic
- Pins
- Comb
How to Wear It:
This works well under sweaters, coats, and hooded sweatshirts because it stays low and flat. It’s a nice everyday style when you want something orderly but not fussy.
Pro Tips for This Style:
- Keep the twist close to the neck so it doesn’t puff out awkwardly.
- If the ends are short, pin them under instead of forcing them into the bun.
Variations on This Style:
- Low Ribbon Twist: Add ribbon into the twist before pinning.
- Loose Nape Knot: Leave the twist less defined for a softer finish.
Common Mistakes to Avoid with This Style:
- Setting it too low into the collar line: It gets crushed fast.
- Twisting one side tighter than the other: The bun may lean to one side.
23. Unicorn Horn Bun
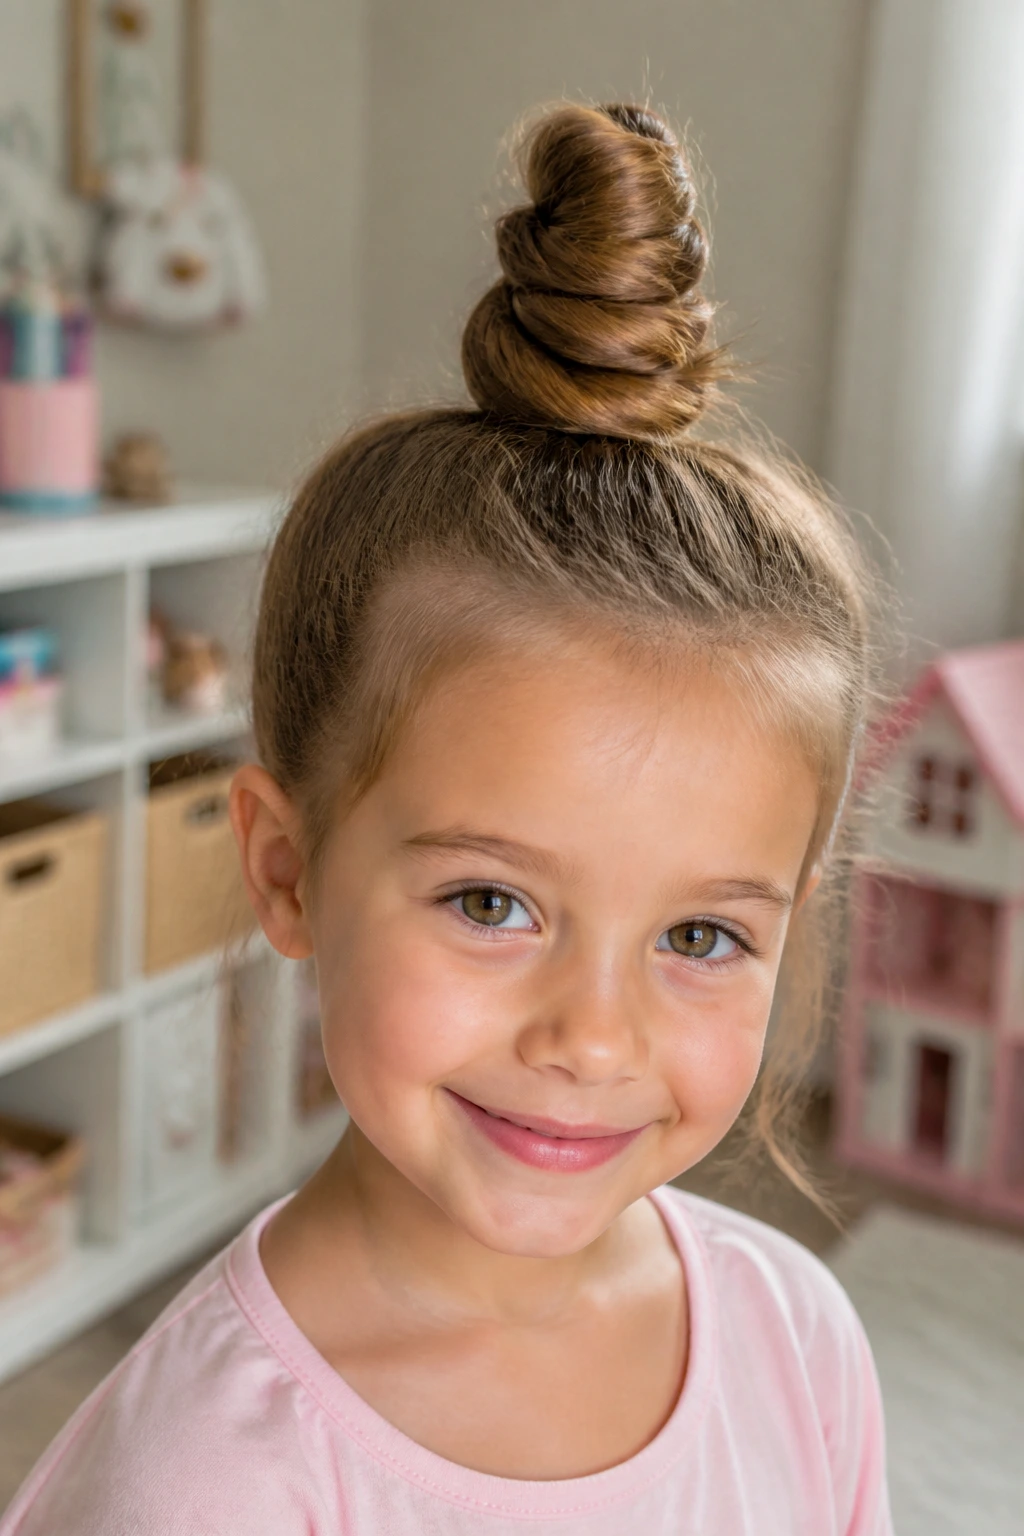
This is the boldest style in the bunch, and little girls usually know right away if they want it. The single high spiral gives a playful, magical feel without needing a lot of accessories. It works best when you let the bun stay a little whimsical instead of trying to perfect every strand.
Why It Works:
The high spiral creates height and shape, which makes the style stand out even on fine hair. A little glitter clip or bright bow can make the whole look feel intentional in a second.
Key Ingredients:
- 1 strong soft elastic
- 3 to 5 bobby pins
- 1 comb
- Optional sparkly clip or tiny star accessory
Quick Steps:
- Gather the hair high at the center of the crown.
- Twist the ponytail upward into a spiral so it stands a little tall.
- Wrap it into a compact bun and pin the base firmly.
- Pull the top edge apart just enough to give the bun a soft peak.
Equipment for This Style:
- Elastic
- Pins
- Comb
- Small decorative clip
How to Wear It:
This is a party, dress-up, or pretend-play bun. It looks best when the rest of the outfit is simple enough to let the hair be the fun part.
Pro Tips for This Style:
- Do not over-tighten the first twist; the bun needs a little bend to form the peak.
- Use one small accessory, not a pile of them.
Variations on This Style:
- Glitter Peak Bun: Add one sparkle clip right at the front of the spiral.
- Mini Unicorn Bun: Keep the height lower for a gentler version.
Common Mistakes to Avoid with This Style:
- Making the bun too wide: It loses the unicorn shape.
- Skipping a firm base pin: The peak can tip over quickly.
24. Ballet-Soft Bun
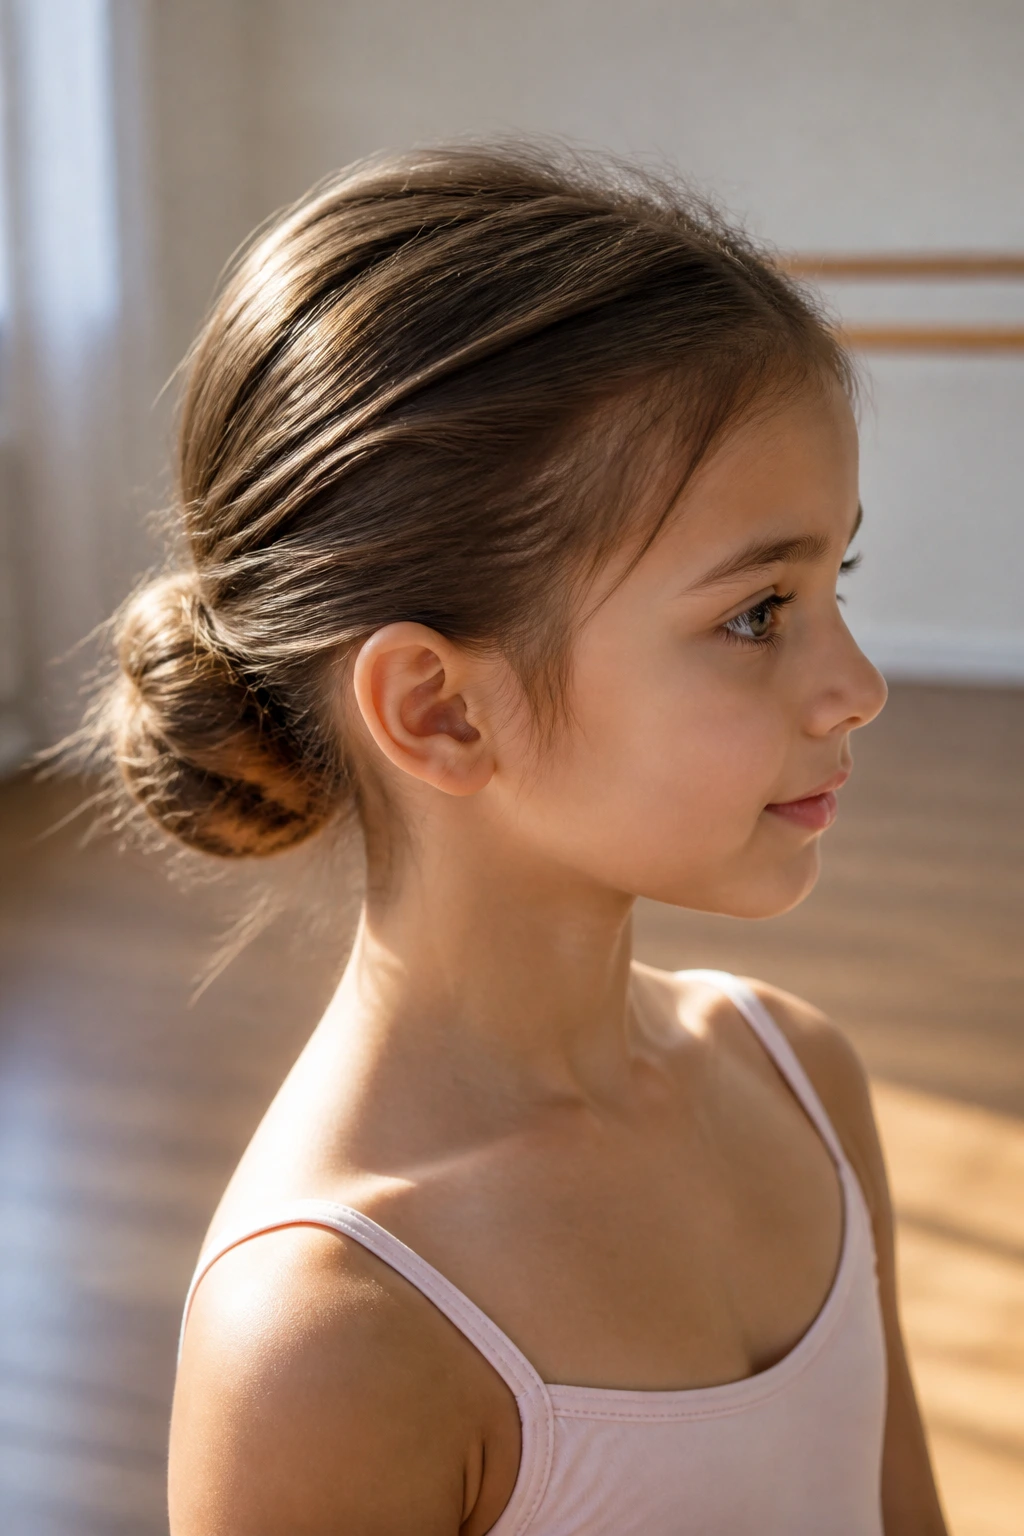
A ballet-inspired bun can still be soft, which is the version I prefer for children. It should feel neat but not severe, with a smooth base and just enough looseness around the edges to keep it from looking like a performance-only style. Think tidy, not tense.
Why It Works:
The low or mid placement keeps the shape controlled while avoiding the high tension that can make kids fidget. A smooth base also keeps stray hairs from popping out every time the child moves.
Key Ingredients:
- 1 elastic
- 4 pins
- 1 comb
- Optional hair net for a more polished finish
Quick Steps:
- Brush the hair back into a low or mid ponytail.
- Twist the ponytail into a flat bun and wrap the ends under.
- Pin the bun in a square or cross pattern so it stays anchored.
- Smooth the crown and loosen only the tiniest bit around the bun edge.
Equipment for This Style:
- Brush
- Elastic
- Pins
- Hair net, optional
How to Wear It:
This is a good fit for recitals, dance class, or dressier events where a cleaner bun makes sense. It can still feel childlike if you keep the finish soft and skip heavy styling product.
Pro Tips for This Style:
- A hair net can help if the hair is thick, but choose one that matches the color closely.
- Flatten the bun with your fingers before pinning so it stays neat.
Variations on This Style:
- Loose Ballet Bun: Leave a few wisps at the temples.
- Wrapped Ballet Bun: Hide the elastic with a small ribbon or a strand of hair.
Common Mistakes to Avoid with This Style:
- Smoothing it into a hard shell: The style looks older than it should.
- Leaving the bun too loose at the base: It will sag before the day is done.
25. Rainy-Day Frizz Bun
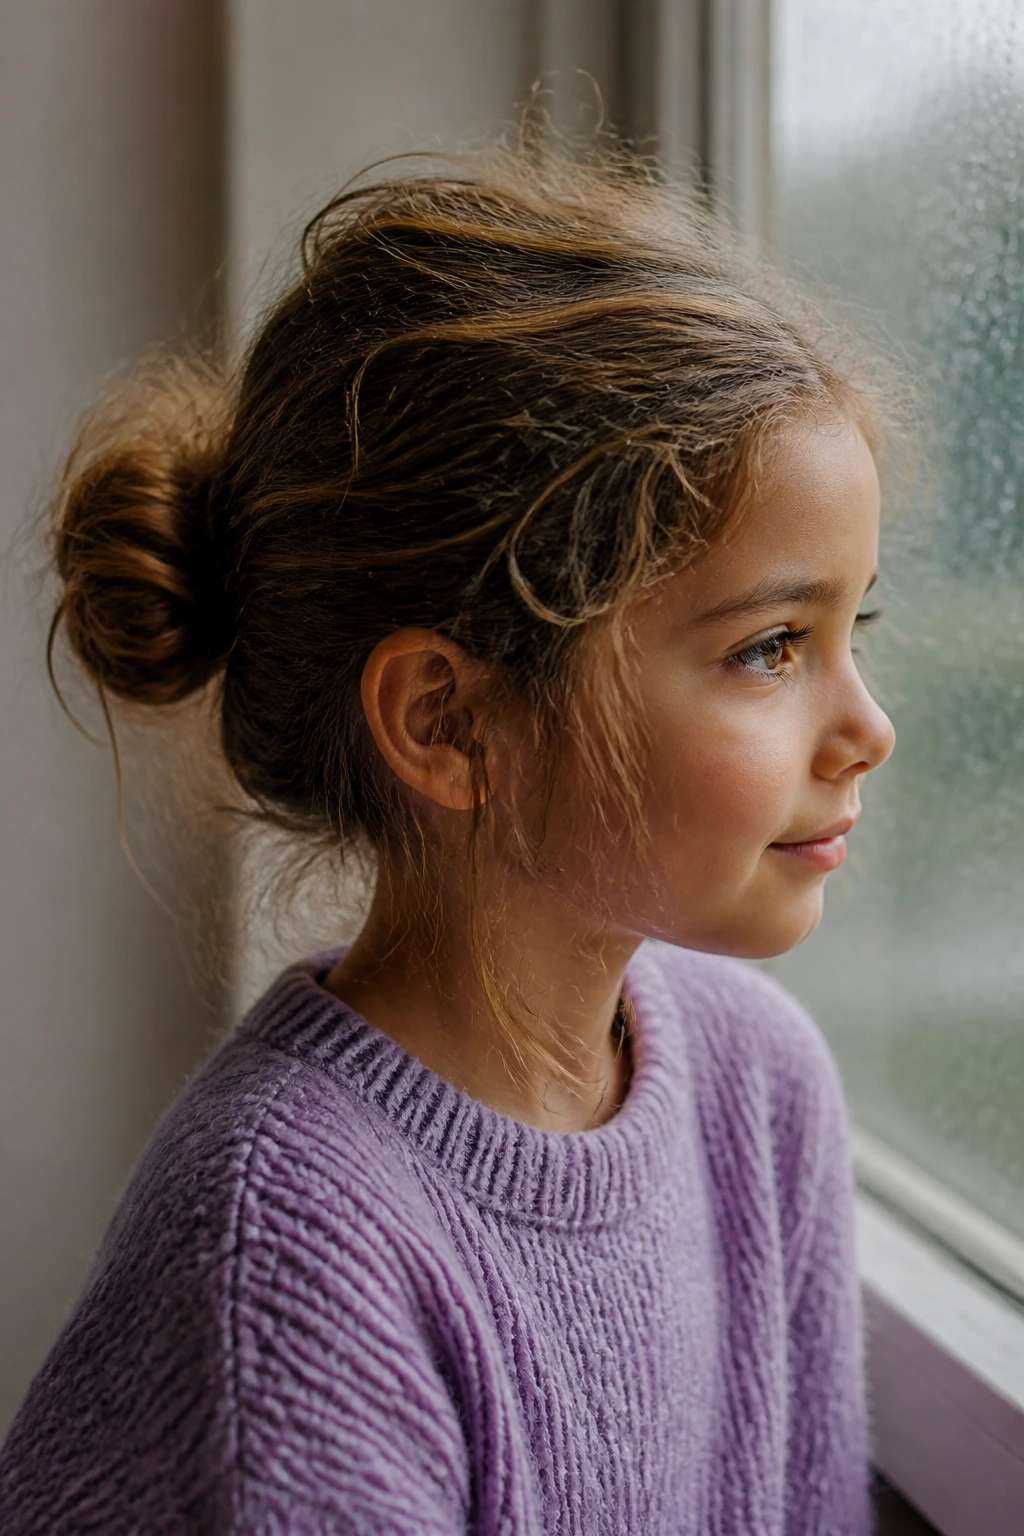
Humidity has a way of ruining good intentions, so a rainy-day bun should work with the frizz rather than against it. This style does not ask the hair to behave perfectly. It just asks it to gather up and stay put.
Why It Works:
A little texture gives the bun grip, and the loose finish makes humidity look like part of the style instead of a problem. This is one of the few times frizz is your ally.
Key Ingredients:
- 1 elastic
- 3 to 5 pins
- Water or anti-frizz mist
- Optional light leave-in conditioner
Quick Steps:
- Apply a light mist to the hair, focusing on the outer layer if it is puffing up.
- Gather the hair into a mid or low bun with your hands rather than brushing it flat.
- Twist and pin the bun in place, keeping a few flyaways on purpose.
- Smooth only the obvious rough spots and stop before it turns slick.
Equipment for This Style:
- Spray bottle
- Soft brush or fingers
- Pins
- Elastic
How to Wear It:
This is a smart everyday bun when the weather is damp or the hair is already frizzy from a long day. It looks best when you don’t fight the texture too hard.
Pro Tips for This Style:
- Use a tiny amount of leave-in on the ends, not the roots.
- Keep an extra pin handy; humidity loosens styles faster.
Variations on This Style:
- Puffy Rain Bun: Leave more texture on top for a cloudier shape.
- Low Weatherproof Knot: Move the bun lower for extra hold.
Common Mistakes to Avoid with This Style:
- Trying to slick everything flat: Humidity wins that battle.
- Using heavy oil near the scalp: It can make the bun slide.
26. Loose Loop Bun
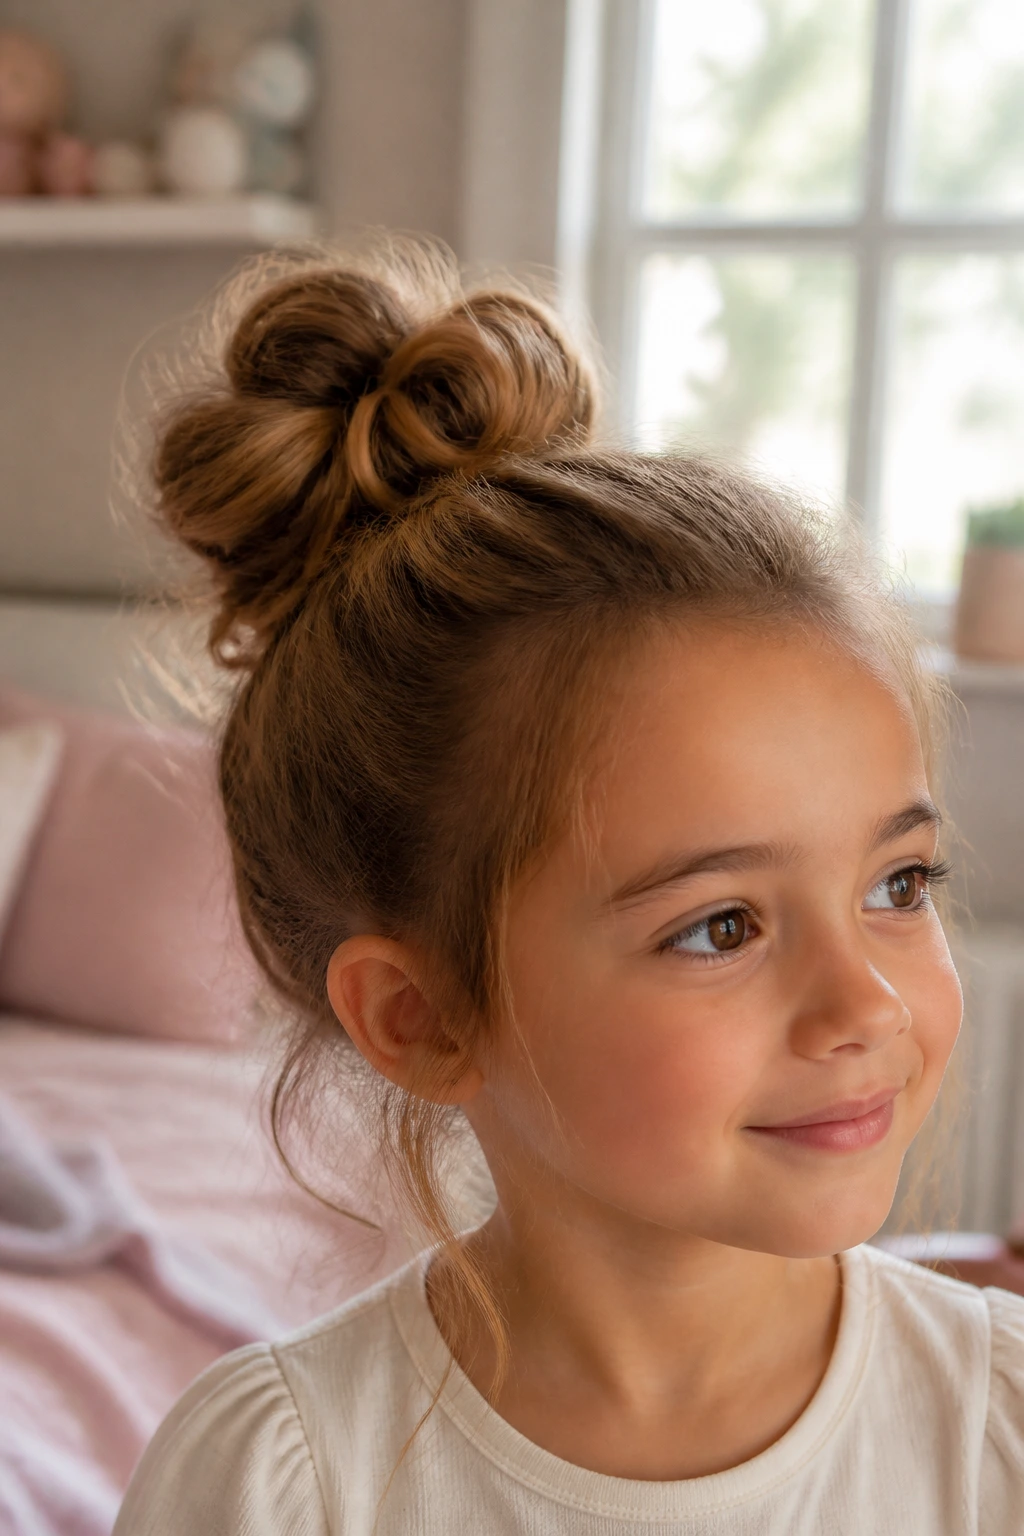
The loose loop bun is the easygoing one in the group. It has a soft loop or two, ends that may peek out a bit, and enough shape to look styled without ever feeling strict. I like this for kids who don’t want their hair completely tucked away.
Why It Works:
The loop creates volume without the pressure of a tight coil. It’s especially good for medium-length hair that needs a bit of encouragement to stay in one place.
Key Ingredients:
- 1 elastic
- 3 bobby pins
- 1 comb
- Optional clip or barrette
Quick Steps:
- Gather the hair into a ponytail and pull it halfway through the elastic on the last loop.
- Leave the ends sticking out a little to form a soft loop.
- Wrap the loose ends around the base and pin them lightly.
- Tug the loop and the crown so the shape looks airy.
Equipment for This Style:
- Elastic
- Pins
- Comb
- Mirror
How to Wear It:
This is a nice one for casual afternoons, school, or anywhere a child wants the hair off her neck without looking too “done.” It pairs well with a headband or a plain clip.
Pro Tips for This Style:
- Leave more ends out if you want a messier feel.
- Use one hidden pin at the base and one on the outer loop for better hold.
Variations on This Style:
- Half-Loop Bun: Pull the hair through only partway for a puffier base.
- Side Loop Bun: Shift the loop to one side for a softer angle.
Common Mistakes to Avoid with This Style:
- Pulling the loop too tight: It becomes small and loses its charm.
- Leaving the ends uneven in a way that looks accidental: Shape them with your fingers before pinning.
27. Double-Dutch Bun Pairs
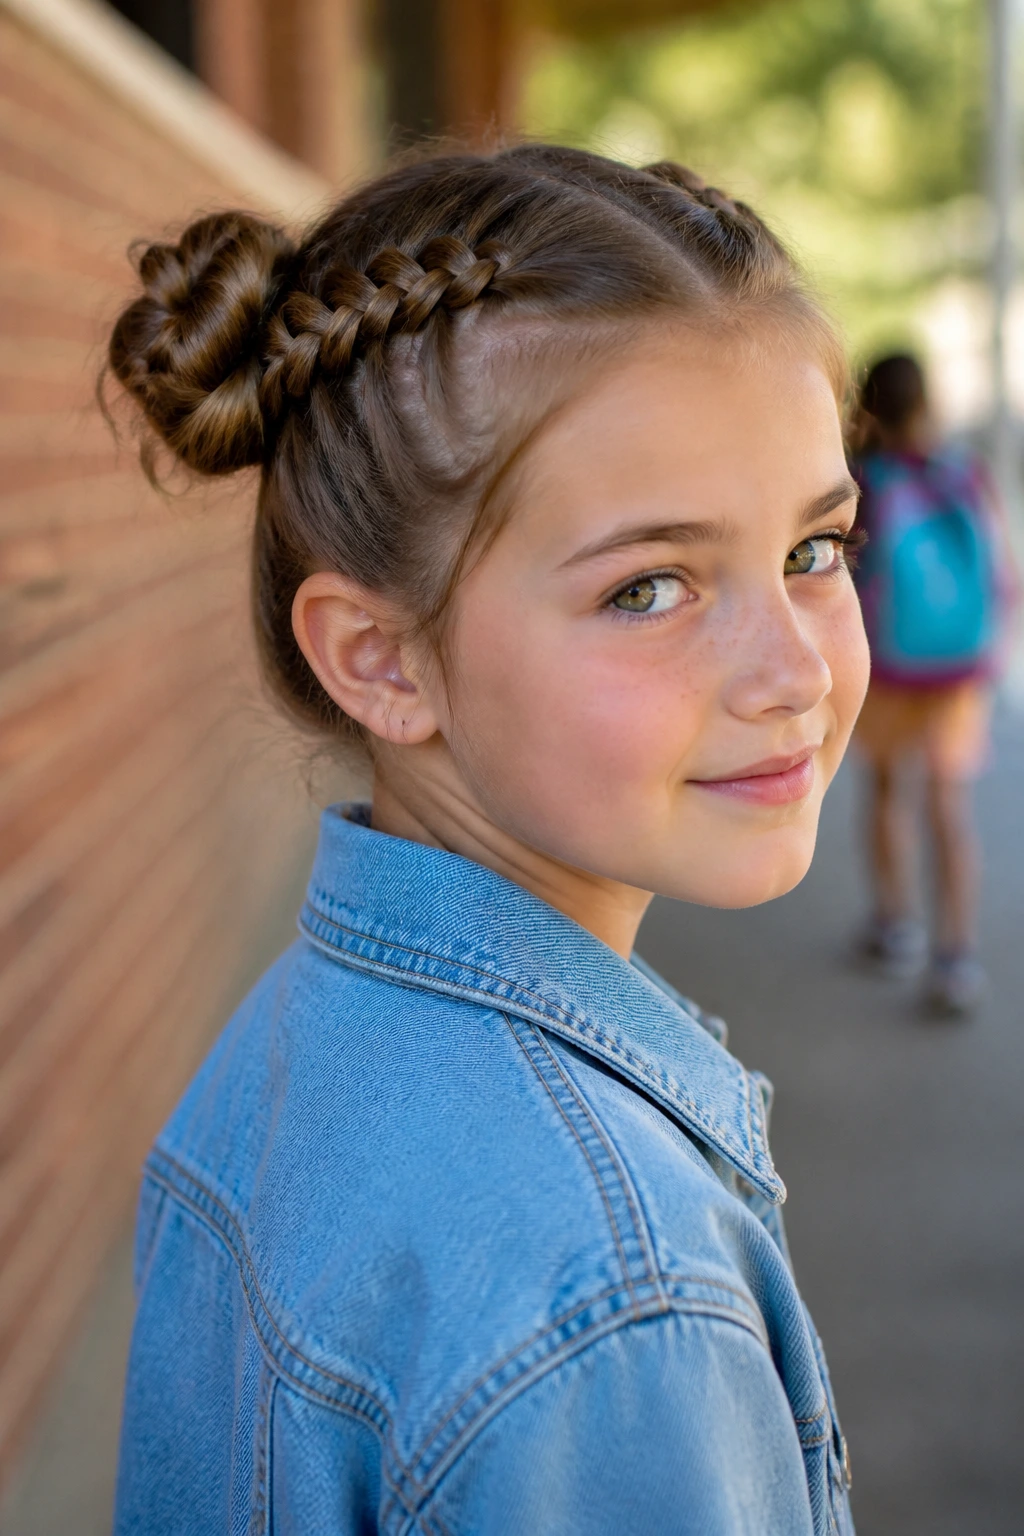
Double-Dutch bun pairs are the most structured of the playful styles, and they hold remarkably well because the braids feed into two secure buns. They look sporty, balanced, and a little bit bold. I save this one for days when the hair needs to stay locked in place.
Why It Works:
The Dutch braids create a strong path for the hair before it reaches the buns, which helps with hold and keeps loose layers from wandering. The twin-bun setup also spreads the weight out, which is a relief on thicker hair.
Key Ingredients:
- 2 elastics
- 6 to 8 bobby pins
- 1 rat-tail comb
- Optional small bows or clips
Quick Steps:
- Part the hair down the middle and Dutch braid each side from the front toward the back.
- Secure each braid into a small ponytail near the nape or mid-back.
- Wrap each ponytail into a bun and pin it firmly.
- Pull the braid sections slightly apart so the style looks soft rather than tight.
Equipment for This Style:
- Rat-tail comb
- Elastics
- Pins
- Brush
How to Wear It:
This is a strong choice for busy school days, sports practice, or long outings where the hair needs to stay in place. It looks especially nice on thicker hair and on kids who like the “two of everything” look.
Pro Tips for This Style:
- Keep both braids the same size so the buns match.
- If the buns feel heavy, move them a little lower and pin them closer to the head.
Variations on This Style:
- Mini Dutch Pairs: Make the braids and buns smaller for a lighter version.
- Ribbon-Braided Pairs: Thread thin ribbon into each braid for color.
Common Mistakes to Avoid with This Style:
- Starting the braids too tight at the scalp: It can feel uncomfortable fast.
- Letting the buns sit too far apart: The style can look unbalanced.
Why a Messy Bun Holds Better Than a Perfectly Smooth One
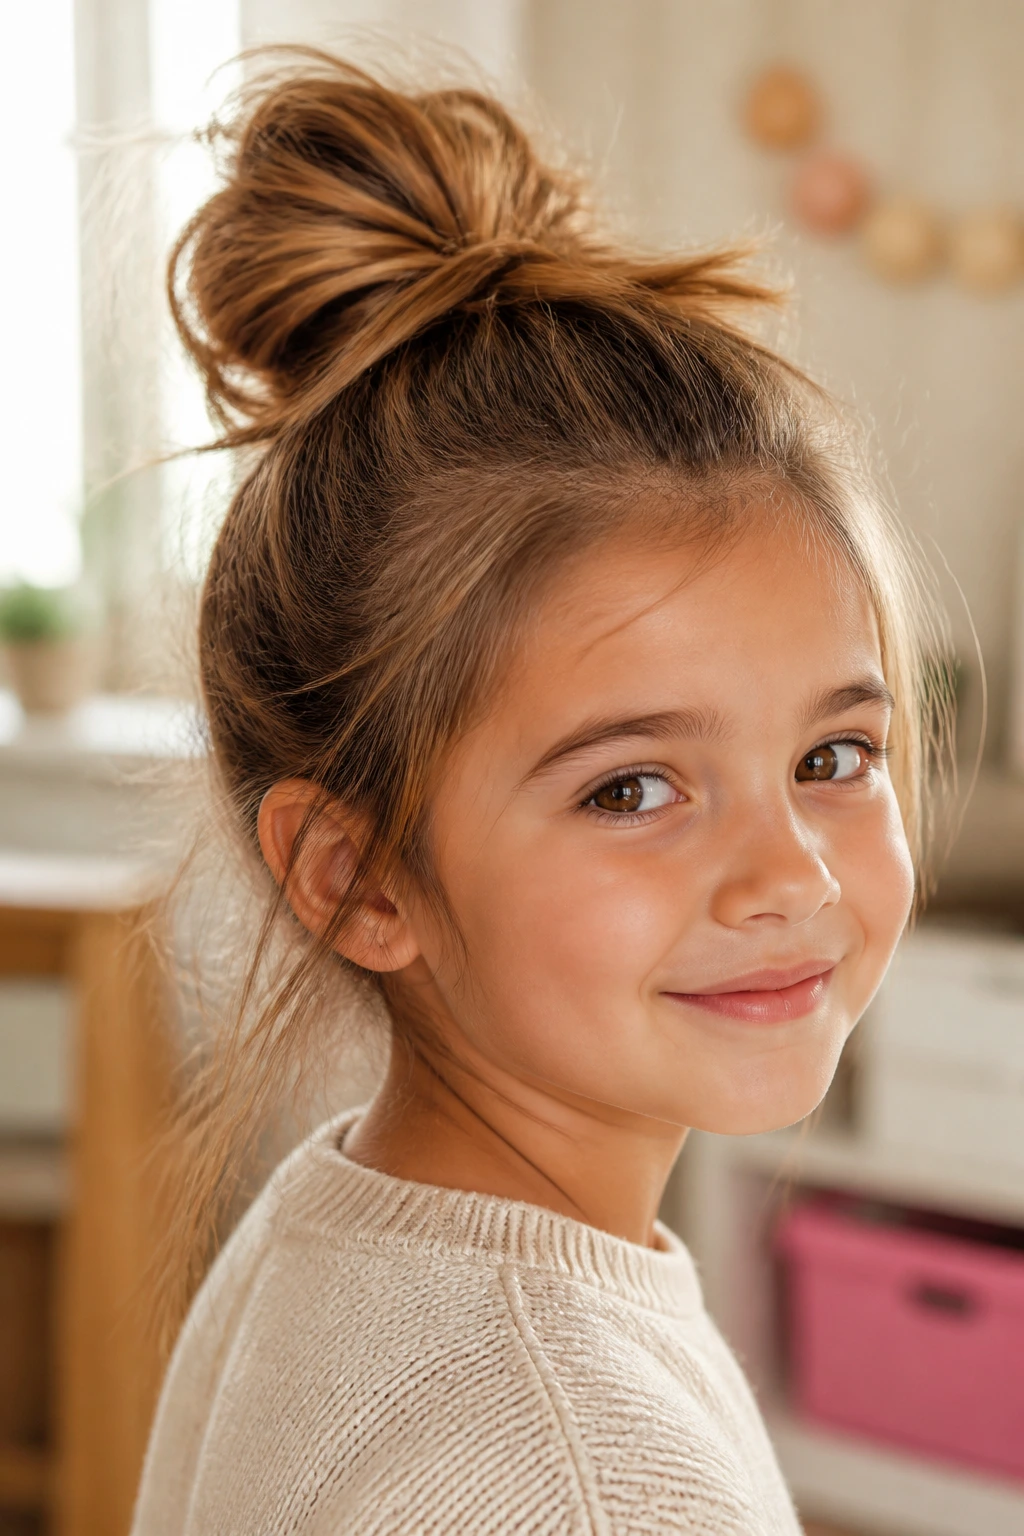
A little grit helps. Freshly washed hair can be slippery enough to make an elastic slide, while hair that has had a day to settle usually grips better and takes a pin more willingly. That’s one reason messy buns often last longer than the sleek version parents think they want at first.
Where the Grip Comes From
The tiny bits of texture near the roots matter more than people expect. A soft mist of water, a touch of leave-in on the ends, or even a little second-day texture gives the hair something to catch on, which helps the bun stop shifting every time a child turns her head.
Where the Tension Should Sit
The scalp should feel held, not pinched. If a bun is built too tightly at the crown, little girls notice immediately and start reaching for it, which usually makes the style look worse by lunch. A better setup is a secure base with soft edges and a little lift around the bun itself.
Why the Ends Matter
Hair ends that are tucked too neatly can make the bun hard and flat. Letting a few ends peek out gives the style a softer outline and helps hide the elastic. That tiny bit of looseness is often what makes the whole look feel like a kid’s hairstyle instead of a tiny adult updo.
The Brushes, Elastics, and Clips That Actually Help
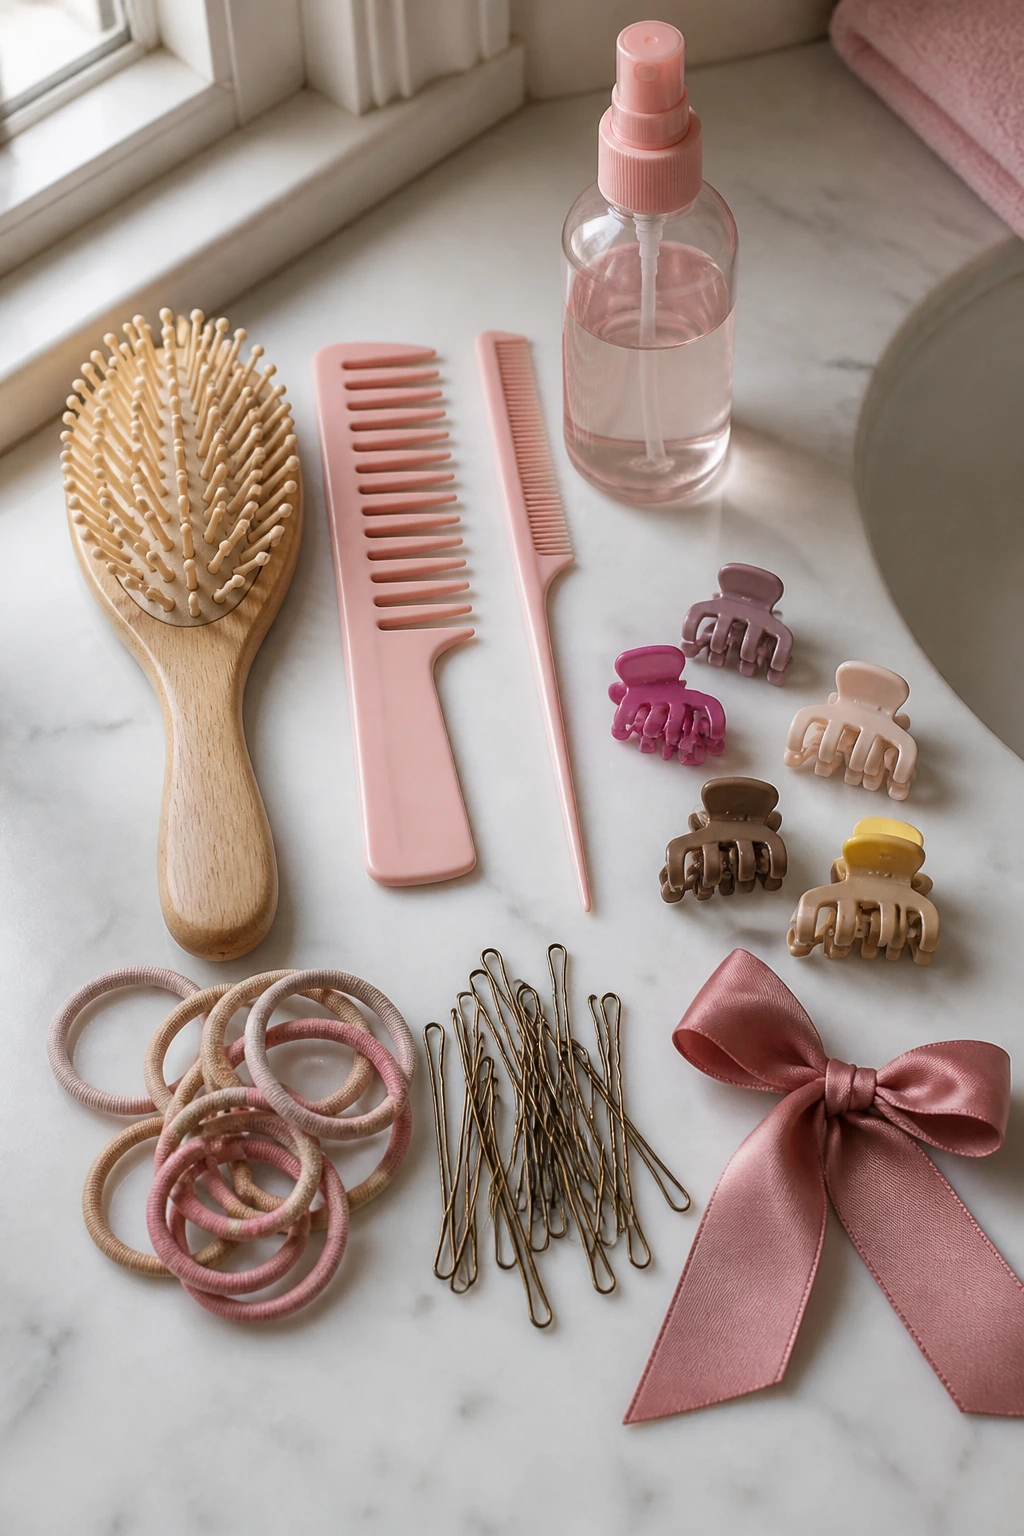
The tool drawer for kids’ hair does not need to be crowded. It needs the right pieces that don’t snag, pinch, or leave little dents in the hair. I’d rather have six useful items than a basket full of things that look cute and behave badly.
What Belongs in the Drawer
-
Soft-bristle brush: Best for smoothing the crown and brushing in one direction without scraping the scalp.
-
Wide-tooth comb: Useful for curls, waves, and any hair that tangles when brushed dry.
-
Rat-tail comb: A small parting comb helps you split sections cleanly without tearing at the roots.
-
Soft elastics: Seamless or cloth-covered bands hold better and remove more easily than rough rubber bands.
-
Rounded bobby pins: These grip the bun without scratching the scalp or poking out at the wrong angle.
-
Mini claw clips: Handy for half-up styles, quick resets, and holding a section while you braid.
-
Spray bottle: Plain water works fine for many styles; a little detangling mist helps if the hair is especially knotty.
-
Ribbon or narrow scarf: Good when you want color without adding weight.
What I’d Skip
Metal-sprung clips with sharp seams can tug at fine strands. Thick, heavy barrettes often slide off smaller heads. And those overly stiff elastics that feel tough in the package? They usually snap the first time you stretch them around thicker hair.
What to Buy at the Hair Aisle and What to Skip
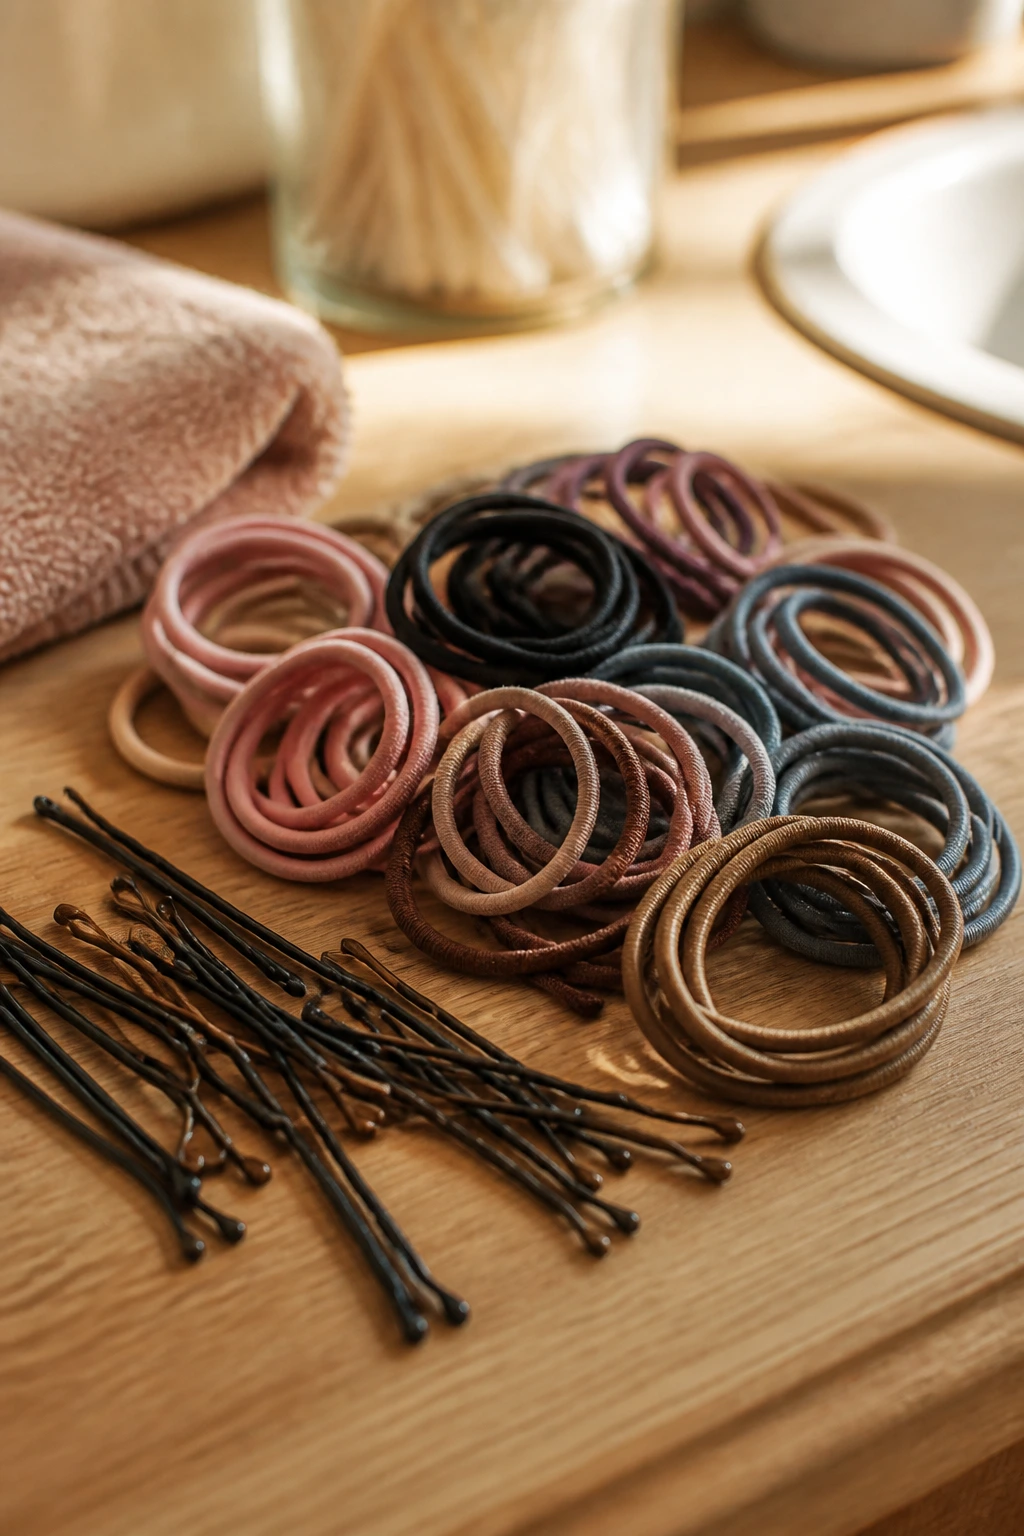
A crowded accessory wall can fool you into buying shiny things that never make it out of the drawer. For messy buns, look for pieces that disappear into the hairstyle and let the hair do the work.
Smart Shopping Notes
Choose seamless elastics for everyday buns. They don’t dig into the hair as much, and they come out cleanly when you remove them at night. For thicker hair, buy a pack with a little stretch but no metal join.
Pick bobby pins with a smooth finish. The cheap ones with rough paint can snag tiny hairs near the temples. If the child has very fine hair, smaller pins often hold better because they sit flatter against the head.
Buy light accessories first. A ribbon, a slim bow, or a small clip changes the style without dragging it down. Heavy decorations look nice on a hook but turn annoying in real hair after an hour or two.
For curly hair, keep leave-in conditioner and a wide-tooth comb on hand rather than heavy smoothing creams. Curls usually need moisture and gentle handling more than they need control. Straight, silky hair often benefits from a little texture spray at the roots before the bun goes in.
What Not to Waste Money On
Tiny accessories with weak clips, glitter that sheds onto clothes, and giant bows that cover half the head all sound charming until they slip off or annoy the child. If it can’t stay put through a school morning, it doesn’t deserve drawer space.
How to Wear These Styles to School, Dance Class, and Parties
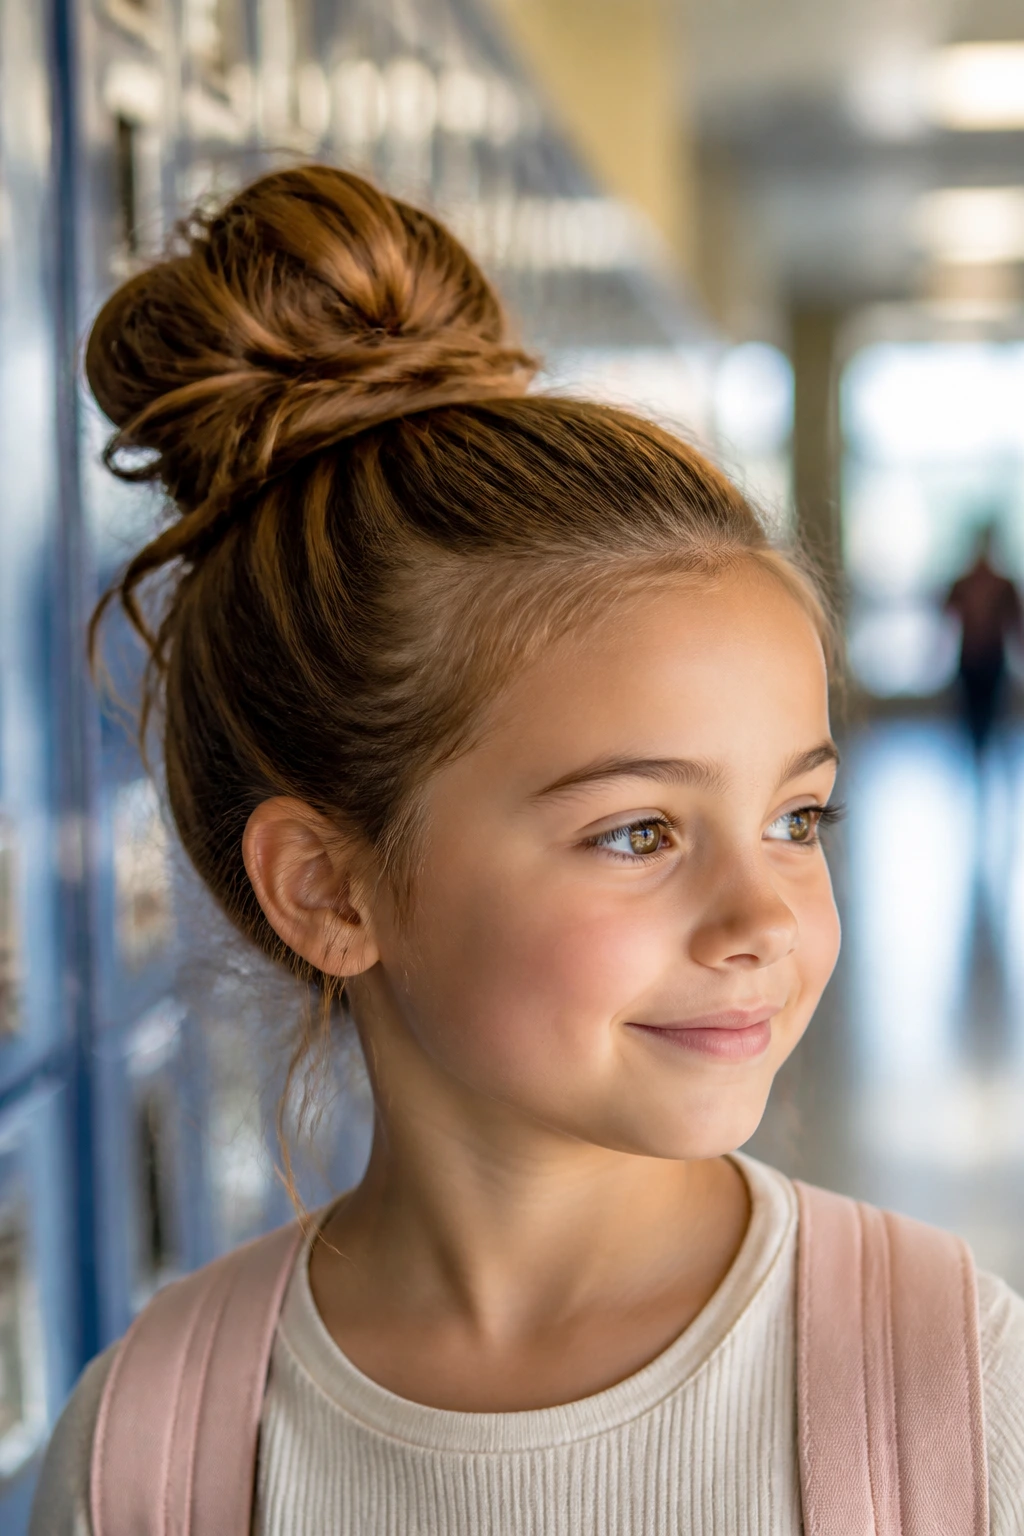
Presentation: Keep the crown smooth when you want a cleaner look, and loosen the bun’s outer edge when you want the style to feel playful. A few face-framing pieces can soften almost any bun, but I wouldn’t pull them out if the child hates hair near her eyes.
Accompaniments: Small bows, ribbons, skinny headbands, and color-matched clips are the easiest add-ons. For school, one accessory is enough. For parties, you can layer a ribbon with a small bow, but stop before the style starts to feel heavy.
Portions: One bun suits shoulder-length hair and longer cuts. If the hair is thick, divide it into smaller sections or use two buns instead of trying to force everything into one knot. For short layers, half-up buns and mini pigtail buns usually hold better than a single oversized topknot.
Occasion Pairing: The topknot and low nape bun are school-friendly. The ribbon and bow versions work better for birthdays or family events. The curly cloud bun and rainy-day bun are the ones I’d reach for when comfort matters more than perfect shape.
Small Fixes That Make the Style Last Longer
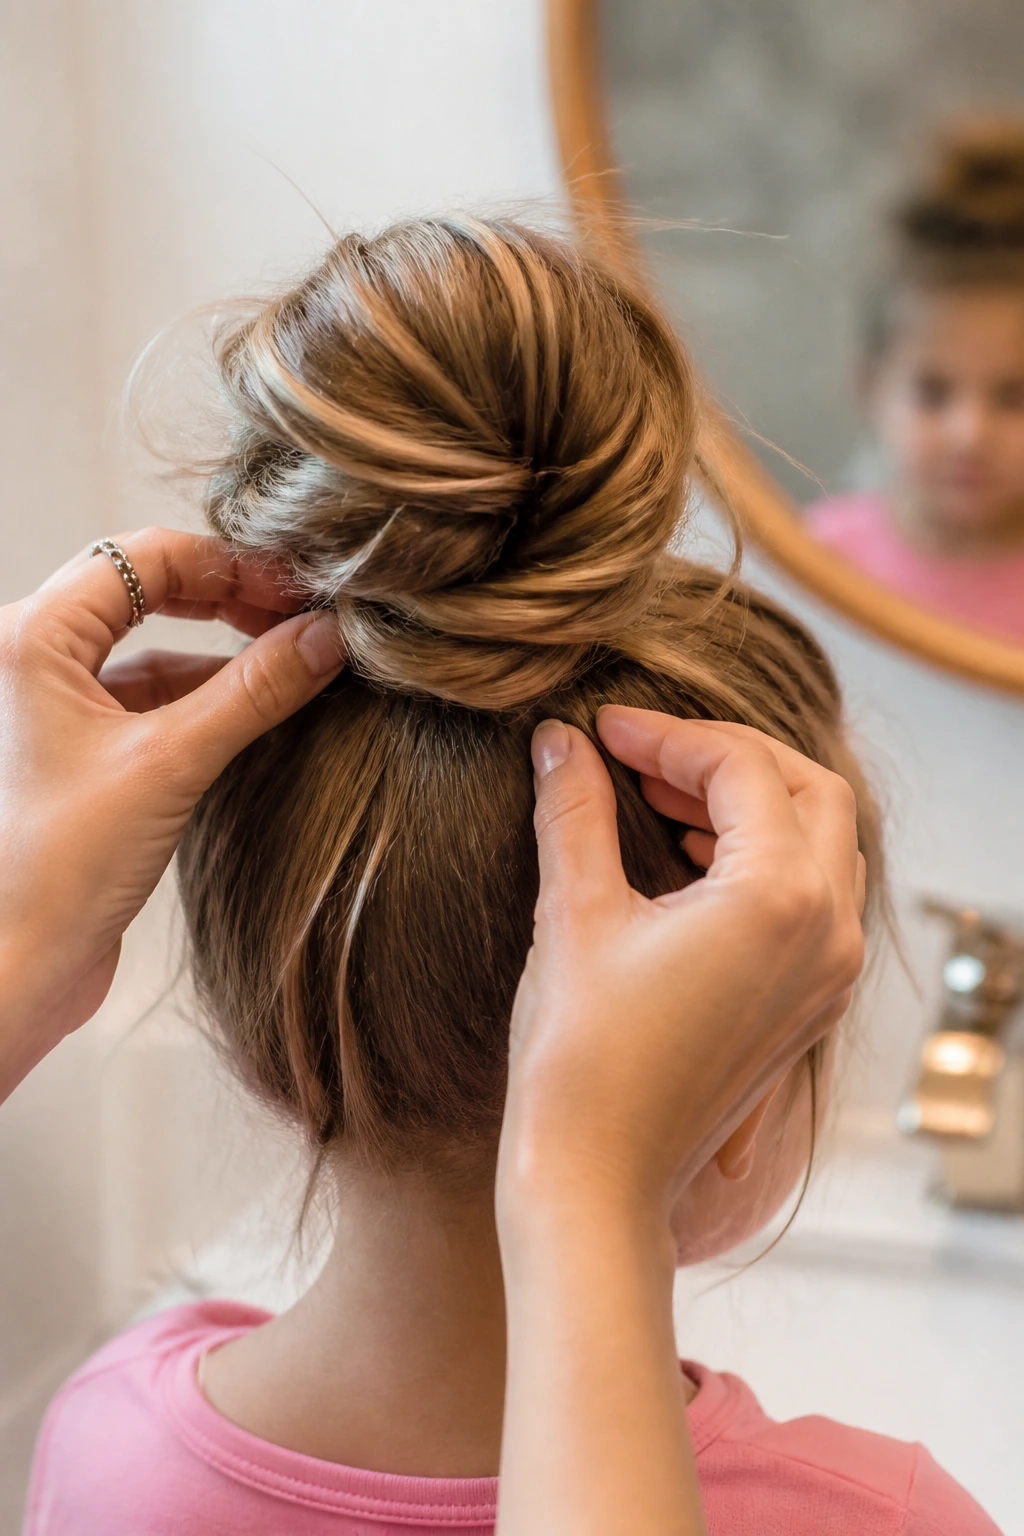
Hold Boost: If the hair is slippery, mist the roots lightly and wait a few seconds before gathering it. That tiny pause helps the strands stop sliding through your fingers. On fine hair, one small puff of texture spray at the crown can make a real difference.
Shape Fix: If the bun looks flat, pin the base first and then lift the outer loop with your thumbs. Do not yank the whole thing apart. A bun needs shape, not chaos. The difference is small but visible.
Accessory Switch: Heavy clips drag a style down. If the bun sags by lunch, switch to a lighter ribbon or a smaller bow. The less weight you hang off the bun, the longer it stays where you put it.
Gentle Finish: If the hairline looks too tight, slide one finger under the elastic and loosen it a fraction. That trick rescues a lot of buns that were on the edge of being too snug. Kids notice comfort before they notice style.
Bun Variations for Curly, Fine, Short, and Thick Hair
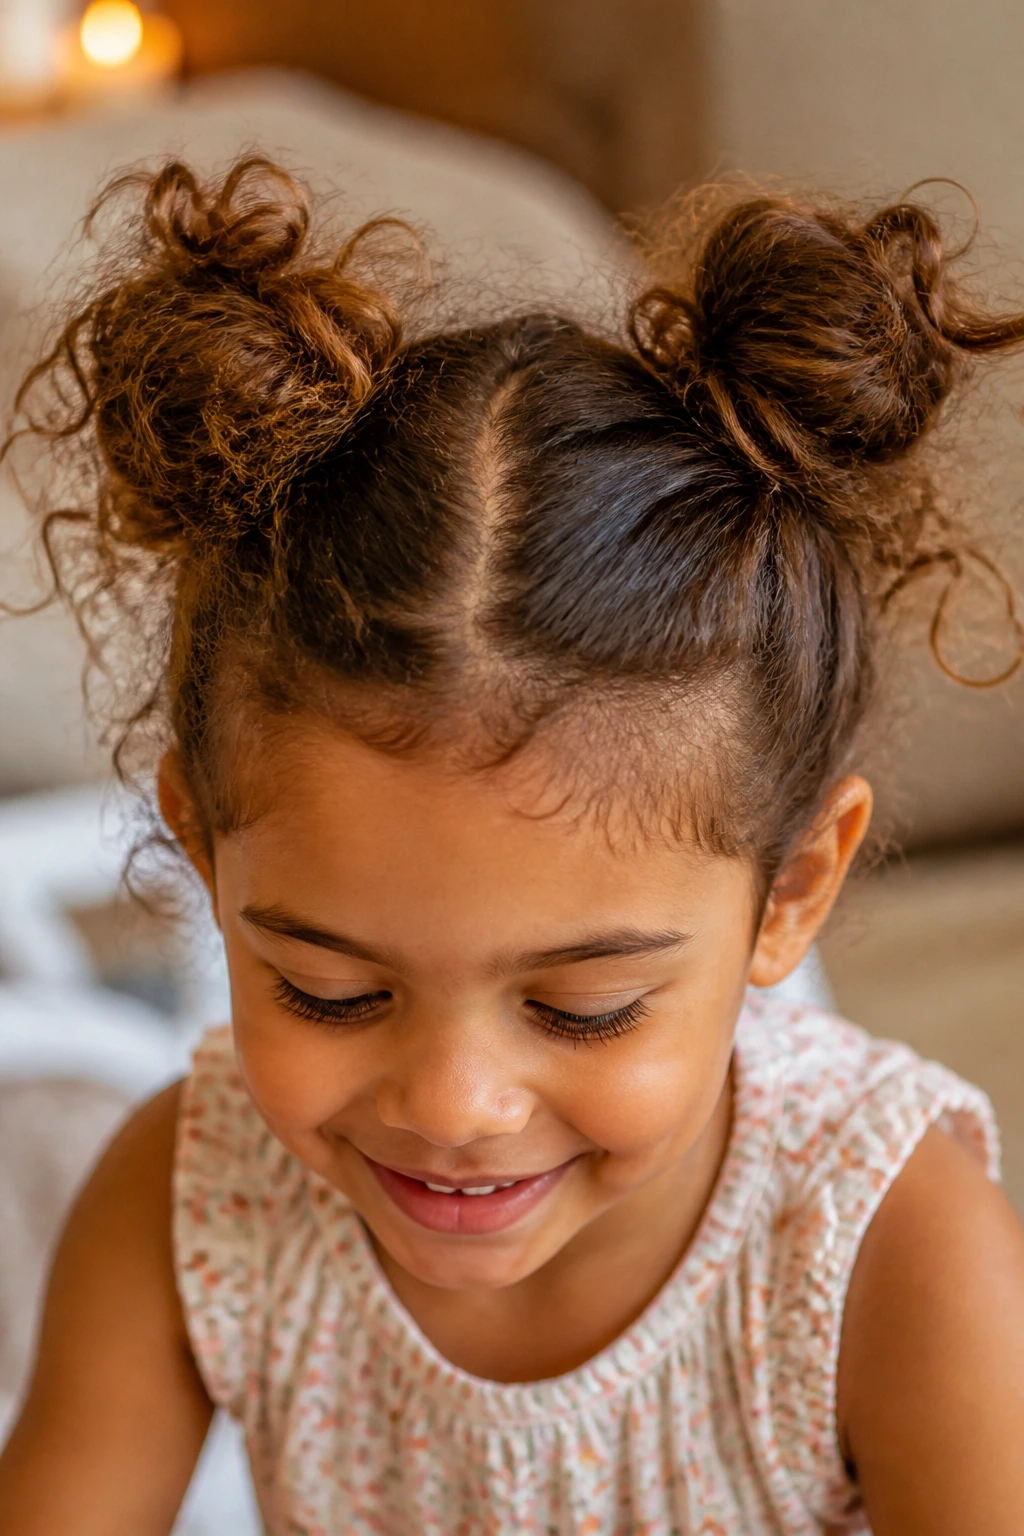
Fine-Hair Puff-Up
Fine hair often needs a little help in the volume department. Use a small amount of texture spray or dry shampoo at the roots, then make the bun a touch looser than you normally would. A donut form or a bubble bun also helps it look fuller without adding weight.
Curly-Pattern Keeper
For curls, skip the hard brushing and gather the hair with your fingers. The bun should keep as much curl shape as possible, which means less frizz later and a softer finish. A couple of pins are usually enough if the curls already have good grip.
Short-Hair Half-Up Fix
If the hair is too short for a full bun, move the style to the top half of the head and leave the back loose. That gives you the bun feeling without fighting the length. Tiny space buns and half-up loops are especially useful here.
Thick-Hair Split Anchor
Thick hair usually behaves better when divided first. Make two smaller sections, create two twists or buns, and let them work together instead of trying to cram all the hair into one knot. The finished style feels lighter, and the pins hold more reliably.
Photo-Day Ribbon Finish
If the style needs to look extra tidy for photos, smooth the crown with a damp brush and add a ribbon or bow in a color that matches the outfit. Keep the bun itself soft, though. The face should look happy, not pinned down.
Night-Before Prep, Storage, and Next-Day Refresh
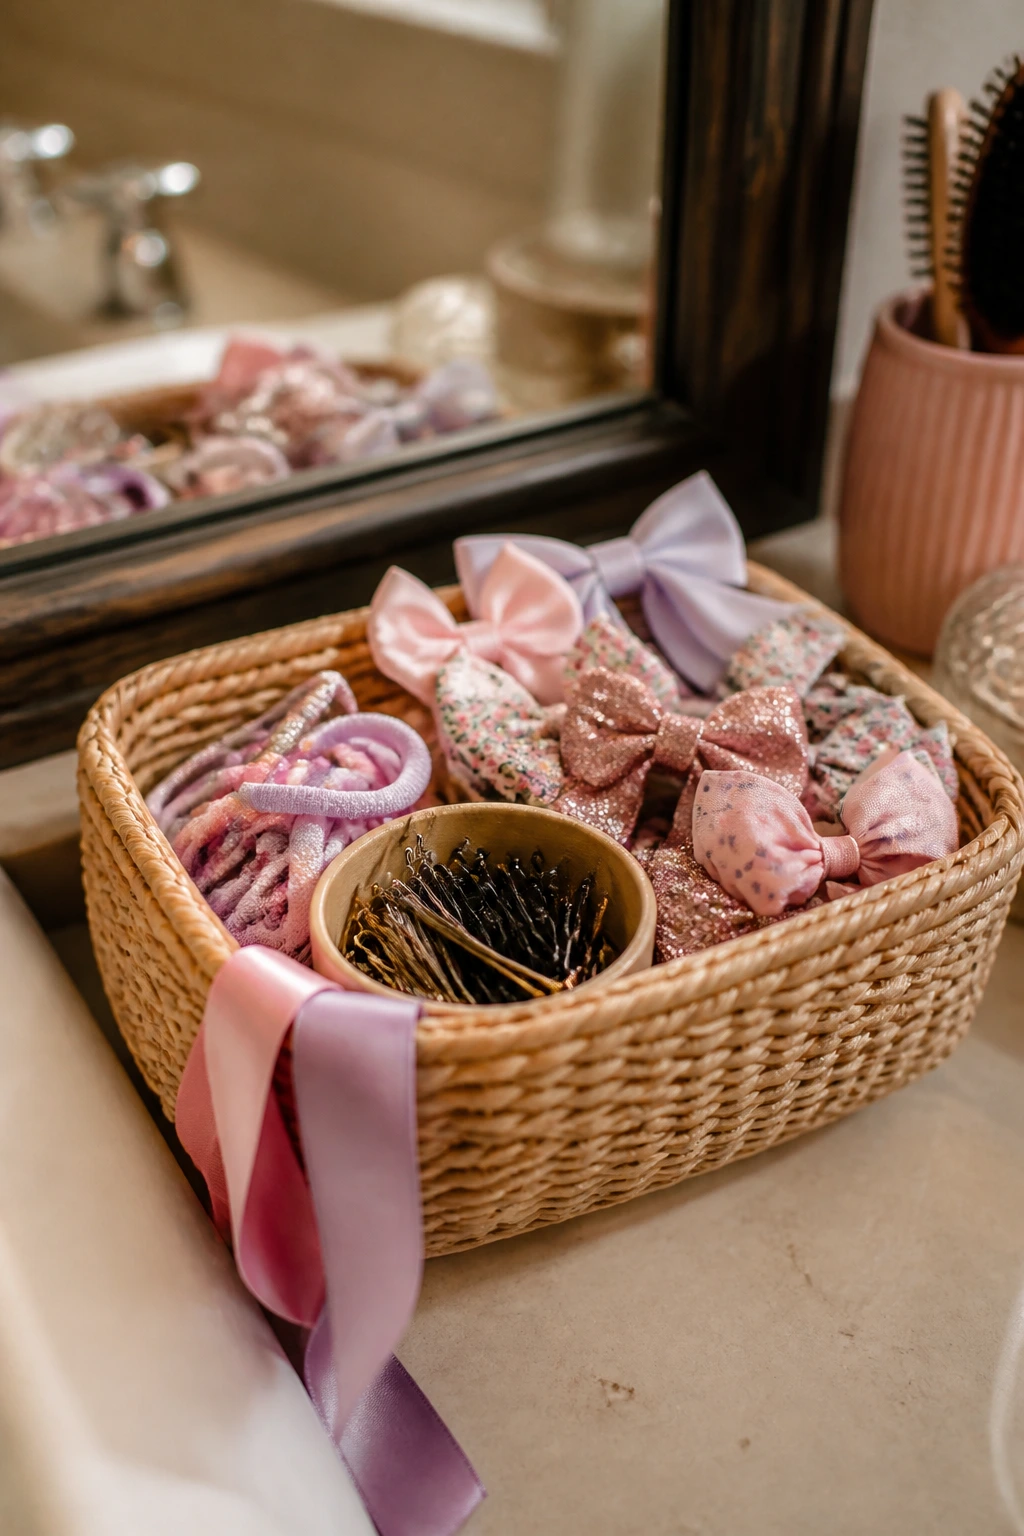
Hair itself does not get stored, of course, but the prep around it can save real time. Keep elastics, pins, bows, and ribbons in one small basket near the mirror so you are not hunting across three rooms at 7:15 a.m. That alone cuts the scramble in half.
If the child’s hair tangles fast, brush it gently at night and put it in a loose braid or low ponytail before bed. That makes the morning bun easier to build, especially on curly or thick hair. For very slippery hair, a light mist of water in the morning is usually enough to bring some grip back.
A messy bun should come down before bedtime. Tight pins left in overnight can make the scalp sore and leave odd dents by morning. If the style has been worn for a long day, remove it, finger-detangle the hair, and give the ends a little leave-in or detangling spray.
Some buns can be refreshed after lunch if they flatten out. A quick mist at the crown, one extra pin, and a small tug on the outer edge usually brings the shape back without rebuilding everything. If the child naps in the car, a low nape bun or soft loop bun is easier to revive afterward than a high topknot.
Mistakes That Make a Messy Bun Scratchy or Flat
-
Pulling the hair too tight at the front: The bun may look neat for ten minutes, then the child starts touching it and the whole thing falls apart. Leave a bit of slack at the hairline so the style stays wearable.
-
Brushing curly hair into submission: Dry curls puff, frizz, and lose their shape. Use fingers or a wide-tooth comb, and let the curl texture do part of the styling.
-
Using one tiny elastic on thick hair: The bun can rotate or slide if the band cannot hold the weight. Double the elastic or split the hair into two sections first.
-
Adding too many heavy accessories: A big bow, a ribbon, and three clips all at once sound festive and behave like a headache. Pick one main accent and let it do its job.
-
Leaving damp hair in a tight bun: That can make the scalp feel cold and the bun swell oddly as it dries. Dry the roots first, then style.
-
Ignoring the end shape: A bun with sharp ends poking out looks unfinished, while one that’s flattened too hard looks stiff. Tuck the obvious bits, then loosen the bun’s outer edge just enough to soften the line.
Questions Parents Actually Ask
How do I keep a messy bun from falling out of fine hair?
Start with a little texture at the roots and use a small elastic plus one or two pins at the base. Fine hair usually needs grip, not more force, so a donut form or bubble section can help the style hold without extra tension.
Can I do these styles on curly hair without brushing everything out?
Yes, and I’d rather you didn’t brush curls into a halo of frizz unless you have to. Finger-detangle, add a little moisture, and gather the curls loosely so the bun keeps its shape and softness.
What if my child’s hair is too short for a full bun?
Use half-up versions, mini space buns, or low loop buns. Shorter hair often looks better when it’s split into smaller sections instead of forced into one oversized knot.
Which accessories are safest for young kids?
Soft elastics, rounded bobby pins, and light clips are the safest bets. Skip sharp metal edges and heavy decorations that can pull or poke during the day.
How tight should a little girl’s messy bun be?
Tight enough to stay in place, loose enough that she forgets about it after a few minutes. If the scalp looks shiny or the child keeps touching the bun, it’s too tight.
What can I do if the bun looks flat by lunchtime?
Lift the outer edge with your thumbs and add one hidden pin if needed. A tiny mist of water at the crown can also help reset the shape without starting over.
Can I build these buns the night before?
I wouldn’t. The style will flatten, and the child may sleep badly if pins are in place. Night-before prep is better for brushing, sectioning, and laying out accessories.
How do I take the bun out without tangles?
Take the pins out first, then unroll the bun slowly and finger-comb the hair before brushing. A little detangling spray on the ends helps a lot, especially if the hair was twisted tightly.
The Five-Minute Style That Doesn’t Feel Like a Fight
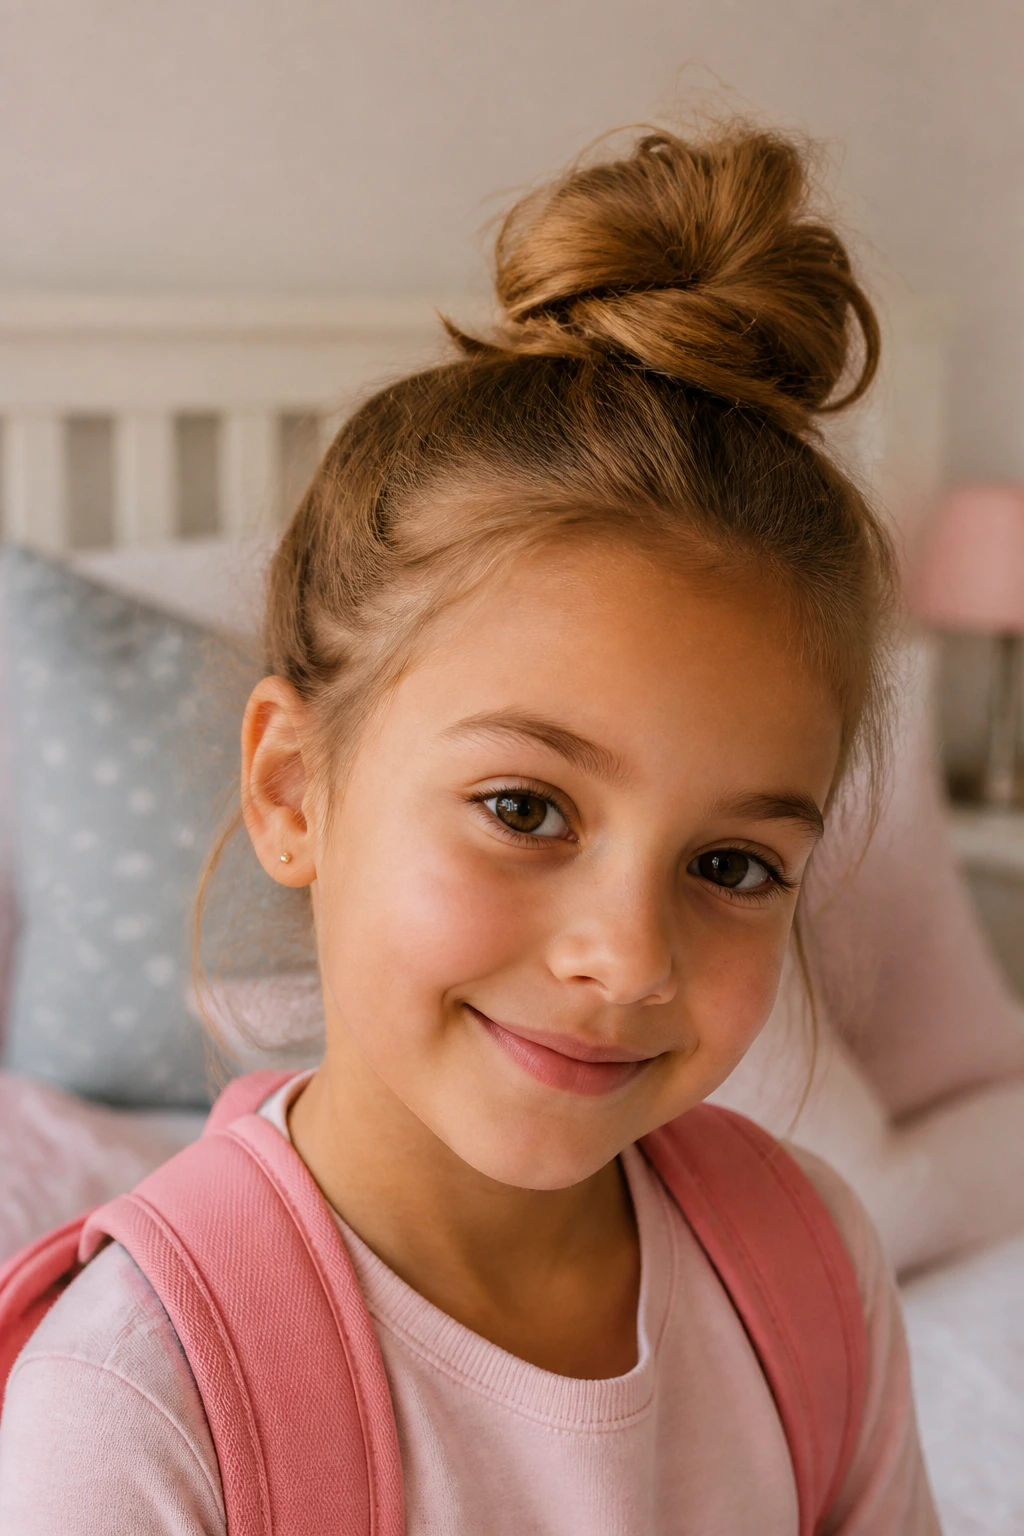
Messy buns for little girls work because they respect the reality of a child’s head. They can be soft. They can be quick. They can survive a school day without making anybody miserable. That is more useful than chasing a perfect little knot that falls apart before lunch.
The trick is choosing the right shape for the hair in front of you. Fine hair wants grip. Curly hair wants room. Short hair wants half-up shortcuts. Thick hair wants smaller sections and a little planning. Once you stop asking one bun to do every job, the whole thing gets easier.
Keep one basket of soft elastics, a few rounded pins, and one ribbon or bow near the mirror, and the morning bun stops feeling like a scramble. It starts feeling like a trick you can repeat.
