



A good shag on wavy hair doesn’t look chopped up. It looks awake.
That’s why mid length curly shag cuts for wavy hair keep landing on my list of styles worth saving. They give the wave pattern room to move, but they stop before the ends get so long that the whole shape drags downward and turns heavy. If you’ve ever left the salon with layers that looked lively in the chair and then oddly puffed out by lunch, you already know the problem.
The sweet spot usually lives somewhere between the collarbone and the upper chest. Short enough to swing. Long enough to keep weight where it belongs. Once the layers follow the bend of the wave instead of fighting it, the haircut starts doing some of the styling work for you — and that is the whole point.
Why These Mid-Length Curly Shag Cuts Deserve a Spot on Your Mood Board

-
Wave-Friendly Weight: These cuts keep enough length at the perimeter to stop wavy hair from flaring out like a bell, which is the usual disaster when layers get too eager at the crown.
-
Real Movement, Not Puff: The best shag layers create separation and swing, not the fuzzy halo that shows up when a stylist thins the hair in the wrong places.
-
Bang Options Without Regret: Curtain bangs, bottleneck bangs, side-swept fringe, and grown-out fringe all show up here, so you can choose how much forehead you want to live with.
-
Salon-Friendly Reference Photos: Each style is easy to explain with a picture and a sentence or two, which matters more than people think. Haircuts go wrong when the words stay vague.
-
Styling That Fits Real Life: These cuts can work with air-drying, a diffuser, or a quick round-brush lift at the roots. No one needs a daily 45-minute ritual.
-
Better Grow-Out: Mid length gives you some forgiveness. The shape still reads even when the fringe grows a half-inch too long and life gets busy.
1. Collarbone Shag With Curtain Bangs
This is the shag I recommend first when someone wants movement but doesn’t want to look like they committed to a full style overhaul. The collarbone length keeps enough weight in the bottom so wavy hair settles instead of exploding outward, and the curtain bangs split the front cleanly without boxing in the face.
Ask for soft layers that begin around the cheekbone, then melt into the rest of the cut. That little detail matters. If the shortest layer lands too high, the whole thing can start to feel fluffy in the wrong way. Done well, though, this one has that easy swing people keep trying to fake with styling products.
2. Shoulder-Grazing Wolf Shag
Want a little more edge without losing the softness that makes wavy hair behave? The shoulder-grazing wolf shag keeps the top a touch shorter and the back a touch longer, so the silhouette feels loose and slightly wild, but not messy in a bad way.
I like this cut on thicker waves that can carry a bit of attitude. It gives the crown lift, then lets the lower layers fall with a little kick. If your hair tends to collapse near the roots, this shape wakes it up. If your hair is already big and buoyant, ask for less crown removal so you do not end up with a puffy helmet.
3. Razor-Soft Shag With Long Layers
The name sounds sharper than the result. That’s intentional. A razor-soft shag can look feather-light on the ends, with long layers that move like ribbon instead of splitting into heavy chunks.
This one works best when the stylist uses a light touch on the perimeter and keeps the internal layers long enough to preserve weight. On waves that bend loosely, too much texture can make the ends look frayed. A soft razor finish can prevent that, but only if the hair is healthy enough to handle it. Dry, over-lightened ends and a heavy razor are a bad pairing.
4. Rounded Shag With Cheekbone Fringe
A rounded shag is for people who like shape. Not chaos. The sides are kept a little fuller, the crown is lifted just enough, and the fringe lands around the cheekbones where it can pull attention upward without swallowing the whole face.
This is one of my favorite options for heart-shaped or narrower faces because the curve makes the cut feel balanced. It also plays nicely with waves that bend outward on their own. You get definition without having to fight your natural texture into a neat line. That’s the point. Let the roundness do some work.
5. Bottleneck Bang Shag
Bottleneck bangs are one of those small haircut decisions that changes everything. They start narrow near the center, then open out as they sweep past the brow and toward the cheekbone, which gives wavy hair a softer frame than a blunt fringe ever will.
On a mid length shag, that fringe gives the whole haircut a little architecture. The top feels intentionally shaped, but the ends still move freely. If your forehead is something you like to minimize without hiding it completely, this is one of the better answers. Leave the shortest bang pieces long enough to dry with a bend. Short bangs and shrinkage are not friends.
6. Invisible-Layer Shag for Fine Waves
Fine waves need restraint. Heavy layering on fine hair can leave the ends wispy and see-through, which is how a cut starts looking thinner than it really is. Invisible layers fix that by removing bulk from inside the shape instead of hacking away at the surface.
The result is subtle at first glance. Then the hair moves, and you see it. That’s the charm here. It’s the shag for someone who wants body without obvious choppiness, and it’s especially good if your waves flatten easily at the sides. Ask for the bottom line to stay fairly clean so the cut still reads as a solid shape.
7. Heavy Fringe Shag for Dense Hair
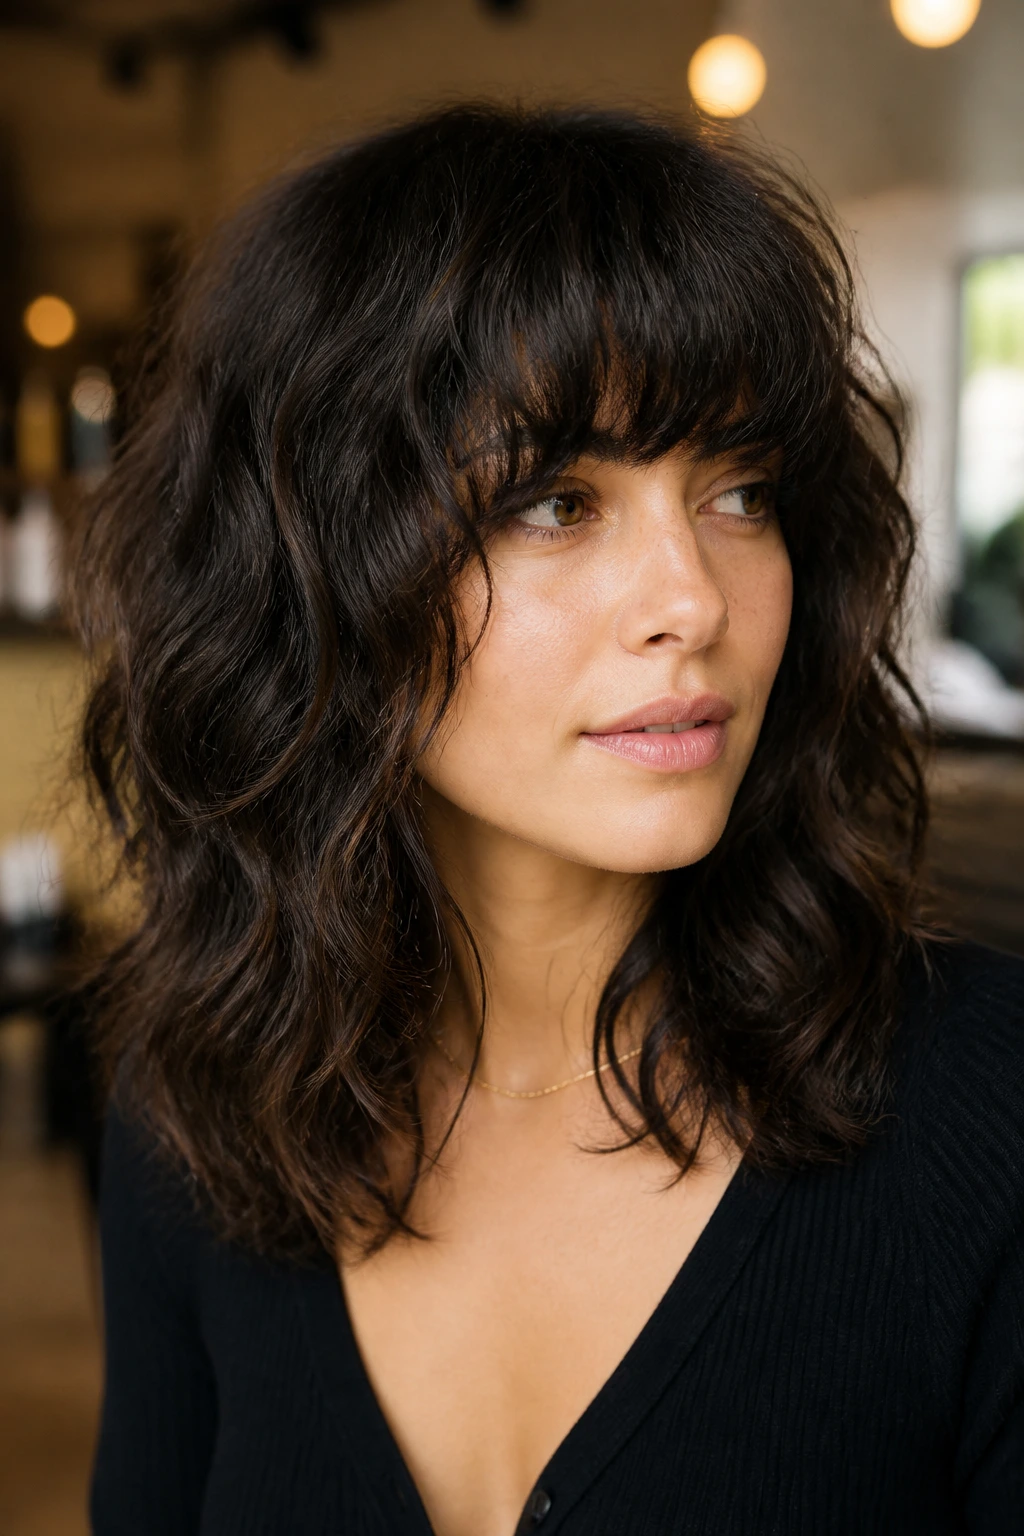
Dense waves can take a stronger fringe and still look balanced. In fact, they often need it. A heavier fringe gives the front some visual weight so the rest of the layers don’t make the hair look too airy up top.
This cut is worth considering if your hair grows outward before it grows down. The fringe helps anchor the shape, and the layers can be cut with enough space between them to release bulk without creating gaps. If your hair is coarse, ask for soft texturizing rather than aggressive thinning. Aggressive thinning on dense wave patterns often looks fine for a week and then turns weird.
8. Face-Skimming Shag With Long Sides
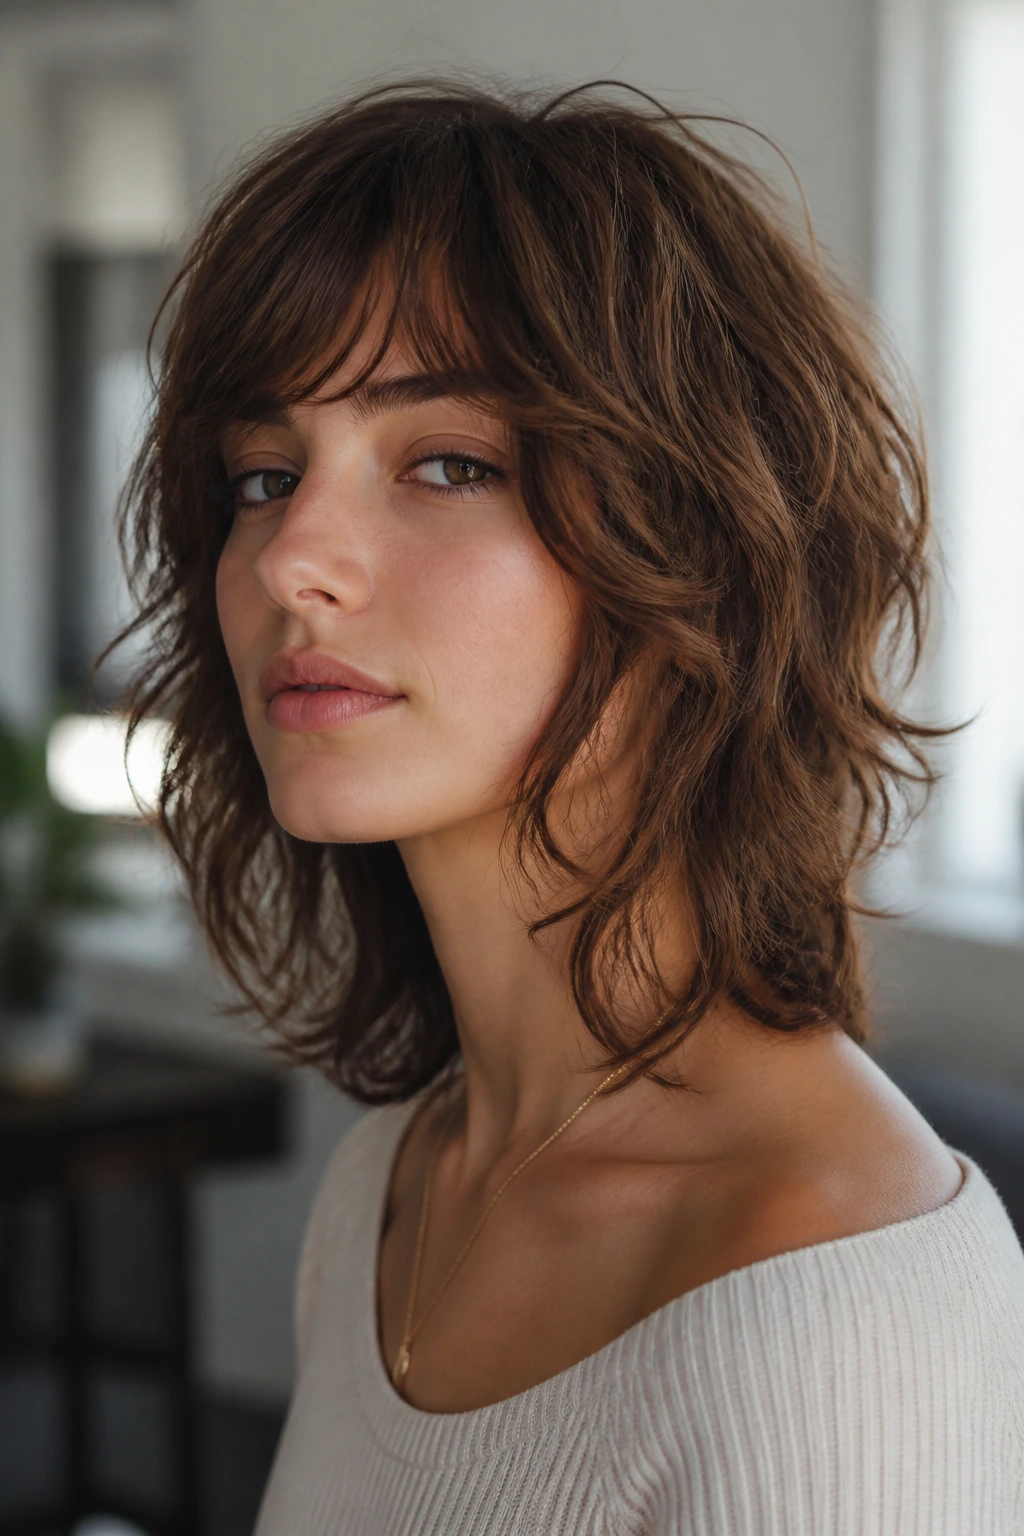
This one is all about the sides. The longest face-framing pieces brush the jaw or skim the neck, which gives the haircut a more graceful outline than a highly chopped shag can manage.
If your face feels wide at the cheeks or your jawline wants a little softening, this style is an easy favorite. The waves should fall around the face, not sit on top of it like a curtain. Keep the crown layers modest and let the front pieces do the visual shaping. That balance keeps the cut from feeling too full around the temples.
9. Deep Side-Part Shag

A deep side part changes the whole mood of a shag. It pushes one side up for lift, drapes the other side down for softness, and gives wavy hair a built-in asymmetry that doesn’t need much styling to feel deliberate.
I like this version when hair naturally falls flat at the crown or when the wave pattern is stronger on one side than the other. The part gives that unevenness a place to live. A little root spray at the heavier side helps, but you do not need much. Too much product here can make the lift collapse into a sticky patch. That part is annoying.
10. Soft Mullet Shag With Longer Nape
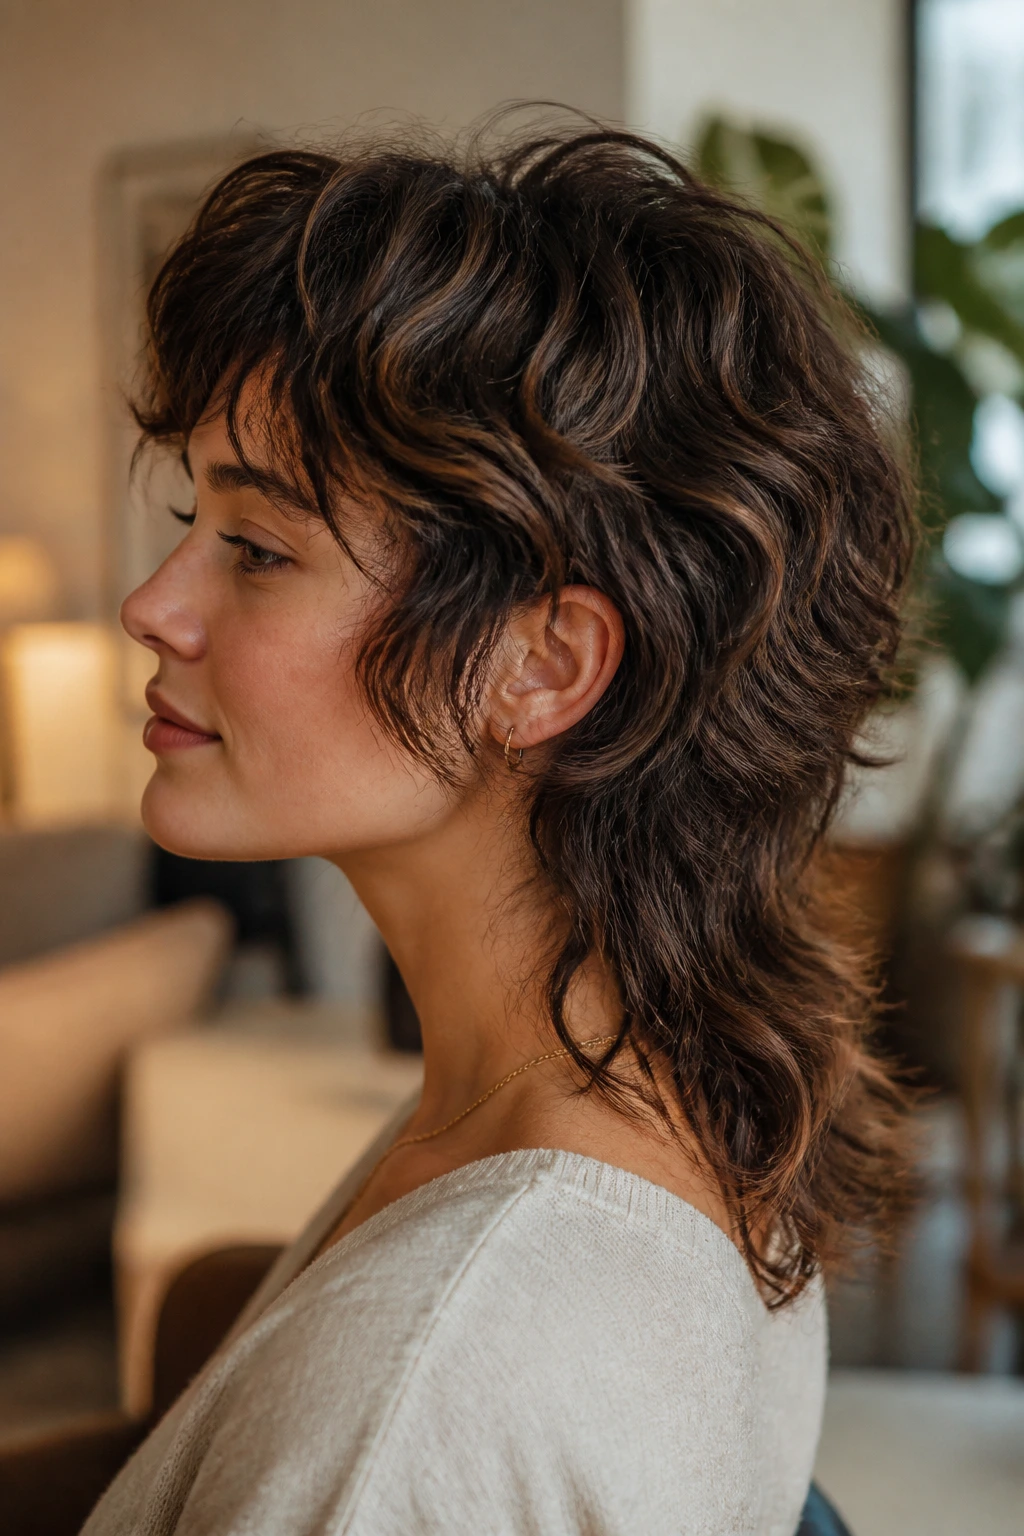
The soft mullet shag has a little attitude, but the key word is soft. The nape stays longer, the crown gets a controlled lift, and the sides taper in a way that feels wearable rather than costume-like.
This is the cut for someone who likes a bit of shape drama without giving up the easy movement of a shag. On wavy hair, the longer back keeps the silhouette from ballooning, especially if the front is layered with restraint. Ask for the transition from crown to nape to feel gradual. A harsh jump in length makes the whole thing look dated fast.
11. Air-Dry Shag With Piecey Ends
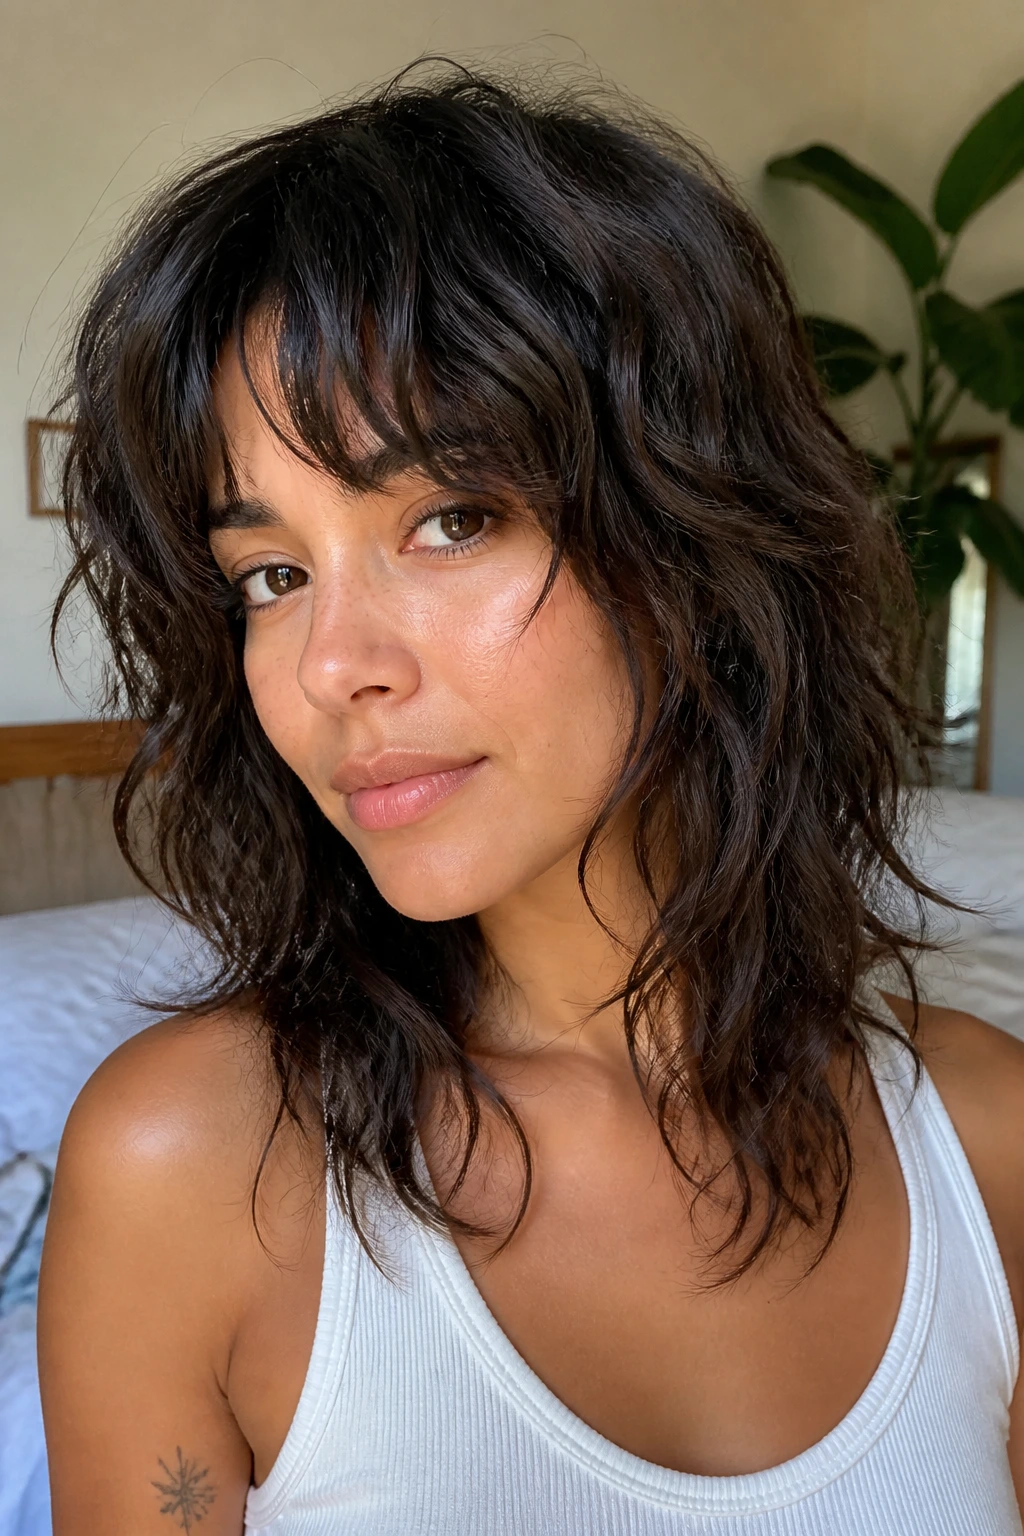
If you live in the land of scrunch, go. This shag is built for air-drying, which means the ends are cut to separate into little pieces instead of merging into one thick curtain.
The trick is not to overdo the layering. Air-dry shags need shape, yes, but they also need enough weight to keep the wave clumps defined. I’d choose this cut for someone who likes a looser, more casual finish and doesn’t mind a little natural frizz at the edges. It looks best with a mousse or foam, not a heavy cream that clogs the pattern.
12. Crown-Lift Shag With Tighter Top Layers

Flat roots can make wavy hair look tired even when the rest of the cut is good. This version solves that by placing shorter layers higher at the crown, creating lift where the head tends to collapse.
It’s a strong choice for people whose waves start halfway down the head and leave the top looking sleepy. The shorter top layers make the silhouette feel fuller, but they need to be blended carefully so the crown doesn’t puff into a mushroom shape. That’s the tightrope. Enough lift to wake the cut up, not so much that it starts hovering.
13. Boho Shag With Feathered Bangs

The boho shag is softer than it sounds. Feathered bangs and fluttery face-framing layers give it an easy, lived-in feel that works especially well when the waves are loose and slightly irregular.
This cut is one of those rare styles that likes a little imperfection. If your waves bend in different directions, the shag absorbs that irregularity instead of fighting it. The bang area should stay light, not skinny. A feathered fringe that’s too sparse can disappear into the rest of the cut. Ask for enough density to hold its shape when the hair dries.
14. Minimal-Layer Shag for Loose Waves

Not every shag needs to be a layered demolition project. Loose waves often do better with a minimal-layer version, where the cut keeps the perimeter strong and only nudges the shape around the face and crown.
This is the one I’d point to if you like the shag idea but hate the look of visibly chopped layers. The result is quieter, cleaner, and easier to grow out. It’s especially good if your wave pattern is gentle and your hair frizzes when it gets over-cut. Sometimes less layering gives better movement. Funny how that works.
15. Curly Shag Lob With Tapered Ends
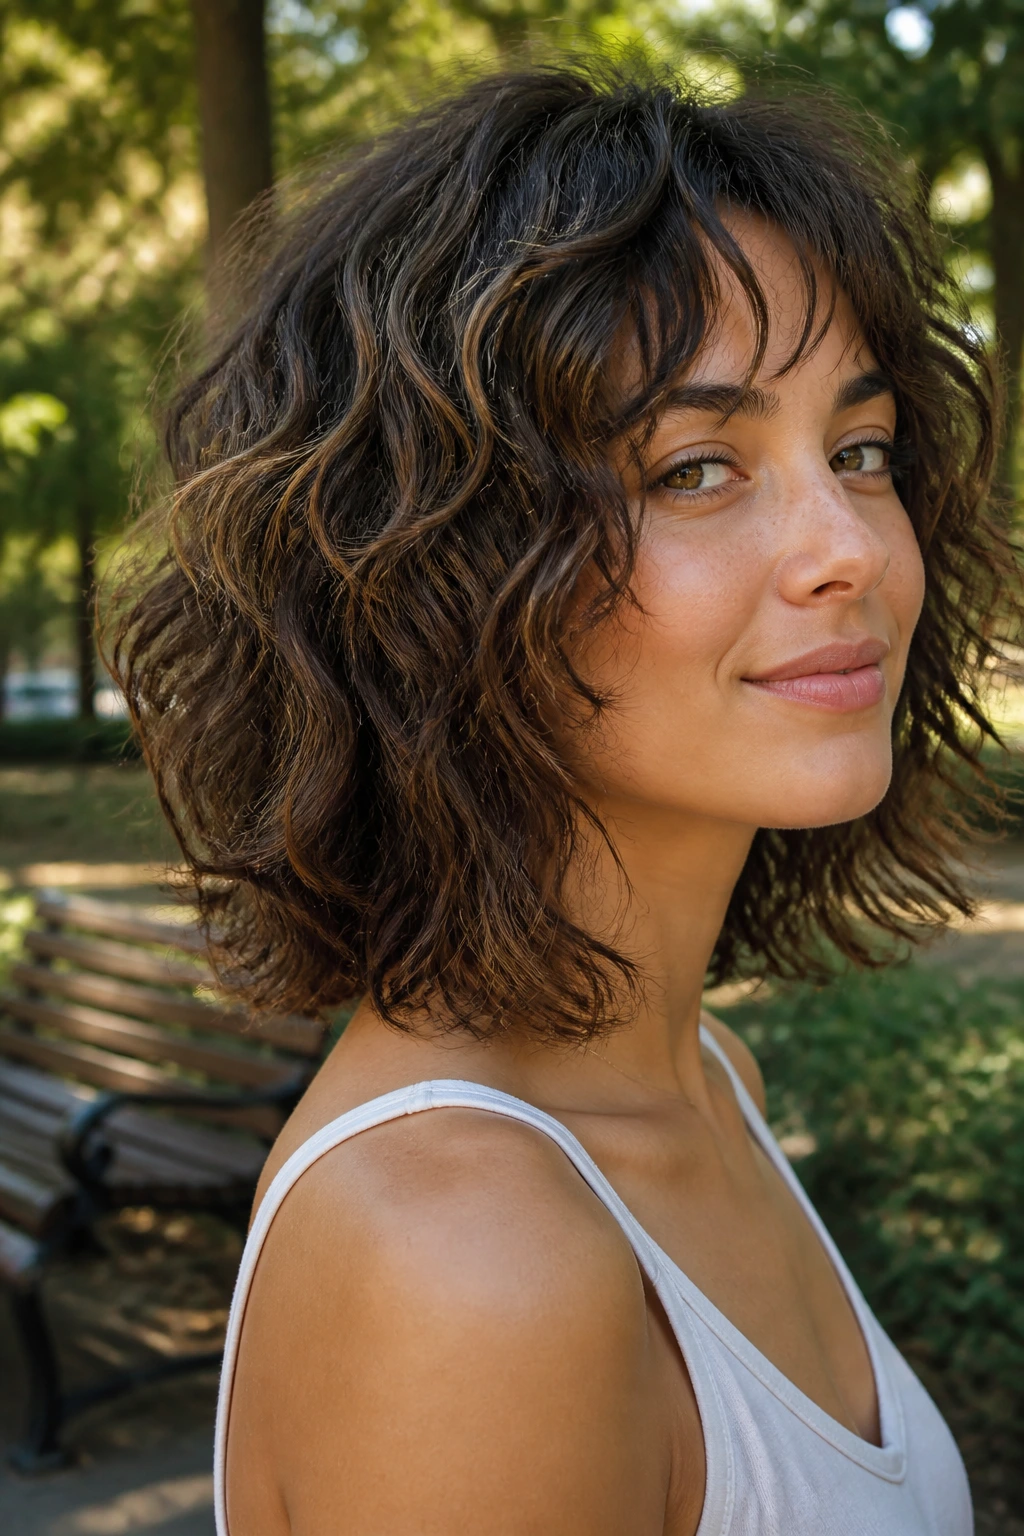
A shag lob sits in that useful middle ground between a bob and a longer shag. The tapered ends keep the outline from feeling blocky, while the longer length lets the waves stack softly instead of springing out in every direction.
This cut works for people who want to keep some length around the neck and collarbone, but still want the texture of a shag. It’s a nice choice for round faces because the length stretches the profile just a bit. Keep the taper subtle. If the ends get too skinny, the whole shape starts looking tired by the third day.
16. Jagged Razor Shag
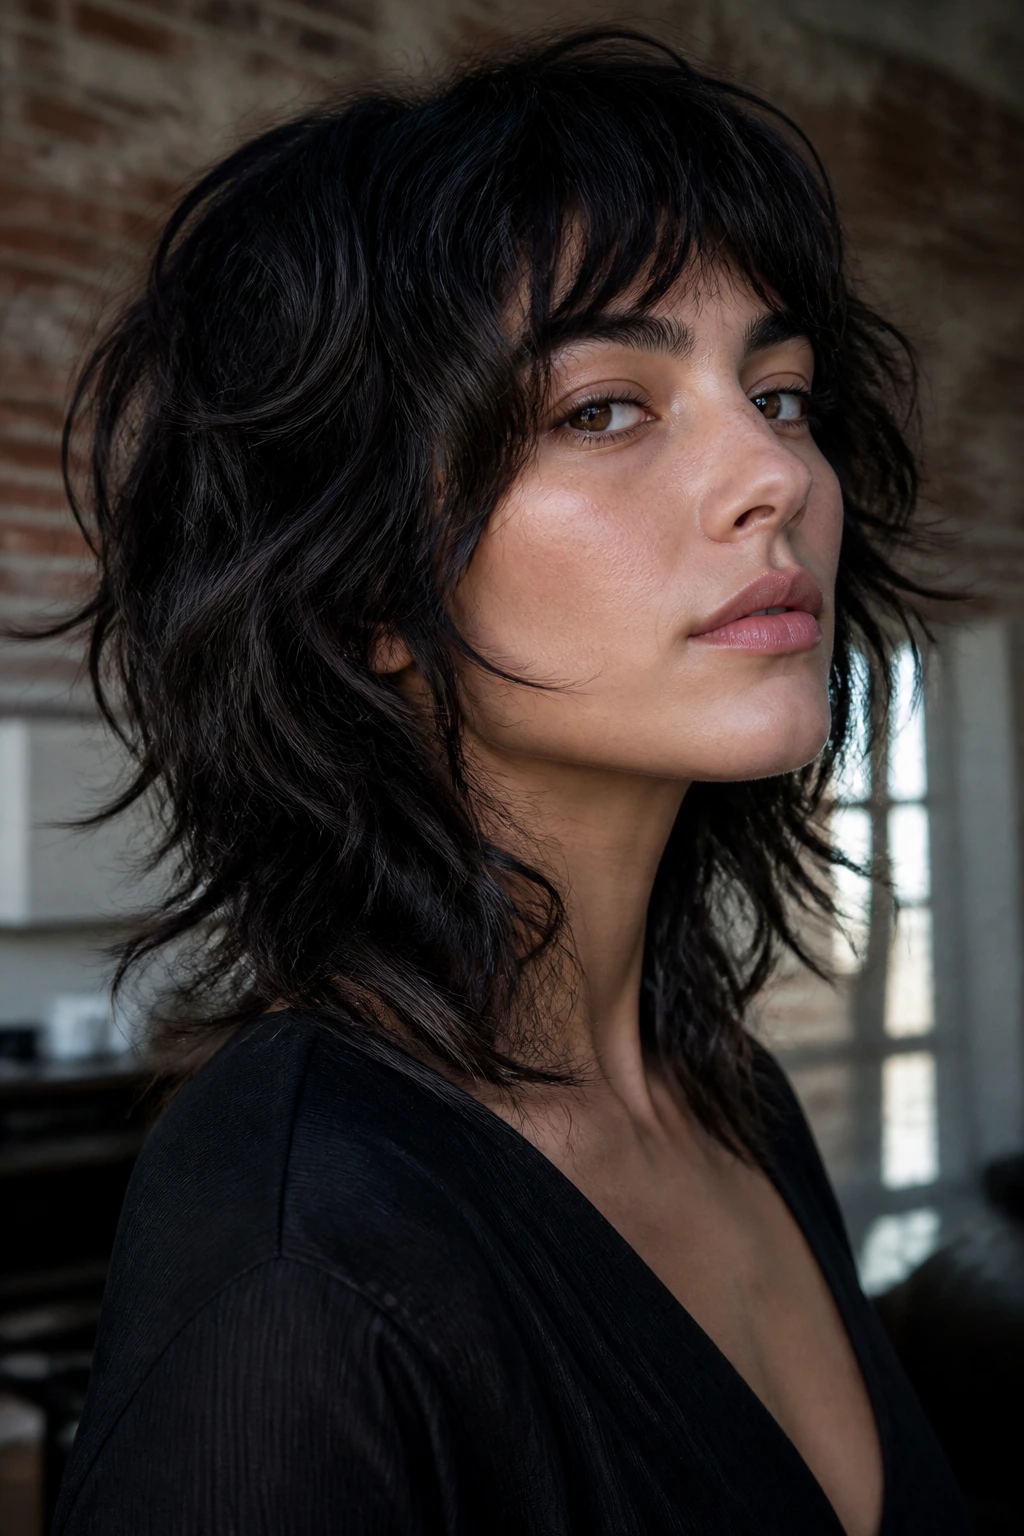
This is the edgy one. The jagged razor shag gives the ends a sharper, more piecey finish, which can make strong waves look almost graphic when the cut is fresh and the hair is behaving.
It’s best on healthier hair with enough density to support that kind of texture. If the ends are already fragile, a jagged razor finish can make them look thinner than they are. I’d also keep the layers moderately long so the cut has some body left in it. Too many short layers and you lose the clean, intentional roughness that makes this style interesting.
17. Polished Shag With Soft Graduation

Not everyone wants a shag that looks like it escaped from a backstage dressing room. The polished version keeps the layered spirit but softens the transition from top to bottom, so the finish feels a little smoother and more controlled.
That makes it a smart pick for office settings, formal clothes, or anyone who just prefers a neater outline. Wavy hair still gets movement, but the cut doesn’t announce itself in every mirror. Ask for soft graduation through the sides and a perimeter that stays tidy. You want refinement, not stiffness. There’s a difference.
18. Side-Swept Fringe Shag
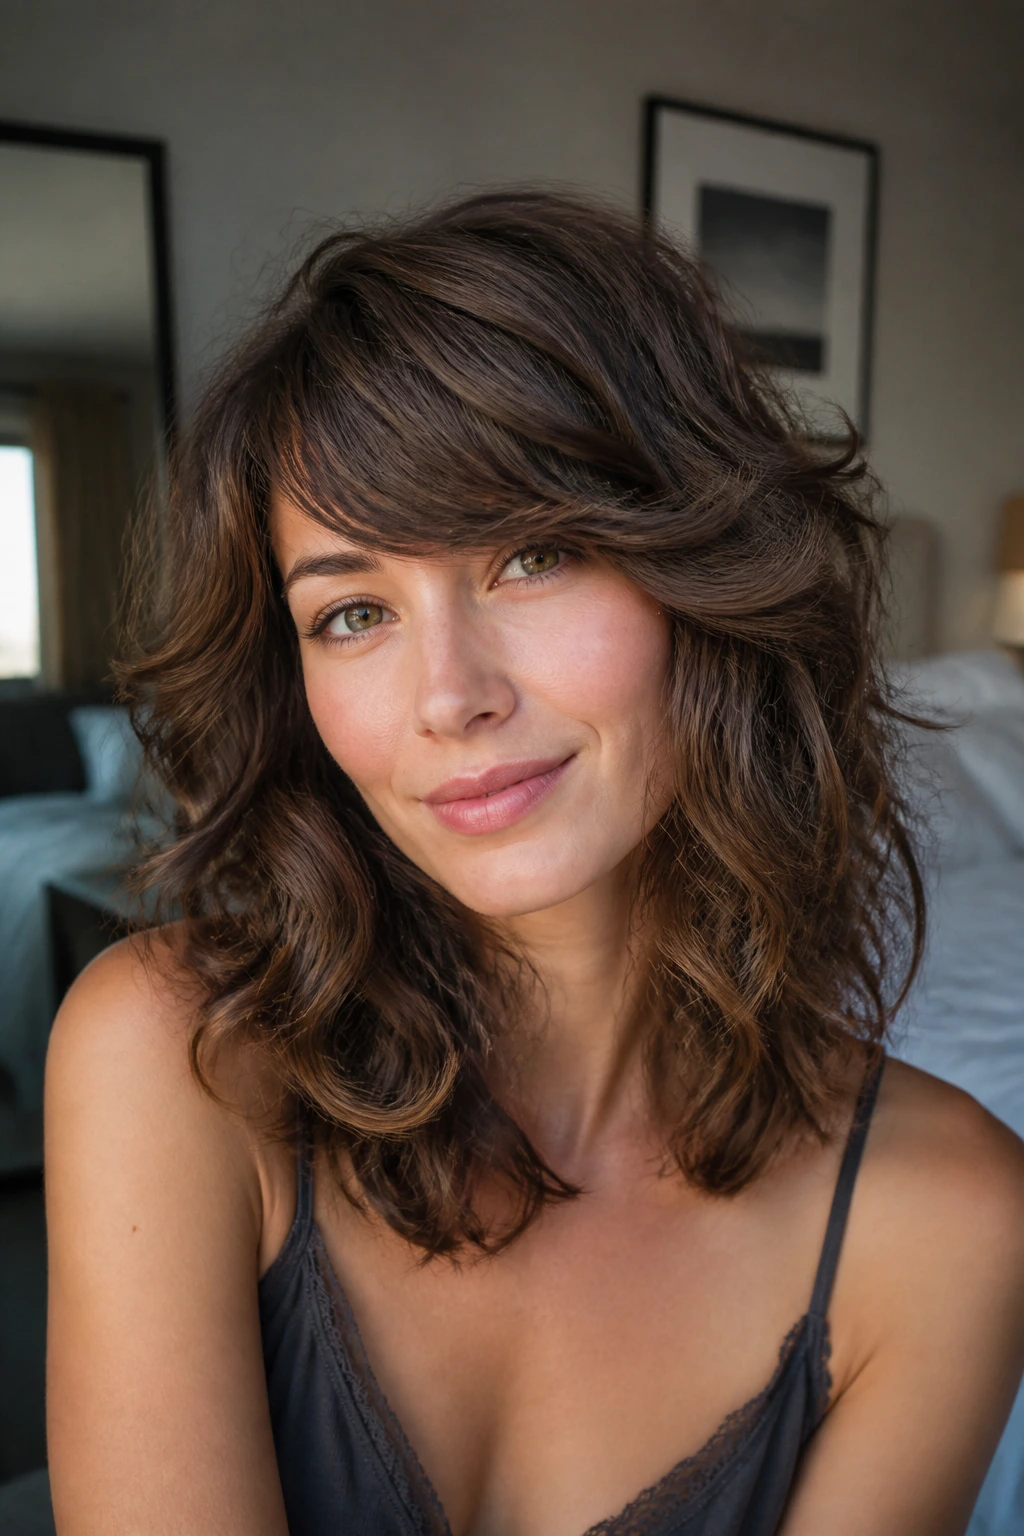
Side-swept fringe changes the whole face map without the commitment of full bangs. It lets the waves spill across one brow and blend into the front layers, which gives the cut a softer, more relaxed shape.
This is a useful choice if your forehead is on the taller side or if you hate the feeling of a straight fringe touching your lashes. The sweep should start high enough to create movement, but not so high that it leaves the front looking empty. A little bend at the part line keeps the fringe from falling flat against the scalp.
19. Cheekbone-Frame Shag
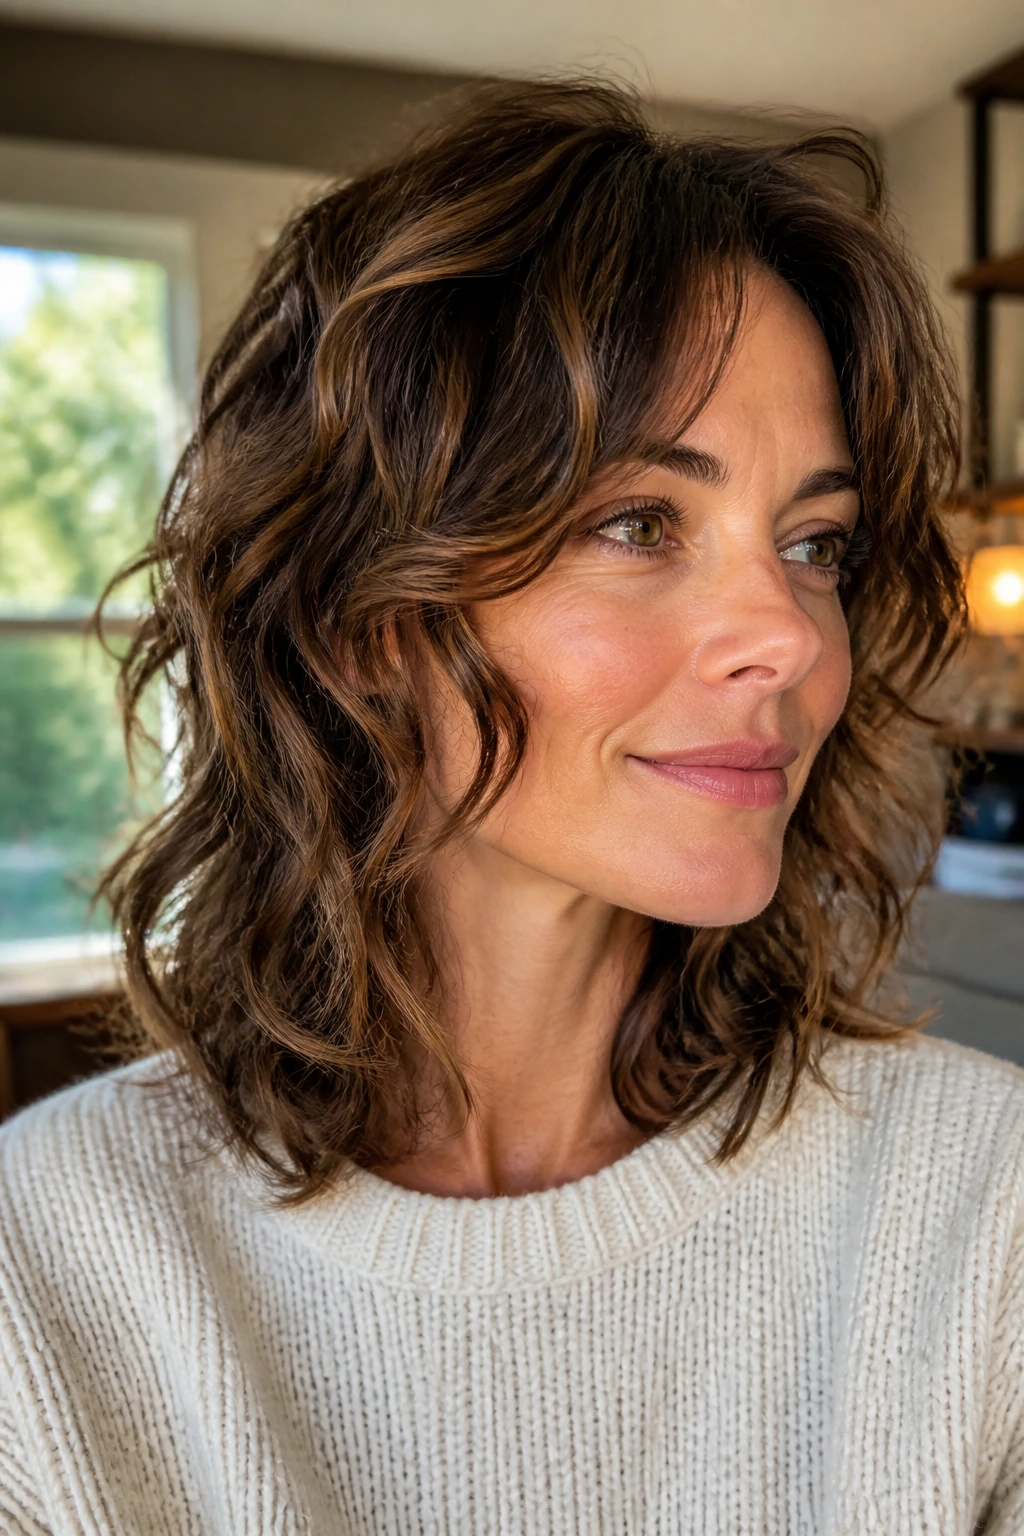
This one is all about drawing the eye upward. Shorter face-framing layers land right around the cheekbones, which can make the face feel lifted even when the rest of the haircut stays mid length and easy.
I like it on people who want more shape near the face but do not want heavy bangs. It’s a good compromise. The cheekbone pieces should be soft enough to move, but long enough to tuck behind the ear if needed. That detail matters more than you think. Hair you can tuck is hair you can actually live with.
20. Thick-Hair Shag With Internal Layers
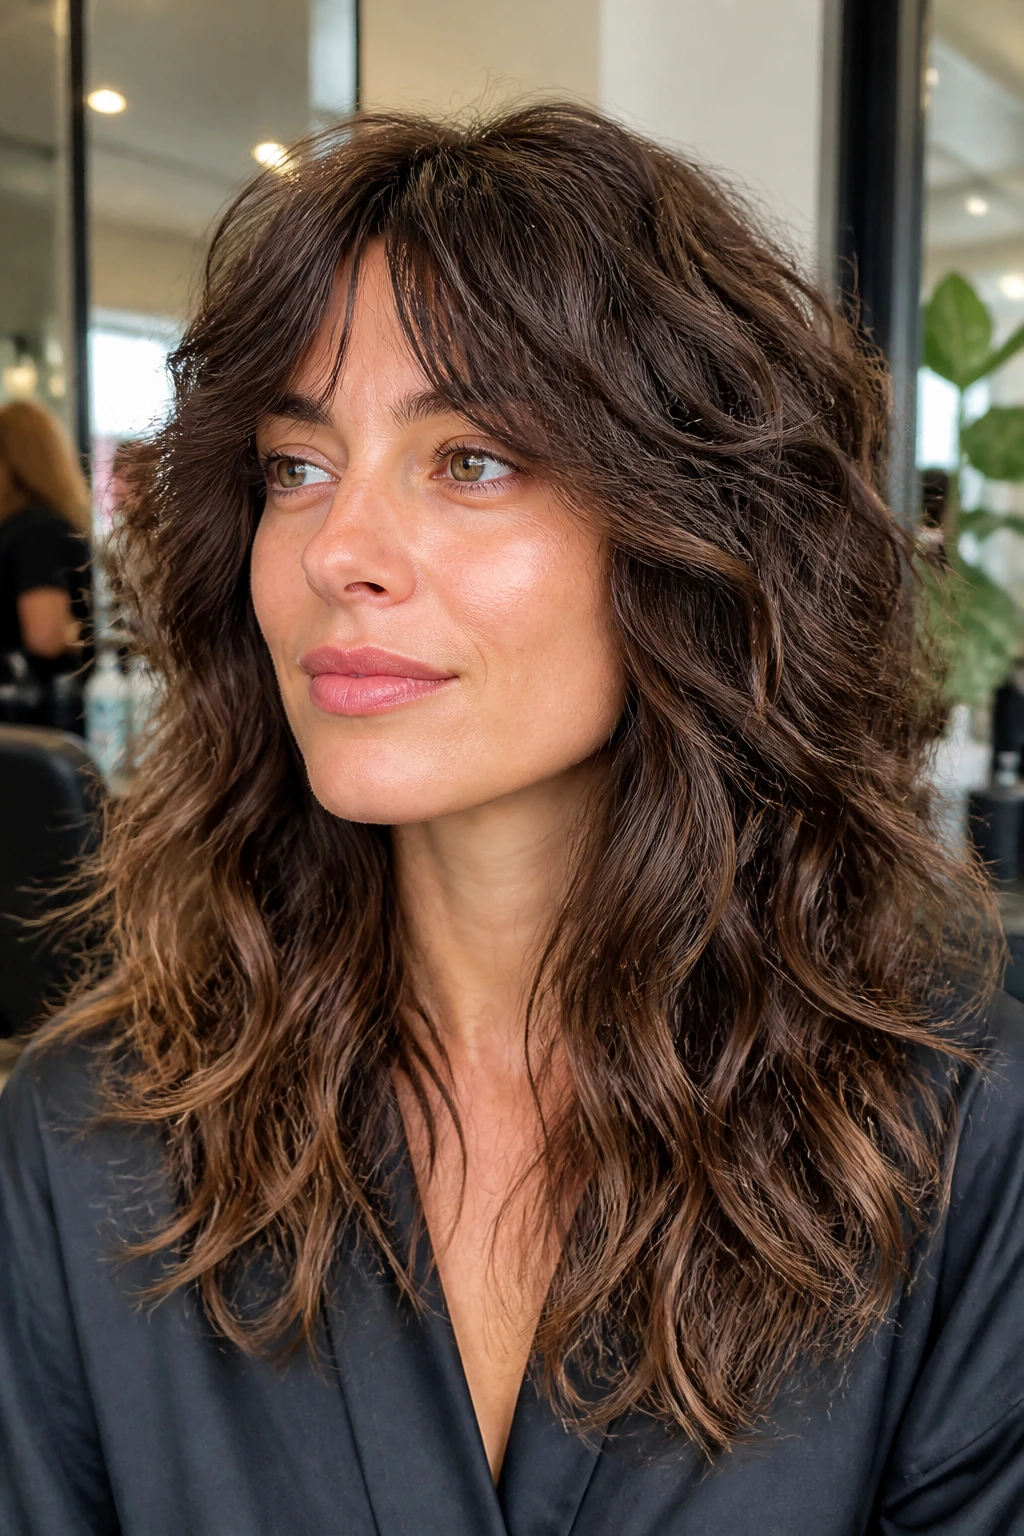
Thick waves need internal layers more than they need a lot of surface choppiness. If you cut too much off the outside, the hair turns bulky in the middle and fuzzy at the ends. Internal layers let the weight come out from underneath instead.
That creates a cut that feels lighter without looking shredded. It also helps the waves fall in cleaner groups, which is a blessing if your hair grows outward with some force. Ask the stylist to keep the perimeter strong and do the bulk removal inside the shape. It sounds minor. It changes everything.
21. 2C Wave Shag With Long Face Frame
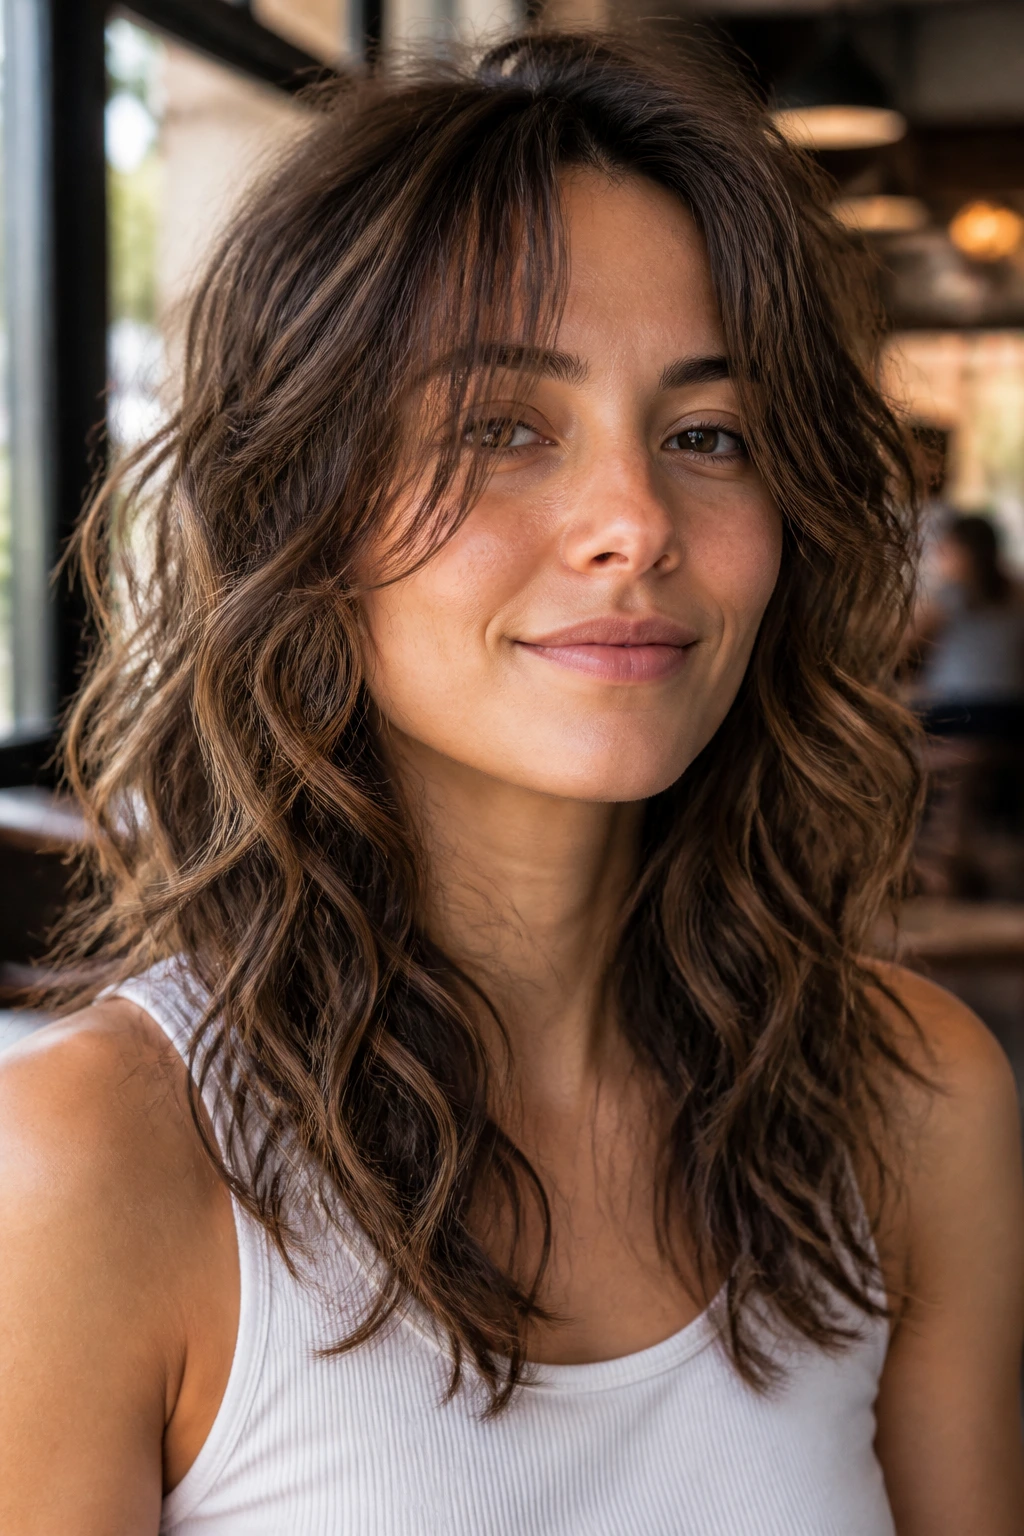
If your waves are closer to 2C, you can handle a little more structure around the face. This shag keeps the front pieces longer, then gives the rest of the cut enough layering to let the wave pattern show instead of sitting like a block.
What I like here is the balance. The face frame stays soft and flattering, while the back and sides keep enough texture to stop the hair from looking heavy. It’s a good option if your waves get springier in humid weather and need room to expand. Cutting the front too short here is a trap. Leave yourself some length.
22. Retro Feathered Shag
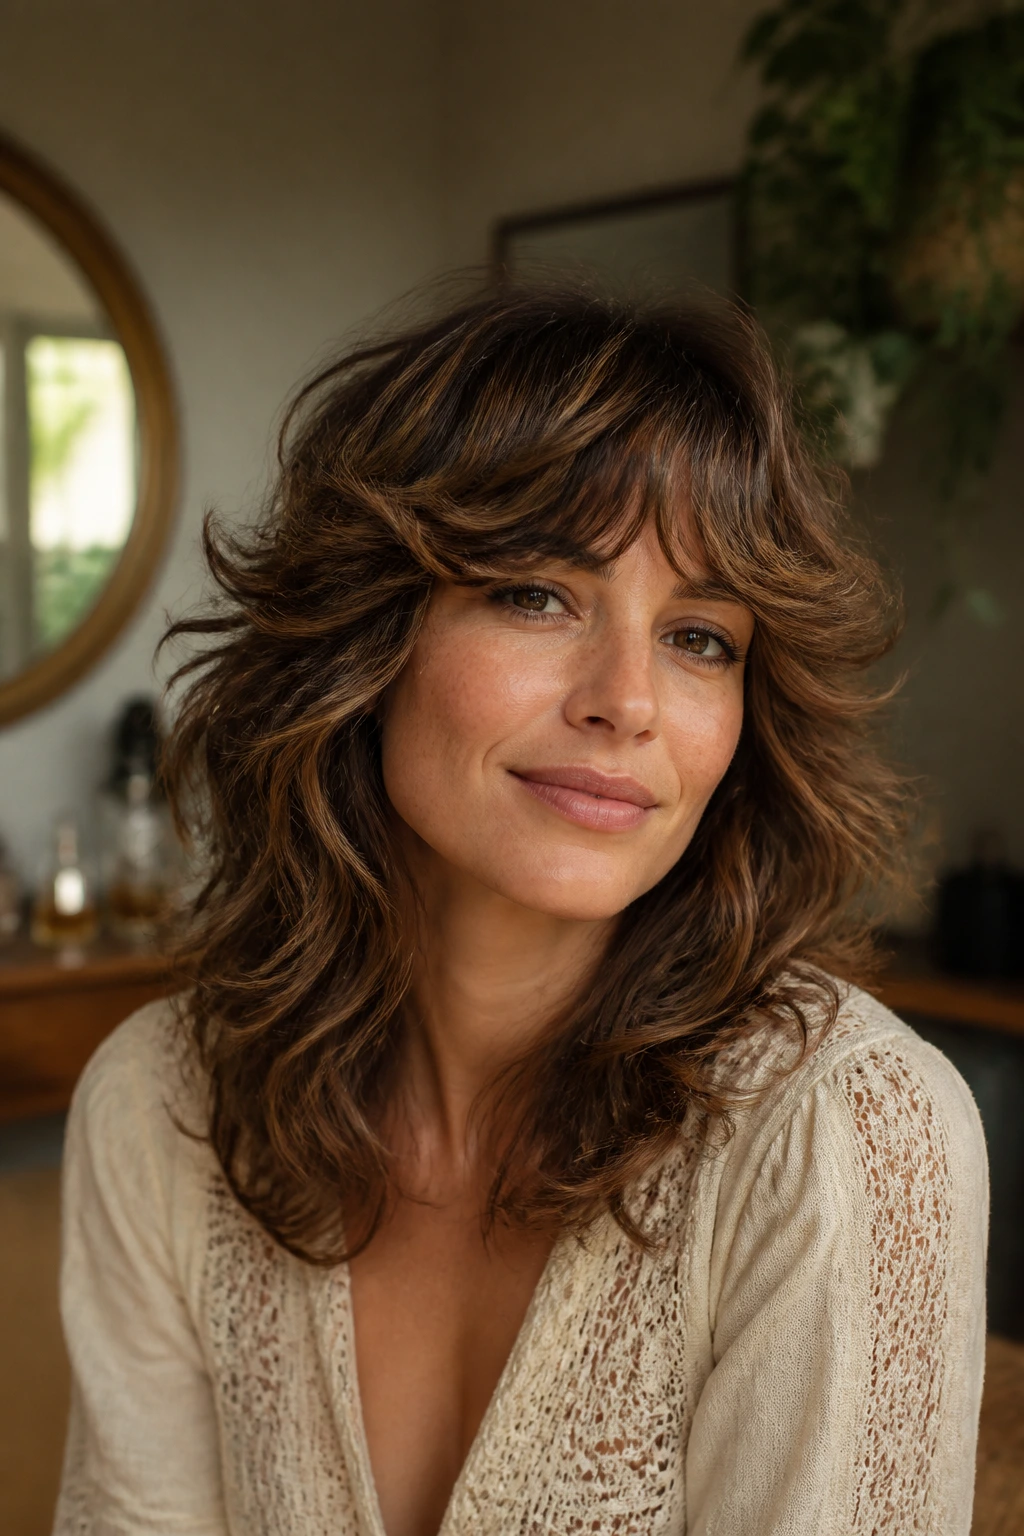
There’s a reason feathered layers keep coming back. They move with a little sweep and turn, and on wavy hair that movement looks natural instead of forced.
The retro version of the shag is usually a bit softer around the perimeter and a little fuller near the top, which makes it flattering on medium-density hair. It can read glam if you blow it out, or easygoing if you air-dry. I’d choose this if you like a hint of old-school shape without going full throwback. The feathering should look airy, not wispy. That’s the difference between chic and thin.
23. Collarbone Flip Shag

This one has a little flick at the ends, almost like the hair wants to turn itself outward. The collarbone length gives those flips space to show, and the shag layers keep the movement from looking stiff.
It’s a solid choice for waves that naturally kick at the ends anyway. Instead of fighting the flip, you lean into it. Ask for the bottom layers to stay slightly longer so the ends can curl or turn without breaking the shape. If you like a haircut that looks a bit different depending on how you part it, this one gives you that flexibility.
24. Weight-Removed Shag With Soft Ends
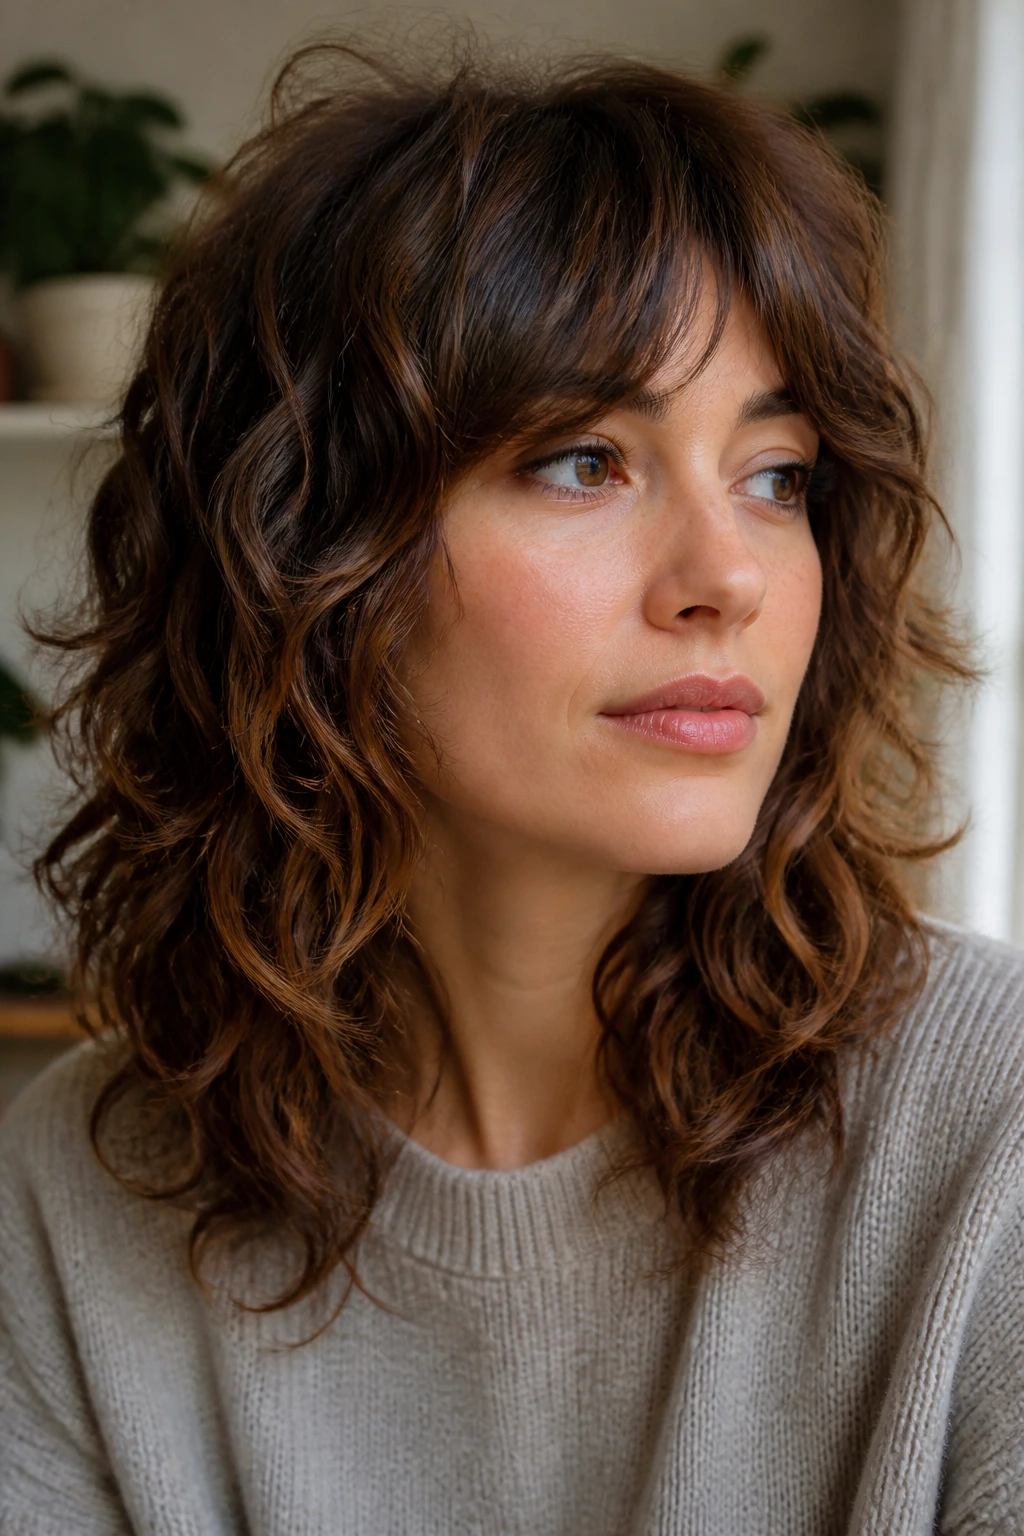
Some shags shout. This one just breathes.
The weight is removed from inside the haircut, not hacked away from the perimeter, so the ends still look soft and full while the bulk comes out of the middle. That is a smart move for dense waves or hair that feels hot and heavy once it grows past the shoulders. It also helps the cut move more freely when you air-dry. If your ends tend to look stringy once too much texture is added, this is a calmer answer.
25. Volume-Heavy Shag With Rounded Ends

This shag is for someone who likes body at the crown and a fuller outline at the bottom. The rounded ends keep the silhouette from turning boxy, while the volume at the top gives the whole style some life.
It works best when the layers are stacked with intention, not just chopped at random. Wavy hair can handle a little lift if the lower layers still have enough substance to anchor the shape. I’d avoid going too short around the ears. That’s where volume-heavy cuts can start to flare in a way nobody asked for. Keep the curve smooth.
26. Grown-Out Bang Shag

If you dislike chasing your bangs every few weeks, this is the one. The fringe is long enough to tuck, part, or sweep aside, which means the haircut still has the feel of bangs without the daily maintenance headache.
I think this is one of the smartest shags for people who wear their hair in a few different ways. You can let the fringe fall forward on wash day, push it apart later, and tuck one side behind the ear when you want a cleaner look. The cut only works if the bang area is blended well into the front layers. Hard edges make grow-out look accidental. Soft blending makes it look planned.
27. Studio-Soft Shag With Airy Layers

This is the version that looks like it was cut by someone who knows exactly where the weight line should sit. The layers are airy, the ends are not over-texturized, and the whole haircut moves with a light, clean swing.
It’s a strong final pick because it can be styled up or down without losing its shape. Wavy hair gets the best result when the cut has just enough internal lift to show the bend, but not so much that the hair starts looking frayed around the edges. If you want a shag that feels modern without trying too hard, this is the one I’d put at the top of the stack.
Why Mid-Length Shag Cuts Work So Well on Wavy Hair

The reason these cuts behave better than a lot of longer layered styles is weight distribution. Wavy hair needs enough mass at the bottom to pull the wave into a clean bend, but it also needs room at the top so the crown doesn’t sit flat and tired. Mid length gives you both.
There’s also the matter of shrinkage. Waves lift more than straight hair once they dry, and that means a cut that looks balanced wet can turn short and fuzzy dry if the stylist is too aggressive with the layers. Dry cutting — or at least cutting with a very clear sense of how the wave falls in its natural state — helps keep the shape honest.
The layer map matters more than the number of layers
A good shag is not about how many layers you can count with your eyes. It’s about where the layers begin. On wavy hair, the crown, cheekbone, and jawline each play a different role, and the stylist has to decide which of those areas needs lift and which needs weight.
Why the mid length sweet spot keeps showing up
Too short, and wavy hair can spring out into a puff. Too long, and the wave loses its shape under its own weight. Mid length tends to hold the line while still letting the bend show. That’s why collarbone and shoulder-grazing shags keep working. They leave enough room for movement without letting the ends get floppy.
What to Bring to the Salon Before the First Snip
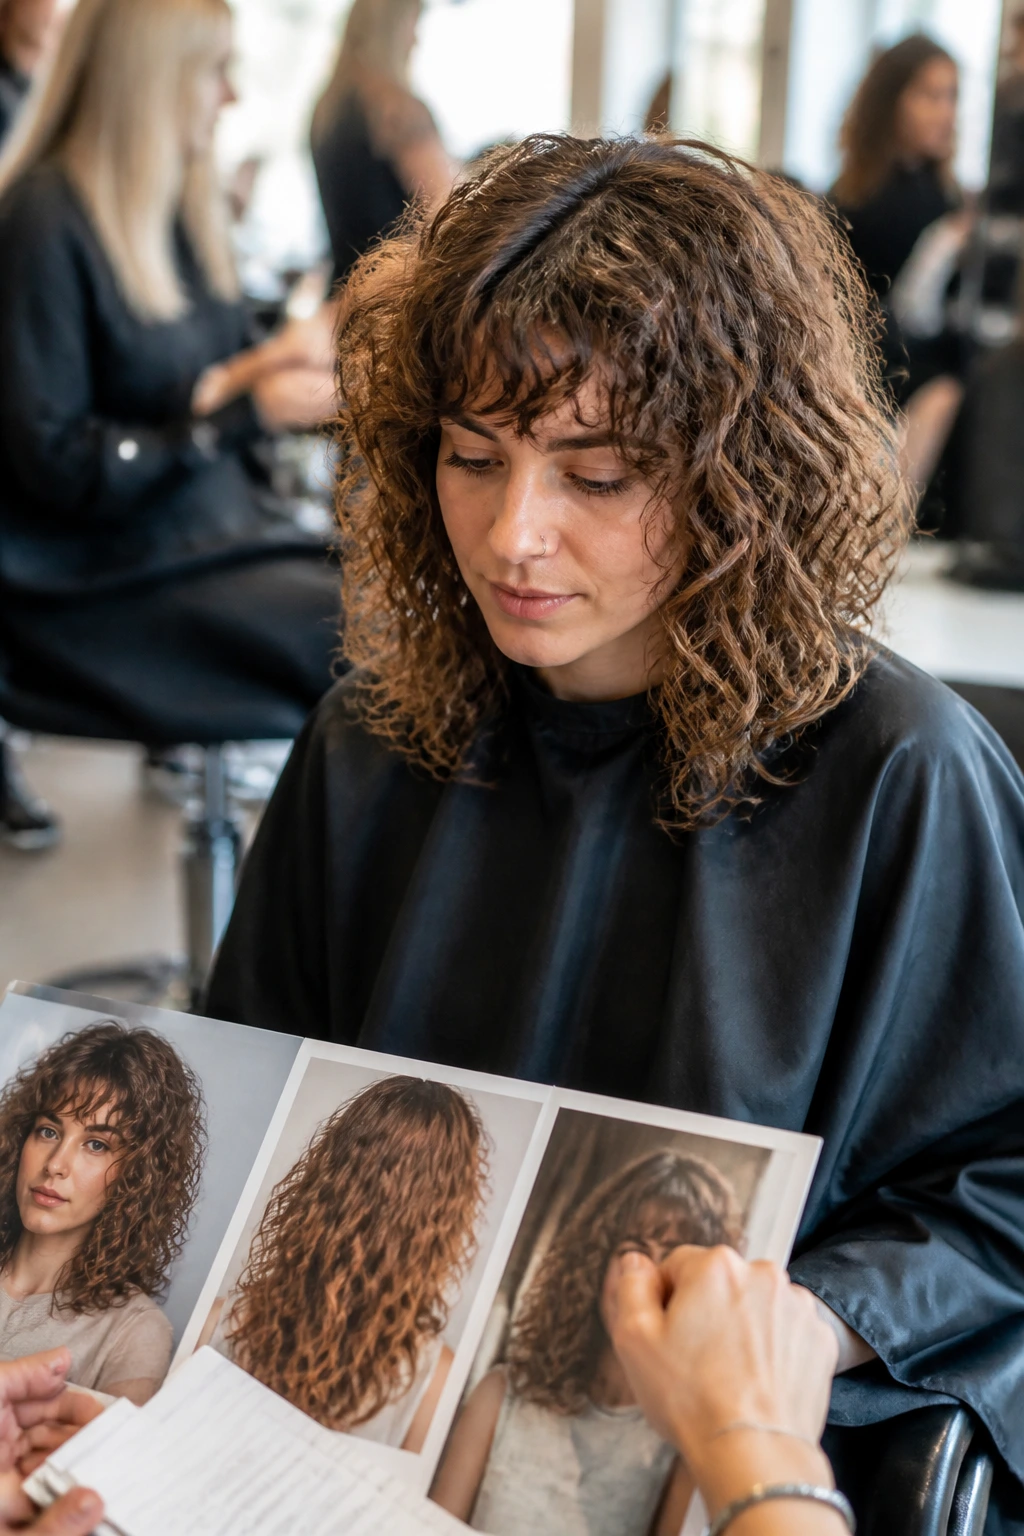
Bring photos, yes, but bring the right kind of photos. One picture of a model with glass-smooth blowout hair tells your stylist almost nothing if you air-dry and scrunch your waves at home. I want people to bring at least one reference shot of the front, one of the side, and one of the back, all showing a cut that has the same amount of bend and density as their own hair.
A second piece of paper helps more than a dozen saved screenshots: a plain sentence about your routine. Say whether you diffuse, air-dry, flat-iron once a week, or avoid heat altogether. That one detail changes where the layers should start and how much fringe you can realistically carry.
-
Your usual finish: Tell the stylist if your hair dries with loose bends, strong spirals, or a mix of both. That changes the amount of layering you can hold.
-
Your density and shrinkage: If your hair puffs up two inches when dry, say it out loud. Stylist ears perk up when they hear that number.
-
The part you hate most: Crown collapse, triangle shape, frizzy ends, or bangs that split badly all point to different fixes.
-
One photo you do not want: This helps more than people think. A bad example is just as useful as a good one.
-
How much maintenance you’ll actually do: If a 6-week bang trim is out of the question, say so. A shag can be tailored around laziness, and I mean that kindly.
Essential Tools for Styling and Maintenance
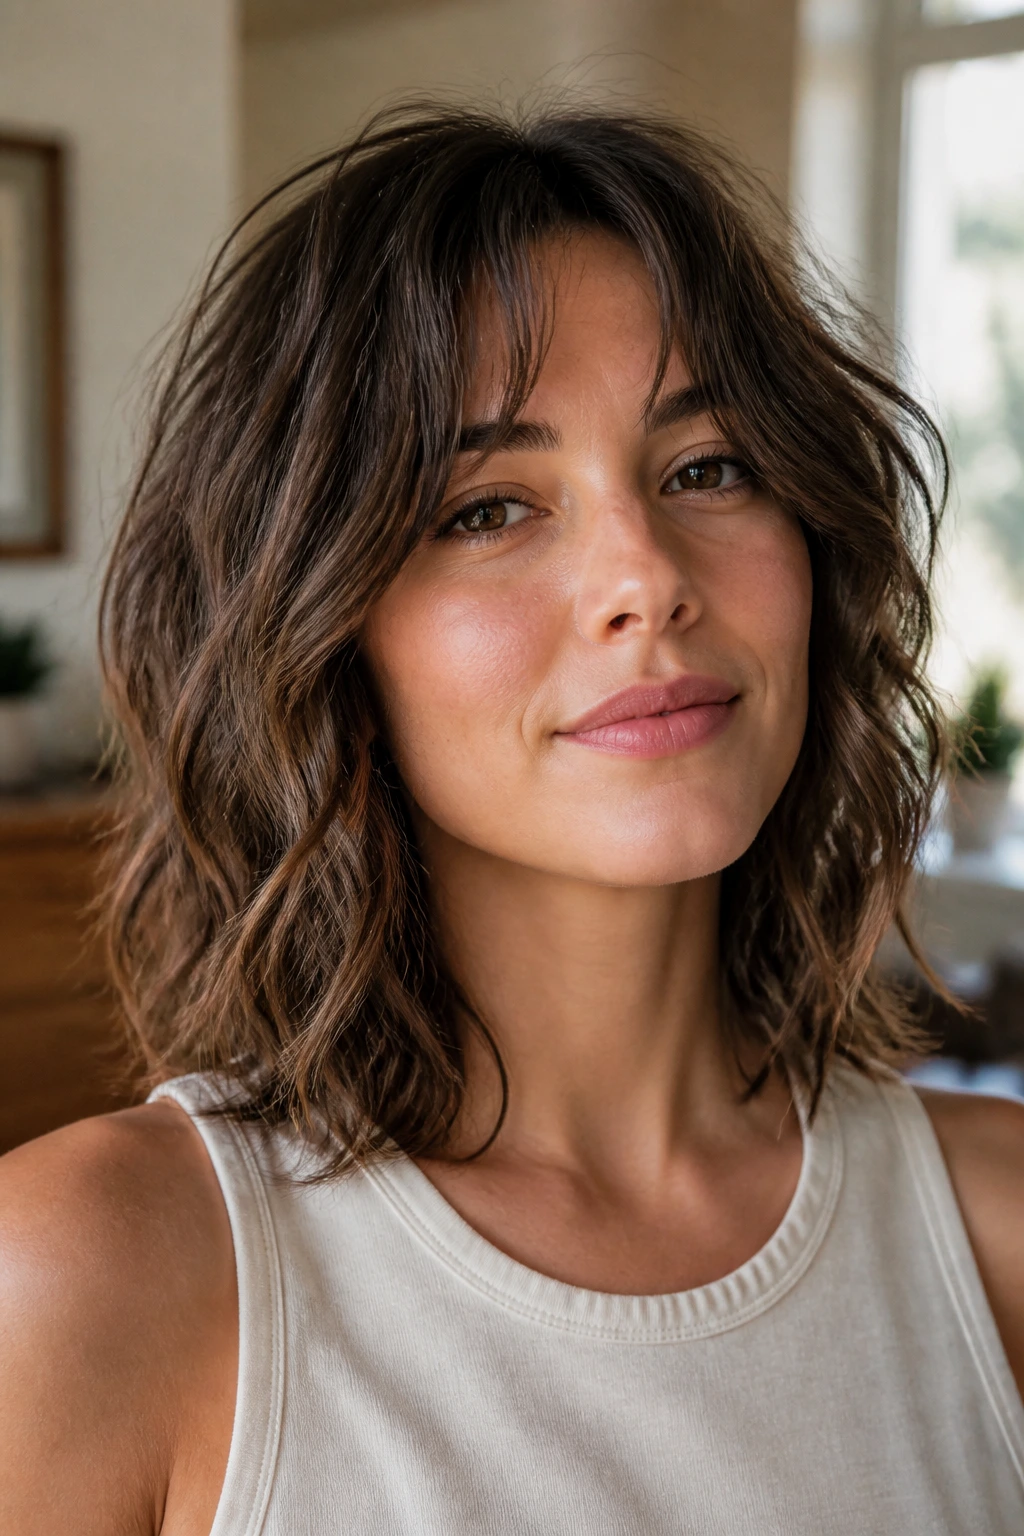
A shag doesn’t need a drawer full of gadgets, but a few specific tools make the difference between shape and fuzz.
-
Diffuser attachment: This is the easiest way to lift the crown without blasting the wave pattern apart. Use it on low heat and low speed.
-
Microfiber towel or soft T-shirt: Regular terry cloth can rough up the cuticle and make wavy hair frizz faster than it needs to.
-
Duckbill clips: These are handy for clipping the crown while it dries, especially if you need a little root lift.
-
Wide-tooth comb: Good for distributing conditioner in the shower and not wrecking the wave clumps afterward.
-
Lightweight mousse or foam: Better for root lift and soft hold than a heavy cream on most wavy shags.
-
Small amount of oil or serum: Use this only on the ends once the hair is mostly dry. Too much, and the shape collapses.
-
Salon reference photos: Not a styling tool, but honestly, it belongs on the list. Pictures prevent bad communication.
How to Style a Wavy Shag Without Flattening It
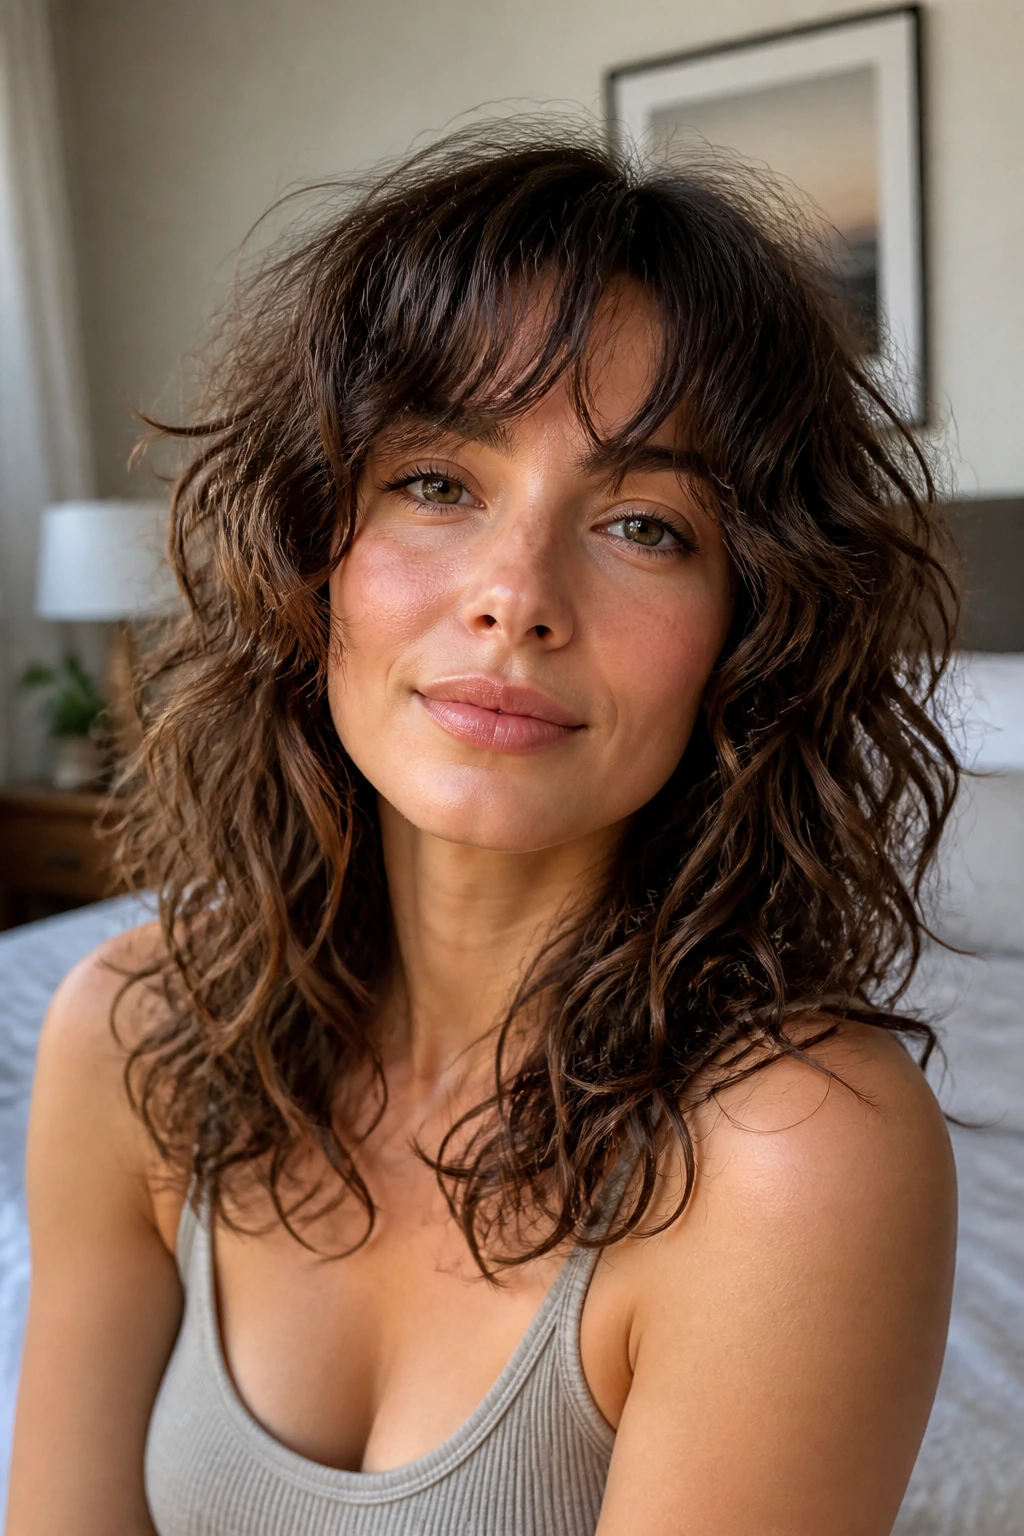
Start with damp hair that’s closer to soaking wet than nearly dry. That’s when the waves are easiest to shape. Work a lightweight mousse or foam through the roots and mids, then scrunch upward with your hands. Don’t smear the product down the strands like frosting. Hair remembers.
Use a diffuser if you want lift, and keep the airflow gentle. Hover it near the roots first, then cup the ends once the wave pattern starts setting. If you air-dry, clip the crown for the first 10 to 15 minutes so the root line does not collapse under its own weight. That tiny head start matters more than most people admit.
Once the hair is dry, break any cast with clean hands and a drop of oil. Not a handful. A drop. The goal is soft separation, not slippery ends. If the front pieces get too fluffy, twist them around your fingers for a few seconds and let them fall back into place.
Keeping the Shape Between Haircuts
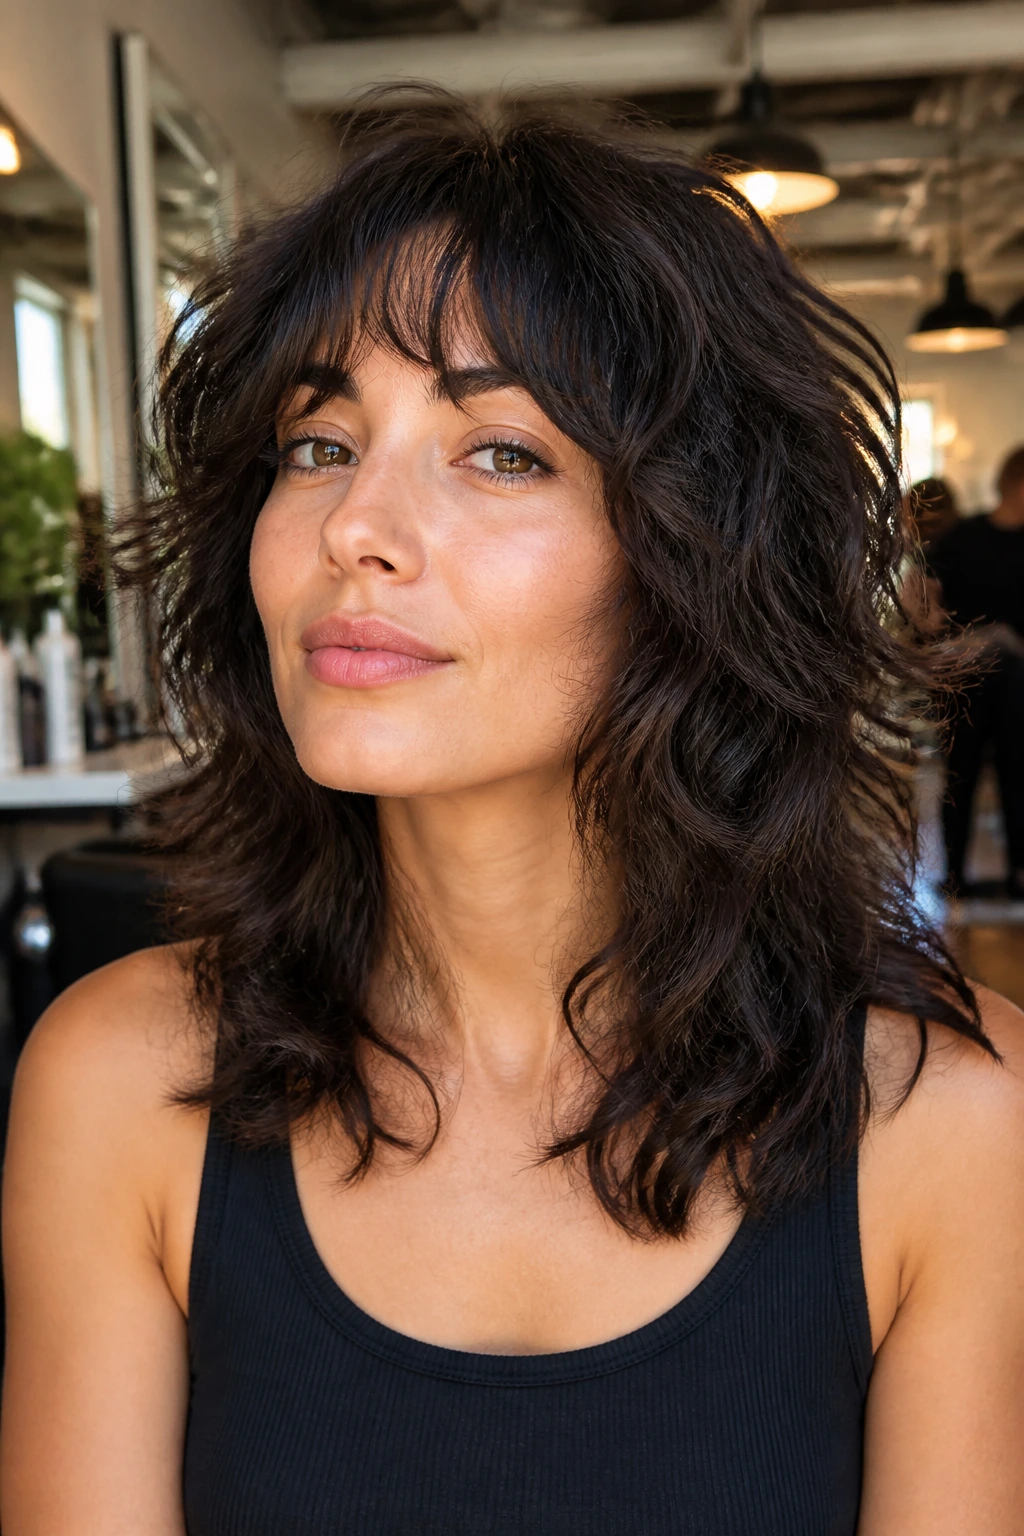
Shags age better than blunt cuts, but they are not self-cleaning. The fringe needs checking more often than the rest of the shape, especially if it lands near the brows. Plan on a bang trim every 4 to 6 weeks if you want the front to keep its original balance. The full shape usually wants a refresh every 8 to 12 weeks, depending on how fast your hair grows and how much layering you chose.
Build-up is another sneaky problem. Mousse, cream, dry shampoo, and even a light oil can stack up at the roots and make waves droop. A clarifying wash once every couple of weeks can wake the whole cut up again. Don’t do it every wash unless your hair is very heavy and product-hungry. Too much clarifying strips the softness out.
Sleep changes the shape, too. A satin pillowcase or loose pineapple clip keeps the top from getting flattened into a weird dent overnight. If the ends feel dry, smooth a pea-sized amount of serum onto them after the morning refresh. The key is small moves, not more product.
Additional Tips for Better Movement and Shine
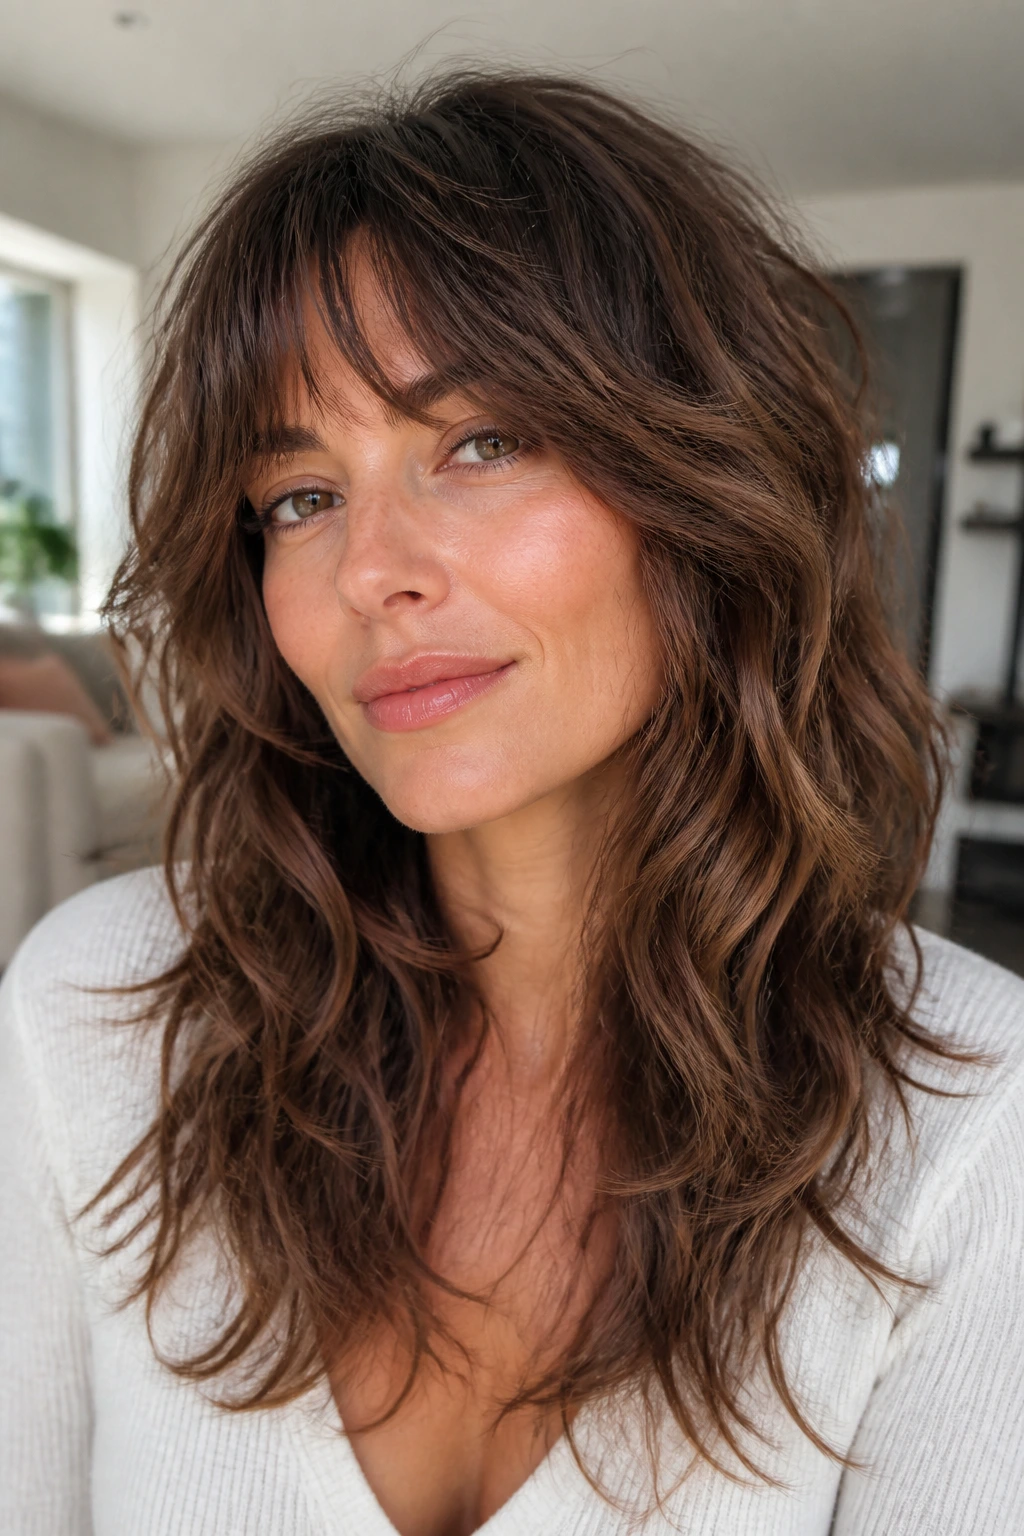
Root Lift: If the top layers keep collapsing, clip the crown while your hair dries and release the clips when the roots are just about set. It gives you lift without teasing, which is a trade I’ll take any day.
Texture Boost: On waves that need help holding their bend, a foam or mousse usually beats a cream. Cream can be nice on dry ends, but it often weighs down the first two inches at the root.
Color Placement: A few lighter pieces around the face and through the upper layers can make the shag read more clearly. The haircut shape shows up better when the light catches the bends.
Shape Control: If your ends start to flare, ask for a tiny trim that cleans the perimeter without reopening all the layers. You do not need to reinvent the haircut every time it grows.
Make-It-Yours: If you like a softer look, keep the fringe long and the layers gradual. If you want more bite, ask for stronger piece separation around the cheekbones and a little more lift at the crown.
Common Mistakes That Make a Shag Look Choppy
-
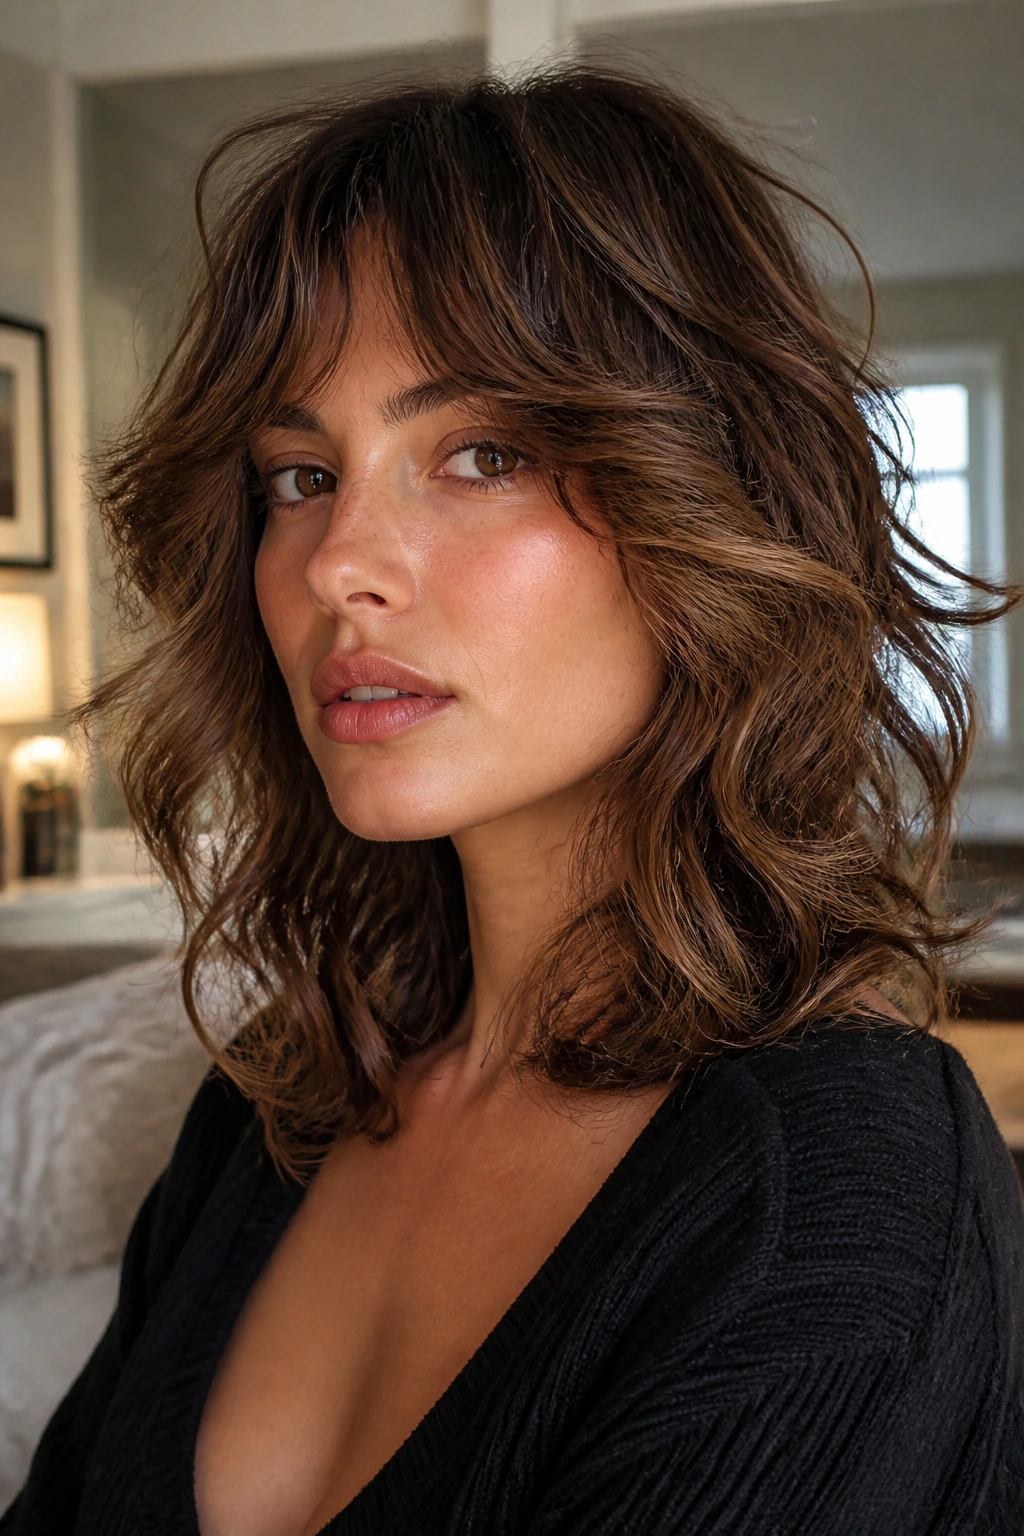
Cutting the crown too short: The symptom is a puffed-up top with heavy sides. The fix is to keep crown layers controlled and let the stylist remove weight more gradually.
-
Using too much thinning or razor work: The ends look feathery for a week, then they start looking frayed and dry. Ask for point cutting or internal layering instead of aggressive texturizing.
-
Forgetting shrinkage: Bangs that looked eyebrow-length in the chair can end up halfway up the forehead once dry. Cut longer than you think, especially on the front pieces.
-
Choosing product that is too heavy: Creams and butters can flatten the wave pattern and make the layers stick together. Use mousse or foam first, then a tiny bit of cream only where the ends need help.
-
Ignoring density: Fine hair and thick hair need different layer maps. A shag that works on dense waves can make fine waves look sparse if the stylist copies the same shape without adjusting the weight.
Variations and Adaptations to Try
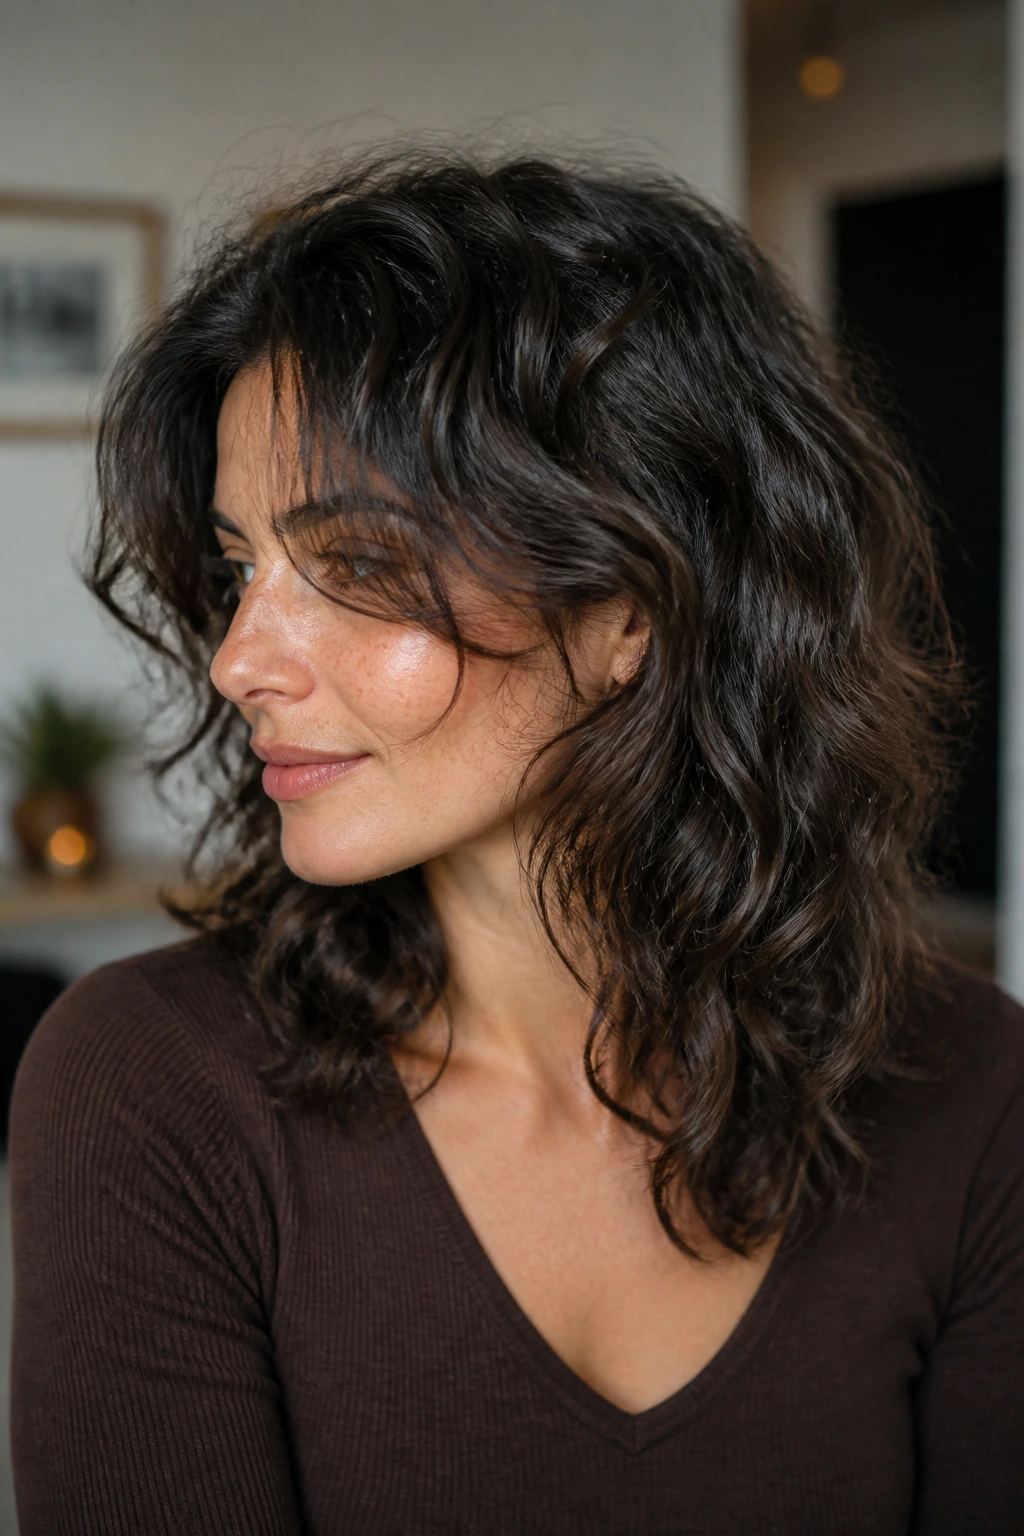
The Fine-Wave Edit: Keep the layers longer, the fringe lighter, and the perimeter stronger. This keeps the haircut from looking see-through once the hair dries.
The Thick-Hair Version: Add internal debulking and a stronger face frame. Thick waves need room to move, but they still need a clear outline.
The Bang-Shy Option: Skip full fringe and ask for grown-out front pieces that sit at the cheekbone. You still get shape without babysitting short bangs every morning.
The Big-Texture Shag: Shorten the crown slightly and let the side layers stay soft. This version gives the waves room to expand and reads especially well on coarse hair.
The Grow-Out-Friendly Cut: Keep the fringe long enough to tuck away and the layers blended rather than chopped. It holds its shape longer and does not punish you when a trim gets delayed.
Frequently Asked Questions
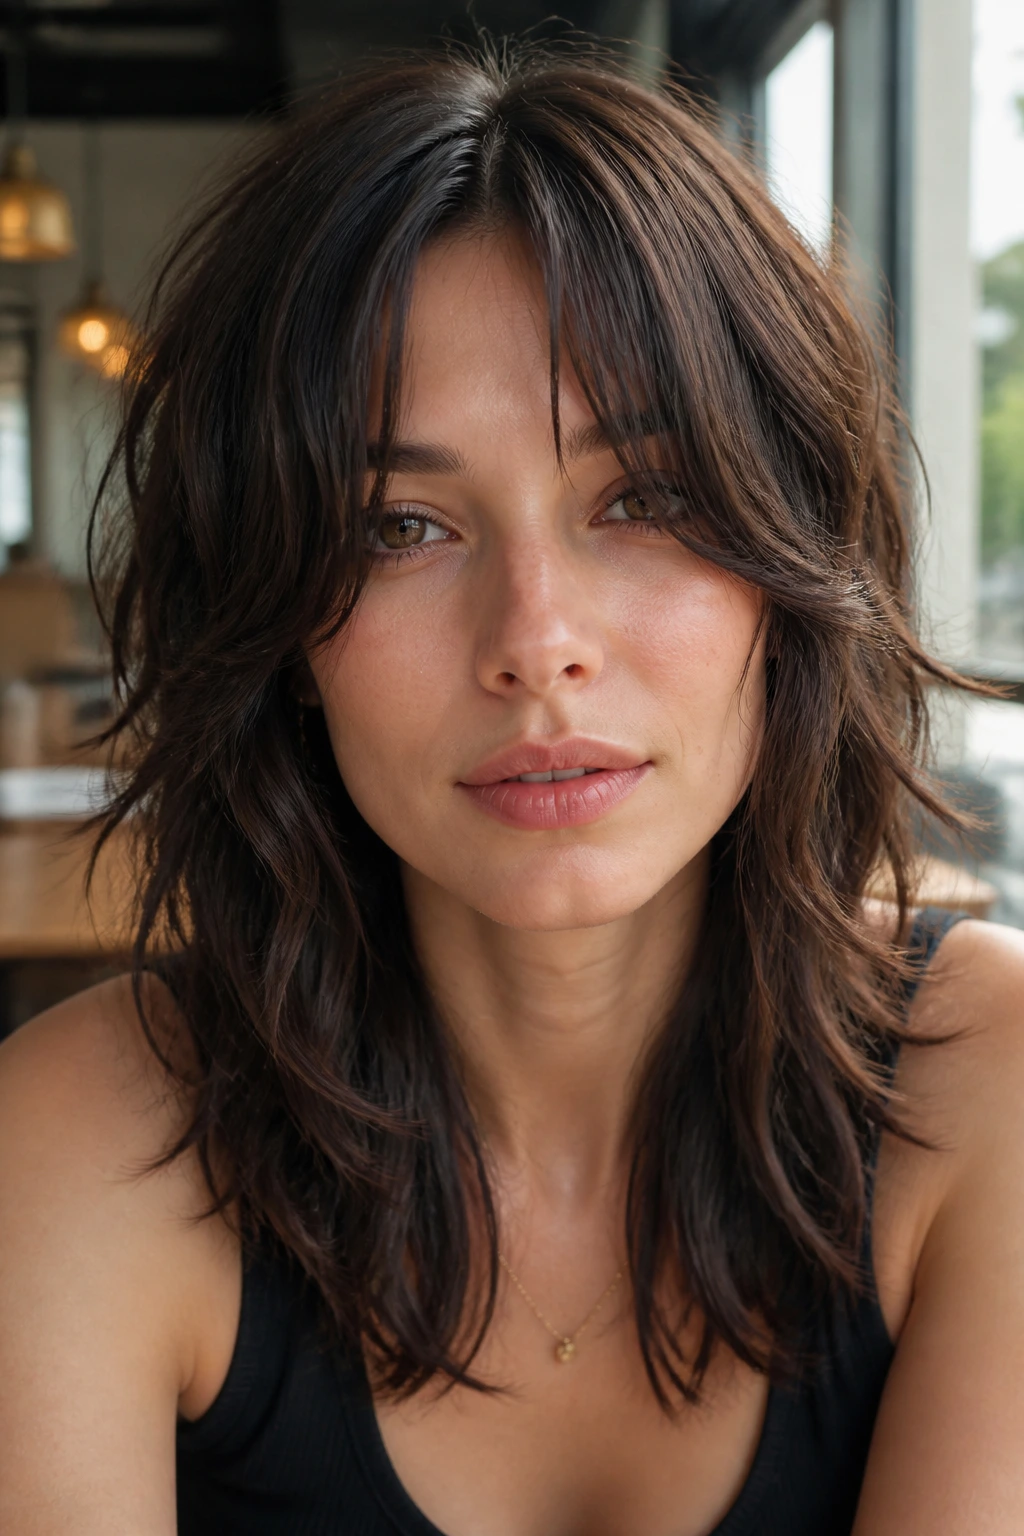
What’s the difference between a shag and a wolf cut on wavy hair?
A wolf cut usually pushes the crown and top layers a little harder, while a classic shag leans softer and more blended. On wavy hair, the wolf version looks rougher and more dramatic; the shag usually gives you cleaner movement and less chance of ending up with a triangular outline.
Will a shag make fine waves look thinner?
It can, if the layers are cut too short or too close together. The safer move is longer layers, a strong perimeter, and less thinning at the ends. Fine waves need shape, not scalp exposure.
Should a wavy shag be cut dry or wet?
Dry or nearly dry is often safer because the stylist can see how much the wave bends and where it shrinks. Wet cutting can still work, but only if the stylist knows how your hair behaves once it loses water and springs back.
How often should I trim a mid-length shag?
Most of these cuts keep their shape best with a salon refresh every 8 to 12 weeks. Fringe may need a touch-up sooner, especially if it sits right on the brows or splits awkwardly at the center.
Can I wear this cut straight sometimes?
Yes, but the layers will show differently when the hair is blown out. The cut should still look balanced straightened, though it will feel more polished and less piecey than it does air-dried.
What if my waves go flat at the crown?
Ask for more lift at the top and use root clips while drying. A little mousse at the roots and a diffuse-dry on low heat can make a bigger difference than a heavier styling cream ever will.
Is this a good cut for thick, dense hair?
Absolutely, as long as the stylist removes weight inside the shape instead of shredding the perimeter. Thick hair often looks better in a shag when the layers are purposeful and the outline stays strong.
Can I still put this hair in a ponytail?
Yes, and you probably will. Mid length makes that easier than a shorter shag, and the face-framing pieces can be left out if you want a softer finish around the temples.
Choosing the Shag That Fits Your Wave Pattern
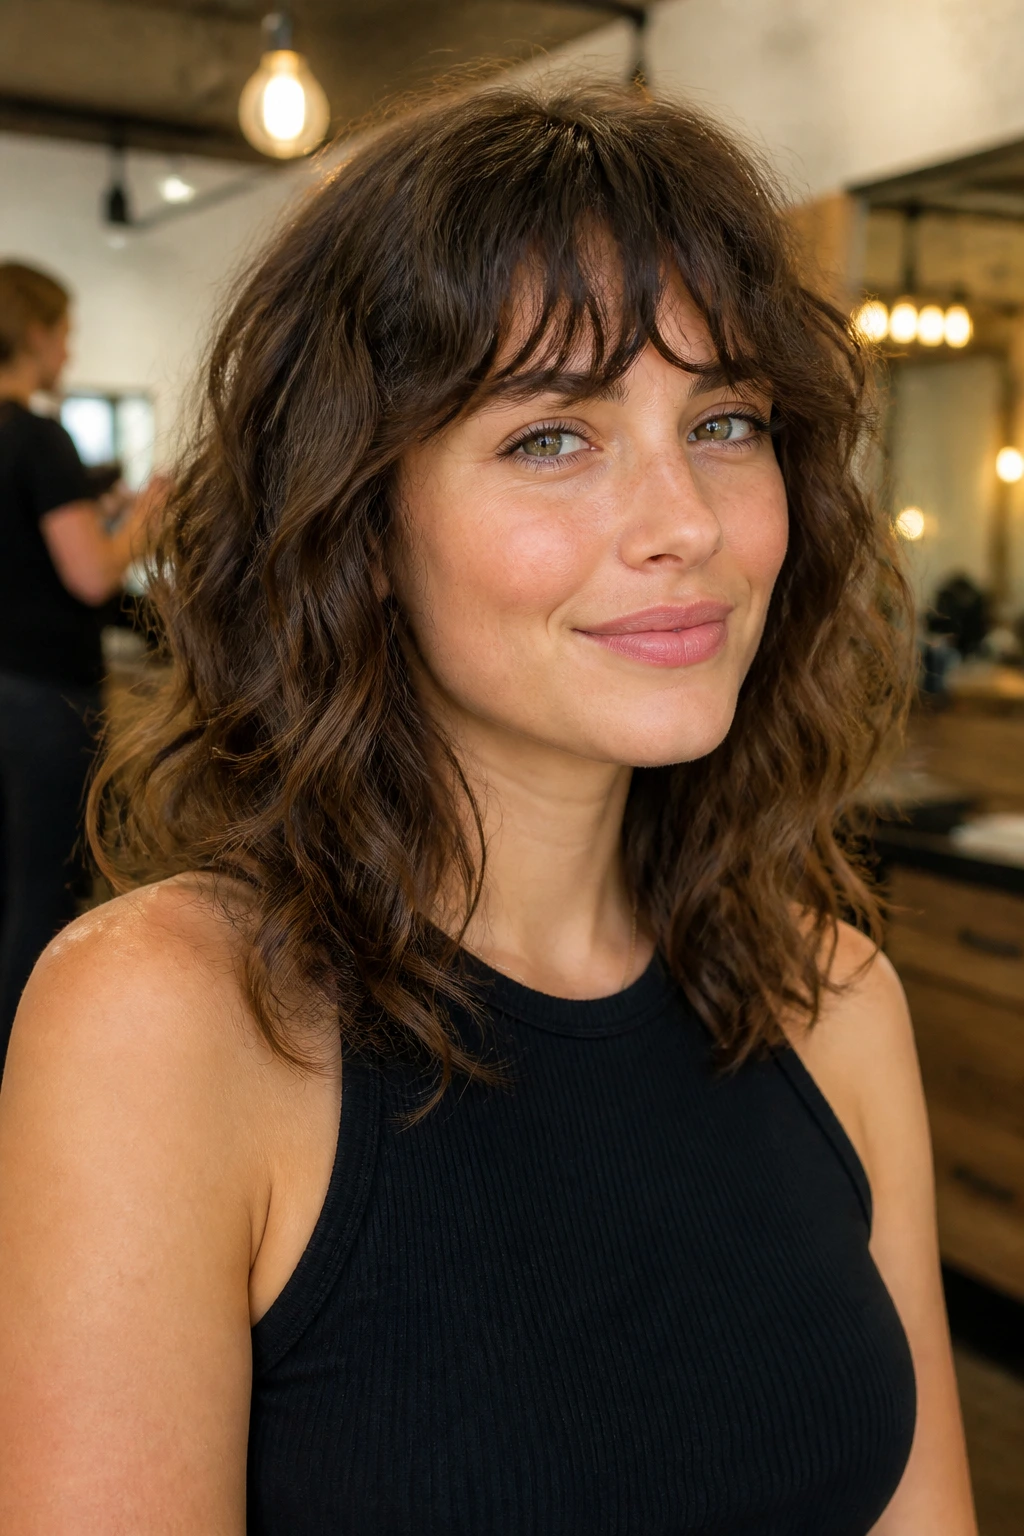
The best version of this haircut is the one that respects what your hair already does. Loose waves need support more than they need drama. Dense waves need weight removed in the right places. Fine waves need shape without a lot of chopping. That sounds obvious, but it is where a lot of cuts go sideways.
If you like low-effort styling, pick a shag with longer layers and a softer fringe. If you like personality around the face, go for curtain bangs or a cheekbone frame. If you want maximum movement, lean into the wolfier shapes and the pieceier ends. There’s room here for all of it.
Bring a photo, bring honesty about your routine, and bring a little patience for the grow-out. The good versions of these cuts get better when they settle in, and the bad versions usually reveal themselves in the first two weeks anyway.
The Shape That Keeps Moving
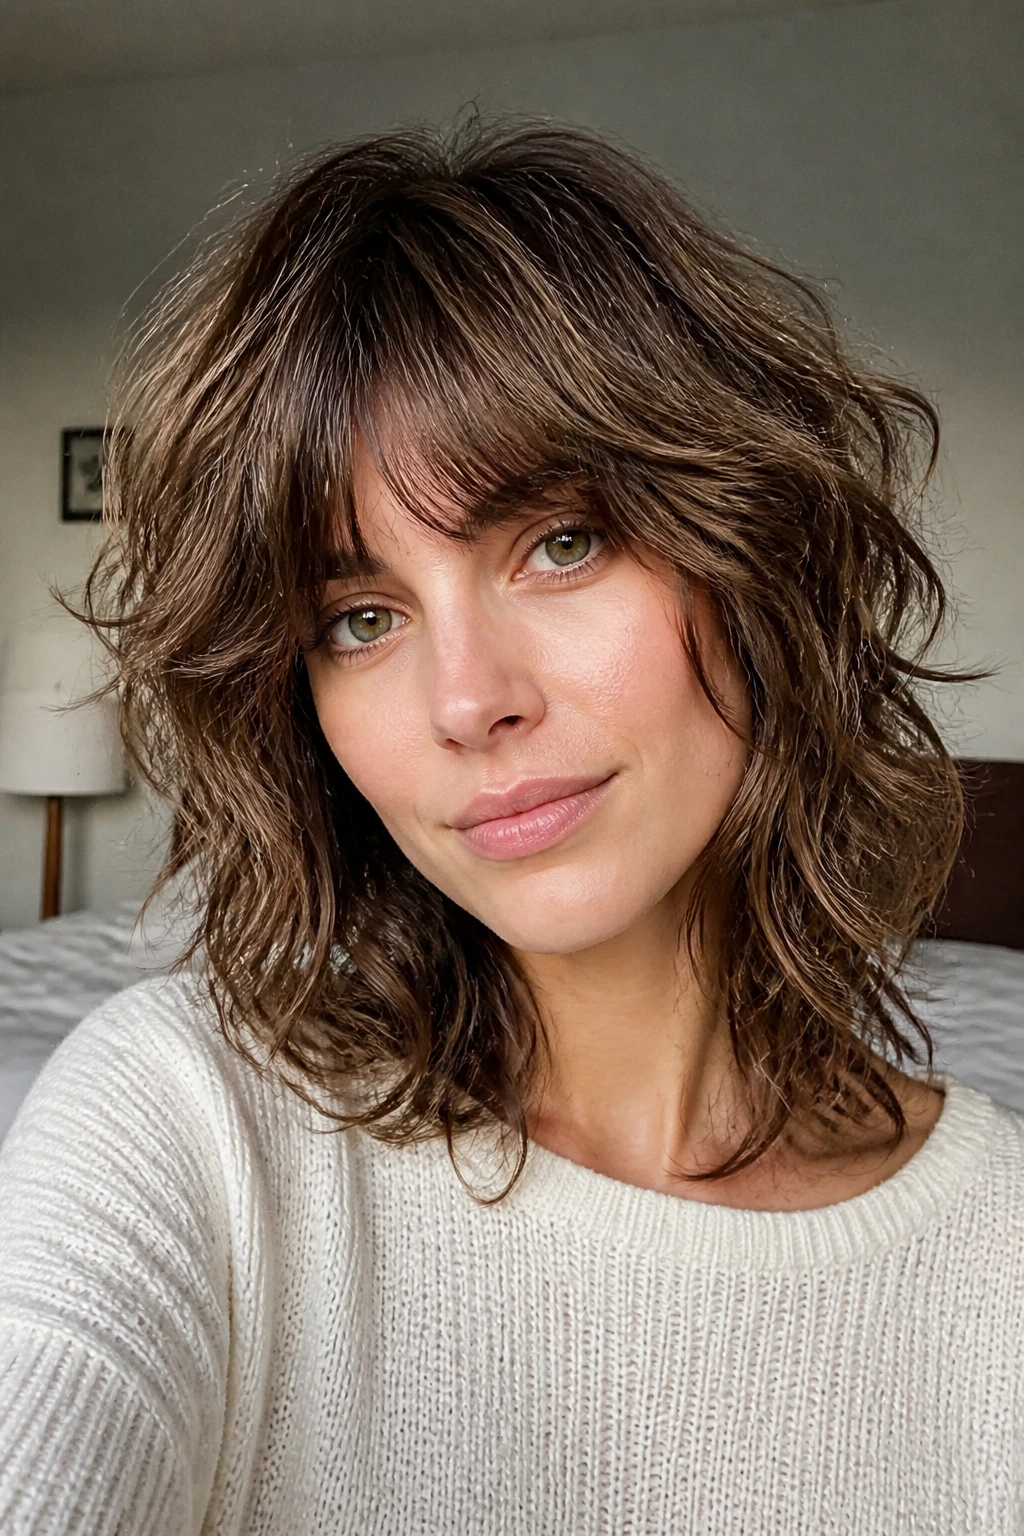
The nicest thing about a well-cut shag on wavy hair is that it doesn’t fight the day. It bends, shifts, and lands with a little more personality than a blunt cut can manage. That is useful. It also means the haircut is doing part of the work before your hands ever touch a diffuser.
Pick the version that matches your density, your fringe tolerance, and the amount of maintenance you can actually live with. Then ask for the layers to be placed with your own wave pattern in mind, not somebody else’s photo. That’s the difference between a shag that feels borrowed and one that feels like yours.
