



Medium-length hair has a sweet spot that short crops and long lengths often miss. It can brush the collarbone, swing when you turn your head, and still stay short enough to manage without a wrestling match at the sink.
That sweet spot gets even better once layers enter the picture. Hair texture changes with age — sometimes it gets finer at the front, sometimes a little coarser at the ends, sometimes flatter at the crown — and that’s exactly where layered hairstyles for medium length hair over 50 earn their keep. The right cut doesn’t just “add movement.” It removes weight where the hair hangs, keeps lift where the eye wants it, and stops the whole shape from collapsing into one dull line.
There’s a reason the best mid-length layered cuts keep showing up in good salons. They can soften a jaw, open up the cheekbones, make gray hair look intentional instead of stubborn, and keep thick hair from puffing into a helmet shape. The trick is knowing which layer pattern does what. Too many, and the ends go wispy. Too few, and you’re back to square one.
What follows is a mix of polished, easy, and a little bit cheeky: some cuts that bend under the chin, some that flip out, some that air-dry into decent shape, and a few that look especially good when silver or salt-and-pepper strands catch the light. A couple are quietly practical. A couple are the kind of cut you notice from across the room.
Why These Cuts Deserve a Look
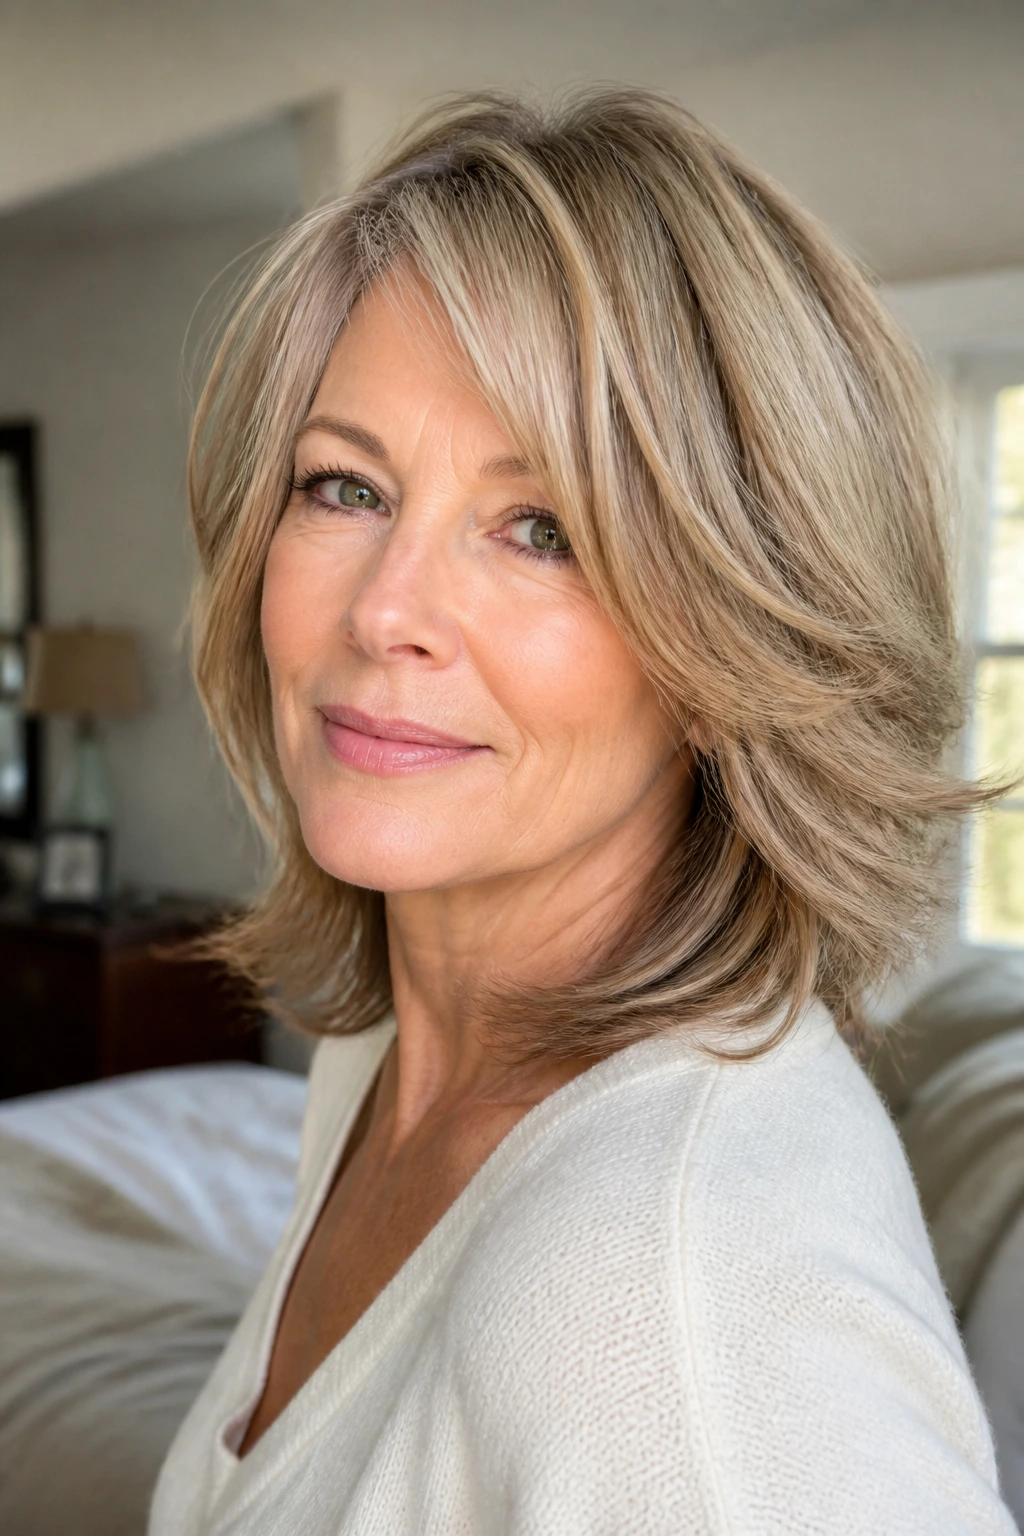
- They keep the shape from drooping: Layers remove bulk where medium-length hair tends to hang flat, especially around the sides and back.
- They play nicely with changing texture: If your hair has gotten drier, coarser, or finer at the front, the right layer pattern helps the cut move instead of sit there.
- They’re easy to style without a full salon routine: A round brush, a diffuser, or a 1¼-inch curling iron is usually enough for most of these looks.
- They soften the face without hiding it: Face-framing pieces can ease a strong jaw, shorten a long forehead, or balance a wider cheek line.
- They grow out better than sharp one-length cuts: When the trim gets a little late, the best layered medium cuts still hold a workable shape.
- They work with gray, silver, highlighted, or natural color: Movement shows off dimension; dead-straight ends tend to swallow it.
The styles below aren’t a one-size-fits-all command list. They’re a set of shapes, each with its own job. Some add lift at the crown, some lighten dense hair, and some make fine hair look like it remembered how to stand up straight.
1. Collarbone Layers with a Side-Swept Fringe
This is one of those cuts that looks calm but does a lot of work. The length grazes the collarbone, which gives the hair enough weight to feel polished, while the side-swept fringe opens the front and keeps the face from looking boxed in.
Best for: medium to fine hair, especially if the crown goes flat by lunchtime. It’s also a good call if you wear glasses, because the fringe can skim above or around the frames instead of crashing into them.
Ask for: layers that start around the jaw and melt down toward the collarbone, not choppy pieces that kick out at the cheek. If the shortest layer lands too high, the cut can puff at the sides.
Styling note: a round brush and a little root lift at the front make this shape behave. The ends should bend under, not curl hard, or the whole thing starts to look dated.
A clean side part helps here. So does a light mist of volumizing spray at the roots before blow-drying.
2. Feathered Lob with Airy Ends
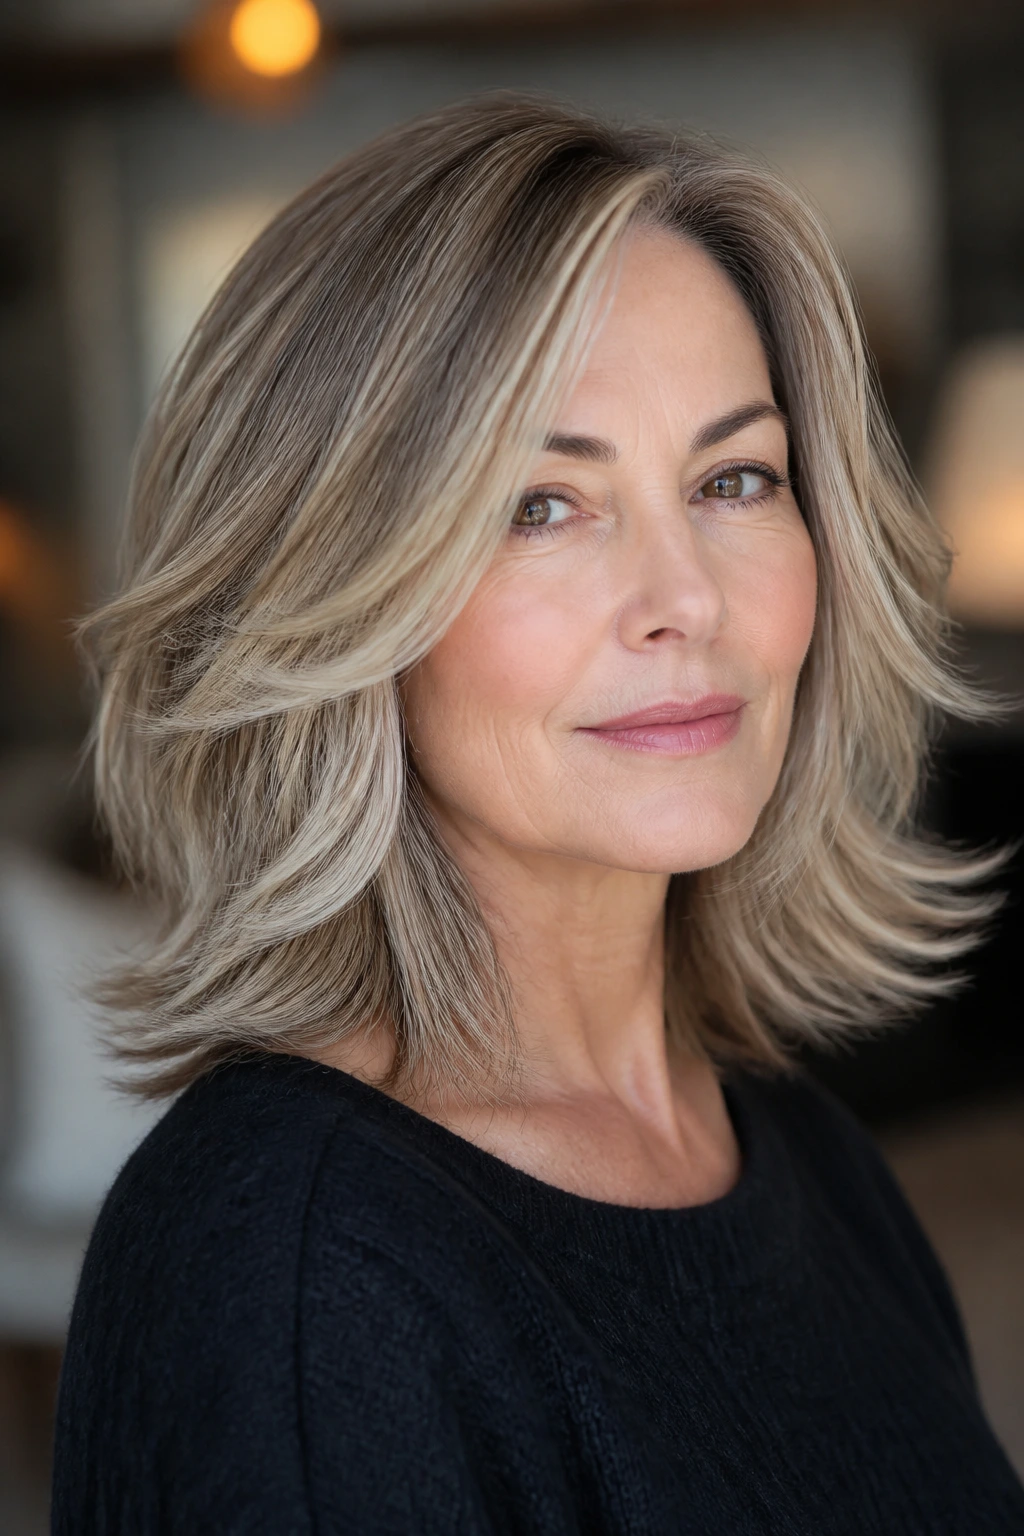
Feathering gives a lob that soft, brushed-out look that always feels a little more expensive than it sounds. The ends are not blunt; they’re lightly textured so the hair moves when you turn your head instead of hanging in one solid block.
That matters if your medium-length hair has gotten denser through the middle or if the ends feel heavy after a trim. A feathered lob keeps the outline smooth while taking just enough weight off the bottom to let the shape breathe. It’s especially nice on straight or slightly wavy hair, where the feathering can show without turning frizzy.
The trick is restraint. You want texture at the ends, not a shredded mess. If your stylist uses thinning shears too aggressively, the hair can split apart and lose that soft swing. A little point-cutting is enough.
I like this cut with a side part and a quick blow-dry using a medium round brush. The hair should look touched, not teased. That’s the whole point.
3. Shoulder-Length Shag with Curtain Bangs
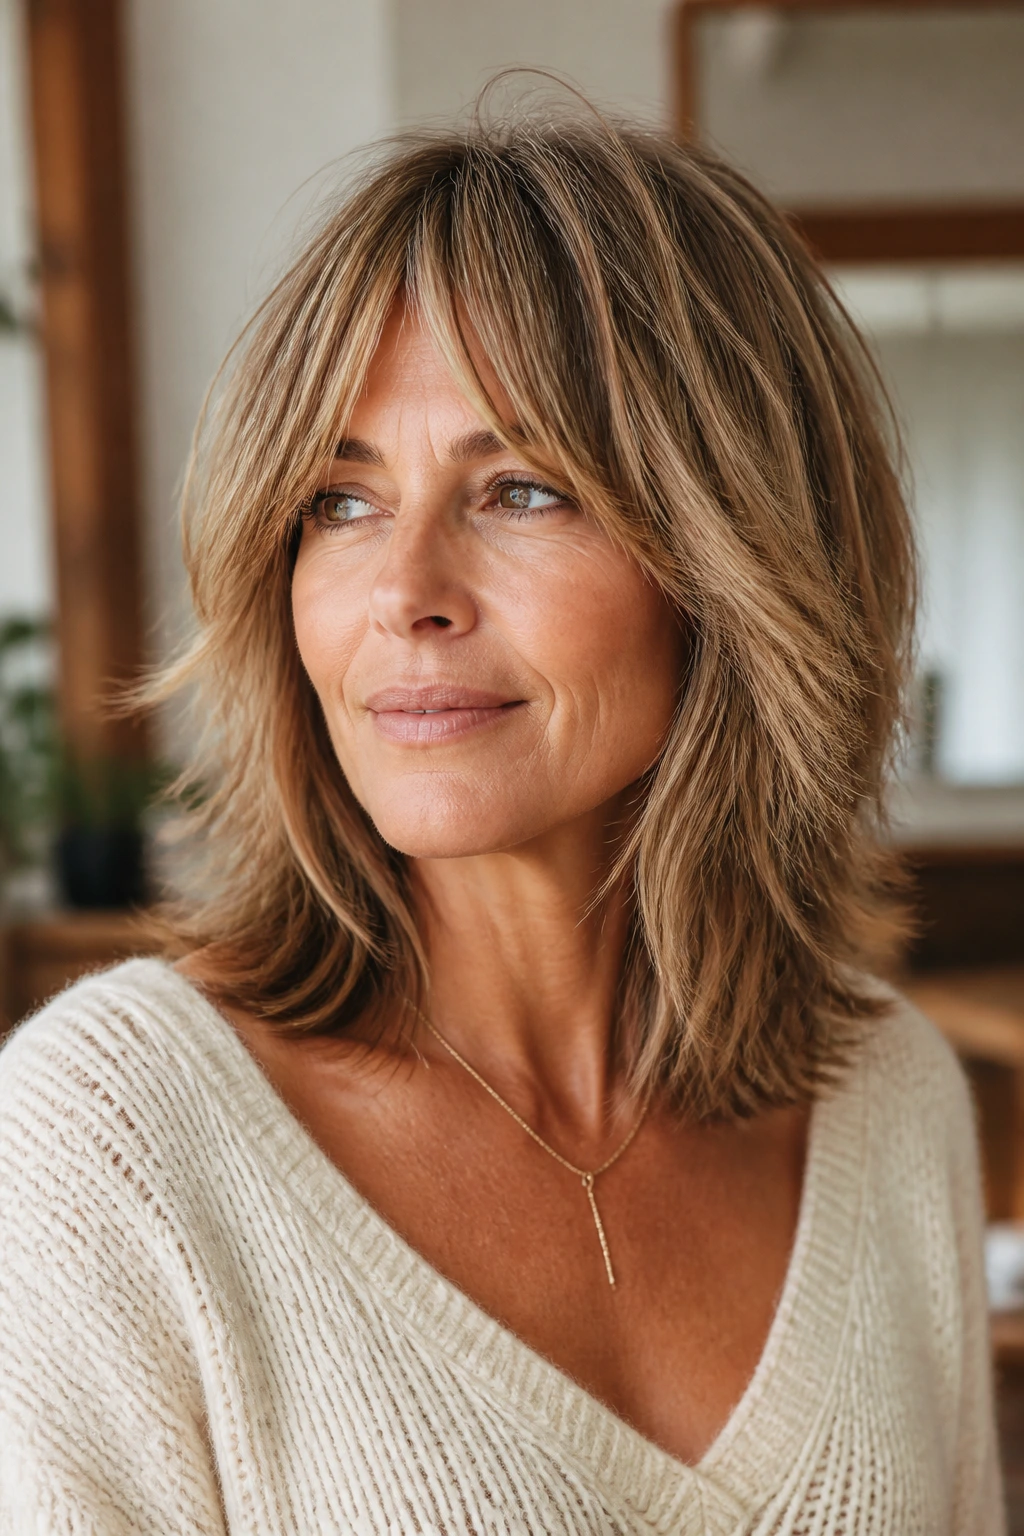
A shag doesn’t have to mean wild layers and a lot of product. At shoulder length, it can be soft, clean, and a little bit airy around the face. Curtain bangs help by breaking up the front line and blending into the rest of the cut instead of sitting there like a separate event.
Why it works: the shorter crown layers create lift where hair often flattens, while the longer perimeter keeps the shape from turning into a puffball. That balance is the part people miss when they ask for “some layers.”
What to keep in mind: if your hair is very fine, the crown layers should stay long enough to preserve density. If your hair is thick, the interior can be lighter, but the ends still need enough weight to fall neatly.
The best version of this cut has movement, not chaos. You should be able to tuck the front behind one ear and still see the shape. If it looks best only after 40 minutes with a wand, it’s asking too much.
How to wear it
Scrunch in a small amount of mousse, rough-dry the roots, then finish the face-framing pieces with a medium barrel brush or a large curling wand. A little bend in the bang area is enough. No need to make every strand behave.
4. Center-Part Face-Framing Layers
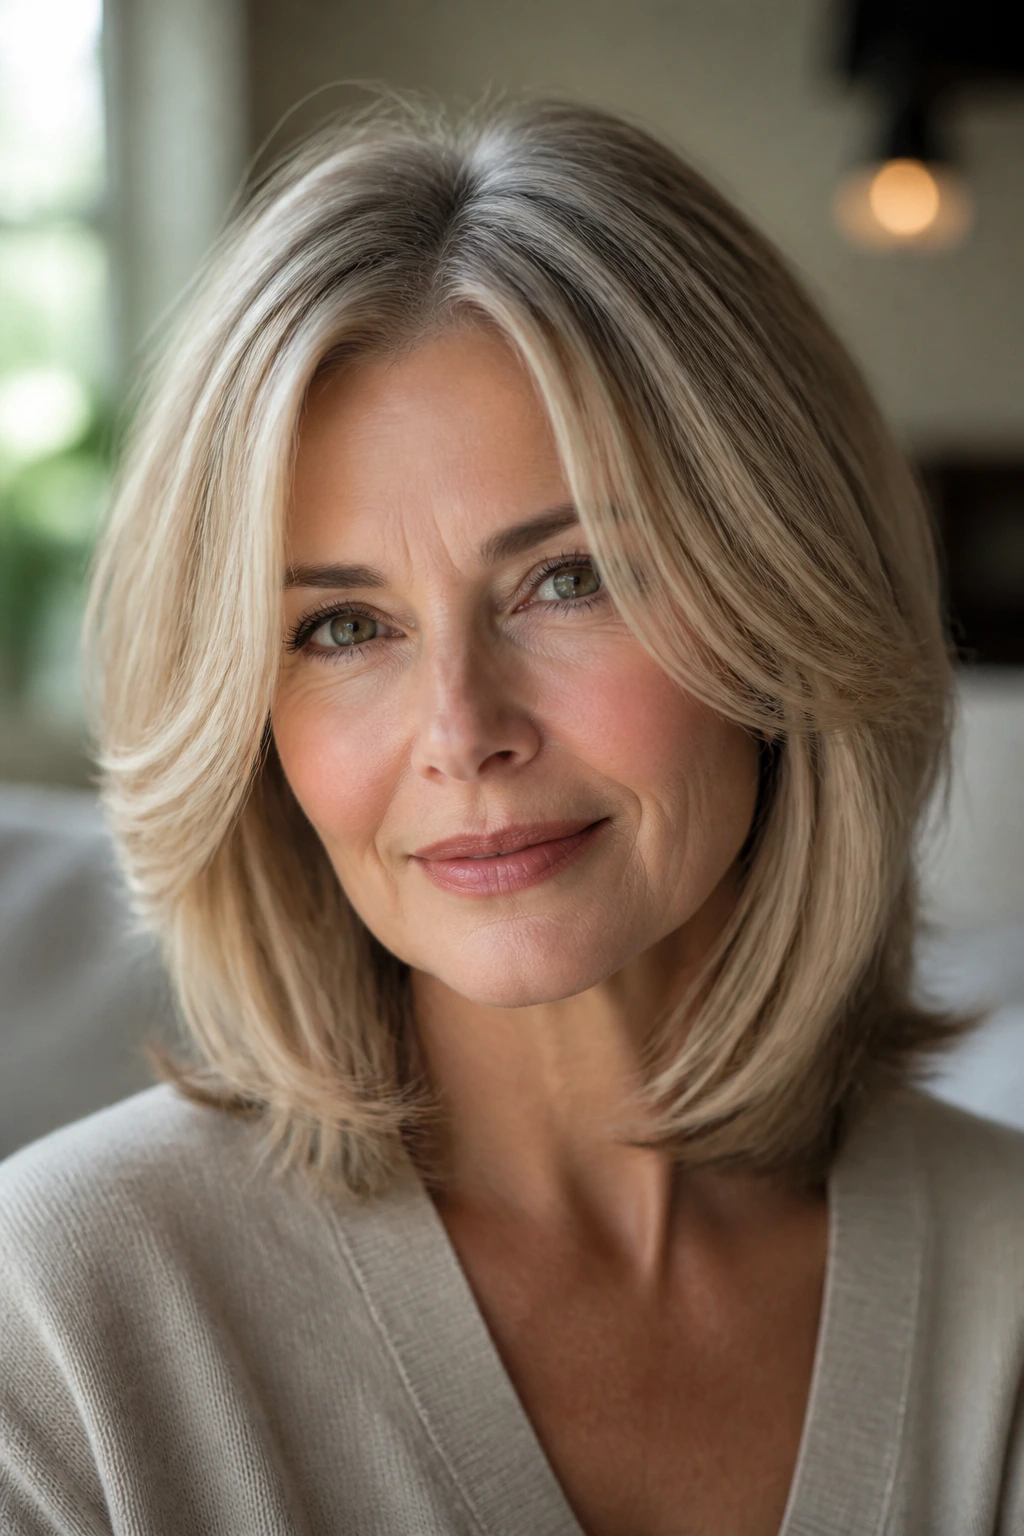
A center part can be unforgiving when the haircut is wrong. With the right face-framing layers, though, it becomes clean and modern instead of severe. The hair falls in two balanced panels, and the front pieces do the softening work that a side fringe would normally handle.
This cut is smart if you want your length to look neat from the front and still have movement around the jaw. Ask for the first face-framing pieces to start below the cheekbone so they don’t cut the face in half. Shorter pieces can look cute in theory and awkward in a mirror.
It’s also one of the better options if your hair has a natural middle part or if you don’t want to fight it every morning. A center-part layered cut makes that part look deliberate. Add a loose bend from mid-length down and the whole thing starts to move in a very easy way.
I’d call this one quietly flattering rather than dramatic. That’s not a flaw. It means the cut works hard without announcing itself.
5. Long Layers with Loose Waves
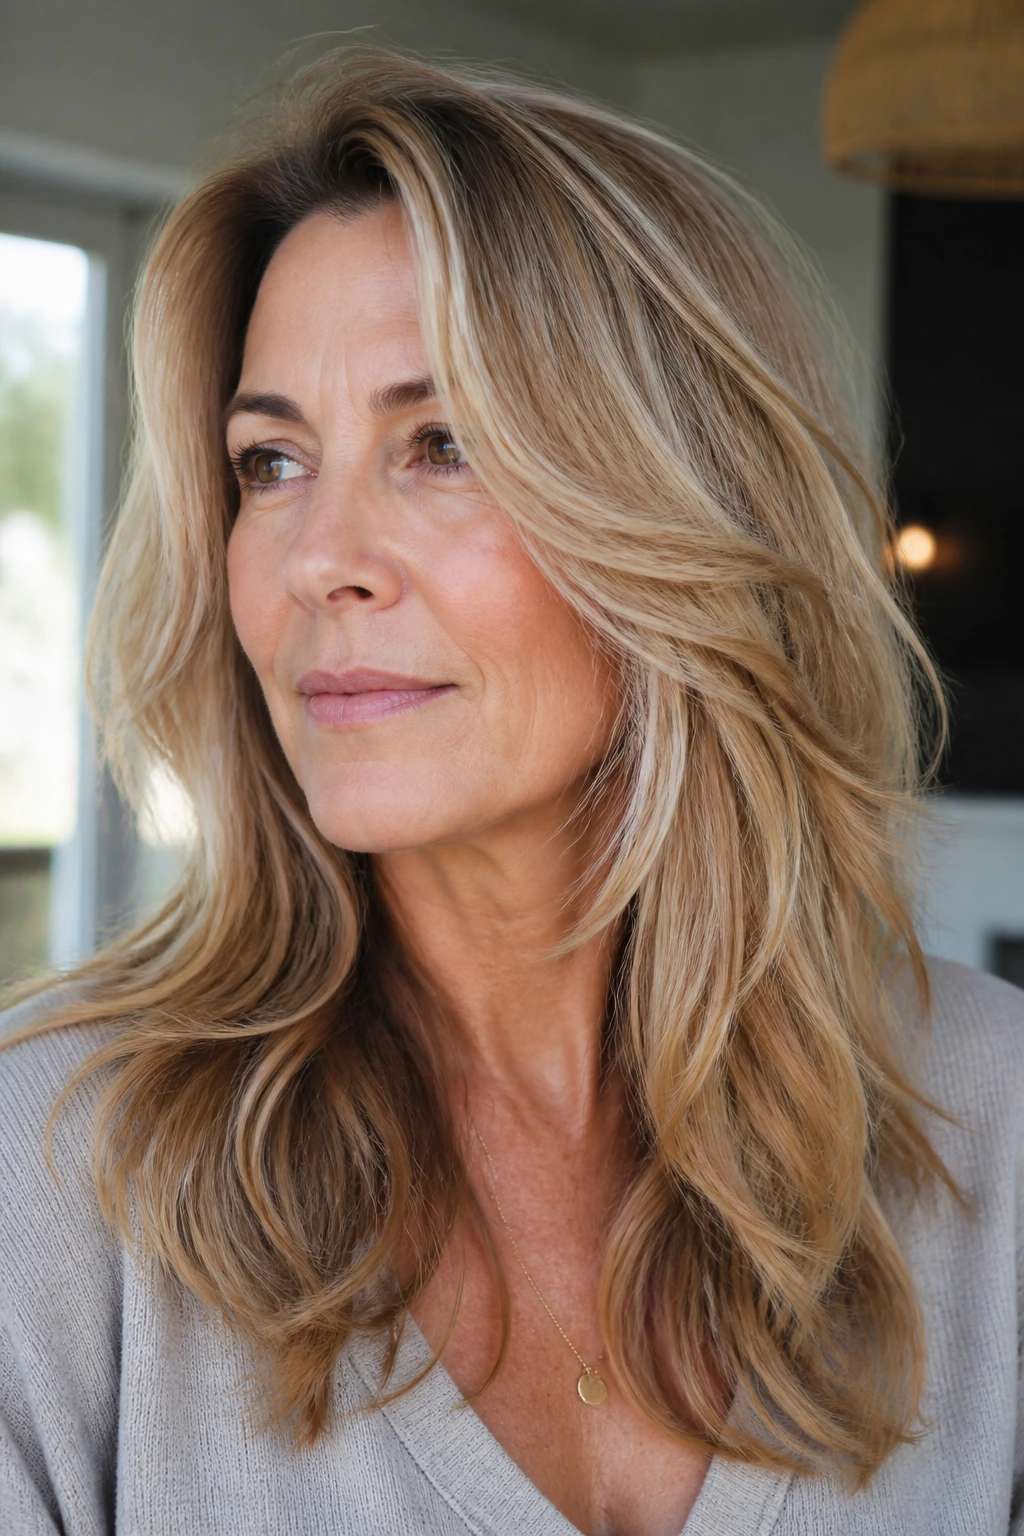
This is the cut for someone who wants to keep a little more length and still avoid the dead-straight curtain effect that medium hair can fall into. Long layers let the waves drift without chopping the ends into pieces that stick out at odd angles.
The shape depends on the ends staying full. That’s the part that matters. If the layers are too aggressive, the perimeter gets stringy and the hair loses its anchor. Good long layers should still give the impression of a solid line, just a softer one.
On medium-length hair, loose waves are the easiest way to make this cut look finished. A 1¼-inch iron, a light bend away from the face, and a finger comb are usually enough. You do not need ringlets. You don’t even want them. The cut is better when the wave looks incidental.
This one works especially well if your hair is naturally medium in density and you want movement without a lot of day-to-day styling. It’s honest hair, not high-maintenance hair. That’s a good thing.
6. Textured Lob with Choppy Ends
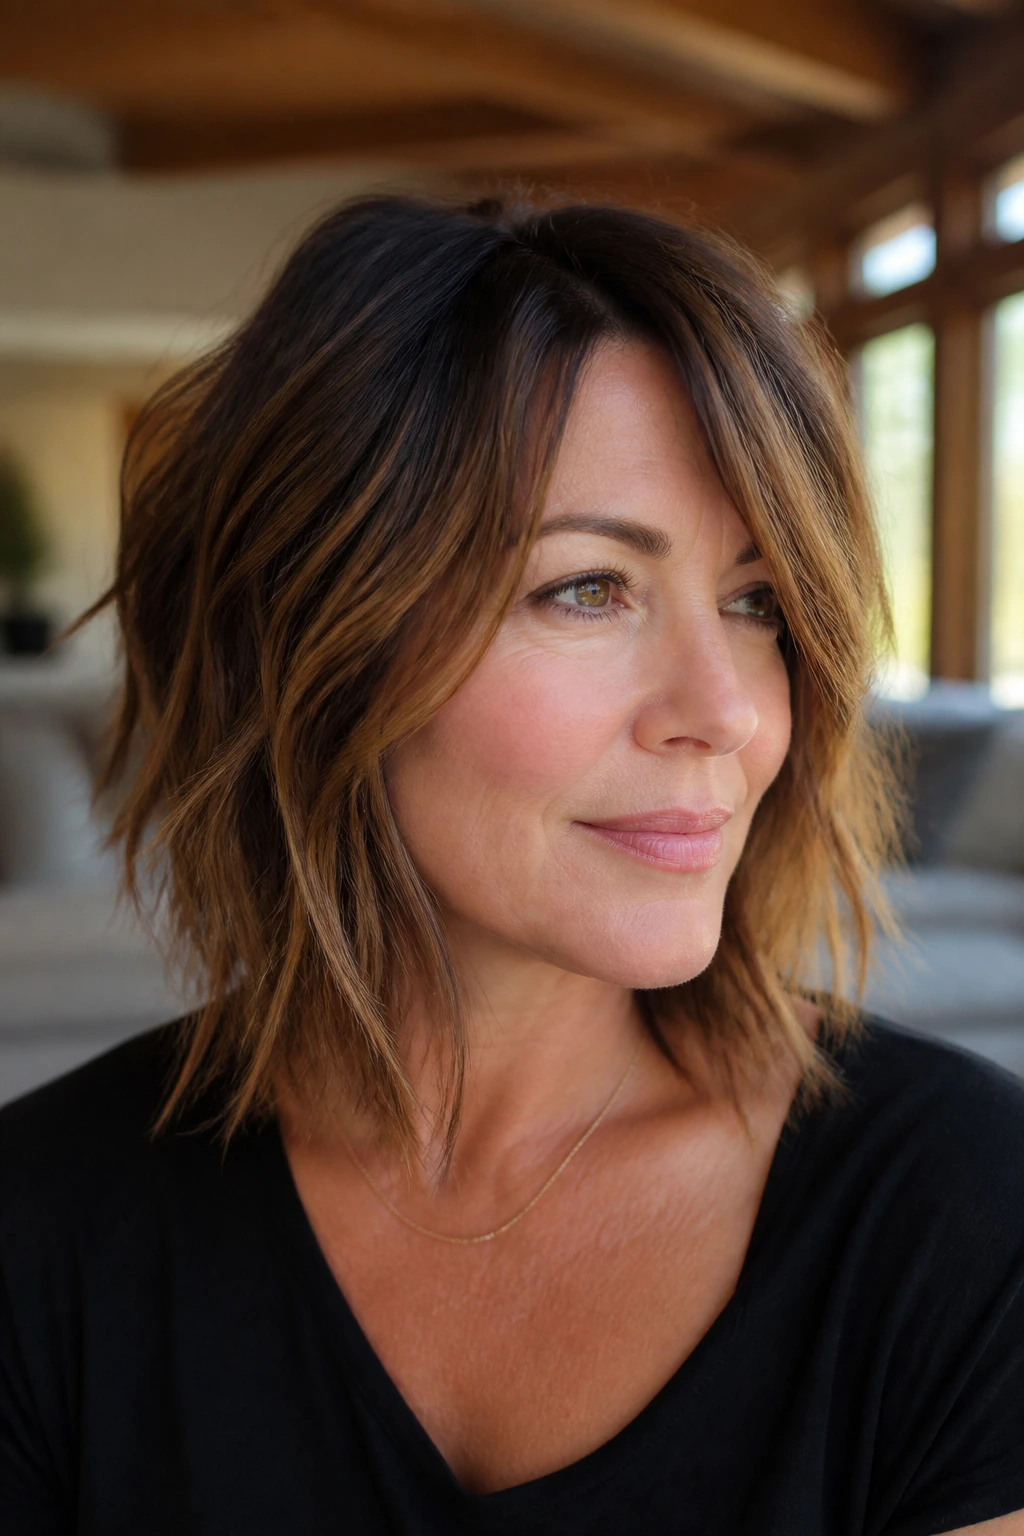
A textured lob is the slightly cooler cousin of the neat, feathered version. The ends are piecey, the layers are a little more visible, and the whole cut has a lived-in feel that suits women who do not want their hair to look overworked.
This is the cut I’d point to if you like shape but hate stiffness. It adds edge to straight hair and keeps wavy hair from turning into one solid curve. On thicker hair, the texture keeps the bottom from sitting like a heavy shelf. On finer hair, the trick is not to overdo it — too much choppiness and the ends start to look thin.
Ask for texture at the bottom third of the cut, not all the way through the crown. That keeps the silhouette grounded. A little sea-salt spray or texture cream can help, but the haircut has to carry the style first. Product should not be doing the whole job.
The best textured lobs look slightly undone on purpose. Slightly. Not like a bad grow-out.
7. Rounded Crown Layers for Lift
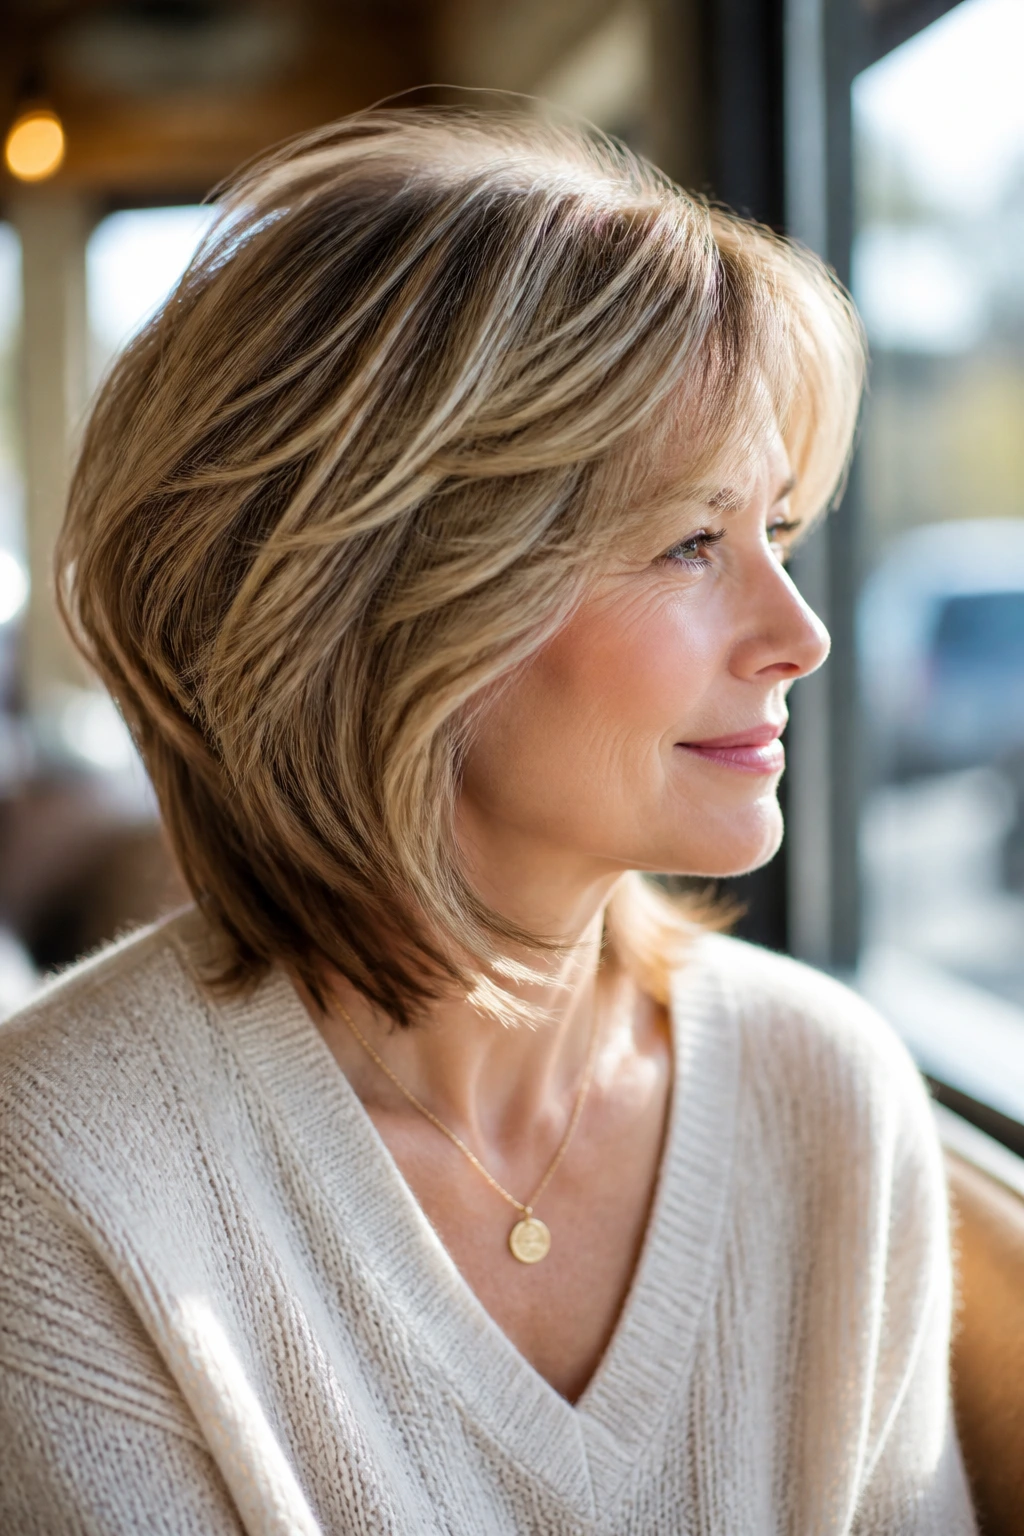
Flat crown? This is the fix I keep coming back to. Rounded crown layers shift the visual weight upward, which is useful when the top of the head needs help but the ends still have enough density to hold shape.
The key is that the layers are concentrated near the crown and blend out gradually. You want the top to rise, not the back to stack. If someone cuts this too high, it starts to read like a short bob trying to become a mullet. Not the goal.
This shape is especially good for fine hair because it makes the whole cut feel lighter without leaving the perimeter see-through. It also works for hair that falls forward at the temples, because the lift at the top balances the side profile. A root-lifting mousse and a quick blow-dry with the head tipped forward make a big difference here.
It’s a practical cut, but it doesn’t look plain. That’s the sweet spot.
8. Hidden Internal Layers for Sleek Hair
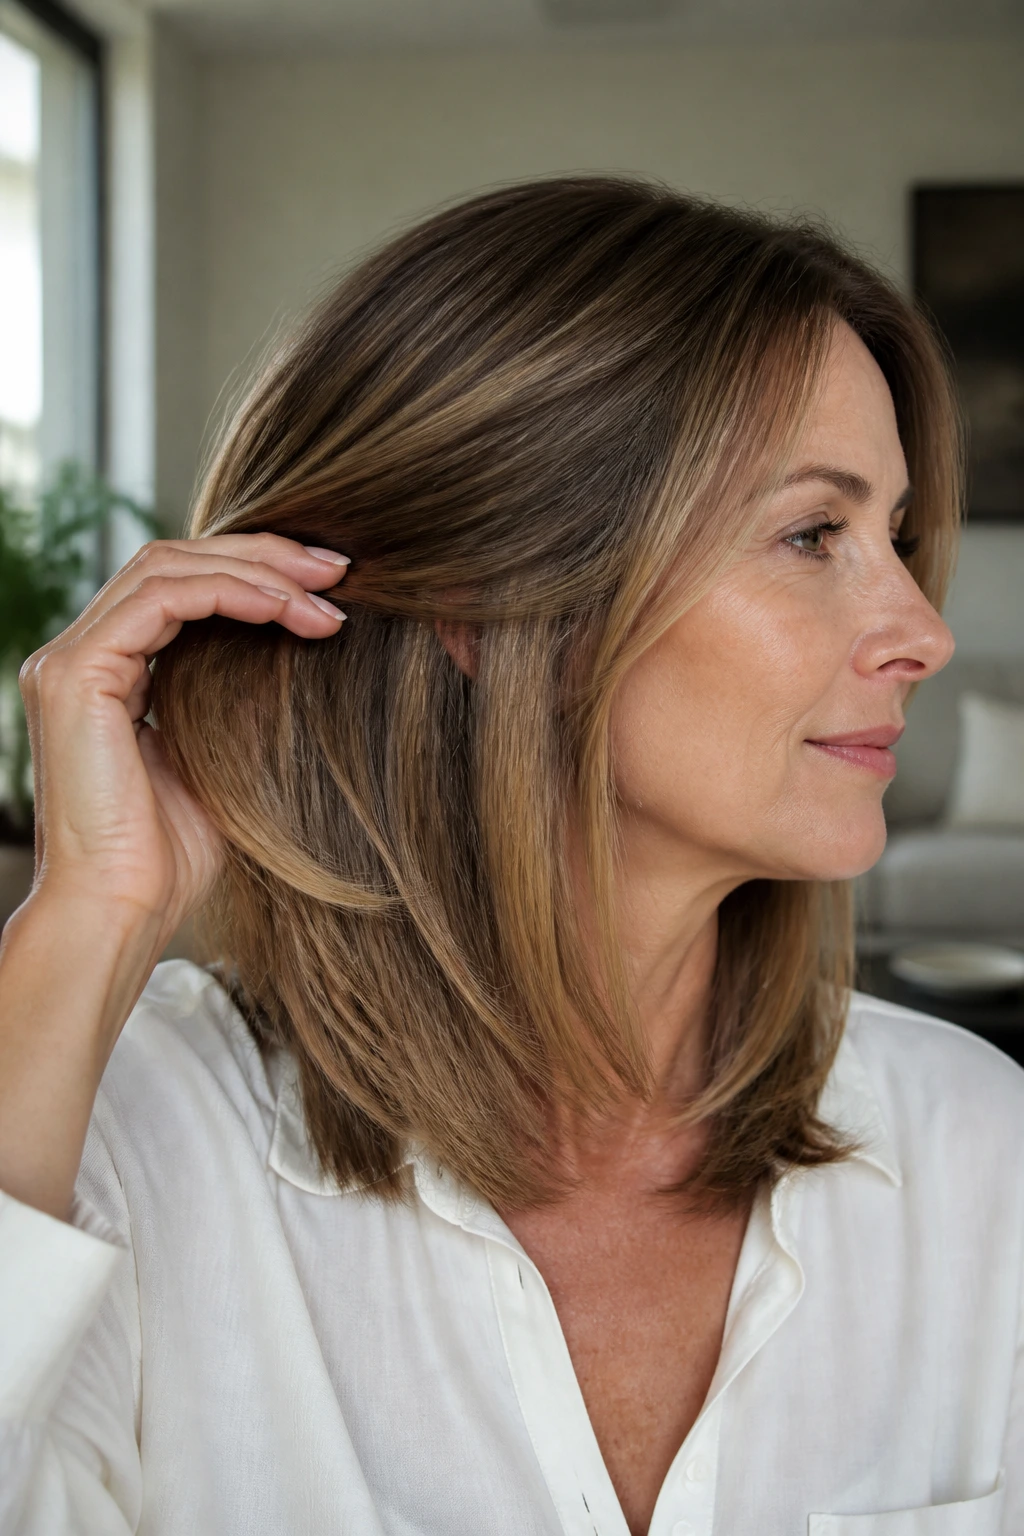
If you like your outline clean and your length visible, hidden internal layers are the move. The outside line stays smooth, but the inside gets enough shaping to stop the cut from feeling heavy or helmet-like.
This is one of the most underrated options for medium hair over 50. It’s especially good on hair that is naturally straight, a little thick, or stubbornly full through the middle. From the outside, the haircut can still look tailored and polished. Inside, the hair is lighter and easier to move.
I’d choose this over obvious layers if you don’t want the cut to shout. It’s also a strong choice if you wear your hair tucked behind the ears often, because the shape doesn’t collapse when the front pieces are pulled back.
The catch is that it needs a stylist who understands internal shaping. If all the layers sit on the surface, you lose the benefit. The best version feels smooth, not chopped.
9. Flipped-Out Layers with a Blowout Finish
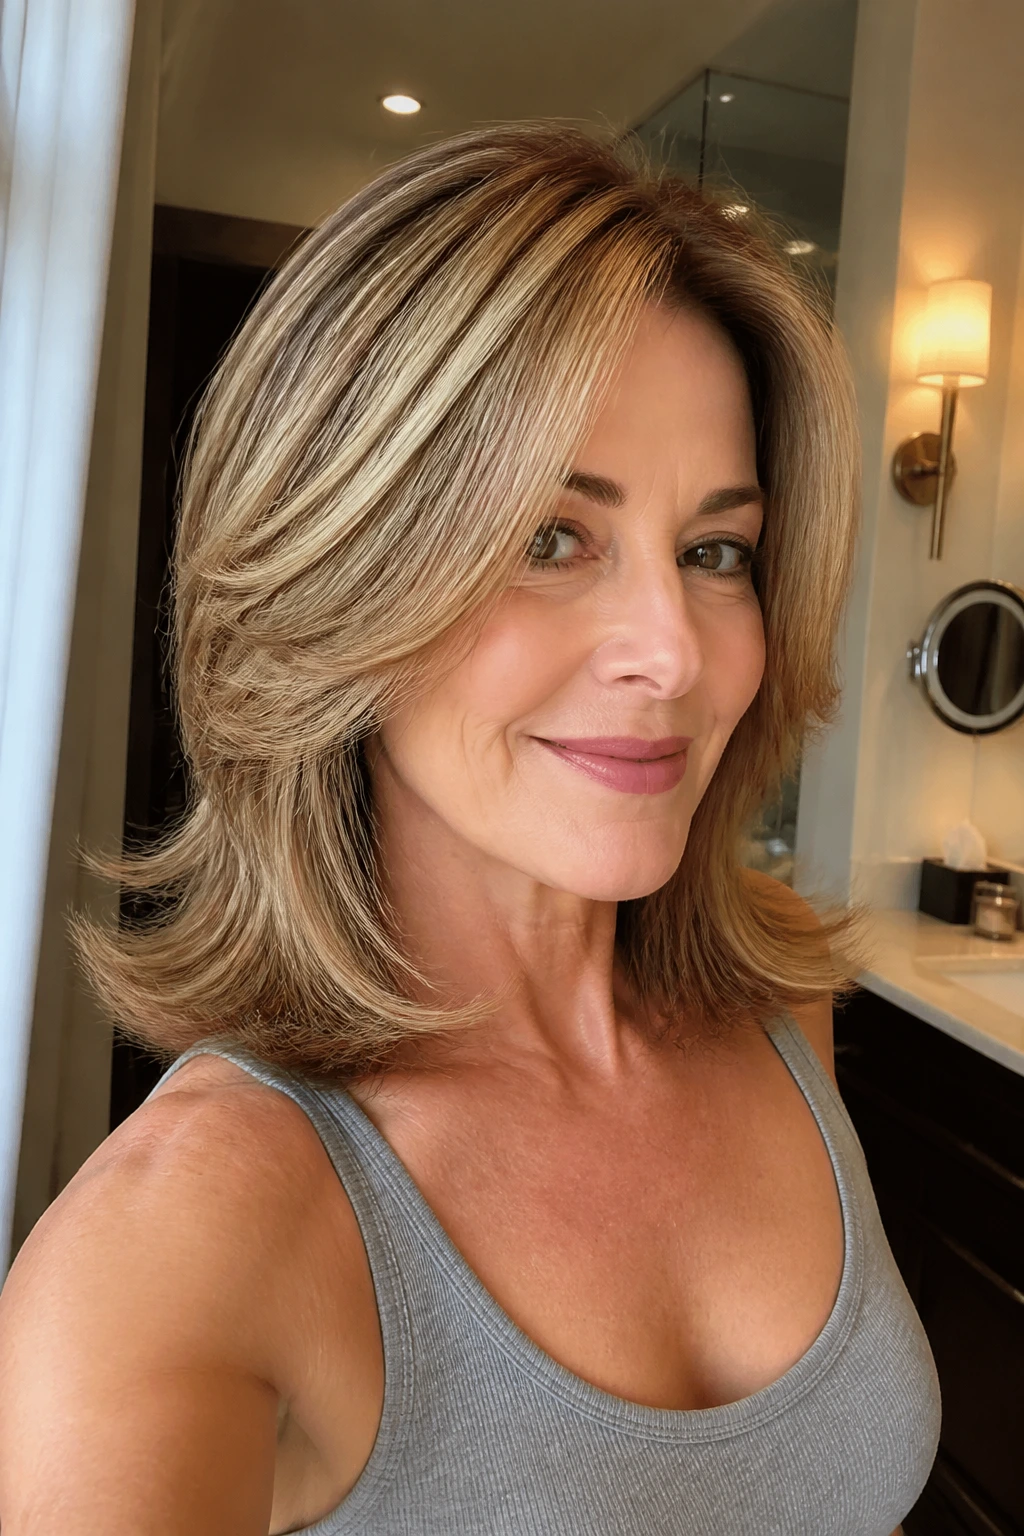
There’s something cheerful about ends that turn outward just a little. Not retro in a costume-y way. More like the kind of blowout that leaves the hair with bounce and a little attitude.
This cut works best when the length brushes the shoulders or sits just below them. The layers support the flip, so the ends don’t all kick in the same place. A large round brush or a blow-dryer brush can do most of the work. If you use a flat iron, keep the bend soft and start only from the lower half of the hair.
The style is useful for medium hair that tends to hang straight when left alone. The flip adds shape without requiring curls. It also shows off silver or highlighted strands nicely because the light catches the movement at the ends.
A little shine serum on the very tips helps. Very little. Too much product, and the flip droops.
10. Razored Layers with a Wispy Fringe
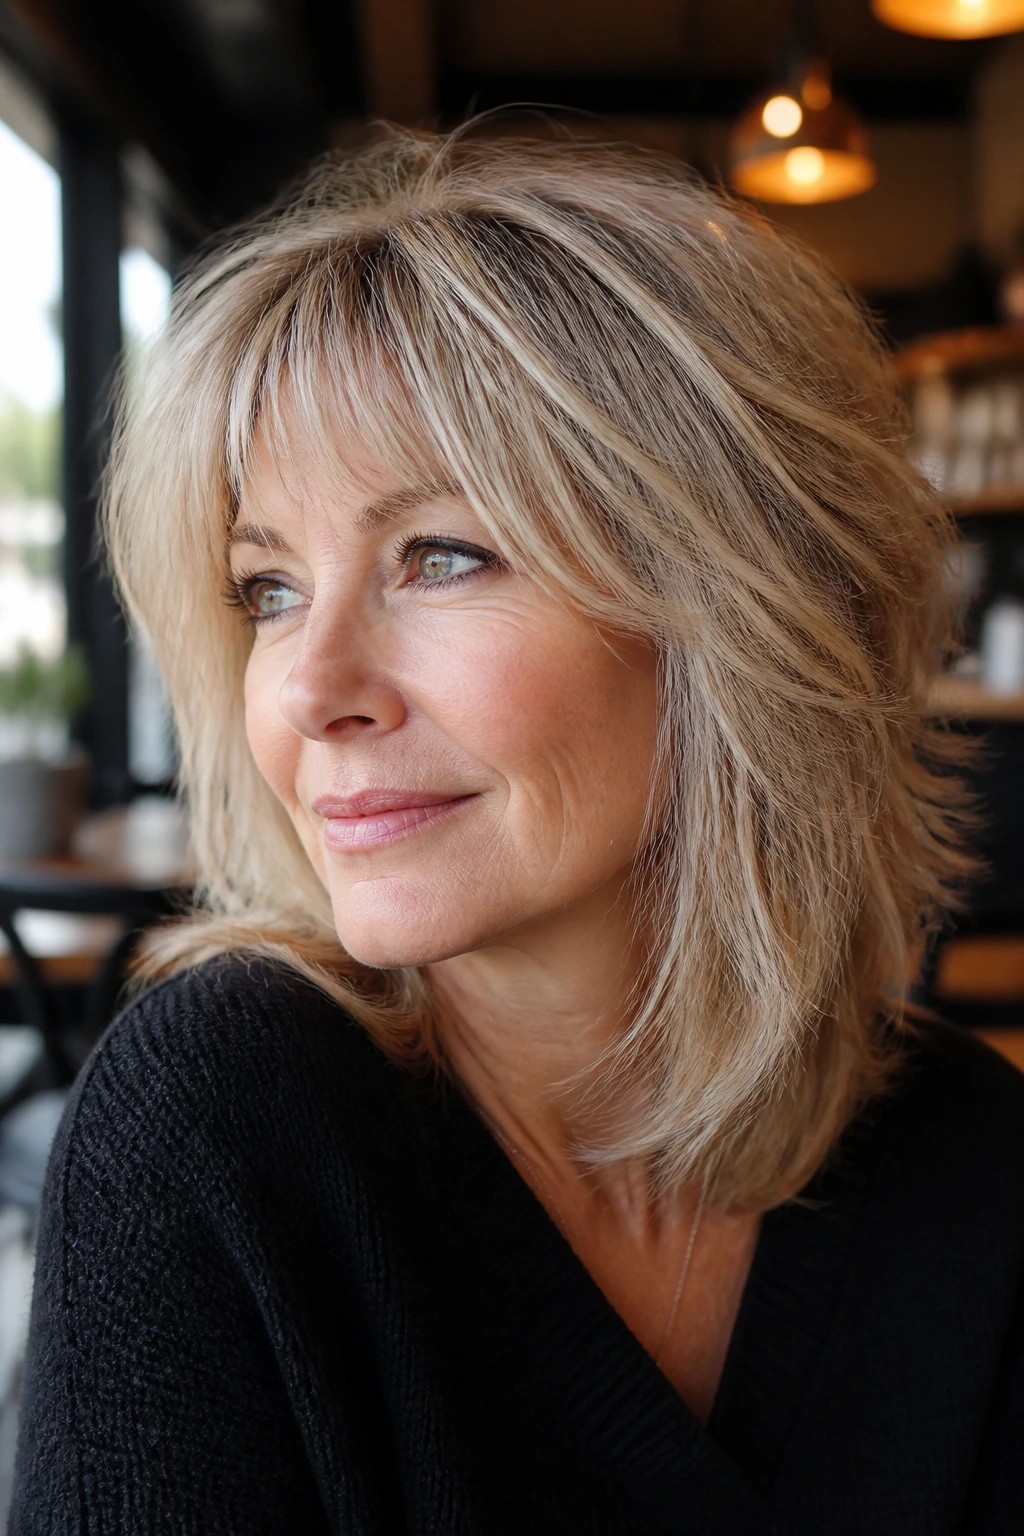
Razored layers can be lovely on medium-length hair, but they need a light hand. The whole point is softness at the edges, not a torn-up finish that leaves the hair frayed and dry-looking.
The wispy fringe makes this cut feel modern without turning it severe. It’s a useful choice if you have a straight-to-wavy texture and want a bit more edge around the face. The razor softens the outline, while the fringe keeps the front from looking heavy or blocky.
This style is not my first pick for very dry, porous hair. Razors can expose that dryness fast. But if your hair is healthy and you want movement without bulky layers, it’s a strong option. The fringe should float into the rest of the haircut, not sit on top like a separate piece.
A smoothing cream and a careful blow-dry matter here. The cut should look soft and swingy, not fuzzy.
11. Side-Swept Bangs and Soft Layers
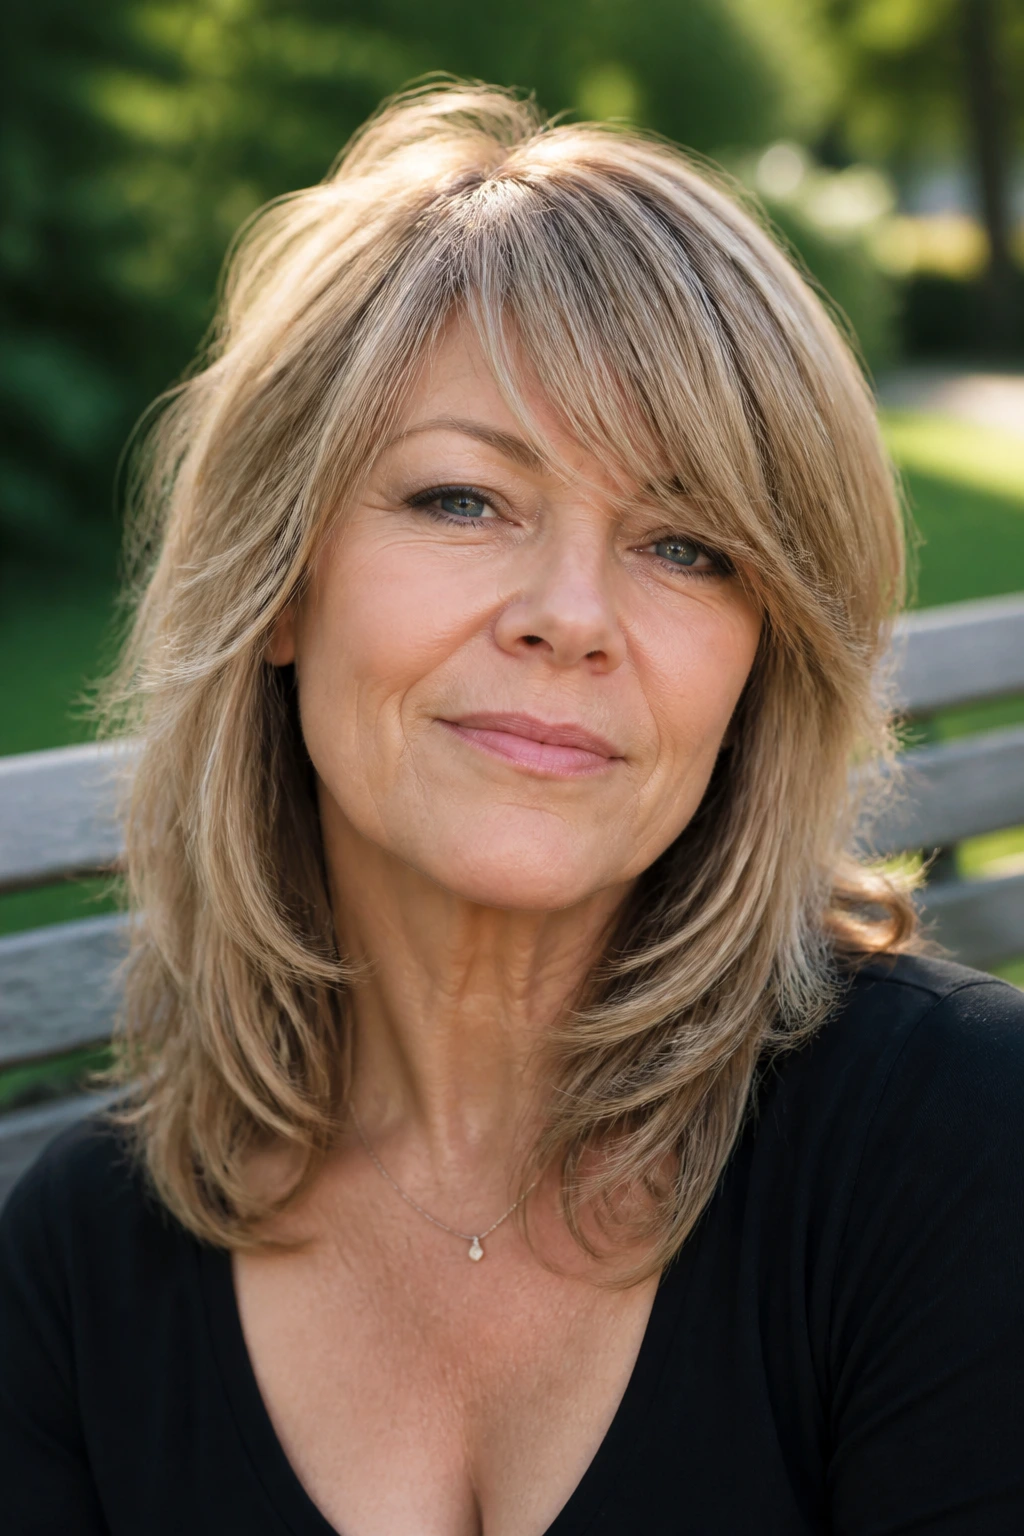
Side-swept bangs are a classic for a reason: they give you forehead coverage without the full commitment of a straight fringe. Paired with soft layers, they make the front of medium-length hair feel lighter and more open.
This cut is especially handy if you want something that works with glasses, side parts, or a slightly wider forehead. The bangs angle across the face and merge into the side layers, so the whole front section reads as one shape instead of two competing ideas.
What I like most here is the flexibility. You can brush the bangs flat on a busy morning, or give them a tiny bend with a round brush when you want the cut to look more finished. The layers don’t need to be dramatic. They just need to keep the hair moving around the jaw and cheekbones.
If your hairline has a cowlick, this is often easier to live with than blunt bangs. Less fight. Better result.
12. Piecey Layers for Air-Dried Texture
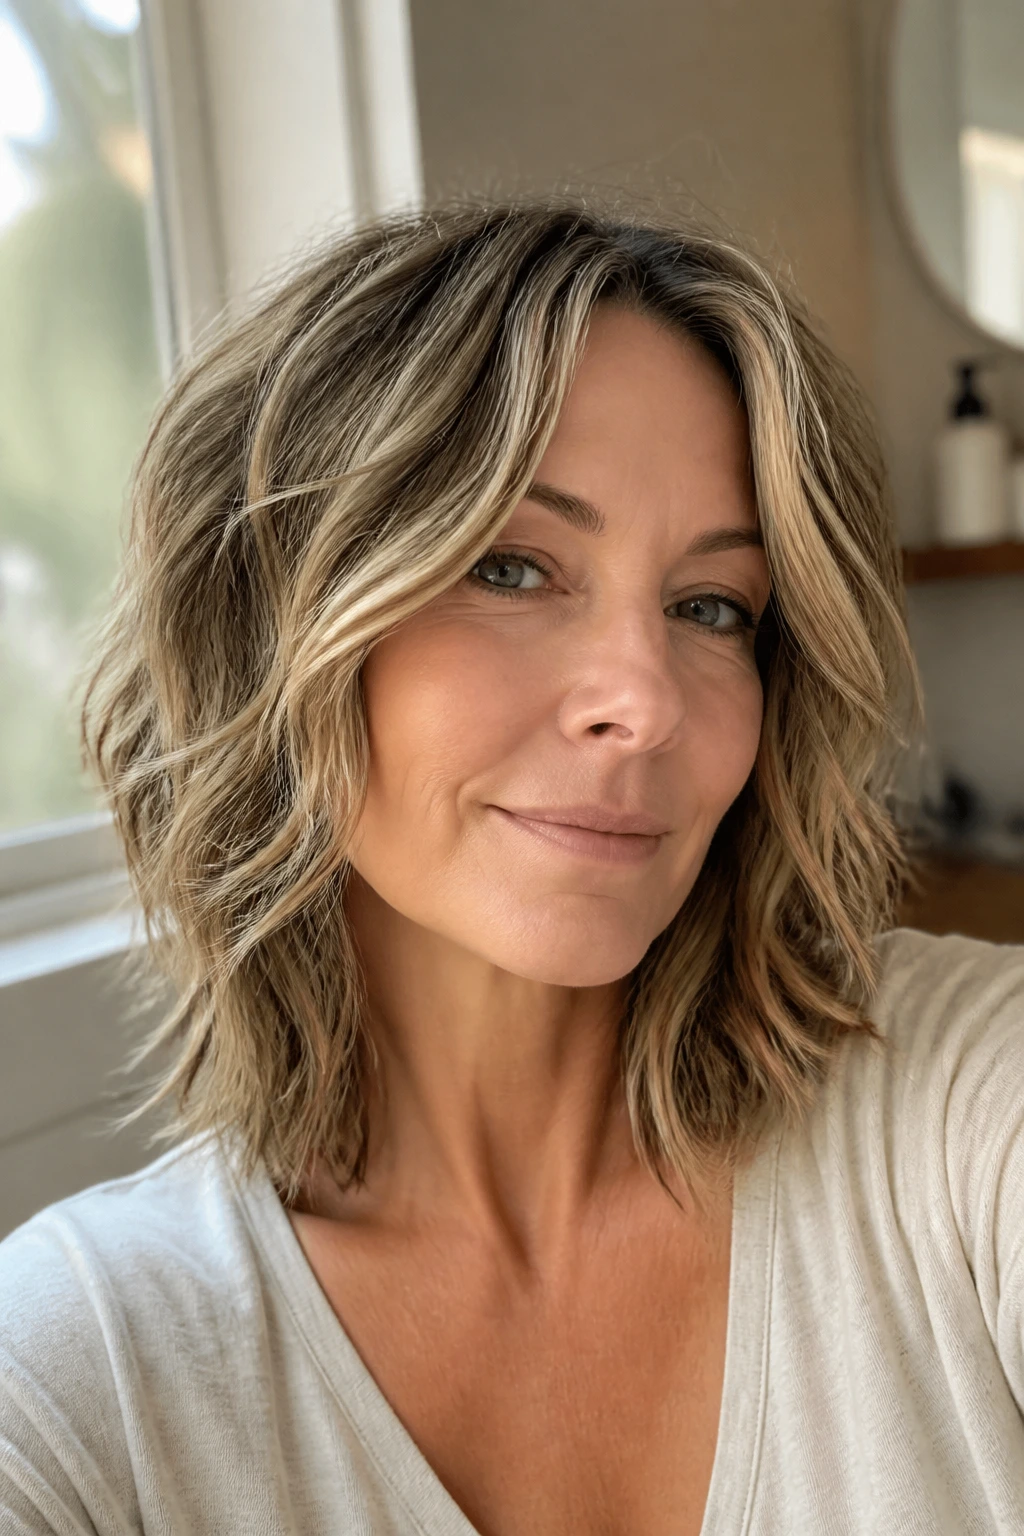
Some cuts are built for the blow dryer. This one is built for a towel, a little product, and patience you can spare for about 10 minutes. Piecey layers let the hair separate naturally, which is especially helpful if your medium-length hair already has a wave or bend in it.
The look is soft and a little undone, but it still has shape. That’s the difference between styled texture and a bad dry-out. Ask for layers that encourage separation, not a heavily thinned finish. Too much feathering can make the pieces frizz apart.
This is one of the easiest cuts to live with if you prefer air-drying. A curl cream or lightweight mousse, scrunched into damp hair, can be enough. If your wave pattern is loose, twist a few front sections away from the face while they dry. That small move gives the front pieces direction and keeps them from drying into random hooks.
It’s not the fanciest option on the list. It may be one of the smartest.
13. Curved Layers for Fine Hair
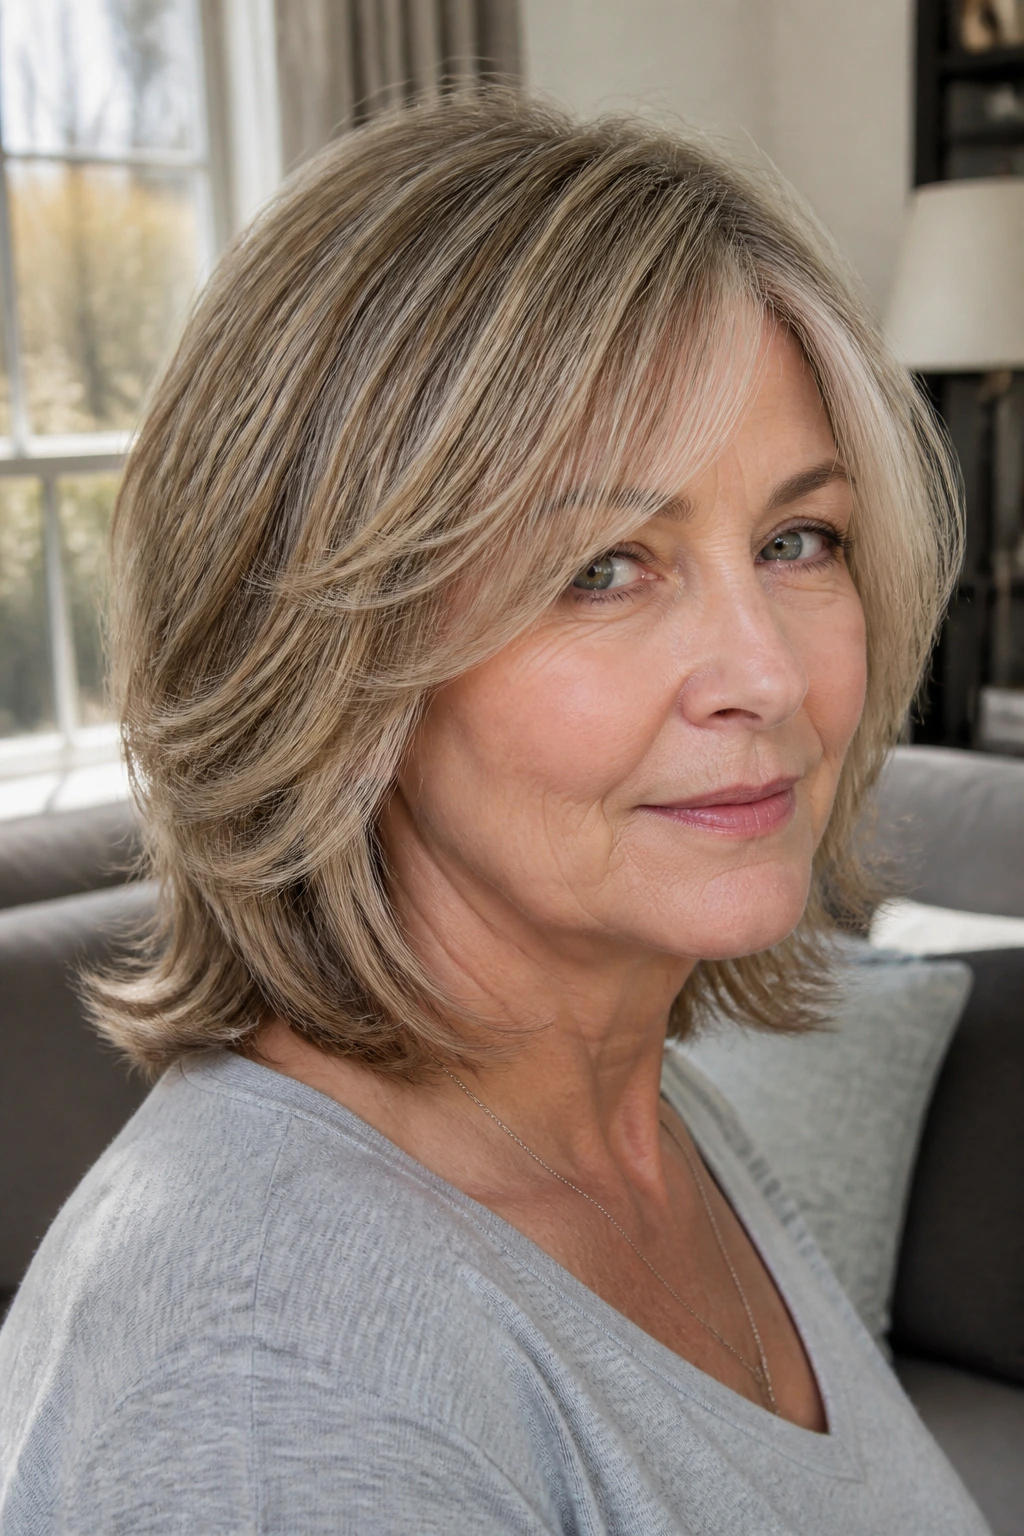
Fine hair can look best when it’s treated with a little restraint. Curved layers do that well. Instead of chopping the cut into obvious sections, they follow the outline of the head and keep the perimeter looking full.
That matters because fine hair tends to show every uneven snip. A curved shape gives the eye a smooth line to follow, which makes the hair look denser than it is. The layers should start low enough to preserve weight at the bottom. If they begin too high, the ends go see-through and the whole cut loses presence.
This style is one of my favorites for people who want movement but hate the feeling of hair disappearing around the neck. It keeps enough structure to feel neat, which is useful when your hair is fine, straight, and slightly stubborn about holding volume.
A root mousse and a medium round brush are usually enough to wake it up. The cut is doing the heavy lifting. As it should.
14. Weight-Removing Layers for Thick Hair
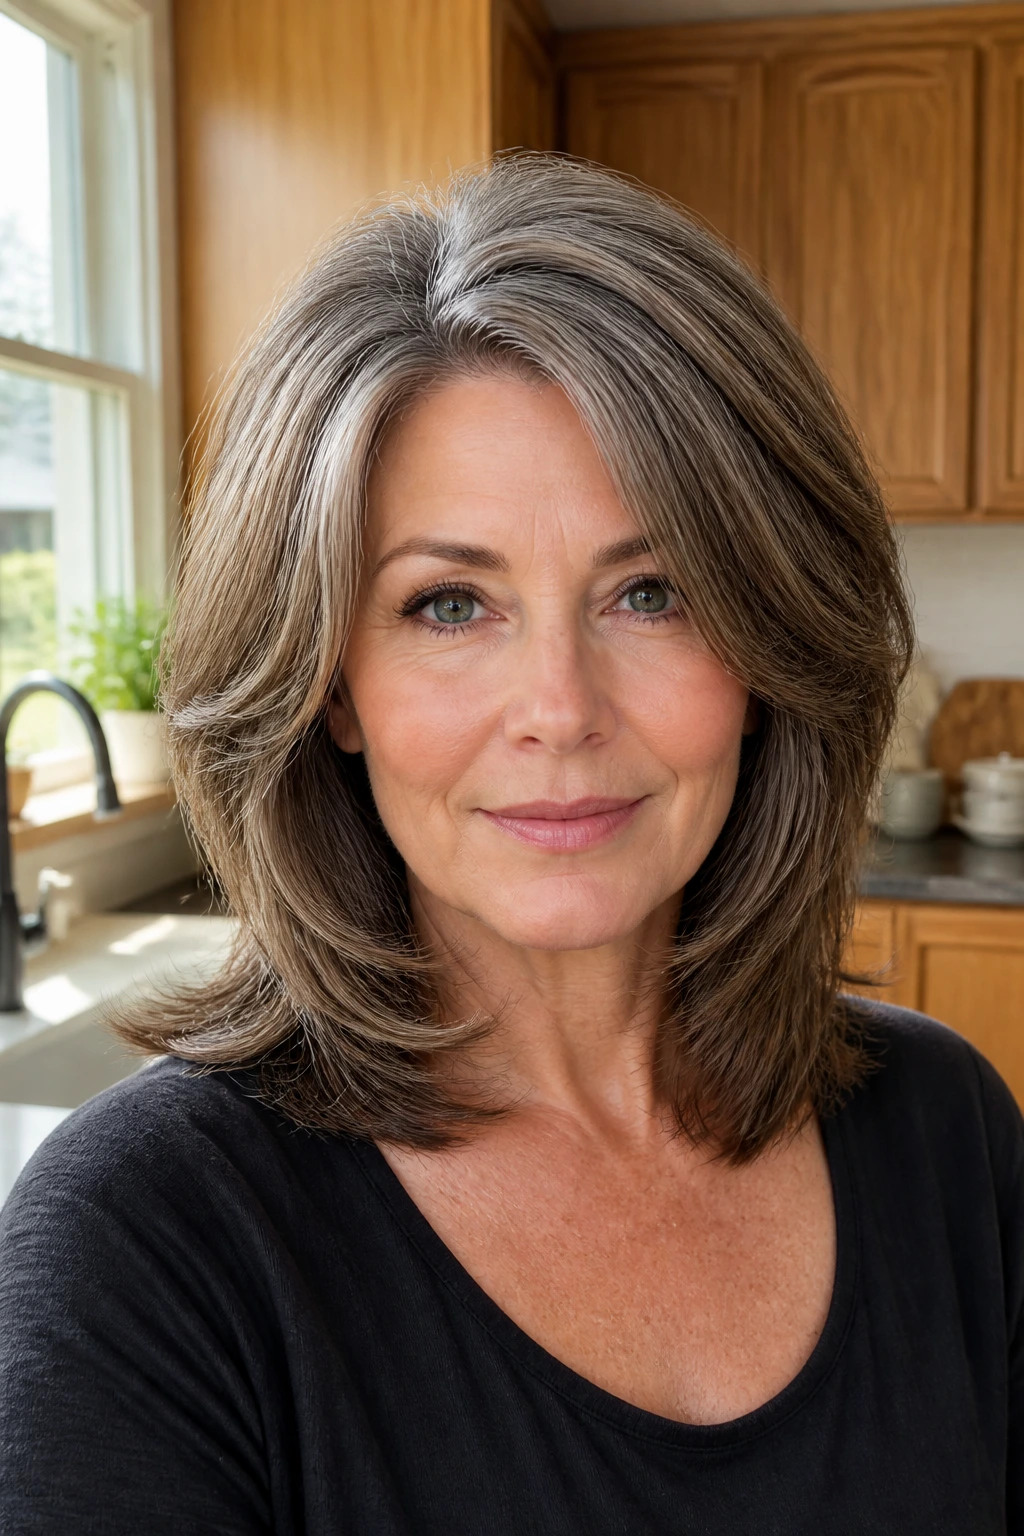
Thick hair can be a gift and a nuisance at the same time. It holds shape, but it also drags itself downward and can balloon at the sides if the cut is too blunt. Weight-removing layers solve that problem by redistributing the bulk.
The best version doesn’t shred the hair. It removes enough mass to let the ends fall, while keeping the top and perimeter solid. I’d be cautious with too much texturizing here; thick hair can go poofy fast if the surface is over-thinned. Long internal layers usually work better than lots of short ones.
This is the cut for hair that feels heavy in a ponytail and dense when you blow it out. It lightens the interior, which makes the whole head feel easier. You’ll notice it most when you tuck it behind the ears or wear one side behind a clip — the shape doesn’t fight you.
If you’ve spent years battling the triangle effect, this one is worth a serious look. Not a tiny trim. A real reshaping.
15. Silver Layers with a Soft Blowout
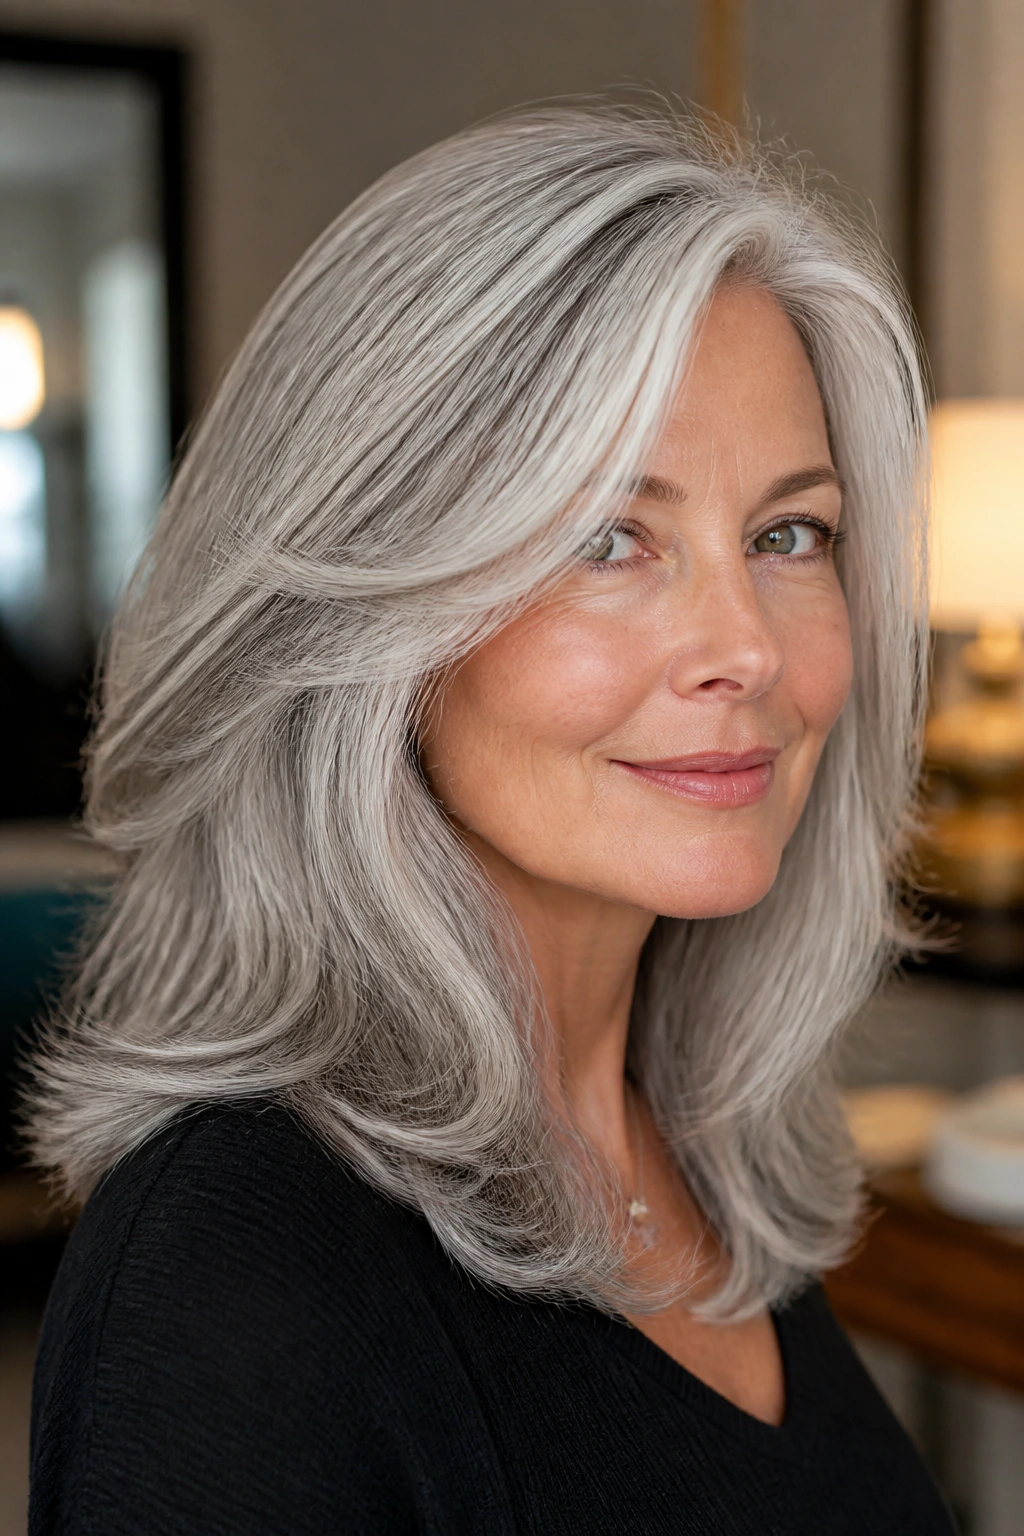
Gray and silver hair often looks strongest when the cut has enough movement to show off the color changes. A soft blowout gives the layers a smooth bend, and the silver catches the light along every curve.
The texture of gray hair is its own animal. It can be wirier, drier, or both, which means harsh layering can make it stick out at odd angles. Soft layers, blended rather than chopped, work better. They help the hair fall in clean sections without breaking the flow of the silhouette.
This is not the cut for someone who wants to hide gray. It’s the cut for someone who wants the gray to look deliberate. A glossing cream or a light serum on the ends can make a huge difference, especially if the hair is no longer laying down as smoothly as it once did.
A soft blowout is enough. No need to over-style and flatten the shine.
16. Jaw-Skimming Layered Bob
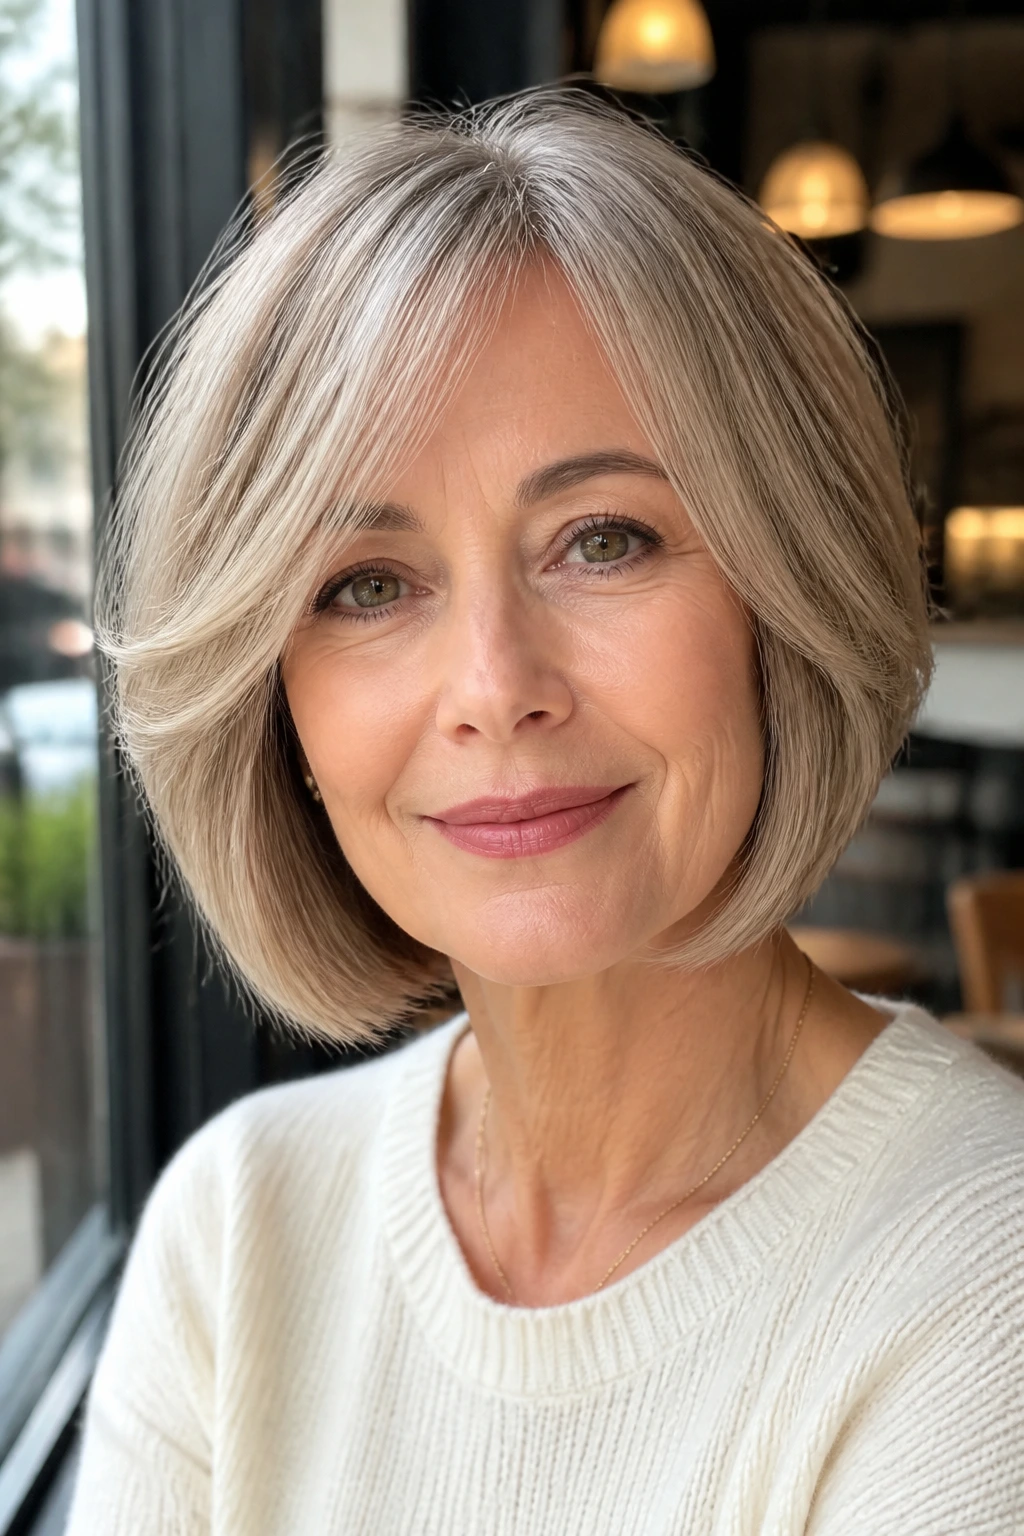
A bob that lands around the jaw can be sharp, but layers keep it from turning severe. The shorter length gives the face structure, while the layered interior stops the bottom from feeling boxy or too dense.
This cut is strong if you want your hair to look polished with less length to manage. The jaw-skimming point draws attention upward, which can sharpen the profile and make cheekbones stand out. At the same time, the layers soften the line enough that it does not feel blunt or heavy.
I’d use this on straight or slightly wavy hair, especially if you want a shape that can be tucked, flipped, or worn smooth. It’s a tidy cut. Not fussy. But it does need regular shaping so the layers stay where they belong.
If your hair tends to curl outward at the neck, ask for the nape to stay a touch longer. That detail saves a lot of frustration.
17. Shoulder-Length Wolf Cut with Soft Edges
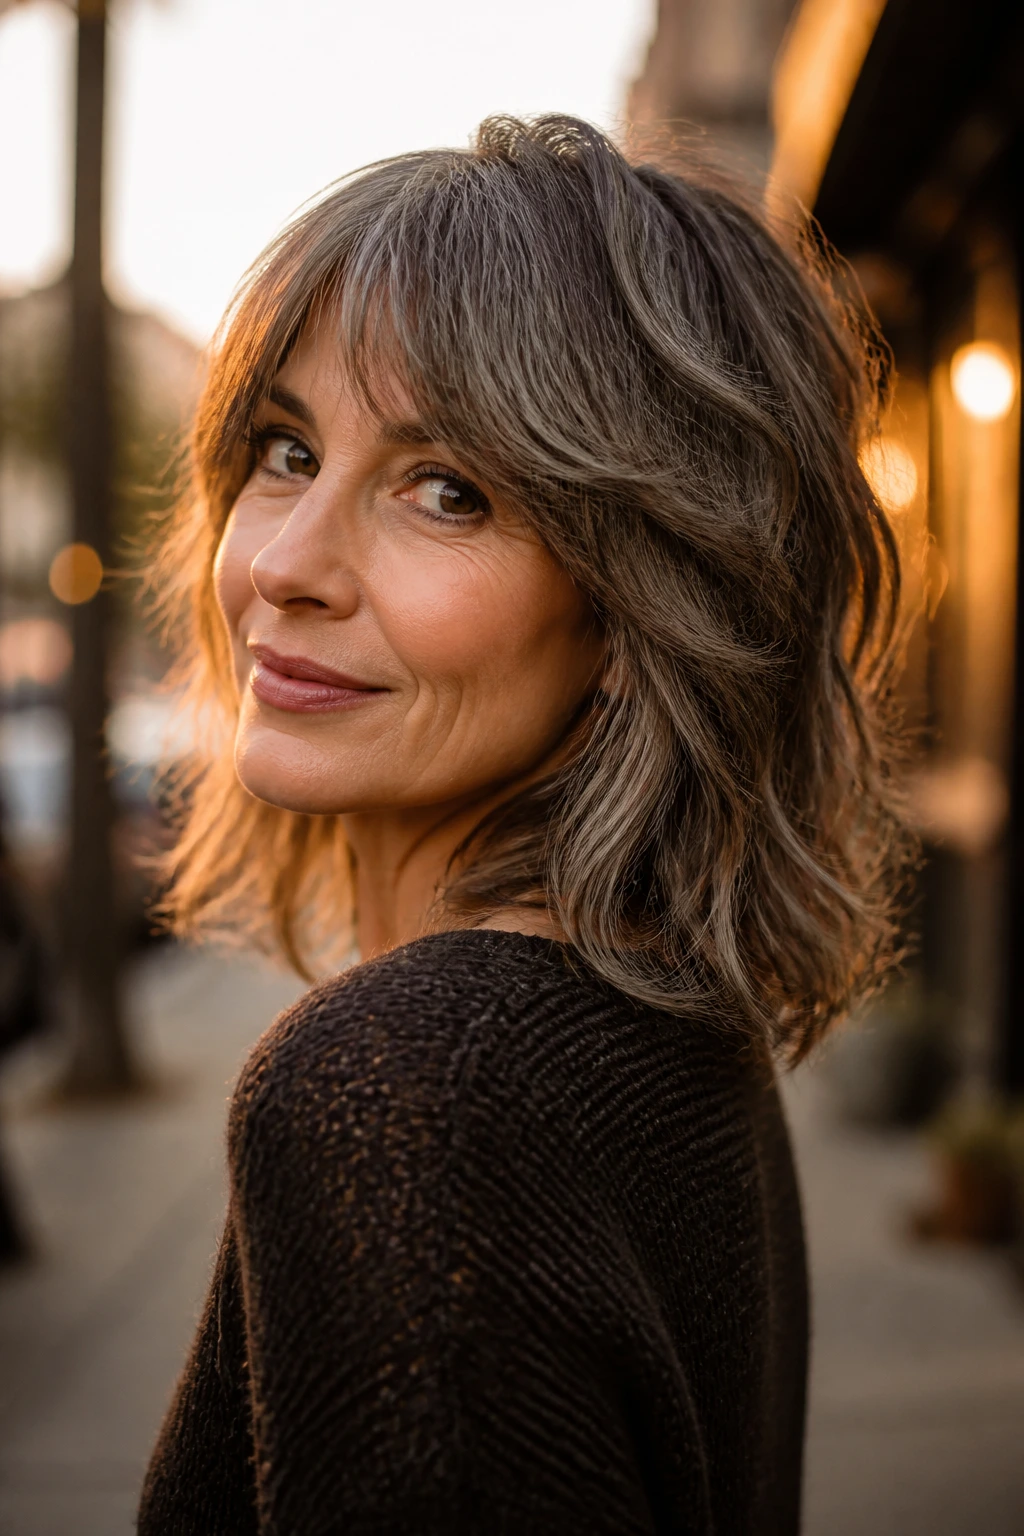
The wolf cut gets a lot of dramatic press, but the softer version at shoulder length is a different animal. Less rock-show, more easy movement. The crown is a little shorter, the ends are lighter, and the shape has a loose, lived-in swing.
This works best if your hair has some wave or body to it already. The cut gives that movement a place to go. If the hair is pin-straight and flat, it can still work, but you’ll need more styling. If it’s curly, the edges need to be softened so the shape doesn’t explode outward.
I like this cut when someone wants edge without looking like they borrowed a style from somebody half their age. The soft edges keep it wearable. The layers create lift without making the silhouette look choppy. A bit of mousse and a diffuser can make the whole thing fall into place quickly.
It’s playful, but it still respects the shoulders. That matters.
18. U-Shaped Layers with Long Front Pieces
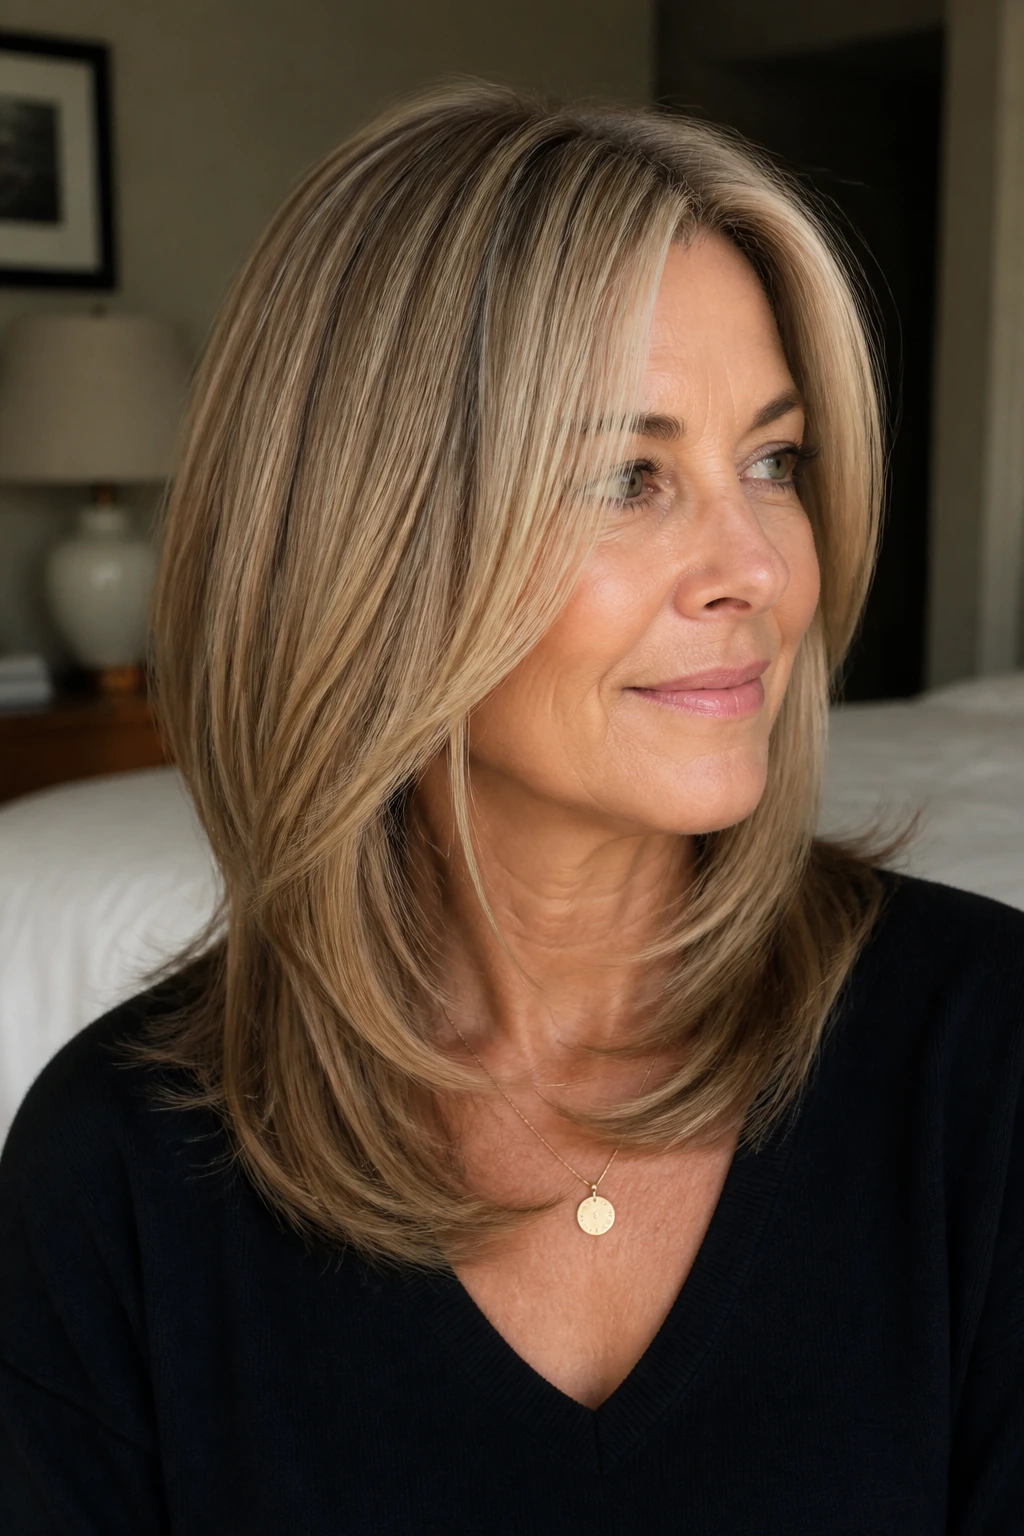
A U-shape gives the back a soft curve, and the long front pieces pull the eye downward in a way that lengthens the face. It’s a simple shape, but it has more motion than a blunt cut, and more elegance than a very layered shag.
This is a good fit if you want your medium-length hair to look full without feeling broad at the sides. The U keeps the ends rounded, which makes the haircut look finished even when the styling is light. Long front pieces can brush the collarbone and soften a square jaw or a round cheek line.
The part that makes this cut work is keeping the front pieces long enough. If they get too short, you lose the elegant sweep and the whole thing starts to feel accidental. A clean blow-dry with the ends tucked under slightly gives the shape the best chance to show off.
It’s one of the more graceful cuts on the list. Quiet, but not plain.
19. Soft Curls with Invisible Layers
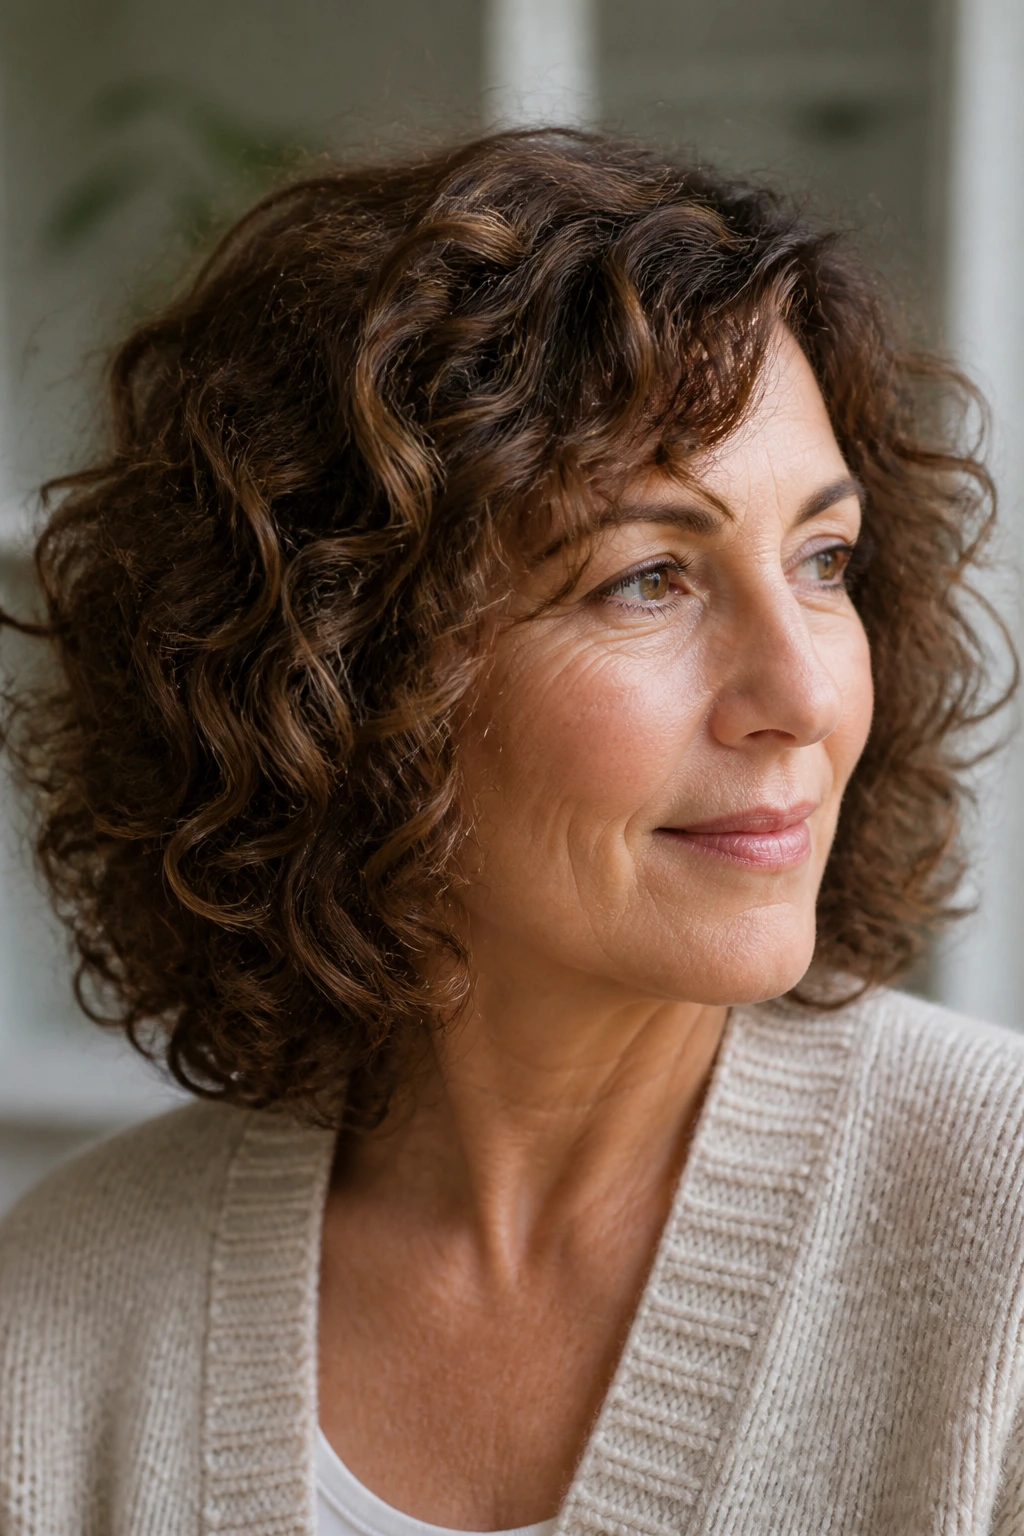
Curly hair after 50 often needs layers, but not the kind that make the shape spring apart. Invisible layers — the sort that sit inside the curl pattern — help the curls stack without building a triangular outline.
The best curly cut is usually shaped dry or nearly dry, because curls lie to you when wet. A stylist who understands curl pattern will cut where the curl wants to sit, not where it looks convenient in the chair. That matters more than almost anything else here.
This cut is especially good if your curls have gotten softer or less predictable over time. The layers can keep the hair from bunching at the ends while still preserving body around the crown and sides. A diffuser and a curl cream are usually enough; a strong hold gel is not mandatory unless your curls are loose and need extra control.
The result should be springy but not puffy. That line matters. A lot.
20. Blunt Base with Light Face-Framing
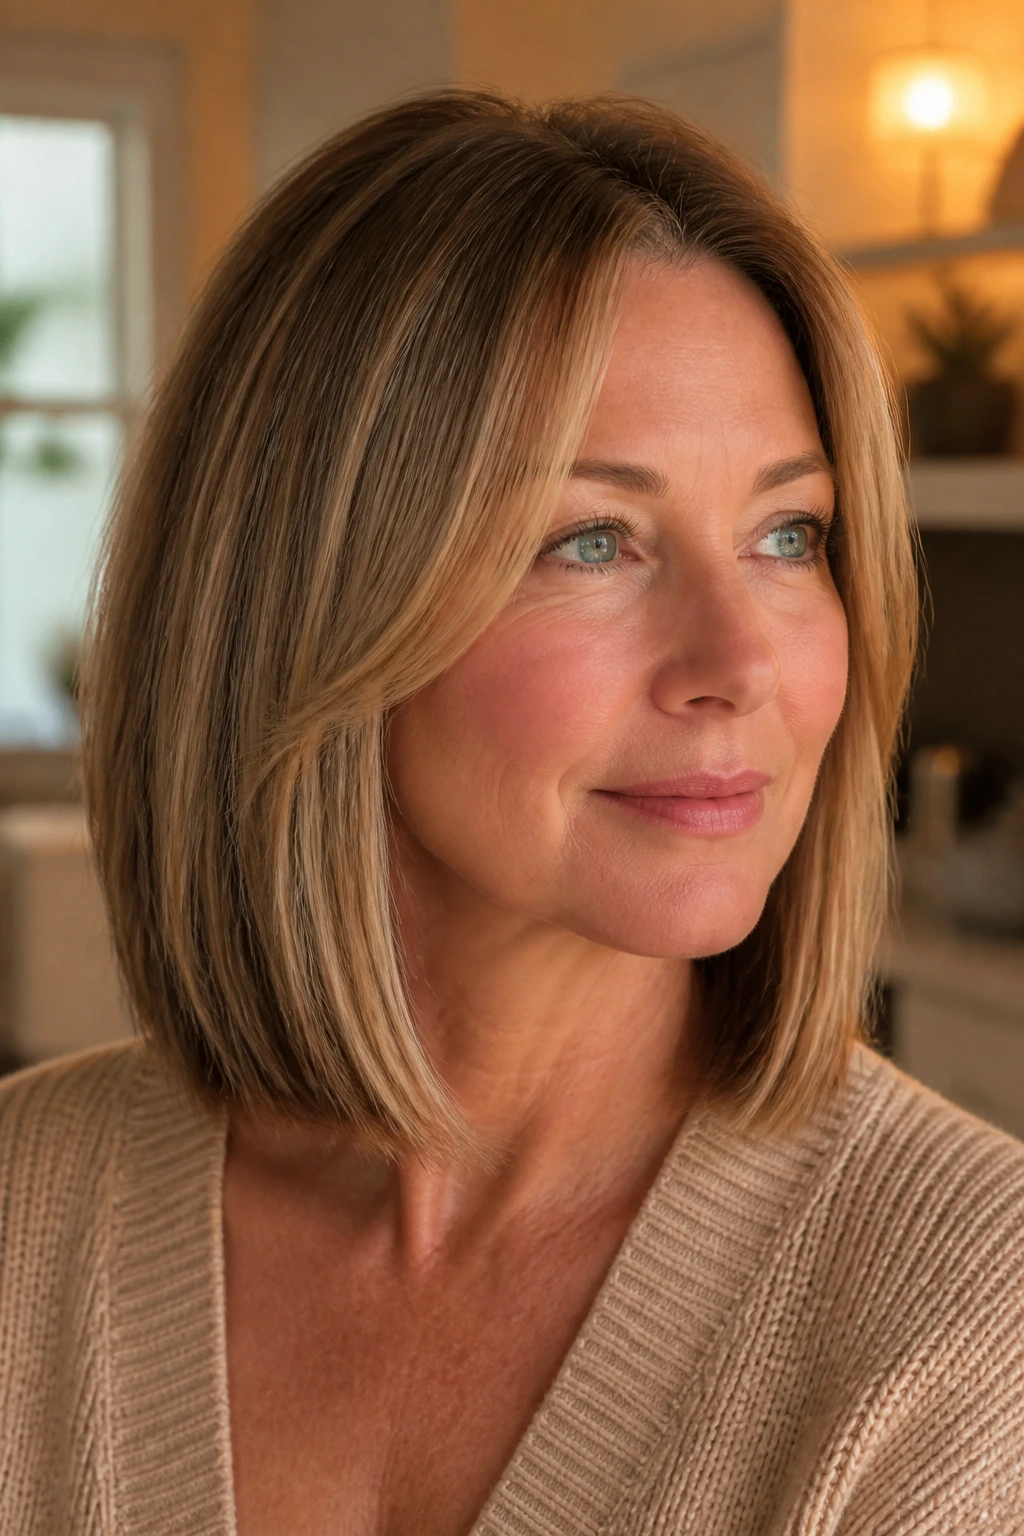
Not everyone wants obvious layers, and that is fine. A blunt base with just a little face-framing gives the hair a solid bottom line while easing the front so the cut doesn’t feel severe.
This is especially smart for fine hair that needs the illusion of thickness. Too many layers can make fine ends look stringy. A blunt perimeter keeps the hair looking full, and the light front pieces give you enough movement to stop the cut from feeling helmet-like.
I’d choose this if you like a neat, controlled shape that still has a little softness near the face. It’s also a good option if you wear your hair down most of the time and want it to look intentional with minimal fuss. A round brush at the front and a flat brush through the back usually do the trick.
Simple does not mean boring. Here, simple means the haircut is doing exactly what it should.
21. Bottleneck Bangs and Collarbone Layers
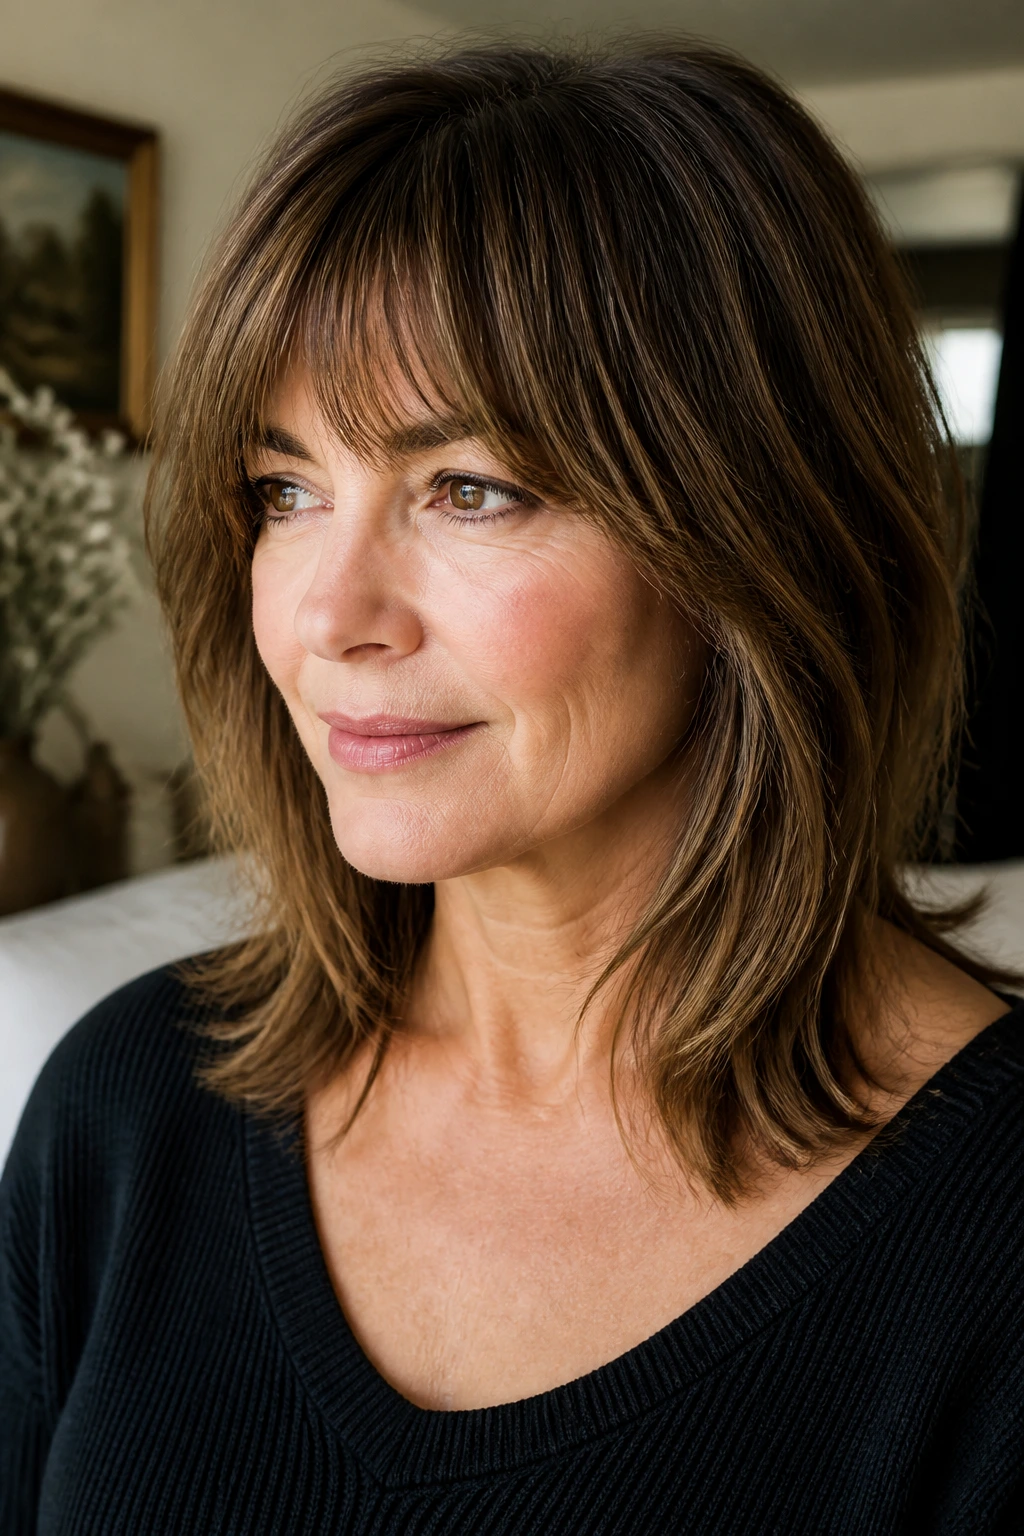
Bottleneck bangs are one of the better fringe choices if you want forehead coverage without a blunt, heavy line. They sit narrow at the center and widen as they blend into the sides, which makes them easier to live with than a full straight bang.
Paired with collarbone layers, the whole cut feels soft and balanced. The bangs frame the eyes, the side pieces blend into the longer layers, and the length keeps the haircut from feeling too short around the face. It’s useful if you want some structure up front but still like being able to tuck the hair back.
These bangs need regular trims to stay neat, but they grow out more gracefully than a hard fringe. That matters. A fringe that turns fussy after three weeks tends to stay in a drawer, clipped aside, and forgotten. Bottleneck bangs are more forgiving.
A light blow-dry with the brush directed away from the face keeps them from closing in too tightly. That small move changes the whole look.
22. Air-Dried Layers for Natural Waves
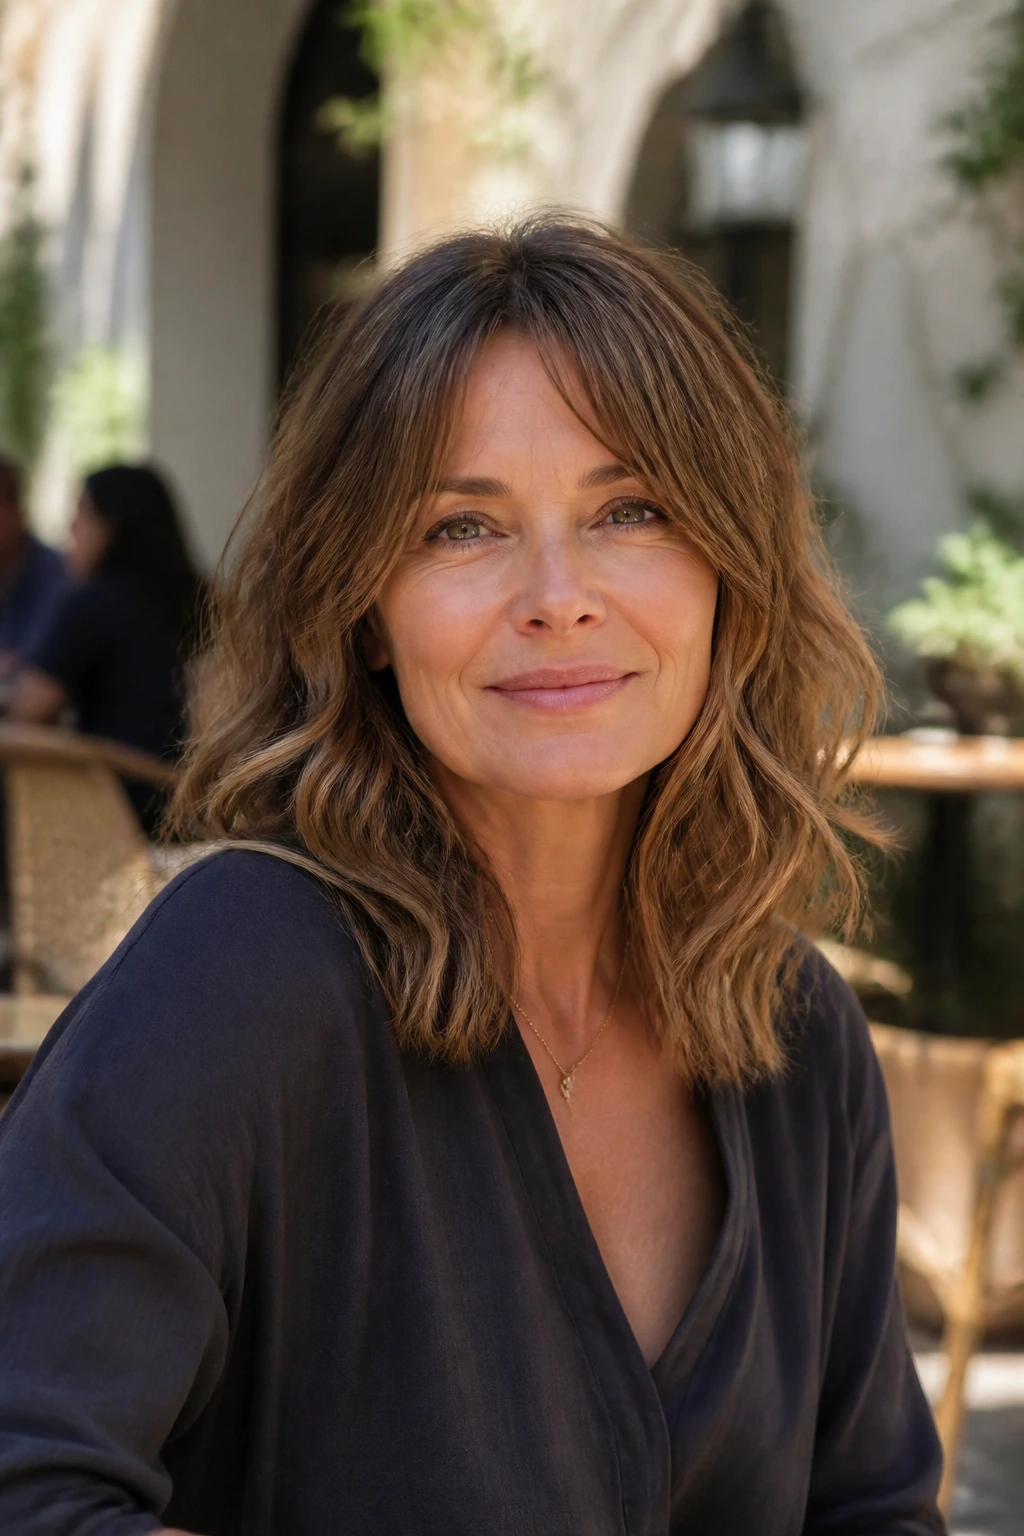
If your hair already has a wave pattern, you can stop fighting it and make the layers serve it instead. Air-dried layers are cut to let the wave settle where it wants, which gives the shape a looser, more natural feel.
The cut should have enough structure to avoid looking messy, but not so much that the wave gets flattened. That balance is the heart of it. Longer layers around the front and mid-lengths often work better than short crown layers, because they let the wave stretch instead of springing straight up.
This is one of the better choices for women who don’t want to blow-dry every day. A little leave-in conditioner, a touch of curl cream, and a quick scrunch are enough for many hair types. If the ends dry too blunt, the shape can look heavy. If they’re too thin, the wave loses its anchor.
The sweet spot is a cut that looks like it belongs to your hair, not against it. Rare thing. Worth chasing.
23. Flipped-In Layers for a Polished Edge
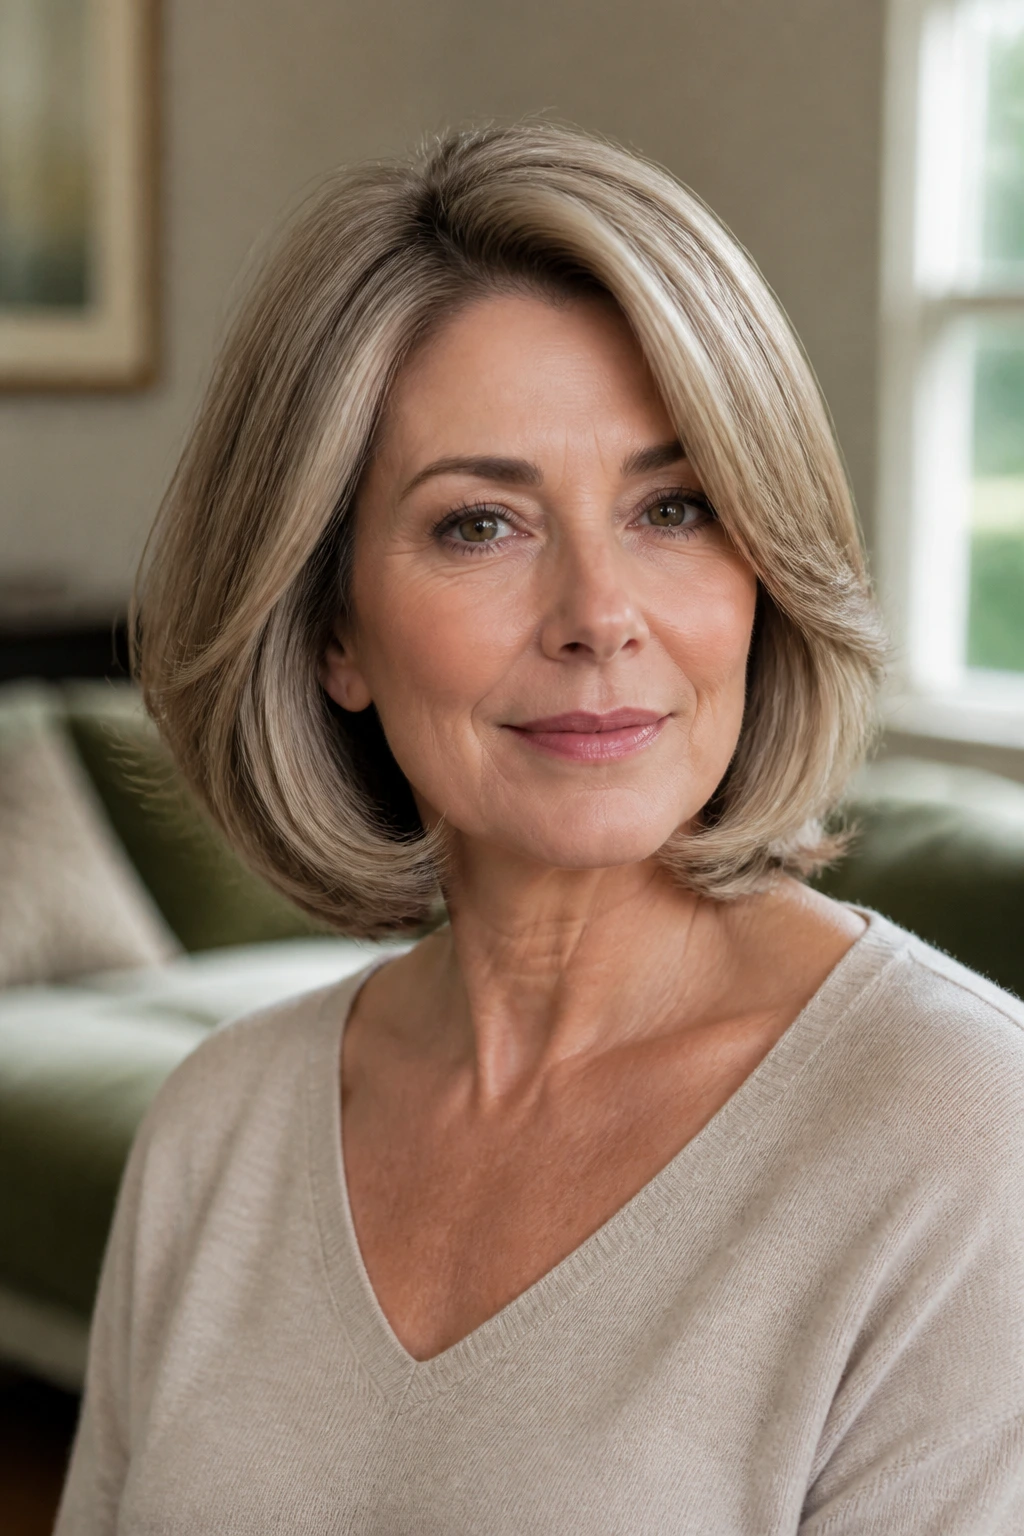
Flipped-in ends give medium-length hair a neat finish that looks tidy without feeling stiff. The layers support the inward bend, which keeps the outline close to the neck and jaw instead of floating away from the head.
This cut is especially good if you like a clean blouse, a strong neckline, or just that smooth, finished look some people can’t stop reaching for. It works well on straight or softly wavy hair and can make the shape feel more controlled if the hair tends to puff at the sides.
A round brush or a blow-dryer brush usually does the job. The important part is drying the roots first, then rolling the ends under while the hair is still warm. If you rush that step, the bend falls out fast.
It’s polished, not stiff. That’s the line to hold.
24. Deep Side-Part Layers for Instant Lift
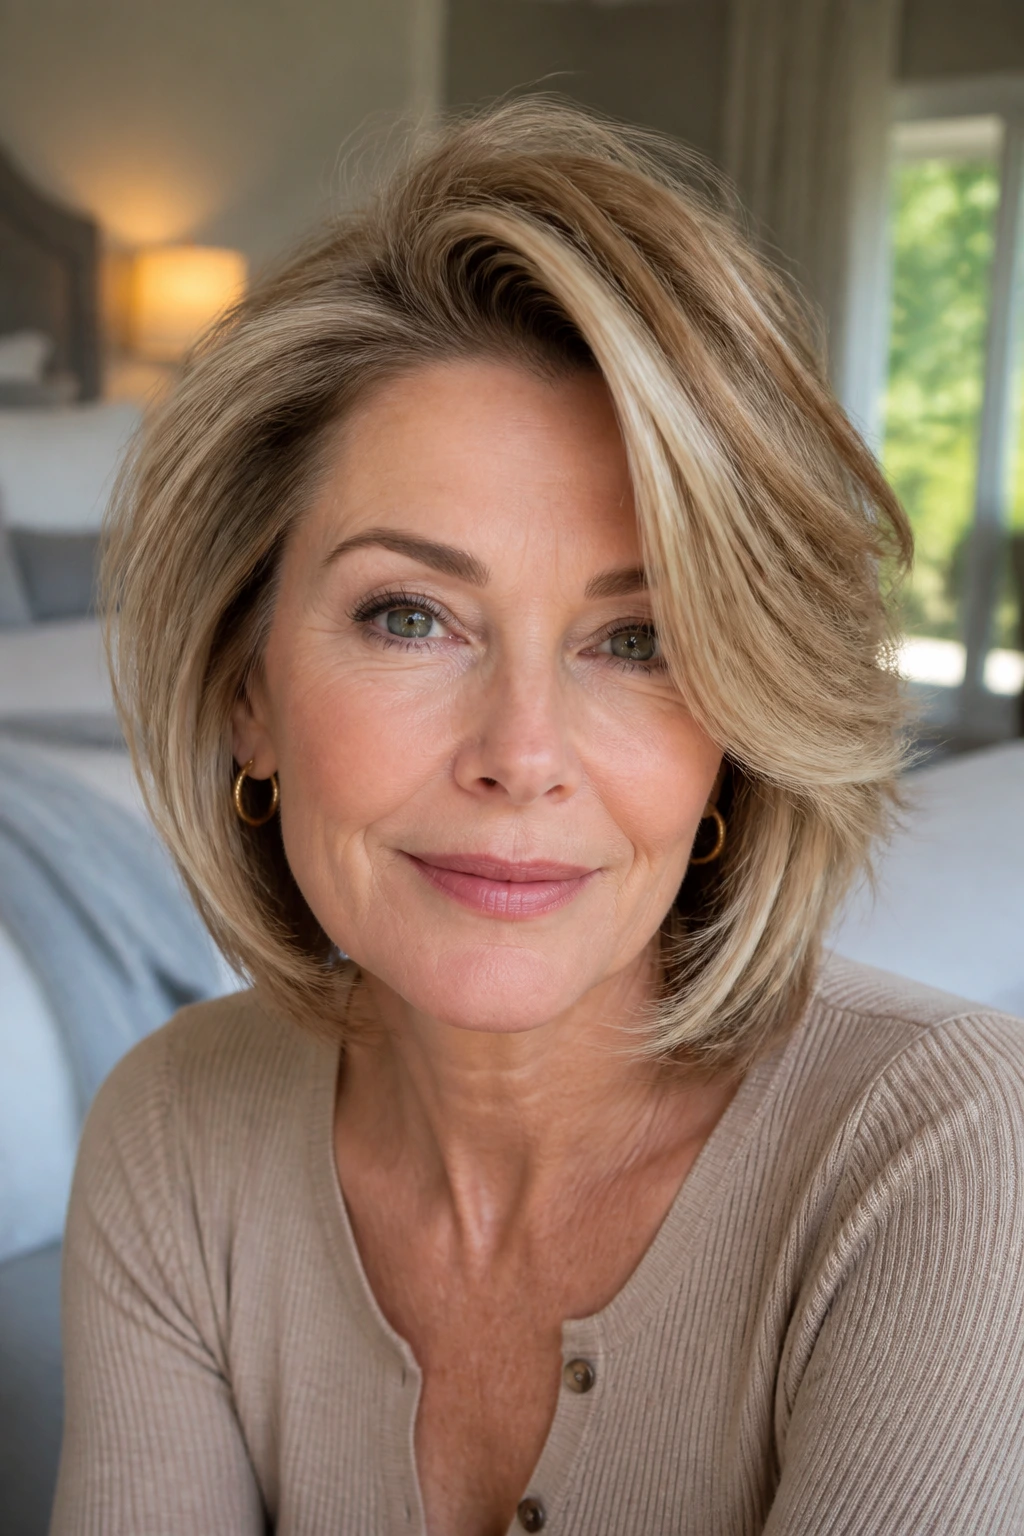
A deep side part can change the whole mood of a haircut in about ten seconds. When paired with layers, it creates lift at the crown and a little sweep across the forehead, which is useful if one side of the hair tends to lie flatter than the other.
This cut is clever for fine or medium-density hair that needs a quick boost without a drastic shape change. The layers support the part by giving the top some bend, while the longer side has enough length to frame the cheek and jaw. It’s also handy if one temple area is a little sparse, because the sweep can soften that zone.
I like this approach when someone wants a noticeable change without losing length. You can wear it smooth, wavy, or tucked behind one ear. The part does a lot of the visual work, which means you don’t need a pile of product.
A root lift spray and a clip set at the crown can help train the shape before you head out the door.
25. Angled Layers for Rounder Faces
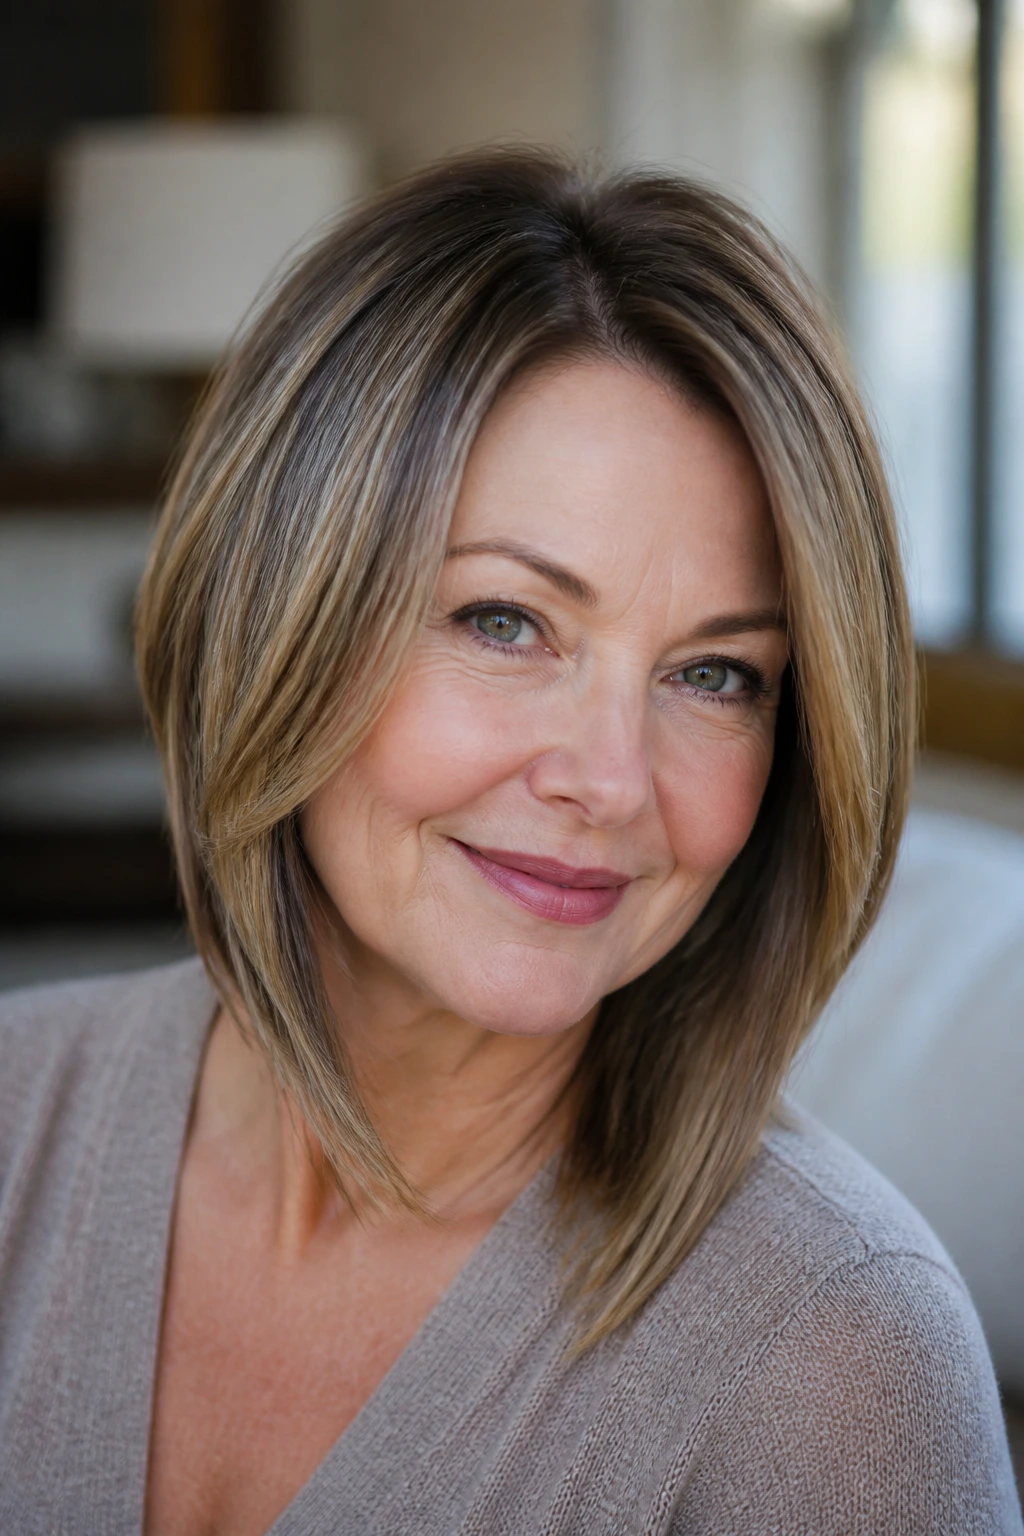
Angled layers create vertical movement, which can be useful if you want the face to look a little longer. The front pieces should angle down below the chin, then blend into softer layers around the shoulders.
That downward line matters. It draws the eye lengthwise instead of sideways, which helps balance fuller cheeks or a round face shape. The cut should still move, though. If the front is too sharp, the whole look feels severe.
This is a nice option if you want your medium-length hair to feel open around the face but still keep some weight at the bottom. It’s also easy to wear with a side part, which can give the angles even more lift. A little bend from a round brush at the front keeps the cut from looking flat.
The shape should feel intentional when you tuck one side behind the ear. If it does, you’re in the right neighborhood.
26. Wispy-End Layers for Shoulder-Grazing Length
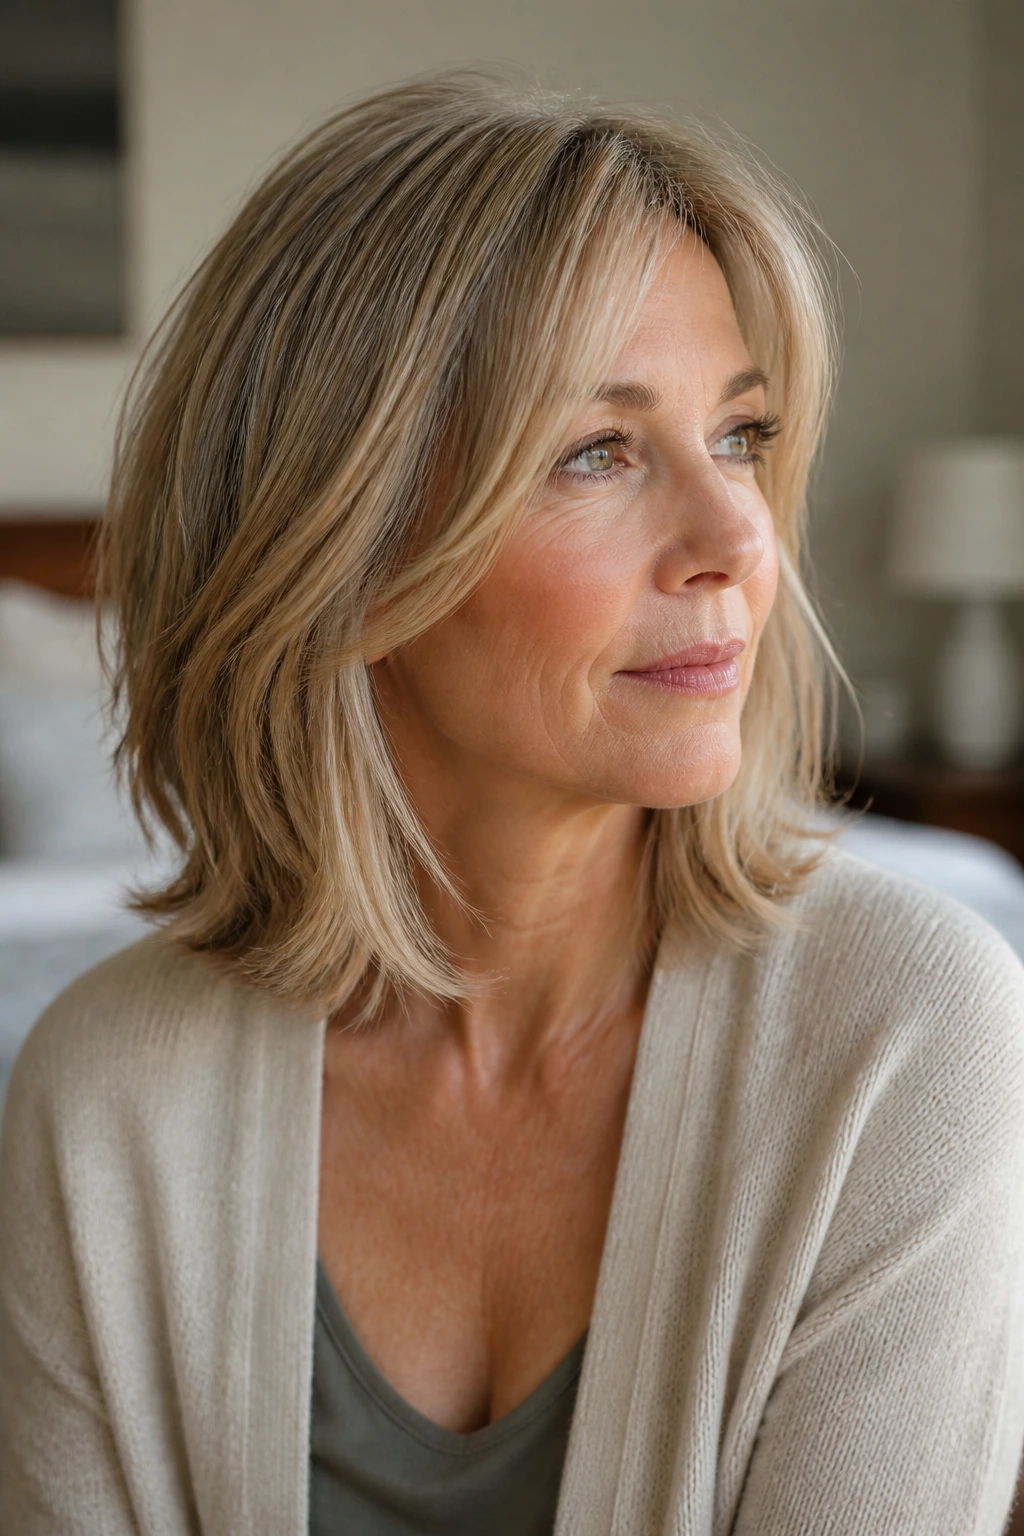
Wispy ends can be beautiful when they’re handled with care. At shoulder-grazing length, they give the haircut a lighter finish without making the whole thing look thin or disconnected.
The appeal here is subtle movement. The ends don’t sit as one hard line, but they also don’t disappear. That makes this a good choice if your hair is medium density and you want it to feel softer without going heavily layered. A little wispy texture can keep the shape from hanging like a curtain.
Be careful with over-texturizing. A few fine pieces are enough. Too much, and the ends start to look scrappy instead of airy. The best version looks like the hair has room to move, not like the cut is trying too hard to be edgy.
This style behaves nicely with a light bend at the ends and not much else. Sometimes that’s all a haircut needs.
27. Grow-Out-Friendly Layers for Gray Hair
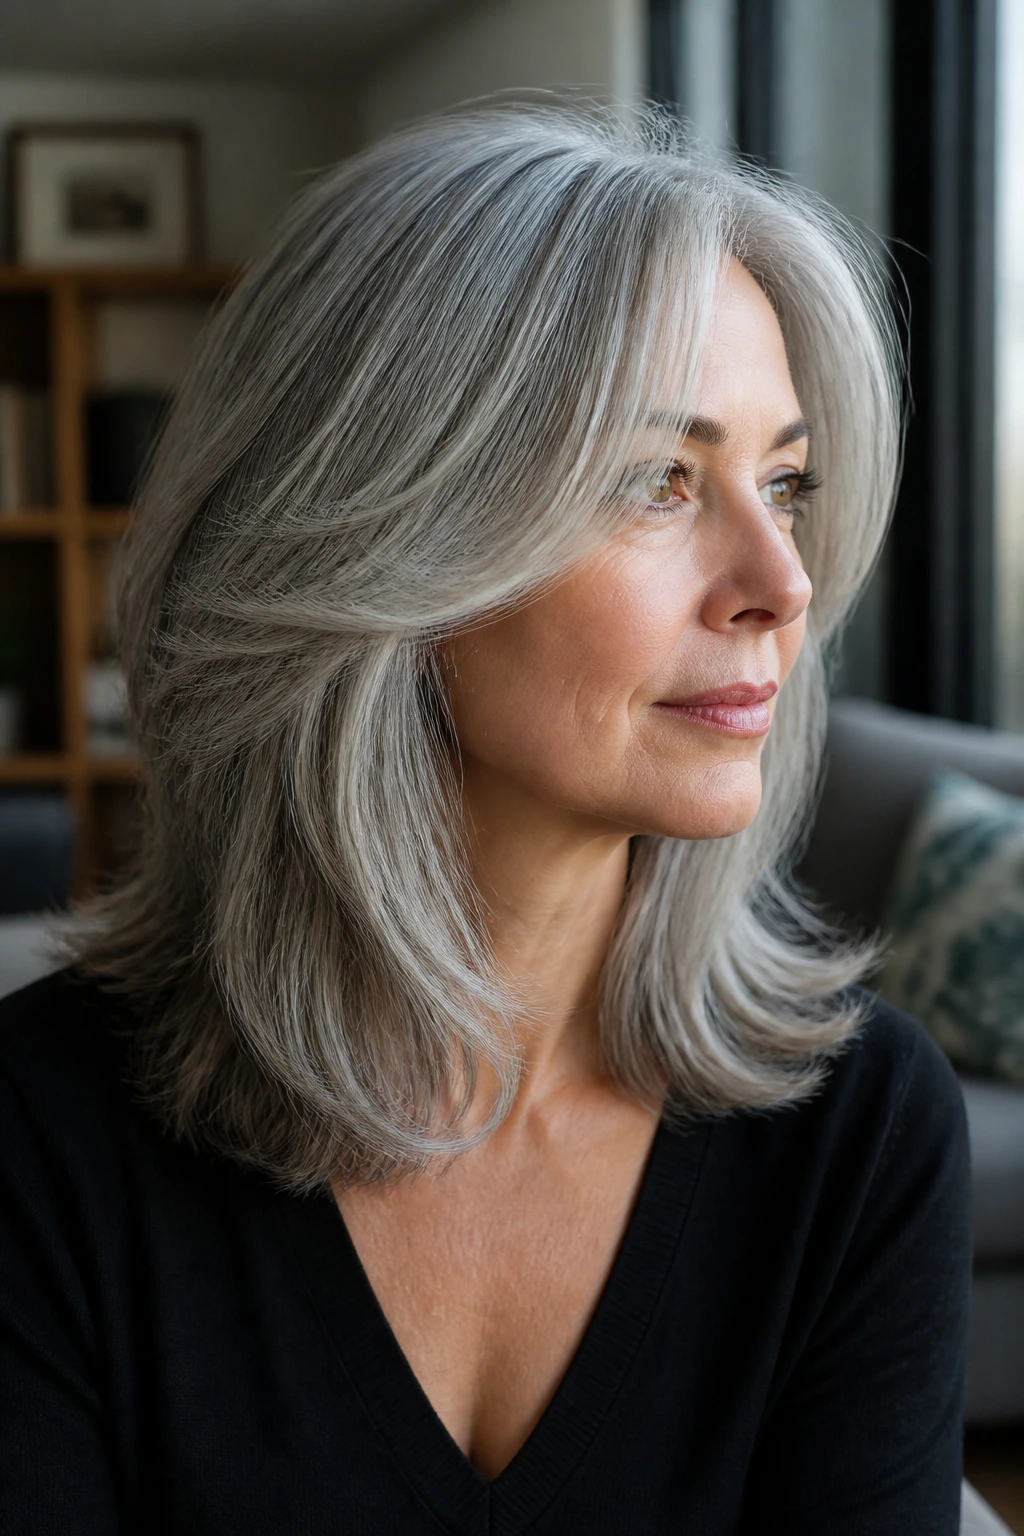
Gray hair often grows in with a different texture and tone than the hair it’s joining, which can make blunt lines feel harsher than they used to. Grow-out-friendly layers soften that transition by keeping the cut blended from top to bottom.
This is a smart option if you’re letting natural gray come in and don’t want a cut that looks neat only for two weeks. Longer layers, a gentle face frame, and no severe fringe help the grow-out stay readable. The shape can live a little longer between trims without looking ragged.
It also helps when the gray hairs are coarser than the rest. Instead of fighting the texture shift, the cut works with it. A smoothing cream at the ends and a soft blow-dry at the front can keep the new growth from standing up in protest.
I’d call this the most forgiving shape on the list. Forgiving is good. It means the haircut can keep its manners while the rest of the hair catches up.
28. Glossy Blowout Layers with a Salon Finish
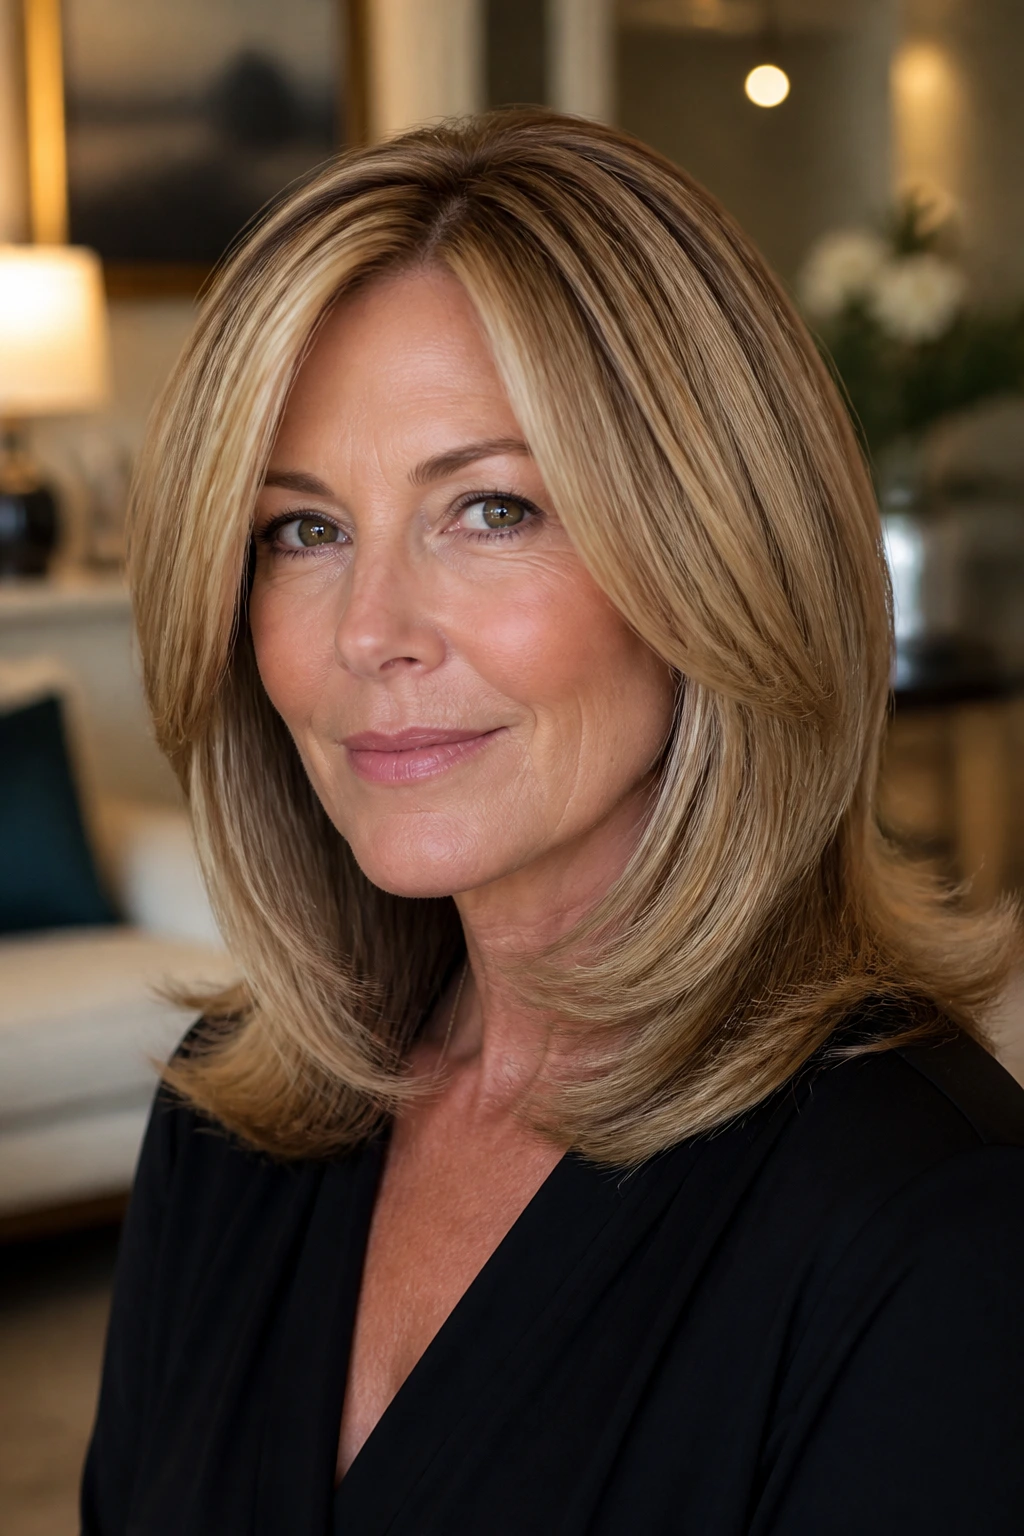
A glossy blowout cut is what you reach for when you want the hair to look smooth, bouncy, and slightly formal without being stiff. The layers are there, but they hide inside the shape enough to keep the outline clean.
This style is especially good for medium-length hair with enough density to hold a round-brush finish. The shine matters here. So does the smooth curve around the face. The hair should move in one graceful arc, then settle at the shoulders with soft ends that don’t flip into a hard curl unless you want them to.
It’s a polished look, but not a hard one. The trick is in the brush work: dry the roots first, then roll the mid-lengths and ends under with tension, finishing with a cool shot to lock the bend. A tiny bit of light-reflecting serum on the last inch of hair can make the whole thing look fresher.
If you want one cut that can go from lunch to a dressier evening without a full reset, this is the one.
Why Layered Mid-Length Cuts Keep Working
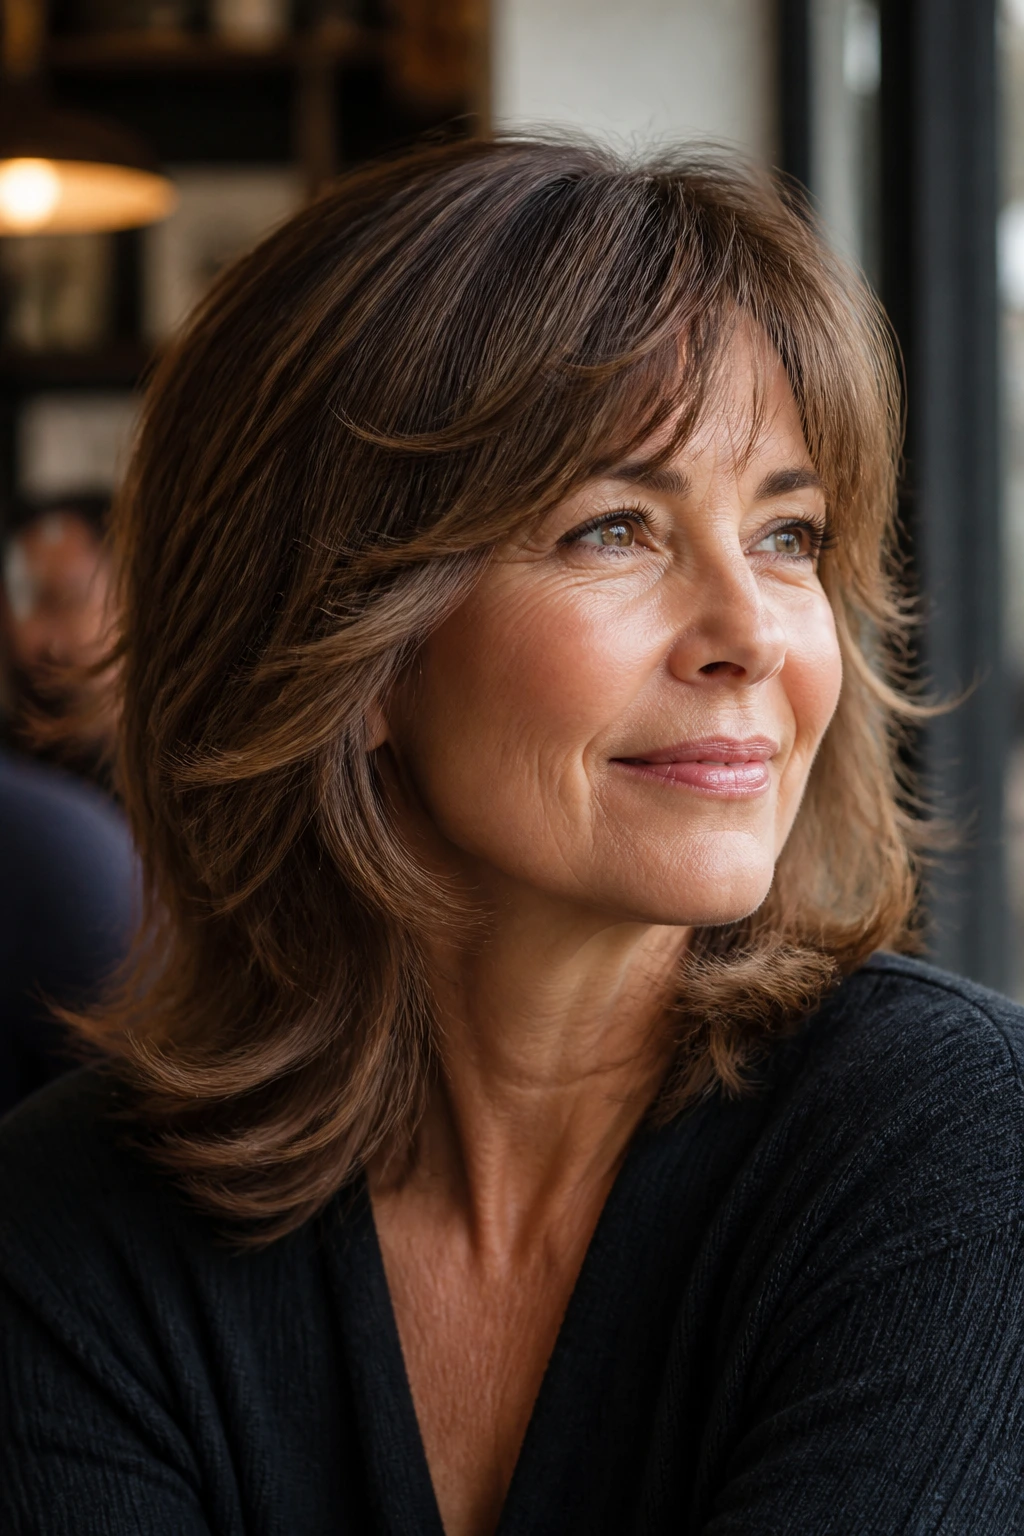
The real advantage of medium-length layers is that they solve problems without demanding a total identity shift. A one-length cut can be sleek, sure, but it also lays the blame on every texture change, every cowlick, every flat spot at the crown. Layers spread the job around.
They also respect how hair behaves after 50. Some strands get drier. Some lose a little density at the sides. Some gray strands feel as if they’ve read a different rule book entirely. A layered cut can account for that by adding lift where the hair needs air and keeping weight where the shape needs hold. That balance is the difference between hair that sits there and hair that moves.
There’s a practical upside, too. Medium length is long enough to style in several ways, but short enough that you can still dry it without losing half your morning. Add layers and the cut starts to do part of the styling for you. The shape keeps its memory. That matters more than people think.
How to Choose Layered Hairstyles for Medium Length Hair Over 50 by Hair Texture
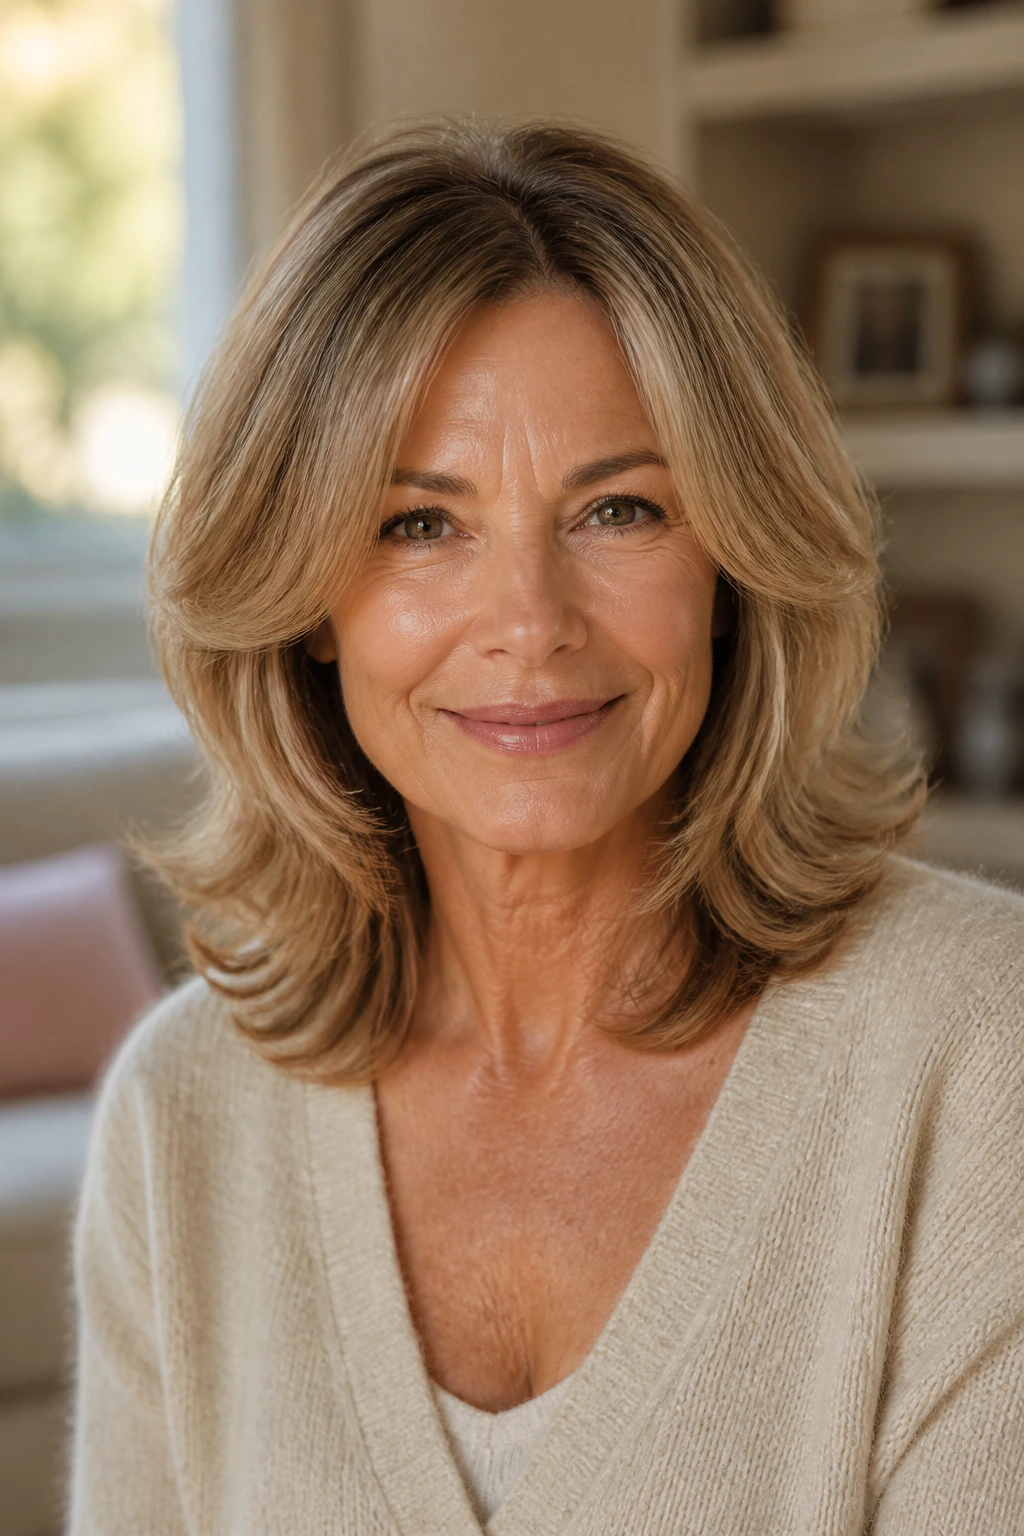
Texture should make the decision, not a random trend photo. Fine hair usually needs fewer, longer layers so the ends stay full. Thick hair can take more internal shaping, but it still needs a solid perimeter or the cut turns fluffy. Wavy hair usually does best with layers that follow the wave pattern instead of trying to flatten it into obedience.
Curly hair is its own category. Dry cutting or curl-by-curl shaping often works better than forcing a wet shape to guess what the curls will do later. If your curls shrink a lot, ask where the shortest layer will sit when the hair is fully dry. That one question saves a lot of regret.
Gray hair deserves its own thought, too. Coarser strands can spring away from the head, especially around the crown and temples, so soft blending matters more than aggressive texturizing. You want movement, not a halo of rebellion.
What to Tell Your Stylist at the Salon
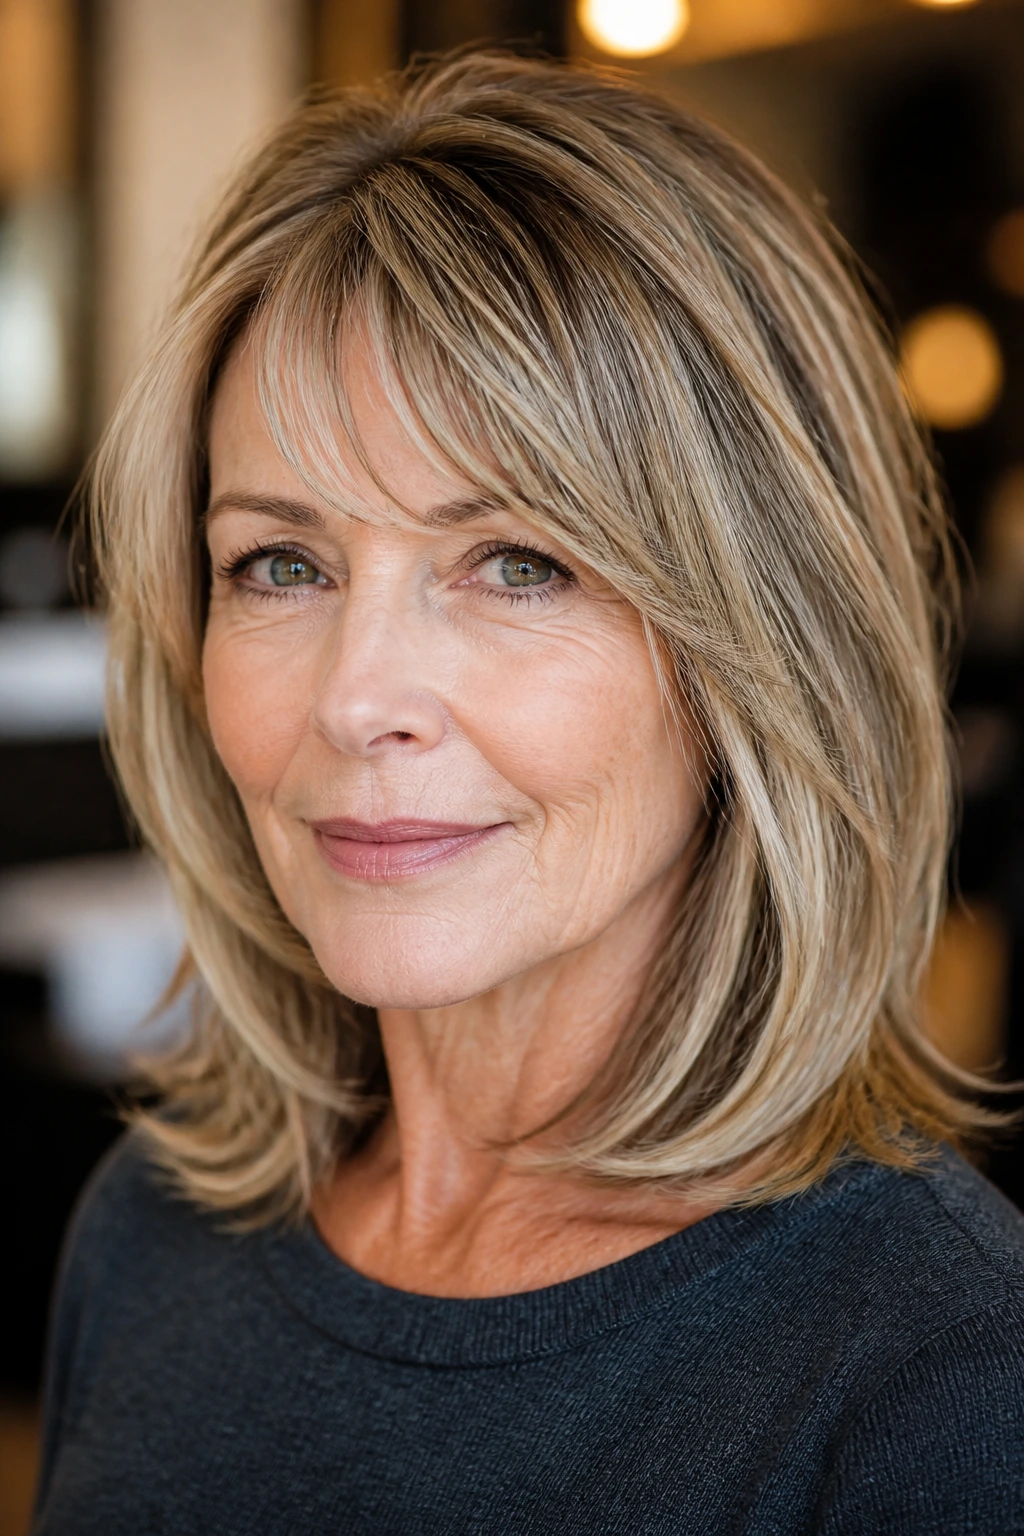
Bring photos, yes, but bring the right kind. A photo of the length is more useful than a celebrity’s face shape. If you love the fringe in one picture and the layering in another, say that out loud. Stylists can work with that. Guessing is where bad haircuts breed.
Tell them how you wear your hair on boring days. That sounds small. It isn’t. If you always air-dry, say so. If you blow it out twice a week and then let it live in a clip, say that too. The cut should match the life you actually live, not the life you imagine on a good hair day.
Point out cowlicks, temples that sit flatter, or a crown that loses lift early. Mention whether you wear glasses, where your part naturally falls, and whether you tuck one side behind the ear. Those details change where the shortest layers should land. The best haircut plans are annoyingly specific. That’s why they work.
Tools That Make Styling Easier
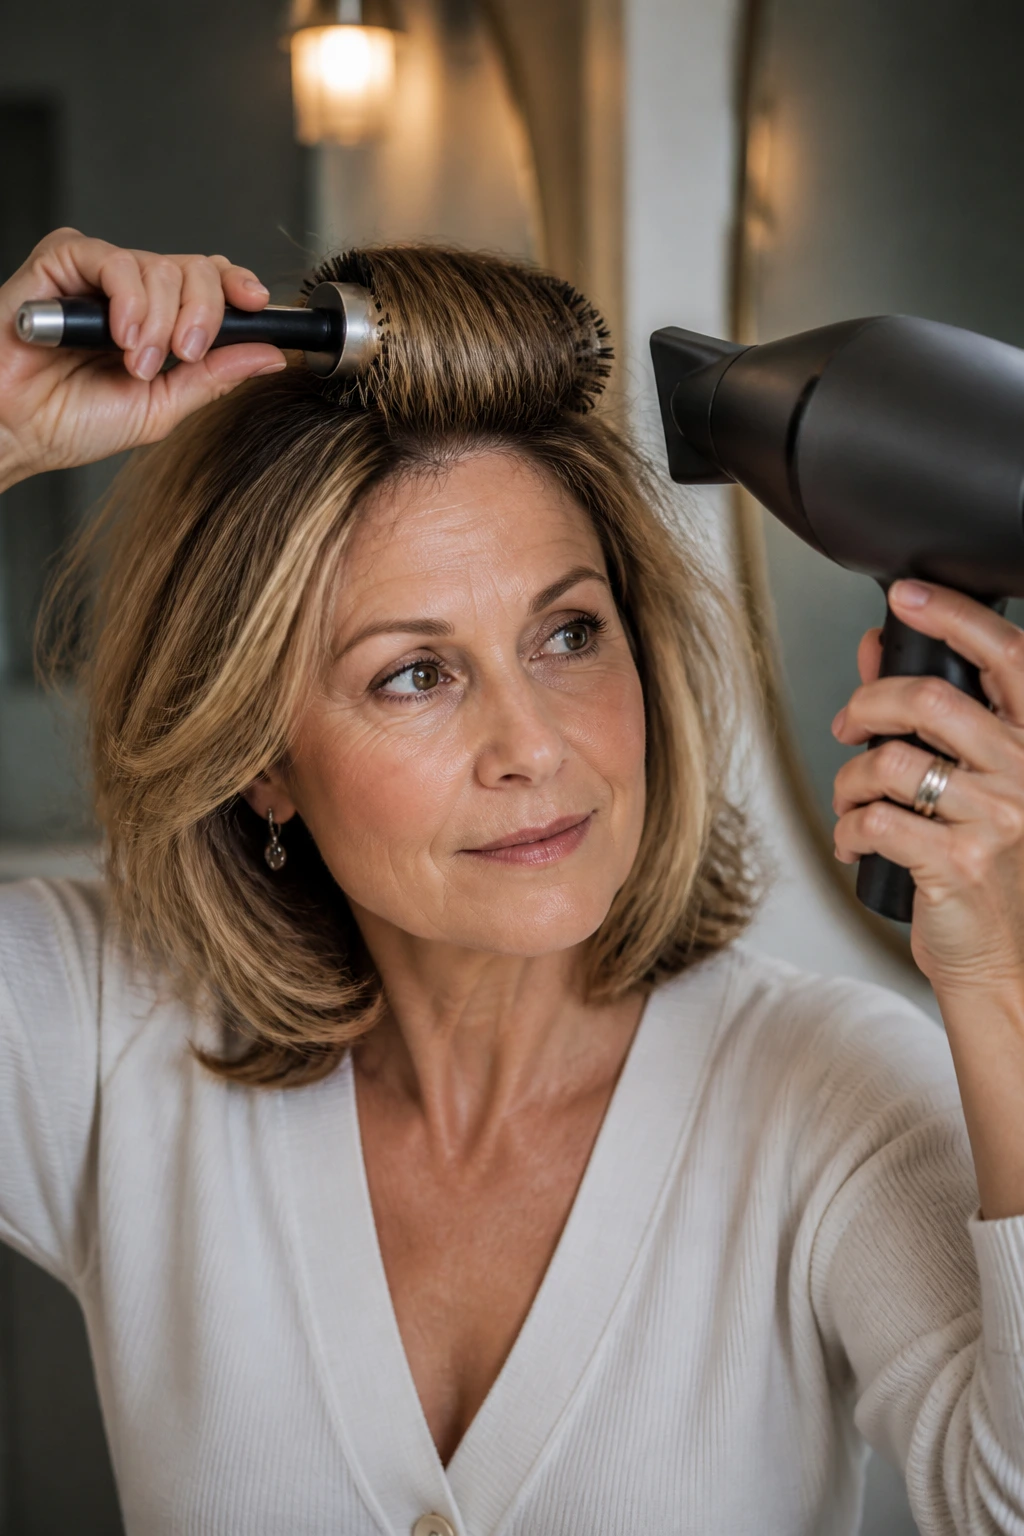
- A 1¼-inch round brush: Good for bending medium-length ends under or out without making the hair curl too tightly.
- A blow dryer with a concentrator nozzle: The nozzle focuses airflow, which gives you more control at the roots and around the face.
- Lightweight mousse: Useful for lift at the crown and for keeping fine or wavy layers from collapsing.
- Heat protectant spray: Especially important if you use a curling iron, flat iron, or hot brush more than once a week.
- A large-barrel curling iron or wand: Best for loose bends and soft movement in layered medium hair.
- Texturizing spray: Handy for piecey cuts, shaggy layers, or air-dried waves that need a little separation.
- A smoothing cream or light serum: Helps with gray hair, frizz-prone ends, and polished blowouts.
- Duckbill clips or sectioning clips: Small thing, big difference; they keep the top sections out of the way while you work the lower layers.
How Layered Hairstyles for Medium Length Hair Over 50 Grow Out Between Trims
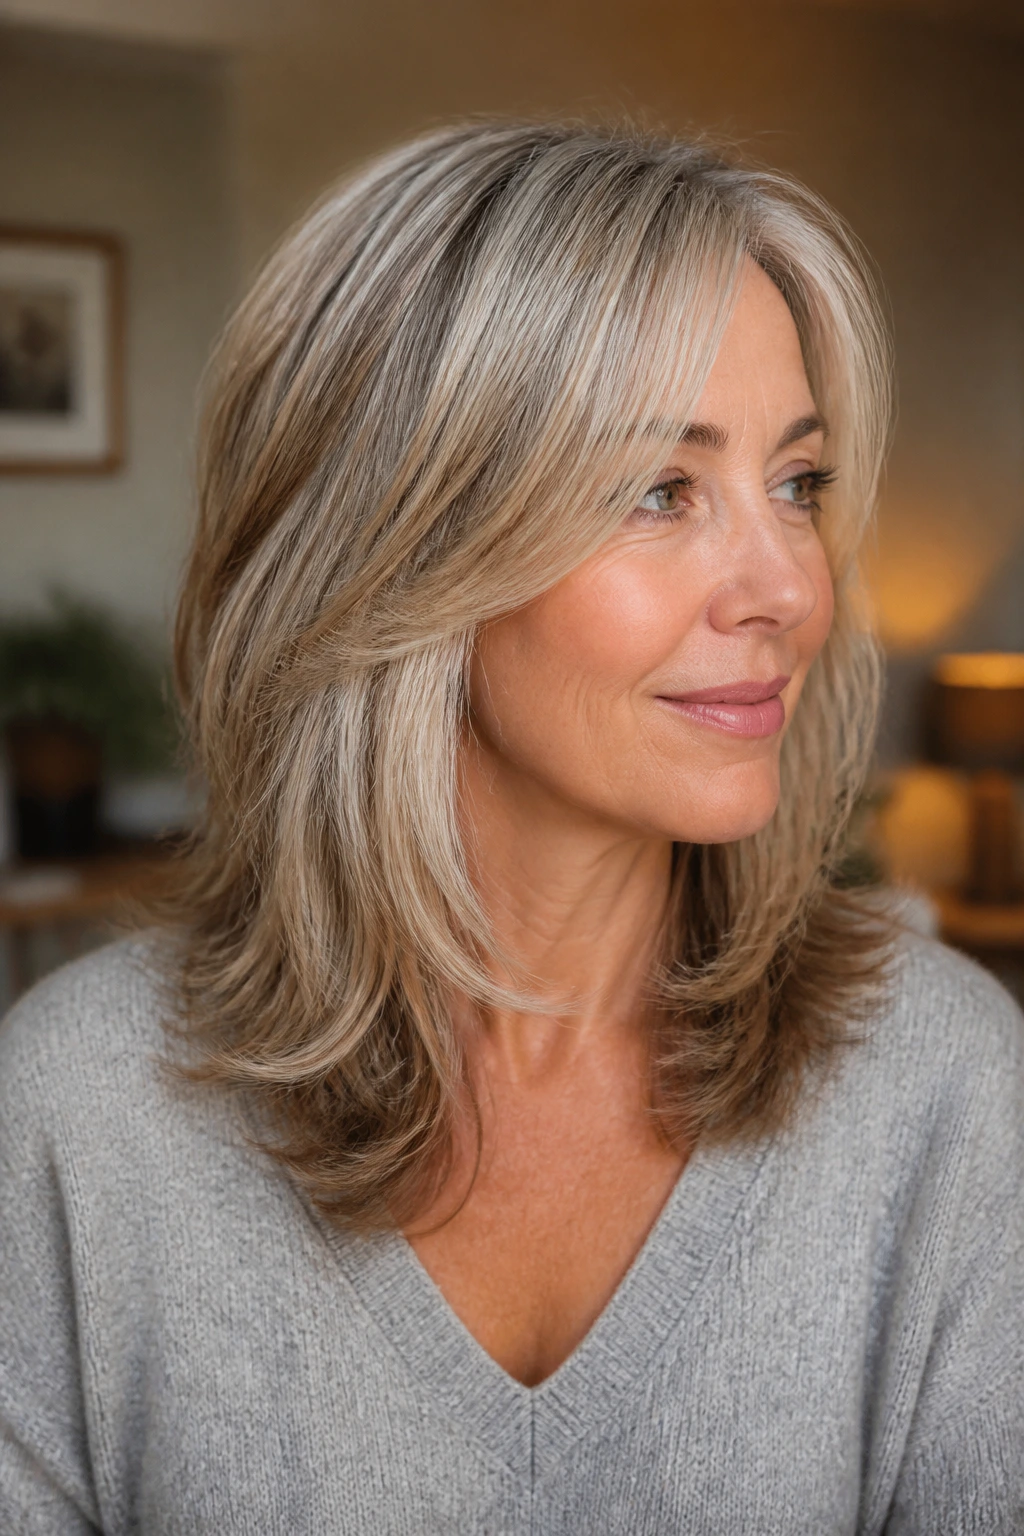
Layers grow out best when the shape is balanced from the start. If the shortest pieces are too high, the haircut can start to stick out or fall into odd shelves after only a few weeks. Longer layers, a soft perimeter, and a face frame that blends instead of stopping abruptly tend to hold up longer.
Most medium-length layered cuts do well with a trim every 6 to 8 weeks if you want the shape tidy, or 8 to 12 weeks if you’re comfortable with a softer grow-out. Bangs need their own timetable. Side-swept or bottleneck bangs may want a small trim sooner, while curtain bangs can usually coast a little longer.
For home care, don’t overload the roots with cream or oil. That flattens the very lift the layers are trying to create. If you need a quick reset between washes, use dry shampoo at the crown and brush it through. If the ends flip in strange ways, a quick pass with a round brush and the dryer on medium heat usually fixes it faster than re-wetting the whole head.
Small Tweaks That Make the Cut Feel More Alive
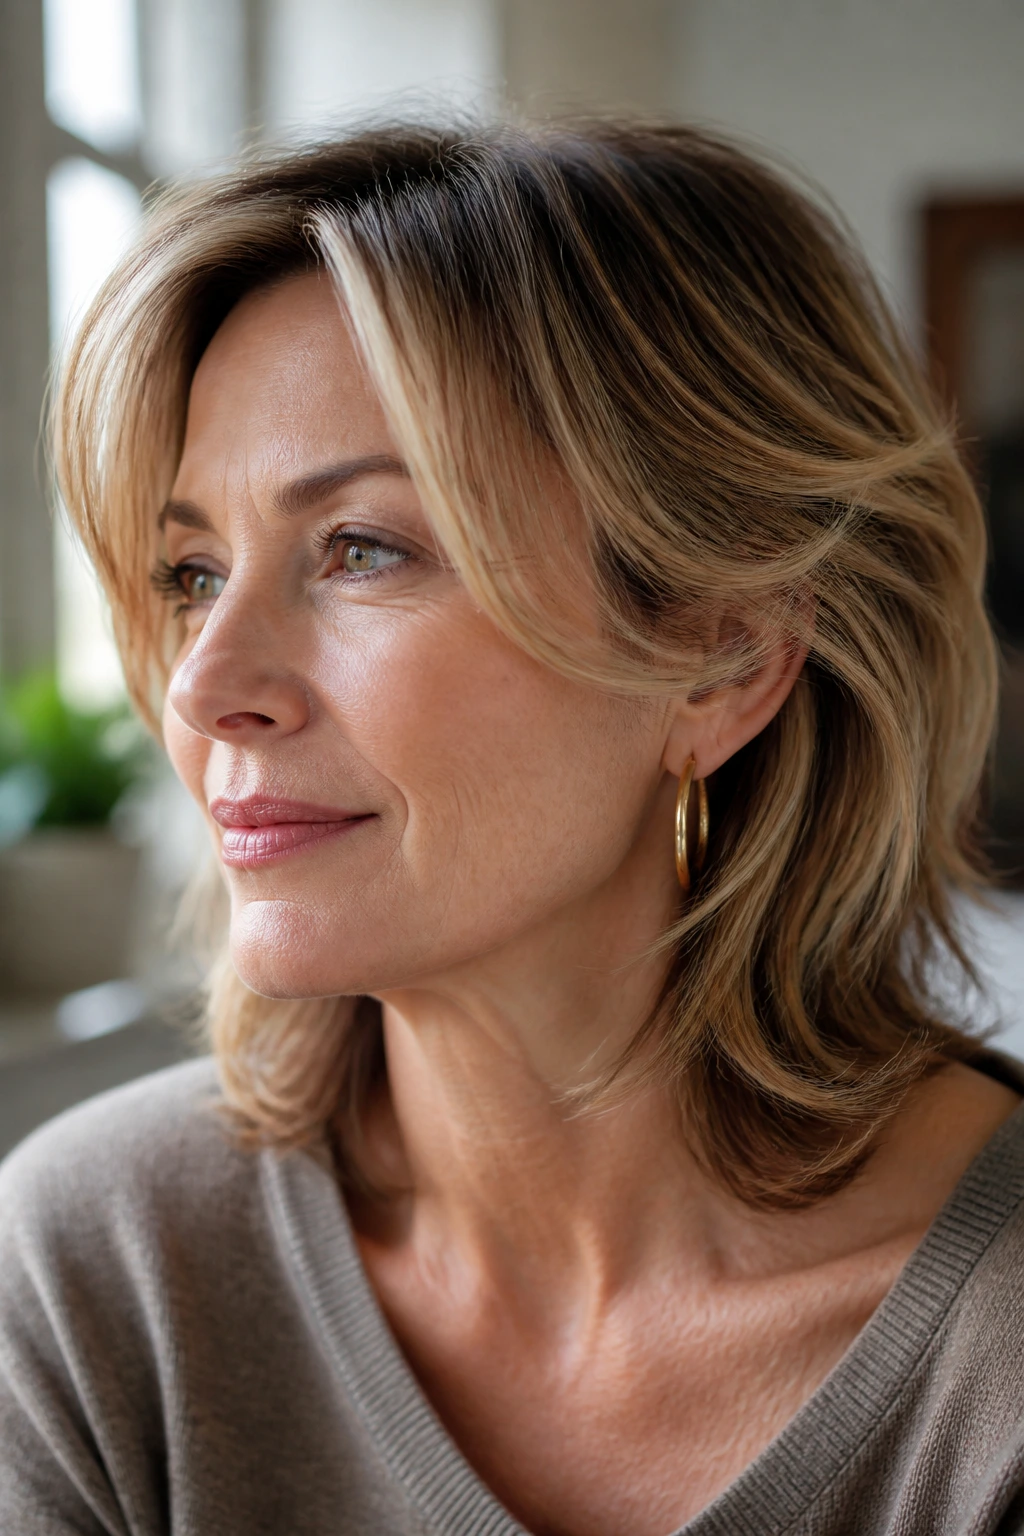
Volume Boost: Lift the roots with mousse or a root spray before drying, then clip the crown for 5 to 10 minutes while it cools. That tiny pause can keep the shape from collapsing an hour later.
Face Softening: Ask for the front layers to start where your cheekbone or jaw actually sits, not where someone thinks it should be. The wrong starting point is why some cuts look detached.
Shine Fix: On gray or highlighted hair, a drop of lightweight serum on the last inch of hair gives the ends a smoother finish. Keep it off the roots.
Make-It-Yours: If you wear your hair up often, keep the shortest face-framing pieces long enough to tuck behind the ear. If you love clips and headbands, avoid bangs that are too short to cooperate.
Common Mistakes That Flatten the Shape
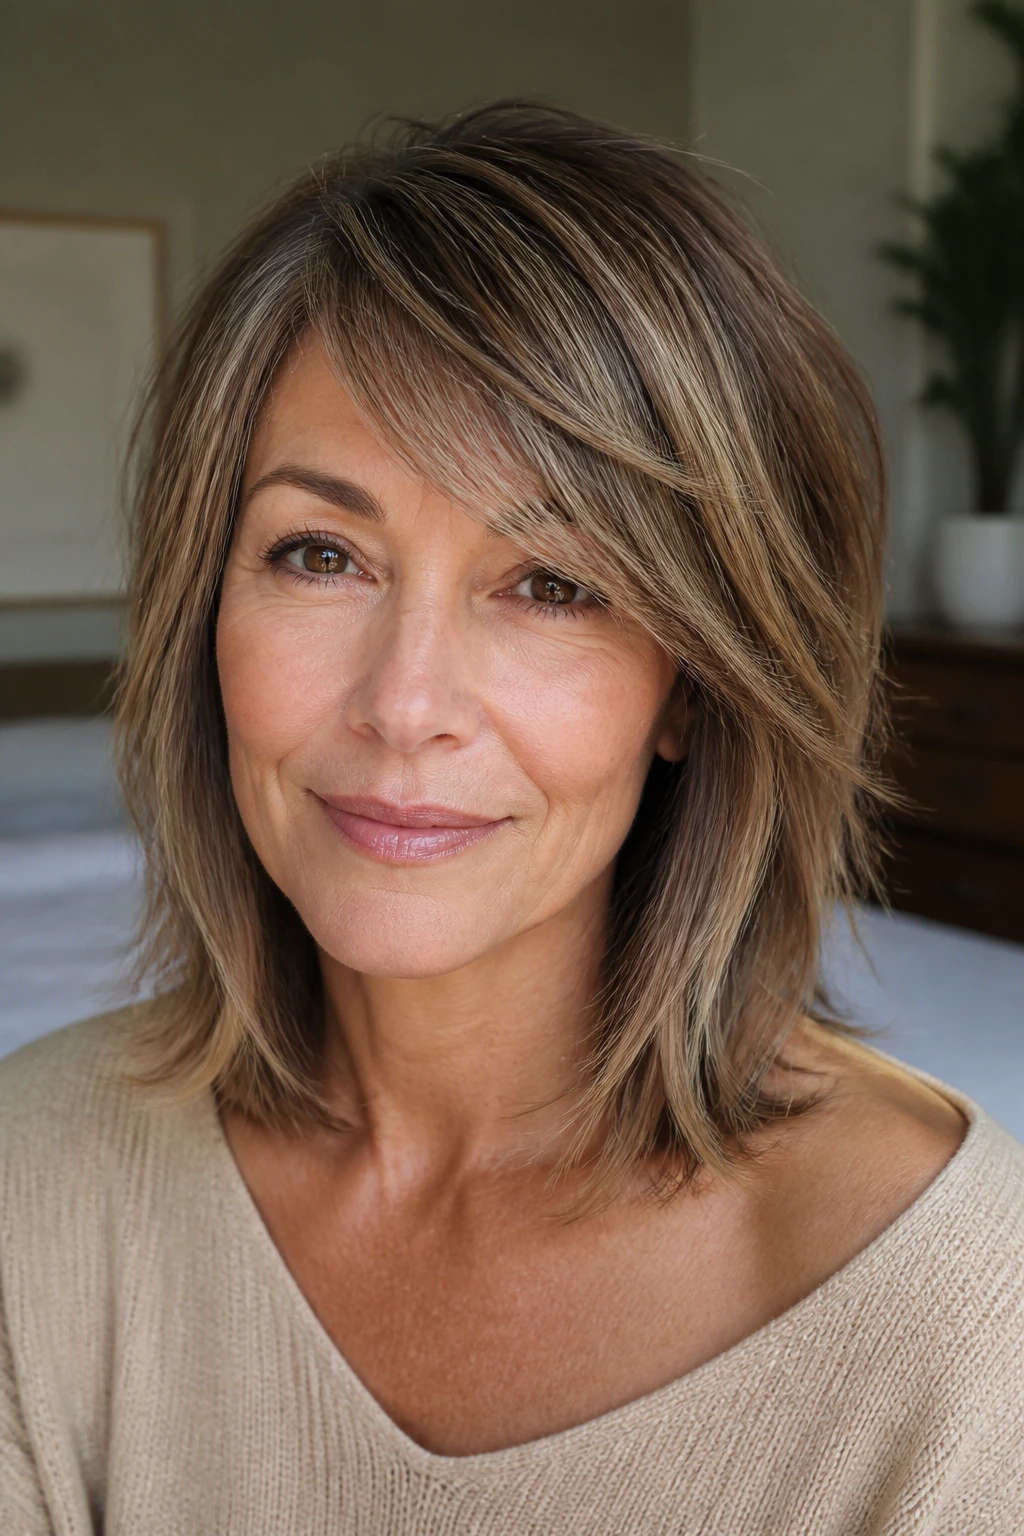
The biggest mistake is starting the layers too high. The haircut may look lively in the chair and then go fluffy and thin at the ends once you style it at home. The fix is simple: ask where the shortest layer will fall when the hair is dry and combed into place.
A second problem is over-texturizing thick hair. That usually shows up as frizz, gaps, or ends that refuse to sit together. Thick hair needs shaping, not shredding. Internal layers and careful point-cutting beat aggressive thinning almost every time.
Another one: choosing bangs without thinking about your daily routine. Straight fringes need upkeep. If you don’t want that, side-swept or curtain-style pieces are far easier to live with. The haircut should work on a Tuesday morning, not only on the day you leave the salon.
And yes, too much product can kill a good layer cut. Heavy oils, thick creams, and too much spray at the roots drag the shape down. Use less than you think you need, then add a touch more only where the hair actually misbehaves.
Ways to Make the Shape Your Own
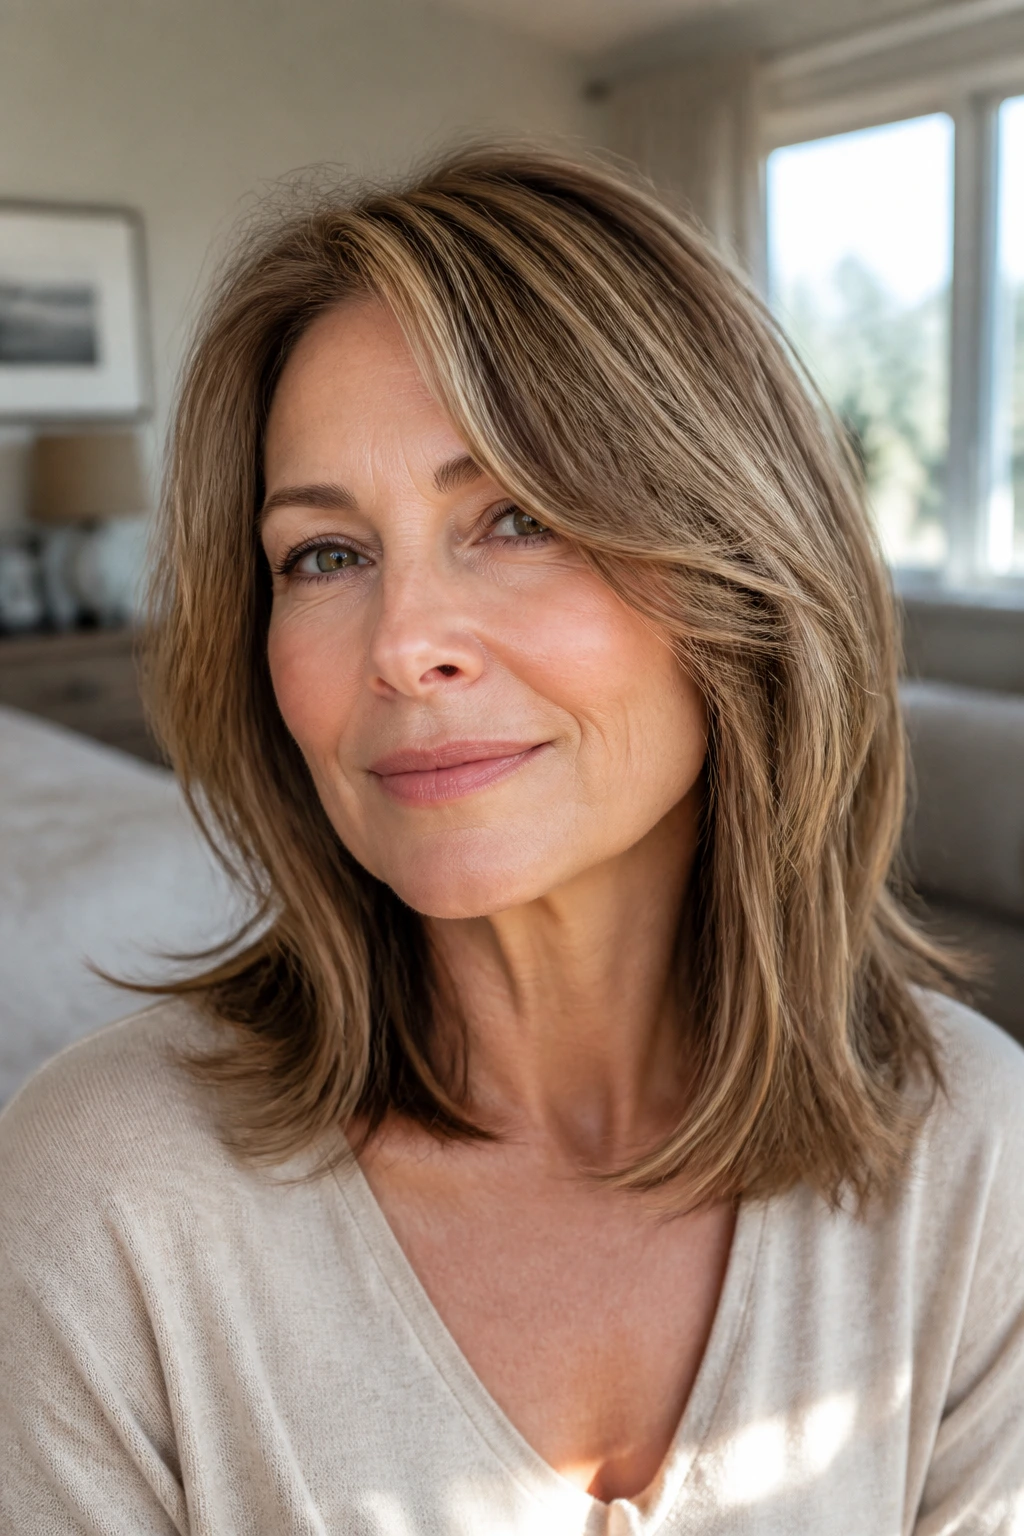
Soft and Fine-Friendly: Keep the perimeter blunt, use longer layers, and choose a side sweep or center part depending on which side has more lift. This is the safest route if thin ends worry you.
Curly and Airy: Go for invisible or dry-cut layers that follow the curl pattern. A diffuser and a curl cream will do more than a round brush ever could.
Polished and Low-Fuss: Ask for blended layers with a smooth outline, then style with a medium round brush and a light shine cream. It’s neat without feeling stiff.
Low-Maintenance Grow-Out: Keep the front pieces long, avoid very short crown layers, and steer clear of blunt bangs. This gives you a cut that doesn’t fall apart between appointments.
Gray-First Shape: Let the layers show movement, not color contrast. Soft blending and a glossy finish make silver hair look intentional without going shiny in a plastic way.
Questions People Ask Before They Book

Will layers make my hair look thinner?
Not if they’re cut with the right weight in the ends. Fine hair needs longer layers and a solid perimeter, while thick hair can handle more internal shaping. The problem usually isn’t layers themselves; it’s too many short ones in the wrong place.
How often should I trim a medium-length layered cut?
Most shapes hold up for 6 to 8 weeks if you want them neat. If you’re okay with a softer grow-out, 8 to 12 weeks can work, especially for cuts with longer front pieces or blended layers.
Are layers a bad idea if my hair is curly?
No. Curly hair often needs layers to keep it from puffing into a triangle. The key is cutting for the curl pattern, preferably when the hair is dry or nearly dry so the final shape makes sense.
Can I keep wearing my hair straight with layers?
Absolutely. Straight styling shows off the layer pattern more clearly, especially in feathered lobs, hidden internal layers, and glossy blowout cuts. Just keep the ends healthy, because straight hair does not hide damage.
What should I avoid if my crown is flat?
Avoid long, heavy one-length cuts and heavy oils near the roots. Ask for crown lift through layering and use a small amount of mousse or root spray before drying.
Do bangs make medium-length hair harder to maintain?
They can, but not all bangs behave the same. Side-swept bangs and bottleneck bangs are far easier than blunt fringe if you want a lighter maintenance load.
How do I explain the cut to a stylist without sounding picky?
Bring one or two reference photos, then name the parts you like: the fringe, the length, the volume, or the texture. Say how you style your hair on a normal day. That gives the stylist more useful information than saying you want it “better.”
What if my layers start flipping in weird directions?
That usually means the shortest pieces landed in a spot your hair doesn’t love. A small trim can correct it, but a smoother blow-dry with a round brush and a little tension may settle it enough in the meantime.
A Cut That Keeps Moving
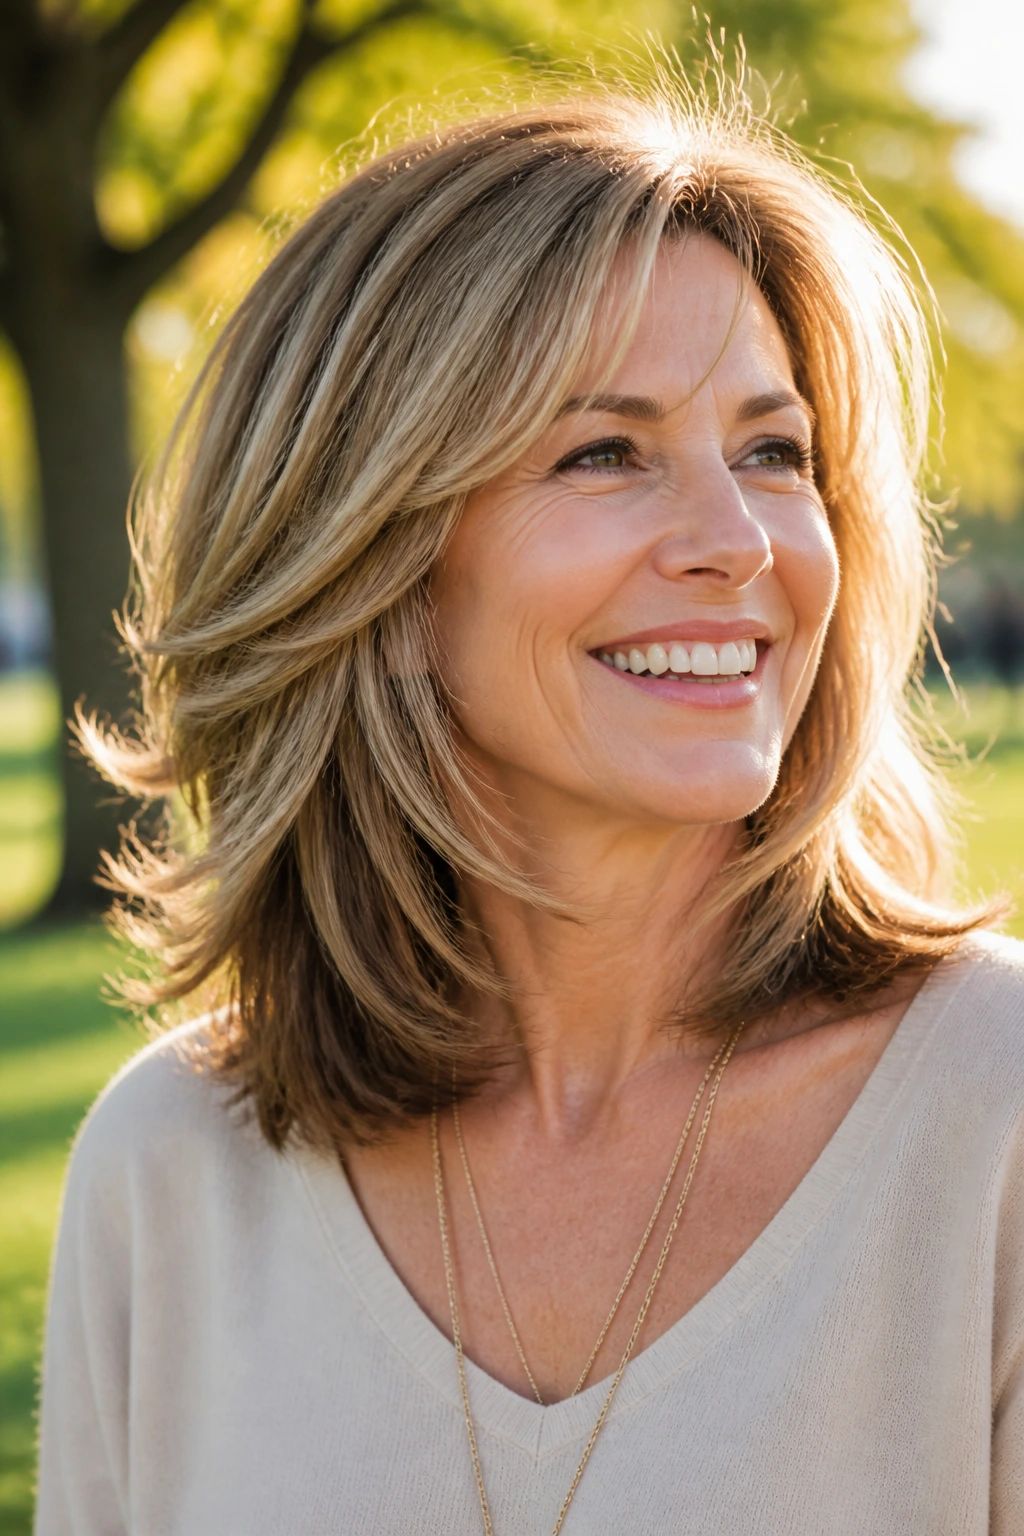
The best medium-length layered cut does not need to shout. It just needs to sit well, move when you move, and still look like itself when you skip a perfect styling day. That’s the real strength of the shapes above: they solve different problems without turning the haircut into a project.
If you’re ready for a change, bring a photo or two, mention how your hair behaves when nobody is watching, and ask for the layer pattern that fits that version of the truth. The right cut will make itself known the first time you run your fingers through it.
