



Face-framing layers for long hair can fix a problem that plain long lengths create all the time: the face gets swallowed by hair that hangs in one heavy sheet from temples to chest. The right front pieces change that immediately. They open the cheek area, loosen a blunt part line, and keep long hair from reading like a solid block.
The tricky part is that the phrase sounds simple, but the cut is all about placement. A piece that lands at the chin behaves very differently from one that starts at the lip or the collarbone. Add waves, a round-brush bend, or a straight blowout, and the whole shape shifts again. That’s why this haircut family has so many versions. One size never fits all here.
I keep coming back to this kind of cut because it gives you movement without forcing you into bangs. You keep the length, the ponytail, the braid, the claw clip. What changes is the way the front falls around your face, and that tiny change can make the whole haircut feel lighter, cleaner, and far more deliberate.
Why This Collection Feels Different
-
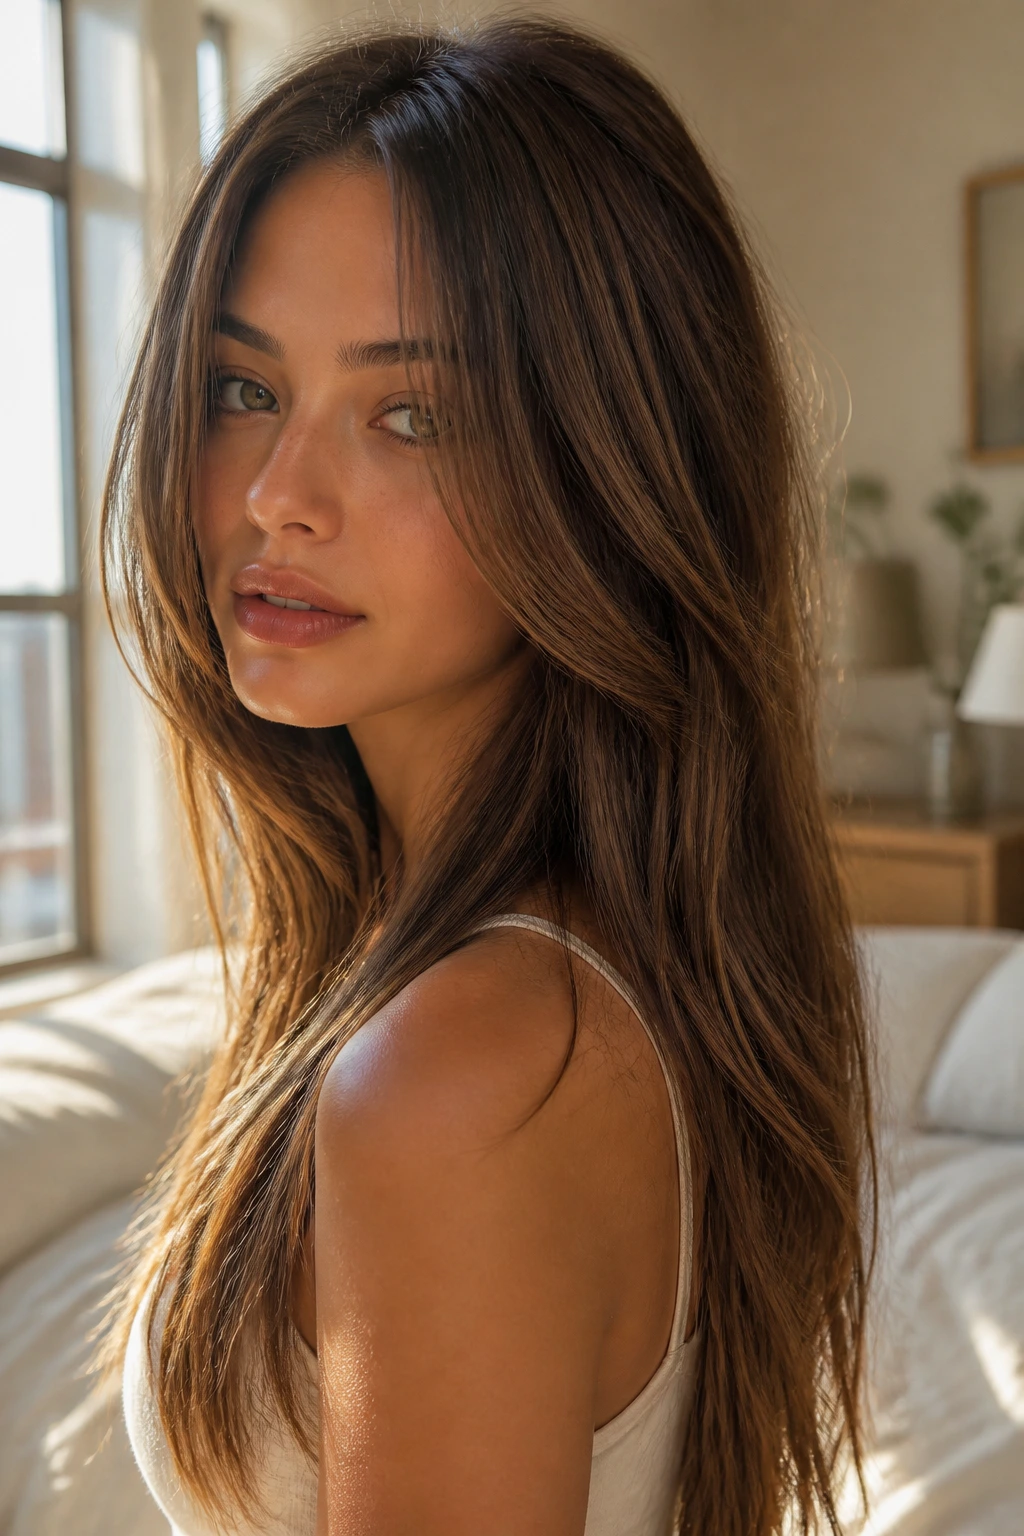
Length stays where you want it: The back can remain long and dramatic while the front pieces land at the chin, lip, or collarbone to stop the face from getting boxed in.
-
Texture changes the result: The same front layer can look soft on waves, sharp on straight hair, and airy on curls, which is why these examples cover several hair types.
-
The part line matters: Center parts, deep side parts, and soft off-center parts all change where the frame sits, so the cut needs to work with your daily part, not against it.
-
Bulk gets handled smartly: Thick hair needs weight removed near the front and temples, not random short layers that make the ends feel thin.
-
Grow-out is part of the plan: Softer versions slide into long layers later instead of turning into a weird shelf around the cheeks.
-
Styling changes the mood fast: A few minutes with a round brush, flat iron, or diffuser can push the same cut from polished to undone without another trip to the salon.
1. Chin-Grazing Curtain Pieces
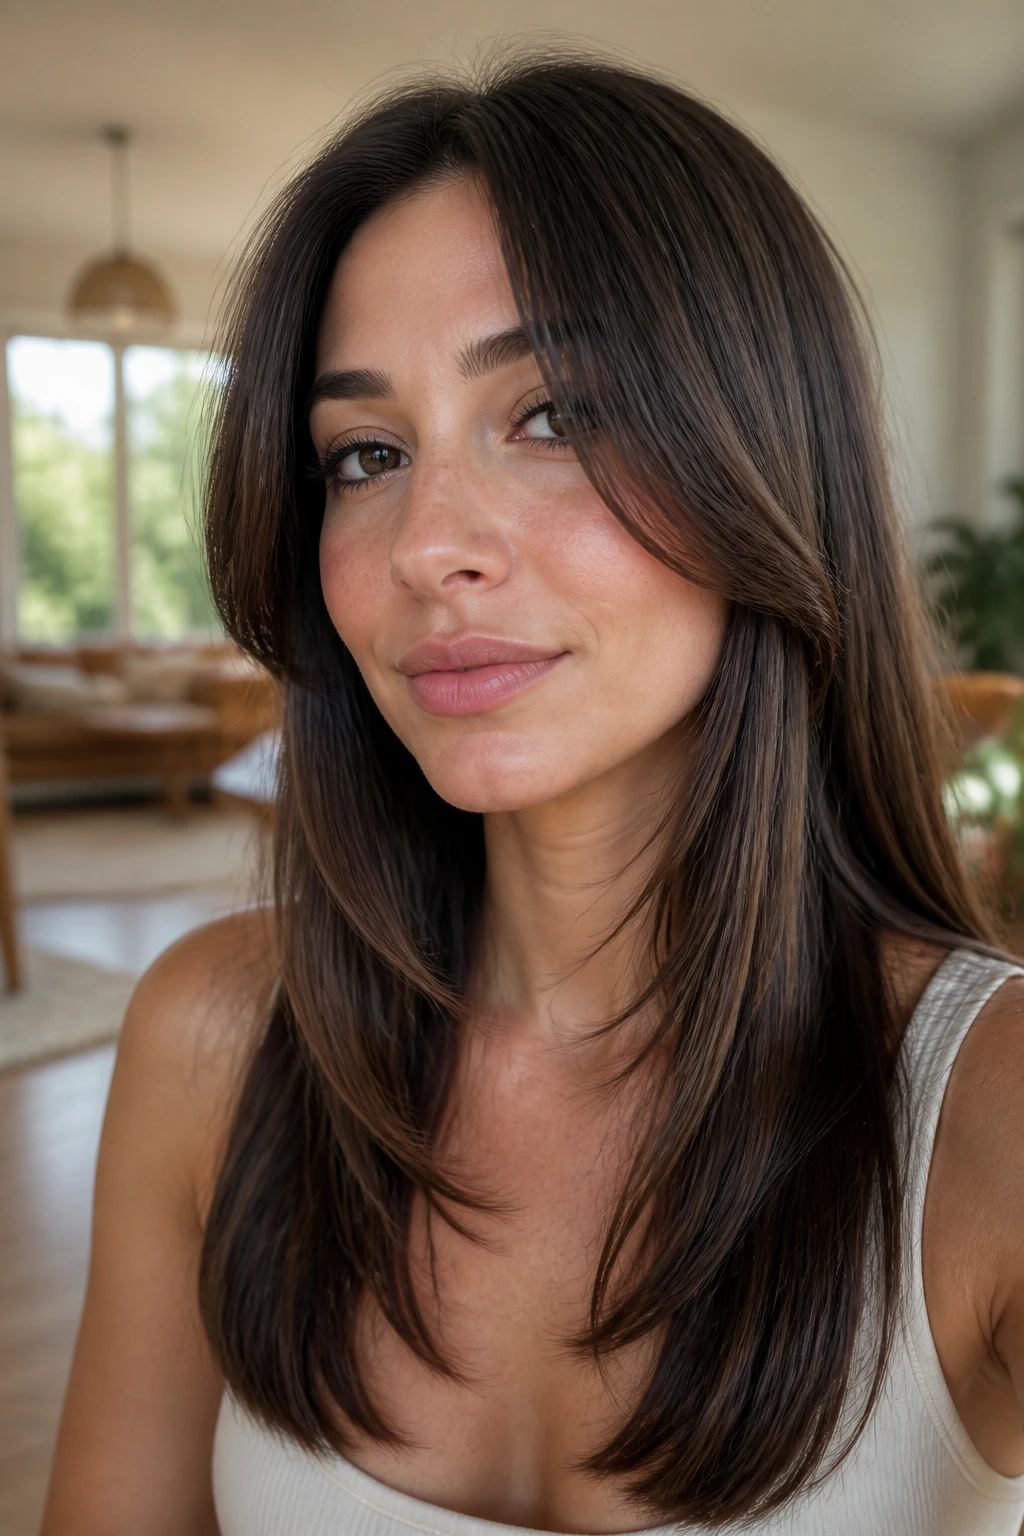
If you want movement without losing the feeling of long hair, start around the chin. That length opens the lower half of the face and gives the front enough swing to look intentional, not accidental. It also keeps the back length intact, which matters if you wear braids, ponytails, or low clips most days.
Ask for the shortest piece to land right at the chin, then let the layers taper longer toward the collarbone. The point is softness, not a sharp shelf. On center-part hair, this version reads calm and balanced; on wavy hair, it falls with a loose bend that feels easy rather than styled to death. It’s one of the safest first steps if you’ve never had face-framing layers before.
2. Lip-Level Face Sweep

Why do some front layers make the face look more awake? Usually because they hit at the lip, which is a useful landmark for opening the center of the face without chopping the hair too high. This version gives you a little more drama than a chin piece, but it still keeps the length connected.
I like it on long hair with a soft wave because the front strands fold around the cheek and mouth instead of hanging straight like ribbons. Ask your stylist to keep the line clean and gradual so the front doesn’t split into two separate chunks once it dries. If you tuck one side behind your ear, the sweep still shows. That’s the nice part. It behaves.
3. Cheekbone Lift Layers
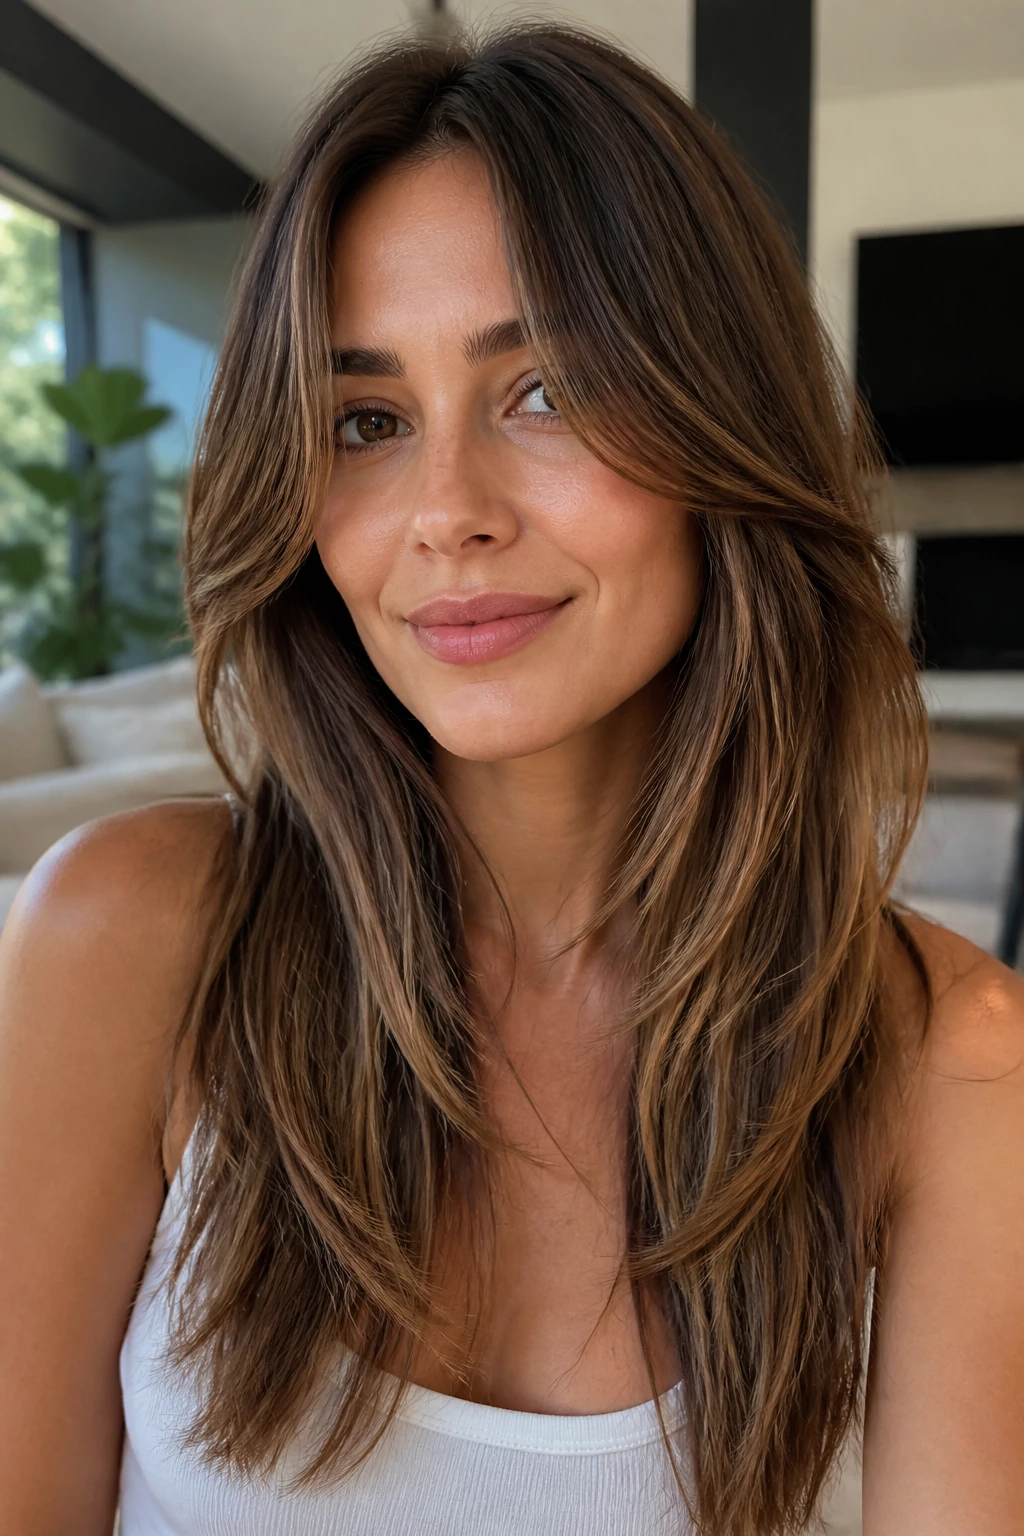
Picture the front pieces lifting right where the cheekbone starts. That’s the whole idea here. The shortest layer lands high enough to open the eyes, but not so high that it starts acting like fringe. On long hair, that balance matters more than people think.
This cut works especially well if you like a round-brush blowout or a loose curling-iron bend. The front has something to catch on, which makes the cheek area look sharper without losing softness. If your cheekbones are one of your best features, this frame puts them in the front row without making the haircut loud.
4. Collarbone Drift Layers

This version is for someone who wants shape, not a statement. The front pieces begin near the collarbone and drift downward in a soft taper, so the change feels like movement rather than a visible haircut. It’s a quiet cut, and that’s exactly why it works.
Long hair can start to feel heavy near the face, even when the back looks healthy and full. Collarbone layers solve that without removing much length. They’re also friendly to half-up styles, because the front still leaves enough hair to pull back while keeping a little movement loose around the cheeks.
5. Bottleneck Frame Blend
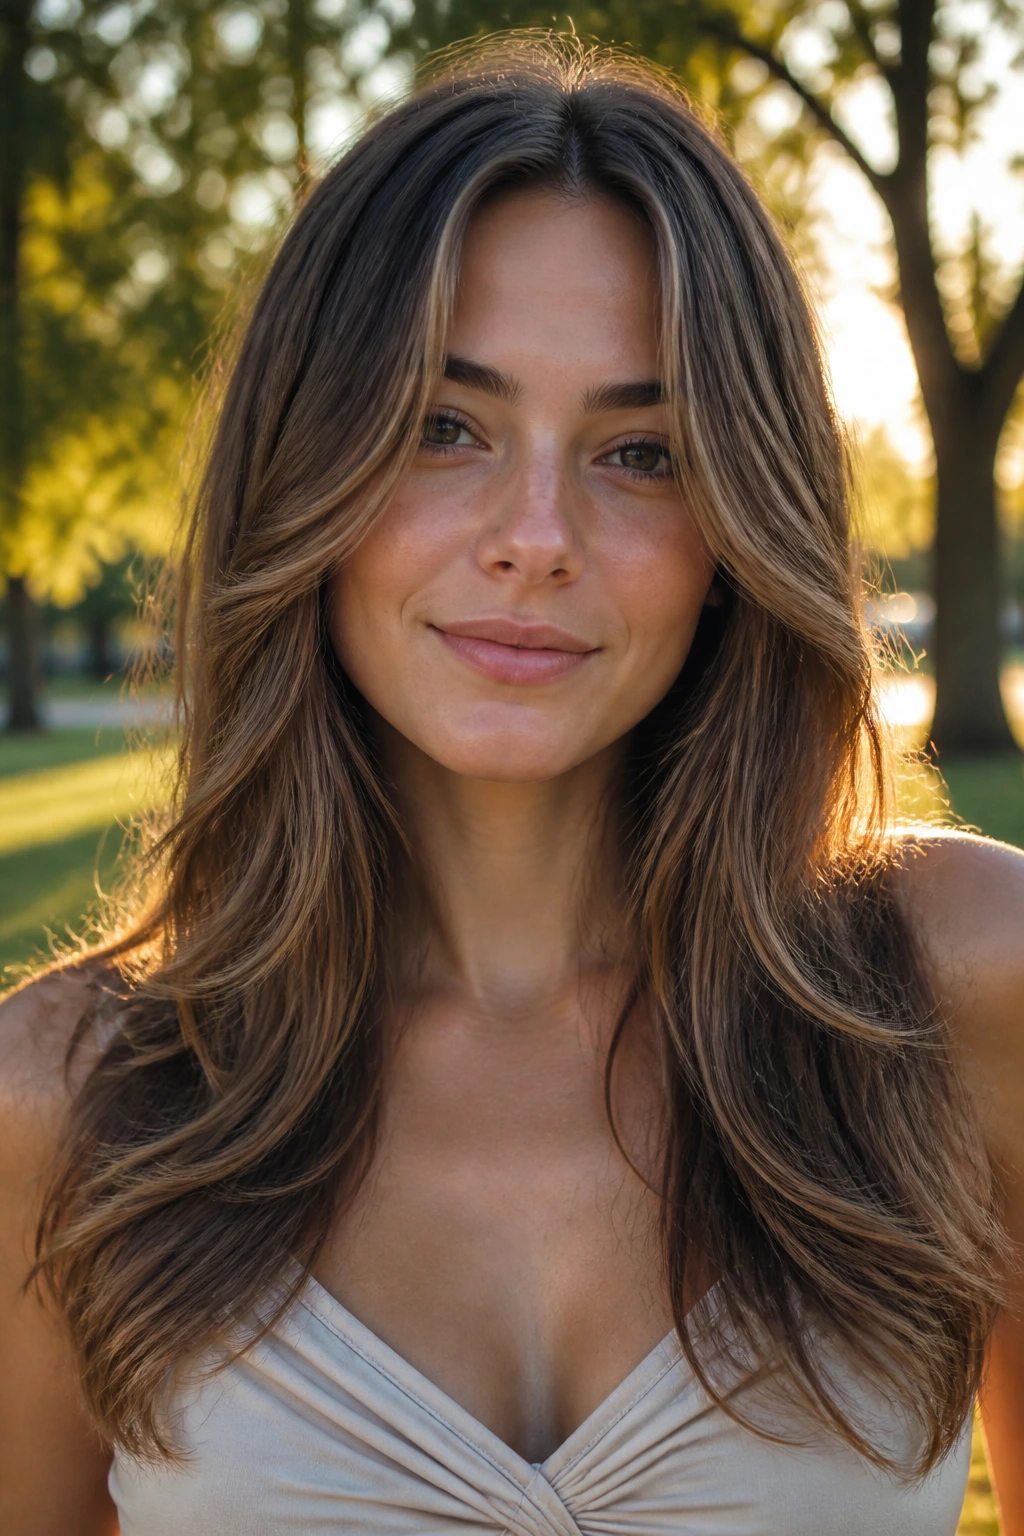
This is the one I reach for when someone wants a bit of fashion-editor edge without committing to bangs. The center front starts shorter, then widens as it drops toward the cheeks and collarbone, creating that narrowed-middle, wider-outer shape people keep screenshotting.
- The center pieces open the eyes.
- The wider sides soften the jaw.
- A center part makes the shape feel balanced.
- A side part tilts it more dramatically.
If your hair is thick, this frame helps the front stop feeling boxy. If your hair is fine, keep the taper gentle so the ends don’t go stringy. It grows out better than a sharp fringe, too. That matters more than most people admit.
6. Butterfly Front Layers
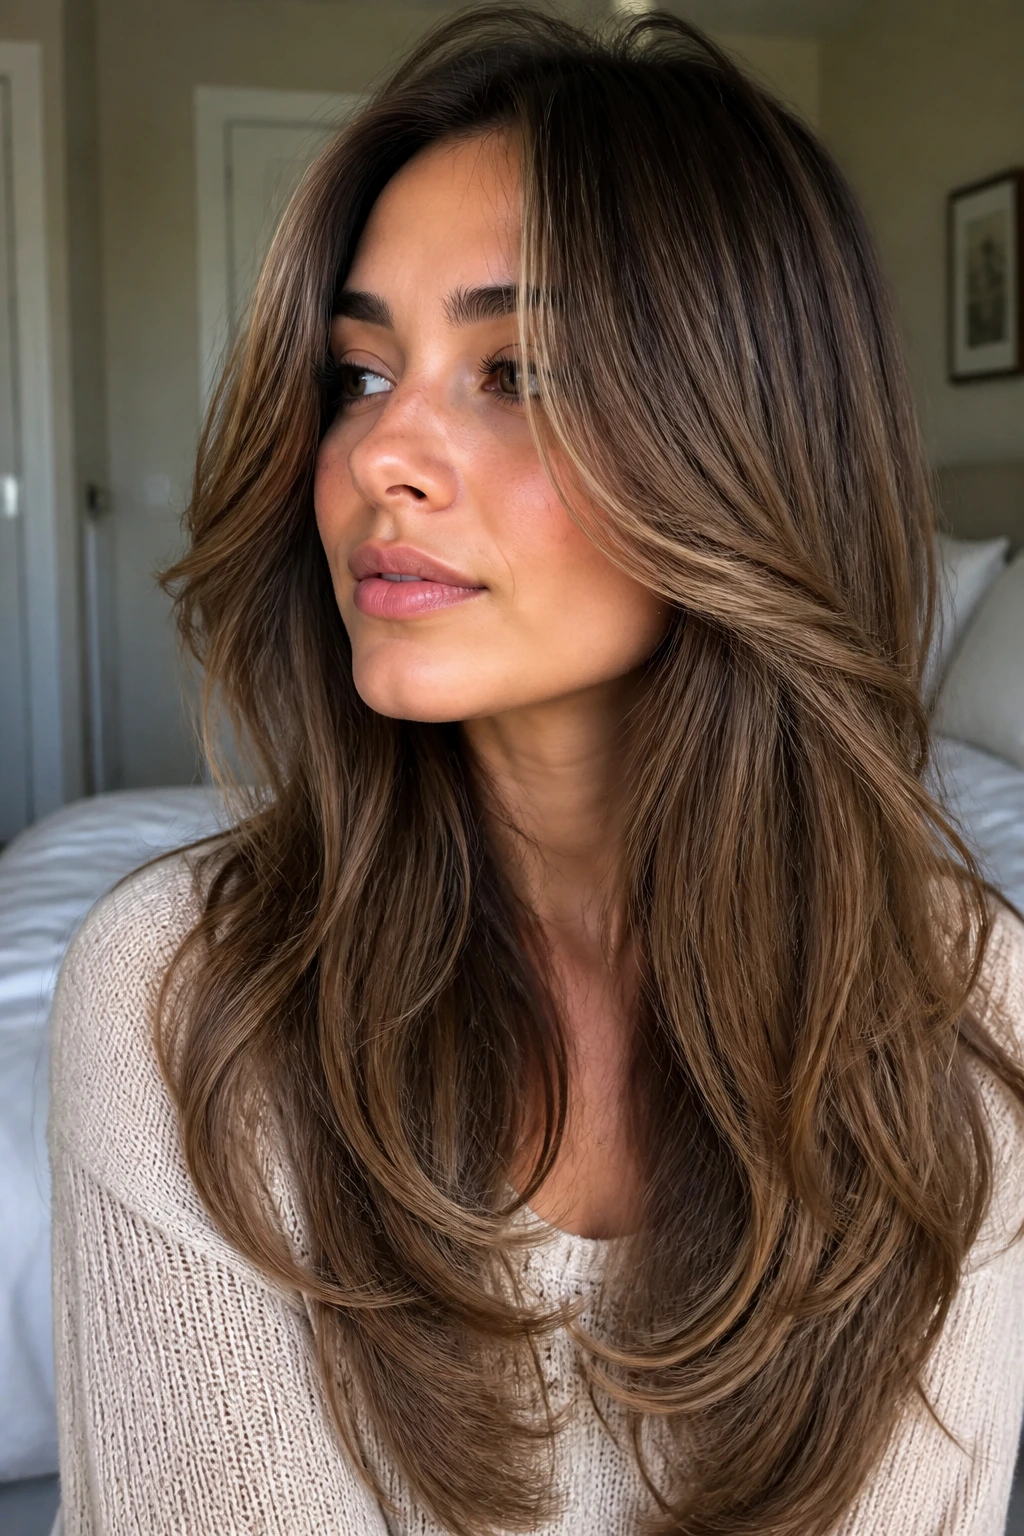
Big hair can swallow timid layers. The butterfly front fixes that by starting with noticeable movement near the cheekbone and then falling into much longer sections through the chest and sides. It gives the front a lifted look while the back keeps its full length and swing.
This one loves a round brush. Blow-dry the front away from the face first, then curve the ends inward so the shape opens the cheeks instead of sitting flat on them. On straight hair, a little internal texture keeps the front from collapsing by noon. On thicker hair, it cuts the heaviness without sacrificing body.
7. Rounded U-Frame Layers
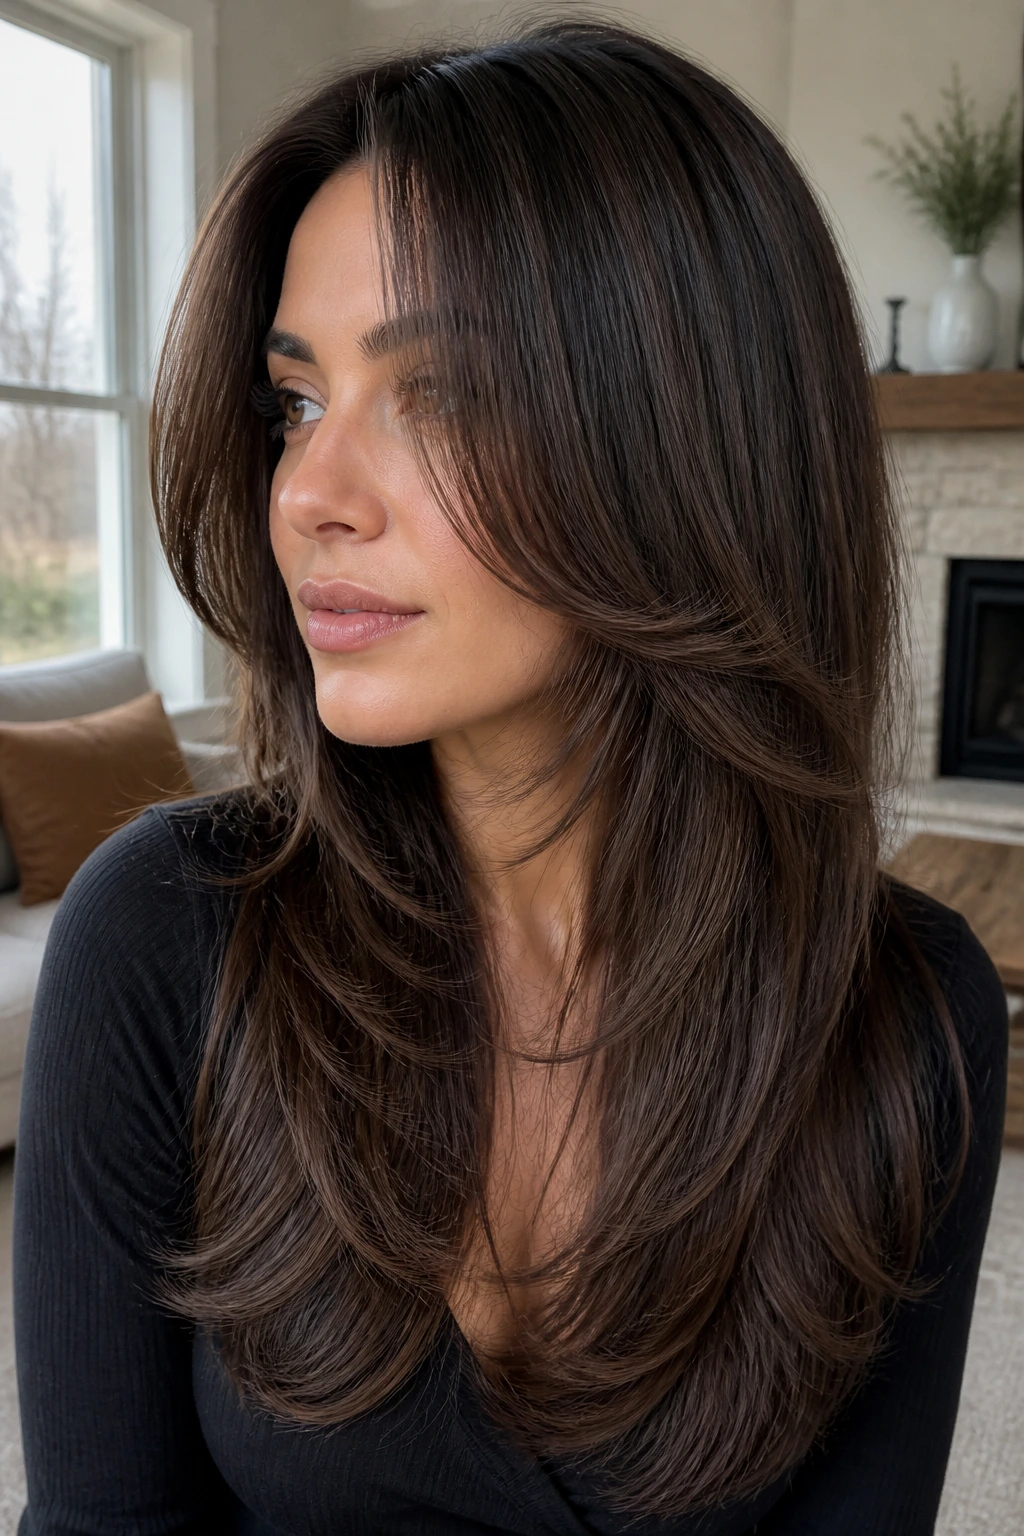
A rounded U keeps the outline soft from top to bottom. The back follows a gentle arc, and the front pieces move with that same curve, which is easier on the eye than a pointy, aggressive V if you prefer a smoother finish. It’s a good choice when you want the hair to look full at the ends.
Ask for the perimeter to stay strong, then have the front carved just enough to let light through around the face. The result feels like long hair with a better outline, not a stacked haircut. If you curl the front, the pieces fall into a clean bend instead of separating into little pieces.
8. Side-Part Cascade Layers
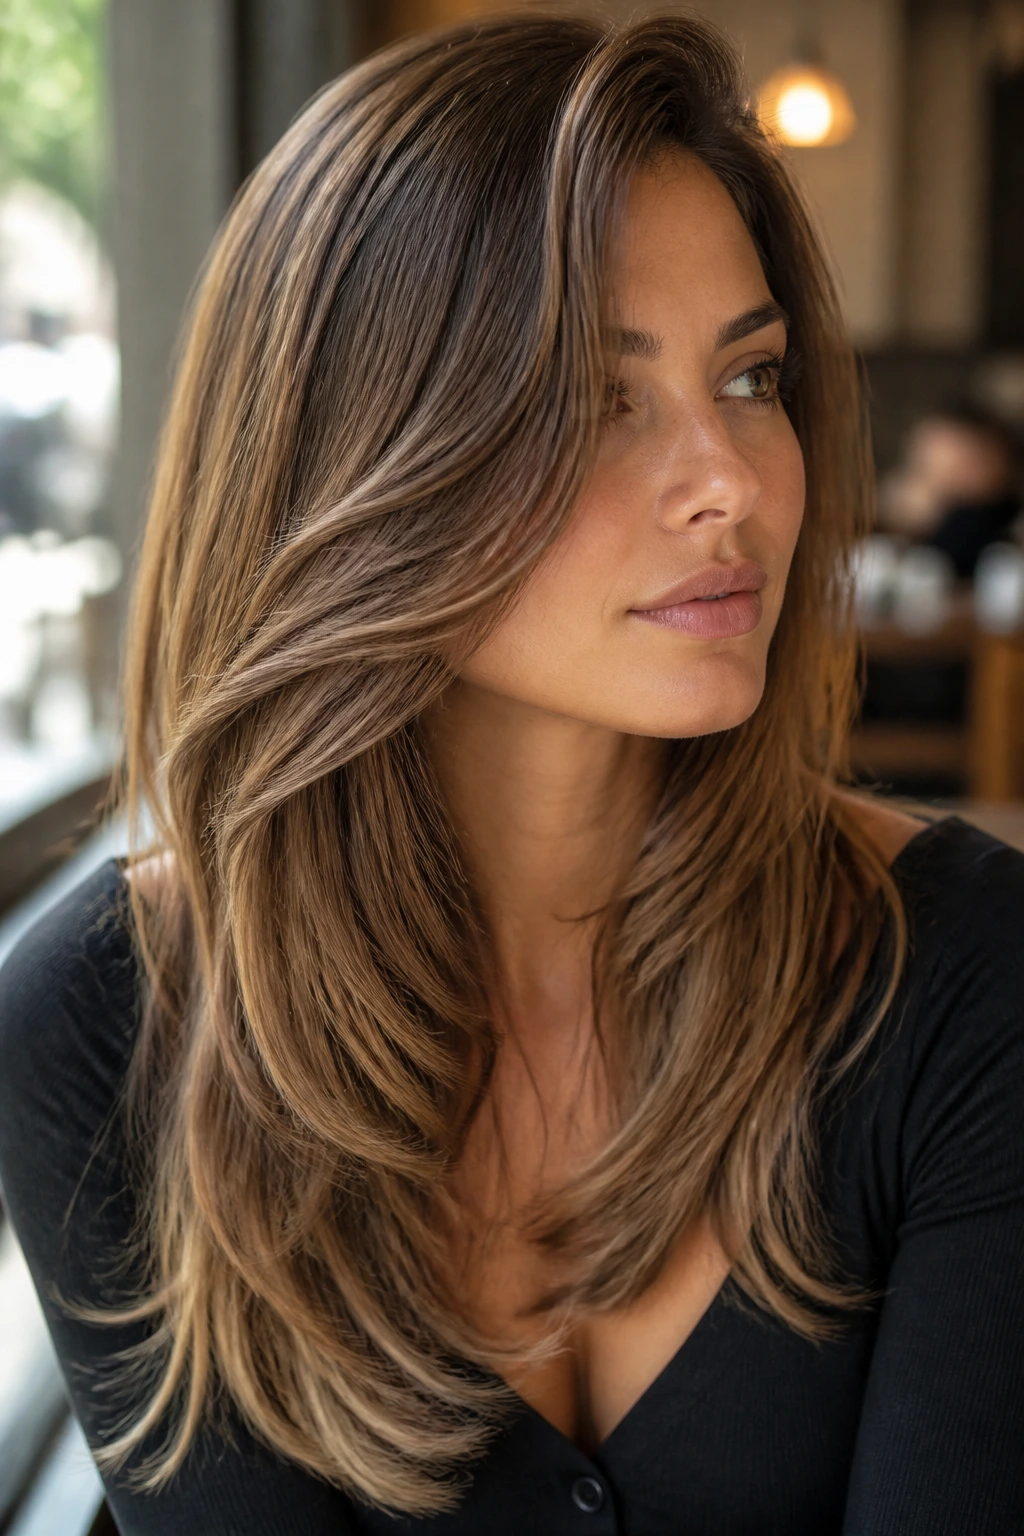
A side part changes the whole story, especially on long hair. When the front pieces start near the part and sweep down across the cheek, the haircut gets a natural direction that can make the face look longer and the roots look fuller. It’s one of the easiest ways to keep long hair from feeling flat.
Keep the shortest strand long enough to clear the eyebrow line, then let it taper toward the chin or collarbone. That way the sweep moves with the part instead of fighting it. If your hair naturally wants to fall to one side, this cut stops that from looking lazy and makes it look deliberate instead.
9. Center-Part Veil Layers
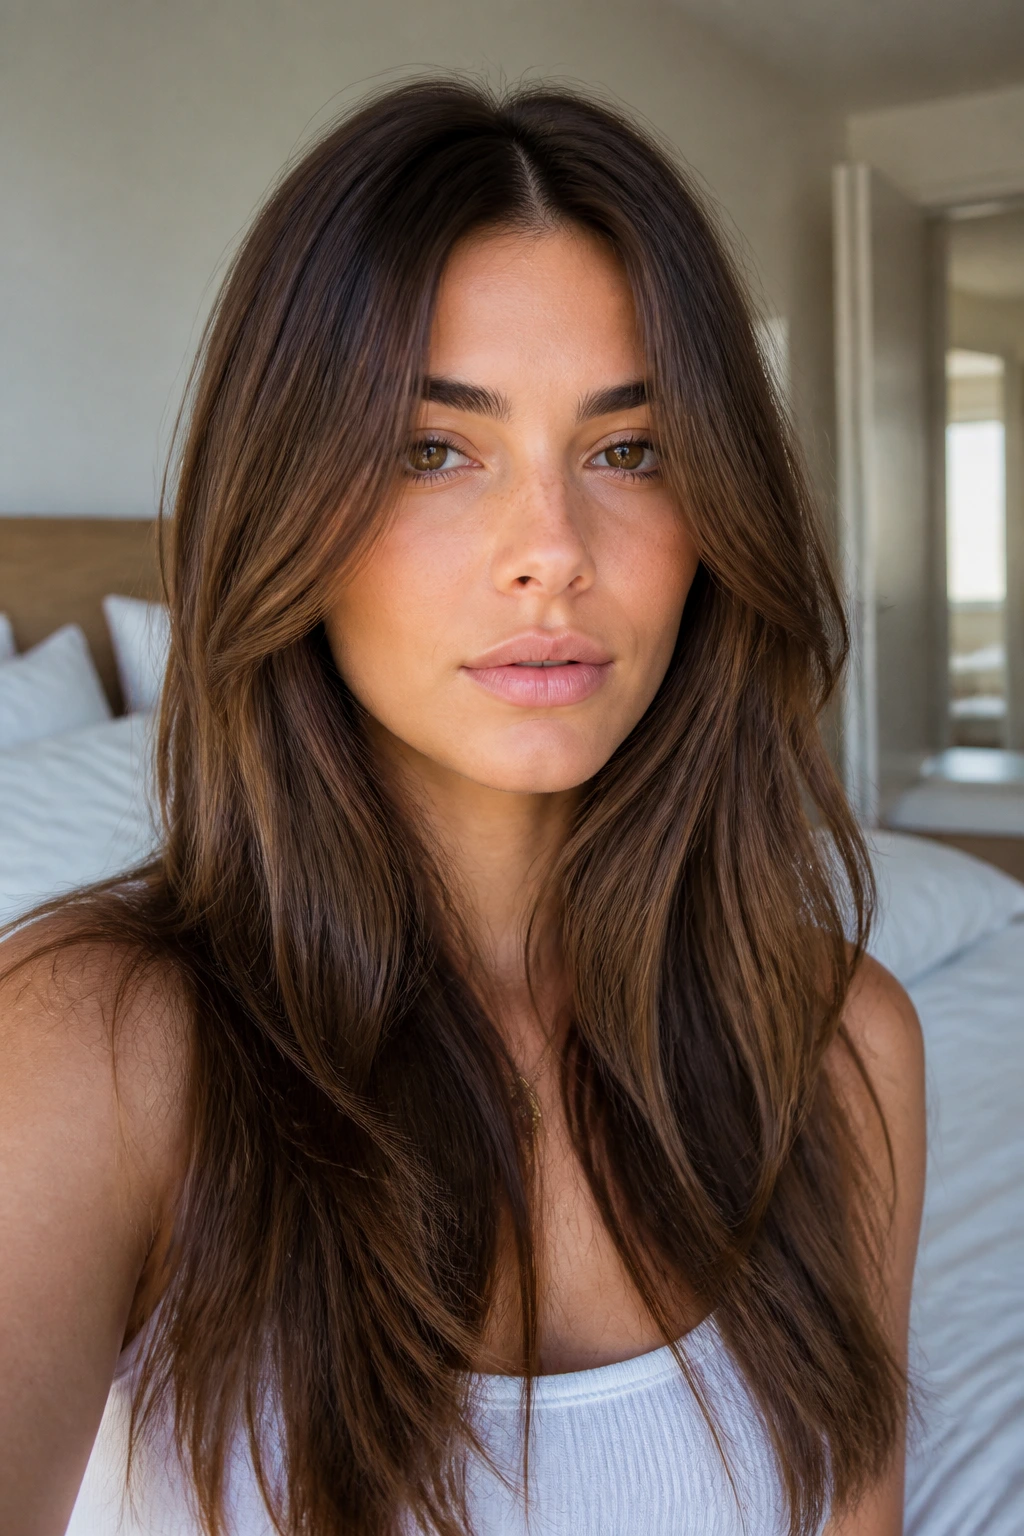
Center-part hair can look severe if the front is blunt. A veil layer softens that line without pretending to be bangs. The strands stay long, light, and a little transparent, which is why this version looks so good on straight or slightly wavy hair.
The front pieces should skim the cheek and disappear into the chest length rather than ending in a hard block. That keeps the cut calm and easy to tuck behind the ears or pin back on rushed days. If your hair is thick, a little internal reduction helps the veil move instead of hanging like a curtain.
10. Invisible Interior Layers
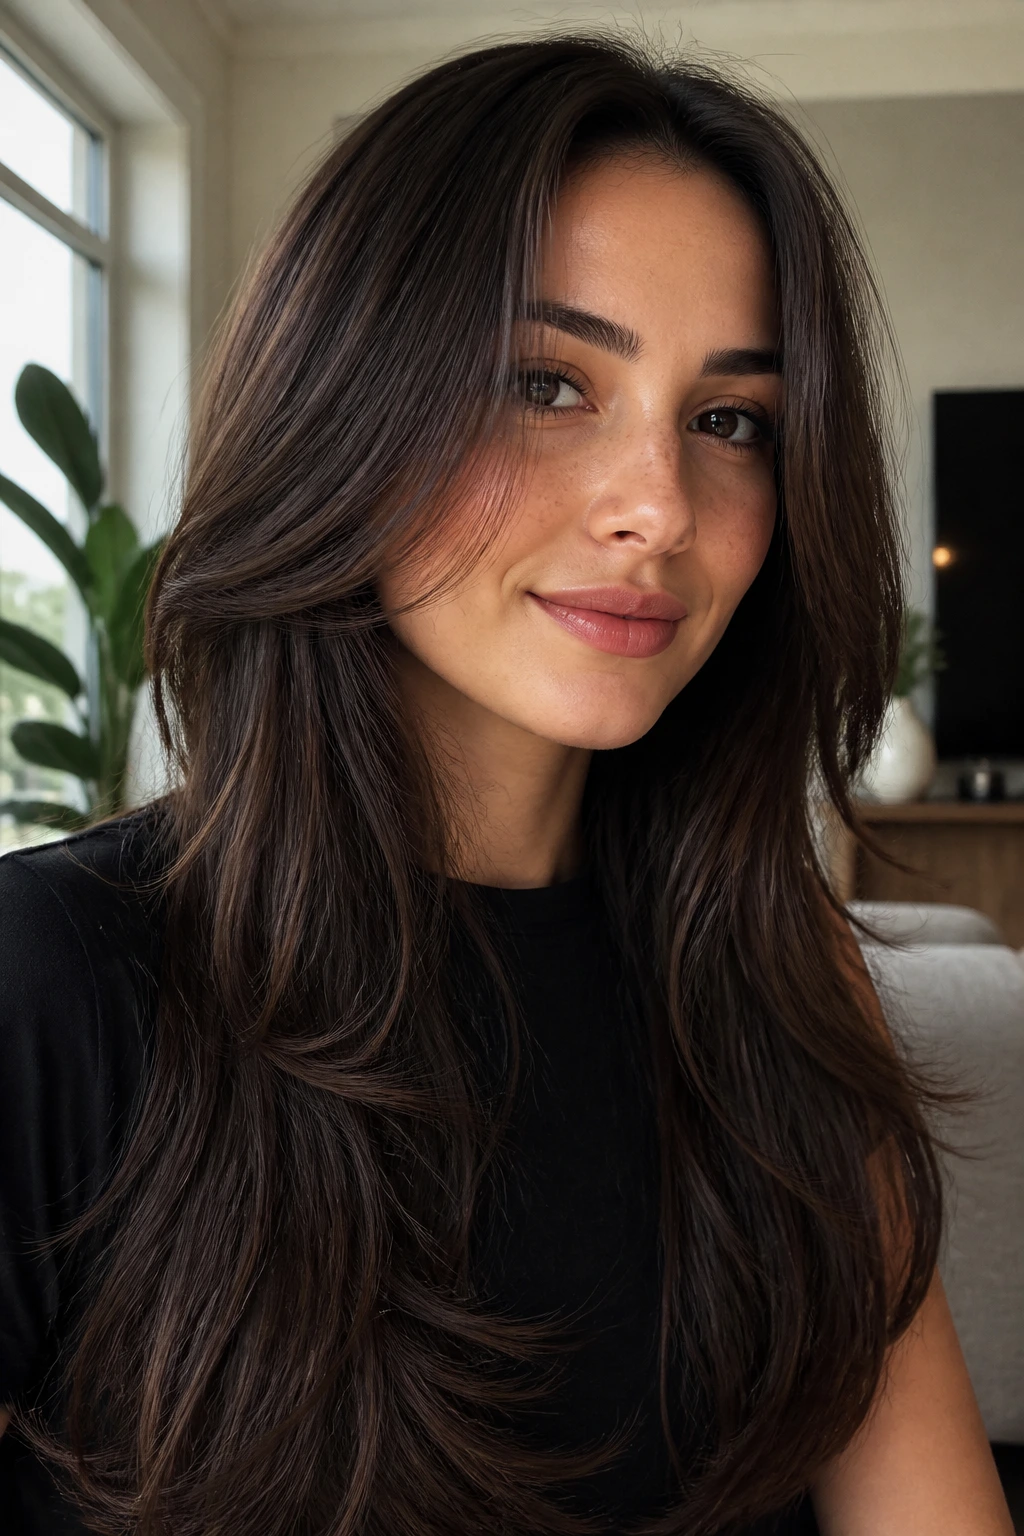
Not every frame needs to announce itself. Invisible interior layers hide most of the action inside the haircut, so the front still falls softly around the face but the step lines stay subtle. If you like long hair that moves when you turn your head, but never looks chopped, this is a smart place to land.
This version is especially good for people who wear their hair both loose and half up. The outline stays full, but the front has enough bend to keep the cheeks from feeling boxed in. Tell your stylist you want shape you can feel more than shape you can spot from across the room. That phrase usually gets better results than asking for “a lot of layers,” which is how people end up with a haircut they didn’t mean to order.
11. Razor-Soft Ribbons
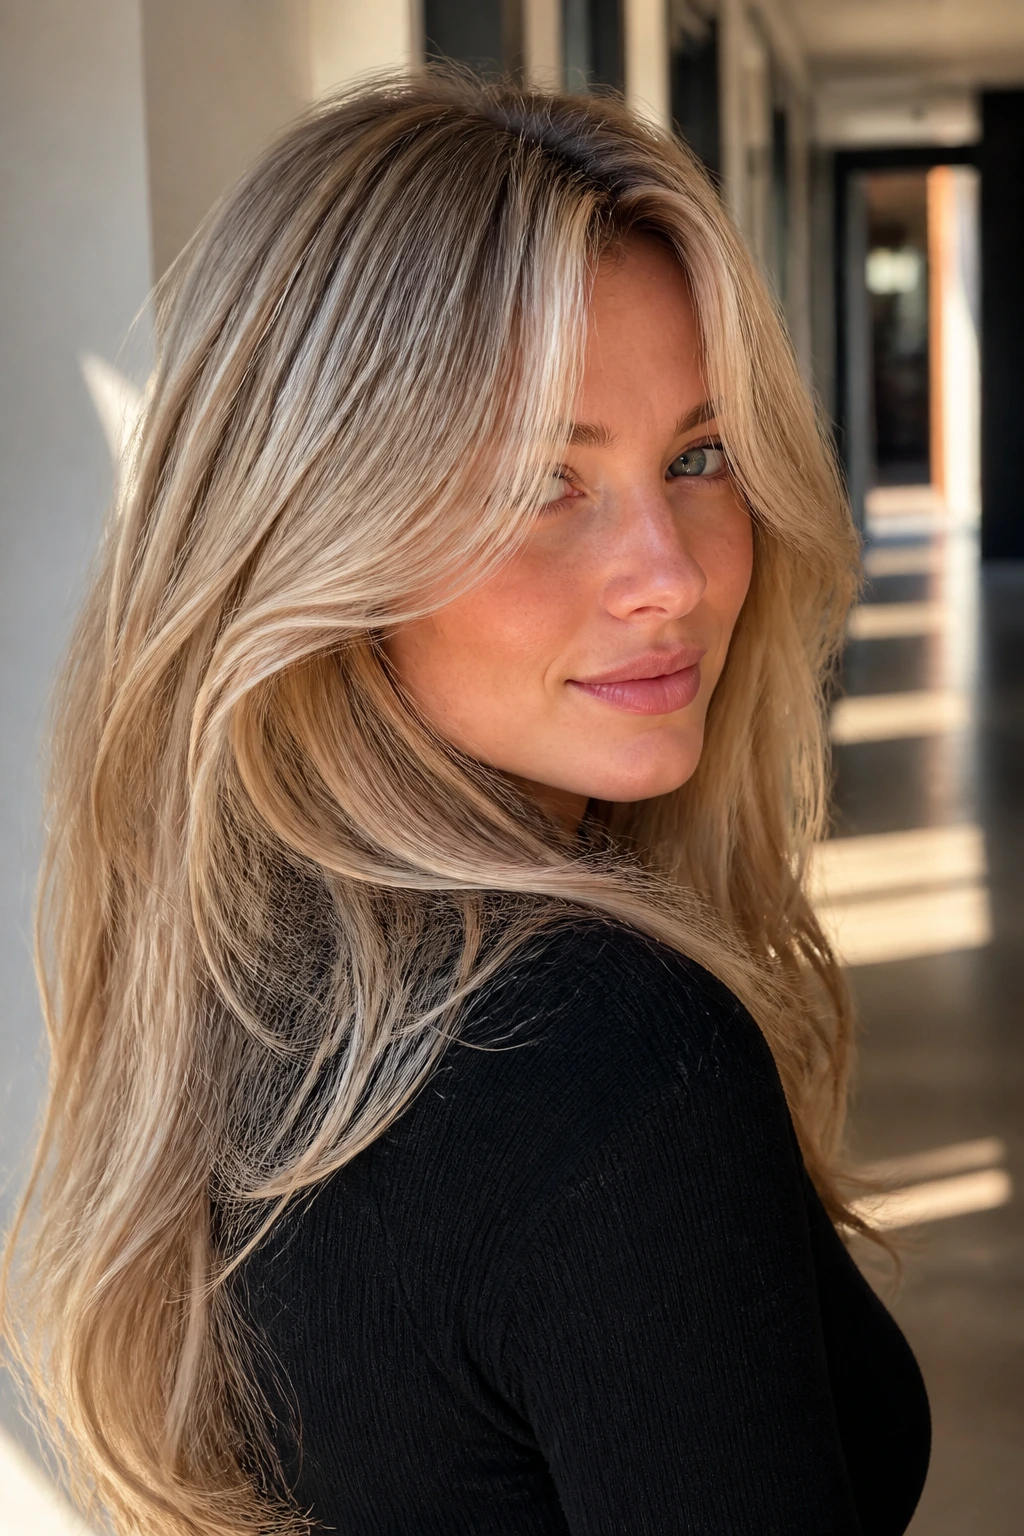
A razor should be used lightly here, not aggressively. A little razor work on the front can create soft ribbons that move well on straight or slightly wavy hair, but the edges need to stay airy, not shredded. Think of the effect as a clean strip of silk, not torn fabric.
This version suits long hair that feels too blunt around the face but doesn’t need a lot of internal removal. If the hair is fine, keep the razor work minimal. If it’s thick, combine it with a longer taper so the front doesn’t puff. The payoff is a shape that flips easily with a curling iron and still settles flat when you skip styling.
12. Piecey Volume Layers
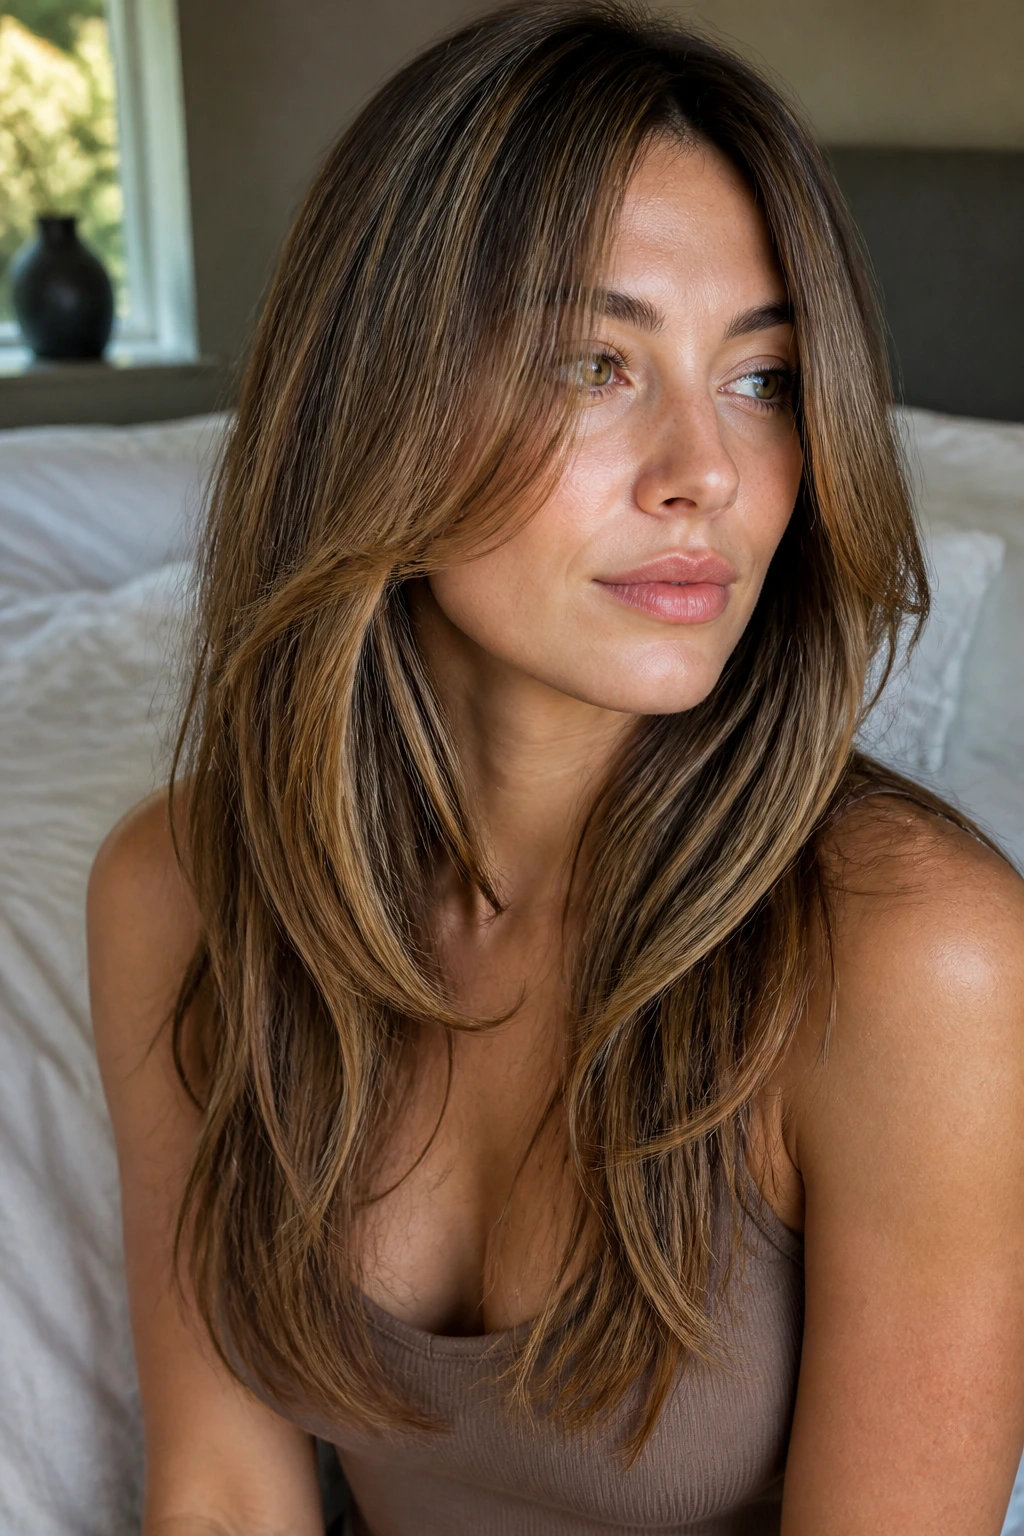
This one is for hair that wants lift, not fuss. The front pieces are cut so they separate into visible strands instead of blending into one soft sheet, which gives fine-to-medium hair a little more presence around the face. It looks especially good when the roots have a touch of mousse or root spray underneath.
- The shortest piece should land around the cheekbone or upper lip.
- Keep the ends slightly blunt so they don’t disappear.
- Use a round brush or large Velcro roller on the front only.
If you over-texturize this cut, it turns wispy fast. Keep the layers deliberate and you get swing without that over-thinned look that fine hair hates. It’s a neat trick. Small changes, big payoff.
13. Dense-Hair De-Bulk Frame
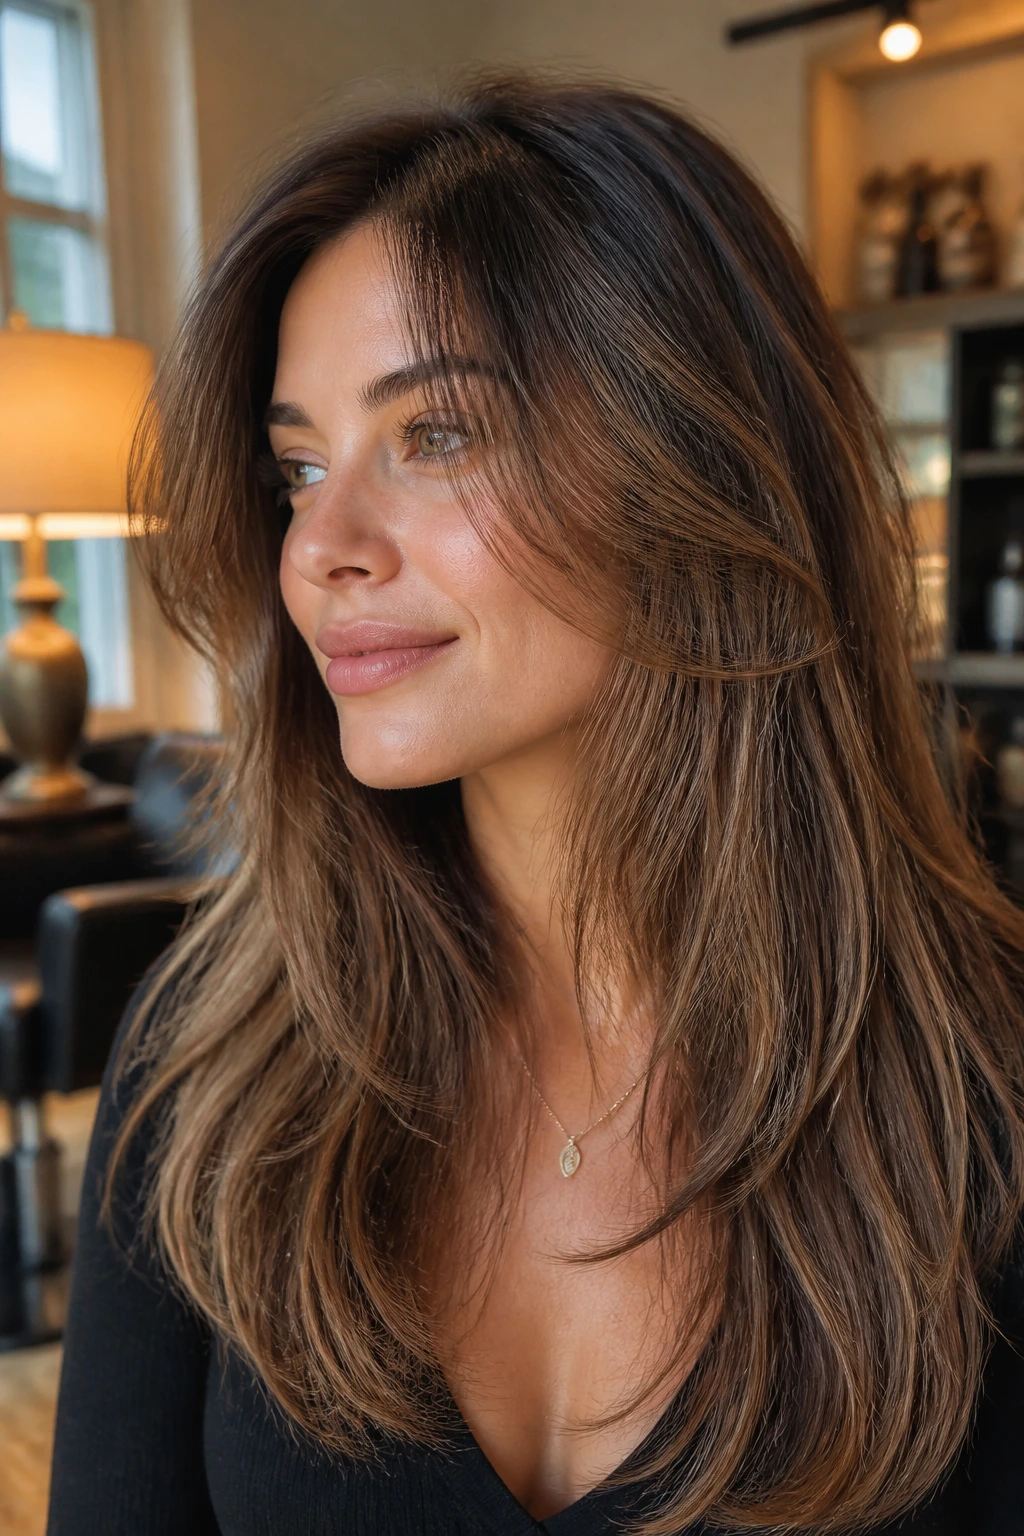
Heavy hair near the face can feel like a wool blanket in warm weather. A de-bulked frame removes weight from the temples, cheek area, and under the front panels so the hair still looks full but doesn’t sit like a wall. The best version keeps the perimeter strong and takes bulk from the inside.
This is the cut that makes long, thick hair easier to part, tuck, and curl. Without that front relief, even a good blowout can puff wide and then collapse. Ask for internal reduction rather than a ton of short layers; that wording tells a good stylist you want control, not feathered chaos. It also helps if your hair frizzes at the front first, because less bulk means less shape fighting you.
14. Curly Halo Layers
Curls need a different contract. A halo frame follows the way the curls spring around the face instead of forcing them into a straight plan that disappears once the hair dries. The front should usually be longer than you think, because curl shrinkage is not polite.
If your hair is curly, this is one of the few cases where I want the cut planned around your dry pattern, not only your wet length. The shortest point may end up near the cheek or chin once the curls settle. That extra length keeps the front from pinging up too high and turning the frame into a fringe you didn’t ask for. Good curl cuts respect shape; they don’t bully it.
15. Wavy S-Curve Layers
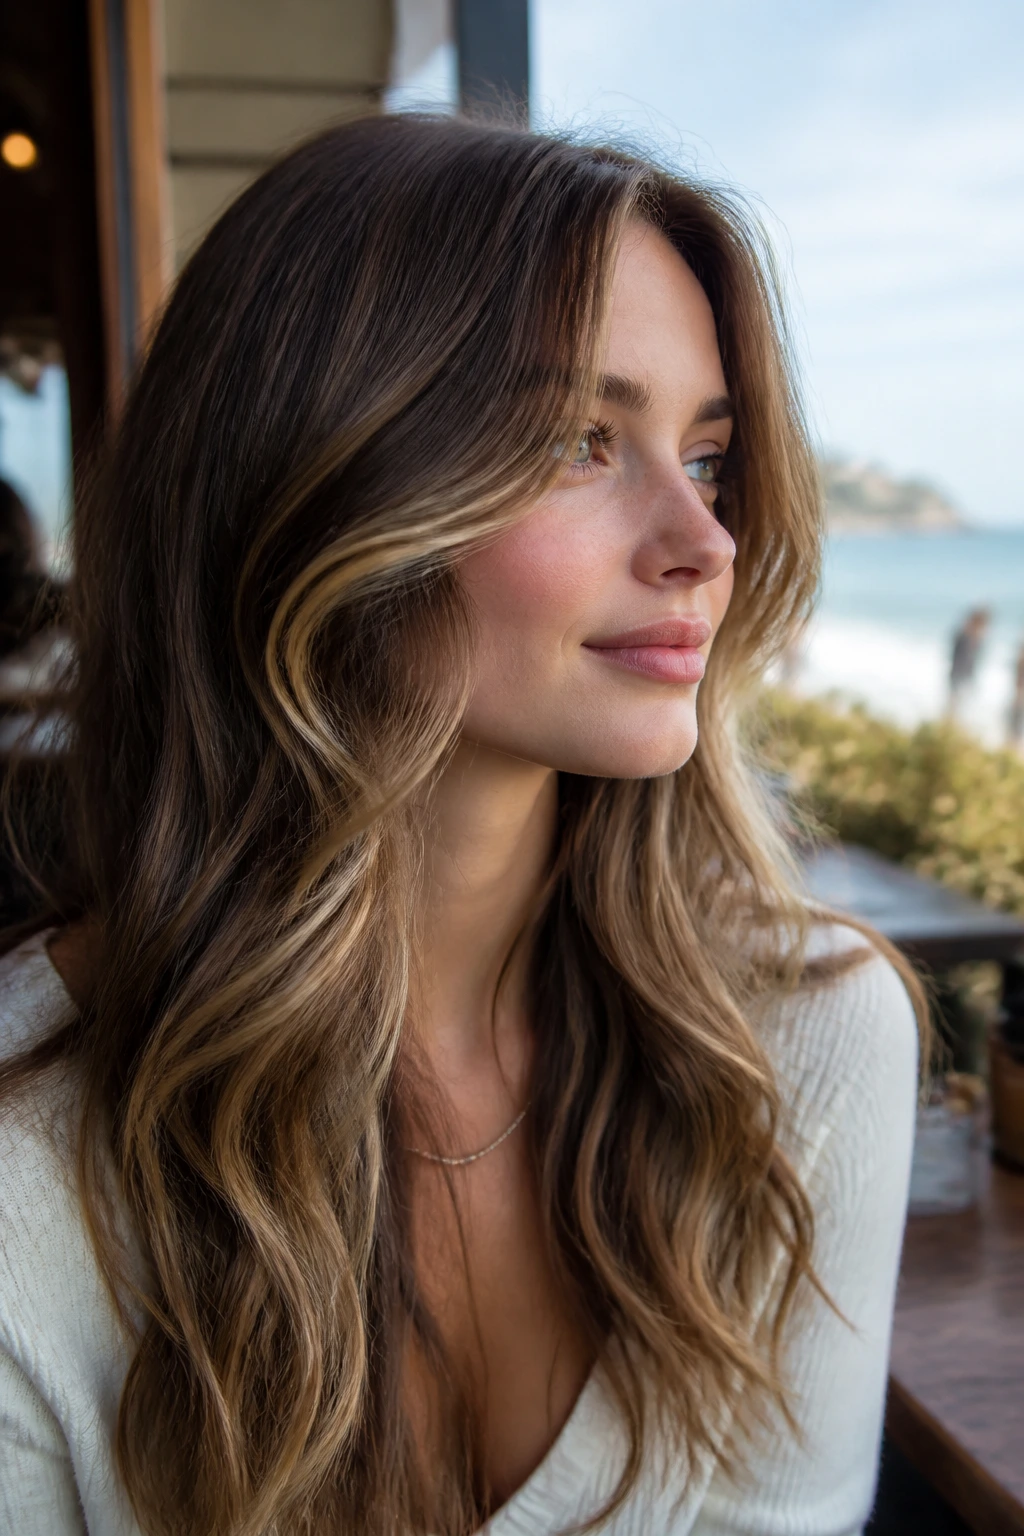
Waves love an S-curve because they already have one built in. The front pieces should travel in a soft bend from the part, around the cheek, and down toward the collarbone, which keeps the movement looking natural instead of overstyled. On long hair, this is one of the prettiest low-effort options.
- Best if your wave pattern starts near the root.
- Keep the front long enough to fold over one shoulder.
- A light mousse or salt spray is enough; heavy cream can flatten it.
The whole point is to echo the wave you already have. If the front is cut too short, the bend gets choppy. Leave enough length, and the layers look like they grew there.
16. Glass-Hair Frame
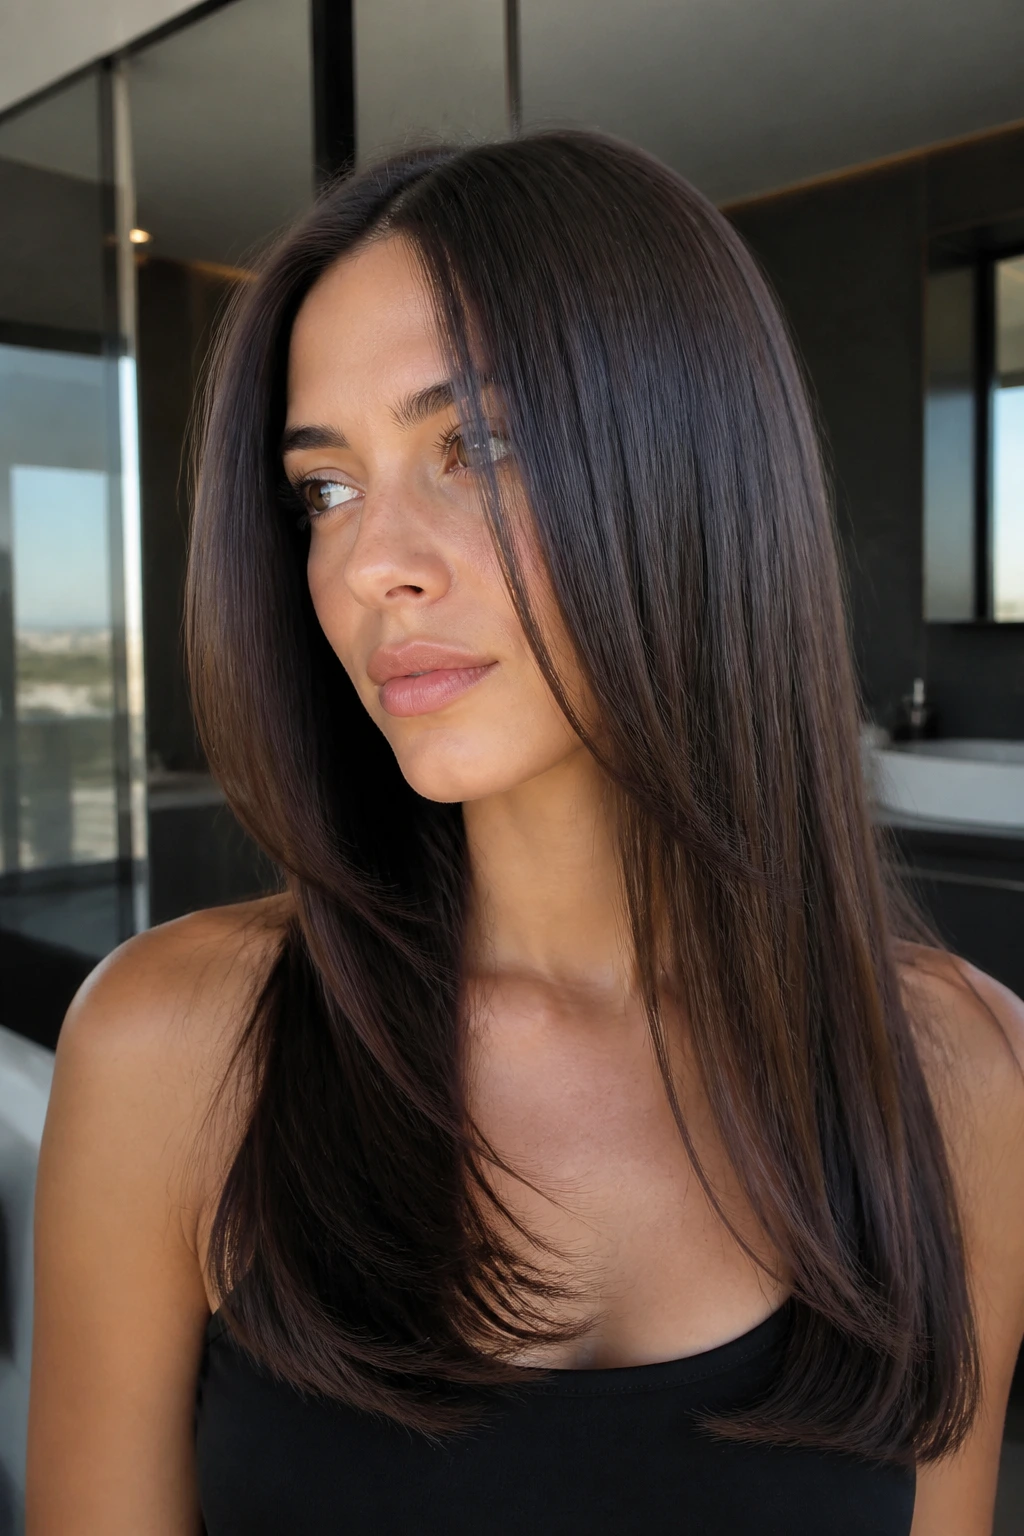
Straight hair can make face-framing layers look sharper than intended, so the cut needs a cleaner line. A glass-hair frame uses controlled front lengths with minimal fray at the ends, which lets the hair lie smooth and reflective instead of piecey. Think polished, not stiff.
This version works best when the stylist keeps the taper long and precise. Too many short internal cuts will pop out on straight hair and show every line. If you like a flat iron finish, this is one of the easier frames to maintain because the front pieces naturally align with the rest of the length. A tiny bend at the ends is enough.
17. Round-Face Lengthening Layers
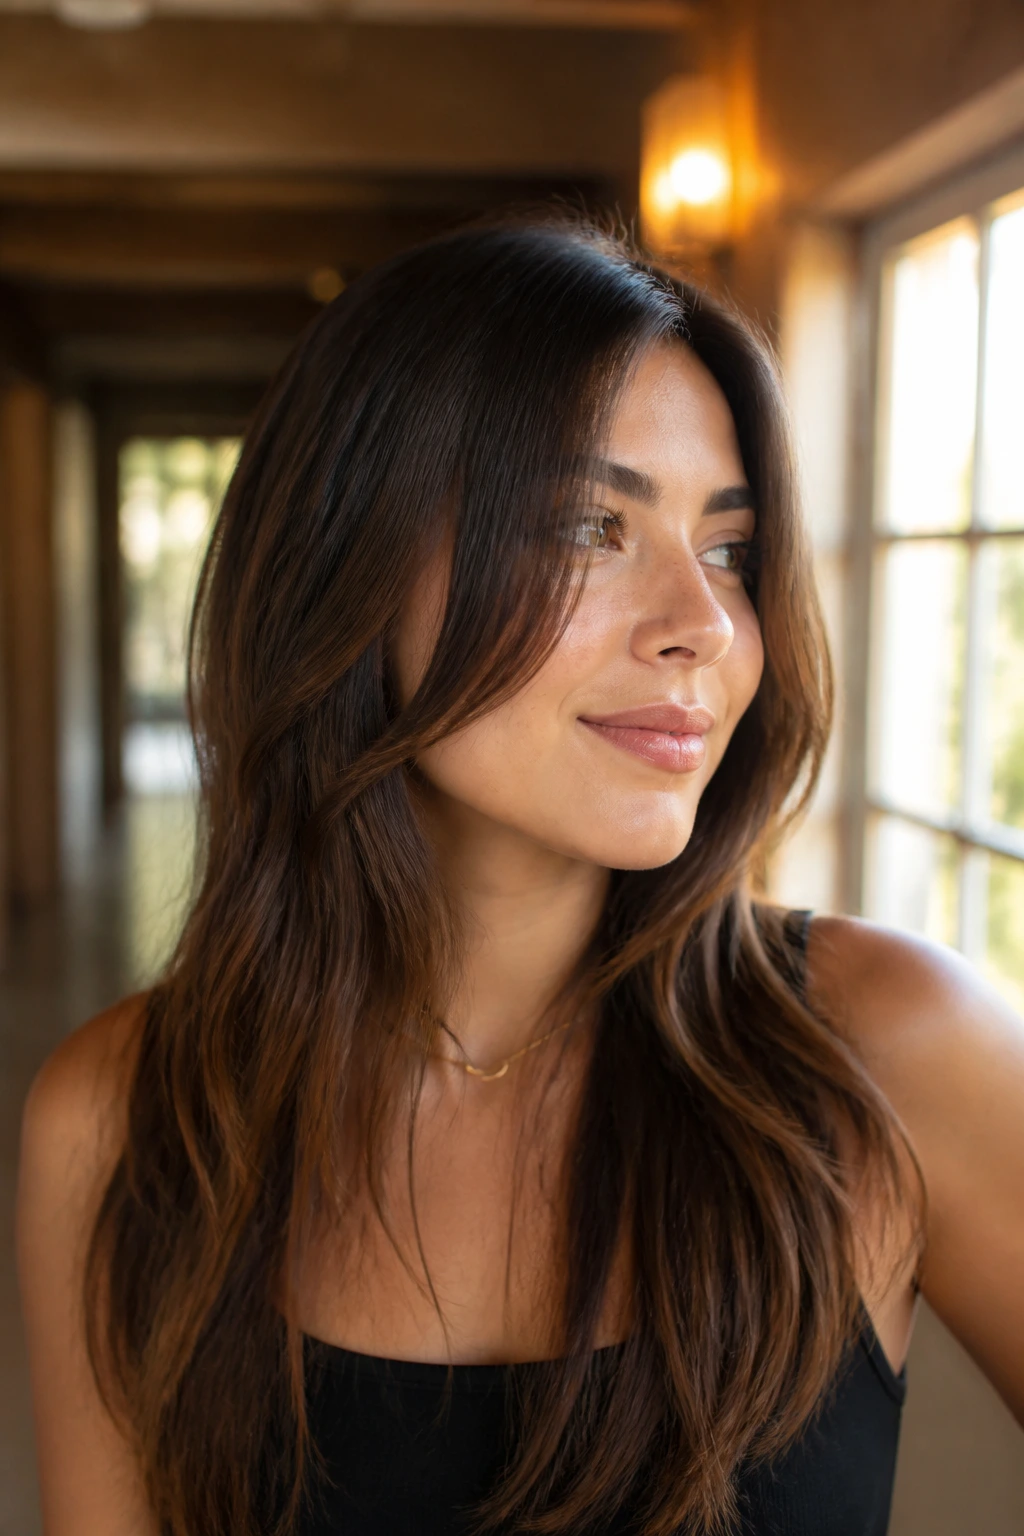
If your face is round, the point is not to make the frame shorter. It’s to create a longer vertical line. Ask for the shortest piece to start below the cheekbone, then let it taper past the jaw so the eye travels downward instead of sideways.
This cut works best when the front is soft and elongated, not fluffy. A center part can help if it sits naturally there; a deep side part can add extra length through the diagonal. Keep the layers connected to the rest of the hair. When the front stops at the widest part of the cheek, the haircut starts arguing with the face. Not ideal.
18. Square-Jaw Softening Layers
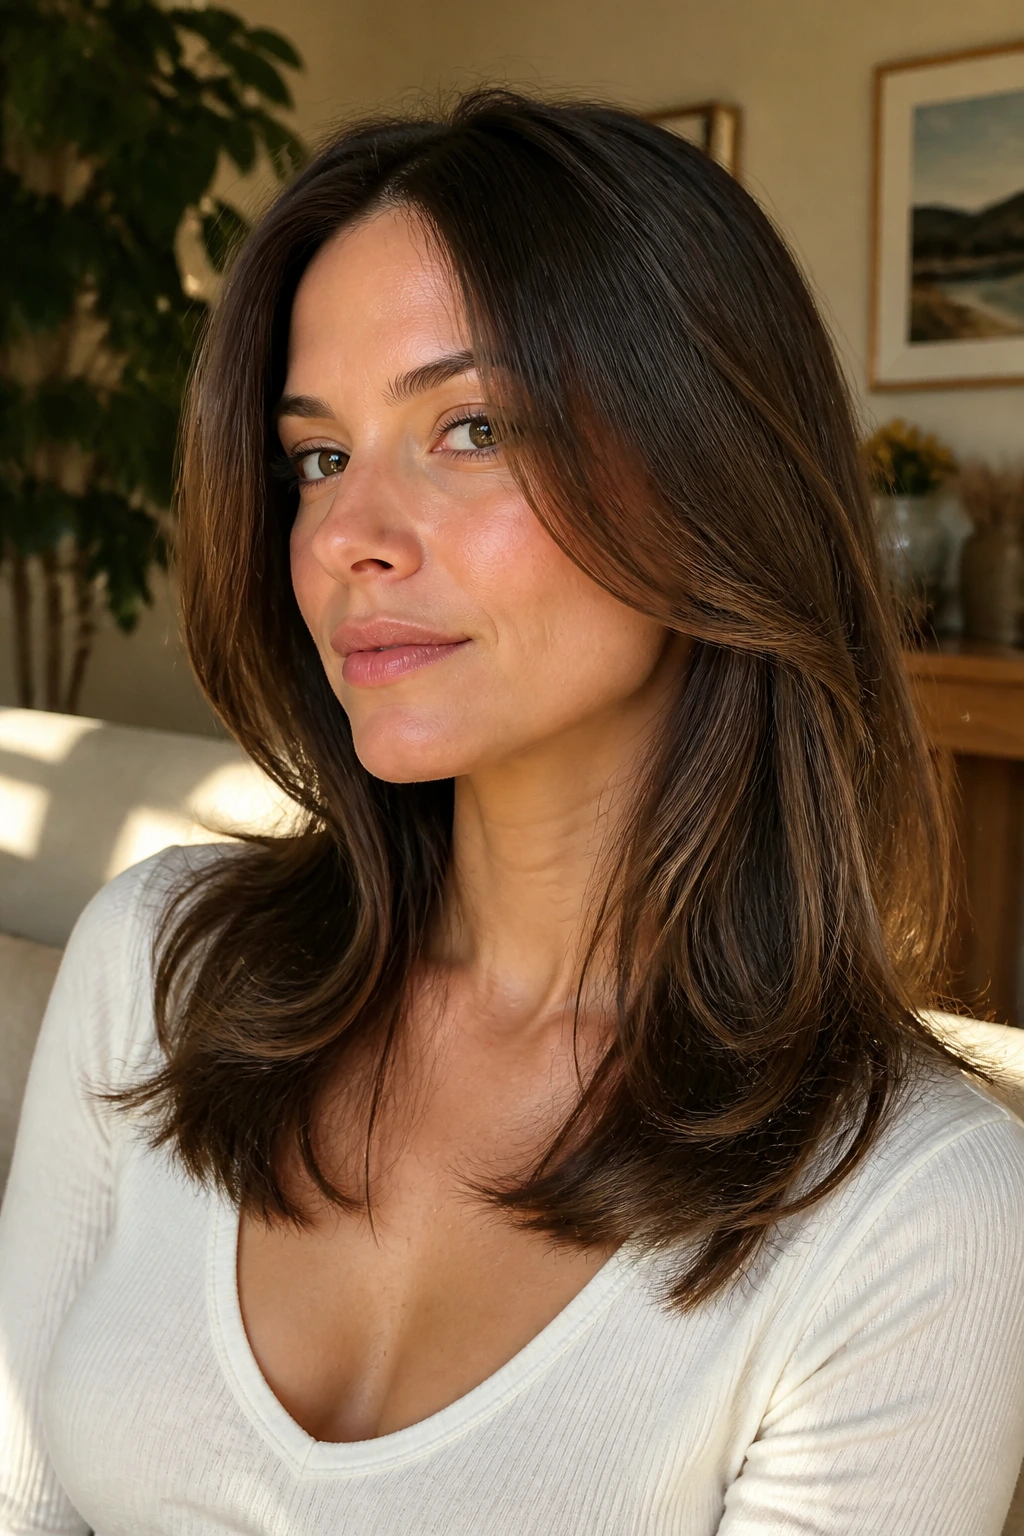
A square jaw needs a frame with curve, not a hard edge. The best front pieces skim the jawline and then bend under or away from it so the line feels broken up. That small bend matters more than most people think.
Avoid a blunt end that lands exactly on the jaw. It tends to box the face in and make the lower half look heavier. I prefer a softer taper that starts at the cheek and ends near the collarbone, especially on long hair with some wave. The result is calmer around the mouth and chin, which is often where square faces want the least noise.
19. Heart-Face Balancing Layers
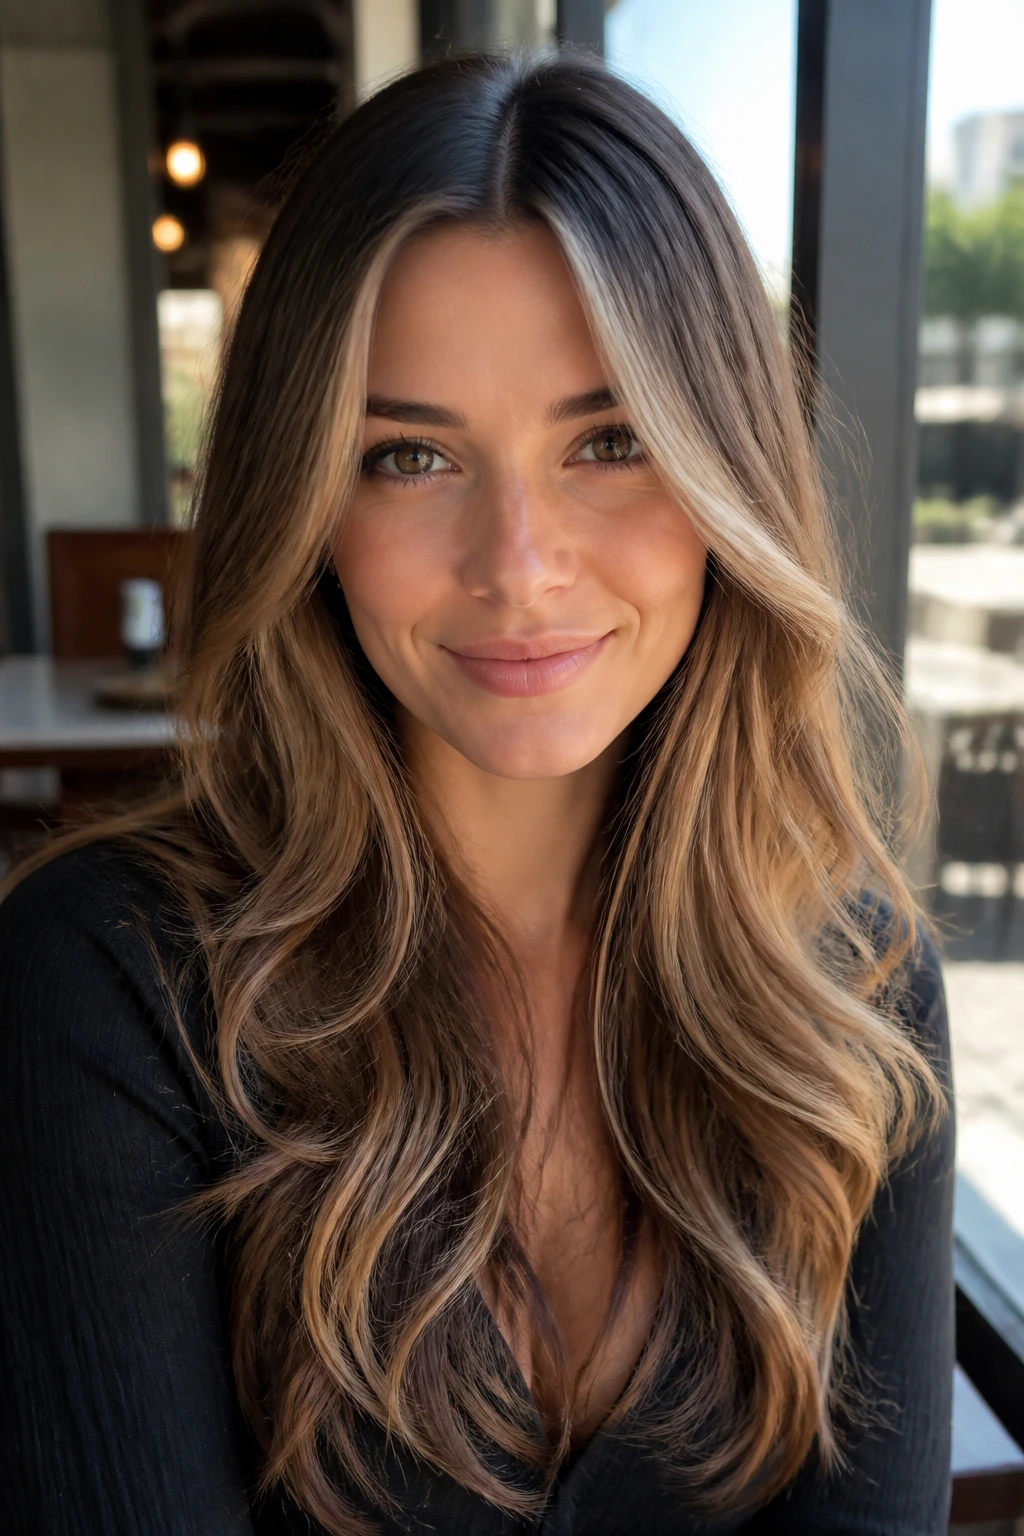
Heart-shaped faces usually have more width up top and a narrower chin. A balanced frame shifts some visual weight lower, which is why collarbone pieces and soft curves around the jaw tend to work well. You want the front to ease attention off the forehead, not pile more volume there.
A center part can still work, but the front needs enough length to soften the top third of the face. If you wear your hair curly or wavy, let the layers widen slightly at the cheek before they narrow. That extra width helps balance the chin without feeling heavy. This is one of those cuts that looks almost casual until you notice how even the shape feels.
20. Oval-Face Halo Layers
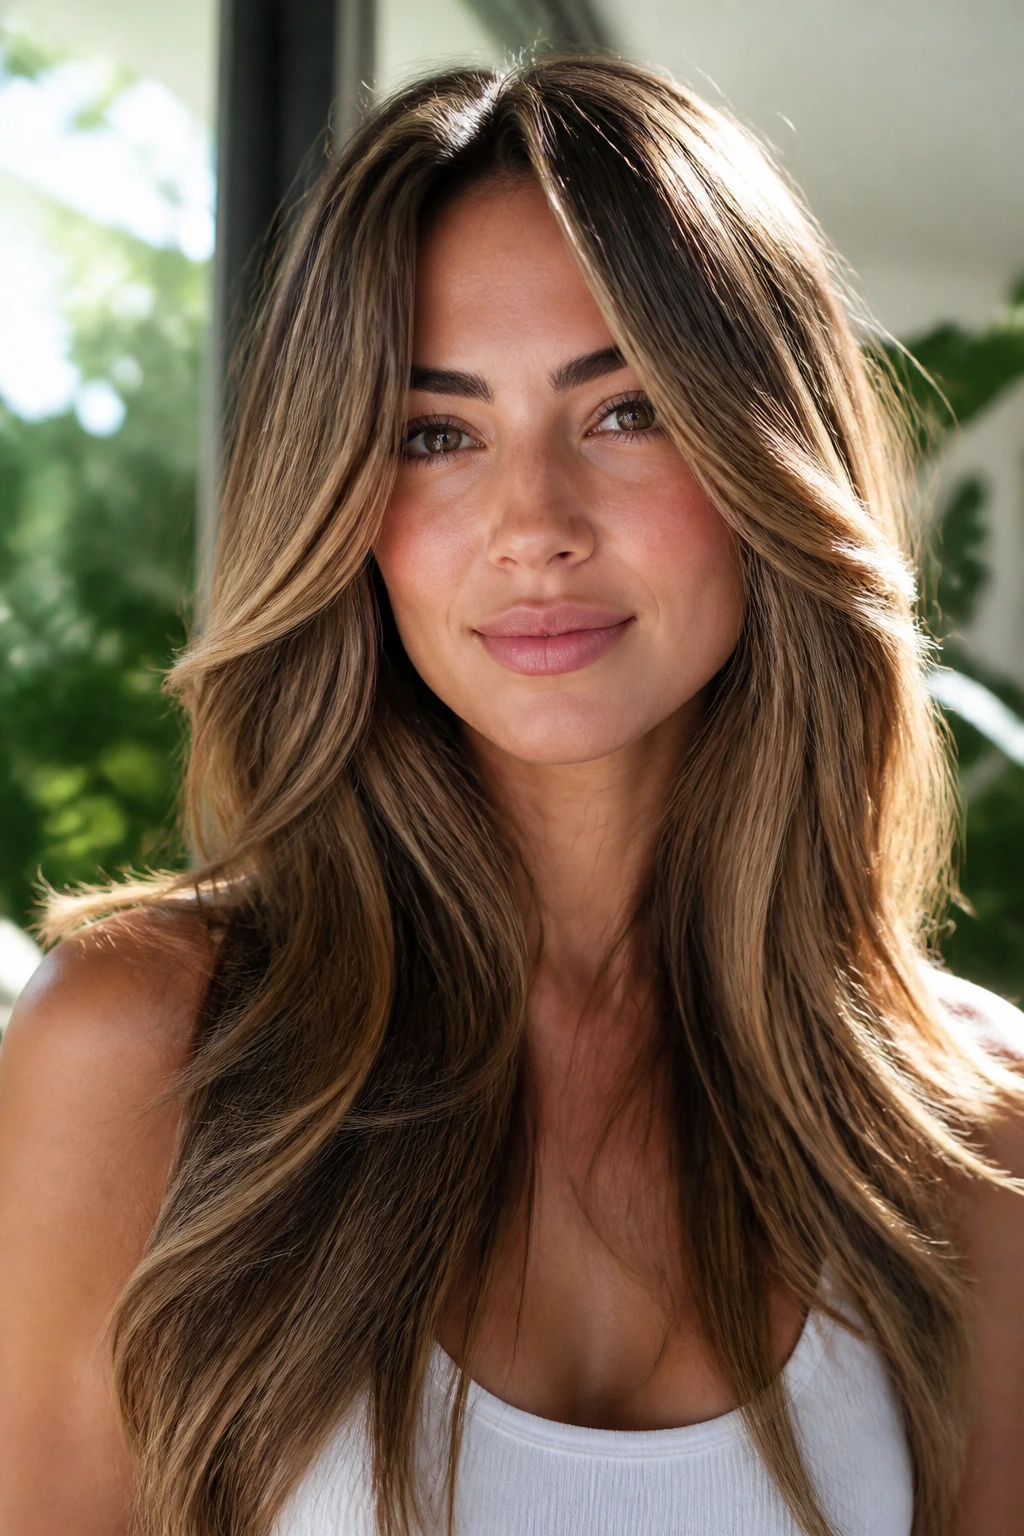
Oval faces can wear almost anything, which is both a blessing and a trap. A halo frame keeps the softness without flattening the natural balance of the face. The front pieces can start at the cheekbone, lip, or chin, but the key is to keep them light enough to move and long enough to blend.
- Do not let the shortest layer stop too high unless you want a stronger fringe effect.
- Keep the taper smooth through the chest.
- Use the front pieces to show off your natural part, not fight it.
If your hair already has texture, this shape can be almost invisible in the best way. It adds motion without making the haircut look busy. Nice for people who want a change no one can quite name.
21. Fine-Hair Airy Frame

Fine hair hates being over-layered. An airy frame uses only a few front pieces, cut long and placed with care so the shape reads as movement rather than thinning. The goal is to keep the ends strong enough to show density while still opening the front of the face.
A little lift at the root does more here than a hundred tiny snips. Ask for soft, long layers around the face and keep the back relatively full. If the front starts to look see-through when dry, the layers are too short or too many. Fine hair usually looks better with restraint. Less drama, more structure.
22. Thick-Hair Weight-Split Layers
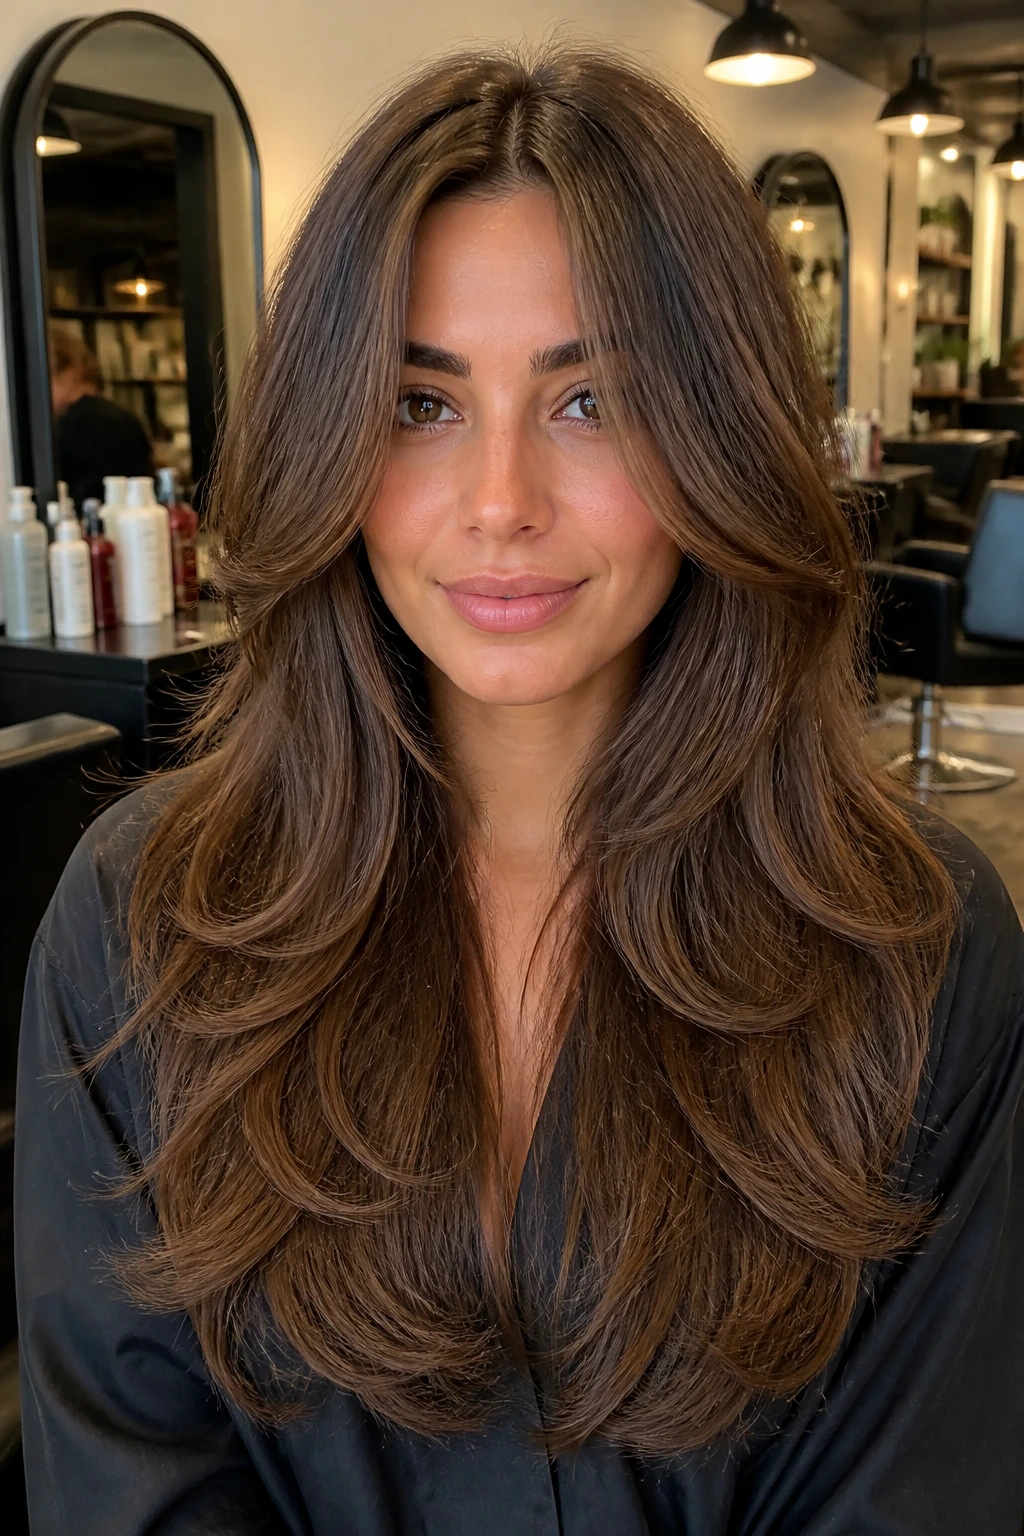
Thick hair can carry more shape, so this cut uses that to its advantage. Instead of cutting the front into separate little pieces, the stylist splits the weight so the hair falls in a cleaner arc around the face. That stops the front from ballooning and keeps the length from feeling like a brick.
This is a good cut if your hair takes forever to dry or if the front tends to puff while the back stays flat. Internal weight removal helps the front settle, and the long perimeter keeps the whole look grounded. If you like a round-brush blowout, it gives the front something to follow. If you air-dry, it keeps the pieces from fighting each other. That’s a nice trade.
23. Grow-Out Friendly Layers

Some face-framing layers look lovely on day one and awkward after six weeks. This is not that cut. A grow-out friendly frame starts with longer front pieces and a gradual taper, so as the hair grows, it slides into a longer layer pattern instead of forming a shelf.
That matters if you only trim a few times a year or if you want to avoid constant salon visits. Ask for the shortest piece no shorter than cheekbone or chin, then keep the rest connected through the collarbone. It’s a softer investment, but it ages better. I’d choose this over an aggressive front shape unless you really love the commitment.
24. Half-Up Friendly Front Pieces
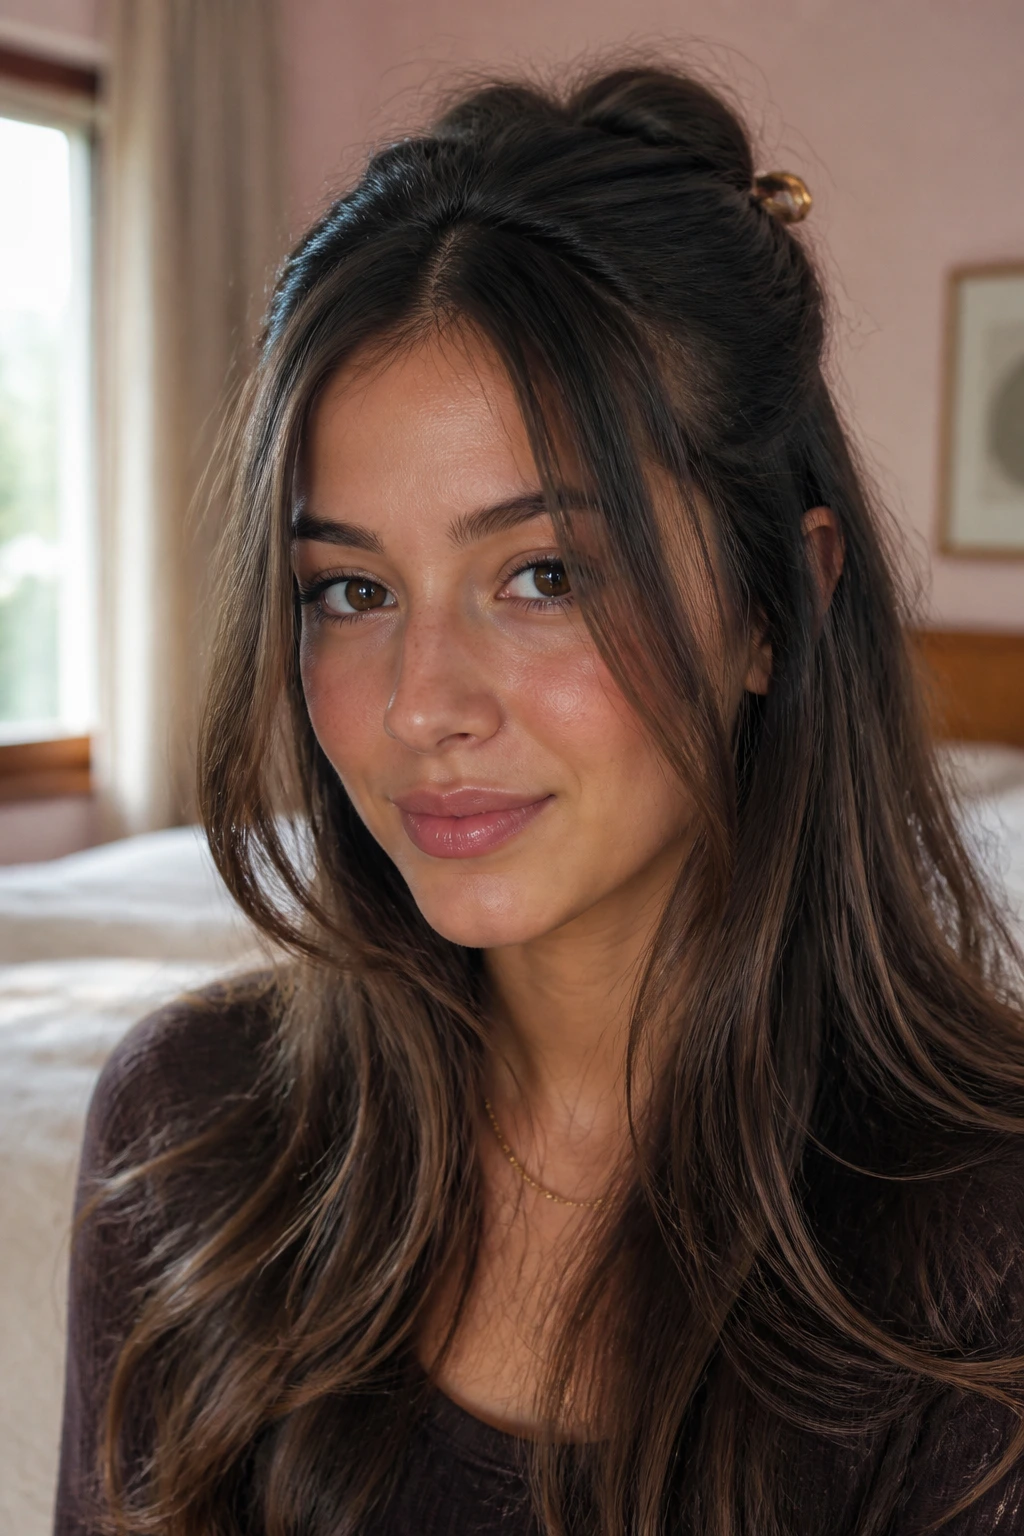
If your hair lives half up, the front has a job to do. These pieces need to be long enough to tuck into the elastic or claw clip while still leaving something loose around the face. That means cutting them with pinning in mind, not only with loose hair in mind.
A piece that sits at the chin or just below will usually give you enough slack to twist back without disappearing. Keep the taper soft so the front pieces don’t stick straight out of the clip like little antennae. When done right, this is one of the most practical face frames on long hair, because it looks intentional whether the rest of the hair is down or partly secured.
25. Blowout-Ready Volume Layers
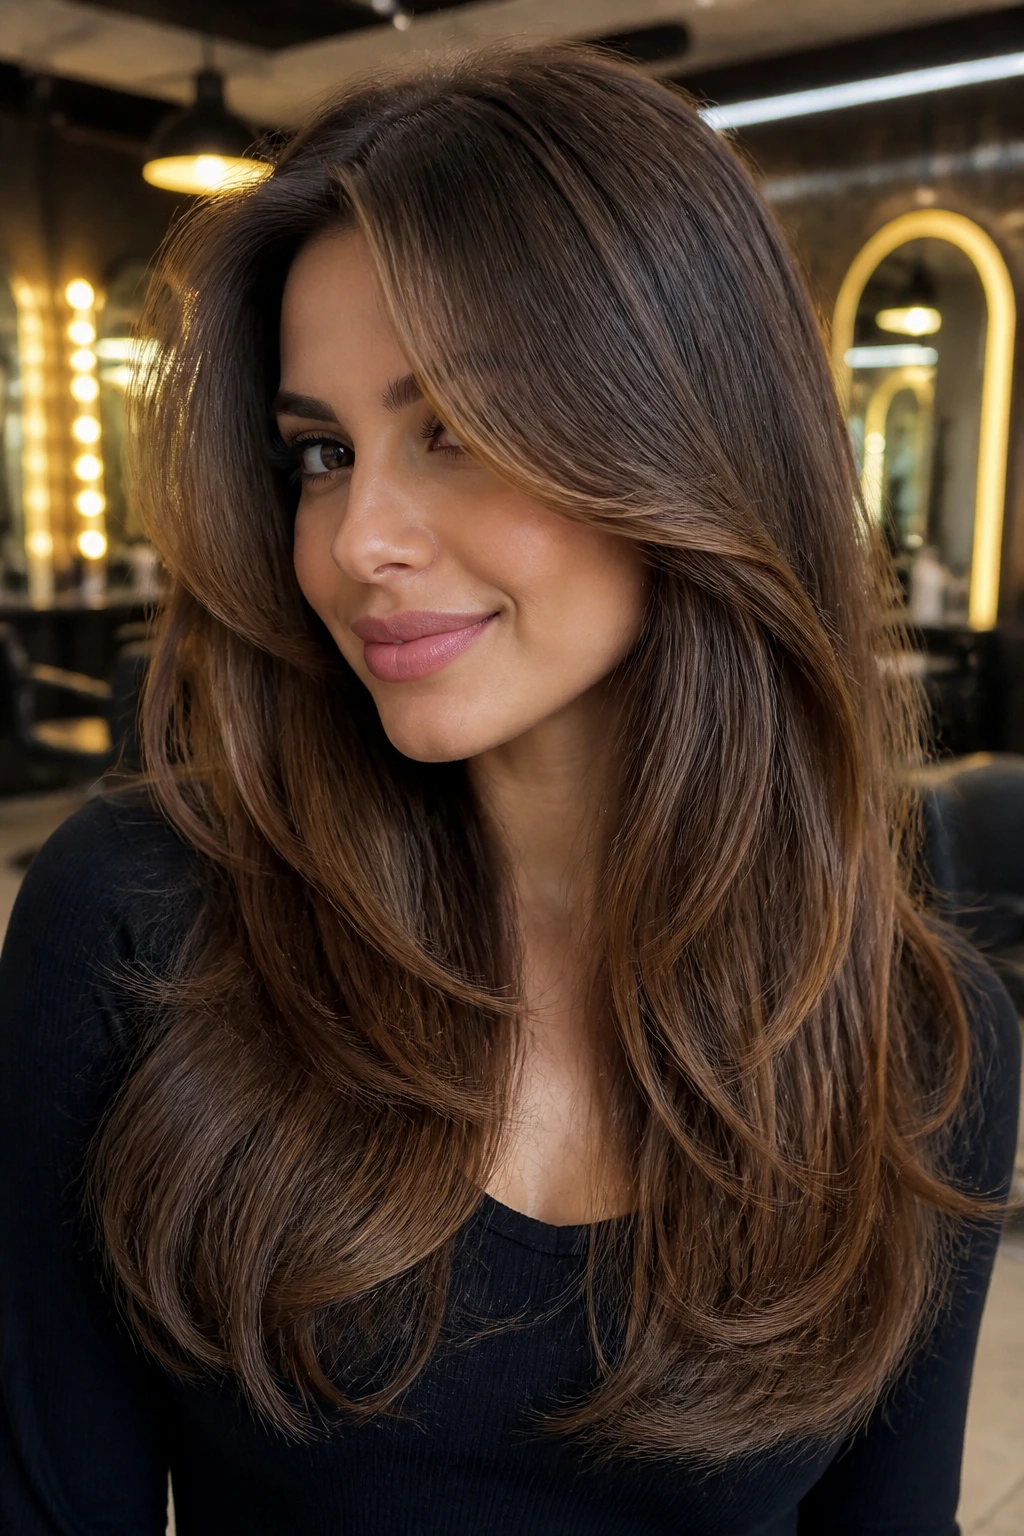
This is the version for people who like their front pieces to have some air. The cut is built to lift away from the cheek with a round brush, then fold back under in a clean curve. It can make long hair look more polished than it is, because the shape comes from the line, not from product overload.
- Blow-dry the front first.
- Direct the airflow from root to ends.
- Finish with a cool shot to lock the bend.
If you skip styling, it still looks fine. If you style it, the whole face gets that lifted, open shape people always ask about. It’s a favorite for dense hair that needs movement and for finer hair that wants more presence.
26. Air-Dry Friendly Shape
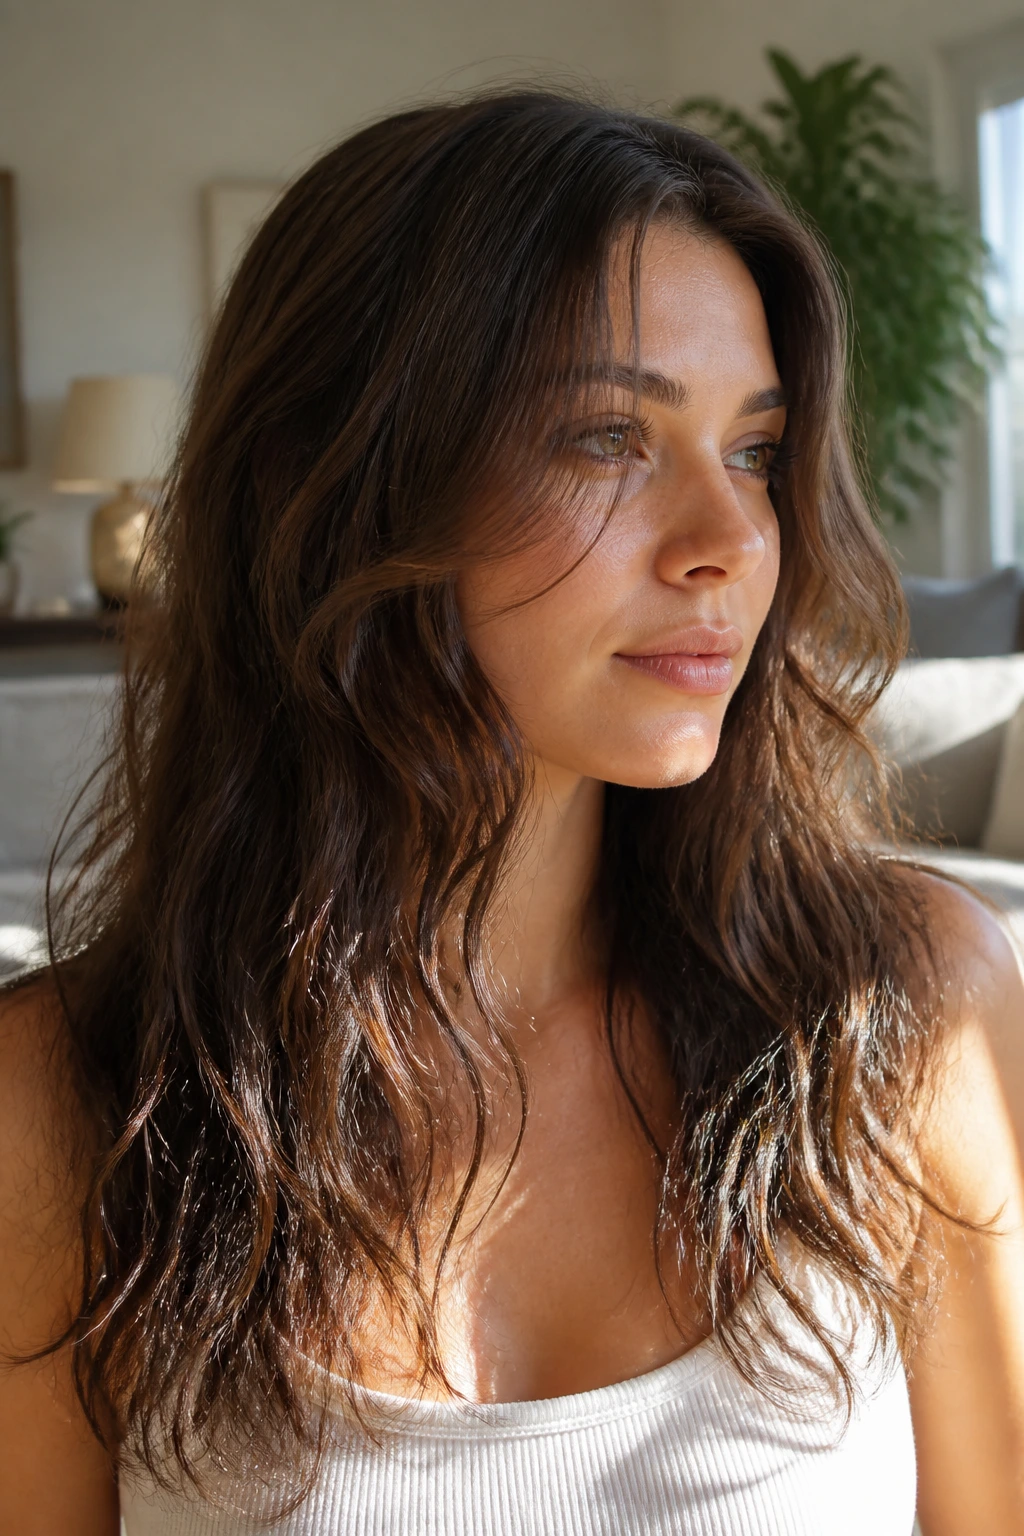
Not everyone wants to negotiate with a brush. An air-dry friendly shape is cut so the front pieces settle into a soft curve on their own, usually with only a little finger-twisting or clipping while damp. The taper stays long and gentle, because harsh angles tend to dry awkwardly.
This is a smart choice if your texture is wavy, loose-curly, or just a bit bendy at the front. The layers should be easy to identify when wet but not so short that they poof apart as they dry. A dab of mousse on the front, a quick scrunch, and you’re done. That’s the point. Hair should not need a production budget.
27. Shag-Inspired Long Frame
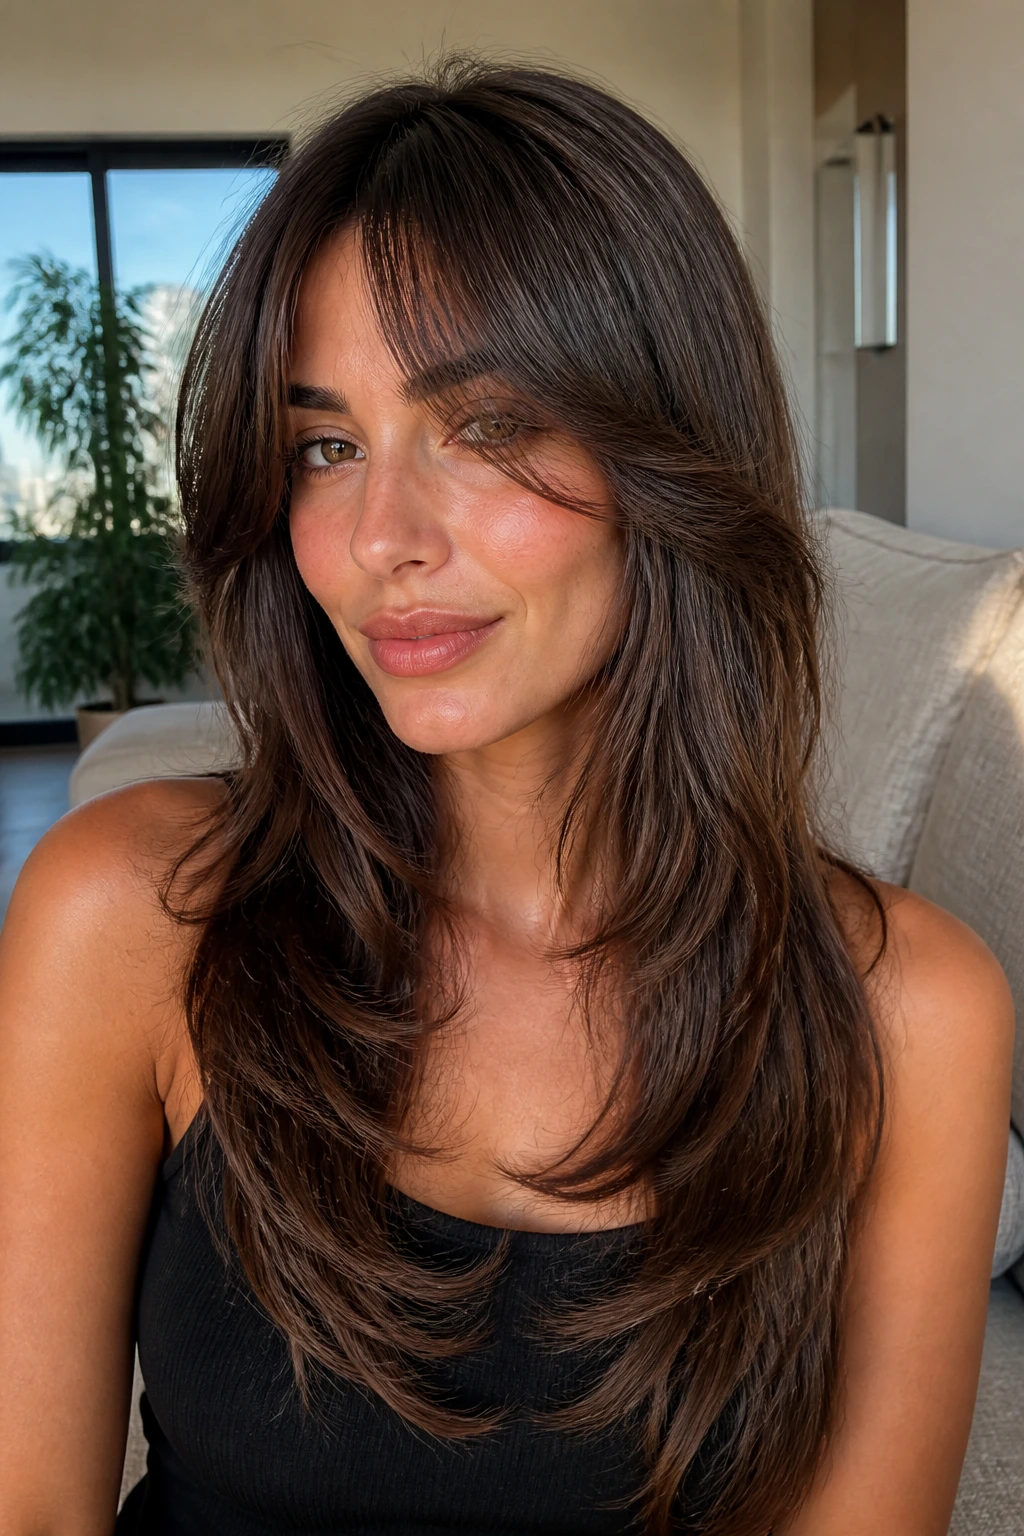
A shag-inspired frame brings a little edge, but it doesn’t have to look rebellious. On long hair, it usually means more piecey front layers, a bit of separation near the cheek, and a softer, lived-in finish through the lengths. It’s the cut for someone who likes movement you can see from across the room.
Keep the back long enough to avoid losing the length completely. The front can be more broken up than in a classic curtain frame, but the pieces still need to connect. If the hair is thick or wavy, this shape can look easy in a way blunt cuts never do. If the hair is fine, go easy on the texturizing or the front will vanish.
28. Long V-Cut with Front Lift
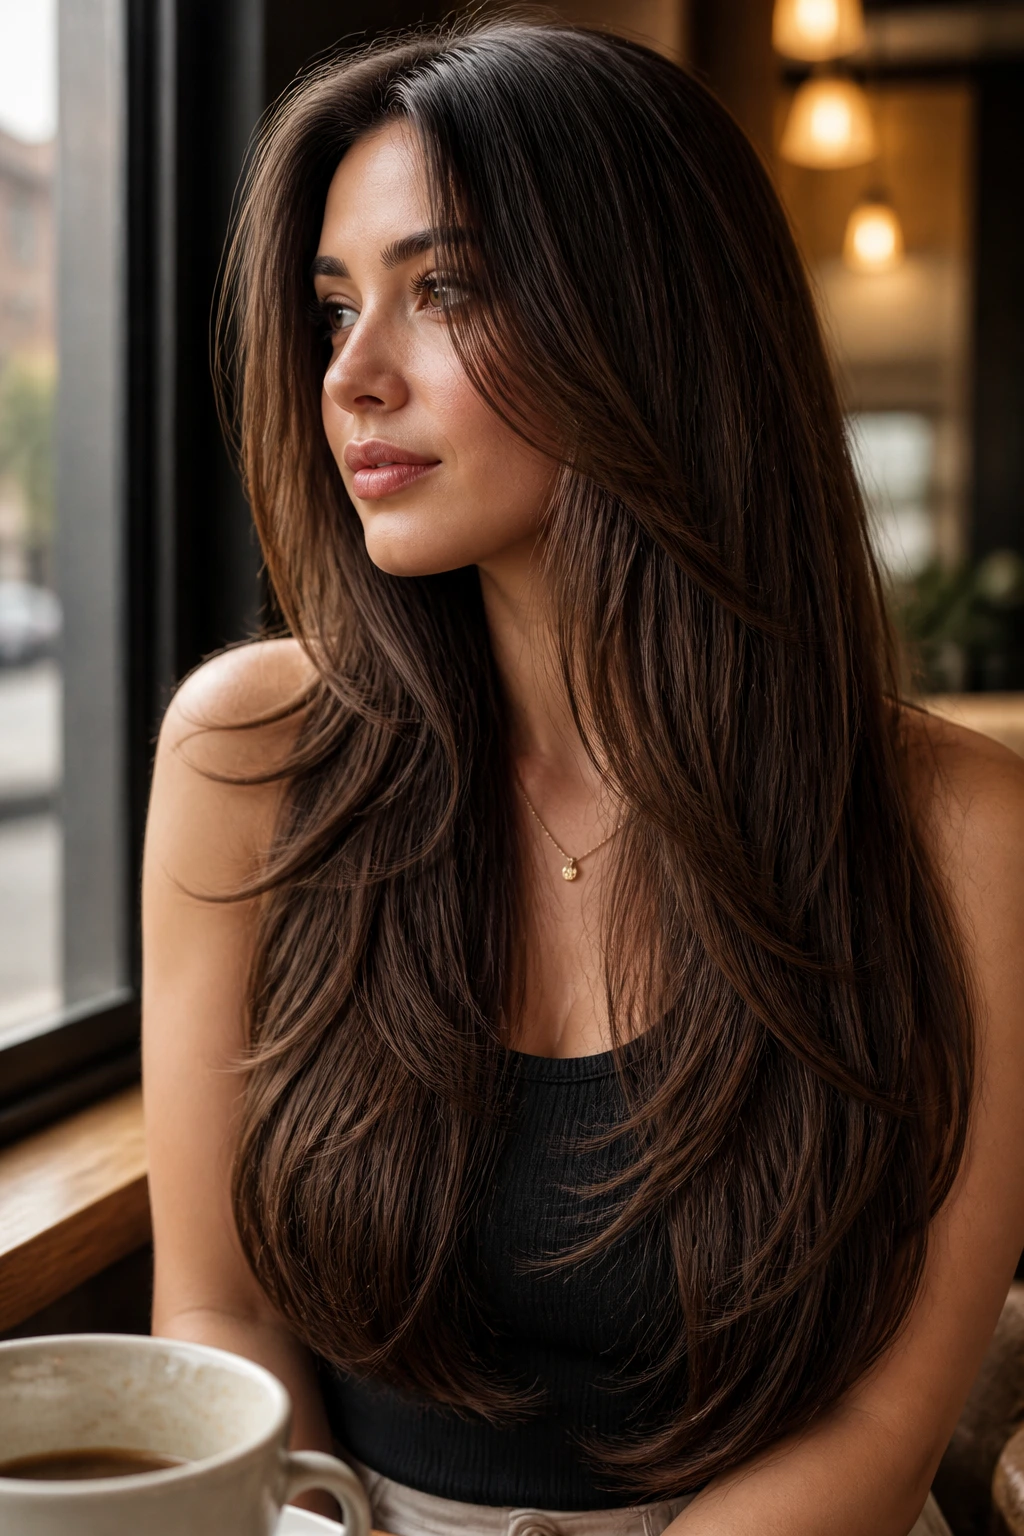
A V-cut draws the eye to the center of the back, while the front pieces lift the face enough to keep the whole shape from feeling bottom-heavy. It’s useful when you want dramatic length but not a blunt edge across the back.
The front lift should stay subtle if you already have strong layers. Too much height in the front can make the back feel disconnected. I like this shape on long hair that’s worn half down, half up, because the V gives the ends a point of interest and the front pieces keep the face from disappearing into the length. It has a little drama, but it behaves.
29. Tapered Side Pieces
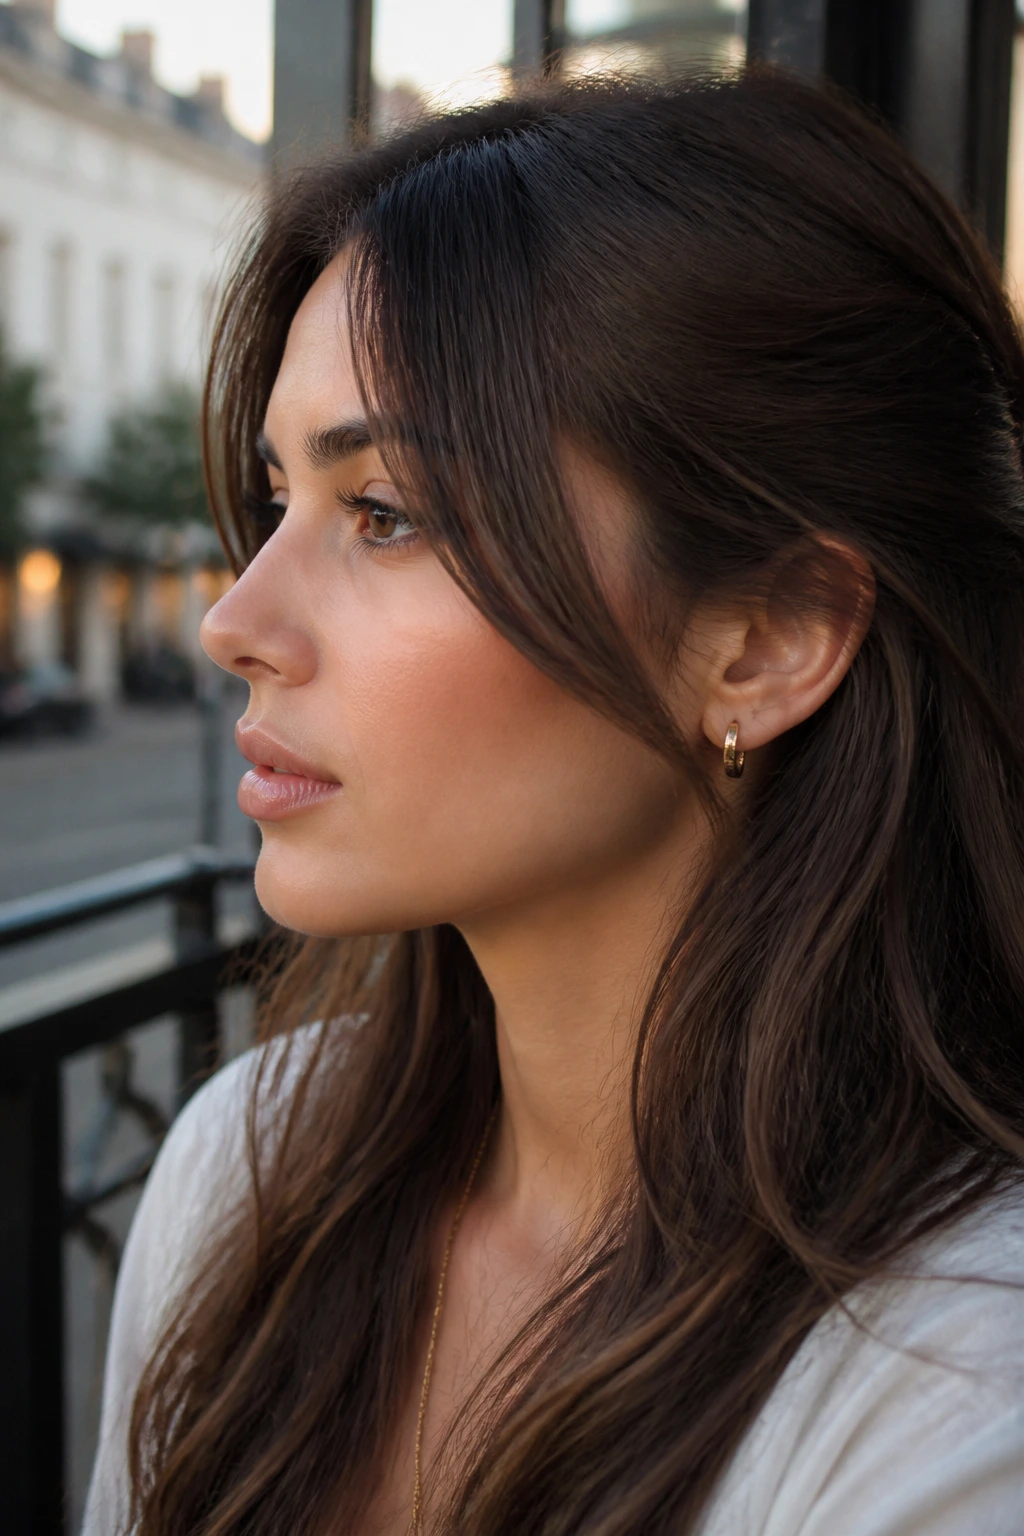
Side parts can be fussy if the cut ignores them. Tapered side pieces start closer to the part, then slide across the face in a long diagonal that blends into the rest of the hair. The result is smoother than a blunt side sweep and less formal than curtain layers.
This one is good if your hair has a natural bend that wants to go to one side. It can also help if one side of your face feels more prominent than the other, because the taper lets you control where the emphasis lands. Keep the shortest point long enough to tuck behind the ear without sticking out. That small detail makes the cut behave in daily life.
30. Deep Angled Face Frame
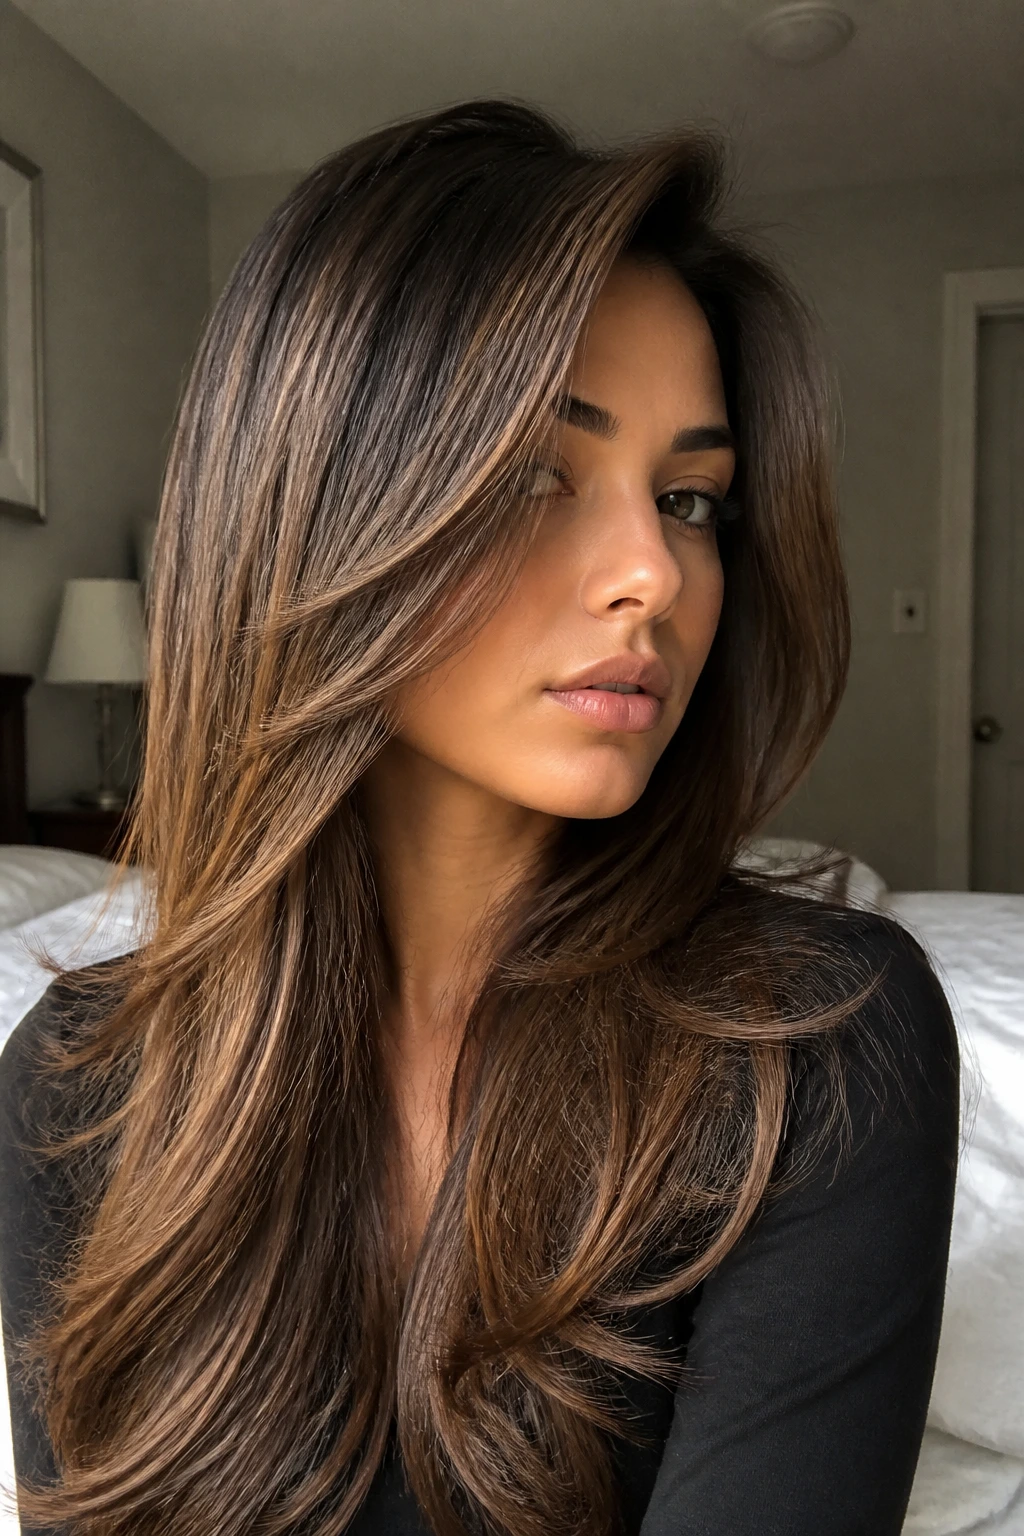
A deeper angle gives the frame more edge. The shortest piece might begin near the cheekbone, then drop quickly toward the chest so the front reads as a clean diagonal. It’s a stronger look than a collarbone drift, and it suits people who want the haircut to show from a distance.
- Best if you style with a flat-iron bend or a large curling iron.
- Works well on medium to thick hair.
- Needs regular dusting if you want the angle to stay sharp.
This is not the softest option, and that’s the appeal. It brings attention to the face without pretending to be invisible. If you like structure, this one has it.
31. C-Curve Layers
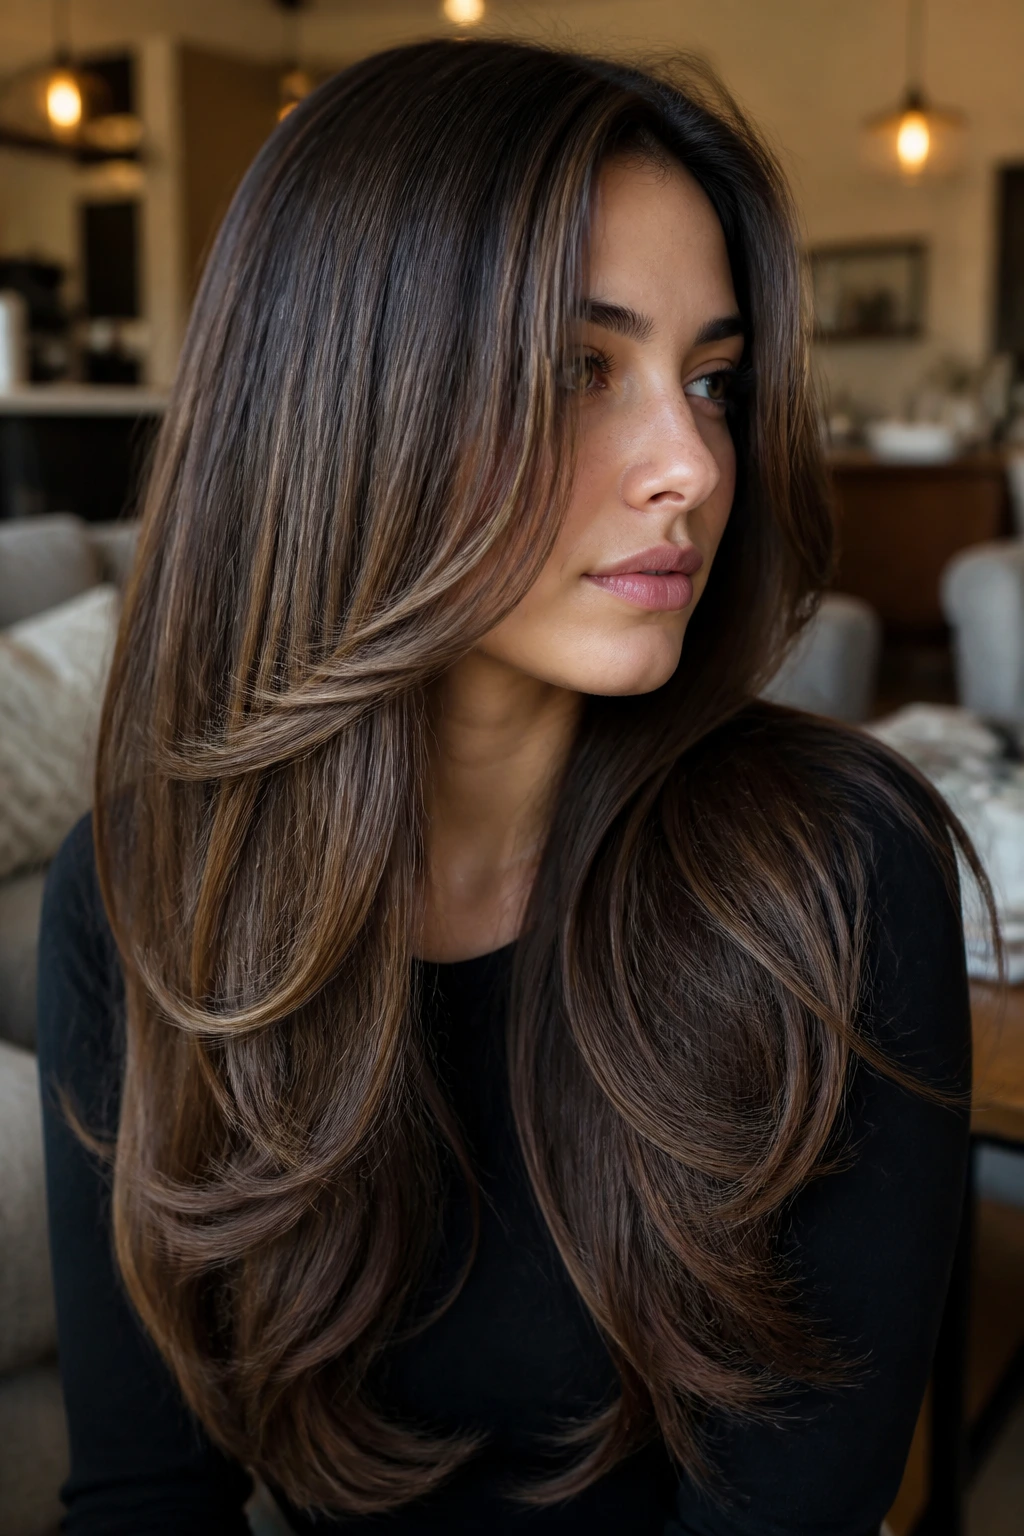
A C-curve front piece bends inward at the cheek and then out again near the end, which gives long hair a rounded, polished sweep. It is a deceptively simple shape. On the right hair, it changes the whole feel of the cut.
The curve is especially nice when you want the front to frame the face without sitting flat against it. Ask your stylist to keep the bend soft rather than dramatic, or the front can look overstyled. A C-curve works with blowouts, rollers, and even a quick flat-iron bend. It’s one of those shapes that looks clean because the line is so controlled.
32. Curtain Bangs Blend
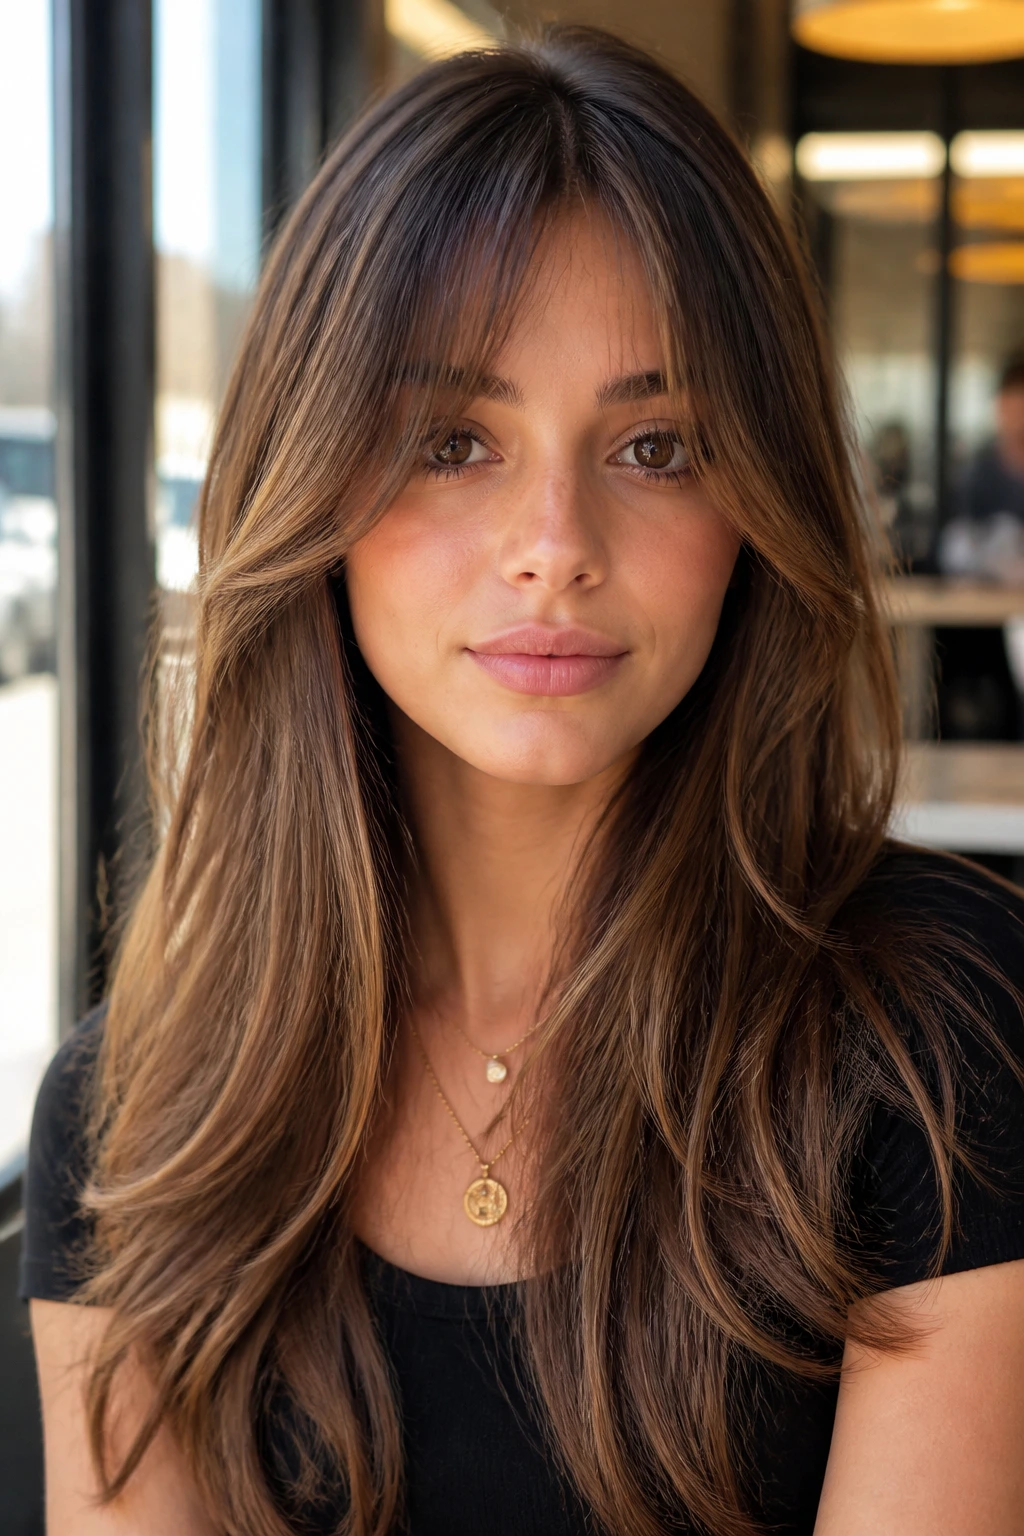
This is for people who want a little fringe but not a full-bang commitment. Curtain bangs blend into long face-framing pieces, so the shortest center point sits around the brows or upper cheek and then drops into the rest of the layer pattern. On long hair, the transition is what makes it work.
The key is softness. The curtain section should merge into the front layers rather than sit on top of them like a separate haircut. If you like styling your hair away from the face, this shape gives you options. If you never blow-dry, keep the bangs longer, because a short curtain fringe can live badly without a little bend.
33. Barely-There Face Sweep
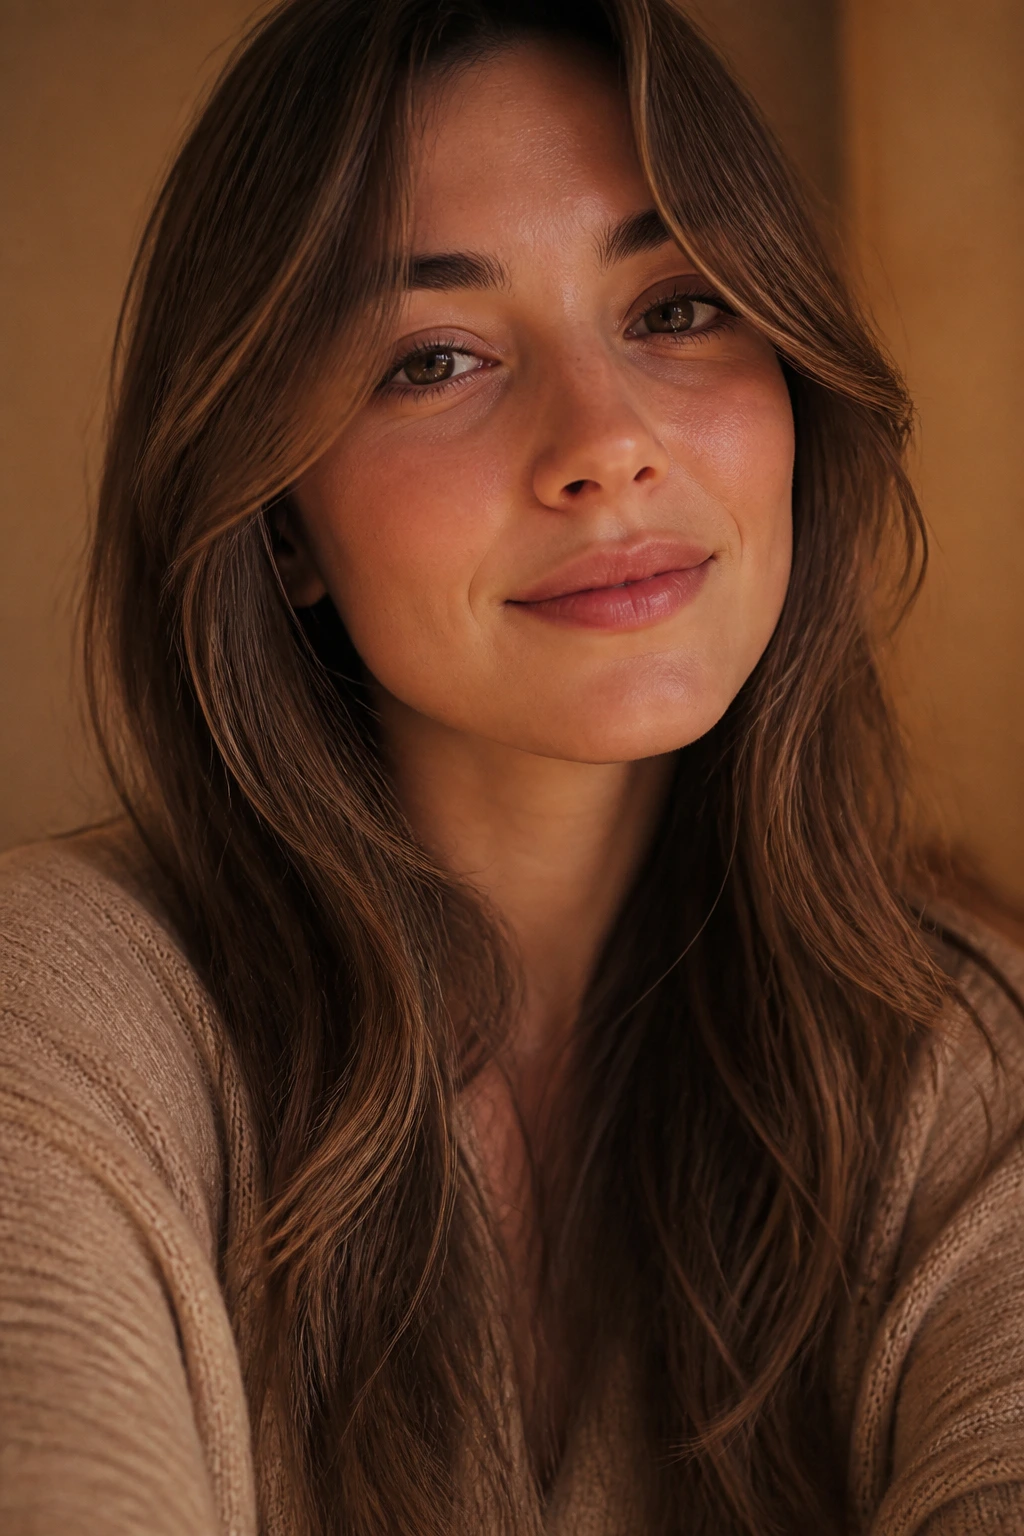
Not everybody wants the haircut to announce itself. A barely-there sweep adds a whisper of shape around the face, with just enough taper to break up a blunt outline. It’s ideal if you’re nervous about layers or if you want long hair that still reads clean in a ponytail.
The shortest piece might only be a few inches shorter than the surrounding lengths, which is enough to change the line without creating obvious steps. I like this for people who wear glasses, because the front can frame the frames instead of fighting them. It’s modest. That’s why it works.
34. Feathered Front Ends

Feathering gets a bad reputation when it’s done too hard. Done lightly, it gives long hair soft, 70s-style movement around the cheeks and neck without making the ends look chopped. The front pieces skim and float instead of hanging in a hard line.
This shape loves a round brush and a little heat. The ends should taper away from the face in a way that looks controlled, not sprayed. It is a good choice if your hair is naturally thick and you want the front to feel lighter without losing the impression of fullness. Done well, it gives movement that feels almost weightless. Almost. Hair still has weight.
35. Custom Consultation Cut
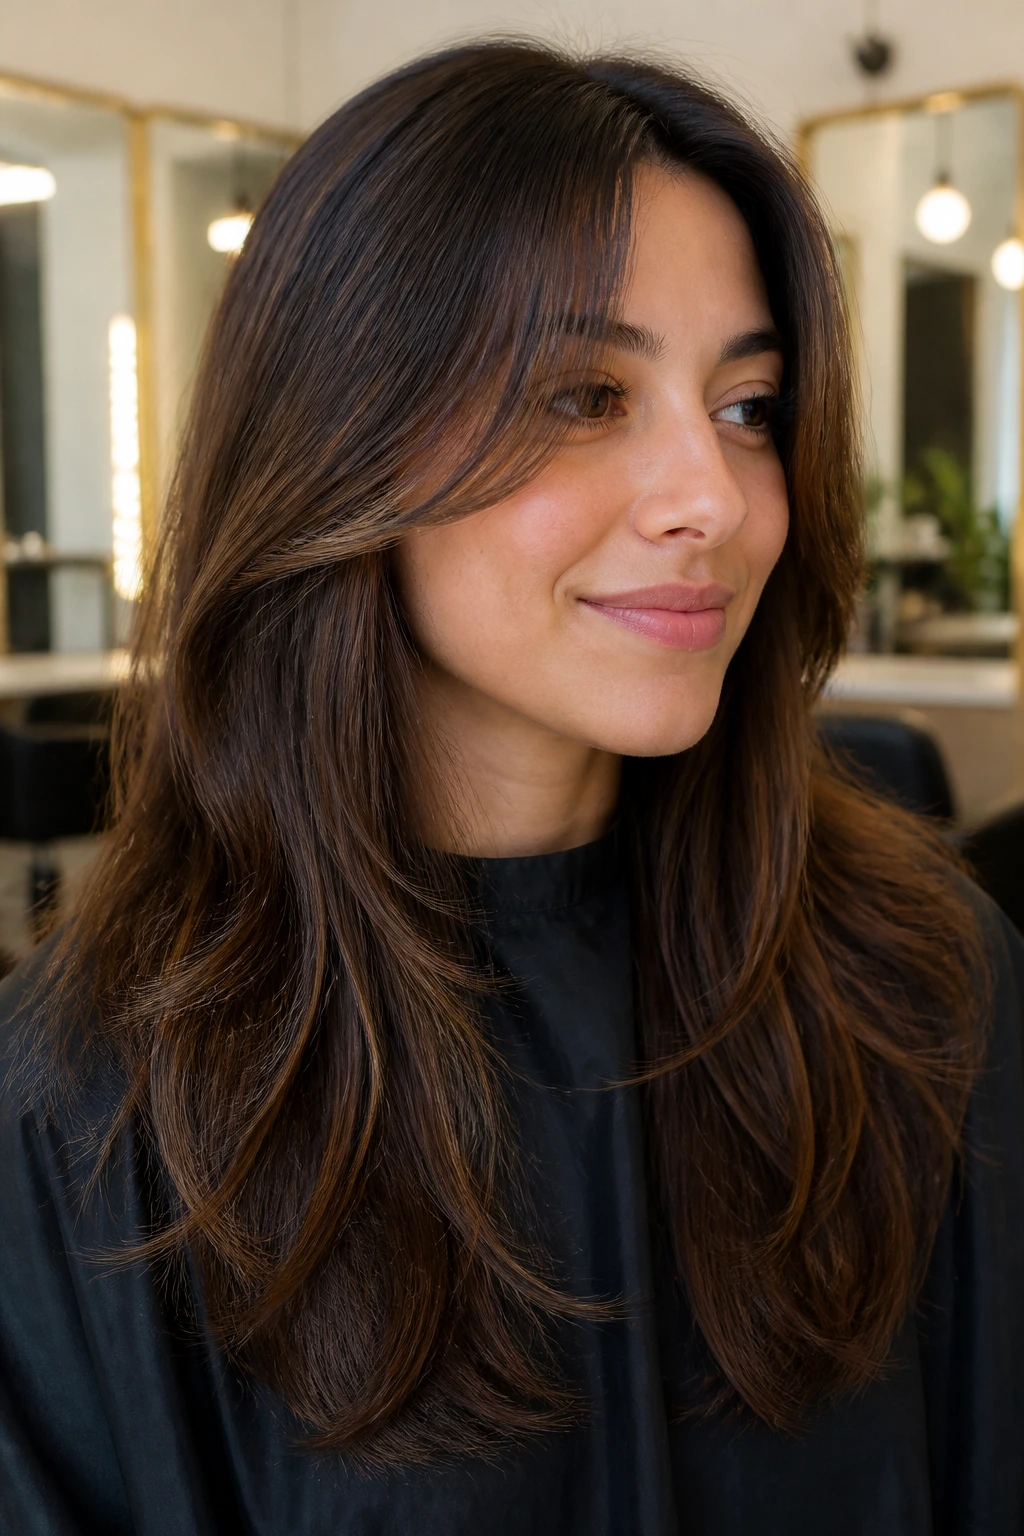
The safest face-framing layer is the one built around your life, not someone else’s photo. A custom consultation cut starts with the basics: where you part your hair, how much length you keep in the back, how much styling you actually do, and whether your front pieces should tuck behind your ears or stay loose. That conversation matters more than the trend name.
Bring 2 or 3 photos, then point to the exact thing you like in each one—the length at the chin, the amount of bend, the way the layers sit near the cheek. If you do that, the cut becomes specific instead of vague. And specific is what keeps long hair from looking generic. That last point matters more than most people admit.
Why Face-Framing Layers Work So Well on Long Hair
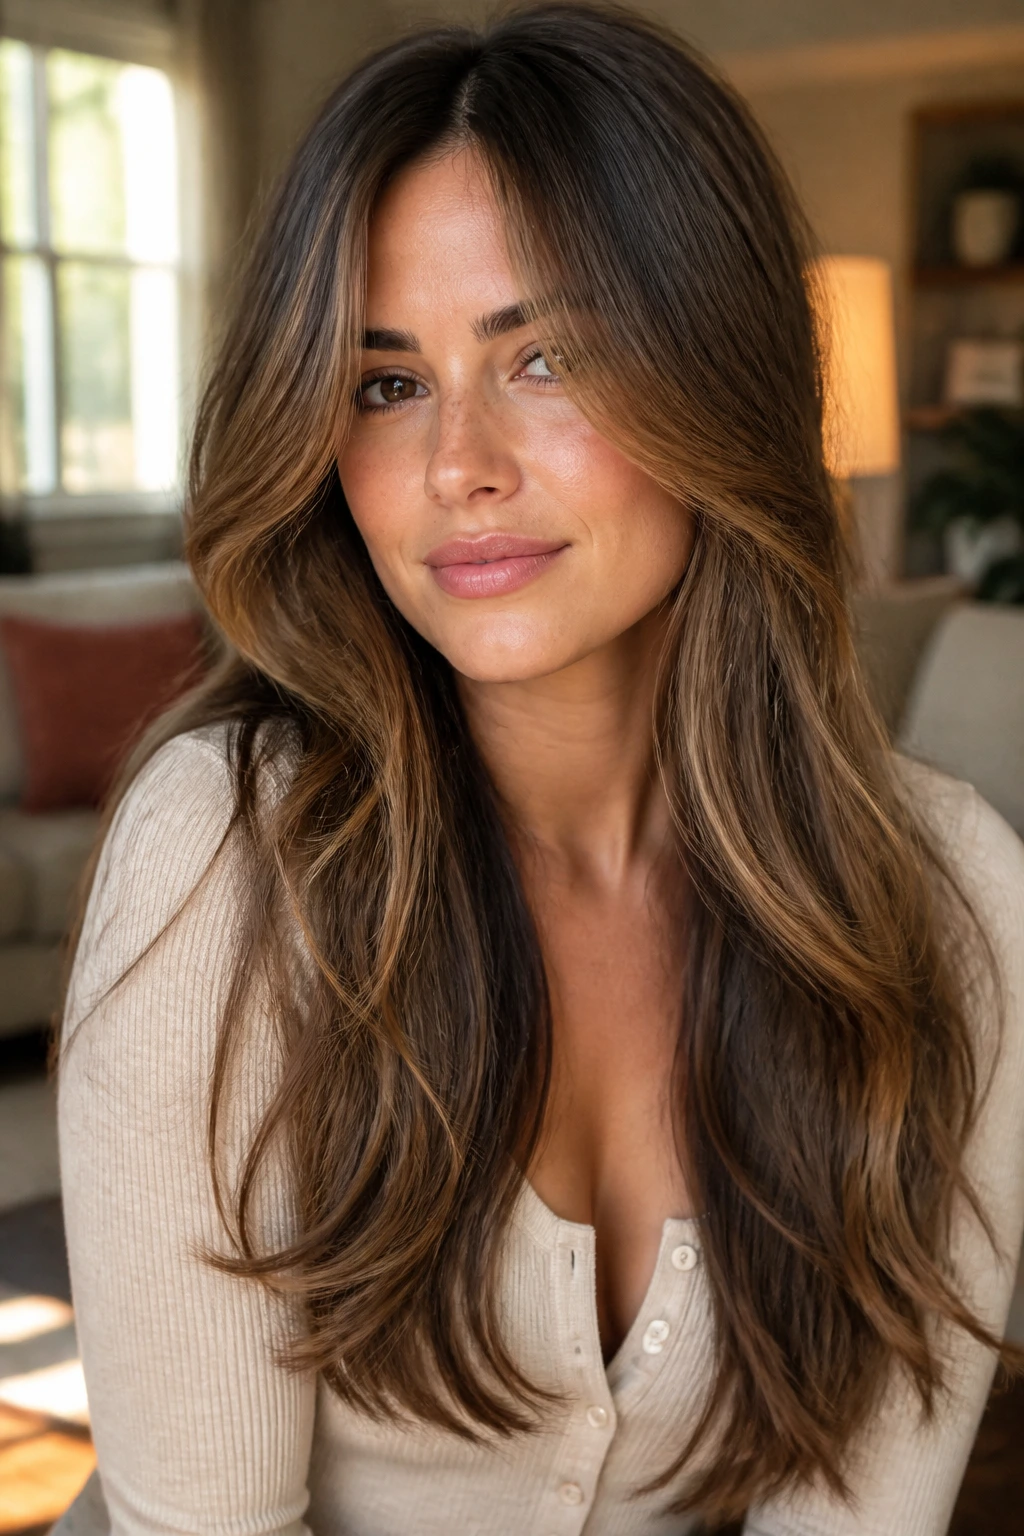
Long hair can get visually heavy near the face. The weight gathers in the front lengths, hangs straight, and leaves the eyes competing with a sheet of hair. A good frame breaks that line. It creates movement where people look first.
The front pieces do the steering. A chin-length piece sharpens the jaw a little. A collarbone piece softens the whole front without drawing too much attention. A lip-length piece sits in between and gives you a cleaner diagonal. That tiny shift changes how the haircut reads in motion, not only in a mirror.
- Thick hair benefits from weight removal near the temples.
- Fine hair needs restraint so the front doesn’t go wispy.
- Waves and curls need more length because they shrink.
- Straight hair shows every line, so the taper has to be clean.
The best versions feel like a haircut and a quiet correction at the same time. They do not shout. They solve.
How to Ask Your Stylist for the Right Lengths
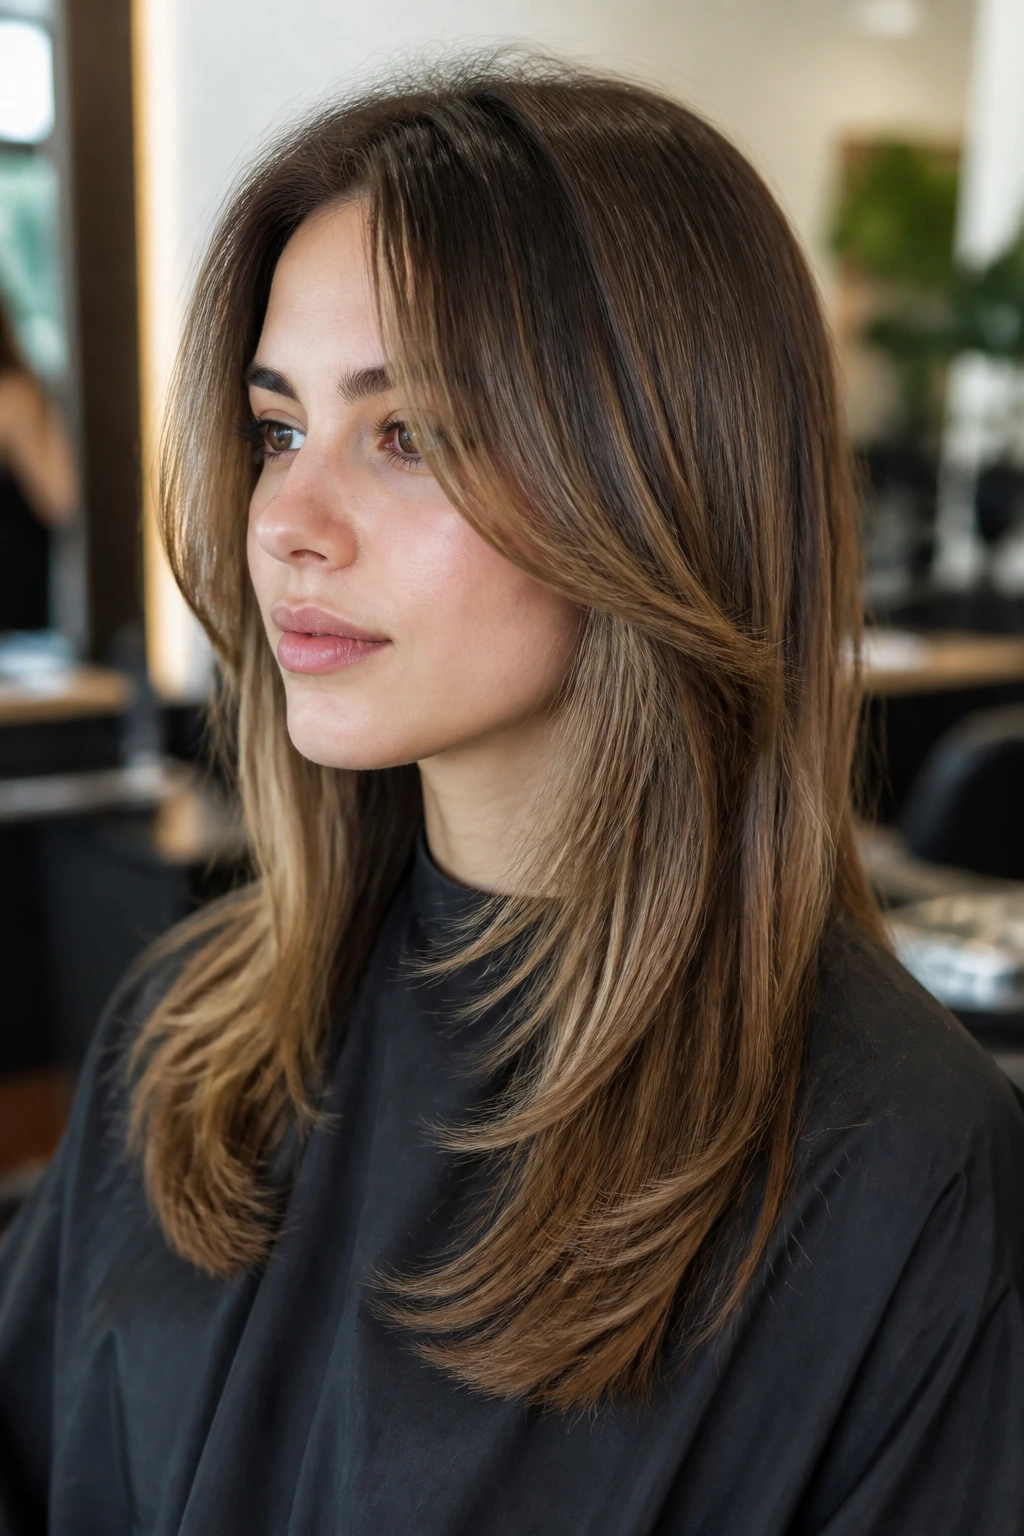
Stop asking for “a little face frame” and start using landmarks. Tell the stylist where you want the shortest point to land—cheekbone, lip, chin, or collarbone—and whether you want the back to stay blunt or softly layered. Those two choices matter more than the rest.
Bring photos, but use them like a translator. Point to the part you like: “I like this front length,” “I like how the ends move here,” “I don’t want this much volume.” That makes the conversation specific instead of vague, which is where a lot of bad cuts start.
A few details help even more:
- Tell them your part: center, side, or something between the two.
- Say how you wear it: air-dried, blown out, curled, or mostly tied back.
- Mention texture: straight, wavy, curly, fine, thick, or a mix.
- Show the hairline you like: if the shortest front piece should clear the jaw, say so plainly.
If your hair is curly, ask to see the shape when it’s dry or stretched, because shrinkage can steal two inches overnight. If your hair is fine, ask for fewer front pieces and more length. If it’s thick, ask where bulk can come out without making the ends look sparse. One decent sentence in the chair can save six weeks of annoyance.
Essential Tools for Styling and Trimming
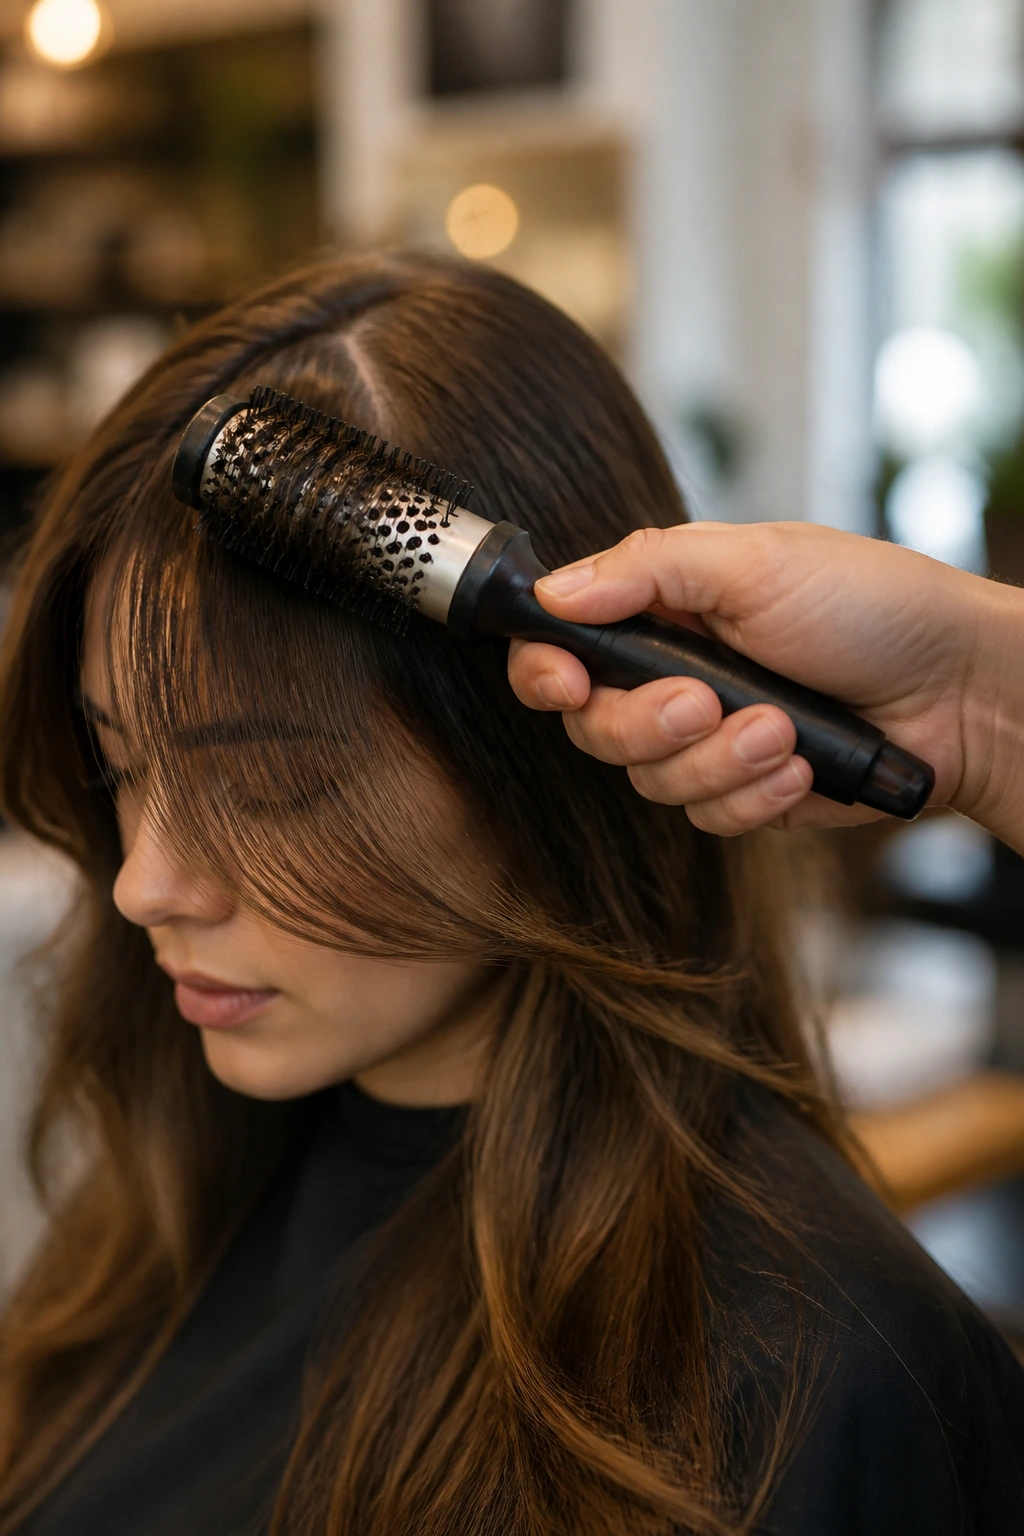
You do not need a drawer full of gadgets. You need a few things that actually help the front pieces do their job.
-
1.25- to 1.5-inch round brush: Best for bending the face-framing pieces under or away from the face without making them too curled.
-
Blow dryer with a concentrator nozzle: The nozzle matters because it lets you aim airflow at the roots and keep the front smooth.
-
Duckbill clips: These hold damp front sections in place while they cool, which helps the shape last longer.
-
Tail comb: Useful for parting cleanly and separating the shortest front pieces from the rest of the hair.
-
Heat protectant spray: A thin mist keeps the front from frying if you use a flat iron or curling iron often.
-
Lightweight mousse or root spray: Good for fine hair or air-dried textures that need a little lift at the roots.
-
Texturizing spray: Helps piece out soft layers without piling on heavy product.
-
Flat iron or 1-inch curling iron: Handy for creating a soft bend in the front when the hair won’t cooperate.
-
Large claw clip or silk scrunchie: Useful for half-up styling so the front pieces can stay loose while the rest of the hair is out of the way.
How to Wear the Cut on Center-Part, Side-Part, and Updo Days
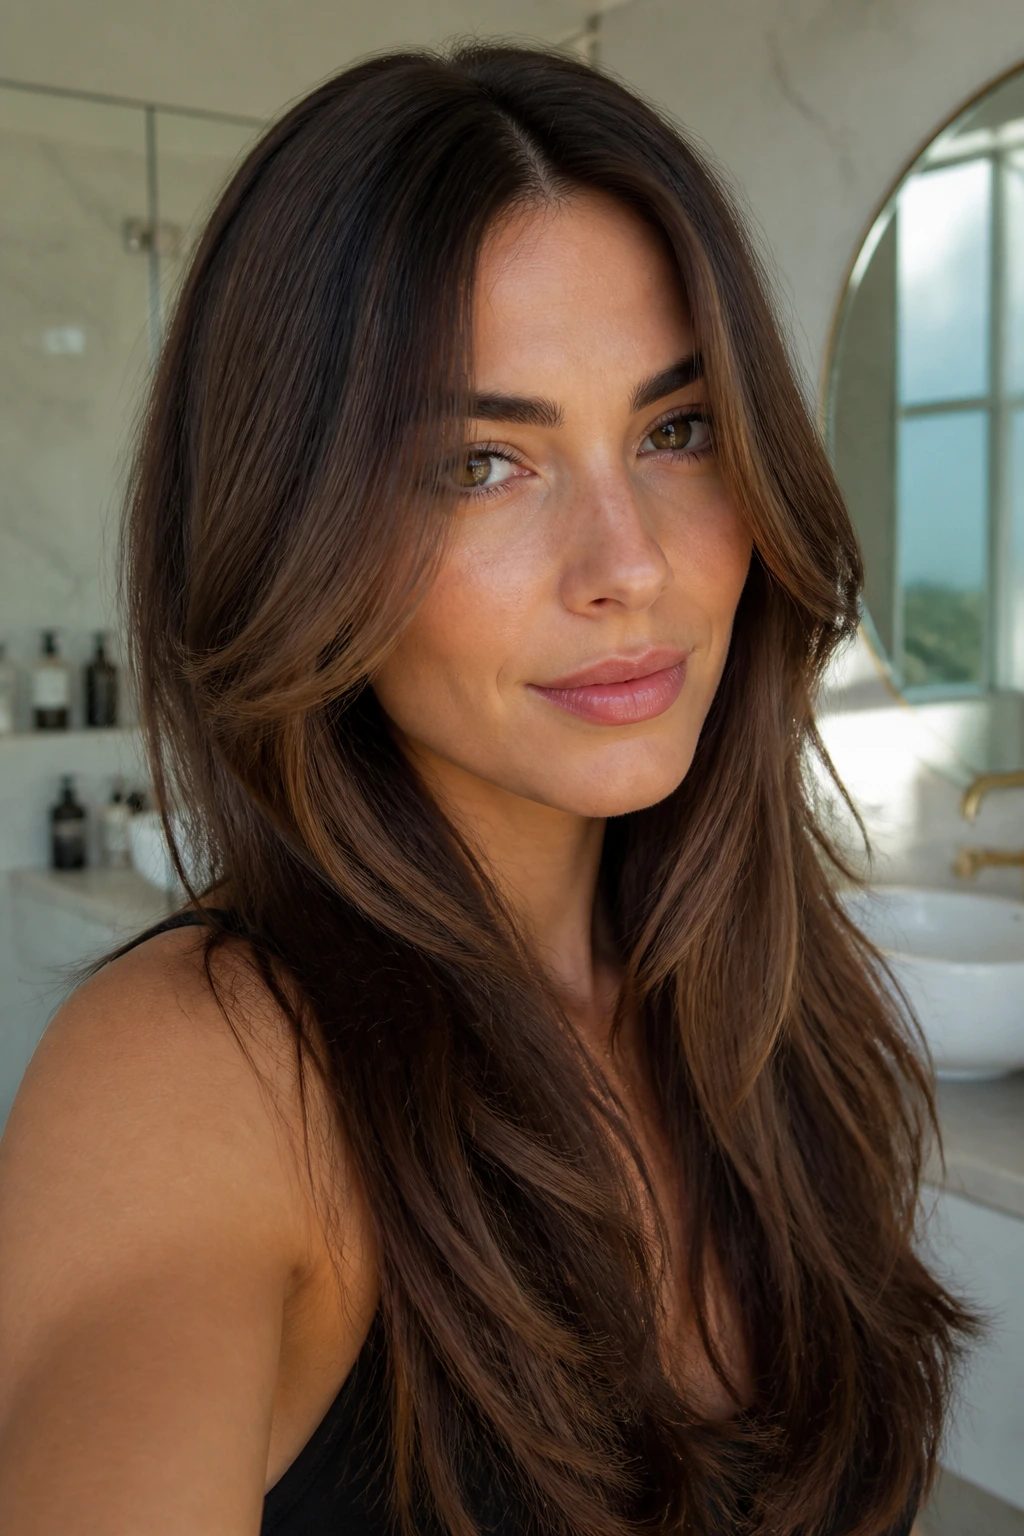
Center-Part Days
A center part makes long face-framing layers look calm and balanced. Keep the shortest piece long enough to skim the cheek or lip so the front doesn’t fall straight like a curtain. A small bend away from the face helps the shape breathe.
Side-Part Days
A side part gives the frame more direction and a little lift at the root. Let the heavier side start a bit higher near the part, then drift down across the cheek. That diagonal line can make long hair look fuller near the crown and softer around the jaw.
Half-Up Days
This is where good face-framing layers earn their keep. Leave the front loose and twist the rest back so the layer still shows around the face. If the shortest pieces are too short, they’ll poke out of the clip. If they’re long enough, they’ll soften the whole style.
Updo Days
Even when the hair is pinned up, the front pieces should still do some work. Pull a few around the cheeks or let them fall near the temples so the style doesn’t look severe. With long hair, those two front pieces can change a bun from plain to deliberate.
Air-Dry Days
A little mousse, a little finger-twisting, and patience. That’s enough for many waves and curls. Clip the front pieces away from the face while damp if you want more lift, then release them once the hair is partly dry. The shape will last longer than you’d expect.
Practical Tips That Make the Shape Look Intentional
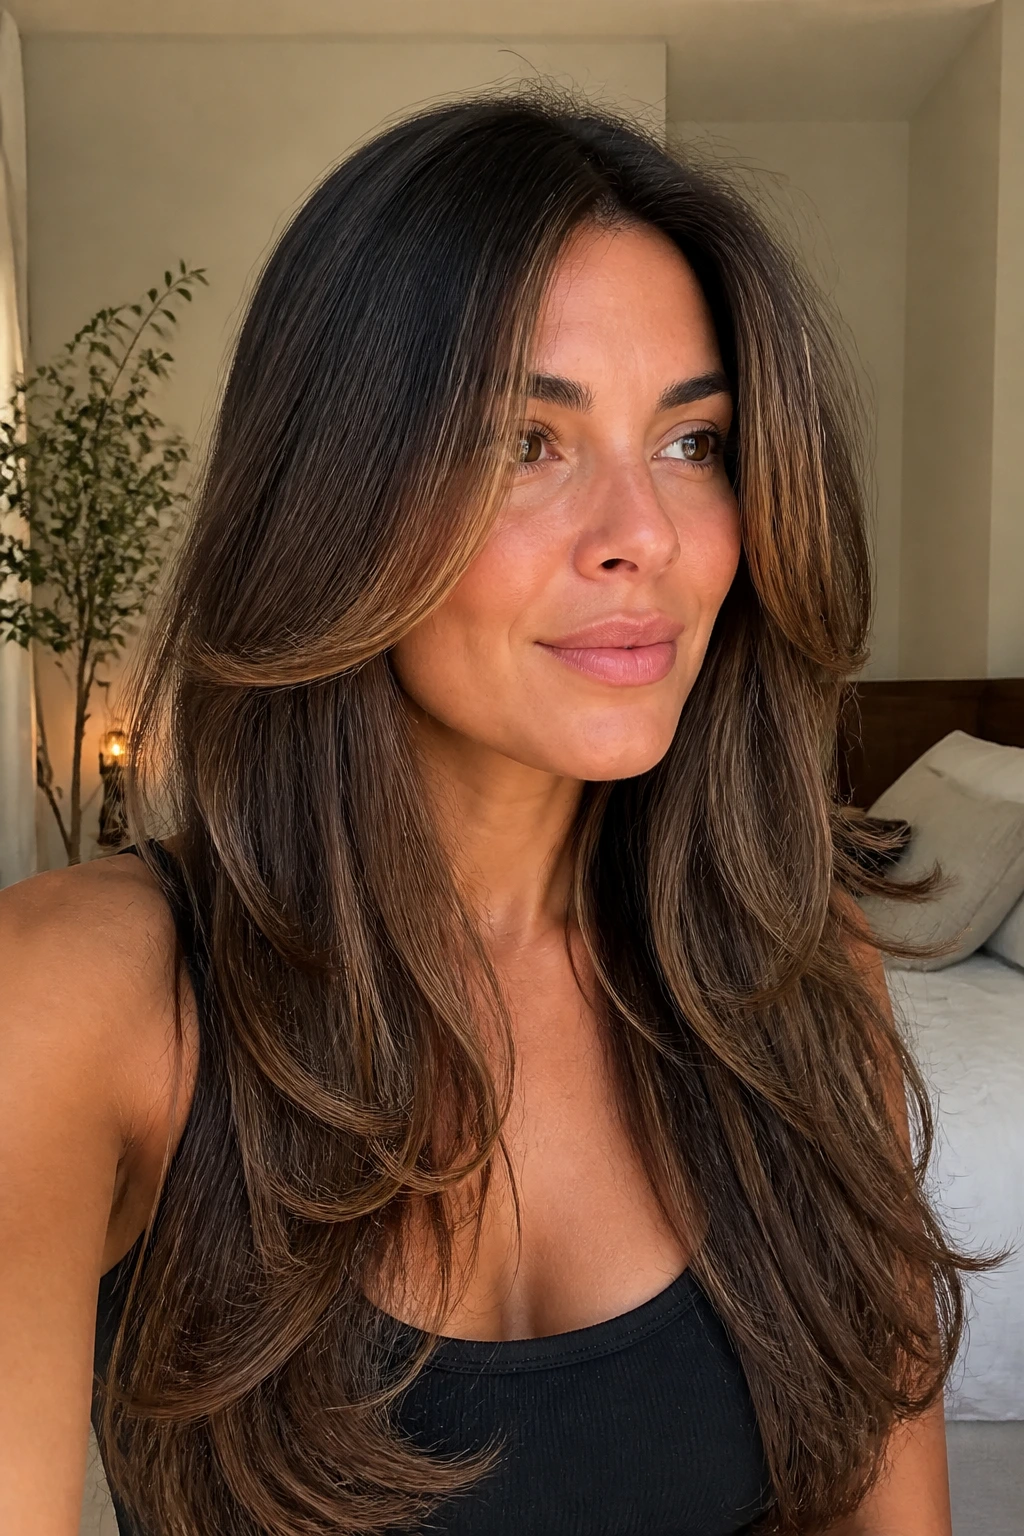
Lift: Dry the front pieces first. If the roots are flat, the whole frame can droop, even when the haircut is good.
Curve: Bend the ends away from the face for a softer look, or under for a more polished one. The direction changes the mood fast.
Texture: Use mousse or a light cream if your hair needs body. Heavy oils can clump the front pieces and erase the shape.
Balance: Keep the shortest layer long enough to tuck behind the ear. That small check keeps the front from becoming annoying in daily life.
Reset: On day two, mist the front with water, hit it with a dryer for 15 to 20 seconds, and smooth the ends with your fingers. It’s a quick fix that beats starting over.
Shape: If one side falls flatter than the other, change the part by half an inch. Sometimes the haircut isn’t the problem. The part is.
How to Keep the Layers Looking Good Between Trims
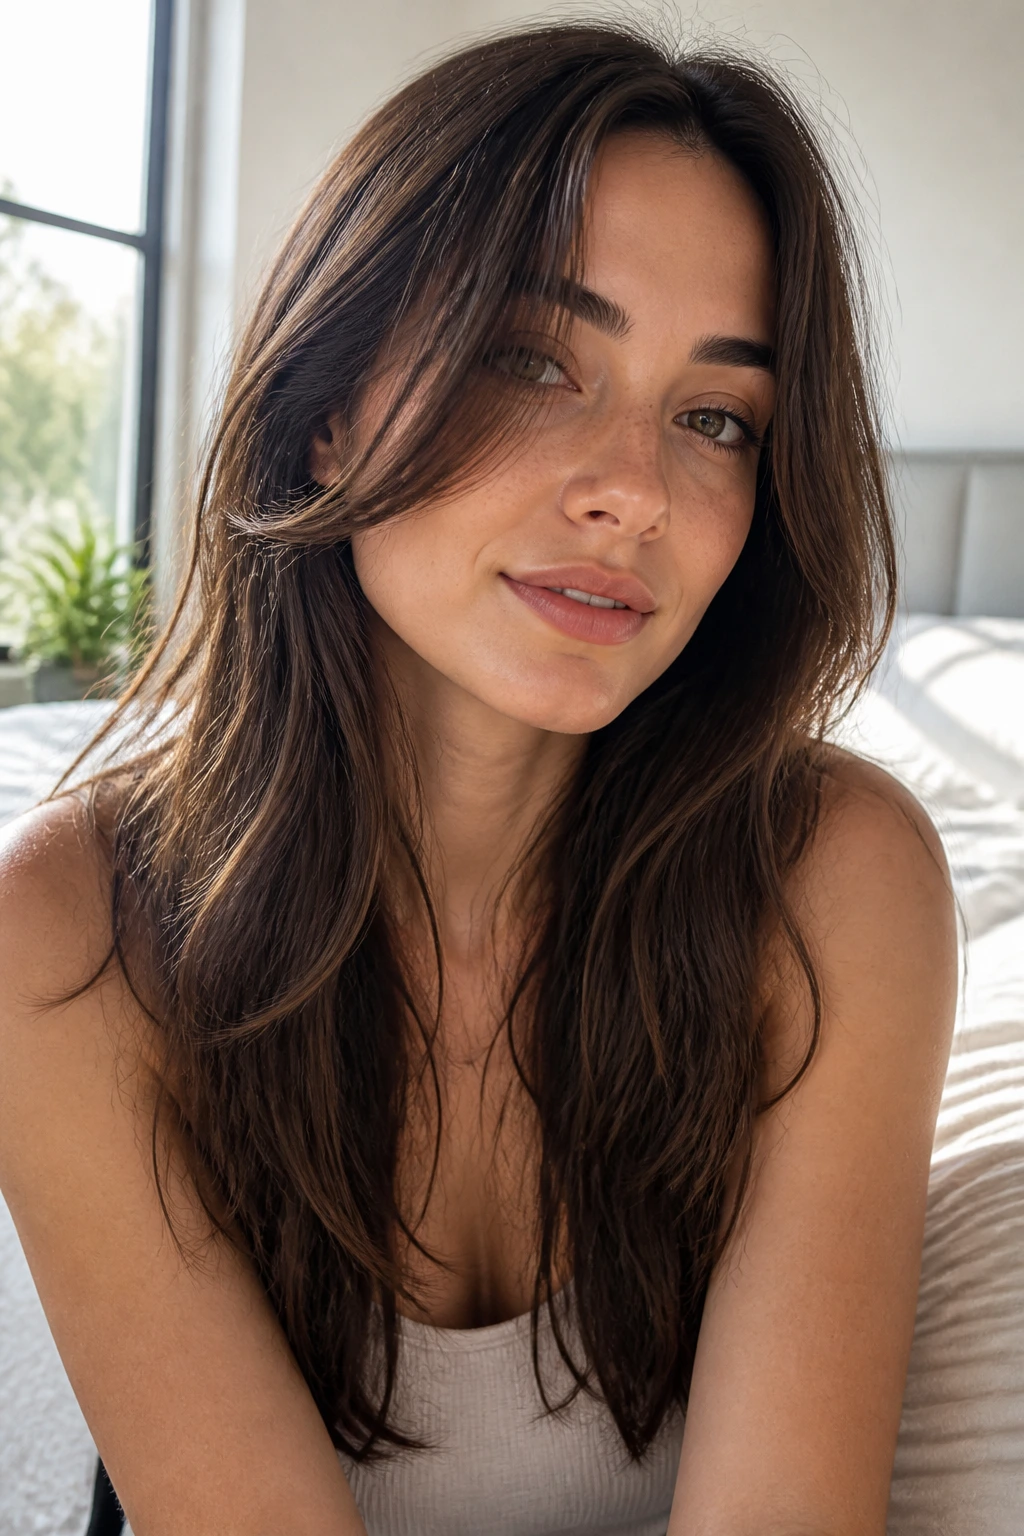
Face-framing layers show wear sooner than the back of long hair because they sit against cheeks, scarves, collars, and hands. If you want the front to stay crisp, plan on a trim every 6 to 8 weeks for shorter chin or lip pieces, and every 10 to 12 weeks for longer collarbone versions. Softer cuts can stretch a little longer than that.
The shortest front pieces usually show split ends first. That doesn’t mean the whole haircut is failing. It means the parts that touch your face the most need the earliest dusting. If you heat-style often, use a light protectant on the front every time, not only when you remember. The front is where heat damage shows fastest.
A few habits help the shape survive longer:
- Sleep on a satin or silk pillowcase if your hair frizzes easily.
- Keep dry shampoo at the roots, not through the front pieces.
- Avoid piling heavy oils on the face frame unless your hair is coarse and thirsty.
- If you wear glasses, watch the side pieces for snags and bends around the temples.
- For curls, refresh with water and a small amount of leave-in instead of brushing the shape apart.
If you want the haircut to grow out cleanly, ask for longer front pieces at the next trim rather than re-cutting the same short length every time. That keeps the line connected and saves you from constant resets.
Variations and Adaptations to Try
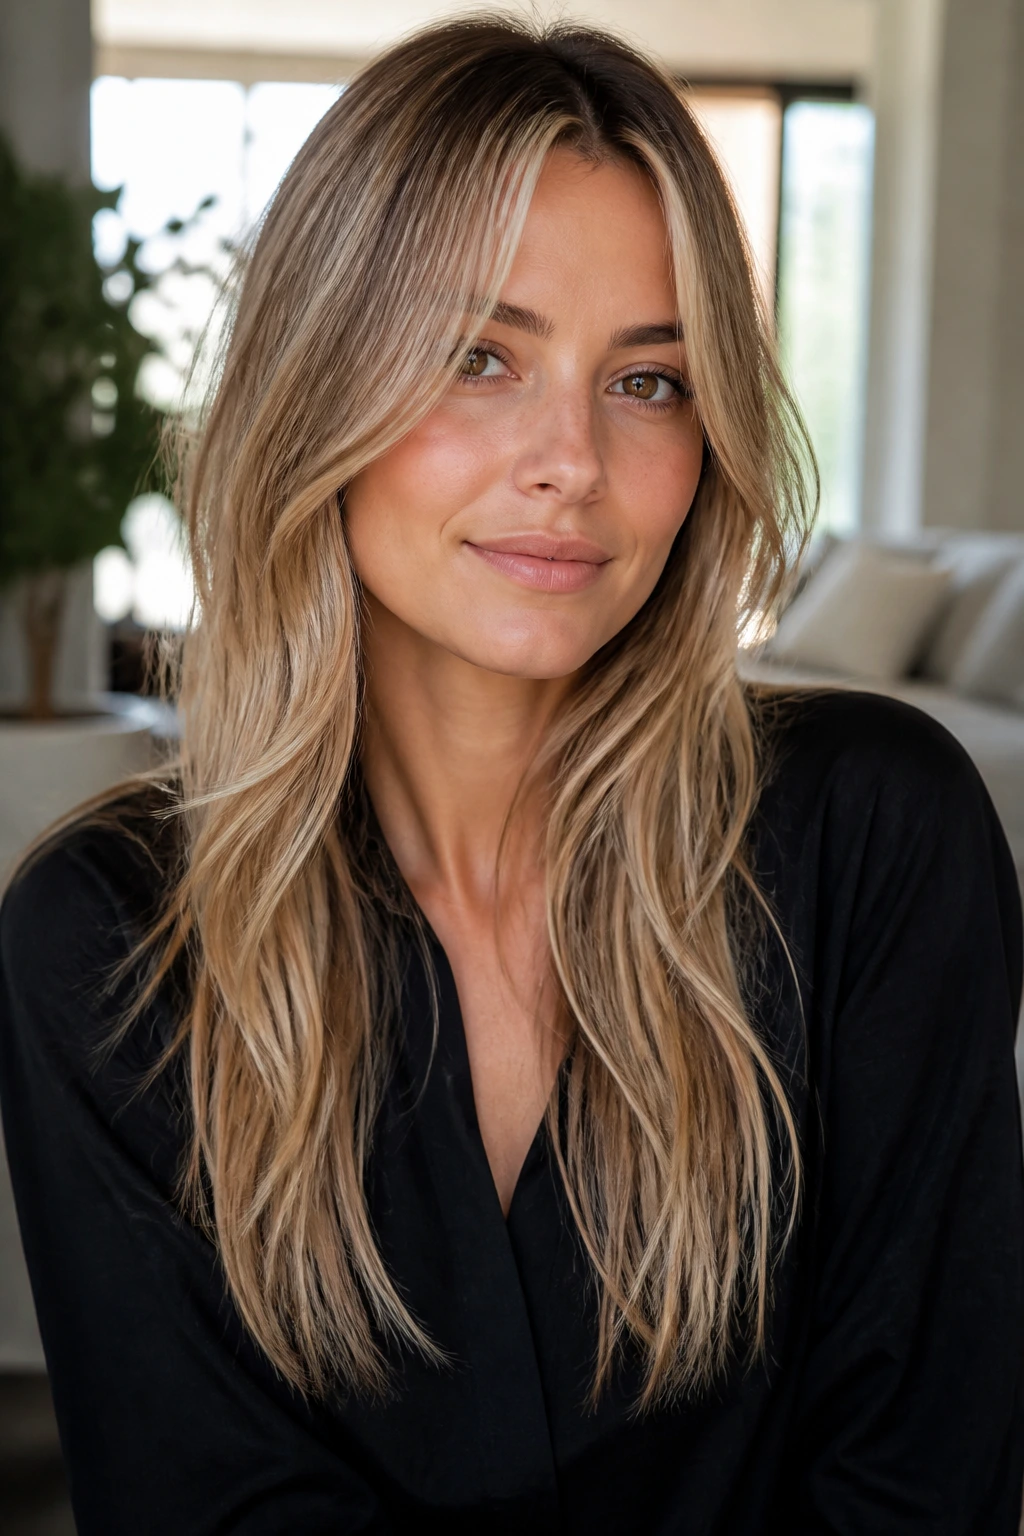
The Fine-Hair Lift: Keep the front long and only lightly layered, with a small amount of root lift at the part. This version gives movement without stripping density. It works best when the ends stay blunt enough to look full.
The Thick-Hair Softener: Ask for internal weight removal near the temples and cheek area, plus a longer taper through the front. This keeps the haircut from puffing out at the cheeks. It’s the version I’d choose if your hair takes forever to dry.
The Curly-First Shape: Have the frame planned around your dry curl pattern, not your wet length. The shortest point usually needs to sit lower than you think because curls spring up. That extra length protects the shape.
The Sleek Straight-Hair Frame: Use clean lines and minimal texturizing so the front lies smooth and reflective. Straight hair shows every snip, which means precision matters more than volume. A flat iron bend can finish the look without making it stiff.
The Low-Maintenance Grow-Out: Start the shortest point at the chin or below and keep the taper gradual. This version slides into long layers over time and doesn’t demand constant trims. It’s the smart choice if you like softness but hate maintenance.
The Big Blowout Version: Build the front pieces for a round brush, large rollers, or a curling iron set away from the face. This cut shines when the roots have lift and the ends fold neatly. It gives long hair that lifted, open look people always ask about.
Common Mistakes to Avoid

-
Cutting the shortest piece too high: If the front stops above the cheekbone, it can read like accidental fringe. Fix it by keeping the shortest point at cheek, lip, chin, or lower unless you truly want a bang effect.
-
Over-texturizing fine hair: Too many snips make the front go wispy and weak. The fix is long, controlled layers with only light refinement at the ends.
-
Ignoring your everyday part: A cut made for one part and worn with another can fall awkwardly. Bring your usual part to the appointment and style it that way when you test the shape.
-
Using heavy cream on the front pieces: Thick product can glue the layers together and erase the movement you paid for. A lighter mousse, spray, or serum usually works better.
-
Skipping styling on straight, blunt hair: If the front is cut clean but never bent, it can hang like a flat curtain. A few minutes with a brush or iron keep the shape alive.
-
Forgetting grow-out: A beautiful front on day one can turn into a shelf by week six if the stylist cuts too aggressively. Ask how the shape will look after a month, not only after the blowout.
Frequently Asked Questions

Do face-framing layers make long hair look thinner?
Not if they’re cut well. A soft frame can make hair look lighter around the face without stealing density from the ends. The problem usually comes from cutting too high or thinning too much near the front.
How short should the shortest layer be?
That depends on the effect you want. Cheekbone or lip length gives more movement, chin length feels softer, and collarbone length is the gentlest option. The best choice is the one that works with your face shape and daily styling habits.
Can curly hair handle face-framing layers?
Absolutely, but the cut needs more length than straight hair. Curl shrinkage can change the front by a couple of inches, so it helps to cut with the dry shape in mind. Many curl-friendly versions work better when the front is left longer than expected.
Will these layers work if I always wear a center part?
Yes. In fact, a center part is often where the front pieces matter most because it creates a strong vertical line. The frame softens that line and keeps the hair from hanging like one solid panel.
How often should I trim face-framing layers?
Shorter chin or lip pieces usually need a refresh every 6 to 8 weeks if you want them crisp. Longer, softer frames can go 10 to 12 weeks or a bit more. If the front starts flipping in odd directions, that’s usually your cue.
What if my stylist cuts the layers too short?
That’s where styling saves you. Blow-dry the front away from the face, use a side part if the center looks too strong, and keep the shorter pieces tucked behind the ears when needed. They’ll grow, but a little shape control helps in the meantime.
Can I have curtain bangs and face-framing layers at the same time?
Yes, and the two often work well together. Curtain bangs create a shorter center point, while the longer frame carries that movement into the cheeks and collarbone. The important part is making the transition gradual so the haircut doesn’t look disconnected.
Are these layers good for very thick hair?
They can be excellent, as long as the stylist removes weight in the right places. Thick hair needs bulk taken out near the face and temples, not random short layers everywhere. Done right, the front feels lighter without making the ends look empty.
What should I tell a stylist if I’m nervous about losing length?
Say that plainly. Ask to keep the back length and only shape the front, starting no shorter than the chin or collarbone. That usually leads to a softer, safer result than asking for “layers” and hoping for the best.
The Shape That Keeps Its Swing
The nicest thing about face-framing layers for long hair is that they change the haircut without taking away what you already like. The length stays. The front works harder. The whole shape moves a little more when you walk, turn your head, or pin it back in a rush.
If you remember only one rule, make it this: the shortest front piece should solve a problem, not create one. Choose the point that helps your face, your part, and your texture, then let the rest of the layers support that choice. That’s what separates a trendy front from a cut you keep reaching for.
And once you find the right version, it stops feeling like a haircut detail and starts acting like part of your whole style.
