



Ombre hair has a bad habit of looking either expensive or slightly accidental, and there’s not much middle ground. When the fade is placed well, the color moves from deep roots to lighter ends in a way that feels lived-in, not striped. When it’s off, you get a blunt line, too much brass, or that old dip-dye look that announces itself before the haircut does.
The trick is not to chase the brightest ends possible. It’s to decide where the transition starts, how warm or cool the mids should be, and how much contrast the haircut can actually hold without looking choppy. A long wave can carry a dramatic fade. A blunt bob usually cannot. Curly hair can hide a lot of sins. Pin-straight hair, not so much.
That’s why ombre hair still earns its place in the salon chair. It softens grow-out, plays nicely with brunette bases, and gives you room to be subtle or bold without repainting the whole head every few weeks. Some of the prettiest versions are barely louder than a gloss. Others go straight into copper, platinum, plum, or navy. The fade does the work either way.
Why These Ombre Looks Keep Working
- Grow-out stays softer: A fade that starts 3 to 6 inches down the hair shaft looks deliberate when the roots come in, which matters if you do not want constant touch-ups.
- The palette is wide: Ombre can stay inside brunette territory, move to blonde, or jump into fashion shades like teal and lavender without changing the basic structure of the look.
- Texture changes the finish: Waves and curls break the color into ribbons, while straight styles show every shift in tone; that makes the same dye job read differently on different heads.
- You can control the damage: Keeping the roots deeper leaves the scalp zone alone and puts the lightening lower, where it matters most to the eye.
- It works with more cuts than people think: Lob lengths, layered long hair, bobs, and curly shags can all wear an ombre, as long as the fade matches the length.
1. Espresso Roots with Caramel Ends
This is the classic brunette ombre that never looks fussy when it’s done right. The roots stay deep espresso, around a level 3 or 4, and the lower half softens into caramel that reads warm instead of orange. On loose waves, the ends catch light in little streaks; on straight hair, the color looks sleeker and a little more polished.
Ask for the transition to begin below the cheekbone on medium-length hair or closer to the collarbone on long layers. That keeps the fade from crowding the face. Best for first-timers who want contrast without a huge bleach commitment.
A quick note: this version grows out cleanly for weeks because the darker root zone stays in charge. If your hair tends to pull warm, keep the caramel in the honey-gold family rather than going too yellow.
2. Dark Chocolate to Mocha Melt
Dark chocolate to mocha is the quieter sister of espresso and caramel. The shift is only one or two levels, which means the whole head still reads brunette, just richer at the ends. That small difference is the point. You get movement without a hard “before and after” line.
This look works especially well when hair is cut in long layers or a mid-length lob. The slight lift at the ends makes the movement show up each time the hair swings. If you wear your hair straight most of the time, ask your colorist to keep the mocha a shade deeper so the fade doesn’t disappear.
I like this one on hair that’s already a little dry at the ends, because you do not need to push it far into blonde territory. A gloss refresh every 6 to 8 weeks is usually enough.
3. Black to Cool Ash Brown
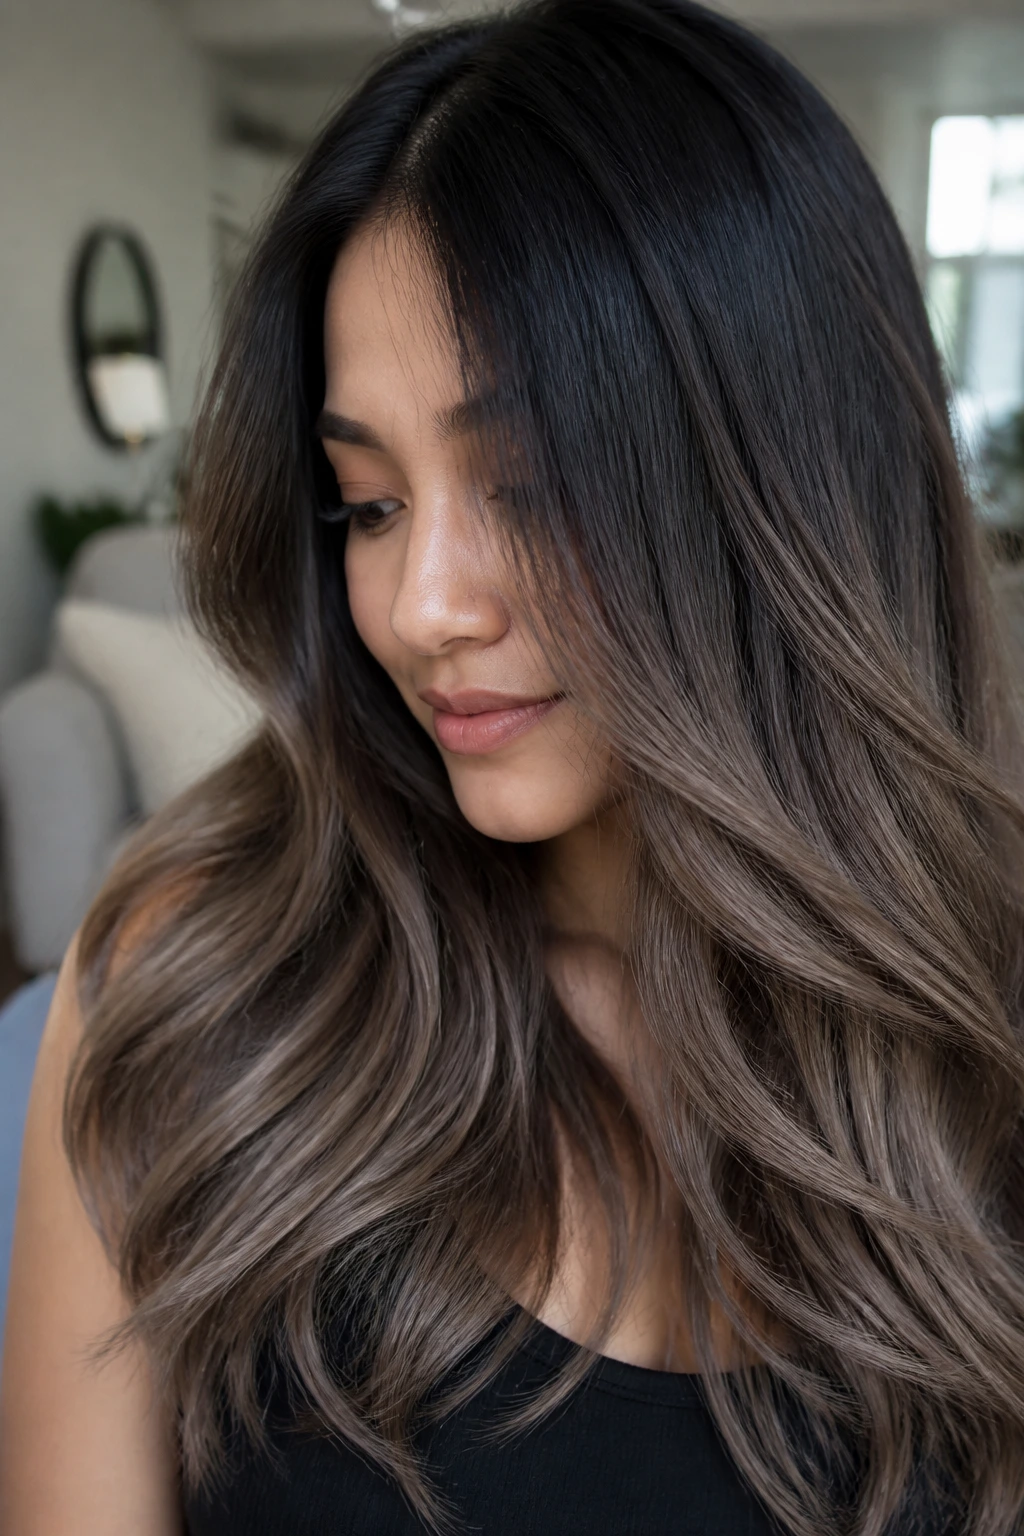
Black to cool ash brown is what you choose when warm tones turn brassy on you in a week and a half. The roots stay near black, but the lighter ends move into a smoky brown instead of caramel, so the finish feels cooler and more modern. The ash tone matters here; without it, the whole thing starts sliding red.
Cool undertones in the skin usually like this look, but neutral skin can wear it too if the ash isn’t pushed into flat gray. The best version has dimension, not chalkiness. On very curly hair, the contrast gets broken up enough that it looks softer than it does on a sleek blowout.
If you ask for this in a salon, mention blue-violet toner rather than golden toner. That one detail saves a lot of disappointment. On the maintenance side, this is less about lightening and more about keeping the ends from drifting warm again.
4. Brunette to Honey Blonde
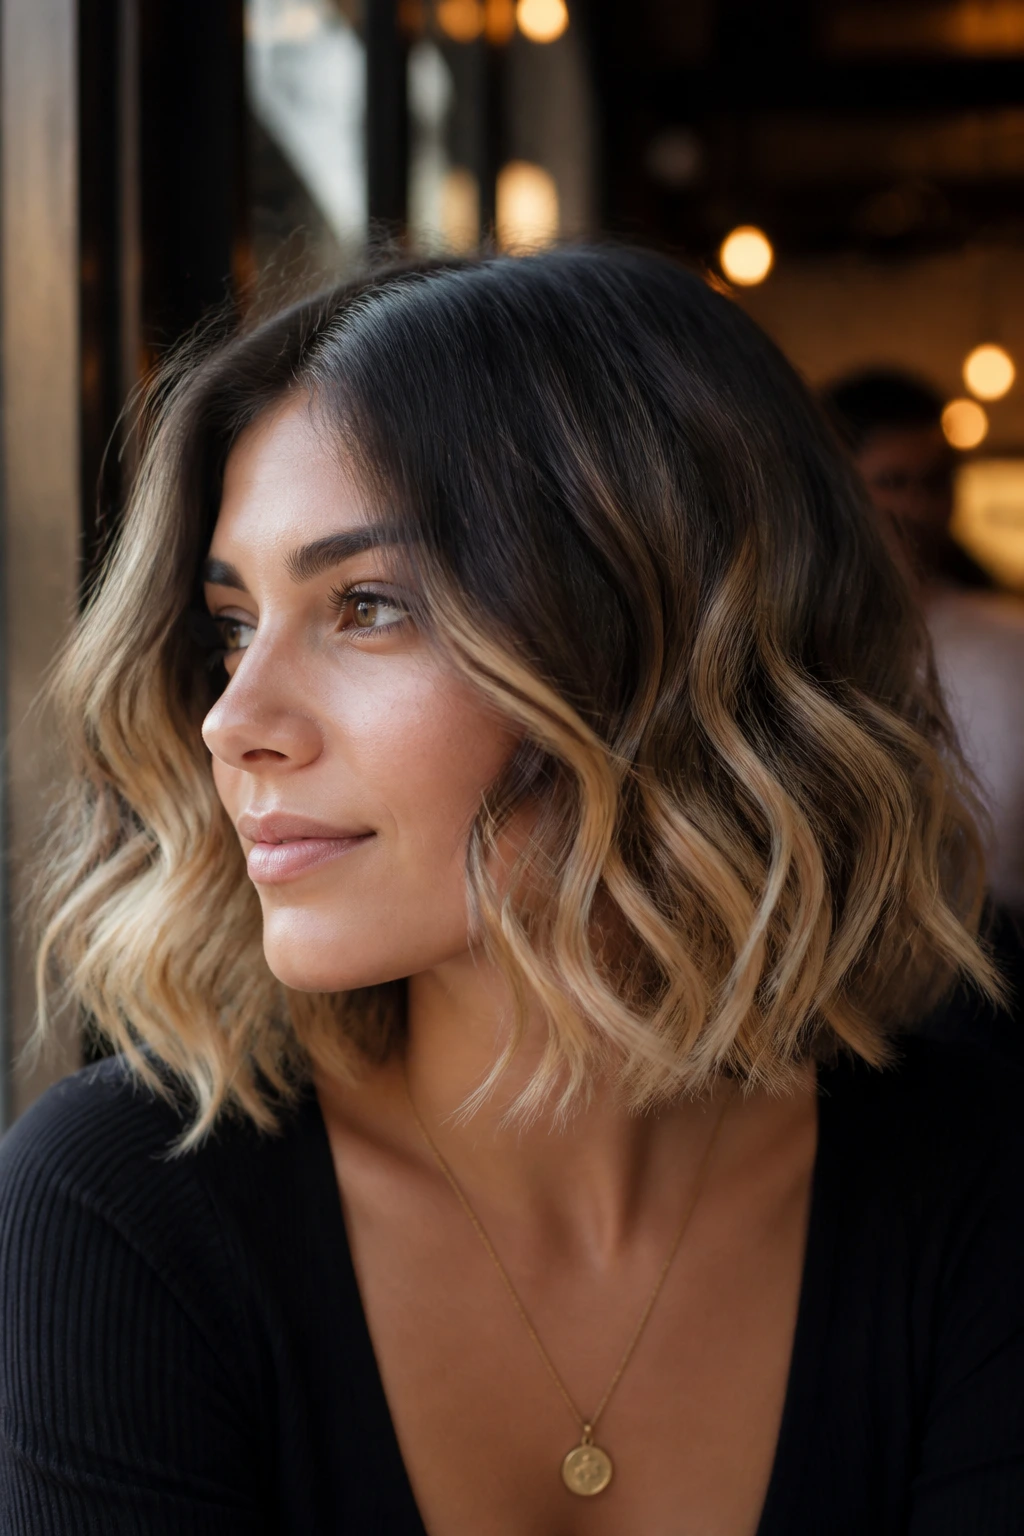
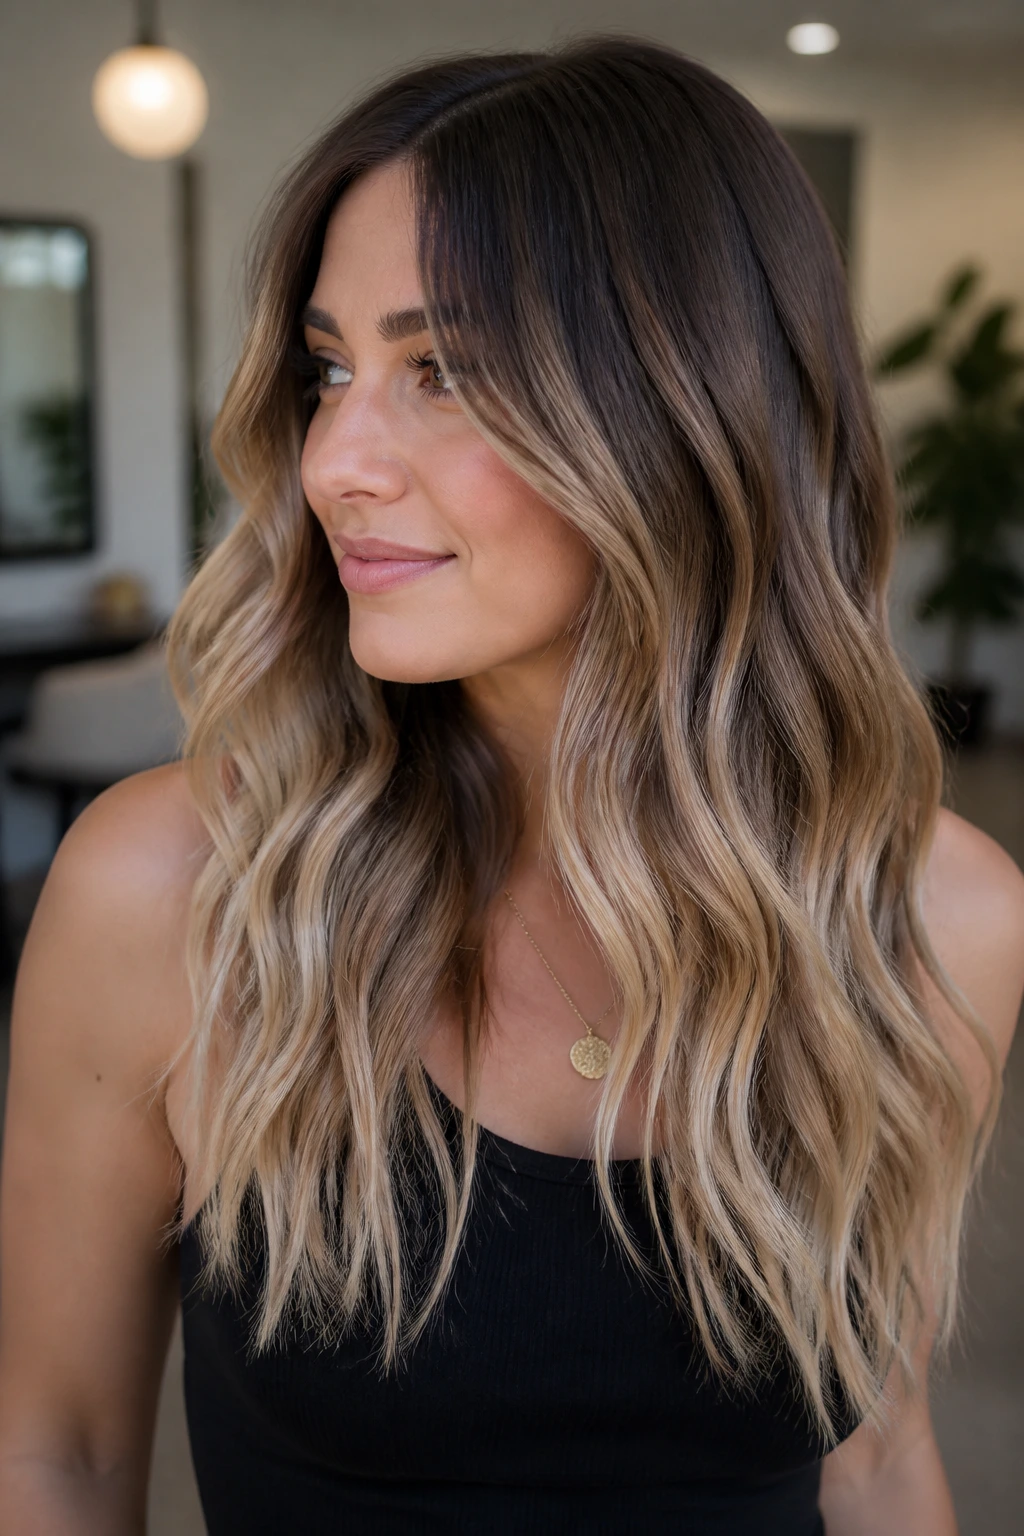
This is the ombre people picture first, and for good reason. Deep brunette roots sliding into honey blonde ends give the hair that sun-hit look without bleaching the scalp area. It’s brighter than caramel, louder than mocha, and still soft enough to wear with everyday clothes.
The line should not start too high. On shoulder-length hair, the fade often looks best around the jaw or just below it, because the blonde needs enough length to breathe. Too high and it turns into a chunky highlight effect. Too low and it can look like grown-out color instead of a designed ombre.
Loose bends from a curling iron help this look more than flat-ironing does. The honey pieces catch movement, and the darker top keeps the finish grounded. If you like dimension but do not want a platinum commitment, this is one of the safest bets.
5. Mushroom Brown Ombre
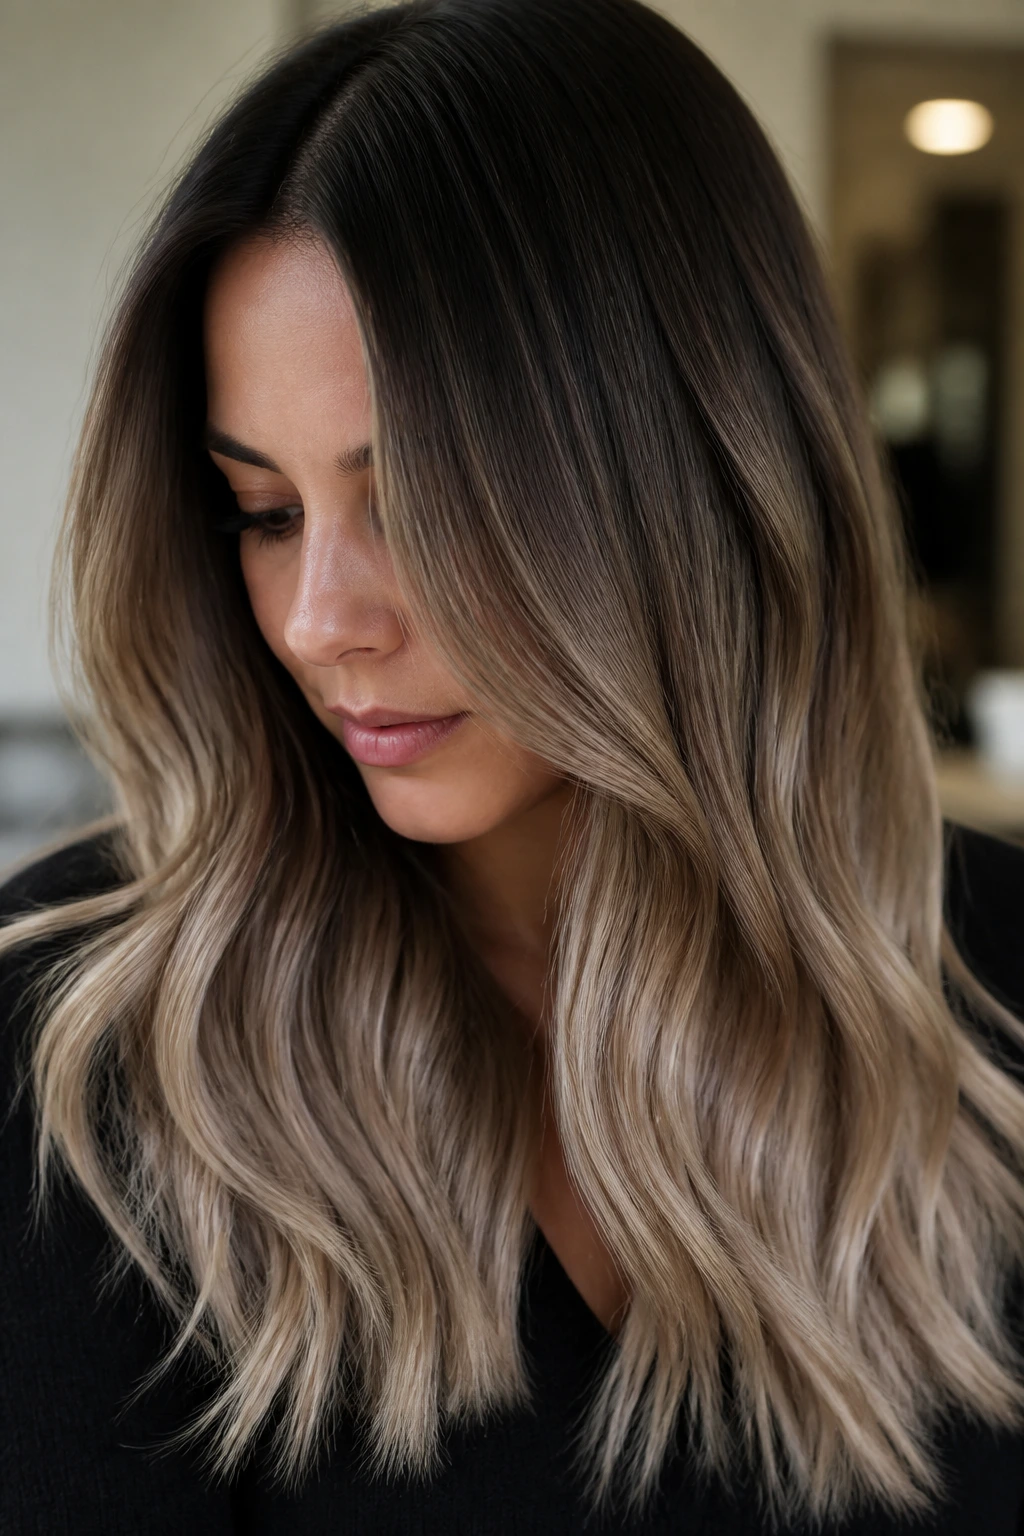
Mushroom brown ombre is for people who love beige, taupe, and ash more than anything sweet or golden. The shift moves from deeper brown roots into a cool, muted brown that sits somewhere between brunette and soft blonde. It has that dusty, expensive feel without needing a bright finish.
This color works best when you want the ombre idea to stay understated. It is not a beachy blonde look. It’s more like a soft shadow turning into a smoky taupe at the ends, which makes it a good fit for straight hair, blunt lobs, and polished waves.
Because the tone is so neutral, toner matters a lot. Too much warmth and you lose the whole point; too much ash and the ends can go hollow. Keep a beige gloss in the rotation every 4 to 6 weeks if your hair lifts warm fast.
6. Chestnut to Copper Fade
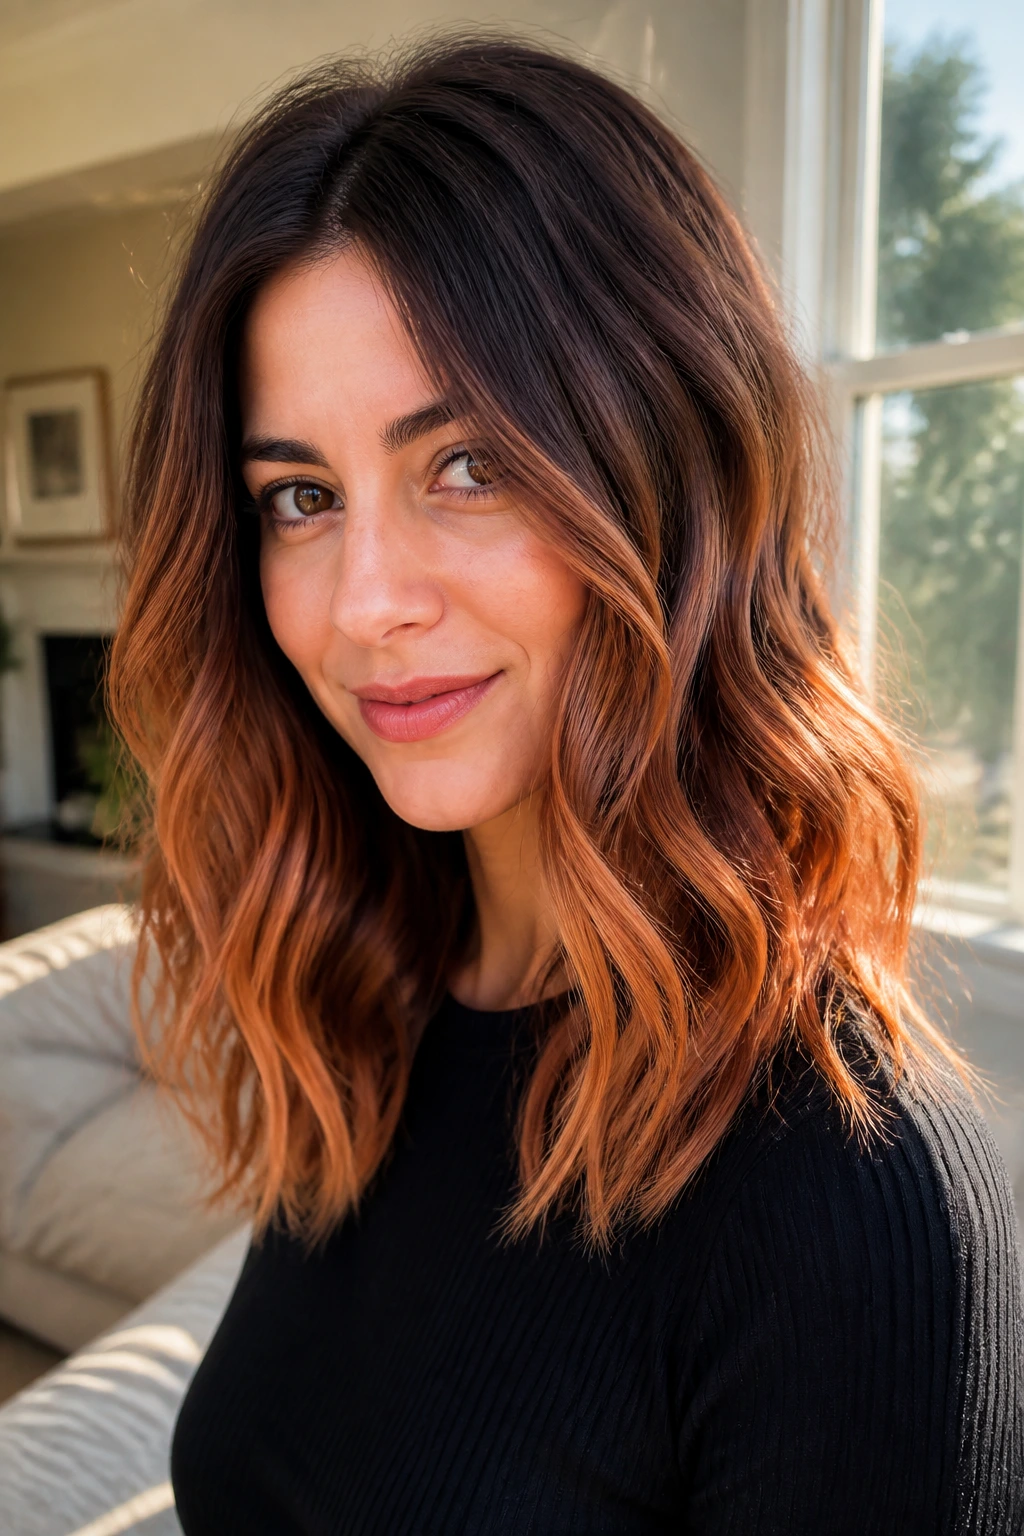
Chestnut to copper is one of those fades that makes wavy hair look like it has been lit from the inside. The top stays a warm brown with red undertones, then the ends move into copper that glows without needing to be neon. It feels rich, not cartoonish.
This is a good pick if you like warmth but want more edge than caramel gives you. Copper fades faster than brunette or ash, so the ends may soften a little after a few washes. That isn’t a flaw. It’s part of the look.
Ask for the copper to stay within a level or two of the chestnut base if you want it wearable day to day. The more saturated the copper, the more often you’ll need gloss or color-depositing conditioner to keep it from dulling.
7. Auburn to Cinnamon Ribbon
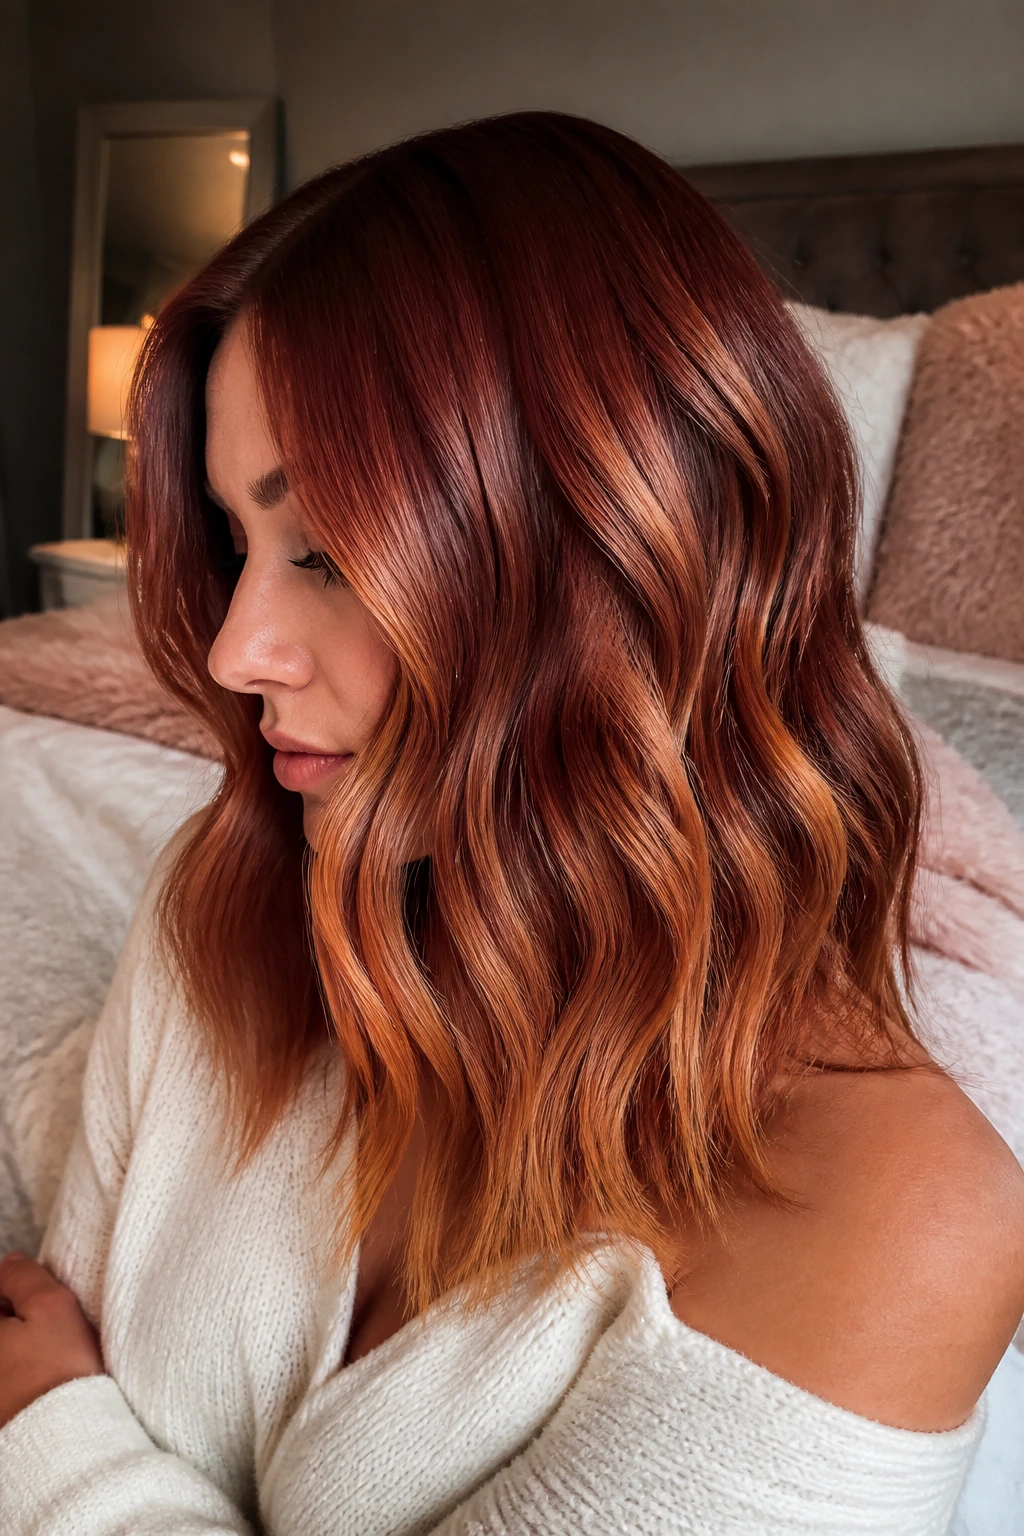
Auburn to cinnamon ribbon gives red hair a softer, more dimensional finish. The roots stay in that deep auburn family, while the lower lengths pick up cinnamon, clove, and a little gold warmth. It’s a little spicier than chestnut, but less harsh than a full red-to-orange shift.
What makes this look work is the ribboning. The ends should not be painted like a block. They need variation so the light catches different parts of the strand. That matters even more on layers, where the movement can either show the color or flatten it.
If your natural hair already has red undertones, this fade is easier to maintain than people expect. A red-safe conditioner and a weekly color-depositing mask usually keep the ends from washing out too fast.
8. Red Wine to Cherry Cola
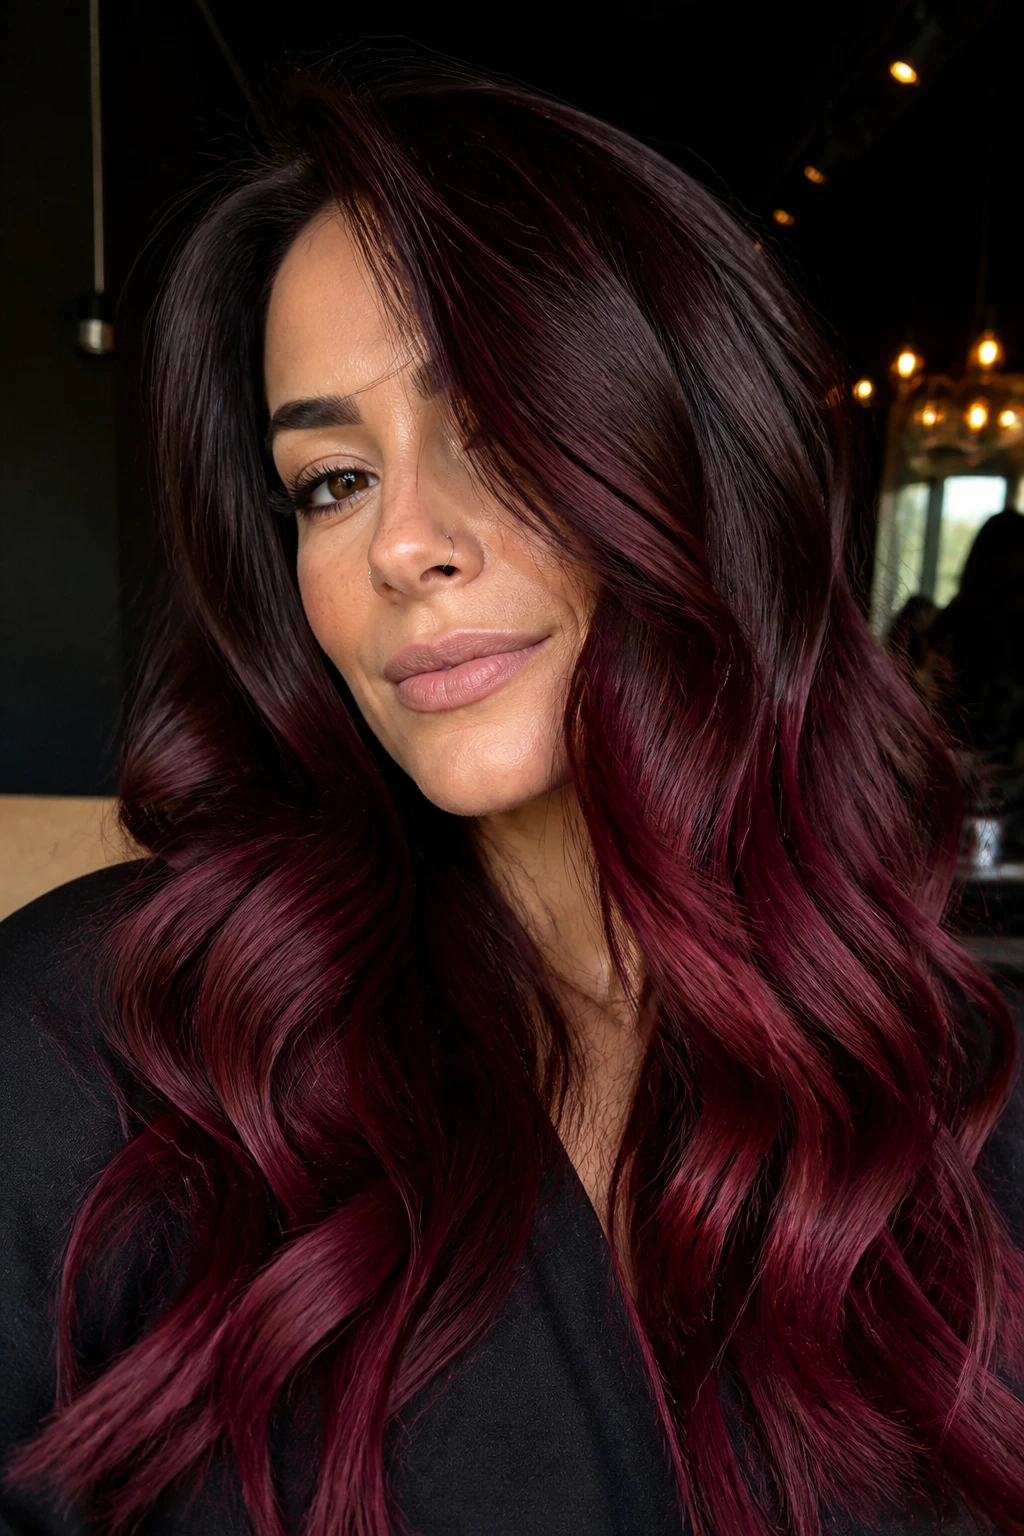
Red wine to cherry cola is deep, moody, and a little glossy in the best way. The base sits in burgundy territory, then the fade warms into a richer cherry tone toward the bottom. It looks especially good against dark clothes and clean makeup because the color has enough depth to stand on its own.
This one is less about brightness and more about sheen. You want the hair to look plush, not flat. A root shadow helps keep the top dark while the lower half holds a little more red payoff. On straight hair, the shift can read sleek and expensive; on waves, it gets more obvious and dramatic.
The challenge is fade speed. Red pigments rinse out fast, especially from porous ends, so this is a look that benefits from cooler water, gentle shampoo, and periodic glosses.
9. Black to Plum
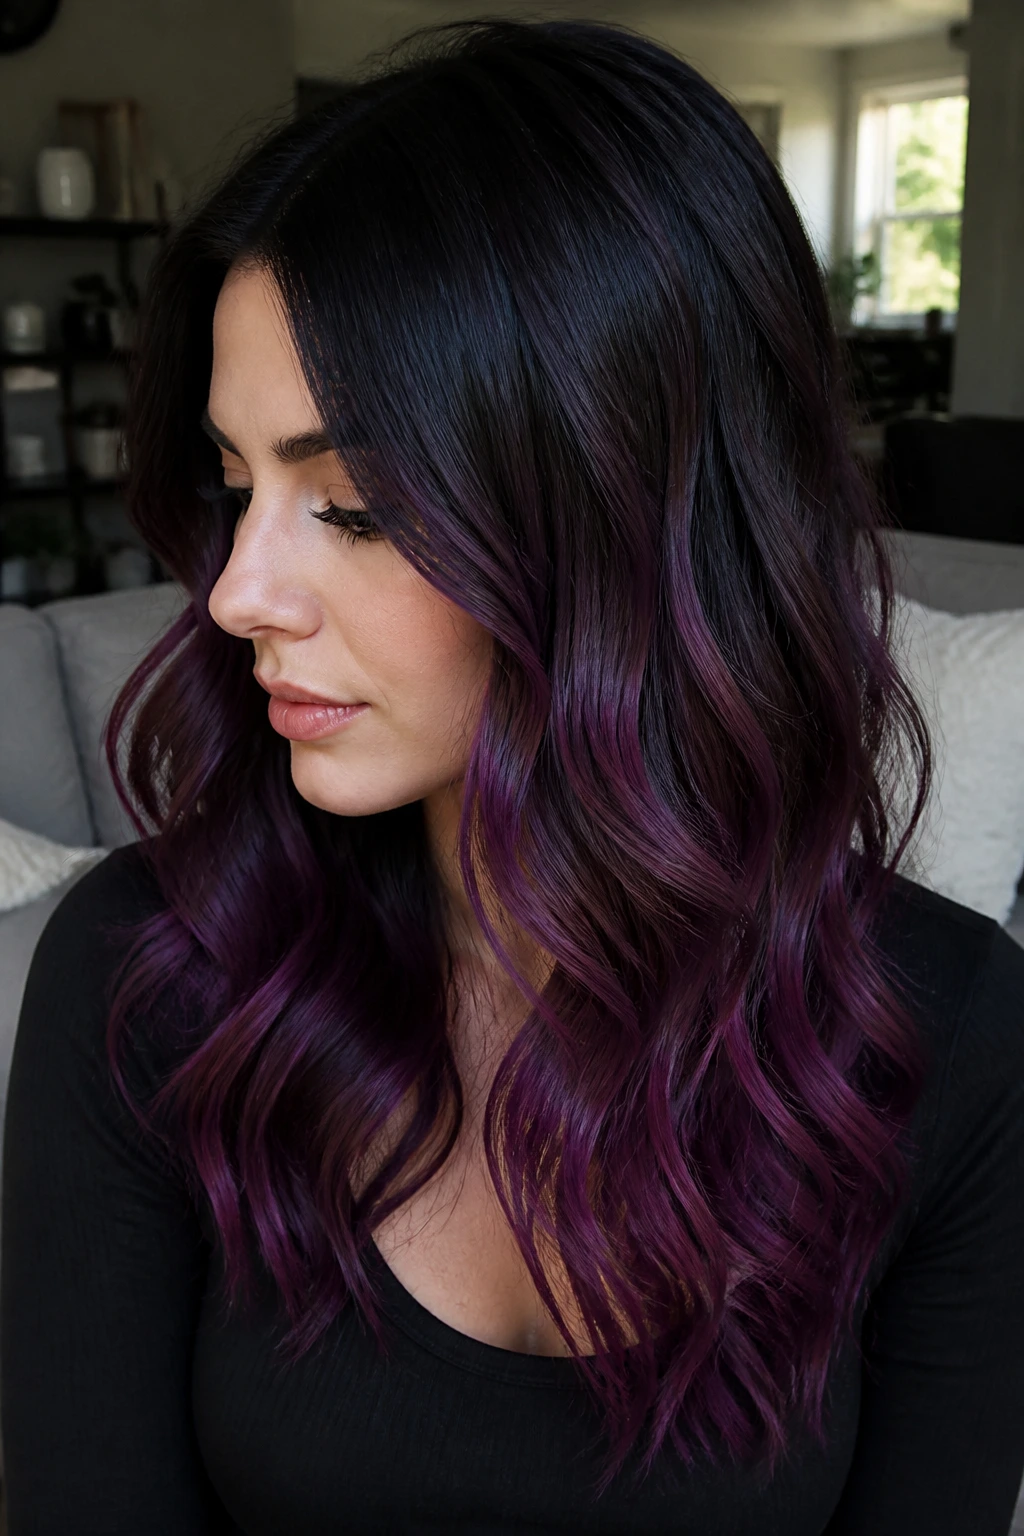
Black to plum has a moody, jewel-toned finish that works when you want color without obvious brightness. At first glance, the hair looks nearly black. Then the ends catch a plum or eggplant tone that only shows itself when the light hits from the side.
This is a smart choice for medium to dark skin tones and for anyone who likes cooler colors but does not want blue-black hair. The plum keeps the look rich. If the purple is too vivid, it can tip into costume territory fast. The best version stays smoky and deep.
A blunt cut gives this style a cleaner edge, while loose curls make the plum pop more. It’s also one of the easiest fashion-color ombres to wear in a conservative setting because it can hide in plain sight until it moves.
10. Midnight Navy Fade
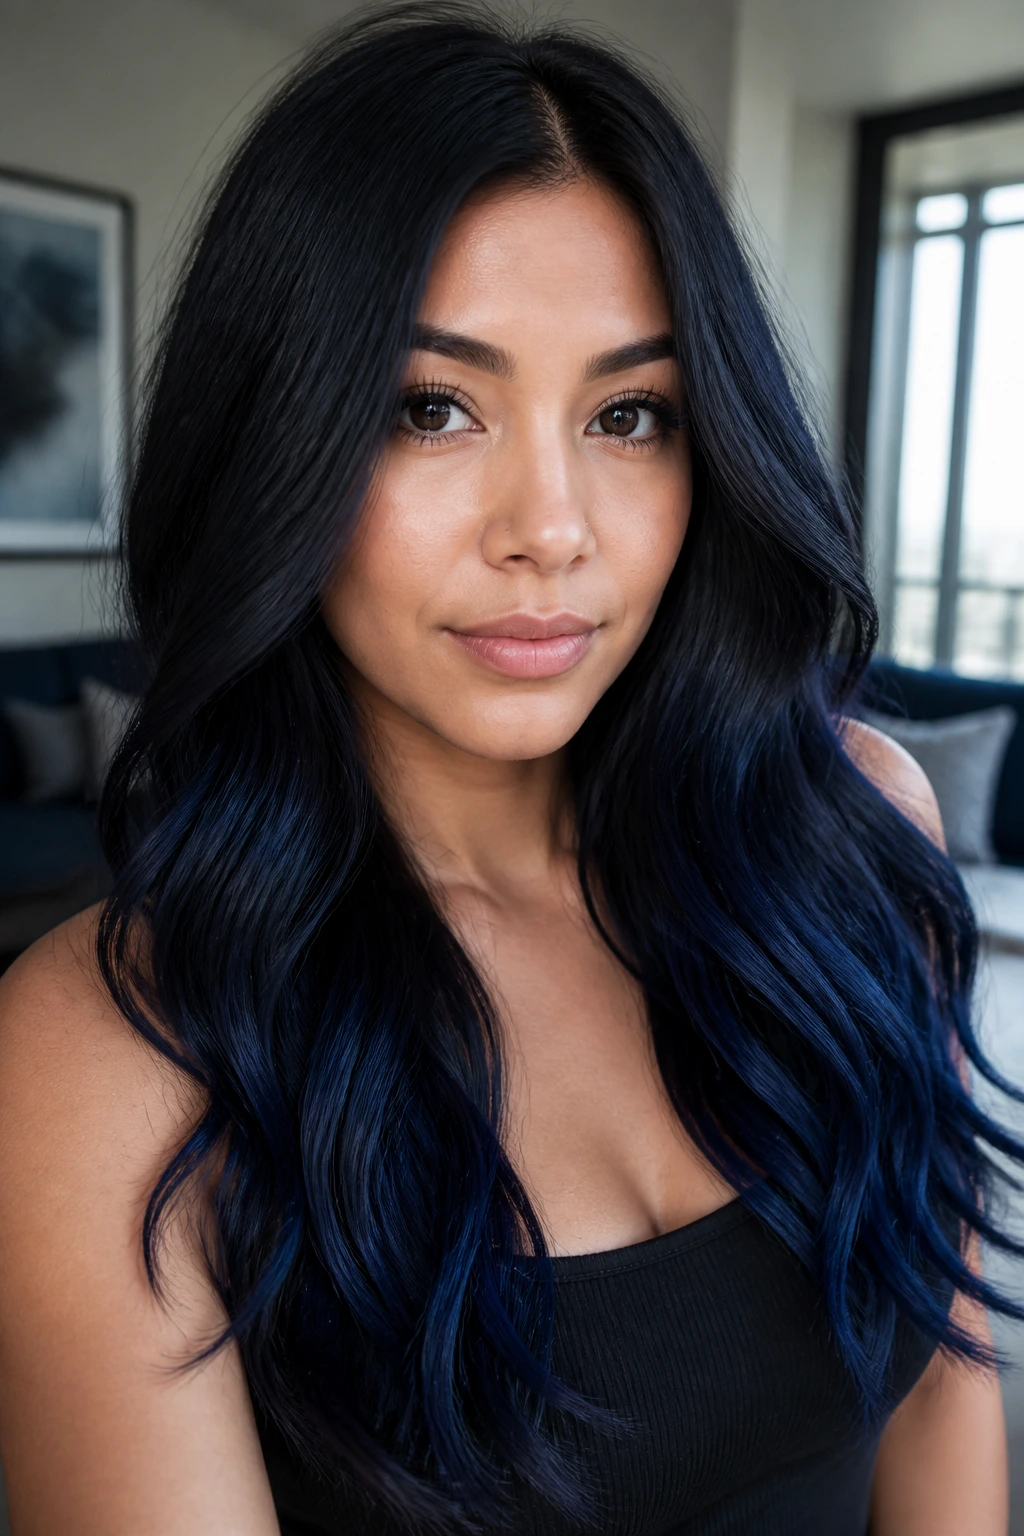
Midnight navy fade is for people who want dark hair with a twist, not a full neon fantasy color. The roots stay black or nearly black, then the mids shift into navy that looks almost charcoal indoors and more obviously blue near daylight. That split personality is half the fun.
The ends should be saturated, not patchy. Navy can turn greenish if the base is too yellow, so the hair needs a clean lift first. On a sleek style, the navy bands look smooth and sharp. On texture, they break into soft blue-black flashes that are easier to live with.
If you’re nervous about vivid shades, this is one of the easiest places to start. It gives you color pay-off without forcing you into bright teal or electric blue.
11. Teal Mermaid Ends
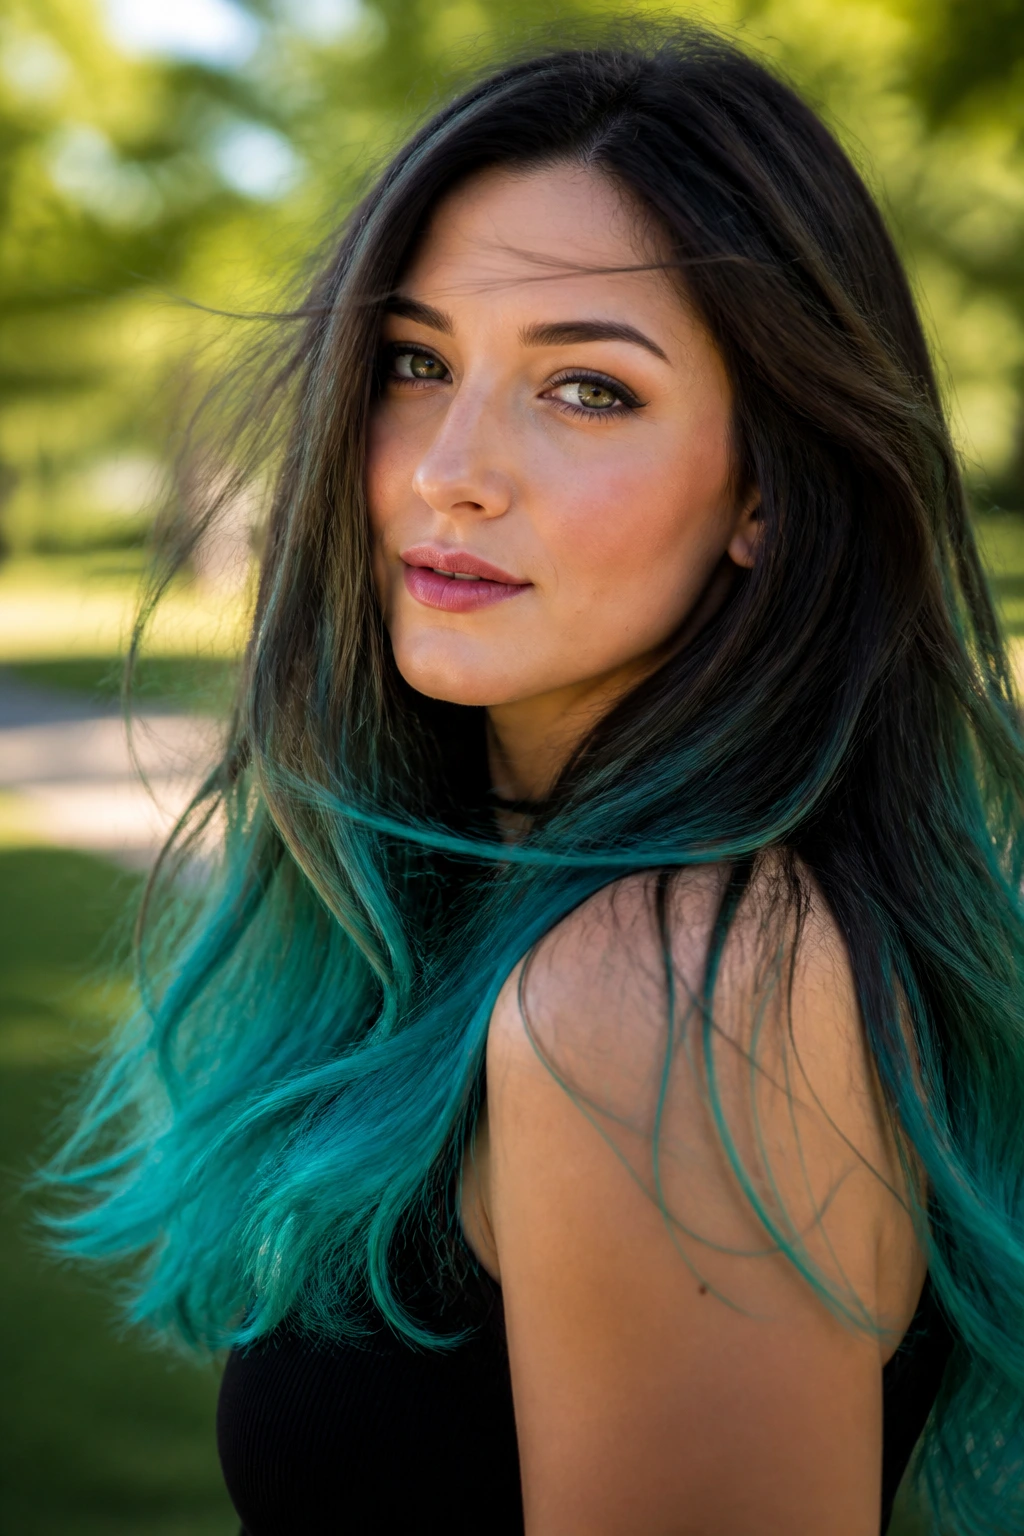
Teal mermaid ends are unapologetic. The top can stay dark brunette or black, but the last portion of the hair shifts into teal with enough saturation to read clearly even when the hair is half up. It’s one of the most playful ombre looks on the list, and it needs commitment.
For the cleanest result, the ends usually need to be lifted to a pale blonde first. Teal sits much better on a lighter base than on orange hair, which can muddy the shade fast. If the hair is porous, a bond builder helps keep the ends from feeling like straw after lightening.
I like this look best on long hair or shags with lots of movement. The color needs room to breathe. A sharp bob can wear it too, but the result feels more graphic and less ocean-like.
12. Lavender Smoke
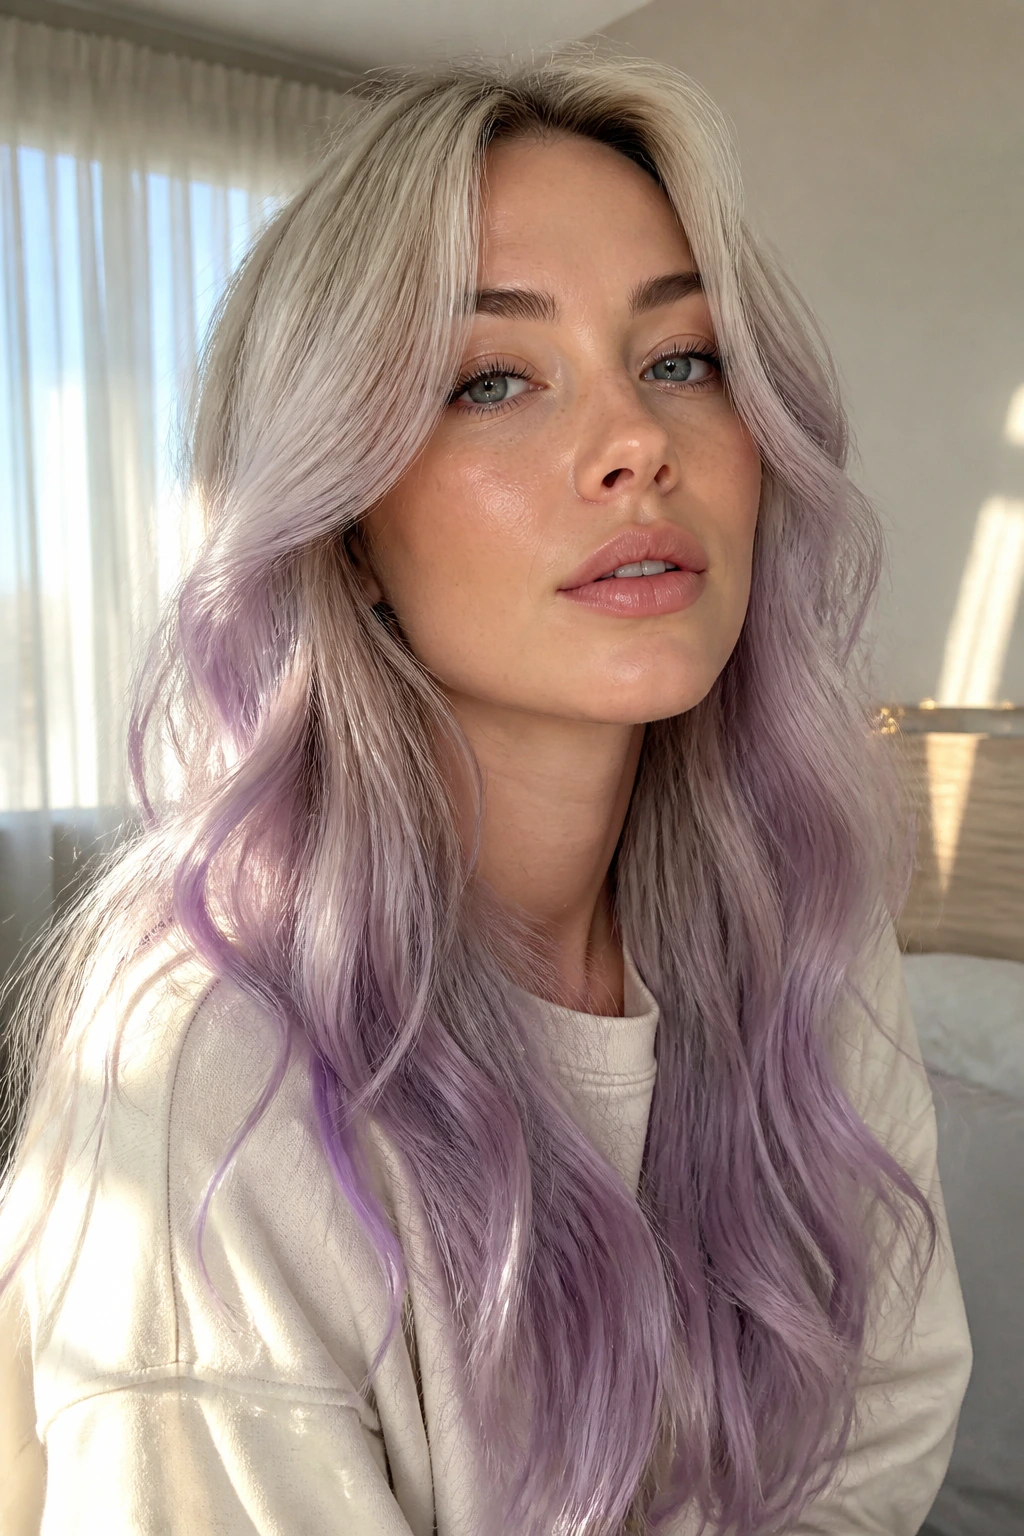
Lavender smoke only works if the hair is light enough to hold a pastel. That’s the first thing to know. The fade usually begins on a pale blonde base and then shifts into a muted lavender that feels dusty rather than candy-colored. The smoke part matters; it keeps the purple from looking chalky.
This is one of those shades that rewards clean prep. If the hair still has yellow left in it, the lavender can turn muddy fast. The best finish is soft, cool, and a little translucent at the edges.
On waves, lavender smoke looks airy. On straight hair, it becomes more graphic. Either way, it fades quickly, so you need to be comfortable with toner and color refreshes. It’s a short-memory color, and that is part of its charm.
13. Rose Gold on Blonde
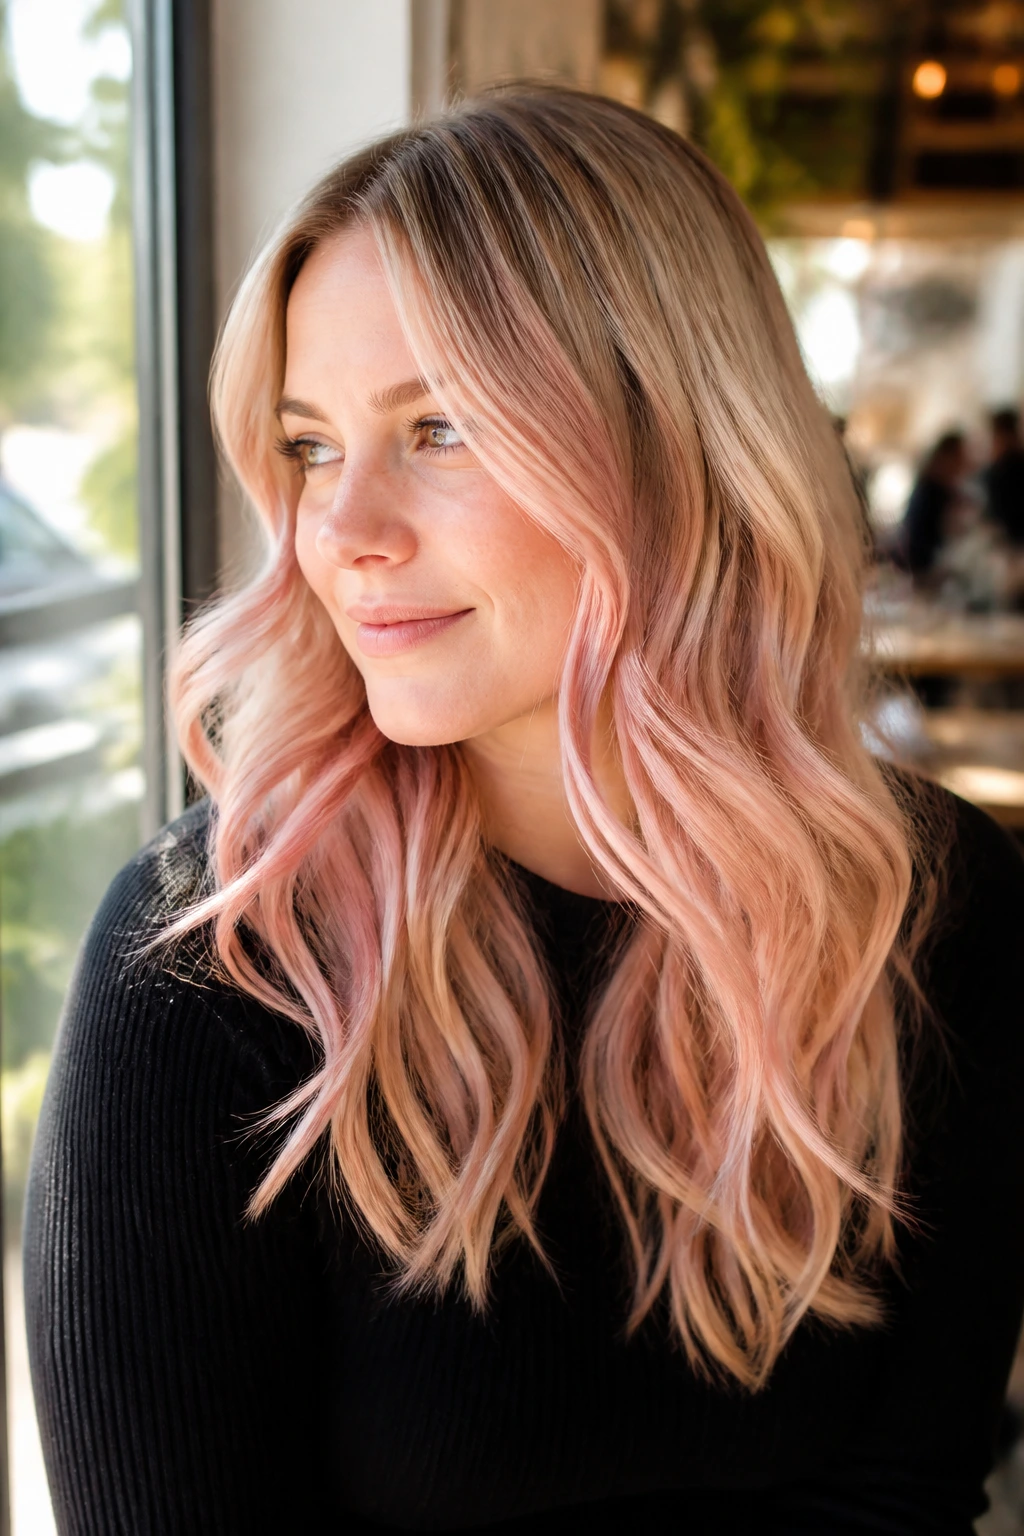
Rose gold ombre has a warmer, softer personality than pink, and that makes it easier to wear. The roots are usually a neutral or light blonde, then the mid-lengths and ends pick up a blush-gold tint that feels gentle instead of sugary. It gives blonde hair a little blush without turning it into a theme.
The best version is not overly metallic. You want a soft pink sheen over beige blonde, not a bright copper-pink block. On textured hair, rose gold flickers in and out as the curls move, which keeps it from looking flat.
This is a good choice if you want a fashion color that still reads polished in daytime. It also grows out nicer than a fully saturated pink because the tone can fade into a warm blonde rather than a muddy pastel.
14. Peach Champagne Fade
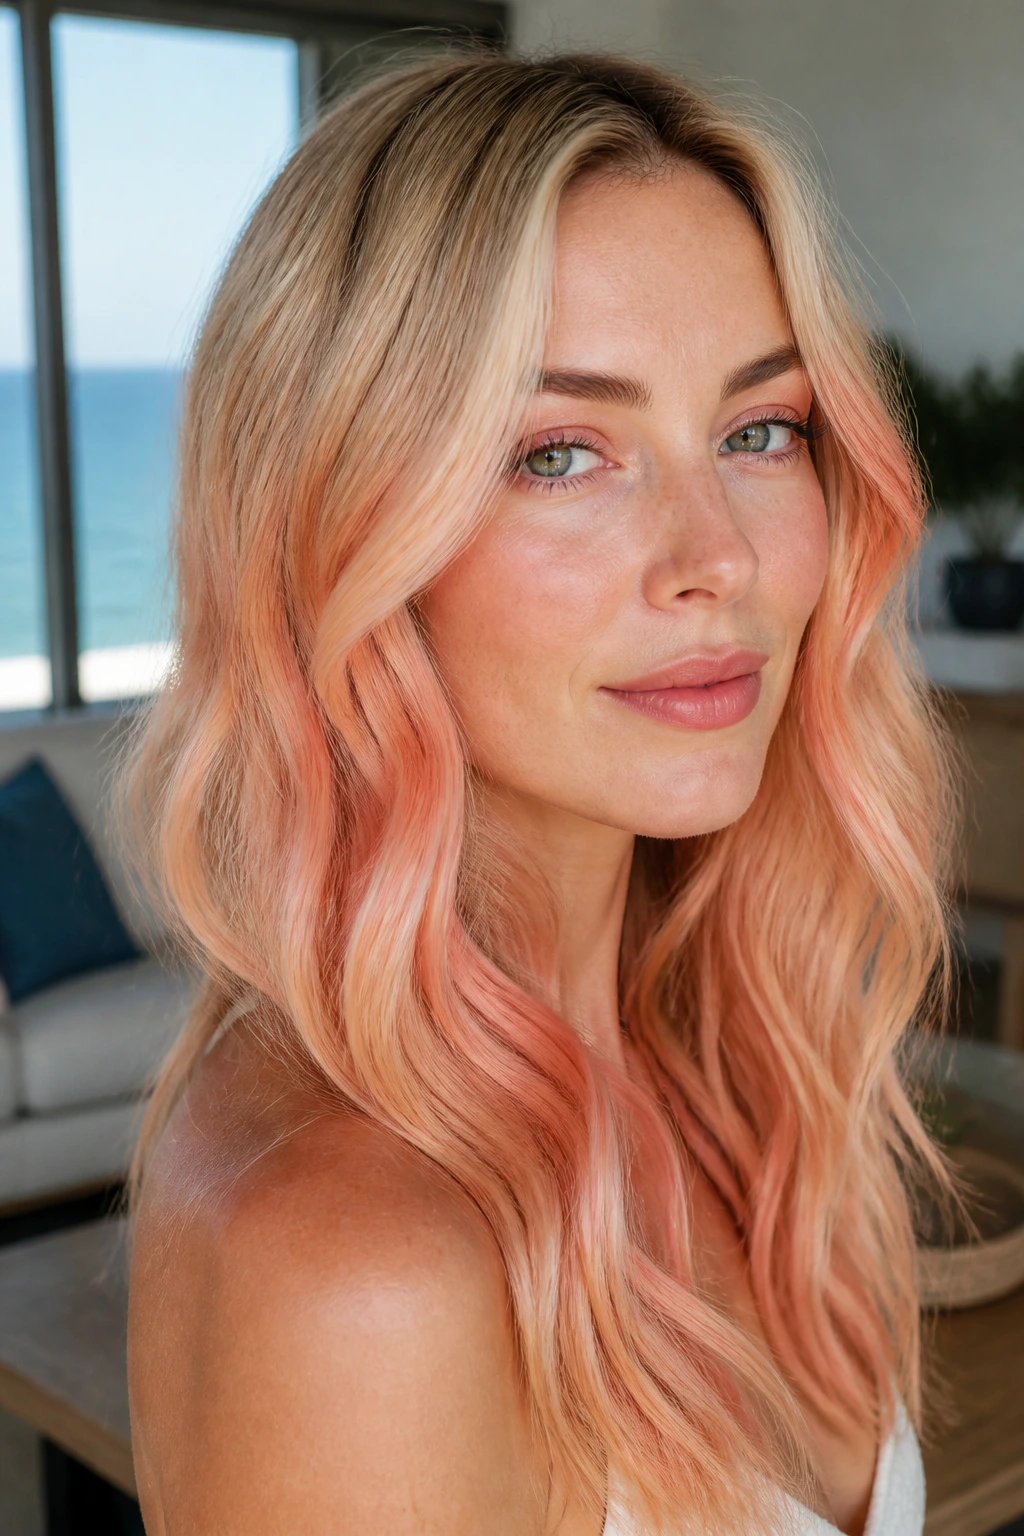
Peach champagne fades sit somewhere between soft coral and warm blonde. The color is lighter than rose gold and less red than copper, which makes it feel airy on long layers or beach waves. There’s a little sparkle to it, but not in a glittery way.
This look usually works best on a pale base. If the blonde underneath is too dark, the peach can disappear. If it’s too white, the shade can look washed out. The sweet spot is a clean level 9 blonde that still has a hint of warmth.
I like this one on hair that already moves well. The peach tone doesn’t need a hard contrast to be noticed; it just needs enough lightness to show through the bend of the hair. A soft curl gives it the most life.
15. Beige Blonde Ombre
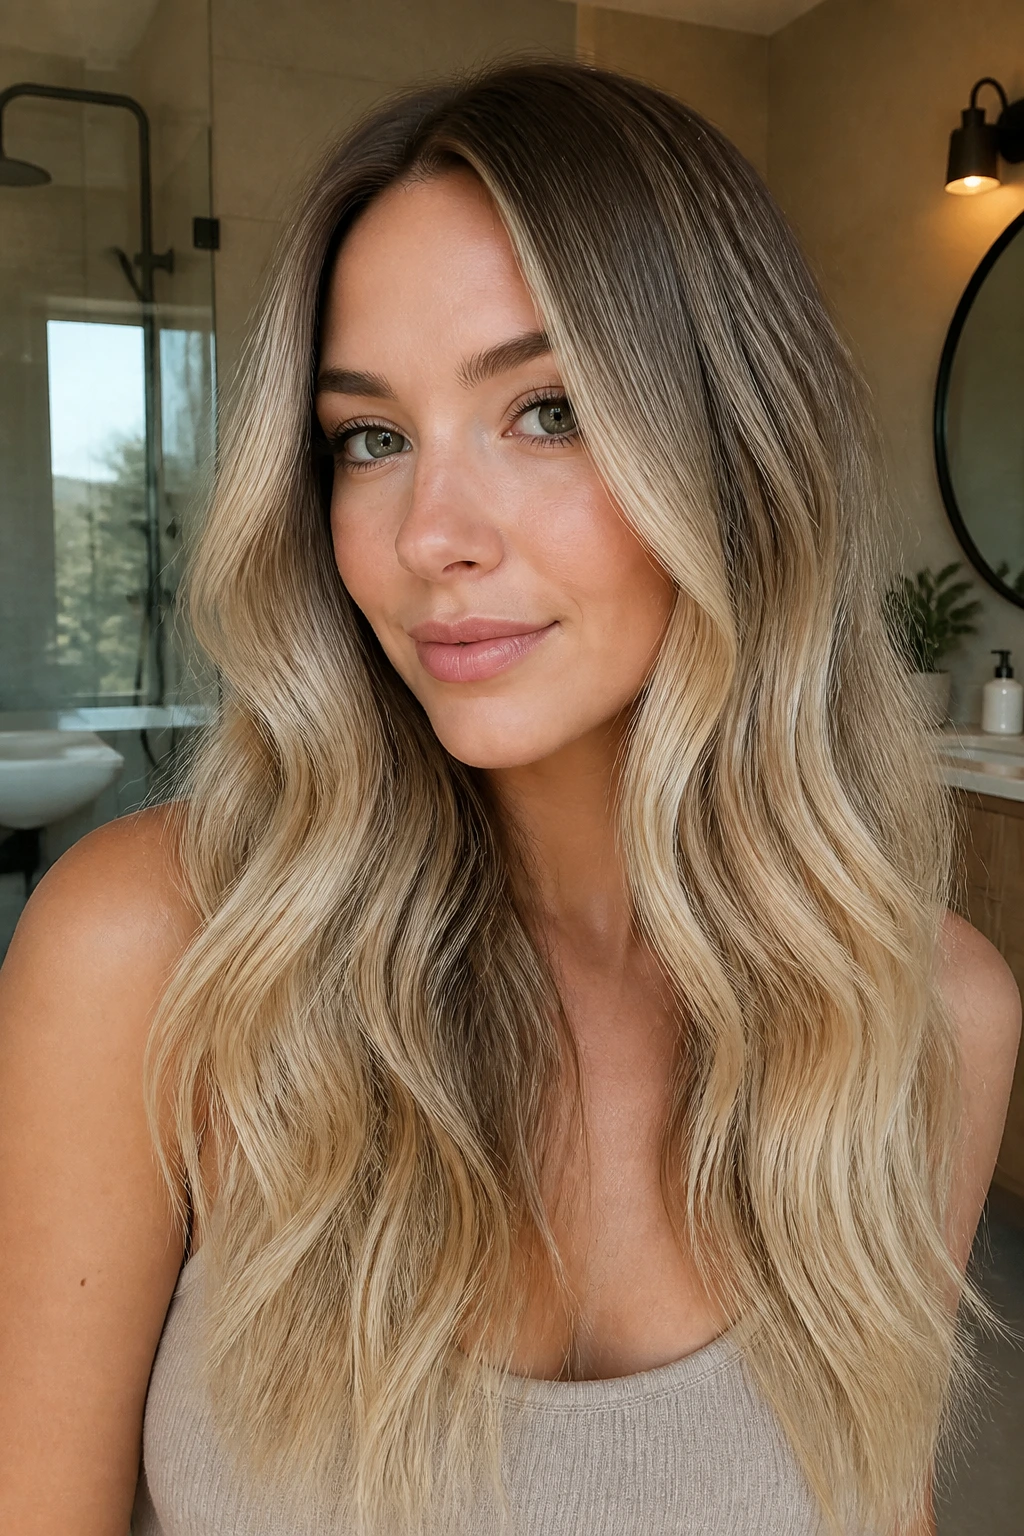
Beige blonde ombre is the answer when you want blonde without the yellow. The roots stay deeper, then the ends lift into a neutral beige that sits between warm and cool. It’s calmer than ash blonde and less gold than honey.
The real advantage here is balance. Beige blonde looks finished even when it fades a little, because the tone is already soft. That makes it easier to keep looking intentional between salon visits. It also flatters people who don’t want their hair to swing too warm in summer light or too icy in winter light.
If you’re asking for this in a salon, say “neutral blonde” rather than “blonde blonde.” That sounds picky, but it saves a lot of back-and-forth. Beige can be surprisingly hard to get right if the toner is too violet or too golden.
16. Ash Blonde to Platinum
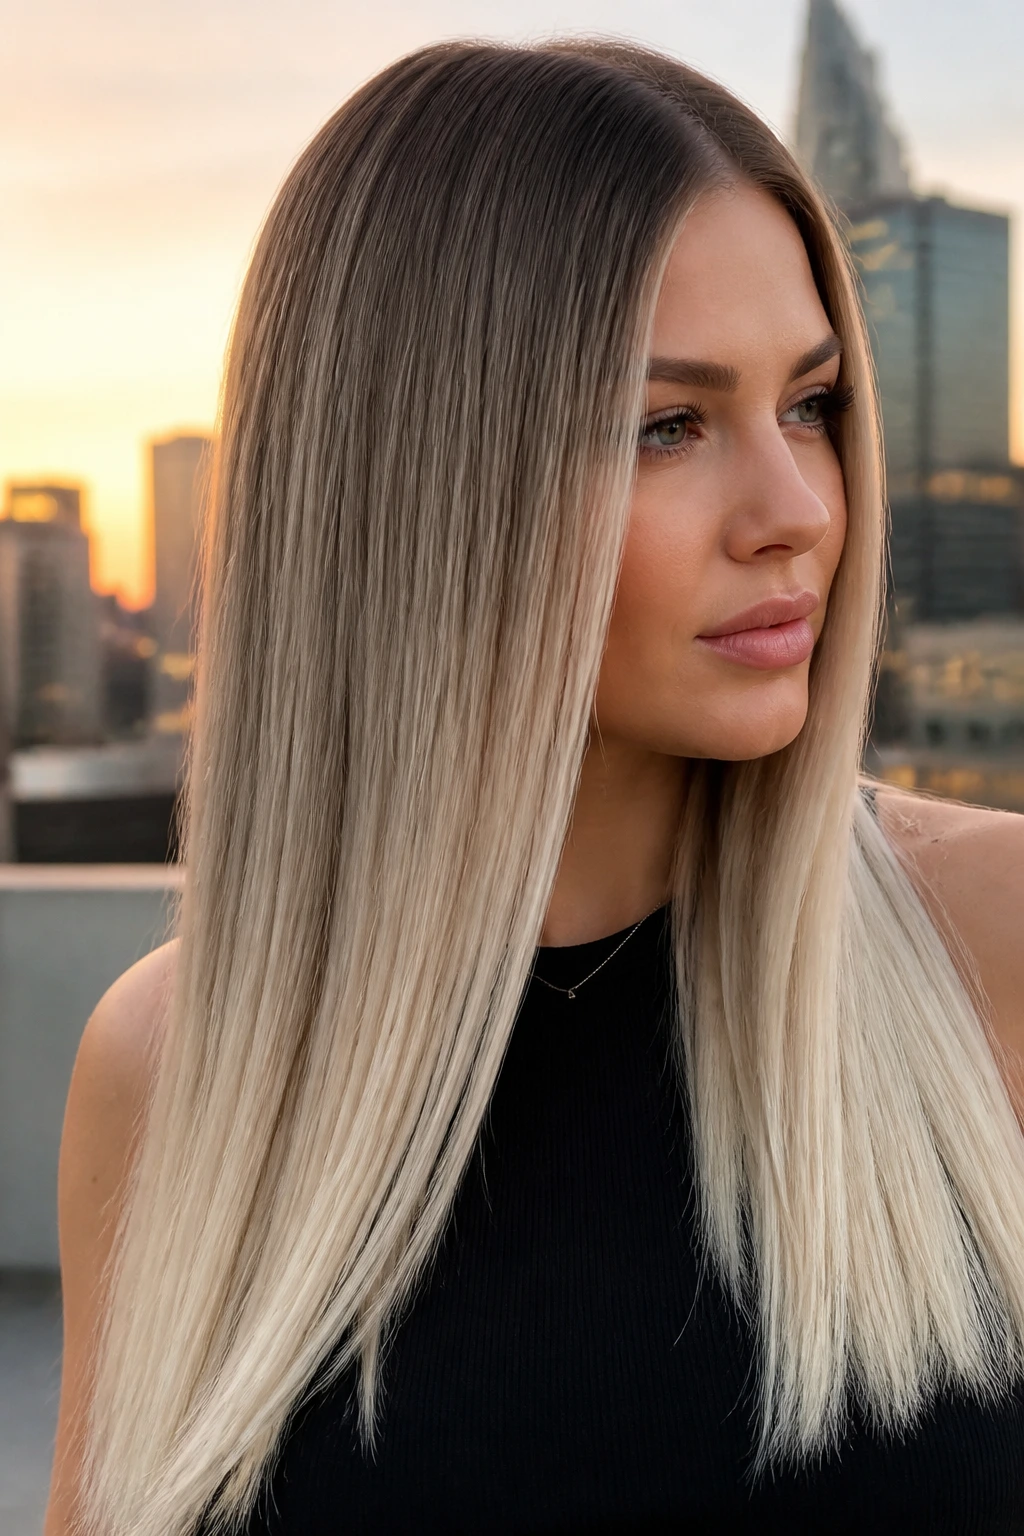
Ash blonde to platinum is the high-contrast icy version of ombre, and it asks for commitment. The top stays ashier and a little deeper, while the ends go all the way to pale platinum. The result is sharp, bright, and not at all shy.
This look needs careful lifting. Dark hair may take more than one appointment to get there without frying the ends, especially if the hair has been colored before. Once the blonde is pale enough, the toner does the rest. Purple shampoo helps, but it will not fix a poor lift.
Straight styles show the platinum best because the transition looks crisp. Waves soften it a little, which is useful if you want the color to feel less severe. Either way, this one needs regular tone refreshes every 4 to 6 weeks if you want the icy finish to stay clean.
17. Bronde Face-Framing Fade
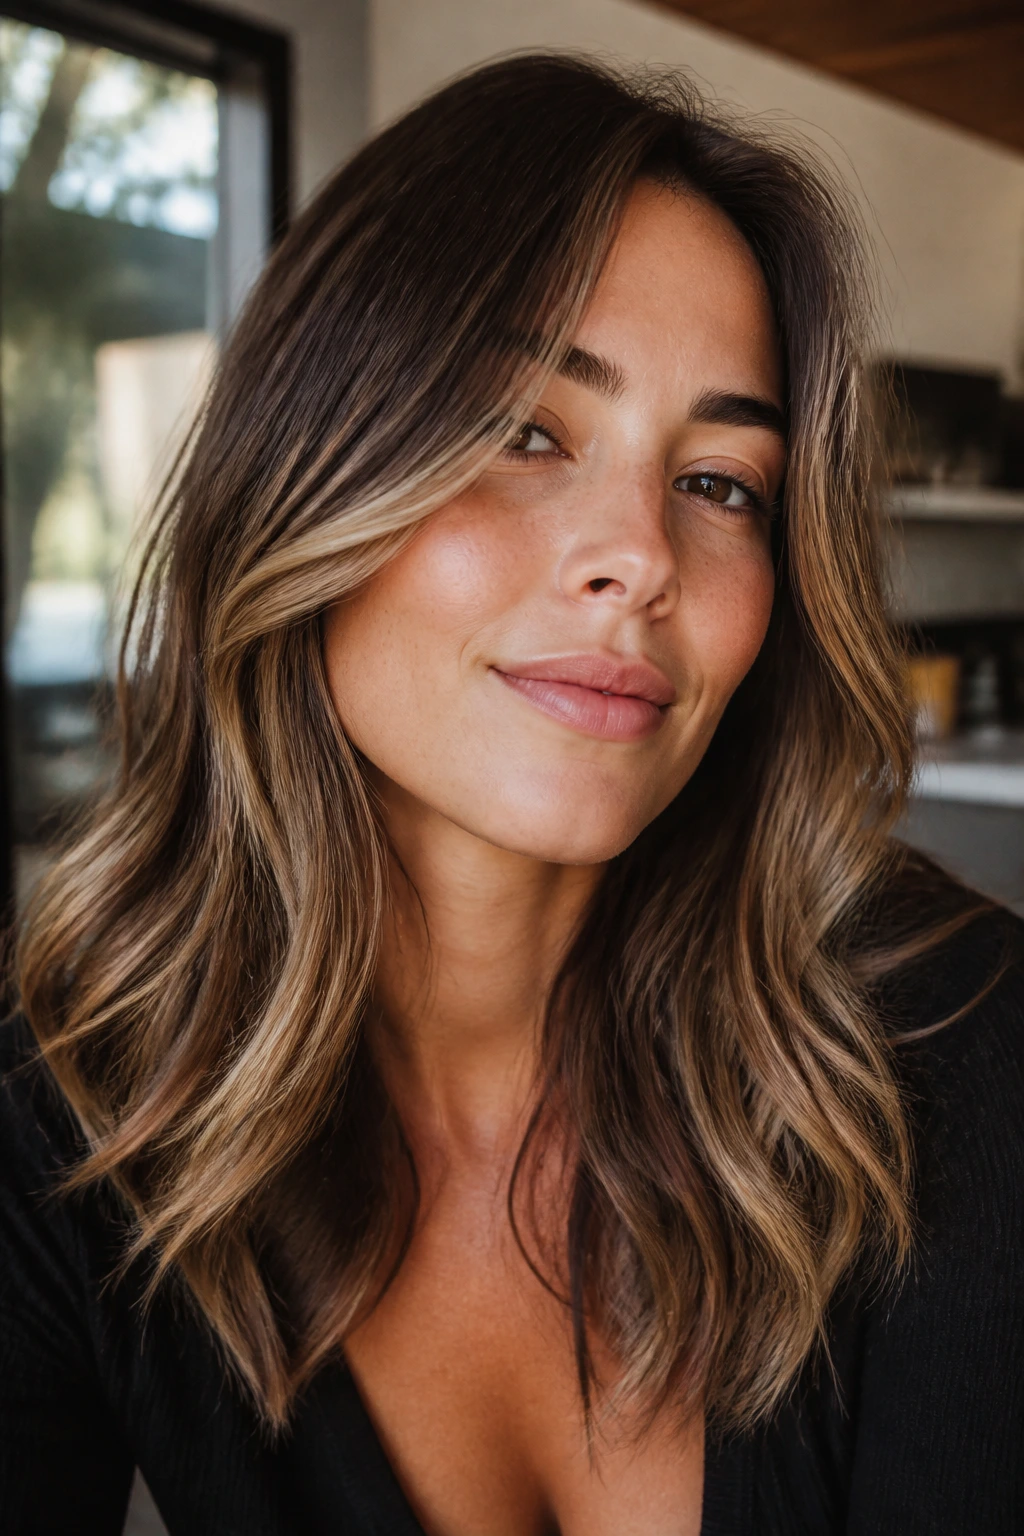
Bronde face-framing fade is the easiest way to test ombre without jumping into a full head of contrast. The base stays brown, the face frame gets brighter, and the ends lighten just enough to keep the whole look from feeling heavy. It is a very forgiving version of the trend.
The face-framing pieces do a lot of the work here. They brighten the front first, which means the color feels noticeable even if the rest of the fade is subtle. That makes it good for people who wear their hair down a lot and want the front half to do the talking.
If you’re worried about maintenance, this is one of the safest places to start. The roots can grow out for a while before the style looks tired, and the ends don’t need to be pushed to platinum to make an effect.
18. Sandy Brown to Soft Blonde
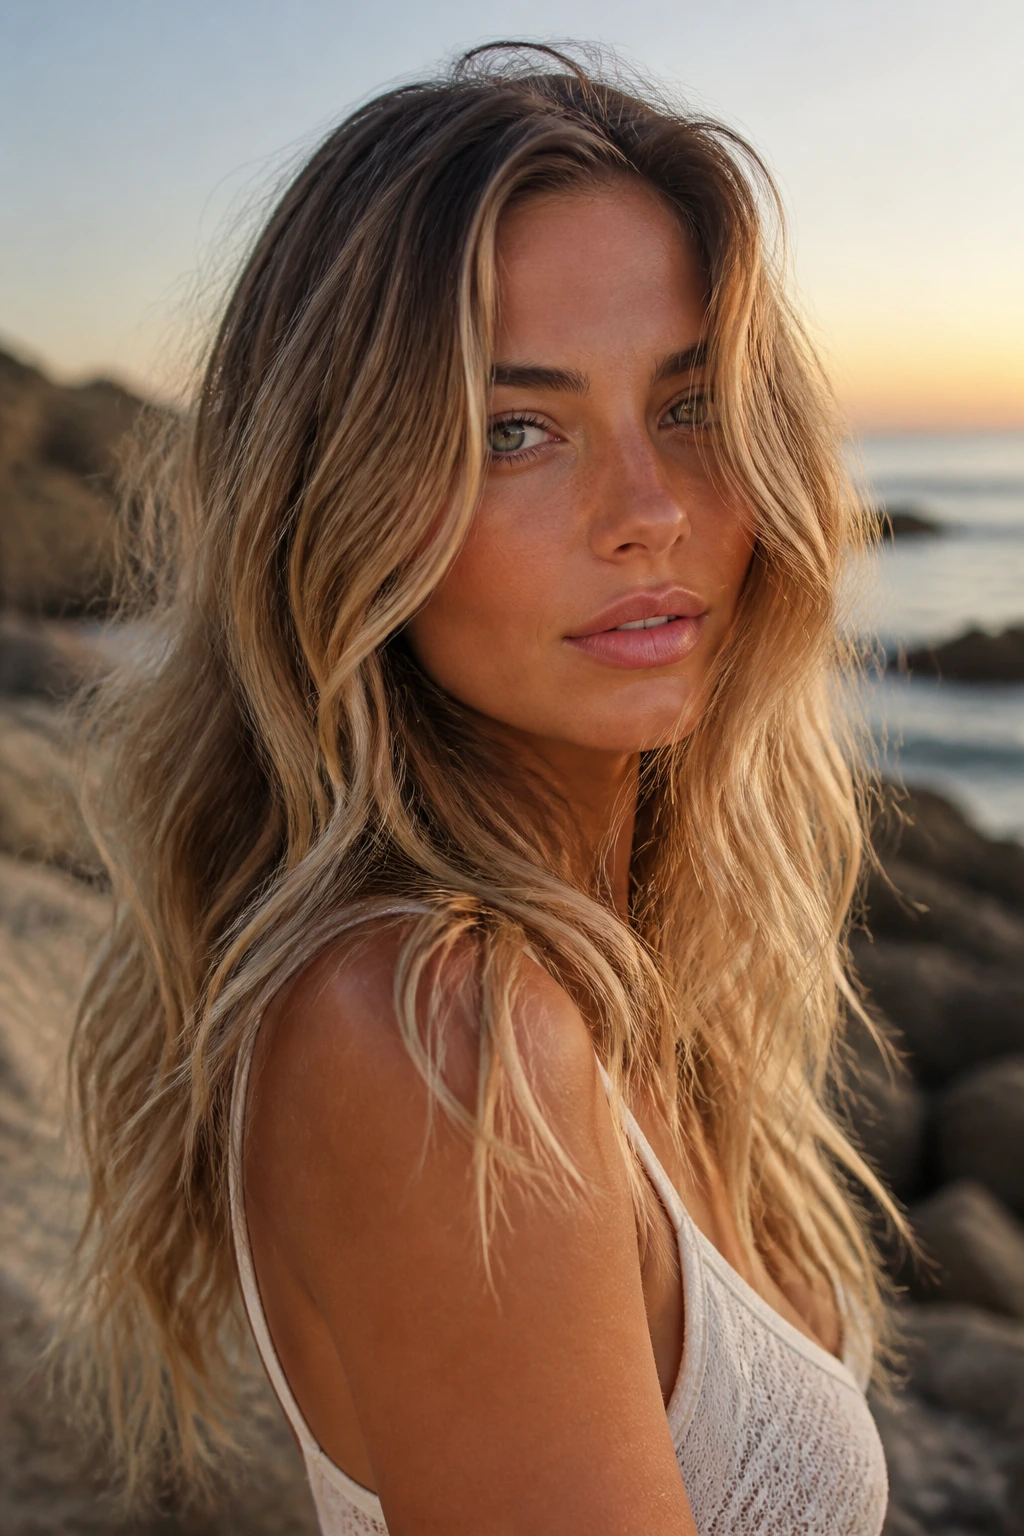
Sandy brown to soft blonde has a sun-touched, slightly muted finish that works well on medium-length layers. The brown base is lighter than espresso or chocolate, and the fade moves into a soft blonde that still looks believable instead of overly bright.
This look shines on hair with a little movement. Beach waves, loose bends, and softly layered cuts all make the sandy tone look natural. If the ends are too yellow, the whole thing loses its calm feel, so the blonde should stay soft and neutral.
A lot of people like this version because it doesn’t scream for attention. It just looks like the hair has been out in the light for a while. That makes it one of the easiest ombre styles to wear every day.
19. Reverse Ombre with Dark Ends
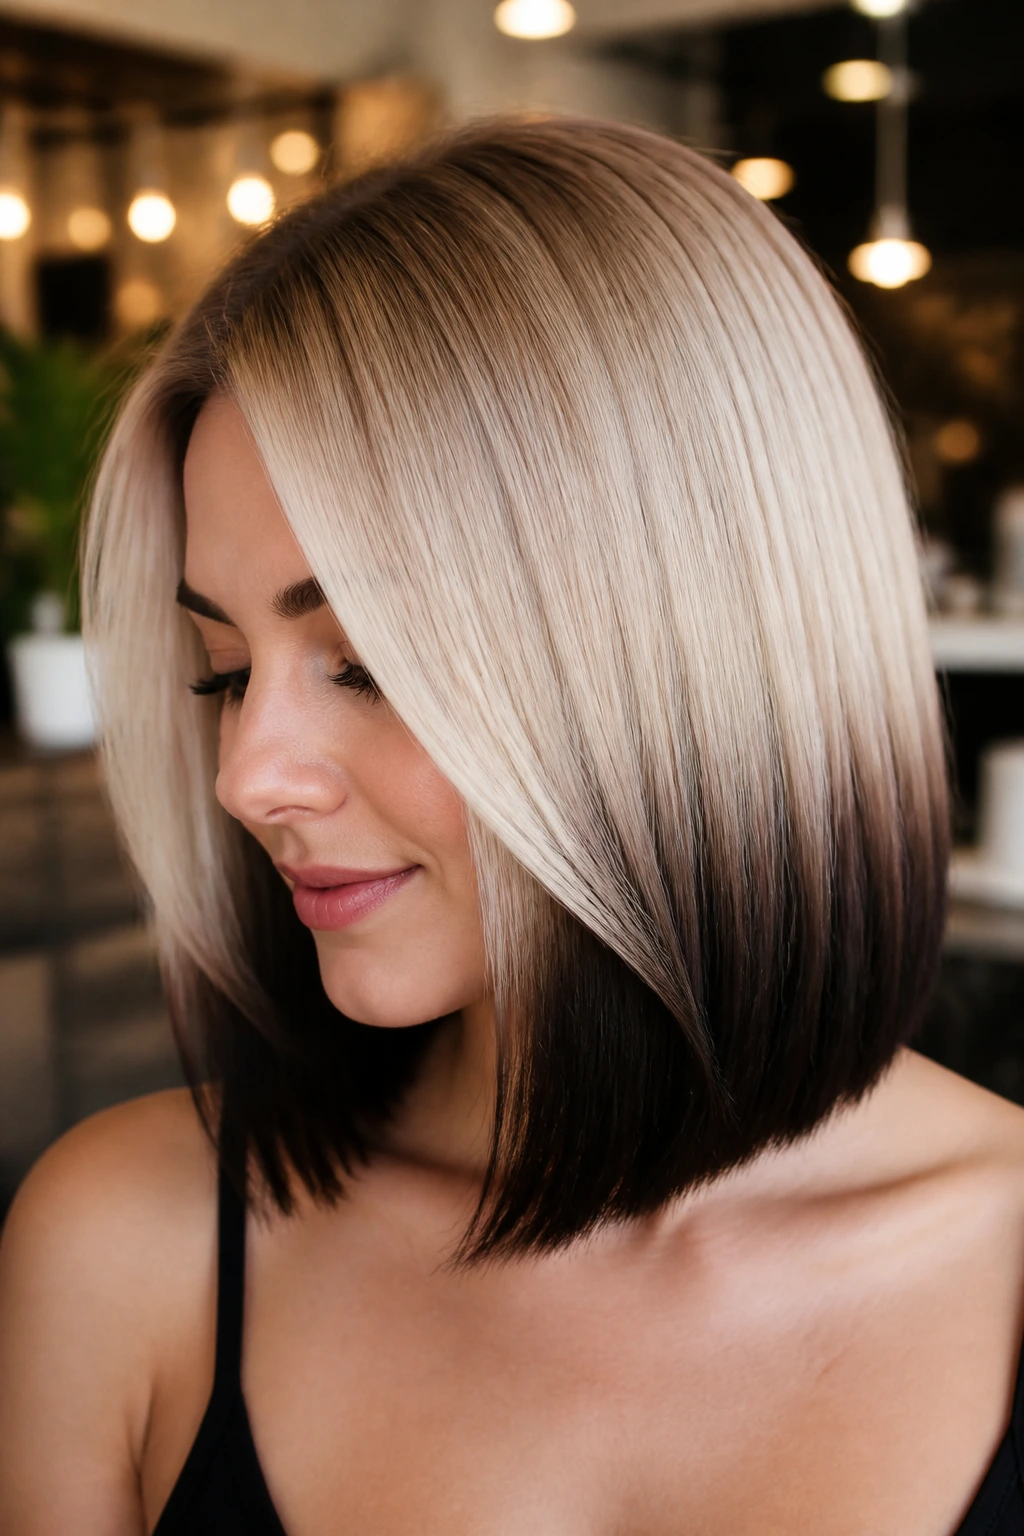
Reverse ombre flips the script: lighter roots, darker ends. It is more dramatic and a little more editorial than the classic fade, and it works best when the haircut has a clean shape. If the cut is messy, the darkness at the bottom can look heavy.
The contrast needs to be deliberate. A pale top falling into smoky brown, charcoal, or even black ends can look fantastic, but only if the transition is blurred enough that it doesn’t feel like two different heads joined together. On a blunt bob, the shape makes sense. On long, thin hair, it can feel weighed down.
This version is not for someone who wants easy grow-out in the traditional sense. It’s for someone who likes the visual twist of ombre and doesn’t mind visiting the salon to keep the light top and dark ends balanced.
20. Curly Ribbon Ombre
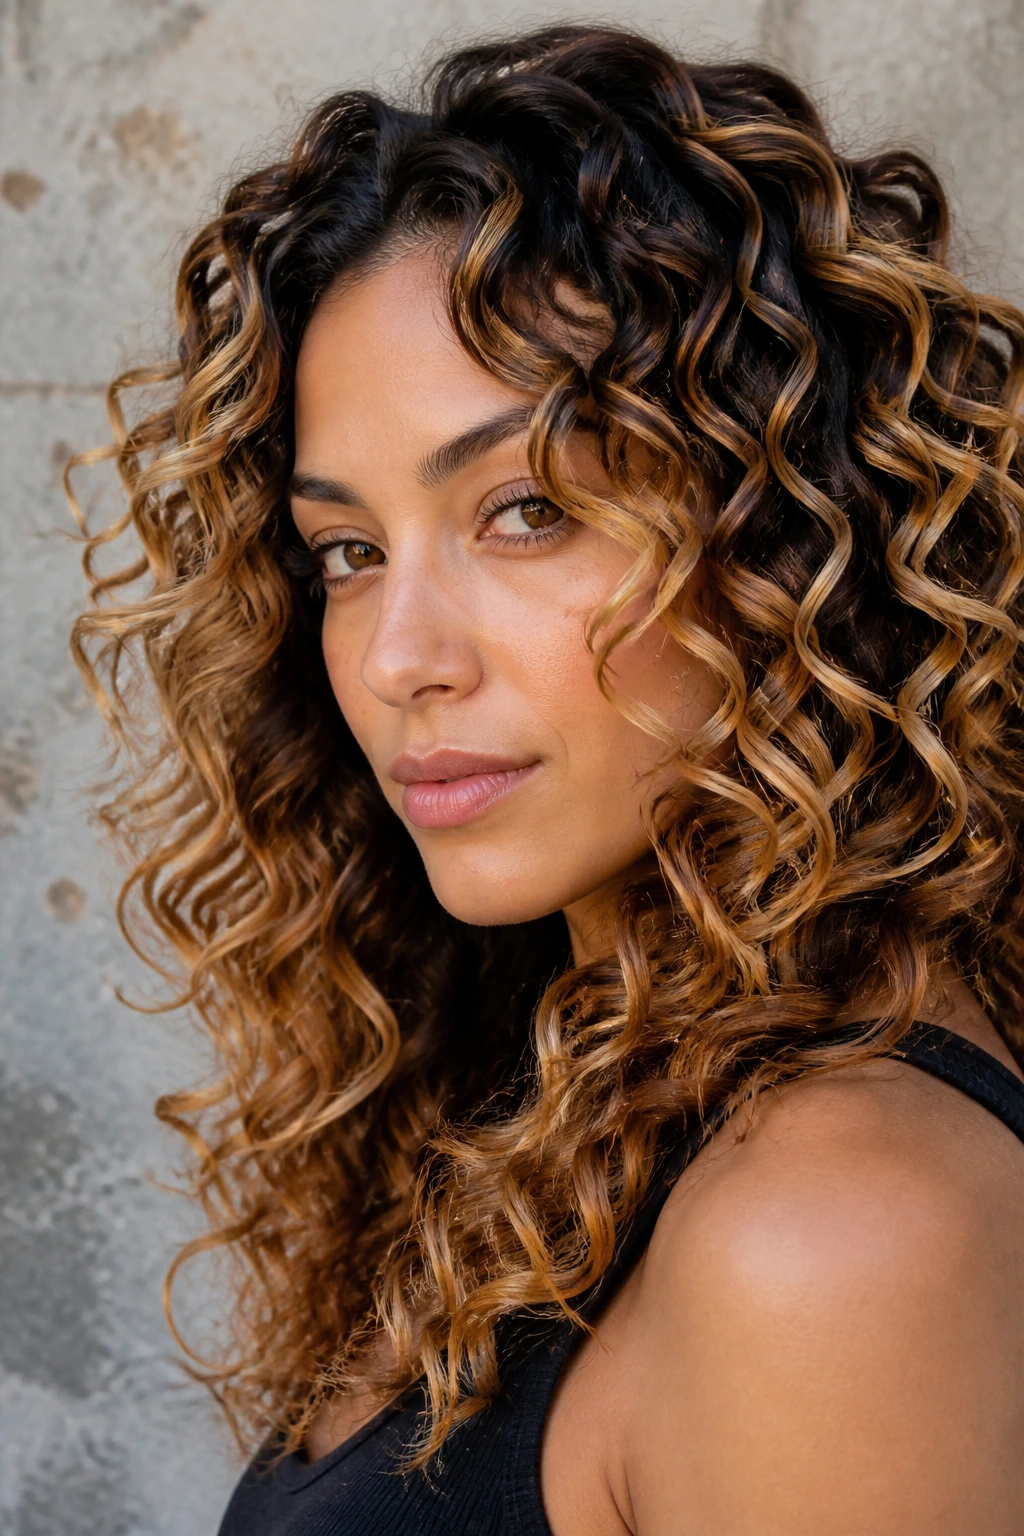
Curly ribbon ombre has to respect the curl pattern or it falls apart. The color should be painted in ribbons that follow the curl’s outer curve, not stamped on as one solid stripe. That gives the shape movement, because each coil shows a slightly different amount of lightening.
This is one of the prettiest ways to wear ombre on curly hair. The fade doesn’t need to be perfectly uniform, and that helps. Curls naturally break up the color, so the ends can be lighter without looking harsh. The trick is to leave enough depth near the roots so the whole head doesn’t turn into a single pale mass.
If your curls are tight, ask for more ribboning and less saturation. If they’re loose, the contrast can be a touch stronger. Either way, the goal is to keep the pattern soft enough that each curl still has shape.
21. Long Layered Beach Fade
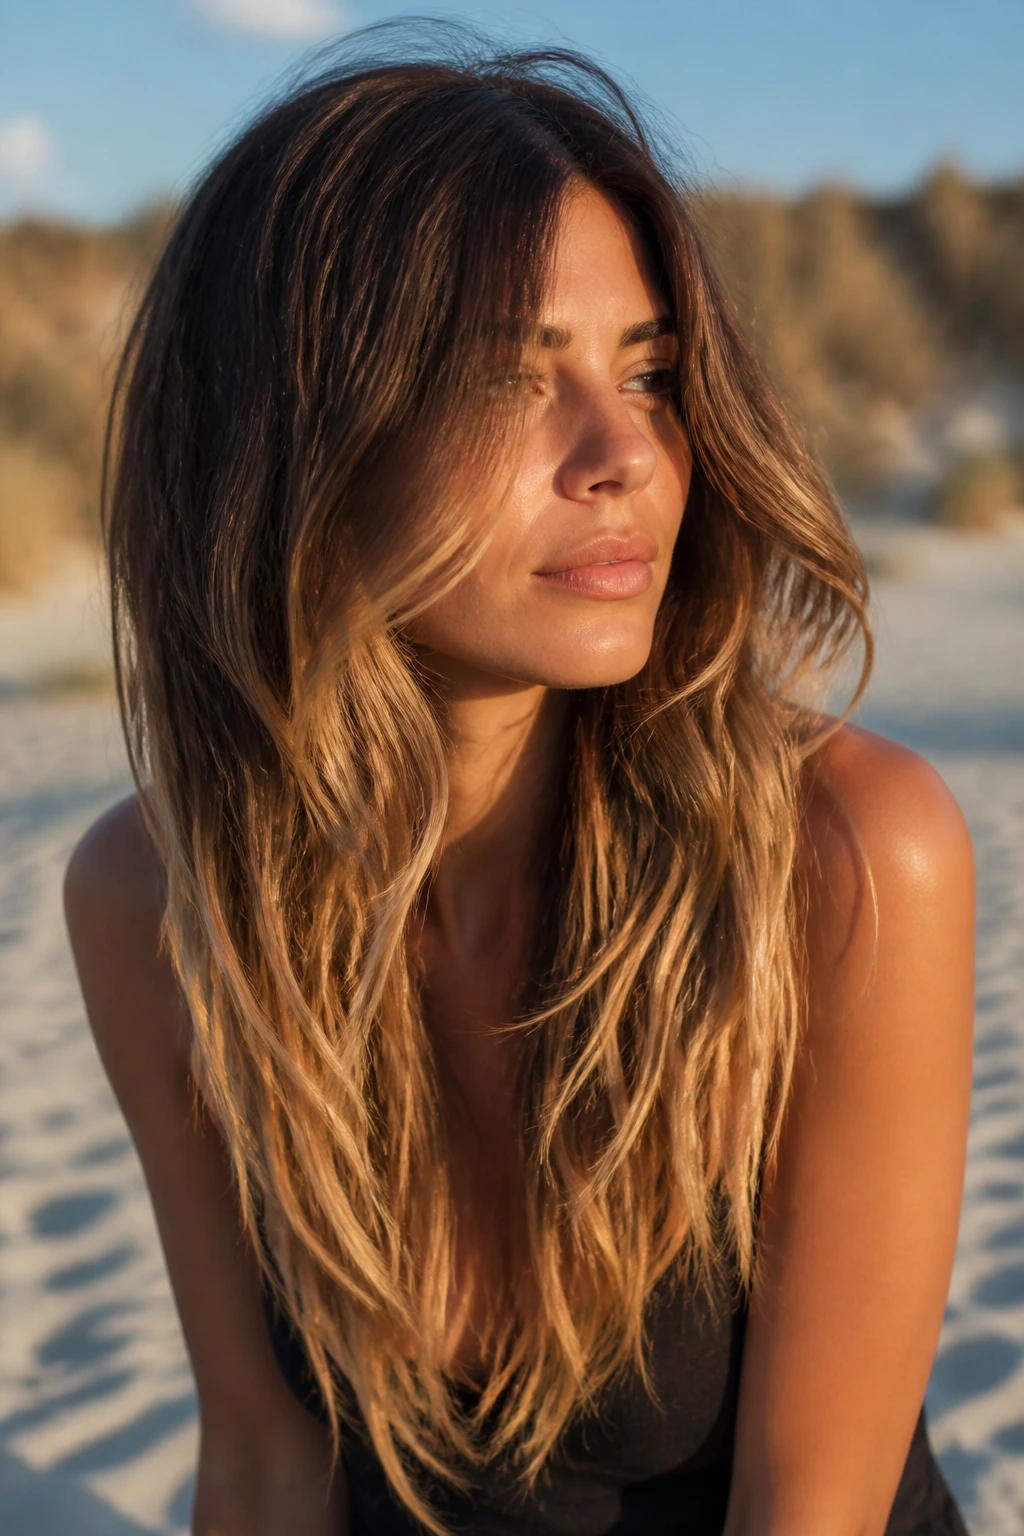
Long layered beach fade is the version that makes sense when the hair has length and you want to keep it looking alive. The roots stay deeper, the mid-lengths soften, and the ends brighten just enough to show off every layer. It is less about color shock and more about motion.
Layers matter here because they let the fade show from different angles. Without them, long ombre can sink into one heavy curtain of color. With them, the ends look feathered and the lighter pieces move across the back when the hair shifts.
This style sits nicely with loose waves, half-up clips, and low ponytails. If you like wearing your hair down, it gives the fade room to breathe. If you like updos, the lighter ends still peek out enough to keep the look from disappearing.
22. Short Bob Ombre
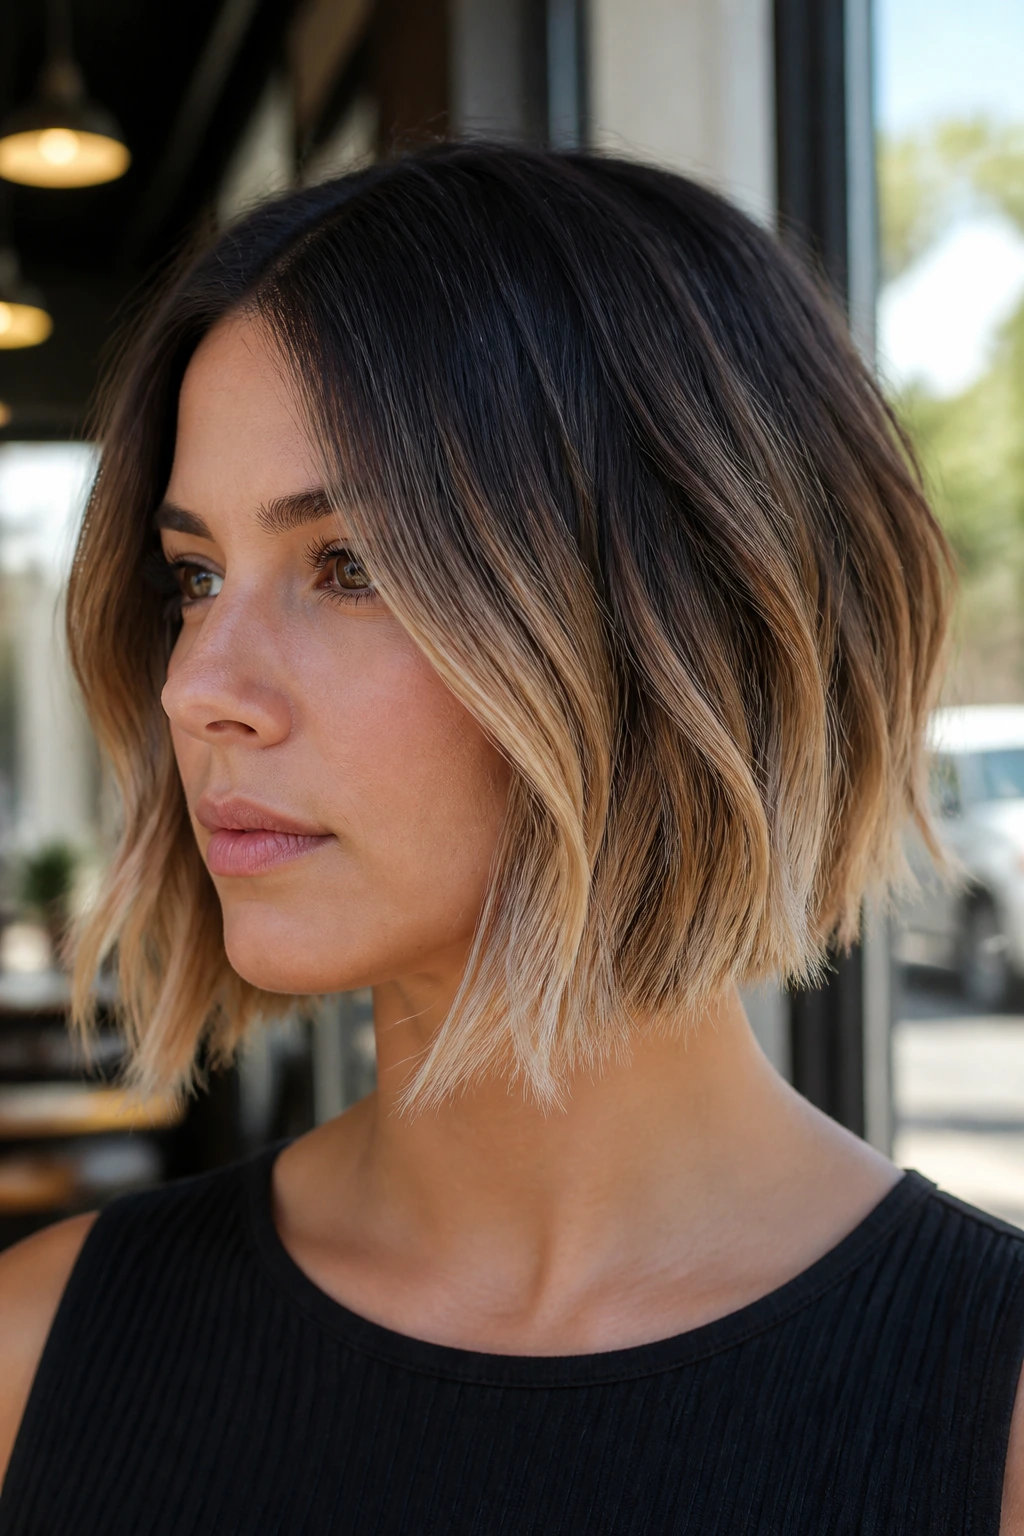
Short bob ombre needs restraint. On a bob, the fade has far less length to travel, so the transition should start lower and stay softer than it would on longer hair. If the color begins too high, it looks like the bob grew out before its appointment.
The best bob ombre uses contrast at the ends, not at the scalp. A deeper root with just-light-enough tips keeps the shape crisp and modern. Straight bobs show the line of the fade more clearly, while slightly waved bobs soften it and make the color feel less graphic.
This is a good option if you like short hair but still want dimension. It gives the bob a little motion without needing full highlights. The main rule is simple: keep the blend subtle enough that the cut still does the talking.
23. Lob with Shadow Roots
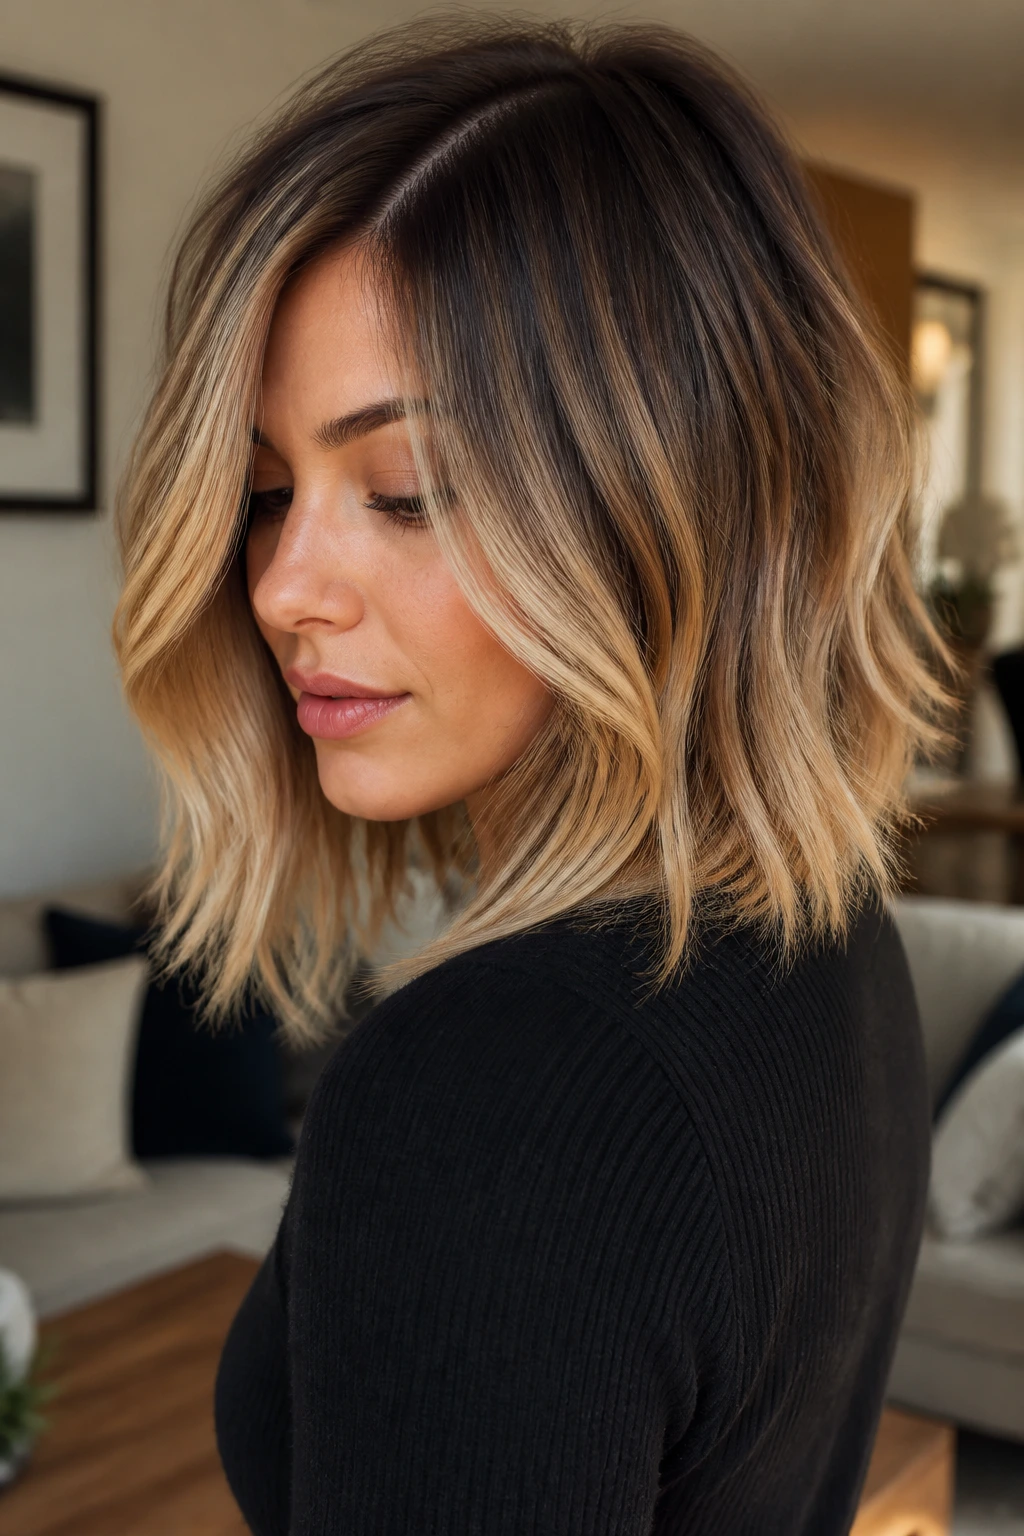
A lob with shadow roots is the low-drama version of ombre for people who want polish more than contrast. The roots are intentionally deeper, the mids are softened with a root melt, and the ends lighten just enough to keep the haircut from feeling flat. It’s neat without being stiff.
This is one of the easiest cuts to wear ombre on because the lob has enough length to show the fade but not so much that the color becomes a project. If the ends are lighter than the roots by only a few levels, the grow-out stays clean for weeks. That’s why this style is such a frequent salon request.
A shadow root helps if your hair grows fast or if you hate seeing a hard demarcation line. It also keeps the whole shape looking full near the top, which is useful on finer hair.
24. Silver Smoke Ombre
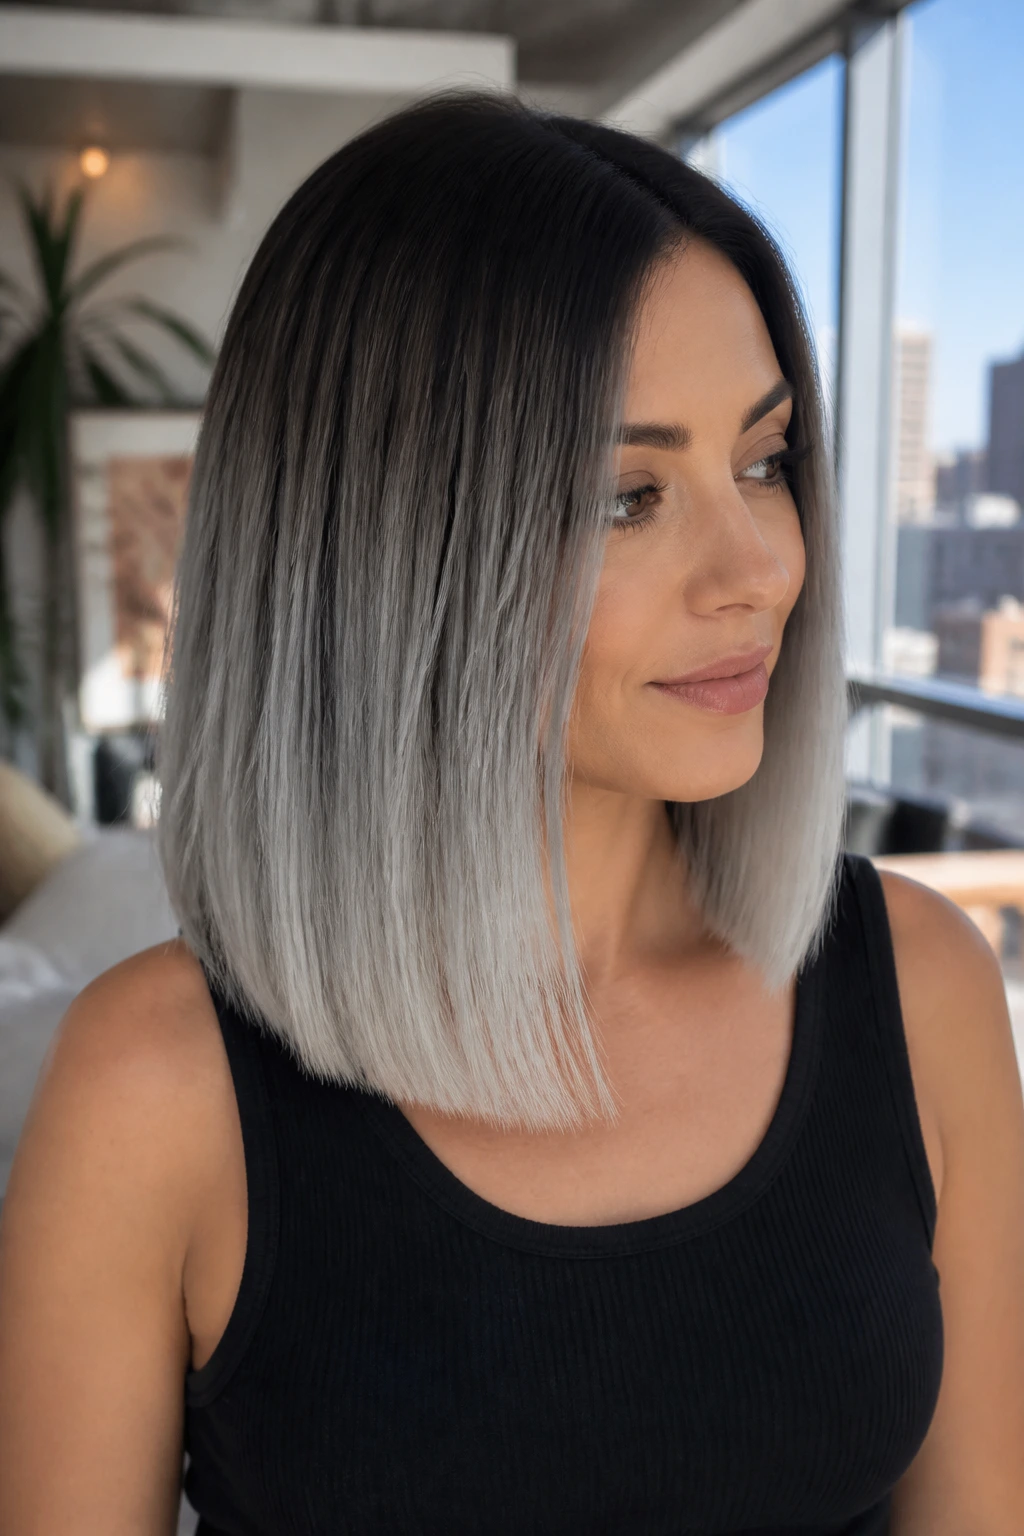
Silver smoke ombre is less about brightening and more about removing yellow until the hair lands in a cool silver-gray zone. The root area usually stays deeper, then the lower lengths fade into smoky silver that looks sleek rather than frosty. The finish is polished, but only if the lift underneath is clean.
This shade needs patience. If the hair is too yellow or too orange before toning, the silver will not sit right. That is why people with darker bases often need multiple steps or a professional hand. Once the tone is right, though, the result is clean and dramatic.
I like silver smoke on blunt cuts and straight styles because the shape helps the color read as intentional. Waves can make it softer, which is useful if you don’t want the hair to look too severe.
25. Cool Cocoa to Taupe
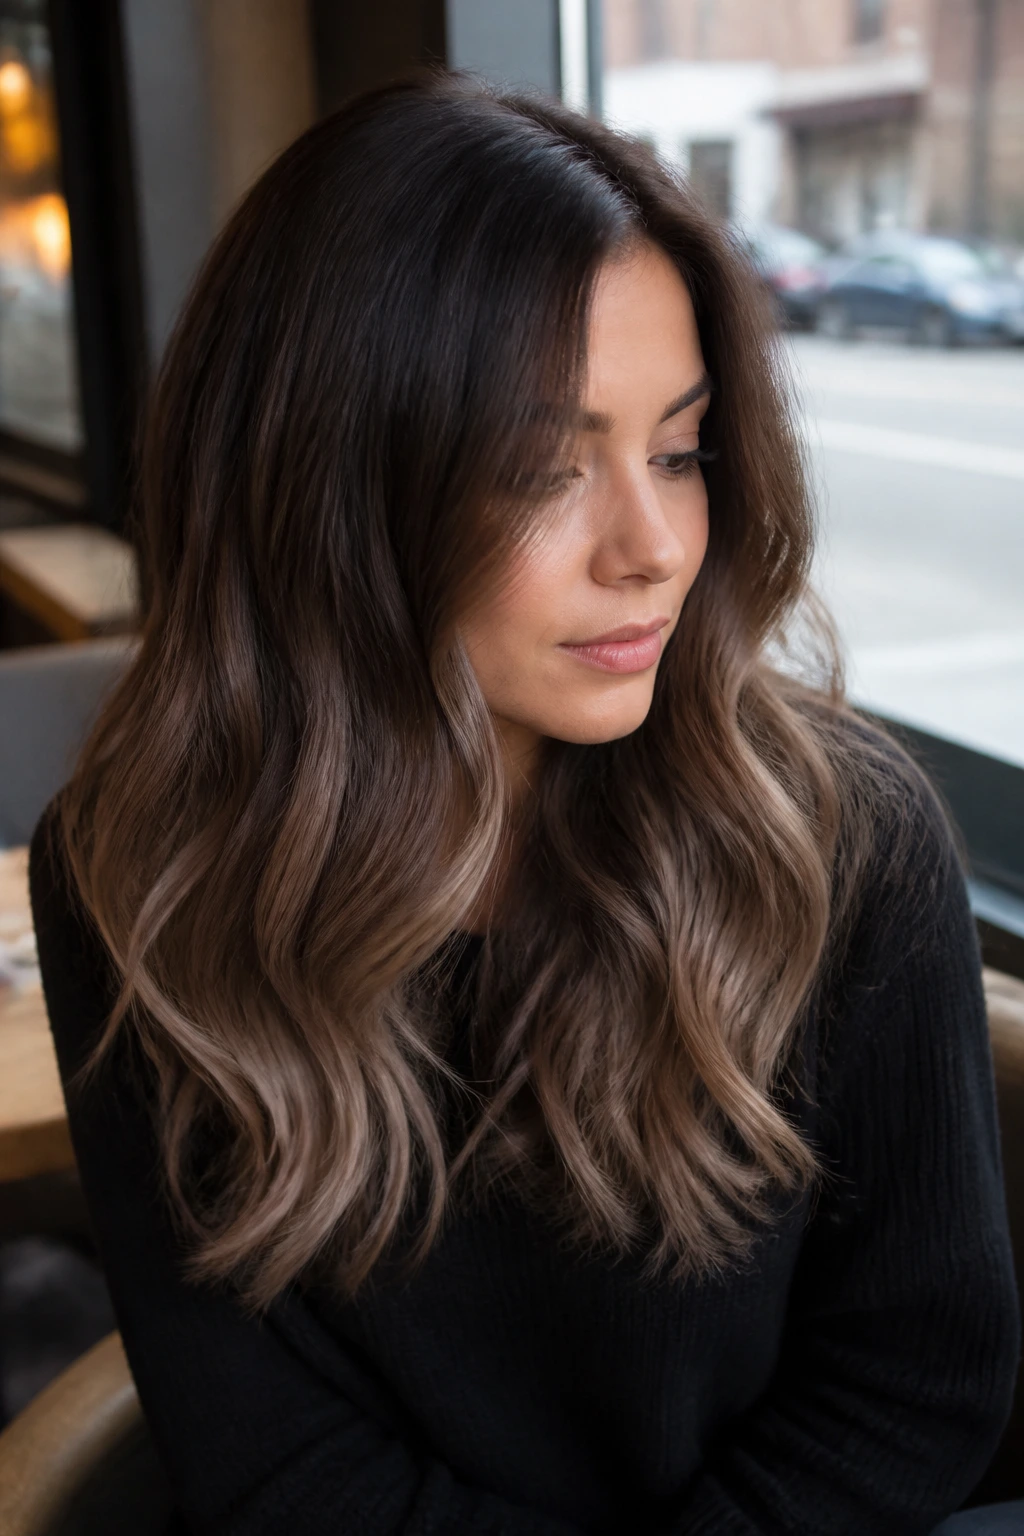
Cool cocoa to taupe keeps the whole look in brunette territory, which is part of its appeal. The cocoa roots are deep and calm, and the ends shift into taupe instead of blonde, so the color stays smoky and grounded. It’s subtle, but it is not boring.
This one is a nice choice if your workplace or lifestyle leans conservative and you still want dimension. Taupe gives the hair enough change to avoid a one-tone helmet effect, but it doesn’t force you into high-maintenance blonde territory. On layered hair, the color looks especially soft around the ends.
Use a cool or beige gloss to keep the taupe from going muddy. If the hair is too warm, it starts to look brown again. If it’s too ashy, it can flatten out. The sweet spot lives right between.
26. Caramel Money Piece Ombre
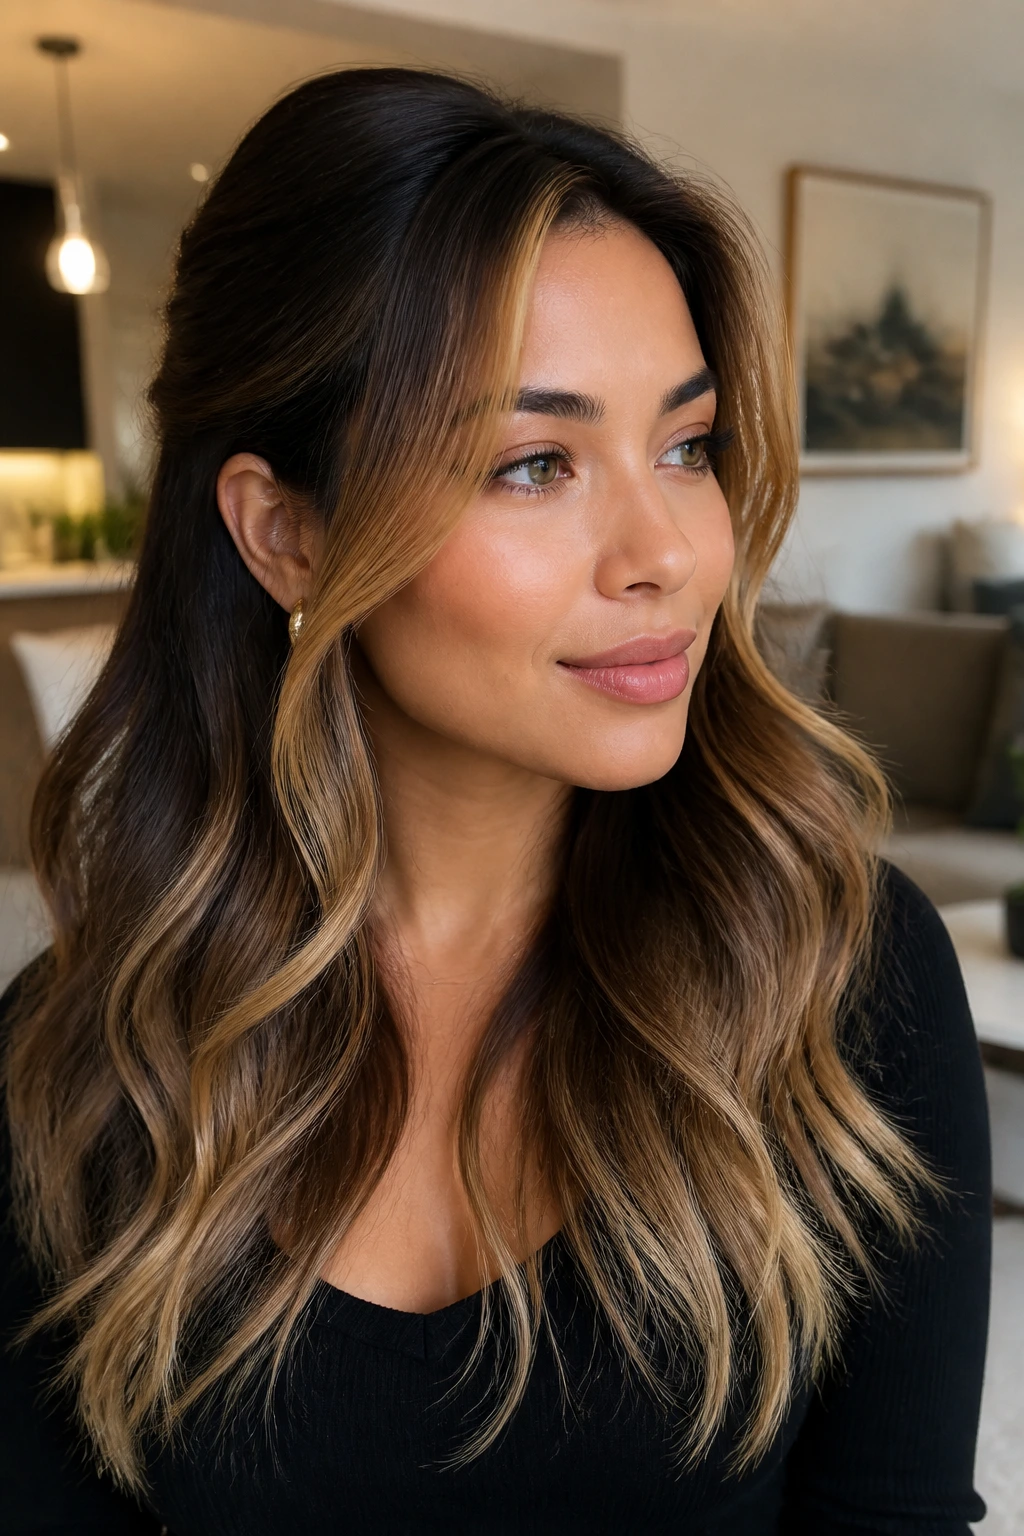
Caramel money piece ombre brightens the face first and lets the fade take over after that. The front pieces around the cheekbones and jaw get a caramel lift, while the rest of the hair fades more gently toward the ends. It gives you brightness where you notice it fastest.
This is a smart move if you want the idea of ombre but do not want the whole head lightened aggressively. The face frame pulls the eye up, and the rest of the color stays softer. On straight hair, the contrast around the face is obvious. On waves, it gets a little more blended and easygoing.
If you wear your hair tucked behind the ears or pinned back, those lighter front pieces keep the style from disappearing. That’s one of the reasons this version works so well on everyday haircuts.
27. Dimensional Balayage Ombre
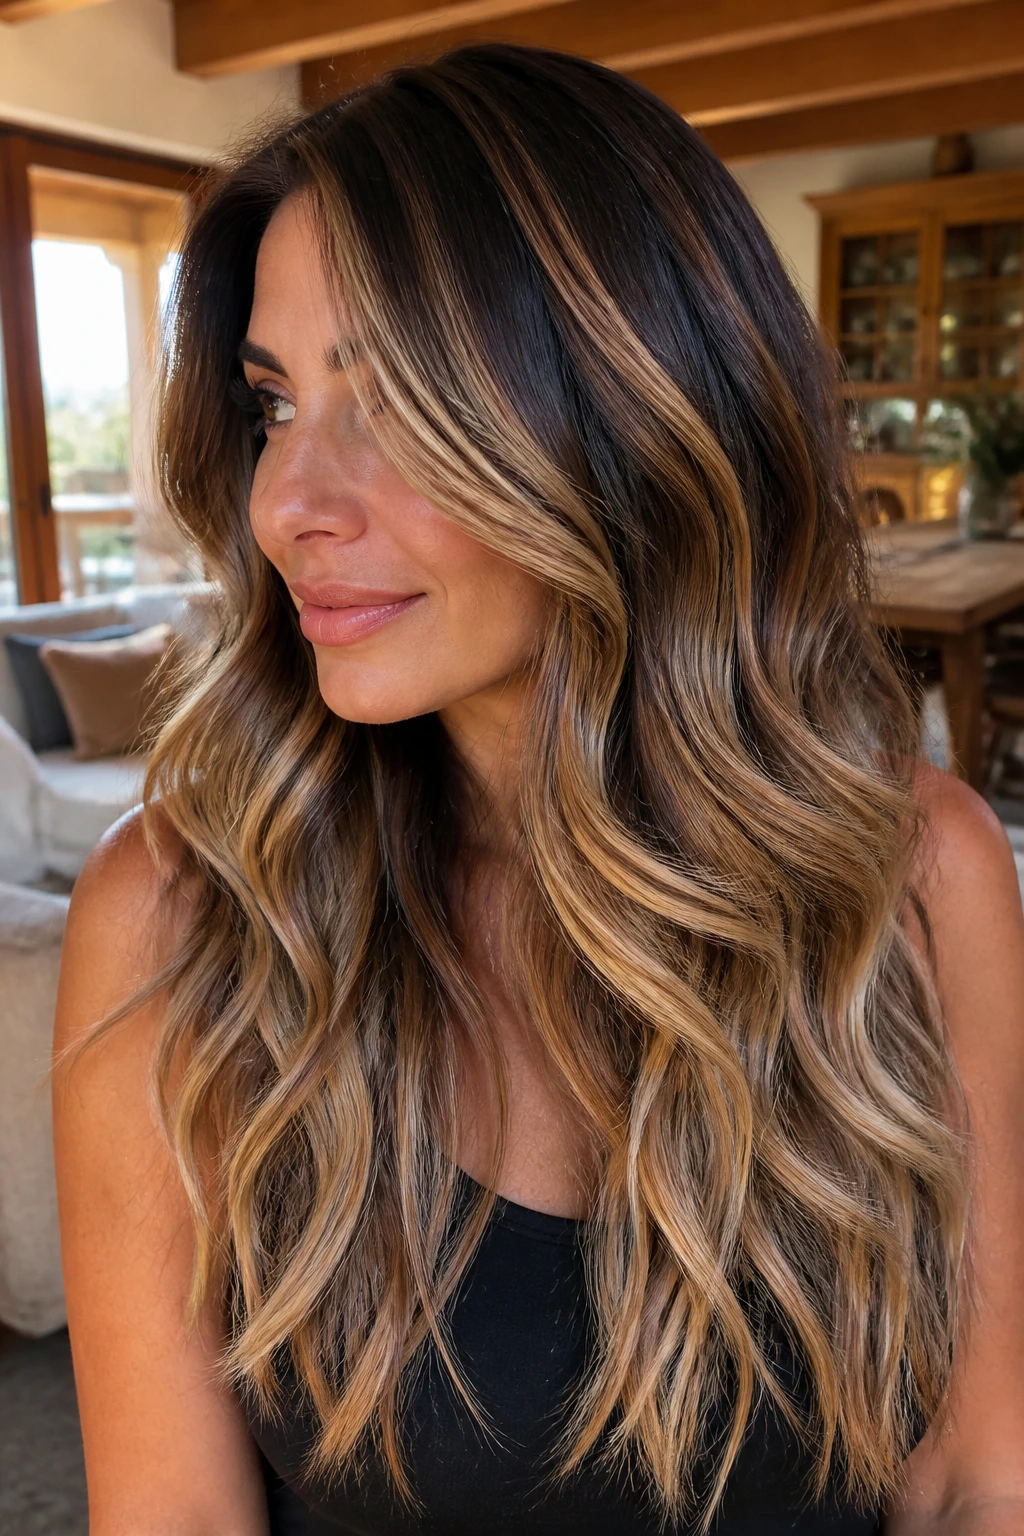
Dimensional balayage ombre is for anyone who hates flat color. Instead of one clean fade, the hair gets painted in soft ribbons that still move from dark to light overall. You end up with depth at the roots, brightness at the ends, and little pieces that catch light at different points in between.
This version takes a steadier hand because the goal is to keep the gradient readable while letting it feel loose. The nicest results often use a mix of hand-painted pieces and a soft root shadow. That keeps the transition from looking stamped on.
If you like hair that looks a little different every time you style it, this is a strong choice. It shows up especially well on layered cuts and medium-to-thick hair because the dimension has enough body to stand out.
28. Soft Black to Espresso Gloss
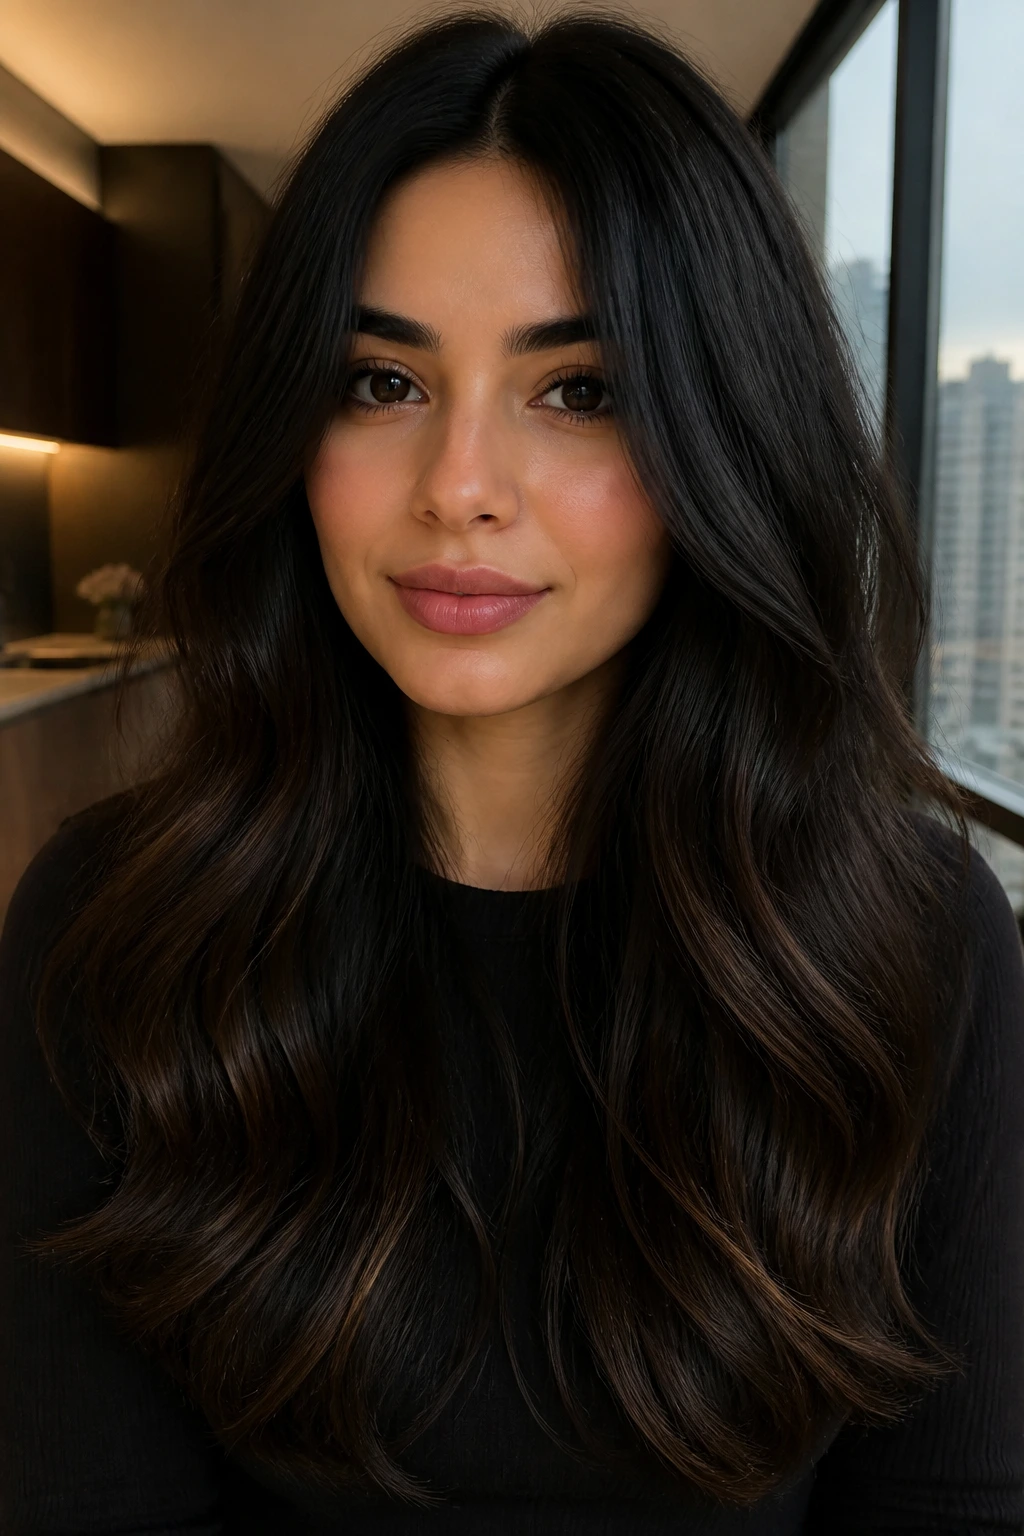
Soft black to espresso gloss is the most subtle ombre on this list, and honestly, that’s why it works. The roots stay near-black, but the ends move only a touch lighter into espresso, so the hair gets depth rather than drama. It is the kind of change people notice only after a second look.
This is a good option if you want to keep your hair dark and shiny but avoid the flat one-shade effect that can happen on long, dense hair. A gloss service helps more than a big lightening session here. The result should look polished, smooth, and a little softer at the ends.
It’s also one of the safest places to start if you’re unsure about ombre at all. You can always go lighter next time. Going the other direction is harder.
Why Ombre Still Beats a Hard Highlight Line
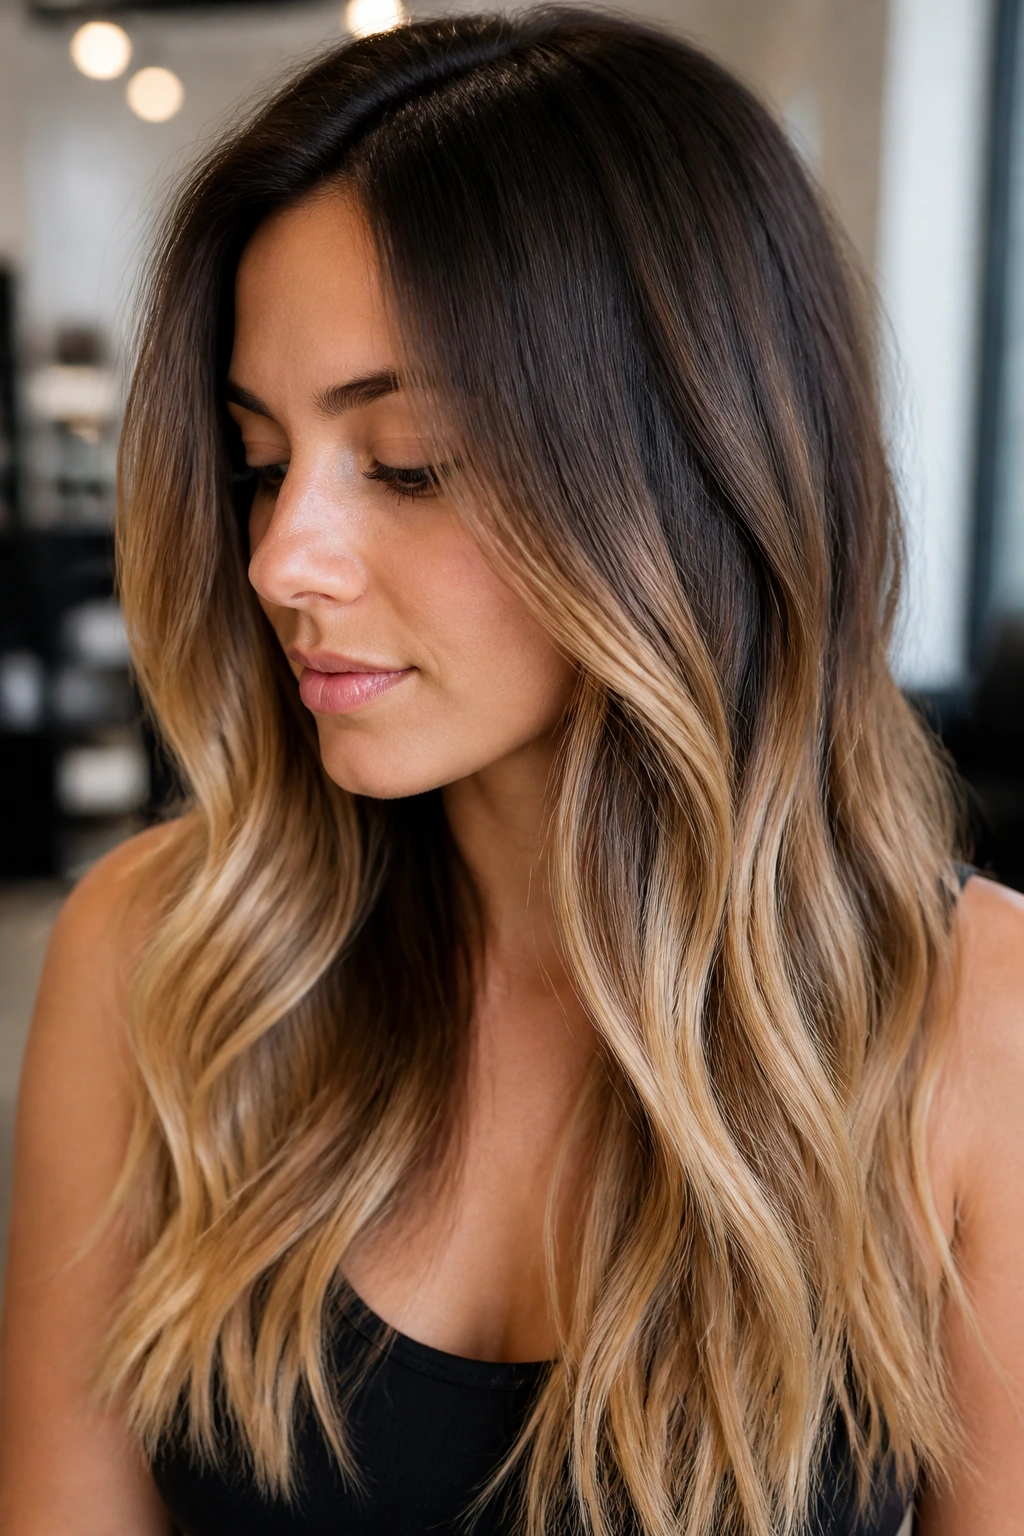
Ombre makes sense because it gives the eye a place to travel. A hard highlight line stops the eye. A fade lets it move from root to mid-length to end, and that is why the hair usually feels softer even when the contrast is high.
The other reason it hangs around is practical. A grow-out line on all-over blonde can look rough after a few weeks. Ombre, by design, makes regrowth part of the look. That matters if your hair grows fast, if you’re covering grays around the hairline, or if you simply do not want to book color appointments on a strict schedule.
It also gives colorists room to solve different problems. Too dark at the bottom? Lighten the ends. Hair feels flat? Add a root shadow and a brighter lower section. Want to stay in brunette territory? Keep the fade inside the brown family and let tone do the work. That flexibility is the whole point.
Essential Tools for Ombre Color Services
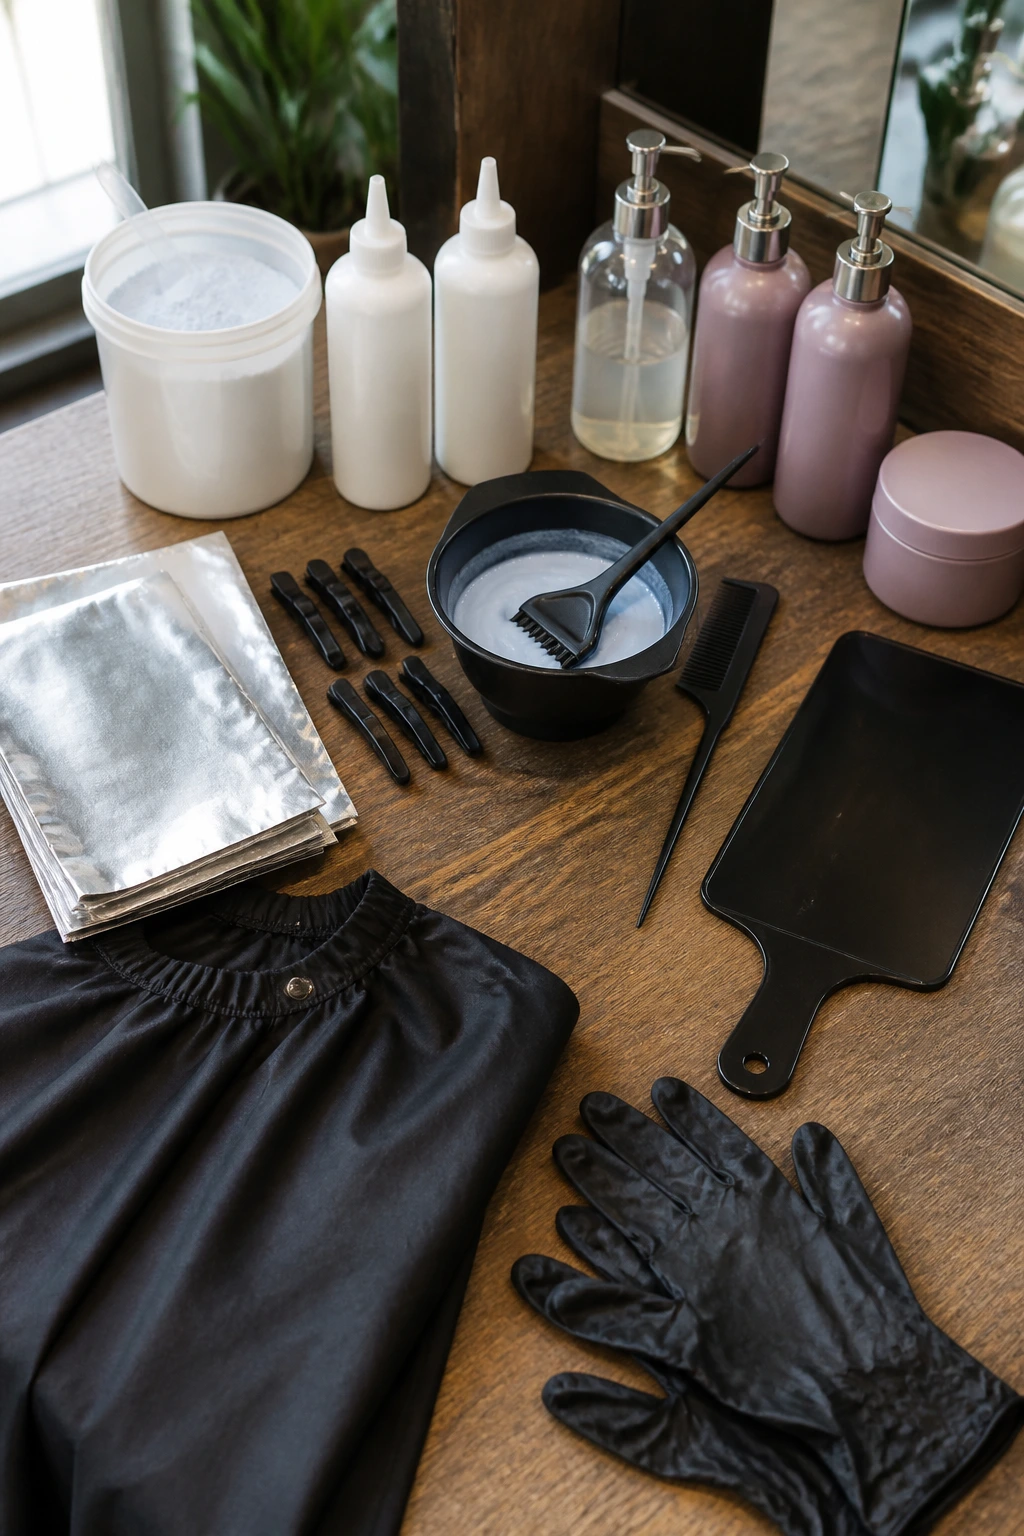
- Lightener and developer: Needed for any look that goes more than a couple of levels lighter, especially brunette-to-blonde or fashion-color fades.
- Toner or demi-permanent gloss: This is what turns yellow into beige, orange into caramel, or pale blonde into silver smoke.
- Tint brush and mixing bowl: A brush gives you more control than a bottle when you’re painting a gradient by hand.
- Sectioning clips: Clean sections keep the fade even from side to side, and they stop shorter pieces from getting lost under longer ones.
- Foils or a balayage board: Foils give more lift and cleaner saturation; a board helps with hand-painted ends.
- Tail comb: Useful for neat partings, section control, and checking whether the fade starts at the same point on each side.
- Gloves and cape: Pastel, copper, navy, and violet shades stain fast. Gloves keep your hands out of trouble.
- Bond builder: Optional, but smart on fragile, previously colored, or naturally coarse hair that needs extra support during lightening.
- Color-safe shampoo and deep conditioner: Ombre hair tends to dry out at the ends first, so aftercare matters as much as the dye job itself.
Choosing the Right Base Shade, Lift Level, and Toner
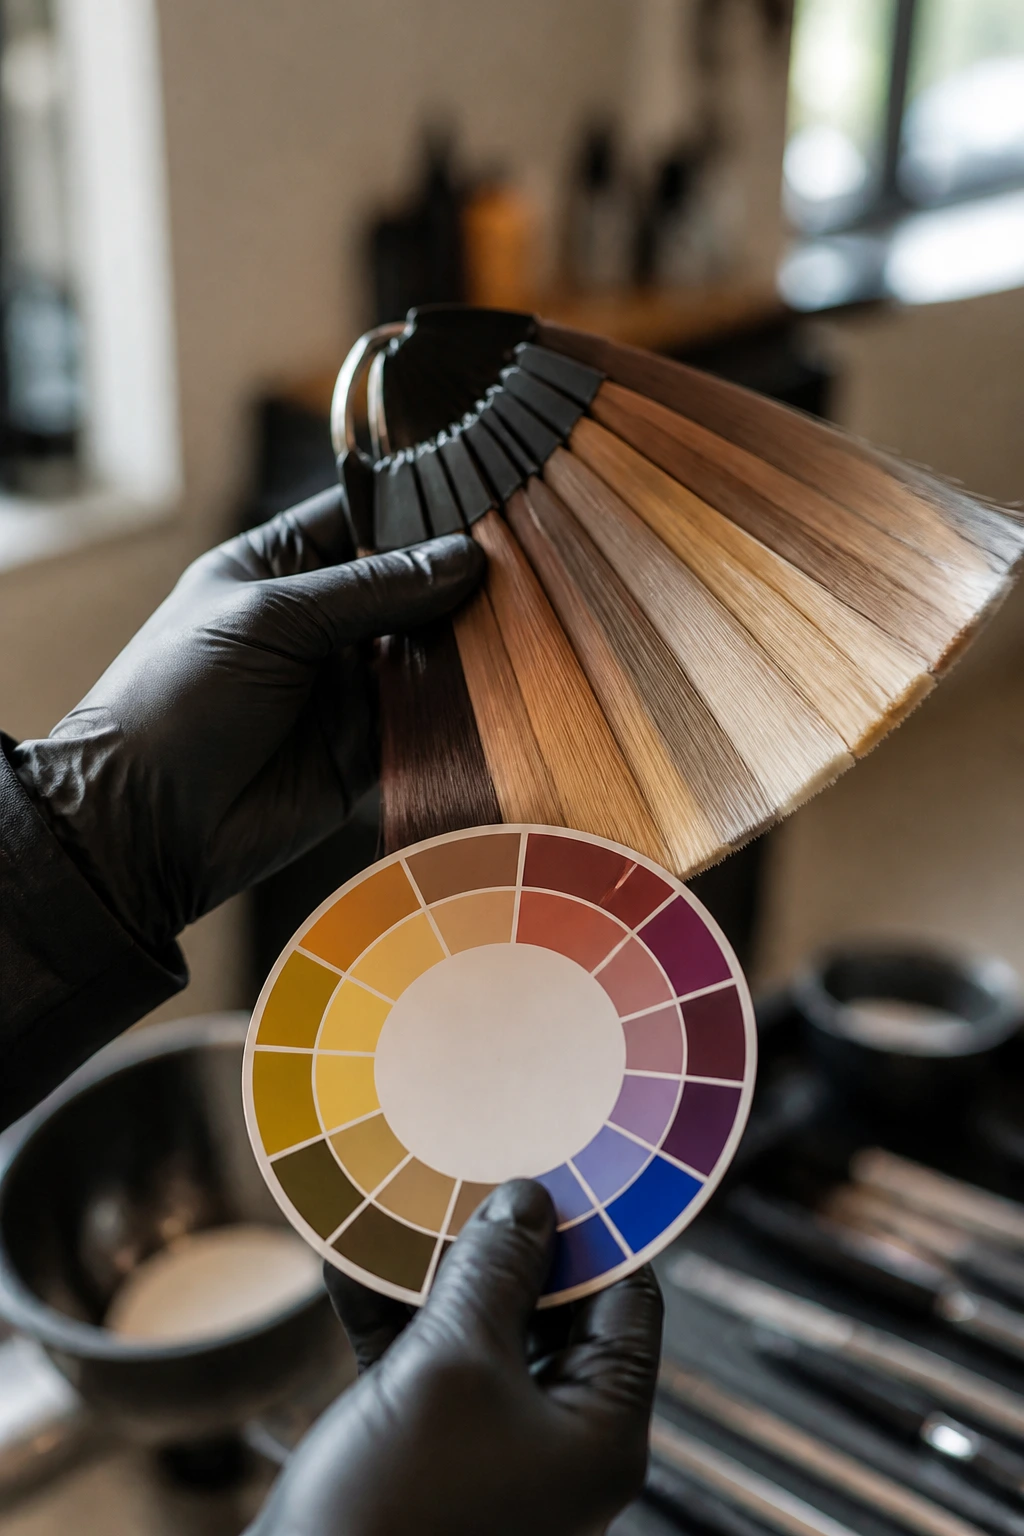
The easiest way to avoid a bad ombre is to match the lift to the starting color instead of copying a photo blindly. A level 3 brunette does not lift the same way a level 6 brown-blonde base does. If the hair is dark and dense, the ends may only need to reach level 6 or 7 for a caramel look. If you want platinum, the target is much lighter and the process gets more fragile.
Tone is the part people underestimate. Warm brunettes usually need blue-violet help once the hair lifts through orange. Pale blondes often need violet to knock down yellow. If you want beige instead of ash, do not overcorrect. Beige is a softer, creamier tone, and too much violet can turn it flat.
A good rule of thumb: the darker the starting point, the more patience the fade needs. Dark hair pushed too fast can get orange at the ends and dry at the same time. Better to stop one level earlier and gloss again than to chase a shade so far the hair starts snapping.
How to Wear These Ombre Looks With Different Cuts and Textures
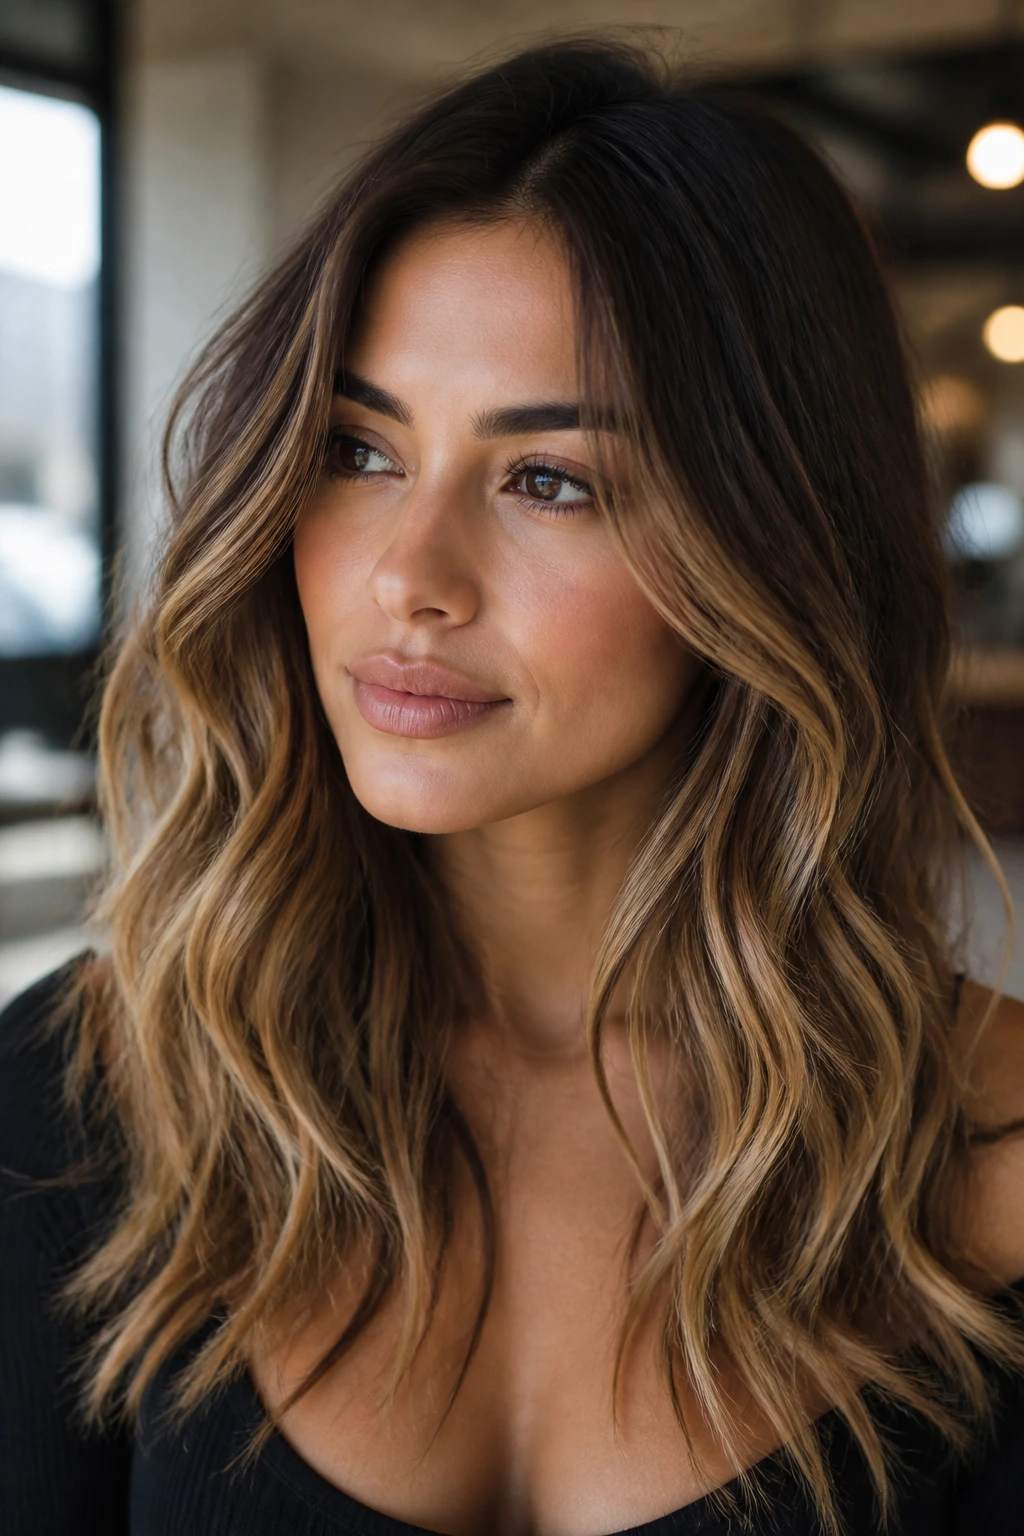
Styling: Loose waves show the gradient best because the bend lets the darker and lighter pieces sit on top of one another. A straight blowout gives a cleaner read on the color, which is useful if you want the fade to look smooth and deliberate.
Cuts: Long layers, lobs, and softly textured bobs give ombre more room to move. Blunt cuts can wear it too, but the fade should stay lower and more controlled so the shape of the haircut does not fight the color.
Texture: Curls and coils blur the line between shades in a way that straight hair never will. That means you can be slightly bolder with contrast on textured hair without getting a harsh stripe.
Accessories: Half-up styles, clip twists, and low ponytails can all show off the lighter ends if you leave a few face-framing pieces out. If you tuck every strand back, the color disappears halfway down the back of the head and the whole point gets lost.
Extra Tips for Richer Color and Softer Ends
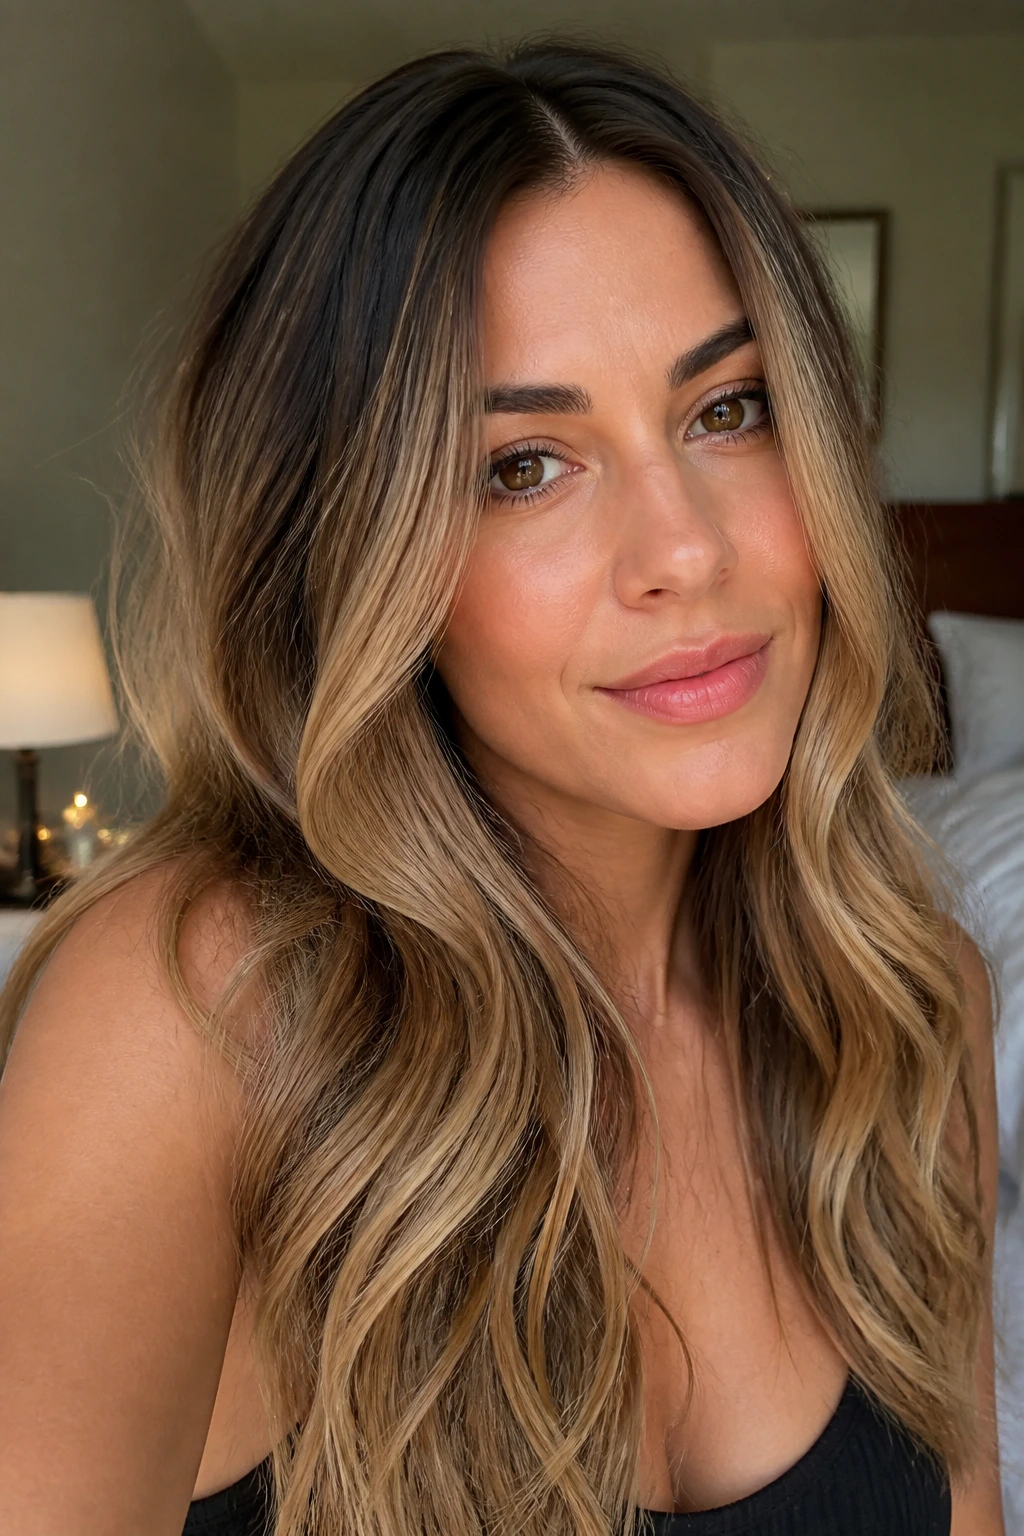
Color Enhancement: Ask for a root shadow that is one level deeper than your natural base if you want the fade to look smoother. That small shift makes the transition feel blended instead of stamped on.
Customization: Keep the lightest pieces around the face if you want more brightness without changing the whole head. It’s a cleaner way to soften the front than dragging the blonde all the way up to the roots.
Styling Suggestions: Use a 1-inch curling iron or a flat iron bend to show off the lower third of the color. Tight curls can hide an ombre; soft bends let the fade show its work.
Make-It-Yours: For fine hair, keep the contrast modest so the ends do not look thin. For thick hair, you can handle stronger contrast because the density keeps the fade from disappearing into the cut.
Common Mistakes That Make Ombre Look Choppy
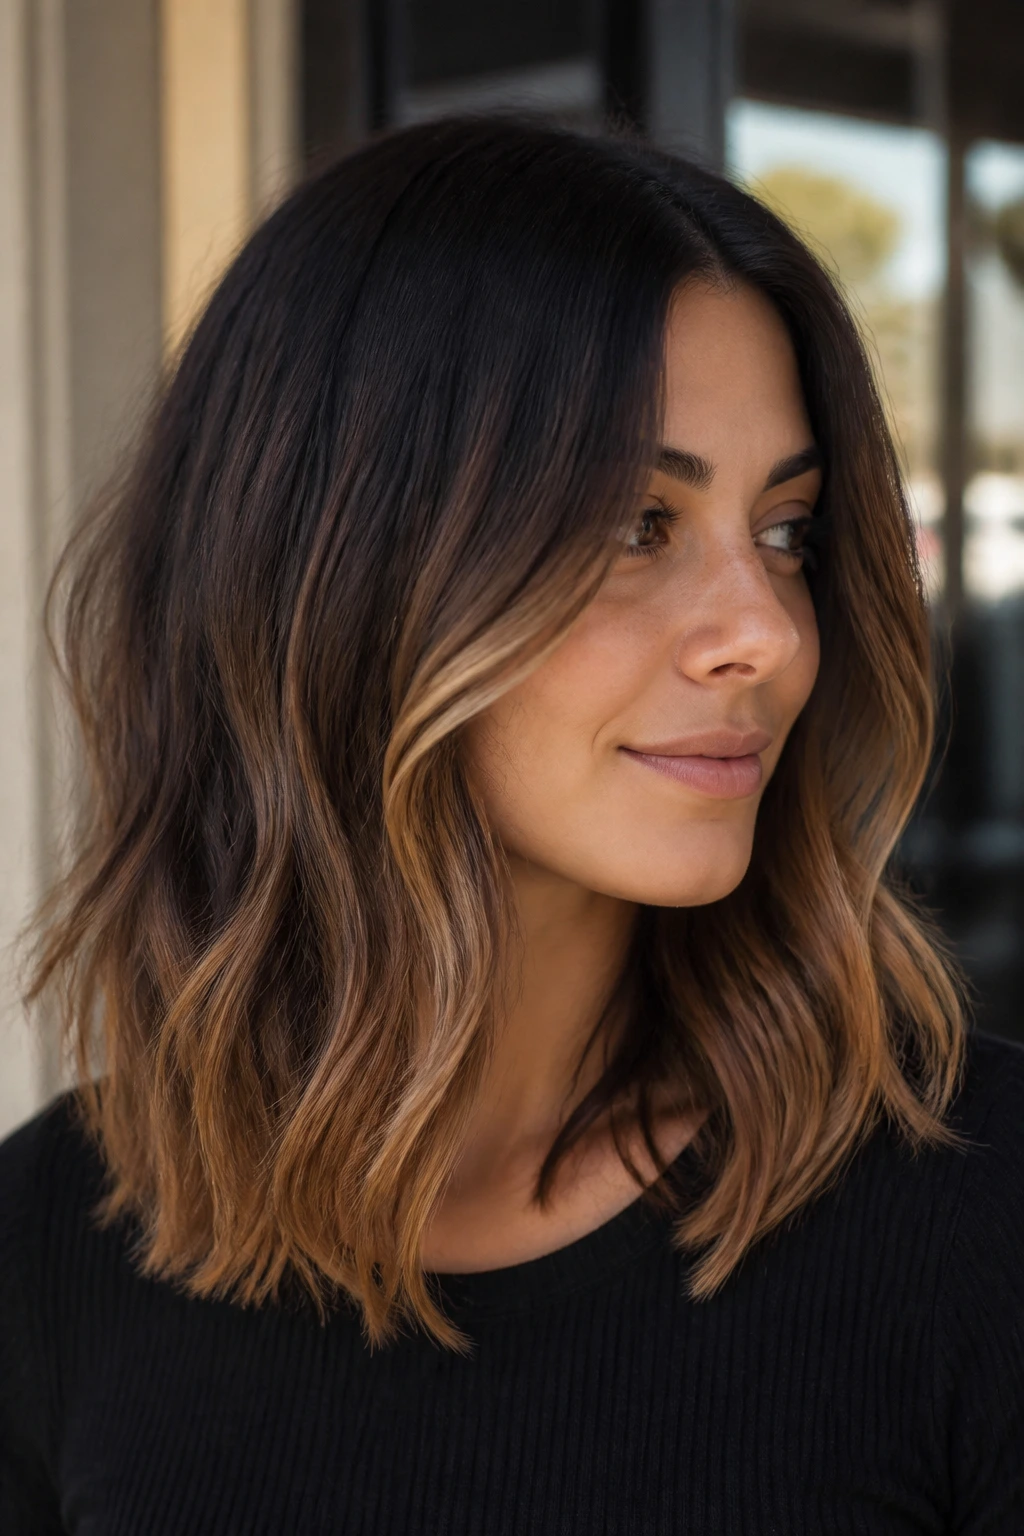
- Starting the fade too high on short hair: The color ends up looking like grown-out highlights instead of a planned gradient. Keep the transition lower on bobs and lobs.
- Ignoring warmth after lifting: If the ends turn orange or yellow and you skip toner, the whole look reads unfinished. Use the right toner instead of hoping the next shampoo will fix it.
- Painting a hard line instead of feathering: A visible band between shades is the fastest way to make ombre look old. Feather the lightener and blur the overlap.
- Lifting dark hair too far in one go: The ends get brittle, and the color often comes out uneven anyway. Safer to lift in stages.
- Choosing a shade that fights the base: Ash on top of warmth can look muddy. Copper on an already orange base can look loud in a bad way. Match the tone to the lift.
- Skipping trims: Split, see-through ends make every fade look thinner and rougher. Trim before or after the service if the ends are already fried.
Variations and Adaptations to Try
Soft Gloss Ombre: Keep the color change inside the brunette family and use a demi-permanent gloss instead of heavy lightening. This works when you want movement, not a dramatic blonde finish.
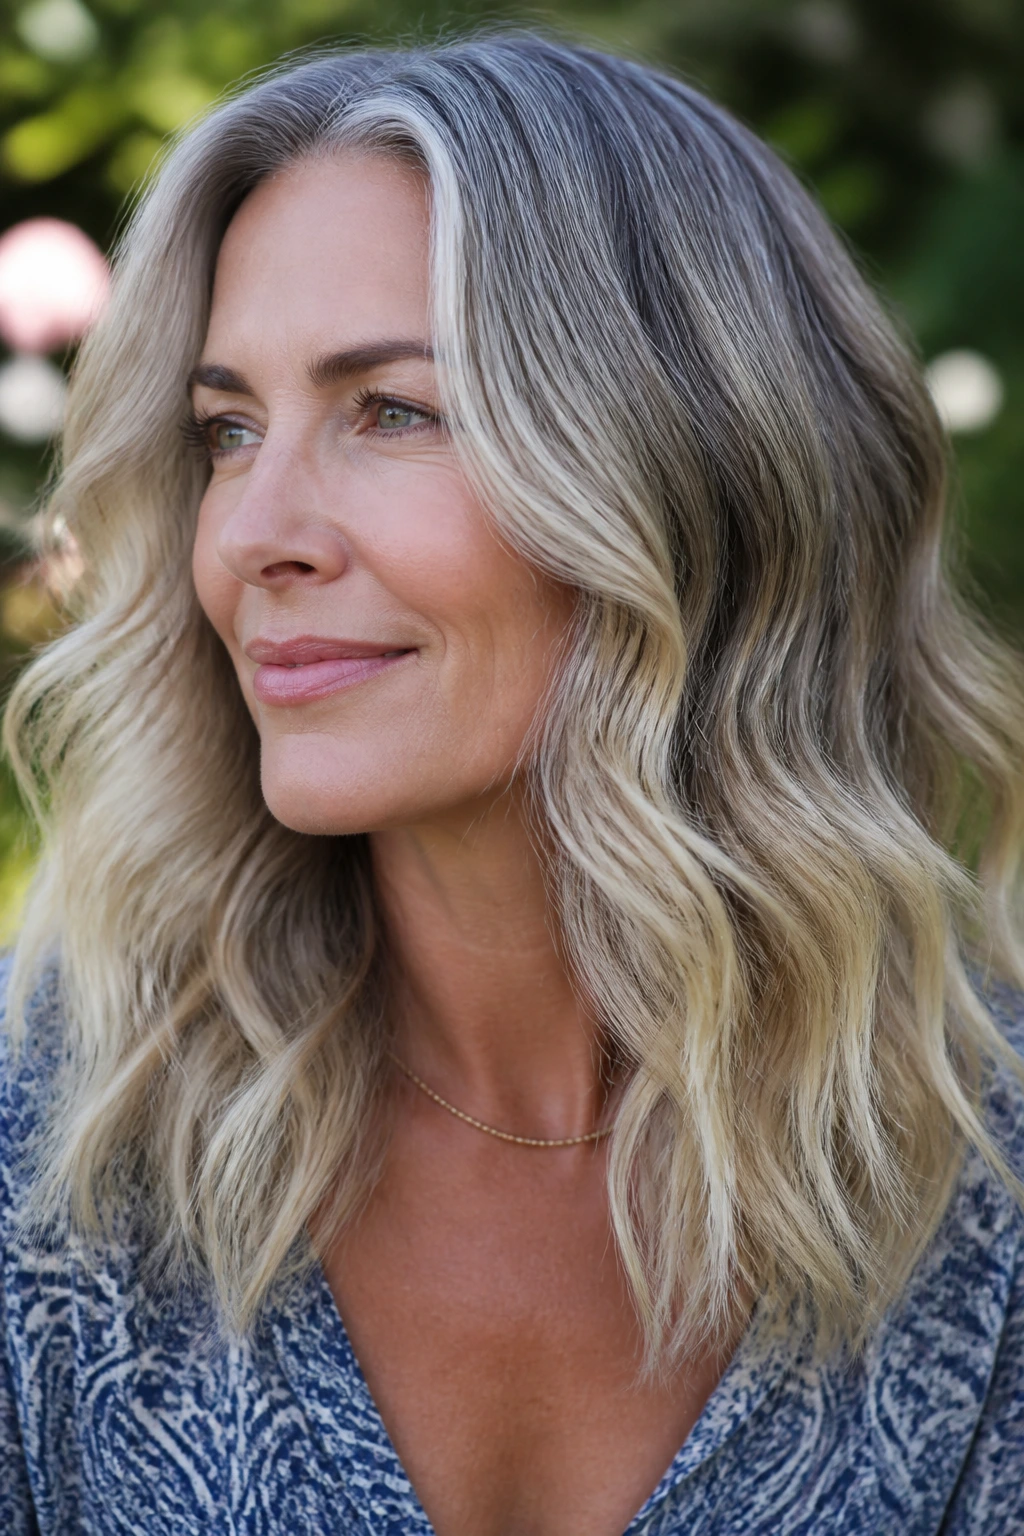
Gray-Blending Ombre: Let the roots stay closer to your natural gray or silver and fade the mids into a soft beige or icy blonde. It helps the grow-out look intentional instead of leaving a sharp line at the hairline.
Copper Lift-Off: Take a chestnut base into a brighter copper fade for more warmth and shine. This is the version to choose if you like red tones but want more sparkle at the ends.
Fashion-Color Dip: Pre-lighten the ends and drop in teal, plum, rose, or lavender. It is louder, yes, but the ombre structure keeps the look wearable because the color stays lower on the head.
Curly Soft-Blend: Reduce the contrast slightly and paint the lighter pieces in ribbons that follow the curl pattern. This keeps the shape of each curl intact instead of turning the whole head into one bright block.
Maintenance, Toning, and Appointment Timing
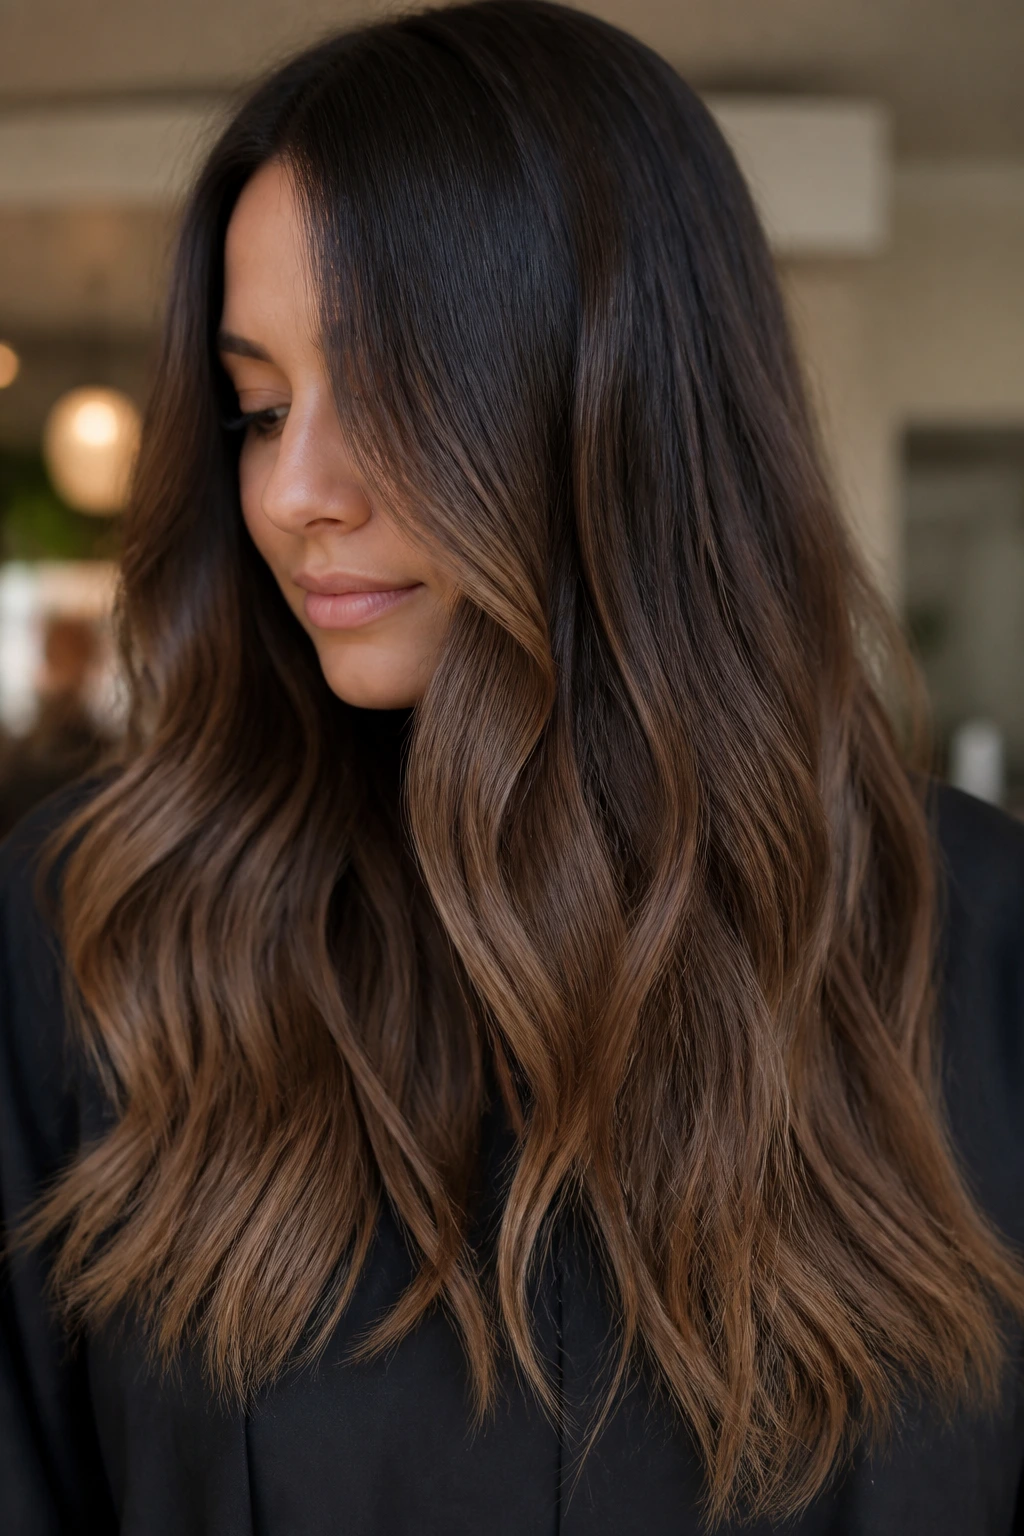
Ombre is easier to live with than all-over blonde, but it is not no-maintenance. Brunette-to-caramel looks can usually stretch 8 to 12 weeks before they start feeling tired, especially if the fade is low and the root shadow is deep. Higher-contrast blondes, silvers, and fashion colors usually need a refresh closer to 4 to 6 weeks.
Wash frequency matters more than people want it to. Two or three washes a week is enough for most ombre styles, and cooler water helps the tone hold longer at the ends. If you use purple shampoo on blonde or silver pieces, keep it to once a week or every other week. Leave it on for 1 to 3 minutes, not 10, unless you want a violet cast.
Heat protection is not optional if the ends are lightened. A blow-dryer or curling iron can chew through toned hair faster than the color itself. Deep condition the ends once a week, trim every 8 to 12 weeks, and book a gloss before the color looks flat rather than after it has already gone dull.
Frequently Asked Questions
How long does ombre hair last before it needs a refresh?
A soft brunette ombre can look good for 8 to 12 weeks, sometimes longer if the fade is subtle. Bright blondes, silvers, and vivid colors usually need a toner or gloss sooner because the ends lose tone faster than the roots show regrowth.
Is ombre less damaging than all-over blonde?
Usually, yes. Since the root area stays darker, you are not lightening every inch of hair, which leaves more of the stronger, newer growth untouched. The ends still need care, though, because that is where dryness shows up first.
Can you do ombre on short hair?
Yes, but the fade needs to sit lower and softer than it would on long hair. On bobs and lobs, a high transition can look like an accident; on longer layers, the same placement might look perfect.
What if my dark hair turns orange when I lighten it?
That means the hair lifted into the warm middle stage and needs toner, not more shampoo. Blue or blue-violet toner helps tame orange, while beige or caramel toner can soften the result without making it flat.
Does ombre work on curly hair?
Very well, if the color is painted with the curl pattern in mind. Curly hair breaks up the fade naturally, so you can usually wear a little more contrast without getting a harsh stripe. The key is to avoid stamping the lightener on in one solid block.
Can I get ombre without bleach?
Sometimes. If your hair is already light enough, a gloss or demi-permanent color can create a softer fade without major lightening. On dark hair, though, you’ll need some lift if you want a true blonde, silver, teal, or pastel end.
How often should I tone ombre hair?
Most blonde and silver ombre looks need toning every 4 to 6 weeks. Brunette and caramel versions can stretch longer, especially if the ends are only a shade or two lighter than the base.
What’s the fastest way to make ombre look polished between salon visits?
A trim, a gloss, and a good wave pattern go a long way. If the ends are frayed and the tone is flat, the fade will look tired no matter how good the initial color was.
The Fade That Keeps Its Shape
Ombre keeps showing up because it solves a real problem: people want dimension, but they do not want their hair to look stale the minute the roots grow. A good fade gives you both movement and mercy. It can be soft, smoky, bright, or bold, and it still buys you breathing room between appointments.
The best versions are the ones that respect the haircut, the starting shade, and the amount of maintenance you actually want to sign up for. That’s the part that gets missed when people chase a photo instead of a plan. Pick the fade that suits your length, your texture, and your tolerance for toner, and the color will keep looking intentional long after the salon mirror is gone.
