



Tousled wave hairstyles for medium hair hit a sweet spot that long hair and short hair both miss. The length is heavy enough to fall in a clean curve, but light enough that one pass with a curling wand can still leave a visible bend.
I keep coming back to medium-length waves because they can look loose at breakfast and pulled-together by dinner without changing the whole cut. A collarbone-length lob, a layered shoulder cut, or a blunt mid-length shape all respond differently, which is exactly why this category has so much room to play.
The trick is not chasing perfect curls. It is choosing where the bend starts, how much of the ends stay straight, and whether the finish is silky, piecey, or a little wind-blown — small choices that change the whole read of the hair. That range is the fun part, and it starts with the styles that use the medium length instead of fighting it.
Why These Tousled Waves Keep Working on Medium Hair
- The length holds shape without dragging it down: Medium hair sits in that useful middle zone where a wave can still show its curve by the end of the day.
- The finish can swing casual or polished fast: One brushed-out wave with shine spray looks very different from a piecey, matte bend with dry texture spray.
- Layers matter, but they don’t have to be dramatic: Even a few face-framing layers or a soft lob shape can keep waves from looking like one heavy block.
- Most of these styles work on second-day hair: A little dry shampoo at the roots and a quick touch-up on the front pieces can bring the shape back without rewashing.
- They play nicely with clips, bangs, and parts: A center part, deep side part, curtain bangs, or a claw clip changes the same base wave in a meaningful way.
- You can fake more density or soften bulk: Medium hair is long enough to build volume, but not so long that the styling gets swallowed by weight.
1. Soft Collarbone Waves with a Deep Side Part
A deep side part changes everything here. The wave itself can stay loose and fairly simple, but the part gives the hair a built-in lift at the front, which keeps medium-length hair from lying flat against the head.
I like this look with a 1-inch curling wand and sections about 1 inch wide. Wrap each piece away from the face, leave the last inch out, then let the hair cool before you touch it. That little straight tail at the ends keeps the style from turning into old-school ringlets, and it reads more modern on collarbone-length hair.
Finish by raking the curls apart with your fingers and misting the roots with a light texturizing spray. The wave should move when you turn your head, not sit like a set pattern. This is the version I reach for when I want the hair to look styled but not spent.
2. Blunt Ends with Barely-There Bend
Blunt medium hair loves restraint. If the cut already has a straight edge, you do not need to force the whole head into curl mode; a soft bend through the mid-lengths is enough.
Why the blunt edge matters
The sharp line at the bottom gives this style a clean finish even when the wave is loose. That contrast is the point. You get movement above the shoulders, then a firmer edge at the ends, which keeps the look from drifting into too much fluff.
Use a flat iron with rounded edges or a curling iron no bigger than 1 to 1.25 inches. Bend the hair in alternating directions and skip the last 1 to 1.5 inches of each section. If you curl all the way to the ends, the shape gets softer, but the blunt cut loses its graphic edge.
- Best product match: a lightweight mousse at the roots and a soft-hold spray after the waves cool.
- Best haircut match: a blunt lob or shoulder-length cut with minimal layering.
- Best finish: finger-combed, not brushed.
One-sentence rule: leave the ends slightly straighter than you think you should. That’s what makes the style feel deliberate.
3. Layered Lob Waves with Crown Lift
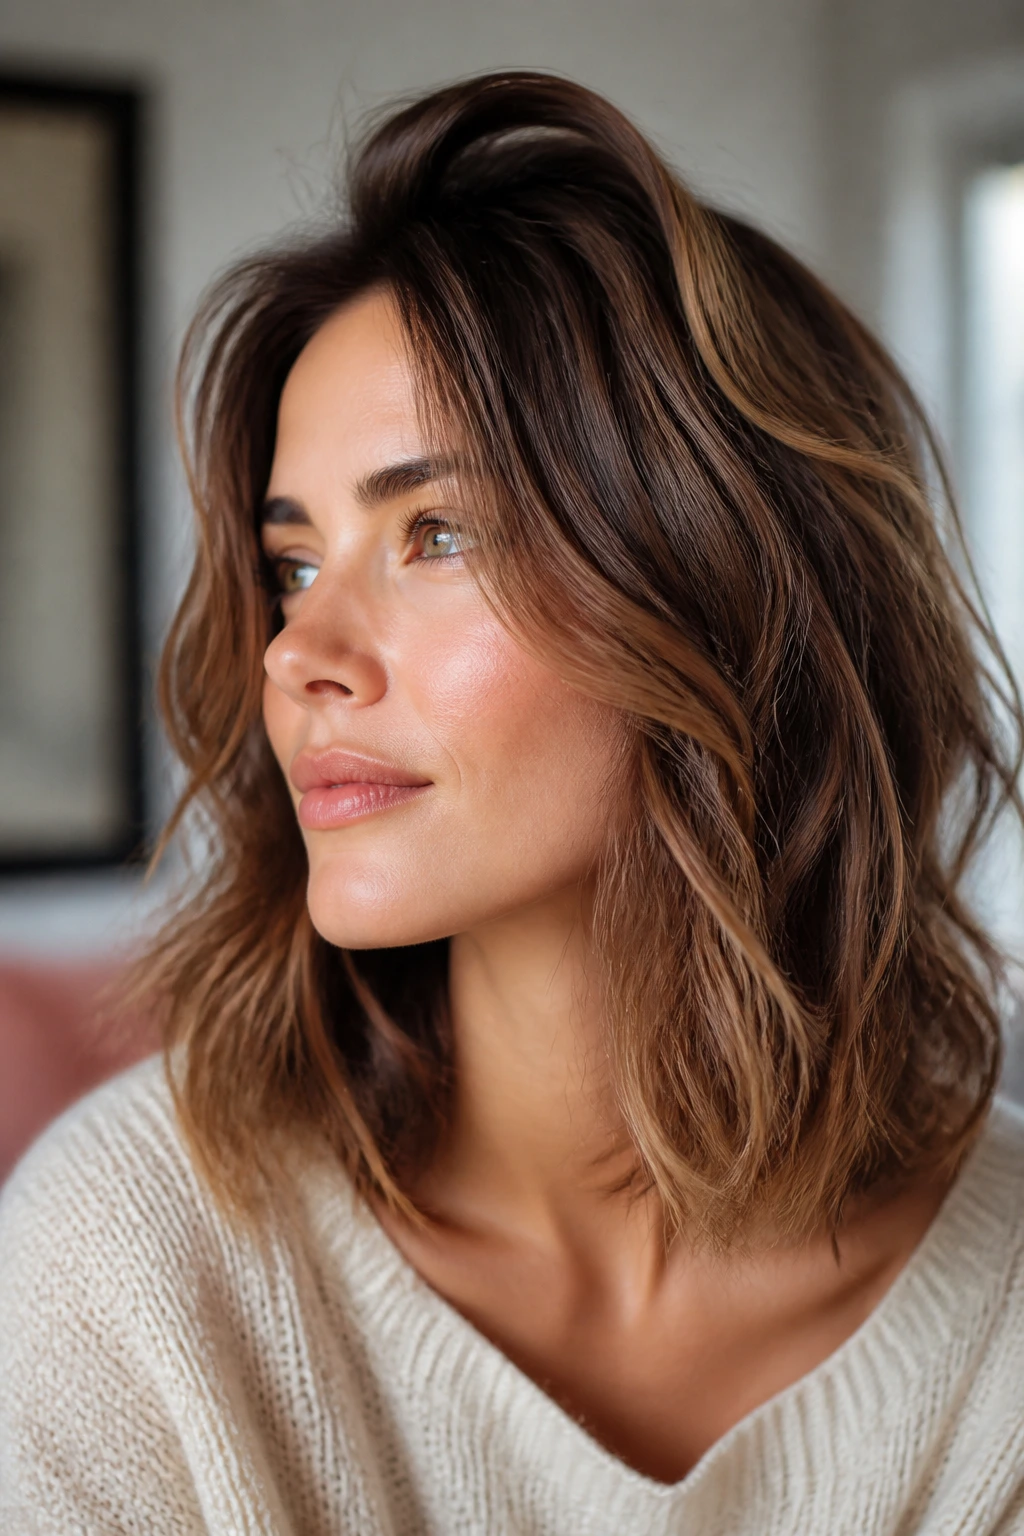
Why does a layered lob hold waves so well? Because the layers give the bend somewhere to live. On one-length medium hair, waves can slide downward under their own weight. With a few well-placed layers, the curve stays visible and the crown gets a little breathing room.
Start with a root-lifting spray or mousse at the crown, then rough-dry the top section with your fingers or a round brush. Once the hair is about 90% dry, switch to a curling wand and take medium sections, wrapping them away from the face on the front half and alternating directions through the back. Let each section cool in your hand for a few seconds before releasing it.
What to watch for
If the layers are short around the top, don’t overcurl them. They can spring up faster than the rest of the hair and make the whole shape look choppy in a bad way. A looser bend near the roots and more movement through the lower half keeps the lob balanced.
This is one of those styles that looks better with a little lift than with perfect smoothness. Flat roots make medium hair feel heavy. A soft crown changes that immediately.
4. Curtain Bang Waves That Brush the Cheeks
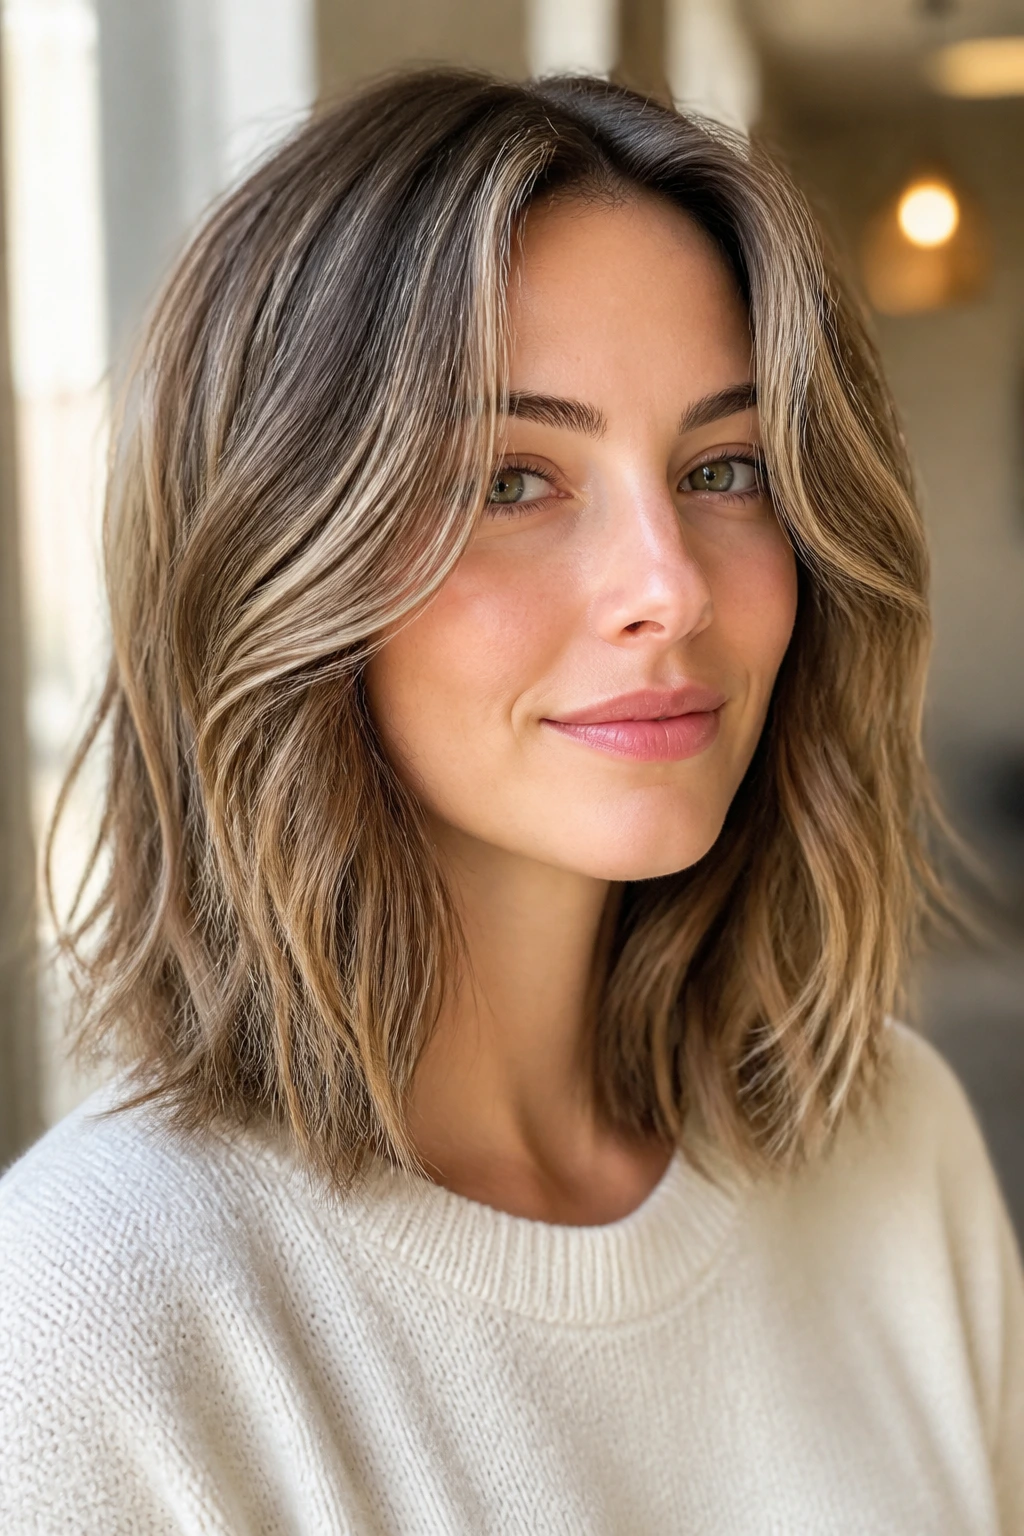
Curtain bangs and tousled medium waves are a very good pair, but the bangs need their own rules. They should look airy and separate, not folded into the wave pattern like an afterthought.
The easiest way to style them is to dry the bangs first with a small round brush or a medium round brush, pulling them away from the face and then letting them fall back into place. After that, wave the rest of the hair with a 1-inch iron, but keep the front sections slightly looser so the bangs can sit on top of the shape instead of disappearing into it.
I prefer this look when the bangs hit around the cheekbone. That length lets them flick open with the wave and keeps the eyes clear. If they’re shorter, the style gets more dramatic; if they’re longer, they can blend into the face-framing layers and act almost like a soft side sweep.
A tiny bit of dry texture spray under the bangs helps too. Not much. Too much product there makes the fringe collapse, and that ruins the whole effect fast.
5. Face-Framing Flicks with Loose Mid-Length Texture
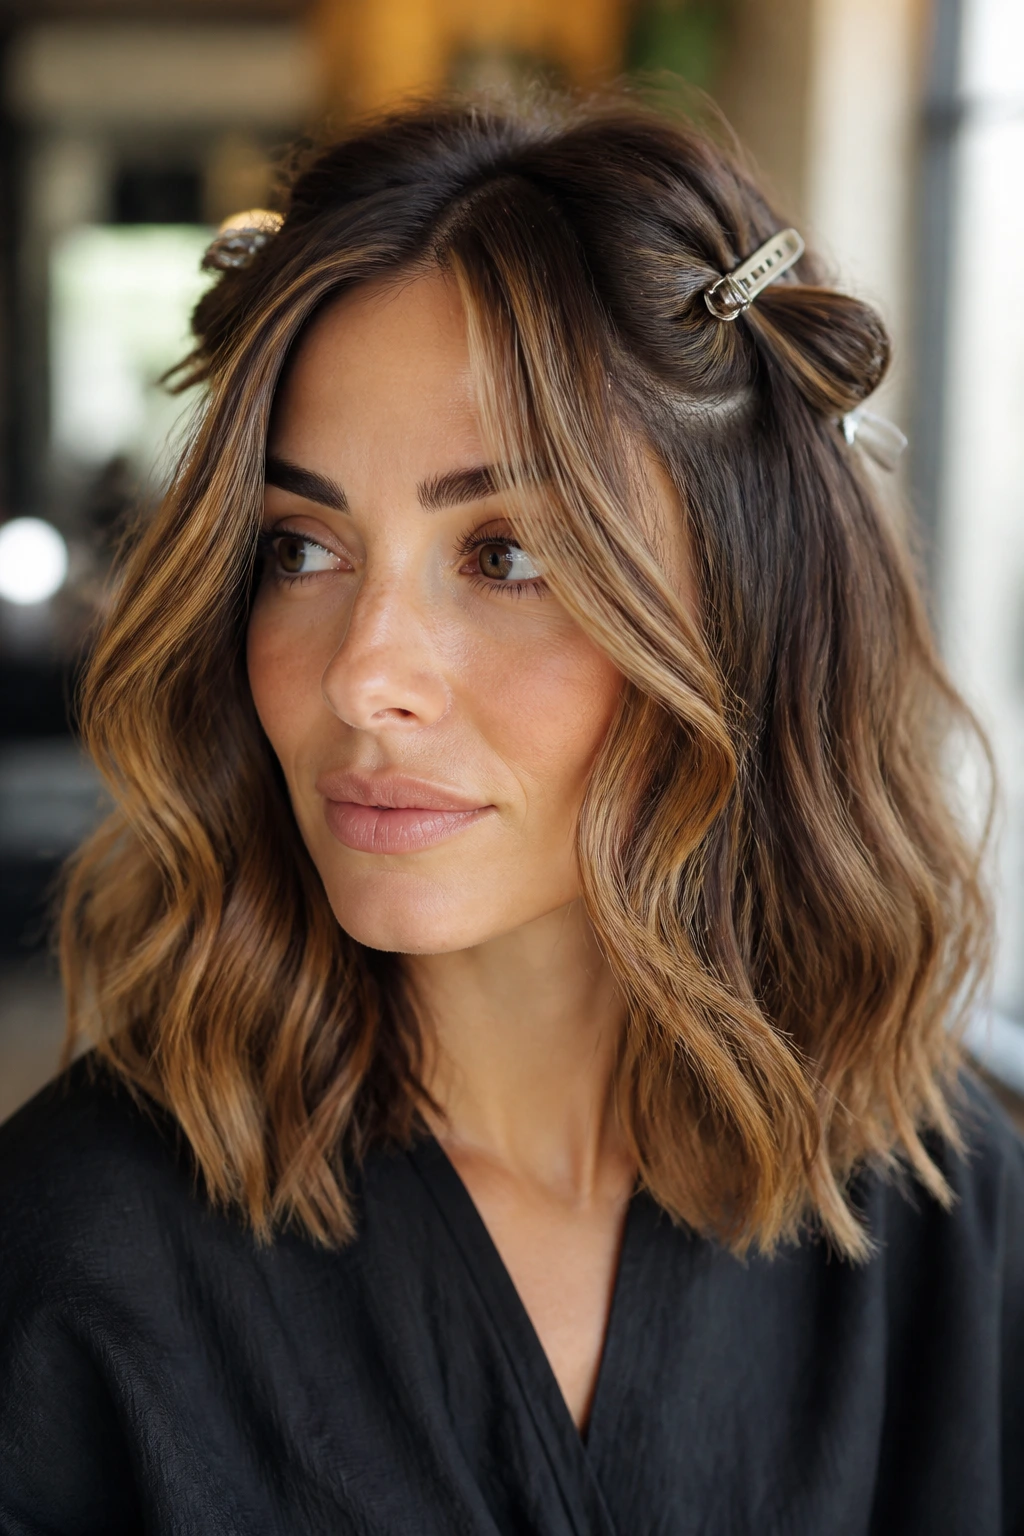
This is the version I recommend when someone wants waves but does not want the whole head to read as “curled.” Keep the texture concentrated around the face, the collarbone, and the top layer, then let the lower lengths stay slightly straighter.
A real-life trick helps here: clip the front sections away from the face while they cool. That slight bend at the cheekbone and jawline opens the face without making the hair look overdone. The rest can stay loose and a little undone, which is the point.
- Best for open necklines: crew necks, boat necks, and simple button-downs.
- Best face effect: it softens sharper jawlines and brings attention upward.
- Best tool: a curling wand, not a tight iron, because the bend should stay relaxed.
If the ends are too curled, this style loses its easy feel. I like the bottom inch nearly straight. That contrast makes the face-framing pieces stand out more, and the hair looks like it moved naturally through the day.
6. Brushed-Out Beach Waves with a Silky Finish
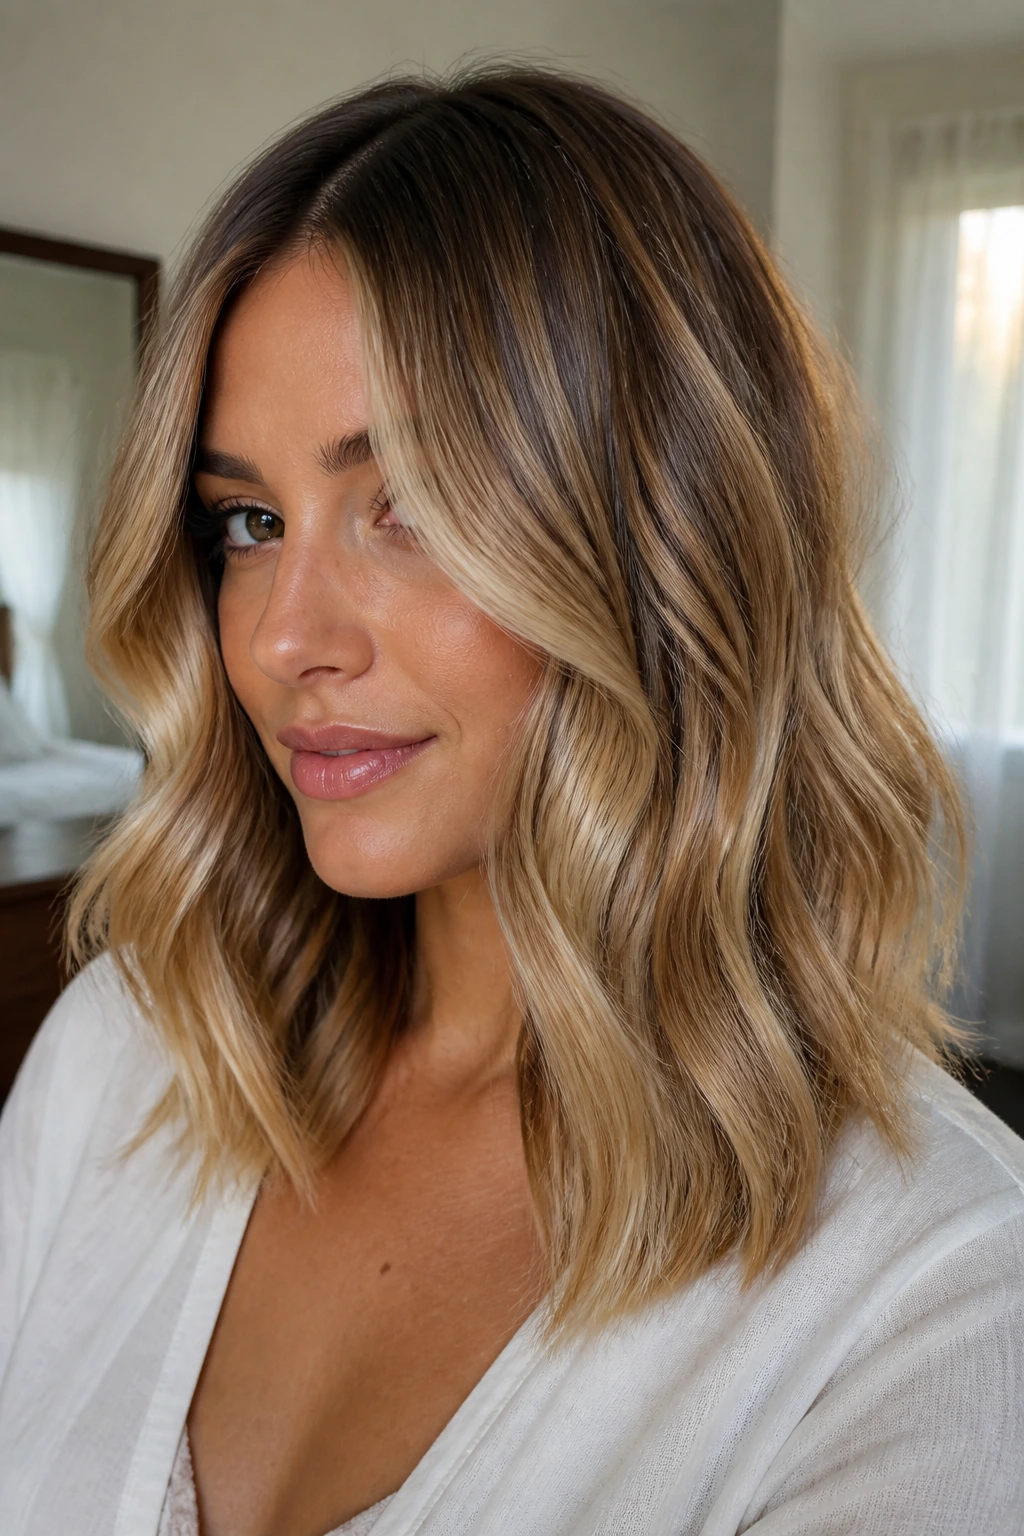
This is the wave pattern for people who like hair that moves in a soft sheet, not a piecey mess. Curl the hair in medium sections, let every section cool completely, then brush through with a paddle brush or wide boar-bristle brush.
That brushing step matters. It softens the wave into a longer bend and takes away the “I just used a wand” look. On medium hair, the result sits somewhere between a blowout and a wave set, which is why it works so well with polished outfits and clean neckline shapes.
I finish this style with one drop of light hair oil on the palms, then skim it over the ends only. Not the roots. The roots need movement, not shine that weighs them down. A little gloss at the bottom keeps the brushed-out wave from looking dusty or dry.
If your hair frizzes easily, brush only after the waves are fully cool. Warm hair gives up shape fast. Cool hair holds onto that long, smooth curve.
7. Claw-Clip Waves That Hide the Clamp Line
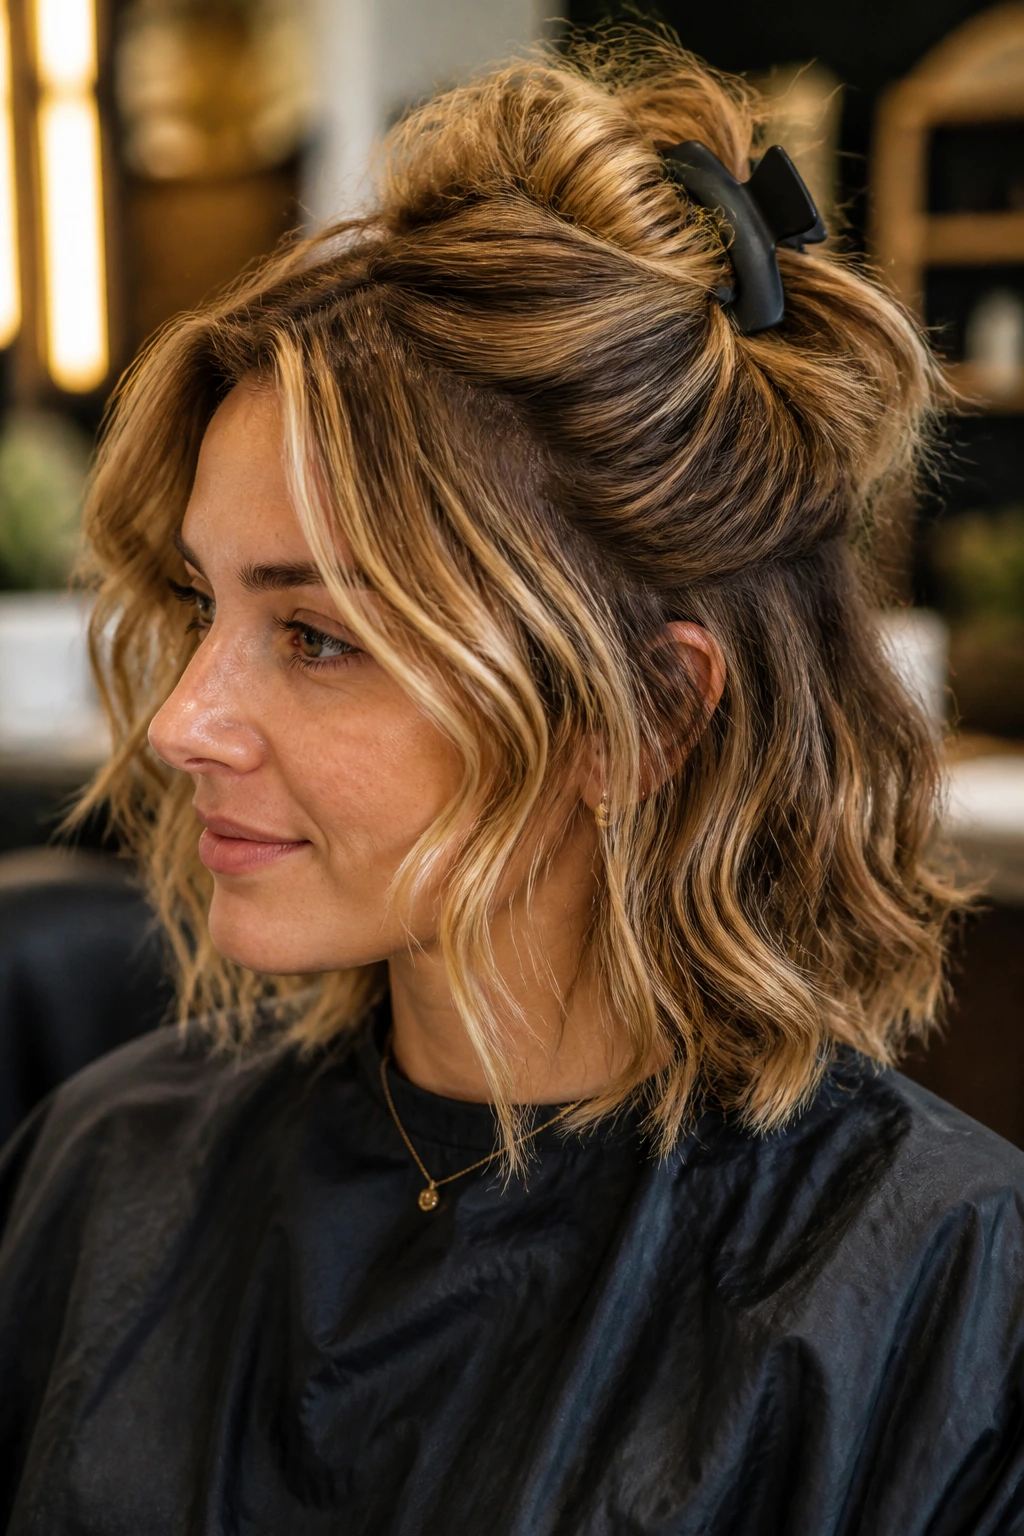
A claw clip changes the whole energy of medium waves. Instead of wearing the hair down all the way, you gather the top half or the back section and let the wave pattern peek through around the clip.
The trick is hiding the clamp line. Create your waves first, then twist the upper section loosely and place the clip slightly higher than the exact center back of the head. Pull a few face pieces loose so the style doesn’t look pinched. If the clip sits too low, it flattens the crown; too high, and the whole thing gets fussy.
This is one of the few styles that can make second-day waves look better. The bent ends and the broken-up texture around the clip keep the look from reading messy. It looks intentional because the clip creates structure, and the loose lengths give it softness.
A matte clip works better than a shiny one here. The texture of the clip should not compete with the hair. Let the wave be the main event.
8. Air-Dried Waves with Soft Product Memory
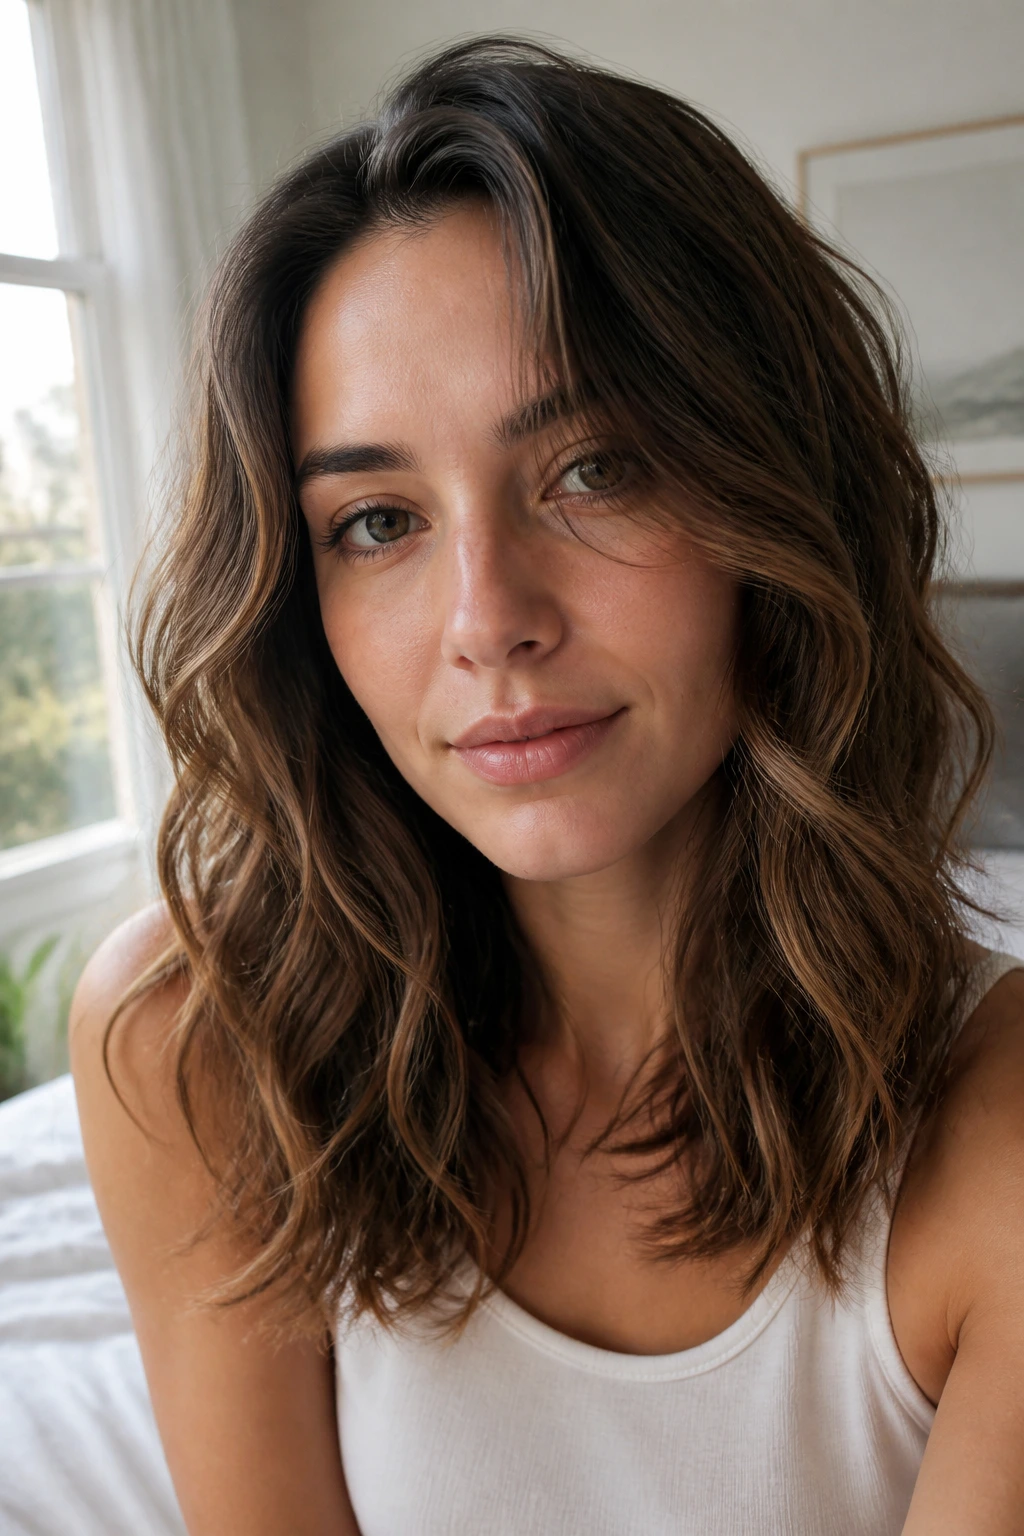
What if you want the wave without heat? Start with damp hair and a lightweight leave-in, then add a mousse or curl cream through the mids and ends. Scrunch, twist a few sections around your fingers, and let the hair dry without touching it.
A diffuser can help if your roots dry too flat, but you do not need to blast the whole head. I usually hover the diffuser near the crown for a few minutes and let the rest air-dry. That preserves the soft bend and keeps the ends from getting frayed.
The big rule here
Do not keep checking the hair while it dries. Every time you rake your fingers through it too soon, the wave pattern weakens. Let the product set first, then break it up lightly once the hair is fully dry.
Air-dried waves on medium hair often come out softer and less symmetrical than heat-styled ones. That is a strength, not a flaw. The unevenness makes the style feel lived-in instead of staged.
9. Side-Swept Waves for a Glossy Finish
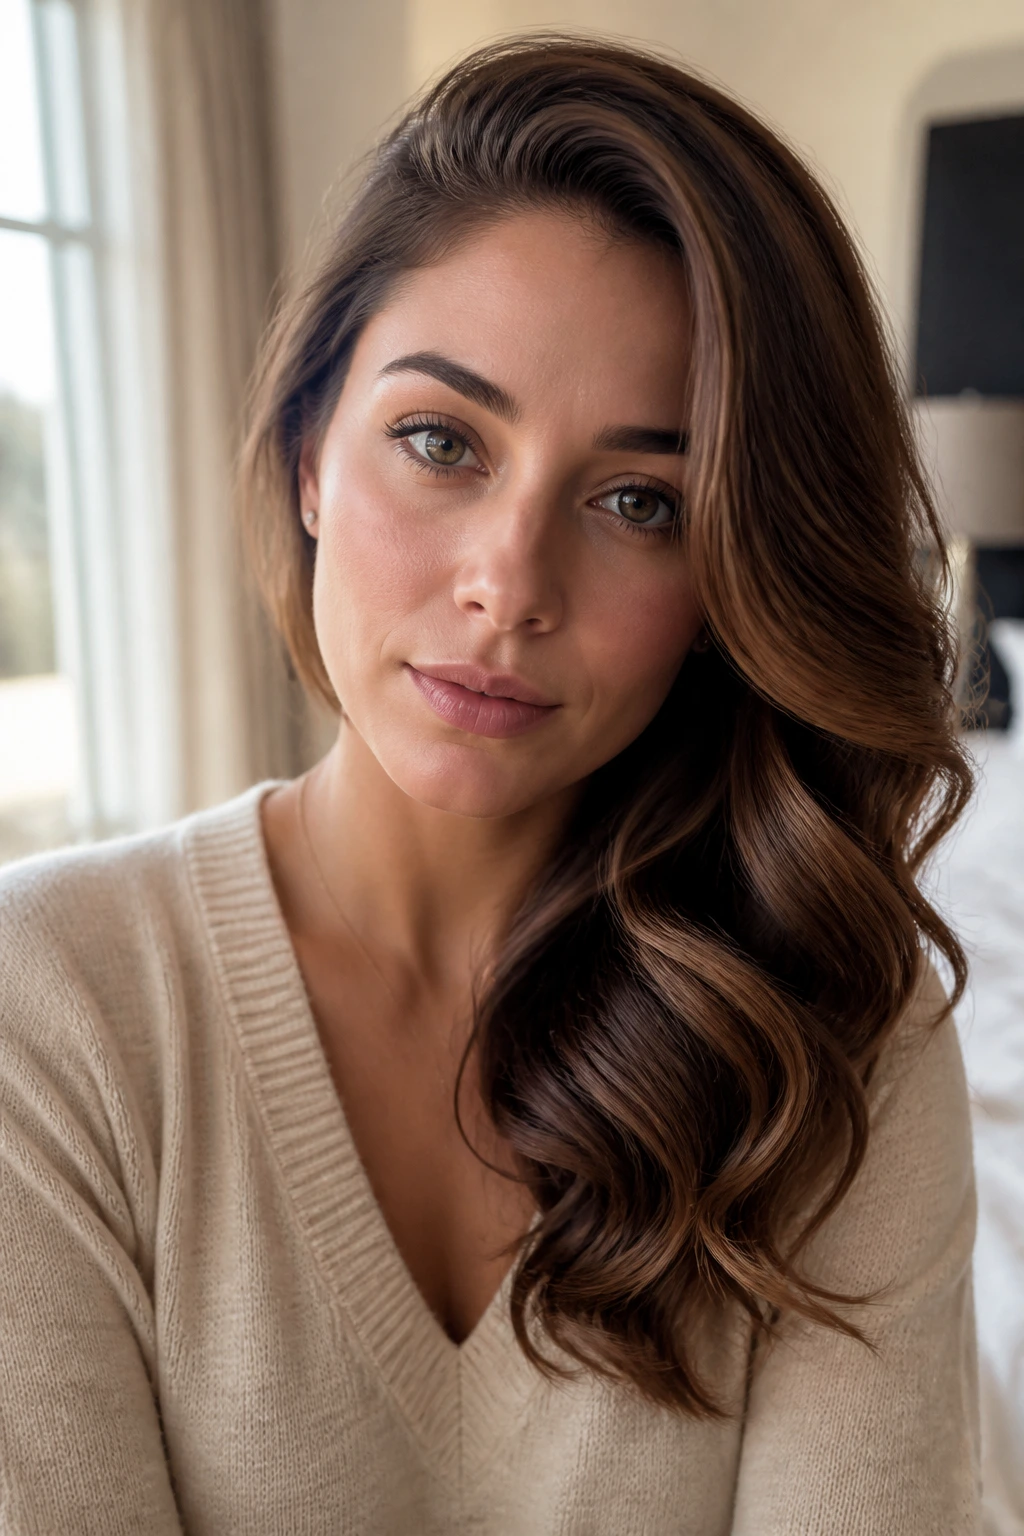
A side-swept wave shape is one of the easiest ways to make medium hair look more dressed up without adding more curl. Push most of the volume to one side, keep the wave smooth across the top, and let the lengths fall over one shoulder.
I like this version best when the finish is glossy rather than fluffy. Use a medium barrel, curl away from the face on the heavier side, and brush the wave into one sweep once it has cooled. A light shine spray on the mid-lengths gives the style a soft sheen without making the roots greasy.
This shape does good things for medium hair with a bit of natural fullness. It adds drama at the front and keeps the back from puffing out. If you have a strong wave pattern already, a side part can sharpen it in a nice way. If your hair is straighter, the side sweep gives the bend some body to lean on.
Small detail, big effect. Tuck one side behind the ear if you want the face to stay open.
10. S-Bend Waves That Look Drawn by Hand
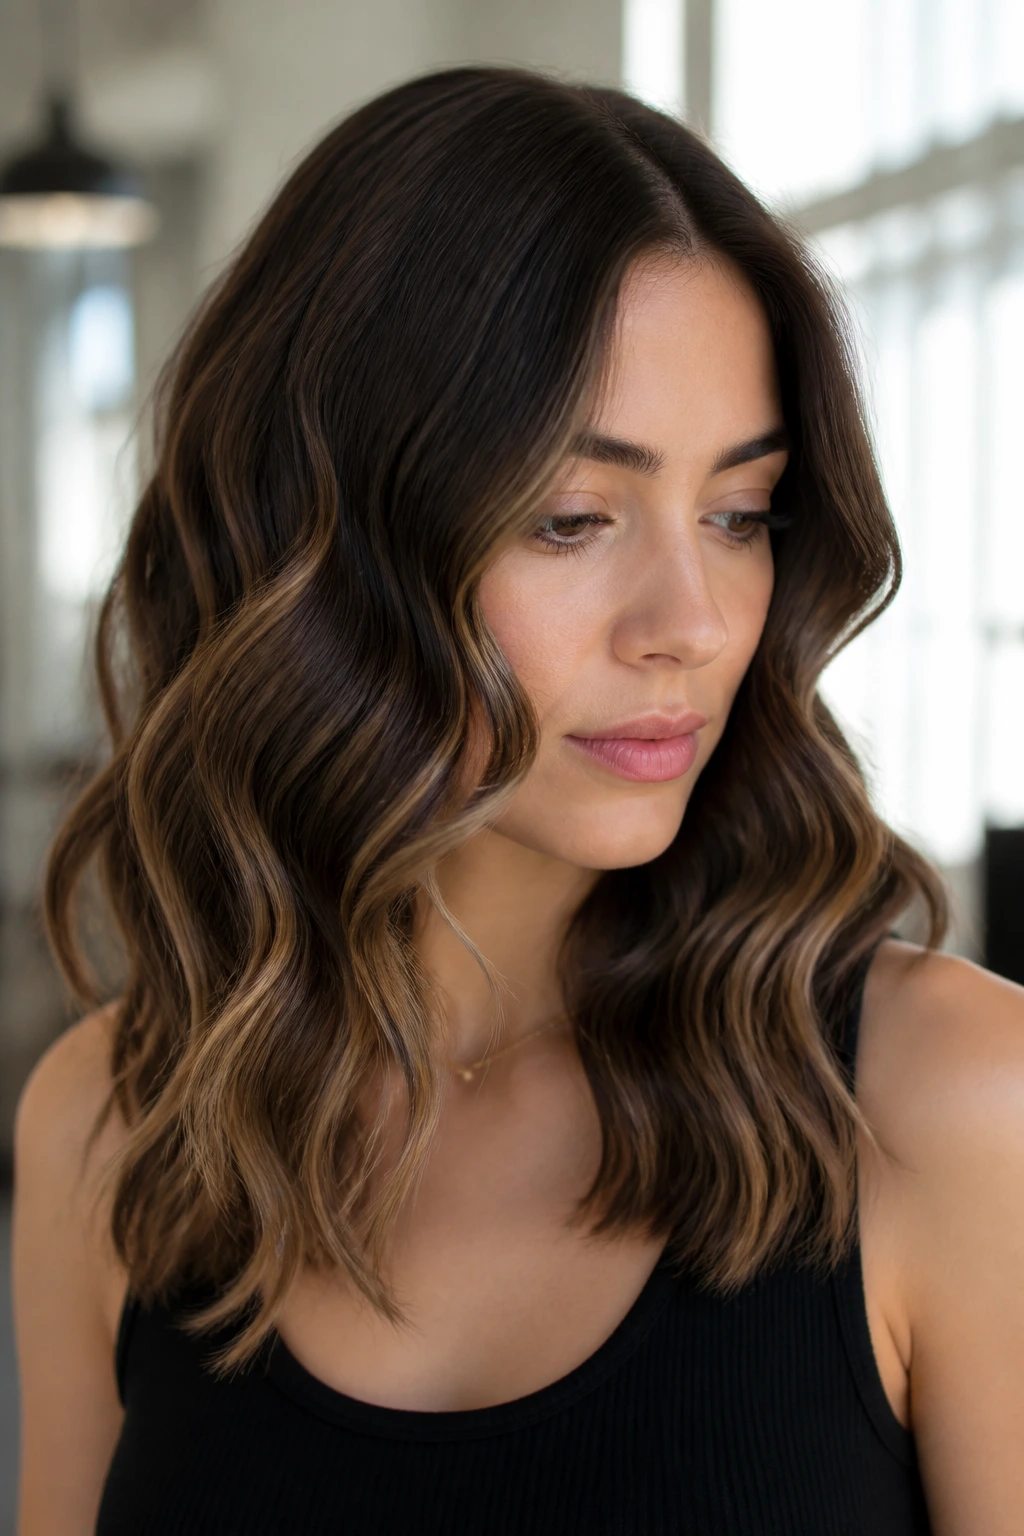
S-bend waves are a different animal from round curls. They look flatter, longer, and a little more graphic, which suits medium hair nicely because the shape stays visible from root to tip.
How to style it
Use a flat iron with rounded plates and bend the hair in a loose S pattern as you slide down each section. Start the first curve away from the face, then flip the iron the other direction a few inches lower. The goal is not a full curl. It is a soft zigzag that reads as wave once the hair falls.
- Section size: about 1 inch wide for a clean bend.
- Heat level: medium, not blazing hot; around 300–350°F is enough for most medium hair.
- Finish: a mist of light texture spray, then a gentle shake at the roots.
This style looks especially good on medium hair with blunt ends or slightly broken-up layers. The line stays interesting. Too much layering can make S-bends look fragmented, so keep the shape cleaner through the bottom half.
11. Choppy Ends with Piecey Movement
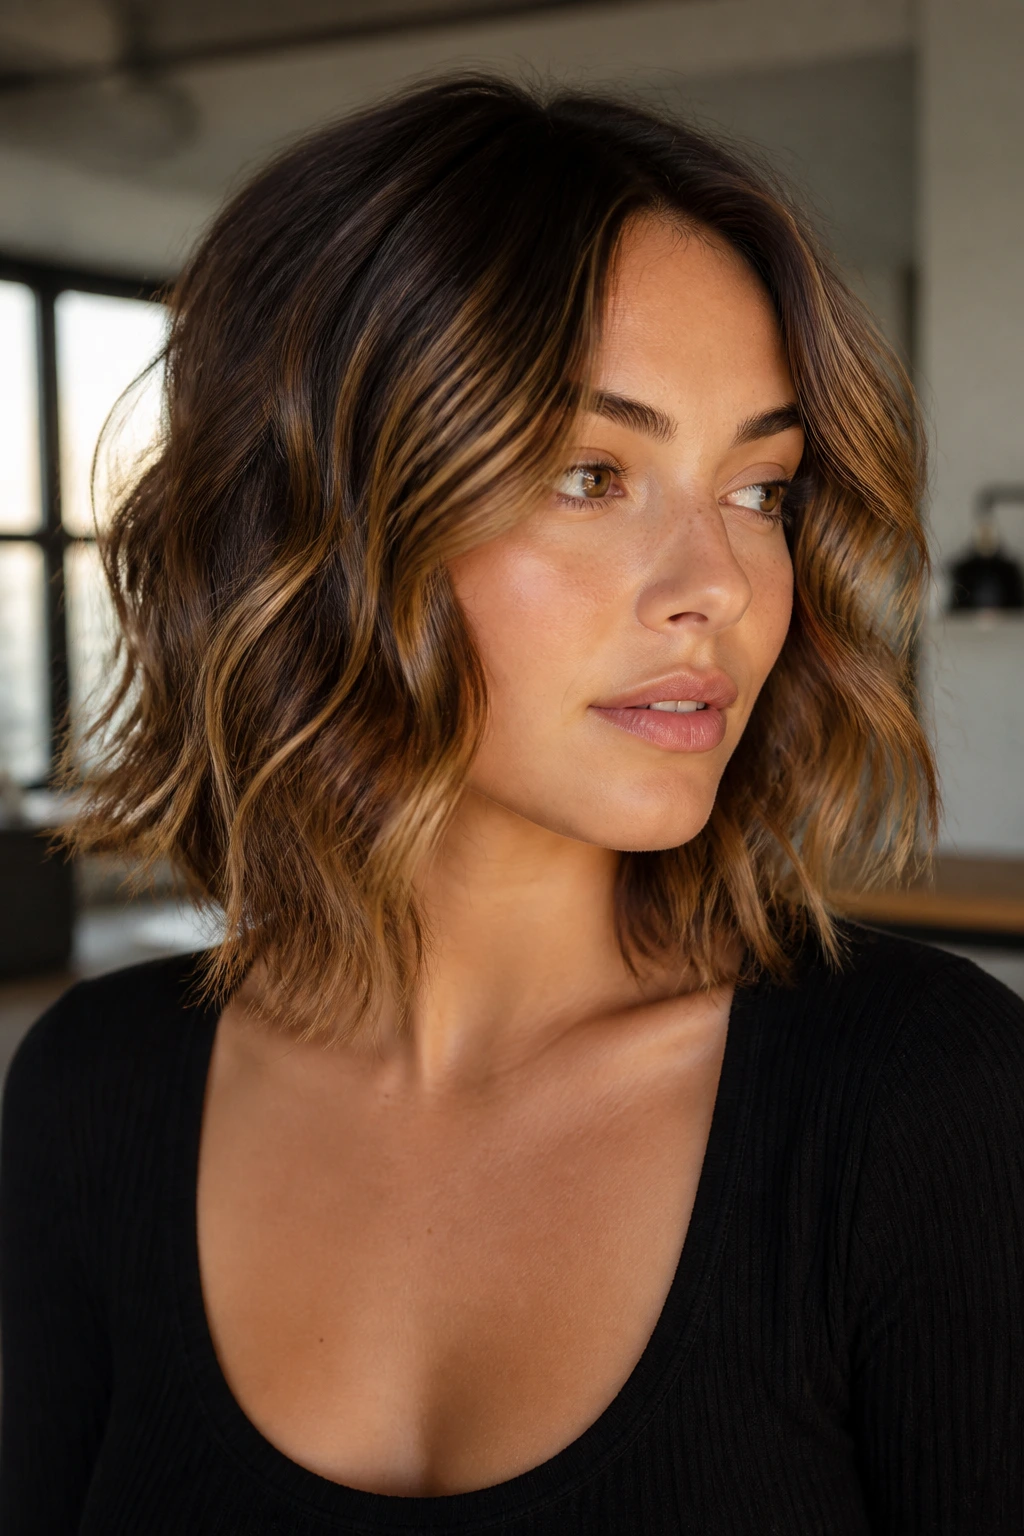
Choppy ends need a looser wave, not a tighter one. If the cut already has broken-up texture, the styling should echo that instead of smoothing it away.
I would use a wand and leave the ends out on almost every section. Then go back in with a dry texture spray or even a tiny bit of matte paste rubbed between your fingertips. Pinch out random pieces through the lower half. That little irregularity is what makes the style feel modern.
This is one of those looks that can go wrong if you overthink it. Overcurling the hair makes the choppy cut lose its edge and start looking too polished. The whole point is movement with a bit of grit. Think of it as a wave with a rough hem.
If your medium hair is naturally thick, this pattern helps break up bulk. If it is finer, keep the product lighter and let the cut do more of the work.
12. French-Girl Waves with Light Separation
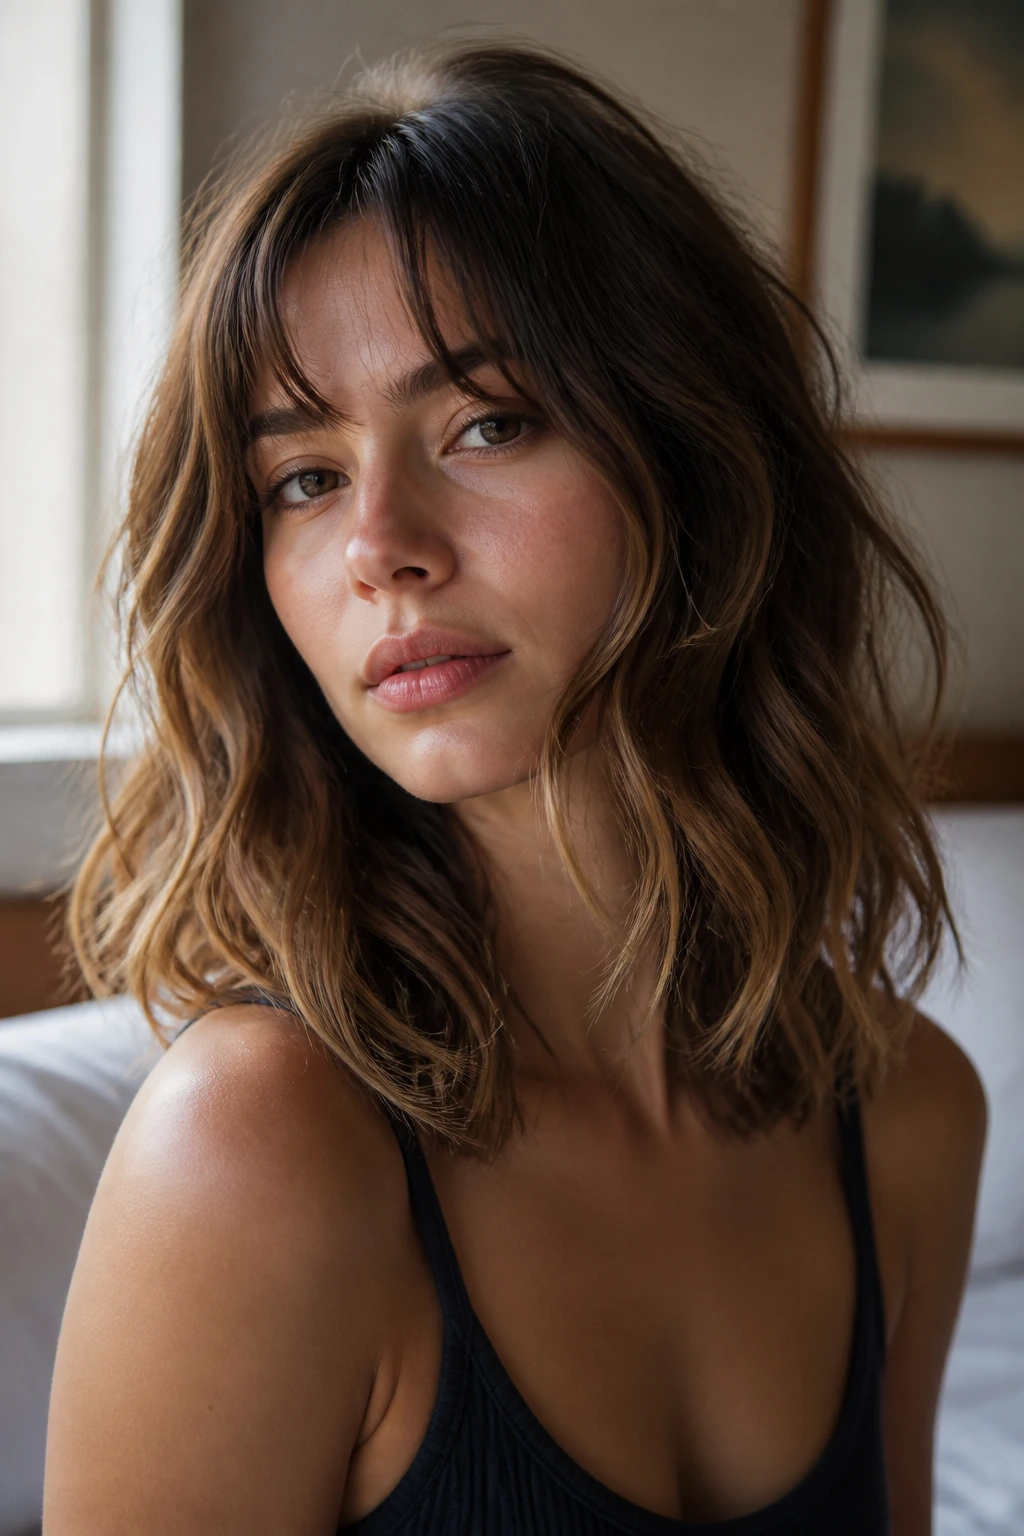
French-girl waves, at least the way I like them, are less about polish and more about shape that looks easy from across the room. The bend is loose, the separation is soft, and the hair never feels stiff.
The trick is to curl only the mid-lengths and ignore the urge to make every section identical. Let a few pieces fall straighter. Let a few ends flick out. That little inconsistency keeps the style from feeling overly styled, which is where this look lives or dies.
A comb through the roots before styling can help if the hair wants to sit too neatly. A bit of mess at the crown makes the rest of the wave feel more relaxed. Finish with a flexible spray, not a crunchy one. Crunchy hair is the enemy here.
This style suits medium hair that already has some natural bend. On very straight hair, you may need more product memory. On wavy hair, it can be almost effortless once the pieces cool in the right shape.
13. Half-Up Waves with Crown Lift
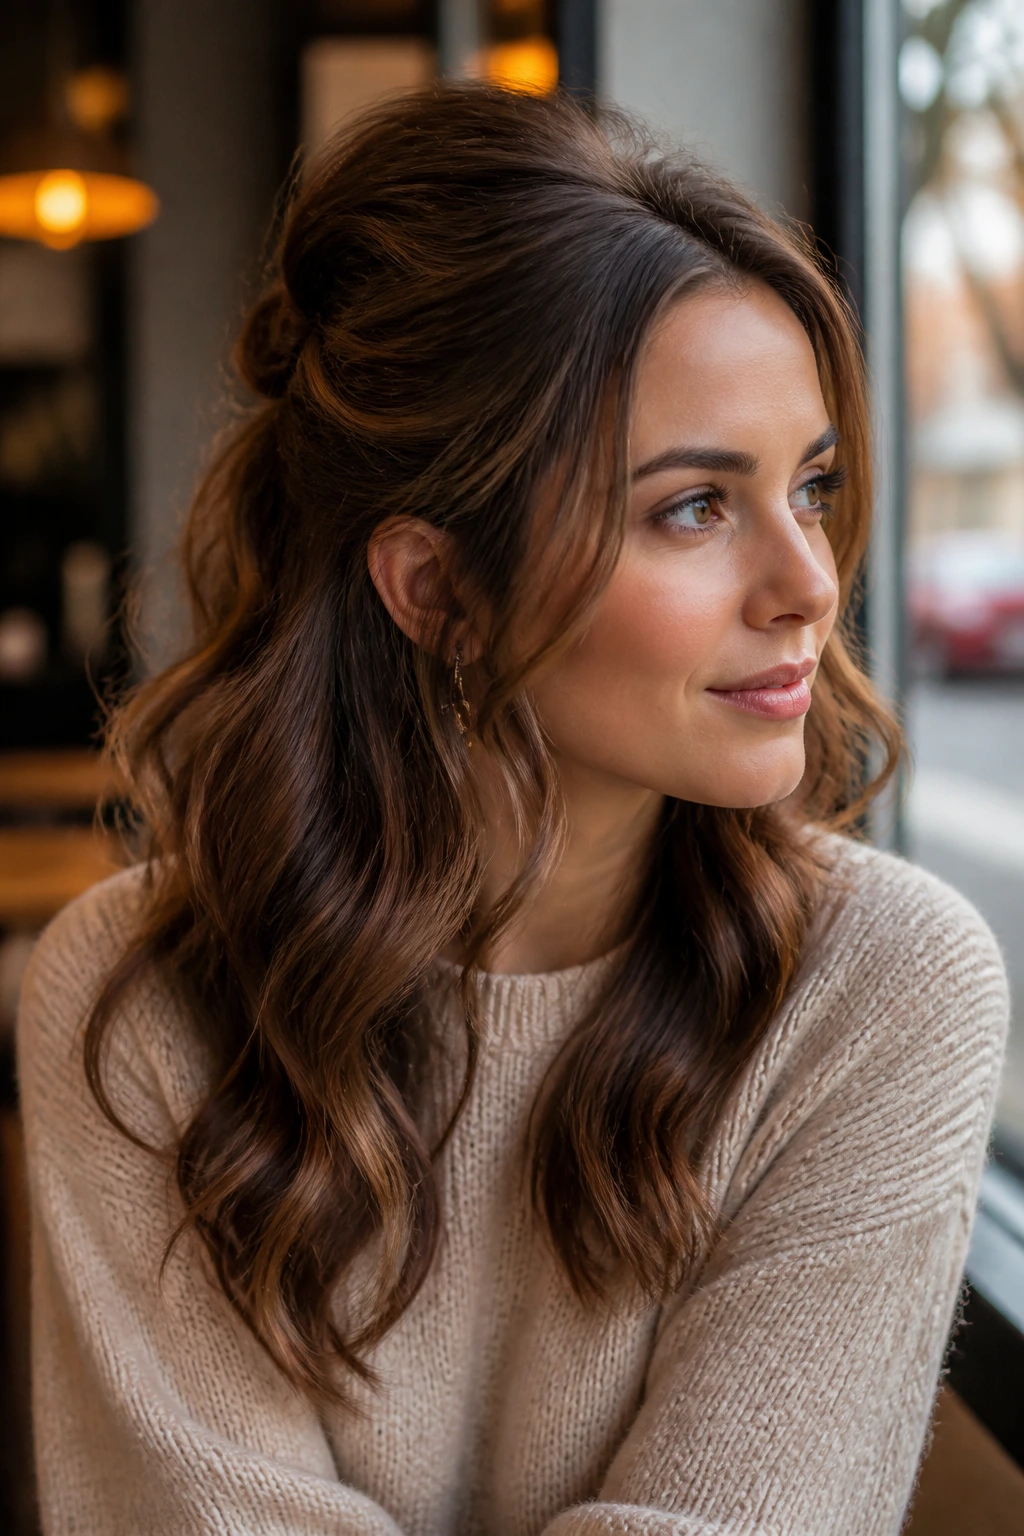
Half-up waves are a neat fix for medium hair that feels too flat when worn down all the way. Pulling the top section back gives the crown a little height, and that height makes the rest of the wave read fuller.
I like to add the waves first, then gather the top half loosely with a small clip, barrette, or soft elastic. Do not pull it tight. If the top section is too polished, the style loses the easy feel that makes medium waves appealing in the first place. Leave a few short pieces around the temples and ears to keep the face frame soft.
This style is especially useful when the front sections have started to go limp. A half-up shape buys you another day of wear because the hair away from the face can be refreshed less often than the pieces around the eyes and cheeks.
A little root powder at the crown helps too. Not too much. Just enough to keep the lift from collapsing by lunch.
14. Low Ponytail Waves That Keep the Texture
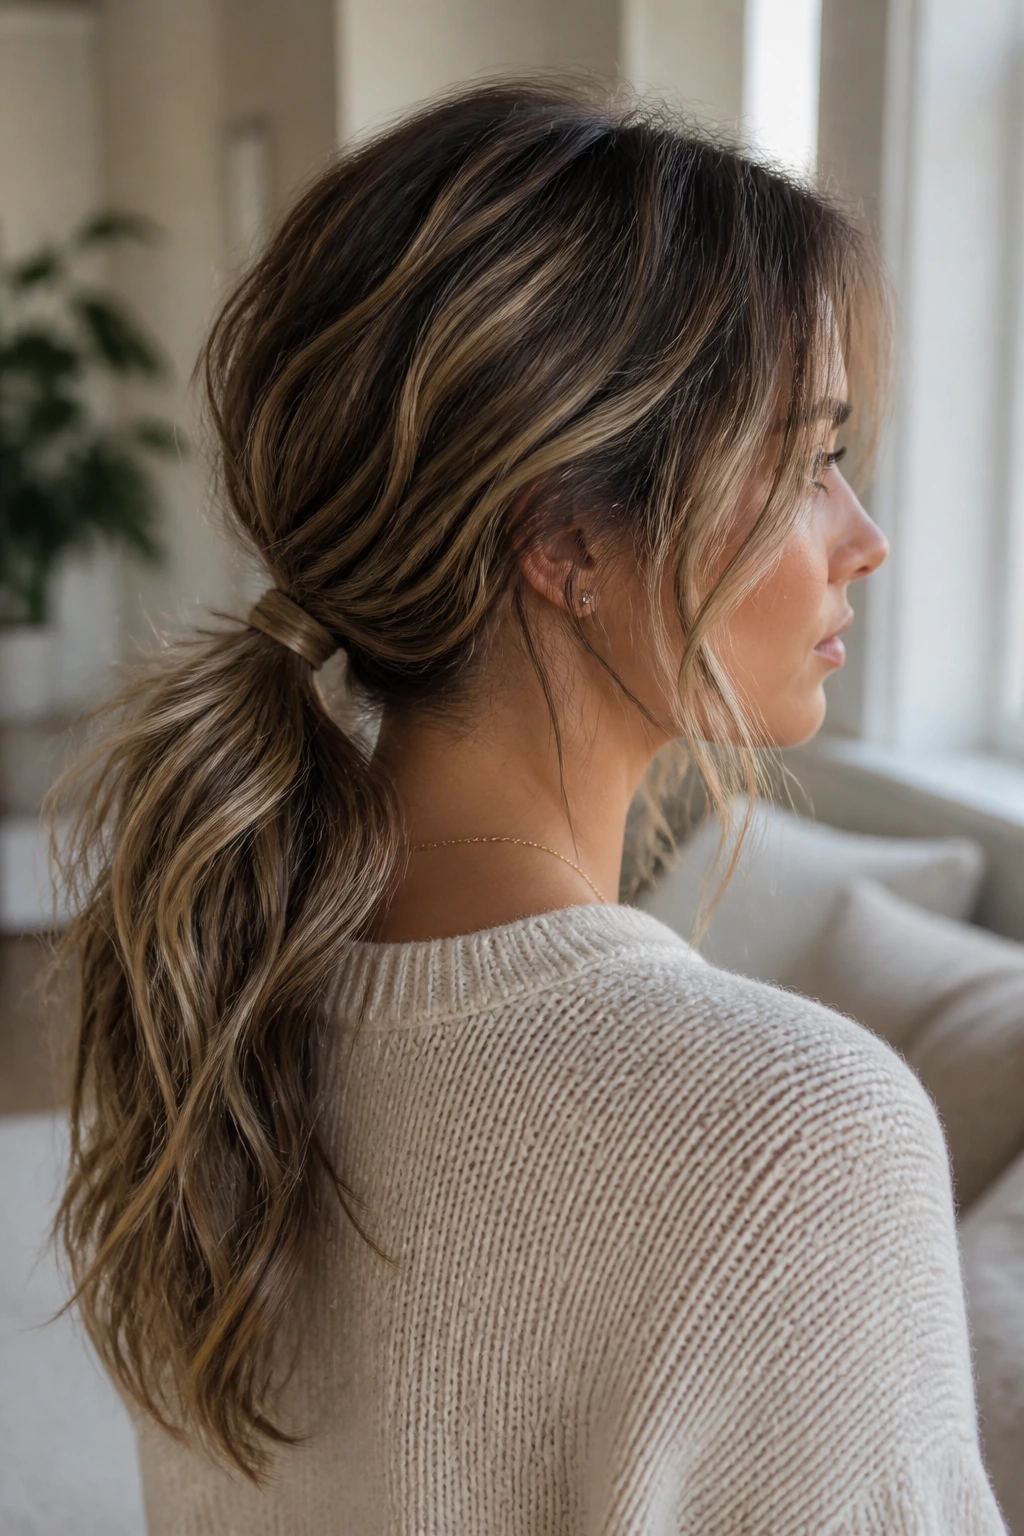
A low ponytail with waves is not boring if you keep the texture visible. In fact, medium hair can look especially good in this style because the tail is long enough to show the wave, but short enough that it still feels neat.
Best way to wear it
Loosely tie the hair at the nape, then pull gently at the crown so the shape is not too tight. If you want it cleaner, leave the top smooth and keep the wave in the tail. If you want it softer, pull out a few face pieces and let the tail stay more undone.
A small section wrapped around the elastic makes the whole thing look more finished. That one detail matters more than people expect. It hides the band and gives the style a more deliberate line.
This is one of the easiest ways to make second-day medium waves useful instead of annoying. The hair may not be perfect, but the texture is still doing something good.
15. Headband Waves with Smooth Roots
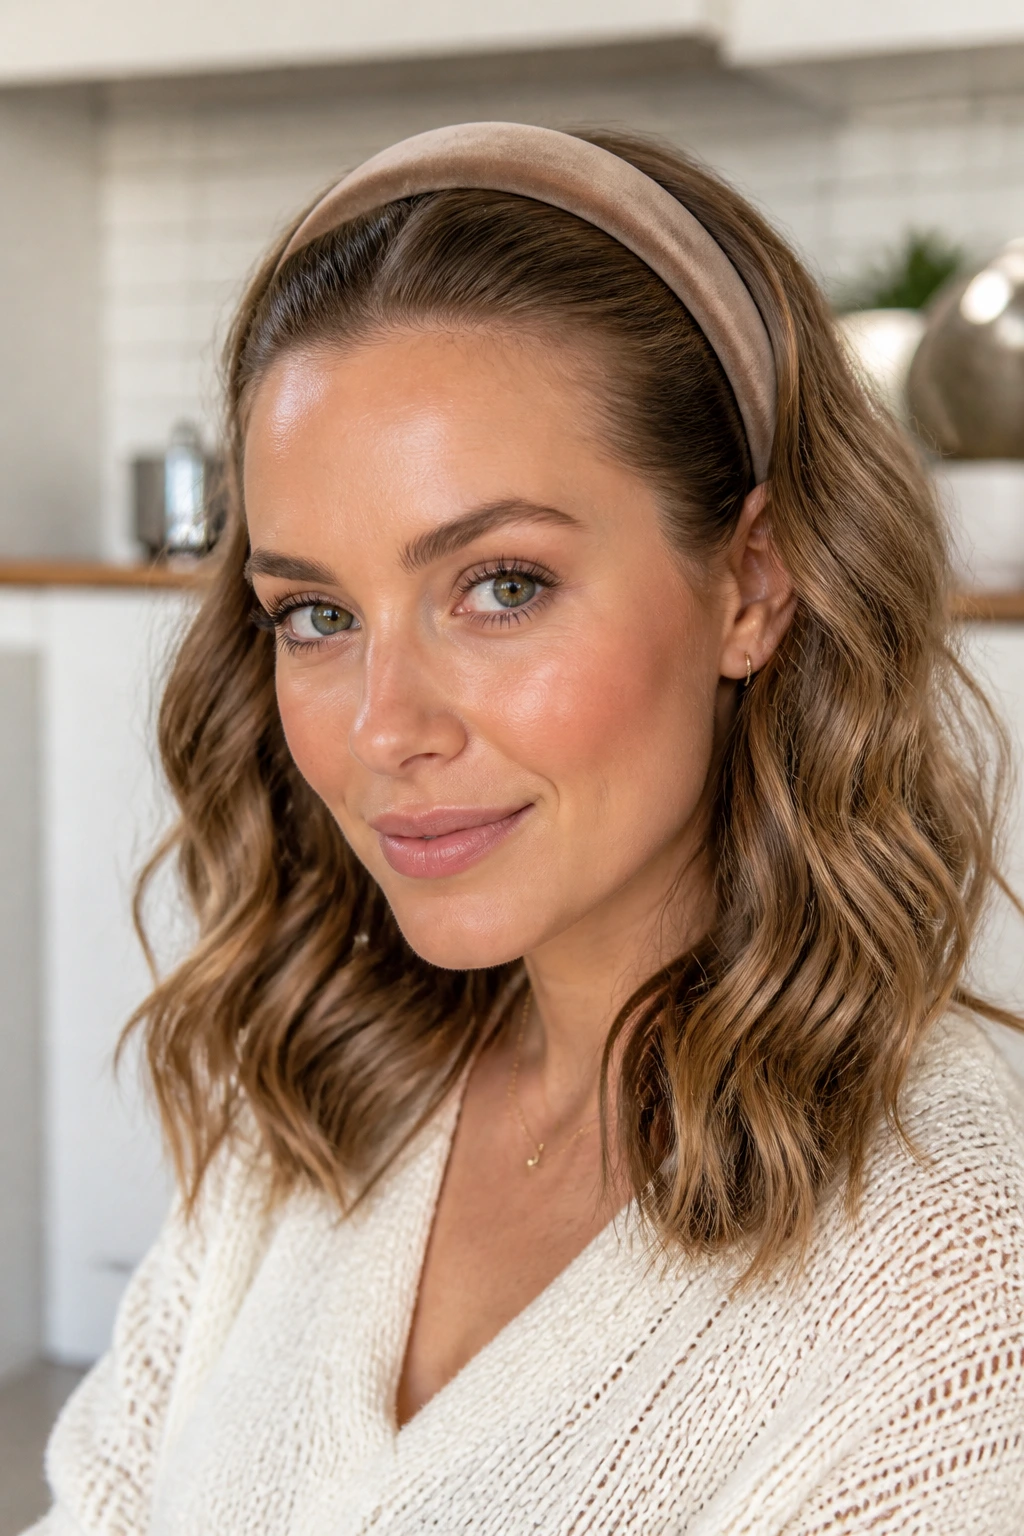
Headbands are a quick way to make medium waves look intentional when the roots are slightly messy and the ends still have life in them. The band smooths the front, and the waves carry the rest.
I prefer a narrow padded headband or a simple fabric band for this. Wide, heavy bands can flatten too much of the top section and make the hair look squeezed. Place the band just behind the hairline, then gently pull a little volume above it with your fingers.
The waves themselves can stay loose and brushed out. That contrast between smooth front and soft length is what keeps the style from looking costume-y. If you wear bangs, tuck them slightly under or let them frame the band. Both can work.
This is also a good style for days when you do not want a lot of product near the face. The accessory gives structure so the hair itself can stay softer and less sprayed.
16. Wet-Root Waves with Drier Ends
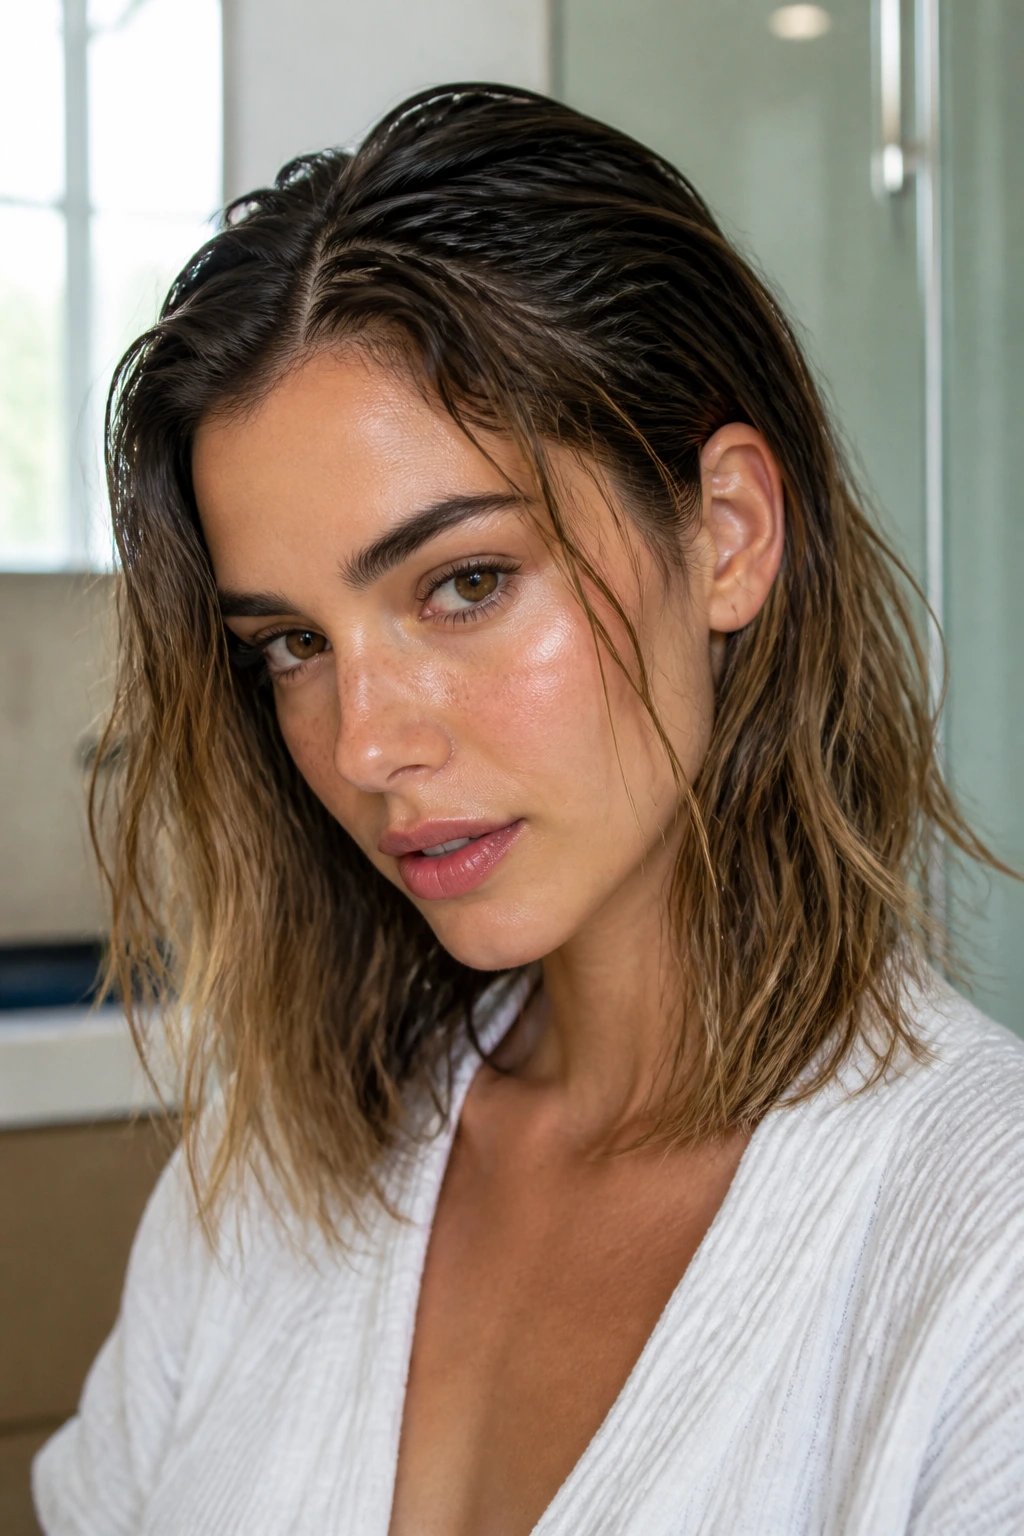
Wet-root waves are one of those styles that look sharper than they sound. The roots stay sleeker and a little more defined, while the ends dry with a freer wave pattern. On medium hair, that contrast gives the style shape fast.
Use a gel or mousse close to the roots on damp hair, then a lighter cream through the mid-lengths and ends. Scrunch the hair upward, but do not overload the ends with product. If the lower half gets too wet or too coated, it dries heavy and loses its swing.
The important part is the balance. Sleek roots frame the face and keep the top from puffing out, while the dry ends keep the style from looking too polished. I like this finish when the goal is movement with a little edge.
A diffuser can help, but low air is better than high heat. High heat tends to make the roots too fluffy and the ends too stiff. Neither is the look.
17. Vintage-Inspired Medium Waves with a Soft Flip
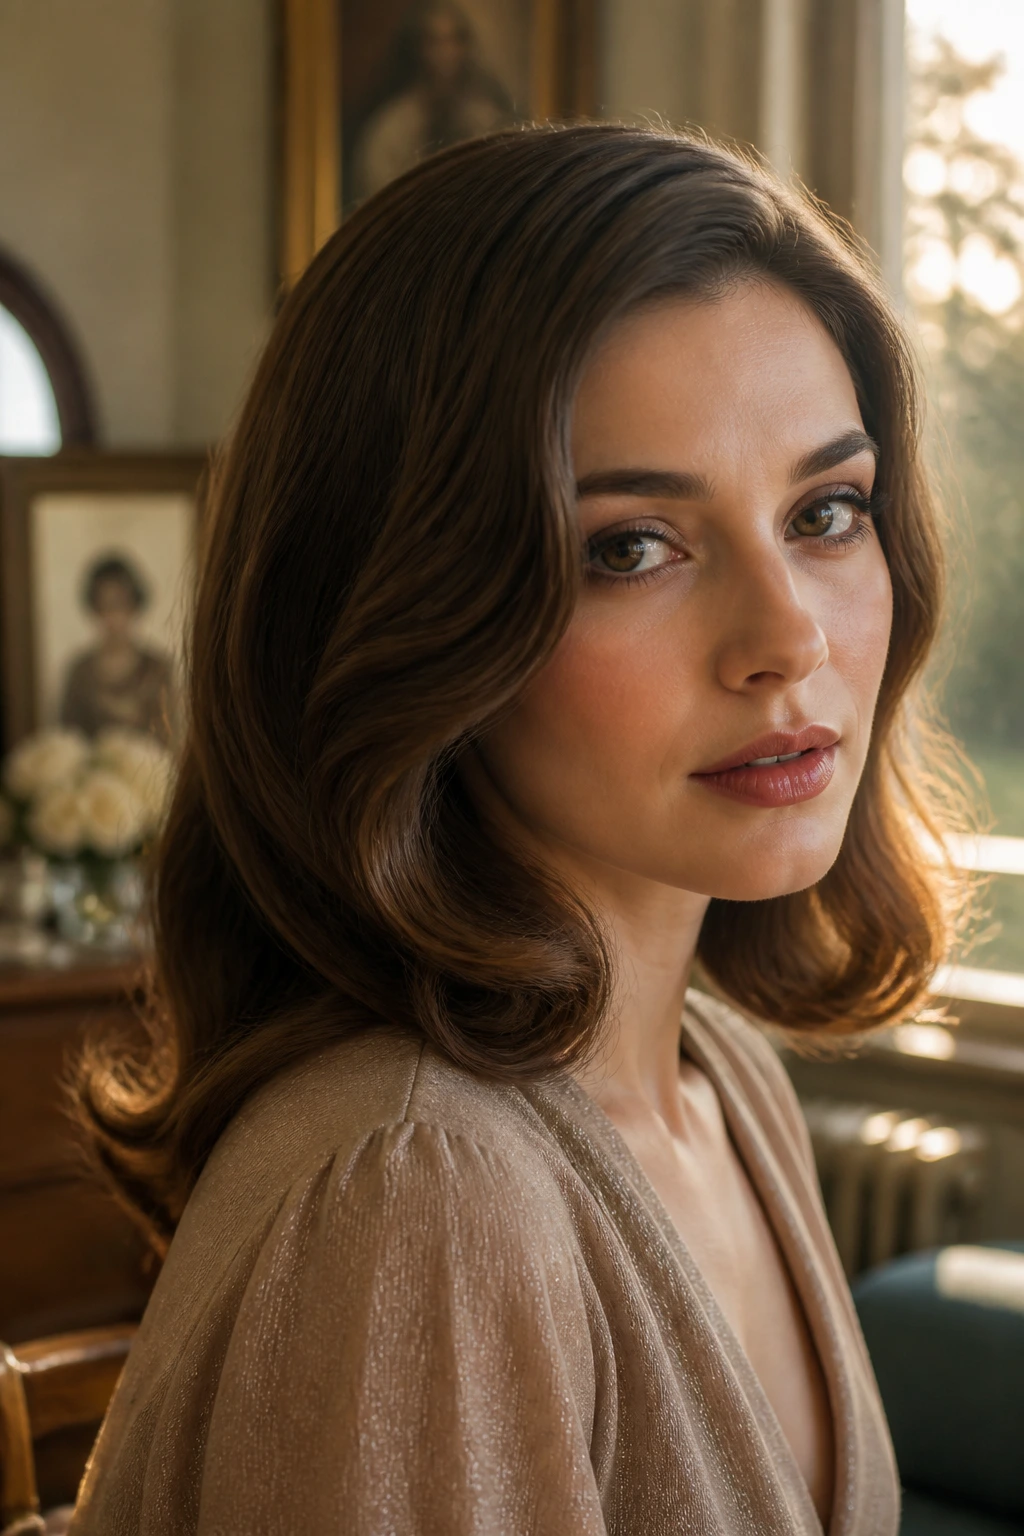
Vintage-inspired waves on medium hair should feel controlled, but not rigid. The wave pattern is smoother, the ends flip just a bit, and the overall shape lands somewhere between a retro set and a modern brush-out.
Use a medium barrel and set the curls in the same direction on each side for a more uniform curve. After they cool, brush them out gently so the wave blends into a long arc. A slight outward flip at the ends keeps it from feeling like a costume look. That flip is small. Think soft bend, not hard curl.
This style is especially nice if your medium cut has a clean shape around the shoulders. The wave echoes the cut line instead of fighting it. A shine spray or a tiny bit of serum on the ends gives the finish a smooth, deliberate look.
Honestly, this is one of the best ways to make medium hair look dressed up without piling on accessories.
18. Fine-Hair Waves That Fake Density
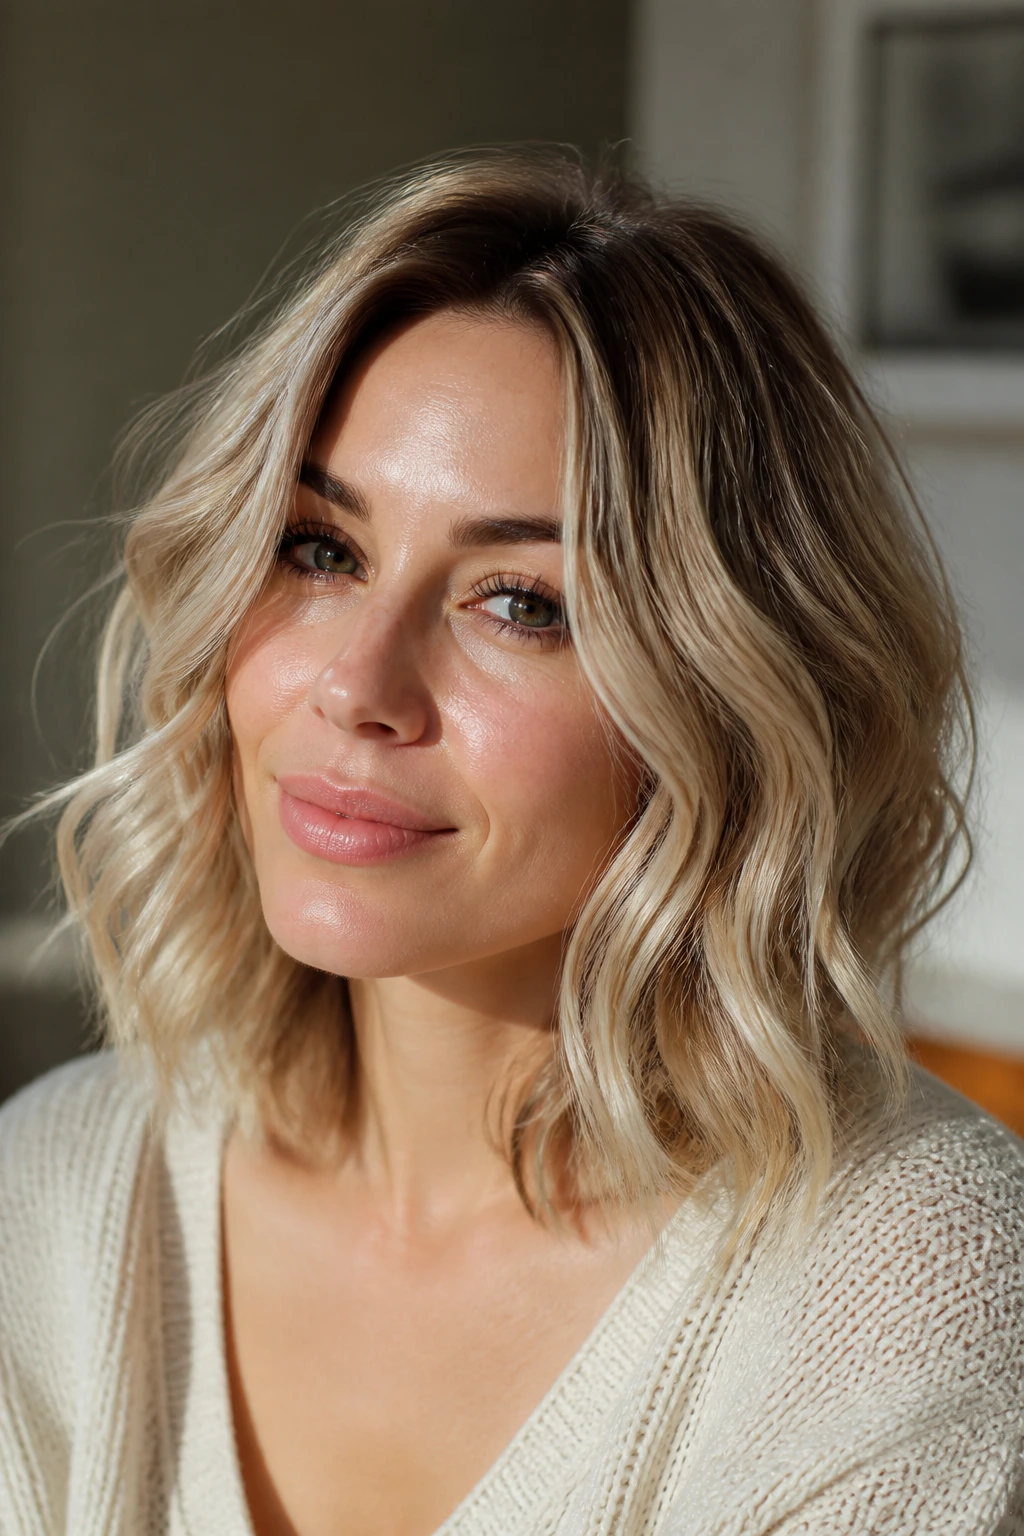
Fine medium hair needs a different plan. Heavy cream and oversized sections will flatten it in a hurry, so the styling has to be lighter and a little more strategic.
How to fake more density
Start with mousse at the roots and a tiny amount through the mids. Use smaller sections — around three-quarters of an inch — and curl away from the face for the front pieces. Let every section cool in a clip if it tends to fall fast. That cooling step helps the wave set before you shake it loose.
- Best tool choice: a 1-inch curling wand for a tighter bend that can be brushed out a little.
- Best finish: dry texture spray, not heavy oil.
- Best move: flip the head upside down and mist the roots lightly before lifting them back up.
Fine hair usually looks fuller when the wave is not too perfect. A little separation keeps the strands from clumping together in a flat sheet. The trick is to create the impression of more hair, not more styling.
19. Thick-Hair Waves That Still Move
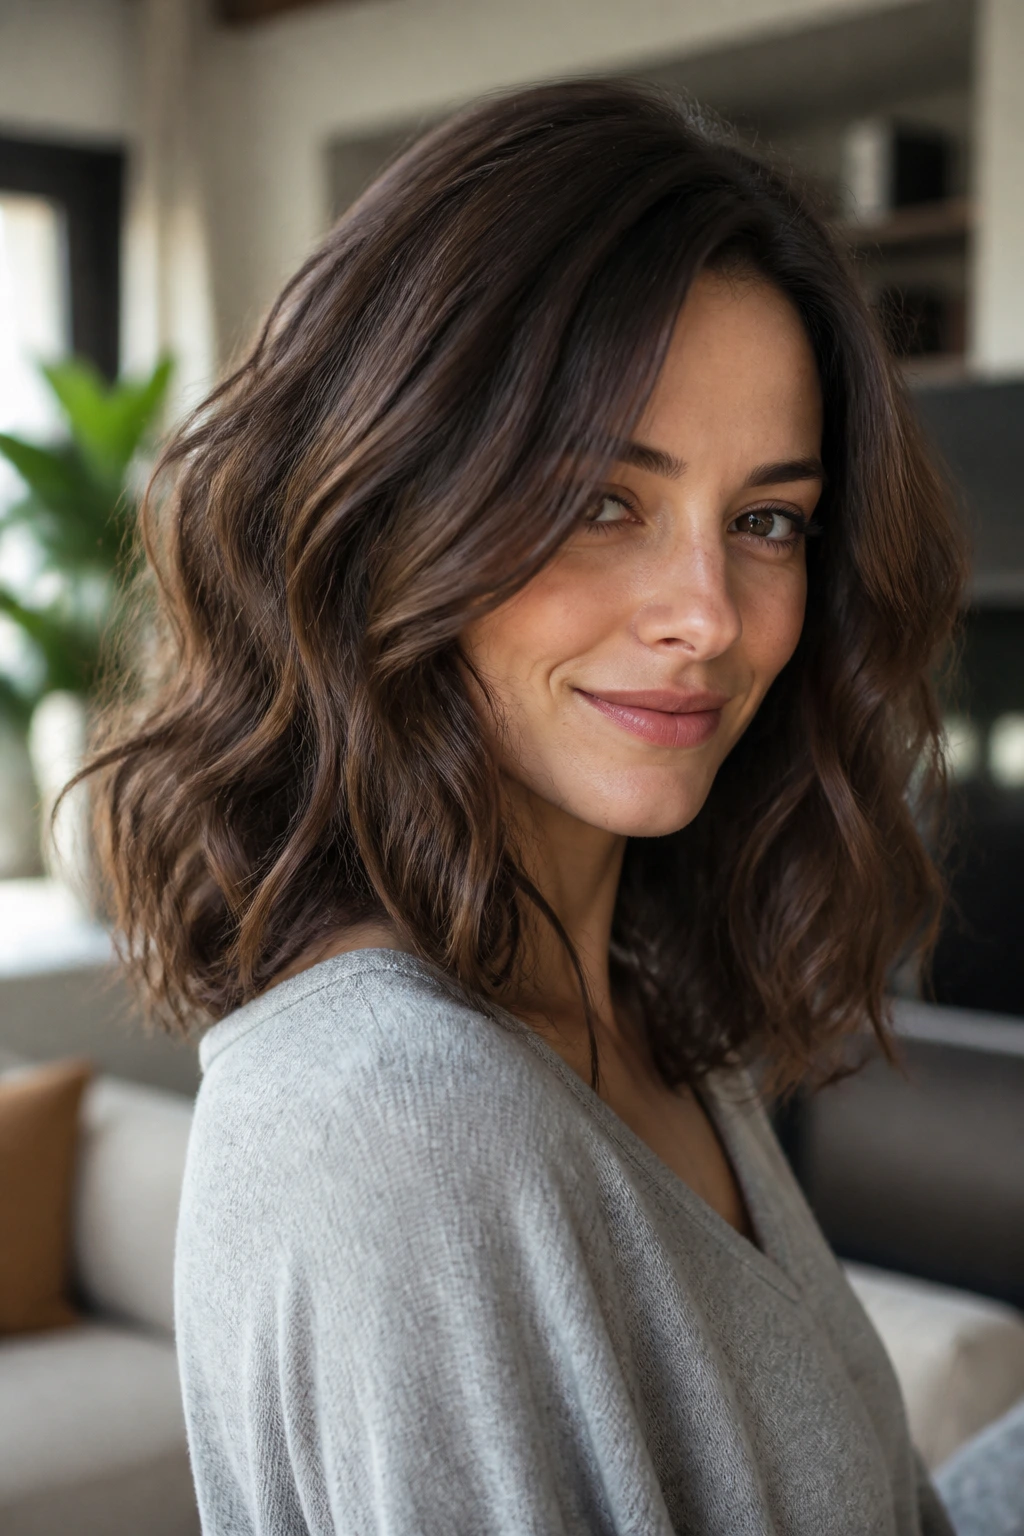
Thick medium hair can hold a wave easily, but it can also turn into a solid block if you load too much product at the roots. The goal here is movement, not bulk.
I like to start with a smoothing cream through the mids and ends, then use a 1.25-inch iron in medium sections. The larger barrel keeps the bend soft enough that the thickness doesn’t get too puffy. If the hair is extra dense, clip away the top half while you work underneath so each section gets enough heat and cool-down time.
The finish should feel touchable, not sticky. Thick hair often needs less hairspray than people think. Too much and the wave gets stiff before it has a chance to move.
A long layered cut helps this style a lot, but even a blunt medium shape can work if the waves are brushed out lightly. The point is to show the hair’s body without letting it swallow the face.
20. One-Length Waves with Flicked Ends
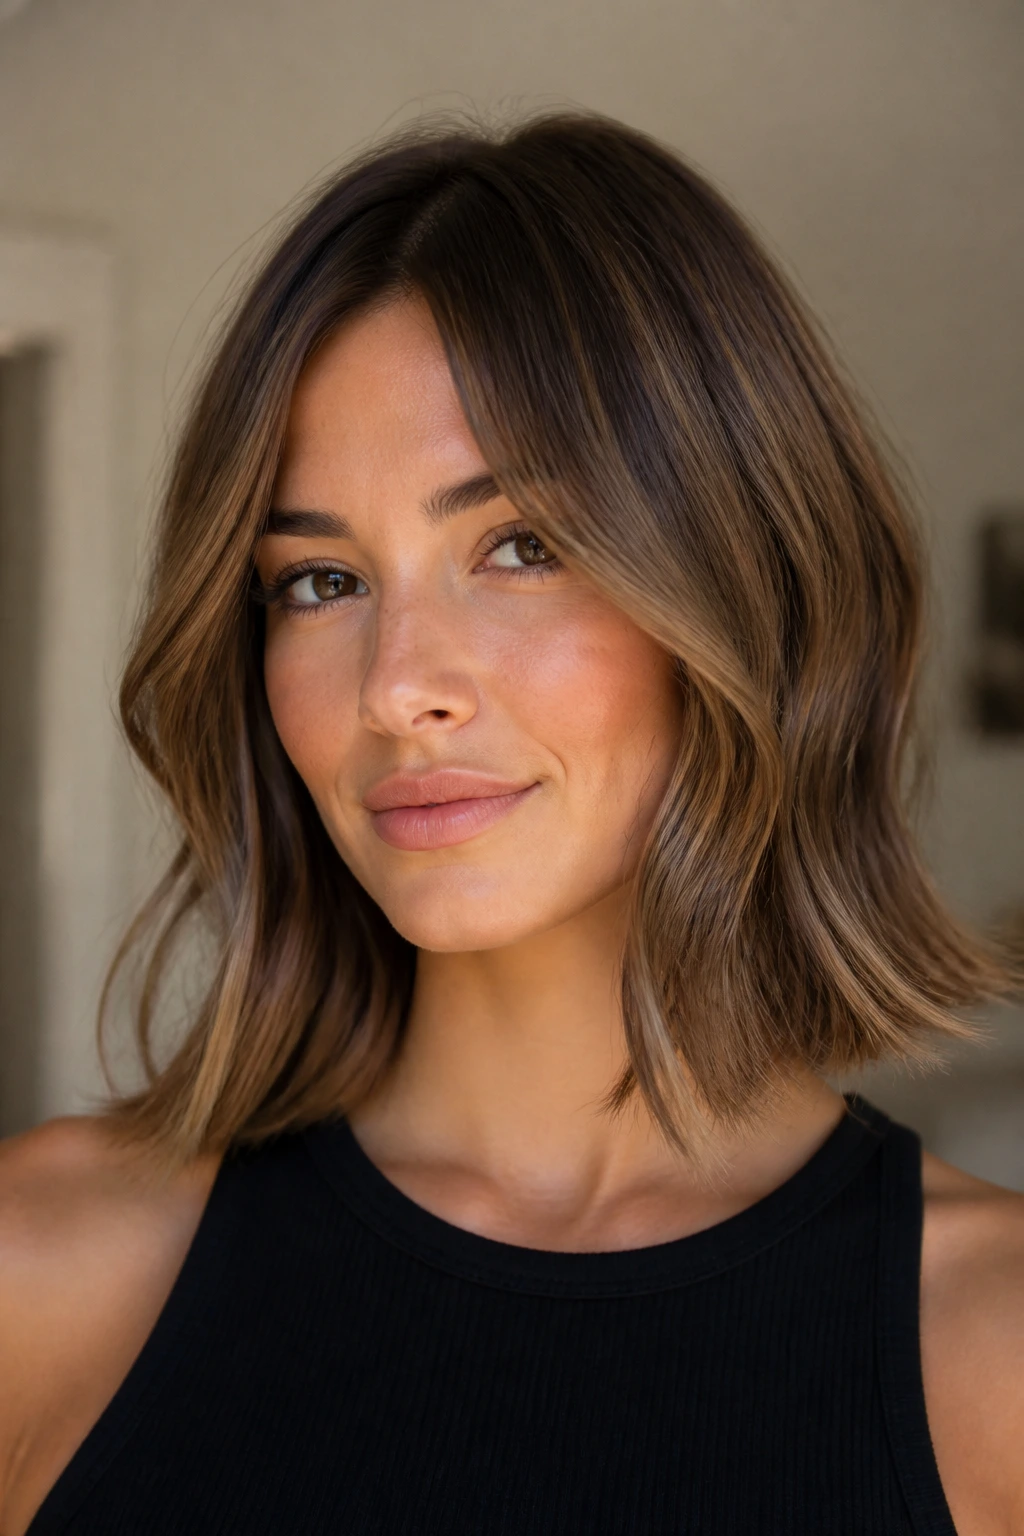
One-length medium hair can be gorgeous with waves, but it needs a little help to keep from looking heavy. The easiest fix is to leave the last inch of each section straighter and let the ends flick naturally.
That flicked bottom edge keeps the haircut visible. If you curl all the way through, the hair can lose its clean line and turn into a softer blob of texture. I’d rather see the cut and the wave working together.
What makes this version stand out
The bend lives in the middle of the hair instead of starting at the root or swallowing the ends. That makes the style feel airy. A light pass of texture spray through the lower third gives the ends enough separation to show movement without making them look crunchy.
This is also a smart option if you want low-maintenance styling. One-length cuts do not need as much shaping as layered ones, so the wave can stay calm and simple. That can be a relief on busy mornings.
21. Deep Side Part Waves with a Front Sweep
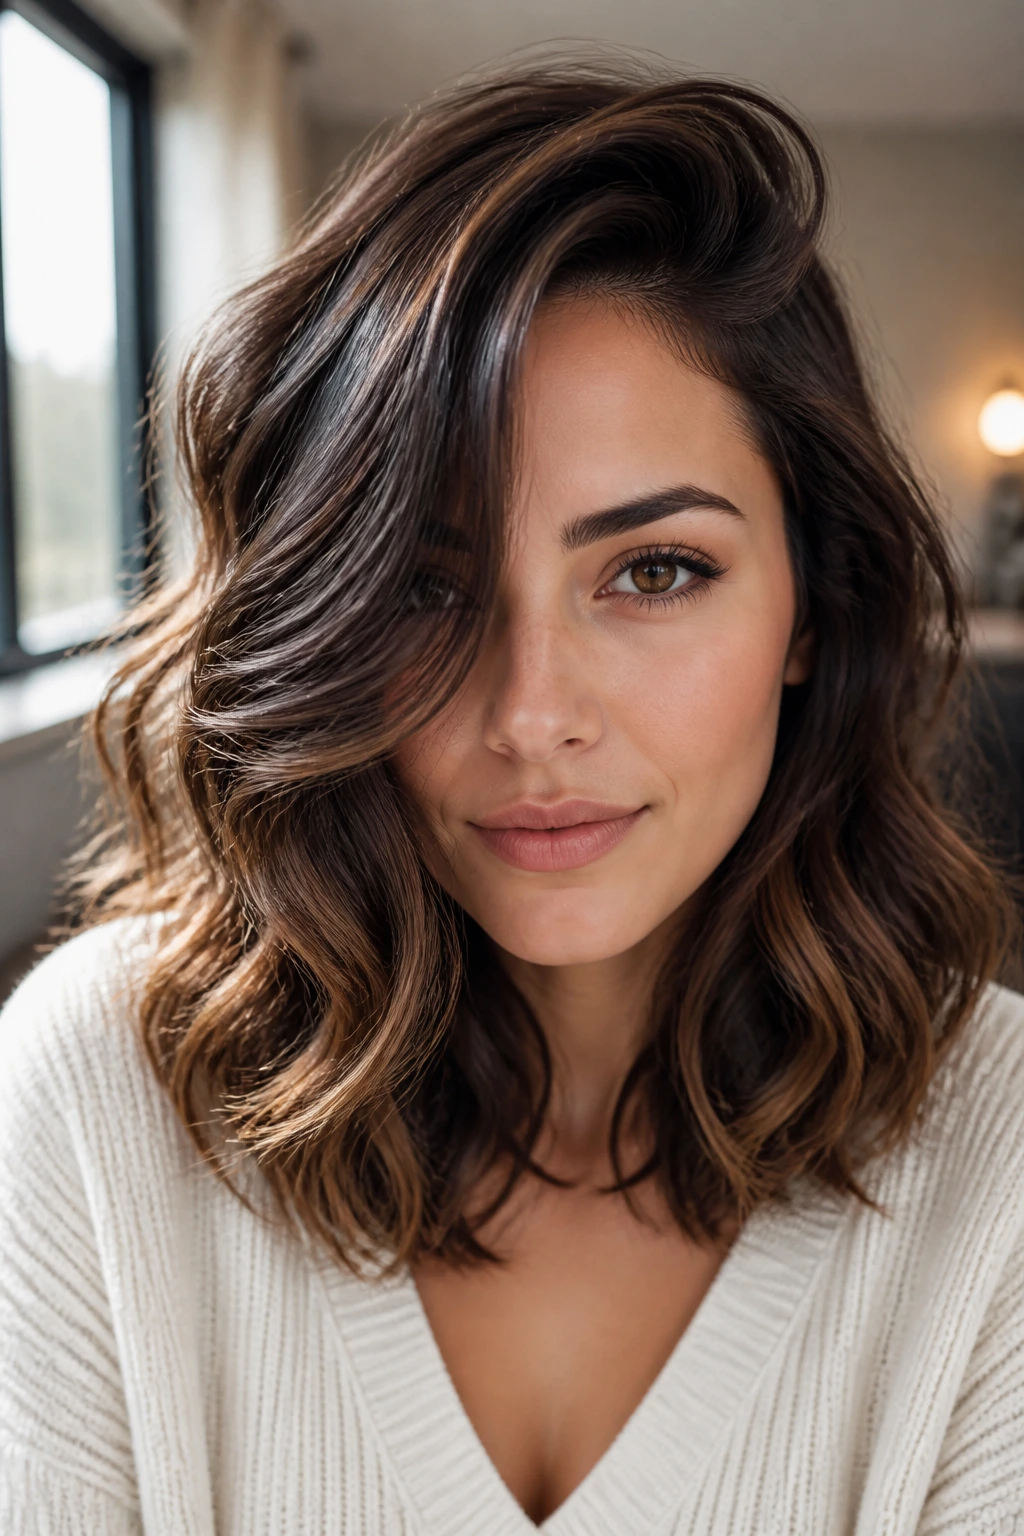
A deep side part does more than change the part line. It changes the whole frame of the face. On medium hair, that front sweep can create height, shorten a long face, or just add a little drama without asking for a full style overhaul.
Use a clip at the crown while the hair cools so the heavier side doesn’t fall flat. Curl the front section away from the face, then sweep it over when it is set. The lifted front wave should sit like a soft curtain, not a helmet.
- Best if your face is longer: the side sweep breaks up vertical length.
- Best if your hair is straight: the part gives the wave a place to start.
- Best if your cut is blunt: the side shape adds movement without needing more layers.
I like this when the rest of the hair stays fairly loose. Too much wave everywhere and the part loses its job. The front should lead; the rest should follow.
22. Wavy Shag Waves with Built-In Mess
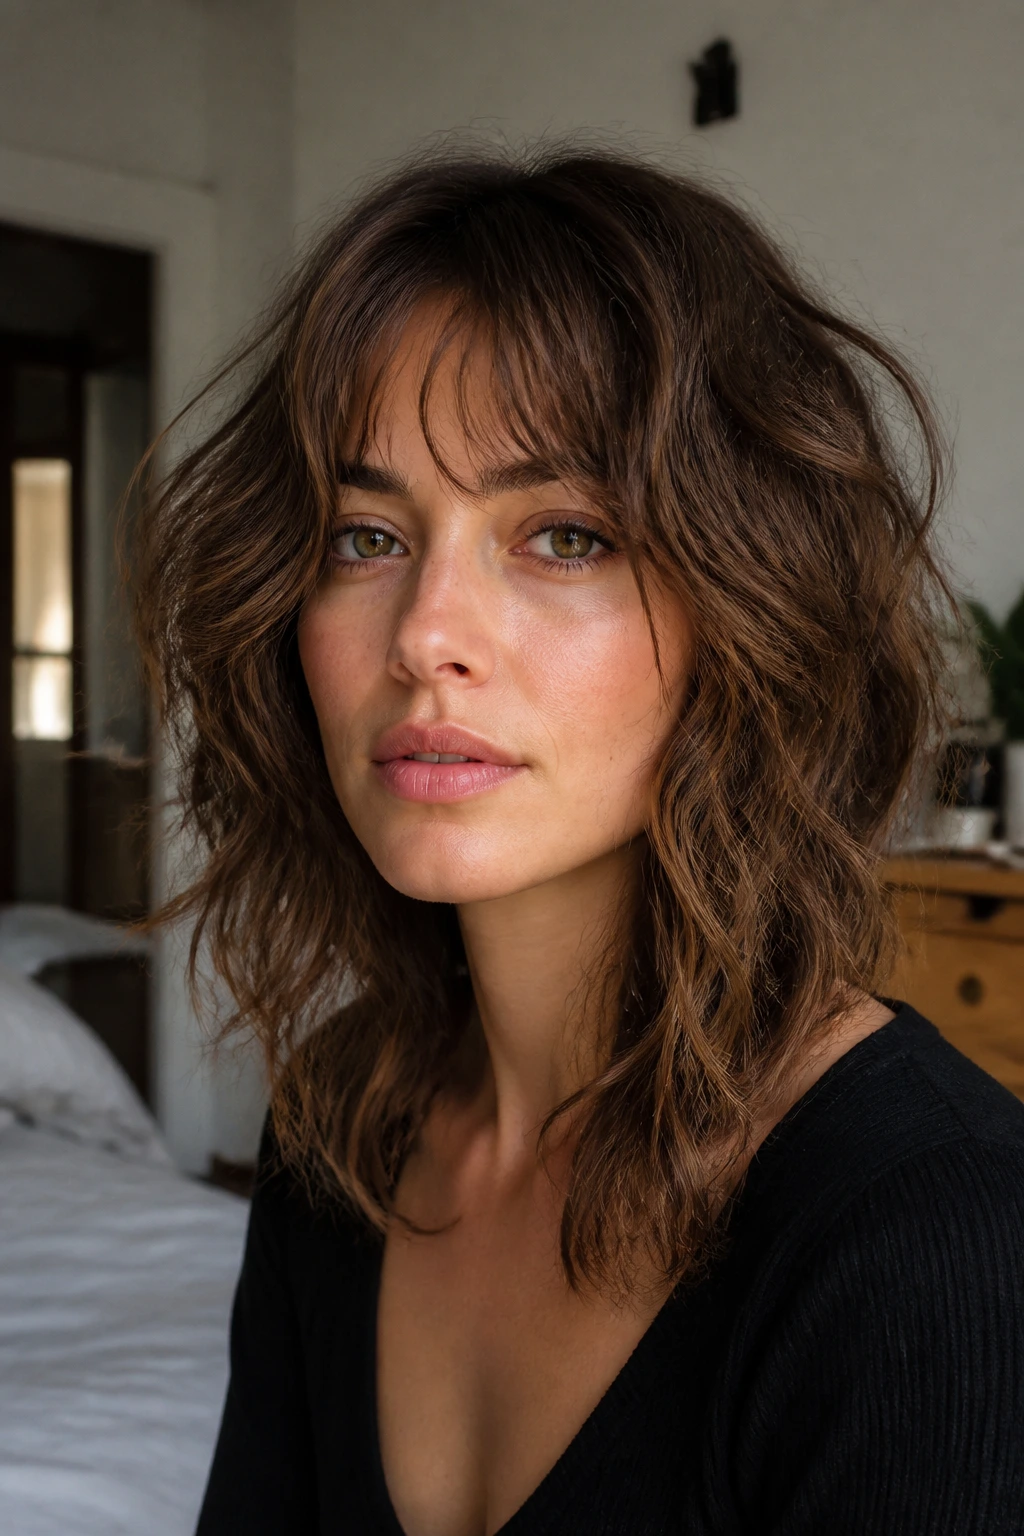
The shag already does half the work for you. Layers, movement, and broken-up ends all help the wave pattern look full without much fuss.
This style should be rough-dried first, then touched with a wand only where the hair needs help. I would not curl every strand. That destroys the shag’s casual shape. Instead, bend a few face-framing pieces, a few crown layers, and a few ends around the perimeter. Leave plenty of hair alone.
The result should feel shaggy in the best sense of the word — airy, a little wild, and visibly layered. A matte texture spray suits this style better than a glossy serum. Shine can flatten the whole point of a shag if you use too much.
Medium hair in a shag cut can look almost weightless, which is rare and useful. It is the style I reach for when I want movement first and polish second.
23. Soft Glam Waves for Dressy Nights
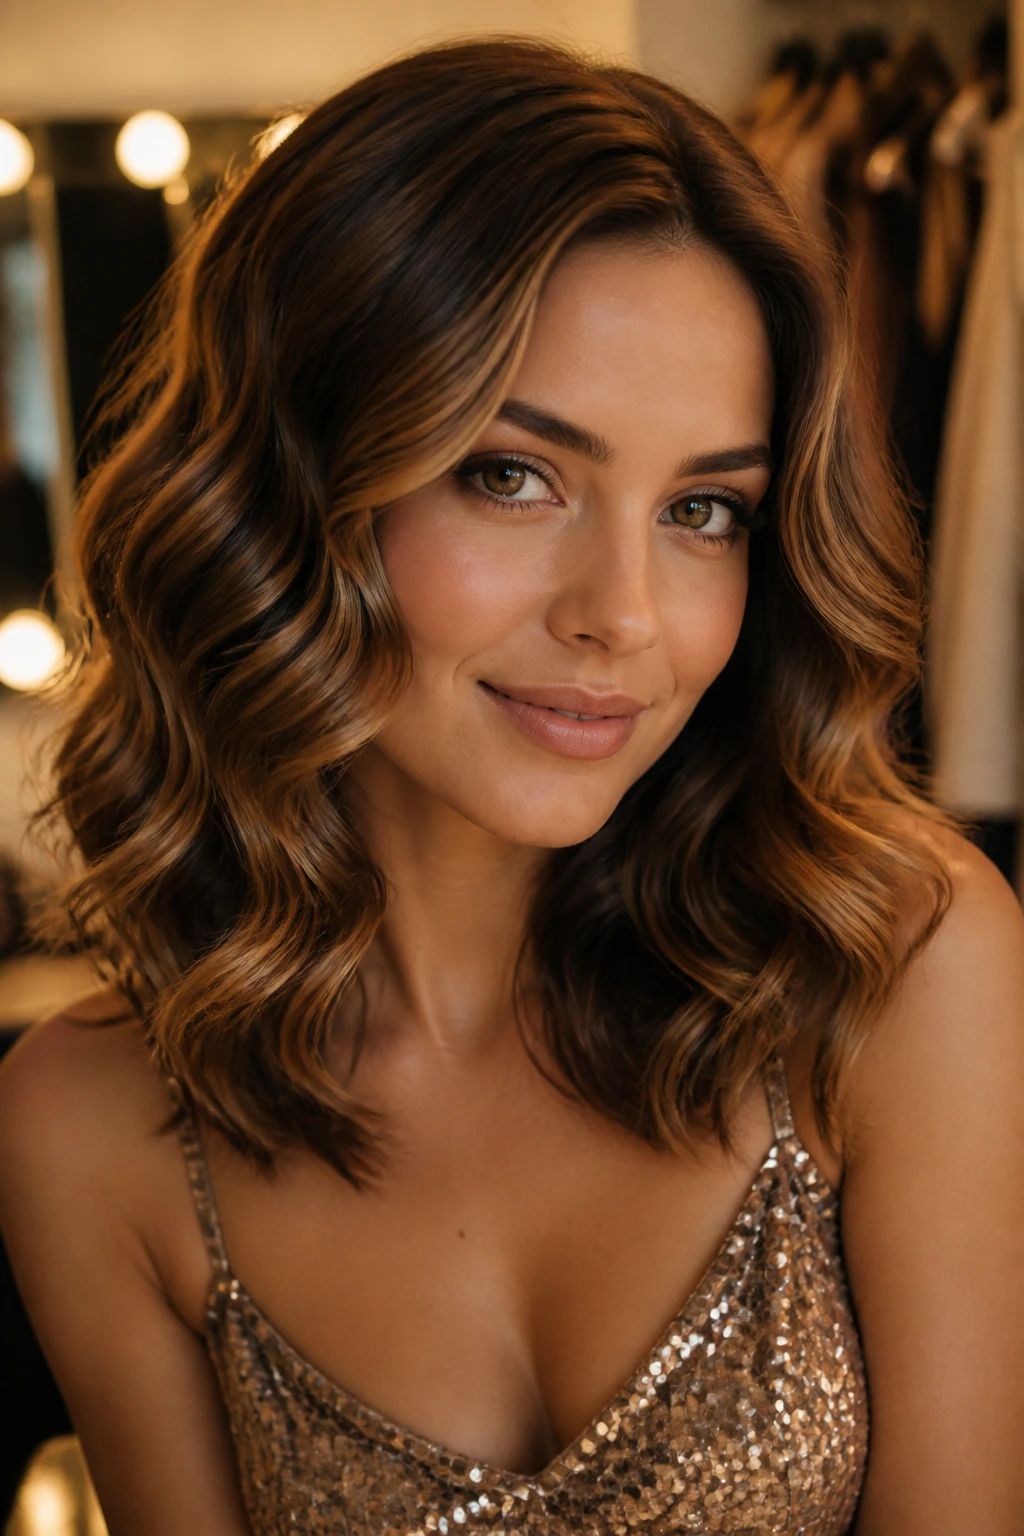
Soft glam waves are the dressed-up cousin of tousled hair. The shape is smoother, the wave is more even, and the finish has a little shine without looking lacquered.
How to keep it from looking stiff
Use medium-sized sections and curl them all in the same direction around the face, then alternate directions through the back so the style doesn’t collapse into one heavy sheet. After the waves cool, brush them out gently and shape the front with your fingers. A light finishing spray is enough; you don’t need much more.
This version works especially well with medium hair that skims the shoulders. The length keeps the wave from dropping too far, and the brush-out gives the hair enough movement to pair with a cleaner outfit. It’s a nice match for earrings, open necklines, and side-swept parts.
A tiny amount of shine spray on the mid-lengths goes a long way here. You want reflection, not slip.
24. Knot-Back Waves with Loose Tendrils
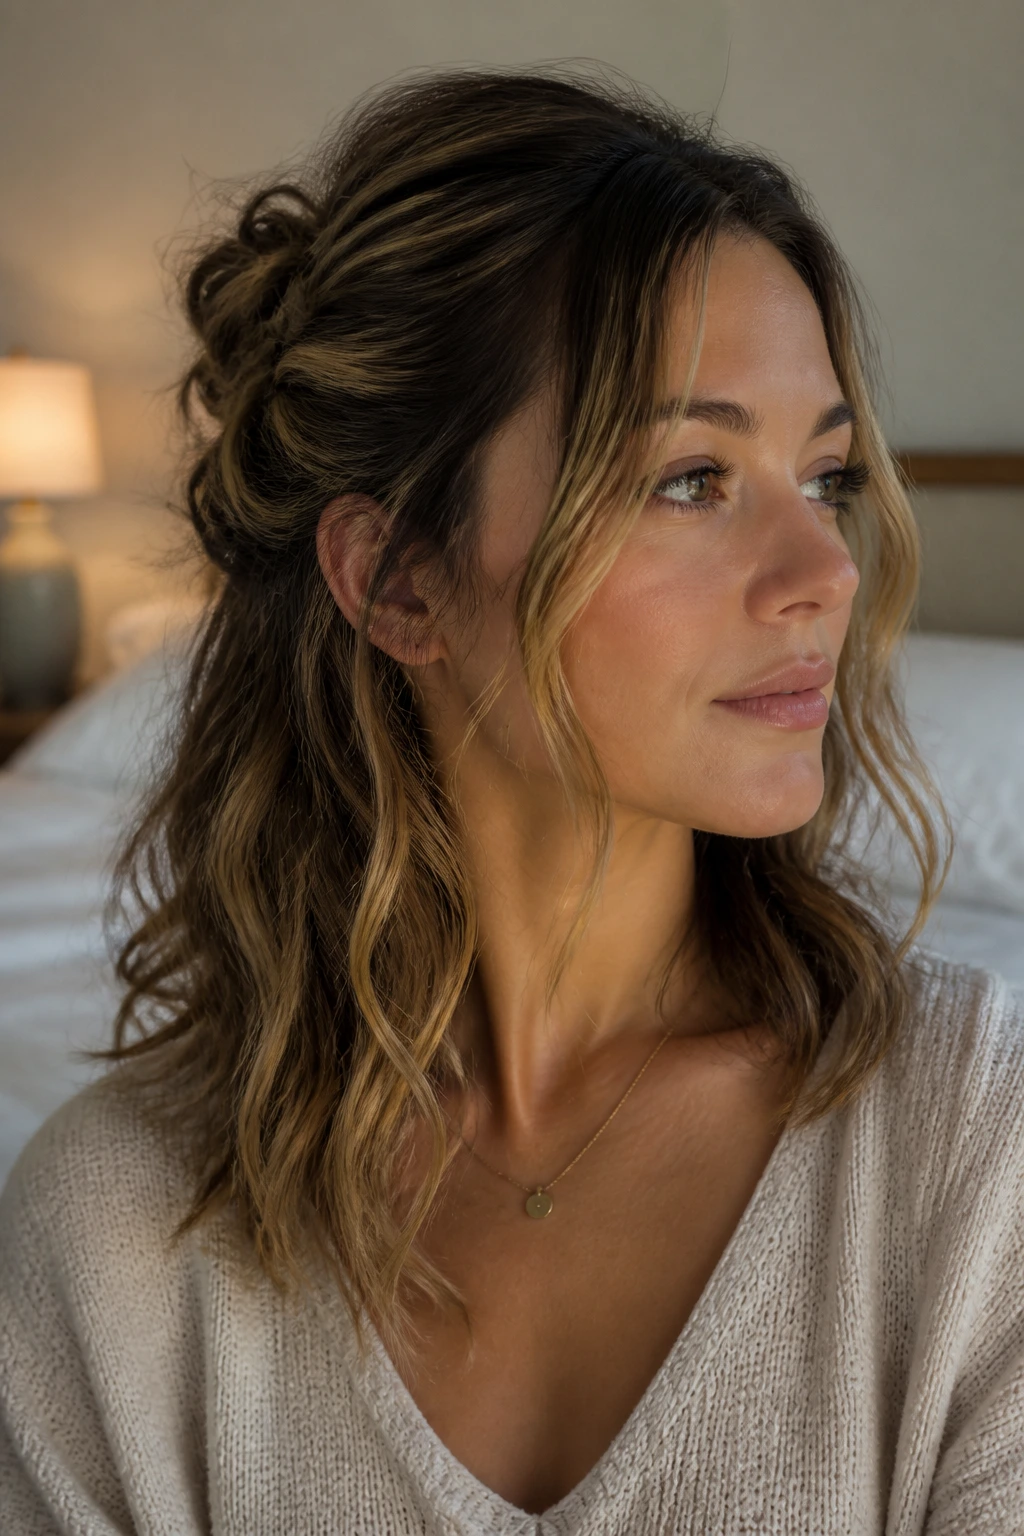
Knot-back waves are one of my favorite fixes for medium hair that’s somewhere between clean and second-day. Twist a small section from each temple or pull back the upper sides into a soft knot, then let the rest fall loose.
The tendrils matter. Leave a few pieces around the face and one or two near the ears so the style doesn’t read too neat. Medium waves can look stiff fast if every strand gets pulled back. The loose pieces break that up and keep the face frame soft.
This style works nicely when the lower half of the hair still has movement but the crown needs structure. It’s a practical, not fussy, shape. And yes, it hides some rough roots well.
If you want it to look more polished, wrap one small piece around the knot or secure the twist with hidden pins. If you want it looser, pin it and pinch the wave shape back open with your fingers. Both are fair game.
25. Razor-Cut Waves with Airy Ends
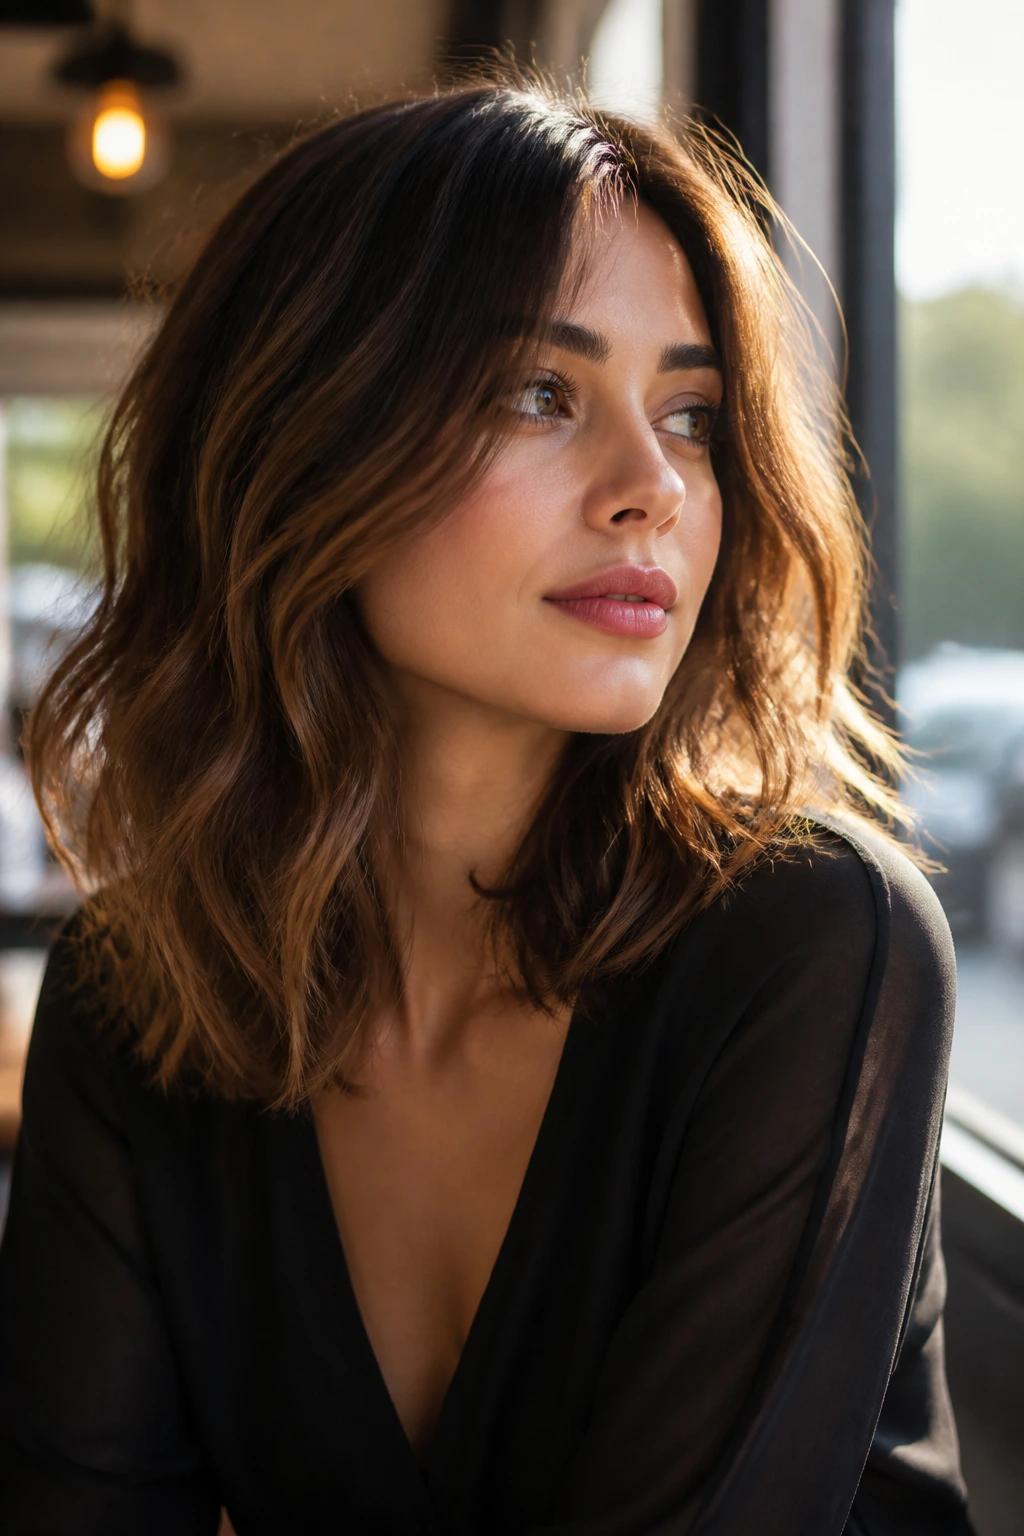
Razor-cut ends already have a lighter, feathered feel, so the waves should respect that. Don’t build a heavy curl pattern that fights the cut. Keep the movement airy and a little broken up.
Why this cut likes a lighter touch
The razored ends move on their own. If you overuse product, they stick together and lose that soft edge. A few passes with a wand, a touch of texturizing spray, and a finger comb are usually enough.
- Use less oil than you think: the ends can go stringy fast.
- Curl the mids, not every inch: the cut needs room to move.
- Let the shape separate naturally: don’t brush it into one flat ribbon.
This is a good choice if you want medium hair to feel lighter around the face and neck. The texture reads as breezy, not heavy. There’s a difference, and it matters here.
26. Natural Curl Waves with Defined Bends
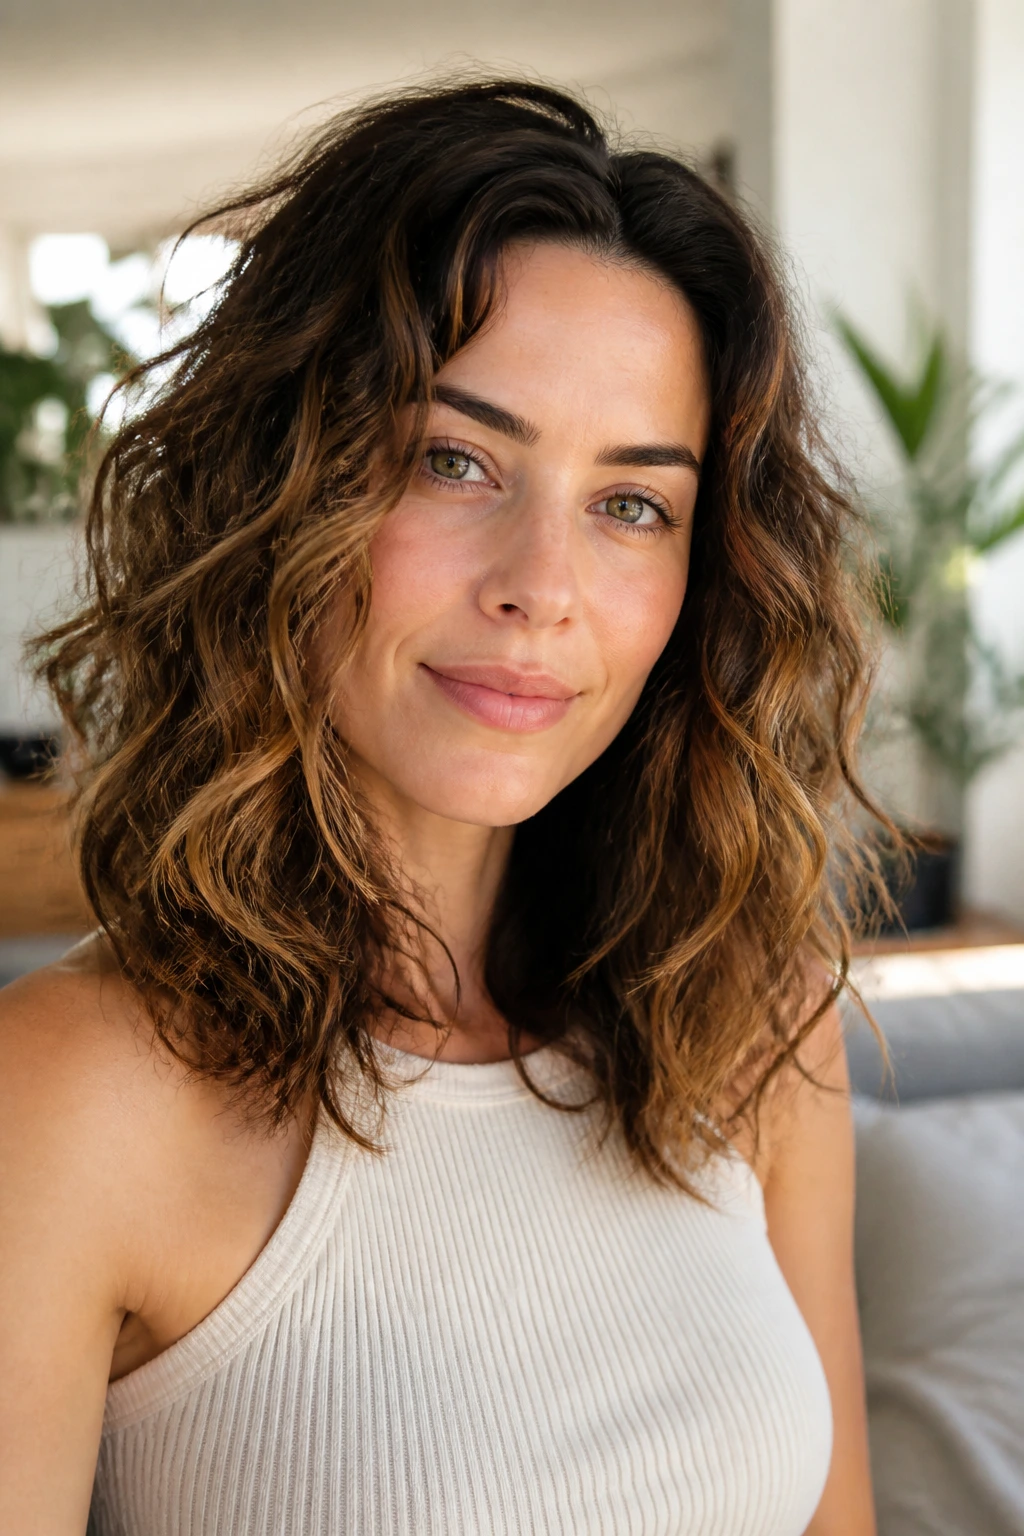
If your hair already has a wave or loose curl pattern, do not fight it into a different shape. Work with the bend you have and polish only the pieces that need help.
Start on damp hair with curl cream or mousse, then scrunch from the ends upward. When it’s dry, pick apart the thicker sections with your fingers and set the face frame with a small iron only if needed. The goal is to define, not redraw.
This is one of the easiest ways to make medium hair look healthy and full without overstyling it. Natural texture usually looks best when it has clear shape around the crown and softer movement through the ends. If you use a diffuser, keep the airflow low and stop once the pattern is set. Too much handling makes the waves frizzy.
A lot of people try to make natural waves look like salon curls. That usually backfires. Better to refine what’s already there.
27. Heatless Rope-Braid Waves
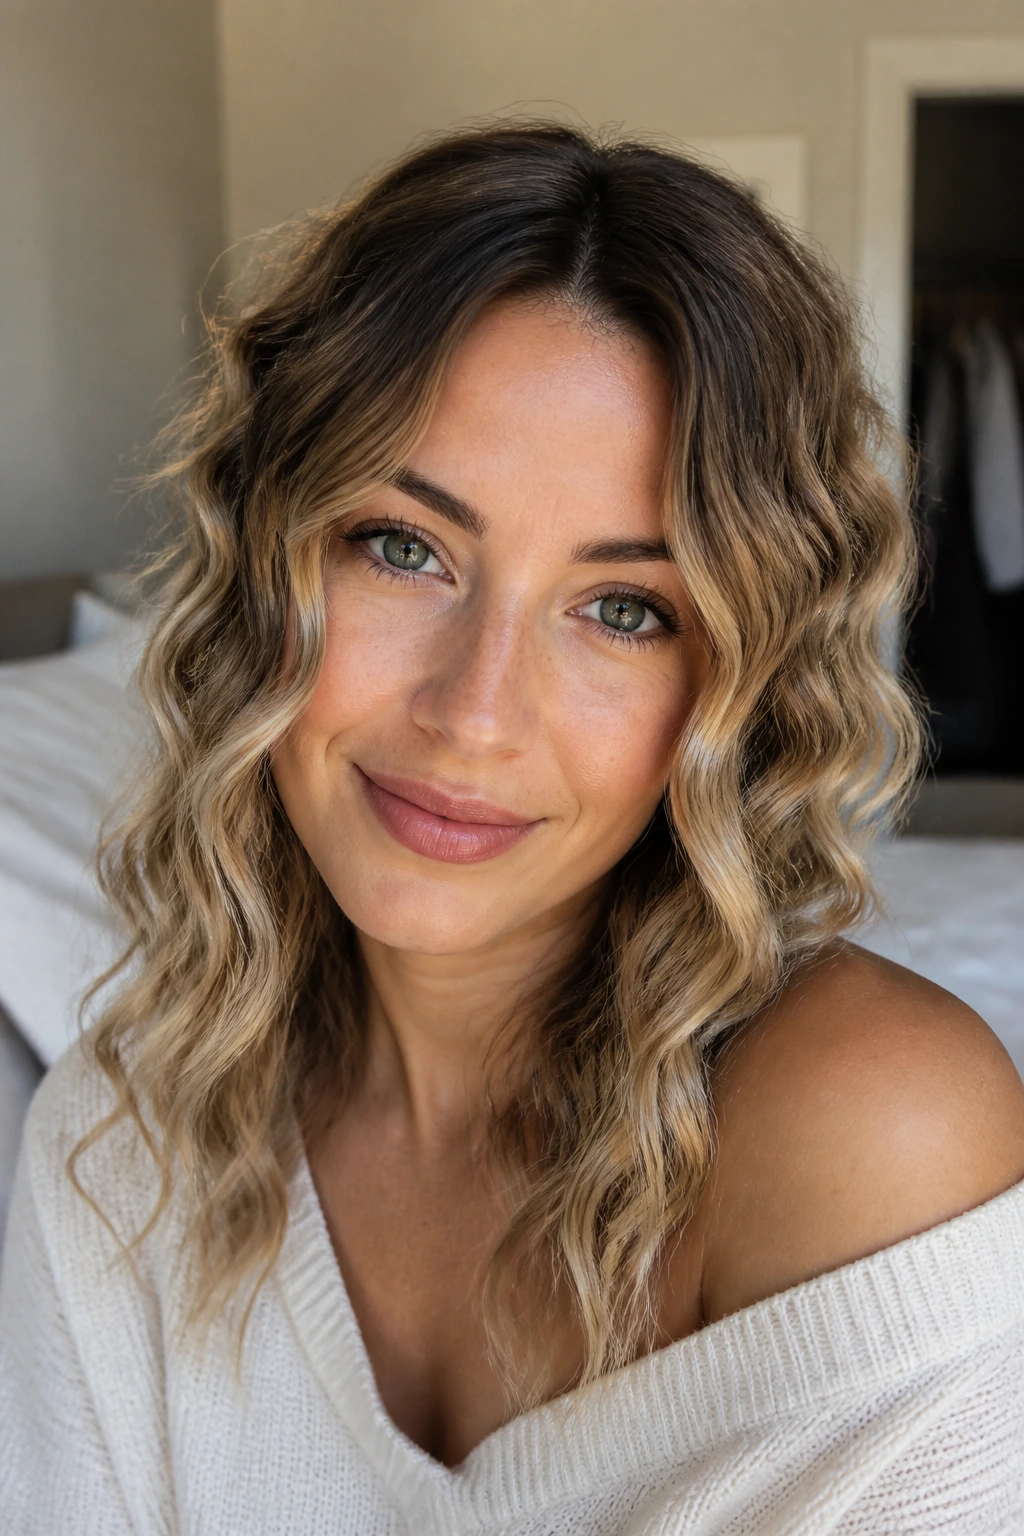
Heatless rope-braid waves are useful when you want a bend without a hot tool anywhere near the hair. On medium hair, two loose rope braids or twists can leave a soft, irregular wave pattern that feels relaxed and wearable.
Dampen the hair lightly — not dripping wet — then divide it into two sections and twist each one away from the face before wrapping it into a braid or rope twist. Secure the ends gently, sleep on it, and shake it out in the morning. If the wave looks too tight, run a little leave-in through the ends and finger-comb it loose.
What to expect
The root area often stays smoother, while the lengths carry most of the texture. That balance can look very pretty on medium hair because it prevents the whole style from puffing out. A touch of dry texture spray after you release the braids helps the wave stay separated.
This is not the most precise wave pattern, and that’s fine. It has a lived-in softness that heat styling sometimes misses.
28. Flat-Iron Bend Waves
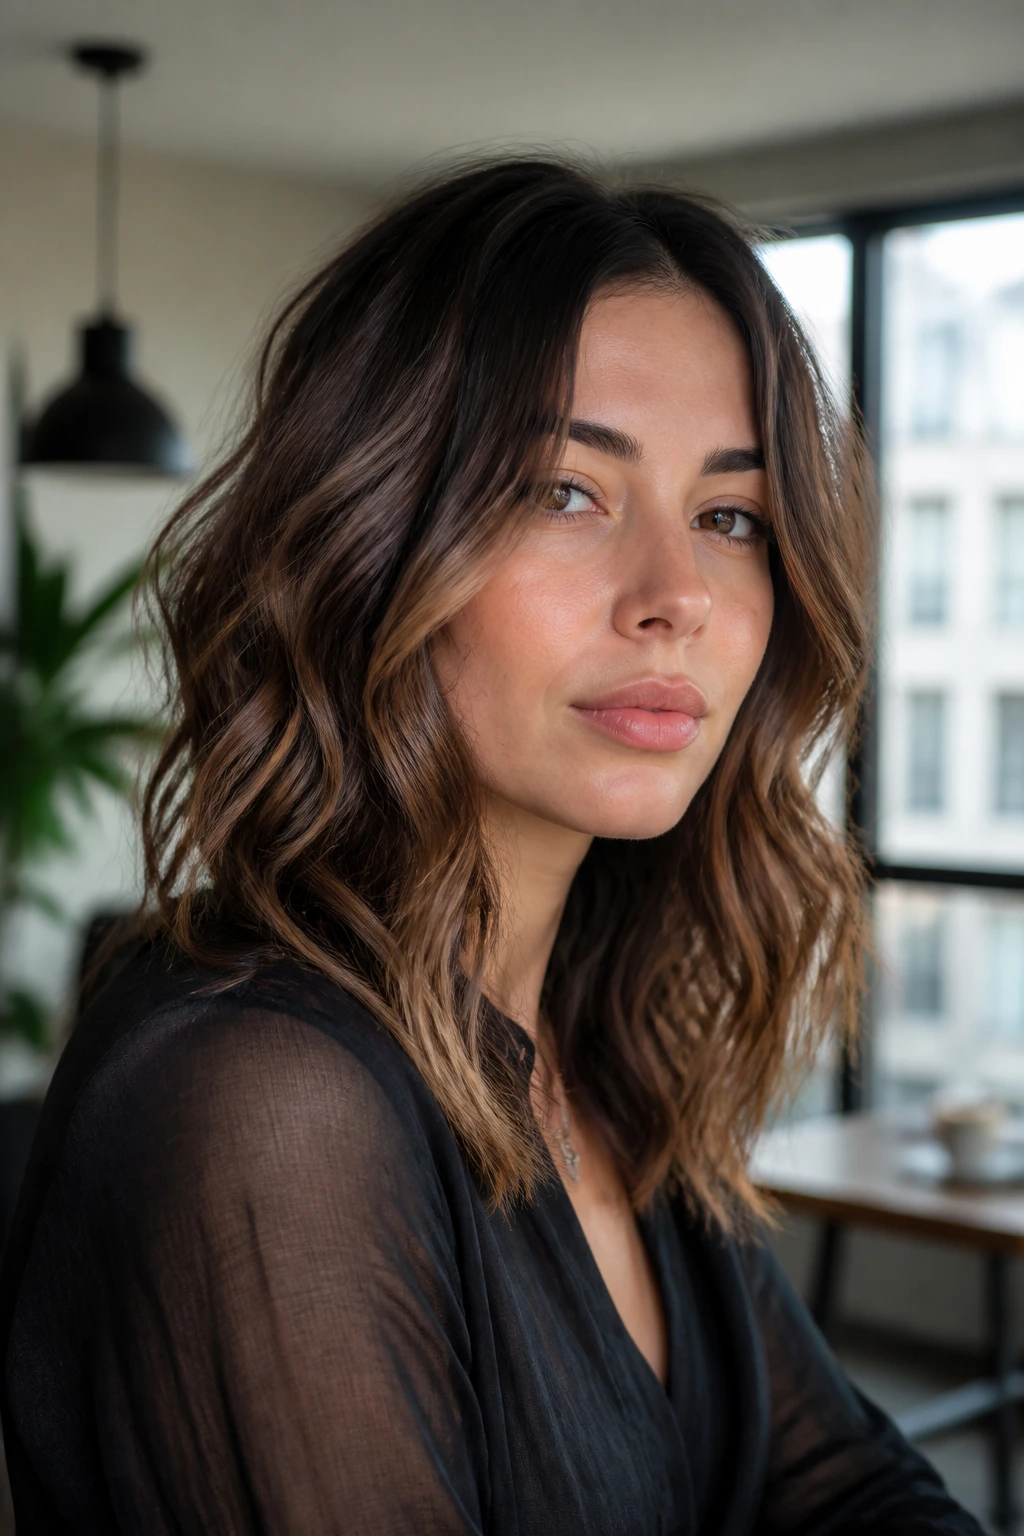
Flat-iron bend waves are the quick, modern option when you want visible movement without round curls. The style comes from wrist motion, not a barrel, which gives the hair a sharper, slightly straighter edge between bends.
Clamp a 1-inch flat iron near the root, turn your wrist one way, slide a few inches, then turn the other way. Keep the bends loose and varied. If every turn is identical, the style starts looking stamped on. You want irregular waves that still follow a pattern.
This works especially well on medium hair that is cut blunt or just a little layered. The bend shows off the length without making the ends too round. A tiny amount of heat protectant and a light finish spray are enough; too much product kills the clean line.
If your arm gets tired halfway through, that’s normal. Flat-iron waves ask for a little concentration. The payoff is a shape that feels fast and polished at the same time.
29. Diffused Waves with Root Volume
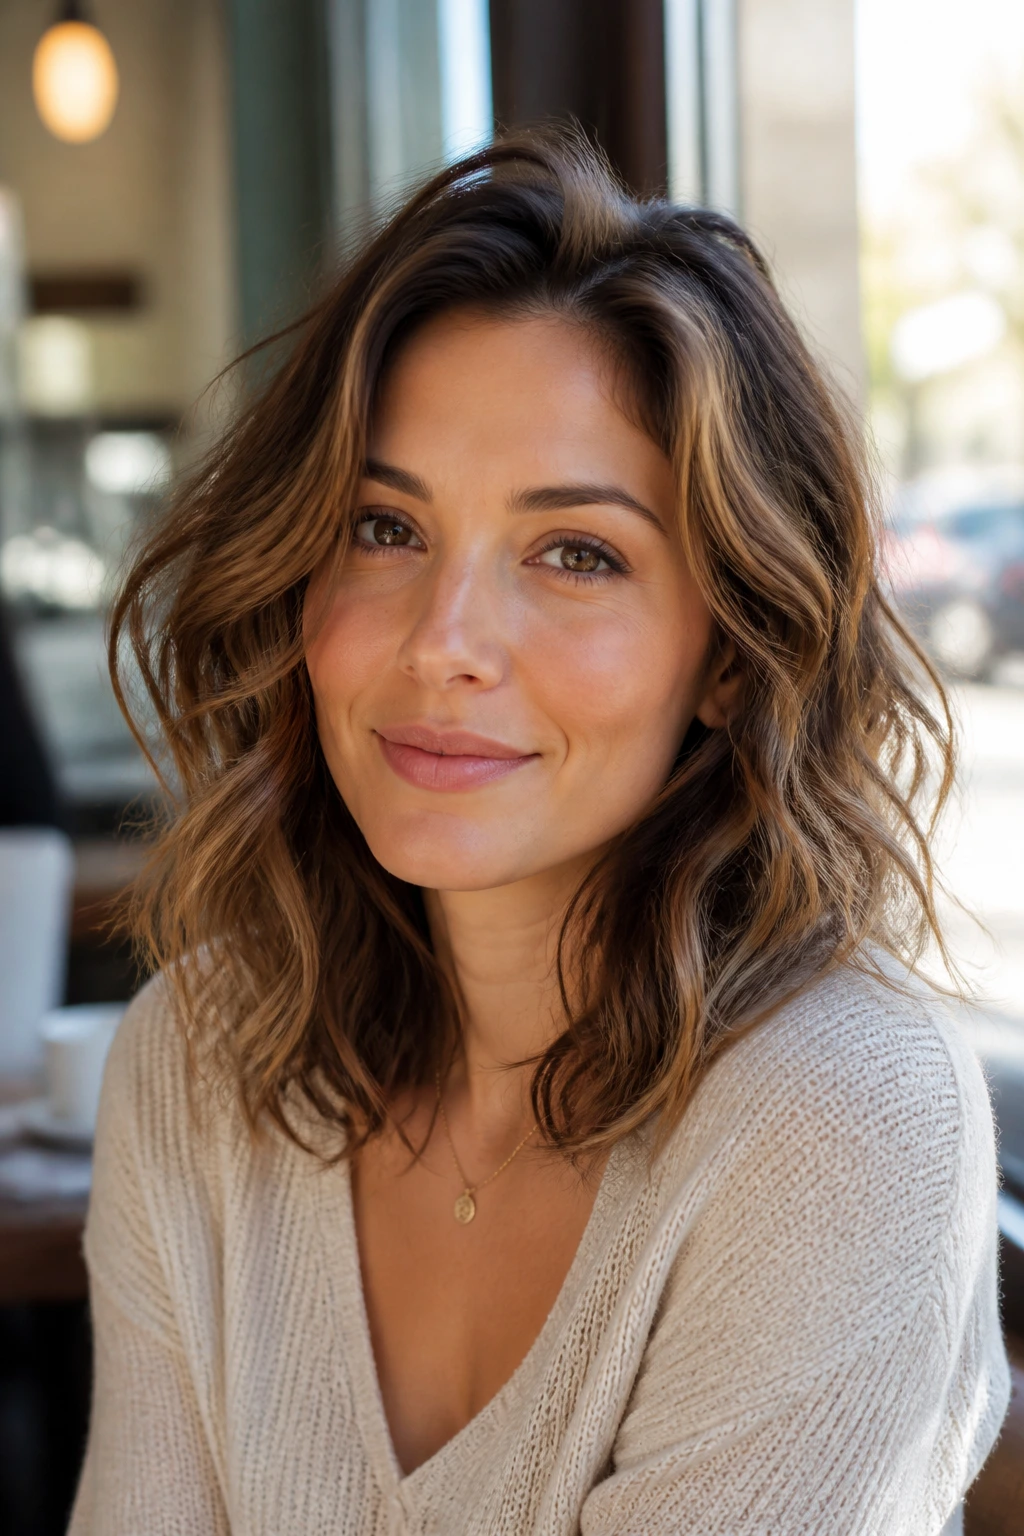
Diffused waves are the answer when the roots keep falling flat but the length still has shape. The diffuser lifts the crown and lets the natural wave pattern dry with more body.
What to watch for
Use mousse or a light curl foam on damp hair, then lift sections into the diffuser bowl at low speed. Hover near the roots first, because that’s where the lift matters most. Once the crown is set, move to the lengths and stop before the hair gets crunchy.
- Low heat, low speed: high heat can make the surface frizzy.
- Clip the crown while drying: it keeps the lift from sagging.
- Scrunch only when fully dry: touching early breaks the pattern.
Diffused waves on medium hair can look fuller than air-dried waves, but they still feel soft. That makes them a useful middle ground if you want body without a hard curl.
30. Matte Texture Waves with Piecey Ends
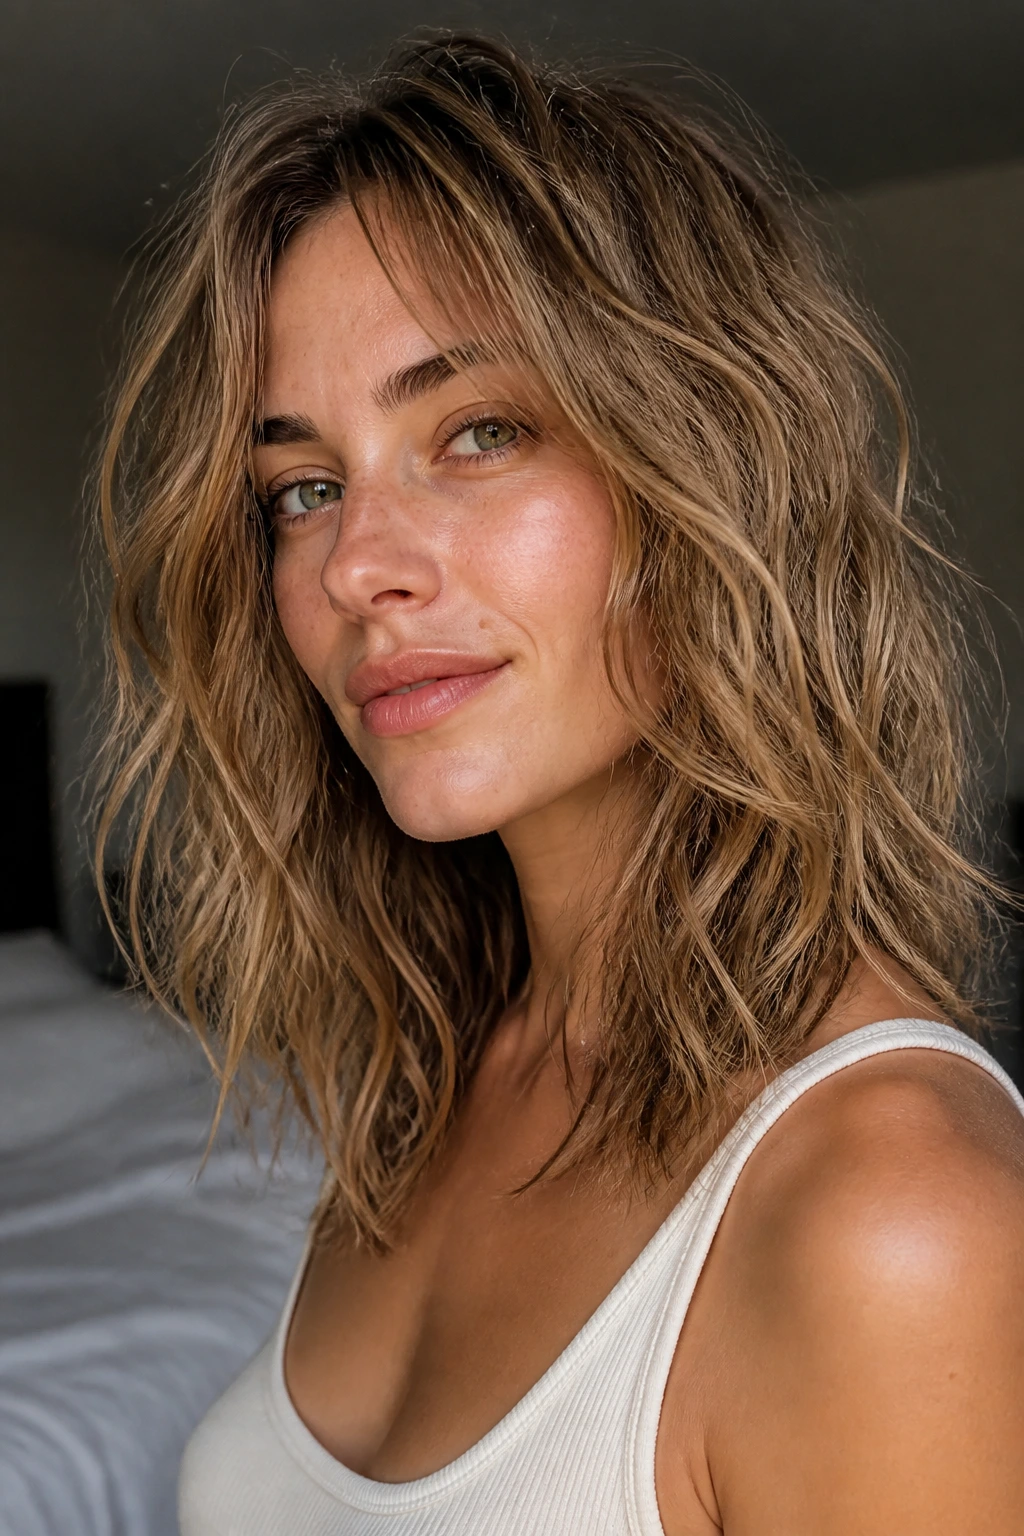
Matte texture waves are for people who like hair that looks a little undone on purpose. The finish is drier, the separation is stronger, and the ends stay piecey rather than smooth.
I’d start with a wand, leave the last inch or so out, then mist the hair with dry texture spray once it cools. After that, pinch a few sections apart with your fingertips. You do not want a brushed-out finish here. You want visible strands, a bit of grit, and enough movement that the style still sways.
This look is especially good on medium hair with layers, because the broken-up ends can show each cut line. On one-length hair, it gives a heavier shape more lift. Either way, the matte finish keeps the wave from looking too formal.
A lot of people reach for shine when they want polish. Sometimes texture is the better answer. On medium hair, it can be the difference between flat and full.
Why Medium Hair Makes Tousled Waves So Easy to Wear
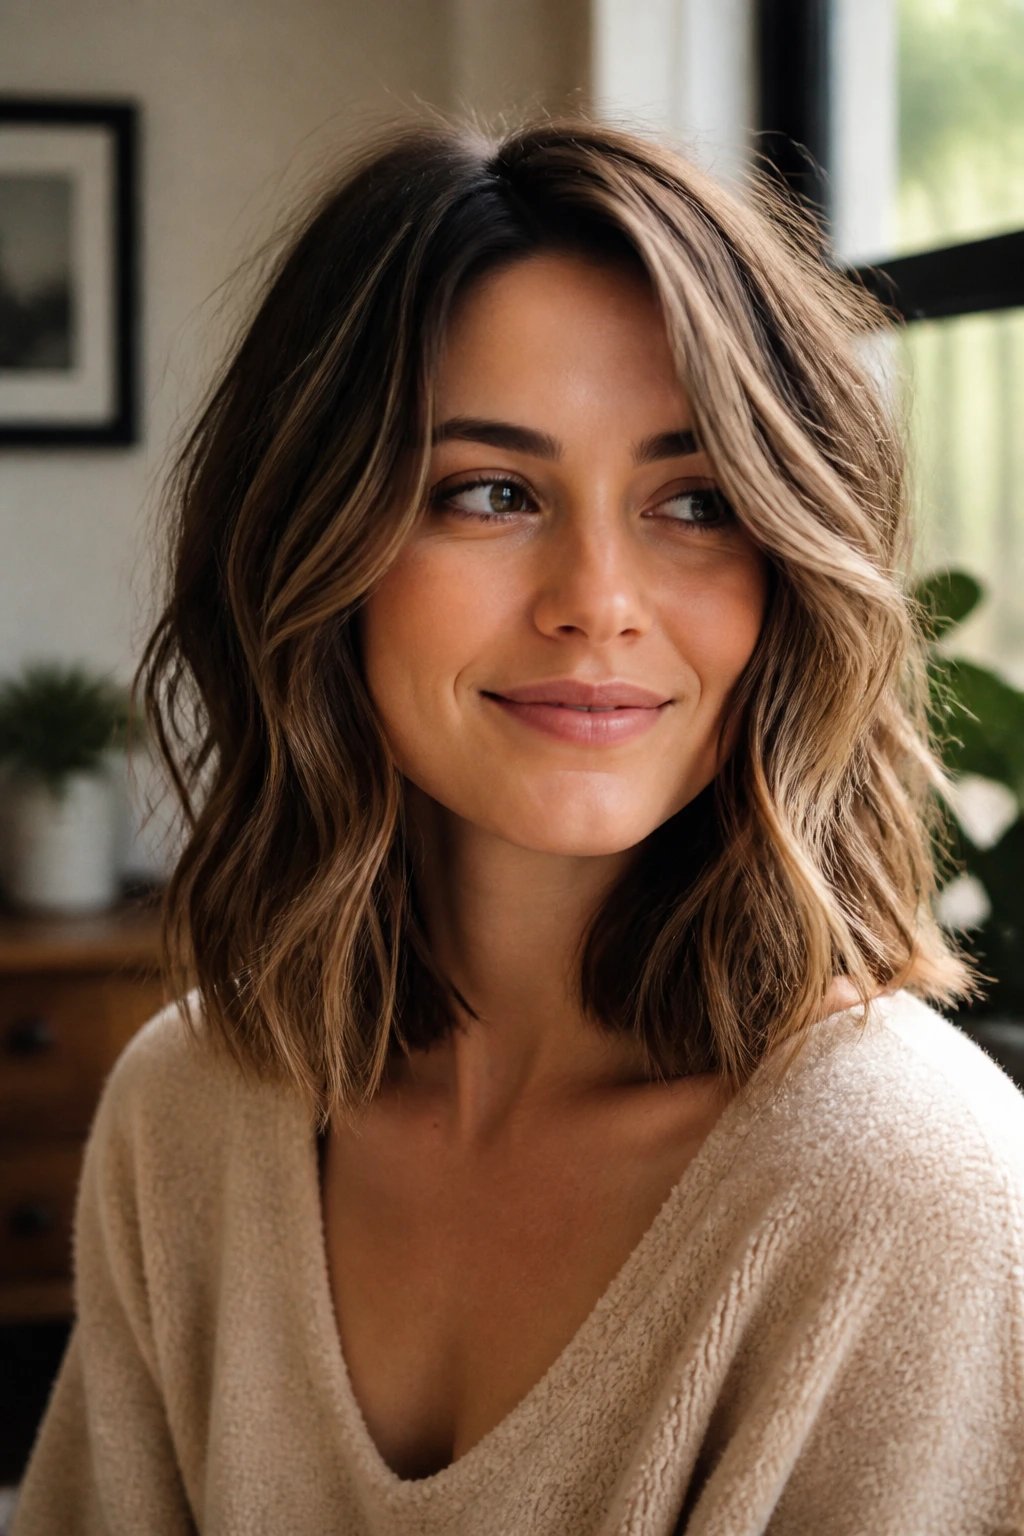
Medium hair gives you a workable length without the extra drag that long hair brings. That sounds simple, but it changes everything. Waves can form, cool, and hold on shoulder-length hair in a way that often feels easier than on hair that reaches well past the chest.
The other advantage is balance. Medium hair can take a deep side part, a brushed-out wave, a shaggy texture, or a half-up shape without the whole style collapsing under its own weight. There’s enough hair to build body, but not so much that every wave needs an hour of recovery time.
I also like the way medium hair shows off layering. A few face-framing pieces can do real work here. So can blunt ends, curtain bangs, or a softly stacked lob. The wave shape becomes part of the cut instead of sitting on top of it.
That’s why medium hair and tousled waves keep showing up together. They fit each other.
Essential Tools for Tousled Wave Styling
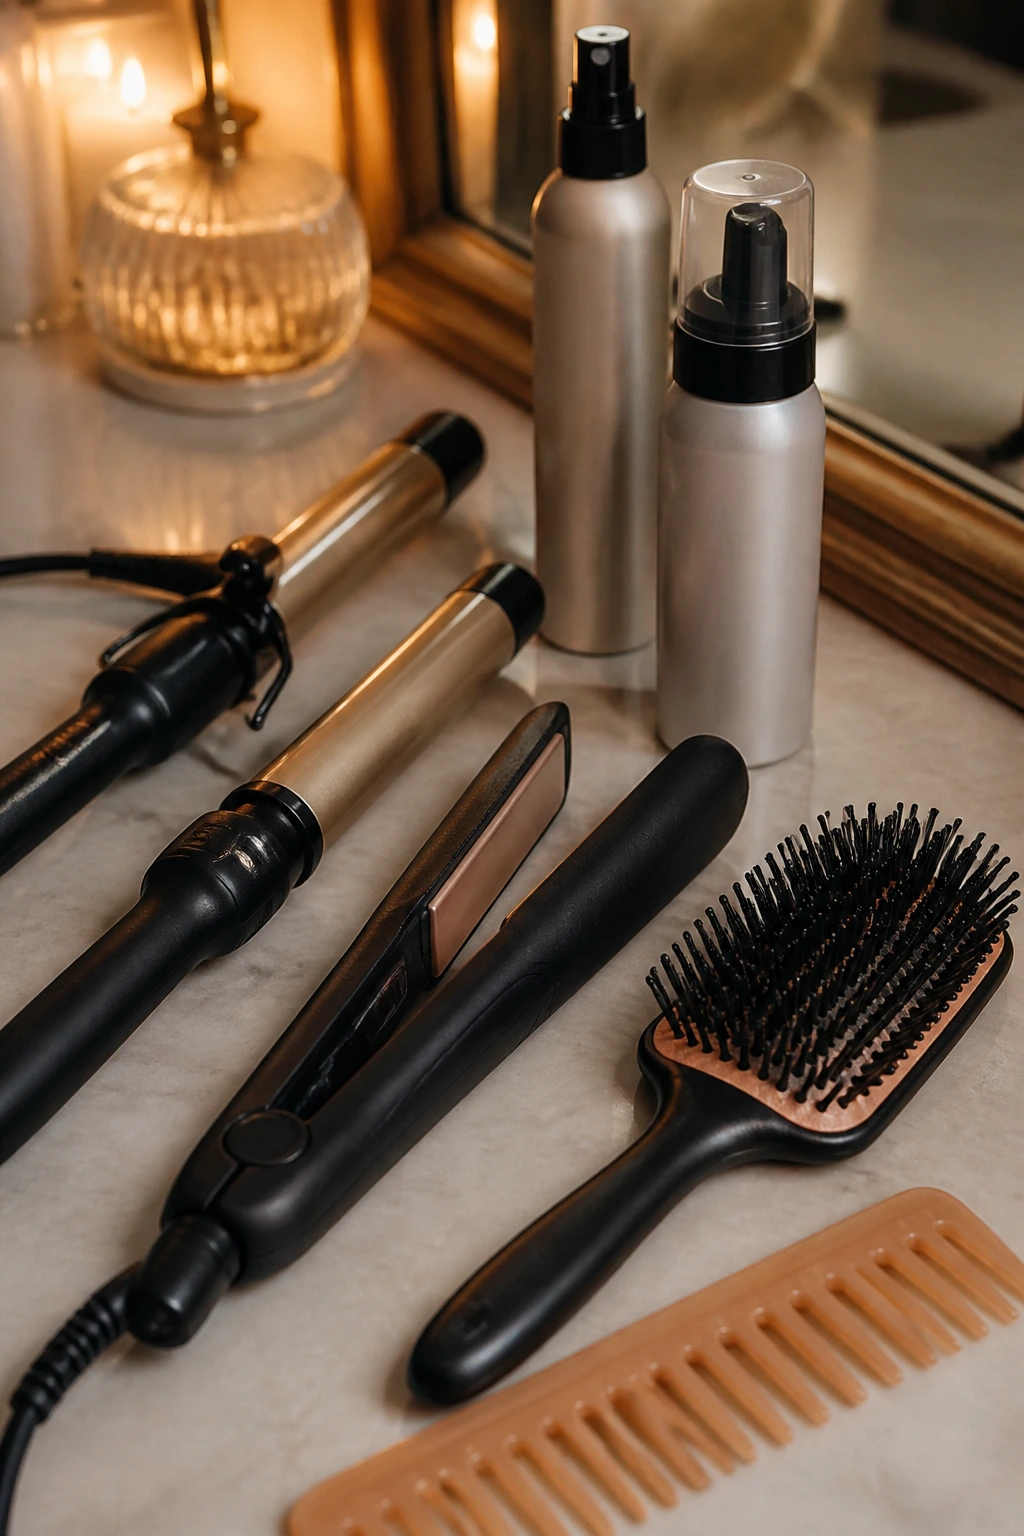
- 1-inch curling wand: Best for loose, modern bends and for making waves that can be brushed out later.
- 1.25-inch curling iron: Handy when you want a softer, larger wave on thicker medium hair.
- Flat iron with rounded plates: Useful for S-bends, flatter waves, and faster styling.
- Heat protectant spray: Non-negotiable if you use hot tools; mist from mid-lengths to ends before styling.
- Volumizing mousse or foam: Good for fine or flat medium hair that needs lift at the roots.
- Texturizing spray: Adds separation and keeps the wave from looking too smooth.
- Dry shampoo: Helps second-day roots hold shape and keeps the crown from going limp.
- Sectioning clips: They make the process cleaner and keep hot sections from getting mixed back into the rest.
- Wide-tooth comb: Better than a fine brush for breaking up waves without flattening them.
- Paddle brush or boar-bristle brush: Useful when you want a brushed-out, silky finish.
- Claw clip or small pins: Great for half-up waves, knot-back looks, and letting the crown cool in place.
- Diffuser attachment: Optional, but useful for natural waves and air-dried texture.
Picking the Right Products and Cut for the Wave You Want
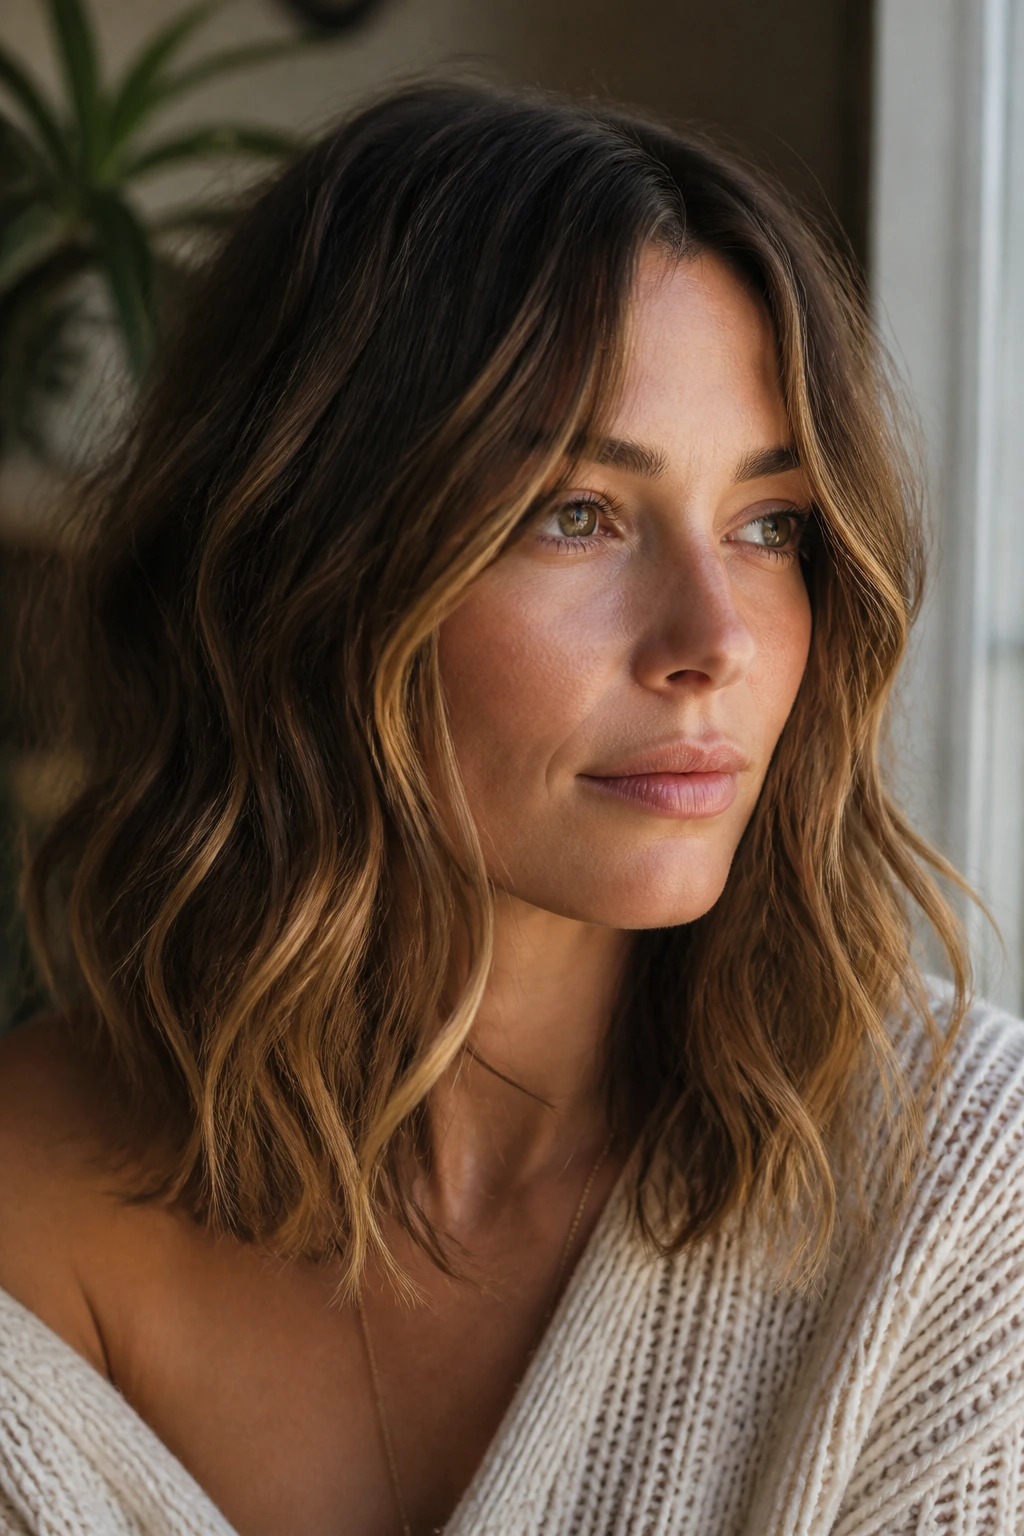
The cut matters more than people admit. Medium hair with long layers will behave differently from a blunt lob, even if you use the same iron and spray. If you want movement, ask for face-framing layers or soft internal layering. If you want a sharper outline, keep the ends cleaner and let the texture live in the mid-lengths.
Product choice should match the finish, not the mood. Fine medium hair usually likes mousse, lightweight texture spray, and a flexible hairspray. Thick hair often needs smoothing cream or a small amount of leave-in to keep the wave from puffing out. If your hair is naturally dry, go easy on salt sprays; they can make the ends look frayed before the day is over.
Barrel size matters, too. A 1-inch barrel gives a smaller bend that can be brushed out. A 1.25-inch barrel is safer when the hair is dense or when you want the wave to stay larger and softer. Smaller sections mean more definition; larger sections mean a looser, faster finish.
One practical note: if your hair holds curl badly, set each wave while it cools. A clip at the crown or a pinch at the ends for 20 to 30 seconds can change the whole result.
How to Wear Tousled Waves with Different Outfits and Occasions
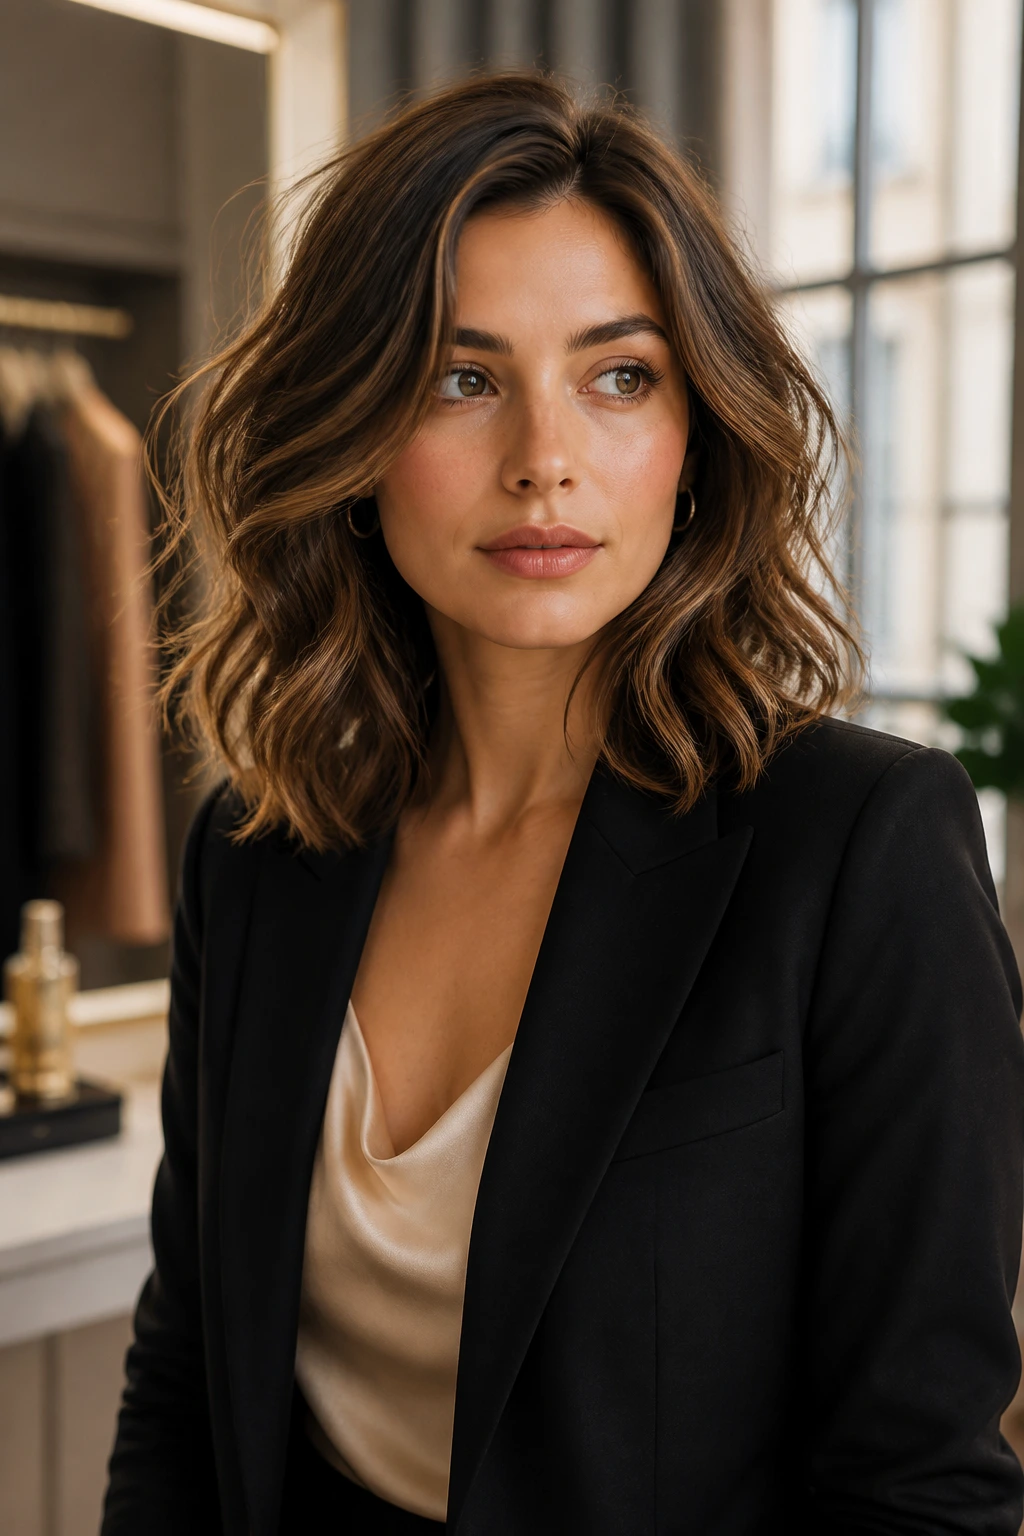
Presentation: Keep the highest volume where your face needs it most. A deep side part adds drama; a center part gives a calmer line; and a slight off-center part often looks the most natural on medium hair. If the wave is brushed out, let it drape over one shoulder. If it’s piecey, let the ends move freely so the texture stays visible.
Accessories: Hoops, slim barrette clips, narrow headbands, and matte claw clips all sit well with wave texture. Heavy, shiny accessories can compete with the hair unless the finish is very polished. One small clip near the temple or a tucked-back side can be enough.
Outfits: Open necklines and structured collars both work, but they change the read of the hair. A crew neck makes the waves feel more casual. A blazer, button-down, or satin top makes the same waves feel sharper, especially if you smooth the crown and keep the ends soft.
Occasion: For daytime, lean into texture and touchable movement. For evening, brush the waves a little more and add shine only to the mids and ends. The hair should feel like it matches the clothes, not like it’s trying to outdress them.
Extra Tips That Make the Texture Look Intentional
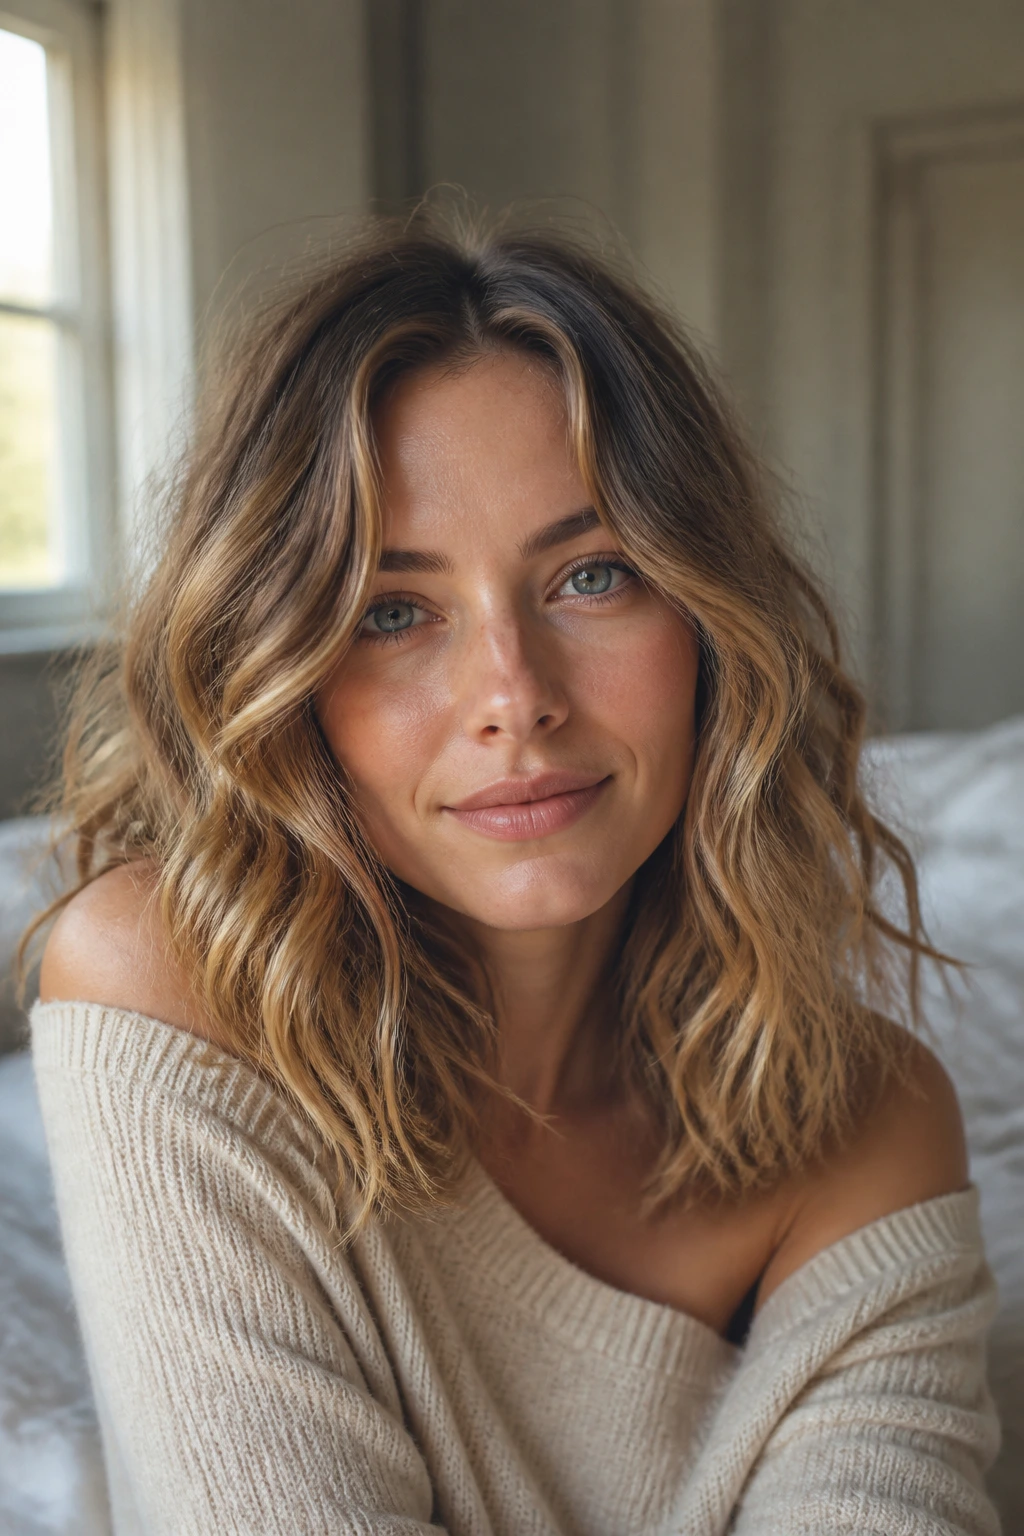
Root Lift: Clip the crown while the hair cools, even if it already looks okay. That one habit helps medium waves keep their shape longer, especially around the top where hair tends to collapse first.
Texture Boost: Mist texturizing spray from about 8 to 10 inches away so it lands like a light veil rather than a wet patch. Too close, and you get sticky spots.
Finish Control: If the hair looks too neat, bend one or two front pieces with a flat iron after the rest is done. Those small touch-ups make the style feel custom instead of uniform.
Make-It-Yours: Fine hair usually needs more lift and less oil. Thick hair usually needs smoother mids and less spray at the root. Straight medium hair often benefits from a little more cooling time between sections, while naturally wavy hair needs less hot-tool work and more product discipline.
A tiny finishing move goes a long way. I like to pinch the ends after spraying, then stop. That’s usually enough.
Keeping Your Waves Fresh Between Washes
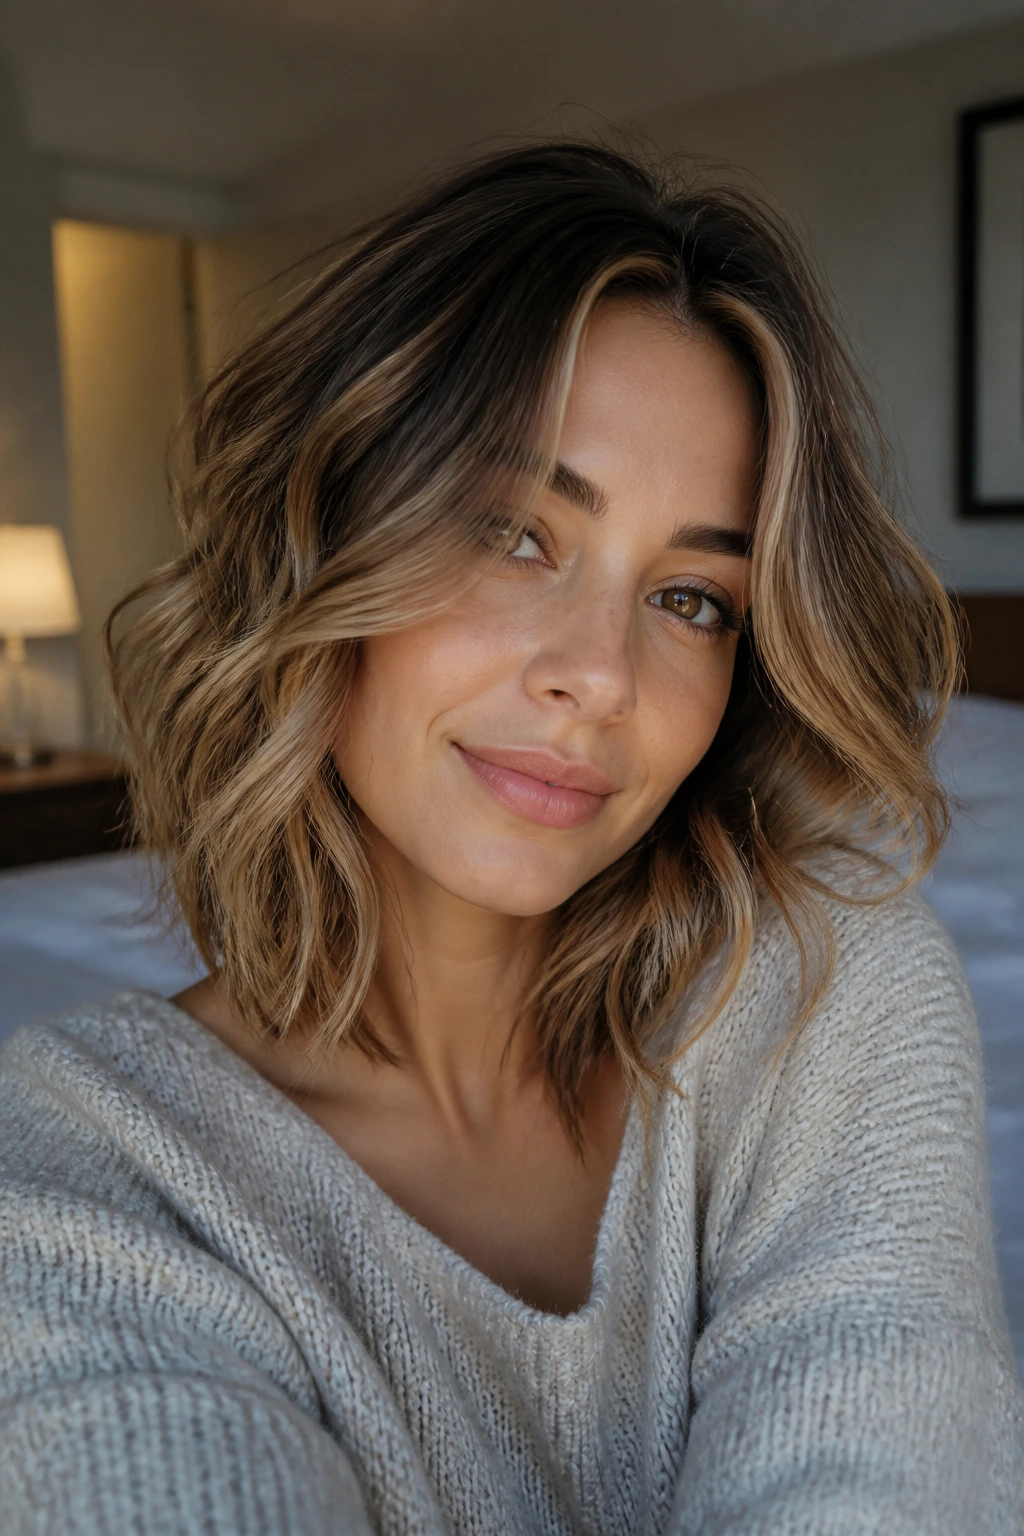
Medium hair usually wears tousled waves well for 2 to 3 days, as long as you treat the roots and ends differently. Day one is the full shape. Day two is the refresh. Day three is where you decide whether the style still has enough life to keep going or whether it needs a proper wash.
At night, a loose pineapple, a soft clip at the crown, or a silk pillowcase can keep the wave from getting crushed. If the hair is very fine, I’d avoid tight ties before bed; they leave bends in the wrong places. If the style still has body in the morning, a light mist of water or leave-in on the front pieces is enough to wake it up.
For refreshing, focus on the roots first. Dry shampoo or a little volumizing powder can help the crown stand up again. Then re-bend only the front pieces and the top layer if they need it. You do not have to redo the whole head. That’s the nice part.
If the ends look dry, use one drop of hair oil in your hands and press it onto the last inch only. Too much moisture at the roots ruins the shape, and medium waves fall fast when the top gets heavy.
Variations and Adaptations to Try
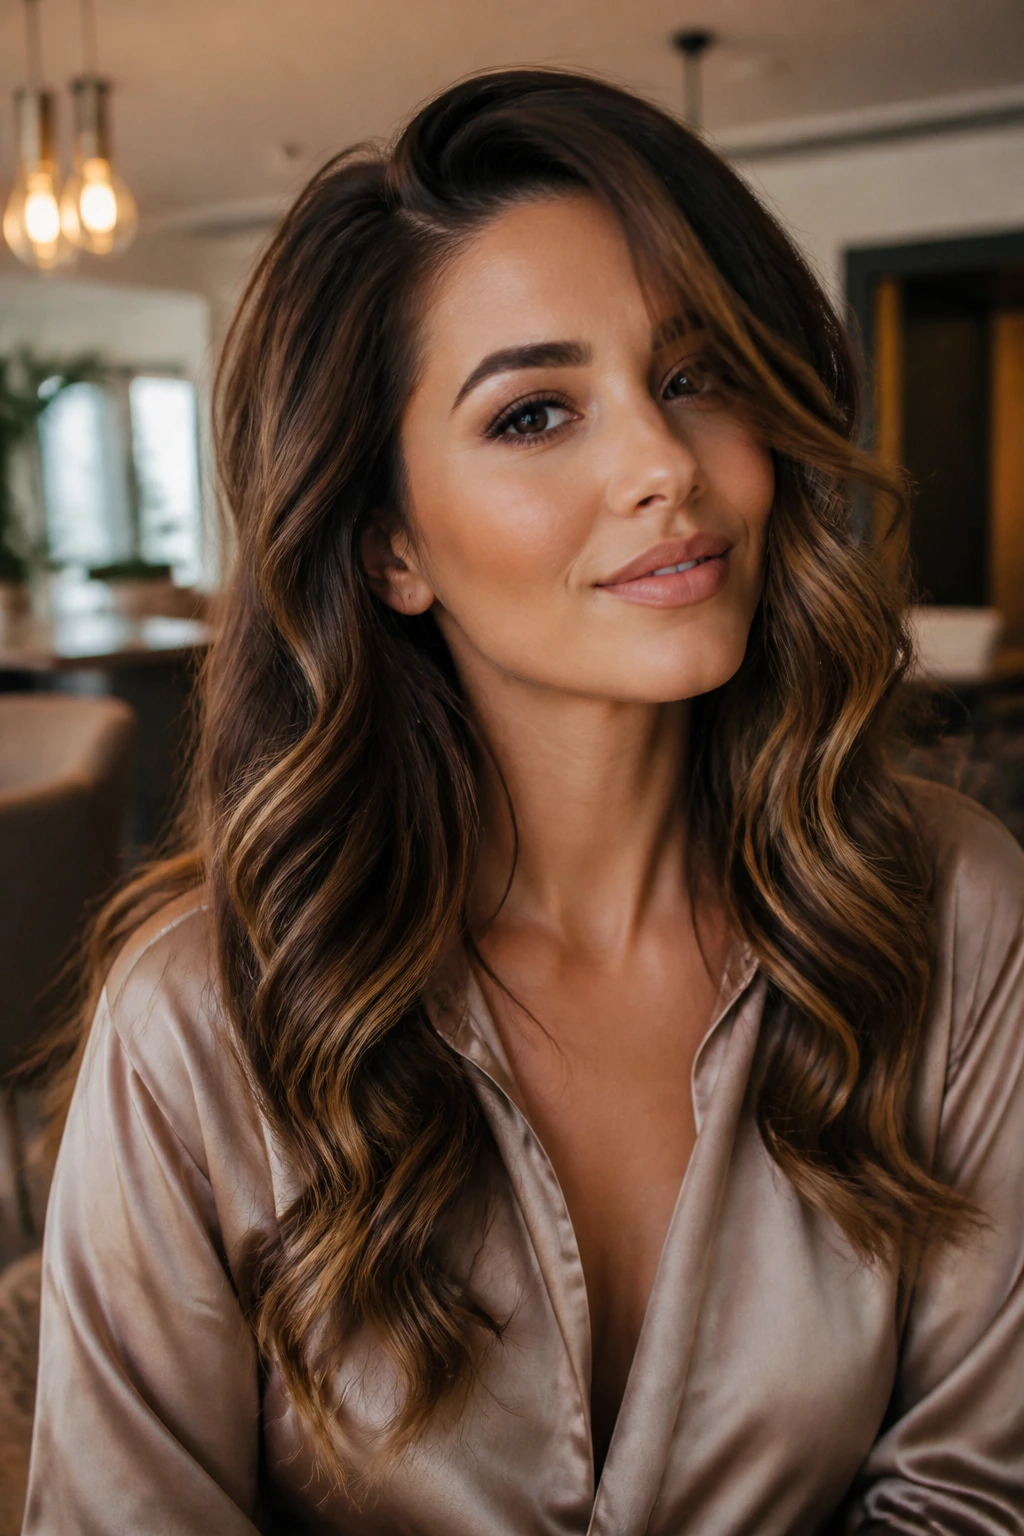
Fine-Hair Float: Use mousse at the roots, smaller sections, and a 1-inch wand. Finish with dry texture spray instead of oil so the waves don’t go limp by lunch.
Thick-Hair Soft Sweep: Choose a 1.25-inch barrel, smooth the mids with a light cream, and let the ends stay a little straighter. This keeps the style from turning puffy.
Heatless Rope Set: Twist damp hair into two loose rope braids overnight, then shake them out in the morning and finger-comb lightly. It gives a softer, irregular wave that feels easy.
Glossy Side-Part Waves: Brush out the curl more fully, push everything into a deep side part, and add a small amount of shine spray on the mids. This one leans dressy without turning stiff.
Matte Piecey Waves: Use dry texture spray and a tiny bit of matte paste on the ends. Best when you want the hair to look broken up and a little edgy.
Natural Texture Refresh: If your hair already waves or curls, skip the full heat styling and just refine the front pieces. A curl cream, a diffuser, and a careful finger-comb often do more than a wand ever will.
Common Mistakes That Flatten the Shape
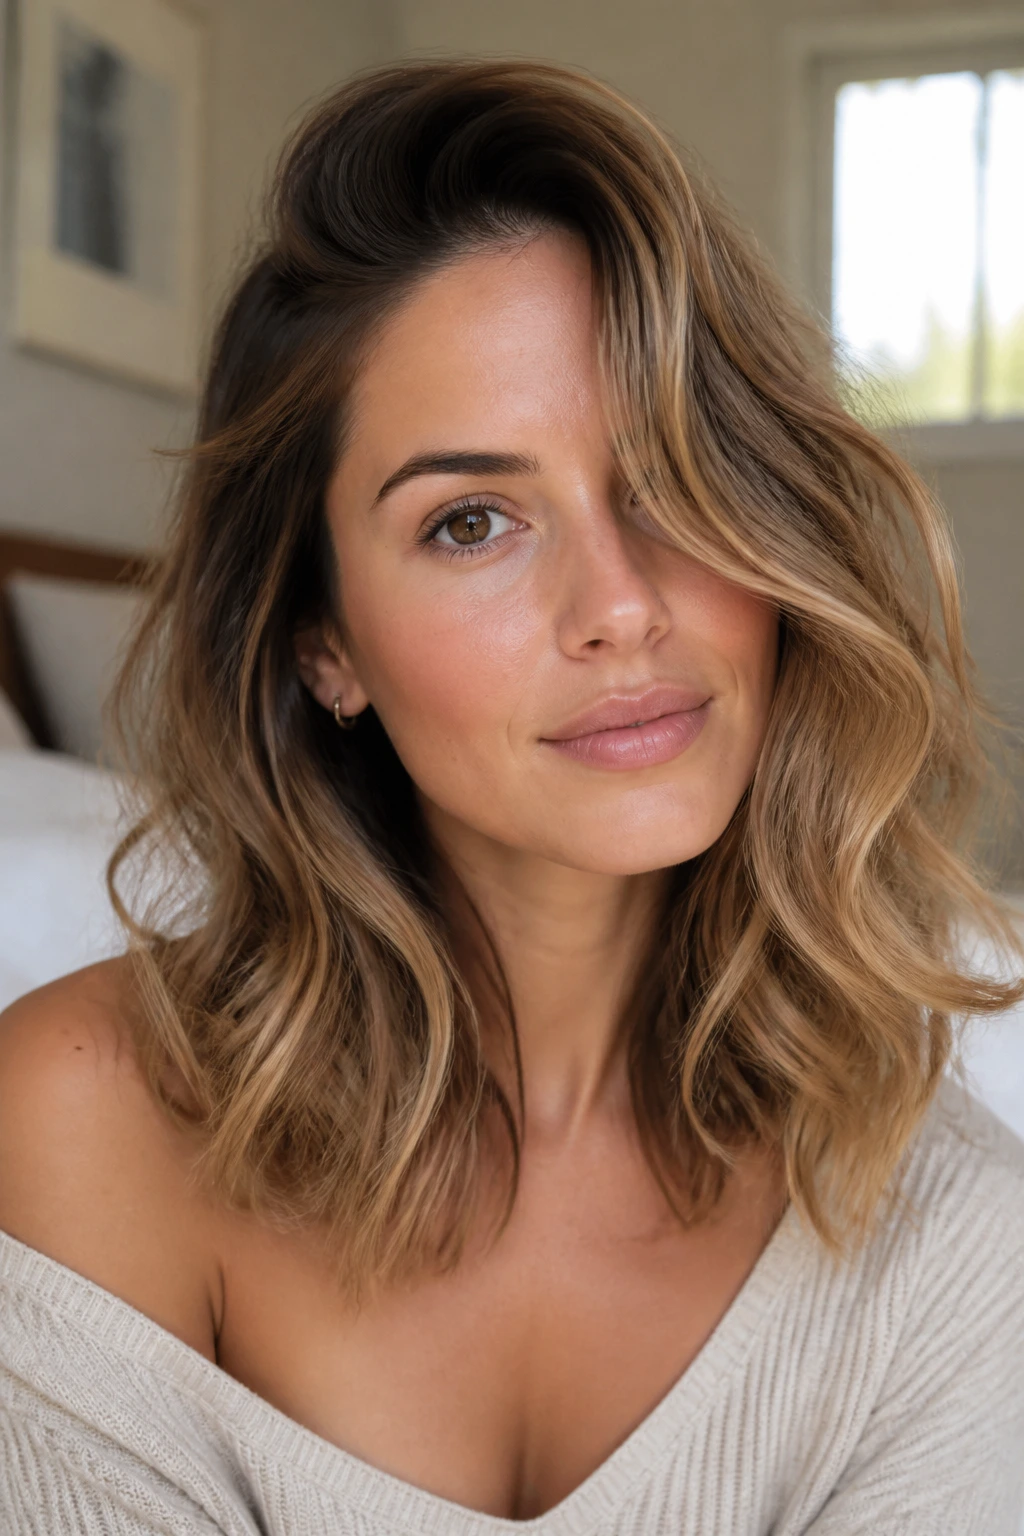
The first mistake is curling every section the same way. That creates a uniform helmet effect, and medium hair looks much better when the wave bends in slightly different directions. Alternate the wrap direction or leave the ends out to keep the shape loose.
Another problem is using too much product too early. Heavy oil, thick cream, or a big hit of hairspray on damp hair can weigh down the crown before the style even sets. Use light layers, and keep the heavier products on the mids and ends.
Brushing too soon is a classic error. Warm hair gives up shape quickly, so if you brush before the sections cool, the wave stretches out and the whole style softens into nothing. Let it set. A few extra minutes matters.
Skipping heat protectant is a bad trade. The ends of medium hair are often the oldest part of the cut and the first to dry out. If you see fraying or a rough, fuzzy edge, that’s usually where the heat did the damage.
Finally, using sections that are too large can make the waves fall out faster than you expect. A curl that starts in a 2-inch chunk won’t hold the same way one that starts in a 1-inch section will. Smaller sections take longer, but they pay off.
Frequently Asked Questions About Tousled Wave Hairstyles for Medium Hair
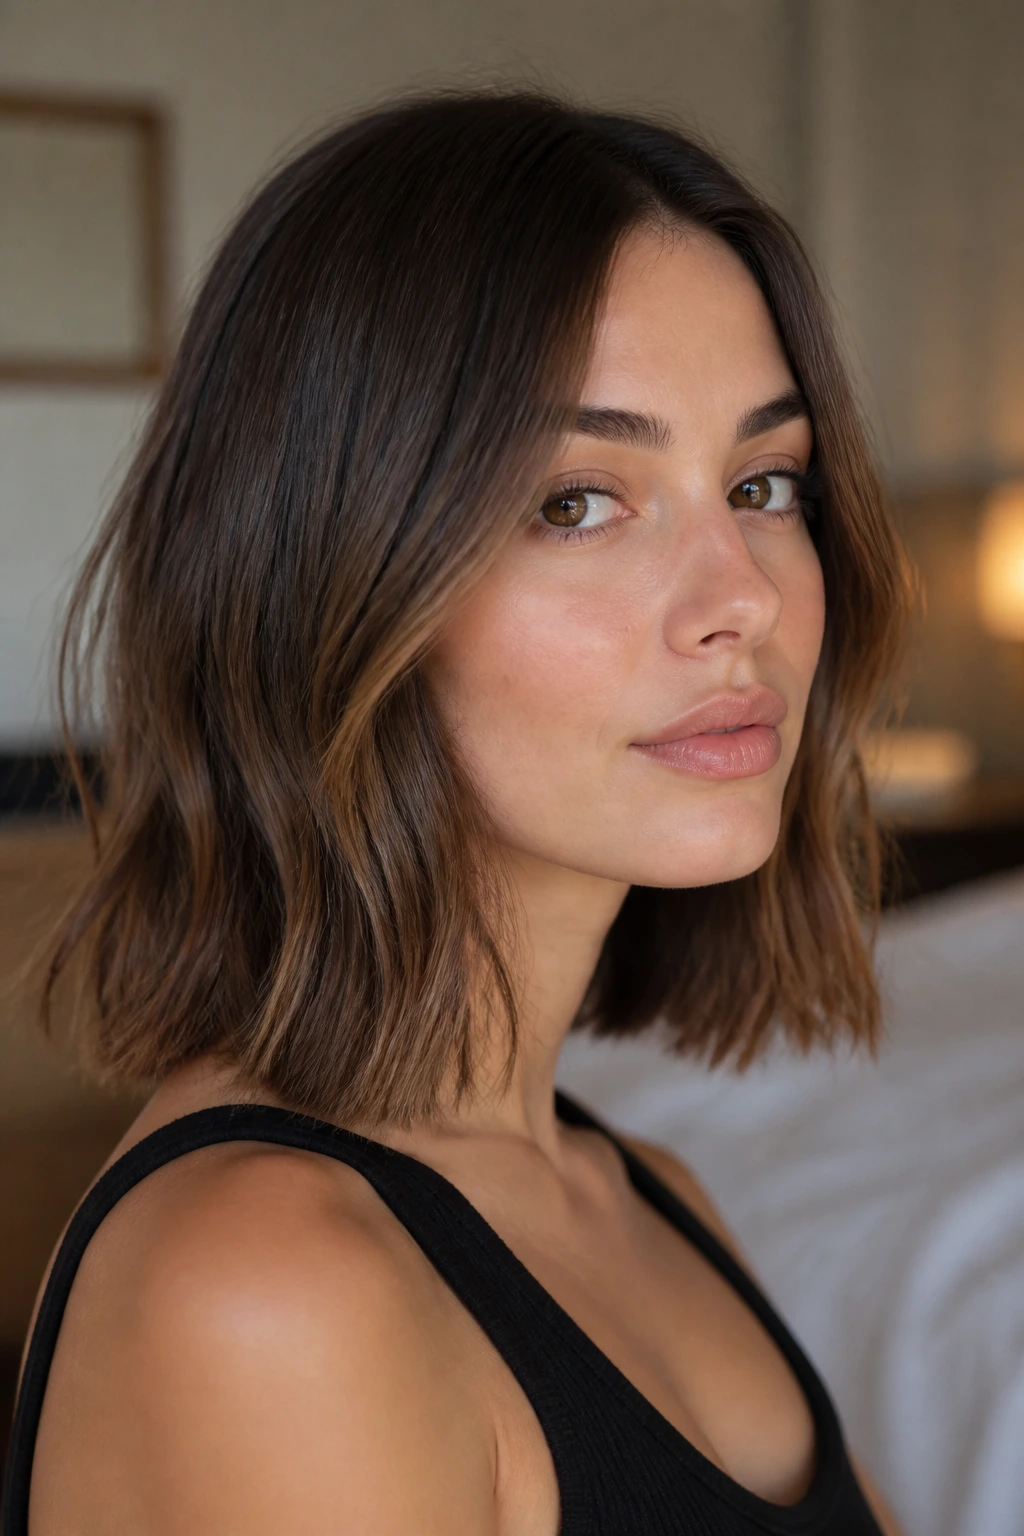
What hair length counts as medium for tousled waves?
Usually anything from just above the shoulders to a few inches below the collarbone. That range gives enough hair to show movement without dragging the wave pattern down.
Do tousled waves work better on layered hair or one-length hair?
Layered hair holds movement more easily, especially around the face and crown. One-length hair can still look great, but it usually needs a little more help from product, brushing, or a soft flip at the ends.
What barrel size should I use on medium hair?
A 1-inch barrel is the most flexible choice because you can brush it out for a softer wave. A 1.25-inch barrel gives a looser, calmer bend and is helpful for thick hair or when you want a more relaxed finish.
How do I keep waves from falling flat at the roots?
Clip the crown while it cools, use mousse or root-lift spray before styling, and keep heavy oils away from the top section. Dry shampoo on day two also helps the roots keep some shape.
Can I make tousled waves without heat?
Yes. Rope braids, loose twists, flexi-rod sets, and overnight braids all leave medium hair with a softer wave. The pattern is usually less polished, but that can be a good thing.
Why do my waves turn frizzy instead of soft?
Usually the hair was handled too much while it was still warm, or the finish spray was too stiff and uneven. Let the waves cool fully, then break them apart gently with dry hands or a wide-tooth comb.
Should I curl toward or away from my face?
Away from the face is the safest choice for the front sections because it opens the face and keeps the shape from collapsing inward. In the back, alternating directions helps the waves look less uniform.
Can medium waves work with bangs?
Absolutely. Curtain bangs, long fringe, and side bangs all work well if you style the front section separately and keep it a little lighter than the rest of the hair.
How much product is too much?
If the hair feels sticky, strings together, or loses movement when you touch it, you’ve used too much. On medium hair, small amounts placed where they matter beat a heavy all-over coat almost every time.
The Shape That Keeps Working
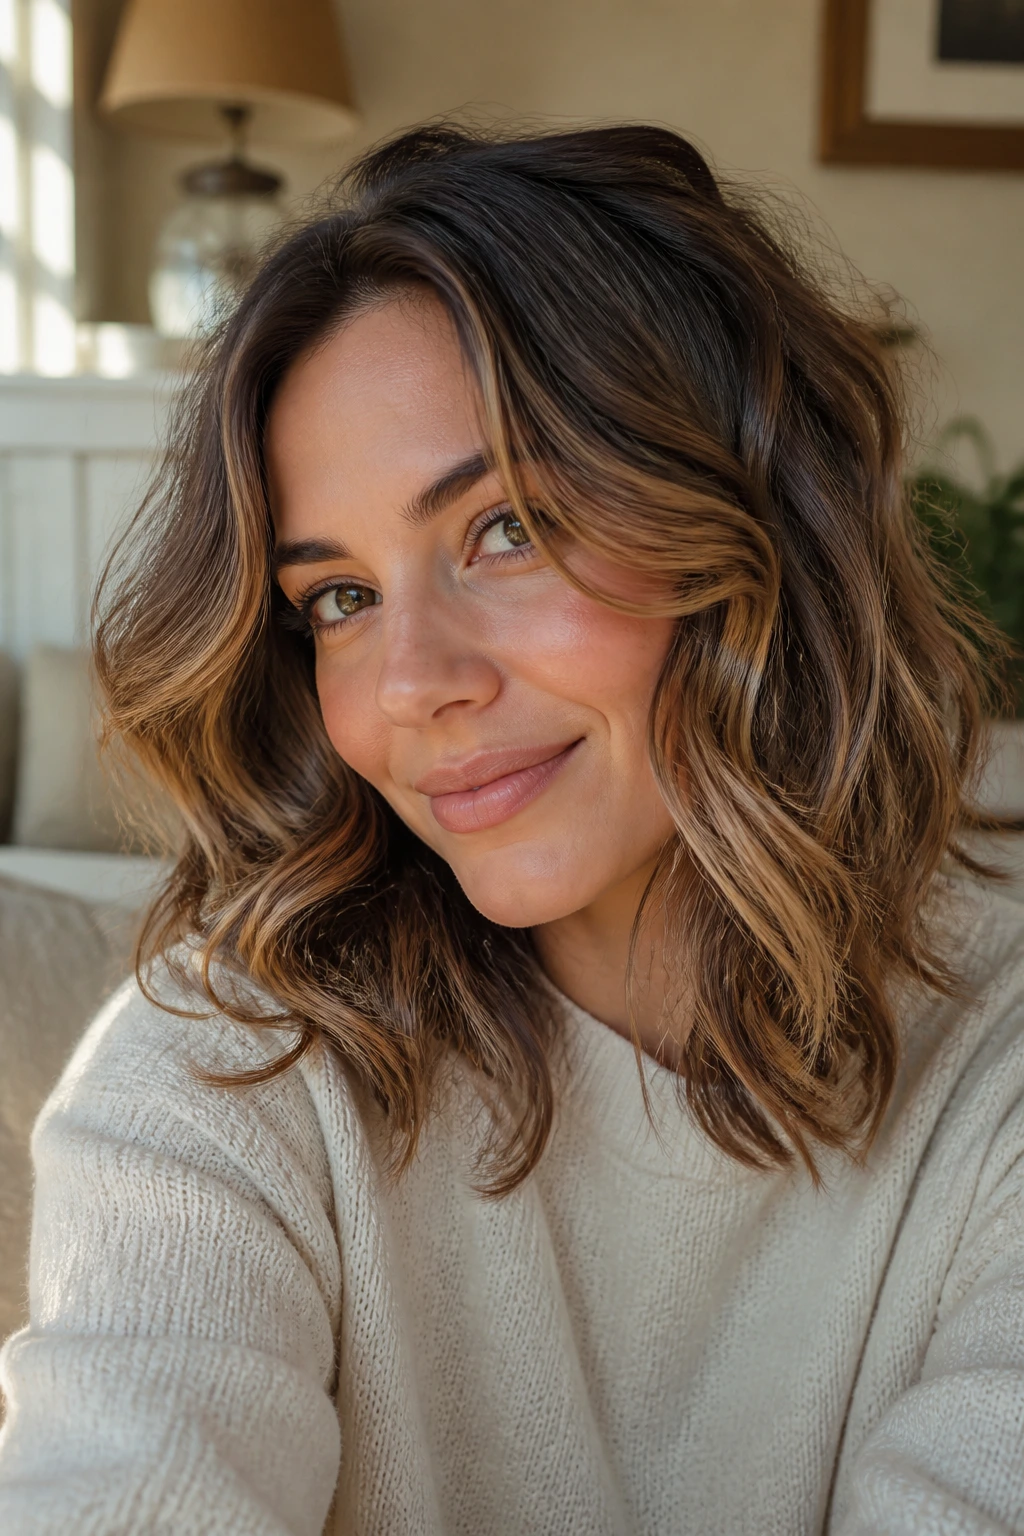
Medium hair has a habit of making waves look easier than they are. That is the whole appeal. You get enough length for movement, enough weight for shape, and enough flexibility to go from brushed-out and glossy to piecey and lived-in without changing the cut itself.
The best version is the one that works with your texture, not against it. Some people need crown lift. Some need a blunt edge left clean. Some need a deep side part and a little shine. Once you find the balance, the rest is mostly habit — and a good eye for when to stop styling and let the wave do its job.
