



The prettiest First Communion hair usually does one quiet thing well: it stays calm. Half-up half-down styles are the sweet spot because they lift the front away from the face, leave room for a veil or bow, and keep enough length visible that the hairstyle still feels soft, not stiff. When the style is done right, the crown sits smooth, the pinned sections disappear into the hair, and the ends still move when the child turns her head.
I’ve always liked half-up looks for this kind of ceremony because they avoid the two extremes that cause trouble. A full updo can feel too tight on a child who has to sit through Mass, while fully loose hair can fall into the eyes, snag on a dress zipper, or flatten before the photos are over. Half-up hair gives you control at the top and freedom at the bottom. It’s also forgiving: if one curl drops or one braid loosens, the whole style still looks intentional.
The trick is matching the style to the hair you actually have. Fine hair needs grip and a little lift at the crown. Thick hair needs hidden pins that do not poke. Natural curls need definition, not brute force. Straight hair needs texture before it can hold a bow or comb. Get those pieces right and the style stops looking “done” and starts looking polished in the nicest, most child-friendly way.
Why These Half-Up Looks Feel Right for the Day
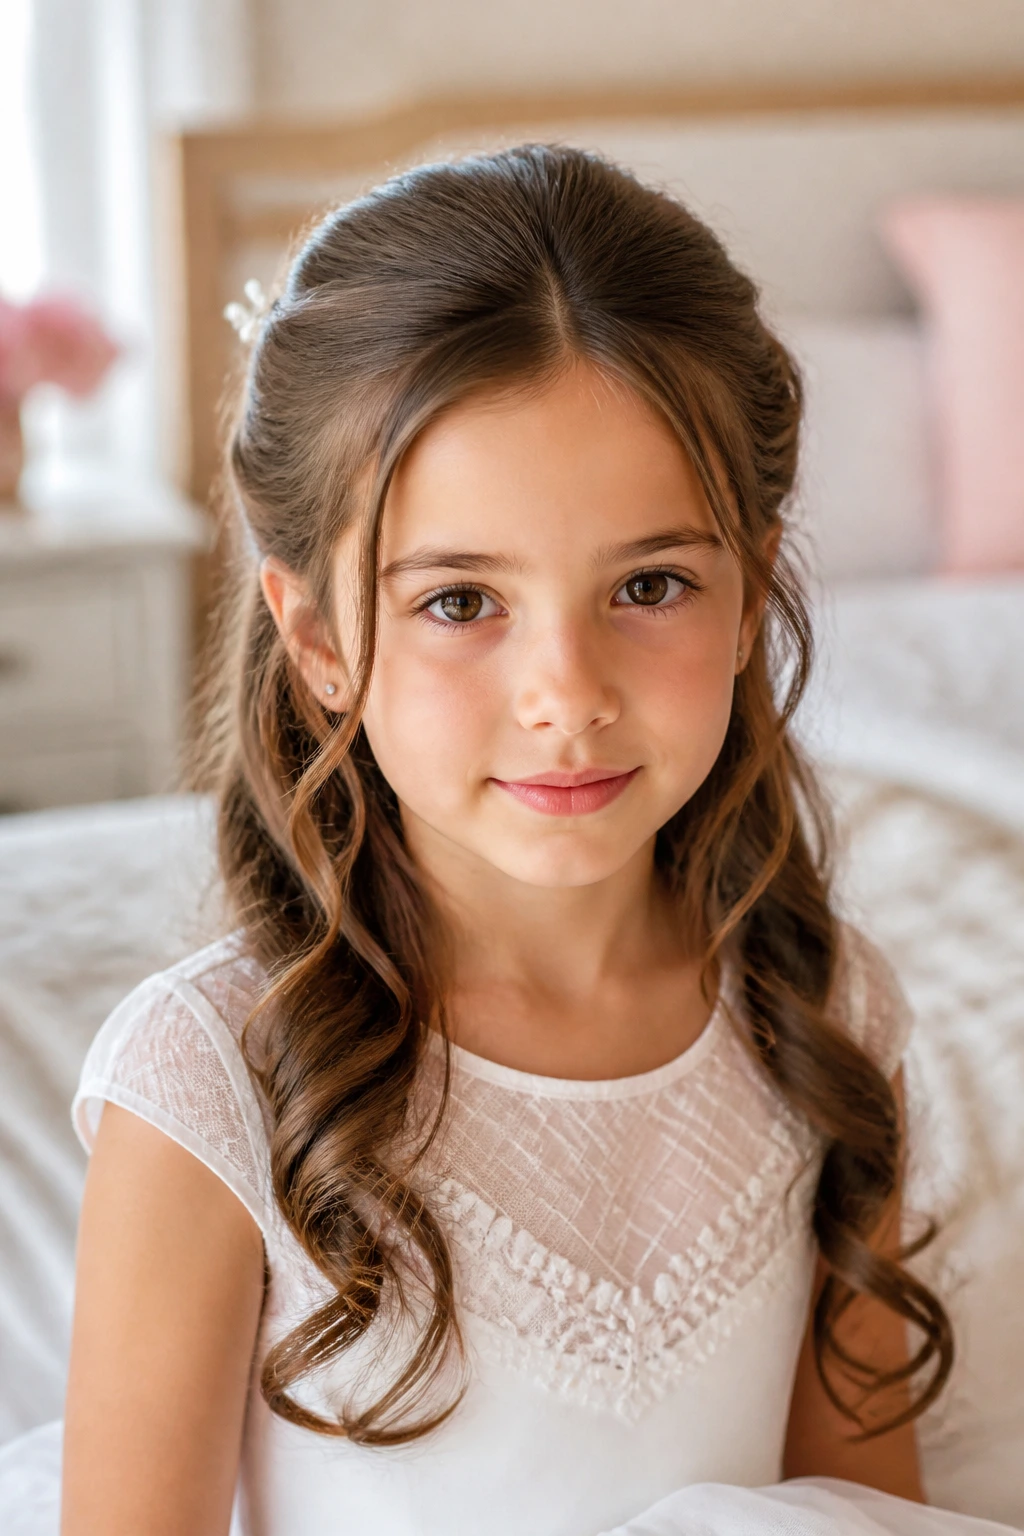
Balanced and respectful: Half-up styles keep the face open for the ceremony, the candle, and the photos, without pushing the hair so far back that it feels severe.
Accessory-friendly: A veil comb, pearl pin, ribbon, or tiny flower cluster has a better anchor in a half-up section than it does in loose hair.
Comfort matters: When the hair isn’t pulled tightly at the temples, kids fidget less. That sounds small. It isn’t.
Photographs well from every angle: Braids, twists, and curls show up from the front, the side, and the back instead of disappearing into one flat mass.
Works for more than one hair type: Fine hair, thick hair, curls, straight hair, shoulder-length cuts, and long lengths can all be shaped into a half-up look with the right prep.
1. Satin Bow Soft Curls
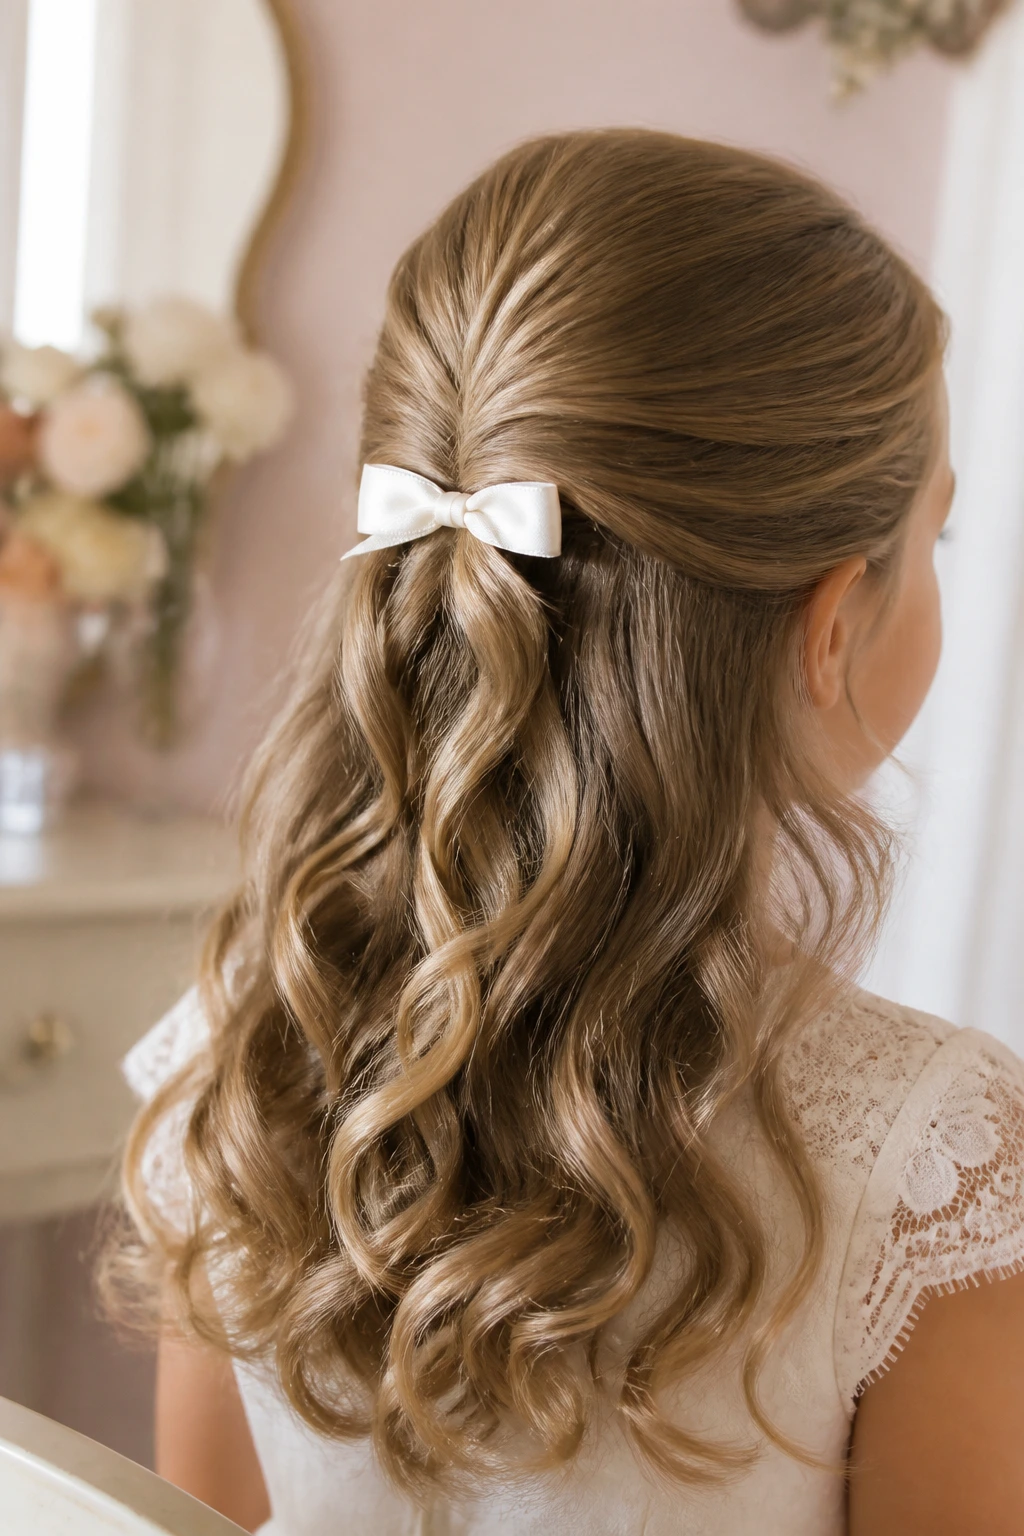
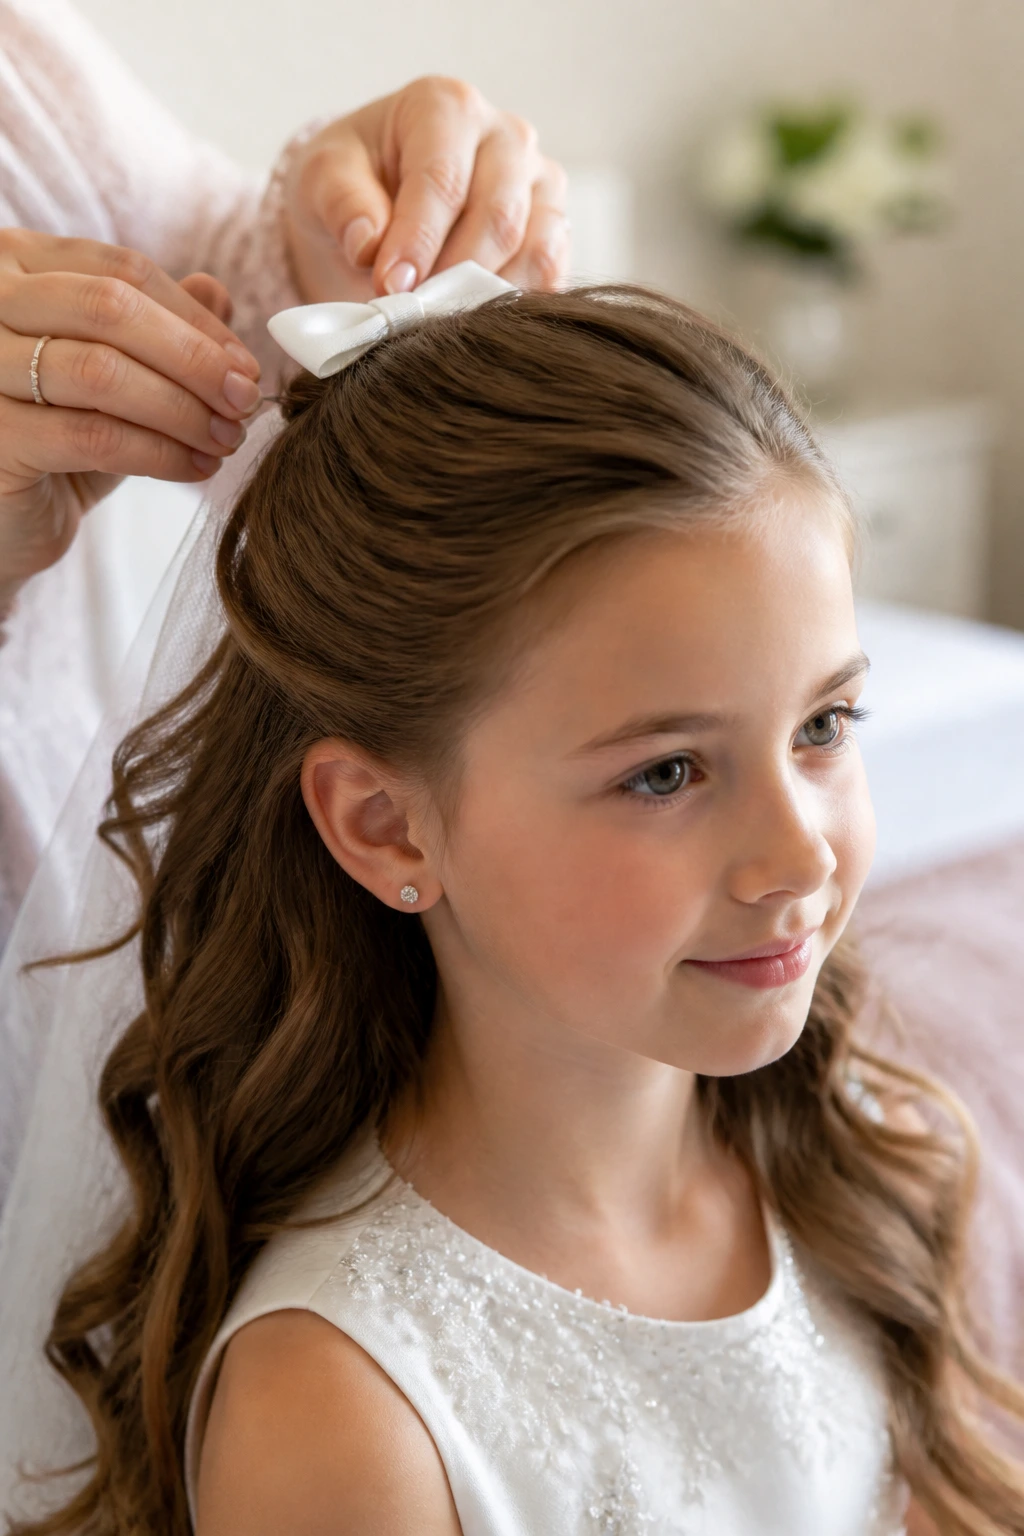
A satin bow at the back of soft curls is the style I reach for when the dress already has the spotlight. It does not fight the outfit. It sits there politely, which is exactly the point. The top section is gently lifted and pinned, then the loose lengths fall in loose curls that move without looking fussy.
The bow should be small enough to feel refined — usually 1½ to 2 inches wide for a child’s hairstyle. Place it just below the half-up section, not right at the crown, so it frames the style instead of swallowing it. If the hair is fine, tease a tiny bit at the crown before pinning. If it is thick, use two crossed bobby pins under the bow so the weight doesn’t drag the top section down.
2. Pearl-Pin Side Twist
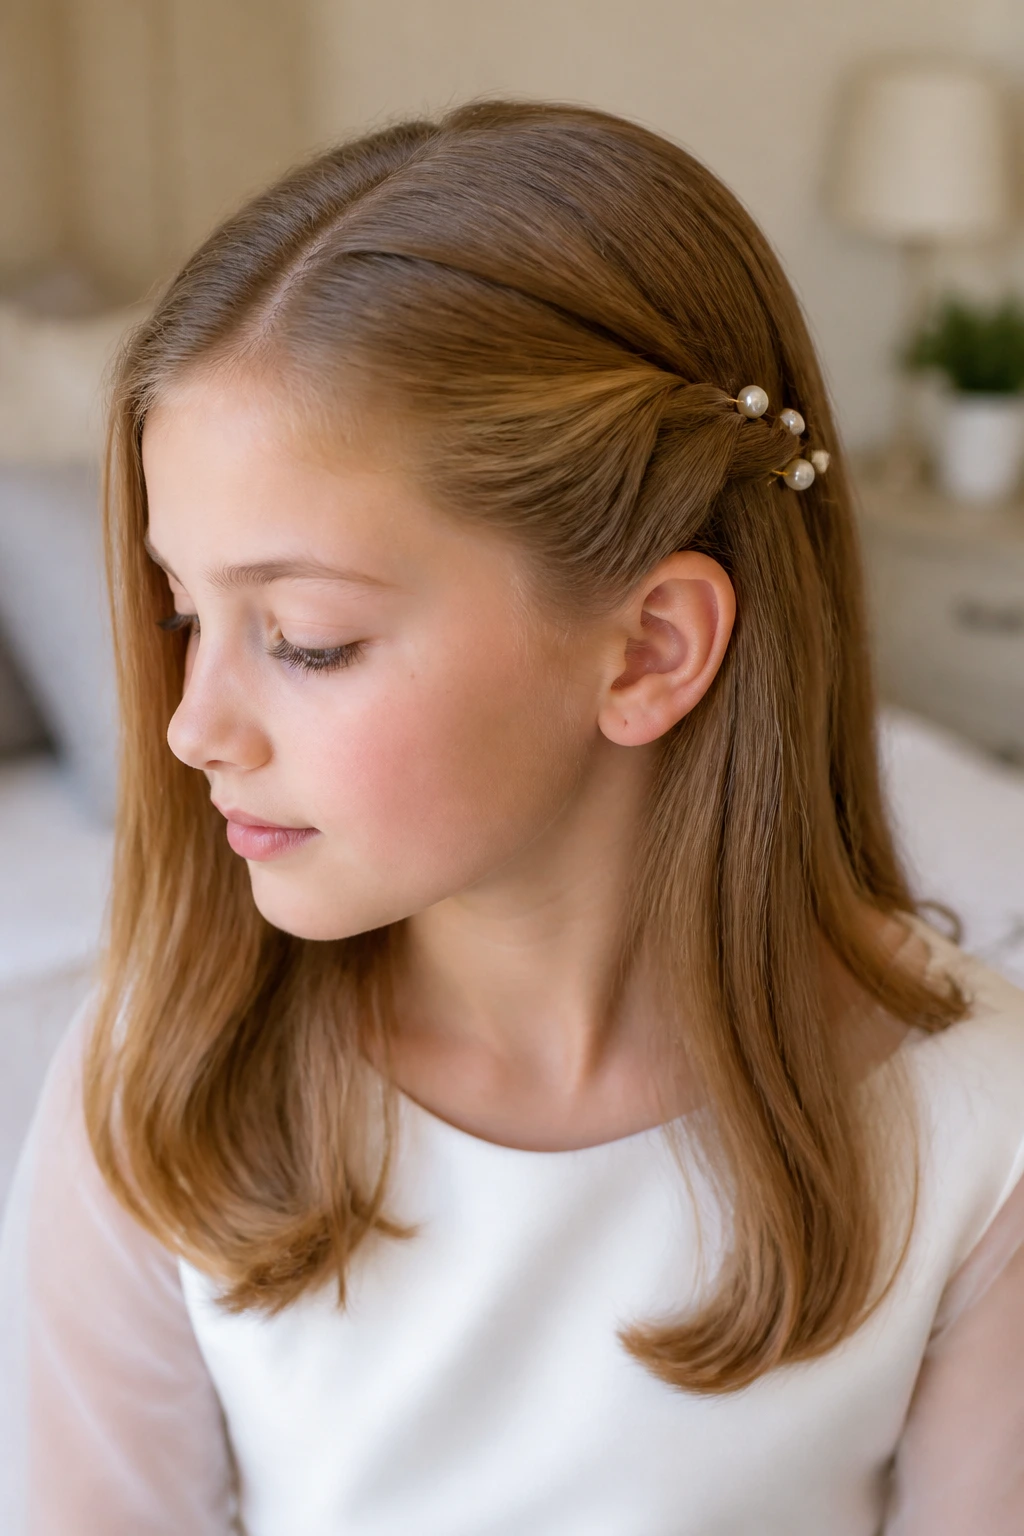
A side twist is one of those styles that looks more elaborate than it is. Pull the front section from one side, twist it back toward the ear, and pin it with three or four pearl-topped pins. Leave the rest of the hair loose and smooth, or soften it with a bend at the ends if the hair is straight.
What makes this one useful is the asymmetry. It keeps the front away from the face without needing a braid across the whole head, and it gives the child a clean side profile for photos. The pearl pins should be small and spaced about half an inch apart. Too many of them starts to look crowded. One good line of pearls is enough.
3. Crown Braid Half-Up
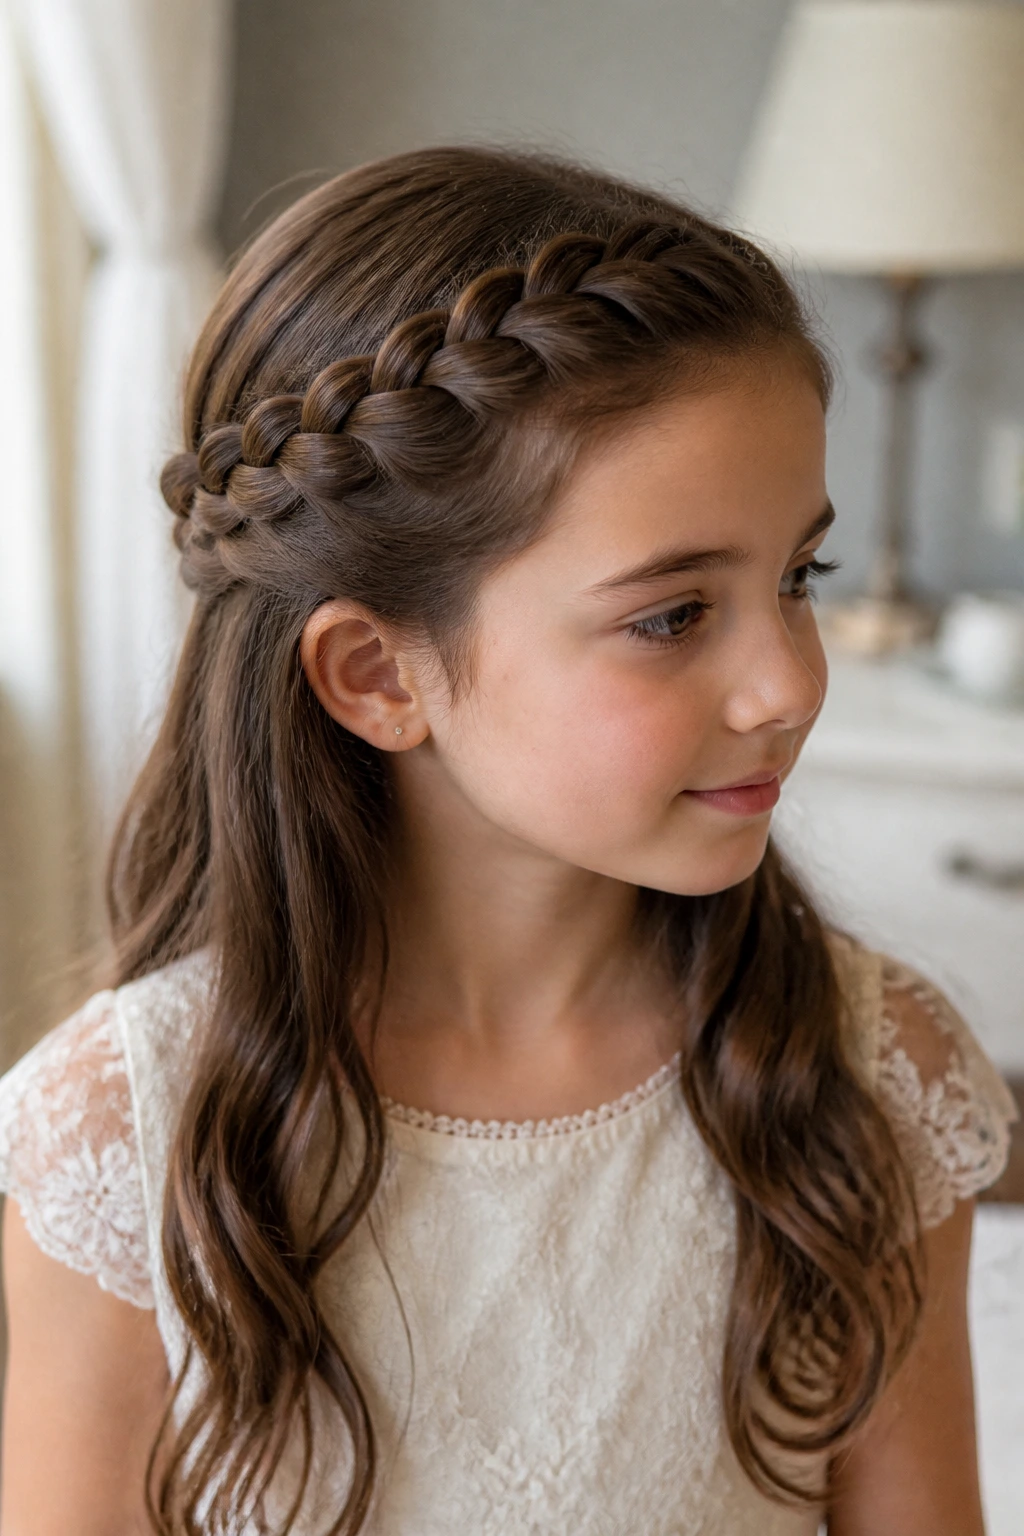
If you want the hair to stay off the face for the entire service, a slim crown braid is hard to beat. It wraps along the top half of the head, usually from one temple to the other, and then disappears into the loose hair at the back. The result feels secure without looking heavy.
Why it flatters the face
The braid creates a neat frame right where hair usually escapes — across the forehead and around the temples. That means fewer flyaways and fewer little adjustments during the day. It also gives the hairstyle structure from the front, which matters more than people think. A braid that is too thick can overwhelm a child’s features, so I like this one best when the braid is kept narrow and the loose ends are left soft.
4. Waterfall Braid with Loose Ringlets
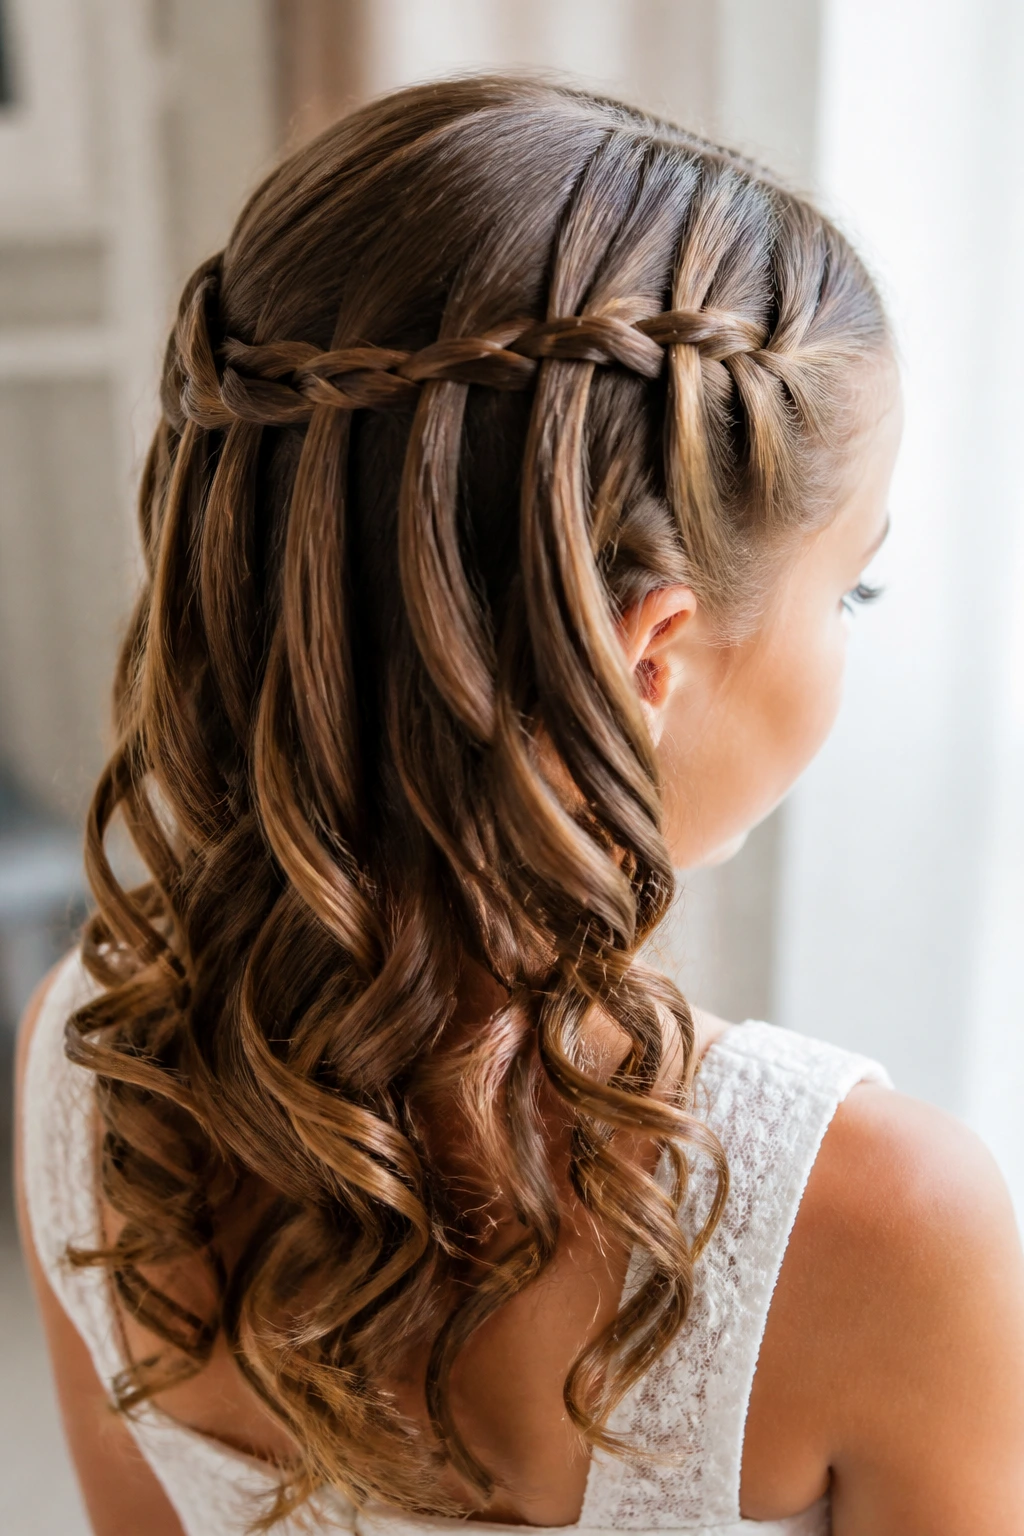
A waterfall braid looks like woven hair with little sections dropping through it, and that movement is what makes it pretty in photos. It works best on medium to long hair because the braid needs enough length to show the pattern. Once the braid is secured across the back of the head, the remaining hair can be curled into ringlets or loose spirals.
This style rewards a little practice. Don’t rush the braid, and don’t stretch the sections too hard or it turns clunky. The drops should look even, not forced. A light mist of texture spray on the top layer helps the braid grip better, especially if the hair is slippery or freshly washed.
5. Ribbon-Woven Half-Up Braids
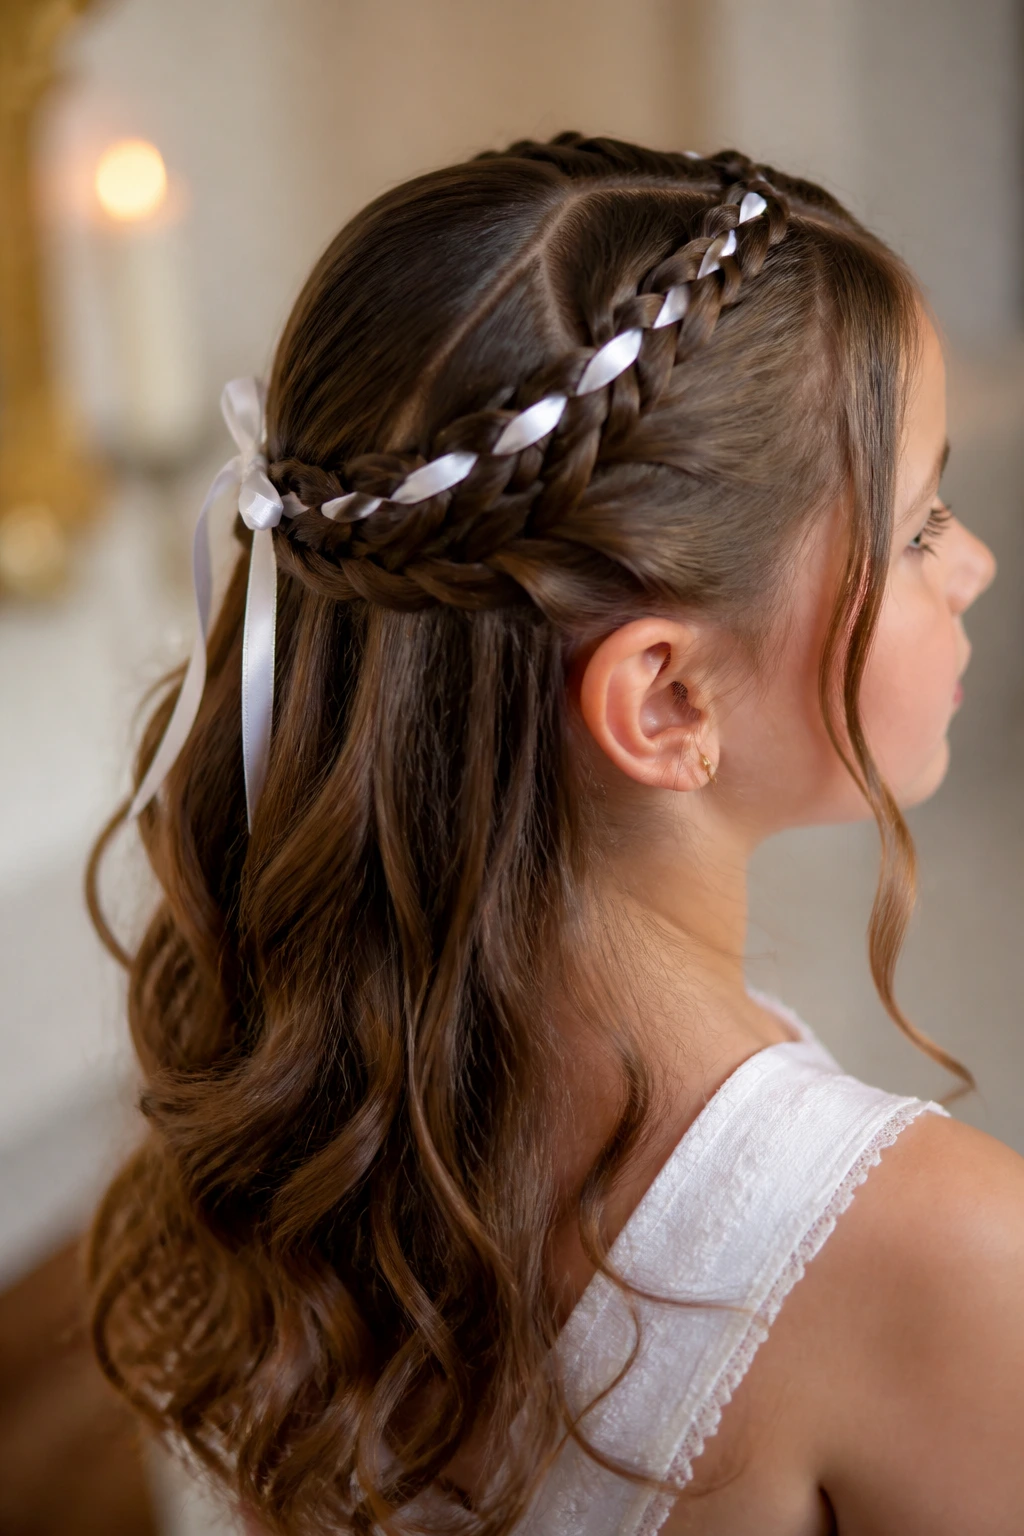
Ribbon woven through a small braid has a sweetness that feels right for First Communion without tipping into overdone territory. Use a narrow satin or grosgrain ribbon and feed it through one or two slim braids pulled from the crown. Match the ribbon to the dress trim, sash, or shoes if you want the outfit to feel pulled together.
This one is especially nice when the dress is simple and needs one soft detail near the hairline. The ribbon should be flat enough to lie inside the braid, not bulky enough to puff it apart. I prefer ribbon that’s about ¼ inch wide. Wider than that and the braid can start looking packed instead of delicate.
6. Bubble Braid Half-Up
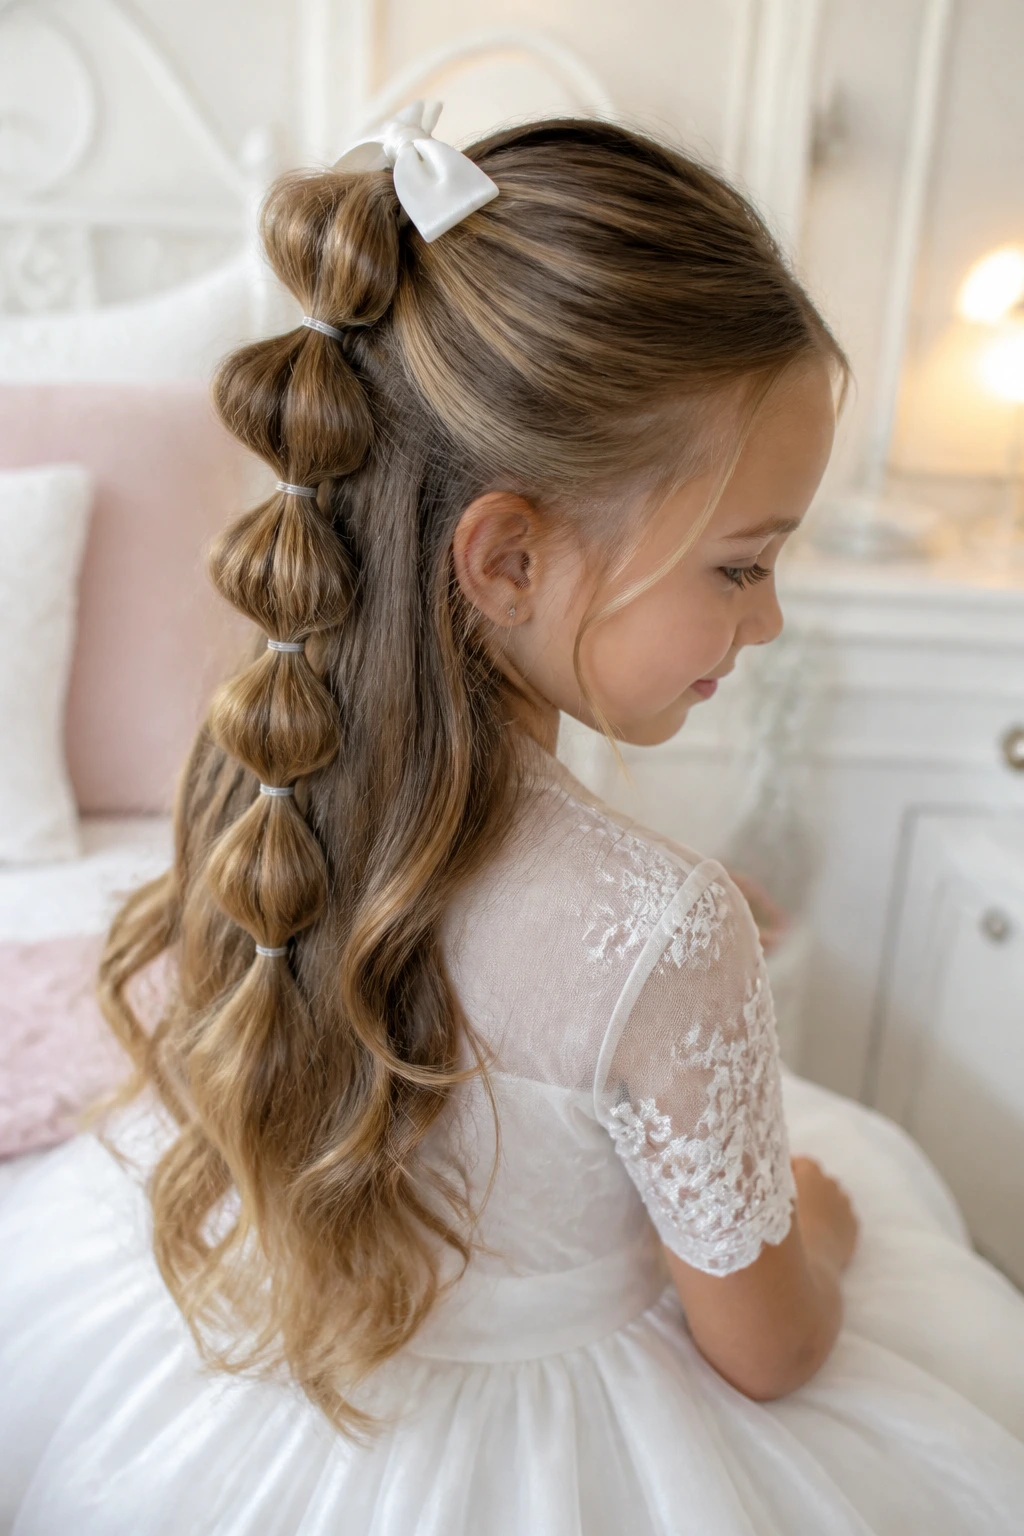
Bubble braids are one of the easiest ways to make a half-up style look deliberate with almost no complicated handwork. Gather the top section into a small ponytail, then place tiny clear elastics every 1 to 1½ inches down the length. Gently pull each section outward so it forms rounded “bubbles.”
The charm here is in the shape, not the tightness. Keep the bubbles even, but not overinflated. If the hair is very fine, pinch a little texture into each section before spacing the elastics. A bubble braid also plays nicely with a small bow at the first elastic, which gives the whole style a tidier finish.
7. Fishtail Accent Half-Up
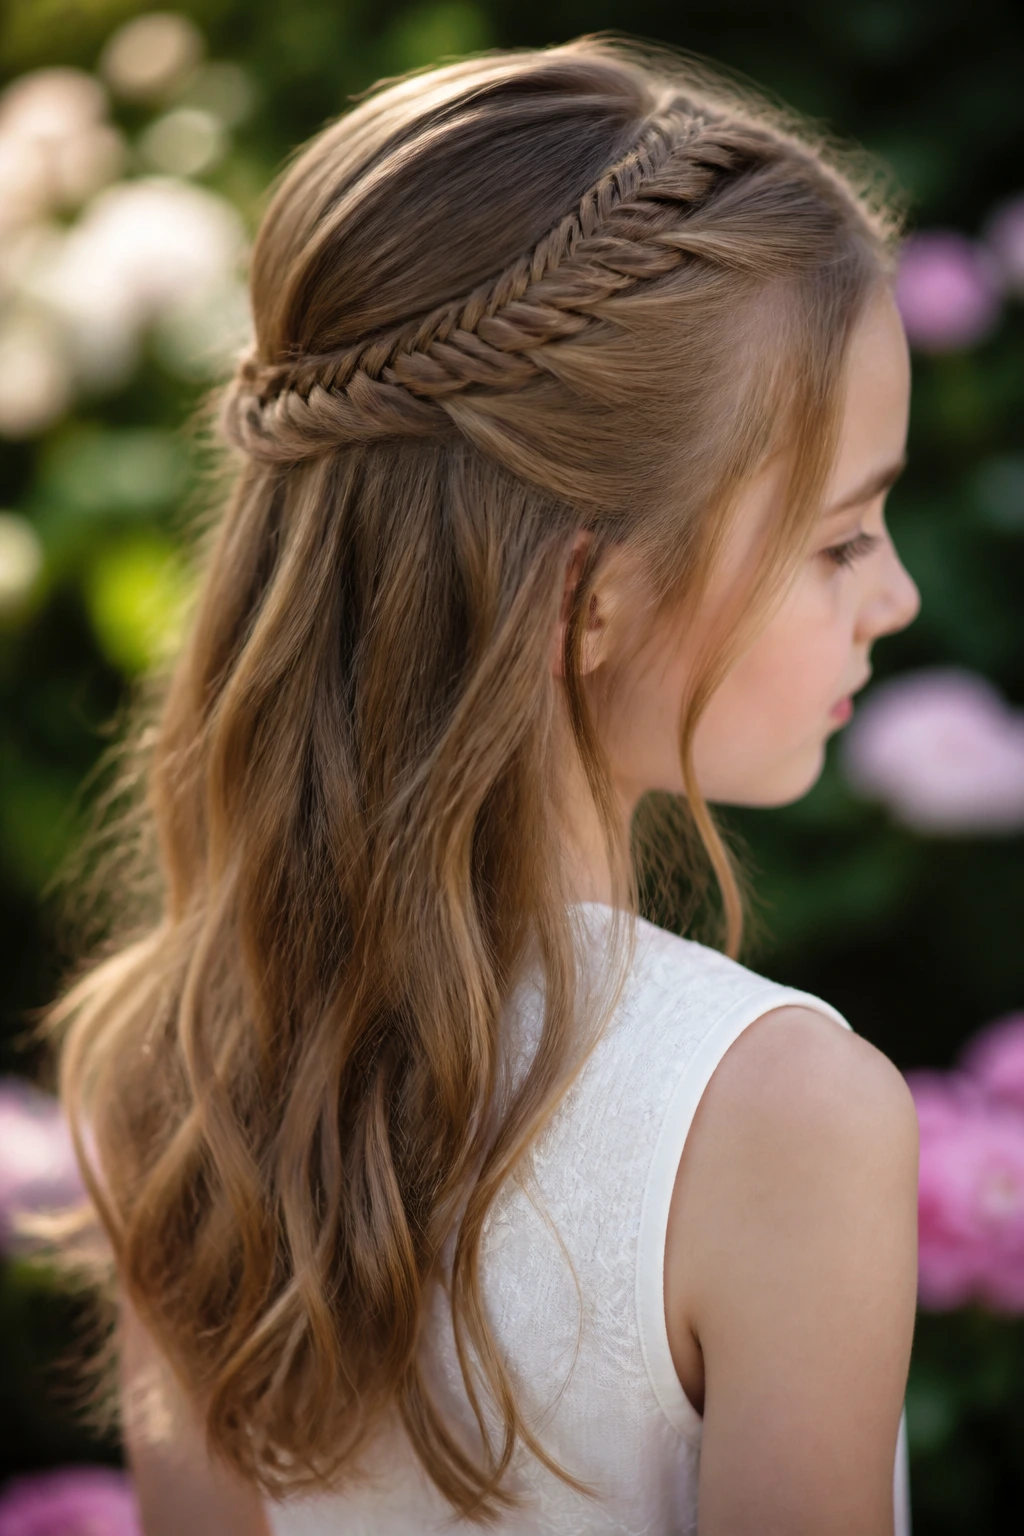
A fishtail accent braid adds detail without taking over the whole head. Pull a small half-up section from the crown, split it into two parts, and weave tiny strands across from one side to the other. It takes a bit longer than a regular braid, but the result has that fine, woven texture that reads beautifully in close-up photos.
Best on hair that is at least shoulder length, this style works especially well when the rest of the hair is left in soft waves. The braid itself should stay narrow. If it gets too wide, it starts to look bulky against a child’s face. A little shine serum on the ends can keep the loose hair looking smooth next to the tighter braid.
8. Mini French Braids into a Back Clip
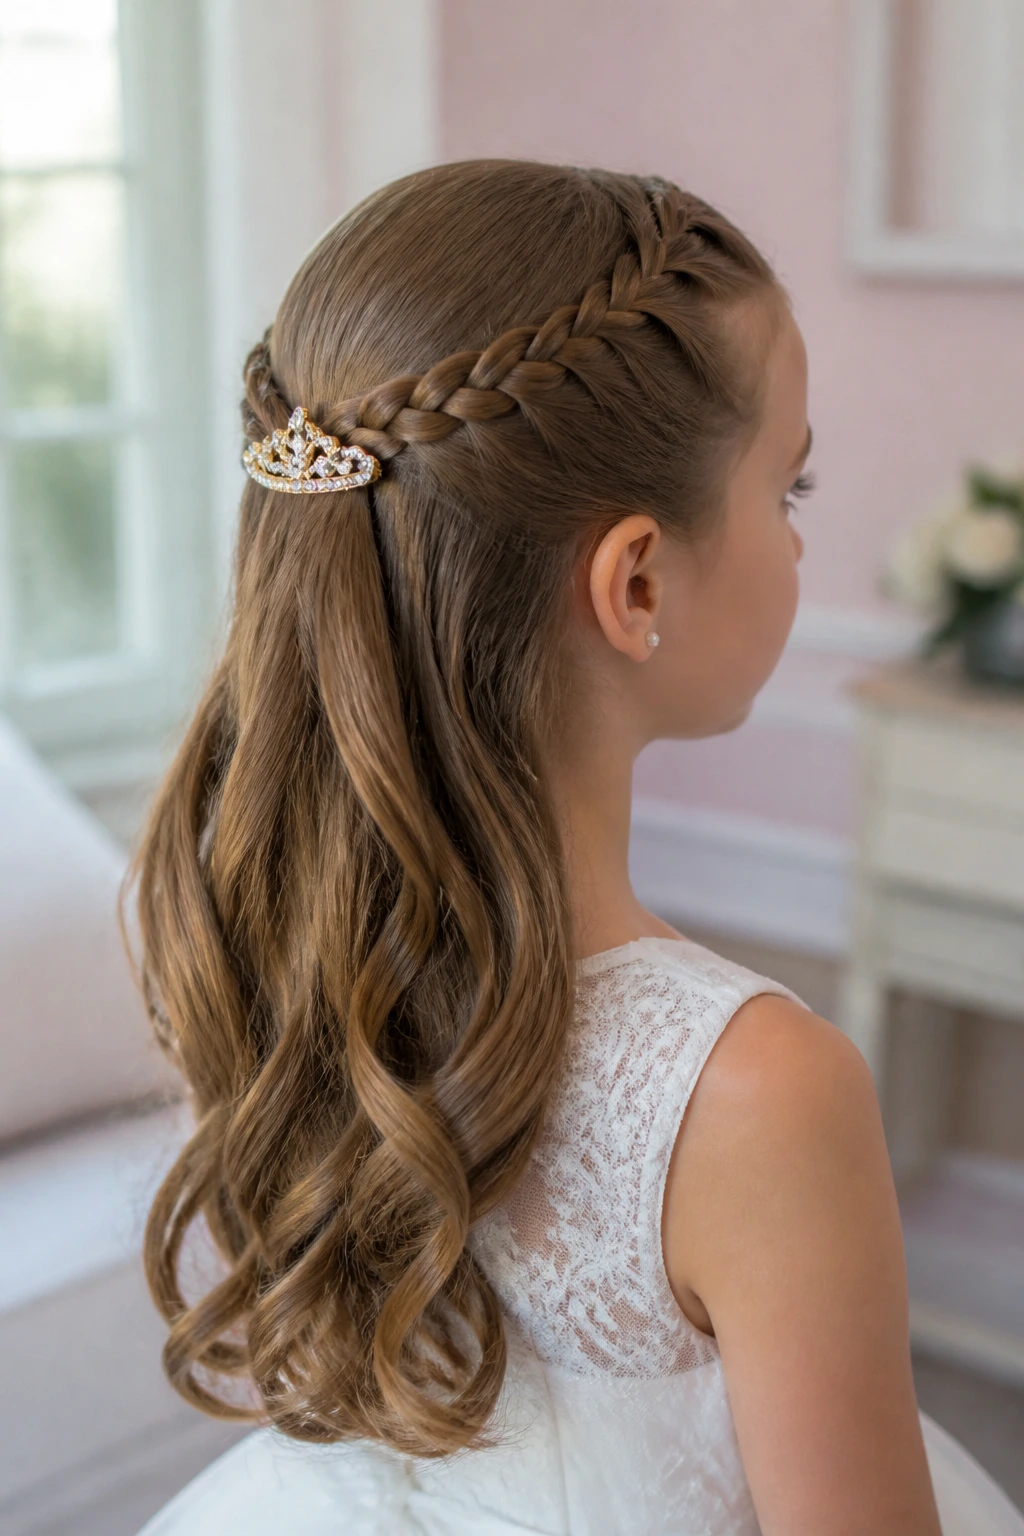
This is the style I choose when I want the front to stay put all morning. Make two tiny French braids from the temples, angle them back, and meet them under a barrette or clip at the back of the crown. The loose hair underneath can stay straight, curled, or lightly bent at the ends.
It’s a practical style, which sounds plain until you see how nice it looks. The braids keep the hairline tidy, and the clip becomes the focal point instead of a scramble of loose pins. A small ivory barrette, pearl clip, or satin-covered clasp works best. Anything oversized takes the style away from the child’s face and into costume territory.
9. Rope-Twist Half-Up
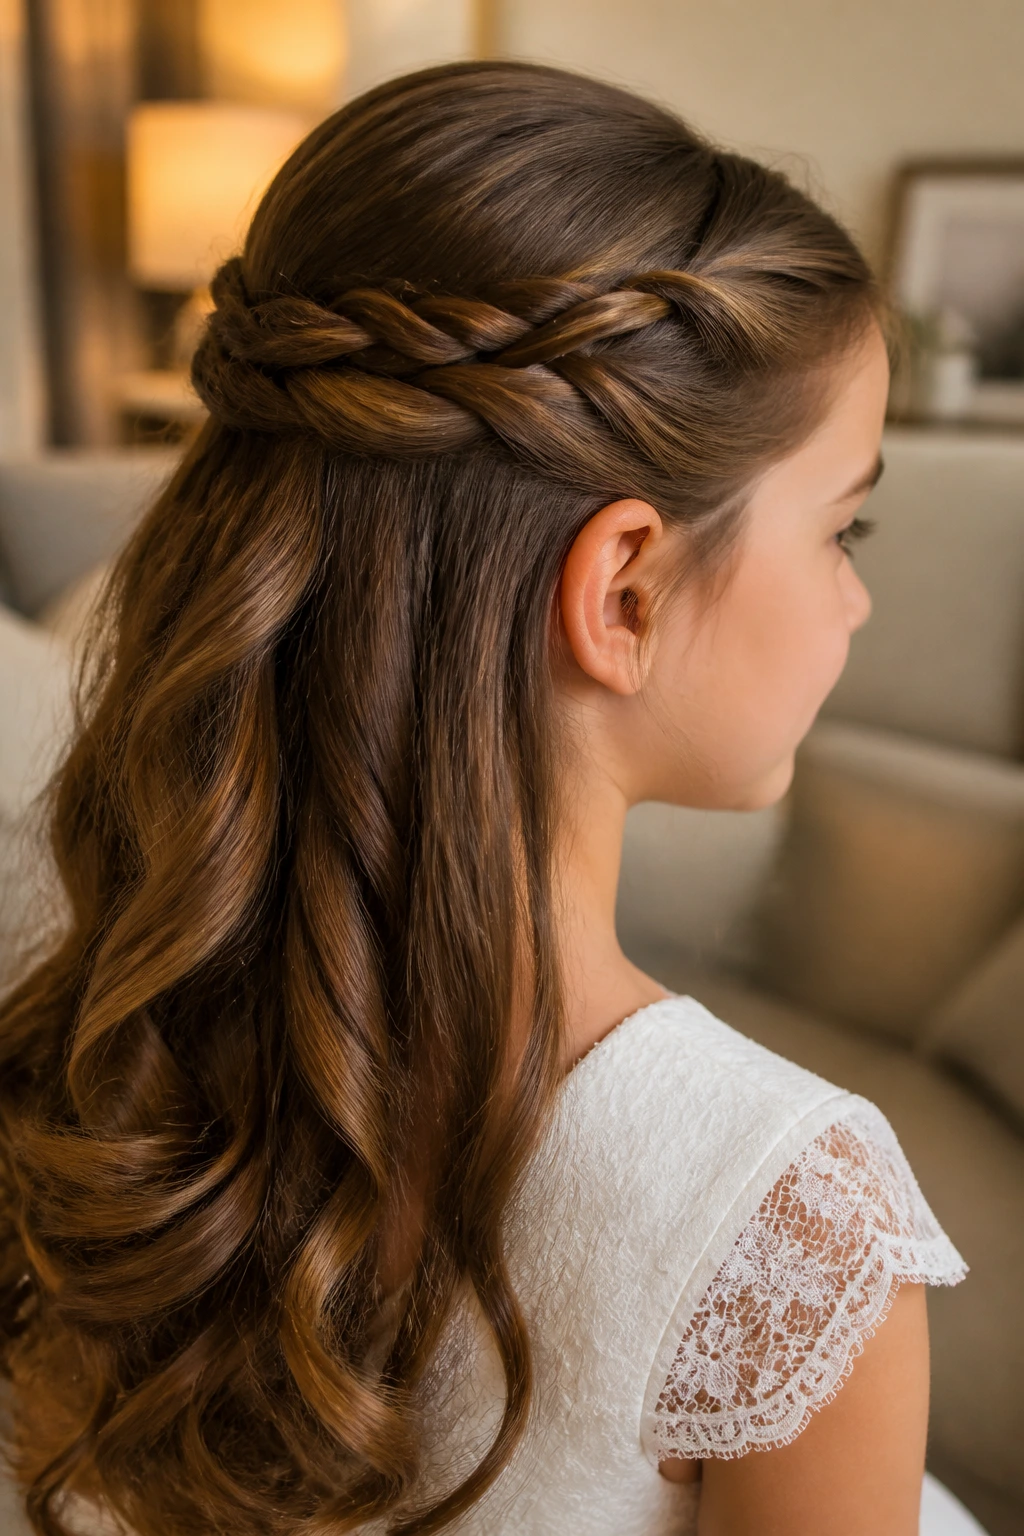
Rope twists are underrated. They’re faster than braids, they lie flat against the head, and they hold well when pinned correctly. Split the half-up section into two pieces, twist each one in the same direction, then wrap them together in the opposite direction. Secure the end with a small elastic and pin the twist flat into the back section.
This style is especially kind to curly or wavy hair because it lets the texture do some of the work. You do not need every strand to behave like a ribbon. The twist should look smooth but not stiff, and a light spritz of flexible hairspray is enough. I’d skip heavy wax unless the hair is very slippery.
10. Floral Pin Half-Up
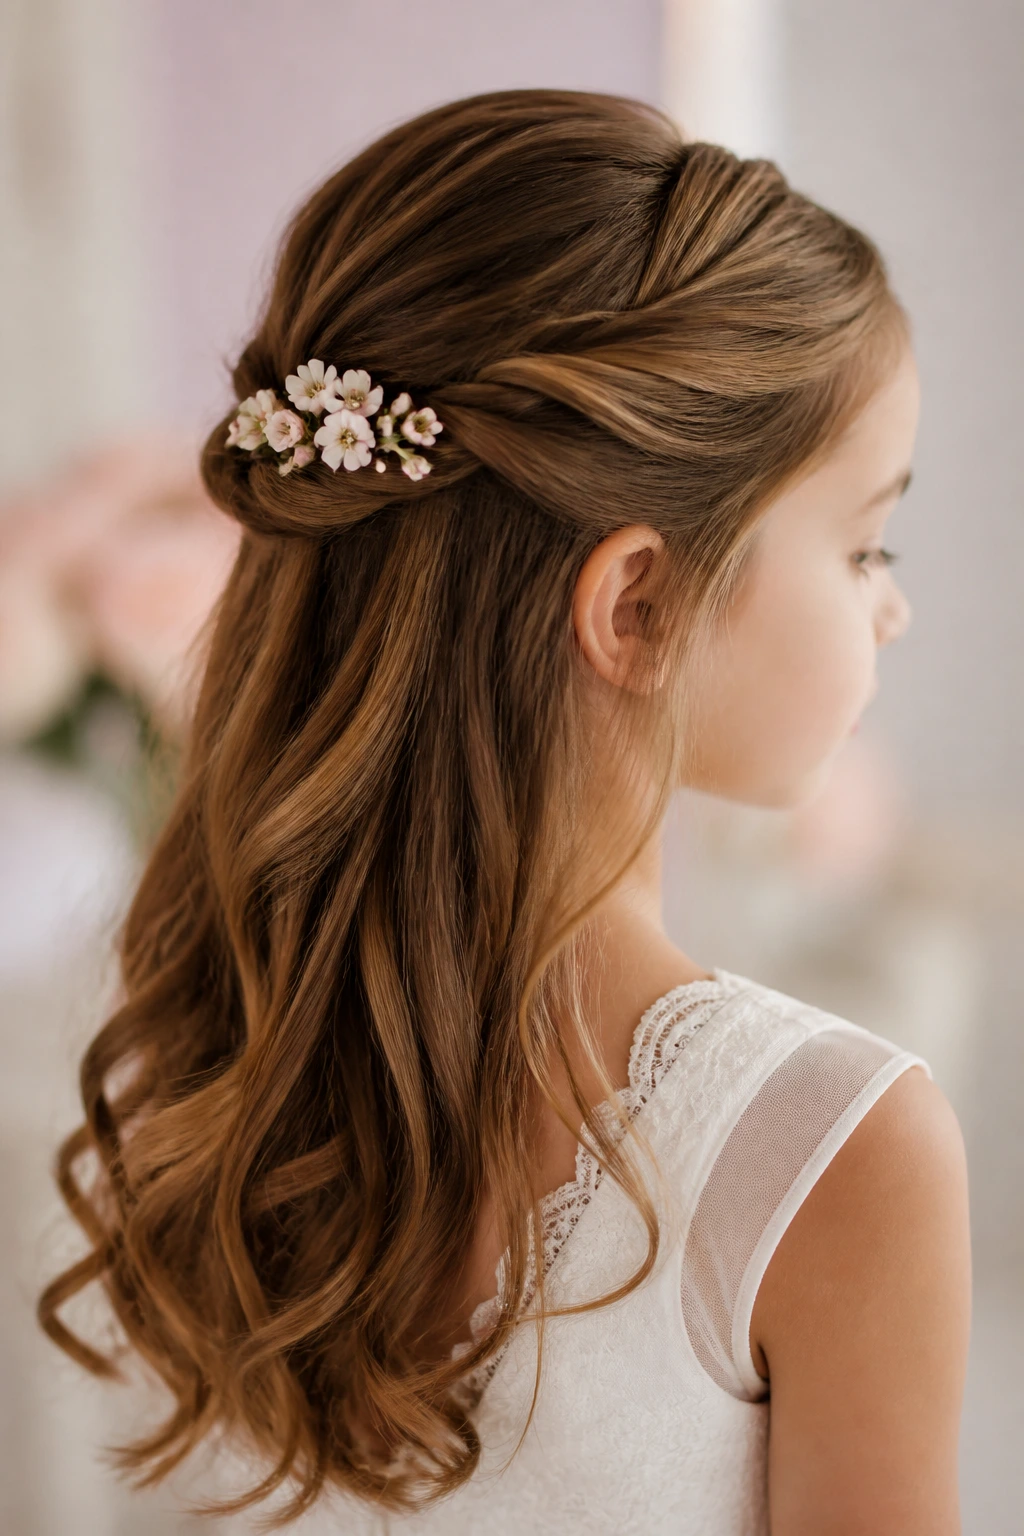
Tiny flowers tucked into a half-up twist can be lovely when the dress is simple and the hair needs a soft focal point. Think small silk blossoms, not a flower crown that takes over the whole head. Pin the flowers around the gathered section, usually just off-center, and let the loose hair fall cleanly around them.
Fresh flowers can work too, but they need more care. Silk blooms are less fragile, they don’t bruise, and they stay put through the service and family pictures. If you use fresh flowers, choose sturdier stems and keep them small. A single spray of baby’s breath or a couple of tiny roses is usually enough.
11. Veil-Ready Half-Up with a Center Sweep
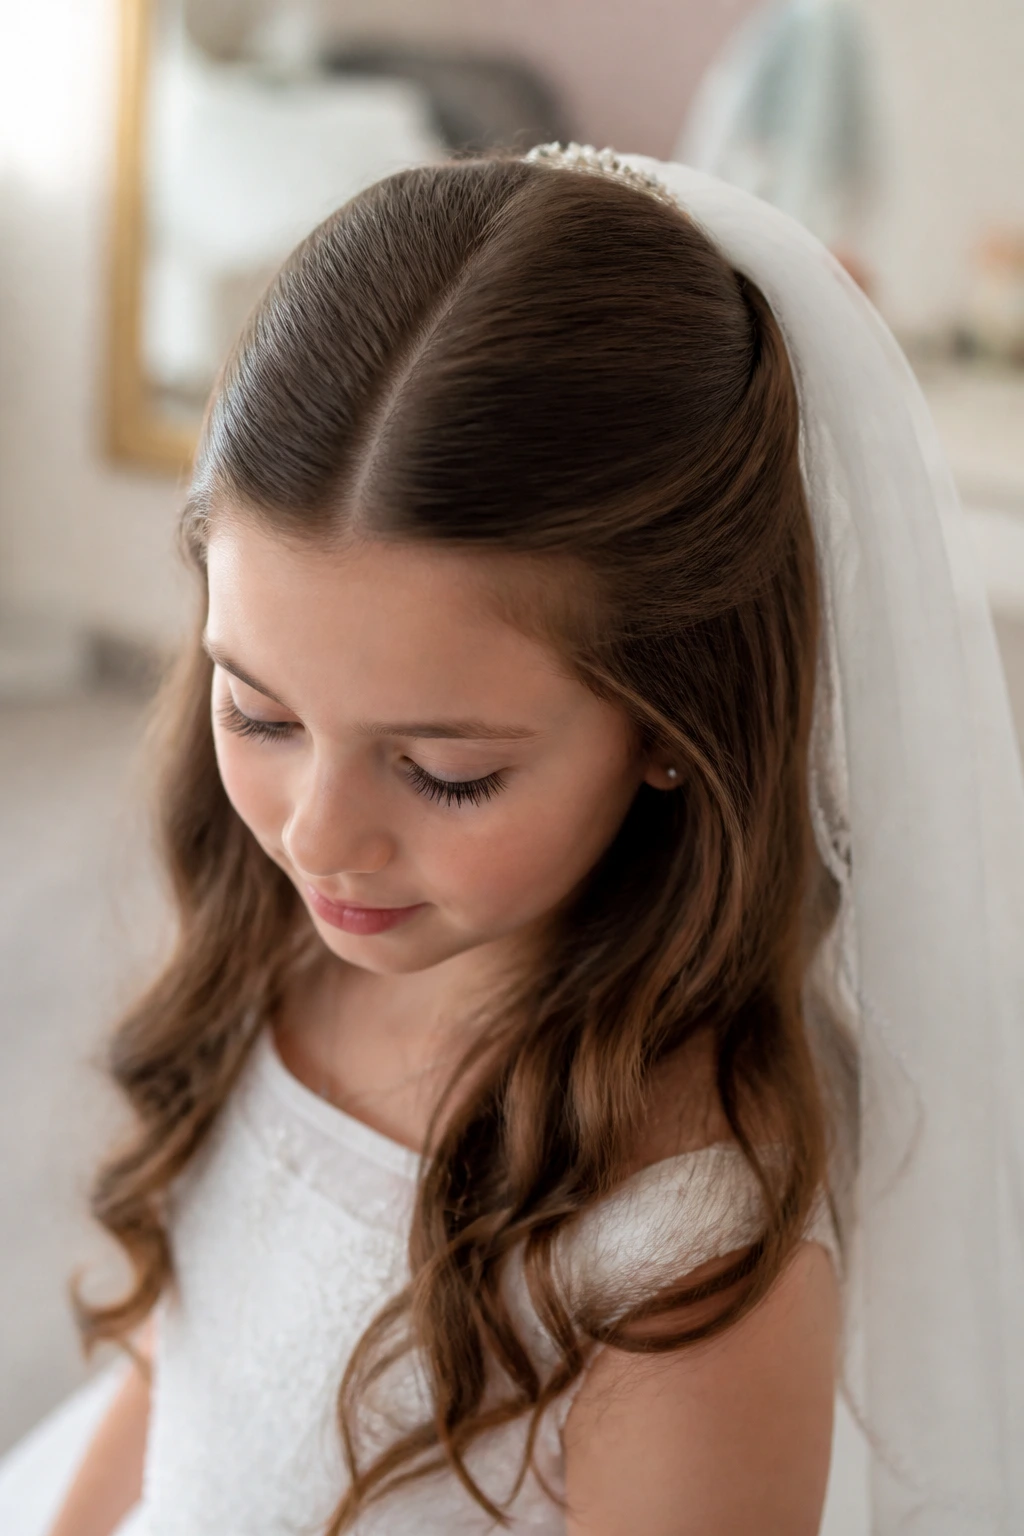
Some styles are built around the veil, and this is one of them. The top section is swept back smoothly with a clean center or soft off-center part, then pinned low enough that the veil comb can sit just above it without fighting for space. The loose hair below can be curled lightly or left with a natural bend.
The big advantage is that the veil sits flat. That matters. If the crown is too bulky, the comb tips, and the whole thing starts slipping during movement. I like to place the veil comb after the hairstyle is pinned and then check it from both sides. If it sticks out, the hair beneath needs to be smoothed down a little more.
12. Half-Up for Natural Curls with a Defined Crown
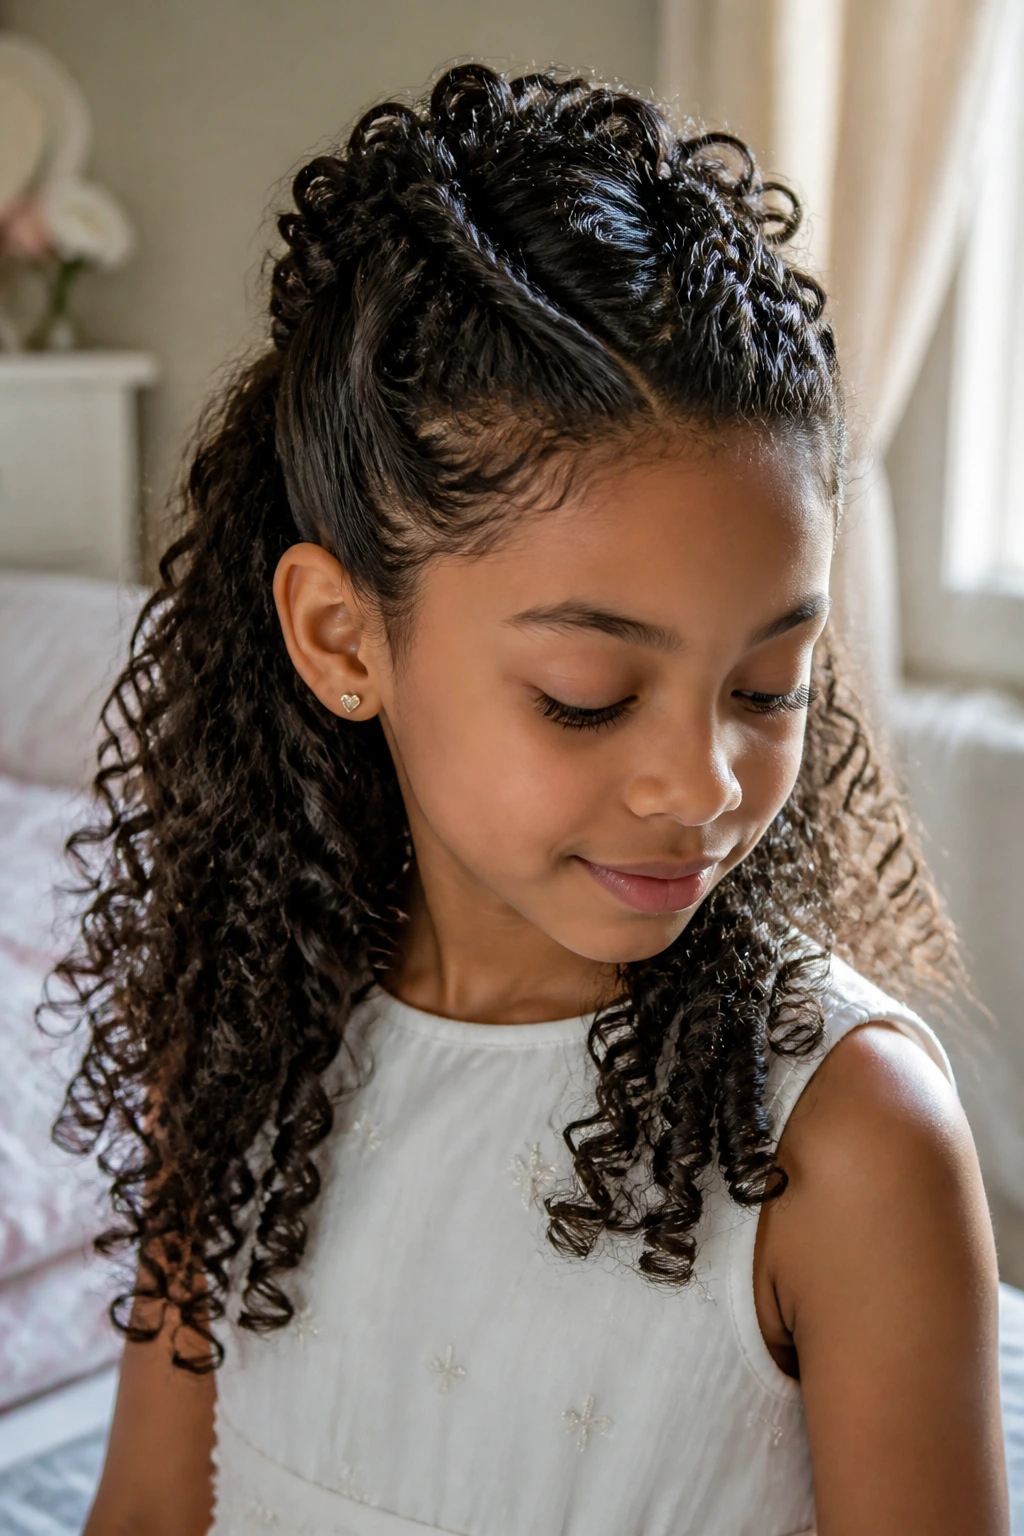
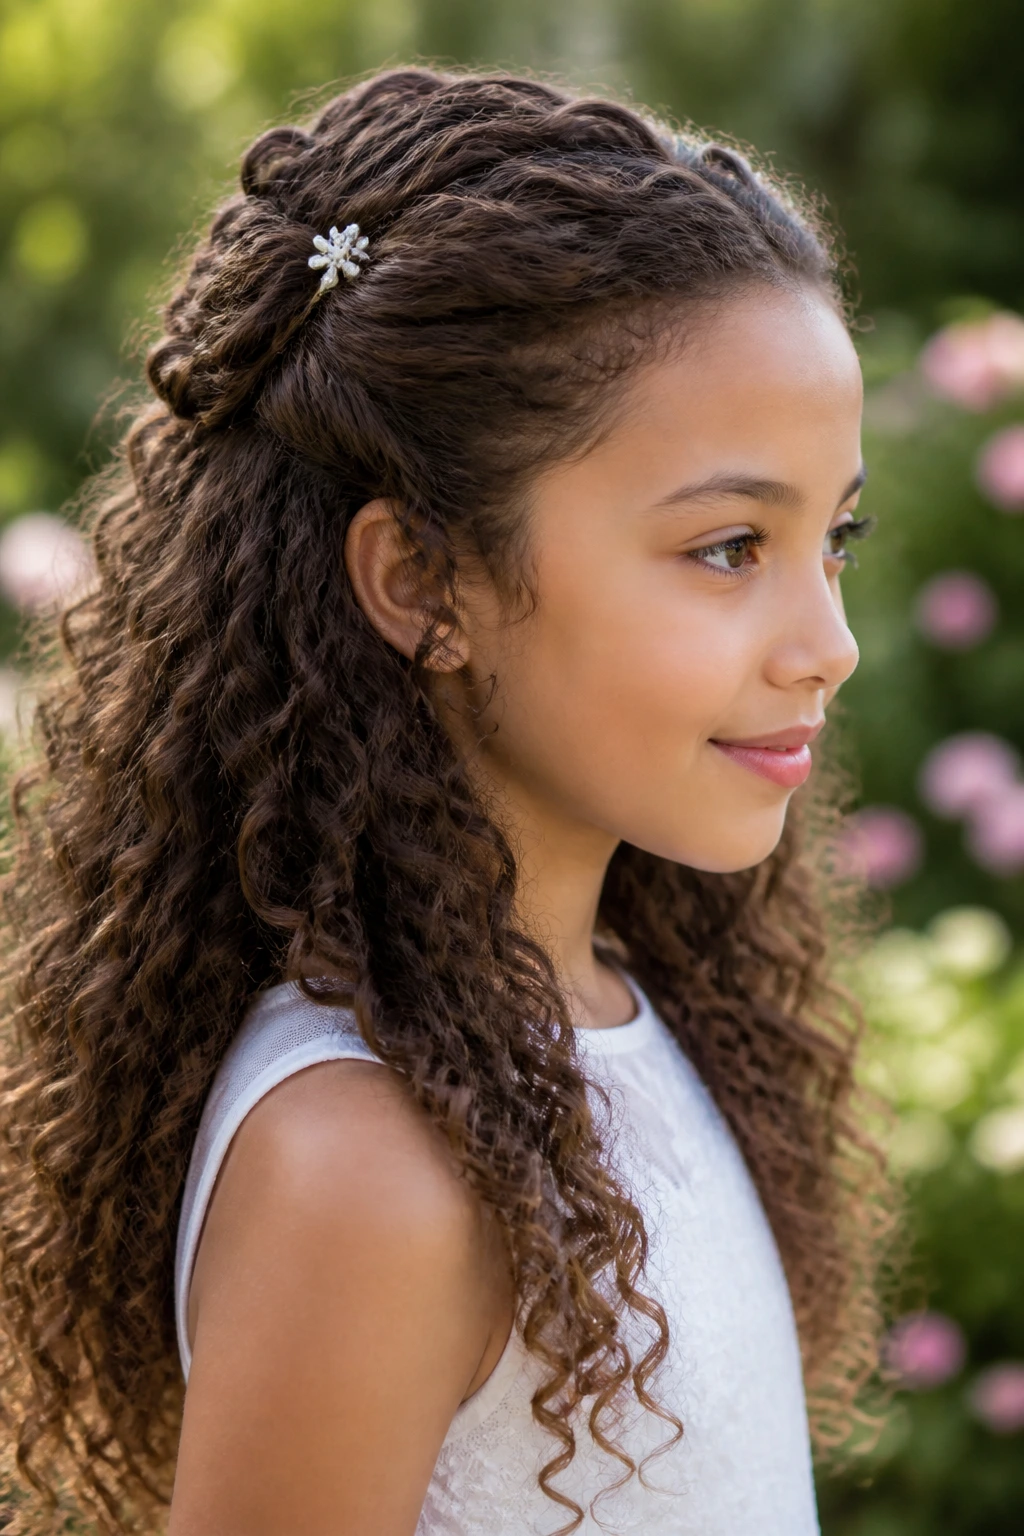
Natural curls do not need to be talked into being what they already are. This style starts with defined curls at the front and crown, then gathers just enough hair to keep the face open. The back stays full and curly, which gives the style shape without flattening the texture.
A curl cream or leave-in conditioner on damp hair will help the curls clump in a clean way. Let the hair dry fully before you pin anything. If the crown is still damp, the pins loosen later. I also like to use a handful of small pins instead of one big clip here; they disappear better into the curl pattern and hold more securely.
13. Braided Headband Half-Up
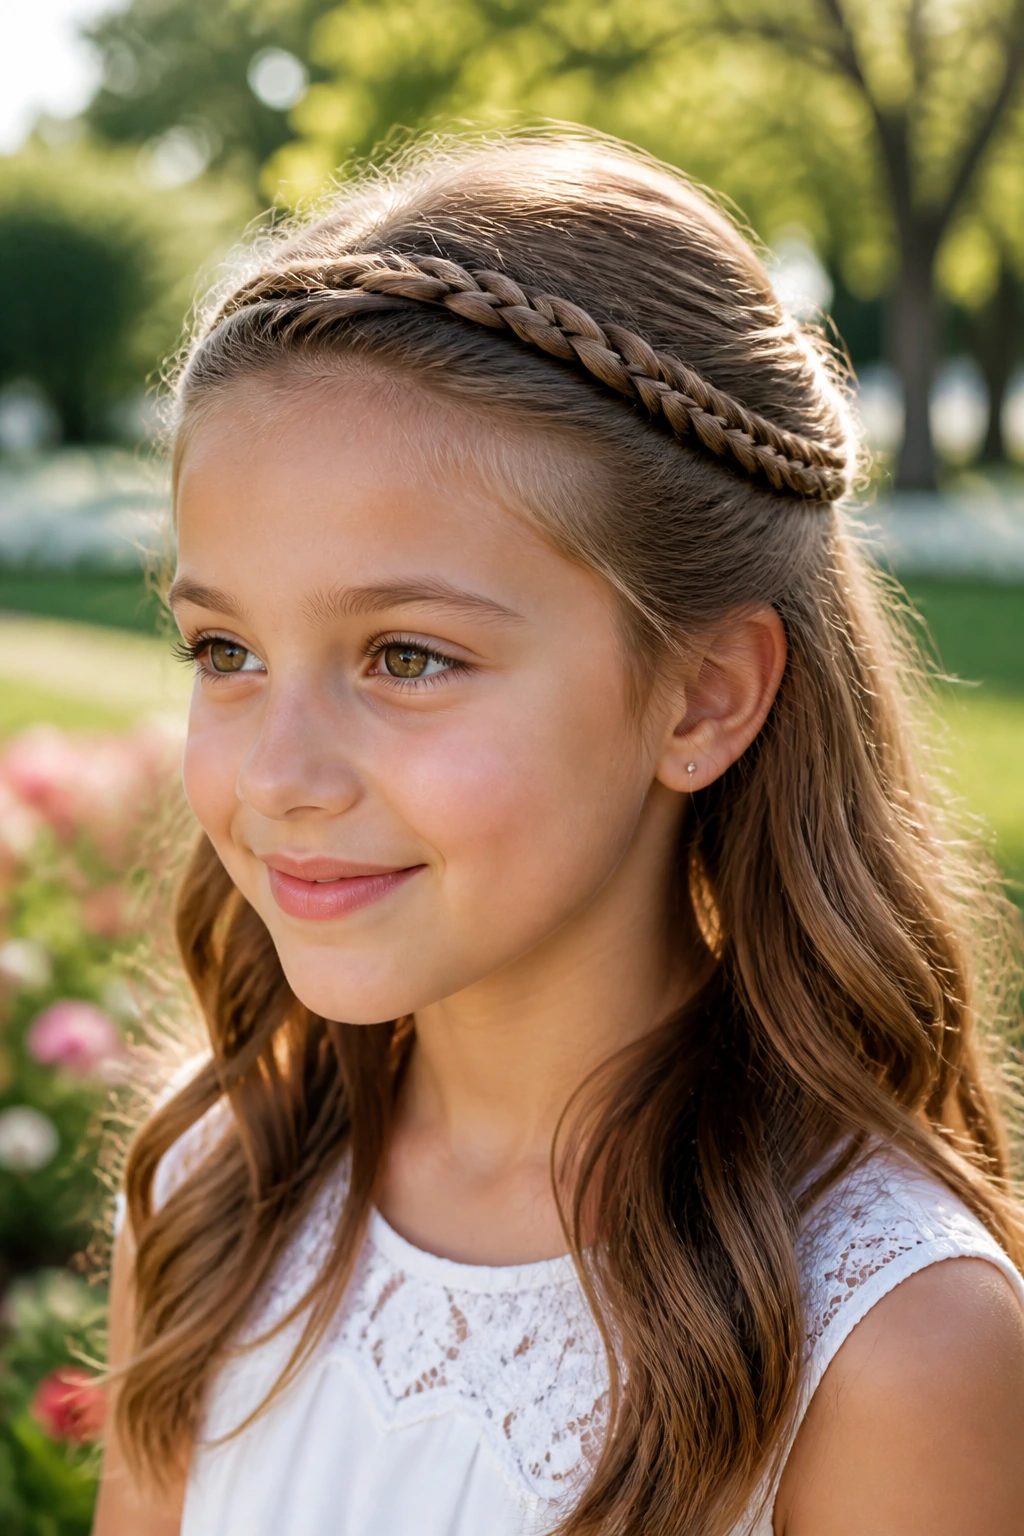
A braided headband is one of the neatest choices for hair that tends to fall into the eyes. Create a braid from one side of the head and sweep it across the front hairline like a headband, then pin it behind the opposite ear. The hair below can stay loose and softly waved.
This is a smart style when the child has shorter front layers or wispy pieces that never stay in place. It gently controls the front without looking severe. If the dress neckline is simple, the braid can be a little more visible. If the outfit already has lace or embroidery, keep the braid slim so the whole look doesn’t compete with the dress.
14. Half-Up Bow Knot
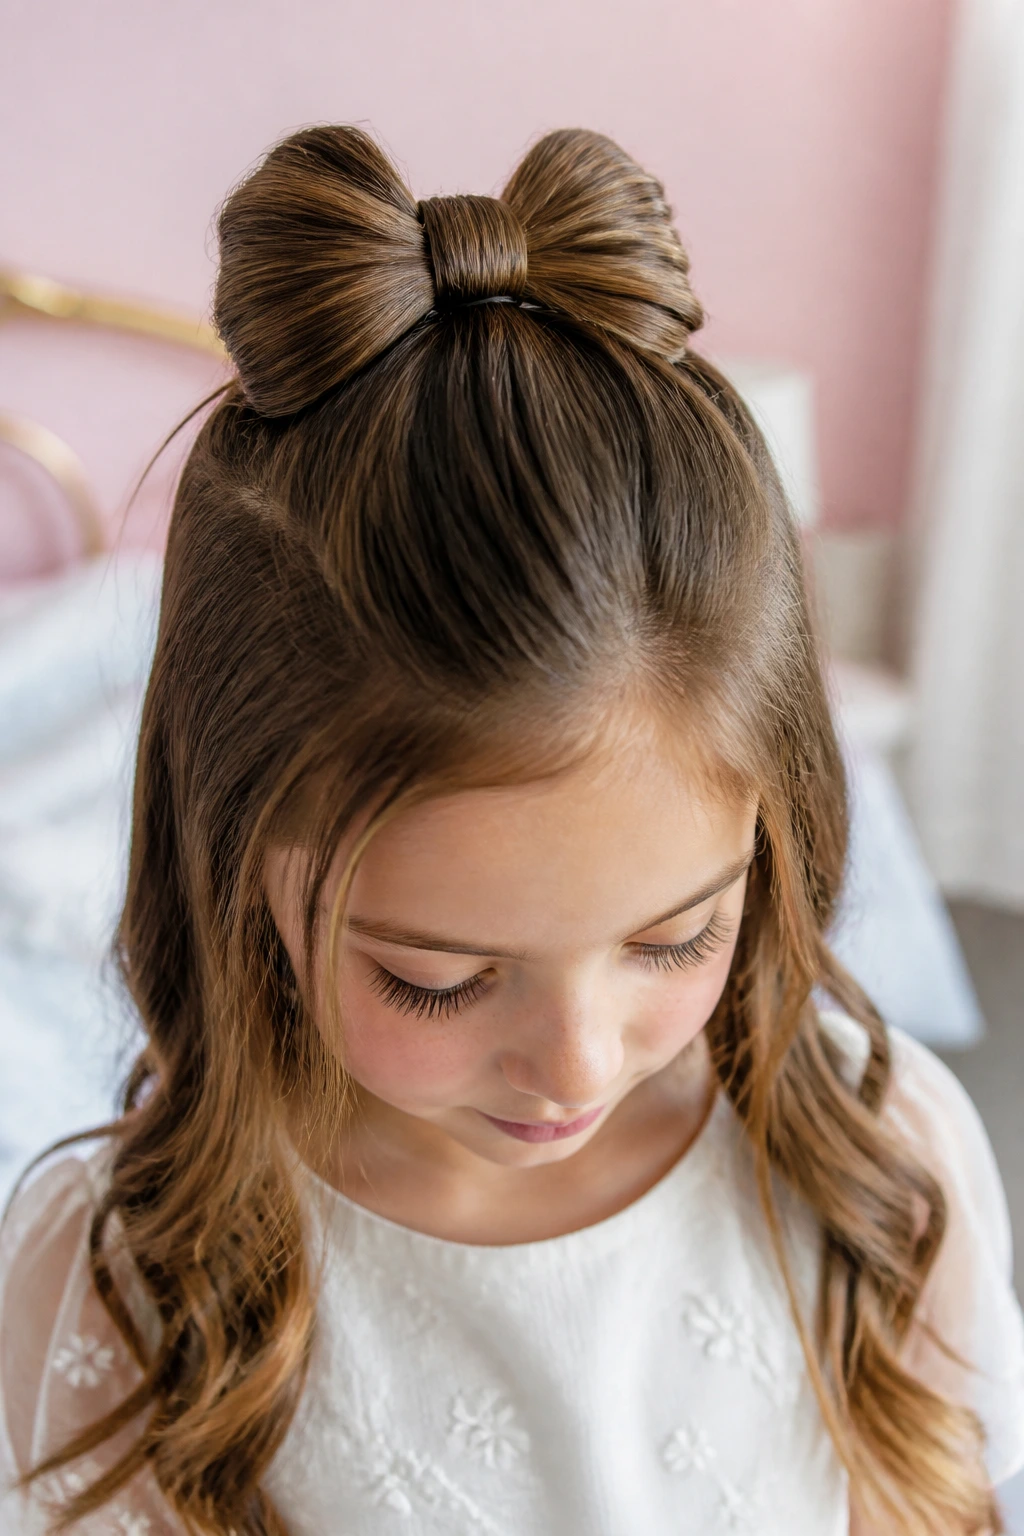
A bow knot made from the hair itself feels playful without turning childish. The top section is gathered, folded into a small bow shape, and pinned at the center back. A tiny ribbon can hide the middle if the hair is fine or if you want a softer finish.
This style needs decent length in the top section, but it doesn’t require a long head of hair. What it does need is careful pin placement. The “loops” of the bow should sit snugly against each other so they do not sag by the end of the service. If the hair is very thick, split the section in half first; trying to force one huge bow usually ends in frustration.
15. Pearl Comb Half-Up
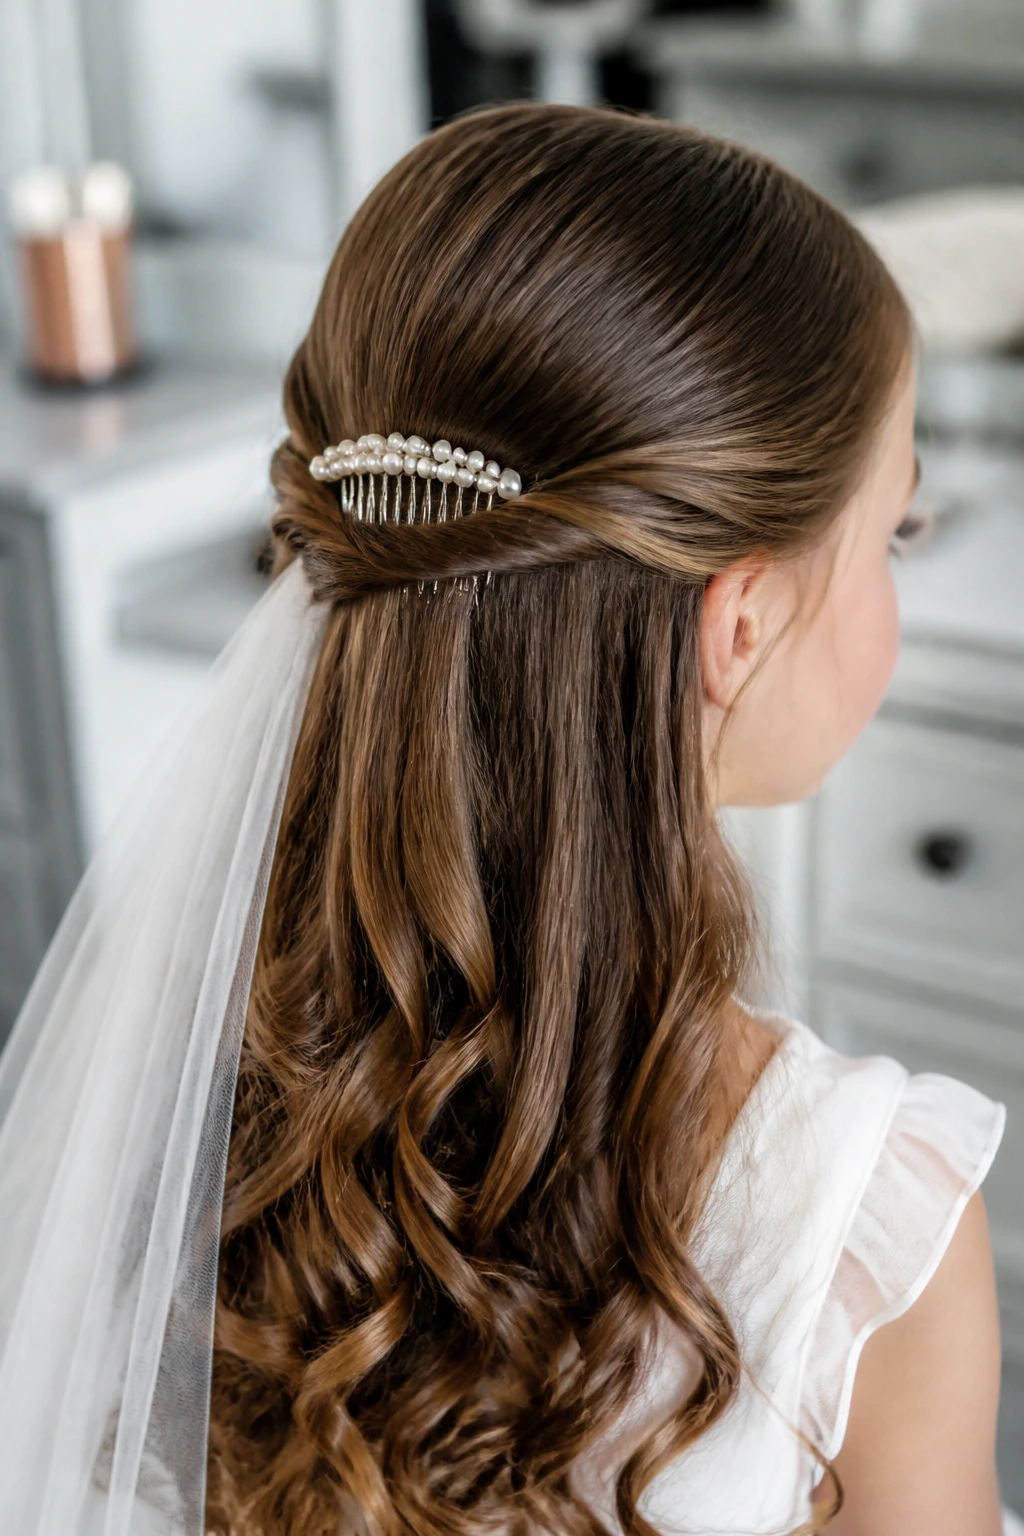
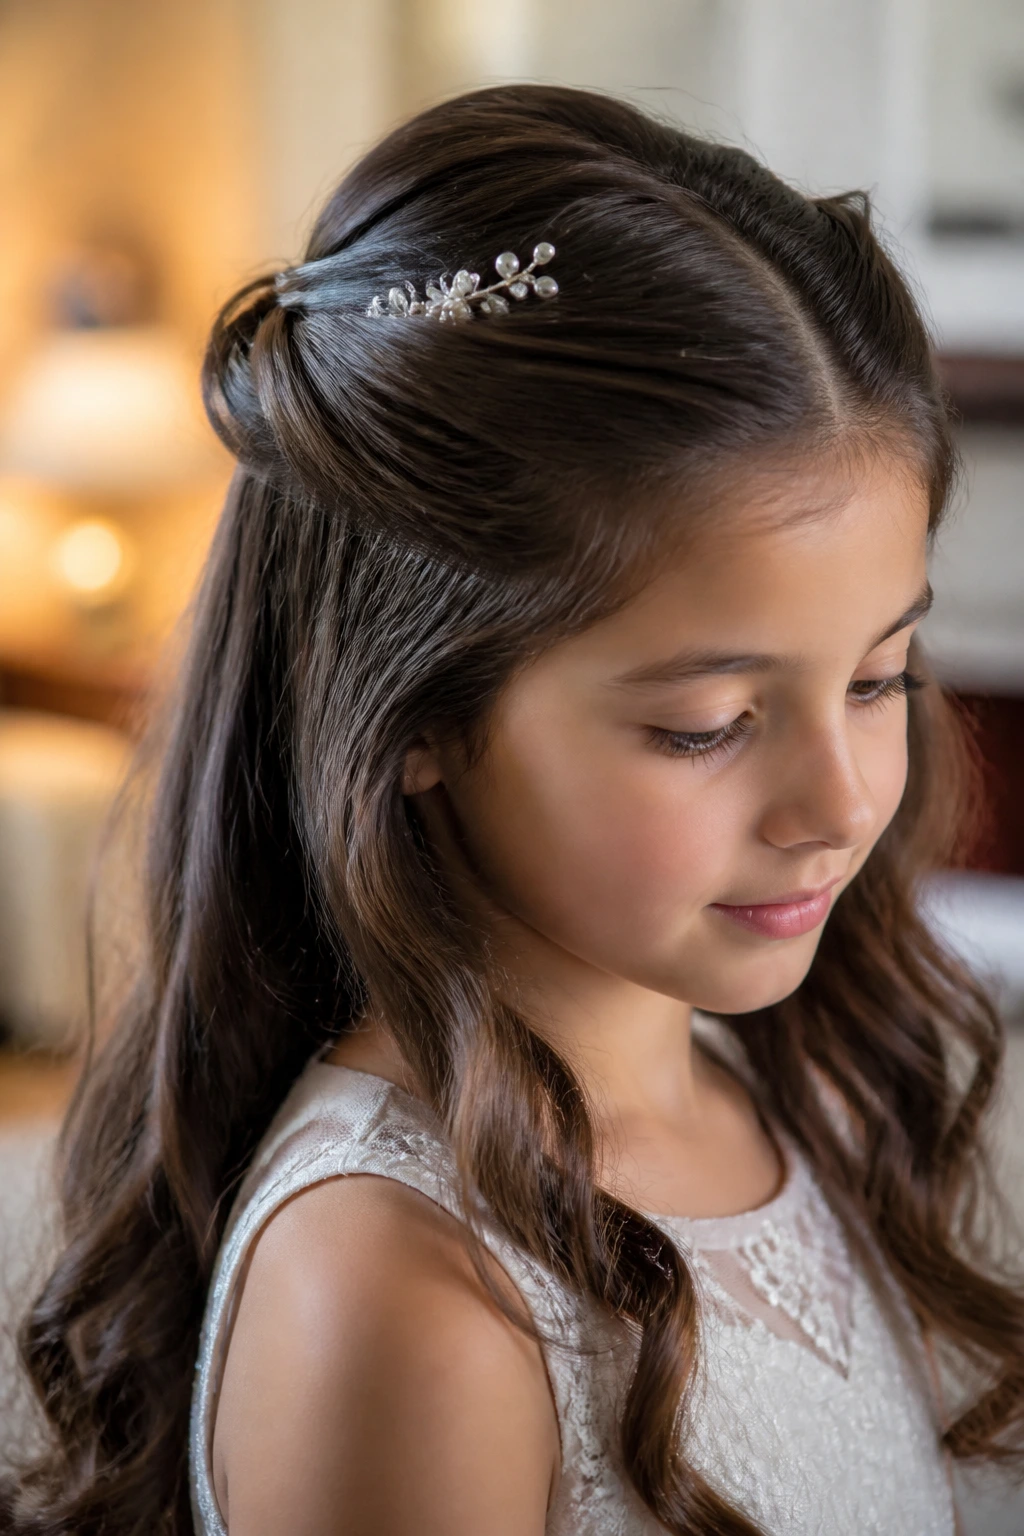
A pearl comb gives the whole hairstyle a finished look with almost no fuss. Sweep a section from each side toward the back, twist them together, and slide the comb over the meeting point. The loose hair can stay smooth or curl gently at the ends.
I like this style because it feels polished without feeling precious. The comb should be small enough to rest comfortably under a veil if needed, and it should sit flat against the head. Larger combs can poke or slide. If the hair is fine, backcomb a tiny bit of the crown before placing the comb so the teeth have something to catch.
16. Side-Swept Half-Up for Short Hair
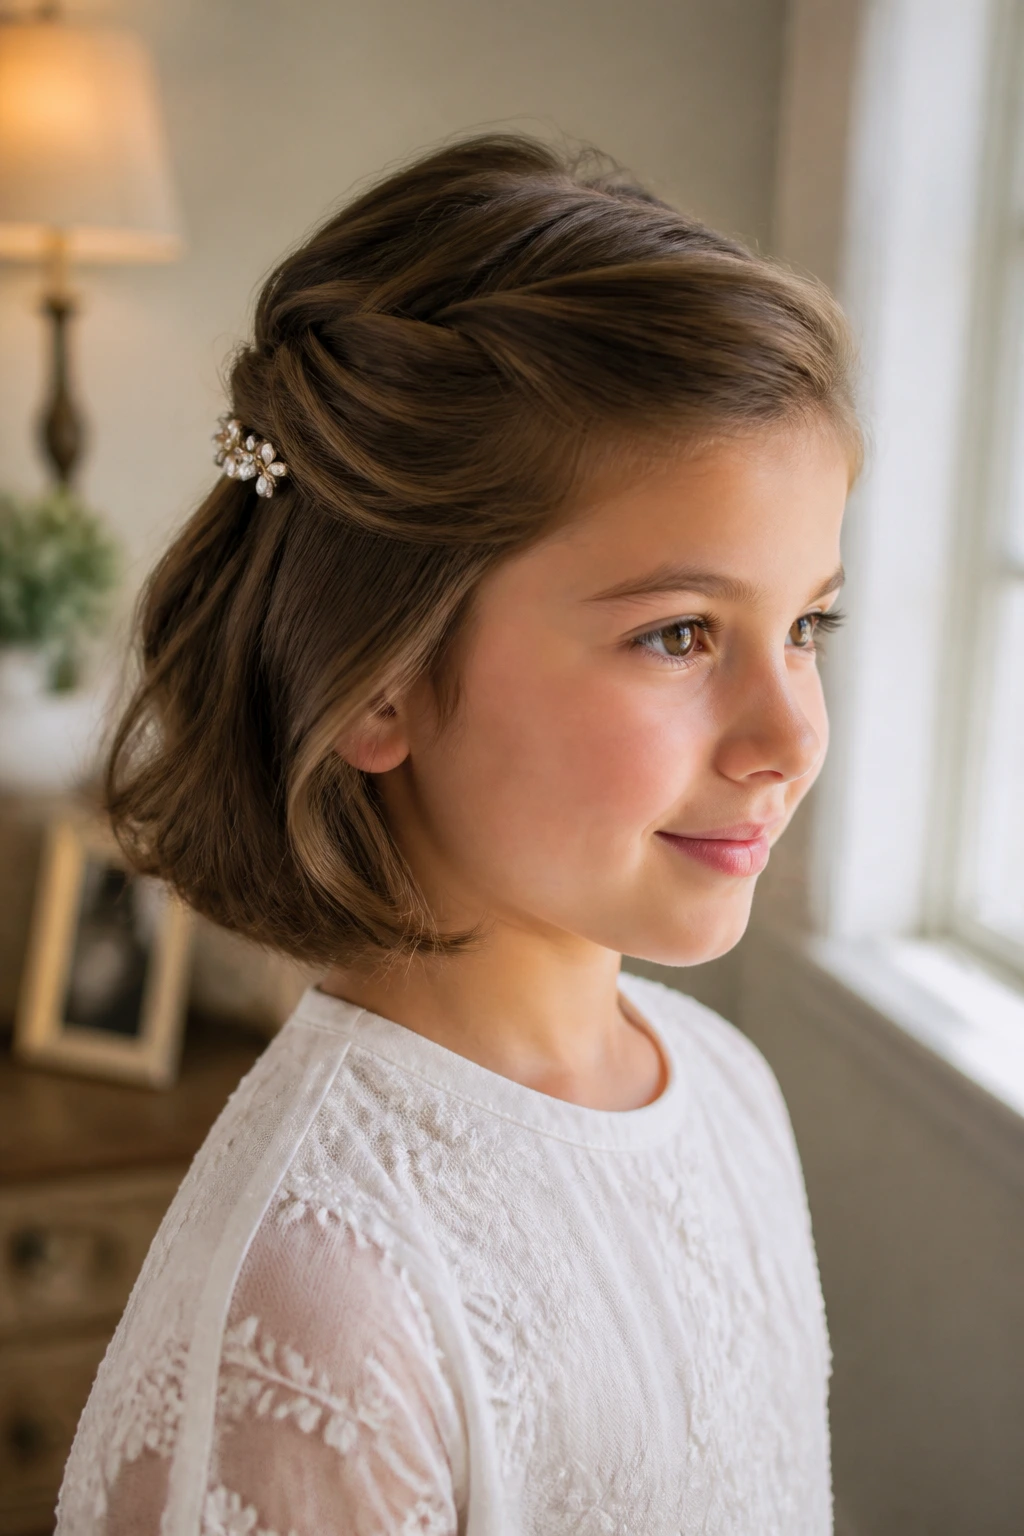
Short hair can still do half-up beautifully. You just need to make the top section do the work. Sweep a small section from one side back toward the crown, twist it, and secure it with a neat clip. Leave the rest of the hair tucked under softly or bent with a flat iron for shape.
This is the style I reach for when the hair falls somewhere between chin and shoulder length. It keeps the look intentional even when there isn’t enough length for big braids or full curls. The clip matters here. Use one with a little grip and not too much shine, because a giant crystal barrette can overwhelm the haircut fast.
17. Double Twist Half-Up
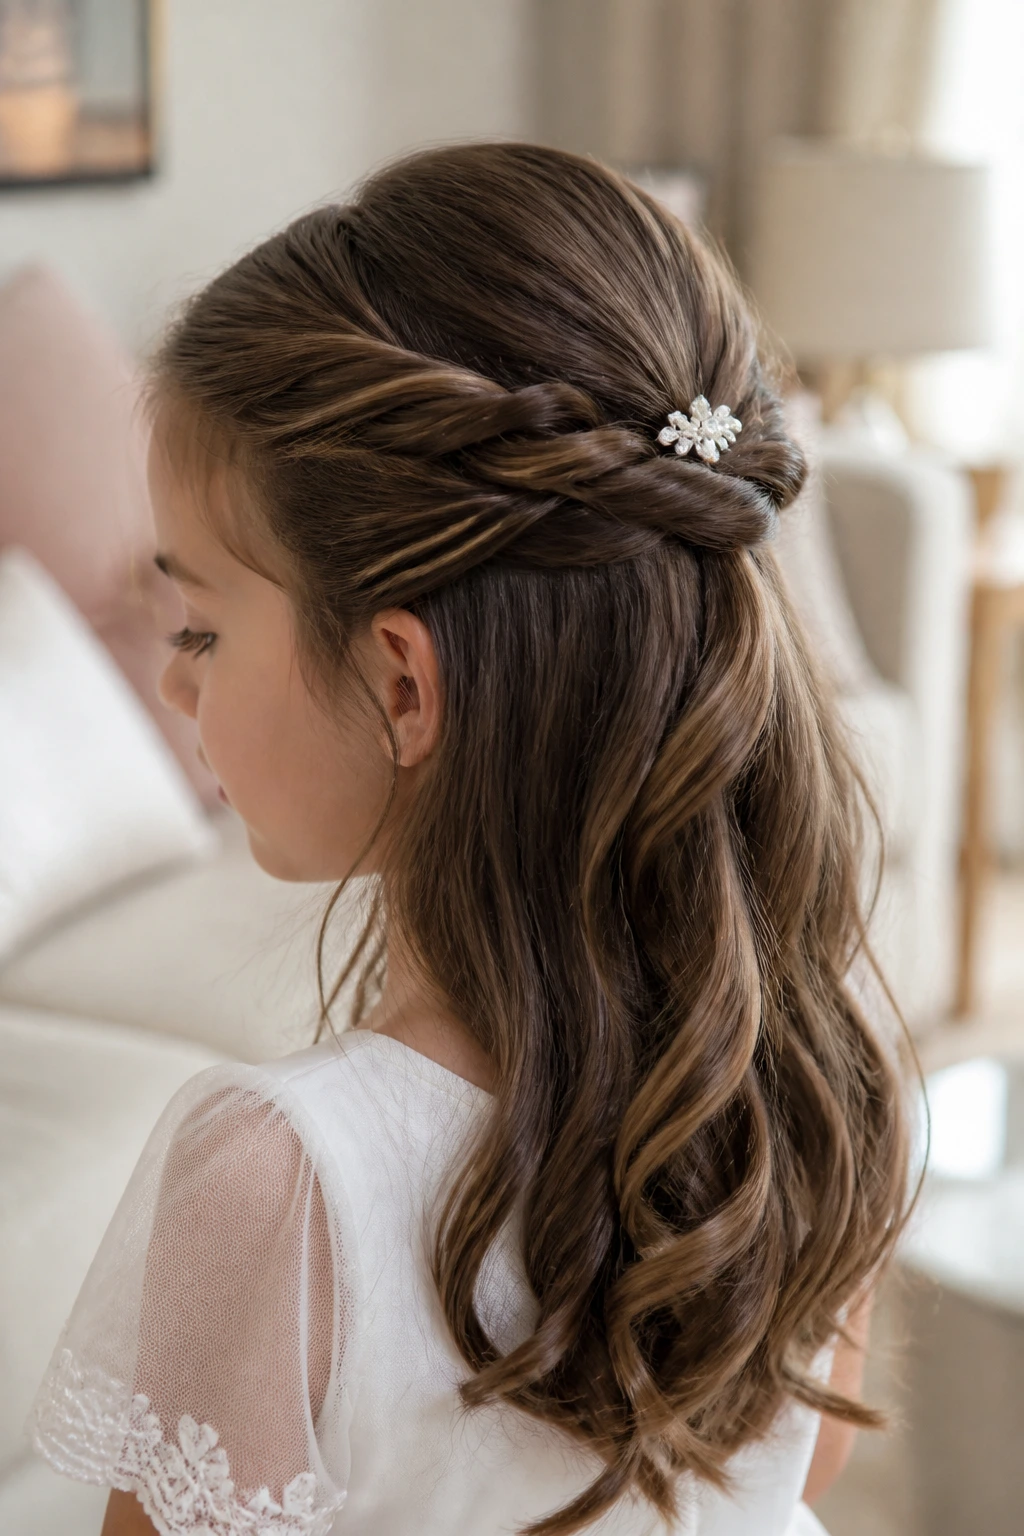
Double twists are a nice middle ground between plain and ornate. Pull one twist from each side of the head, bring them together at the back, and pin them under a small accessory or simply cross them and hide the pins. The loose ends can be curled, smoothed, or left with a soft bend.
What makes this style so reliable is the shape. The two twists create symmetry without looking stiff, and they hold up well because each side supports the other. If the hair is slippery, rough up the roots slightly before twisting. Just a little. Too much teasing turns the crown into a lump, and nobody wants that.
18. Crown of Tiny Braids
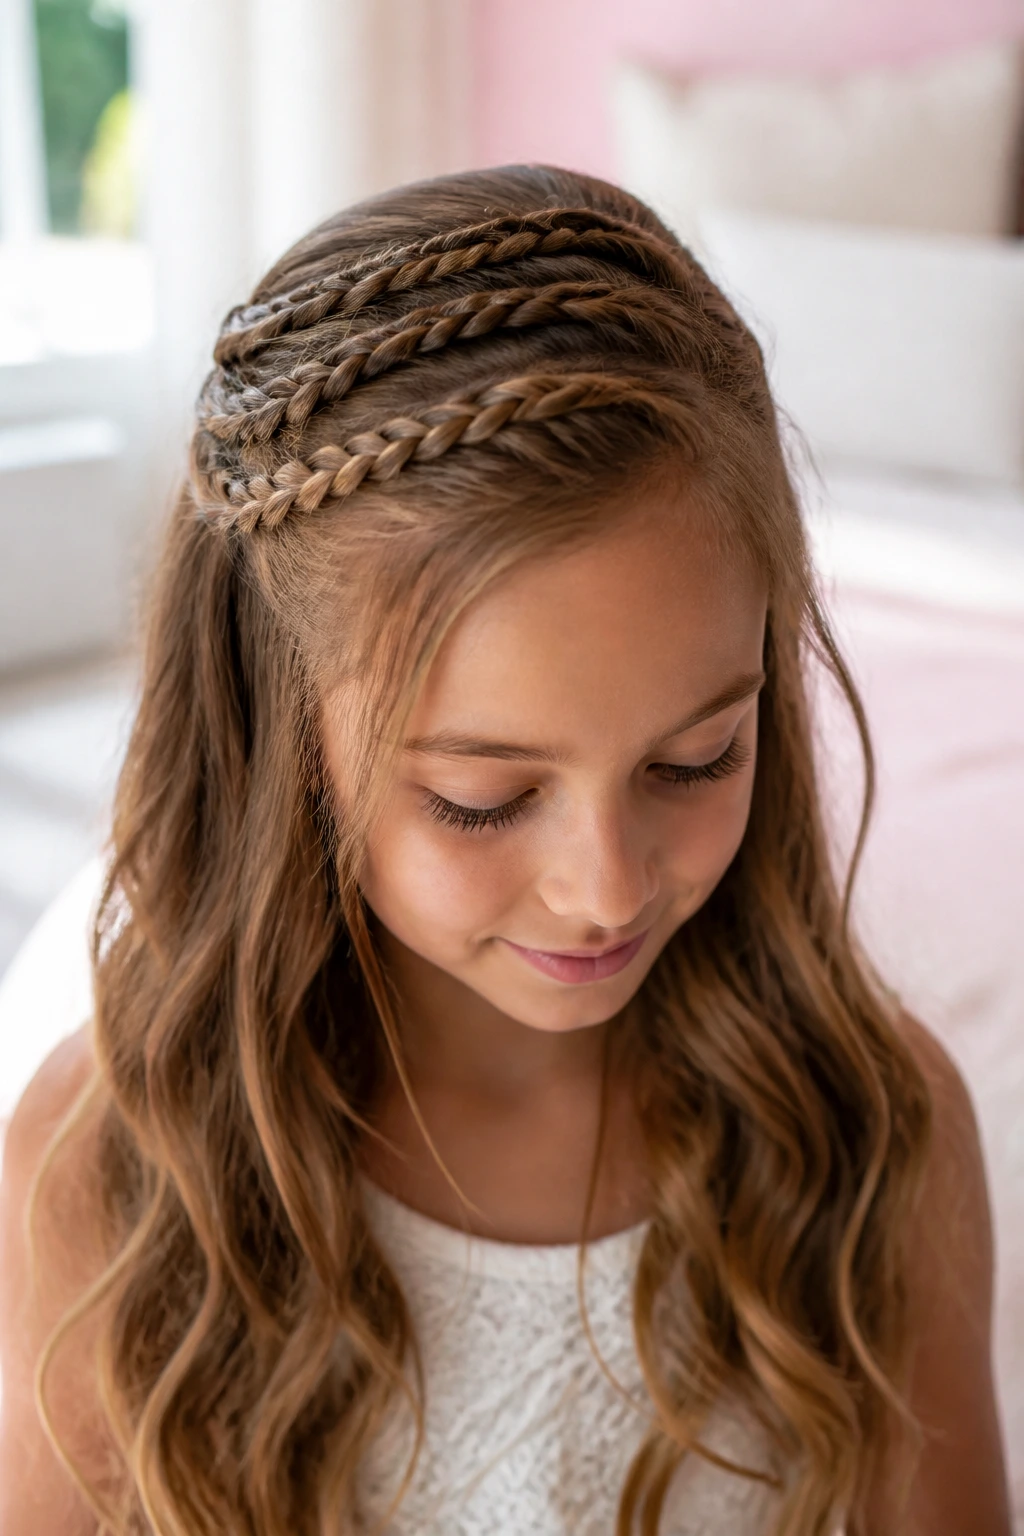
Tiny braids across the crown look delicate, almost like a stitched trim on the hair itself. The idea is not to build one huge braid. It’s to place two, three, or even four slim braids across the top section and pin them into the rest of the hair. The loose length below can stay straight, wavy, or curled.
This style is useful when you want texture at the front but don’t want the top section to feel heavy. It also gives you a good place to tuck small pearls or baby flowers if you want to dress it up a little. Keep the braids narrow. That’s the whole trick. Big braids can make a child’s head look top-heavy in a way that photographs poorly.
19. Half-Up with Soft Spiral Ringlets
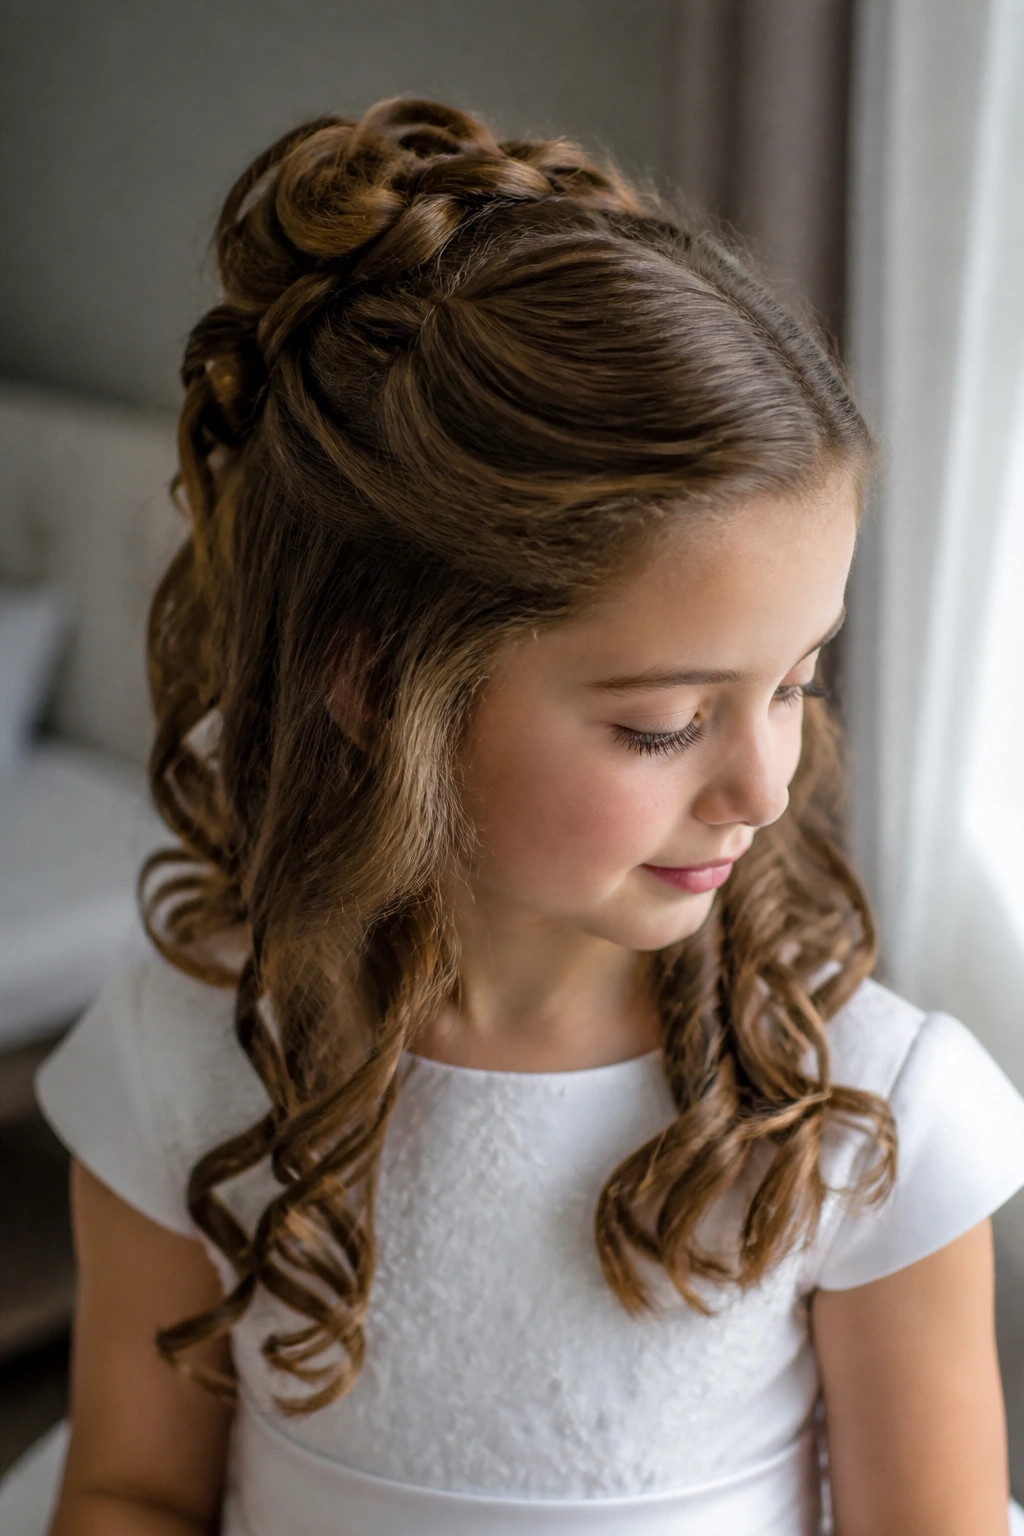
If the child already has ringlets or the hair holds a curl well, don’t fight it. Gather the top half neatly, secure it with pins or a clip, and let the spiral ends hang in clean sections. The ringlets should stay defined, not brushed into fluff.
This look has a sweetness that comes from the texture itself. It’s especially nice when the dress is plain and the hair can carry a little of the softness. A diffuser helps if the curls are natural; a small-barrel iron works if you’re creating the ringlets from straight hair. Either way, let the curls cool fully before touching them. Warm curls fall flat fast.
20. Sleek Center-Part Half-Up
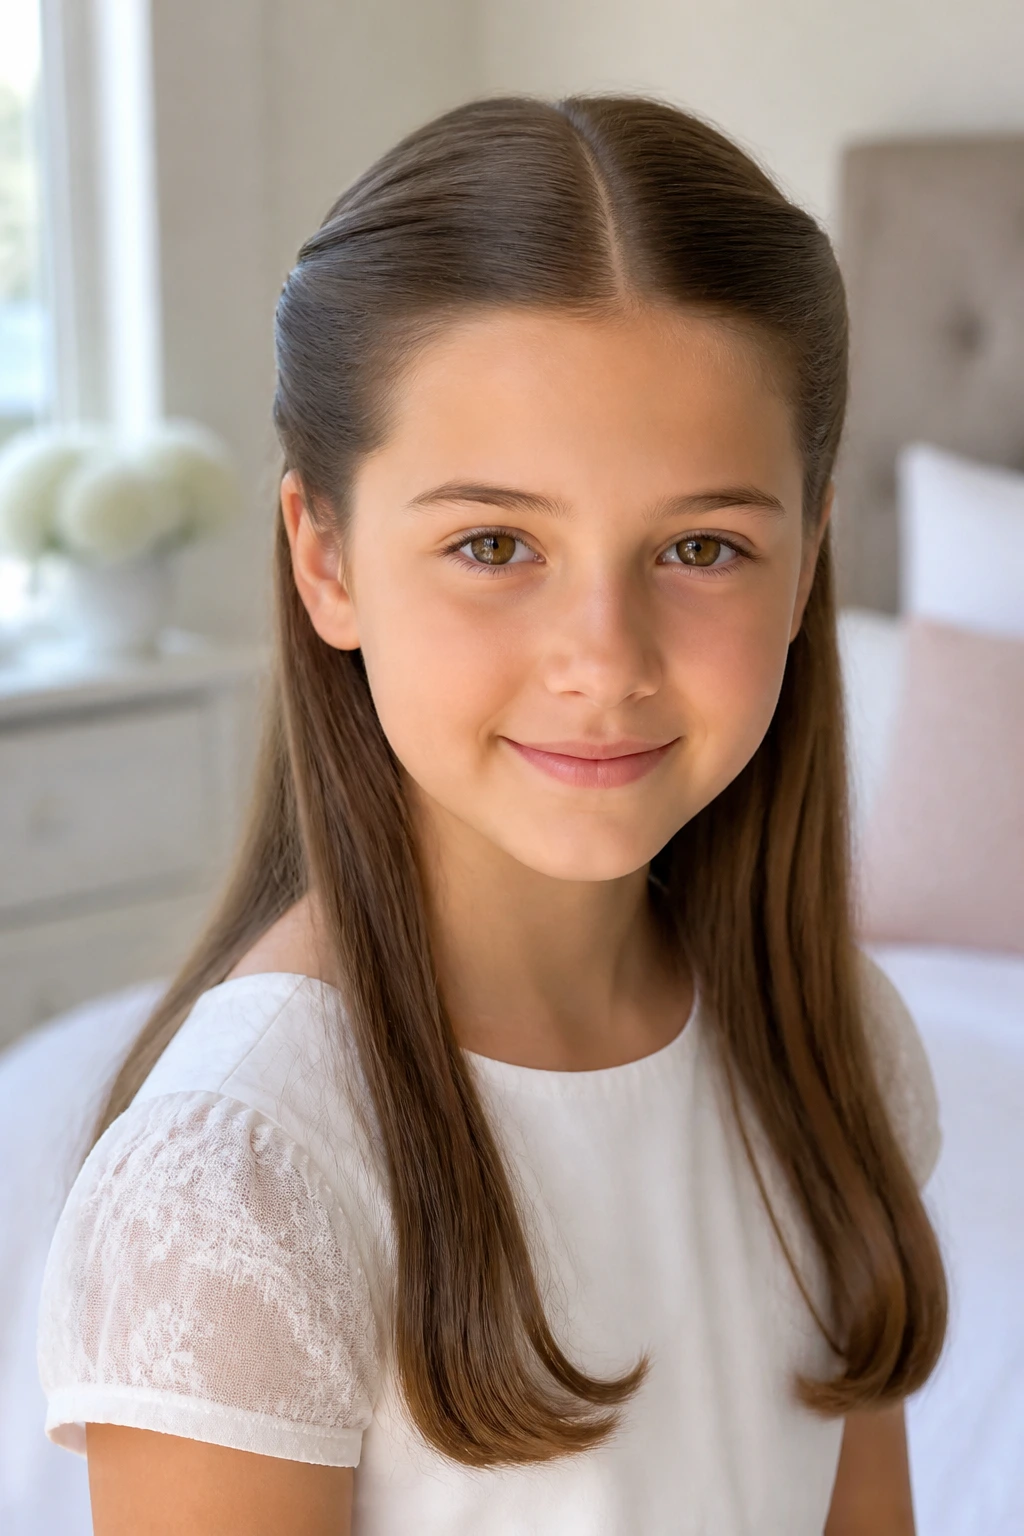
A sleek center part can be beautiful when the dress or veil already has a lot going on. Smooth the hair with a fine-tooth comb, gather the top section evenly on both sides, and pin it flat at the back. Leave the lengths straight or give them a barely there bend at the ends.
I like this look for its restraint. It doesn’t try to be fancy. The neat part and smooth sides let the face stay open, and the clean line reads very clearly in photographs. It’s also one of the easiest styles to pair with a simple pearl clip or narrow ribbon. The key is finish, not volume. If the hair frizzes near the part, a touch of lightweight smoothing cream on fingertips solves most of it.
21. Soft Side-Part Half-Up with a Tucked Ear Piece
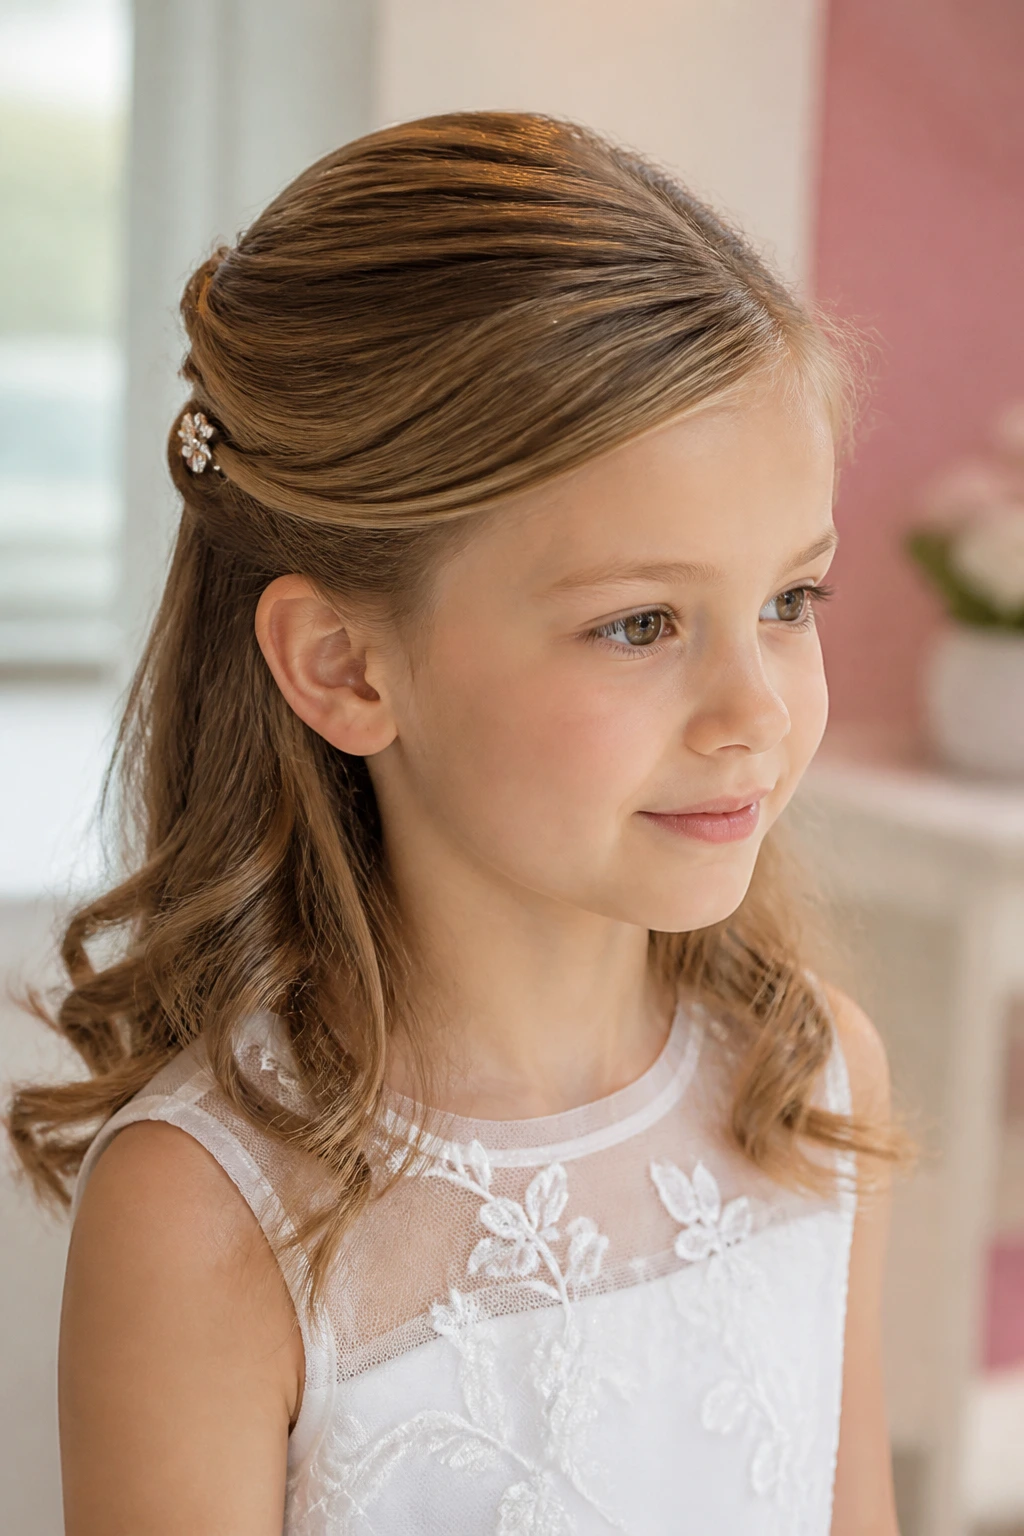
A side part softens the face and makes the whole style feel less rigid. Sweep one side back first, tuck it behind the ear, then pull the rest into a half-up section at the back. A tiny pin or small clip near the tucked side can keep it tidy without making the look busy.
This works especially well when the dress neckline is already detailed. The hair can be quieter and still feel finished. I also like it for children who do not love a strict center part. The side part relaxes the whole expression a little. And yes, that matters in photos more than people admit.
22. Satin Headband Half-Up
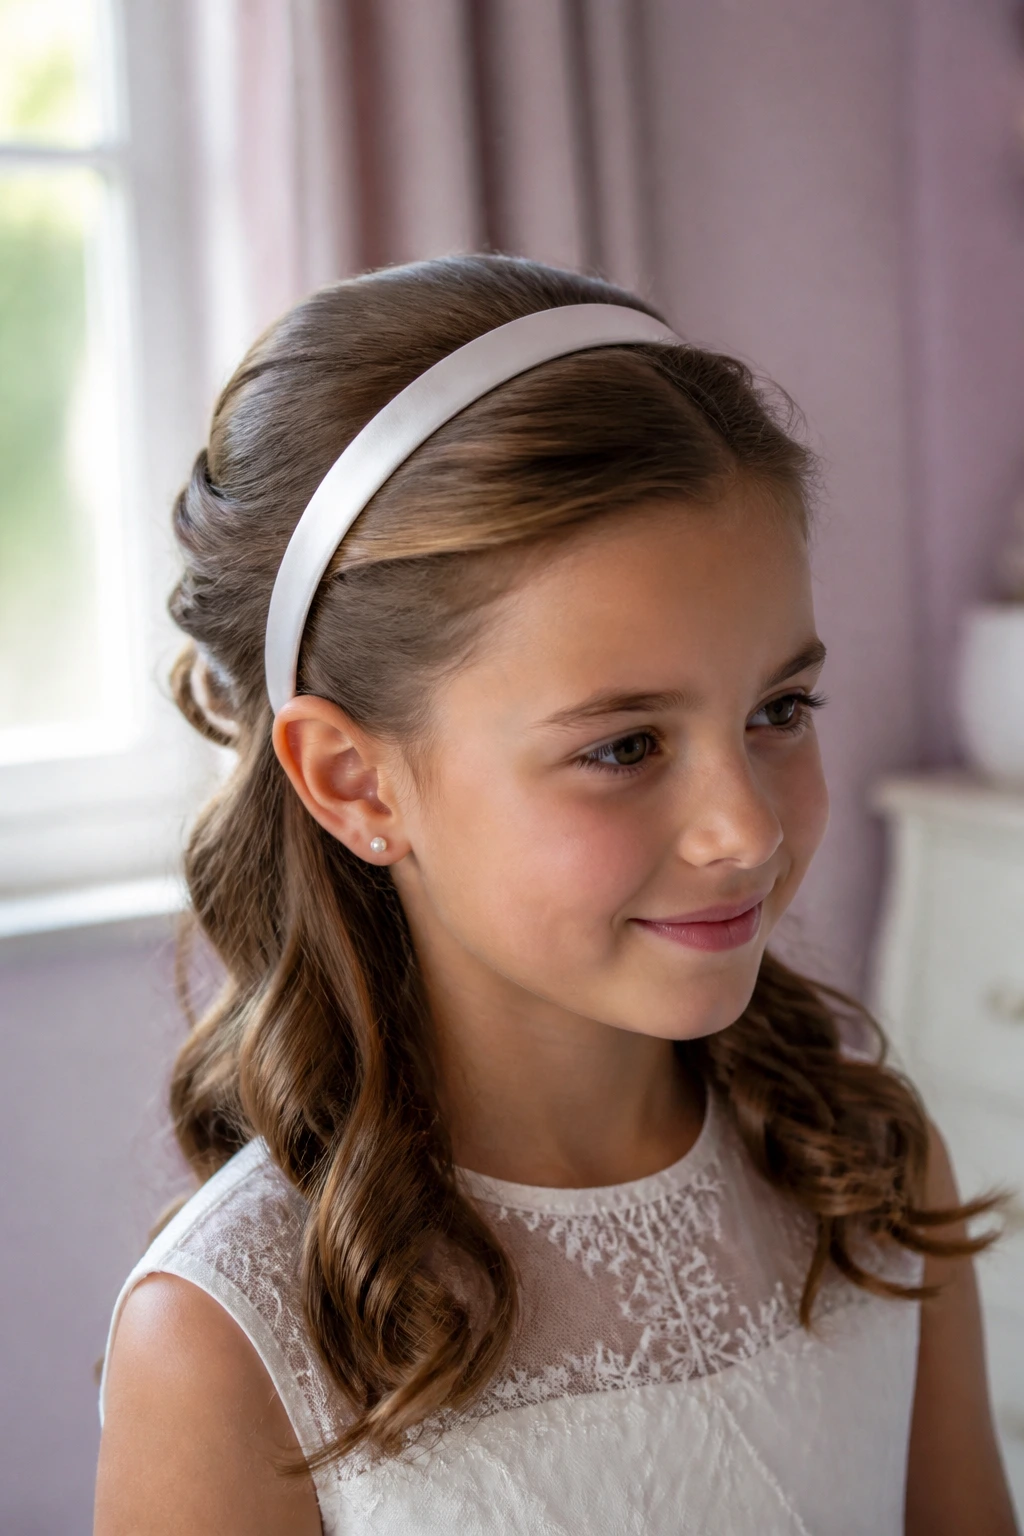
A satin headband can do the job of several pins at once. It holds the front away from the face, adds a clean line to the style, and gives you a simple anchor for the half-up section behind it. Choose one that fits snugly but does not squeeze the temples.
This style is especially handy when the hair is fine and hard to pin. The headband adds structure where the hair itself won’t. Keep the rest of the look soft. Loose curls, gentle waves, or even straight ends can all work here. If the headband is already shiny, skip extra glittery clips. The look is better when one thing leads.
23. Subtle French Twist Half-Up
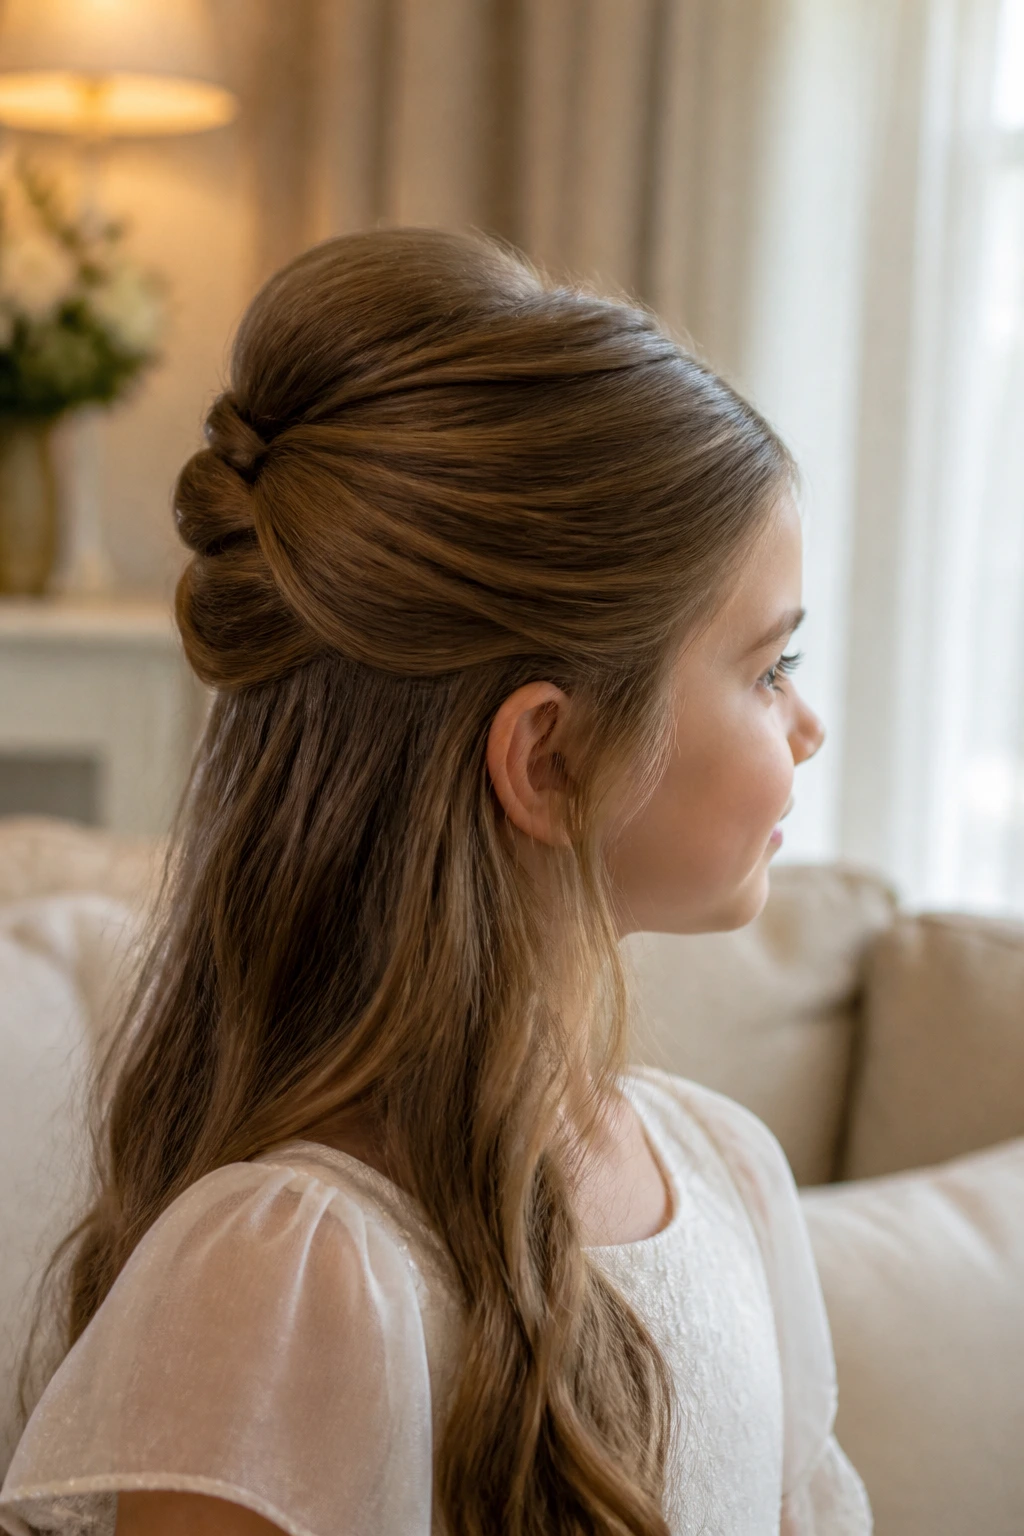
A French twist does not have to mean a full formal updo. In half-up form, it becomes a low, tucked roll of hair that sits neatly at the back of the crown. The loose lengths remain free below, which keeps the style lighter and more age-appropriate.
This is one of my favorites for a dress with a tidy neckline or a small collar. It has structure without looking severe. The twist should be smooth and tucked, not over-stuffed with hair. If the section is too thick, split it in half and twist both sides toward the center before pinning. That gives a cleaner roll and less puff at the base.
24. Fresh Flower Half-Up
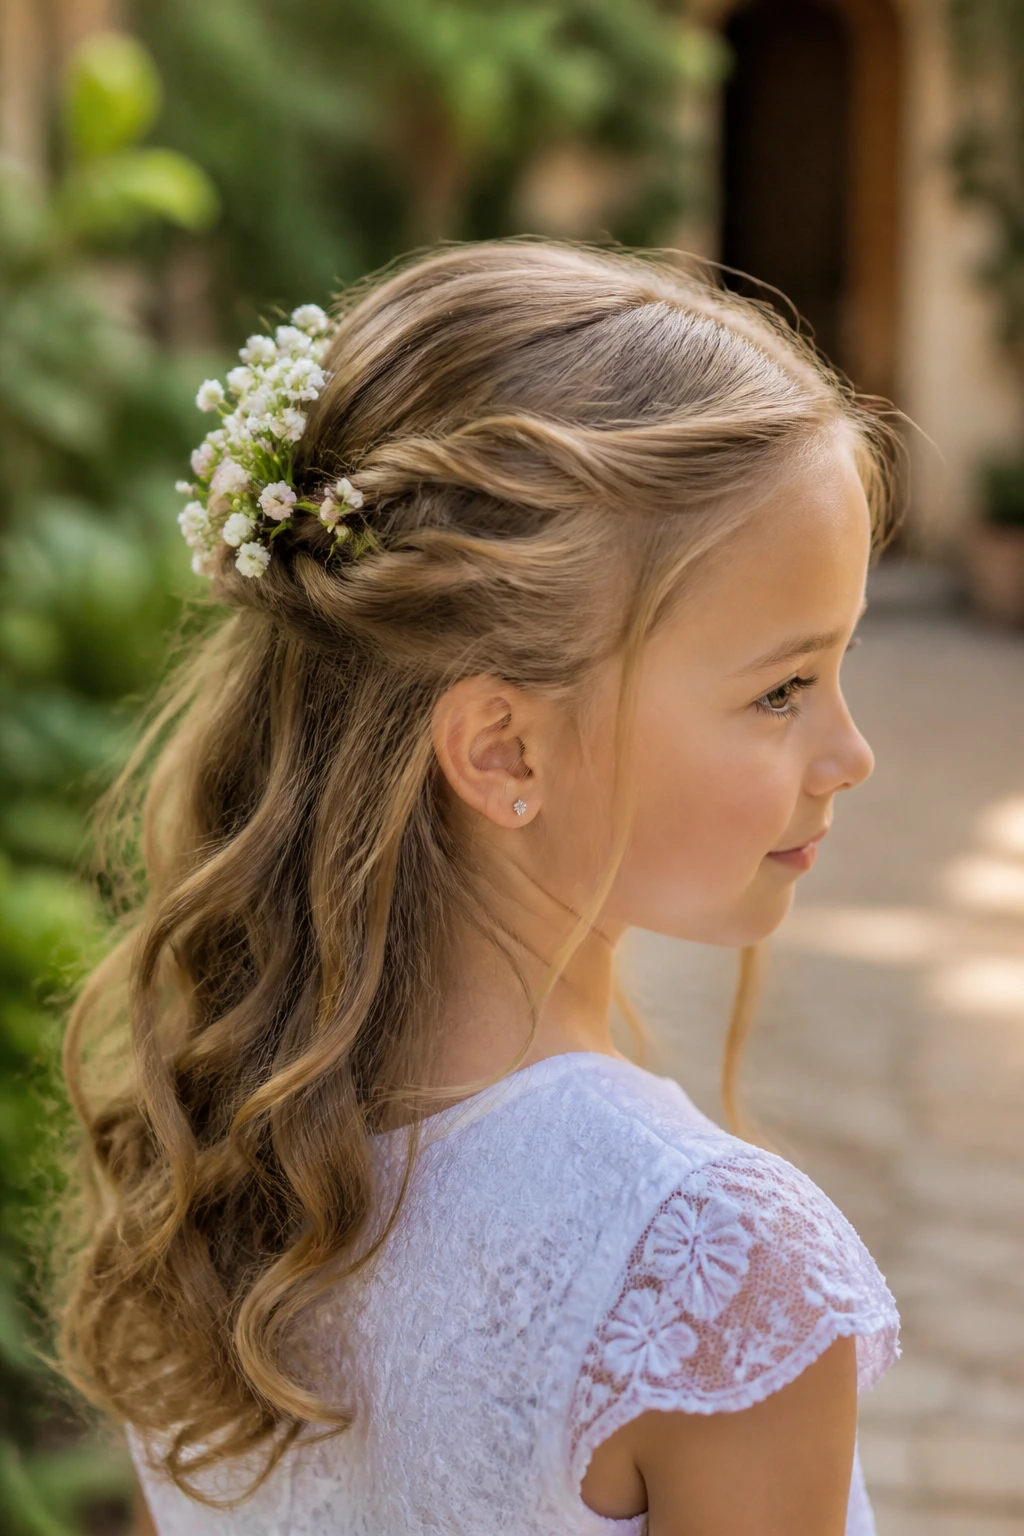
Fresh flowers can be beautiful if they are used sparingly. Tuck a couple of tiny blooms into the back twist or place one small cluster near the accessory point. Keep the flowers small enough that the child still looks like the child. The hairstyle should not start pretending it’s a wedding bouquet.
I’d choose fresh flowers only when they can be kept cool and handled gently. Silk is easier. But if fresh blooms are part of the day’s style, use sturdy stems and keep them hydrated until the last minute. A flower with a soft stem and a bloom that droops by noon is not the friend you want here.
25. Hidden-Cross-Pin Half-Up for Thick Hair
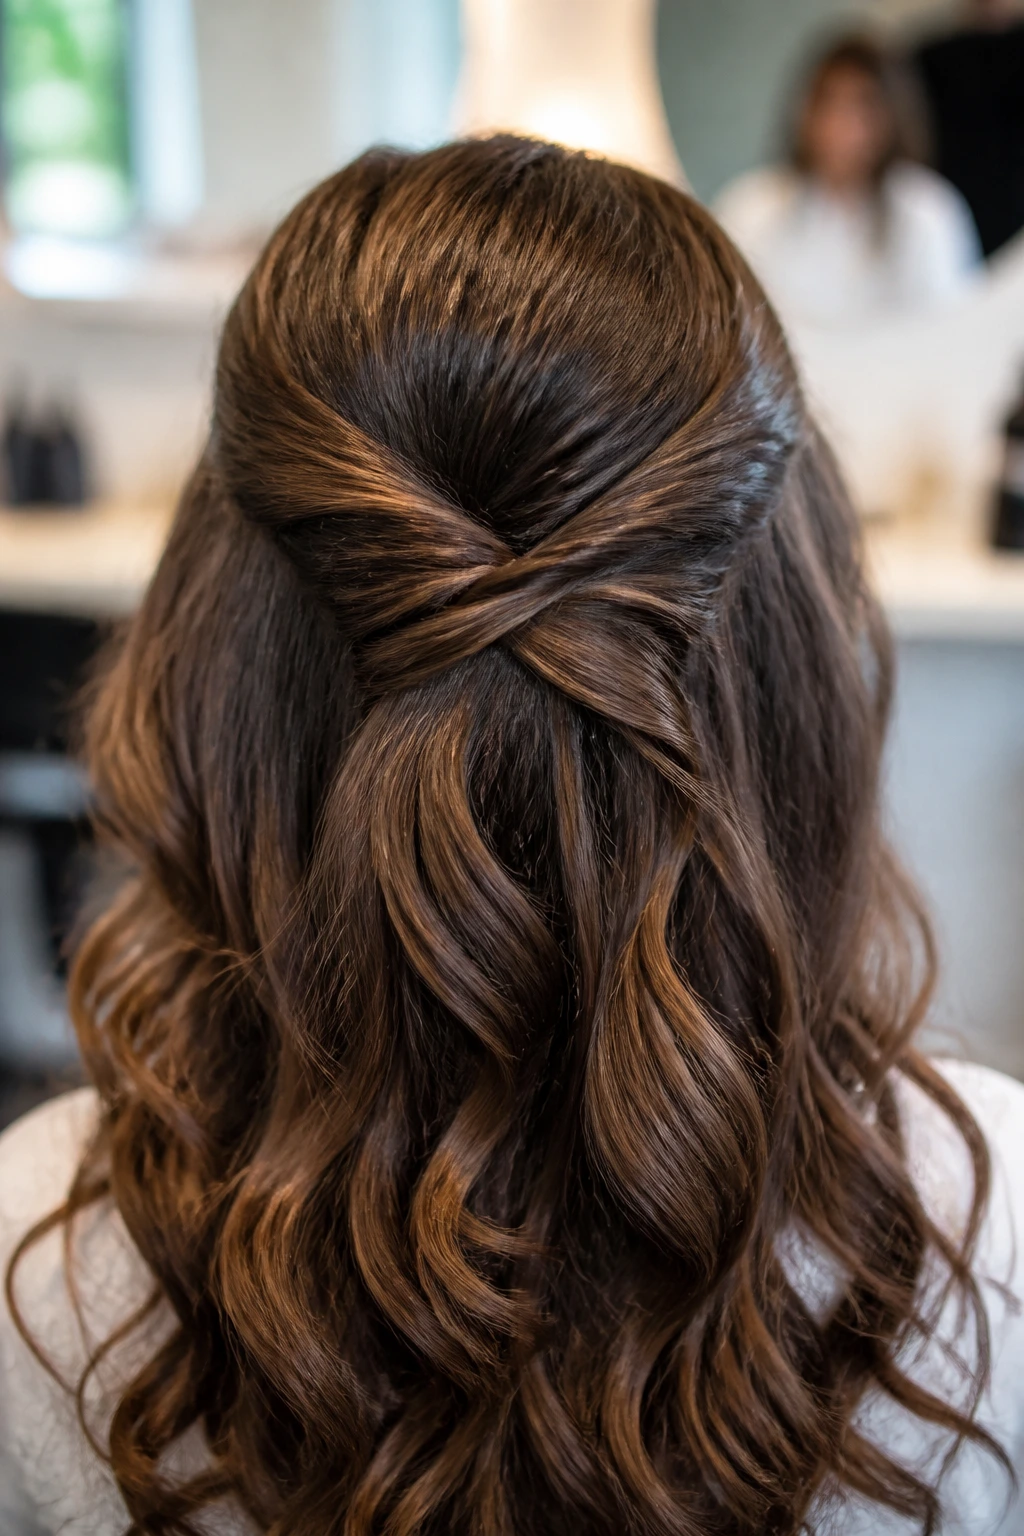
Thick hair can pull a style downward if the pins are not anchored properly. This version uses small sections at the crown, twisted and crossed over each other, then pinned in an “X” pattern underneath. That hidden cross is what keeps the top section from sliding.
It’s a practical solution, and I mean that as praise. Thick hair needs engineering, not hope. If the back section is very full, secure the top half in two layers instead of one. Start with the inner layer close to the scalp, then add the outer layer over it. That way the style sits on a base instead of hanging from a single line of pins.
26. Root-Lift Half-Up for Fine Hair
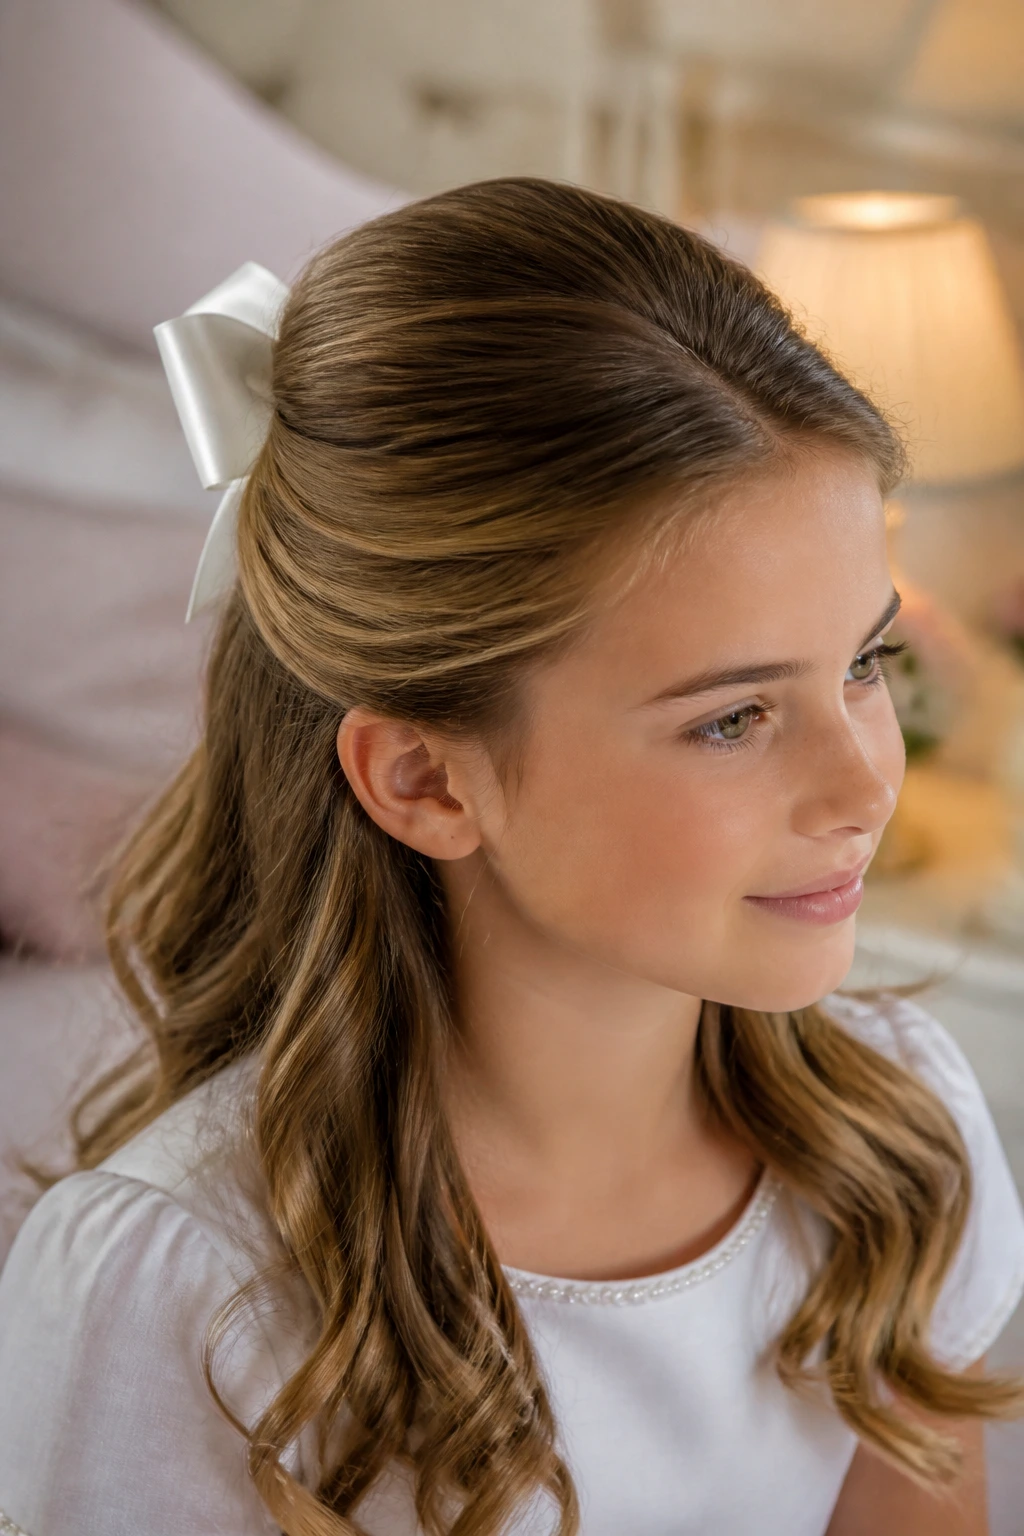
Fine hair needs a little fake fullness at the crown, but not a teased nest. Lift the roots lightly with a tail comb, mist a texturizing spray at the base, and pin the half-up section a little higher than you normally would. The point is to create shape, not puff.
This style is one of the most useful in the whole set because fine hair can look flat in photographs even when it was carefully styled. A small amount of lift changes the silhouette right away. I’d keep the accessory small here — a narrow satin bow, one pearl clip, or a tiny comb — because heavy pieces drag the shape down. The whole trick is height without bulk.
27. Face-Framing Half-Up with Loose Tendrils
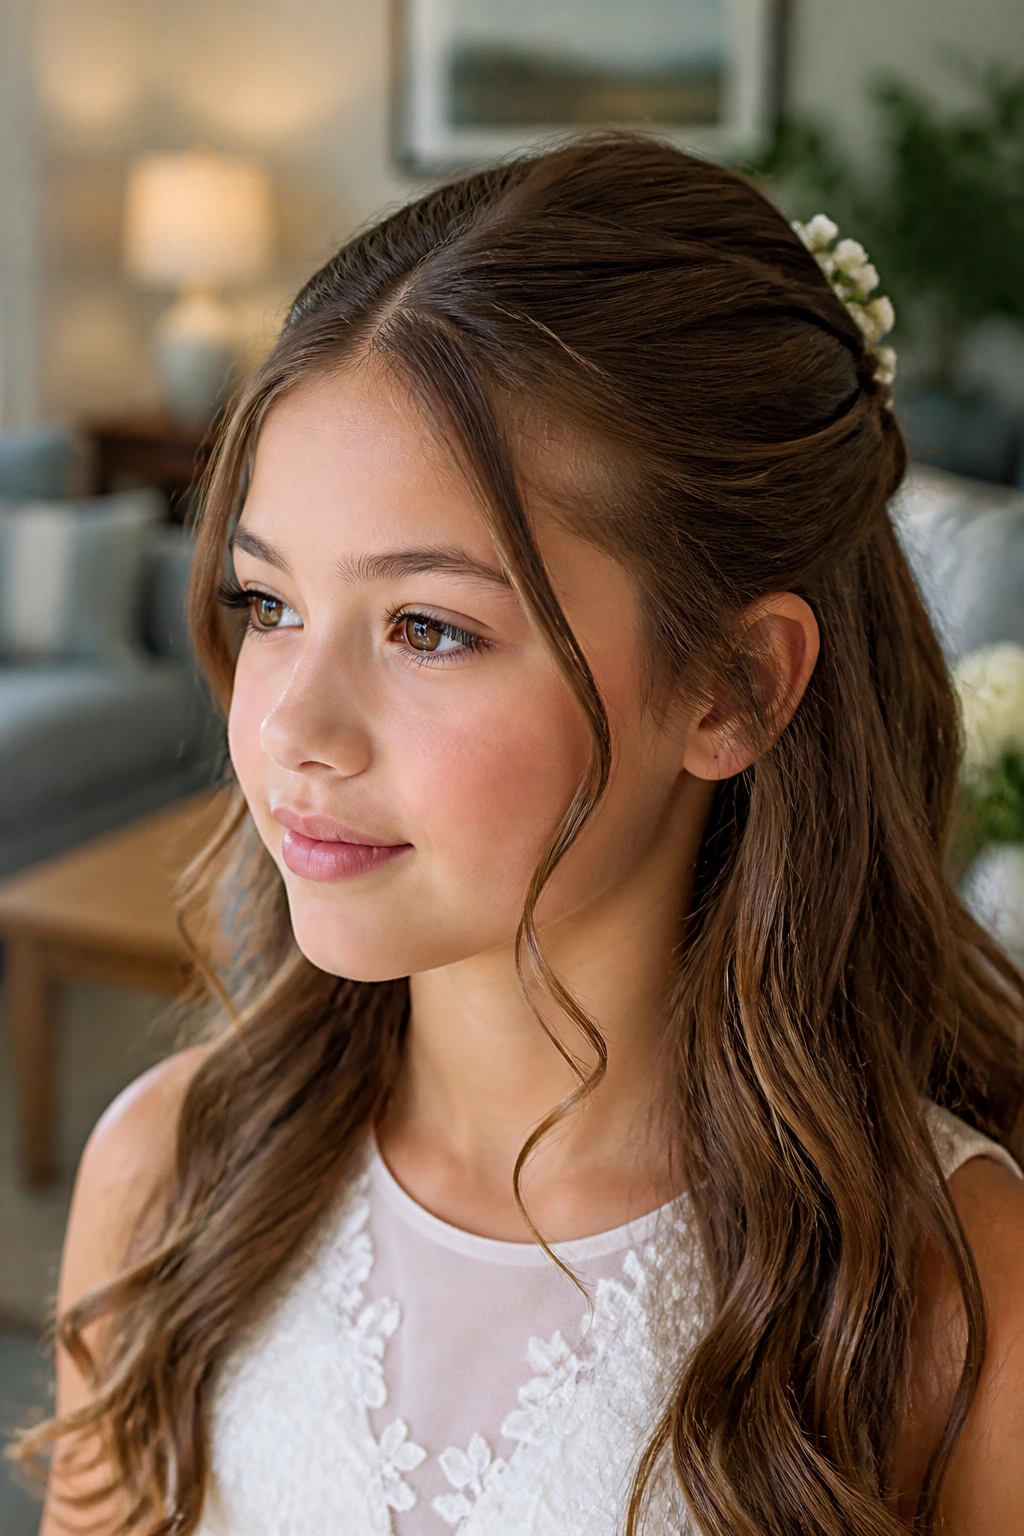
Loose tendrils can soften a child’s face, especially if the front hairline is sharp or the part sits very straight. Pull the top section back, then leave two thin pieces near the cheeks free so they can curve gently. The rest of the hair can stay in waves or curls.
This is one of those styles that needs restraint. Too many tendrils and it starts to look messy. Two, maybe four at most, is enough. Keep them thin and intentional, and curl them away from the face so they sit in a soft arc instead of sticking straight down. The result is relaxed, but still neat enough for church and photographs.
28. Braided Bun Accent Half-Up
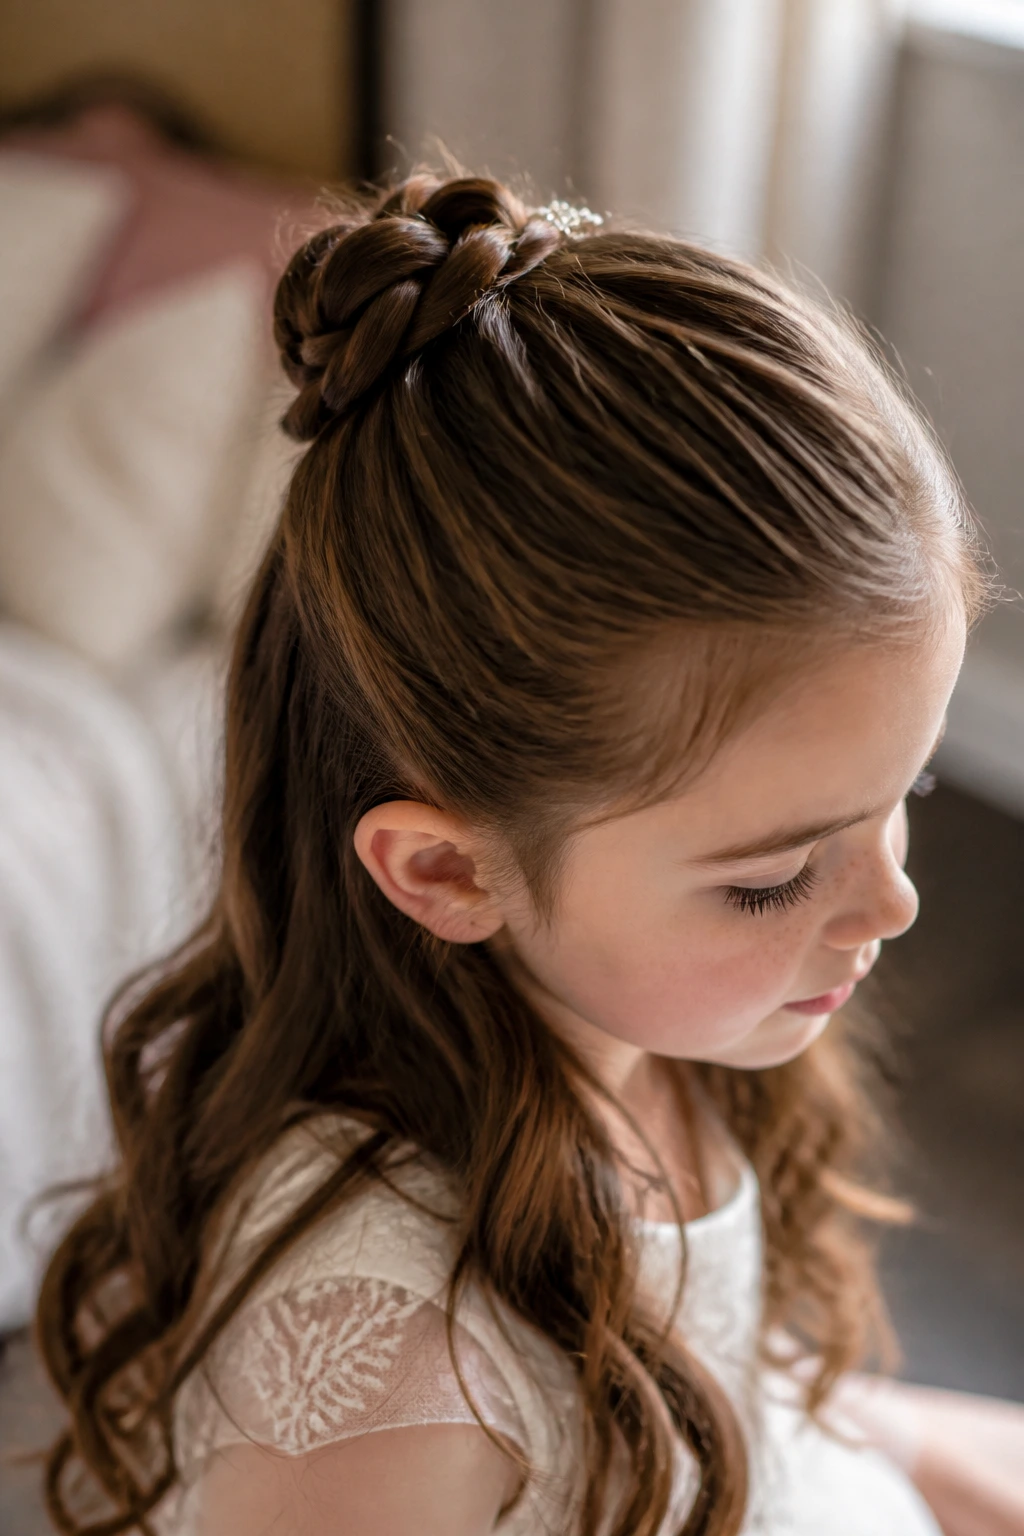
A braided bun accent gives the hairstyle a little sculpted shape at the back without taking it all the way into a full updo. Make a small braid or twisted rope from the top section, coil it into a tiny bun, and pin it low at the back of the crown. Let the remaining hair fall beneath it.
This style suits longer hair best, especially when you want the top half to feel controlled. The bun should be small. Tiny, even. If it gets too large, the style loses the lightness that makes half-up hair so nice in the first place. A satin bow or pearl pin beside the bun can finish it, but it does not need much more.
29. No-Heat Twist Half-Up
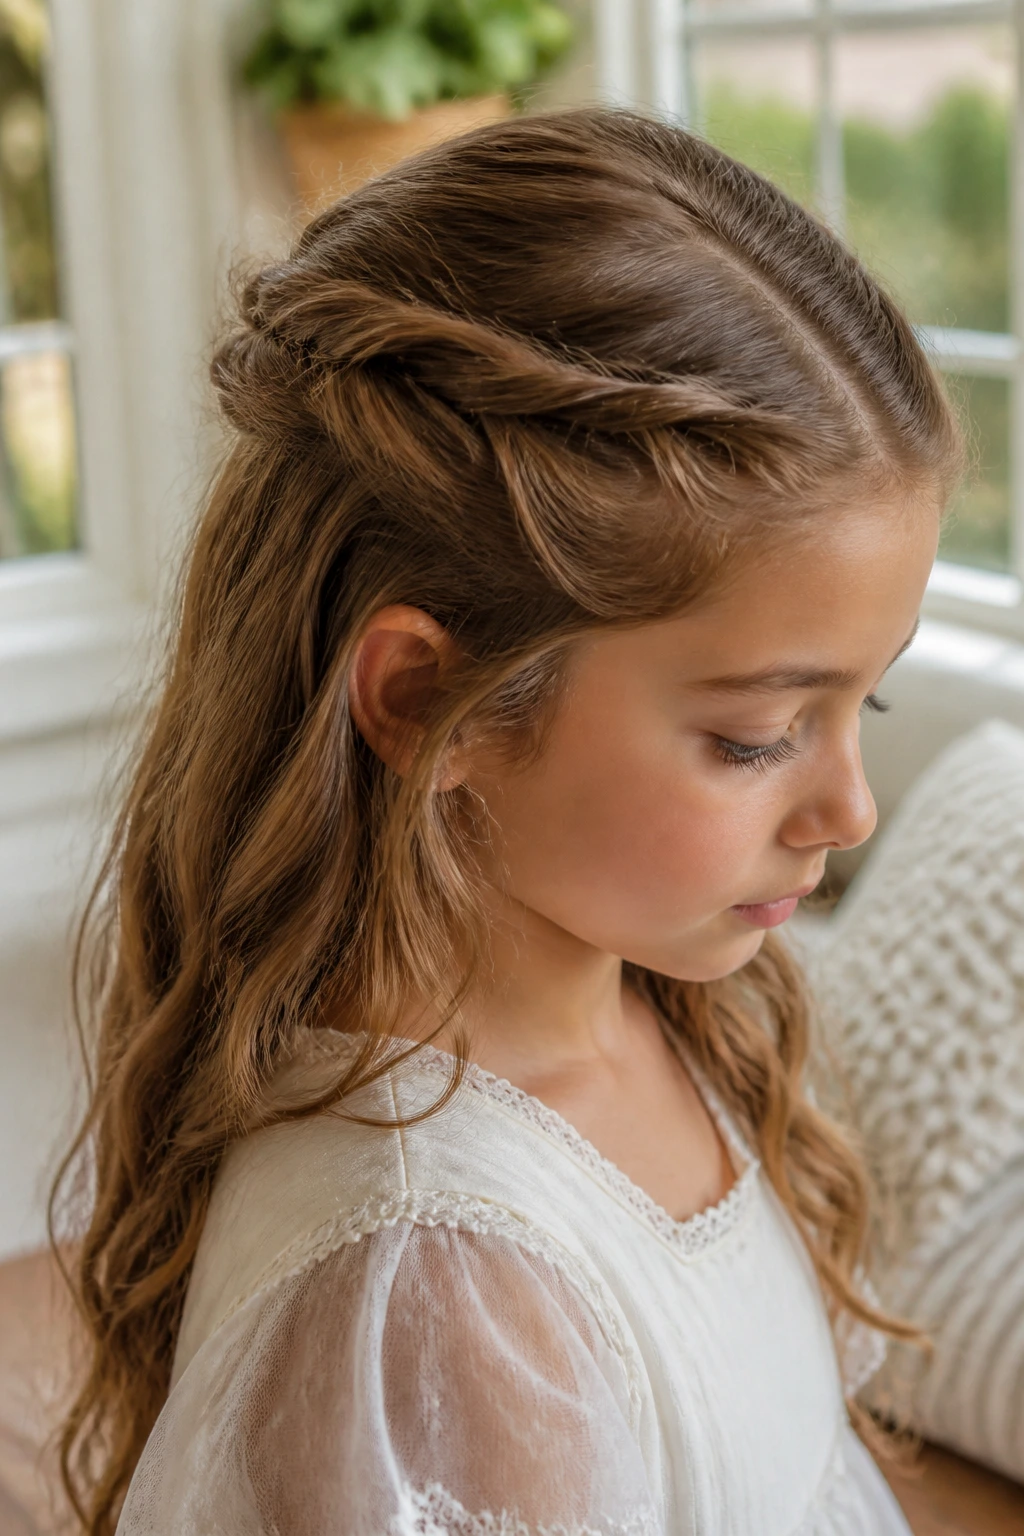
A no-heat style is a relief on a morning when you do not want curling tools in the mix. Twist small sections of damp or lightly styled hair, let them dry, then pin those twists into a half-up shape. The loose hair can air-dry in soft bends or stay naturally straight if that is what the hair wants to do.
I like this option for children who dislike a lot of styling time. It is gentle. It also avoids the overly perfect curl pattern that sometimes looks stiff on younger kids. The key is to work with small sections and let the hair set fully before undoing or pinning too much. A little texture cream at the ends can keep the finish from frizzing out.
30. Polished Half-Up for Very Straight Hair
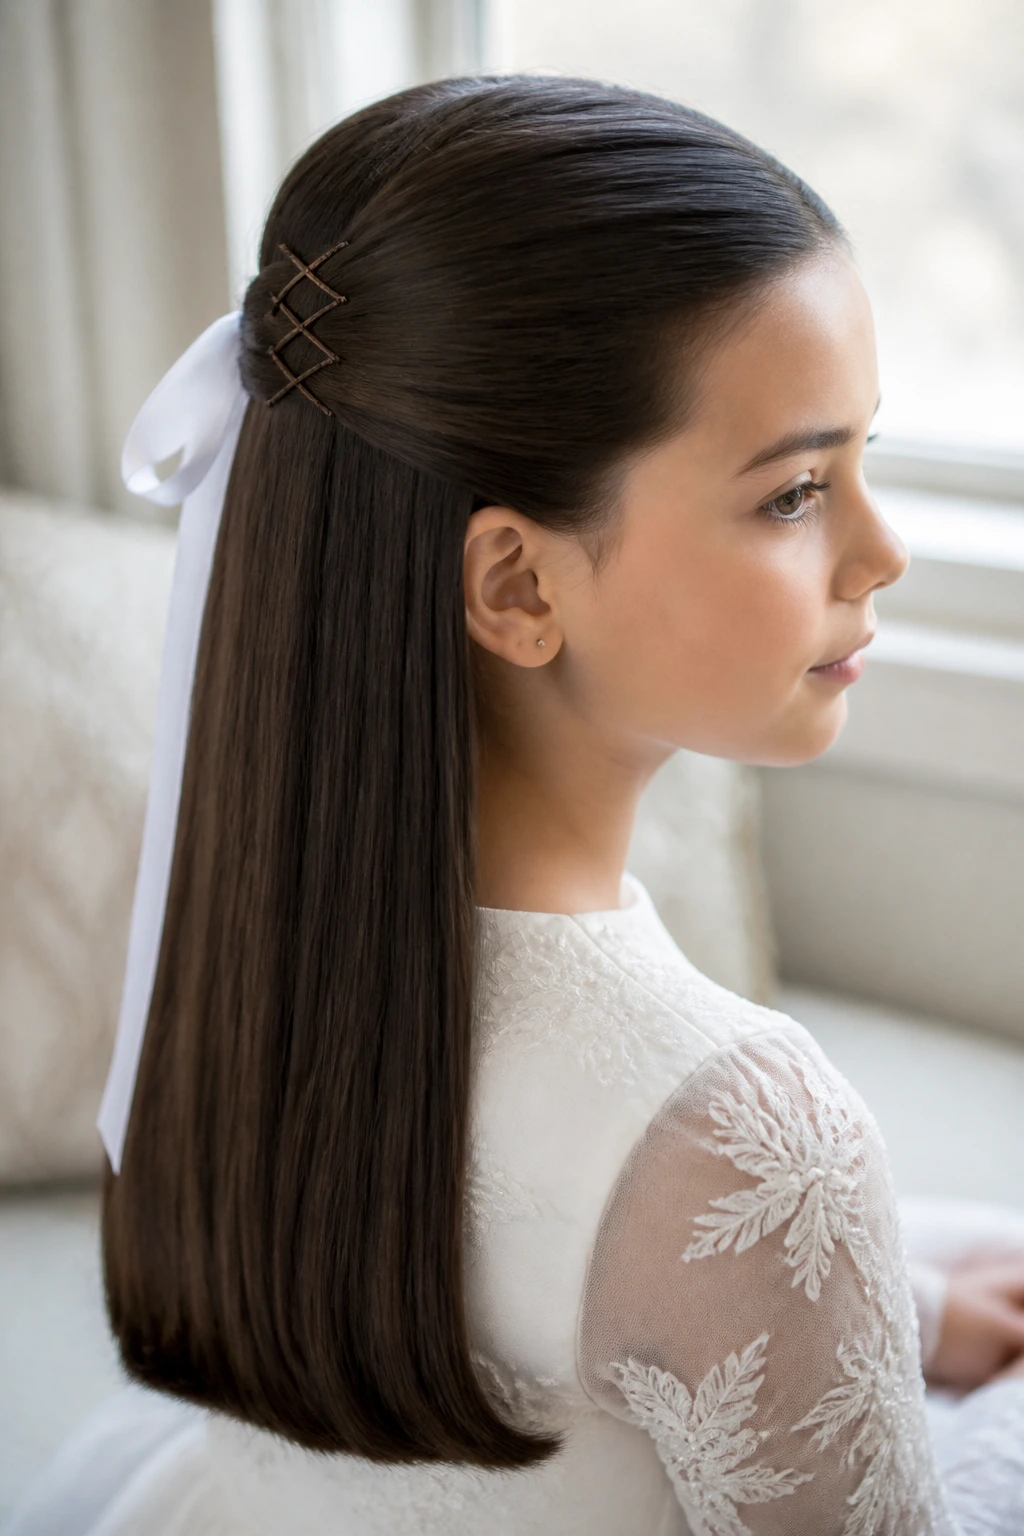
Very straight hair can look sleek in a way that curled hair sometimes cannot, but it needs a little help to keep from slipping. Prep the lengths with a bit of texturizing spray, smooth the top section back, and use pins placed in a crisscross pattern. Then let the ends fall straight or add a soft bend only at the bottom.
This style is one of the cleanest choices in the set. It feels modern, tidy, and calm. A satin ribbon or pearl comb sits nicely with it because the hair itself stays understated. If the hair is pin-straight and prone to sliding, do not skip the prep spray. That is the part that keeps the whole thing from unraveling before lunch.
Why Half-Up Styles Work So Well for First Communion
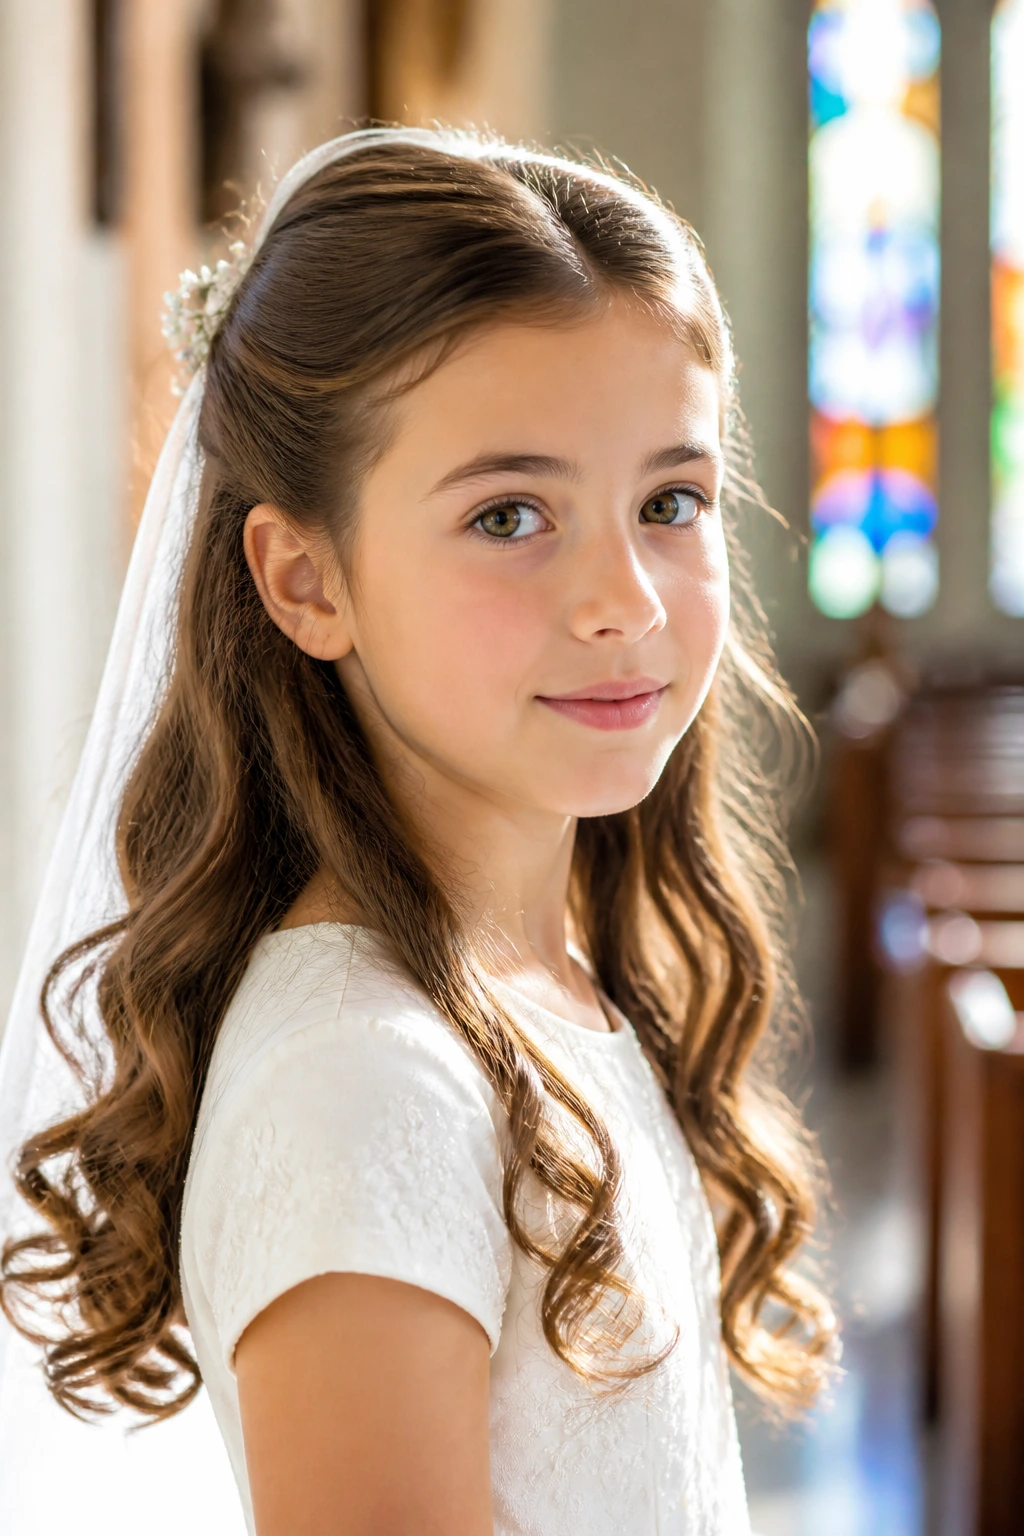
Half-up styles make sense for First Communion because they solve three problems at once. They keep the face open, they give you a secure place for accessories, and they let the hair stay soft enough to feel age-appropriate. That balance is hard to beat. A full bun can feel too formal. Loose hair can look pretty for ten minutes and then start drifting everywhere.
There’s also a practical side that matters more than people expect. A half-up style gives the photographer shape at the crown and movement at the ends. It gives the child a comfortable fit around the ears and temples. And it gives you room to adjust. If the hairstyle needs a bow, a veil comb, or a few extra pins, there is space for all of it without turning the whole head into a pin cushion.
Essential Tools for Secure Half-Up Styling
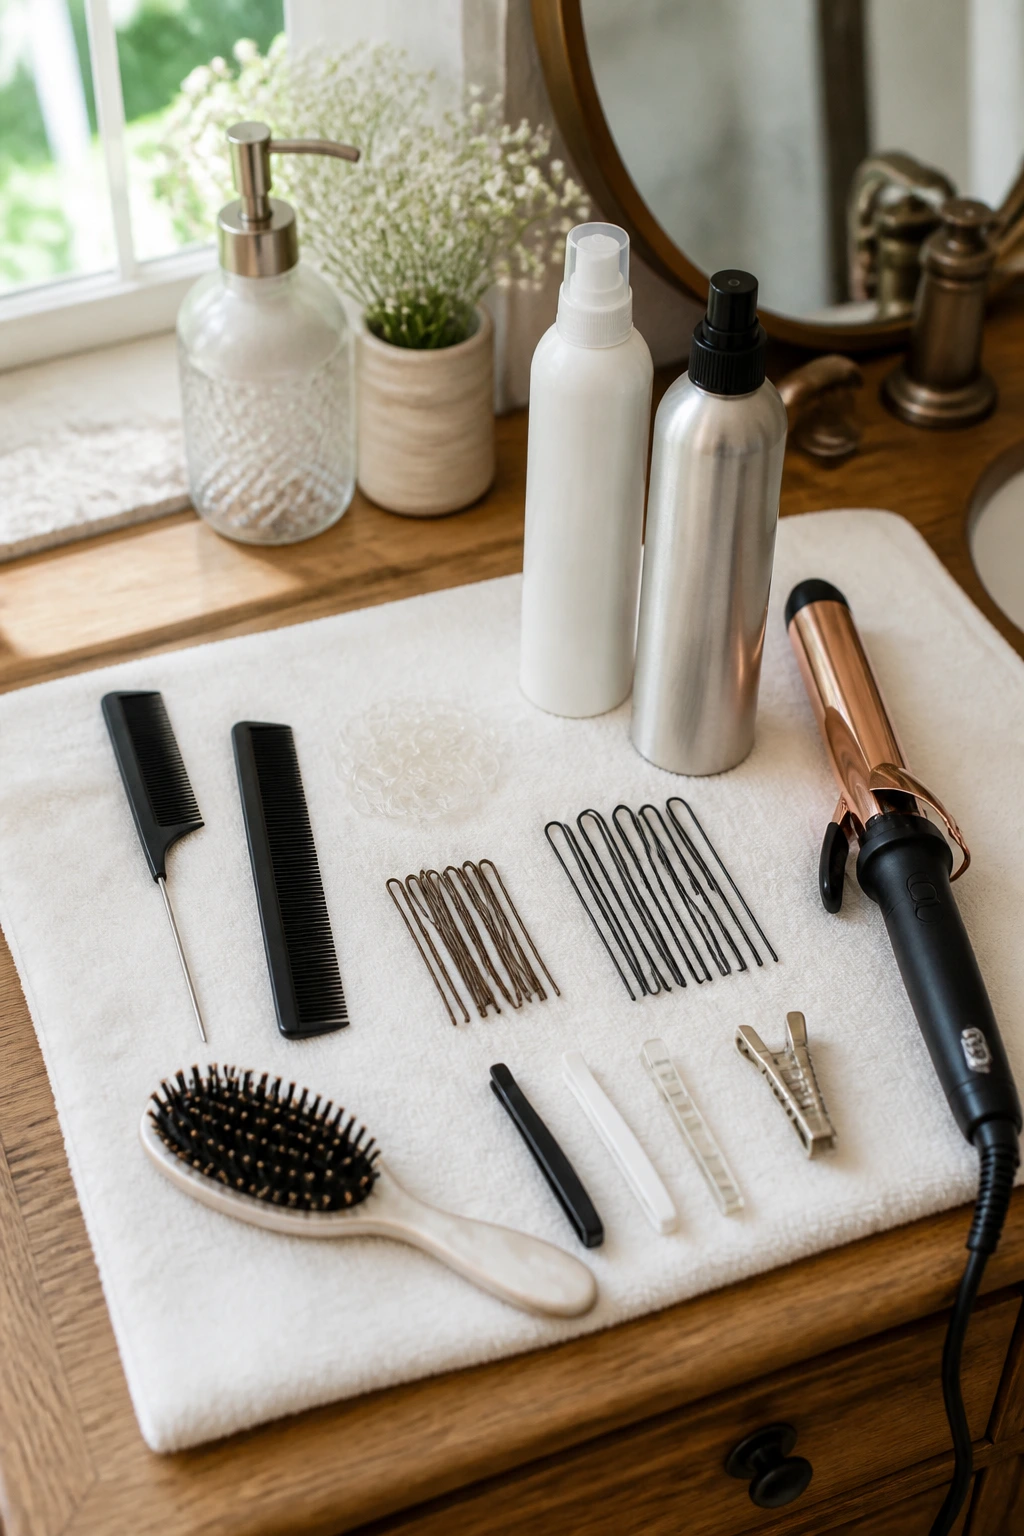
- Rat-tail comb: The pointed tail makes clean sections and sharp parts without snagging.
- Fine-tooth comb: Handy for smoothing the crown before pinning, especially on straight hair.
- Small clear elastics: Best for tiny braids, bubble sections, and hidden anchors.
- Bobby pins and U-pins: Use both if the hair is thick or the accessory has weight.
- Light-hold hairspray: Gives hold without turning the hair crunchy.
- Texture spray or dry shampoo: Useful on fine or slippery hair that needs extra grip.
- Curling iron or wand: Pick one barrel size and stay consistent so the curls match.
- Soft brush: A boar-bristle or paddle brush helps smooth the top without roughing up the finished style.
- Small clip set: Keeps sections separated while you work. Worth it.
- Ribbon, bow, comb, or veil: Choose the accessory first if it matters to the outfit, then build the style around it.
Choosing Bows, Pins, Ribbons, and Veils Without Overdoing It
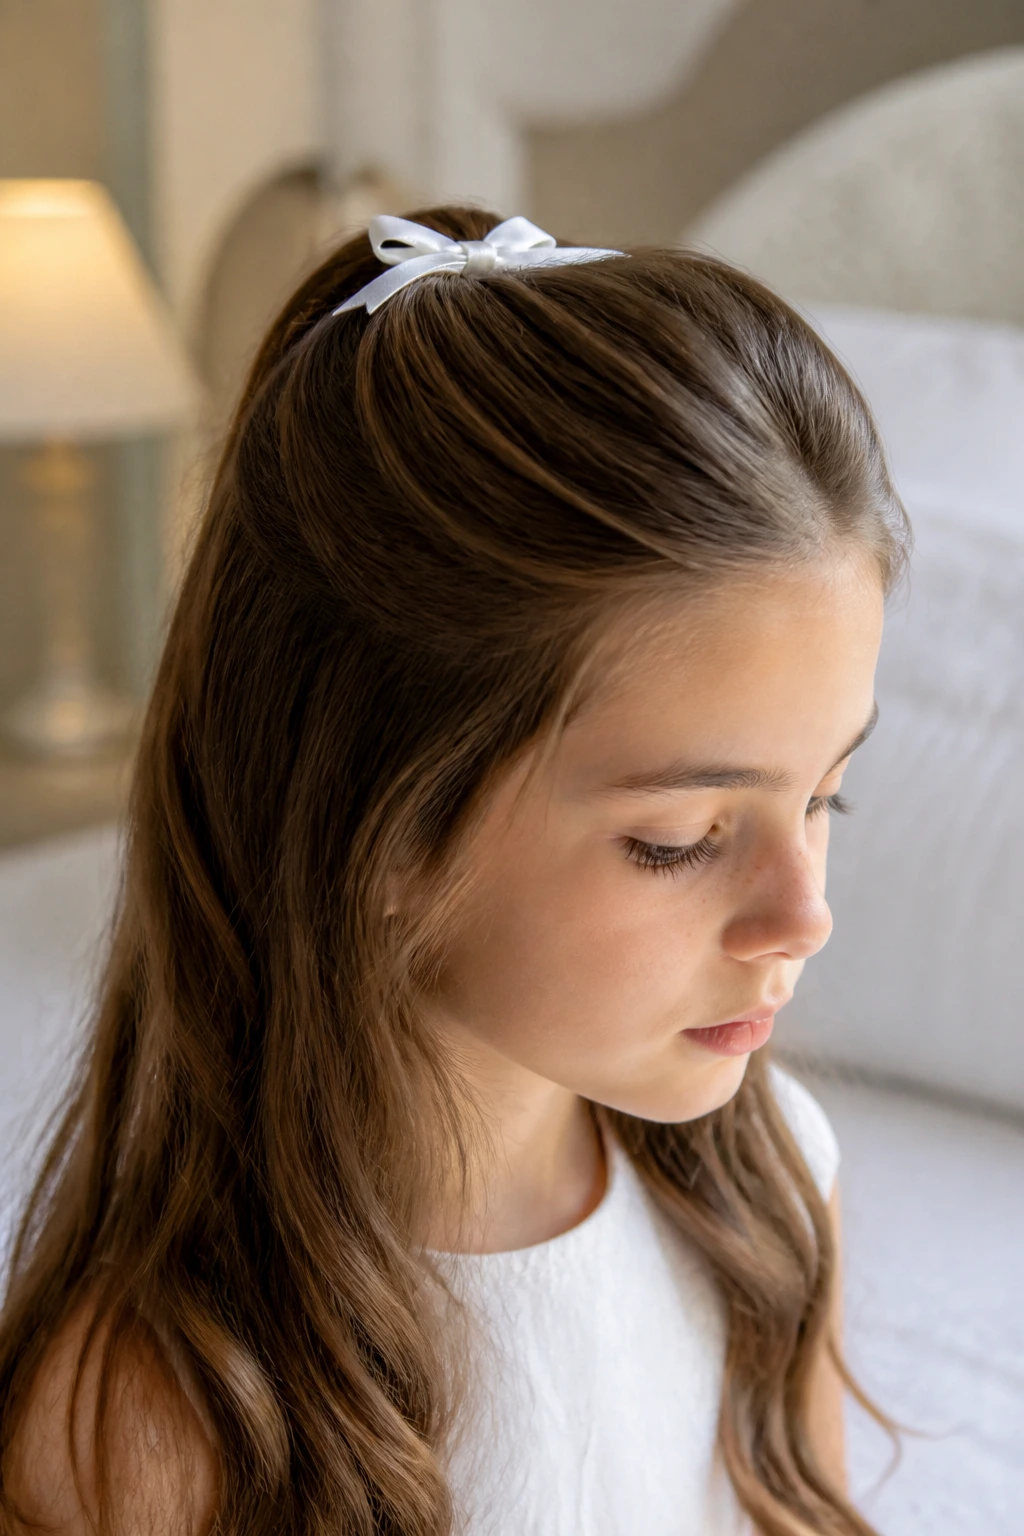
The best accessory is usually the one that looks like it belongs to the dress, not the one that demands attention from across the room. If the dress already has lace, embroidery, or beadwork, keep the hair accessory simple: a slim pearl comb, a narrow satin bow, or a single flower cluster. If the dress is plain, the hair can carry a little more detail.
Pay attention to texture. Satin reads softer, pearl details feel formal, grosgrain grips better and looks a little more matte. Veil combs need a flat base, so don’t place a giant bow exactly where the veil is supposed to sit. Ribbon widths around ¼ to ⅜ inch usually look neat on a child. Wider than that and the hair can start to disappear under the accessory.
How to Finish the Look for Church and Photos
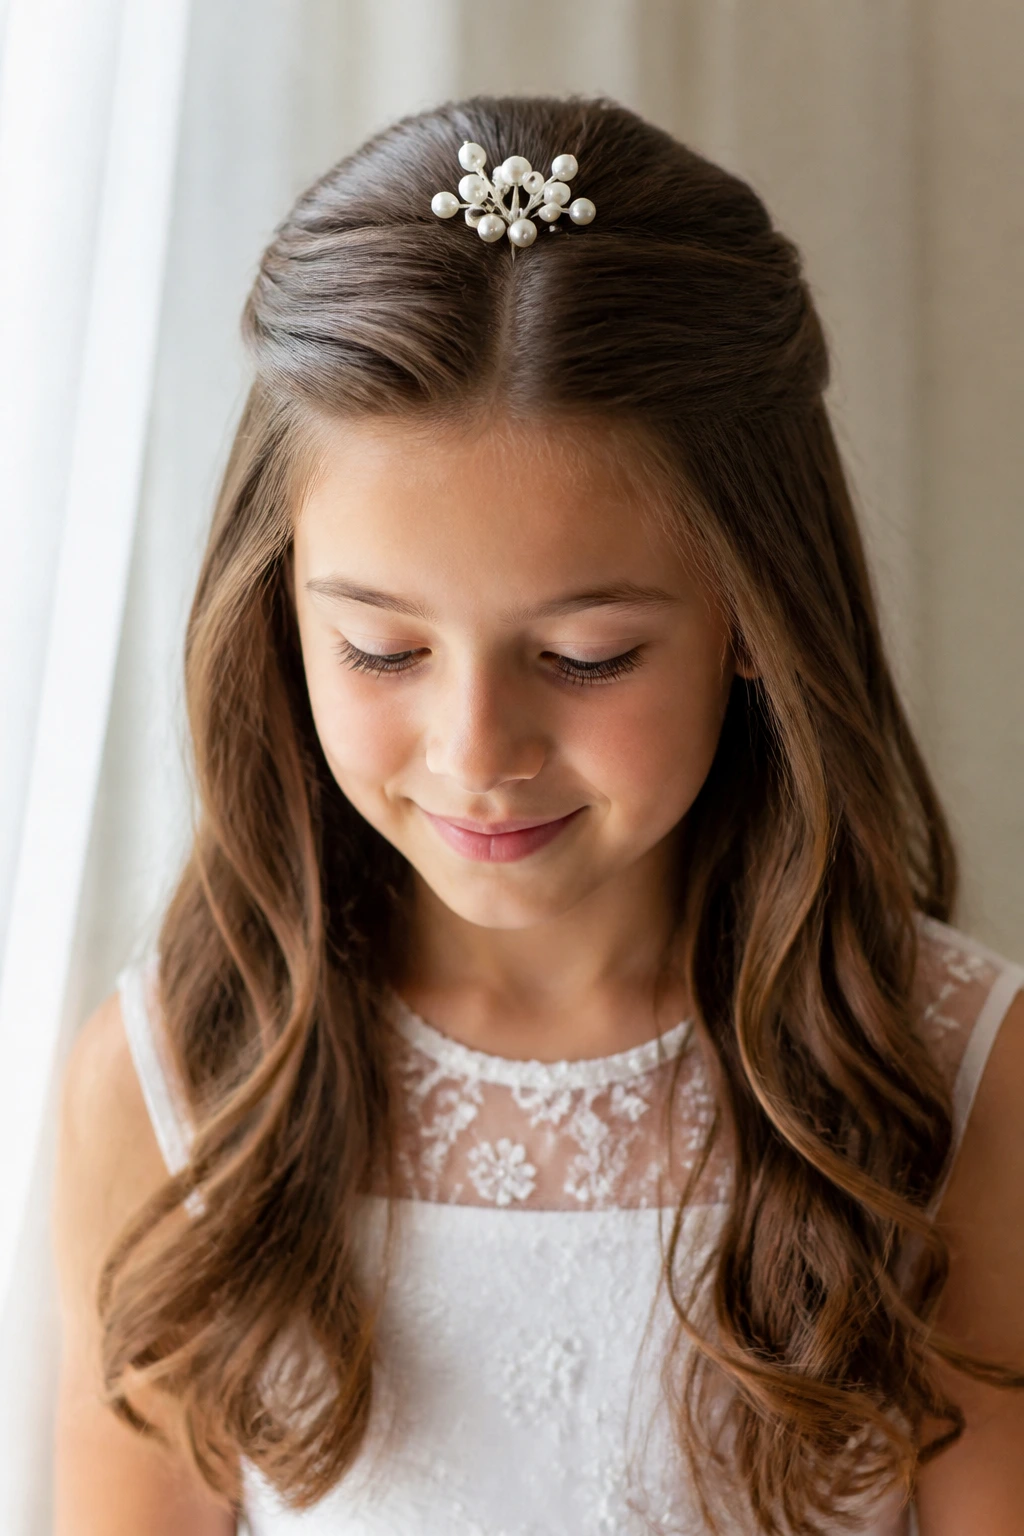
Presentation: Keep the front smooth, the part clean, and the accessory centered or slightly off-center on purpose. A style that looks deliberate from the front will photograph better from the pew than one that is overworked at the back.
Accessories: Match the hair piece to the dress, not to the loudest thing in the room. Pearls, satin, tiny flowers, and narrow ribbon all behave well here. Big clips and oversized bows tend to win the conversation, and that usually isn’t what you want.
Comfort: Check the temple area, behind the ears, and the nape before leaving. If anything pulls, shifts, or scratches, fix it right away. Children remember that feeling fast.
Photos: Tuck a few stray baby hairs at the hairline, then let the rest stay soft. Perfectly shellacked hair often looks harsher in close-up than people expect. A little movement is kinder on the face.
Additional Tips for Better Hold and Smoother Shape
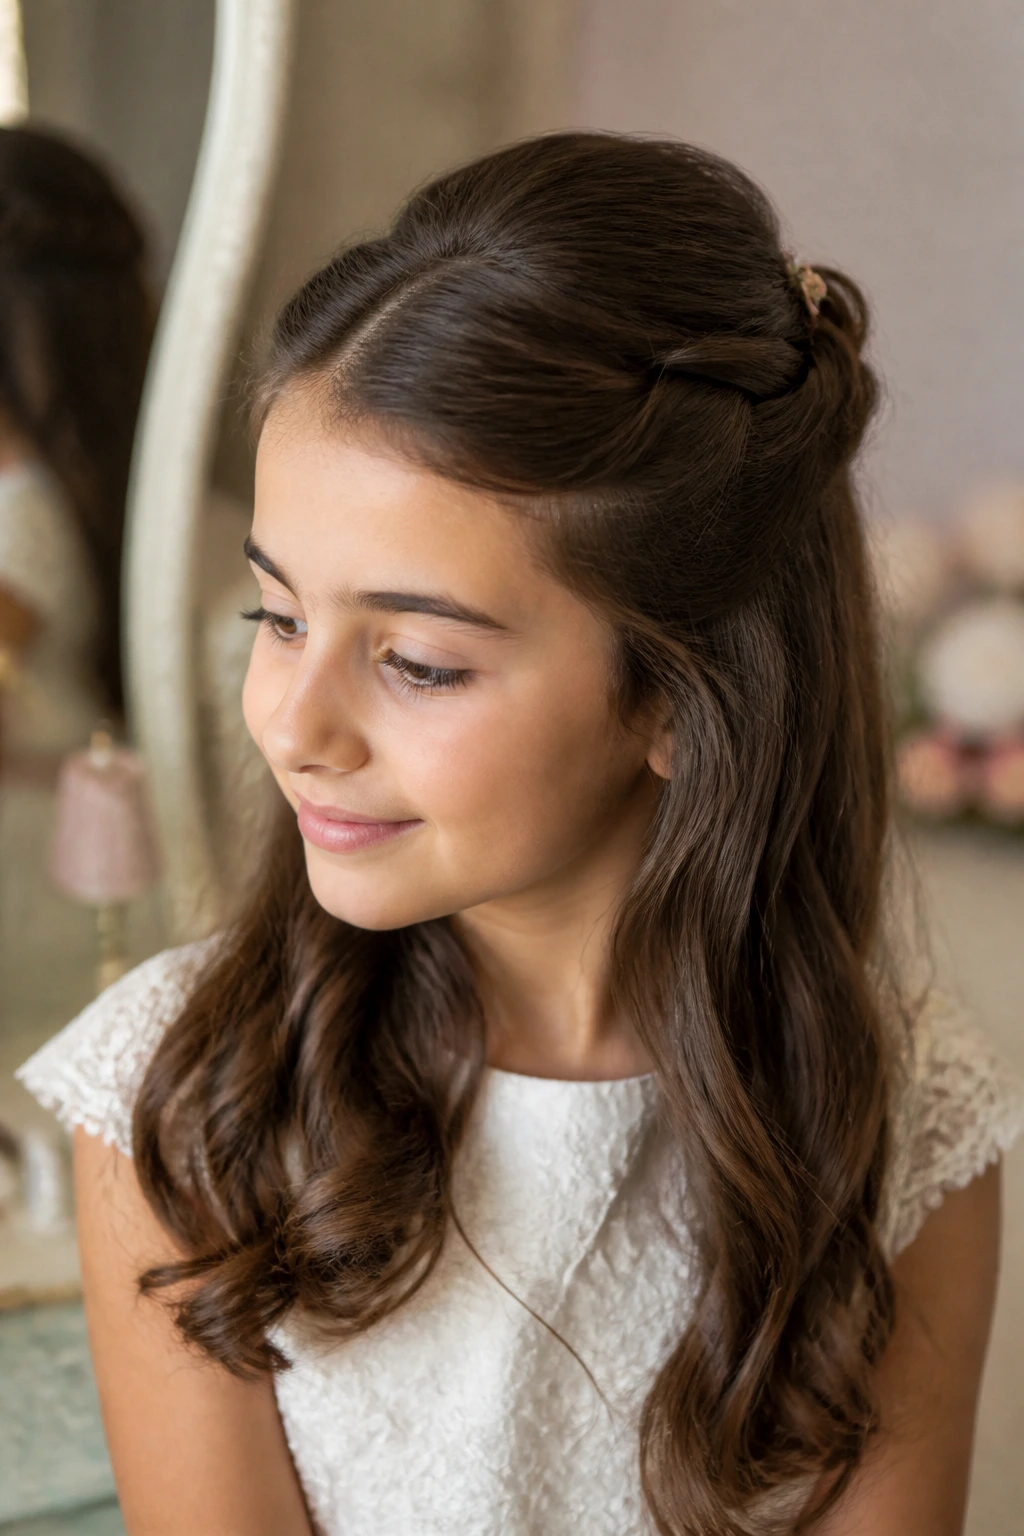
Grip: If the hair slips, mist the roots with texture spray before you pin anything. One light pass is enough. Don’t soak the crown; wet product weighs the hair down and makes the style collapse later.
Shape: Curl or bend the ends away from the face so the style opens outward. That tiny detail matters in photos. It keeps the hair from sitting flat against the cheeks.
Accessory placement: Put the bow, comb, or flower cluster right after the pins go in, not before. You’ll get a cleaner anchor point and fewer gaps around the accessory.
Finish: A light mist of flexible hairspray from about 10 to 12 inches away holds flyaways without making the hair stiff. If you need to smooth a stubborn piece later, warm a drop of serum between your fingers and press it over the problem area. Don’t rub.
Trial Runs, Morning Prep, and Touch-Ups
A trial run saves stress. Not because the first attempt is doomed, but because hair tells you things when you actually work with it. You’ll see whether the crown needs more texture, whether the bow sits too low, and whether the veil comb slips on the chosen section. That is information you want before the morning matters.
On the day itself, start with hair that has a little grip. Day-old hair often behaves better than freshly washed hair, especially for braids and twists. If the hair must be washed that morning, dry it fully and add a small amount of texture product before you start pinning. Keep a few bobby pins, a mini brush, and a small spray bottle nearby. That is enough to fix most problems without rebuilding the whole style.
Variations and Adaptations for Different Hair Types
Fine-Hair Lift: Use a little dry shampoo at the roots and build the half-up section slightly higher at the crown. Fine hair needs shape before it needs decoration.
Thick-Hair Anchor: Split the top section into smaller pieces and pin each one in two places. One pin is rarely enough when the hair has weight.
Curly-Hair Respect: Keep the curls defined and avoid brushing them apart once they’re dry. Pin the crown, leave the length full, and let the texture do the showing off.
Short-Hair Solution: Focus on one side twist, one clip, and smooth ends. Shorter hair can still look finished when the sections are neat and the accessory is well chosen.
Veil-Friendly Build: Keep the top section flat where the comb will sit and avoid bulky bows in that same area. The veil needs a calm surface to rest on.
Minimalist Look: Skip extra flowers or glitter clips and choose one clean piece — pearl, satin, or a simple ivory bow. Less can feel more formal here.
Common Mistakes That Make the Style Slip
- Pulling the hair too tight: If the temples look stretched or the child keeps touching the style, it’s too tight. Loosen the section and re-pin it lower and softer.
- Using the wrong pins: Slick, flimsy pins slide right out of fine hair. Use crossed bobby pins or crisscrossed U-pins when the hair is heavy or silky.
- Adding too much product: Heavy cream, oil, or spray can flatten the crown and make pins slide. Use the smallest amount that fixes the problem.
- Waiting until the end for the accessory: If you pin the bow or veil first, then try to shape the hair around it, the result usually looks crowded. Build the style first, then place the accessory.
- Ignoring the hairline: Loose flyaways at the front can make the hairstyle look unfinished in photos. Smooth the hairline with a fingertip and a touch of serum before you stop.
- Skipping the trial with the actual accessory: A style that works without a veil can fail once the comb is added. Test the real pieces together before the day.
Frequently Asked Questions
How long should the hair be for a half-up First Communion style?
Shoulder length is usually enough for twists, small braids, and simple clips. Longer hair gives you more options, but even shorter cuts can work if the top section has enough length to pin back cleanly.
Can these styles work on curly or coily hair?
Yes, and they often look beautiful because the texture adds shape without much extra work. The main thing is to define the curls first and pin the crown in a way that respects the pattern instead of flattening it.
Should the hair be washed the morning of First Communion?
Not always. Day-old hair often has more grip and holds braids and pins better. If you do wash it that morning, dry it fully and add a little texture product before styling.
How do I keep a veil from slipping?
Place the veil comb into a flat, secure section of the half-up style and use crossed pins underneath the comb teeth. The comb needs a stable base more than it needs extra hairspray.
What if the child doesn’t like having hair pulled back?
Keep the style looser around the temples and use a side twist or soft crown braid instead of a tight center pull. Comfort shows in the face, and you’ll see it in the photos immediately.
Are bows or flowers better?
Bows read cleaner and stay tidier, while flowers feel softer and more delicate. If the dress already has detail, I’d lean toward a bow or pearl clip. If the dress is plain, tiny flowers can be lovely.
Can I do one of these styles at home without a stylist?
Yes, especially the rope twists, side twists, satin bow curls, and simple braid-accent looks. Do a practice run first and use the real accessories during that trial so the morning itself feels familiar.
What if the hair starts falling apart before pictures?
Don’t rebuild the whole style. Add one or two hidden bobby pins, smooth the crown lightly, and refresh only the loose section that needs help. Most styles fail at one spot, not everywhere at once.
A Soft Finish That Lasts
The nicest First Communion hairstyles do not try to steal the scene. They make room for the day. A half-up look gives you that balance: enough structure to stay neat through the service, enough softness to still feel childlike, and enough polish to sit well with a veil, bow, or pearl clip.
Pick the version that matches the hair you have, not the one that looks hardest on a Pinterest board. A style that stays comfortable, secure, and calm will always photograph better than one that looks dramatic for ten minutes and then starts slipping. Keep the crown tidy, the accessory modest, and the finish soft. That combination never feels tired, and it holds up just fine when the candles are lit and the cameras come out.
