



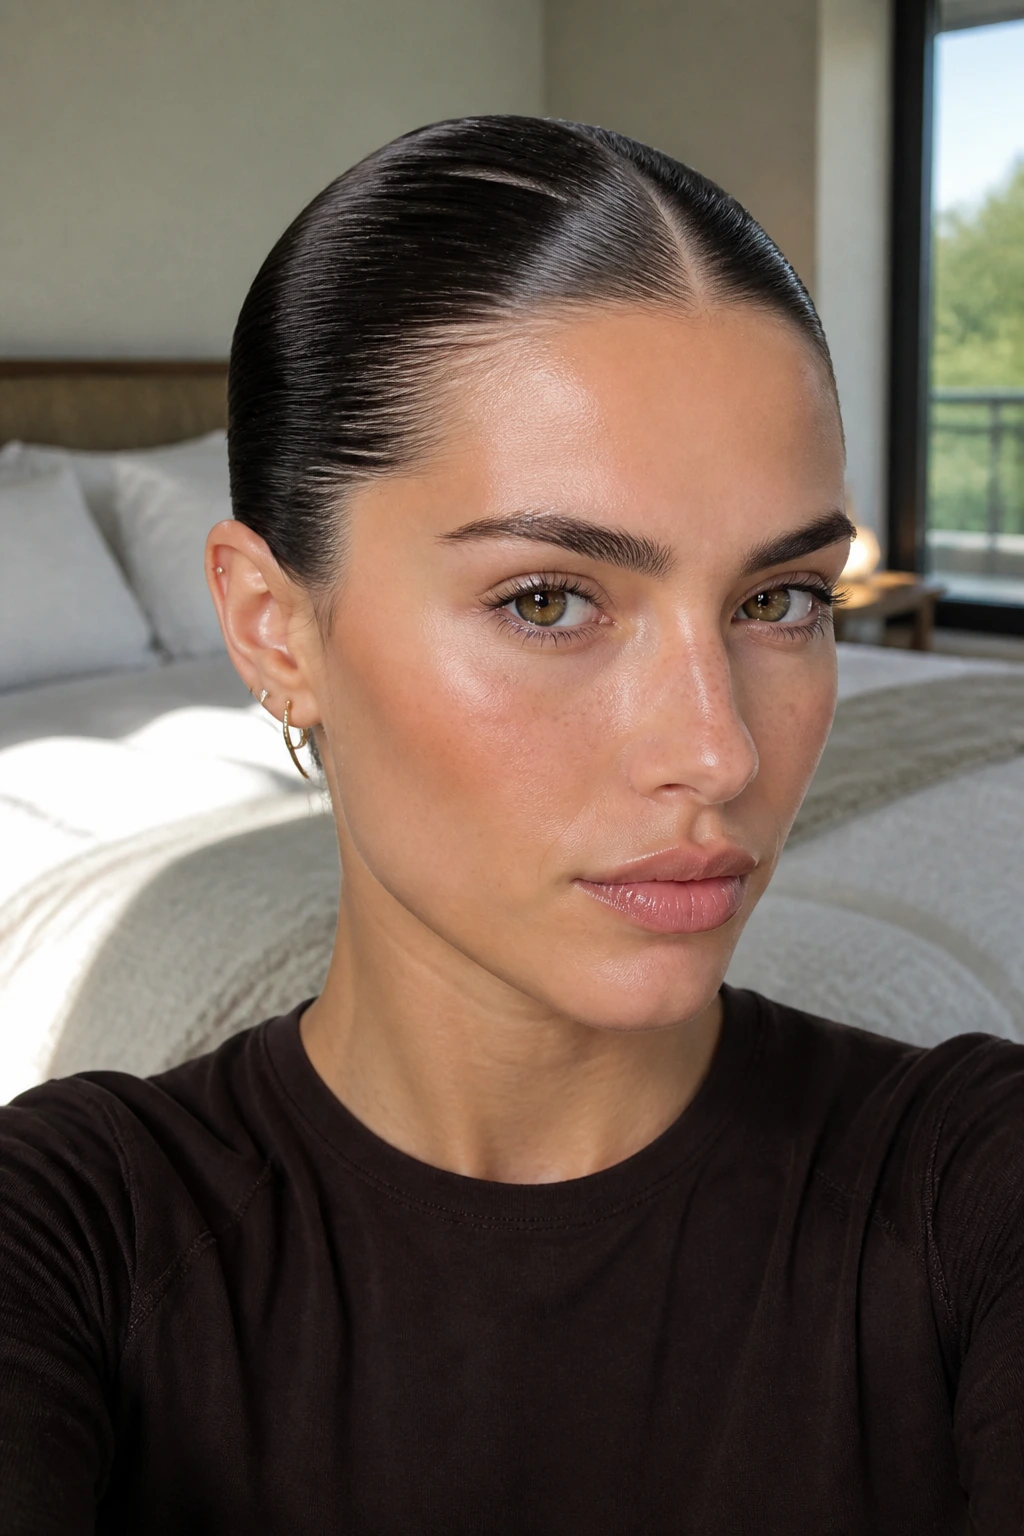
Some hairstyles look better with a little frizz. Slicked-back hair is not one of them. The shape has to be deliberate from the first brush stroke: clean roots, a part that sits where you meant it to sit, and enough hold that the front doesn’t slowly drift loose while you’re halfway through dinner.
A good slicked-back look for women does a lot with a small surface area. It clears the face, shows off earrings and brows, and turns second-day hair into something that looks planned rather than surrendered. The real trick is not piling on product until the crown feels stiff. It’s choosing the right finish for the hair you actually have — fine, coarse, curly, coily, short, long, layered, slippery, dry, all of it.
I keep coming back to these styles because they solve different problems without pretending to be one-size-fits-all. Some versions are sharp enough for a blazer and a red lip. Others are soft, a little glossy, and easy to wear with a knit sweater and no makeup at all. The best ones look clean from three feet away and still hold up when you lean into a car seat, tuck your hair behind your ears, or step outside into wind.
Why These Slicked-Back Looks Keep Working
-
They tame messy roots fast: A damp brush, a little gel, and a firm first pass can turn a rough crown into something that looks intentional in under 10 minutes.
-
They show off the face instead of fighting it: When the hair is pulled back cleanly, earrings, jawline, cheekbones, and eyeliner stop competing with flyaways.
-
They stretch between wash days: Second-day hair usually grips product better than freshly washed hair, which is why so many slicked-back styles hold more reliably after the first day.
-
They work across textures: Straight hair, waves, coils, locs, and short cuts can all be slicked back — the product and brush choice changes, not the idea.
-
They move easily from casual to dressed up: Swap a plain elastic for a satin bow, a clip, pearls, or a wrapped strand, and the whole mood shifts.
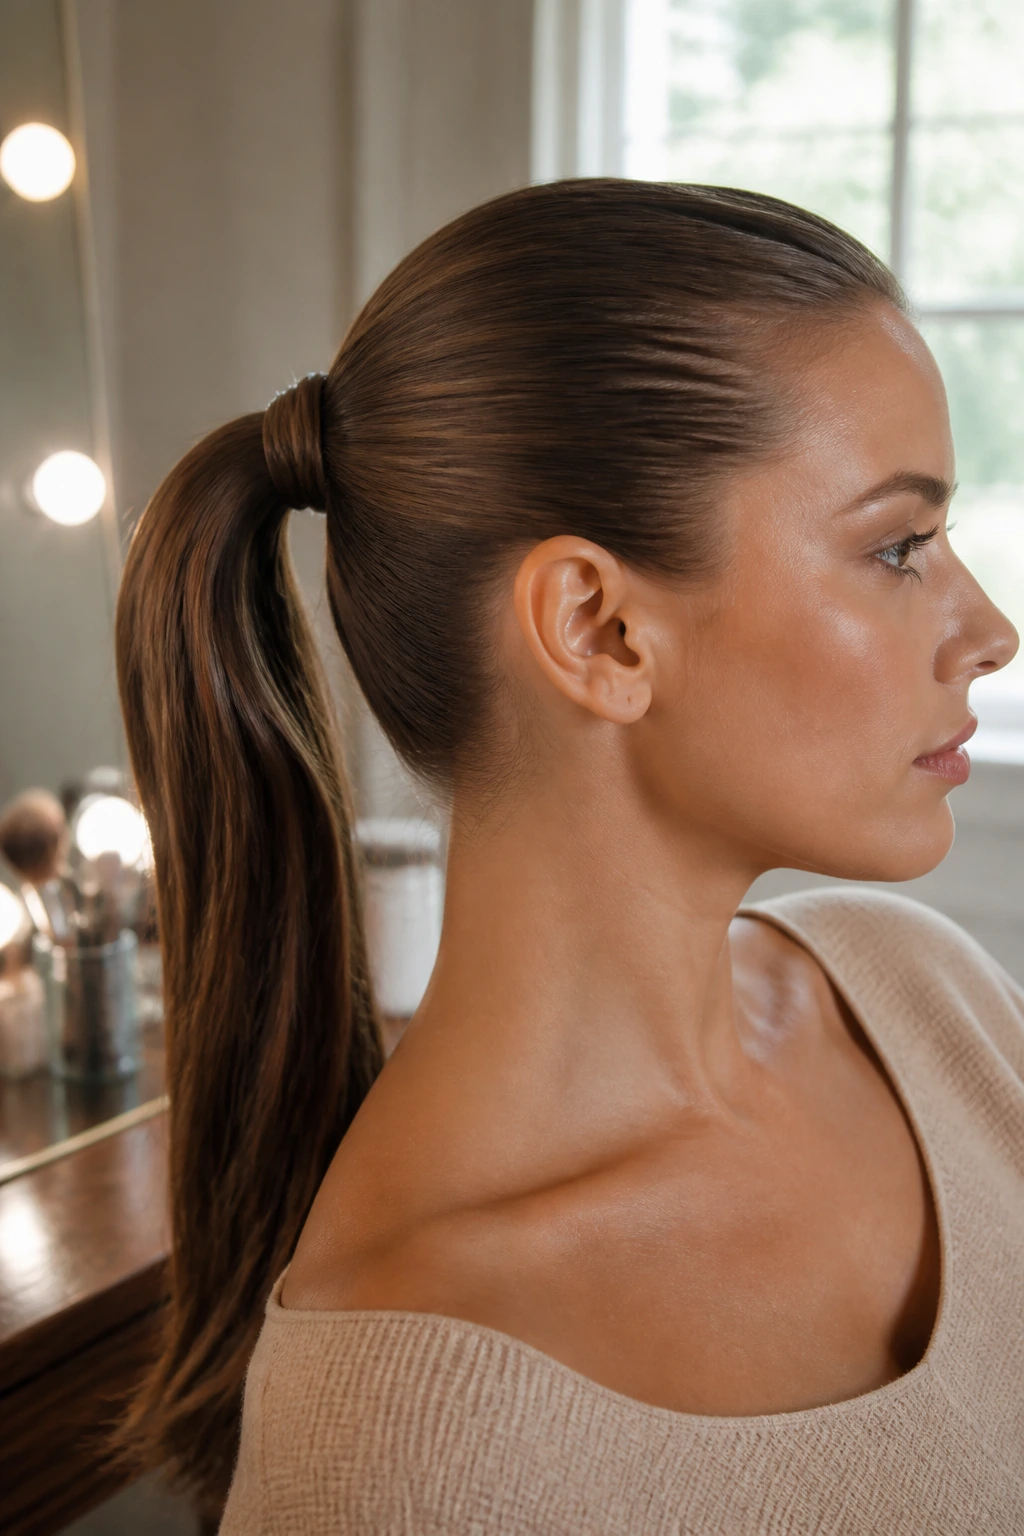
1. Glass-Sleek Low Ponytail
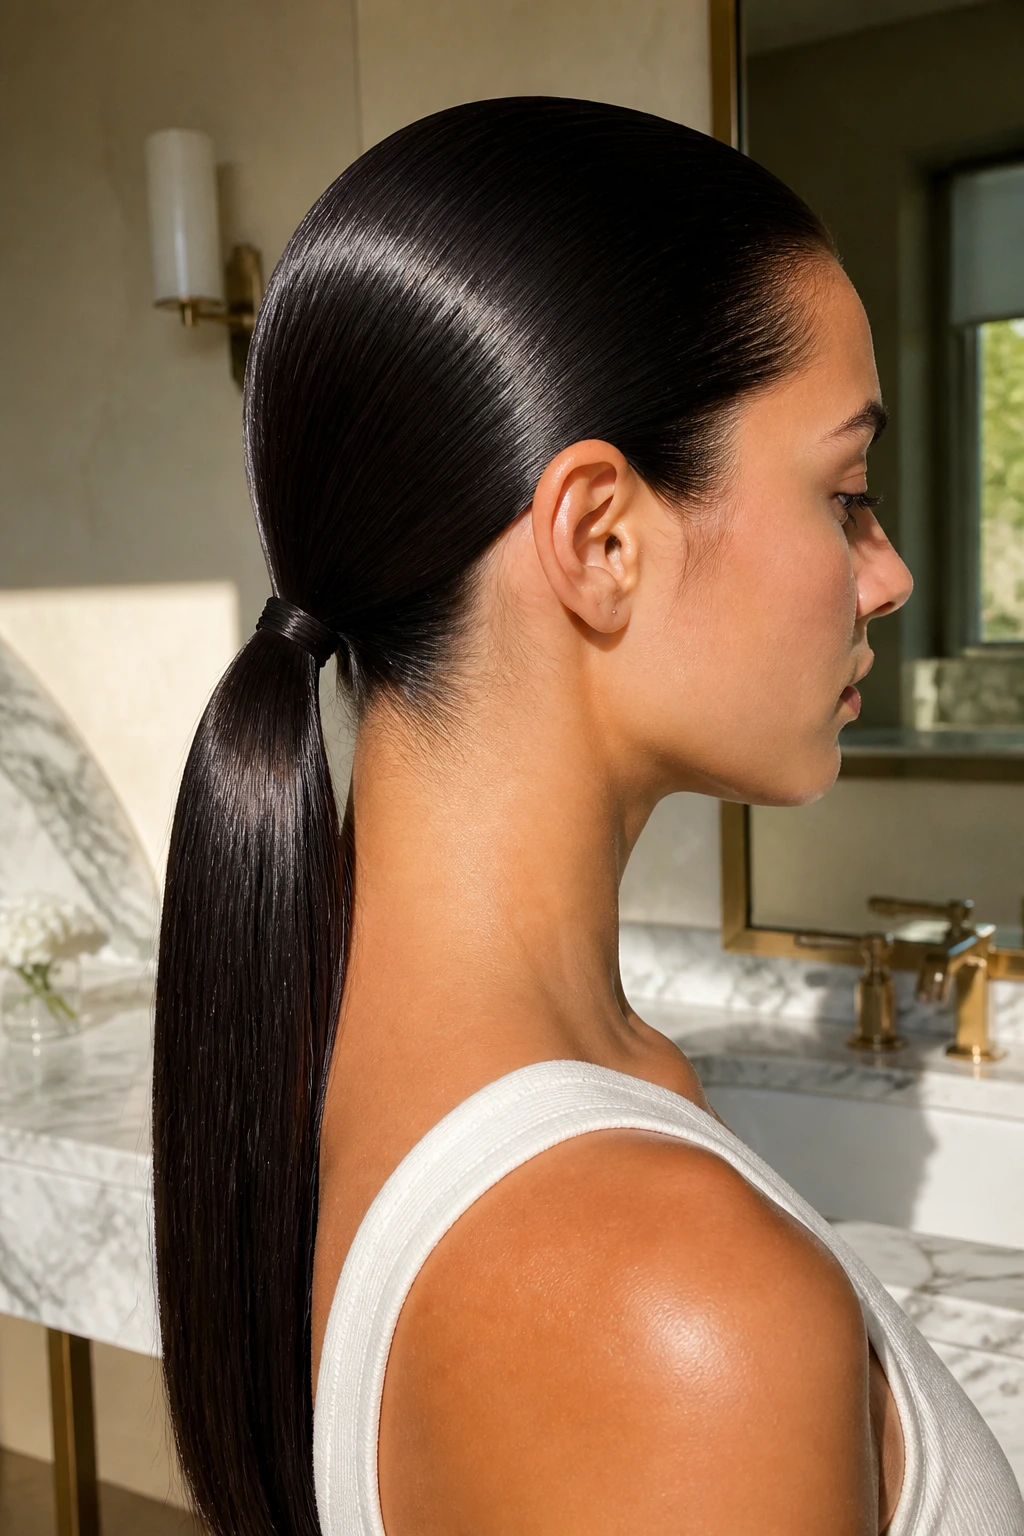
The low ponytail is the cleanest place to start, and it still looks sharp when the crown is pressed flat and the base sits right at the nape. A glass-sleek finish makes the pony read as deliberate, not lazy, which is the whole point.
Use a rat-tail comb to trace the part, then brush the roots back in small sections before you tie it off. If your hair slips easily, a pea-sized amount of gel at the hairline and a little pomade through the top layer will keep the front from fraying.
2. Center-Part Wet Look
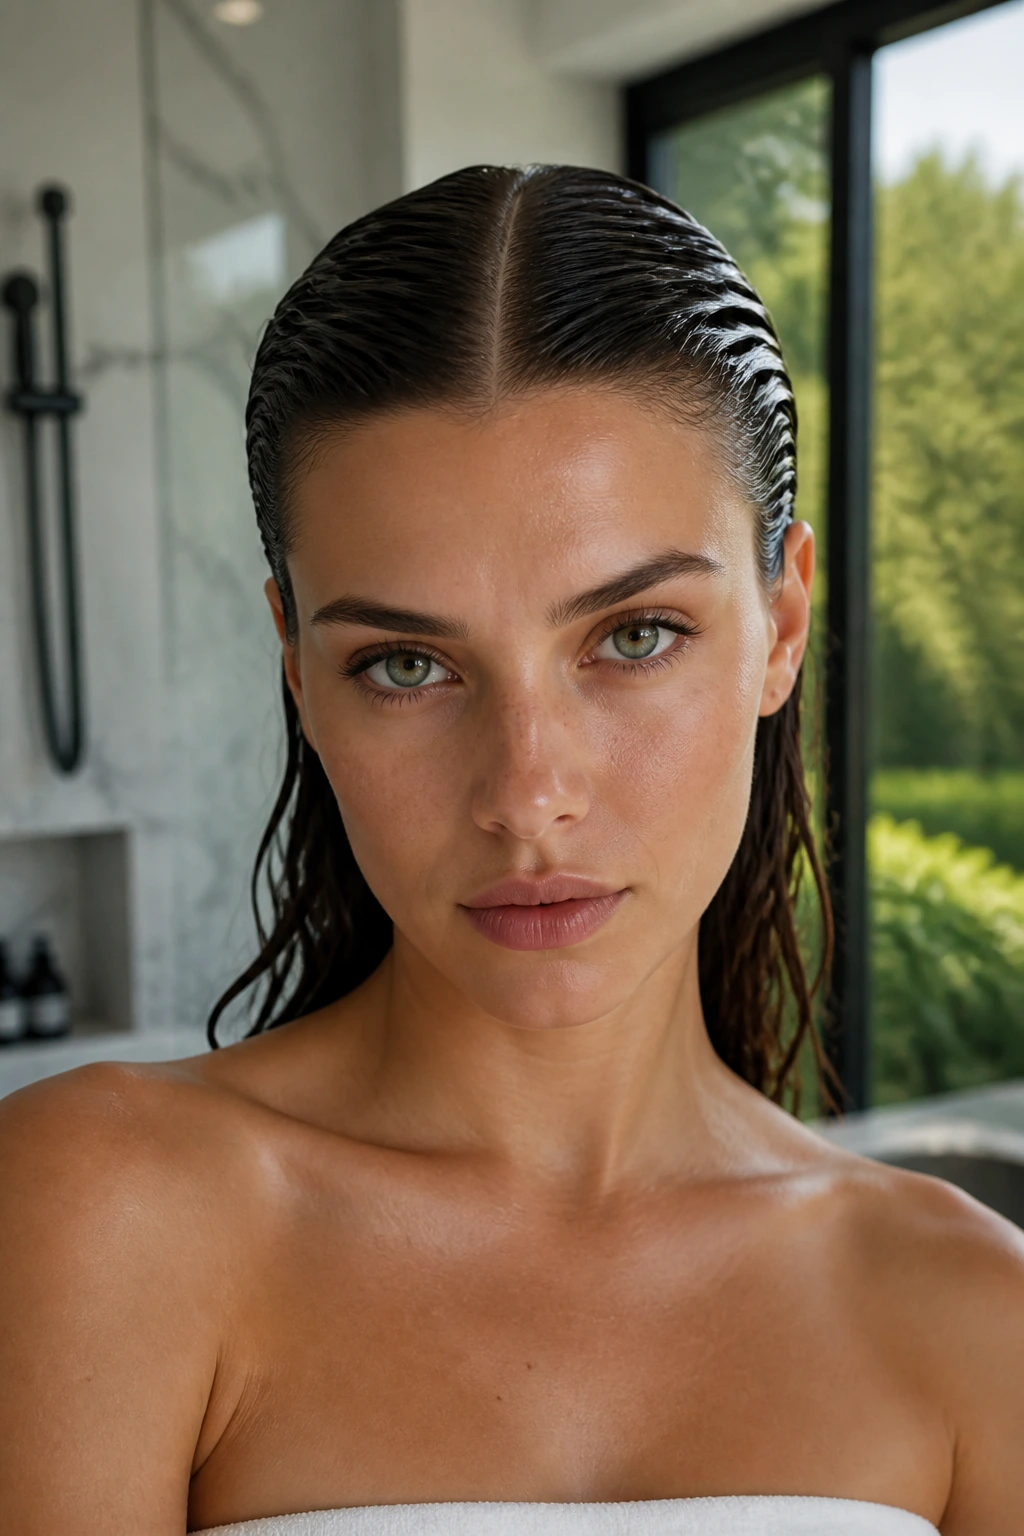
A middle part with a wet finish can look almost architectural when the shine is controlled. The key is to keep the roots sleek and the lengths glossy, not drenched to the point that the style collapses by noon.
Start with damp hair, then smooth a leave-in and gel mixture from the temples back. If your ends are dry, stop the product before the last two inches so they stay soft instead of crunchy.
3. Deep Side-Part Slick Back
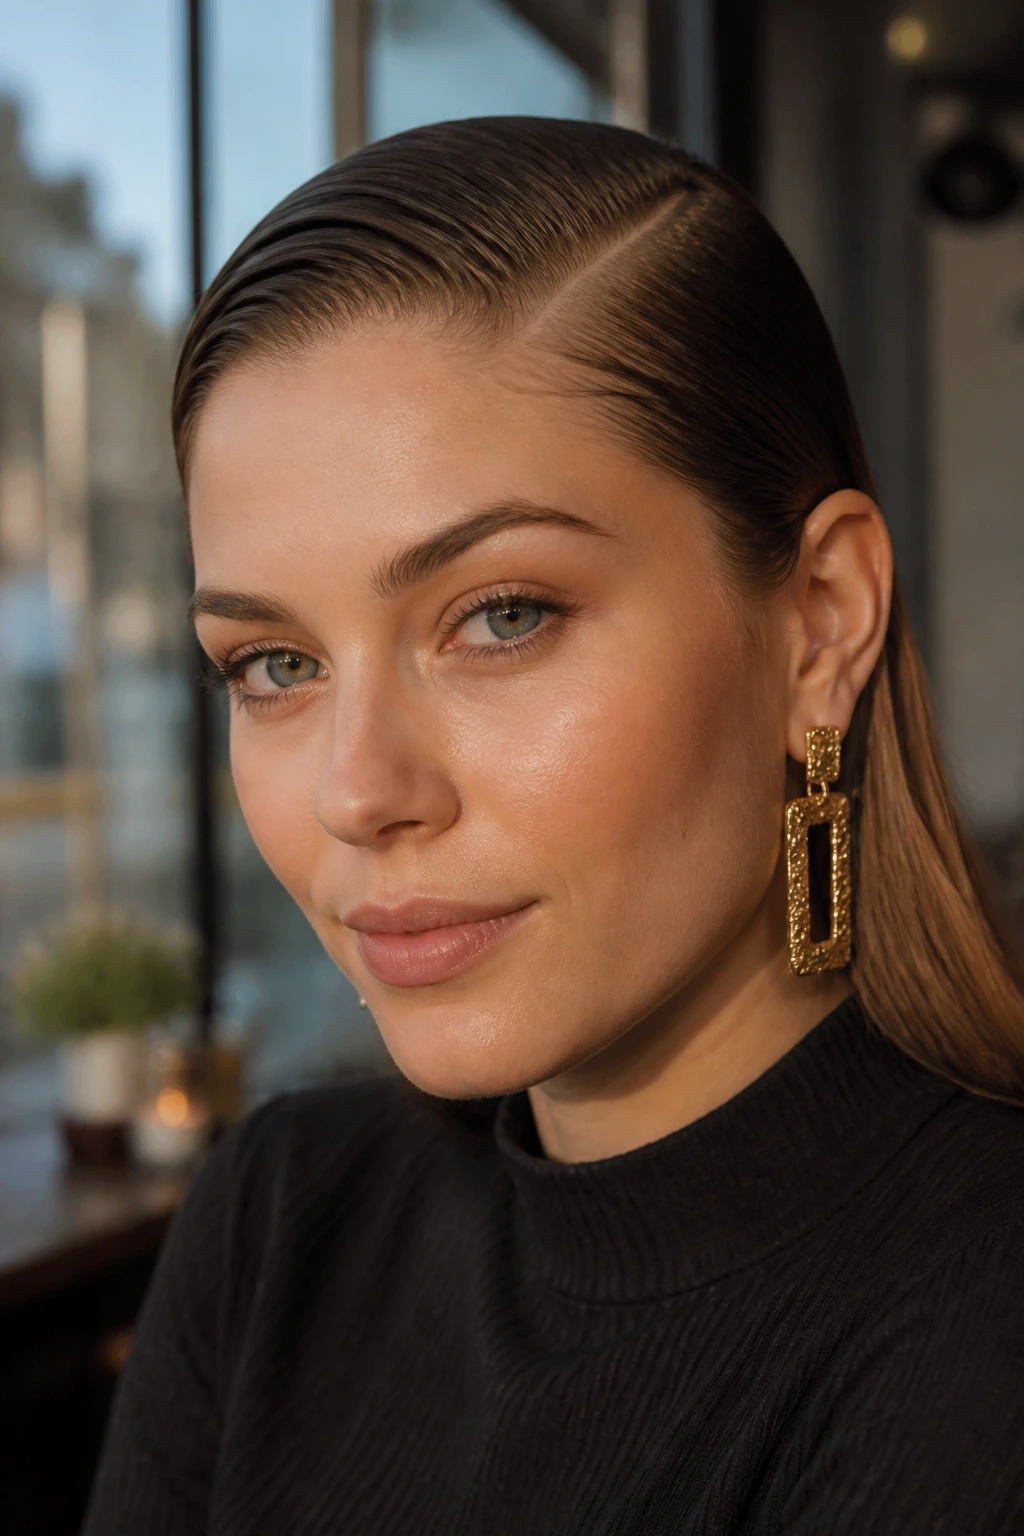
A deep side part changes the whole mood. It takes the severity out of a slicked-back style and gives the face a longer, softer line, especially when one side is tucked tighter than the other.
Brush the heavier side across the crown first, then pin the tucked side behind the ear if it needs help staying flat. This version looks especially good with a strong brow or a statement earring on the open side.
4. Low Chignon with Tucked Ends
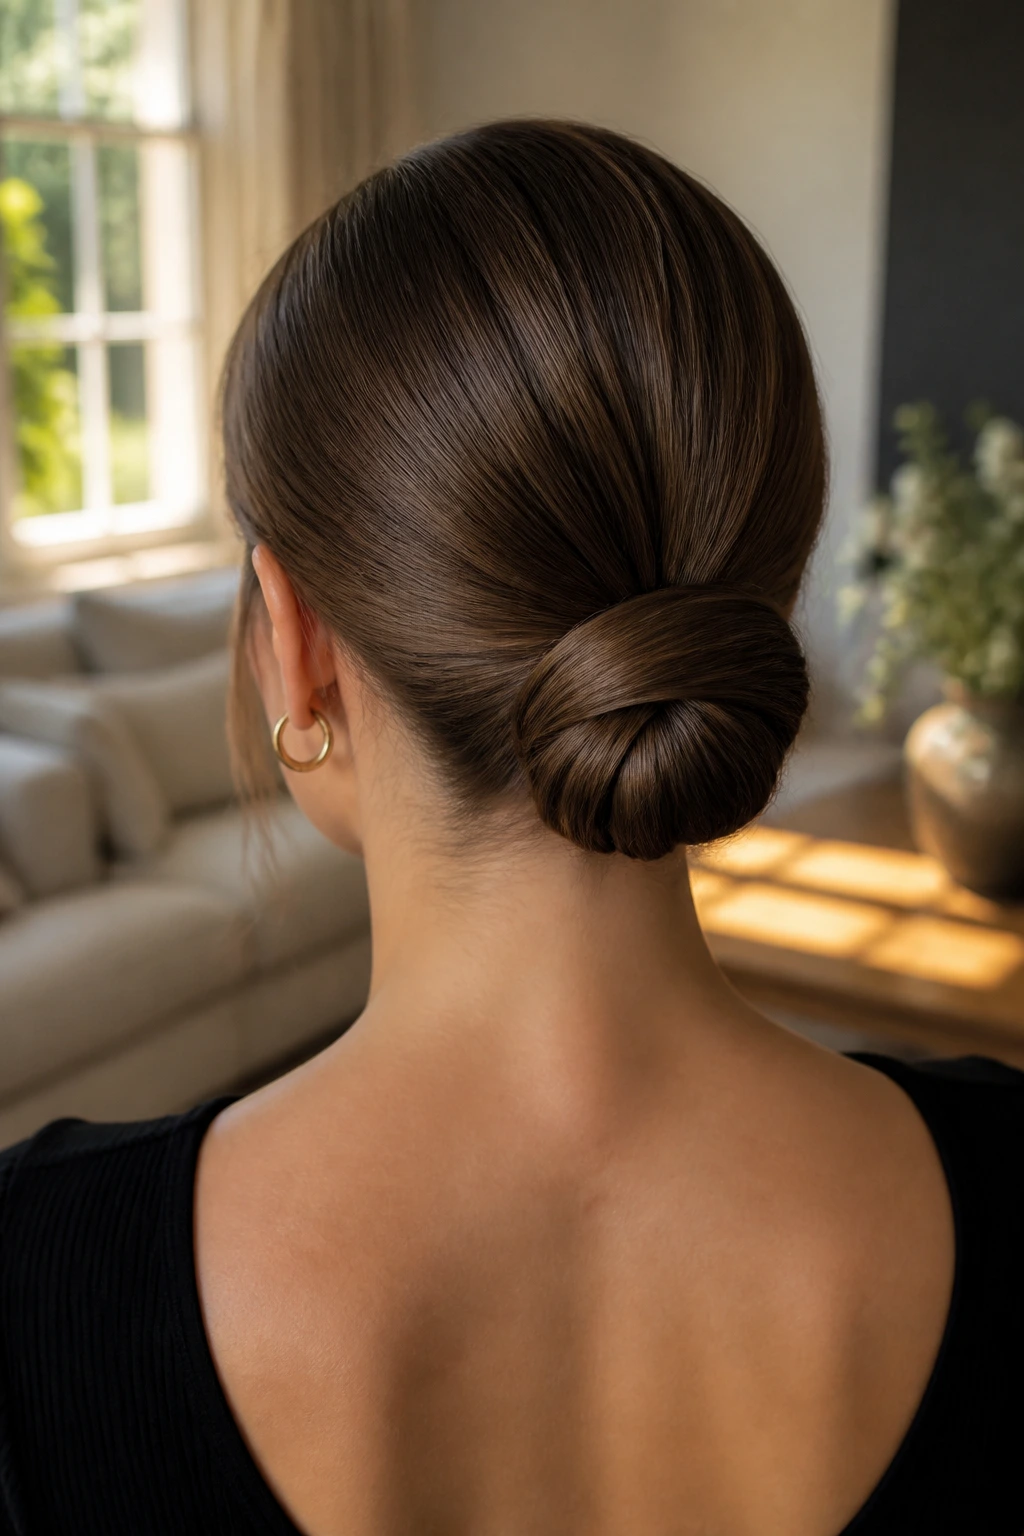
A low chignon feels neat without looking fussy, and tucked ends keep the shape compact. It’s the kind of bun that stays in place when you’re moving through a long day and don’t want to keep checking the mirror.
Why it stays neat
The trick is to build the slicked base first, then twist the pony into a coil and pin the ends under the bun so they disappear. If layers keep escaping, use crossed bobby pins instead of one heavy pin — they grip better and sit flatter.
5. Braided Slicked-Back Ponytail
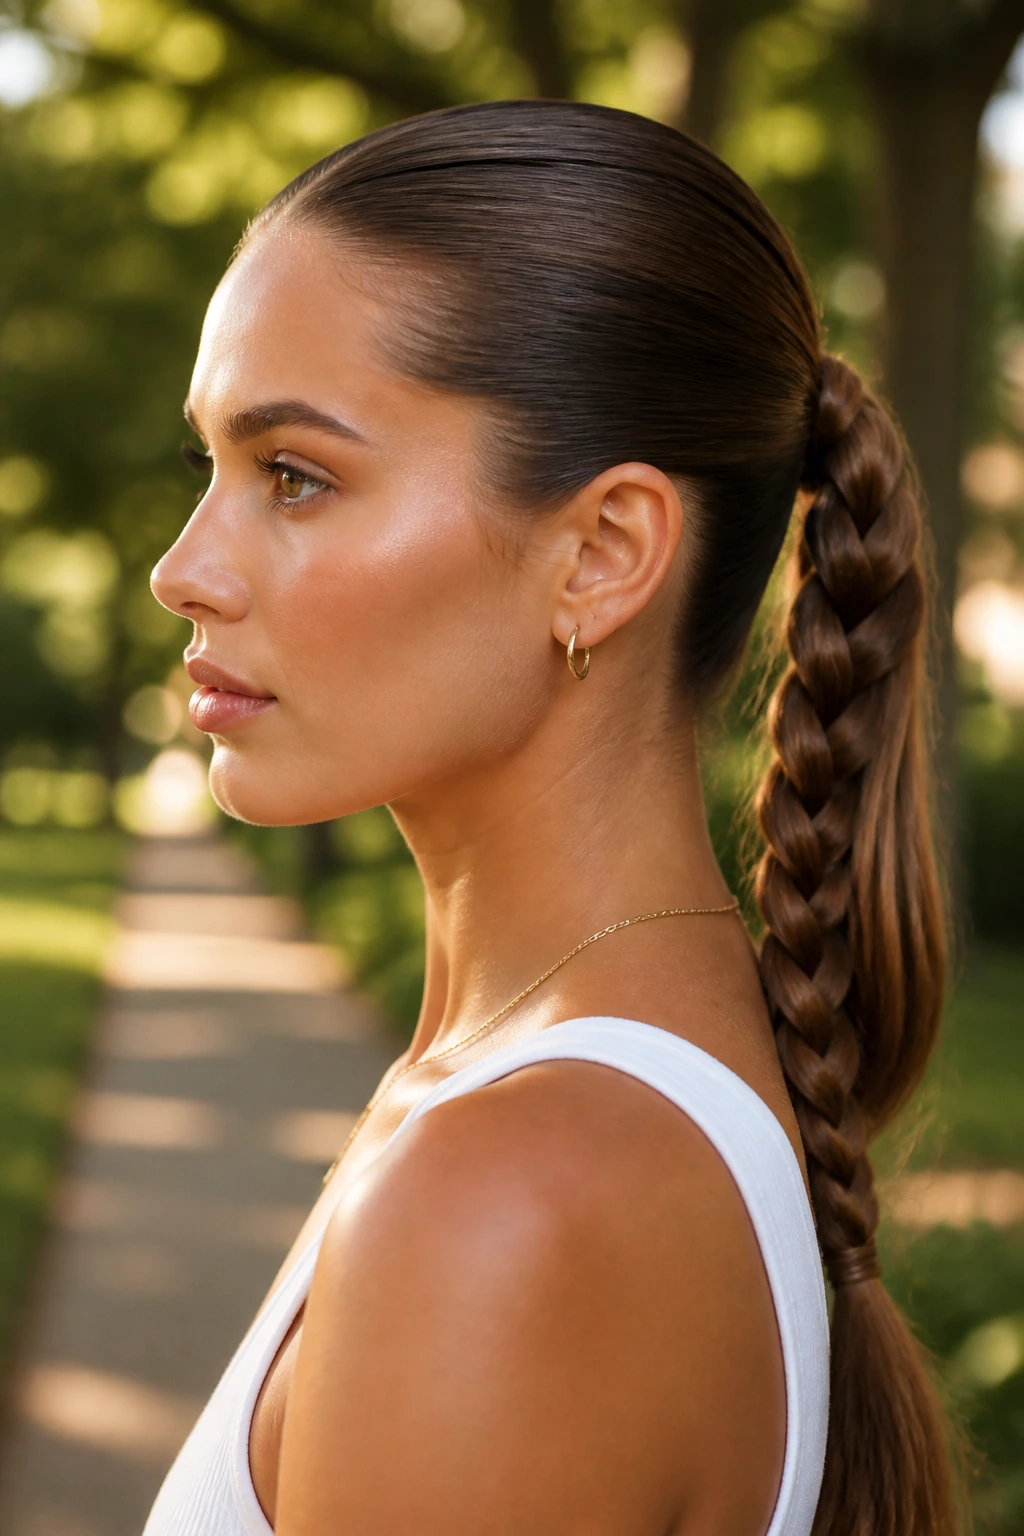
If your ponytail tends to puff up, braiding the tail is a smart move. The roots stay tight and smooth, while the braid gives the whole style a little texture without ruining the clean front.
This works especially well on thick hair because the braid keeps the length under control. A shine serum on the tail before braiding helps the plait sit neatly instead of looking dry and fuzzy.
6. Rope-Twist Ponytail
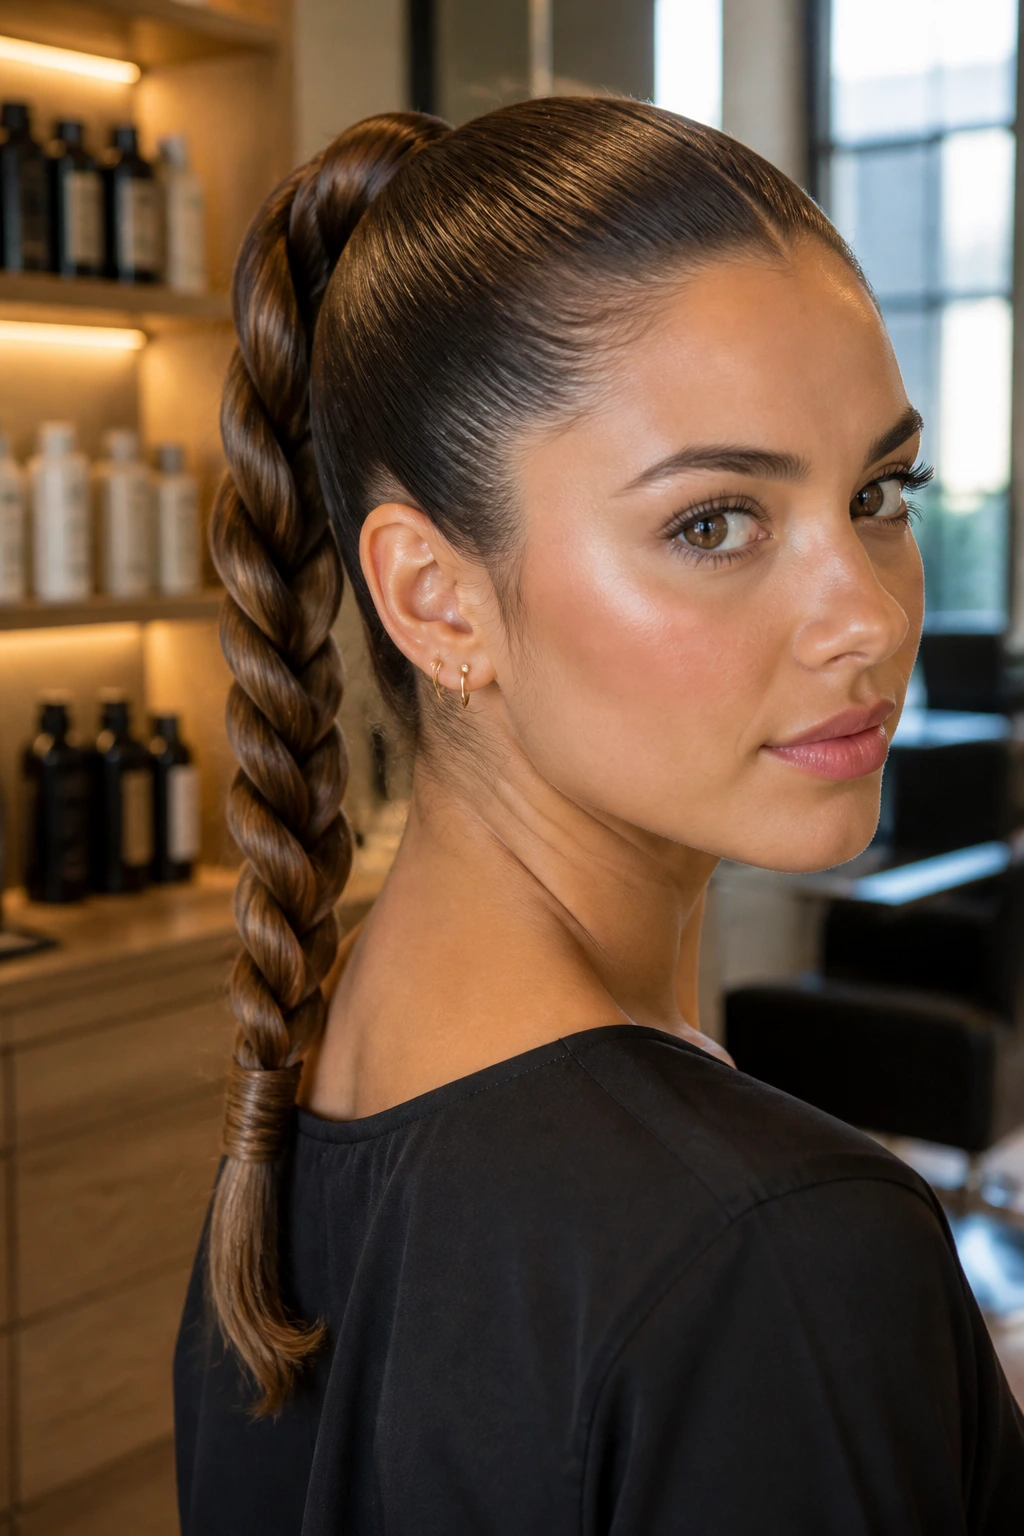
A rope twist reads sleeker than a loose braid and takes less time to build. Two sections twisted around each other hold a narrow, polished shape that works well when you want the ponytail itself to look tidy.
It’s a good option if your hair is medium-length and you don’t want the heaviness of a full braid. Keep the twist even from top to bottom, or the tail will start leaning off to one side.
7. Bubble Ponytail
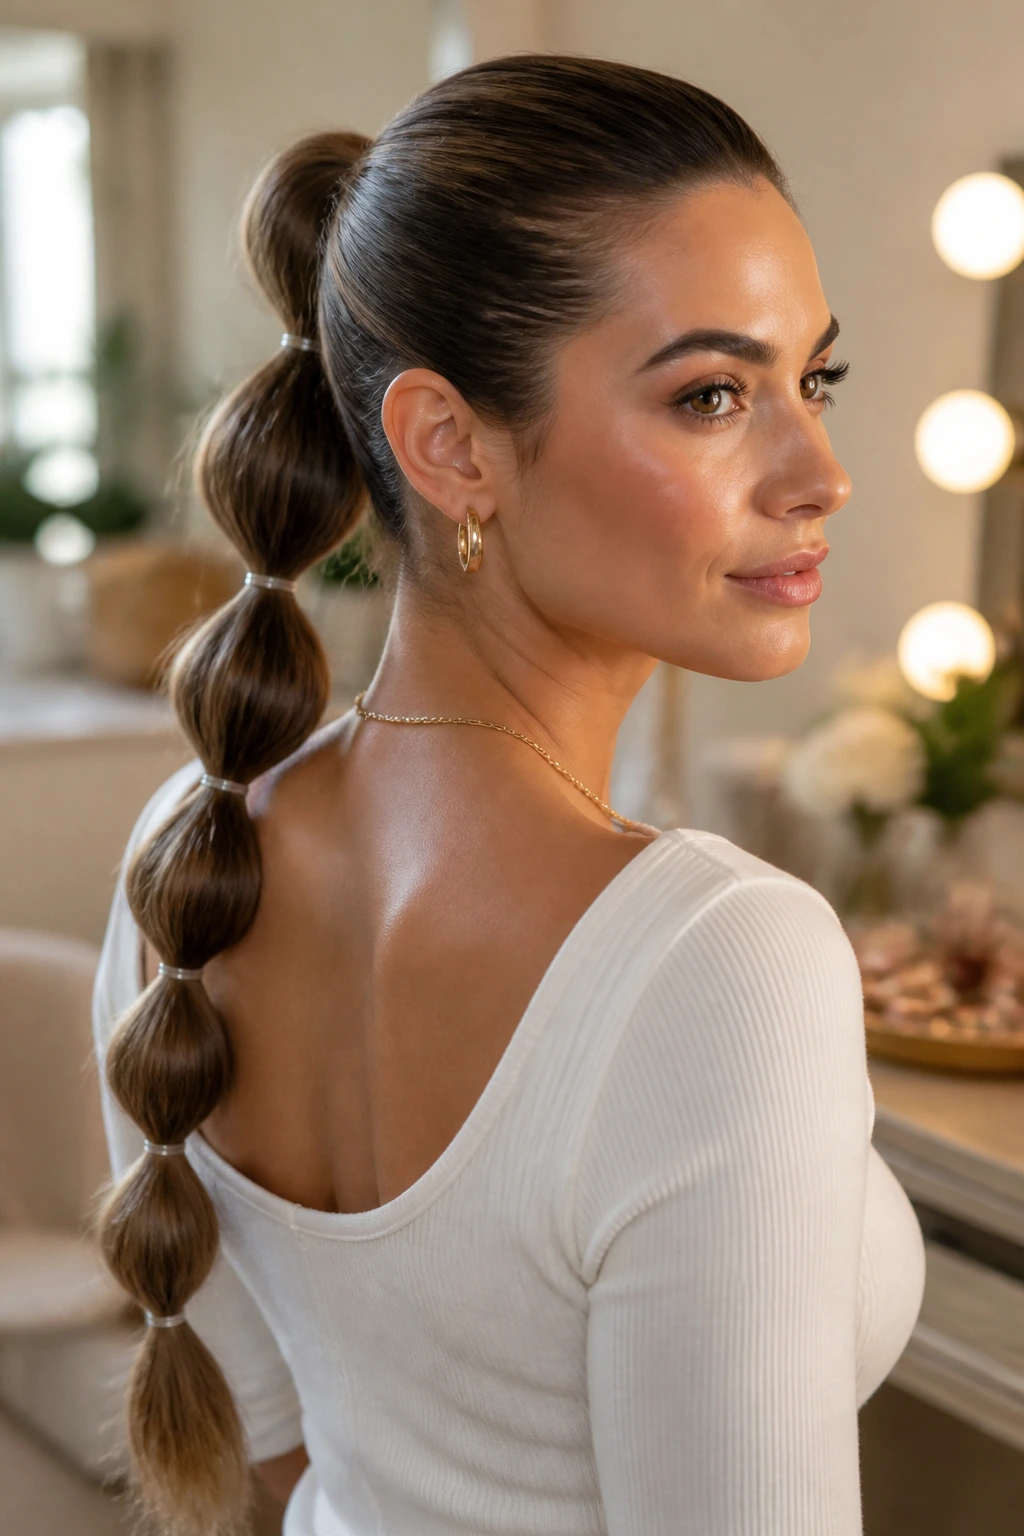
Bubble ponytails look playful, but the root area can still be very polished. That contrast is what makes them interesting — flat at the crown, rounded down the length, with each bubble puffed on purpose.
Use clear elastics every 2 to 3 inches, then gently tug each section once the tail is secured. If your hair is fine, a little texturizing spray inside the bubbles helps them hold shape instead of collapsing into skinny little tubes.
8. Braided Low Bun
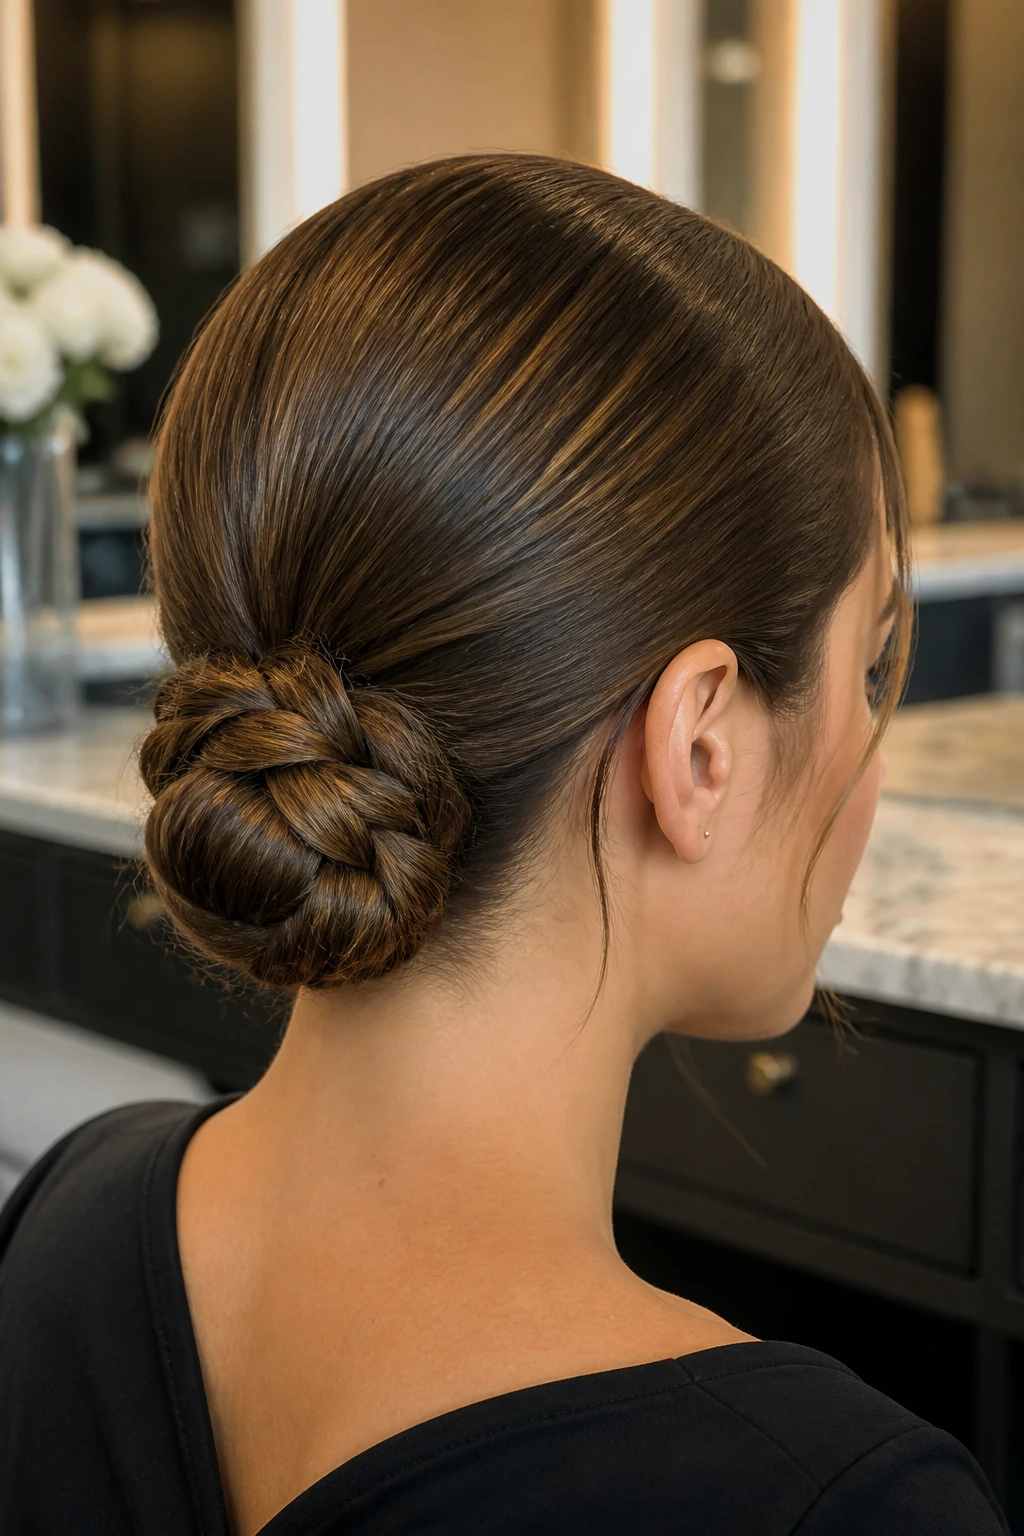
A braid wrapped into a bun gives you structure and a bit of texture at the same time. It’s especially useful when your ends are dry or layered, because the braid hides the mess and gives the bun a firmer shape.
Braid the ponytail first, coil it around its base, and pin through the braid rather than just around it. That small difference matters. The bun stays tighter, and you don’t end up with a lopsided knot by the end of the evening.
9. Twisted Crown Into Low Knot
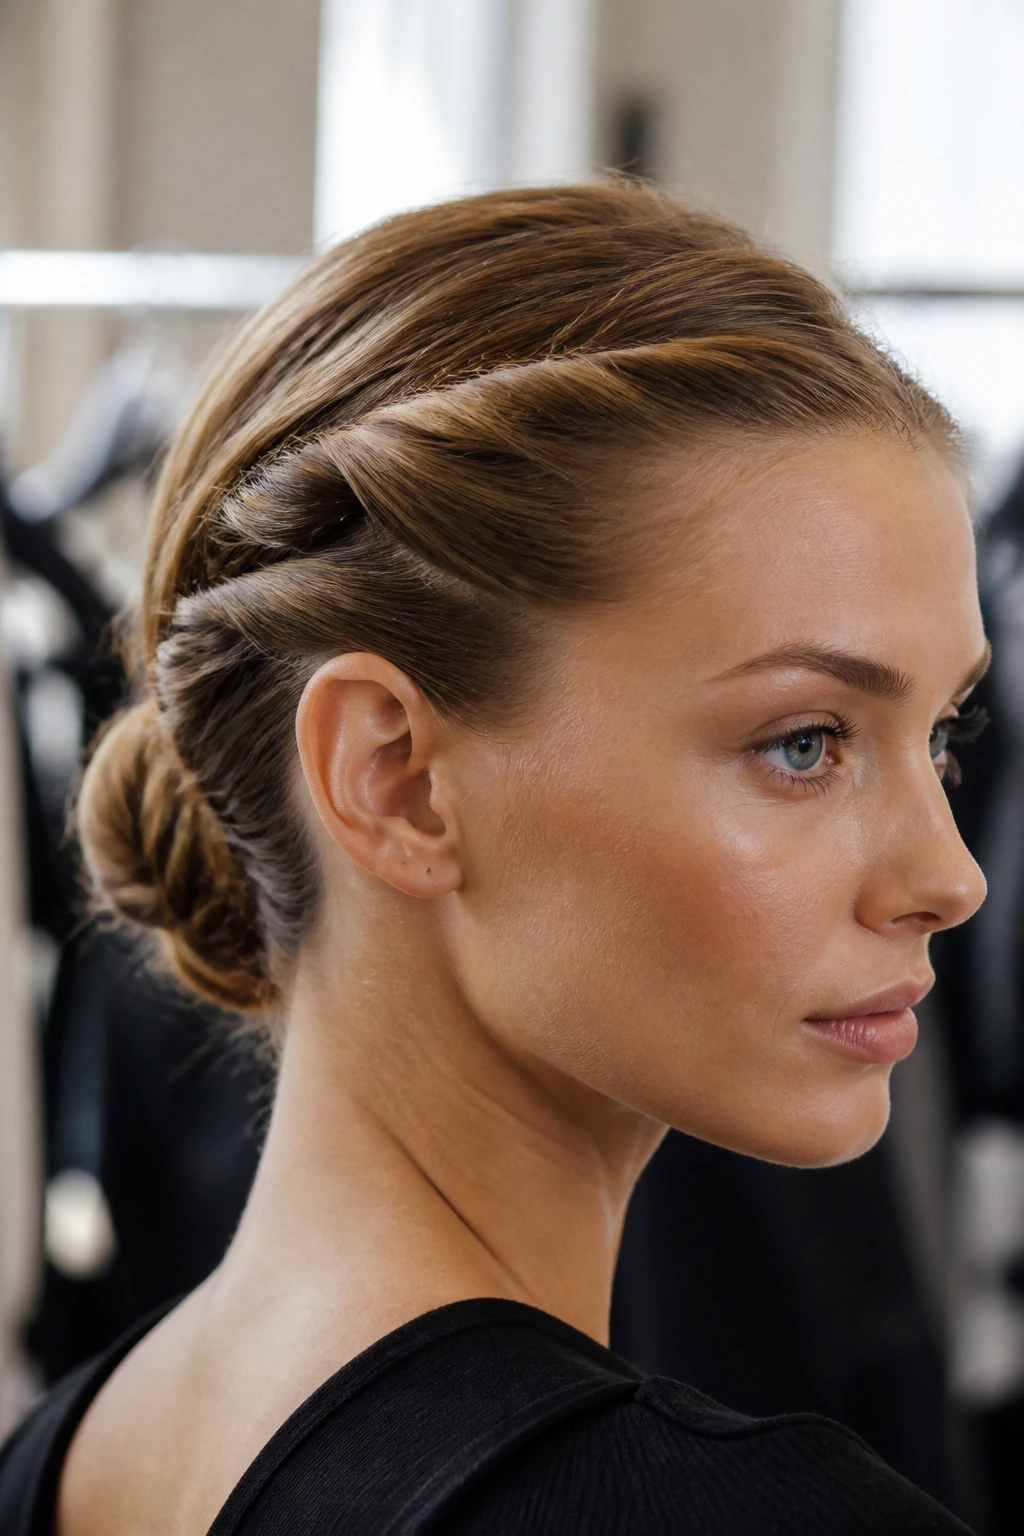
This one has a softer feel than a full slick-back, because the sides are twisted instead of combed straight down to the scalp. The result still looks clean, but the front has a little movement and won’t feel as severe on a long face.
Start each side with a flat twist near the hairline, then gather the back into a knot at the nape. A mist of flexible hold spray before pinning keeps the twists smooth without making them brittle.
10. Sculpted High Ponytail
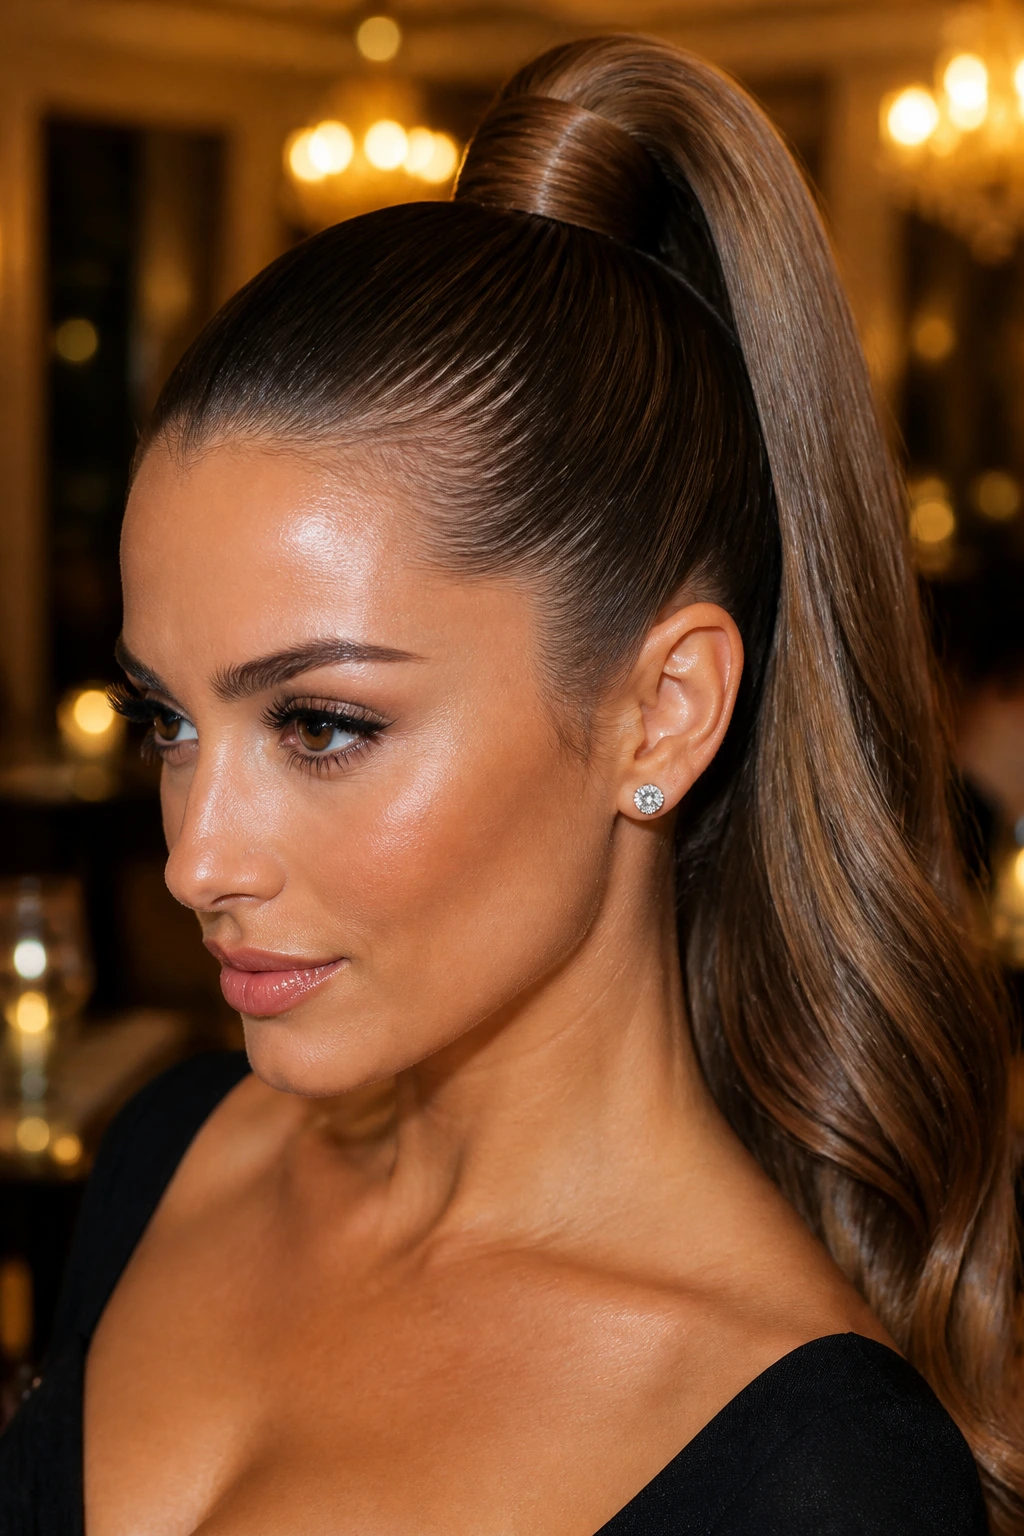
A high ponytail needs structure from the first brush stroke. If the crown isn’t slicked tight, the lift looks accidental; if it is, the whole style feels crisp and pulled together.
Best for
- Hair that needs a bit of root lift but still wants a clean finish.
- Work events where a low pony would feel too quiet.
- Thick hair that can support height without falling flat.
Wrap a small strand around the elastic and pin it underneath. That tiny finish makes the pony look like it was styled on purpose, not tied up in a rush.
11. Ultra-Flat Mini Bun
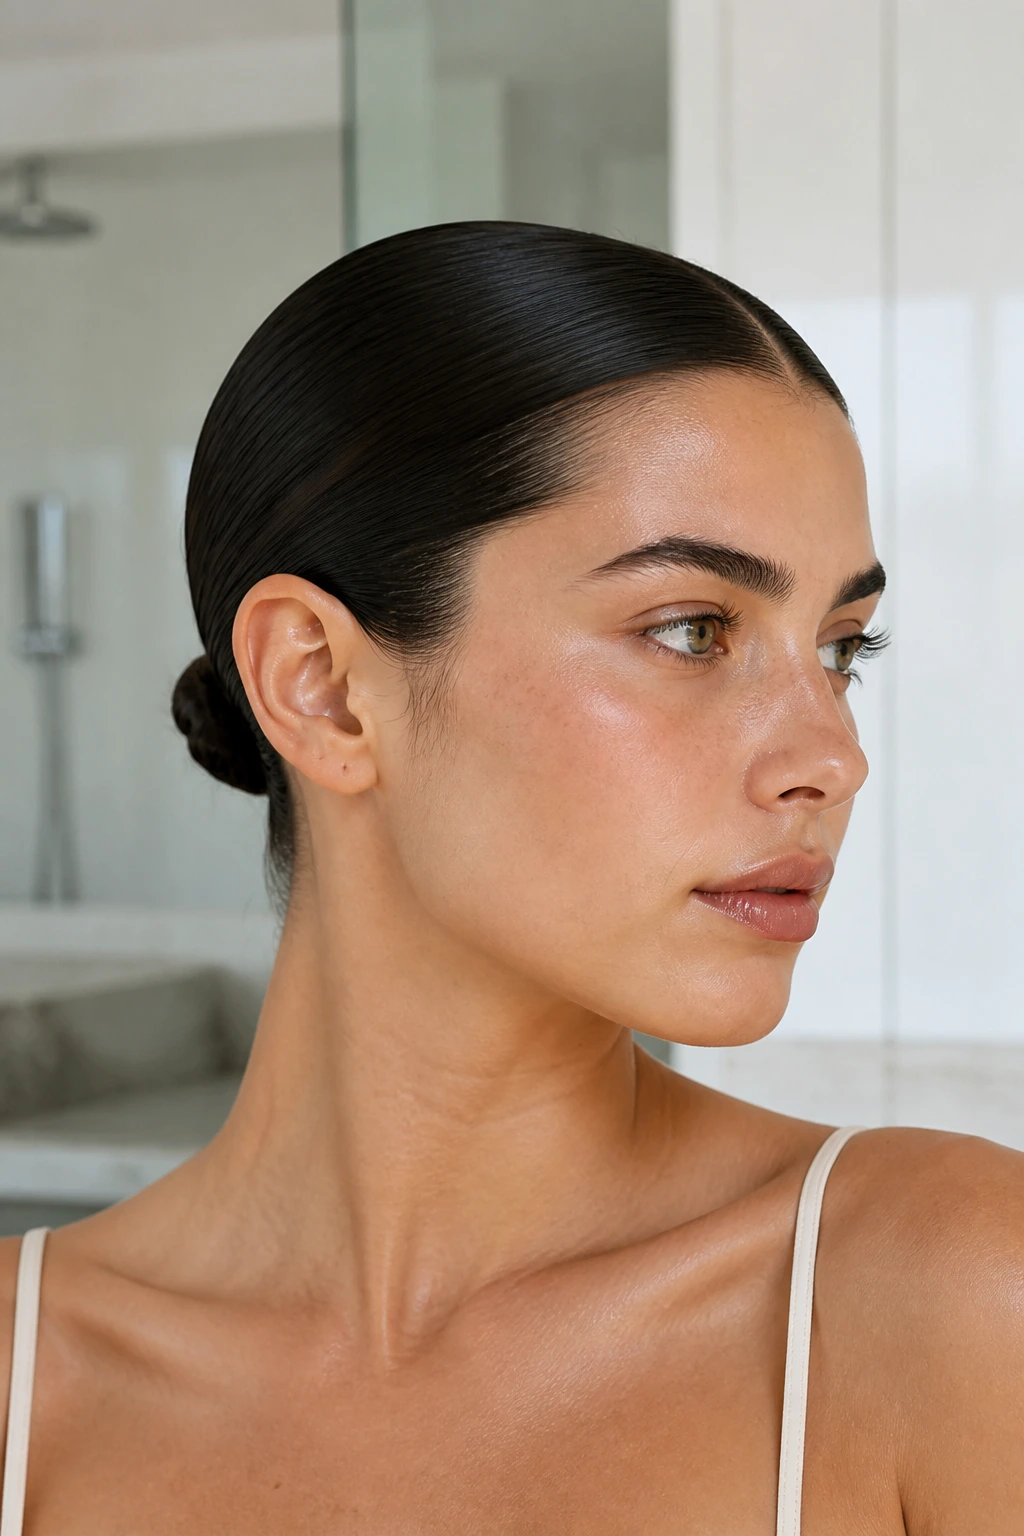
A mini bun keeps the profile small and sharp, which is useful when you want the face and neck to stay open. It works best on short to medium hair, or on long hair when you want the bun to sit low and tight.
Use a fine brush to press the top flat before you twist. If the bun looks too tiny, pull a few millimeters of hair from the crown for a softer, less severe shape — just a little. Not much.
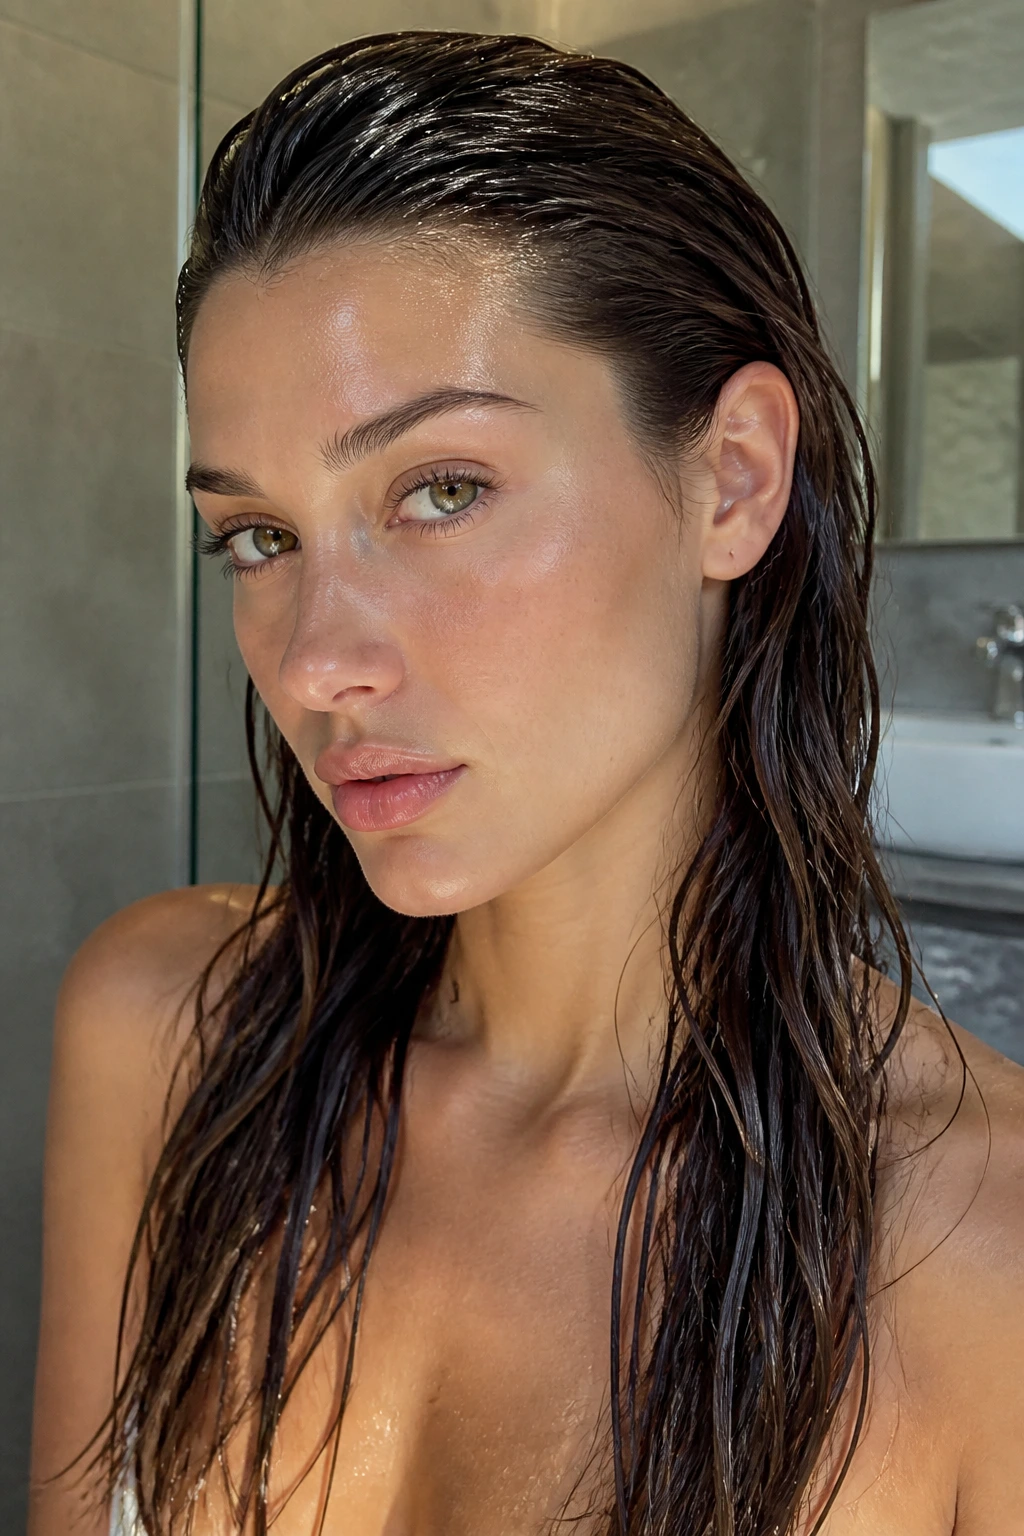
12. Wet Look with Loose Length
Loose lengths change the feel of a slicked-back style fast. Instead of tying the hair away, you smooth the roots and let the rest fall straight, glossy, and slightly separated.
This is the version to choose when you want shine more than structure. It works best if the ends are healthy-looking, because the wet effect will show dryness in a way a bun or ponytail can hide.
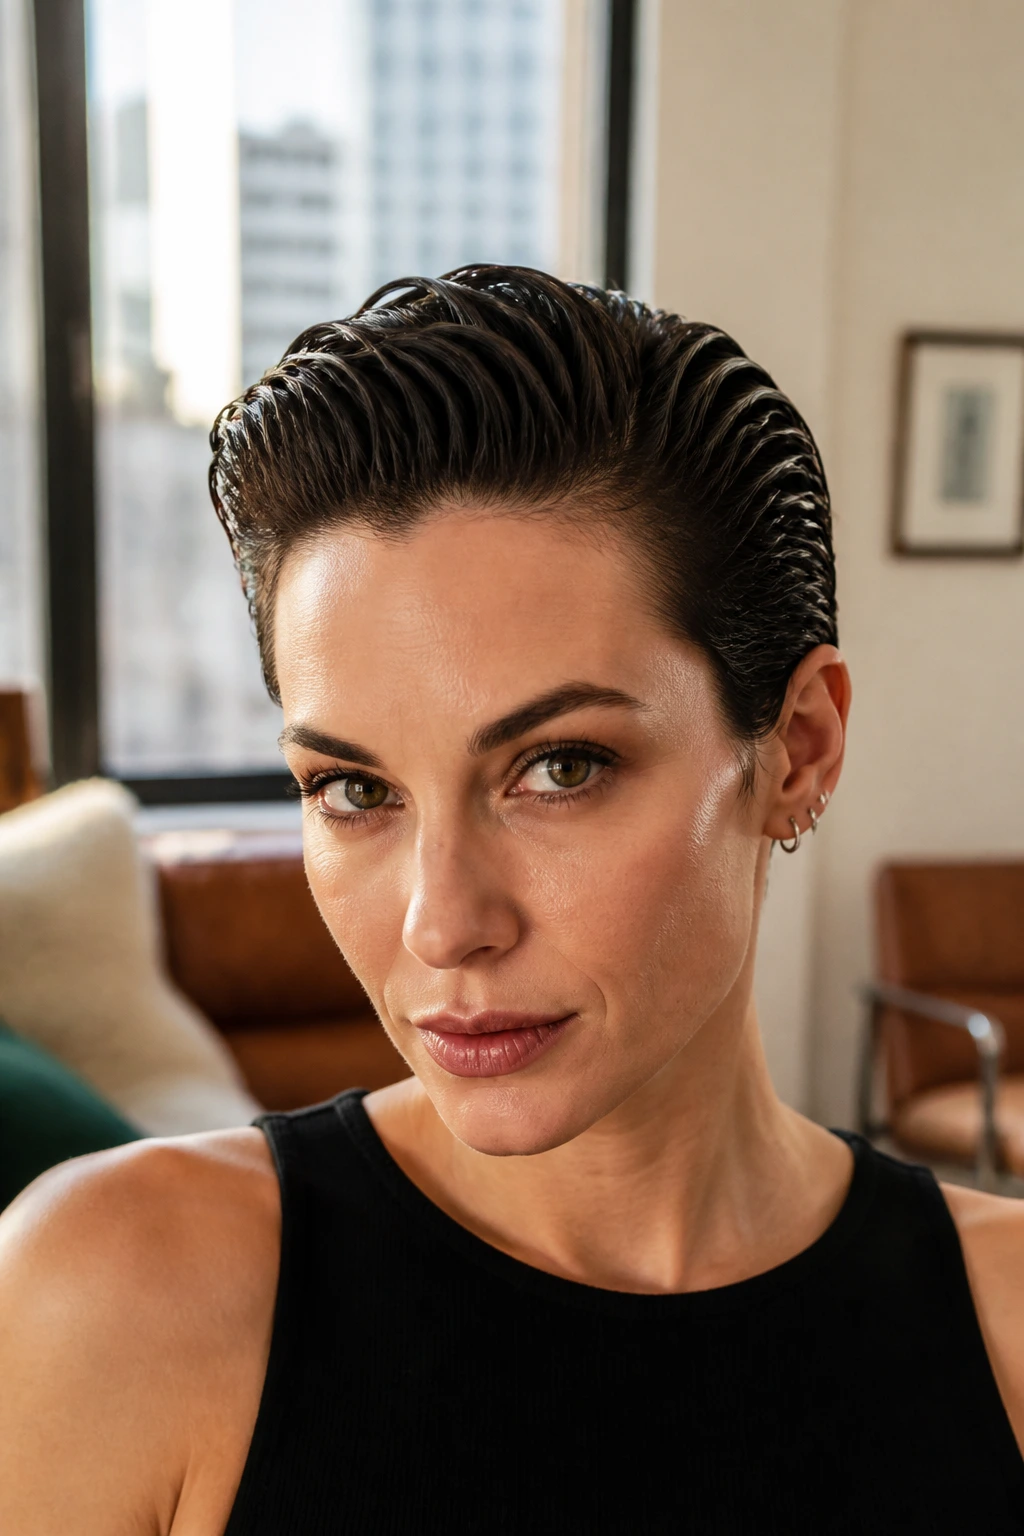
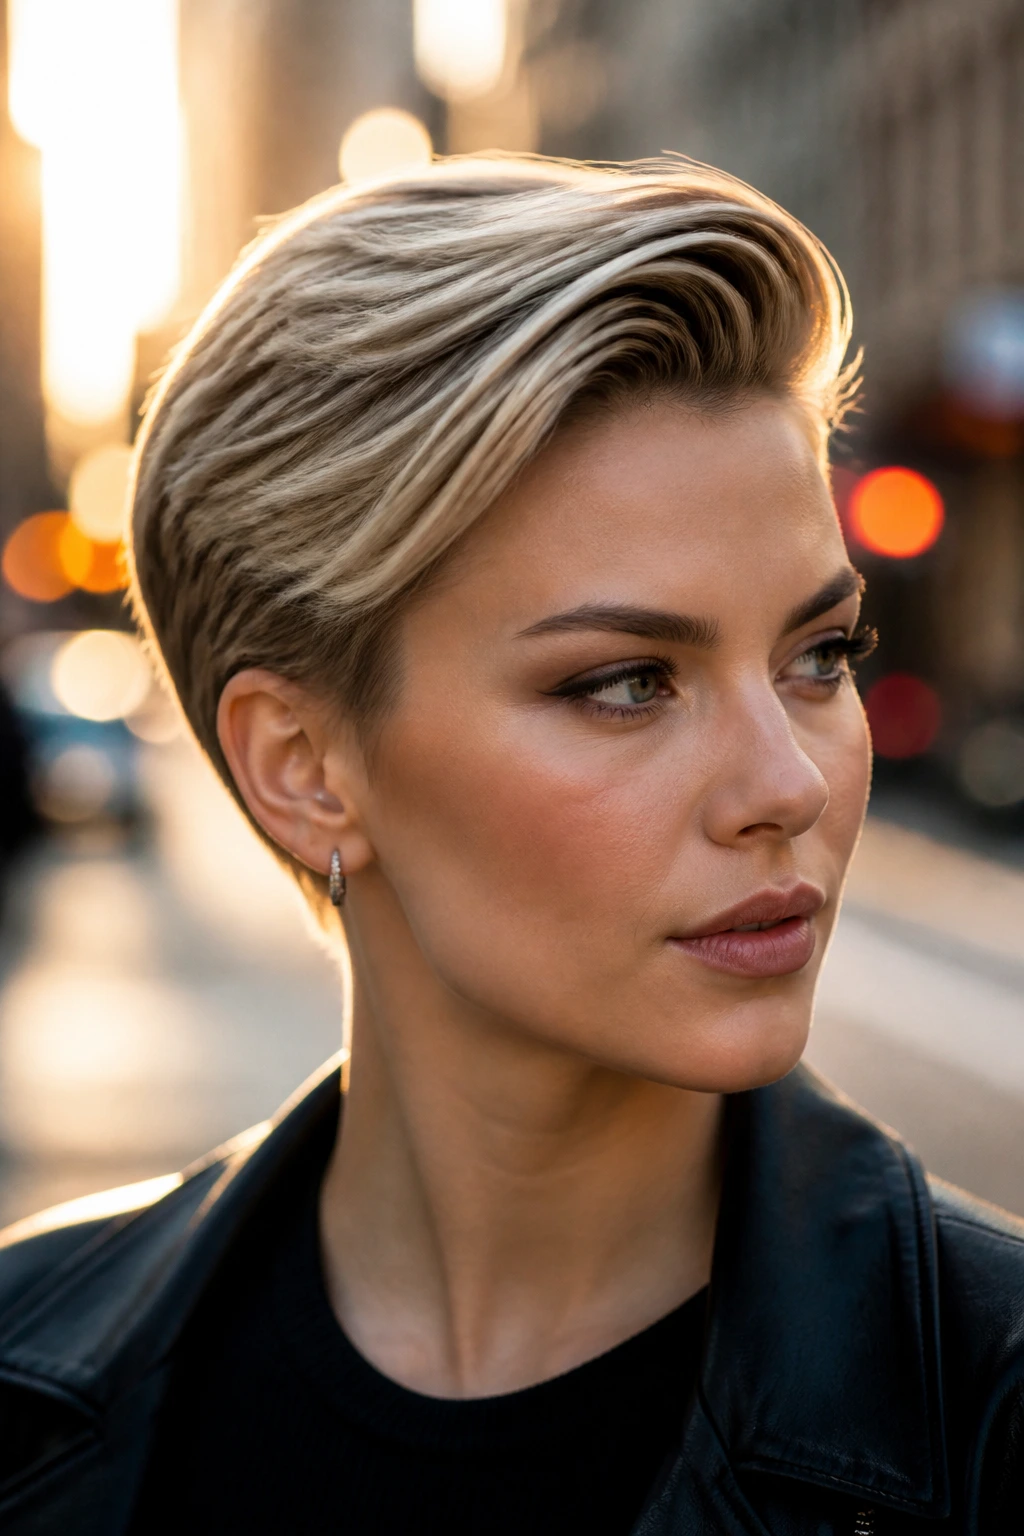
13. Slicked-Back Pixie
Short hair can do slicked-back styling better than people expect. A pixie with the top brushed back and the sides pressed close to the head looks sharp, a little edgy, and very intentional.
Use a small amount of pomade or wax between your fingers, then press it through the top in short passes. A toothbrush-sized brush helps at the hairline, where a full brush is usually too clumsy.
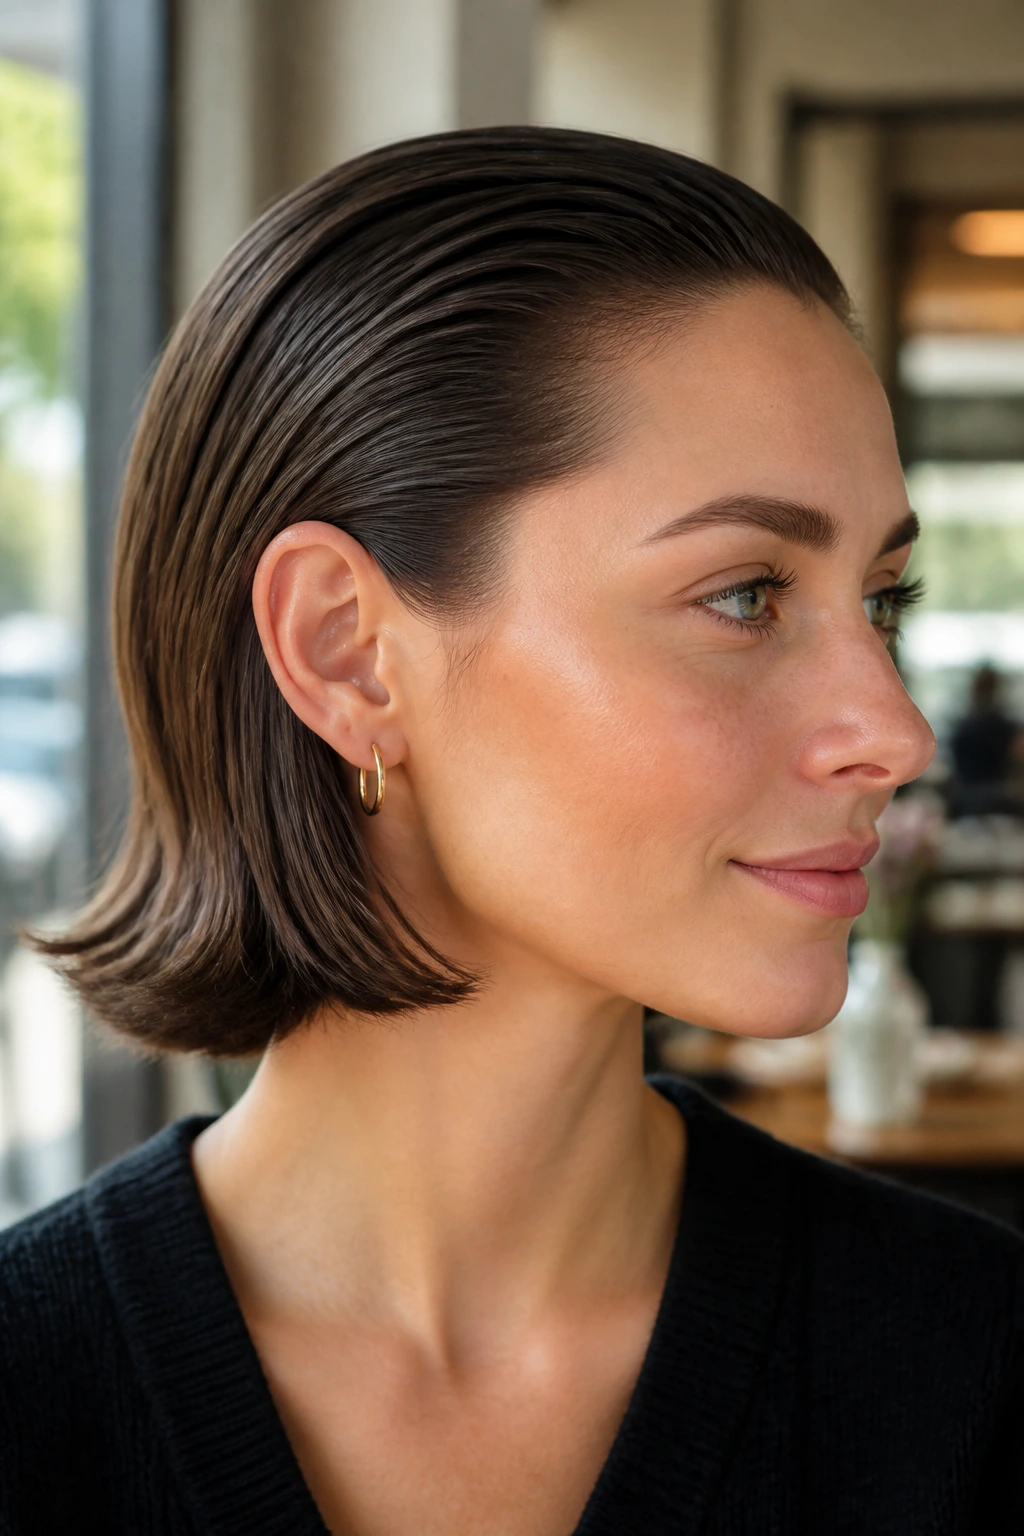
14. Slicked-Back Bob Behind Ears
A bob tucked behind the ears with a slicked crown has a neat, modern line. The hair stays close to the head, but the shape still feels light because the ends can swing at the jaw.
What makes it work
The front needs more hold than the back. Smooth the roots back with gel, tuck the sides behind the ears, and pin just enough to stop the shorter pieces from hopping free. If your bob has layers, this is where a wax stick earns its keep.
15. Side-Swept Tapered Slick Back
A side-swept slick-back is good when you want the clean look without full symmetry. The hair is brushed diagonally across the head, which softens the forehead and gives the style a little more motion.
It’s especially flattering on shorter cuts and bobs because the angle stops the style from looking too severe. Add shine only to the top section; the rest should stay controlled, not greasy.
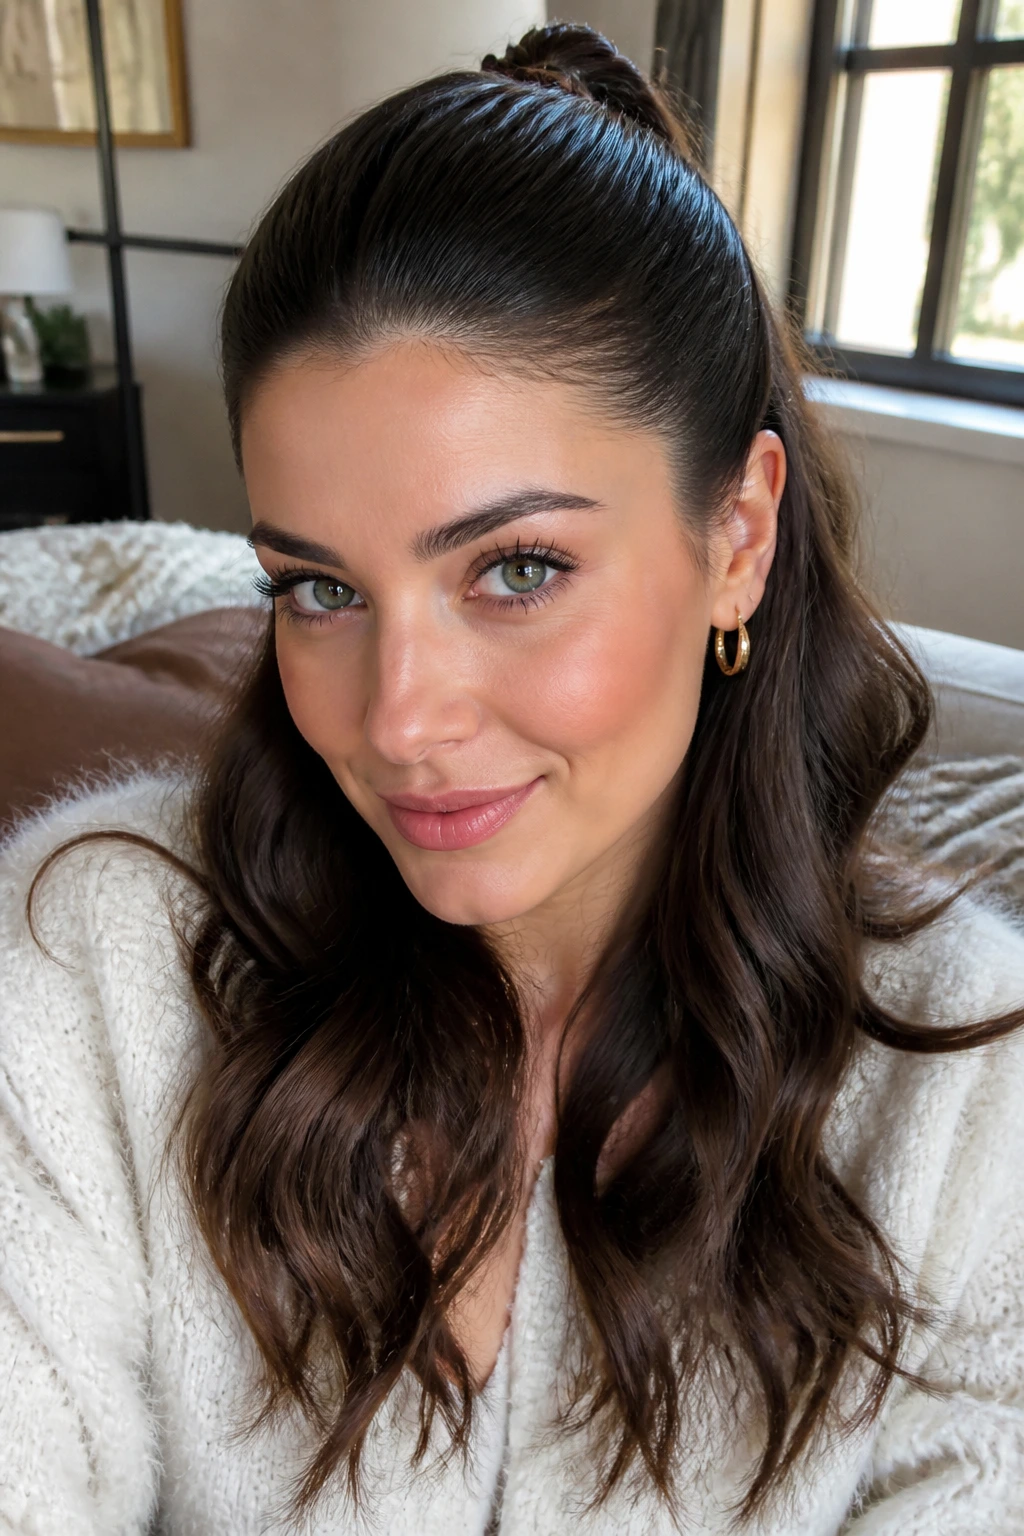
16. Half-Up Slicked Back Waves
This one keeps the roots tight and lets the lengths do their own thing. That balance is the reason it works: polished at the top, softer through the bottom, with just enough movement to keep it from feeling heavy.
Gather the top section from temple to temple, smooth it back, and tie it off with a small elastic or clip. If your waves frizz easily, touch only the root area with gel and leave the loose hair alone.
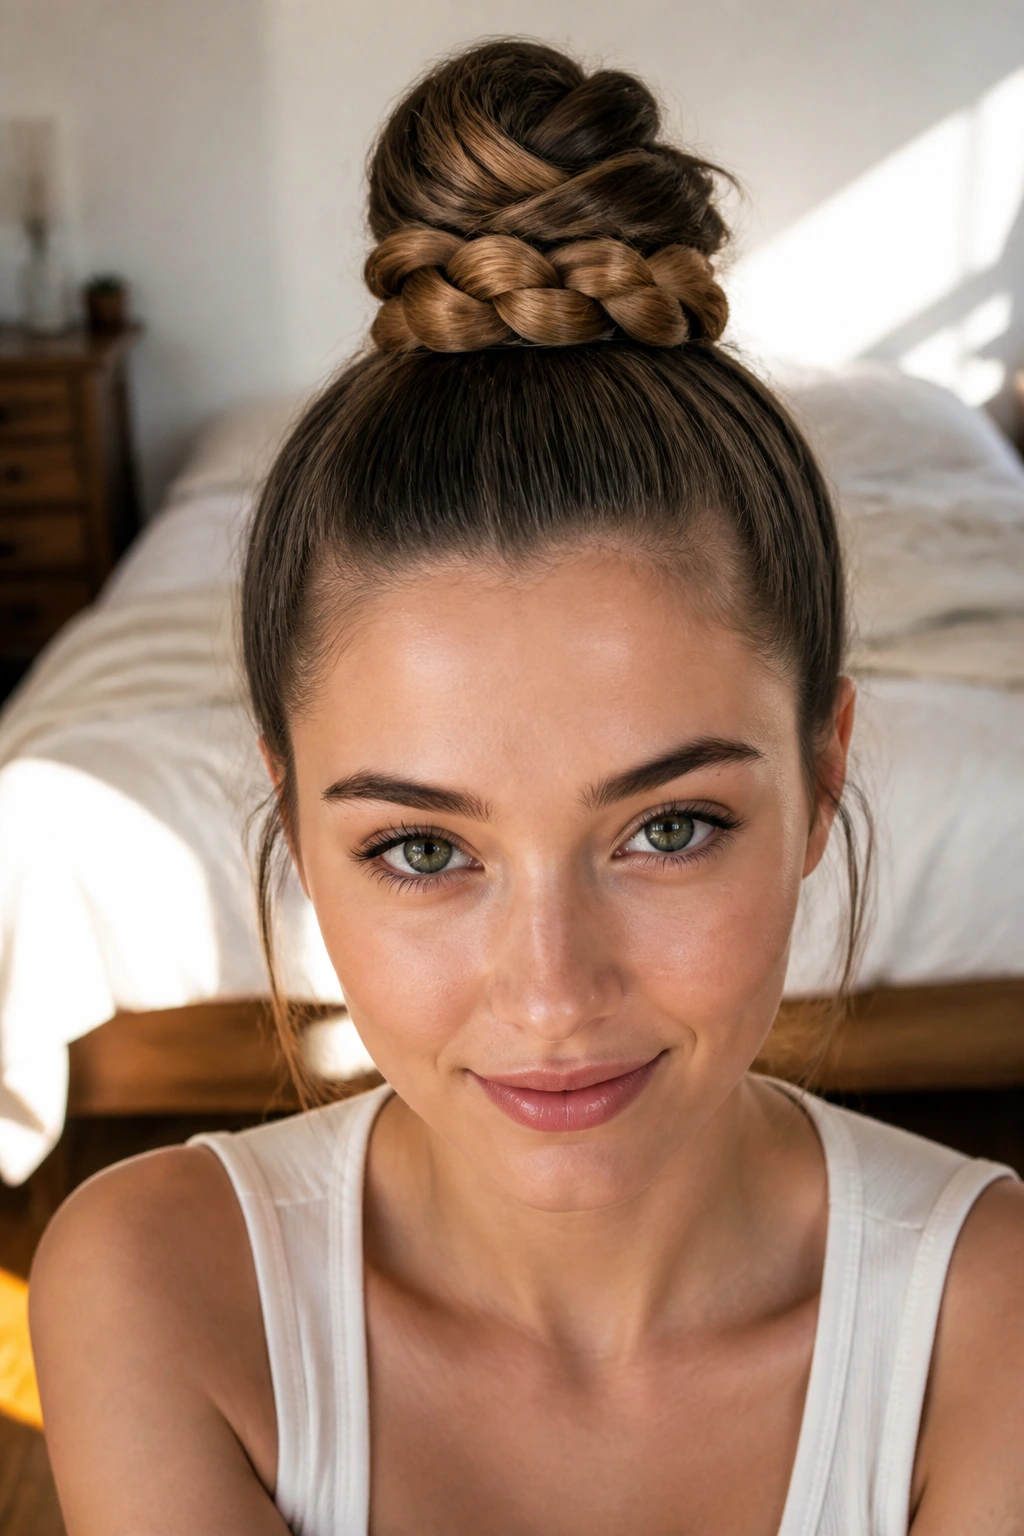
17. Braided Top Knot
A braided top knot can take a lot of hair and make it look tidy fast. The braid gives the bun a firm core, which helps if your hair is thick, long, or prone to escaping pins.
Tie the ponytail high, braid it, then wrap the braid around its base. A few hidden pins at the underside usually do more than a dozen decorative ones on top, so anchor the bun first and worry about the finish second.
18. Wrapped-Base Sleek Pony
A wrapped base is one of those details that makes a simple ponytail feel finished. The hair tie disappears, the shape looks cleaner, and the whole style has a more expensive feel without needing more time.
Use a strand from underneath the pony and wind it around the elastic until the band is covered. Pin the tail underneath the pony, not on the outer side, or the wrap can shift and show the tie again.
19. Statement-Clip Slick Back
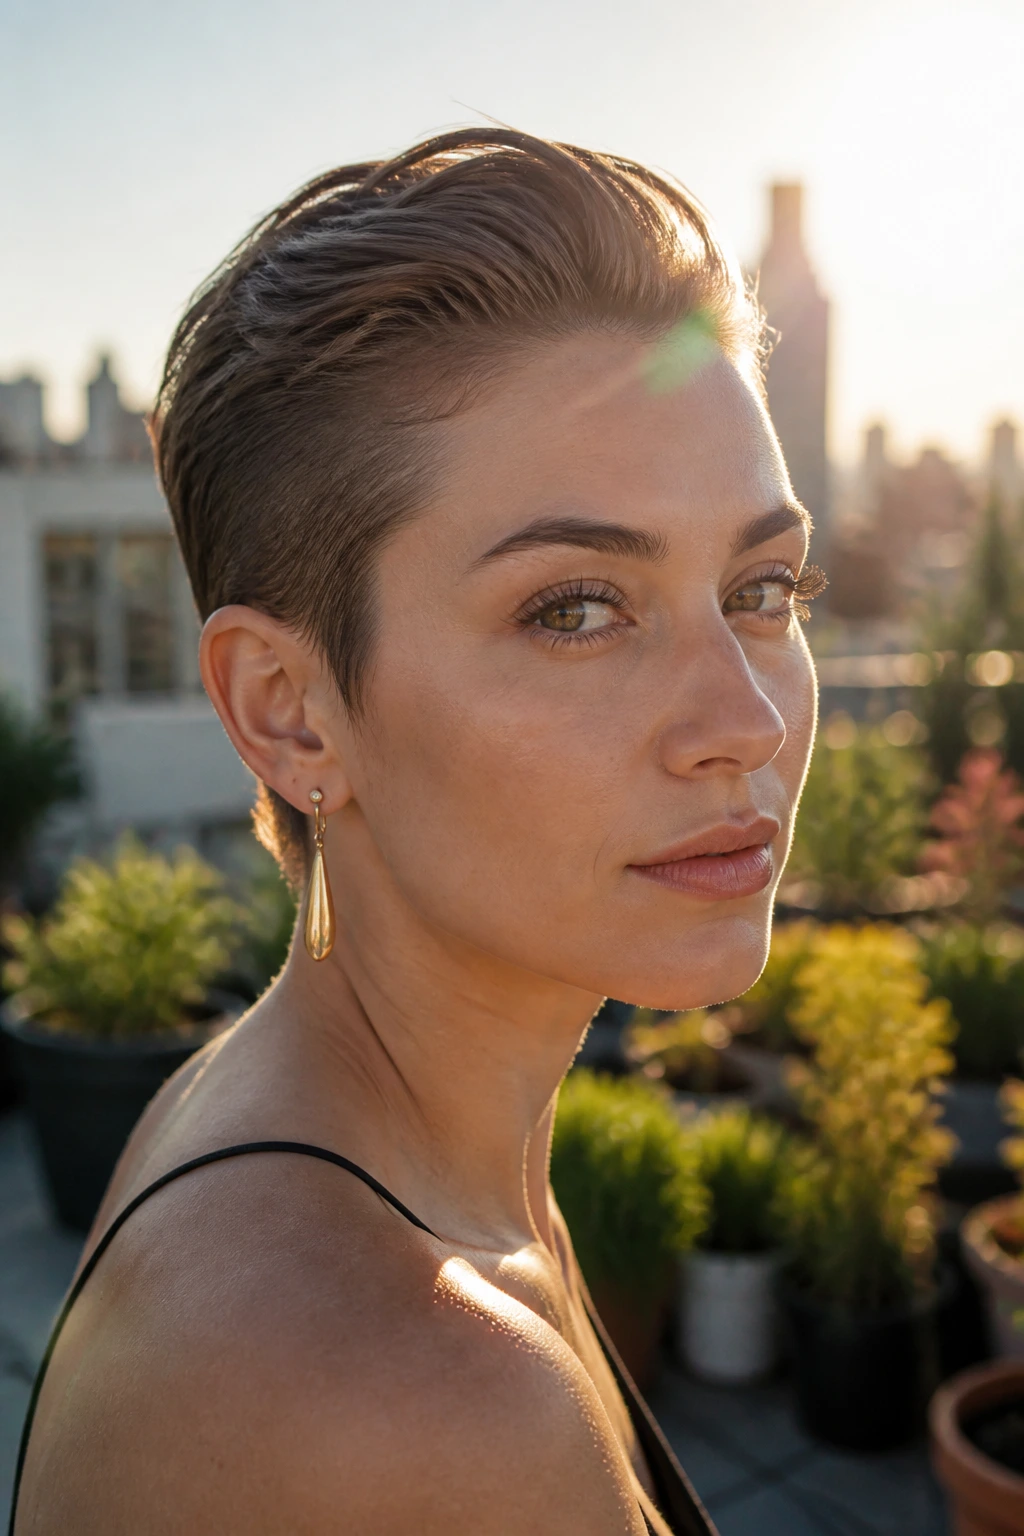
A statement clip changes the job of the style. Instead of relying on a bun or ponytail to do all the work, the hair stays slicked back and the accessory carries the mood.
This is a smart option for shorter hair or shoulder-length cuts that don’t want to be forced into a full updo. Keep the front flat and clean, then place the clip low enough that it grips more hair than just the top layer.
20. Fishtail Braid with Root Control
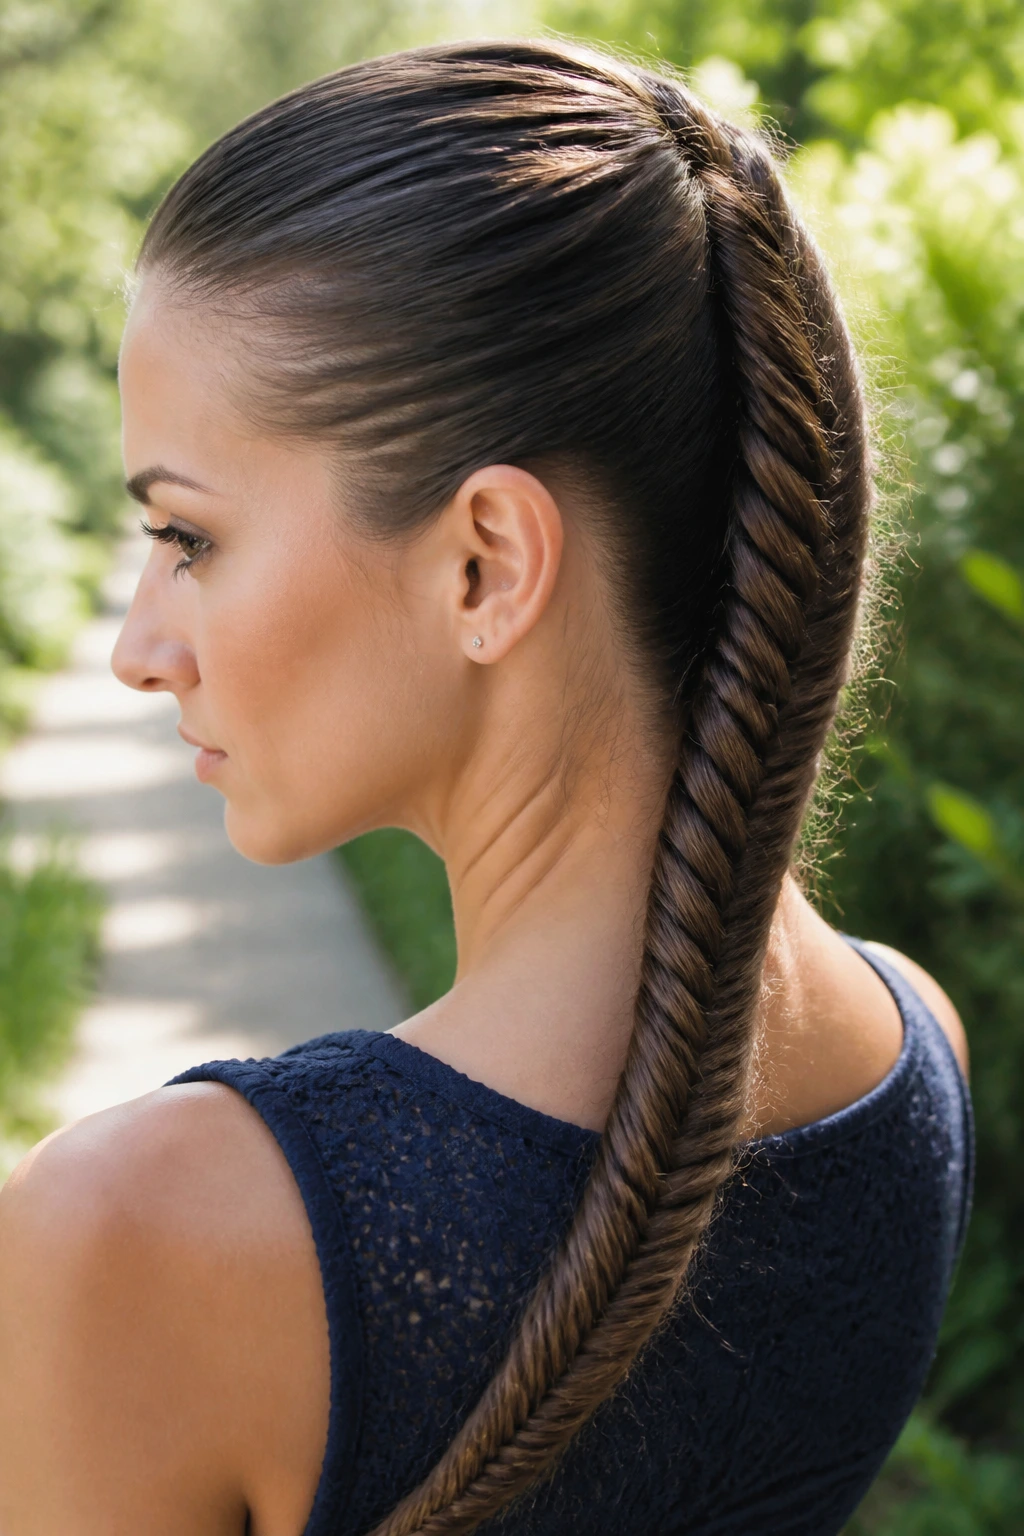
A fishtail braid looks more detailed when the crown is slicked tight first. Otherwise the braid can get lost in the overall shape, and the front ends up looking loose while the braid is trying to look polished.
Smooth the hair straight back, secure it low, and build the fishtail from there. The tighter the roots, the cleaner the braid reads. If the braid is fraying, dampen your hands slightly before weaving the sections.
21. Low Pony with Face-Framing Tendrils
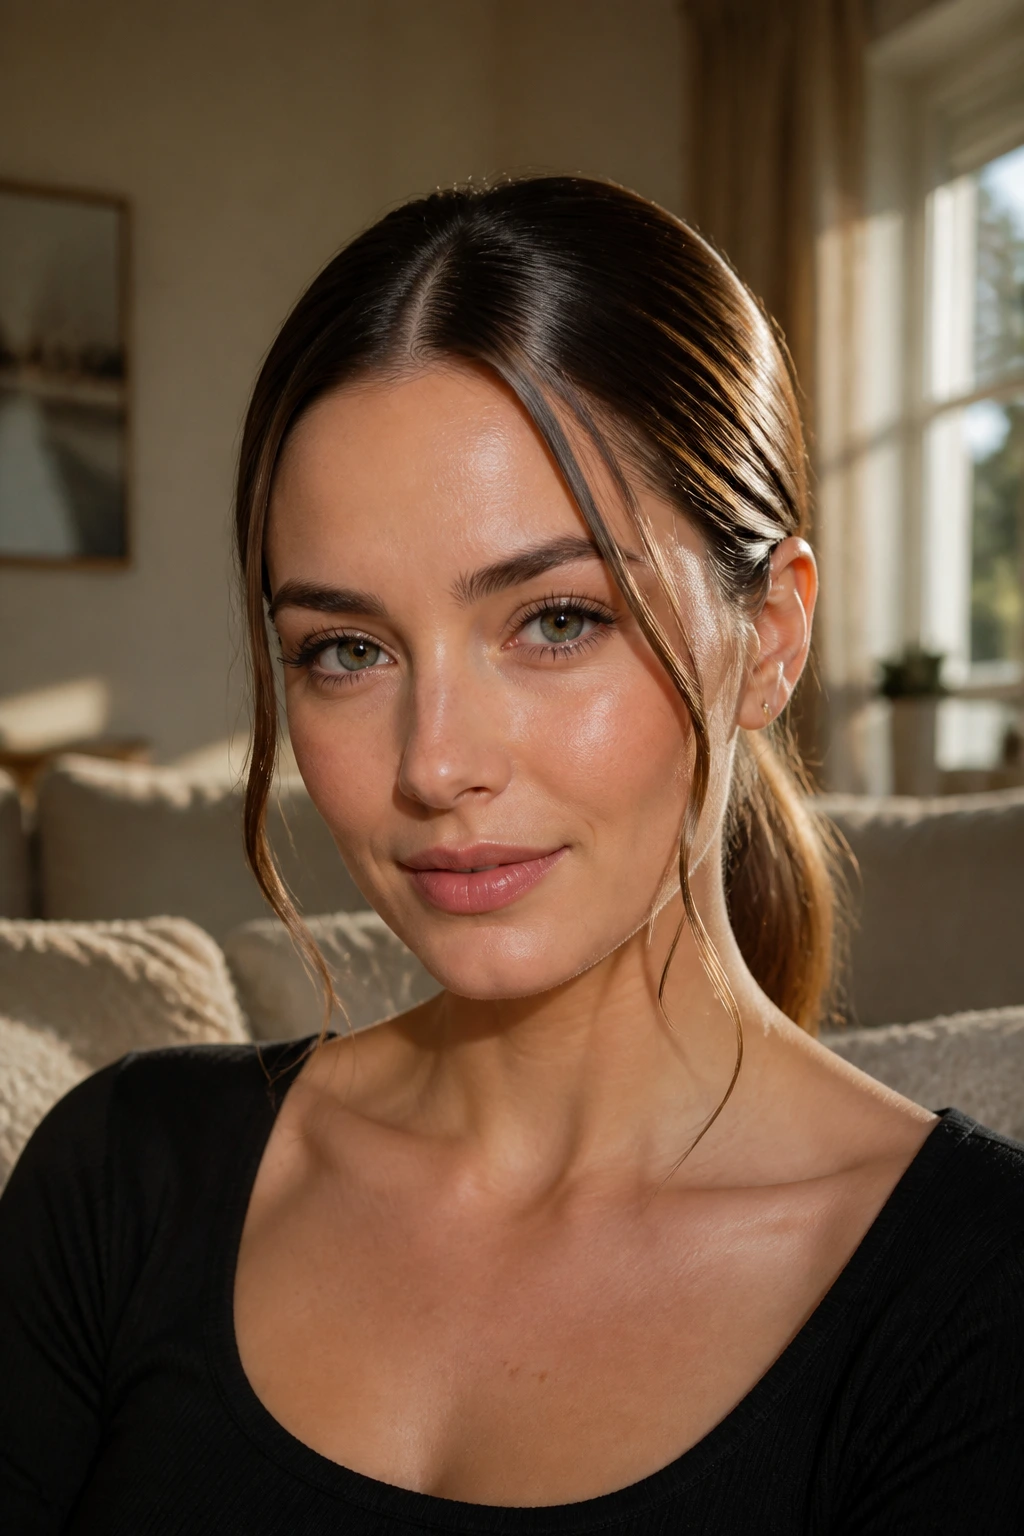
A few loose tendrils can soften a slicked-back pony without turning it messy. The trick is to leave out only the front pieces you mean to leave out — not half the hairline.
This style is useful when a full slick-back feels too harsh for the outfit or the day. Curl or bend the tendrils lightly so they sit on the cheeks instead of sticking straight out, which tends to happen when they’re too short.
22. Hard-Part Slick Back
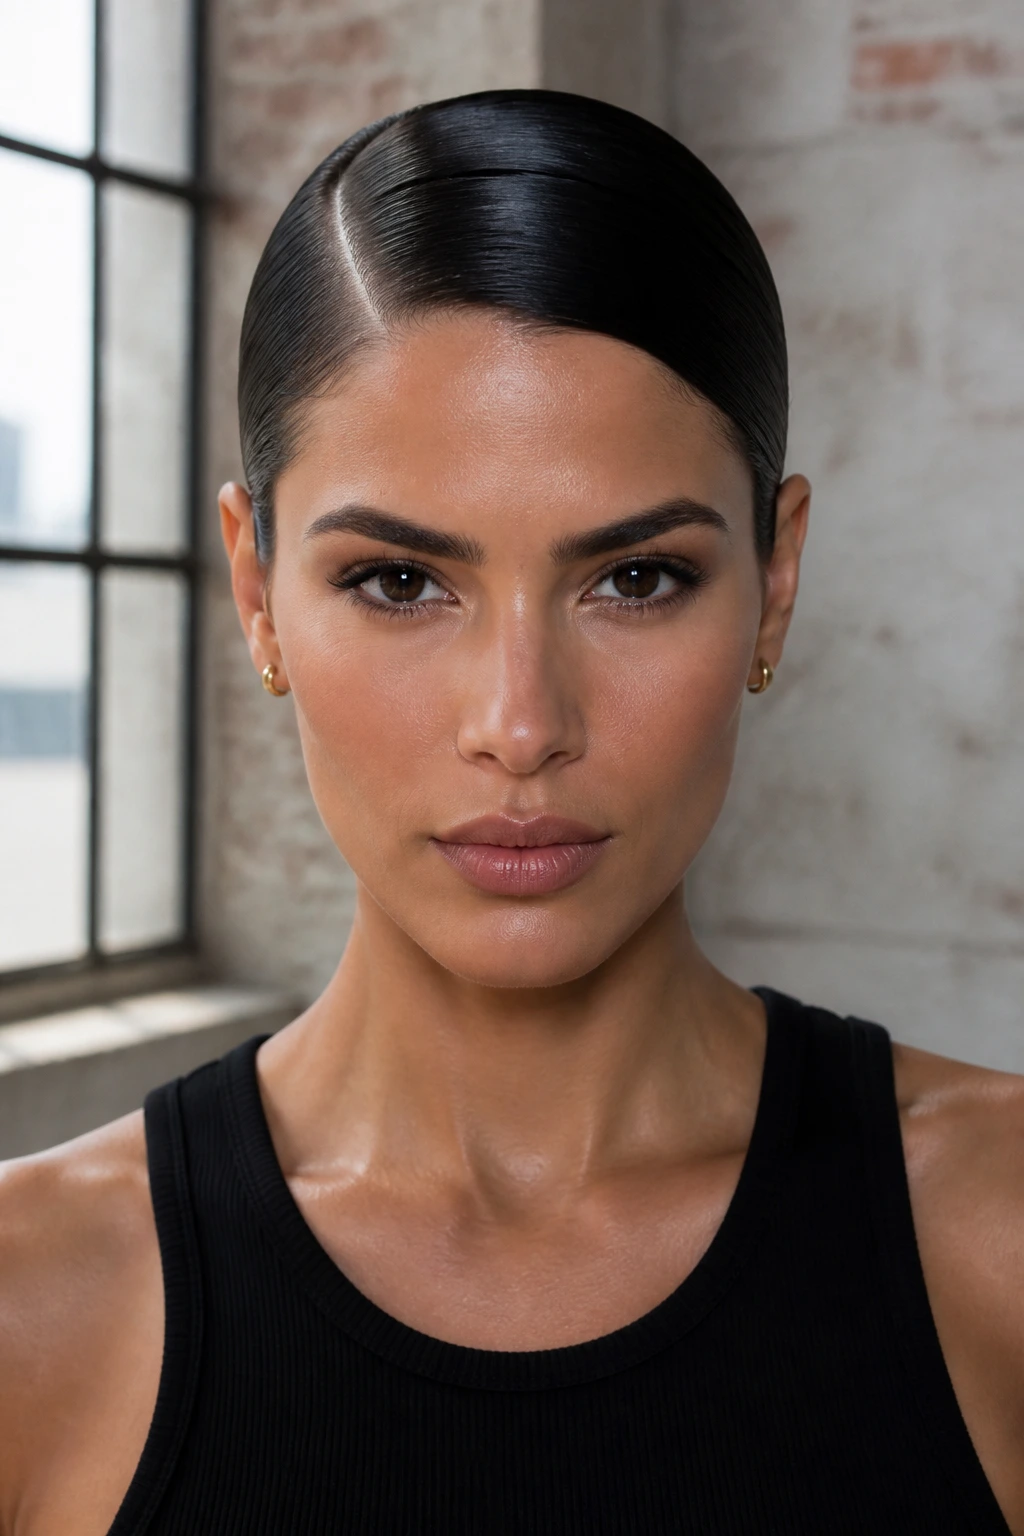
A hard part gives the style a crisp spine. It’s a sharper version of the slick-back, and it looks especially clean on straight or relaxed textures where the part line can stay visible.
What to watch for
The line has to be exact. Use the tail of a comb and trace once, not six times, or the scalp area starts looking irritated and fuzzy. A little shine spray on the top only keeps the part visible without flooding the roots.
23. Flat Twists Into Bun
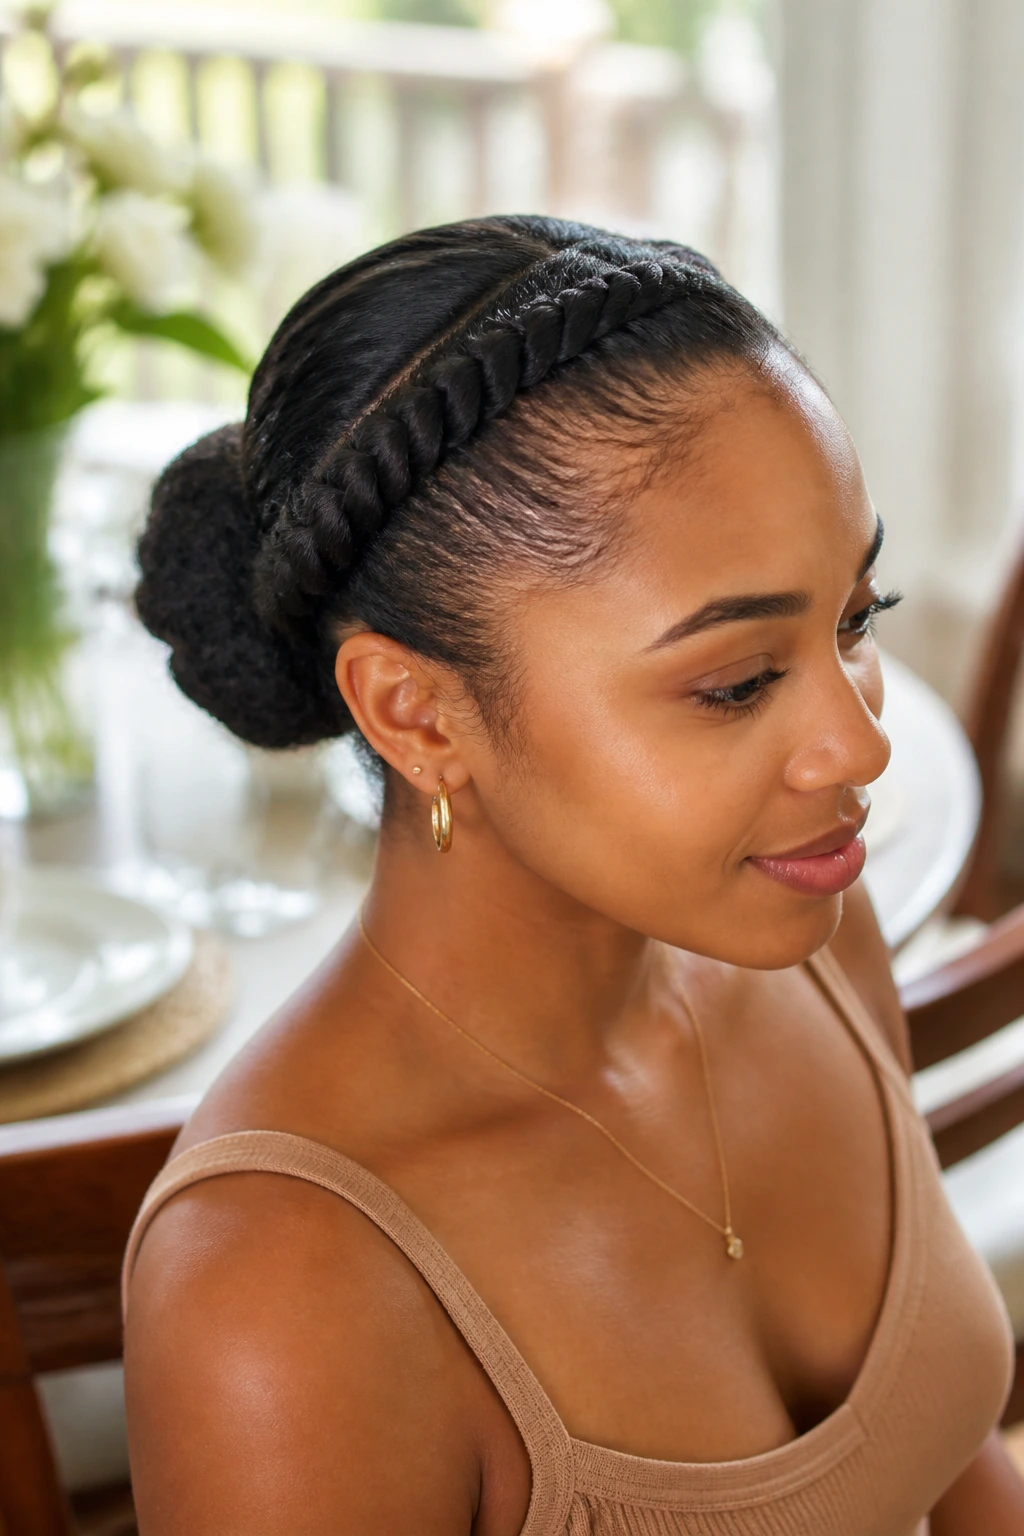
Flat twists offer a smoother root line on textured hair than trying to brush everything flat. They hold better, protect the hair a little more, and give the bun a built-in pattern that looks elegant instead of overworked.
Create two or four twists from the front hairline back toward the crown, then gather the rest into a bun. This is one of those styles that looks even better if the twists aren’t too perfect. A touch of texture keeps them alive.
24. Braided Headband Slick Back
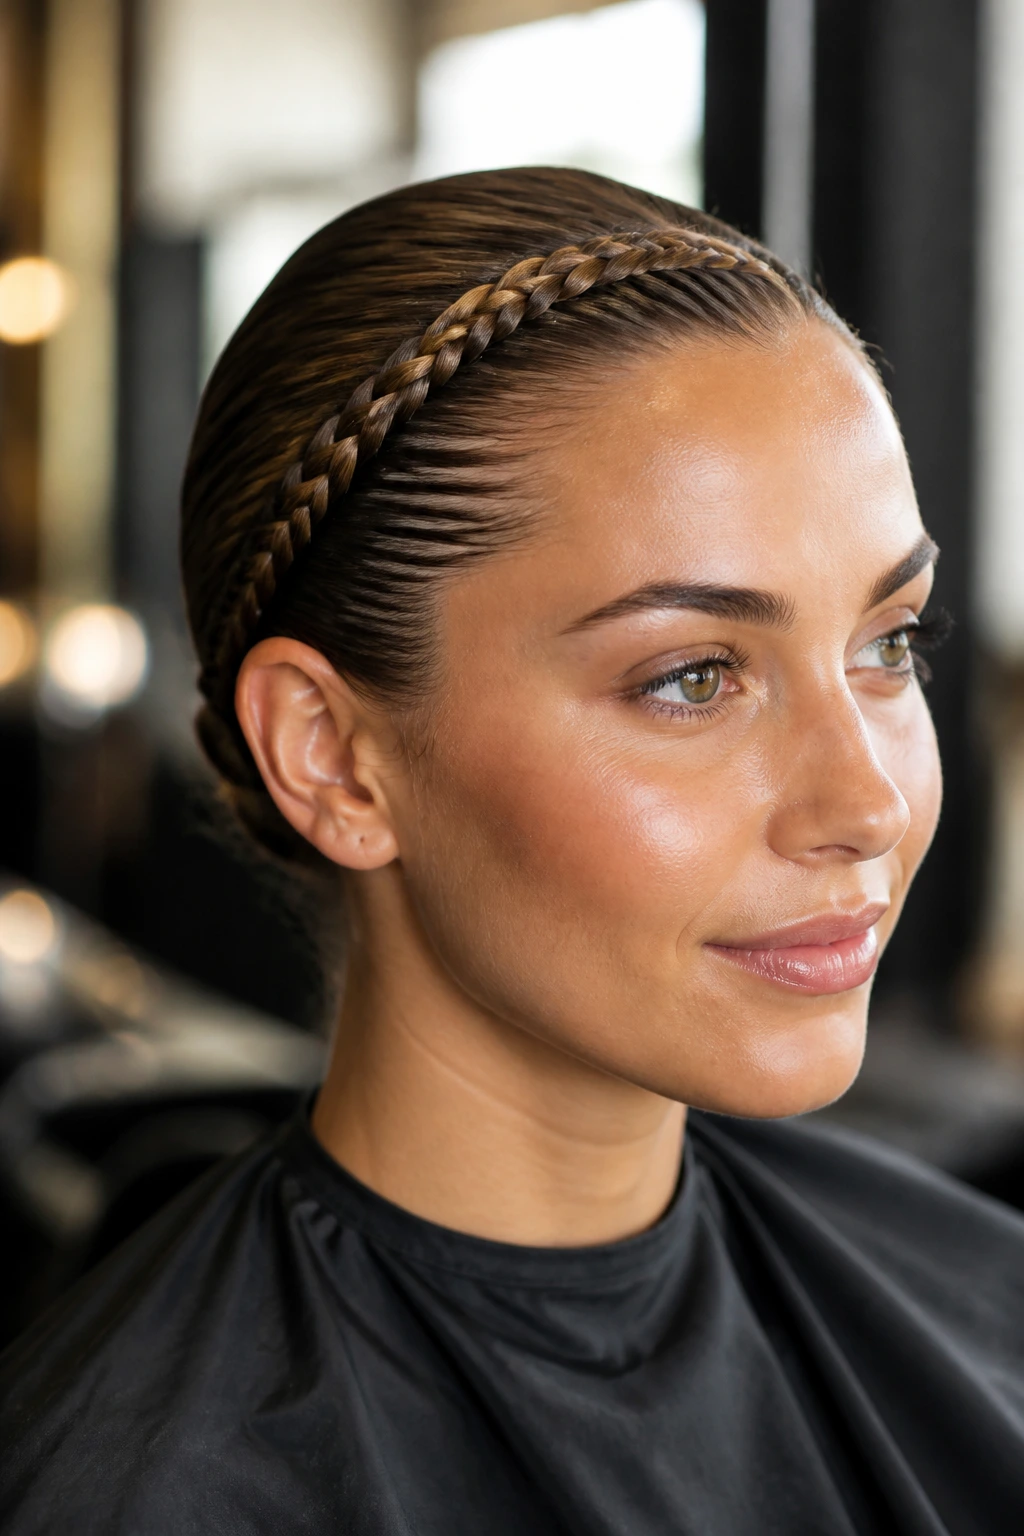
A braided headband acts like a built-in accessory. It frames the hairline while the rest of the hair stays swept back, which is a neat fix for styles that need some detail but not too much volume.
You can braid a small front section on each side and pin them over the crown, or use one braid across the hairline and tuck the rest back. Either way, the slicked base should sit close to the head so the braid feels like a feature, not a distraction.
25. Smooth Low Knot with Side Part
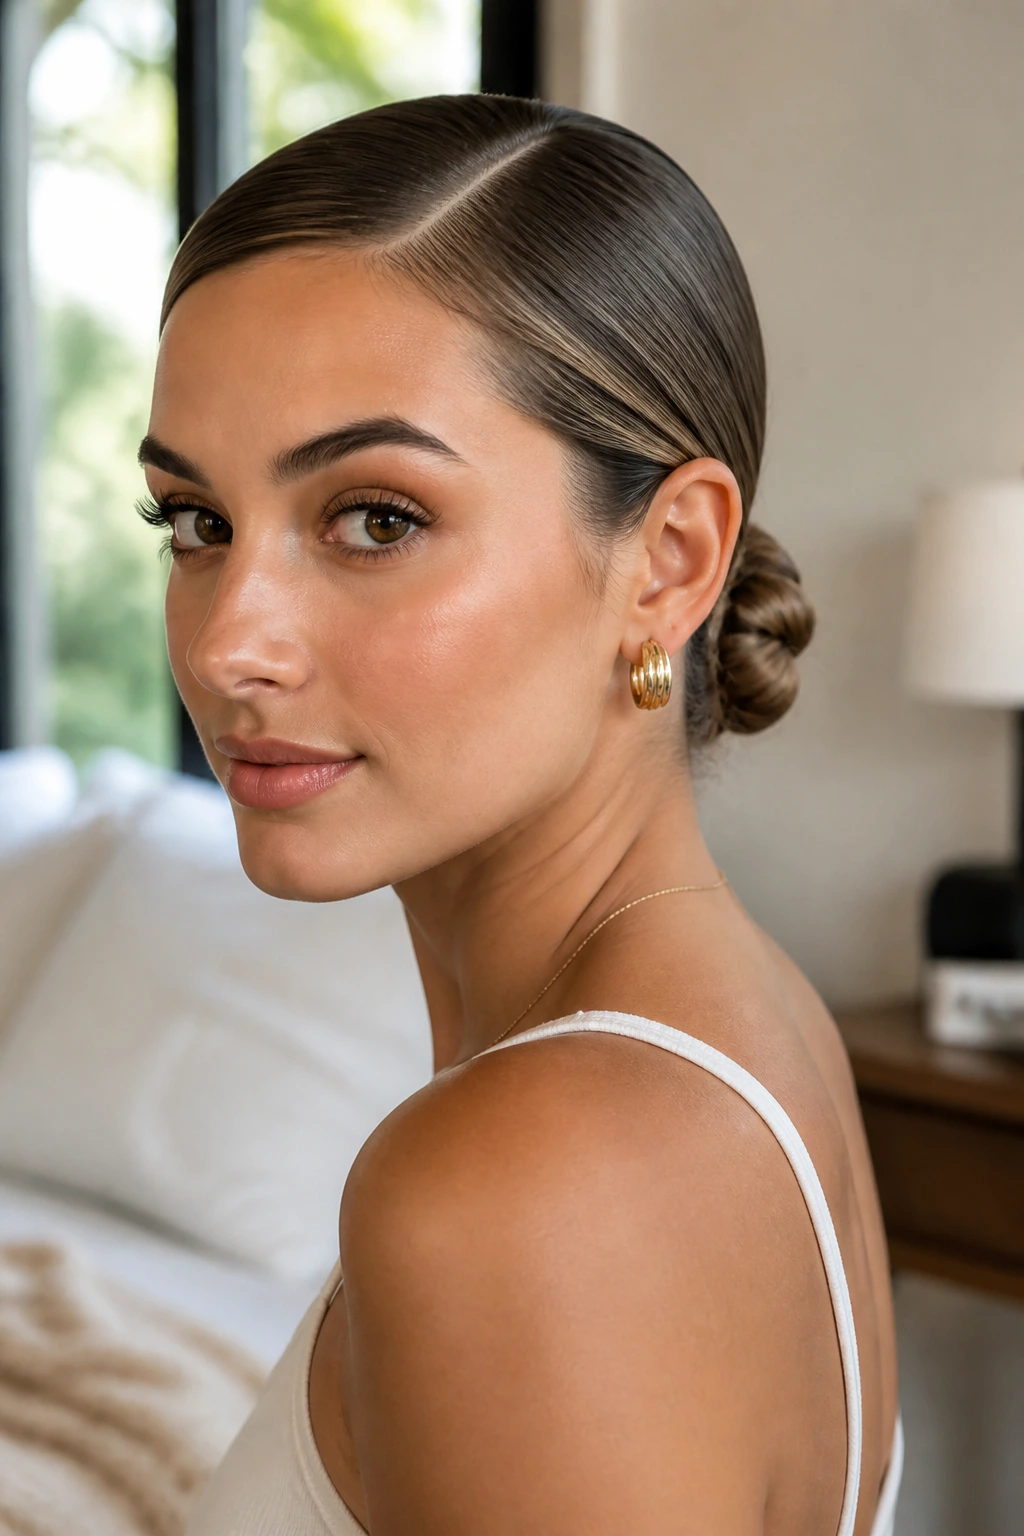
A side part changes a low knot from plain to polished. It breaks the symmetry just enough to keep the style from looking severe, especially when the bun is smooth and small.
Brush the hair toward the bun in the direction of the part, then twist it low and flat against the nape. If your hairline is sparse or fine, a matte edge product can help the part sit neatly without looking shiny in a patchy way.
26. Wet-Look Afro Puff
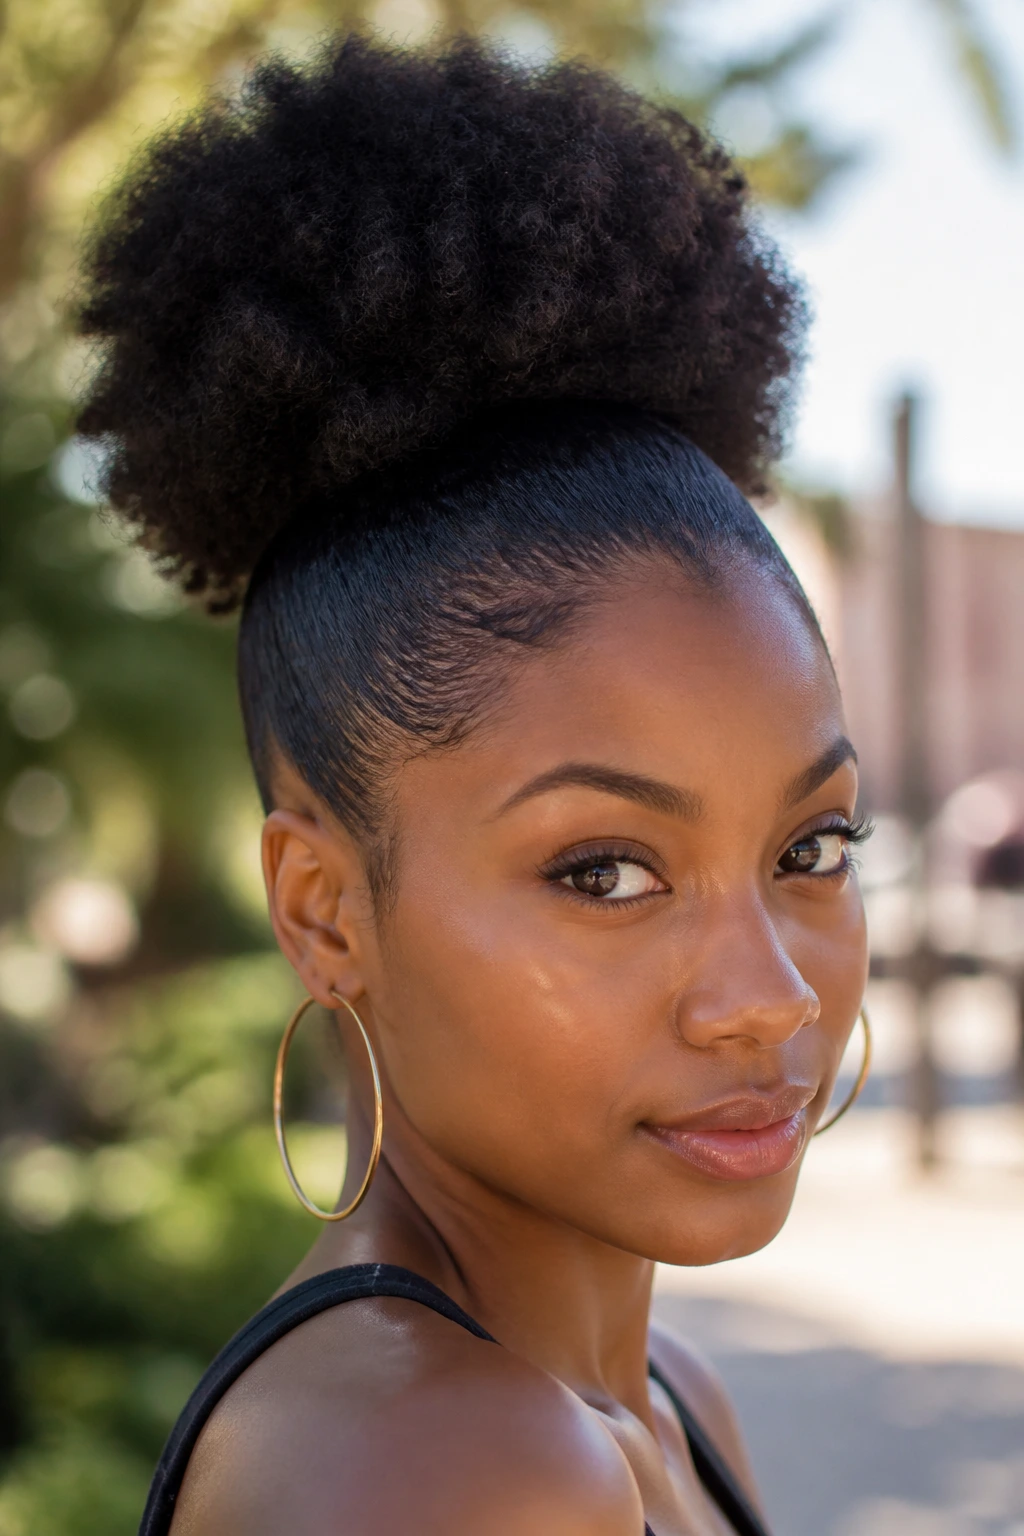
An afro puff with sleek sides is one of the most useful versions of this whole category. The front and sides stay close to the scalp, while the puff keeps the hair’s natural volume front and center.
Why it lands
It respects texture instead of flattening it into something it isn’t. Use water, leave-in, and a strong gel or edge control on the perimeter, then gather the puff high enough to show the shape. The contrast between the tight crown and full puff is the point.
27. Slicked-Back Locs Ponytail
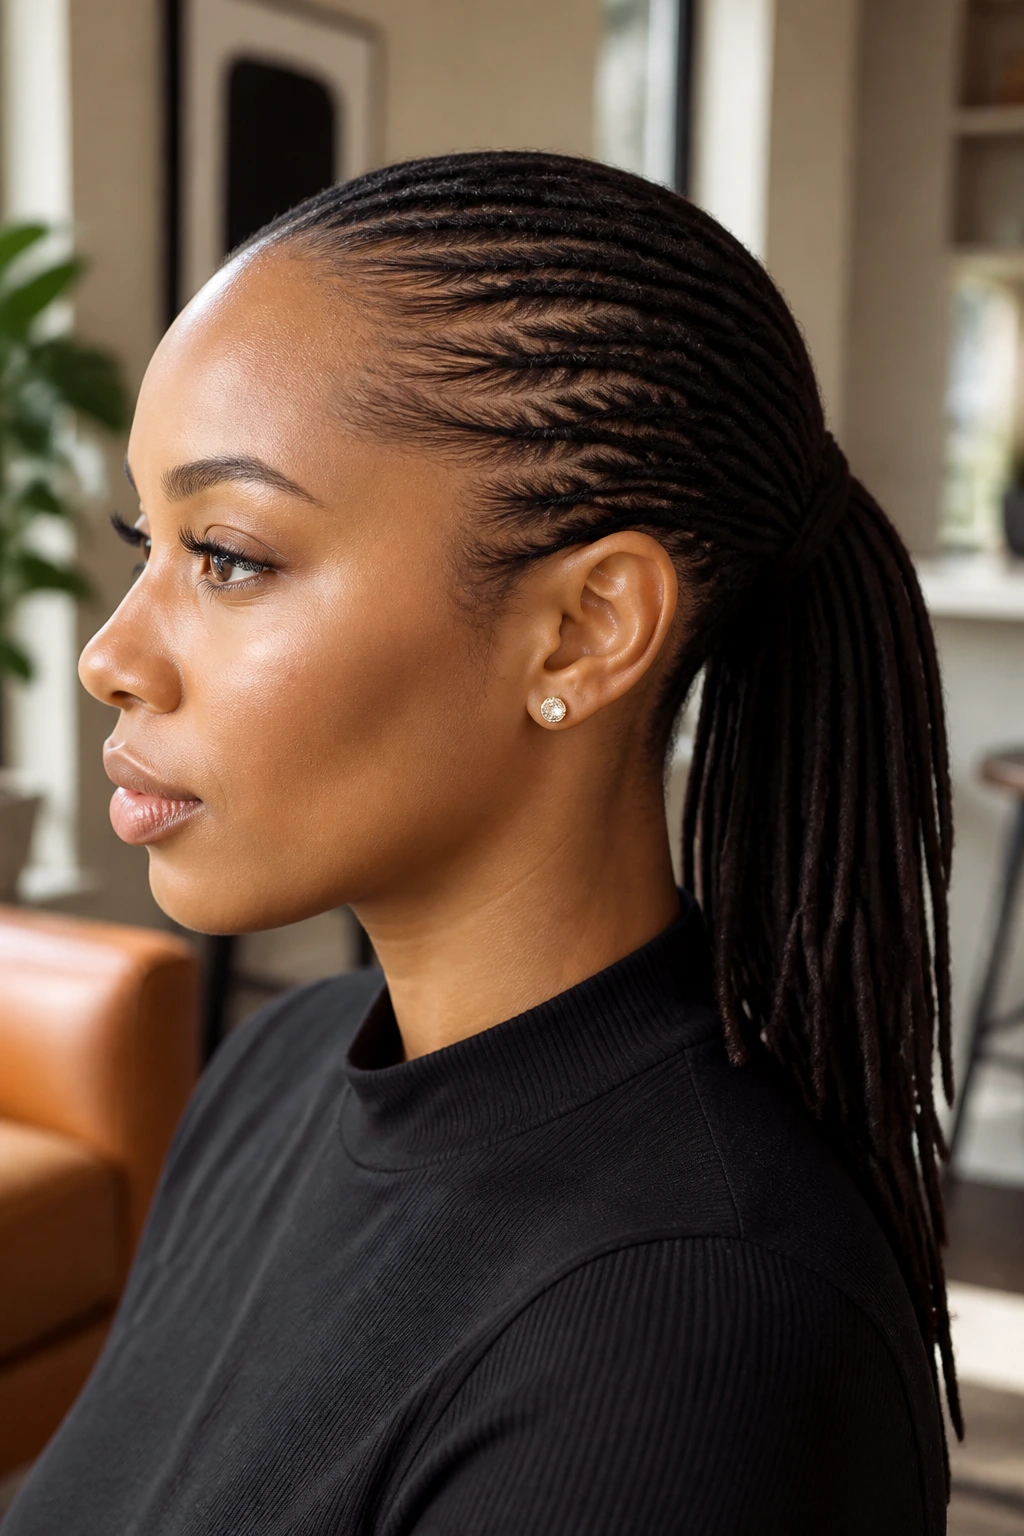
Locs already bring texture, so the slicked-back move here is mostly about root control and a clean outline. A gathered ponytail, high or low, keeps the locs out of the face while still letting the style feel rich and full.
Use a scarf or brush to press the roots first, then secure the pony with a strong tie that won’t tug. If the base looks bulky, wrap a loc around it or pin the loose pieces underneath so the silhouette stays tidy.
28. Low Braided Pigtails
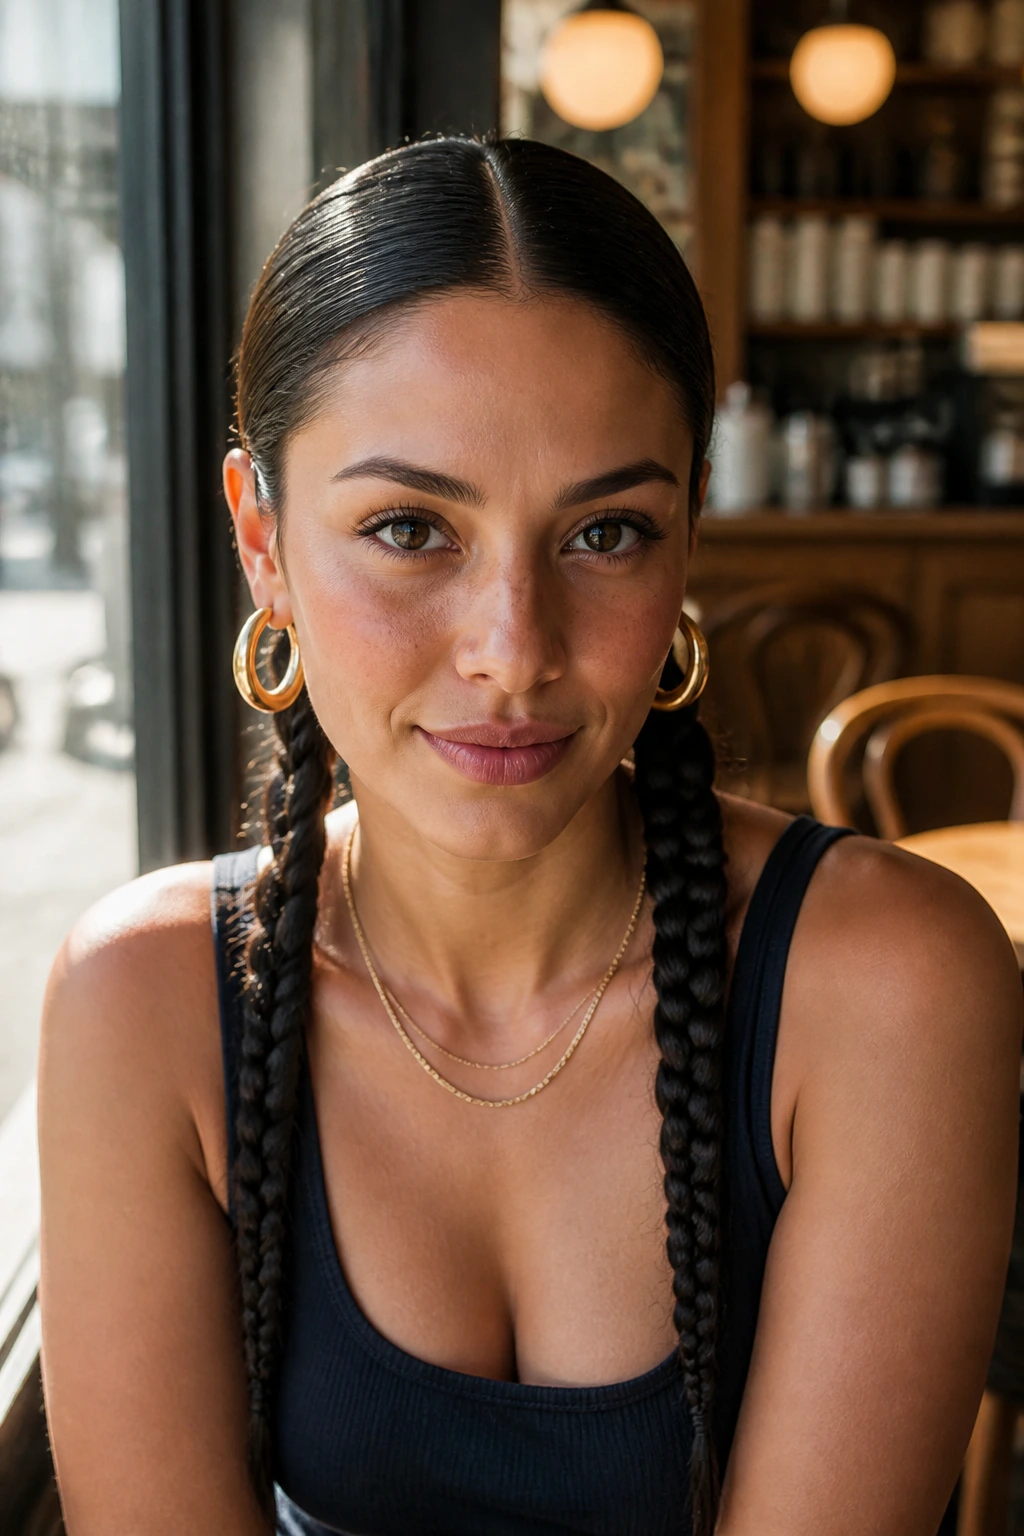
Pigtails can look surprisingly adult when the part is sharp and the roots are smooth. Low placement keeps them from feeling childish, and the slicked crown makes the symmetry look deliberate.
This is a good choice when you want something playful but not loud. Braid the tails loosely if you want movement, or keep them tight for a more structured line. Either way, the scalp should look clean before the braids start.
29. Sleek Space Buns
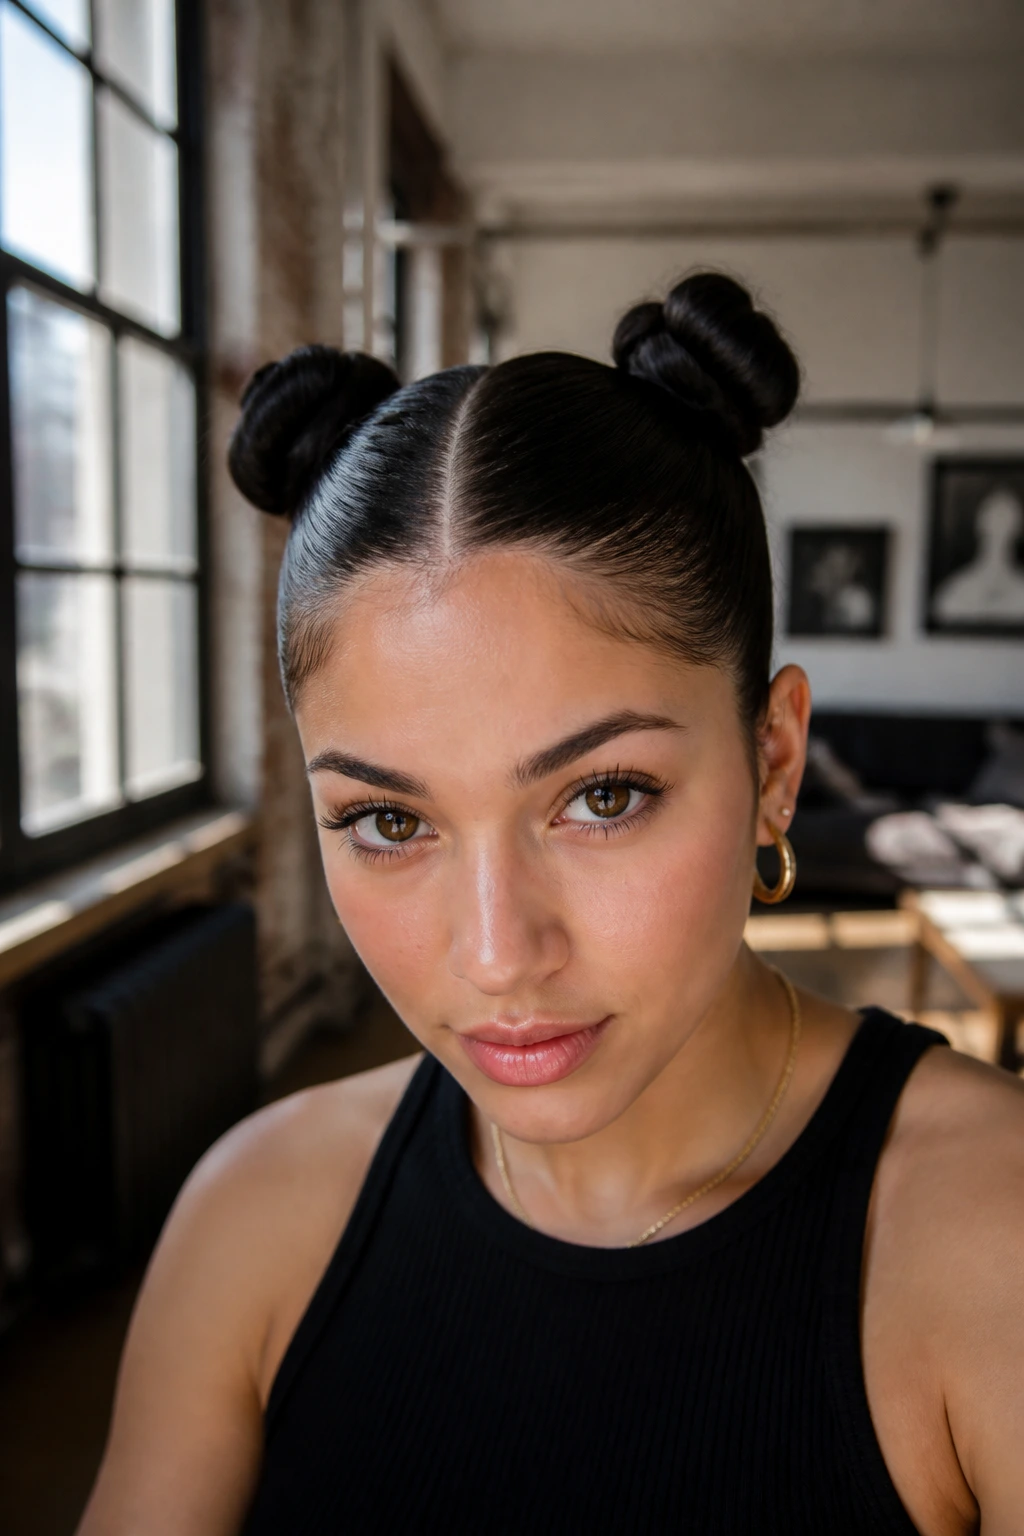
Space buns don’t have to feel costume-like. When the roots are slicked down and the buns sit neat and even, they read more modern and less literal.
Make them grown-up
Keep the buns small, place them slightly behind the hairline, and leave no puff at the crown unless you want it there on purpose. A middle part makes the symmetry strong, while a side part gives the buns a softer, less schoolroom feel.
30. French Roll with Gel Finish
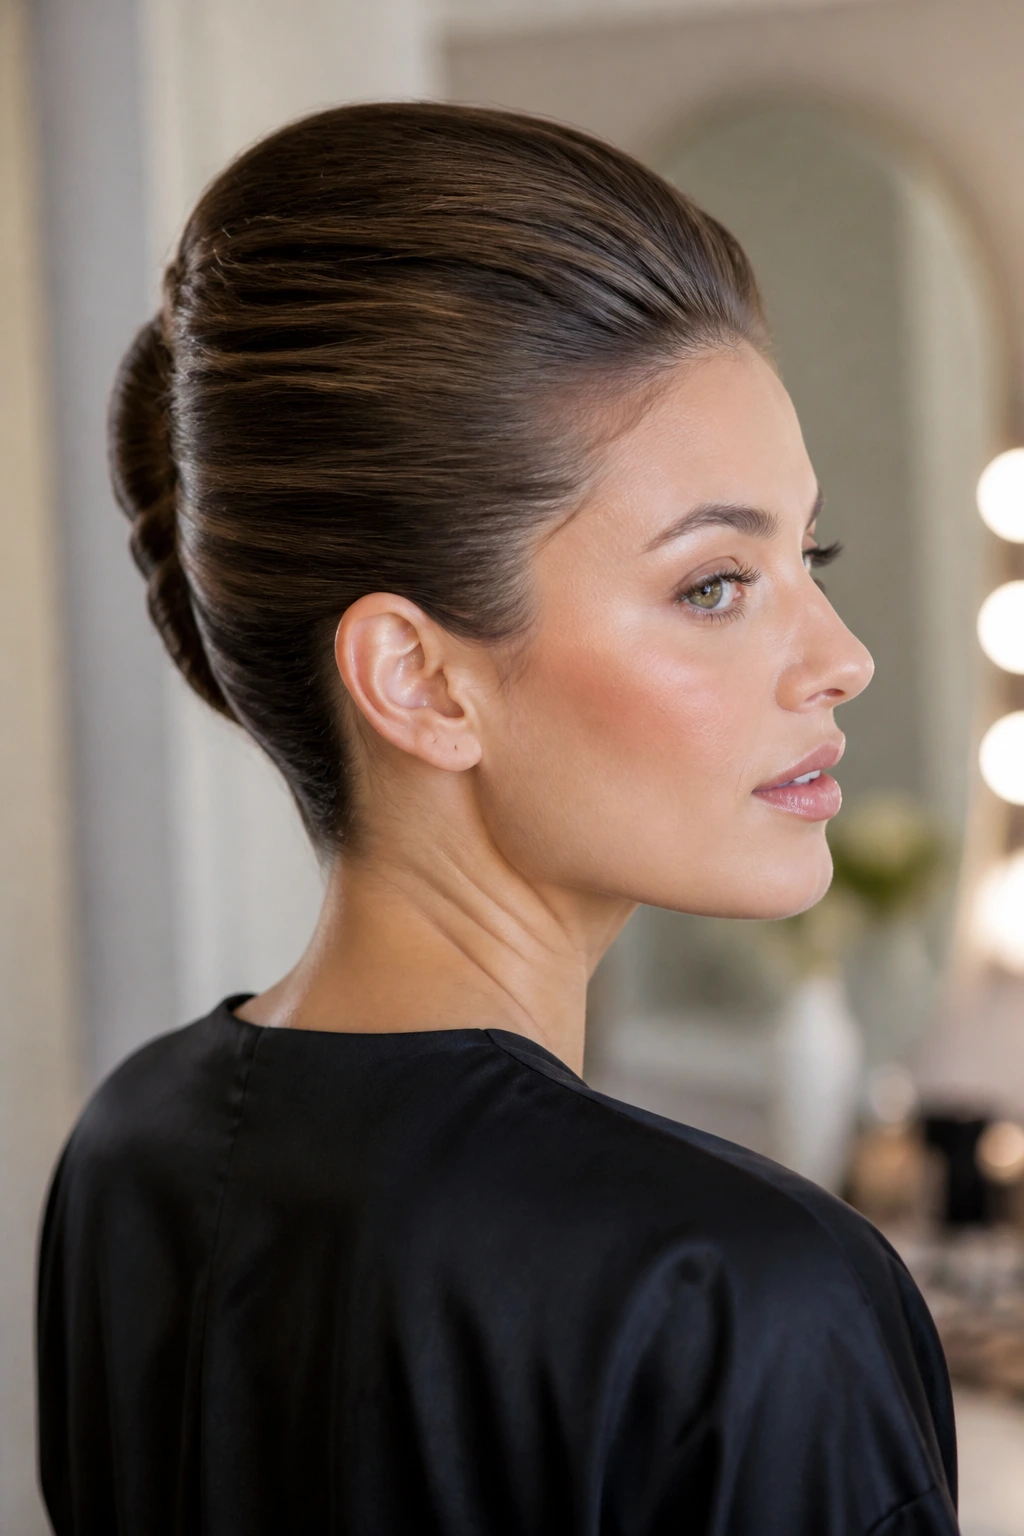
The French roll is old-school in the best way. It has a clean vertical line, a tucked seam, and enough polish to work with a dressy neckline or a plain black tee.
Roll the hair upward from the nape, then tuck and pin along the seam so the fold sits flat. A thin layer of gel on the crown helps the front stay smooth, but skip the heavy oil — it can make the roll slip.
31. Red-Carpet Knot
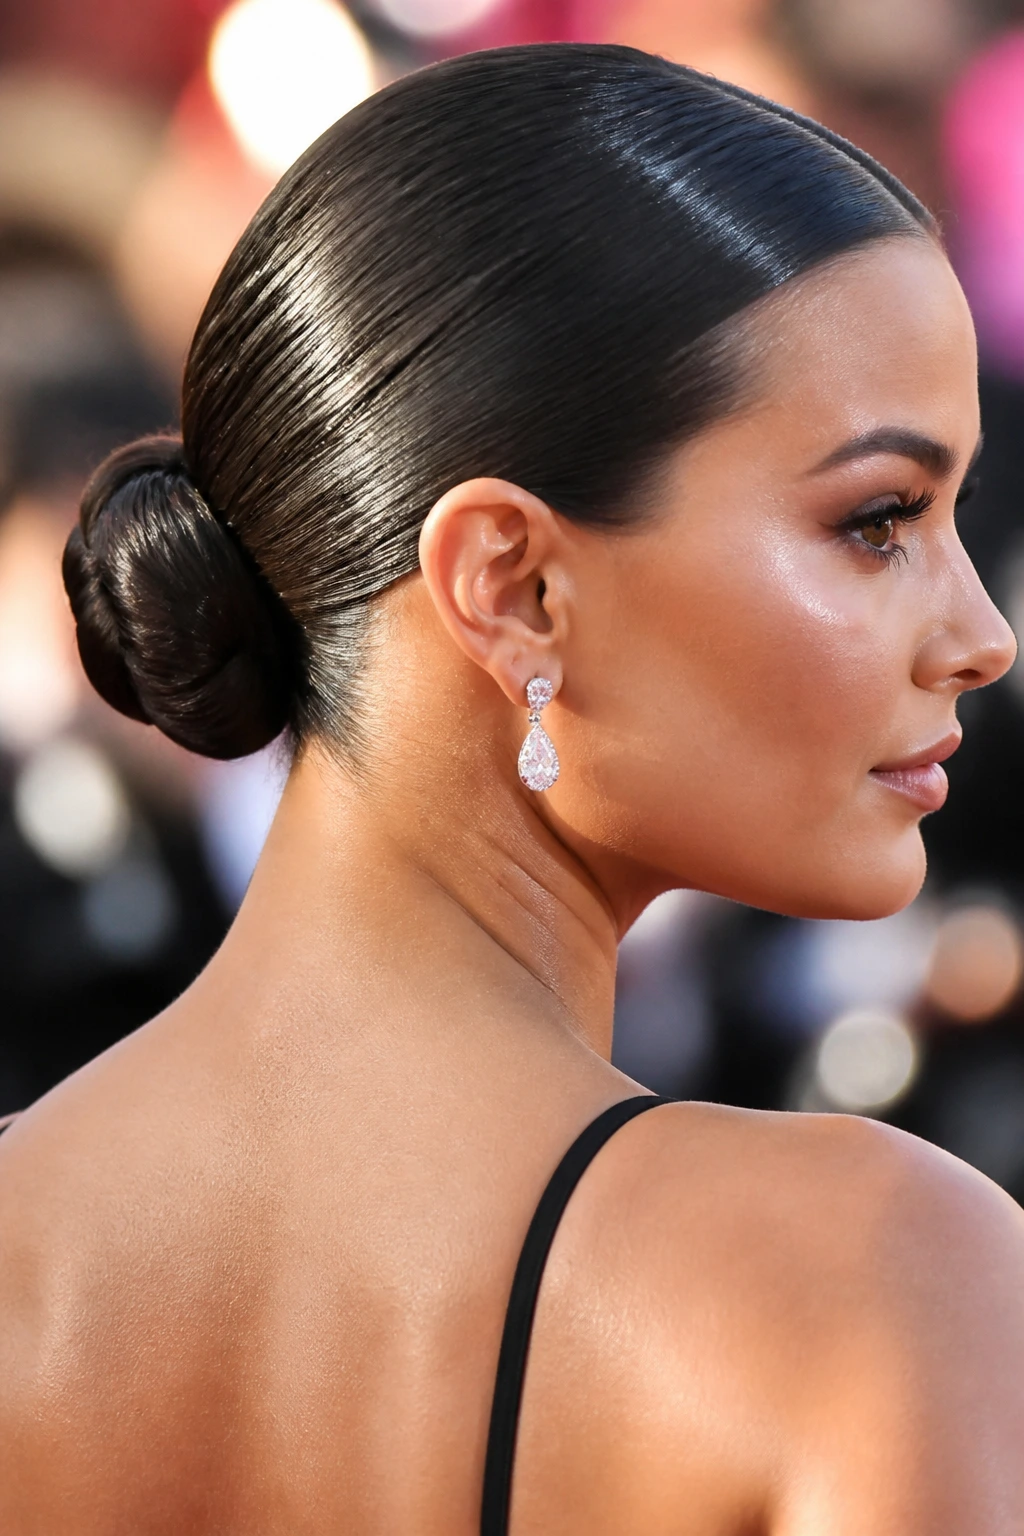
A red-carpet knot is a sleeker, tighter bun with almost no loose ends. It works when you want the hair to disappear into the shape and let the face, makeup, or clothing take over.
The difference is precision. The pony must sit where you want the final knot to sit, and the pins should be hidden under the bun rather than scattered around it. Finish with a shine spray from a distance so the hair glows instead of looking wet.
32. Sporty Slick Pony
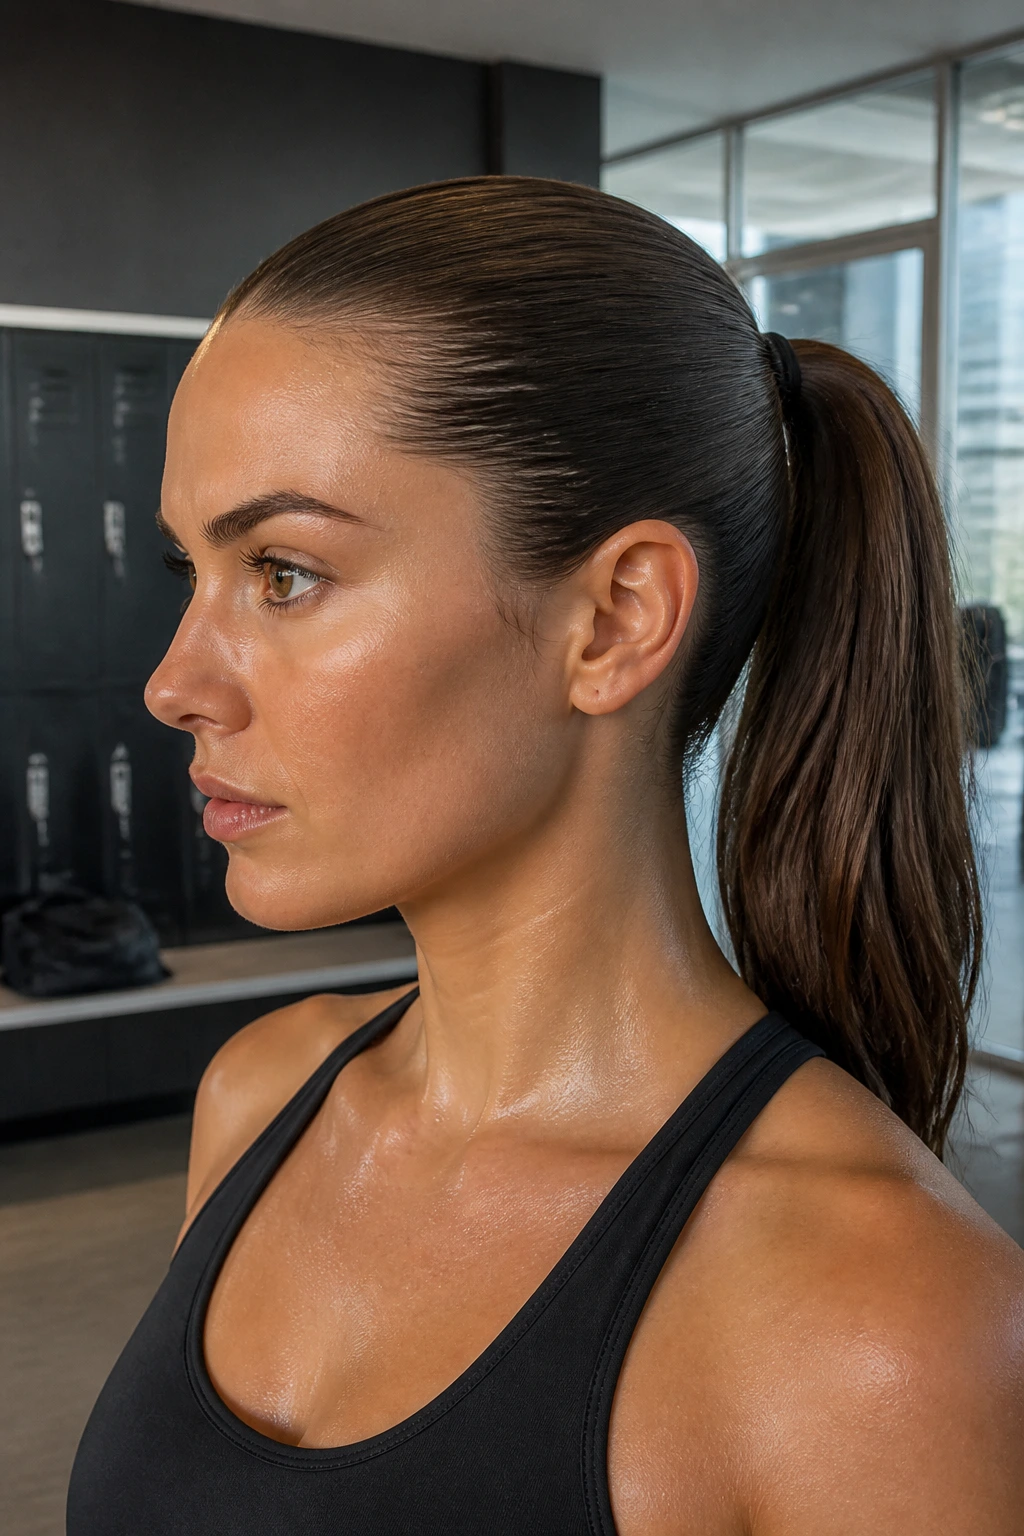
A sporty slick pony should stay put, even if you’re moving a lot. The goal is hold, not shine overload, so the finish can lean a little matte and still look clean.
This style is best when you want the front controlled and the length secure for errands, workouts, or travel. Use a strong elastic and a little more product at the nape, since that area tends to puff when the weather gets warm or humid.
33. Tucked-In Roll
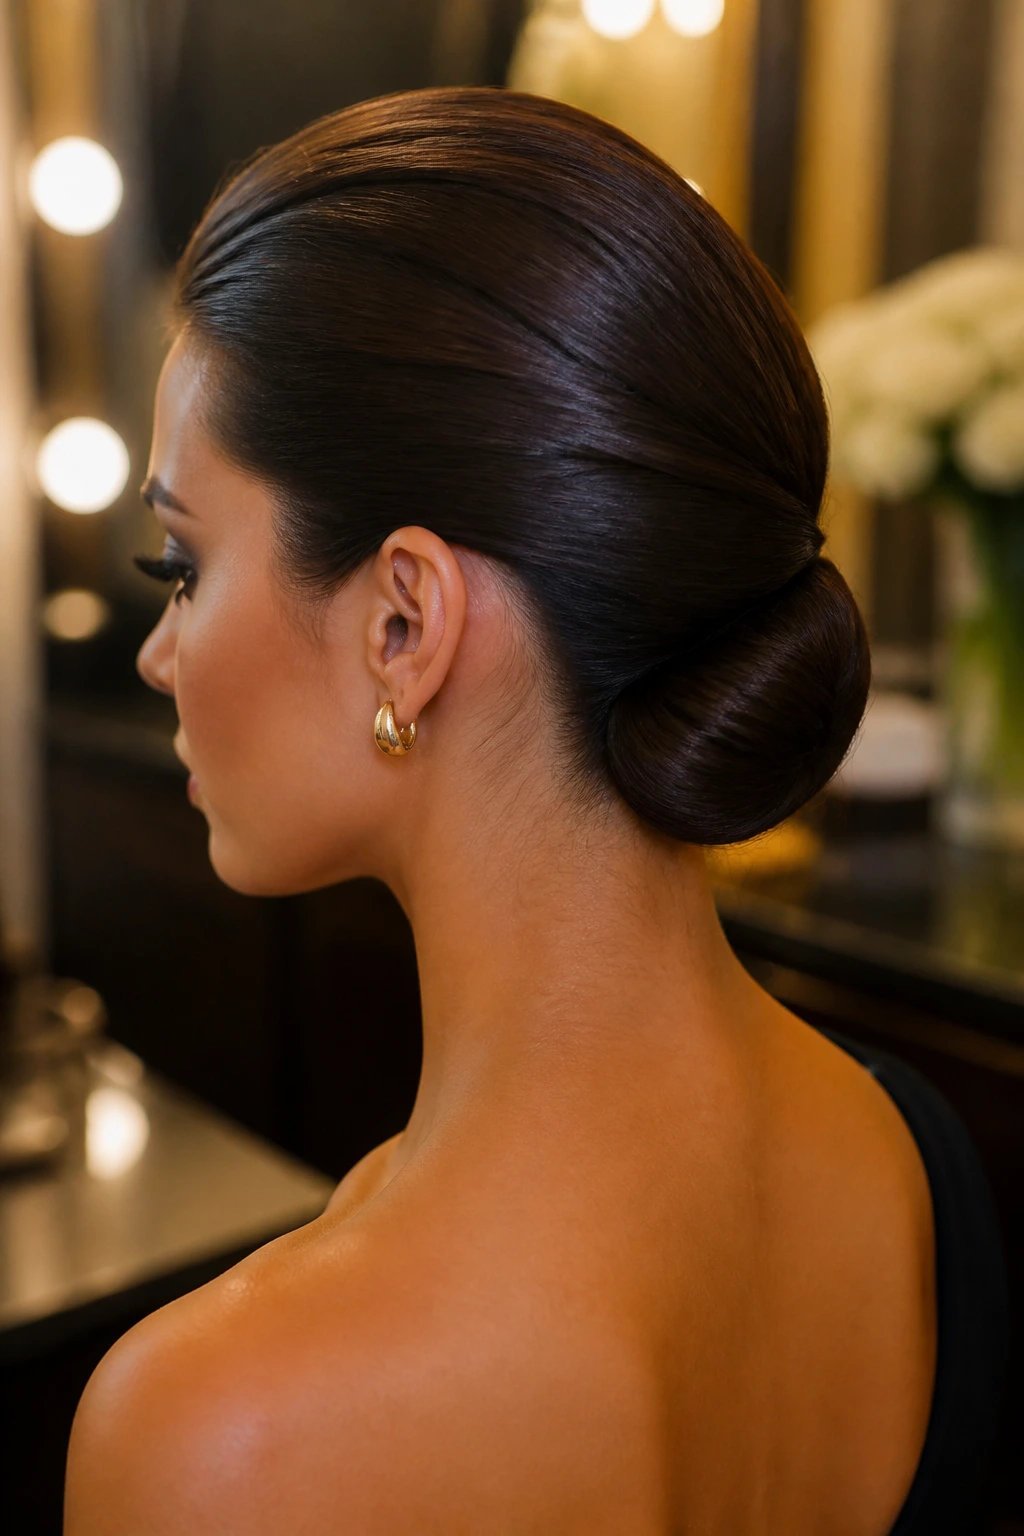
A tucked-in roll hides the ends entirely, which makes it useful when the hair is uneven or the last few inches are dry. The shape stays close to the head and gives a smooth, almost shell-like line at the back.
Use a low pony as the base, then fold the length inward and pin it flat. If the roll feels bulky, split the tail into two sections and tuck them separately — less bulk, fewer bumps.
34. Asymmetrical Slick Back
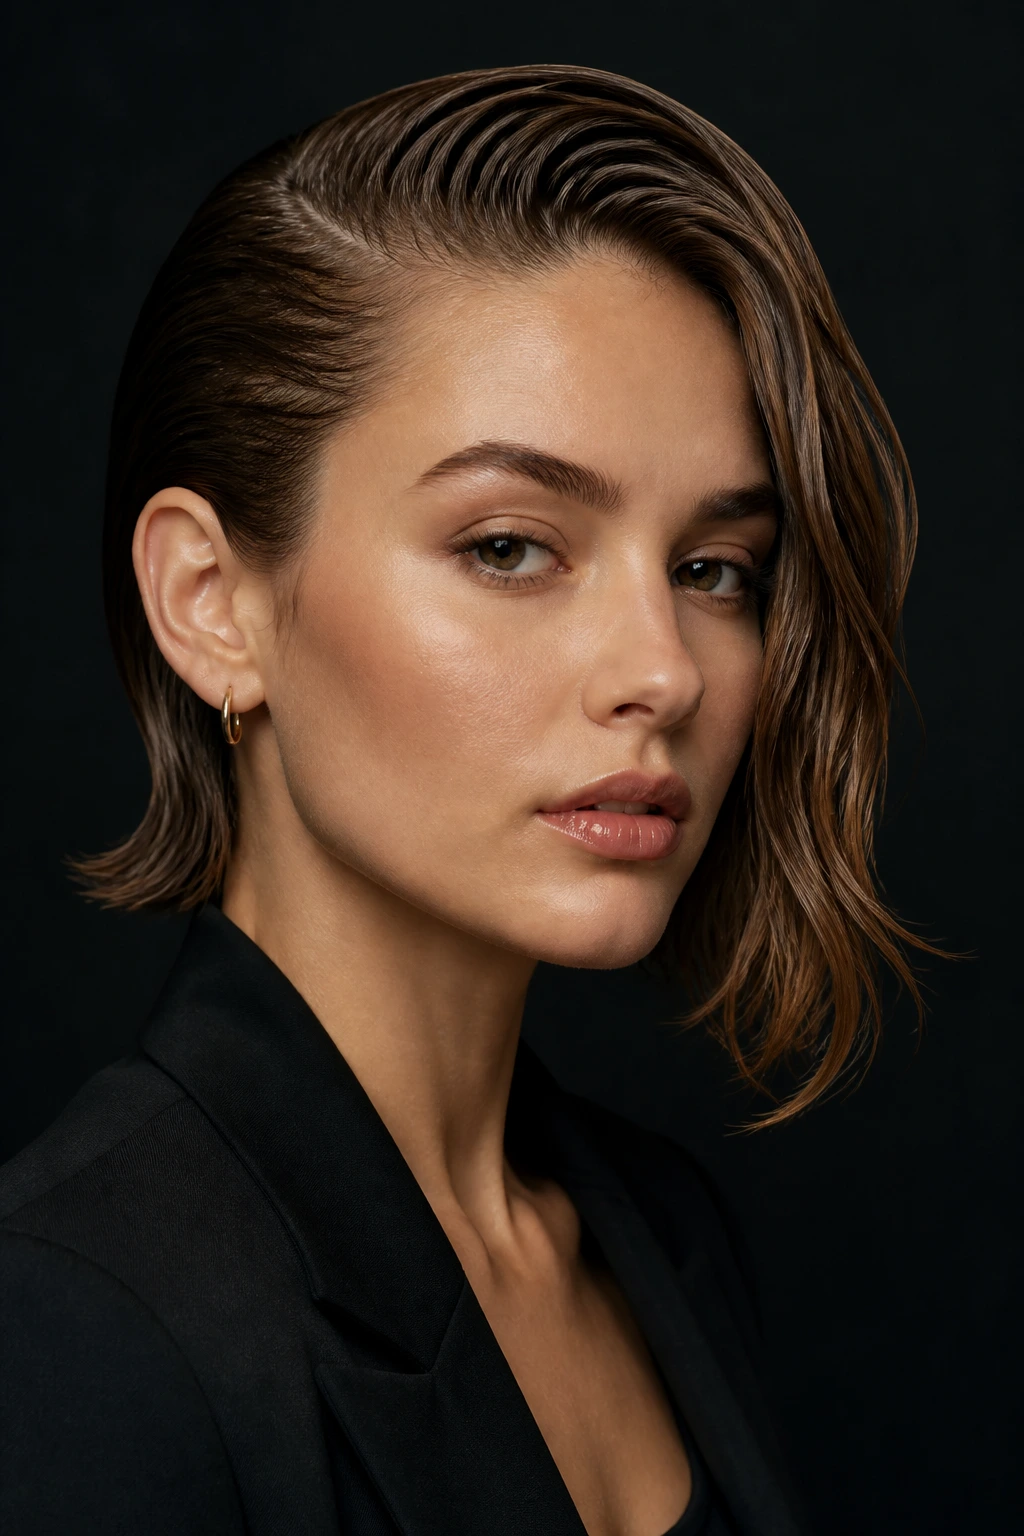
An asymmetrical slick-back gives you a little drama without needing extra length or ornament. The hair is swept harder to one side, often with one ear exposed and the other side tucked flatter.
Best on
- Bob lengths that need shape.
- Strong side parts that don’t sit evenly.
- Outfits with a single shoulder or a cutout neckline.
The uneven balance makes the style feel modern. Keep the lifted side glossy and the tucked side tight, or the contrast disappears.
35. Pearl-Studded Low Bun
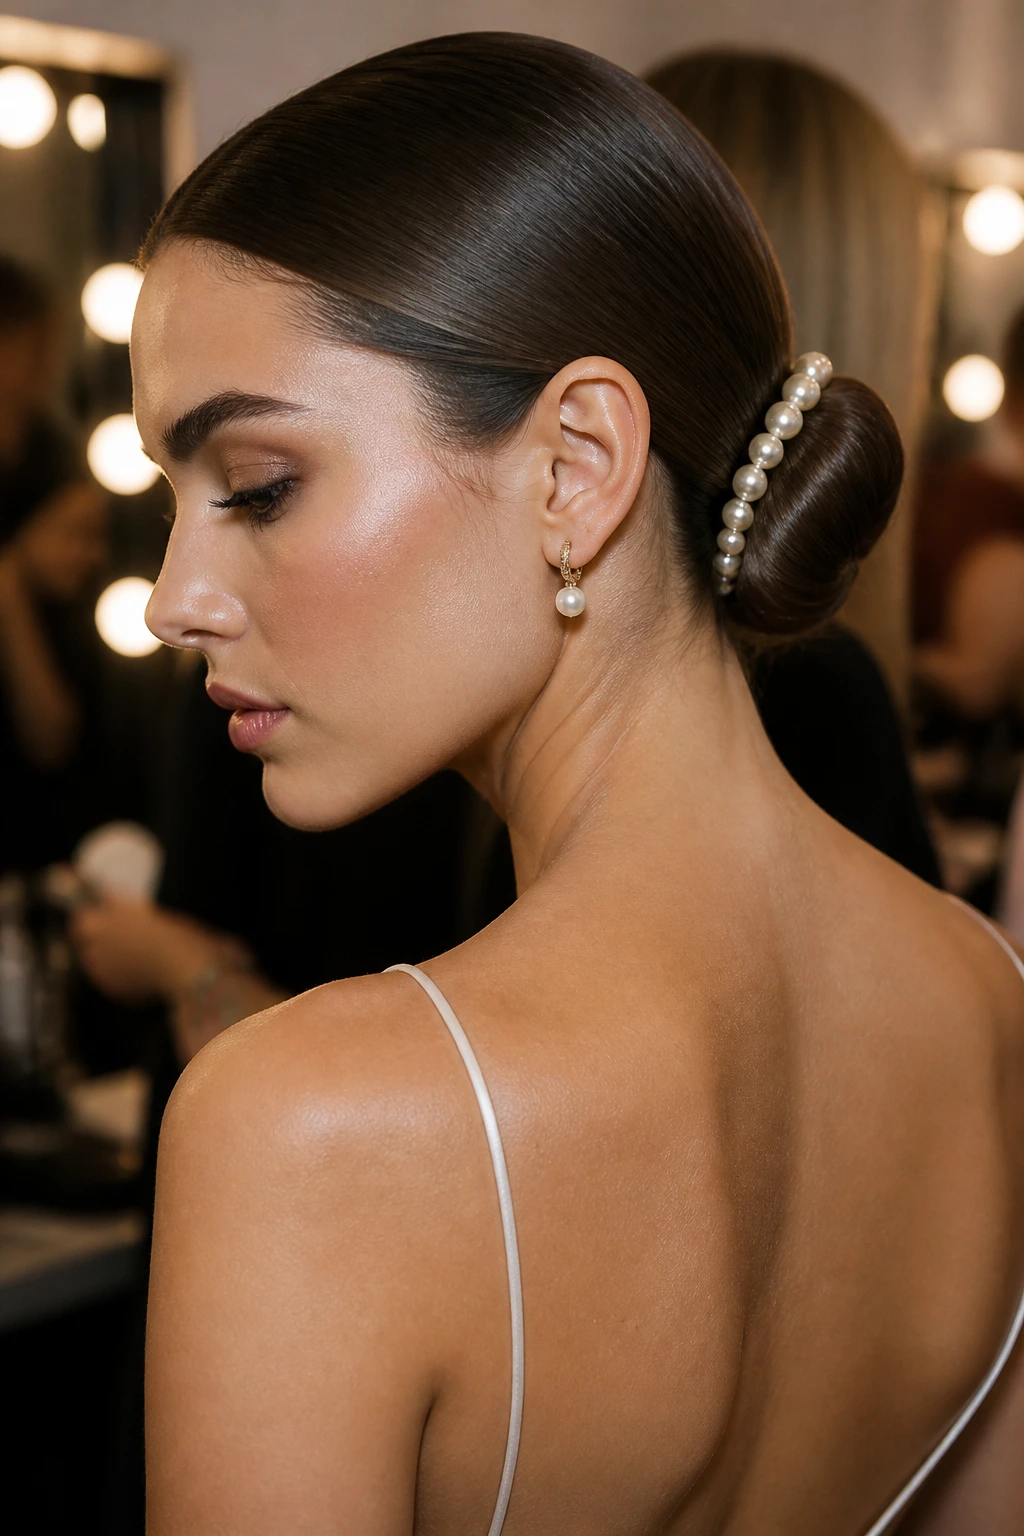
Pearls turn a low bun into a dressed-up style fast, but the bun itself should stay plain and neat. If the base is messy, the pearls look random. If it’s clean, the whole thing feels composed.
Place the bun low and smooth, then add the pearls along one side or around the outer edge. I like fewer pearls rather than more — a small line of them is usually sharper than scattering them everywhere.
36. Slicked-Back Undercut Reveal
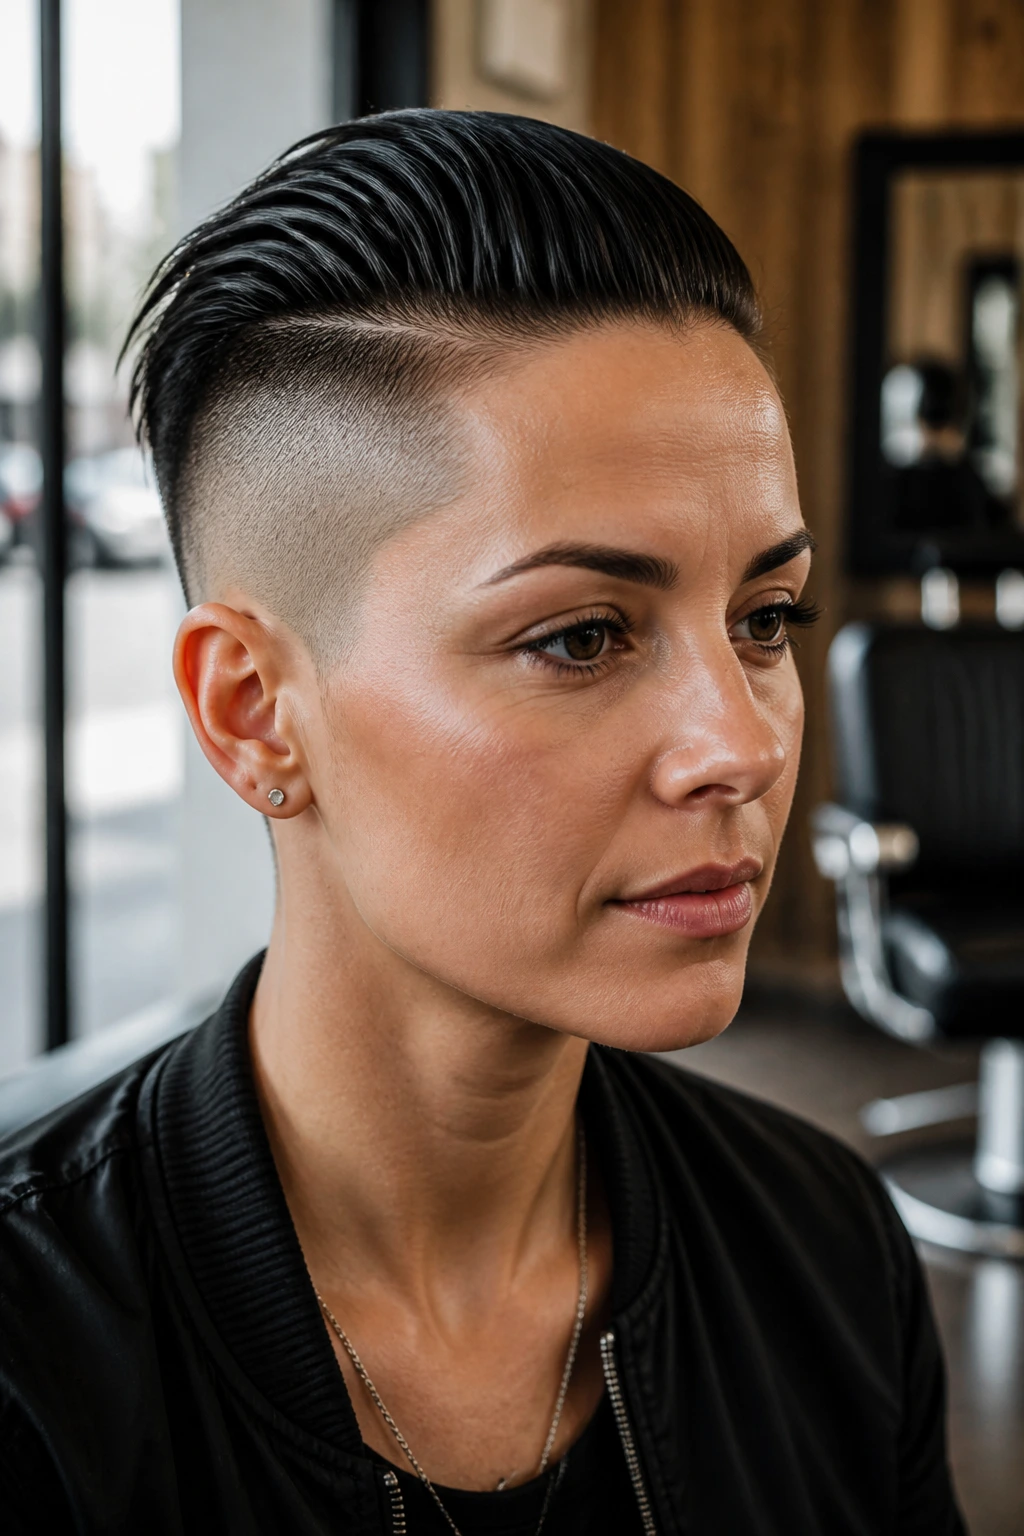
An undercut reveal works because it shows the cut instead of hiding it. The top stays smooth and pulled back, while the shaved or closely cropped sides become the detail.
What to watch for
You need enough product to control the top, but not so much that it clogs the contrast. If the undercut is shaved close, even a small amount of lift at the crown can look dramatic. That’s a good thing, unless you accidentally puff the roots and lose the line.
37. Soft-Gel Side Bun
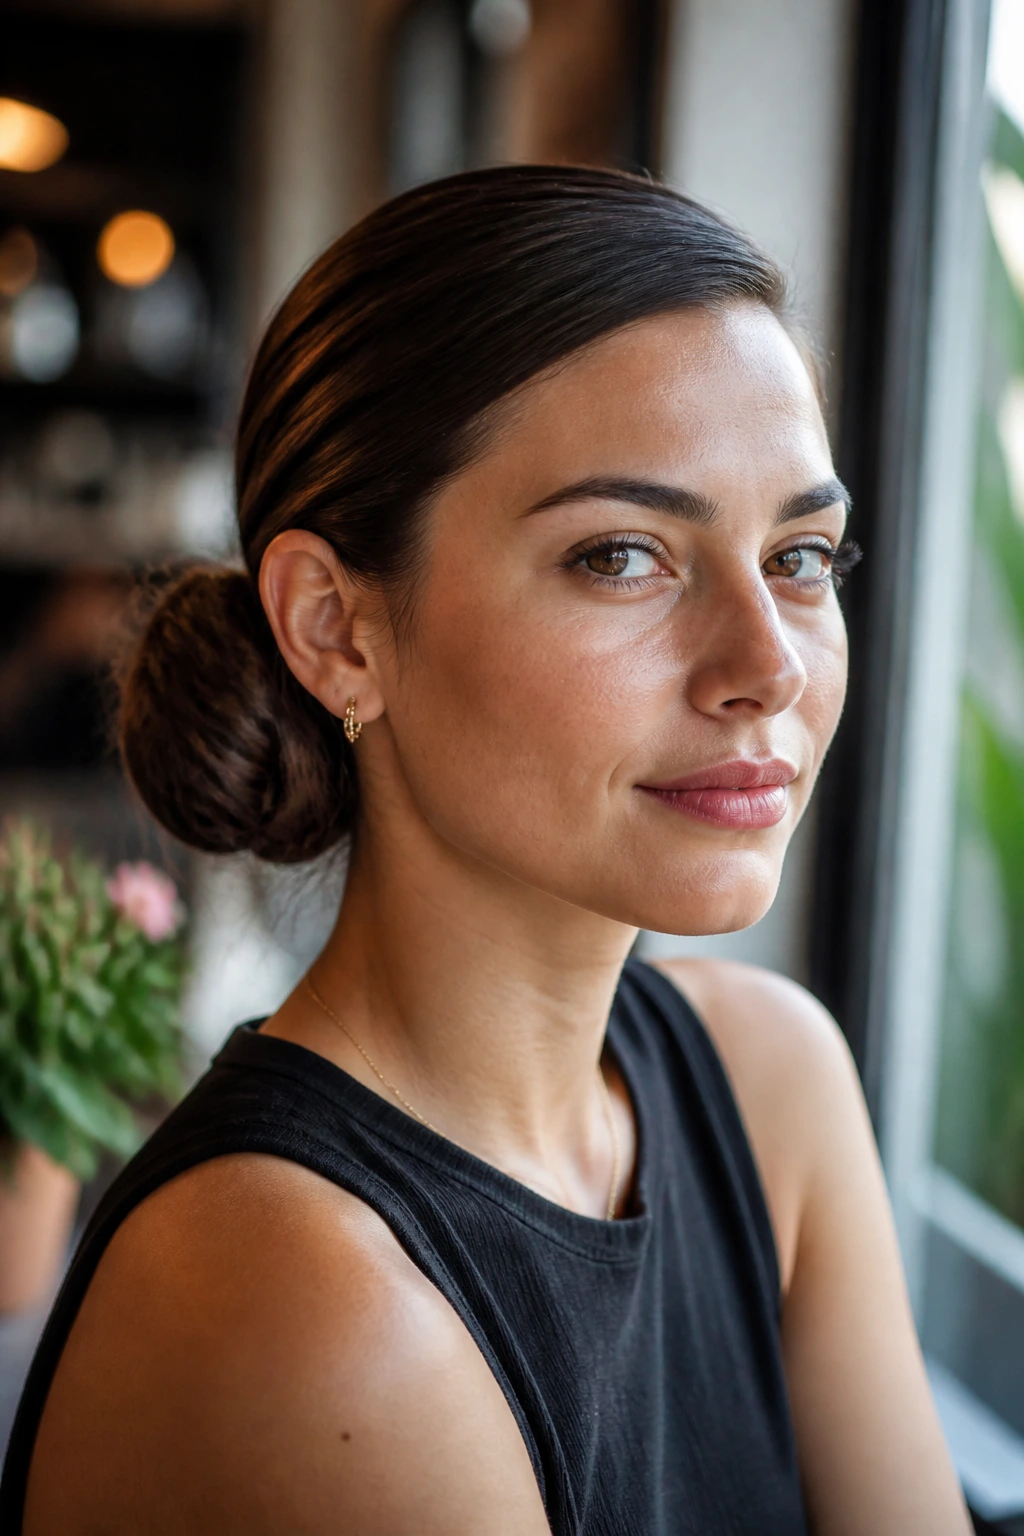
A soft-gel side bun is the gentler cousin of the severe slick-back. The product keeps the roots in place, but the finish doesn’t have to look glassy or stiff.
This version works well for daytime events, wedding guests, or anything where you want control without looking armored. Let the bun sit just behind one ear, then soften the hairline with a tiny bit of cream on your fingertips if needed.
38. Bridal Glossy Chignon
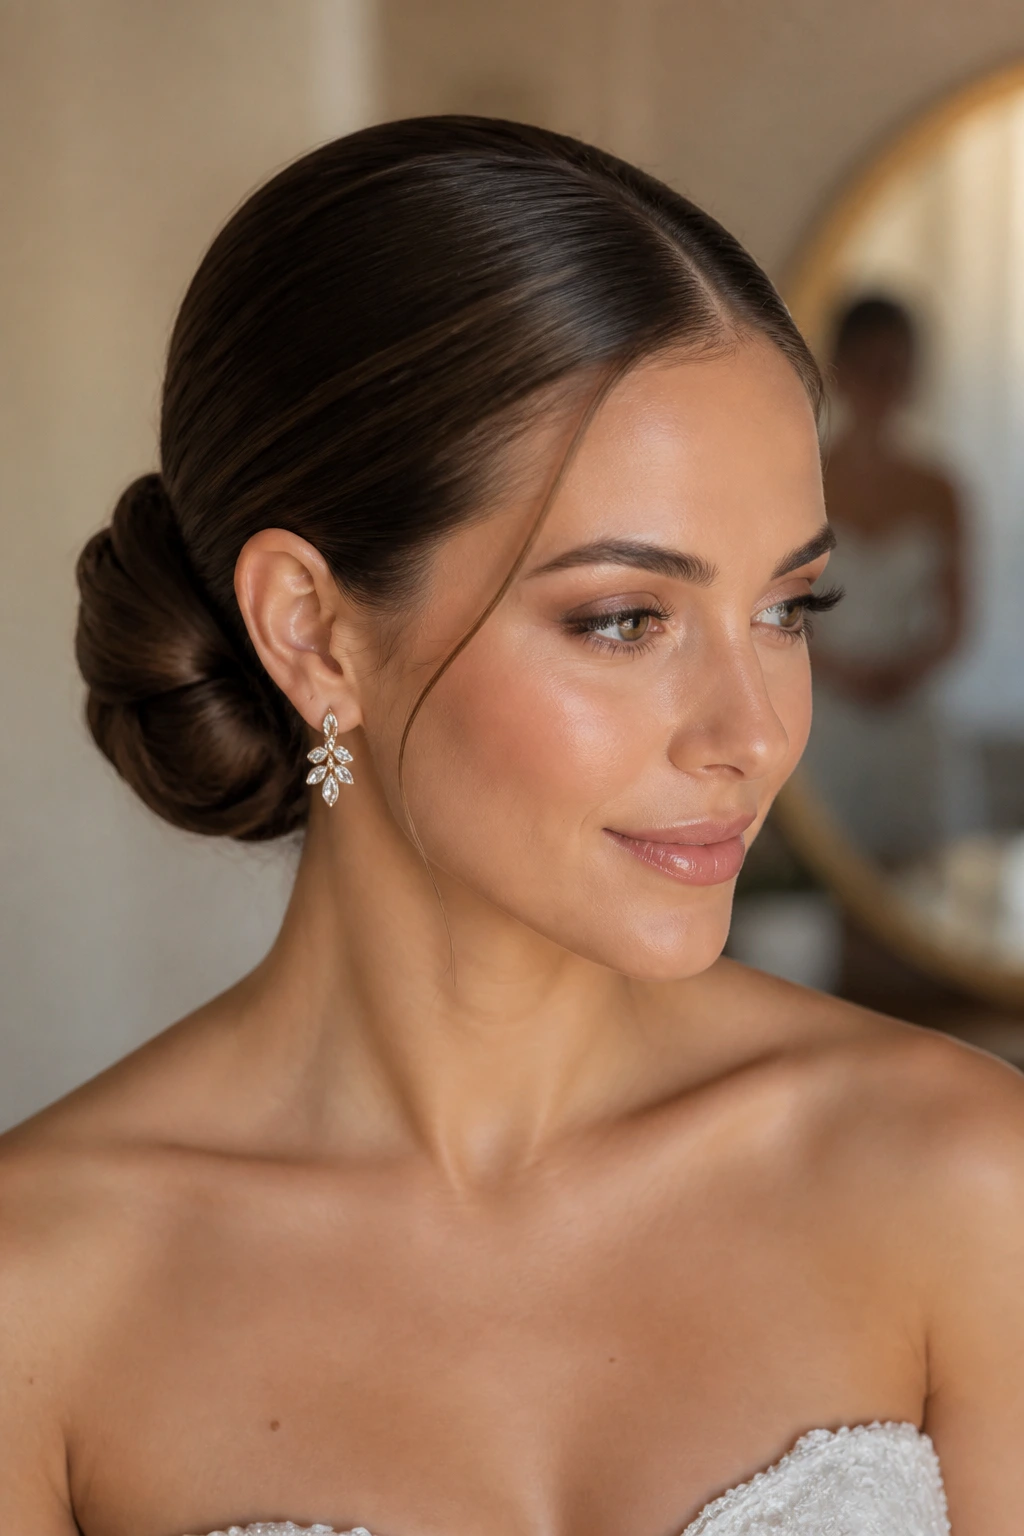
A glossy chignon is the polished finish a lot of formal styles are trying to borrow from. It sits low, stays smooth, and holds up well with veils, pins, or delicate earrings.
The shape should look firm from every angle. Use a fine-tooth comb to smooth the crown, pin the bun securely, and finish with shine spray only after the style is locked down. If a few baby hairs escape, leave them. Too many looks accidental; one or two look human.
Why Slicked-Back Hair Feels Clean Instead of Severe
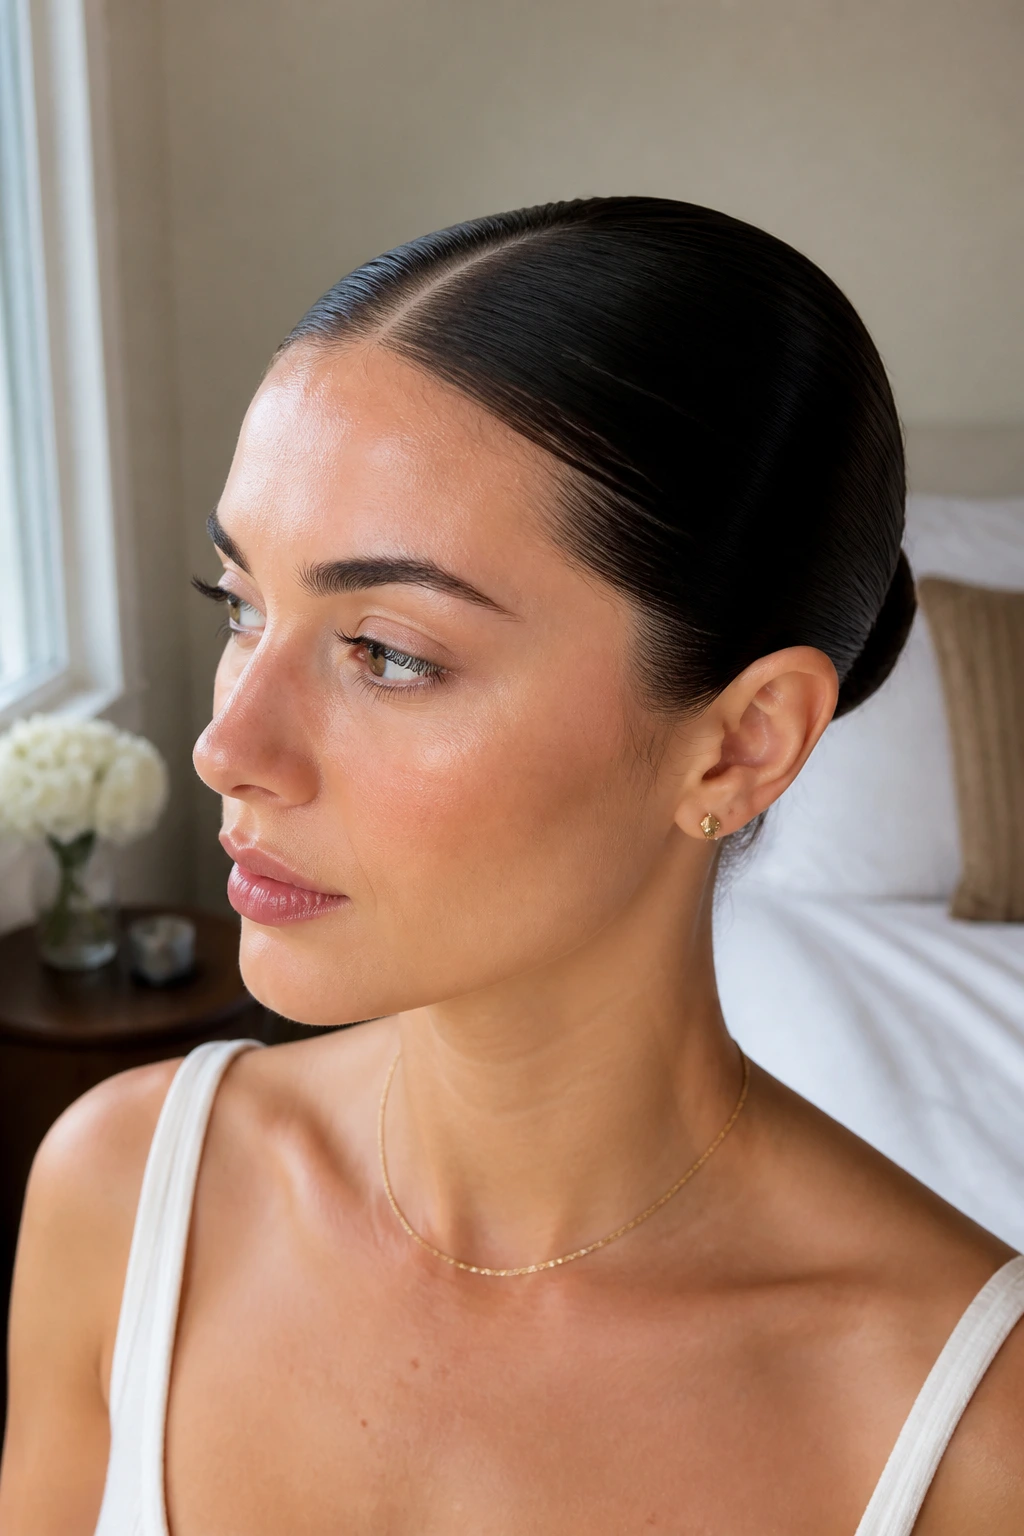
The styles work because they control the top half of the head, where the eye lands first. Once the roots are orderly, the rest of the hair can be as simple as a ponytail, bun, braid, or loose length.
Product layering matters more than people think. A little water, a little cream, a little gel — in that order — usually gives a smoother result than dumping on one heavy product and hoping the brush will sort it out. The brush can’t fix everything.
Part placement changes the mood too. A center part reads crisp, a side part softens the face, and no part at all leans more sporty or editorial. Pick the line first. Then build the rest around it.
Essential Tools for These Looks
-
Rat-tail comb: Best for clean parts and sectioning the front without tearing through tangles.
-
Boar-bristle or smoothing brush: Helps press the crown flat and move product evenly through the roots.
-
Fine-tooth comb: Useful for slicking short hair, laying edges, and smoothing the top of buns.
-
Gel or edge control: Choose a hold level that matches your hair texture; stronger hold matters more for coarse or curly hair.
-
Bobby pins and U-pins: Hide them under buns, rolls, and twists so the style stays put.
-
Clear elastics or snag-free ties: Handy for wrapped ponytails, bubble ponytails, and braids.
-
Wax stick or pomade: Good for flyaways, pixies, bobs, and the front few inches around the part.
-
Shine spray: Use lightly. A mist is enough; a soaked crown will collapse the shape.
-
Silk or satin scarf: Useful for setting the roots while makeup goes on or while the style dries.
Smart Product and Product Selection Tips
Start with hold, then choose the finish. If your hair is fine and slippery, a light gel plus a touch of mousse under it usually gives more control than a thick cream alone. If your hair is coarse, coily, or very dense, look for a product that says strong or extra hold — the roots need more help, not more shine.
The ingredient list matters more than the label art. Water-based gels rinse out more easily, which is a relief if you slick your hair back often. Heavy waxes and oil-rich pomades can be useful on pixies or undercuts, but they tend to build up faster on long hair and make the crown look greasy by the second wear.
For edges, use a small amount. Seriously. A pea-sized bit spread with a toothbrush or edge brush usually does more than a fat scoop that flakes later. If a product flakes in the jar, it will probably flake on your head too. That one saves headaches.
How to Wear and Pair These Looks
Presentation: Keep the silhouette clean first, then decide what the eye should notice — the part, the bun, the braid, the earrings, or the neckline. A slicked-back look earns its place when the front stays flat and the shape at the back is neat from every angle.
Accompaniments: Hoops, drop earrings, strong brows, a bare neck, a sharp blazer, a square-neck top, or a plain crew tee all work because they don’t fight the hairline. Wide collars and busy necklines can crowd the style unless the bun or pony sits low.
Scale: Fine hair usually looks best with a smaller bun, a tighter pony, or a softer wet look. Thicker hair can handle a high pony, braids, and wrapped bases without losing structure. If the style looks too big, reduce the amount of hair left loose at the crown.
Finish: A matte lip, dewy skin, or a clean winged liner can shift the mood fast. The hair doesn’t need to be the loudest thing in the room. It just needs to be clean enough that the rest of the outfit can breathe.
Additional Tips and Finish Boosters
Root Control: If the hairline keeps puffing back up, work in thin layers and let each one set for a minute before adding more. One heavy pass of product is easier to mess up than two light ones.
Shine Without Crunch: Apply shine spray to the ponytail, bun, or lengths, not directly to the crown. The top should look smooth, not wet and sealed like plastic wrap.
For Fine Hair: Backcomb the ponytail base just a little before tying it off, then smooth the outside layer. That tiny bit of grip gives the style more shape without making the top visible.
For Coarse or Curly Hair: Use a leave-in under the gel so the hair doesn’t feel dry the second the product sets. Coarse hair often needs moisture first and hold second.
Make It Yours: Add a ribbon, barrette, pearl pin, or wrapped braid only after the shape is stable. Accessories should finish the look, not rescue it.
Maintenance, Re-Styling, and Washout
A slicked-back style usually lasts one full day well, and many of them can stretch to a second day with a little touch-up at the hairline. The styles with buns, knots, and wrapped bases tend to hold longer than loose wet looks, which flatten faster once the product dries down.
Overnight, a silk scarf or bonnet protects the crown from frizz and keeps the part from drifting. If you wake up with a few flyaways, a damp toothbrush and a trace of gel can fix the front in under a minute. Don’t start over unless you have to. That’s a waste of time and hair.
For washout, shampoo the crown twice if you used a strong gel or wax. The first wash loosens the product; the second actually lifts it. A little conditioner through the lengths helps, but don’t smear heavy conditioner on the roots unless you want to start the whole thing slippery again.
Variations and Adaptations to Try
Soft Office Slick: Use a lighter hold product and keep the pony, bun, or part a little looser. This version still looks neat, but it won’t read as severe under fluorescent lights.
High-Gloss Evening Finish: Add shine spray only after the style is pinned and secure, then smooth the top with a comb one last time. It works well for dinner, events, or photographs where the hair needs to look especially clean.
Texture-First Version: Leave the front slicked and let the ends stay airy, curly, or waved. That contrast keeps the look from feeling overworked and gives the style more movement.
Short-Hair Adaptation: Use a wax stick or pomade on pixies, bobs, and cropped cuts, then pin or clip the sides behind the ears. Short hair doesn’t need a lot of product — it needs precision.
Protective-Style Friendly Version: On locs, braids, or twists, focus on the perimeter and gathering points rather than trying to flatten the whole head. That keeps the style neat without fighting the texture you already have.
Common Mistakes to Avoid
Too Much Product at Once: The crown turns greasy, the style breaks down, and the front starts looking heavy instead of sleek. Start small and add only where the hair is resisting.
Brushing Dry Tangled Hair Flat: That just creates breakage and puff at the hairline. Mist the hair lightly first, or use a little leave-in so the brush can glide instead of snagging.
Ignoring the Back of the Head: The nape matters. If the front is smooth but the back is loose and lumpy, the style still looks unfinished from the side.
Pulling Too Tight at the Edges: A slick-back should feel secure, not painful. If the scalp aches or the roots start looking thin around the temples, loosen the tension and rebuild with fewer tugging passes.
Using the Wrong Finish for the Hair Type: Heavy wax can flatten fine hair into a sticky sheet, while a weak gel won’t control coarse or curly roots for long. Match the product to the texture, not the photo you saw online.
Frequently Asked Questions
How do I keep a slicked-back style from turning greasy?
Use product in thin layers and stop at the point where the hair lies flat. Shine belongs on the surface, not soaked through the crown.
Can curly hair do slicked-back looks without looking crunchy?
Yes. Start with leave-in conditioner, then use gel or edge control on the roots and a softer touch on the lengths. Curly hair usually needs more moisture at the start and more patience at the end.
What’s the easiest slicked-back style for beginners?
A low ponytail or low bun is the least fussy place to begin. Both hide small mistakes well, and both let you practice parting, smoothing, and wrapping the base without a lot of pin work.
How do I stop flyaways around the hairline?
Work in small sections and let the first layer of product set before adding more. A toothbrush or edge brush gives more control than a full-size brush near the temples and ears.
Can I do these styles on short hair?
Absolutely. Pixies, bobs, side-swept cuts, and tucked-back clips all count. The shape changes, but the slicked-back idea is the same: clean roots, controlled sides, and a clear outline.
How long can I wear a slicked-back bun or ponytail?
Usually one to two days, depending on product and hair type. If the crown starts to puff or flake, refresh the front and redo the elastic rather than piling on more and more product.
Will slicked-back styles damage my hairline?
Not if you keep the tension reasonable. Pain, soreness, and visible thinning at the temples are signs the style is too tight, so loosen it and avoid pulling the same sections hard every time.
What if my hair refuses to stay flat?
Use a damp brush, a stronger hold product, and a scarf to press the roots for a few minutes before leaving the mirror. If the hair is very thick or coarse, work in sections instead of trying to flatten everything in one sweep.
The Shape That Does the Work
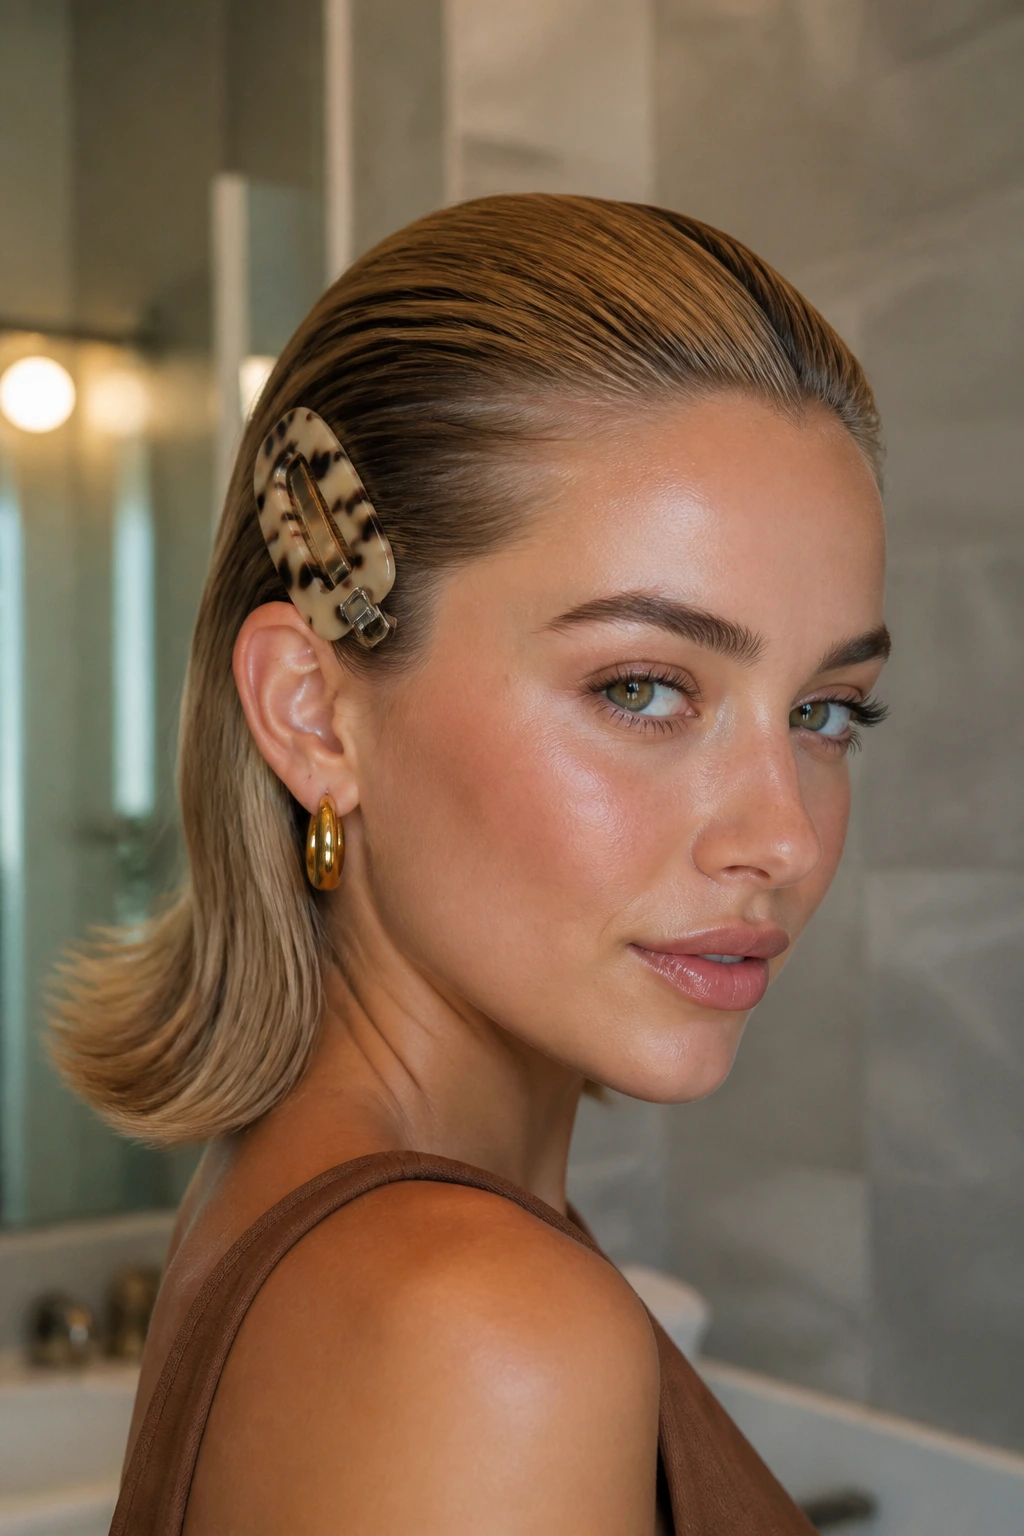
A slicked-back style is one of those rare looks that can be plain, formal, sporty, or a little dramatic without changing the basic rule: the front has to be controlled. Once that part is handled, the rest becomes almost easy. Ponytails sit cleaner. Buns look sharper. Bobs and pixies suddenly feel intentional.
The best version is the one that fits your hair, not the one that fights it. A wet look on fine hair, a strong gel pony on curls, a wrapped bun on locs, a clipped-back bob, a glossy chignon for a wedding — they all sit under the same umbrella, but they don’t behave the same way. That’s the fun of it.
Pick one shape, one part, and one finish. Then make it repeatable. The styles that last are the ones you can do again without guesswork, and that’s where the real payoff lives.
