



By noon, long hair can feel like a damp scarf stuck to your neck, and that’s where braid hairstyles for long hair in summer earn their keep. A braid doesn’t just “look cute”; it pulls weight off your shoulders, keeps the ends from tangling into a knot by dinner, and behaves a lot better than loose layers when the air gets sticky.
There’s also a practical side people skip over. Long hair is beautiful, sure, but it’s heavy, and heat makes every loose section feel louder than it did in the mirror at 8 a.m. A braid changes the shape of that whole situation. Sometimes it keeps everything tucked in. Sometimes it gives you movement without the frizz halo. Sometimes it’s the difference between hair you touch all day and hair you forget about.
And that’s the sweet spot here: styles that work hard without looking fussy. Some of these are fast enough for a weekday run to the grocery store. Others are the sort you wear when you want your hair to do the talking while the rest of you stays cool and unbothered. Either way, the details matter, so let’s get into the ones that actually hold up.
Why These Braids Earn Their Keep
-
They move weight off your neck: A braid keeps long ends from swinging against sweaty skin, which matters more than people admit once temperatures climb.
-
They tame day-two hair: Slightly lived-in hair often braids better than squeaky-clean hair, especially if your strands are silky and slippery.
-
They work with hats and sunglasses: Low braids, side braids, and crown styles leave room for summer staples that can flatten loose hair in a hurry.
-
They buy you time between washes: Braids hide root oil and keep the ends contained, so you can stretch wash day without looking like you’ve given up.
-
They can go casual or polished: The same braid pattern can look sporty, romantic, or sharp, depending on where you place it and how tight you pull the sections.
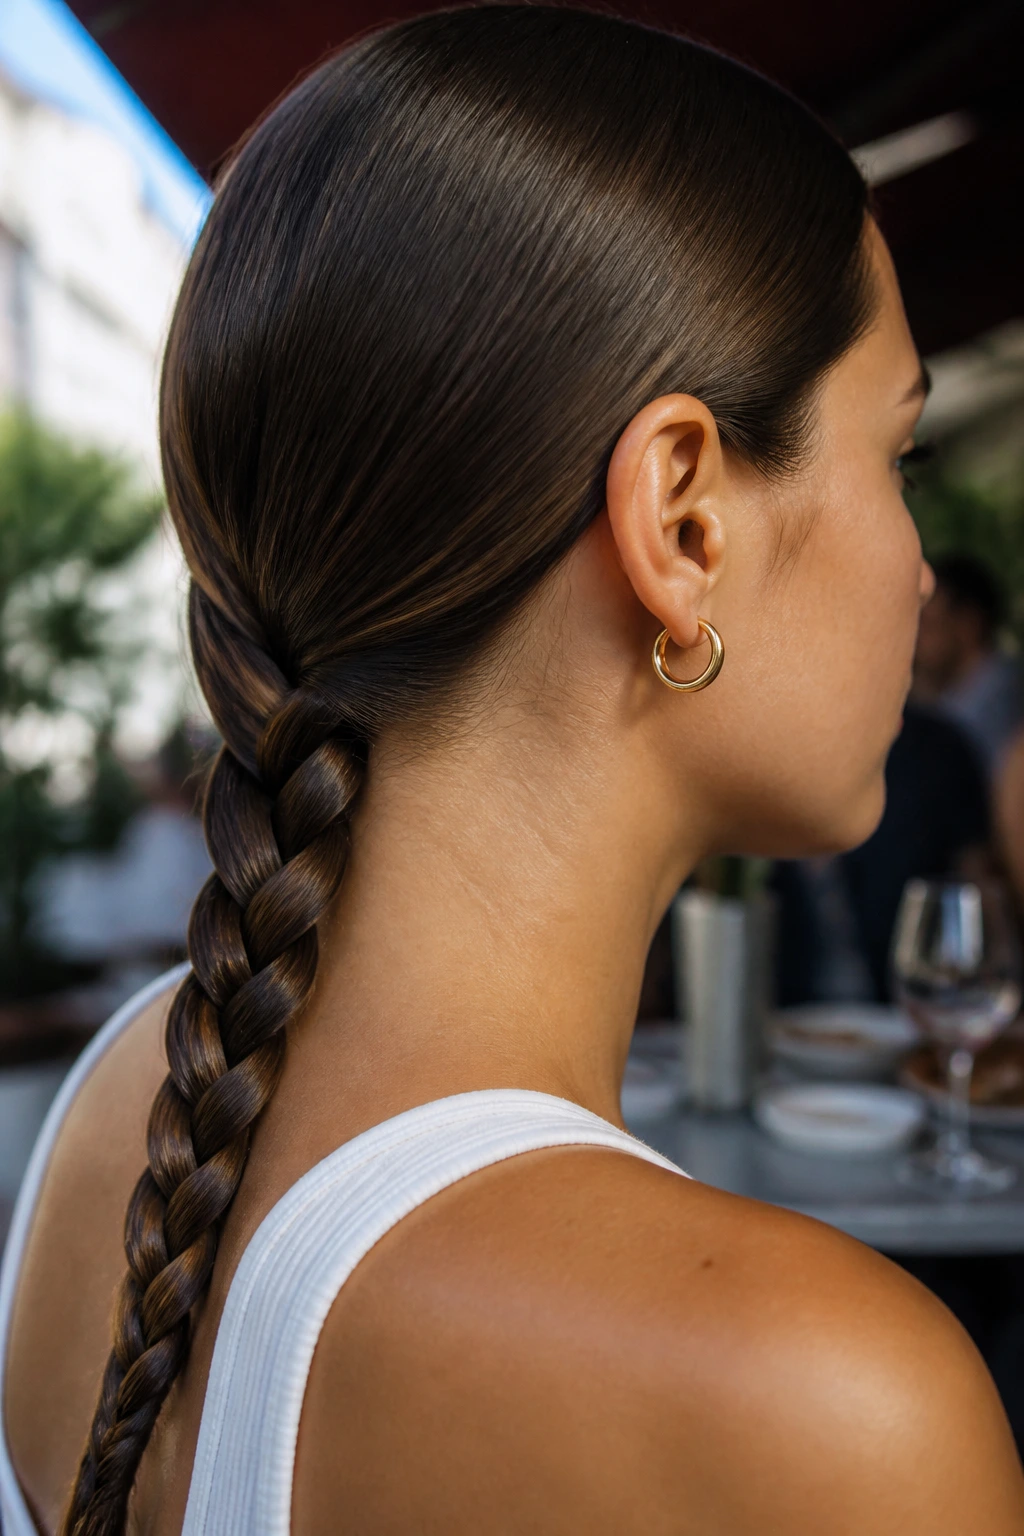
1. Sleek Low Three-Strand Braid
A low three-strand braid is the style I reach for when I want long hair to behave without looking overworked. It sits close to the nape, stays out of the way in heat, and keeps the finish clean instead of fluffy. On very hot days, that matters.
Why It Works:
This braid keeps the weight low, which means it feels lighter than a high ponytail braid by midafternoon. It also works well on layered hair because the tension is even from crown to ends, so the shorter pieces are less likely to pop out if you smooth the surface first.
Key Ingredients:
- 1 detangling brush
- 1 teaspoon smoothing cream or lightweight leave-in
- 1 rat-tail comb for a clean part
- 1 clear elastic
- 2 bobby pins, if you want to tuck flyaways at the nape
Quick Steps:
- Brush hair flat and work a small amount of leave-in through the mid-lengths and ends.
- Gather hair low at the nape and split it into three even sections.
- Braid down with steady tension until you reach the last 2 to 3 inches.
- Secure with an elastic, then pinch the outer loops gently if you want a softer shape.
Equipment for This Style:
- Paddle brush
- Fine-tooth comb
- Small elastic
- Mirror with a clear view of the back of your head
How to Wear It:
Keep it centered with a tank, a linen shirt, or a simple sundress. If you want it to look more finished, wrap a thin strand of hair around the elastic and pin the end underneath.
Pro Tips for This Style:
- Use less product than you think; too much cream makes the braid feel greasy at the base.
- If your ends puff out, mist them lightly before tying off and smooth them with your fingers.
Variations on This Style:
- Wrapped-Elastic Finish: Hide the hair tie with a thin strand for a cleaner look.
- Soft Side Sweep: Move the braid just off-center if you want a less severe shape.
Common Mistakes to Avoid:
- Don’t braid tangled hair; the braid will look lumpy and feel rough.
- Don’t start too high unless you want the weight on your crown instead of your neck.
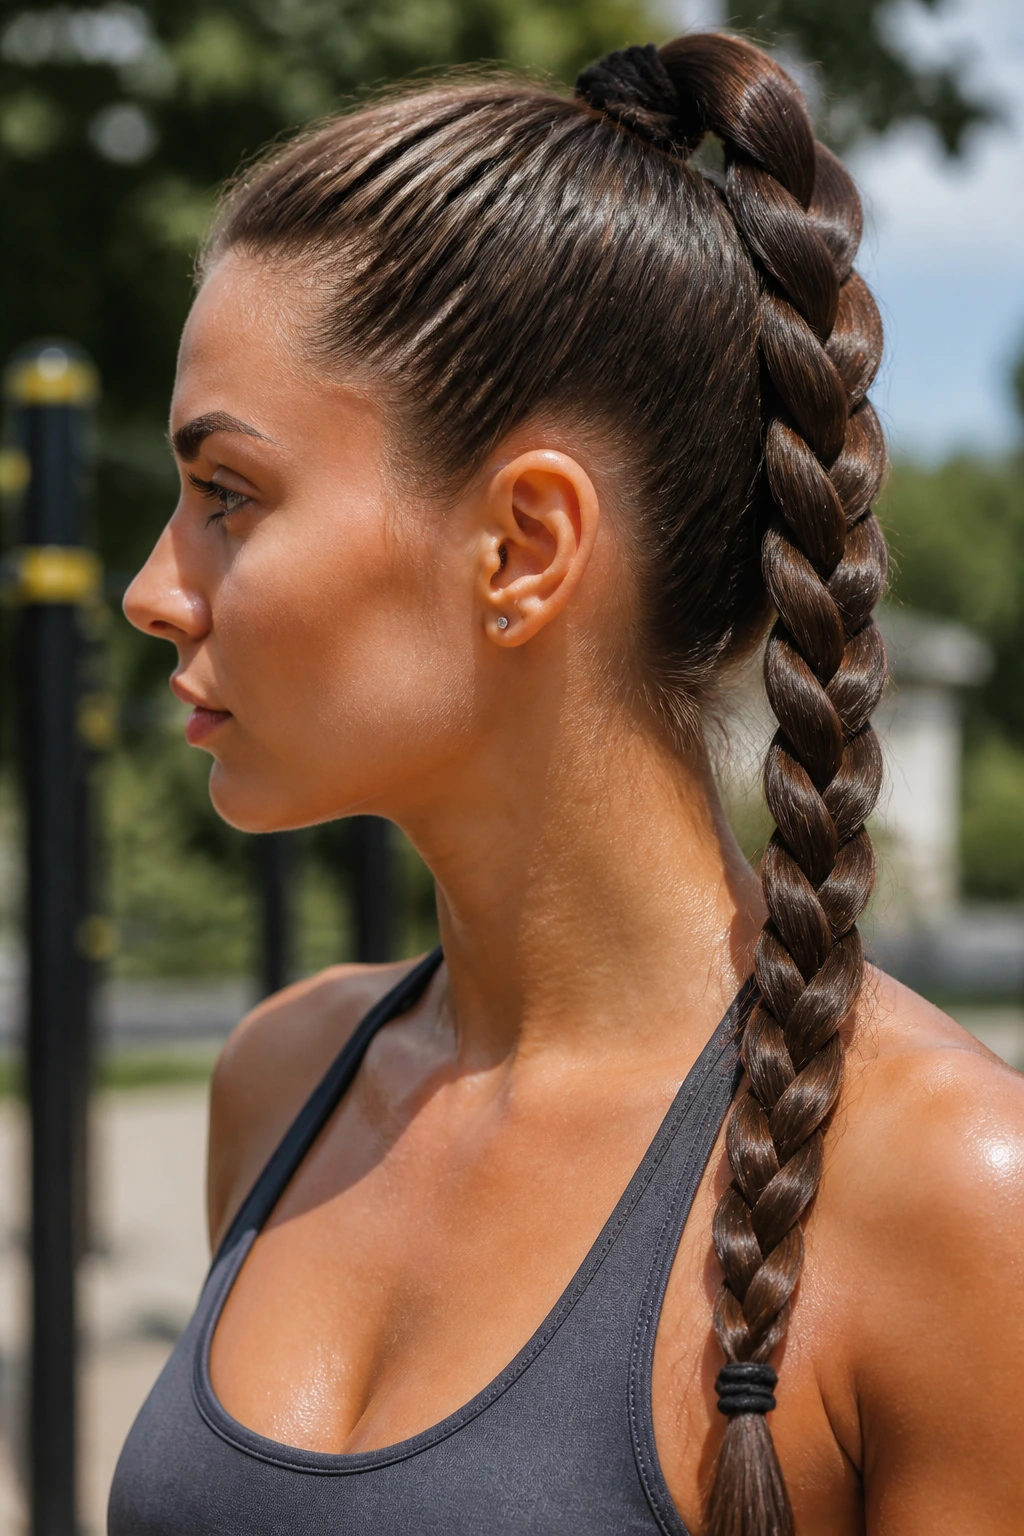
2. High Braided Ponytail
A high braided ponytail has a sharp, sporty edge that makes long hair feel almost lighter the second it’s secured. The lift at the crown opens up your face, and the braid tail keeps the length from whipping around. It’s an easy one to love on humid days.
Why It Works:
The ponytail base takes the pressure off the neck, and the braid keeps the length controlled, so you’re not dealing with a loose tail stuck to your back. It’s also a smart option if your hair is thick, because the weight is distributed more evenly than in a plain pony.
Key Ingredients:
- 1 boar-bristle or paddle brush
- 2 elastic bands
- 1 teaspoon strong-hold gel or edge control
- 1 small hair oil for the ends
- 3 to 4 bobby pins, optional
Quick Steps:
- Brush hair straight back and smooth a thin layer of gel along the hairline.
- Secure a high ponytail at the crown with one elastic.
- Braid the ponytail to the ends with even tension.
- Tie off the end, then wrap a small strand around the base if you want a polished finish.
Equipment for This Style:
- Brush
- Rat-tail comb
- 2 elastics
- Edge brush
How to Wear It:
This looks good with athletic wear, yes, but it also works with a fitted tank and hoops. The height gives the style more energy than a low braid, so it can carry a sharper outfit without fighting it.
Pro Tips for This Style:
- Flip your head upside down before tying the ponytail if you want more lift.
- Smooth the tail with a tiny drop of oil only after the braid is finished.
Variations on This Style:
- Bubble-Length Base: Add elastics every 2 inches before braiding for extra texture.
- Wrapped Power Pony: Leave the braid fuller and hide the base with hair.
Common Mistakes to Avoid:
- Don’t pull the front too tight; that tension shows up fast along the temples.
- Don’t overload the braid with oil or it will slip apart by lunch.
3. Classic French Braid
French braids stay popular for one reason: they work. The braid lies neatly against the head, which makes long hair feel controlled without needing pins everywhere. On summer days, I like that it looks finished even when the rest of the outfit is dead simple.
Why It Works:
This style is especially good for layered hair because the braid gathers new sections as it goes, which helps shorter pieces stay tucked in. It also spreads the weight of long hair across the scalp instead of hanging all at once from one point.
Key Ingredients:
- 1 rat-tail comb
- 1 light-hold mousse or styling foam
- 1 clear elastic
- 1 spray bottle with water, if your hair needs a little slip
- 1 smoothing brush
Quick Steps:
- Part hair where you want it and smooth a small amount of mousse through the top layer.
- Take a section at the crown and split it into three parts.
- Cross the outer sections over the middle, adding hair from each side as you work down the head.
- Keep the braid snug, then finish the length like a regular braid and tie it off.
Equipment for This Style:
- Rat-tail comb
- Brush
- Elastic
- Clip for holding the unused hair
How to Wear It:
Wear it straight back for a clean look or angle it slightly to one side for something softer. It pairs well with sunglasses because there’s no loose top section to fight the arms of the frames.
Pro Tips for This Style:
- If your hands slip, braid on hair that’s fully dry, not damp.
- Pancake the braid lightly at the edges after tying it off if you want more width.
Variations on This Style:
- Side French Braid: Start near one temple and sweep the braid across the head.
- French Braid Into Ponytail: Stop at the nape and let the rest swing freely.
Common Mistakes to Avoid:
- Don’t grab sections that are too big; the braid gets bulky and uneven.
- Don’t braid on hair that’s still wet unless you want the shape to dry weird.
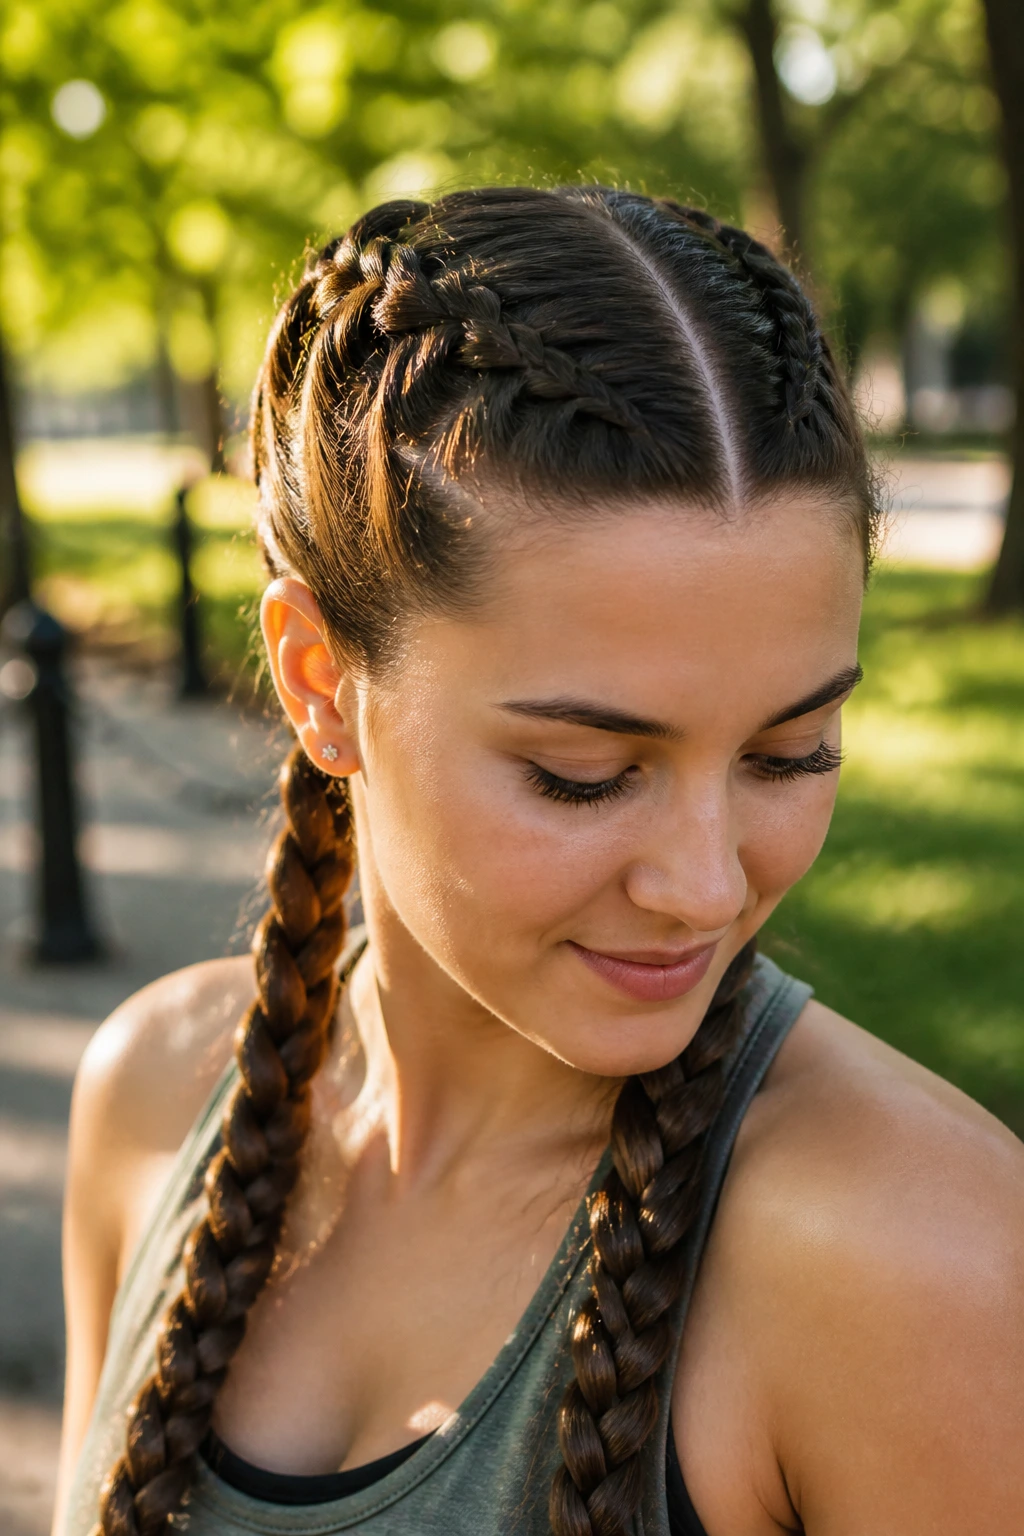
4. Double French Braids
Two French braids are one of those styles that can look sporty or sweet depending on how tight you pull them. On long hair, they divide the bulk in a way that feels calmer than a single heavy braid down the back.
Why It Works:
Because the hair is split down the center, each braid carries less weight. That makes the style easier on your scalp than one thick braid, and it tends to stay put through walking, errands, and a sweaty commute.
Key Ingredients:
- 1 rat-tail comb
- 2 small elastics
- 1 teaspoon styling cream
- 2 sectioning clips
- 1 edge brush, optional
Quick Steps:
- Part hair straight down the center and clip one side out of the way.
- Braid the first side from crown to nape, adding hair as you go.
- Repeat on the other side, keeping the tension as even as you can.
- Tie both ends and smooth any flyaways near the part.
Equipment for This Style:
- Fine-tooth comb
- 2 elastics
- Clips
- Brush
How to Wear It:
This is one of the best choices for active days, but it also works with a breezy sundress if you keep the braids slightly loose at the ends. The center part gives the style a tidy look without much fuss.
Pro Tips for This Style:
- Make the part before you add product so the line stays clean.
- If one braid looks flatter than the other, tug the outer loops gently to match the shape.
Variations on This Style:
- Loose Weekend Version: Braid from the ears down, leaving the top softer.
- Braided Ends: Braid each tail into a small rope braid for extra texture.
Common Mistakes to Avoid:
- Don’t make the part jagged unless you want the style to look deliberately undone.
- Don’t pull too hard near the hairline, or you’ll feel it by the end of the day.
5. Fishtail Side Braid
A fishtail braid looks more detailed than it is, which is part of the appeal. Swept over one shoulder, it keeps long hair contained while still showing off the length. It’s a good choice when you want the braid to feel a little special without going full formal.
Why It Works:
The smaller cross-over sections create a flatter, denser braid that holds shape nicely in long hair. Side placement keeps the weight off your back, and the structure looks best when the hair has a little grit or texture.
Key Ingredients:
- 1 texturizing spray or dry shampoo
- 1 clear elastic
- 1 tail comb
- 1 small finishing serum
- 2 hairpins, optional
Quick Steps:
- Prep hair with a light mist of texturizing spray.
- Gather hair over one shoulder and split it into two sections.
- Take a thin piece from the outer edge of one section and cross it into the other, then repeat on the opposite side.
- Keep going to the ends, secure, and loosen the braid slightly for a fuller look.
Equipment for This Style:
- Comb
- Elastic
- Spray bottle
- Mirror
How to Wear It:
This braid works nicely with off-shoulder tops, boatneck tees, or anything with a wide neckline. Let the tail rest over the front of your shoulder; that’s where the detail shows best.
Pro Tips for This Style:
- Fishtails hold better on hair that isn’t freshly washed.
- Use smaller sections if you want a neater, tighter pattern.
Variations on This Style:
- Messy Fishtail: Pull the braid apart more for a wider, softer shape.
- Half-Up Fishtail: Braid only the top half and leave the rest loose.
Common Mistakes to Avoid:
- Don’t rush the section size; uneven pieces make the braid look messy in a bad way.
- Don’t forget to secure the tail tightly or it will unravel faster than you expect.
6. Double Dutch Braids
Double Dutch braids have a more sculpted look than French braids because the sections sit on top of the hair instead of sinking into it. That makes the pattern pop, which is useful when long hair needs to stay controlled and still show some shape.
Why It Works:
The inside-out technique keeps the braids raised, so they read clearly even from a distance. They’re also very steady, which is why people keep wearing them for workouts, travel days, and long walks in heat.
Key Ingredients:
- 1 rat-tail comb
- 2 clear elastics
- 1 styling cream
- 2 section clips
- 1 edge brush
Quick Steps:
- Part the hair down the middle and clip one side away.
- Start a Dutch braid near the hairline, crossing sections under the middle instead of over.
- Continue adding hair down the side of the head.
- Repeat on the other side, then tie both ends.
Equipment for This Style:
- Comb
- Brush
- Elastics
- Clips
How to Wear It:
These braids look sharp with sporty clothing, but they also work with a plain tank and gold hoops. The shape is strong enough that you don’t need much else.
Pro Tips for This Style:
- Keep the first few passes close to the scalp so the braid doesn’t puff at the crown.
- If you want a softer finish, pancake only the lower half of each braid.
Variations on This Style:
- High Dutch Pigtails: Start the braids slightly higher for more lift.
- Dutch Braids Into Buns: Twist the tails into low buns for a compact finish.
Common Mistakes to Avoid:
- Don’t cross the strands over instead of under. That turns the braid into a French braid and changes the whole look.
- Don’t leave one side tighter than the other; it shows fast.
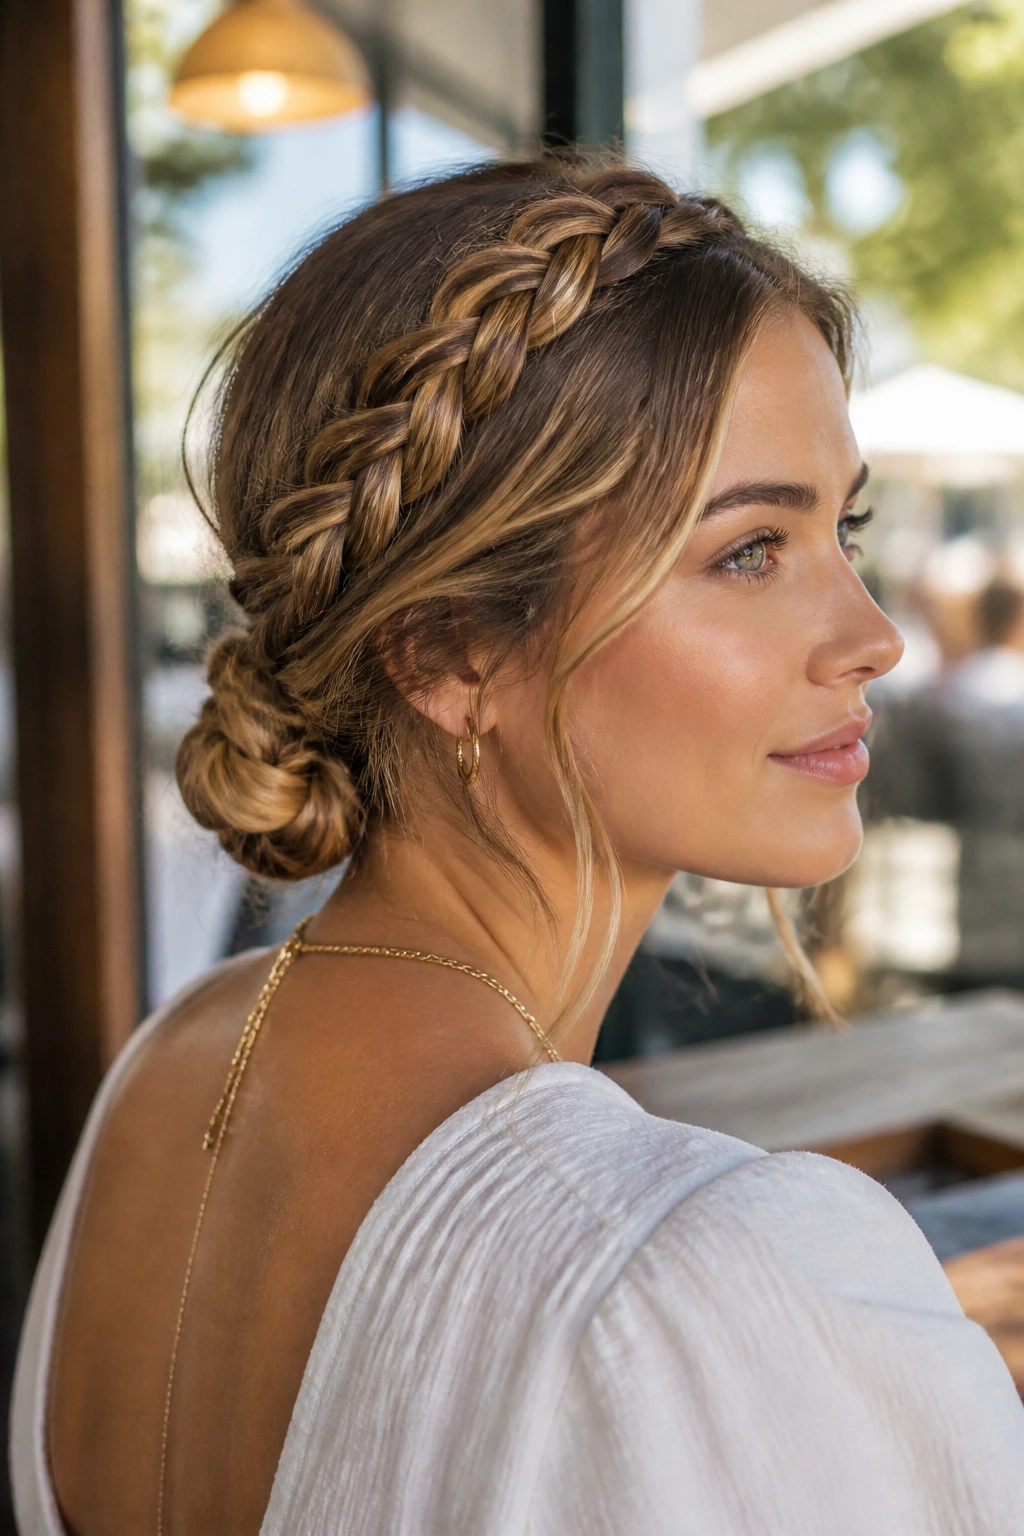
7. Crown Braid
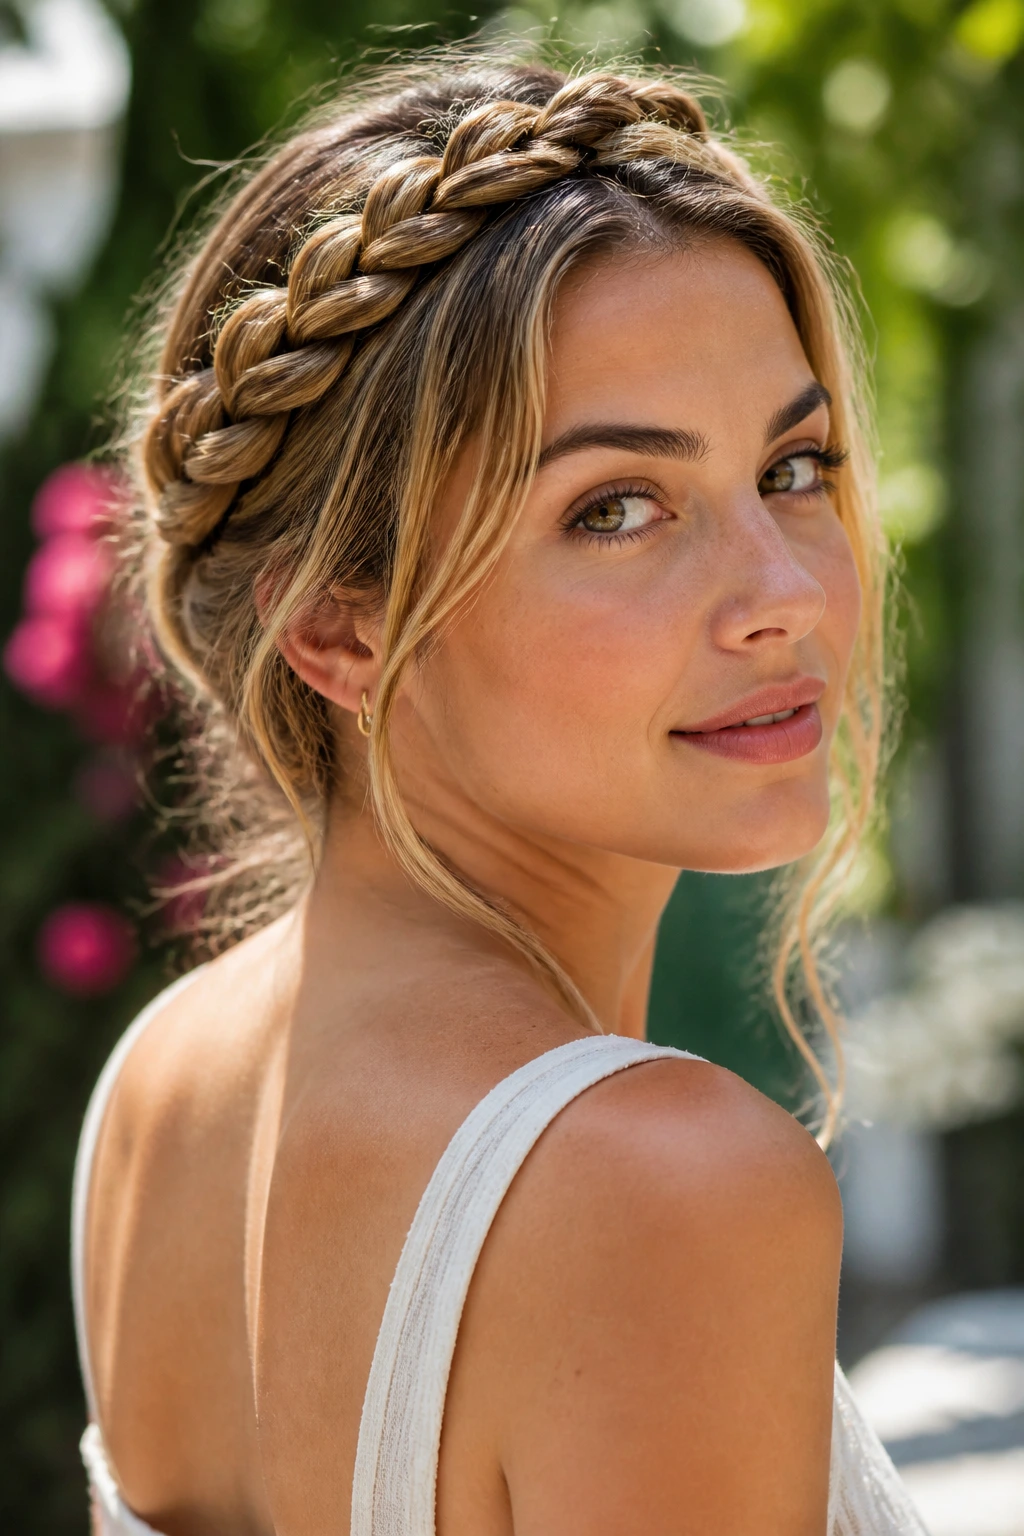
A crown braid wraps around the head like a built-in headband, and that’s a smart move when the weather is hot and you want the hair off your face completely. It has more polish than a simple braid, but it still feels practical rather than precious.
Why It Works:
The shape keeps the front and sides secure, which is where long hair tends to bother you first. It also gives the illusion of a styled updo without the pins and spray that a formal twist usually needs.
Key Ingredients:
- 1 rat-tail comb
- 4 to 6 bobby pins
- 1 small elastic
- 1 smoothing cream
- 1 mirror for the back of the head
Quick Steps:
- Part hair where you prefer and start a braid near one temple.
- Braid along the hairline, keeping the tension steady as you curve around the head.
- Continue until the braid reaches the opposite side.
- Pin the tail underneath the braid and tuck any loose ends.
Equipment for This Style:
- Bobby pins
- Comb
- Elastic
- Strong mirror setup
How to Wear It:
This is a good choice with dresses, linen sets, or anything that looks a little more dressed up. It keeps the neckline open, which matters if the fabric already has a lot going on.
Pro Tips for This Style:
- Work on second-day hair if your strands are too silky to hold a curve.
- Use pins that match your hair color so the braid line stays clean.
Variations on This Style:
- Loose Crown: Leave a few face-framing pieces out for softness.
- Double Crown: Make two parallel braids around the head for more texture.
Common Mistakes to Avoid:
- Don’t place the braid too high or it will read like a headband instead of a crown.
- Don’t skip pins at the tuck point; that’s where the style slips first.
8. Milkmaid Braids
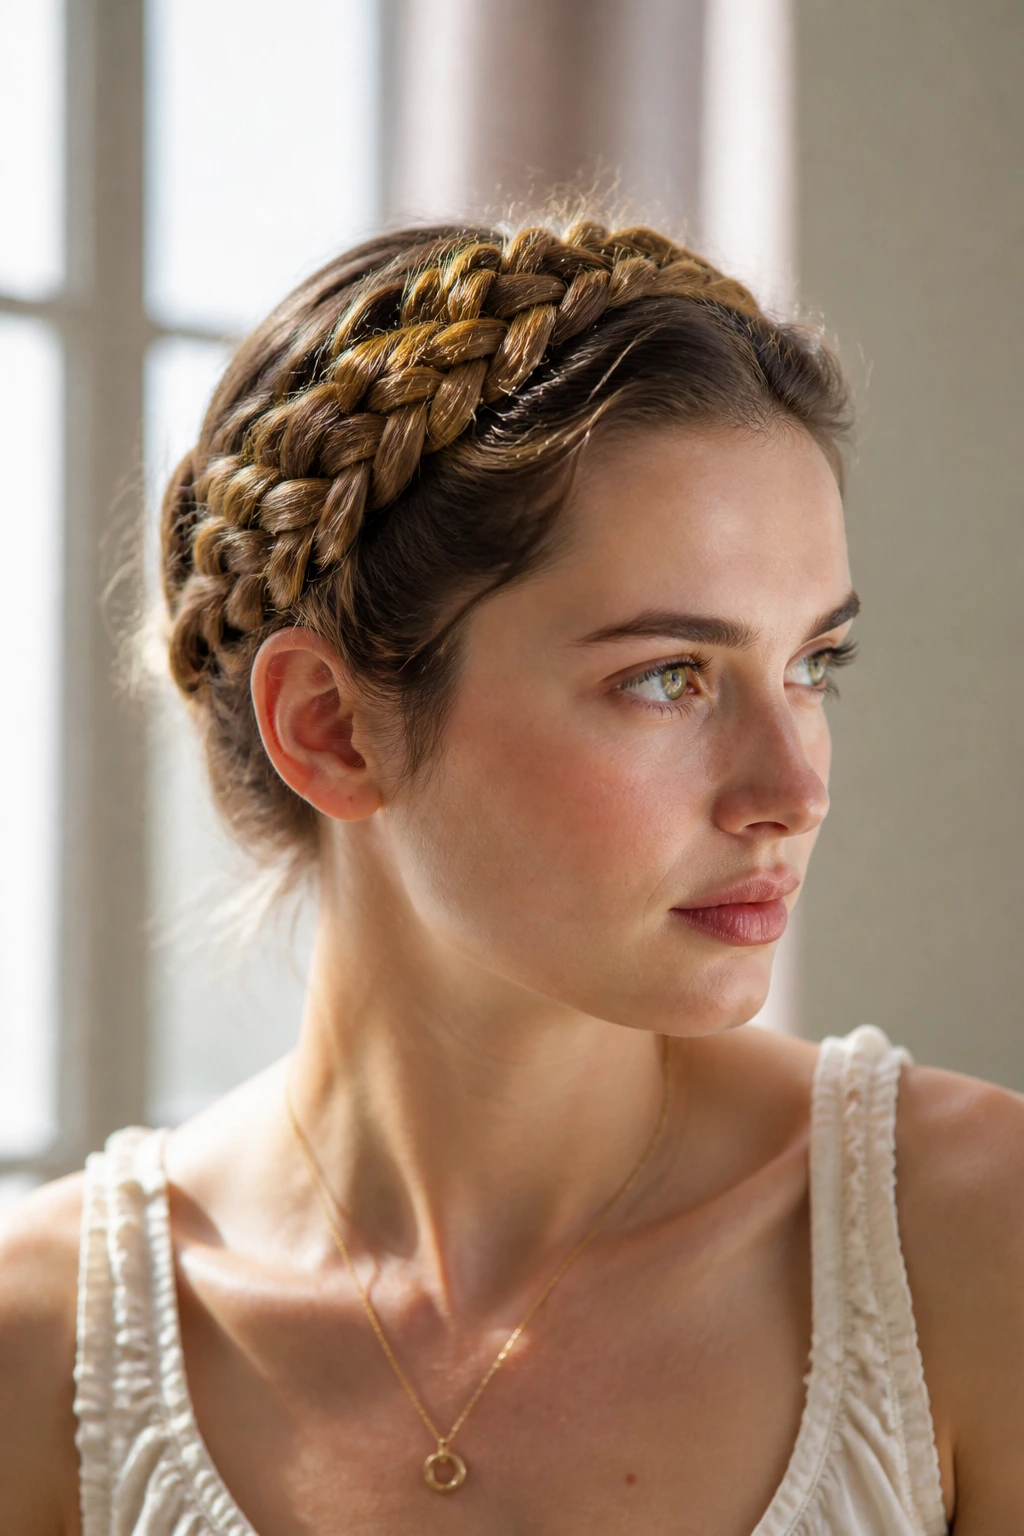
Milkmaid braids are the kind of style that looks old-school in the nicest way. Two braids are looped over the head and pinned across the crown, which gets a lot of long hair up and away from the skin.
Why It Works:
Because the braids sit higher than a low bun, they free up the neck and lower back more completely. They also make thick hair feel more manageable, since the weight is split into two smaller sections before it’s pinned.
Key Ingredients:
- 2 small elastics
- 6 to 8 bobby pins
- 1 smoothing cream
- 1 rat-tail comb
- 1 light mist of flexible-hold spray
Quick Steps:
- Part hair in the middle and braid each side into a simple three-strand braid.
- Bring one braid up and across the crown, pinning it in place.
- Lay the second braid across the opposite side so the ends tuck underneath.
- Pin every hidden edge until the shape feels secure.
Equipment for This Style:
- Comb
- Pins
- Elastics
- Spray
How to Wear It:
This suits square necklines, open collars, and dresses with a little structure. The style has enough shape that you can keep jewelry simple and still look finished.
Pro Tips for This Style:
- Braid slightly loosely before pinning so the loops don’t look too tight.
- Hide the ends under the opposite braid for a cleaner finish.
Variations on This Style:
- Soft Milkmaid: Pull out a few wisps around the face.
- Braided Ribbon Milkmaid: Thread ribbon through each braid before pinning.
Common Mistakes to Avoid:
- Don’t pin only the braid ends; the middle needs anchoring too.
- Don’t make both braids too tight or the crown will sit hard and flat.
9. Waterfall Half-Up Braid
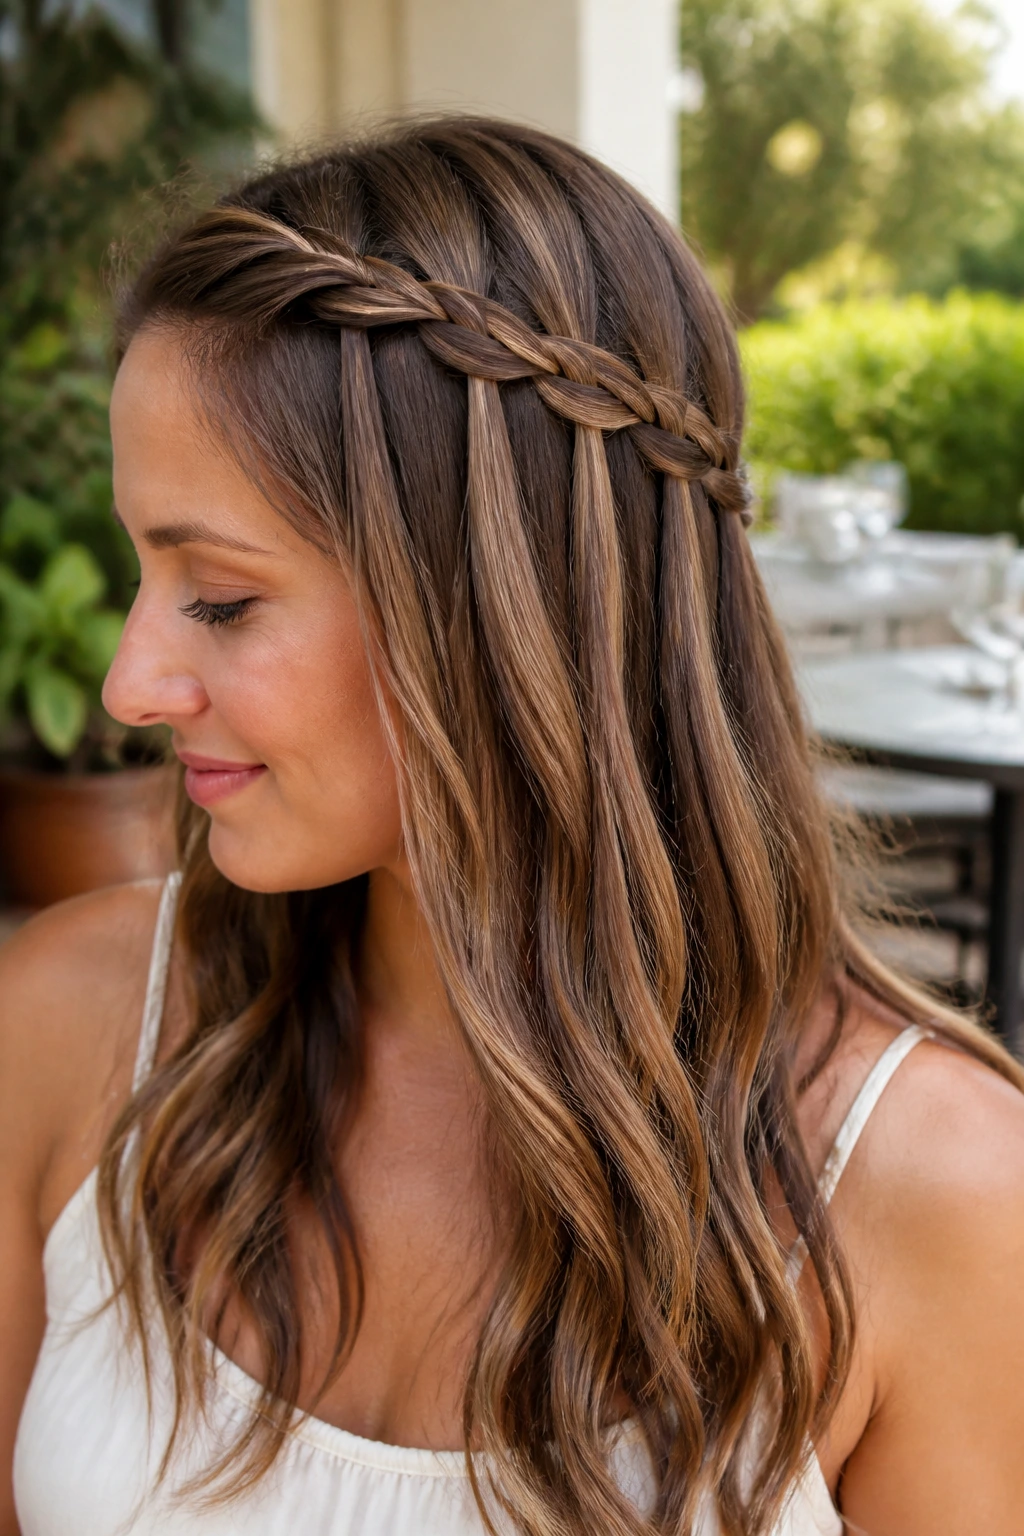
Waterfall braids are for days when you want your long hair to stay visible. The braid holds the top section in place while the rest falls through in soft pieces, so you get movement without chaos.
Why It Works:
This style keeps hair away from the face but leaves the length showing, which matters if you like the look of long hair and still want some heat relief. It also suits waves and curls better than a lot of rigid braid styles, because the loose length becomes part of the design.
Key Ingredients:
- 1 tail comb
- 1 small clear elastic, if needed
- 1 smoothing cream
- 2 to 4 bobby pins
- 1 finishing spray
Quick Steps:
- Start a French braid near one temple with three small sections.
- Let the lower strand drop each time you cross, then pick up a new section from above.
- Continue across the back of the head until you reach the other side.
- Pin the end out of sight or tuck it into loose hair.
Equipment for This Style:
- Comb
- Pins
- Elastic
- Clip for holding loose hair
How to Wear It:
Wear this with a soft neckline or something simple up top; the braid gives enough detail on its own. It’s a pretty good choice for brunch, weddings, or any afternoon when you want a little more than a plain half-up style.
Pro Tips for This Style:
- Curl or wave the loose hair first if you want the waterfall sections to stand out.
- Keep the braid narrow so the dropped pieces show clearly.
Variations on This Style:
- Two-Side Waterfall: Repeat on both sides and meet at the back.
- Curly Waterfall: Works especially well with thick curls left loose underneath.
Common Mistakes to Avoid:
- Don’t pull the dropped strands too hard or they’ll look kinked.
- Don’t make the braid too thick at the start; the waterfall effect gets lost.
10. Pull-Through Braid
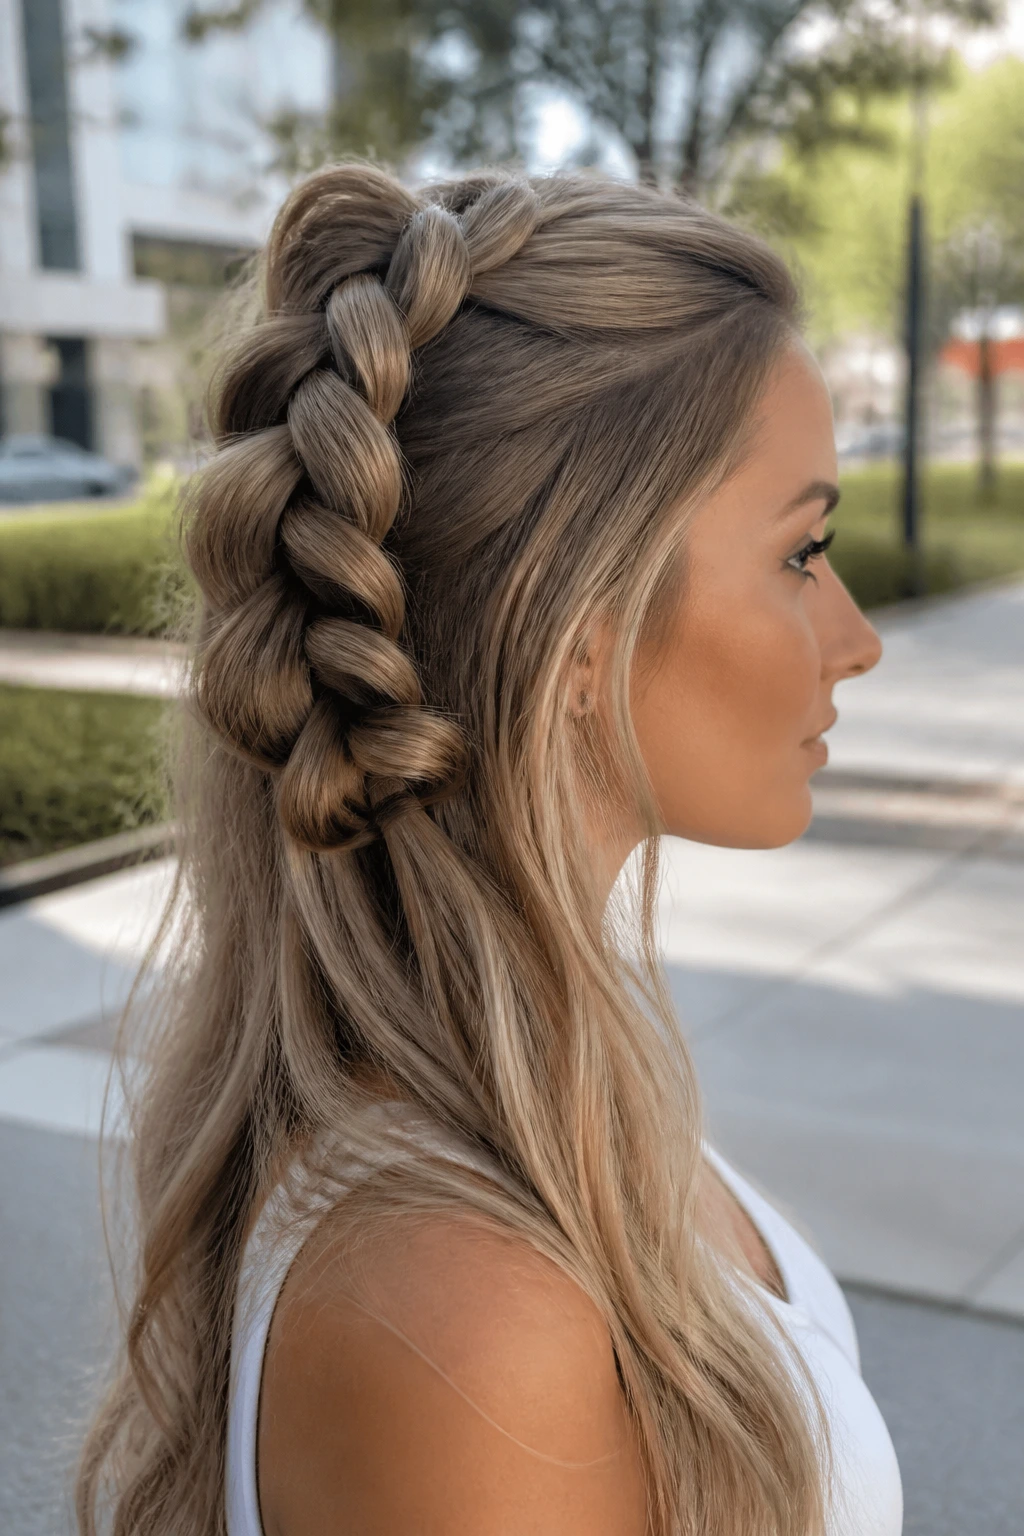
If your hair is long and you want maximum size without needing actual braid skill, the pull-through braid is a good trick. It looks elaborate from the outside, but the structure comes from a row of elastics and a bit of patience.
Why It Works:
Long hair gives this style the length it needs to look full and dramatic. It also creates a braid-like shape without tight weaving, which can feel easier on the scalp if your hair is heavy or sensitive.
Key Ingredients:
- 6 to 10 clear elastics
- 1 teasing comb, optional
- 1 smoothing cream
- 1 brush
- 1 finishing oil for the ends
Quick Steps:
- Gather the top section into a ponytail and secure it.
- Add another ponytail underneath, then split the top one and pull the lower one through.
- Repeat down the length, spacing elastics 2 to 3 inches apart.
- Tug the sides gently for volume and hide the elastics if you want.
Equipment for This Style:
- Elastics
- Brush
- Comb
- Clips
How to Wear It:
This one works well with long, straight hair or blown-out texture, and it looks especially good with simple clothes because the braid itself brings the detail. It also photographs cleanly from the side, which is a small but real bonus.
Pro Tips for This Style:
- Use matching elastics or the whole thing reads a little school-project.
- Backcomb the base slightly if your hair is very fine.
Variations on This Style:
- Half Pull-Through: Stop at mid-back and leave the ends loose.
- Bubble Pull-Through: Leave the sections puffier instead of smoothing them tight.
Common Mistakes to Avoid:
- Don’t space the elastics too far apart or the braid collapses.
- Don’t yank the loops hard when you’re separating them; the shape can go lumpy.
11. Rope Braid
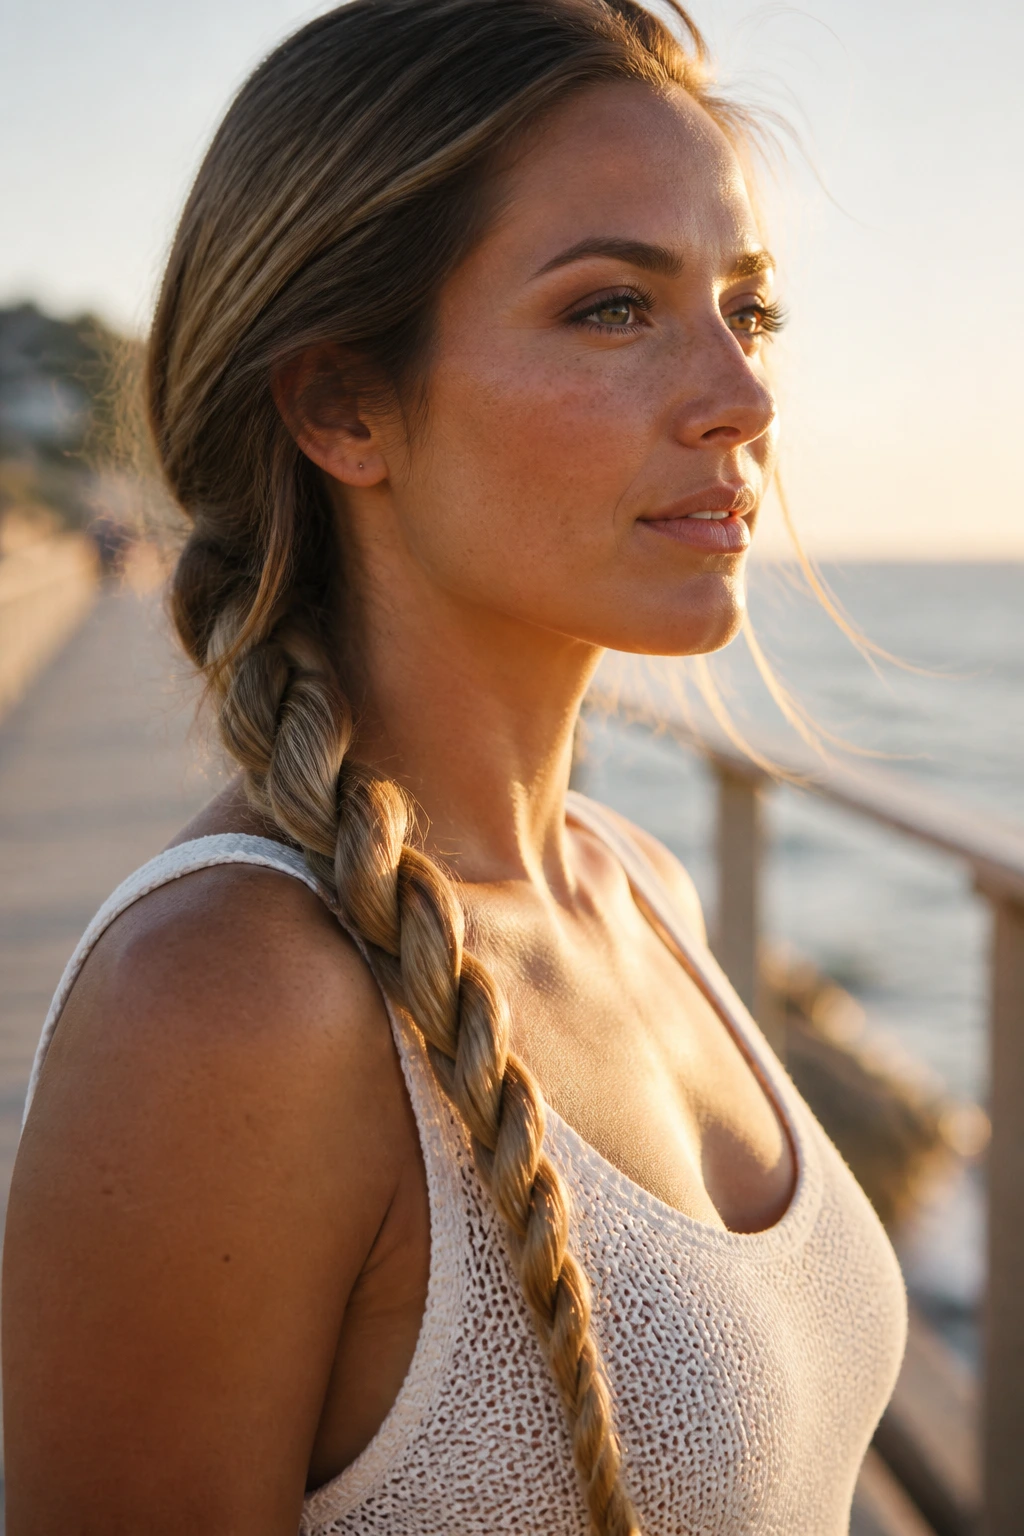
A rope braid is really two sections twisted around each other, and that simple move makes it a clean, low-friction style for long summer hair. It’s one of the few braids that can look neat even when the air feels heavy.
Why It Works:
The twist pattern resists frizz better than a looser weave, especially on smoother hair textures. It also takes less hand coordination than a fishtail, which makes it a good choice when you want speed over fancy detail.
Key Ingredients:
- 1 brush
- 1 leave-in conditioner mist
- 1 elastic
- 1 small amount of serum
- 1 clip to hold the base
Quick Steps:
- Pull hair into a low or mid ponytail and secure it.
- Split the tail into two equal pieces.
- Twist each section in the same direction, then wrap them around each other in the opposite direction.
- Secure the end and smooth the twists lightly.
Equipment for This Style:
- Brush
- Elastic
- Comb
- Optional bobby pin
How to Wear It:
This braid works best when you want something tidy and unfussy. Wear it low for a polished shape or over one shoulder for a softer, more casual look.
Pro Tips for This Style:
- Twist both sections firmly before crossing them, or the braid will loosen fast.
- A little grip spray helps if your hair is very straight.
Variations on This Style:
- Side Rope Braid: Sweep it to one side for more movement.
- Rope Braid Bun: Twist the finished braid into a coil at the nape.
Common Mistakes to Avoid:
- Don’t twist one section tighter than the other. The braid will corkscrew awkwardly.
- Don’t start on slippery hair without any product.
12. Braided Low Bun
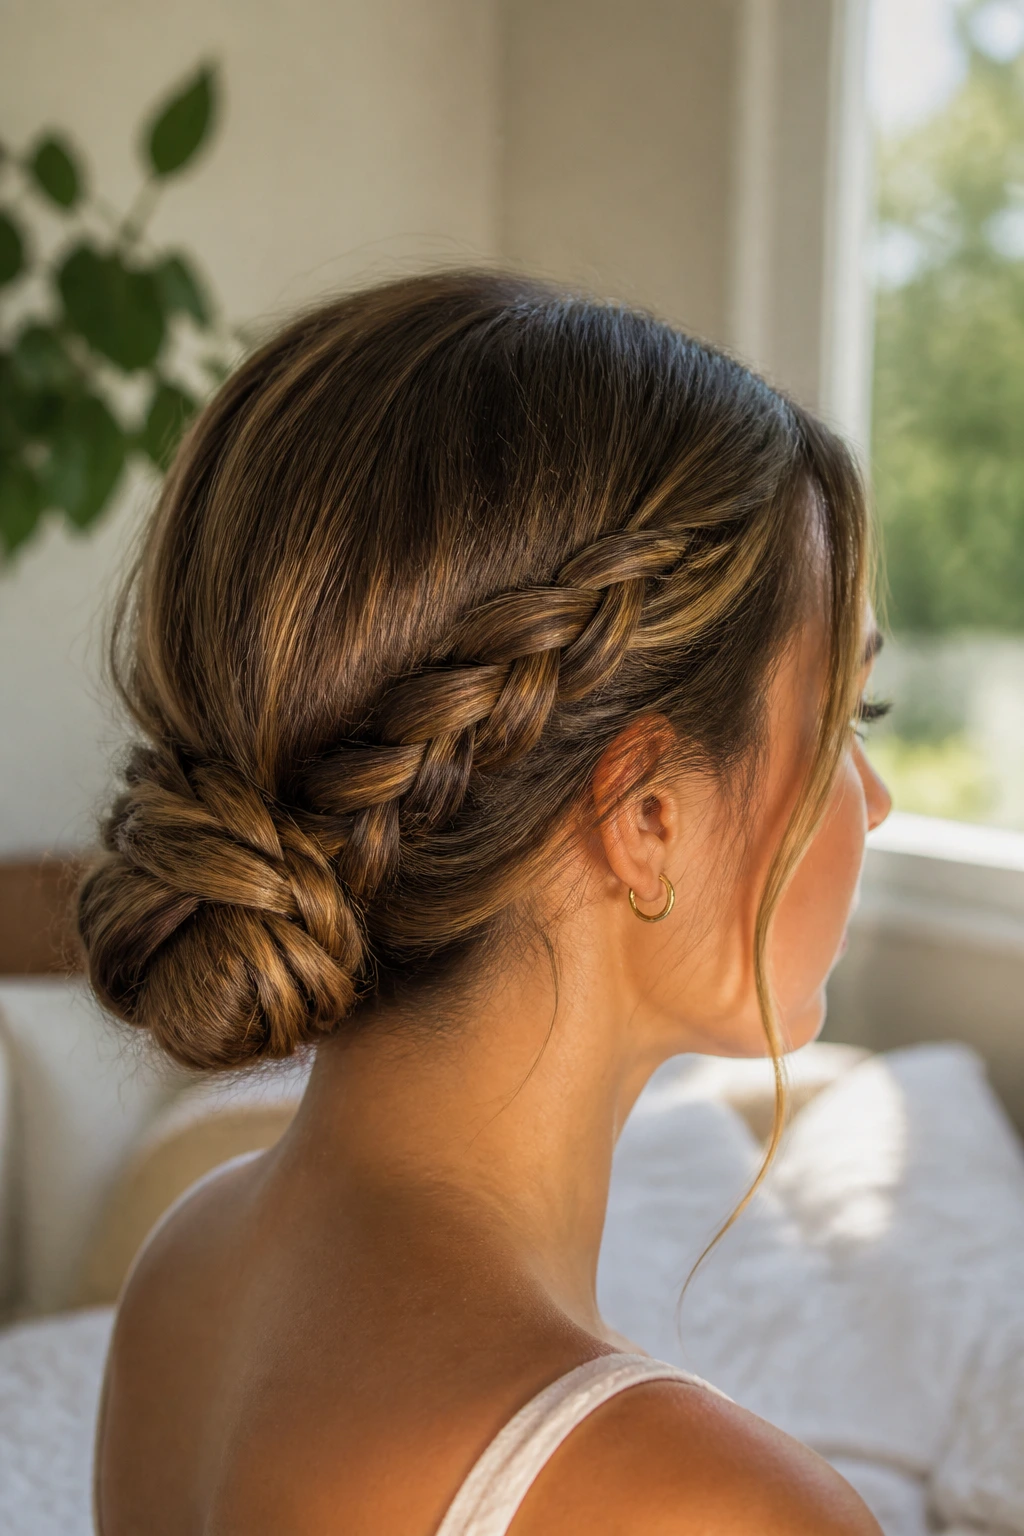
A braided low bun keeps the braid and the heat relief in one place. The braided length gets wrapped into a knot at the nape, so nothing rubs the back of your neck when the day gets long.
Why It Works:
This style is one of the best picks for hot, humid weather because the ends are fully secured. It also looks more deliberate than a plain bun, which matters if you want the style to read finished instead of thrown together.
Key Ingredients:
- 1 elastic
- 6 to 10 bobby pins
- 1 smoothing cream
- 1 tail comb
- 1 hairnet, optional for extra hold
Quick Steps:
- Make a low braid and secure the end.
- Coil the braid into a bun at the nape.
- Pin the coil in a few directions so it stays flat.
- Tuck the tail under the bun and pin again.
Equipment for This Style:
- Pins
- Elastic
- Comb
- Mirror
How to Wear It:
This is the braid you wear when the outfit already has a strong neckline or a lot of detail. It stays out of the way and won’t fight with earrings, which is part of why it keeps getting repeated.
Pro Tips for This Style:
- Make the braid slightly looser before coiling if you want a softer bun shape.
- If your hair is very thick, split the braid into two coils instead of one.
Variations on This Style:
- Twisted Bun Blend: Braid only halfway, then twist the rest into the bun.
- Braided Knot Bun: Wrap the braid into a figure-eight for a flatter finish.
Common Mistakes to Avoid:
- Don’t make the bun too high or it stops feeling cooling.
- Don’t leave the tail sticking out; it catches and loosens the pins.
13. Braided Top Knot
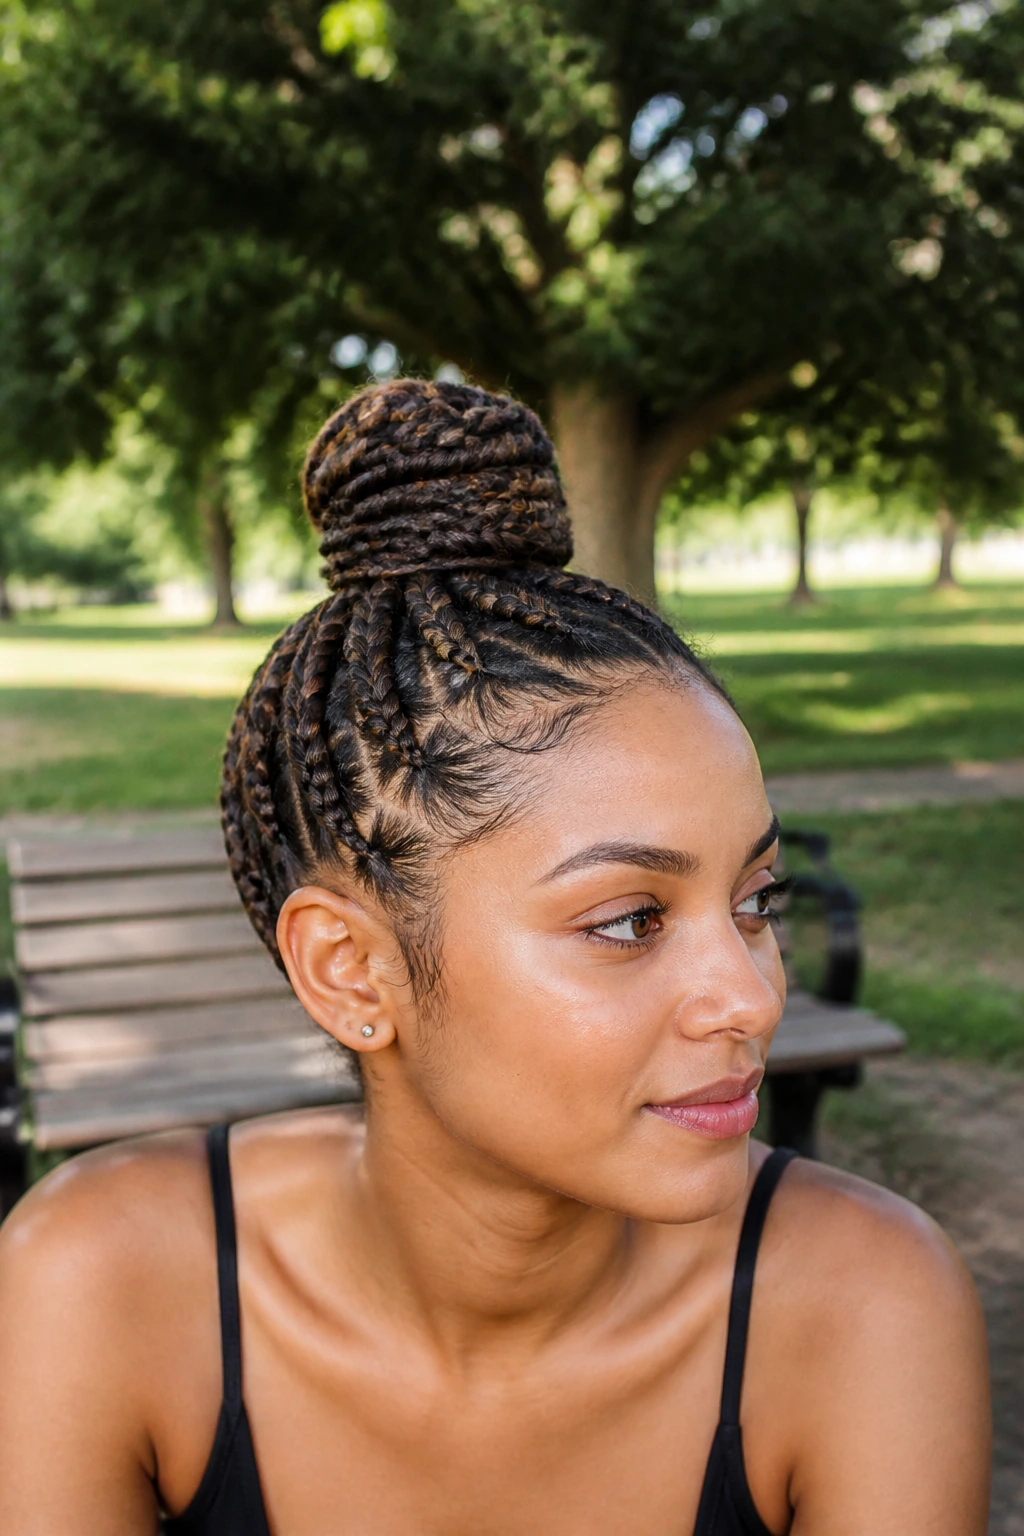
A braided top knot is the loud cousin of the low bun. It pulls the whole braid upward, which can feel surprisingly good when your neck is already hot and you need hair off your skin completely.
Why It Works:
The height gives long hair a lot of lift, so the style feels lighter than it looks. It also keeps the braid compact, which is handy when you’re moving a lot or don’t want the ends brushing your shoulders all day.
Key Ingredients:
- 1 strong elastic
- 6 to 12 bobby pins
- 1 texturizing spray
- 1 brush
- 1 small gel for edges
Quick Steps:
- Gather hair into a high ponytail.
- Braid the tail and secure the end.
- Wrap the braid around the pony base into a knot.
- Pin every side until the knot feels stable.
Equipment for This Style:
- Brush
- Elastics
- Pins
- Edge brush
How to Wear It:
This style looks best with casual tops, sportswear, or anything with a high neckline. It reads energetic, and it gives the face a clean frame.
Pro Tips for This Style:
- Use a second elastic if the knot feels heavy before pinning.
- Texture spray helps long, straight hair hold the shape better.
Variations on This Style:
- Loose Top Knot: Leave the braid a little imperfect for a softer look.
- Double-Knot Version: Split the braid into two loops for extra volume.
Common Mistakes to Avoid:
- Don’t place the pony too far forward or the knot tips awkwardly.
- Don’t use weak pins; the weight of long hair will pop them out.
14. Boxer Braids
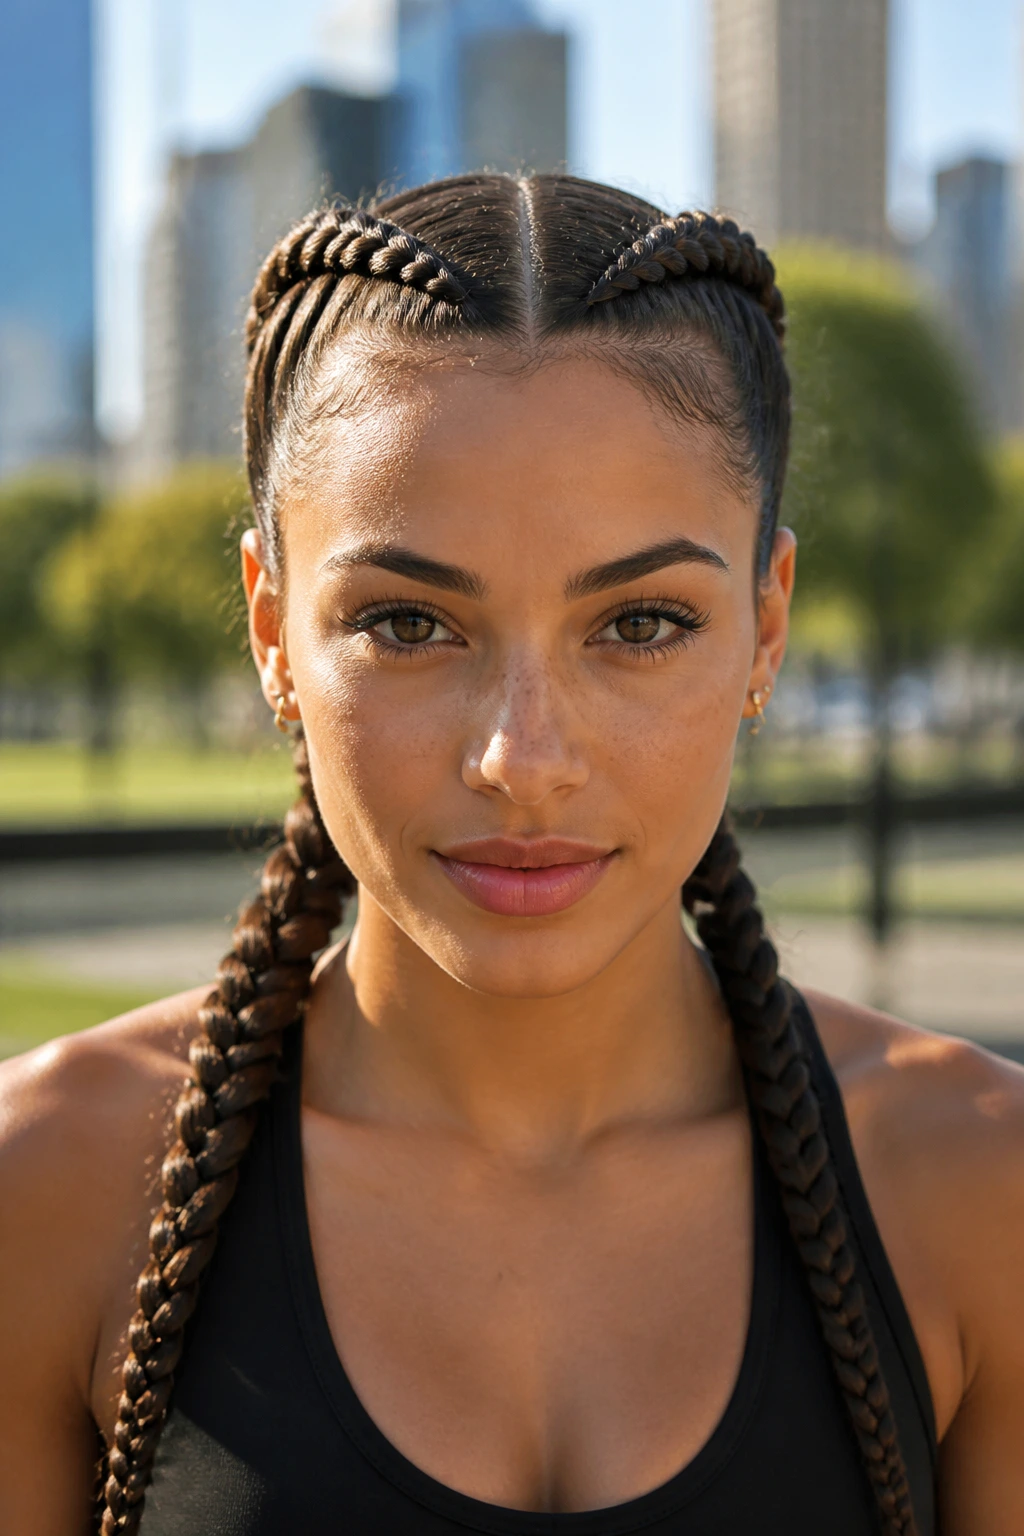
Boxer braids are tight, athletic, and very good at staying where you put them. If your long hair has a mind of its own, these two braids can calm it down fast.
Why It Works:
The close-to-scalp pattern keeps the braid compact and reduces movement, which is why it’s a favorite for exercise and travel. It also handles humid weather well because the structure sits firmly against the head instead of floating away from it.
Key Ingredients:
- 1 rat-tail comb
- 2 clear elastics
- 1 firm-hold gel
- 2 section clips
- 1 edge brush
Quick Steps:
- Part hair cleanly down the center.
- Start a Dutch braid at the front on one side and keep adding hair as you go back.
- Repeat on the other side.
- Secure both ends and smooth the part with a touch of gel.
Equipment for This Style:
- Comb
- Elastics
- Clips
- Brush
How to Wear It:
Wear these when you want the face and neck completely open. They look sharp with minimal makeup and a simple tee, which is part of their appeal.
Pro Tips for This Style:
- Part the hair first, then clip one side away so the line stays neat.
- Keep the braid tension even all the way down, or the side shapes will match badly.
Variations on This Style:
- Low Boxer Braids: Start lower for a softer, less athletic feel.
- Boxer Braids Into Braided Ponytails: Let the ends swing after the nape.
Common Mistakes to Avoid:
- Don’t braid too tight at the hairline; that’s the quickest path to discomfort.
- Don’t ignore the part line, because a crooked part changes the whole look.
15. Cornrow Straight-Back Braids
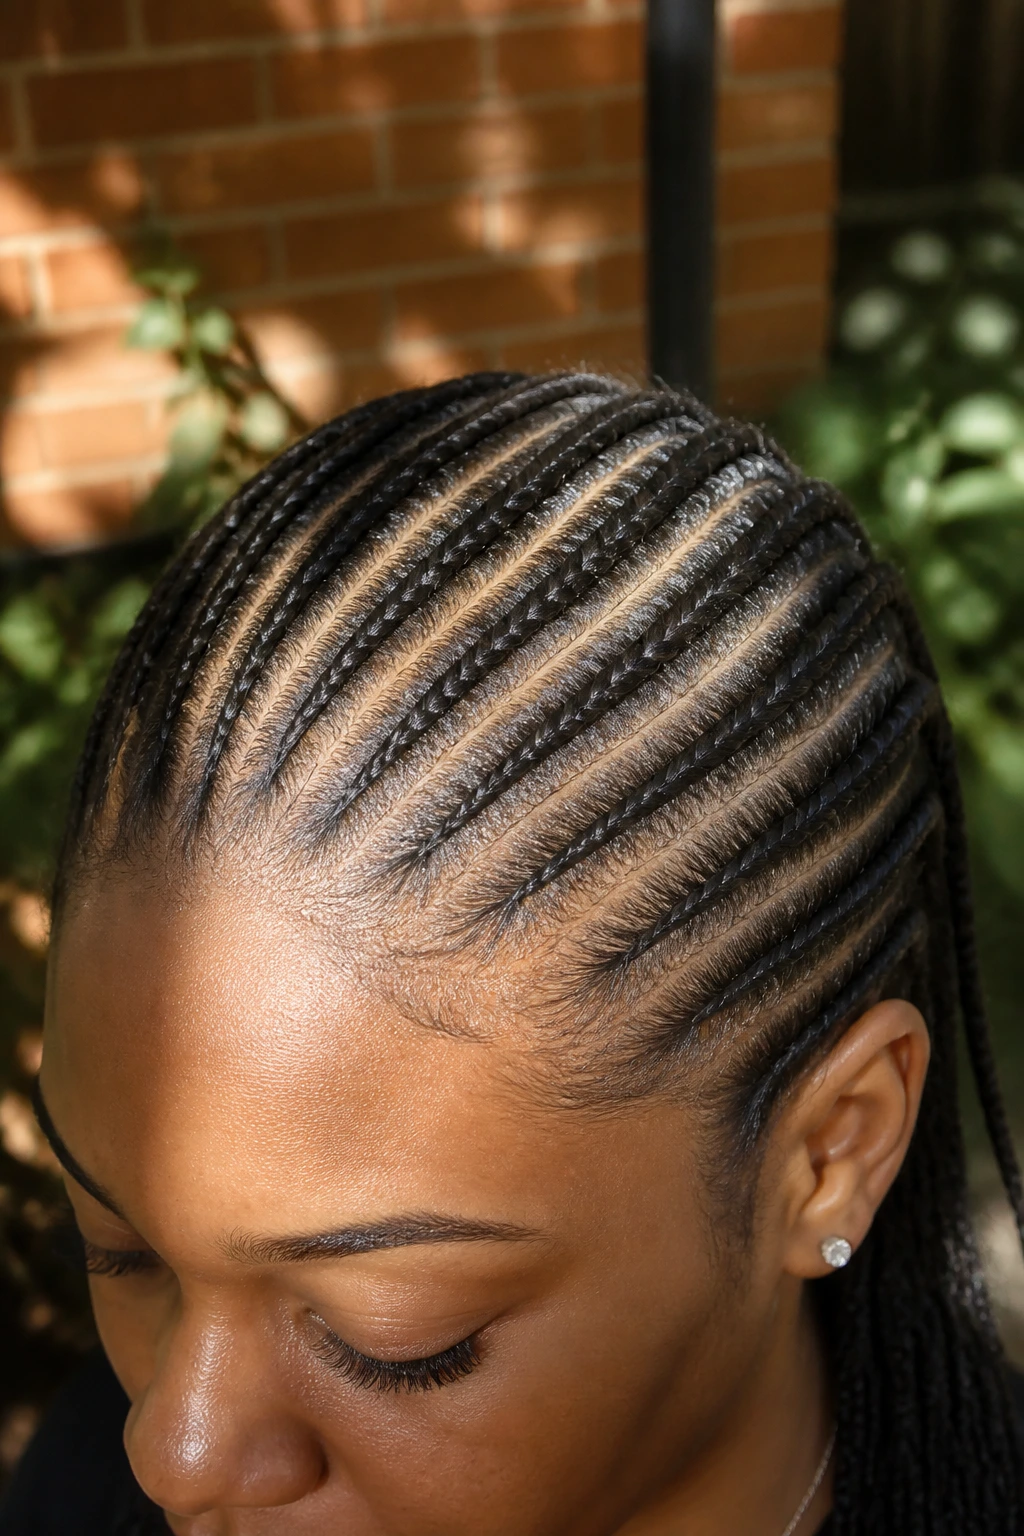
Straight-back cornrows are one of the most efficient ways to get long hair off the face and keep it there. They sit close to the scalp, which makes them feel stable and neat even when you’re sweating through the day.
Why It Works:
The style distributes the tension across several rows, so it can feel lighter than one big braid if it’s done with care. It’s also one of the best shapes for keeping the front of the hair controlled under hats, scarves, or helmets.
Key Ingredients:
- 1 rat-tail comb
- 1 strong-hold gel
- 1 edge brush
- 4 to 8 section clips
- Optional braiding hair for added length
Quick Steps:
- Part the hair into straight rows from front to back.
- Apply a thin layer of gel to each part line.
- Braid each row snugly back to the nape.
- Tie off the ends or add extension hair if you want extra length.
Equipment for This Style:
- Rat-tail comb
- Clips
- Gel
- Small elastics
How to Wear It:
This style works well for active days, travel, and any outfit where you want the hair to stay quiet. It also makes a strong base for ponytails, buns, or cuffs.
Pro Tips for This Style:
- Keep the parts precise; the row pattern is the whole point.
- Don’t overload the scalp with gel or it will flake and itch.
Variations on This Style:
- Middle-Part Rows: Split the head down the center for symmetry.
- Curved Row Pattern: Use slight curves instead of straight lines if you want movement.
Common Mistakes to Avoid:
- Don’t braid wet hair into tight rows; that can set the style poorly.
- Don’t pull the roots hard just to make the lines neat.
16. Feed-In Ponytail Braids
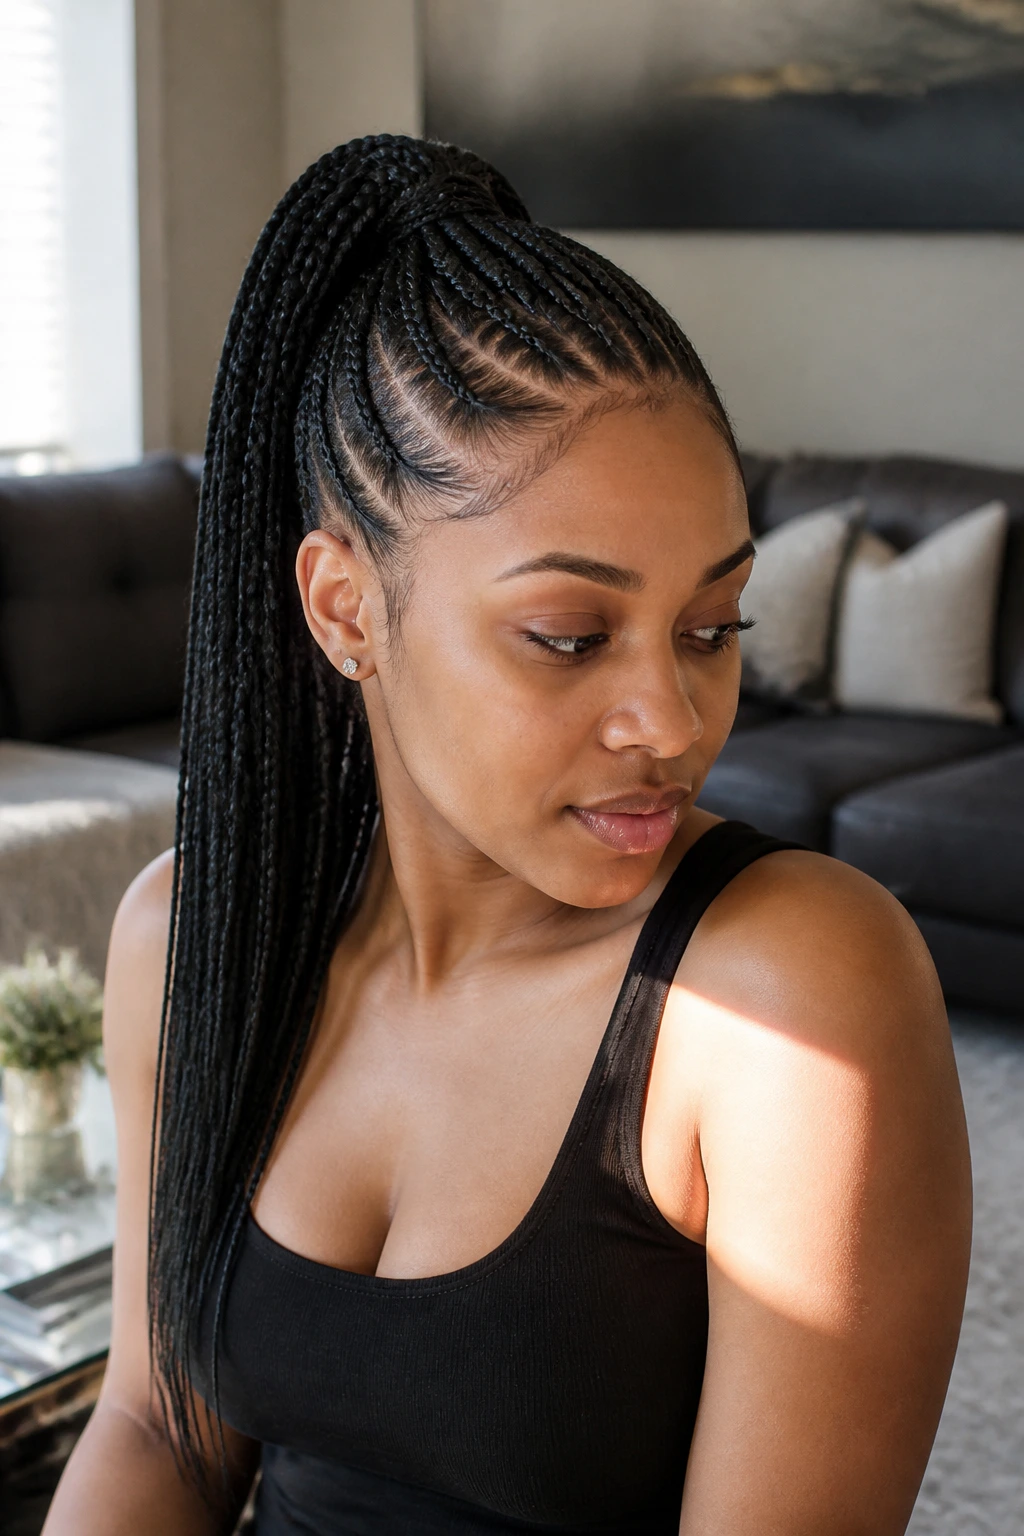
Feed-in braids start with a small section and build gradually, which gives the braid a smoother, cleaner base than a hard start. Pulled into a ponytail, they feel sleek and dramatic without looking bulky at the hairline.
Why It Works:
The gradual addition of hair keeps the front from looking swollen, which is a common problem with long hair and tighter braid patterns. The ponytail finish gives you length and motion, so the style stays practical while still looking deliberate.
Key Ingredients:
- 1 rat-tail comb
- 1 to 2 packs braiding hair, if adding extensions
- 1 firm gel
- 2 to 4 elastics
- 1 spray bottle with water
Quick Steps:
- Part the hair into the shape you want and smooth the roots with gel.
- Begin each braid with a small starter section, then feed in more hair as you braid.
- Guide the braids into one ponytail at the back or crown.
- Secure the ponytail and smooth the base.
Equipment for This Style:
- Comb
- Gel
- Elastics
- Clips
How to Wear It:
This style pairs well with simple clothes because the braids themselves bring the drama. It’s a good pick when you want length controlled but not hidden.
Pro Tips for This Style:
- Pre-section the braiding hair so the feed-in stays even.
- Match the tension from braid to braid or the ponytail base looks uneven.
Variations on This Style:
- High Feed-In Ponytail: Adds lift and a more playful finish.
- Braided Wrap Base: Wrap a braid around the pony for a polished base.
Common Mistakes to Avoid:
- Don’t start the braid too thick; the feed-in effect disappears.
- Don’t let the ponytail base sit loose, or the whole style shifts.
17. Goddess Braids
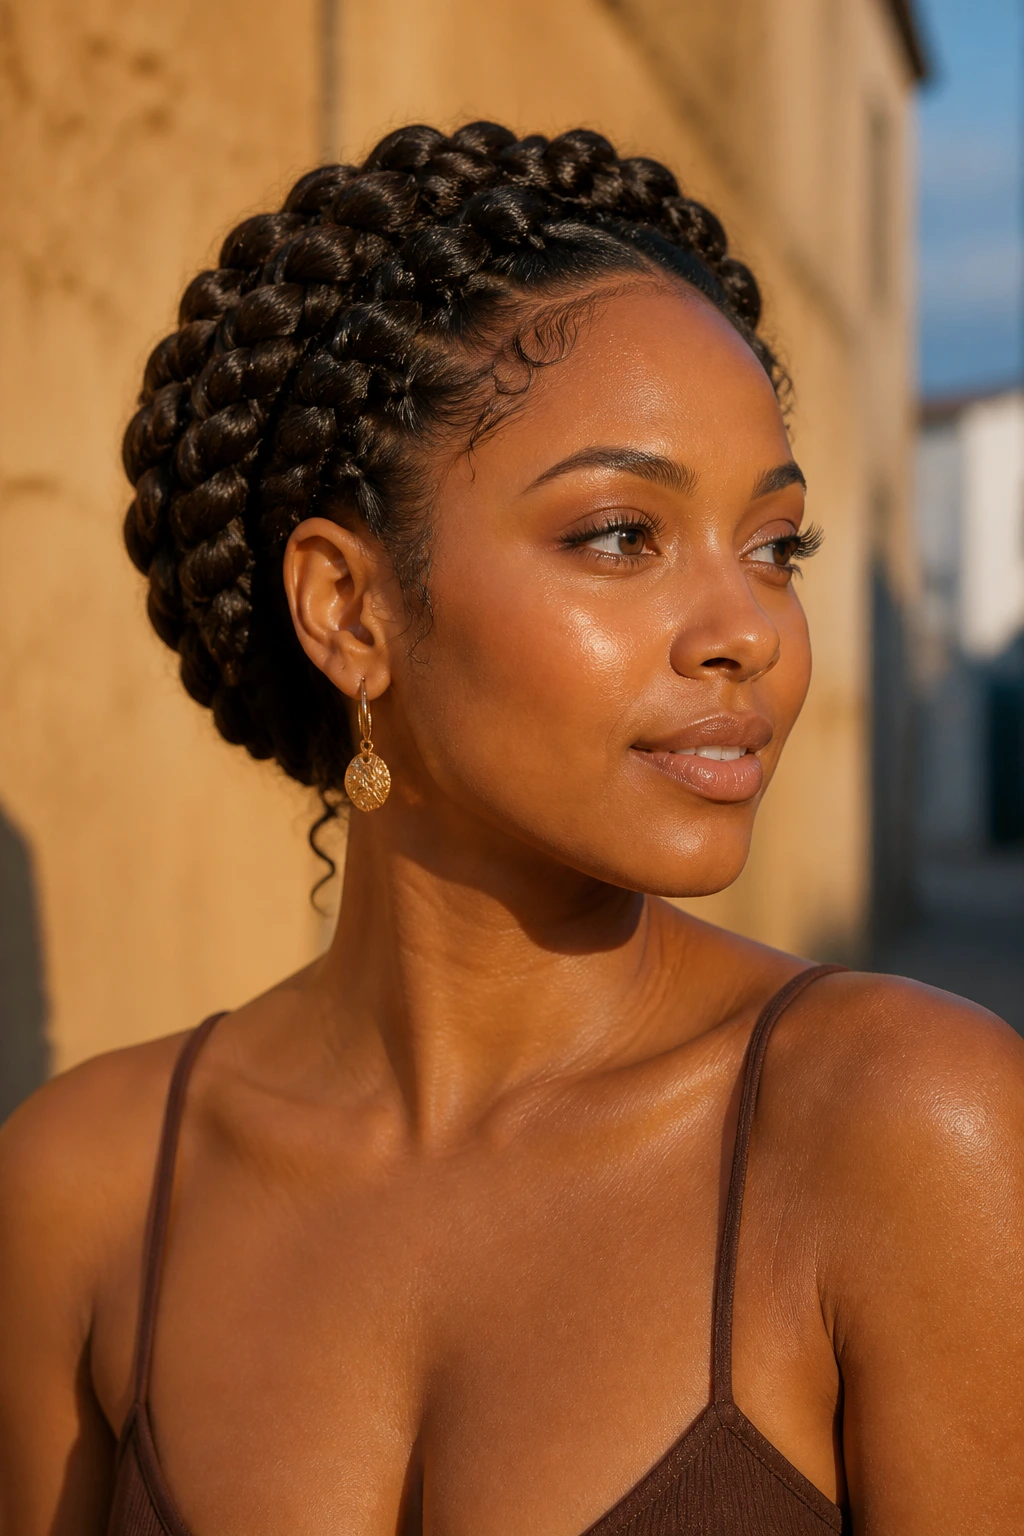
Goddess braids are thicker, softer cornrow-style braids that can carry long hair beautifully. They have enough size to feel substantial, but they still keep the head clear and the ends under control.
Why It Works:
The larger sections make the style faster than tiny rows, and the shape has a little more softness around the face. That makes it useful when you want a protective look without the strictness of very tight braiding.
Key Ingredients:
- 1 rat-tail comb
- 1 strong-hold gel
- 1 edge brush
- 4 section clips
- Optional braiding hair
Quick Steps:
- Part the hair into large, clean sections.
- Start each braid close to the scalp and add hair gradually.
- Keep the braids broad and smooth, not skinny.
- Finish the ends neatly or wrap them if you’re using extension hair.
Equipment for This Style:
- Comb
- Clips
- Gel
- Elastics
How to Wear It:
This style looks good on its own, so you can keep the rest of the look plain and let the braids do the work. It sits well with hoops, stacked necklaces, or a crisp shirt.
Pro Tips for This Style:
- Use a small amount of gel on the part lines only.
- Bigger braids hold a softer shape, so don’t over-tighten them.
Variations on This Style:
- Side-Swept Goddess Braids: Curve all the braids toward one shoulder.
- Goddess Braids Into Bun: Tuck the ends into a low wrapped knot.
Common Mistakes to Avoid:
- Don’t confuse “chunky” with “loose”; the braid still needs definition.
- Don’t overload the scalp with product just to make the rows look shiny.
18. Knotless Box Braids
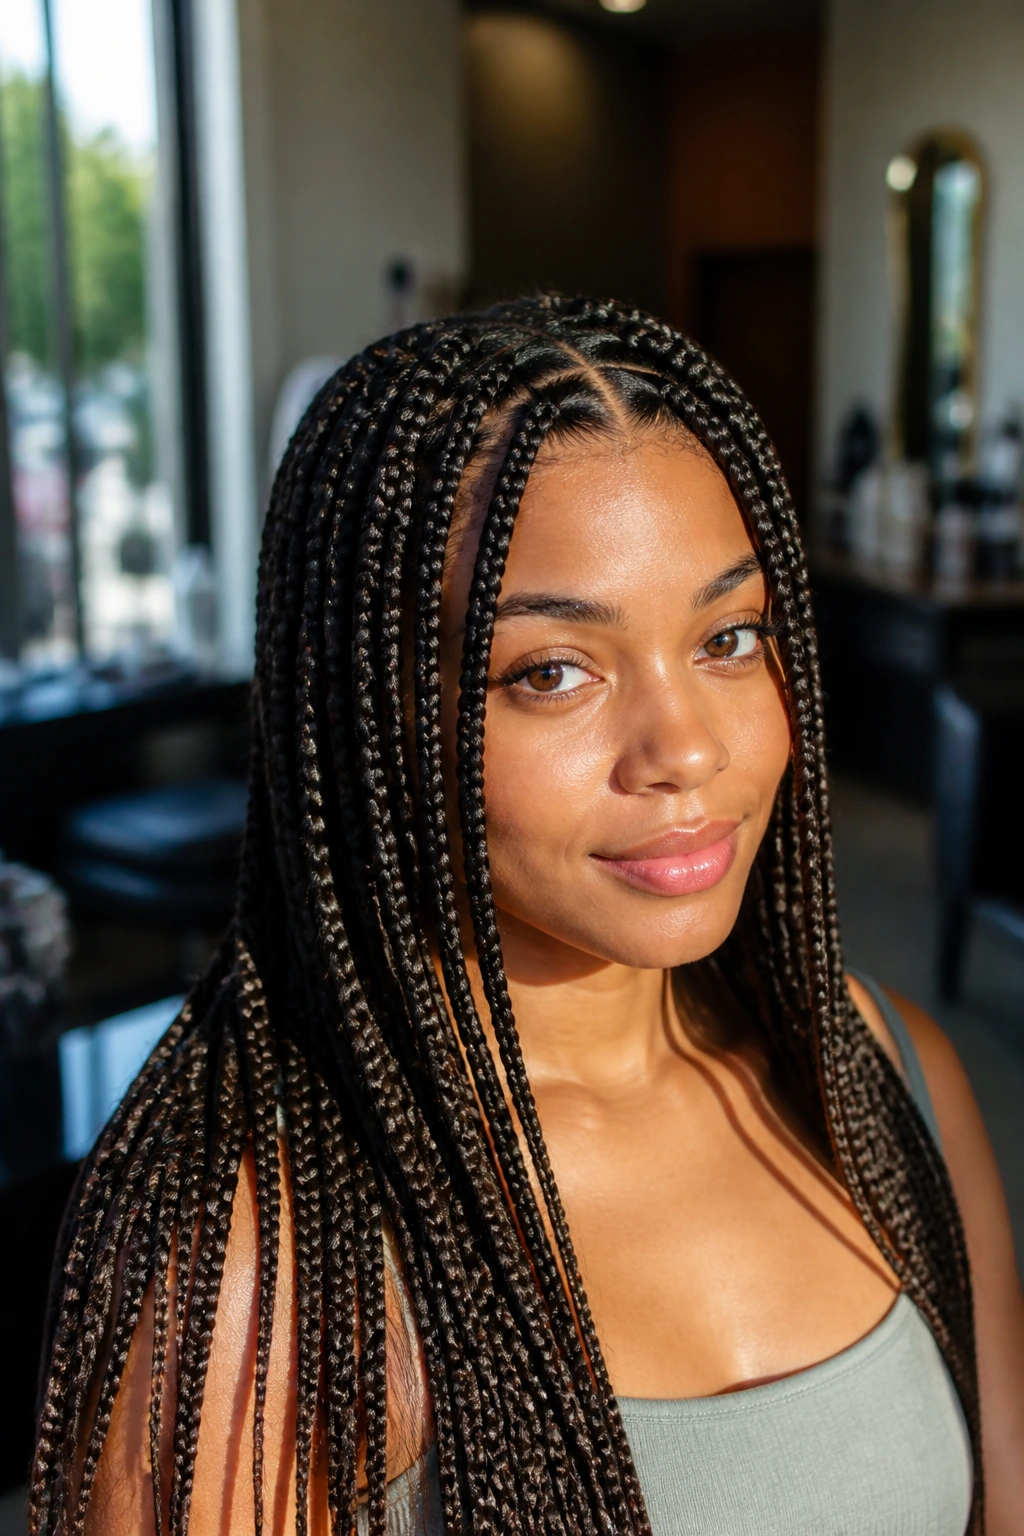
Knotless box braids are the braid style people reach for when they want long wear with less tension at the root. The braid starts with your own hair first, then the extension hair is fed in gradually, which makes the base feel smoother.
Why It Works:
That gradual start is easier on the hairline than a knot-heavy beginning. It also gives the braid a cleaner fall, so long hair or extensions move with less lumpiness at the top.
Key Ingredients:
- 1 to 2 packs pre-stretched braiding hair
- 1 rat-tail comb
- 1 lightweight gel
- 1 edge brush
- 10 to 20 small elastics, if needed for section control
Quick Steps:
- Section the hair into neat squares or triangles.
- Start each braid with natural hair only, then feed in extension hair little by little.
- Keep the braid even all the way down.
- Seal or tie the ends based on the braid hair you choose.
Equipment for This Style:
- Comb
- Clips
- Gel
- Hair clips for sectioning
How to Wear It:
This is a longer-term protective style, so wear it with outfits and accessories that won’t snag the braids. A scarf at night and a clean neckline during the day make it easier to live with.
Pro Tips for This Style:
- Pre-stretch the braiding hair if the ends are blunt and stiff.
- Keep the part size consistent or the braid sizes will fight each other.
Variations on This Style:
- Medium Knotless: Easier to wear day to day than very small parts.
- Curled Ends: Leave the ends with a soft curl for movement.
Common Mistakes to Avoid:
- Don’t feed in hair too fast or the base bulks up.
- Don’t install them too tight; the style should feel secure, not biting.
19. Jumbo Braids
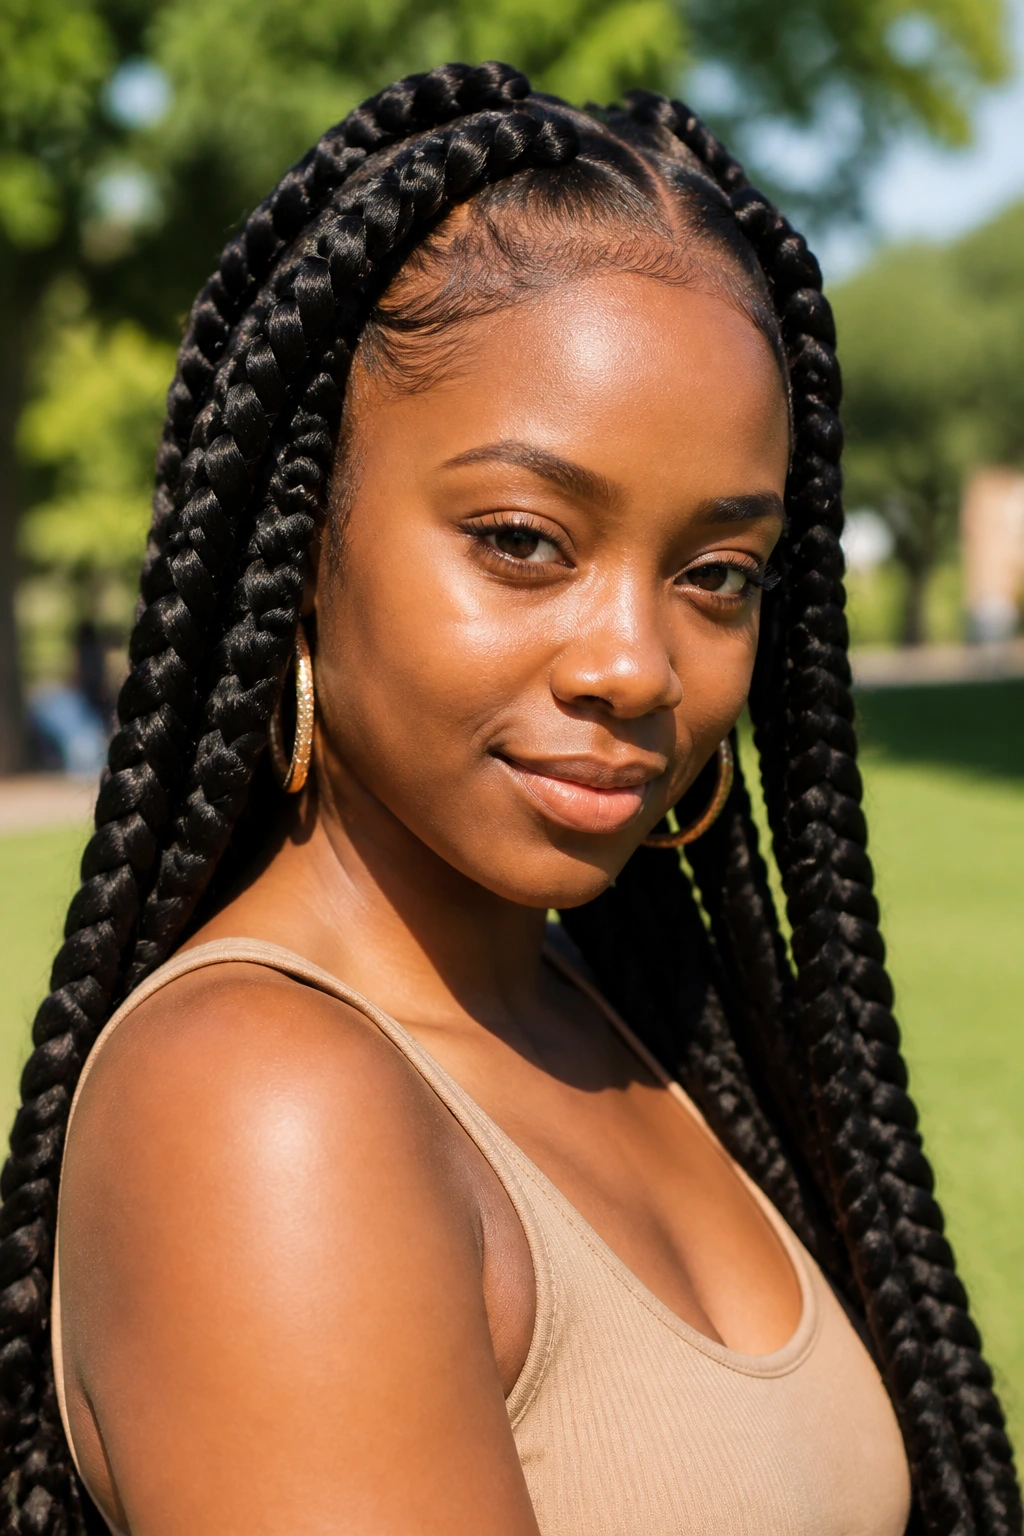
Jumbo braids make a statement because they use big sections and move fast. Long hair helps the style read clearly, and the thick shape is useful when you want a protective look without spending half the day in the chair.
Why It Works:
The larger size means less manipulation and fewer points where hair can frizz loose. It’s also one of the easiest ways to make long hair feel intentional on a hot day, because the structure is bold enough to hold its shape on its own.
Key Ingredients:
- 1 rat-tail comb
- 1 to 2 packs braiding hair, optional
- 1 strong gel
- 4 section clips
- 1 smoothing brush
Quick Steps:
- Part the hair into large sections.
- Start each braid with a firm grip at the root.
- Add extension hair gradually if you want more thickness.
- Braid to the ends and secure well.
Equipment for This Style:
- Comb
- Clips
- Gel
- Elastics
How to Wear It:
Jumbo braids look best with plain clothes and simple jewelry because the scale is already doing a lot. They’re good for travel, heat, and days when you need the hair out of the way without shrinking the whole look.
Pro Tips for This Style:
- Use clean part lines; jumbo braids show every mistake.
- If the braid feels heavy, reduce the section size a little next time.
Variations on This Style:
- Center-Part Jumbo Braids: Gives the style a neater frame.
- Side Jumbo Braids: Adds a softer, asymmetrical line.
Common Mistakes to Avoid:
- Don’t make the sections inconsistent or the braid sizes will look random.
- Don’t keep a jumbo braid too tight around the edges.
20. Mermaid Braid
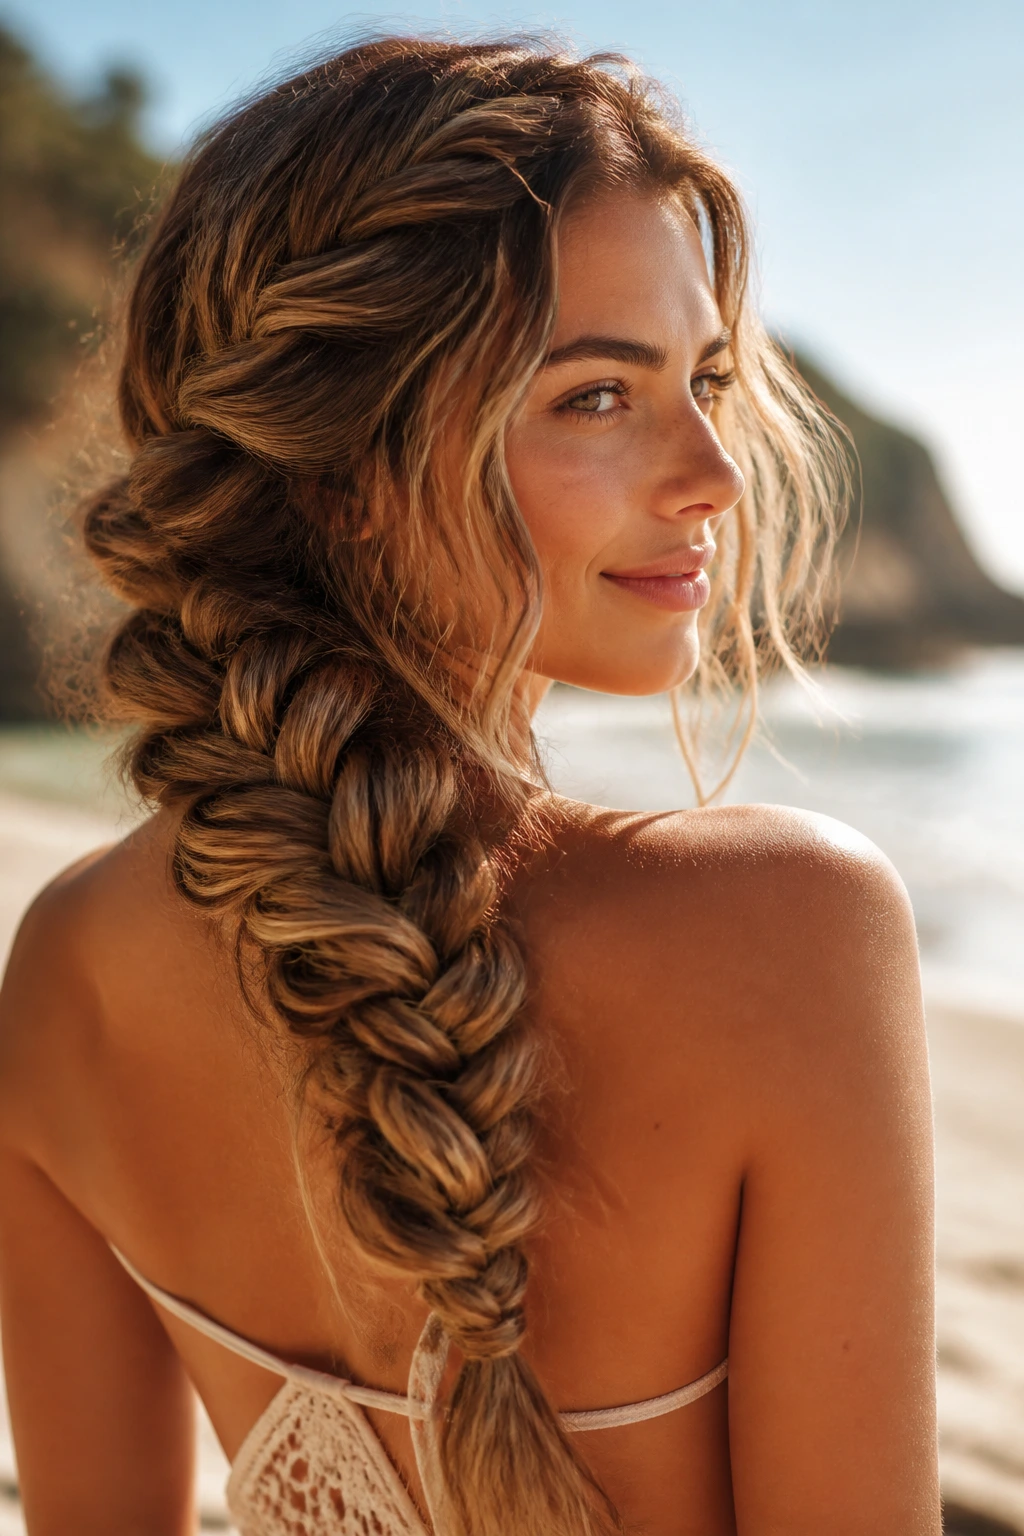
A mermaid braid is a fuller, looser braid pattern that leans into volume instead of precision. On long hair, that volume has room to show up, which makes the braid feel lush and a little dramatic.
Why It Works:
The pattern is built to look thick, so it suits long hair that needs a style with some presence. It also handles wavy or textured hair nicely because the braid can borrow the natural body instead of fighting it.
Key Ingredients:
- 1 texturizing spray
- 1 elastic
- 1 tail comb
- 1 finishing oil
- 2 to 4 pins, optional
Quick Steps:
- Prep hair with texture spray for grip.
- Build a loose braid pattern with slightly larger sections than a standard braid.
- Pull the braid apart gently to widen it.
- Secure the end and smooth the face line if needed.
Equipment for This Style:
- Comb
- Elastic
- Spray
- Pins
How to Wear It:
This style looks best when the rest of the outfit is simple and the braid gets to be the focal point. It works with beachy waves, soft dresses, or anything with a romantic neckline.
Pro Tips for This Style:
- Start with hair that has some grip, not freshly conditioned silk.
- Pull the outer loops evenly so the braid keeps a balanced shape.
Variations on This Style:
- Side Mermaid Braid: Sweep it over one shoulder for more softness.
- Half-Up Mermaid Braid: Keep only the top section braided.
Common Mistakes to Avoid:
- Don’t over-loosen the braid or it stops reading as a braid at all.
- Don’t use heavy cream at the roots; it flattens the body.
21. Infinity Braid
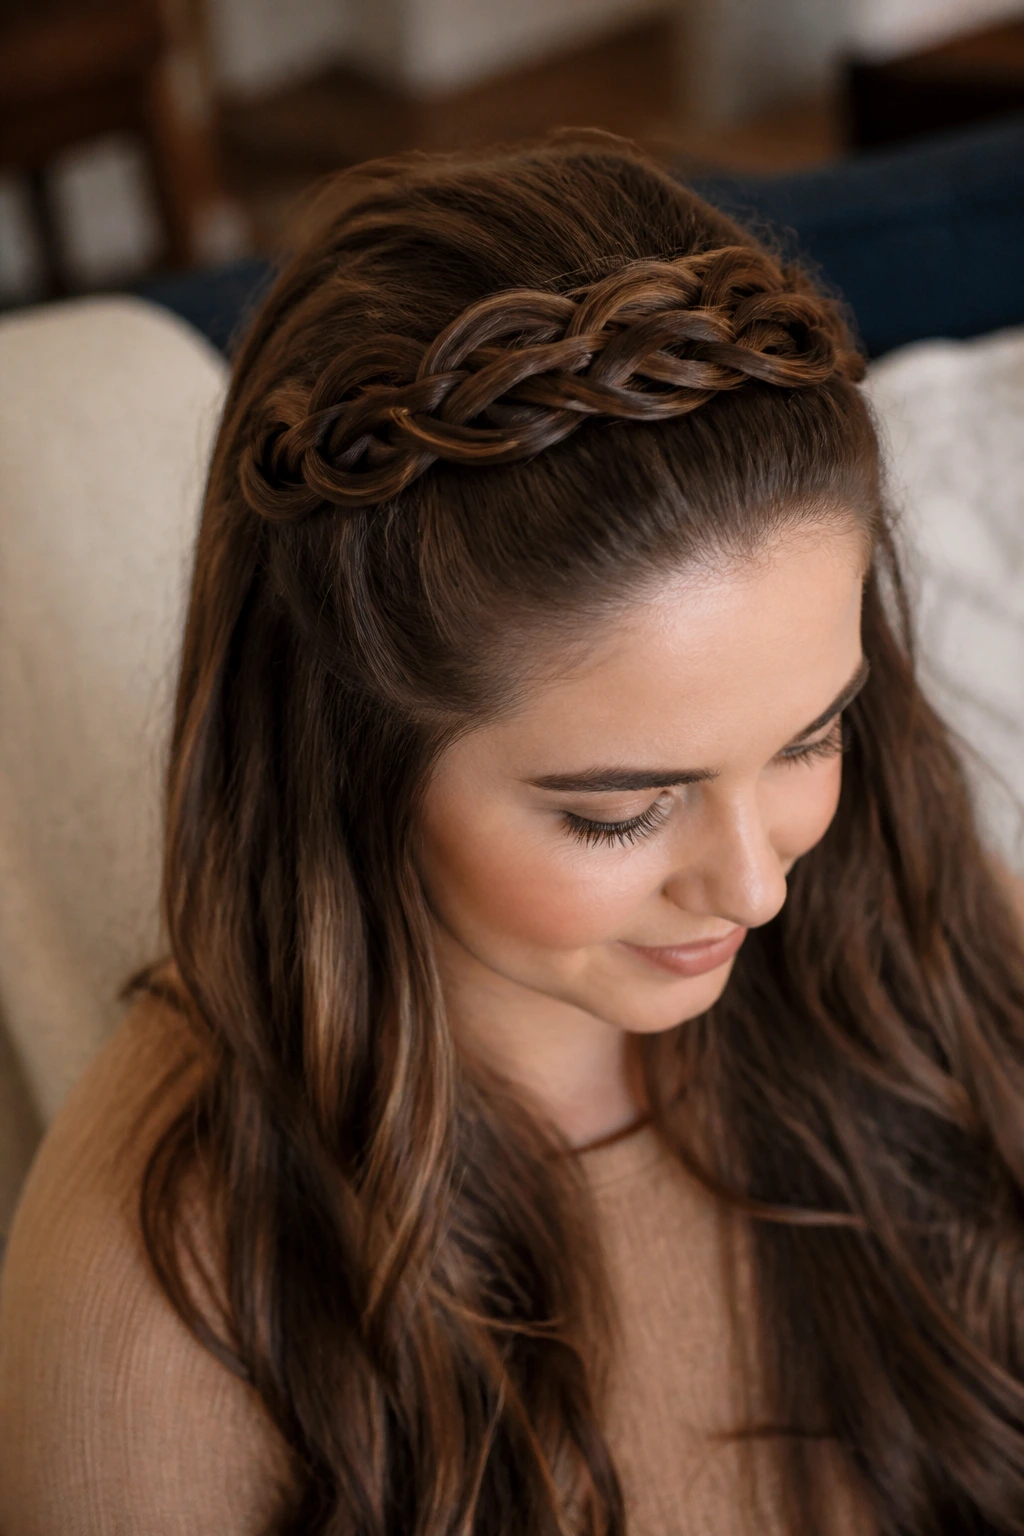
The infinity braid has that looped, woven look that makes people stare a second longer. It’s not the fastest braid on this list, but if you like detail, it pays you back with a pattern that feels crisp and different.
Why It Works:
The repeating loop structure holds well on long lengths because it uses the length to create the motif. It’s also a nice change from standard three-strand braids when you want the style to feel more decorative.
Key Ingredients:
- 1 tail comb
- 1 elastic
- 2 section clips
- 1 styling cream
- 1 patience, honestly
Quick Steps:
- Start with two sections and create a looped crossover pattern.
- Keep feeding small pieces into the same looping motion.
- Maintain tight control at the top so the pattern stays readable.
- Secure the end once the braid reaches the tail.
Equipment for This Style:
- Comb
- Clips
- Elastic
- Mirror
How to Wear It:
This braid works well when you want the hair to look special without adding accessories. It’s a strong choice for events, dinner out, or any day you want the braid to be the detail.
Pro Tips for This Style:
- Practice the loop motion once before you start on clean hair.
- Use smaller sections; the pattern is easier to see that way.
Variations on This Style:
- Side Infinity Braid: Lets the loops show off against the shoulder.
- Half-Up Infinity Accent: Use the motif as a top detail, then stop.
Common Mistakes to Avoid:
- Don’t rush the loops or the pattern will blur.
- Don’t choose hair that’s too slippery without grip spray.
22. Lace Braid
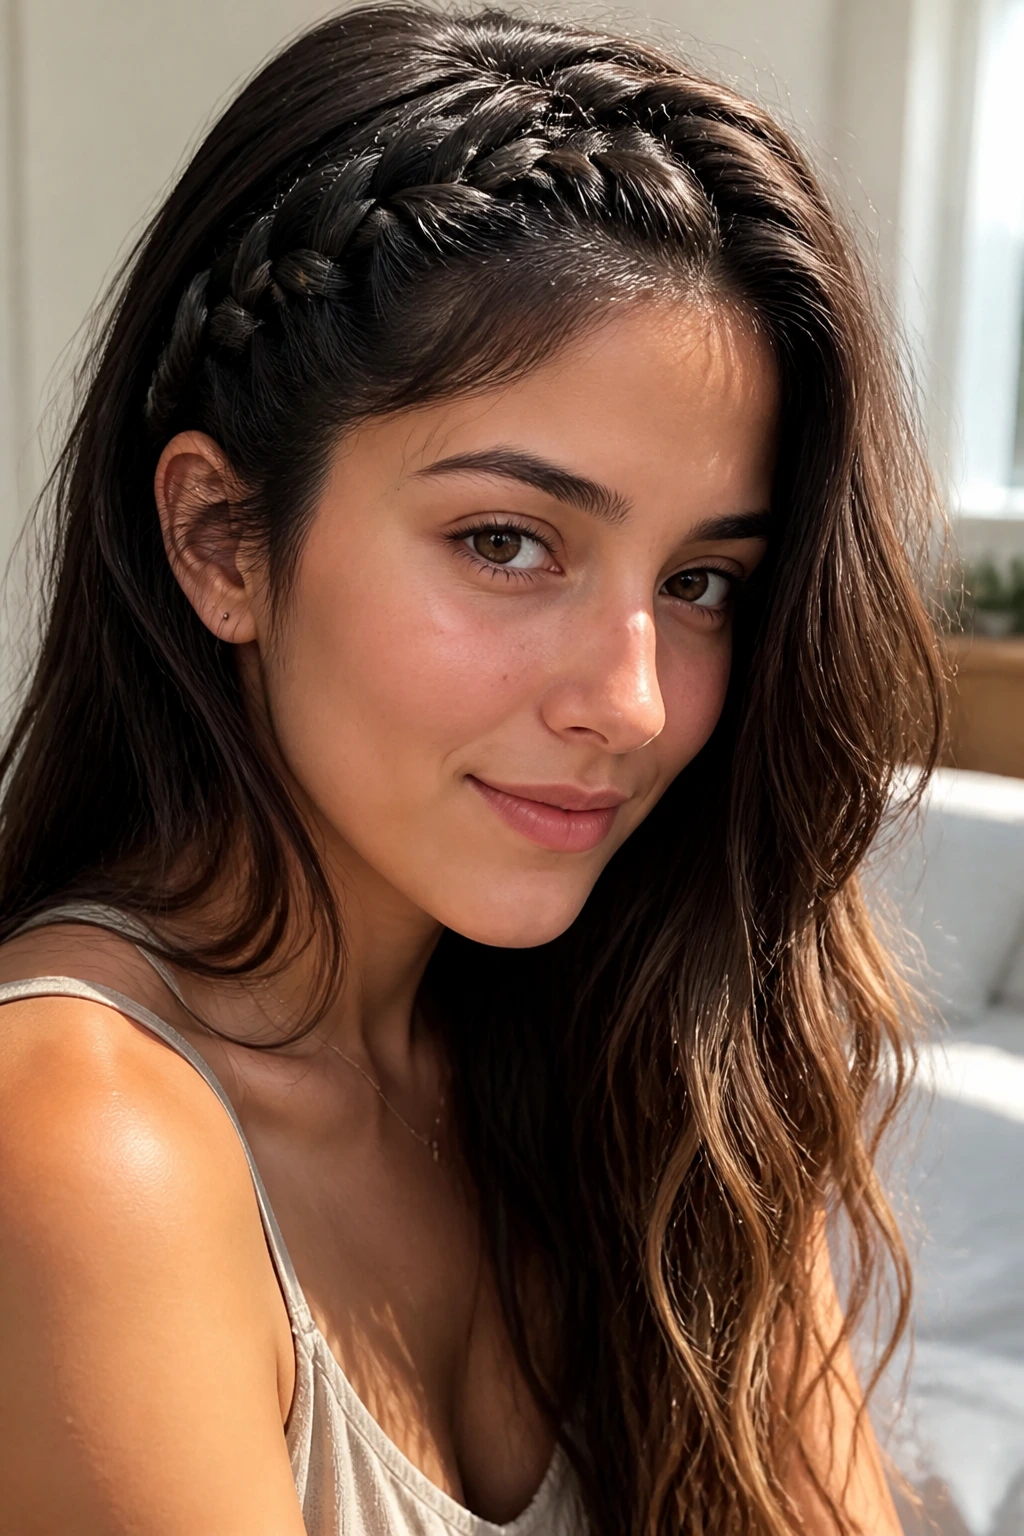
A lace braid is basically a French braid that uses hair from only one side, which gives it a clean curve and a softer shape. It’s a good summer option when you want hair away from one side of the face but don’t want a full braided setup.
Why It Works:
Because it draws from just one side, it keeps some looseness in the style while still controlling the front. It also blends well with long hair that’s worn down, which makes it useful if you like half-up looks that don’t feel fussy.
Key Ingredients:
- 1 rat-tail comb
- 1 small elastic
- 1 smoothing cream
- 2 bobby pins
- 1 light spray
Quick Steps:
- Take a side section near the temple and divide it into three pieces.
- Braid while adding hair from only the top side.
- Keep moving along the hairline until you reach the point you want.
- Pin or tie the end into the loose hair.
Equipment for This Style:
- Comb
- Pins
- Elastic
- Clip
How to Wear It:
It’s best with loose waves, layered cuts, or anything that benefits from a bit of framing near the face. Think of it as a braid that behaves like an accessory rather than the whole hairstyle.
Pro Tips for This Style:
- Keep the braid close to the part line for a clean curve.
- Use it to tame one side only if your hair tends to fall forward.
Variations on This Style:
- Lace Braid Headband: Continue the braid across the forehead line.
- Two Lace Braids: Make a pair and leave the middle loose.
Common Mistakes to Avoid:
- Don’t pull from both sides if you want the lace effect.
- Don’t braid too far down if you want the look to stay light.
23. Half-Up Accent Braids
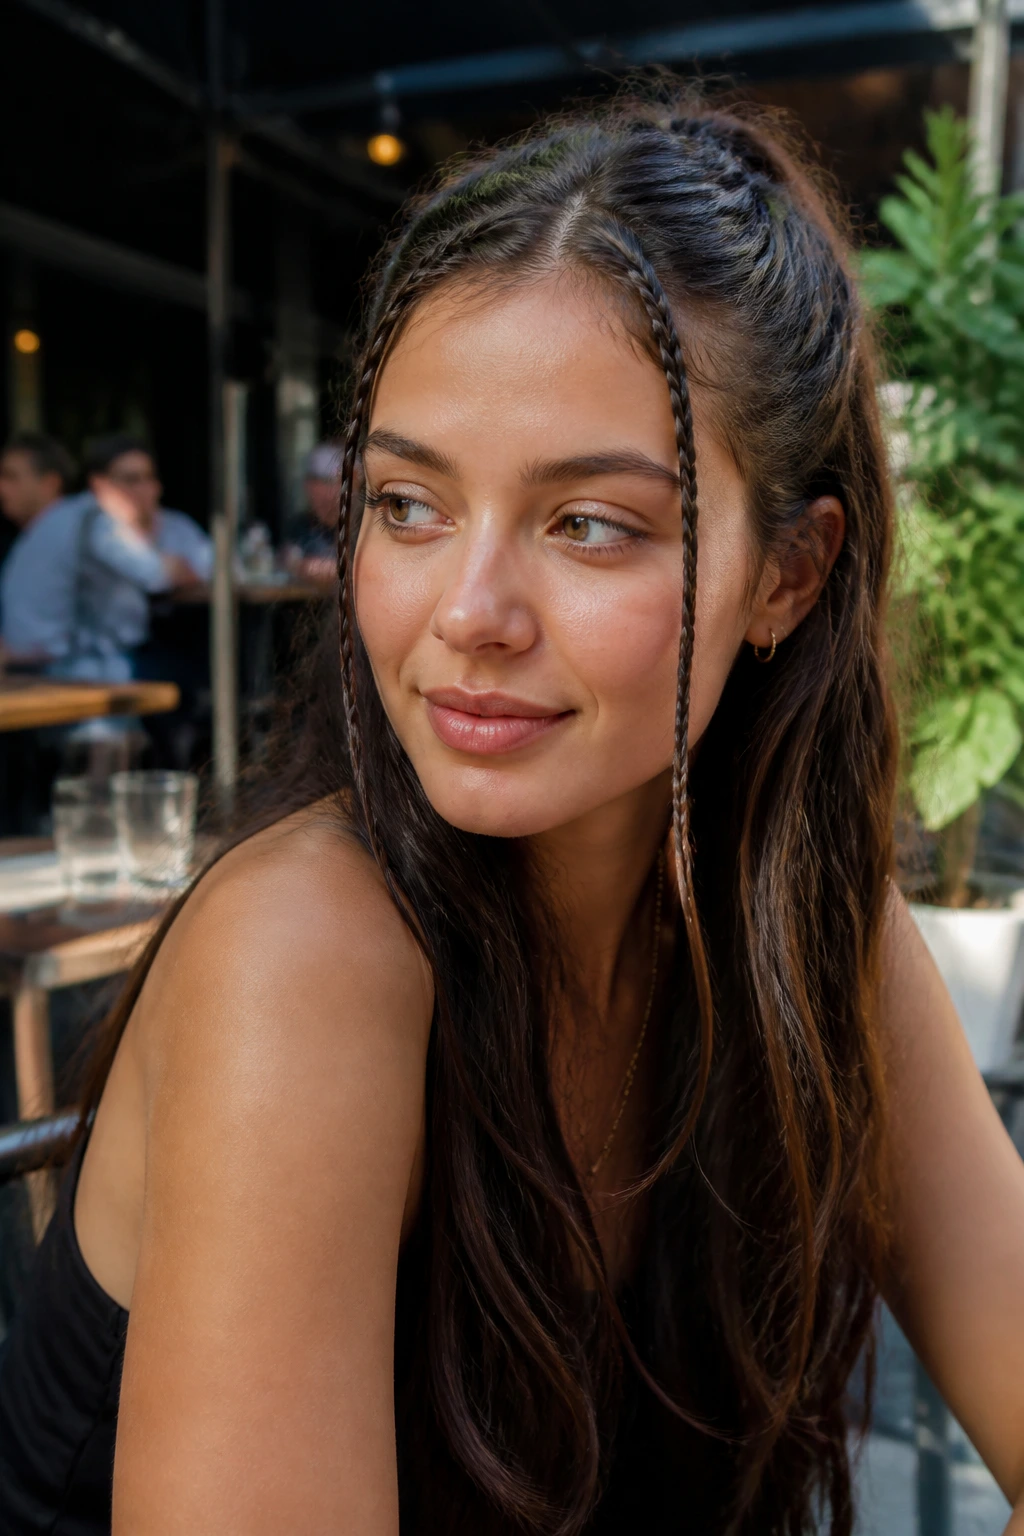
Accent braids are tiny braids added into loose hair, and they’re a nice way to make long hair feel styled without committing to a full updo. In summer, that’s useful when you want some hair down but less of it on your face.
Why It Works:
Small braids control just enough hair to change the shape of the style without hiding the length. They also work across different textures, because the braids can sit inside waves, curls, or straight hair without demanding perfection.
Key Ingredients:
- 1 rat-tail comb
- 2 to 4 clear elastics
- 1 texturizing spray
- 1 small styling cream
- 1 clip for sectioning
Quick Steps:
- Pick 2 or 3 narrow sections near the front.
- Braid each section with a small three-strand braid.
- Pin or tie them into the loose hair.
- Leave the rest of the length free.
Equipment for This Style:
- Comb
- Elastics
- Clips
- Optional curl wand, if you want movement
How to Wear It:
This style works with almost anything because it doesn’t take over the whole head. It’s especially good when you want your hair to look done but not formal.
Pro Tips for This Style:
- Braiding the pieces before you curl the rest gives a nice contrast.
- Use a tiny bit of product so the accents stay neat.
Variations on This Style:
- Face-Framing Accent Braids: Keep them very small and close to the temple.
- Back Crown Accents: Braid the top layer and pin it behind.
Common Mistakes to Avoid:
- Don’t make the accent braids too thick or they stop being accents.
- Don’t place them randomly without thinking about the rest of the hairstyle.
24. Braided Space Buns
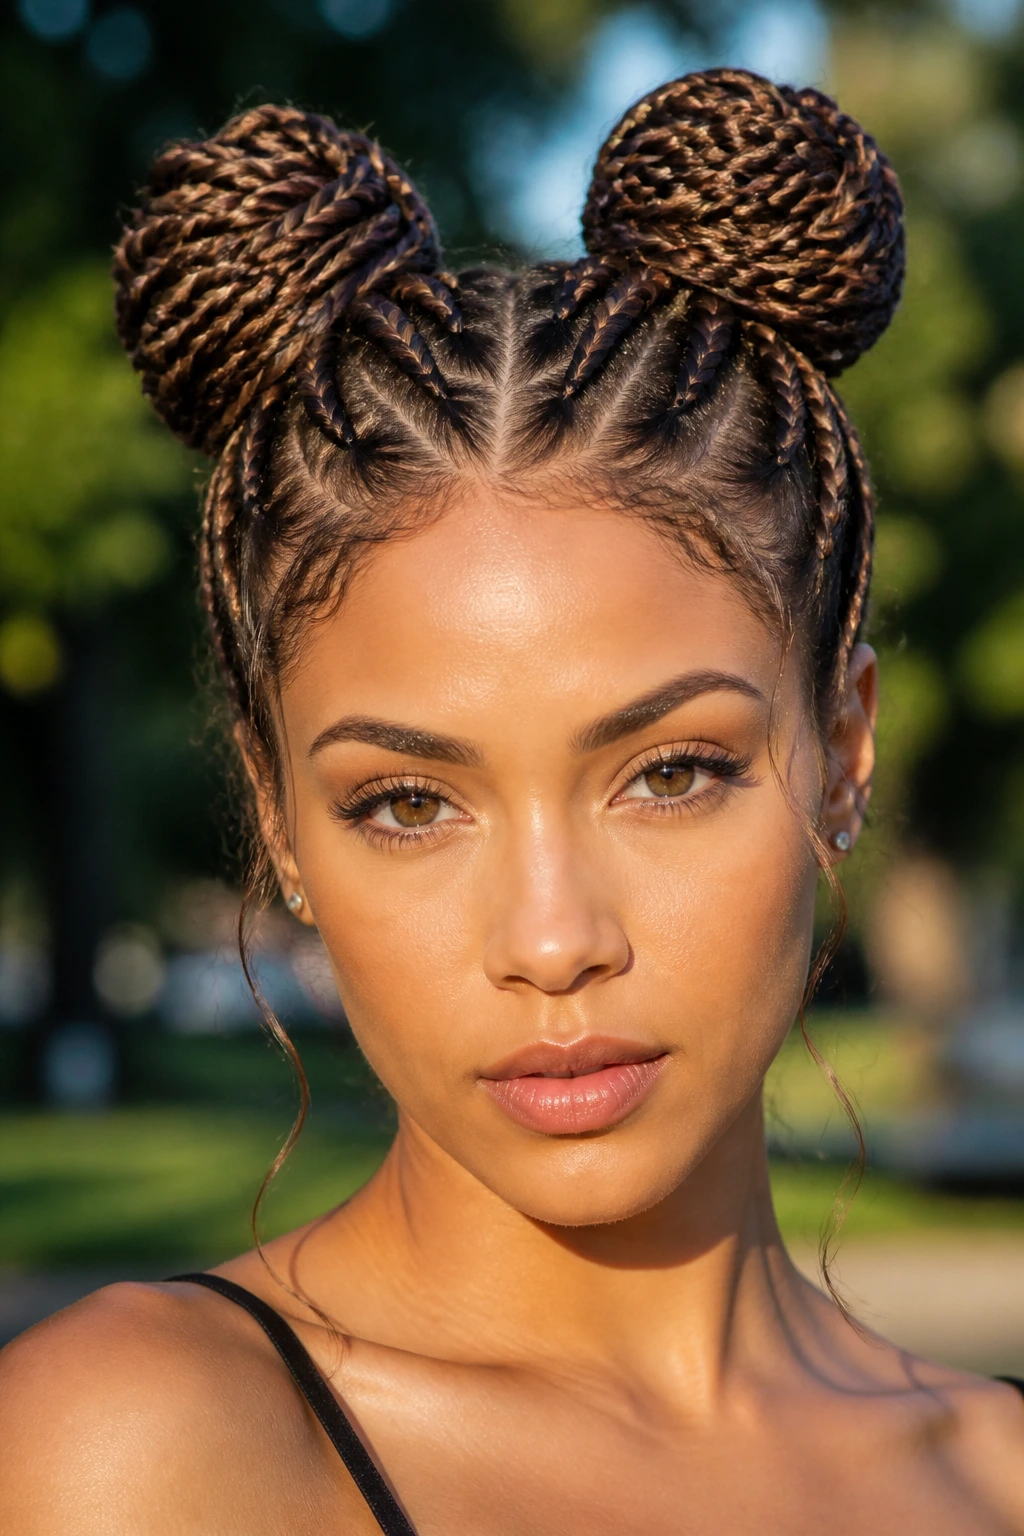
Braided space buns are playful, a little bold, and very good at keeping hair off the neck. They’re a summer style with some personality, and long hair gives them the length and fullness they need to look balanced.
Why It Works:
The braid adds structure before the hair is wrapped into two buns, so the shape holds better than plain buns. It also lets you split the weight evenly across the head, which makes the style feel less heavy.
Key Ingredients:
- 2 elastics
- 8 to 12 bobby pins
- 1 texturizing spray
- 1 rat-tail comb
- 1 edge brush
Quick Steps:
- Part the hair down the center into two equal halves.
- Braid each half, then coil each braid into a bun.
- Pin the buns securely and smooth the hairline.
- Loosen the buns a little if you want them fuller.
Equipment for This Style:
- Comb
- Pins
- Elastics
- Spray
How to Wear It:
This style suits concerts, casual weekends, and hot days when you want something with a little edge. It pairs well with simple tops because the buns already do the talking.
Pro Tips for This Style:
- Keep the part line clean so the buns feel balanced.
- If your hair is thick, braid first and coil later; don’t try to wrap loose hair straight into buns.
Variations on This Style:
- Half-Up Space Buns: Leave the bottom length free.
- Low Space Buns: Shift the buns lower for a softer look.
Common Mistakes to Avoid:
- Don’t make one bun bigger than the other unless you want it asymmetrical on purpose.
- Don’t use pins only at the surface; the center needs support too.
25. Braided Faux Hawk
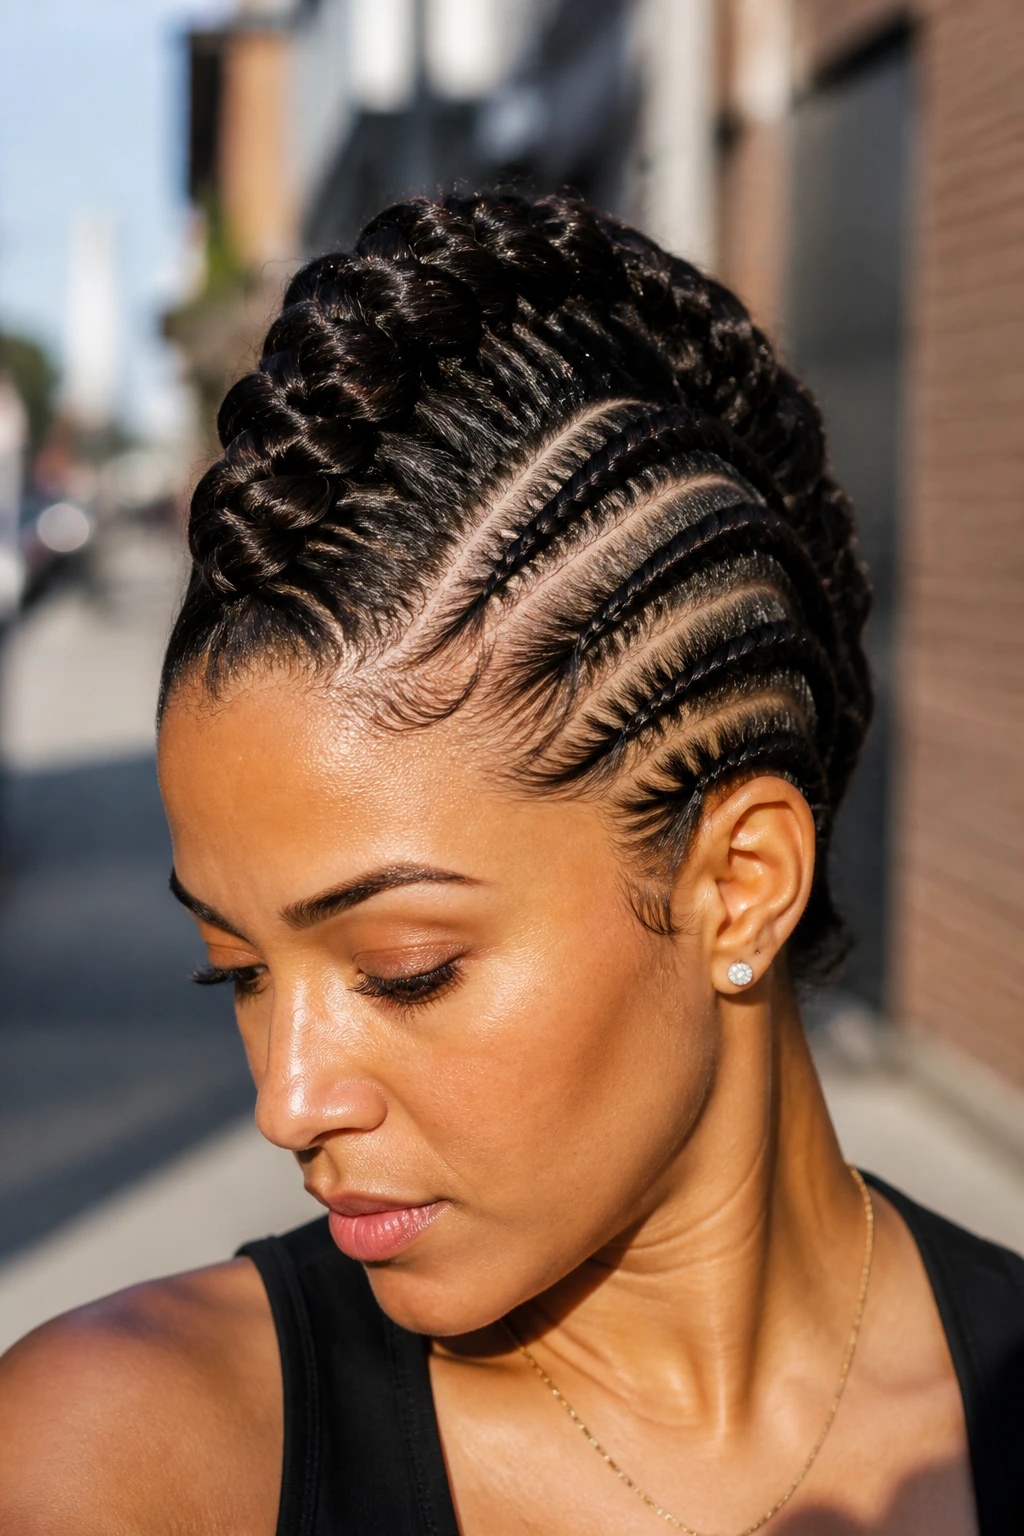
A braided faux hawk gives you height down the middle and cleaner sides, which can be a great balance for long hair in hot weather. It feels bolder than a plain braid and still keeps the hair anchored.
Why It Works:
The raised center line keeps the braid visible while the sides stay close to the head, so the style feels airy and controlled at once. It’s a good choice if you want something that reads strong without needing a full shave-and-go attitude.
Key Ingredients:
- 1 rat-tail comb
- 3 to 5 elastics
- 1 firm-hold gel
- 6 to 10 bobby pins
- 1 edge brush
Quick Steps:
- Section the sides away from the center strip.
- Braid the center strip into one or several raised braids.
- Pin or smooth the side hair tight against the head.
- Finish the ends into a bun, braid, or ponytail.
Equipment for This Style:
- Comb
- Pins
- Elastics
- Gel
How to Wear It:
This looks good with simple clothing because the braid already has a strong shape. It’s the kind of style that makes even a plain T-shirt feel deliberate.
Pro Tips for This Style:
- Use smaller center sections if you want more height.
- Keep the sides flat so the faux hawk line stays clear.
Variations on This Style:
- Braided Mohawk Buns: Turn the center into a row of small buns.
- Loose Faux Hawk: Leave some texture in the side sections.
Common Mistakes to Avoid:
- Don’t let the side pieces puff out or the silhouette collapses.
- Don’t make the center braid too thin if you want visible height.
26. Braided Headband
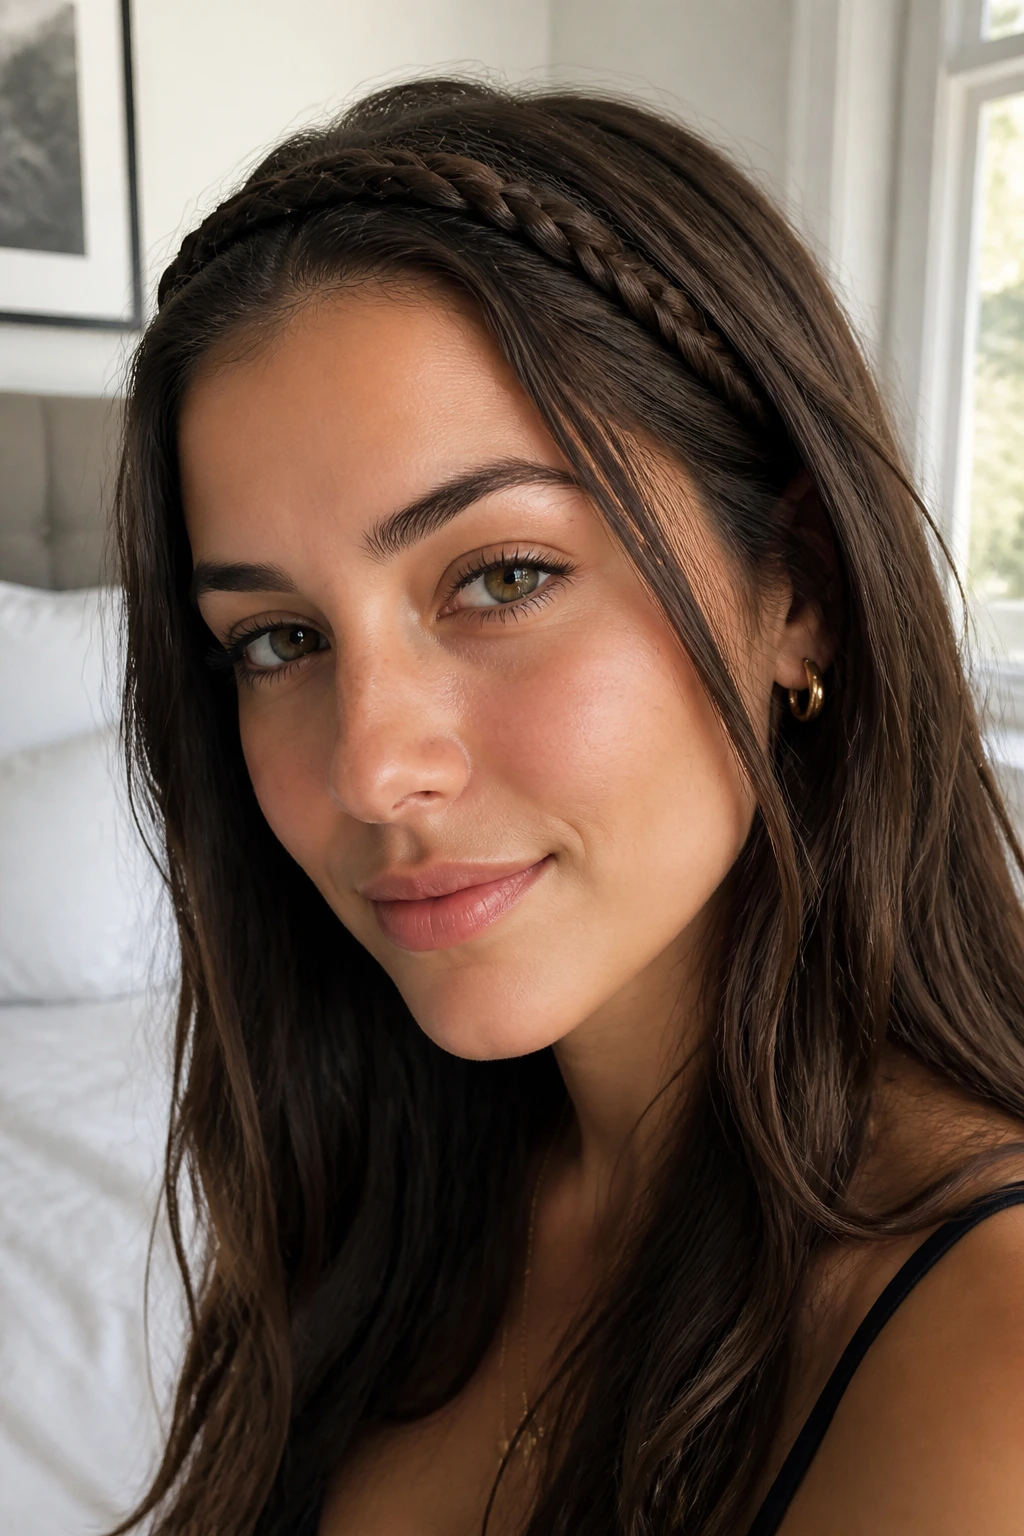
A braided headband sits where an actual headband would, which is handy when you need the front hair off your face but don’t want to hide the length. It’s one of the easiest summer styles to repeat because it uses a small amount of hair for a big visual change.
Why It Works:
The braid works like a built-in accessory, and it keeps sweat-prone front pieces from falling into your eyes. It’s also a smart way to salvage second-day hair without starting over.
Key Ingredients:
- 1 rat-tail comb
- 2 bobby pins
- 1 small elastic
- 1 smoothing cream
- 1 light-hold spray
Quick Steps:
- Take a section from one side near the temple.
- Braid it along the hairline like a narrow rope or three-strand braid.
- Bring it across the top of the head.
- Pin the end behind the opposite ear.
Equipment for This Style:
- Comb
- Pins
- Elastic
- Clip
How to Wear It:
Wear it with loose hair, waves, or a low ponytail. It makes the face line feel cleaner without turning the whole hairstyle into an updo.
Pro Tips for This Style:
- Use a touch of texture spray so the braid doesn’t slide.
- Pin the end under another section of hair for a cleaner hide.
Variations on This Style:
- Double Headband Braids: Two narrow braids instead of one.
- Braided Crown Headband: Curve the braid all the way around.
Common Mistakes to Avoid:
- Don’t make the braid too thick or it starts to overwhelm the front.
- Don’t pin it too high unless you want a very obvious braid band.
27. Scarf-Woven Braid
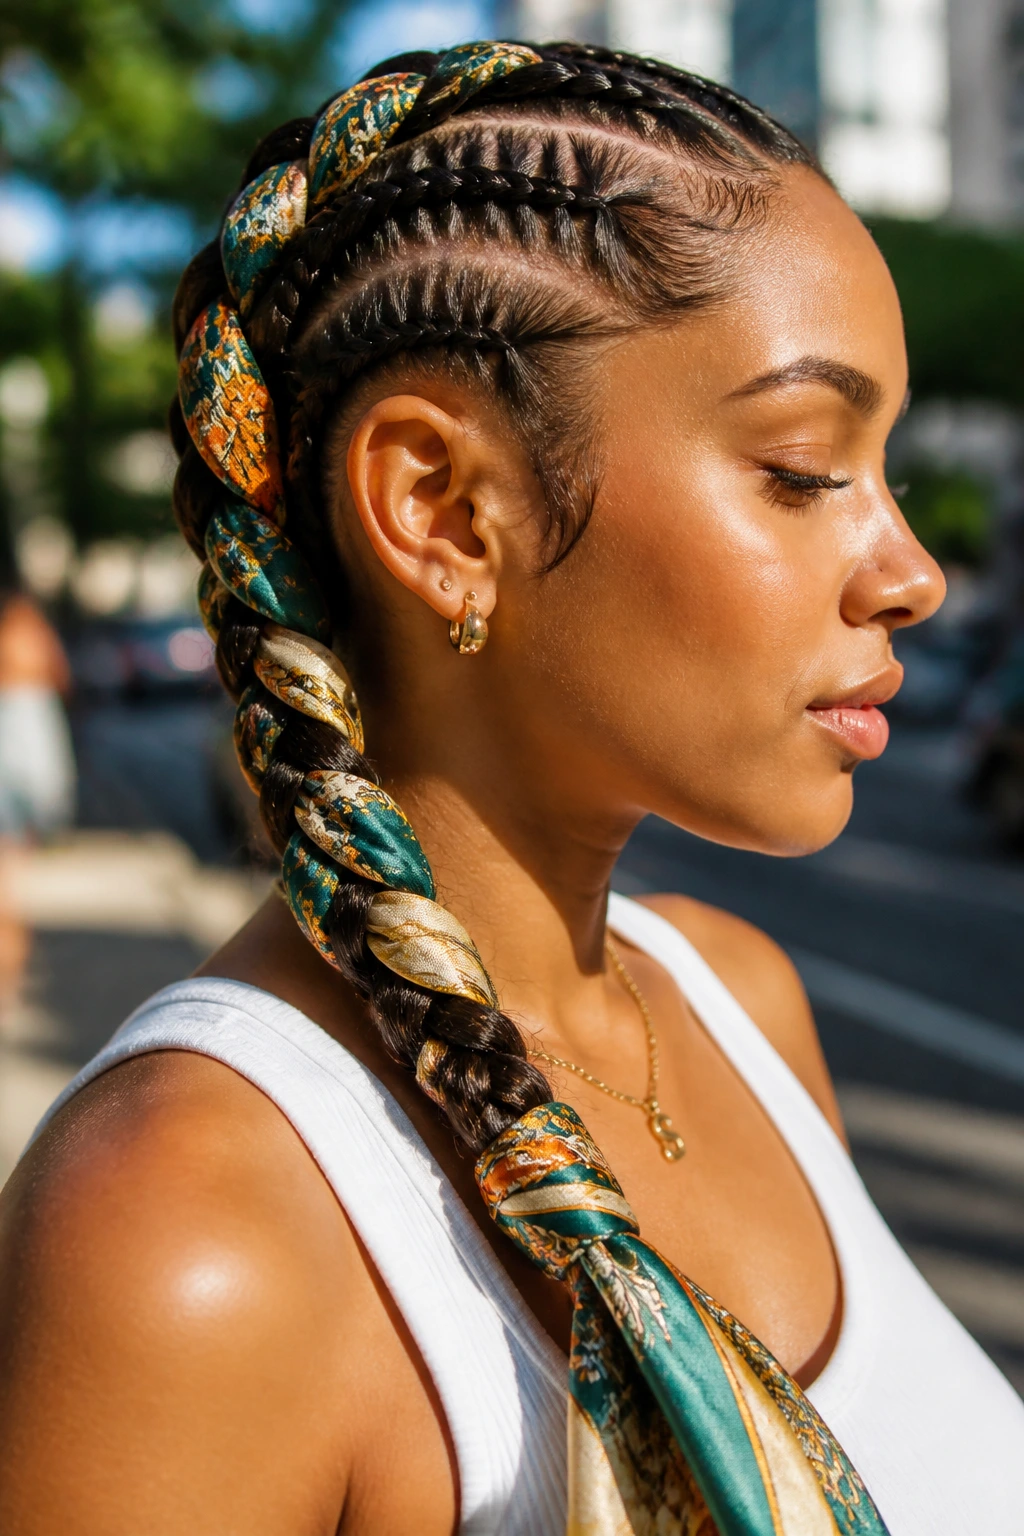
A scarf-woven braid changes a standard braid without changing the basic skill level much. The scarf adds color, a little movement, and enough visual interest that the braid can carry a plain outfit all by itself.
Why It Works:
The scarf gives long hair something soft to wrap around, and it helps bulk up the shape if your braid usually looks too slim. It’s also a nice way to keep a braid from feeling repetitive when you wear them often.
Key Ingredients:
- 1 narrow scarf, about 1 to 2 inches wide
- 1 elastic
- 1 brush
- 1 small amount of oil for the ends
- 1 clip
Quick Steps:
- Secure the braid at the base or start the scarf near the root.
- Weave the scarf into one strand or wrap it alongside the braid.
- Continue to the ends with even tension.
- Tie off the scarf neatly and trim any excess if needed.
Equipment for This Style:
- Scarf
- Elastic
- Brush
- Pins, optional
How to Wear It:
This is the braid to wear when the outfit needs a little color or when you want the hair to feel more personal. It works with neutral clothing especially well.
Pro Tips for This Style:
- Choose a scarf with a smooth weave so it doesn’t snag.
- Keep the fabric flat while braiding so it doesn’t bunch.
Variations on This Style:
- Silk Scarf Braid: Softer and slicker, with more shine.
- Printed Cotton Scarf Braid: Better grip and a more casual finish.
Common Mistakes to Avoid:
- Don’t use a scarf that’s too thick; it makes the braid bulky fast.
- Don’t let the fabric twist up inside the braid.
28. Ribbon-Woven Braid
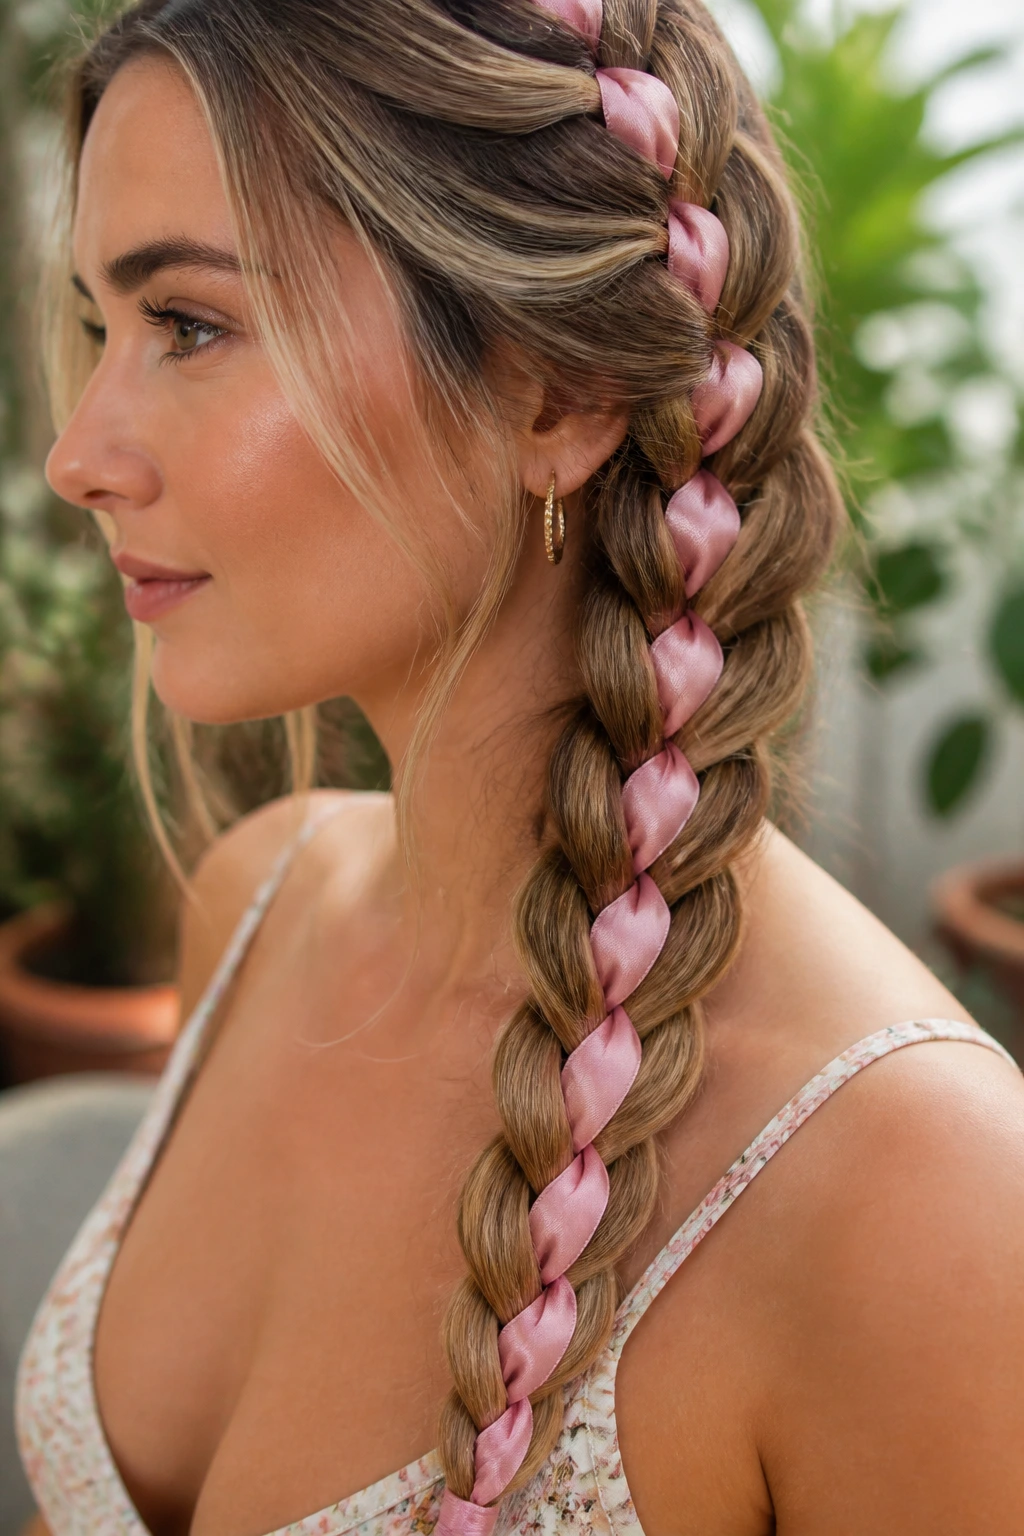
A ribbon-woven braid leans more polished than a scarf braid because the ribbon sits neatly inside the plait. Long hair gives the ribbon room to show, and that makes the whole style feel more intentional.
Why It Works:
The ribbon changes the braid’s silhouette without adding much weight. That means the style stays comfortable in heat while still having a defined accent that catches the eye.
Key Ingredients:
- 1 ribbon, ideally 1/4 to 1/2 inch wide
- 1 elastic
- 1 brush
- 1 small sewing pin or clip, if needed
- 1 light spray
Quick Steps:
- Tie or clip the ribbon into the braid base.
- Split the hair and ribbon so one ribbon tail joins a strand.
- Braid normally, keeping the ribbon flat.
- Finish at the end and secure both hair and ribbon.
Equipment for This Style:
- Ribbon
- Elastic
- Brush
- Clip
How to Wear It:
This works well for dressed-up summer events, but it also keeps a plain braid from feeling too plain. The ribbon color can echo your outfit or contrast it hard.
Pro Tips for This Style:
- Use satin ribbon if you want it to lie flat and glide.
- Pick a ribbon length at least twice the braid length.
Variations on This Style:
- Double Ribbon Braid: Two ribbons for more color.
- Thin Grosgrain Accent: Best when you want the braid pattern to remain visible.
Common Mistakes to Avoid:
- Don’t use a ribbon that frays immediately.
- Don’t braid too tightly over the ribbon or it wrinkles badly.
29. Bubble Braid with Braided Base
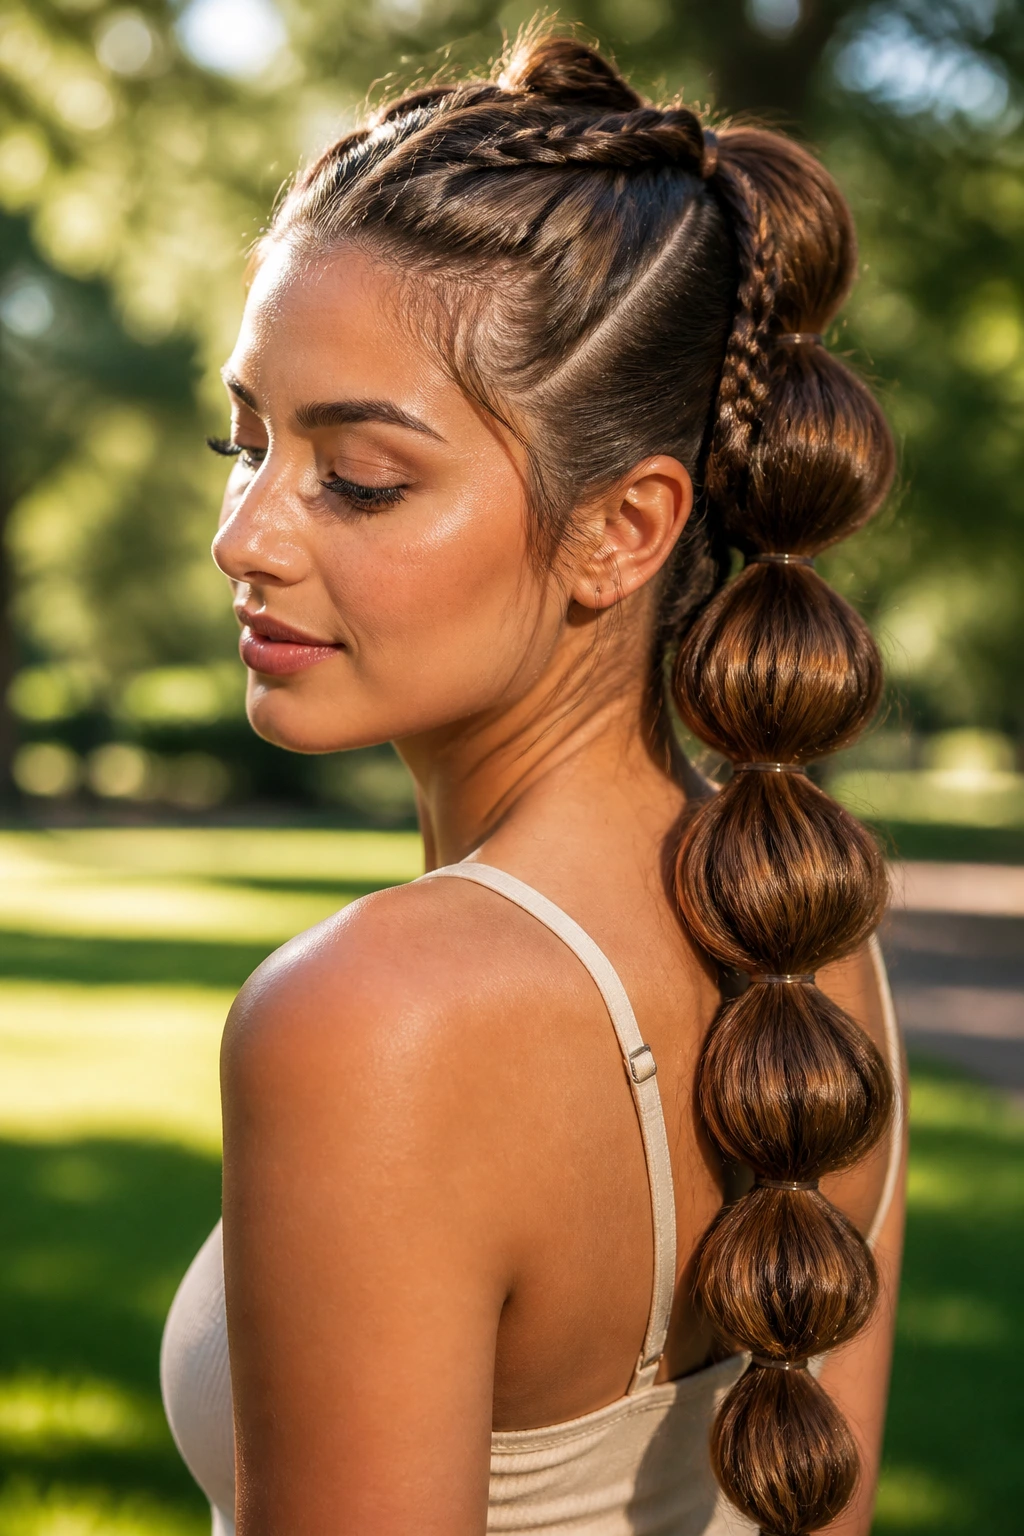
A bubble braid with a braided base gives you the clean start of a braid and the playful shape of bubble sections. Long hair is the best canvas for it, because the bubbles have enough length to stack clearly.
Why It Works:
The braided base keeps the top secure, while the bubble sections add volume without requiring classic braiding all the way down. That makes it a smart option for long hair that you want to show off in a more graphic way.
Key Ingredients:
- 5 to 8 clear elastics
- 1 brush
- 1 teasing comb, optional
- 1 texturizing spray
- 1 small oil for ends
Quick Steps:
- Braid the top section close to the scalp.
- Gather the rest into ponytail segments every 2 to 3 inches.
- Tug each section outward to form bubbles.
- Smooth the base and finish the ends.
Equipment for This Style:
- Elastics
- Brush
- Comb
- Mirror
How to Wear It:
This style suits casual summer outfits, travel days, and anything that benefits from a little structure. It looks especially good with straight or lightly waved long hair.
Pro Tips for This Style:
- Keep the elastic spacing even so the bubbles match.
- Tease the segments lightly if your hair is very fine.
Variations on This Style:
- Half Bubble Braid: Start at the crown and stop halfway.
- Double Bubble Tails: Split the braid into two bubble ponytails.
Common Mistakes to Avoid:
- Don’t make the bubbles too fat near the top and too small at the bottom.
- Don’t forget to smooth the braid base or it will look disconnected.
30. Crown Braid Into Low Ponytail
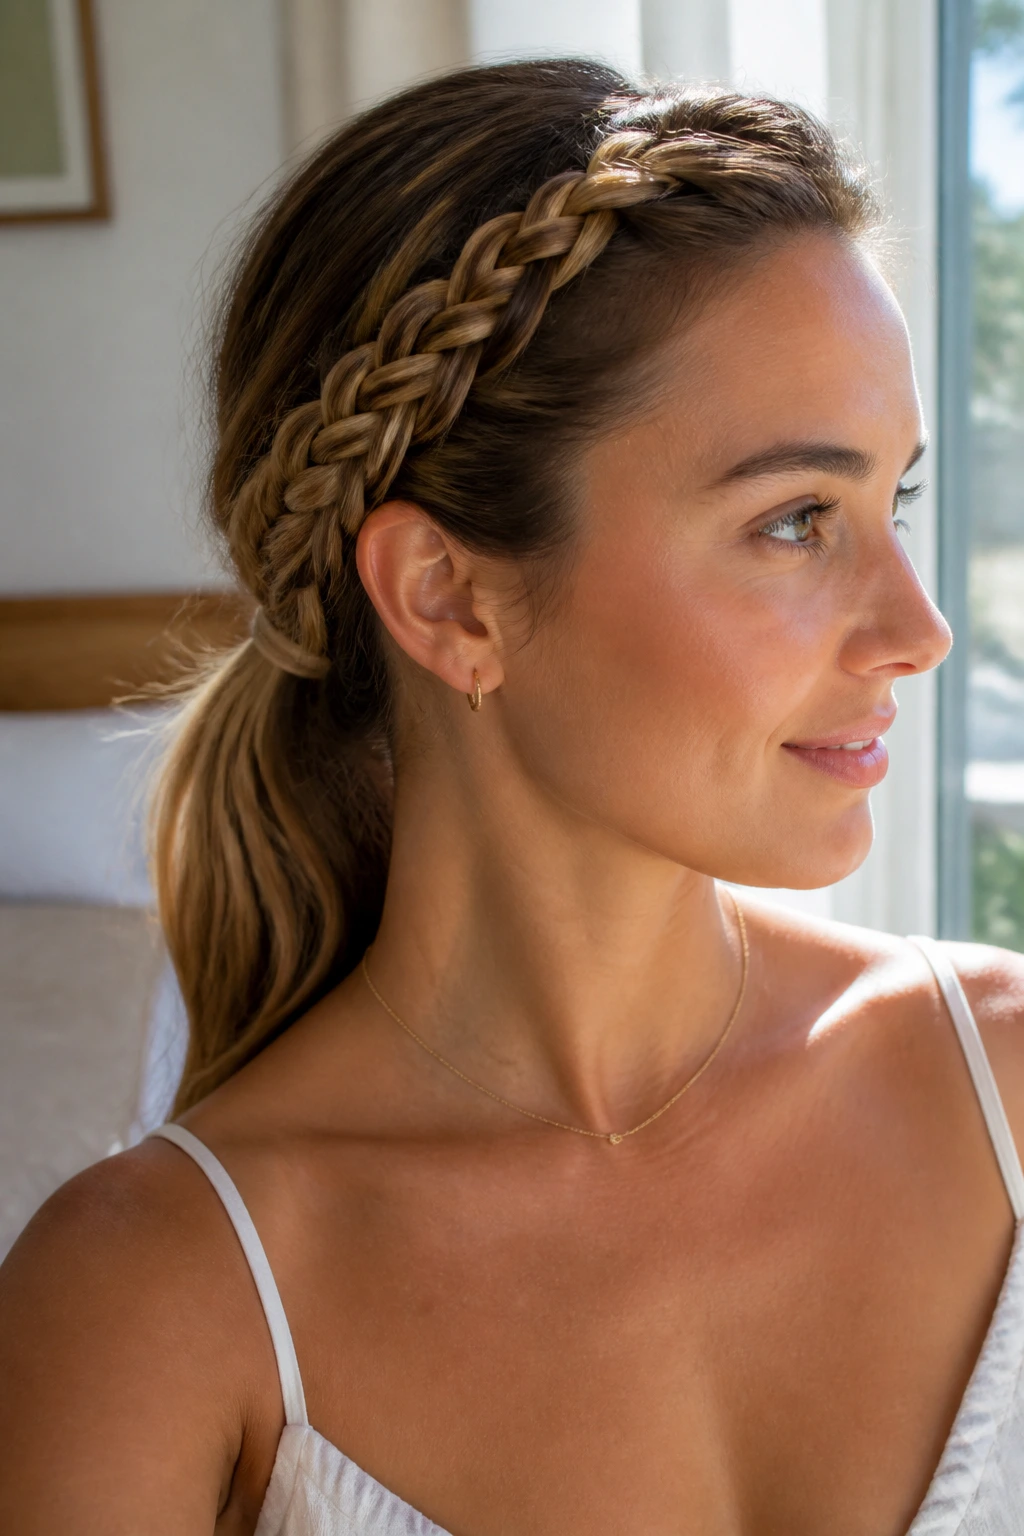
This style takes the neatness of a crown braid and lets the length continue in a low ponytail, which is a nice middle ground if you want both control and movement. It feels more relaxed than a full pinned crown.
Why It Works:
The braid around the hairline clears the face, and the ponytail keeps the long length visible. It’s a good compromise when you want heat relief but don’t want to hide all the hair.
Key Ingredients:
- 1 rat-tail comb
- 1 elastic
- 4 to 6 bobby pins
- 1 smoothing cream
- 1 light spray
Quick Steps:
- Braid around the hairline from one side to the other.
- Let the braid end meet the rest of the hair at the back.
- Gather everything into a low ponytail.
- Wrap or pin the transition point so it looks tidy.
Equipment for This Style:
- Comb
- Pins
- Elastic
- Brush
How to Wear It:
This works nicely with soft tops, open collars, and any outfit where you want some shape around the face but not a full updo. It has a calmer feel than a tight braided crown.
Pro Tips for This Style:
- Make the ponytail base low enough that it doesn’t pull the crown forward.
- Use a small elastic hidden under the braid if needed.
Variations on This Style:
- Wavy Ponytail Finish: Curl the loose length after braiding.
- Sleek Ponytail Finish: Keep the tail straight and polished.
Common Mistakes to Avoid:
- Don’t set the braid too tight across the forehead.
- Don’t leave the transition between braid and ponytail messy.
31. Side Swept Dutch Braid
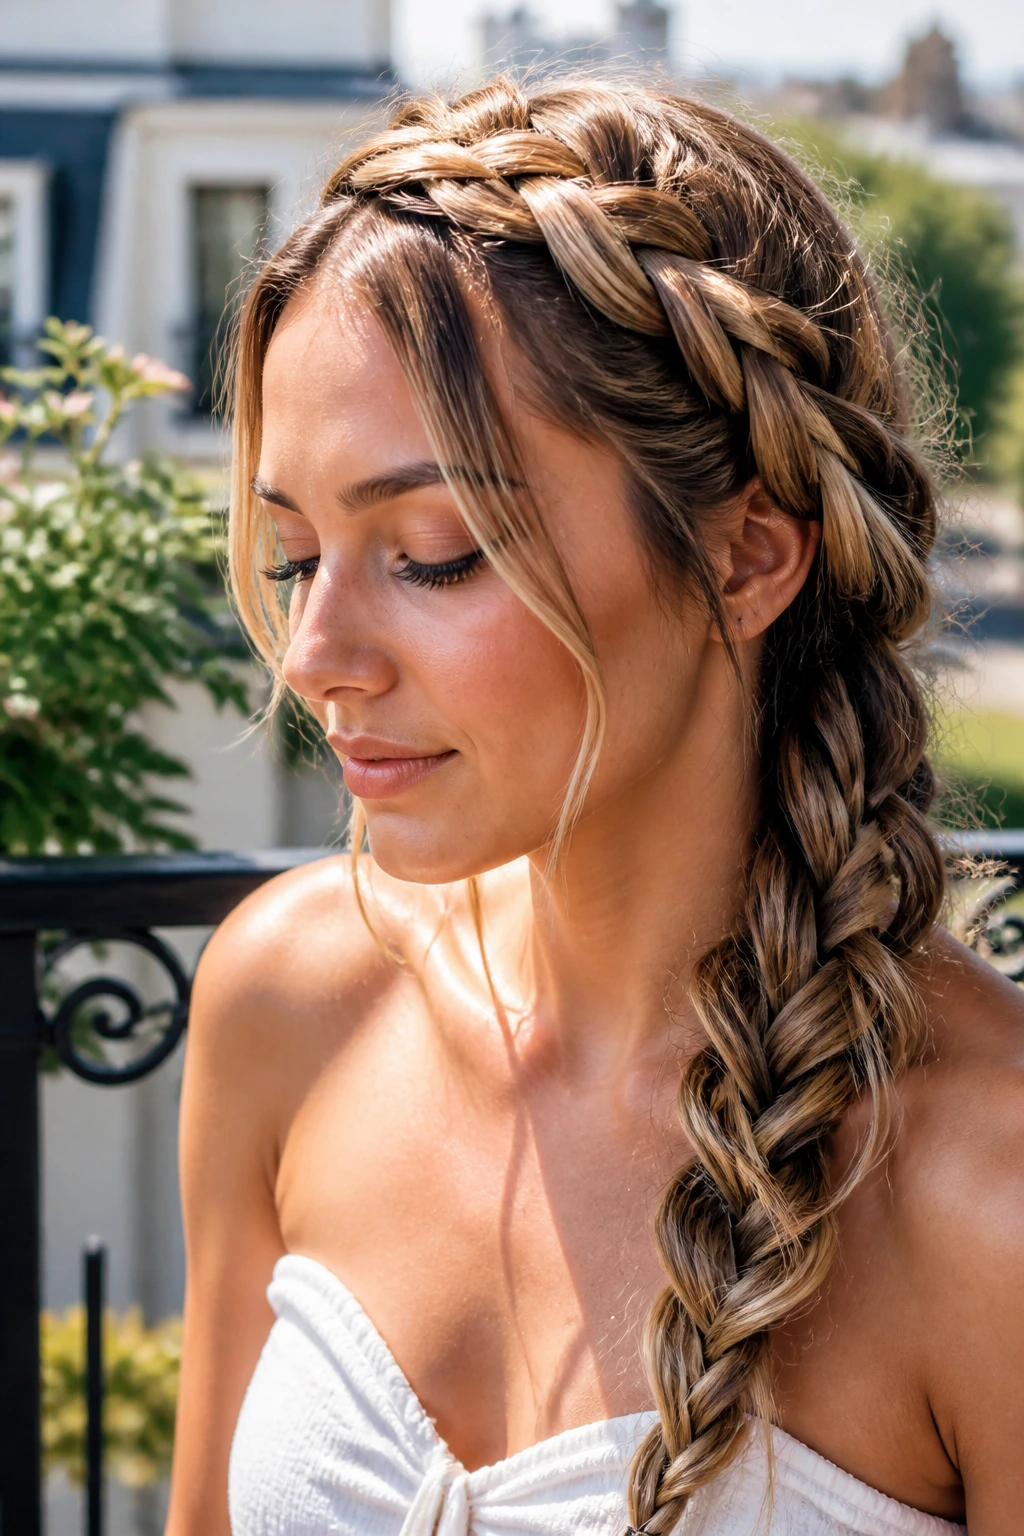
A side-swept Dutch braid has movement built into it, which makes long hair feel less heavy than a straight-down version. It’s a good style when you want the braid to rest on one shoulder and still look full.
Why It Works:
The diagonal line softens the look, and the Dutch structure keeps the braid raised so it shows up clearly. It’s useful if your hair tends to fall flat in the back because the side sweep gives the braid some natural lift.
Key Ingredients:
- 1 rat-tail comb
- 1 elastic
- 1 texturizing spray
- 2 pins, optional
- 1 smoothing brush
Quick Steps:
- Part hair slightly off-center.
- Start a Dutch braid near one front section and carry it diagonally back.
- Add hair as you braid so the shape stays full.
- Secure the tail over one shoulder.
Equipment for This Style:
- Comb
- Elastic
- Spray
- Brush
How to Wear It:
This looks nice with asymmetrical tops, one-shoulder dresses, or anything that leaves one collarbone open. The braid follows that line naturally.
Pro Tips for This Style:
- Keep the braid angled consistently or the sweep looks accidental.
- Pull the edges a little for a softer shoulder line.
Variations on This Style:
- Loose Side Sweep: Leave the top a bit relaxed.
- Side Sweep Into Bun: Coil the tail under the shoulder line.
Common Mistakes to Avoid:
- Don’t let the braid drift straight down unless that’s the plan.
- Don’t start with a sloppy part; the angle depends on it.
32. Four-Strand Braid
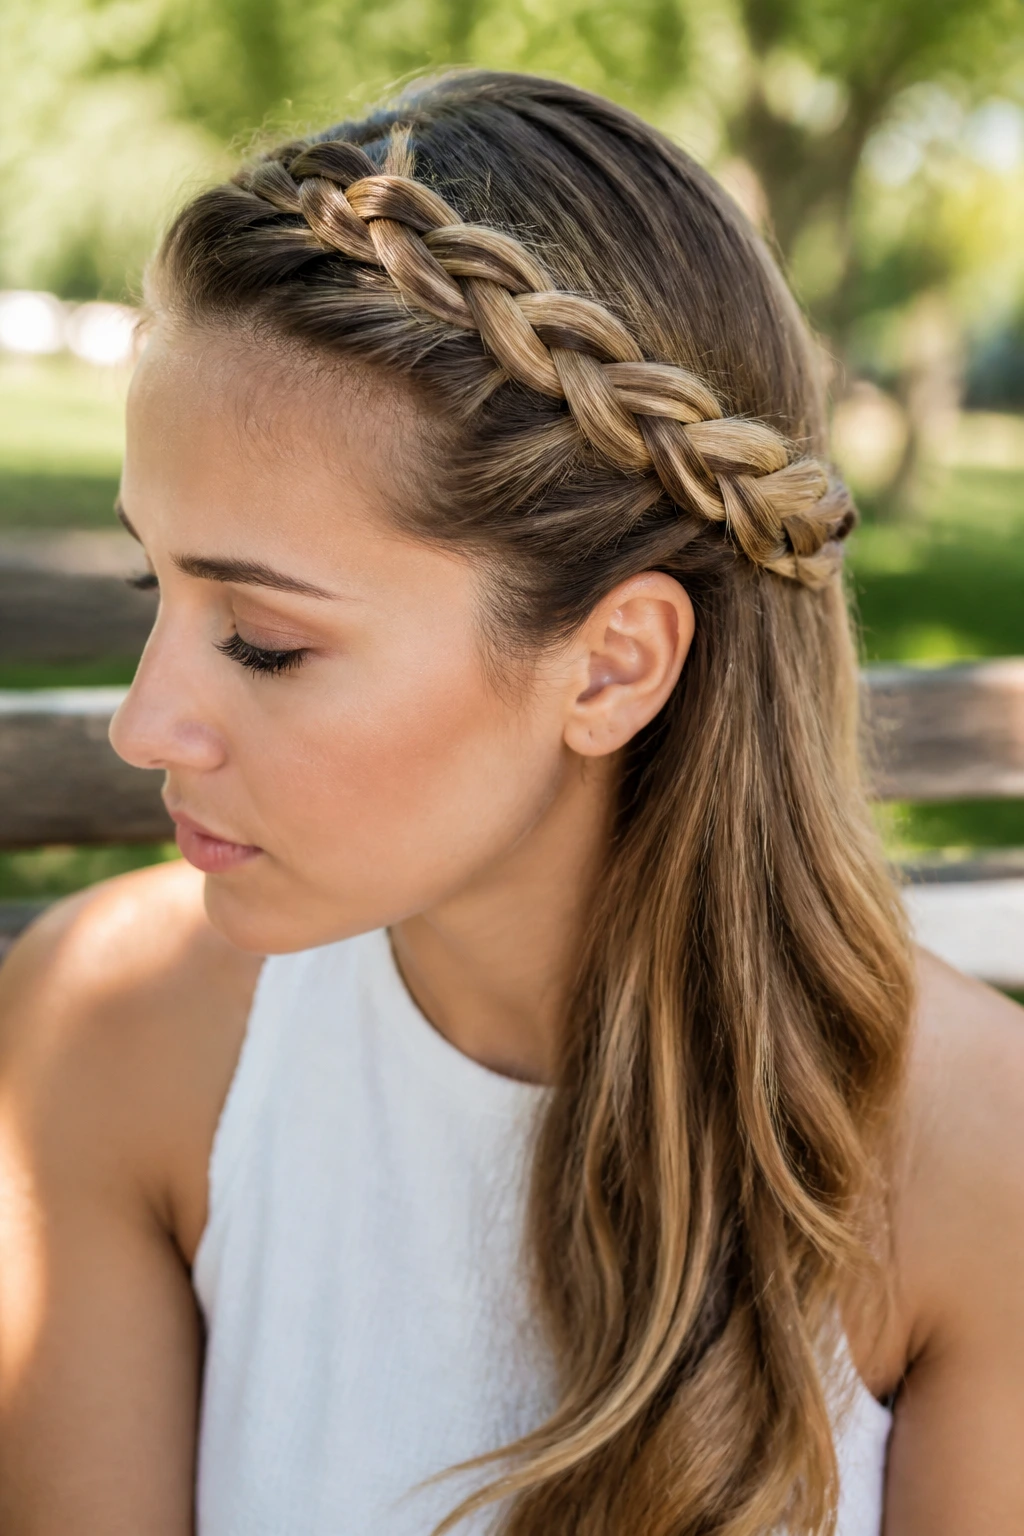
A four-strand braid is a little more intricate than the standard version, and that extra strand gives the plait a flatter, more woven look. On long hair, it can feel almost ribbon-like.
Why It Works:
The extra section creates a denser surface, which can make the braid stay tidy longer than a looser three-strand version. It’s a good pick if you like the look of detail and don’t mind spending an extra few minutes.
Key Ingredients:
- 1 brush
- 1 elastic
- 1 smoothing cream
- 1 tail comb
- 1 bit of patience again
Quick Steps:
- Divide the hair into four equal sections.
- Cross the outer sections over and under in a steady pattern.
- Keep tension even so the braid doesn’t lean.
- Tie off the end and flatten the braid lightly with your hands.
Equipment for This Style:
- Comb
- Brush
- Elastic
- Clip
How to Wear It:
This braid sits well with simple clothing because the braid itself has enough detail. It’s useful when you want something a little different without adding pins or accessories.
Pro Tips for This Style:
- Practice the hand pattern once on a ribbon or cord if you’re new to it.
- Don’t split the strands unevenly; the braid will twist.
Variations on This Style:
- Side Four-Strand: Swept over one shoulder.
- Double Four-Strand Accent: Use two small braids instead of one large one.
Common Mistakes to Avoid:
- Don’t rush the crossing order.
- Don’t use hair that’s too slippery unless you want the braid to slip apart.
33. Five-Strand Braid
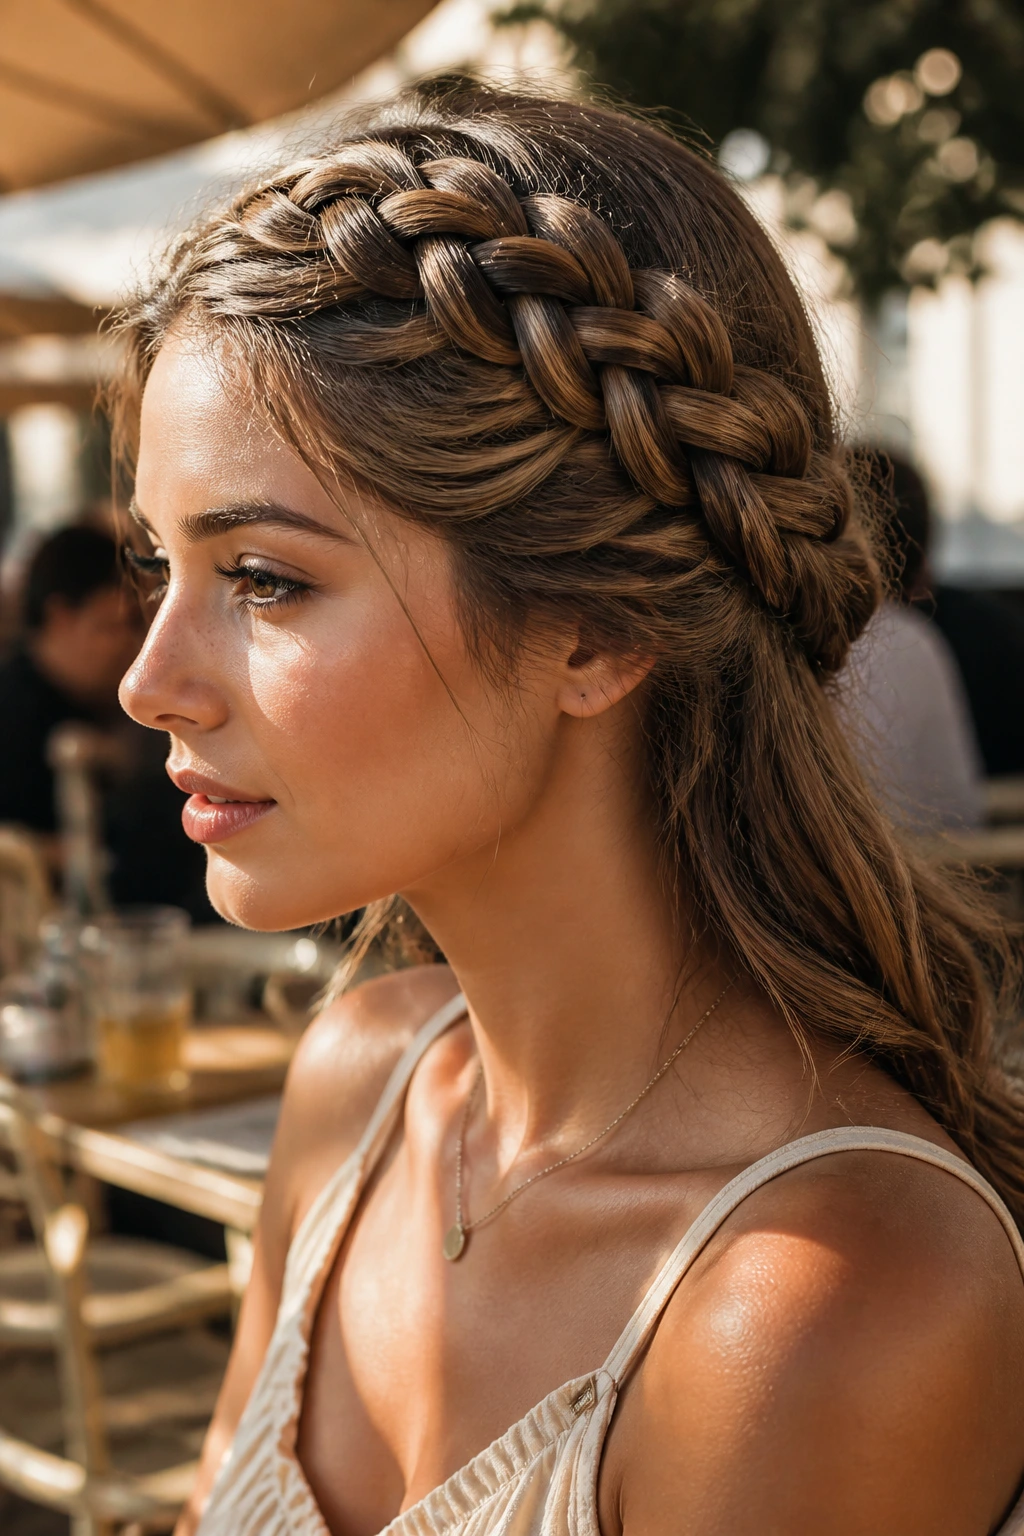
A five-strand braid is for the days when you want the braid pattern to be the whole point. It’s detailed, structured, and very good at making long hair look deliberate in a way that a plain braid sometimes doesn’t.
Why It Works:
The extra strands make the braid feel fuller and more patterned, which is useful on long lengths. It also gives you a flatter finish that can sit neatly down the back or over one shoulder.
Key Ingredients:
- 1 brush
- 1 elastic
- 1 tail comb
- 1 smoothing cream
- 1 clip for sectioning
Quick Steps:
- Divide hair into five equal strands.
- Move the outer strands toward the center in a repeatable pattern.
- Keep your grip steady so the braid doesn’t get uneven.
- Secure the tail and lightly spread the edges if desired.
Equipment for This Style:
- Comb
- Elastic
- Brush
- Clip
How to Wear It:
This style works best when the rest of the outfit stays simple. Let the braid be the focal point and keep the accessories quiet.
Pro Tips for This Style:
- Section carefully at the start; the whole braid depends on it.
- Keep the strands smooth as you cross them to avoid a fuzzy surface.
Variations on This Style:
- Low Five-Strand: Cleaner and more polished.
- Side-Swept Five-Strand: Softer and easier to see.
Common Mistakes to Avoid:
- Don’t expect this one to work fast the first time.
- Don’t let the center strands get swallowed by the outer sections.
34. Braided Ponytail with Wrapped Base
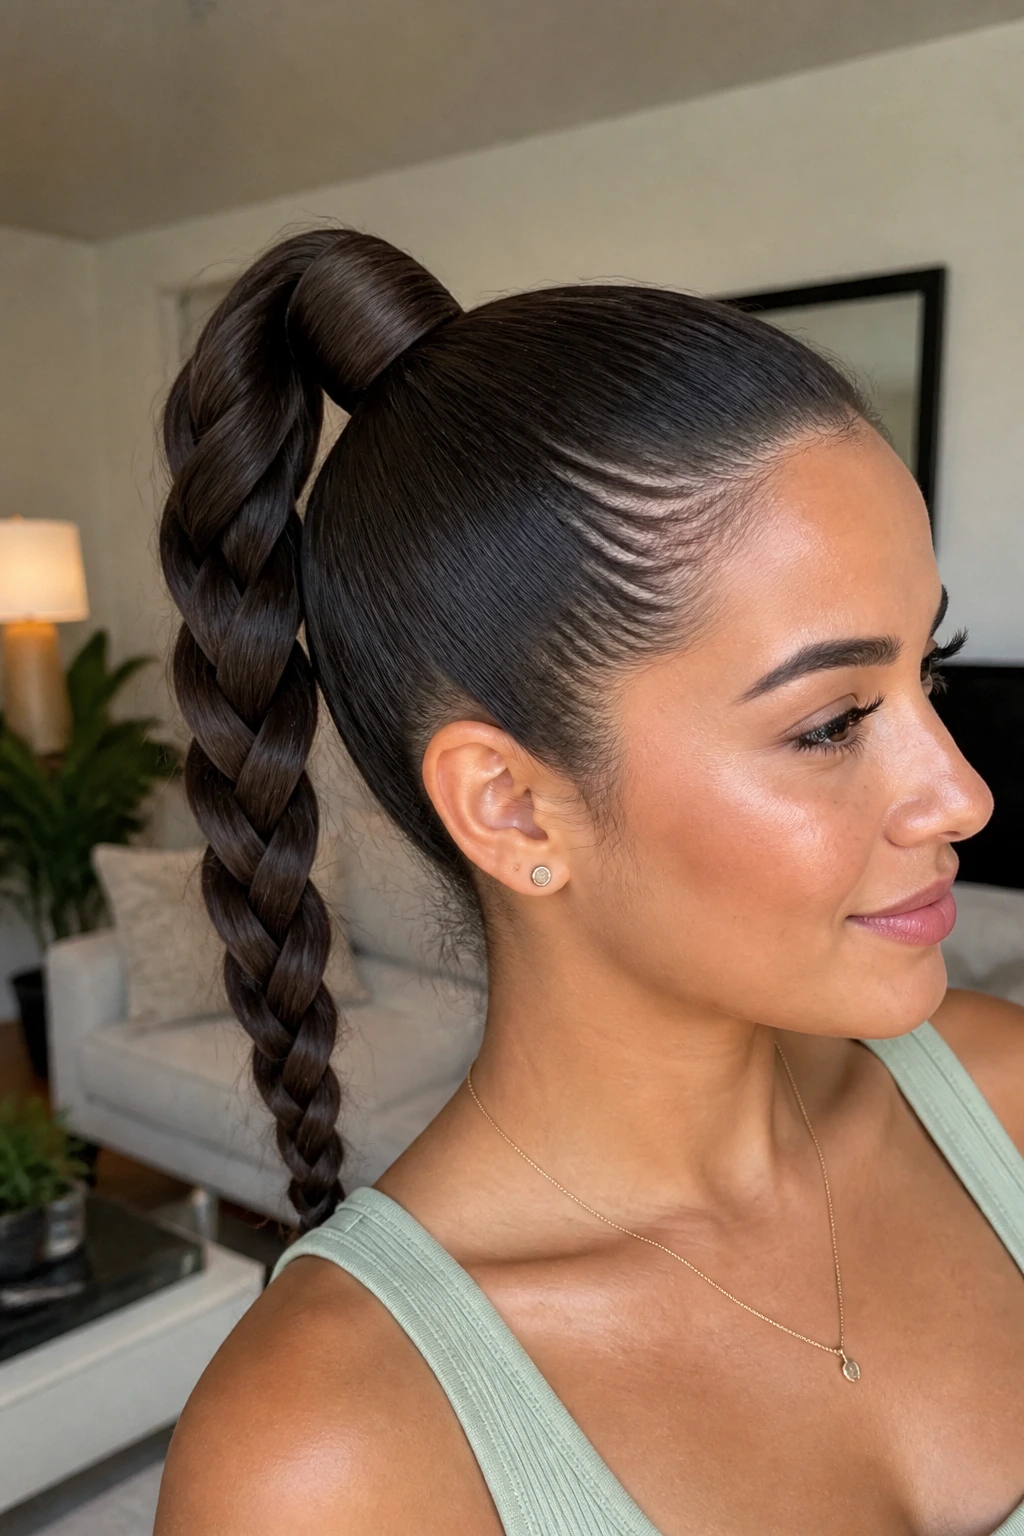
A braided ponytail with a wrapped base gives you the security of a ponytail and the texture of a braid. It’s one of those styles that looks more finished than it really is, which is useful when summer days start getting messy by noon.
Why It Works:
The braid adds detail to the tail, while the wrapped base hides the elastic and smooths the overall shape. Long hair gives the tail enough length to hang well instead of shrinking into a stub.
Key Ingredients:
- 1 elastic for the ponytail
- 1 small elastic for the braid end
- 1 thin strand of hair or ribbon to wrap the base
- 1 brush
- 1 light oil for the tail
Quick Steps:
- Gather hair into a mid or high ponytail.
- Braid the ponytail all the way down.
- Wrap a strand of hair around the pony base and pin it underneath.
- Smooth the tail and secure the end.
Equipment for This Style:
- Brush
- Elastics
- Bobby pins
- Comb
How to Wear It:
This works with casual clothes, workwear, and even dressier tops if the finish is neat. It keeps the outline clean, which helps the braid read polished.
Pro Tips for This Style:
- Wrap the base with a thin section, not a thick chunk.
- If the tail needs more shape, curl just the last few inches.
Variations on This Style:
- Sleek Wrapped Pony: Keep the crown smooth.
- Textured Wrapped Pony: Add a little volume before braiding.
Common Mistakes to Avoid:
- Don’t leave the elastic exposed if you want the style to feel finished.
- Don’t braid the tail so loosely that the ponytail frays.
35. Micro Braid Accent Layers
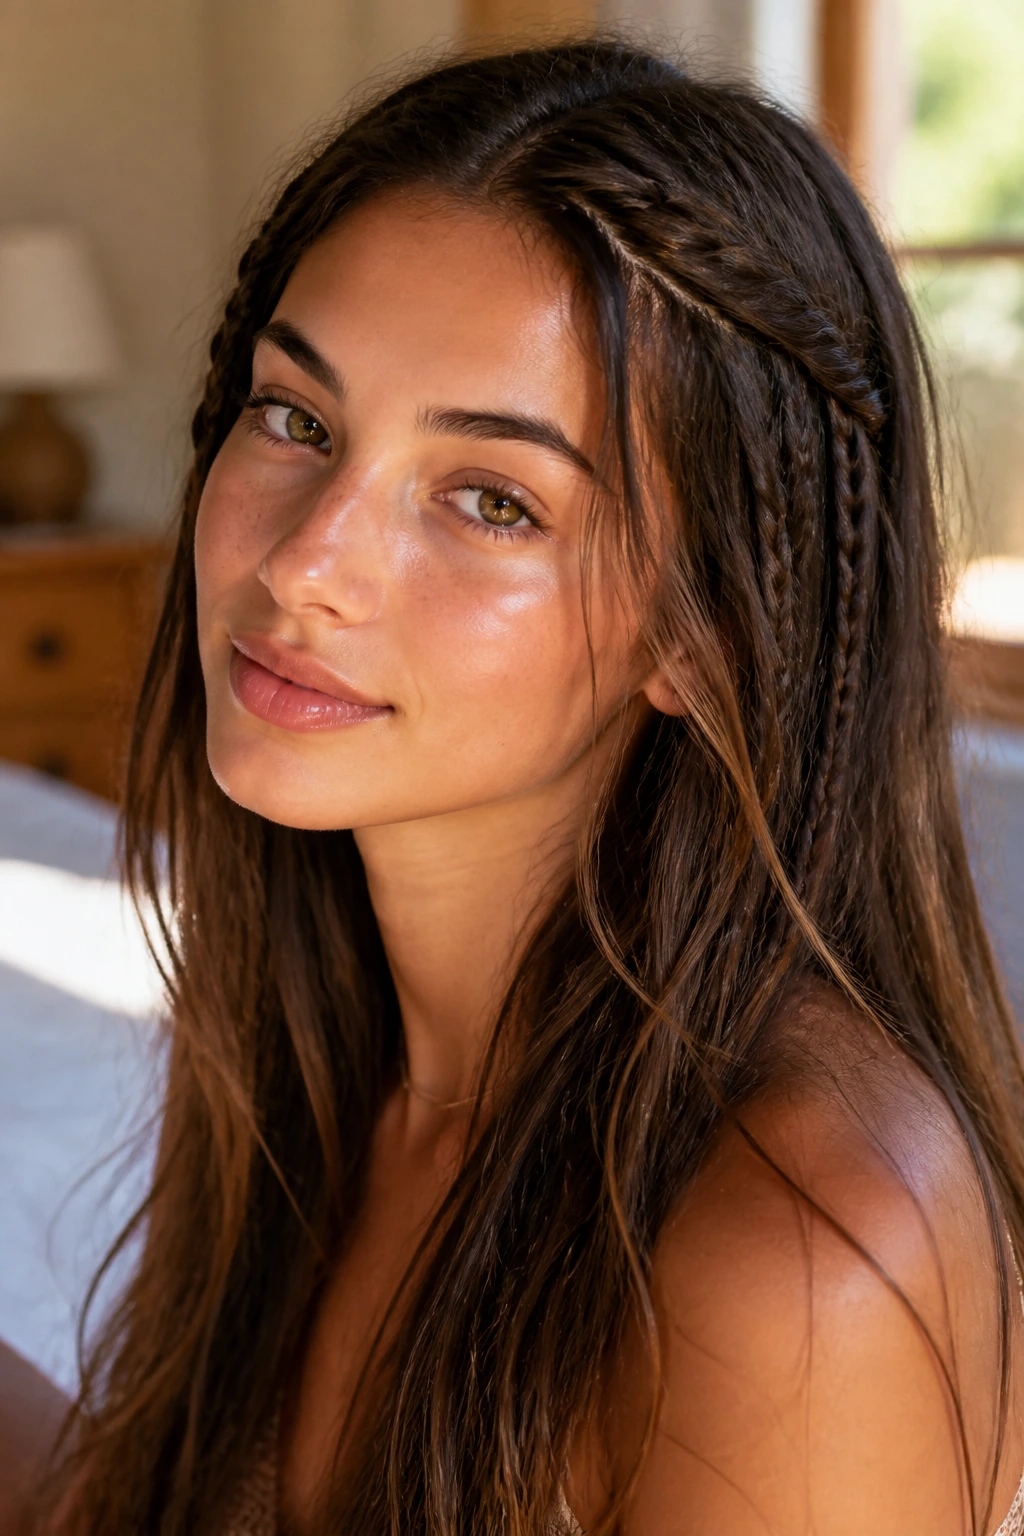
Micro braid accents are tiny braids tucked into loose long hair, and they’re one of the easiest ways to make a simple style feel intentional. In summer, they add interest without trapping all the length in one heavy shape.
Why It Works:
The small size means they sit inside the hair instead of taking over the whole style. That makes them flexible, especially if your long hair is layered and you want to keep the length loose.
Key Ingredients:
- 1 rat-tail comb
- 2 to 6 tiny elastics
- 1 light texturizing spray
- 1 small clip
- 1 smoothing cream
Quick Steps:
- Pick a few tiny sections near the face or crown.
- Braid each section tightly and secure the ends.
- Blend them back into the loose hair.
- Leave the rest of the hair down or wave it lightly.
Equipment for This Style:
- Comb
- Elastics
- Clip
- Brush
How to Wear It:
This style works when you want a low-effort change that still looks styled. It’s good with loose waves, sleek straight hair, or a half-up finish.
Pro Tips for This Style:
- Keep the micro braids narrow or they start to look like the main style.
- Add them after curling if you want the braid contrast to stand out.
Variations on This Style:
- Temple Micro Braids: Keep them near the face.
- Crown Micro Braids: Use them as a subtle top detail.
Common Mistakes to Avoid:
- Don’t make all the accents identical unless you want a very strict pattern.
- Don’t overdo the number of braids; the look gets busy fast.
36. Braided Chignon
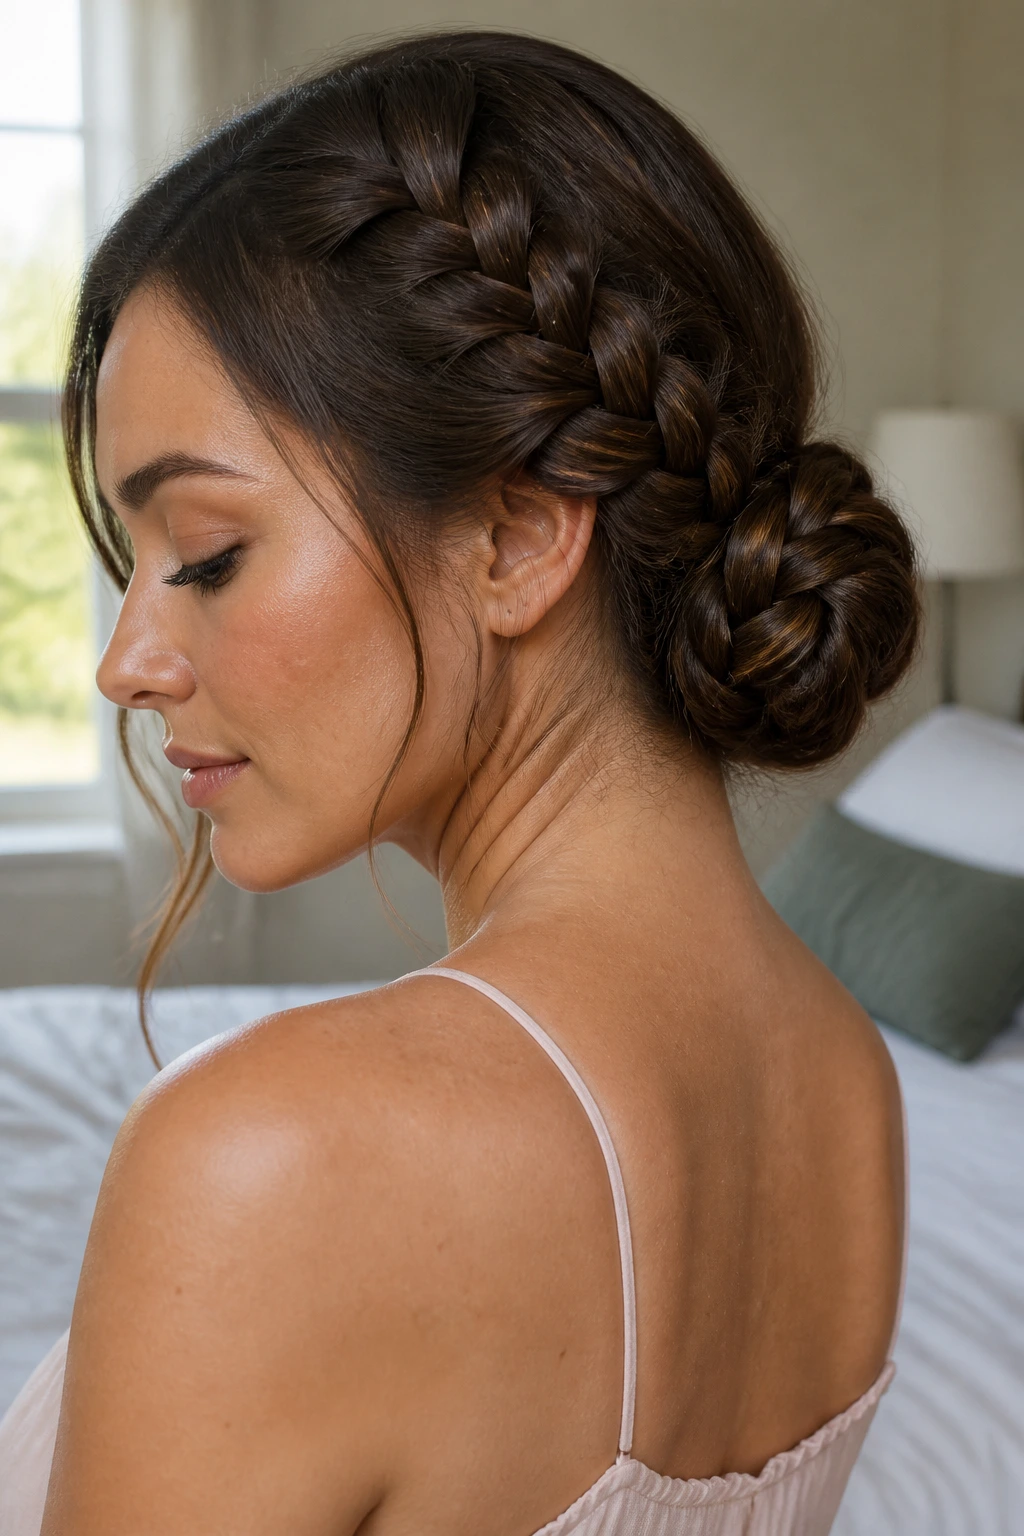
A braided chignon is basically a low, coiled knot with braid texture built in. It feels neat and controlled, which is useful when you need long hair off your skin and out of the way for hours.
Why It Works:
The braid gives the bun more grip and structure than a plain twist. It also keeps the shape close to the nape, so the style stays comfortable even when the day turns warm.
Key Ingredients:
- 1 elastic
- 8 to 12 bobby pins
- 1 smoothing cream
- 1 tail comb
- 1 hair net, optional
Quick Steps:
- Braid the hair into a low braid.
- Coil the braid into a flat knot at the nape.
- Pin around the perimeter until it feels secure.
- Tuck any ends tightly underneath.
Equipment for This Style:
- Pins
- Comb
- Elastic
- Mirror
How to Wear It:
This is a good choice for more polished settings, but it doesn’t feel stiff when you keep the finish a little soft. It works with dresses, shirts with open collars, and minimal accessories.
Pro Tips for This Style:
- Make the braid loose enough to wrap, but not so loose that it collapses.
- A hair net can help if your hair is very thick.
Variations on This Style:
- Soft Chignon: Leave the braid slightly loosened before coiling.
- Braided Side Chignon: Shift the knot off-center for a gentler line.
Common Mistakes to Avoid:
- Don’t pin only the top layer. The underside needs anchoring too.
- Don’t make the coil so tight that the braid texture disappears.
37. Zig-Zag Part Braids
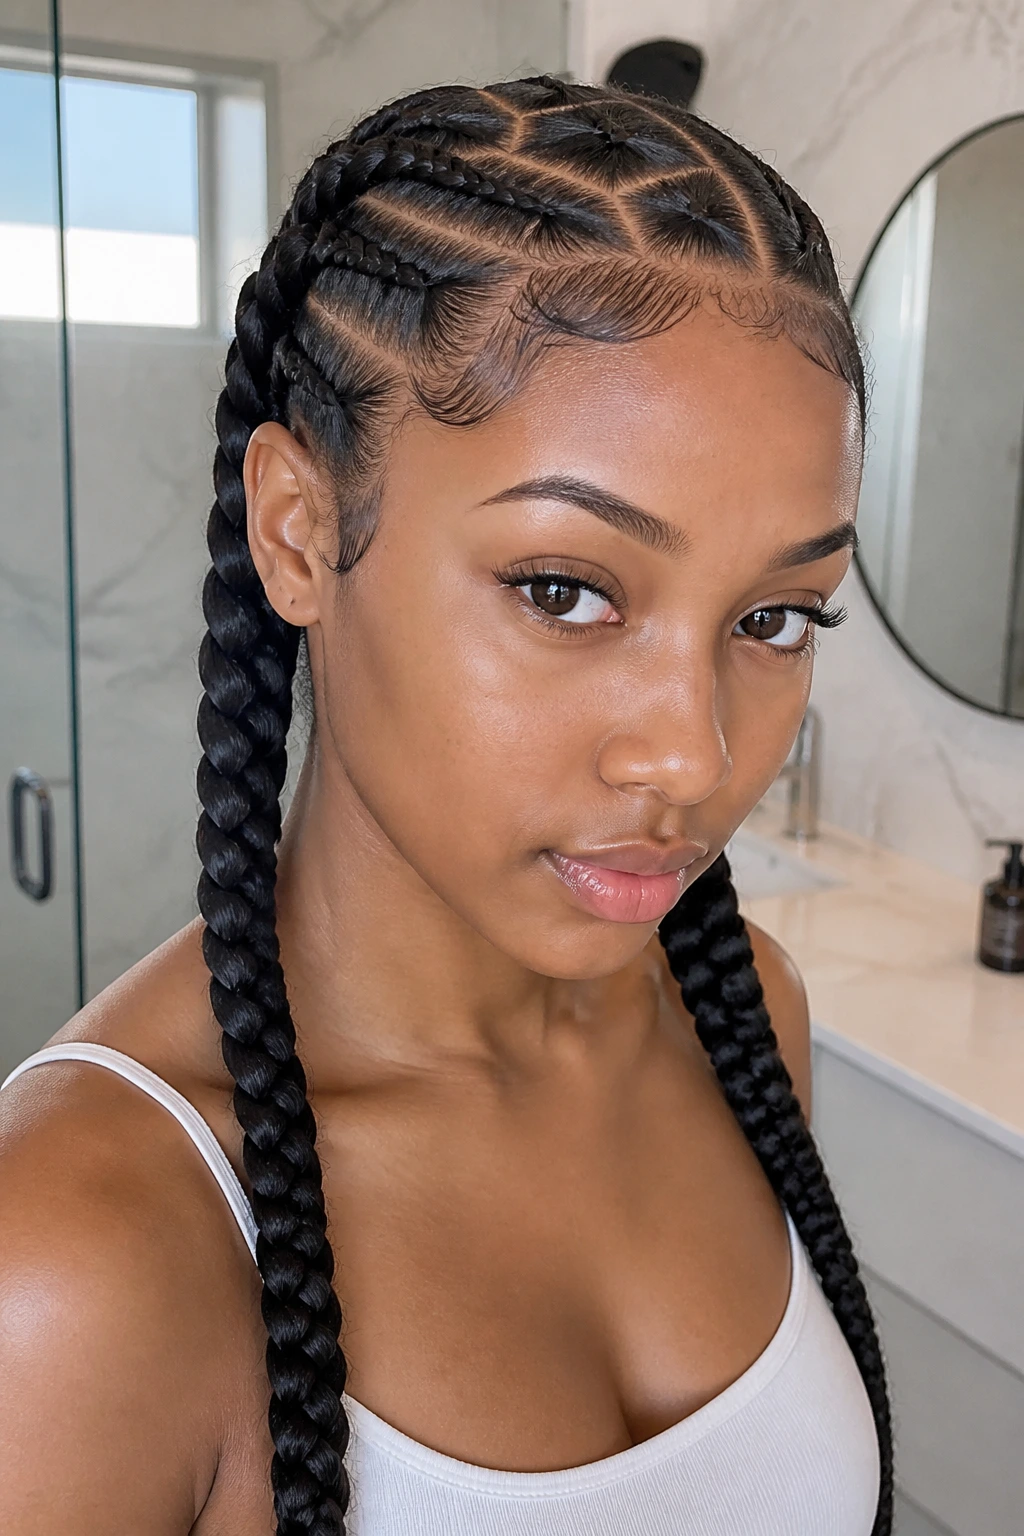
Zig-zag part braids give a simple braid more personality before you even get to the braiding itself. The part line becomes part of the design, which is useful when long hair needs a little lift without a complicated pattern.
Why It Works:
The sharp part pattern breaks up a plain center or side part and makes the braids feel custom. It’s especially useful on sleek textures, where a strong part line can change the whole mood of the style.
Key Ingredients:
- 1 rat-tail comb
- 2 elastics
- 1 light gel
- 1 edge brush
- 2 section clips
Quick Steps:
- Draw a zig-zag part with the tail of the comb.
- Separate the hair into two or more braid sections.
- Braid each section down with even tension.
- Smooth the part and finish the ends.
Equipment for This Style:
- Tail comb
- Gel
- Elastics
- Clips
How to Wear It:
This is a good choice when you want the style to show from the front and back. It works with pigtails, single braids, or half-up sections.
Pro Tips for This Style:
- Keep the zig-zag shallow; deep angles can get messy fast.
- Clip the sections away as you part so the line stays crisp.
Variations on This Style:
- Double Zig-Zag Braids: Use the pattern on both sides.
- Zig-Zag Half-Up: Let the lower hair stay loose.
Common Mistakes to Avoid:
- Don’t rush the parting stage.
- Don’t choose a braid pattern that hides the part entirely.
38. Triangle-Part Feed-In Braids
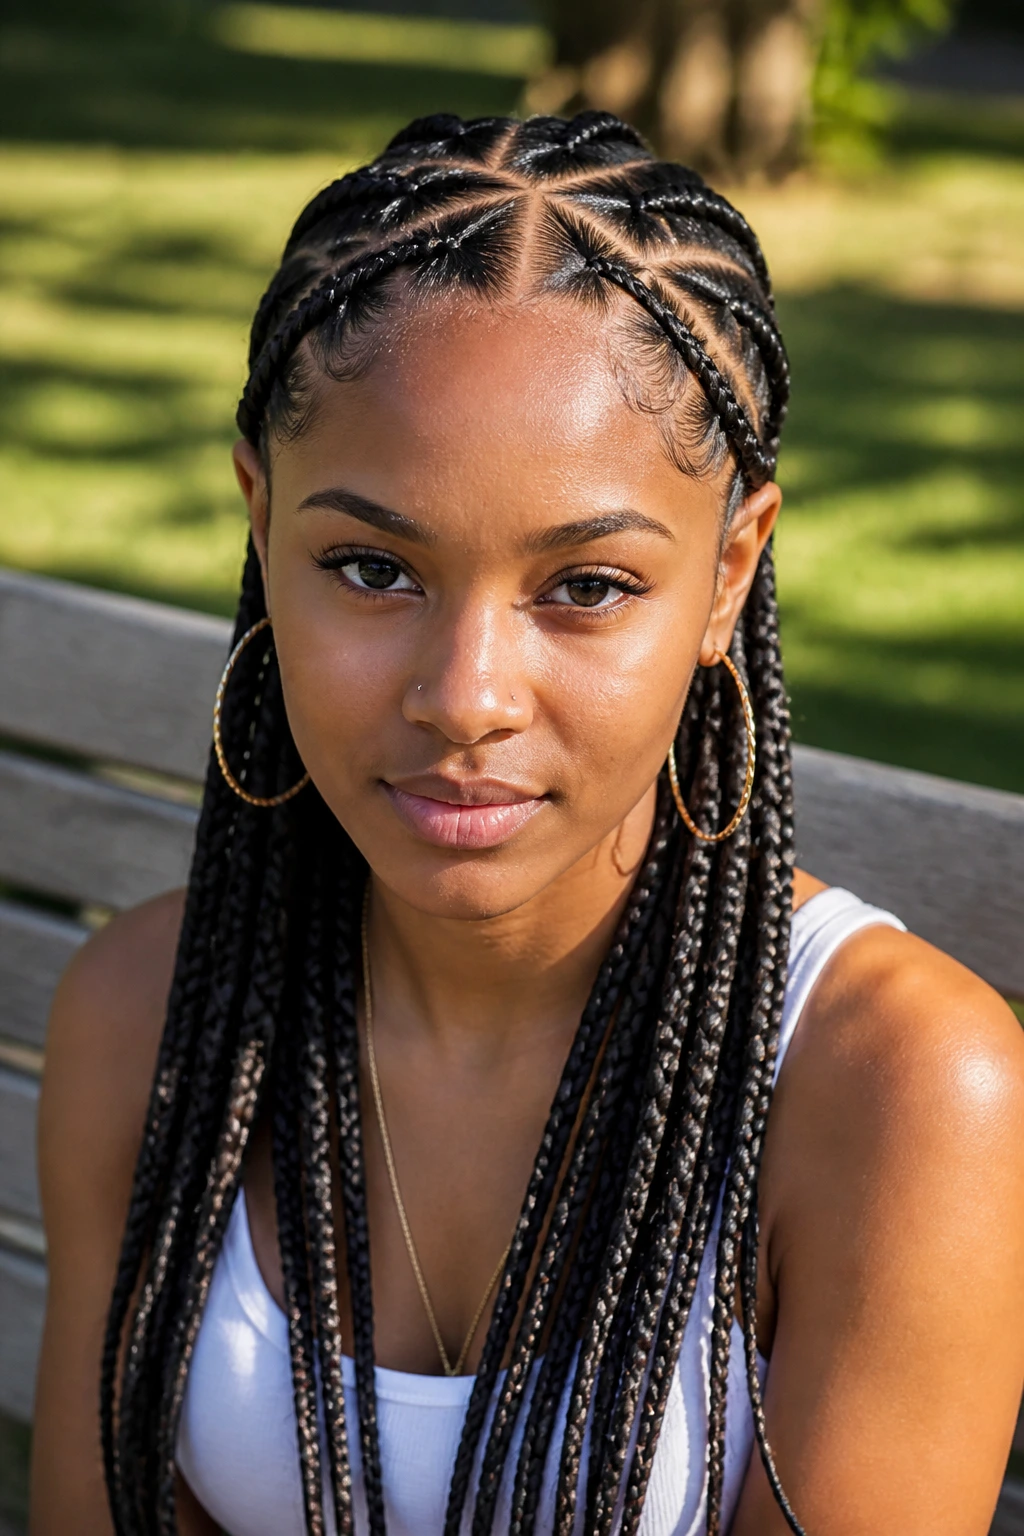
Triangle parts change the look of feed-in braids in a way that feels cleaner and a little more modern. The shapes are sharp, and on long hair, they make the scalp pattern part of the design instead of something to hide.
Why It Works:
Triangle parting gives each braid a more graphic start, which helps the whole style read intentional and neat. The feed-in structure also keeps the root area smoother, so the finished look feels less bulky at the base.
Key Ingredients:
- 1 rat-tail comb
- 1 to 2 packs braiding hair
- 1 strong-hold gel
- 1 edge brush
- 4 to 6 section clips
Quick Steps:
- Create triangle parts instead of squares.
- Apply a thin line of gel to each part.
- Start each braid small, then feed in hair gradually.
- Braid down or into a ponytail, depending on the finish you want.
Equipment for This Style:
- Comb
- Clips
- Gel
- Braiding hair
How to Wear It:
This style is strongest when the part pattern is visible, so keep the front clean and skip heavy accessories that hide the geometry. It works well for long wear and hot days because the structure stays close to the head.
Pro Tips for This Style:
- Make each triangle point consistent so the grid doesn’t wobble.
- If the parts look crowded, widen them a little before braiding.
Variations on This Style:
- Triangle-Part Half-Head Braids: Keep the back loose.
- Triangle Feed-In Ponytail: Pull all the braids into one tail.
Common Mistakes to Avoid:
- Don’t make the triangles uneven; the pattern will show every difference.
- Don’t braid too tightly at the root just to force a crisp part.
Why Braid Hairstyles for Long Hair in Summer Work So Well
Long hair and hot weather don’t always get along. The hair wants to fall, swing, frizz, and cling to the skin, and the weather usually wins unless you give the length some structure.
That’s where braids earn their place. They redistribute weight, control the outline, and keep the ends from turning into a moving blanket. The styles that last best usually do one of three things: hold close to the scalp, split the hair into smaller sections, or tuck the ends away completely. You don’t need all three in every style, but you do need at least one.
Loose vs. Anchored Shapes
A loose side braid gives movement and softness. A tight Dutch braid or cornrow gives control and staying power. Summer usually calls for the second group when the day is long, but I like the first group when I want the hair to breathe a little.
Where the Heat Shows Up First
The back of the neck and the hairline are the trouble spots. Styles that clear those areas — low buns, braided ponytails, crown braids, feed-ins — feel better by a mile when the air is thick. That’s not a luxury. That’s sanity.
Essential Equipment for These Hairstyles
-
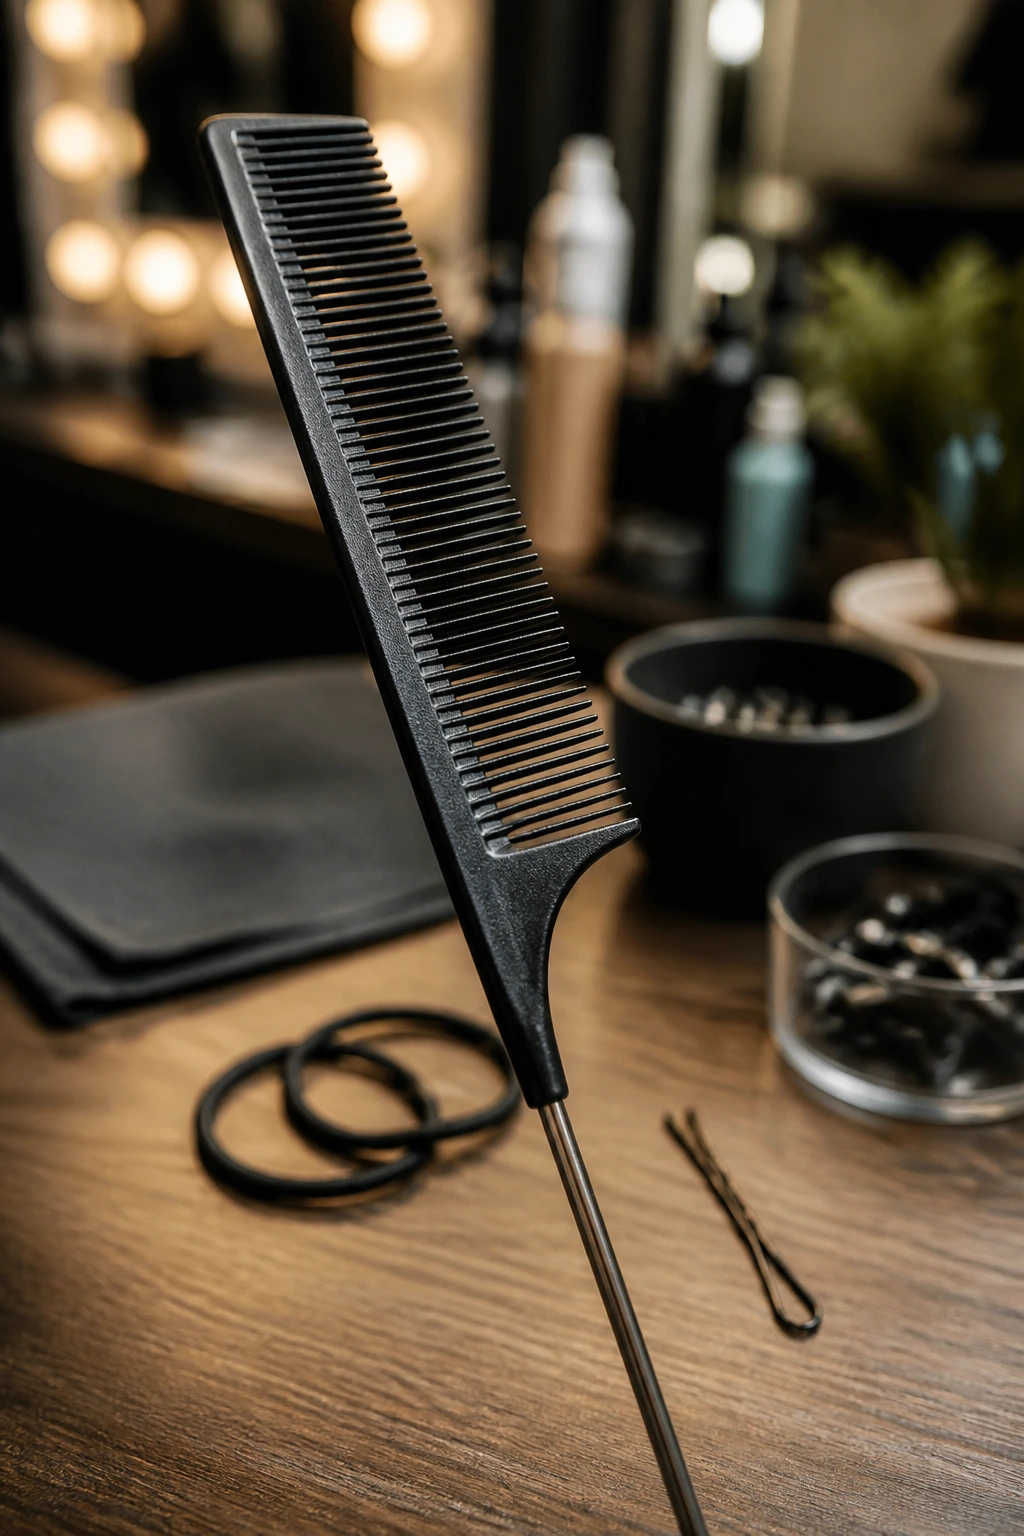
Rat-tail comb: Best for clean parts, sharp sectioning, and those little adjustments you always notice after the braid is already half done.
-
Paddle brush: Useful for smoothing long hair before braiding, especially if the ends tangle when the weather gets humid.
-
Wide-tooth comb: A safer choice for curly or textured hair when you want detangling without flattening the shape.
-
Clear elastics: Small and discreet, which matters when the braid itself should be the main event.
-
Bobby pins: The workhorses for crown braids, buns, and tucked finishes. Buy more than you think you need.
-
Sectioning clips: They keep unused hair out of the way and make parting much less annoying.
-
Light gel or edge control: Good for hairlines and part lines, but use a small amount or the style starts to flake.
-
Mousse or styling foam: Helps long hair hold a braid pattern without feeling crunchy.
-
Texturizing spray or dry shampoo: Useful on silky hair that slips out of braid patterns too fast.
-
Satin scarf or bonnet: The easiest way to keep the style from getting flattened overnight.
Smart Product and Prep Tips for Long Hair in Summer
The difference between a braid that lasts and one that falls apart by afternoon is usually prep, not talent. Start with detangled hair. Not “sort of brushed.” Properly detangled, from ends to roots, so the braid doesn’t snag while you’re working.
For silky hair, a little grip helps more than extra product. A light mist of texturizing spray or a touch of dry shampoo at the roots gives the strands enough tooth to hold the pattern. For curly or coily hair, don’t fight the texture into submission; stretch it a bit first with a blow-dry on low heat or by braiding it loosely the night before, then braid it when it’s cool and dry.
Heavy creams can make the roots slide. A small amount of mousse or light leave-in at the mid-lengths is usually enough. If you want shine, save the oil for the ends only. That’s the part that dries out first, and it’s also the part that needs the least help staying smooth.
Parting matters more than people think. A clean middle part looks sharp with boxer braids and crown styles, while a soft off-center part works better for side braids and waterfall styles. If your part line is crooked, the entire braid reads a little tired.
How to Wear These Braids
Placement:
Low styles sit best with high necks and heat-heavy days. Crown and headband styles keep the front clean. Side braids soften a square neckline fast, which is why they keep showing up in my own shortlist.
Accessories:
Hoops, small studs, silk scarves, braid cuffs, and simple clips all make sense here. Don’t pile on everything at once. If the braid is detailed, the accessory should be quiet. If the braid is plain, the accessory can do a little more work.
Outfit Pairing:
A sleek low braid looks sharp with a tank and linen shirt. Braided buns pair well with dresses that have open shoulders. Braided ponytails and space buns sit comfortably with casual streetwear and sporty pieces.
Best Situations:
Errands, travel, weddings, beach days, workouts, long car rides, and any day you know you’ll be touching your hair less if you put it up first. That’s the real test.
Additional Tips and Finishers
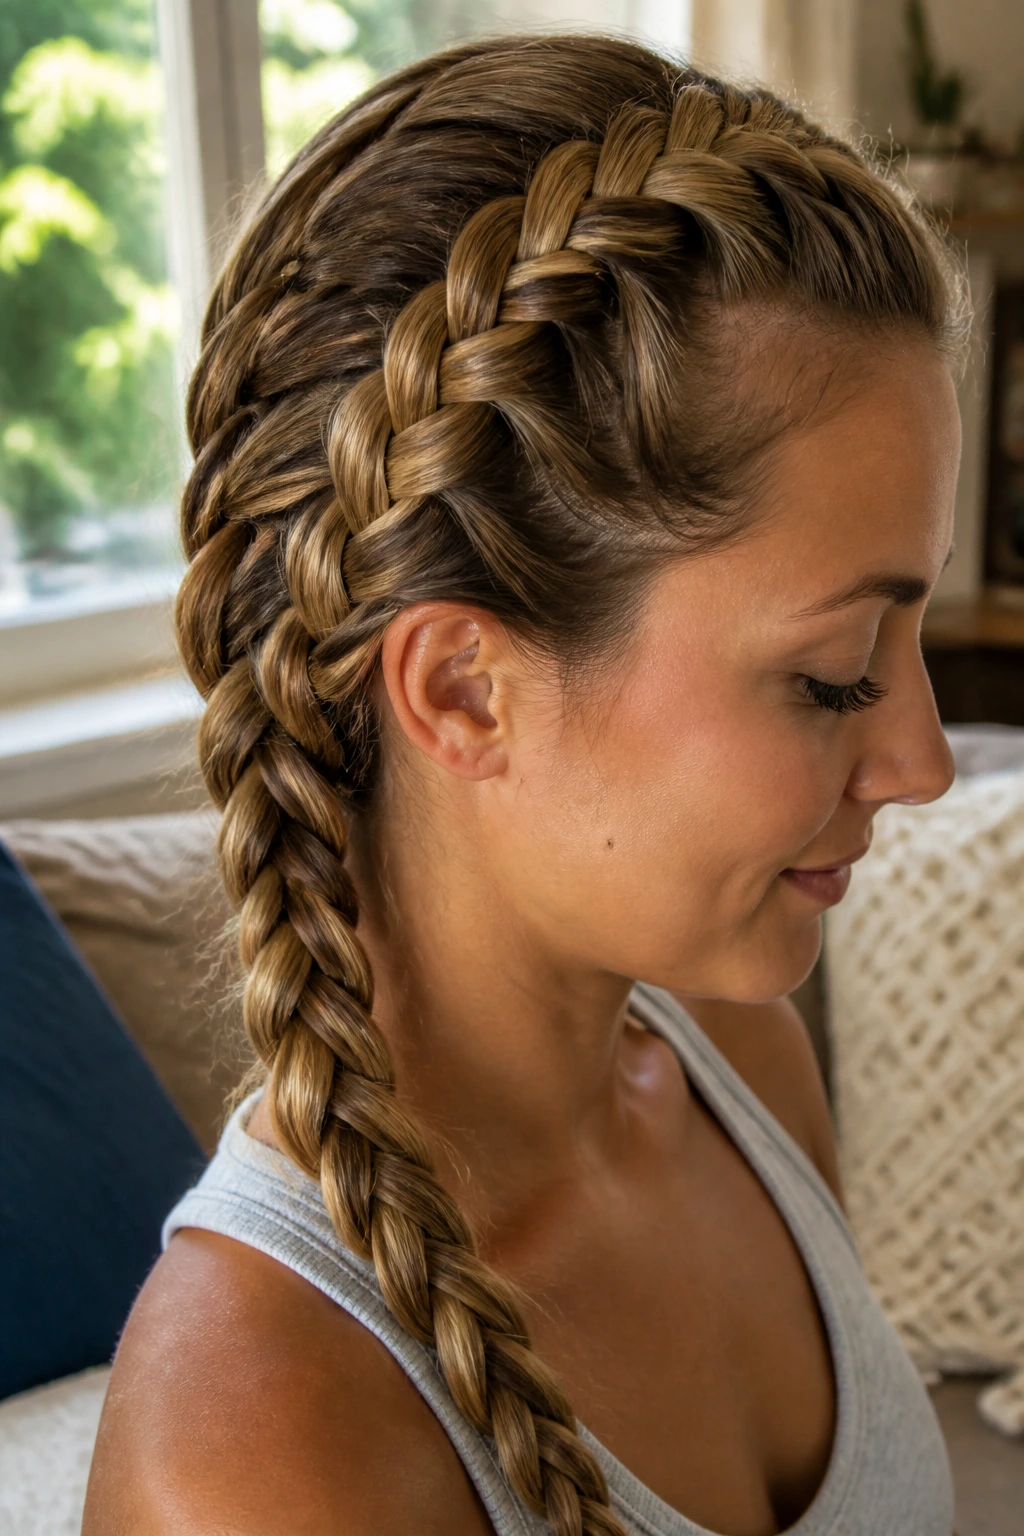
Frizz Control:
Use product in thin layers, not one heavy blob. A pea-sized amount of gel on the part line and a light mist of spray on the braid itself usually does more than coating the whole head. If the ends puff, smooth them with a touch of serum after the braid is finished.
Texture Boost:
If your hair is too soft, braid on second-day hair or rough-dry it a bit first. Long hair with a little grit behaves better, especially in fishtails, pull-through braids, and rope braids.
Accessory Ideas:
Tiny cuffs, ribbon, a narrow scarf, or even a single pinned barrette can change the feel of the style without rebuilding it. I like one accent more than five; too many details make the braid look like a craft project.
Make-It-Yours:
For fine hair, pick tighter braids or a pull-through version for more bulk. For thick hair, go bigger with jumbo braids, buns, or side-swept styles so the weight stays manageable. For curls, leave a little texture on purpose. For straight hair, add grip and let the braid be crisp.
Make-Ahead, Overnight Care, and Refreshing Guidance
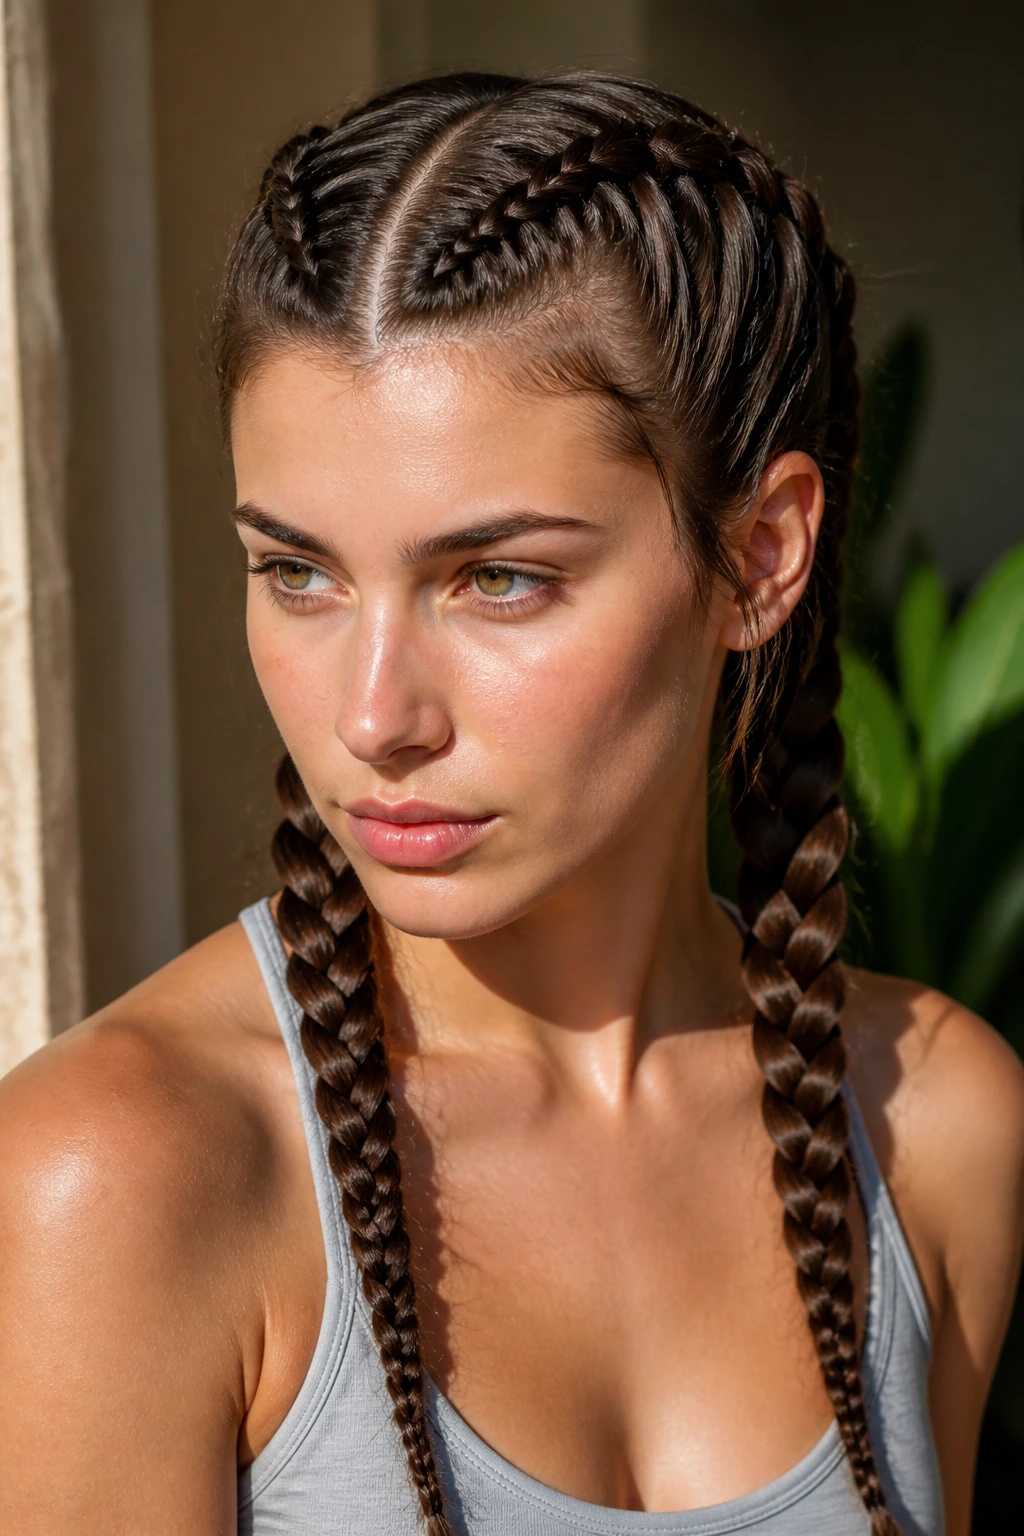
Loose braid styles usually last the day and often the next morning if you sleep with a satin scarf. French braids, Dutch braids, and braided ponytails tend to keep their shape for 1 to 2 days if you don’t thrash them around at night. Protective styles like knotless braids, feed-ins, and cornrows can last much longer, often several weeks, but only if the scalp stays clean and the tension stays comfortable.
If you want a braid to hold overnight, do the boring part first: smooth the flyaways, secure the ends, and protect the hair with satin. Cotton pillowcases dry the braid out and rough up the surface. Satin or silk keeps the edges from fraying as fast.
Refreshing a braid is usually simple. Mist the hairline lightly, smooth it with your fingers or an edge brush, and re-tie any slipping elastics. If the braid itself has loosened, don’t keep piling on product; take it down and redo the top half. That takes less time than trying to rescue a collapsed braid with more gel.
For styles with extensions or tighter rows, give the scalp a break when it starts to feel sore. Tight is not a virtue. Comfortable tension lasts longer and looks better.
Summer-Friendly Variations and Adaptations to Try
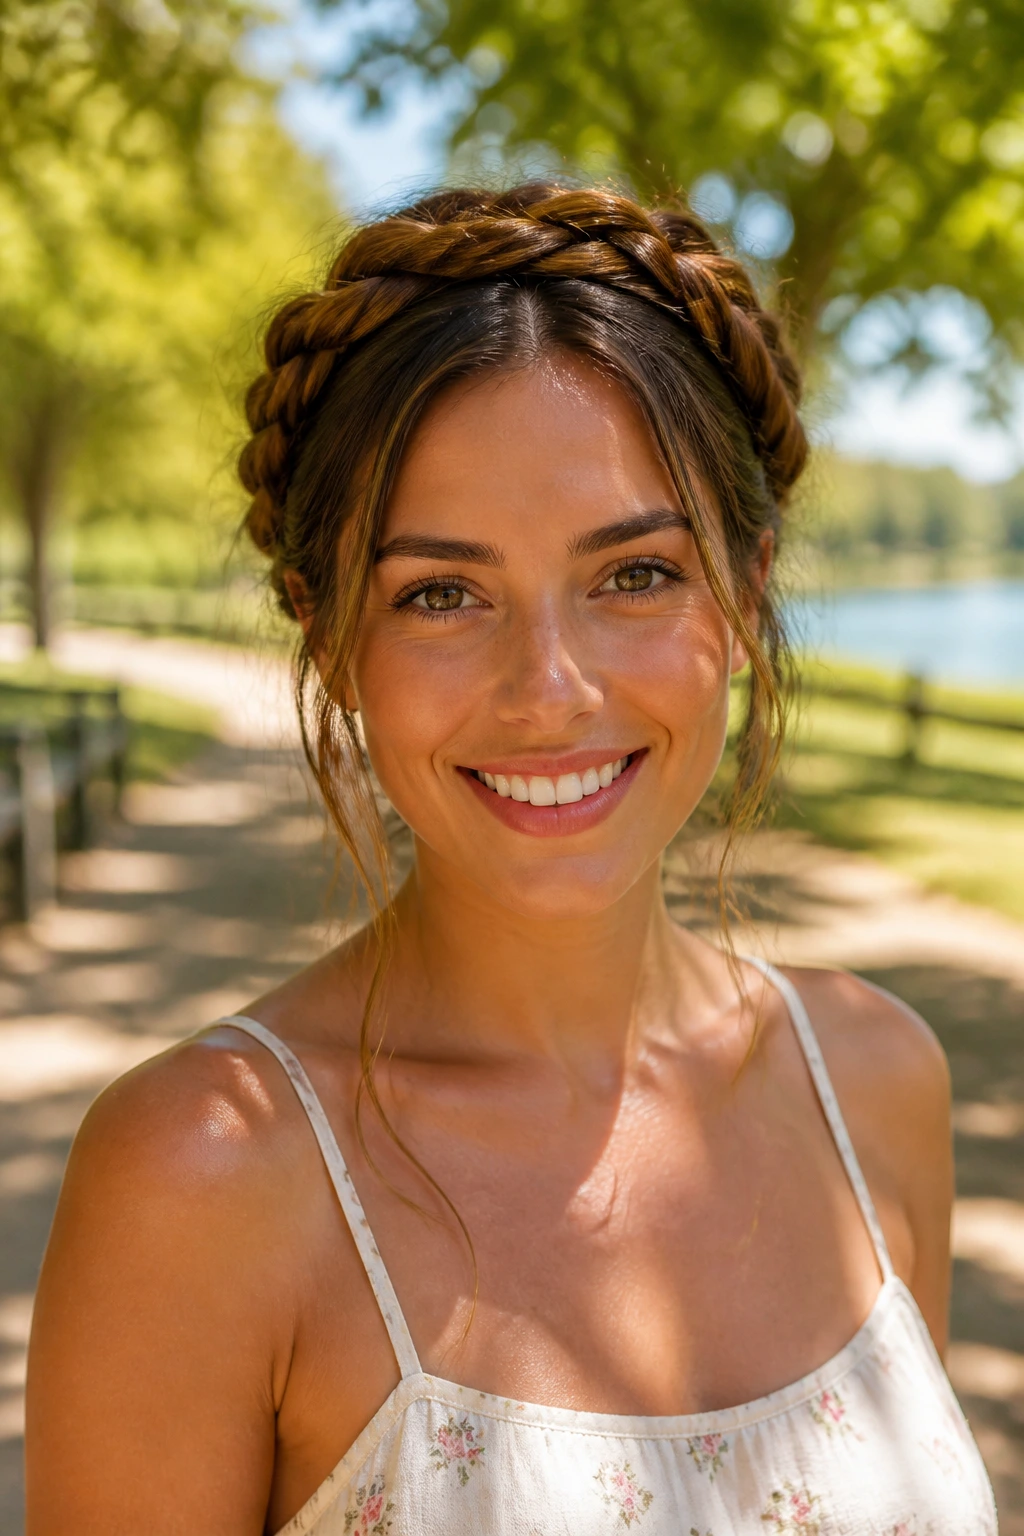
Fine-Hair Lift:
Use smaller sections, texture spray, and pull-through or rope patterns that create more visual bulk. Fine hair can look flat in a loose braid, so build shape with section size rather than heavy cream.
Thick-Hair Control:
Choose crown braids, low buns, double braids, or jumbo patterns so the weight is spread out. Thick long hair usually behaves better when it isn’t all hanging from one anchor point.
Curly-Hair Soft Finish:
Leave the ends curly, braid a little looser, and don’t smooth the whole head flat. The texture reads better when the braid works with it instead of against it.
Heat-Defense Version:
Pick braided buns, boxer braids, cornrows, or crown styles when you know you’ll be outside for hours. These keep the neck clear and cut down on the constant hair-flipping that makes hot days worse.
Accessory Swap:
Swap elastics for ribbon, scarf, or braid cuffs when you want the style to feel less everyday. One accessory is enough. More than that and the braid stops breathing.
Common Mistakes to Avoid
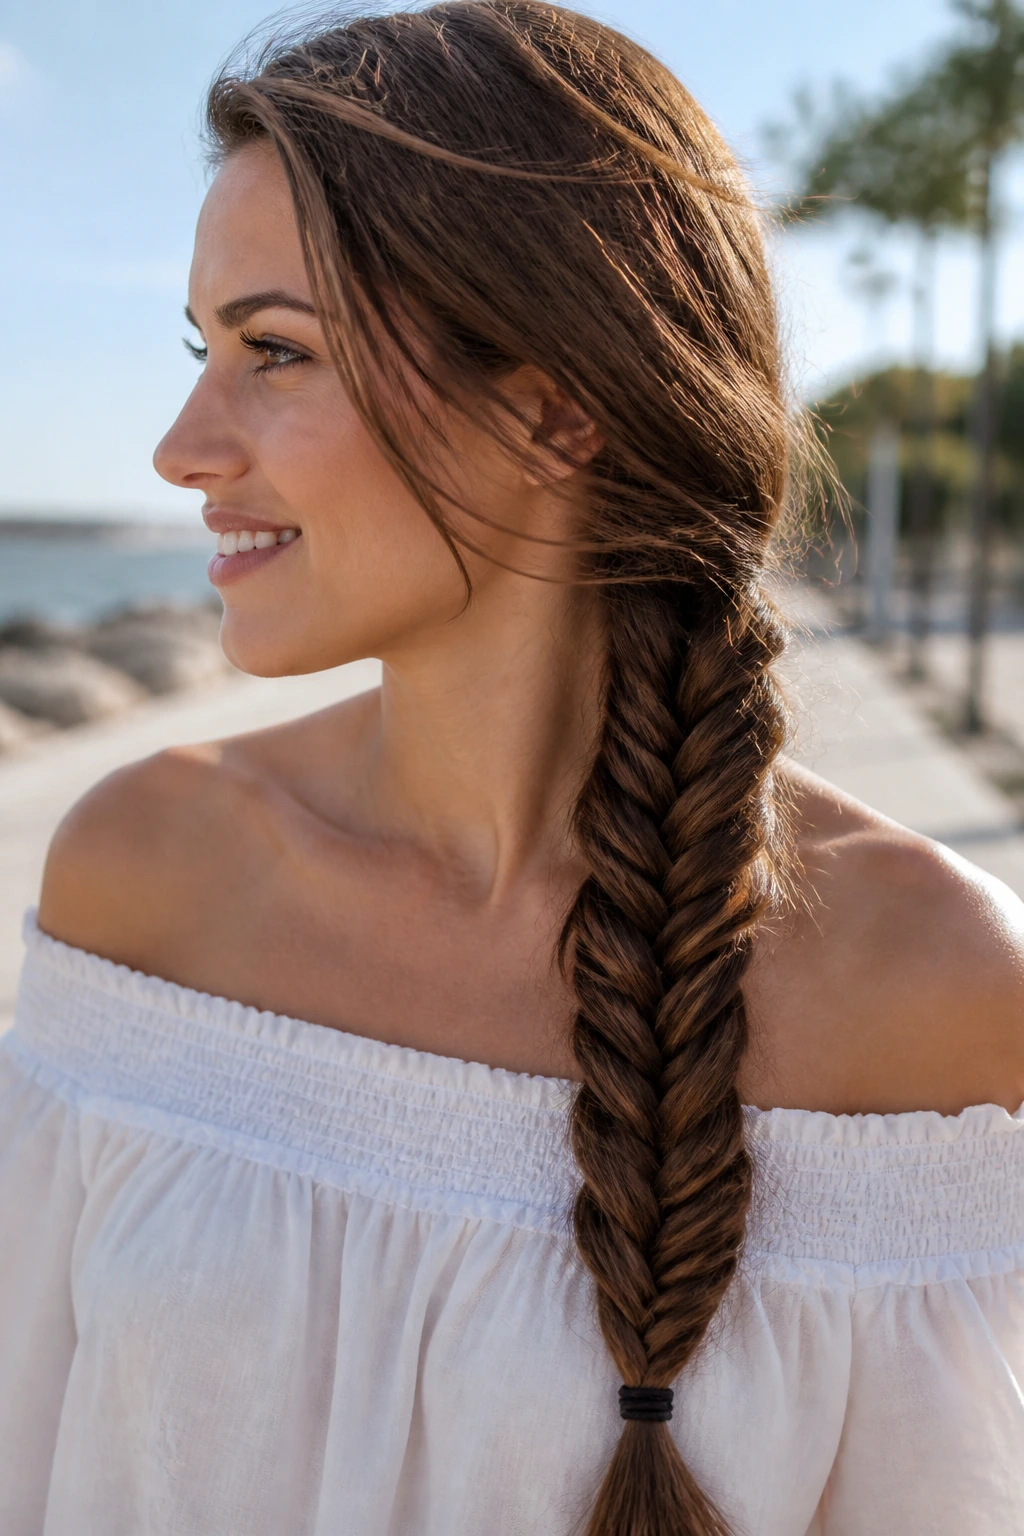
Starting on tangled hair:
If the hair snags while you braid, the whole style will look rougher than it should. Detangle first, from ends to roots, and use a little slip if the hair is dry.
Using too much product at the roots:
Heavy cream or oil near the scalp makes parts slide and braids loosen early. Keep most of the moisture on the mid-lengths and ends.
Pulling too tight at the hairline:
The braid may look neat for ten minutes, then your scalp starts complaining. A firm braid is fine. A painful one is not worth it.
Choosing a braid that fights your texture:
Very silky hair can’t always support a loose fishtail without help. Very thick hair can swallow a tiny accent braid. Match the braid to the hair, not the photo.
Skipping overnight protection:
Even the prettiest braid loses its shape if it sleeps bare on cotton. Satin or silk keeps the finish intact much longer.
Frequently Asked Questions About Braid Hairstyles for Long Hair in Summer
Which braid holds best in humid weather?
Dutch braids, boxer braids, cornrows, and braided buns usually hold up well because they stay close to the scalp and control movement. Loose styles can still work, but they need more product and a bit of texture to stay put.
Can I braid long hair if it’s layered?
Yes, but layers need a little help. Use a light mousse or texturizing spray, and keep the braid snug enough that the shorter pieces stay tucked in. French and Dutch braids usually handle layers better than very loose patterns.
How do I keep braids from looking flat?
Pancake the braid gently by pulling the outer loops a little, not yanking the whole thing apart. You can also start on hair with a bit of texture so the braid has more body from the beginning.
Are tight braids bad for the hairline?
Tight, repeated tension around the edges can be rough on the hairline over time. If the style hurts, that’s your cue to loosen it. A secure braid should feel stable, not like it’s holding your scalp hostage.
What braid is easiest for beginners with long hair?
A low three-strand braid, a rope braid, or a braided ponytail is the easiest place to start. They teach you control without asking your hands to manage four or five moving sections at once.
Can I wear these braids to swim or at the beach?
Yes, and the tighter styles usually survive better. If you swim, rinse the hair afterward, use a little conditioner on the ends, and let the braid dry fully so salt or chlorine doesn’t sit in the hair.
How long do protective braids like knotless or feed-in styles last?
They can last several weeks when installed well and cared for properly. The key is scalp comfort, clean parts, and nighttime protection. If the roots get sore or fuzzy fast, the style needs attention sooner.
What if my braid keeps slipping apart?
That usually means the hair is too smooth or too freshly washed. Add texture spray, start on drier hair, or choose a tighter braid pattern with more anchor points at the root.
Braids That Keep Their Shape
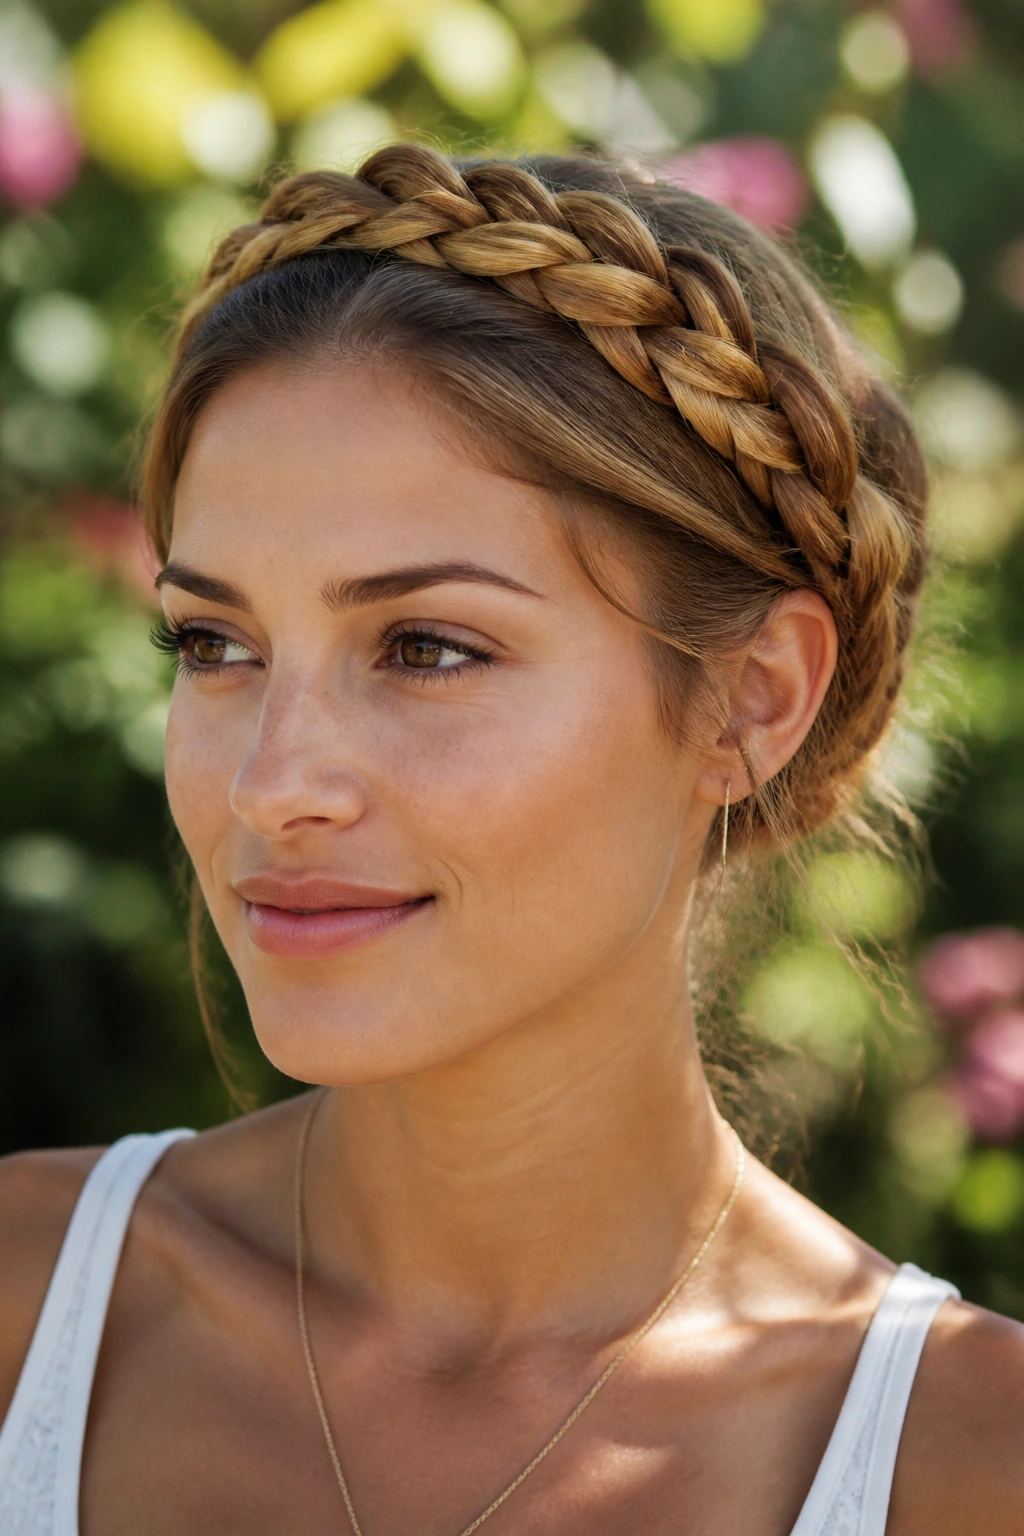
The best braid styles for long hair in summer do one simple thing well: they keep the hair where you want it without turning your head into a project. Some days call for a clean low braid. Other days want a crown, a ponytail, or a braid that looks more decorative than practical. The good ones handle both jobs.
What I like most about this list is that it gives you range. You do not have to pick one “best” braid and live there forever. Match the braid to the heat, the texture, and how much time you actually have in the mirror. That’s the part people usually get backward.
Start with one style that fits your hair on an ordinary day, then steal the next one when you want a little more shape. Summer hair behaves better when it has structure, and braids give you that without asking for much in return.
