



Coiling styles can make natural curly hair look controlled without making it look stiff, and that’s why they stay in rotation for so many Black hair routines. Finger coils, comb coils, rod sets, puff shapes — they all lean on the same trick: give the curl pattern a path to follow instead of asking it to guess. When the hair is damp, sectioned cleanly, and finished with the right hold, the shape can hang on for days.
On Black hair, especially 3C through 4C textures, that matters even more because shrinkage is not a problem to fix. It’s part of the silhouette. A good coil set can turn shrinkage into height, width, or a neat frame around the face, and that’s a more interesting result than flattening everything under heat.
Thirty-two coiling styles might sound like a lot, but the category is smaller than it looks. Change the section size, part placement, or finish — soft, crisp, puffed, pinned, shiny — and the whole mood shifts. The hair can read sharp on Monday and loose on Saturday without leaving the coil family.
Why These Styles Earn a Spot in Your Rotation
- Shape Control: Coils let you decide whether the hair sits tight to the head, opens into a puff, or falls in a clean bob.
- Low Heat: Every style here skips hot tools, which keeps the curl pattern intact between wash days.
- Flexible Length: Tiny coils, rod sets, and pinned updos all work on short TWA hair, shoulder-length curls, and longer shrinkage-prone hair.
- Fast Refresh: A water spritz, a dab of gel, and a satin scarf can wake up most of these looks without a full wash.
- Soft Edges: These styles can look neat or fluffy, and the line between the two is often only section size and how much you separate.
Why Coiling Works So Well on Natural Curly Hair
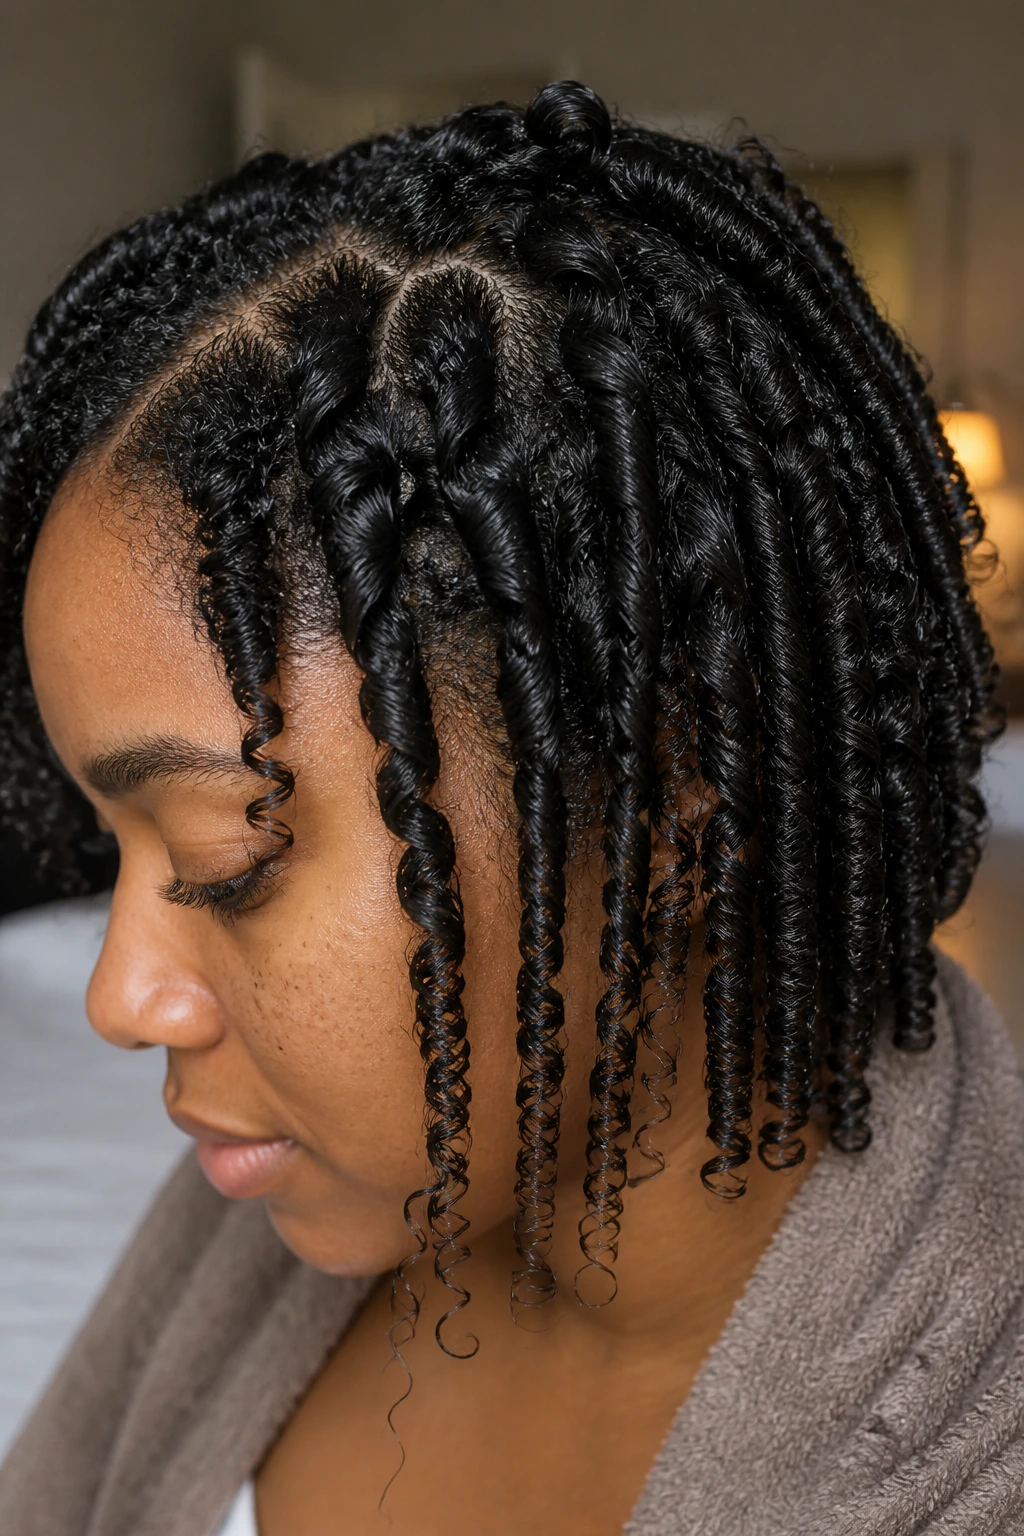
Coiling gives each strand a lane. That sounds simple, and it is. Natural curls behave better when they are grouped, hydrated, and guided while wet or damp, because the strand can dry in the shape you set instead of drying into whatever mood the room was in.
I like coils more than a generic wash-and-go when I want the style to hold its shape past the first day. They’re a little more deliberate. The payoff is cleaner definition at the roots, better curl memory, and less of that vague “my hair did something” look that happens when sections are too large or the product load is all wrong.
Section size changes everything. Small sections give you a tighter spiral, more definition, and more dry time. Larger sections move faster and leave more space between the coils, which means more volume and a softer finish. There’s no magic number that fits every head, but if your hair shrinks hard, smaller sections usually read cleaner. If your density is lighter, bigger coils keep the style from looking overworked.
The other piece is product balance. Coils like moisture, but they do not love being drowned in butter. A water-based leave-in gives slip, a cream can help if your strands are coarse or rough at the ends, and a gel or mousse adds the memory that keeps the spiral from collapsing. Too much oil underneath and the hair slides apart before it sets. Too much hold with no moisture and the finish can feel brittle. The sweet spot sits in the middle.
1. Classic Finger Coils
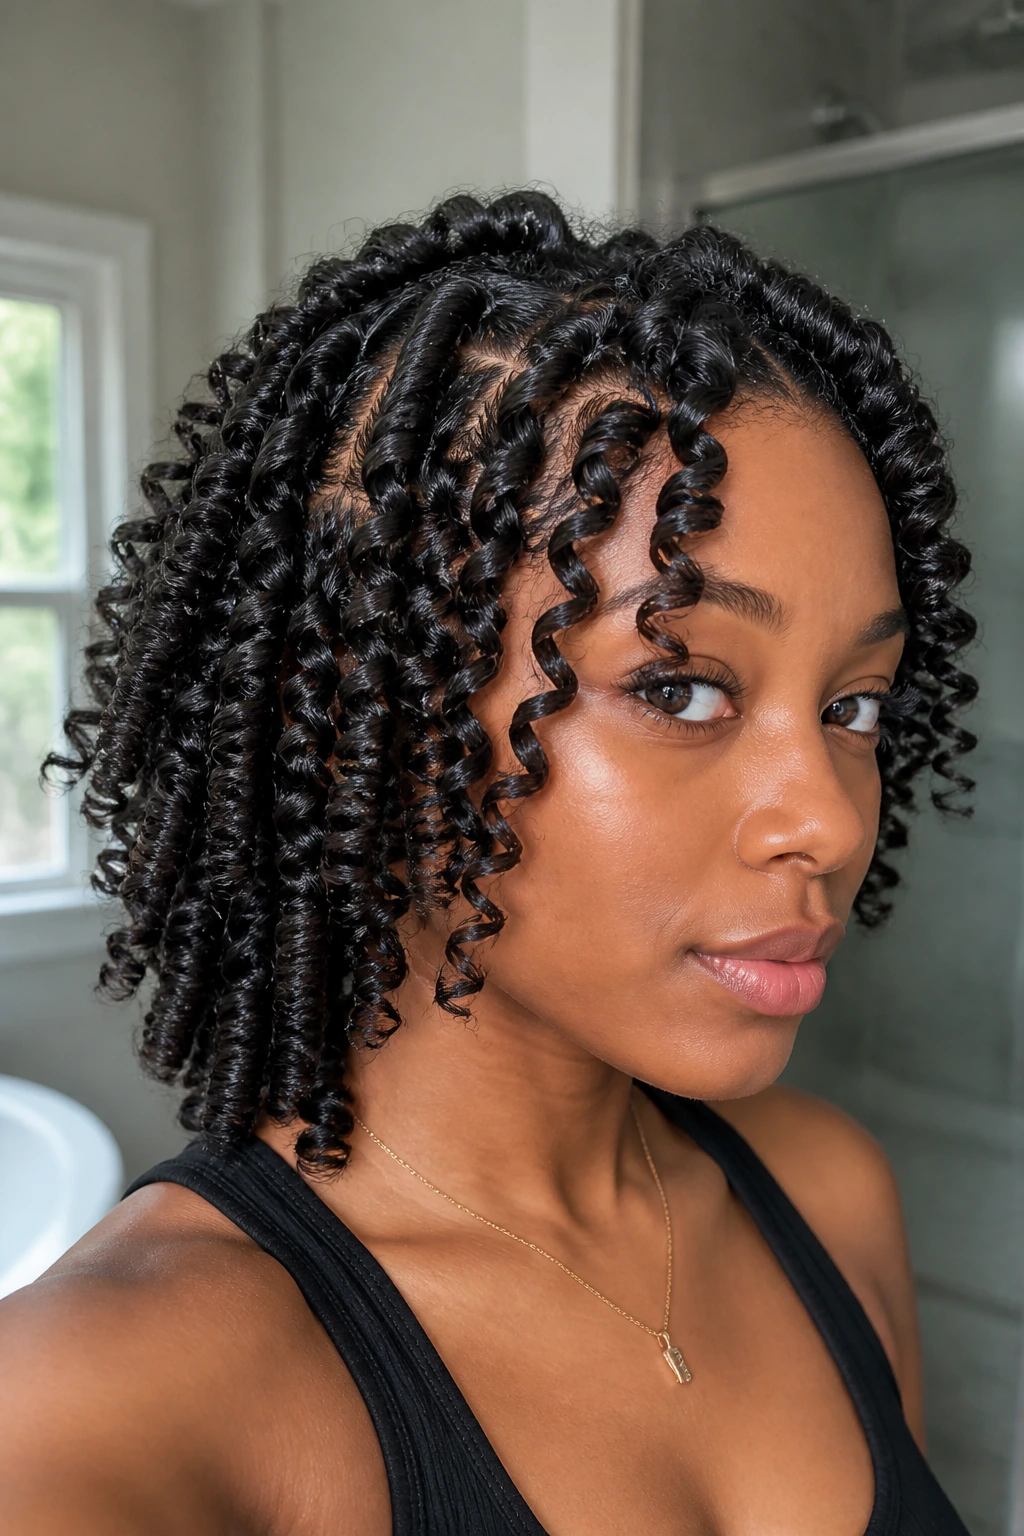
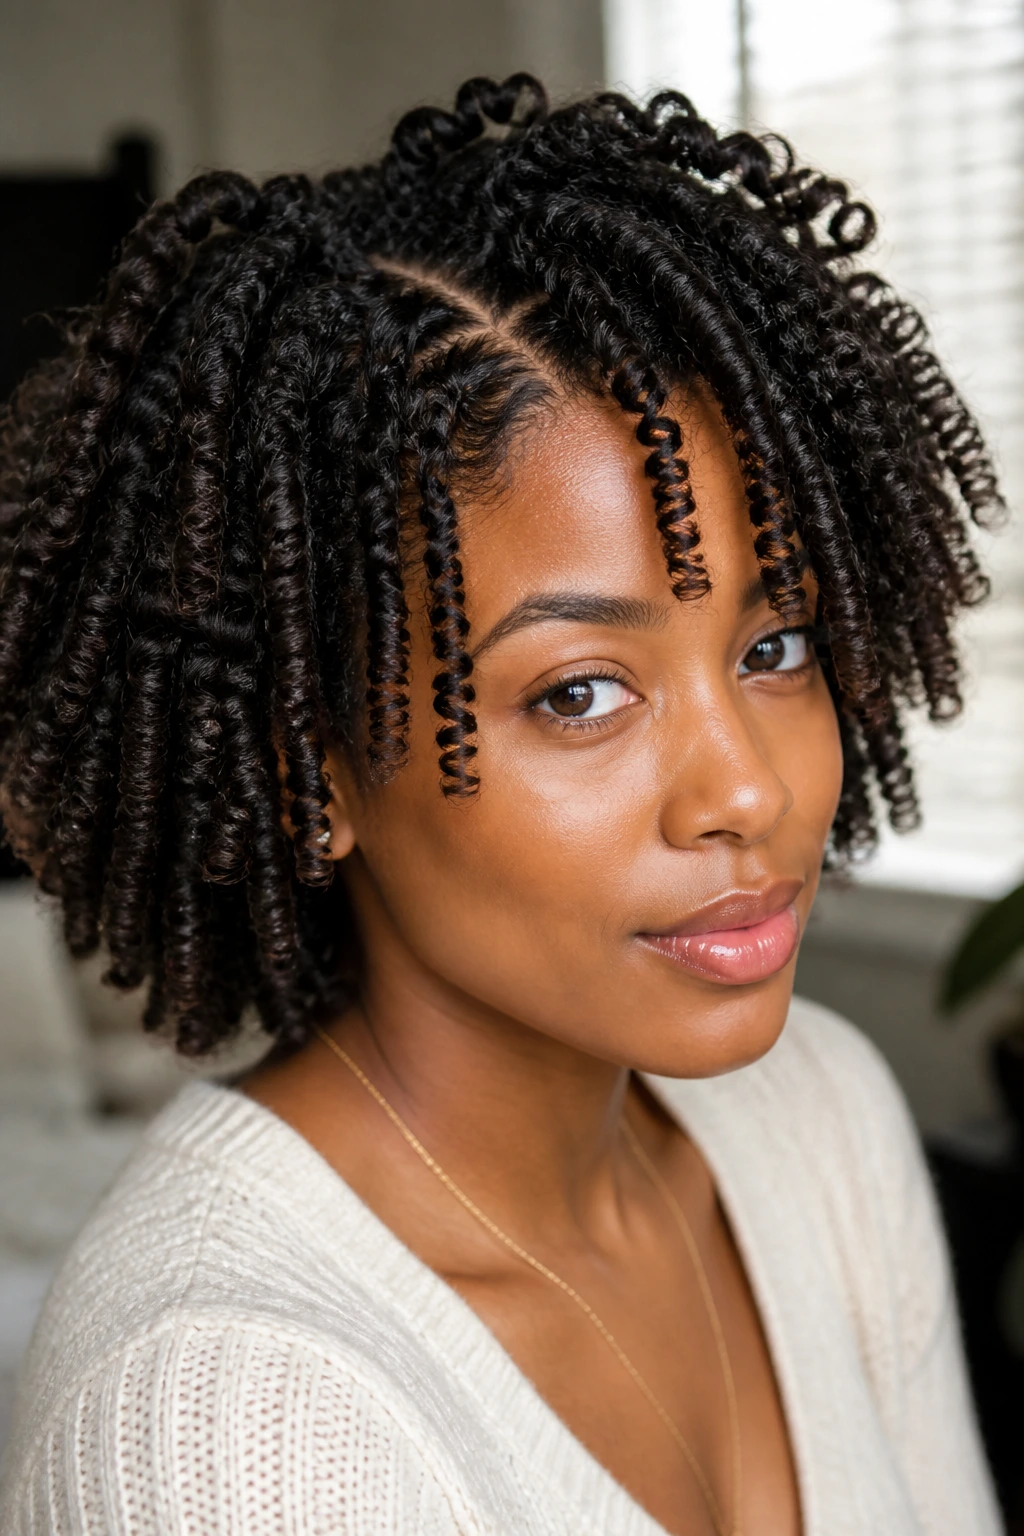
Finger coils are the reference point for the whole category. They give natural curly hair a neat spiral from root to tip, with enough softness that the style still moves when you turn your head. I reach for this look when I want the hair to look deliberate without feeling sealed in place.
What makes them work
- Use sections about 1/2 inch wide for tighter definition.
- Start on damp, not dripping hair so the product can grip.
- A leave-in plus gel gives more hold than cream alone.
- Let the coils dry fully before separating anything.
A tiny detail matters here: if the end keeps slipping free, add a little gel to the last quarter inch instead of loading the whole strand. That keeps the coil neat without making the roots sticky.
2. Precision Comb Coils on a Short TWA
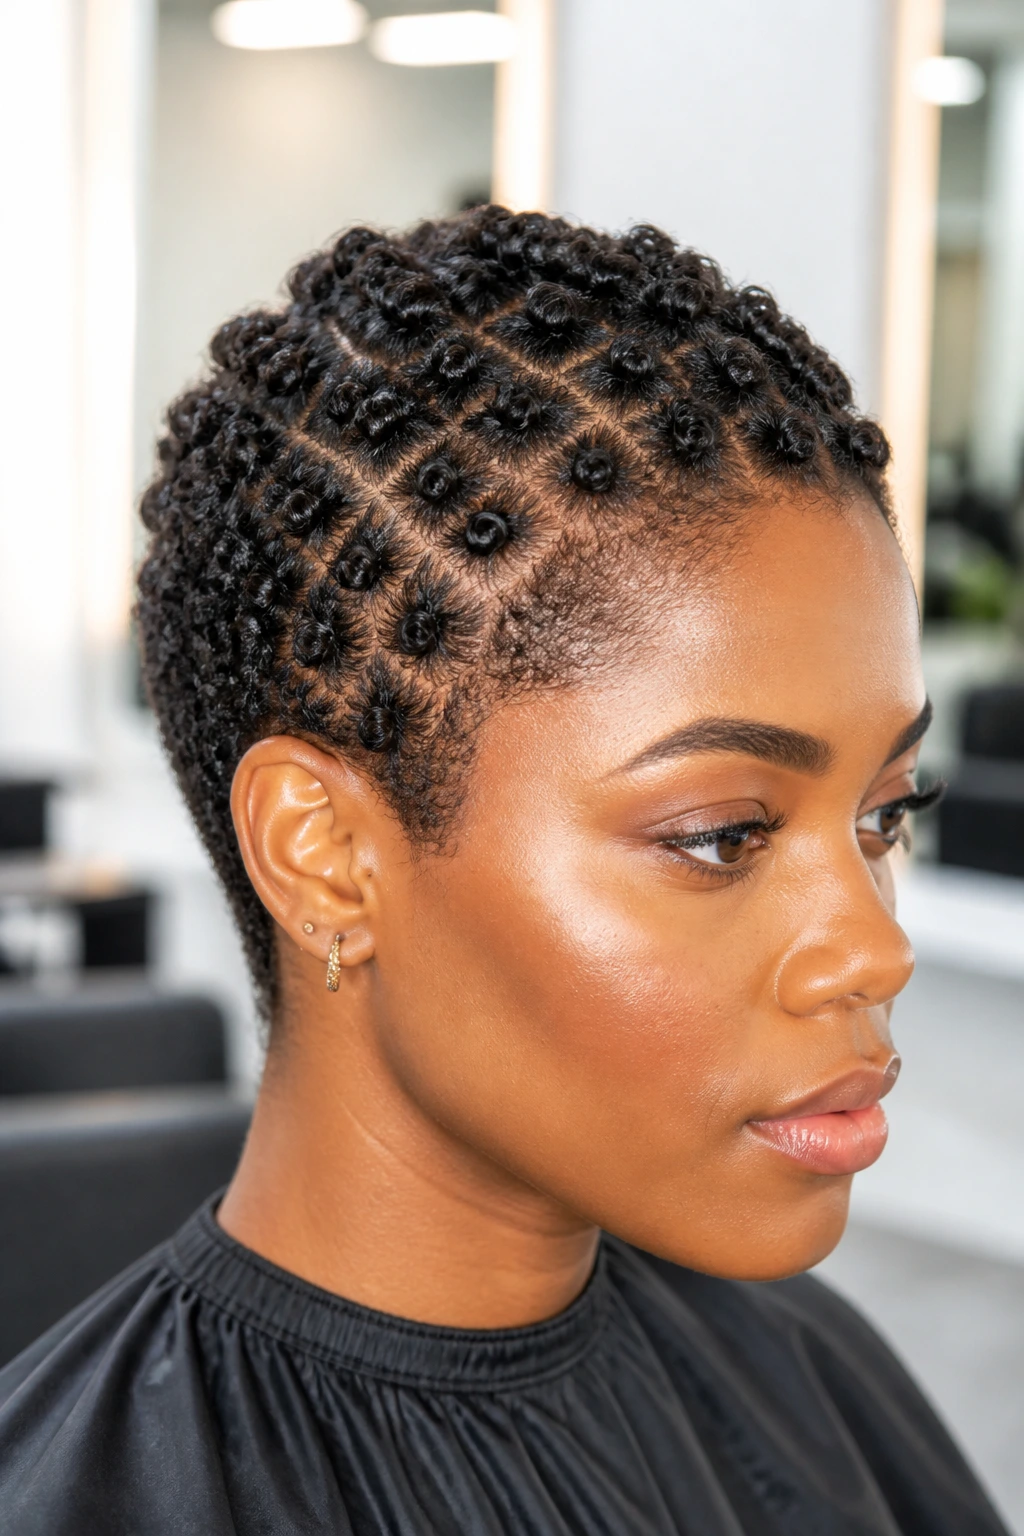
Comb coils on a short TWA look crisp in a way finger coils sometimes do not, mostly because the rat-tail comb keeps the tension even. The style is sharp, close to the scalp, and clean around the parting lines. On short natural hair, that precision makes the whole cut feel intentional.
This is the style I’d choose for a taper or a fresh big chop when the hair is still too short to hang in a loose shape. Use a strong-hold gel, make your parts clean, and twirl each section with the comb until the coil wraps around itself. If the roots puff up fast, smooth them with a little product on your fingertips before the hair starts to dry.
3. Mini Coils for Dense, Tight Definition
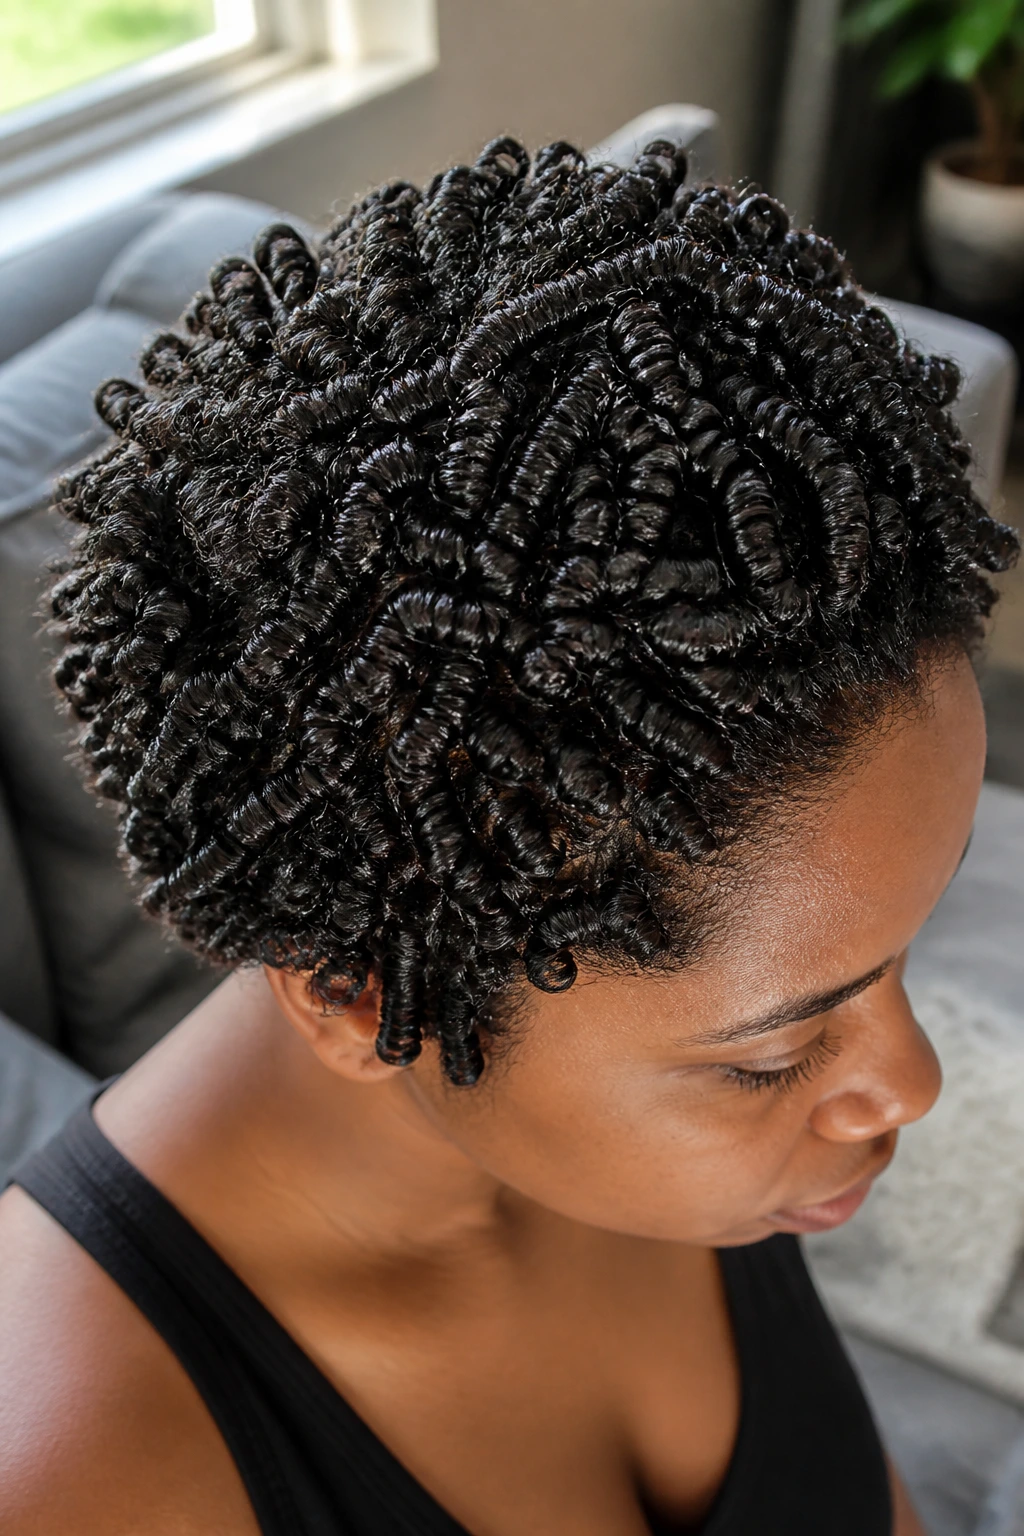
Can tiny coils look full instead of cramped? Yes, if the sectioning is consistent and the product is spread evenly from root to tip. Mini coils are a smart choice when the hair is dense and you want the finished set to hold its shape for several days.
The tradeoff is time. Lots of time. Small parts mean more rows, more product control, and more patience while the hair dries, but the payoff is a clean, tiny spiral pattern that reads from across the room. I like this style on coily hair that tends to expand fast, because the mini size keeps the shape from spreading too early.
Best for
- Short to medium lengths
- Thick, dense curls
- Styles that need stronger hold and longer wear
4. Jumbo Coils With Bigger Shape
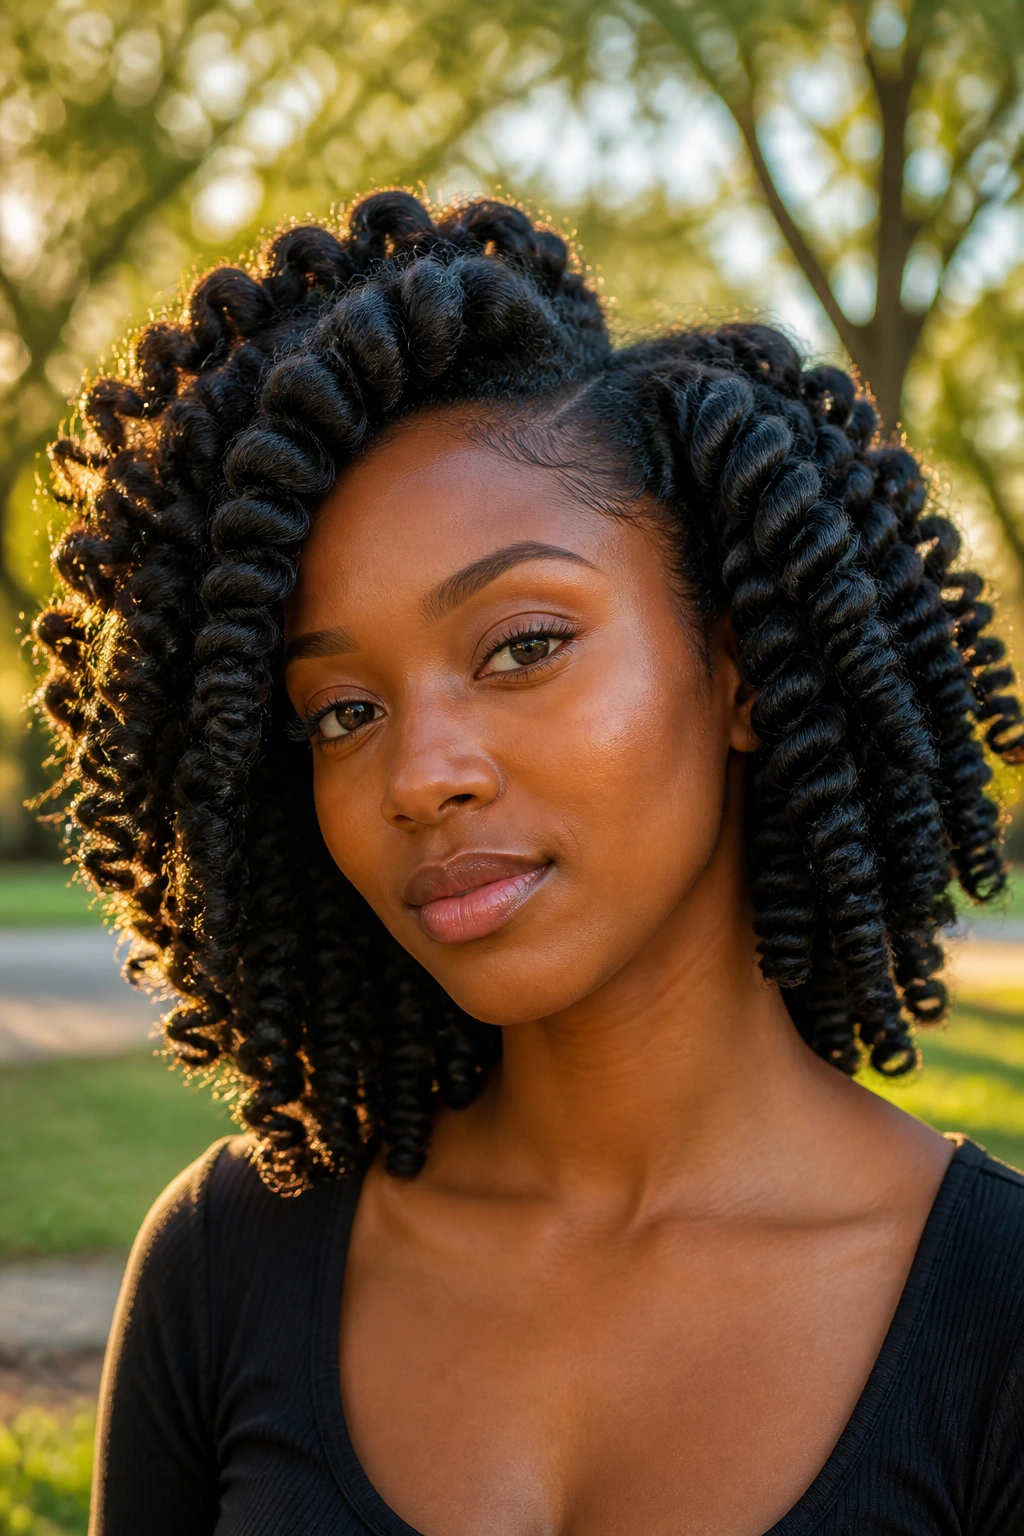
Jumbo coils are the opposite mood. They trade sharp definition for width and movement, and that can look better on longer hair or on hair you want to finish faster. The coil is still there, but it reads as a wider spiral rather than a tiny spring.
Use sections closer to 1 inch if you want the coils to feel loose and full. A medium-hold styler works well here; heavy gel can make jumbo coils hang too flat and lose the airy shape. This is the style I’d choose when I want volume first and precision second.
5. Two-Strand Twisted Coils
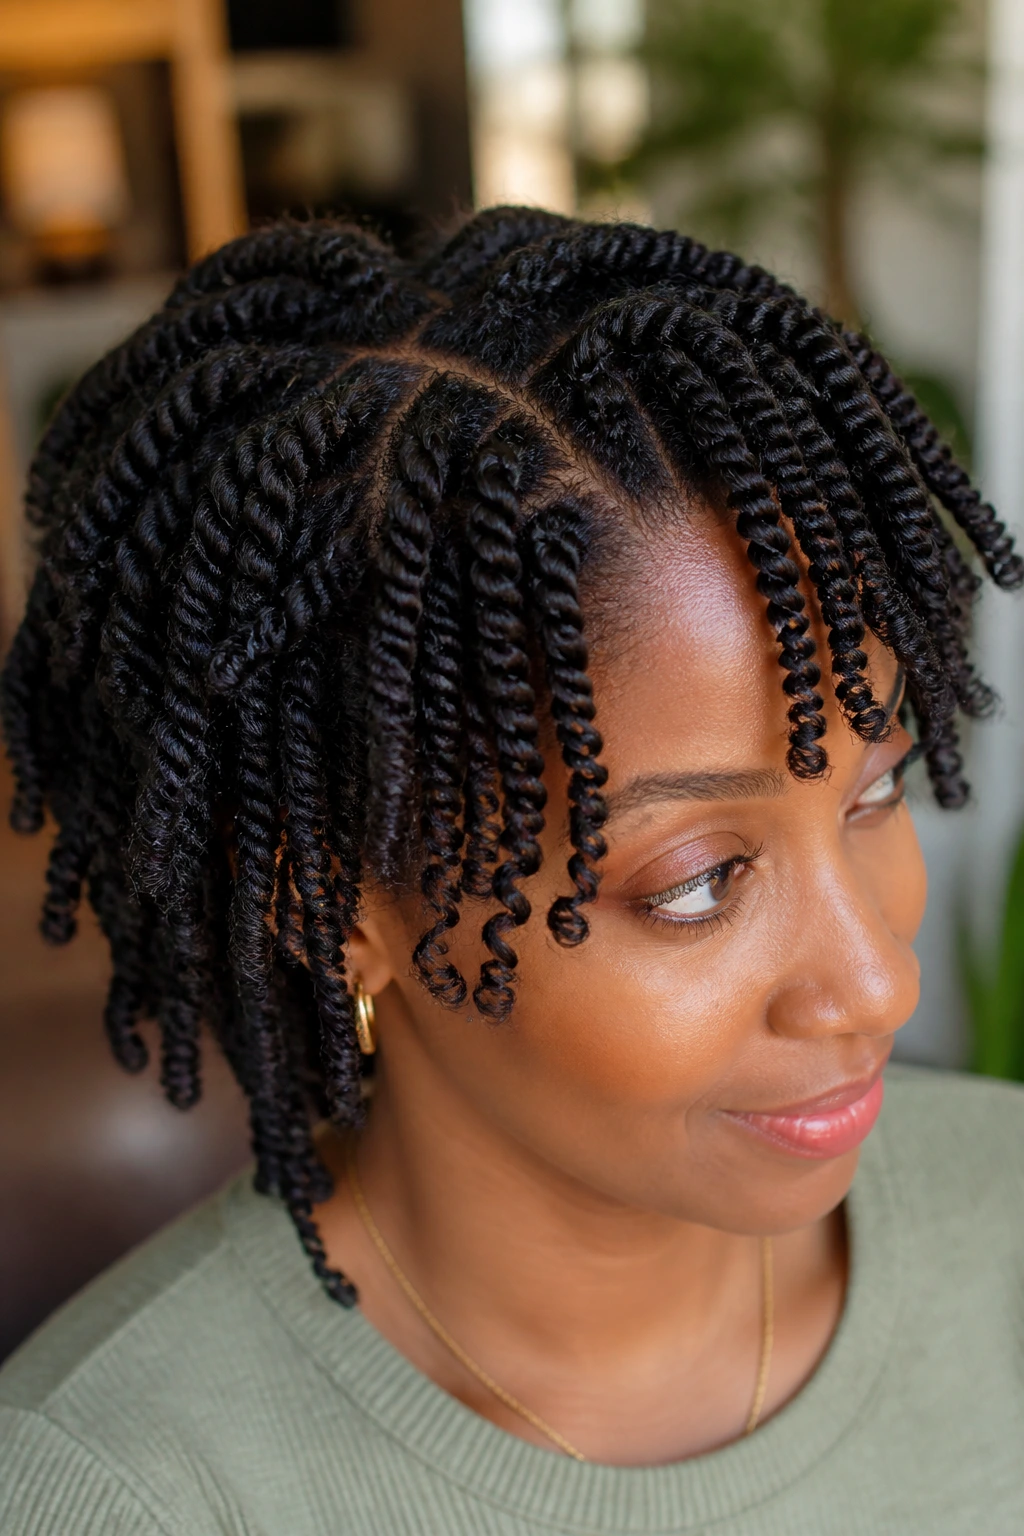
Unlike finger coils, two-strand twisted coils give the root a little more grip and the finish a little more texture. They are useful when your hair does not want to stay wrapped around a finger but will behave nicely when crossed over itself. That makes them a smart middle ground for coarse or springy curls.
The best part is the wear pattern. After a full dry, the style sits with more lift at the root and a softer spiral through the ends. If your fingers get tired halfway through a full head of finger coils, this method saves your hands without losing the coil look.
6. Flat-Twist Ends Coiled Inward
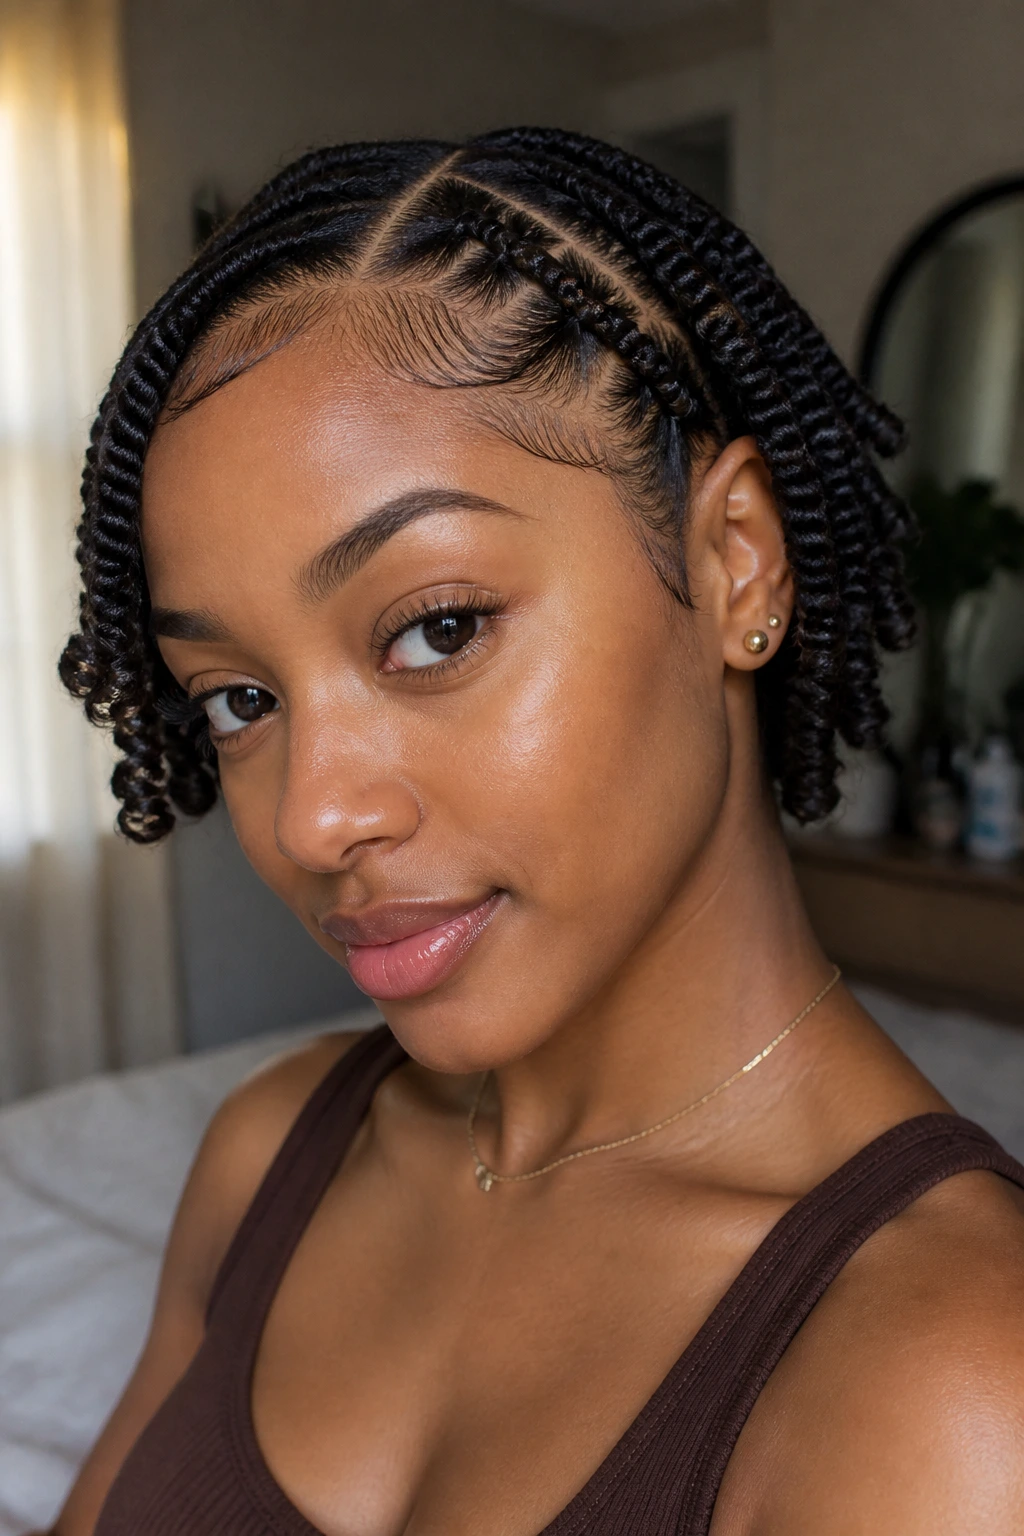
This is the style for days when you want direction at the roots and a little softness at the ends. Flat-twist the front or side sections close to the scalp, then coil the loose ends once the twist reaches the mid-length point. It keeps the hair controlled without making the whole head feel too tight.
I like it for temple areas and front rows because the flat twist lays the hair where you want it, while the coiled ends keep the shape playful. Use gel at the roots, cream on the lengths, and a small pin if one side keeps springing loose. It is one of the few coil looks that handles transition length well.
7. Defined Coil Wash-and-Go
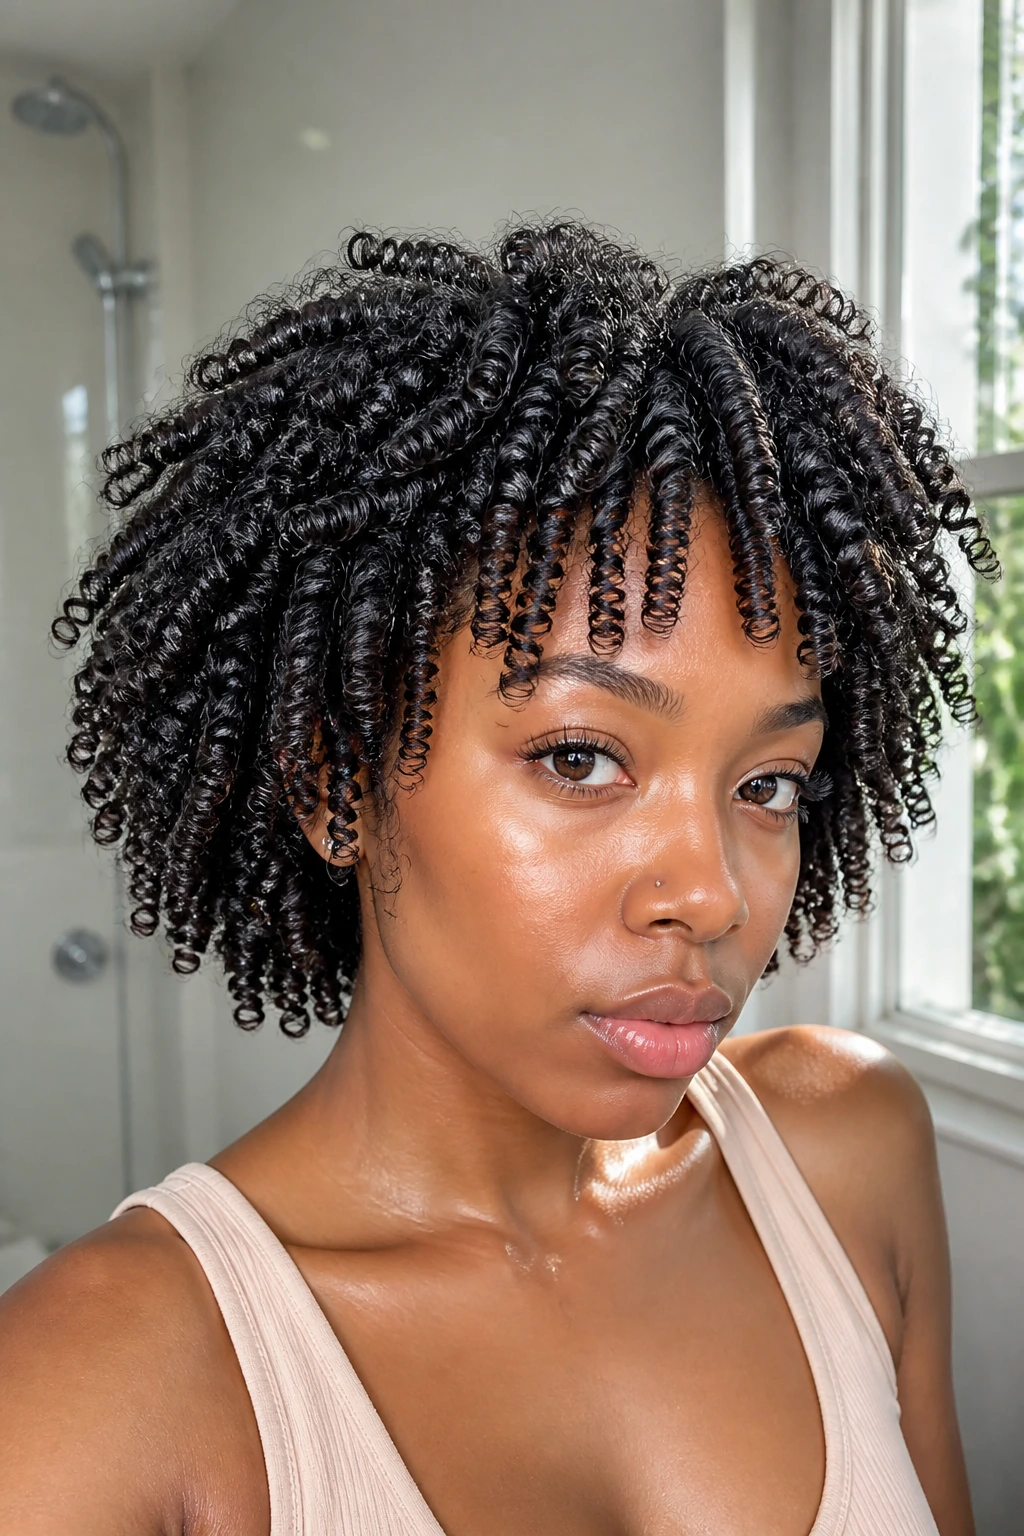
A defined coil wash-and-go is for people who want the natural curl pattern to stay visible but a little more organized than a plain shake-and-go. Start on freshly washed hair, add a water-based leave-in, then coil the sections with your fingers while the hair is still damp. A diffuser on low heat can help if the room is humid or the schedule is not patient.
This one works best when the product is lightweight and the sectioning is clean. If you pile on too much cream, the curls clump into soft blobs instead of crisp spirals. Keep the first layer of product thin, and add hold only where the ends need it.
8. Clean Side-Part Coils
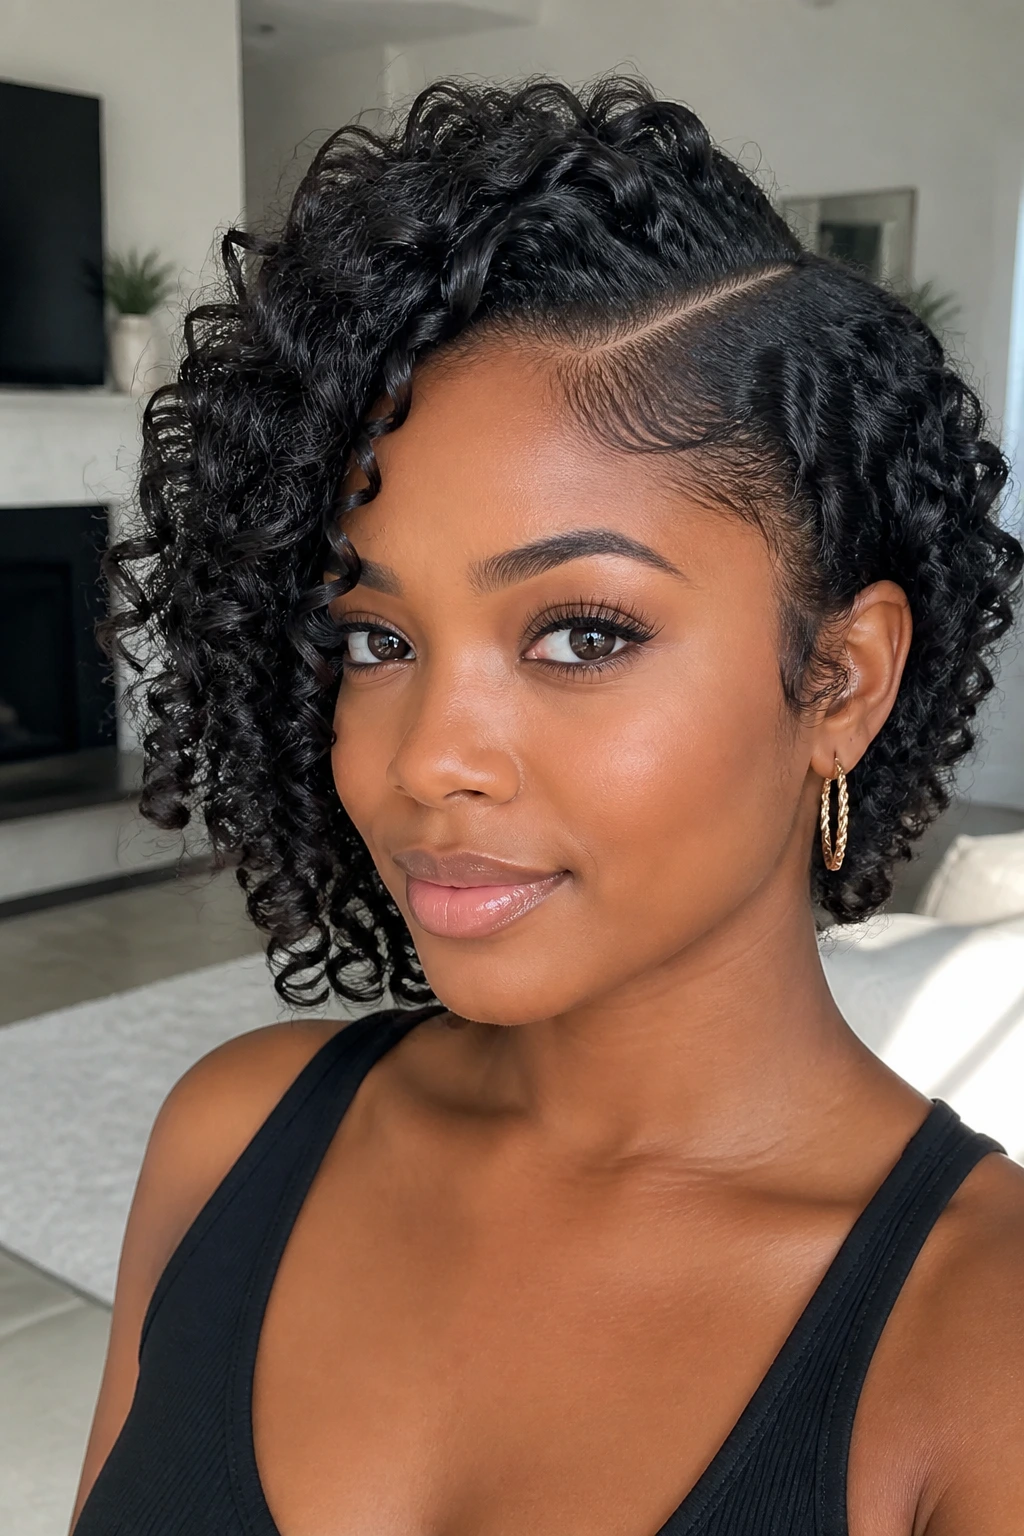
A side part changes the entire face frame. With coils, it creates a soft sweep that can flatter rounder faces or soften a strong jawline without needing a cut. The style feels tidy, but not rigid.
The key is part placement. Draw the part from the front hairline back toward the crown with a rat-tail comb, then let the coils fall in the direction the part gives them. If you want the front to sit flatter, pin the heavier side down at the temple for ten minutes under a scarf. That small hold makes the difference between “side part” and “the hair ignored the part.”
9. Center-Part Curtain Coils
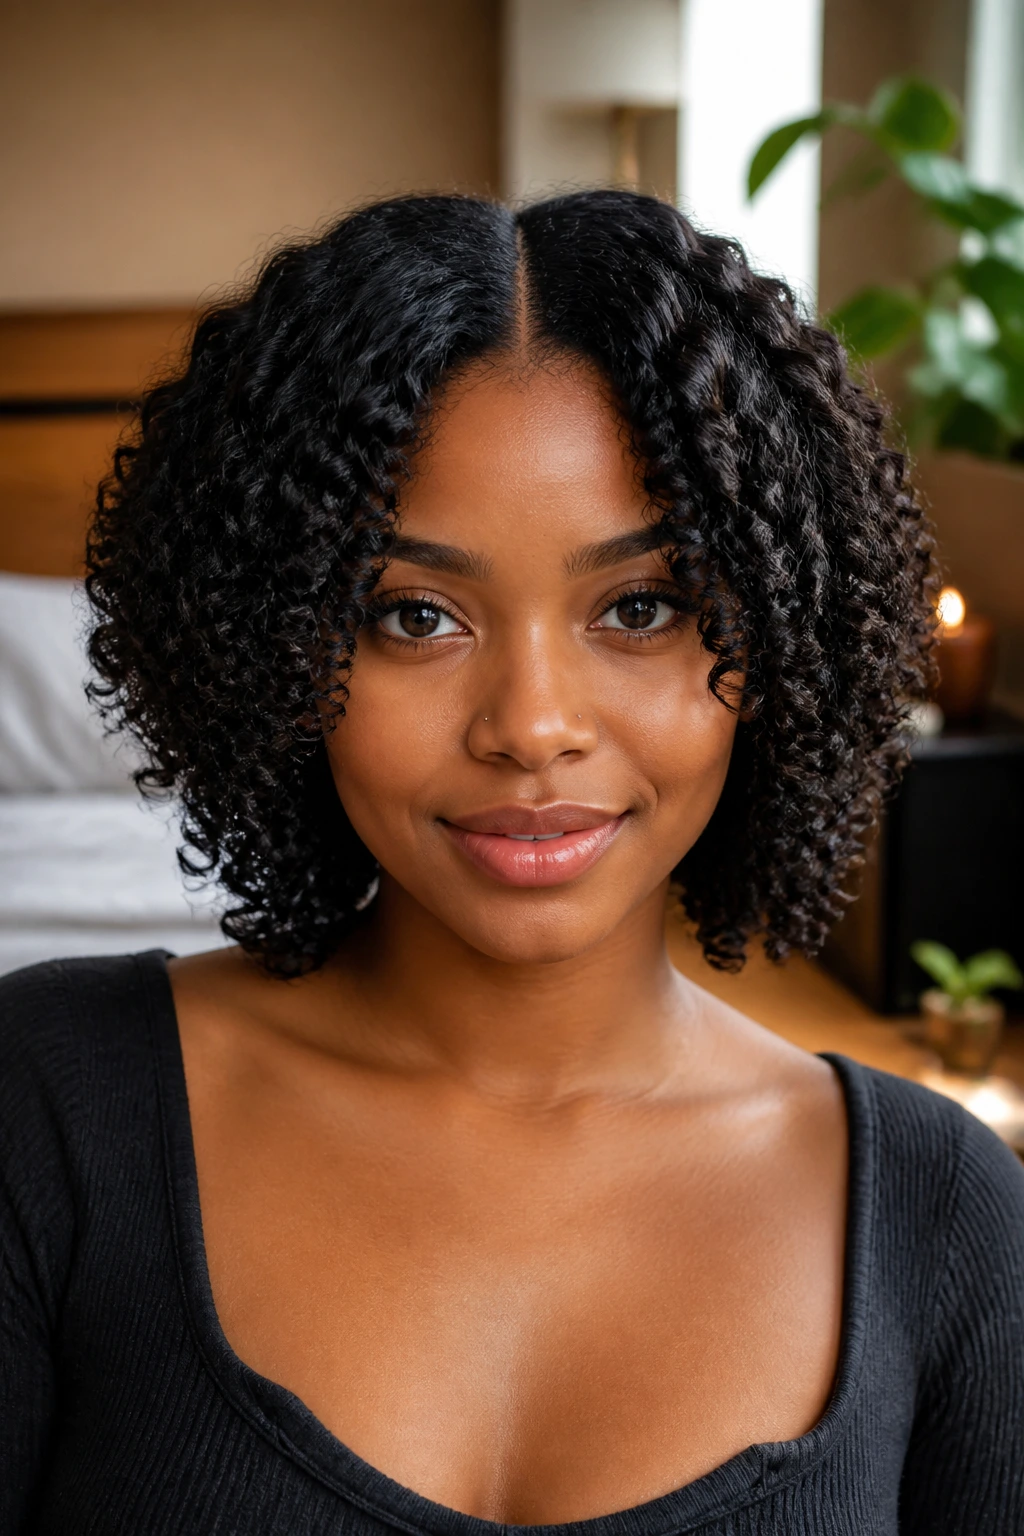
A center part gives coil styles a calm, balanced frame. The look is symmetrical, which helps the coils hang on both sides instead of collapsing into one heavy section. On medium-length hair, this can read almost like a curtain around the cheeks.
The style works best when the front pieces are a touch shorter than the back. That lets the coils move away from the face instead of sitting flat on the forehead. I like this one with a little shine spray at the very end — not enough to wet the hair, only enough to keep the part from looking dry and dusty.
10. Deep Side-Swept Coils
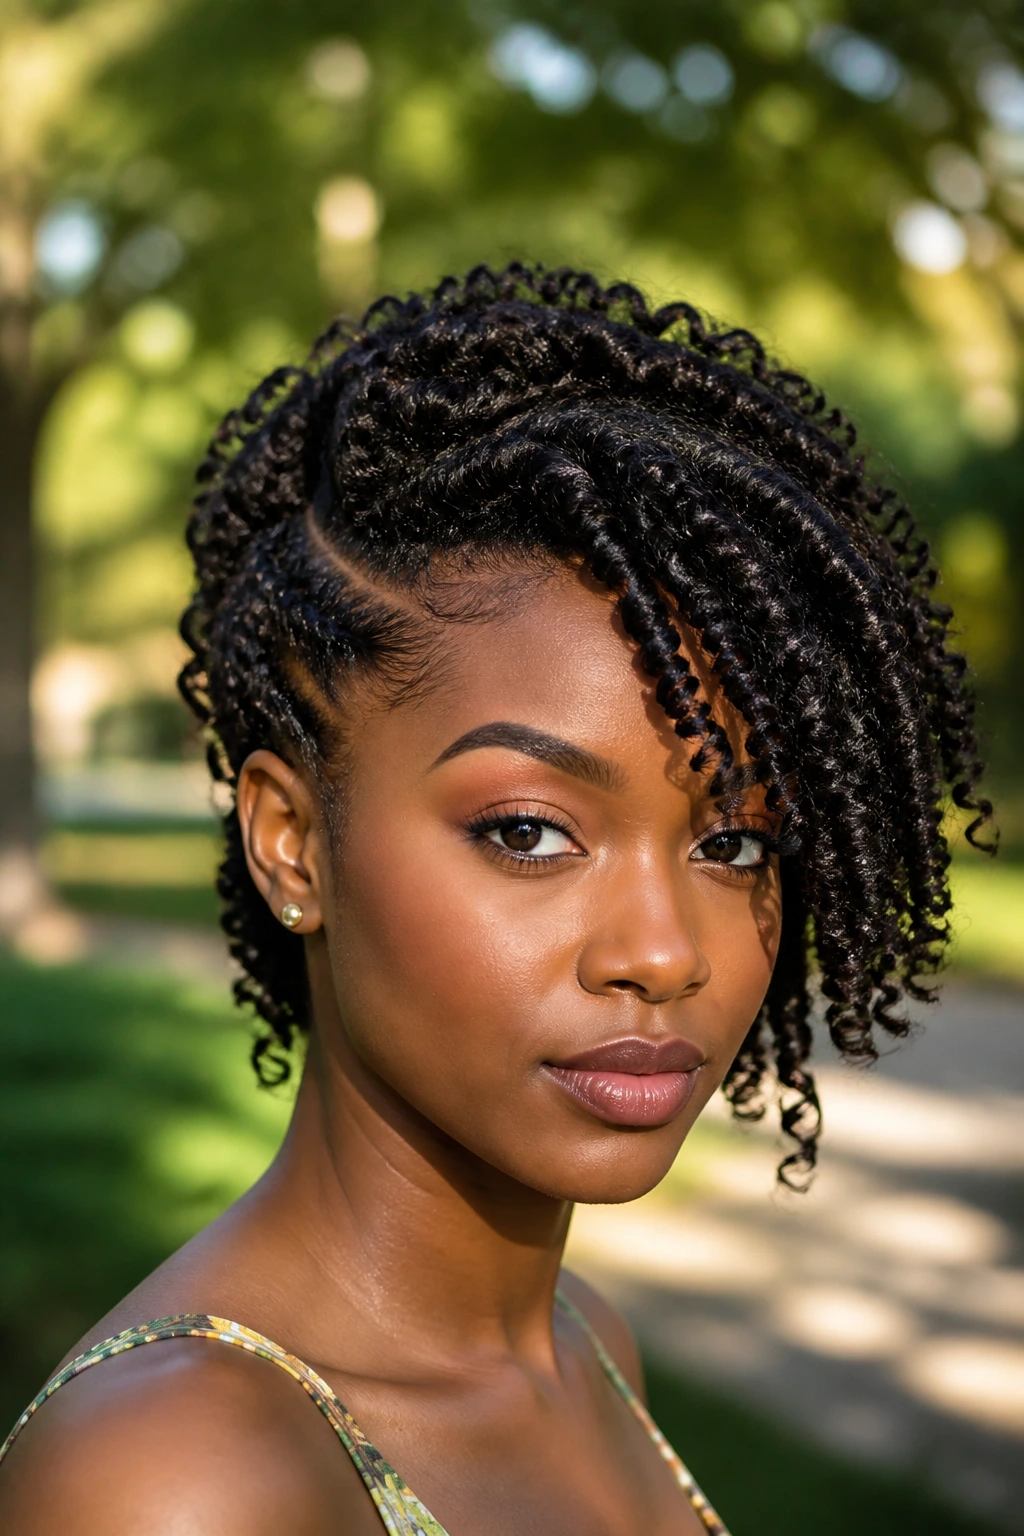
A deep side sweep makes coils feel dressed up with almost no extra work. It’s the kind of style that looks like you planned the whole outfit around the hair, even if you did not. The heavier side gives the face a diagonal line, and diagonals are your friend when you want movement.
Pin the front coils behind the heavier side if they keep falling forward, then separate the ends only after they are dry. A couple of bobby pins hidden under the top layer is enough. If the part is too shallow, the style loses the sweep and turns into a regular side part. Go deeper than you think.
11. Half-Up, Half-Down Coil Style
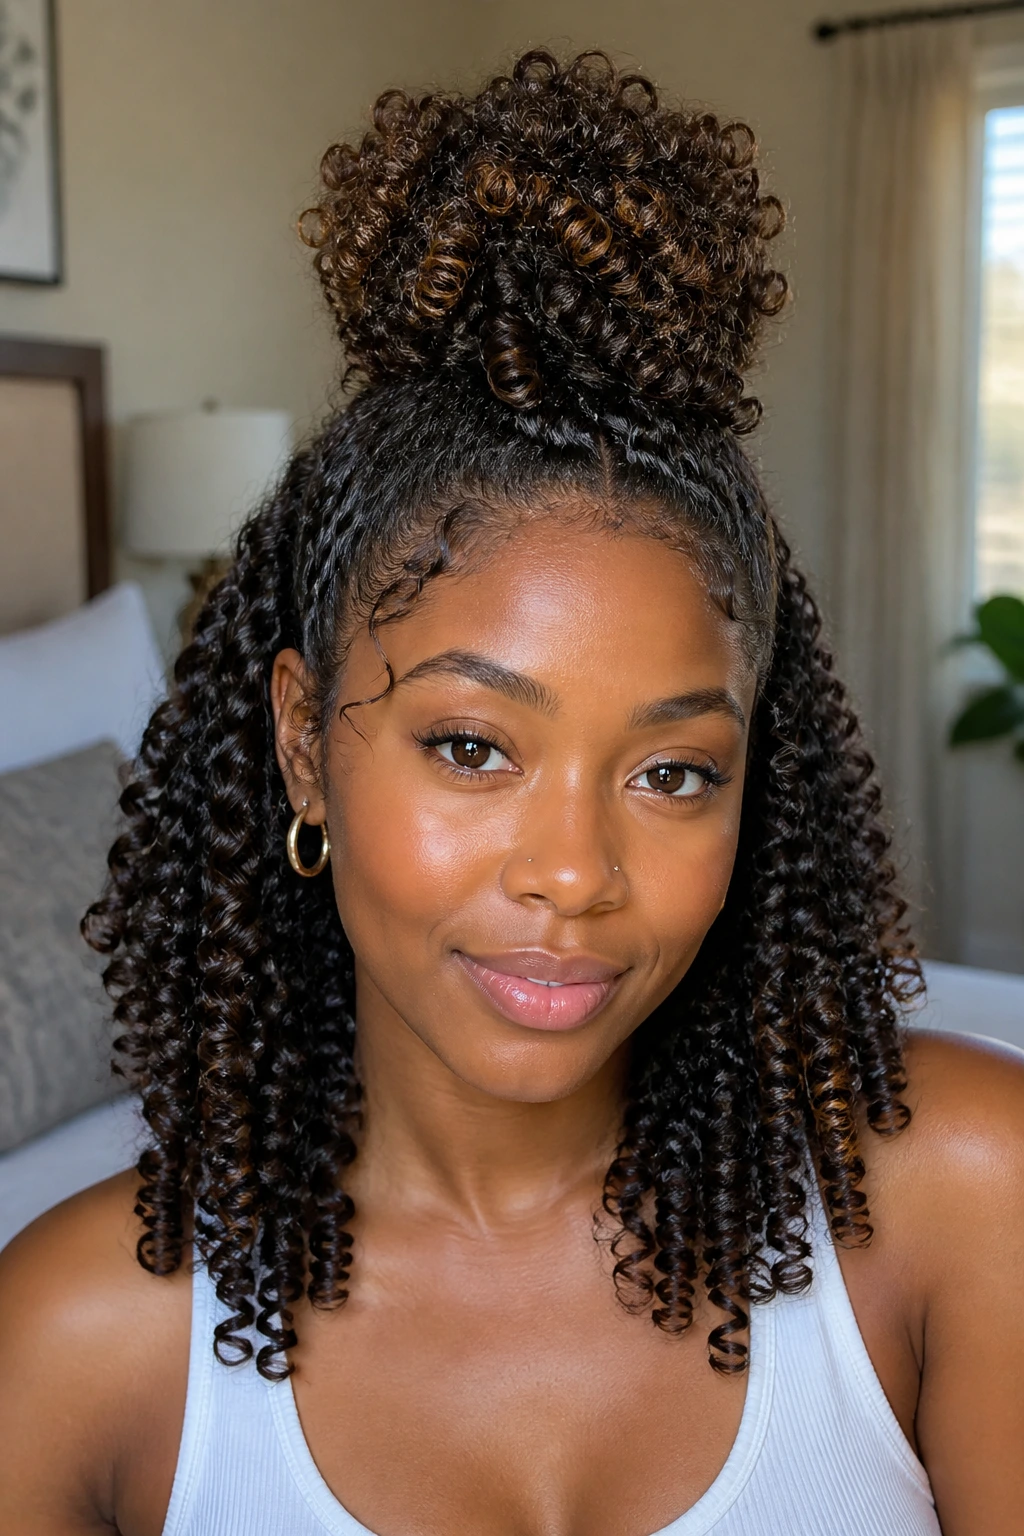
Half-up, half-down coils are the easiest way to get shape off the face without giving up length. Pull the top section into a puff, small bun, or clipped crown, then leave the lower coils free so the silhouette still reads soft and full. It works especially well when the crown starts to puff before the ends do.
I like this look on second- or third-day hair because the top can be refreshed with a little water and gel, while the lengths stay mostly untouched. Use a satin scrunchie if you can; tight elastics leave a dent that takes longer to smooth out. Simple. Practical. It holds.
12. Crown Coils Into a Soft Puff
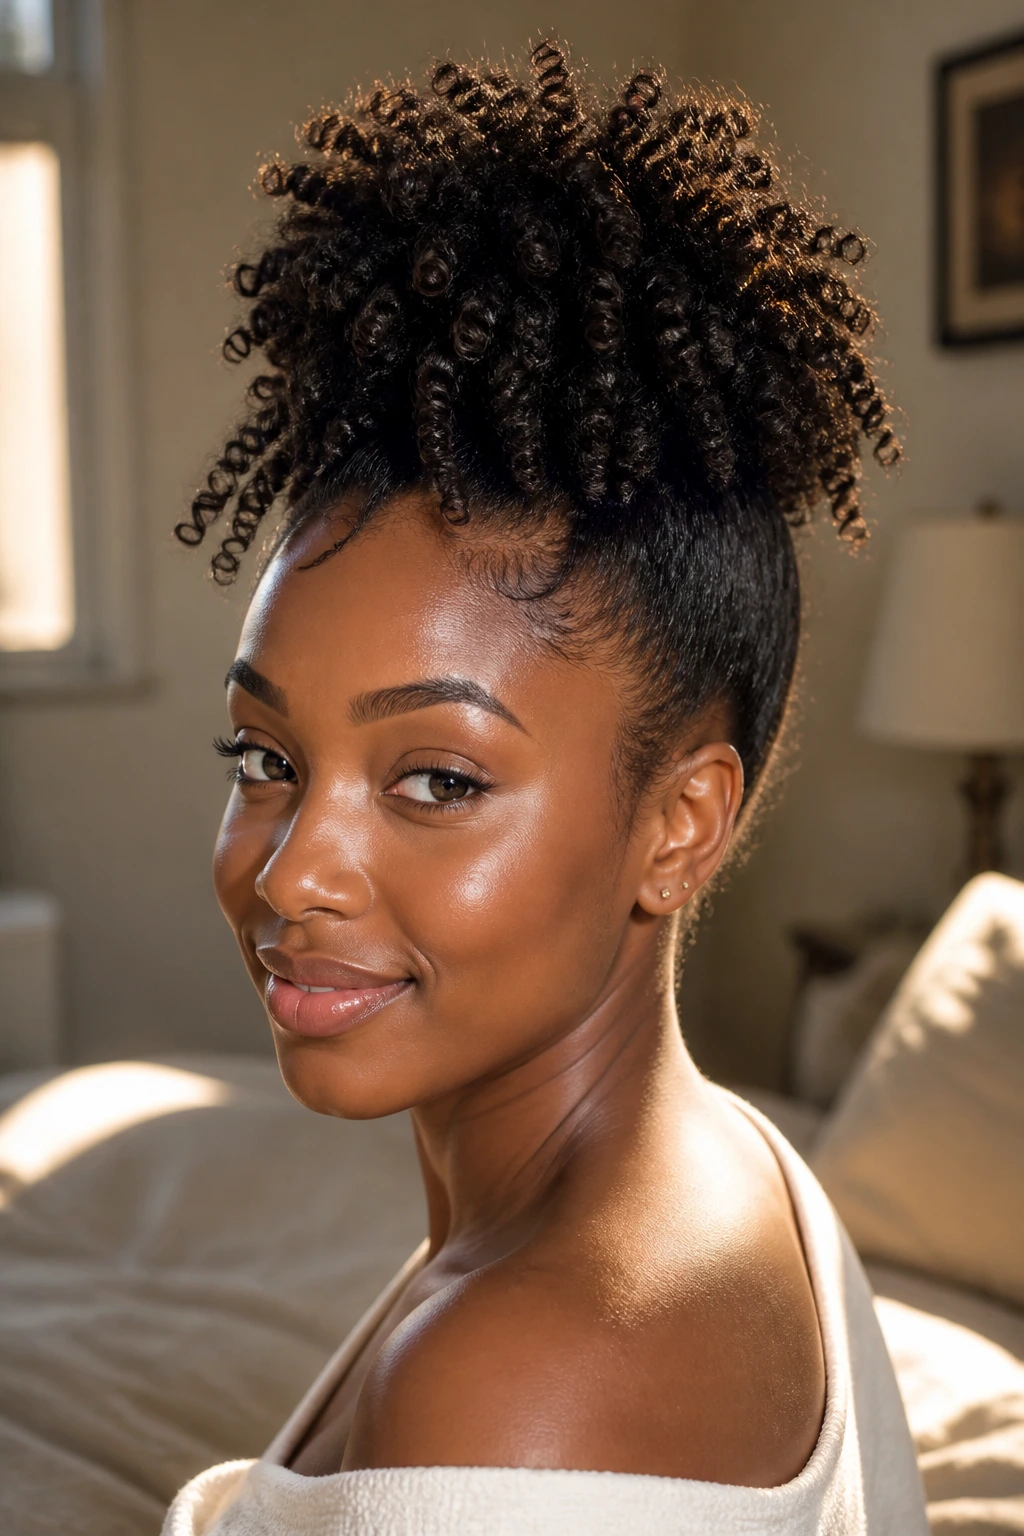
A crown puff with coiled lengths gives you height without making the whole head look pulled back. Gather the top or center of the hair, let the coils fan out from the crown, and keep the tension loose enough that the scalp stays happy. The shape is casual, but it still reads put together.
This is a good move when the roots are a little stretched and the ends still have life. If the puff starts to sag, lift it from underneath and pin the base instead of pulling tighter at the elastic. Tightening the band only makes the front line rough. A hidden pin is cleaner.
13. Tapered Coils With Clean Sides
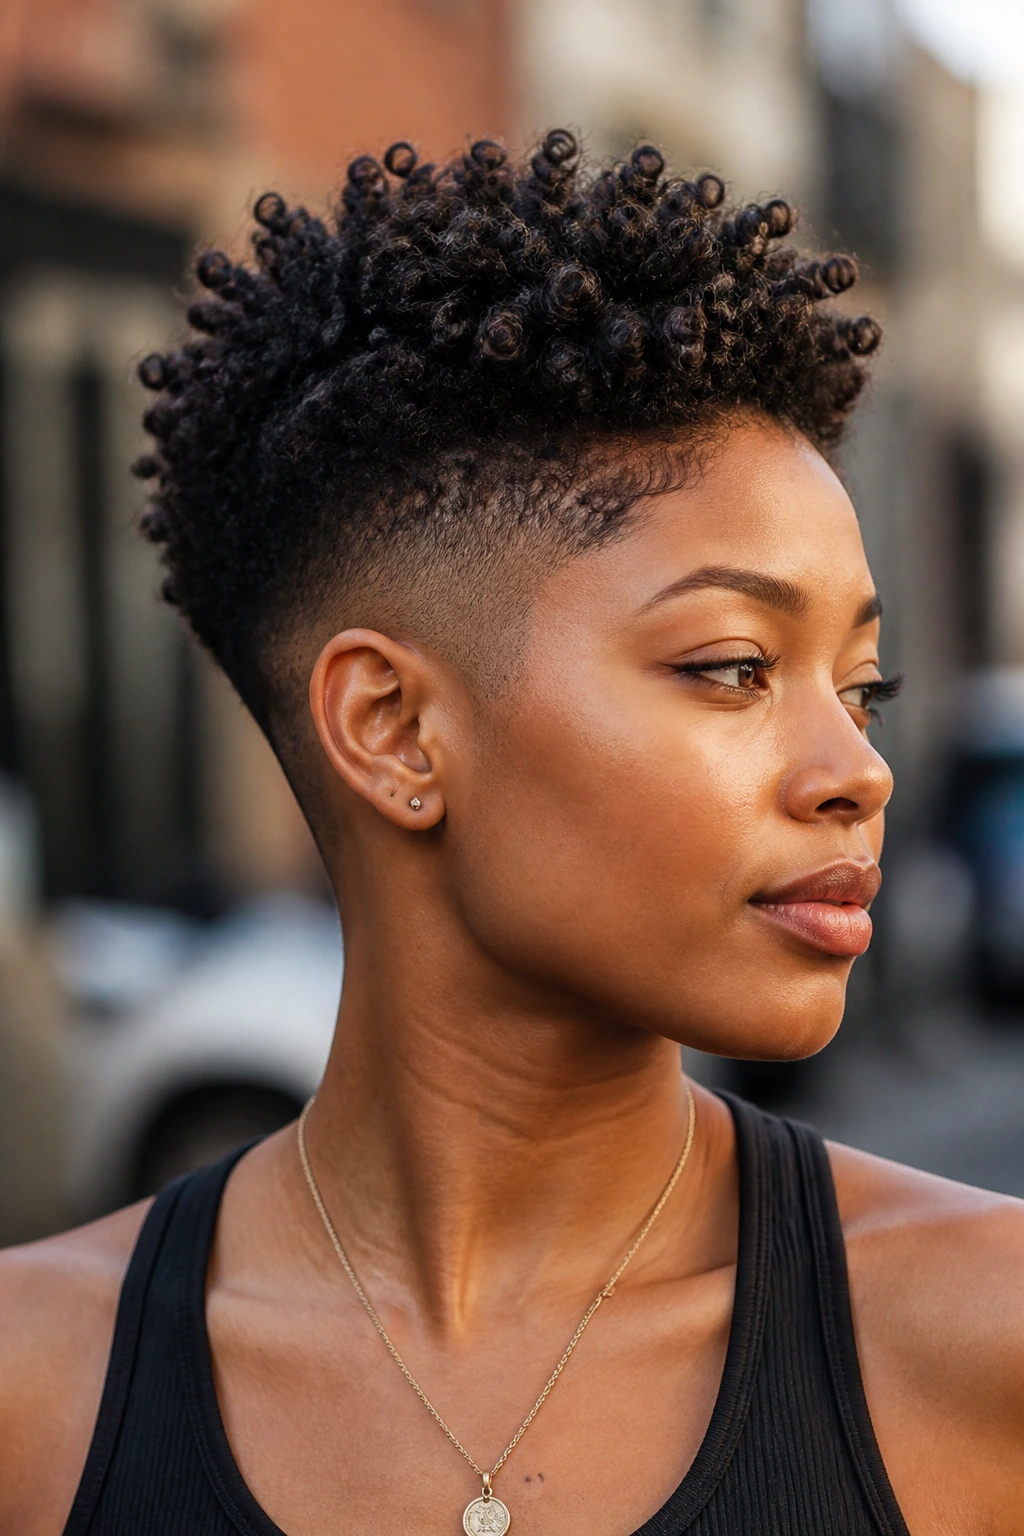
Tapered coils are all about contrast: short, neat sides and more length on top. The cut does some of the work for you, so the coils can sit like a crown instead of spreading in every direction. That makes the style look sharp without needing much extra styling.
A small edge brush and a tiny bit of product around the hairline are enough. Keep the top sections uniform, because the cut already gives the shape. If the coils on top vary too much in size, the silhouette gets lumpy fast. Clean sides, consistent coils, done.
14. Coil Bob at Jaw Length
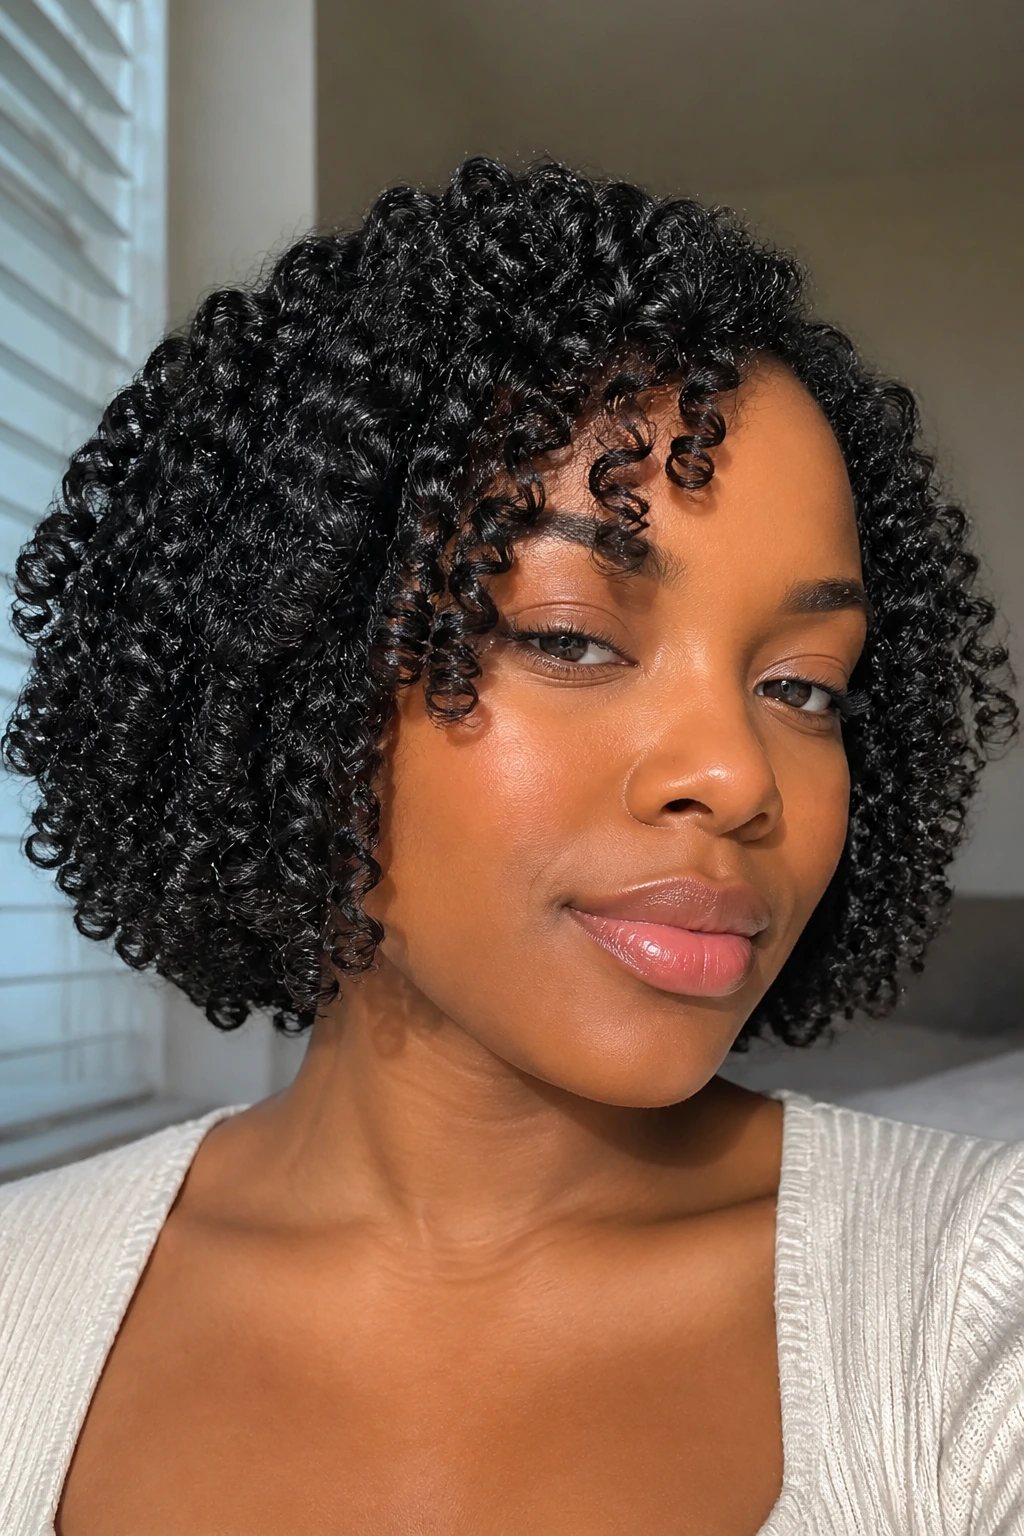
A coil bob works when the hair falls around the jaw or just below it, because the shape can bounce instead of collapsing. It is one of the neatest coil styles on medium-length natural hair, and it can look polished without asking for a blowout. The trick is letting the ends settle inward while they dry.
If your hair shrinks hard, set the coils a little longer than you want the final bob to sit. The length usually comes back up once the hair is dry and separated. I’d avoid heavy creams here. They pull the bob down and make it sit flatter than it should.
15. Coiled Bangs That Frame the Eyes
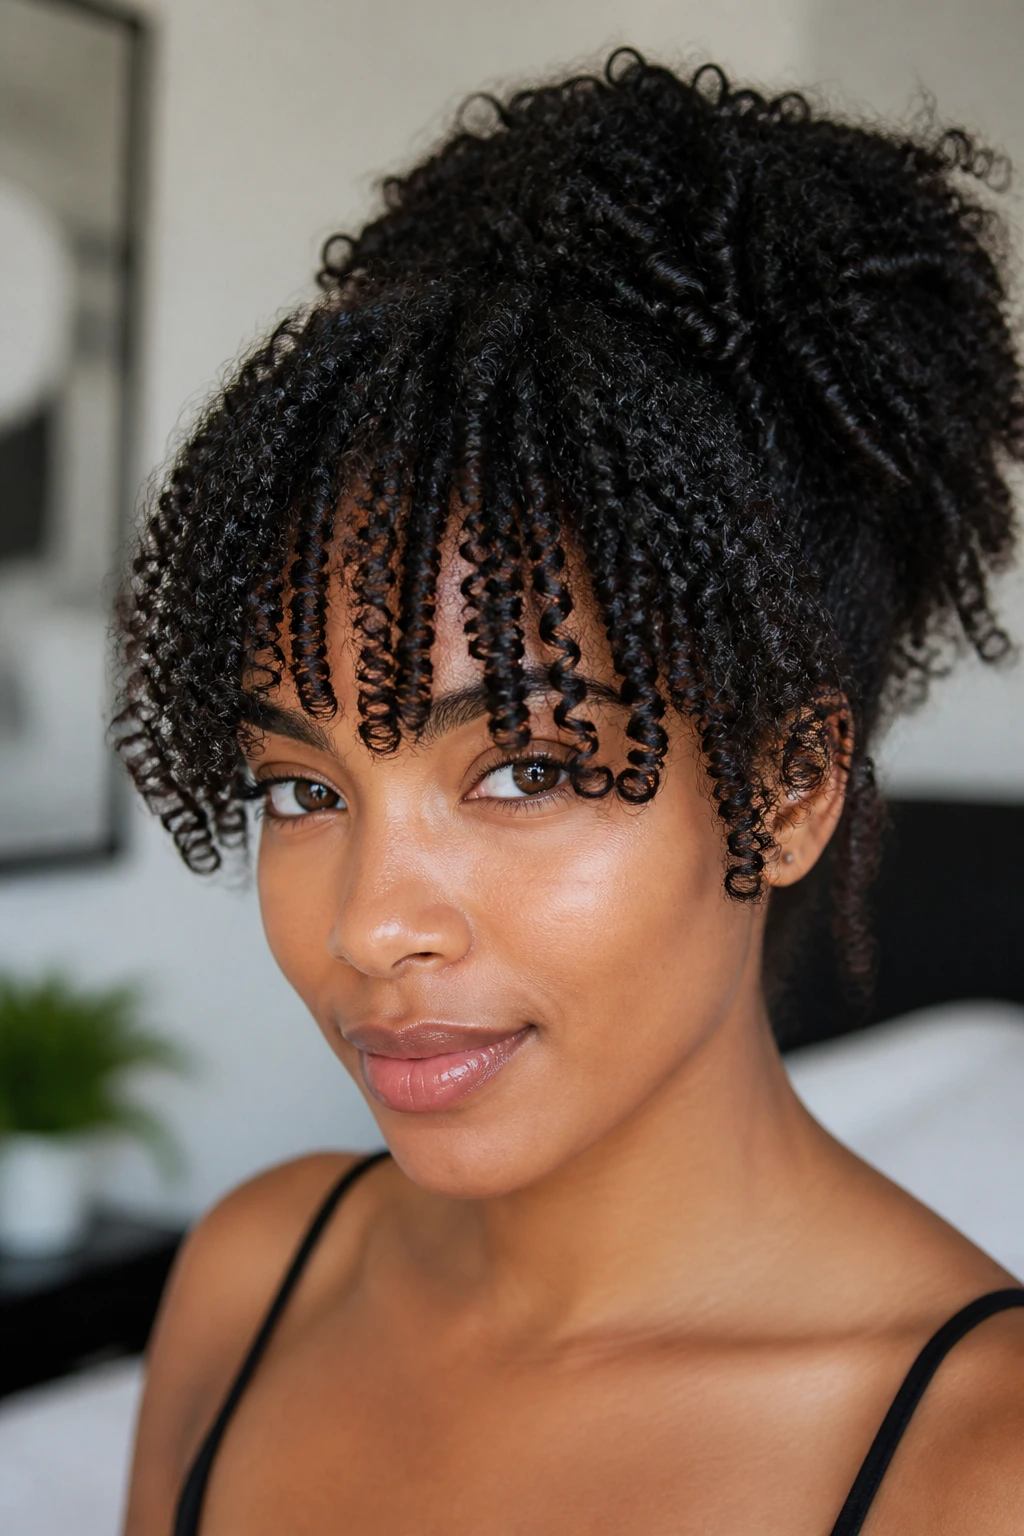
Bangs change a coil style more than people expect. A small front section, coiled with extra care, can sit at brow length or just above the eyes and soften the whole face. It gives shape without cutting off the rest of the length.
This is a good place to use smaller rods or tighter finger coils if the front pieces are stubborn. The fringe will shrink more than the rest, so set it a little longer than you think you need. If the bangs dry too high, lightly mist them, rewrap the front coils, and clip them in place for ten minutes. That often fixes the line.
16. Mohawk Coils With Tapered Sides
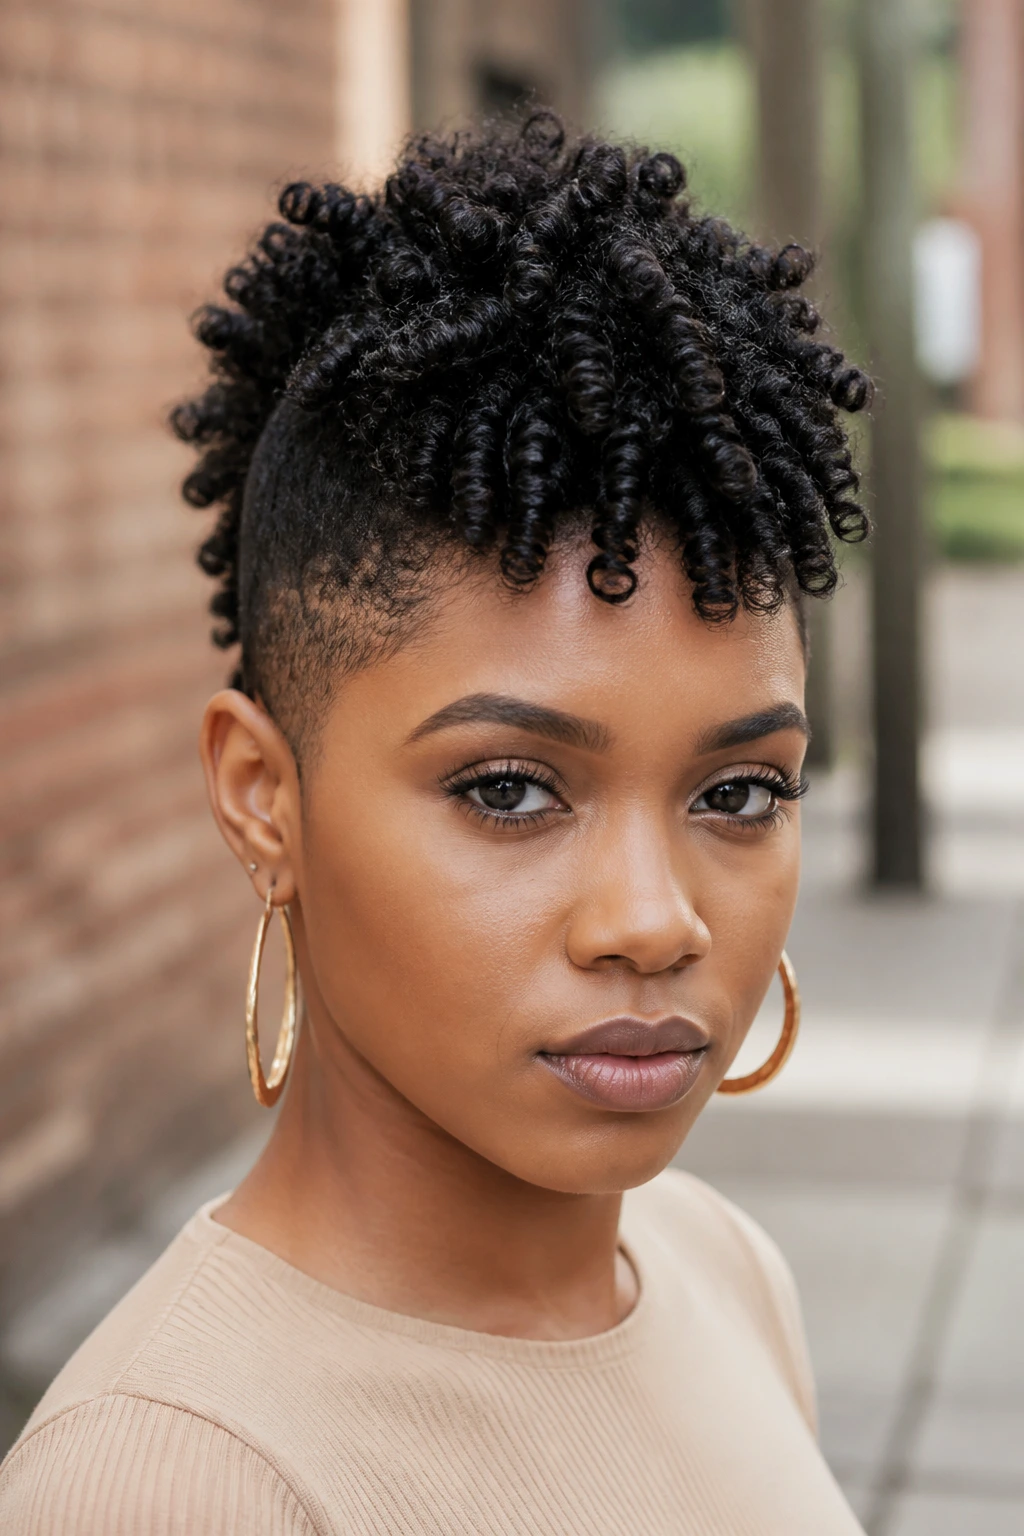
Mohawk coils bring the volume to the center and keep the sides low, pinned, or tightly controlled. The middle strip becomes the feature, which is handy when the rest of the hair is growing in unevenly or when you want a strong shape without a full updo.
I like this look with a few hidden pins along the sides and a little extra height at the crown. Don’t overthink the outline. The point is contrast. If the side sections get fluffy, smooth them down with a tiny amount of gel and a scarf for ten minutes, then leave the center alone.
17. Halo Coil Crown
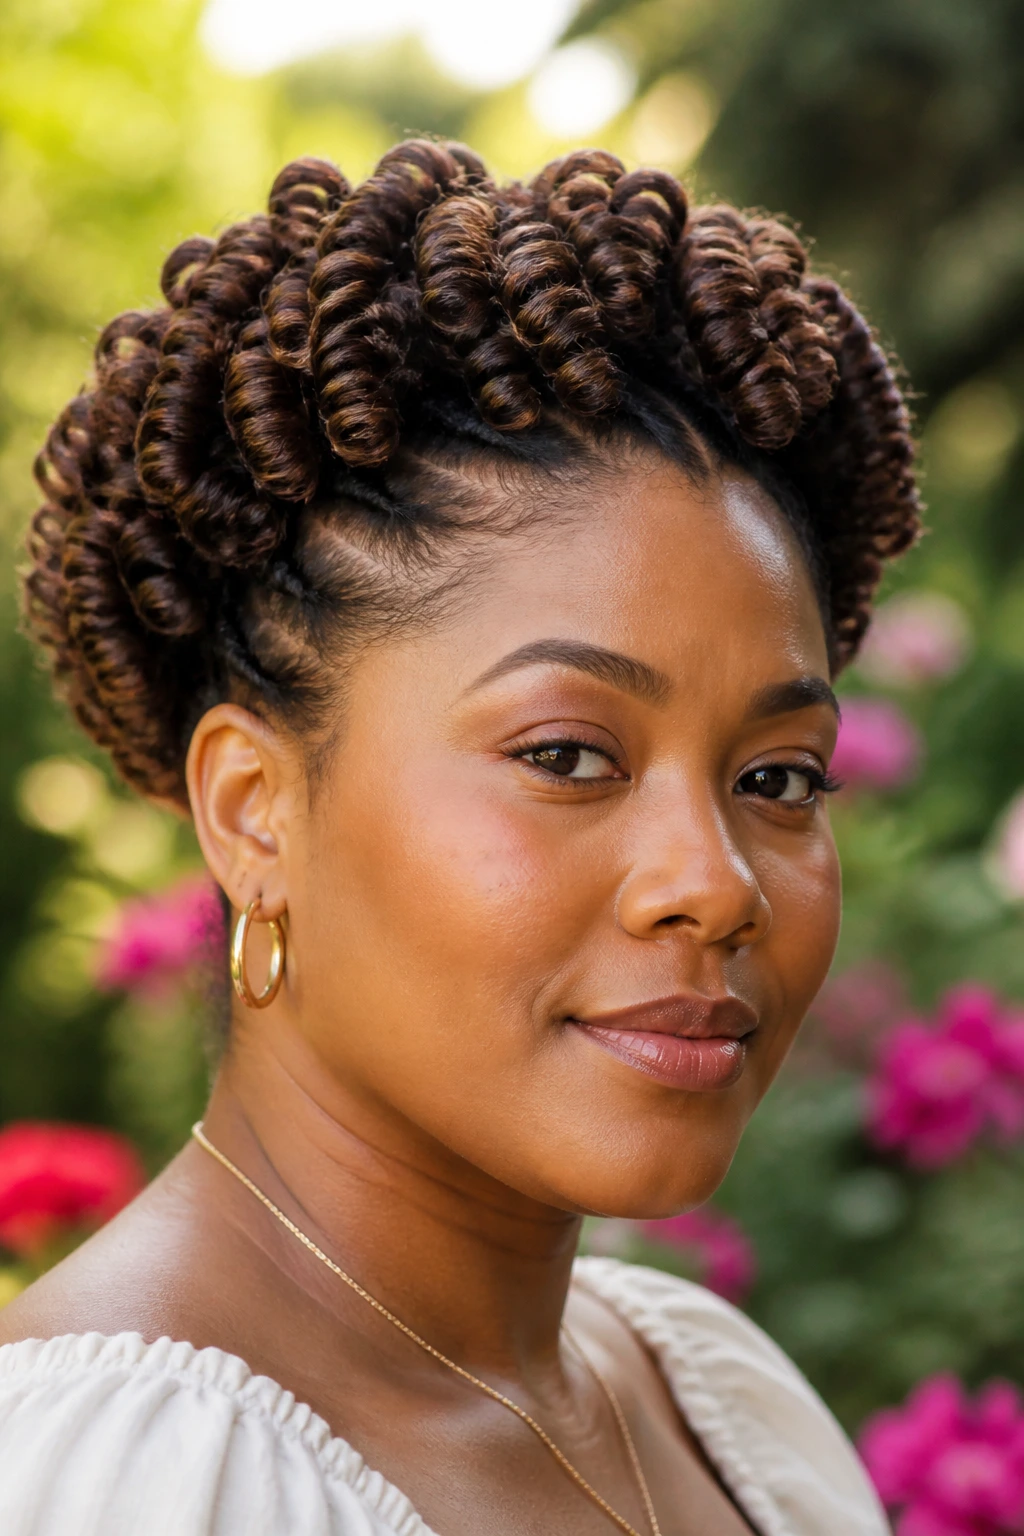
A halo coil crown wraps the coils around the perimeter of the head, which gives the style a soft, lifted outline. It is one of the prettiest options in the whole group when you want the hair to feel formal without looking sealed up. The center can stay tucked, or you can keep a little volume there.
This style works well with medium to longer lengths, though short hair can still do a mini halo with enough pins. Keep the parting circle even, and pin the back sections first. If the front pieces fall too far forward, adjust them before adding accessories. A halo looks best when the line is clean.
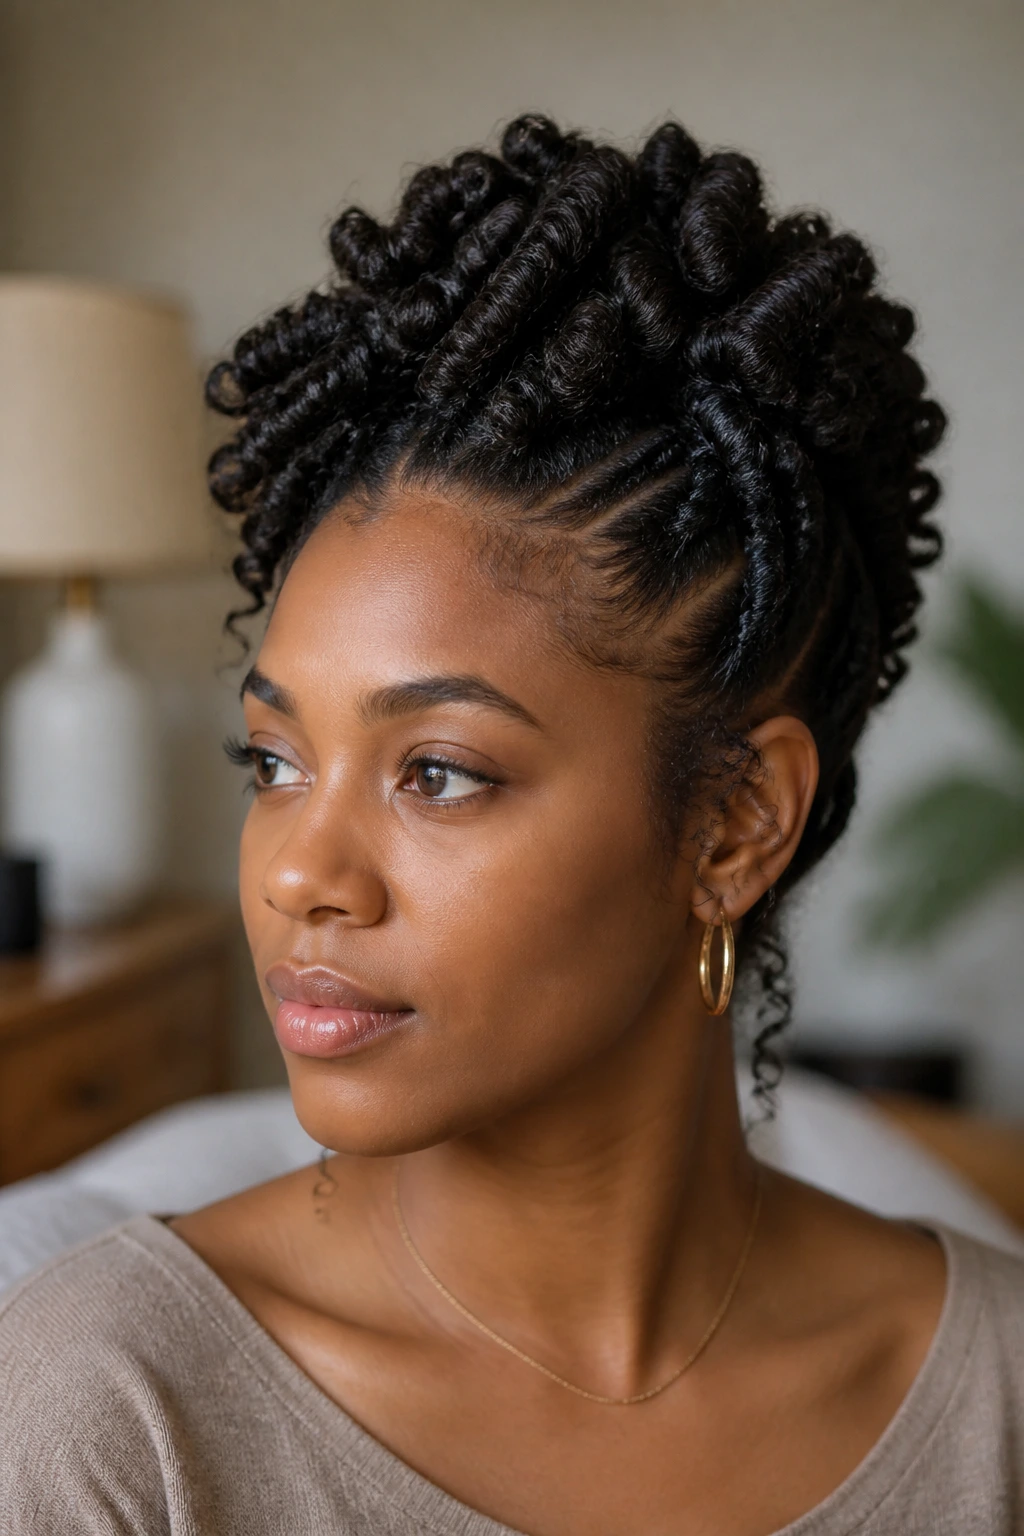
18. Pinned Crown Updo Coils
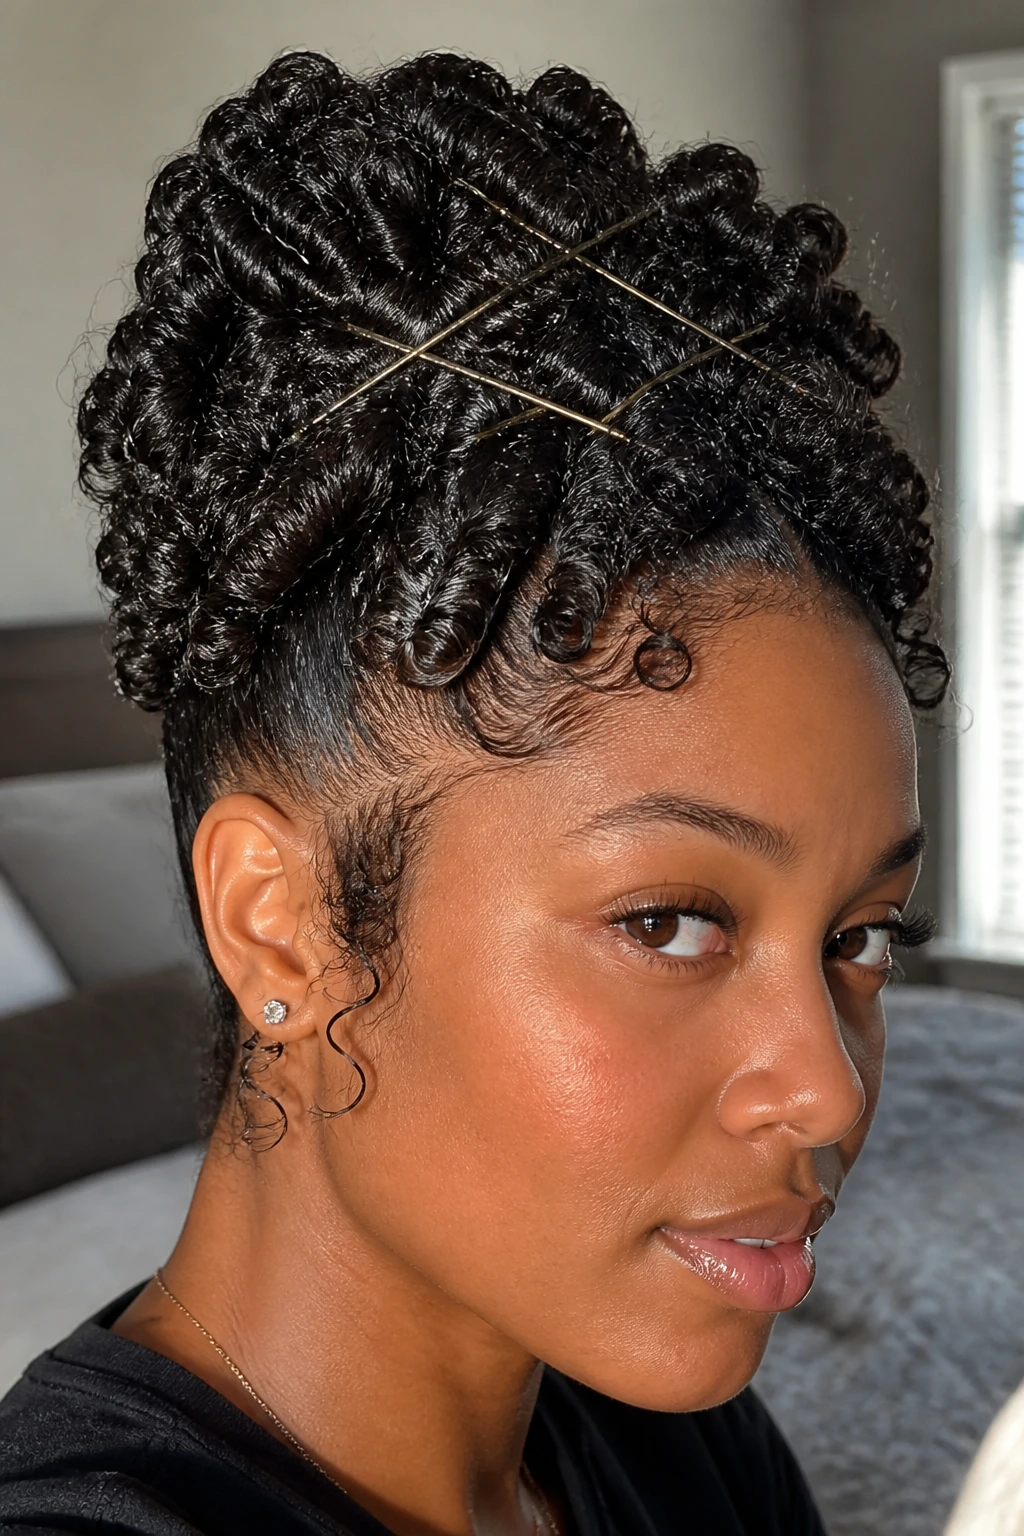
Pinned crown updo coils are the answer when you want the hair off the neck but still want the coil pattern visible. Sweep the coils upward, secure them with bobby pins, and let the shape sit high enough to show the texture. It feels neat, but not severe.
The best versions leave a few coiled tendrils loose around the hairline or ears. That softens the updo and keeps the style from looking too tight. Use pins that match your hair color if you can; they disappear better. And pin in a crisscross, not in a straight line. The hold is stronger.
19. Space Bun Coils
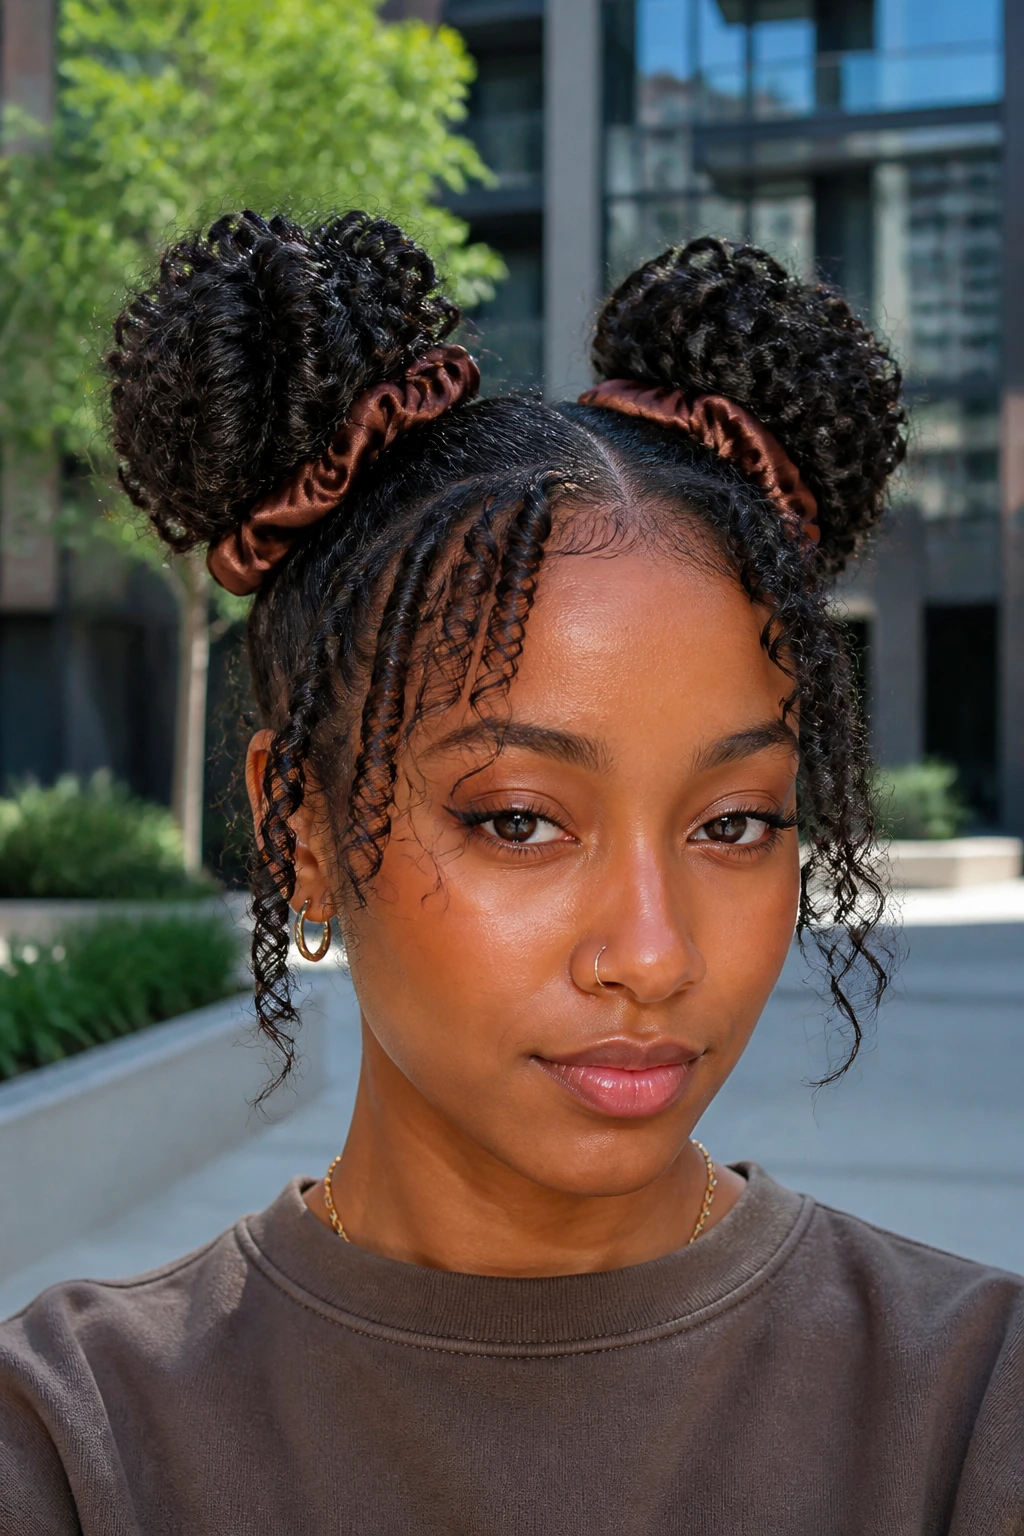
Space buns change the coil look from polished to playful fast. Split the hair into two high sections, coil or wrap each section into a bun, and leave the ends free or tucked depending on the mood. It is a good style when you want the hair controlled but not quiet.
On curly hair, the shape works best if the buns sit a little higher than the temples. Too low and the style can sag. Too high and the buns lose balance. A satin scrunchie or a few strong pins help a lot here, because the hair wants to spring back out if the base is weak.
20. Pineapple Coils for Stretch and Lift
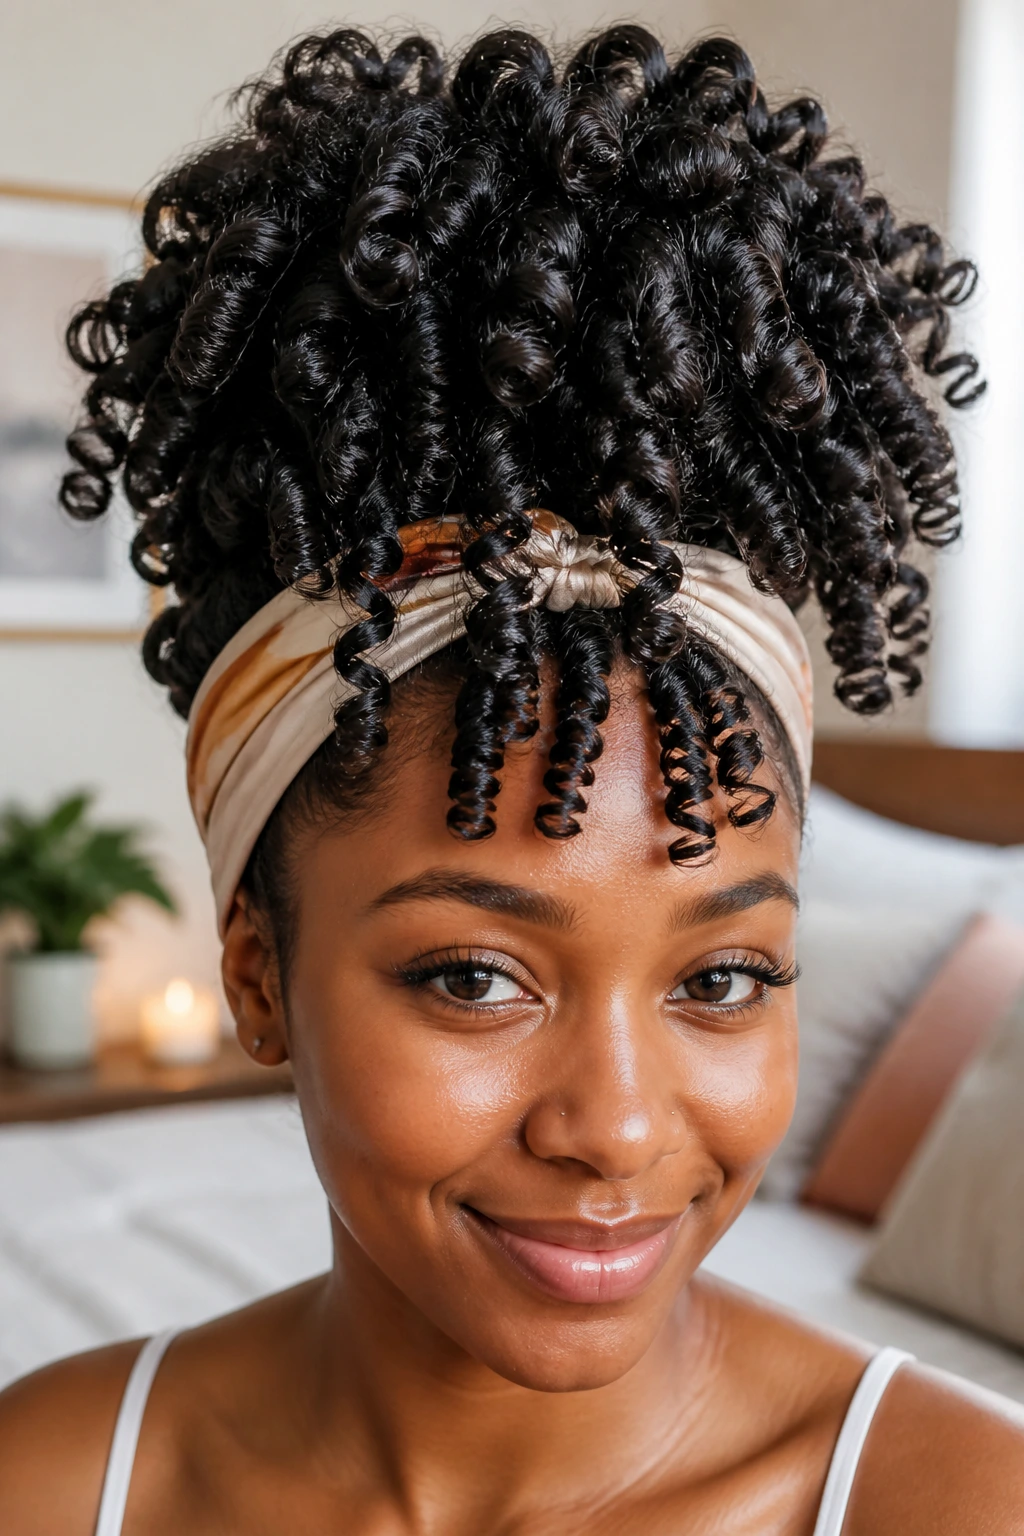
Pineapple coils are high, loose, and practical. Pull the coils up toward the crown and let the lengths fall forward or out, which keeps the shape tall and protects the ends. It is one of the easiest ways to keep coils from getting crushed overnight and still wear them during the day.
If your hair is dense, the pineapple can sit like a soft fountain of texture. If it is lighter, pin a few side pieces so the shape does not look sparse. A satin scarf around the hairline keeps the front smooth, and a loose scrunchie prevents the crown from denting. That little setup matters more than people think.
21. Bantu-Knot-Out Coils
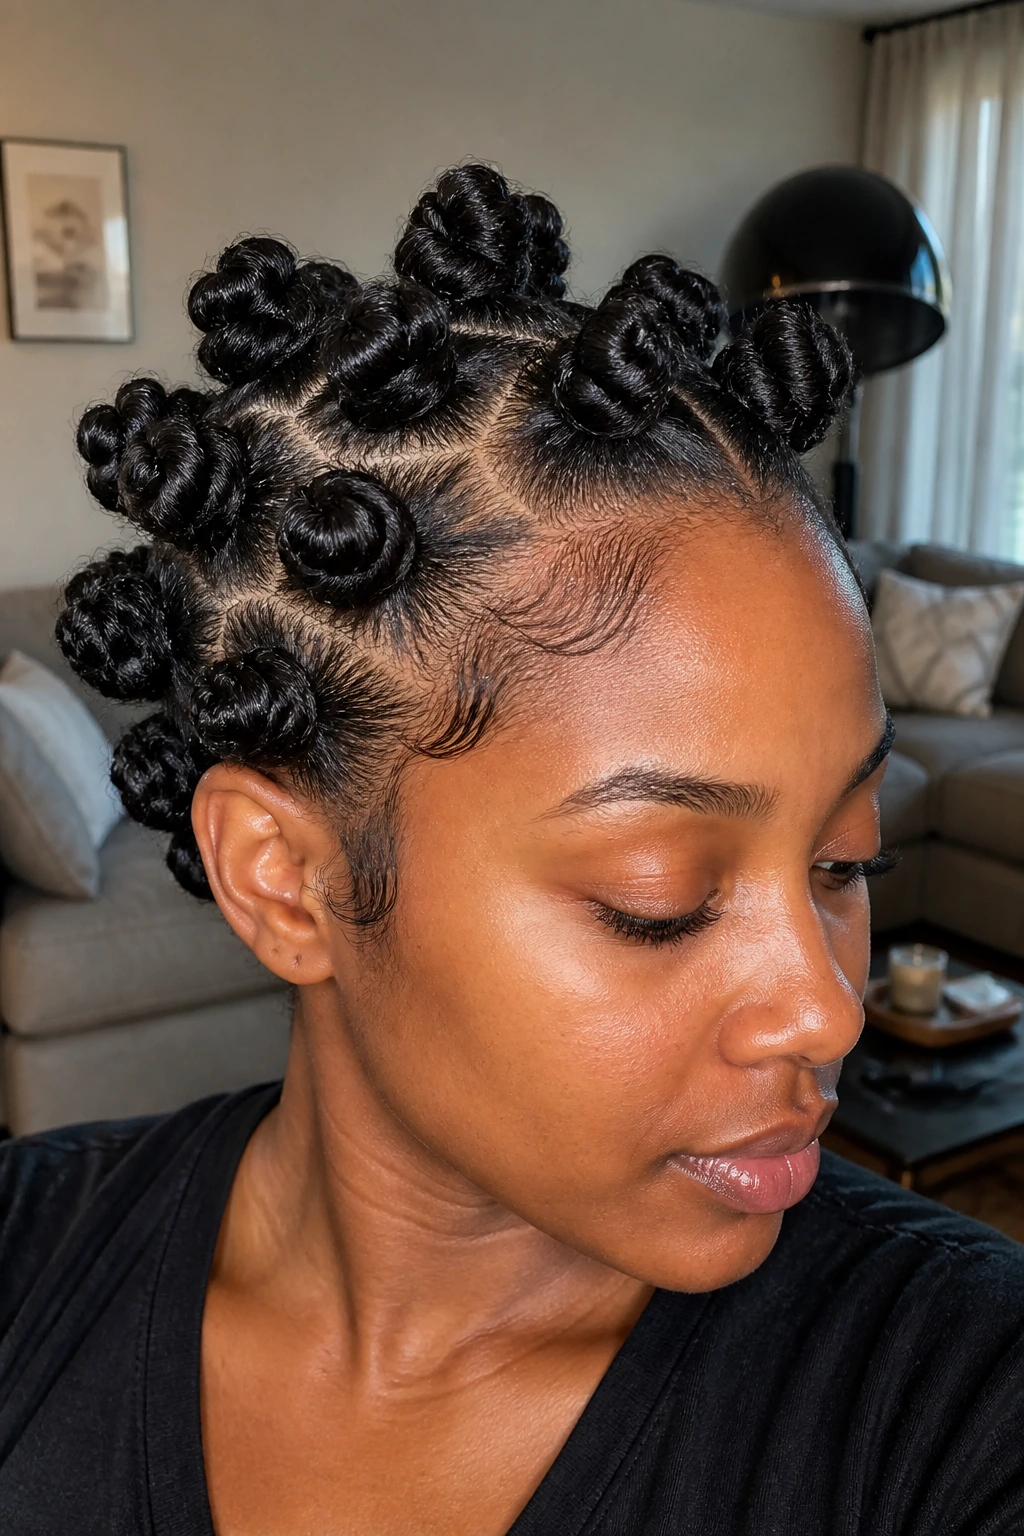
Bantu-knot-out coils have a rounder, springier finish than finger coils, and they give the hair a small, uniform lift at the root. Set the knots while the hair is damp, dry them fully, then release the coils with dry hands. If you rush the take-down, the pattern turns fuzzy fast.
This style rewards patience. A hooded dryer makes the process faster, but air drying works too if you do not mind waiting. I like the way this look sits on thicker hair because the knots create a bounce that finger coils sometimes lose at the ends. Keep your hands out of the set until it is dry. Seriously.
22. Flexi-Rod Spiral Coils
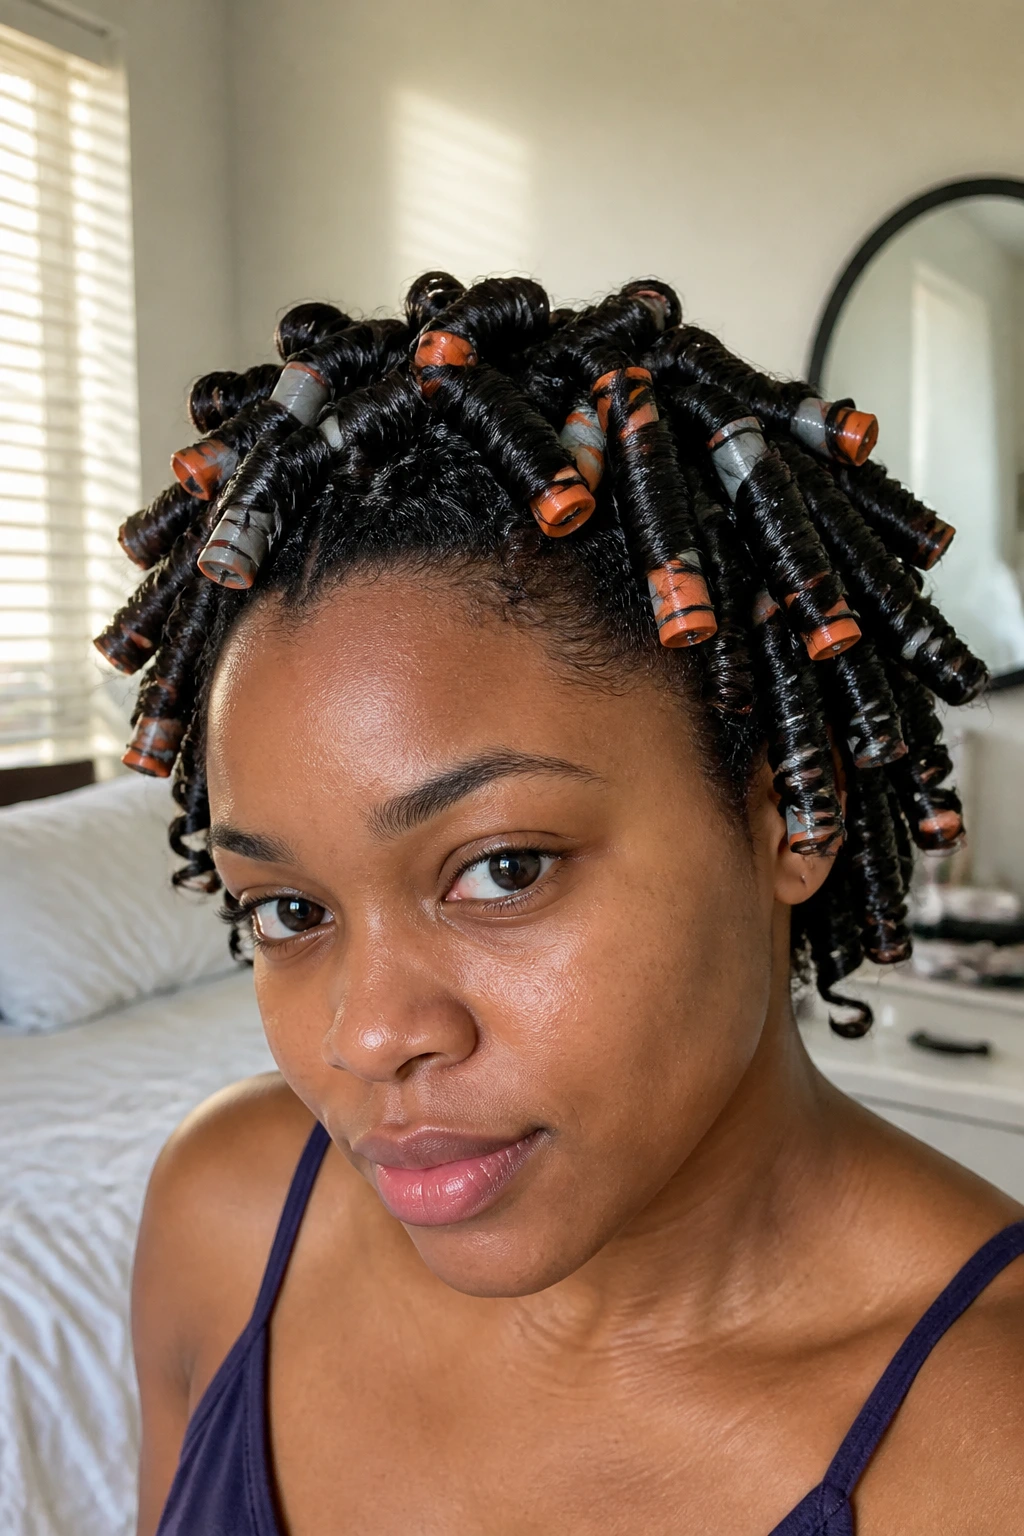
Flexi-rod coils are for when you want a cleaner spiral and less hand-twisting. Wrap damp sections around the rod, bend the ends to lock them, and let the shape dry until it feels cool all the way through. The result is smooth and fairly uniform from root to tip.
Use smaller rods for tighter coils and larger rods when you want more length to show. A mousse or setting foam usually works well here because it coats evenly without weighing the hair down. If the rods feel sticky after removal, you used too much product. Less on the next set.
23. Perm-Rod Coils for a Polished Finish
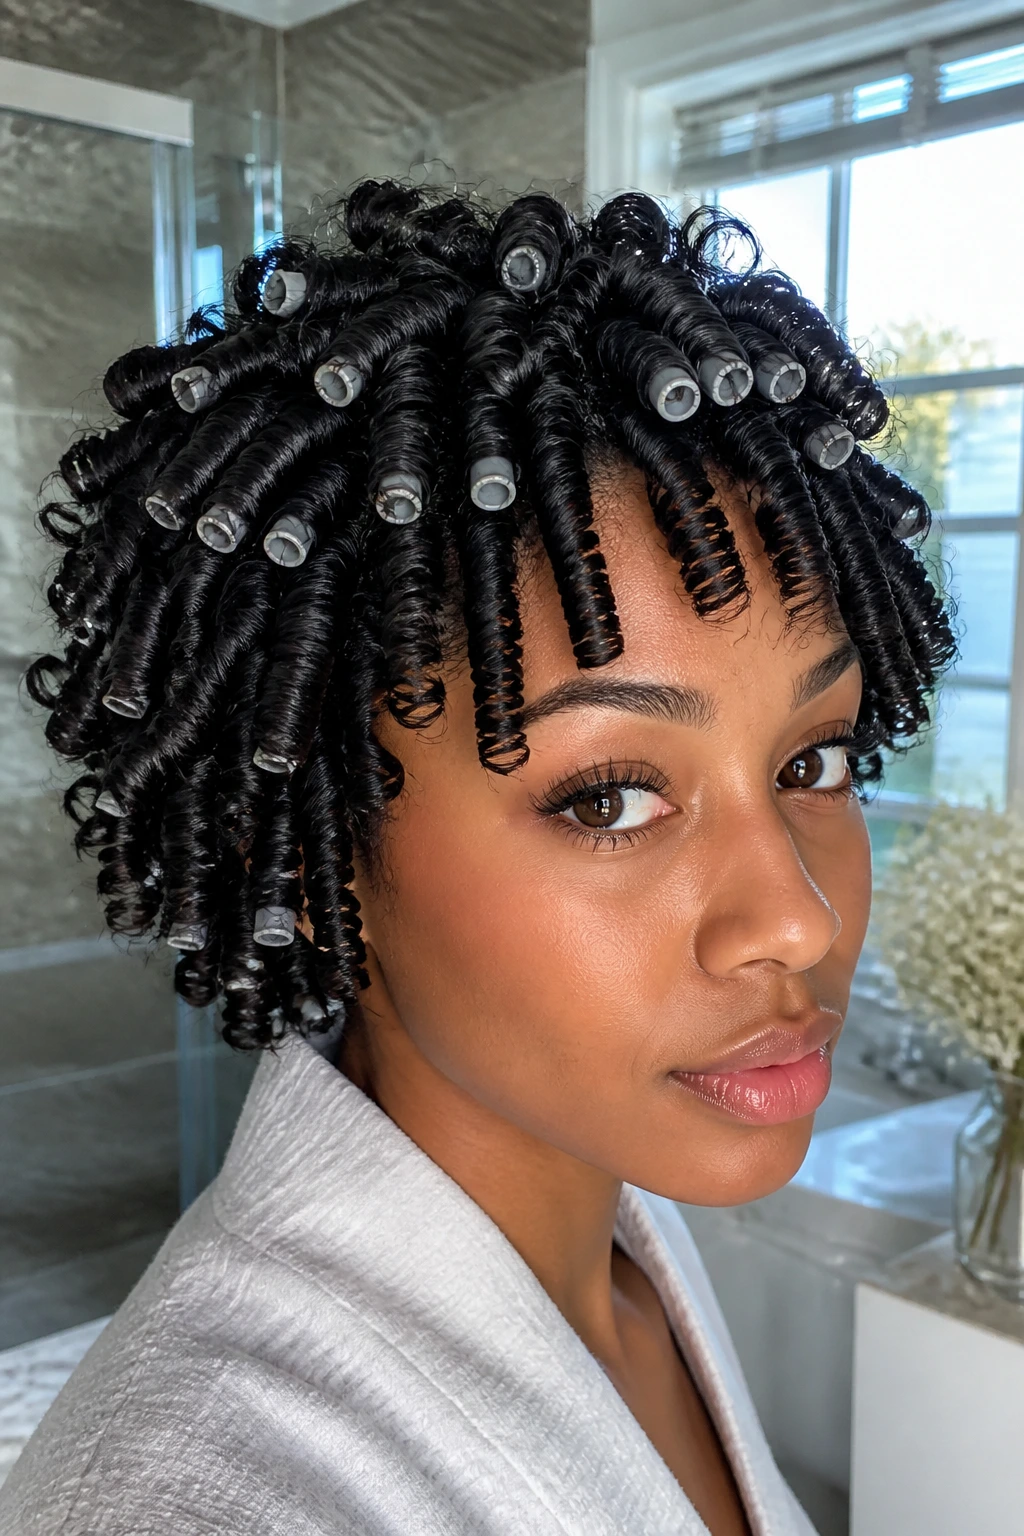
Perm rods give a tighter, more polished spiral than many other set methods. They are especially handy on short to medium lengths, where the curl can pop without dragging the hair down. Use setting lotion or a light gel, wrap the hair neatly, and keep the tension even.
I prefer perm rods when I want the ends to look clipped and tidy. They dry faster than larger rods, though the smaller size can feel more time-consuming to install. If your hair is thick, work in very small parts so the strands do not bunch under the rod. Bunched hair dries unevenly. That is where the frizz starts.
24. Rope-Twist Coils With Soft Ends
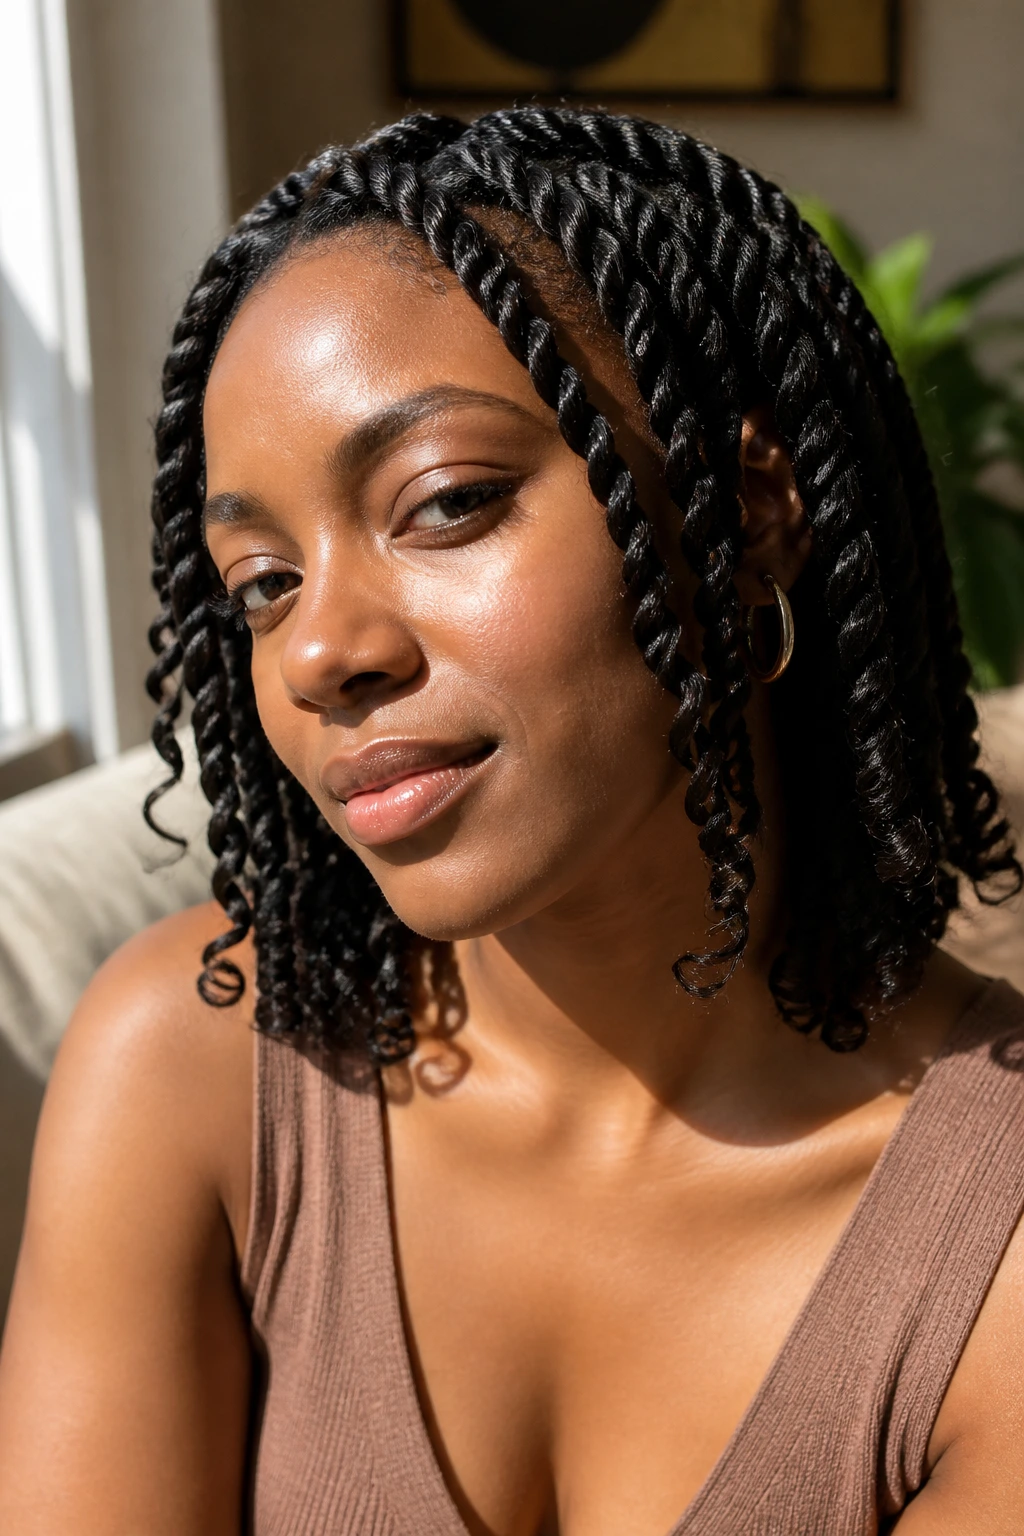
Rope-twist coils sit between a twist-out and a coil set, which makes them useful when you want texture with a little less uniformity. Twist two strands together, then let the ends spiral on their own or wrap them around a finger for a cleaner finish. The style has movement built in.
It works well on coarse or high-density hair because the twist gives the roots more structure. If the ends are prone to unraveling, seal them with a little gel before drying. You do not need a heavy hand here. Rope twists look better when the strands still have some separation.
25. Stretched-Root Coils
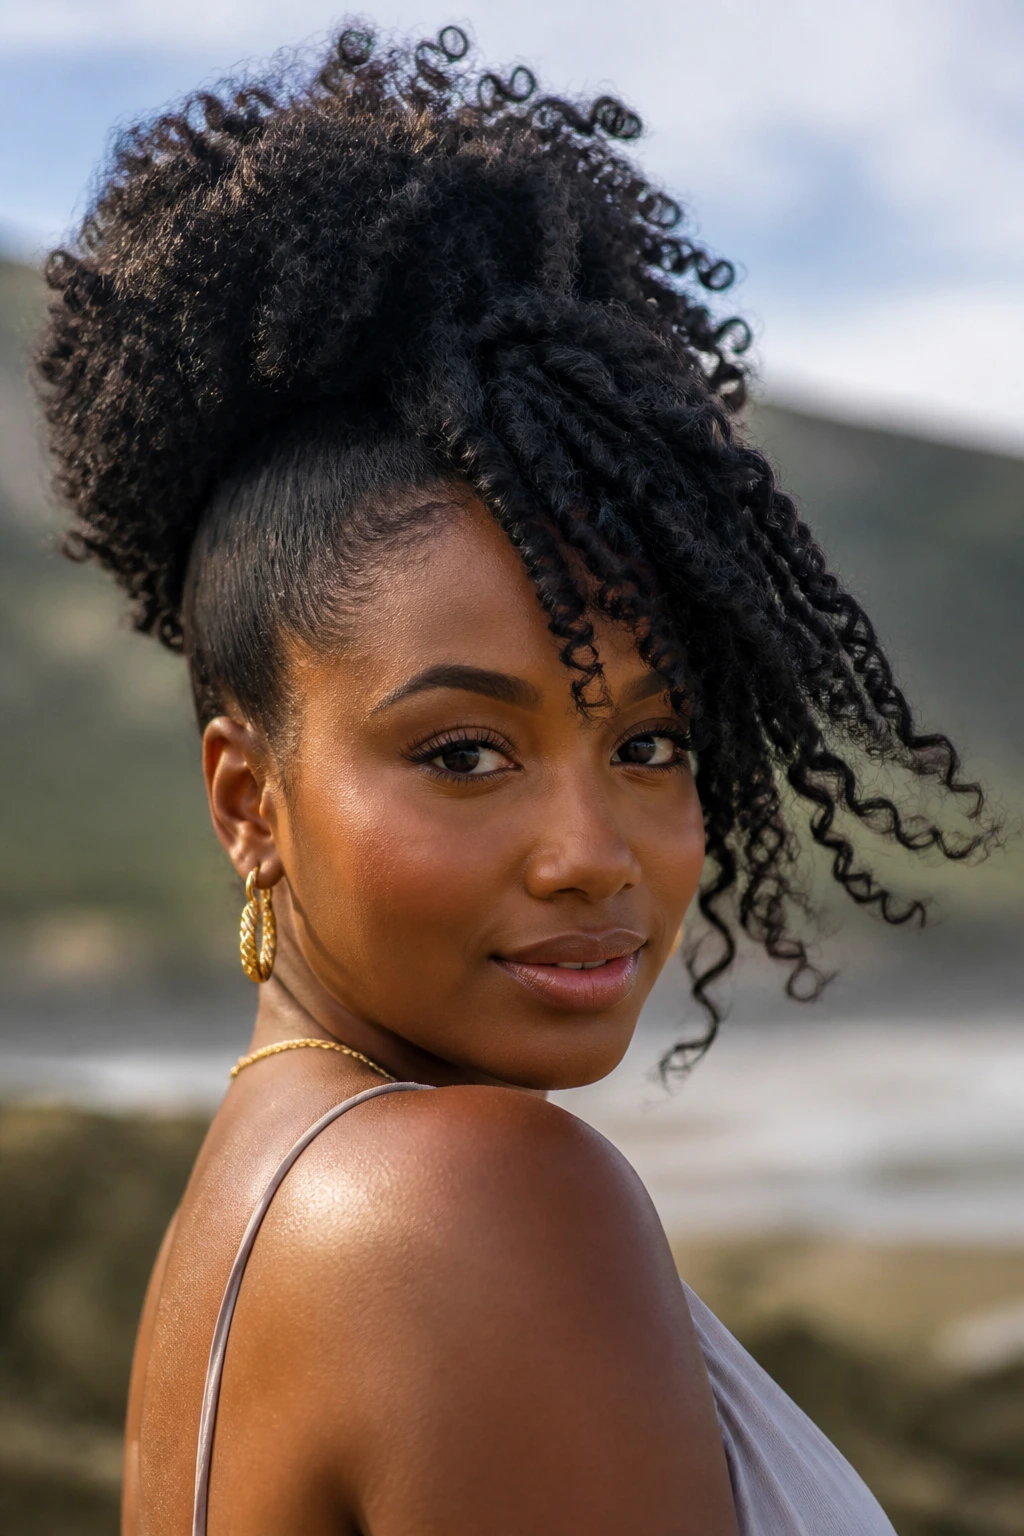
Stretched-root coils are a smart fix when shrinkage is taking over the whole head. Stretch the roots lightly with banding, tension-drying, or a low-heat blow-dry with a protectant, then coil the lengths so the pattern still shows. The style keeps more length visible while preserving the texture.
This is not the time for heavy oil. The stretch needs hold, not slip. I like this on hair that sits very tight to the scalp after washing, because the lifted root gives the coil a more relaxed read. If you use heat, keep it low and move the nozzle constantly. One hot spot can flatten the whole section.
26. Fluffed Coil Fro
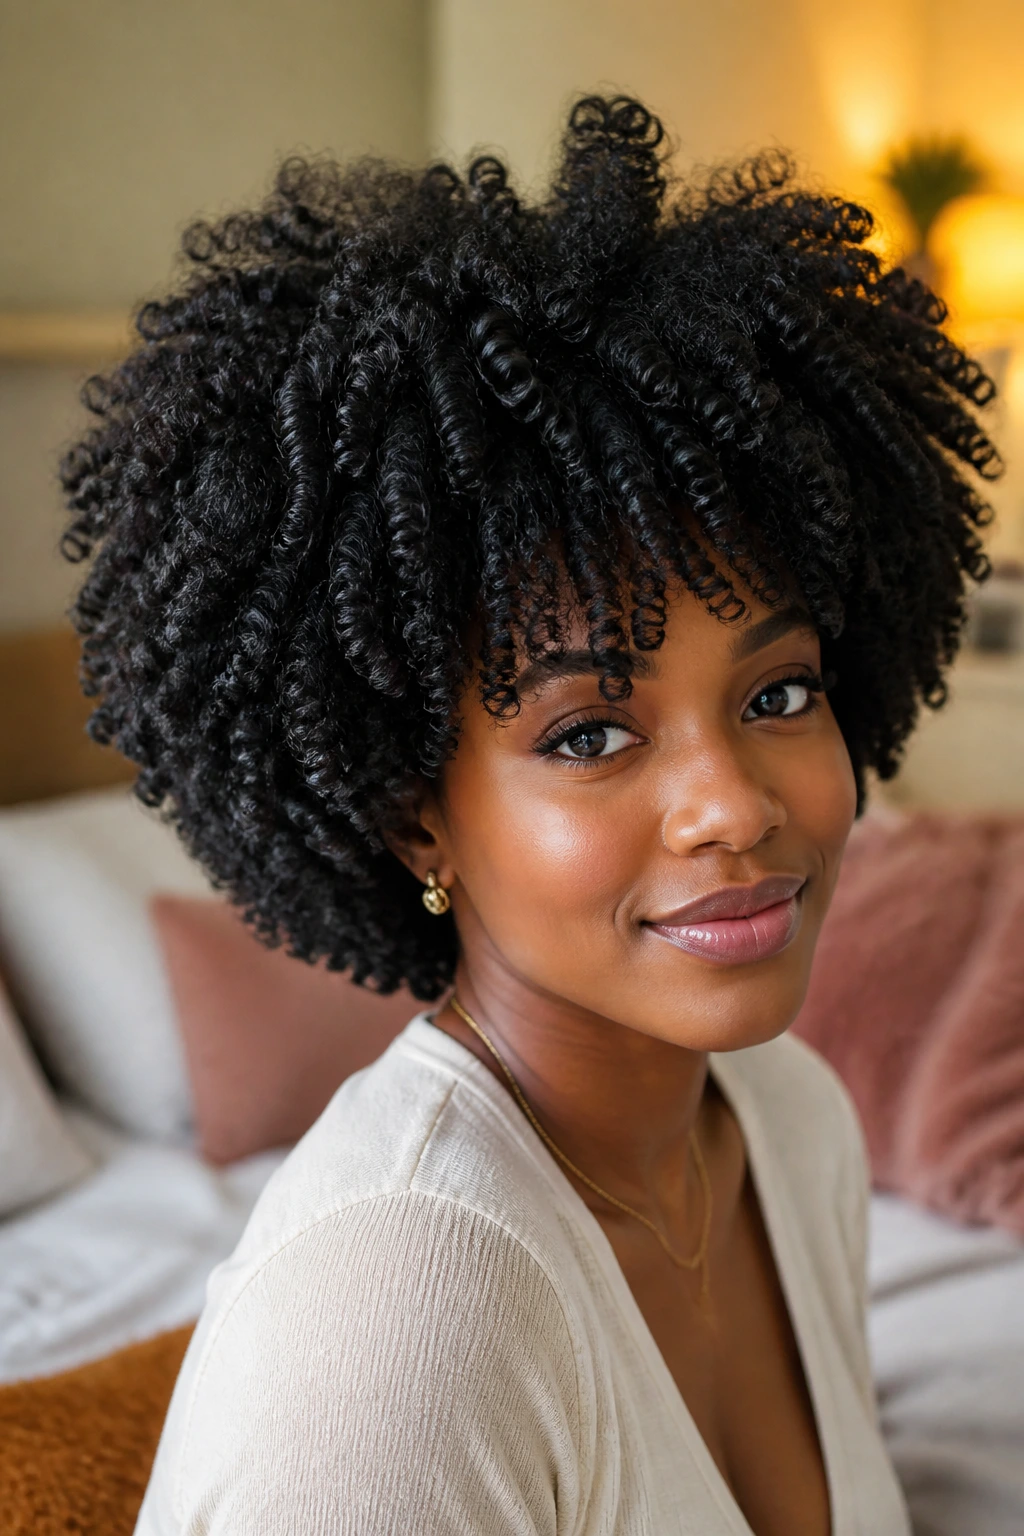
A fluffed coil fro is what happens when you set the coils, let them dry fully, and then separate them enough to create a fuller cloud of texture. It is less about crisp spirals and more about shape, width, and movement. The roots need a little lift, but the coils should still be visible.
Use a pick only at the base, not through the whole length. That keeps the ends from turning into fuzz. I like this look when I want volume for the day but do not want to lose the fact that the hair was coiled on purpose. It reads relaxed, not messy, if you stop separating once the silhouette is balanced.
27. Wet-Look Gel Coils
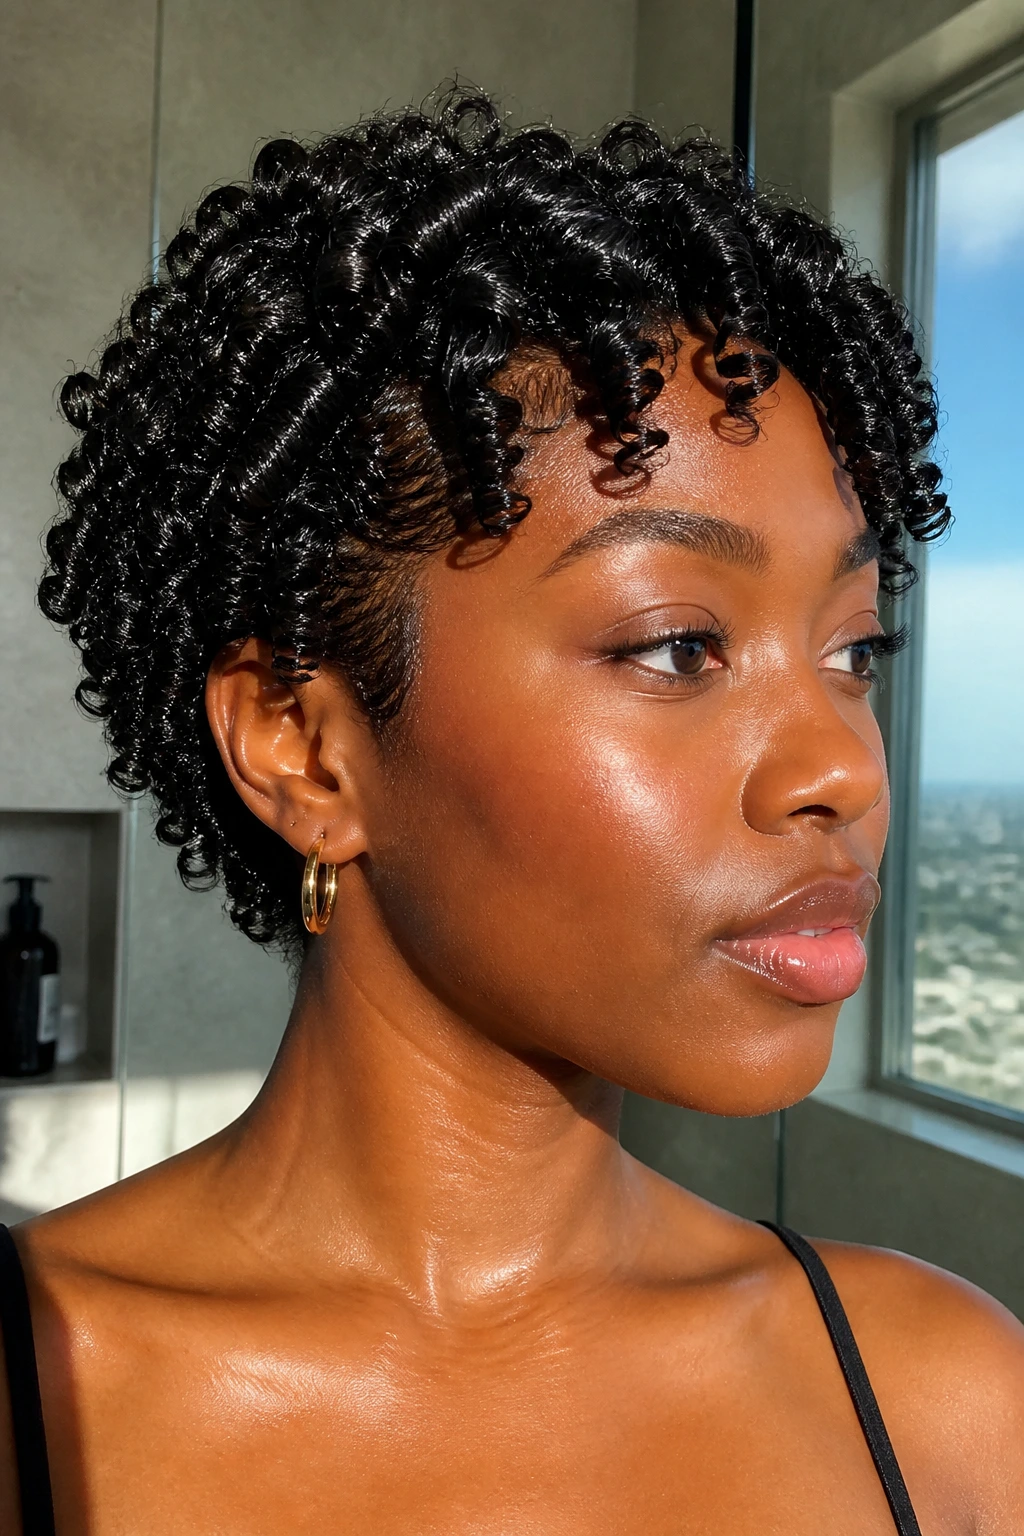
Wet-look gel coils are about shine and hold. The hair looks slick at first, then dries into clean spirals with a glossy finish that holds a little more tightly than a soft coil set. This is one of the sharper options for events, photos, or any day when you want the hair to look controlled on purpose.
The key is restraint with separation. Touch it too much while it is drying and the surface loses that glassy look. A strong-hold gel and thin sections help a lot. If you like a crisp part and a clean outline, this style gives you both without much fuss.
28. Scarf-Accent Coils
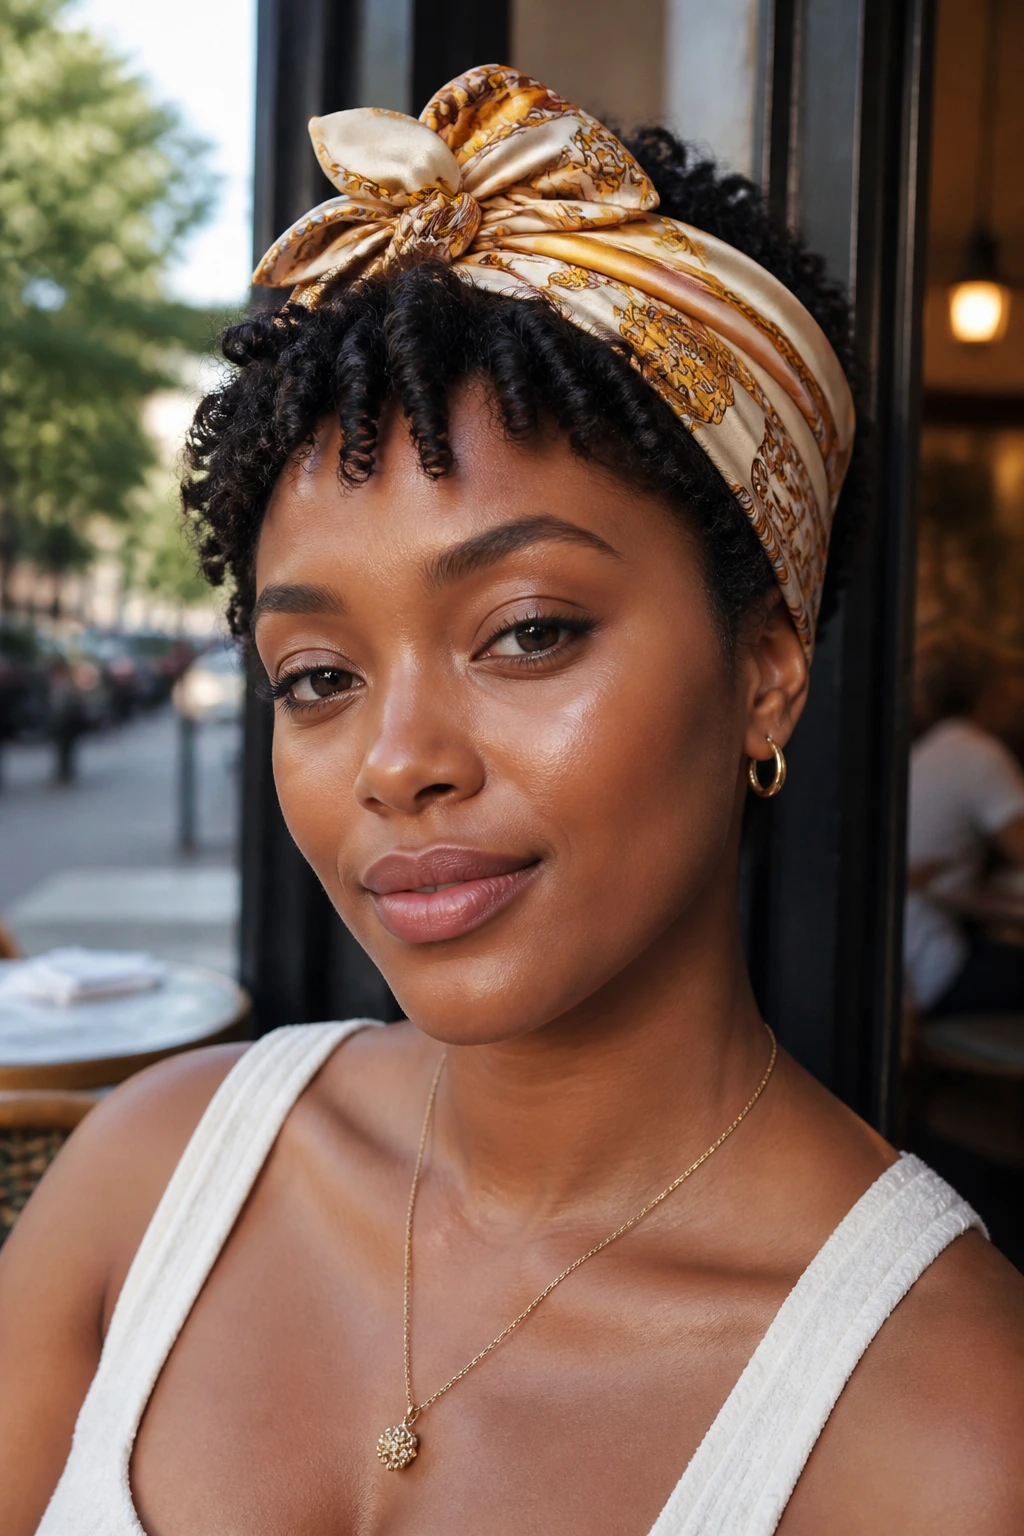
A scarf can change the whole mood of coils in one move. Tie a silk scarf around the hairline, knot a bandana at the crown, or wrap a printed headscarf over the top section while leaving the coils visible below. The accessory does half the styling work.
This is a useful option when the roots need a touch-up but the ends still look good. It also keeps day-old coils from feeling repetitive. A scarf looks especially nice when the coils are side-swept or pinned back, because the fabric creates another line in the shape. Keep it silk or satin if you want to avoid friction.
29. Clip-Back Front Coils
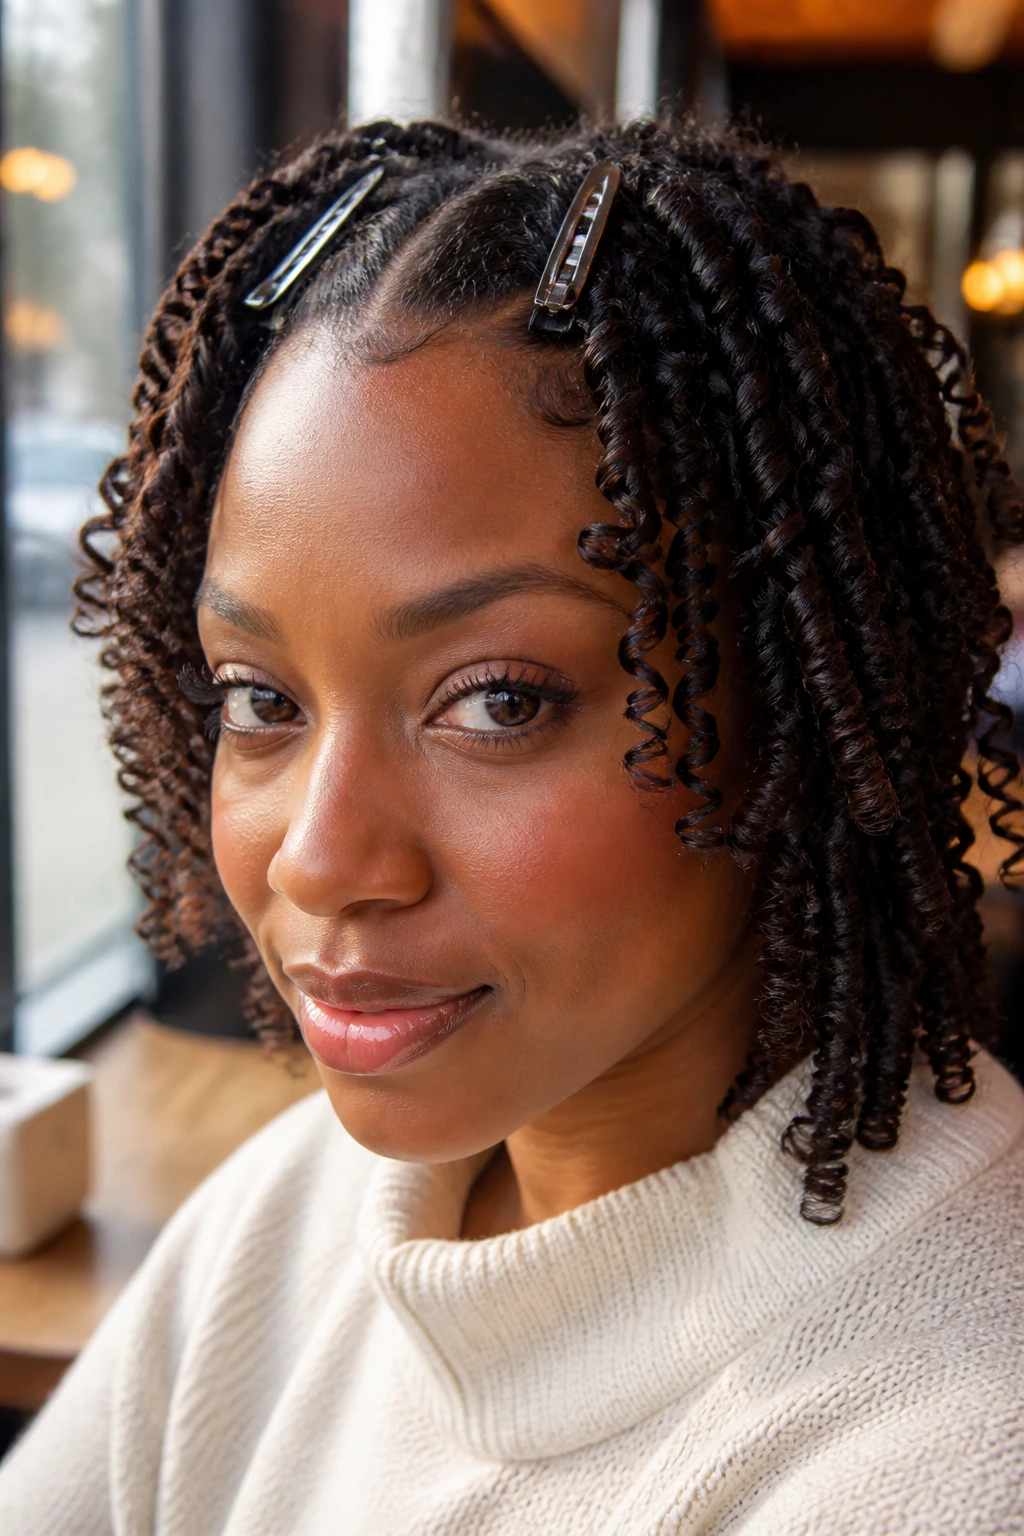
Clip-back front coils are as practical as they sound. Pull the front pieces away from the face with small clips, barrettes, or snap pins, then let the rest of the coils hang free. It keeps the style neat around glasses, makeup, or a humid forehead.
I like this on days when the front line is doing too much. A couple of clips can save the whole style. Choose simple hardware if you want the coils to stay the focus, or go for bold barrettes if you want the accessories to do some talking. Either way, keep the clips flat so they do not dent the hair.
30. Side-Tucked Coils
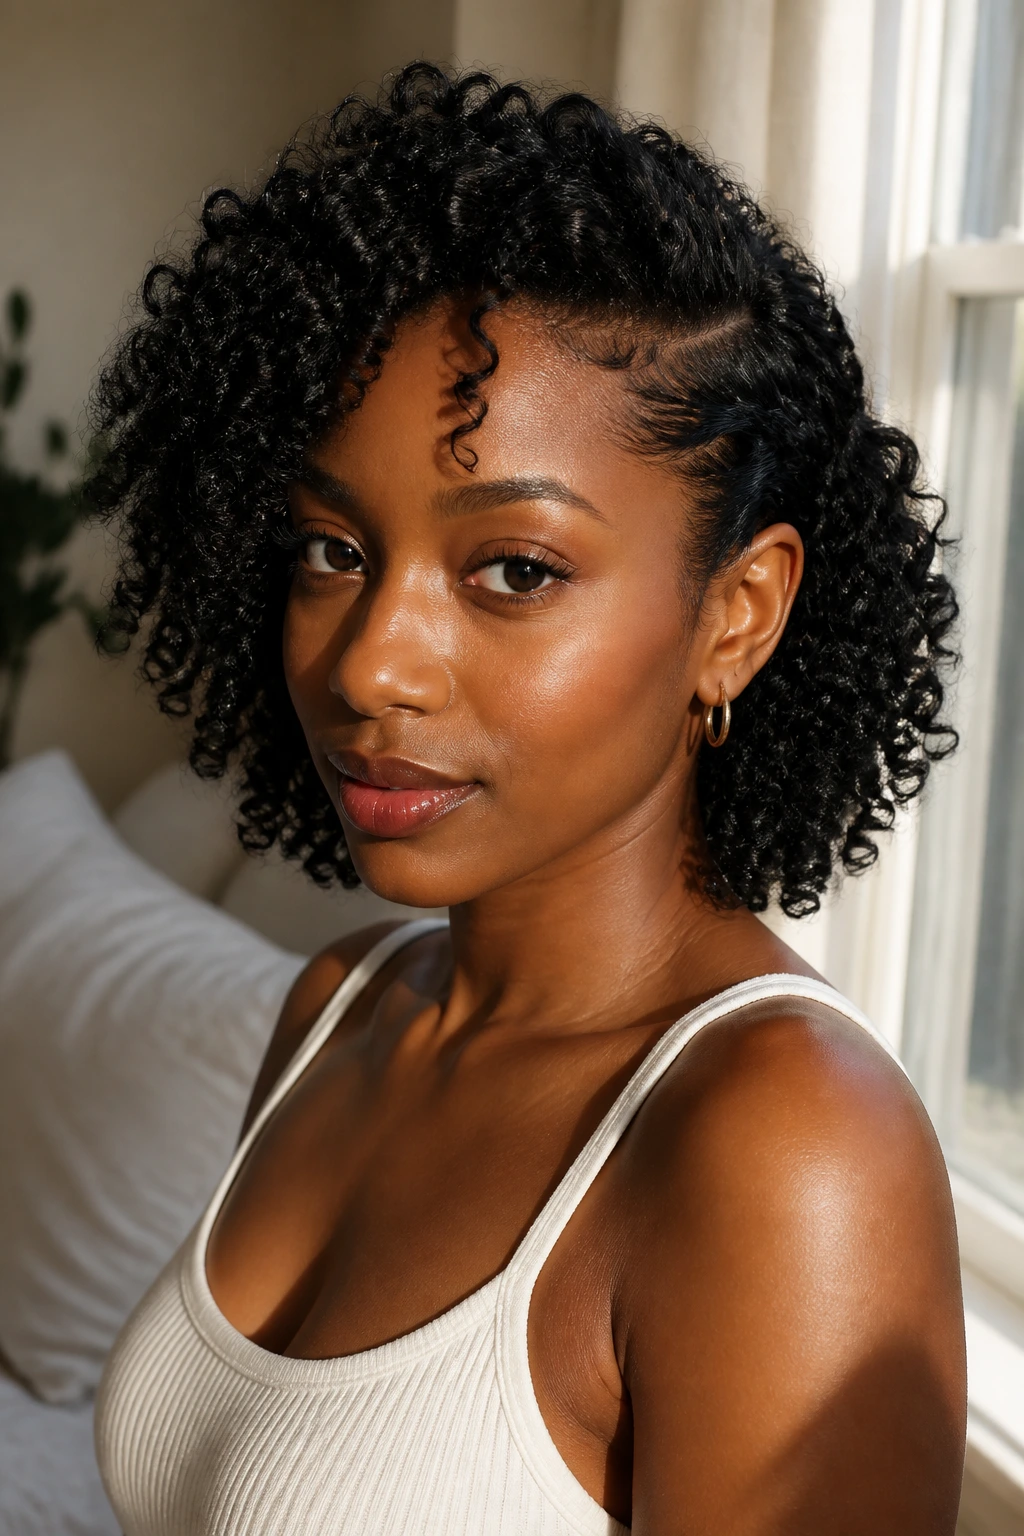
A side-tucked coil style is one of the easiest ways to change the silhouette without touching the whole head. Tuck one side behind the ear, pin it flat if needed, and leave the other side loose. It creates shape fast, which is helpful when one side of the hair is behaving better than the other.
This look works well with earrings because it opens one side of the face. If the tucked side keeps slipping, use a bobby pin underneath the top layer and angle it upward. Small detail, big payoff. The style reads softer than a strict side part and takes less time than a full pinned look.
31. Layered Face-Framing Coils
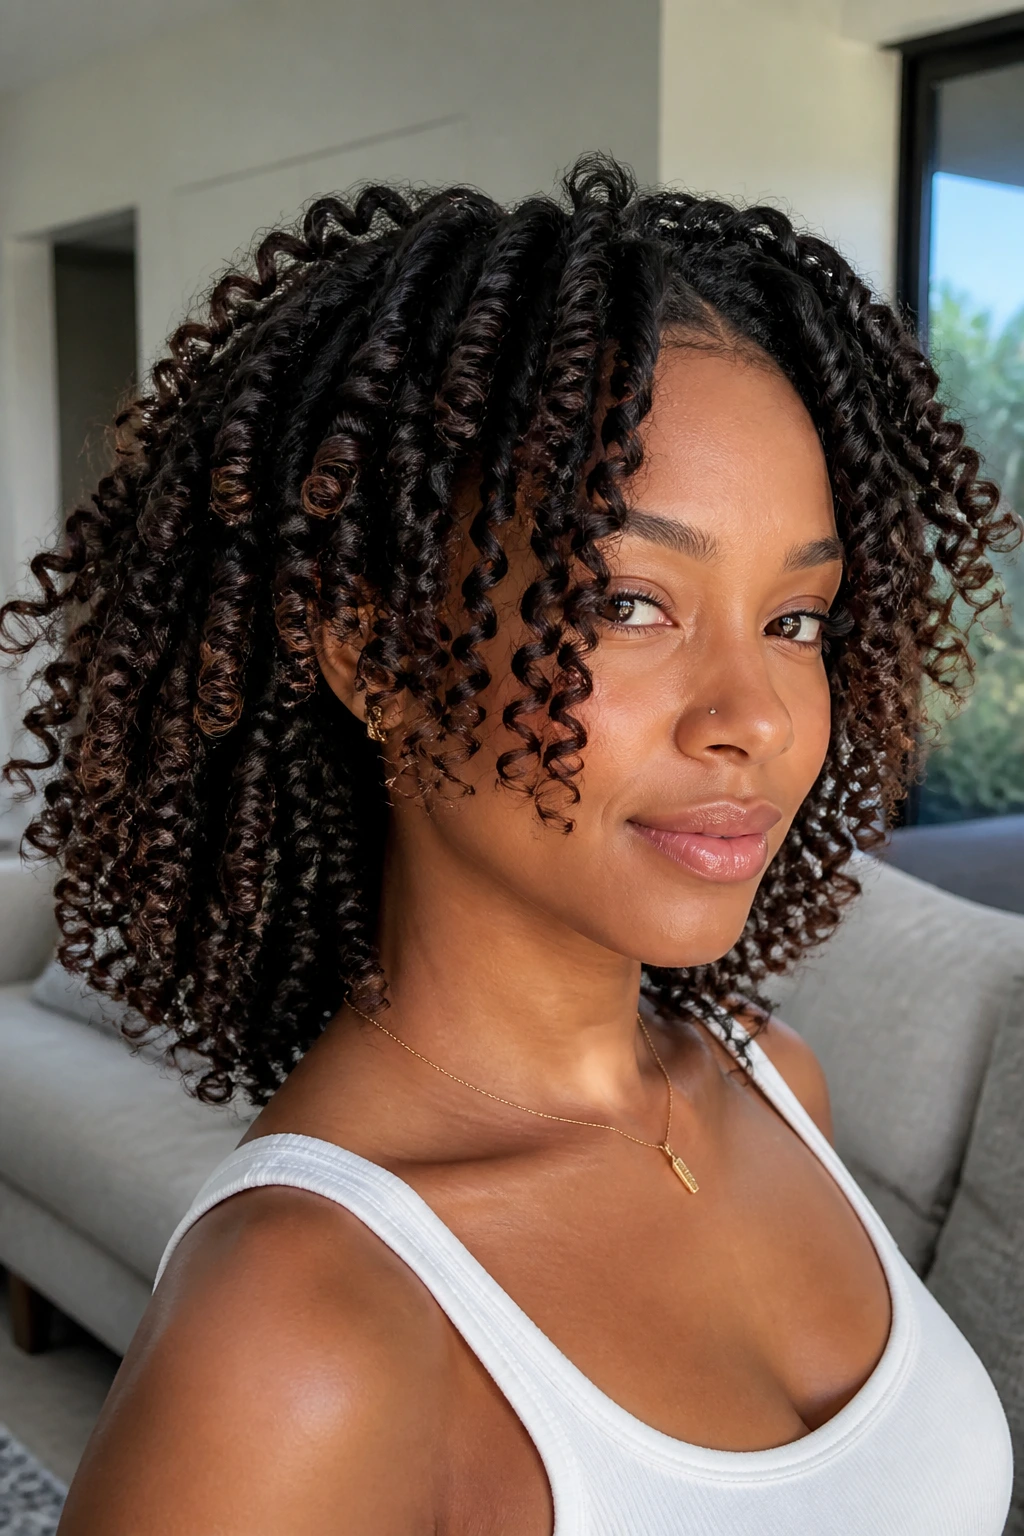
Layered face-framing coils matter when you want the front to move and the back to carry the volume. Shorter pieces around the cheeks and jaw give the whole style shape, especially on longer natural hair that can otherwise turn into a triangle. The layers make the coils look intentional.
If your haircut already has shape, let it do the work. If not, create the illusion by setting the front pieces smaller and leaving the back pieces a little larger. That keeps the front light and the back full. I like this style because it avoids the heavy curtain effect that can happen when every coil sits at the same length.
32. Protective Tuck-In Coils
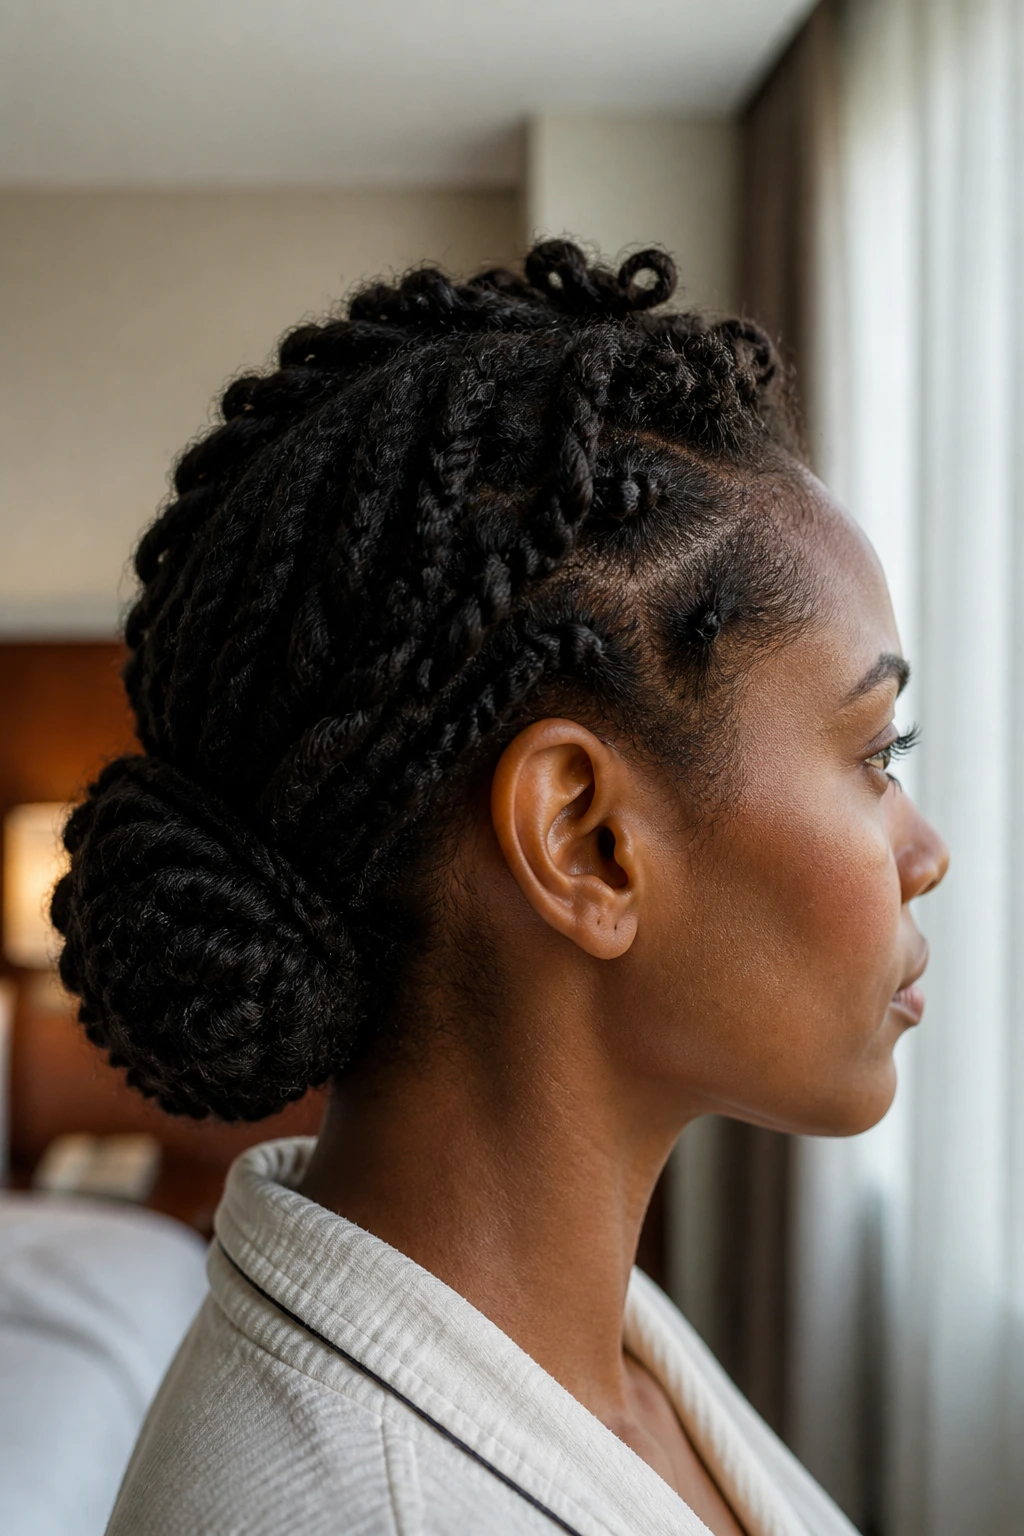
Protective tuck-in coils are for days when you want the ends covered and the hair controlled. Sweep the coils into a low bun, French roll, or tucked crown and pin the ends beneath the shape. The finish can be smooth or textured, depending on how much of the coil you leave visible.
This is one of the better options for travel, long workdays, or any time the weather is trying to flatten your patience. Use enough pins to secure the tuck, then cover the style with a scarf for ten minutes so the base settles. If a few coils peek out, leave them. The style looks better when it does not try too hard.
Essential Equipment for These Styles
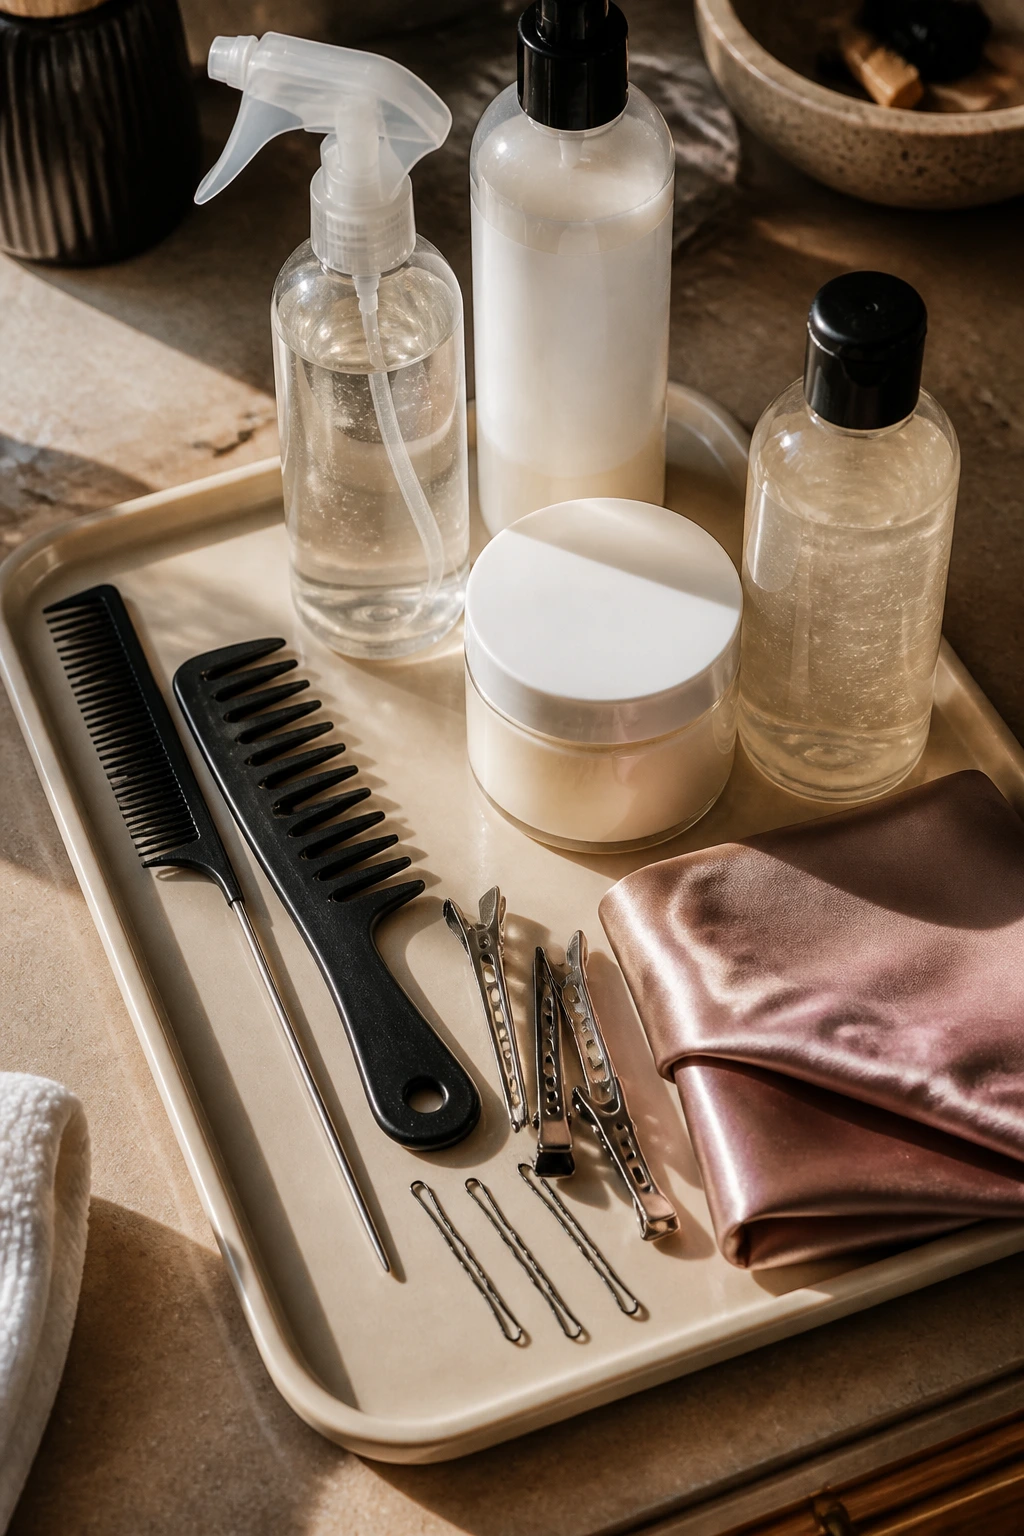
- Rat-tail comb: Sharp parts and even section sizes start here; a metal tail gives cleaner lines than a soft plastic one.
- Wide-tooth comb: Helps distribute leave-in or cream without ripping through the curl pattern.
- Spray bottle: Keeps the hair damp while you work; you want damp, not dripping.
- Leave-in conditioner: A water-based formula gives slip and keeps the coils from feeling dry at the core.
- Curl cream or styling lotion: Useful for finger coils, two-strand coils, and softer finishes.
- Strong-hold gel or custard: Gives the coil memory and helps the set survive humidity.
- Mousse or foam: Good for rod sets, Bantu knots, and softer wet-look styles.
- Duckbill clips: Keep finished sections out of the way while you work through the rest of the head.
- Bobby pins and small elastics: Needed for puffs, updos, tucked styles, and side sweeps.
- Satin scarf and bonnet: Protect the shape overnight and keep the edges from puffing up.
- Hooded dryer or diffuser: Optional, but helpful when the air is humid or time is tight.
- Flexi rods or perm rods: Needed for rod sets and spiral styles that need a uniform curl.
Smart Shopping and Product Tips for Coil Definition
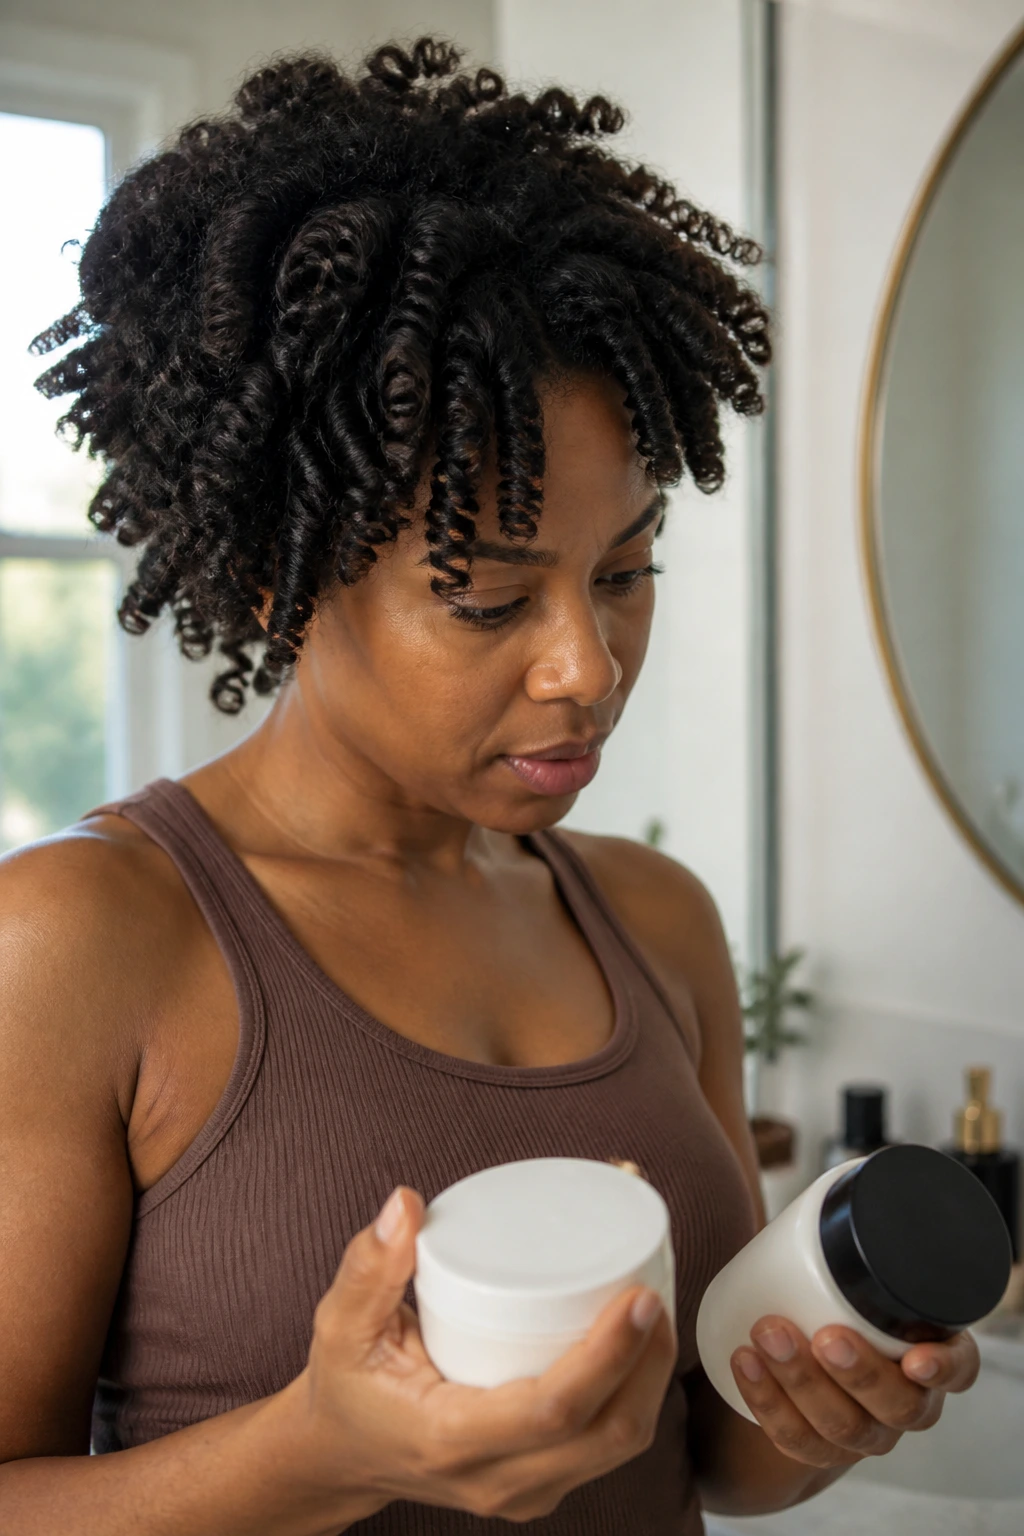
The product label matters less than the hold. A jar can promise softness, shine, or definition, but if it leaves your hands greasy after ten seconds, it will probably make coil sets slide before they dry. I look for water in the first few ingredients on leave-ins and gels that dry clear or close to clear. That usually means less buildup and less white cast around the roots.
Heavy butters are the fastest way to flatten a coil set. They can feel nice while you are smoothing the hair, then they coat the strand so the coil never really locks. If your hair is coarse and dry, use a lighter leave-in underneath and save the heavier cream for the ends only. Fine or low-density hair usually does better with mousse, foam, or a lighter custard.
Humidity changes the game. In wetter air, a stronger gel or a mousse with more hold often beats a soft curl cream because the style needs memory more than slip. In drier air, you can get away with a creamier base. That is one of those annoying truths that hair teaches over and over. The texture of the room matters.
For rods and knot sets, avoid piling on oil before the hair is wrapped. It slows drying and can blur the curl. A clean, evenly coated strand works better than a shiny one that still feels slippery an hour later. If you color your hair, keep an eye on the ends — they can get dry fast, so a little leave-in there helps more than grease on the scalp.
How to Wear These Styles So They Frame the Face
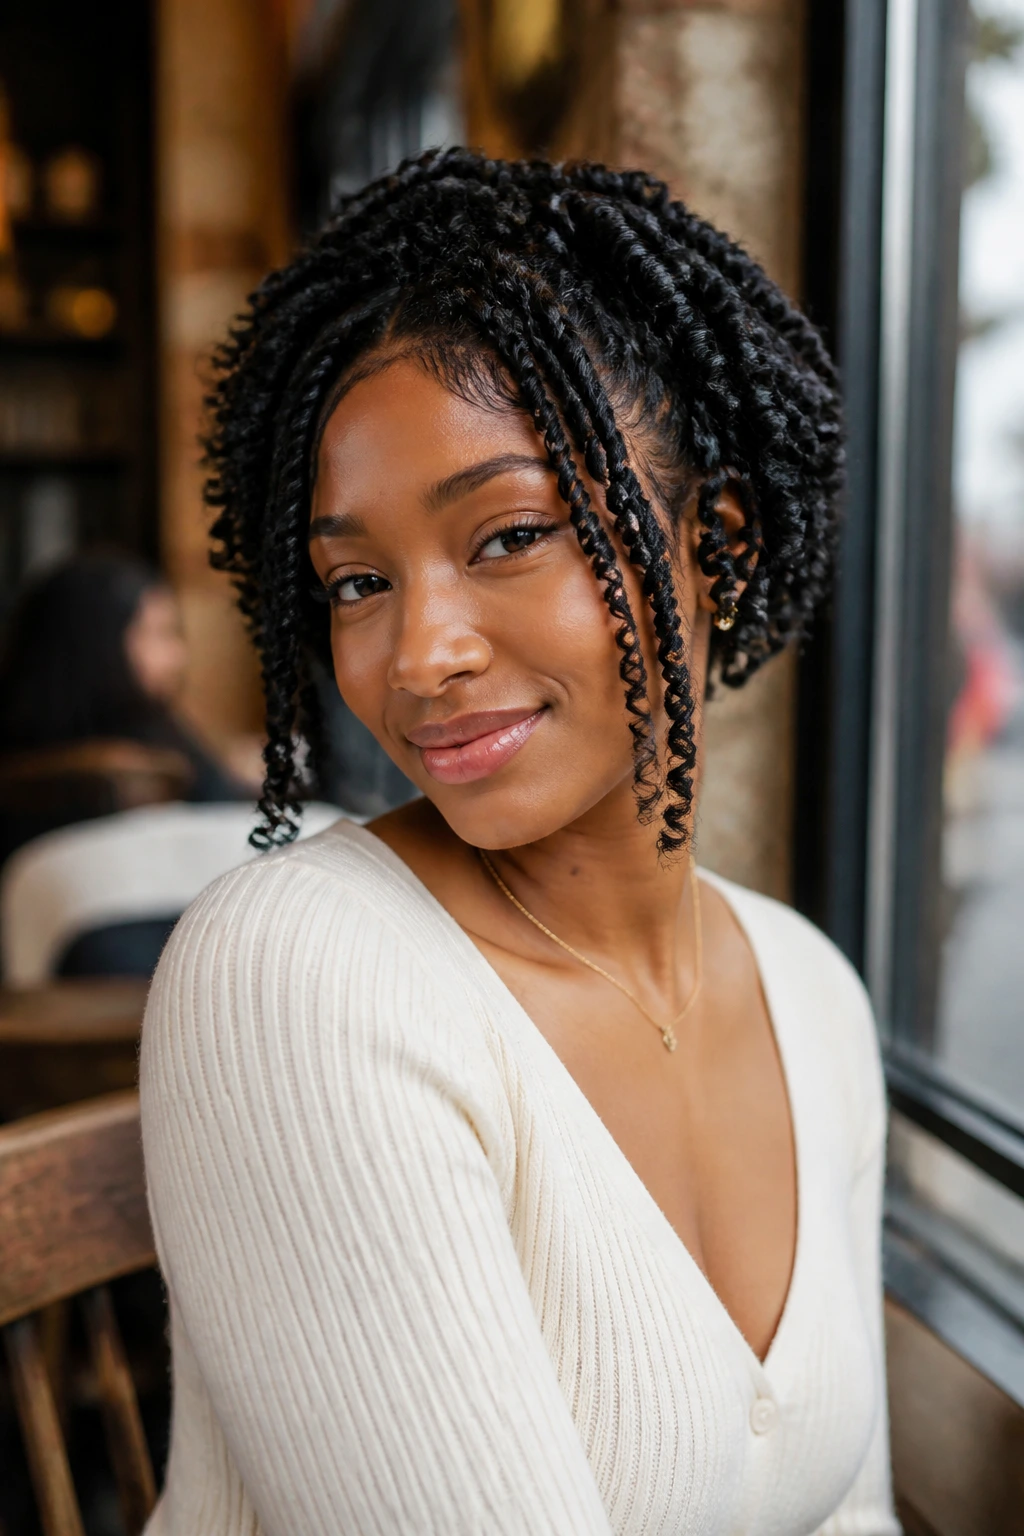
Presentation: Clean part lines and consistent coil size make the style read sharper; looser separation and a lifted root make it read softer. If you want the coils to sit close to the head, leave them alone after drying. If you want more shape, separate them with oiled fingertips and stop once the pattern opens.
Accessories: Small hoops, satin scarves, hair cuffs, and flat clips change the look in one step. Coils plus a clean neckline look different from coils with a turtleneck or a collar, so think about the whole shape around your face and shoulders.
Best Matches: Side parts work well with rounder faces and stronger cheekbones because they break the symmetry. Center parts feel calmer and more balanced. If you wear glasses, clip-back front coils and side-tucked styles keep the temples clear.
Length Guide: Short natural hair looks strongest with tighter coils, rods, and tapered shapes. Longer hair can handle puffs, layered coils, bob shapes, and tucked crowns without losing movement. The same coil pattern can read small or big depending on length, so use that on purpose.
Additional Tips and Finishing Touches
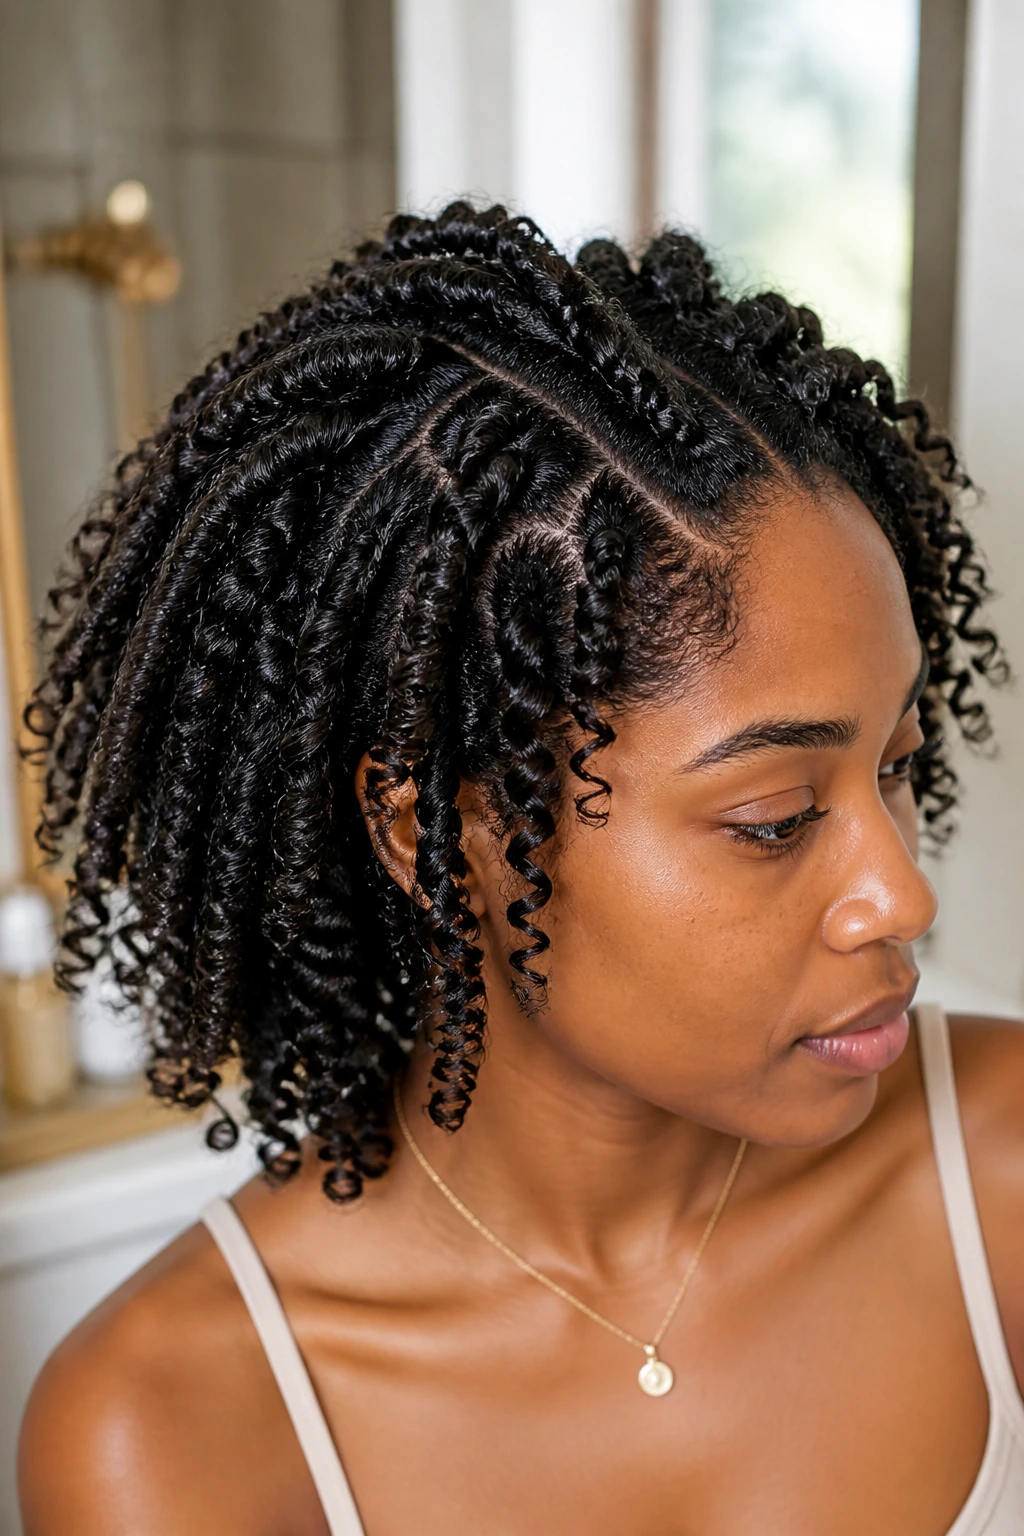
Shine Boost: Use two or three drops of lightweight oil only after the hair is fully dry. Put it on the ends first. If the roots look dull, a little mist of water with a pea-size amount of leave-in in the palms works better than pouring on more oil.
Frizz Control: The crown frizzes first on a lot of coil styles. If that happens, smooth the roots with damp fingers and a tiny bit of gel, then tie a satin scarf around the hairline for ten minutes. Do not chase every fuzzy strand. A little texture at the top is normal.
Time-Saver: Part the whole head before you start coiling. Once the map is set, clip each row out of the way and work one quadrant at a time. That keeps the sections even and stops you from backtracking when the hair starts to dry.
Make-It-Yours: Add a zig-zag part, a front braid, or a few clear clips if you want a less plain finish. On formal days, hair cuffs or a narrow scarf can pull the style together fast. Keep the extra piece light so it does not fight the coil pattern.
Night Care, Refreshing, and Make-Ahead Maintenance
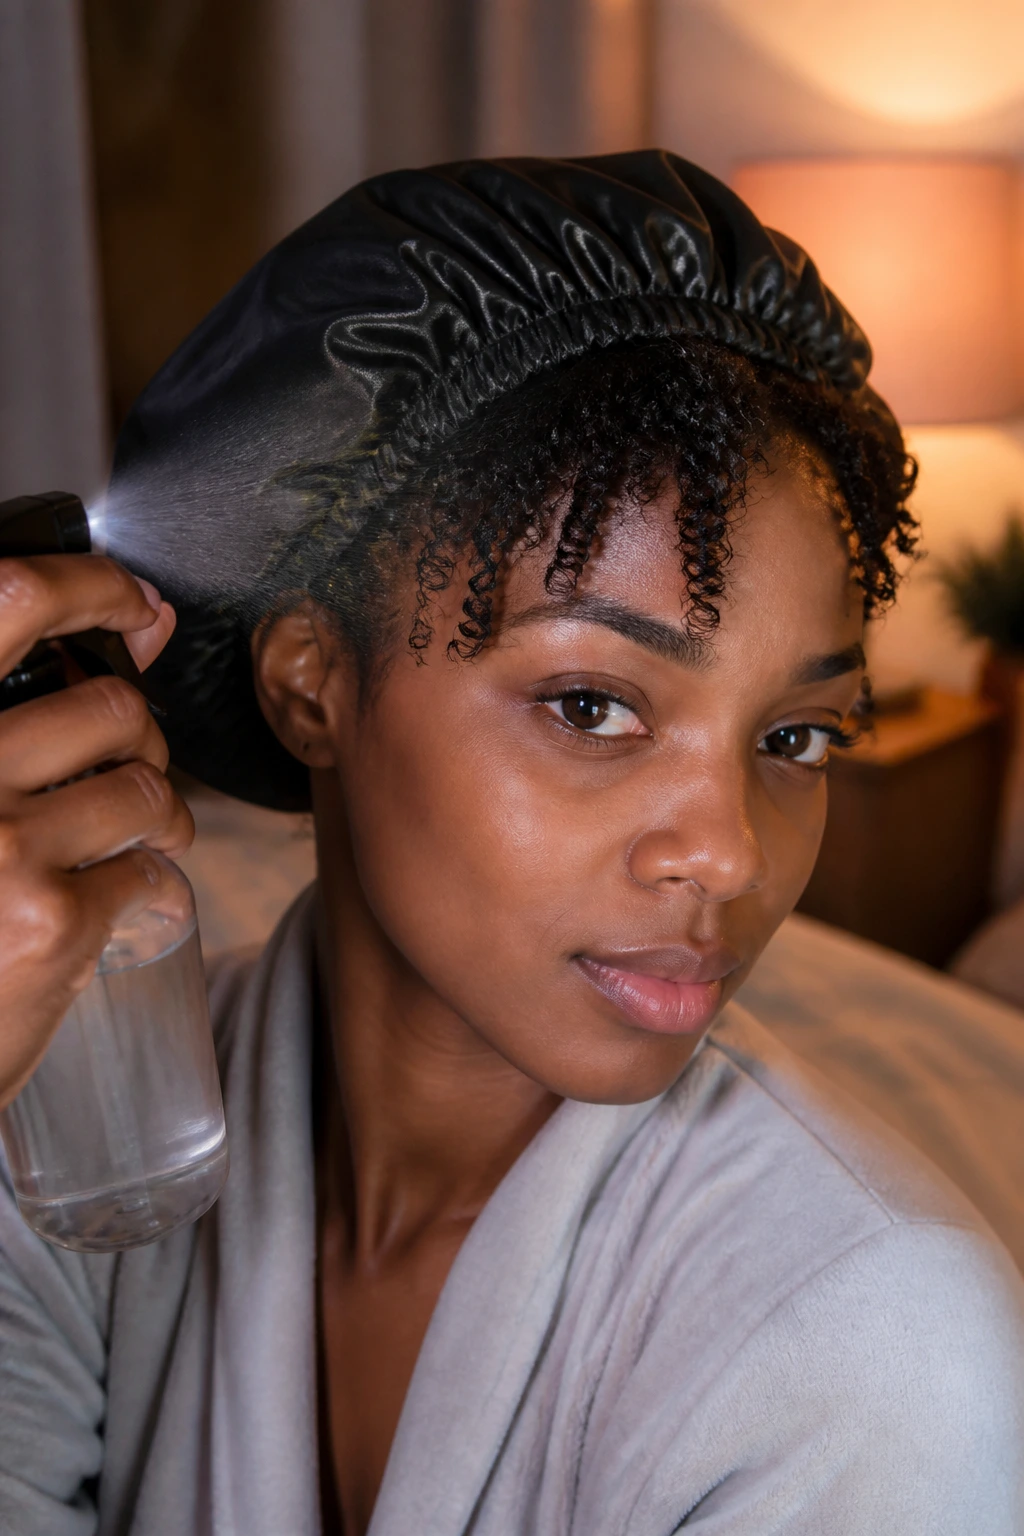
Most coil styles hold for 3 to 5 days when you protect them at night. Mini coils, perm-rod sets, and comb coils often last longer because the pattern is tighter. Bigger puff shapes, side sweeps, and fluffed coil styles need a touch-up sooner, usually around day two or three. The style that stretches the most is usually the one that needs the most care.
A satin bonnet helps, but a scarf at the hairline helps more than people think. The front is where friction shows first. If the crown tends to flatten, pineapple the hair loosely before the bonnet goes on. You want the coils to sit with room, not packed down hard against the scalp.
For refreshing, use a spray bottle with water and a tiny amount of leave-in — about 8 ounces water to 1 teaspoon leave-in is enough for most sets. Mist the hair lightly, then smooth the frizzy parts with damp hands. If one coil has lost its shape, re-wrap only that section around your finger and pin it for a few minutes. Do not soak the whole head again unless you plan to reset it.
If you want to make part of the style ahead of time, section the hair and apply product the night before, then finish the coiling in the morning. That saves time on busy days and keeps the product distribution even. A rod set or knot set can also be installed the night before and taken down only when the hair is fully cool and dry. That is the difference between a neat finish and a fuzzy one.
Common Mistakes That Flatten Coils or Make Them Frizzy
- Starting with hair that is too wet: Soaking hair takes forever to dry and makes the roots puff before the ends set. Use damp hair that feels cool and pliable, not dripping.
- Making every section a different size: Uneven parts dry unevenly, so some coils look tight while others balloon. Keep the section size consistent, especially across the front row.
- Using heavy butter under strong gel: The coil may look smooth at first, then slide apart and leave flakes or limp roots. Pick one main styler and keep the layers light.
- Pulling the coils apart too early: If the hair is still warm or slightly damp, the pattern will frizz and lose shape. Wait until it is fully dry and cool.
- Sleeping on cotton: Cotton grabs moisture and roughs up the surface. Satin or silk keeps the finish smoother overnight.
- Overseparating: A coil can open into two or three pieces. Beyond that, the pattern turns fluffy in a hurry. Stop before the coil disappears.
Variations and Adaptations to Try
Short-Crop Coil Set: On a short TWA, use tiny comb coils or mini finger coils with a strong-hold gel and a precise part. This version dries fast under a hooded dryer and keeps the cut looking sharp. It is the easiest route if you want crisp shape with very little length.
Soft Volume Coil-Out: Make the sections slightly larger, then separate the coils once they are dry for a softer cloud of texture. This works well when you want movement and width instead of exact spirals. It is a good choice for medium to long hair that gets flat when over-styled.
Event-Gloss Finish: Use a hard-hold gel, keep the parts clean, and leave the coils almost untouched after drying. The result is sleeker and shinier, which suits formal looks, photos, or evenings out. Add a scarf for ten minutes before leaving the house to smooth the hairline.
Low-Tension Coil Updo: Gather the coils into a pinned crown, bun, or tuck-in style without pulling the scalp tight. This helps when your scalp is tender or you need the hair off your neck. It can look polished without feeling locked down.
Kid-Friendly Coil Style: Use fewer sections, a softer styler, and minimal pulling at the roots. Bright clips or small bows can make the style feel fun without adding weight. Keep the session short; kids notice every tug.
Questions People Ask Before They Try Coil Styles
How long do coiling styles usually last?
Most hold for 3 to 5 days, and tighter sets can stretch to nearly a week if you sleep on satin and avoid over-touching them. Bigger shapes and accessory styles need more frequent refreshing because the silhouette changes faster.
Are finger coils better than comb coils?
Finger coils usually feel softer and take a little more time, while comb coils give a sharper finish on short hair. If you want a neat outline and faster sectioning, comb coils win. If you want a gentler, hand-shaped spiral, finger coils are the better pick.
Can I do coiling styles on stretched hair?
Yes, and stretched hair often makes the style sit longer because there is less shrinkage at the root. Use a lighter product load so the coil does not slip. Stretched-root coils also work when you want the length to show more.
What if my coils frizz at the roots first?
That usually means the roots were not set firmly enough or the hair was touched before it cooled. Smooth the roots with a little water and gel, then tie a scarf around the hairline for ten minutes. If the frizz keeps showing up, make the sections smaller at the front row.
Do I need gel for every coil style?
No, but you do need hold. Mousse works for softer rod sets, and a styling lotion can be enough for loose two-strand coils. For crisp finger coils or wet-look sets, gel is the safer choice.
Can I refresh coils without washing my hair again?
Yes. A light mist of water and leave-in, followed by a gentle finger reset on the flattened spots, is usually enough. If the style has gone past saving, redoing the front row and crown can bring it back without a full wash day.
Are these styles protective?
Some are low-manipulation, and some protect the ends better than others, but not every coil style is fully protective. Tucked styles, crown updos, and pinned versions shield the ends best. Loose coil styles still leave the ends exposed, so they need more care at night.
What is the best style for short natural hair?
Precision comb coils, mini coils, and tapered coil looks usually give the cleanest result on short hair. They keep the silhouette close to the head and make the length look intentional. Rod sets can work too, but the shape depends on how much length you have to wrap.
Coils That Still Move
The best coil style is the one that fits your week, your length, and how much time you want to spend in the mirror. Tight comb coils can give you structure. A puff, a side sweep, or a tucked crown can give you ease. Rod sets and knot-outs bring a different kind of finish, one that reads a little more rounded and a little less exact.
Pick one style that matches the day you actually have, not the day you wish you had. Try a mini set when you want definition, a softer puff when you want speed, and a pinned style when you need the hair to stay off your face. Coils are at their best when they look like they belong to your texture, not someone else’s idea of it.
