



A frohawk on curly natural hair has a useful trick: it gives you height where you want it and keeps the sides clean without flattening the texture. That matters because curly hair looks best when the shape works with the curl pattern instead of bullying it into submission with a gallon of gel and a prayer.
Frohawk hairstyles for curly natural hair can lean soft, sharp, playful, or dressed up. A few bobby pins and a strong center ridge can make the style look sculpted; a looser twist-out or puff stack turns it into something that moves when you turn your head. The sides can be slicked, braided, twisted, or tucked so far back they almost disappear.
Shrinkage is part of the charm. So is contrast. A frohawk that looks almost small while you’re styling it can open into a tall, airy shape once the curls dry, which is why the best versions are planned with a little room to grow.
Why These Frohawk Styles Stand Out
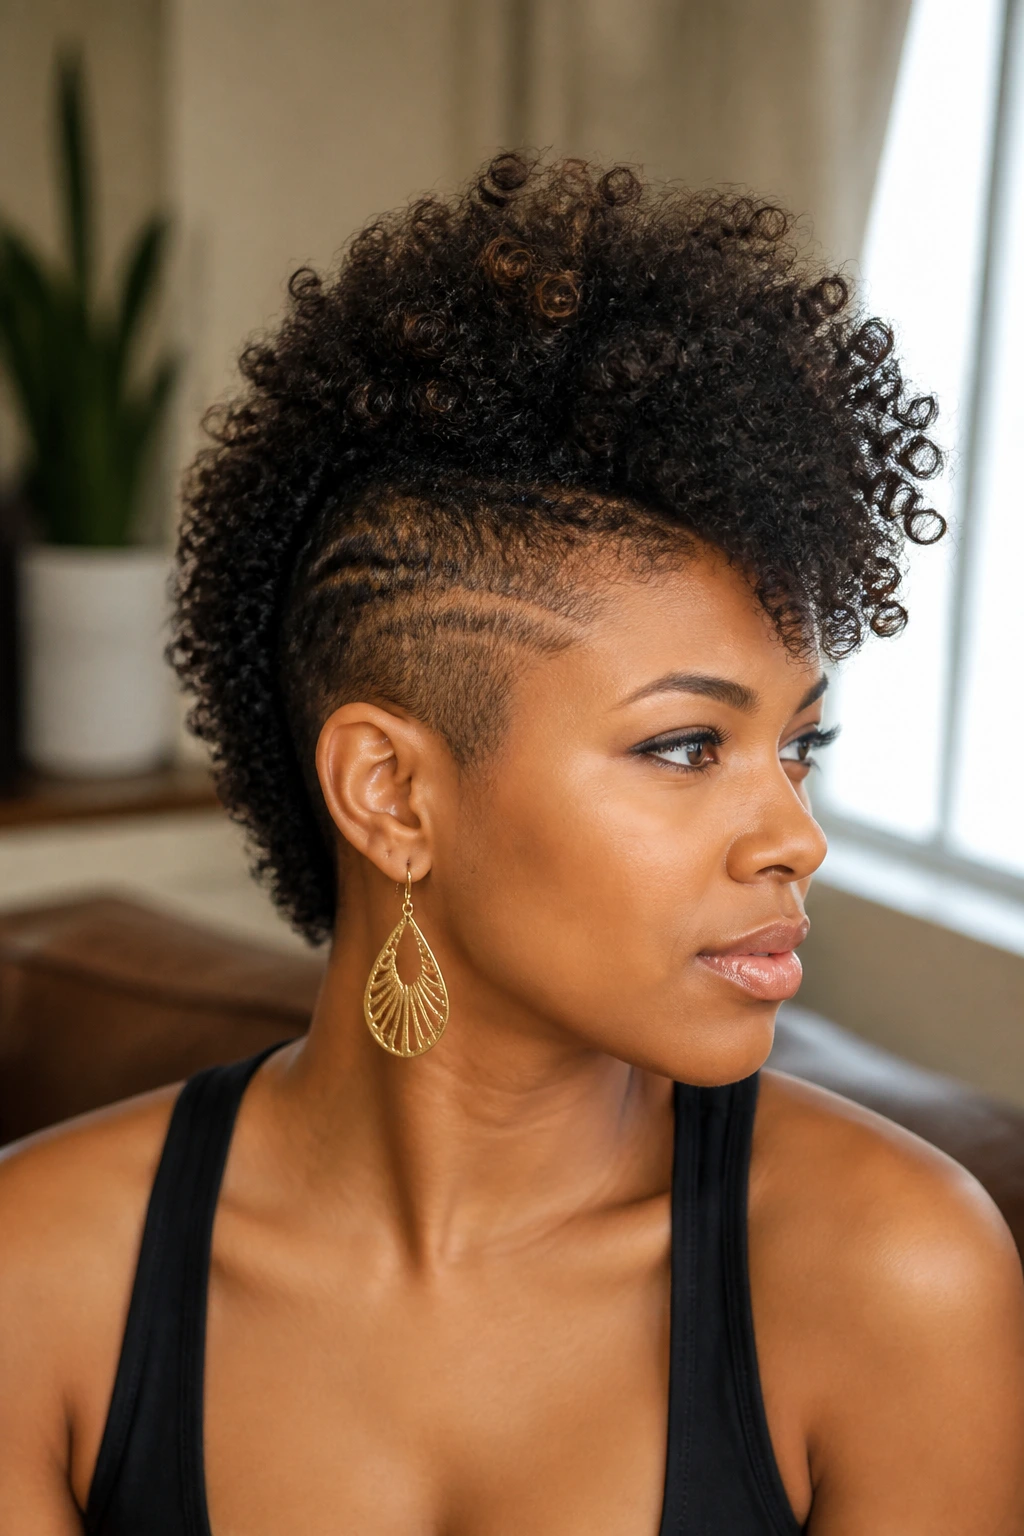
-
Low-tension options: Many of these looks keep the sides braided, twisted, or pinned instead of yanked tight, which matters when your edges get tired fast.
-
Curl-friendly shape: The center ridge lets coils, curls, and stretched textures stay visible, so the style reads as a frohawk instead of a flat updo.
-
Range of wear times: Some versions are a one-evening style; others can last several days if you pin them carefully and sleep on satin.
-
Flexible for length: Short curls, shoulder-length coils, and longer stretched hair can all work here with a few changes in section size and pin placement.
-
Easy to dress up or down: Swap a headband for cuffs, or leave the crown soft and loose, and the whole mood changes.
1. Classic Pin-Side Frohawk
The classic version is the one most people picture first: smooth sides, a raised strip of curls through the middle, and enough height to make the silhouette read from across the room. It’s clean, a little dramatic, and mercifully simple once you learn where to place the pins.
What makes it work is the contrast. The sides stay close to the head, while the center gets coaxed upward with defined curls or a stretched twist-out. Use a strong-hold gel on the temples and nape, then hide bobby pins under small curls instead of lining them up like metal dots. That little bit of concealment makes the style look finished instead of rushed.
2. Wash-and-Go Frohawk
If your curls already clump well, this version can be the easiest one to reach for. You keep the natural coil pattern intact, set the sides back, and let the center dry into its own shape.
The key is timing. Apply your leave-in and gel while the hair is soaking wet, then shape the middle strip with your fingers before the cast forms. If you wait until the hair starts drying, you’ll get frizz in the center and that awkward half-committed puff that never quite lands.
3. Twist-Out Frohawk
Twist-out texture gives a frohawk more body than a wash-and-go, and I like that it doesn’t collapse as fast under a little humidity. The twists bring definition, but once you separate them, the curls look soft rather than stiff.
This version works especially well when you want the hawk to look full without being crunchy. Unravel the twists with oiled fingertips, not dry hands, and stop separating the curls once you see a nice open pattern. Over-picking the hair turns the whole style into a cloud in five minutes flat.
4. Flat-Twist Frohawk
Flat twists along the sides make the profile look neat without the severe tension that tight cornrows can bring. They also give the frohawk a subtle sculpted line, which I think looks better than a hard, overdrawn edge on most curl patterns.
The center can stay curly, stretched, or tucked into a few small knots. Flat twists are one of those styles that look more complicated than they are, which is useful when you want polish but do not want to spend an hour fighting with part lines. Keep the twists medium-sized so they don’t pull at the scalp.
5. Two-Strand Twist Frohawk
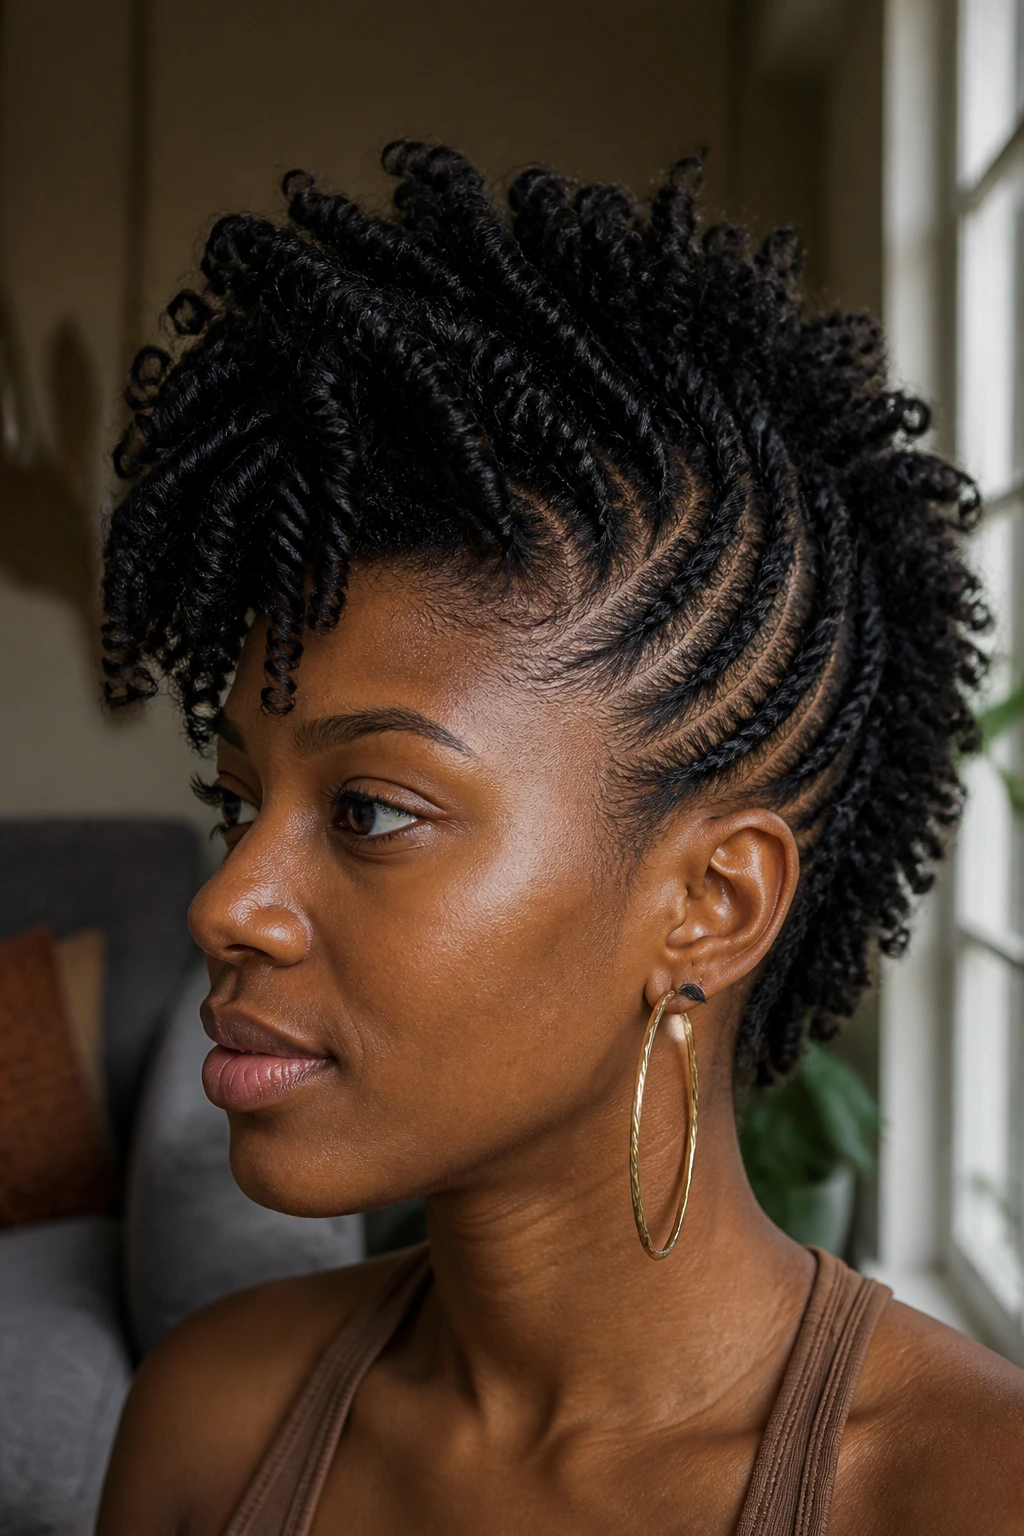
This one is softer, chunkier, and a little more relaxed than the flat-twist version. Two-strand twists on the sides give the frohawk a rope-like frame, and the center ridge can echo that texture with matching twists or loose curls.
It’s especially good when your hair is medium to high density and you want the style to hold shape for more than a few hours. Use a cream or foam that gives slip, then twist in sections that are broad enough to feel full but not so wide that they loosen by lunchtime. Small twists tend to frizz less, but chunky ones look richer.
6. Cornrow-Side Frohawk
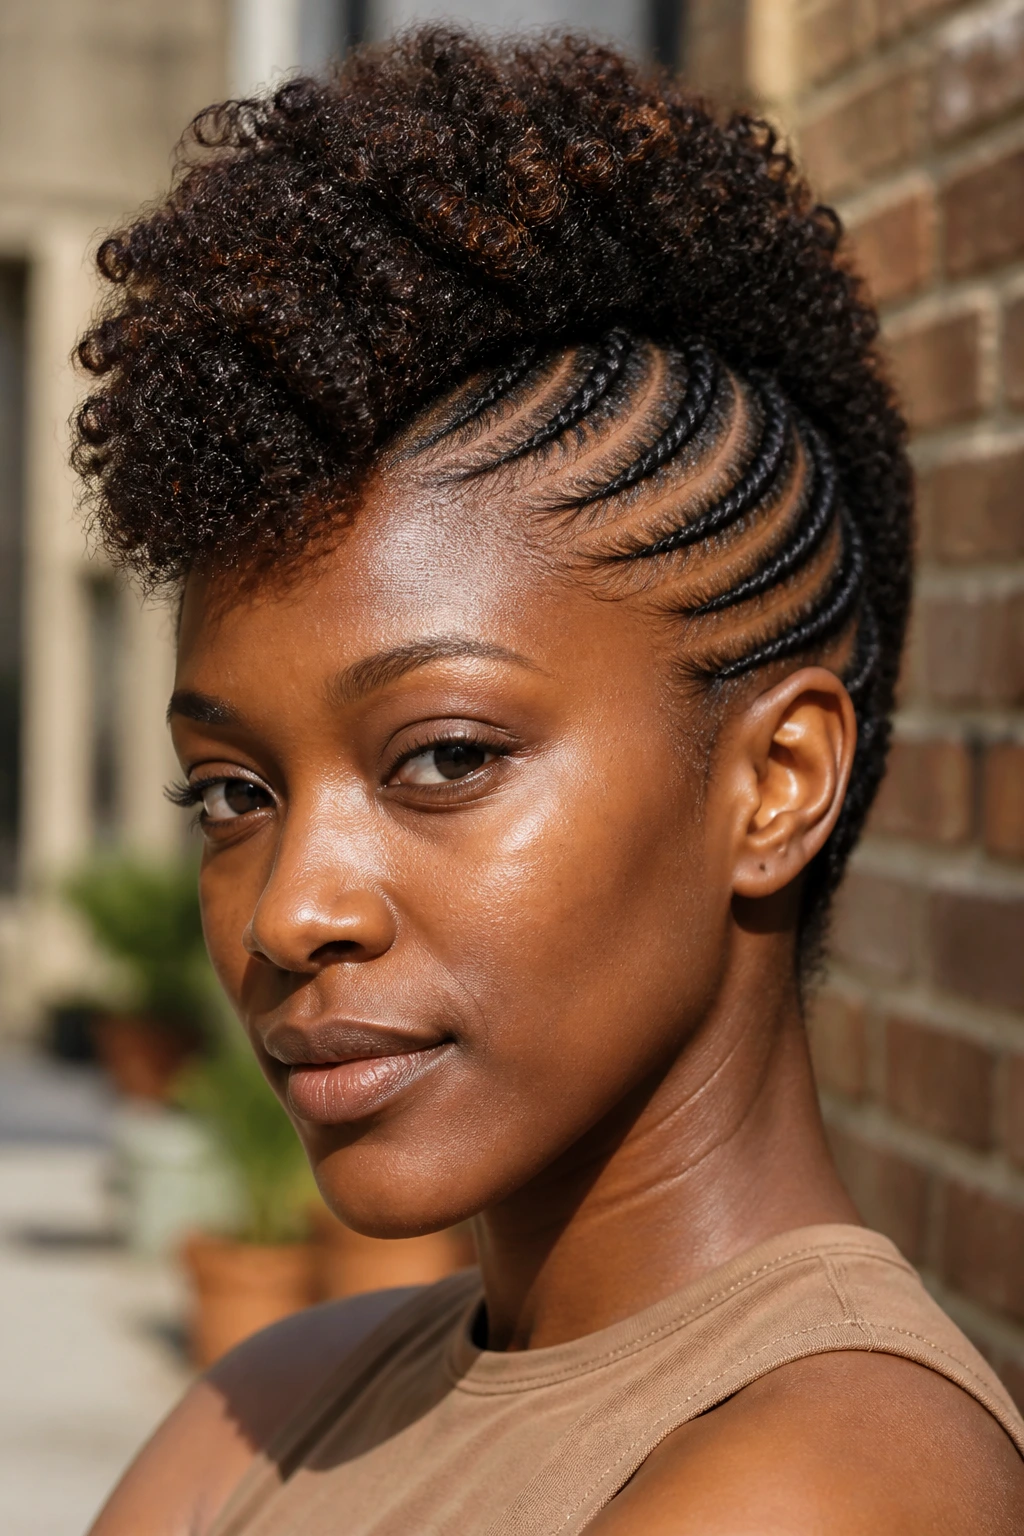
Want the sides to stay put? Cornrows are the blunt instrument here, and I mean that in a good way. They lock the side sections down, which leaves the center free to carry all the volume and drama.
The best cornrow-side frohawks keep the braids narrow enough to curve neatly around the head. If you braid too thick, the style starts to feel bulky at the temples. A little scalp oil on the part lines helps, too, especially if your hair gets dry under braided styles and starts to itch.
7. Feed-In Braid Frohawk
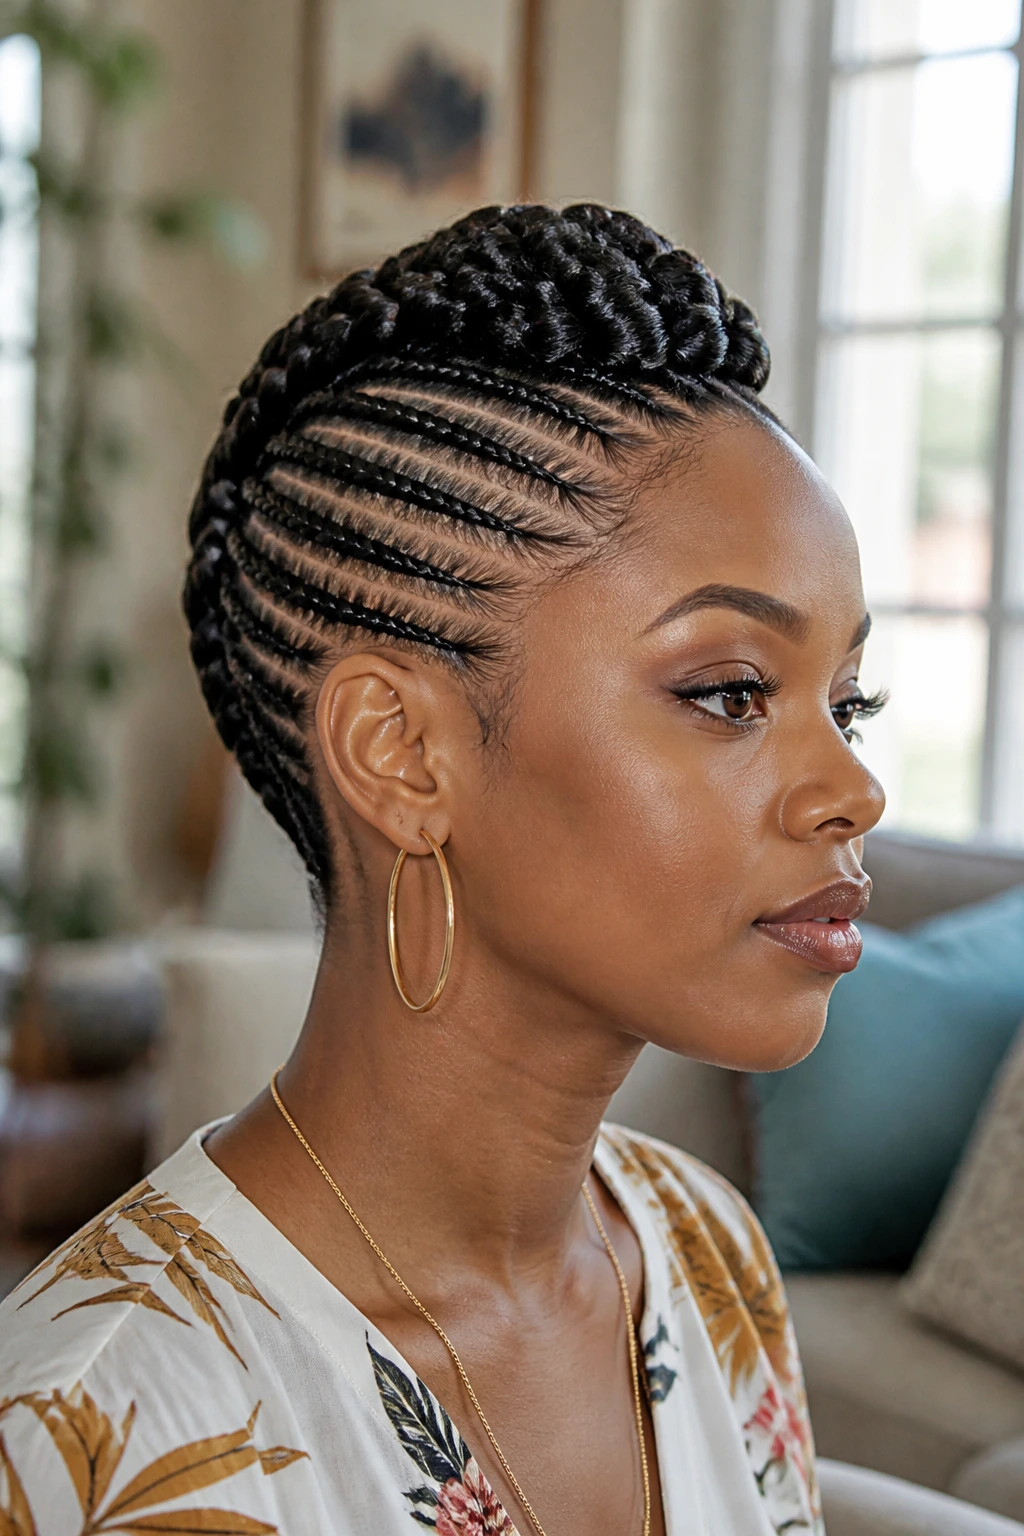
Feed-in braids make the transition from sleek sides to fuller center look smooth, almost architectural. The braid starts small, then gains hair gradually, which keeps the base neat and the silhouette long.
This is a strong choice when you want a frohawk that feels more polished than playful. The feed-in method also helps if your hairline is fine or delicate, because the tension can be distributed more evenly than with a thick braid slapped down at the edge. Keep the ends tucked into the middle ridge so the overall line stays clean.
8. Puff-Stack Frohawk
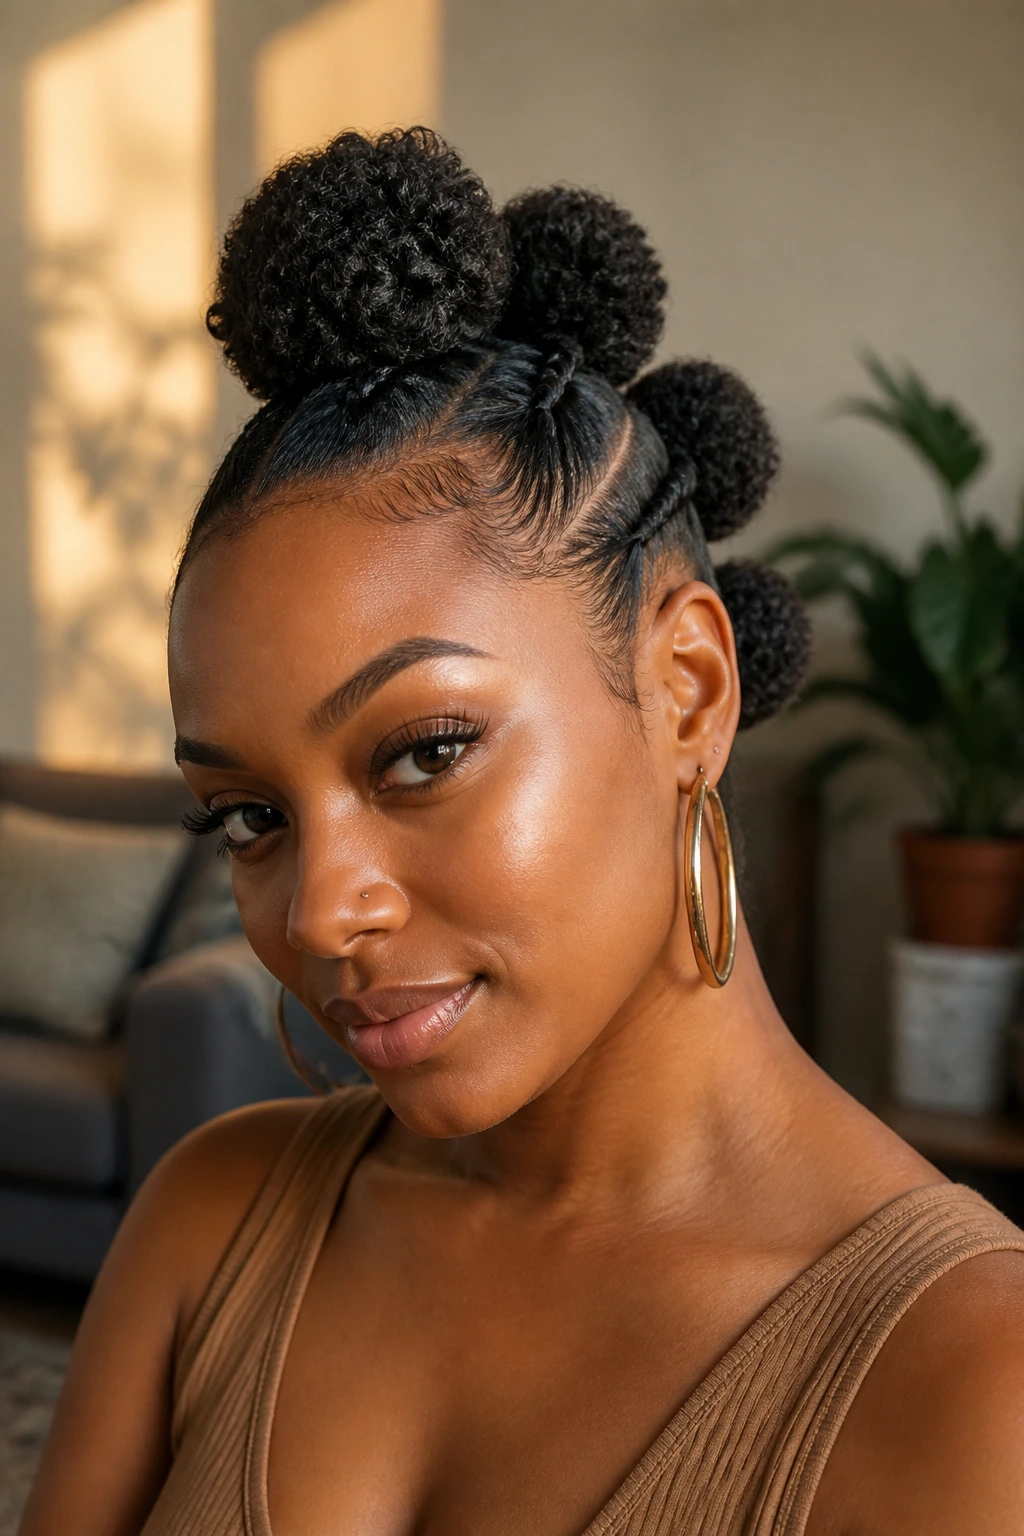
Think of this as a series of puffs marching down the center of the head. The result is playful and sculptural at the same time, which is not as easy to pull off as it sounds.
The trick is sectioning. Use 3 to 5 center sections, depending on your length, and secure each puff with snag-free bands. Pull each section outward a little before setting it, because a puff that starts too small can disappear once the hair settles. This style looks especially good on hair that’s dense but not extremely long.
9. Double Puff Frohawk
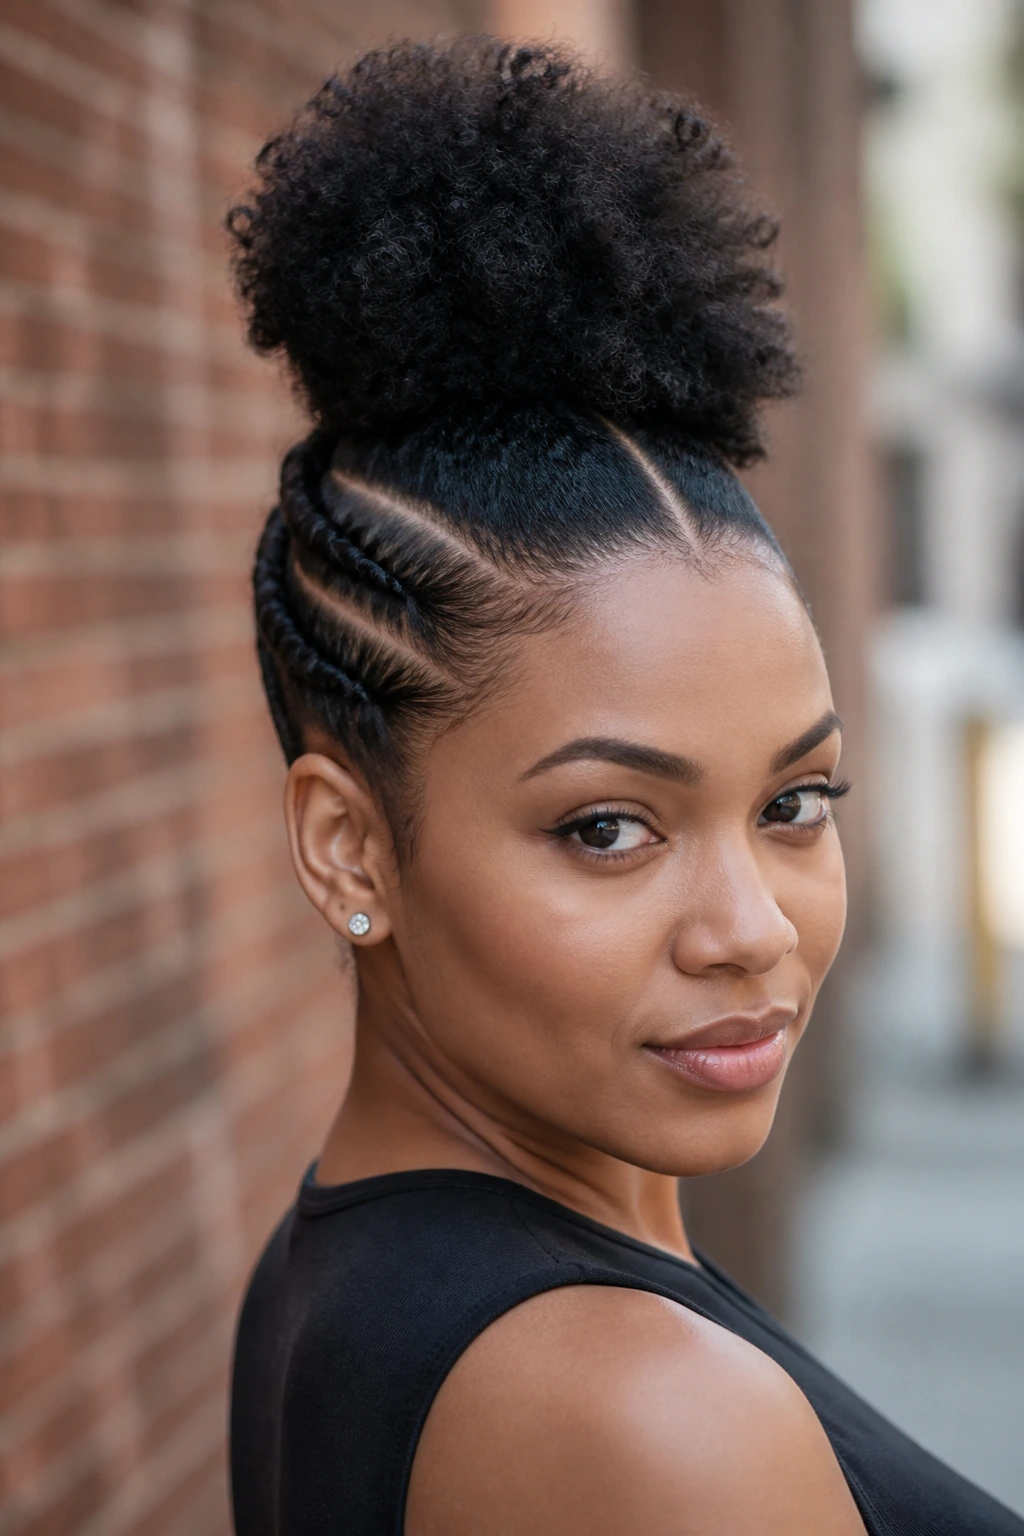
A double puff frohawk gives you a bigger shape with less fuss. You gather the hair into two rounded puffs along the center line, leaving the sides slicked or twisted, and that creates a strong, youthful profile.
It works best on hair that has some stretch, because the puffs need enough length to show shape rather than just puffing straight up. Use a light edge gel and keep the center part precise. If the sectioning is crooked, the whole style feels off even if the curls themselves look good.
10. Bantu Knot Frohawk
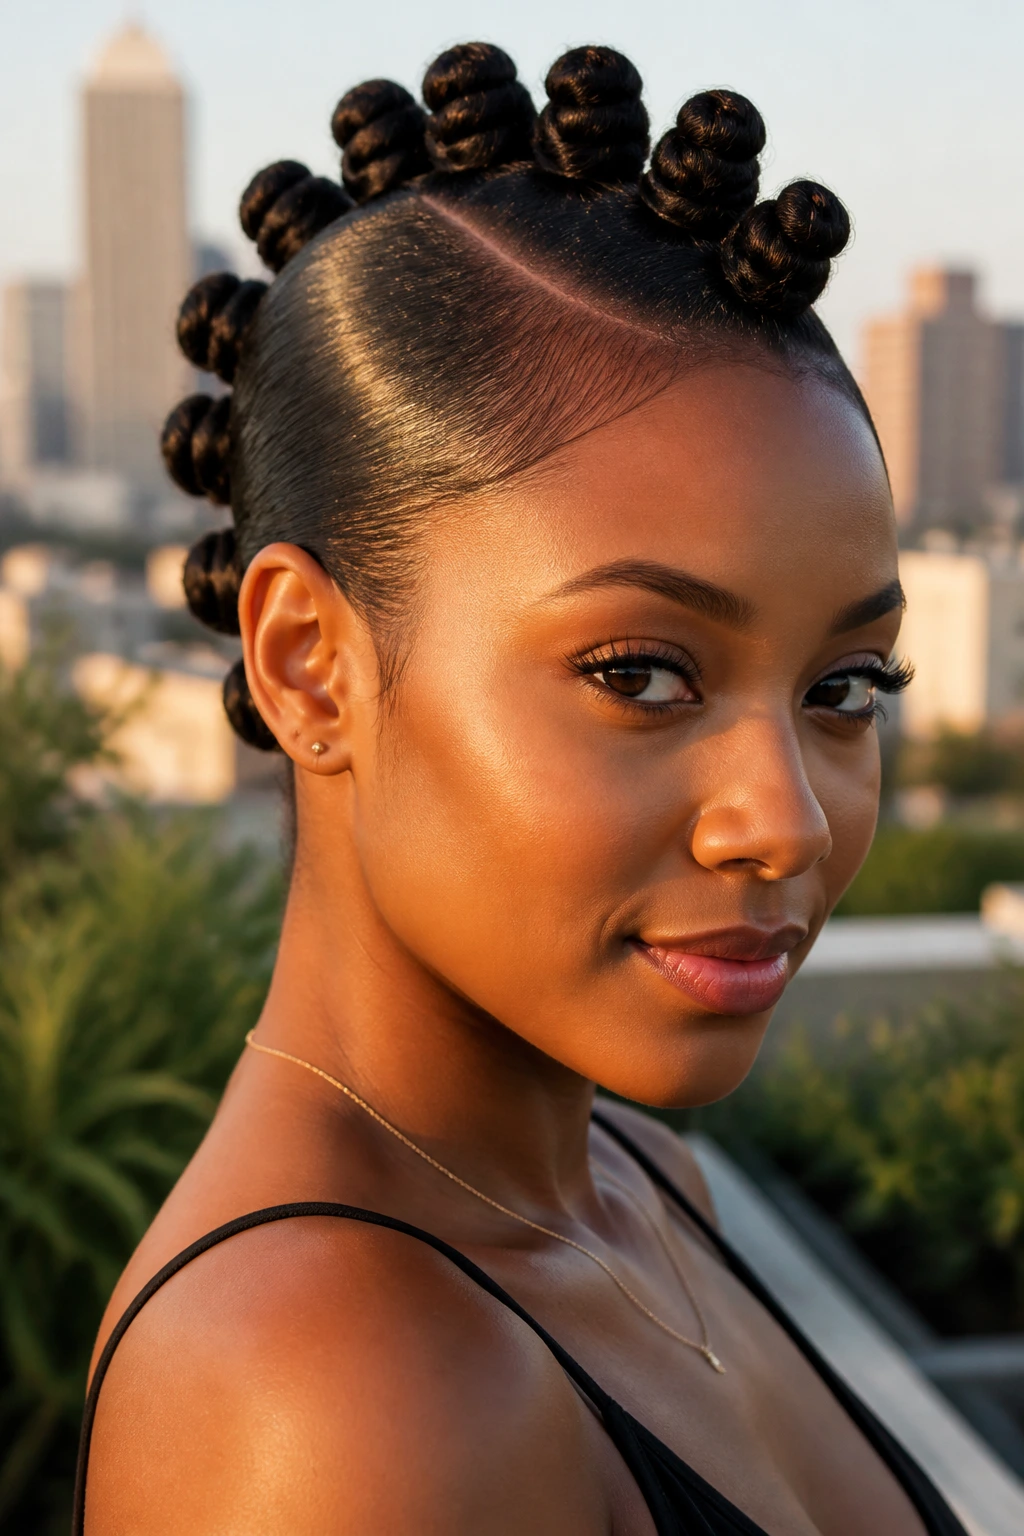
Bantu knots bring texture and attitude to the frohawk without requiring a lot of length. You can set a row of knots down the center, or use a few larger knots near the crown and let the rest stay sleek.
The look is strongest when the knots are uniform in size and spaced with intention. Tiny knots everywhere can feel busy. A line of medium knots gives the style rhythm, and if you take them down later, you get a second hairstyle out of the same prep. That’s the sort of efficiency I can get behind.
11. Rope-Twist Frohawk
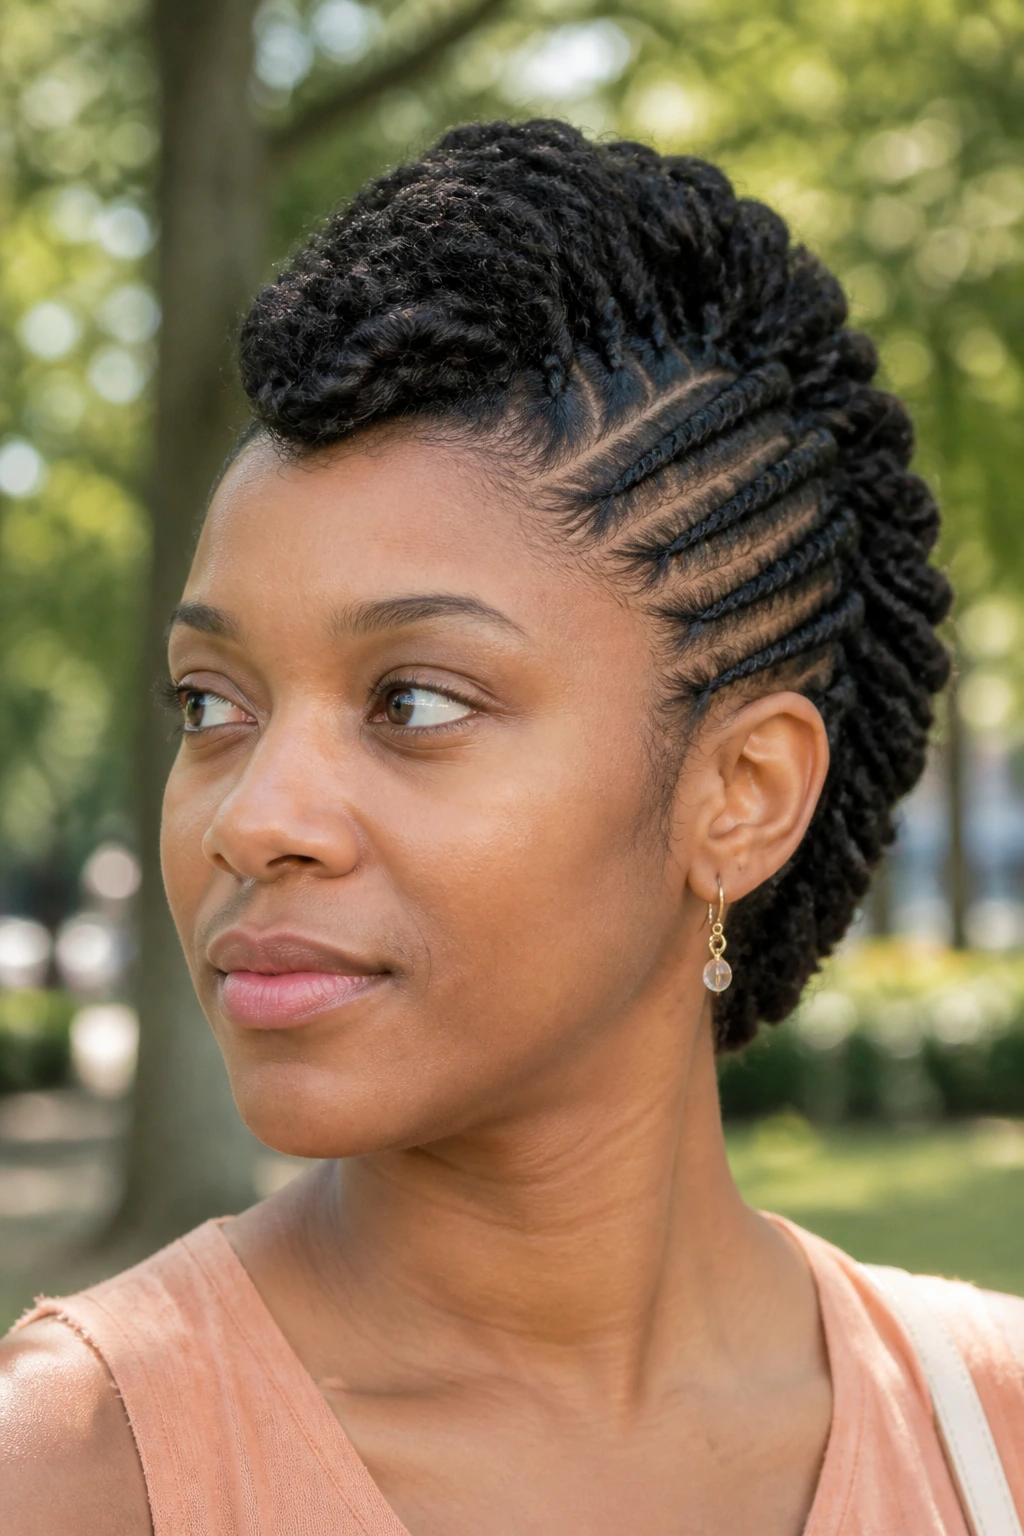
Rope twists give the frohawk a twisted ridge that feels tidy but not stiff. The texture is smoother than chunky two-strand twists, and that makes the center line look longer and more deliberate.
I like this version for medium-length hair, especially when you want a style that’s neat enough for daytime and still interesting after sunset. Twist the center in the same direction on both sides so the pattern stays even. If one side twists tighter than the other, the whole hawk can lean a little awkwardly, and yes, your mirror will tell on you.
12. Side-Swept Frohawk
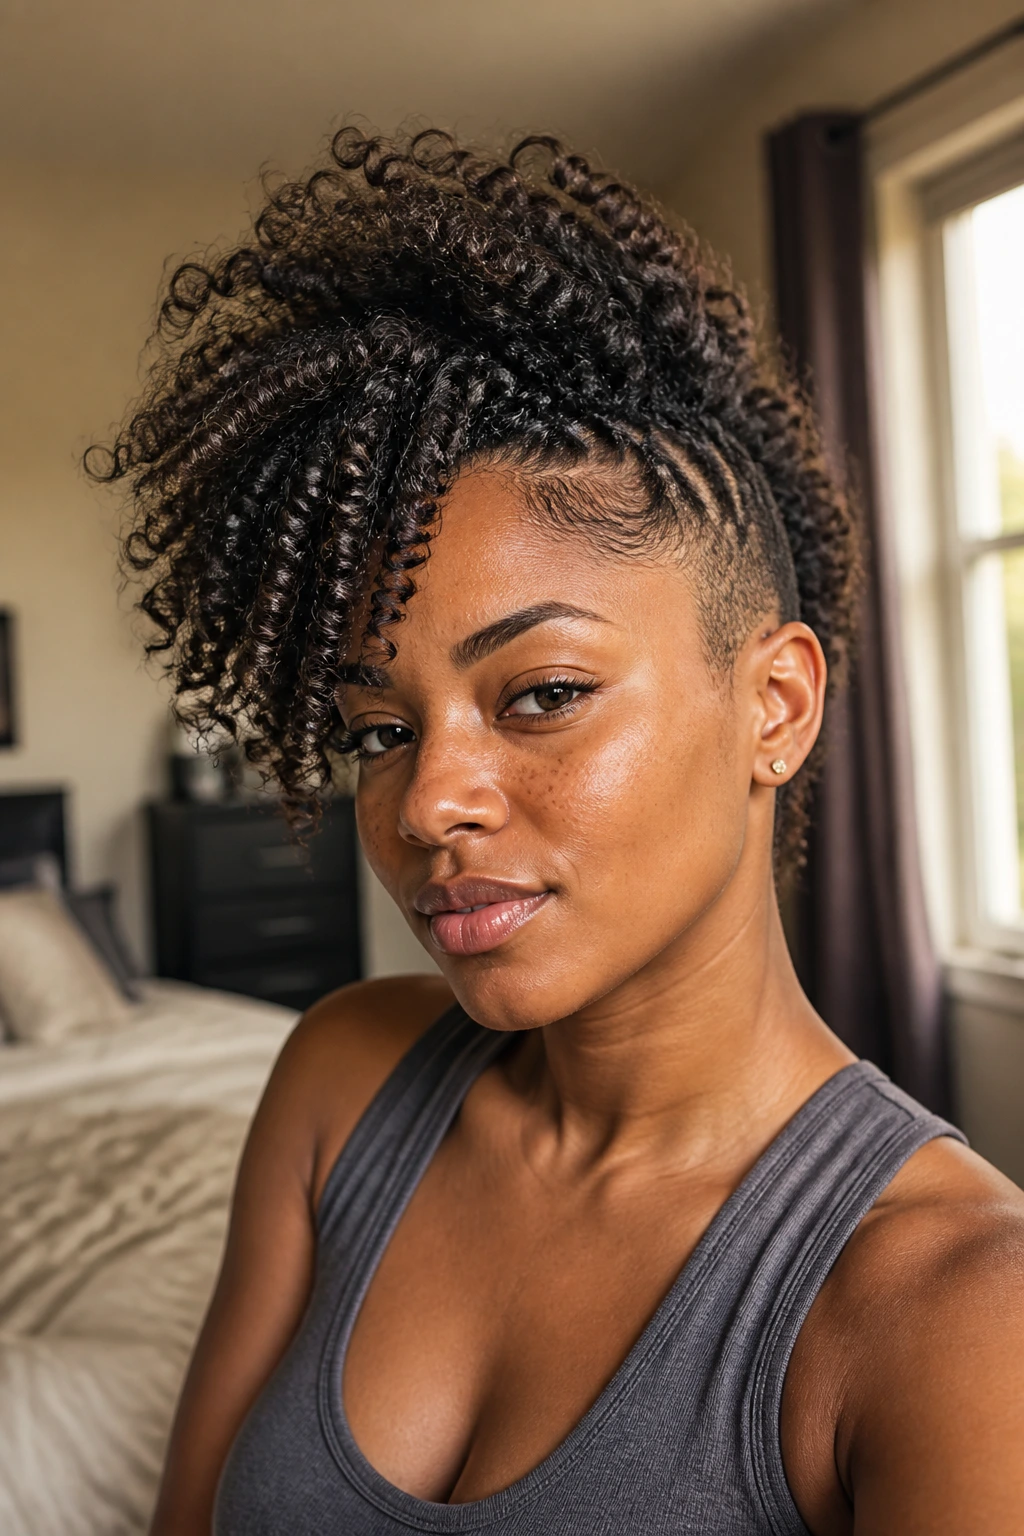
A side-swept frohawk breaks the usual center line and pushes the volume over one shoulder or slightly off-center. It feels softer than the straight-ahead version, and it gives you a chance to show off curl definition from a different angle.
This style is especially good when the front curls frame your face well and you want movement instead of a stiff silhouette. Sweep the top section with your fingers while the product is still pliable, then pin the heavier side underneath. It looks easiest when the part is imperfect on purpose.
13. Asymmetrical Frohawk
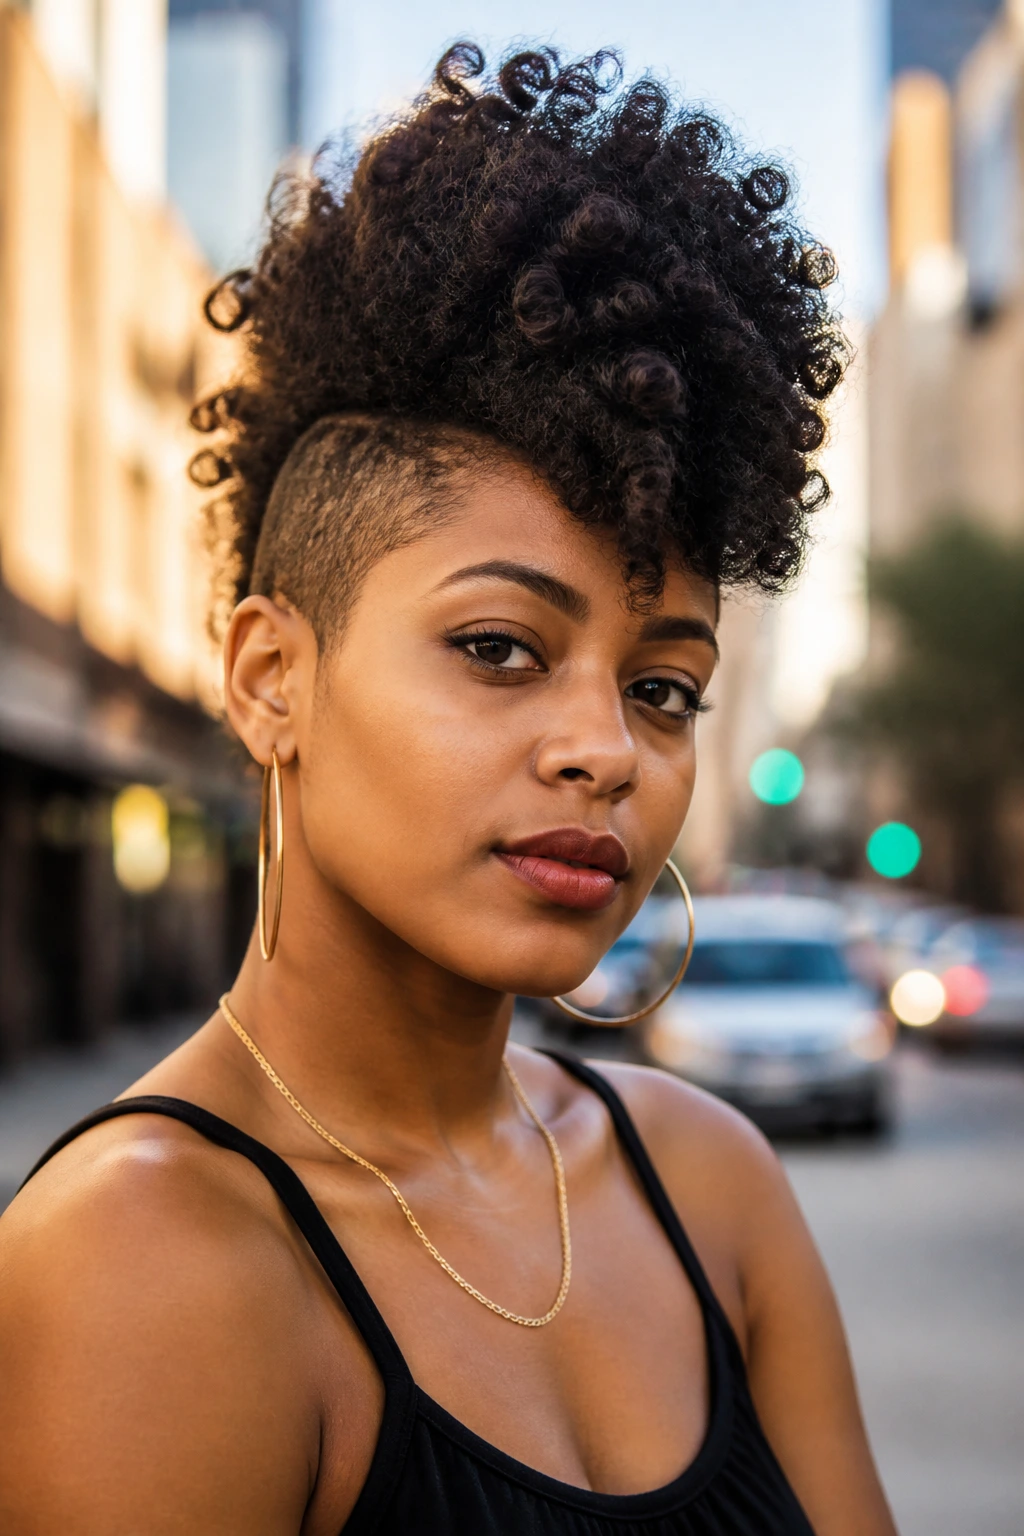
Asymmetry makes the style feel modern without needing a lot of extra work. One side can sit flatter and tighter, while the other side carries more height or more curl volume.
That imbalance is the point. It’s the kind of look that benefits from a confident hand and a light touch with the styling cream. Keep the heavier side in larger sections and the flatter side in tighter twists or cornrows, so the difference reads clearly rather than looking accidental.
14. Tapered-Cut Frohawk
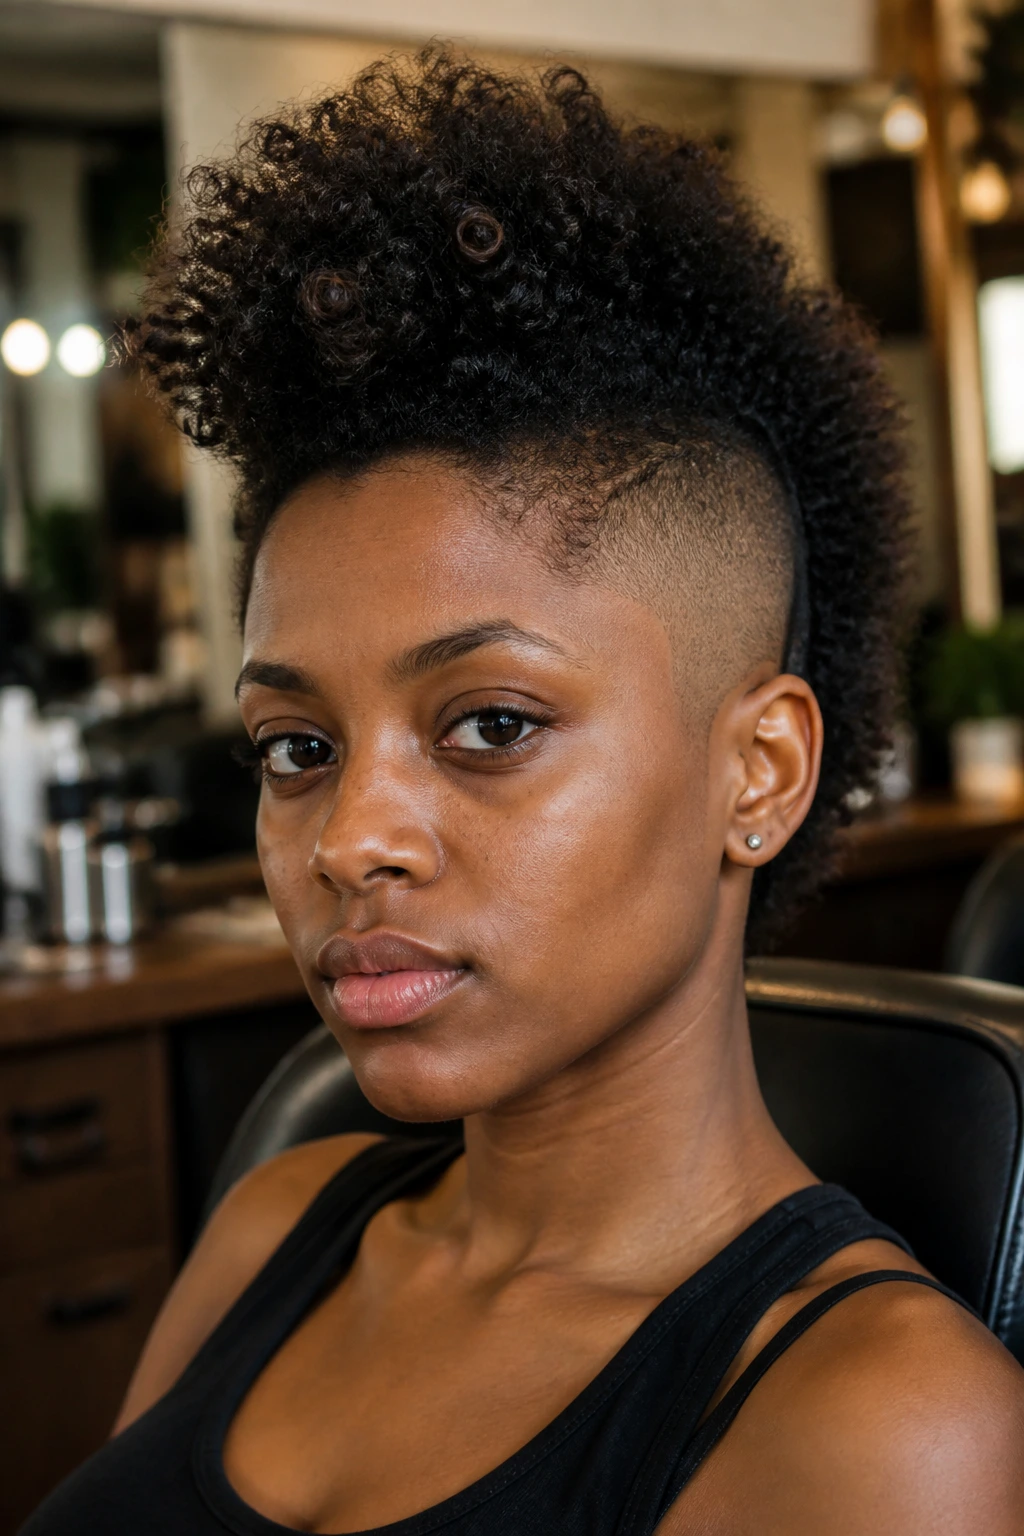
If your hair is already cut with a taper or fade, the frohawk shape comes almost built in. The sides are shorter, so the center strip naturally becomes the star without much pinning.
This is one of the easiest ways to wear the style because the haircut does half the work. You can enhance the shape with a little mousse at the crown and a pick at the roots, but you do not need a cabinet full of products. Honestly, when the cut is right, less is better.
15. Short-Coil Frohawk
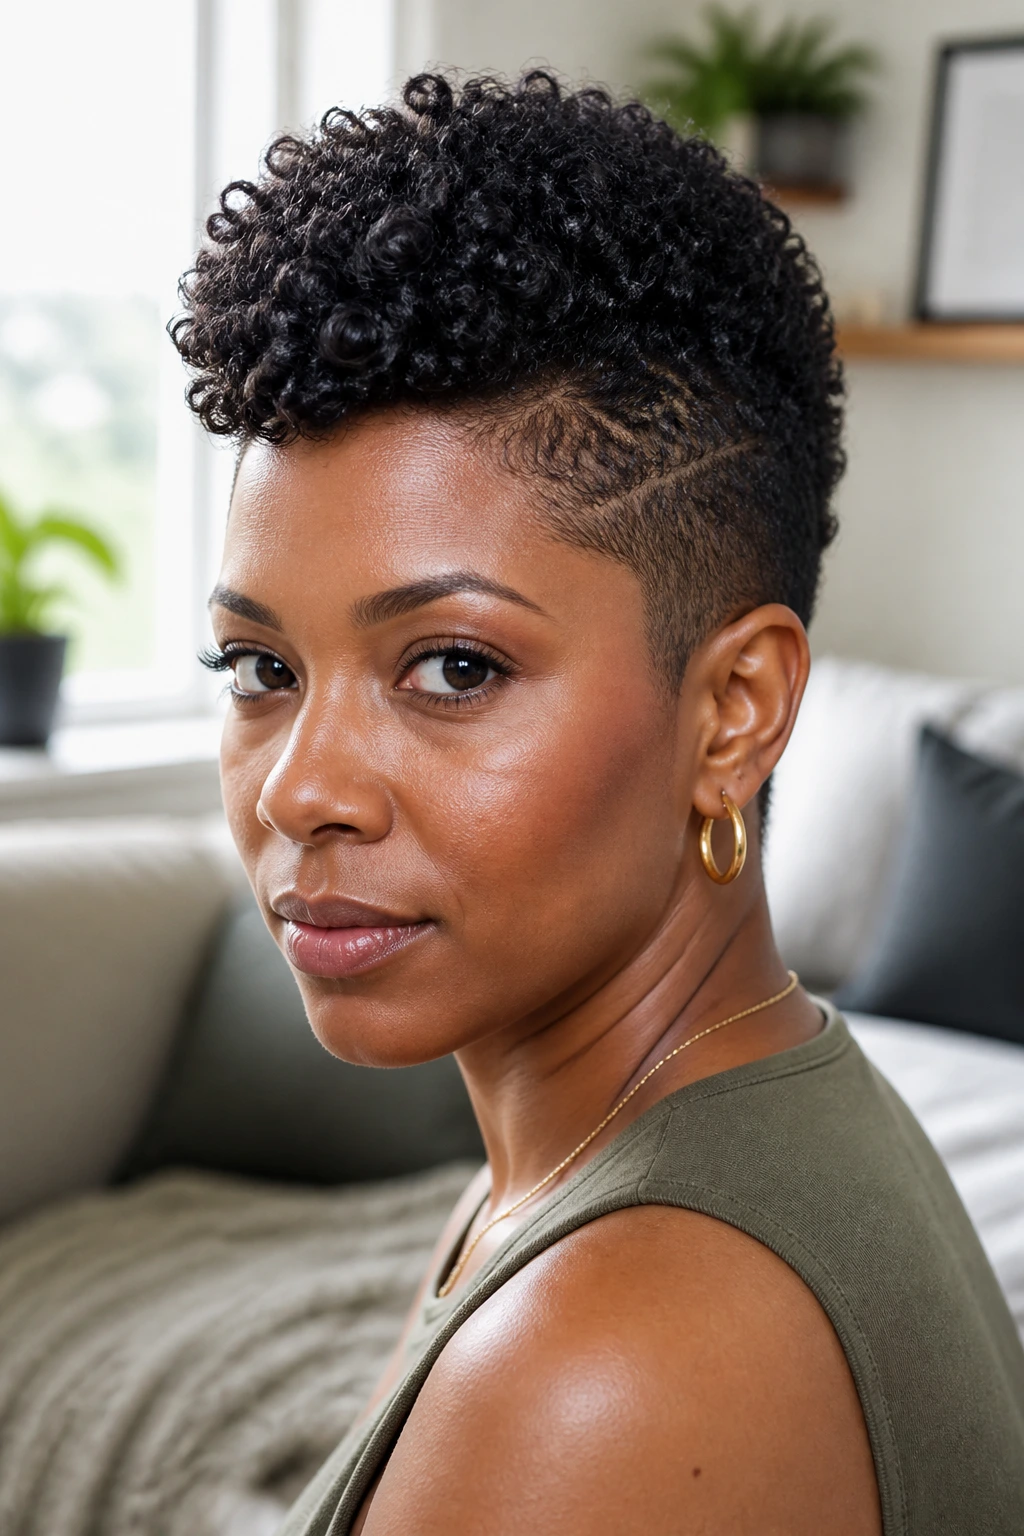
Short coils can pull off a frohawk with more attitude than length. The shape is tighter, closer to the head, and the result feels crisp rather than fluffy.
The goal here is clean sectioning and good moisture. Short hair shows every uneven part, so use a rat-tail comb and slow down when you define the center ridge. A tiny bit of curl cream goes a long way; too much will make the style sit heavy and lose that compact hawk shape.
16. Long-Stretch Frohawk
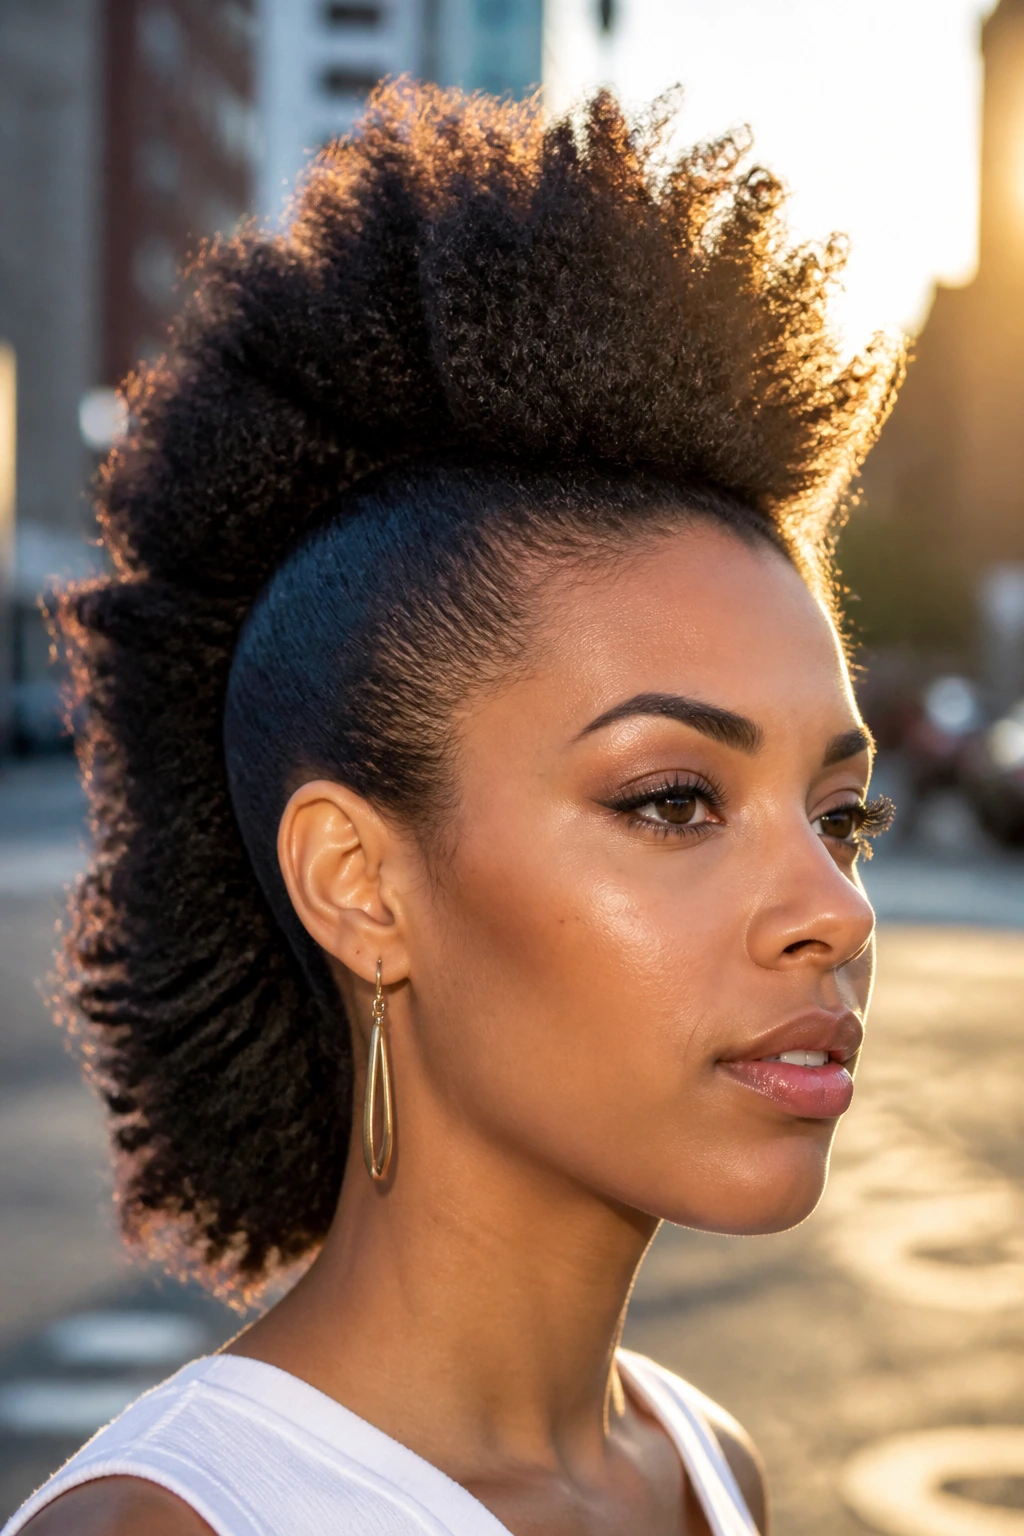
Long hair changes the game because the frohawk can stand tall without being overworked. Stretching the hair first—banding, braiding out, or using low heat—keeps the center from shrinking into a stubby mound.
I prefer this version when I want visible length and a more dramatic line. The center can be brushed upward, twisted loosely, or rolled into soft ridges, but keep the ends together enough to show the length. If you separate too far, you lose the clean shape and end up with a halo instead of a hawk.
17. Wet-Look Frohawk
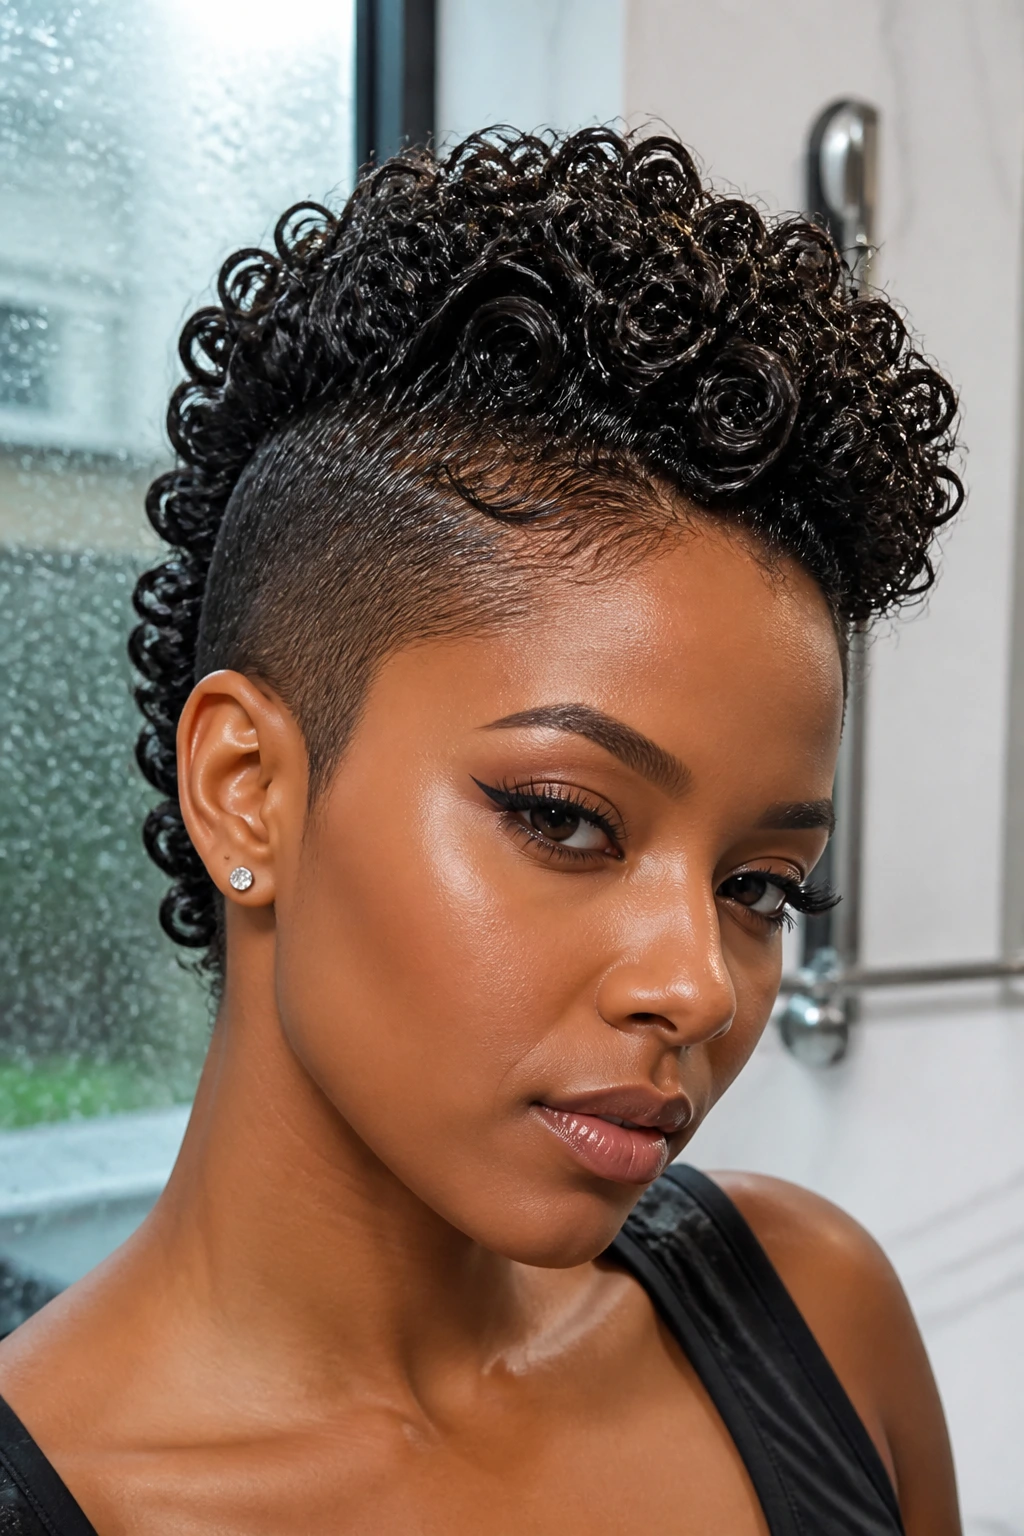
A wet-look frohawk goes glossy and sharp, with the curls and edges held close enough to look almost lacquered. It’s bold. Not subtle.
Use this one when you want the style to feel dressed up and sculpted. Apply gel in thin layers rather than slapping on one heavy coat, because thick gel turns flaky fast once it dries. The finish should look slick, not white at the roots, and that difference matters more than people think.
18. Fluffed-Out Volume Frohawk
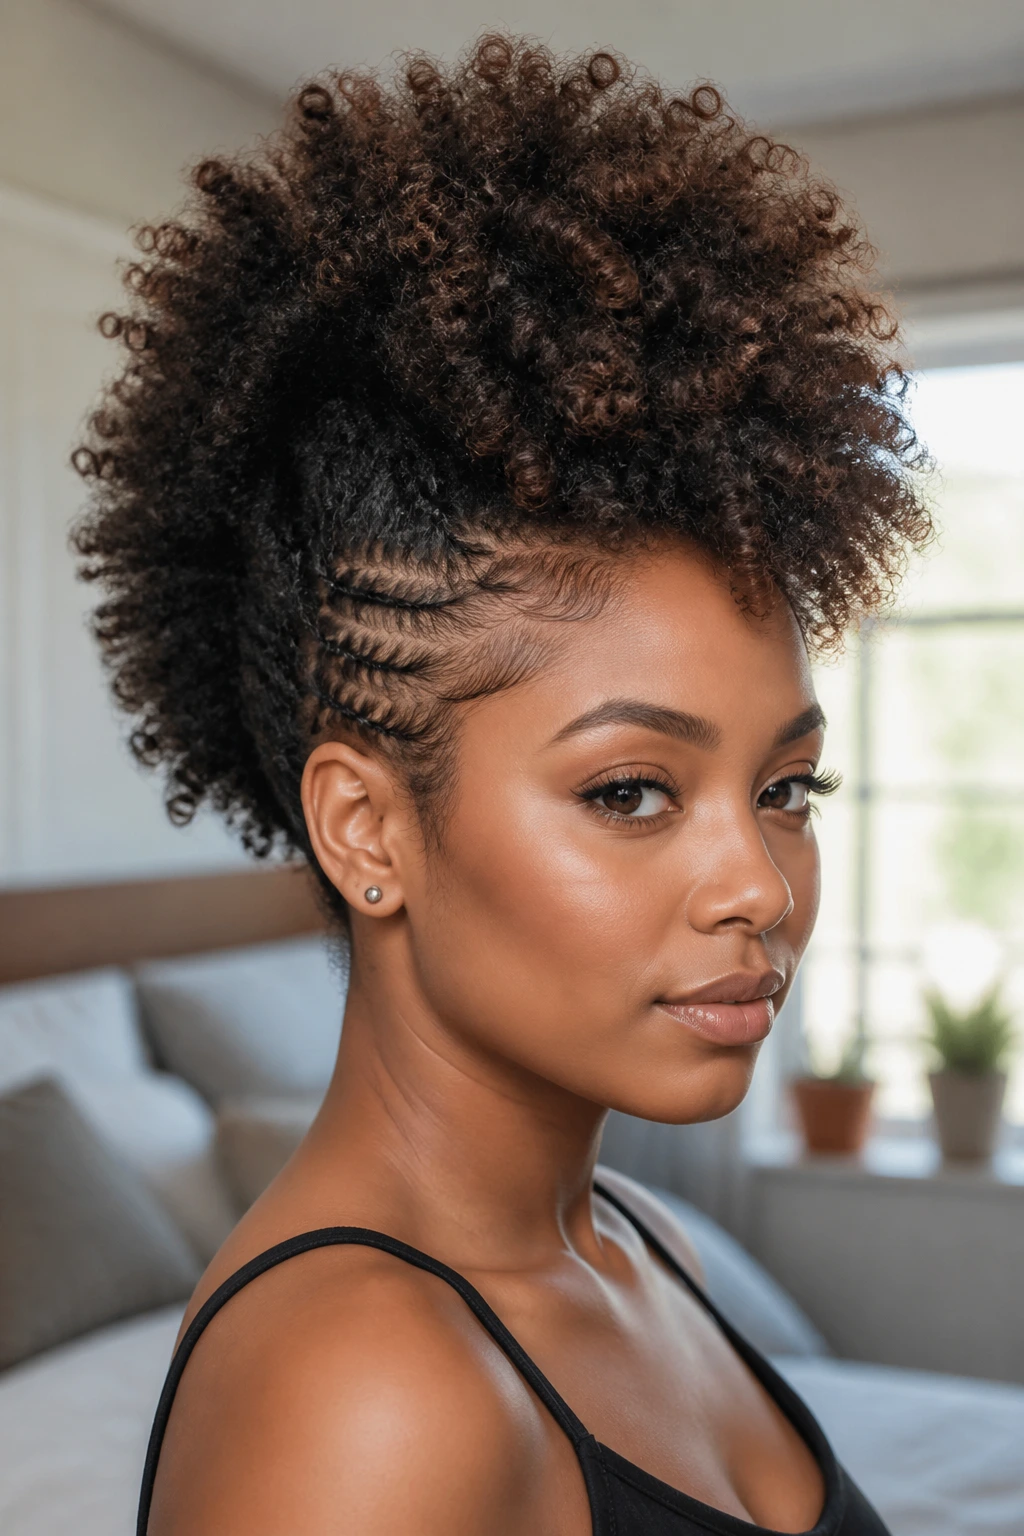
This is the version for people who love big hair and do not want to apologize for it. The center is left loose, picked out, and airy, so the frohawk reads as soft volume instead of hard structure.
The sides still need to stay controlled, or the shape vanishes. That contrast is what makes the look work. Use a light hold on the sides, then fluff the center only after it’s fully dry. If you start picking before the style sets, the curls lose their pattern and the whole thing goes fuzzy in a bad way.
19. Cuffed Frohawk
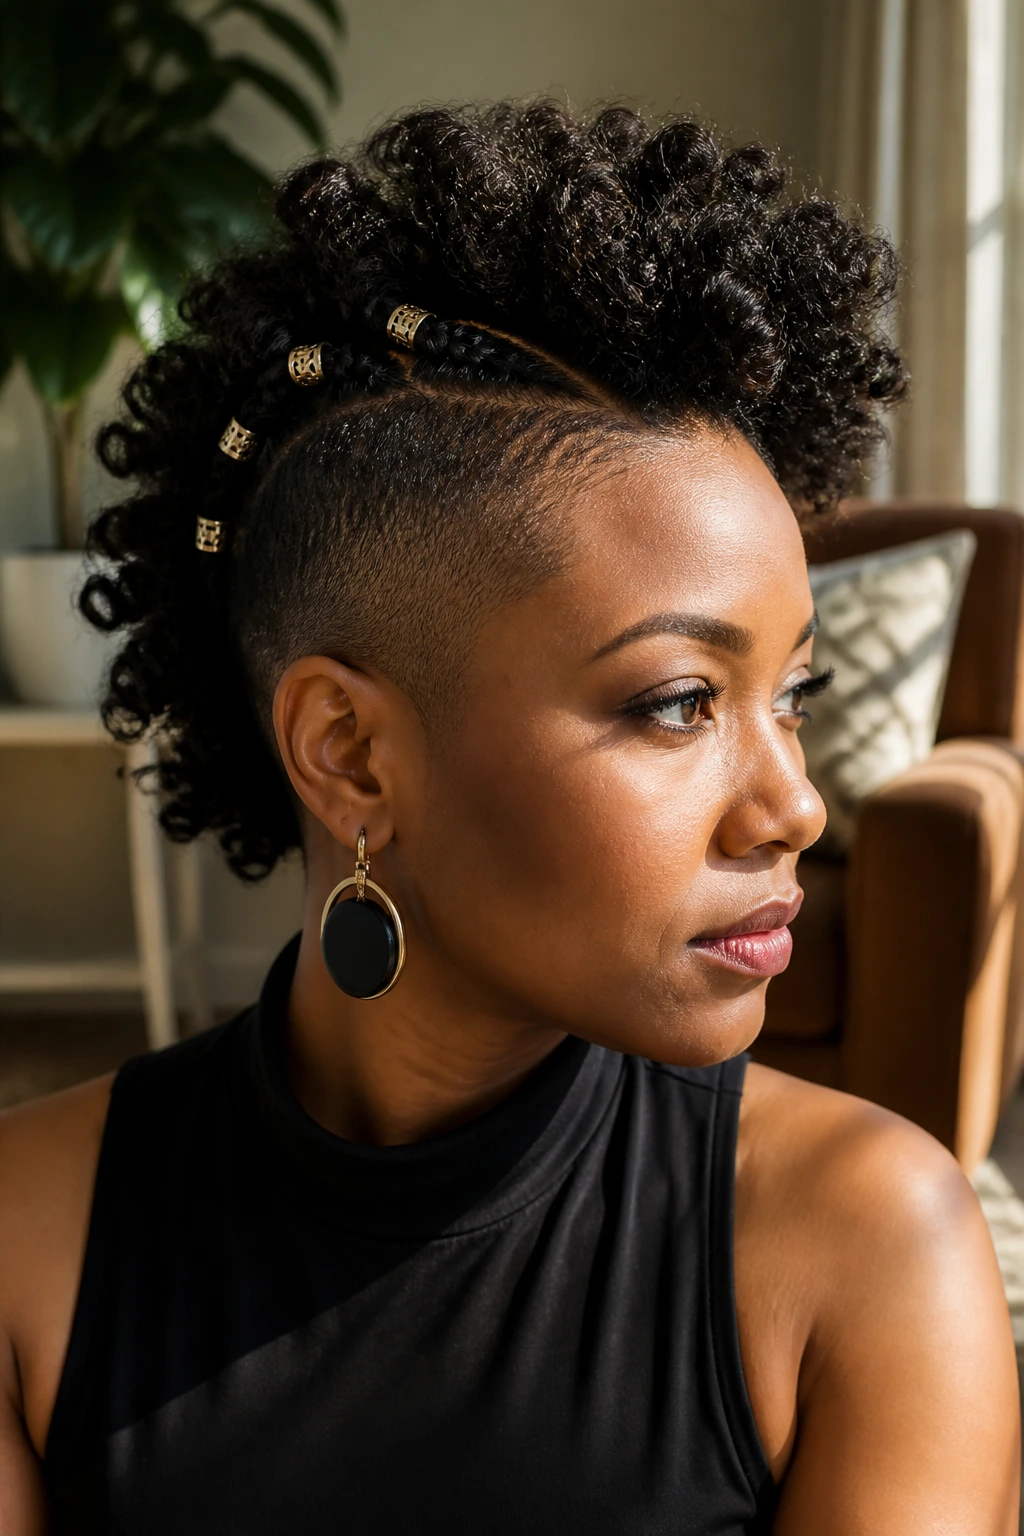
Hair cuffs give the frohawk a little hardware without crowding the style. They work best on braided or twisted sections running through the center or near the sides, where the metal can catch the eye without fighting the curls.
A few cuffs are enough. Ten cuffs start to look busy. I like this style because it adds shape in a quiet way; you notice the shine first, then the texture. If your hair is soft or fine, place the cuffs on slightly thicker sections so the weight doesn’t tug.
20. Beaded Frohawk
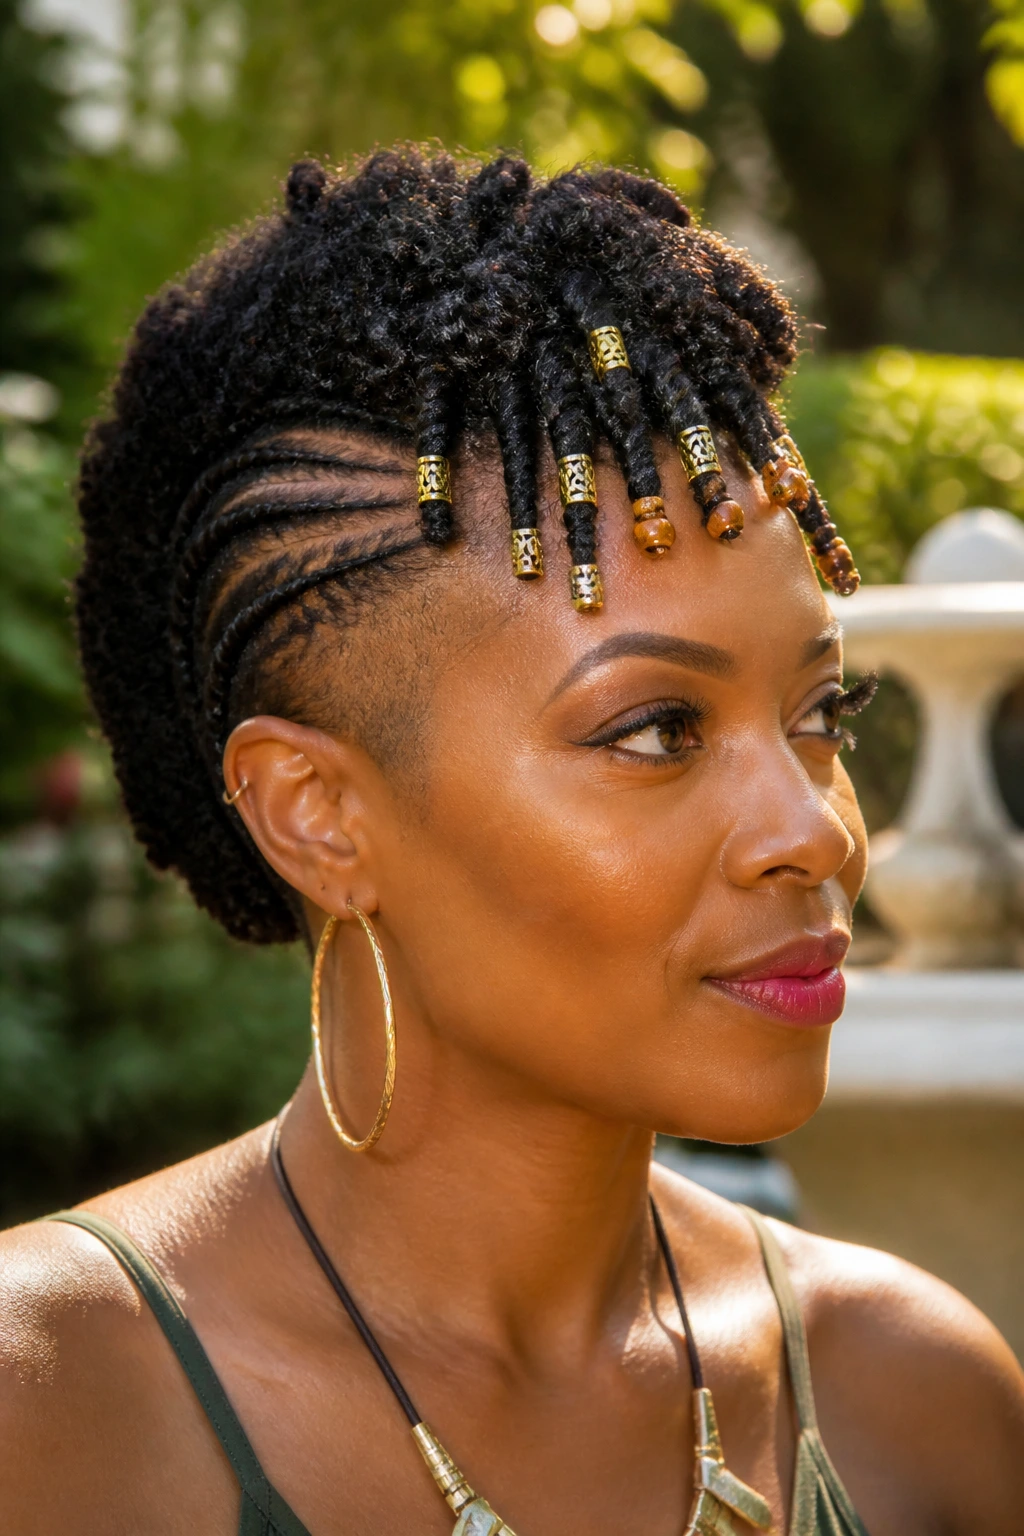
Beads bring movement, sound, and a bit of edge. They’re especially good on the ends of twists, braids, or banded sections inside the frohawk, where they hang cleanly instead of crowding the crown.
The balance matters. Heavy beads at the top can drag the style down, while smaller beads near the ends keep the line light. This is a good one for special events, but it can also work on an ordinary day if you keep the rest of the look simple. Let the hair do the talking.
21. Headband Frohawk
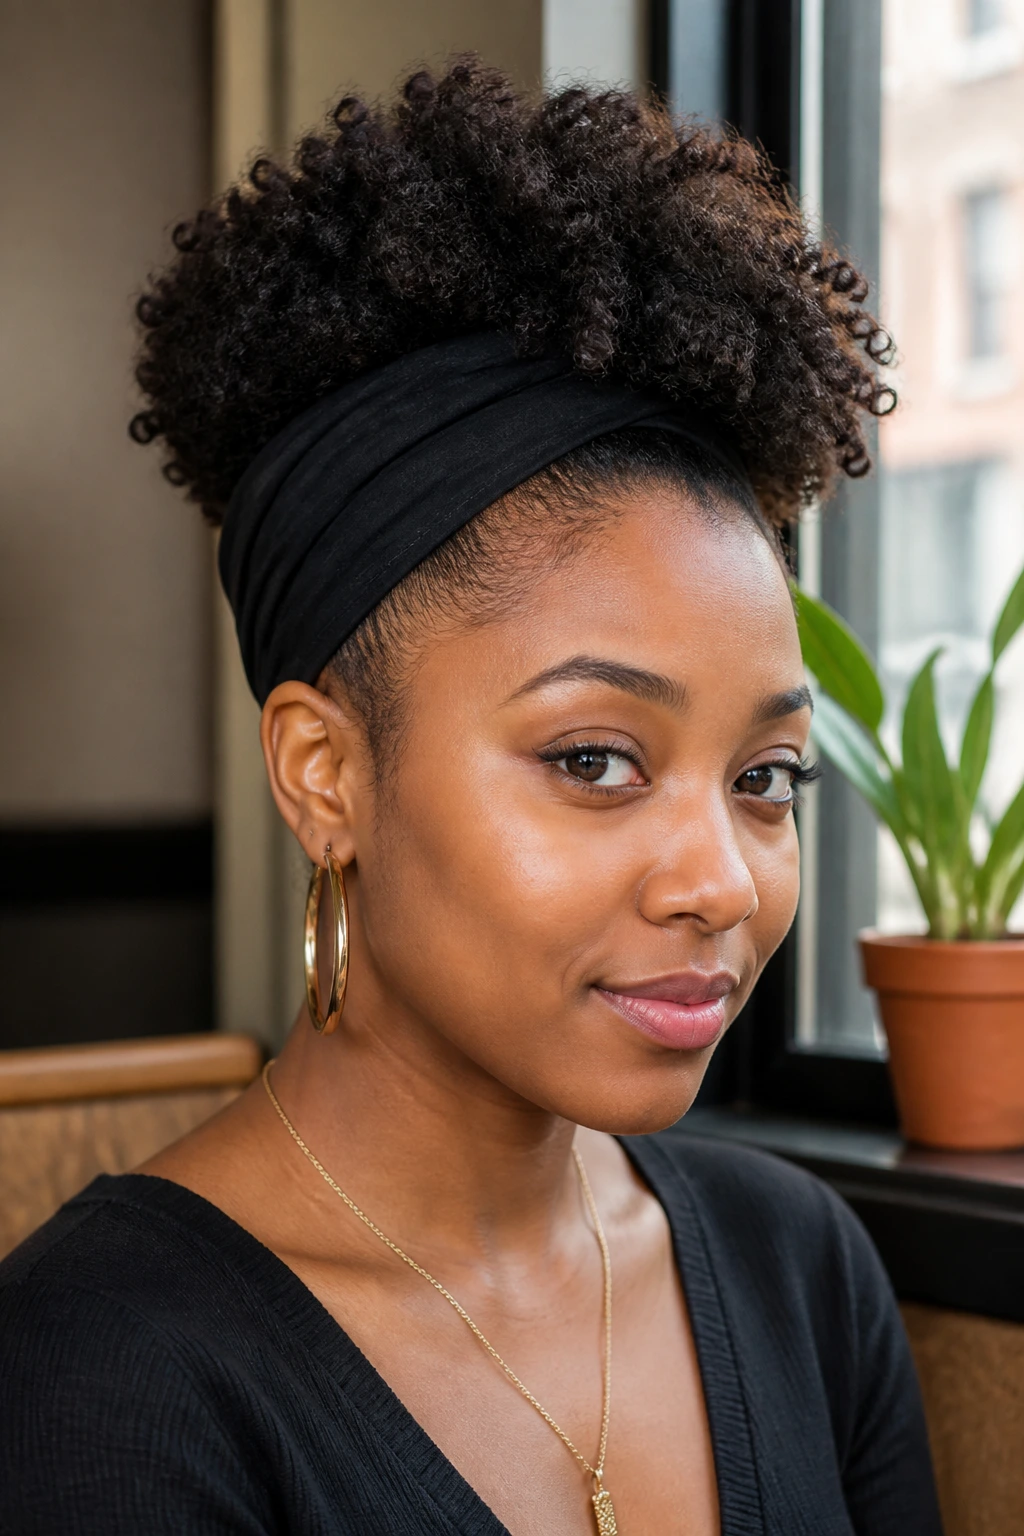
A headband frohawk is one of the easiest ways to fake a more polished shape fast. The band smooths the sides, keeps flyaways in check, and gives the center a framed, lifted look.
Wide bands work better than narrow ones here because they cover more of the side section and keep the silhouette clean. Choose a band that grips without digging into the scalp. If the band keeps sliding back, your center ridge will slowly flatten, and that is annoying in the least glamorous way possible.
22. Scarf-Wrapped Frohawk
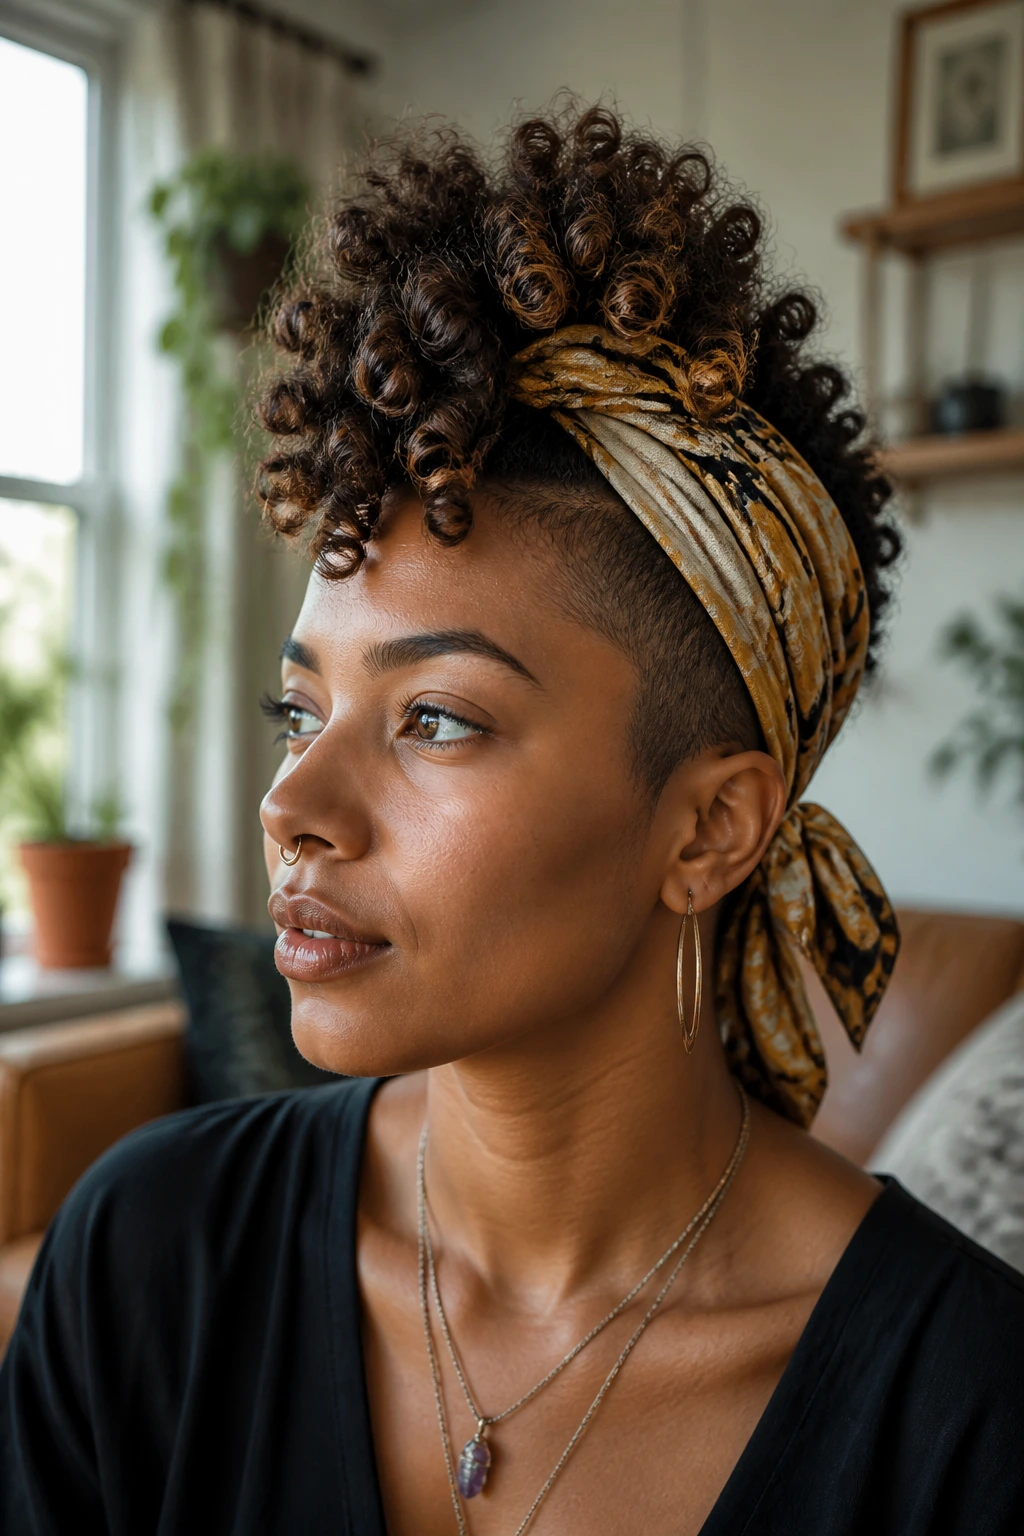
A scarf can turn a frohawk into something softer and more styled, especially when it wraps around the crown and leaves the curls peeking through at the top. It feels a little retro, a little regal, and a lot easier than trying to engineer the whole shape with pins alone.
Use the scarf to frame the hair instead of hiding it. A silk or satin scarf helps reduce friction, which matters when the style has a lot of texture on top. Tie it low at the nape if you want the center ridge to stay full.
23. Bridal Frohawk
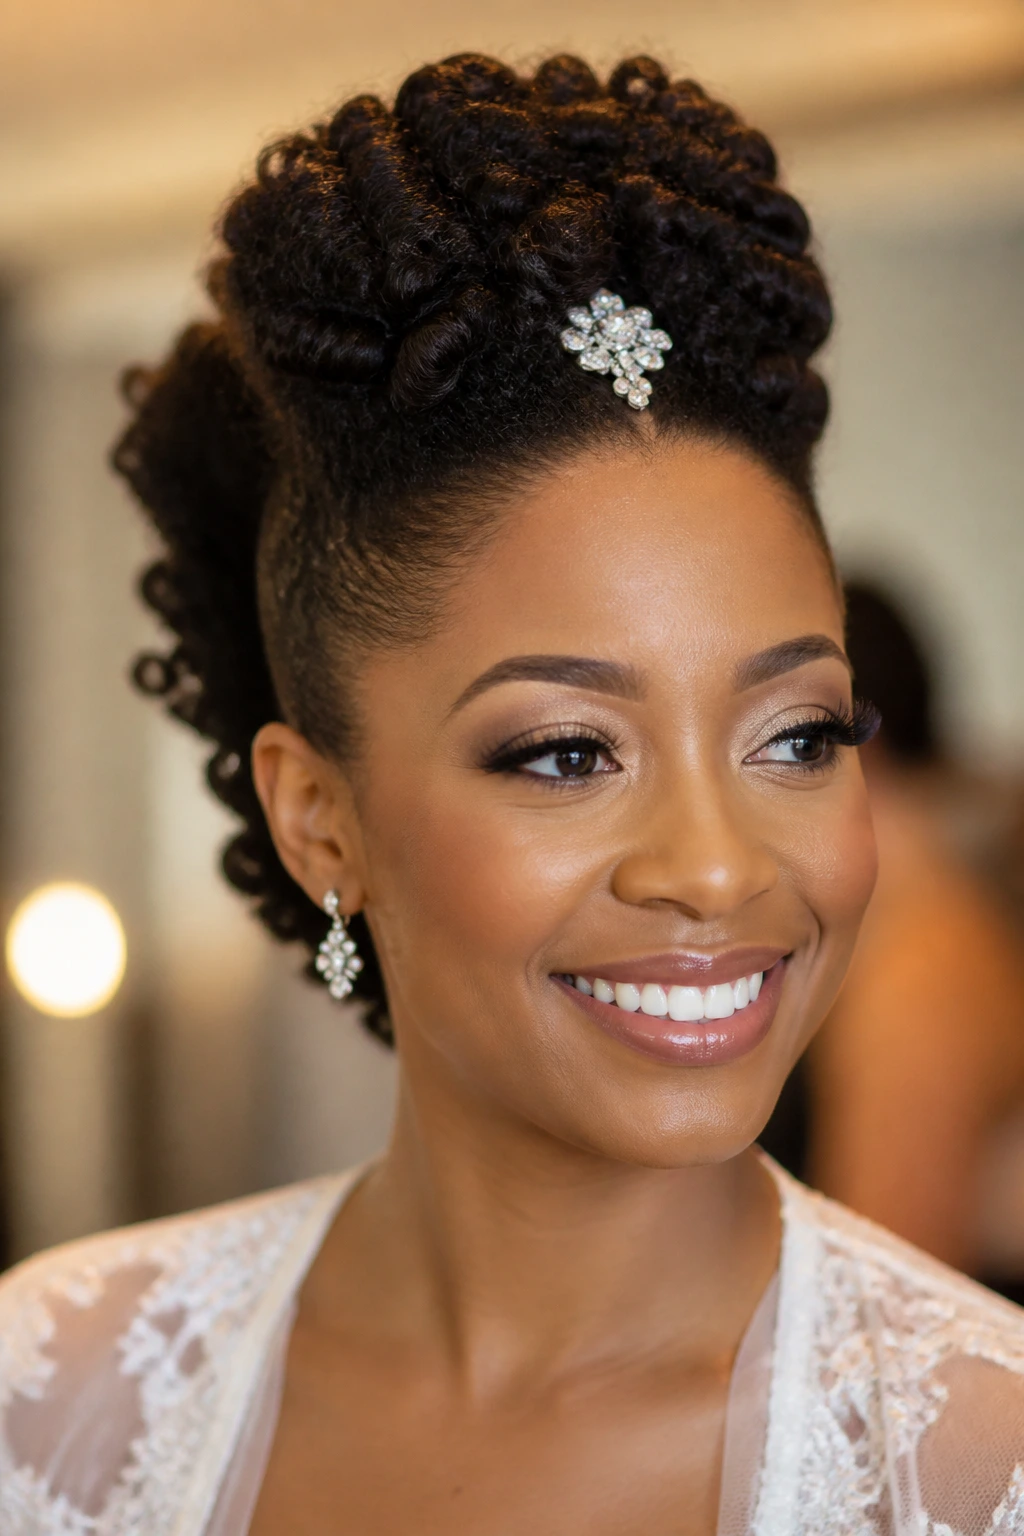
The bridal frohawk is all about polish. Clean sides, shaped curls, and maybe one accessory placed exactly where it belongs. No stray bobby pins wandering around the head like they got lost.
This version is best when the center has been defined with a twist-out, roller set, or stretched curls that can hold their shape for hours. A little shine serum on the ends is enough; too much makes the style look greasy in photos and under indoor lights. Keep the accessories simple unless the dress is doing the loud work.
24. Gym-Ready Frohawk
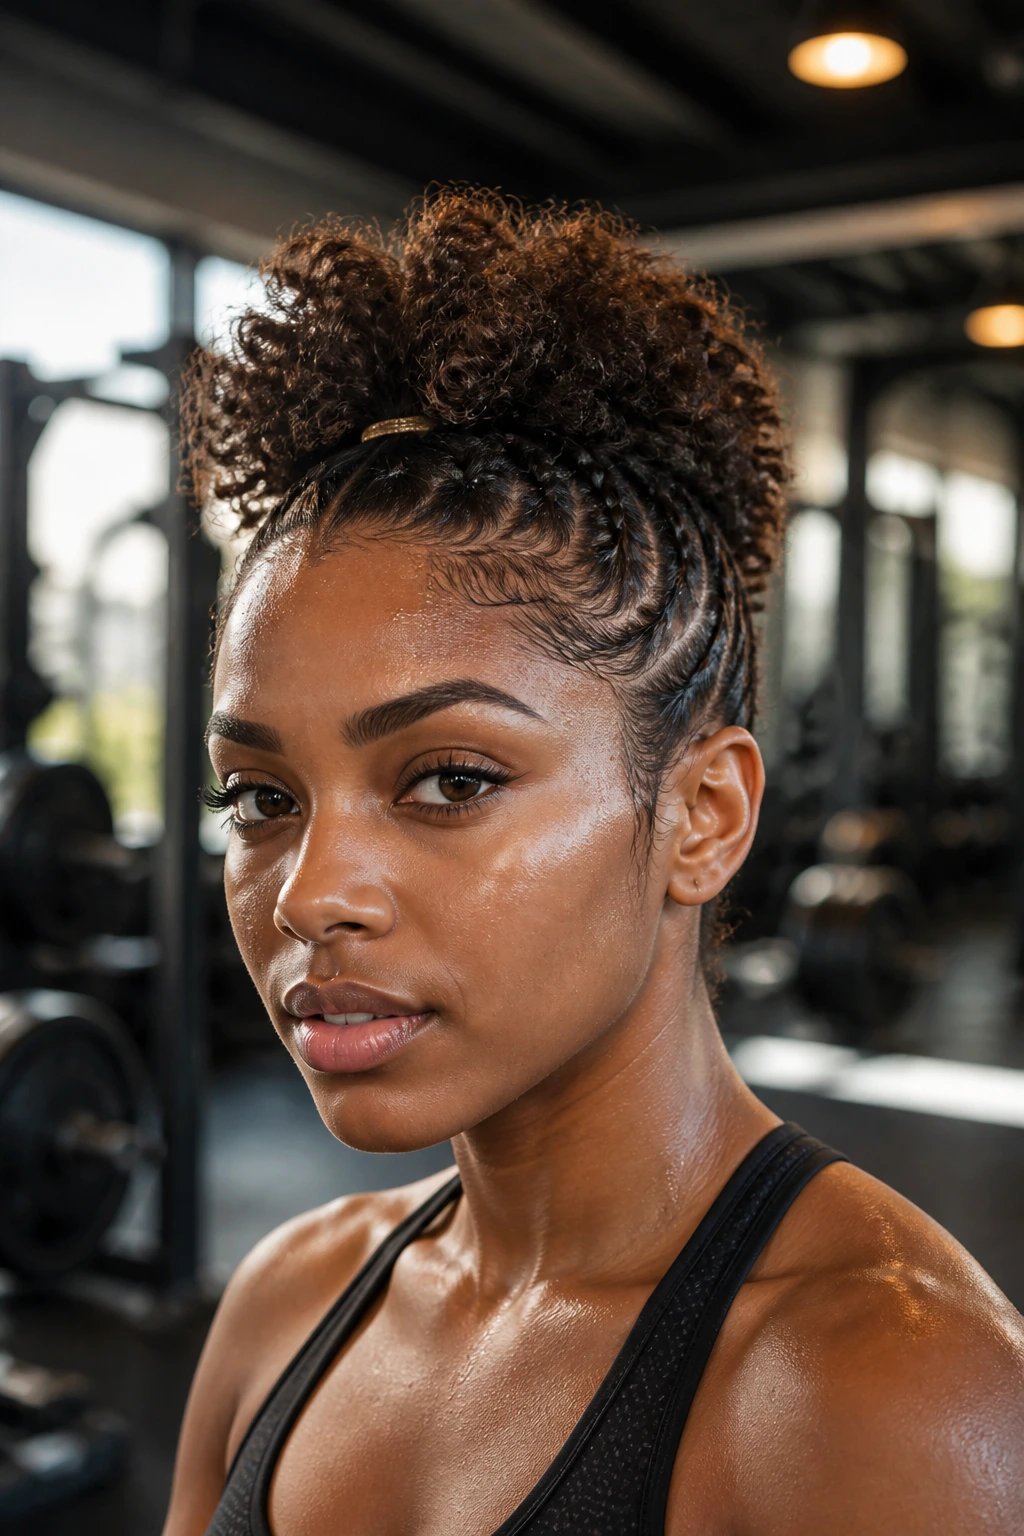
Some frohawks are built for a long event. This one is built for sweat, movement, and the kind of day when you do not want hair falling across your face every five minutes.
The sides should be pinned or braided down firmly, and the center should be secured with an elastic or twist that can survive motion. Skip heavy creams here. Lightweight gel and a few strong pins are better, because too much product mixed with sweat turns the roots into a slippery mess.
25. Day-Two Revival Frohawk
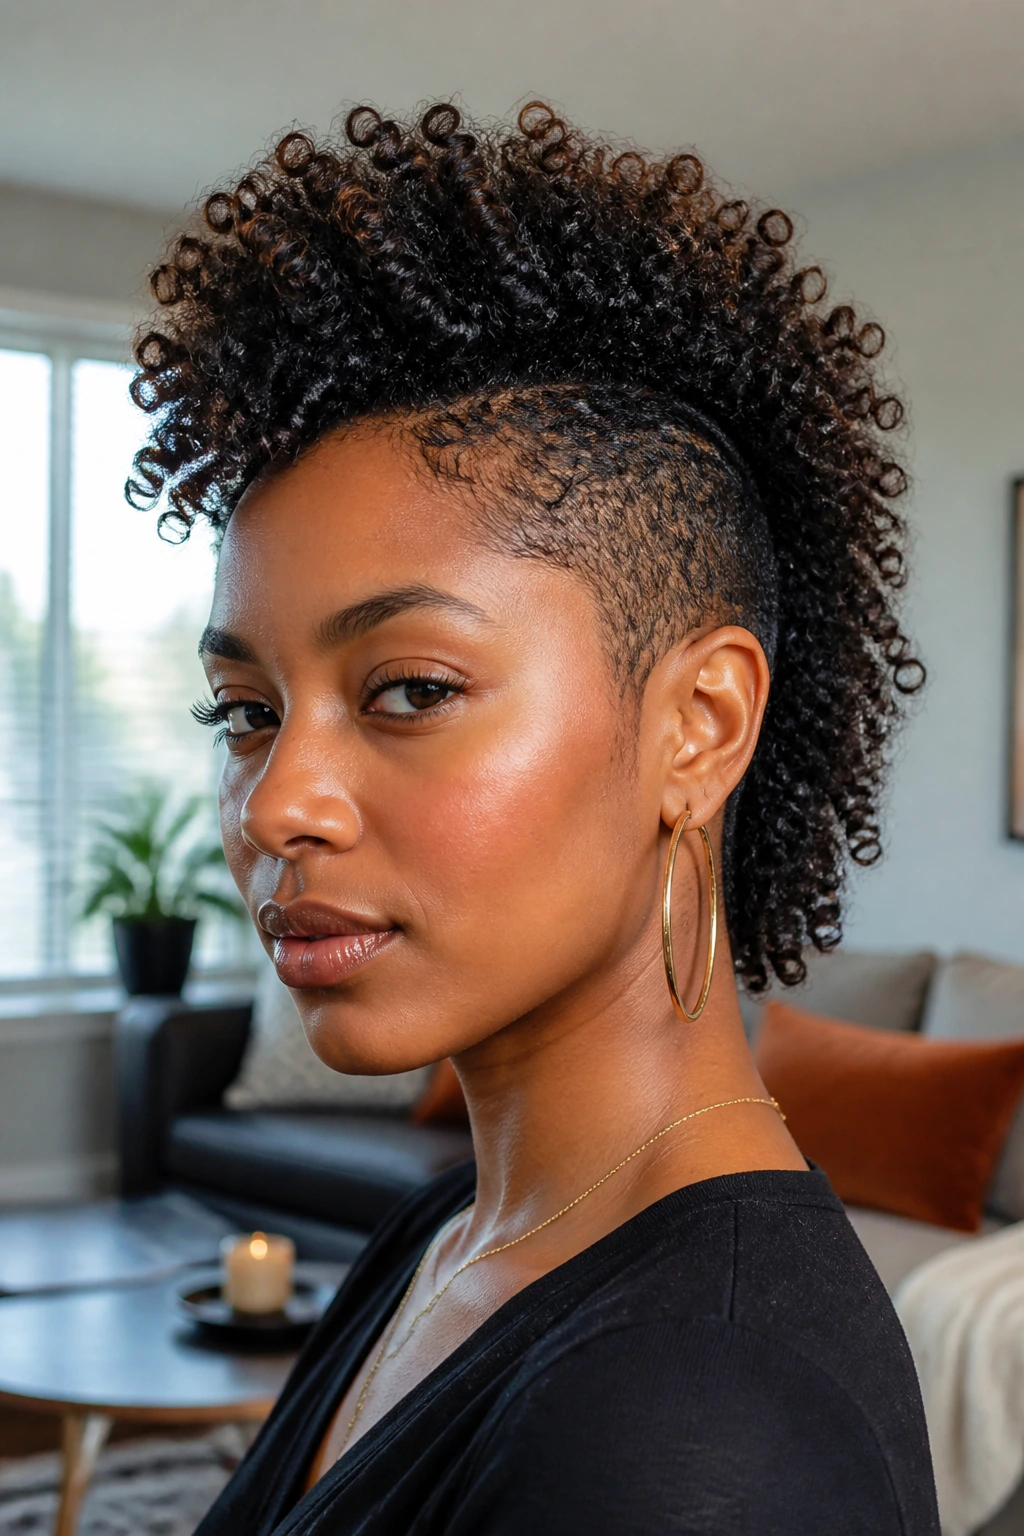
A day-two frohawk is often better than day one. The curls have settled, the shape has relaxed a little, and the center ridge can look fuller after a quick refresh.
Mist the hair lightly, then use a bit of foam or curl refresher through the top sections. Re-pin the sides where they’ve lifted, especially around the temples and nape. This style rewards restraint. If you soak the hair again, you’ll lose the original pattern and have to rebuild it from scratch.
26. Protective Frohawk
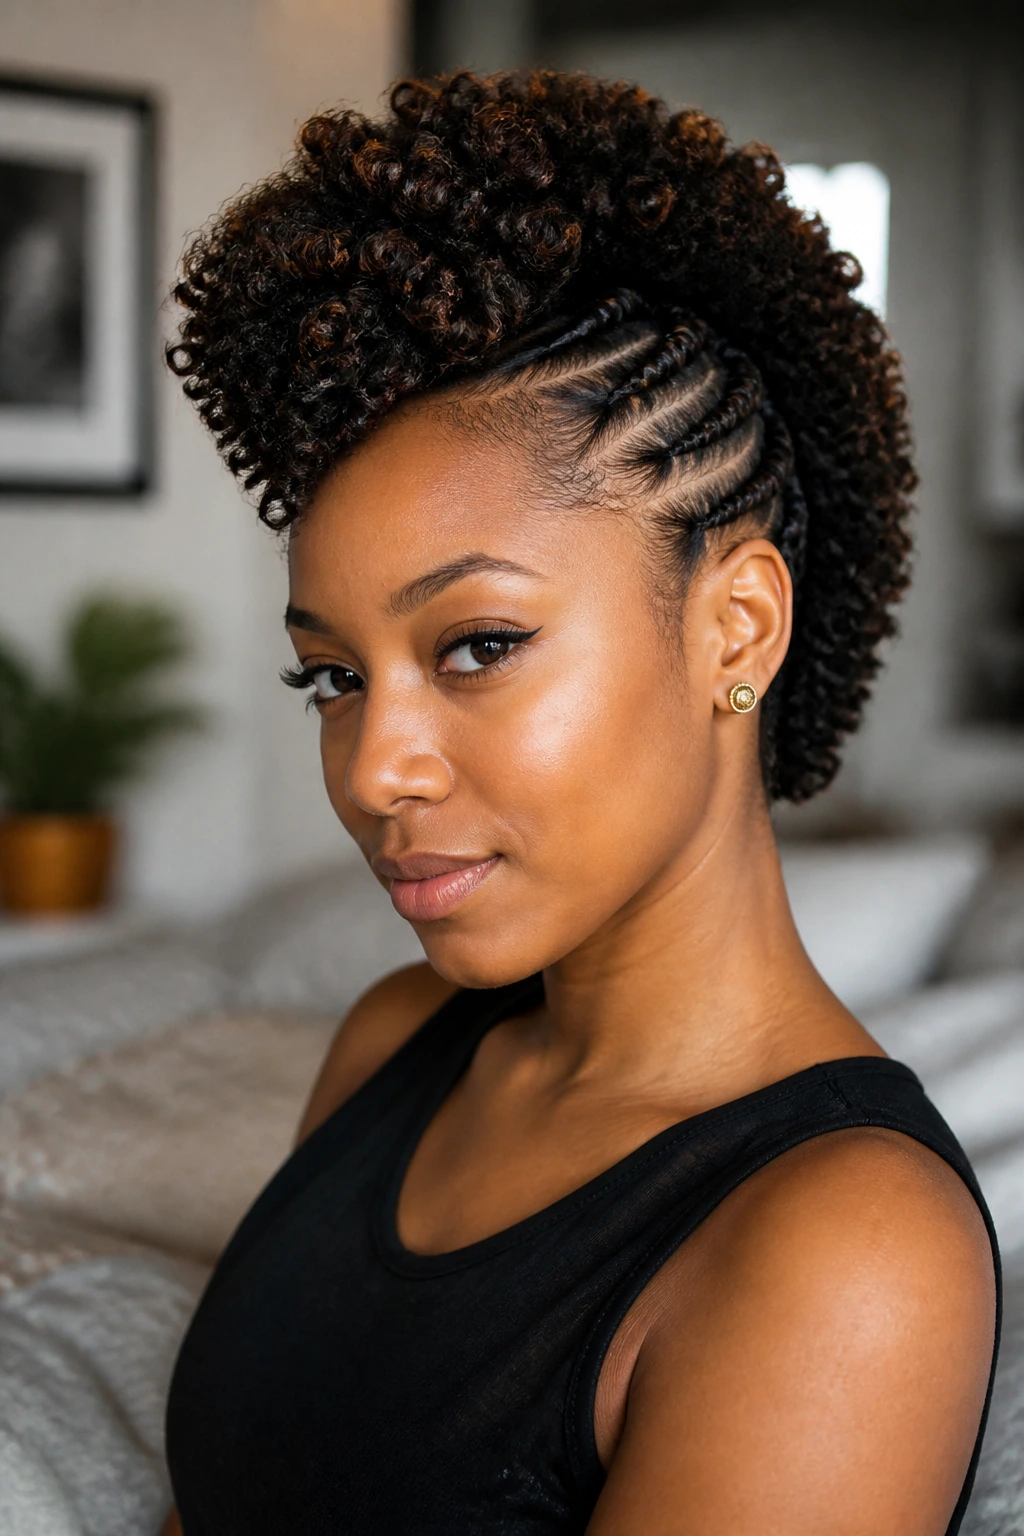
Protective frohawks trade a bit of softness for better hair care. The sides are tucked, braided, or twisted in a way that keeps ends safer and cuts down on daily handling.
That makes this version a good choice when your hair feels dry or fragile and you want a style that can stay neat for a few days. Keep the tension light, even if the style looks snug. Protective should mean protective, not painful. If your scalp feels sore after styling, the section is too tight.
27. Defined Edge Frohawk
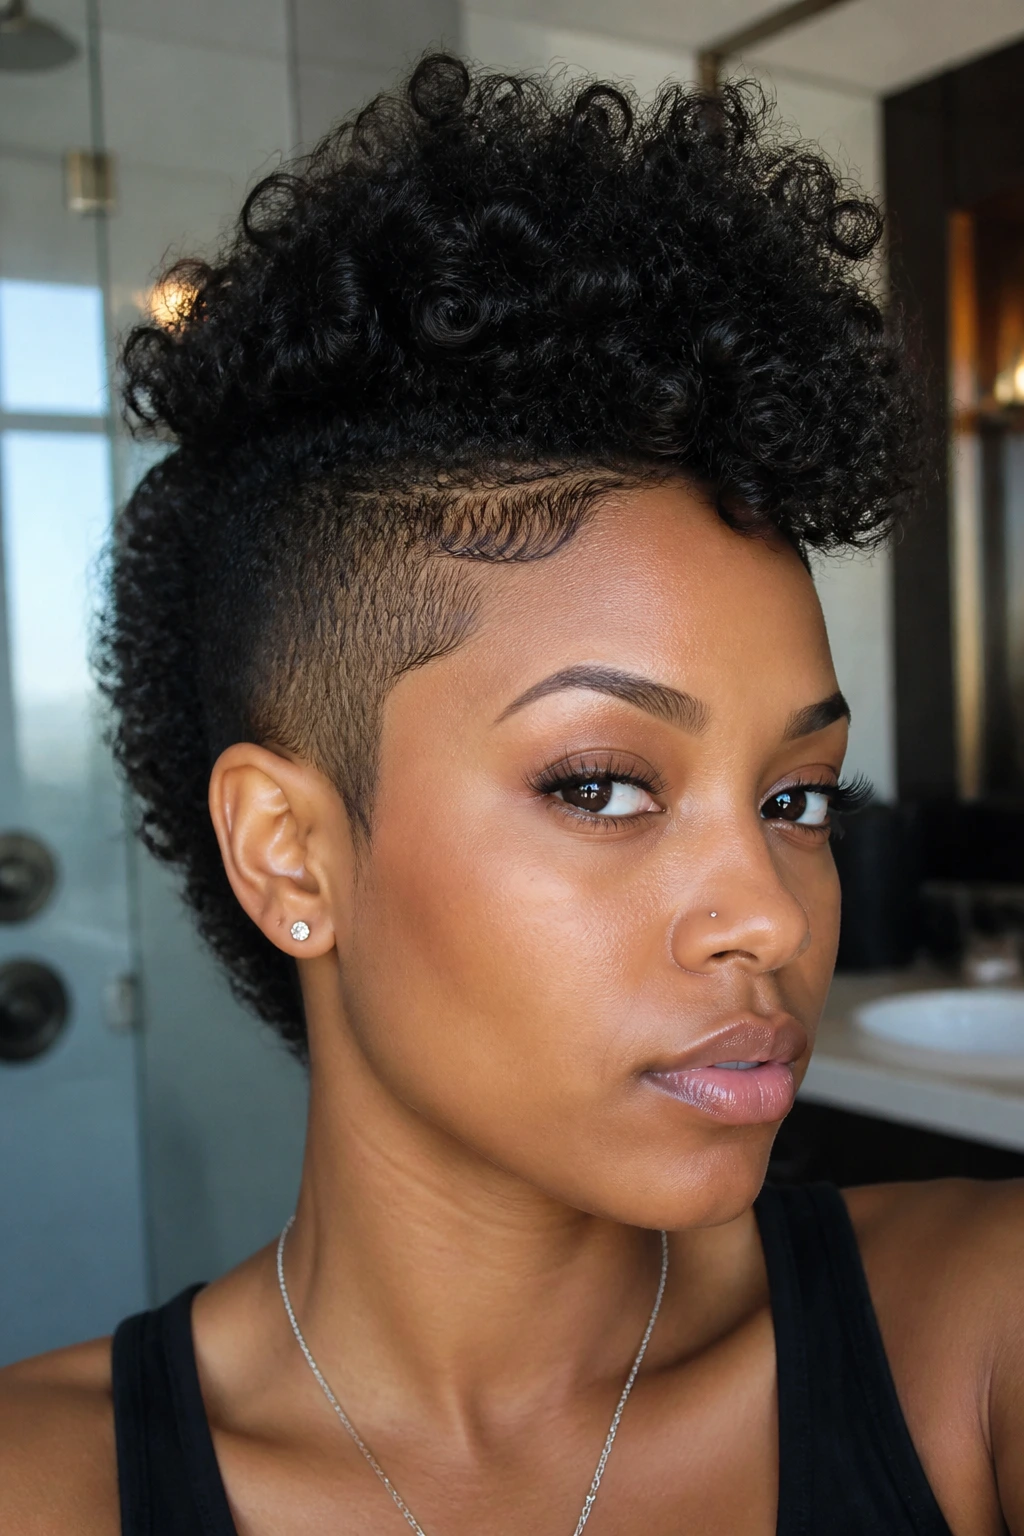
This one leans hard on sharp edges and a tidy hairline. The center can be soft, but the perimeter needs to look deliberate, with gel or edge control placed in thin layers and brushed into place.
I like this style when I want the shape to feel crisp from the front. It frames the face fast. Use a small brush for the edges, then stop touching them. Over-brushing turns the gel tacky and creates flakes, and nobody asked for dandruff confetti.
28. Chunky Twist Halo Frohawk
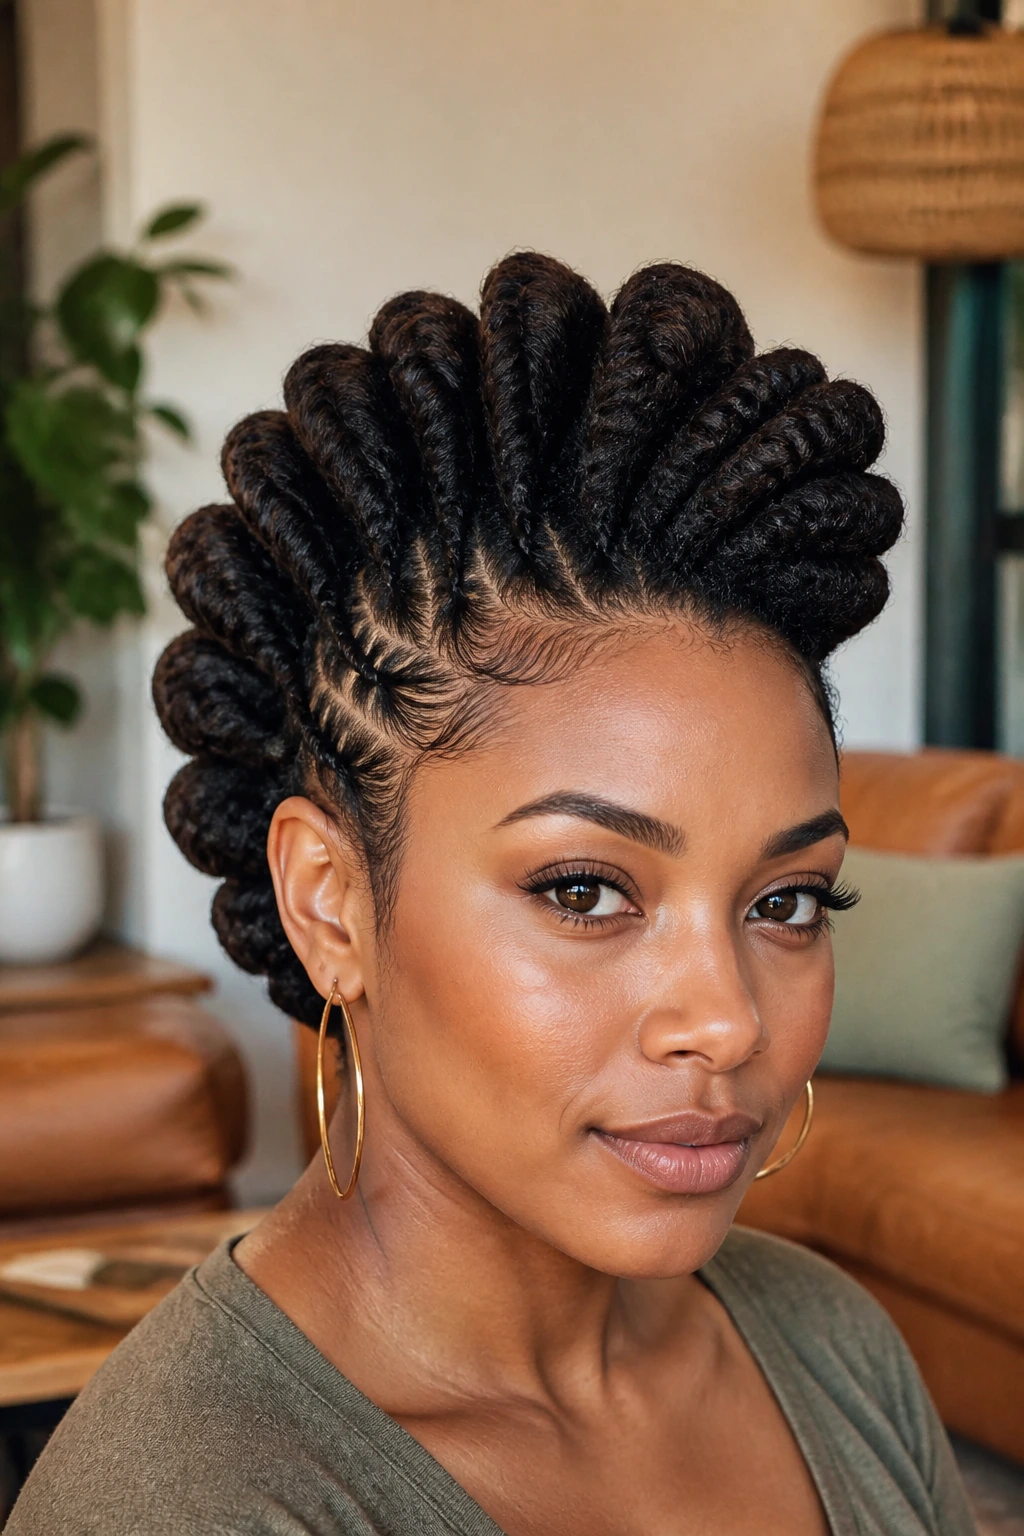
Chunky twists curving around the sides into the middle create a halo effect that still reads as a frohawk. It’s softer than a braided version and feels more romantic than sporty.
This style works nicely on thicker curls because the twists have enough bulk to hold their line. Keep the center twist larger than the side twists so the middle remains the focus. If everything is the same size, the shape can flatten out and lose the hawk profile.
29. Crown-Braid Frohawk
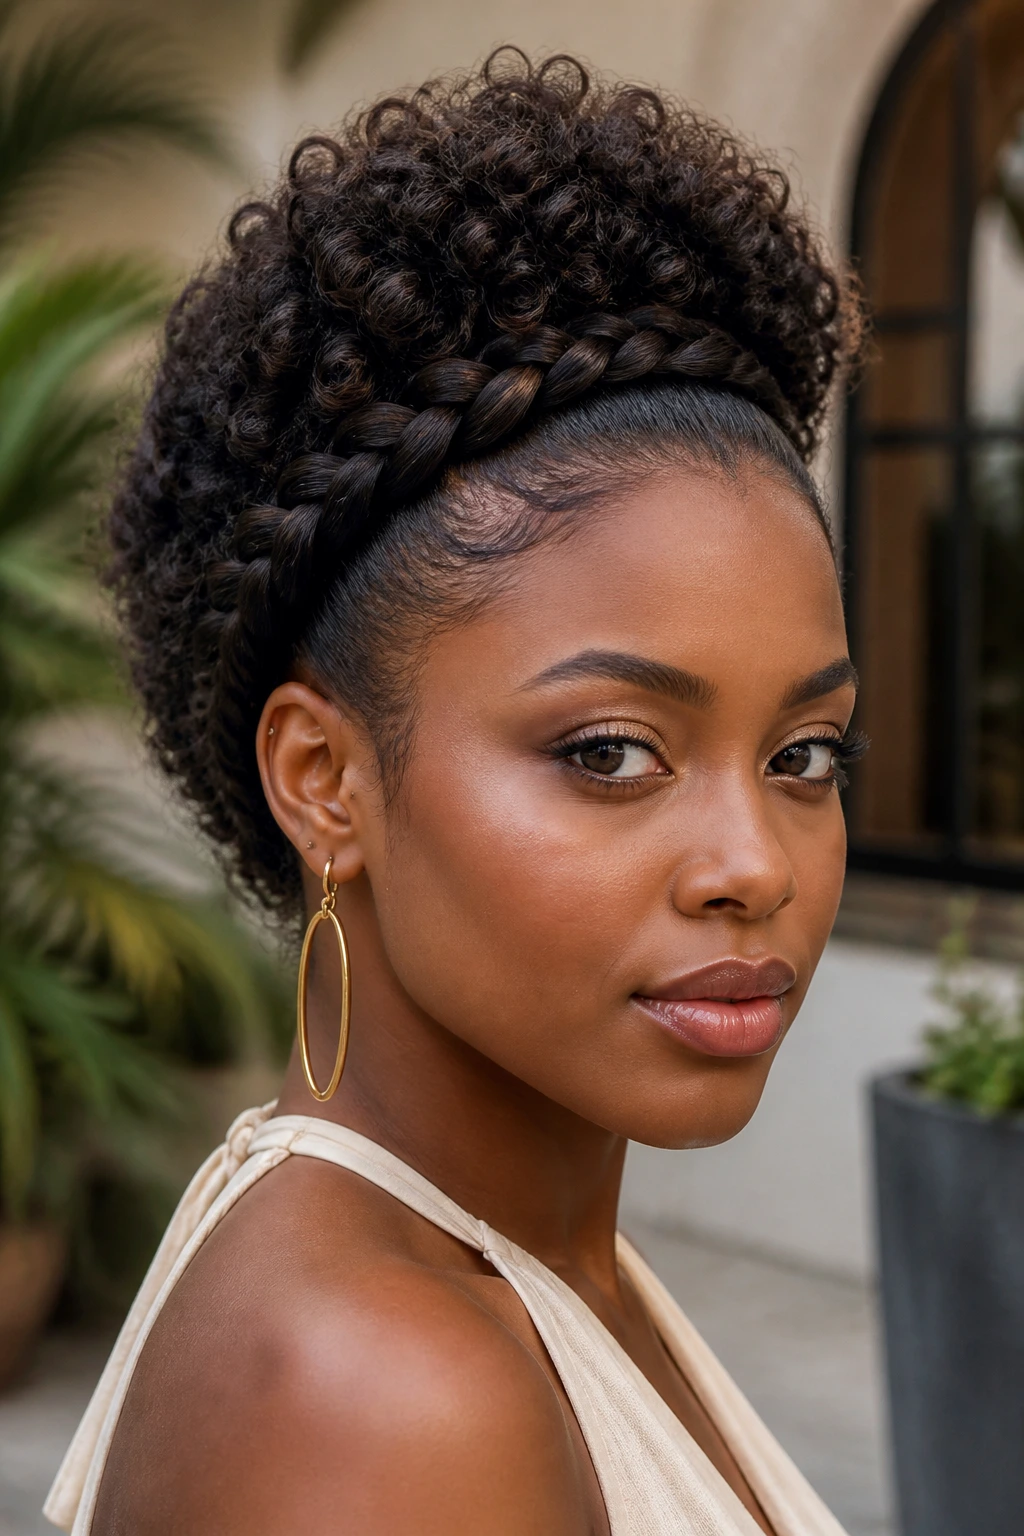
A crown braid gives the frohawk a strong frame and keeps the style from feeling unfinished. The braid wraps around the head, guiding the eye to the lifted center section.
Use this when you want a frohawk that feels a little more formal without becoming stiff. The braid should sit close enough to the hairline to clean up the perimeter, but not so tight that it pulls the corners of the forehead. That line is easy to cross if you rush.
30. Color-Pop Frohawk
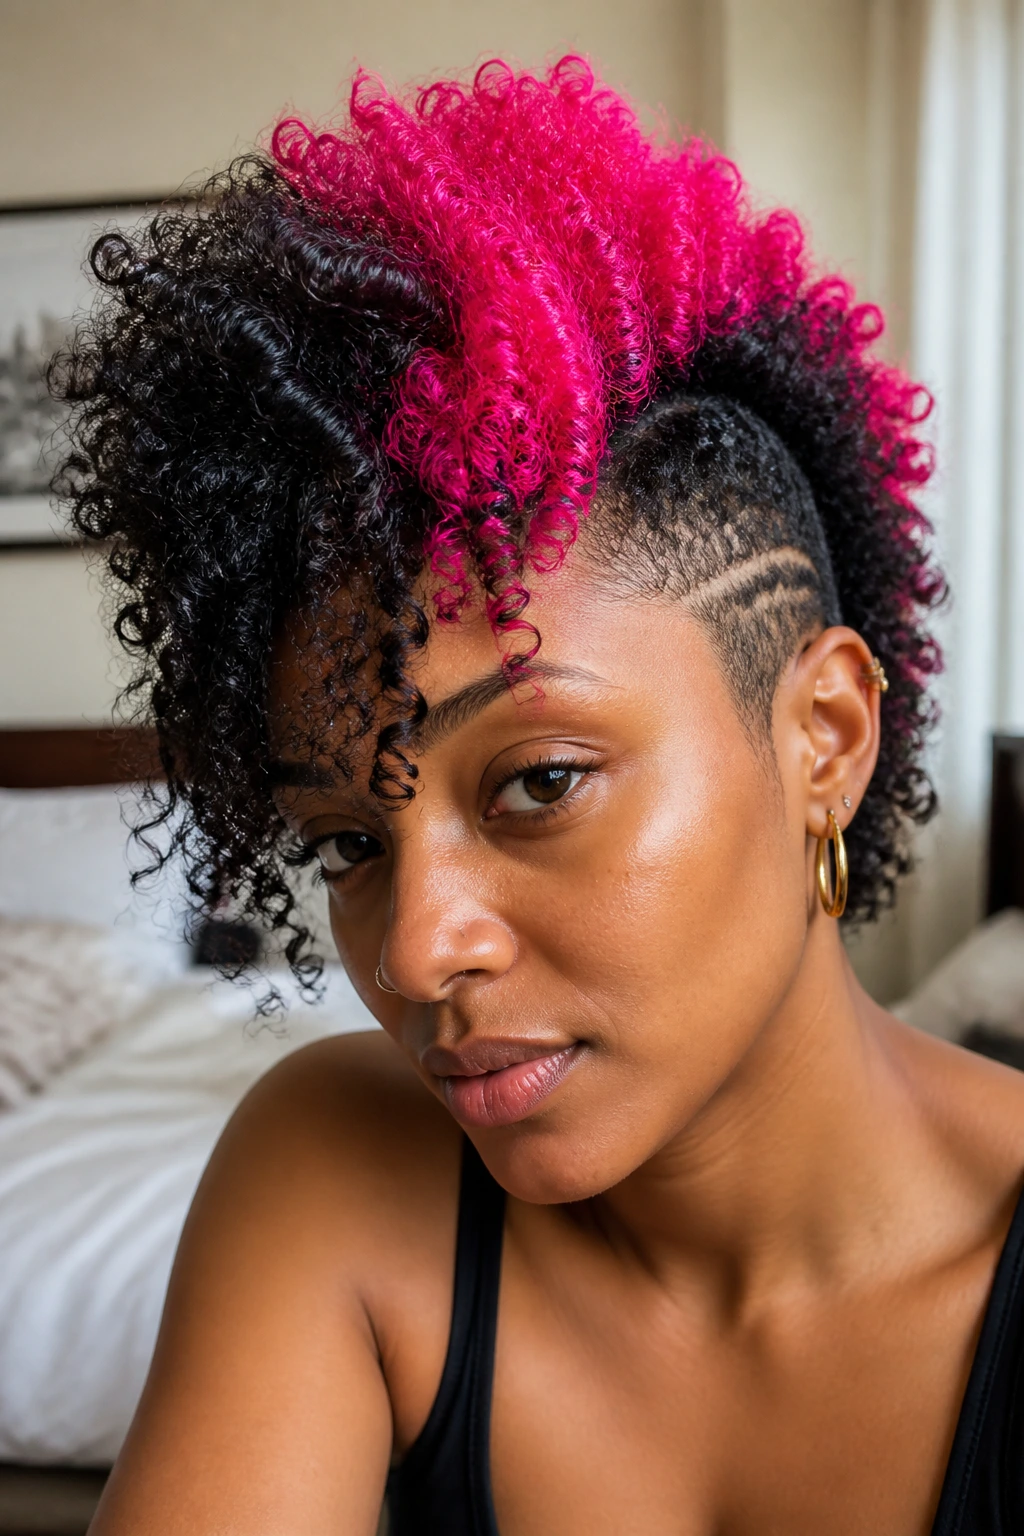
Highlights, temporary color, or even a bright scarf tucked into the center can turn a frohawk into something louder without changing the shape itself. The color catches your eye first, then the curls do the rest.
This works especially well on dark coils, where one bright strip or a few colored ends create a sharp contrast. Keep the styling simple so the color stays the star. If you add too many accessories and too much product, the whole look starts competing with itself.
31. Mini-Bun Frohawk
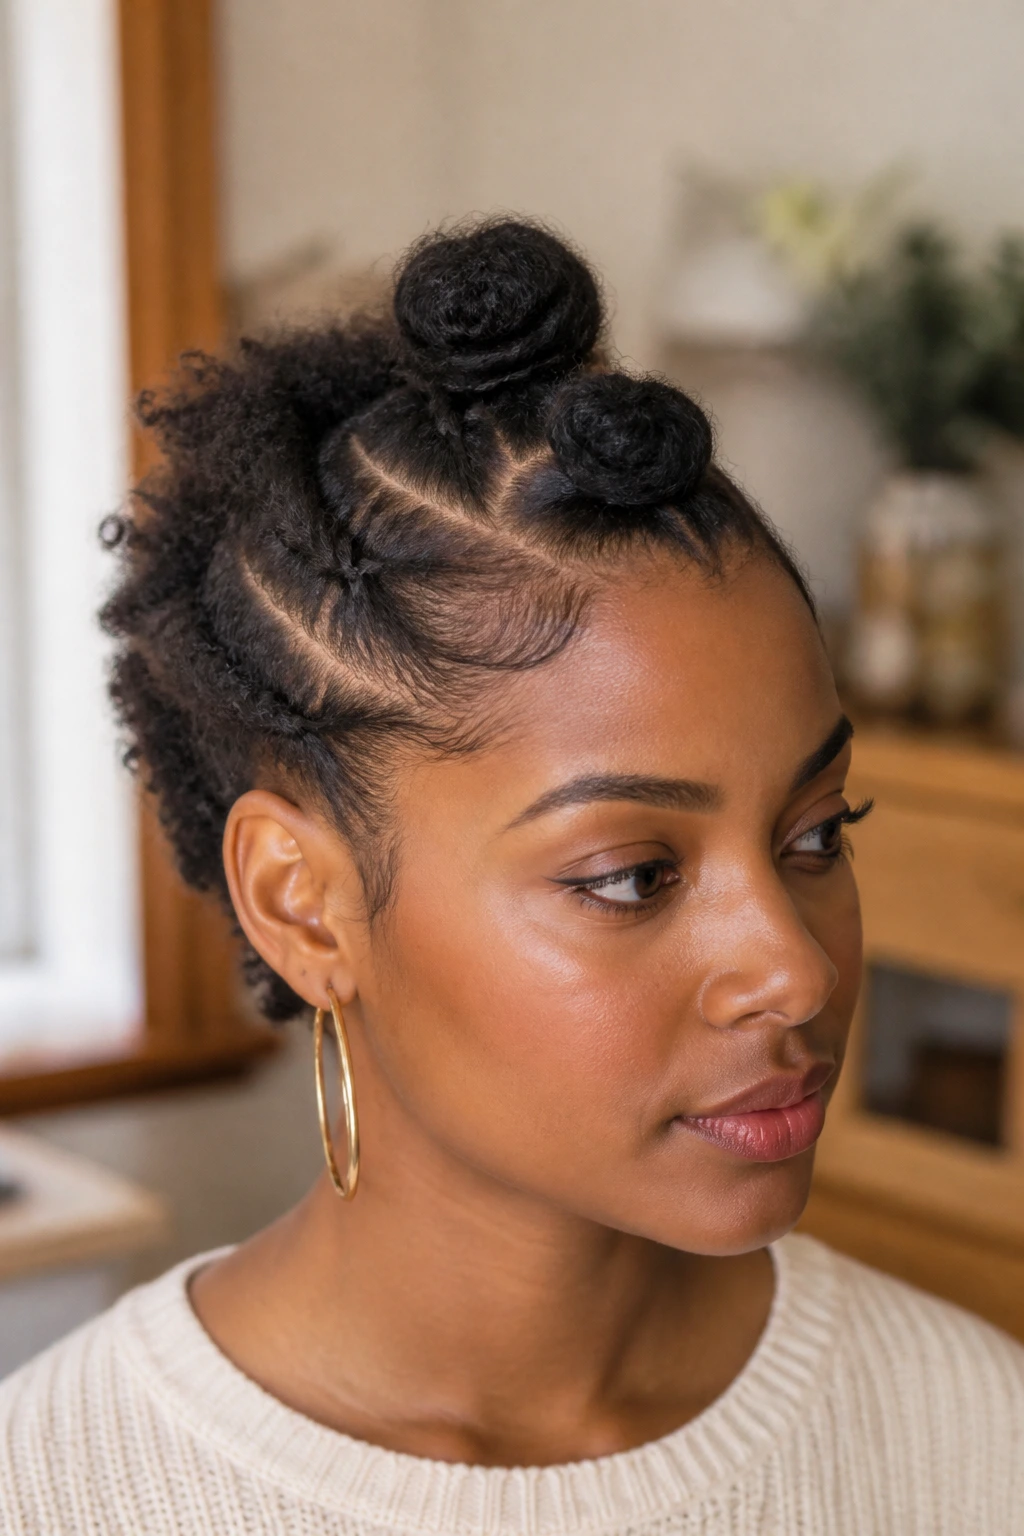
Mini buns down the center give the frohawk a neat, almost architectural line. They’re tidy, playful, and useful when the hair is too short for a full high ridge but still long enough to section.
Spacing matters. Three buns can look balanced; seven can look fussy. I usually suggest smaller buns toward the front and slightly fuller ones toward the crown so the style lifts where the head naturally curves. That keeps the silhouette from drooping backward.
32. Soft Feathered Frohawk
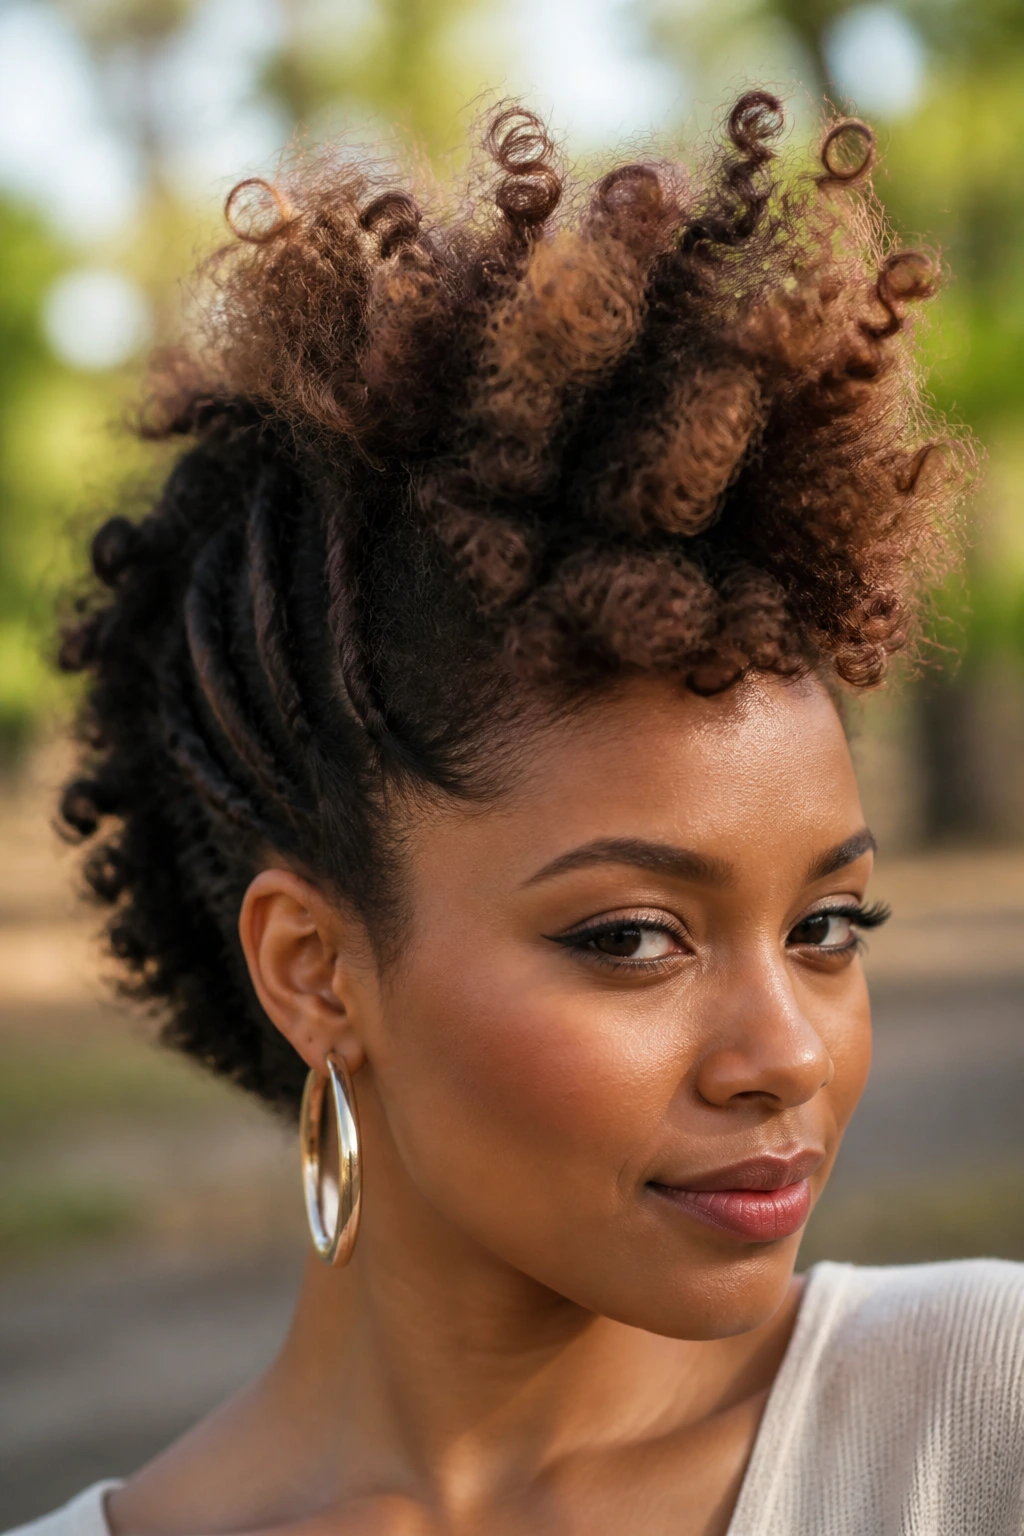
The soft feathered frohawk is the least rigid version here, and maybe my favorite when the goal is movement. The curls are separated gently, the sides are guided back, and the top has a loose, airy feel that shifts as you move.
It’s the style for people who want a frohawk without a hard edge. A light mousse, a diffuser if you need one, and patient drying are enough. Leave the curls a little imperfect. That uneven softness is the point, and it looks better than trying to iron every piece into line.
Why Frohawk Hairstyles Work So Well on Curly Natural Hair
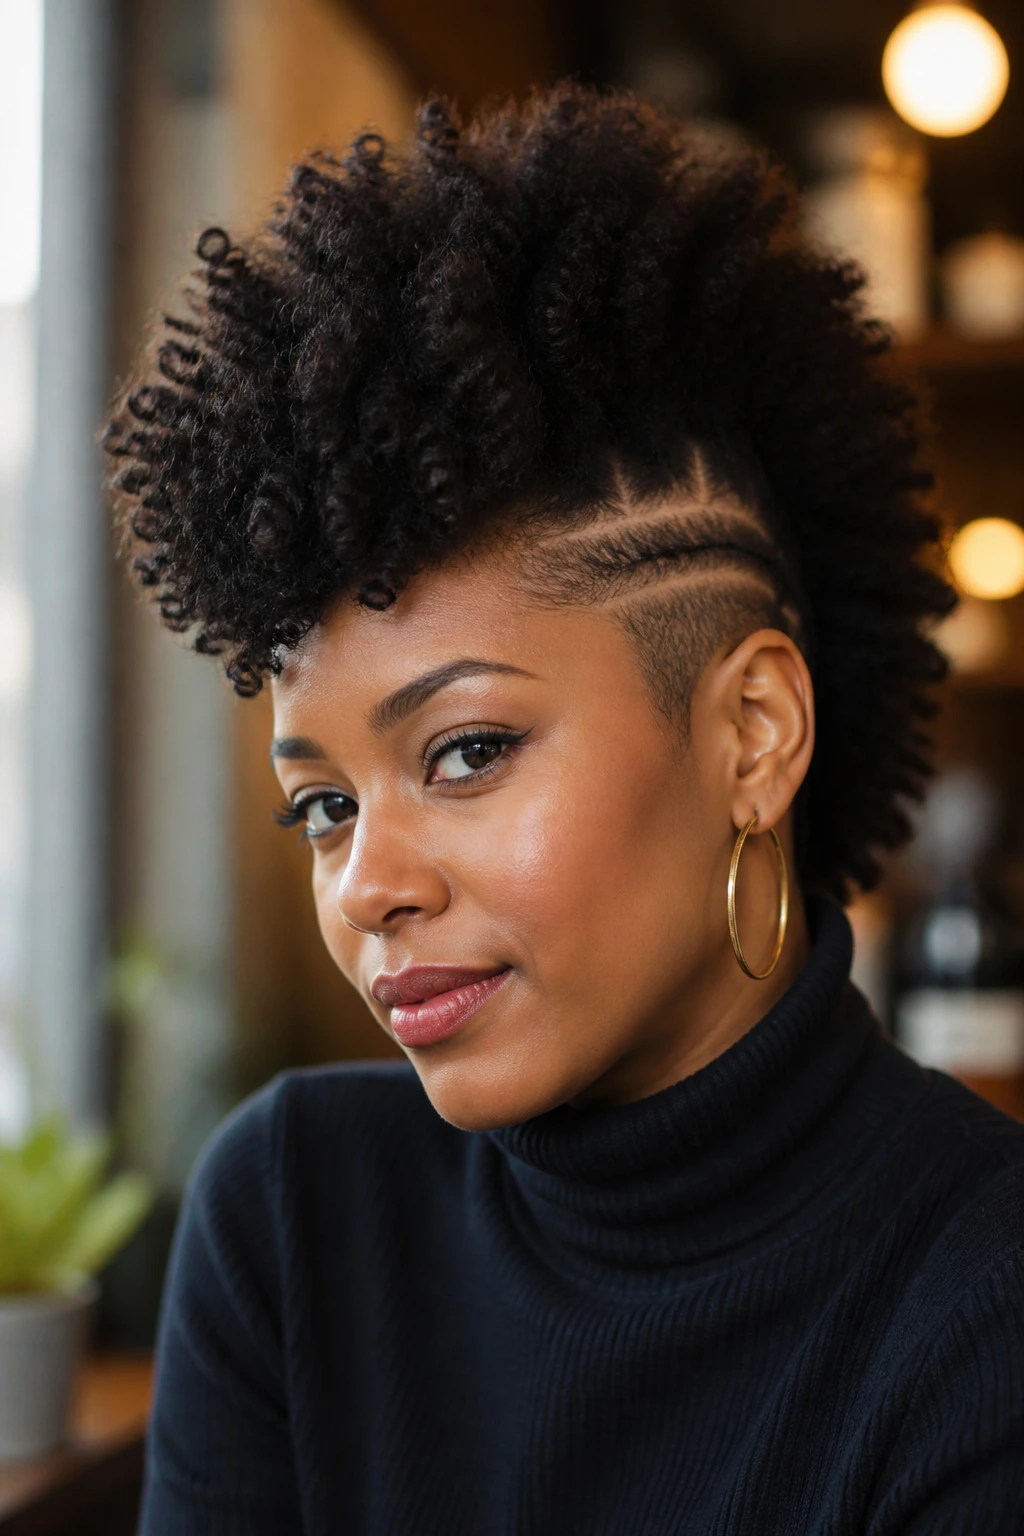
Curly natural hair already wants to make shape. A frohawk just gives that shape a lane to live in. The sides are controlled, the center stays alive, and the contrast between the two creates a silhouette that reads instantly.
The other reason these styles work is shrinkage. People treat shrinkage like a problem, but in a frohawk it can help. A stretched center can tighten into a fuller ridge as it dries, while a twist-out or wash-and-go can settle into a shape that looks cleaner on day two than it did in the mirror ten minutes after styling.
Face shape matters too, even if people don’t talk about it enough. A taller frohawk can lengthen the face, a side-swept version softens a strong jaw, and a puff stack can balance out broader cheeks. That’s why the same haircut can look fierce on one person and soft on another—the shape is doing real work.
Choosing Gels, Mousses, and Pins That Behave
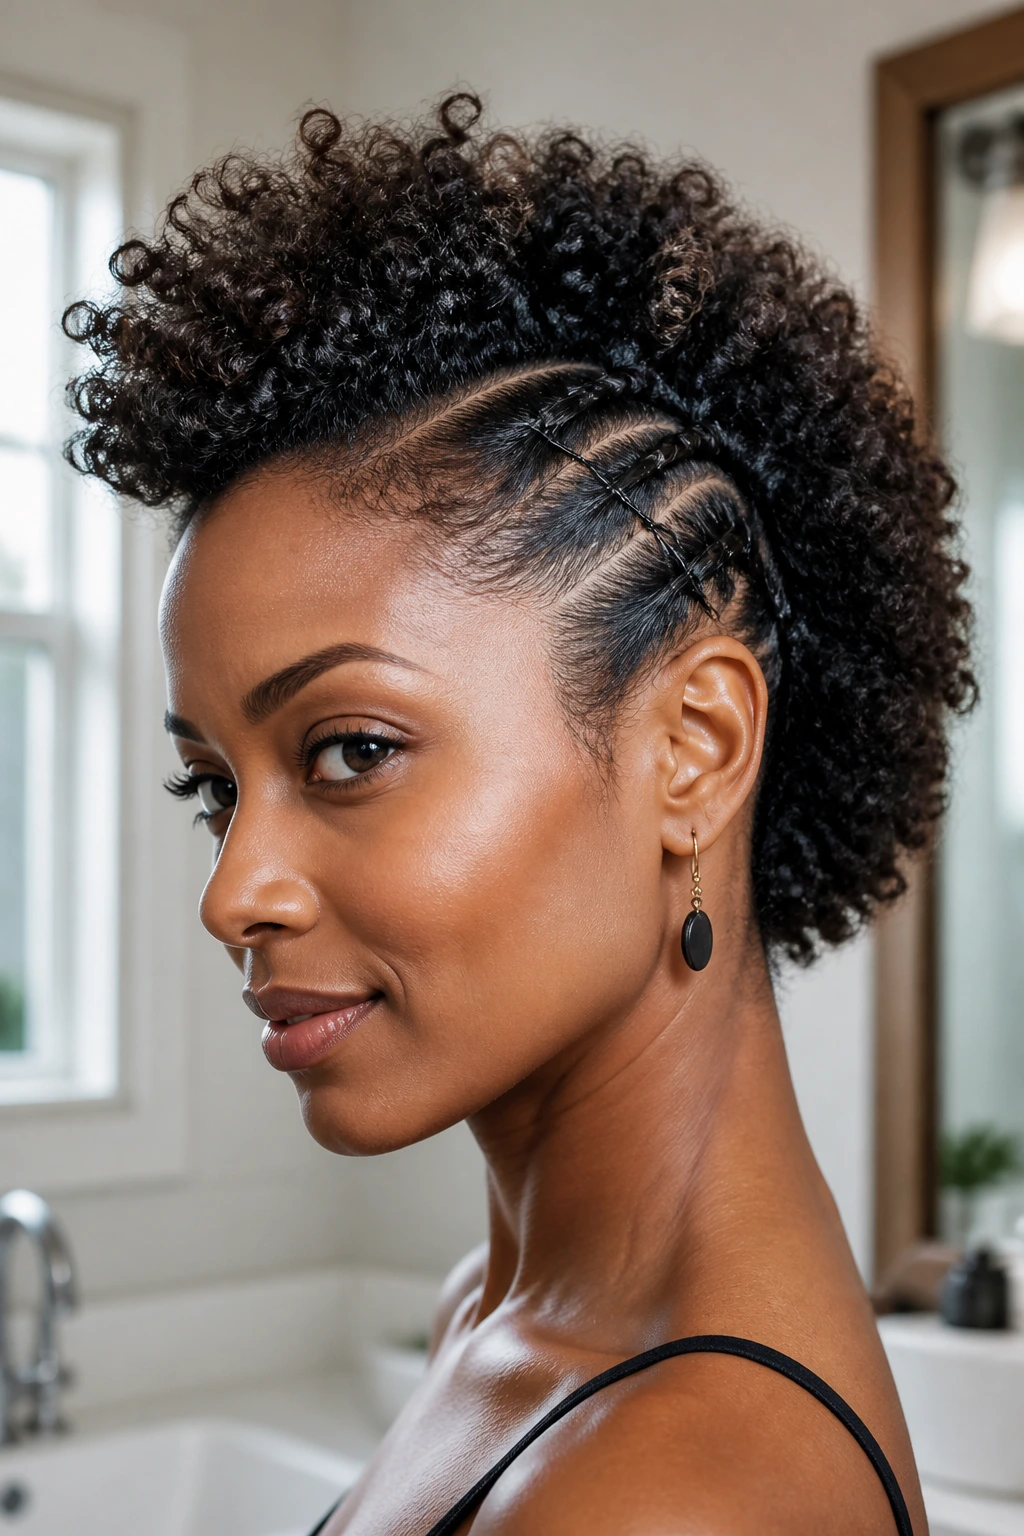
The wrong product mix will flatten a frohawk fast. Heavy creams on the sides can make the style slide, while a dry gel can leave white flakes along the hairline by lunchtime. I like a simple setup: a moisturizing leave-in, a lightweight mousse or foam for curl definition, and a gel with enough hold to keep the sides down without turning them into cardboard.
Pins matter more than people admit. Cheap, flimsy bobby pins lose their grip halfway through the day, and if the coating is rough they snag on coils when you remove them. Look for coated pins or sturdy duckbill clips for the bigger sections. Little details like that save you from having to rebuild the style in the bathroom mirror.
Edge control is a separate job, not an excuse to coat the whole head. Use it at the hairline and maybe the nape, then stop. The rest of the style usually looks better with touchable curl and a little movement. Too much shine on the entire head can make the frohawk look greasy instead of styled.
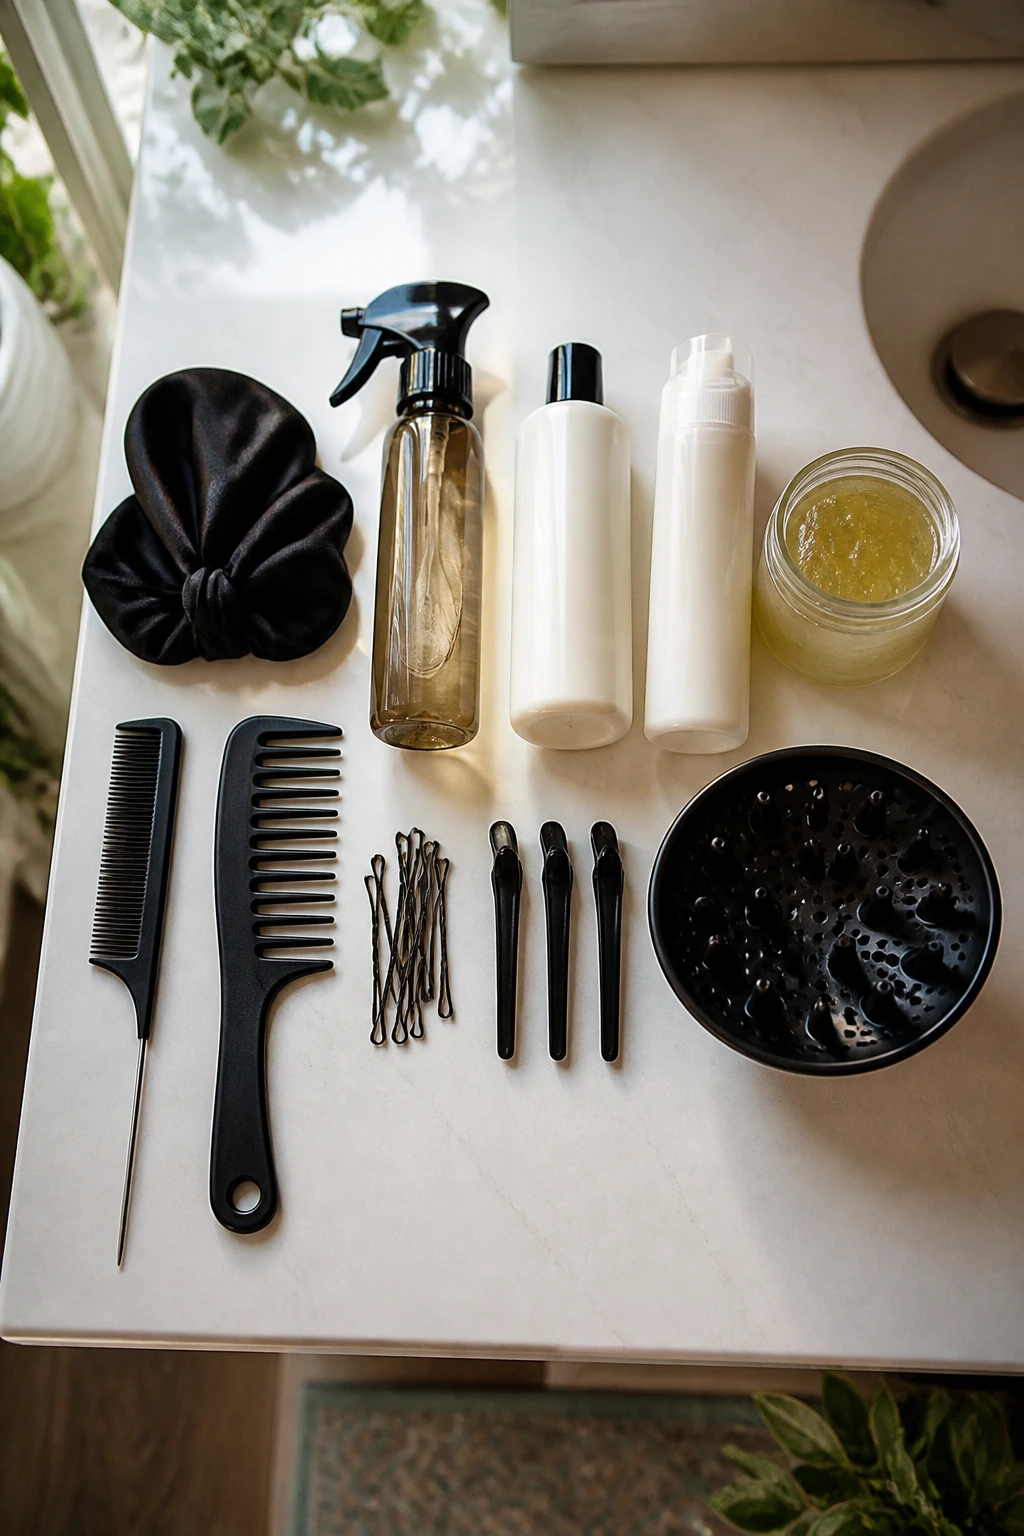
Essential Tools for These Looks
-
Rat-tail comb: Useful for crisp parts and neat sectioning, especially in styles like the crown braid or defined edge frohawk.
-
Wide-tooth comb: Good for detangling without wrecking curl clumps before you start styling.
-
Spray bottle with water: Helps reactivate product and tame frizz while you shape the center ridge.
-
Leave-in conditioner: Keeps curly natural hair flexible so the style doesn’t feel brittle or dry.
-
Curl cream or mousse: Gives the center section shape and helps wash-and-go or twist-out styles hold together.
-
Strong-hold gel or edge control: Best for the sides, hairline, and any section that needs to stay close to the head.
-
Bobby pins and duckbill clips: Hold the sides and center in place while you work; duckbill clips are especially handy when you’re setting the shape.
-
Satin scarf or wrap: Presses the sides flat while the style sets and protects the finish overnight.
-
Diffuse attachment or hooded dryer: Useful if you need the curls to dry faster without blowing the shape apart.
-
Small snag-free elastics: Handy for puffs, mini buns, and twisted sections where pins alone aren’t enough.
How to Prep the Hair Before Styling
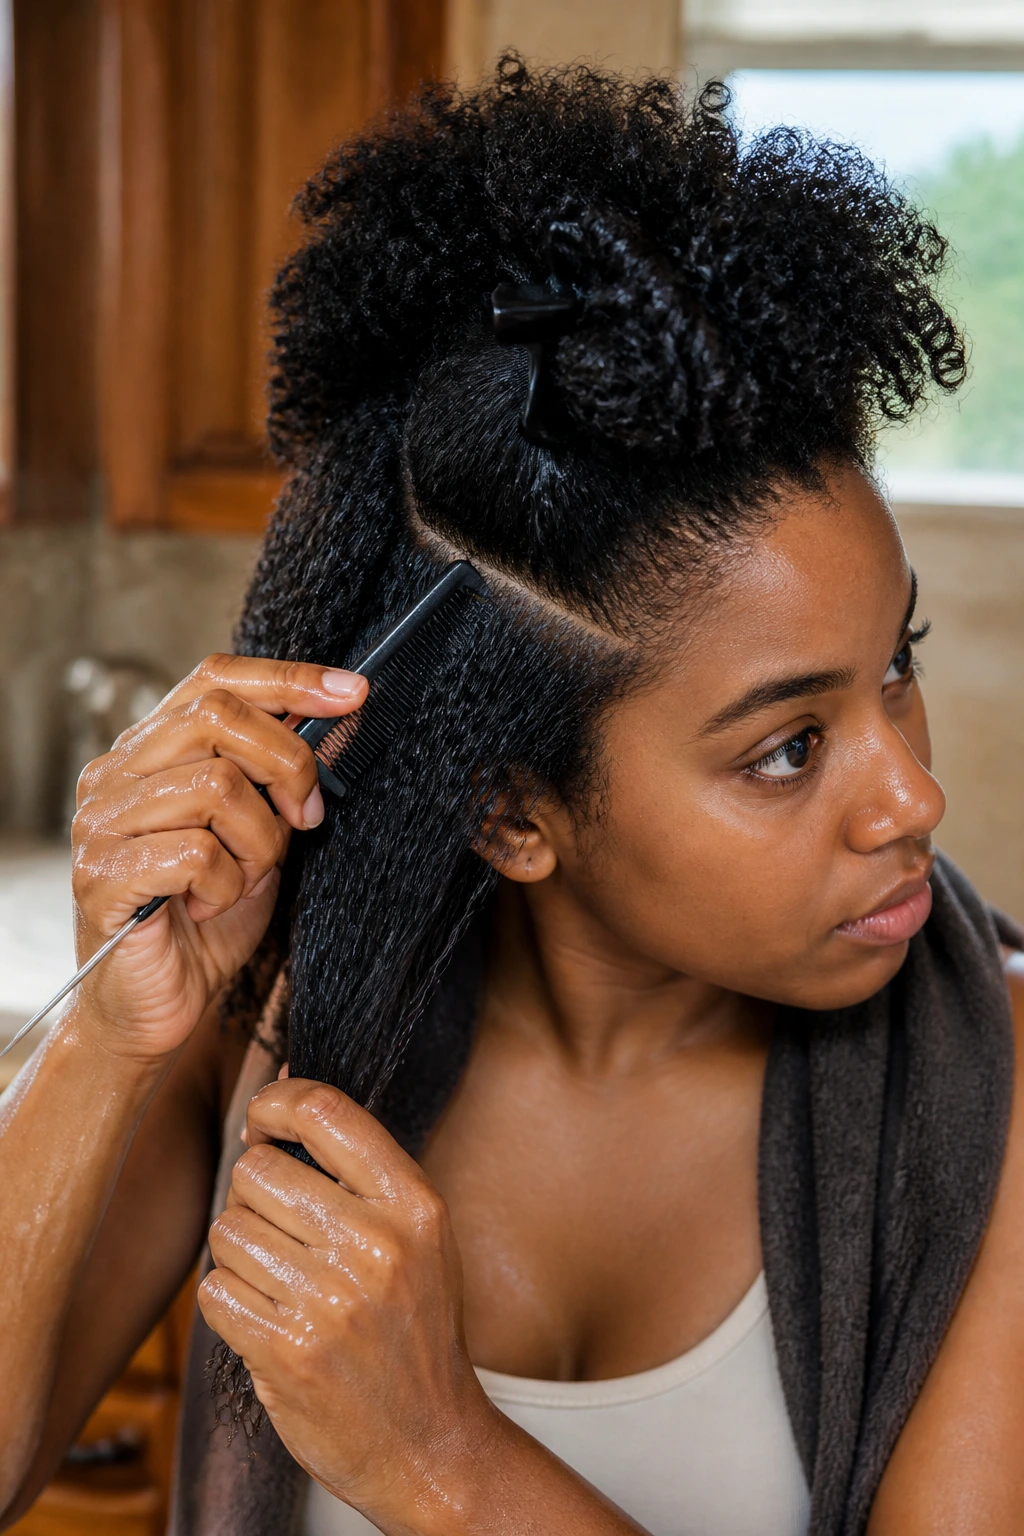
Start with hair that is clean enough to hold product, but not squeaky-dry. Curly natural hair usually behaves better when it has a little moisture left in it, because dry strands puff up the second you touch them. Detangle first, then decide whether you want the style on stretched hair, defined curls, or something in between.
Parting comes before pinning. Always. If you skip the part map, you end up adjusting one side three times and the other side never quite matches. Use the rat-tail comb to carve the center ridge and side sections, then clip everything before you start applying product. That keeps the shape balanced.
If your goal is height, stretch the center a bit before setting it. A quick blow-dry on low heat with a diffuser, or a night of braids or banding, can help the frohawk stand instead of collapsing into a round puff. But don’t overdo the heat. A little stretch helps; bone-dry hair blasted into submission usually does not.
How to Wear the Finished Look
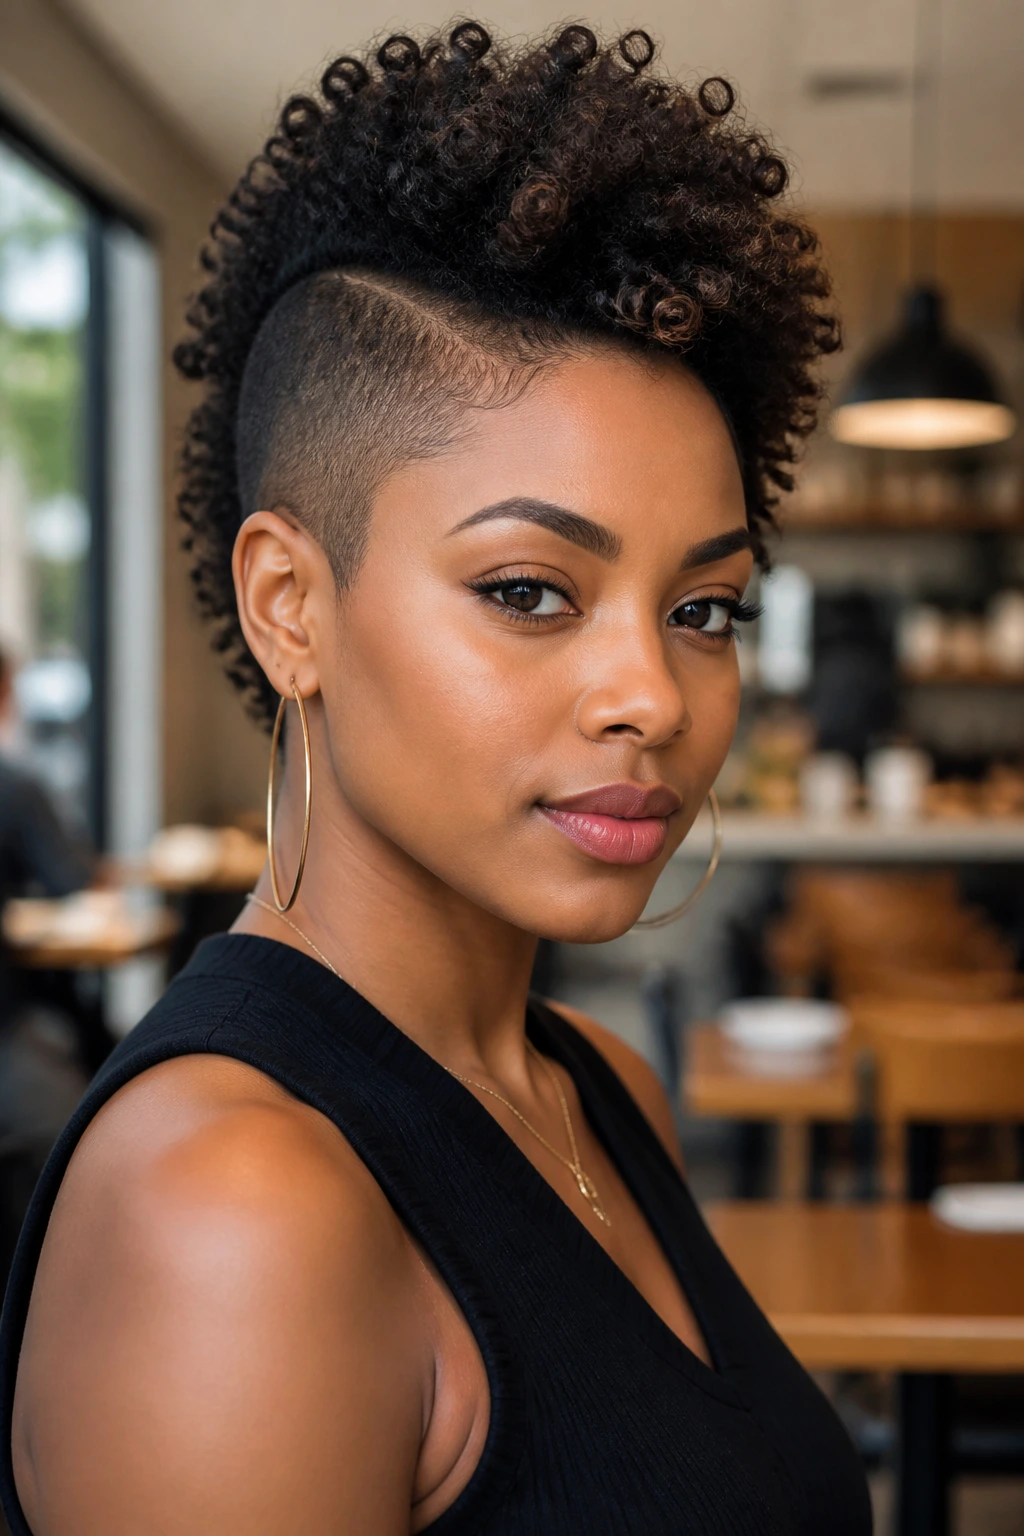
Presentation: Let the center ridge stay the star and keep the sides neat enough that the shape reads from the front and the profile. A frohawk looks best when the silhouette is clear, so stop touching the top once the curls settle.
Accents: Big earrings, a clean neckline, or a strong lip can all work here because the hair already brings height. If the style has cuffs, beads, or a scarf, keep the rest of the accessories calmer so the look doesn’t get noisy.
Balance: Taller frohawks pair well with fitted collars, off-shoulder tops, or simple jackets. Softer versions can sit next to a blazer or a dress with more detail because the hairstyle won’t fight the outfit for attention.
Mood: A wet-look or braided version feels sharper and more formal. A fluffed-out frohawk or puff stack reads relaxed and a little playful. Pick the one that matches your day instead of forcing every style into the same lane.
Styling Boosters and Personal Touches
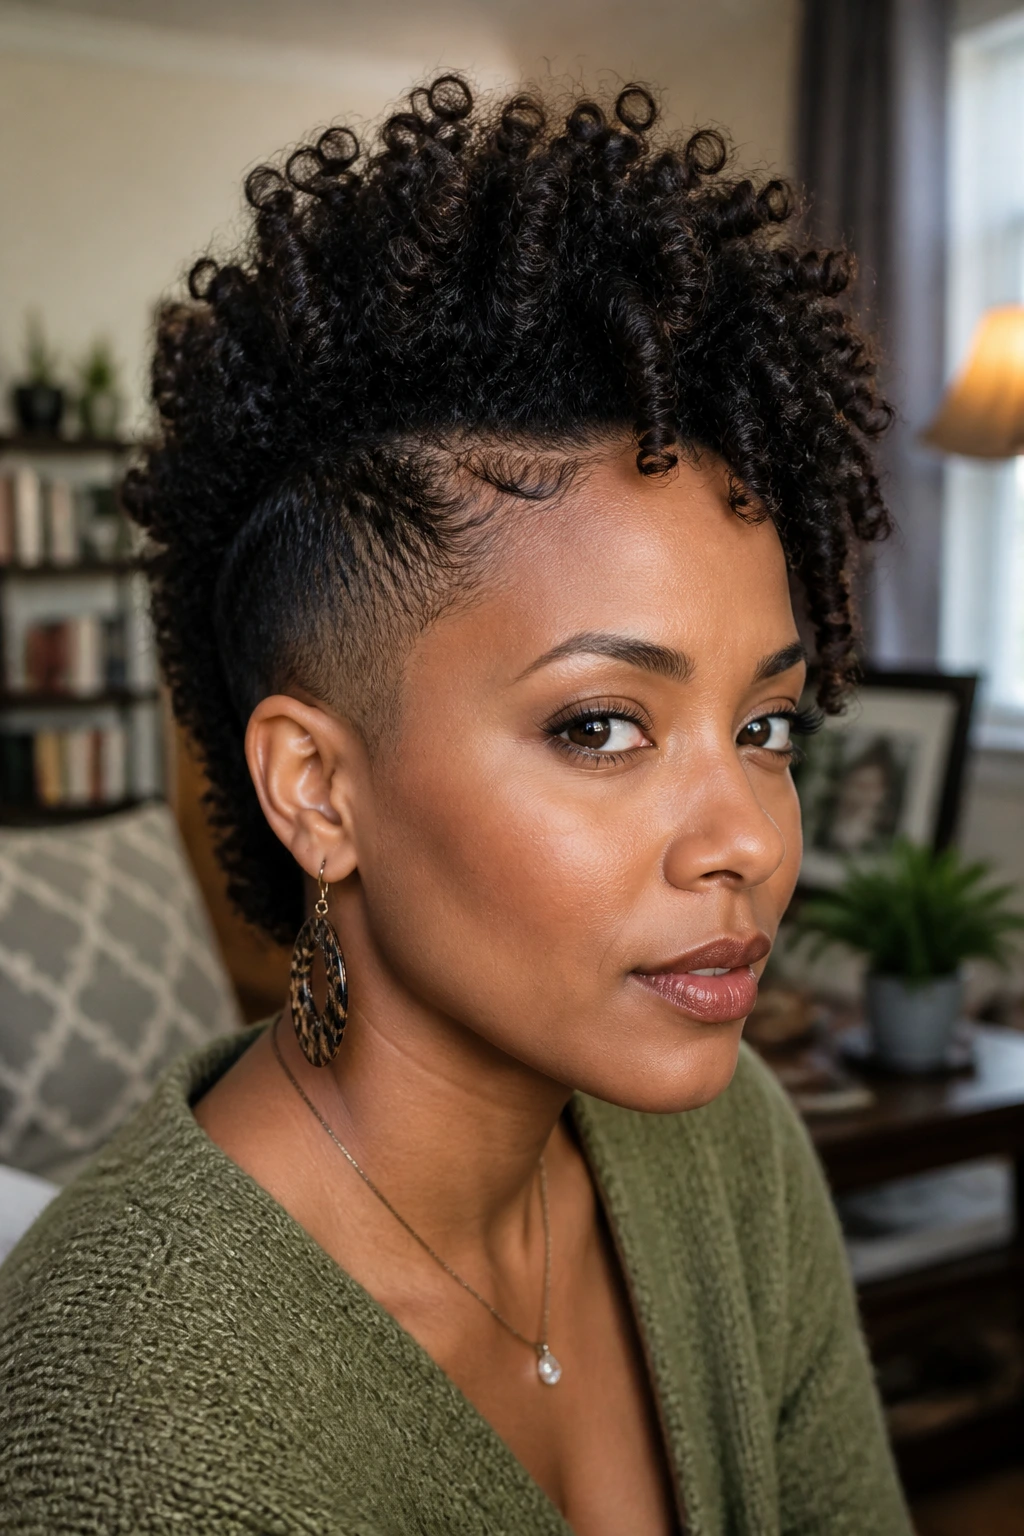
Volume Boost: Pick the center at the roots with a small comb once it’s fully dry, then stop before you turn the curls into fuzz. That one move can lift the whole shape by an inch or two.
Edge Game: Use edge control only where the hairline needs polish. A thin layer brushed in with a soft bristle brush gives a clean frame without the shiny crust that cracks when you smile.
Accessory Play: Cuffs, beads, and wide headbands work best when they support the silhouette instead of hiding it. Place them where the eye naturally follows the line of the style.
Make-It-Yours: Fine hair usually benefits from tighter sections and lighter products. Dense hair tends to hold up better with bigger twists, stronger pins, and a little more hold at the roots. If your curls are loose, a twist-out base helps. If they’re tight, a wash-and-go or puff stack keeps the shape from feeling too stiff.
Common Mistakes That Flatten Frohawk Hairstyles
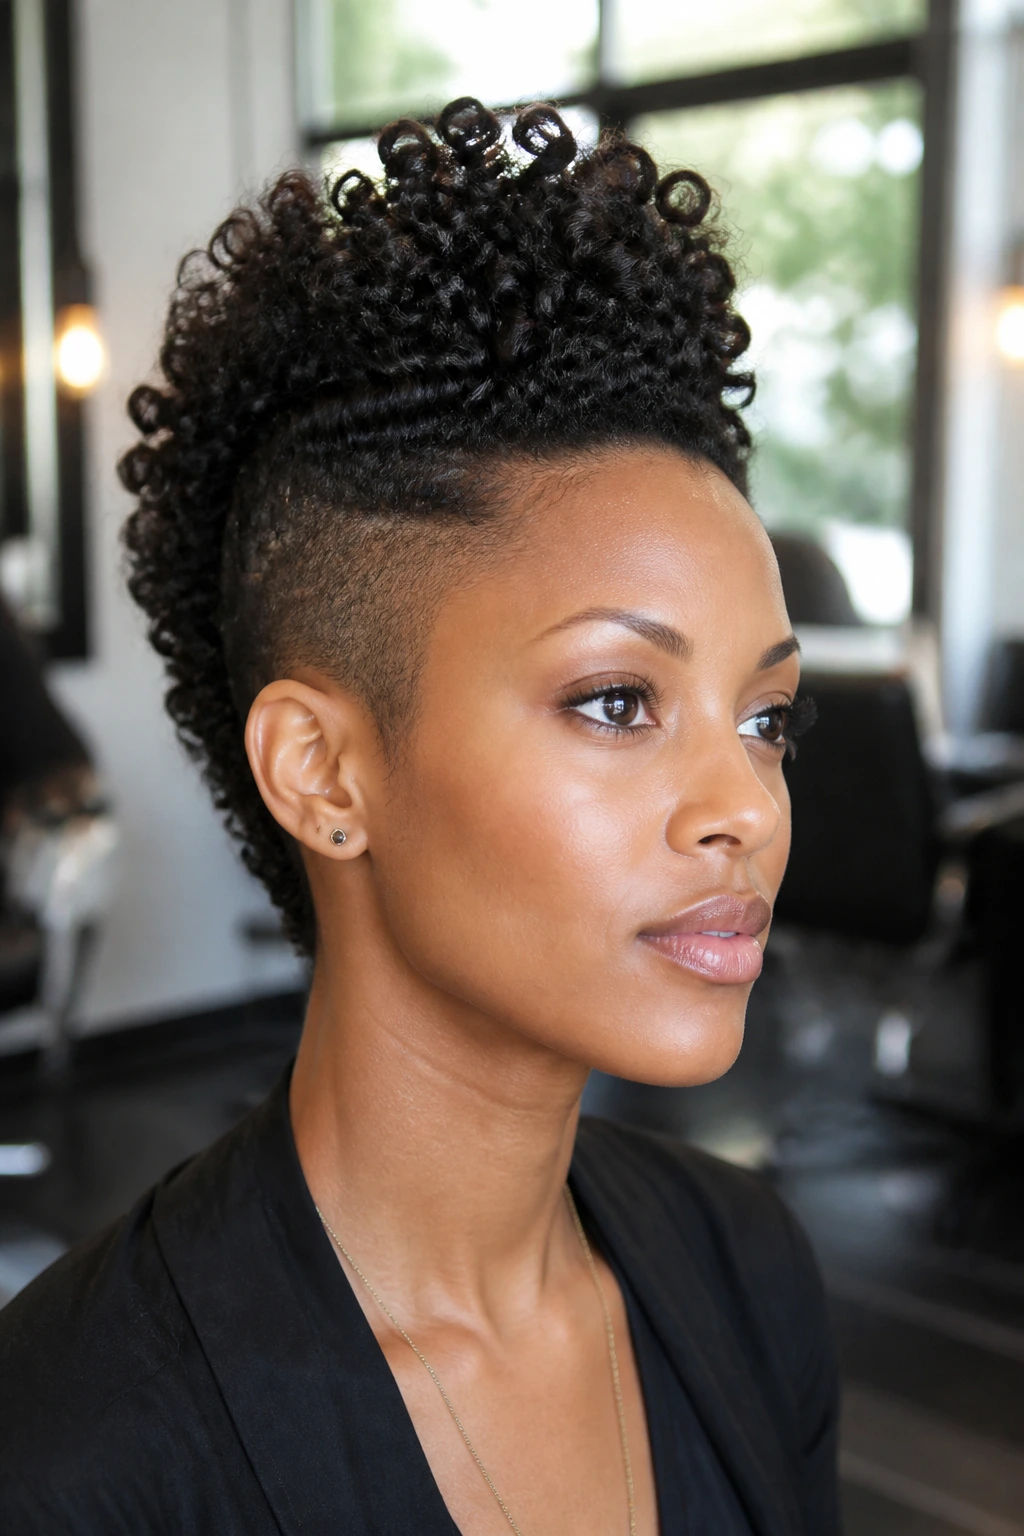
Heavy product is the first trap. When the sides are packed with thick cream and gel, they can look smooth for an hour and then start sliding down the scalp. The fix is thin layers: a small amount of gel for hold, a light mousse or foam for the center, and no extra cream where you need the shape to stay lifted.
Wrong section size causes a different problem. If the center strip is too wide, it stops looking like a frohawk and starts looking like a wide puff with pinned sides. If it’s too narrow, the style can feel thin and underfed. You want enough hair in the middle to create a ridge that stands up on its own.
Underdrying is another one. Wet curls look promising for about ten minutes, then they soften and sink. If you pin the hair before it’s dry, the style may never fully set. Give it time under a diffuser, hooded dryer, or good old-fashioned air-dry time, and resist the urge to touch it every five minutes.
Too much tension at the edges is a mistake people make when they want the style to last. A tight braid or an overpulled flat twist can leave the hairline sore and frizzy by the end of the day. A frohawk should feel secure, not punishing.
Variations and Adaptations to Try
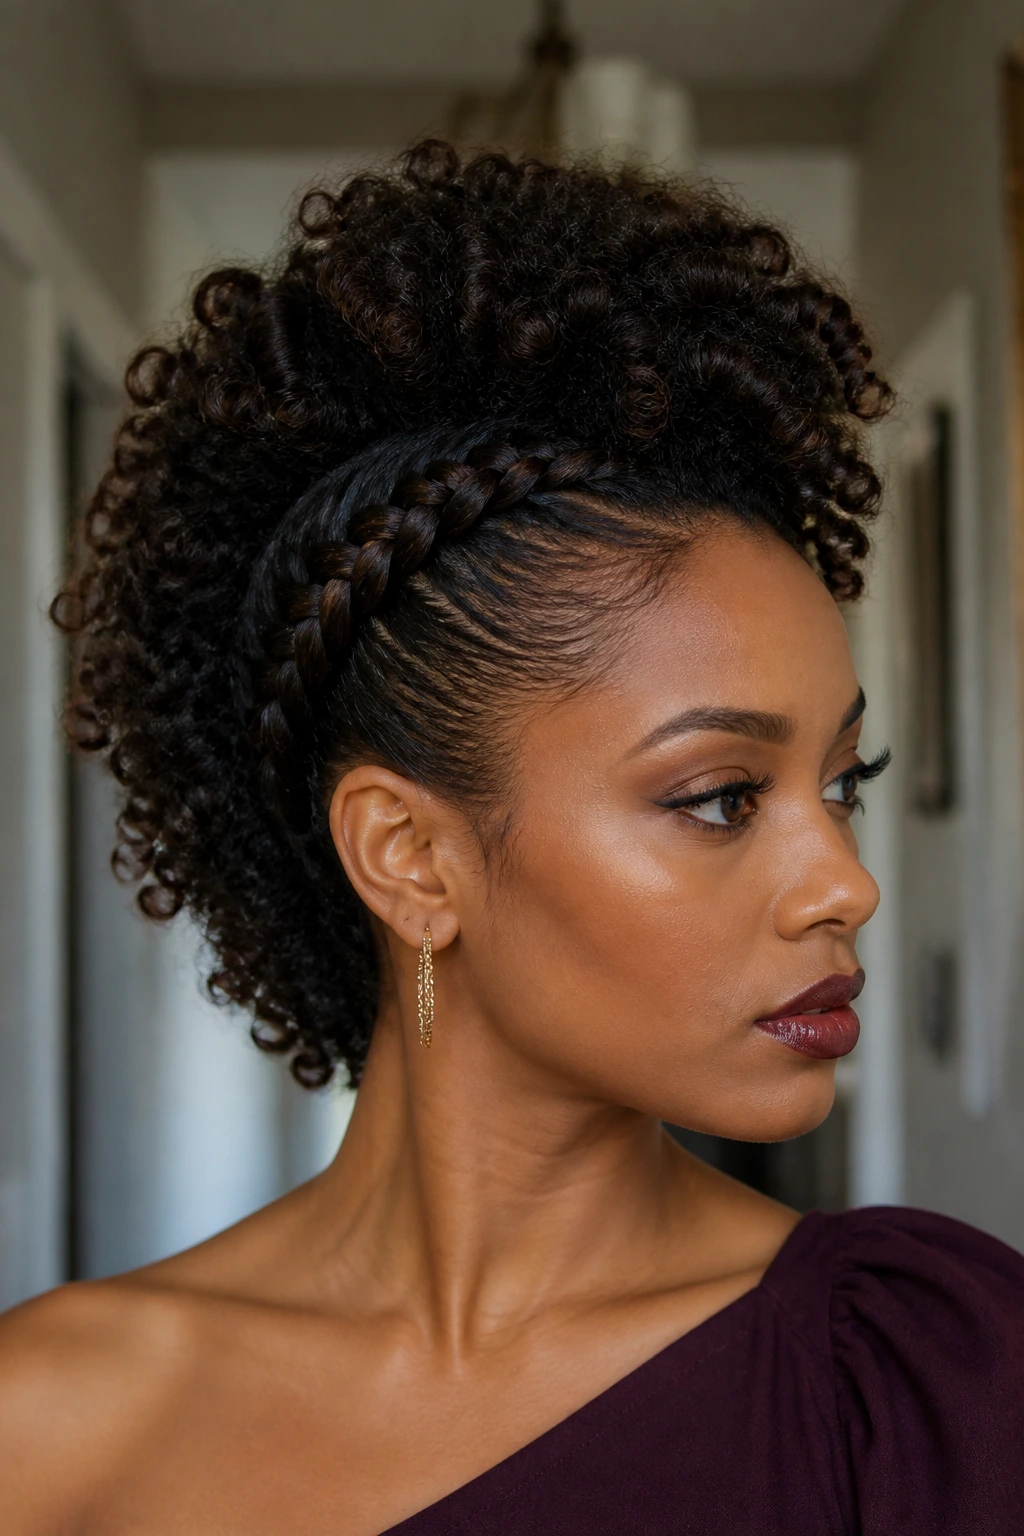
Soft Office Frohawk: Keep the sides low and neat, then choose a center ridge with softer curls instead of a hard sculpted shape. It reads polished without looking stiff.
Weekend Volume Frohawk: Let the top stay big and airy, then use fewer pins and more curl separation. This one works best when you want movement and don’t mind a little frizz.
Protective Frohawk: Replace loose center curls with twists or braids and keep the sides tucked away. You’ll get less daily handling, which makes sense if your hair needs a break.
Formal Frohawk: Add a braid crown, a satin ribbon, or one clean accessory placed at the crown. The style becomes event-ready fast.
Short-Length Frohawk: Use mini puffs, tiny twists, or finger-defined coils if your hair doesn’t have much length yet. The trick is making the shape clear, not making it tall at any cost.
Color-Aware Frohawk: If your hair already has highlights or temporary color, keep the styling simple so the color pattern stays visible. The contrast between texture and tone does most of the work.
Night Care and Refreshing the Shape
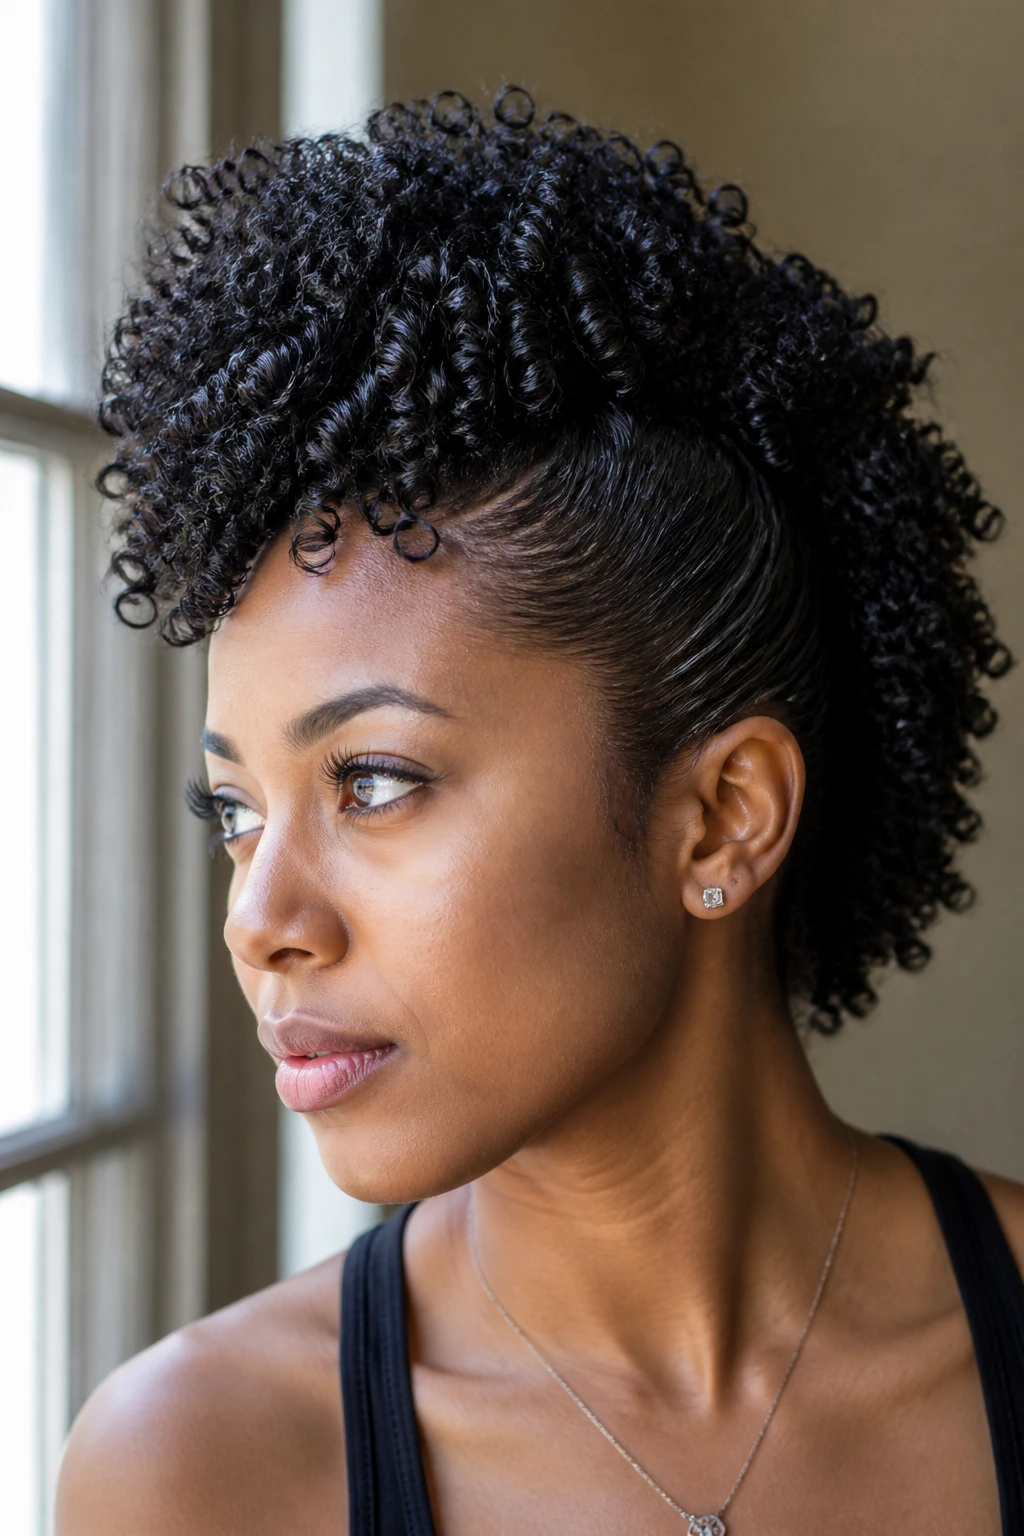
Sleeping on a frohawk without protection is a quick way to wake up to flattened sides and a lopsided center. Use a satin scarf or bonnet, and if the style has pins, check that none are poking the pillow before you lie down. Comfort matters more than people admit at midnight.
If the style needs to last more than one day, refresh only what has actually gone soft. Mist the sides lightly, smooth them back with your hands, and re-secure any loose pins. A tiny bit of mousse on the top can revive curl clumps without turning the whole style wet again.
Most frohawks hold their shape for one to three days, depending on the base style. Twist-outs and braided versions usually last longer than loose wash-and-go versions. The more structure you build into the hair on day one, the easier the second day becomes. That’s the trade-off, and it’s worth planning for.
Frequently Asked Questions
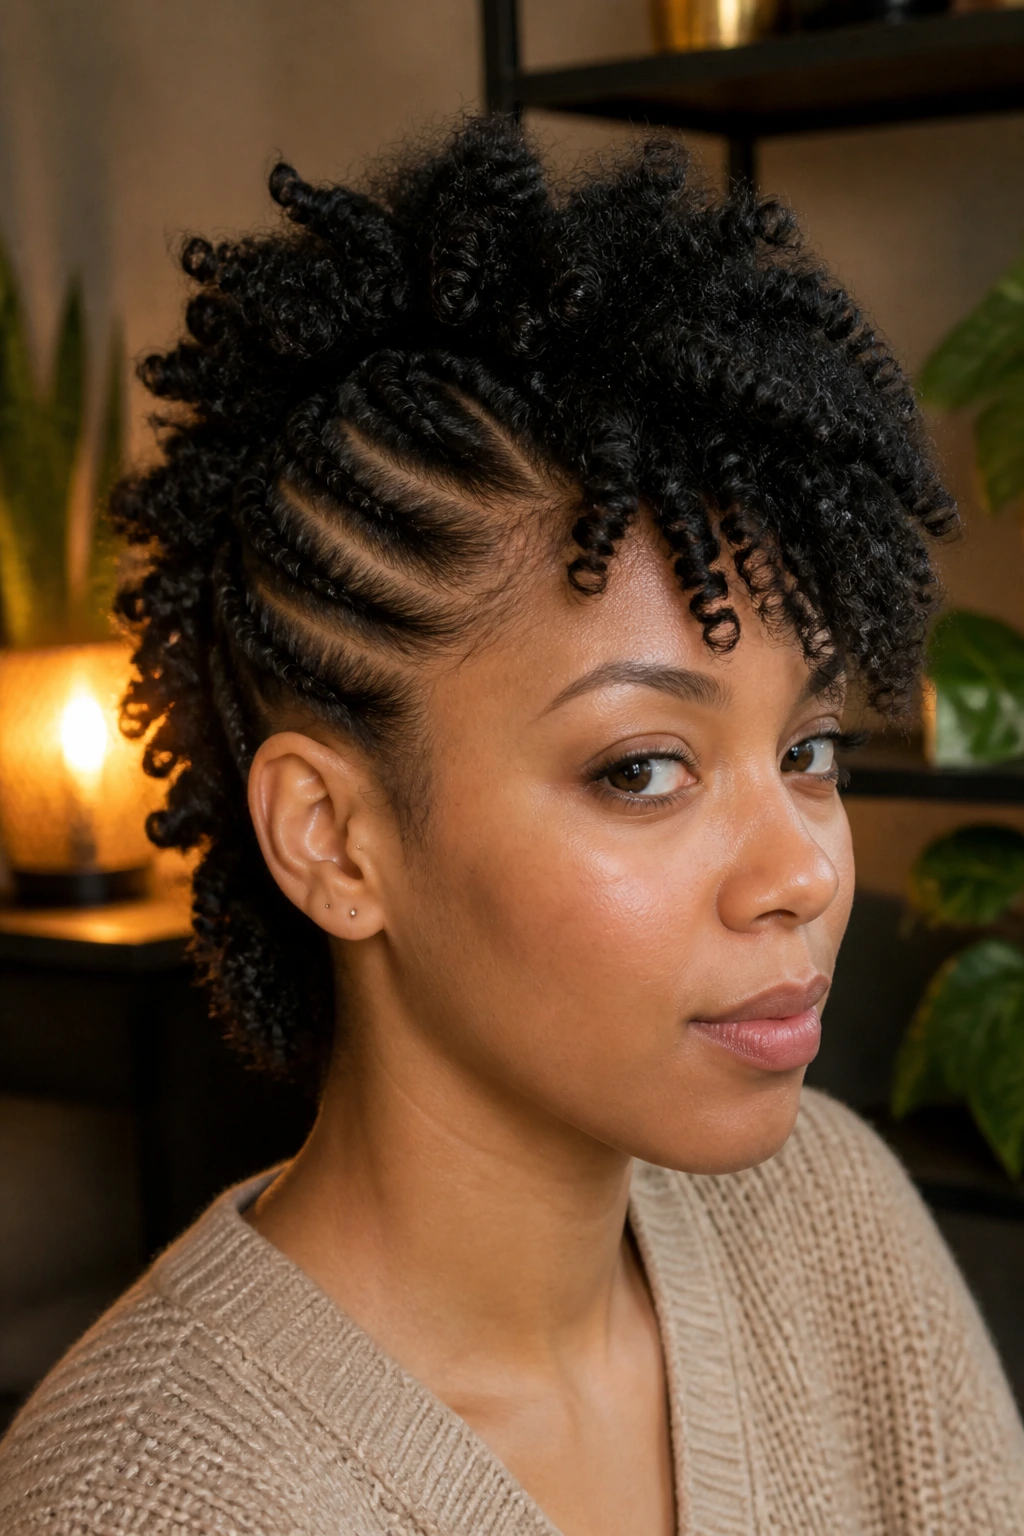
Can frohawk hairstyles work on short curly natural hair?
Yes. Short curls often make a very sharp frohawk because the shape stays close to the head and the center ridge has less chance to droop. Mini puffs, tiny twists, and pinned coils work especially well.
Do I need heat to make a frohawk look good?
No. Heat can help stretch the center, but it is not required. Braids, twists, banding, and air-drying with product can all create enough structure for the style to hold.
Which curl types suit a frohawk best?
Almost any curl type can wear one. Loose curls give you movement, while tighter coils usually give the style more height and a firmer silhouette. The real deciding factor is density and how much control you want on the sides.
How do I stop the sides from puffing up during the day?
Use a small amount of gel or edge control, then press the sides with a scarf for ten to fifteen minutes before you leave the house. A few extra pins at the temples and nape help a lot, too.
Can I make a frohawk protective?
Yes, if you use braids, twists, or tucked sections that reduce daily handling. Keep the tension gentle and avoid styles that pull the hairline too tightly just to make the shape look crisp.
What if my frohawk keeps collapsing at the crown?
The center is probably too heavy, too wet, or too loose at the root. Add more root support with pins, stretch the hair a bit more before styling, and let it dry fully before you leave the mirror.
Can I wear accessories without ruining the shape?
Absolutely, but choose one or two, not five. Cuffs, beads, a wide headband, or a scarf can all work if they support the line of the style instead of covering it up.
How do I keep the style from looking frizzy too fast?
Start with properly moisturized hair, avoid over-picking once the style is dry, and sleep on satin. Frizz usually shows up fastest when the hair is too dry, too touched, or pinned before it set.
The Shape That Holds Its Own
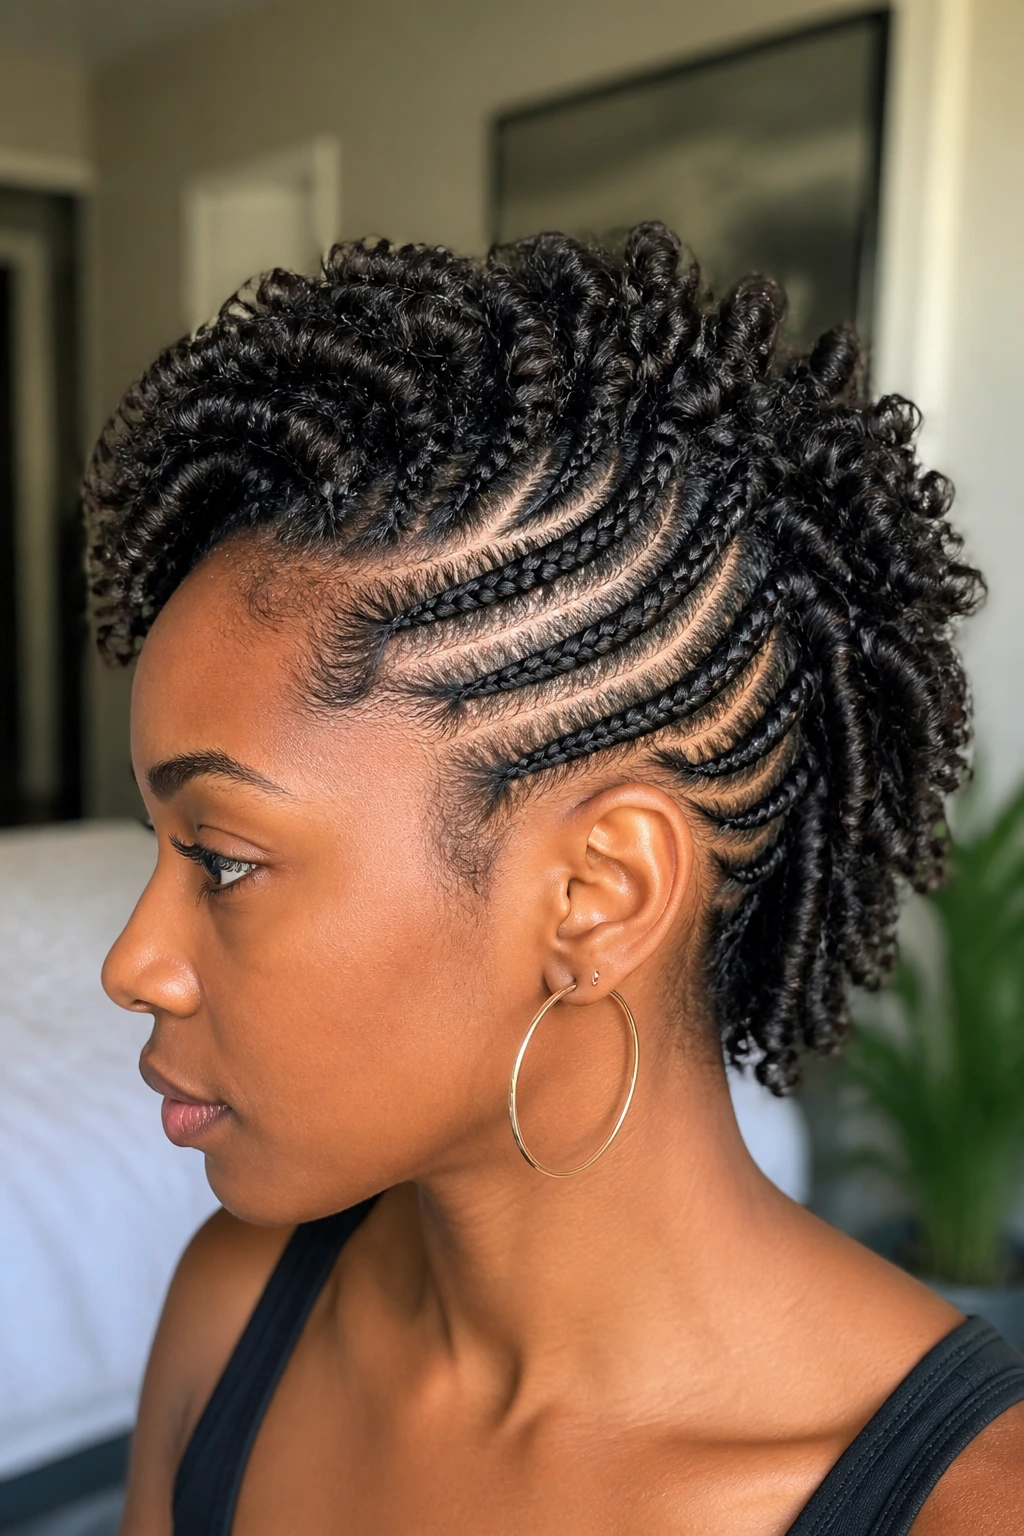
A frohawk on curly natural hair works because it lets the curls stay visible while giving the whole head a stronger outline. That combination is hard to beat. Clean sides, a raised center, and enough texture to keep things from looking stiff—that’s the sweet spot.
The best part is how much room you have to change the mood. You can go polished, soft, sculptural, playful, or protective without changing the basic idea. If you choose the right base texture and keep the sides under control, the style does the rest.
