



Thick natural hair has a memory of its own.
Natural hairstyles for thick hair work best when they stop arguing with that memory. The hair will spring back, flare out, eat a flimsy elastic, and turn a neat part into a soft blur by lunch if the style is built the wrong way. That is not a flaw. It’s the reason the right cut, twist, puff, braid, or rod set can look so striking on dense coils.
The styles that do well here usually share the same instincts: they respect shrinkage, give the roots room to move, and keep tension where it belongs — not on the edges. A high puff with a clean base can look sharper than a complicated updo that was pulled too tight. A twist-out on stretched hair often wears better than one done on soaking-wet strands, because thick hair likes a little head start.
And that’s the fun part. Thick natural hair can take shape in a dozen directions without losing its personality. Some looks lean polished. Some stay fluffy. Some tuck the ends away and leave the crown doing all the talking. The styles below cover the whole range, from fast weekday fixes to the ones that make a simple scarf or pair of earrings suddenly look intentional.
Why These Styles Earn Their Place in a Thick-Hair Routine
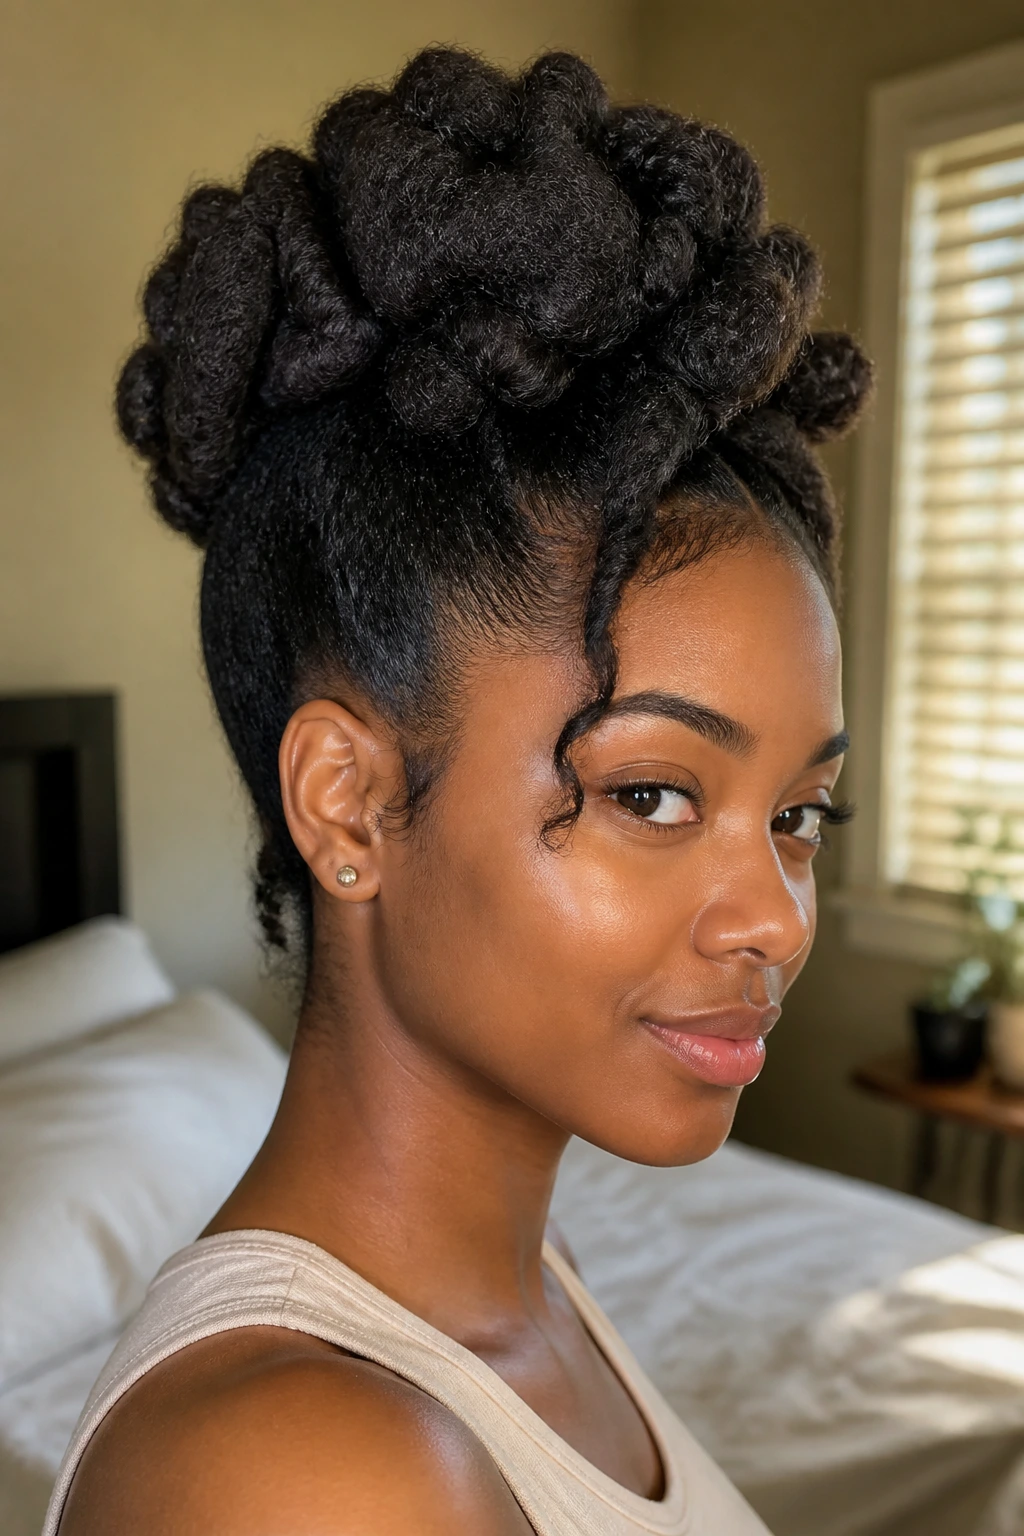
-
Shrinkage-friendly: These styles don’t treat shrinkage like an enemy; they use it to build shape, especially in twist-outs, puffs, and wash-and-go sets.
-
Bulk-aware: Thick hair needs a style that understands weight, so several of these looks rely on parting, stretching, or anchored bases instead of tiny sections that vanish under density.
-
Protective where it counts: Styles like cornrows, twists, and tucked-up looks keep the ends tucked away, which matters when your hair tangles fast.
-
Fast without looking rushed: A claw-clip updo or scarf-wrapped puff can look deliberate with only a few parts and one strong accessory.
-
Flexible enough for real life: The same stretched base can become a twist-out, bun, puff, or rod set depending on how much time you have that morning.
-
Easy to dress up or down: Beads, cuffs, a side part, or a clean wrap can change the mood without changing the whole style.
1. Twist-Out on Stretched Hair
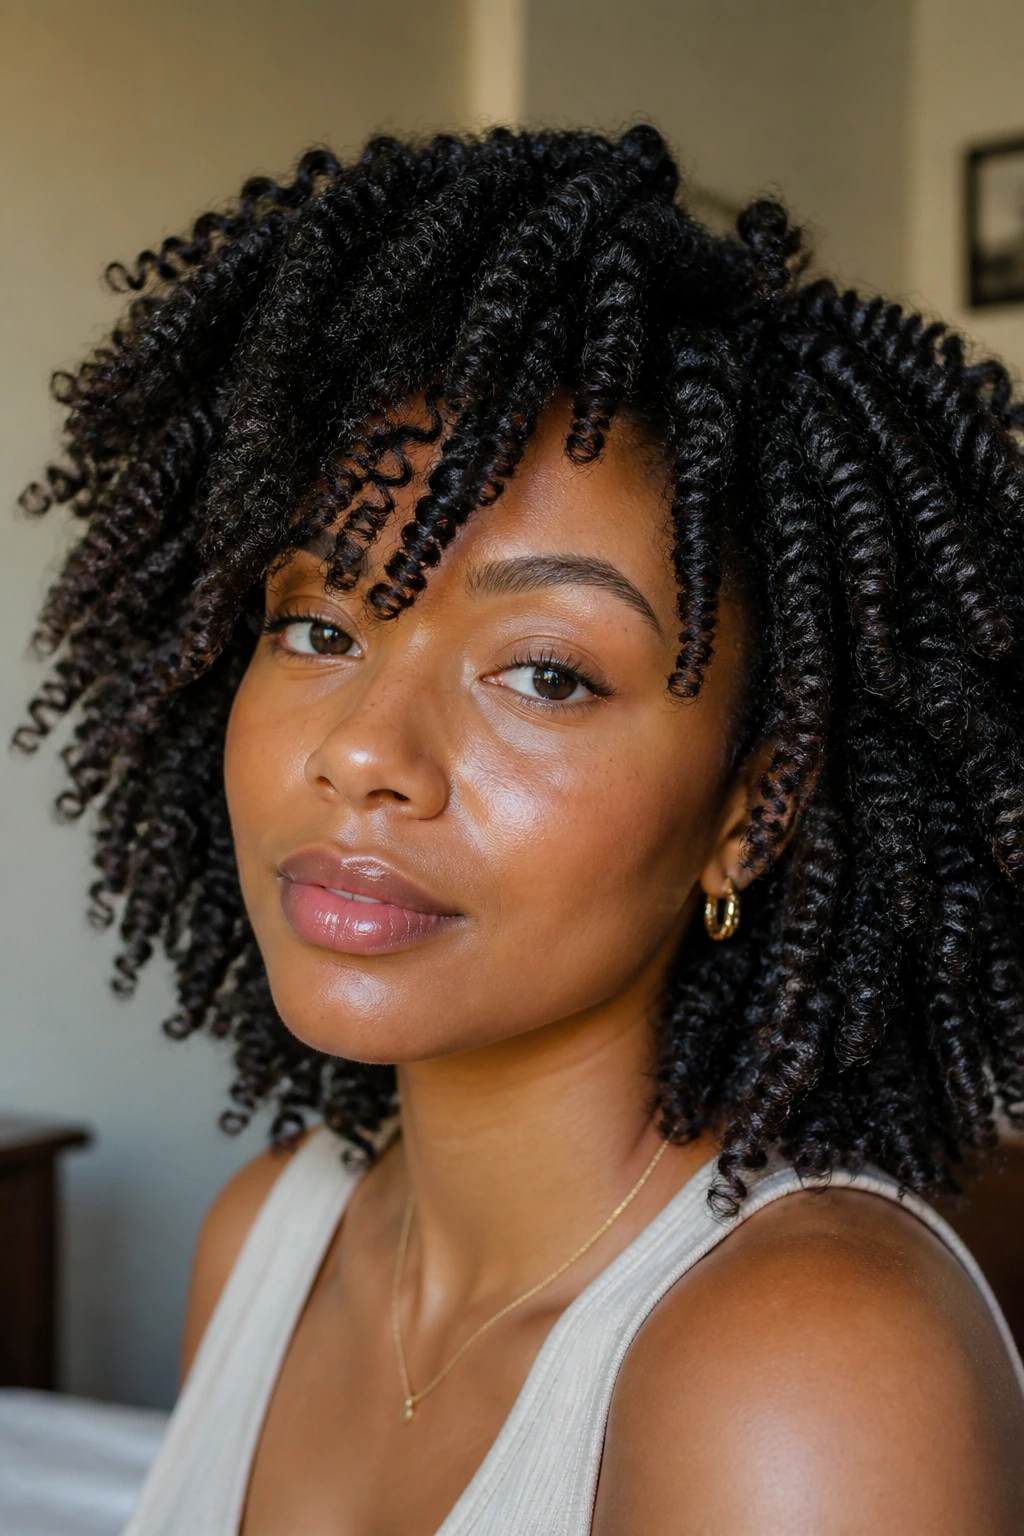
A good twist-out on thick hair starts before the first twist even goes in. Give the hair some stretch first — banding, braiding overnight, or a light blow-dry on cool can make the finished shape longer, smoother, and easier to separate without wrecking the pattern. Thick coils like that little head start.
Why Stretching Changes the Whole Look
When the roots are already elongated, the twist-out lands with cleaner definition at the crown and less of that mushroom shape that can happen when dense hair shrinks hard at the base. Medium sections are the sweet spot here. Too small and the style takes forever; too large and you lose the ribbed twist pattern that makes it worth doing.
A cream with slip, not a heavy butter bomb, usually gives the best feel. The hair should feel coated, not greasy.
- Twist on damp, not dripping hair.
- Smooth each section with your fingers before twisting.
- Let the twists dry all the way through before unraveling.
- Separate with a tiny bit of oil on your fingertips.
Best move: twist the front a little tighter than the back. The front frizzes first, and this buys you an extra day of neatness.
2. High Puff with a Clean Base
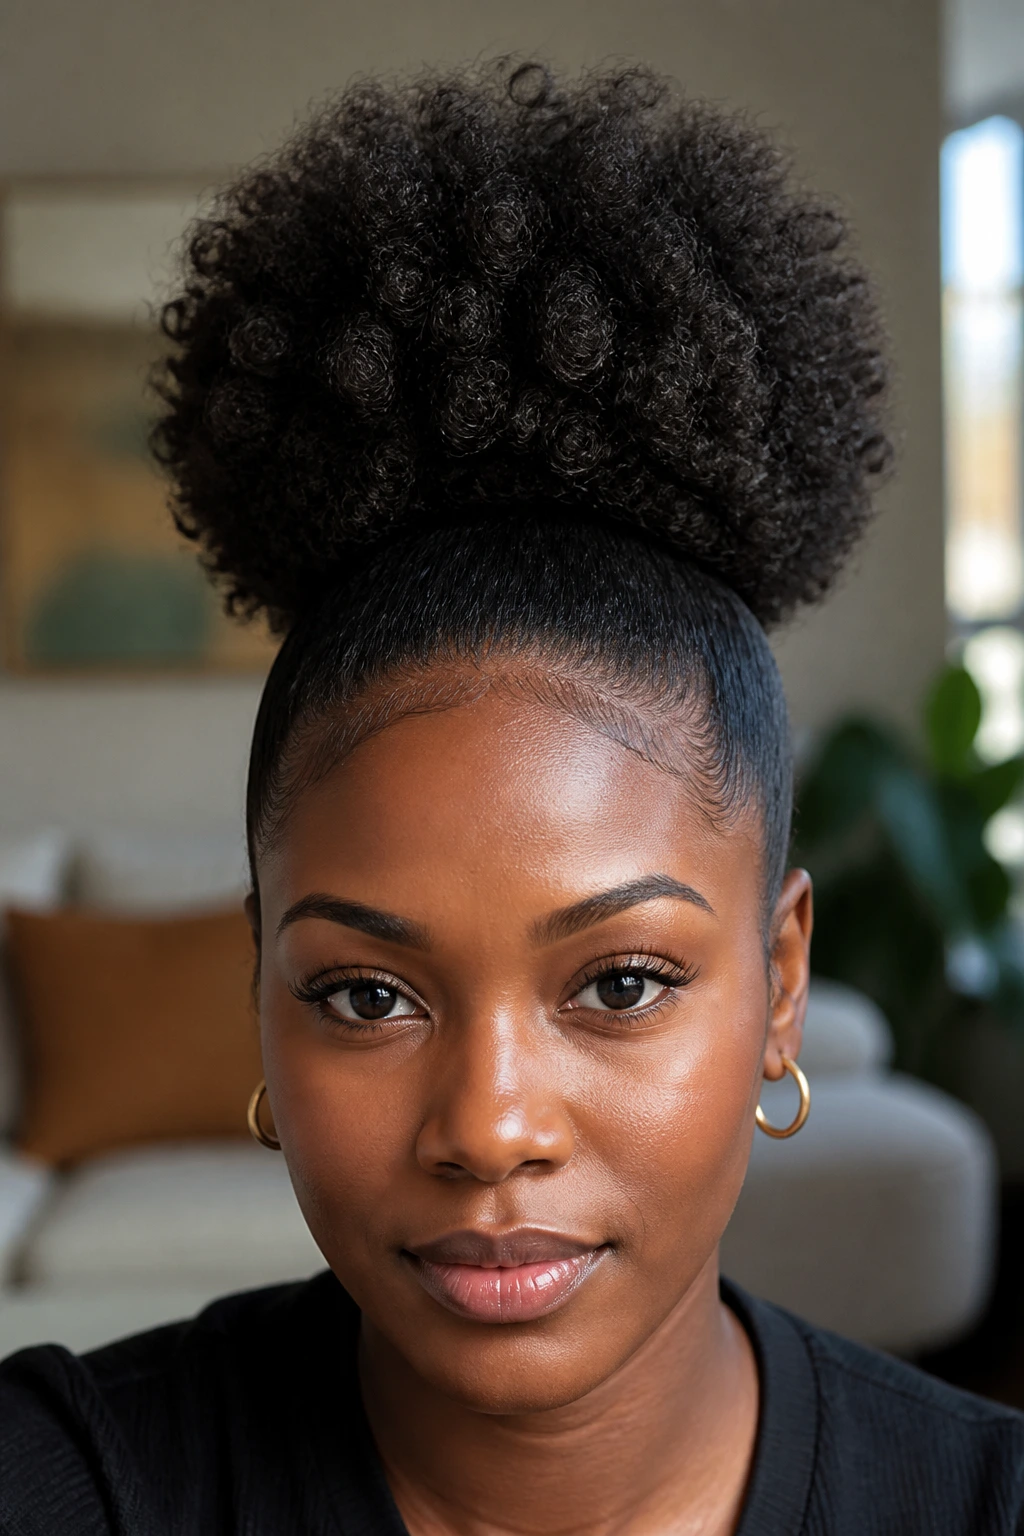
A high puff is not a lazy style. On thick natural hair, it is a shape decision. The point is to gather all that density into one lifted cloud that sits at the crown instead of spreading out over your shoulders and collar.
The trick is the base. Smooth the perimeter with a little gel or edge control, then secure the puff with a snag-free band that won’t chew up the hair. If your hair is very full, use two wraps of the band and stop there. Pulling it tighter does not make it cleaner. It just makes your scalp complain.
I like a high puff best on second- or third-day hair, when the texture has a little grip. Freshly washed hair can be too slippery and hard to anchor.
3. Braid-Out with Fluffy Roots
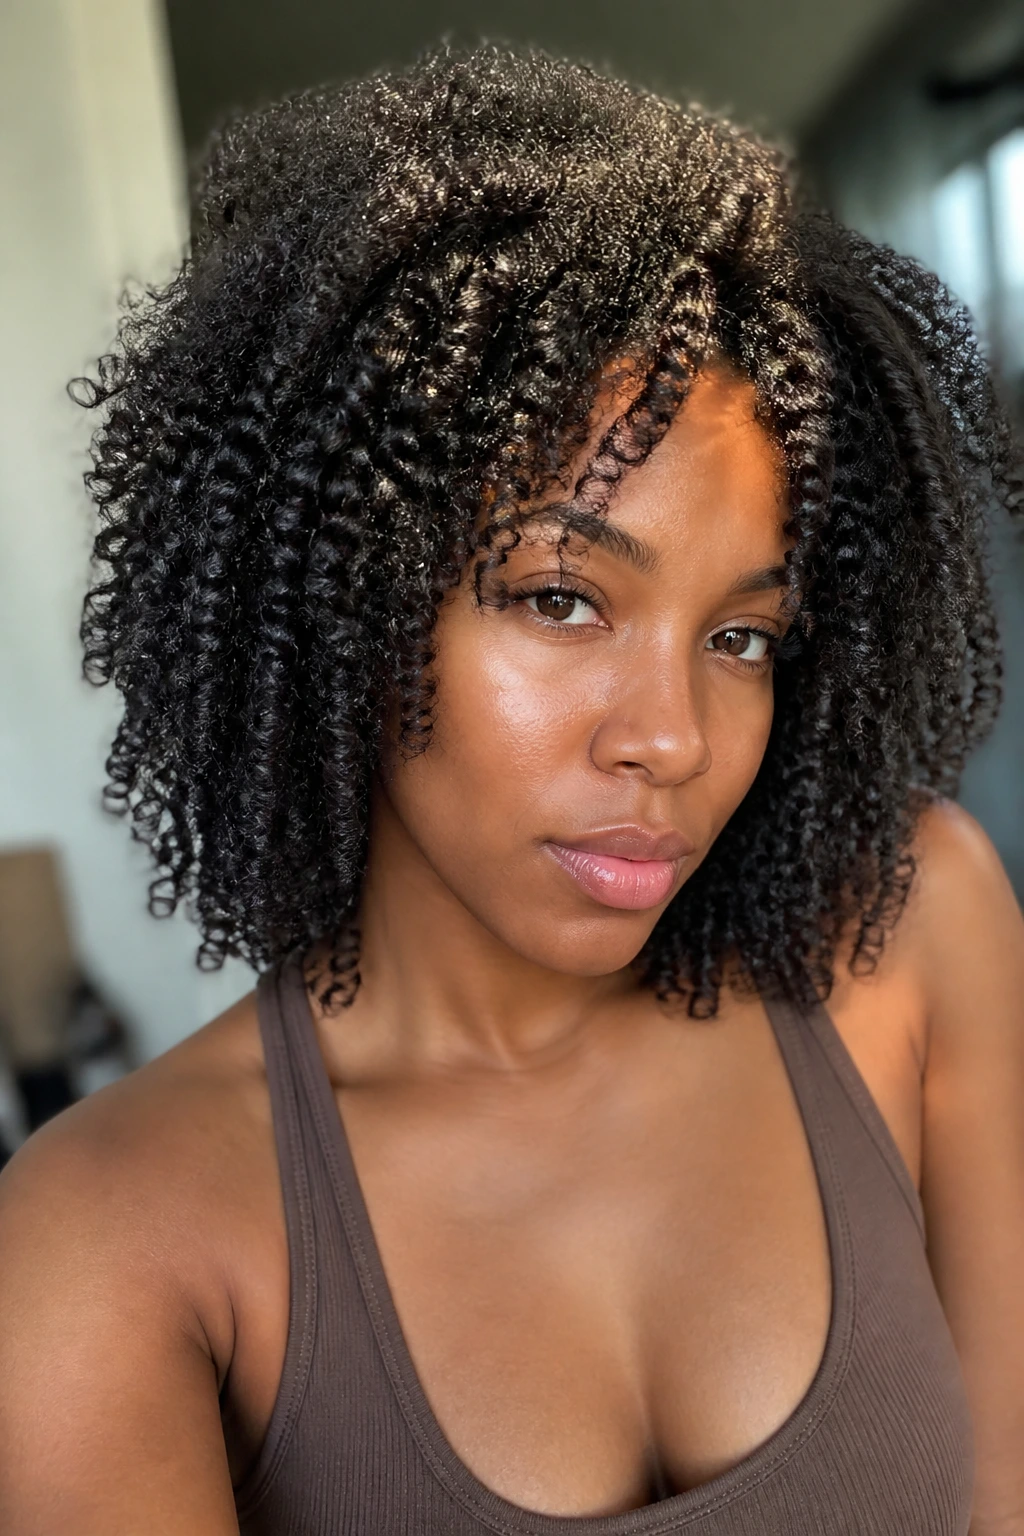
Why do braid-outs often look bigger than twist-outs? Because braids press the hair into a sharper wave pattern, especially when thick strands are packed into medium sections. The result is a style with more visual texture and less of the soft rope effect twists give you.
How to Keep It From Looking Crimped Instead of Defined
Start the braids on damp hair, not wet hair. That small difference matters. Wet hair takes forever to dry when it’s dense, and a braid-out that’s still damp at the core will frizz the second you separate it.
Keep the roots neat and the ends sealed. Thick hair can hold a beautiful braid pattern, but only if you do not rush the release. Unravel each braid slowly, then use your fingers to separate just once or twice. More than that and you lose the shape.
A braid-out is the style I reach for when I want fullness without the roundness of a twist-out.
4. Low Puff and Center Part
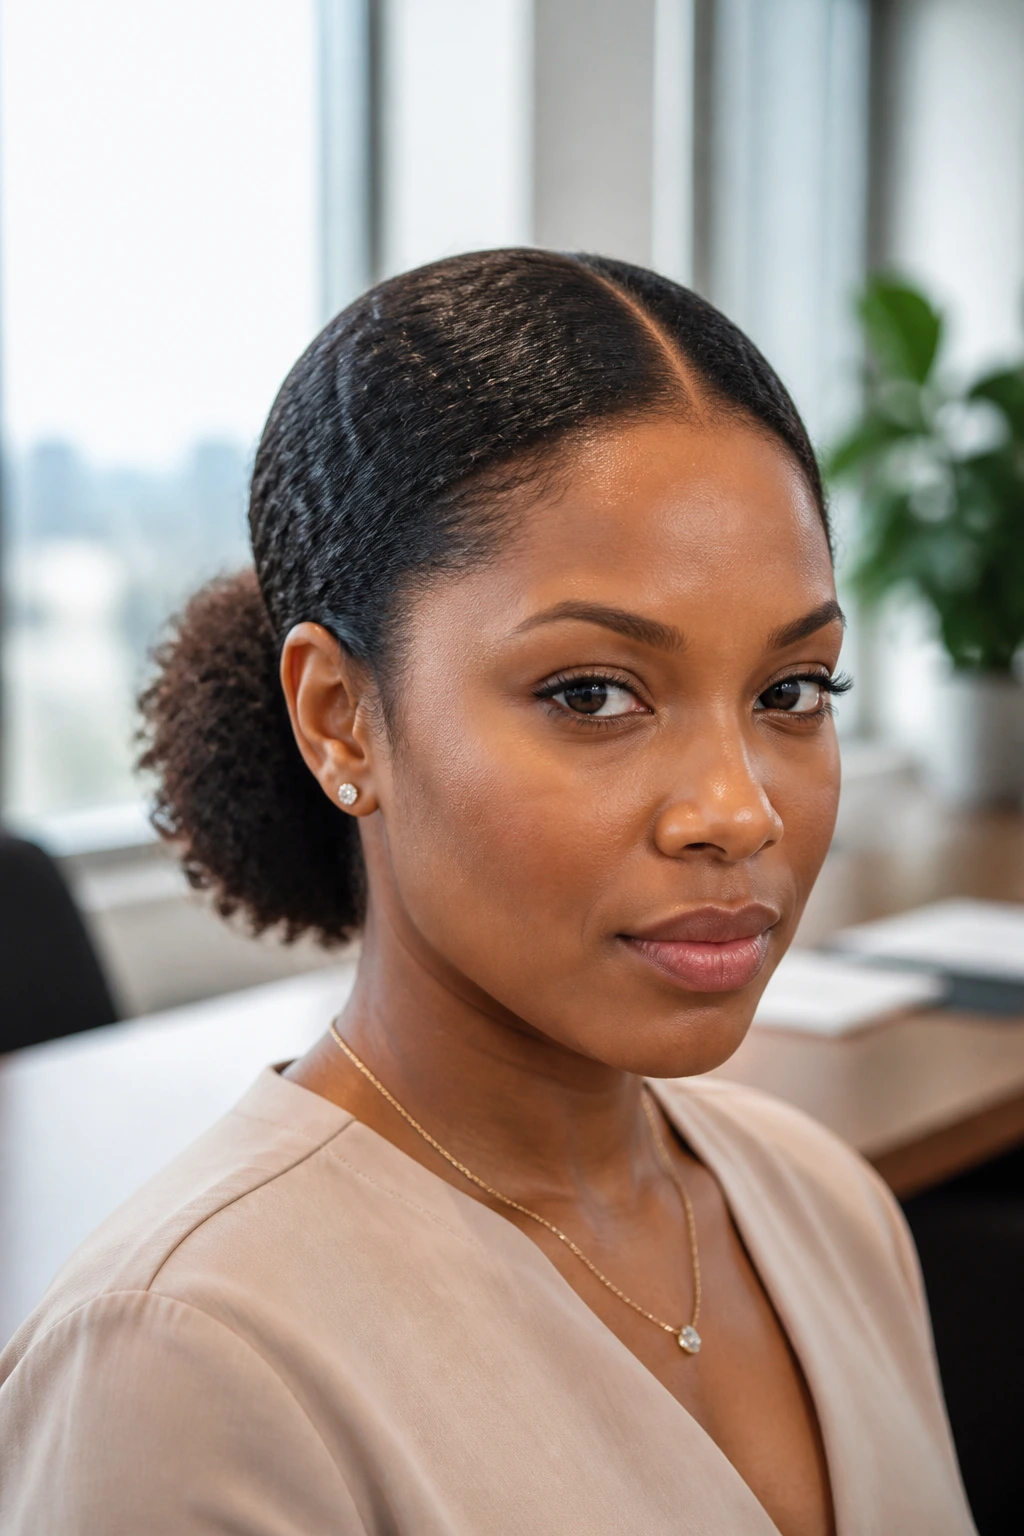
A low puff is what thick hair wears when it wants to behave for work, church, or any day when your face should stay clear and your hair should still look like hair. The center part gives it structure. Without that line, the style can feel too casual and a little shapeless.
Use a rat-tail comb to draw the part while the hair is still slightly damp, then smooth the sides back with a light gel or mousse. The puff itself should sit low and loose at the nape, not squeezed flat. If the base looks too bulky, split the hair into two low sections and anchor them together under the puff.
This one has a clean, almost tailored feel. Not stiff. Just tidy.
5. Wash-and-Go with Sculpted Definition
A wash-and-go on thick natural hair works when you treat the curl pattern like something to shape, not something to guess about. Apply product in wet sections, rake or shingle until the clumps are even, and leave them alone while they set. That last part is where most people get impatient and wreck the finish.
The finished look can be fluffy, defined, or somewhere in the middle. Thick hair usually gives you a lot of body at the root, so the trick is getting the ends to cooperate. A leave-in plus a gel with enough hold tends to beat a pile of heavy creams, which can sit on top of the hair and never really dry down.
If you like a softer result, scrunch out the cast once the hair is fully dry. If you like it crisp, keep the cast longer and fluff only the roots.
6. Bantu Knots with a Tight Grid
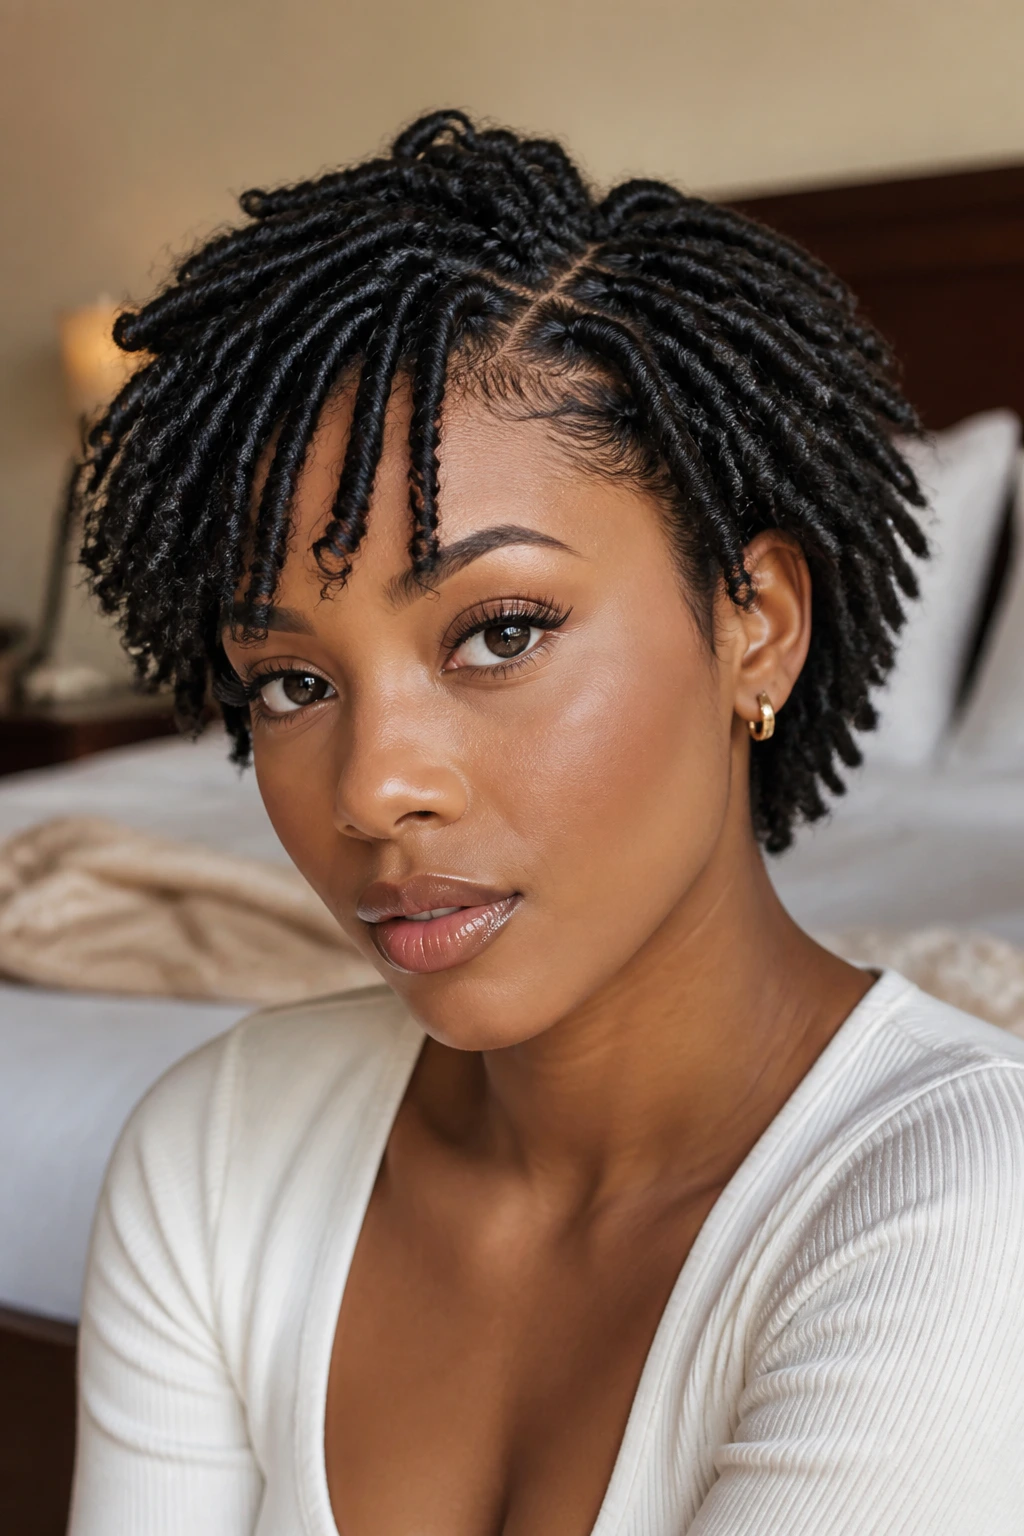
Bantu knots are one of those styles that look more complicated than they are. On thick hair, they read almost sculptural because the density gives each knot shape and presence. That’s the beauty of them. They do not need fake volume.
Part the hair into clean squares or rectangles, then twist each section until it coils into a little knot at the base. If your hair is extra thick, don’t make the parts too small unless you have patience to spare. The style works better when the spacing feels even and the knots sit close to the scalp.
Wear them as the final style, or use them as the setup for a knot-out later. Either way, the grid matters.
7. Bantu Knot-Out with Soft Spring
What makes a knot-out different from a twist-out? The curl is rounder and springier, with more lift at the ends and a little more halo around the face. Thick hair loves that shape because the style keeps body without turning into one flat mass.
Release the Shape, Don’t Fight It
Wait until the knots are bone dry. Warm hair unraveled too soon turns puffy in the wrong places and limp in others. Once dry, coat your fingers lightly with oil and unwind each knot in the same direction it was set. That keeps the curl from collapsing.
A knot-out usually looks best after a night in a satin bonnet and a very gentle fluff at the roots. Pull too hard and the pattern loses its spring. Leave it a little imperfect, and it looks richer.
8. Flat Twists Wrapped Into a Crown
Flat twists are one of the smartest ways to make thick hair sit down without making it look flat. They keep volume close to the head, which means the crown gets structure and the sides stay neat. A twisted crown also clears the face without pulling on the edges the way some slick styles do.
This style shines when the parting is clean and the twist line is even. A center part gives it a soft, balanced look. A deep side part makes it feel more dramatic. Either way, the hair should be lightly damp and properly detangled before you start, or the twists will look lumpy at the scalp.
I like this style when I want my hair to stay put for more than one day and still look soft around the hairline.
9. Two-Strand Twists That Hold Their Shape
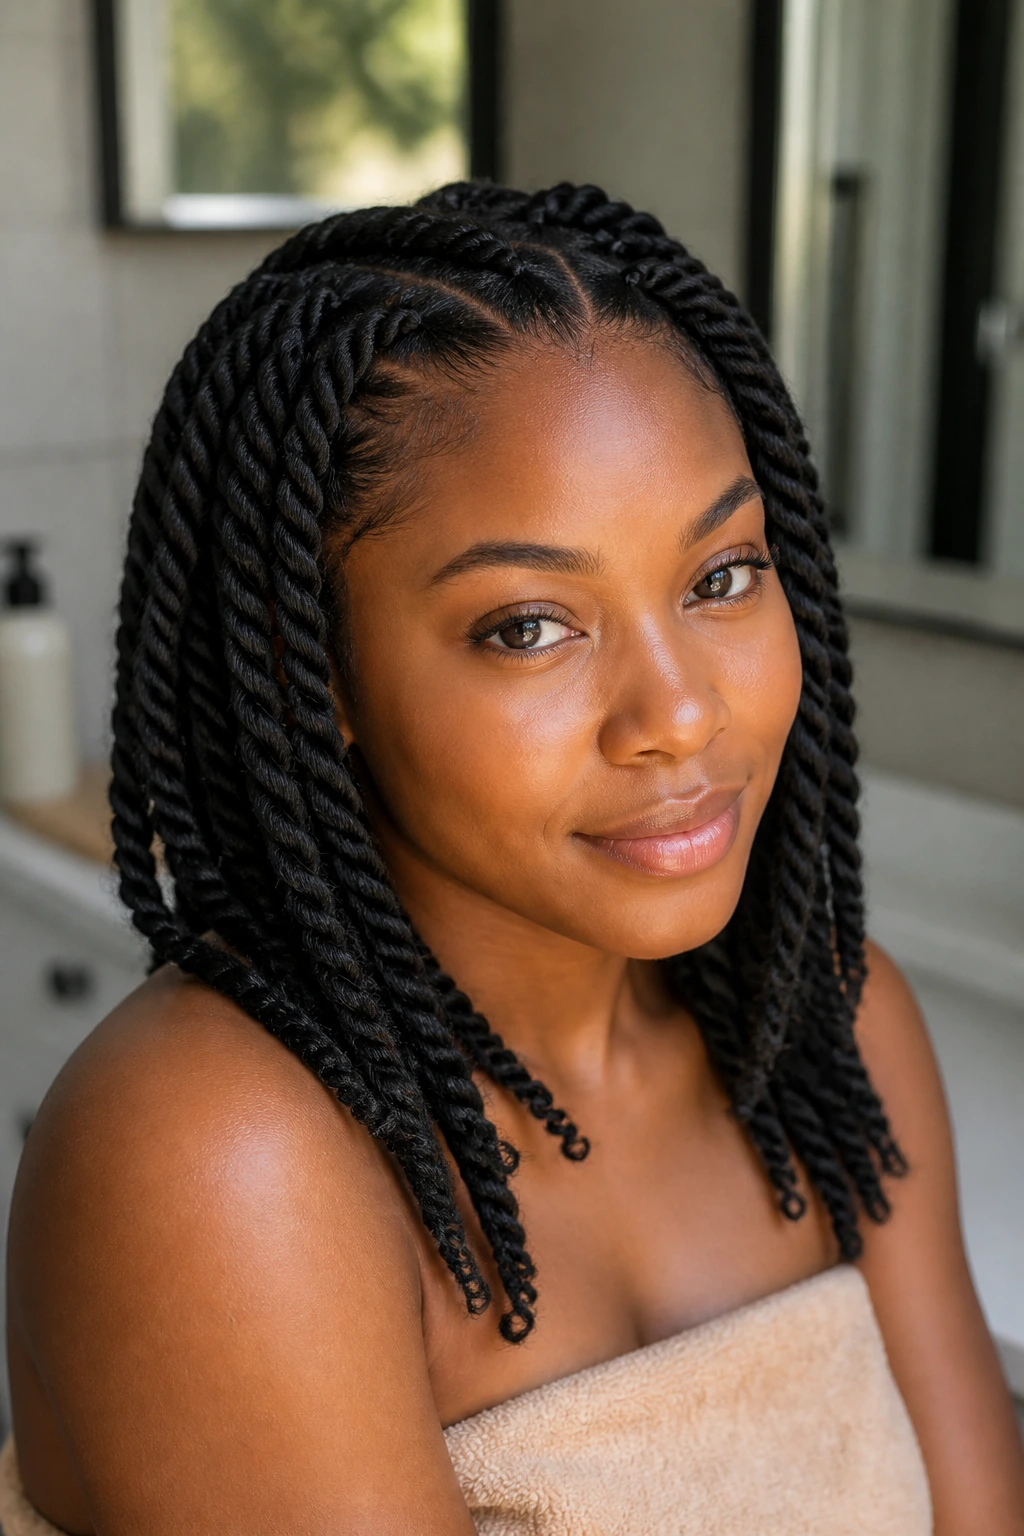
Need a style that stays neat but doesn’t eat your whole evening? Two-strand twists are the answer. On thick hair, medium-sized twists give you the best balance: enough definition to hold shape, enough size that you are not twisting for hours.
The real appeal is how flexible they are. Wear them as a protective style, tuck them into a bun, or unravel them later into a twist-out with more texture. Thick hair usually gives twists a fuller look than fine hair does, which means you do not need fake hair or tiny parts to make them interesting.
A little styling cream at the ends helps keep the twist from fraying first. That’s where the style usually gives up.
10. Mini Twists for Long Wear
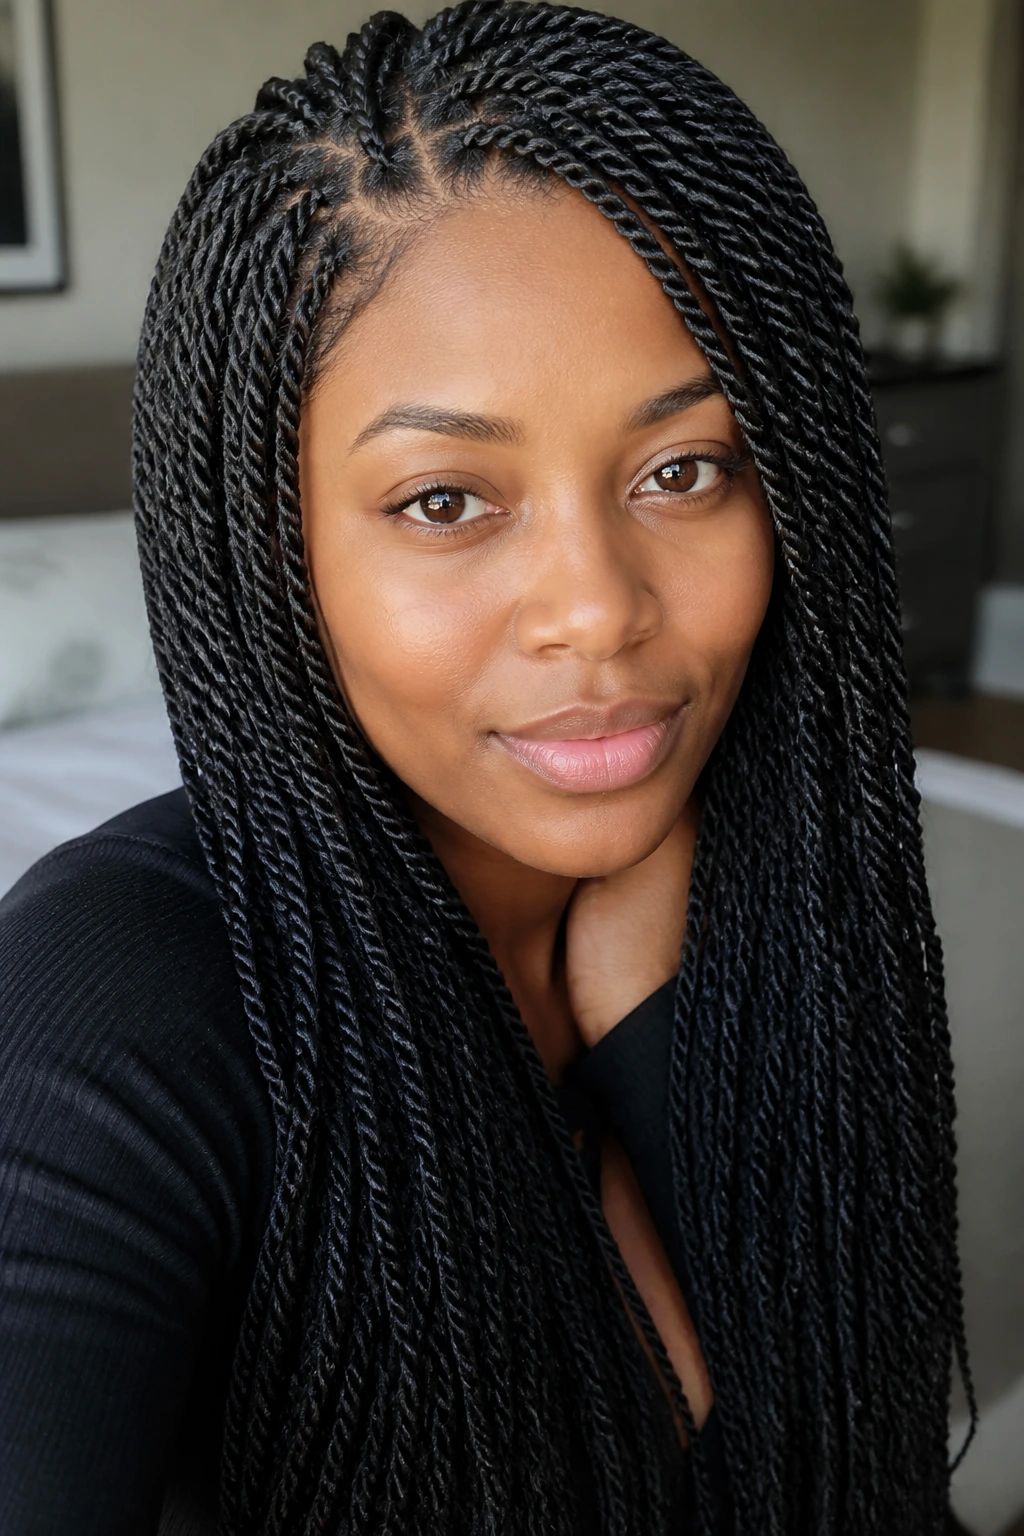
Mini twists are for people who can handle an install that asks for patience and gives back in rent-free weeks of easy hair days. Thick natural hair makes them look rich, not stringy, as long as the sections are even and not too bulky at the roots.
The upside is obvious: low daily fuss, less tangling, and a style that can be worn loose, pinned, or swept up. The downside is the setup time. If you rush the parts, the twists will look messy before they’ve had a chance to settle.
Keep the product light here. Too much cream makes mini twists sticky and slow to dry. A clean part, a small section, and a little grip go a long way.
11. Jumbo Twists with a Deep Side Part
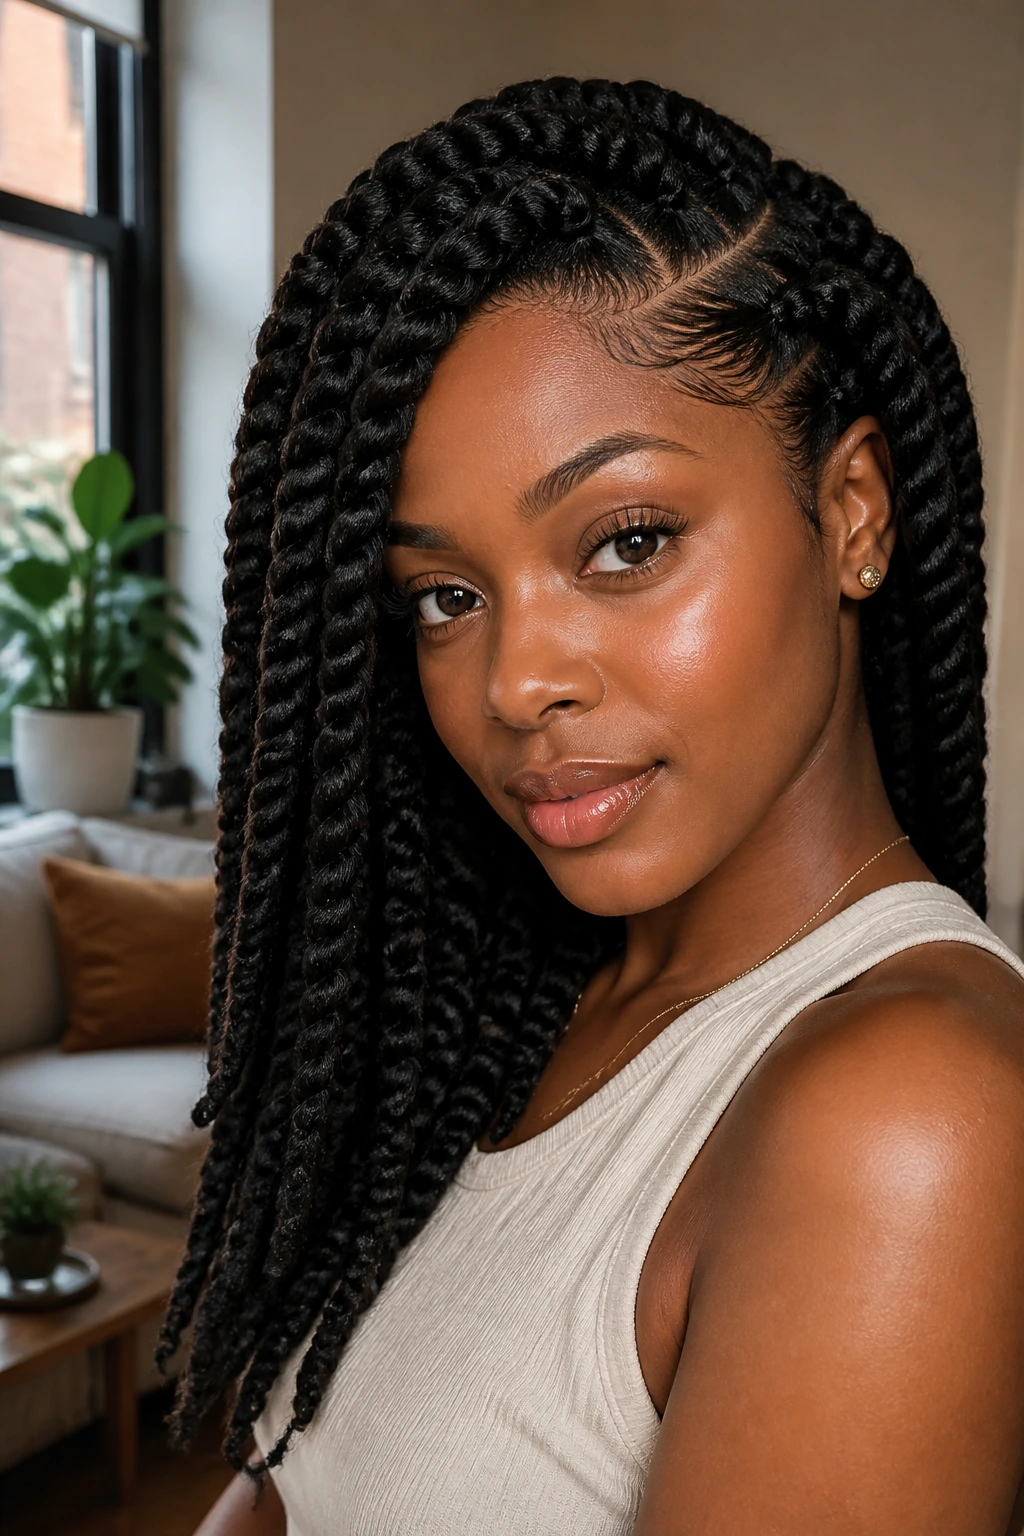
Jumbo twists are what thick hair should get to do when you want speed and shape in the same style. The size works because dense hair gives the twists enough body to look intentional instead of sparse. A deep side part makes the whole look land with more polish.
This is one of those styles where the ends matter more than people think. Smooth them with a small bit of cream or mousse so they stay tucked and rounded instead of ragged by day two. If the hair is longer, a jumbo twist can hang beautifully. If it’s shorter, it still reads as full.
I prefer this over tiny twists when the goal is visible shape with less install time.
12. Halo Braid Crown
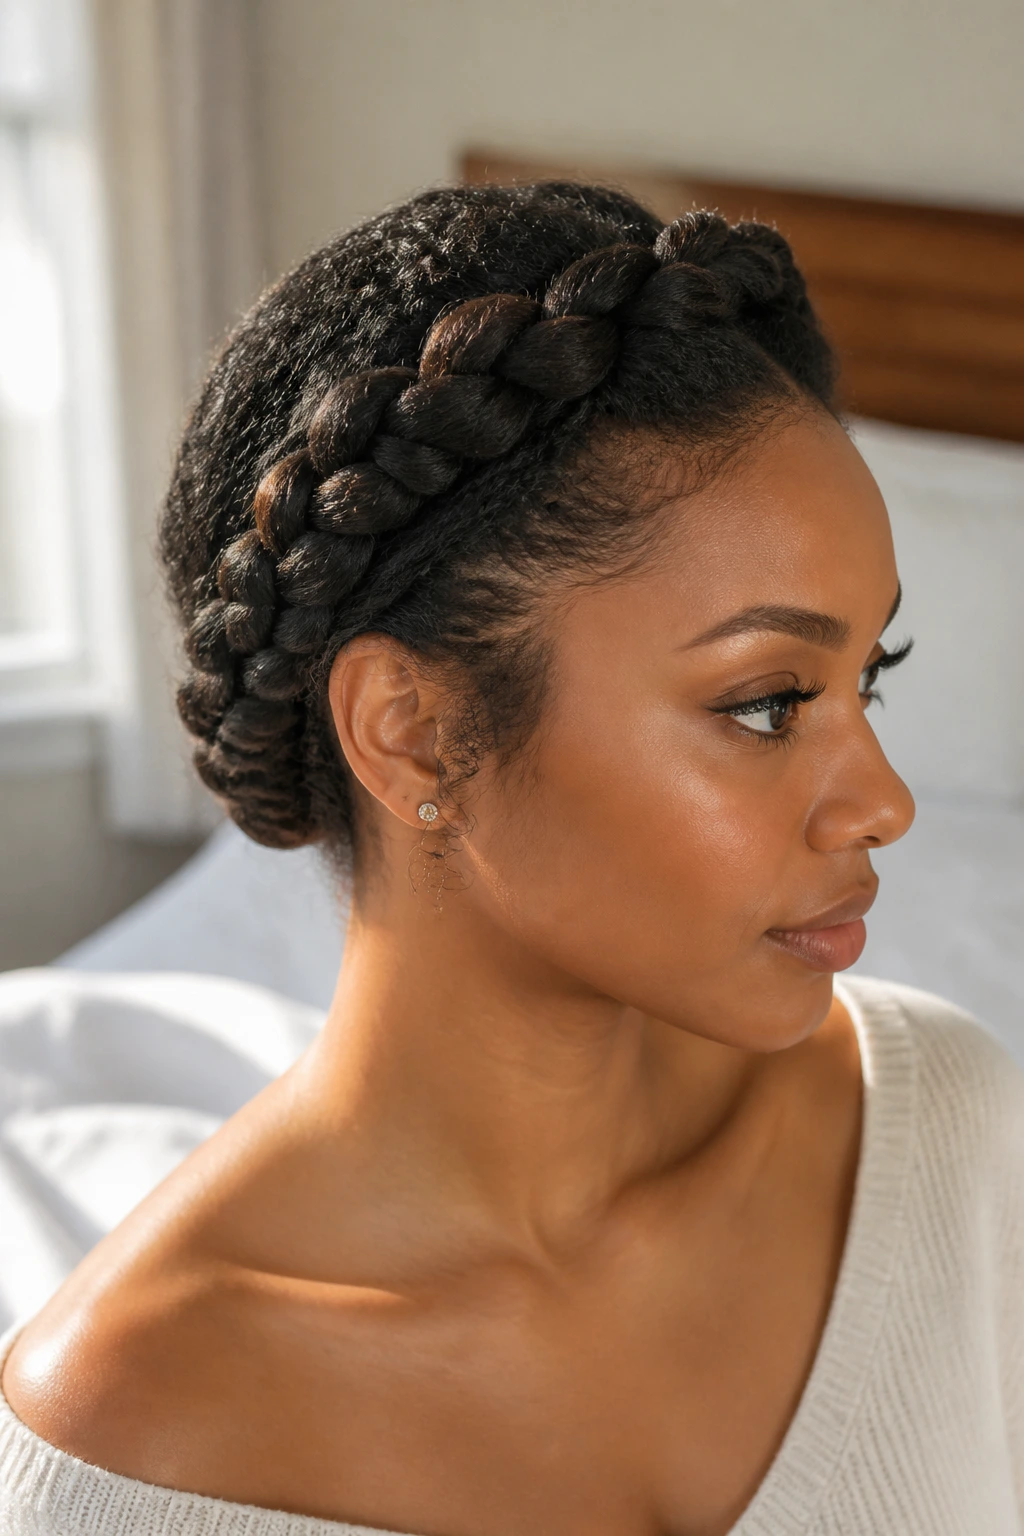
A halo braid crown can make thick hair look almost architectural. The braid wraps the head, uses the hair’s own density as a base, and leaves the center and back with a soft lifted line. It works especially well when you want your hair off your neck but do not want a severe bun.
The braid should sit snug, not tight. That’s the part that matters. Too much tension around the hairline makes the style look harsh and gives you a sore scalp by afternoon. Tuck the ends at the nape and pin them out of sight, then smooth the flyaways just enough to keep the braid line readable.
If your hair is extra full, a halo braid is one of the few styles that uses that fullness as an asset instead of a challenge.
13. Feed-In Cornrows Into a Bun
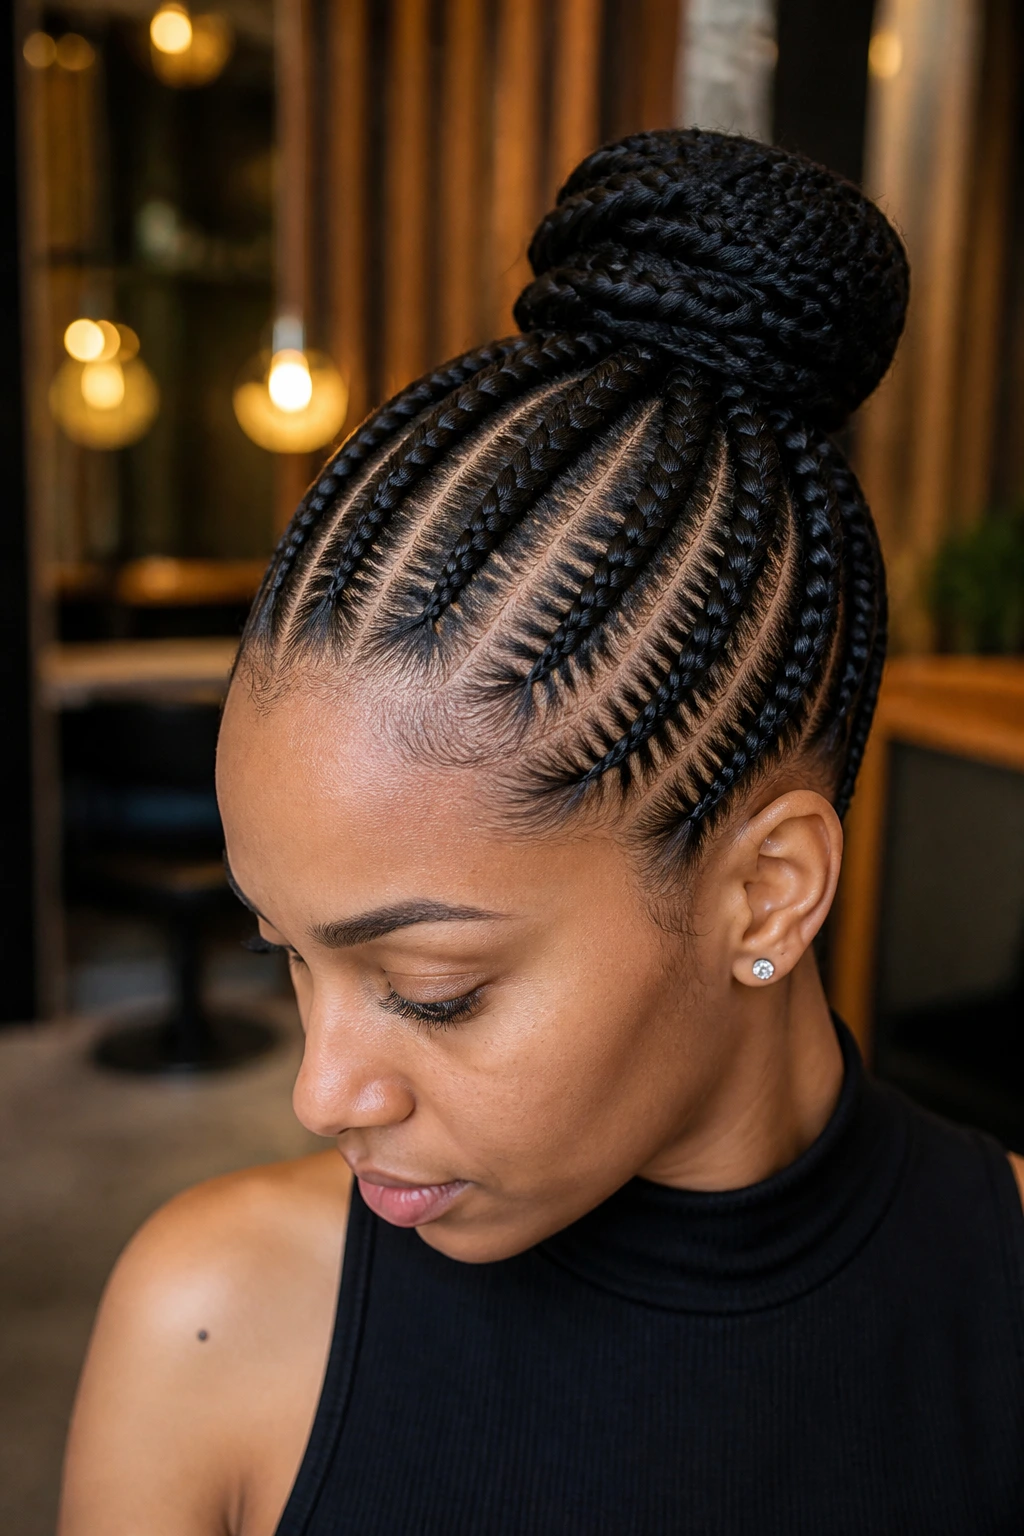
When thick hair refuses to lie flat, feed-in cornrows solve the problem with less bulk at the start of the braid. You add hair gradually, which keeps the base smooth and avoids the chunky lump that happens when someone grabs too much at once. That matters a lot at the temples and edges.
Pull the braids back into a bun once they reach the crown or nape. The bun hides the ends and turns the whole style into something that looks clean from every angle. This is one of the better protective options if you want your hair tucked away and your mornings short.
The key is gentle hands. Feed-in braids should feel secure, not sharp.
14. Frohawk with Lift at the Crown
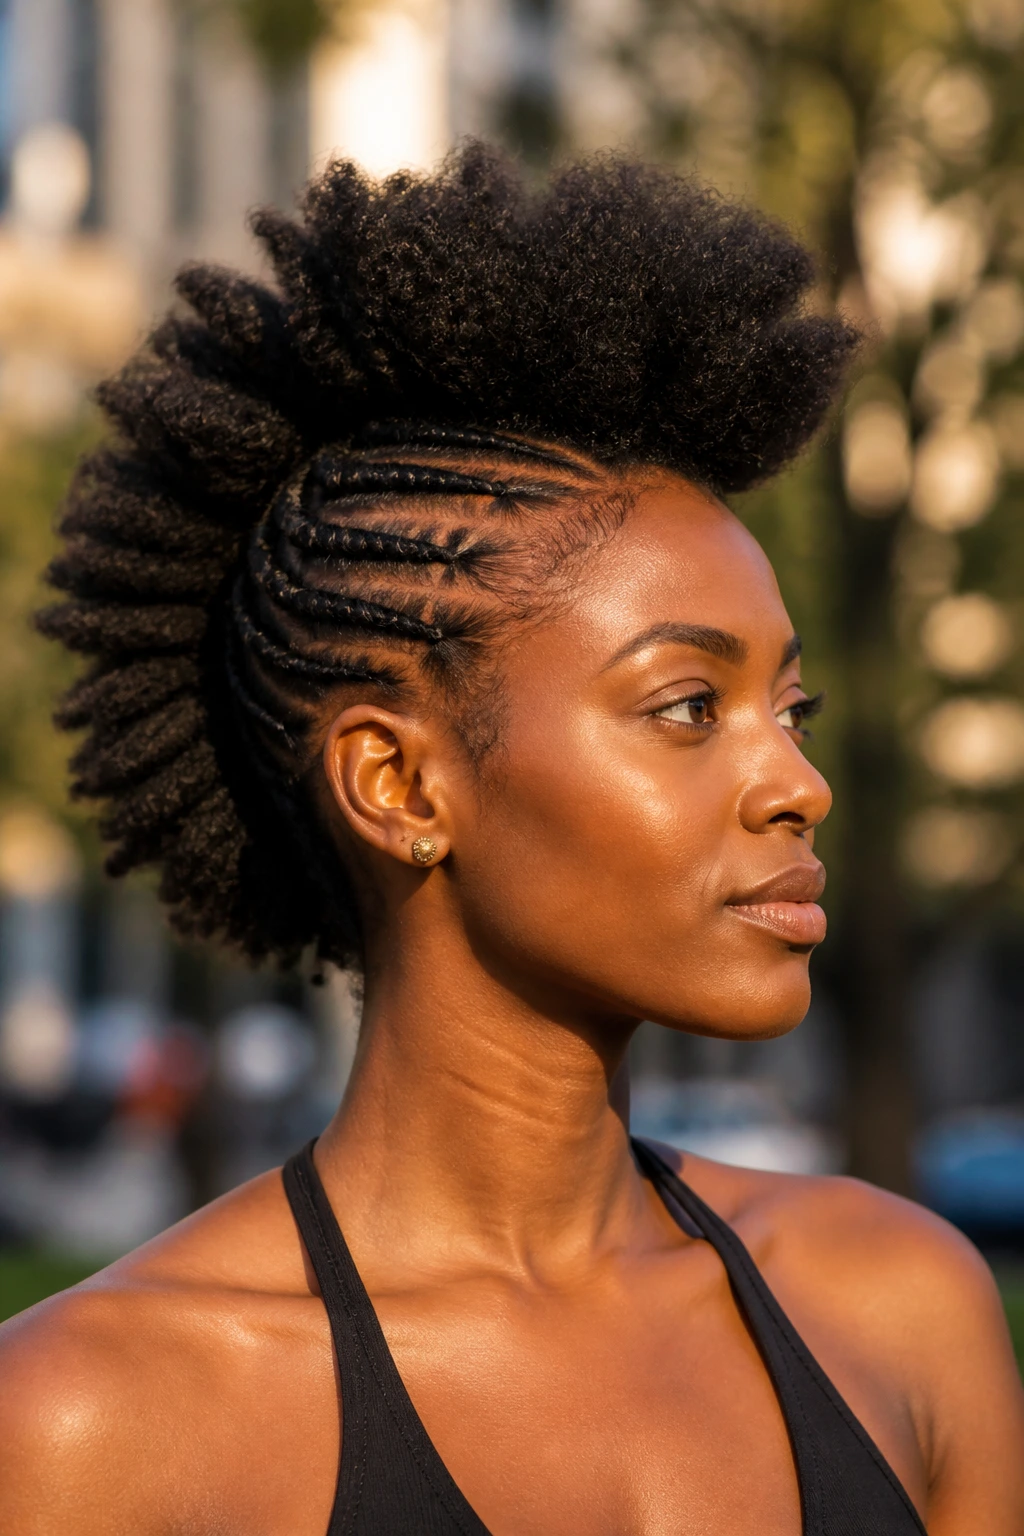
A frohawk on thick natural hair has the kind of shape other textures have to fake. The center strip gives you height, and the sides can be flat-twisted, braided, or pinned up to keep the silhouette narrow.
This style works because it creates contrast. Tight on the sides, full in the middle. That simple shift makes the volume look deliberate. Use a few well-placed pins instead of piling on a dozen; too many pins make the sides bulky and visible in the wrong way.
If you want a bolder finish, fluff the center strip with your fingers instead of a comb. Comb-picking a frohawk can make it fray too fast.
15. Rounded Afro with Picked Volume
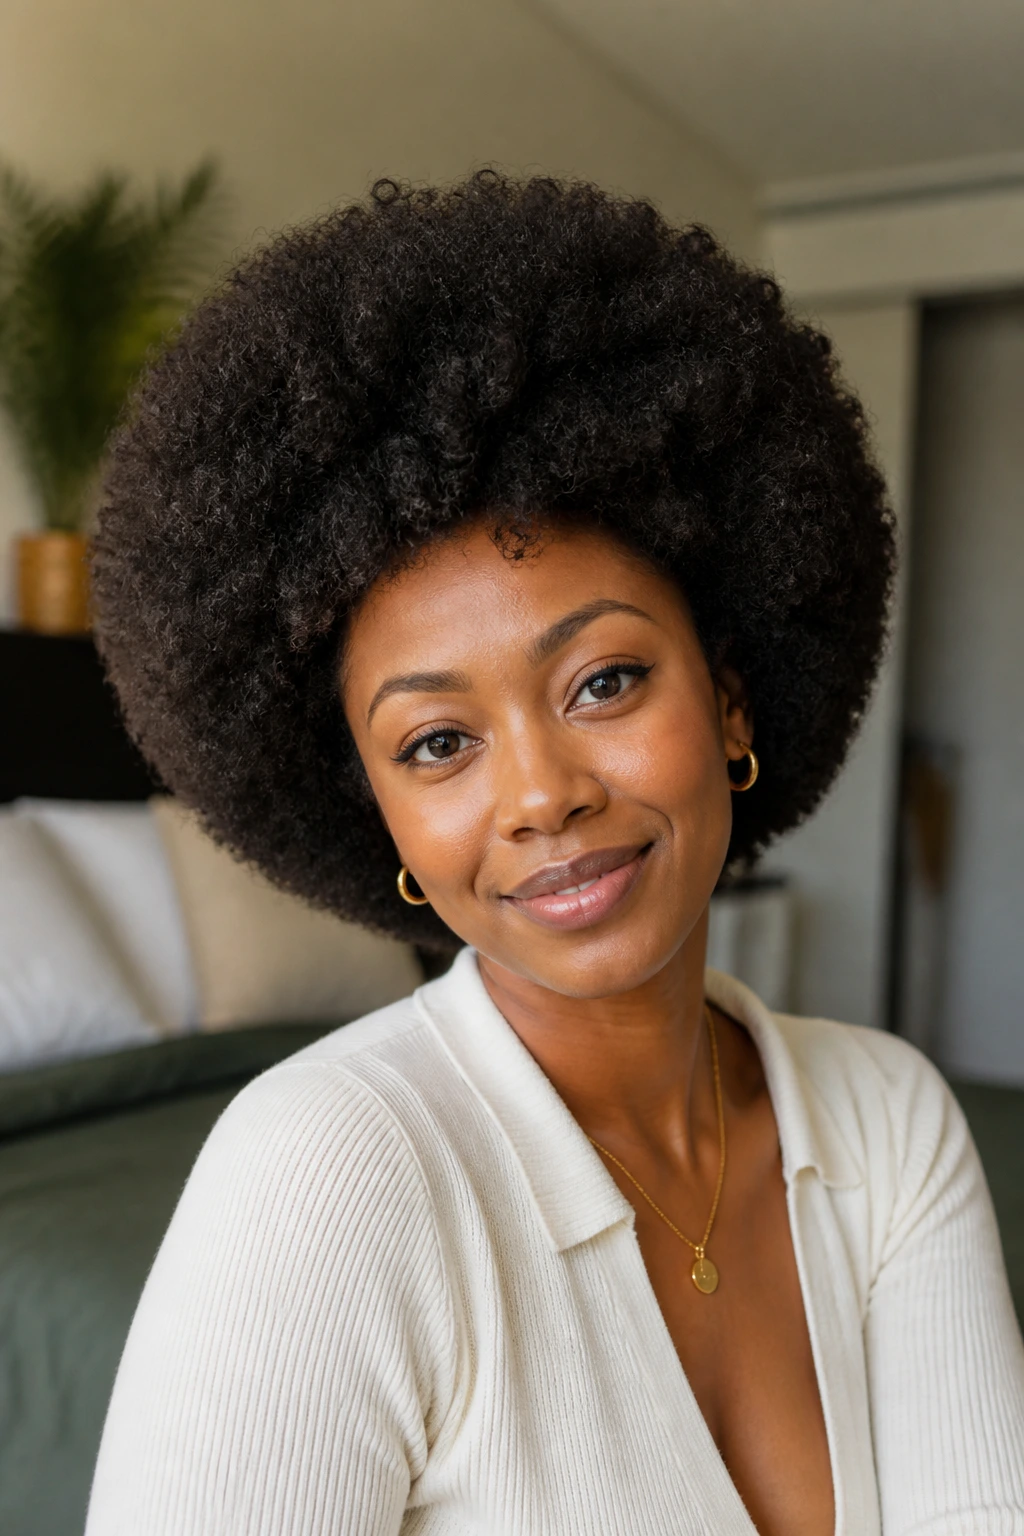
How do you make a thick afro look shaped instead of random? You pick at the roots and leave the ends alone. That’s the whole trick. The body should come from the base, not from pulling the curls apart until they look tired.
A rounded afro works best when the silhouette is soft but still controlled. Trimmed edges help, but even without a fresh cut, you can use a pick to lift the crown, round the sides, and keep the top from flattening. A little moisture and a light seal at the ends make the shape hold longer.
This is one of my favorite looks because it does not apologize for taking up space. It just does.
16. Tapered Afro with Sharp Shape
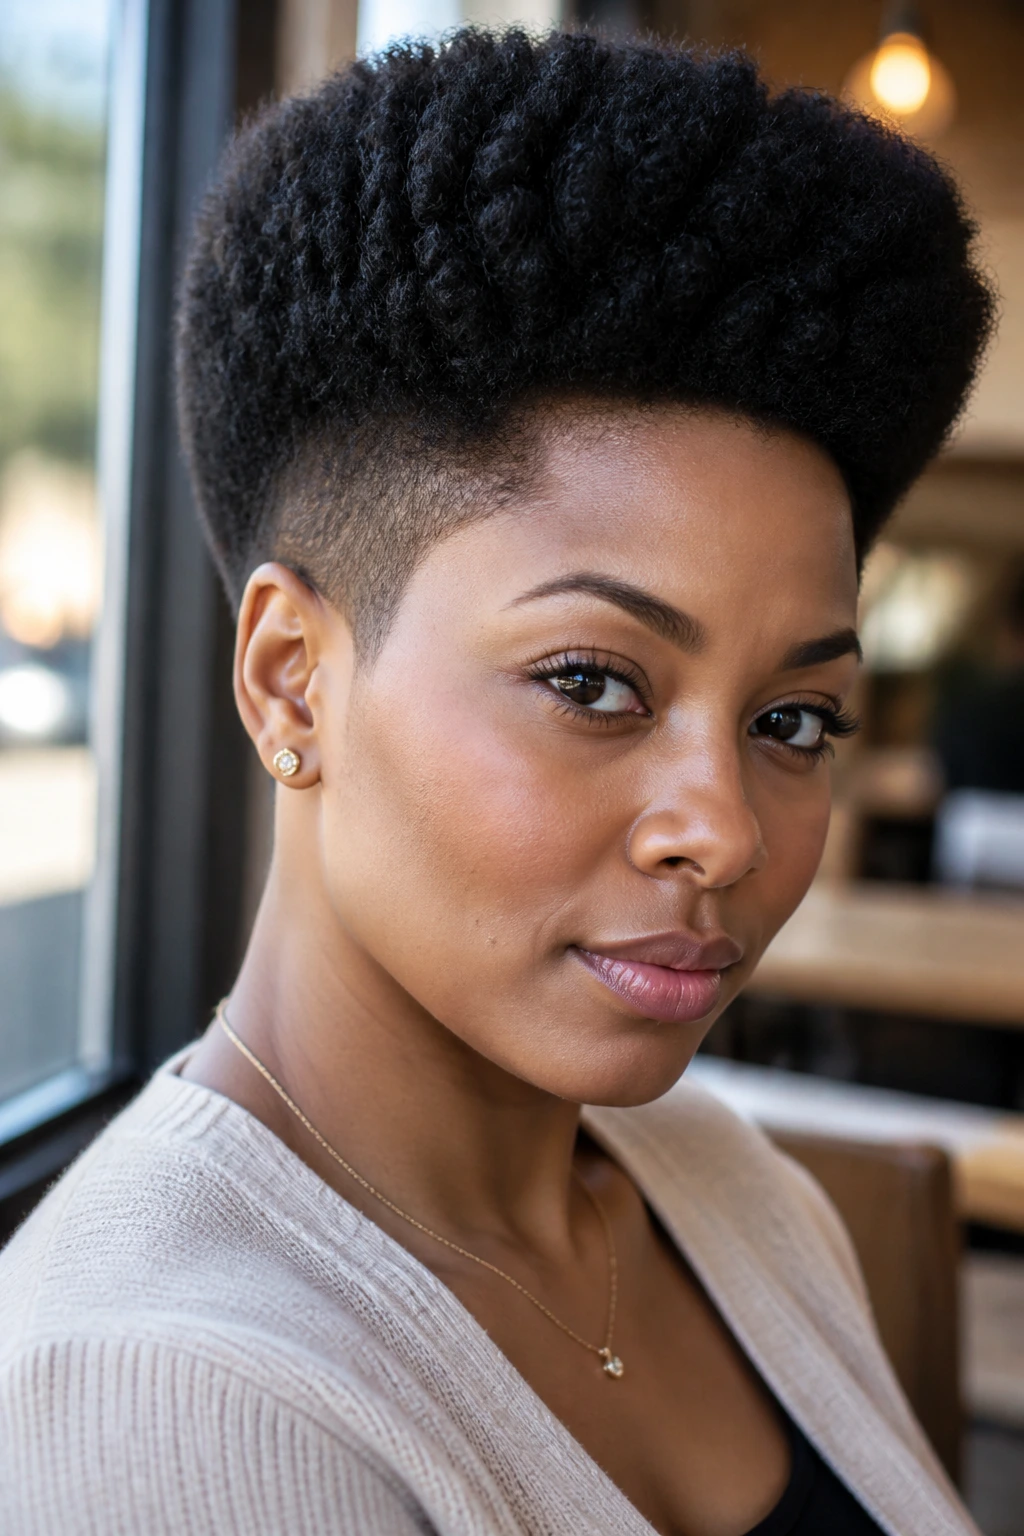
A tapered afro is what happens when the cut and the texture agree with each other. Thick hair looks especially good here because the top gets to stay full while the sides and nape stay close. The shape does half the styling work for you.
Use fingers or a sponge to bring the top into focus, then leave the sides alone. Too much handling on a tapered cut can erase the clean line that makes it special. If the cut is fresh, the look almost styles itself. If the cut has grown out, a bit more shaping at the temple and nape brings it back.
This one feels sharp without looking stiff. That’s a rare balance.
17. Side-Swept Afro with a Soft Line
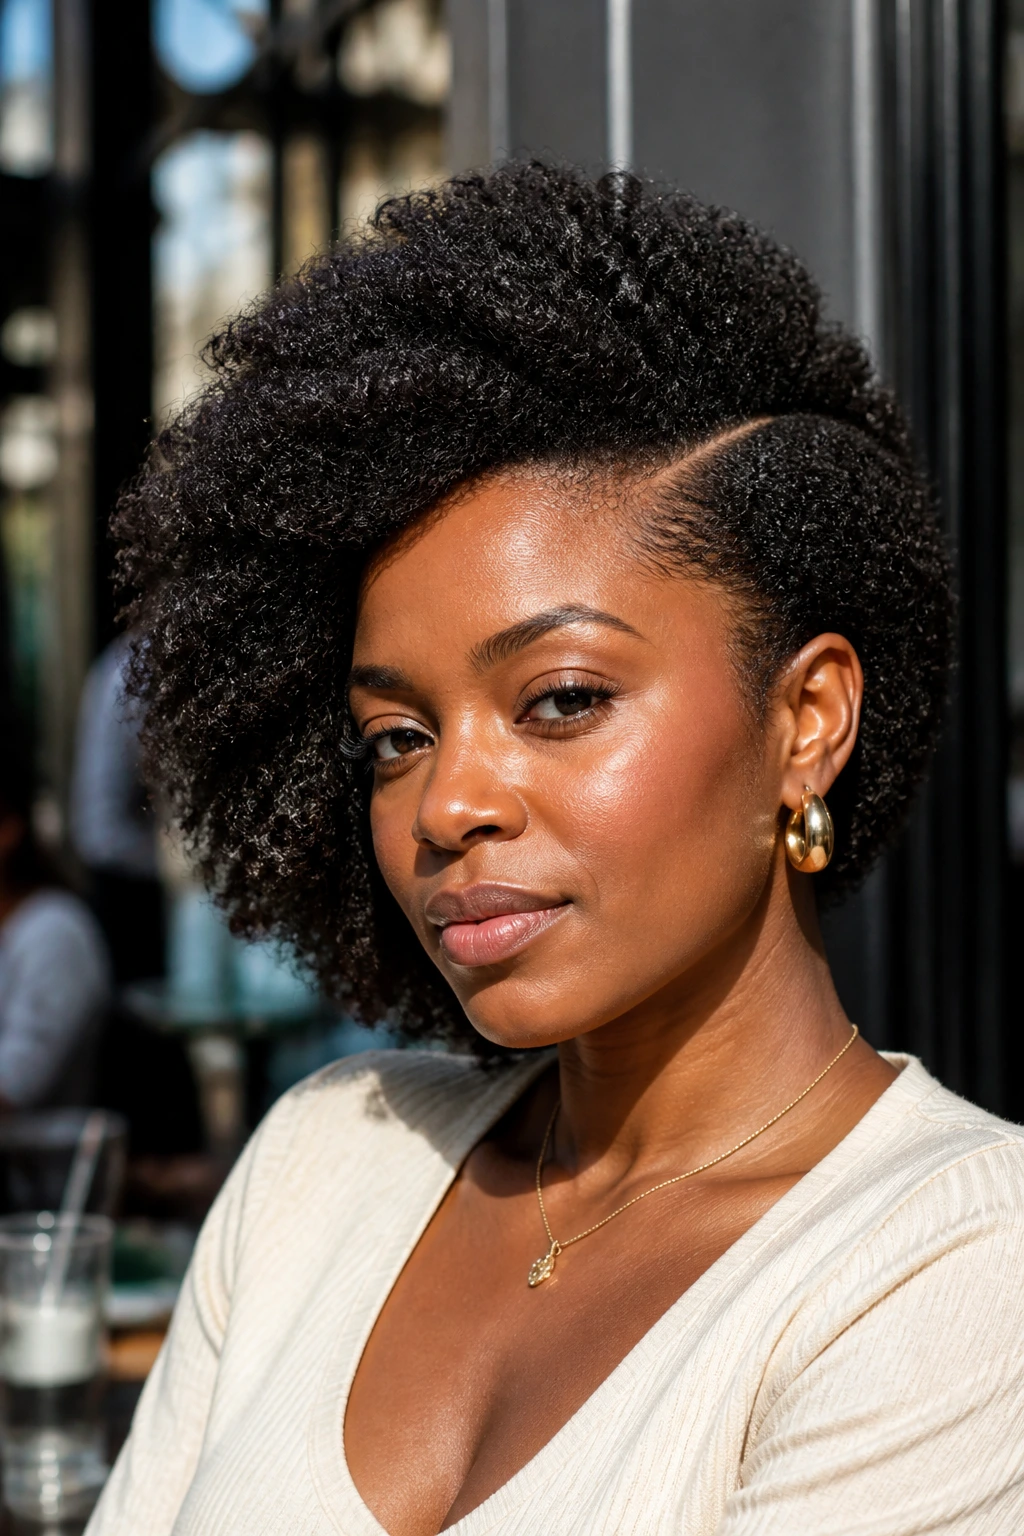
A side-swept afro changes the whole mood of thick hair without asking for a new routine. Move the part low and deep, then pin the heavier side behind the ear or at the temple. The asymmetry breaks up the bulk and makes the face look softer.
This works especially well when one side of the hair has more shrinkage than the other. Instead of fighting that difference, you use it. Thick hair tends to make a side sweep look lush rather than thin, which is why this style can feel more expensive than it actually is to do.
A decorative clip or one well-placed bobby pin is enough. No need to flood it with accessories.
18. Space Buns on Stretched Hair
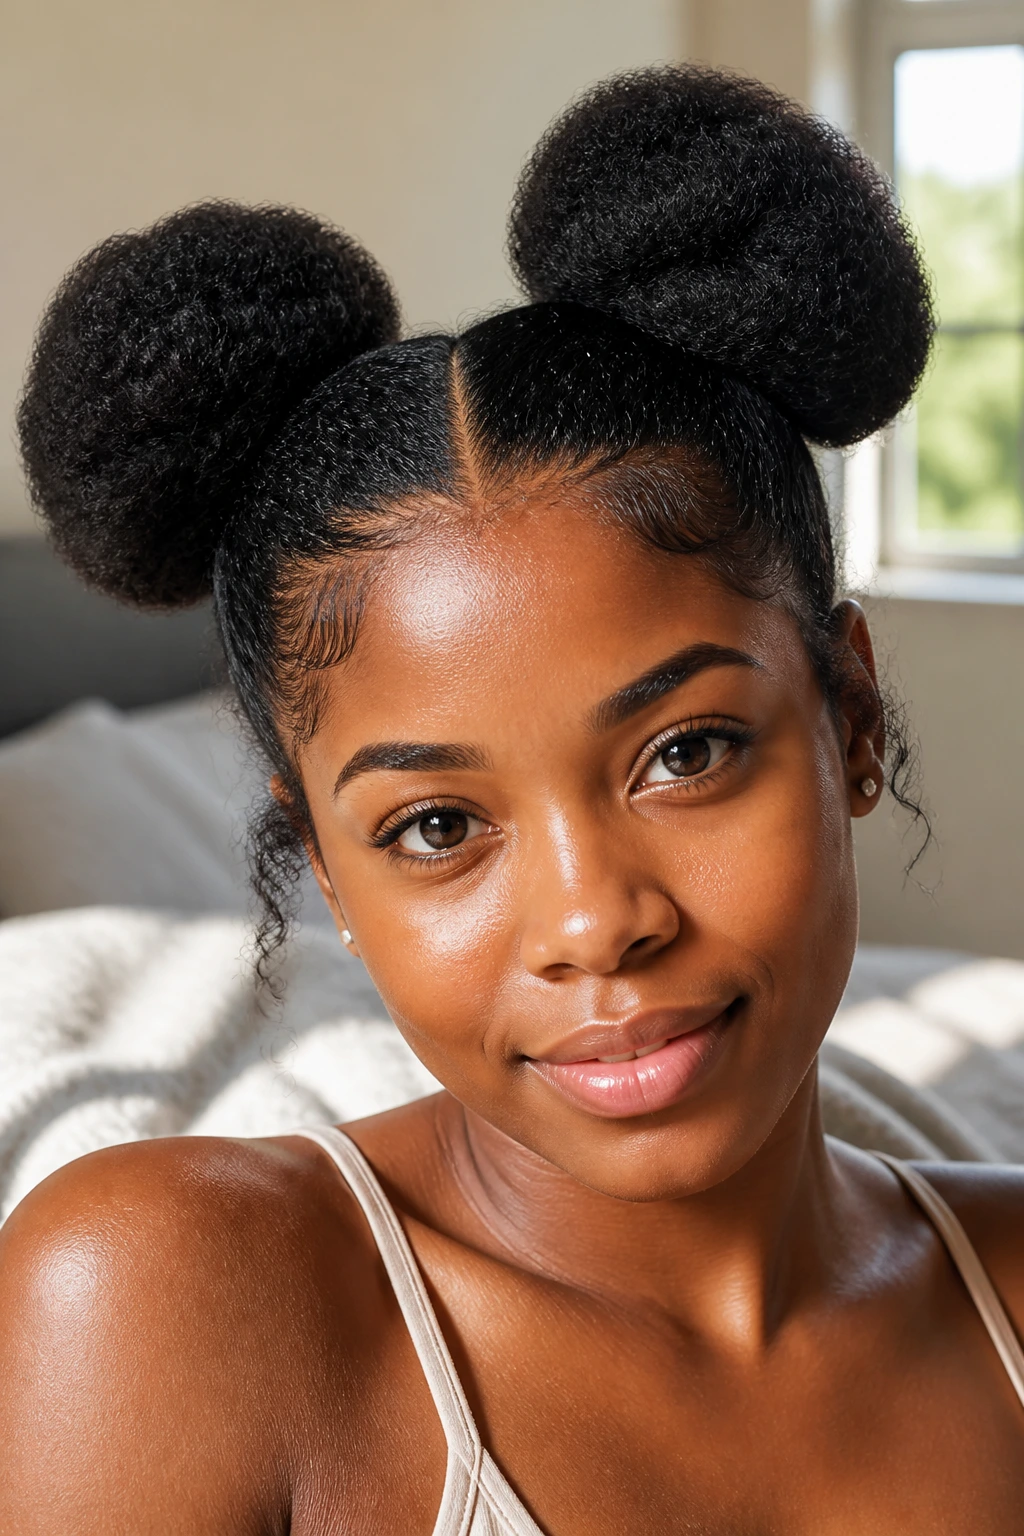
Space buns are playful, but on thick natural hair they are also practical. The hair has enough body to make each bun look full instead of small and apologetic. Start with stretched hair, twist or braid the sections first, and then coil them into buns so the shape stays neat.
If your hair is shoulder length or longer, keep the buns slightly off-center so the weight sits better. Very dense hair can make buns slide if the base is too small, so anchor them with a strong band or a few pins. The style reads casual, but the structure underneath matters.
I like this for weekends, concerts, and any day when you want a style with a little personality.
19. Half-Up Half-Down Puff
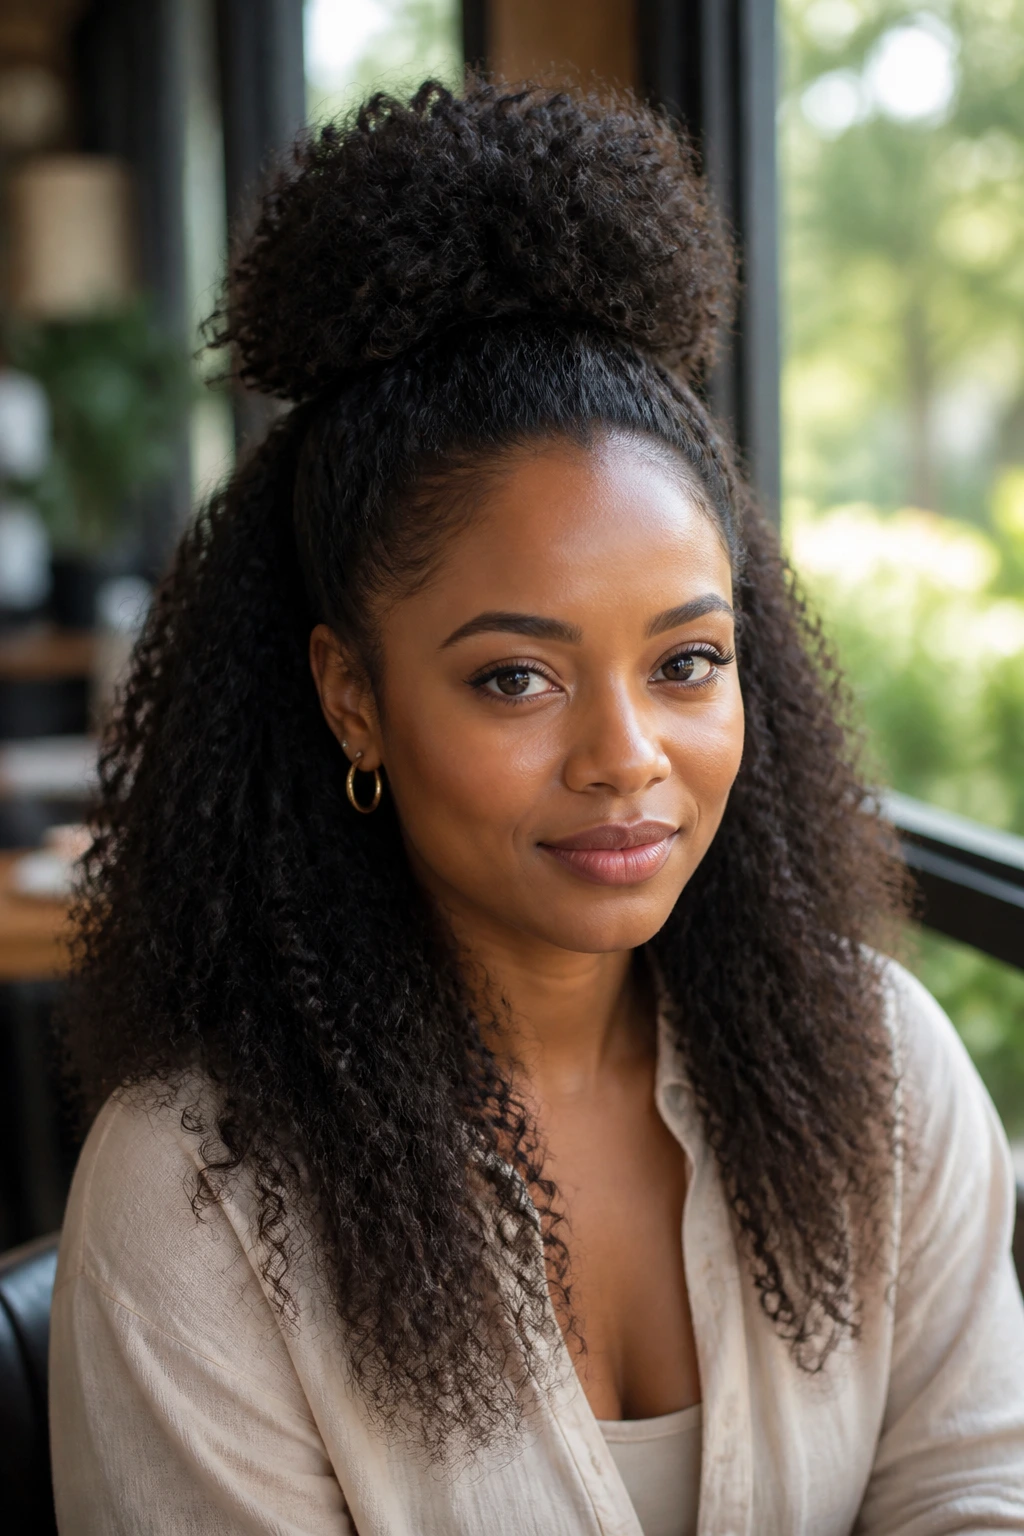
This style solves the oldest thick-hair problem: you want volume, but you don’t want all of it in your face. Pull the top section into a puff or mini bun, then leave the rest loose so the length still shows. The contrast between lifted top and free lower hair makes the whole look feel balanced.
It works best when the parting is clean and the top section is anchored firmly enough to stay put. If your hair is very thick, split the top into two small sections and join them under one puff base. That reduces bulk and makes the crown sit flatter.
It’s a compromise style. In the good way.
20. Pineapple Updo for Defined Curls
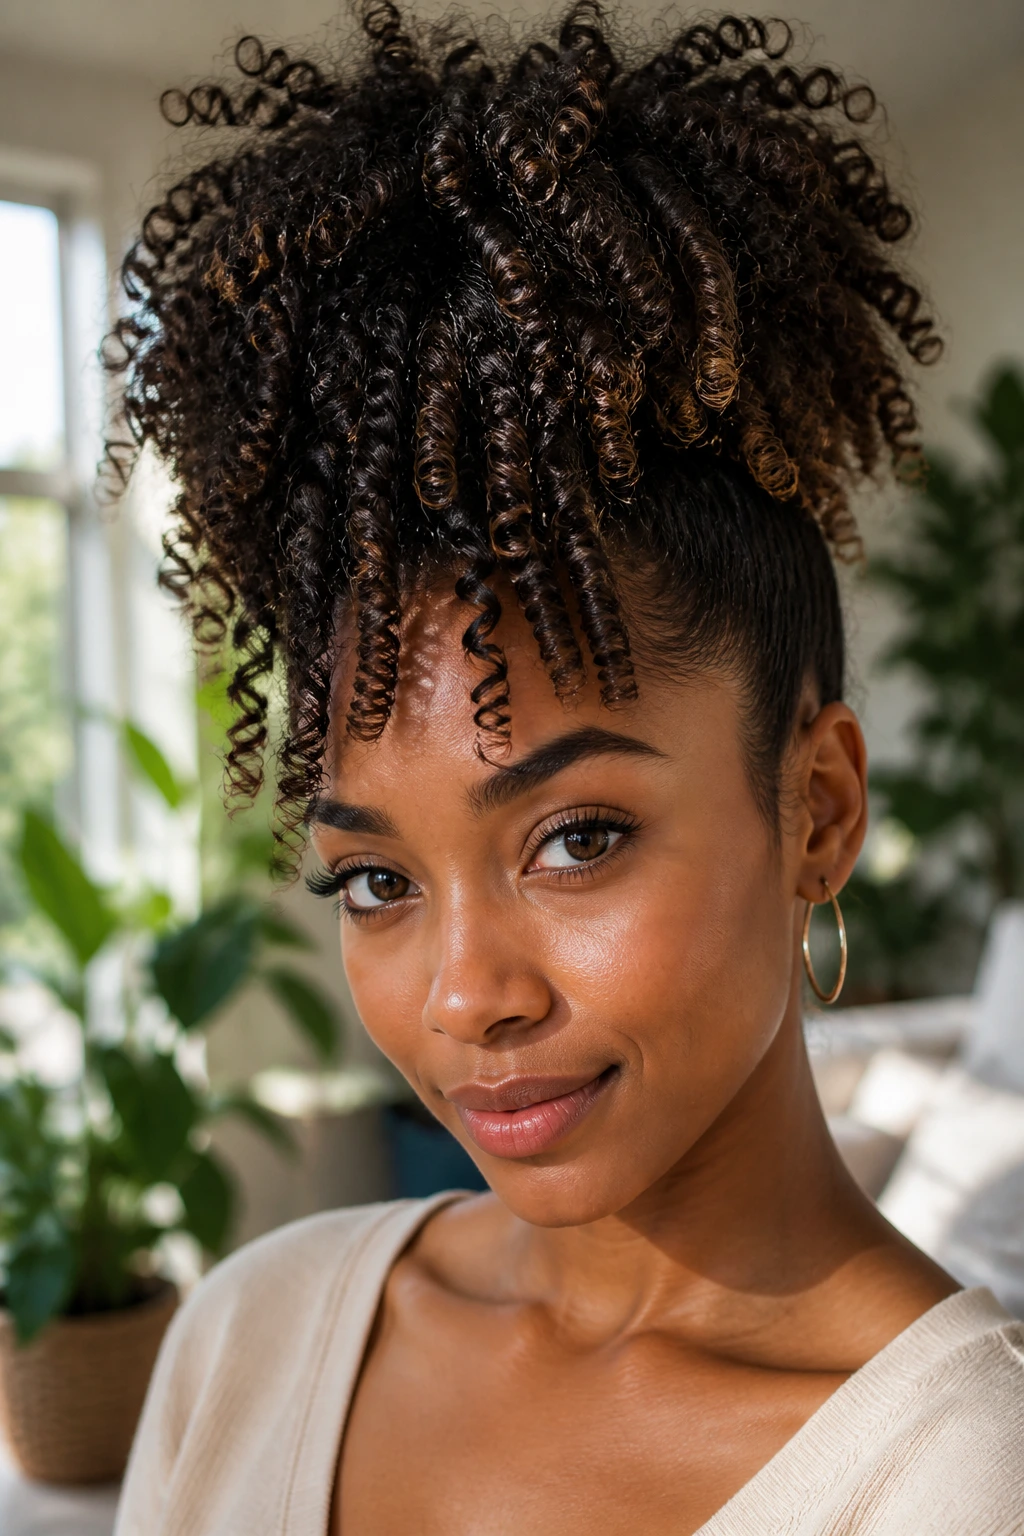
A pineapple is one of those rare styles that works as both a day look and a night routine. Gather the hair high and loose, let the curls fall forward, and the result is a big, soft shape that preserves definition at the back. Thick hair makes the silhouette dramatic fast.
Keep the base loose. That is the part people get wrong. If the band is too tight, the curls at the front flatten and the whole style stops looking airy. Use a satin scrunchie and let the ends keep their shape.
If you already have a wash-and-go or rod set, the pineapple can stretch its life another day without much work.
21. Perm Rod Set with Spiral Curls
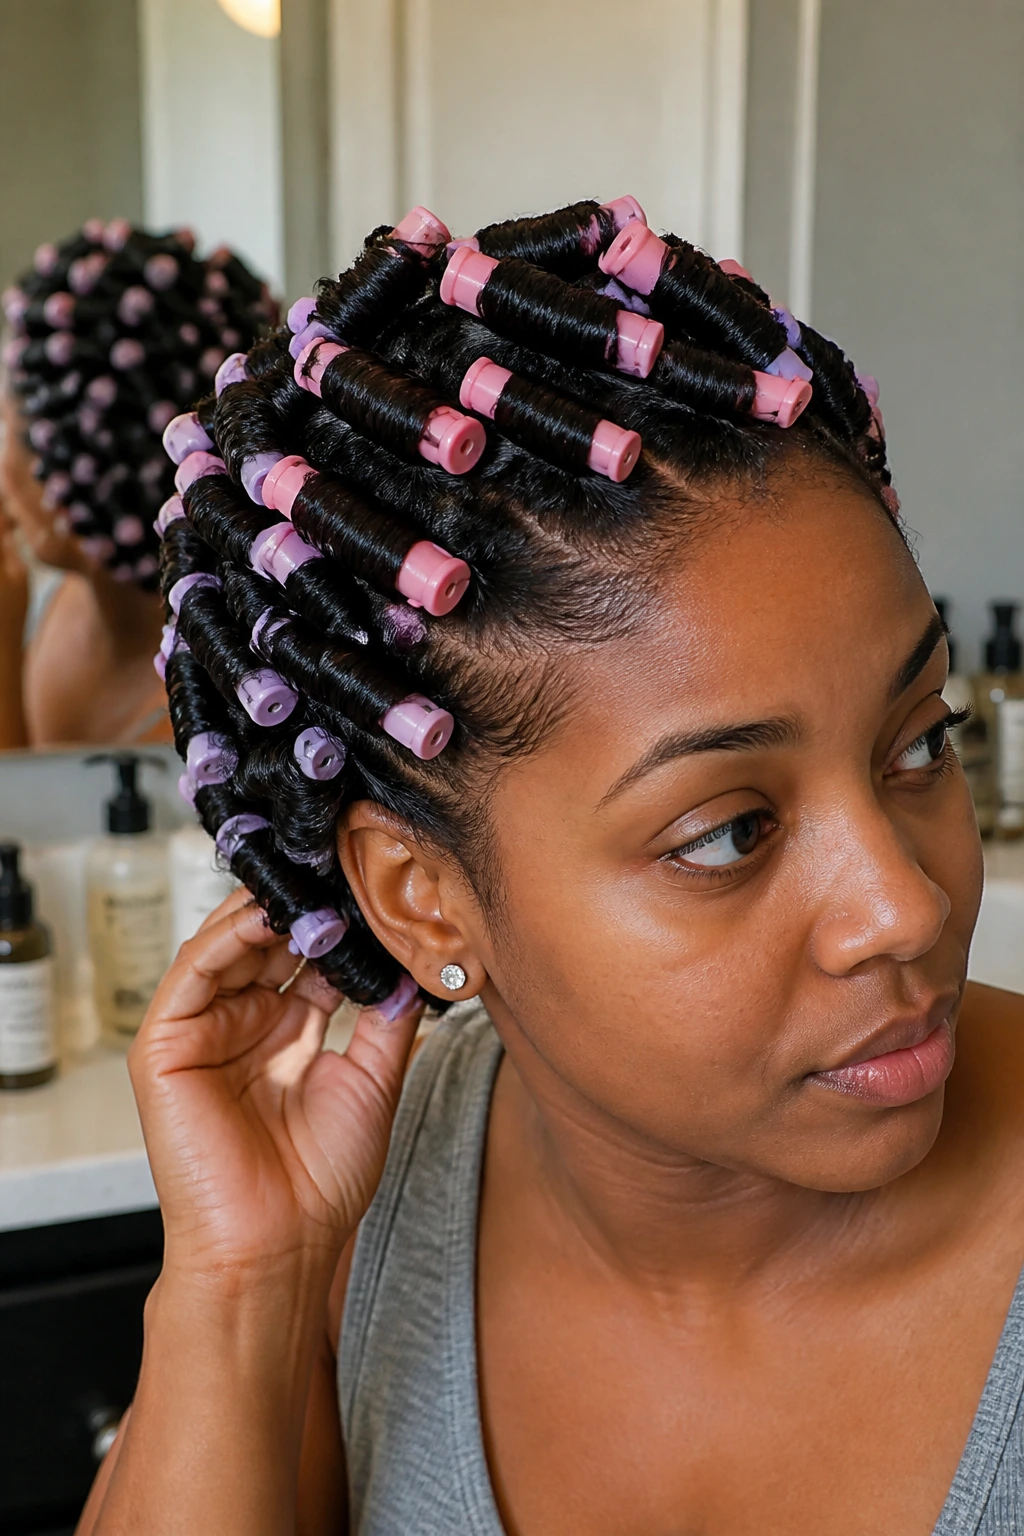
A perm rod set on thick hair gives you defined spirals that can look polished without feeling stiff. The rod size matters. Medium rods usually work better than tiny ones when the hair is dense, because the smaller rods can make the set take forever to dry.
Apply setting foam or a lightweight gel, then wrap each section smoothly from ends to roots. If the ends look bent or frayed before you start rolling, fix that first. A bad end ruins the whole curl.
Drying is the thing nobody wants to hear about, but it decides everything. If the rods come down while the hair is still damp in the middle, the curl collapses by noon.
22. Flexi Rod Set with Soft Ringlets
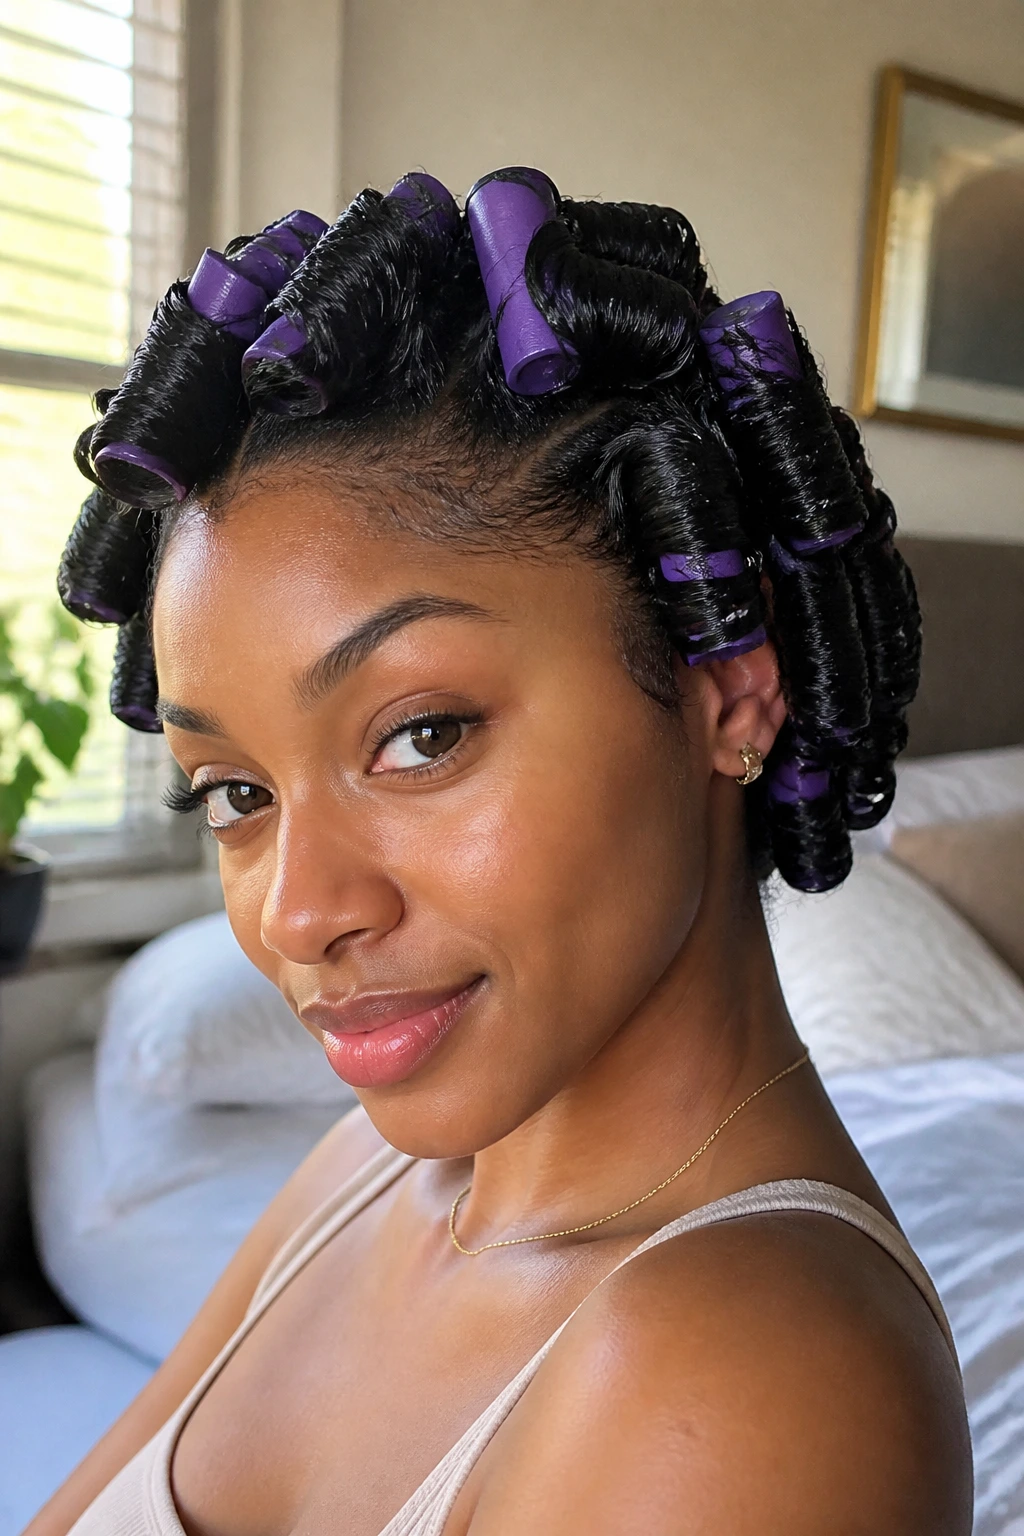
Flexi rods are the softer cousin of perm rods. They bend to the shape of the hair and are easier to sleep in if you use them at night. Thick hair likes them because they give a smooth ringlet without the hard snap of a tighter roller set.
Use them on damp hair with a setting foam or mousse, then make sure each section is wound evenly all the way down. The ends should sit flat before you bend the rod into place. If they’re crooked, the curl line will look rough when you take the rods out.
This is the set I’d pick when comfort matters almost as much as the result.
23. Roller Set Under a Hooded Dryer
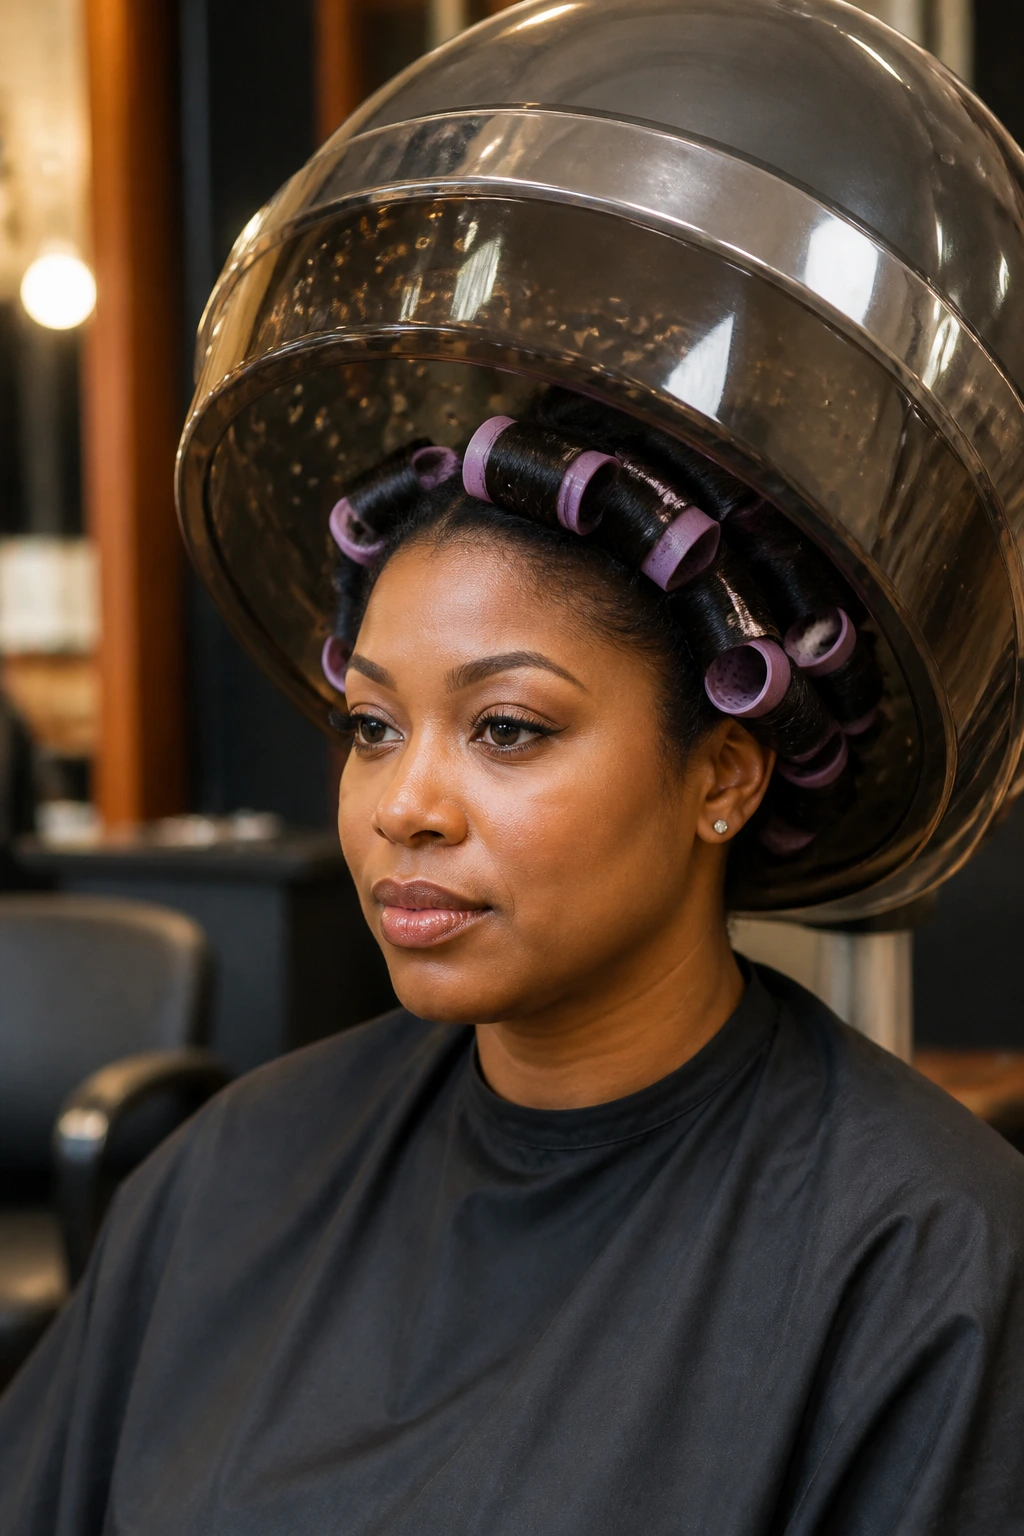
A roller set under a hooded dryer is one of the cleanest ways to smooth thick natural hair without flattening it into submission. The heat gives the set even drying, which means fewer limp spots and less frizz at the back where hair usually stays wet longest.
Small sections are the key. Thick hair needs the rollers to do more work, not less, so trying to cheat with giant sections usually ends in a half-dry set and a lot of fluff you didn’t ask for. Put the rollers in with careful tension, then let the dryer do the boring part.
The payoff is shine, stretch, and a shape that looks neat before you touch it.
24. Finger Coils with Clean Ends
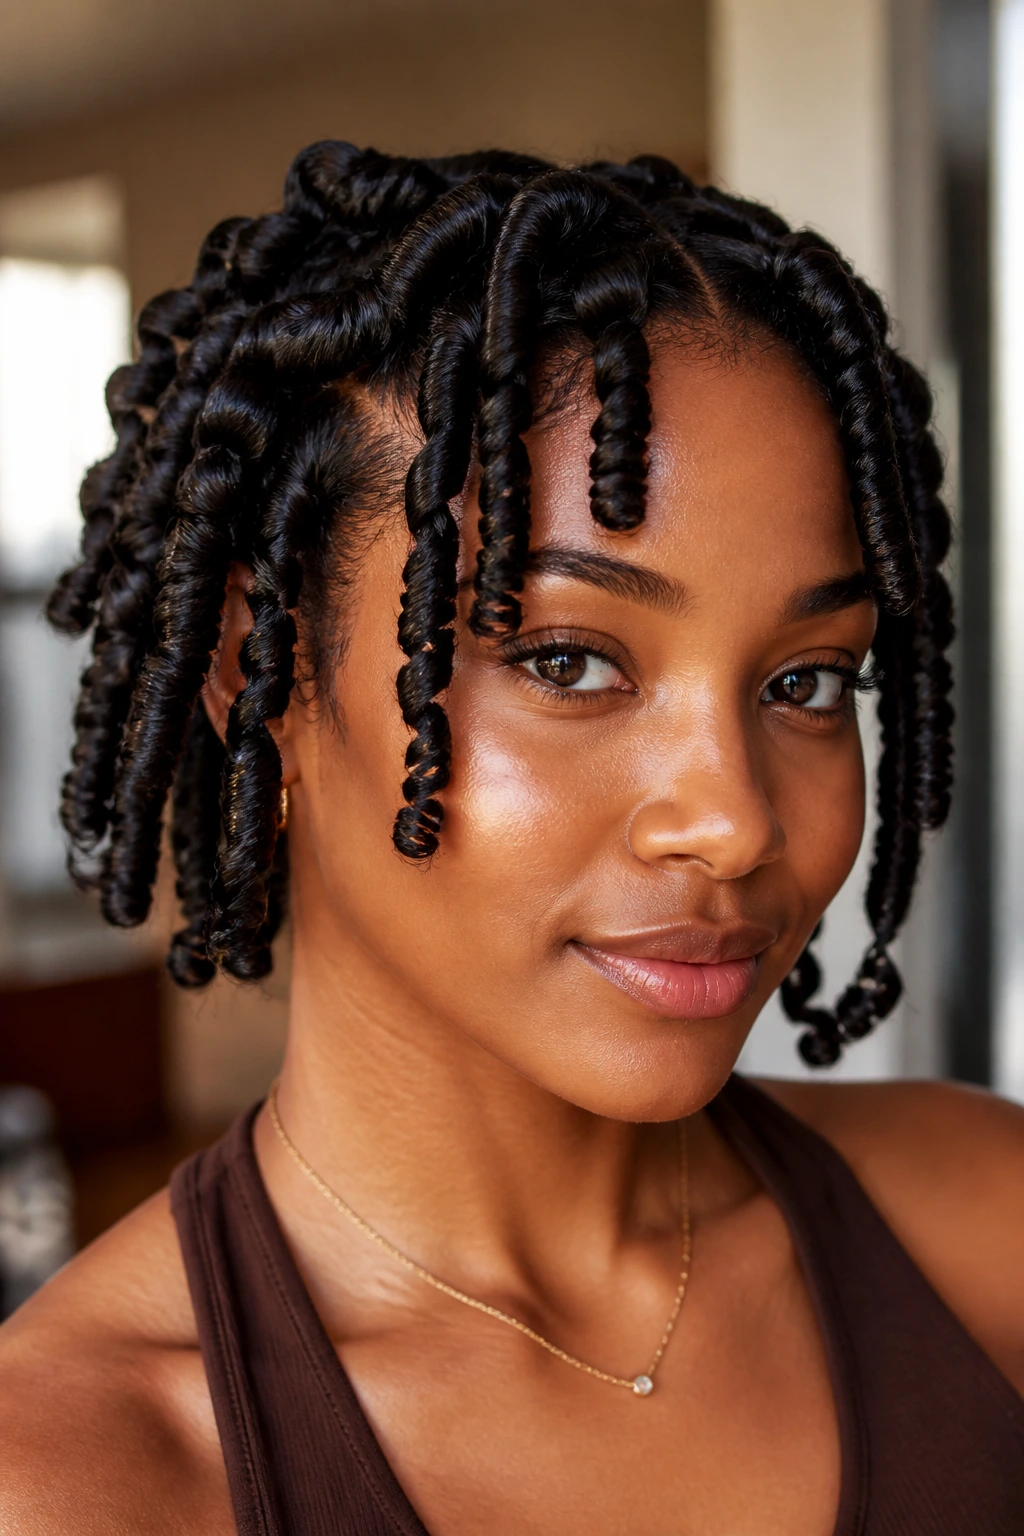
Finger coils are slow. No way around it. But on thick natural hair, they can make the front, the sides, or the whole head look tidy in a way that twists sometimes don’t. The curl pattern is more exact, and the ends stay sealed if you take your time.
Use a water-based gel or cream that gives slip, then coil each small section around your finger until it wants to hold its own shape. Shorter lengths often look especially good with coils because the style reads clean rather than heavy. That makes this a smart move for tapered cuts, short bobs, or the front of a longer style.
A coil that’s rushed looks fuzzy. A coil that’s patient looks crisp.
25. Shingled Wash-and-Go with Wet-Set Definition
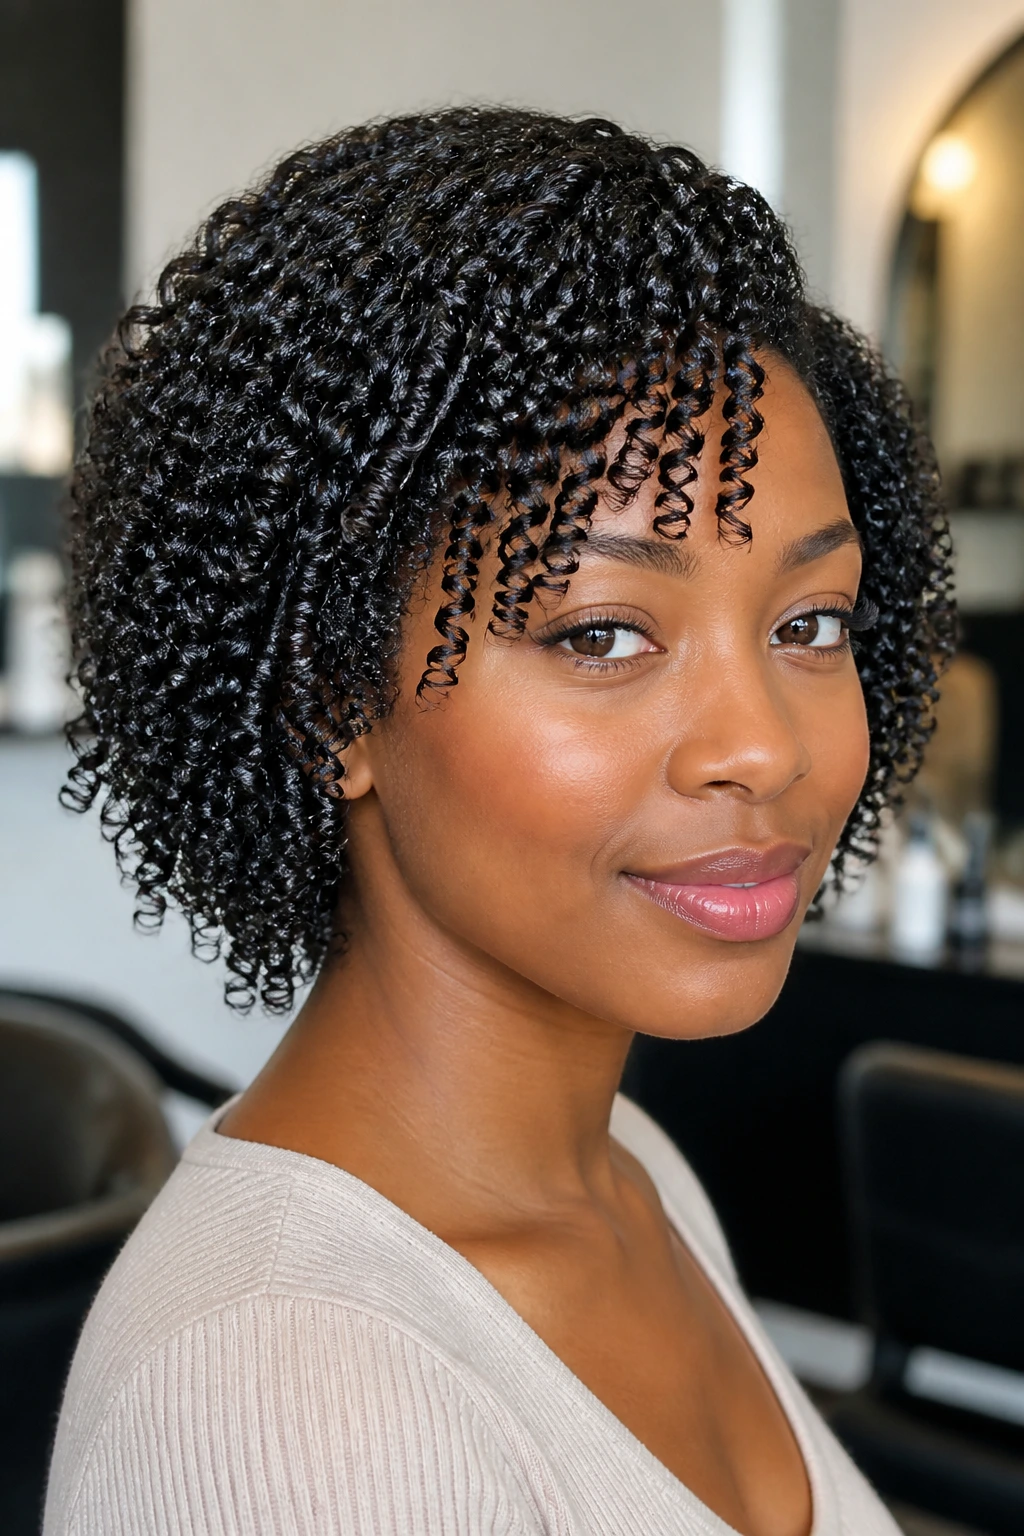
If a regular wash-and-go turns into a fuzzy halo by lunchtime, shingling is the fix. You smooth product through tiny sections one by one, then separate only enough for the curls to clump naturally. Thick hair responds well to that level of attention because it gives every coil a lane.
This method takes longer than raking product through the whole head, and that’s the tradeoff. But the finish is cleaner, especially around the crown and nape where dense hair can get mashed together. Use enough water to keep the strands slick, then stop touching it once the cast starts to form.
The style is controlled, not flat. That’s the point.
26. Claw-Clip Twist-Up for Busy Days
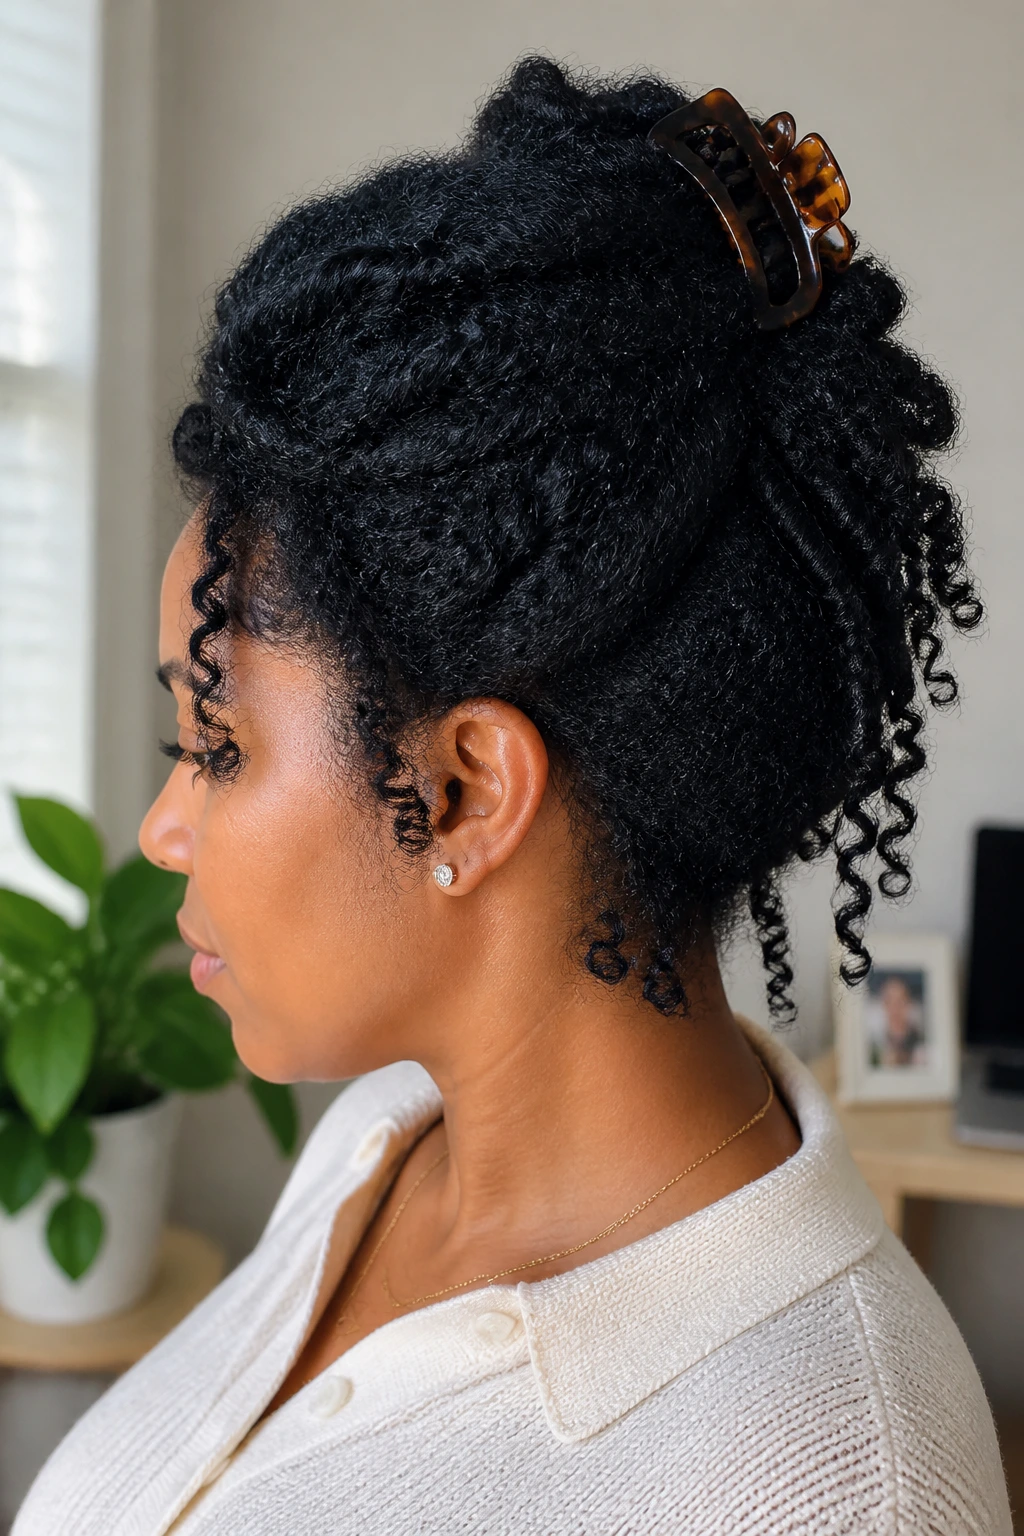
A claw-clip twist-up is what happens when you need your hair up in under five minutes and still want it to look intentional. Twist the length once or twice, lift it, clip it, and let the ends spill however they want. Thick hair gives the shape enough body that it won’t look empty.
This style works best on stretched hair or hair that’s already lived a day or two. Freshly washed hair can be too slippery and collapse out of the clip. If your clip keeps sliding, switch to a larger one or secure the base with a small elastic first.
It’s a useful style because it does not demand perfection. Not every day should.
27. Cornrow-and-Twist Combo
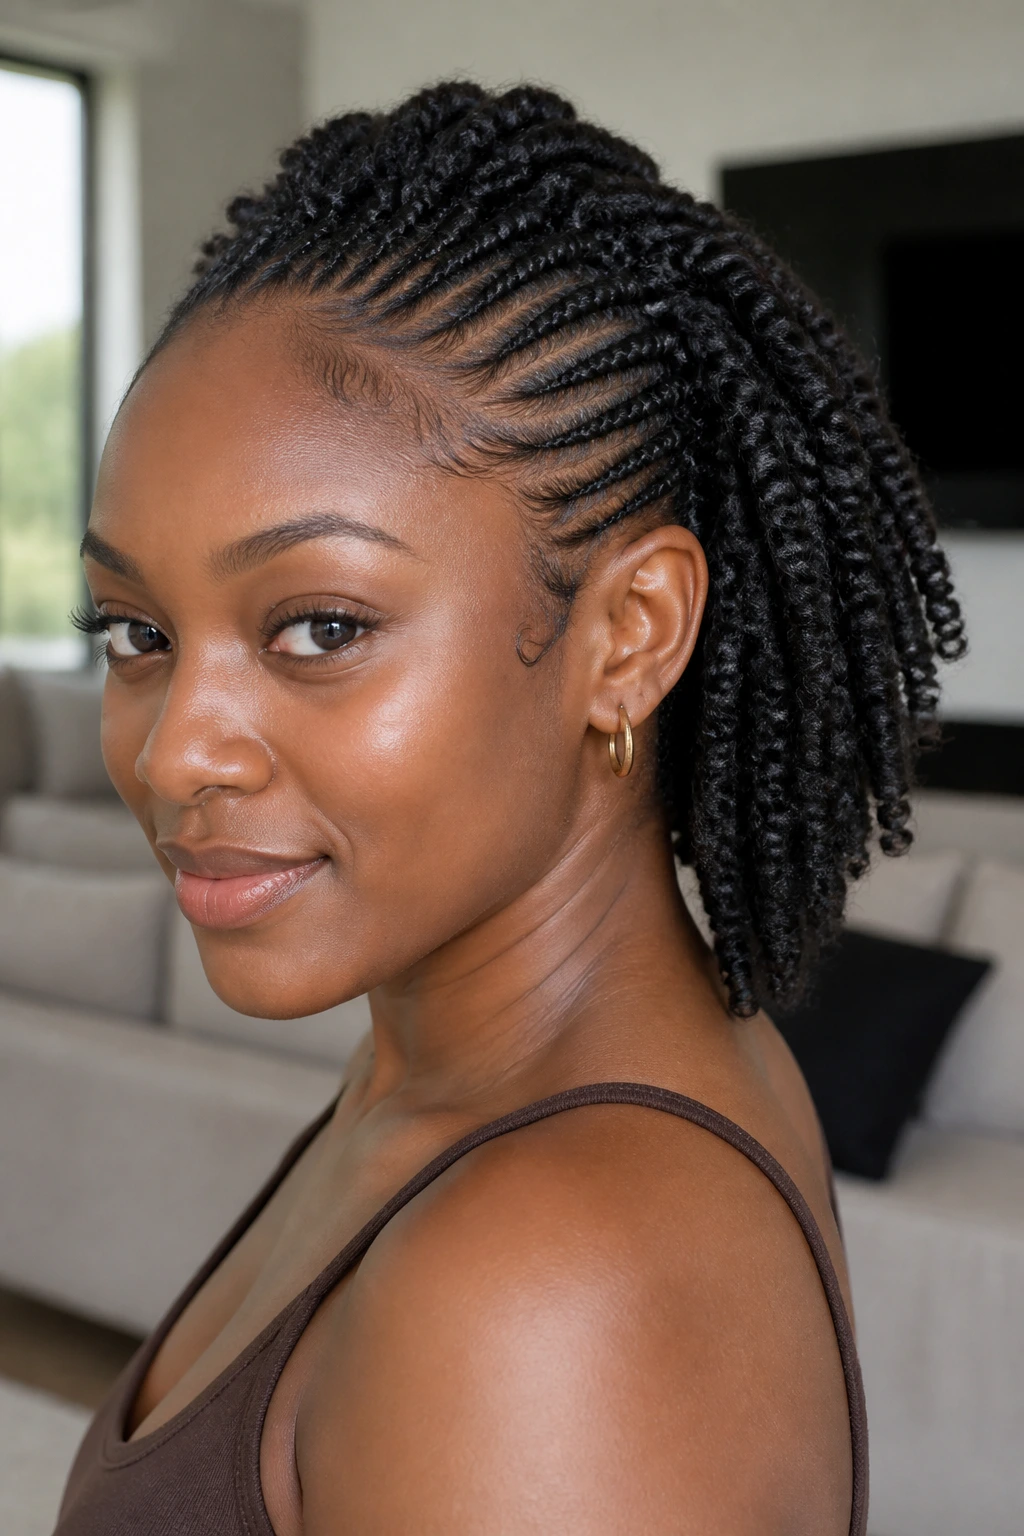
Combining cornrows and twists is a smart way to split the job in two. The front stays sleek and controlled, while the back keeps some softness and movement. Thick hair makes the contrast even stronger, which is why this combo can look more styled than either texture on its own.
A center cornrow or two on the top can guide the eye back into chunky twists at the nape. Or flip it: twists at the crown, cornrows on the sides. The style gives you room to protect the ends without locking the whole head down.
I like this one when I want structure up front and a little volume in the back.
28. Tuck-and-Roll Updo
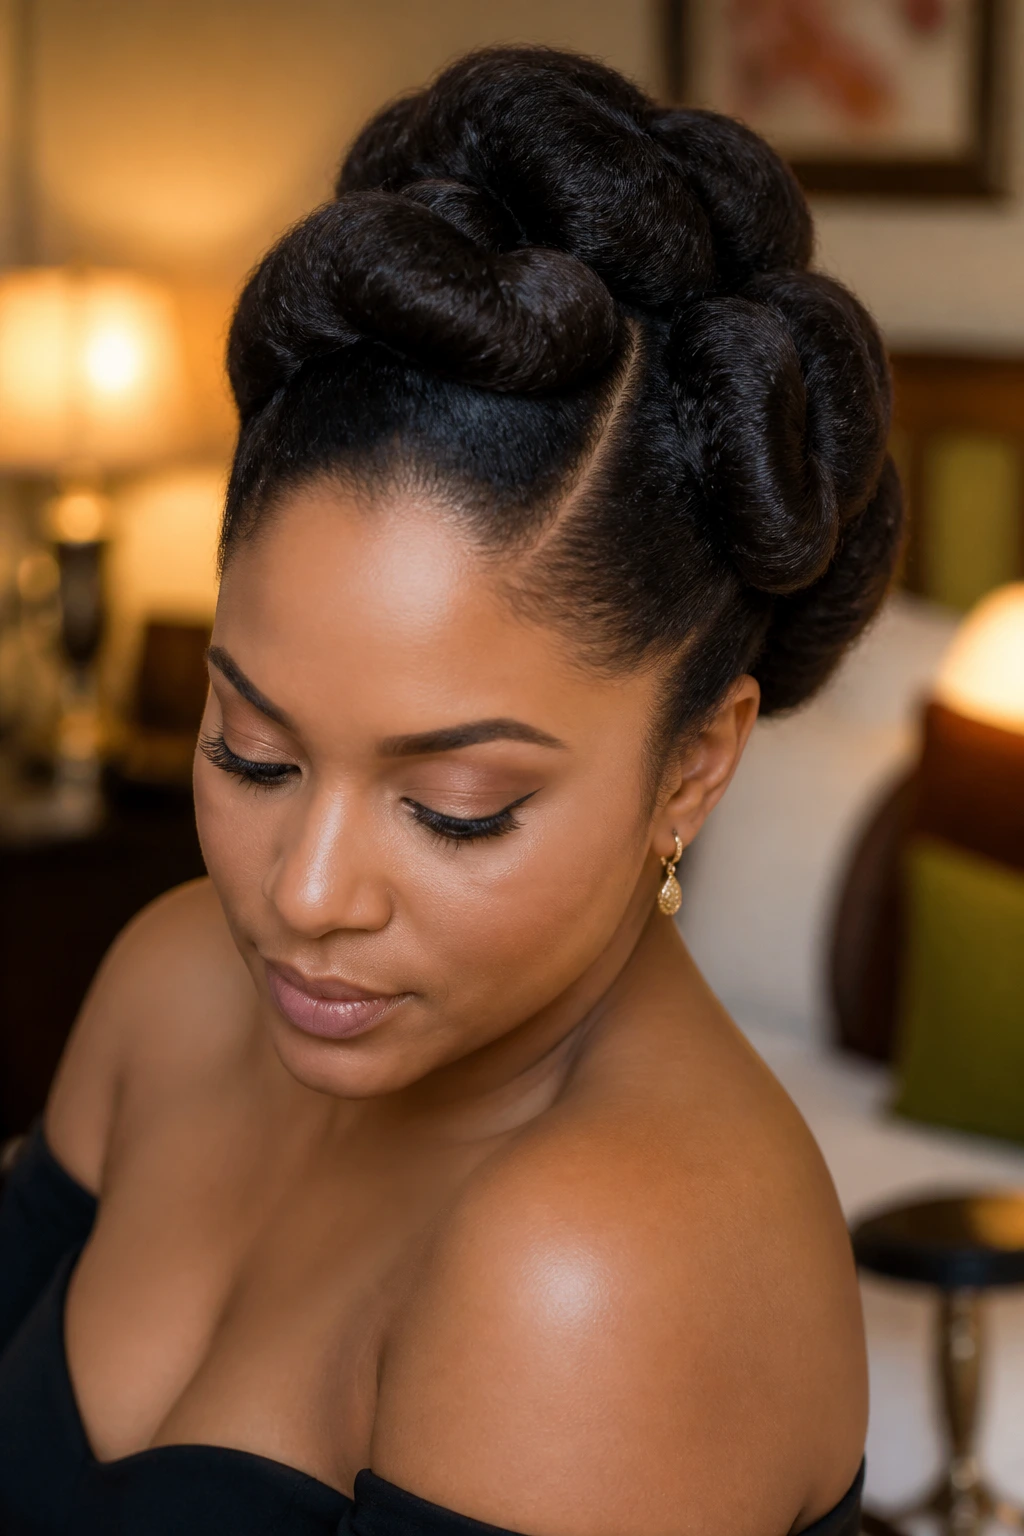
A tuck-and-roll updo makes thick hair look polished without forcing it into a flat shape it doesn’t want. Roll sections under, pin them in place, and let the texture create the body inside the style. When it’s done well, the whole thing sits close to the head and still feels full.
This is a good formal style because it hides the ends and shows off the face. Use stretched hair if you can. It gives the rolls a smoother finish and makes pinning much easier. If the hair is too shrunken, the rolls fight back and the shape gets lumpy.
There’s a quiet elegance to it. Not fussy. Just neat.
29. Side-Part Puff with Sleek Edges
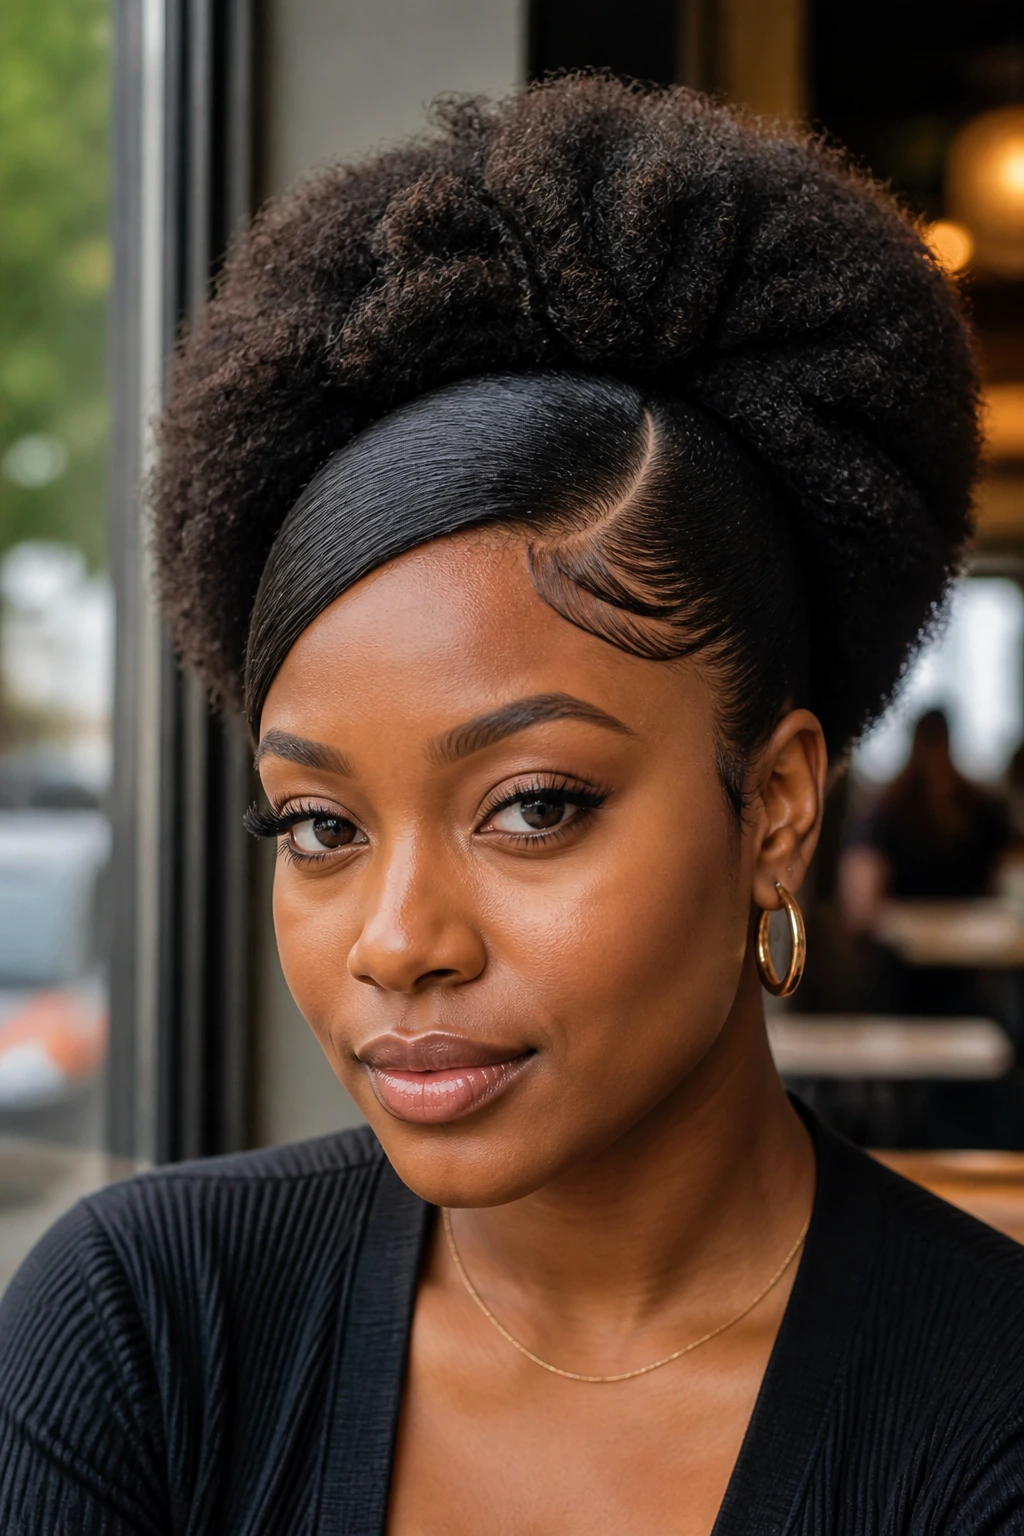
Why does a side part change everything? Because it breaks the bulk. Thick hair with a deep side part suddenly has direction, and the puff stops looking like a single mass and starts reading as a shape.
Smooth the part and the edges first, then gather the rest into a puff that sits slightly off-center. A little gel at the front is enough. More than that, and the style can start looking hard and shiny in a way that doesn’t suit the texture. The puff itself should stay soft.
This is the style I’d choose when I want a quick fix that still looks thought through.
30. Faux Hawk with Flat Twists
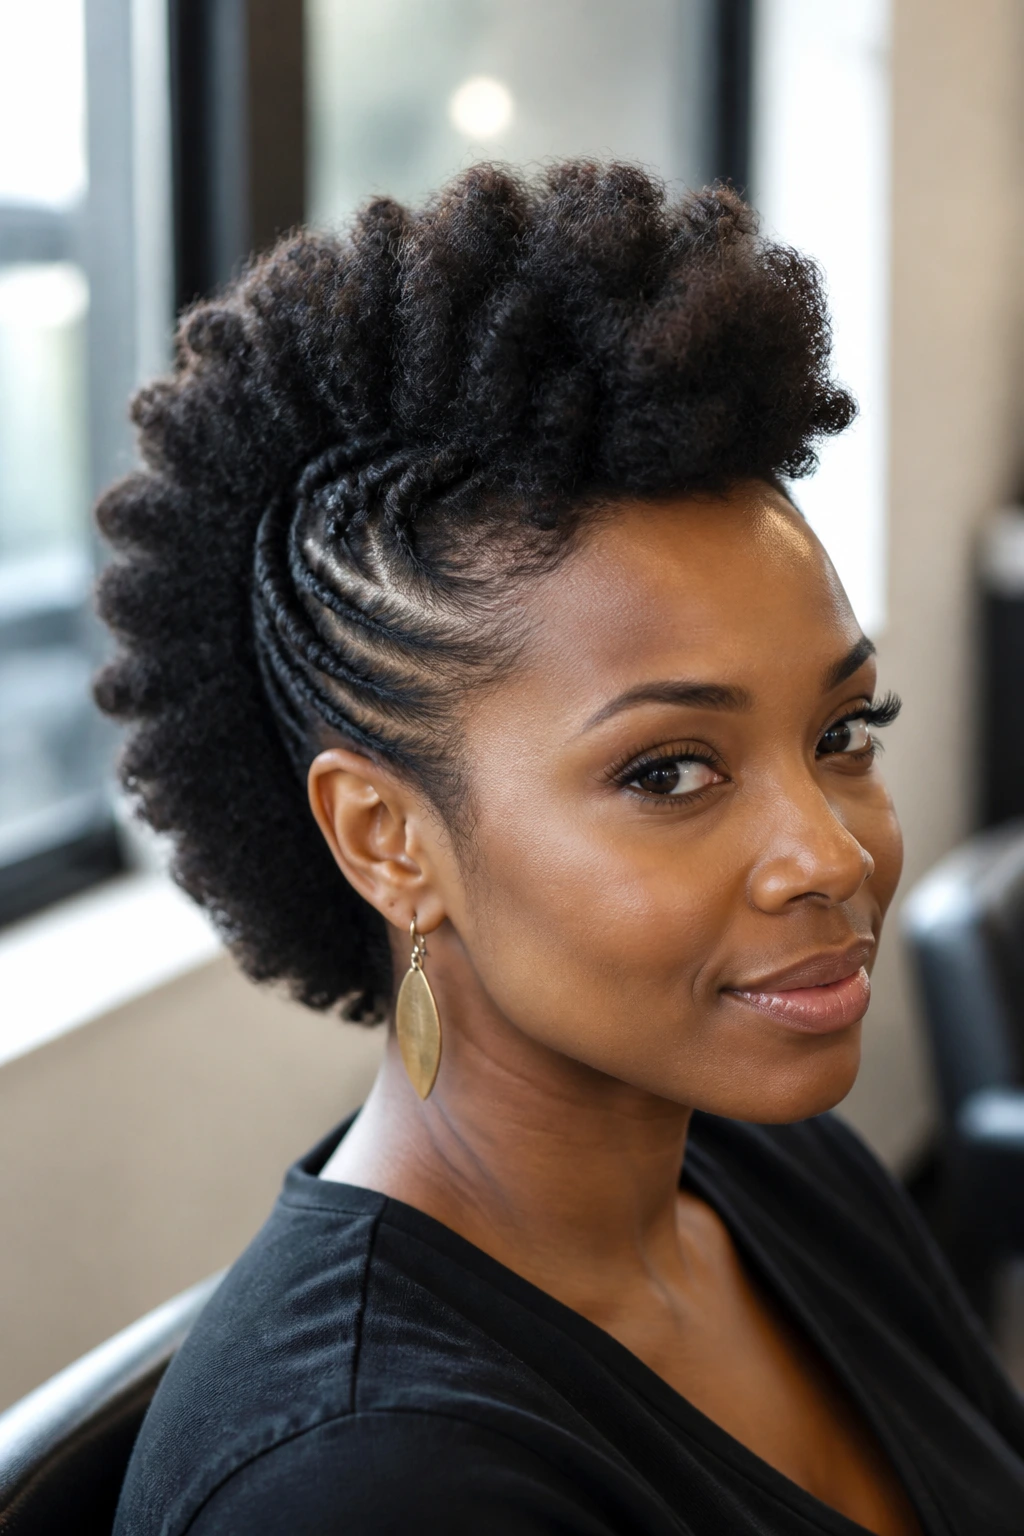
A faux hawk on thick natural hair gives you drama without having to cut anything. Flat-twist or braid the sides upward, pin them close to the head, and leave the center ridge full. Dense hair is ideal for this because it naturally creates a strong middle line.
The trick is not to over-smooth the center. Let it keep some lift. If the middle gets pressed down too much, the style loses the whole point. A little fluff at the top makes the hawk shape sharper, not messier.
If you want a look with energy and edge, this is one of the easiest ways to get it.
31. Fulani-Inspired Braids with Beads
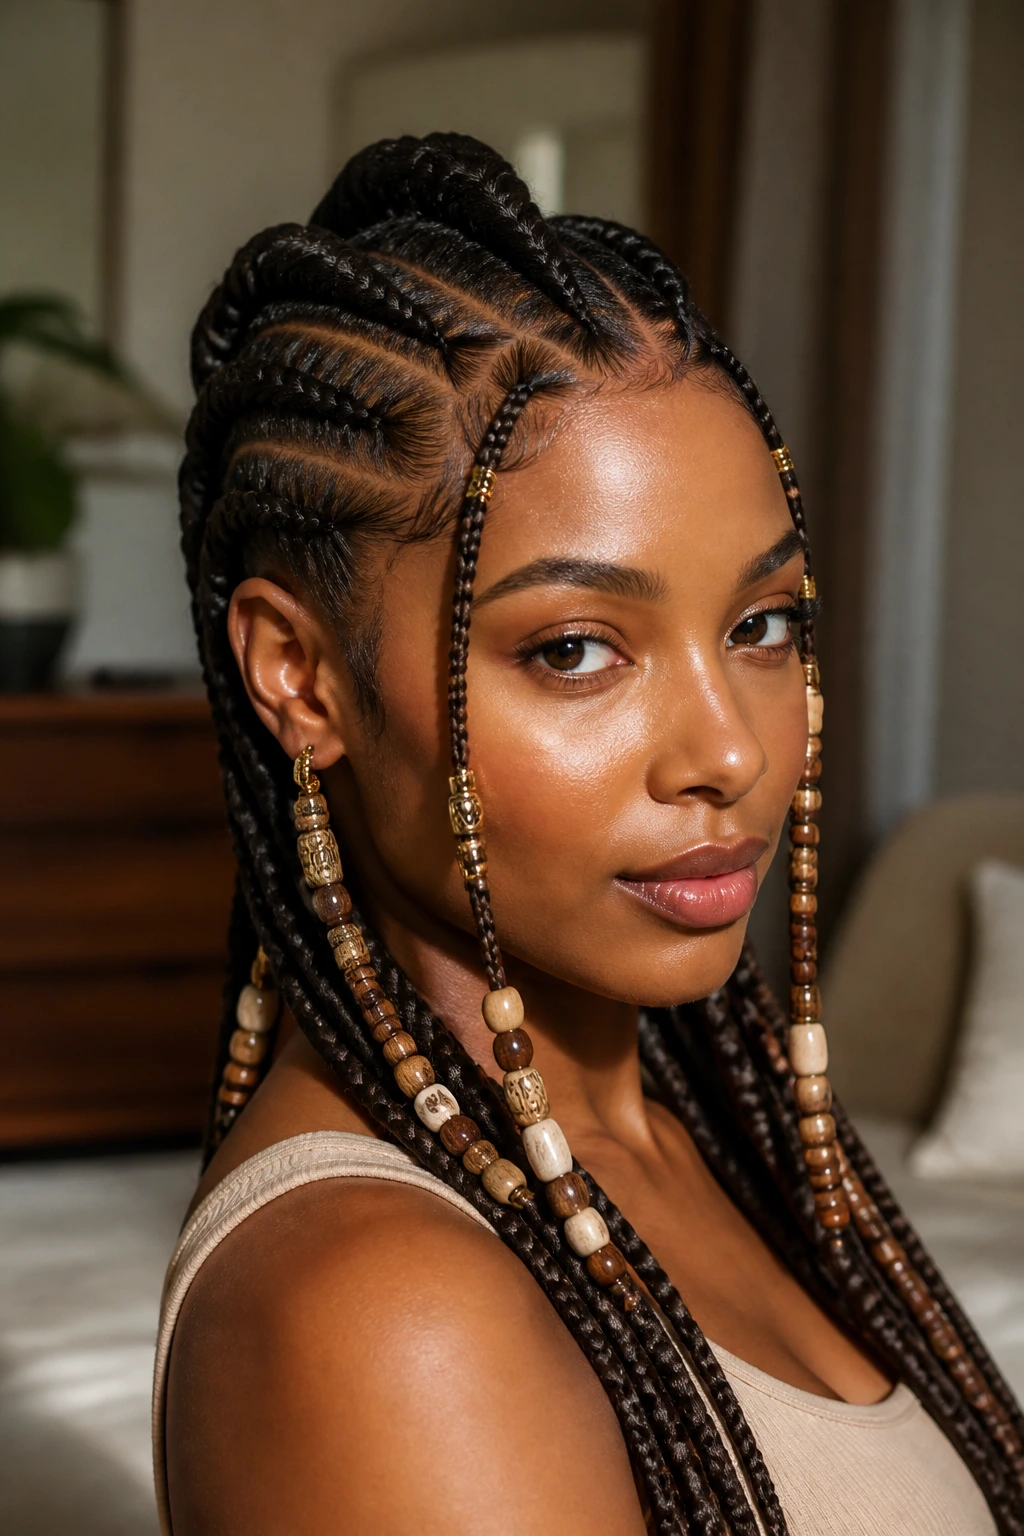
Fulani-inspired braids work well on thick hair because the plaits have enough body to hold detail. A center braid, side braids, or a few face-framing pieces with beads can turn the whole style into something with rhythm and movement. Keep the tension light near the temples. That part matters more than the decoration.
Beads and cuffs should go on after the braids are fully set and dry. Heavy accessories look better when the braid base is strong enough to support them. If the hair is very dense, the style can look especially rich without needing a lot of add-ons.
This is a good option when you want pattern, length, and a little shine all at once.
32. Scarf-Wrapped Puff
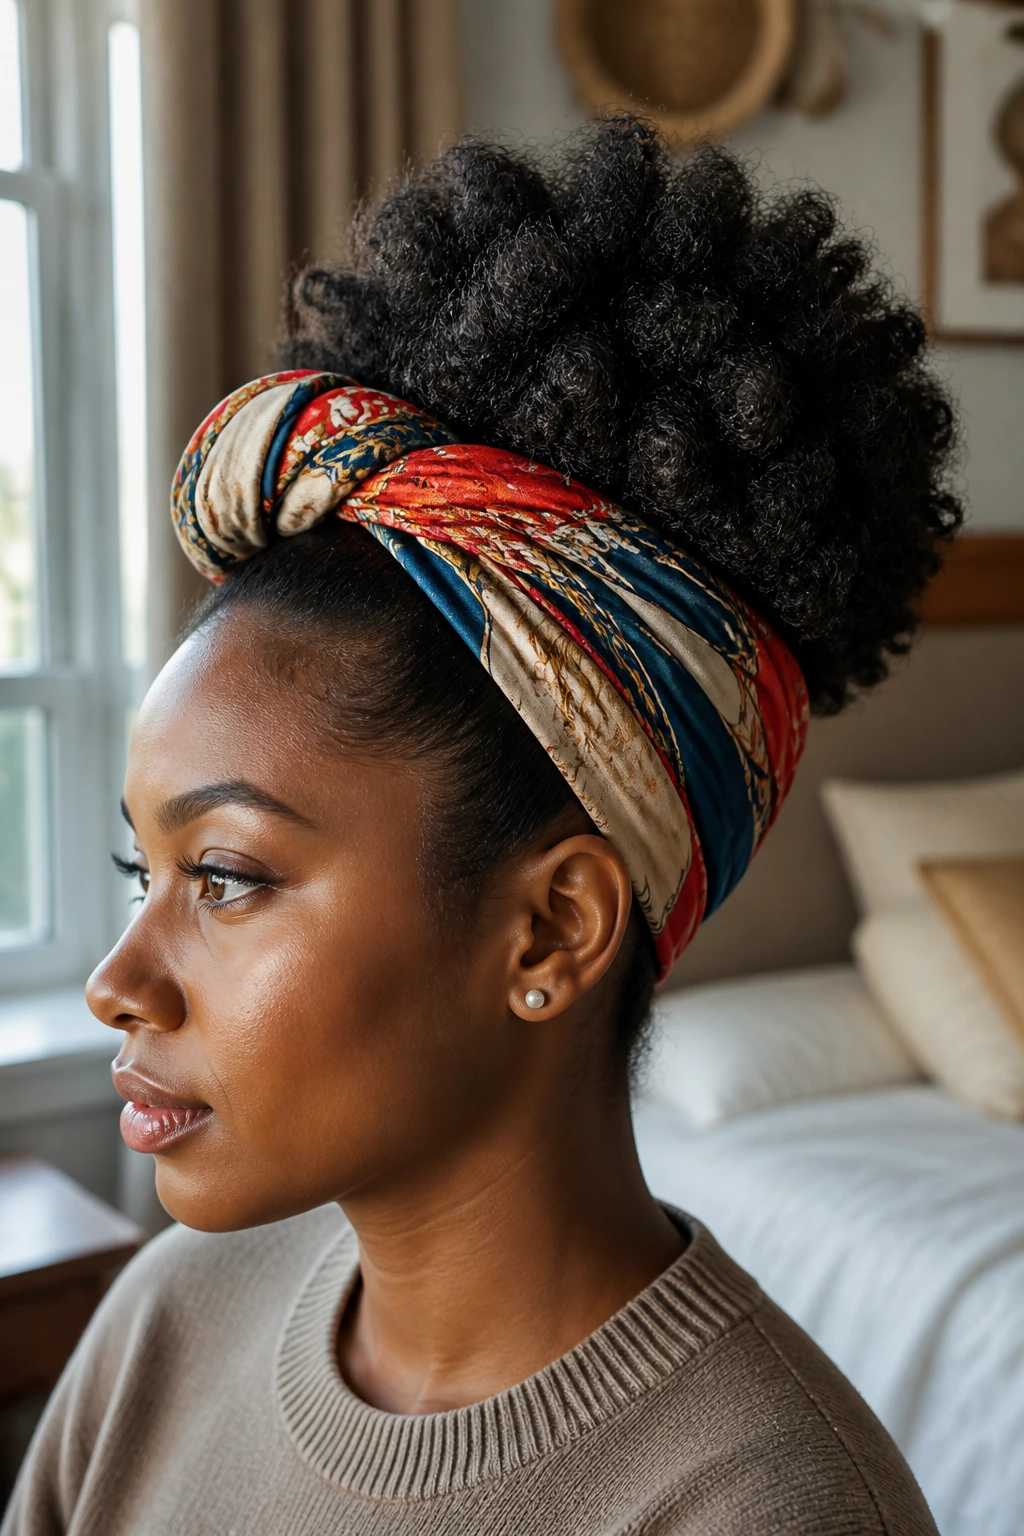
Sometimes the smartest style is the one that admits the hairline needs a break. A scarf-wrapped puff gives thick hair a clean center shape and lets the scarf do part of the styling work. The puff at the back stays full, while the wrap adds color, control, or both.
Use a silk or satin scarf if you want less friction, or a cotton scarf if you care more about the look than the glide. Fold it wide enough to cover the front without squeezing the roots. If the puff itself is already good, the scarf should frame it, not take over.
It is simple. Which is why it works.
What Thick Natural Hair Needs Before You Choose a Style
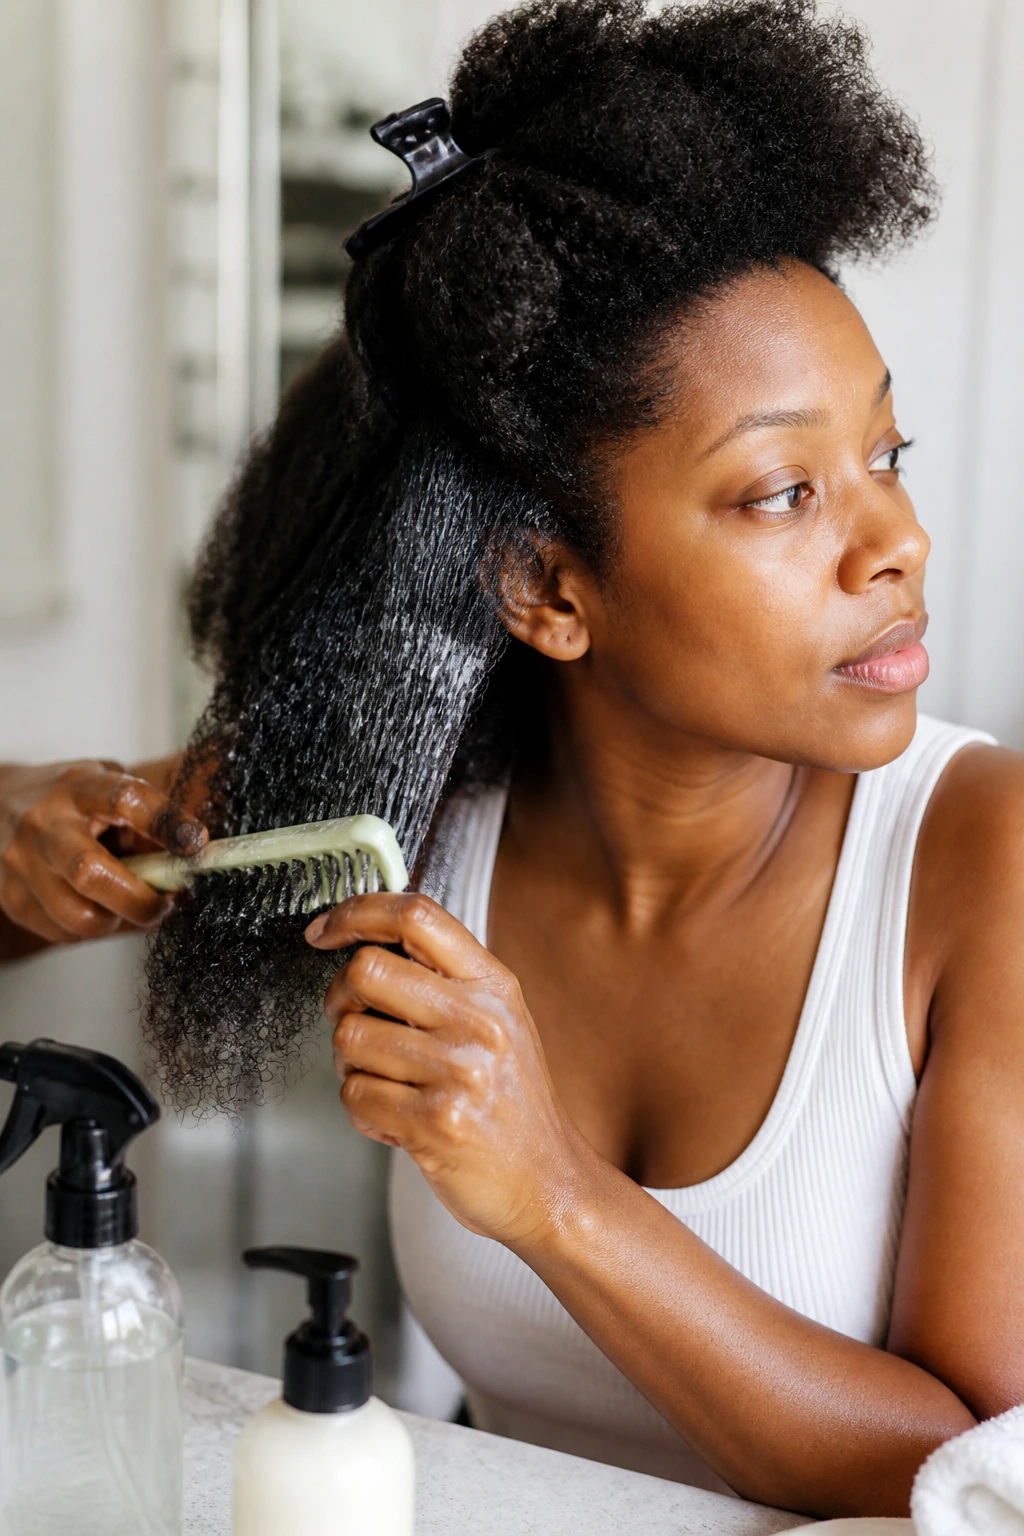
Thick hair is usually at its best when it has been cleaned, detangled, and given a shape-friendly base. That does not mean every style needs a blow-dry or a stretch session. It means the hair should know where it’s going before the styling starts. If the roots are tangled and the ends are dry, even a beautiful style will fight you halfway through the week.
A lot of the styles above lean on sectioning. That’s not an accident. Dense coils need smaller working areas than fine hair does, not because they are delicate, but because they are strong and full. A rat-tail comb, clips, and a little patience can save an hour of rework later.
Moisture matters, too. Not soaking. Moisturized. If the strands feel squeaky or rough when you start, add a leave-in with slip before anything else. If product tends to sit on top of your hair, use less cream and more water-based layers. Thick natural hair can handle richness, but it hates being smothered.
Essential Tools That Save Time and Arms
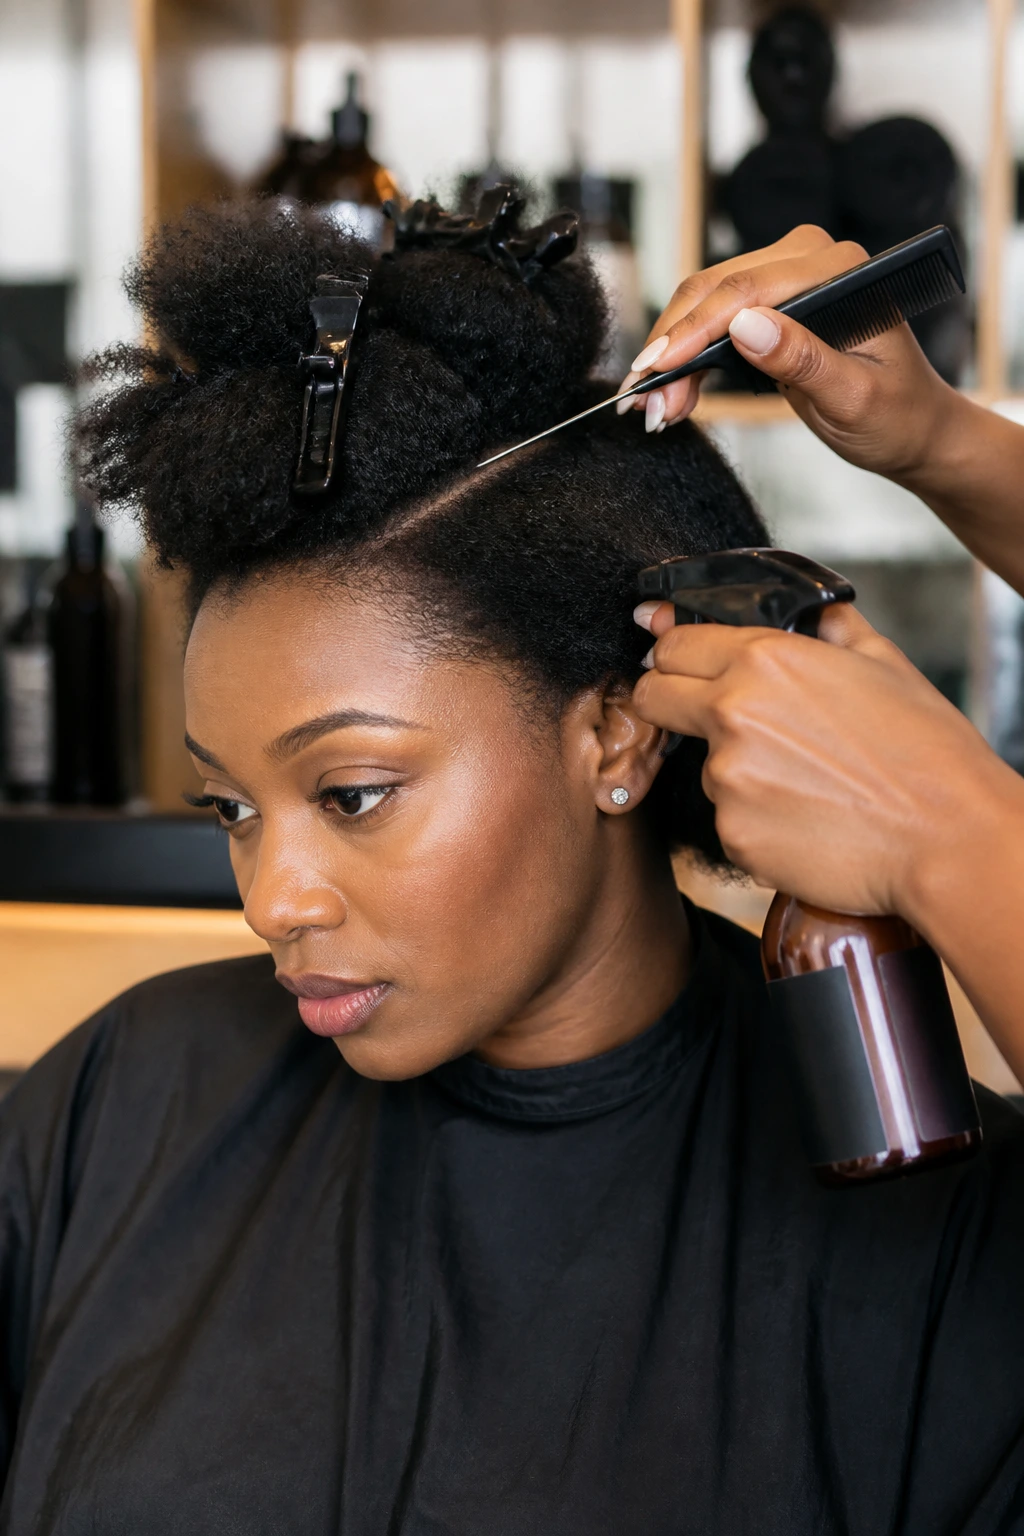
-
Rat-tail comb: Clean parts and neat sections depend on this more than on anything fancy.
-
Wide-tooth comb: Use it after conditioning to detangle without ripping through wet coils.
-
Spray bottle with water: A light mist reactivates product and helps with re-twisting or reshaping.
-
Sectioning clips: They keep the rest of the hair out of your way while you work one small area at a time.
-
Snag-free elastics: Better for puffs and half-up styles than old-school bands with rough seams.
-
Bobby pins and U-pins: These are what make updos behave when the hair wants to spring back.
-
Satin scarf or bonnet: Night protection is not optional if you want styles to last more than one sleep cycle.
-
Hooded dryer or diffuser: Helpful when you do not want a twist-out, rod set, or braid-out to stay damp forever.
-
Claw clip: A quick fix for thick hair that has enough volume to make clip styles look full.
-
Edge brush: Useful for smoothing the hairline, though I prefer light pressure over repeated brushing.
Product Picks and Prep Choices That Actually Help
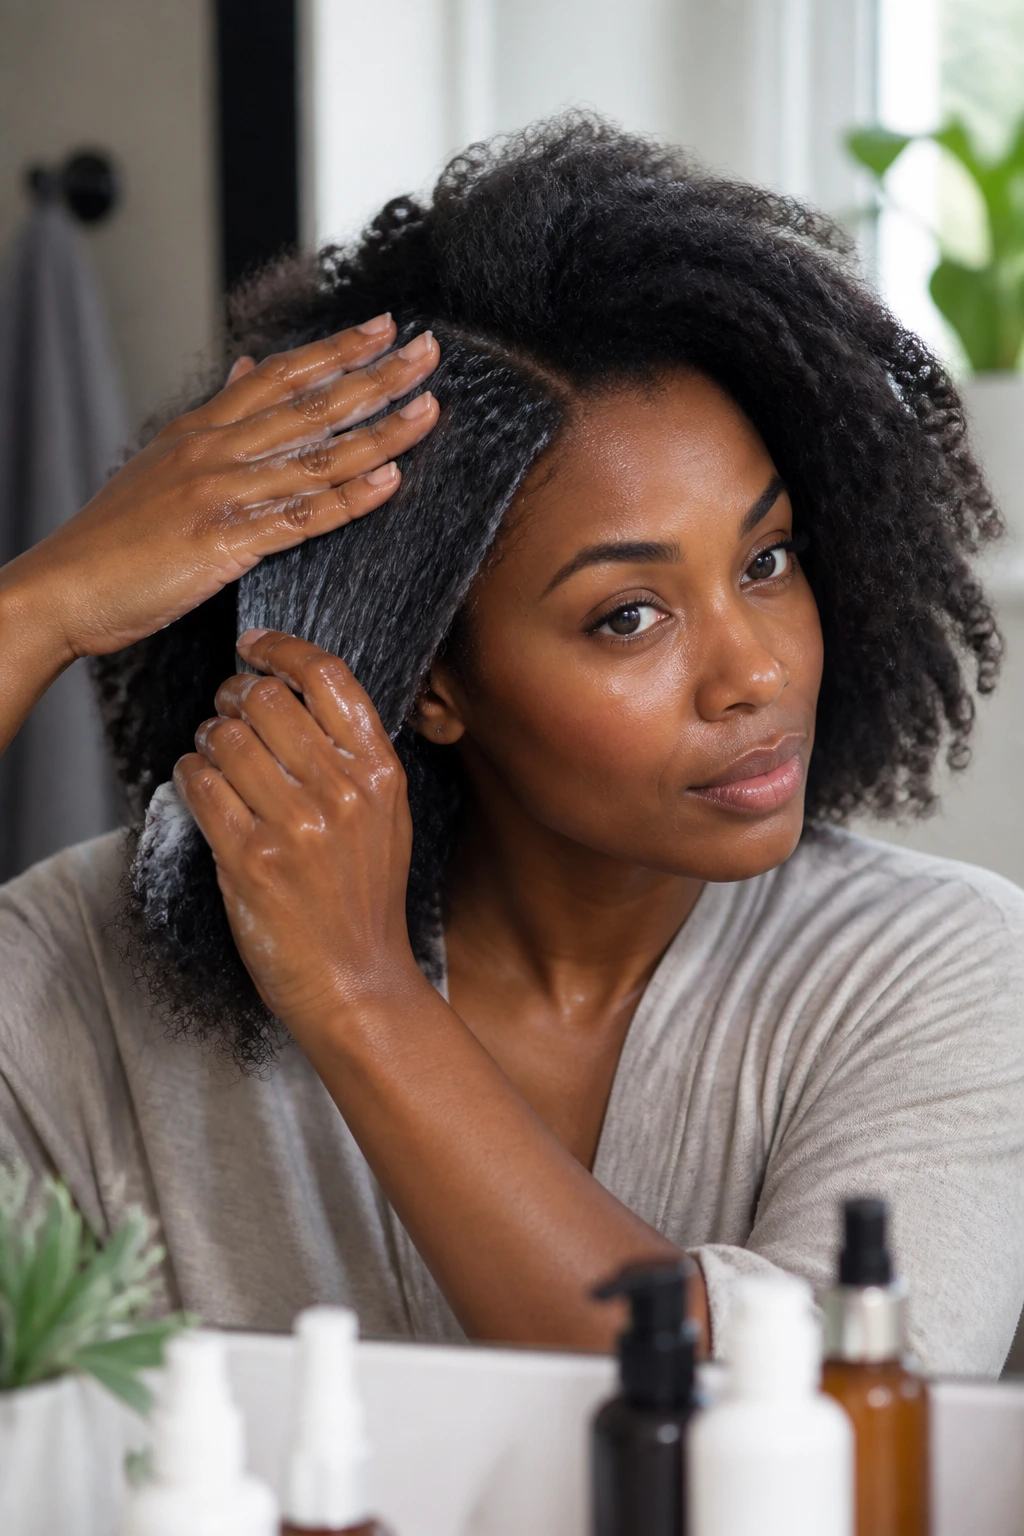
For thick natural hair, product order matters more than brand names. A water-based leave-in usually belongs first because it gets into the strand faster than a heavy cream. After that, choose based on the style. Twists and braids often need a cream with slip. Wash-and-gos want a gel that dries with enough hold to keep clumps together. Rod sets usually behave best with mousse or foaming lotion.
If your hair feels coated but still dry, you’re probably using too much oil and not enough water. That happens all the time. Oil seals, but it does not moisturize on its own. Thick hair can take richer products, yes, but piling on butters before a gel often leaves the surface greasy and the inside thirsty.
One more thing: if a product makes your hair feel sticky in the jar, it will probably feel sticky in your hair too. Trust that instinct.
How to Keep Natural Hairstyles for Thick Hair Fresh Longer
At Night
A satin bonnet or scarf should be the first line of defense. For puffs and updos, use a loose pineapple or re-wrap the base so the style doesn’t flatten against cotton pillowcases. Twist-outs and braid-outs do better with a pineapple plus a scarf tied around the perimeter to keep the roots from spreading out.
Midweek Reset
Do not drench the hair every morning. A light mist from a spray bottle, a little finger fluff, and a re-pin of the front is usually enough. If the style starts to frizz at the crown, work on the crown only. The ends usually need less attention than people think.
When It’s Time to Start Over
Twist-outs and braid-outs often look best for 3 to 5 days, depending on humidity and how much you touch them. Puffs may need a small refresh after 1 or 2 days. Cornrows, flat twists, and braid-based protective looks can last 1 to 2 weeks if the scalp stays clean and the tension was gentle from the start. Rod sets and finger coils need the most careful drying up front, but they can stay neat for several days if you leave them alone.
Common Mistakes That Make Thick Natural Hair Puff Out Too Soon
-
Using sections that are too big: The style looks rushed, the parts disappear, and twists or braids unravel faster. Go smaller than you think you need, especially at the crown.
-
Styling before the hair is fully dry: Damp roots make twist-outs frizz, rod sets droop, and braid-outs puff from the inside. If the set still feels cool or soft in the middle, keep drying.
-
Smothering the hair with heavy products: Too much butter or oil can make the surface look shiny but flat, and the style often turns sticky instead of defined. Use enough for slip, not a whole jar.
-
Pulling puffs and buns too tight: A neat base is one thing. Pain and edge breakage are another. If the style gives you a headache, it is not secured better — it is secured worse.
-
Skipping night protection: Cotton strips moisture fast and roughs up the surface. A satin scarf or bonnet keeps the style from fraying before you’ve had a chance to wear it.
Variations and Adaptations to Try
The Short-Length Version
Mini twists, finger coils, and flat twists are the friendliest options if your hair is short or you’re growing out a tapered cut. They sit close to the head and use the natural density of thick hair without asking for length you don’t have yet.
The Low-Tension Version
If your scalp hates tight styles, lean into puffs, halo braids, claw-clip updos, and scarf wraps. They keep the hair in place without putting the whole load on the edges and temples. That matters more than people admit.
The Heat-Stretched Version
A light blow-dry, banding, or braiding on stretched hair makes twist-outs, braid-outs, and rod sets last longer. The hair looks a little longer, the parts show cleaner, and the final shape usually survives humidity better.
The Event-Ready Version
Add beads, cuffs, a deep side part, or a sleek scarf to turn a simple style into something sharper. Thick hair gives you enough base to support accessories without looking overdone. The accessories should frame the style, not bury it.
The Gym-Friendly Version
Cornrows into a bun, a secure high puff, or a tucked-up frohawk hold up better when sweat is part of the day. These styles keep the ends controlled and the hairline less exposed, which makes the post-workout reset much easier.
Frequently Asked Questions
Which style lasts the longest on thick natural hair?
Mini twists, cornrows, flat twists, and braid-based protective styles usually last the longest because the hair is tucked away and not being separated every day. If you want the style to keep its shape, start with a clean part and protect it at night.
What if my hair shrinks the moment I finish styling it?
That usually means the hair started too damp or too un-stretched for the style you chose. Try banding, braiding, or a gentle blow-dry first, then choose styles like twist-outs, puffs, or rod sets that work with a little shrinkage instead of against it.
Can thick 4c hair do a wash-and-go without looking fuzzy?
Yes, but the product application has to be deliberate. Use wet sections, define the curls one area at a time, and let the cast form before you touch the hair again. A rushed wash-and-go on dense coils usually turns into frizz because the clumps never got the chance to set.
How do I keep a high puff from sliding down?
Use a snag-free band with enough grip, smooth the base first, and anchor the puff where the crown is widest. If the hair is slippery, a little gel at the perimeter helps more than coating the whole head. Two wraps of the band is often enough; more than that can create breakage.
Are these styles protective?
Some are, some aren’t. Twists, braids, cornrows, tuck-and-roll updos, and flat-twist styles are more protective because the ends are tucked away. A wash-and-go or afro style can still be healthy, but it asks for more daily handling.
What if my twist-out turns puffy too fast?
The usual culprits are sections that were too big, hair that wasn’t fully dry, or too much touching after separation. Try twisting on stretched hair, drying longer, and separating only once or twice. The goal is shape, not endless fluffing.
Can I do these styles on hair that’s short and thick?
Absolutely. Mini twists, finger coils, flat twists, puffs, and small rod sets work well on shorter thick hair because the density gives the style enough presence. If the length is very short, choose styles that sit close to the scalp and don’t rely on hanging length.
How often should I redo cornrows or twists?
That depends on scalp comfort and growth, but most people redo them when the roots start bunching or the parts stop lying flat. For many heads of thick natural hair, that means about 1 to 2 weeks for cornrows and a bit less for styles that stay loose at the ends.
The Styles That Let Thick Hair Breathe
Thick natural hair looks best when the style stops pretending it should behave like something smaller. The whole point is not to flatten it into submission. It’s to give it a shape that makes sense on day one and still looks good when the air gets humid, the scarf slips, or the roots start to wake up.
The styles that keep winning in real life are the ones that respect the hair’s size, texture, and appetite for movement. Some are neat. Some are fluffy. Some sit close to the scalp and some lean all the way into volume. Pick the one that matches the day instead of the one that asks your hair to be less of itself, and you’ll spend a lot less time fighting your mirror.
