



Short hair can look timid when it’s cut without a point of view. A good pixie cut for short hair does the opposite: it places the line exactly where the eye should go, keeps the nape clean, and lets the top carry the personality.
That matters because a pixie exposes everything. Your hair density. Your cowlicks. The shape of your ears. Even the way your fringe falls when it dries crooked on a humid morning. The difference between chic and awkward can be a quarter inch at the temple or a slightly softer corner around the ears. Tiny things. Annoying things. The kind that matter.
These 32 pixie cuts cover the whole range, from whisper-short crops to shaggy, face-framing versions that grow out with some grace. Some are neat. Some are a little rebellious. A few are the sort of cut you get when you want the back of your neck to feel air instead of hair.
Why These Pixie Cuts Work Across Real Hair
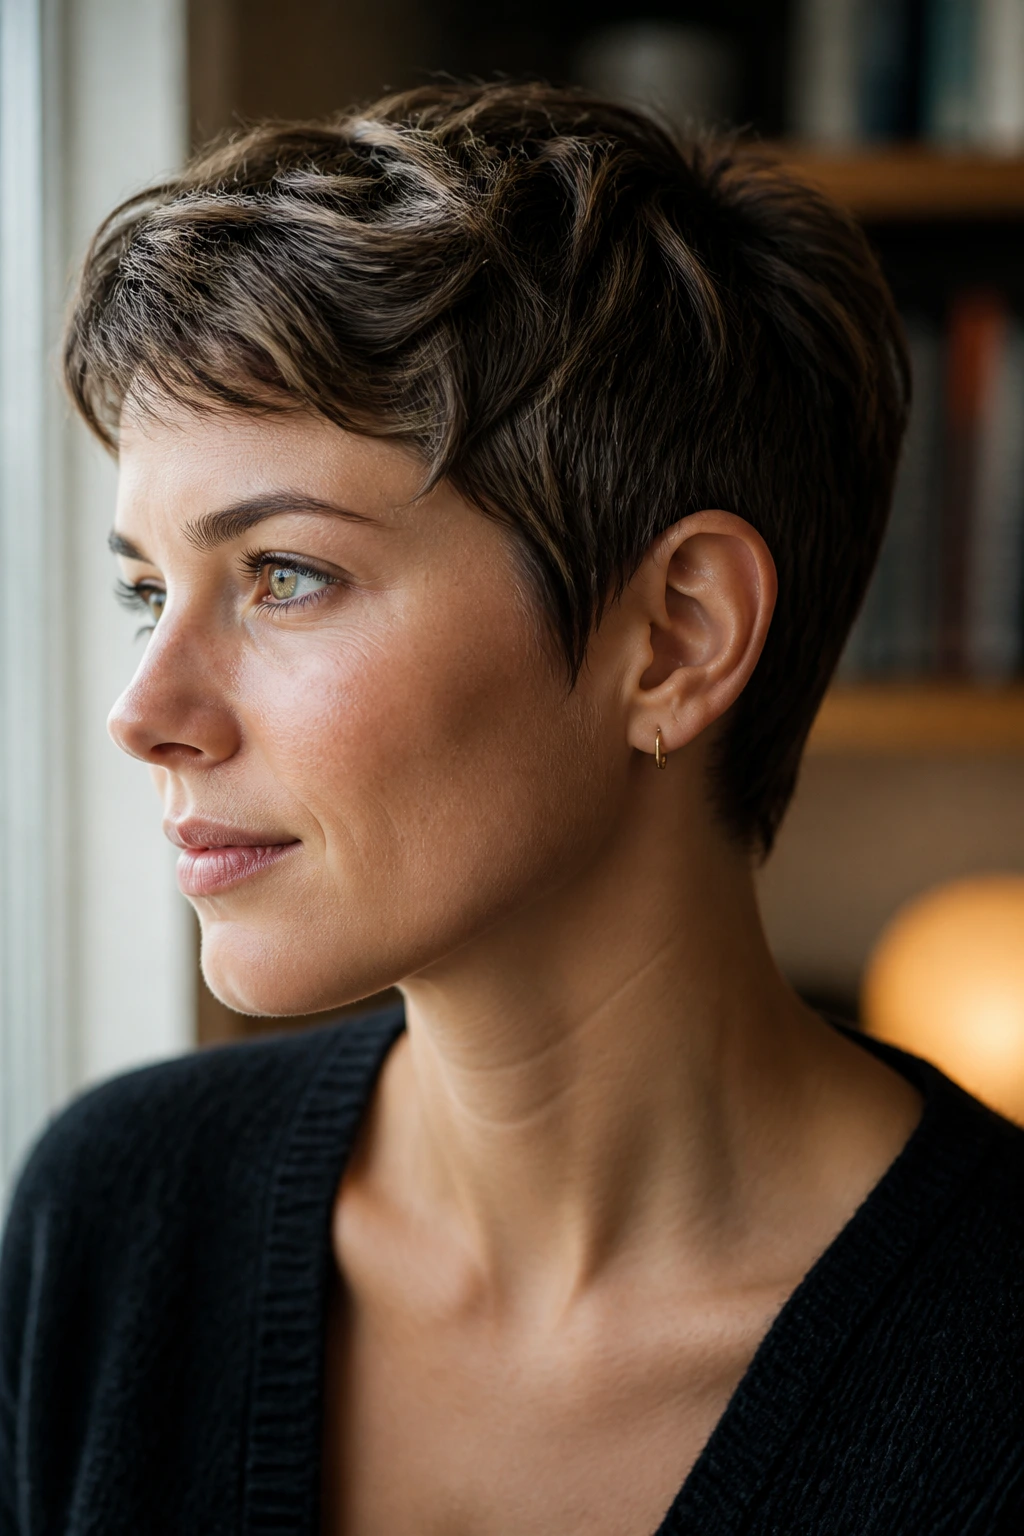
- Texture First: These styles make room for straight, wavy, curly, and coily hair, because a pixie only looks good when it respects the hair you already have.
- Not One Mood: The lineup runs from soft and airy to sharp and sculpted, so you can pick a cut that matches your face and your patience level.
- Easy to Tweak: A half-inch more fringe, a tighter nape, or a deeper side part changes the whole read of a short cut.
- Salon-Friendly Language: Each style gives you a real way to describe the shape, so you can ask for the cut without waving your hands around and hoping for the best.
- Grow-Out Tolerant: Several of these pixies slide into a bixie or short bob without turning into a mullet-shaped regret.
- Low Product, High Shape: A lot of these cuts look better with a pea-sized amount of paste or mousse than they do with a heavy hand and half a jar of gel.
1. Classic Side-Swept Pixie
The classic side-swept pixie is the one I’d hand to someone who wants short hair but still wants movement around the face. The top usually sits around 2 to 3 inches long, with the fringe brushed across the forehead and the sides tapered close enough to keep the outline neat.
It works because the shape does not ask for perfection. You can finger-dry it, tuck one side behind the ear, or add a little cream and let it settle where it wants. Ask for the front to stay a touch longer than the crown if you want that soft sweep instead of a stiff, helmety line.
- Best for: Oval, heart, and narrow faces.
- Styling note: A deep side part gives it more lift without extra product.
- Watch out for: Cutting the fringe too short on the first pass; once it’s gone, it’s gone.
2. Textured Choppy Pixie
Fine hair gets a huge favor from choppy ends. Instead of one clean, smooth line, this pixie uses point-cut layers and a little irregularity to create movement, which makes the hair look fuller without making it puffy.
The trick is to keep the texture intentional, not ragged. You want little pieces to break up the surface, especially at the crown and fringe, while the nape stays tidy. A matte paste rubbed between the palms and pressed into the ends gives this cut its best shape. Too much shine and it starts to look flat; too much product and you lose the airy edge that makes it work.
3. Feathered Pixie With Soft Ends
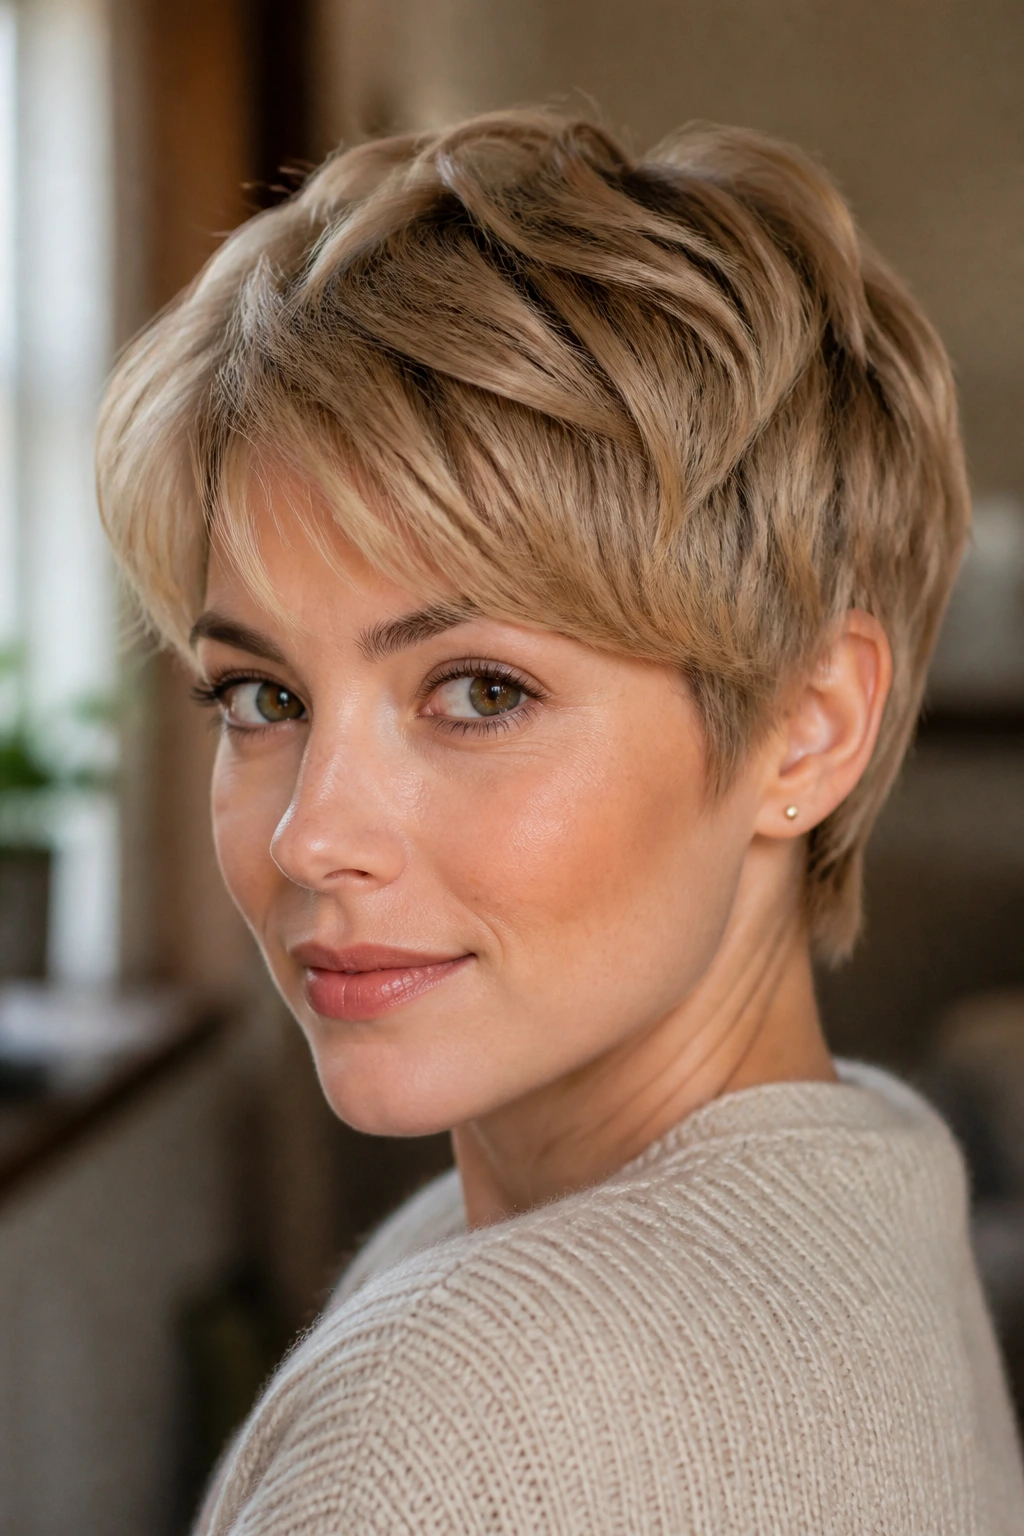
A feathered pixie is the haircut equivalent of lowering the volume. The edges are softened, the top is lightly layered, and the perimeter around the ears and neck feels less blunt than a classic crop.
That softness is the point. It flatters people who want short hair but do not want anything severe near the jawline. It also grows out with less fuss than a harder-edged cut, because the shape already has some give built into it. A lightweight styling cream or a touch of leave-in conditioner keeps the feathering from looking dry or wispy.
4. Tapered Nape Pixie
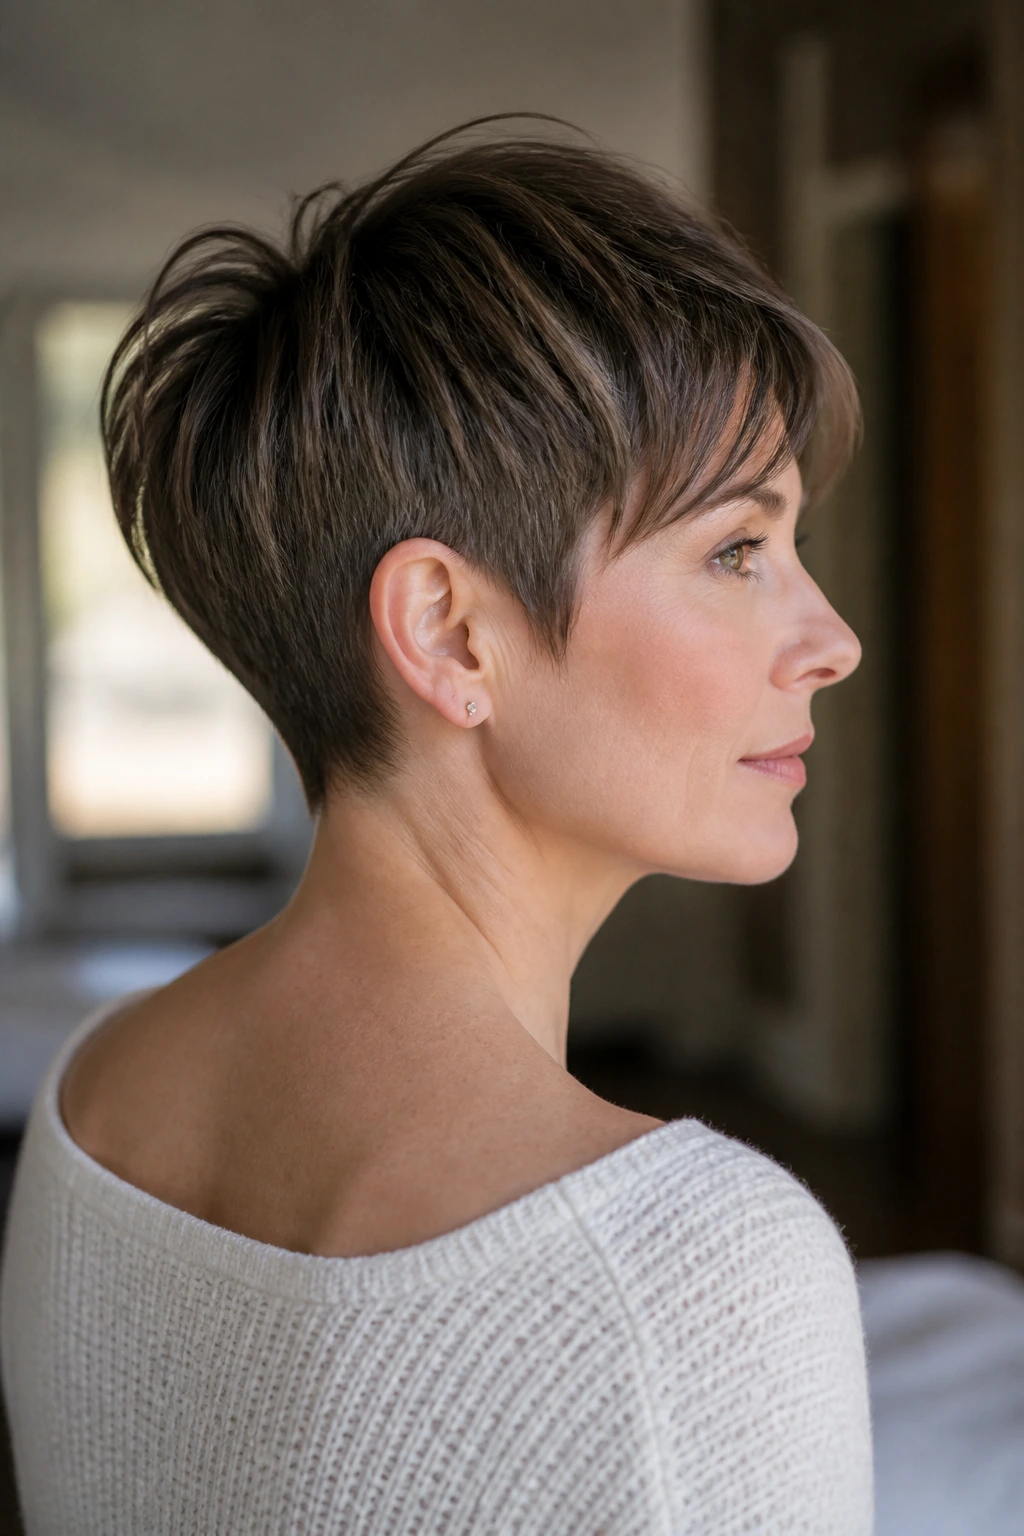
The nape is the part people forget, and it’s often the part that makes or breaks a pixie. A tapered nape version keeps the back of the neck close and clean while allowing the top to stay slightly longer and more flexible.
That contrast makes the whole cut read as deliberate. Thick hair especially benefits here, because the tapered neck removes bulk where it gathers fastest. Ask your stylist to leave the taper soft rather than shaved if you want the grow-out to stay graceful. A hard line at the neck can look sharp for two weeks and then turn fussy. Soft taper. Better payoff.
What to ask for
Ask for the nape to be tapered into the natural hairline, not cut blunt. Keep the top long enough to move but short enough to sit without a lot of brushing.
5. Undercut Pixie
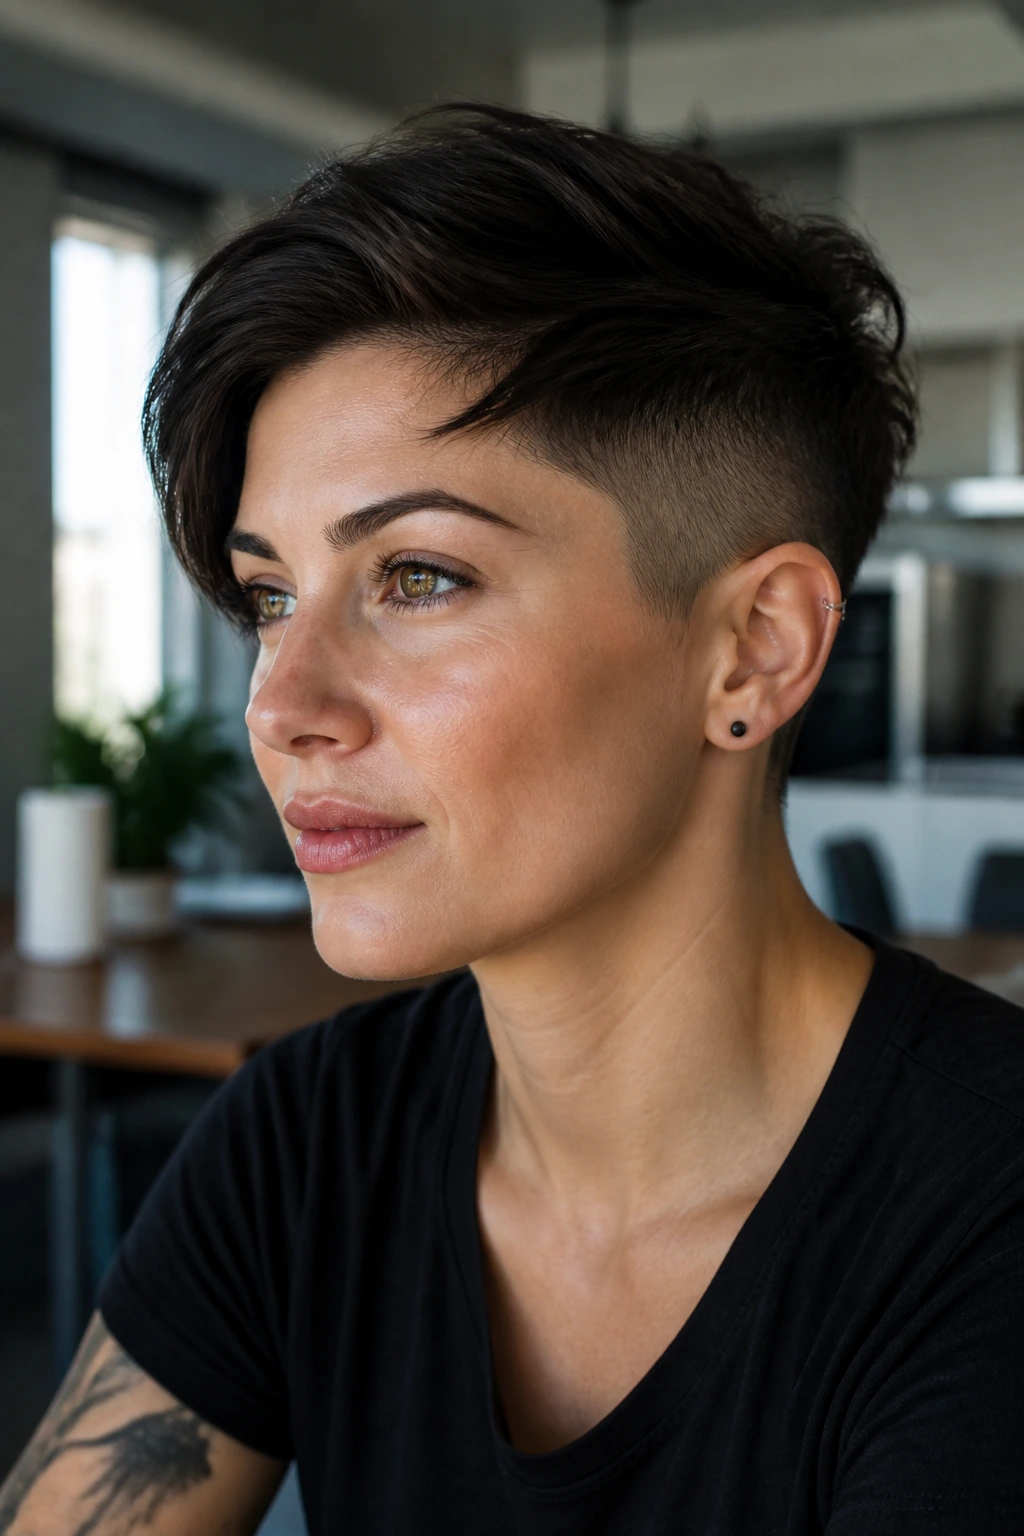
An undercut pixie earns its keep the moment the weather turns warm or your hair starts trying to expand sideways. The sides and nape are clipped or clipped very close, while the top stays longer and can be swept, flipped, or tousled depending on the day.
This is the cut for dense hair that needs control, not more shape on the surface. It also gives you a cleaner silhouette under hats and collars, which sounds like a small thing until you’ve lived with a bulky crop rubbing at the back of your neck. If you want the top to fall forward more easily, keep the front section longer than the crown.
6. Curly Pixie Crop
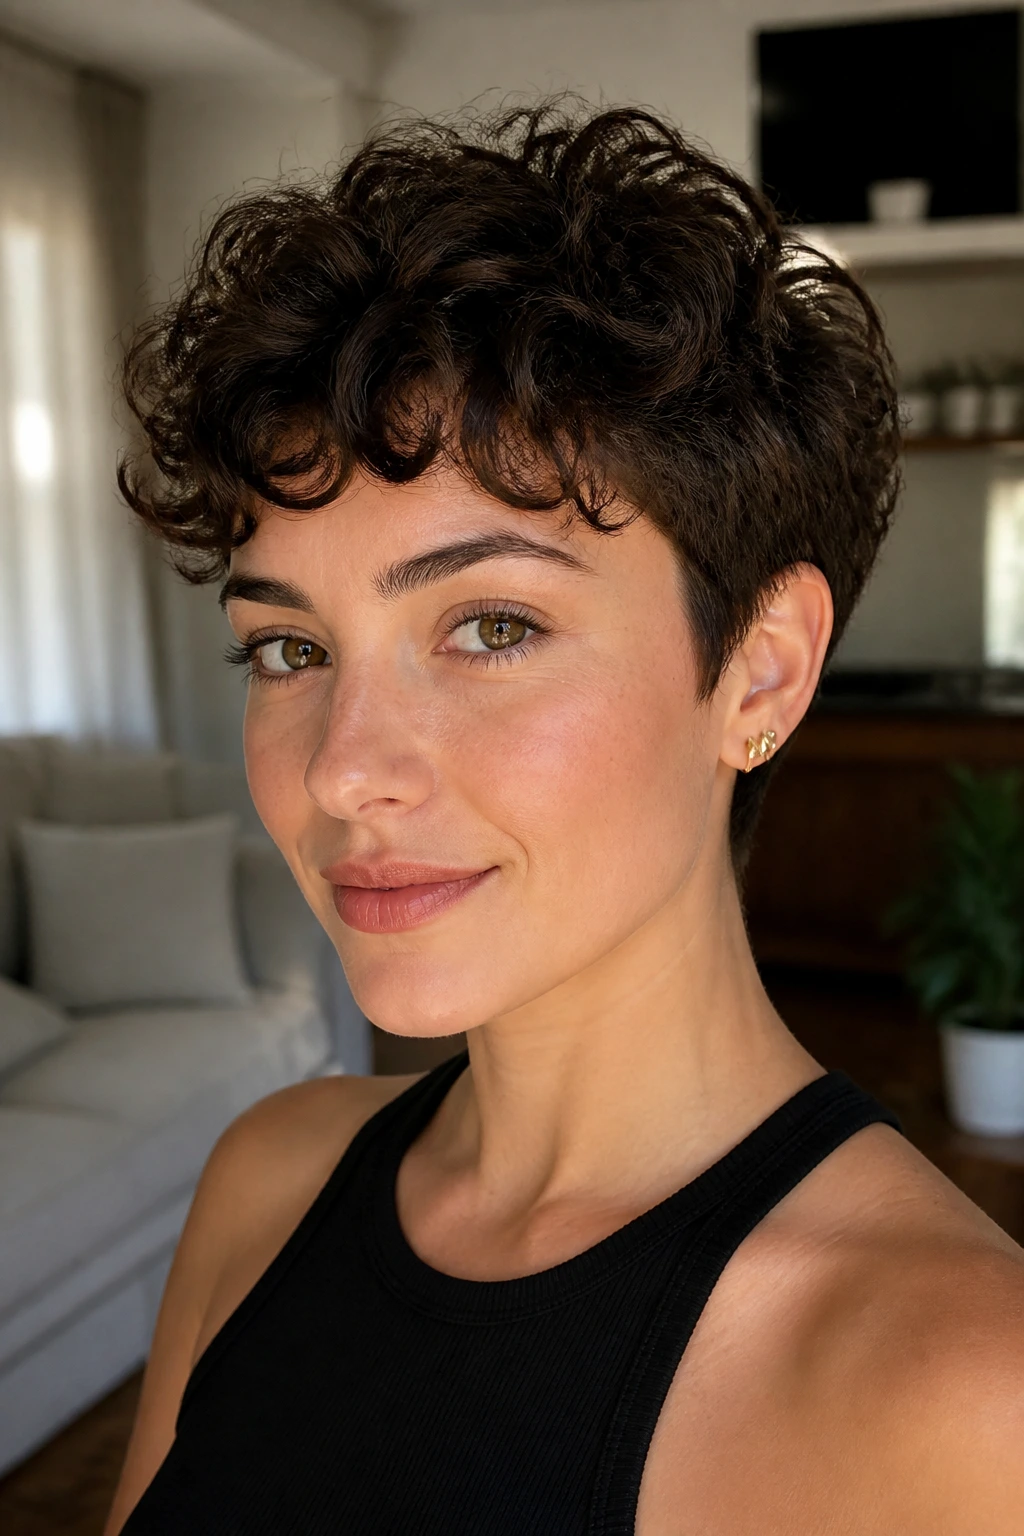
Curly hair does not need to be bullied into a straight-line pixie. It needs room for the curls to spring. A curly pixie crop keeps the top long enough for curl pattern to show, while the sides and nape are shaped so the silhouette still looks neat.
Dry-cutting helps here, because curls sit differently when they’re dry than when they’re wet. That little fact saves a lot of disappointment. A diffuser, a curl cream, and a light gel cast can make the shape feel polished without killing the bounce. If you’ve got a stronger curl at the crown than at the temple, the right cut will balance that instead of fighting it.
7. Wavy Air-Dry Pixie
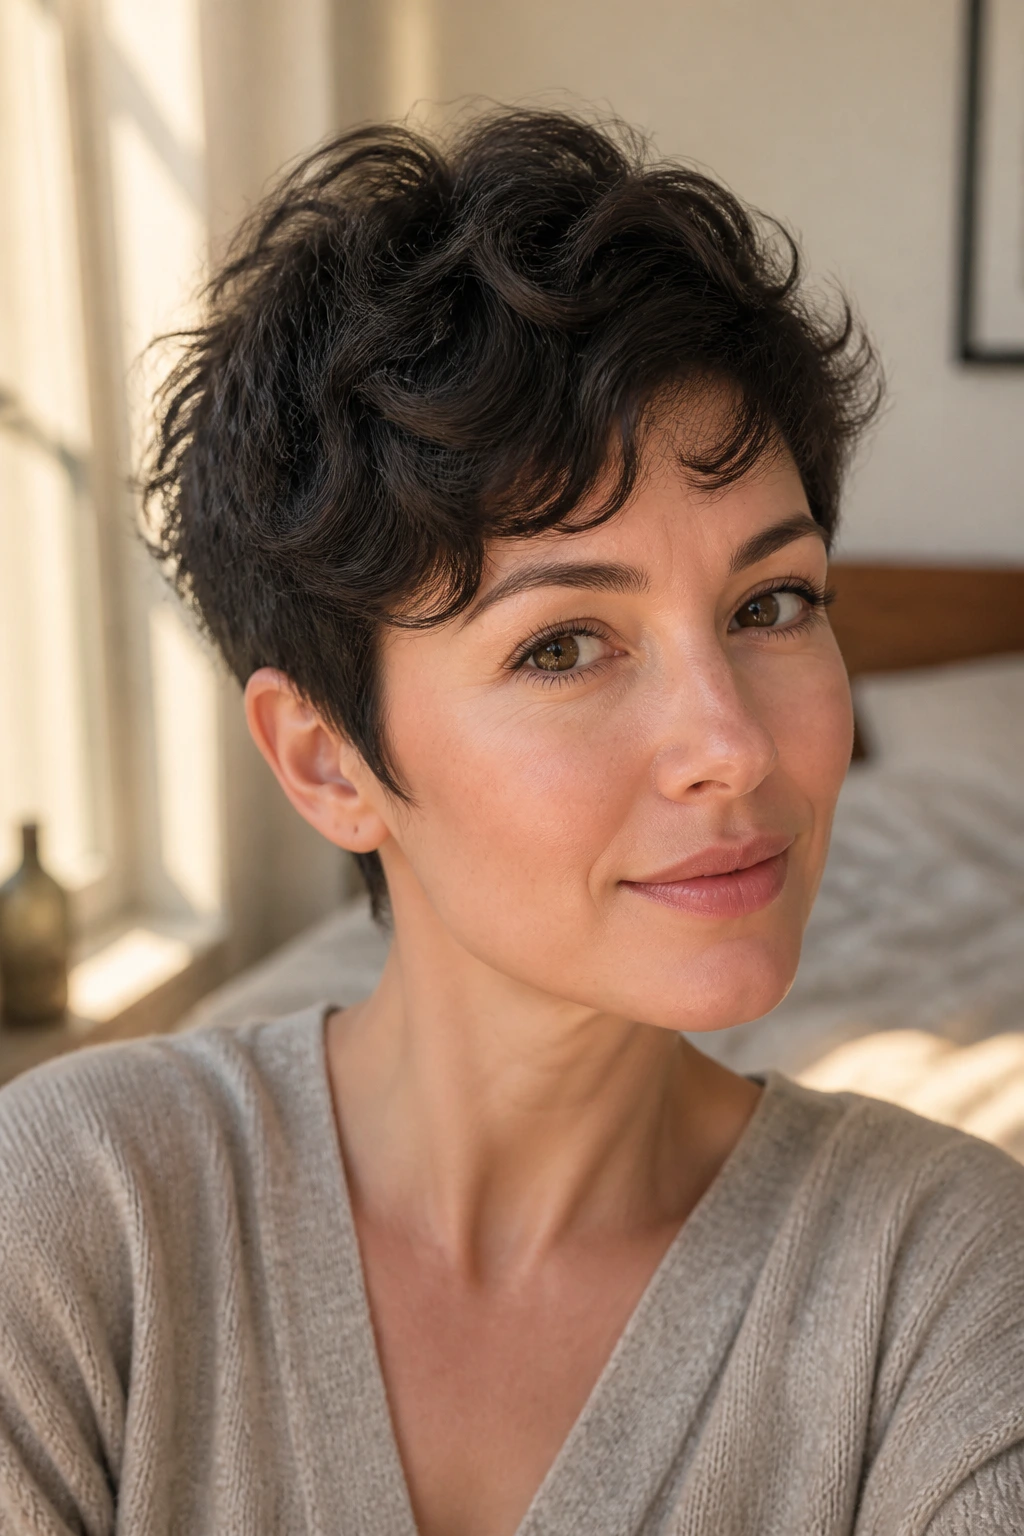
Let the hair dry on its own, and the shape tells you what it wants. That’s the appeal of a wavy air-dry pixie: it uses your natural wave pattern as the styling plan, not as a problem to flatten out.
This cut usually sits softer through the crown and fringe, with just enough internal layering to keep the waves from clumping in one heavy section. A little mousse at the roots and a salt spray through the mid-lengths is enough for most days. If you brush it once it’s dry, you’ll stretch out the wave and lose the shape. Use your fingers. Less drama. Better result.
8. Long-Top Pixie
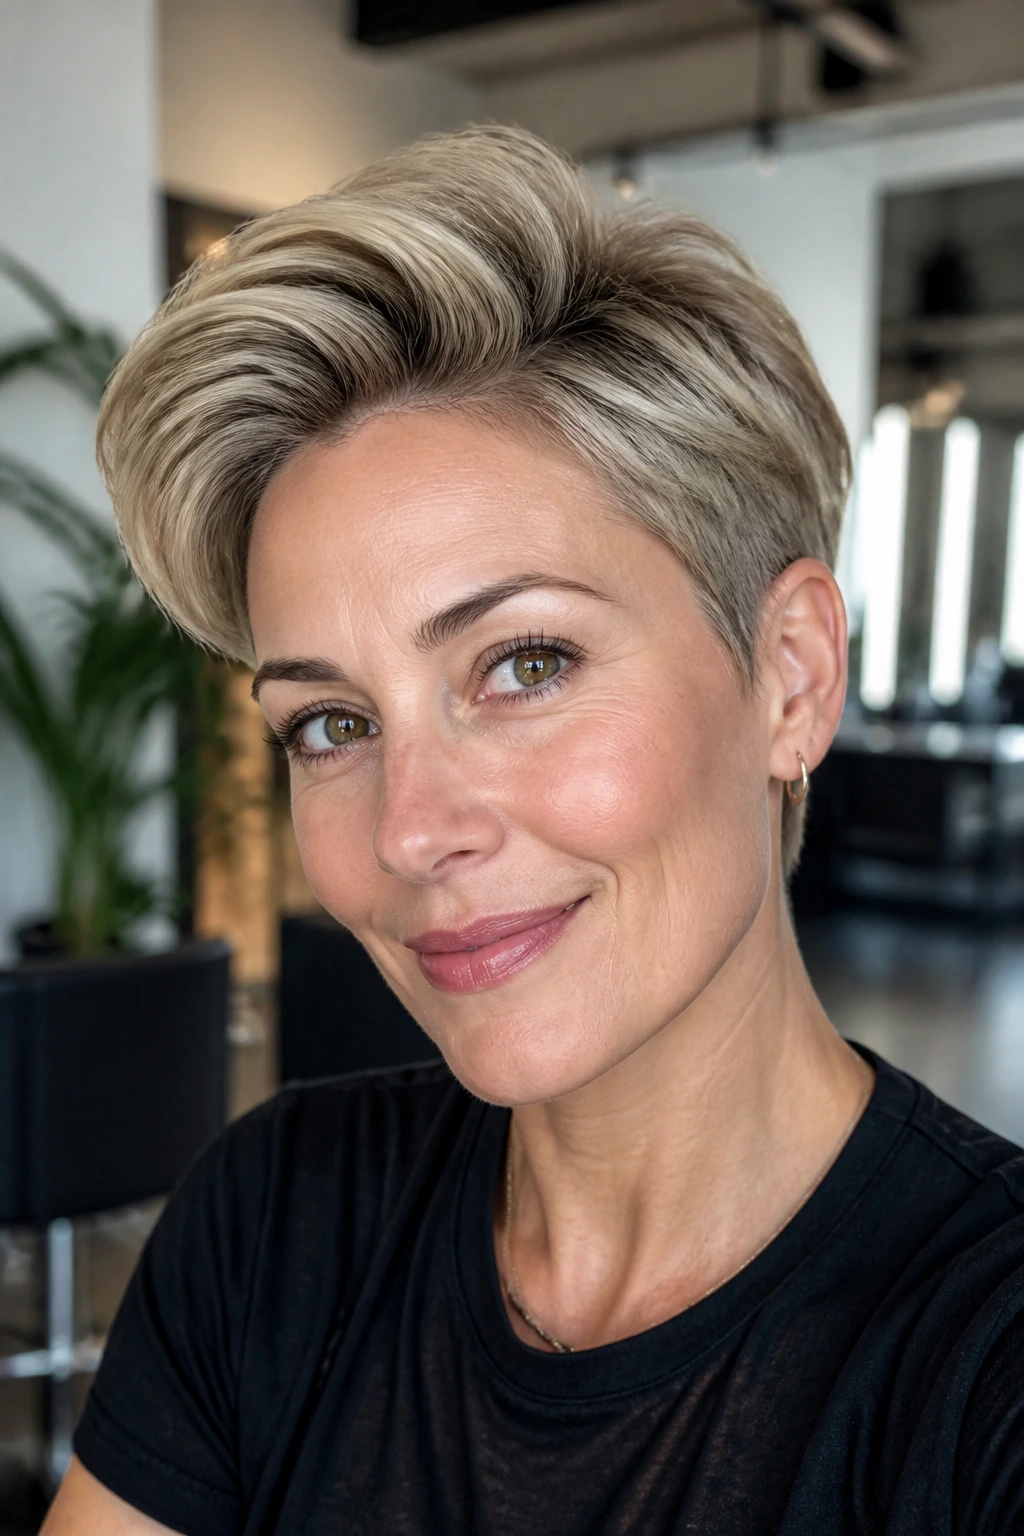
The long-top pixie is basically a shortcut with options. The top can stretch to 4 or 5 inches, which means you can sweep it back, part it deep to one side, or push it forward when you want more fringe.
That extra length makes the cut feel less rigid and more playful. It’s a smart pick if you’re not ready for a micro crop but still want the sides and back to stay short. A blow-dryer pointed upward at the roots, plus a dab of paste at the ends, gives the top enough direction to hold shape without looking lacquered.
Styling note
If the top falls flat, dry it opposite the direction you want first, then switch the part. That tiny bit of resistance creates lift.
9. Asymmetrical Pixie
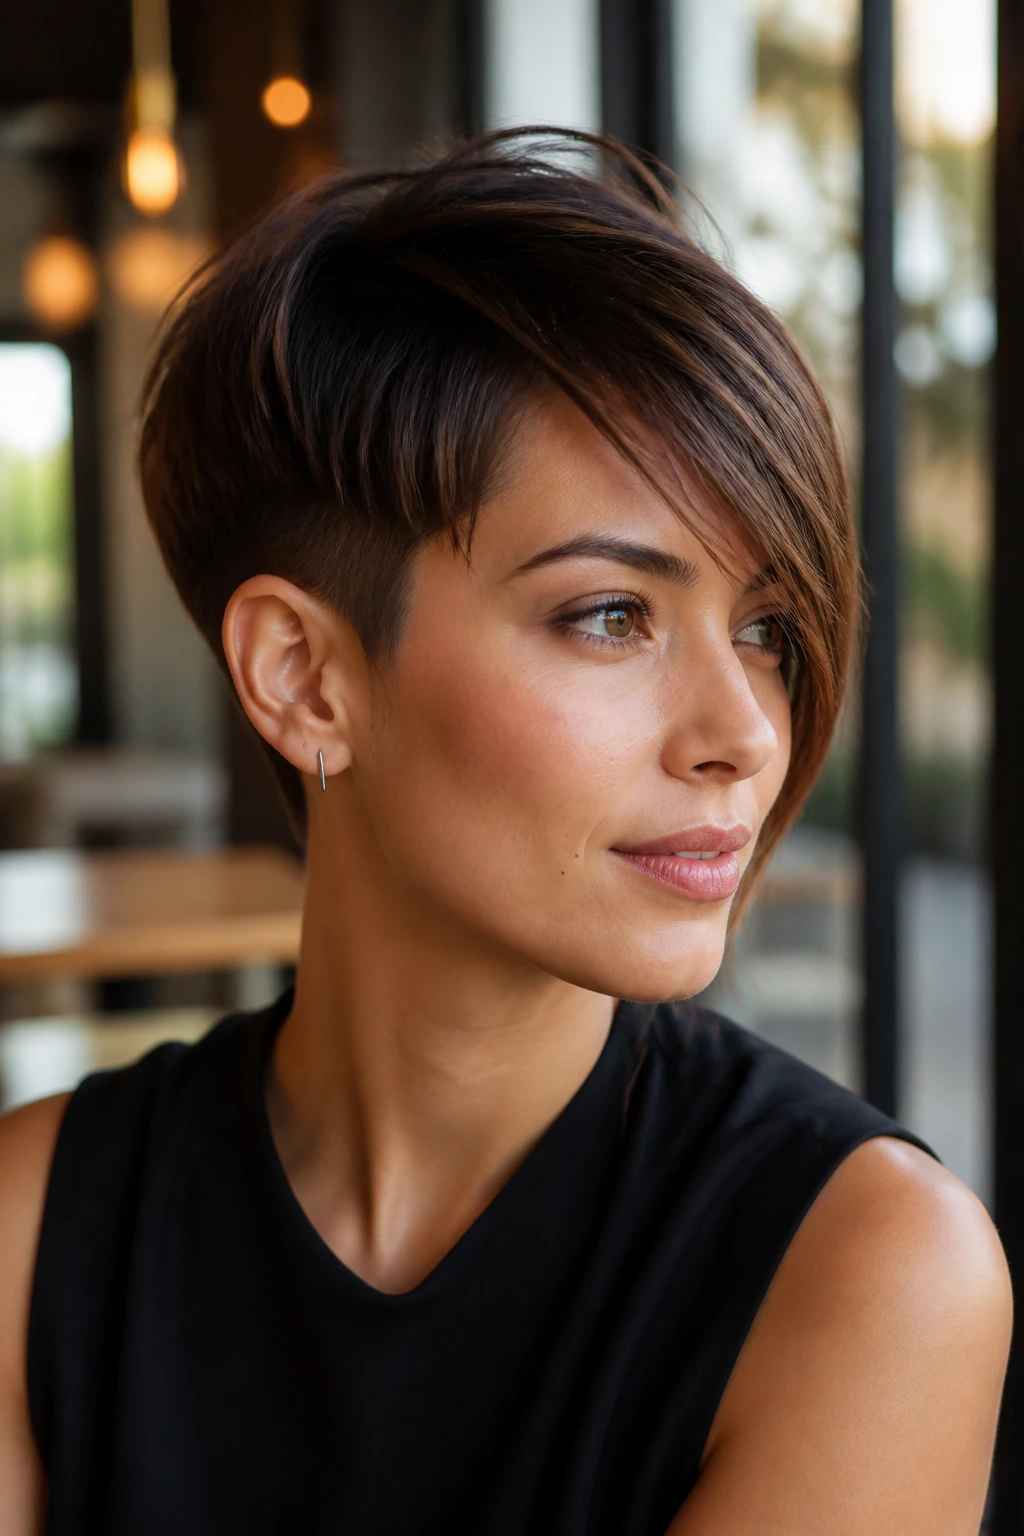
Asymmetry does a lot of quiet work. One side stays longer, or the fringe drops diagonally across the face, and the whole haircut suddenly feels more sculpted than symmetrical versions usually do.
This is a strong move for rounder faces, because the diagonal line gives the eye somewhere to travel instead of stopping at the widest point. It also works well if one side of your hair naturally behaves better than the other. I like asymmetrical pixies when the stylist leaves enough length on the longer side to tuck behind the ear. It keeps the cut from looking too staged.
10. Micro Pixie

A micro pixie is not shy hair. It’s the kind of cut that puts the face out front and does not apologize for it. The length sits very close to the head, often with just a sliver of fringe or a slightly softer top to keep it from feeling severe.
The upside is obvious: almost no styling time. The less obvious upside is how clean the shape can look when the neckline, temples, and crown are all trimmed with care. The downside is also obvious: every growth stage shows. If you like changing your mind every other week, this is not the one.
Best for
Strong features, regular trims, and people who prefer structure over softness.
11. Pixie With Wispy Bangs
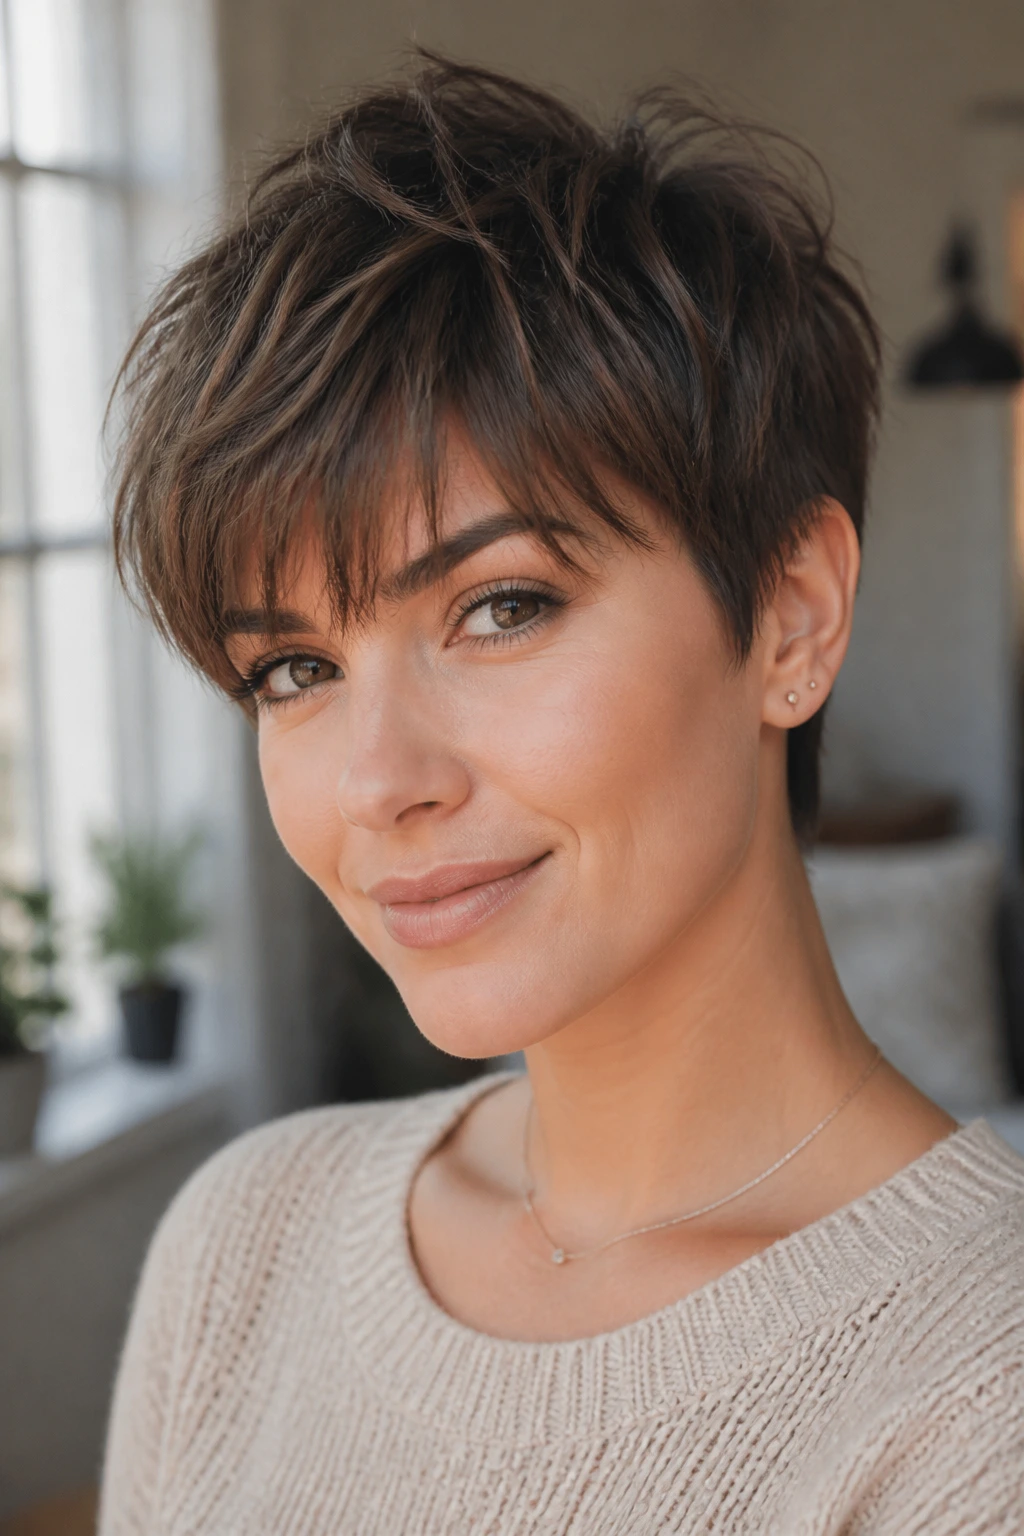
Wispy bangs change the whole mood of a pixie. Instead of a bare forehead or a heavier fringe, you get a softer line that sits lightly over the brows and moves when you turn your head.
This is one of the easiest pixie cuts for glasses wearers, because the fringe can sit just above the frame without crowding it. It also plays nicely with softer jawlines and broader foreheads. Keep the bang section airy, not packed together. If the fringe gets too dense, it loses the lightness that makes this version useful.
12. Shaggy Pixie
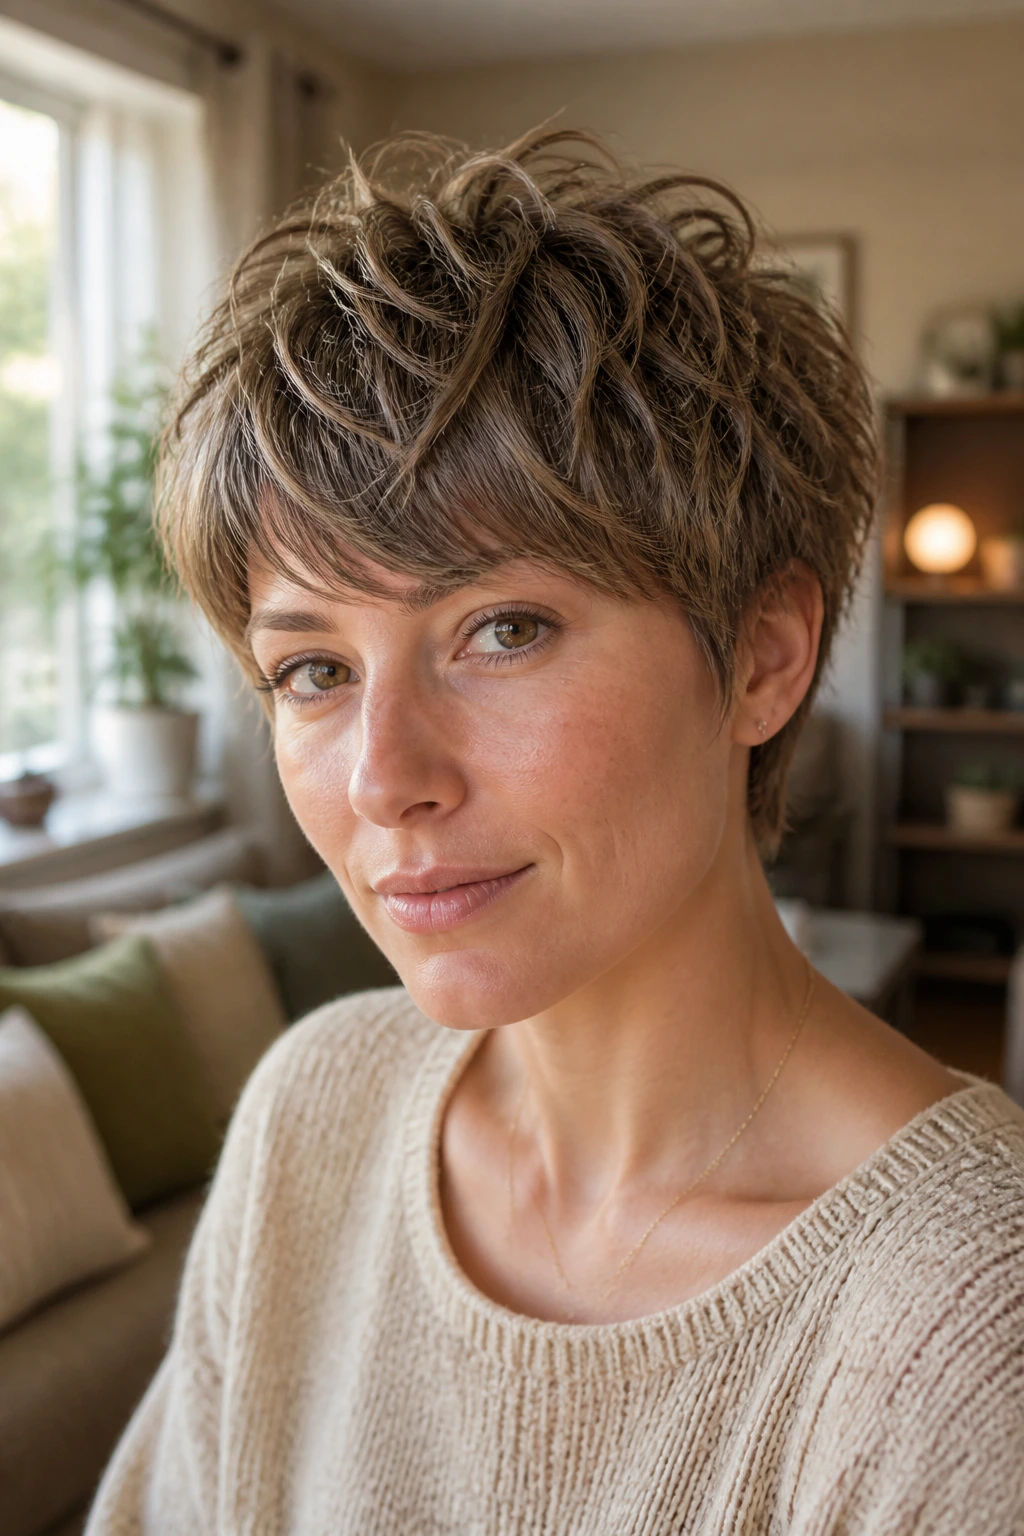
The shaggy pixie is for people who like a little chaos, but not the kind that looks unwashed. Layers live everywhere: crown, sides, fringe. The ends stay rough enough to move, which gives the cut a lived-in feel even when you’ve barely touched it.
It’s especially good on wavy hair, because the texture and the layers do half the work. A texture spray at the roots and a tiny amount of paste on the ends is enough.
Why it doesn’t swallow the face
The trick is keeping the perimeter tapered while the interior stays choppy. If the layers go too far down the sides, the cut turns into a puff instead of a shape. Short, broken-up layers up top. Cleaner lines near the ears.
13. Pixie Bob Hybrid
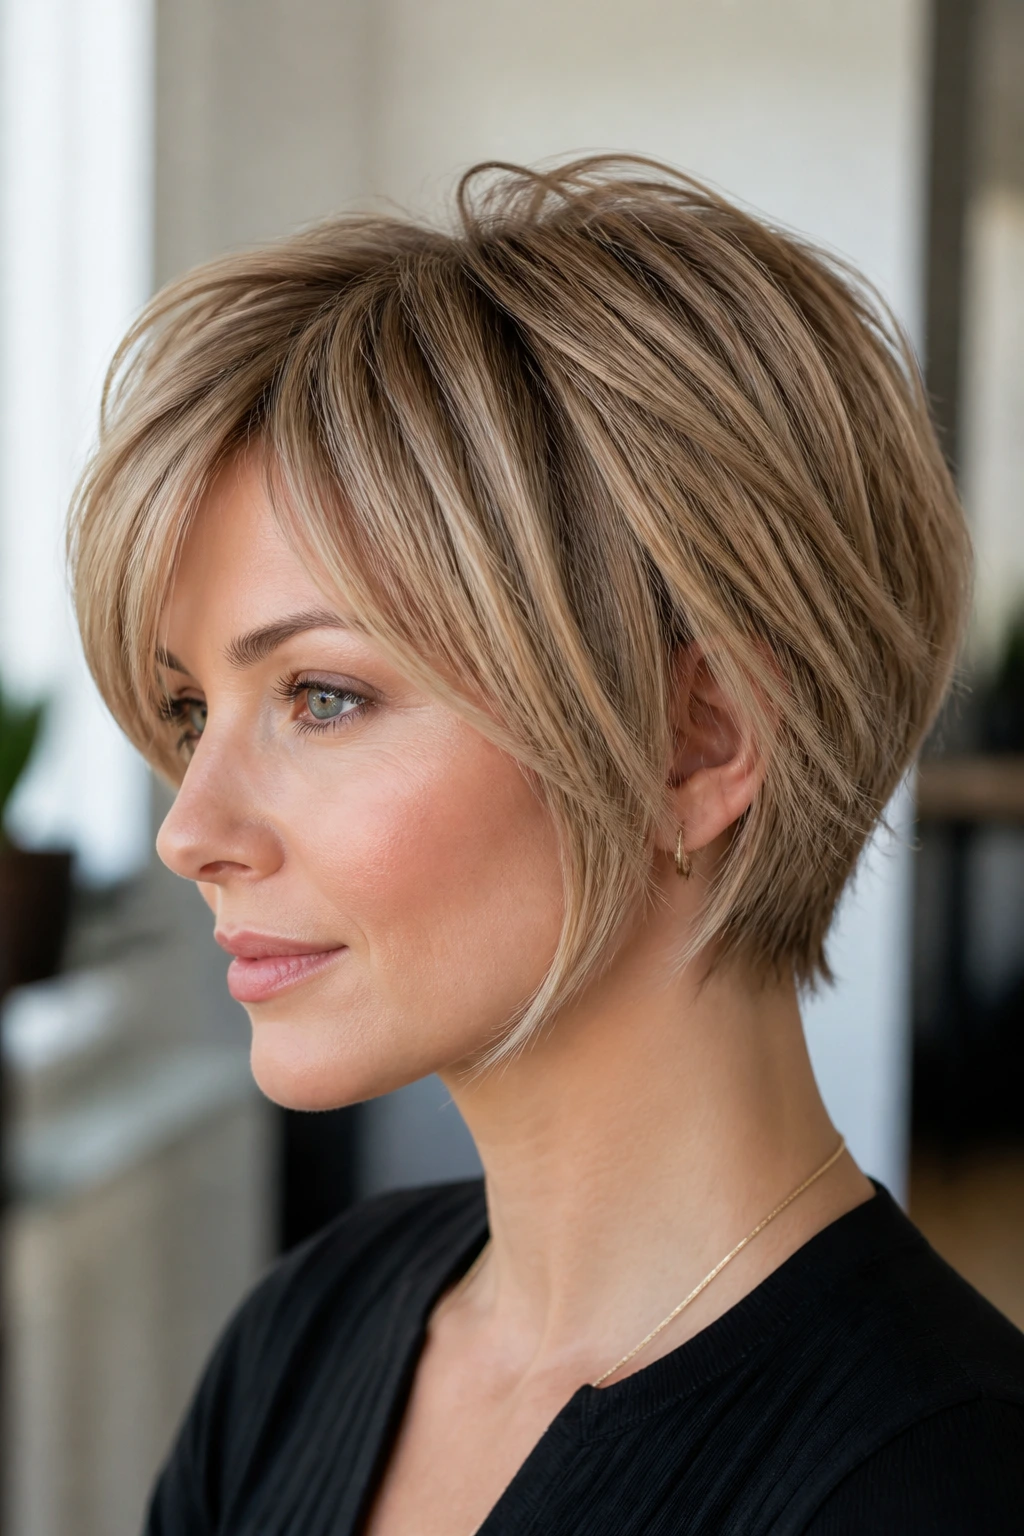
A pixie bob hybrid sits in the middle, and that middle is useful. The back is longer than a classic pixie, the front often drifts toward the jaw, and the whole cut feels less abrupt.
If you want short hair but not too short, this is the bridge cut. It’s also a smart choice for people growing out a tighter pixie, because the silhouette already leans longer and can move toward a bob without an awkward jump. A round brush or quick bend with a flat iron can tuck the ends under or flip them out depending on the mood.
14. Ear-Length Pixie
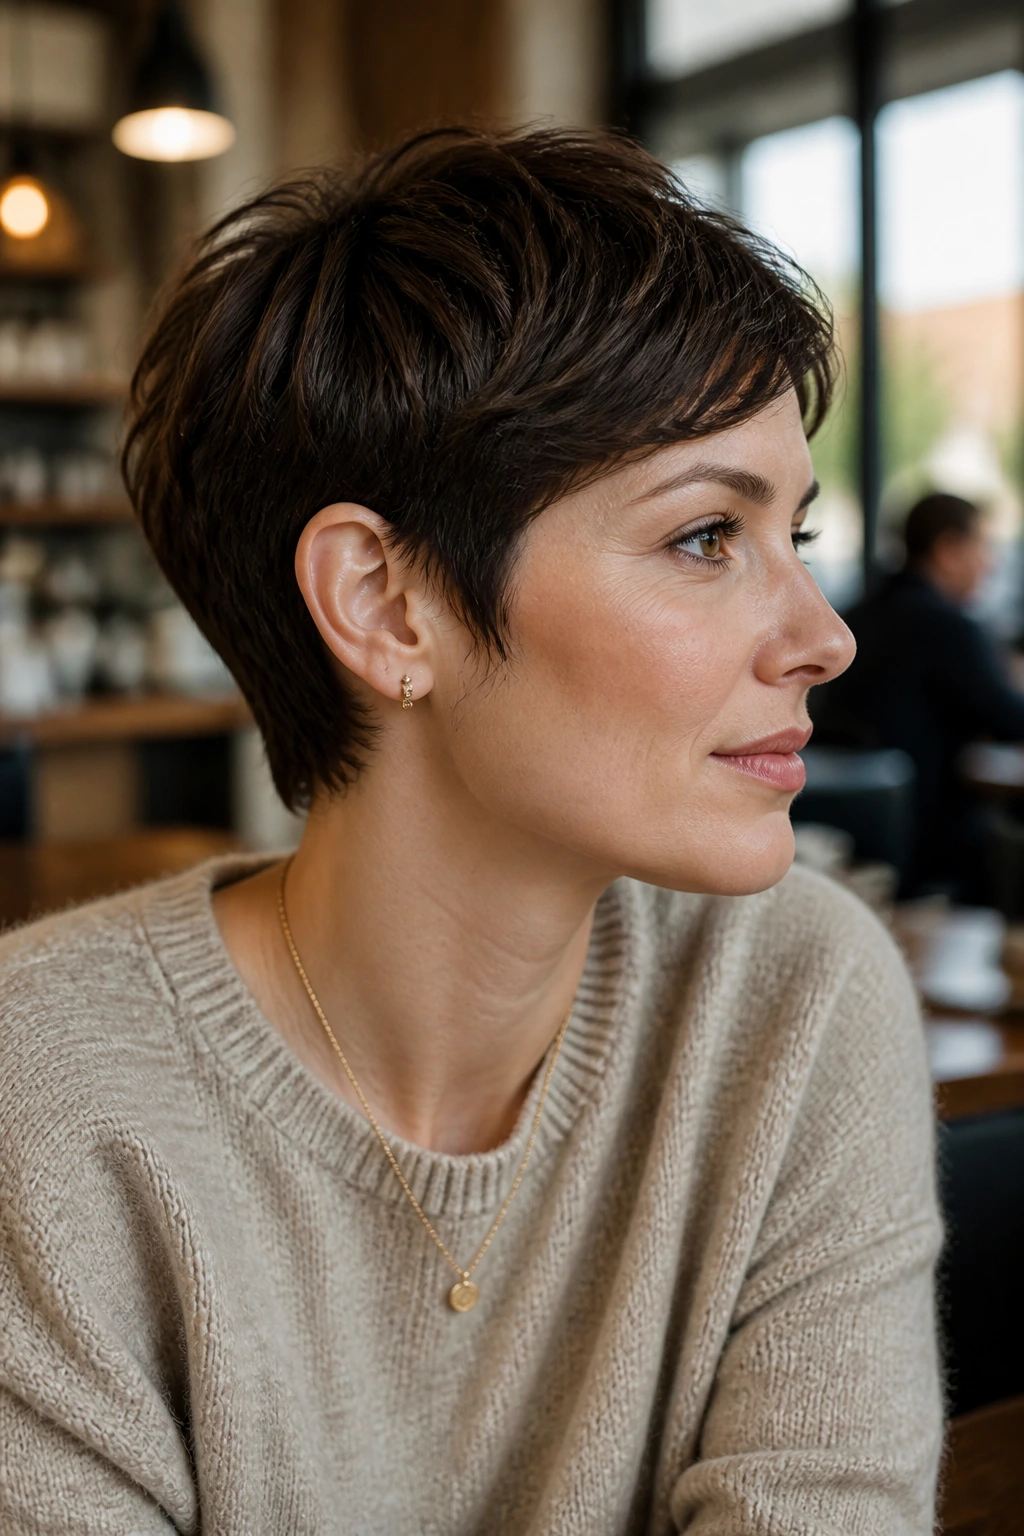
Ear-length hair changes the whole mood. The cut still reads as short, but the side panels graze the tops or backs of the ears, which gives you more room to tuck, twist, or leave loose.
This version is kinder to people who want some softness around the face. It also works well with statement earrings, because the hair moves out of the way without needing a full updo. If your ears stick out a little or you simply like the look of hair that brushes them instead of hiding them, this cut gives that detail a place.
15. French-Girl Pixie
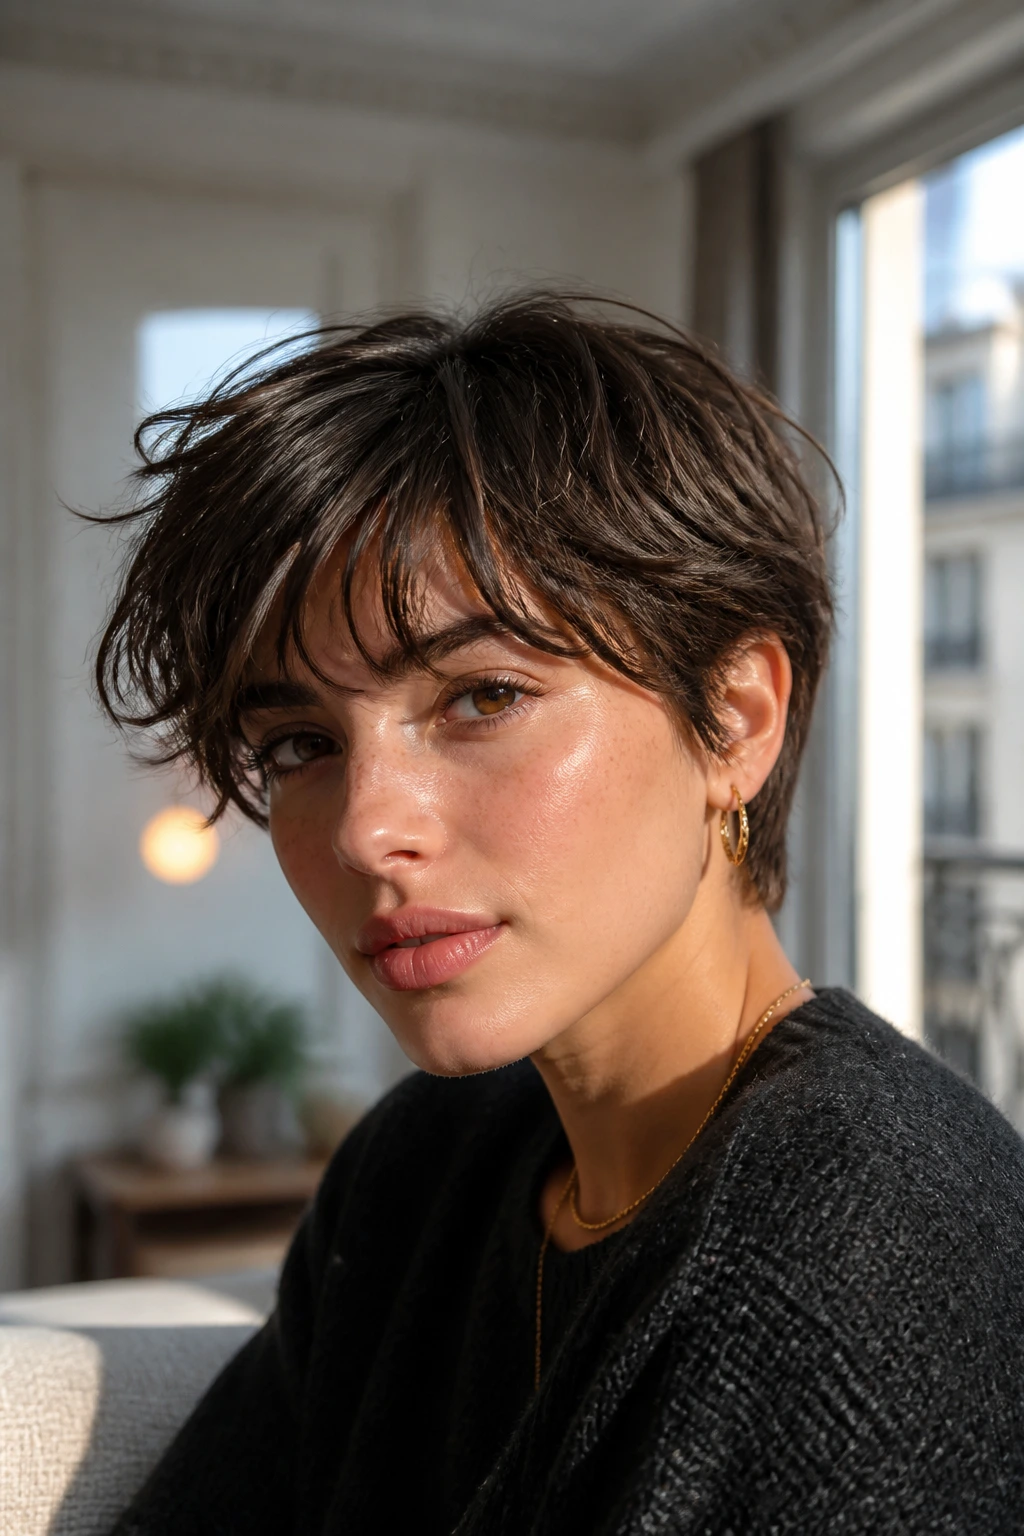
French-girl versions rely on softness, not polish. The fringe sits a little longer, the texture stays lightly undone, and the shape looks like it was styled with fingers rather than tools.
That does not mean sloppy. It means the cut is built with enough balance that a little air-drying and a small amount of cream are enough. The best ones leave some length around the temples and a touch of bend at the front, which keeps the haircut from feeling too hard. If you want a pixie that looks better after you’ve worn it for a few hours, this is a strong bet.
16. Bowl-Inspired Pixie
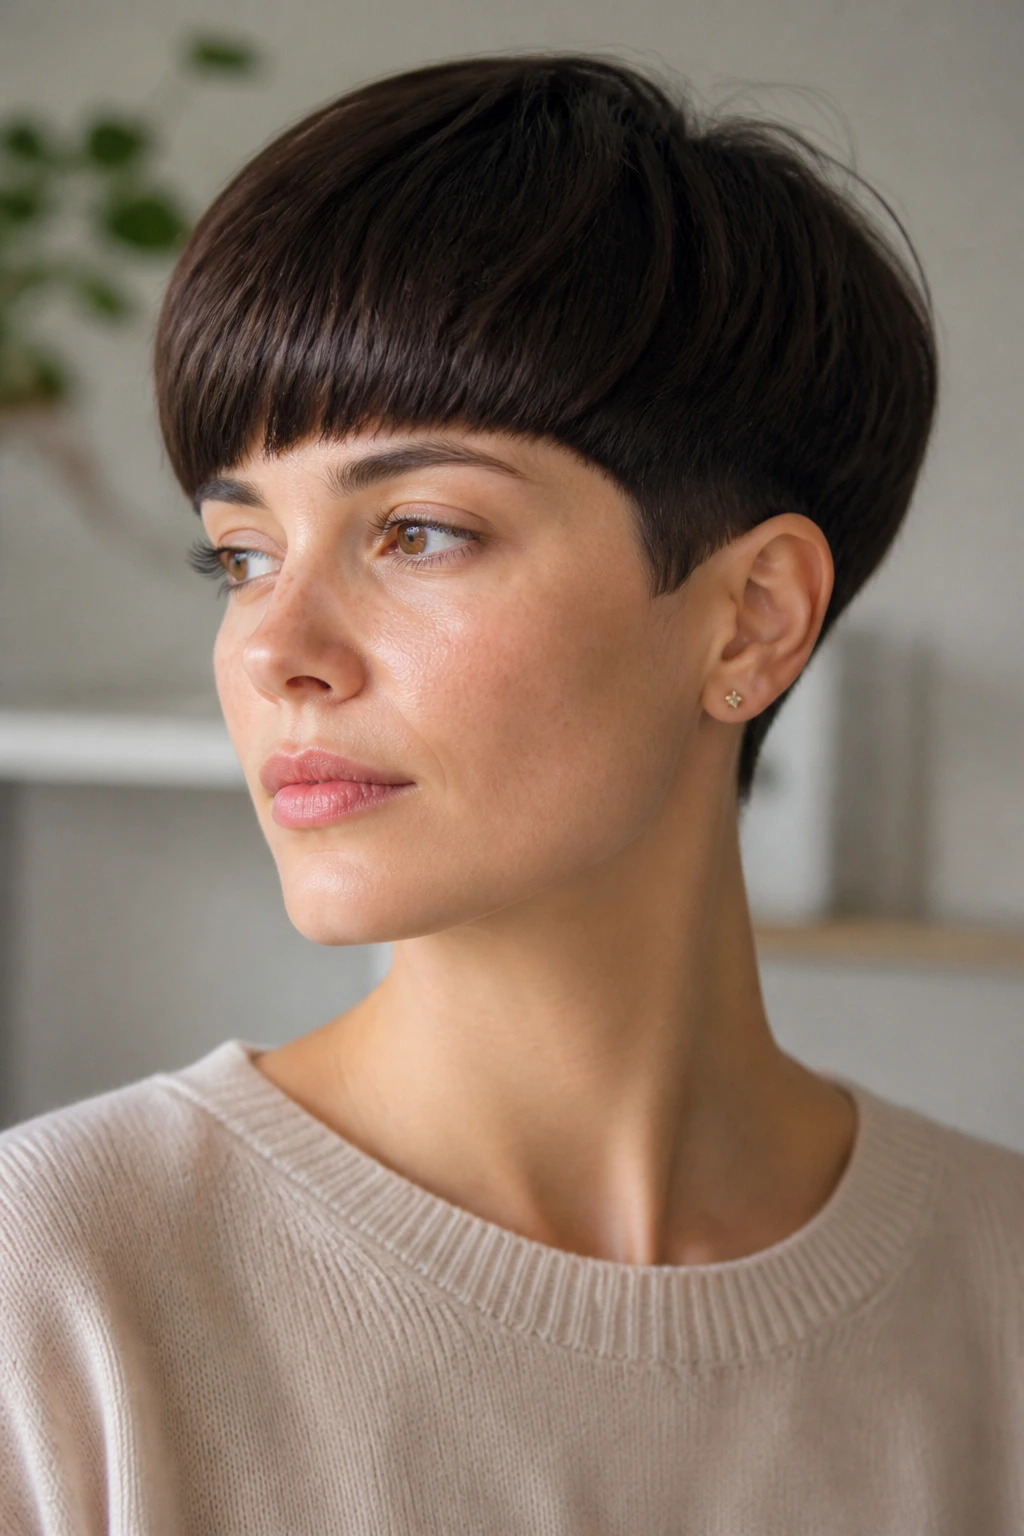
A bowl-inspired pixie needs a brave stylist and a tidy outline. The fringe tends to sit fuller across the forehead, while the sides curve in a rounded way that gives the cut a very deliberate shape.
This is not the cut for someone who wants invisible hair. It is the cut for someone who wants the haircut to be the outfit. The reason it works is proportion: the line around the head has to be even, and the density has to be balanced so the fringe doesn’t collapse. Ask for softening at the edges if you want the shape without the hard retro stamp.
What keeps it wearable
The curve around the ears should be controlled, not puffed. A little taper under the top line makes the whole thing sit better.
17. Slicked-Back Pixie
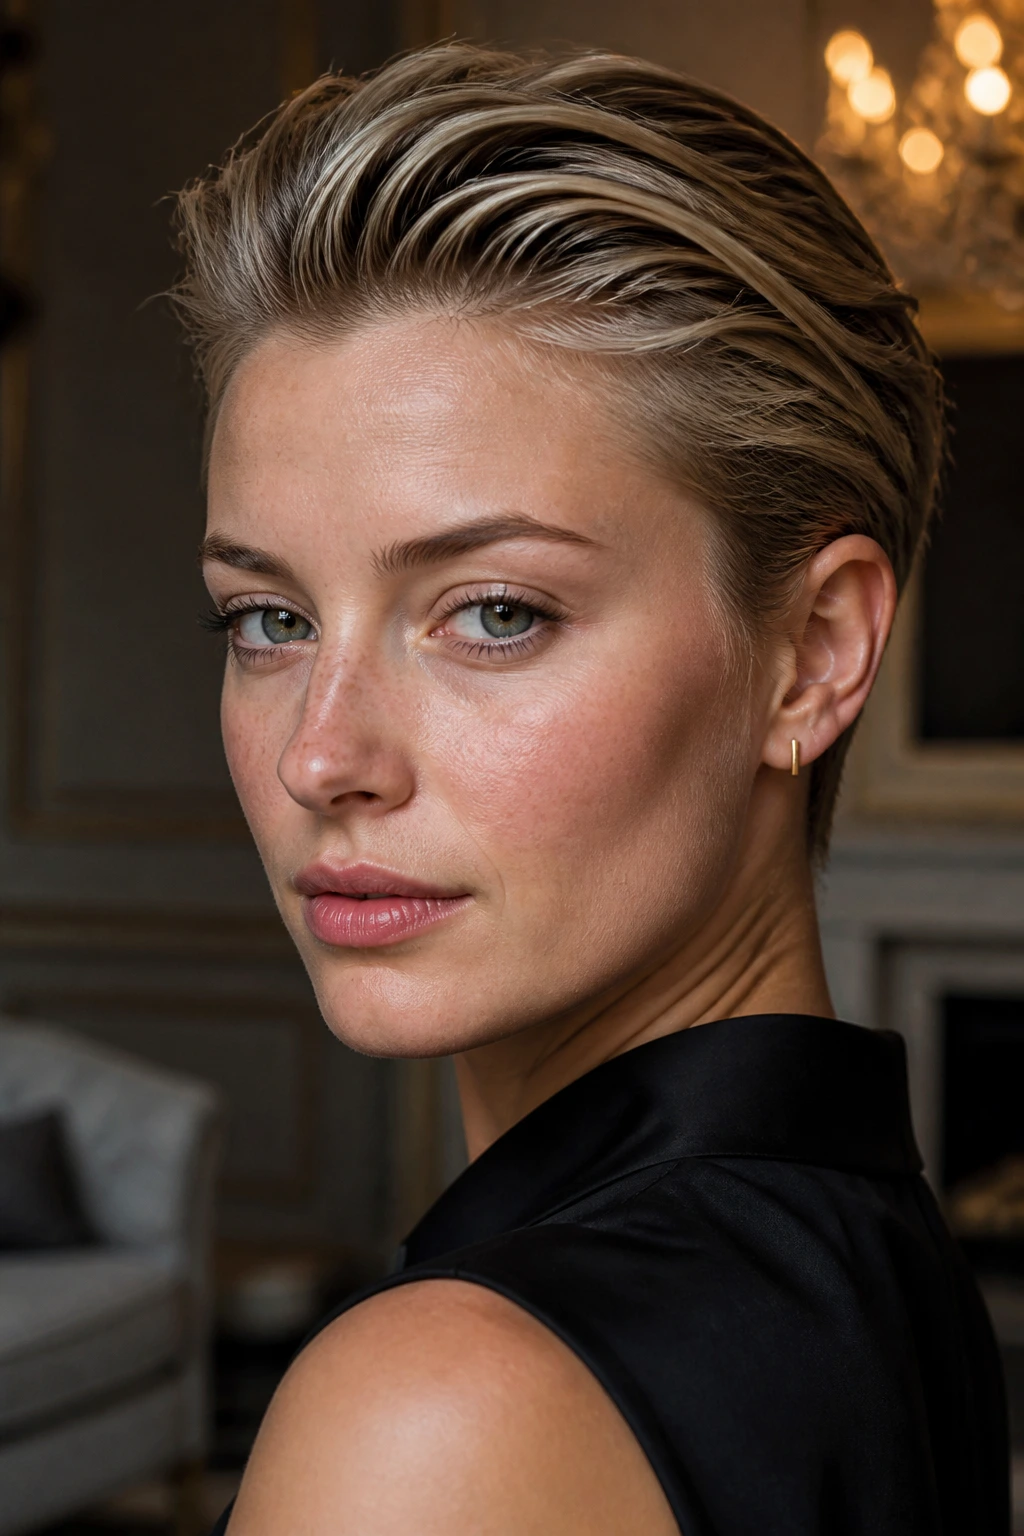
A slicked-back pixie is all about line and shine. The top is long enough to be brushed backward, or slightly upward and back, while the sides stay neat so the face stays open.
It’s a clean look for evenings, formal settings, or just days when you want the haircut to look sharp without a lot of fuss. Gel or a strong cream will do the job, but the important part is application: start with damp hair, smooth the product from front to back, and do not overload the roots. Too much product at the hairline turns sleek into greasy in a hurry.
18. Side-Parted Pixie
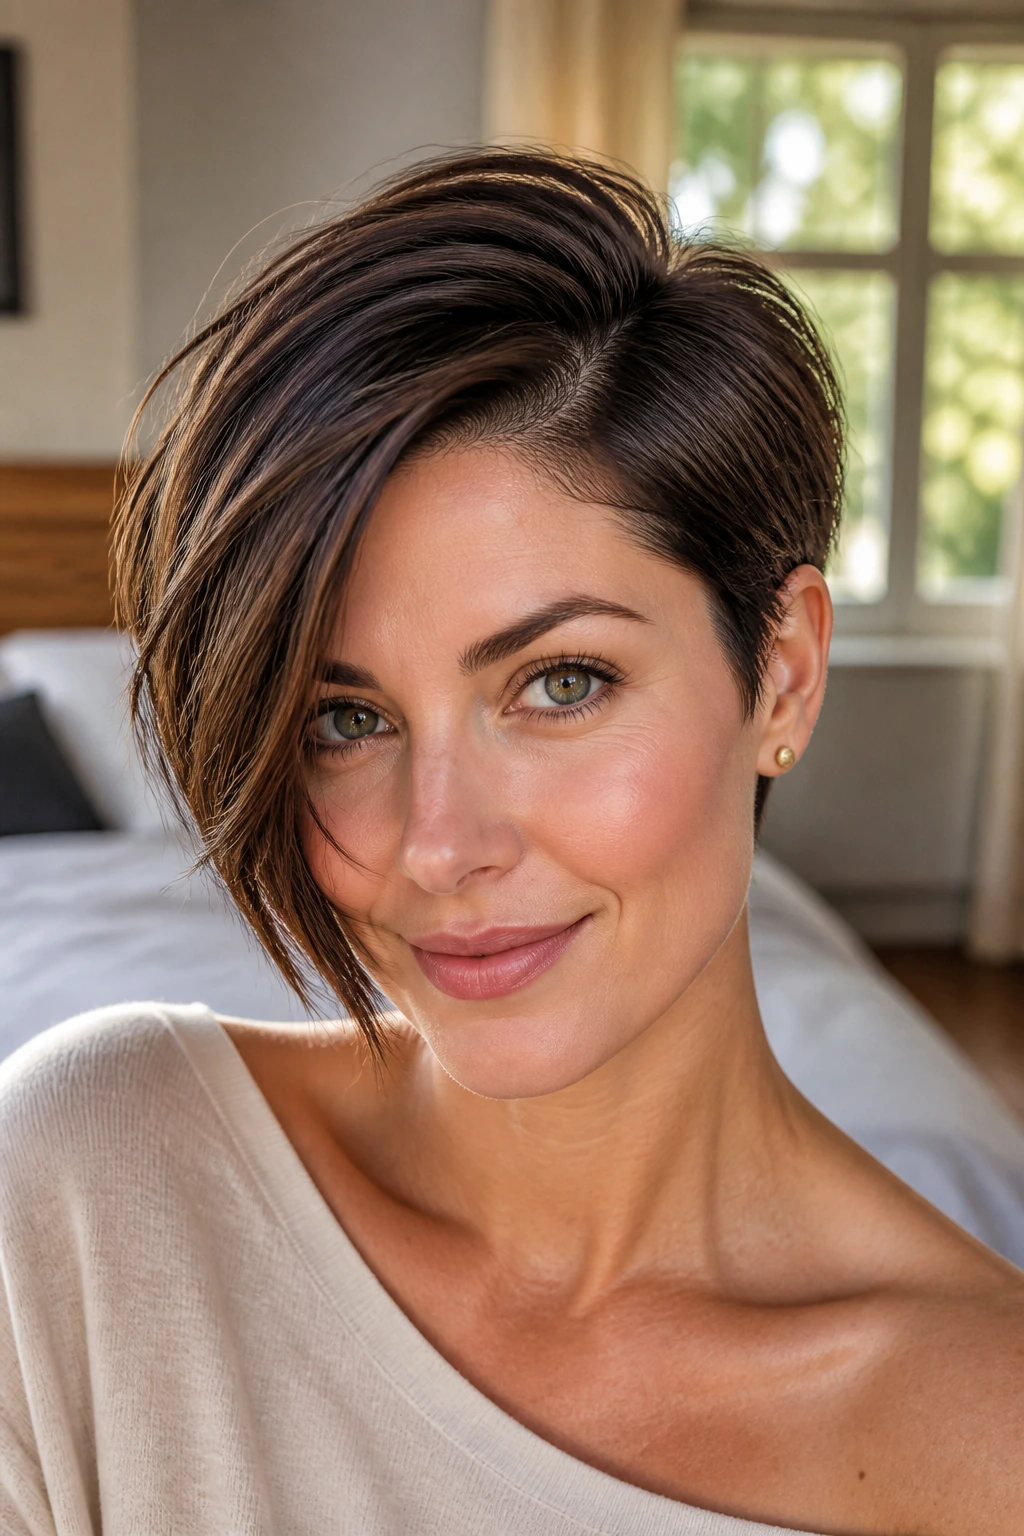
A deep side part can make a short crop feel taller. That’s the whole trick. The heavier side builds a little lift at the crown while the lighter side falls closer to the face and gives the cut some shape.
This is a good choice for fine hair because the part creates instant direction without needing a lot of heat. It also helps if one side of your hair likes to lie flatter than the other. I’d avoid cutting the top too evenly here; the asymmetry is what gives the style its edge. A little root lift spray at the part line helps, but the cut should do most of the work.
19. Piecey Fringe Pixie
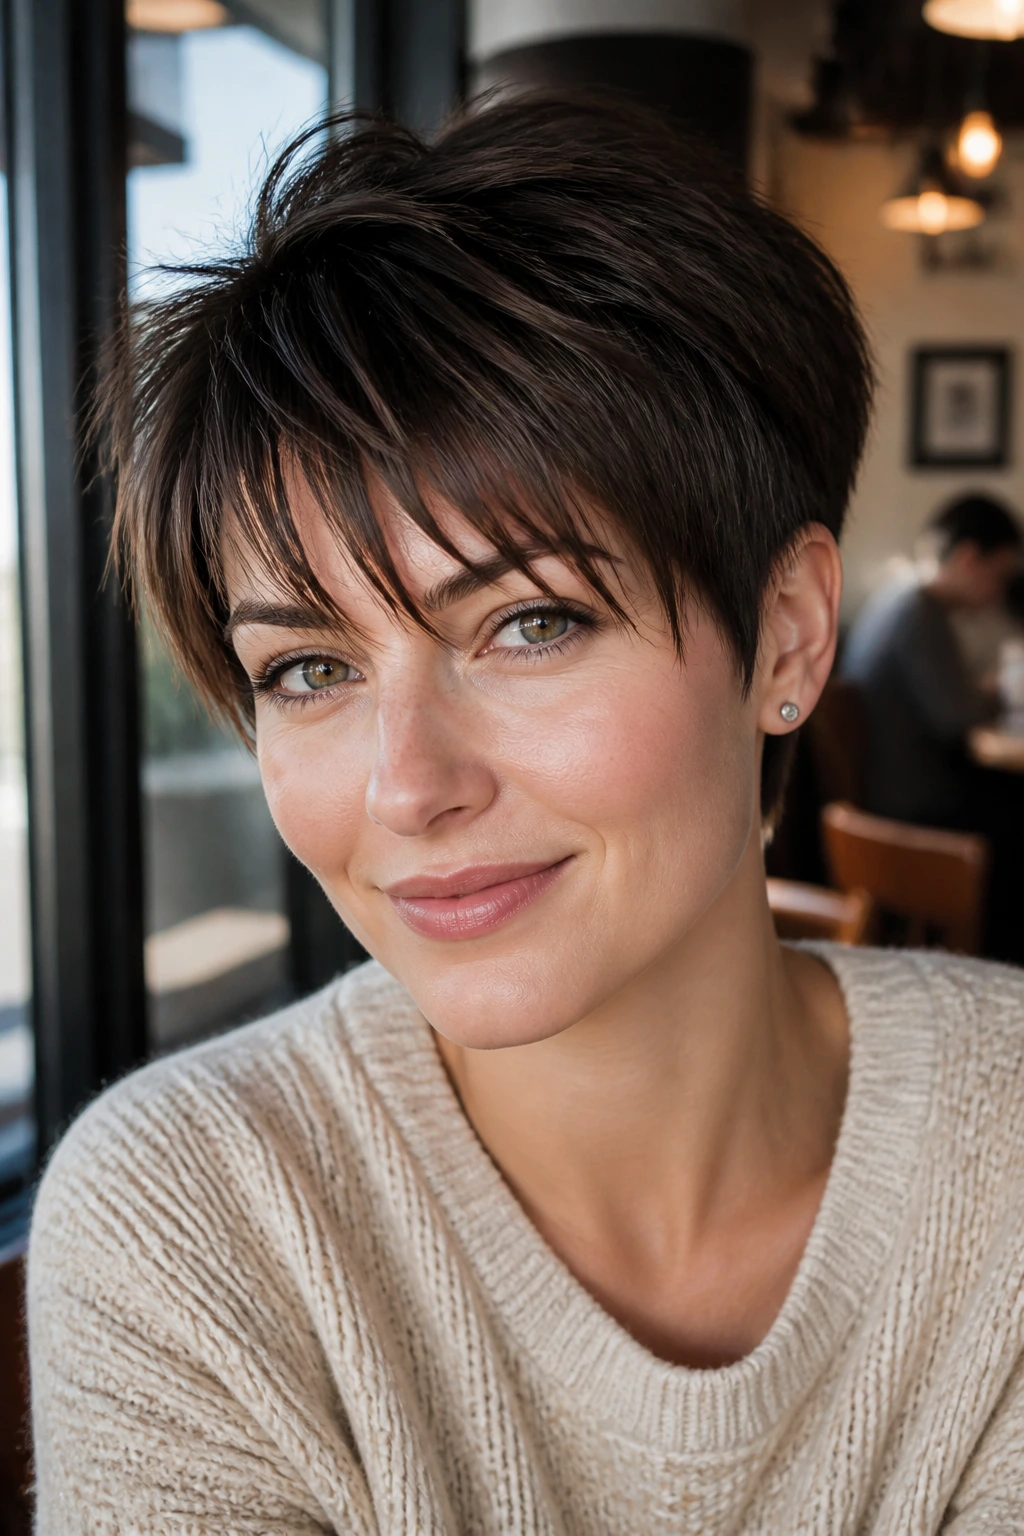
Piecey fringe looks casual, but it needs intent. The front is cut and styled so the strands separate into visible bits instead of forming one solid curtain.
That separation works well if you like texture close to the forehead. It draws attention to the eyes and softens a strong brow. A wax or paste with a dry finish is better than a slippery cream, because the pieces need grip. If the fringe starts looking stringy, you’ve used too much. If it looks too neat, you’ve used too little. Annoying, yes. Also fixable.
20. Crown-Volume Pixie
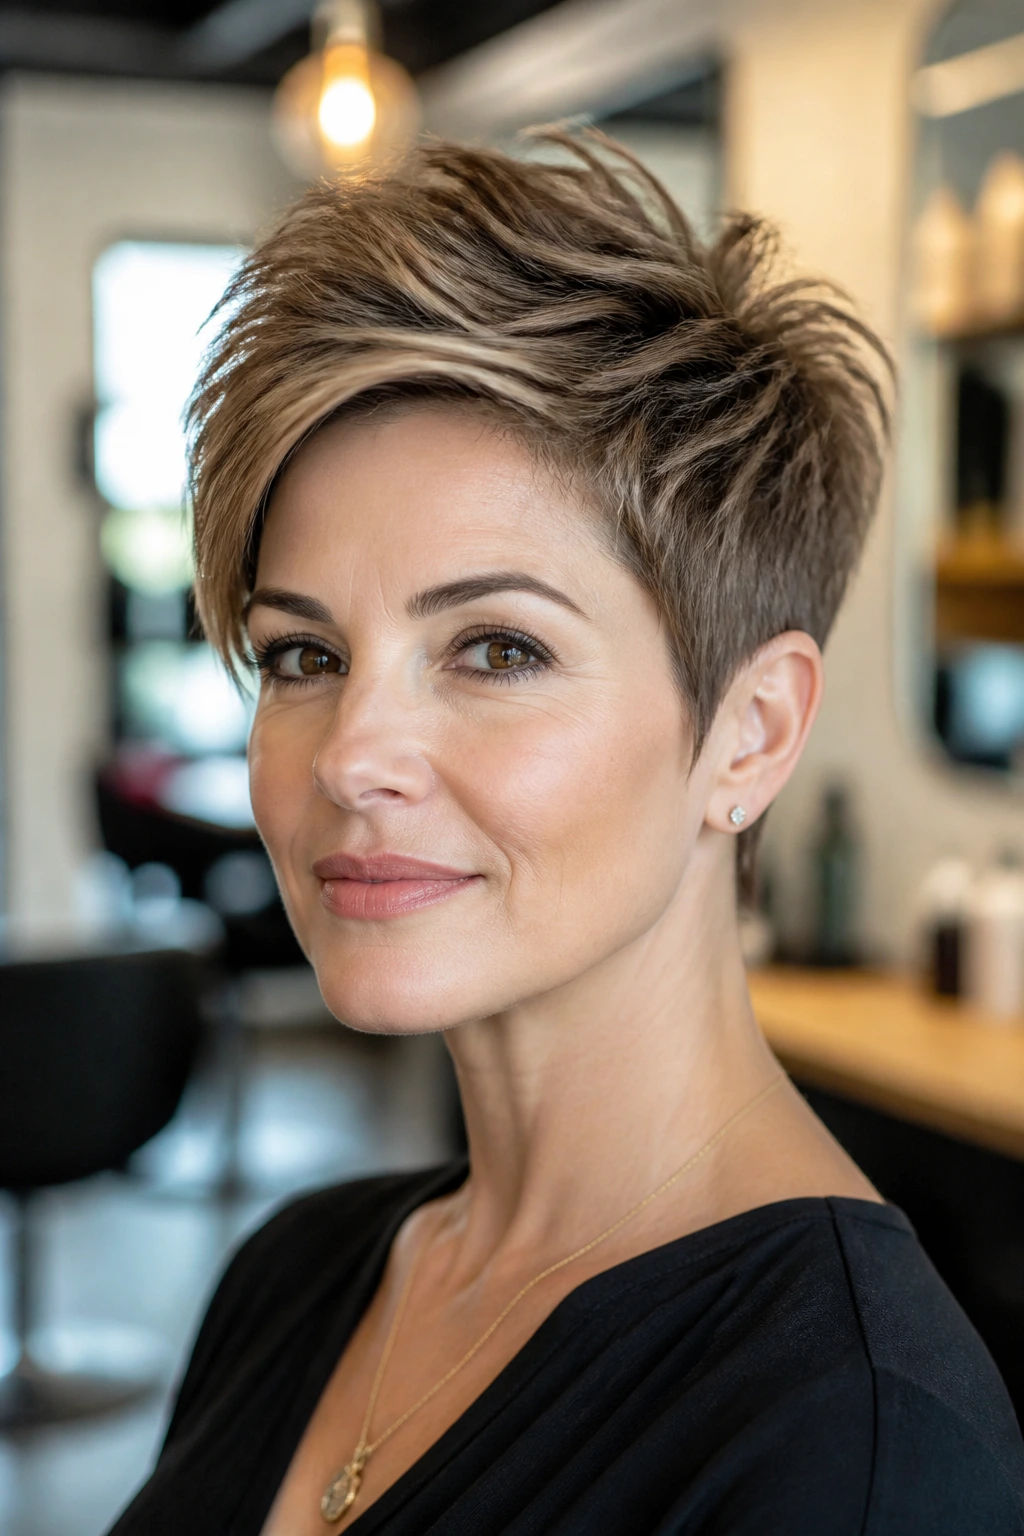
Crown volume is the thing that keeps a short cut from lying flat. You can have the sharpest nape in the room, but if the top sits like a pancake, the whole haircut goes limp.
This version concentrates lift at the crown and lets the sides stay tighter, which gives the head a little height without making the cut broad at the cheeks. It’s especially useful for round faces or flat crowns. Backcombing is not the answer; a root-lifting mousse and directional blow-drying are. Build shape with air and angle, not with a teasing comb and hope.
The useful detail
Dry the roots in the opposite direction of your part first, then switch back. That creates shape without the helmet effect.
21. Disconnected Pixie
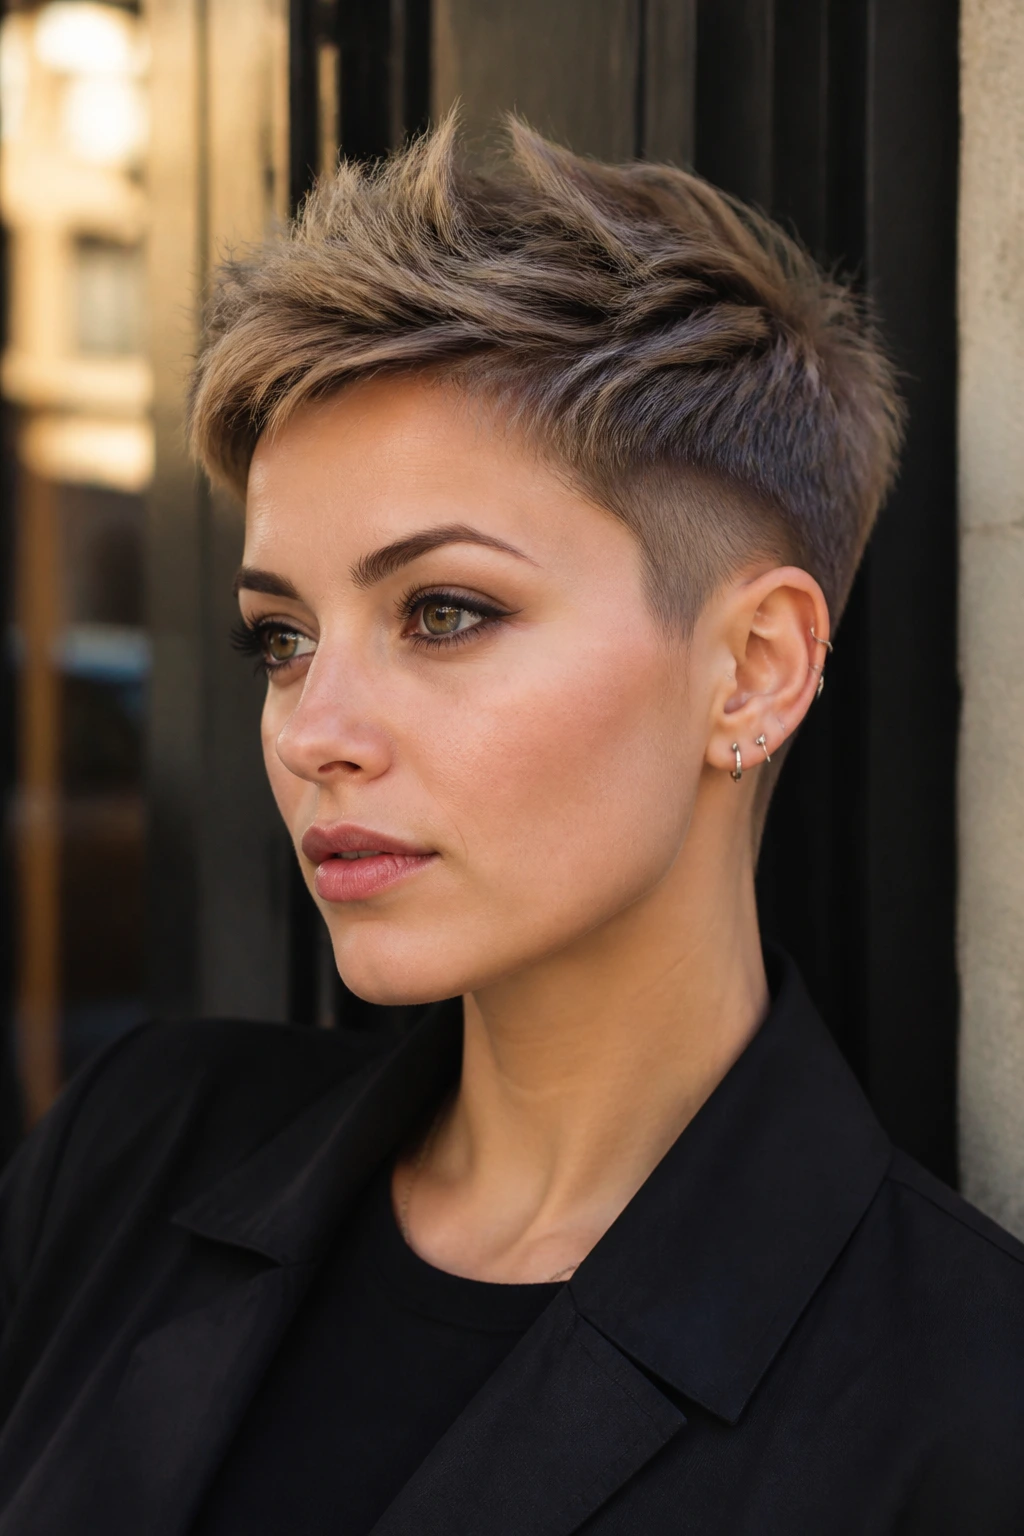
A disconnected pixie is all contrast. The top stays clearly longer than the sides and back, and the transition between those lengths is sharp enough to read from across the room.
That sharpness is the appeal. It gives the cut attitude without needing a lot of decoration. It also works well on thick or coarse hair, because the shorter sides remove bulk and let the top move on its own. If you want a more polished finish, keep the disconnect subtle. If you want edge, let the gap between top and sides show.
22. Mohawk Pixie
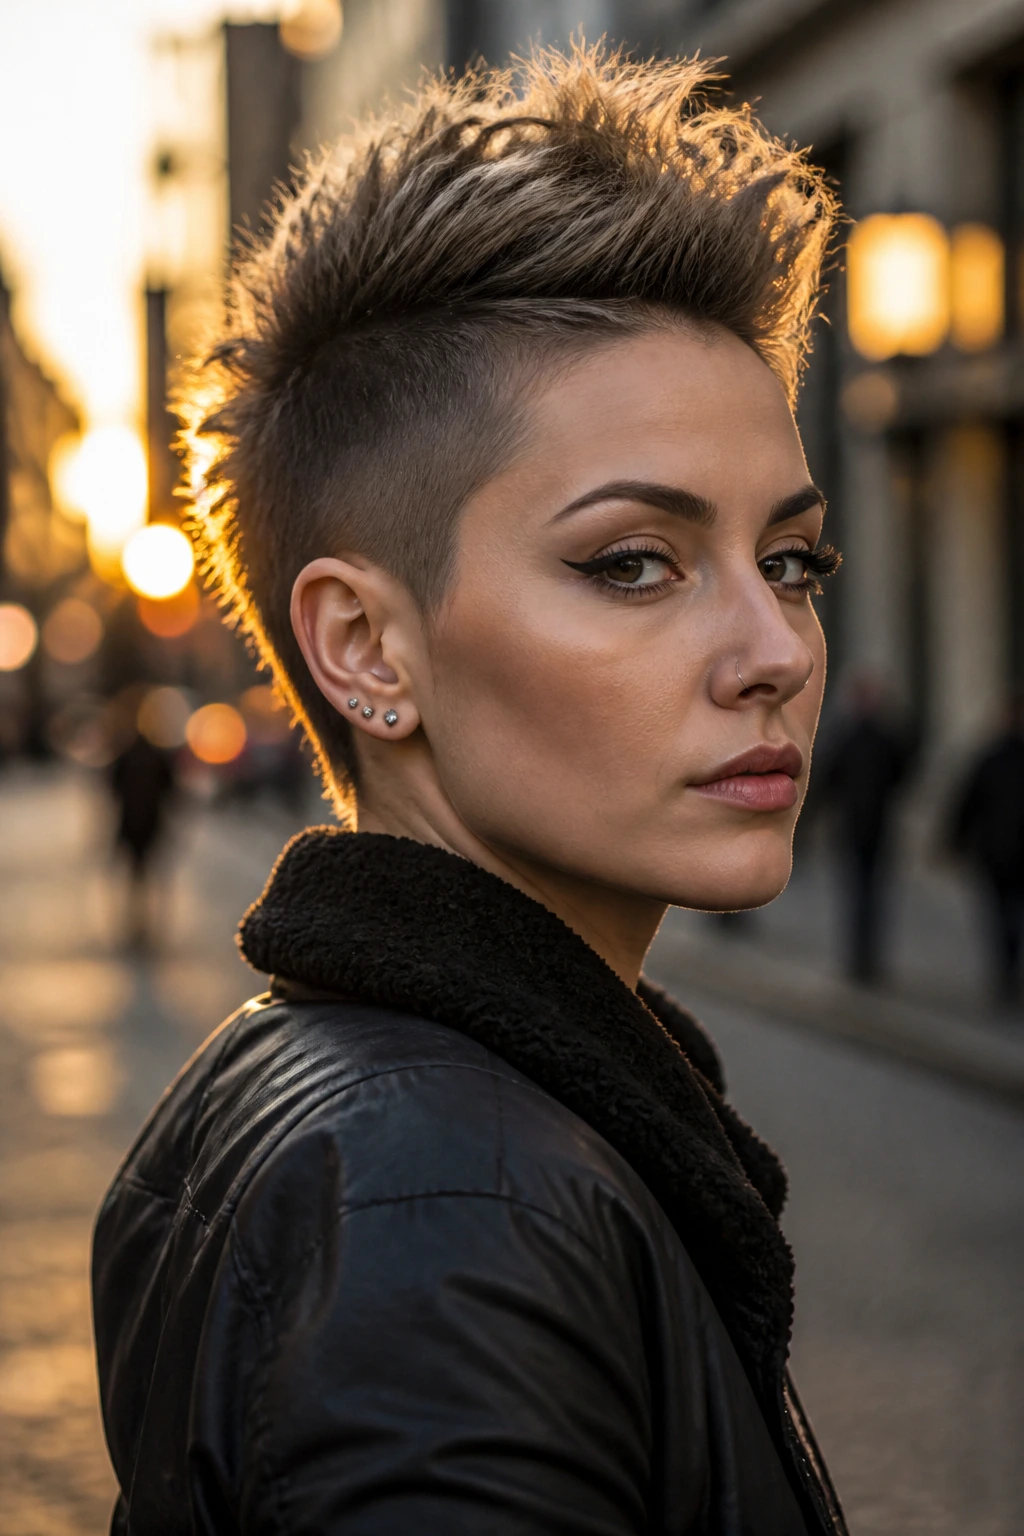
The mohawk pixie takes that contrast and pushes it into a ridge. The center strip stays longer from front to crown to nape, while the sides sit much shorter and tighter.
This cut has a loud silhouette, but it can still be wearable if the ridge is shaped well and the sides aren’t pushed too far into hard-clipped territory. I like it on people with strong bone structure or naturally straight hair that can hold a center line. Use a bit of paste at the top and smooth the sides down with your hands. It should look deliberate, not like the hair lost a fight with the clippers.
23. Grown-Out Pixie
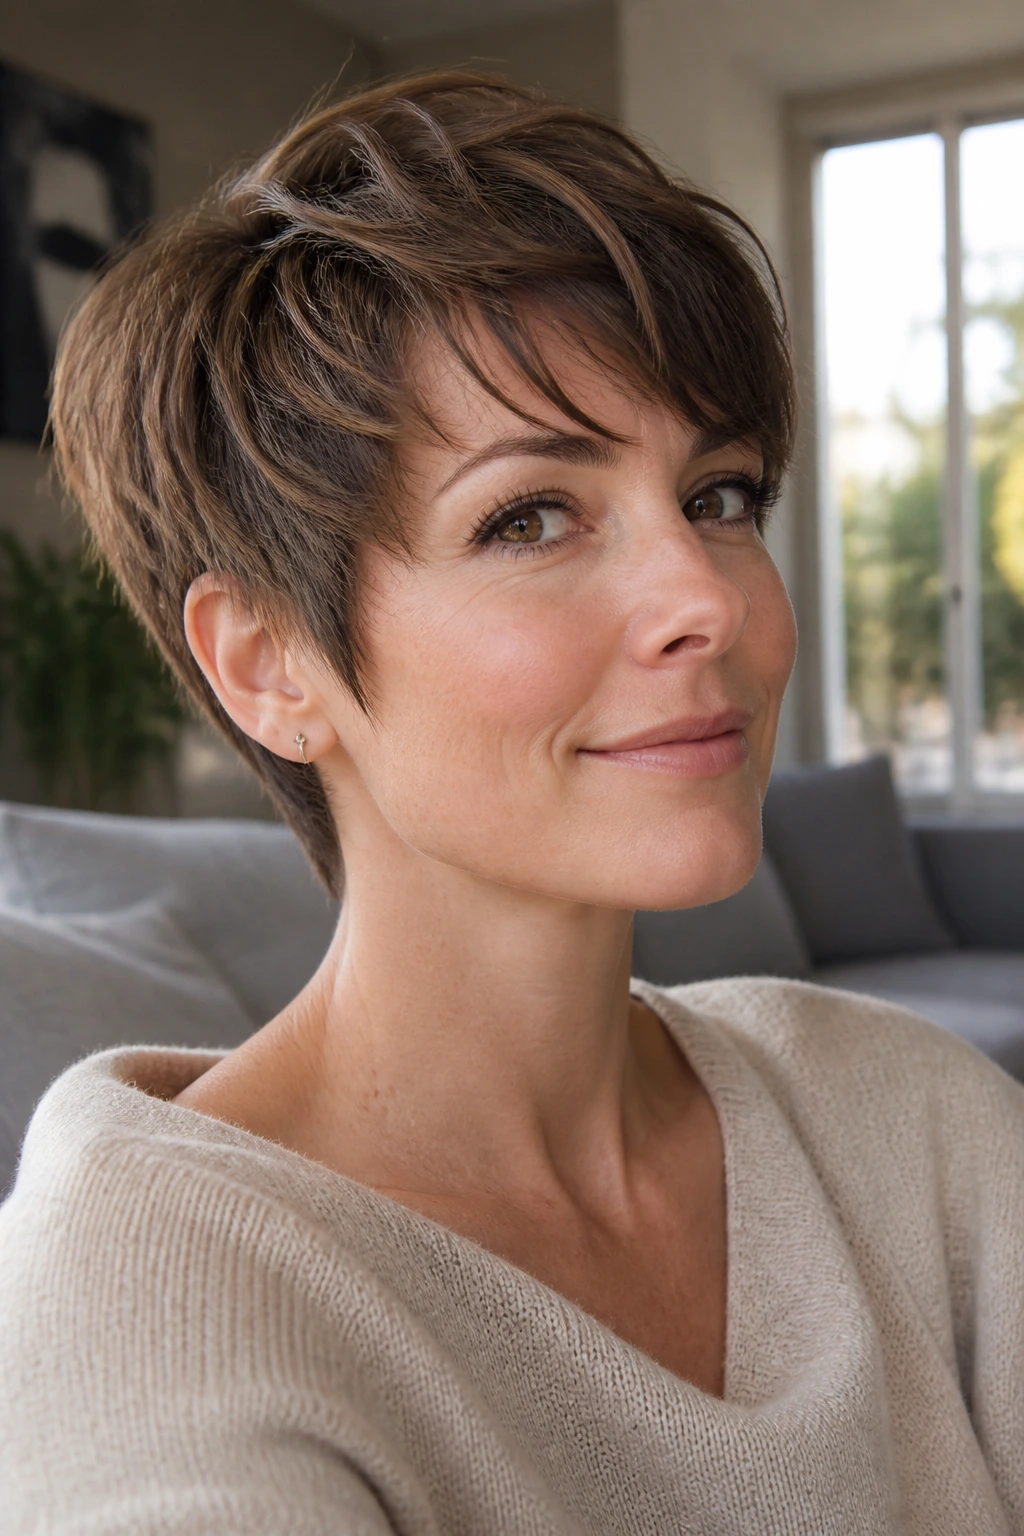
The grown-out pixie solves an awkward stage. It keeps some structure at the nape and sides, but lets the top, fringe, and crown drift longer so the shape can stretch toward a bixie or short bob.
This is the practical choice if you do not want a hard salon schedule. It also looks good on people who like a little softness around the ears and forehead. The cut works best when the outline is still maintained; if the bottom gets too uneven, it stops looking grown-out and starts looking neglected. There’s a difference. A clear one.
24. Soft Buzzed Pixie
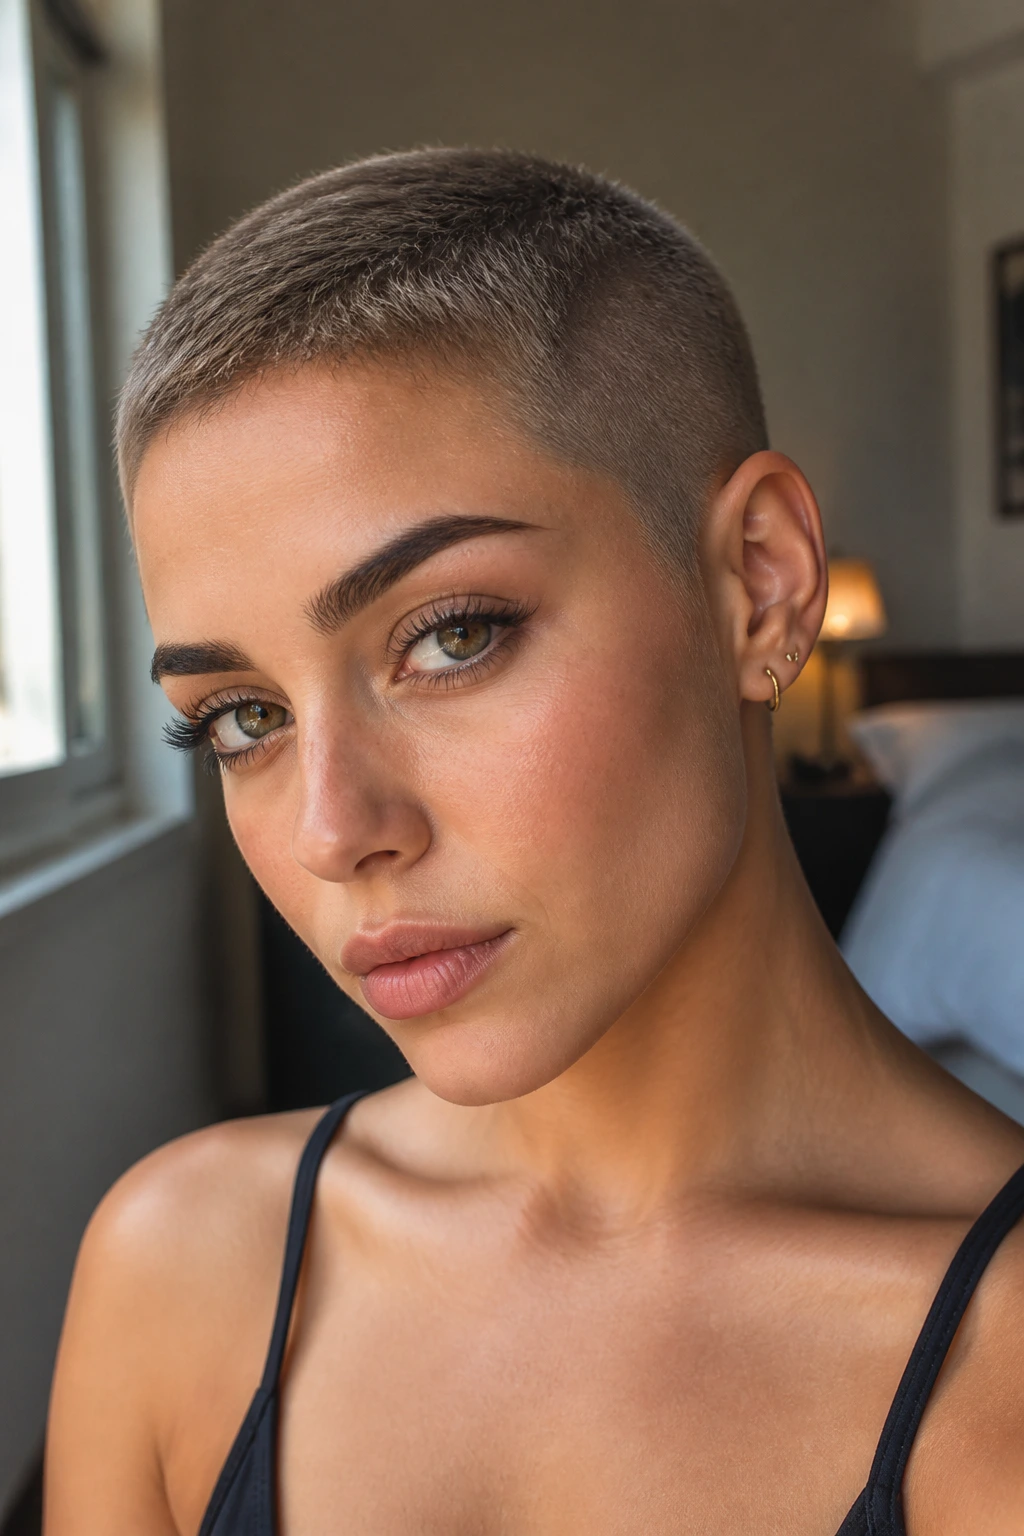
A soft buzzed pixie has almost no wasted motion. The sides and back are kept very close, but the top still carries a touch of softness so the cut does not look military or severe.
This version is for people who want the shortest end of the pixie spectrum without going full clipper-sharp all over. It flatters faces with strong brows, defined cheekbones, or a good head shape. Not every buzz-adjacent crop does. The key is leaving enough softness at the hairline and crown so the cut looks intentional as it grows, not like it was forgotten.
When to choose it
If styling time matters more to you than styling options, this is the lean, clean answer.
25. Tucked-Behind-Ear Pixie
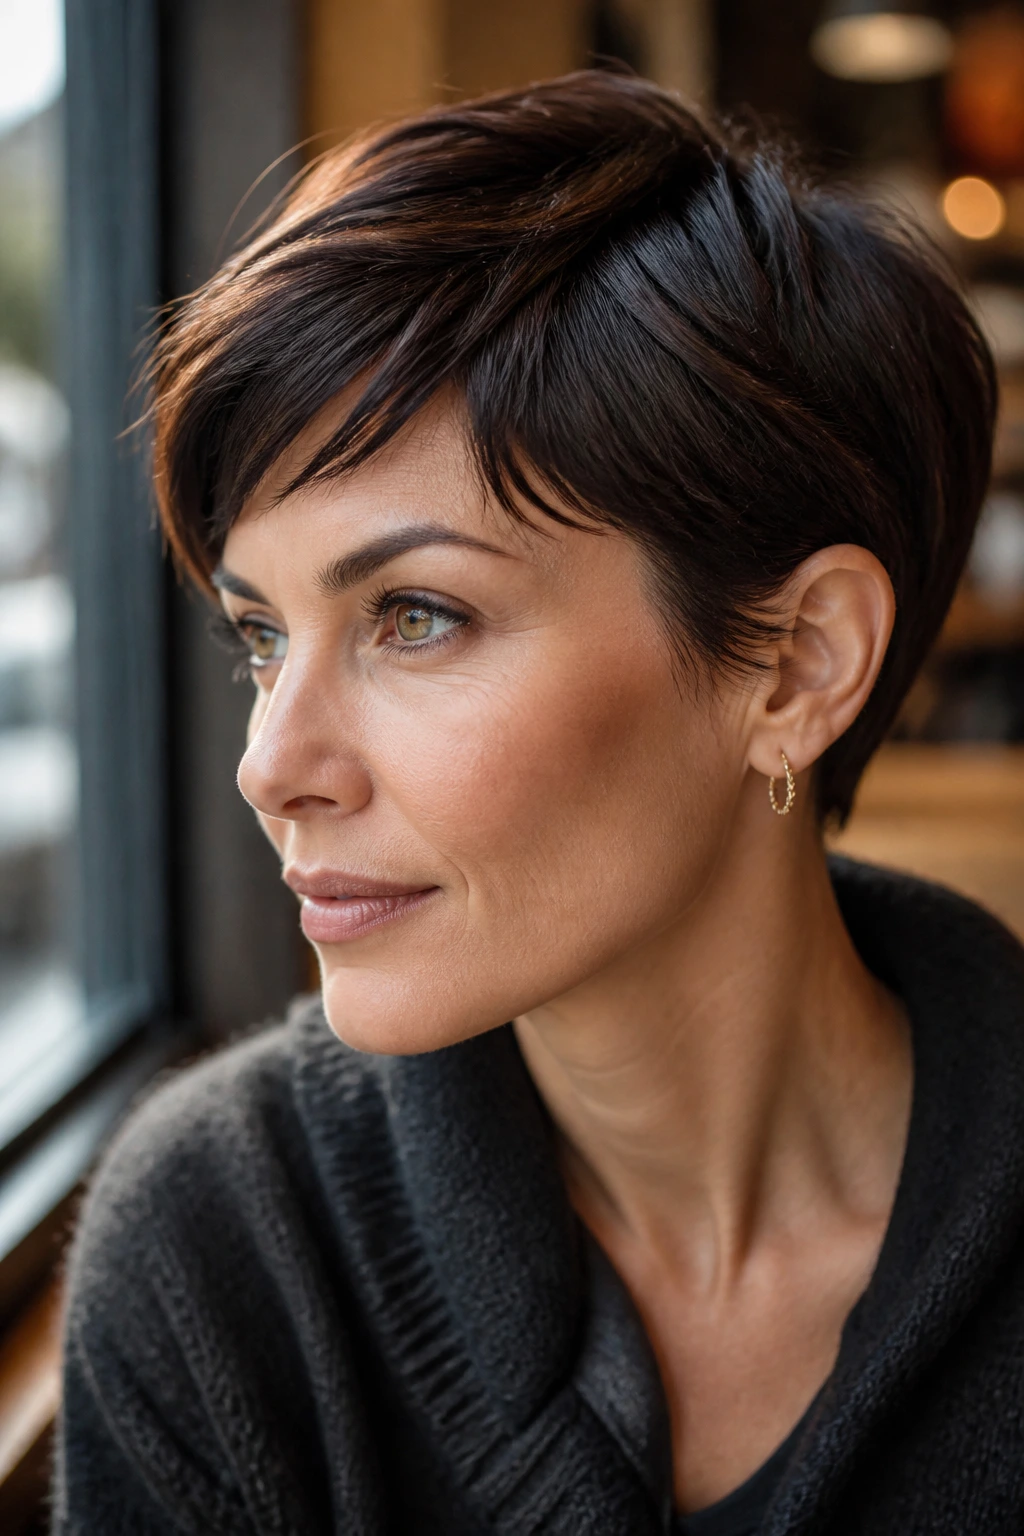
Tucking hair behind the ear sounds small. It isn’t. A pixie built for that move has enough length at the sides to clear the ear without fighting back, and that changes the way the face reads.
This is a friendly cut for earrings, eyeglasses, and anyone who likes to show a little skin at the cheek and jaw. Keep the side length slightly longer than you think you need; the tuck itself removes visible length, so if you start too short you lose the gesture. The best versions look almost casual when tucked, which means the cut was planned with the tuck in mind.
26. Wet-Look Pixie
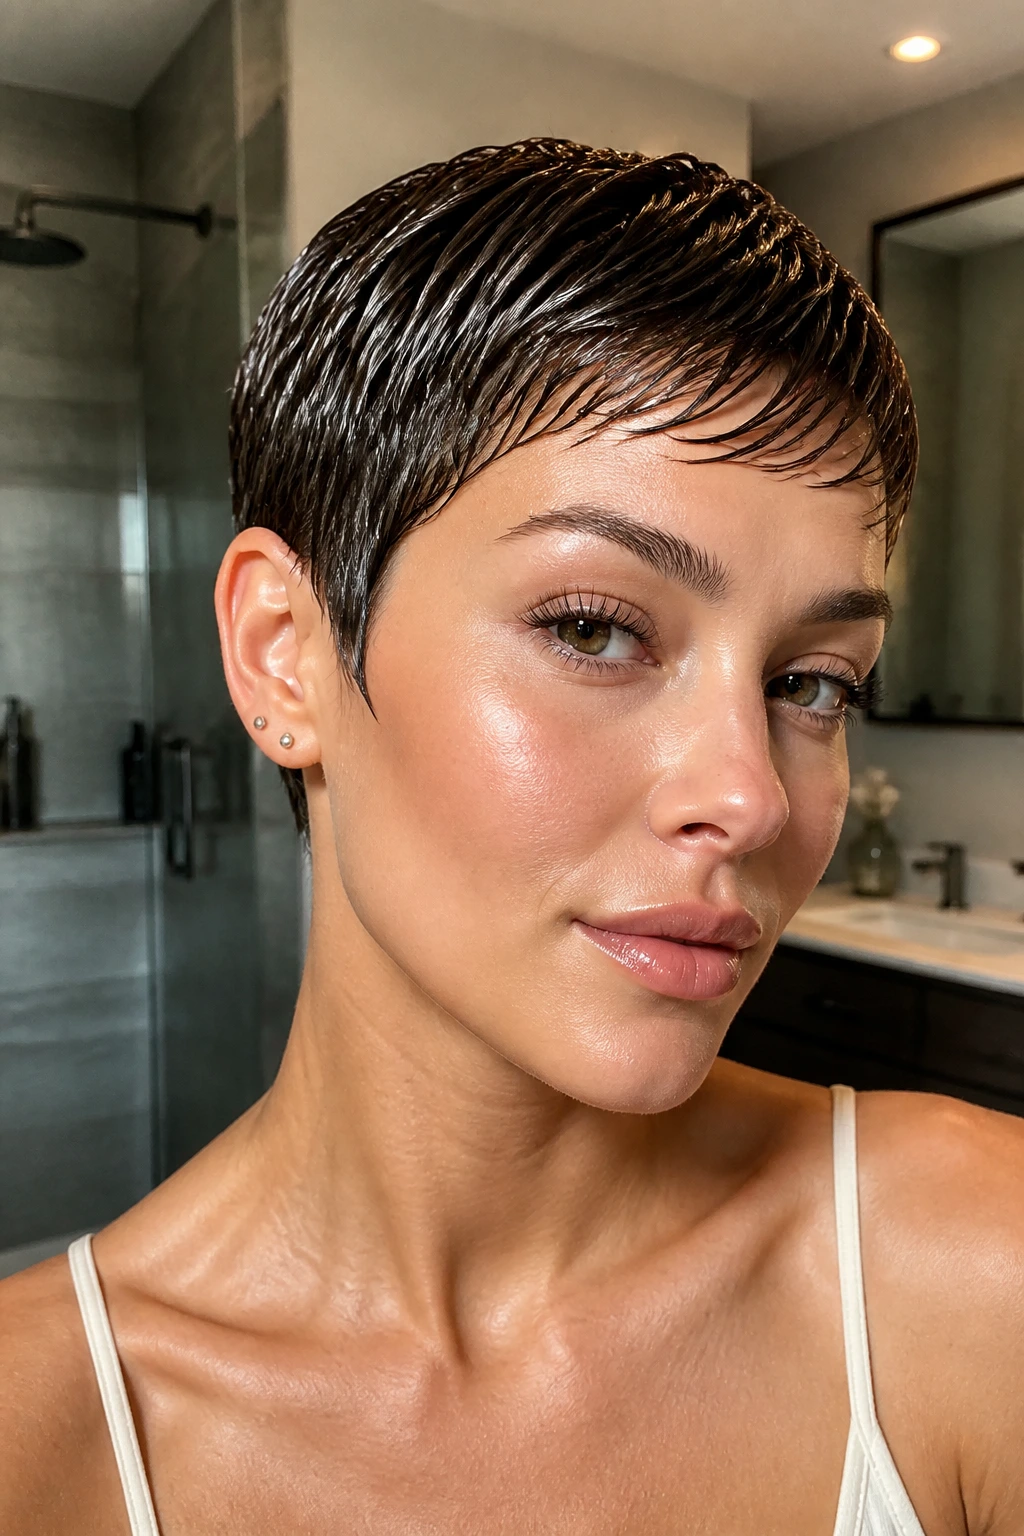
Wet-look hair needs a hand, not a brush. The finish is sleek and glossy, with the fringe and top combed close to the head so the shape reflects light instead of scattering it.
This version is strongest on straighter hair, though looser waves can work if the cut is short enough and the product is controlled. Use gel or a high-shine cream on damp hair, then press it into place with your fingers or a fine-tooth comb. Stop before it turns helmety. The point is polished sheen, not a shellacked cap.
27. Layered Fine-Hair Pixie
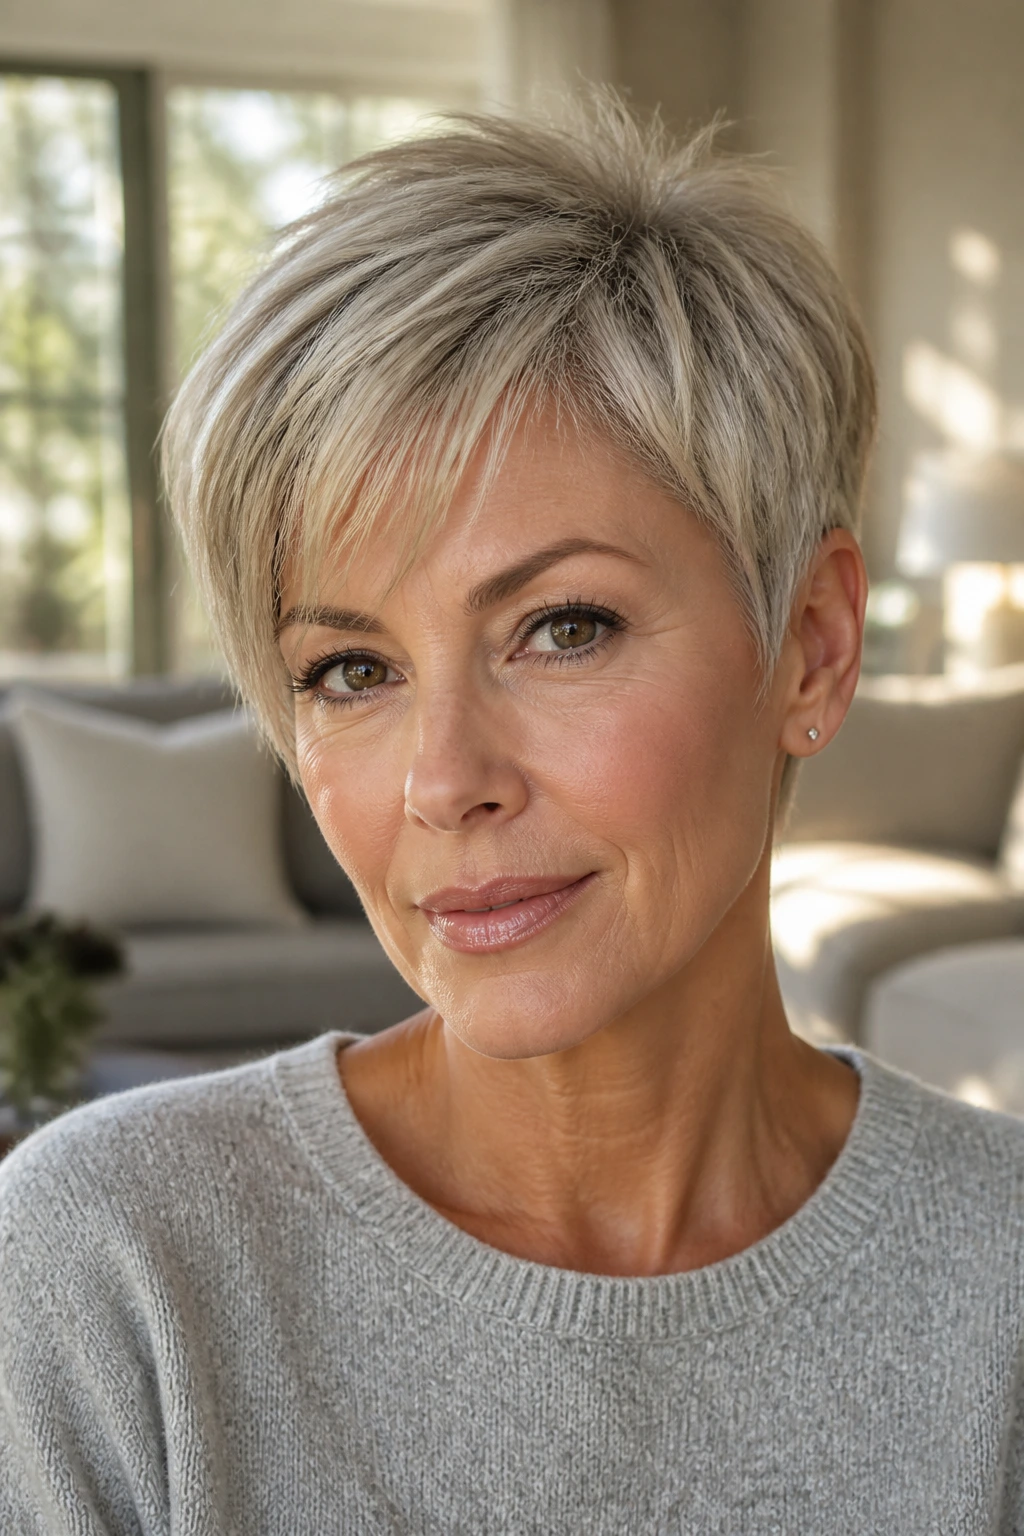
Fine hair loves layers until someone overdoes it. A layered fine-hair pixie aims for lift at the crown and movement through the top, but it keeps enough density around the perimeter so the cut does not look see-through.
This is where a good stylist matters. Thinning shears used recklessly can leave gaps and weak ends, which is the opposite of what fine hair needs. Ask for soft layering, not aggressive removal. A light mousse at the roots and a bit of dry shampoo on day two can keep the cut from collapsing by lunch.
28. Thick-Hair Tapered Pixie
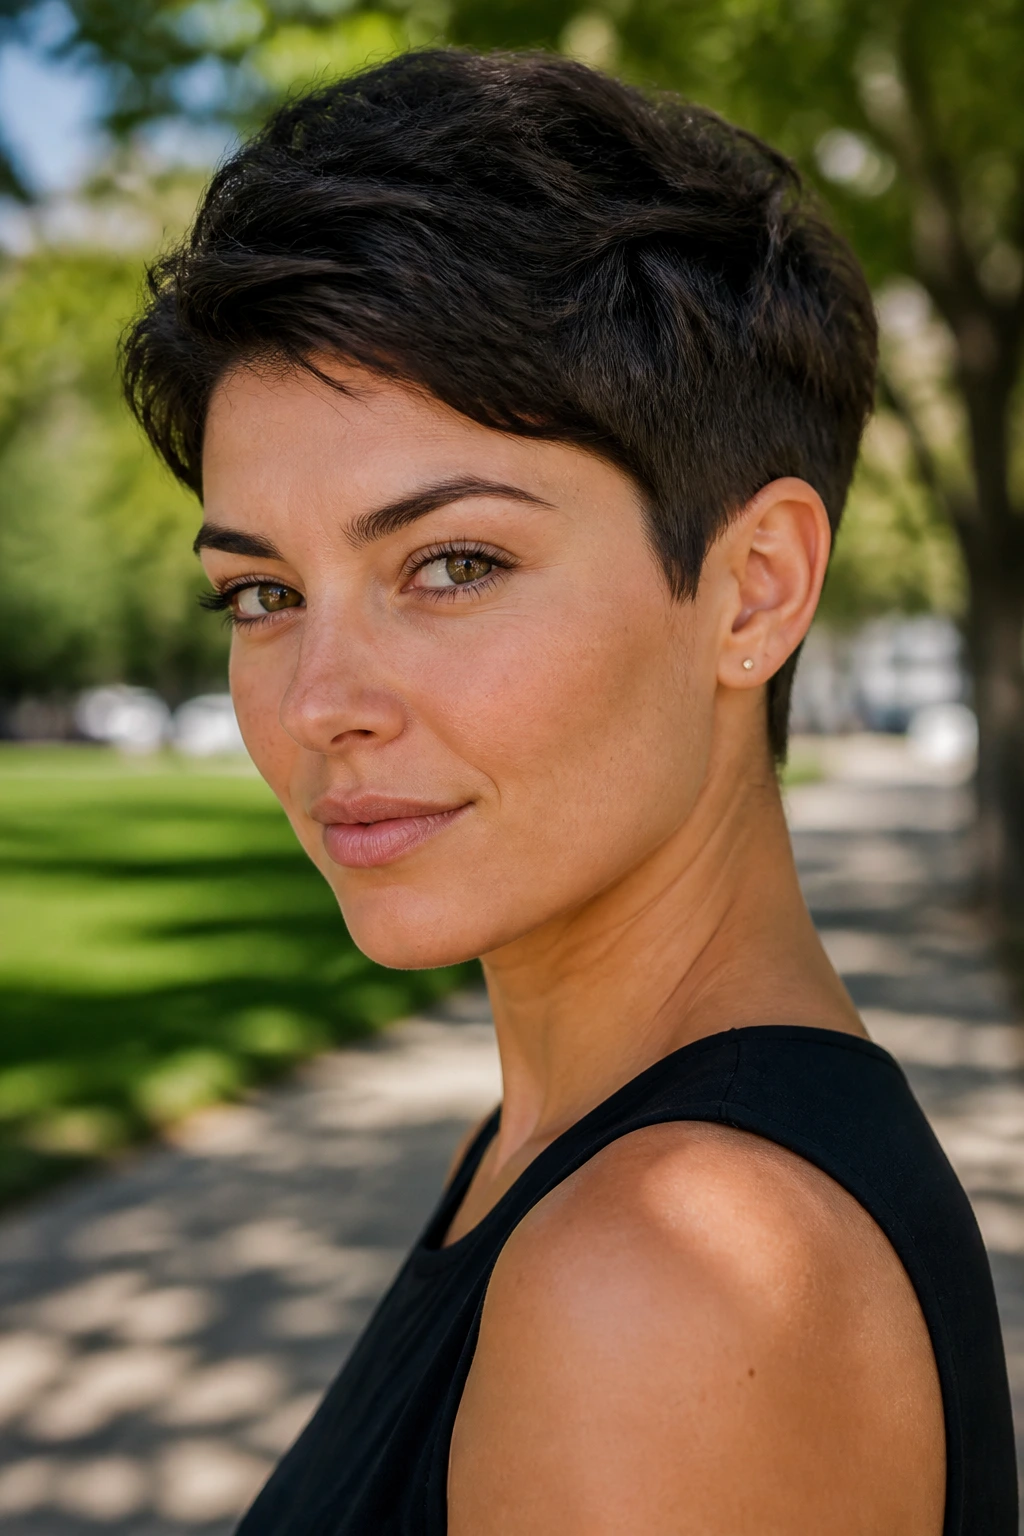
Thick hair usually needs subtraction before shape. A tapered pixie for dense hair removes bulk inside the cut, then narrows the sides and nape so the whole thing sits closer to the head.
What thick hair needs cut away
Not all thickness should be cut off the surface. Internal debulking, careful tapering at the neckline, and a top that is long enough to move but not so heavy that it mushrooms out are the real fixes. If your hair puffs at the temples after a wash, this is the version that can handle that.
A good thick-hair pixie should feel lighter at the roots and cleaner at the edge. That’s the goal.
29. Coily Pixie
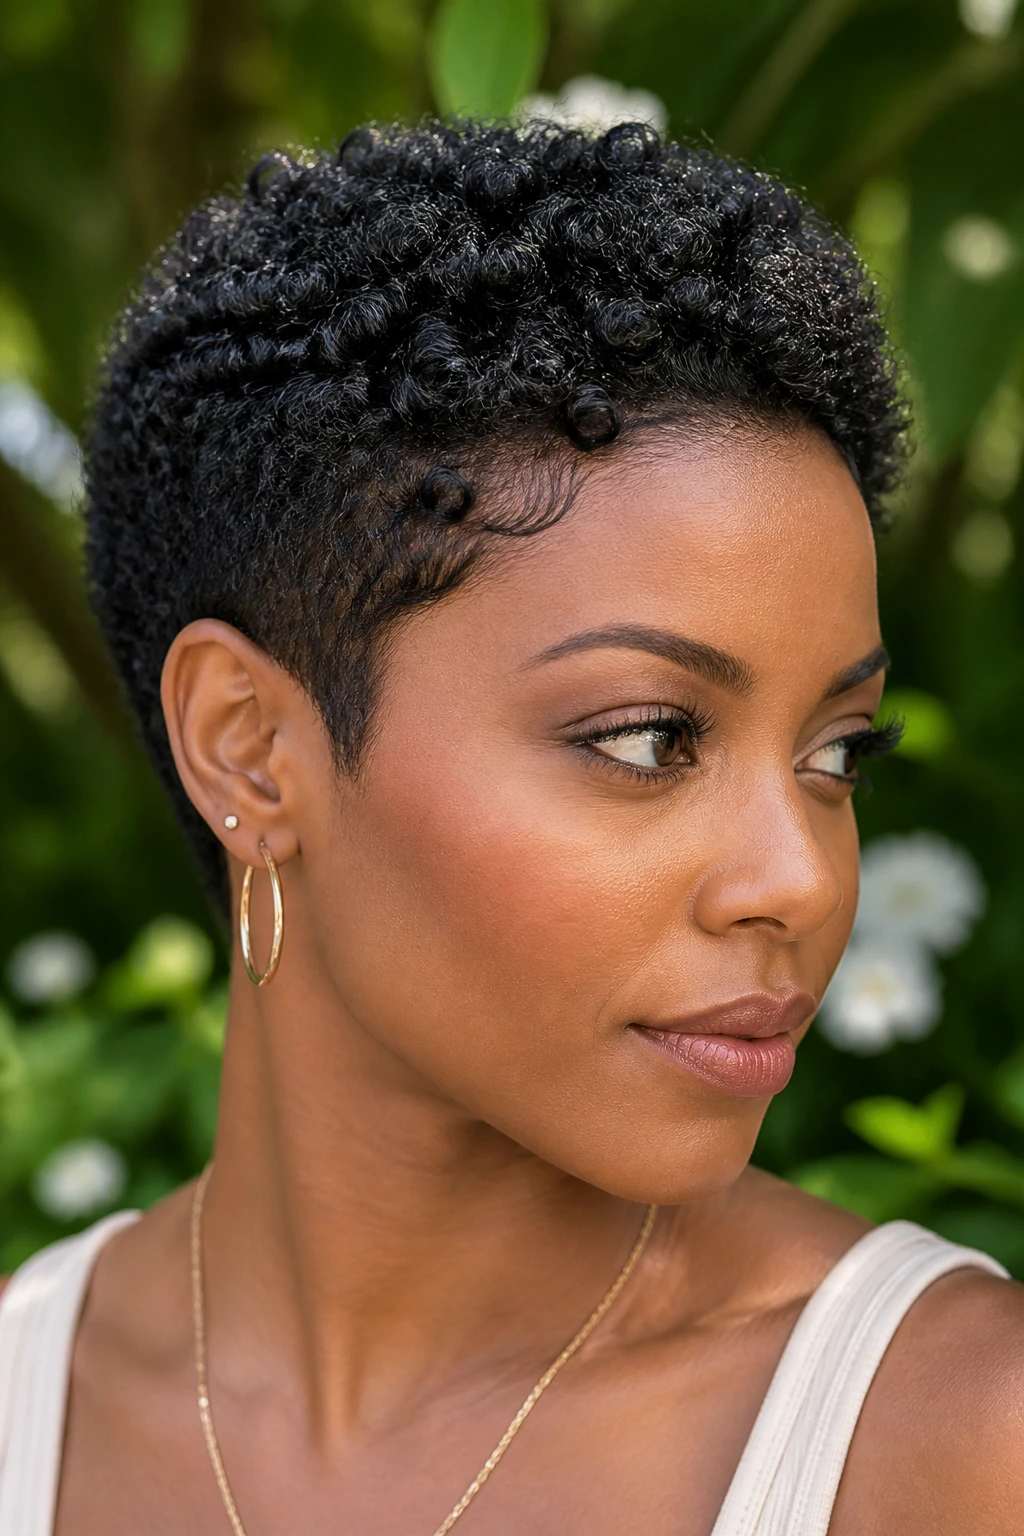
Coily hair looks best when the cut follows the curl pattern instead of fighting it. A coily pixie keeps enough length for the coils to spring, while the sides and nape are shaped so the outline still feels crisp.
Dry cutting is often the smarter call here, because coils shrink in ways wet hair won’t reveal. Moisture matters too. A leave-in conditioner and a small amount of curl cream keep the coils defined without weighing them down. If your curl pattern is tighter at the crown than at the temples, a smart shape can balance that and make the whole cut read evenly from all sides.
30. Rounded Pixie Crop
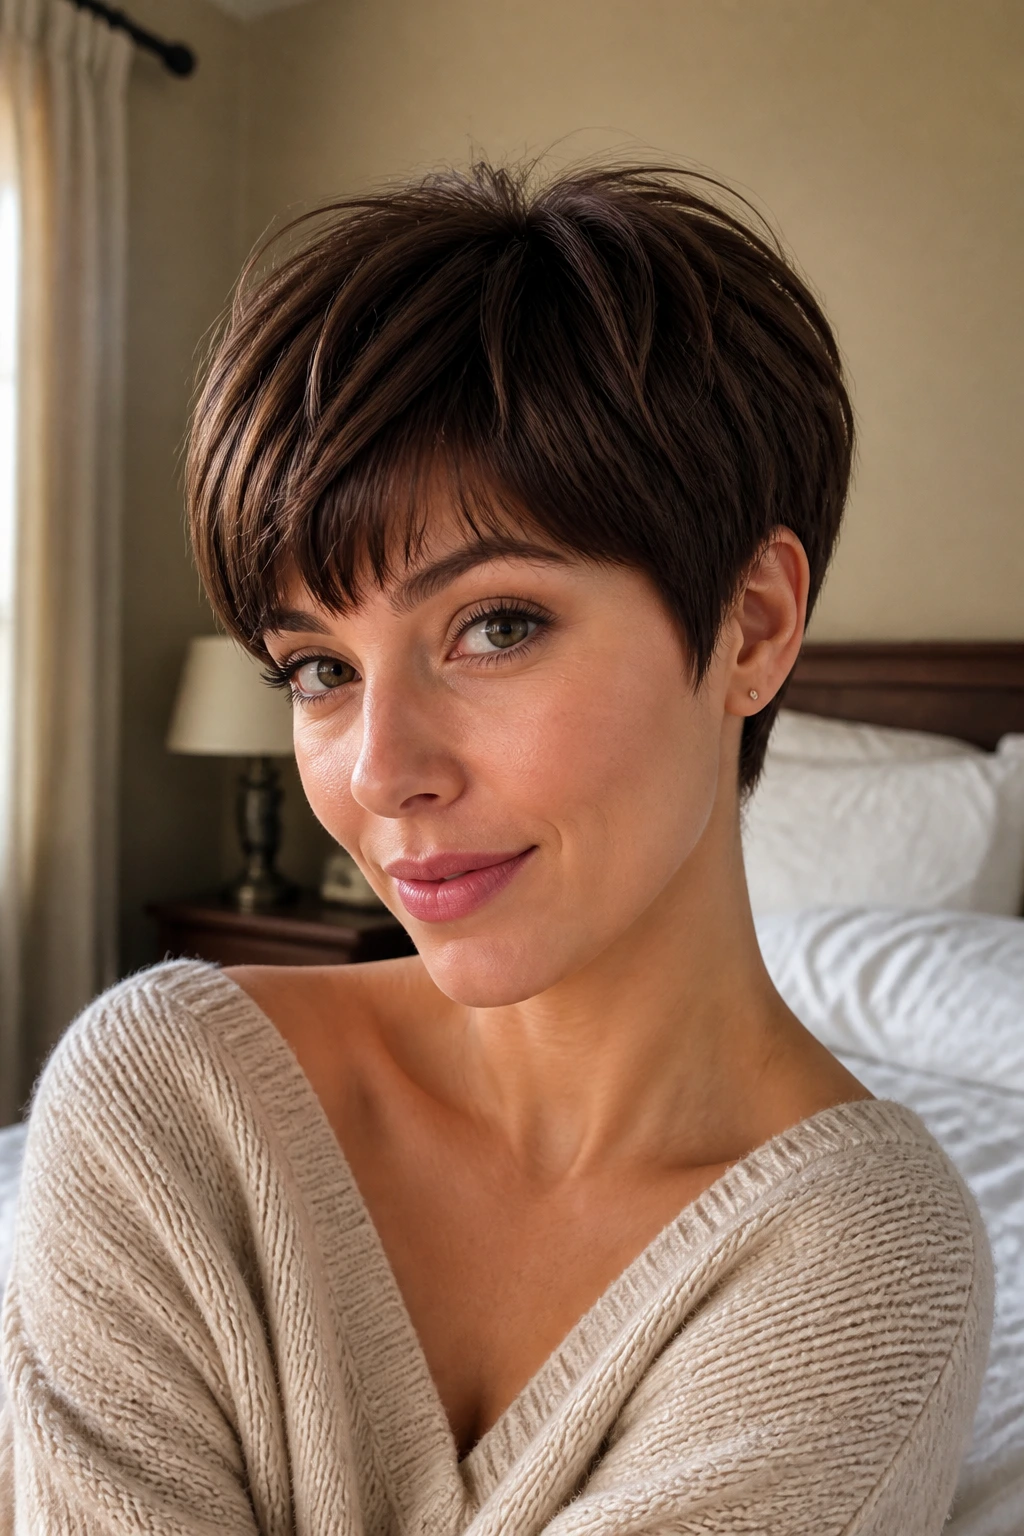
Rounded crops work when you want softness at the edges. The silhouette curves around the head instead of stopping in hard corners, which makes the cut feel gentler through the temples and nape.
That rounded line can be lovely on stronger features or square jawlines because it takes some of the edge out of the face. It also works well if you want your short hair to look polished without looking severe. Keep the top softly layered and the sides curved in just enough to avoid bulk. Too much roundness and you get a mushroom. Too little and you lose the point of the shape.
31. Sculpted Quiff Pixie
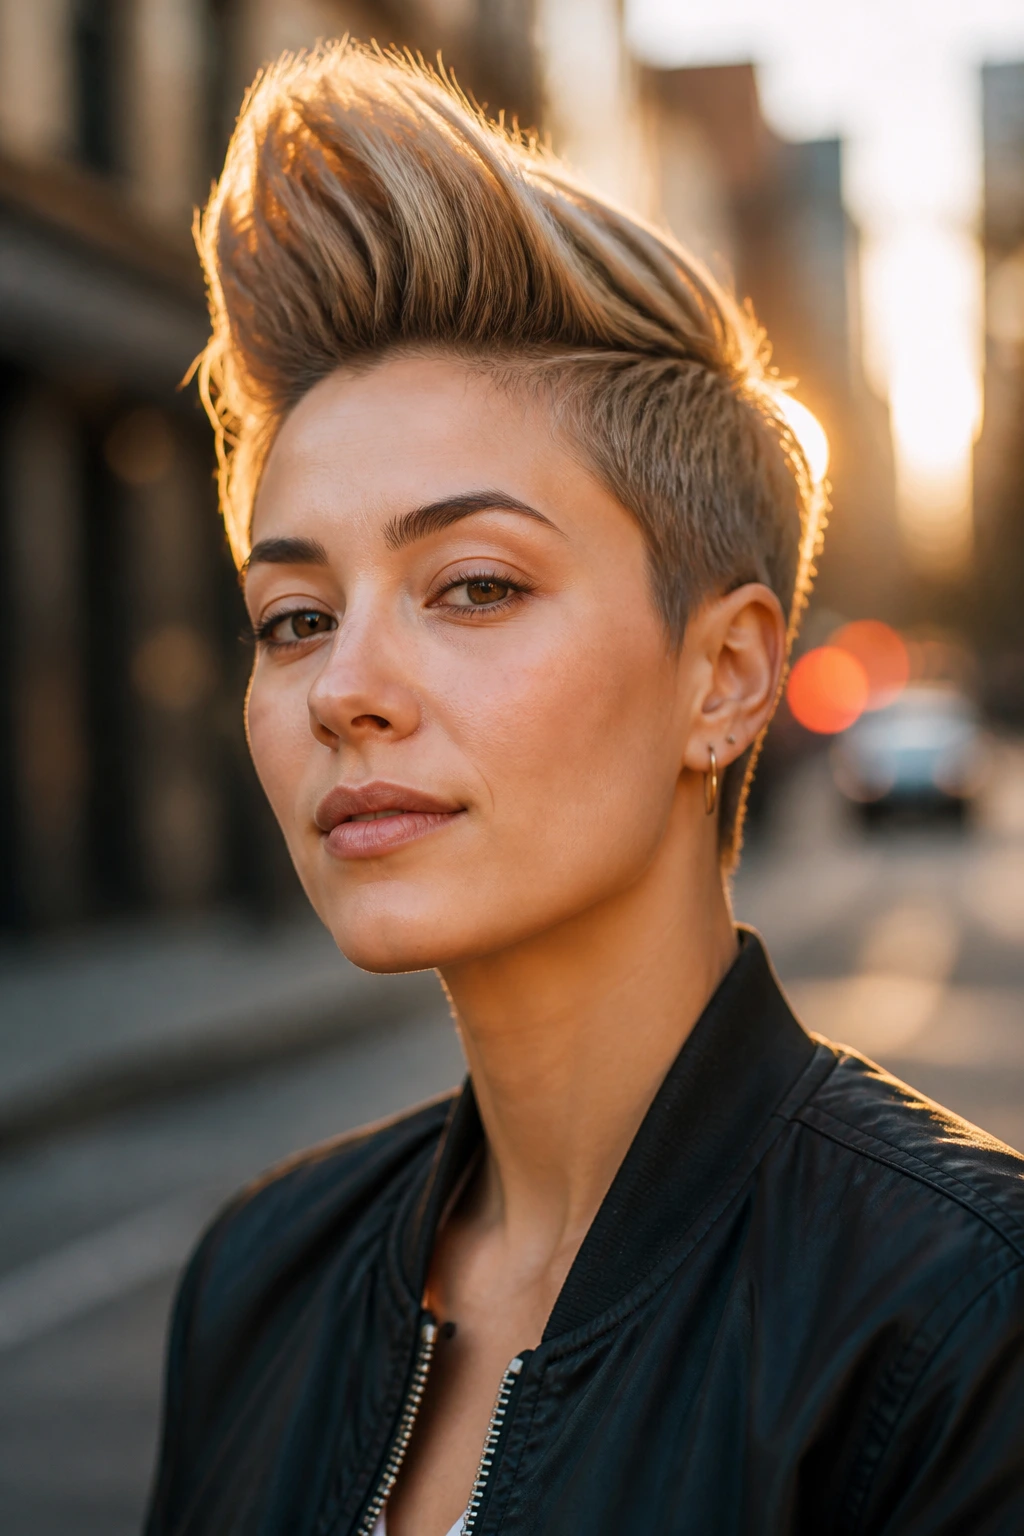
A sculpted quiff is what happens when a pixie borrows from old-school pompadours. The front is lifted and shaped upward or slightly back, while the rest of the cut stays short enough to keep the silhouette clean.
This one has presence. It suits people who want height and a little drama at the forehead without committing to a full faux-hawk. Blow-dry the front section upward first, then set it with paste or a flexible-hold product. If the quiff collapses, the issue is usually at the roots, not the ends. Dry the base properly and the whole thing behaves better.
32. Choppy Razor Pixie
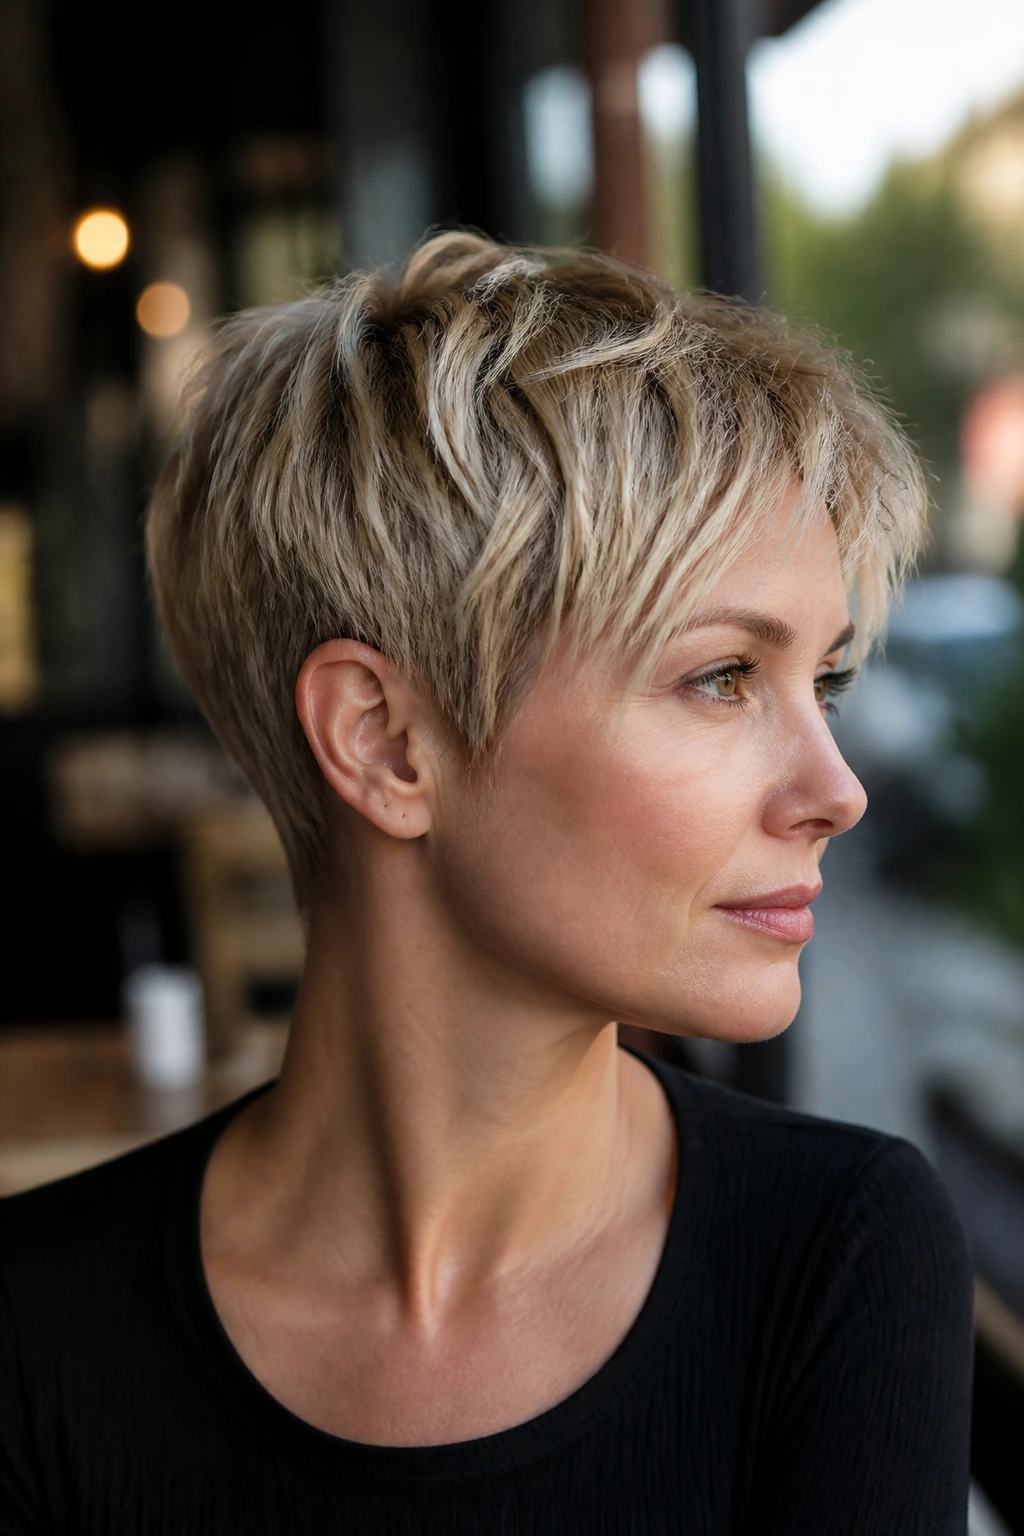
Razor-cut ends give the last entry its bite. The lines feel softer than scissor-clean edges, but sharper in texture, which creates that slightly undone, editorial look people chase in short hair.
This cut likes movement, not perfection. It works on straight or slightly wavy hair, especially if you want the fringe and top to separate into visible pieces instead of one solid block. A razor should only be used by someone who knows how your hair reacts; on fine hair, it can make the ends too wispy, and on thick hair it can turn blunt mass into frizz if the hand is rough. Good razor work looks light. Bad razor work looks like a rescue project.
What Makes a Pixie Cut Work on Short Hair
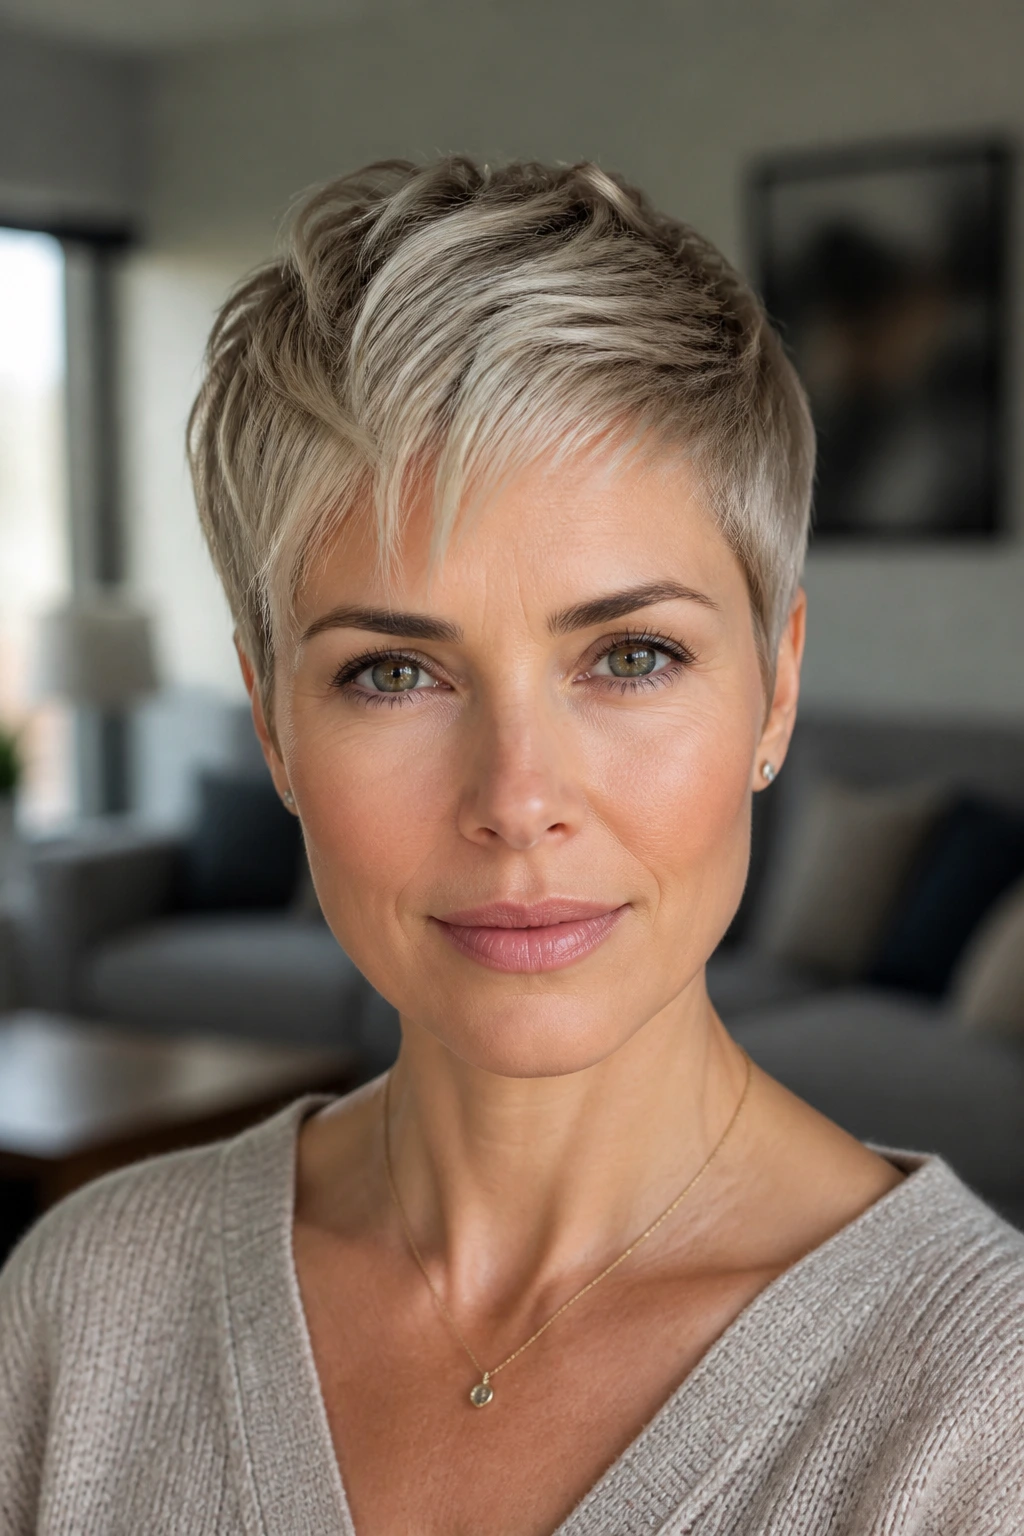
A pixie cut is not about being brave enough to go short. That part is easy. The hard part is shaping the short hair so it still looks like a choice instead of a shortcut.
The silhouette matters most. Think in three zones: fringe, crown, and nape. If all three zones are the same length, the cut usually sits too flat. If the crown is too full and the nape too wide, the head starts to look boxy. If the fringe is cut too short before you understand the cowlicks, the front can kick up in ways no styling cream can fix. The balance between those zones is what gives a pixie its outline.
Crown height changes everything
A little lift at the crown can make a short haircut feel airy and modern. Too much lift, and the top starts to float away from the face. That’s where root direction and interior layering matter more than the product sitting on the shelf.
The nape does quiet work
The back of the neck is not background. A tapered, clean nape keeps the haircut from looking bulky when you turn your head or wear a high collar. Skip that, and even a well-cut top can look unfinished.
Cowlicks are the boss
They decide where your fringe lands and how the top wants to separate. A good stylist cuts with those growth patterns in mind. A bad one fights them. You already know which result lasts longer.
Essential Tools for Styling Pixie Cuts
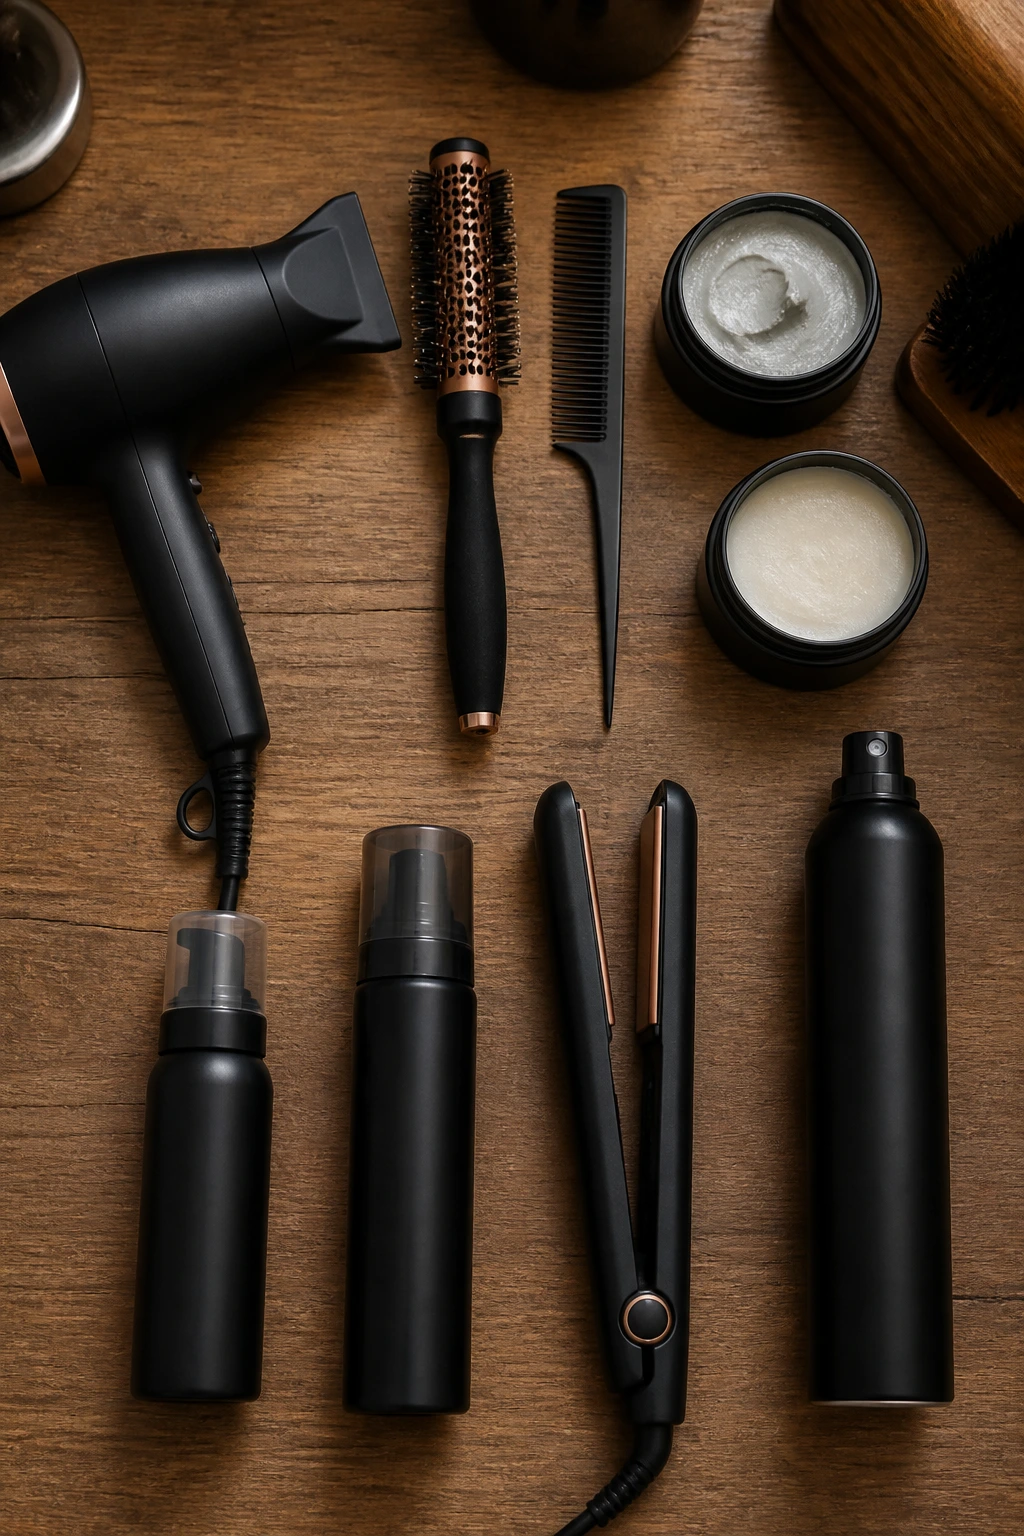
- A blow-dryer with a narrow nozzle: It gives you more control at the crown and fringe, where a few degrees of direction make a real difference.
- A small round brush: Helpful for shaping the front of a longer pixie or lifting roots without puffing the whole head.
- A fine-tooth comb: Best for slicked-back styles, wet looks, and clean side parts.
- Matte paste or styling wax: Use a pea-size amount to give choppy and textured cuts separation without shine.
- Lightweight mousse: Good for fine hair, wavy hair, and any style that needs lift at the roots before drying.
- Dry shampoo: Not only for greasy roots; it also adds grip on day two and helps bangs sit with a little more shape.
- 1-inch flat iron: Optional, but useful for bending the fringe or smoothing a stubborn side panel.
- Flexible-hold hairspray: Locks the shape without turning the cut into a helmet.
How to Choose the Right Pixie for Your Face Shape and Texture
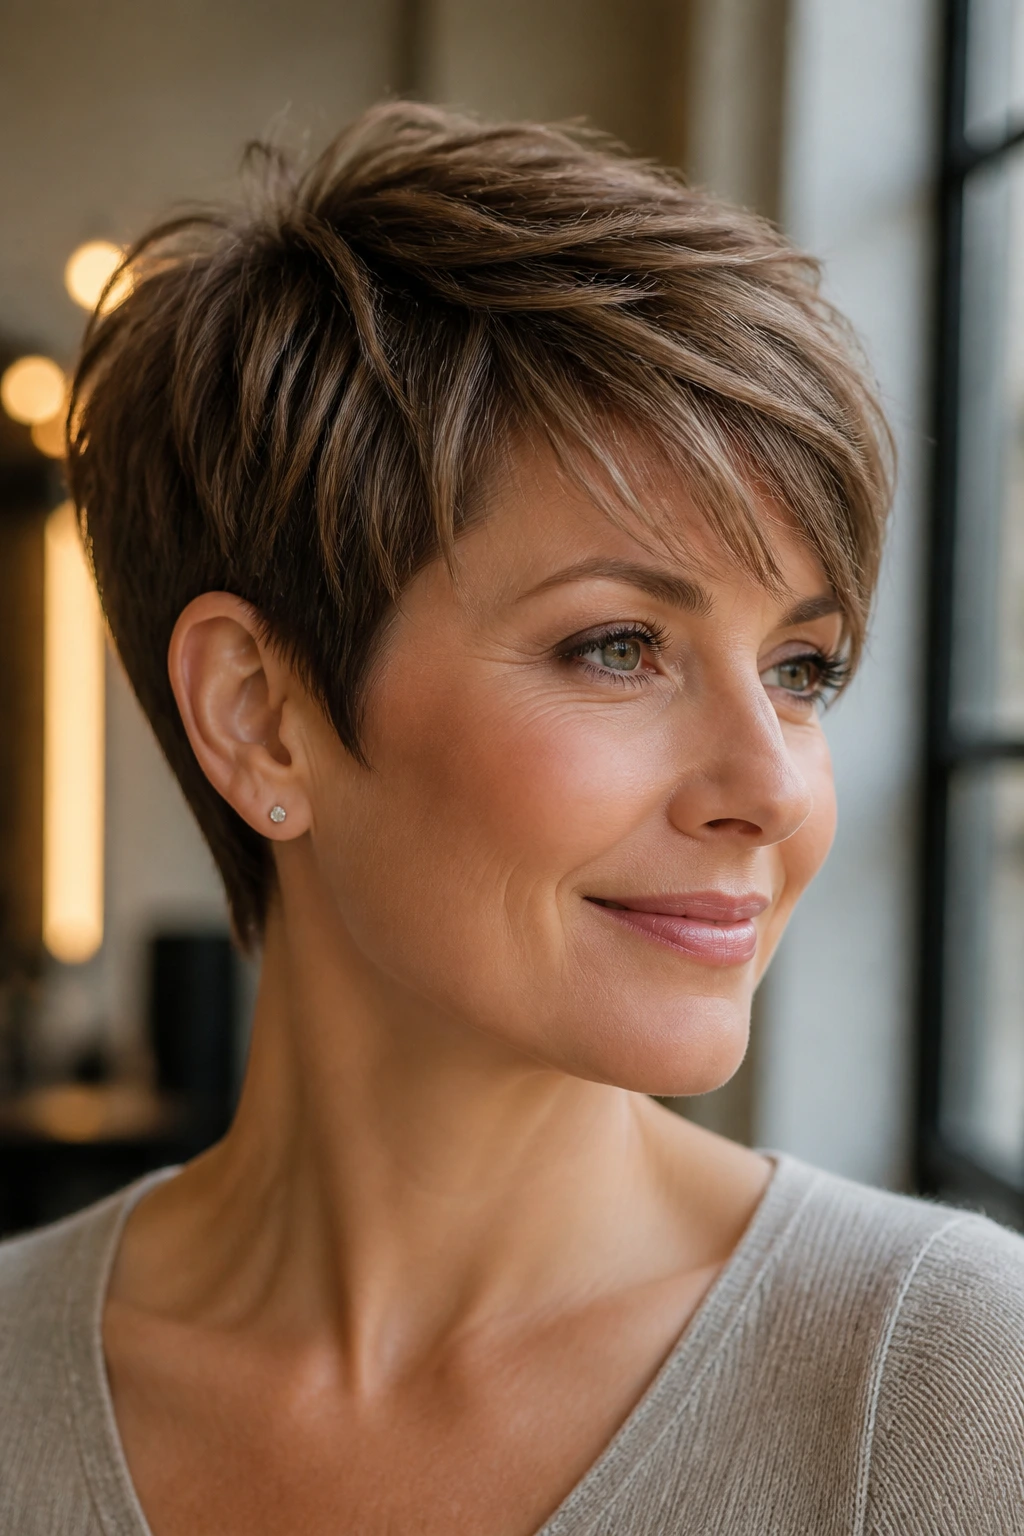
The best pixie is the one that works with your hairline and your texture before it tries to flatter your face. That sounds blunt because it is. A face shape matters, sure, but a cowlick at the temple or a heavy crown can decide more than cheekbones ever will.
If your hair is fine
Choose textured or layered versions that keep some density at the ends. Fine hair usually looks better with a little choppiness or a crown-lift shape than with an aggressively thinned-out crop.
If your hair is thick
Go for tapering, internal debulking, or an undercut. Thick hair needs room removed from the inside, not just the outline shaved shorter. That is how you stop the mushroom effect.
If your hair is curly or coily
Keep enough length for the curl to show its pattern. Dry cutting helps, and so does leaving the top a little longer than you would on straight hair. Short curls spring up fast.
If your face is round or wide
Try side-swept, asymmetrical, or crown-volume shapes. They draw the eye vertically and keep the haircut from widening at the cheeks.
If your face is long or narrow
Fringe helps. So does a little side softness around the temples. A micro-short top can exaggerate length if there’s no balance near the forehead.
How to Style Pixie Cuts for Short Hair Without Fuss
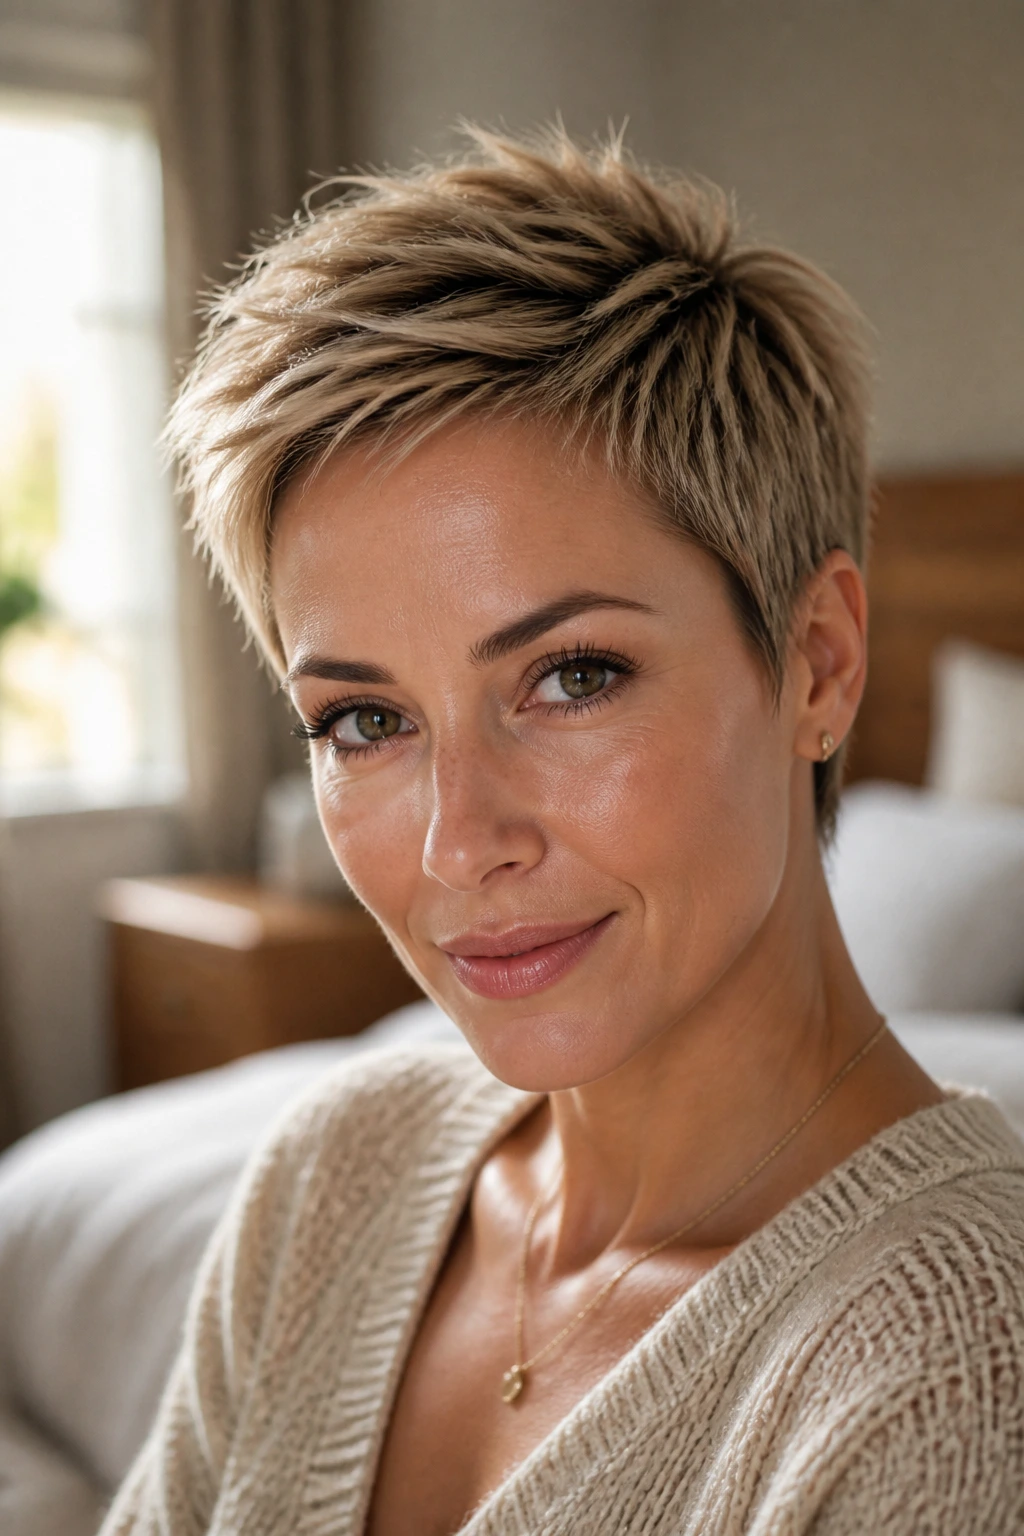
Start with damp hair, not soaking wet hair. That small difference matters because product spreads better on damp strands and the roots dry with more control. A mousse at the crown gives lift, while a cream or paste on the ends helps the pieces stay defined.
- Apply the base product first. Work a small amount of mousse or light cream through the top and crown. Use less than you think; short hair goes heavy fast.
- Dry the roots in the direction you want the hair to sit. Lift at the crown with your fingers or a small brush. If your part is deep, dry against the part first for a bit of extra height.
- Shape the fringe last. The front always needs the most judgment. Push it side to side, then stop when it falls in the direction that looks cleanest.
- Add texture only at the ends. Rub a tiny amount of paste between your fingers and pinch the ends or fringe pieces. Do not drag it through the scalp.
- Finish with a light mist. Flexible spray holds the shape without freezing movement.
The biggest mistake is styling the whole head as if it were one surface. It isn’t. The crown, fringe, and nape each need different handling.
How to Wear a Pixie With Glasses, Earrings, and Necklines

A pixie changes how the rest of your face and outfit reads. That is part of the fun. With glasses, I like a fringe that either sits just above the frame or sweeps cleanly to one side. Bangs that hit the glasses right in the middle get annoying fast.
Earrings suddenly matter more, too. A tucked side or an ear-length cut gives hoops, studs, and longer drops room to show up. If you like necklaces and higher necklines, a cleaner nape keeps the line from feeling crowded. With open collars, a softer fringe can keep the look from going too stark. Small details. They carry more weight than people expect.
Trims, Grow-Outs, and Day-Two Hair
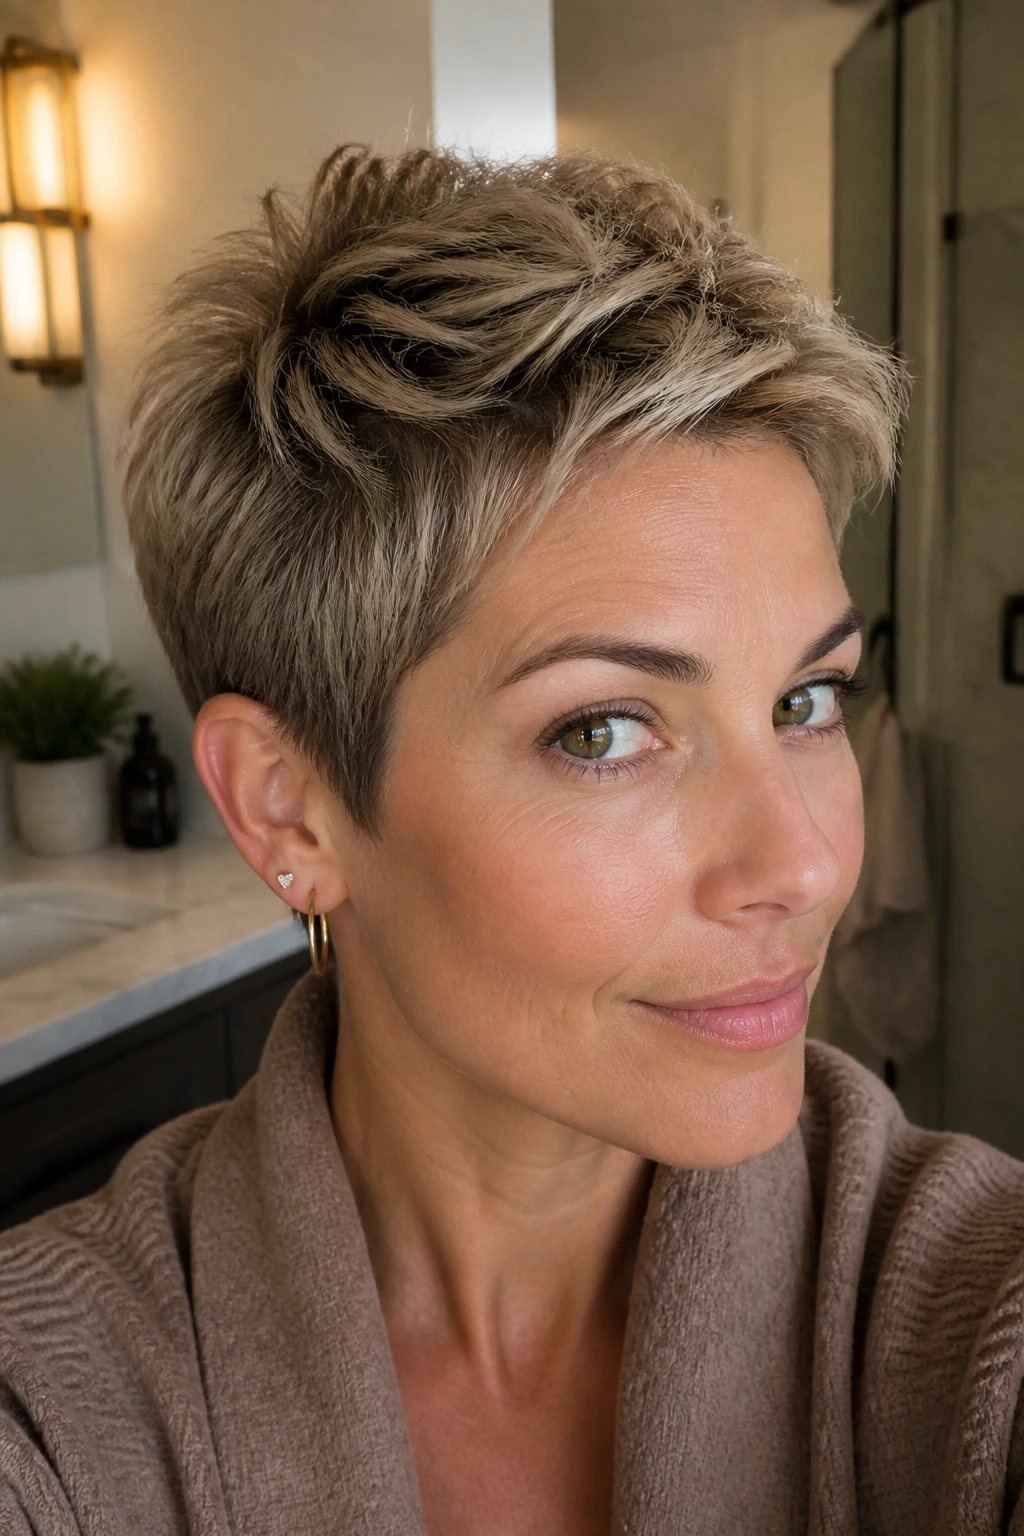
Short hair grows fast enough to show it and slow enough to annoy you. That means trims matter. Micro pixies usually need cleanups every 3 to 4 weeks if you want the shape to stay sharp. Classic pixies can stretch to about 5 or 6 weeks. Softer, shaggy, and grown-out versions often make it to 6 to 8 weeks without looking abandoned.
Day-two hair is not a problem on every pixie. In fact, textured cuts often look better after a night’s sleep. A little water mist, a pea-size bit of paste, and a touch of dry shampoo at the roots can bring the shape back without a full wash. If the front starts sticking up, dampen just the fringe and re-dry it for 20 seconds. Do not soak the whole head again unless you want to start over.
Common Mistakes That Make Short Pixies Fight Back
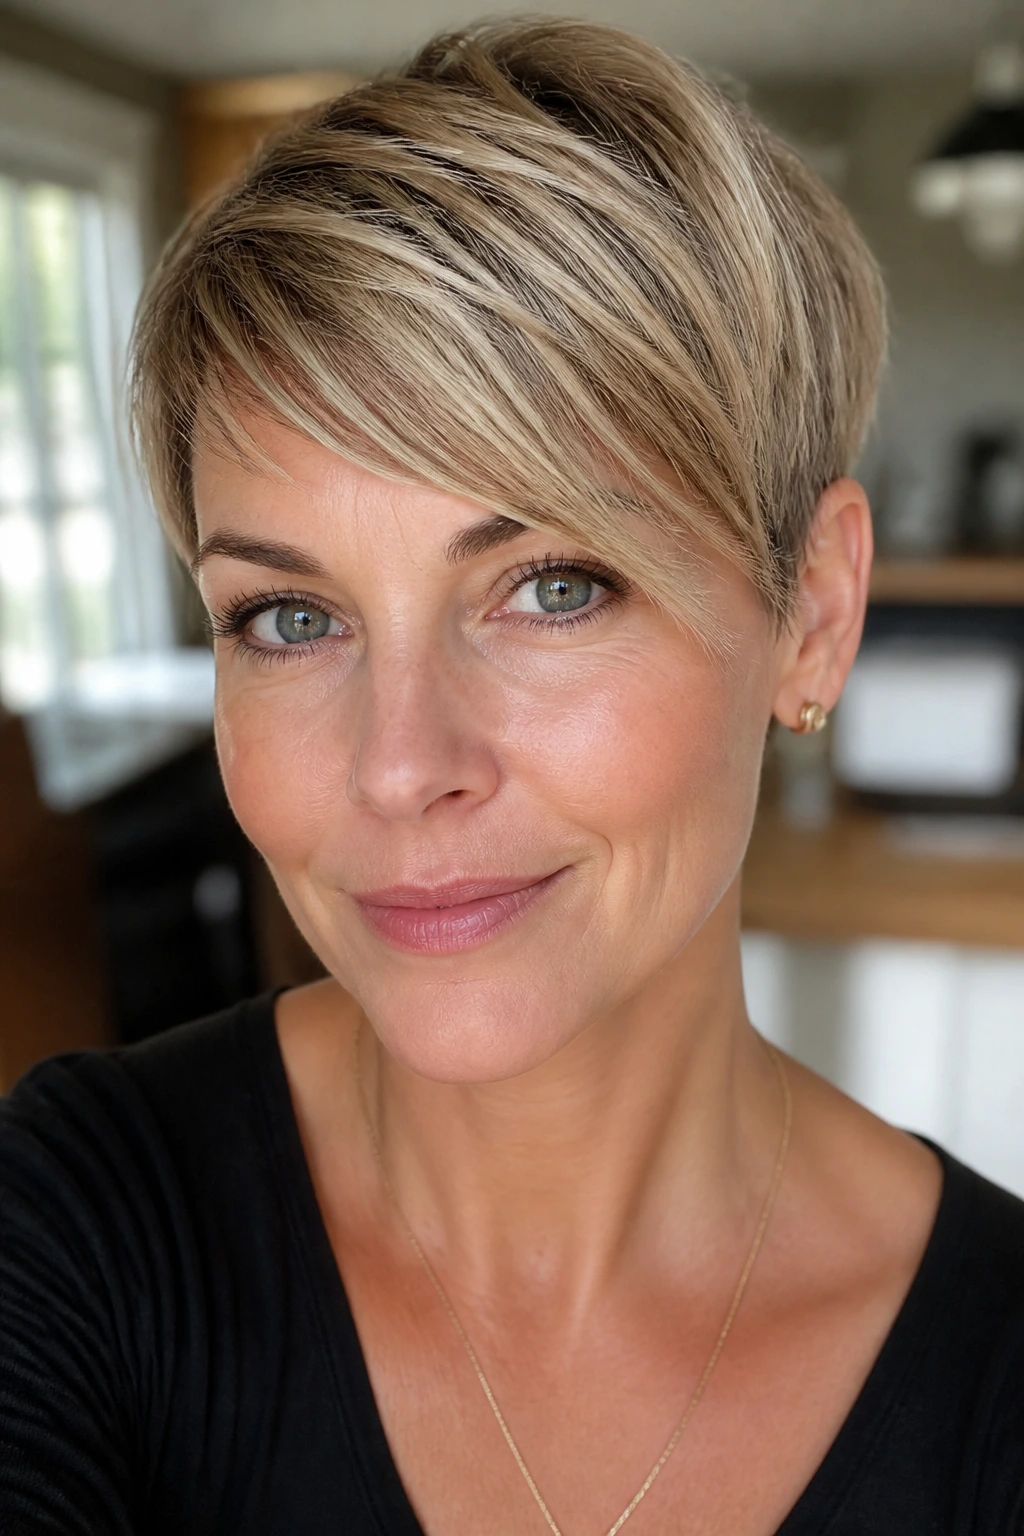
- Cutting the fringe too short too soon: The front frames the face, and once it’s gone, there’s no temporary fix. Leave the fringe longer on the first cut and shorten later if needed.
- Over-thinning fine hair: If the cut looks airy in the chair and see-through at home, too much density was removed. Fine hair needs shape, not holes.
- Ignoring the nape: A neglected back line makes the whole haircut look late for something. Ask for a tidy neckline, even if the top stays soft.
- Using too much product: Pixies need a little help, not a full coating. Heavy wax or gel can flatten the crown and make the hair separate in greasy-looking chunks.
- Forgetting growth patterns: Cowlicks at the temple or crown can flip a fringe in the wrong direction. A good cut accounts for those patterns before the first snip.
Ways to Customize a Pixie Without Losing Its Shape
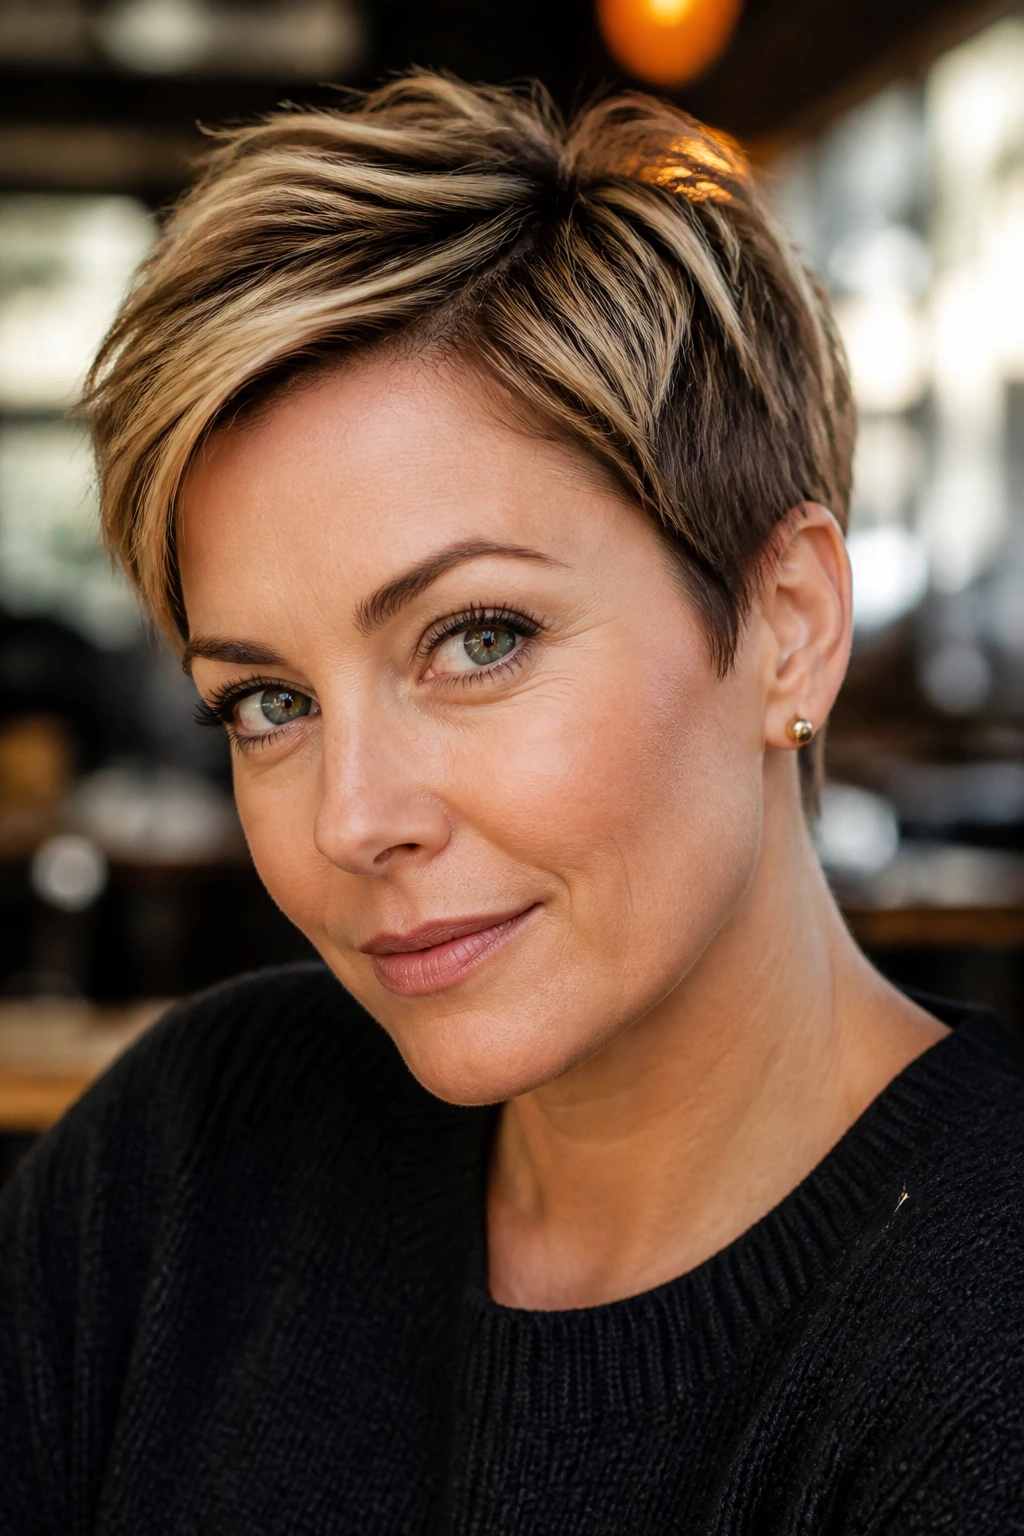
- Shift the Part: Move the part a half-inch deeper or farther over, and the cut suddenly feels sharper, softer, or more lifted.
- Raise the Fringe: Keep the front slightly longer if you want softness around the eyes. Shorten it if you want a cleaner, more severe line.
- Change the Finish: Matte paste gives a choppy pixie grit; gloss cream makes a slick pixie feel polished.
- Adjust the Nape: A tighter neckline gives the cut edge. A softer taper keeps it from feeling too severe.
- Add Color With Purpose: A few lighter pieces near the fringe or crown can make texture show up more clearly on camera and in daylight.
- Use Ear Tucks and Clips: One tucked side or a tiny clip changes the mood without changing the actual haircut.
Frequently Asked Questions About Pixie Cuts for Short Hair
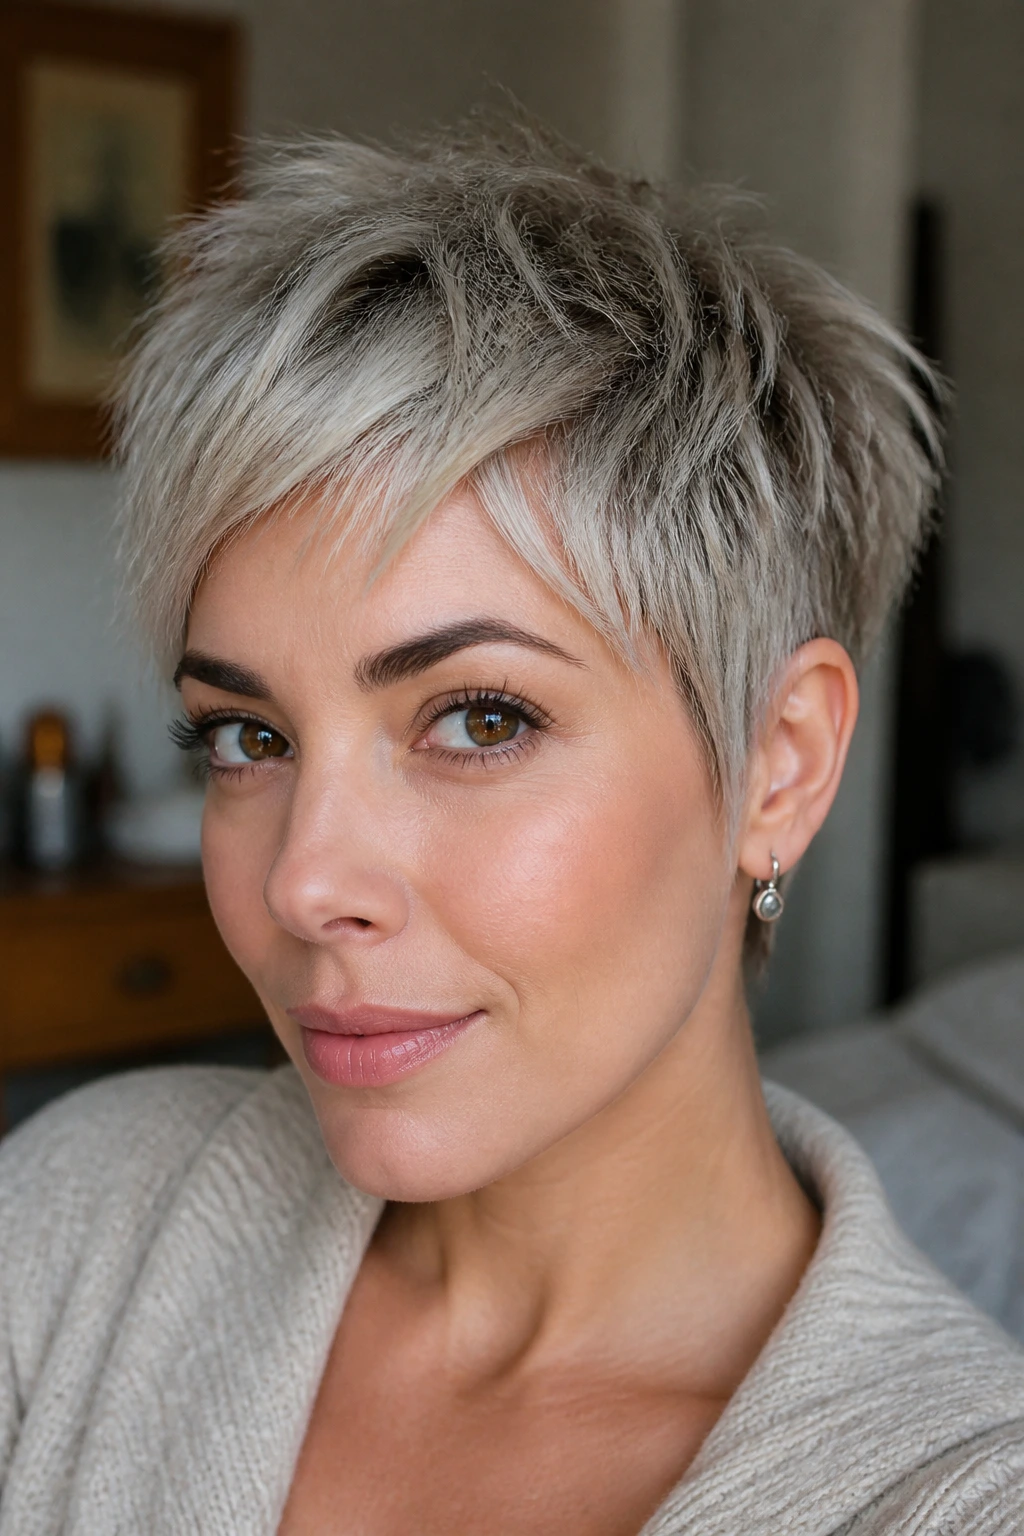
Will a pixie cut work if my hair is really fine?
Yes, but the cut has to keep some density at the perimeter. Fine hair usually looks better with texture on top and a neat nape than with aggressive thinning everywhere.
Are pixie cuts hard to maintain?
The short answer is yes and no. Styling can take only a few minutes, but the shape needs trims more often than a bob or lob. If you want the cut to stay crisp, expect regular cleanups.
Can curly hair wear a pixie without looking bulky?
Absolutely, if the cut leaves enough room for the curl pattern and the stylist shapes it with shrinkage in mind. A dry cut and a diffuser usually help.
What if I have a cowlick at the front?
Tell your stylist before the cut starts. The fringe length and direction should work with the cowlick, not against it, or you’ll spend every morning trying to flatten something that wants to stand up.
Do pixie cuts suit round faces?
They can, especially versions with side-swept fringe, asymmetry, or crown height. The goal is to keep the shape from widening at the cheeks.
How do I grow out a pixie without looking awkward?
Keep the nape and sides trimmed while the top grows. That keeps the outline tidy enough to move through the in-between stage without looking sloppy.
Can I still wear glasses with a pixie?
Yes, and a lot of pixie cuts actually look better with frames. A side-swept fringe or a bit of ear length helps the haircut sit around the glasses instead of colliding with them.
Should I use pomade or paste?
Paste is better for matte texture and piecey ends. Pomade gives more shine and a smoother finish. If you want movement, start with paste and use less than you think.
The Cut That Gives Short Hair a Real Outline
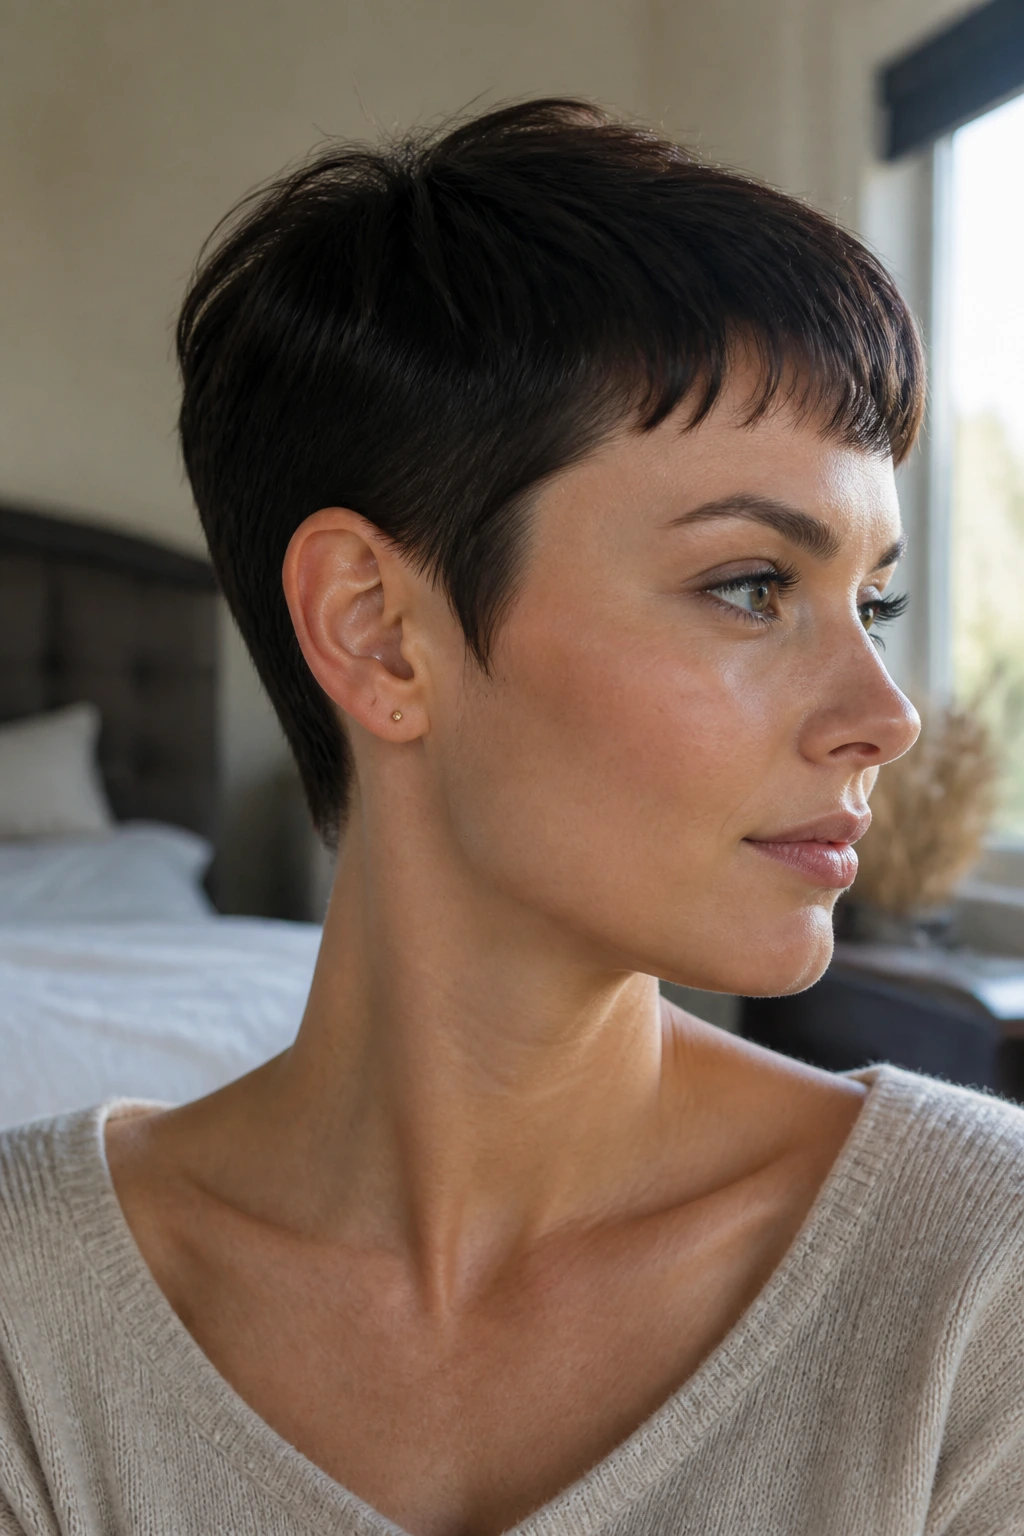
The best pixie cuts do not just shorten the hair. They give the head a shape you can see from the front, the side, and the back. That is why a well-cut pixie can look soft, sharp, messy, or polished without changing length by much at all.
If you’re choosing one, start with the version that matches your texture and your tolerance for trims. That’s the part people skip, and it’s usually the part that decides whether the haircut feels easy or irritating. Short hair rewards clarity.
When the shape is right, you stop thinking about the cut and start noticing the line of your neck, the framing around your eyes, and the way a small sweep of fringe can change the whole face. That’s the real appeal here.
