



Thin hair and a shag haircut can get along beautifully—if the layers are cut with restraint. The problem is that a lot of shag inspiration online was built for denser hair, the kind that can survive heavy texturizing and still look full after a rough dry. Fine strands are less forgiving. Take too much from the ends, and the whole shape starts looking transparent, especially around the neck and temples.
The sweet spot is a shag that gives movement where the hair can handle it: at the crown, around the cheekbones, and through the front. Keep a little weight at the perimeter. That line at the bottom matters more than people think. It is the difference between “airy and full” and “why do my ends look like one sad thread?”
I keep coming back to this because it’s the part most haircut photos skip. A good shag for thin hair is not just about looking edgy or lived-in. It’s about building a shape that survives a windy sidewalk, a day at work, and the second day after wash day when your roots have already started to flatten. That’s the real test.
Why These 32 Shag Haircuts Work on Thin Hair

- Perimeter weight: These cuts keep enough fullness at the bottom that the hair doesn’t break into see-through wisps.
- Lift in the right places: Crown layers and face-framing pieces create height without shredding the whole head.
- Length options: Some versions stay near the jaw, some skim the collarbone, and some keep long hair intact, so you can choose the amount of change you want.
- Better grow-out: A thoughtfully cut shag stays wearable for weeks because the shape was built on purpose, not hacked into place.
- Styling flexibility: Most of these cuts can be worn smooth, tousled, air-dried, or curled with a large iron without losing their line.
1. Airy Shoulder-Length Shag
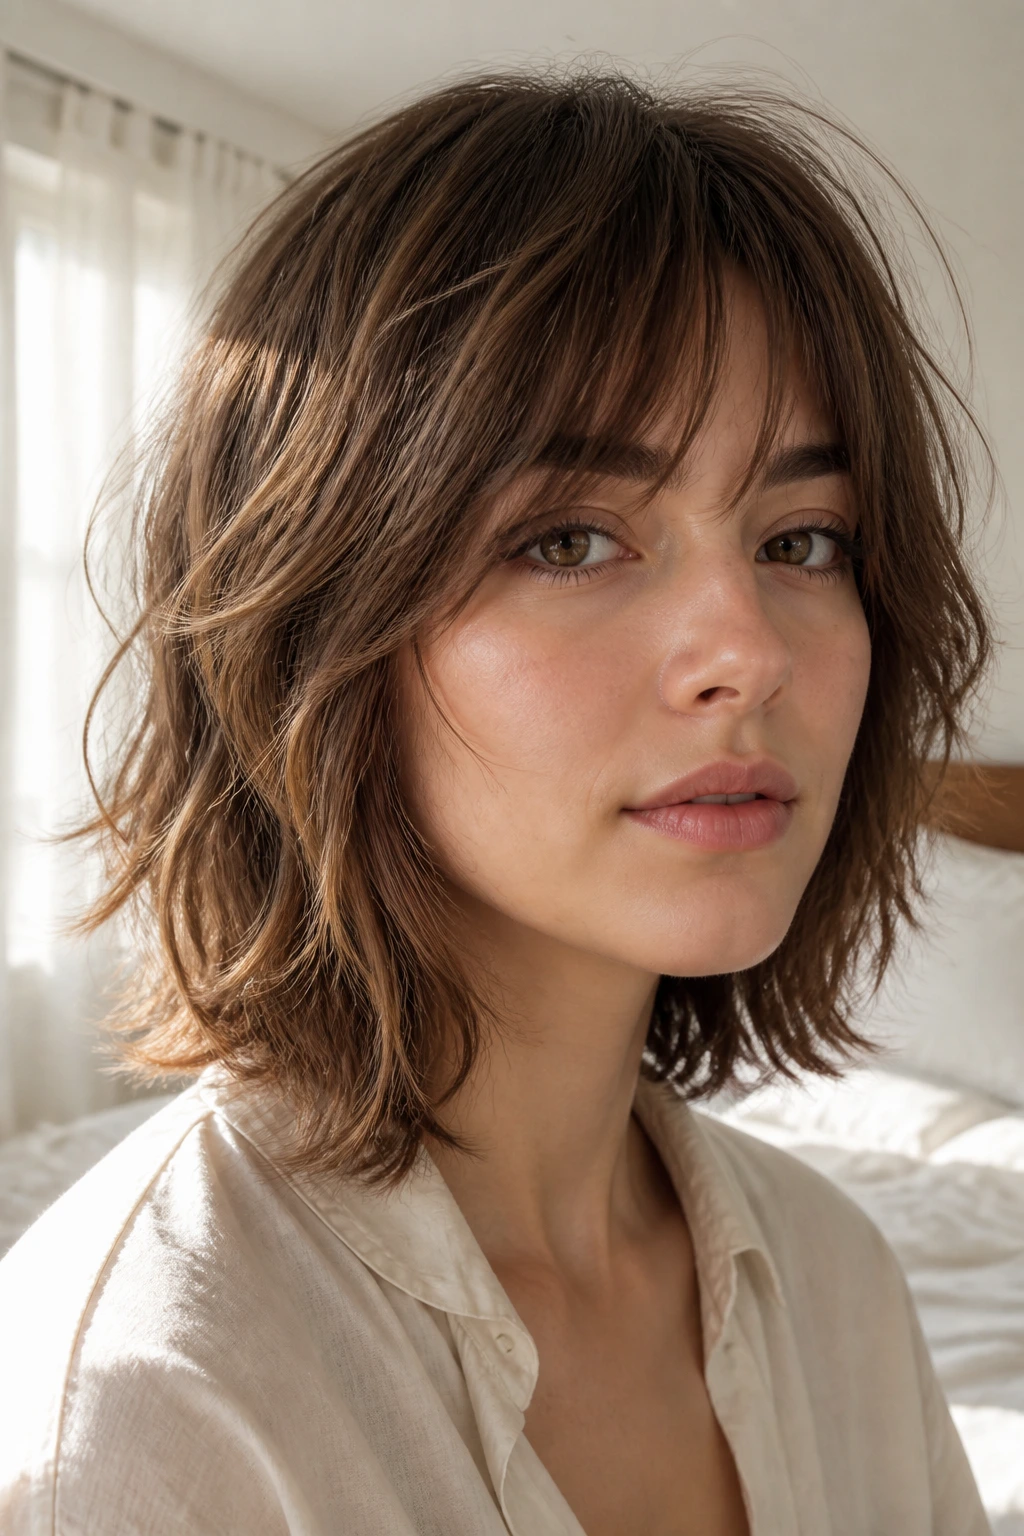
This is the shag I reach for first when someone wants movement but not drama. The length sits around the shoulders or just below the collarbone, which gives thin hair a little anchor at the ends. That anchor matters. Without it, the strands can start separating into little strings the second they dry.
Why It Helps Thin Hair
Ask for layers that begin below the cheekbone and travel softly through the mid-lengths. The front can be slightly shorter than the back, but the bottom line should stay visible. That bluntness keeps the haircut from collapsing.
A light curtain fringe works well here, especially if your forehead is a little broad or your crown goes flat fast. Blow-dry the fringe forward first, then curve it away from the face with a round brush. It should look soft, not overworked.
- Start with a collarbone-length perimeter for fullness.
- Keep the top layers light so they lift without exposing the scalp.
- Avoid heavy thinning shears through the ends.
- Use a pea-sized mousse at the roots, not all over the length.
Best move: dry the first two inches at the root before you fuss with the rest. That small step changes the whole shape.
2. Curtain-Bang Lob Shag

If you want a shag that still feels polished, this is the easy place to start. The lob length keeps enough density through the bottom, while curtain bangs split the face in a way that makes the hair look more deliberate. Thin hair loves a clean outline with some movement inside it.
The trick is not to carve too much into the sides. A lot of lobs go wrong because the front gets too airy and the back ends up hanging flat. Here, the layers should skim, not slice. I like this version on people who wear a center part and do not want to fight their cowlick every morning.
The fringe should open around the cheekbones, then blend into the front layers. When it’s styled correctly, the shape creates the illusion of width through the upper half of the haircut. That’s useful. Really useful.
3. Chin-Length Shag Bob
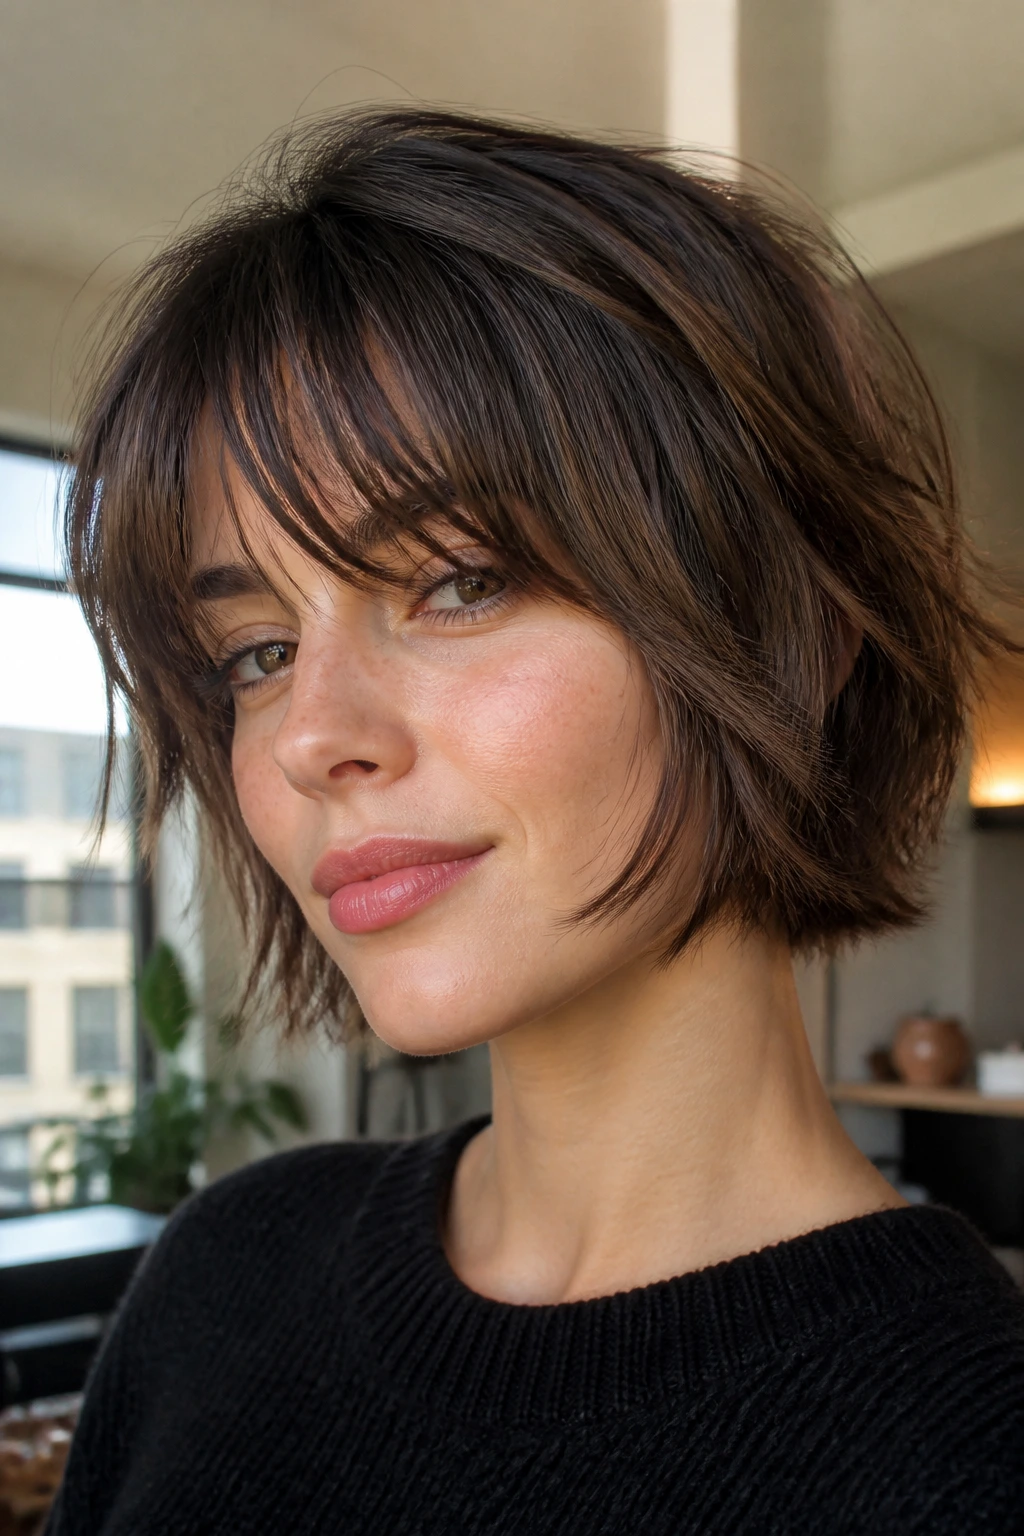
Can a bob be shaggy without looking sparse? Yes, and this is the proof. A chin-length shag bob gives thin hair a compact shape, which often reads as fuller than a longer cut with too many layers. The line at the jaw holds everything together.
How to Ask for It
Tell your stylist you want a bob with soft internal layers, not a heavily thinned-out finish. The outer edge should stay blunt around the jaw, while the inside gets just enough movement to keep the shape from feeling helmet-like.
A small amount of crown lift makes this cut feel modern rather than stiff. Think of it as a bob with a little attitude, not a chopped-up pixie. It also works well if your hair naturally tucks behind the ears, because the shorter length still has enough body to sit there without vanishing.
- Keep the length at or just below the chin.
- Let the front pieces angle forward slightly.
- Use a round brush or a one-and-a-half-inch iron for a soft bend.
- Skip aggressive razoring if the hair is very fine.
4. Collarbone Razor Shag

This one looks light, but it needs a careful hand. Collarbone length gives thin hair enough heft to swing, while razor-cut layering softens the shape around the face. If the razor is used gently, the finish feels feathered instead of shredded.
The reason this cut works is balance. The long layers prevent the style from turning into a triangle, but the ends remain full enough that you still see a line when the hair moves. That line is the guardrail. Without it, the haircut can go wispy in a hurry.
I like this cut on hair that has a little natural wave or bend. On pin-straight hair, you may need a quick blow-dry with a round brush to get the layers to show. But once it’s shaped, it has a nice swing that makes thin hair look less limp.
5. Feathered Pixie Shag
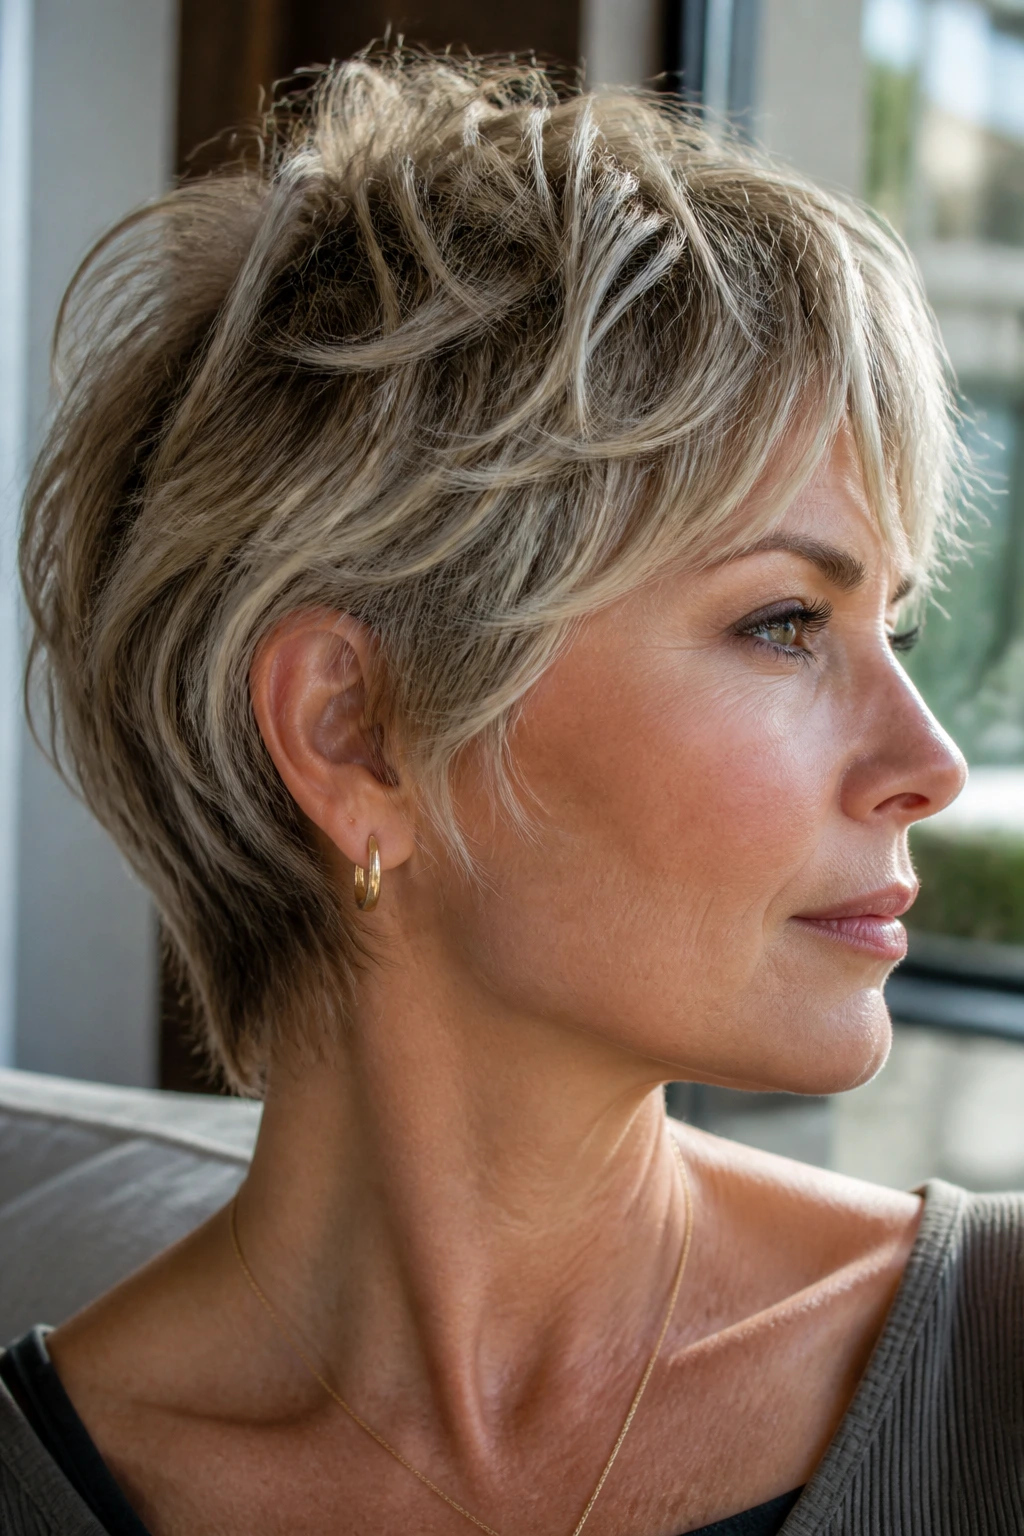
Short hair with texture can be a gift for thin strands. A feathered pixie shag builds height through the top and keeps the sides clean, so the hair never has to pretend it’s denser than it is. It’s compact, quick, and a little bit cheeky.
The crown should stay soft and lifted, not over-thinned. If the top is cut too aggressively, the style starts separating into tiny pieces that sit flat by lunch. Better to keep some length through the top and let the fringe and side pieces do the work.
This is a good cut for someone who likes to finger-style and move on. A matte paste, a dab of wax, or a light styling cream is enough. No heavy gloss. No oil slick. The point is piecey movement, not shine that collapses the silhouette.
6. French Shag with Bottleneck Bangs

This cut sits between relaxed and refined, which is why it works so well on fine hair. Bottleneck bangs are narrow at the center and slightly wider as they move outward, so they frame the face without eating too much density from the front. That’s a smart trade.
Unlike a blunt fringe, this bang shape grows out gracefully. It also keeps the top of the haircut from looking empty, because the bangs are soft enough to blend into the side layers. That blend matters on thin hair. Hard lines can make the top look sparse if the fringe is too short.
The rest of the cut should stay light around the cheekbones and jaw, with the longest pieces grazing the collarbone. I’d choose this one if you want a haircut that looks styled even when you’ve only used a brush and a bit of mousse.
7. Wolf-Cut Lite

The wolf cut has become the loud cousin in the shag family, but thin hair usually does better with the quieter version. Wolf-cut lite keeps the crown lift and face shape, then stops short of overdoing the back. That restraint is what saves the cut.
A full wolf cut can swallow fine hair if the layers are too disconnected. Here, you want a suggestion of the shape, not a full-on mullet silhouette. Keep the top fluffy enough to rise at the roots, and let the back taper only a little.
This works especially well when your hair has some natural wave. You can scrunch in mousse, diffuse for five minutes, and get a shape that looks intentional. If your hair is straight, ask for softer transitions between the layers so the cut doesn’t land in choppy territory.
8. Blunt-End Shag Lob

This is one of my favorites for thin hair because it refuses to pretend that more layers are always better. The internal layering gives the lob movement, but the ends stay blunt. That one choice keeps the whole haircut from looking too feathery.
If your ends already feel fragile, this is the safer move. Ask for texture through the midsection and around the face, then keep the hemline dense. The result is a shag that reads soft from the top and solid from the bottom. That combination is gold for fine hair.
A side benefit: the blunt edge looks good air-dried or blown smooth. You’re not trapped in a single styling routine, which matters if your mornings are messy. And honestly, a lot of mornings are.
9. Micro Shag Crop

Very short hair can be a clever move when density is low. A micro shag crop keeps the top piecey and the sides neat, so the eye reads texture before it notices how little hair there is. That’s the whole point.
The crown should be the longest part, with tiny layers that move when you shake your head. The fringe can be wispy or slightly side-swept. What you do not want is a fluffy, over-layered top that turns airy in the wrong way. On a crop, less is more.
This cut needs a little styling product, but not much. A fingertip of paste or cream can give separation without making the roots soggy. If your hair has a bend to it already, even better. The cut will do half the work for you.
10. Side-Part Swoop Shag

A side part can rescue flat hair faster than people like to admit. It shifts the weight, creates a natural lift at the roots, and gives the front more shape. On thin hair, that asymmetry often looks fuller than a rigid center part.
The swoop should start around the arch of the brow and move into the face-framing layers. Keep the opposite side soft, not shaved close to the head. The goal is not drama for drama’s sake. The goal is to trick the eye into seeing more volume on top.
This is the cut I’d point to for anyone whose crown lies flat no matter what product they use. The part itself does some of the volume work. Sometimes that’s enough to save a morning.
11. Bottleneck Bang Shag

Bottleneck bangs earn their keep on thin hair because they create shape without eating density across the whole forehead. The narrow center opens the face, then the wider sides blend into the layers. It looks soft, but it has structure.
This style works best when the rest of the shag stays fairly controlled. If the whole head is heavily shattered, the bangs lose their job and the haircut starts drifting toward chaos. Keep the layers around the cheekbones and jaw soft, and let the fringe be the most defined part.
A round brush helps here, but only on the bangs and front pieces. You do not need a full blowout every time. Even a quick bend with a large iron can make the fringe look finished.
12. Rounded Layered Shag
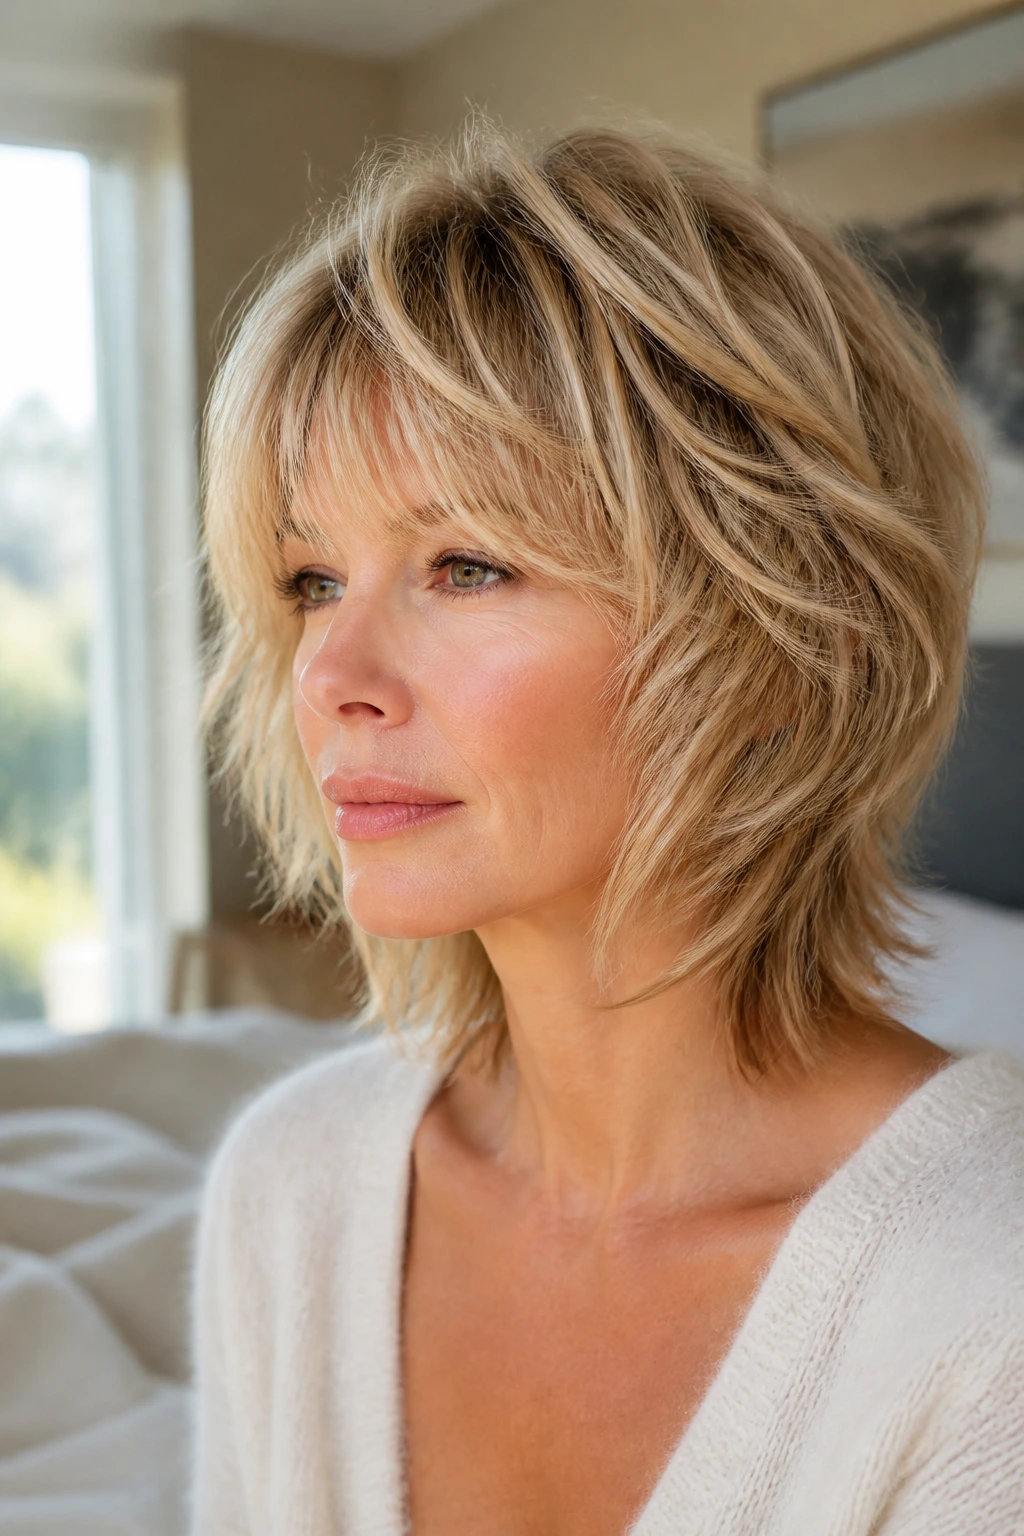
Most people think shag haircuts should be jagged. Not always. A rounded shag can be better for thin hair because it follows the shape of the head and adds fullness through the sides instead of carving holes into the length.
The curve is the trick. The top lifts, the sides stay plush, and the ends fall in a soft arc rather than a broken line. That makes the hair feel thicker from every angle. It also looks cleaner when the weather turns damp and your styling efforts start to sag.
I’d choose this if you want movement but hate the look of obvious choppiness. The haircut should feel touched by scissors, not attacked by them. There’s a difference.
13. Air-Dry Wavy Shag

Some cuts are built for a blow-dryer. This one is built for a towel and a little patience. An air-dry shag works because it respects what your waves already do, then nudges them into shape with longer layers and soft face-framing pieces.
The best version doesn’t have too many short bits around the crown. Those can spring up weirdly once the hair dries. Instead, the layers should encourage a loose bend from the mid-length down. Fine wavy hair can look twice as full when the wave pattern is allowed to do its own thing.
Use a light mousse, scrunch in sections, and stop fussing. Over-handling is the enemy here. Let the cut dry where it wants to dry, then break up the cast with your hands once it’s fully dry.
14. Sleek Straight-Hair Shag

Straight hair can wear a shag, but it needs a more measured cut. Too much texture and the style turns stringy. Too little and it goes flat. The answer is a sleek shag with controlled layers and a clean outline.
I like this version with a side part or a soft center part, depending on the face. The layers should live mostly inside the haircut, so the perimeter remains visible. That helps straight fine hair look fuller from the side.
When you style it, smooth the top with a brush, then add just a small bend through the front pieces. Do not over-curl it. A straight-hair shag works best when it still looks like hair, not an audition for a curling wand commercial.
15. Choppy Midi Shag

The midi length gives you room to play, and the choppy layers keep the cut from hanging like a curtain. This is a strong choice if you want a shag that reads modern but not extreme. The length sits between the shoulders and chest, which gives thin hair a bit of body.
The chop should be noticeable around the ends, not all the way up the head. That keeps the top from going see-through. I’d ask for the layers to start low and the perimeter to stay healthy, because the bottom line is doing a lot of heavy lifting here.
This cut is good if you wear hair half-up often. The shorter face frame still shows when you pull it back, and the rest of the shape keeps some personality. Small win. Big difference.
16. Tapered Nape Shag
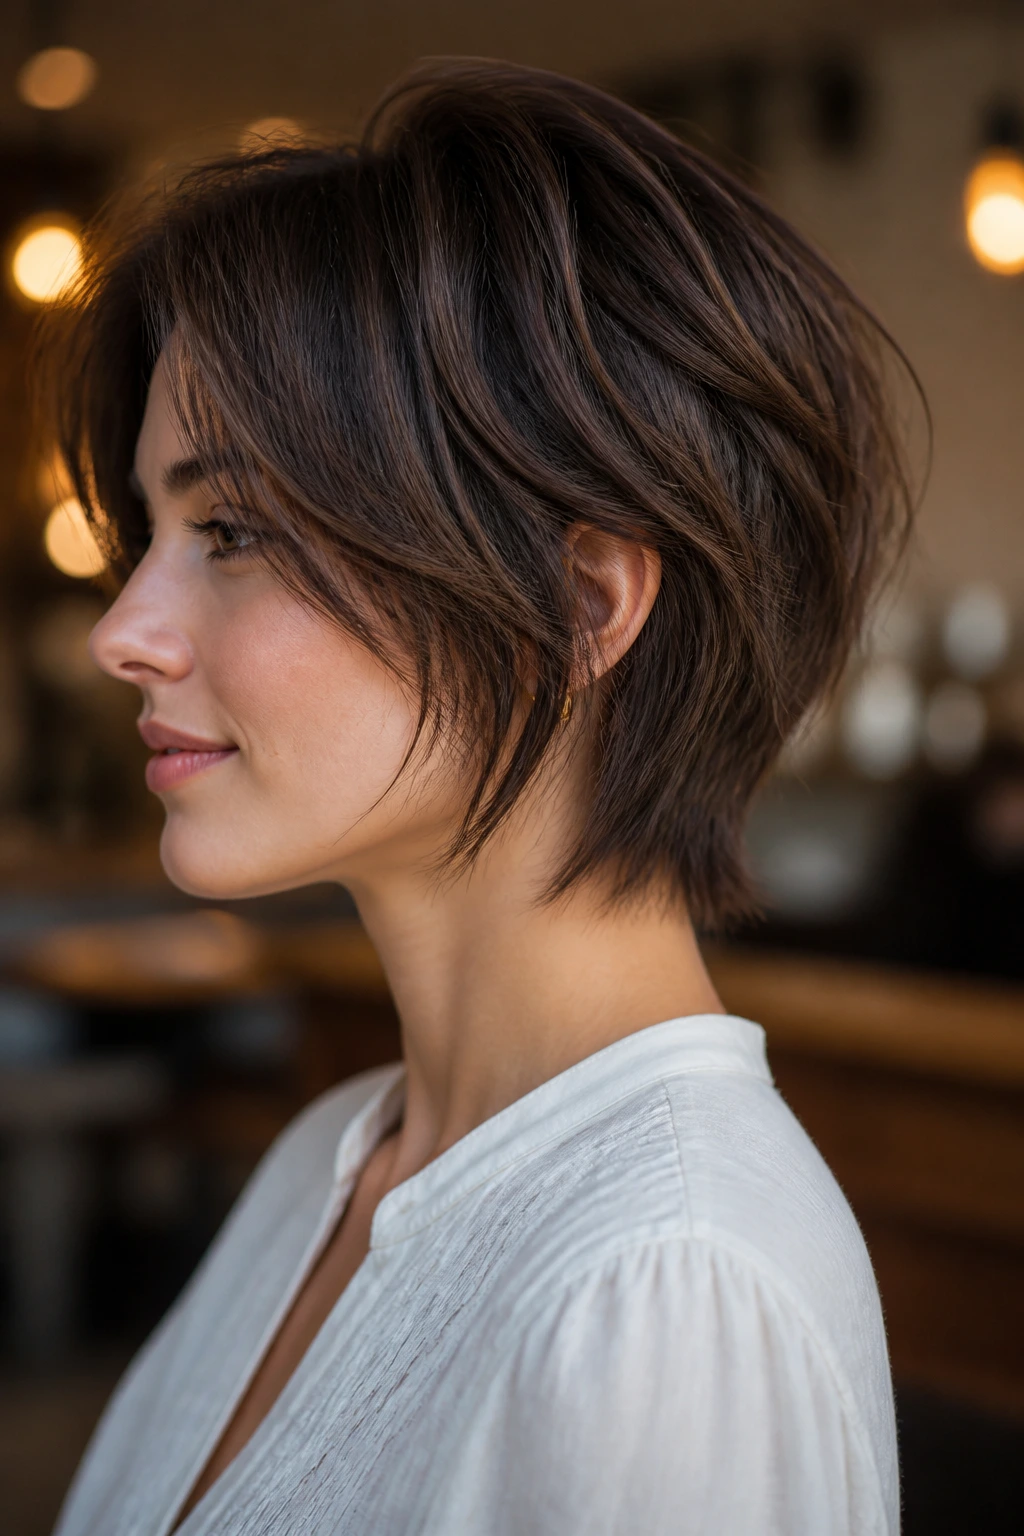
A tapered nape can make the crown look fuller without making the haircut feel too short. The back is slightly shorter and lighter, while the front stays longer and softer. That creates a gentle push forward around the face.
For thin hair, this kind of shape can be a relief. The lift at the back prevents the style from lying flat against the head, and the longer front keeps the haircut from looking clipped too close. It also grows out in a useful way, which is not a small thing.
Ask for the nape to be neat but not shaved down. You want a taper, not a disappearance. If the back becomes too sparse, the whole haircut loses its balance.
17. Long Shag with Internal Layers

Long hair can still be part of the shag conversation. It just needs a different approach. Instead of slicing away the ends, keep the length and place the movement inside the haircut, where it creates lift without exposing the bottom line.
This is the version I’d choose for someone who likes their hair long but hates the dead weight that often builds at the bottom. Internal layers give the shape some air, and the face frame can still do a lot of work. The key is restraint. Long thin hair looks better with hidden structure than with obvious shredding.
It also helps if you wear a slight wave. Straight, long, fine hair can show every cut line, so subtlety is safer. A bend through the mid-lengths makes the whole thing look fuller.
18. Cheekbone Face-Framing Shag

Face framing is not decoration. On thin hair, it is architecture. Starting the shorter pieces around the cheekbones draws attention upward and gives the haircut a visible shape even when the ends are quiet.
This cut is especially useful if your hair falls flat at the sides. The front pieces create width where the haircut needs it most, and the rest of the shag can stay softer and less obvious. That balance keeps the cut from looking over-layered.
I like this one with a center or off-center part and a little bend at the ends. The face frame should sweep, not stick out. If it flares too wide, the whole thing can look dated fast.
19. Razor-Cut Lob Shag

A razor-cut lob can look airy and expensive when it’s done well. When it’s done badly, the ends fray. Thin hair sits right on that line, which is why I’m picky about this version. Use the razor with a light hand and keep the perimeter in view.
The lob length gives the hair room to move, and the razor softens the layers enough to keep things from feeling blocky. The result is a haircut with a little edge but not a lot of fuss. That’s the appeal.
Best on hair that has a tiny bend or a lot of natural slip. If your strands are brittle, ask for a scissors-based version instead. The shape can stay the same; the tool should change.
20. Piecey Fringe Shag

A piecey fringe can make thin hair look more lively in an instant, but only if the fringe is kept light and clean. Too much thinning turns it into broken little scraps. The better approach is separation, not depletion.
This style works because the fringe gives the eye a focal point. Once the front is interesting, the rest of the shag can stay softer. The haircut reads full even if the actual density isn’t huge.
I’d wear this cut with a lightweight texturizer and almost no heavy conditioner near the roots. The fringe wants to move. It does not want to cling.
21. Layered Flip-Out Shag

There’s a reason flipped ends keep coming back: they add width where thin hair often needs it. A layered flip-out shag uses that outward turn to create a broader silhouette at the bottom, which can make the whole haircut look denser.
The layers should be cut to support movement, not to collapse inward. Think shoulder brushes, not tight coils. A quick pass with a round brush or a flat iron gives the ends their outward bend.
I like this option when the hair is fine but not overly sparse. The flipped edges create energy, and the layers keep the movement from feeling old-fashioned. It has a little retro charm without turning into costume hair.
22. Curly Shag for Fine Hair

Fine curly hair needs a different rulebook. The cut has to respect the curl pattern, or the curls will separate and the whole shape will lose body. A curly shag works best when the layers follow the curl groupings instead of slicing through them randomly.
The worst thing you can do here is over-shorten the top while leaving the bottom heavy. That creates a mushroom effect. Better to build a rounded shape with layers that encourage the curls to stack and bounce.
A diffuser helps, but the cut is doing the real work. Keep products light, and avoid anything sticky that drags the curls down. Fine curls love definition; they hate weight.
23. Wavy Shag with Soft Ends

Wavy hair and a shag have an easy relationship, but the ends need to stay soft. If the layers are too hard, the waves can separate into skinny pieces. Soft ends keep the shape connected.
This version is less about obvious choppiness and more about flow. The hair should move from face frame to mid-length to hemline in a way that feels easy. That is how you get volume without losing the softness that makes waves look good in the first place.
A mousse or lightweight foam is usually enough. Sea-salt sprays can work, but they can also dry out thin waves and make them frizzier than you want. I would use them sparingly.
24. Grow-Out Friendly Shag

Some cuts are cute on day one and a headache by week six. This is not one of them. A grow-out friendly shag keeps the layers low-contrast, which means the shape still looks intentional as it lengthens.
That makes a lot of sense for thin hair. If the cut is too dramatic at the start, the ends can look sparse before you’ve even reached the first trim. A gentler shag gives you a wider window between appointments.
The face frame should stay soft, and the perimeter should not be overly thinned. You want the haircut to age into a new shape, not fall apart. That’s the whole selling point.
25. Polished Office Shag

Not everyone wants bedhead texture every morning. Fair. A polished office shag keeps the same layered idea, but the finish is smoother, neater, and easier to wear with structured clothes or a clean makeup look.
The shape should stay controlled at the crown and around the face. Shorter pieces can still exist, but they should blend instead of spike. For thin hair, that kind of quiet shape often looks thicker than an over-teased version.
I’d style this with a round brush and a soft-hold hairspray, then stop. No roughing it up too much. The haircut should look like you meant it.
26. Rocker Shag

This is the louder cousin. More texture, a sharper fringe, a little more edge around the crown. It works on thin hair when there is enough length to support the shape and enough natural density at the roots to keep it from looking naked.
The danger here is overdoing the shredded pieces. A rocker shag should feel lived-in, not frayed. Keep some structure through the back and sides so the haircut still has a backbone.
This one likes matte styling paste and a bit of mess. If you love a blunt, clean look, skip it. If you want a haircut with some bite, it can be fun.
27. Soft Mullet Shag

A soft mullet is what happens when the shag gets a little braver but stays wearable. The front and crown stay fuller, while the nape runs slightly longer. On thin hair, that back length can help the cut look intentional instead of just short.
The blending is the important part. A hard mullet line can make fine hair look patchy. Soft graduation keeps the style moving. That’s why this version works better on people who want a little shape shift, not a full retro moment.
Keep the fringe soft and the back feathered, not stripped. It should still feel like hair you can brush with one hand and leave the house.
28. 70s Feathered Shag

There is something satisfying about a feathered shag done right. The layers sweep away from the face, the crown gets lift, and the ends keep enough fullness to avoid that tired, over-razored look. Thin hair likes that old-school feathering when it’s controlled.
The cut should be soft around the cheeks and a little shorter at the top, but the bottom line needs to hold. That line is what prevents the style from disappearing into air. I would not go heavy on the razor here.
A big round brush helps create the curve, but even a large roller set can work if you like a softer finish. It’s one of the few styles on this list that can look both casual and a little dressed up.
29. Invisible-Layer Shag

Invisible layers are the secret weapon for thin hair. Instead of making the cut look obviously chopped, the layering happens inside the shape. From the outside, you still see a solid silhouette.
That matters because thin hair can lose strength fast when the layers are visible all the way through the ends. Hidden structure gives you movement without the sparse look. It’s a smarter approach than trying to make every piece shout.
This style is especially good if you wear your hair straight most of the time. Straight hair shows cut lines immediately, so a softer interior layer keeps the finish cleaner. The haircut looks calm. Which is nice.
30. Shoulder-Grazing Flip Shag

Shoulder-grazing cuts catch natural movement from your coat collar, your hands, and the way hair settles when you turn your head. Add a slight flip at the ends and the shape becomes fuller than it sounds on paper.
The length is the reason it works. Too short and the flip can feel puffy. Too long and the movement disappears. Around the shoulders is the sweet spot, especially for thin hair that needs a little visual width.
Use a round brush or a large iron to turn the ends outward just enough to show the layers. The look should be breezy, not curled.
31. Deep Side-Bang Shag

A deep side bang can change the whole haircut. It drapes across the forehead, builds volume at the front, and hides a flat crown better than almost anything else on this list. If your roots go limp fast, this is worth a look.
The side bang should be long enough to tuck behind the ear on days when you want less face coverage. That flexibility is handy. The rest of the shag can stay soft and slightly layered around the jaw, which keeps the cut balanced.
This one benefits from a little root spray and a quick blow-dry in the direction opposite the part. It does not take long. It just needs the right direction.
32. Mini Shag for Fine Hair
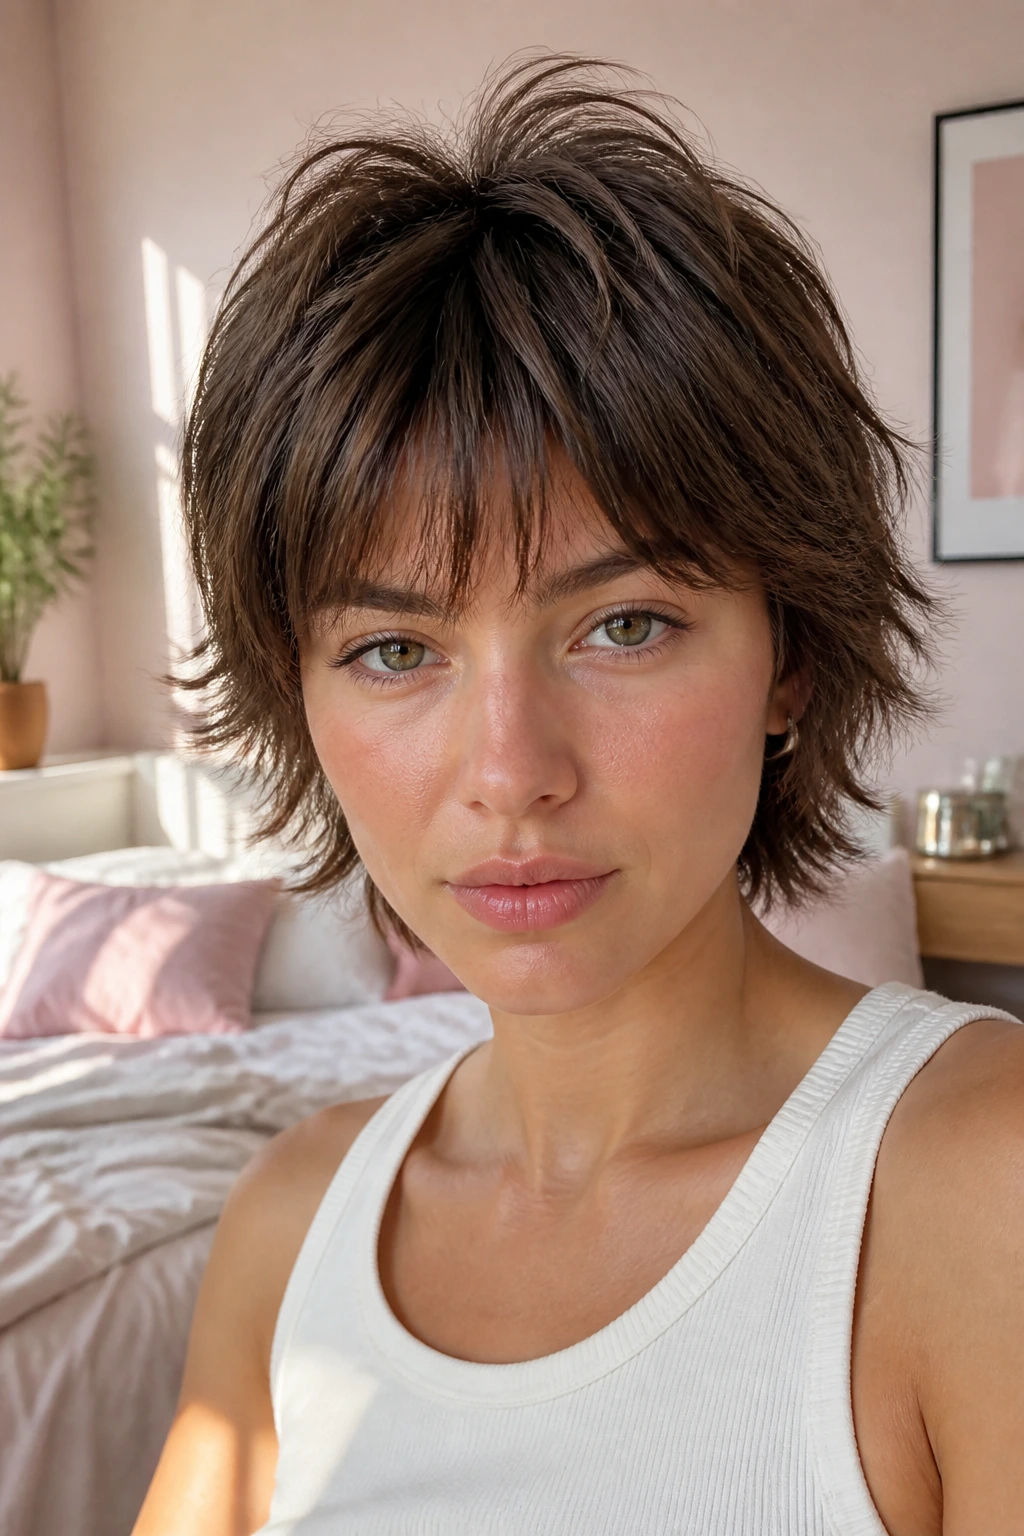
If your hair is very thin, very soft, or very prone to looking flat, a mini shag can be the cleanest answer. The cut stays short enough to hold body, but shaggy enough to keep texture at the top and around the fringe.
The key is not to over-layer the sides. That’s where the haircut can start to disappear. Keep the shape compact, lift the crown a touch, and let the fringe do some of the visual work. It’s a tiny haircut with a lot of strategy behind it.
I’d choose this if you want the easiest possible styling routine. A little paste, a quick finger-comb, and you’re done. Some cuts ask for half your morning. This one doesn’t.
Why a Shag Gives Thin Hair More Shape Than a Heavy One-Length Cut

A one-length cut can look sharp on dense hair. On thin hair, it often looks flat fast, especially when the ends start to separate. A shag changes where the eye goes. Instead of focusing on the lack of bulk at the bottom, people see the movement at the crown, the cheekbone frame, and the swing through the mid-lengths.
The best shag haircuts for thin hair do not remove weight everywhere. They move it around. That’s a huge difference. A strong perimeter keeps the haircut honest, while internal layers add lift without exposing the scalp line. If you’ve ever had a shag that looked cute in the chair and stringy two weeks later, it was probably cut too high or too aggressively.
There’s also a styling trick built into the shape. Fine hair usually falls fastest where it’s longest and heaviest, which is why the right cut has to work with gravity rather than fight it. A careful shag gives gravity fewer places to win.
How to Brief Your Stylist So You Get the Right Layers
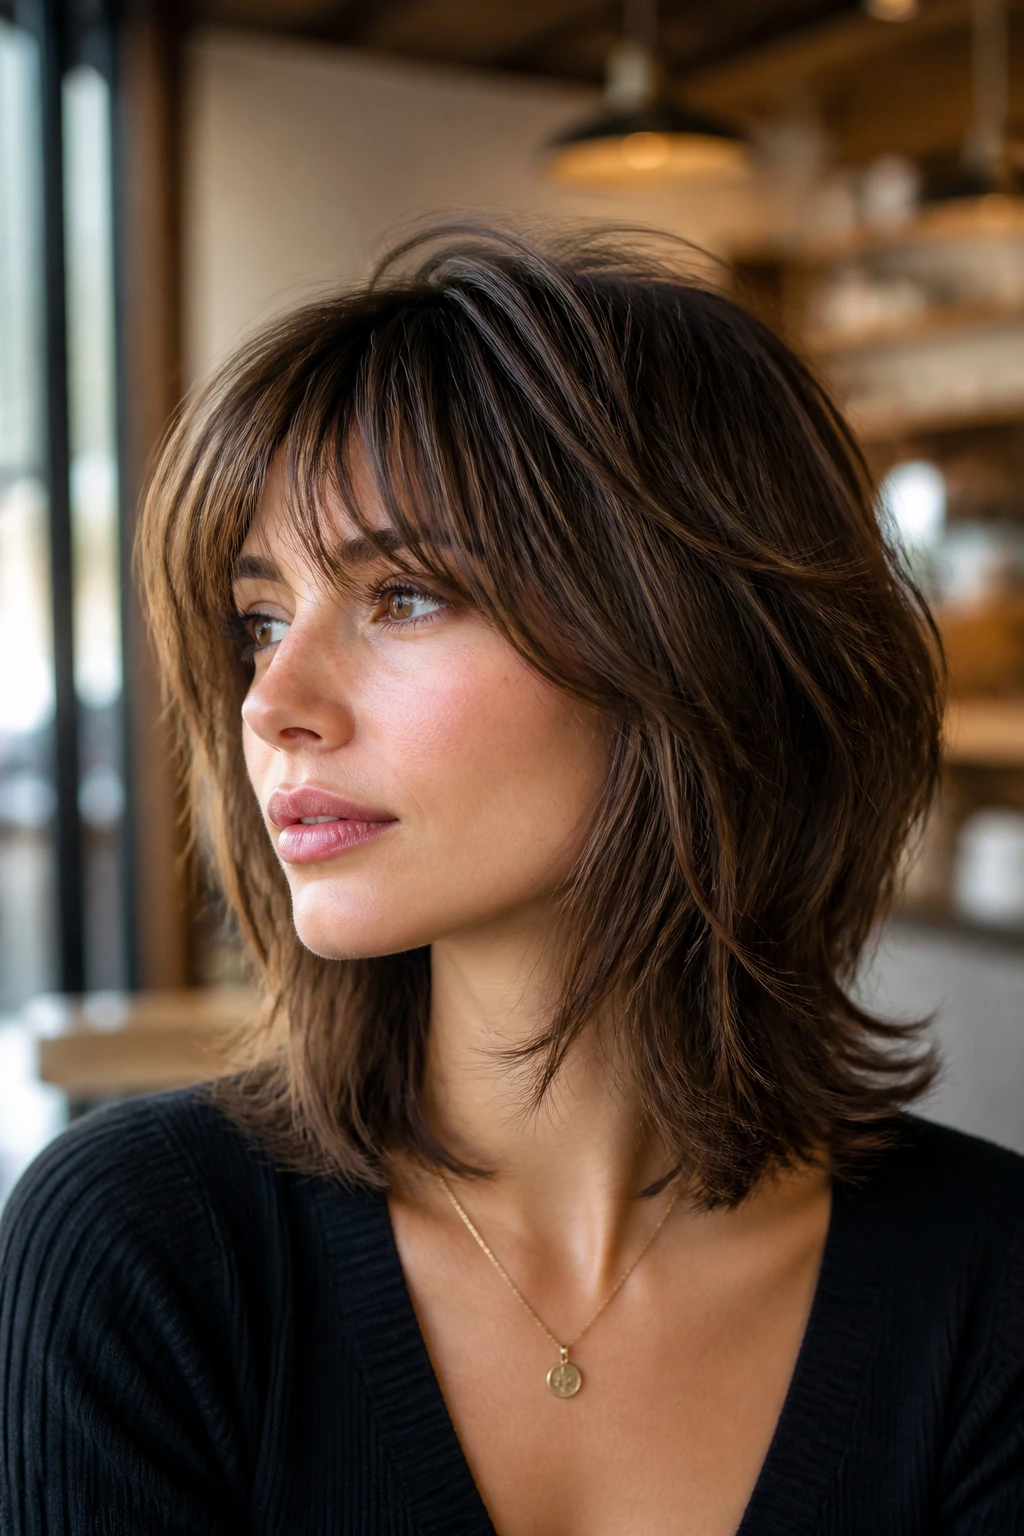
Bring photos, yes, but bring the right kind. One picture should show the length you want. Another should show the fringe. A third can show the overall texture. People make the mistake of handing over one glamorous photo and hoping the stylist can read their mind. That’s not a plan.
Say these things plainly: keep the perimeter fuller, do not over-thin the ends, and start the shortest layers lower than cheekbone level if my hair gets see-through fast. Those phrases are useful because they describe the real problem, not a vague aesthetic. If your hair is sparse at the temples, mention it. If your crown collapses, mention that too.
The other thing I’d ask for is a dry cut check or at least a dry finish check before you leave. Fine hair can shrink visually once it’s dried, and a cut that looked balanced wet may need a small tweak when it’s fully dry. That’s normal. Better to fix it in the chair than at home with a pair of kitchen scissors.
Tools That Make Styling a Thin-Hair Shag Easier
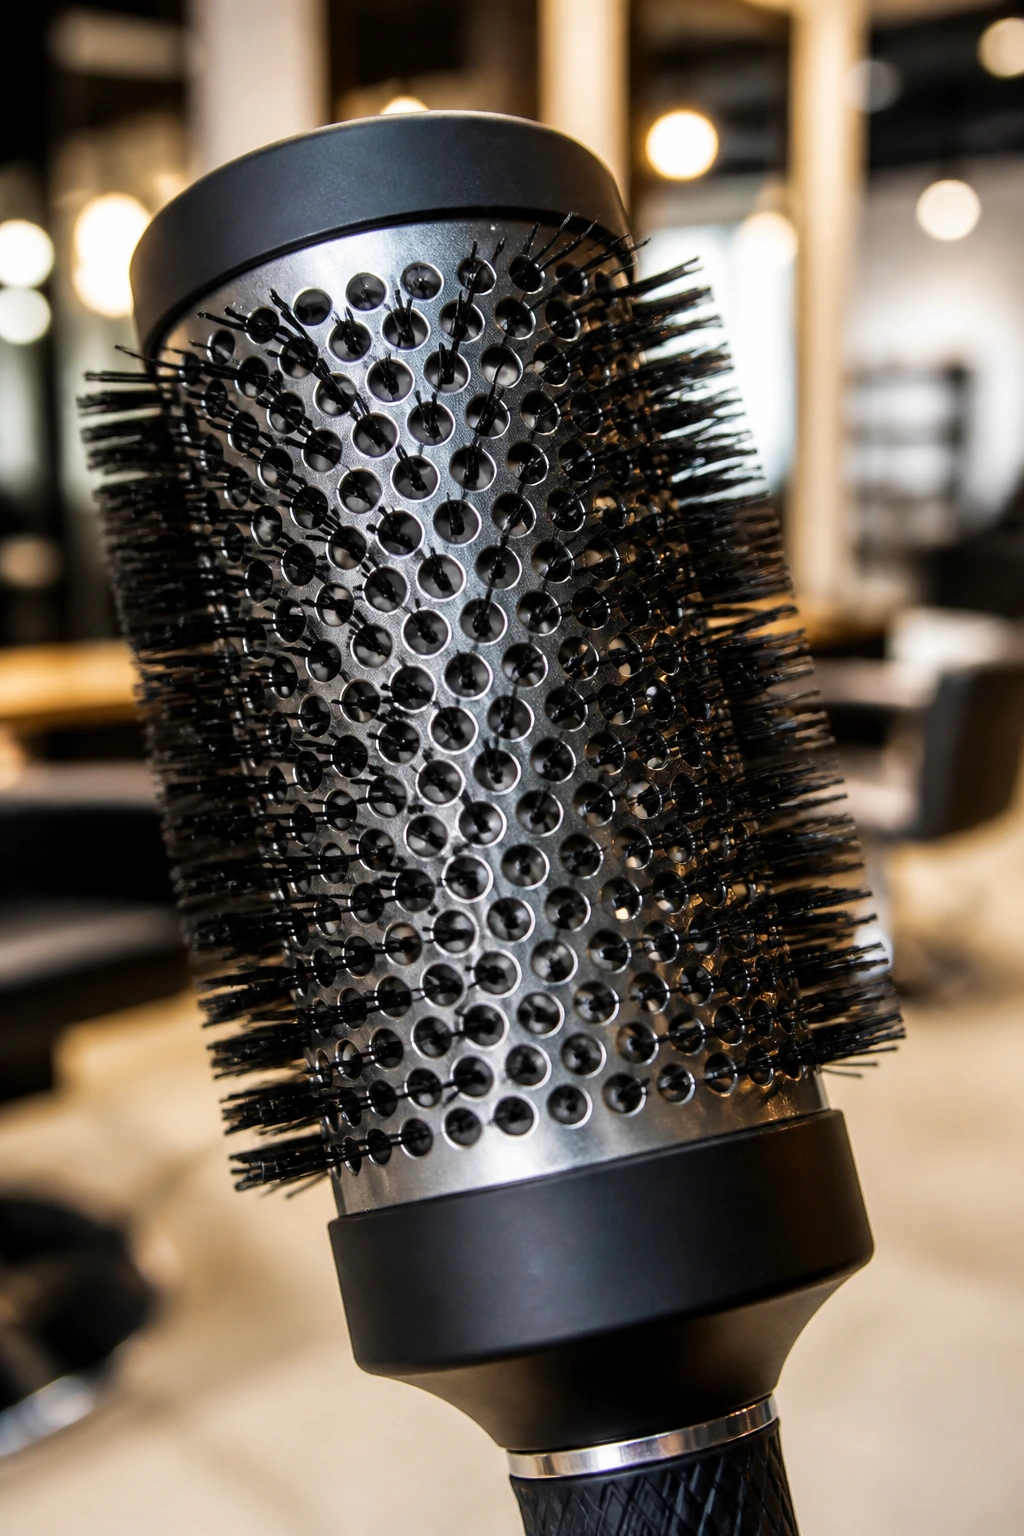
- 1.5-inch round brush: Good for shaping curtain bangs, face frame, and soft bends without making the hair look over-curled.
- Blow dryer with a concentrator nozzle: Directs air at the roots so you can lift the crown instead of blasting the whole head flat.
- Lightweight volumizing mousse: Gives grip at the root and a little memory through the mid-lengths; use it sparingly.
- Root-lift spray: Best on damp hair at the scalp line, especially if your crown collapses by noon.
- Dry shampoo: Useful on day two or three to keep the root from looking oily and limp.
- Wide-tooth comb: Better than a brush for distributing product through fragile strands without breaking up the shape too hard.
- Small flat iron or large curling iron: Handy for flipping the ends or adding a soft bend to the front pieces.
- Sectioning clips: Not glamorous, but they keep the top section separate while you dry the underlayers.
Small Styling Moves That Keep the Shape From Collapsing

Root Lift: Concentrate your first round of drying at the crown, the part line, and the front hairline. That is where thin hair gives up first, so that’s where you should spend your attention.
Product Choice: Use products that leave a little grip, not a slick finish. Heavy oils and rich creams can make fine hair look shiny for ten minutes and flat for the rest of the day. Mousse, spray foam, and light texturizers do more useful work here.
Brush Direction: Blow the fringe and face frame forward first, then curve them away. That extra direction gives the front some body instead of making it sit too close to the head.
Day-Two Reset: Flip the part, mist the roots lightly with water or dry shampoo, and re-dry the crown for thirty seconds. You do not need a full wash every time the shape starts to sag.
Common Mistakes That Leave a Shag Looking Sparse

The first mistake is over-layering the ends. You’ll see it right away: the haircut looks fluffy in the salon and stringy after one wash. The fix is simple but stubbornly important—keep the perimeter heavier and move the texture higher up the head.
The second mistake is using thinning shears everywhere. That tool has a job, and that job is not “make fine hair lighter.” On thin hair, overuse of thinning shears turns the ends into little frayed ribbons. Better to point-cut a few pieces for movement and leave the rest alone.
A third problem is choosing bangs that are too short or too dense. Short, blunt bangs can swallow half the front density. A shag with a softer fringe usually wears better because it blends into the haircut instead of boxing it in. If the fringe starts at the middle of the forehead and feels heavy, it’s probably too much.
Then there’s styling with too much cream or oil. Fine strands do not need a lot of product to look styled; they need the right product in the right spot. Put richer formulas near the ends only if the hair is truly dry, and keep the roots light.
Variations and Alternatives to Try

The Shorter Bob Version: If you want less length, take the shoulder-length shag up to the jaw or chin and keep the bottom line blunt. You’ll get more fullness fast, and styling gets easier almost immediately.
The Long-Length Version: If you refuse to lose length, keep the hair past the shoulders and ask for invisible layers instead of obvious chopping. This is the safer route for thin hair that still wants swing.
The Curly Version: For curls and waves, shape the layers around the curl pattern rather than fighting it. The haircut should encourage clumping and bounce, not separate the curls into skinny strands.
The Side-Part Version: If your crown is flat, a deep side part can do half the work before any product touches your head. It gives the illusion of lift with almost no effort.
The Polished Version: If you hate messy texture, keep the layers soft and the finish smooth. A polished shag can still have movement; it just doesn’t need to look tousled to be interesting.
Keeping the Cut Fresh Between Trims
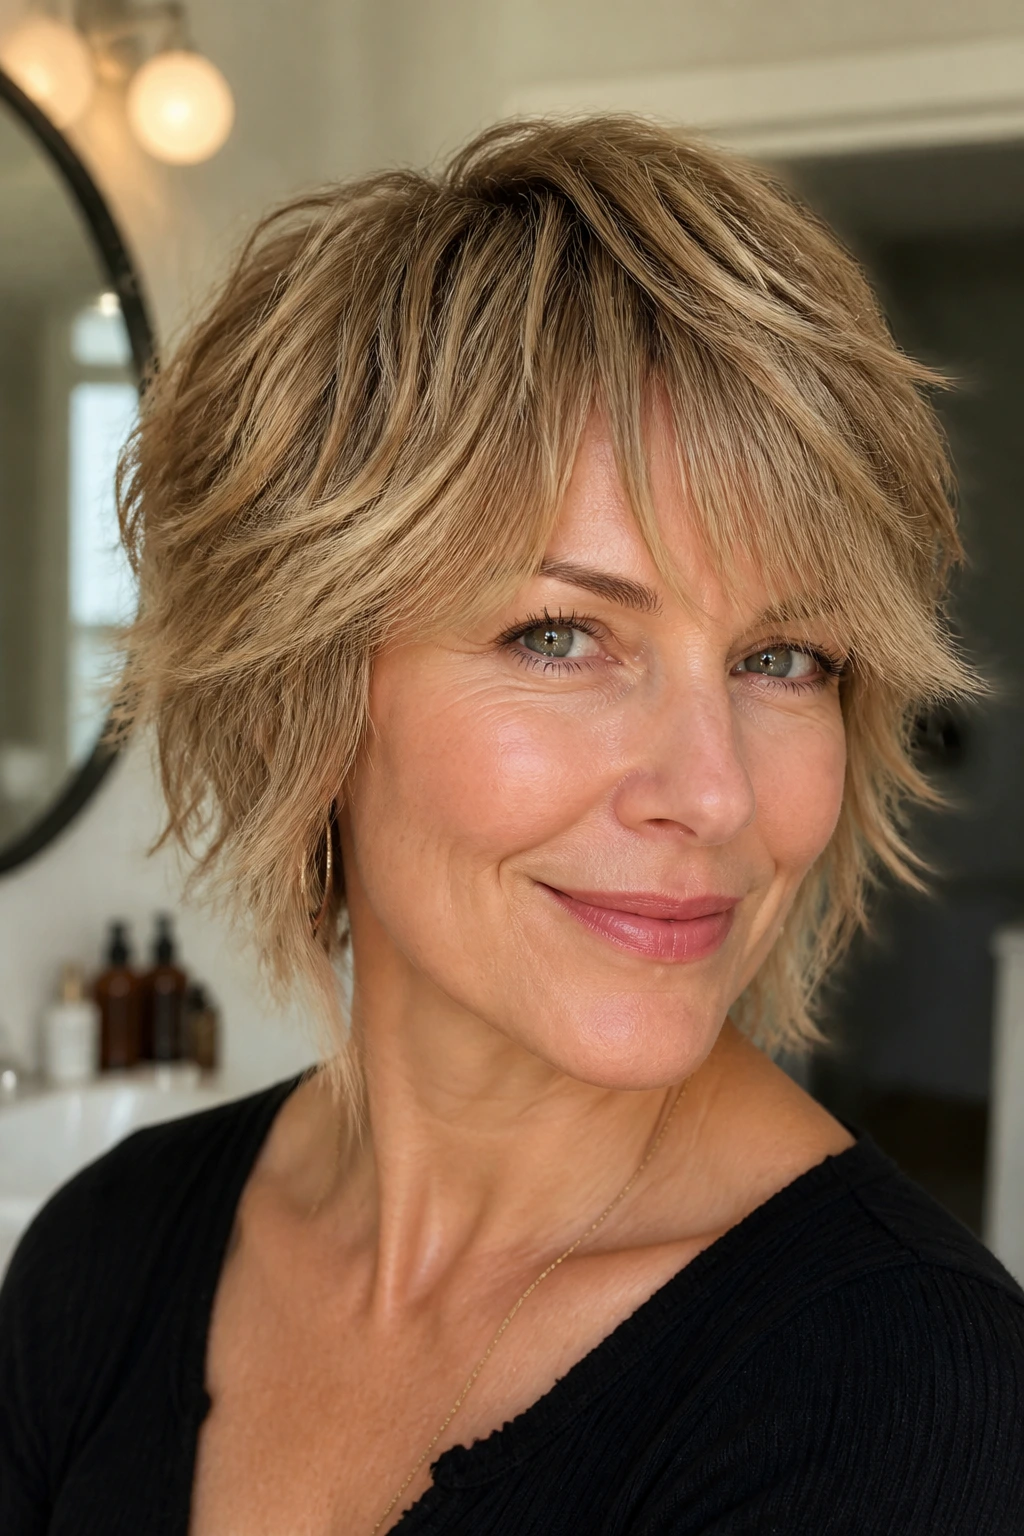
Shorter shag styles usually need a trim every 6 to 8 weeks, especially if the fringe is part of the design. Medium and longer versions can stretch closer to 8 to 12 weeks, but only if the perimeter stays in good shape. Once the ends begin to split or look transparent, the haircut loses its structure fast.
Bang maintenance matters just as much. Curtain bangs, bottleneck bangs, and side fringe often want a tiny trim every 3 to 4 weeks so they don’t fall into your eyes or lose their shape. If you cut bangs yourself, go very small and use dry hair. Wet bangs lie.
Between appointments, a light dry shampoo at the root is more useful than piling on new product through the lengths. Thin hair usually looks better with a clean root and slightly textured mid-lengths than with a lot of buildup everywhere. If the haircut starts feeling limp, it is usually a styling-product problem before it is a haircut problem.
Questions People Ask Before Choosing a Shag
Can shag haircuts for thin hair really make hair look thicker?
Yes, when the layers are placed with restraint. The illusion comes from movement at the crown and around the face, plus a perimeter that still holds a visible line.
Are curtain bangs a good idea if my hair is very fine?
Usually, yes, if they’re kept soft and blended. The issue is not curtain bangs themselves; it’s making them too dense or too short, which can eat too much front volume.
Will a wolf cut work if my hair is thin?
A softened version can work, but a heavy wolf cut can make the ends look scarce. Ask for a wolf-cut lite shape with controlled layers and a fuller bottom edge.
What length is safest for very fine hair?
Jaw to collarbone is the most forgiving range for many people. That said, a well-cut short crop or a long invisible-layer shag can also work if the shape is built carefully.
Do I need heat styling every day?
No. A good shag should still have a shape after air-drying or a quick rough dry. Heat is useful for the front pieces and crown, not for making every strand behave.
What if my hair looks stringy after the cut?
That usually means the layers are too high or the ends were thinned too much. Go back to the stylist and ask for more weight at the perimeter and a softer face frame.
Can a shag help if my crown is flat?
Yes, and that’s one of its best uses. Ask for lift through the top section, then style the roots forward and up with a blow-dryer and a small round brush.
How often should I wash thin hair with a shag?
As often as your scalp needs it, but avoid soaking the lengths in heavy conditioner every wash. Fine hair tends to do better with lighter formulas and careful root cleansing.
The Cut That Stays Interesting as It Grows

A good shag for thin hair should not need a perfect blowout to feel alive. That’s the point. It should have enough structure to hold a shape on lazy mornings and enough movement to look intentional when you do take ten extra minutes with a brush.
The smartest version for you is the one that keeps a little weight where your hair wants to disappear. Sometimes that means a blunt lob with soft layers. Sometimes it means a tiny crop with lift at the top. Sometimes it means long hair, but with the invisible layers doing the real work.
Pick the shape that gives your hair a line, a bit of movement, and a grow-out you can live with. That’s where shag haircuts for thin hair stop being a trend photo and start being a haircut you actually enjoy wearing.
