



Straight hair tells on you. A crooked part, a puffed-up seam, an end that kicks out in the wrong place—none of it hides once the hair is long, smooth, and under a little studio light or a bathroom mirror with unforgiving bulbs.
That is why the best extension styles for straight hair are never random. They use the line you already have. A razor-clean center part, a wrapped ponytail, a blunt lob that stops at the collarbone, a crimped crown that gives the eye somewhere to land—those shapes work because they respect the straightness instead of pretending it isn’t there.
And there’s a real sweet spot here. Straight hair can look sleek in a way wavy hair sometimes can’t, but it can also look flat, thin, or too even if the extension plan is lazy. The difference between polished and slightly suspicious is usually about 1 inch of placement, one shade too much density, or one section left without enough anchor.
Why Straight Hair and Extensions Work So Well Together
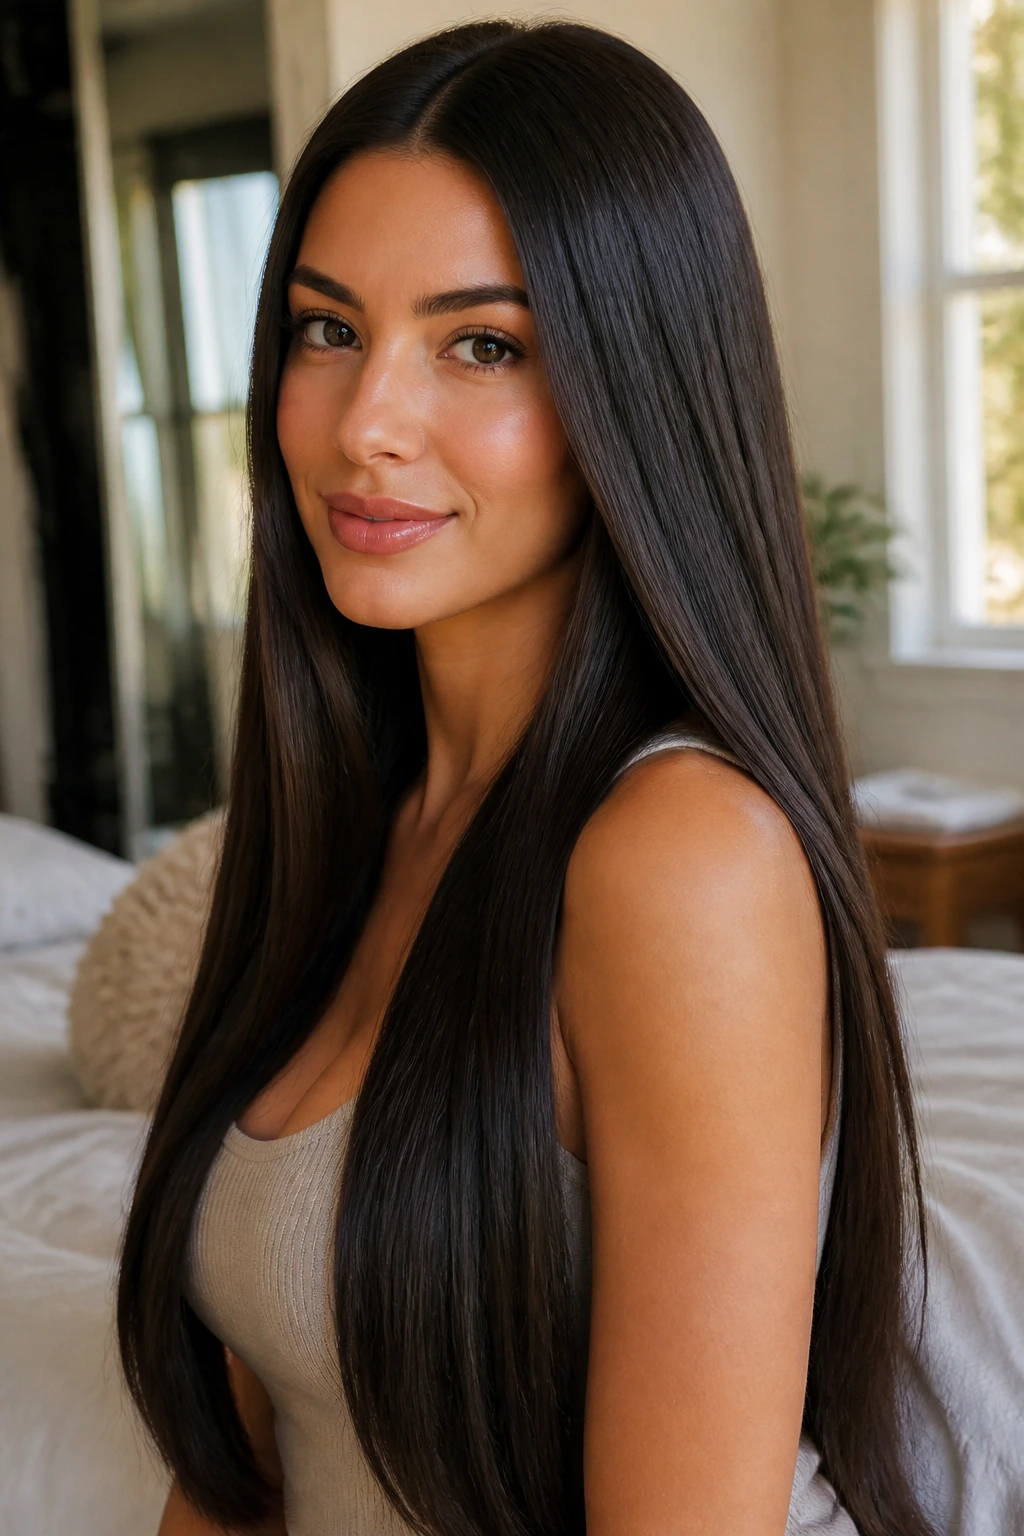
- Clean lines show off the hair shape: Straight hair makes blunt ends, tucked styles, and sharp parts read immediately, so the cut and the extension placement do half the styling for you.
- Blending is easier to control: When the texture is already smooth, you’re mostly matching density and finish instead of fighting frizz or curl mismatch.
- Small changes make a big visual shift: A center part, a side part, or a wrapped base can change the whole look without adding extra heat or product.
- Texture can be added on purpose: Straight hair gives you room to add a crimped crown, beveled ends, or a braided detail without the style turning busy.
- Long extension pieces stay elegant: With straight hair, long lengths look intentional rather than puffy, especially when the ends are trimmed in one clean line.
- The same base can wear a dozen moods: Sleek, glossy, editorial, undone, blunt, soft, or polished—all of it starts from the same straight canvas.
1. Bone-Straight Center Part
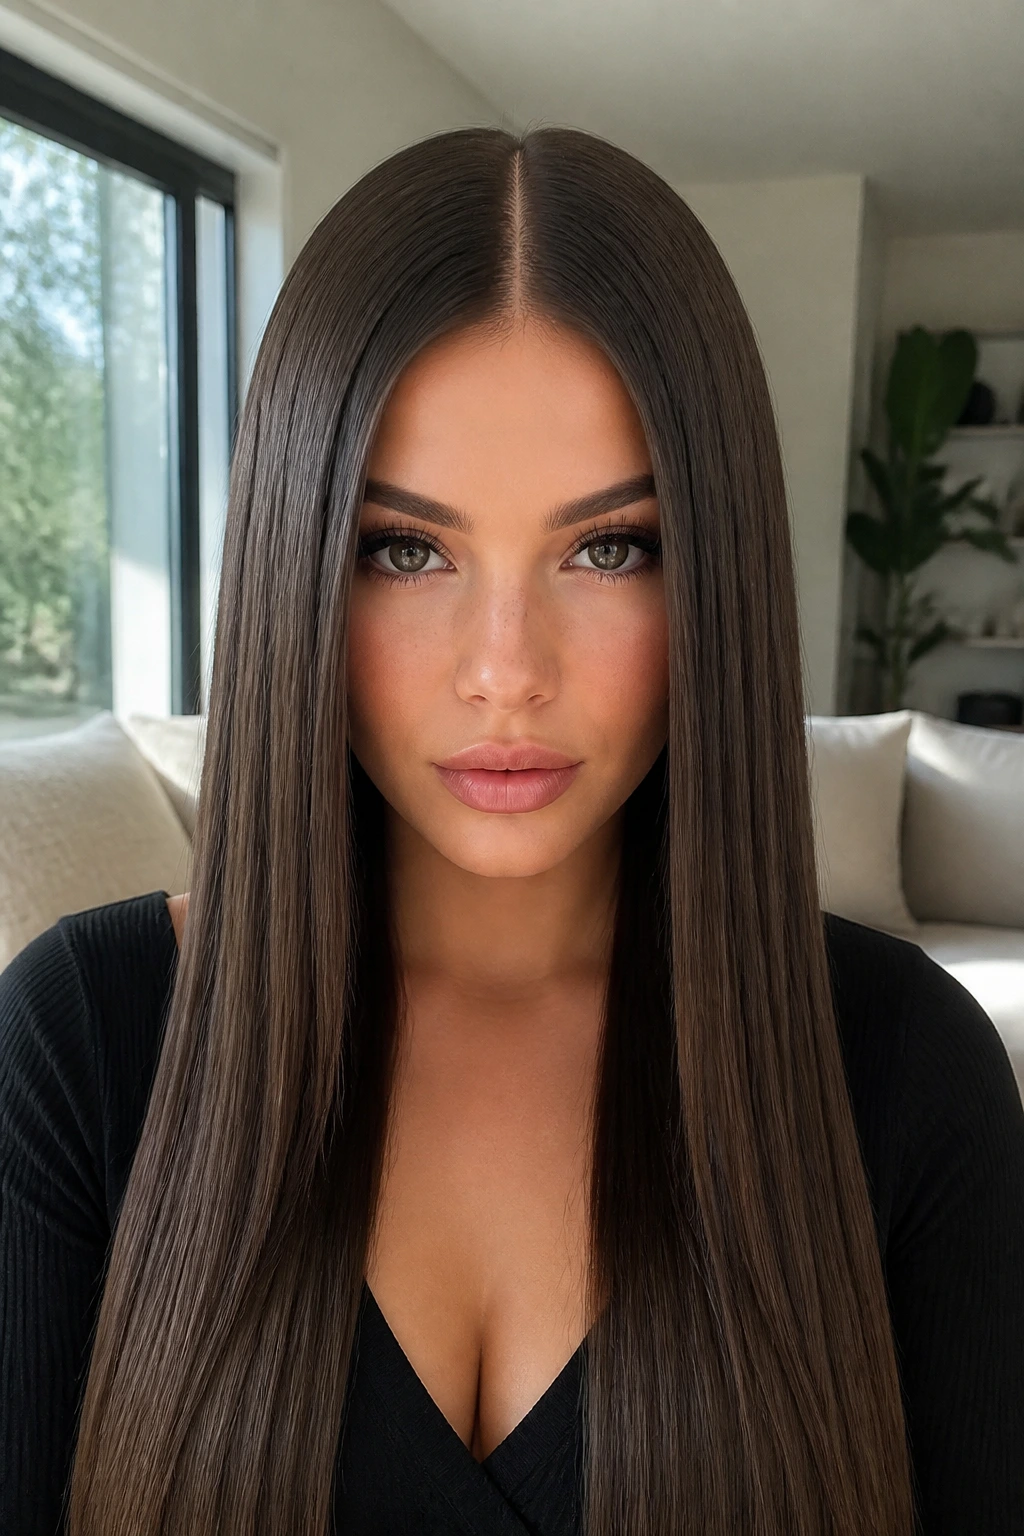
This is the look that makes straight hair extensions feel expensive without trying too hard. The whole point is a single, uninterrupted line from scalp to ends, so the extension hair has to be matched well and placed low enough that nothing bulks up at the crown.
Why It Works
A center part divides the face evenly and keeps the eye moving straight down the length, which is exactly where straight extensions look best. Use tape-ins or a full set of clip-ins if you want the smoothest fall, and press the roots flat with a 325°F to 350°F flat iron—not hotter unless your own hair needs it.
Quick Facts
- Best on hair with a naturally smooth finish and medium density.
- Looks strongest at 24 inches or longer because the line has room to read.
- Needs a tail comb and a light mist of flexible hairspray so the part stays crisp.
- Works especially well with glass-hair shine spray at the ends, not the roots.
Tiny tip: if the ends look thin, have the last 1 to 2 inches trimmed bluntly after the extensions are in. That little haircut makes the whole style look deliberate.
2. Blunt Collarbone Lob
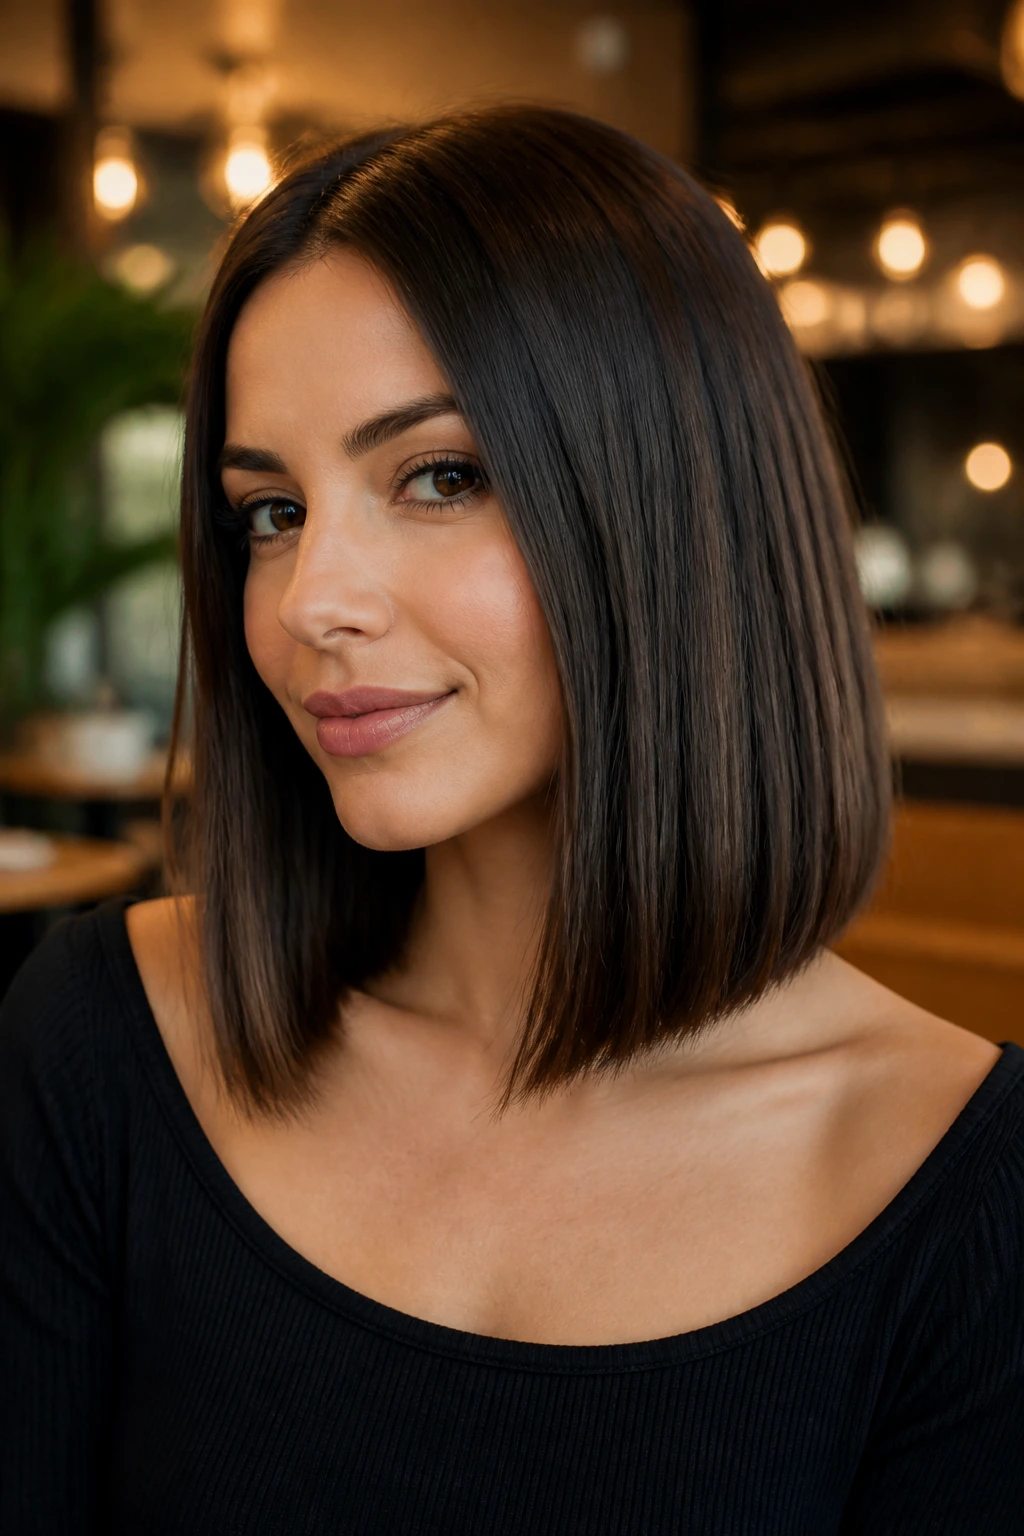
A blunt lob is the straight-hair version of a clean white shirt. Plain? Not even close. The shape lands somewhere between chin and shoulder, and that one length gives the hair a dense, deliberate feel that extensions can sharpen instead of bury.
Why It Works
The collarbone length keeps the look from dragging, which matters when you’re adding extra hair. Halo extensions or shorter tape-ins are the easiest way to build this shape, because you want fullness, not a curtain that overwhelms your jawline. The best finish is a slight bevel under the ends—just enough to keep them from flaring.
How to Wear It
If your own hair is fine, keep the extension length only 2 to 4 inches past your natural ends. Too much extra length and the lob loses its point. A blunt lob is one of those styles that looks best when the side profile is clean; if the back is bulky, the whole thing starts to feel heavy.
Best move: tuck one side behind the ear and let the other side stay full. It makes the cut read sharper.
3. Face-Framing Layers That Start at the Cheekbone
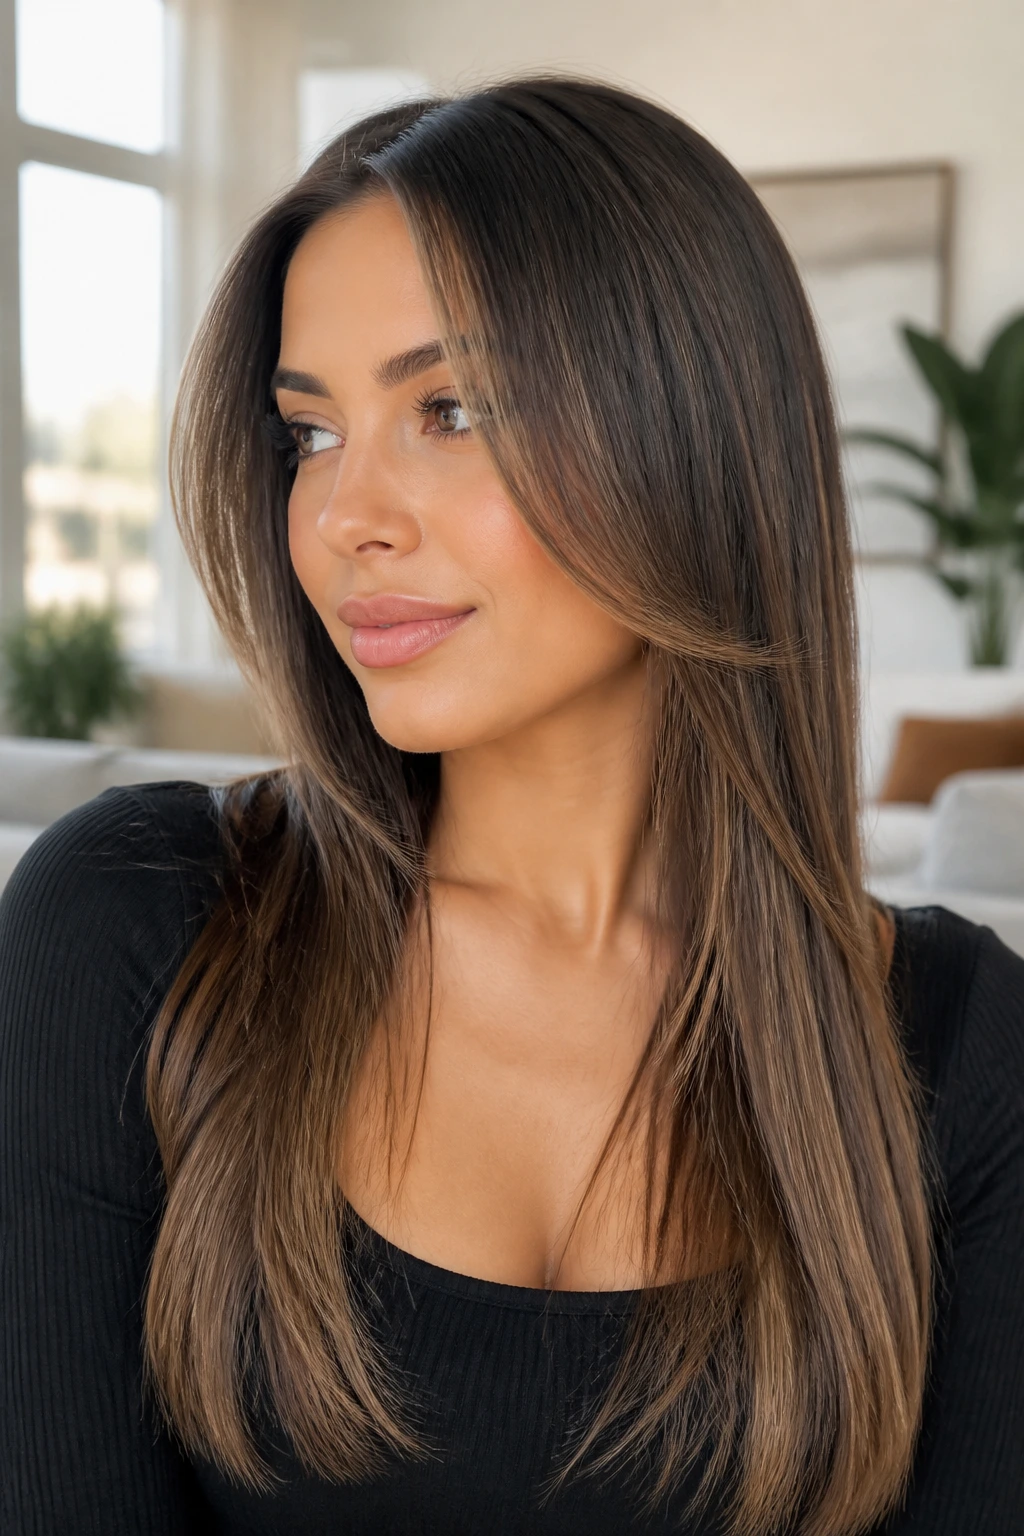
Want straight hair to move without losing its sleek mood? Face-framing layers are the answer. They soften the front without turning the style into a blowout, and they give extension lengths a reason to fall in different planes.
Why It Works
The trick is keeping the shortest layer at or just below the cheekbone so the shape opens the face without chopping the length into pieces. Clip-ins with a few long front pieces are ideal here, because you can build the face frame first and then leave the back fuller. It keeps the hair from looking like one giant sheet.
How to Use It
- Ask for the first layer to start no higher than the cheekbone.
- Keep the rest of the extension hair long and straight so the shape stays elegant.
- Use a round brush only on the front pieces if you want a tiny bend away from the face.
The style is especially good if your natural hair is blunt at the bottom and you want more shape without committing to a full layered cut. It’s subtle. That’s the point.
4. Curtain Bangs with Long Straight Lengths
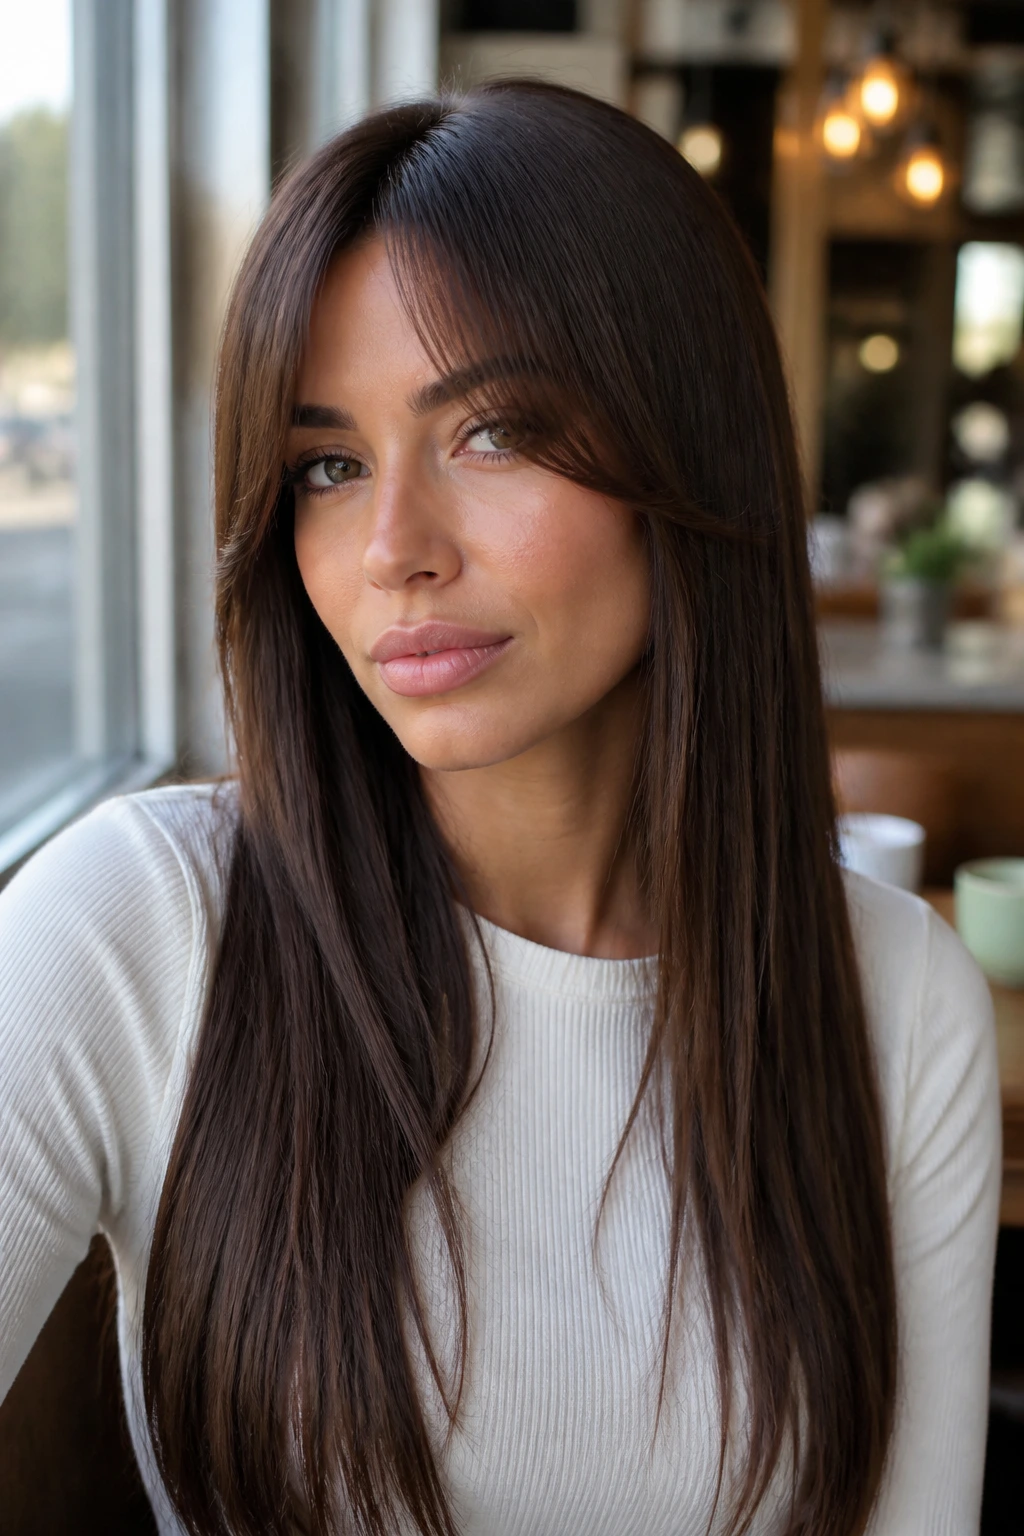
Curtain bangs on straight hair have a bit of attitude. Not loud attitude. More like the kind that knows it’s going to look good in a car mirror with one hand on the wheel.
Why It Works
The bangs give the front of the haircut some personality, while the straight extension lengths keep the rest of the style calm. If the bangs are cut to graze the cheekbone and feather slightly away from the face, the whole look has movement without giving up the straight finish. Tape-ins work well because they stay flat while the front pieces stay light.
Key Detail
Do not over-style the bangs. A tiny bend at the ends is enough. If you hot-tool the curtain section until it looks stiff, the contrast with the long straight lengths gets awkward fast.
Quick Tip
Use a dab of lightweight styling cream only on the bangs. The lengths need shine; the front needs control. Those are not the same thing.
5. Glass-Hair High Ponytail
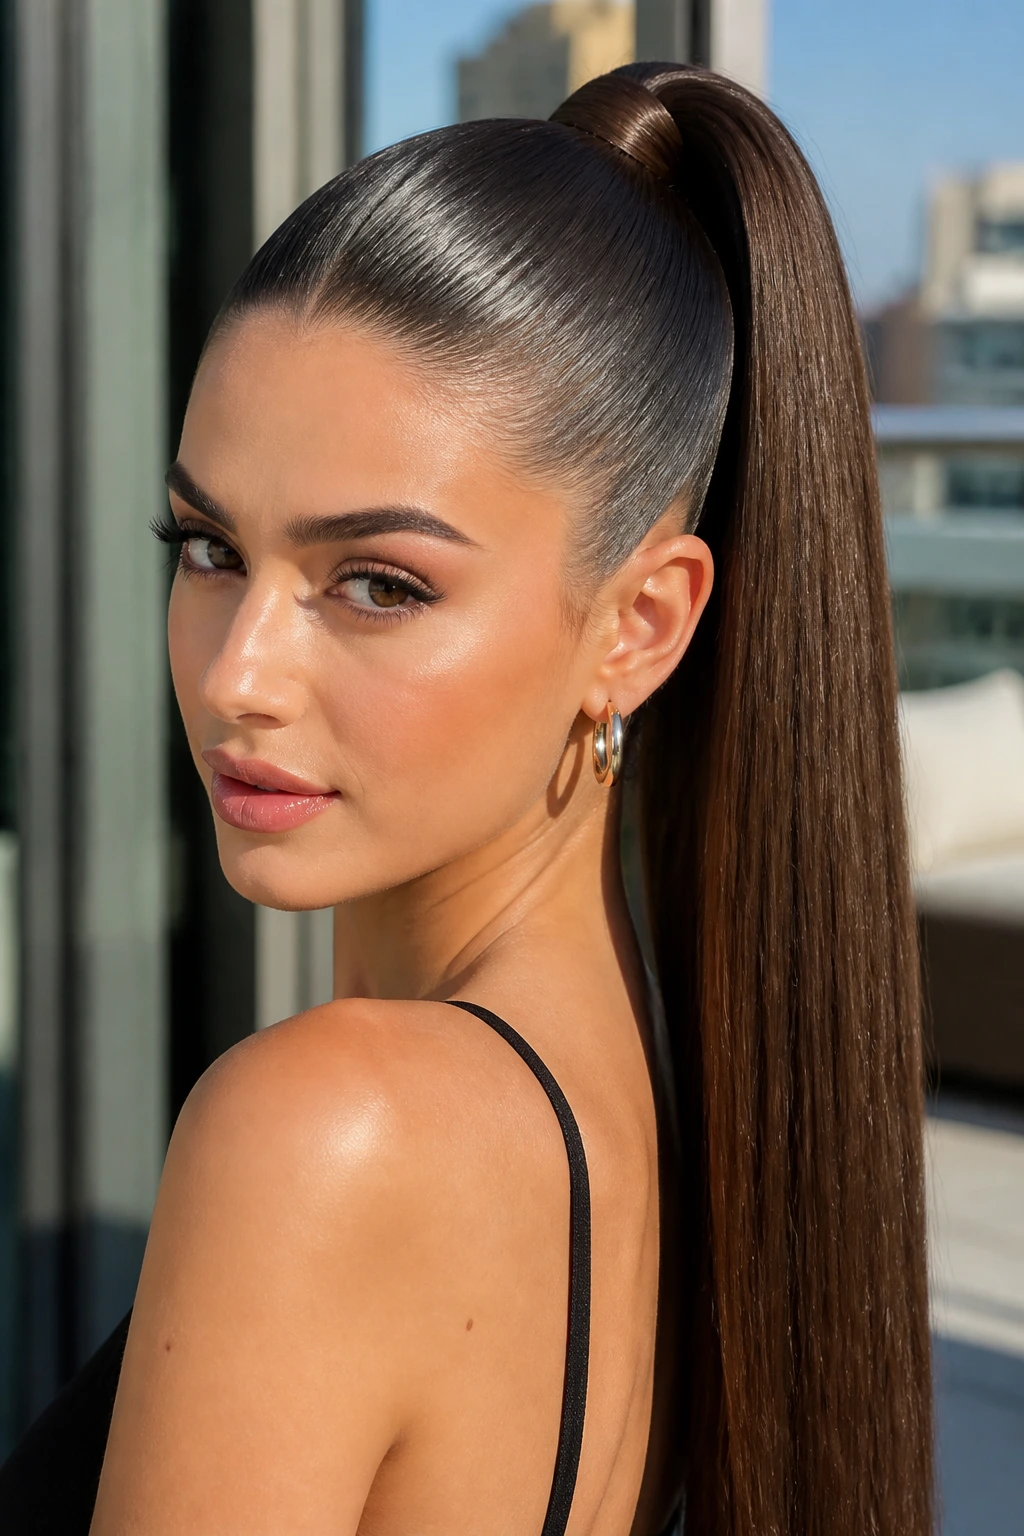
This is the ponytail that looks like it could cut through a room. Sleek roots, long tail, wrapped base, and enough shine to make every stray flyaway feel like a personal insult.
Why It Works
A high ponytail puts the extension length right where people can see it, which is why this style is so good with pony extensions, clip-ins, or a sewn-in base. The key is tension. The crown should sit flat, but not painfully tight. If the base is snagged and the hair is combed upward in sections, the pony gains lift without leaving bumps.
How to Wear It
A 1-inch flat iron is enough to smooth the surface before you gather the hair. Wrap a small strand around the elastic and pin the end underneath. That tiny detail matters more than people think. A naked elastic makes the style look half-finished.
A high ponytail like this is best when the ends are one clean line. If the tail is frayed or heavily layered, the whole thing loses that glassy effect.
6. Wrapped Low Ponytail
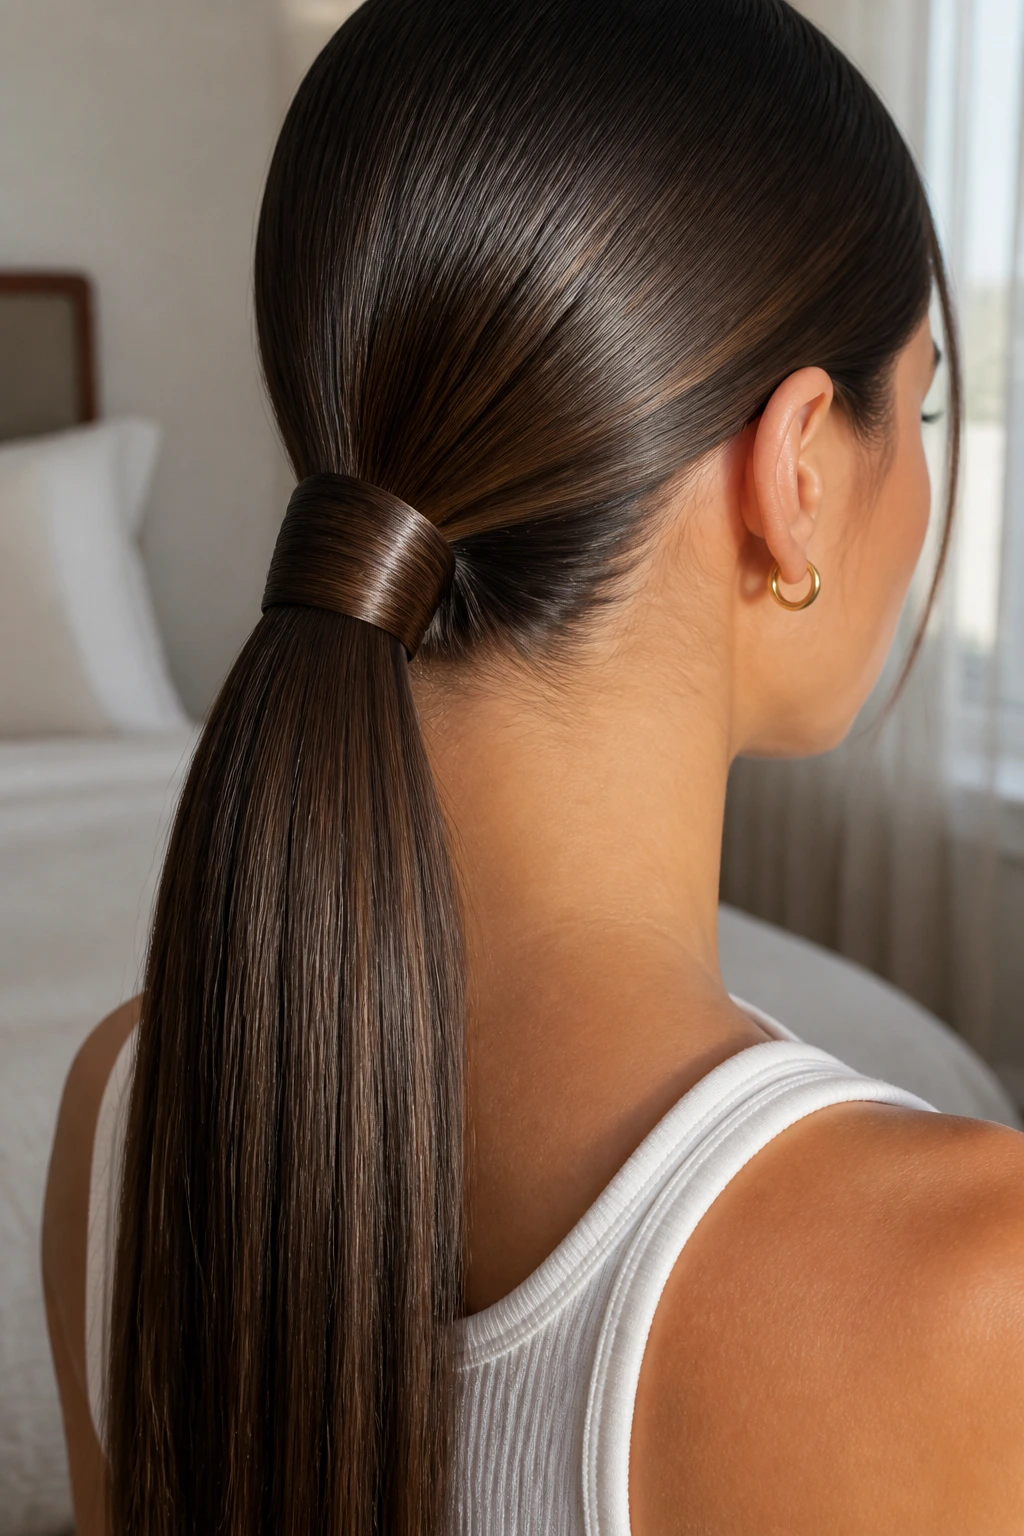
The low ponytail is where straight hair gets a little grown-up. Not stern. Just composed. It sits at the nape, swings cleanly, and looks best when the base is wrapped with a piece of your own hair so the elastic disappears.
Why It Works
Low placement keeps the weight of the extensions close to the neck, which helps the tail fall straight instead of puffing out. Clip-ins placed below the ear line can add tail density without making the crown bulky. If your hair is very fine, keep the pony just slightly off-center; that gives the style more body from the side.
Best for
- Workdays when you want polish without the drama of a high pony.
- Straight hair that gets stringy when it’s fully down.
- Extension wearers who want the seam hidden fast.
It’s a style that rewards neatness. Use a tail comb, smooth the top with a boar-bristle brush, and stop touching it. That last part is the hardest.
7. Bubble Ponytail
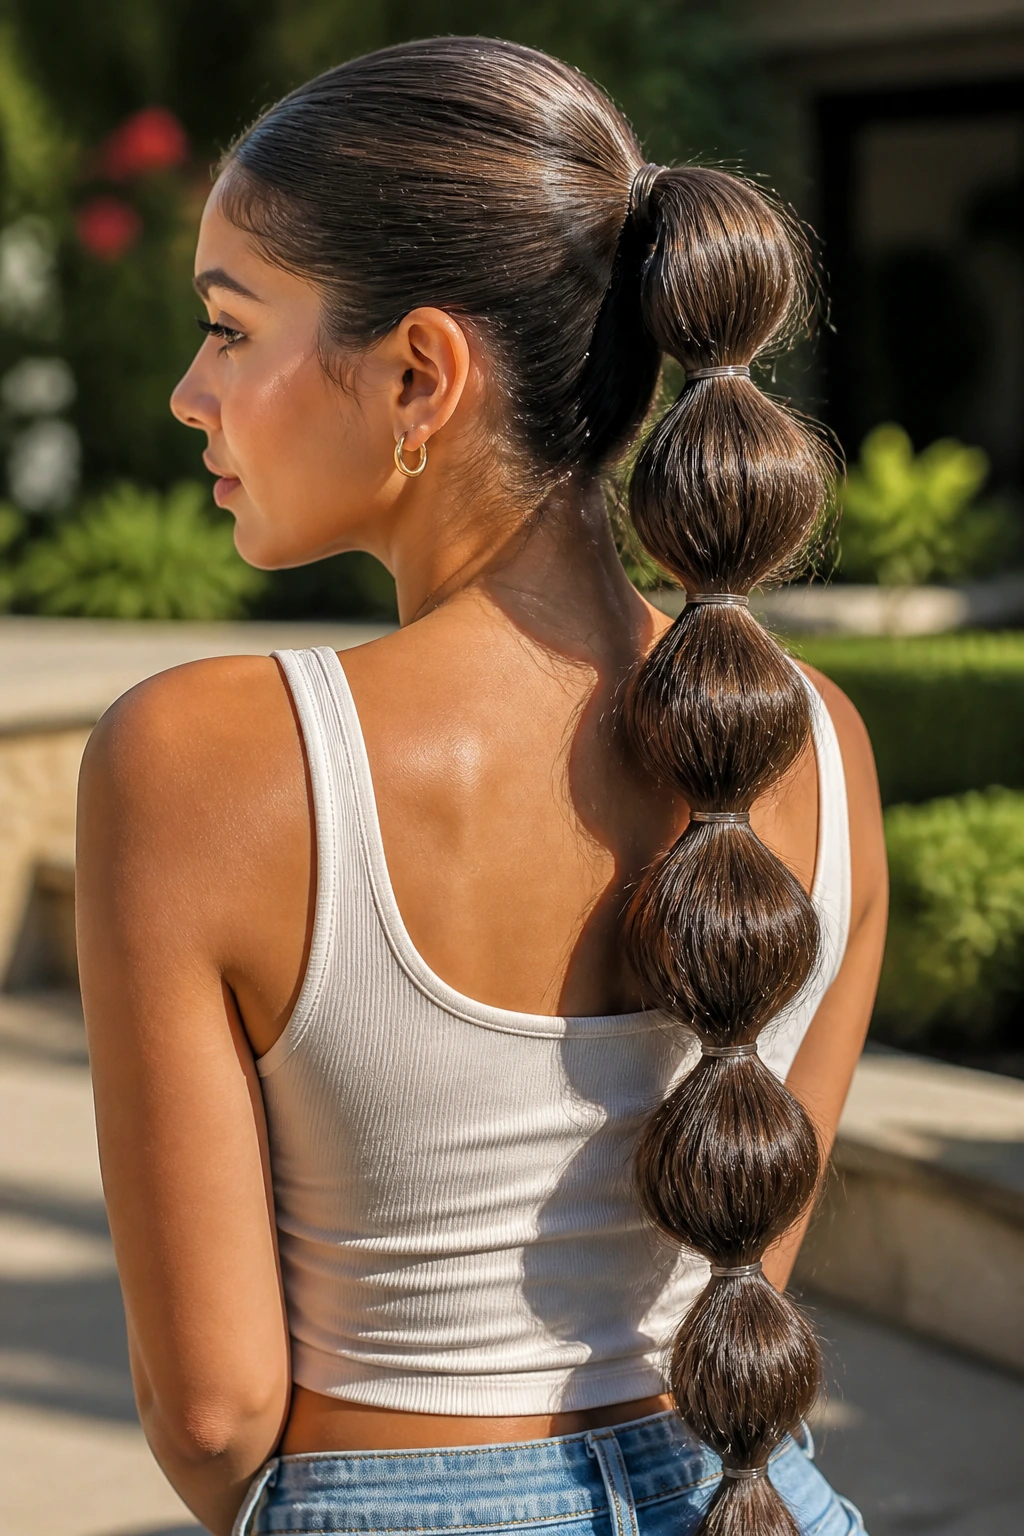
The bubble ponytail has a little more personality than a straight pony, but it still stays neat. It works because the elastic placements create shape even when the hair itself is pin-straight.
Why It Works
Straight extensions make the bubbles crisp, which is the whole point. The sections between elastics puff outward in a controlled way, and long straight lengths keep the look from tipping into costume territory. It’s especially good with mid-back or waist-length hair, because the bubbles need room to stack.
Quick Facts
- Use clear elastics every 2 to 3 inches.
- Gently tug each bubble after tying so it rounds out.
- A tiny mist of shine spray on the outer surface makes the sections read clean.
- Works best when the ponytail starts at the mid-crown or low crown, not too high.
Pro move: pull a few millimeters of hair from the top of each section before tightening the elastic. That gives the bubbles more dimension without making them sloppy.
8. Half-Up Crown Twist
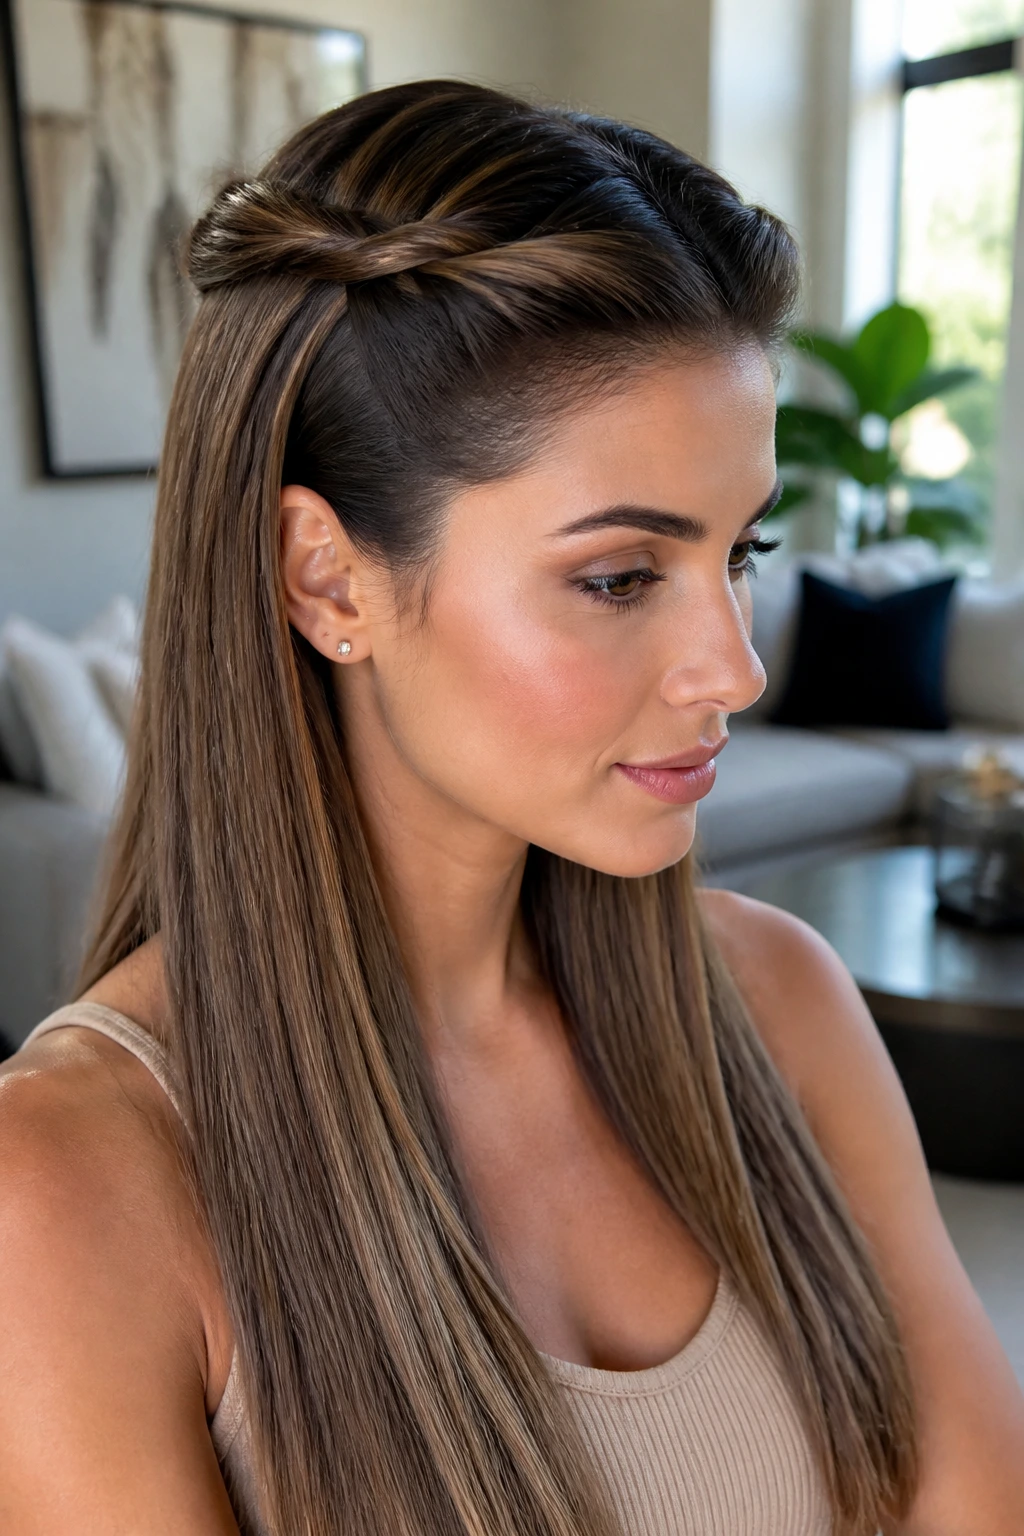
If you like your length visible but want the front off your face, this is the move. The half-up crown twist gives straight extensions a little lift at the top and leaves the rest of the hair long enough to do the talking.
Why It Works
A twist across the crown adds structure without erasing the line of the hair. It’s a smart choice for clip-ins because the upper section can help hide any top-row seams while the lower hair stays loose. The twist also keeps straight hair from collapsing at the roots, which can happen after a long day or a warm room.
How to Wear It
Keep the twist narrow, almost like a band, rather than making a bulky half-up puff. Pin it flat with bobby pins that match your hair color. Then leave the lower lengths sleek and one-directional—center part or slight side part, your call.
This one is better than people give it credit for. It looks polished from the front and soft from the back, and it takes maybe half the time of a full updo.
9. Flipped-End Straight Hair
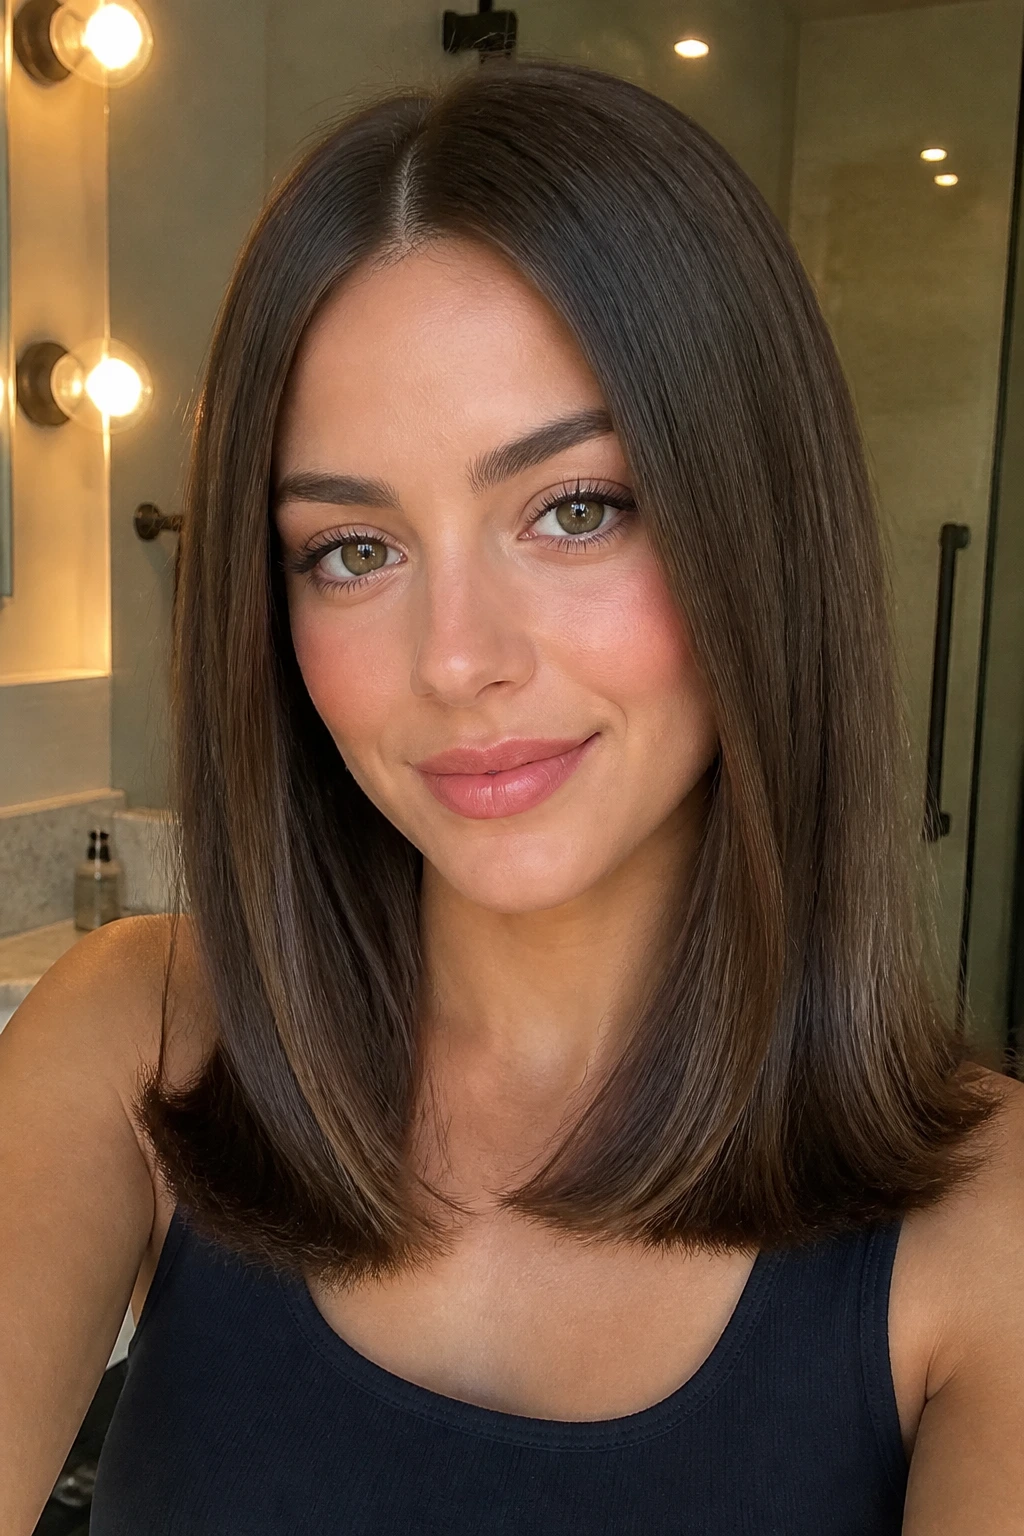
There’s a lot to love about a tiny bend at the ends. It keeps straight extensions from looking too severe, and it gives the style a slightly retro shape that feels deliberate instead of accidental.
Why It Works
The flip-out ends create movement at the bottom, which is where long straight hair can get heavy. A quick pass with a flat iron or round brush at the last inch and a half is enough. Tape-ins and wefts both work here, but the ends should be trimmed into a shape that responds to heat instead of fighting it.
How to Use It
- Flip every end the same direction for a cleaner look.
- Keep the top smooth so the bottom detail stands out.
- Use a heat protectant before touching the ends, because that last bend needs less heat than people think.
The style reads best on hair that lands below the shoulder. Shorter lengths can look stubby with a flipped finish. Longer lengths give the bend room to breathe.
10. U-Cut Waist-Length Layers
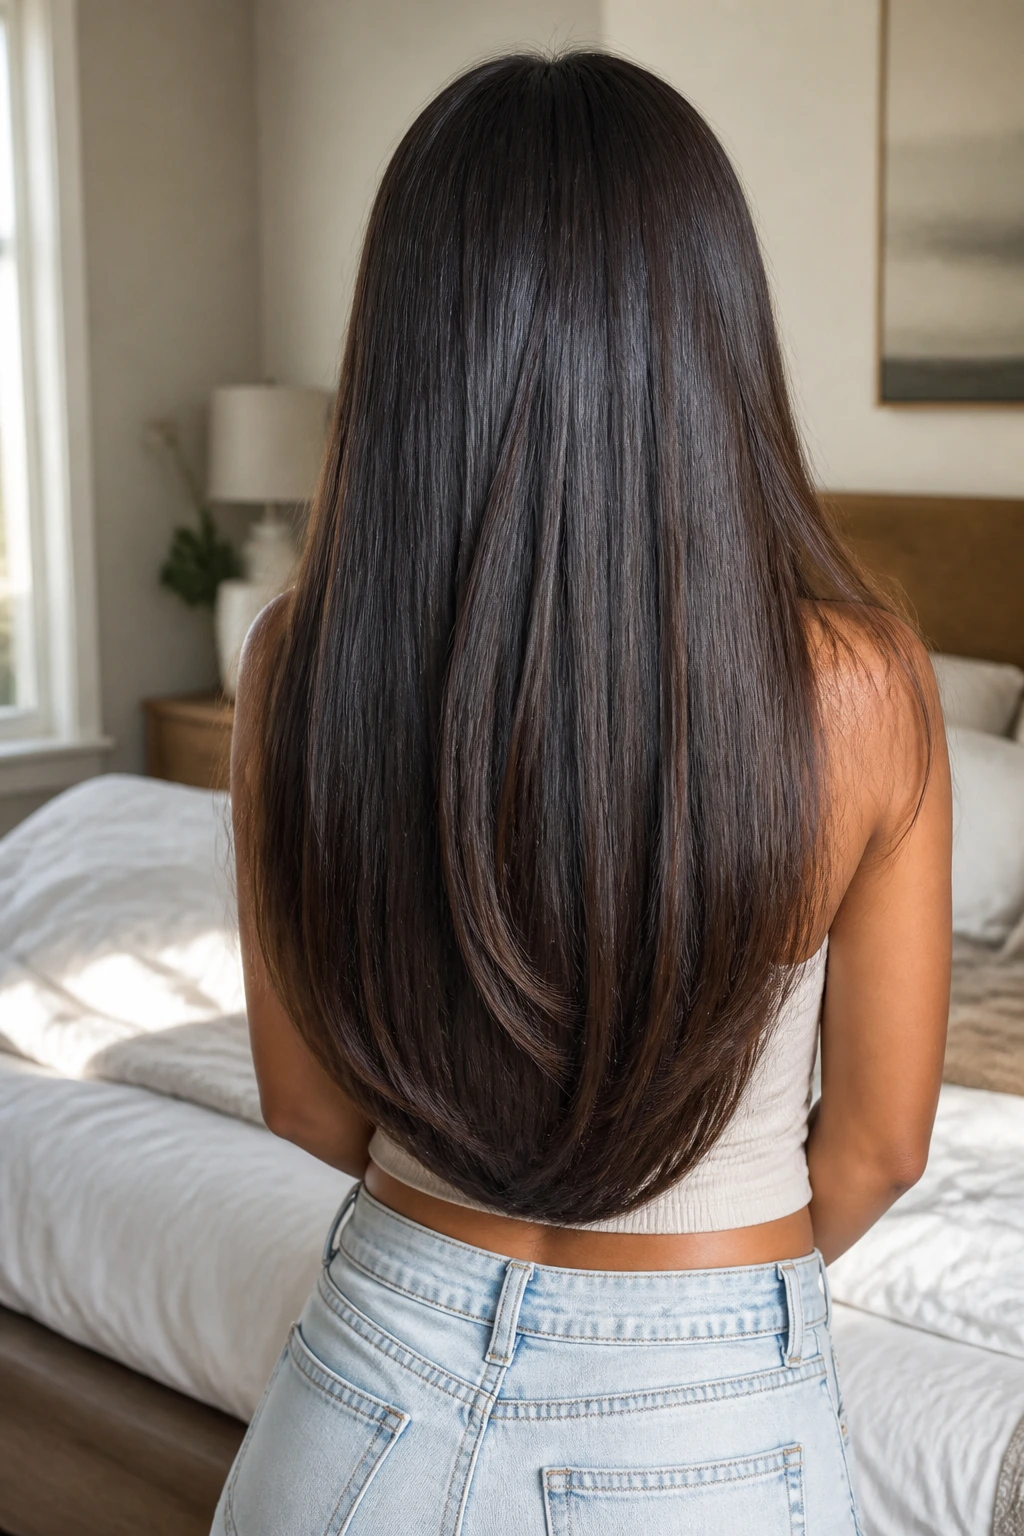
A U-cut is one of the cleanest ways to make long straight extensions look expensive. The center falls a little longer than the sides, which softens the back without losing the dramatic length.
Why It Works
That rounded hemline keeps the hair from turning into a hard block. With full-volume clip-ins or sewn-in extensions, the U-shape gives the ends a nicer fall, especially if you like long hair but hate the shelf-like look that blunt cuts can create on dense extensions.
Bullet Points
- Best for thick extension sets that need shape at the bottom.
- Keeps the sides from feeling too heavy against the face.
- Looks especially good when the back is trimmed after installation.
- Easy to wear both straight and with a slight bevel.
One warning: the U-cut needs regular end checks. If the lower center gets ragged, the shape stops reading as U-shaped and starts looking like you forgot to trim it.
11. V-Cut with Soft Point
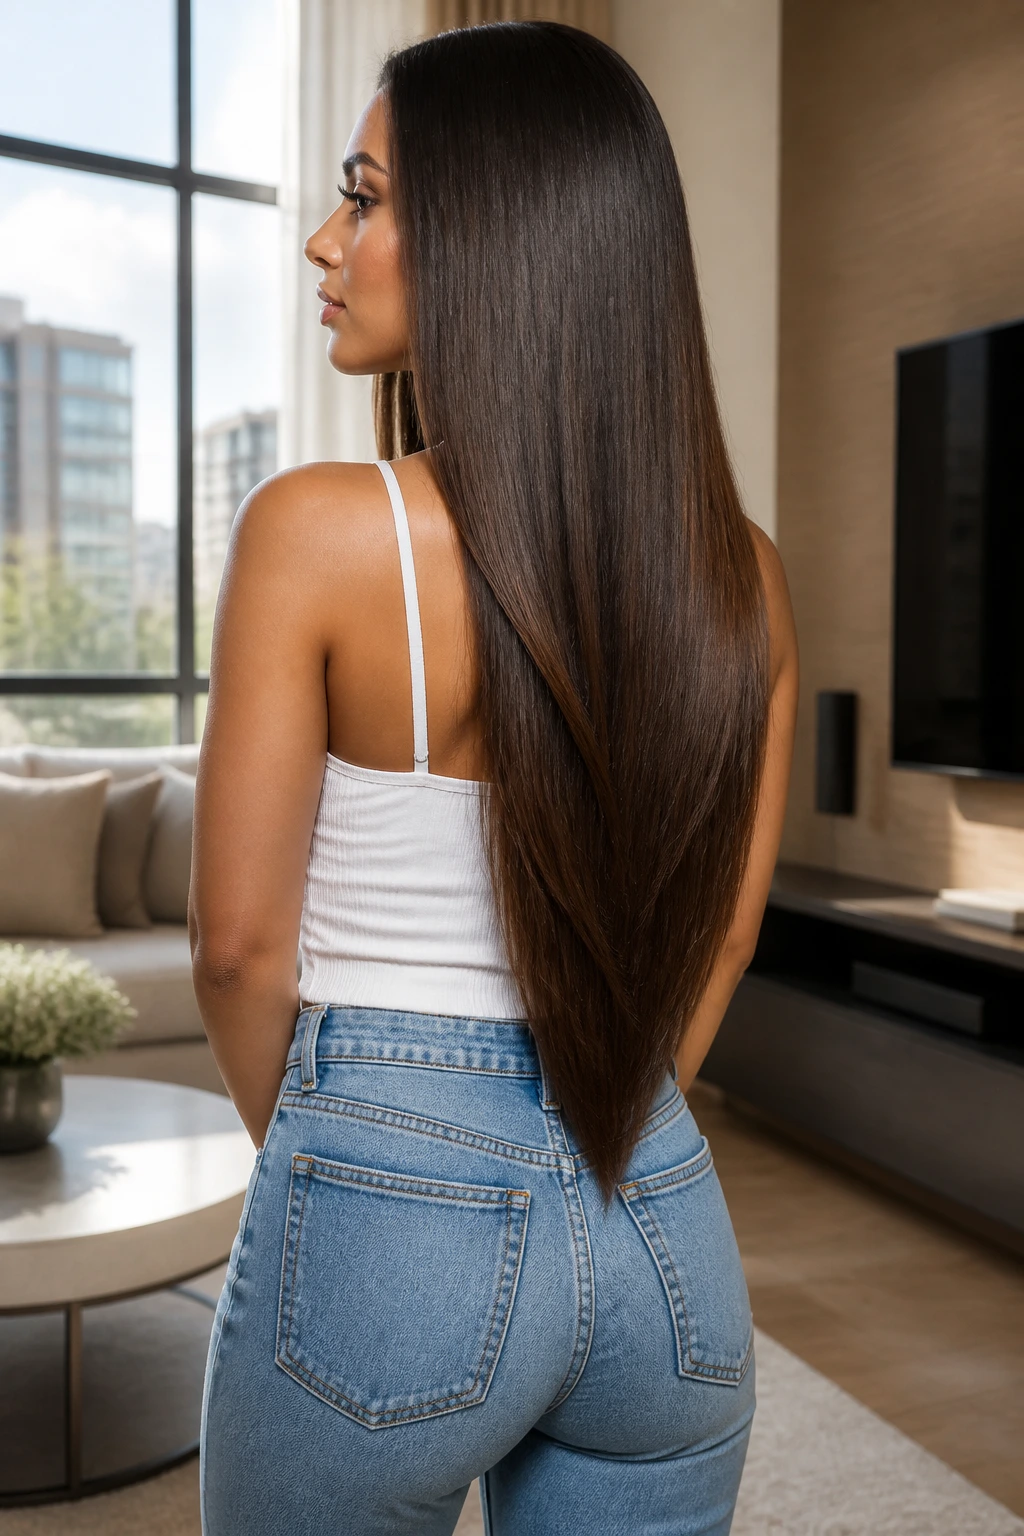
A V-cut is sharper than a U-cut, and that’s the whole appeal. The hair narrows into a pointed center back, which makes long straight extension lengths feel leaner and more dramatic.
Why It Works
The point draws the eye downward and makes the ends seem lighter. That matters if your extension hair is dense or if your own hair is fine and needs a little shape to stop the lower section from looking like a curtain. The best V-cut starts gently, not with a dramatic, narrow point that splits the hair too much.
A soft V also plays nicely with layers in the front. You get shape at the edges, movement in the center, and a finish that looks neat even when the hair hangs completely straight.
Practical note
If you’re installing extensions for a V-cut, plan the cut after the hair is in. Cutting the shape while the pieces are loose can throw off the balance once the extensions settle.
12. Butterfly Layers on Straight Hair
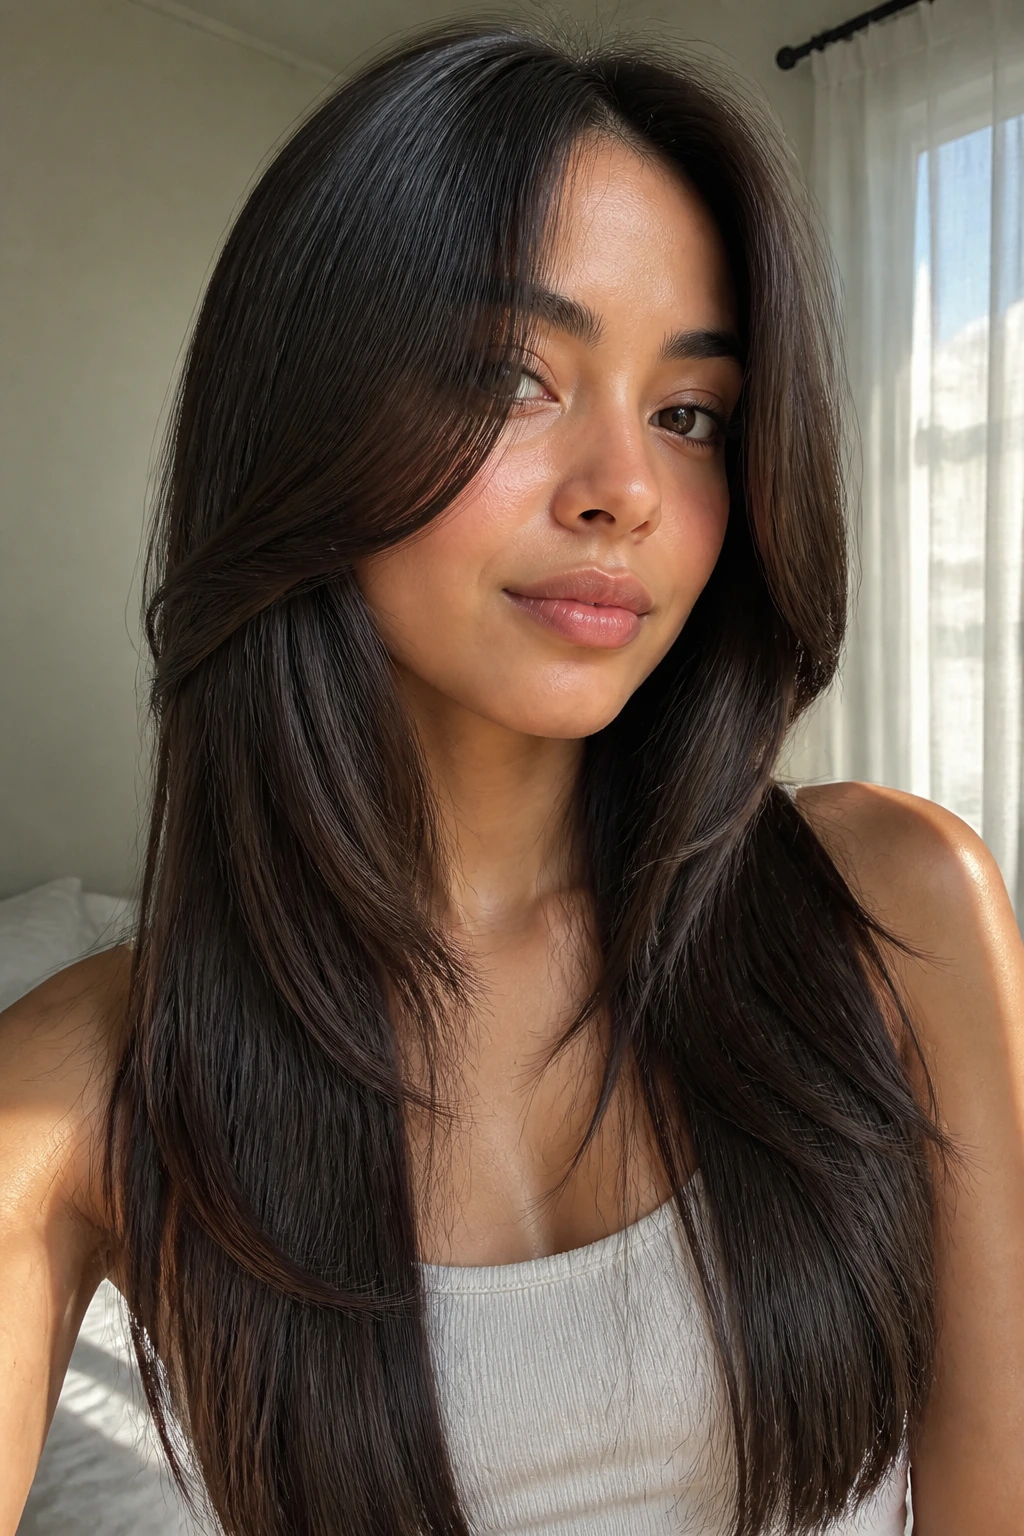
Butterfly layers are for anyone who wants body without losing the long straight look. The shorter pieces sit around the face and upper chest, while the longer layer keeps the shape anchored.
Why It Works
This is one of the better extension styles for straight hair when the goal is movement. The shorter top pieces stop the style from lying flat against the head, and the long bottom layer keeps the outline sleek. Clip-ins or tape-ins with long face-framing pieces make the effect easier to control.
Who It’s Best For
If your hair tends to hang straight but lifeless, this shape adds lift without making you curl anything every morning. It’s also forgiving when the weather feels humid or your roots go a little flat, because the built-in layers keep the hair from sticking to your head.
A butterfly cut can go wrong if the shortest pieces are too short. Once the top layer jumps up too high, the whole thing becomes more feathered than straight. Keep the layers long and the mood calm.
13. Deep Side-Part Sweep
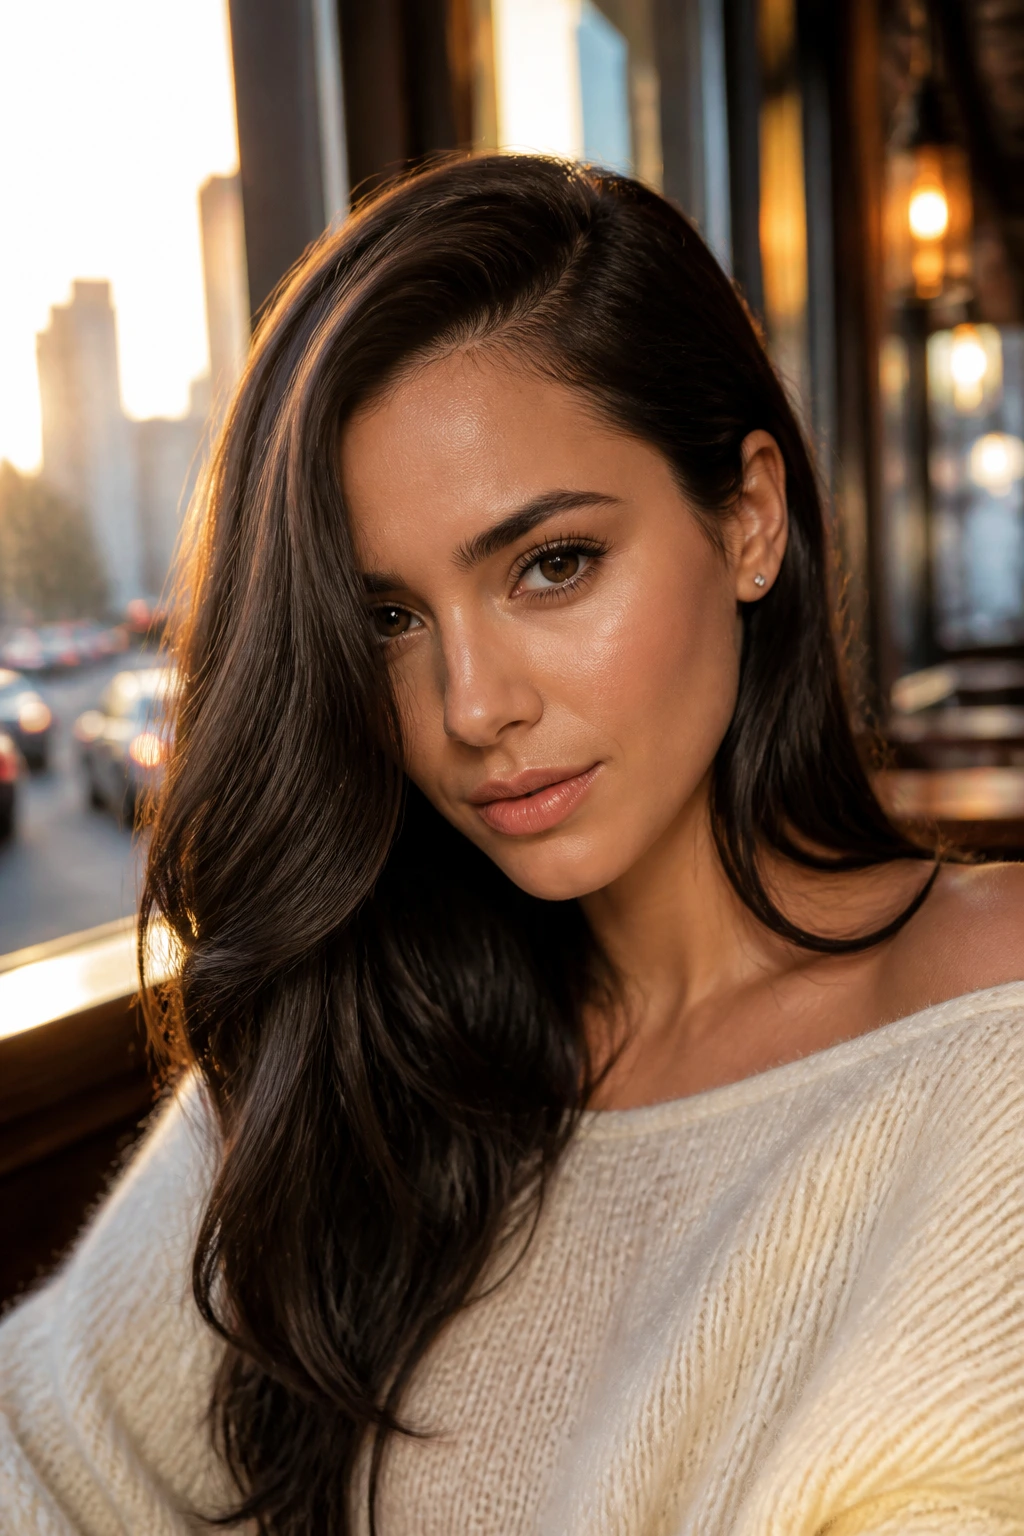
A deep side part changes the mood of straight hair instantly. It makes the hair feel richer, heavier on one side, and a little more dramatic without adding one extra inch of length.
Why It Works
The shifted part gives the roots lift on one side and a sleek fall on the other. With extensions, that asymmetry helps hide wefts or clip bases because the bulk isn’t split evenly down the center. It’s a nice trick for fine or medium-density hair that needs a little visual weight.
Quick Facts
- Comb the part while the hair is still slightly damp if you want it to stay put.
- A root-lift spray at the new part line helps the hair stand up instead of collapsing.
- Tuck the lighter side behind one ear and let the fuller side hang forward.
This style is clean, but not rigid. That’s why it works on straight hair so often. It gives shape without demanding curls, waves, or heavy product.
14. Deep Side Part with Tucked Front
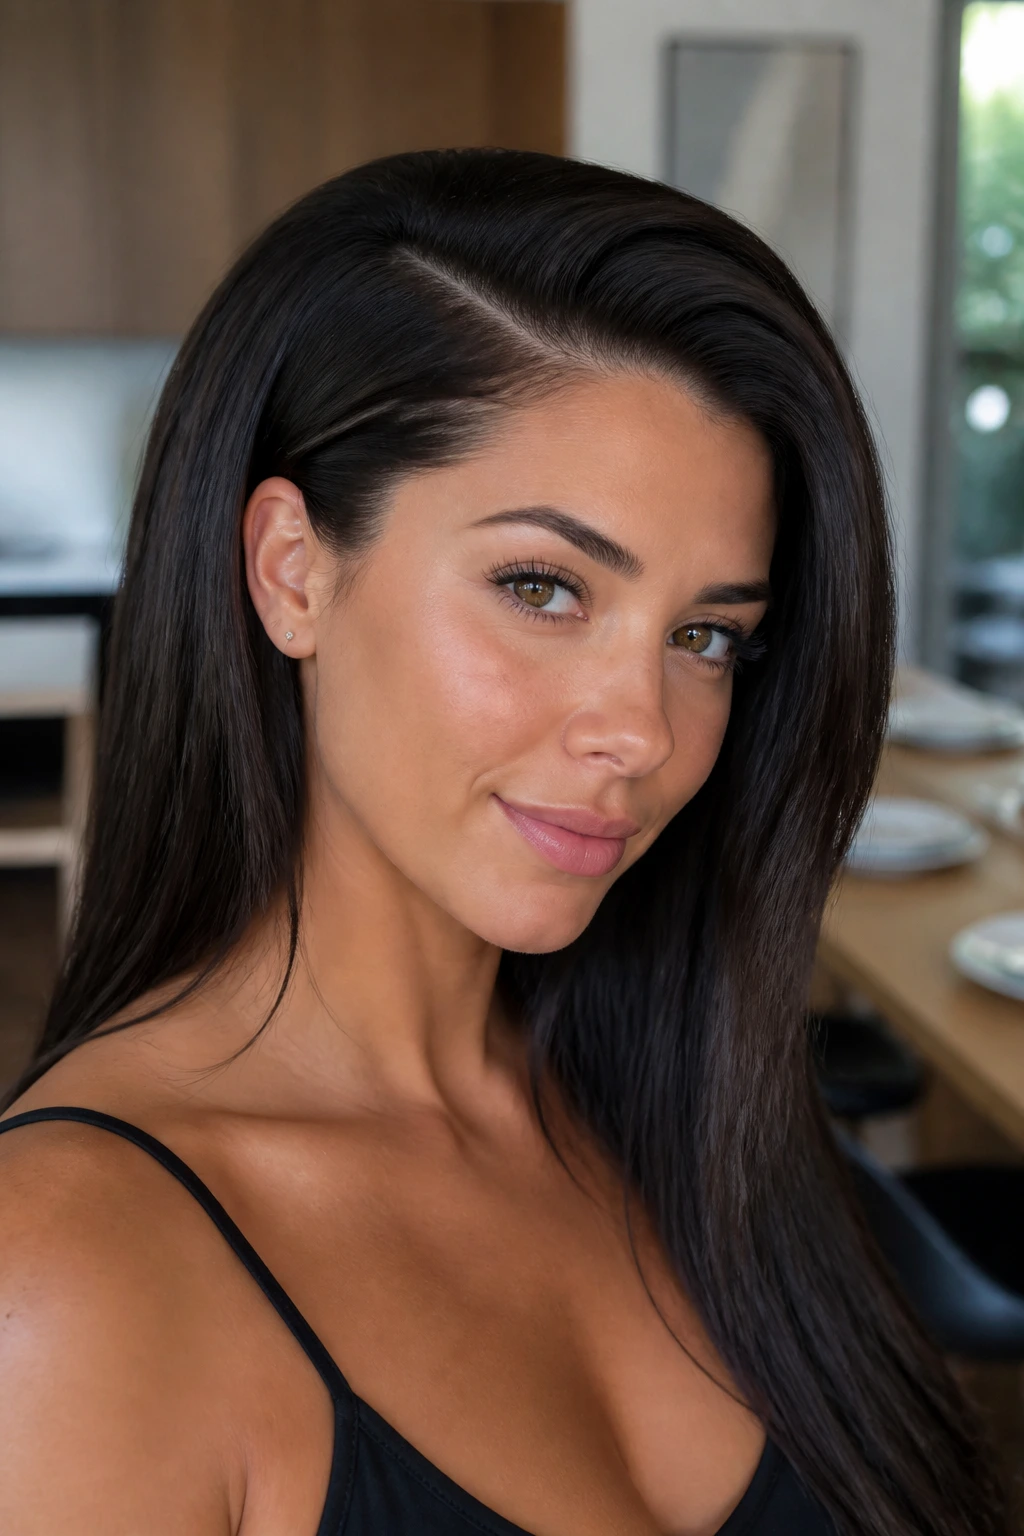
This version is a little more styled and a little less serious. You still get the depth of the side part, but the front section is tucked behind the ear or pinned at the temple, which opens the face and shows off the jawline.
Why It Works
The tucked front creates a break in the straight line, which keeps the look from becoming too flat. Tape-ins and invisible wefts are especially good here because the hair needs to move away from the face without showing hardware. It also helps if you wear glasses or statement earrings; the style frames both without competing.
Best move
Use one small flat bobby pin under the tucked section. Don’t shove the whole front behind the ear and hope it stays. Straight hair is slippery. It always wants to slide back into place unless you give it a pin or two.
This one is a quiet favorite for dinners, interviews, or any day when you want the face front and center.
15. Claw-Clip French Roll
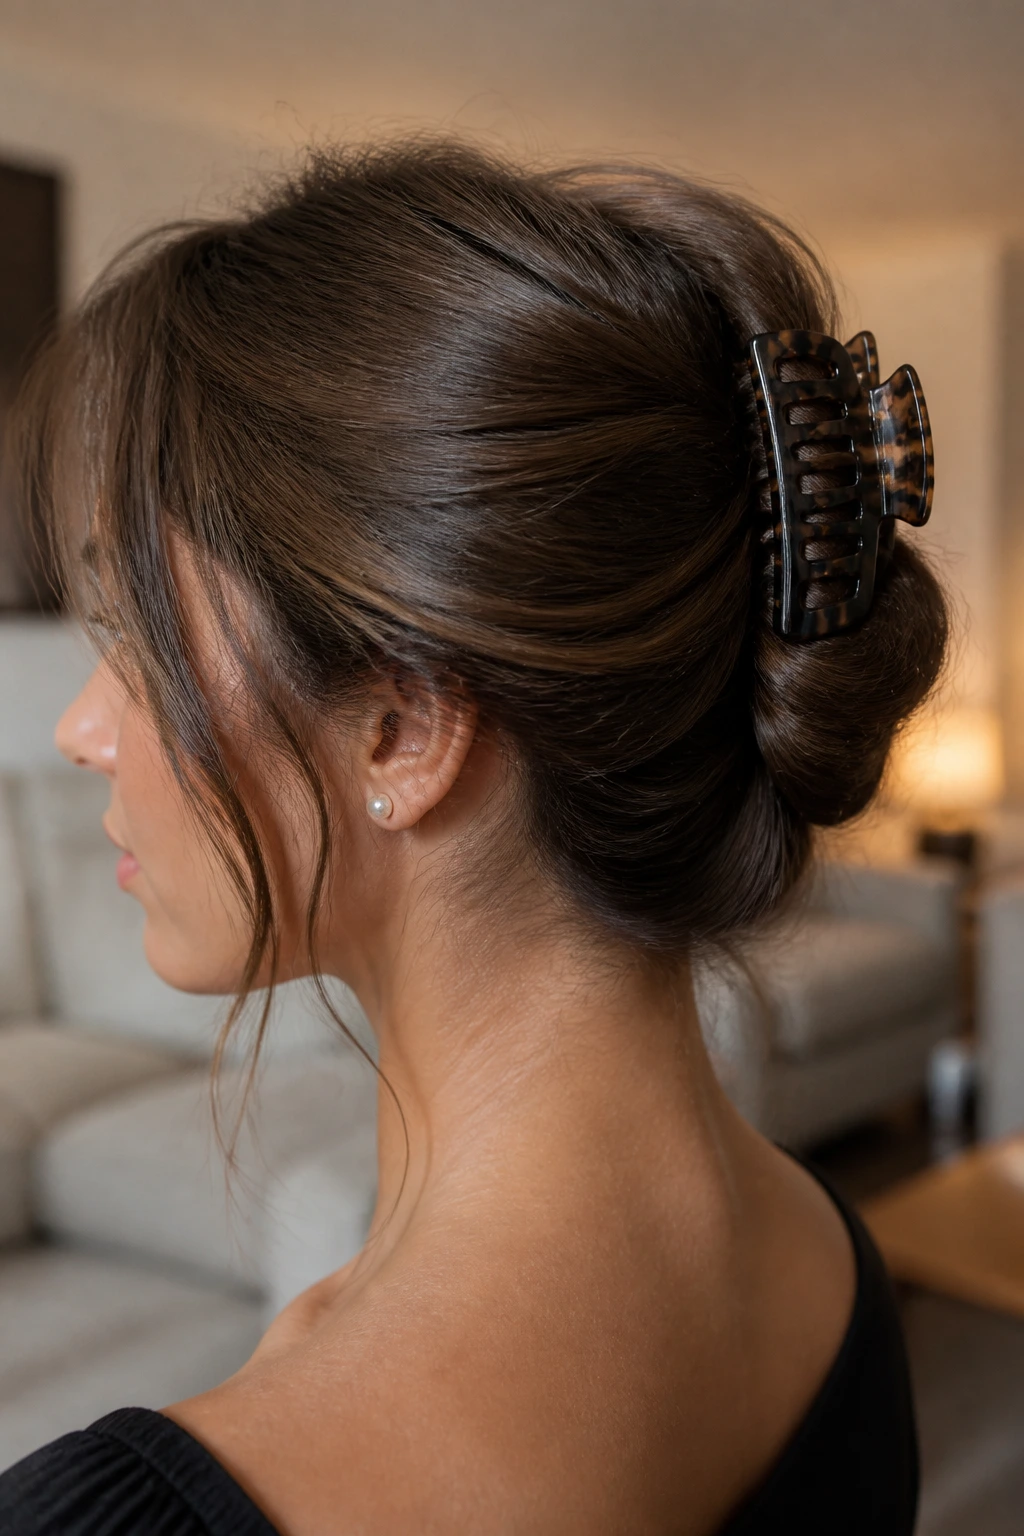
The claw-clip roll is the easiest polished style in the entire group, and it’s a good one for straight extensions because it gives the length somewhere to go without stuffing everything into a tight bun.
Why It Works
The hair is rolled upward at the back, then clipped so the tail drops loosely or tucks in depending on length. With long straight extensions, the roll gets enough bulk to hold the clip without looking thin. That is the catch with natural straight hair—it can slide right out of a weak clip if there’s not enough weight.
How to Wear It
Pick a medium or large claw clip with teeth that actually grip. A glossy plastic clip may look cute, but if it can’t hold 160 grams of hair, it’s decoration. Leave a few front pieces out if you want softness, or smooth everything back for a cleaner shape.
It’s one of those styles that looks more deliberate than the time it takes to do it. I like that.
16. Low Chignon
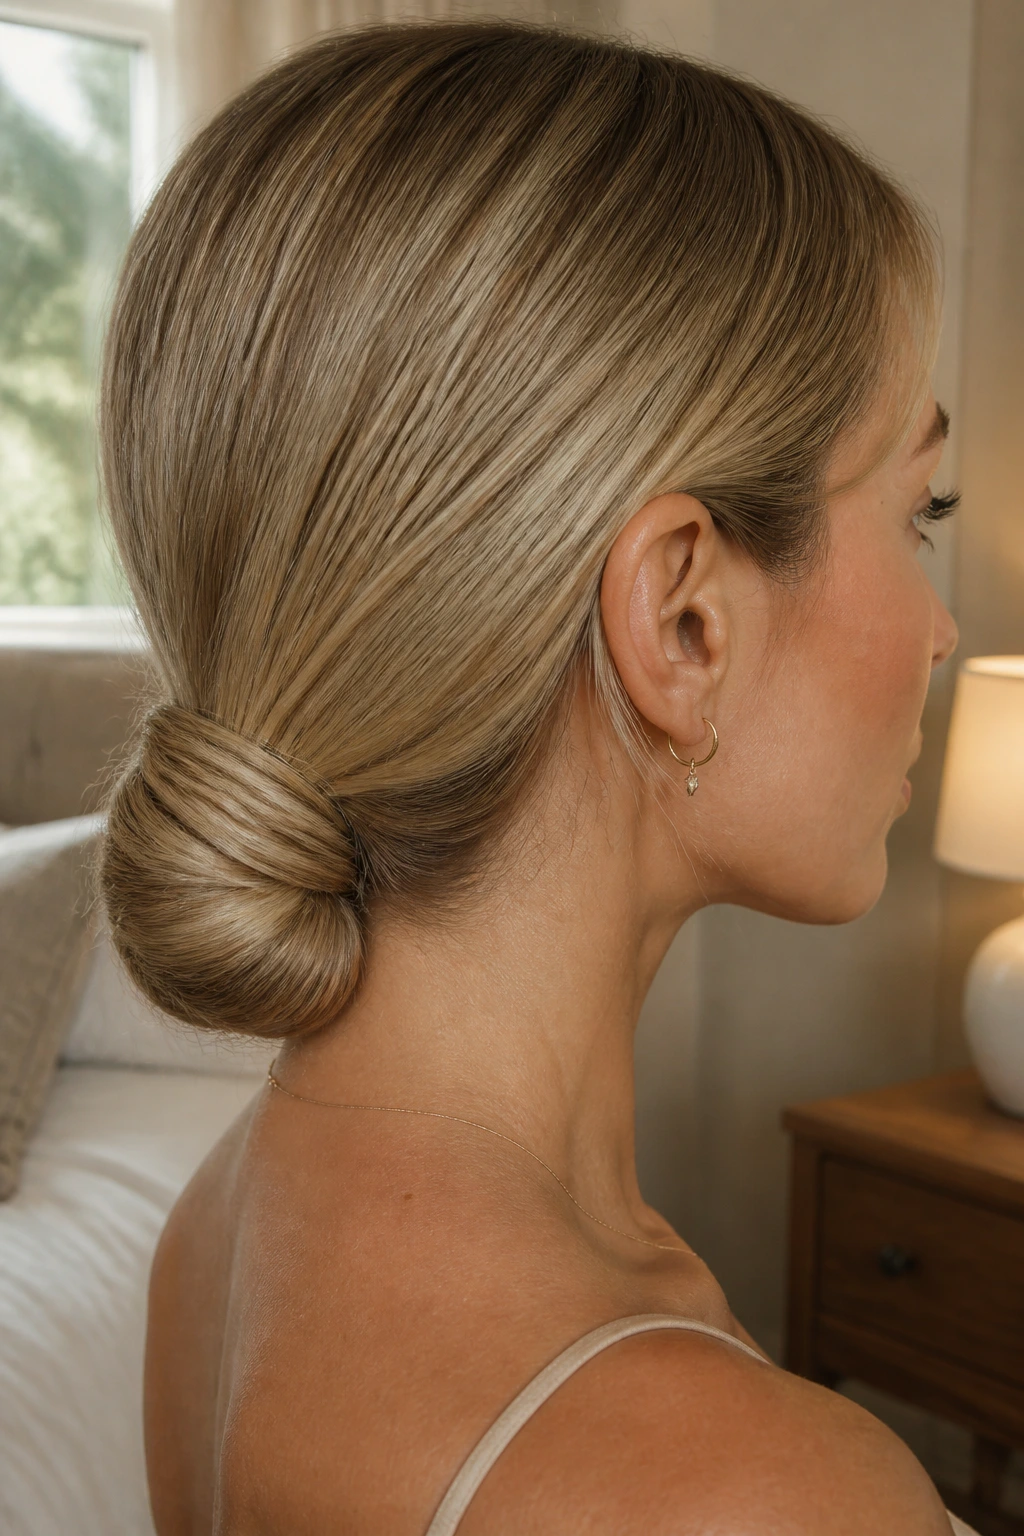
A low chignon on straight hair is all about control. The shape sits close to the neck, which keeps the extensions from fanning out and makes the whole style feel neat, even when the hair underneath is quite long.
Why It Works
A chignon gives straight hair a place to fold back on itself. That makes it useful when the extension length is extra long, because you can tuck the ends in without stuffing them into a lumpy knot. Sew-ins or tape-ins work especially well here since the roots stay flat while the bun gets shape.
Bullet Details
- Keep the bun slightly off-center if your nape is low and you want the style to stay soft.
- Pin the roll from underneath, not the top, so the shape stays smooth.
- Finish with a fine mist of strong-hold spray on the outer shell only.
This isn’t a fussy style, despite how polished it looks. It’s mostly about patient pinning and not rushing the tuck.
17. Sculpted Top Knot
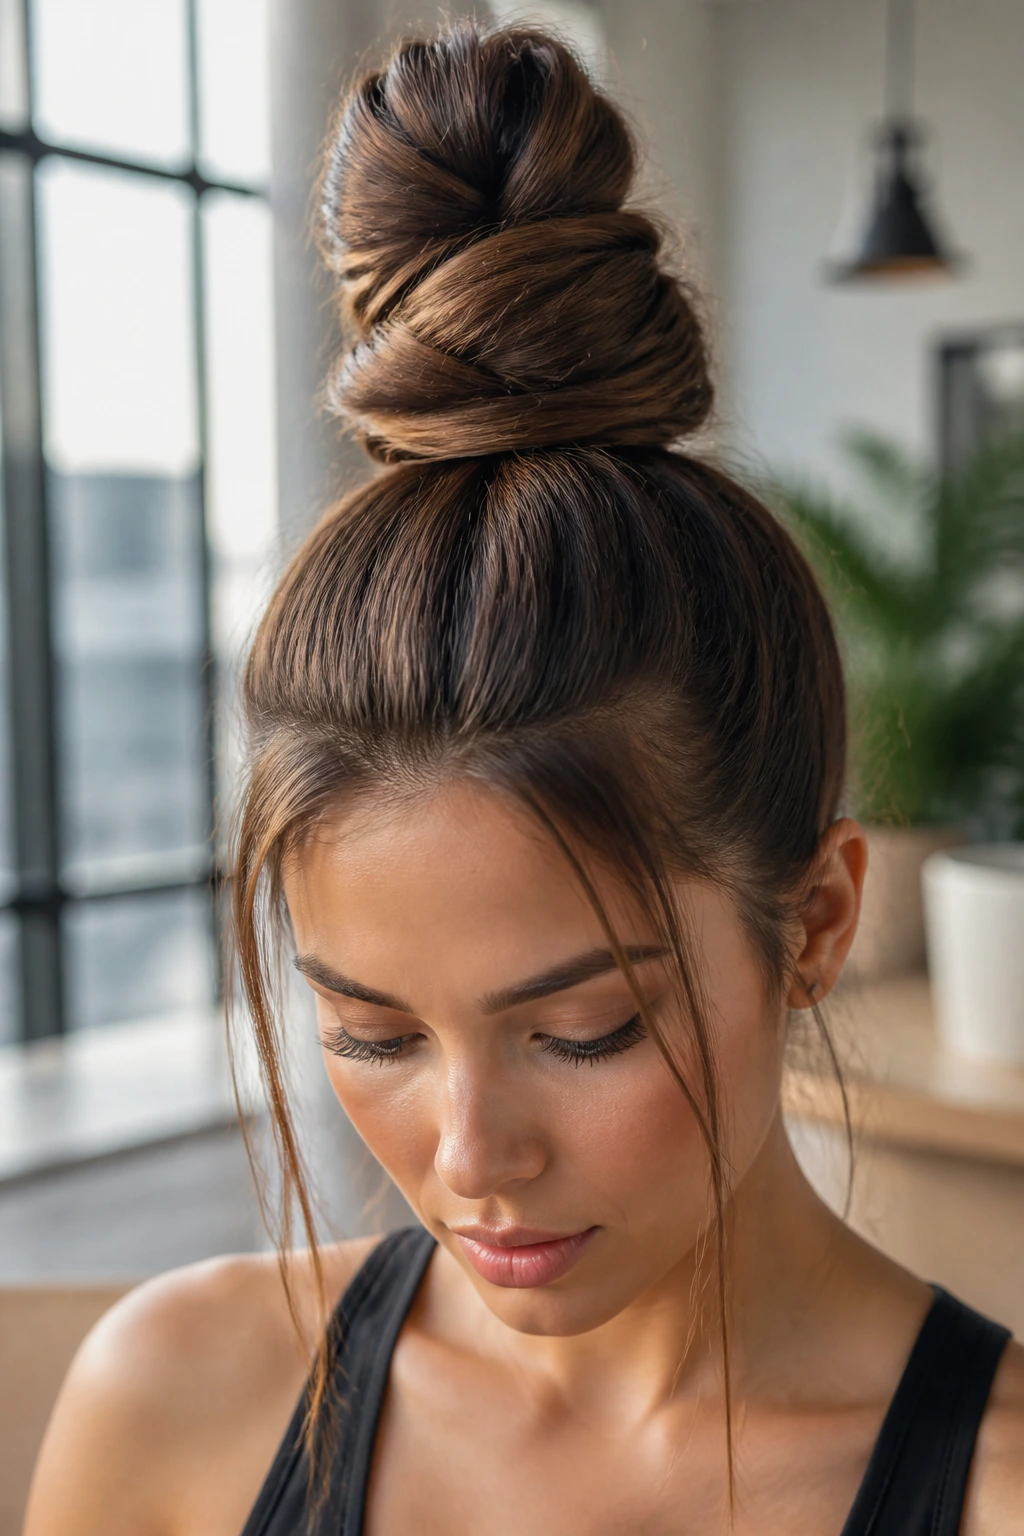
The top knot is the opposite of the low chignon: higher, sharper, and more open. Straight hair extensions make it look fuller, which helps the knot hold its shape instead of shrinking into a tiny knot on top of the head.
Why It Works
A sculpted top knot needs density at the crown, so clip-ins placed high enough to support lift can be a better fit than very low extensions. The hair should be brushed up in sections, not yanked once from the nape. That keeps the front smooth and the knot round.
The style is best when the hair is wrapped around the base with some care. A lazy top knot looks like an afterthought; a sculpted one looks like you had a plan.
Quick Tip
If the knot keeps collapsing, coil the hair around a second elastic before pinning. Extra hold matters more than extra spray.
18. Space Buns with Straight Tails
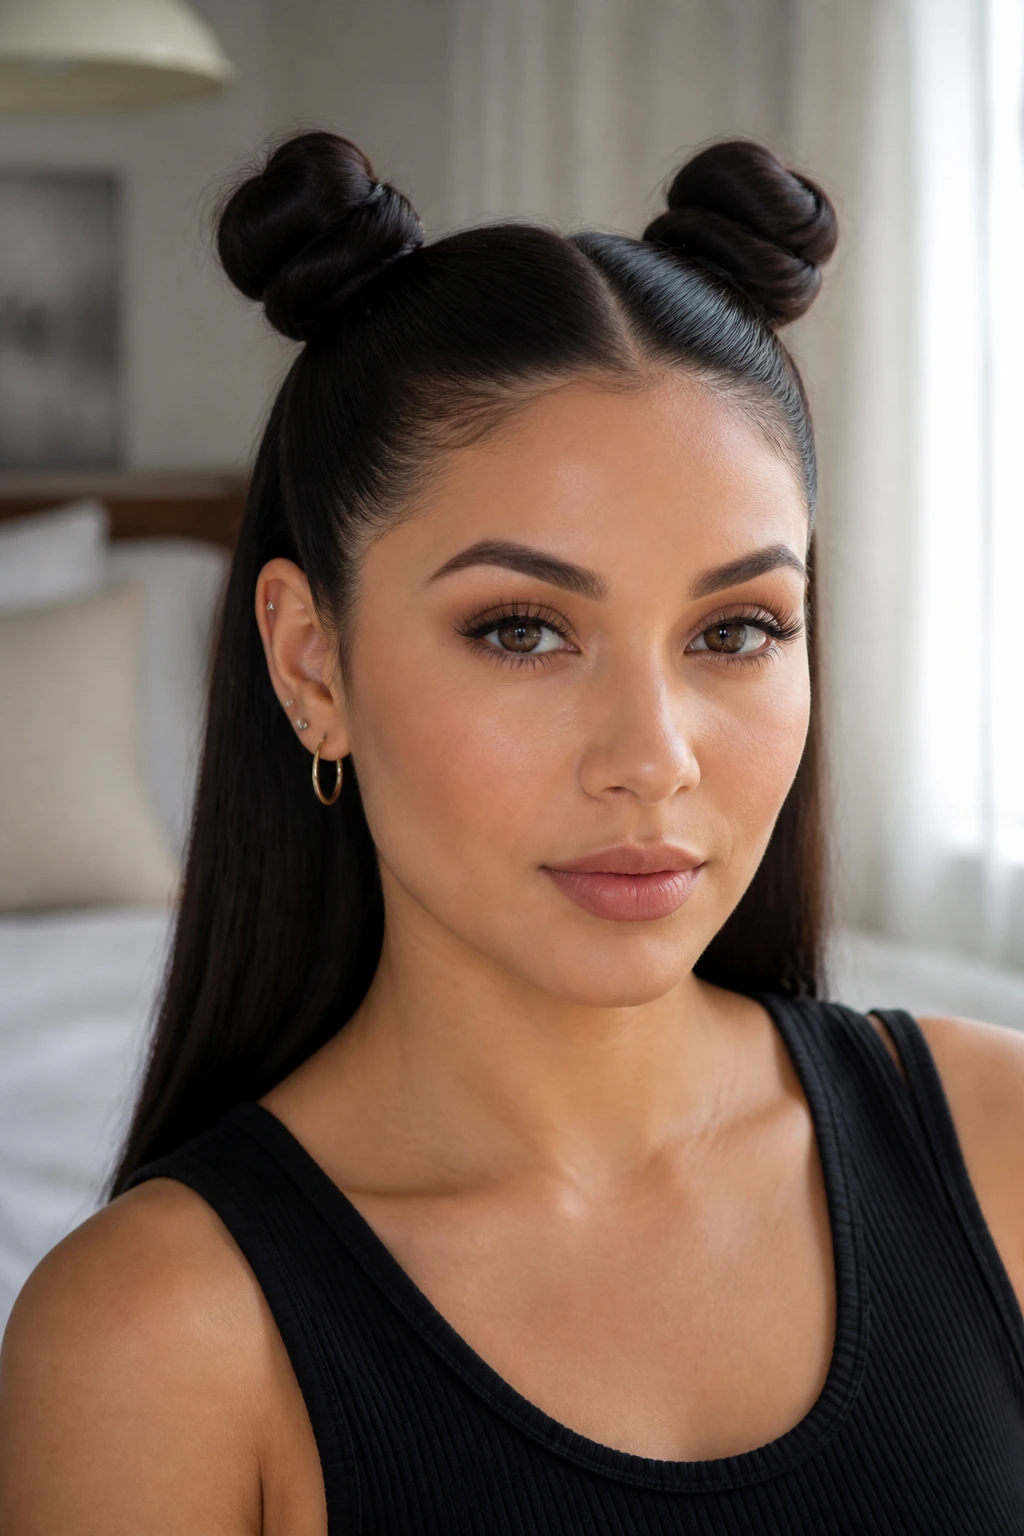
Space buns can feel playful or slightly edgy depending on how neat you make them. On straight hair, they look cleanest when the buns are compact and the tails fall straight and smooth.
Why It Works
The two-bun setup breaks up the length, which is useful if your extensions are very long and need a break from hanging loose. It also gives the style a little structure at the crown, where straight hair can go flat fast. Halo extensions and clip-ins are both workable here, as long as the base isn’t too bulky.
Who It’s Best For
This one suits casual weekends, music nights, or any day when you want the hair out of your face but still visible. It also hides day-two roots better than a single ponytail because the buns create intentional texture up top.
A little shine serum on the tails goes a long way. Keep the buns matte-ish and the lengths glossy. That contrast makes the shape pop.
19. Pigtail Braids with Sleek Roots
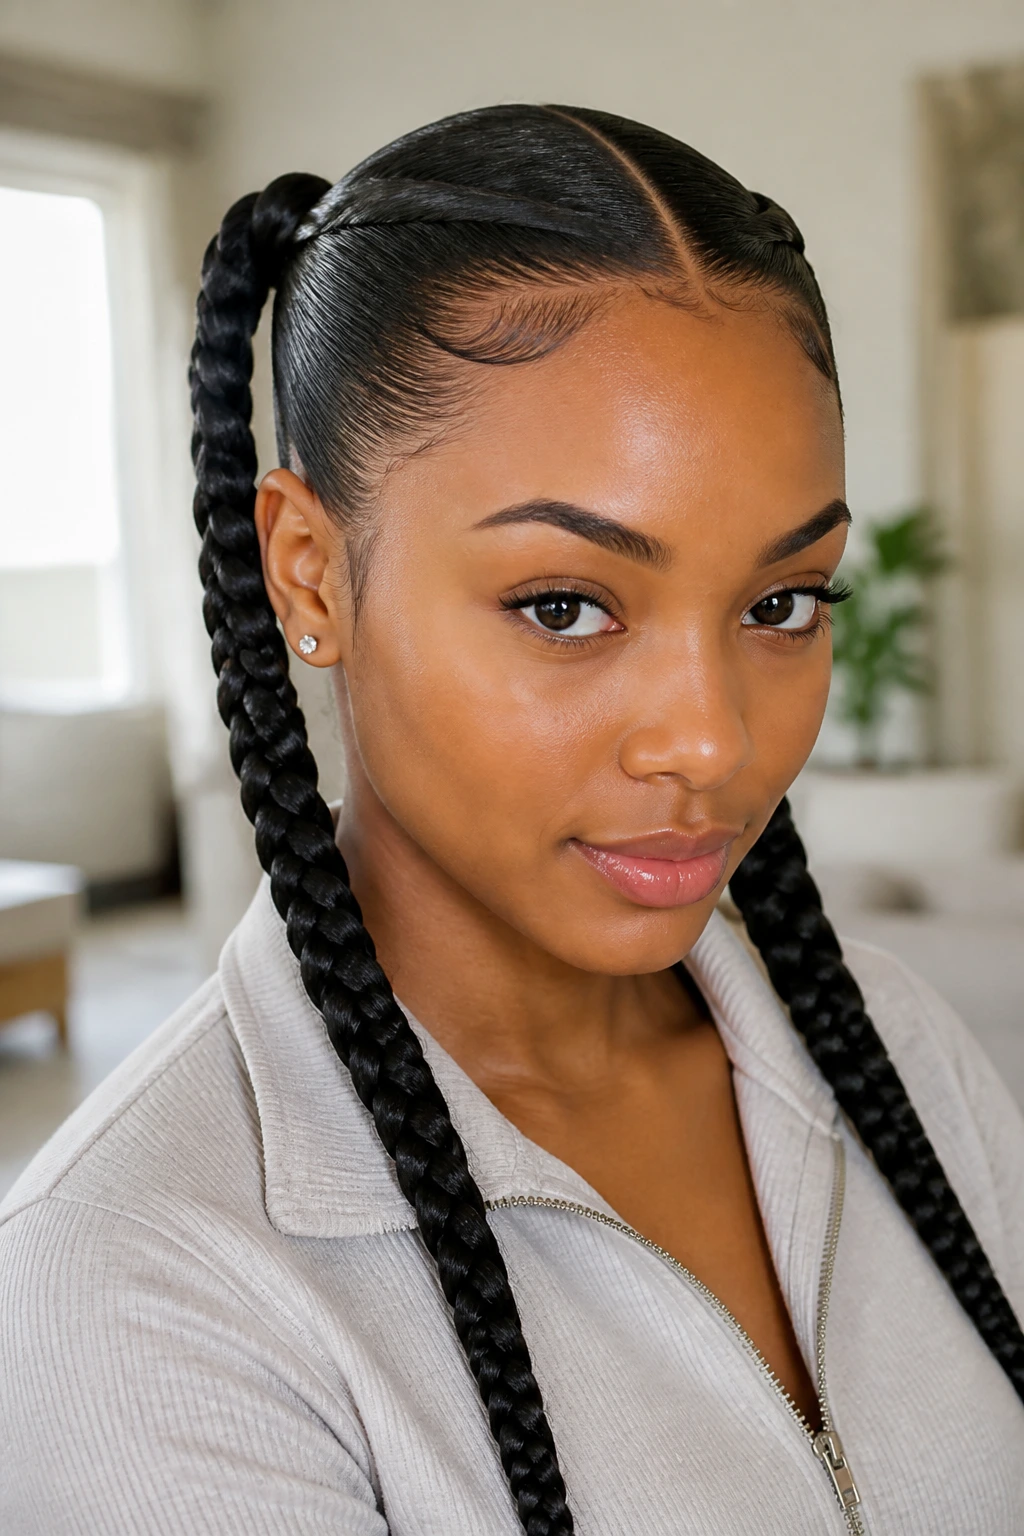
Pigtail braids sound simple, but on straight extensions they can look striking. The neat parting, the smooth crown, and the thick braid line give the whole style a crisp, almost athletic finish.
Why It Works
Braids hold straight extensions well because the texture is already smooth. There’s less puff at the crossover points, so the braid looks tighter and cleaner. If you want the braids to feel fuller, add clip-ins mid-length, not right at the scalp, so the braid doesn’t get bulky near the roots.
Quick Facts
- Best for hair that’s past the shoulders.
- Use a styling cream on the mid-lengths before braiding to reduce flyaways.
- Secure the ends with small elastics and wrap a tiny piece of hair around them if you want a cleaner finish.
- Great for keeping straight extension hair controlled on active days.
It’s a classic for a reason. The shape is simple, but straight hair makes every line sharper.
20. Braided Ponytail
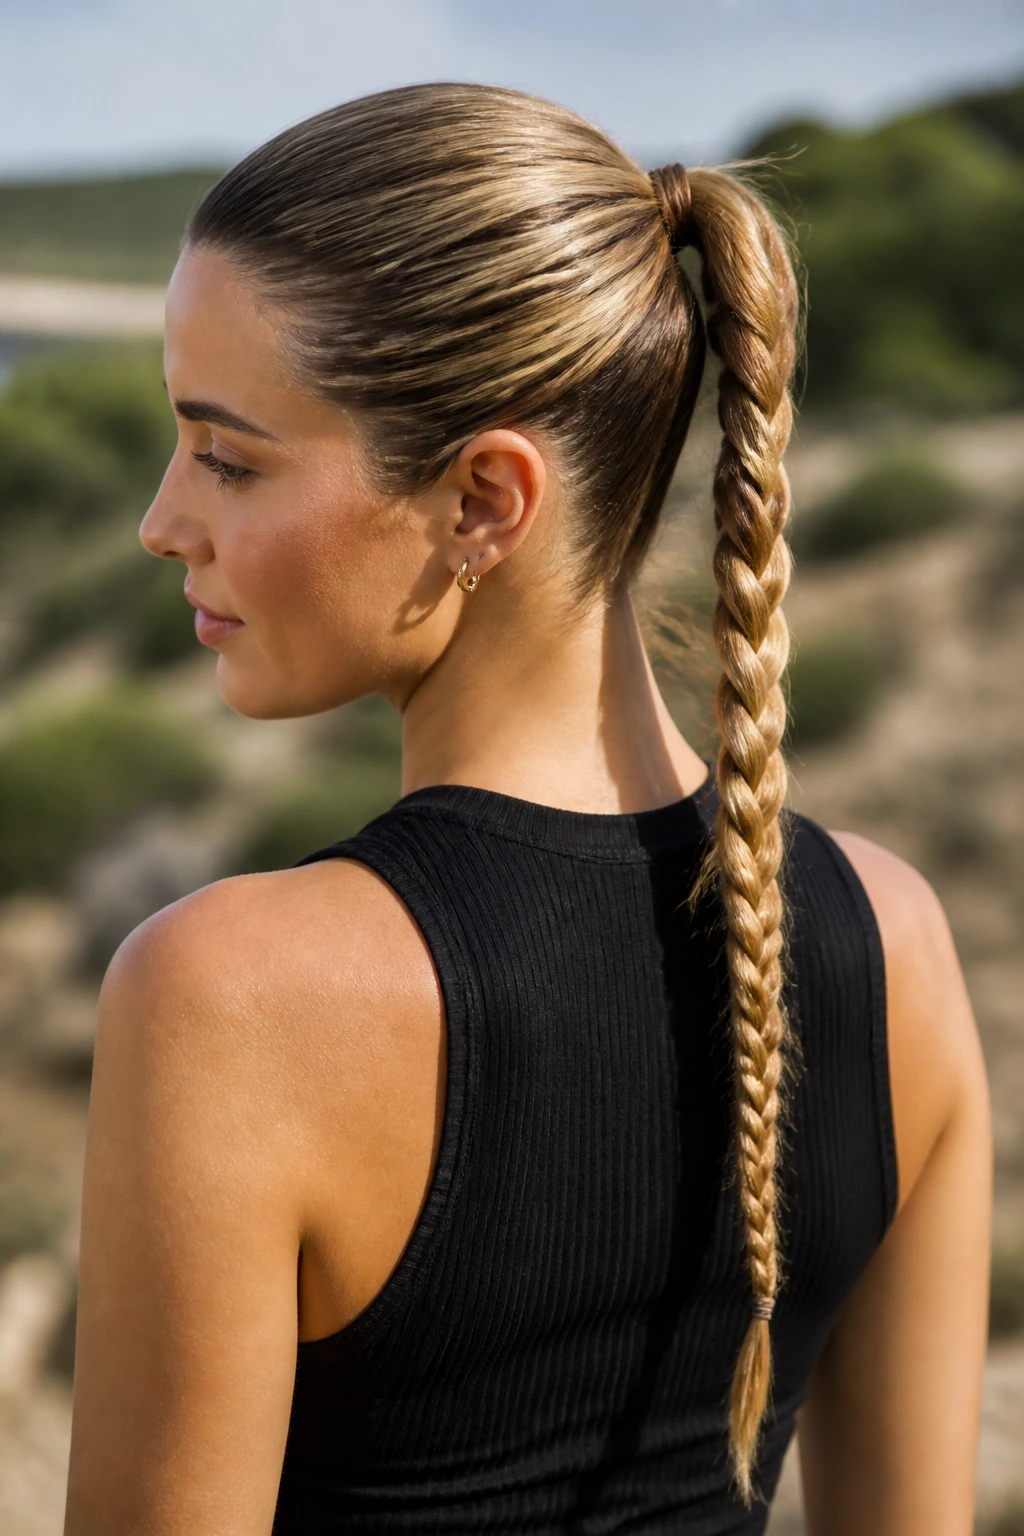
A single braided ponytail takes the neatness of a pony and gives it more texture. It’s especially good when you want the length visible but don’t want the ends blowing around in the wind all day.
Why It Works
The braid consolidates all that straight length into one long rope of hair. That means the extension hair has to be well-matched in thickness, or the braid will look thin at the bottom. A ponytail extension piece can help if your own hair is fine, since it gives the braid a better body from the start.
Best for
- Humid days when loose straight hair gets noisy.
- Long extension wear that needs a controlled finish.
- People who like a clean back view more than loose movement.
The braid should feel snug, not compressed. If it’s pulled too tight, the scalp line gets harsh and the crown starts looking stiff. A little looseness around the top keeps it wearable.
21. Crimped Crown, Straight Lengths
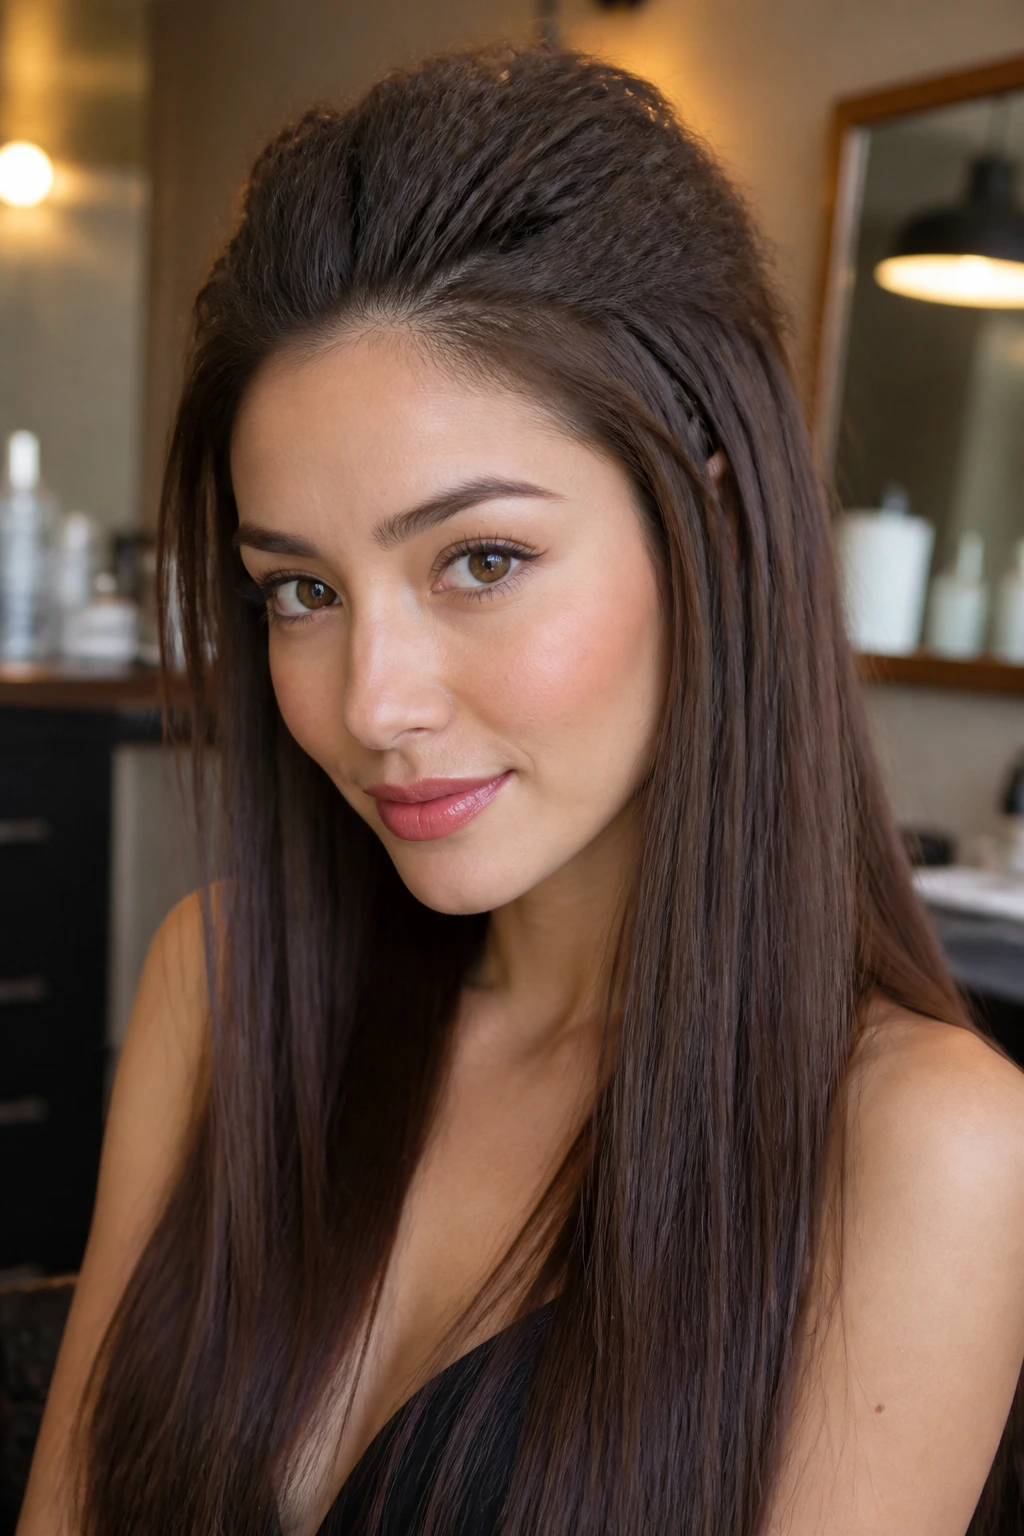
This one is for the texture people. The top section is lightly crimped or bent close to the roots, while the rest stays straight and smooth. The contrast gives straight hair a little grit without turning it into a full texture look.
Why It Works
The crimped crown adds lift where straight hair usually collapses. It can also help clip-in bases grip more securely because the roots are no longer glass-smooth. The lower lengths stay polished, which keeps the style from becoming too busy or too nostalgic.
How to Wear It
Use a micro-crimper or braid the roots overnight if you want a softer version. Just don’t crimp the entire head unless you want the style to lean fully into texture. The best version is subtle: a raised crown, a straight middle, and ends that stay neat.
This is one of my favorite fixes for hair that looks flat in the first hour and limp by the third.
22. Beveled Ends
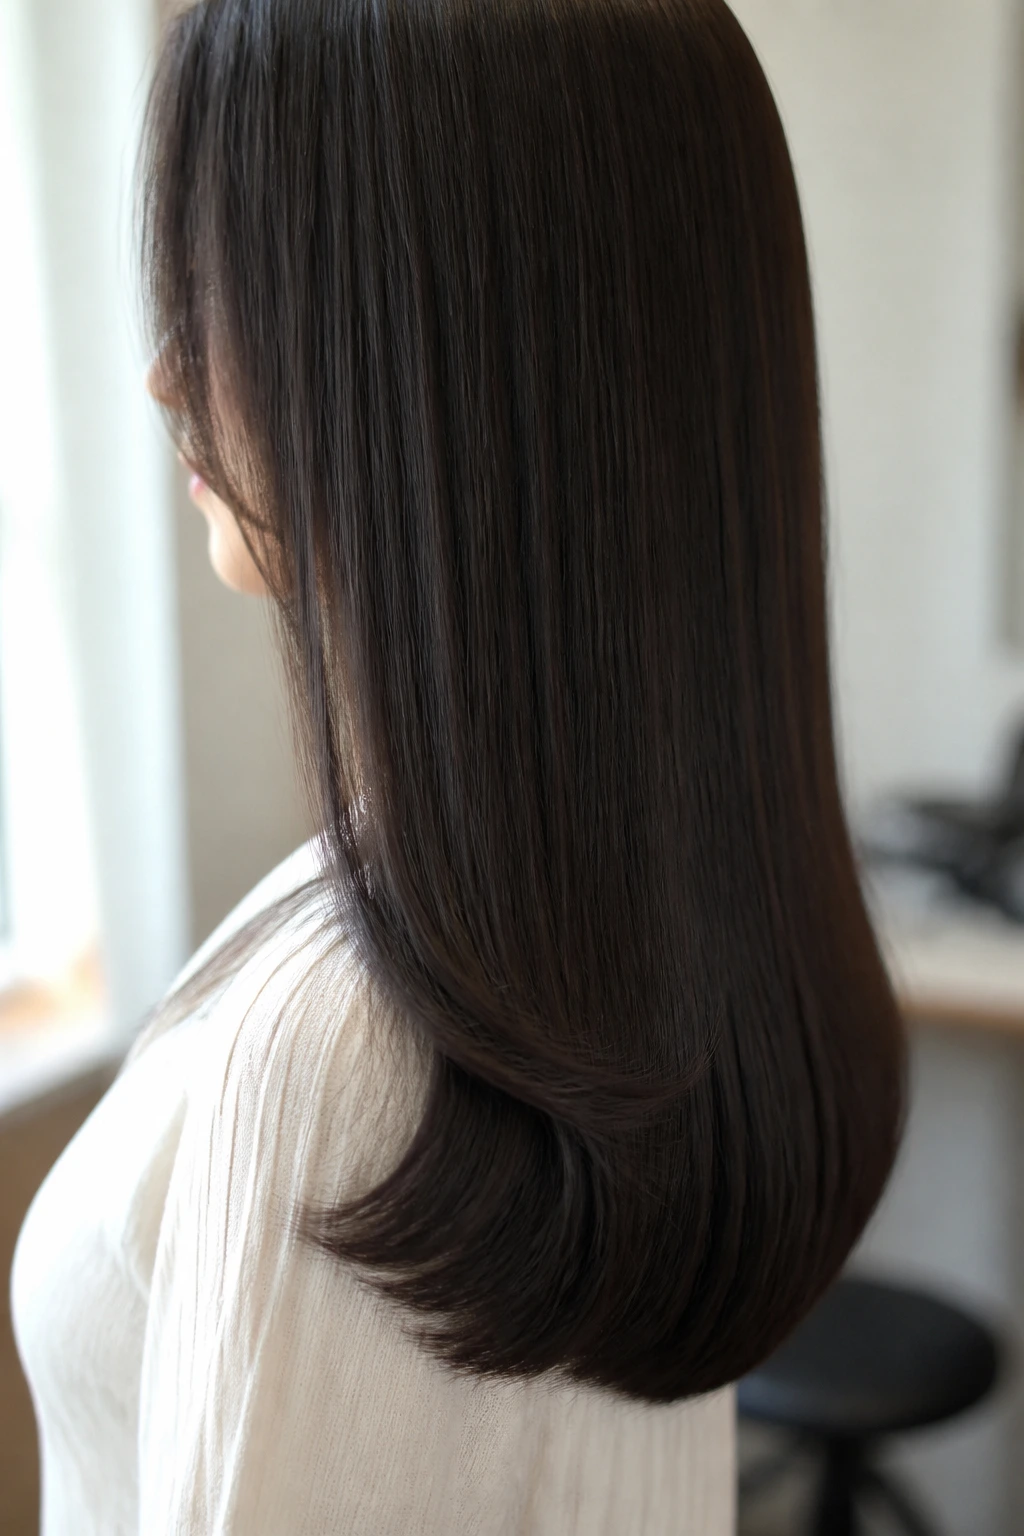
Beveled ends are a quiet detail, but they change everything. The hair stays straight through the body, then turns under just a little at the bottom so the outline looks finished instead of chopped off.
Why It Works
Straight extensions can look too severe when the ends hang like a ruler line. A bevel softens that edge. It’s a smart choice for tape-ins, wefts, or halo extensions because the style still reads straight; it just has a slightly friendlier landing point.
Bullet Details
- Use a flat iron with rounded plates for the last inch of hair.
- Bend the ends under in the same direction on both sides.
- Keep the crown and mid-lengths smooth so the end shape stands out.
The style works especially well on medium to long lengths. Very short hair can look a bit stubby if the bend is too strong.
23. Tucked-Under Bob Illusion
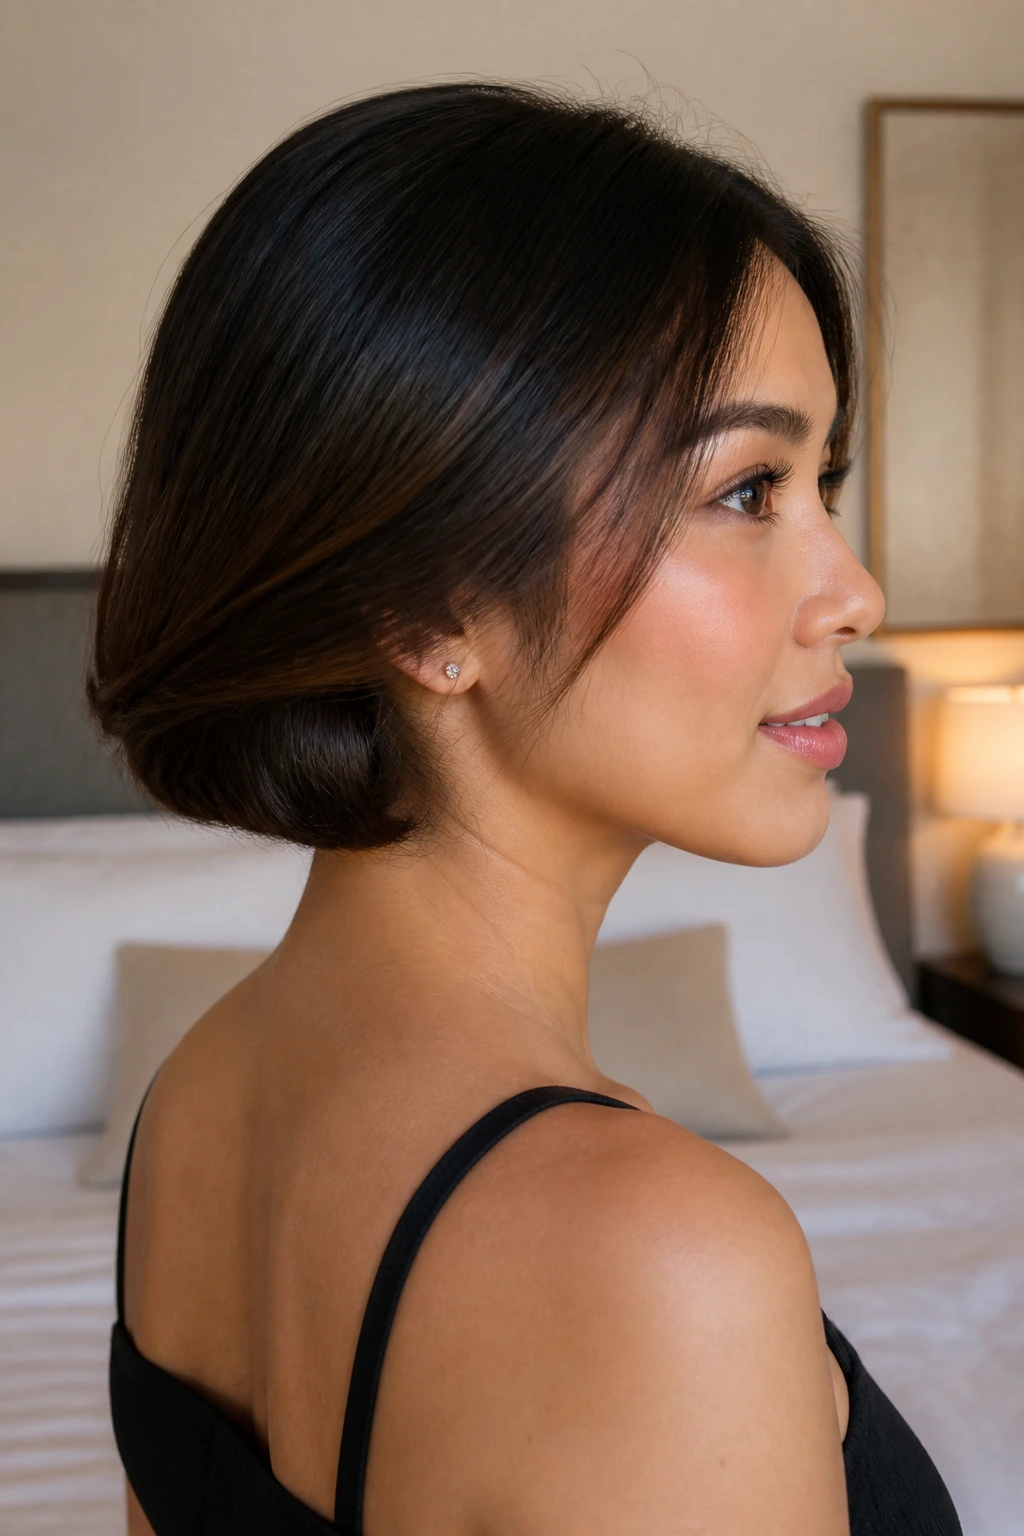
A tucked-under bob illusion is one of those clever styles that makes long straight hair feel unexpectedly short for a night. You pin and tuck the length under itself until it reads like a bob from the front and side.
Why It Works
The shape is great when you want to hide extension length, either for a change of pace or because the weather is working against you. Long clip-ins or sewn-in hair can be tucked neatly if the ends are smooth and not overly layered. The trick is shaping the nape first and then tucking the rest in small sections.
It’s not an everyday style, and that’s part of the fun. It feels a little editorial, a little practical, and very good with a crisp neckline or a structured jacket.
Best move
Secure the tucked sections with flat pins in the color of your hair. Big shiny pins ruin the illusion fast.
24. Lob with Airy Internal Layers
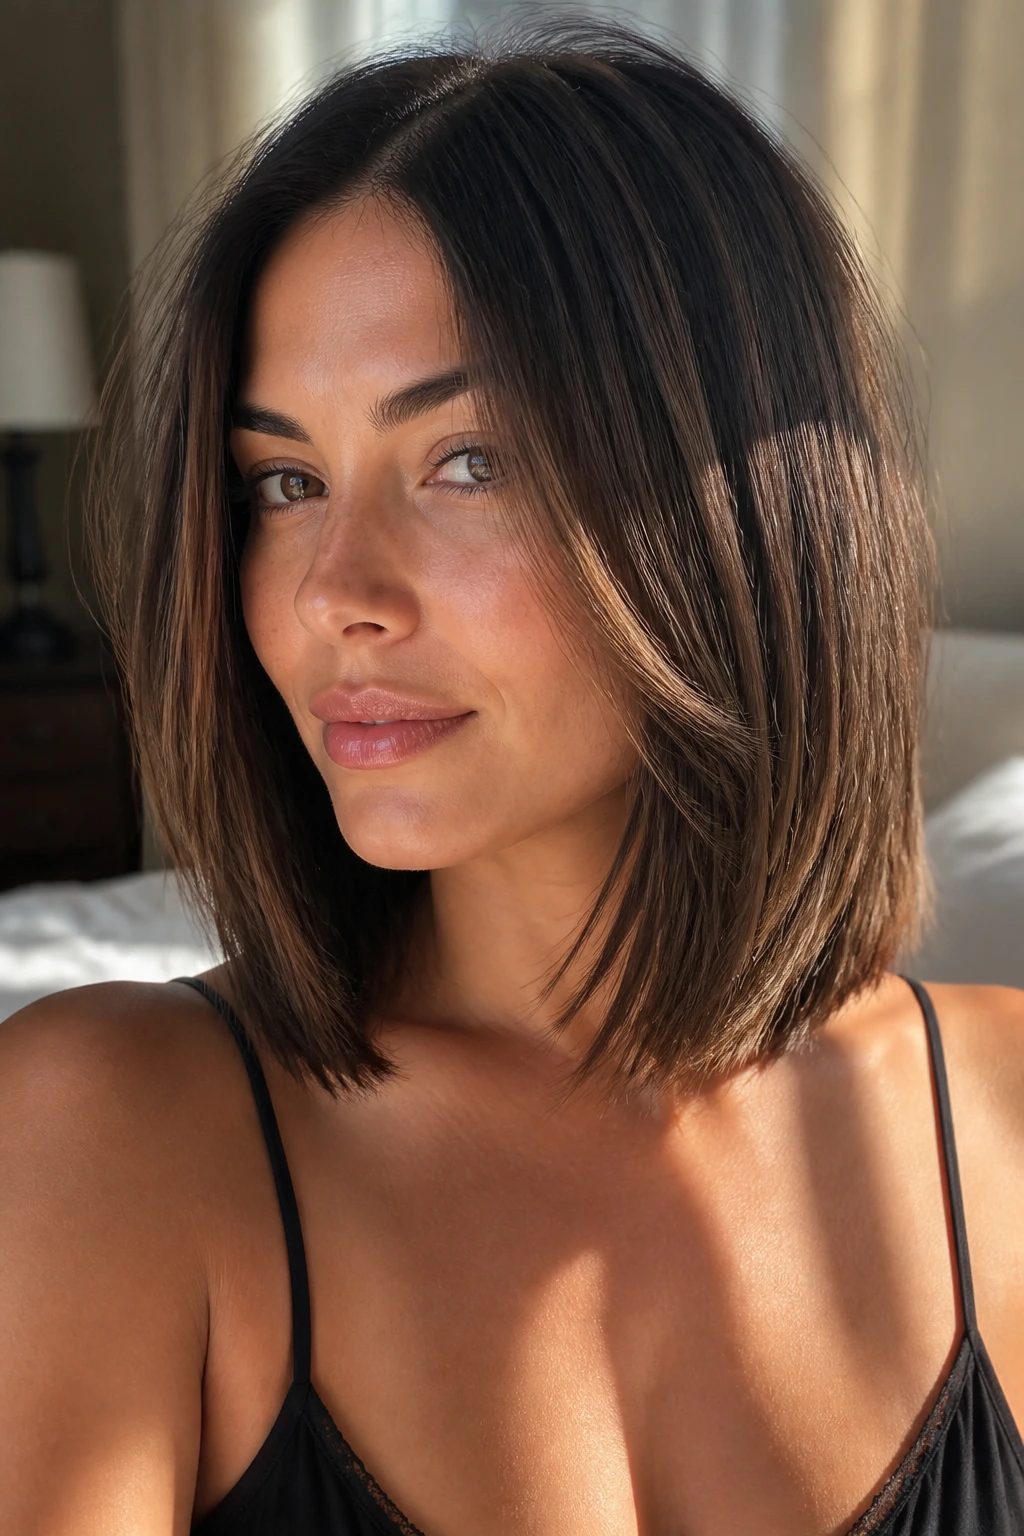
This is the straighter, softer cousin of the blunt lob. The outline still lands at the collarbone, but hidden internal layers give the hair movement so it never looks shelf-heavy.
Why It Works
The internal layers reduce weight inside the shape, which helps straight extensions fall with a little swing. It’s useful if your hair is thick enough to need shape but not so thick that a blunt edge flatters you. Halo extensions and lightweight clip-ins are especially easy here because the style does not need a dense wall of hair to work.
Who It’s Best For
If you like the look of a lob but hate the feeling of too much hair at your shoulders, this is the compromise. It’s neat without being severe, and the airy interior stops the hair from flipping out at the wrong angle.
The key is restraint. Too many layers and the lob loses its clean line. Too few and it turns boxy.
25. Scarf-Tied Straight Tail
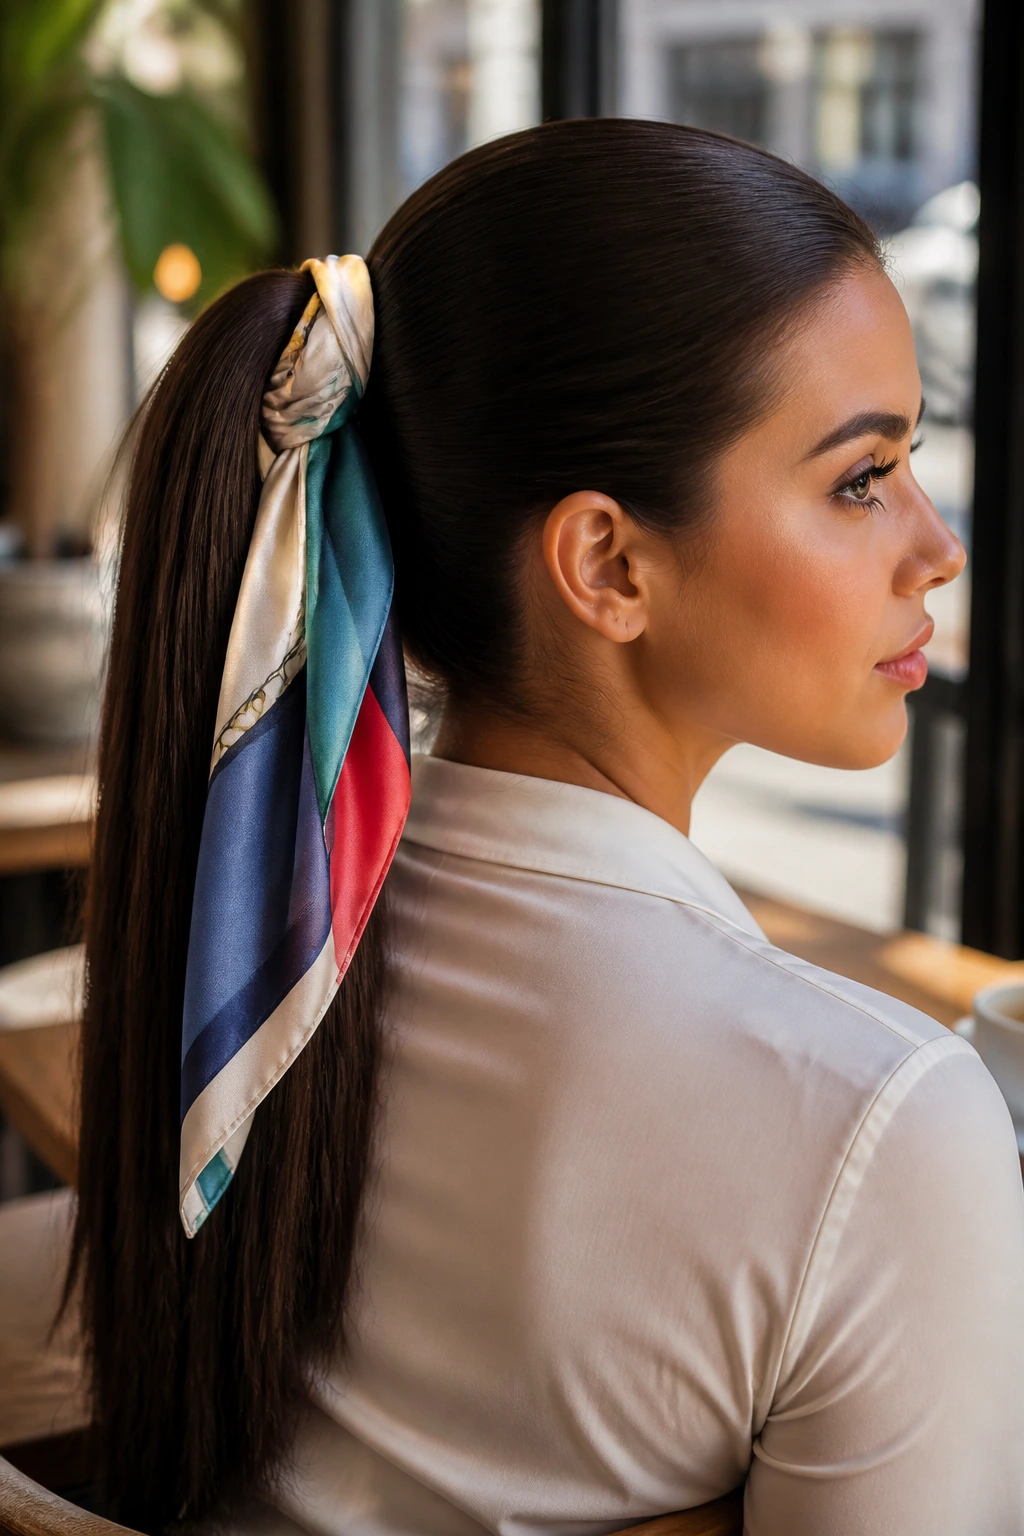
A silk scarf around a straight ponytail looks simple, but it changes the whole mood. The scarf adds color, keeps the base tidy, and gives the hair a little motion where the pony otherwise might sit flat.
Why It Works
The scarf distracts from any slight mismatch between natural hair and extensions, which is handy if you’re blending several lengths. It also helps soften the look of a ponytail extension piece by breaking up the visual weight at the base. Low ponytails or mid-height tails work best, since the scarf can sit cleanly without slipping.
Quick Facts
- Pick a scarf that’s narrow enough to tie without bulk.
- Wrap it once or twice, then knot it to the side.
- Use it to hide a plain elastic or to echo the color of your outfit.
The style feels relaxed, but not lazy. That’s the balance people keep trying to fake with hair, and the scarf actually helps.
26. Peekaboo Color Panels Under Straight Lengths
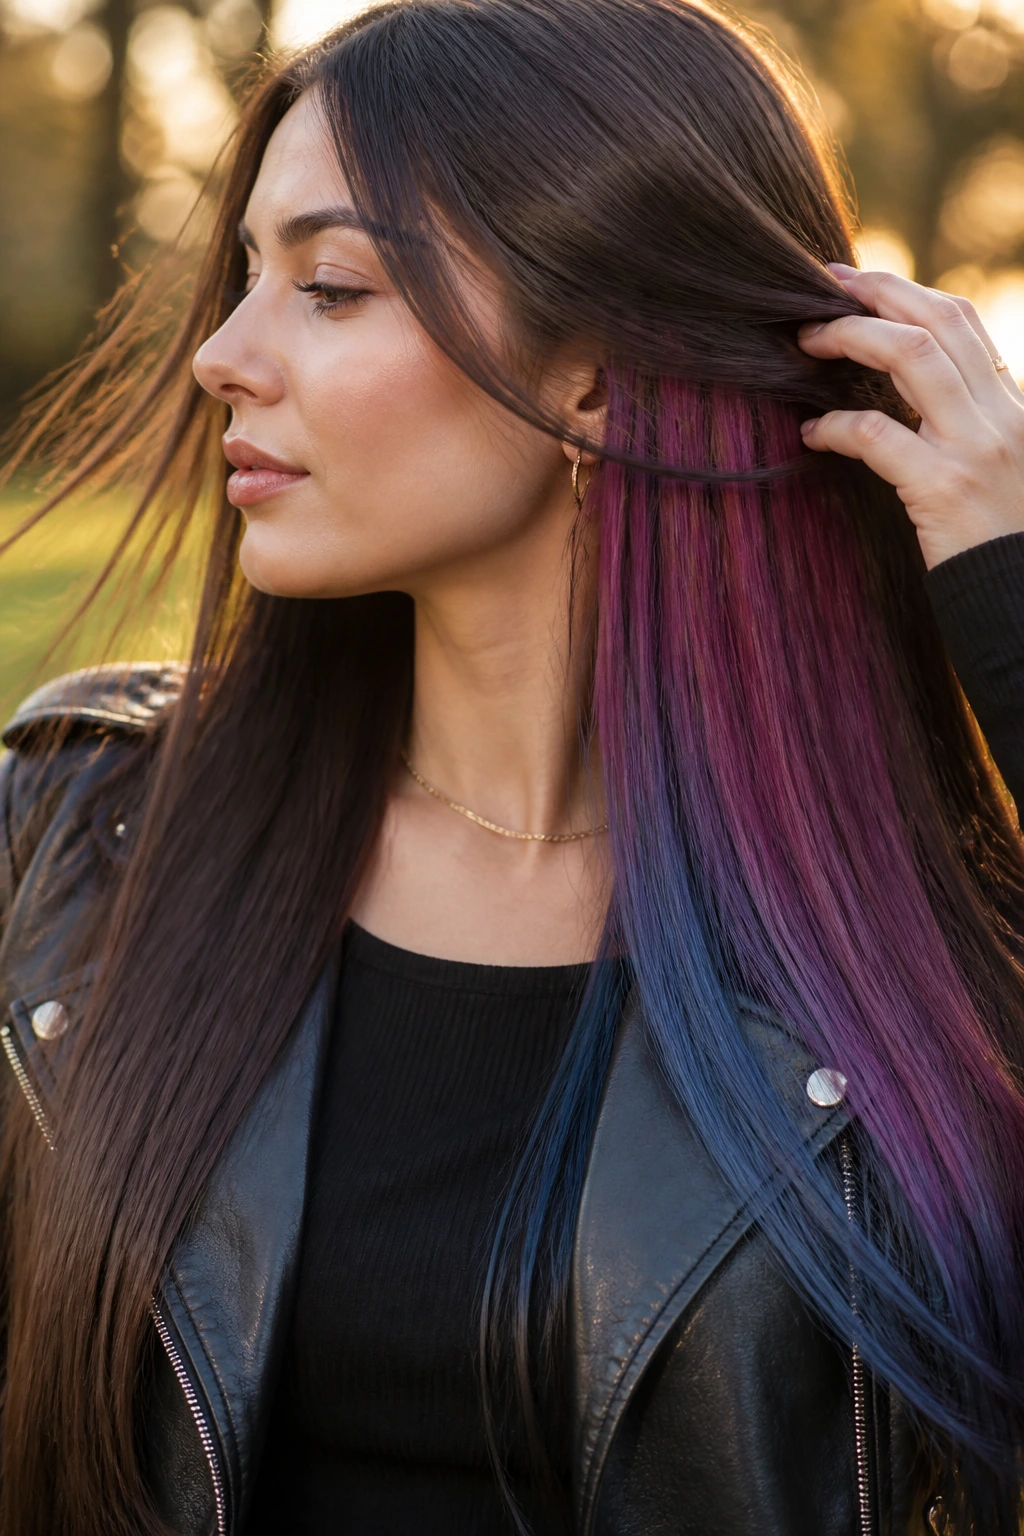
Peekaboo color is one of the easiest ways to make straight extensions feel more personal. The top layer stays natural, while the underneath sections show a hit of color when the hair moves or gets tucked behind the ear.
Why It Works
Straight hair lays flat enough to reveal hidden panels in a clean way, so you don’t need dramatic contrasts for the effect to read. A few colored clip-ins under the top layer can change the whole look without committing the full head to one shade. That makes it a smart option if you want to test color without a permanent step.
Best for
- People who like a conservative top layer and a little surprise underneath.
- Straight hair that already gets worn behind the shoulders.
- Extension sets where a small amount of specialty color is easier to buy than a full match.
The best version is not loud. It’s a flash of color when the hair shifts, and that’s enough.
27. Wet-Look Straight Finish
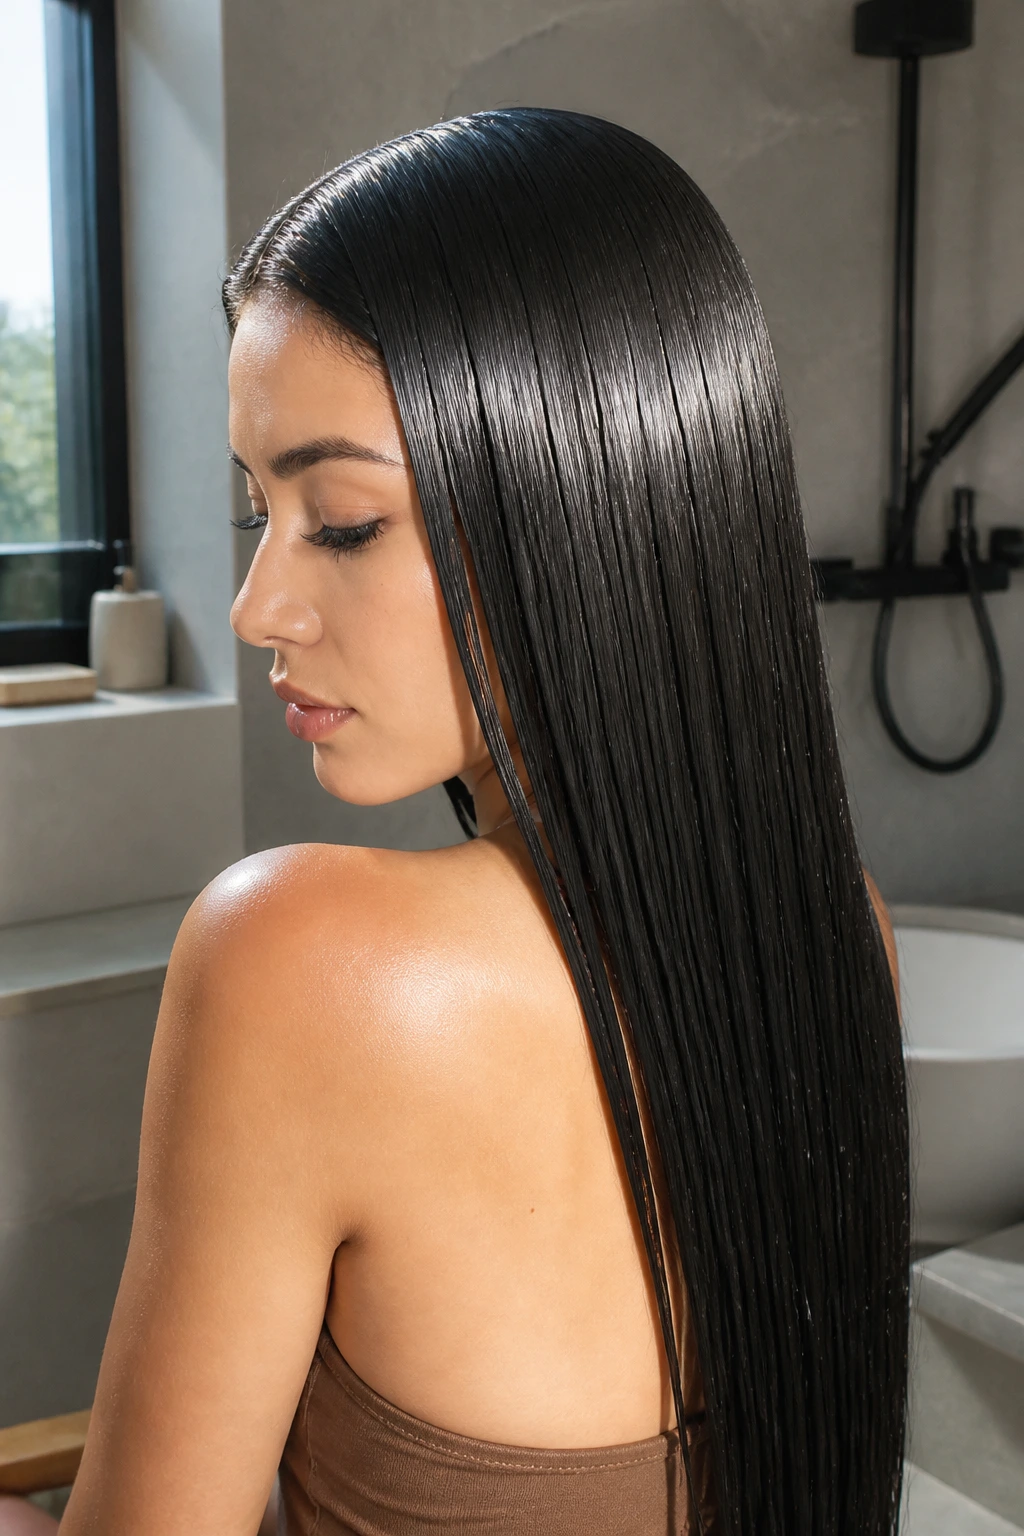
The wet look can be tricky, but on straight extensions it has a sharp, almost runway feel when done well. The whole trick is using gel or styling cream near the roots and a cleaner finish through the lengths so the hair looks sleek, not greasy.
Why It Works
Straight hair already has the base shape for this style, so you’re mostly deciding how glossy and controlled you want the surface to be. Tape-ins are excellent here because they sit flat and disappear under a slicked finish. The lengths can stay smooth and narrow, while the crown has that fresh-from-the-shower look.
How to Wear It
Keep product away from the ends if they’re dry. A heavy wet look on dry extension hair can make the bottom look stringy. Use a small amount of gel, comb it through with a fine-tooth comb, and stop before the hair starts clumping.
It’s a bold finish. Not for everyone. But when the hair is straight and the lines are clean, it lands.
28. Ribbon and Barrette Grid
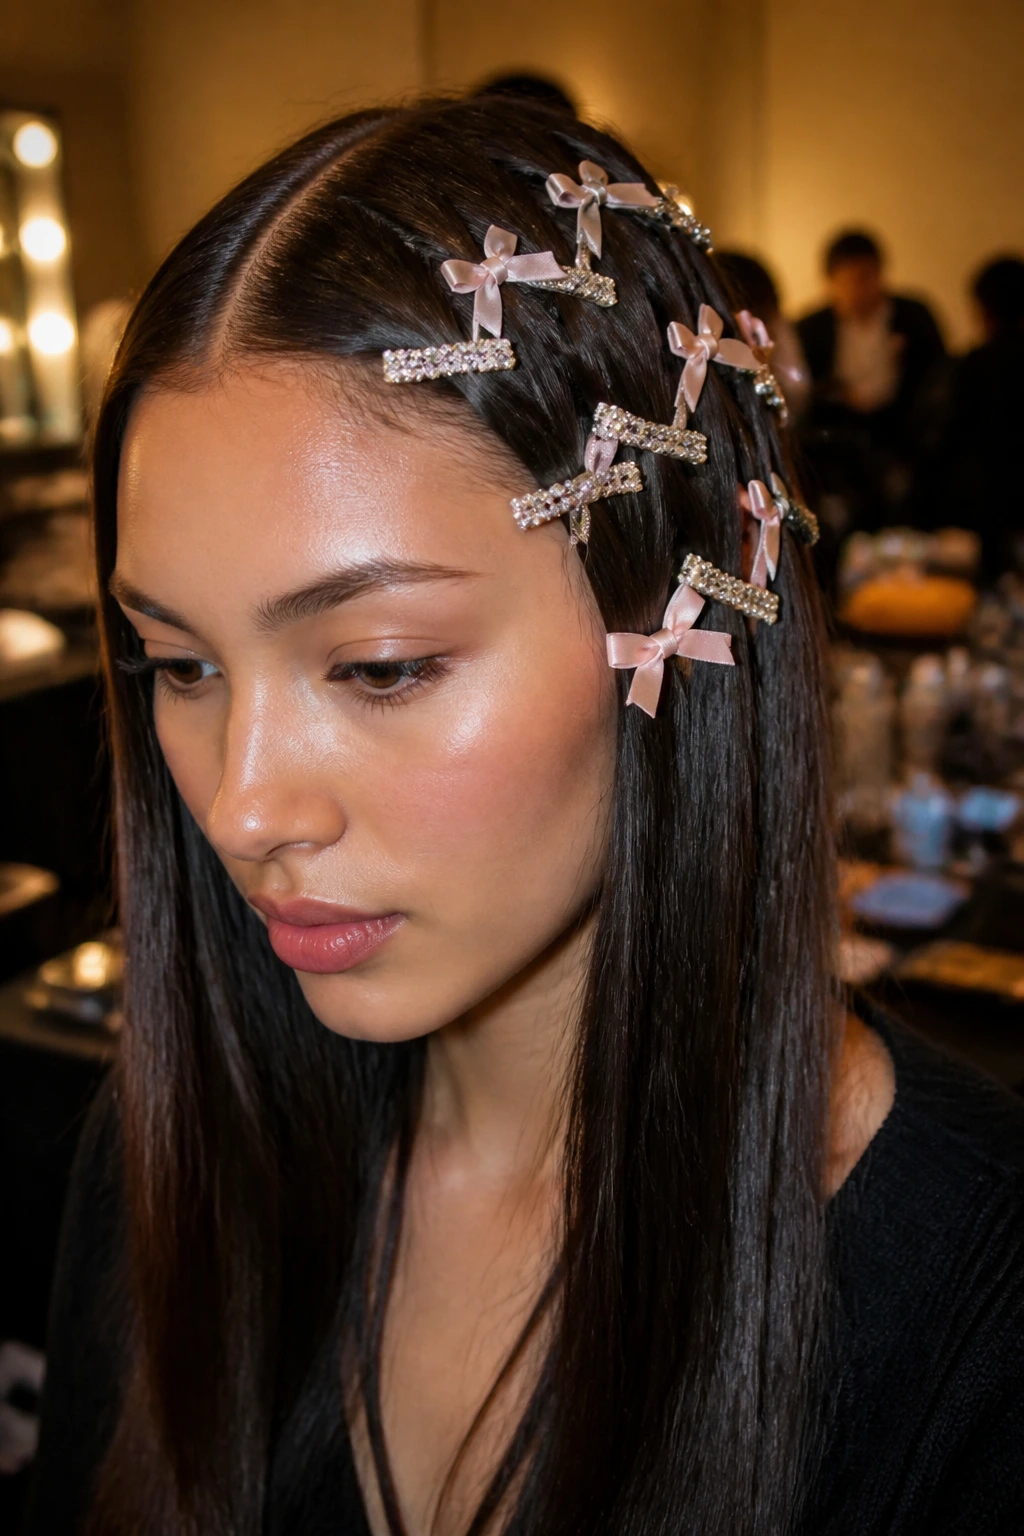
This style is a little editorial and a little playful. You keep the hair straight, then add ribbons or a line of barrettes so the accessories do the talking instead of curls or texture.
Why It Works
Straight hair gives accessories a flat backdrop, which helps the clips stay visible and the ribbons lie neatly. If the extensions are long, the vertical lines of the hair make the accessory grid read even cleaner. It’s especially good when you want the style to feel dressed up without a lot of heat work.
Bullet Details
- Use matching metal clips for a polished look.
- Space barrettes evenly along one side or in a mirrored pattern.
- Satin ribbons hold better than slippery silk if the hair is very smooth.
This one is a favorite for events where the hair needs to feel styled but not overworked. It takes a basic straight base and gives it shape by adding rhythm.
29. Rope-Braid Headband
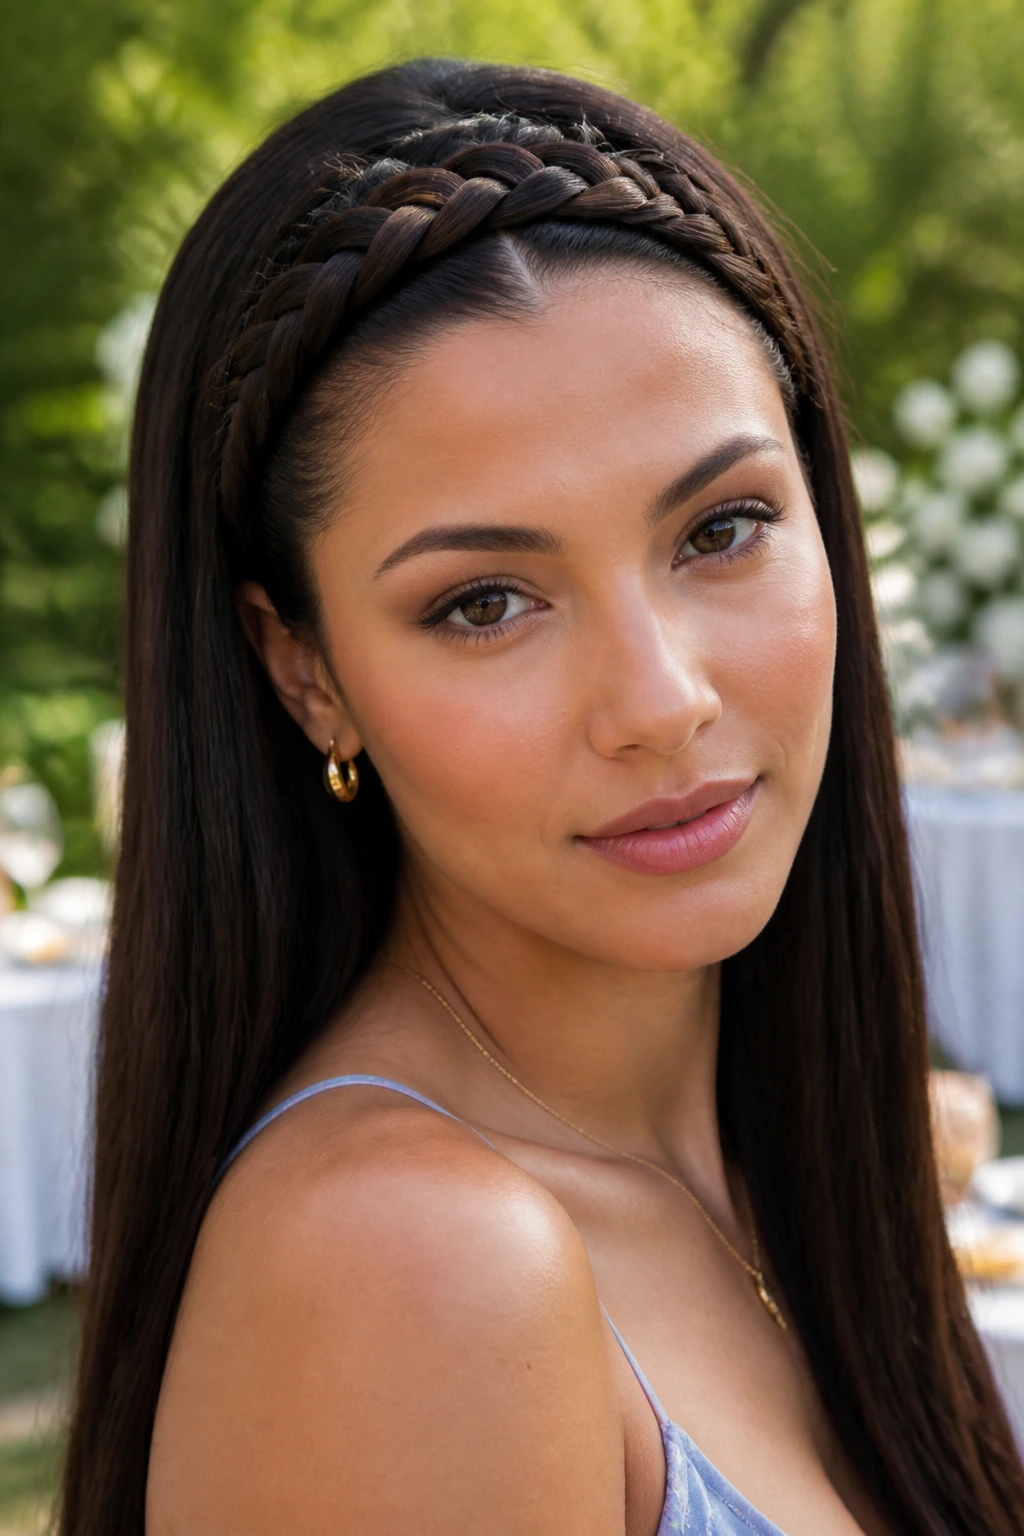
A rope braid across the hairline gives straight hair a built-in frame. It keeps the front off the face and adds just enough texture to stop the style from looking too plain.
Why It Works
The braid acts like a headband made from your own hair. On straight extensions, the strand pattern stays crisp, which is exactly what you want. Medium-density clip-ins help if your own hair is fine, because the braid needs enough hair to stay round instead of flat.
The rest of the hair can stay loose and straight, which keeps the look from getting fussy. That contrast—braided front, sleek lengths—is what makes it work.
Quick Tip
Keep the braid shallow and close to the hairline. If it sits too high, it starts reading more like a crown braid and less like a tidy frame.
30. Feathered Blowout Ends
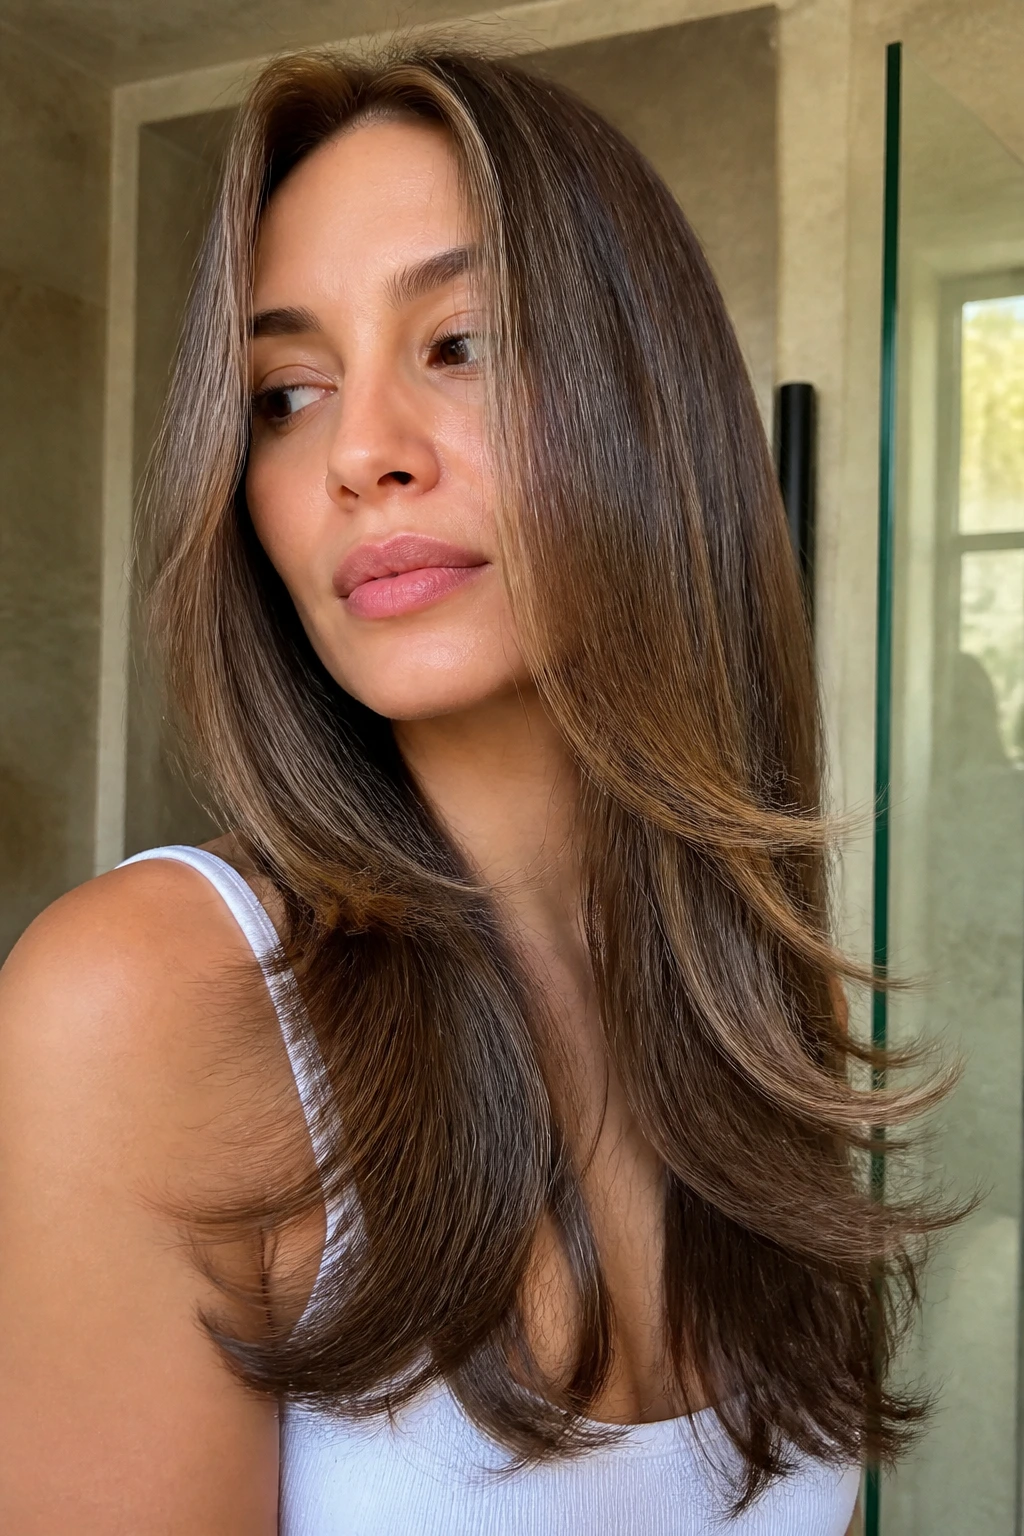
Feathered ends sit somewhere between straight and softly flipped. The hair stays smooth through the body, but the bottom edges get a little airy movement so the style doesn’t feel heavy.
Why It Works
This shape is particularly good for long straight extensions because it breaks up the weight at the bottom. The ends fan slightly outward, which makes the hair move when you walk instead of hanging like a sheet. It also flatters straight hair that tends to go limp after a few hours.
Who It’s Best For
If you like polished hair but hate anything too rigid, this is the version to try. It looks good on shoulder-length to very long hair, and it gives layered extension sets a way to blend together without drawing attention to each row.
You don’t need a full salon blowout every time. A round brush on the last two inches can do the job.
31. Micro-Bubbled Half Pony
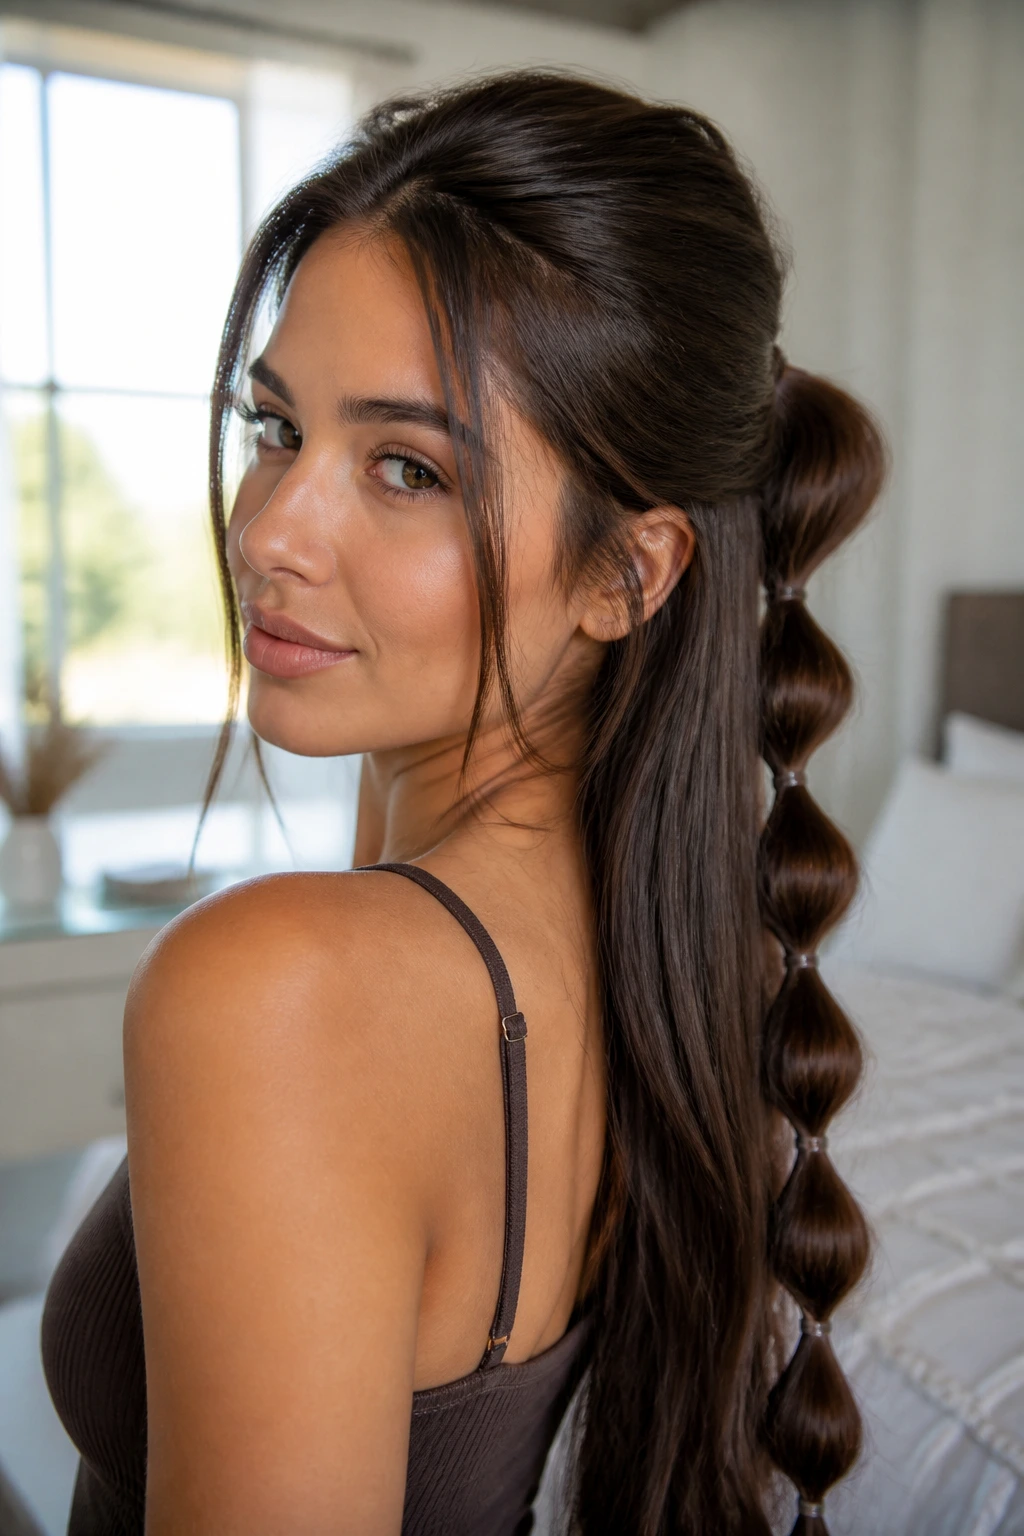
This is the half-up style’s more detailed cousin. Instead of one simple half pony, you add tiny elastics down the hanging section so it forms little bubbles with movement.
Why It Works
The micro-bubbles add texture to straight extensions without breaking the overall sleek shape. Since the top is still half-up, the crown stays controlled and the lower section remains visible. It’s a smart choice if your hair is very straight and you want one small area of interest without turning the whole head into a project.
Bullet Details
- Use small elastics every 1 to 2 inches.
- Gently widen each bubble with your fingertips.
- Keep the top section smooth and the lower lengths straight.
The look is small, but the effect is not. It’s the kind of detail people notice after they’ve already decided the hair looks put together.
32. Low Twisted Bun with Loose Face Pieces
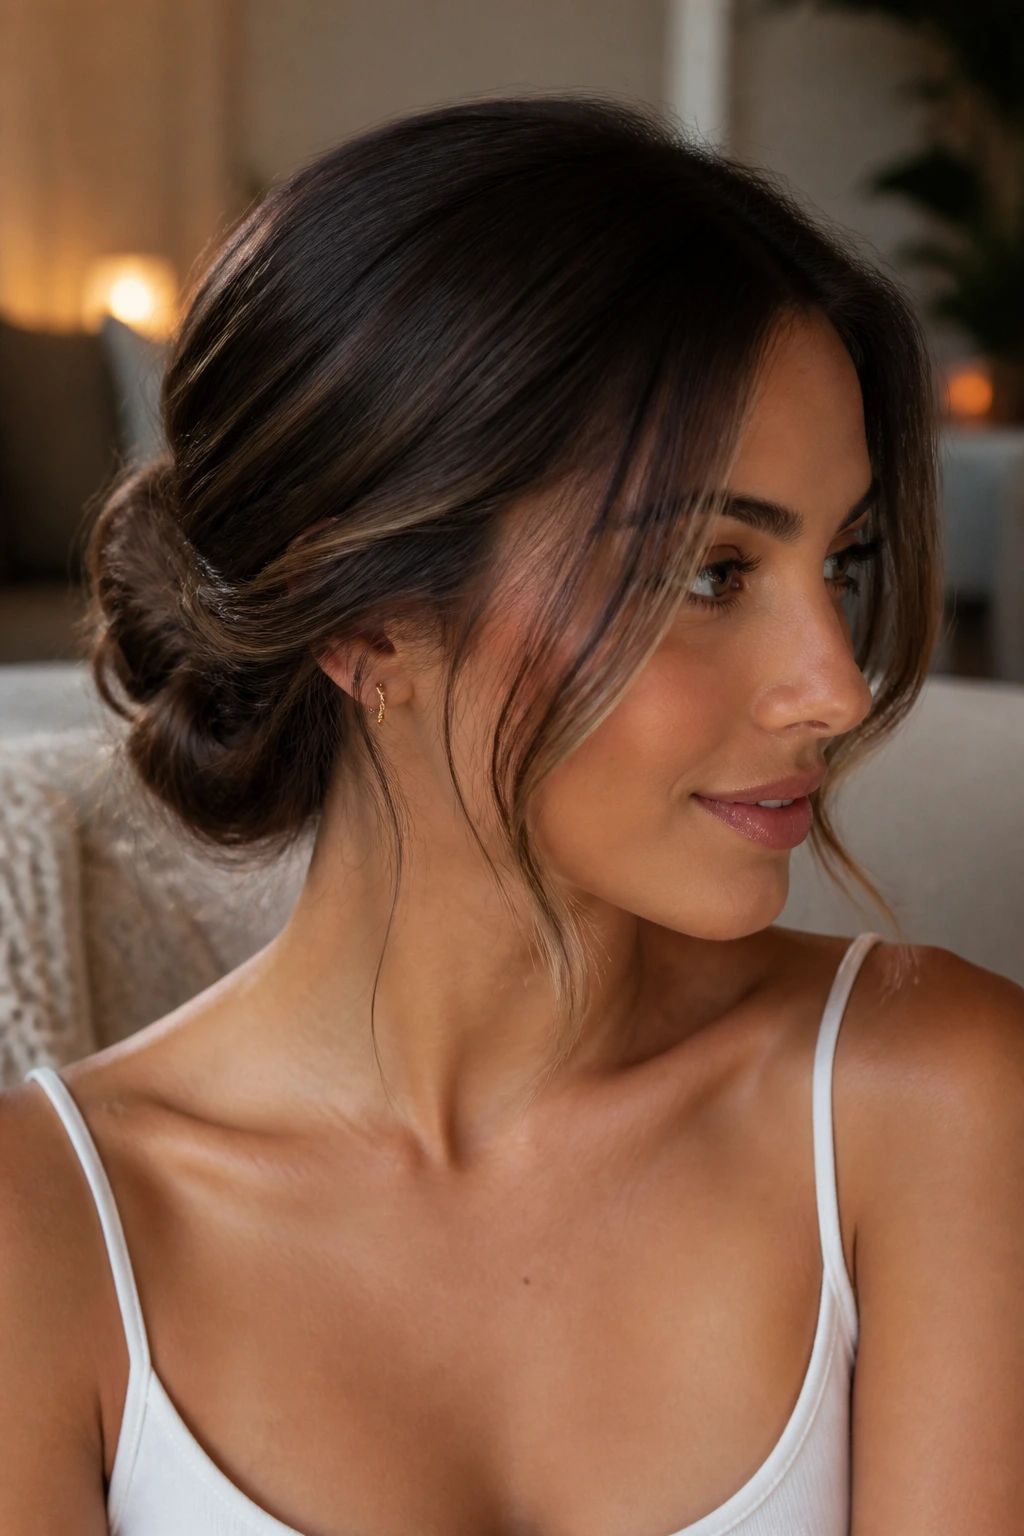
A low twisted bun is one of the most forgiving extension styles for straight hair. It keeps the length contained, gives the nape a clean finish, and leaves a couple of front pieces out so the style doesn’t feel too strict.
Why It Works
The twist hides the bulk of the extension hair, which is useful if you’re wearing a lot of length and don’t want the bun to look too tight. The loose face pieces keep the shape softer and help balance the smoothness of the rest of the hair. Sew-ins, tape-ins, or clip-ins can all work here as long as the ends are pinned flat.
It’s a style that looks better with a tiny bit of texture at the crown. A fully glassy bun can feel severe. A little looseness around the ears fixes that.
33. Invisible Volume Layers
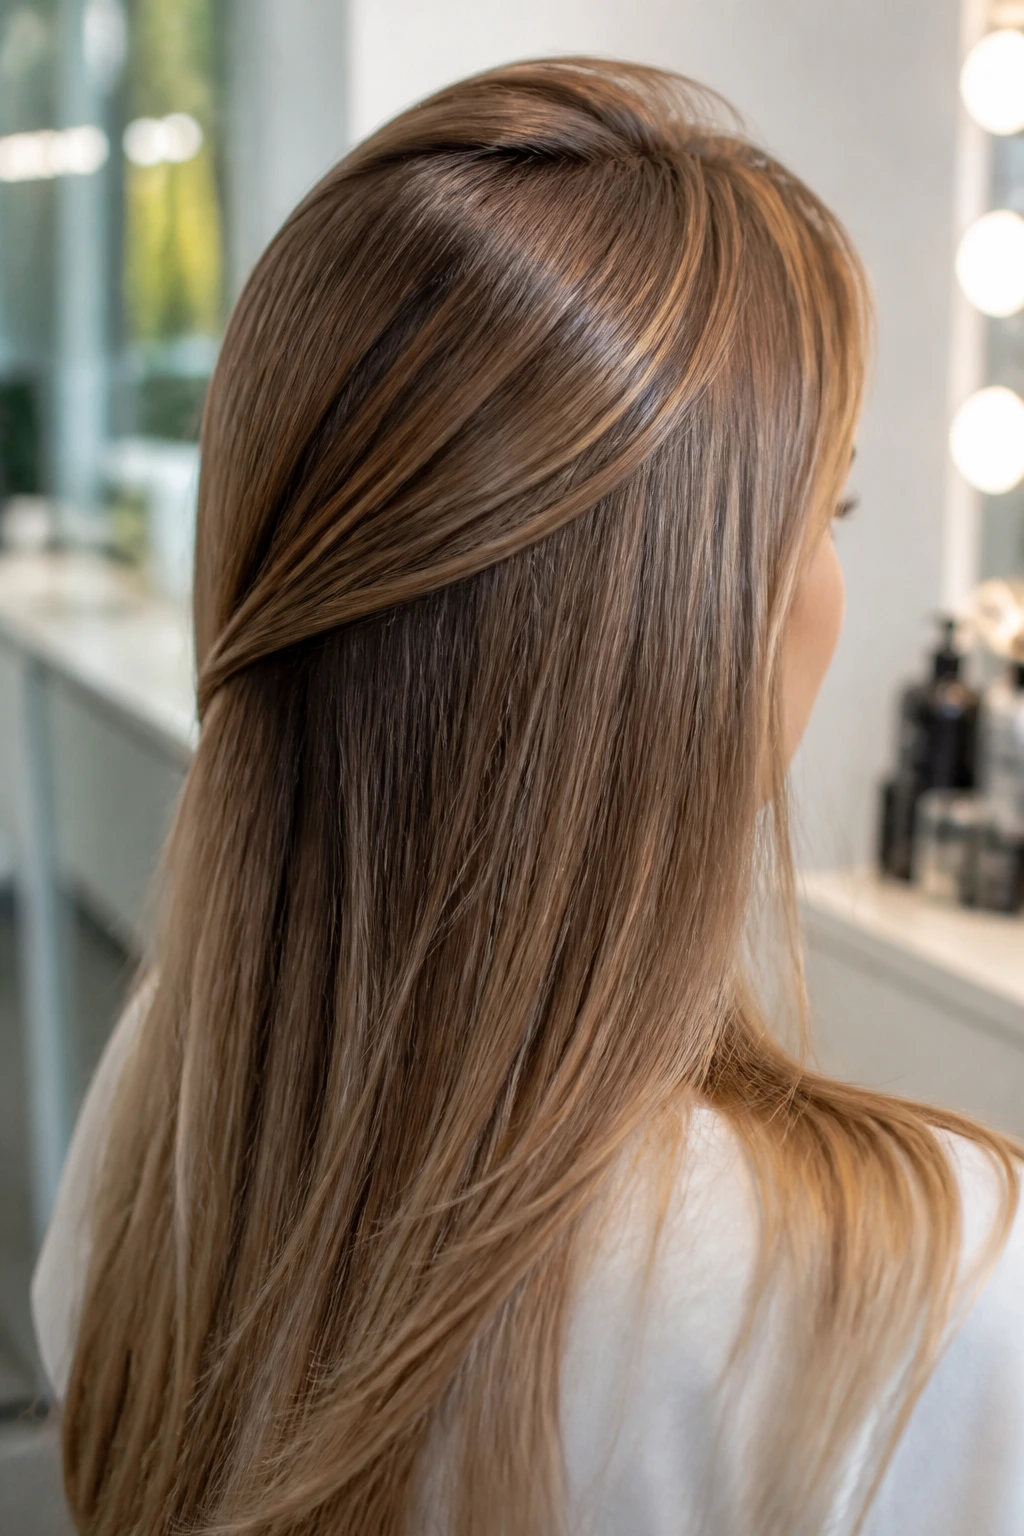
This last one is less about a visible shape and more about how the extensions are placed. The goal is to create straight hair that looks naturally fuller from the inside, not obviously “extended” from the outside.
Why It Works
Invisible volume layers use shorter pieces underneath longer ones so the top layer falls smoothly while the hidden layers lift the body. It’s one of the best extension styles for straight hair if your biggest complaint is flatness, not length. Clip-ins placed in a staggered pattern give the most control because you can build density only where the hair needs it.
How to Use It
Keep the longest layer on the outside and fill the middle with slightly shorter pieces. That way the hair moves like one curtain, but the middle has enough lift that the ends don’t look too thin. If the crown needs help, add a small root bump with a round brush or velcro roller before placing the top row.
It’s not flashy. It’s just smart. And straight hair often looks best when the trick is invisible.
Why Straight Hair Gives Extension Styling a Clean Advantage
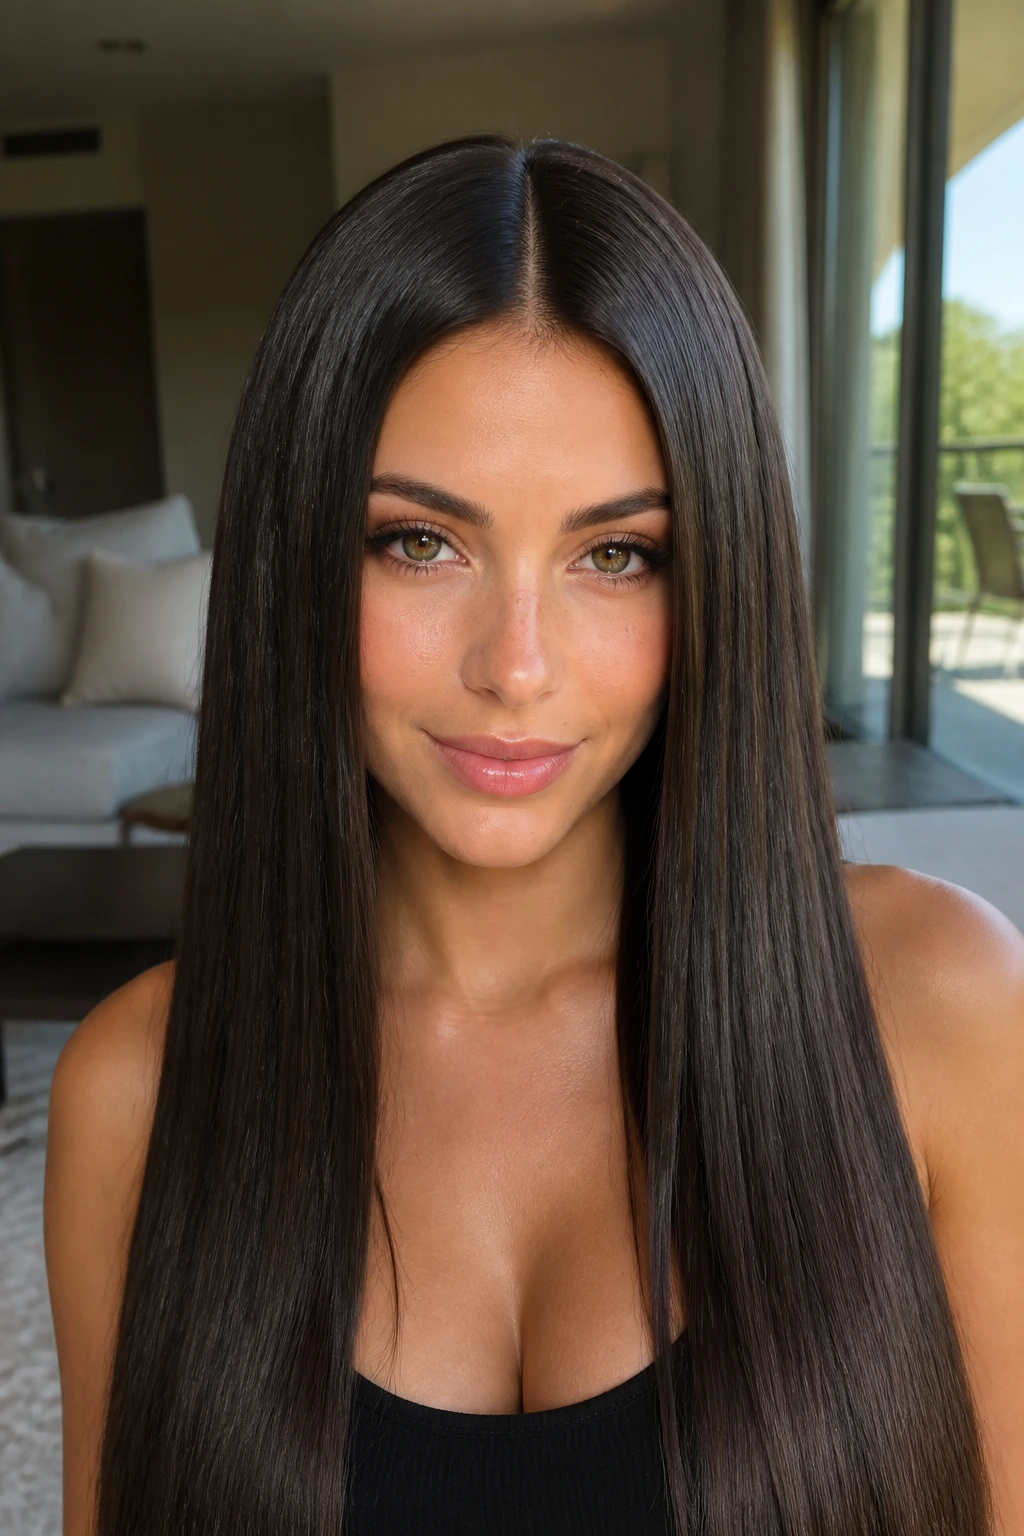
Straight hair does not forgive sloppy placement, which sounds harsh until you realize that same honesty is what makes it so good for extensions. You can see the line. You can see the balance. You can see whether the weight is sitting where it should.
That clarity is a gift if you like precision. Blunt cuts look sharper, ponytails look cleaner, and texture details like crimped roots, beveled ends, or a twisted crown read with more contrast because the base is already smooth. The whole head becomes easier to edit.
The one catch is that straight hair shows problems fast. Thin ends, dry extensions, mismatched density, and root bumps are harder to hide here than they are in wavier hair. Fix the structure first, then the style. That order matters.
Essential Equipment for These Styles
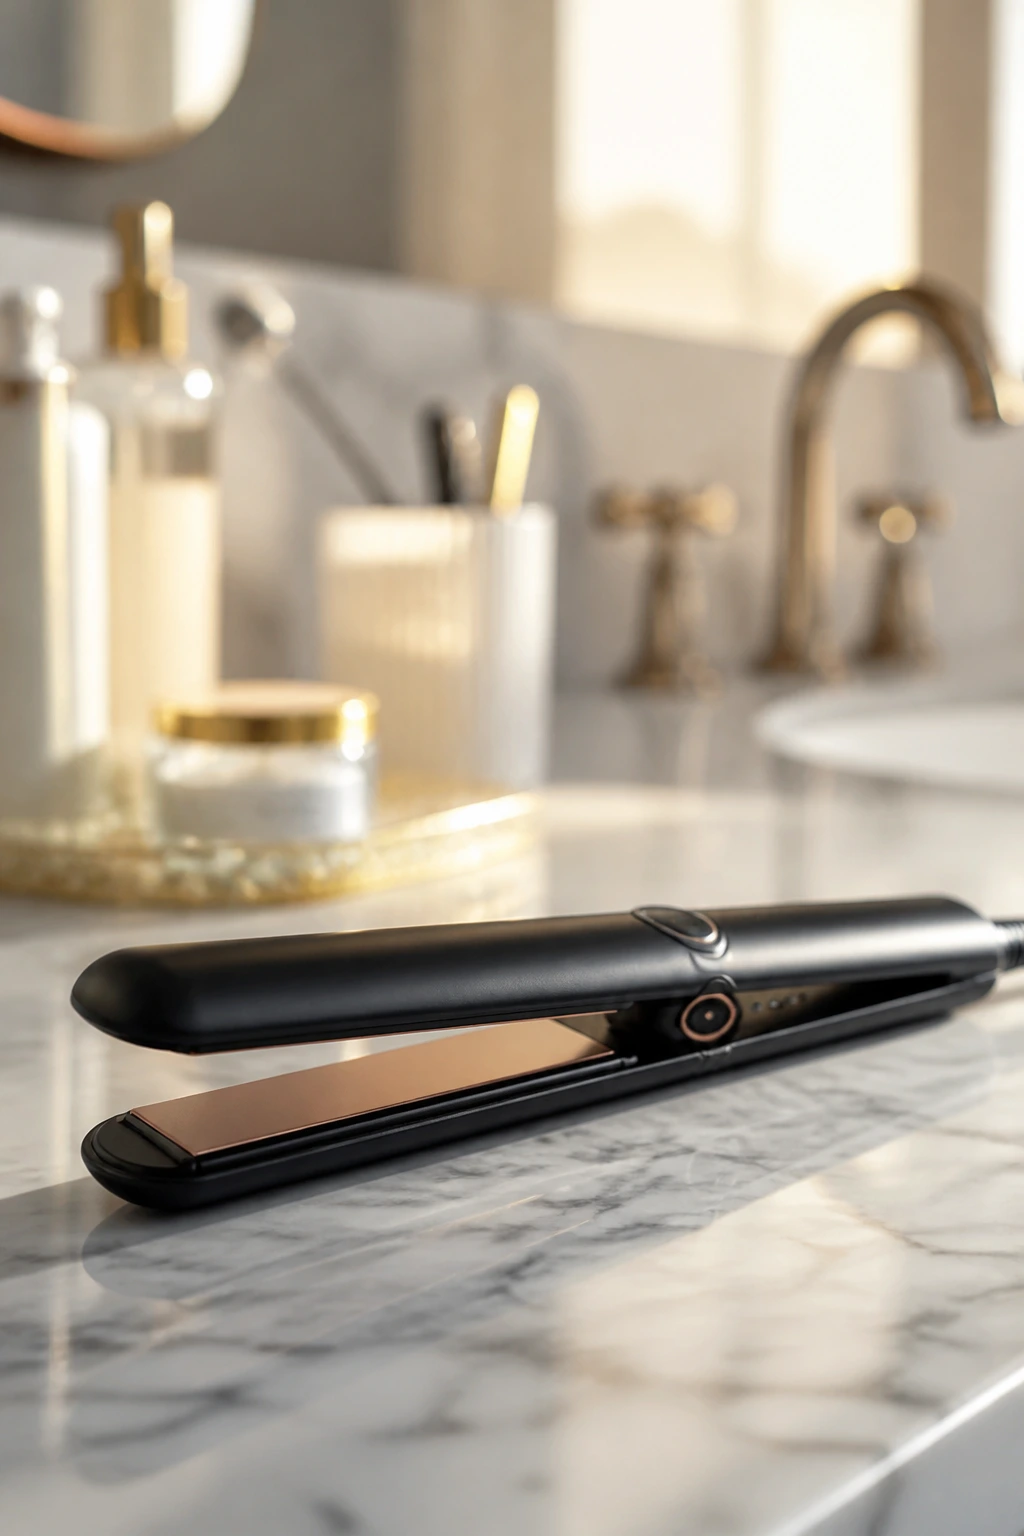
- 1-inch flat iron: The workhorse for smoothing roots, beveling ends, and creating sharp ponytail finishes.
- Tail comb: Best for clean parts, sectioning, and hiding extension seams under a neat top layer.
- Sectioning clips: Keep the hair out of the way while you place clip-ins, braid, or smooth the crown.
- Boar-bristle brush: Helps lay the surface flat without leaving the hair too puffy.
- Fine-tooth comb: Useful for slick ponytails, wet looks, and gelled roots.
- Clear elastics: Needed for bubble ponytails, braids, and micro-bubbled styles.
- Bobby pins that match your color: They disappear better in buns, rolls, and tucked styles.
- Flexible-hold hairspray: Holds the part and surface in place without making the ends crunchy.
- Heat protectant spray: Non-negotiable if you’re using a flat iron on extension hair.
- Silk scarf or satin scrunchie: Good for wrapped ponytails, overnight protection, and preventing dents.
- Claw clip with real grip: Cheap clips slip. A sturdy one saves you from redoing a French roll twice.
- Silk storage bag or hanger: Keeps clip-ins from tangling and fraying when you’re not wearing them.
How to Match Straight Hair Extensions Without Guessing
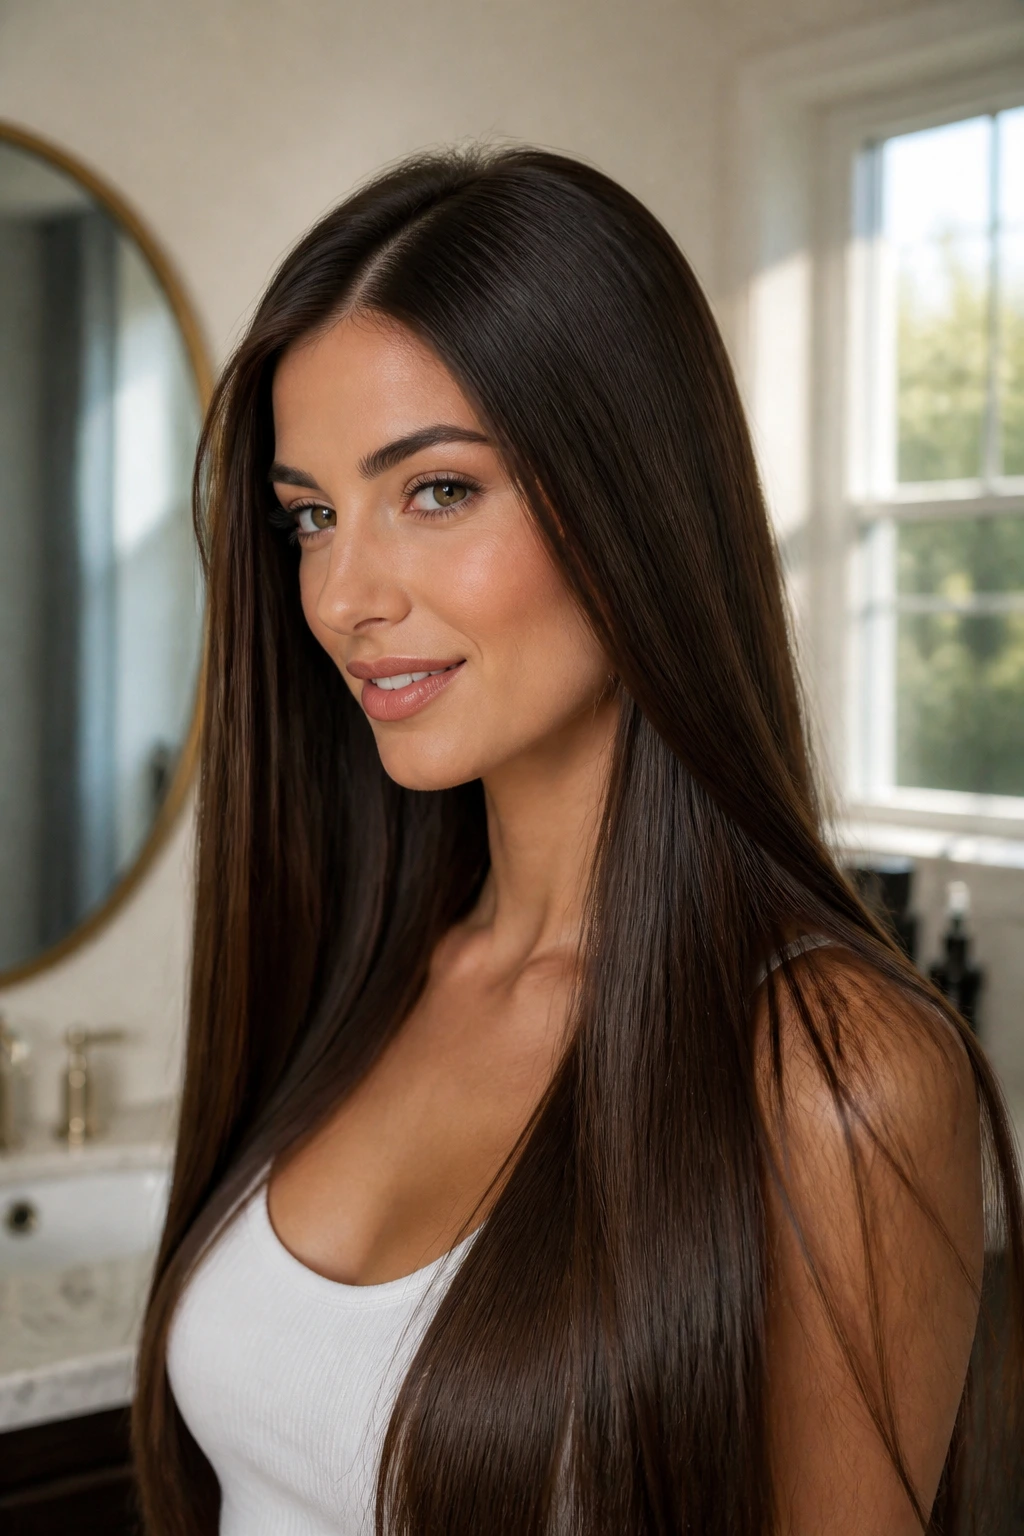
Picking straight hair extensions is mostly about balance, not just length. The biggest mistake people make is buying the longest set in the shop and assuming that more inches automatically means better hair. Usually it means more bulk at the wrong places.
Texture match comes first. If your natural hair is pin-straight, get extensions that are truly straight or only lightly blown out. If your ends bend a little, a completely glassy set can look too rigid, and you’ll spend all day fighting the mismatch. Remy human hair is the safest bet when you want to heat-style and trim the ends cleanly.
Density matters just as much. Fine hair usually looks best with about 120g to 140g of extension hair for a softer build, while medium density often needs 160g to 180g to look full. If you’re doing waist-length ponytails, blunt looks, or anything with a lot of straight surface, 200g or more can make sense. Don’t buy density you can’t support at the roots.
Color matching is less about one flat shade and more about the full line. A rooted color or slightly varied tone blends better than a dead-flat hue, especially near the part. If your ends are lighter than your roots, choose extensions that split the difference. That usually looks better in real life than one perfectly matched swatch under store lighting.
How to Wear These Styles Without Fighting Them
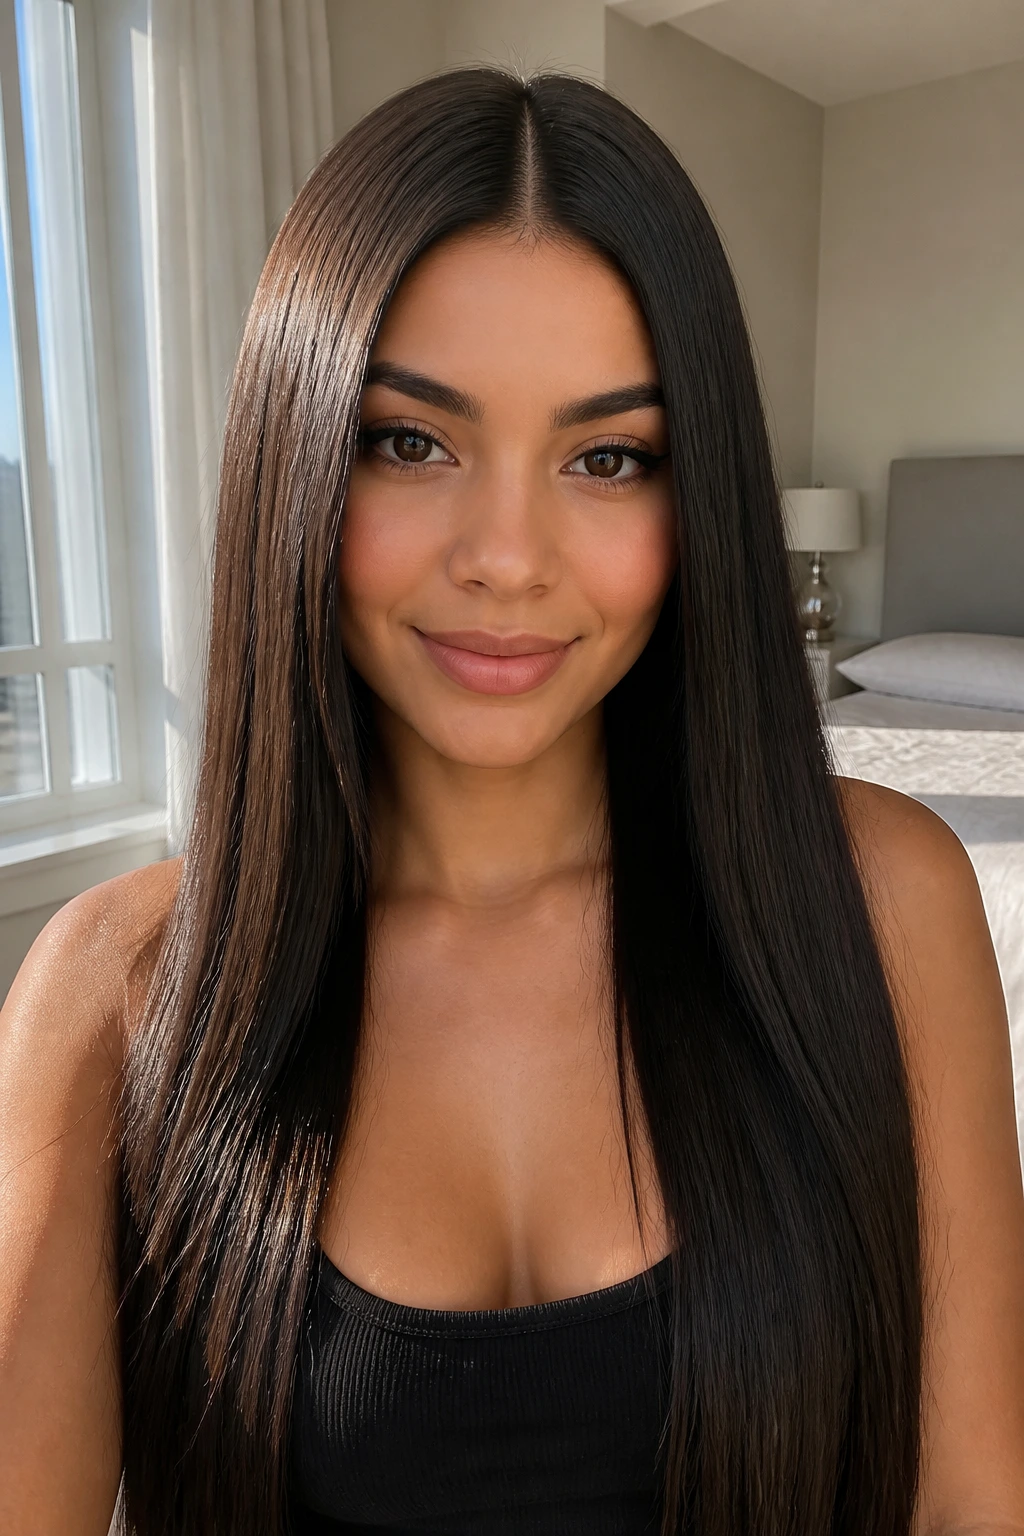
Presentation: Keep the part honest and the crown clean. Straight hair looks best when the first inch near the scalp is smoothed with intention, whether that means a center part, a deep side part, or a soft tucked section behind one ear. If the top is neat, the rest of the style can stay simple.
Accompaniments: Straight extension styles love a few well-chosen extras—small hoops, a silk scarf, a single dramatic clip, or a pair of sunglasses that sits cleanly against the face. Don’t pile on every accessory at once. Pick one thing to frame the hair and let the length stay the focus.
Portions: Think in terms of density and length, not just inches. A low ponytail needs enough hair to feel thick at the nape; a blunt lob needs just enough extension to fill the ends; a braided style needs even tension all the way down. If the style looks too skinny at the bottom, add more hair lower in the head, not more product.
Beverage Pairing: A covered iced coffee, cold water, or herbal tea is the only sensible pairing when you’re styling straight extensions for a long session. It keeps your hands free and your mirror from becoming a sticky mess. Nothing fancy. Just something that won’t spill when you pin the last section.
Additional Tips and Texture Boosters
Flavor Enhancement: A pea-sized drop of hair oil on the ends—only the ends—makes straight extensions look softer and more blended. Put it near the mid-lengths if the hair is dry, but stay away from tape tabs, bonds, and roots.
Customization: If the style feels too plain, add one small texture move instead of changing everything. A crimped crown, a twisted front piece, or a flipped end changes the mood without messing up the whole shape.
Serving Suggestions: A narrow barrette near the temple, a wrapped elastic at the base of a ponytail, or a satin ribbon at the tail can turn an ordinary straight style into something that looks planned. Keep the finish crisp. Straight hair gets messy fast if the accessories are too loose.
Make-It-Yours: Fine hair usually needs more root support and less length; thick hair can handle sharper cuts and bigger ponies; longer faces often benefit from side parts and cheekbone layers; rounder faces often look sharper with a center part or a longer front frame. Those tweaks sound small. They are not.
Common Mistakes to Avoid
The first mistake is buying extensions that match length but not density. You get the hair home, clip it in, and the ends look thin while the crown stays heavy. Fix it by comparing grams, not just inches, and by placing more hair where the style needs width.
Another one: pushing the extension hair too close to the hairline. That’s how seams show in center parts, ponytails, and tucked styles. Leave enough space to hide the row under your own top layer, even if that means using one fewer piece at the front.
Overheating straight hair is a sneaky problem. People assume straight hair can take more heat because it’s already smooth. Wrong. Too much heat fries the ends and makes them cling in a dry, squeaky way that never looks glossy. Use the lowest temperature that actually smooths the strand.
Then there’s too much serum at the roots. One drop on the ends can help. A greasy crown makes tape-ins slip and makes clip-ins slide. Keep oils and creams away from the top section unless the product is made for roots.
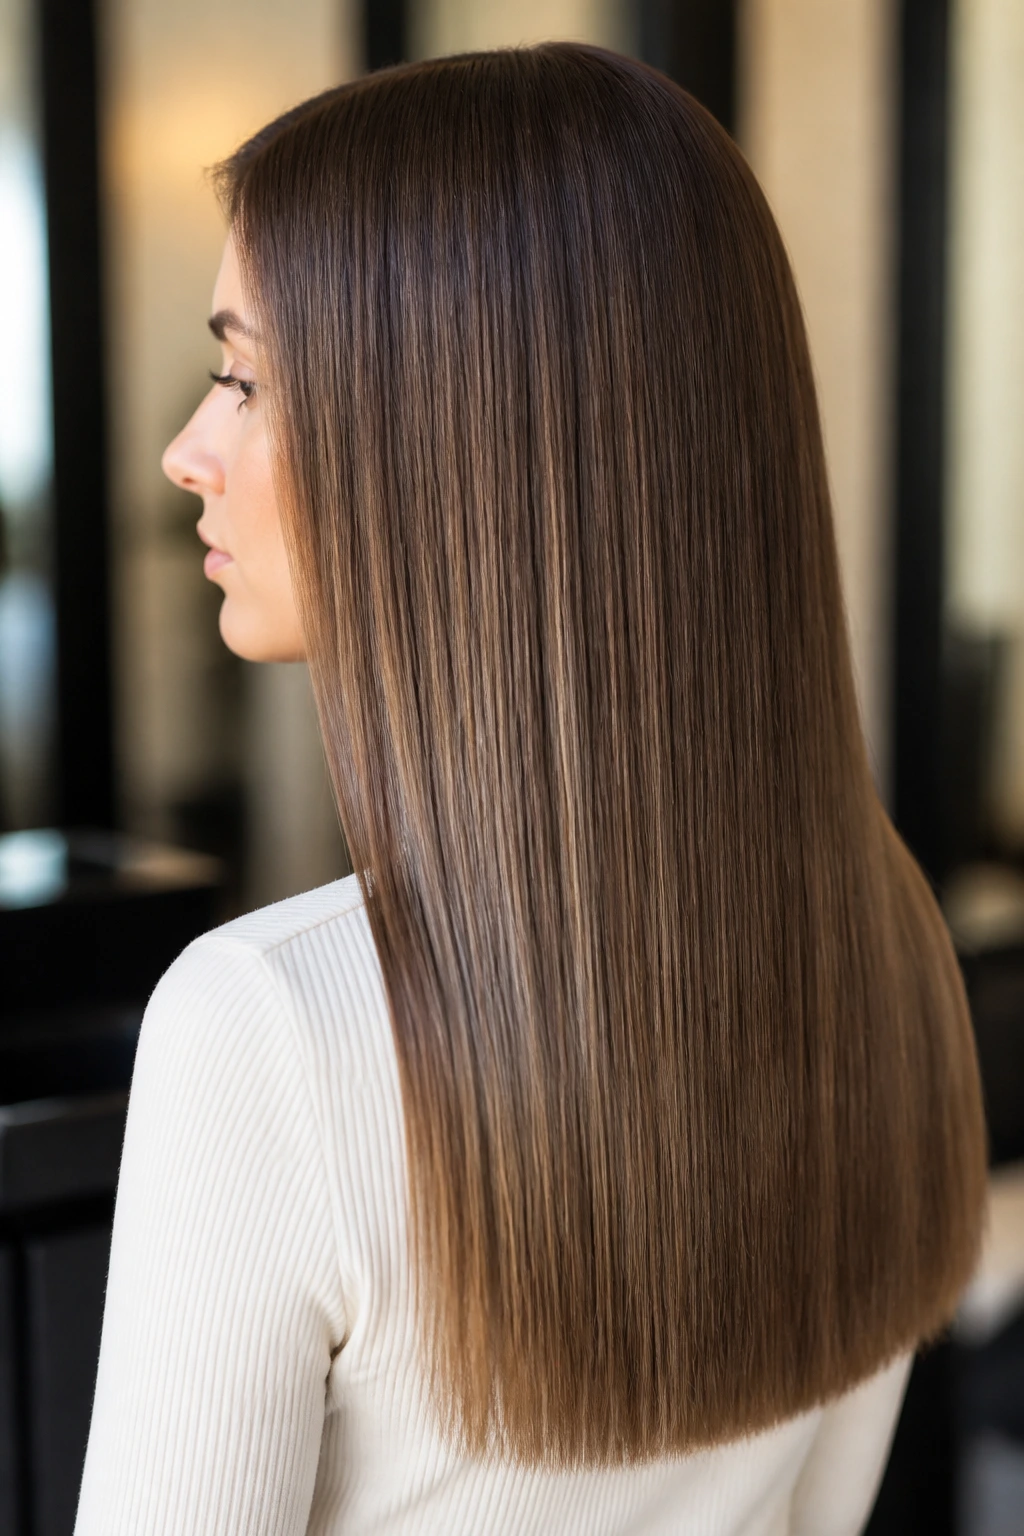
Last, forgetting the silhouette from the side. A style can look fine from the front and awkward from profile if the pony sits too high, the bun sits too flat, or the layers flare out near the neck. Check the side view. It catches more mistakes than the mirror straight on.
Variations and Adaptations to Try
The Minimalist Blunt Edit: Keep everything one length, one part, and one finish. This works when you want the extensions to disappear and the shape to feel expensive without extra detail.
The Texture-Plus-Gloss Mix: Add a crimped crown, a braid, or flipped ends while keeping the mid-lengths straight. It’s a good choice if your hair tends to flatten out and you want a little visual grip.
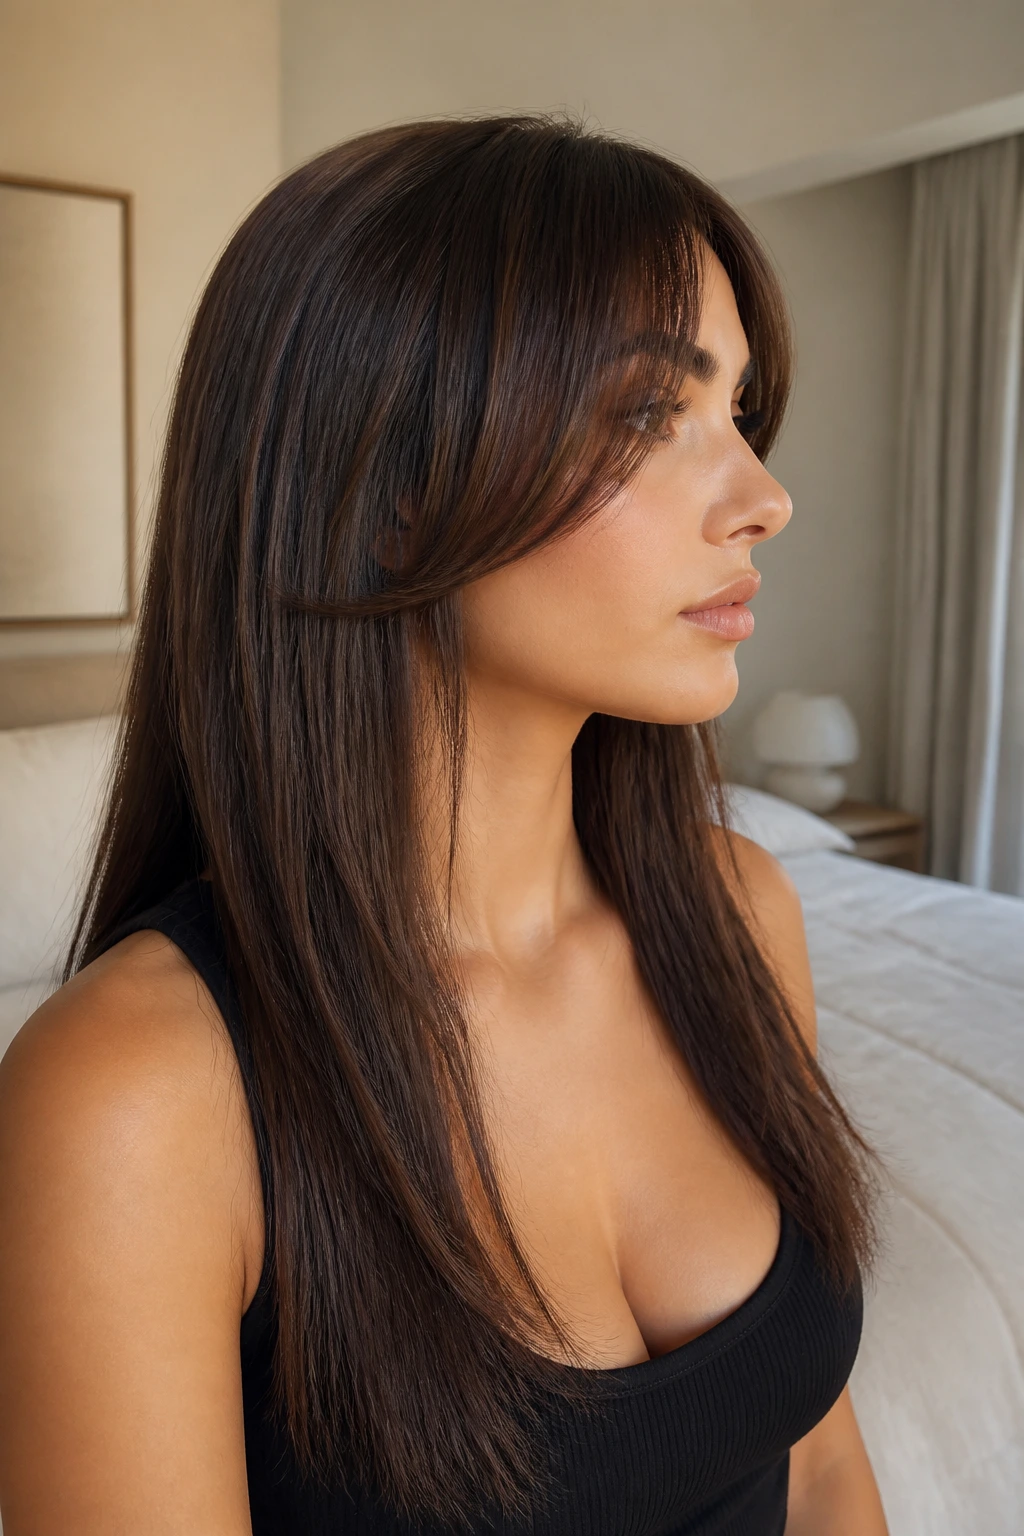
The Soft-Frame Version: Build in face-framing layers or curtain bangs, then keep the rest long and smooth. This is the easiest way to soften a strong jawline or a long face without changing the whole cut.
The Event Pony: Go for a high wrapped ponytail, braided pony, or bubble ponytail, then anchor the base with extra pins and a strong elastic. Straight hair extensions make these styles look crisp, which is exactly why they show up so often for nights out and formal events.
The Low-Key Office Look: A side part, low ponytail, low bun, or tucked front piece keeps the hair polished without feeling over-styled. These are the looks that survive a full day of desk work without asking for a restyle at lunch.
Make-Ahead, Storage, and Rewear Guidance
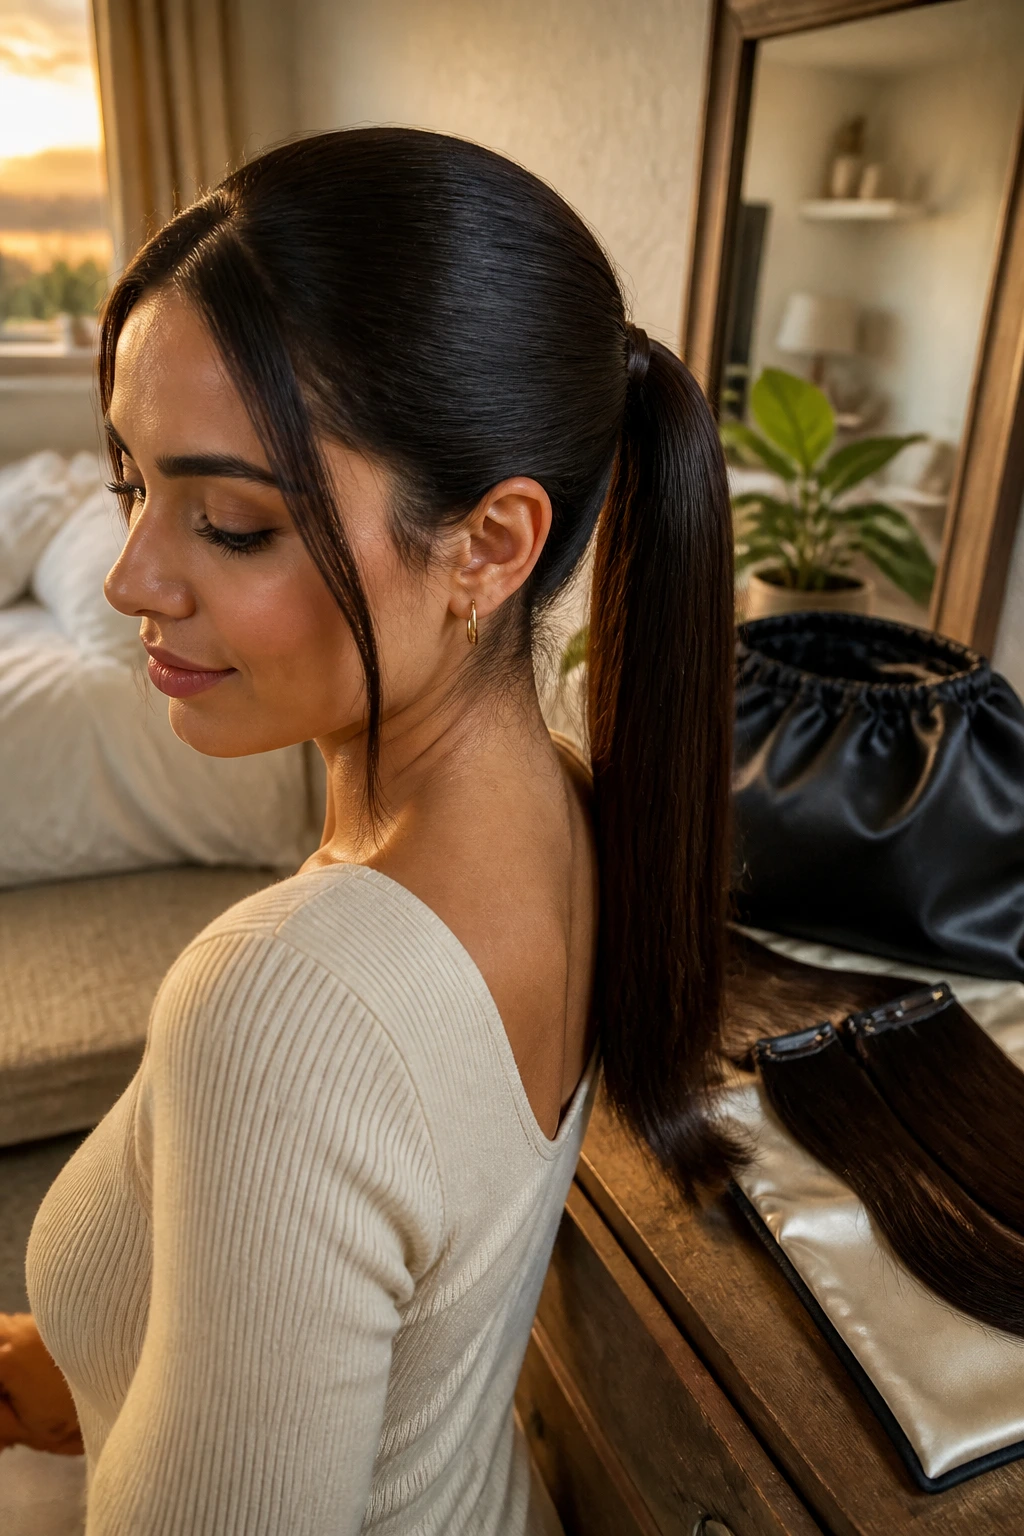
Straight extension styles hold up best when the hair is clean, fully dry, and stored with less drama than most people give them. Clip-ins should be brushed out after each wear, then laid flat or hung on a hanger in a silk bag. If you toss them in a drawer, they tangle. Every time.
Wash clip-ins only when they start feeling coated or limp—usually after 10 to 15 wears, depending on how much hairspray, oil, and heat you use. Use a sulfate-free shampoo, wash gently in downward strokes, and let them air-dry fully before storing. Damp extensions molder. That smell is miserable and avoidable.
Tape-ins and sewn-in hair need different care. Avoid heavy oils near the bonds, and go back for maintenance on the usual install schedule recommended by the person who fitted them. If the style starts slipping, tugging, or sitting unevenly, don’t force it with more spray. That only hides the problem for an hour.
For rewearing straight styles, the safest trick is to protect the shape overnight. A silk pillowcase, a loose braid, or a low wrapped pony helps preserve the finish. If you’re wearing clip-ins, take them out before bed. Sleep is not kind to clips, and it’s worse to your scalp.
Frequently Asked Questions
What type of extensions works best for straight hair?
Tape-ins and clip-ins are the easiest to blend because they lie flat and keep the profile smooth. Sew-ins can work too if the install is done with enough attention to density and placement. A ponytail piece is handy when the style centers on a sleek tail.
How do I keep straight hair extensions from looking fake?
Match the density, not just the color. Then trim the ends after installation so the bottom edge fits your own hair instead of hanging as one blunt block. A clean part and the right amount of shine help, but shape is what sells it.
Can I wear these styles with fine hair?
Yes, but keep the extension weight realistic. Fine hair usually looks better with lighter sets, smaller updos, and low ponytails rather than giant high buns. Start with less hair and build the look where it actually needs fullness.
Do I need to curl straight extensions to style them?
No. Most of these looks work because the hair stays straight. If you want movement, use a bevel at the ends, a small bend at the front, or one texture detail at the crown instead of curling the whole head.
How do I hide the clips or wefts in a center part?
Place the top row lower than you think you need, then leave enough of your own hair on top to cover the seam cleanly. A narrow part line and a light root bump help keep the top from separating and exposing the track.
Can I sleep in straight clip-in extensions?
I wouldn’t. Clip-ins bend, tug, and tangle overnight, and the stress on your scalp isn’t worth the convenience. Remove them, brush them, and store them flat or on a hanger.
What if the style keeps falling flat at the crown?
Add root lift before the extension goes in, not after the style collapses. A little texturizing spray at the roots, plus careful placement of the top row, usually solves the problem better than more hairspray.
How long should the extensions be for a sleek ponytail look?
Long enough that the tail looks intentional, not like a stub. For most people, 18 to 24 inches gives a real ponytail shape, while anything shorter may look too small once it’s wrapped and tightened.
Clean Lines, Better Hair
Straight hair extensions do not need to be complicated to look good. A blunt line, a clean part, a wrapped base, or one well-placed texture detail can carry more visual weight than a pile of product ever will.
What makes these styles work is the discipline of them. The seams are hidden. The silhouette makes sense. The ends are trimmed with intention, not left to chance.
Pick the shape that suits your day, match the density honestly, and let straight hair do the work it’s already good at. That’s where the nicest looks live.
