



Medium-length hair gets awkward right before it gets good. The sides puff out, the top starts falling over your forehead, and a bad haircut can make the whole shape feel heavier than it should.
That’s where fade haircuts for medium length hair earn their keep. A fade clears out the bulk around the ears and neckline, but it leaves enough length on top to push, sweep, curl, part, or rough up depending on the day. It’s a cleaner look than a full scissor cut and less bare than a buzz, which is why this length keeps showing up in barbershops for men who want movement without chaos.
Done well, the fade gives the haircut structure. Done badly, it turns into a disconnected mess with a top that looks stranded. The difference usually comes down to fade height, how much weight gets left on the crown, and whether the hair is styled to match its own texture instead of fighting it.
Why You’ll Love This Collection
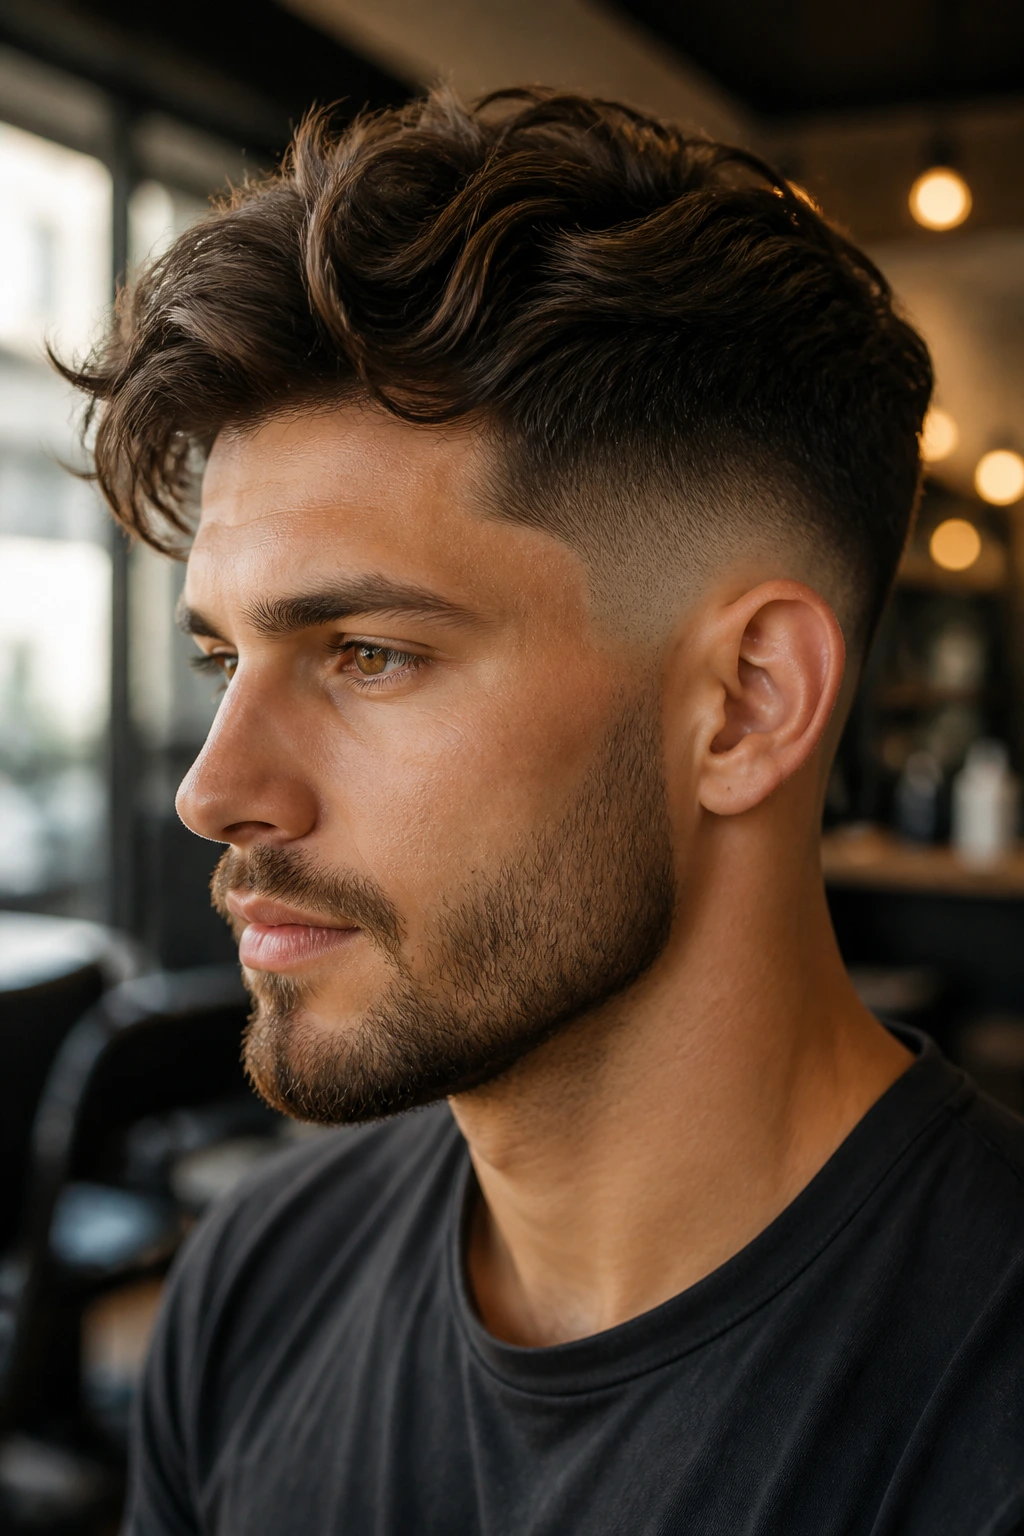
-
Built for the awkward stage: Medium length is where hair starts doing its own thing, and a fade cuts the bulk so the shape stops spreading sideways.
-
Easy to steer: You can wear these cuts forward, back, loose, curly, or parted, which matters when your hair changes personality from one wash to the next.
-
Cleaner grow-out: A low or taper fade grows out with less edge than a hard disconnect, so you do not look shaggy two days after the barber chair.
-
Works with real hair: Cowlicks, waves, thick crowns, and curls all behave better when the sides are tightened and the top gets room to move.
-
Barber-friendly choices: Every style here can be described clearly at the chair, which helps you avoid the “I wanted that, but shorter” problem.
1. Low Skin Fade with Side-Swept Length
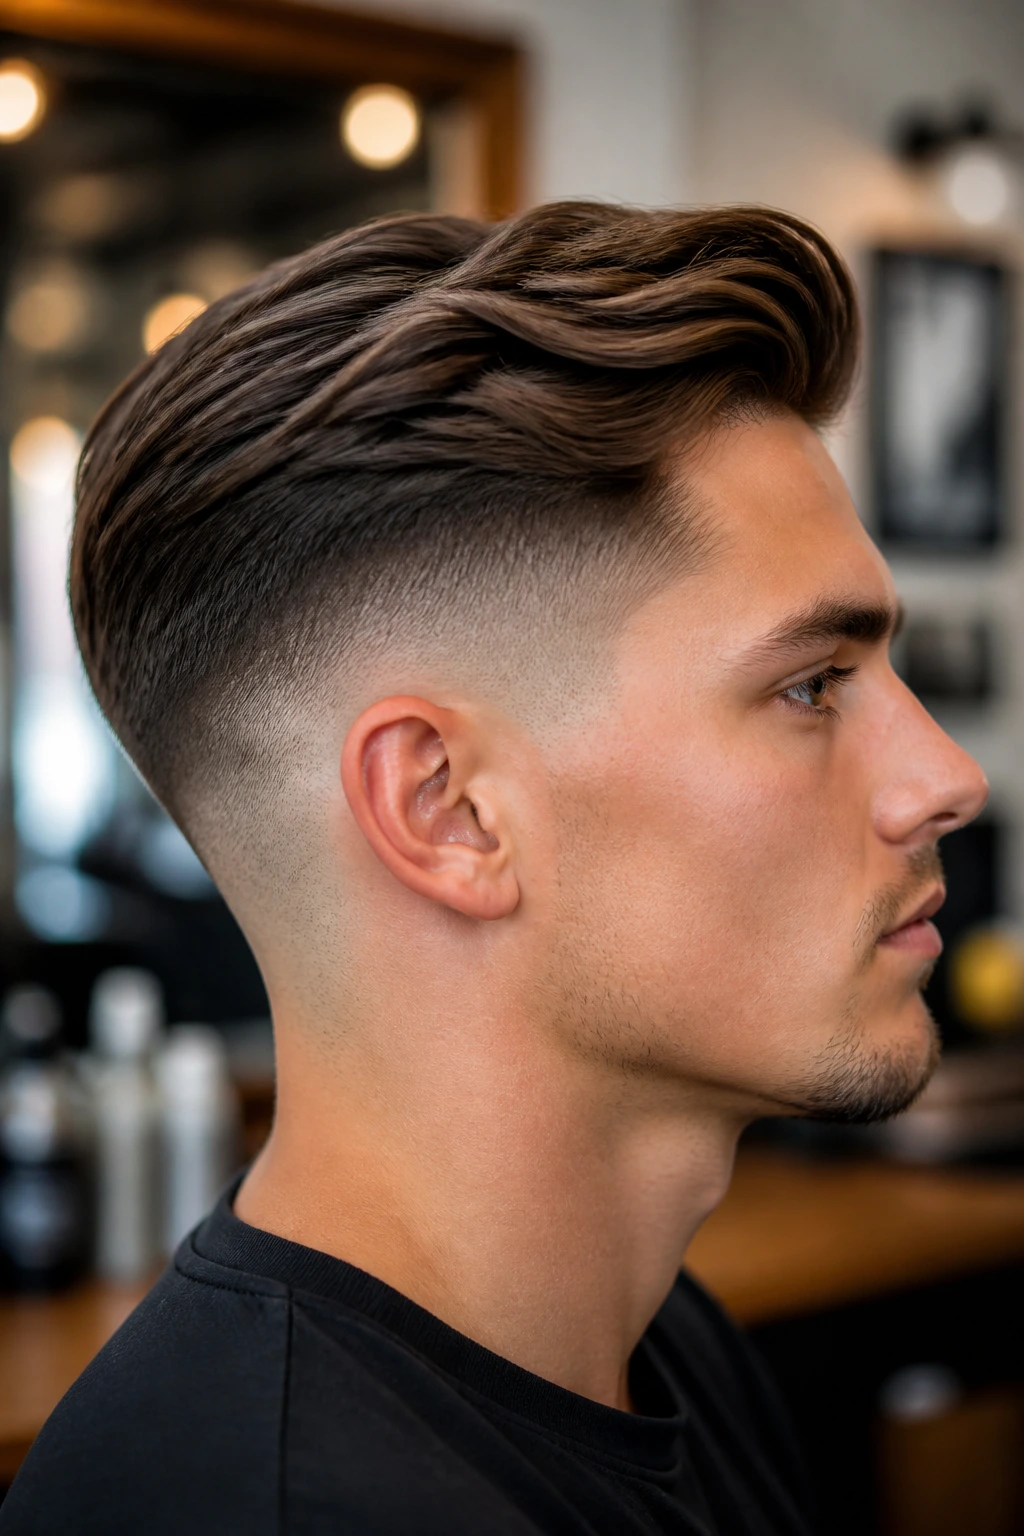
A low skin fade with side-swept length is the cut I’d hand to someone who wants clean edges without looking like they tried too hard. The fade sits low around the ears, while 3 to 5 inches on top gives you enough hair to sweep over a natural part and keep some softness in the front.
Why It Works:
The low fade removes bulk where medium hair tends to balloon, but it keeps the haircut readable from the side. That matters when your hair has density or a strong cowlick near the temple.
Key Ingredients:
- 3 to 5 inches of hair on top, left longer at the front
- Low skin fade at the temples and nape
- 1 dime-sized scoop of matte cream or clay
- 1 light mist of hairspray if your hair falls flat
Quick Steps:
- Ask for a low skin fade and keep the top long enough to sweep over, not spike up.
- Blow-dry the top to the side while lifting at the roots with your fingers.
- Work the product through dry or slightly damp hair, then comb only the front section into place.
- Pinch the ends for a softer finish, not a helmet.
Equipment for This Cut:
- Clippers with guards
- Round or vent brush
- Blow dryer
- Fine-tooth comb
How to Wear It:
This one looks sharp with a clean neckline, light stubble, and a collar that sits close to the neck. It reads polished without feeling stiff.
Pro Tips for This Recipe:
- Keep the side sweep shallow; a dramatic comb-over turns the cut into something else.
- If your hair is thick, ask your barber to remove a little weight from the crown.
Variations on This Dish:
- Softer Office Version: Ask for a low taper instead of a skin fade.
- Hard-Part Version: Add a razor part if you want more contrast and a cleaner line.
Common Mistakes to Avoid with This Dish:
- Taking the fade too high: It can swallow the top and make medium length look short.
- Using too much product: A dime-sized amount is enough; more will make the sweep collapse.
2. Mid Fade Textured Quiff
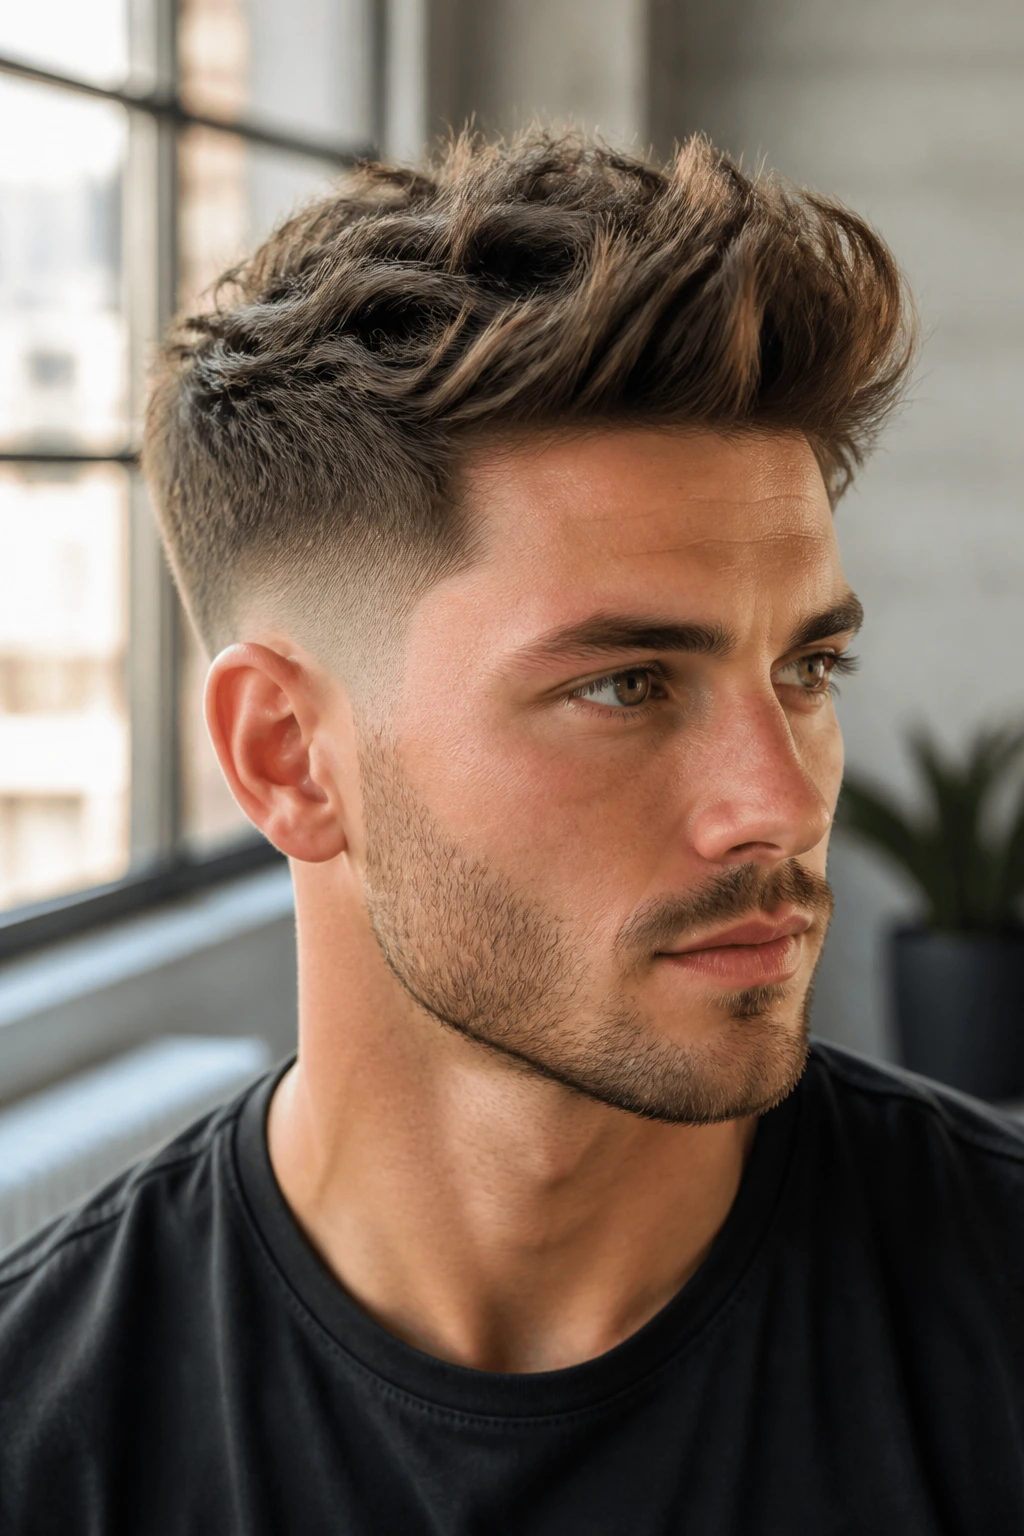
A mid fade textured quiff has more attitude than the low fade styles, but it still stays wearable. The front lifts, the crown holds shape, and the fade lands right around the middle of the head so the whole cut feels balanced instead of severe.
Why It Works:
Medium-length hair gives the quiff enough body to stand up, and the mid fade keeps the sides from stealing the show. It’s a good match for straight or slightly wavy hair that needs direction.
Key Ingredients:
- 3.5 to 5 inches at the front
- Mid fade that starts around the temple line
- 1 teaspoon of sea salt spray
- 1 pea-sized dab of matte clay
Quick Steps:
- Ask for extra length in front and point-cut texture through the top.
- Spray sea salt spray into damp hair and blow-dry the front up and back.
- Rub matte clay between your palms and push it through the top from roots to tips.
- Break the quiff apart with your fingers so it looks lifted, not glued.
Equipment for This Cut:
- Blow dryer
- Round brush
- Matte clay
- Sectioning clips if your hair is thick
How to Wear It:
It suits denim jackets, tailored tees, and anything that benefits from a little height up front. The shape looks best when the front has movement, not a stiff wave.
Pro Tips for This Recipe:
- Dry the front first; if it dries flat, the quiff gets lazy.
- Ask for texture, not thinning, because thinning shears can make fine hair look frizzy.
Variations on This Dish:
- Loose Quiff: Use cream instead of clay for a softer front.
- Sharp Quiff: Add a hard part if you want more barbered structure.
Common Mistakes to Avoid with This Dish:
- Blow-drying the wrong way: If you dry everything forward, the quiff never lifts.
- Overloading the crown: Too much product there makes the top sit like a cap.
3. Drop Fade Slick Back
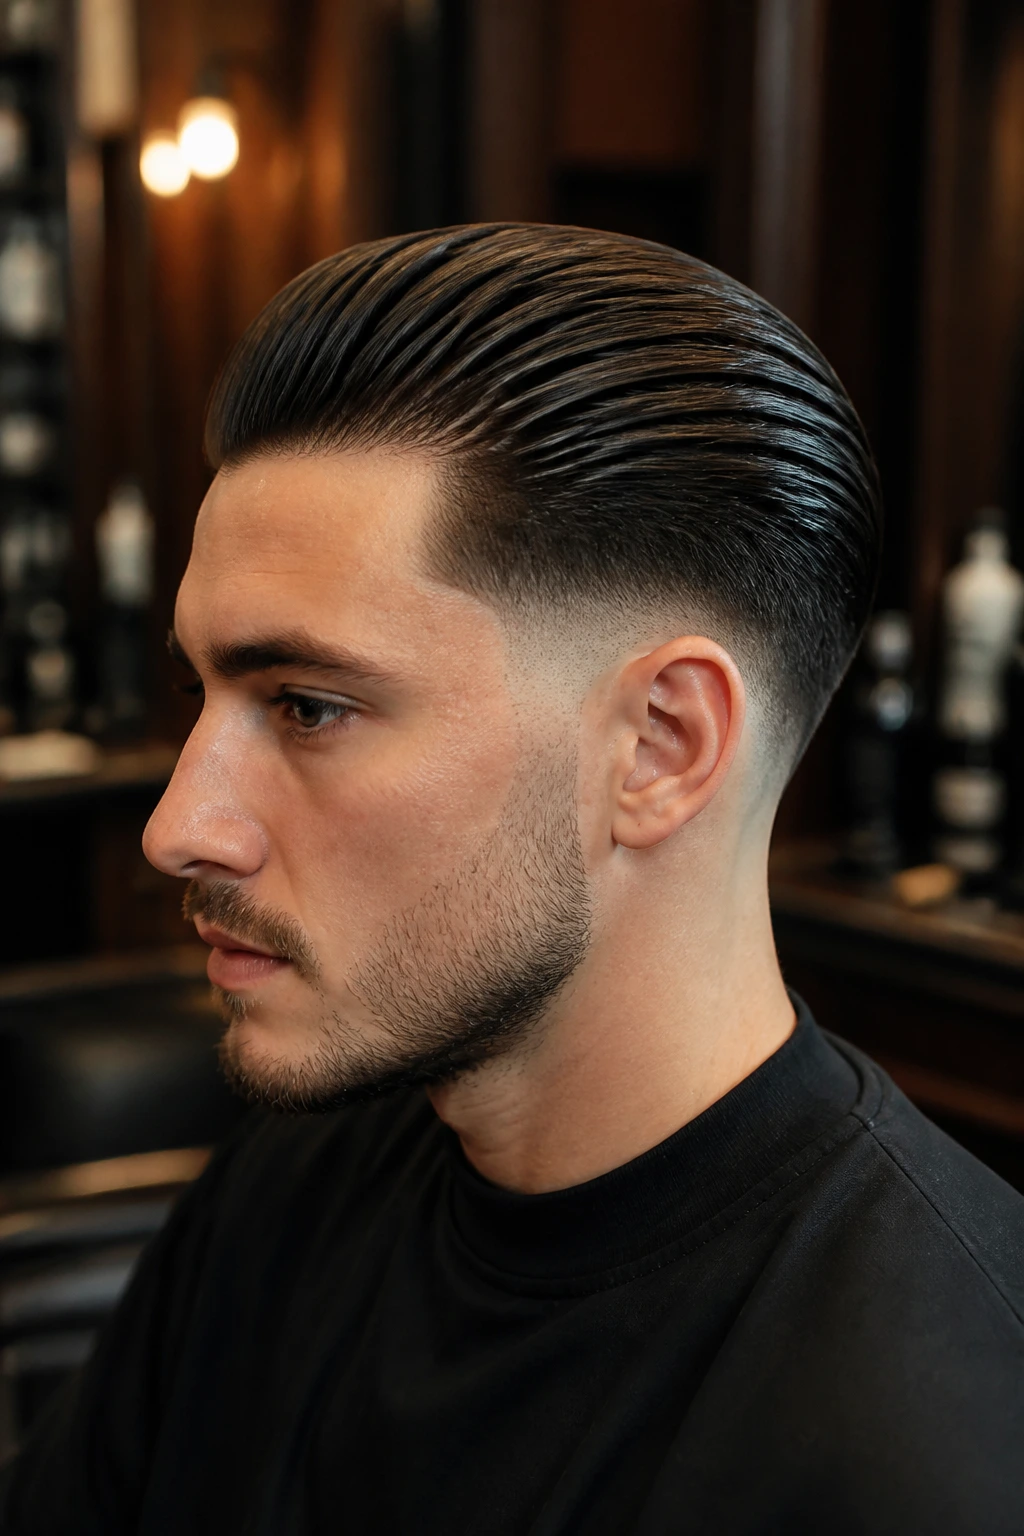
A drop fade slick back has one job: look controlled without feeling flat. The fade curves lower behind the ears, which gives the profile a nice bend, while the top stays long enough to comb straight back with a little shine or a matte finish, depending on how formal you want it.
Why It Works:
The drop shape follows the head instead of drawing a straight line across it, and that’s the detail that makes the cut look expensive even when the styling is simple. It’s especially good if your hair has a natural wave and does not want to stay in a side part all day.
Key Ingredients:
- 4 to 6 inches on top
- Drop fade that dips behind the ear
- 1 nickel-sized amount of medium-hold pomade or cream
- 1 towel-dried base before styling
Quick Steps:
- Ask for the fade to drop low behind the ears and keep the top long.
- Comb the hair straight back after a quick blow-dry to remove bend.
- Apply product from the back forward so the front does not get overloaded.
- Finish with a comb pass for polish or fingers for a looser finish.
Equipment for This Cut:
- Fine-tooth comb
- Blow dryer
- Medium-hold styling cream
- Mirror with a good side view
How to Wear It:
Wear this with a clean shave or short beard line if you want the fade to stand out. It pairs well with button-down shirts and dark outerwear because the silhouette is neat and deliberate.
Pro Tips for This Recipe:
- Keep the top damp, not wet, before combing back or it will separate awkwardly.
- Use less shine if your hair is very dense; too much gloss can make it look greasy.
Variations on This Dish:
- Wet Slick Back: Swap in a stronger pomade for a glossy finish.
- Matte Back Sweep: Use clay and your fingers for a less formal shape.
Common Mistakes to Avoid with This Dish:
- Making the top too short: You need enough length to lie back without standing up.
- Combing against the grain too hard: That flattens the crown and makes the top fight you.
4. Burst Fade Curly Top
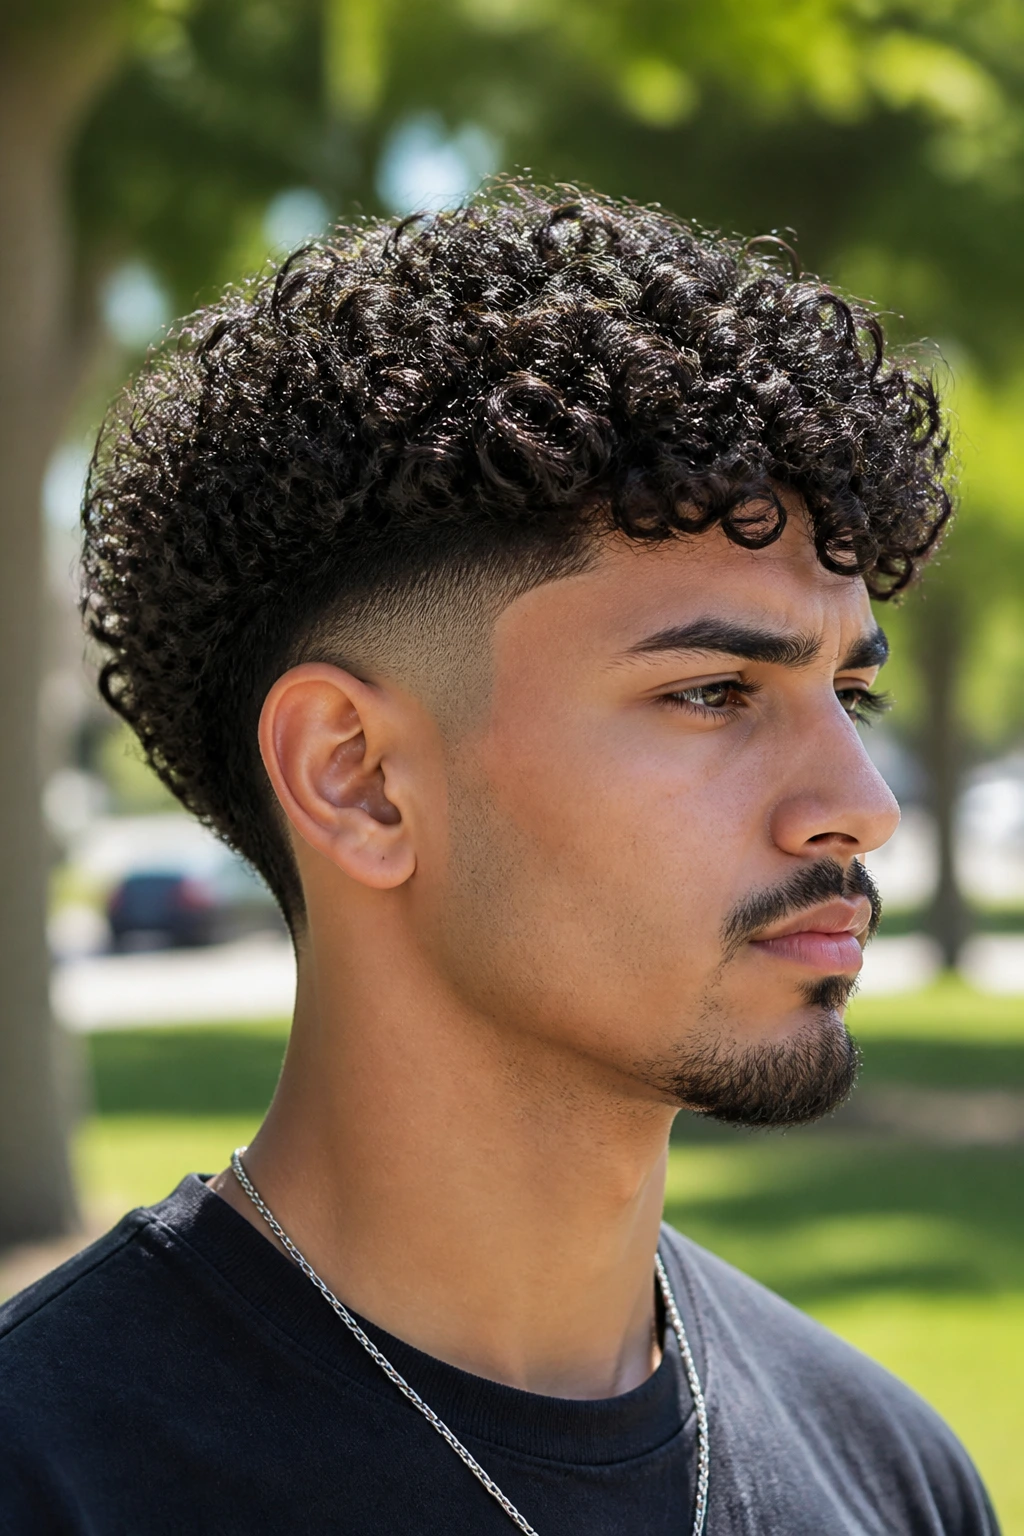
A burst fade curly top keeps the sides tight around the ear while letting the curls sit up where they belong. If your curls are medium length, this cut gives them shape without turning the whole head into a triangle.
Why It Works:
The burst fade opens space around the ear, which makes curly hair look lighter and cleaner. It also keeps the silhouette from widening at the sides, a common problem when curls reach medium length.
Key Ingredients:
- 3 to 6 inches of curls on top
- Burst fade around the ear
- 1 tablespoon of curl cream
- 1 diffuser attachment for the dryer
Quick Steps:
- Ask for the top to stay long enough for curl definition and the fade to burst around the ear.
- Work curl cream through damp hair with your fingers.
- Use a diffuser on low heat and cup the curls upward until they set.
- Separate only the larger curls by hand; do not rake through them too much.
Equipment for This Cut:
- Diffuser dryer
- Wide-tooth comb
- Curl cream
- Microfiber towel
How to Wear It:
This cut looks best when the curls stay springy and not crushed. A clean beard line can help balance the roundness, but the cut already has enough presence on its own.
Pro Tips for This Recipe:
- Dry curls in sections so the top does not puff unevenly.
- Ask your barber to leave a little extra length if your curls shrink a lot when dry.
Variations on This Dish:
- Shorter Curl Burst: Keep the top tighter for easier morning styling.
- Long Curl Burst: Leave more length for fuller shape and a looser outline.
Common Mistakes to Avoid with This Dish:
- Brushing curls dry: That makes them frizzy and expands the sides.
- Cutting the top too short for shrinkage: What looks medium in the chair can feel short once dry.
5. Temple Fade Curtain Flow
A temple fade curtain flow is for the guy who wants movement and a little retro attitude. The center part falls softly around the face, while the temple fade cleans up the sides so the whole thing looks intentional instead of overgrown.
Why It Works:
Medium-length hair naturally wants to split in the middle once it gets a little weight. The temple fade gives that shape a cleaner frame, and the result is lighter around the temples, which is where curtain styles usually get fuzzy.
Key Ingredients:
- 5 to 7 inches on top with extra length in front
- Temple fade at the sideburns and temples
- 1 teaspoon of light styling cream
- 1 spritz of sea salt spray
Quick Steps:
- Ask for a center part with length left at the front and a soft temple fade.
- Work spray into damp hair, then blow-dry the part open with your fingers.
- Use a small amount of cream so the curtain falls instead of freezing in place.
- Tuck the ends behind the ears only if you want a neater finish.
Equipment for This Cut:
- Blow dryer
- Wide-tooth comb
- Light cream
- Hand mirror for checking the part
How to Wear It:
This cut likes open collars, relaxed knits, and glasses with thin frames. It has an easy, lived-in feel when the front moves a little as you walk.
Pro Tips for This Recipe:
- Do not force the part if your cowlick wants to split slightly off-center.
- Trim the front every few weeks or the curtain starts falling into your eyes.
Variations on This Dish:
- Center-Part Clean Version: Keep the curtain straighter and less tousled.
- Wavy Curtain Version: Leave more texture and let the natural bend show.
Common Mistakes to Avoid with This Dish:
- Cutting the sides too high: Curtain hair needs a little weight removed, not a sharp disconnect.
- Using heavy wax: It makes the front slump and look sticky.
6. Taper Fade Bro Flow
A taper fade bro flow keeps the length moving back and away from the face while the taper around the neckline makes the whole cut look finished. It is one of those cuts that looks easy, but only if the layers are handled with some care.
Why It Works:
The taper preserves the relaxed flow without shaving the sides down too aggressively. That matters because bro flow needs balance; too much fade and it loses the laid-back shape that makes it work.
Key Ingredients:
- 5 to 8 inches of layered hair on top
- Taper fade around the ears and neckline
- 1 tablespoon of light mousse
- 1 wide-tooth comb
Quick Steps:
- Ask for layered length on top and a soft taper, not a tight skin fade.
- Work mousse through damp hair and comb it back with your fingers.
- Let it air dry halfway, then shape the front away from the eyes.
- Hit only the roots with a dryer if you need extra lift.
Equipment for This Cut:
- Wide-tooth comb
- Light mousse
- Blow dryer
- Towel
How to Wear It:
This sits well with casual jackets, flannel, and a little facial hair. It reads as relaxed, but the taper keeps the neckline from looking like an afterthought.
Pro Tips for This Recipe:
- Keep the layers soft or the flow starts to kick out at odd angles.
- A tiny bit of mousse goes farther than people think.
Variations on This Dish:
- Surfier Version: Add sea salt spray and air dry more often.
- Cleaner Version: Tighten the taper and comb the top back with more control.
Common Mistakes to Avoid with This Dish:
- Leaving the top one length: That can turn flow into a blunt mop.
- Over-fading the sides: The haircut needs some side weight to keep its shape.
7. High Fade Pompadour
A high fade pompadour is pure contrast. The sides disappear fast, and the front takes the stage with height, shape, and a little drama that medium-length hair can handle better than short hair ever could.
Why It Works:
The high fade strips away enough bulk to make the pompadour lift look clean instead of bulky. With 4 to 6 inches up front, you can build real volume without needing cartoon-level product.
Key Ingredients:
- 4 to 6 inches at the front
- High fade that starts above the temple
- 1 dime-sized amount of volumizing mousse
- 1 small round brush
Quick Steps:
- Ask for a high fade and leave the front longer than the crown.
- Blow-dry the front up and slightly back with the brush.
- Add mousse at the roots, then shape with a small amount of cream or paste.
- Finish by pushing the front into a rounded lift, not a flat wall.
Equipment for This Cut:
- Round brush
- Blow dryer
- Volumizing mousse
- Medium-hold paste
How to Wear It:
This one likes sharper clothes, clean shoes, and a neckline that stays neat. It has enough structure for a night out, but it can still work with a plain tee if the styling is good.
Pro Tips for This Recipe:
- Dry the roots first or the height will collapse halfway through the day.
- Keep the sides tight, because a high pompadour needs contrast to read properly.
Variations on This Dish:
- Matte Pompadour: Skip shine and use a dry paste.
- Classic Gloss Version: Add pomade for a smoother, older-school look.
Common Mistakes to Avoid with This Dish:
- Using too much product near the front: It drags the lift down.
- Leaving the crown too long: That can make the back kick out instead of flowing.
8. Mid Fade Messy Fringe
A mid fade messy fringe is the haircut for guys who want movement in the front and less fuss everywhere else. The fringe falls forward with some texture, while the mid fade keeps the sides from puffing up around the ears.
Why It Works:
The fringe gives medium-length hair a purpose instead of letting it hang in random directions. A mid fade also helps fine or straight hair look fuller because the top gets all the visual attention.
Key Ingredients:
- 3 to 5 inches of length in the front
- Mid fade around the temples
- 1 pea-sized amount of matte paste
- 1 spritz of texturizing spray
Quick Steps:
- Ask for a forward fringe with texture, not a blunt bowl line.
- Blow-dry the top forward while lifting the roots with your fingers.
- Scrunch in paste and separate the front into uneven pieces.
- Let a few strands fall naturally across the forehead.
Equipment for This Cut:
- Blow dryer
- Texturizing spray
- Matte paste
- Finger comb or wide comb
How to Wear It:
It pairs well with casual clothes, hoodies, and anything a little rugged. The fringe softens a sharp jawline nicely, which is a detail most people notice before they can name it.
Pro Tips for This Recipe:
- Ask for point cutting through the fringe so it does not look like a straight bar.
- If your hair is oily, use less paste and more spray.
Variations on This Dish:
- Chunky Fringe: Leave thicker pieces up front for more edge.
- Soft Fringe: Keep it looser and less separated.
Common Mistakes to Avoid with This Dish:
- Cutting the fringe too short: It loses the whole point of the style.
- Trying to make every piece sit the same way: Messy fringe needs some chaos.
9. Low Fade Hard Part Comb Over
A low fade hard part comb over is a neat, barbered cut with a strong line and enough top length to keep it from looking stiff. The hard part gives direction immediately, and the low fade keeps the shape polished.
Why It Works:
The cut has a built-in roadmap. That helps medium-length hair behave, especially if your part tends to disappear after lunch or your crown pushes in the wrong direction.
Key Ingredients:
- 3 to 4 inches on top
- Low fade at the sides
- 1 defined razor line for the part
- 1 nickel-sized amount of medium-hold pomade
Quick Steps:
- Ask for a hard part placed where your hair naturally wants to split.
- Comb the longer side across and slightly back.
- Apply pomade in thin layers so the top stays movable.
- Set the shape with a quick comb pass and a light spray.
Equipment for This Cut:
- Comb
- Razor or trimmer for the part
- Pomade
- Blow dryer
How to Wear It:
This one belongs with button-downs, jackets, and clean facial hair lines. It gives strong “I paid attention” energy without needing a lot of styling time.
Pro Tips for This Recipe:
- Do not force the part too far from the cowlick.
- Keep the fade low if you want the hard part to stay the focal point.
Variations on This Dish:
- Softer Side Part: Skip the razor line and keep it natural.
- Glossy Office Version: Use more pomade for a sharper finish.
Common Mistakes to Avoid with This Dish:
- Making the hard part too wide: It can look cartoonish fast.
- Using heavy gel: The comb over becomes helmet-like.
10. Skin Fade Modern French Crop
A skin fade modern French crop is short in the right places and blunt only where it should be. The front fringe sits forward, the skin fade clears the sides, and medium-length hair on top gets compressed into a compact shape with edge.
Why It Works:
French crops are useful when you want less daily styling but still want texture. The skin fade adds contrast, and the short fringe keeps the cut from getting floppy as it grows out.
Key Ingredients:
- 2 to 4 inches on top
- Short fringe in front
- Skin fade on the sides
- 1 small scoop of matte clay
Quick Steps:
- Ask for a cropped top with texture and a tight skin fade.
- Blow-dry the fringe forward and slightly upward at the roots.
- Work clay through dry hair, then pinch the fringe into rough pieces.
- Leave the front a little uneven so it does not look like a helmet edge.
Equipment for This Cut:
- Matte clay
- Blow dryer
- Barber comb
- Clippers for upkeep
How to Wear It:
This cut works with sharp necklines, plain tees, and dark frames. It looks especially good when the fringe is clean but not overly polished.
Pro Tips for This Recipe:
- Ask for texture on top, because a flat crop can look blunt in the wrong way.
- Keep the fade fresh; the contrast is half the cut.
Variations on This Dish:
- Longer Crop: Leave more top length for a softer finish.
- Choppier Crop: Add more point cutting for a rougher texture.
Common Mistakes to Avoid with This Dish:
- Cutting the fringe too thick: It can box out the forehead.
- Skipping texture product: The top sits dead without it.
11. Drop Fade Wavy Brush Back
A drop fade wavy brush back lets the wave pattern do the talking while the fade keeps the outline tidy. The drop at the back gives the cut some curve, and the brushed-back top keeps it from looking too casual.
Why It Works:
Wavy hair likes direction, not strict control. This cut gives it a lane to move in, and the drop fade stops the sides from widening once the waves start to swell.
Key Ingredients:
- 4 to 6 inches of wavy hair
- Drop fade that curves behind the ears
- 1 teaspoon of sea salt spray
- 1 dime-sized amount of light cream
Quick Steps:
- Ask for enough length to see the wave pattern and a curved fade.
- Mist sea salt spray through damp hair and brush the top back loosely.
- Blow-dry until the roots set, then add cream for control.
- Push the waves back with your fingers so they keep their texture.
Equipment for This Cut:
- Vent brush
- Blow dryer
- Sea salt spray
- Light cream
How to Wear It:
It suits casual jackets, open collars, and anything that looks better with texture than shine. The waves keep it from feeling too formal.
Pro Tips for This Recipe:
- Let some wave show; do not flatten it into a smooth helmet.
- If the front splits weird, dry it in the direction it wants first.
Variations on This Dish:
- Larger Wave Version: Leave more length and less product.
- Cleaner Brush Back: Use a comb and a little more cream.
Common Mistakes to Avoid with This Dish:
- Over-brushing the top: It erases the wave pattern.
- Using wax on damp hair: It clumps instead of shaping.
12. Burst Fade Faux Hawk
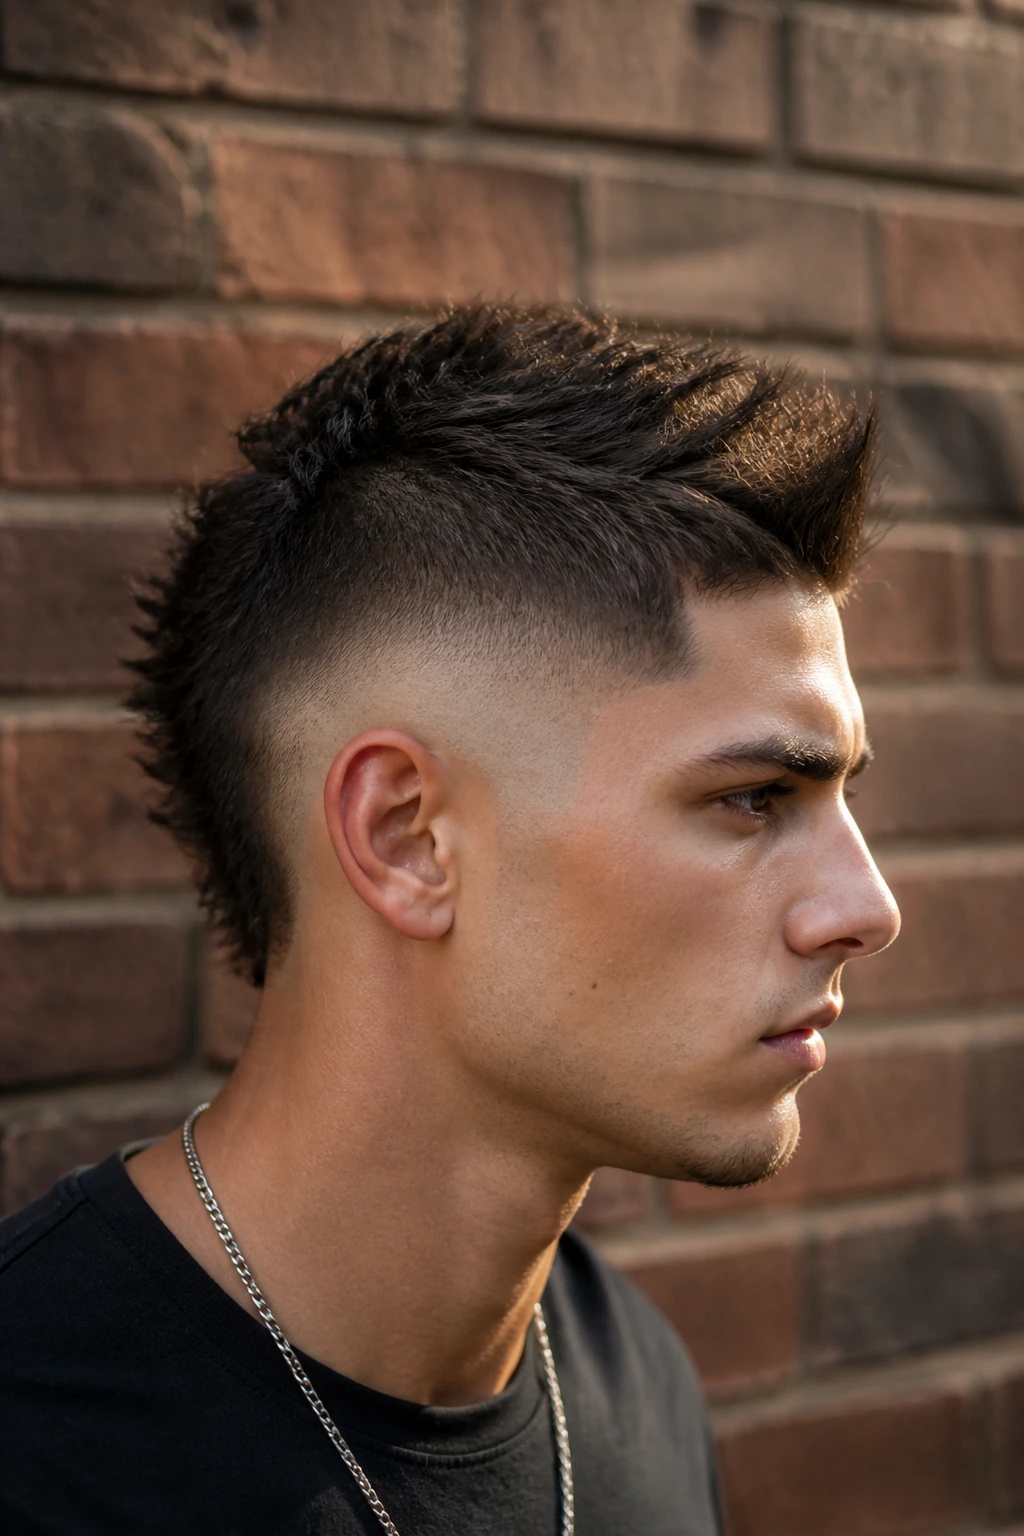
A burst fade faux hawk takes medium length and gives it a center line to follow. The fade curves tightly around the ears, and the top rises through the middle like a narrow ridge instead of a full mohawk.
Why It Works:
The burst fade keeps the sides controlled while the center section creates lift without needing extreme length. That makes the style wearable even if your hair is only moderately thick.
Key Ingredients:
- 4 to 5 inches through the center
- Burst fade around the ear
- 1 teaspoon of matte paste
- 1 blow dryer with a nozzle attachment
Quick Steps:
- Ask for a narrow center ridge and a clean burst fade.
- Blow-dry the middle section upward while pressing the sides down.
- Work paste through the center and pinch it into a pointed line.
- Keep the sides flat so the hawk shape stays readable.
Equipment for This Cut:
- Blow dryer
- Matte paste
- Comb
- Clippers
How to Wear It:
This cut reads bold, so let the haircut be the loud part and keep the rest simple. It works with streetwear, athletic gear, or a beard that’s lined up clean.
Pro Tips for This Recipe:
- Keep the top narrow; a wide hawk loses the point of the style.
- Use the nozzle on the dryer to steer the center ridge.
Variations on This Dish:
- Loose Faux Hawk: Soften the ridge and leave more movement.
- Sharper Hawk: Add more product and tighten the sides.
Common Mistakes to Avoid with This Dish:
- Letting the sides puff out: The shape collapses immediately.
- Using too much gel: It turns the top into a stiff strip.
13. Low Fade Layered Mop Top
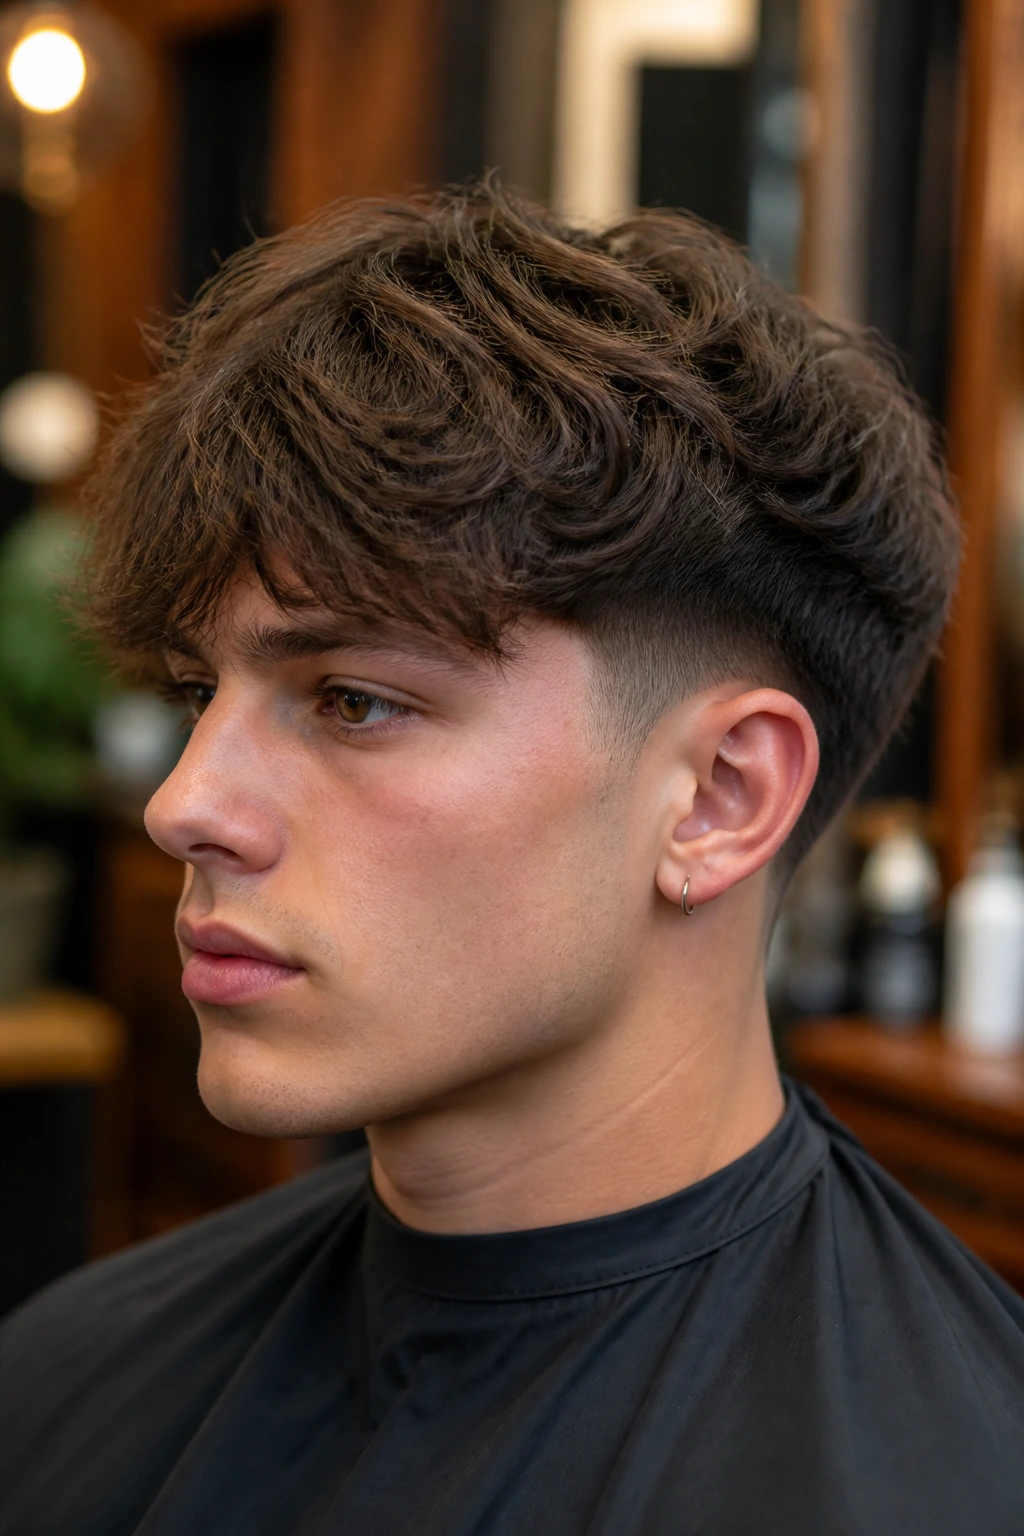
A low fade layered mop top sounds messy, but the good version has shape underneath the looseness. The layers stop the top from sitting like a block, and the low fade keeps the edges neat enough to pass for style instead of neglect.
Why It Works:
Medium-length layered hair has room to move, and the low fade trims away the side bulk that usually makes a mop top look bulky. It’s a solid choice for guys who like softness but still want the cut to have a plan.
Key Ingredients:
- 4 to 6 inches of layered top
- Low fade around the sides and neckline
- 1 teaspoon of light cream
- 1 microfiber towel
Quick Steps:
- Ask for layers through the top and a low fade that keeps the outline tidy.
- Towel-dry until damp, then work cream through the mid-lengths.
- Finger-style the hair forward and slightly to the side.
- Let a few pieces fall where they want; that’s part of the cut.
Equipment for This Cut:
- Microfiber towel
- Light cream
- Wide-tooth comb
- Blow dryer if you want more volume
How to Wear It:
It suits softer clothes, knitwear, and an easy, slightly undone look. The layers keep it from becoming heavy around the forehead.
Pro Tips for This Recipe:
- Ask for invisible layers, not choppy chunks.
- Keep the fade low so the top remains the main event.
Variations on This Dish:
- Cleaner Mop: Add a side part and a bit more control.
- Wavier Mop: Leave it loose and air dry.
Common Mistakes to Avoid with This Dish:
- Cutting it all one length: That’s when the shape gets boxy.
- Using a heavy pomade: It weighs down the layers fast.
14. High Fade Angular Fringe
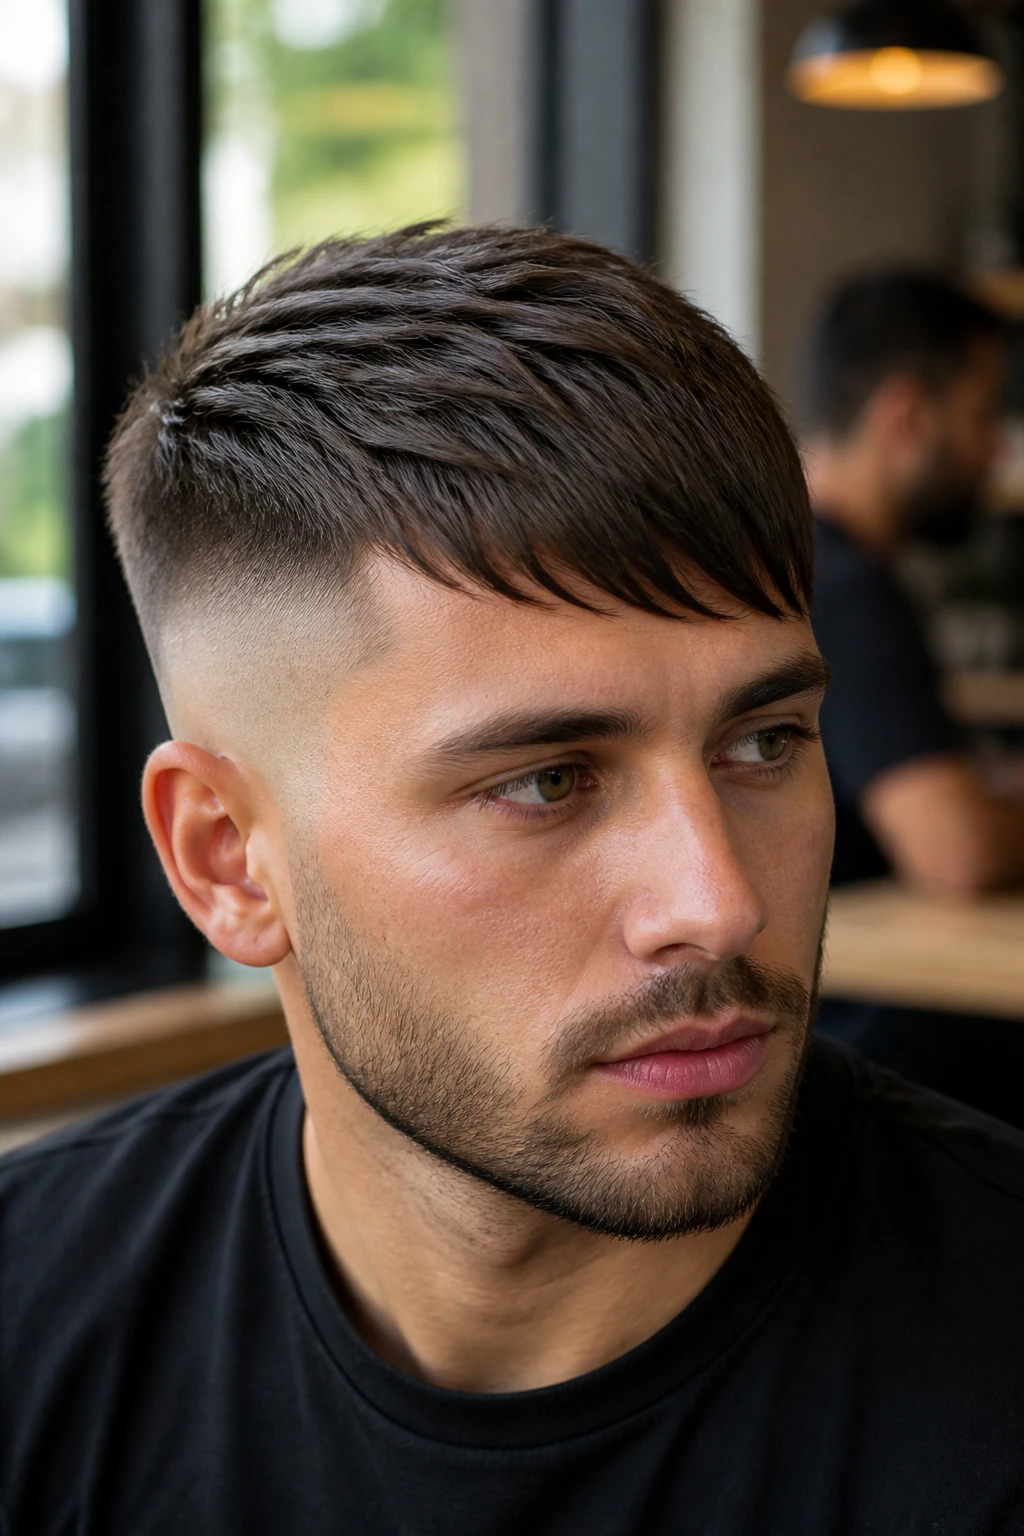
An angular fringe with a high fade gives the face a diagonal line that feels sharper than a straight-across crop. The fringe points to one side, and the high fade strips out the bulk so the angle becomes the whole point.
Why It Works:
A diagonal front is useful when your face benefits from length or movement near the forehead. The fade keeps the sides from competing with that line, which is the whole reason the cut looks deliberate.
Key Ingredients:
- 3 to 5 inches in the fringe
- High fade around the temples
- 1 pea-sized amount of matte paste
- 1 comb with fine teeth
Quick Steps:
- Ask for a fringe that falls diagonally, not straight down.
- Blow-dry the front in the direction you want the angle to sit.
- Add paste to the ends and separate the fringe into uneven strands.
- Keep the side line tight so the diagonal reads clearly.
Equipment for This Cut:
- Fine-tooth comb
- Blow dryer
- Matte paste
- Clippers for the fade
How to Wear It:
This cut likes slim collars, sharp jackets, and clean glasses frames. It has a little edge without feeling like it belongs on a stage.
Pro Tips for This Recipe:
- Show your barber a direction, not just a photo, because the angle depends on your part.
- Point cutting the fringe helps keep it from looking too heavy.
Variations on This Dish:
- Soft Angle: Make the front less severe.
- Hard Angle: Add more contrast with a higher fade.
Common Mistakes to Avoid with This Dish:
- Cutting the fringe square: That kills the whole diagonal effect.
- Letting the sides get too full: Then the angle disappears.
15. Taper Fade Ivy League Sweep
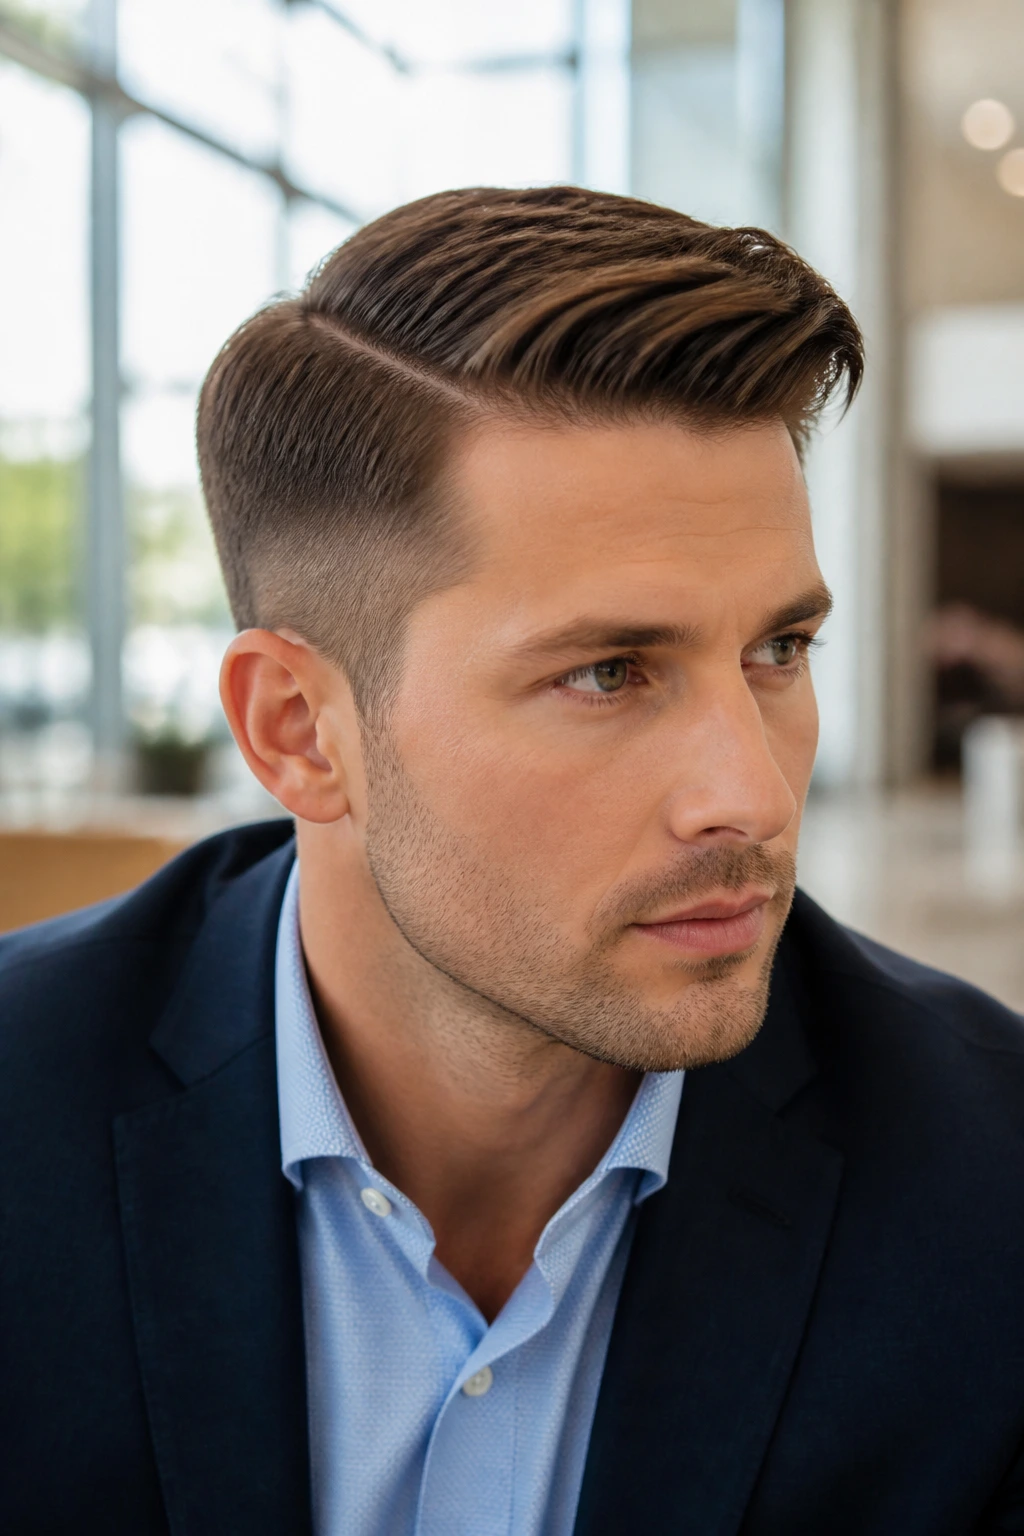
A taper fade Ivy League sweep is the quiet one in the group. It has enough length on top to part and sweep, but the taper gives the sides a crisp finish without turning the cut into something flashy.
Why It Works:
The Ivy League shape likes control. Medium-length hair gives you that, and the taper keeps the haircut neat around the ears and neckline, which is where most longer men’s cuts start to look lazy.
Key Ingredients:
- 3 to 4 inches on top
- Taper fade at the sides and back
- 1 nickel-sized amount of light pomade
- 1 comb
Quick Steps:
- Ask for a side-swept Ivy League with a soft taper.
- Comb the top into a neat part while it’s still slightly damp.
- Apply a small amount of pomade and brush the sweep into shape.
- Keep the crown smooth but not flat.
Equipment for This Cut:
- Comb
- Light pomade
- Blow dryer
- Trimmer for clean edges
How to Wear It:
This one works in offices, dinners, and any setting where you want the haircut to behave. It looks especially good with a short beard or clean shave.
Pro Tips for This Recipe:
- Keep the part subtle if your hair is thin; a heavy part can expose too much scalp.
- The taper should be clean, not faded to skin.
Variations on This Dish:
- Dressier Sweep: Add more shine.
- Relaxed Sweep: Use cream and finger-comb instead of a hard part.
Common Mistakes to Avoid with This Dish:
- Making it too stiff: Ivy League hair should move a little.
- Cutting the top too short: It loses the sweep and becomes a basic short cut.
16. Mid Fade Curly Crop
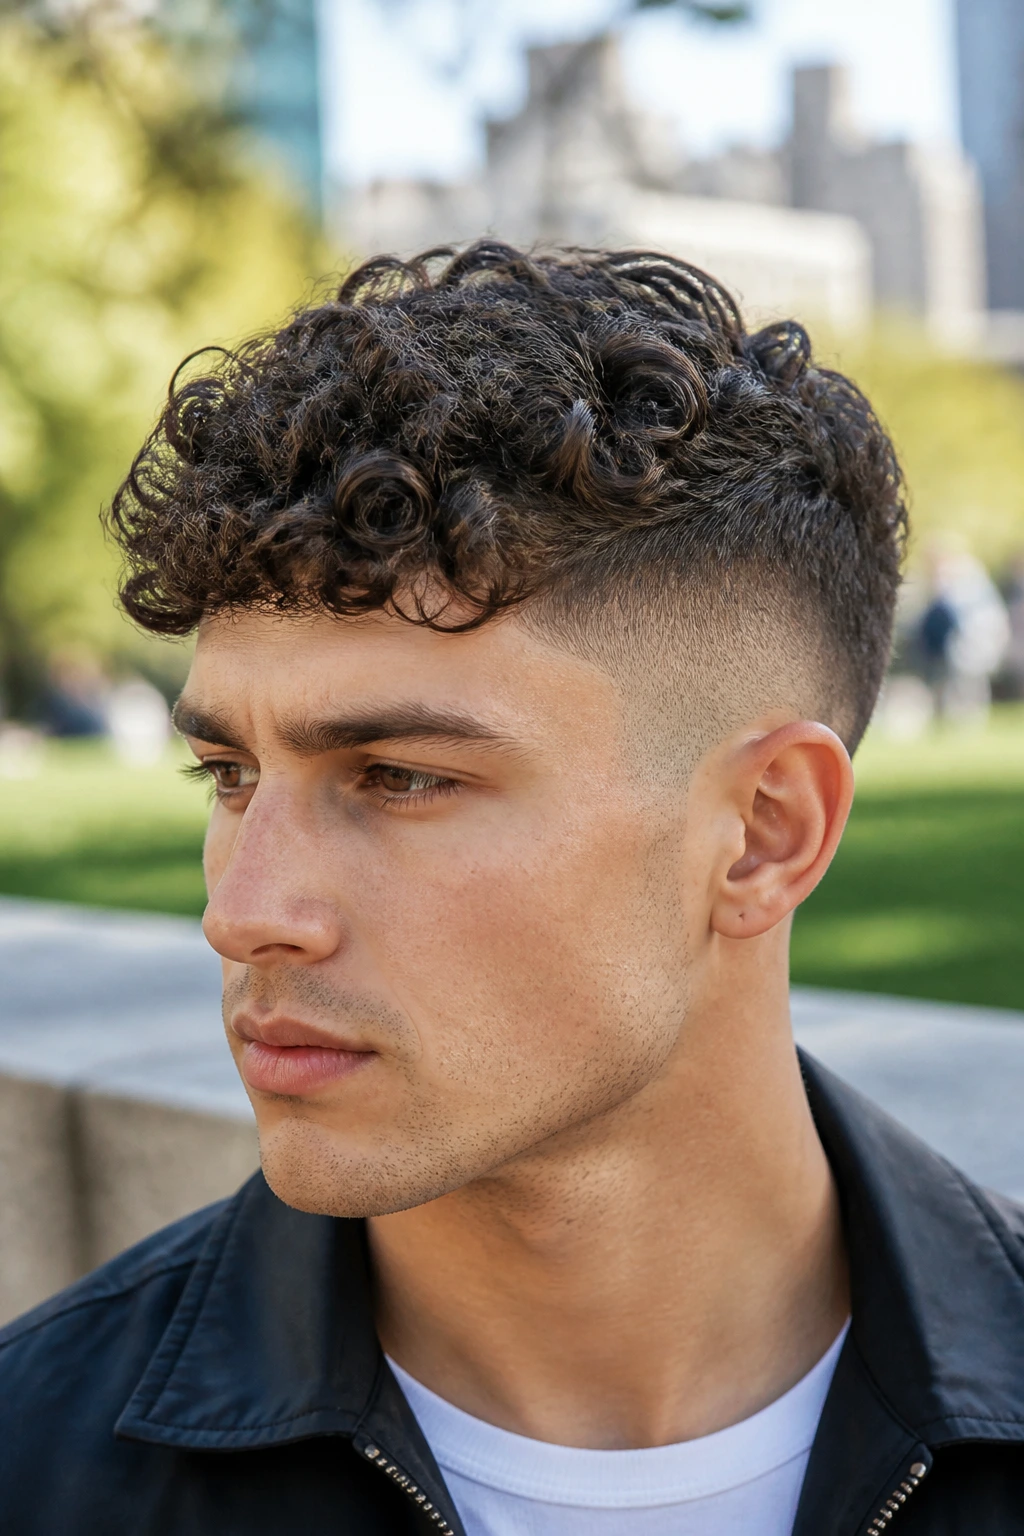
A mid fade curly crop keeps curls in a compact shape while still letting them show off texture. The top stays shorter than a full curly fro, and the fade brings the sides in so the cut looks crisp instead of round and wide.
Why It Works:
Curly hair needs room, but not too much. This cut gives the curls a controlled perimeter, and the mid fade makes the shape look intentional even when the curls dry in different directions.
Key Ingredients:
- 2 to 4 inches of curls on top
- Mid fade at the temples
- 1 tablespoon of curl cream
- 1 microfiber towel
Quick Steps:
- Ask for a cropped curly top with enough length to keep curl definition.
- Apply curl cream to damp hair and scrunch upward.
- Diffuse on low heat or let it air dry until the curls set.
- Trim only the edges of the shape, not the curl pattern itself.
Equipment for This Cut:
- Diffuser
- Curl cream
- Microfiber towel
- Wide-tooth comb
How to Wear It:
This cut works well with casual clothes, a short beard, and a clean neckline. It looks best when the curls stay soft, not crunchy.
Pro Tips for This Recipe:
- Cut curls when dry enough to see their real length.
- Ask for a little more top length if your curls shrink hard.
Variations on This Dish:
- Tighter Crop: Keep the curls shorter and more controlled.
- Fuller Crop: Leave extra length for more volume.
Common Mistakes to Avoid with This Dish:
- Drying curls with too much heat: That builds frizz fast.
- Taking the fade too high: It can make curly hair look too round.
17. Skin Fade Slick Side Part
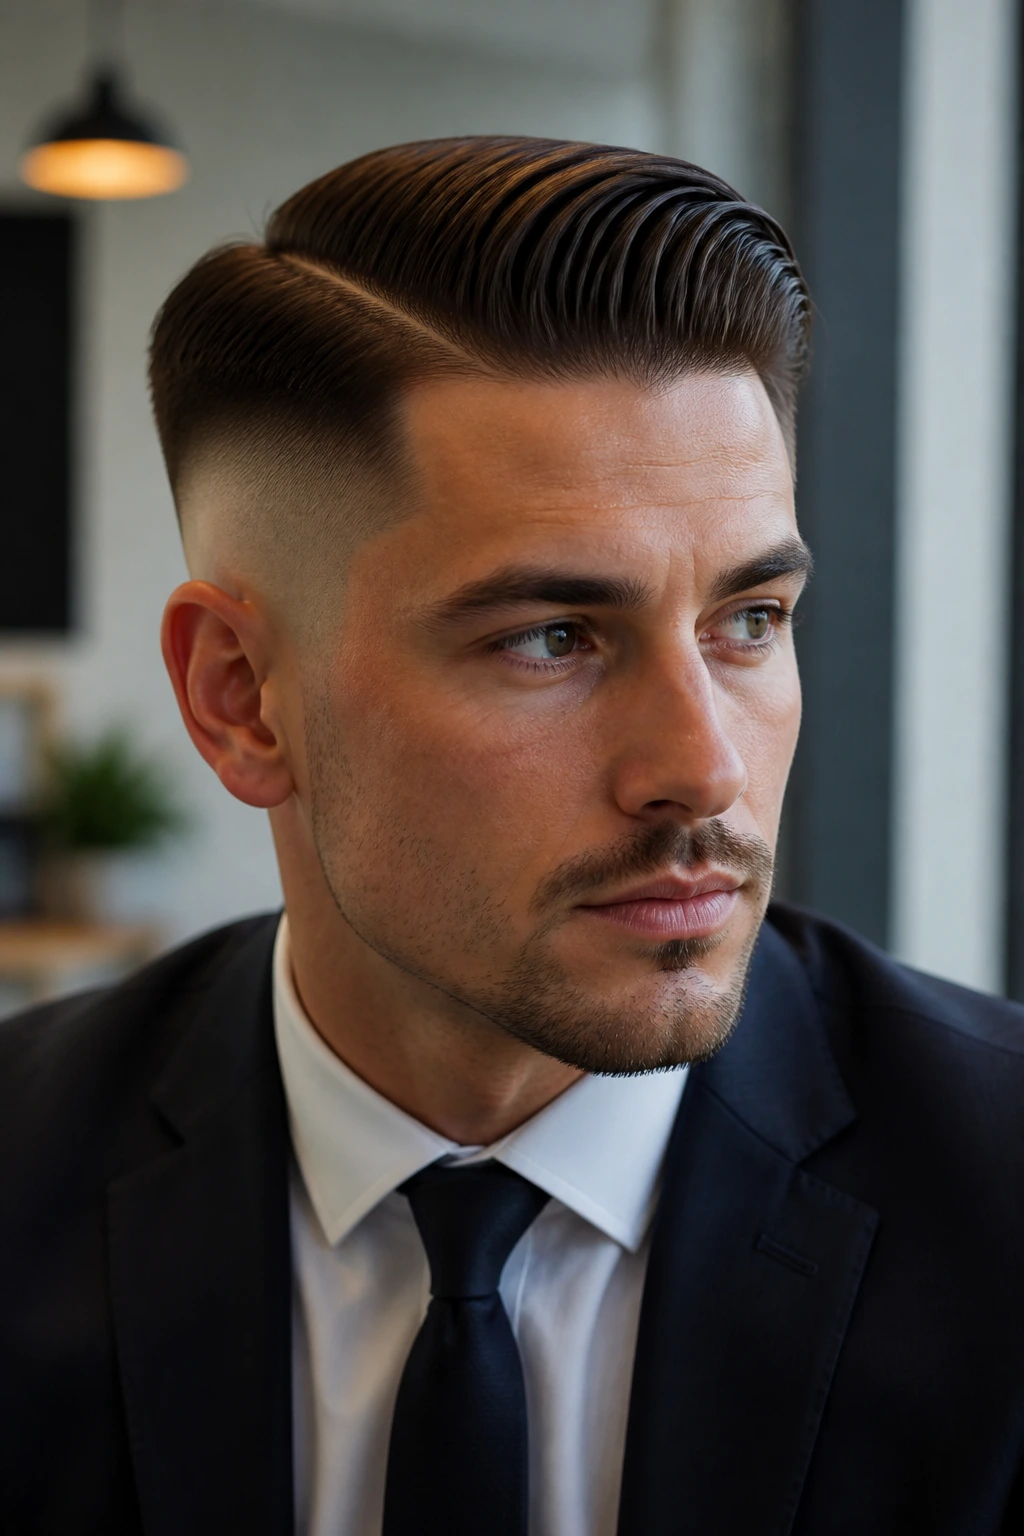
A skin fade slick side part is sharp in the cleanest way. The line is crisp, the sides go down to skin, and the top stays long enough to comb into a smooth, deliberate part.
Why It Works:
The skin fade gives the haircut a hard edge, which makes the side part read instantly. With medium-length hair, the top has enough mass to hold shape without getting floppy.
Key Ingredients:
- 3 to 5 inches on top
- Skin fade down the sides
- 1 dime-sized amount of strong-hold cream or pomade
- 1 comb with a tight tooth pattern
Quick Steps:
- Ask for a skin fade and leave enough top length to comb across.
- Comb the part while the hair is damp so the direction sets.
- Add product in thin layers and smooth the top toward the part.
- Clean the line with a final comb pass.
Equipment for This Cut:
- Fine-tooth comb
- Pomade or styling cream
- Blow dryer
- Trimmer
How to Wear It:
This cut suits business shirts, sharp jackets, and neat facial hair. It has a clean, direct shape that does not need much else.
Pro Tips for This Recipe:
- Match the part to your cowlick, or you’ll fight it every morning.
- Keep the shine low if your hair is naturally fine.
Variations on This Dish:
- Sleek Version: Use pomade for a wetter finish.
- Natural Version: Use cream and keep the part softer.
Common Mistakes to Avoid with This Dish:
- Over-greasing the top: It flattens the whole cut.
- Starting the part in the wrong place: That makes the style sit crooked.
18. Low Fade Loose Curls
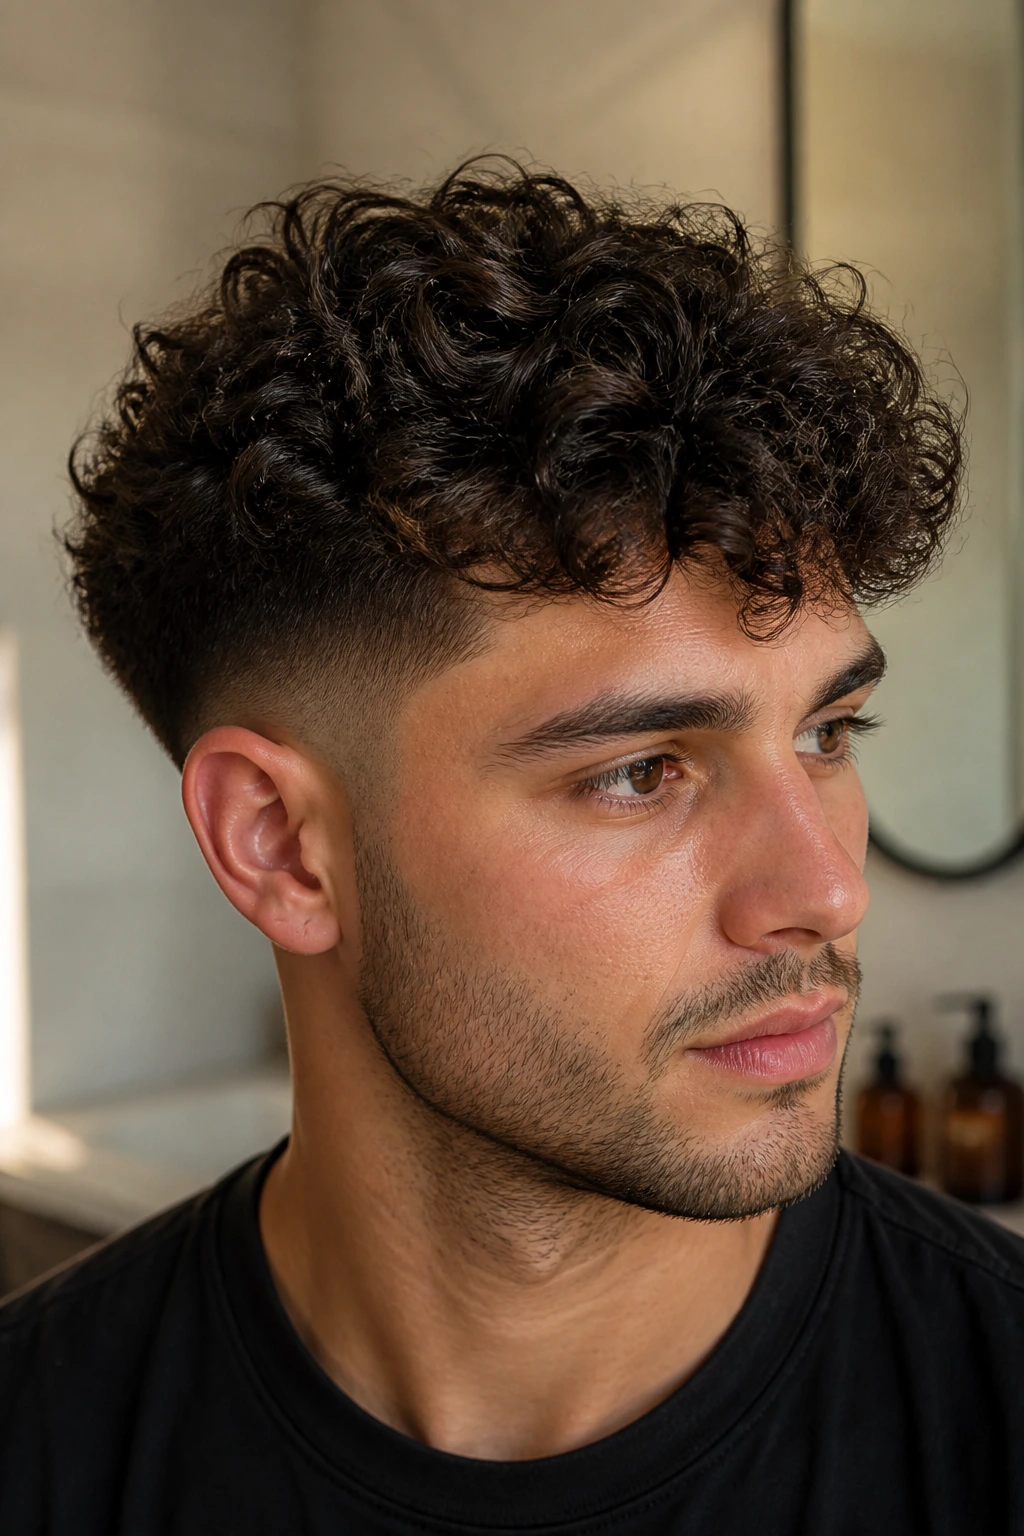
A low fade with loose curls is one of the easiest ways to make curls look clean without stripping out their character. The fade stays low and soft, and the curls keep their length and bounce on top.
Why It Works:
Loose curls need a little side cleanup so they do not spread outward. A low fade does that job gently, which is why this cut grows out better than tighter fades on textured hair.
Key Ingredients:
- 4 to 6 inches of loose curls
- Low fade around the ears and neckline
- 1 tablespoon of leave-in conditioner
- 1 teaspoon of curl cream
Quick Steps:
- Ask for a low fade that keeps the side shape soft.
- Apply leave-in conditioner to damp curls and scrunch gently.
- Let the curls air dry or diffuse on low heat.
- Separate only the largest clumps with your fingers.
Equipment for This Cut:
- Diffuser
- Leave-in conditioner
- Curl cream
- Microfiber towel
How to Wear It:
This looks relaxed with tees, denim, and casual layers. It also plays well with light stubble because the fade and curls create enough contrast on their own.
Pro Tips for This Recipe:
- Keep the top hydrated or loose curls frizz up by midday.
- Ask for a bit of weight on top if your curl pattern is very loose.
Variations on This Dish:
- More Defined Curl Version: Add gel over cream.
- Air-Dry Version: Use leave-in only and let the curls settle naturally.
Common Mistakes to Avoid with This Dish:
- Brushing curls out dry: That destroys shape and creates fluff.
- Cutting the top too short at the crown: Loose curls shrink more than people expect.
19. Drop Fade Textured Mullet
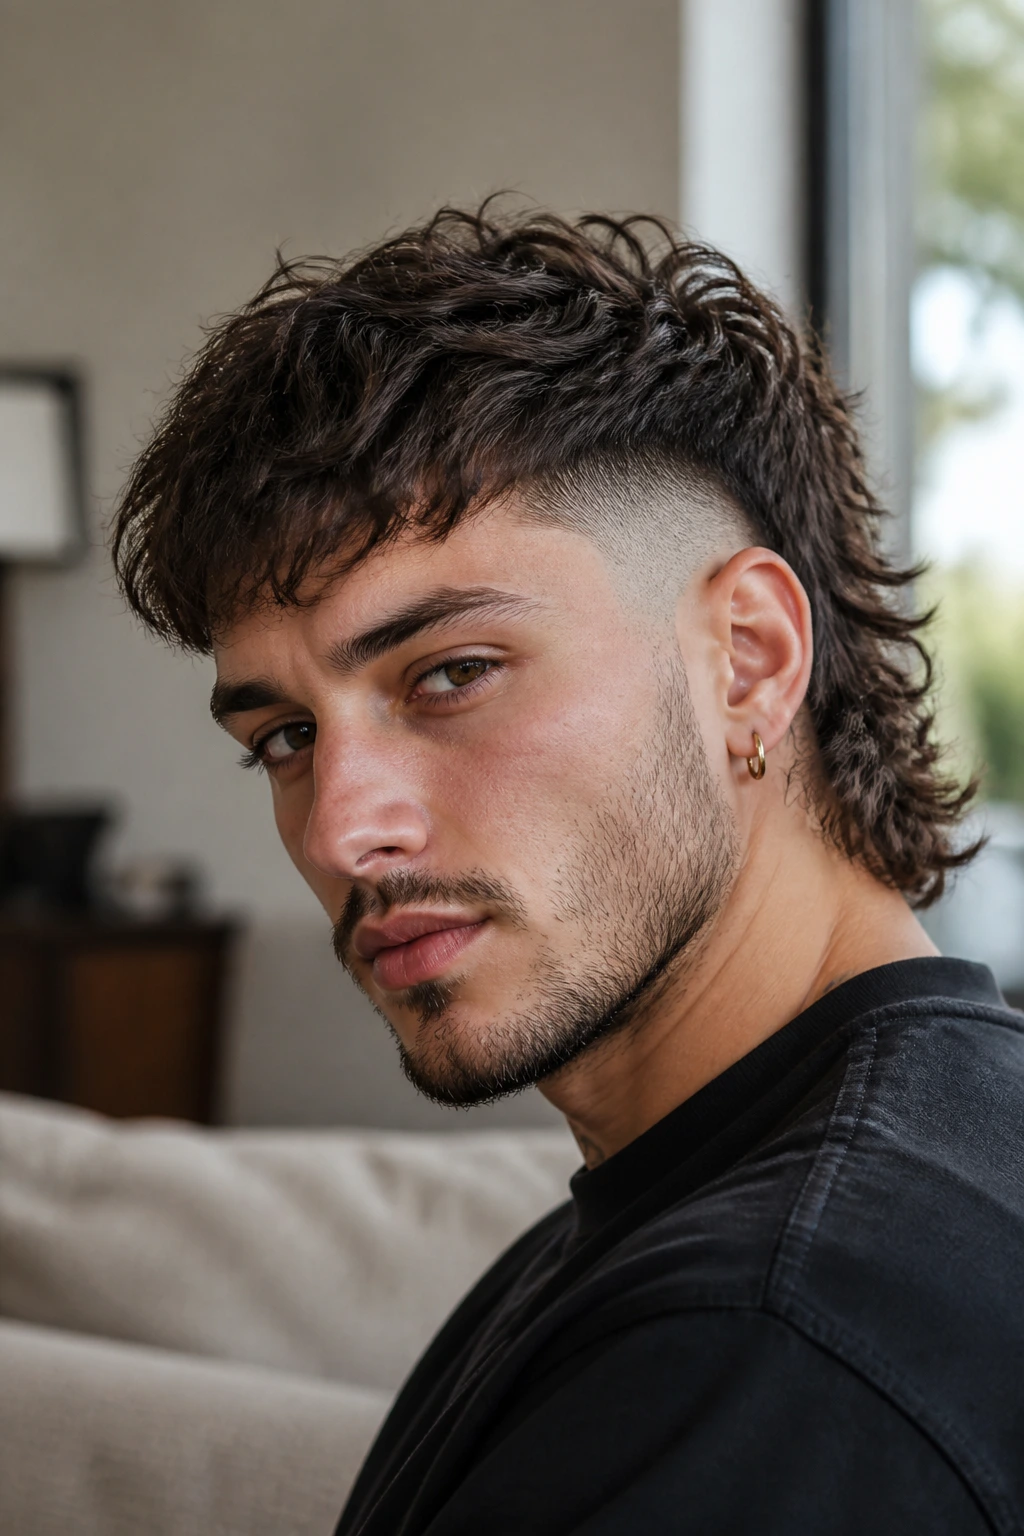
A drop fade textured mullet is not subtle, and that is the point. The fade curves low, the front stays textured and wearable, and the back keeps enough length to make the mullet shape obvious without turning it into a costume.
Why It Works:
The drop fade makes the sides and back look deliberate while the textured top stops the whole haircut from feeling too stiff. Medium-length hair is the sweet spot here because the back can move while the front still gets shape.
Key Ingredients:
- 3 to 5 inches on top
- Medium length at the back, around 4 to 6 inches
- Drop fade at the sides
- 1 teaspoon of matte paste
Quick Steps:
- Ask for a textured top with length left in the back.
- Blow-dry forward and back in separate passes to build shape.
- Add matte paste and rough up the top with your fingers.
- Let the back move a little instead of forcing it flat.
Equipment for This Cut:
- Blow dryer
- Matte paste
- Comb
- Clippers
How to Wear It:
This cut works best with casual clothes and some confidence. The silhouette is the statement, so keep the rest of the look simple.
Pro Tips for This Recipe:
- Keep the transition soft so the mullet does not look disconnected in a bad way.
- Ask for texture at the front, or the top can look boxy.
Variations on This Dish:
- Shaggier Version: Leave more movement through the back.
- Cleaner Version: Tighten the sides and keep the back shorter.
Common Mistakes to Avoid with This Dish:
- Letting the back get too thin: The mullet needs some weight.
- Using shiny product: It can make the texture disappear.
20. Temple Fade Long Quiff
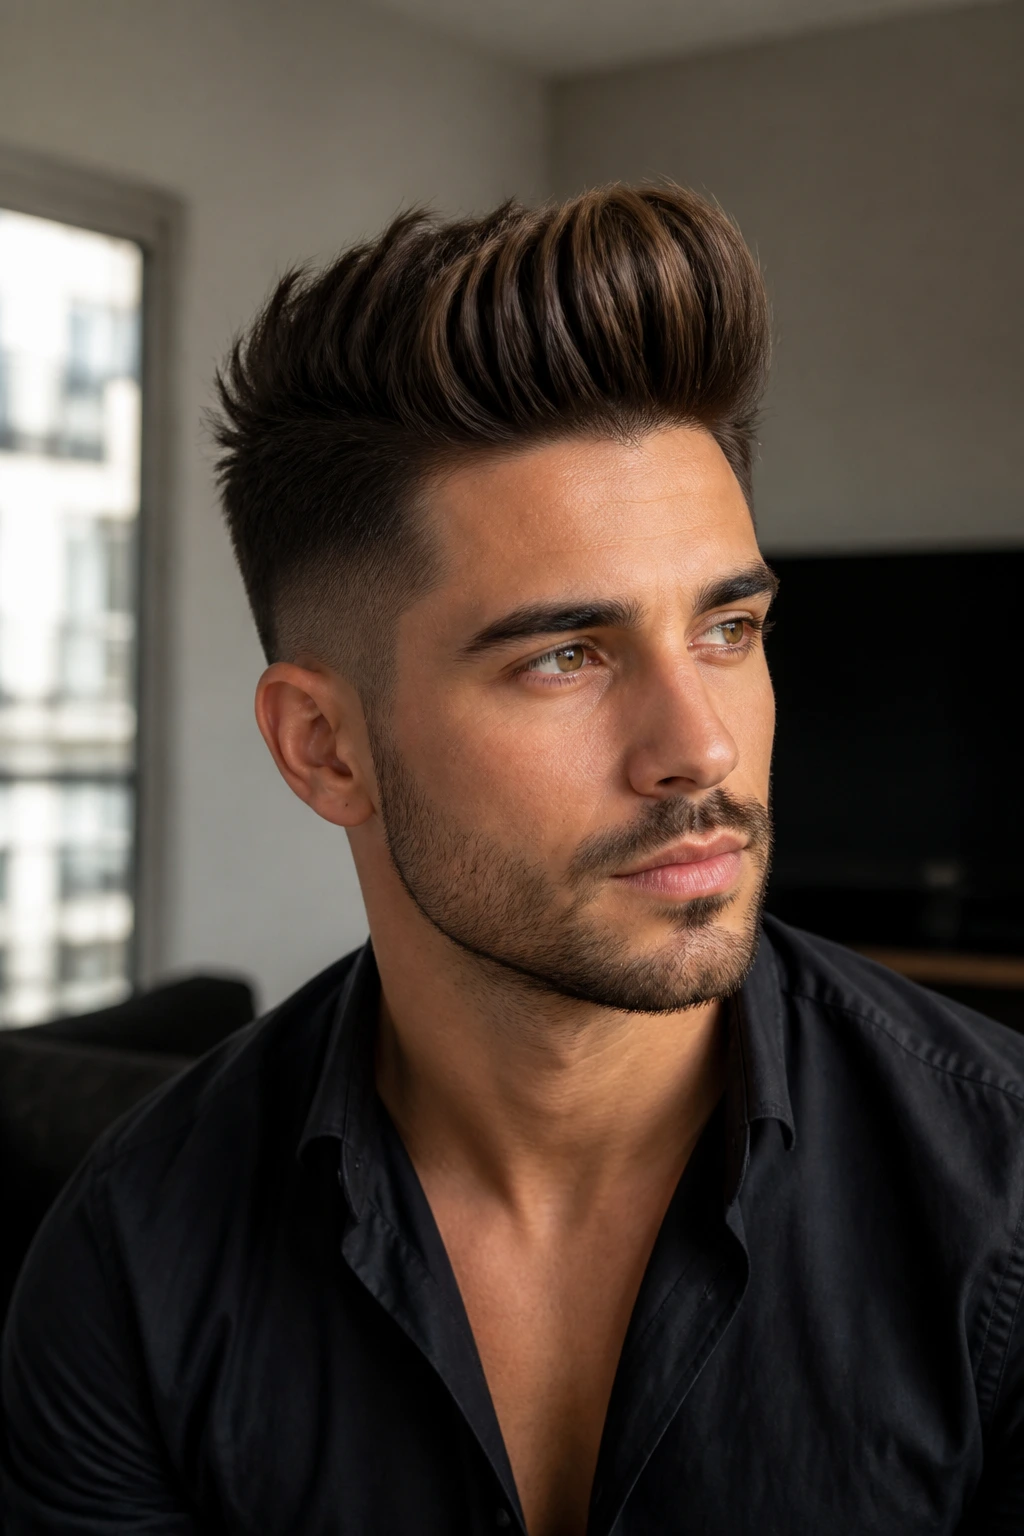
A temple fade long quiff gives height without dragging the sides along for the ride. The fade stays clean at the temples, and the front lifts into a soft wave that suits medium-length hair better than a shorter cut ever could.
Why It Works:
The long quiff needs enough front length to stand up, and the temple fade gives that height a clean frame. It’s a smart choice if you want volume but do not want the top to feel bulky everywhere.
Key Ingredients:
- 5 to 6 inches at the front
- Temple fade around the sides
- 1 teaspoon of volumizing mousse
- 1 round brush
Quick Steps:
- Ask for extra length in front and a neat fade at the temples.
- Blow-dry the front up with the brush, pulling the root forward first, then back.
- Work in mousse or paste once the shape is set.
- Keep the front loose enough to move.
Equipment for This Cut:
- Round brush
- Blow dryer
- Volumizing mousse
- Comb
How to Wear It:
This cut likes jackets, boots, and anything that benefits from a little vertical line up front. It looks strongest when the front is lifted but not frozen.
Pro Tips for This Recipe:
- Dry the roots first, or the quiff sags.
- Ask your barber not to over-thin the crown.
Variations on This Dish:
- Loose Quiff: Softer front, less spray.
- High-Control Quiff: Use more hold and a tighter brush set.
Common Mistakes to Avoid with This Dish:
- Pushing the front too far back: It can flatten the whole style.
- Leaving the temples too bulky: The height loses contrast.
21. Burst Fade Mullet
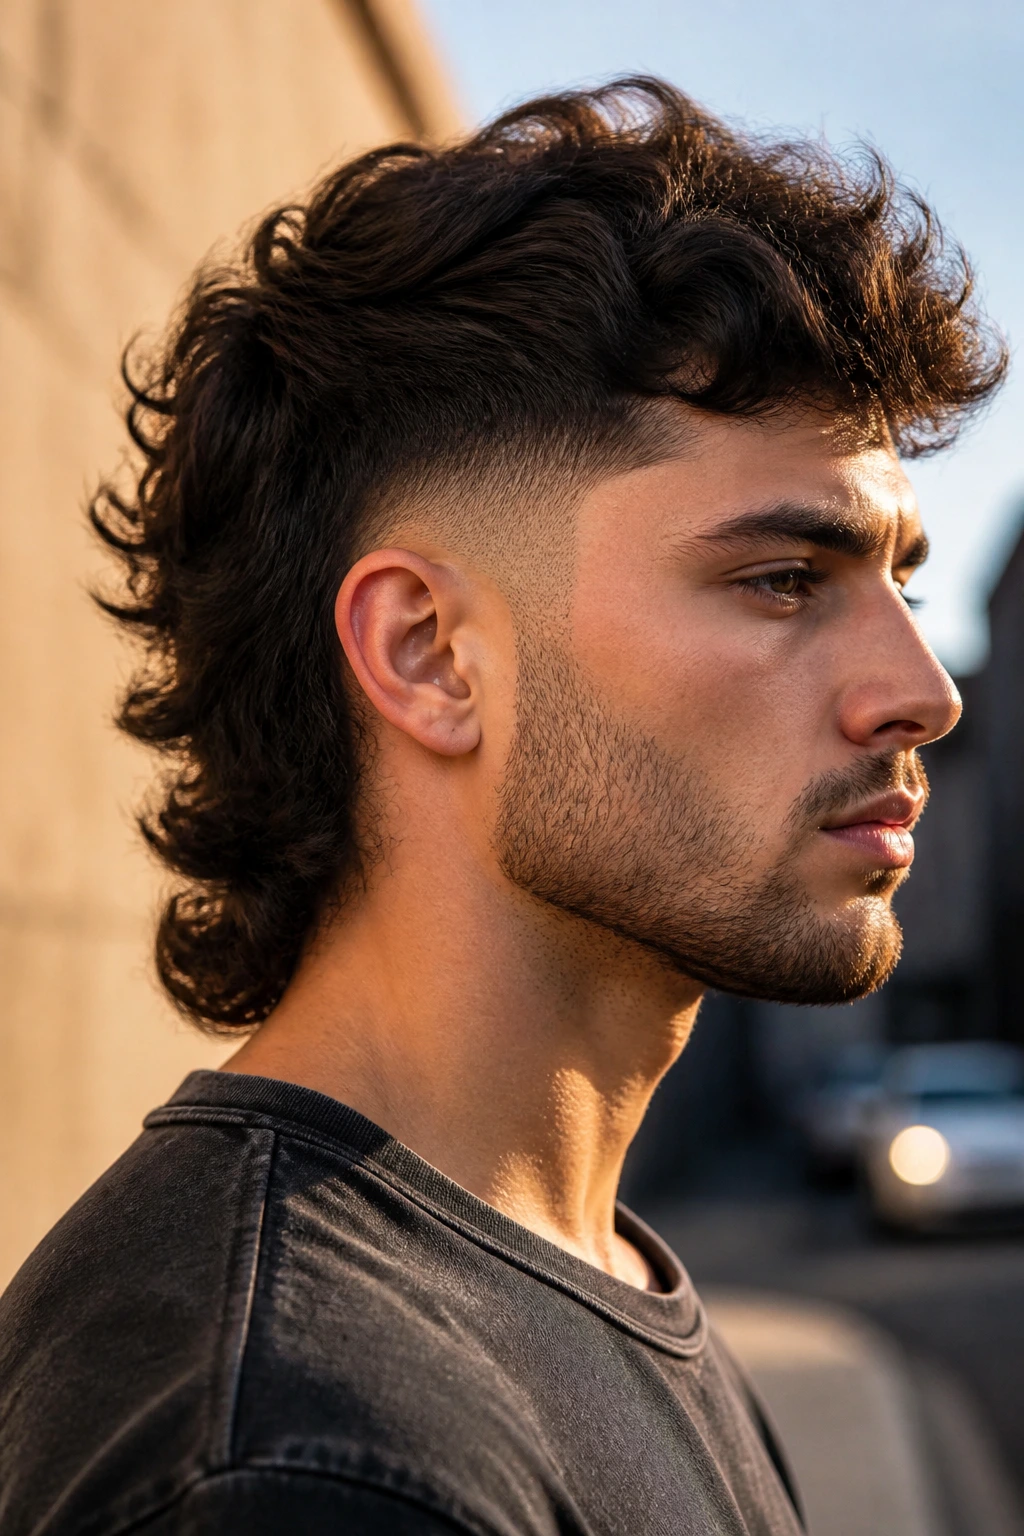
A burst fade mullet is bolder than the textured mullet because the fade wraps the ear with a tighter curve and the back gets to stay the drama piece. Medium-length hair gives it enough body that the style feels intentional, not unfinished.
Why It Works:
The burst fade tightens the sides right where a mullet can get messy, and that makes the back length stand out more. It also keeps the shape more modern than an old-school flat-back version.
Key Ingredients:
- 3 to 6 inches of length on top and back
- Burst fade around the ear
- 1 tablespoon of texturizing cream
- 1 blow dryer
Quick Steps:
- Ask for a burst fade with a noticeable back length.
- Blow-dry the top forward and the back outward so the shape separates naturally.
- Add texture cream to the top and ends.
- Let the back move; do not press it into place.
Equipment for This Cut:
- Blow dryer
- Texturizing cream
- Clippers
- Comb
How to Wear It:
This one is made for casual clothes and a sense of humor. The shape works best when the rest of the grooming stays tidy.
Pro Tips for This Recipe:
- Keep the top layered or it can sit like a shelf.
- Trim the neckline often so the mullet looks styled, not accidental.
Variations on This Dish:
- Soft Burst Mullet: Reduce contrast for a more wearable version.
- Hard Burst Mullet: Tighten the sides and leave more back length.
Common Mistakes to Avoid with This Dish:
- Neglecting the neckline: The mullet shape gets sloppy fast.
- Using too much heavy clay: It kills the movement in the back.
22. Mid Fade Bro Flow with Beard
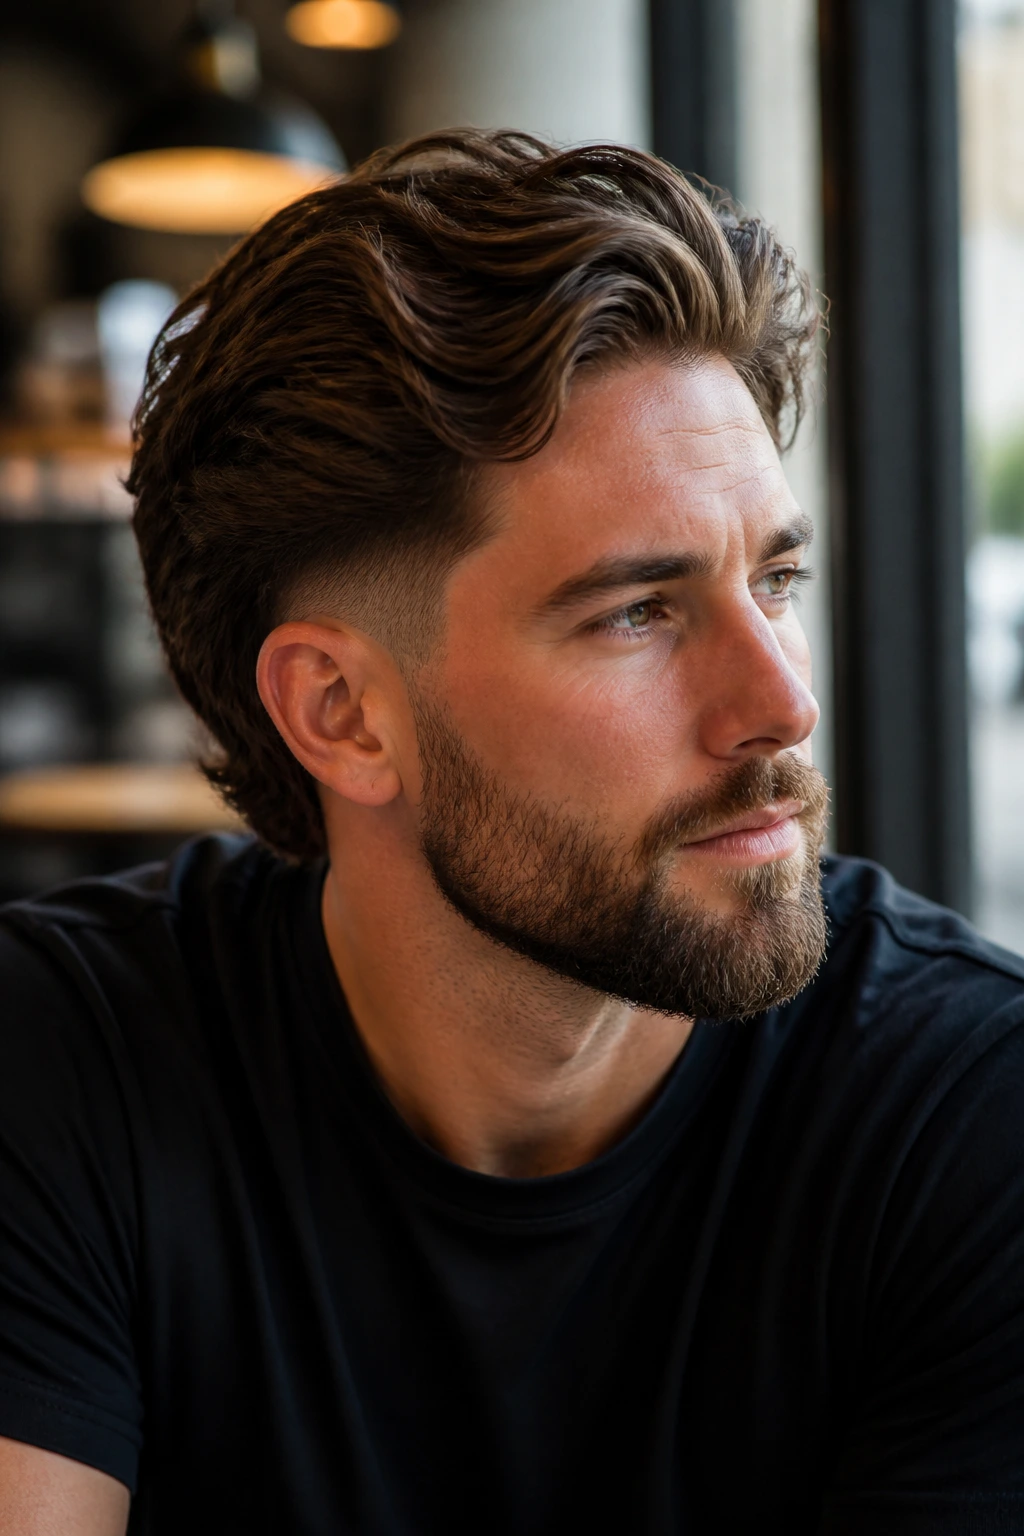
A mid fade bro flow with beard works because the haircut and facial hair balance each other out. The top stays loose and layered, the fade clears the sides, and the beard gives the whole look some weight underneath.
Why It Works:
Bro flow can look airy on its own, which is fine until the sides start widening. The mid fade reins that in, and the beard line anchors the face so the medium-length top does not float away.
Key Ingredients:
- 5 to 7 inches of layered hair
- Mid fade at the temples and sides
- Beard trimmed to match the fade line
- 1 tablespoon of light cream or mousse
Quick Steps:
- Ask for layers on top, a mid fade, and a beard blend that connects cleanly.
- Work cream through damp hair and comb it back loosely.
- Let the beard line meet the sideburn fade without a hard gap.
- Air dry for movement or blow-dry for a smoother flow.
Equipment for This Cut:
- Beard trimmer
- Comb
- Light cream
- Blow dryer
How to Wear It:
This cut looks strong with casual jackets, plain tees, and a short-to-medium beard. It has a natural, rugged feel without looking unkempt.
Pro Tips for This Recipe:
- Blend the beard line every time you touch the fade.
- Keep the top layered so it moves instead of sitting heavy.
Variations on This Dish:
- Longer Flow: Leave more top length and let it fall.
- Tighter Beard Blend: Sharpen the transition for a cleaner outline.
Common Mistakes to Avoid with This Dish:
- Letting the beard and fade disconnect: That breaks the silhouette.
- Keeping the top one length: It turns flow into a heavy curtain.
23. High Fade Curly Fringe
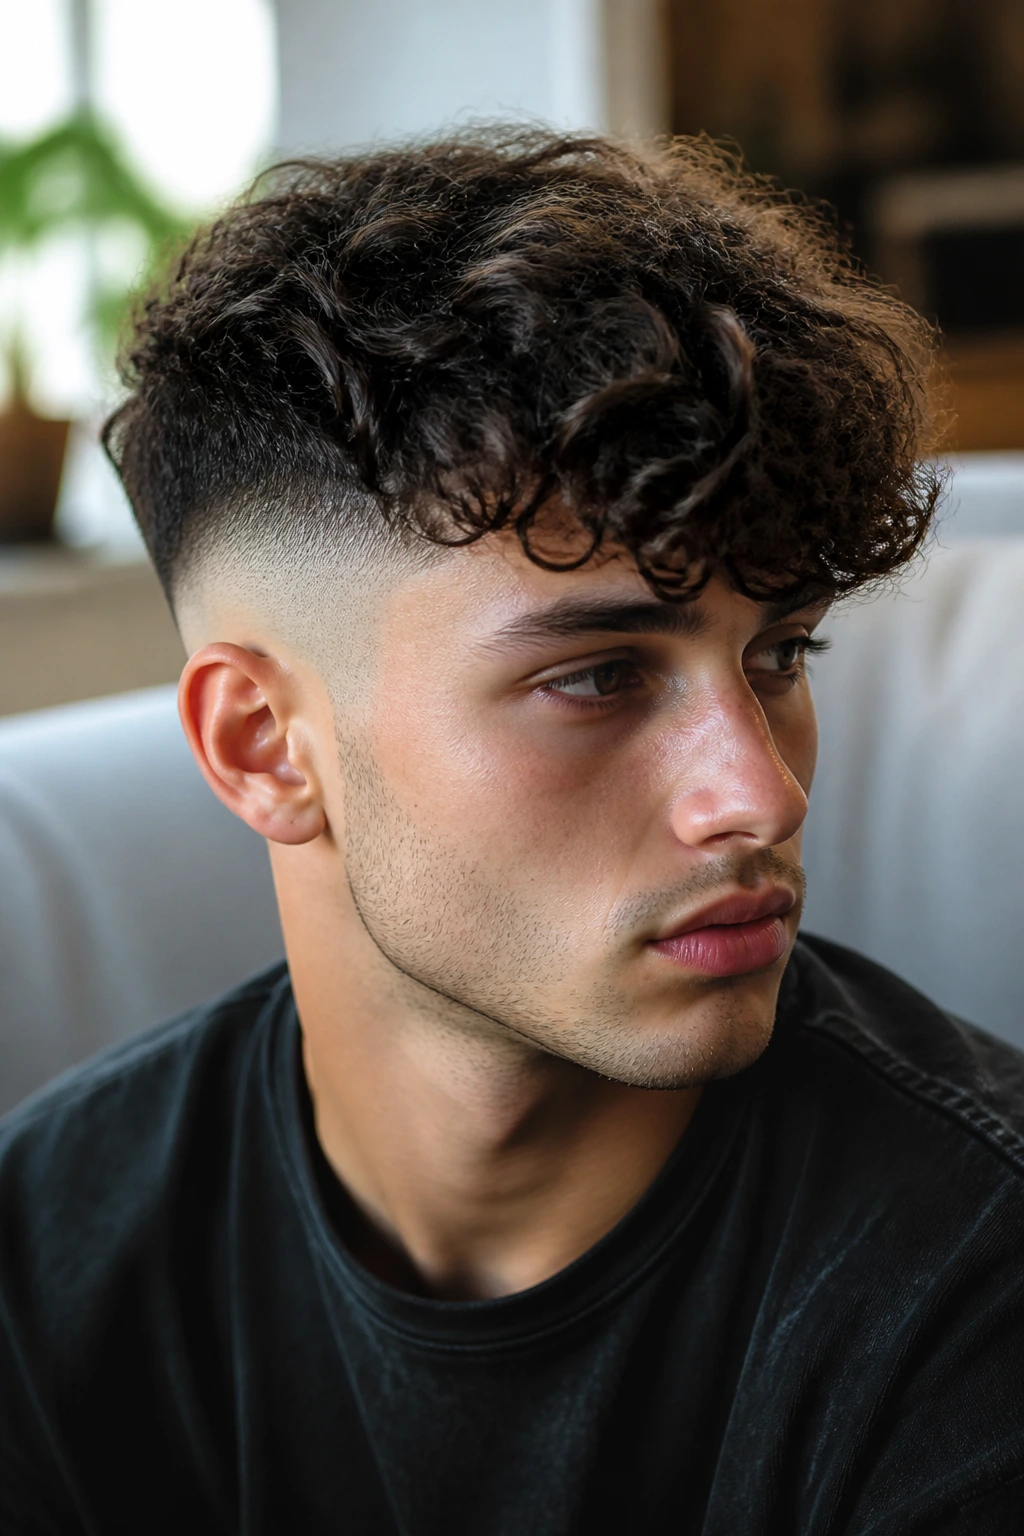
A high fade curly fringe puts the curls right where they can frame the face, then clears the sides before the haircut gets wide. It has more edge than a low fade curly style, and that extra contrast makes the front pop.
Why It Works:
Curly fringe can get heavy fast. The high fade removes the bulk that usually crowds the temples, which keeps the curls from turning the head into a round shape.
Key Ingredients:
- 3 to 5 inches of curls in front
- High fade at the sides
- 1 tablespoon of curl cream
- 1 diffuser or air-dry setup
Quick Steps:
- Ask for curls left long enough to fall forward.
- Apply curl cream while the hair is damp and scrunch the fringe down and forward.
- Diffuse only until the curls are set.
- Separate the front gently so the fringe stays loose.
Equipment for This Cut:
- Diffuser
- Curl cream
- Microfiber towel
- Wide-tooth comb
How to Wear It:
This one looks best when the fringe stays soft and a little imperfect. It pairs well with light facial hair and simple clothes.
Pro Tips for This Recipe:
- Do not over-diffuse the fringe or it will shrink too much.
- Ask for the fade to stay high enough to keep the temple line clean.
Variations on This Dish:
- Short Fringe Version: Easier daily styling, less length in front.
- Full Fringe Version: More forward curl and more face framing.
Common Mistakes to Avoid with This Dish:
- Cutting the fringe too short for shrinkage: Curly hair always bounces up.
- Brushing curls apart too soon: That creates frizz instead of shape.
24. Taper Fade Spiky Texture
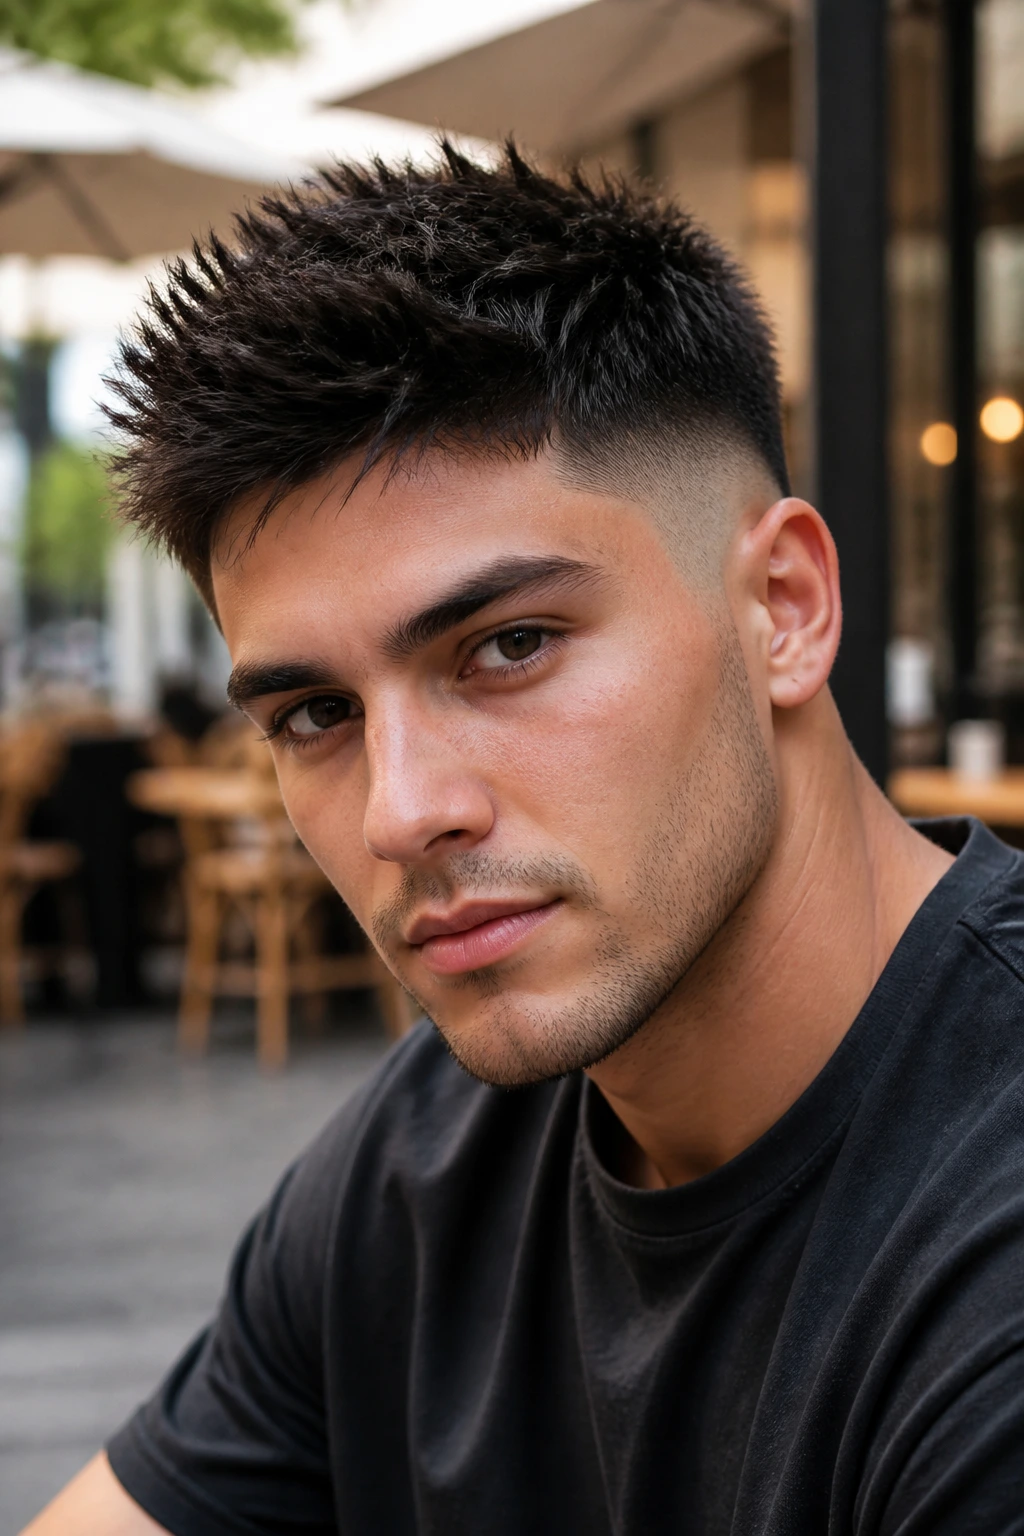
A taper fade spiky texture is the least fussy way to make medium-length hair feel sharp. The taper keeps the edges clean, and the top has enough length to stand into small, broken spikes rather than stiff, obvious points.
Why It Works:
Spiky hair fails when it gets overworked. A taper fade helps because it gives the style a neat outline, so the top can stay textured without the sides looking bulky or dated.
Key Ingredients:
- 2 to 4 inches on top
- Taper fade around the ears and neckline
- 1 pea-sized amount of matte clay
- 1 blow dryer
Quick Steps:
- Ask for short textured length on top and a soft taper at the edges.
- Blow-dry the hair upward with your fingers to build lift.
- Use a small amount of clay and pinch tiny sections into place.
- Keep the spikes irregular so the cut looks current.
Equipment for This Cut:
- Blow dryer
- Matte clay
- Fingertip comb
- Clippers
How to Wear It:
This one works well with sporty clothes, casual layers, and an easy morning routine. It has enough structure to look styled without needing a mirror every ten minutes.
Pro Tips for This Recipe:
- Use less product than you think; spikes get stiff fast.
- Ask for texture, not a uniform chop.
Variations on This Recipe:
- Shorter Spike Version: Cleaner and easier to manage.
- Messier Texture Version: Push the spikes apart instead of straight up.
Common Mistakes to Avoid with This Dish:
- Using gel: It makes the spikes shiny and hard.
- Making every spike the same height: That looks flat and dated.
25. Skin Fade Disconnected Medium Undercut
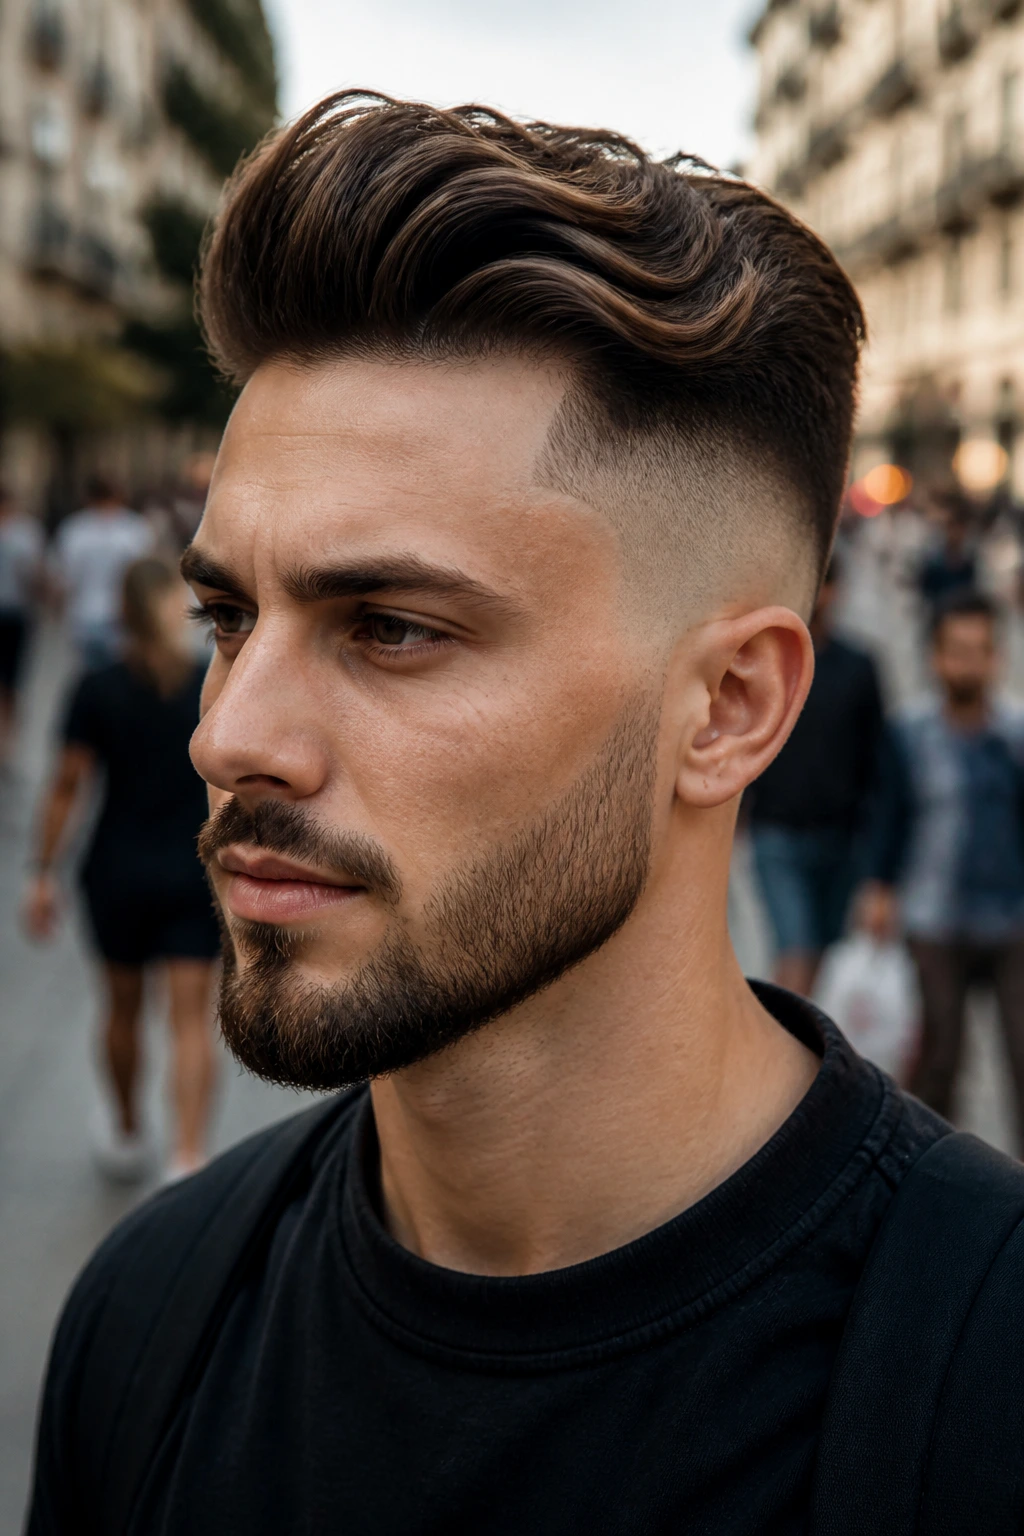
A skin fade disconnected medium undercut is for someone who wants a clear break between top and sides. The contrast is the whole point: long hair on top, bare or near-bare sides, no soft blending trying to smooth it all out.
Why It Works:
Medium-length hair has enough weight to sit over the disconnect without collapsing into the sides. The skin fade underneath keeps the look crisp, and the separation makes the top feel fuller.
Key Ingredients:
- 5 to 7 inches on top
- Skin fade or near-skin fade on the sides
- 1 tablespoon of light cream or paste
- 1 blow dryer
Quick Steps:
- Ask for a disconnected undercut and make the break line clear.
- Blow-dry the top back, forward, or sideways depending on the shape you want.
- Add product only after the shape is in place.
- Keep the disconnect clean by trimming the side line often.
Equipment for This Cut:
- Blow dryer
- Cream or paste
- Comb
- Clippers
How to Wear It:
This cut looks strongest when the clothes are simple and the haircut does the talking. It works with streetwear, tailored jackets, and strong glasses frames.
Pro Tips for This Recipe:
- Do not blend the line if you want a true disconnect.
- Keep the top heavy enough to sit over the break.
Variations on This Recipe:
- Softer Undercut: Add a little blending near the transition.
- Sharper Undercut: Keep the line crisp and the sides very tight.
Common Mistakes to Avoid with This Dish:
- Trying to blur the disconnect too much: Then the cut loses its point.
- Letting the top get too thin: It will not sit over the sides properly.
26. Low Fade Surfer Flow
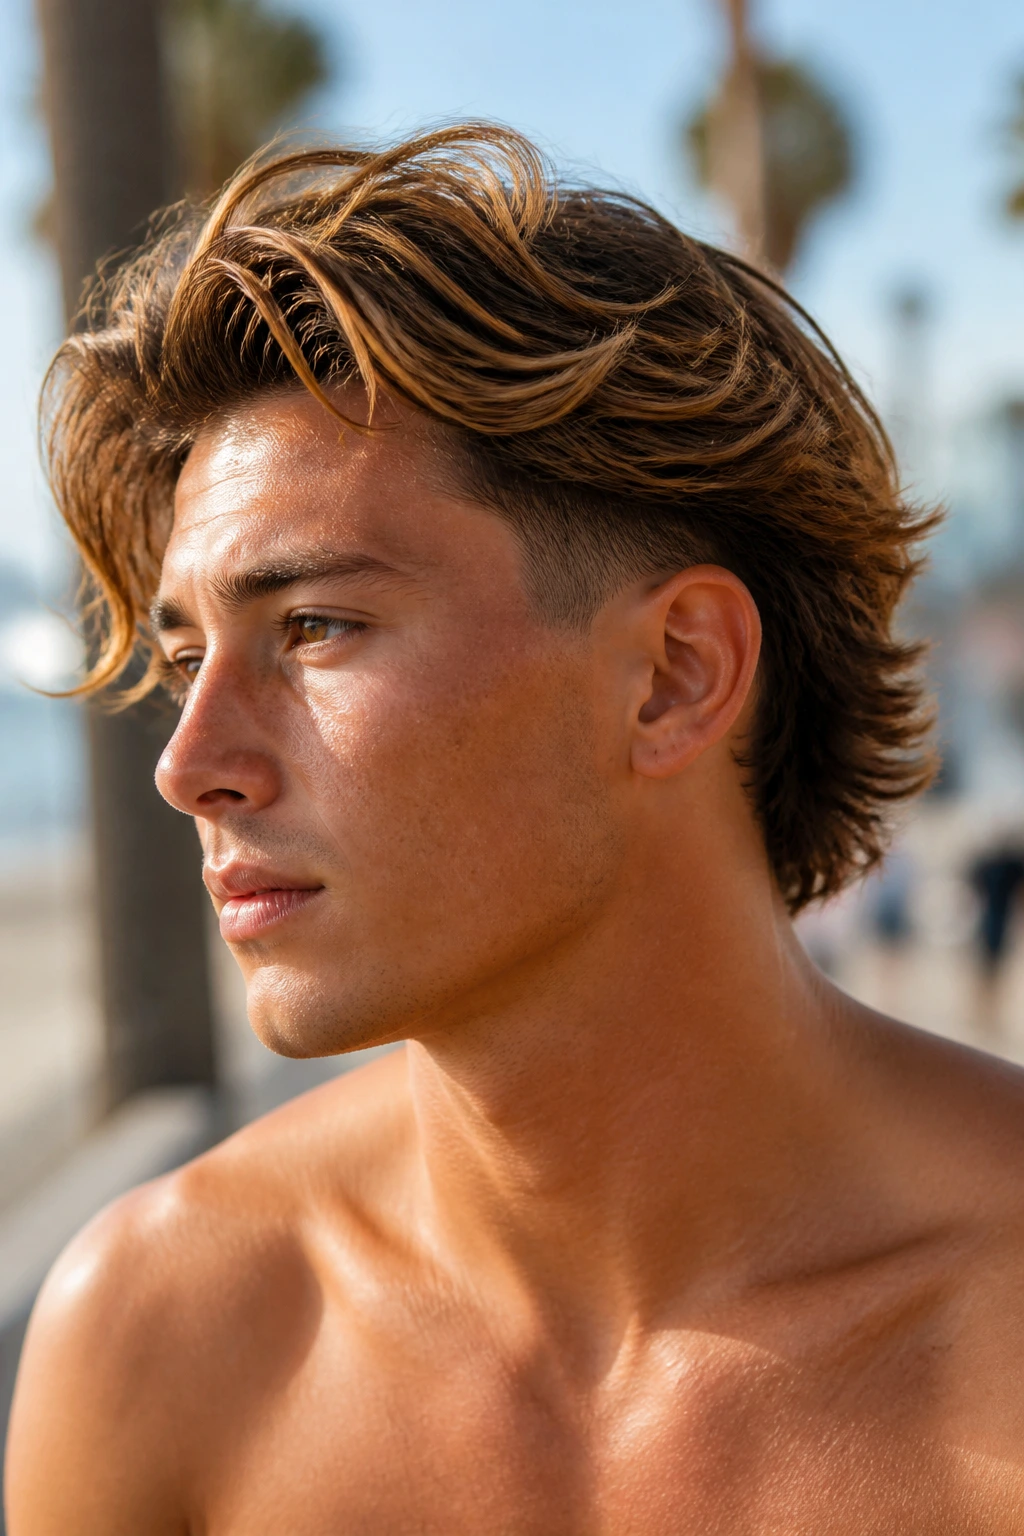
A low fade surfer flow is loose, airy, and easy to wear when medium-length hair has some wave or bend. The low fade keeps the neckline clean while the top stays long enough to move like it’s been air-dried after a beach day.
Why It Works:
The style relies on motion, not precision. The low fade makes the haircut tidy around the edges, but the flow on top stays relaxed, which is exactly why this cut looks best when it is a little imperfect.
Key Ingredients:
- 5 to 8 inches of flowy, layered hair
- Low fade at the sides and neck
- 1 teaspoon of sea salt spray
- 1 light cream
Quick Steps:
- Ask for layers with a low fade and keep the top moving away from the face.
- Spray sea salt spray into damp hair and scrunch or finger-comb it.
- Air dry most of the way, then finish with a little cream on the ends.
- Let the front fall naturally rather than forcing it flat.
Equipment for This Cut:
- Sea salt spray
- Light cream
- Wide-tooth comb
- Blow dryer if you need root lift
How to Wear It:
This haircut fits relaxed clothes, rolled sleeves, and a no-stress style vibe. It looks best when the texture is allowed to breathe.
Pro Tips for This Recipe:
- If your hair is straight, add a little more sea salt spray for grip.
- Ask for long layers or the flow gets heavy.
Variations on This Recipe:
- Beachier Version: Use less cream and more spray.
- Smoother Version: Blow-dry the top back for a neater sweep.
Common Mistakes to Avoid with This Dish:
- Using heavy wax: It kills the airy movement.
- Letting the sides stay bulky: The flow turns into a triangle.
27. Mid Fade Pompadour with Matte Finish
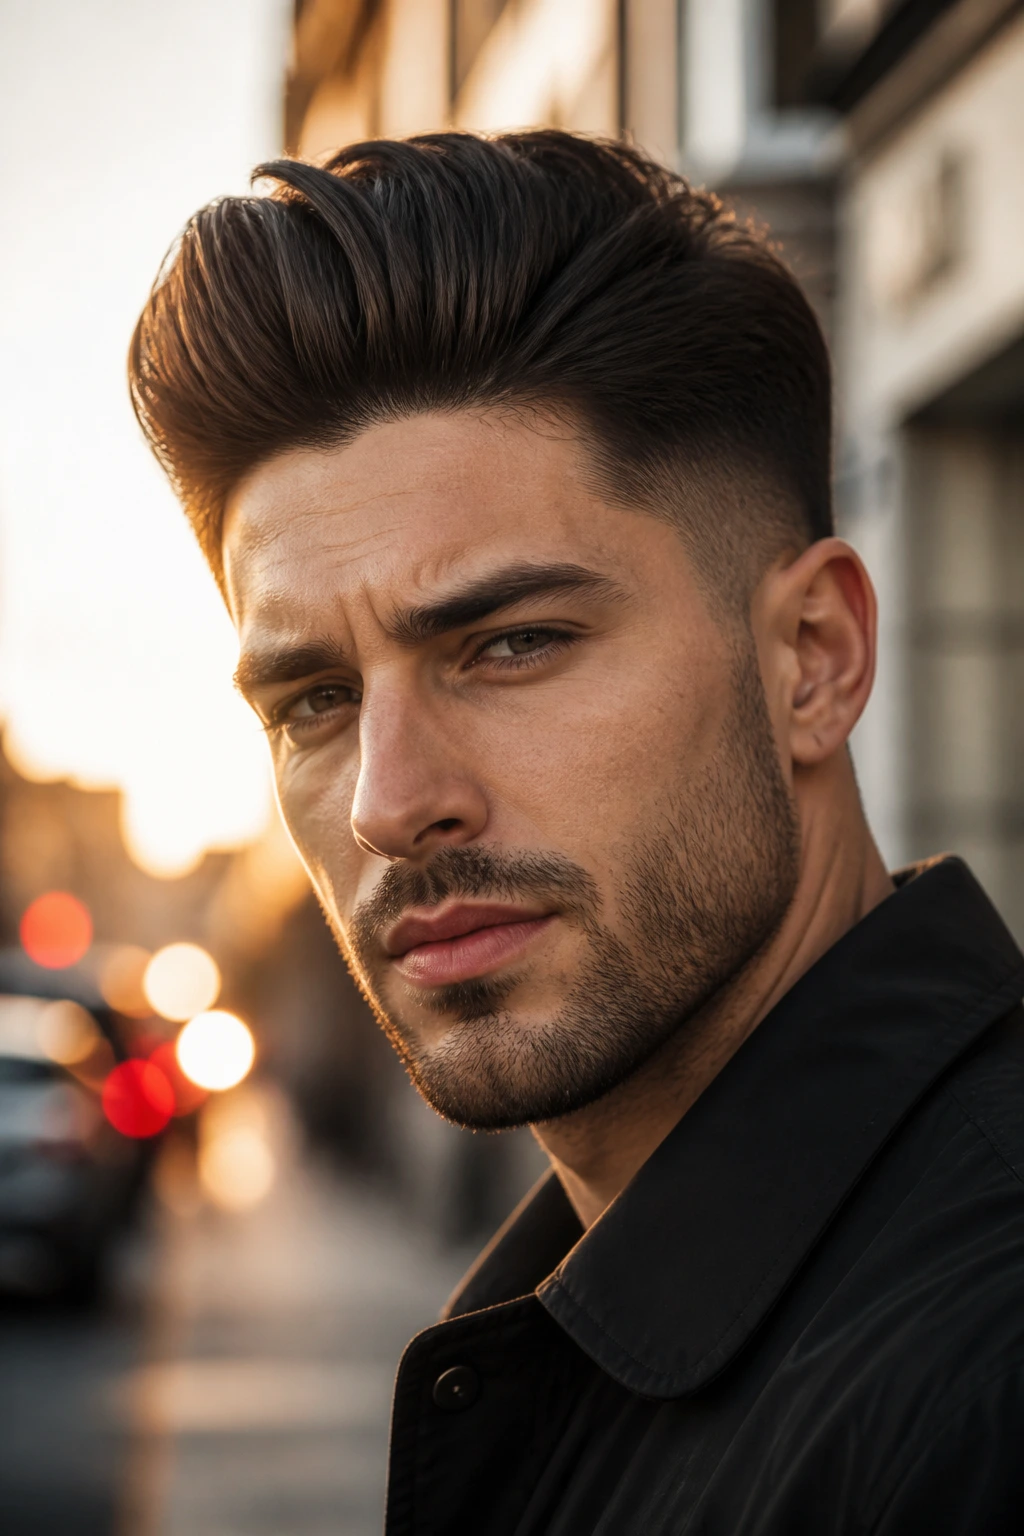
A mid fade pompadour with a matte finish gives you the height of a classic pompadour without the shine that makes some versions feel too formal. The fade keeps the sides tidy, and the top stays tall but textured.
Why It Works:
Medium-length hair has enough density to build a pompadour, and the matte finish makes it read modern. The mid fade balances the volume so the haircut looks sculpted rather than puffed up.
Key Ingredients:
- 4 to 6 inches on top, longer in front
- Mid fade at the sides
- 1 teaspoon of volumizing mousse
- 1 dime-sized amount of matte paste
Quick Steps:
- Ask for a mid fade and leave enough front length for height.
- Blow-dry the front up and slightly back using your hands or a brush.
- Add mousse at the roots, then matte paste through the surface.
- Shape the top with your fingers so it stays full but not slick.
Equipment for This Cut:
- Blow dryer
- Round brush
- Volumizing mousse
- Matte paste
How to Wear It:
This cut looks good with sharp collars, leather, and a short beard. It has a polished shape, but the matte finish keeps it from getting too shiny.
Pro Tips for This Recipe:
- Dry the roots first; that’s where the height comes from.
- Keep the crown controlled, or the front will slump backward.
Variations on This Recipe:
- Louder Pompadour: Add shine and more height.
- Softer Pompadour: Reduce the lift and keep it textured.
Common Mistakes to Avoid with This Dish:
- Using too much paste: It can flatten the volume.
- Leaving the sides too full: The pompadour loses its contrast.
28. Drop Fade Comb-Back Waves
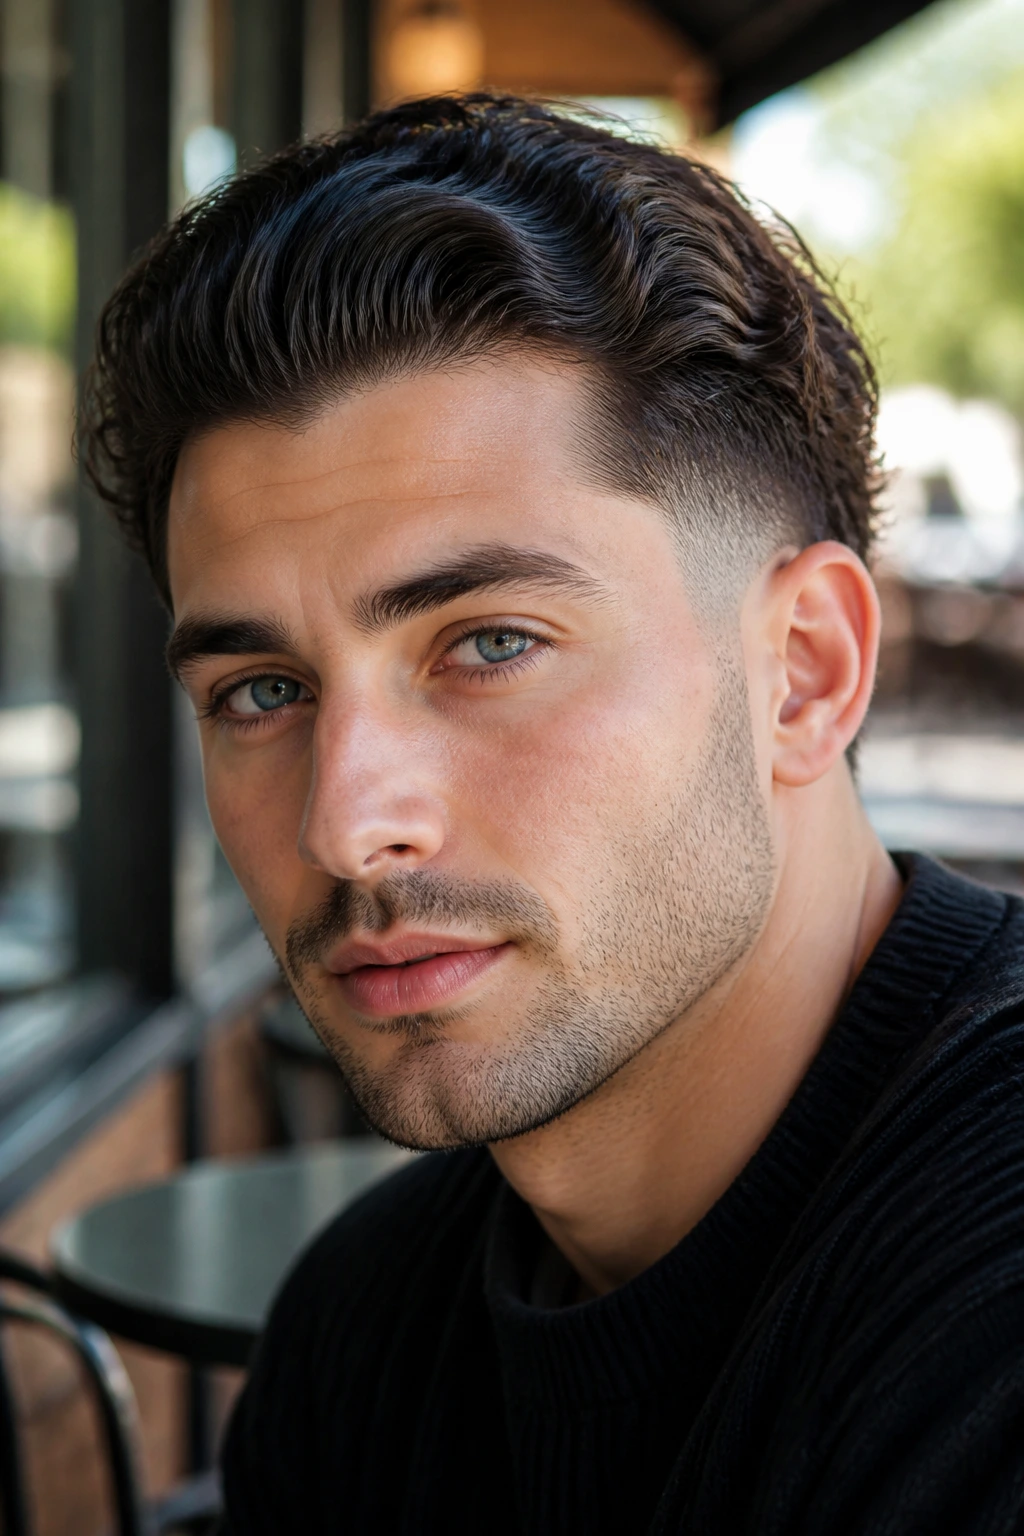
A drop fade comb-back waves cut uses the natural bend in the hair instead of fighting it. The drop fade curves around the head, while the comb-back shape keeps the waves moving in one direction.
Why It Works:
Waves sit better when they are guided, not crushed. The drop fade gives the haircut a smooth outline, and the comb-back lets the texture stay visible without turning into frizz.
Key Ingredients:
- 4 to 6 inches of wavy hair
- Drop fade behind the ears
- 1 teaspoon of light cream
- 1 comb and 1 vent brush
Quick Steps:
- Ask for enough length to show the wave pattern and a curved fade.
- Comb the hair back while damp, then blow-dry from front to back.
- Add cream lightly through the top.
- Use your fingers to separate the waves instead of flattening them.
Equipment for This Cut:
- Vent brush
- Comb
- Blow dryer
- Light cream
How to Wear It:
It works well with clean tees, jackets, and minimal accessories. The haircut carries enough movement that you do not need much else.
Pro Tips for This Recipe:
- Comb with the wave pattern, not against it.
- Leave a little room around the ears so the drop fade can show.
Variations on This Recipe:
- More Structured Back: Use a comb for a smoother finish.
- Looser Waves: Finger-style and air dry more often.
Common Mistakes to Avoid with This Dish:
- Pressing the waves flat: You lose the texture that makes the cut worthwhile.
- Overworking the top with product: It gets sticky and clumped.
29. Temple Fade Side-Swept Layers
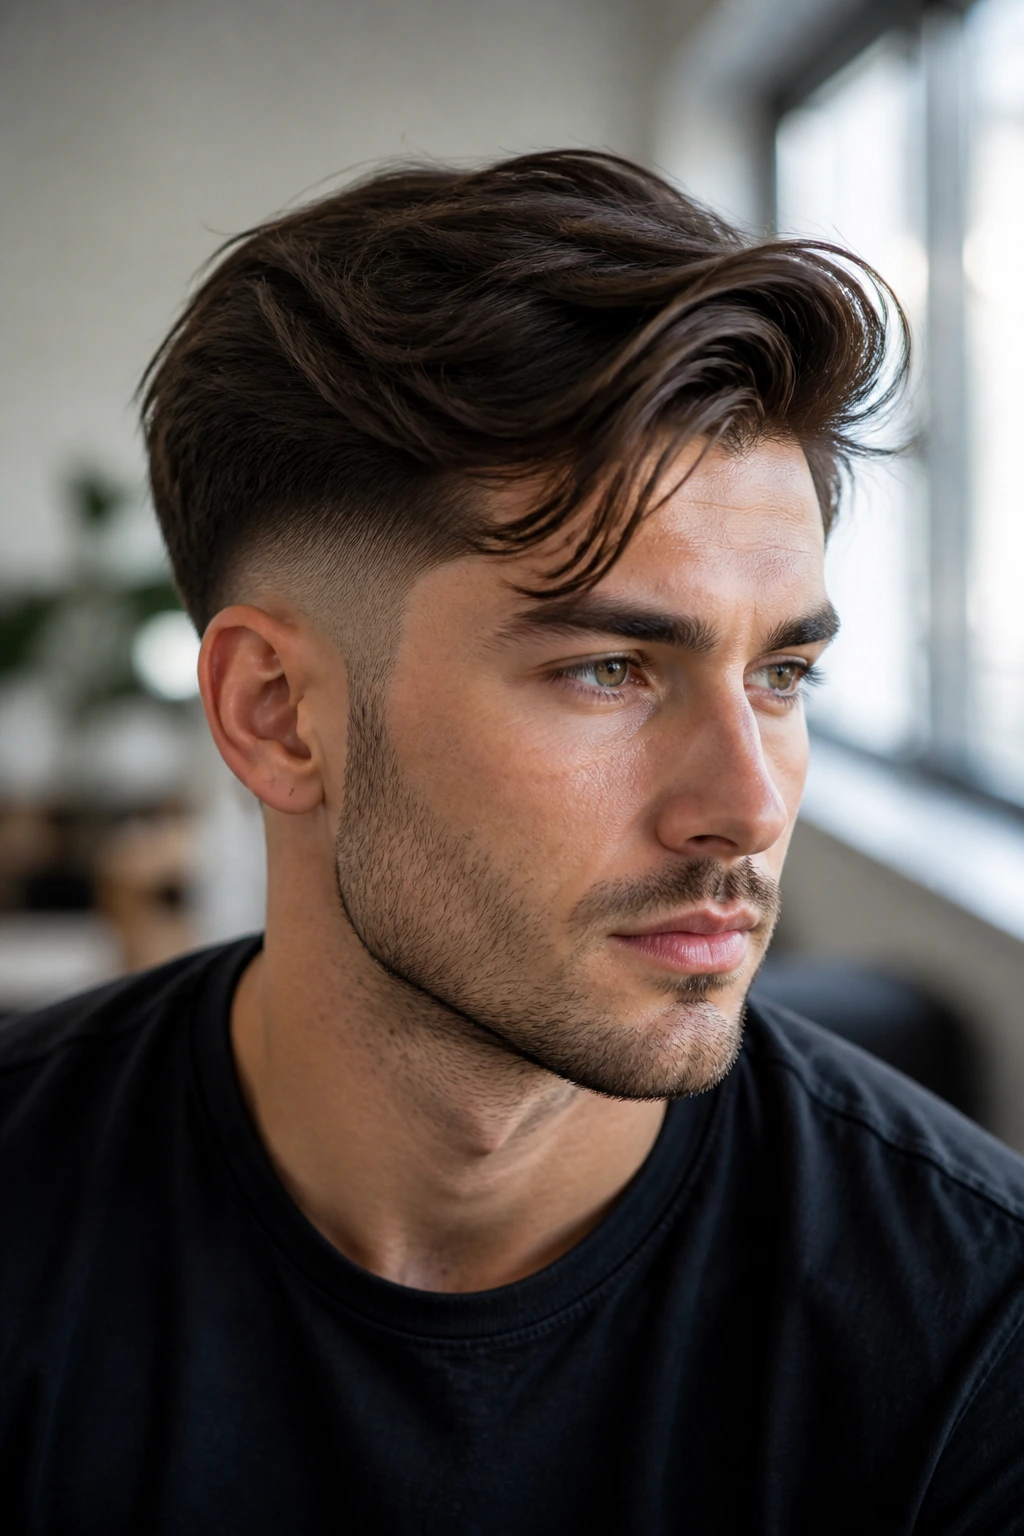
A temple fade side-swept layers cut is softer than it sounds. The temple fade clears the sides, but the layered top sweeps across the head with enough movement to feel relaxed, not rigid.
Why It Works:
Layers keep medium-length hair from behaving like a single heavy sheet. Once the temples are cleaned up, the top gets all the visual lift, which is the entire point of the style.
Key Ingredients:
- 4 to 6 inches of layered top
- Temple fade at the sideburns
- 1 teaspoon of light styling cream
- 1 blow dryer
Quick Steps:
- Ask for layers and a temple fade that keeps the outline neat.
- Blow-dry the top in the sweep direction while lifting at the root.
- Add a light cream and guide the top across with your fingers.
- Keep the side sweep loose so it moves a little.
Equipment for This Cut:
- Blow dryer
- Light cream
- Comb
- Clippers
How to Wear It:
This cut is easy to dress up or down. It sits nicely with collared shirts, knitwear, and even glasses because the sweep frames the face instead of blocking it.
Pro Tips for This Recipe:
- Ask for point cutting through the layers so the ends do not sit heavy.
- Keep the fade at the temples soft if you want a more natural feel.
Variations on This Recipe:
- Sharper Sweep: Add a clearer part line.
- Softer Sweep: Keep the top more blended and airy.
Common Mistakes to Avoid with This Dish:
- Leaving the layers too blunt: The sweep gets clumsy.
- Using too much hold: The hair stops moving and looks stiff.
30. Burst Fade Textured Crop
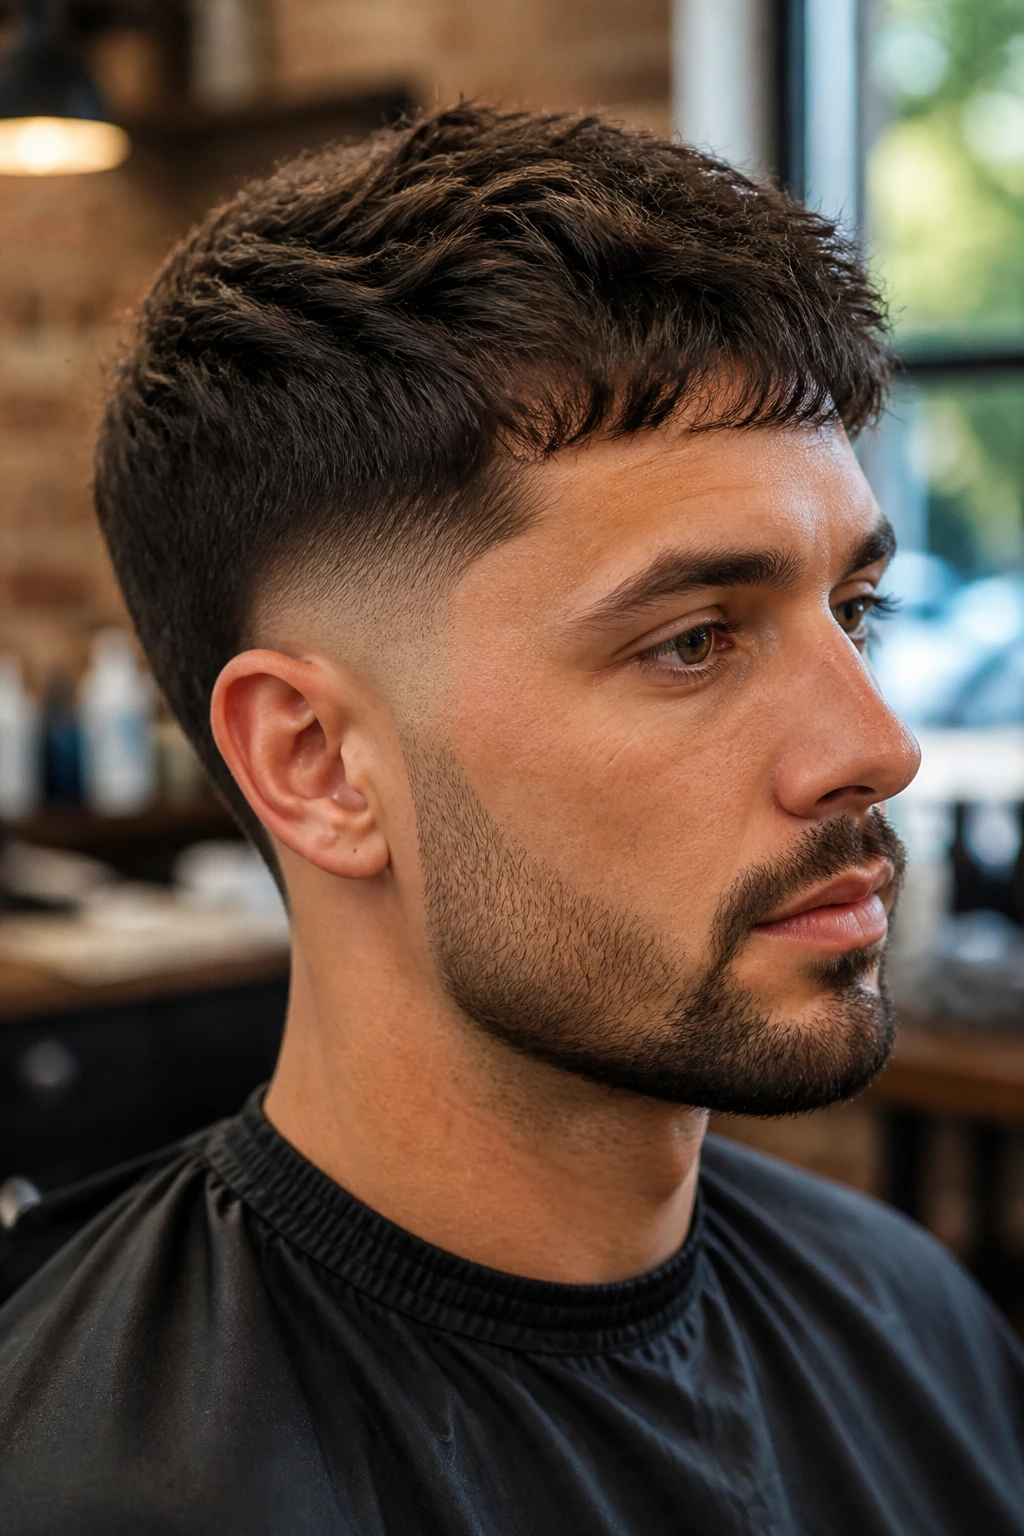
A burst fade textured crop is compact, modern, and easy to keep clean. The burst fade wraps the ear, while the top stays short enough to style in seconds and textured enough to avoid looking flat.
Why It Works:
This cut is useful when medium length on top is enough for shape but not enough for long styling sessions. The textured crop keeps everything controlled, and the burst fade adds a little curve to the outline.
Key Ingredients:
- 2 to 4 inches on top
- Burst fade around the ears
- 1 pea-sized amount of matte clay
- 1 comb or finger-styling only
Quick Steps:
- Ask for a short textured top with a burst fade that hugs the ear.
- Dry the top forward or slightly upward, depending on your cowlicks.
- Rub clay between your fingers and piece out the top.
- Leave the front a little uneven so it does not look too tidy.
Equipment for This Cut:
- Matte clay
- Blow dryer
- Clippers
- Finger comb
How to Wear It:
This one works with athletic wear, simple tees, and a neat beard line. It is low drama in the best way.
Pro Tips for This Recipe:
- Keep the crop short enough that it does not puff out at the front.
- Ask your barber to texture the top rather than thinning it heavily.
Variations on This Recipe:
- Softer Crop: Leave a touch more length in front.
- Sharper Crop: Increase the fade contrast and keep the top tighter.
Common Mistakes to Avoid with This Dish:
- Letting the top grow too long: The crop loses its shape.
- Using a shiny product: It flattens the texture.
31. High Fade Brush-Up
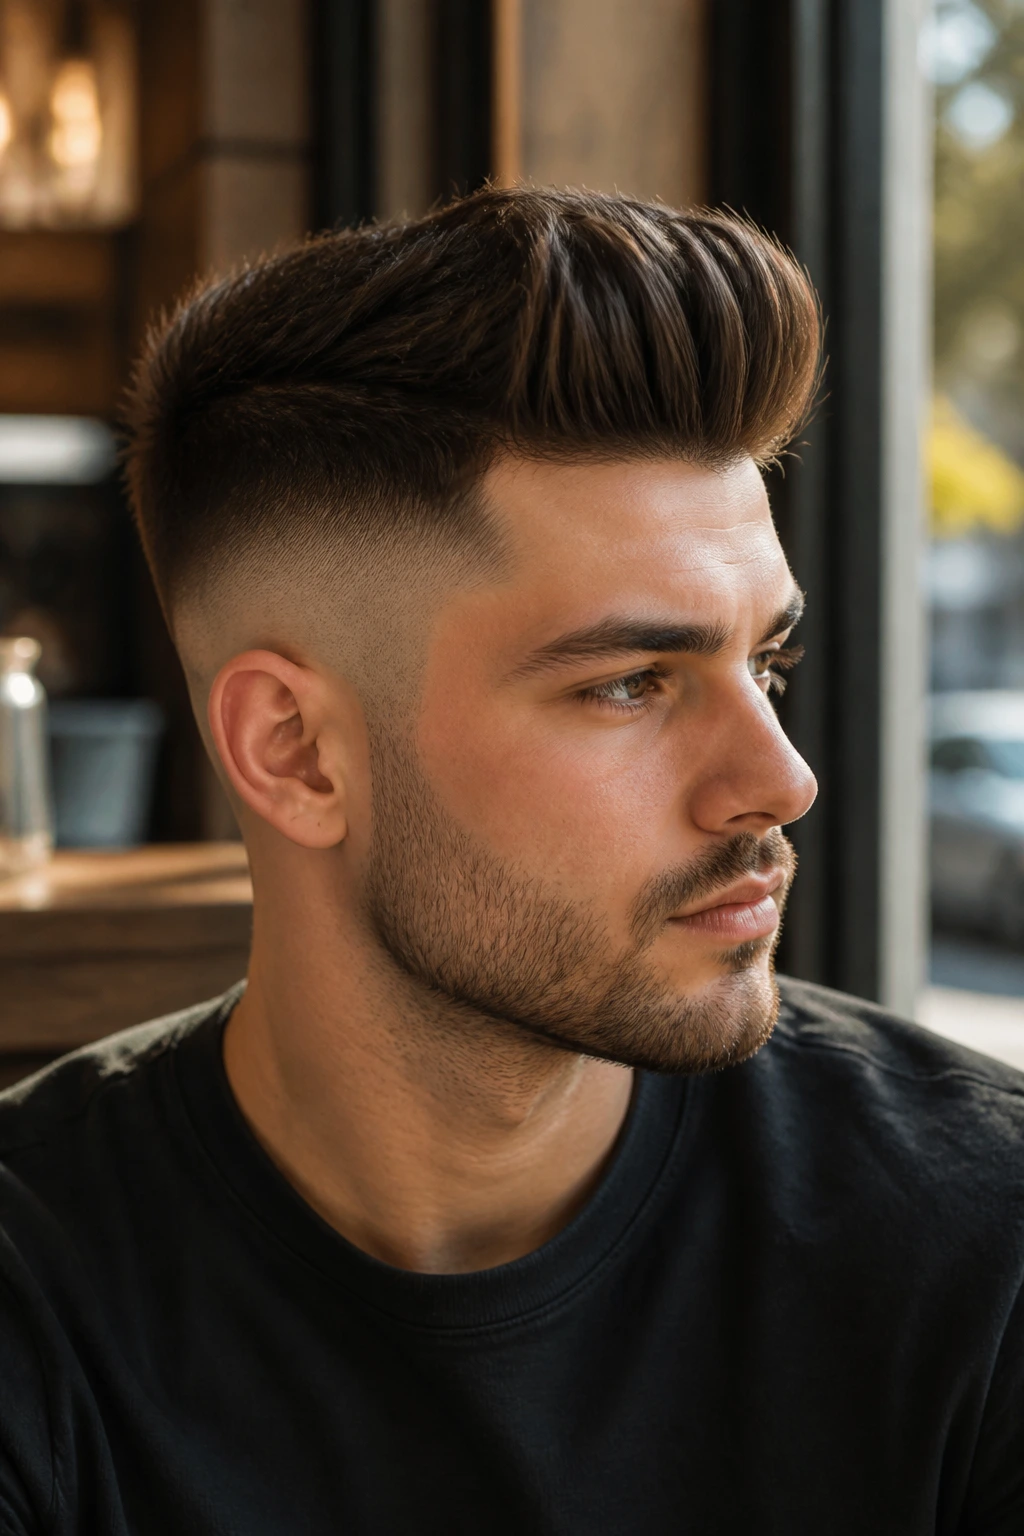
A high fade brush-up uses height to create the shape and the fade to strip out the noise. Medium-length hair gives the top enough room to lift, while the high fade keeps the sides from stealing volume.
Why It Works:
Brush-up styles need root support, and medium length delivers that better than short hair. The high fade makes the top look taller because the eye has less side bulk to compare it to.
Key Ingredients:
- 3 to 5 inches on top
- High fade at the temples
- 1 teaspoon of volumizing mousse
- 1 vent brush
Quick Steps:
- Ask for a high fade and leave enough top length to brush upward.
- Blow-dry the roots up and slightly back with a vent brush.
- Add mousse or matte paste for hold.
- Separate the front into lifted pieces instead of one solid block.
Equipment for This Cut:
- Vent brush
- Blow dryer
- Volumizing mousse
- Matte paste
How to Wear It:
This cut looks good with cleaner, sharper clothing because the haircut has a strong vertical line. It also works well with stubble because the contrast stays balanced.
Pro Tips for This Recipe:
- Dry the roots fully or the brush-up falls by lunch.
- Ask for textured ends so the top does not look too smooth.
Variations on This Recipe:
- Soft Brush-Up: Less height, more texture.
- Hard Brush-Up: More lift and a tighter finish.
Common Mistakes to Avoid with This Dish:
- Over-brushing the front into one shape: It looks stiff.
- Leaving the crown too flat: Then the top leans backward.
32. Low Fade Long Fringe with Shape
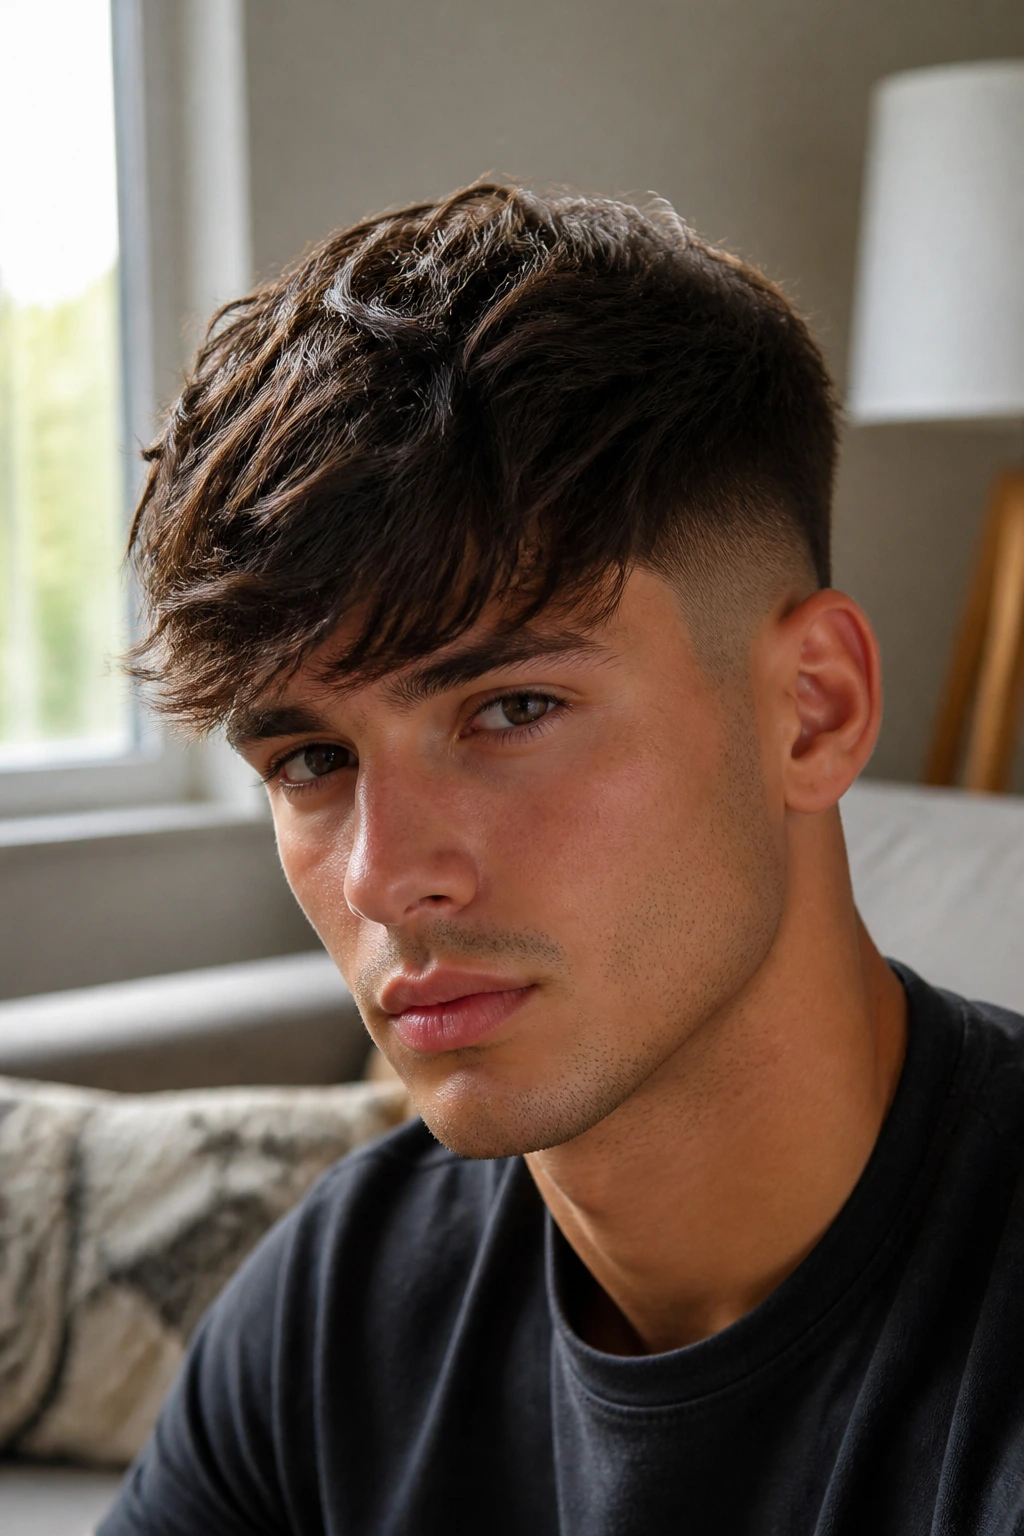
A low fade long fringe with shape gives the front room to fall while the rest of the cut stays controlled. It’s a good fix for medium-length hair that wants to drop into the eyes but still needs structure around the edges.
Why It Works:
The long fringe gives the haircut personality, and the low fade keeps the sides clean enough that the front can stay the star. This is one of the easier cuts to live with when your hair grows fast.
Key Ingredients:
- 4 to 6 inches in the fringe
- Low fade around the sides and neckline
- 1 teaspoon of lightweight paste
- 1 comb or your fingers
Quick Steps:
- Ask for a long front section with enough shape to sweep or fall forward.
- Blow-dry the fringe into the direction you want it to land.
- Add a small amount of lightweight paste to the ends.
- Keep the fringe movable so it does not sit like a wall.
Equipment for This Cut:
- Blow dryer
- Lightweight paste
- Comb
- Clippers
How to Wear It:
This cut fits relaxed clothes, hoodies, and layered jackets. It has a softer edge than cropped styles, which makes it good for guys who do not want the forehead fully exposed.
Pro Tips for This Recipe:
- Keep the fringe textured so it falls in pieces, not one heavy slab.
- Trim the front more often than the rest of the cut.
Variations on This Recipe:
- Swept Fringe: Push it slightly to one side.
- Messy Fringe: Let the front break into uneven sections.
Common Mistakes to Avoid with This Dish:
- Cutting the fringe too dense: It will sit flat and heavy.
- Using too much product near the roots: The front gets greasy fast.
33. Mid Fade Medium-Length Shag
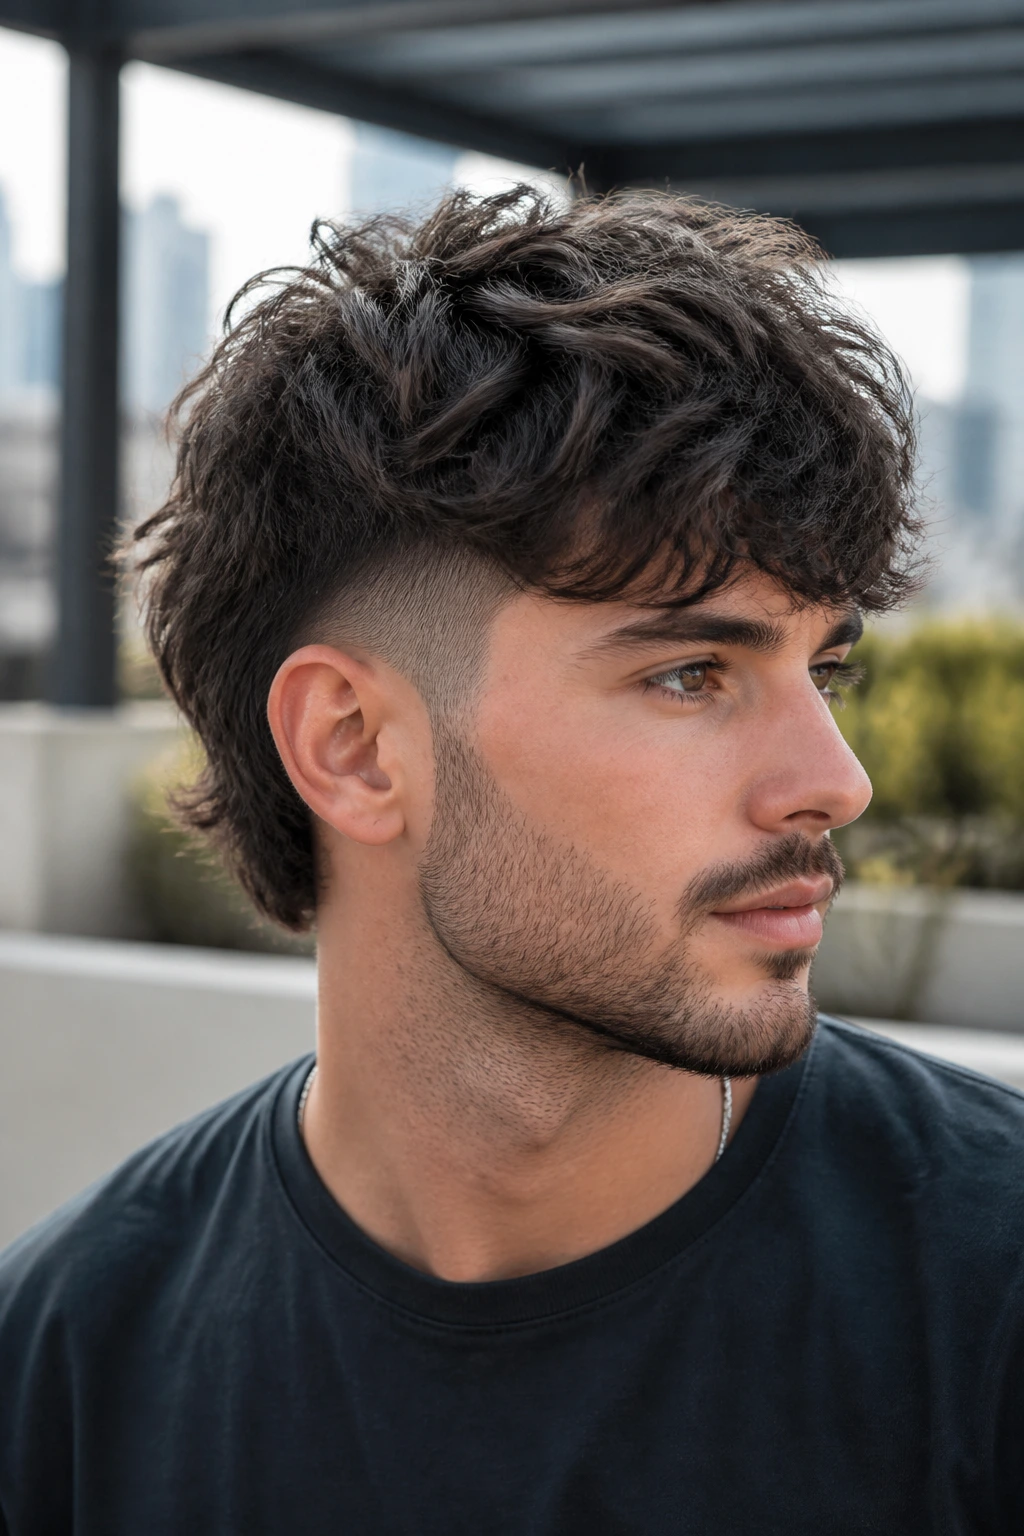
A mid fade medium-length shag is the most relaxed cut in the bunch, and that’s what makes it useful. The layers do the shape work, the mid fade clears out the sides, and the whole thing keeps a little rock-and-roll movement without looking unruly.
Why It Works:
A shag needs layers to stop the hair from turning blocky. The fade trims the lower half so the shape stays open, which is especially helpful when the hair has wave or a little natural bend.
Key Ingredients:
- 5 to 7 inches of layered top
- Mid fade at the sides
- 1 tablespoon of light cream
- 1 wide-tooth comb
Quick Steps:
- Ask for layered length and a mid fade that keeps the outline clean.
- Towel-dry until damp, then add cream through the middle and ends.
- Scrunch or finger-style the hair so the layers fall unevenly.
- Let the fringe and crown move on their own instead of forcing symmetry.
Equipment for This Cut:
- Wide-tooth comb
- Light cream
- Blow dryer if needed
- Texturizing spray
How to Wear It:
This cut looks best with casual clothes, boots, and a little personality in the rest of the outfit. It is less polished than a side part, but that looseness is the point.
Pro Tips for This Recipe:
- Ask for layers that remove weight around the crown.
- Keep the fade soft if you want the shag to stay relaxed.
Variations on This Recipe:
- Short Shag: Less length, easier styling.
- Heavier Shag: More length and stronger movement.
Common Mistakes to Avoid with This Dish:
- Leaving the top one length: The shag loses its separation.
- Using a heavy wax: It destroys the texture and movement.
Why the Fade Works So Well on Medium-Length Hair
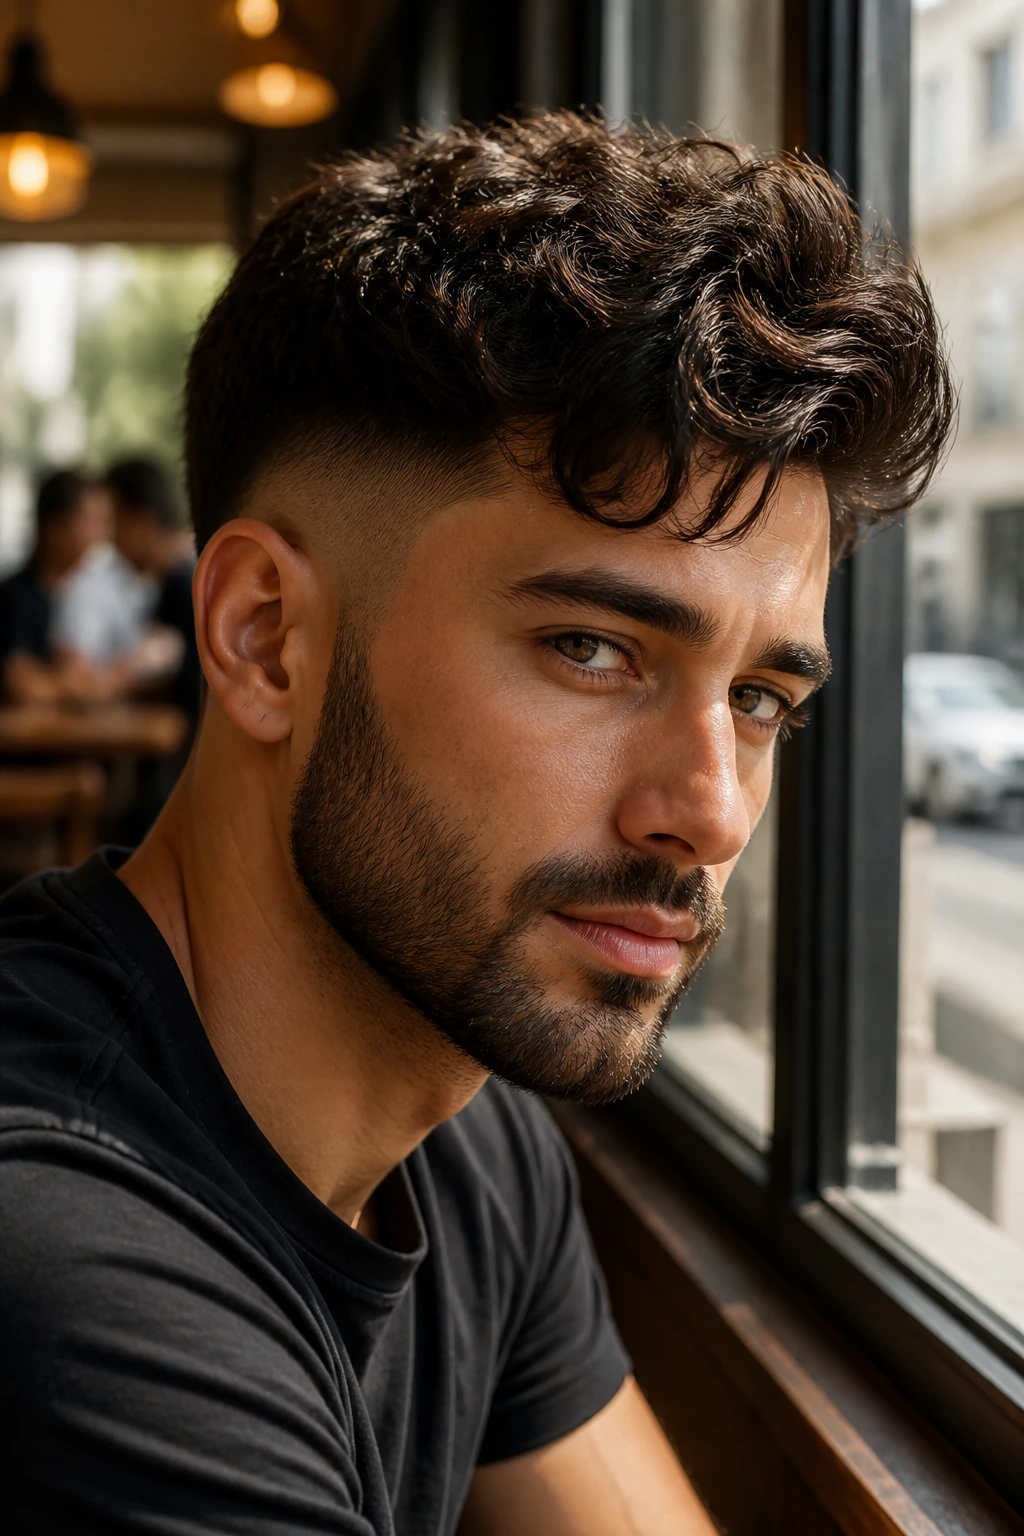
Medium-length hair sits in a strange middle ground. Too short for real flow, too long to ignore. A fade fixes that by removing the visual weight that builds up around the ears and neckline, which is where medium hair starts to look bulky first.
The other reason these cuts work is contrast. A clean fade makes the top look longer, fuller, and more deliberate without adding extra length. That’s why a 4-inch quiff feels bigger after a skin fade than it does after a scissor-only cut. Your eye compares the top to the tight sides, and the whole shape snaps into focus.
Less Bulk, More Shape
The side and back cleanup is not decoration. It changes how the haircut sits on the head. A mid or low fade trims the roundness that thick medium hair tends to create, especially on square faces or heads with a strong crown.
The Top Gets Room to Move
With the sides controlled, medium hair can do one of three useful things: fall, lift, or curl. That gives you real range. One cut can be brushed back for dinner and mussed up for the weekend without changing the actual haircut.
Grow-Out Is Easier Than You’d Think
A fade does not stay sharp forever, but it fades out more gracefully than a harsh blocky side line. Low and taper versions can stretch to three or four weeks before they feel sloppy. Skin fades need more frequent cleanup, which is the trade-off for that crisp first week.
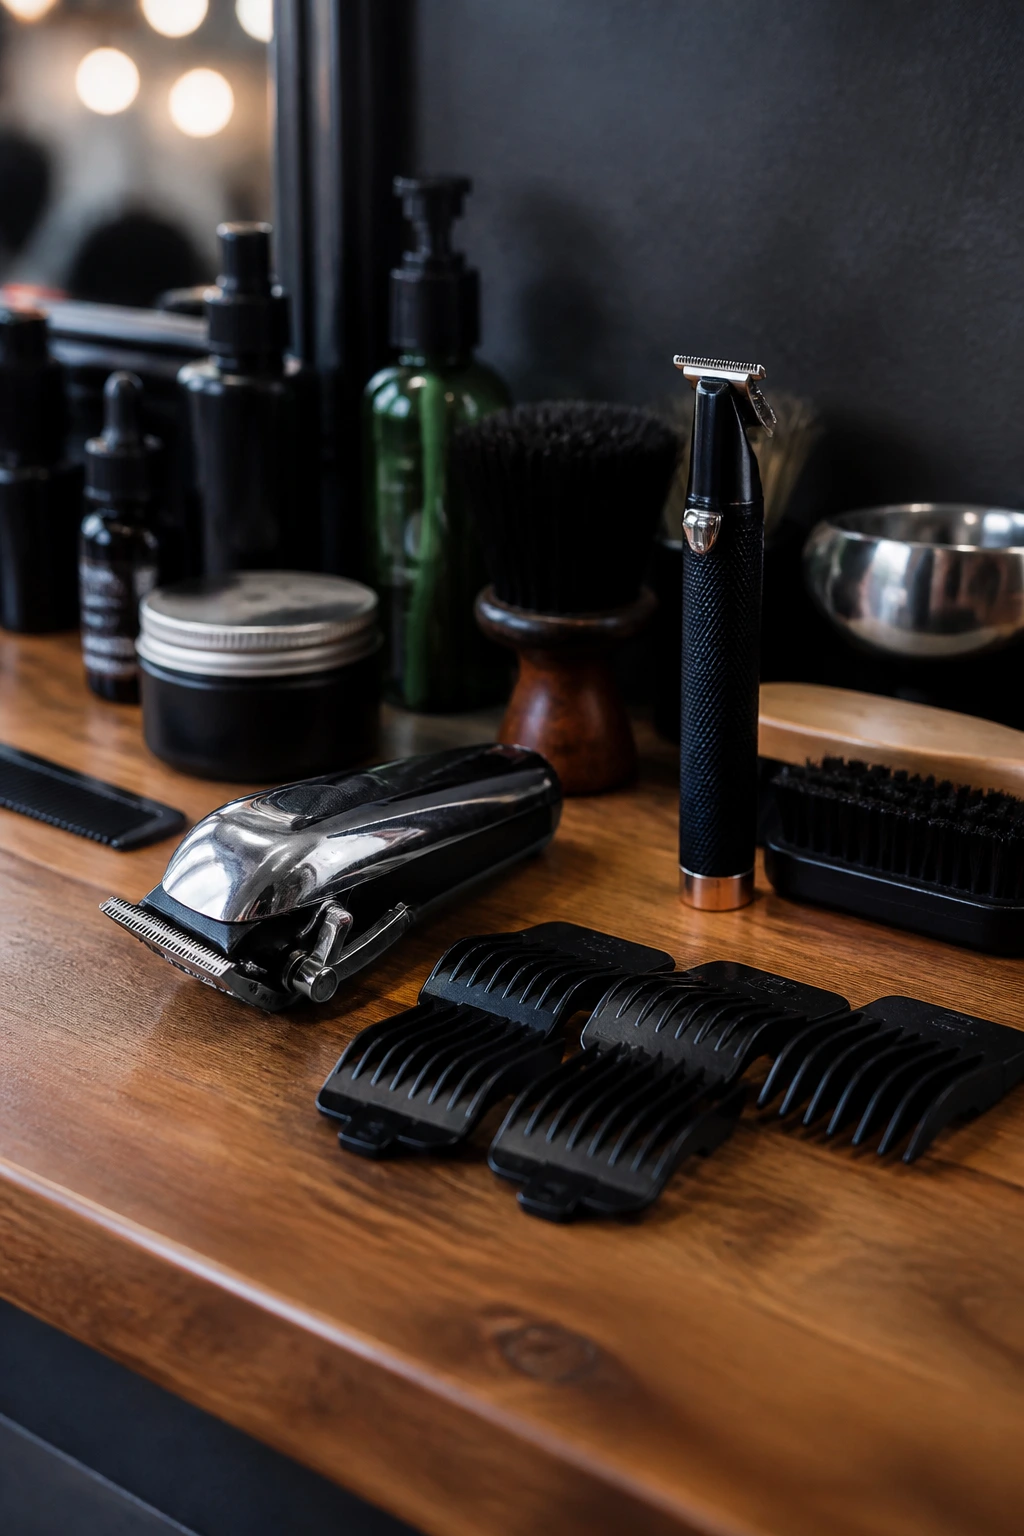
Essential Tools for Styling and Barber Visits
-
Clippers with guards: Useful for keeping necklines, sideburns, and edge cleanup under control between visits.
-
Trimmer: Best for hard parts, sharp temple lines, and touching up the perimeter without overcutting.
-
Blow dryer with nozzle: Strong airflow matters more than heat for lifting the top and keeping the fade from looking puffed.
-
Round brush and vent brush: The round brush builds height in quiffs and pomps; the vent brush is faster for brush-backs and waves.
-
Matte clay or paste: Good for texture-heavy cuts where shine would make the top collapse.
-
Light cream or mousse: Better for curls, flow styles, and anything that needs movement instead of rigid hold.
-
Sea salt spray: Adds grip to loose waves, flow cuts, and curtain styles before you style them.
-
Wide-tooth comb: Easier on curls and wavy hair, and less likely to blow the texture apart.
-
Hand mirror: Sounds basic, but it helps you check the fade line and neckline before you leave the bathroom.
Smart Barber Notes and Product Picks
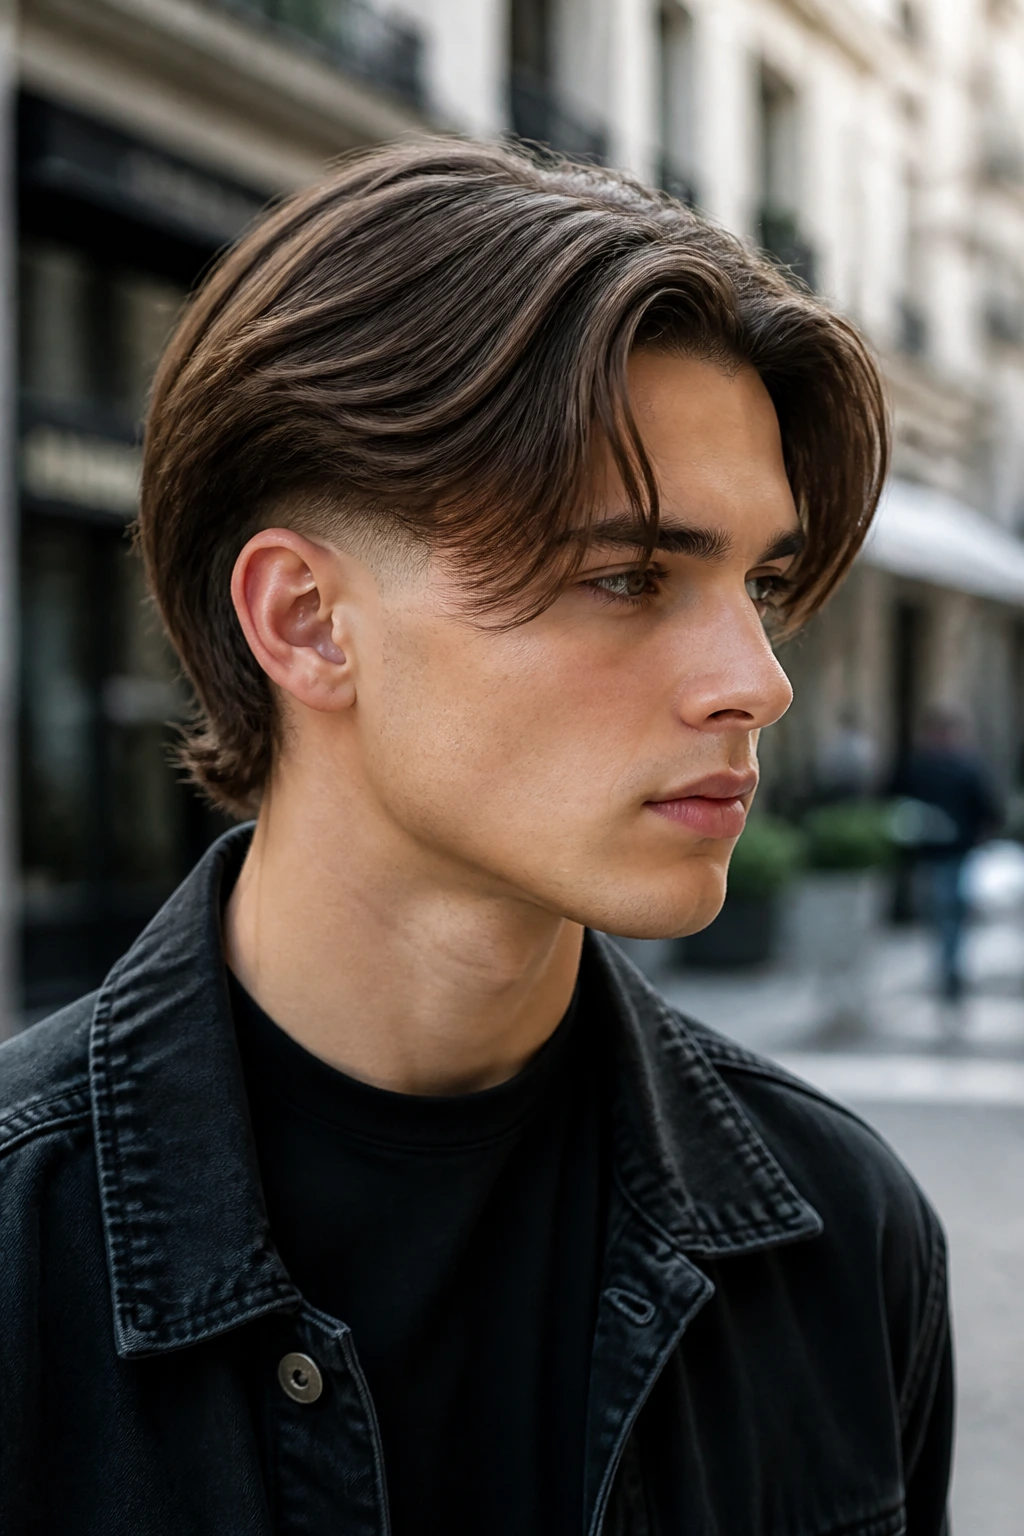
The cleanest haircut starts before the clippers come out. Tell your barber how you wear your hair on most mornings, not just how you want it to look on the best day. If you never blow-dry, say that. If your crown splits hard, say that too. Those details matter more than a reference photo that ignores your growth pattern.
Fade height should match the top length. A high fade can handle a pompadour, brush-up, or faux hawk because there is enough volume on top to support the contrast. A low or taper fade is usually better for curtain flow, bro flow, side sweeps, and softer shags, where the top needs the sides to stay out of the way but not disappear entirely.
Product choice should follow hair type, not the label on the jar. Fine hair usually does better with mousse or light clay because heavy wax collapses it. Thick hair often needs matte paste or stronger cream to keep the style from frizzing out. Curly hair almost always needs moisture first, hold second. If your top feels crunchy before lunch, you used the wrong thing or too much of it.
How to Wear These Cuts in Real Life
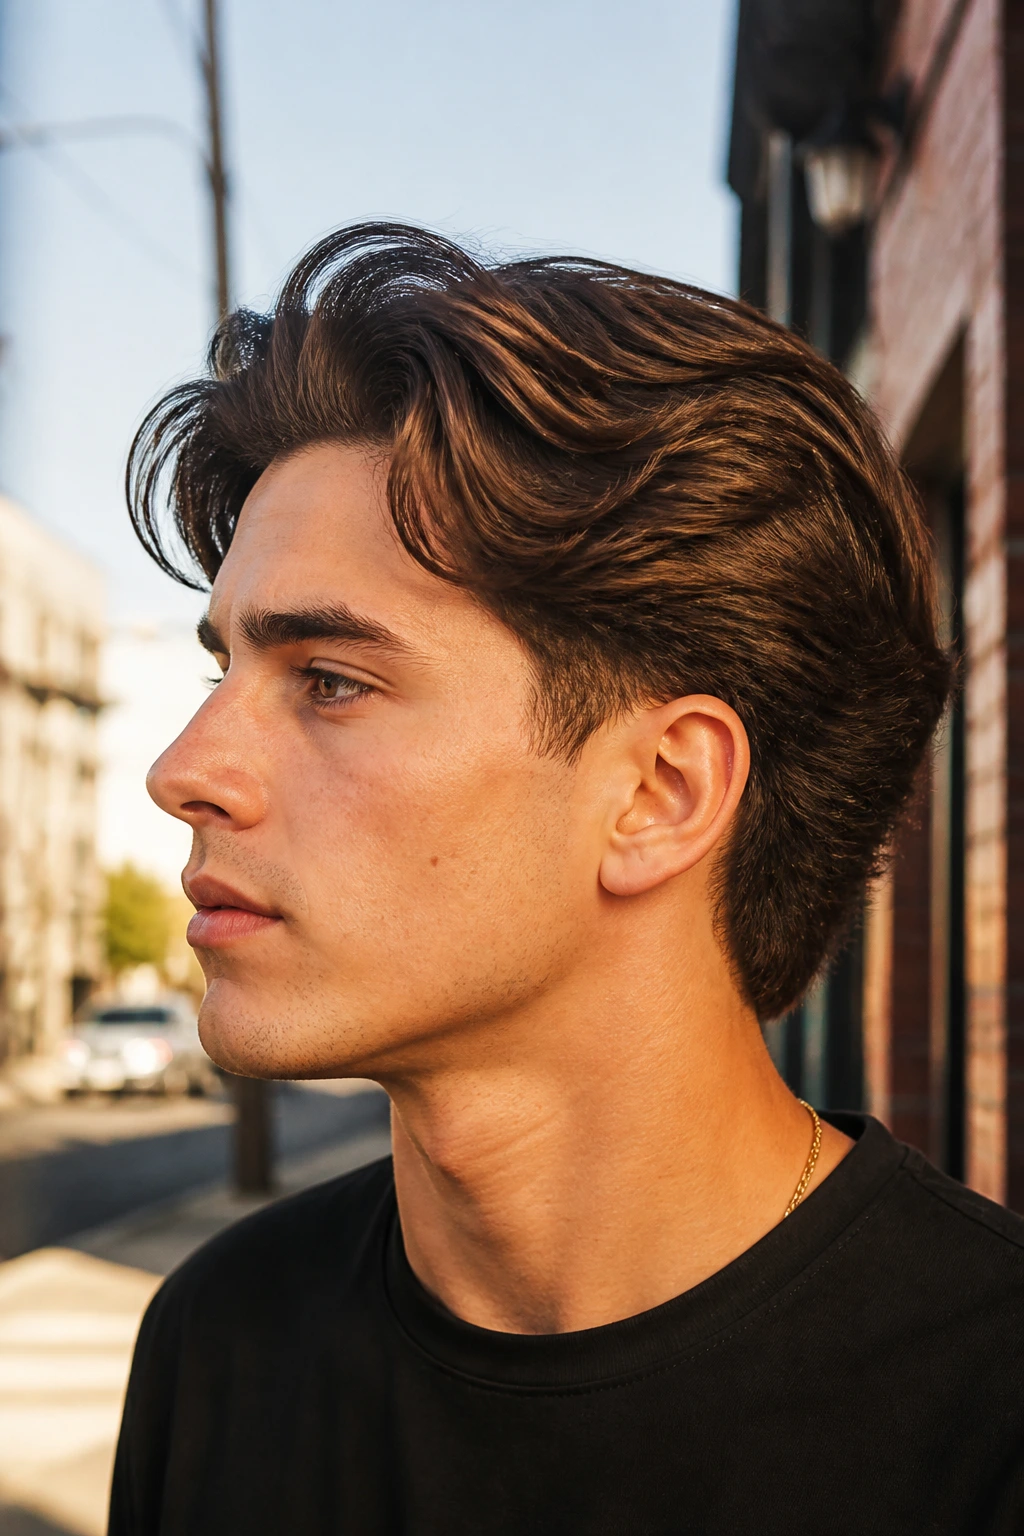
Presentation: Keep the fade lines crisp and the top shaped with intention. The haircut should look like it belongs to your face, not like you copied a photo without adapting the length.
Accompaniments: A beard can deepen the look, but stubble is often enough. Glasses work well with side parts, curtain styles, and temple fades because they echo the clean line around the face.
Portions: Most medium-length fade styles need only a dime-sized amount of product, maybe a nickel if the hair is thick. Start smaller than you think; adding more is easier than washing out a greasy top.
Occasion Pairing: Slick backs, side parts, Ivy League sweeps, and pompadours lean formal. Curl-heavy styles, shags, bro flow cuts, and textured crops land better in casual settings. Keep one polished option and one easygoing option in your head, and you will always have a style that fits the day.
Additional Tips and Finishers
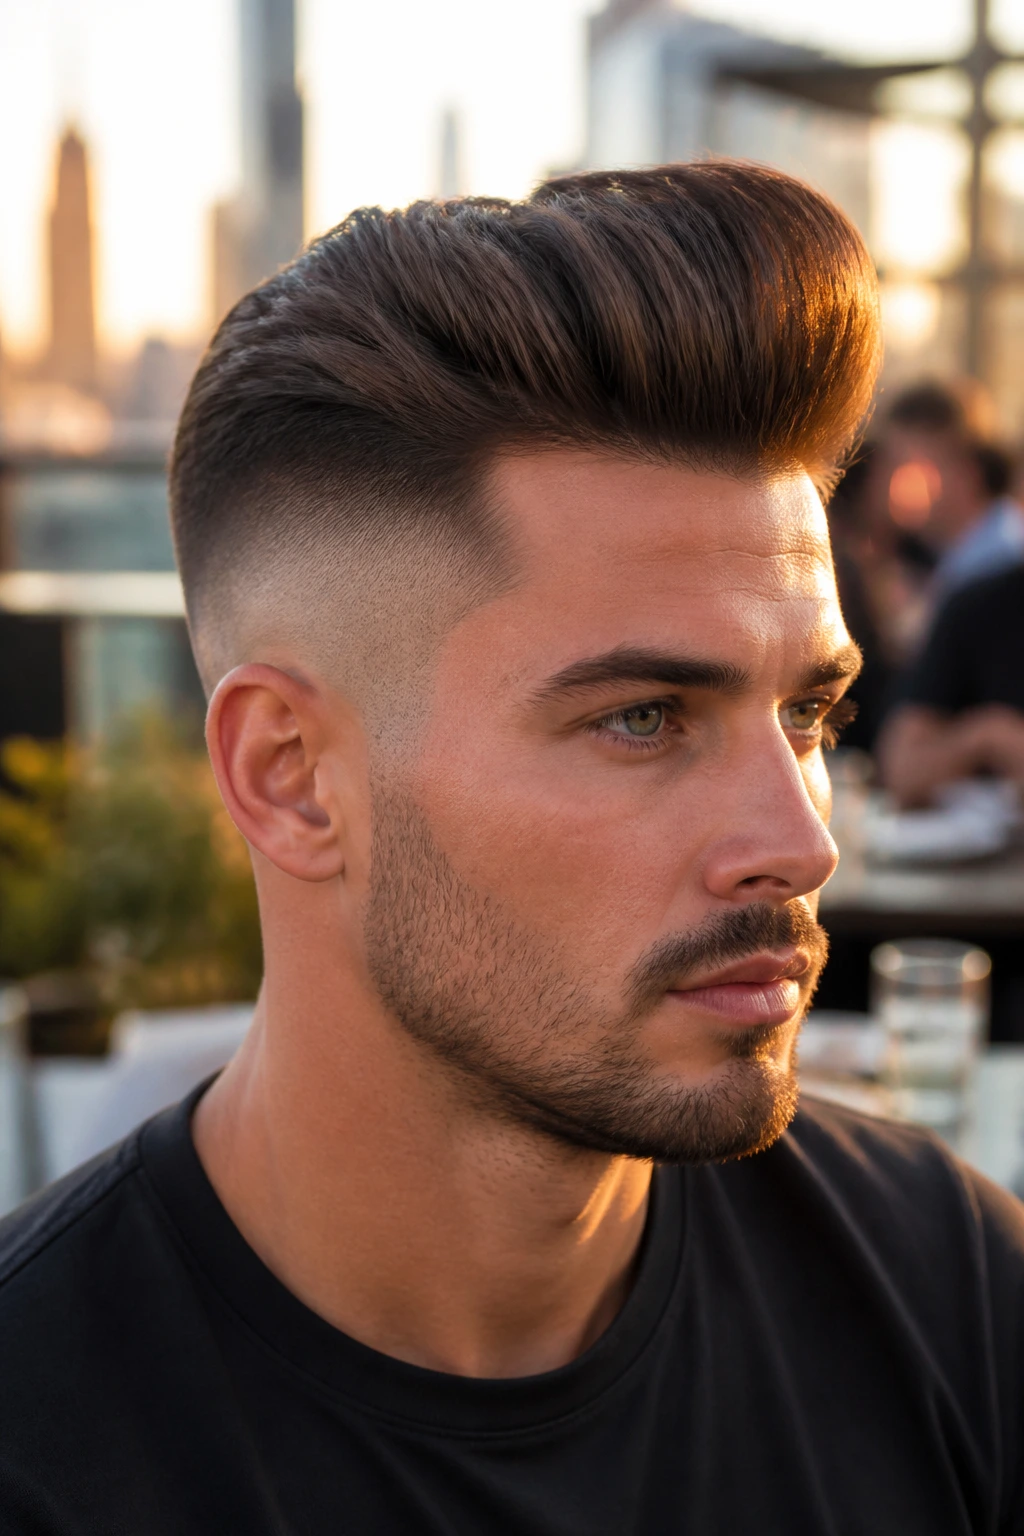
Texture Boost: If the top falls flat, mist sea salt spray at the roots before drying. That gives the hair something to grab onto and keeps the fade from looking like the only thing with shape.
Customization: Ask for point cutting, not blunt cutting, on the top if you want movement. A few broken ends can make a medium-length style look lighter without losing length.
Face Shape Tweaks: Round faces usually benefit from height or side sweep. Longer faces often do better with fringes, curtains, or a lower quiff so the haircut does not add even more length.
Finishers: A matte paste gives cleaner separation, while a light cream softens the edges. Keep both around if you wear more than one of these cuts.
Common Mistakes to Avoid
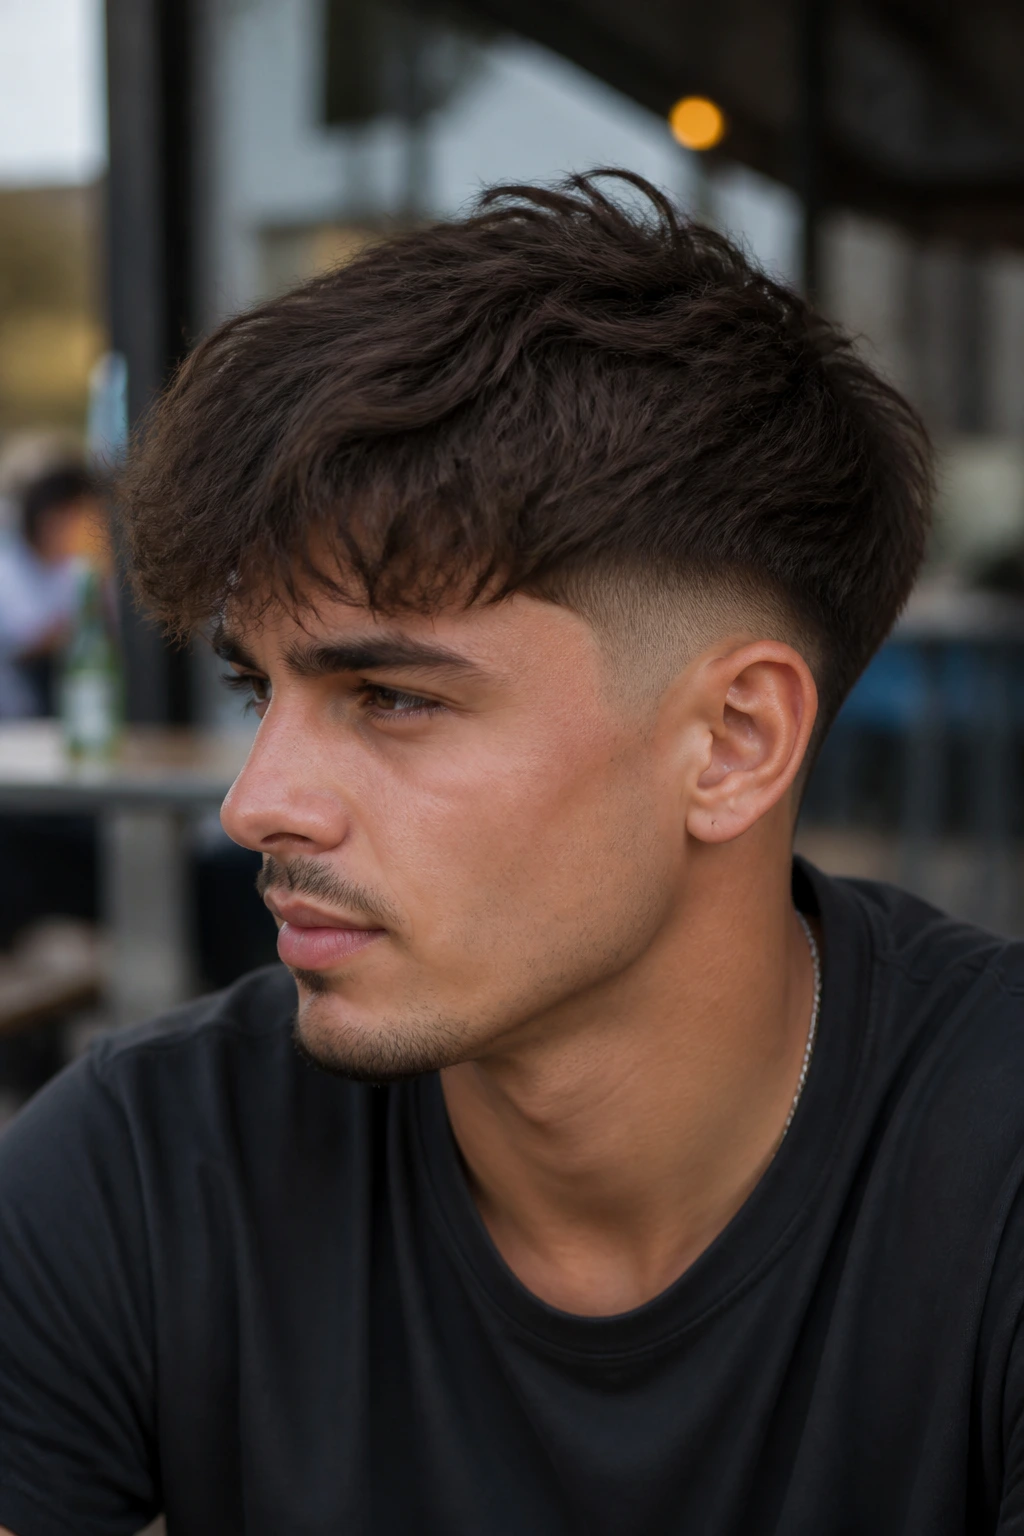
The biggest mistake is taking the fade too high for the amount of top length you have. That can make medium-length hair look accidental, especially if the top is only barely long enough to style. If you want flow, sweep, or a curtain part, keep some side weight.
Another common miss is using the wrong product for the hair type. Thick hair with heavy shine can look greasy by noon. Fine hair with a sticky wax can go limp in twenty minutes. Match the product to the texture, not to the photo on the package.
People also overcut the fringe. With medium-length styles, the front often needs a little extra length because it shrinks, bends, or separates once it dries. If the hair hits your eyes in the chair, that does not always mean it is too long. Sometimes it means it is the right length after it settles.
Variations and Adaptations to Try
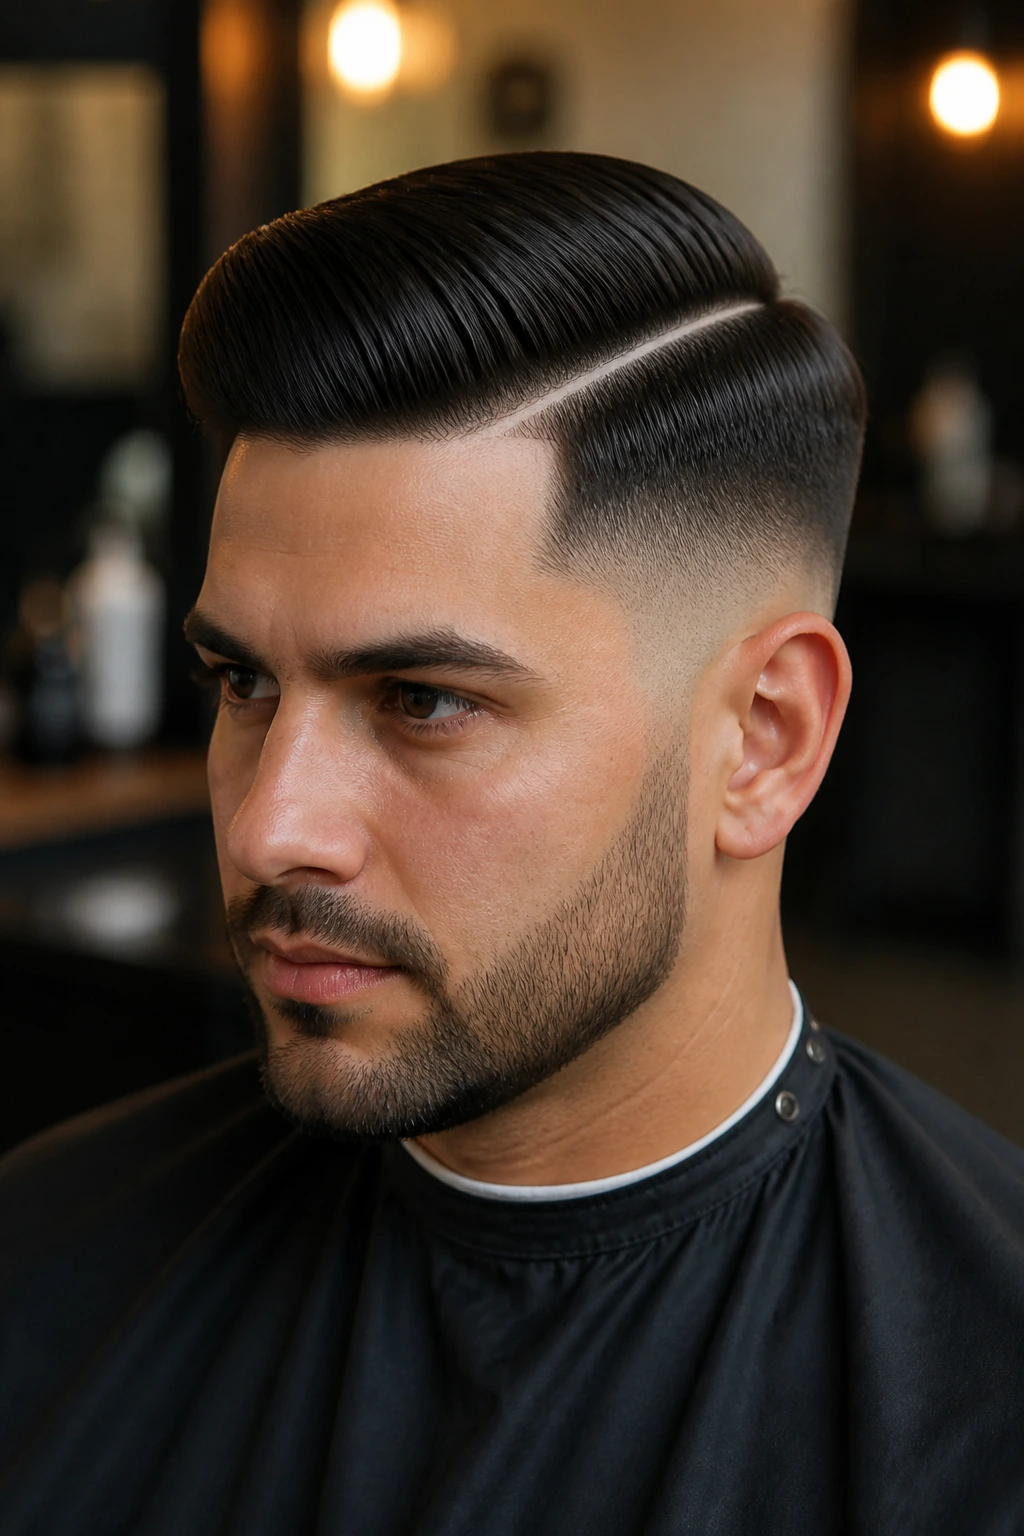
Curly-Hair Friendly Version: Keep more length through the top and ask the barber to cut curls when they are dry enough to show shape. This keeps the curl pattern from springing up into a shorter cut than you expected.
Fine-Hair Lift Version: Choose a lower-contrast fade and use mousse at the roots before blow-drying. Fine hair often needs support more than product, and a lighter fade makes the top feel fuller.
Thick-Hair Control Version: Ask for internal weight removal on top, not just shorter sides. Thick hair can hold shape well, but it gets bulky fast if the crown is not thinned with care.
Beard-Blend Version: Connect the sideburns into the fade and keep the beard line clean under the cheekbone. That makes the haircut feel finished from temple to jaw.
Low-Maintenance Version: Choose a taper fade, side sweep, or textured crop. These cuts forgive skipped styling days better than slick backs or pompadours.
Maintenance, Wash Days, and Grow-Out
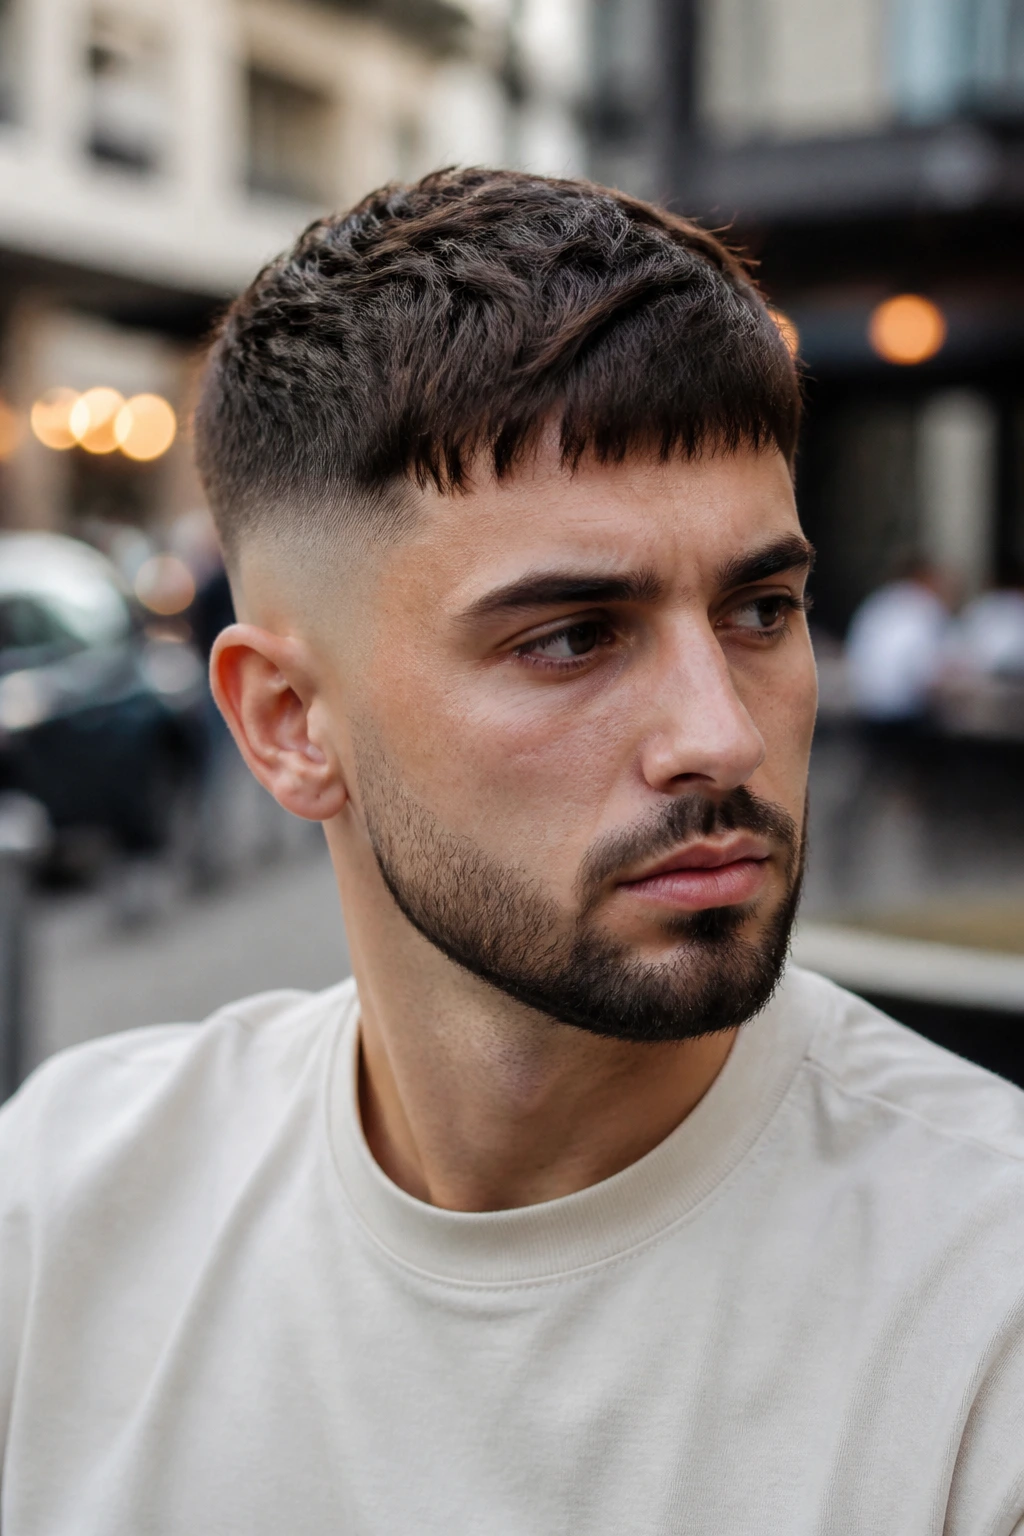
Skin fades need the most upkeep. If you want the line to stay clean, plan on a touch-up every 10 to 14 days. Low and taper fades can stretch farther, often closer to three weeks, before the edges start to blur in a way that feels sloppy.
Wash frequency depends on product use. If you style with matte clay or paste every day, rinse and shampoo as needed so buildup does not make the top heavy. Curls and flow styles usually do better with gentler washing and more conditioner, because stripping them dry only makes them puff.
When the cut grows out, do not panic if the fade gets soft first. That is normal. What matters is whether the top still has shape. If the sides are starting to widen but the top still looks good, a simple clean-up on the fade is often enough; you do not need to throw away the whole style.
Frequently Asked Questions
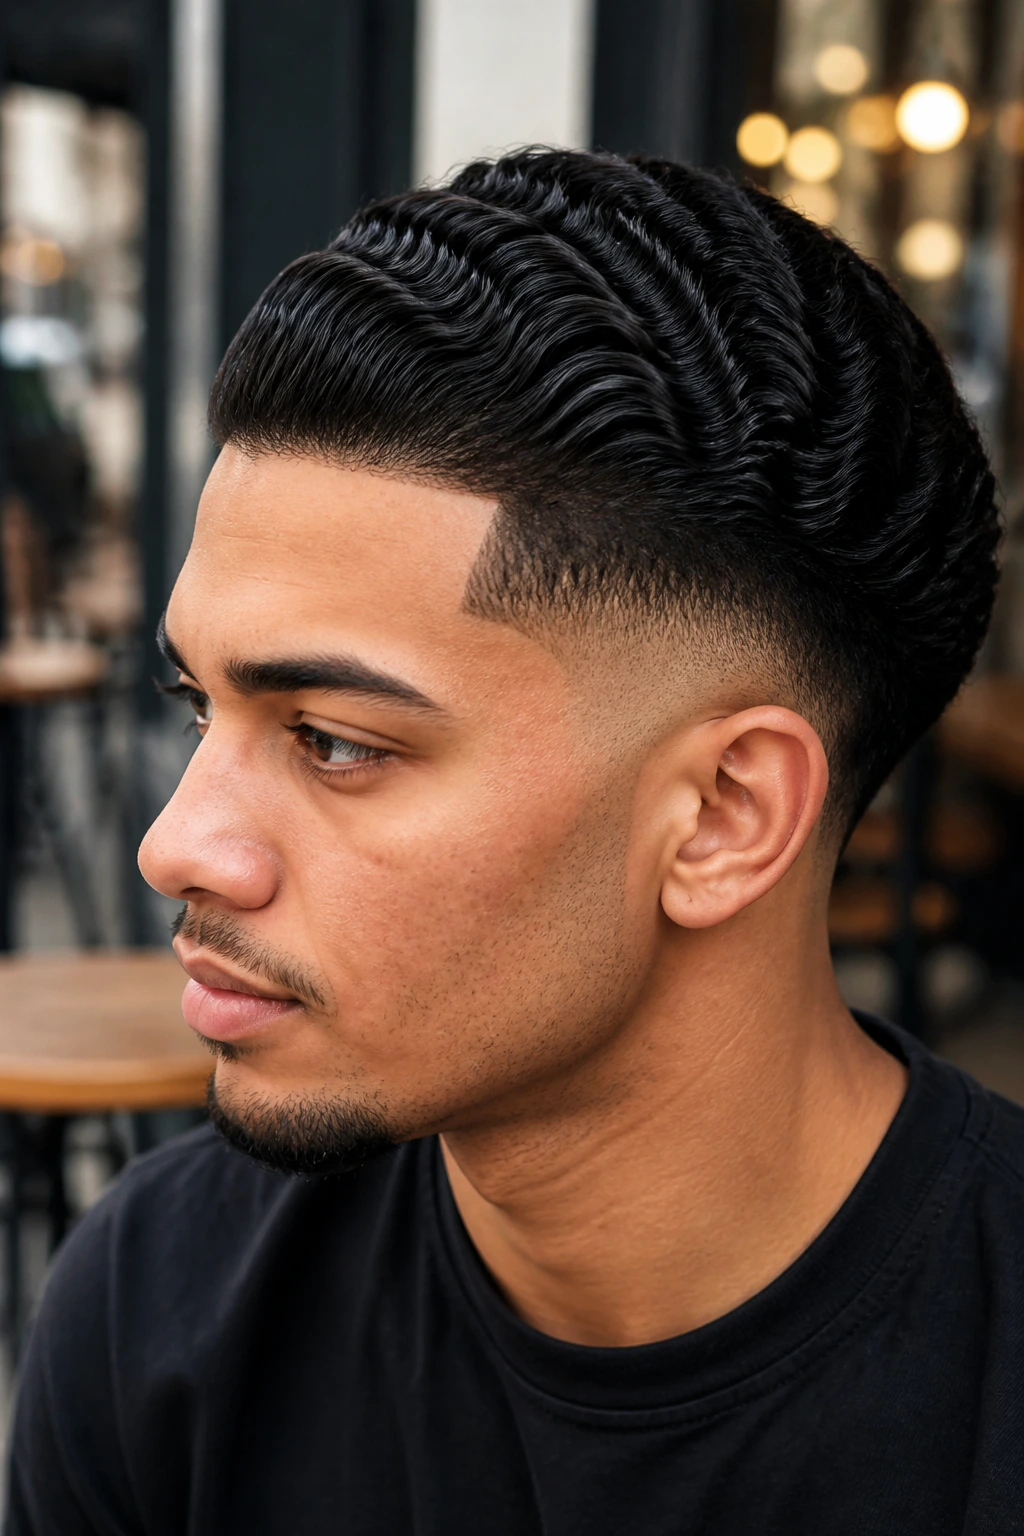
How do I tell my barber what I want without sounding clueless?
Bring a photo, then point to three things: fade height, top length, and how much texture you want. Say those out loud in inches if you can. That makes the conversation much easier than saying “something modern” and hoping for the best.
Which fade is easiest to grow out?
Low fades and taper fades usually grow out the cleanest because the transition is softer. Skin fades look sharper at first, but they need more upkeep to stay crisp.
What if my hair is thick and puffy on the sides?
Ask for more bulk removal around the temples and above the ears, not just a higher fade. Thick hair needs shape control, and the barber should be able to leave enough top length to style without the sides taking over.
Can medium-length fades work with curly hair?
Absolutely. Curly hair often looks better in a fade because the sides stop ballooning outward. The only real caution is shrinkage, so leave more length on top than you think you need.
What product should I start with if I’m not sure?
A light matte cream is the safest first buy for most medium-length styles. It gives a little hold, does not shine too much, and is easier to fix if you use a bit too much.
How often should I wash and style these cuts?
Most guys can wash every other day, then refresh the style with water or a light mist on off days. If your hair is curly or dry, shampoo less often and lean on conditioner and leave-in cream.
Will a fade make my hairline look worse if it’s receding?
It can if the fade is too high or too severe. A lower fade, side sweep, or textured crop usually softens the hairline better than a slick style that exposes everything.
What should I do if the style falls flat by midday?
Use less product at the roots and more blow-drying at the start. Most flat styles are not a product problem first; they are a drying problem first.
The Shape That Keeps Its Edge
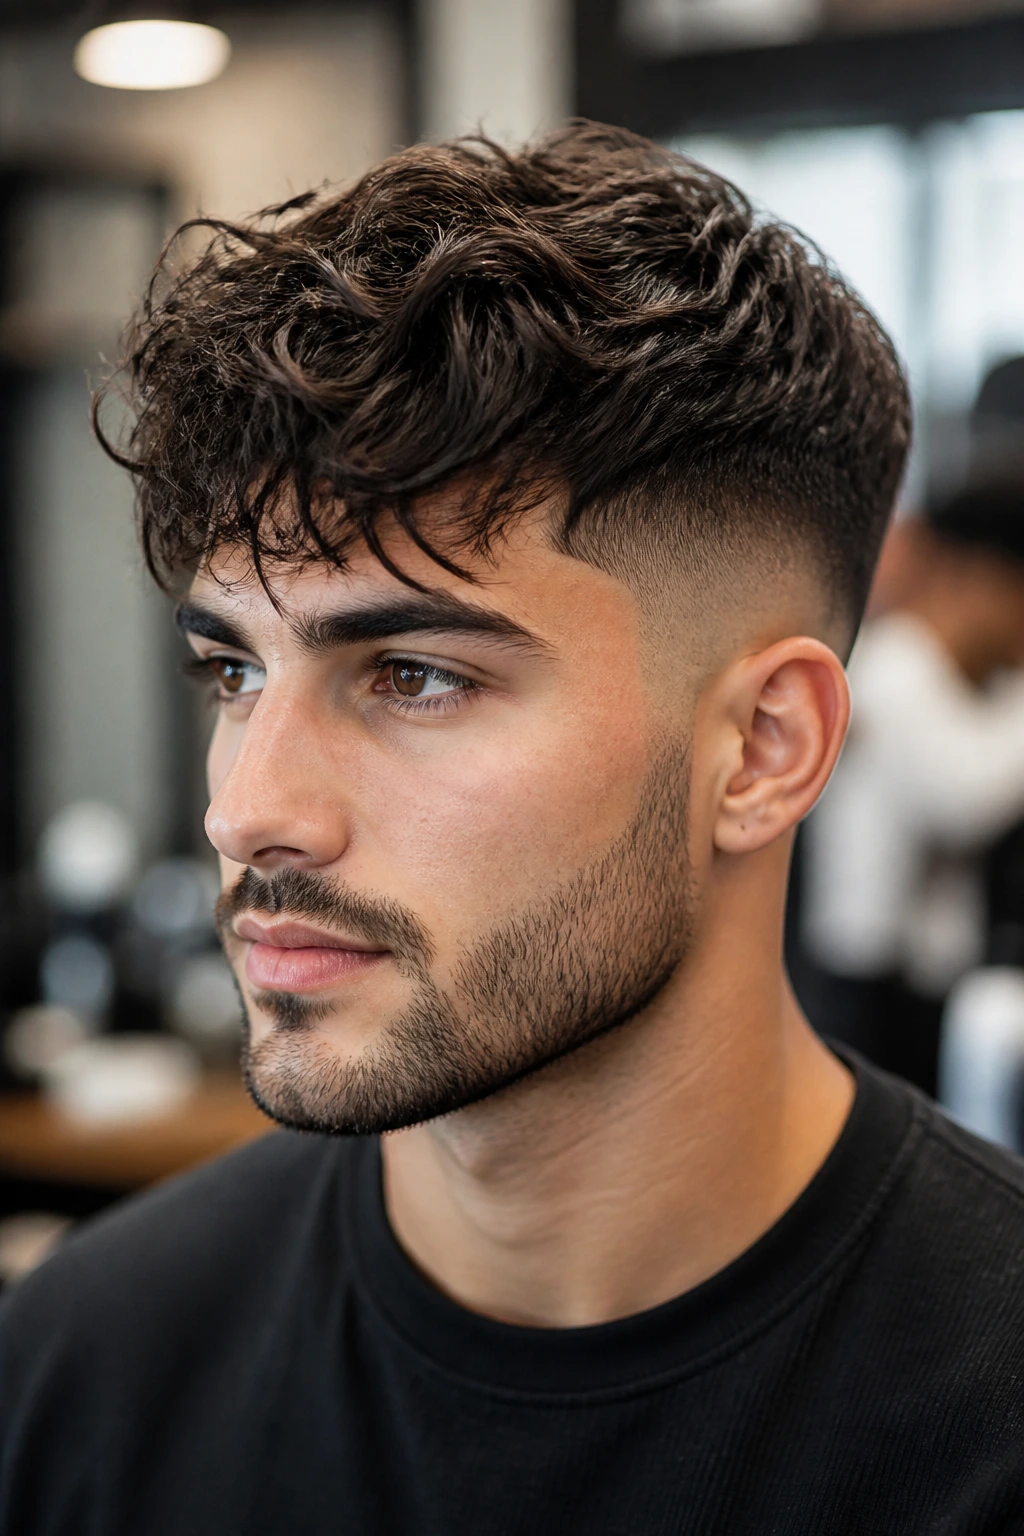
A good fade on medium-length hair does more than clean up the sides. It gives the top a reason to exist. That is why these cuts keep working across curl patterns, face shapes, and personal styles: they create structure where medium hair tends to drift.
The real advantage is flexibility. You can wear one version neat and another version a little rougher, and both still look like the same haircut. If you keep the fade matched to the top length and let your hair’s own texture do some of the work, you end up with a cut that looks considered without feeling precious.
