



Updos for little girls have a funny job: they need to look sweet at 8 a.m. and still be standing after lunch, recess, and one determined nap in the car seat. That’s a tougher assignment than it sounds. Tiny heads, silky hair, curls that spring loose if you look at them wrong, and scalps that do not forgive a tight pull — all of it means the usual adult bun logic can fall apart fast.
The styles worth keeping are the ones that respect the hair instead of wrestling it. A little texture. A clean part. Soft elastics that don’t snag. Pins placed where they actually grip, not just where they look neat. That’s the real difference between a hairstyle that survives a school day and one that unravels before the coat comes off.
I’ve pulled together styles that sit in that sweet spot: polished enough for picture day, sturdy enough for dance class, and cute enough that a child usually doesn’t complain halfway through the mirror check. Some are five-minute fixes. Some take a few more hands and a calmer morning. All of them are built around the same idea: make the hair work with you, not against you.
Why These Updos Work So Well
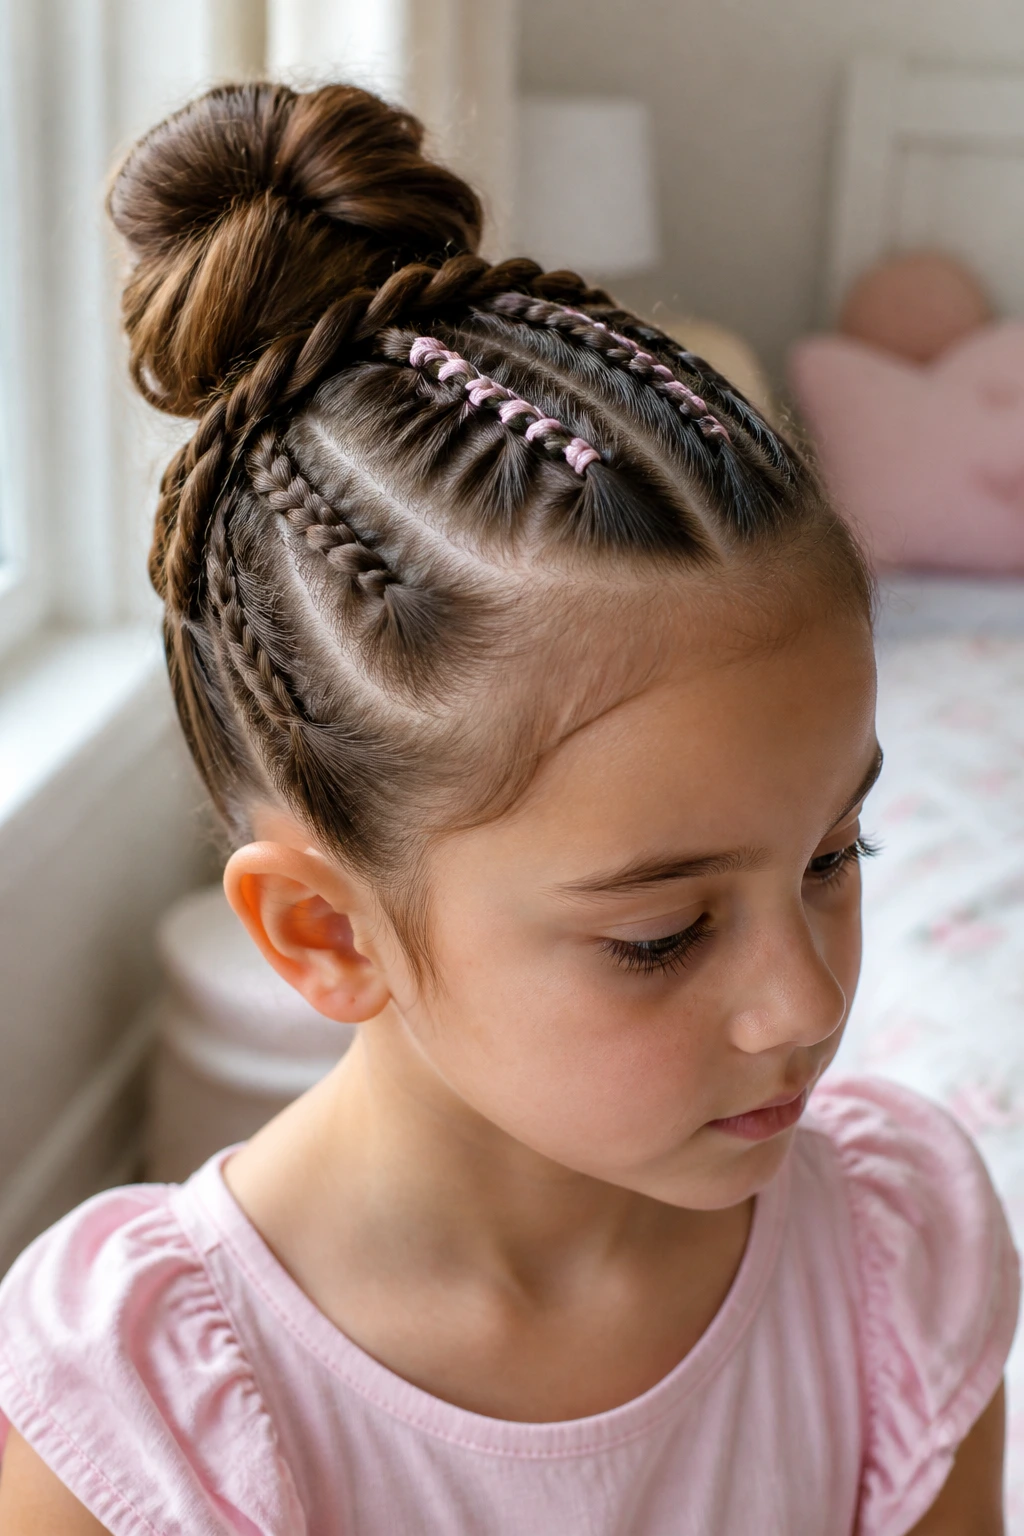
- They start with the hair’s natural grip: Braids, twists, and crossed elastics give fine or slippery hair something to cling to instead of relying on one lonely ponytail.
- They spread tension out: The best styles here avoid one tight pull at the hairline, which matters if your child gets tender around the temples or hates the “too tight” feeling.
- They work on more than one texture: Straight hair, ringlets, thick waves, and mixed textures all show up in this list with a style that won’t fight them.
- They look tidy without looking stiff: A neat bun with one ribbon or a braided crown can read dressed-up without turning the head into a helmet.
- They can be scaled up or down: The same idea can become a tiny school-day bun or a bigger recital style just by changing the section size and the accessory.
1. Sleek Ballet Bun
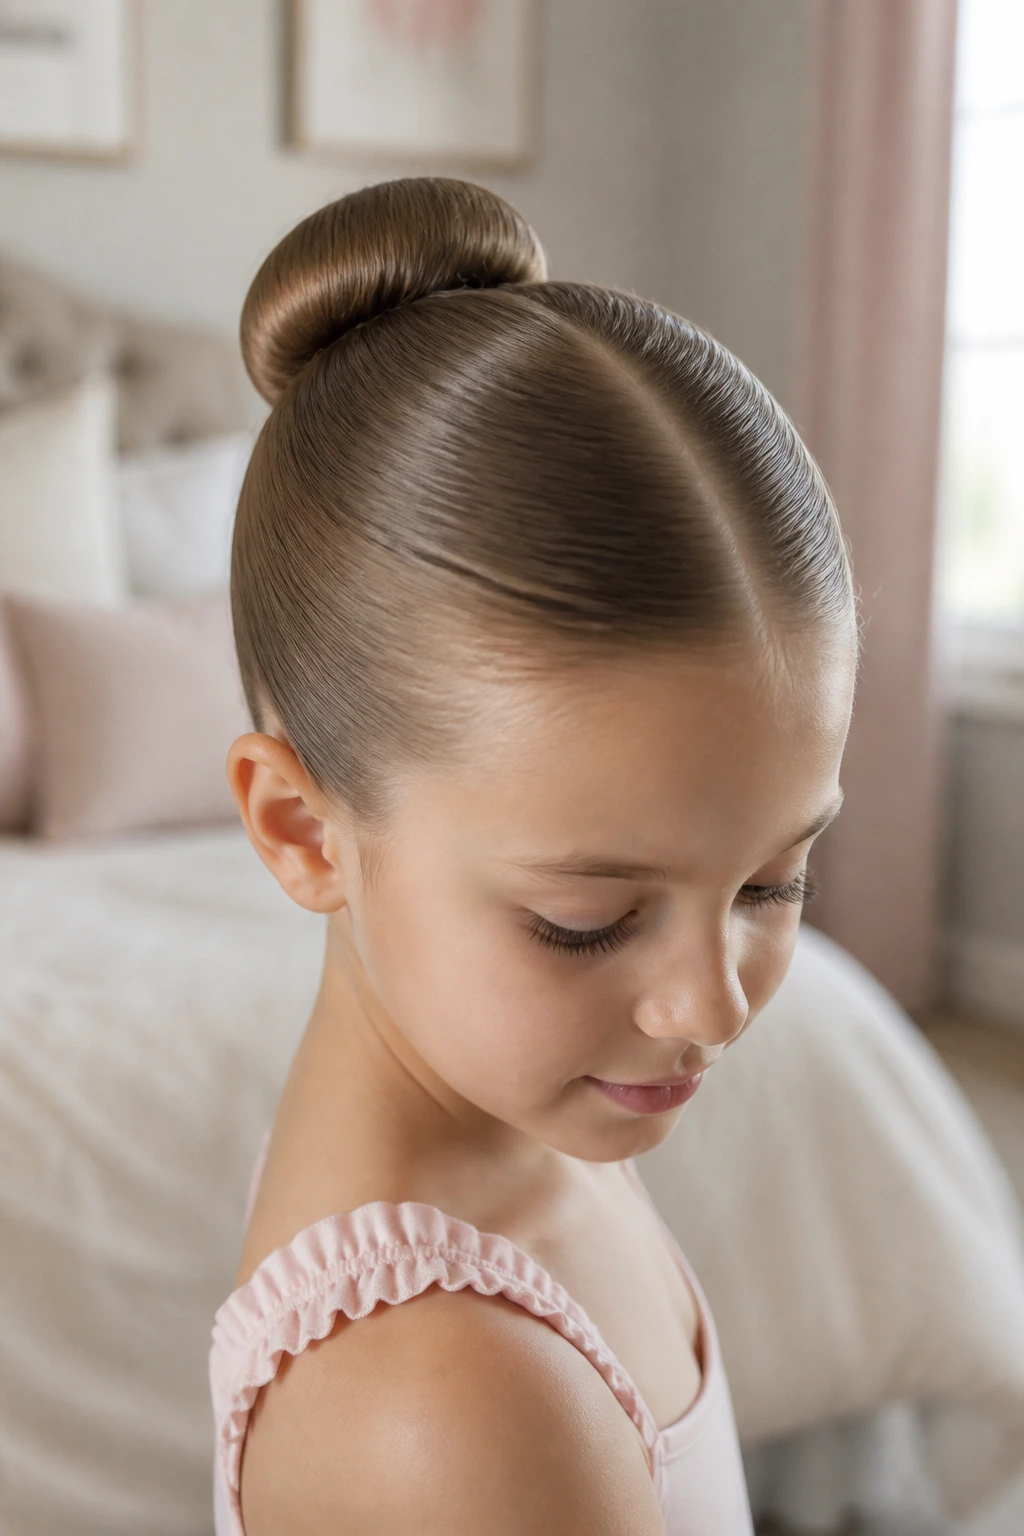
A sleek ballet bun is the classic for a reason. It sits close to the head, keeps every strand tucked in, and has that clean little-circle shape that looks especially neat on smaller faces. I like this one for picture day and performances because it does not wobble around once it’s pinned correctly.
Why it works
The bun stays put because the weight is centered, not dragged to one side. A medium elastic, a second wrap for support, and two or three U-pins crossed through the base usually do the job better than a pile of random bobby pins. If the hair is very slippery, a little mist of water or a pea-sized amount of styling cream gives you grip without making the bun crunchy.
Quick details
- Best on shoulder-length hair and longer
- Works well with fine hair if you add texture first
- Looks sharp with a side part or a center part
- Needs only a small ribbon or bow to dress it up
My tip: If the bun looks perfect but feels tight at the front, loosen the crown a hair. A pretty bun that gives a child a headache is not worth keeping.
2. Side-Braid Wrapped Low Bun
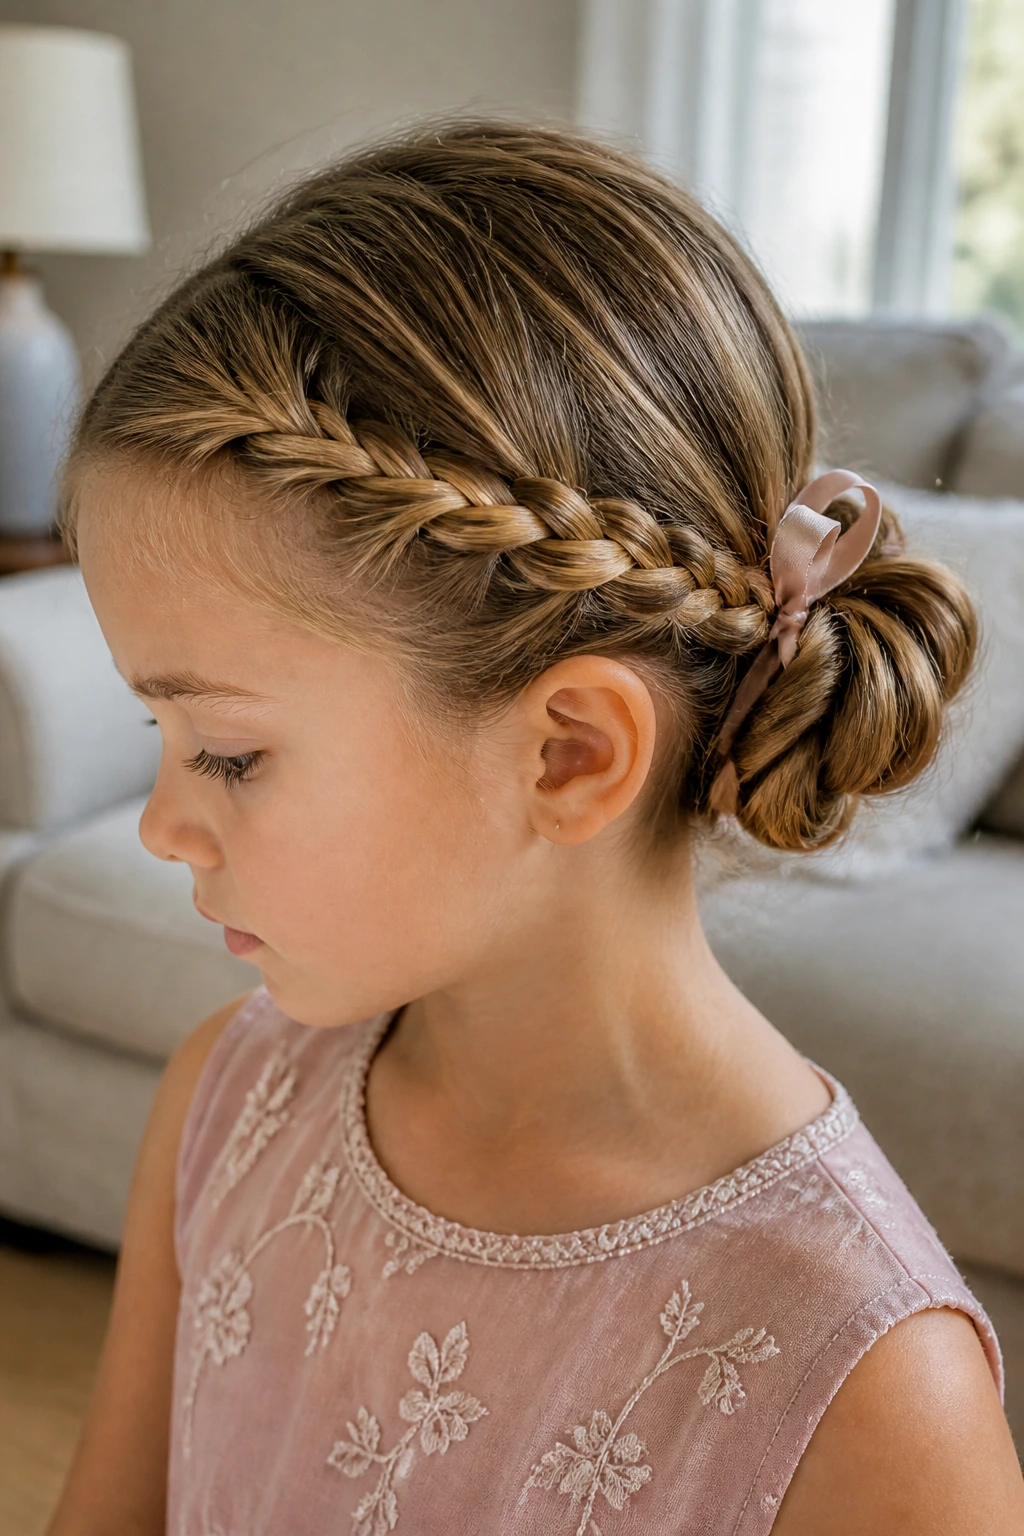
This one has a softer face than the ballet bun. The front braid starts near one temple, sweeps across the head, then feeds into a low bun at the nape. The braid acts like a little frame, so even if a few baby hairs escape later, the style still looks intentional.
It’s especially good for growing-out bangs. You know the stage I mean — that awkward month where fringe wants to live in both the eyes and the eyebrows. A side-braid wrapped bun fixes that without a ton of product.
What makes it stand out: the braid hides the join. So instead of a simple bun that can feel plain, you get a style that looks layered and a bit more dressed up.
A satin ribbon tucked into the bun makes it feel finished. I’d skip giant bows here; they compete with the braid instead of helping it.
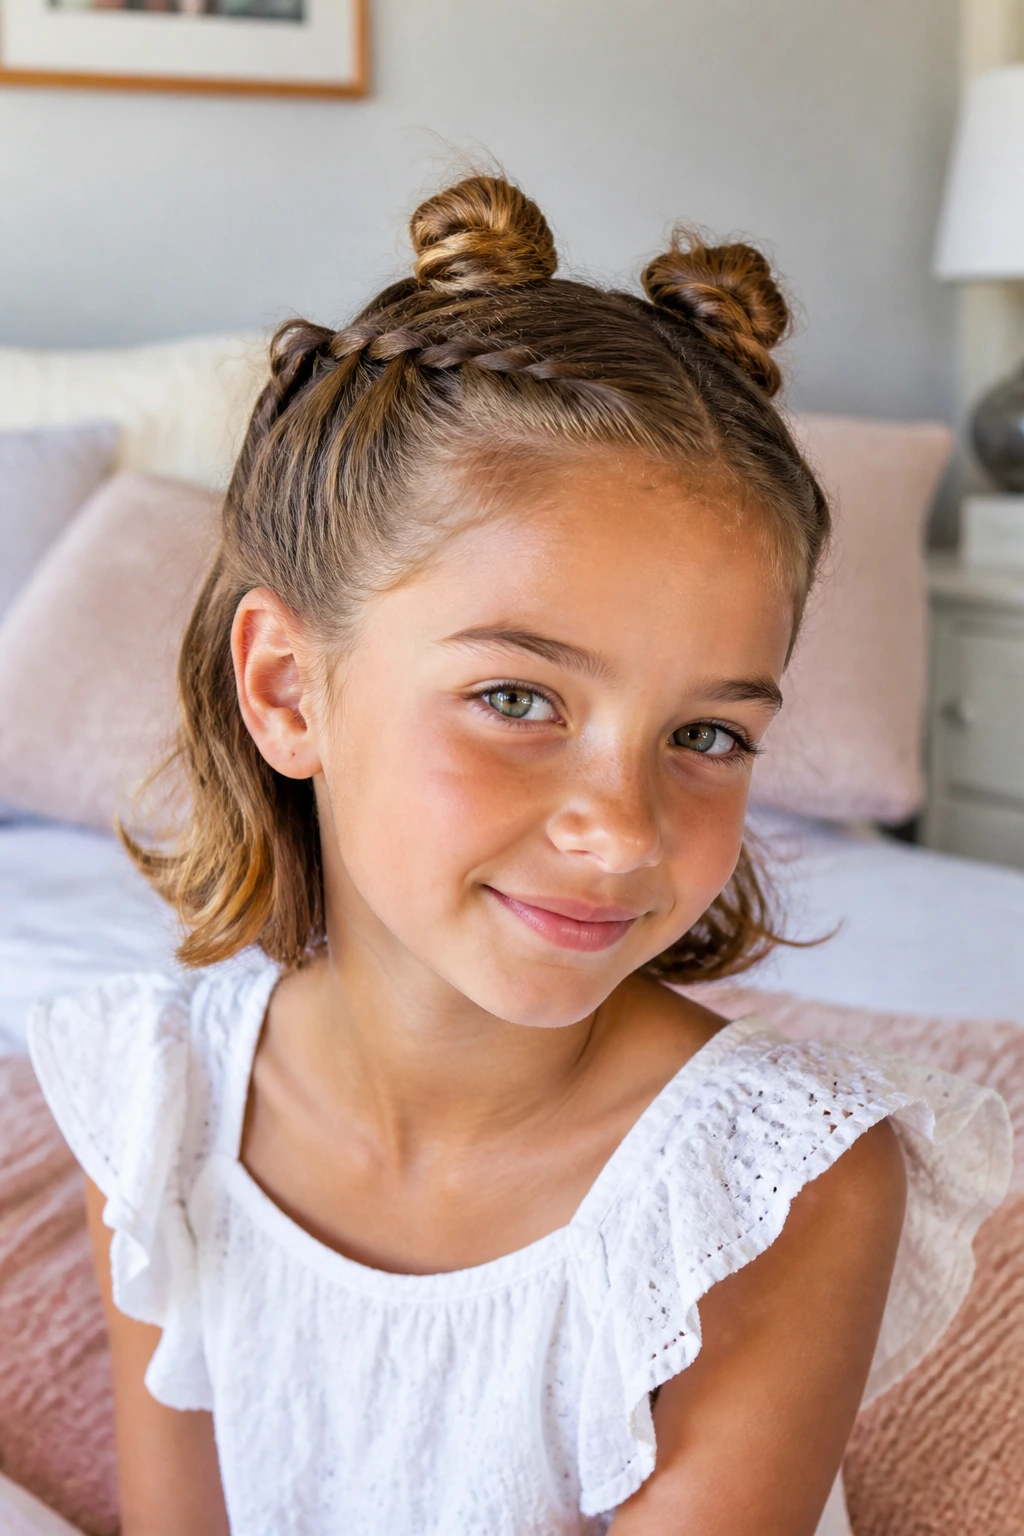
3. Double Space Buns
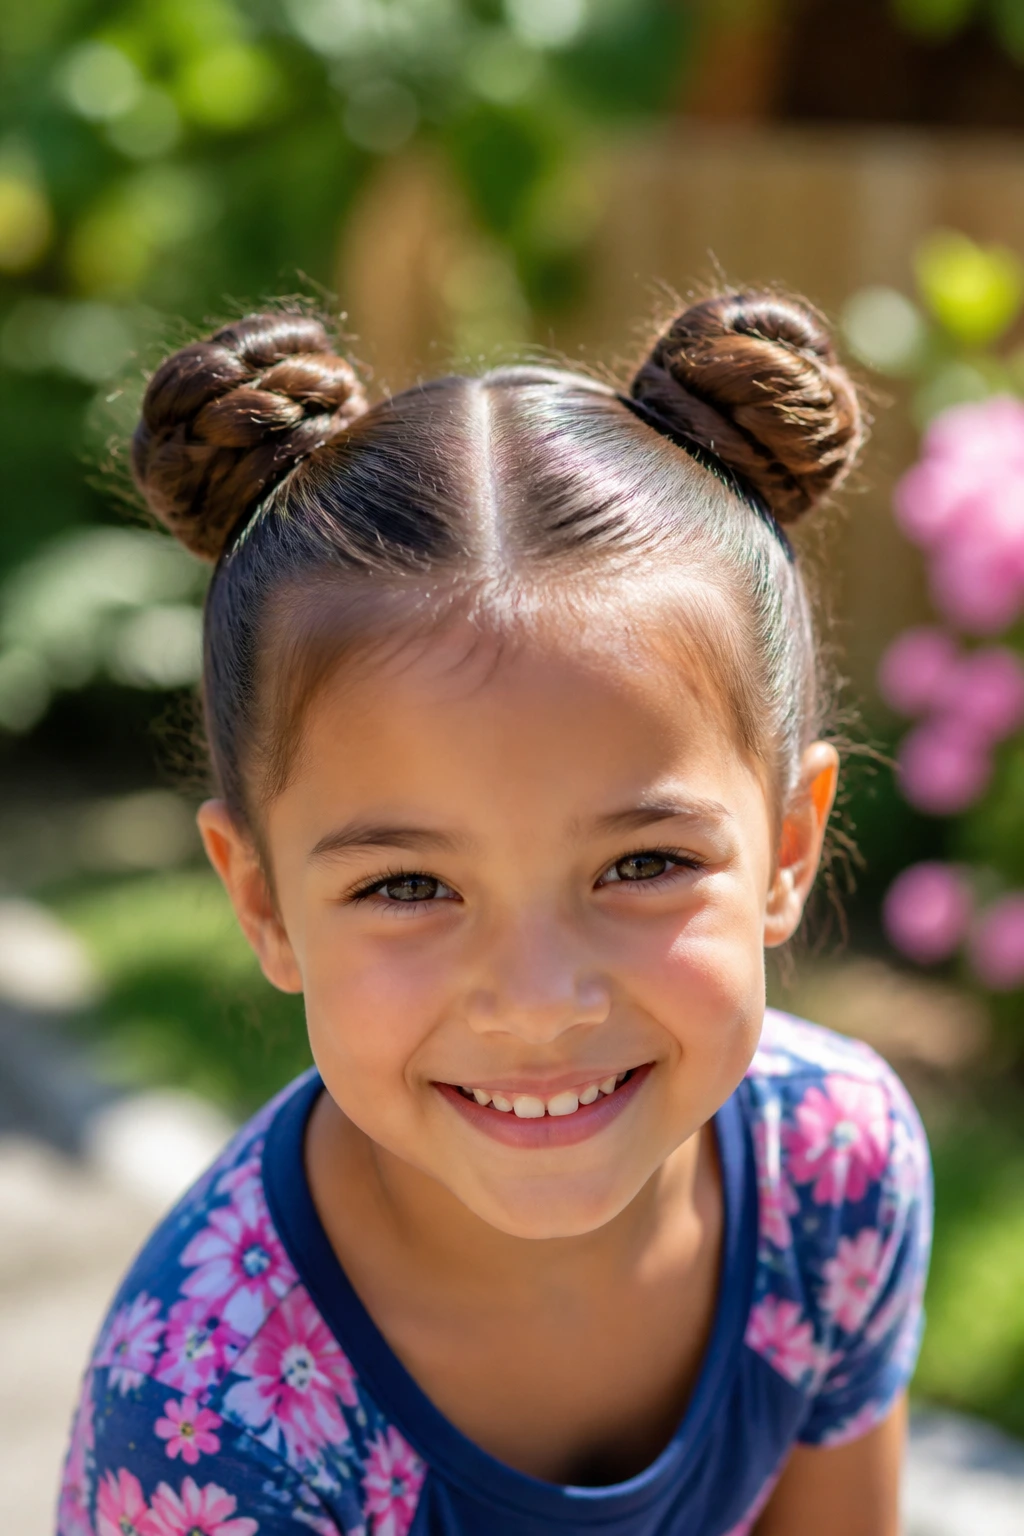
Why do space buns work so well on little girls? Because they split the look into two smaller shapes instead of one big heavy one. That makes them easy to wear and easy to understand, which sounds silly, but children usually love a style they can point to in the mirror and name out loud.
The trick is keeping the buns balanced. Part the hair straight down the middle, smooth each side into a high ponytail, then twist or coil each one into a bun. If the hair is silky, a little dry shampoo at the roots gives the elastics something to hold.
How to use it
- Great for short-to-medium hair
- Best on active days when you want hair off the neck
- Works with glitter clips or tiny bows at the base
- Can be made neat or slightly messy, depending on the event
One warning: do not pull the buns too far back. On a child’s head, that can make the style look stretched and can bother the scalp behind the ears.
4. Twisted Crown Bun
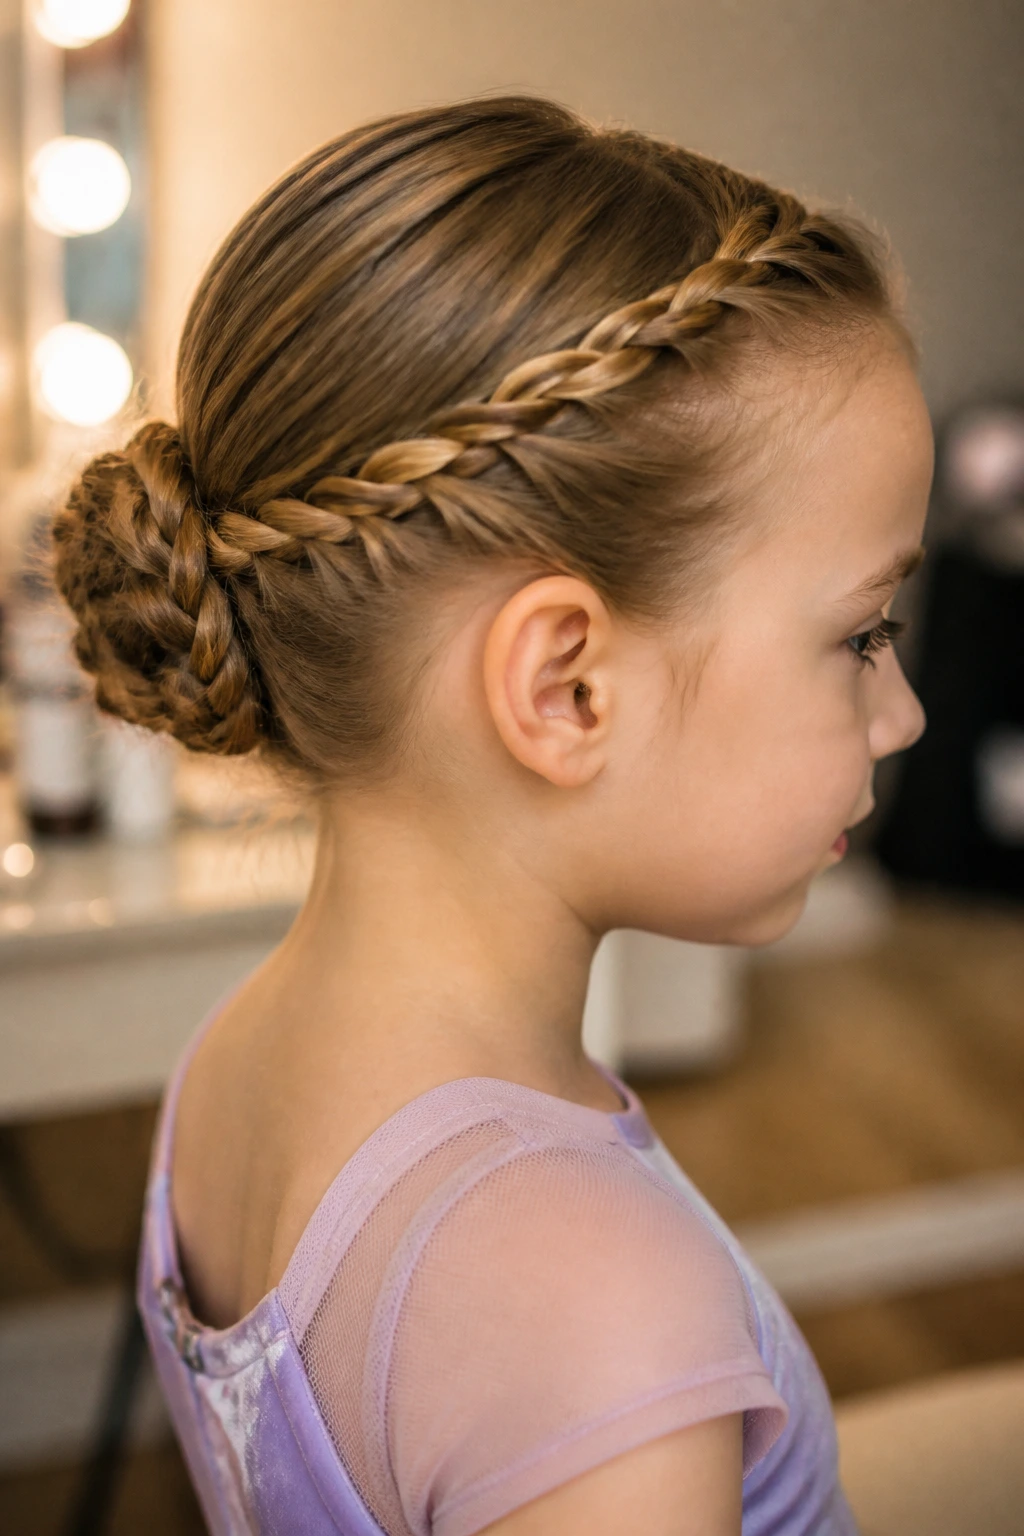
Picture a child walking into a recital with two soft twists running along the sides of the head and meeting in a bun at the back. That’s the whole charm here. It feels polished, but the twists keep it from looking too severe.
This style is one of my favorite answers for thick hair because twists tame bulk better than a single tight elastic ever will. They also sit flatter against the head, which helps if you’re working around hair that wants to puff out at the crown.
A few small pins placed along the twist line are better than forcing everything into one giant knot at the end. That’s where many home styles go wrong. The bun should be the anchor, not the punishment.
5. Bubble Ponytail Updo
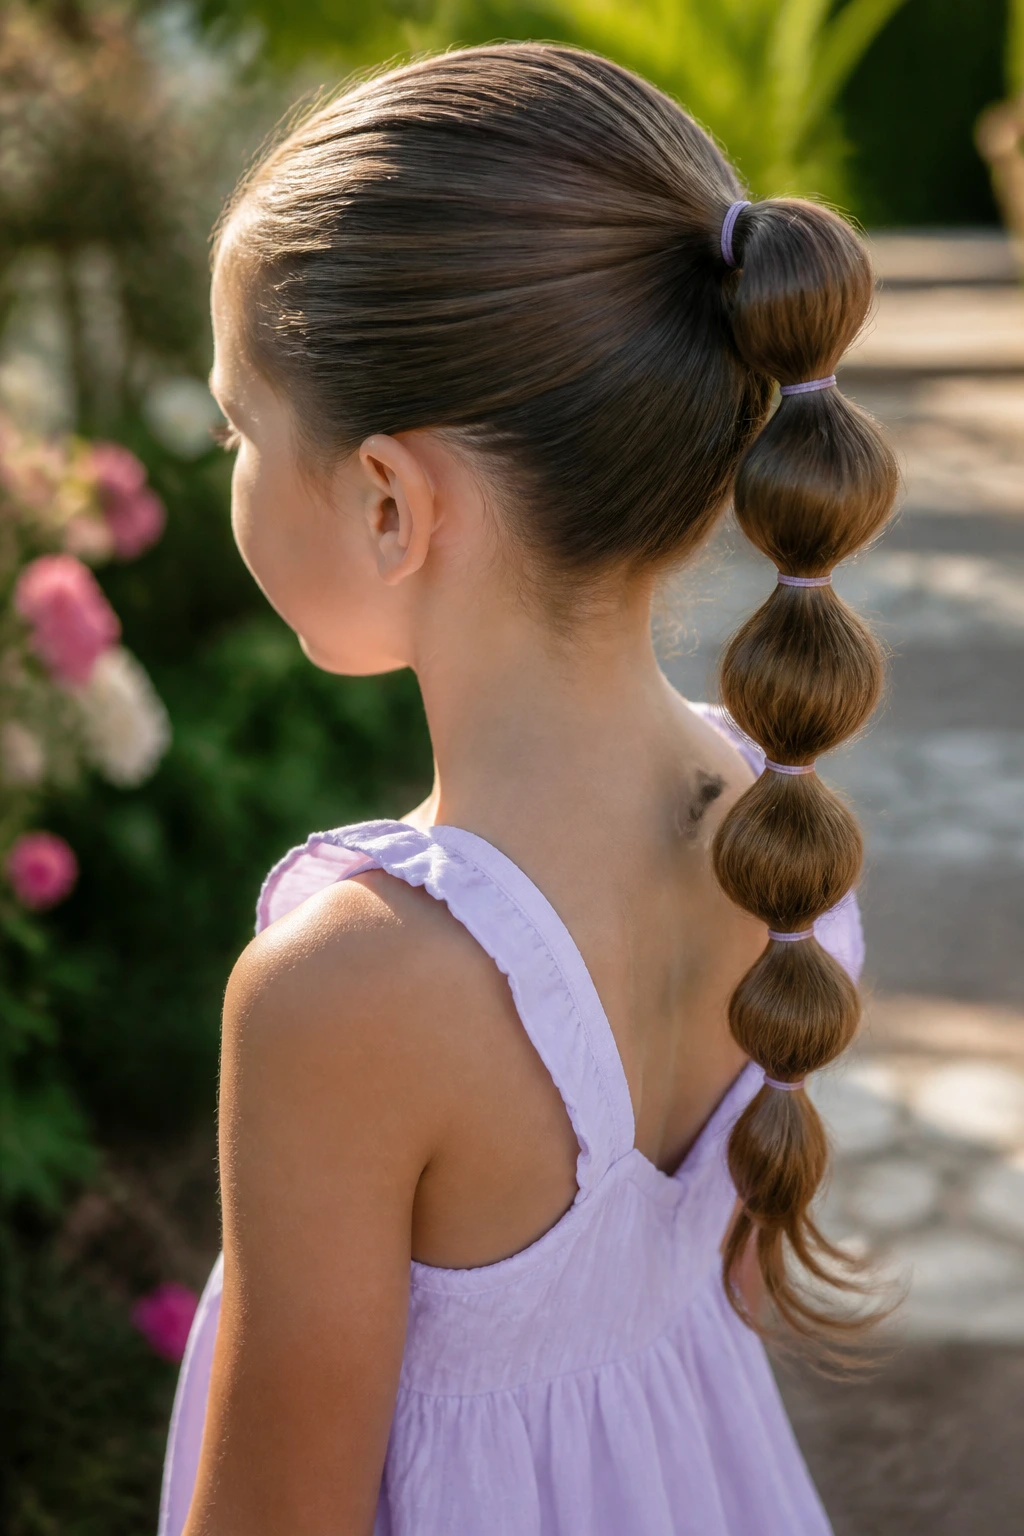
A bubble ponytail reads playful fast. It’s one of those styles that looks more complicated than it is, mostly because the repeated little elastic sections create shape all the way down the tail. On little girls, that segmented look can be adorable without feeling babyish.
I like it when the child wants movement but not loose hair in the face. You gather the ponytail, add elastics every couple of inches, then gently tug each section so it puffs into a bubble. If the ends are tucked under at the last elastic or wrapped into a small bun, you get a cleaner updo feel.
It works best on medium-to-long hair. On very fine hair, a little texture spray at the root keeps the first elastic from sliding.
6. Half-Up Top Knot
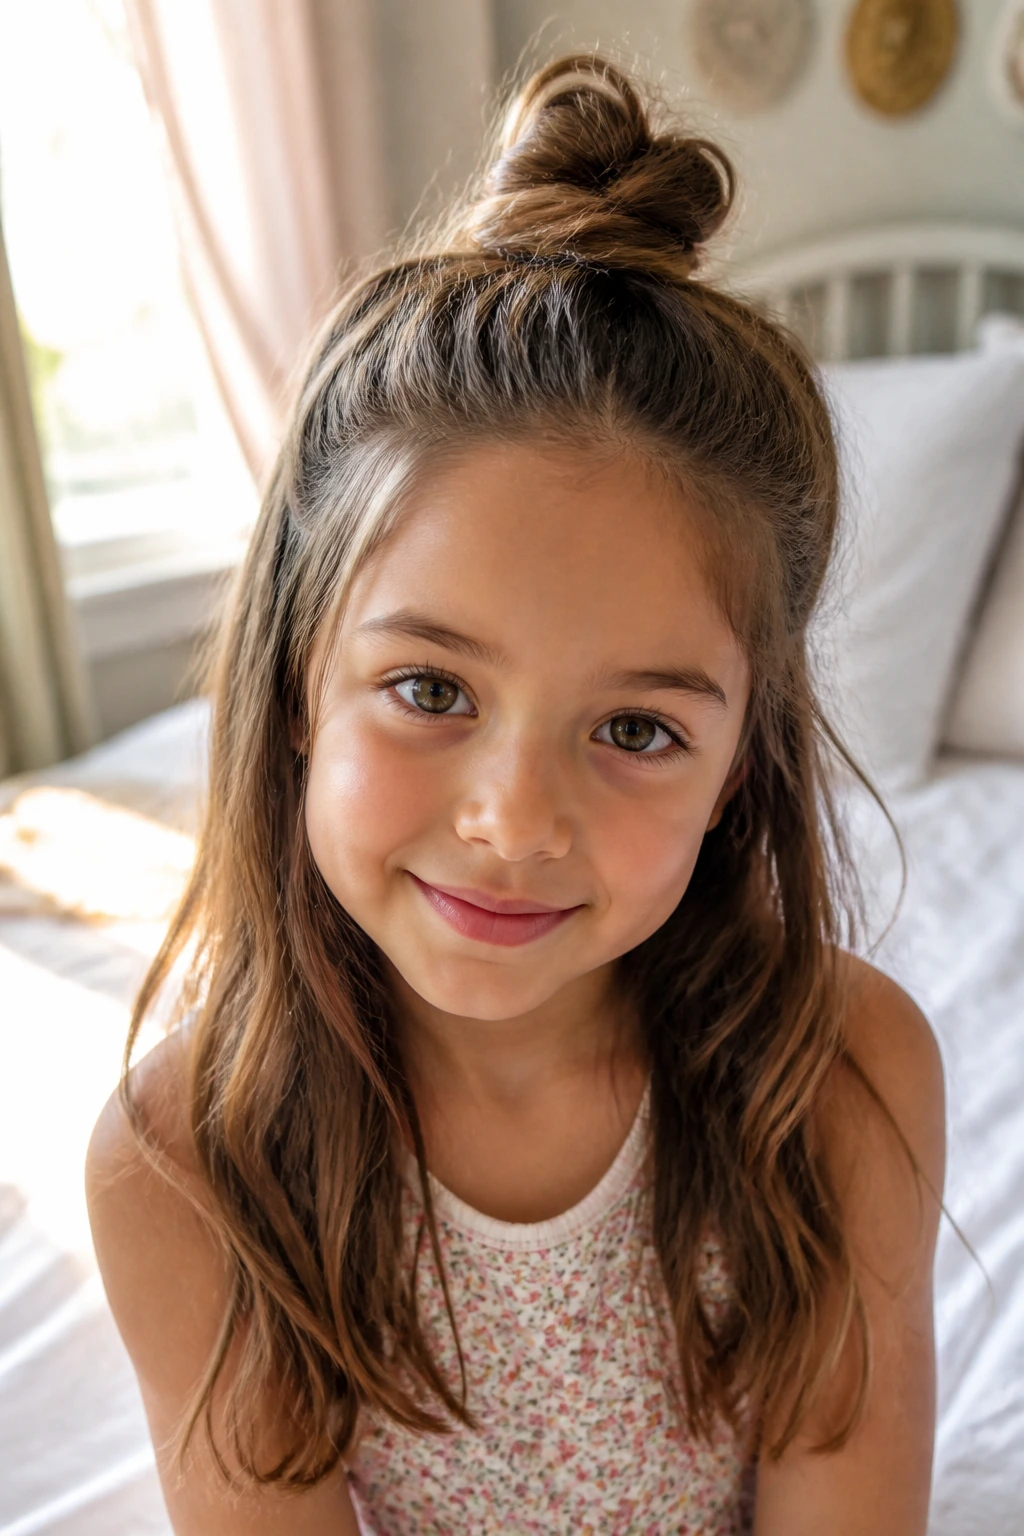
This style is the compromise I reach for more often than people expect. The top half goes into a knot or tiny bun, while the rest stays down. That means hair is out of the eyes, but the length still shows, which is useful for children who do not want their whole head “done.”
Compared with a full bun, it feels lighter and usually gets less resistance from the child in the chair. It’s also a smart pick for layered hair, because the shorter pieces around the face can stay free while the crown is controlled.
Best for: school mornings, playdates, and anyone who wants a tidy look without a full updo.
Add a ribbon tie around the base or a small claw clip above the knot, and you’ve got a style that looks a little more finished without becoming fussy.
7. Low Ribbon Chignon
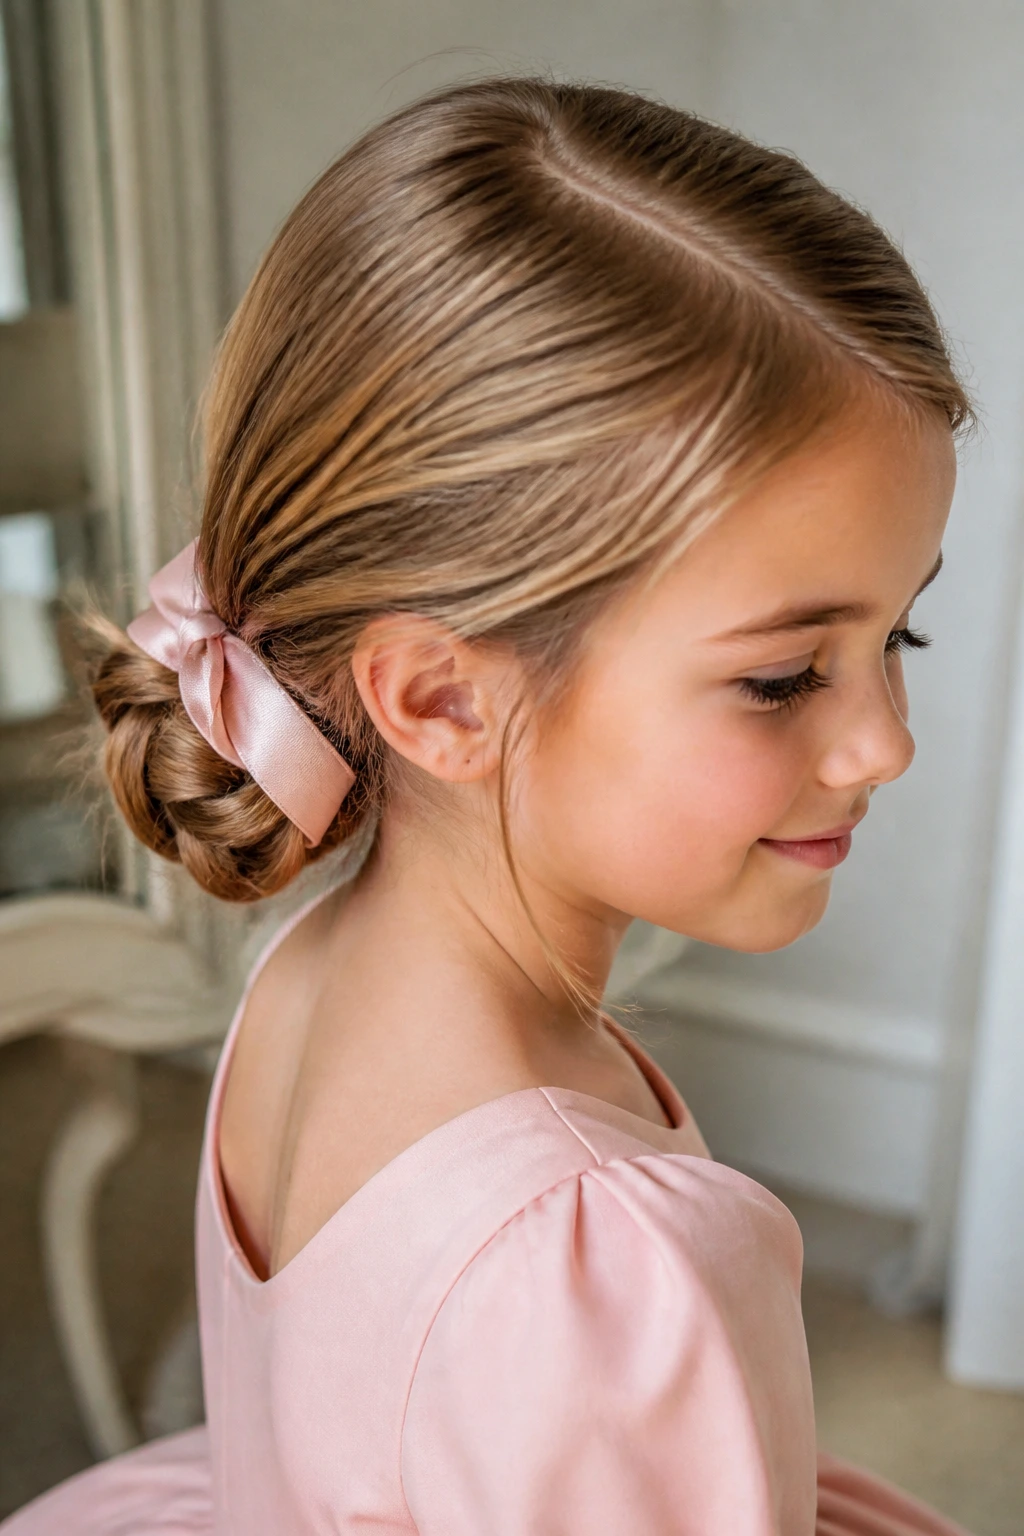
A low chignon with ribbon is the one I’d save for a dressy event when you want the hair to look calm and deliberate. It sits at the nape, which keeps the silhouette soft. A ribbon woven around the bun or tied at the base is enough to make the whole thing feel special.
The useful part is that a low bun is easier to pin securely than a high one. Gravity helps instead of fighting you. If a child has thick hair, split it into two low twists first, then coil them together. That keeps the bun from turning into a lumpy mound.
Best pairing: a side part, smooth crown, and one satin ribbon in a color that matches the outfit instead of shouting over it.
8. Braided Sock Bun
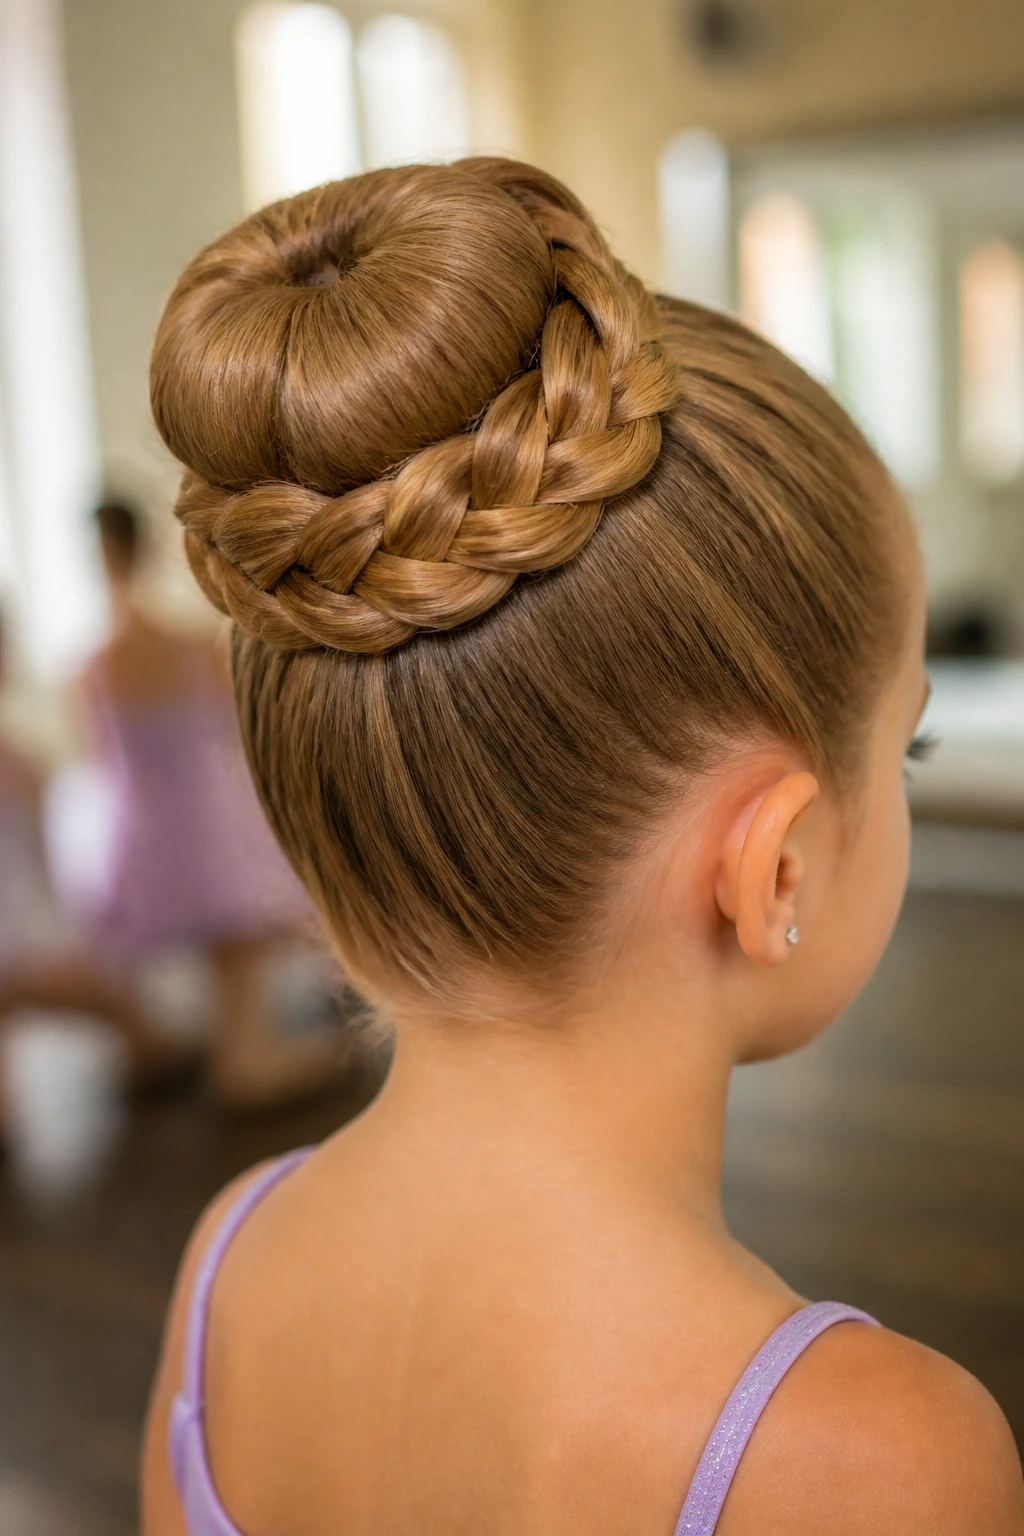
This is the style people think of as “fancy,” but it’s really just smart engineering. A braid wrapped around a bun base gives you a neat shape and a little more thickness than a plain coil. If the hair is fine, a bun donut or sock bun maker can help create a rounder shape without adding bulk with teasing.
The braid gives the bun a ridged texture that looks tidy even if the section underneath is not perfect. That’s the part I appreciate. It forgives a little unevenness.
Key things to know
- Works best when the braid is snug, not stretched flat
- Small pins disappear better than large shiny ones
- Great for dance, church, and family photos
- You can finish it with one bow under the bun for a cleaner line
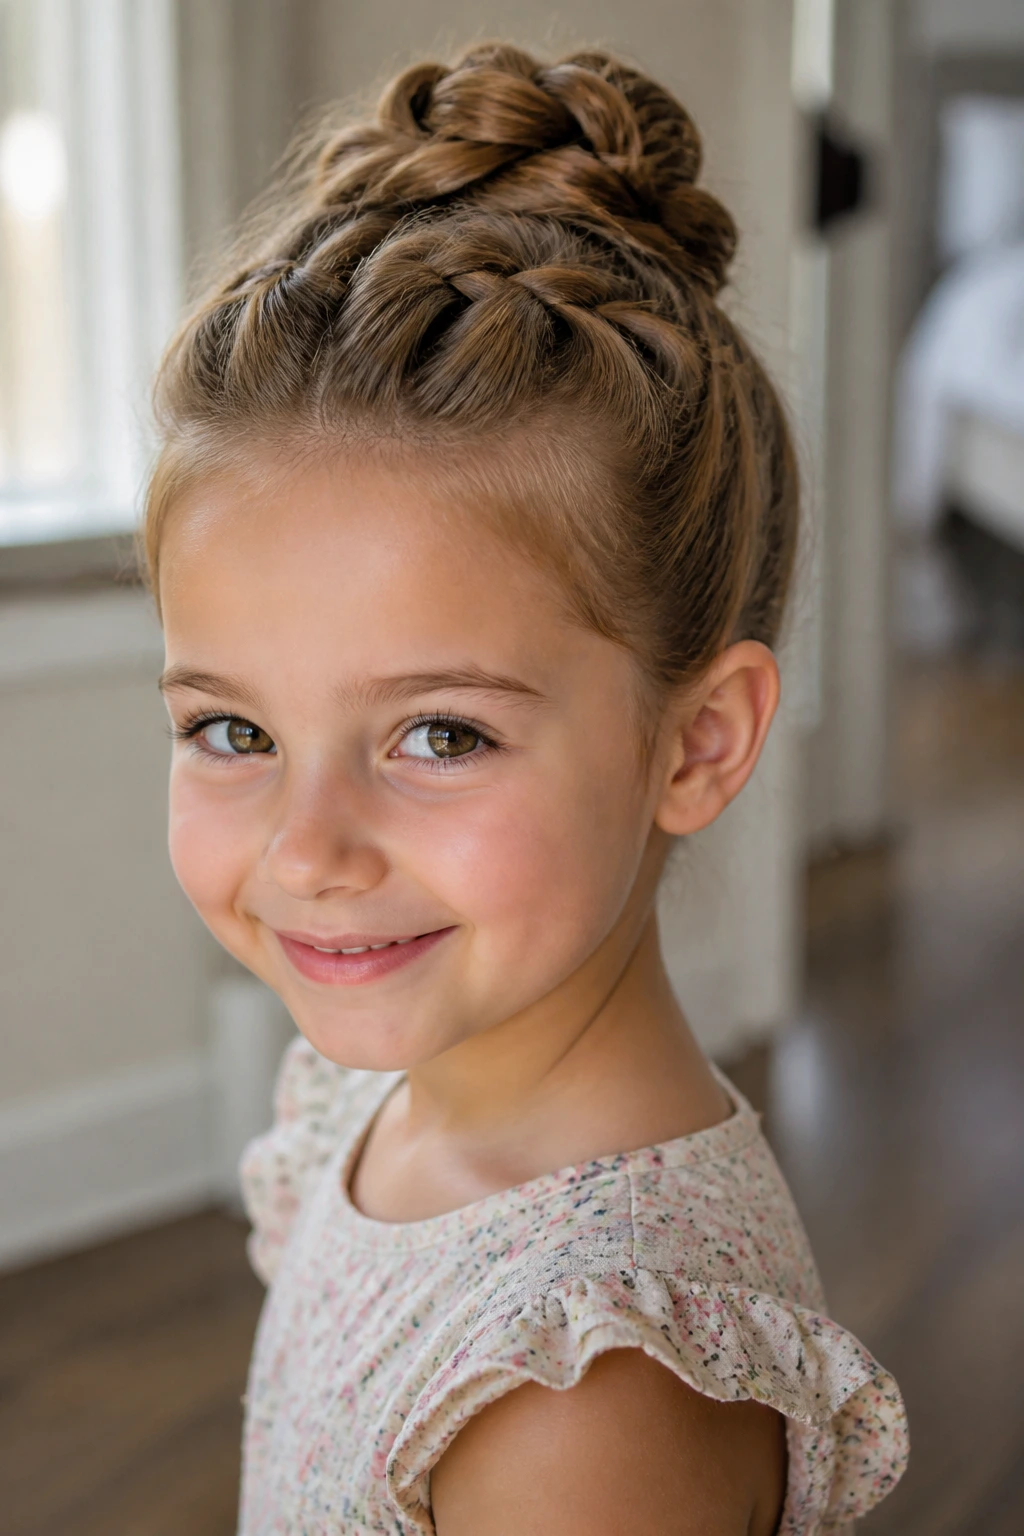
9. Dutch Braid Into a Bun
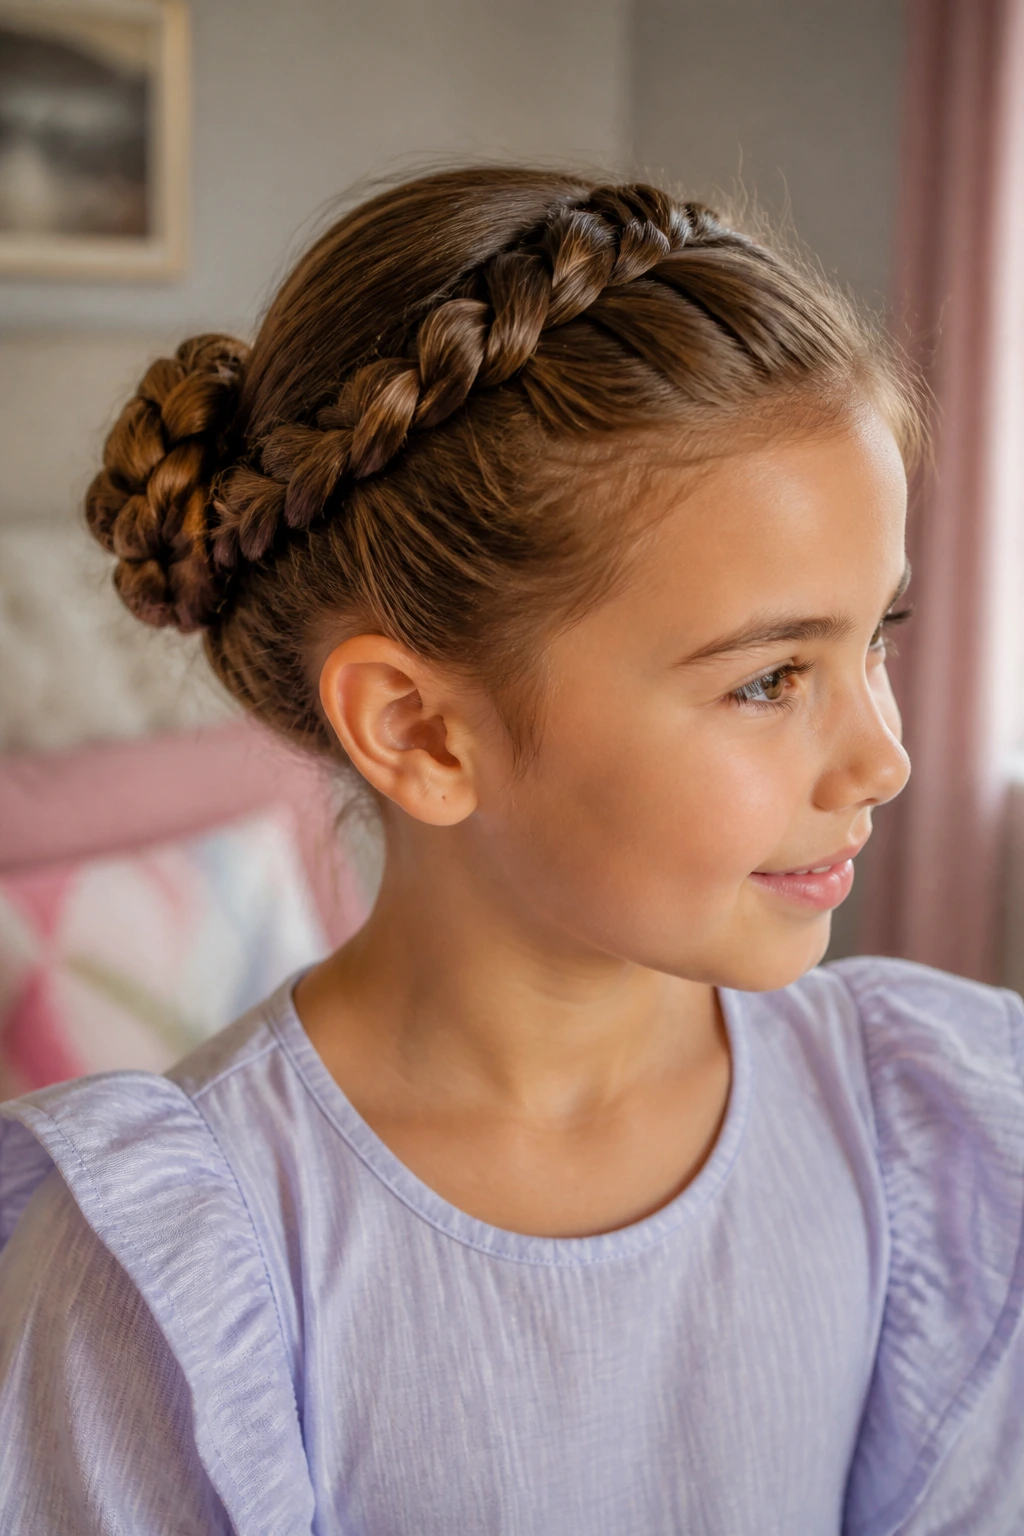
If I had to choose one style for slippery hair, I’d take this over a basic top knot every time. A Dutch braid feeds hair under instead of over, which makes the braid sit up from the head and grip better. Then you wrap the length into a bun and pin it down.
That raised braid texture gives the style some bite. Fine, straight hair often needs that extra texture to hold a shape for more than an hour. The result looks cleaner than a French braid pulled into a bun and usually lasts longer, too.
I’d keep the braid fairly tight at the scalp but not painfully tight. If the front hairline is pulling, loosen the first two braid sections slightly. That one small adjustment matters.
10. Mini French Twist
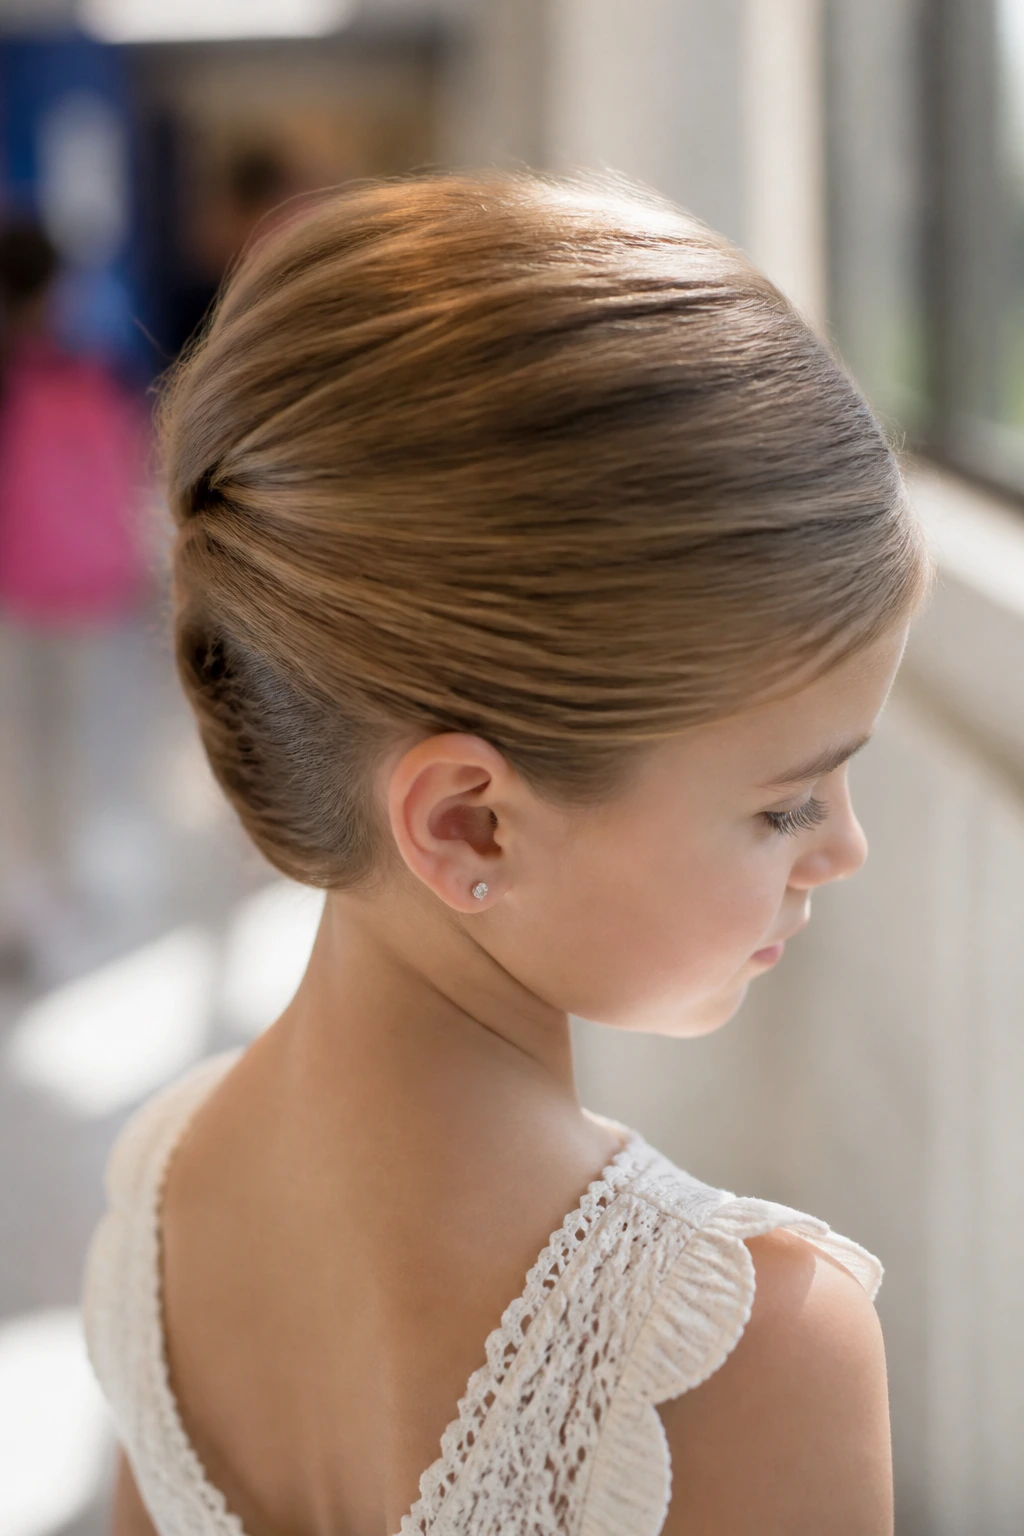
This is the elegant little cousin of the adult French twist. On a child’s head, it works best when you keep it shorter and lower, more like a tucked roll than a dramatic vertical sweep. That makes it wearable, not costume-like.
It’s a nice choice for straight hair that lies flat and doesn’t want to make a round bun on its own. A few hidden pins and a small comb at the base usually keep it in place. I like this one for dressy family events because it looks polished from the side without needing much decoration.
Tiny detail that helps: clip the hair slightly off-center before rolling it. That gives the twist a softer curve and keeps it from looking severe.
11. Four Mini Buns
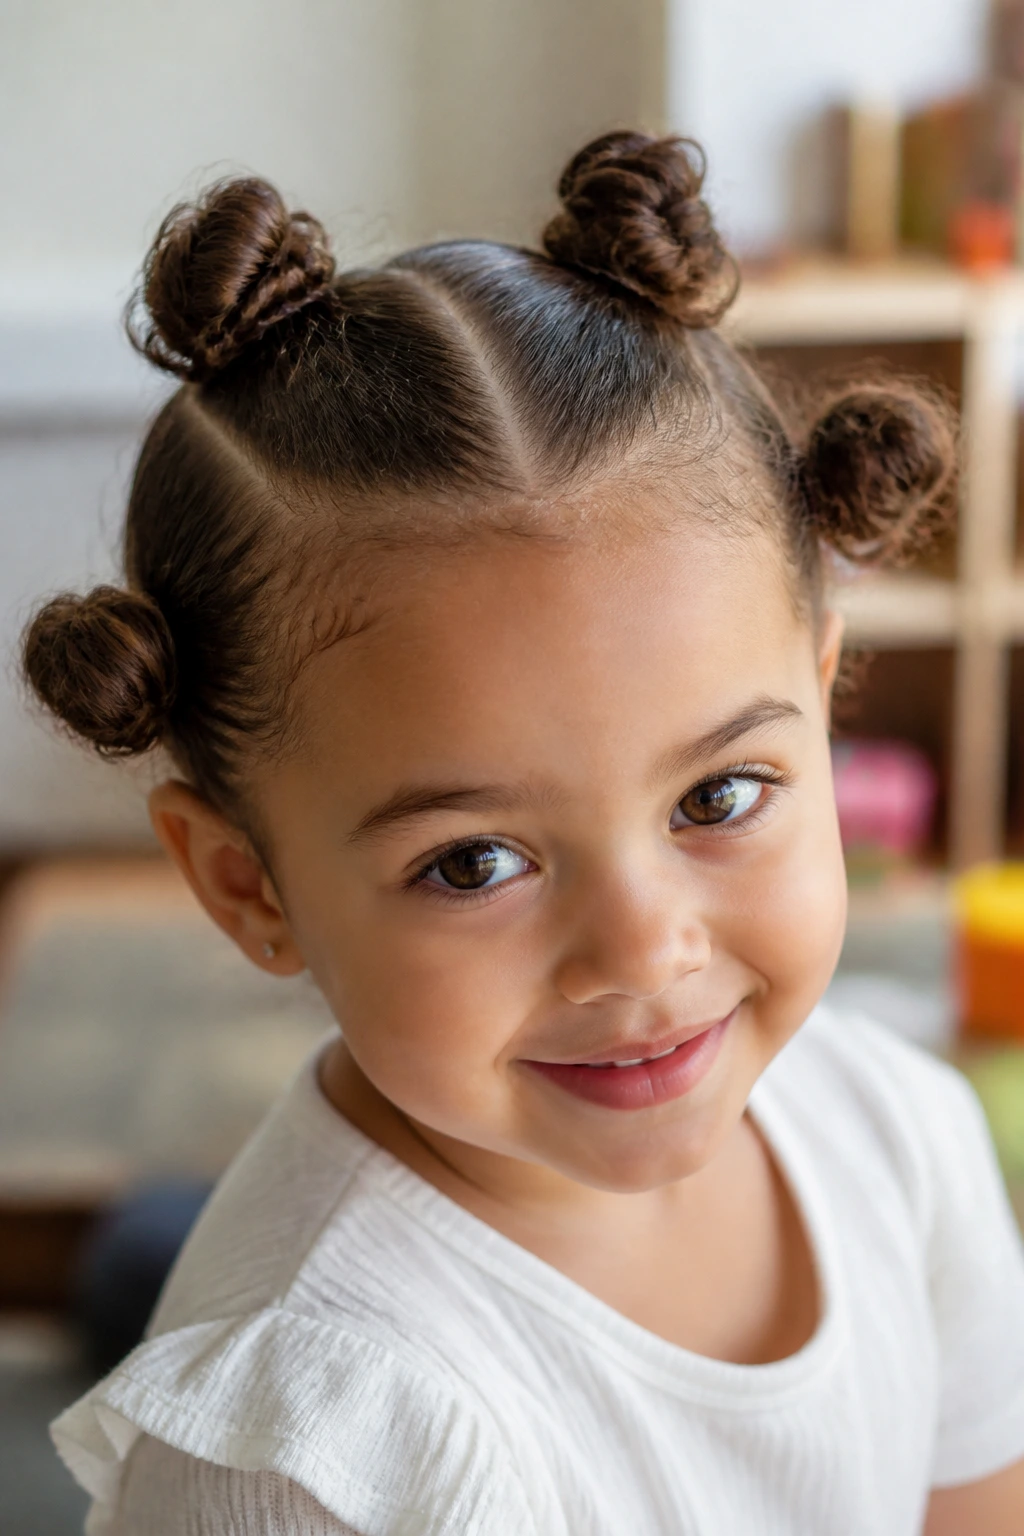
Why stop at one bun when you can divide the hair into four? Four mini buns are playful, neat, and better balanced than they sound. Each bun is small enough to hold its shape, which is useful if the child has thick hair that makes one big bun feel heavy.
Part the hair into four sections — front left, front right, back left, back right — and build each mini bun at the edges of those sections. The style has a tidy rhythm to it. It also gives you more control over hair that slips out at the sides, because each piece is anchored separately.
Best on:
- Medium to thick hair
- School spirit days
- Young kids who like playful styles
- Hair that usually refuses to stay in one bun
Add tiny clips to the front pair if you want a little sparkle without overdoing it.
12. Halo Braid Crown
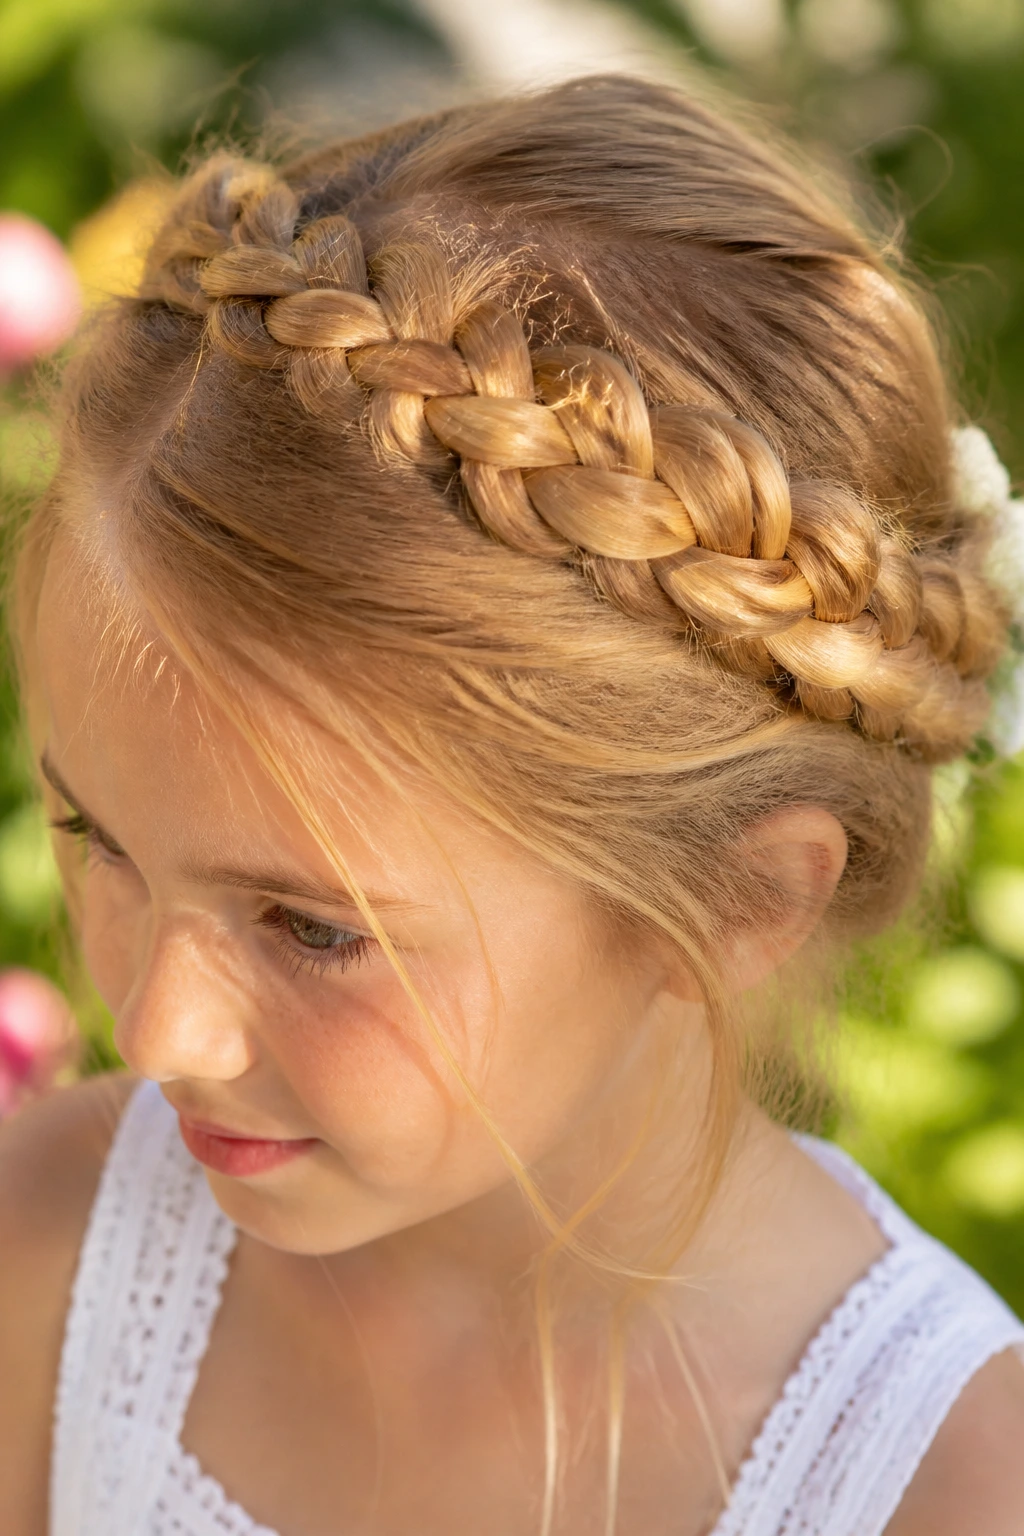
A halo braid crown looks like the child stepped out of a storybook, but the real appeal is practical: it keeps hair wrapped around the head instead of bouncing around the face. That makes it great for weddings, school concerts, and those days when you want the hairstyle itself to do the decorative work.
The braid runs around the perimeter of the head and tucks in at the back. For fine hair, gently pancaking the braid — loosening the outer edges a bit — gives it more visible width. For curly hair, I’d keep the braid firmer and let the texture do the styling.
This one can feel a little advanced on the first try. Once you’ve done it a couple of times, it becomes a solid fallback for special occasions.
13. Messy Loop Bun with Face-Framing Pieces
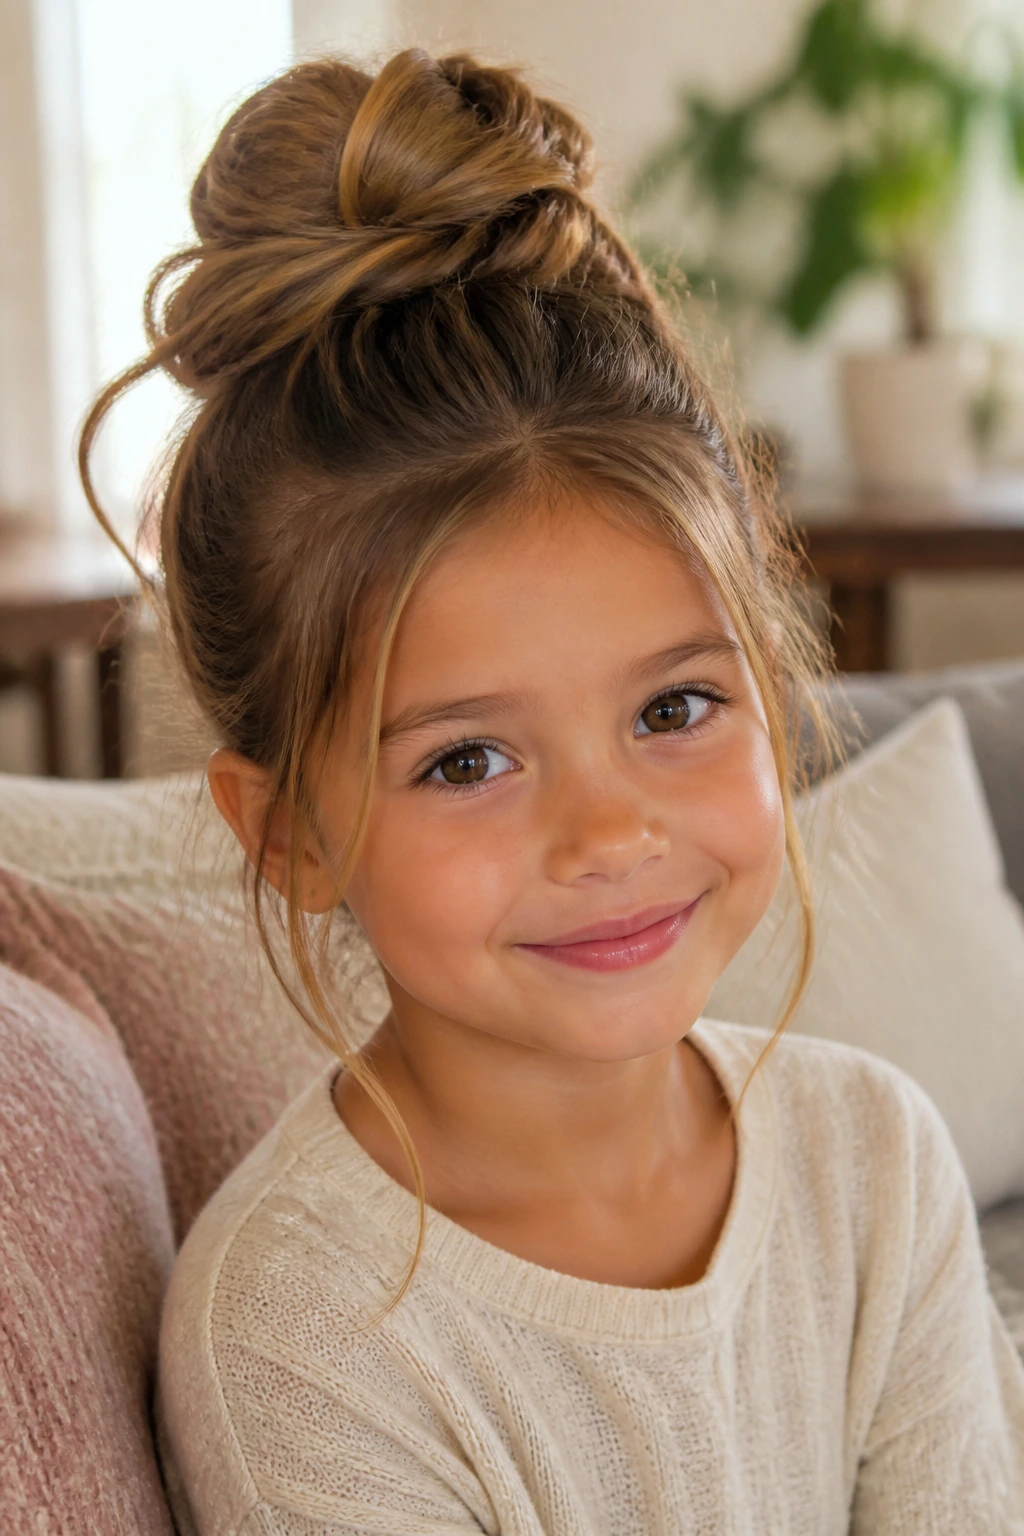
Not every little-girl updo has to be locked into place like a museum piece. This one is softer. You gather the hair into a looped bun, let the ends hide inside or fan out a bit, and leave a few small face-framing pieces loose.
The loose pieces are what make it feel fresh. They soften the face and keep the style from looking too stiff on a child. I like this for older girls who want something a little more grown-up without losing movement.
The catch is balance. If the bun itself is too sloppy, the whole thing can look unfinished. Keep the bun base neat, then allow the front pieces to be the relaxed part.
14. Rosette Braid Bun
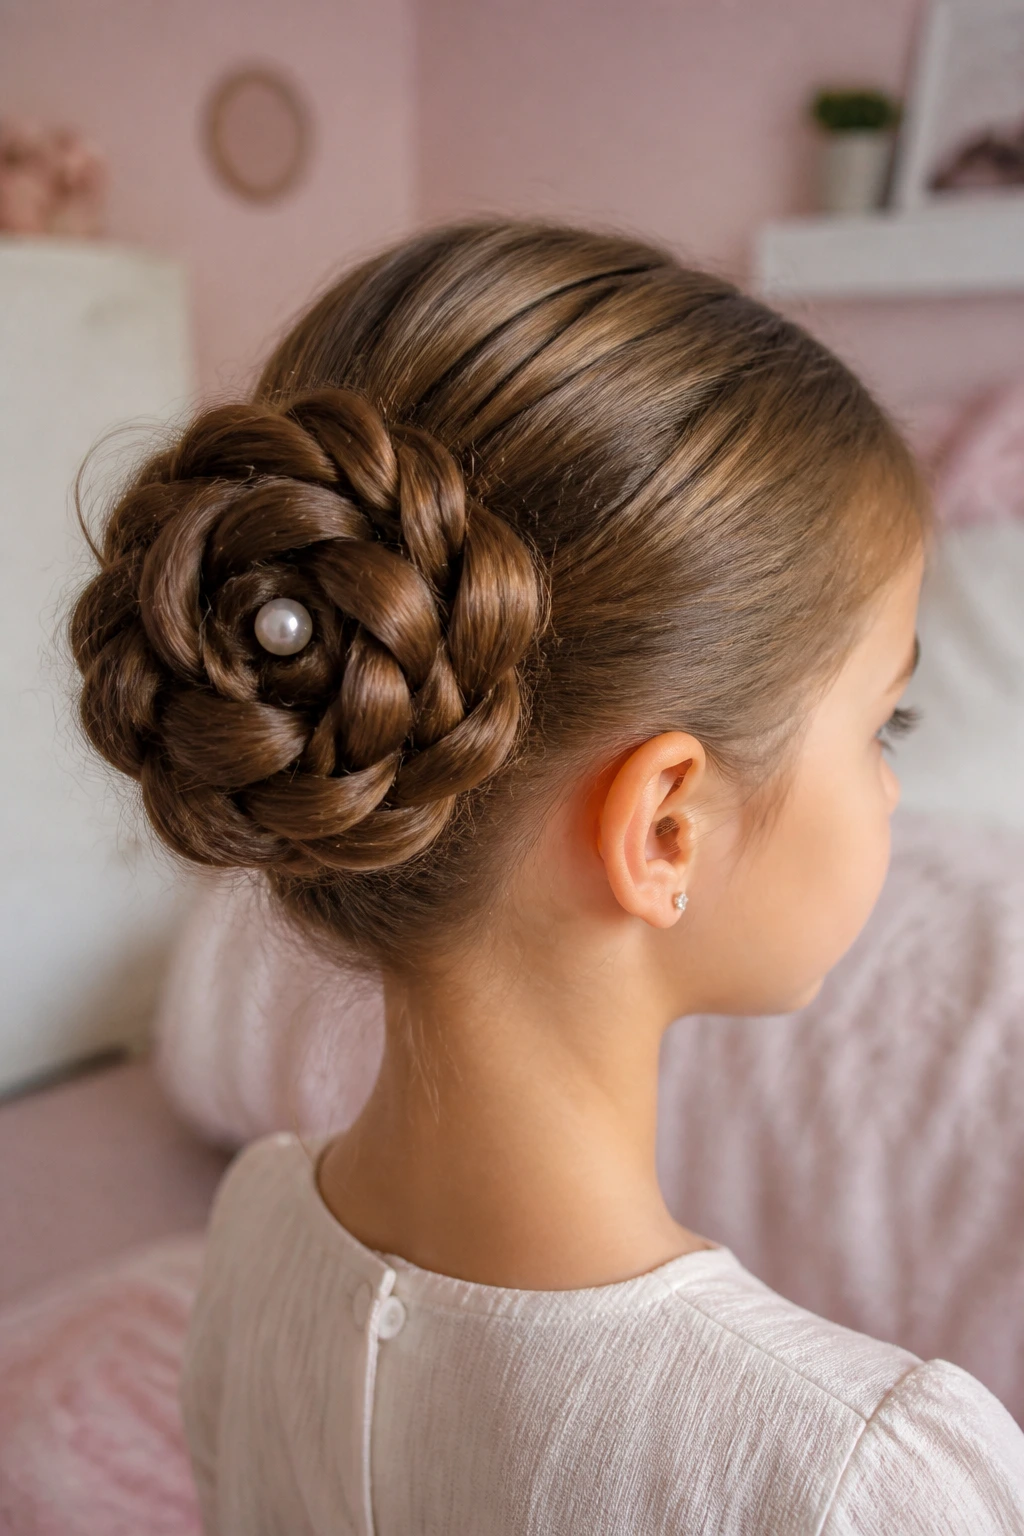
A rosette bun is made by coiling a braid in a circular shape so it looks like a flower. It’s one of the prettier braided updos on the list, and it gives you a nice place to hide pins because the braid itself provides texture.
This style works beautifully on medium-length hair that might not fill out a giant bun. The rosette shape gives the illusion of fullness without needing extra padding. A single hairpin or pearl clip in the center can make it feel special without tipping into too much decoration.
What I like about it: the braid stays visible. So even from the back, the style has structure instead of looking like a plain knot.
15. Faux Hawk Braid Updo
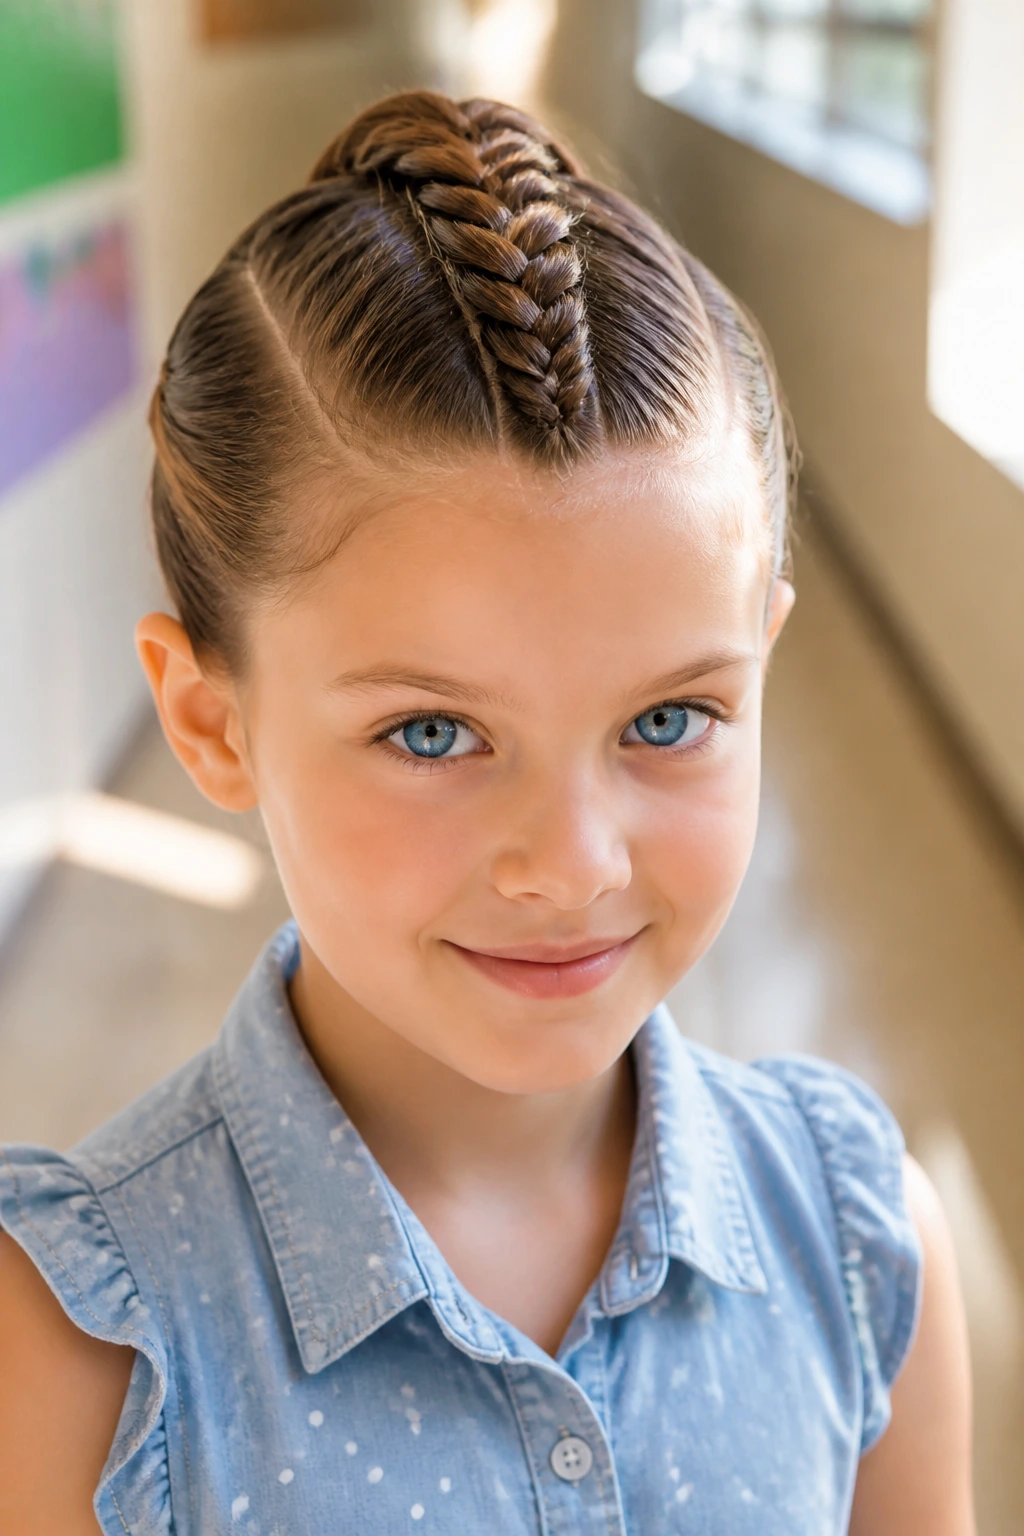
This one looks bolder than it is. A central braid or series of twists runs from the front hairline down the middle, while the sides are pinned back close to the head. The result has a little lift and edge without actually leaving hair loose.
It’s a good pick for kids who want something fun and a little different. It also works well on thick hair because the center line becomes the focus, which helps manage volume. If the hair on the sides is very smooth, a touch of styling cream or water mist keeps flyaways from popping out.
I’d use this for birthdays, themed events, or any day when the child wants a style with personality. It’s tidy, but not sleepy.
16. Knotted Top Bun
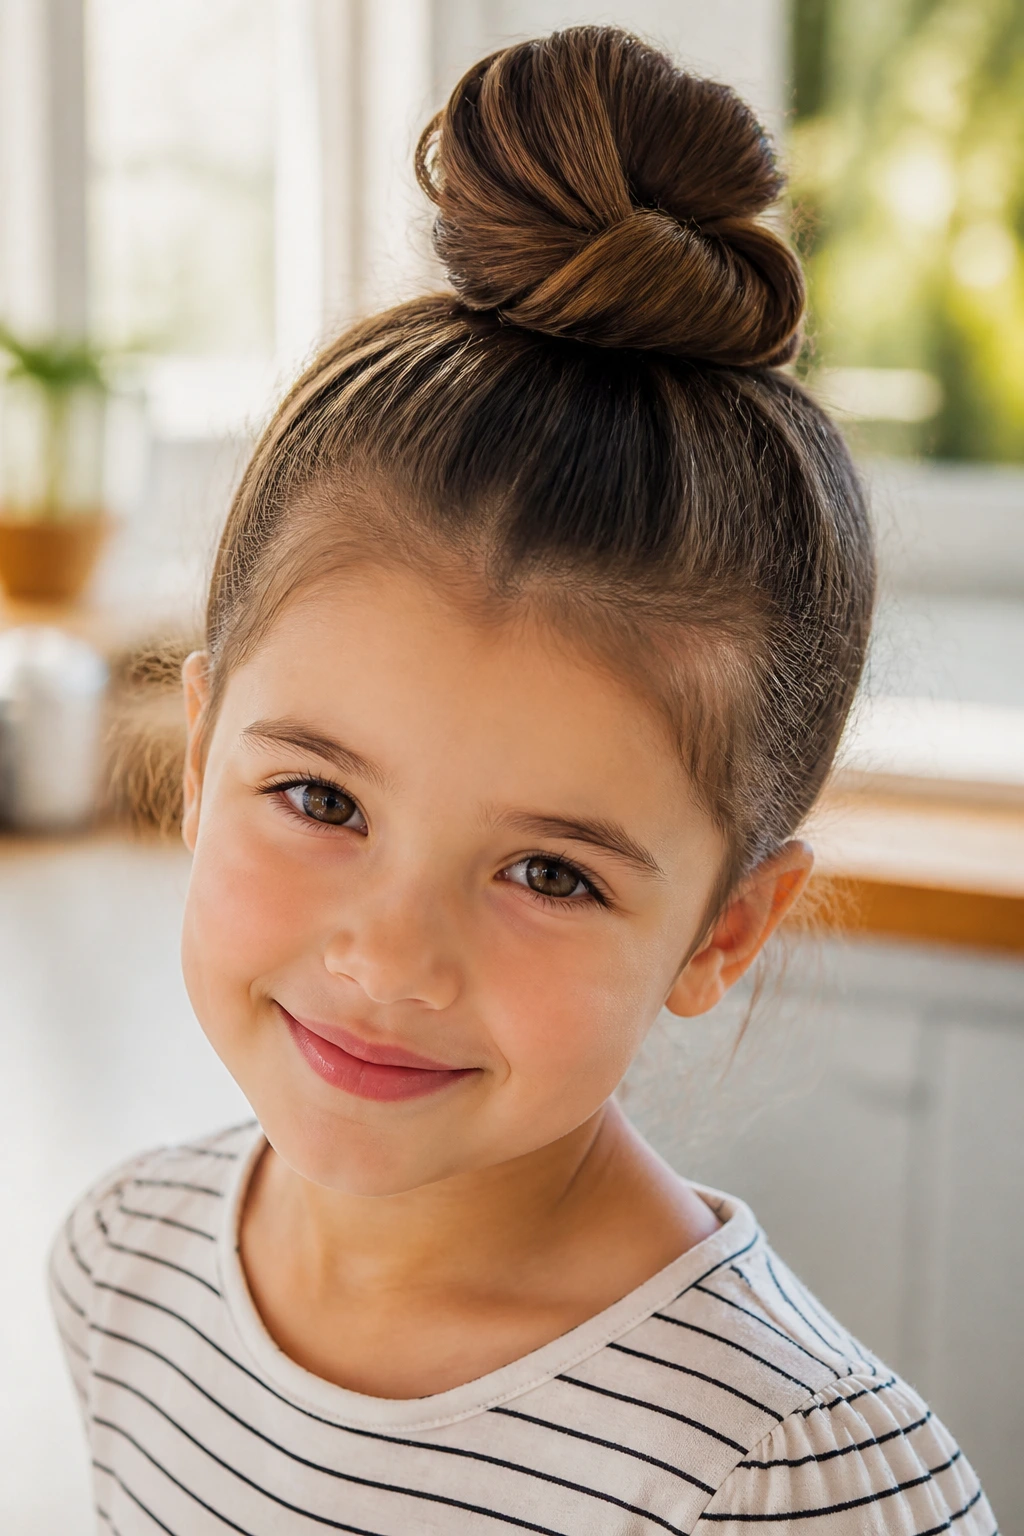
A knotted top bun feels modern, but the mechanics are old-fashioned: twist, fold, pin, repeat. The knot itself creates shape fast, which is why I like it for mornings when you need a quick answer and do not want to spend ten minutes wrapping and re-wrapping a bun.
The style is strongest when you split the ponytail in two and knot the sections around each other before securing the ends. That gives the knot some grip. It’s especially useful on medium hair that isn’t long enough for a big bun but still needs to be off the neck.
Use it when:
- You need a quick school style
- Hair is too short for a full chignon
- You want a cleaner look than a messy bun
- The child likes seeing the knot shape from the side
17. Princess Rope Twists
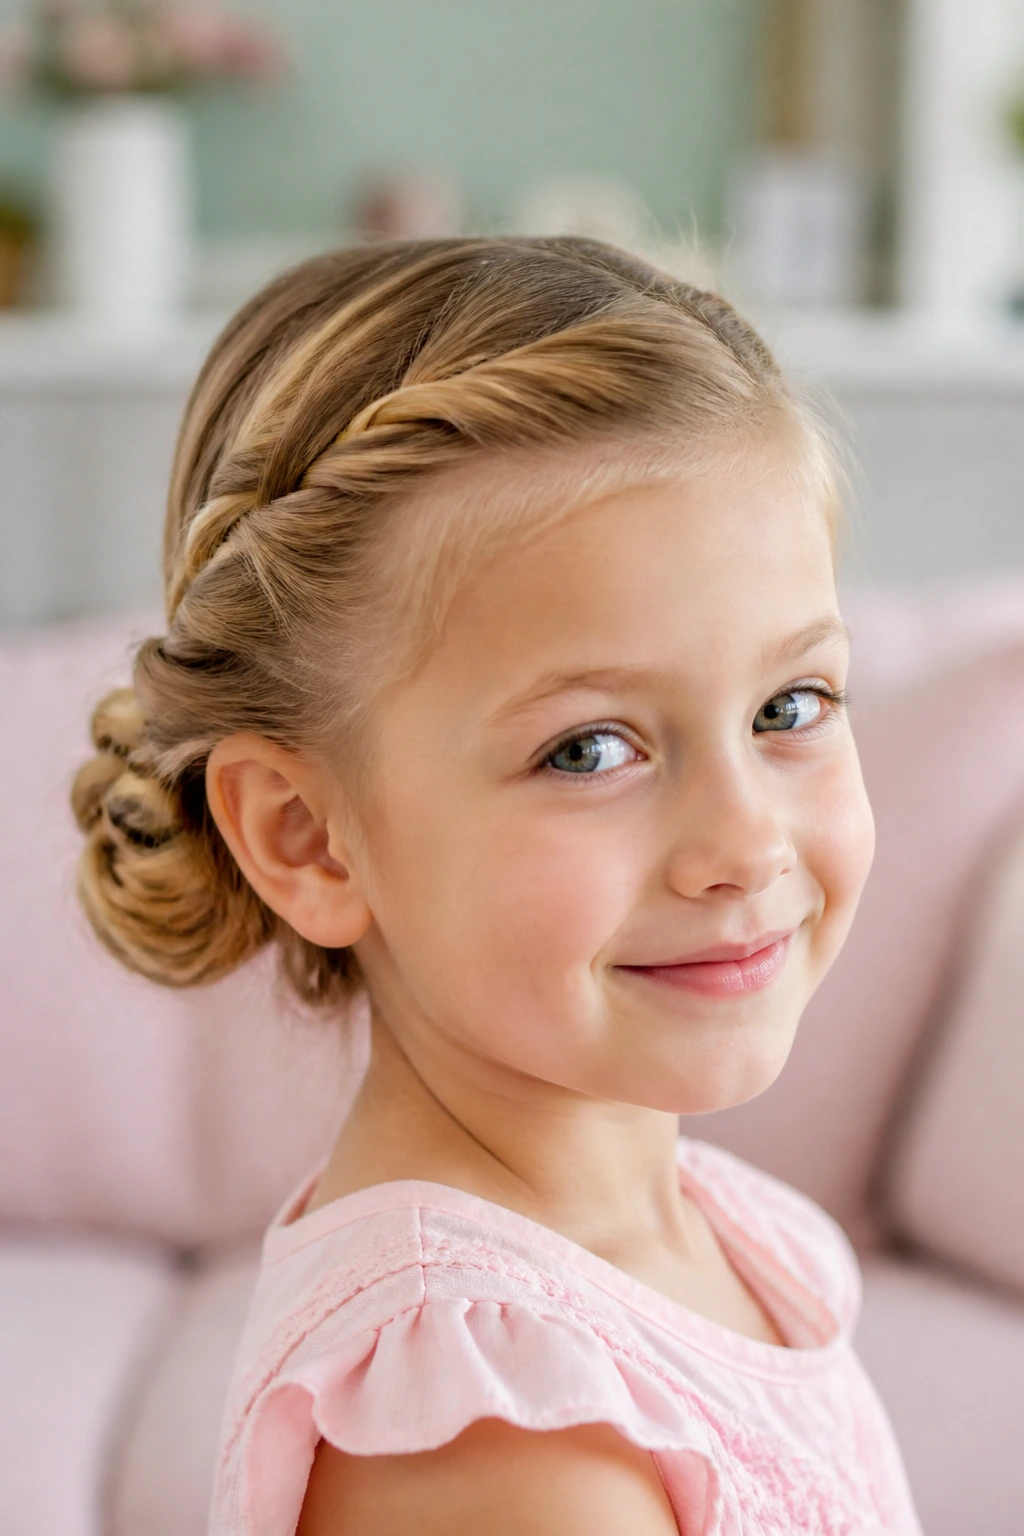
Rope twists are one of those styles that look simple and calm, which is sometimes exactly the point. You divide the hair into two strands, twist each section, then twist them around each other before pinning the end into a low bun or tucked roll.
The texture looks smoother than braids and a little softer around the face. That makes rope twists a smart pick for children who dislike the feel of tight braiding. They also hold nicely on silky hair if you start with a touch of leave-in spray.
If a braid looks too busy for the outfit, rope twists are the cleaner choice. They’re less sharp, less angular, and easier to dress up with a satin clip.
18. Pull-Through Braid Bun
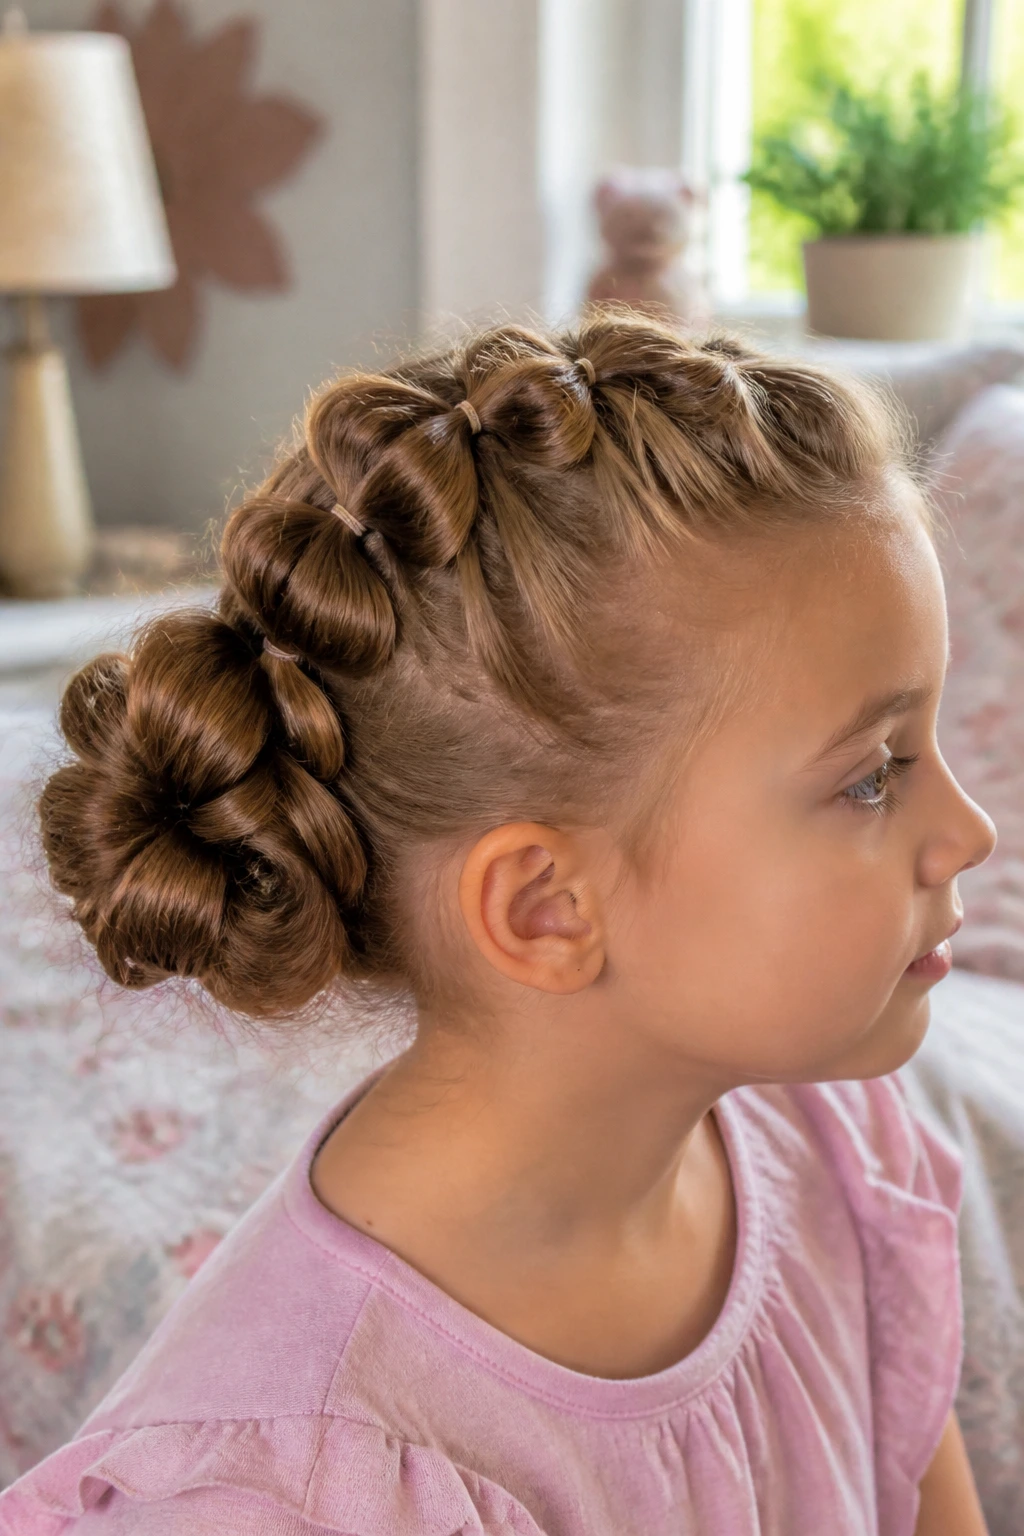
The pull-through braid gives you a lot of texture without actually braiding in the traditional sense. That makes it useful for little girls with hair that slips apart when you try to do a regular braid. Each small ponytail section gets looped through the one above it, creating the look of a thick, woven braid.
Wrap that textured length into a bun and it suddenly looks fuller than a simple twist. This is one of the best styles for fine hair that needs volume at the back. It also holds up well because every section has its own elastic anchor.
My opinion: if you want the braid look without the fuss of perfect three-strand sections, this is the one to learn.
19. High Pony Wrapped Braid
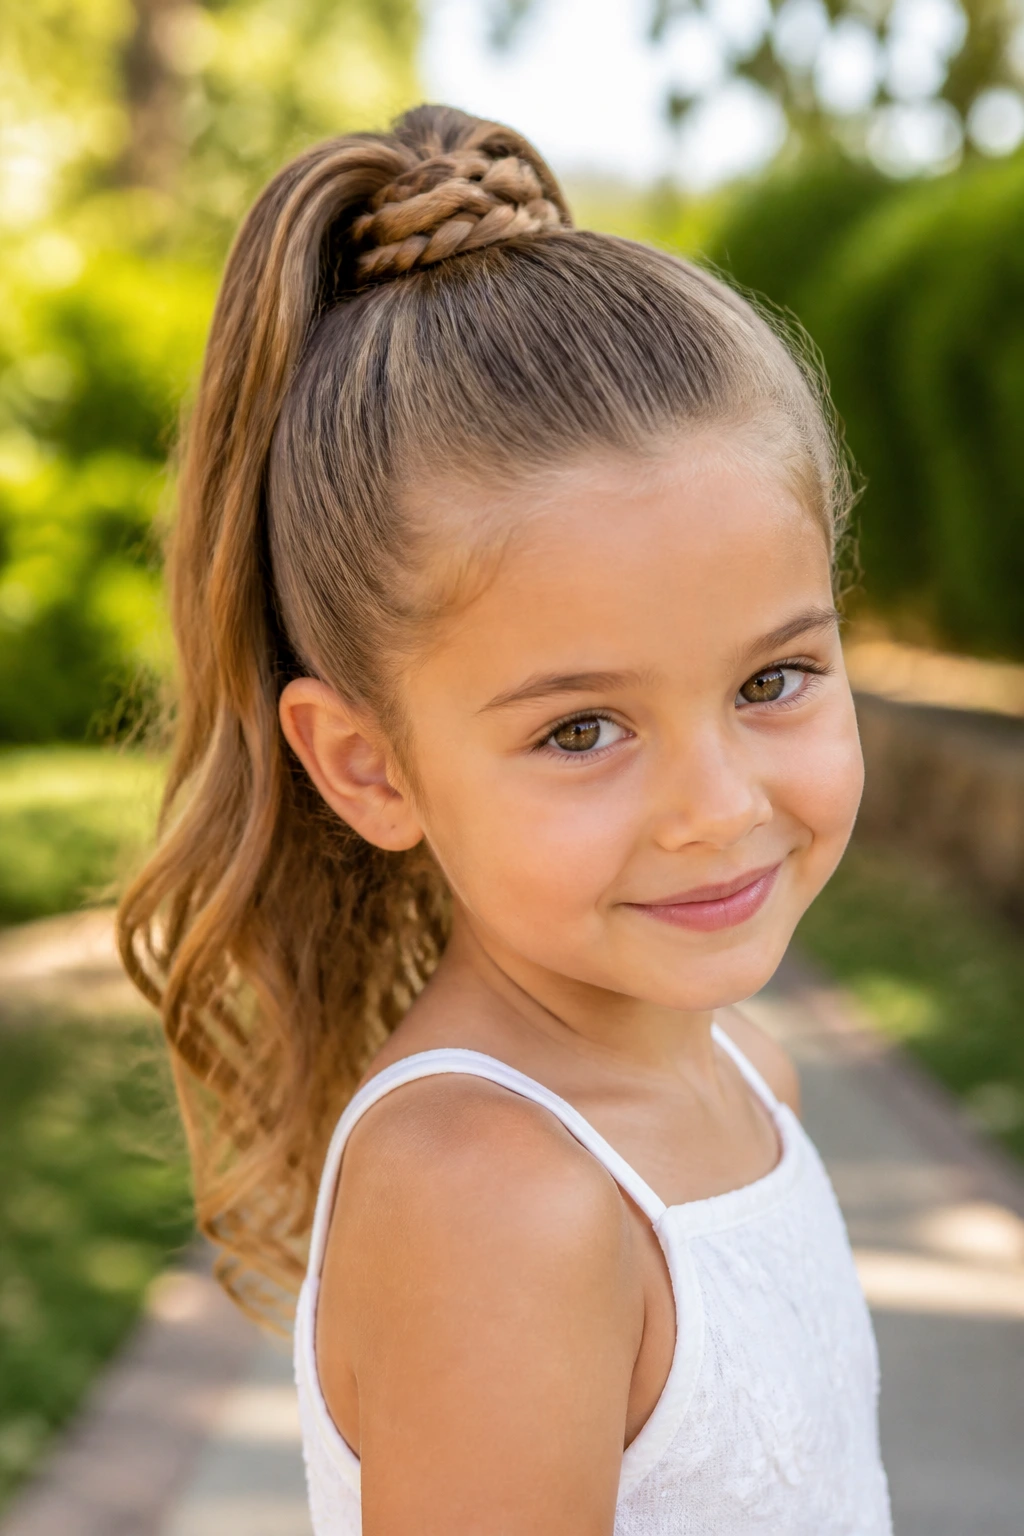
A high pony wrapped braid has more energy than a low bun. The pony sits high, the braid wraps around the base, and the overall shape feels lifted and neat. It’s a good choice when you want hair off the neck but still want movement in the tail.
The wrapped braid detail is what keeps it from looking like an ordinary ponytail. It adds just enough polish. If the hair is thick, braid the tail all the way down and let the end tuck under the wrap. If the hair is fine, keep the wrap tighter so the tail doesn’t sag.
This style is a solid middle ground between sporty and dressed-up.
20. Side-Swept Crown Braid Bun
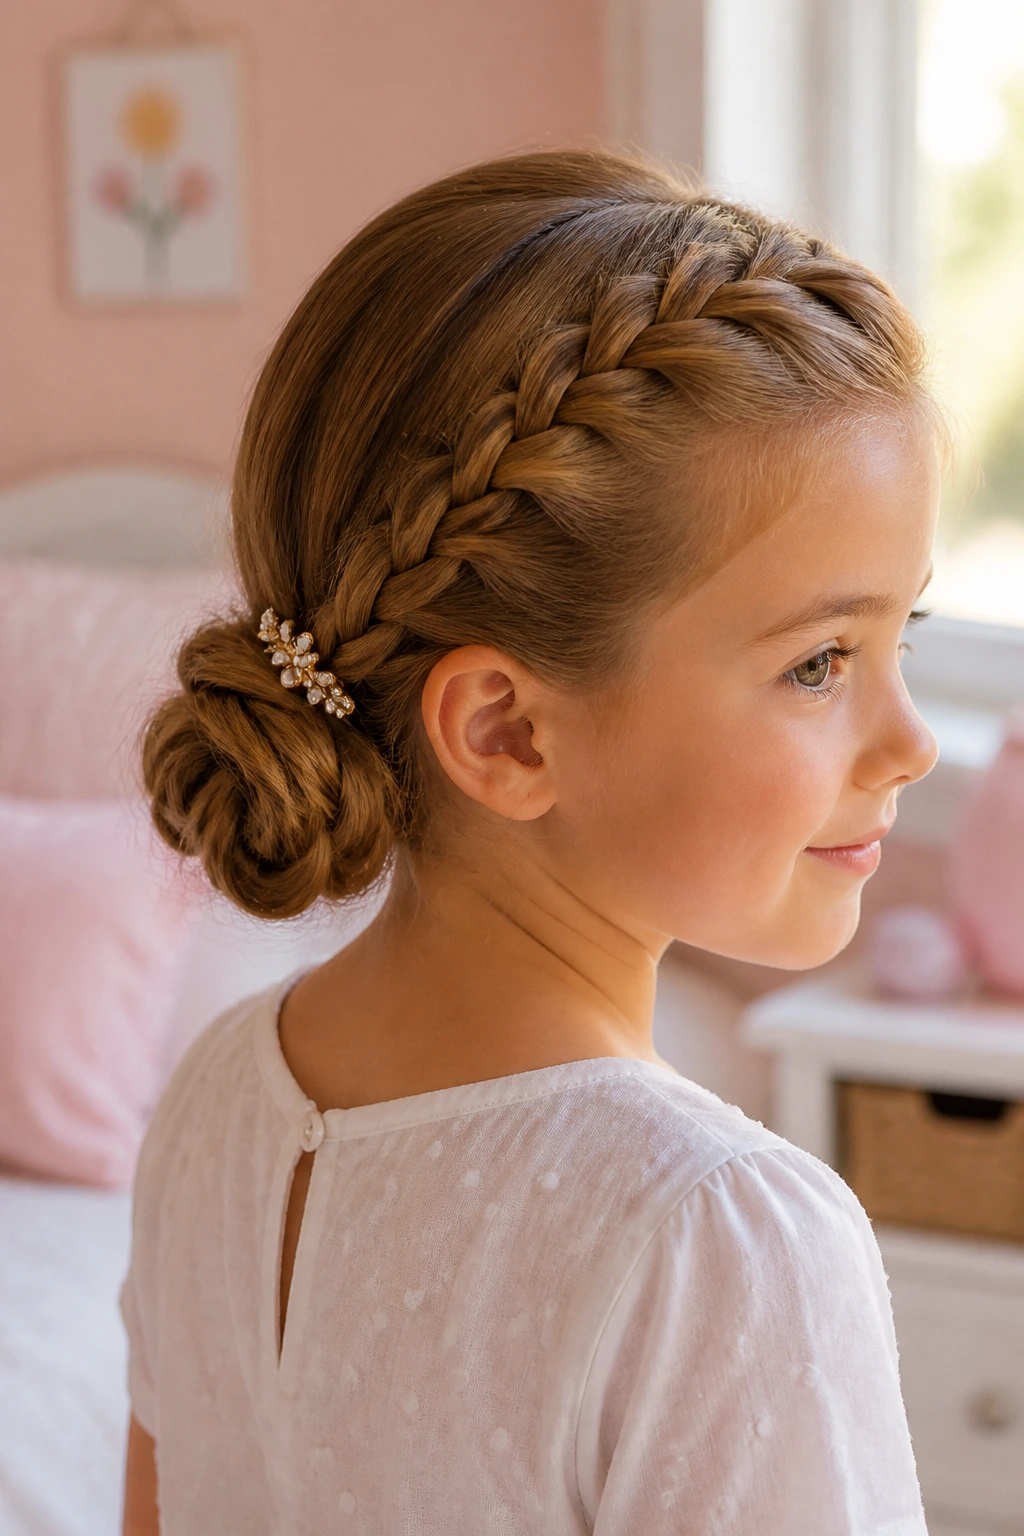
Why does a side-swept crown braid look so good on little girls? Because the asymmetry softens the face. A braid that starts near one side and curves toward a low bun looks less formal than a straight-around halo and a little more relaxed than a center-part style.
That makes it handy for events where you want polish without stiffness. The braid can be thick or thin, and the bun can sit low and neat or slightly loose. I prefer a low placement because it keeps the style balanced on a child’s smaller head.
A small clip where the braid ends meet the bun is enough decoration. You do not need much more.
21. Heart Braid Pony Bun
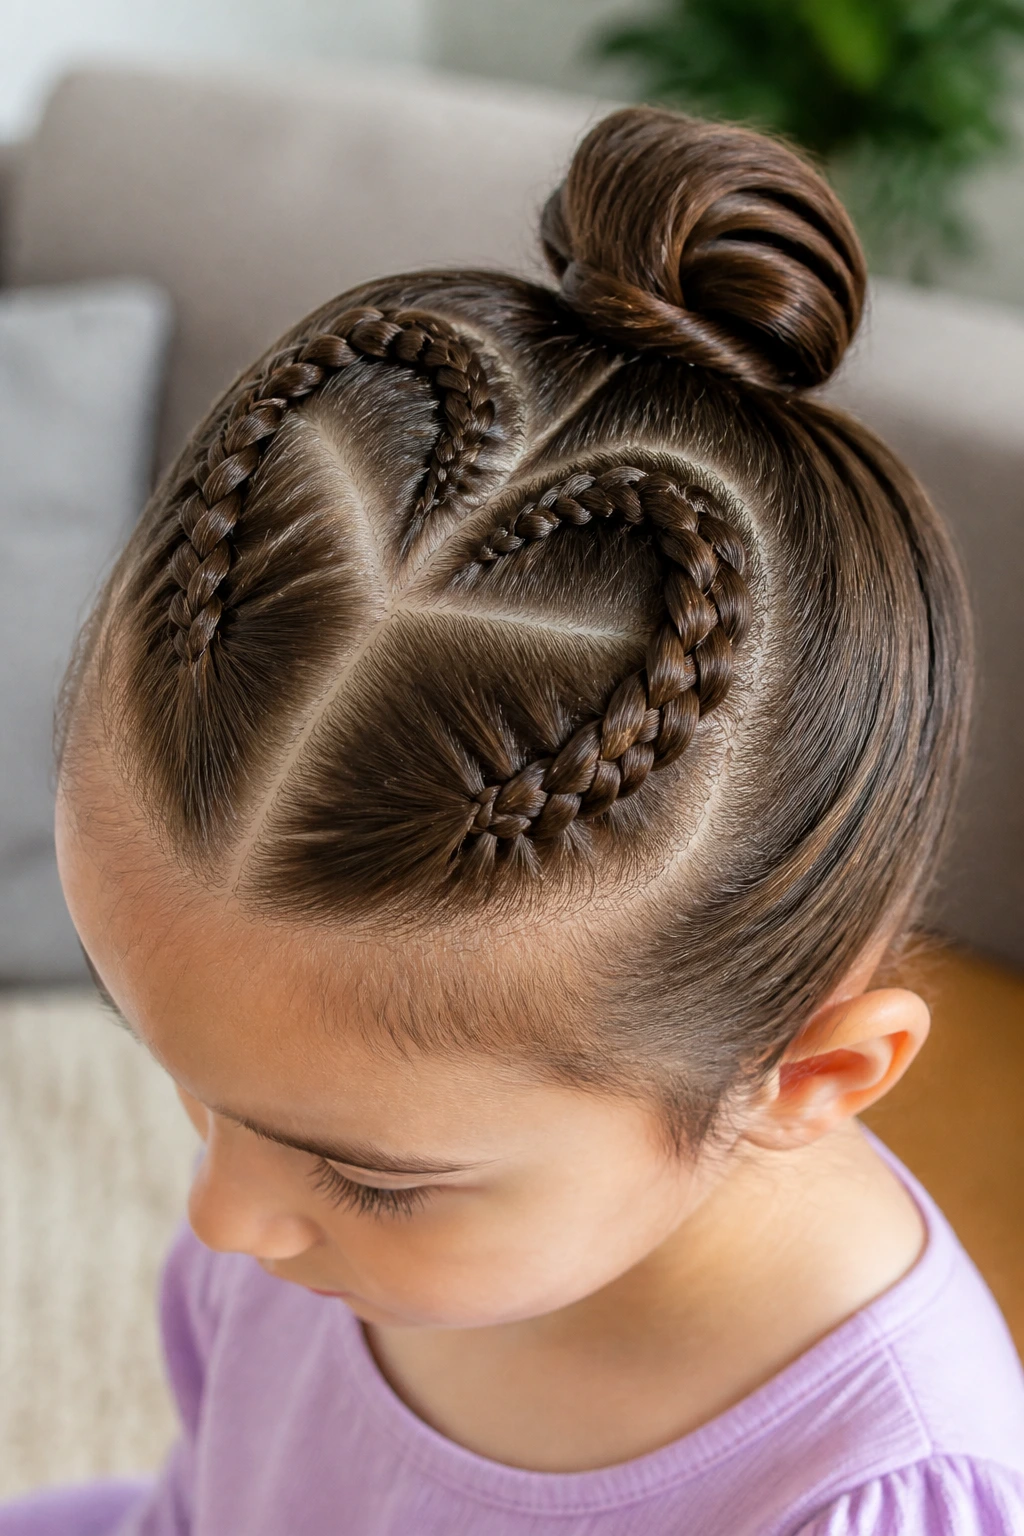
This one gets attention fast. Two braided sections curve inward to create the outline of a heart before they join into a ponytail or bun. It sounds complicated, and yes, it takes a steadier hand, but the result is worth it for birthdays, Valentine-themed events, or any day when the child wants something special.
The trick is making the heart clear from above, which means clean parts matter. Use the rat-tail comb, clip each side, and check the shape in the mirror before you finish the back. If one side is too rounded, the heart loses its edge.
This is a style I’d reserve for when you have an extra few minutes. It’s a little showier than the everyday buns, and that’s the point.
22. Double Dutch Braid Buns
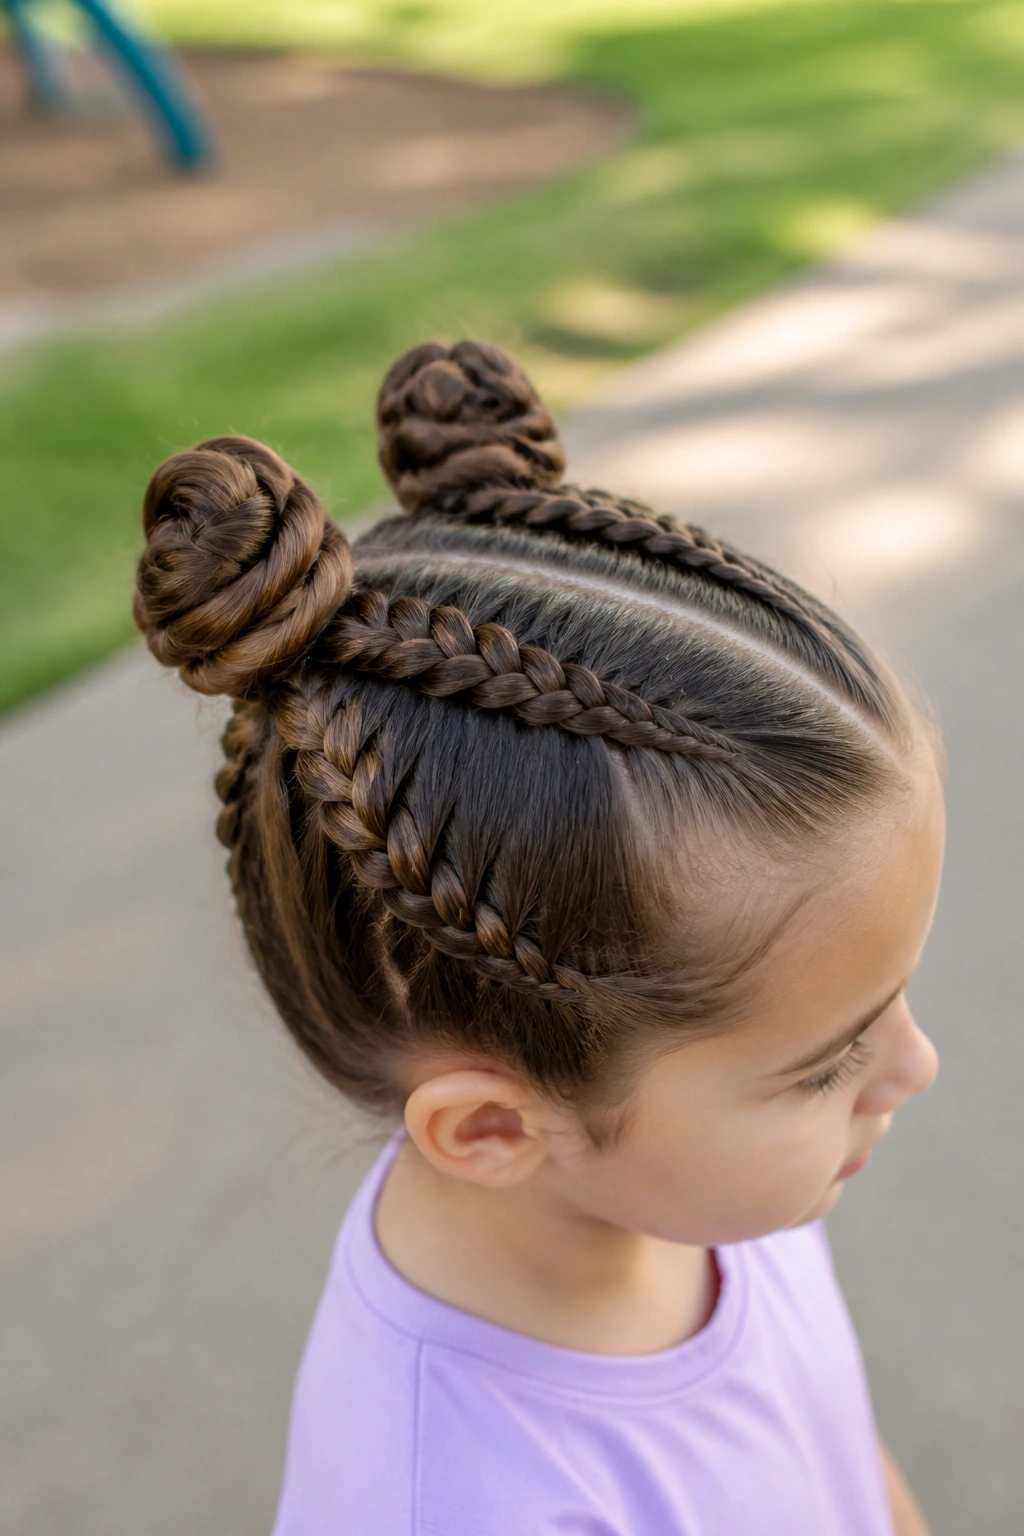
Double Dutch braid buns are the sporty answer to a day full of movement. Two raised Dutch braids run from the front to the nape, where each one coils into a separate bun. The braids make the style secure, and the buns keep the hair off the neck.
I like this one for thick or medium-thick hair because the braids distribute volume so well. It also stays neat when a child is running around, which is not a small thing. If you’ve ever watched a regular ponytail turn into a frizz cloud by lunch, you’ll appreciate the extra structure.
Keep the buns low enough that they don’t jab the back of the head when a child leans back. Small details. Big difference.
23. Hair Bow Bun
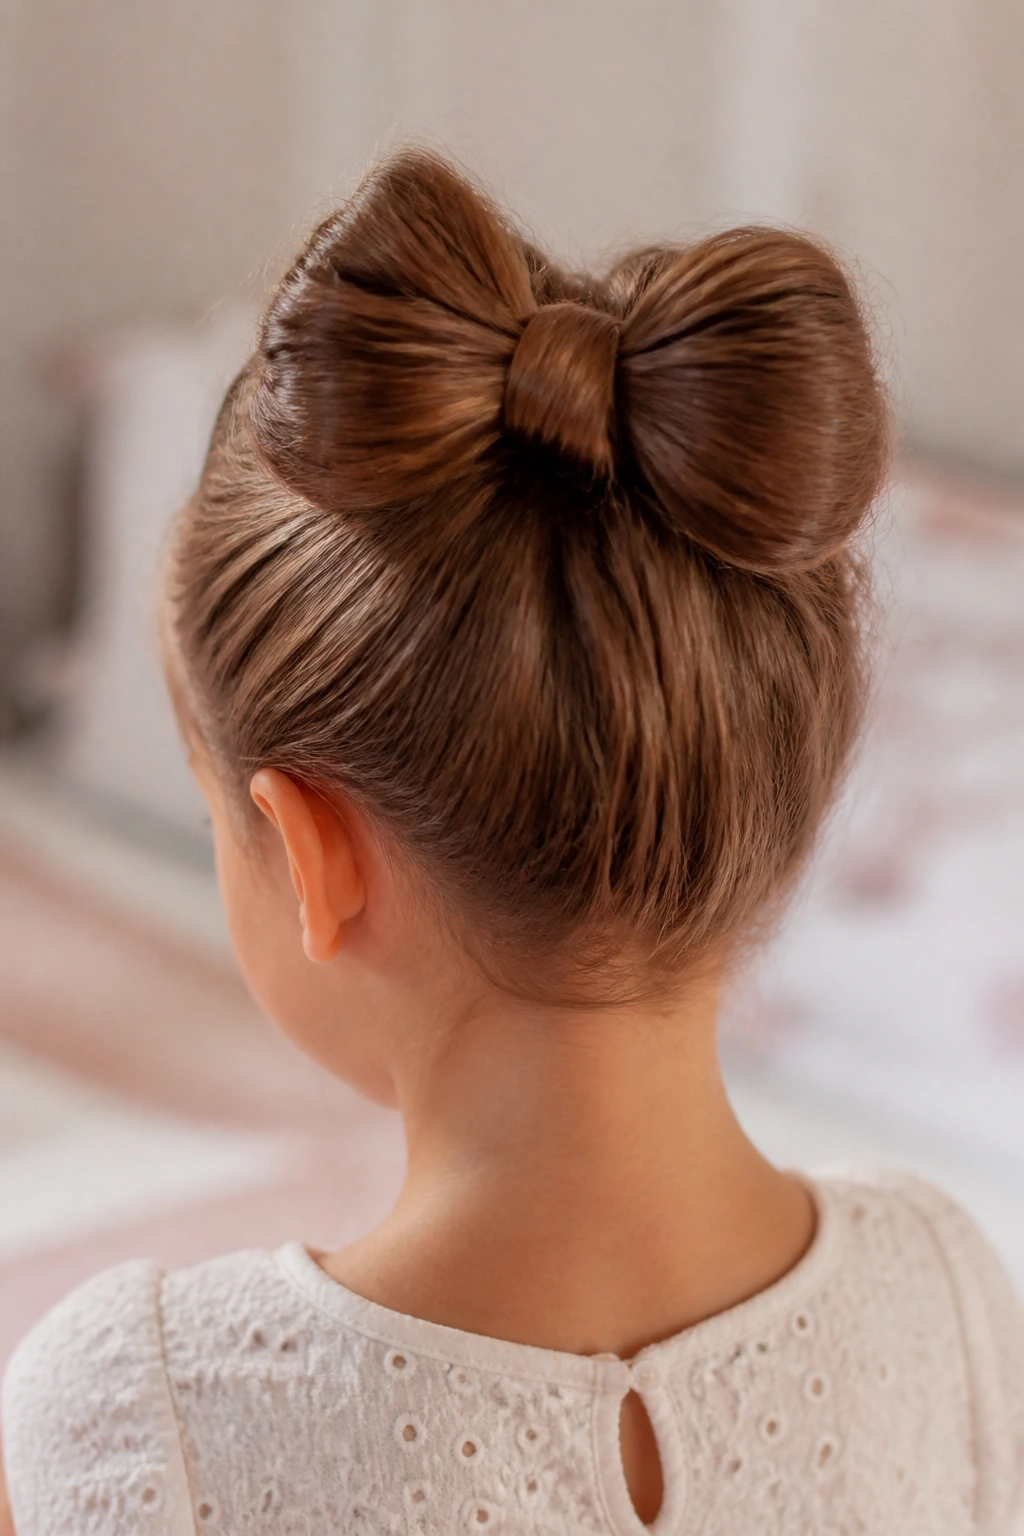
A hair bow bun is exactly what it sounds like: the hair is shaped to resemble a bow rather than just decorated with one. It sounds playful because it is, and children tend to love that there’s something recognizably “made out of hair” going on.
The style works best when the sections are smooth and the center tie is hidden with a small strand or clip. I like it more on medium hair than very long hair, because long hair can make the loops too heavy. A little hairspray at the center helps the bow keep its shape.
When to choose it
- Birthday parties
- School events
- Photo sessions
- Any day the child wants a style with a bit of drama
24. Tuck-and-Roll Bun
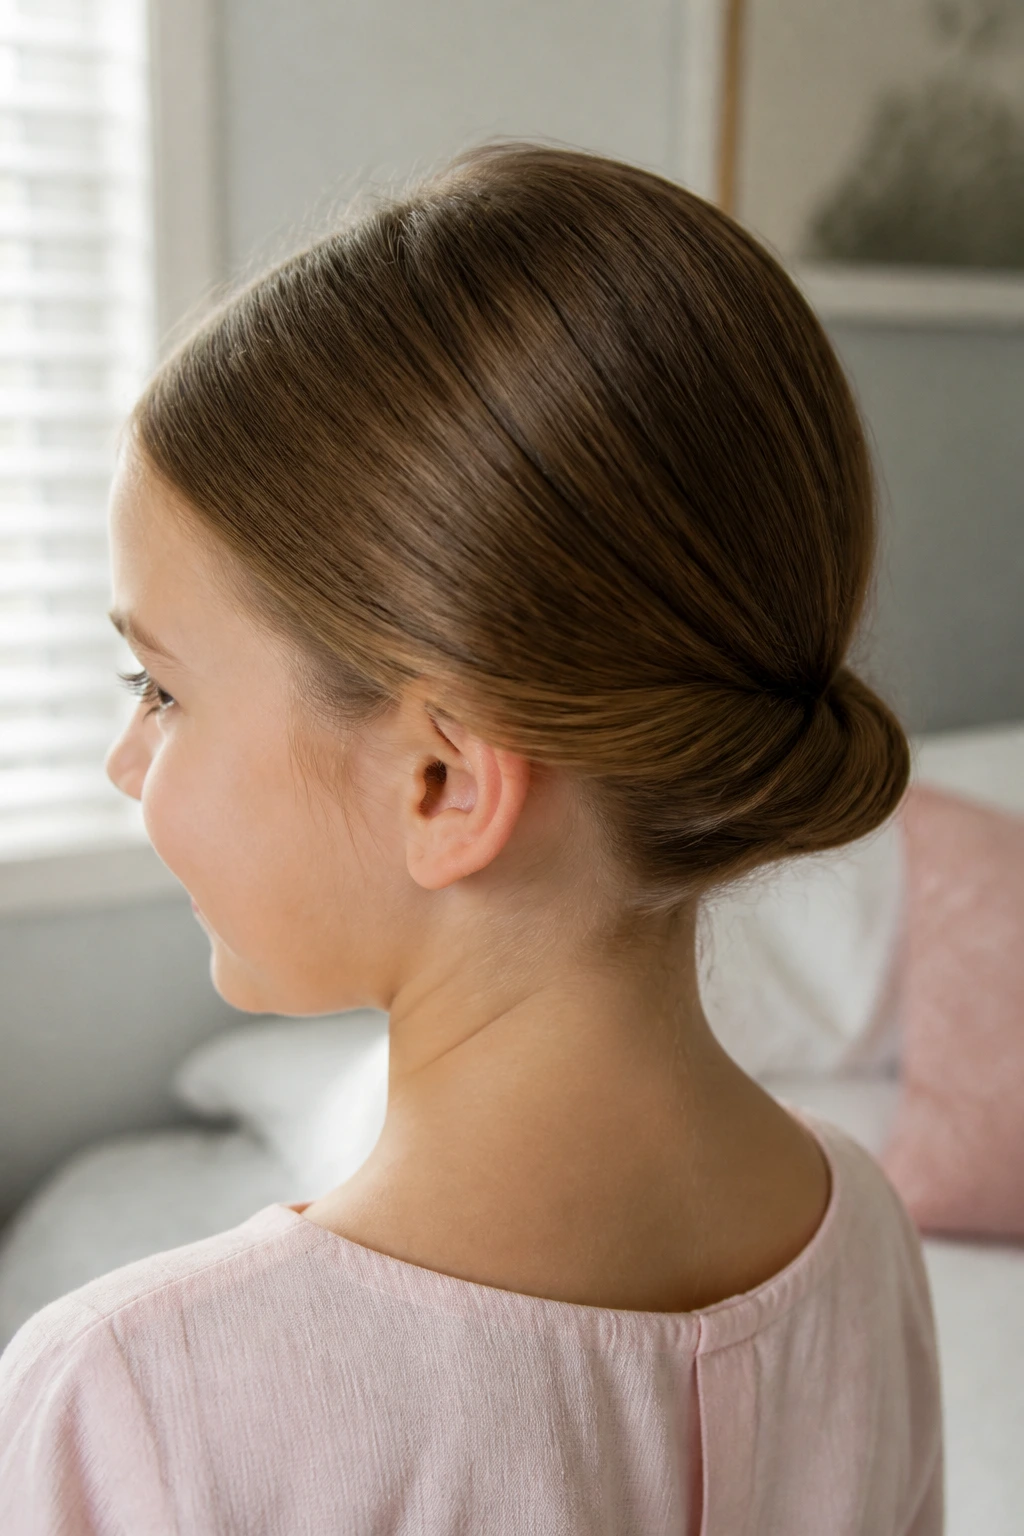
The tuck-and-roll bun is quieter than the bow bun, but it has a lovely clean line. You roll the hair inward toward the nape and tuck the ends under, pinning along the seam so the shape stays smooth. It’s a good fit when you want something classic that doesn’t need much ornament.
This style is especially forgiving on layered hair because the layers can disappear into the roll instead of poking out. If the hair is fine, a little texturizing powder at the roots gives the roll enough grip to hold. If it’s thick, split the hair into two rolls and tuck them together.
It feels neat. Not stiff. That’s why it works.
25. Milkmaid Braid Tuck
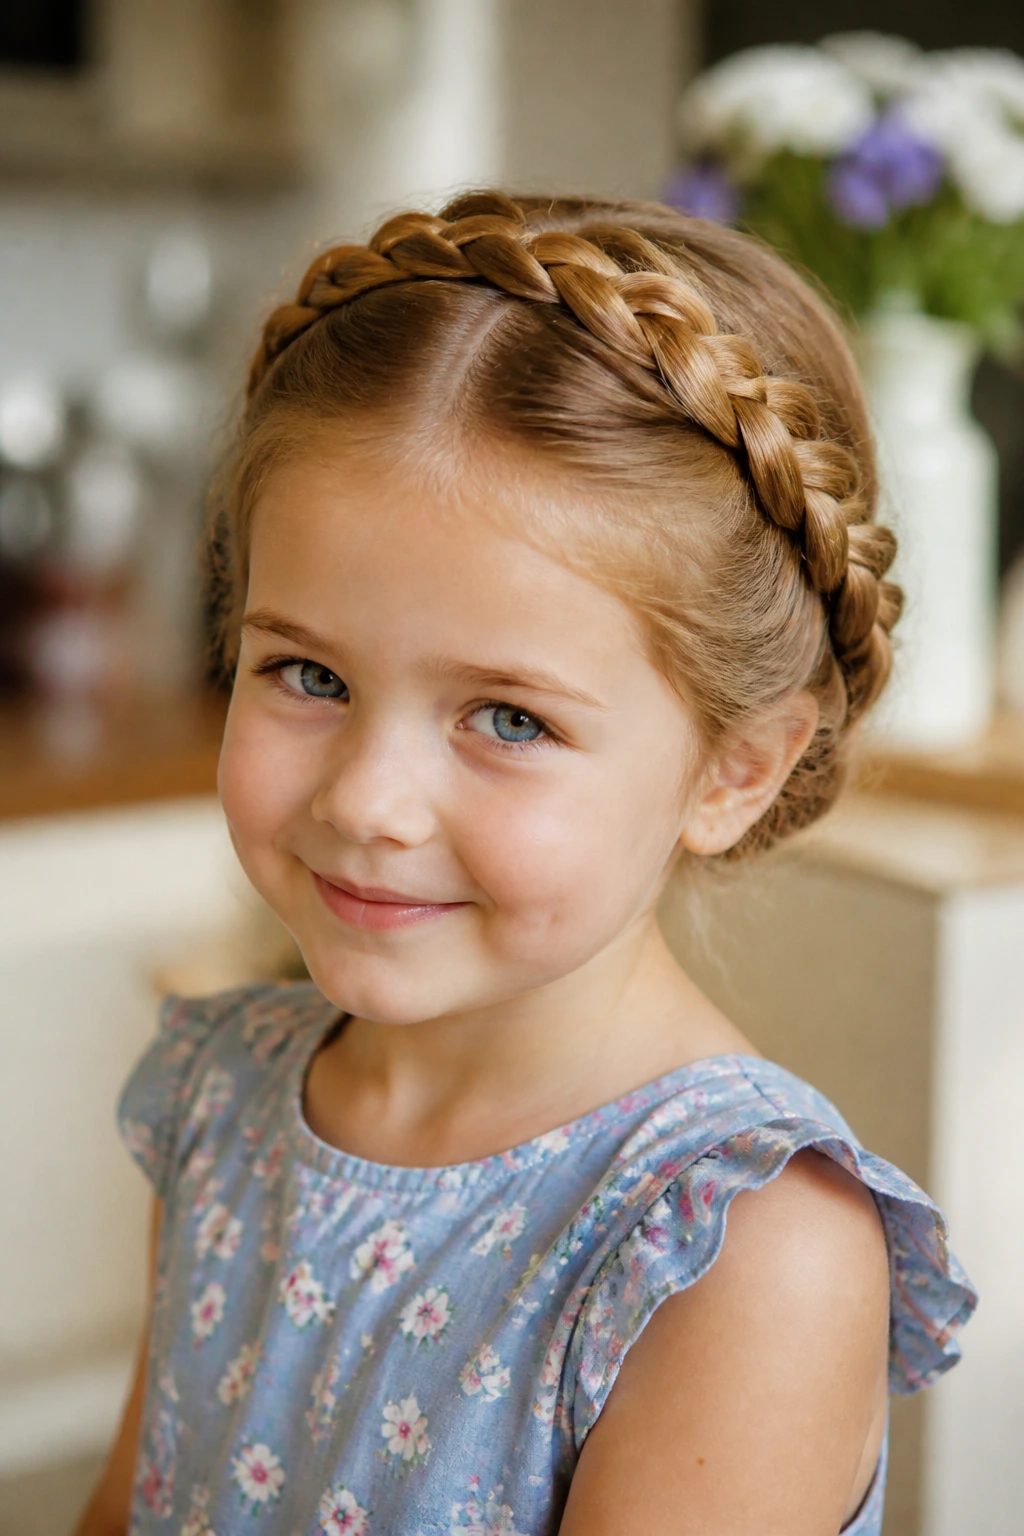
The milkmaid braid tuck has that tidy, almost old-world look that still feels sweet on a child. Two braids wrap around the head and tuck under at the back, holding the hair off the neck and away from the face. It’s one of the best options for hot days, dance classes, or any time you want a secure style that doesn’t depend on a single pin.
What I like most is the way it frames the face. The braids sit like a soft border instead of a hard line. If the hair is too short to wrap fully around, fake the tuck by braiding the sides and pinning them across the crown.
This is one of those styles that looks harder than it is once you’ve done it a couple of times. The first attempt may be lopsided. The second usually lands.
26. Fishtail Bun
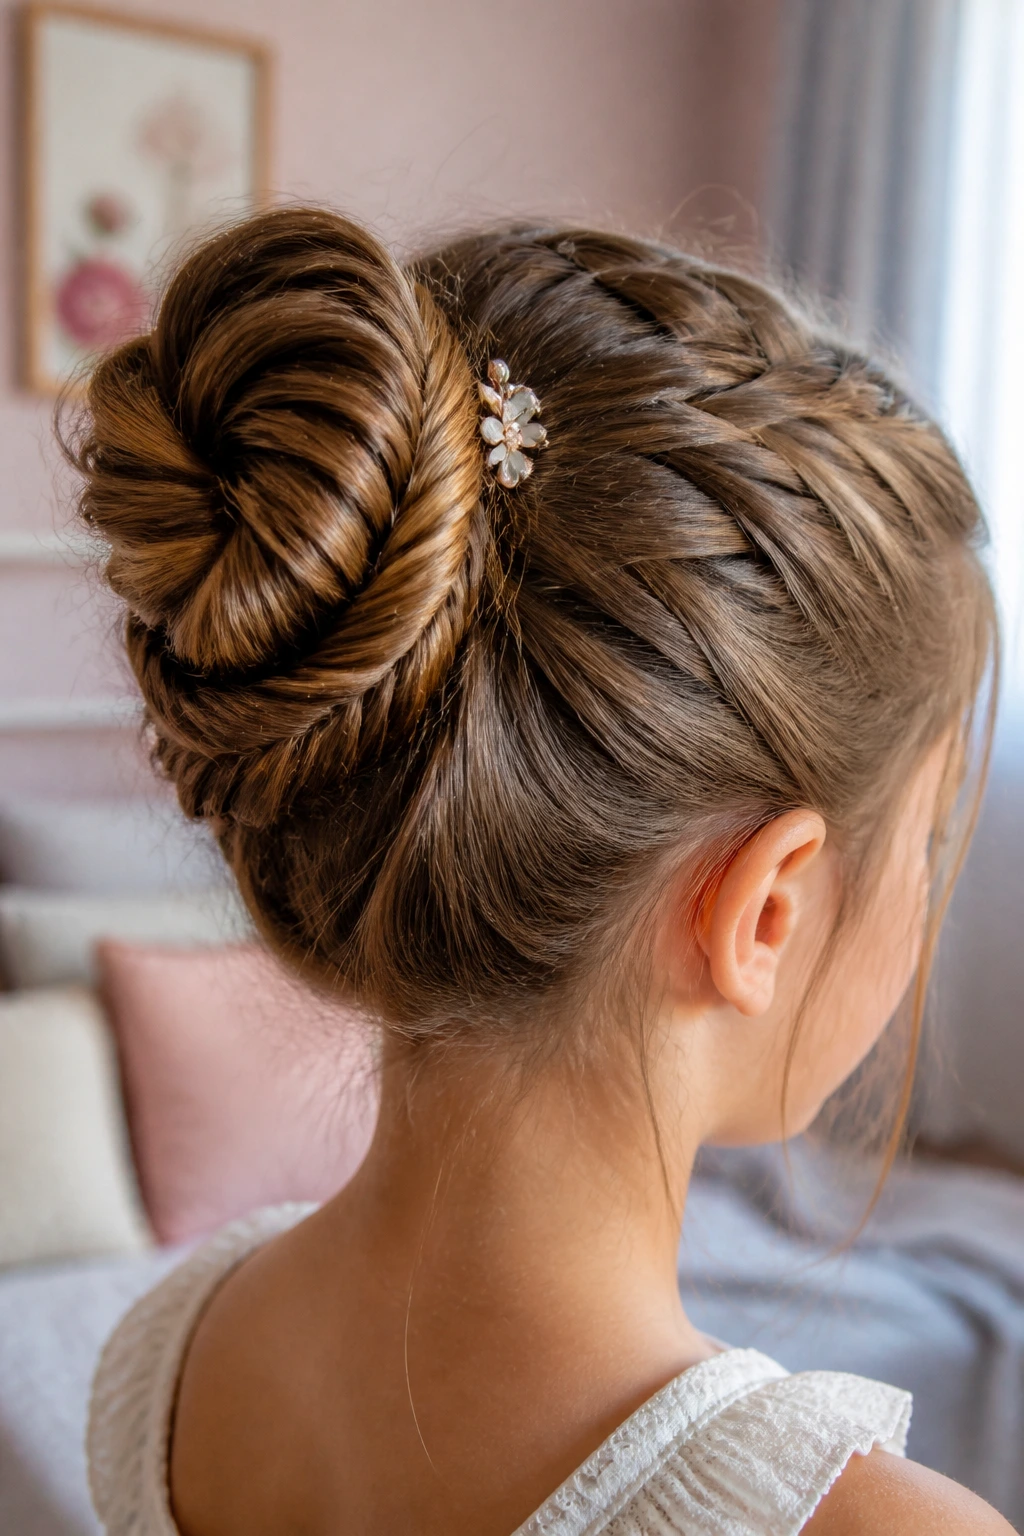
A fishtail braid wrapped into a bun gives you texture that reads detailed even from a distance. The braid itself looks a little more intricate than a standard three-strand braid, so when it’s coiled into a bun, the style has enough visual interest to stand on its own.
It’s a good pick for older little girls who want something a bit more refined. The fishtail also holds up well on medium-to-thick hair because the woven pattern locks in place tightly. If the hair is fine, don’t make the braid too loose or it can look wispy instead of polished.
A tiny floral clip or pearl pin near the bun center is enough. The braid already does the heavy lifting.
27. Braided Pigtail Bun
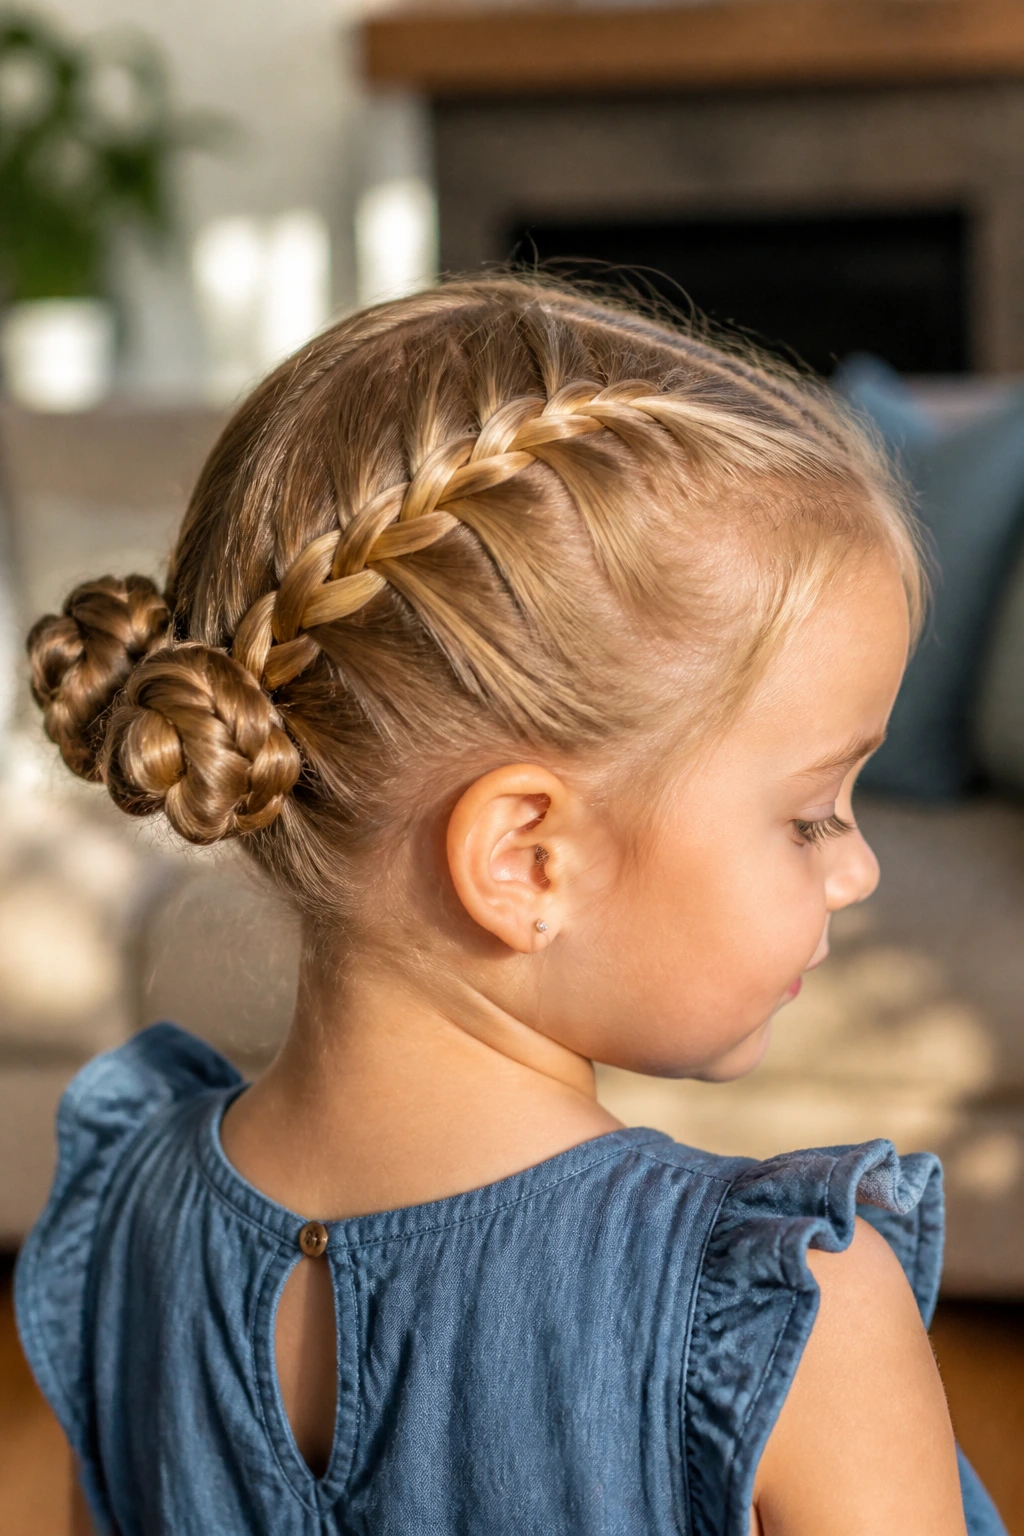
This style starts playful and ends tidy. Two braids begin like pigtails, then meet at the back and wrap into one bun or two small joined buns. That makes it a strong pick for children who want something fun but still off the neck.
The braids help hold shorter layers that would otherwise slip from a simple bun. They also make the style easier to wear for a full day because the hair is divided before it’s gathered. That alone can reduce the tugging at the crown.
Quick note
If the child has very thick hair, keep the braids slightly looser so the bun doesn’t become too bulky. If the hair is fine, braid tighter and tuck the ends carefully.
28. Deep Side-Part Low Bun
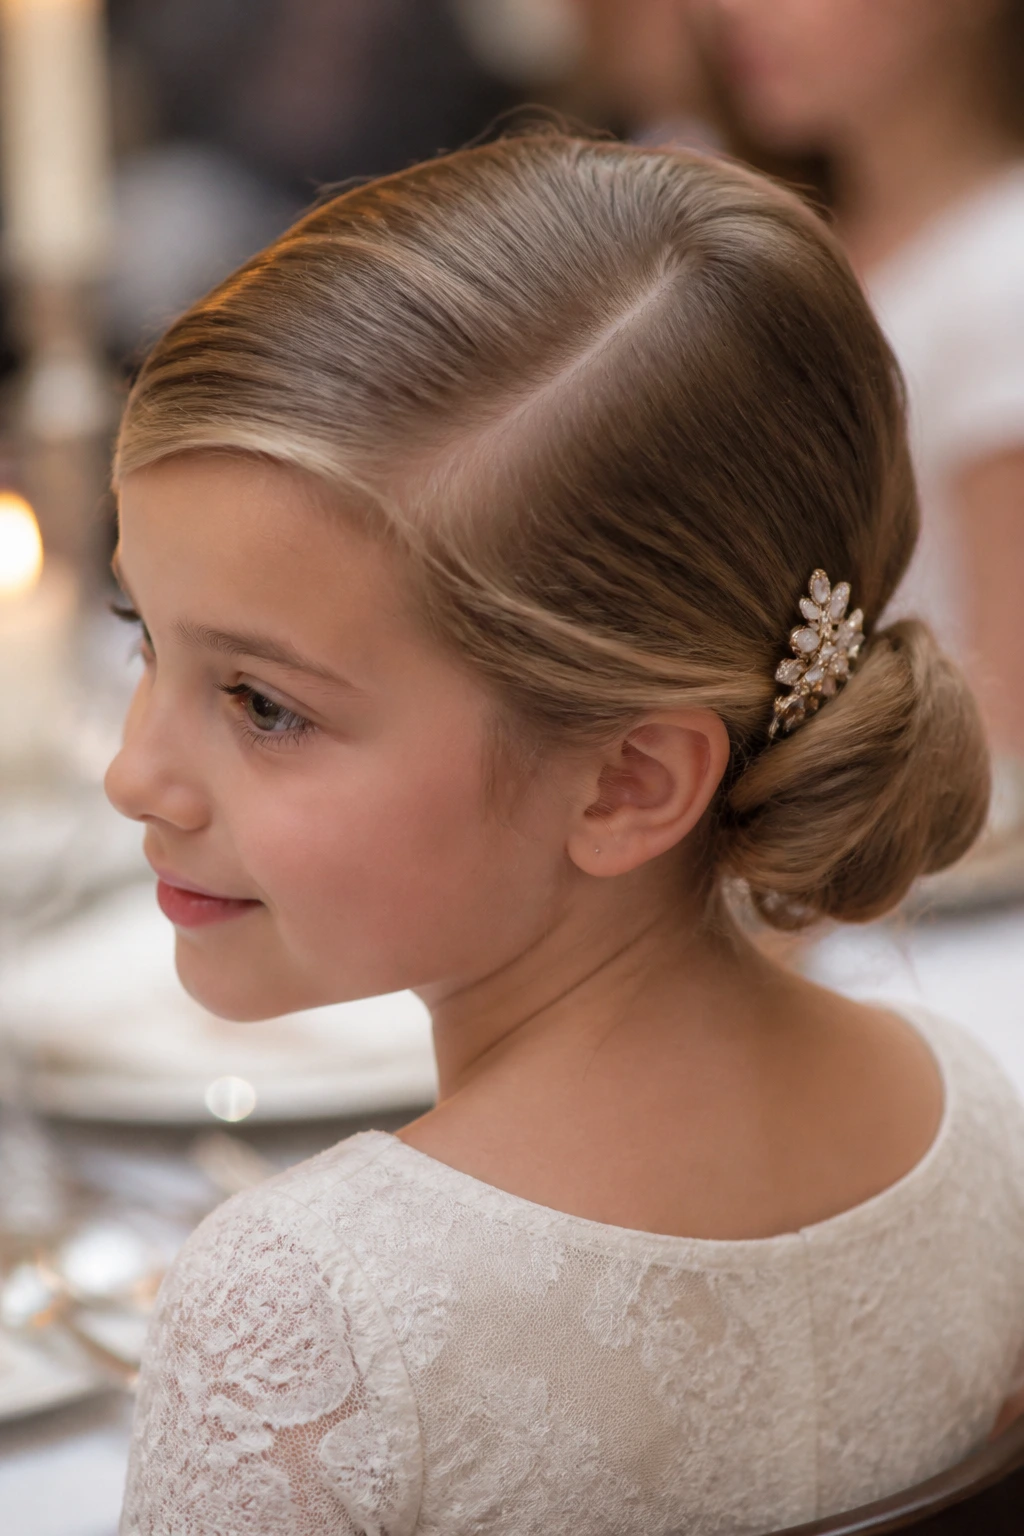
A deep side part changes the whole mood of a low bun. It makes the style look softer and a little more formal without adding any extra work. The bun stays low at the nape, which is gentle for children who don’t like high tension at the crown.
I especially like this one with smooth hair and a single decorative clip tucked just above the bun. That tiny off-center detail keeps the style from feeling too plain. It’s also a good way to make a simple bun look more thoughtful for church, family dinners, or school photos.
This is one of those styles where the part does half the work. Get the part clean, and the rest falls into place.
29. Ribbon-Laced Bun
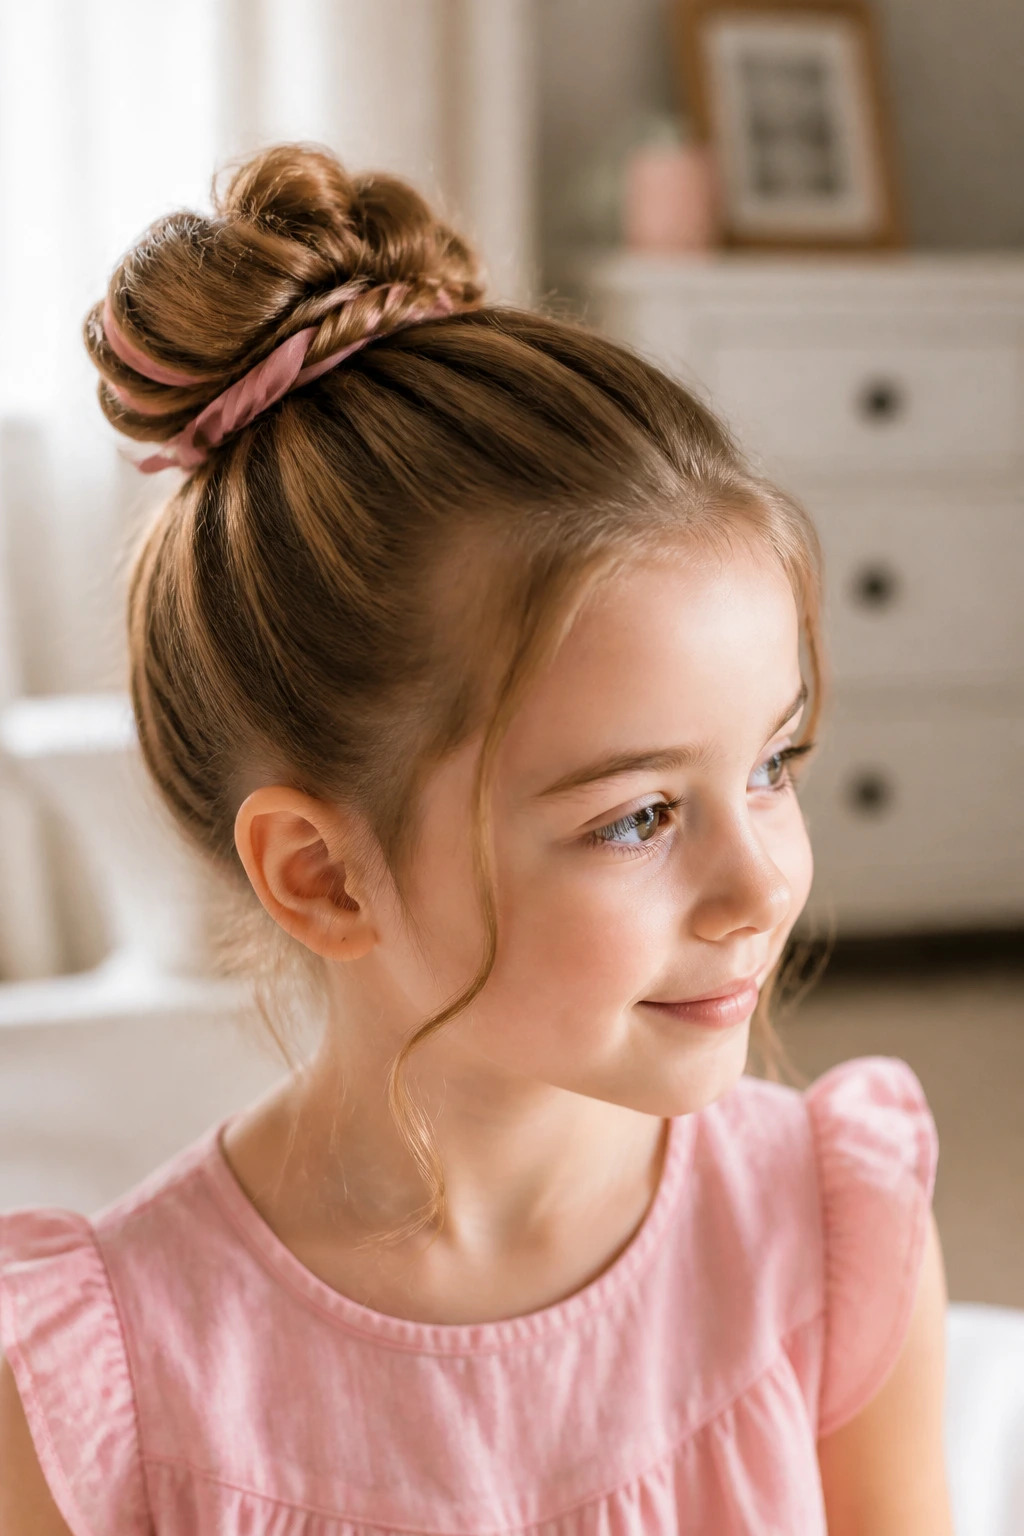
A ribbon-laced bun is one of the easiest ways to make a plain bun feel dressed up. You can weave the ribbon through a braid before wrapping it, or thread it around the bun base like a tiny corset. Either way, the ribbon adds color without making the style heavy.
The trick is choosing a narrow ribbon so it doesn’t bulk up the hairstyle. Satin can slide, so if the hair is very fine, knot it under the bun where it won’t be seen. Grosgrain holds better and has more texture.
I’d reach for this style when an outfit needs one more detail but the hair should still stay calm. It’s simple, and that’s why it works.
30. Curly Puff Updo
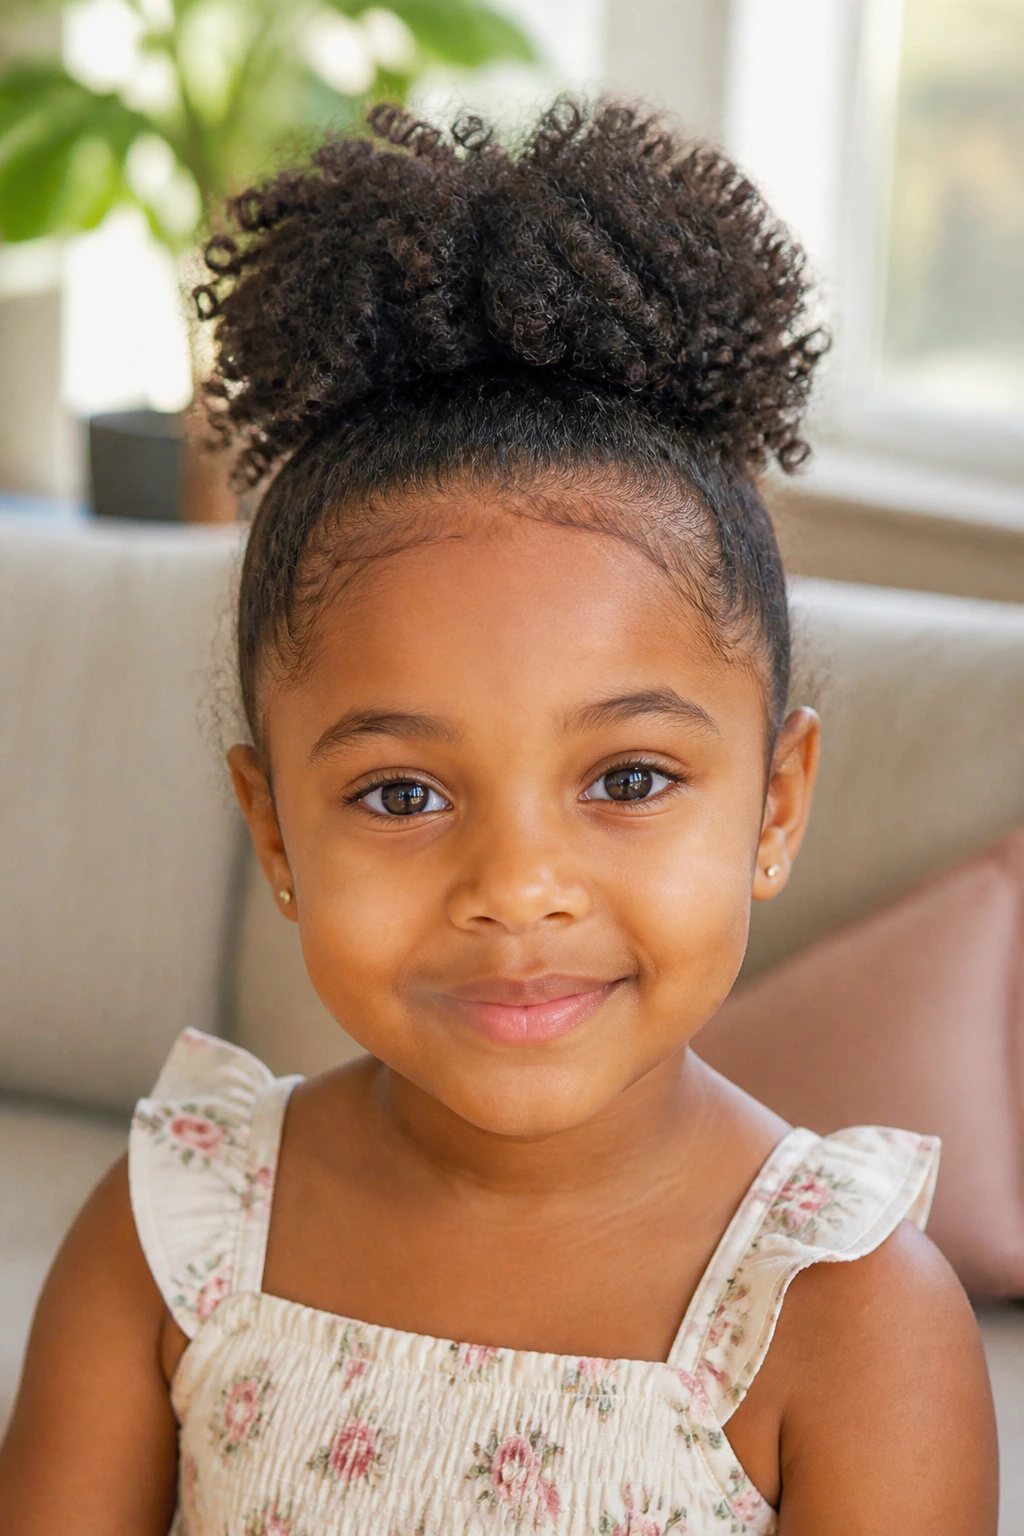
Curly hair does not need to be flattened to look neat. A curly puff updo keeps the volume on top and the sides controlled, which respects the texture instead of fighting it. That alone makes the style better than any version that tries to press curls into submission.
Use a soft band or stretchy tie to gather the hair at the crown or mid-head, then smooth the sides lightly with a bit of leave-in or gel. The puff should still look like curls, not a stiff ball. If the hair is very dense, split it into two sections and stack the puffs.
This style wears beautifully on kids with natural curls, coils, or waves that spring up on their own. Don’t overwork it. The curl pattern is the point.
31. Scarf-Wrapped Crown Twist
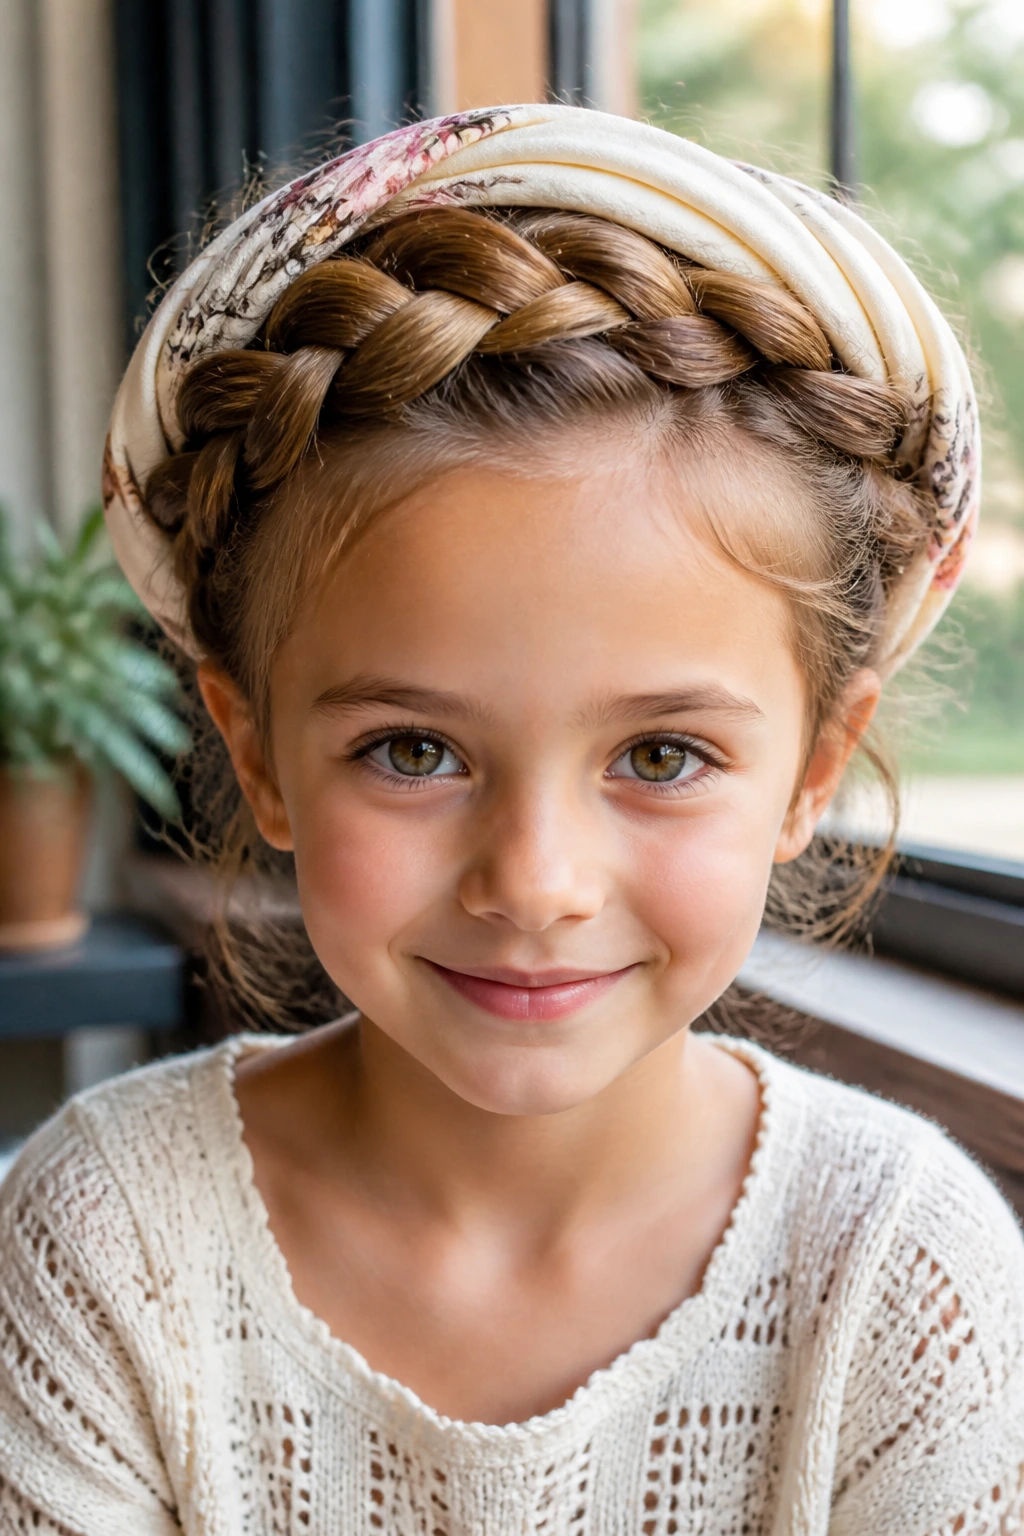
A scarf-wrapped crown twist is equal parts style and utility. The twists hold the hair in place, and the scarf adds a soft border that can tame frizz or cover a less-than-perfect hairline. It’s especially good on days when you want to protect the hair a bit more than usual.
Choose a light scarf with enough grip to stay put but not so much bulk that it slides around. Cotton voile or a thin satin scarf can both work, depending on whether you want hold or shine. Tie it low enough that it doesn’t press into the forehead.
I’d use this for travel days, holiday outfits, or any morning when the child wants hair “different” without spending forever on it.
32. Flower-Clip Bun
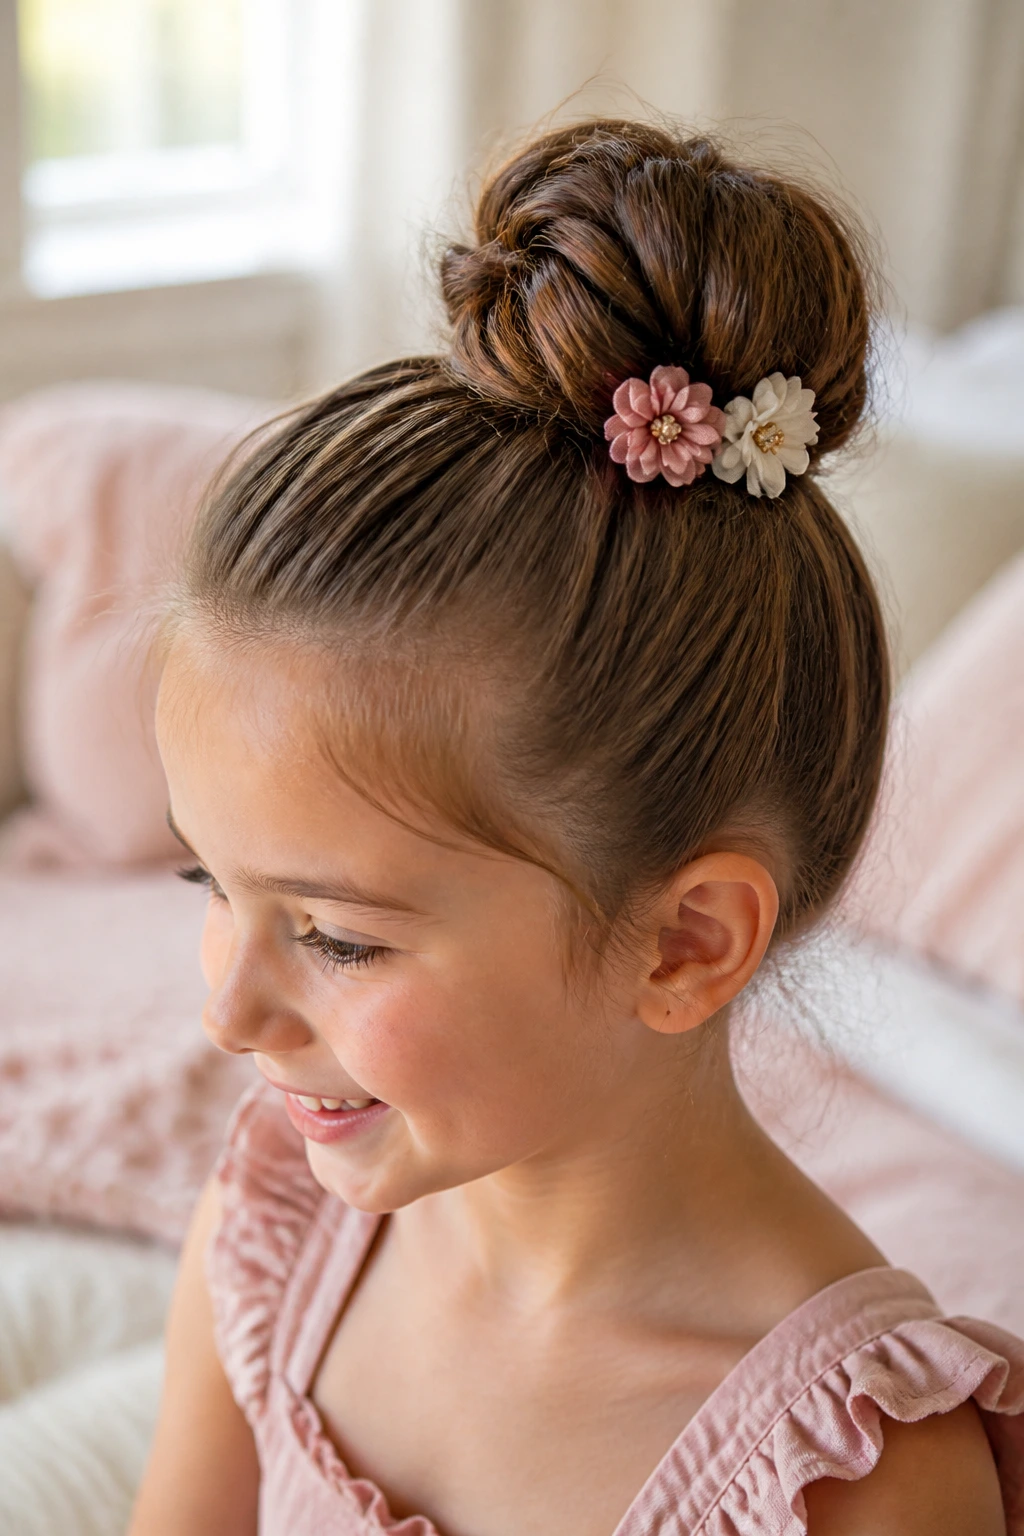
The flower-clip bun is the easiest kind of special. Start with a neat bun, then add one or two small flower clips around the base or off to one side. That’s it. The hairstyle stays simple, but the accessory gives it a softer, more festive finish.
This works because the bun provides a plain backdrop. The flowers don’t have to compete with a busy braid or a heavy twist. I like tiny fabric flowers more than oversized plastic ones; the smaller ones look calmer and sit flatter against the head.
Best use: weddings, family portraits, Easter outfits, or any day the child wants something pretty without a lot of fuss.
33. Glitter-Part Sleek Knot
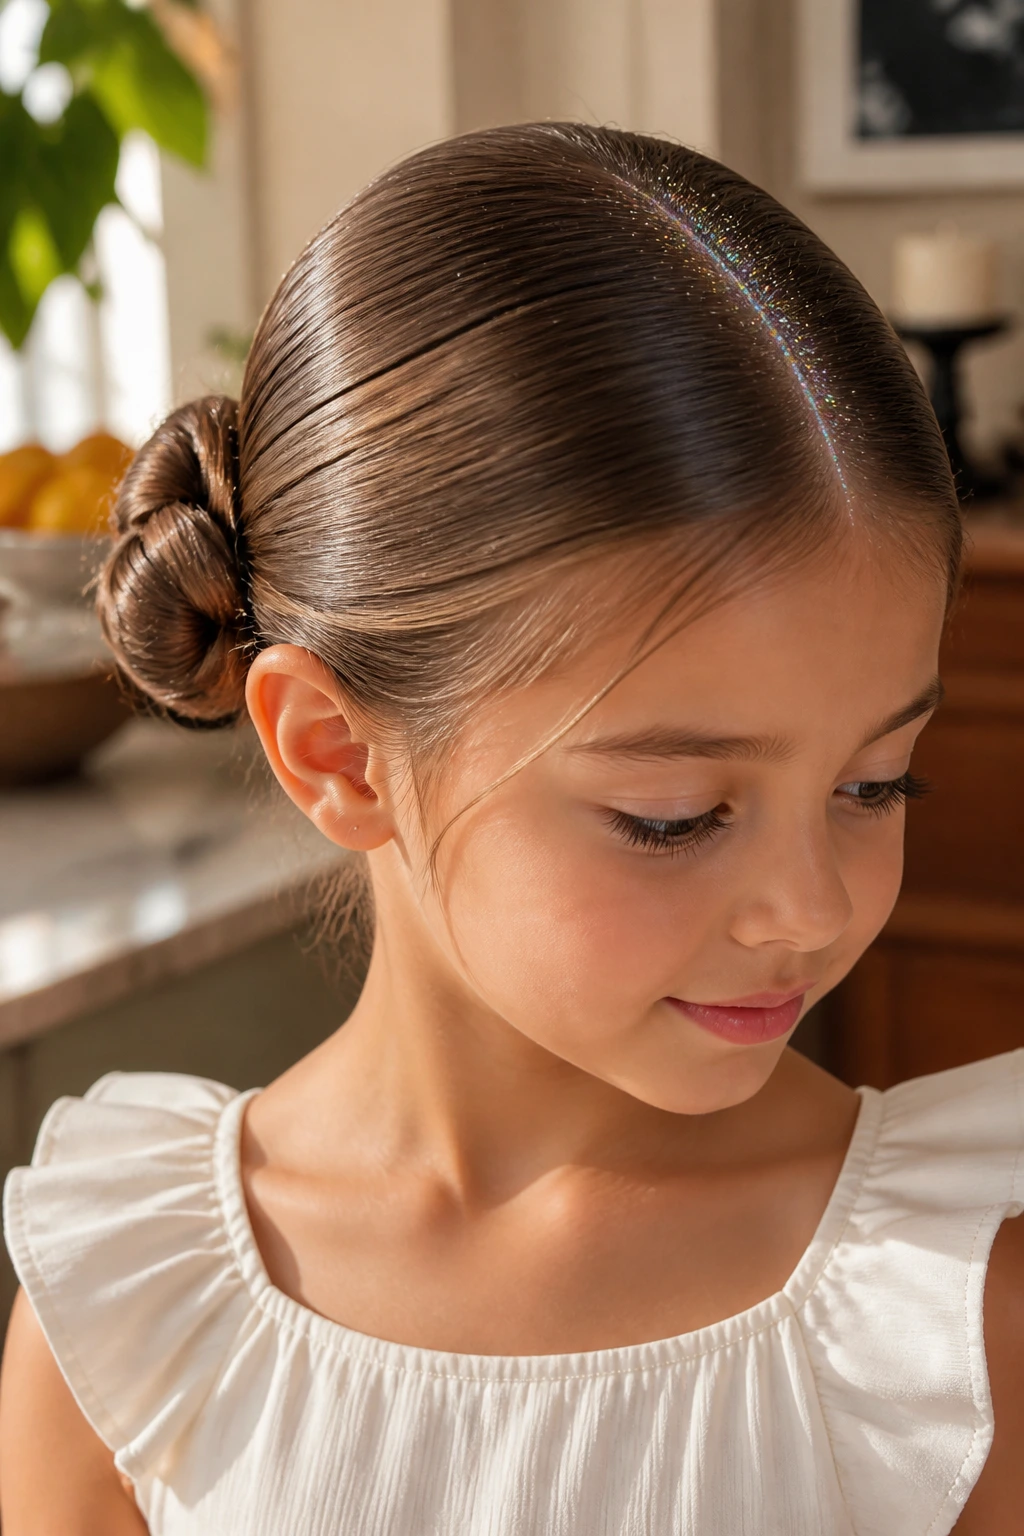
A sleek knot with a glitter part is the style that ends the list on a little sparkle. The hair is parted cleanly — center or side — and the part line gets a trace of glitter gel or hair-safe shimmer before the rest is smoothed into a tidy knot. It sounds bold, but if you keep the glitter narrow, it looks sharp instead of messy.
This is the one I’d save for photos, parties, or holiday events where the outfit needs a little extra brightness. The knot should stay the main event. The glitter is just the accent.
A small detail matters here: use hair-safe shimmer, not loose craft glitter. The fine stuff applies cleaner and rinses out more easily, which is a pretty decent trade when you’re dealing with a child’s hair.
What Makes a Child-Friendly Updo Stay Put Without a Fight
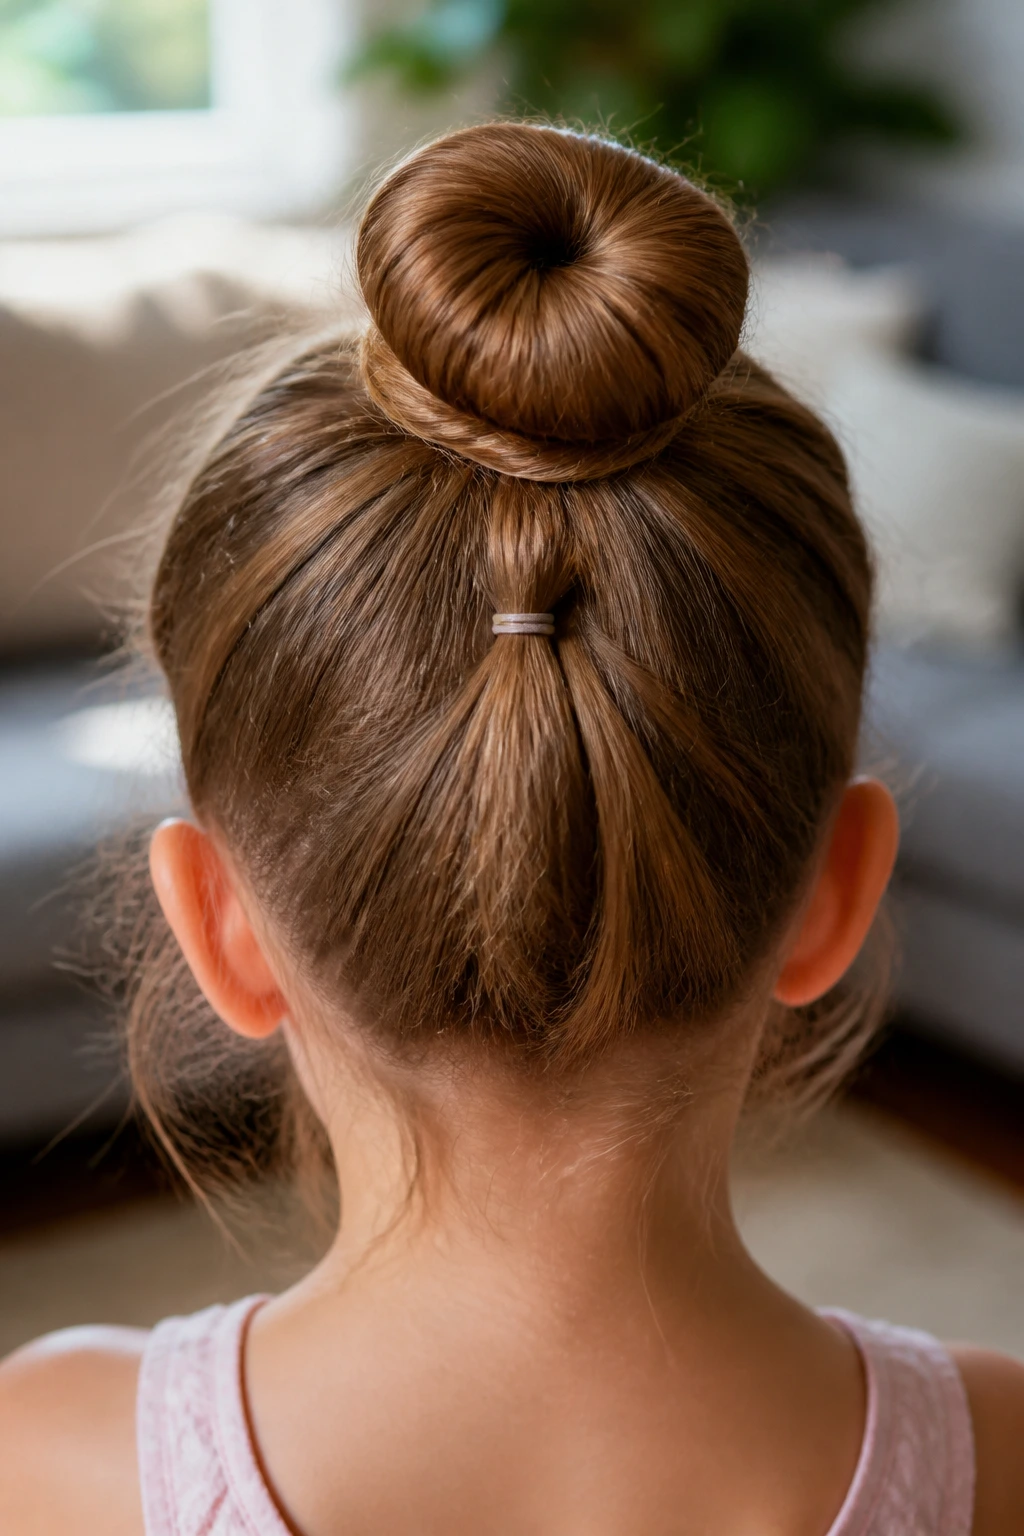
A child’s updo lasts longer when it has more than one anchor. One elastic at the base is not enough for slippery hair that likes to slide free the second a child puts on a hoodie. Braids, twists, crossed pins, and a second tie lower down all help distribute the hold so the style doesn’t collapse in one spot.
Texture matters too. Freshly washed hair often feels too smooth for some styles, especially sleek buns and wraparound braids. A little day-old grit, or a light mist of dry shampoo at the roots, can make a huge difference. That’s not about dirt; it’s about grip. Fine hair needs it most, but even thick hair behaves better with a bit of texture before you start.
Scalp comfort is the other piece people skip. If the hair looks pin-straight at the hairline and the child keeps touching the sides of her head, it’s probably too tight. A style that hurts before breakfast will not make it to the end of the day happily. I’d rather rebuild a bun once than spend six hours hearing about it.
Start with a clean part, section the hair before you pull, and use accessories that match the hair’s weight. Small elastics for small sections. Bigger pins for thicker twists. The hold should feel secure, not aggressive.
Essential Equipment for These Styles
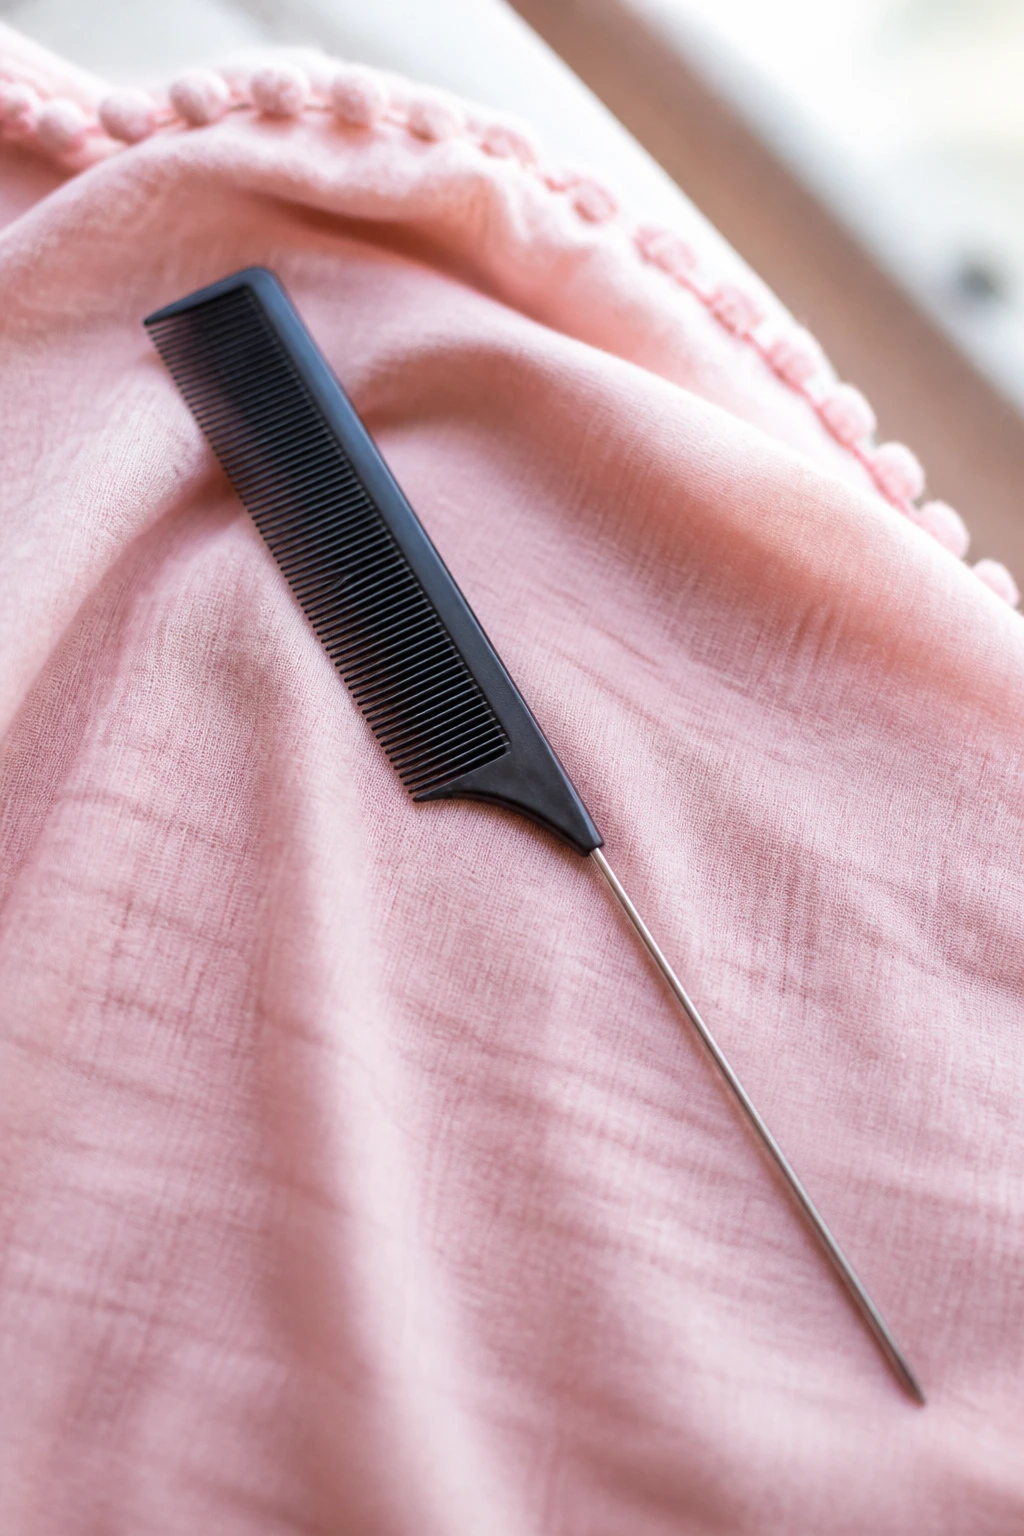
- Rat-tail comb: For clean parts, crown sections, and those sharp lines that make a style look deliberate.
- Wide-tooth comb: Best for detangling before you touch the hair with anything finer.
- Soft bristle brush: Smooths the top layer without roughing up the hair too much.
- Spray bottle with water: A light mist helps control flyaways and gives braids a bit of grip.
- Detangling spray or leave-in conditioner: Useful for silky hair or curls that need slip before styling.
- Mini snag-free elastics: The small ones that disappear into the hair and don’t chew it up when you remove them.
- Regular elastic bands: Handy for ponytails, buns, and anything that needs a stronger base.
- Bobby pins and U-pins: Bobby pins catch loose edges; U-pins are better for bun shapes and larger coils.
- Edge brush or small toothbrush: Great for smoothing the hairline without plastering it flat.
- Ribbon, bows, or clips: Keep them light, especially on fine hair, so they do not drag the style down.
- Satin bonnet or pillowcase: Helpful for keeping styles smooth overnight if you’re trying to stretch the look one more day.
- Hand mirror: Makes it easier to check the back of the head without guesswork.
Picking the Right Elastics, Pins, and Styling Help
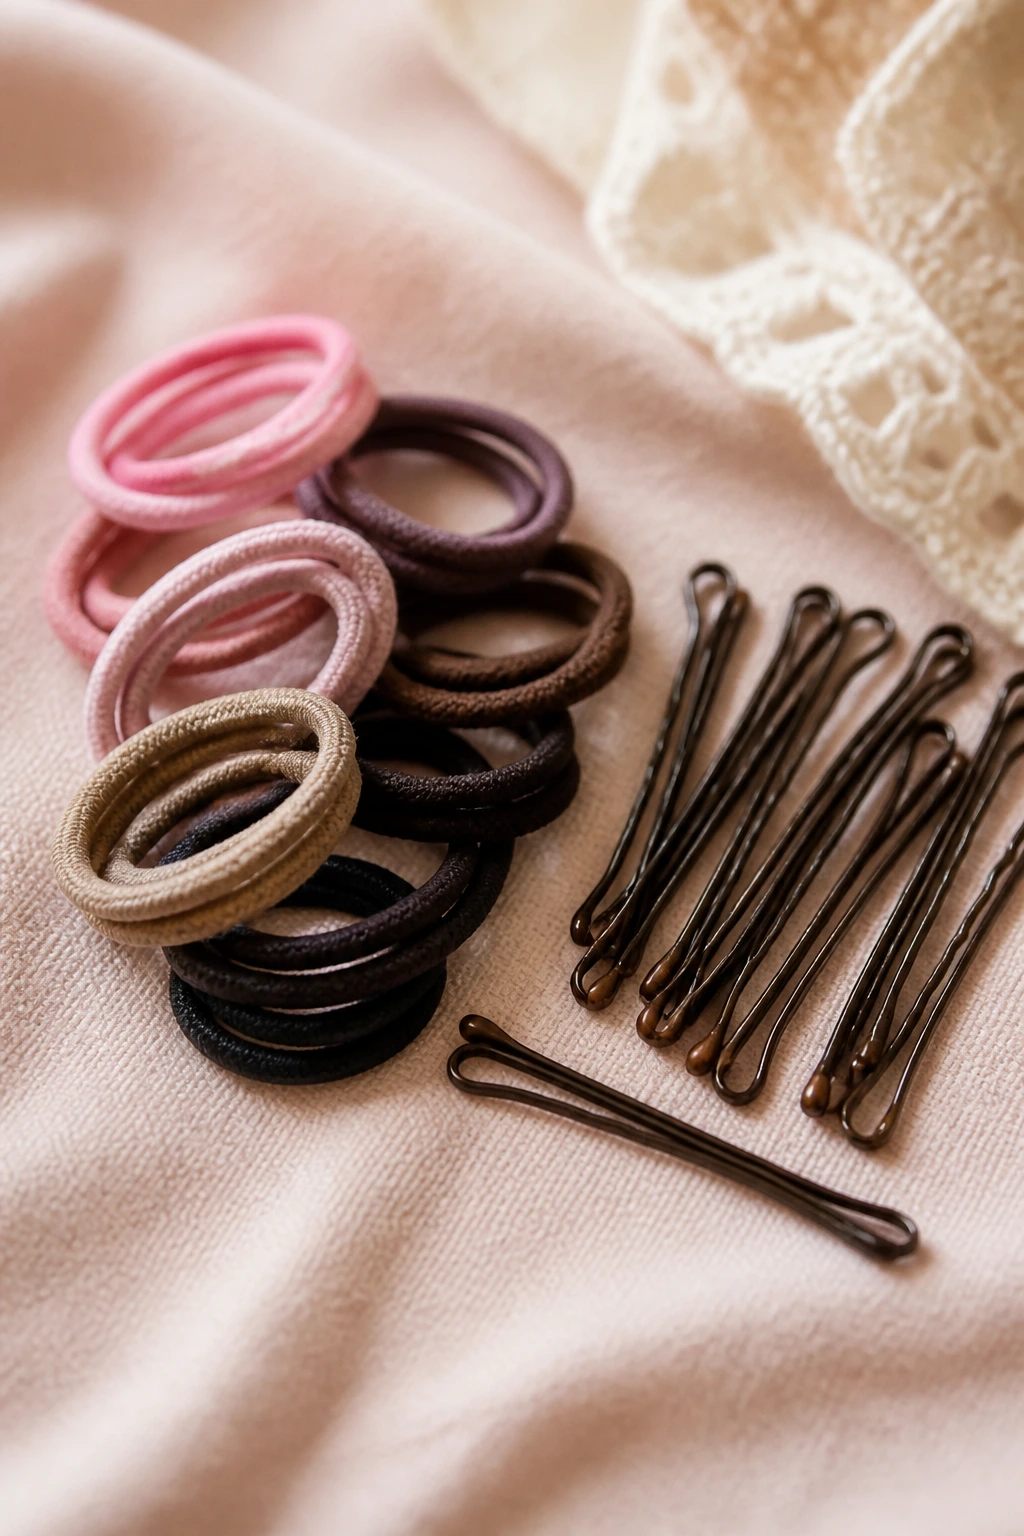
Buy for hair texture, not just color. Matte mini elastics tend to grip better than shiny, slippery ones, and that matters on straight hair that slides out of everything. Clear elastics disappear well, but they can snap sooner than you expect, so I like to keep a bigger pack on hand than seems reasonable. You will use them.
For pins, the finish matters. Rounded-tip bobby pins are kinder on little scalps than the sharp-edged kind, and darker colors blend into brown or black hair better than silver ones. U-pins are underrated for buns because they hold the shape without stabbing the child every time she turns her head. If you’ve only ever used bobby pins, try a few U-pins before dismissing them.
Styling product should be light, not gluey. A detangling spray, a thin cream, or a touch of gel at the hairline is usually enough. Heavy pomades can make hair look greasy fast, especially on fine hair. And giant bows? Cute in theory, awkward in practice if they’re top-heavy. Keep the accessory scale in line with the child’s head. Tiny details read better than oversized decoration most of the time.
How to Wear These Updos
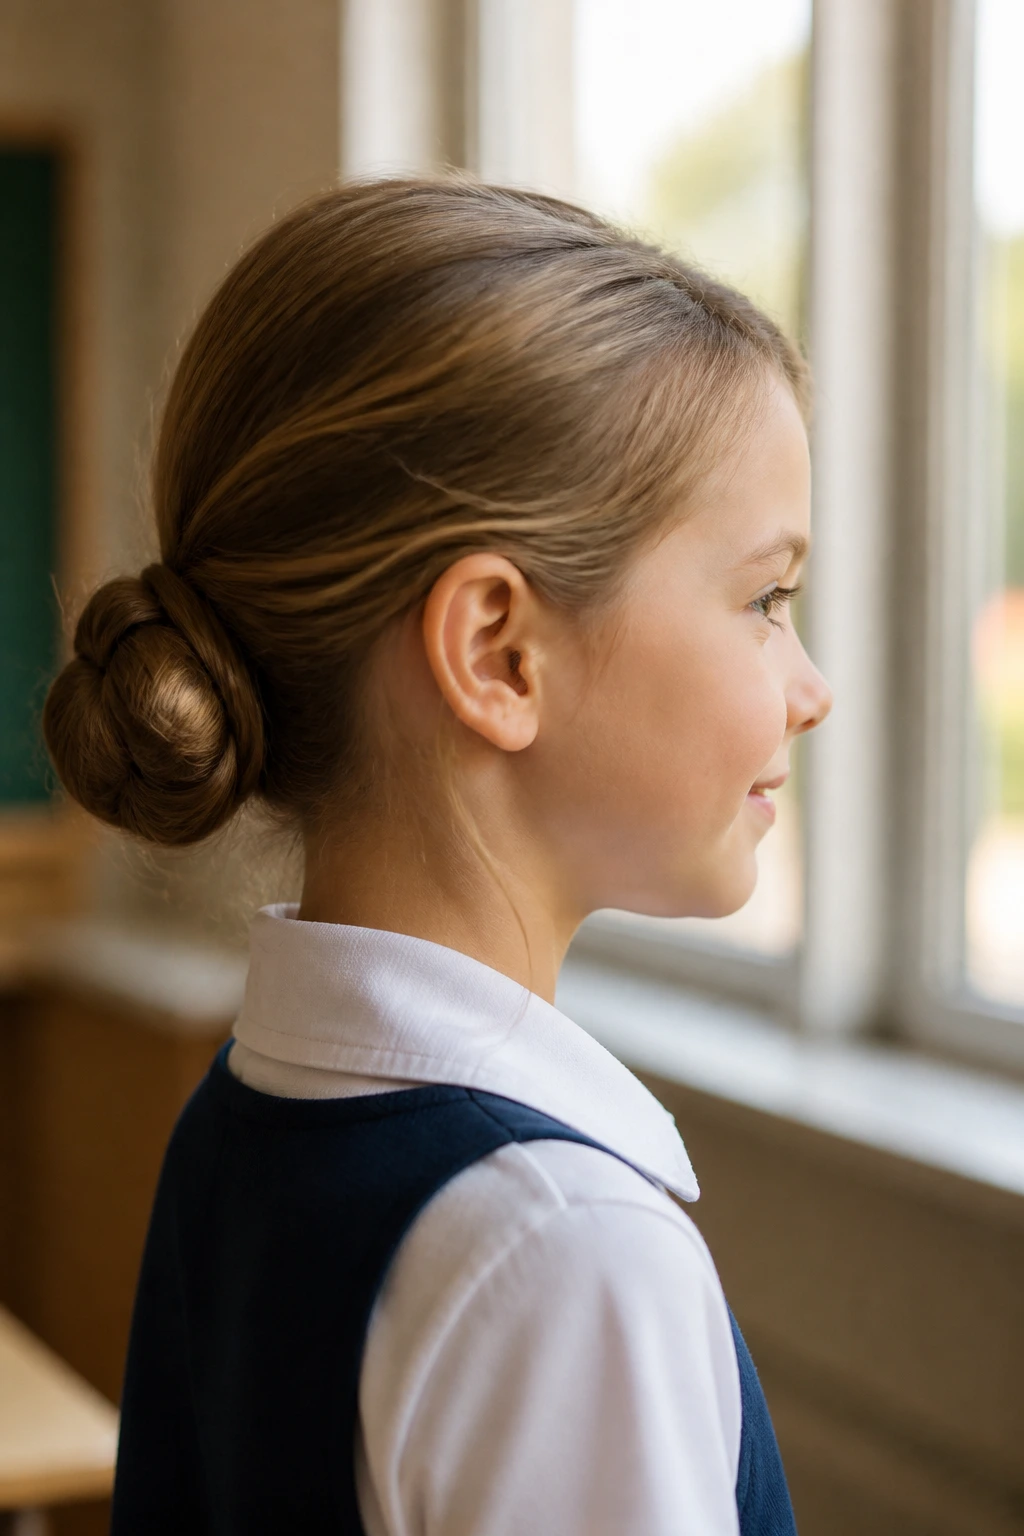
Presentation: A neat part, a smooth crown, and one visible focal point — braid, bun, ribbon, or clip — keep the style readable from across the room. On a little head, a small accessory often looks more polished than a giant one.
Accompaniments: Bows, satin ribbons, pearl clips, tiny flowers, and hair cuffs all work, but keep them close to the base of the style so they do not pull the shape off balance. One accessory is usually enough.
Portions: Shoulder-length hair can handle half-up knots, low buns, and side braids without trouble. Longer hair can build fuller buns and crown braids. Very thick hair often looks best divided into two or three sections before it’s gathered, because one big pony can turn into a heavy lump.
Occasion Pairing: School days call for buns, braids, and double knots that won’t snag on collars. Recitals and weddings can carry more ribbon, shimmer, and symmetry. For playground time, I’d choose something low, tight enough to stay put, and not decorated with anything that can snag on a slide.
Small Tweaks That Make the Whole Style Feel New
Texture Boost: A puff of dry shampoo or a light wave from a damp braid overnight can give straight hair more hold, especially on styles that need pins to stay where you place them.
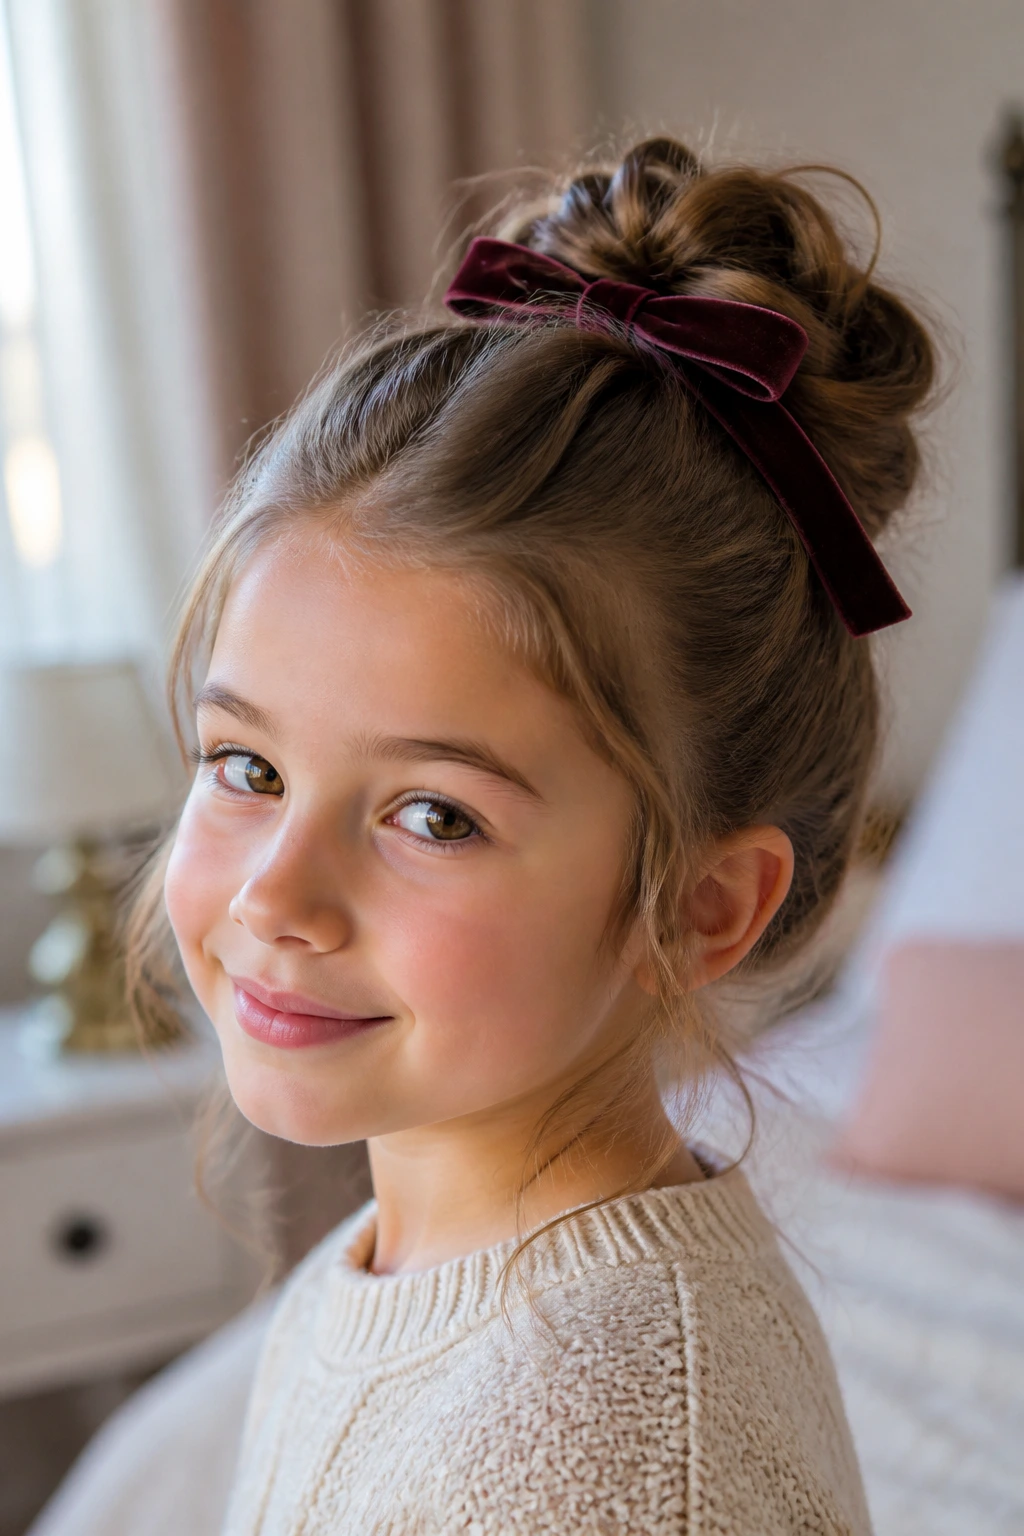
Accessory Swap: Change the whole mood by swapping a satin bow for a velvet one, or a plain elastic for a ribbon tie. Same base style. Different feel.
Gentle Hold: If the hairline is sensitive, use fewer anchor points at the front and more support at the back. The style should feel snug, not pinched.
Make-It-Yours: For curls, keep volume at the crown and avoid brushing the curl pattern out flat. For fine hair, build smaller buns and tighter braids. For thick hair, split the style into two stages so the weight is spread out instead of dumped into one knot.
Night-Before Prep and Morning Refresh
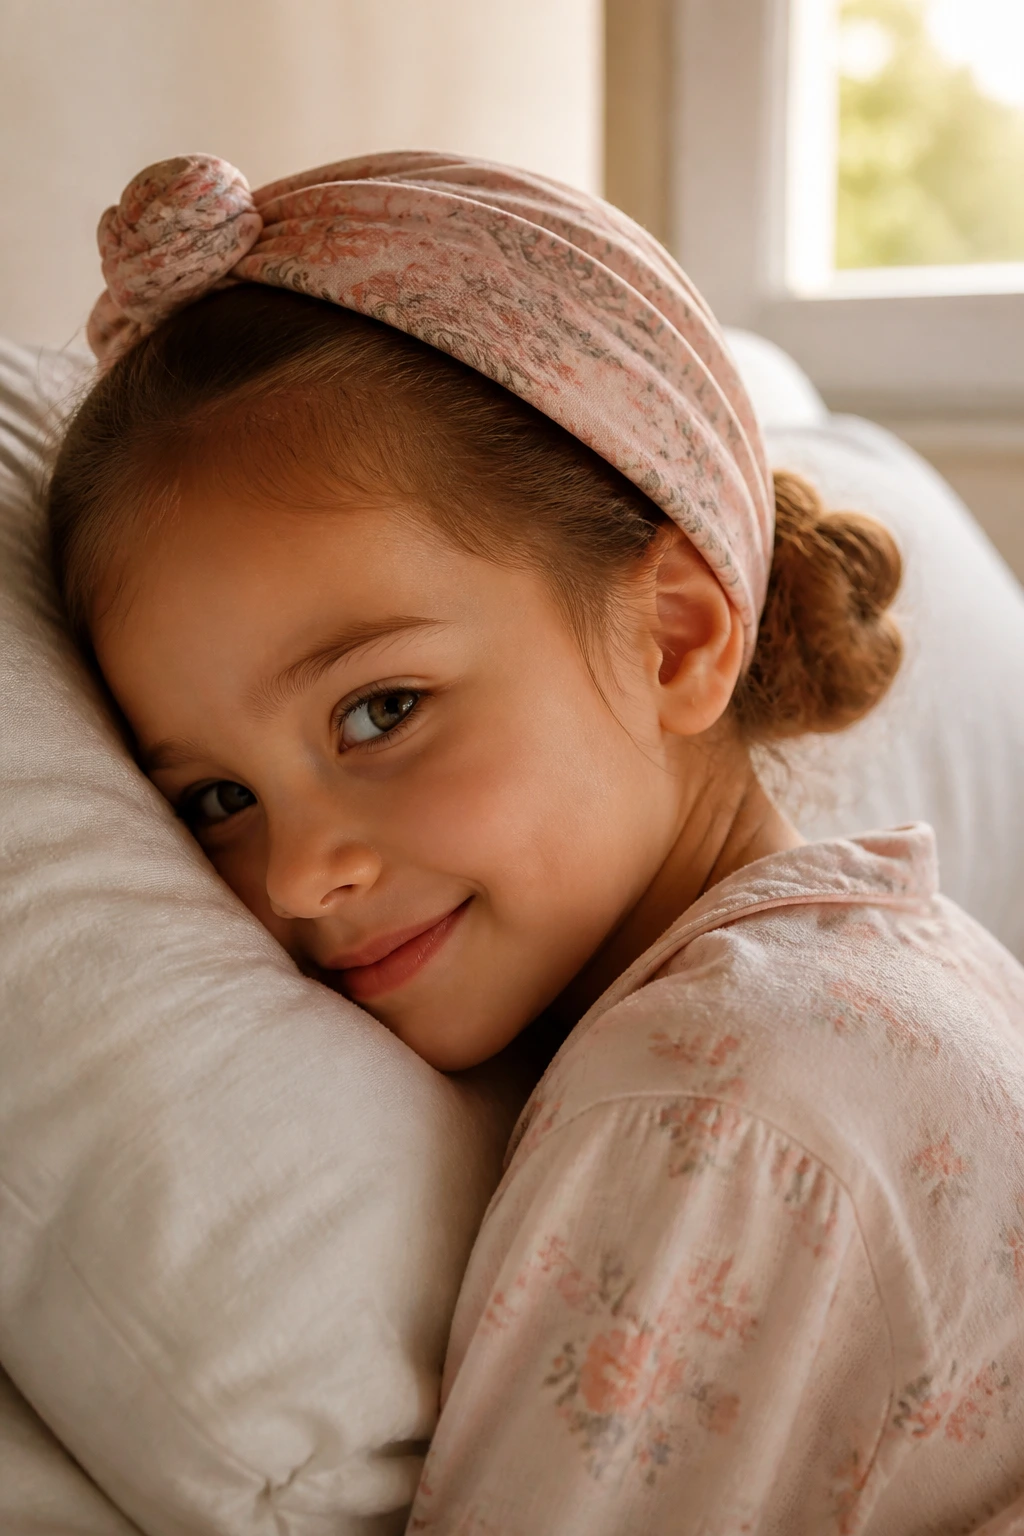
Most of these styles are easier if you do the boring work the night before. Detangle while the child is still calm, check the part, and decide where the main section will sit. If you’re planning braids, pre-sectioning with clips can save five messy minutes in the morning. For curly hair, a satin bonnet or pillowcase helps preserve shape without flattening the whole style.
A style built for one day usually lasts 6 to 10 hours if it’s pinned well and not yanked at constantly. If you need a second day, don’t just pile more pins onto the same tired shape. Loosen it, refresh the hair with a light mist, and rebuild the base. That takes less time than fighting a collapsed bun at 7:15 a.m.
Sleep matters too. Tight high buns can press awkwardly against a pillow, so if you want to keep the style overnight, a low braid, a wrapped bun, or a soft scarf works better. If the child wakes up with a flat crown, a quick spritz and a tiny brush-through at the front usually brings it back.
Variations and Adaptations to Try
Fine-Hair Grip Version: Add dry shampoo at the roots, use smaller elastics, and crisscross two pins where one would normally sit. Fine hair looks best when the style is smaller and tighter to the head.
Curly-Crown Version: Keep the curl pattern visible and use twists or gentle puff styles instead of brushing everything flat. The shape stays prettier when the curls are allowed to do part of the styling.
Short-Hair Helper Version: Build with mini buns, half-up knots, and tiny braids along the hairline. If the length is awkward, work with it instead of trying to force a big bun that won’t hold.
Rainy-Day Version: Choose a low style — bun, braid tuck, or wrapped pony — and use a little anti-frizz cream at the crown. High styles tend to get puffier faster when the air is damp.
Picture-Day Version: Keep the part clean, smooth the crown, and use one elegant accessory instead of three. The hair should look neat from the front and tidy from the back.
Playground-Proof Version: Use crossed elastics, secure the base with pins, and skip anything that can snag or fall off. If the child is going to run hard, the hairstyle should be ready for it.
Common Mistakes to Avoid
- Starting with tangled hair: If you try to braid through knots, the style will look uneven and the child will feel every tug. Detangle first with a wide-tooth comb and a little slip.
- Pulling too tight at the hairline: A slick front can look polished, but if the skin is stretched tight or the child complains right away, loosen it. Secure the back more firmly instead.
- Using accessories that are too heavy: A big bow or chunky clip can drag a fine style down and cause the bun to sag. Keep the accessories light unless the hair itself is thick enough to support them.
- Relying on one anchor point: One elastic alone is not much of a defense against slipping hair. Add a braid, a second tie, or a few crossed pins.
- Overloading with product: Too much gel or cream can make hair greasy and can also make pins slide. Use less than you think you need, then add more only where the flyaways actually are.
- Forgetting to match the style to the child’s hair type: A polished bun on very fine hair may need texture spray; a curly puff should not be brushed into submission. Build the style around the hair you have.
Questions Parents Ask Most Often
What updo lasts the longest on slippery straight hair?
The Dutch braid into a bun and the pull-through braid bun usually hold best because they create multiple grip points. A plain top knot can slip much faster if the hair is freshly washed.
Can these styles work on short hair?
Yes, but shorter hair does better with half-up knots, mini buns, and tucked braids than with large wraparound styles. If the ends can’t reach, use the hairline and crown as your working area.
How do I keep bobby pins from slipping out?
Cross them over each other, slide them into a little bit of texture instead of smooth flat hair, and push them in against the direction of the hair’s lay. If the hair is very silky, a tiny bit of powder or dry shampoo helps.
Is it okay to use gel on a child’s hair?
Yes, in a light amount. I’d use just enough to smooth the hairline or tame flyaways, then wash it out later the same day instead of leaving it in overnight.
What if my child hates the feeling of tight styles?
Choose low buns, loose braids, or styles with soft twists rather than slick high knots. Comfort matters more than symmetry when the child is old enough to tell you something feels off.
How do I make the style look neat without making it stiff?
Smooth the crown with a brush, keep the base secure, and leave the rest of the shape a little softer. A few tiny wisps around the face can make the style feel friendlier.
Can curly hair do these updos without being straightened first?
Absolutely. Curly puff styles, crown twists, and low buns often look better when the curls are left intact. Straightening first usually adds work and takes away the hair’s natural hold.
What’s the best way to take the style down without tangles?
Remove pins first, then take out elastics one at a time, and never rip through a braid dry. A little detangling spray and patient fingers are faster than a brush forced through knots.
Styles That Stay Sweet All Day
The best little girls’ updos do not try to overpower the hair. They work with the texture, the length, and the amount of patience available that morning. That’s the real trick. Soft tension, clean sections, and one or two good anchor points beat a dozen rushed pins every time.
If you only try one new style this week, make it one that suits your child’s actual hair, not the hair you wish she had. That’s when these buns, braids, twists, and crowns start earning their keep — and the mirror stops turning into a battlefield.
