



Face-framing layers have a funny little power: they can make a haircut feel lighter, sharper, softer, or more expensive-looking without changing the whole length. A blunt cut can be fine. Then you add two front pieces that fall from the cheekbone toward the jaw, and suddenly the whole shape wakes up. The eye goes where you want it to go. That’s the whole trick.
I like face-framing layers because they solve a real problem that a lot of haircuts ignore. Heavy hair can swallow the face. Fine hair can fall flat against it. Wavy and curly hair can puff in the wrong spots. Good front layers fix the silhouette first, then the styling becomes easier because the cut is already doing some of the work.
The part people miss is placement. A face frame that hits at the cheekbone does a different job than one that starts at the lip or chin. A layer cut too high can look disconnected. Too low, and it behaves like long hair with a few accidental shorter pieces. The best versions feel chosen, not random. That’s why the details below matter.
Why These Face-Framing Layers Work Better Than a Generic Layered Cut
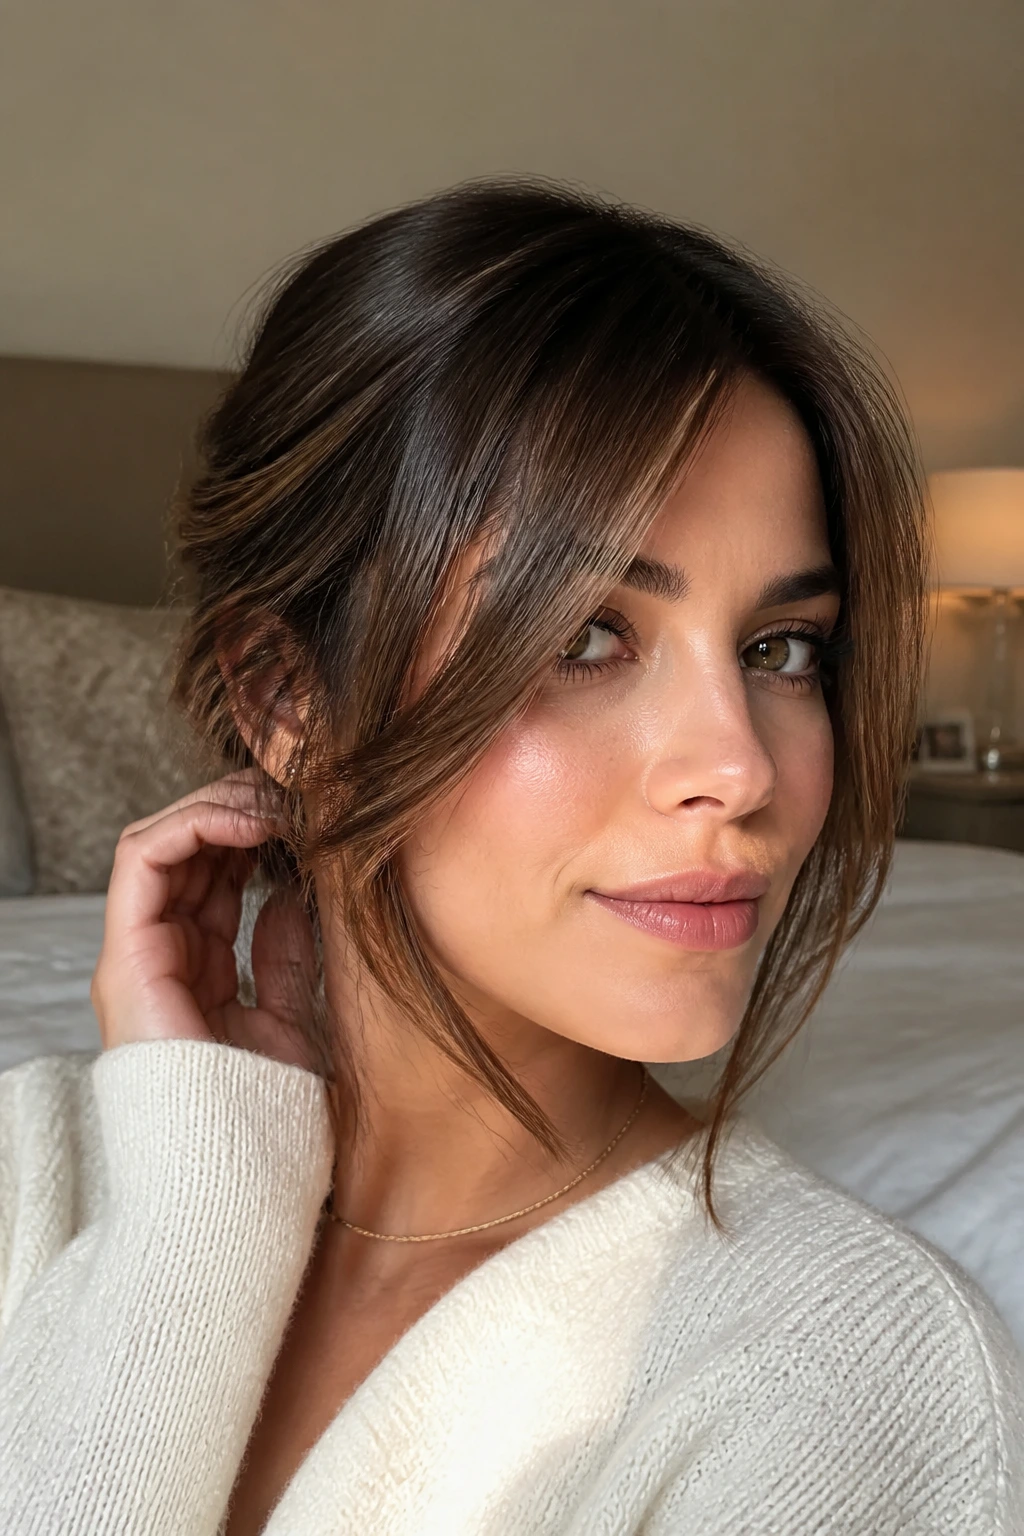
Shape control: The shortest pieces near the face pull attention upward, which is why a well-placed frame can soften a heavy jaw or open up a narrow forehead without taking length away.
Grow-out grace: Front layers are easier to live with than a full short chop because they keep blending into the rest of the cut as they grow. You do not get that awkward “I need a haircut yesterday” feeling quite as fast.
Texture-aware styling: The right layer placement can make blow-drying faster, help curls sit where they should, or keep straight hair from hanging like a curtain.
Face-specific balance: A round face usually needs a little vertical line; a long face usually needs width and movement near the cheeks; a square face often looks softer when the shortest pieces land just below the cheekbone.
Low-commitment change: If you’re nervous about going shorter, front layers are the easiest way to change the mood of your hair without giving up the length you’ve spent months growing.
Salon-friendly language: These styles are easier to ask for when you know the landmarks—cheekbone, lip, jawline, collarbone—so you can leave the chair with something intentional instead of “a few pieces in front.”
1. Cheekbone Curtain Layers

These are the front pieces I reach for first when someone wants movement without drama. The shortest bits sit around the cheekbone, then sweep down into longer lengths that meet the collarbone or chest. On straight hair, they create a clean frame. On wavy hair, they catch the bend in a way that looks planned instead of airy in a vague, fuzzy way.
What makes them flattering is the angle. The eye gets pulled toward the center of the face, then down through the length, which is exactly what you want when a cut feels flat around the front. Ask for a center part, then have the stylist start the shortest face pieces no higher than the top of the cheekbone if you want a soft look.
How to wear them
Blow-dry the front away from the face with a round brush, then flip the ends back in with your fingers. If you want a little more polish, one pass with a 1.25-inch curling iron through the front pieces is enough. Don’t curl the whole head. Just the frame.
2. Chin-Skimming Front Pieces
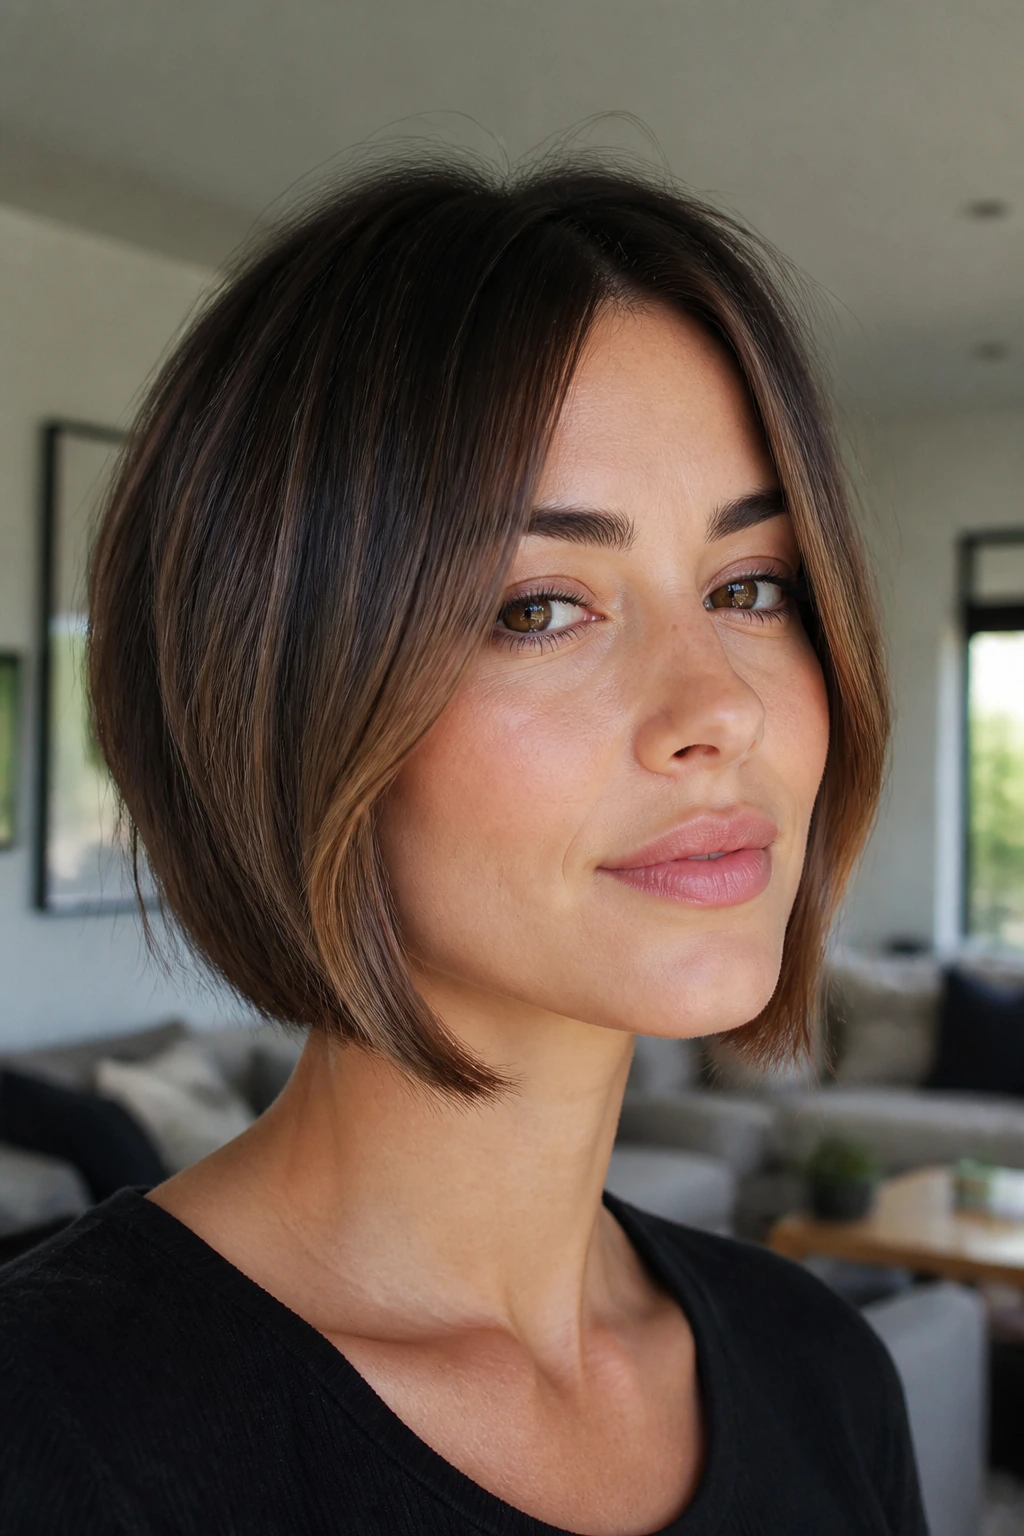
Chin-length front layers have edge, but they’re not as severe as a blunt bob. They sit right where the jaw starts to show, which makes them useful for softening a square face or giving a narrow chin a little more visual weight. On medium and thick hair, this shape can look expensive in the best way—clean, deliberate, not overworked.
The catch is balance. If the rest of the haircut is too heavy, the chin pieces can look like they were dropped in by accident. The fix is a gradual connection into the rest of the length, not a hard step. Ask for the front to “swing” rather than stop.
Best for: mid-length cuts, thicker straight hair, and anyone who wants the face frame to show even when the hair is tucked behind the ears.
3. Collarbone Layers with a Soft Bend
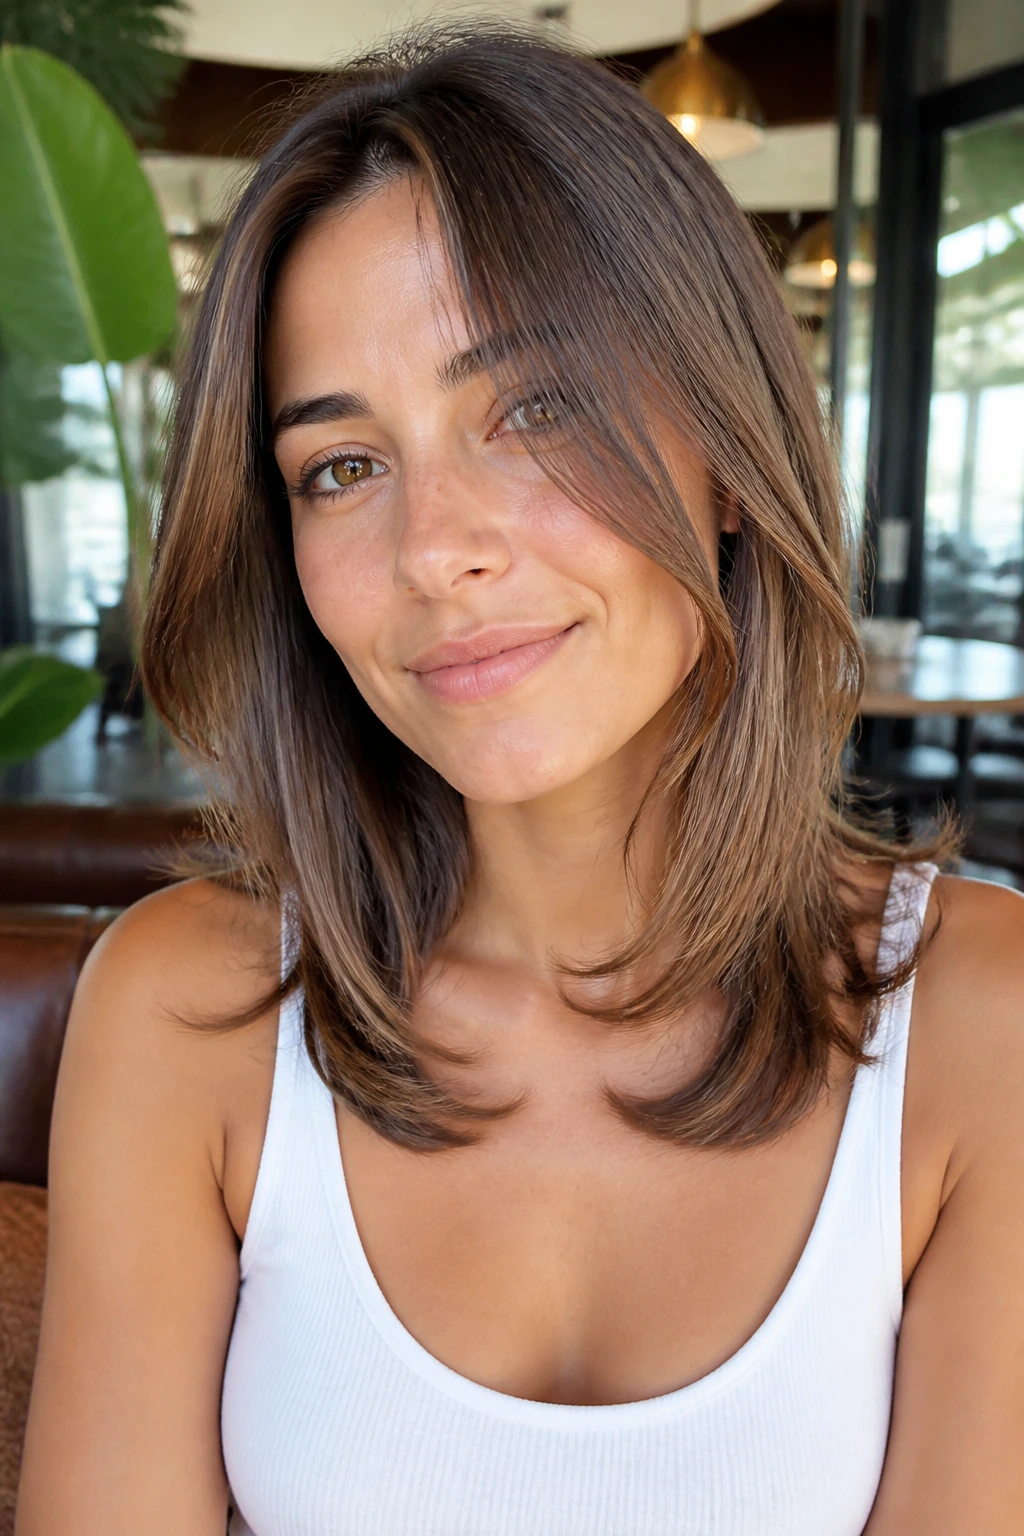
The collarbone is a sweet spot. It gives you enough length to tuck the hair, toss it over one shoulder, or clip it back, but the front layers still have enough room to move. I like this shape on people who want a cut that behaves well on busy mornings and still looks like a decision when they put a little work into it.
The frame usually starts between the mouth and jaw, then runs into a longer line that lands at the collarbone. That longer front line is what keeps the cut from feeling choppy. If your hair tends to puff at the ends, ask for the layers to be carved with scissors rather than heavily razored.
Quick read
- Works well on medium-density hair.
- Sits nicely under a blazer collar.
- Looks good with a middle part or a soft side part.
- Needs only a quick bend with a brush and dryer.
4. Butterfly Layers for Long Hair
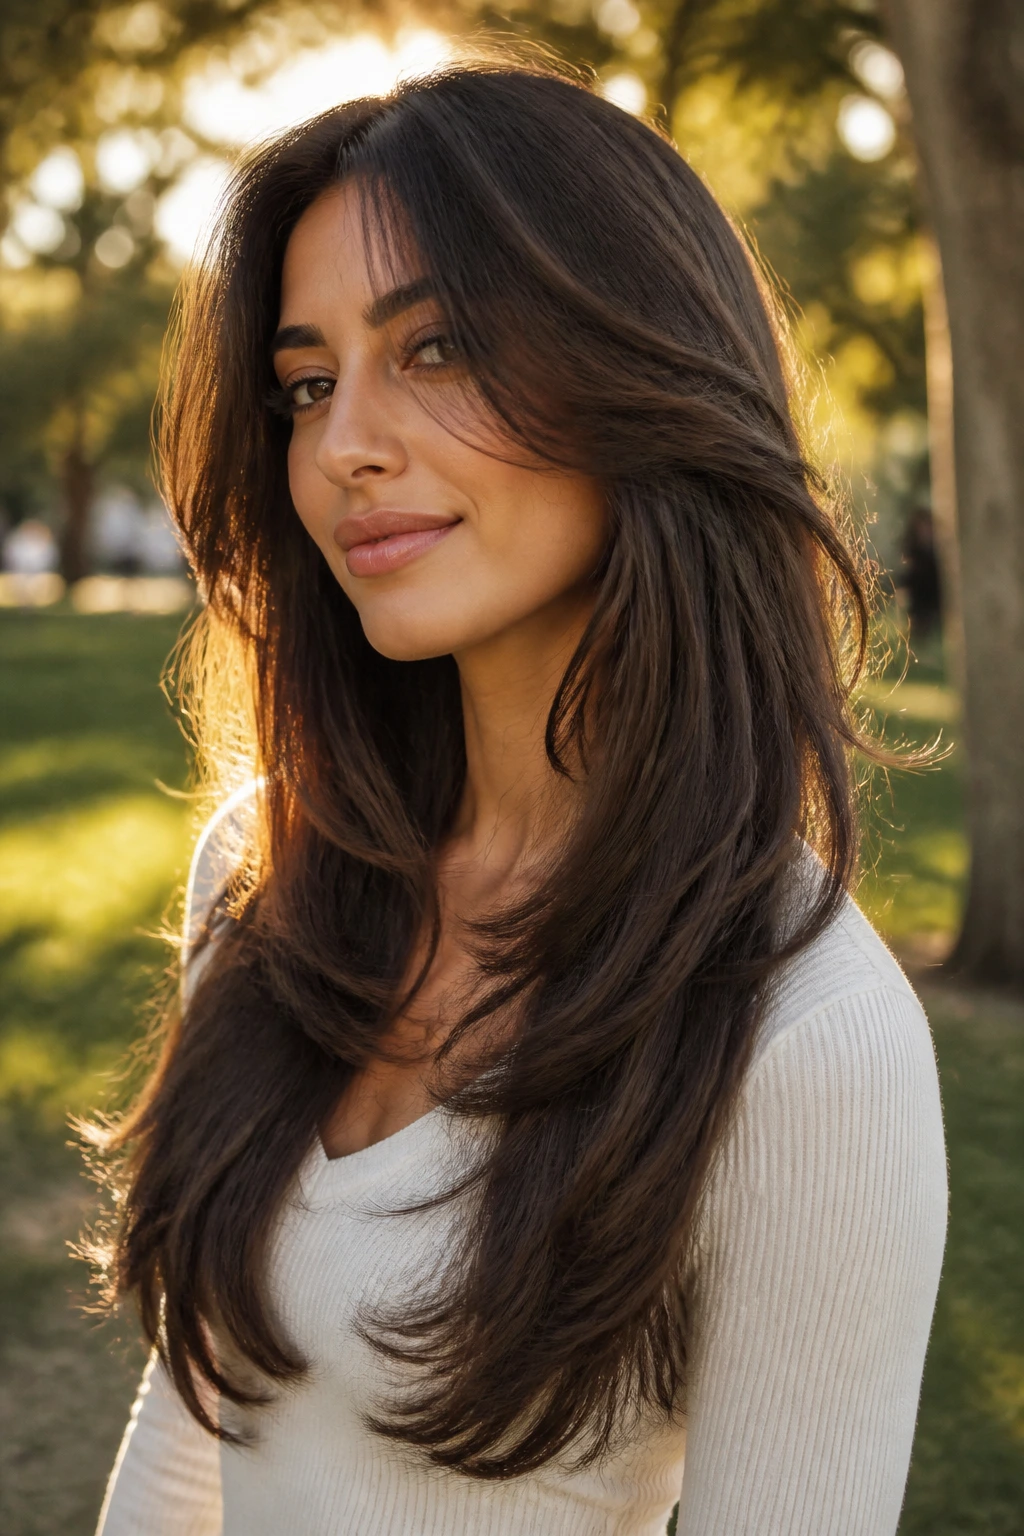
Butterfly layers are the dramatic one in the group, but they can be surprisingly wearable when the face frame is handled well. The top layers are shorter and lighter, while the bottom length stays long. That means the front can float around the face without sacrificing the weight at the back.
This cut is a good pick if you like a blowout shape. The front pieces can hit around the cheekbone or lip, then cascade into longer pieces that give the whole cut that airy, split-layer look. It’s not subtle. That’s the point. On very fine hair, though, too much layering can take away too much bulk, so keep the interior layers controlled.
Style note: round-brush the top section up and away from the face, then over-direct the front pieces forward before flipping them back. That small move creates lift where most long hair goes limp.
5. Feathered Layers for Fine Straight Hair

Fine straight hair can look stringy when the layers are too blunt or too short, so feathering matters. Feathered face-framing layers use soft, tapered ends that break up the line without turning the front into wisps. The result is movement with less visual weight, which is exactly what thin hair needs.
I prefer this shape when the shortest piece lands around the nose or mouth, not right at the brow. That gives you enough softness without making the hair look sparse at the front. The texture should feel light, not shredded. If a razor is used, it should be a gentle one, because too much slicing can make fine hair fray.
A light mousse at the roots and a small round brush are enough here. Don’t pile on heavy creams. They flatten the lift that makes the cut work.
6. Rounded Layers for Thick Wavy Hair
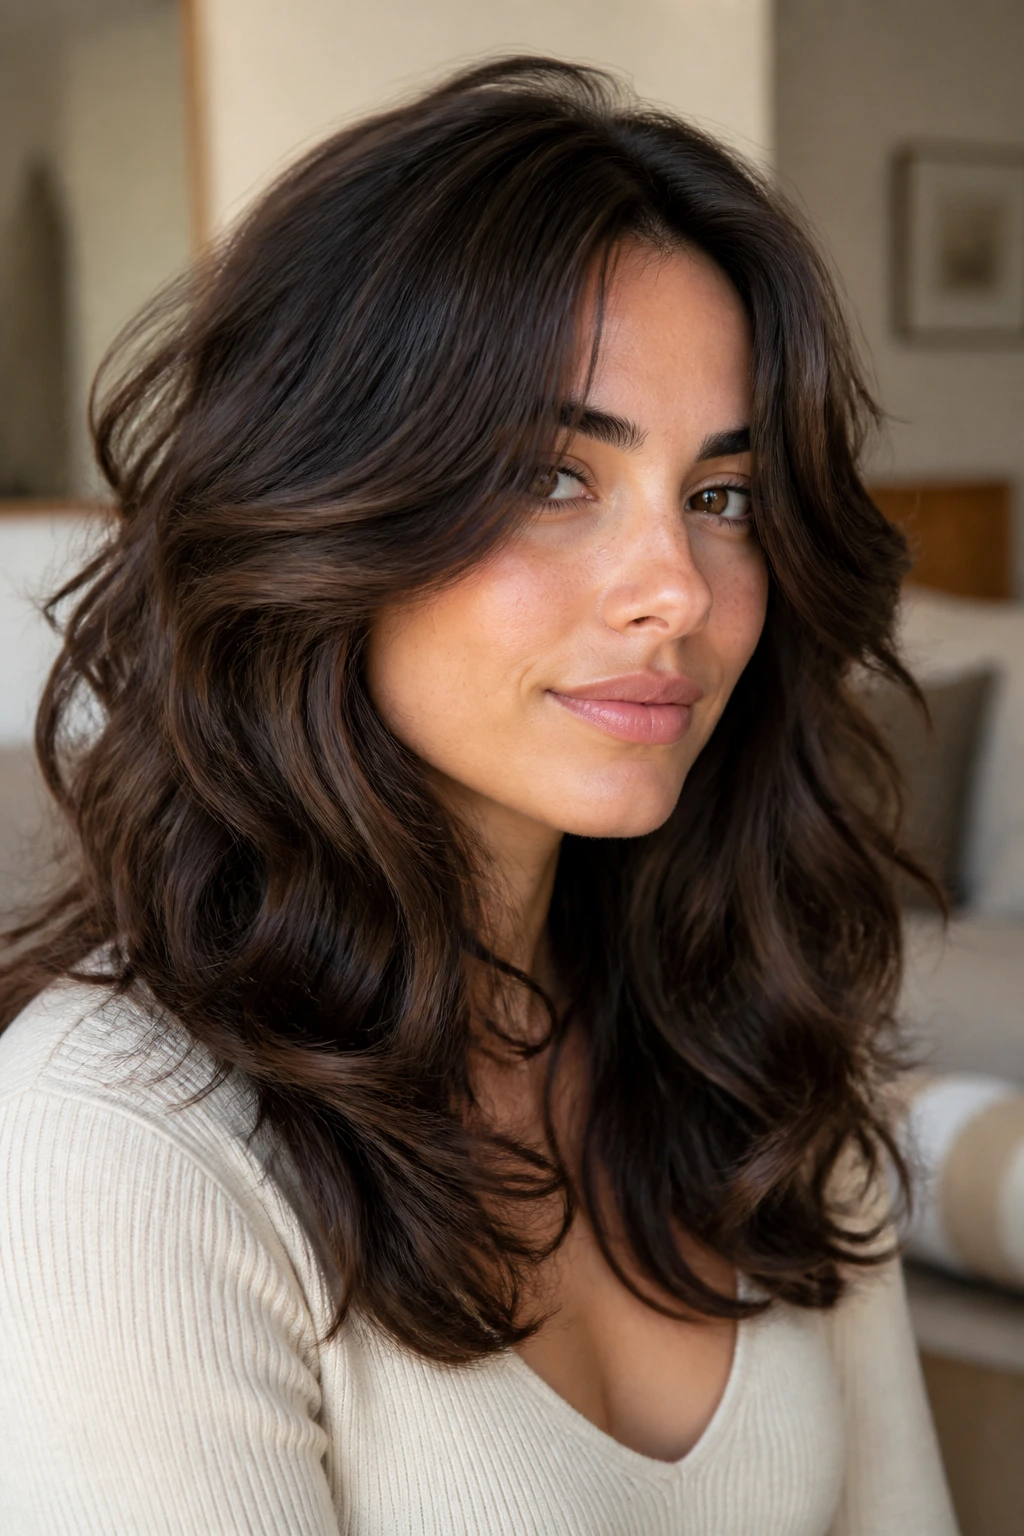
Thick wavy hair can balloon at the sides if the front pieces are cut too square. Rounded layers fix that by curving the frame gently around the face, then letting the rest of the hair fall in a softer arc. The shape feels balanced, almost like the haircut was planned around the natural bend of the wave pattern.
What to ask for
- Keep the shortest face piece around cheekbone height.
- Round the layers into the mid-lengths instead of stopping them abruptly.
- Remove bulk through the interior, not only at the ends.
- Leave enough weight at the bottom so the cut doesn’t puff out.
The best version of this cut looks polished when air-dried, which is a blessing if you hate spending forever with a blow dryer. Scrunch in a light cream, twist the front pieces once while damp, and let the wave do the rest.
7. Bottleneck Bangs with Soft Side Pieces
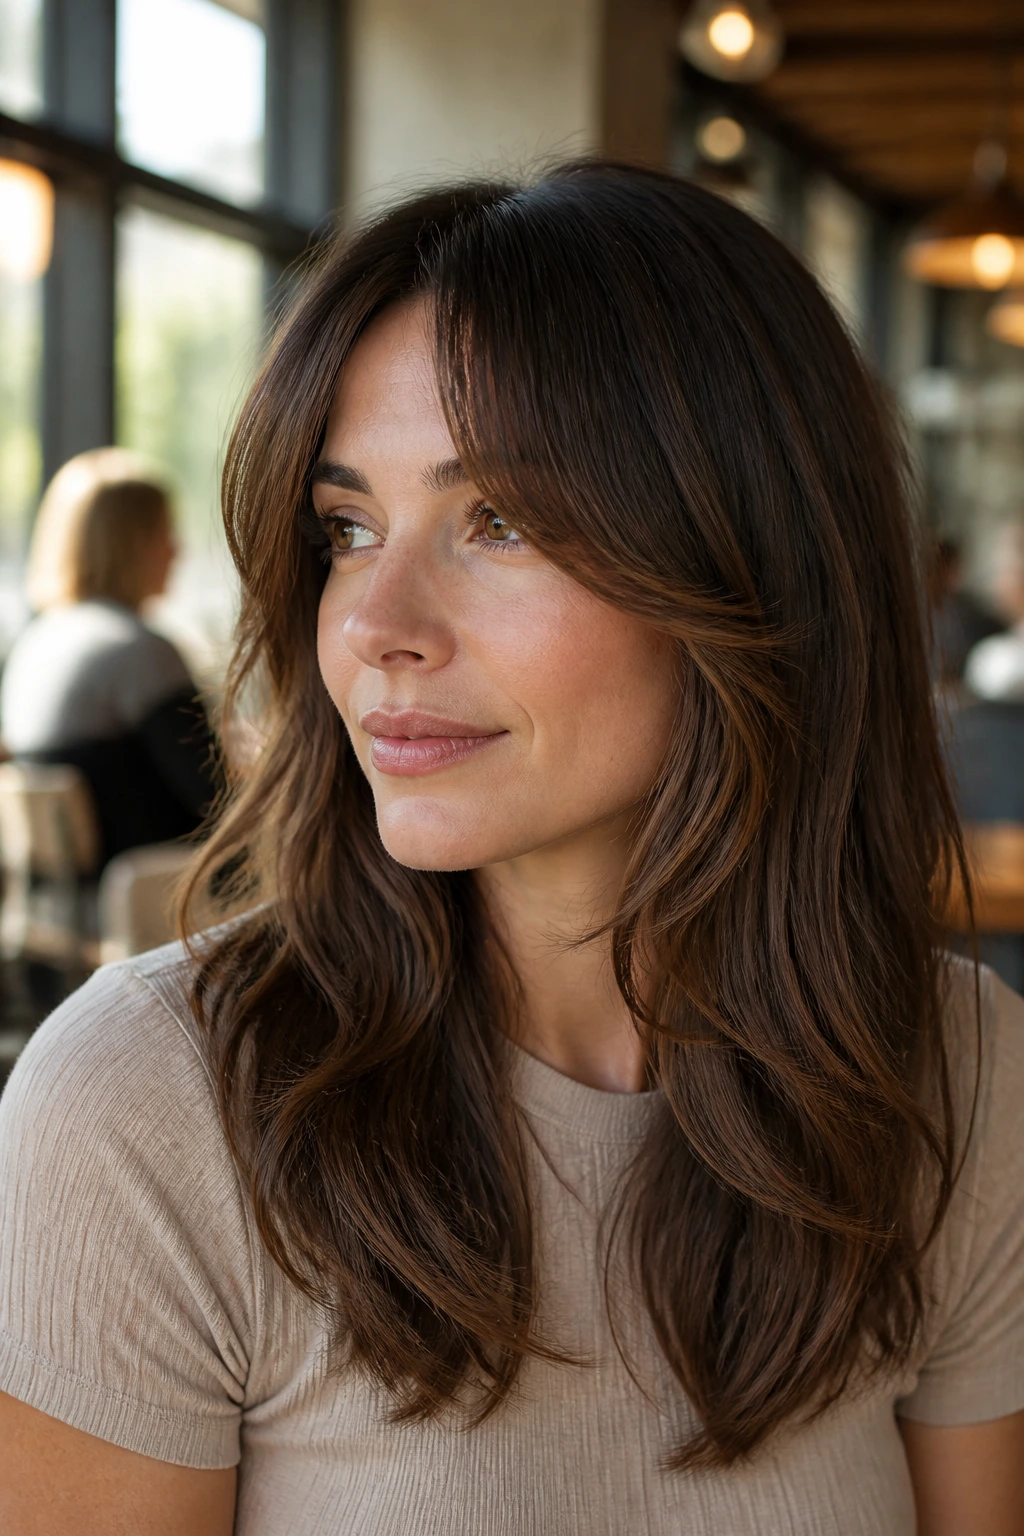
Bottleneck bangs sit in that sweet middle zone between bangs and layers. They start narrower near the center, then open out toward the temples, where the side pieces take over. On a layered haircut, that shape gives you face-framing movement without needing a heavy fringe across the whole forehead.
This is one of my favorite options for people who want softness but not full commitment. The front isn’t chopped straight across, so it grows out with less fuss. It also gives the cheekbones something to work with, which is why it’s so good on longer faces or on anyone who wants their eyes to pop a little more.
If you style it with a blow-dryer, direct the center forward first, then sweep the sides out and back. That keeps the fringe from splitting in a weird way. A tiny dab of styling cream on the ends can stop the shorter pieces from puffing.
8. Side-Part Sweep Layers
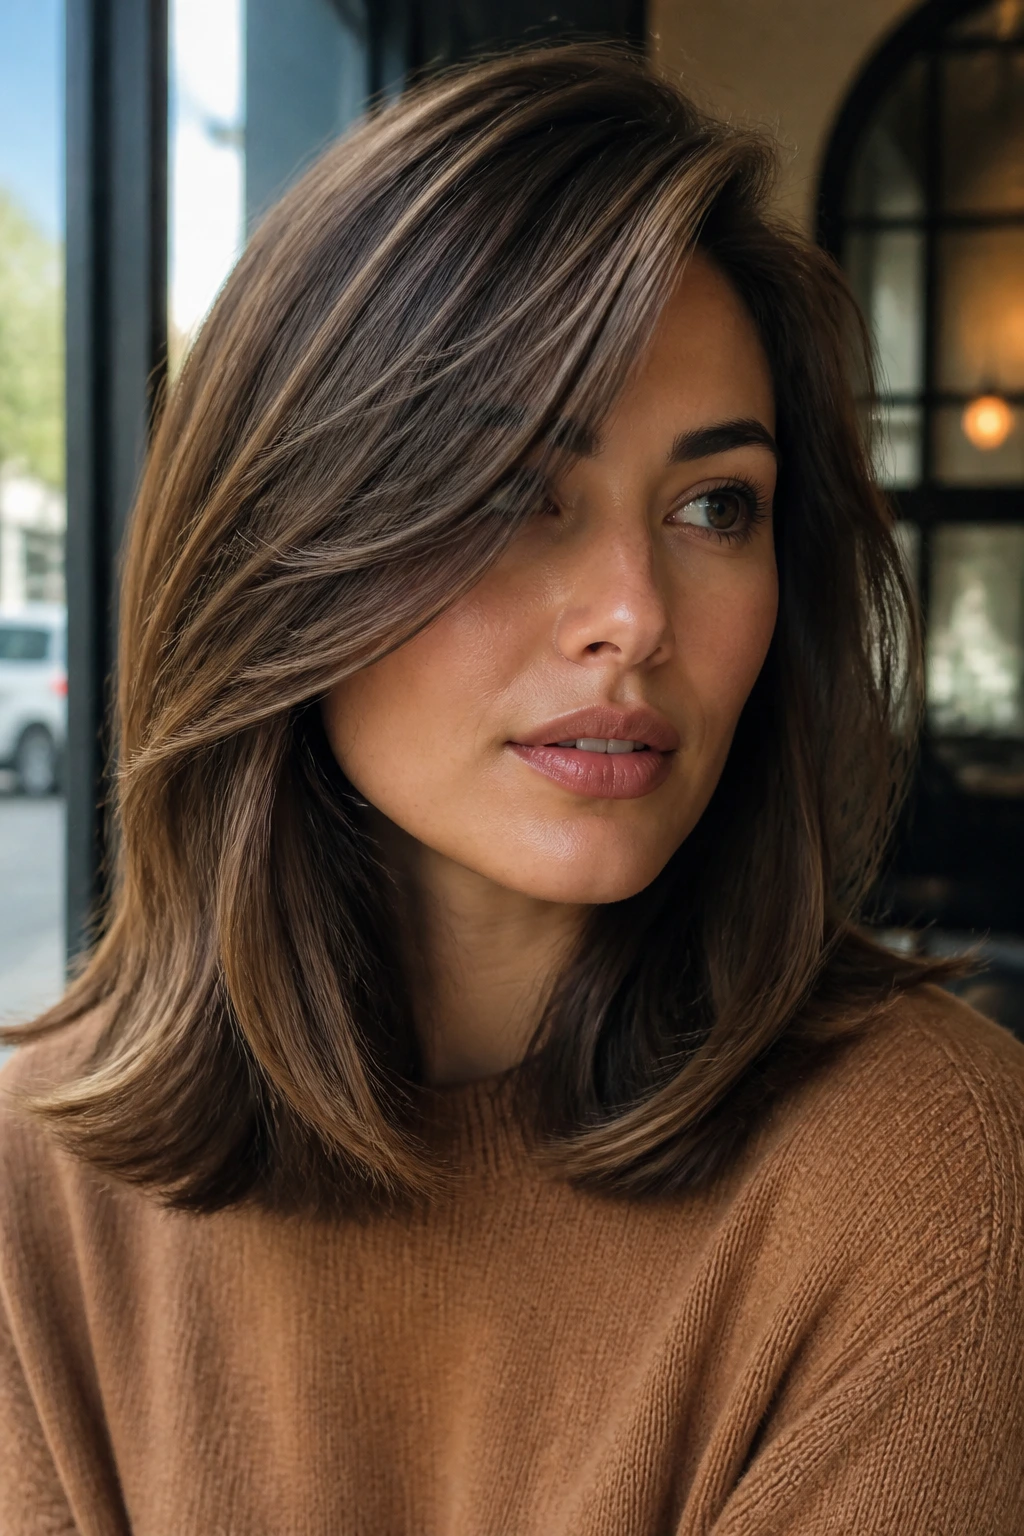
A deep side part changes the whole mood of face-framing layers. Instead of splitting the face in half, it throws one side forward and lets the other side fall away, which adds fullness where a round or soft face sometimes needs a little more edge. It’s a simple move, but it changes the lines in a big way.
The haircut itself can stay fairly long, with the front layers starting around the lip or chin. What makes it different is the direction. Once you train the hair to sweep across the forehead, the shorter pieces stop reading as “front layers” and start reading as shape.
Styling cue
Use a blow-dryer nozzle and brush the front section across the head first, then back into place. That over-direction gives the lift that keeps the side part from collapsing by lunchtime.
9. Jawline Flick Bob Layers
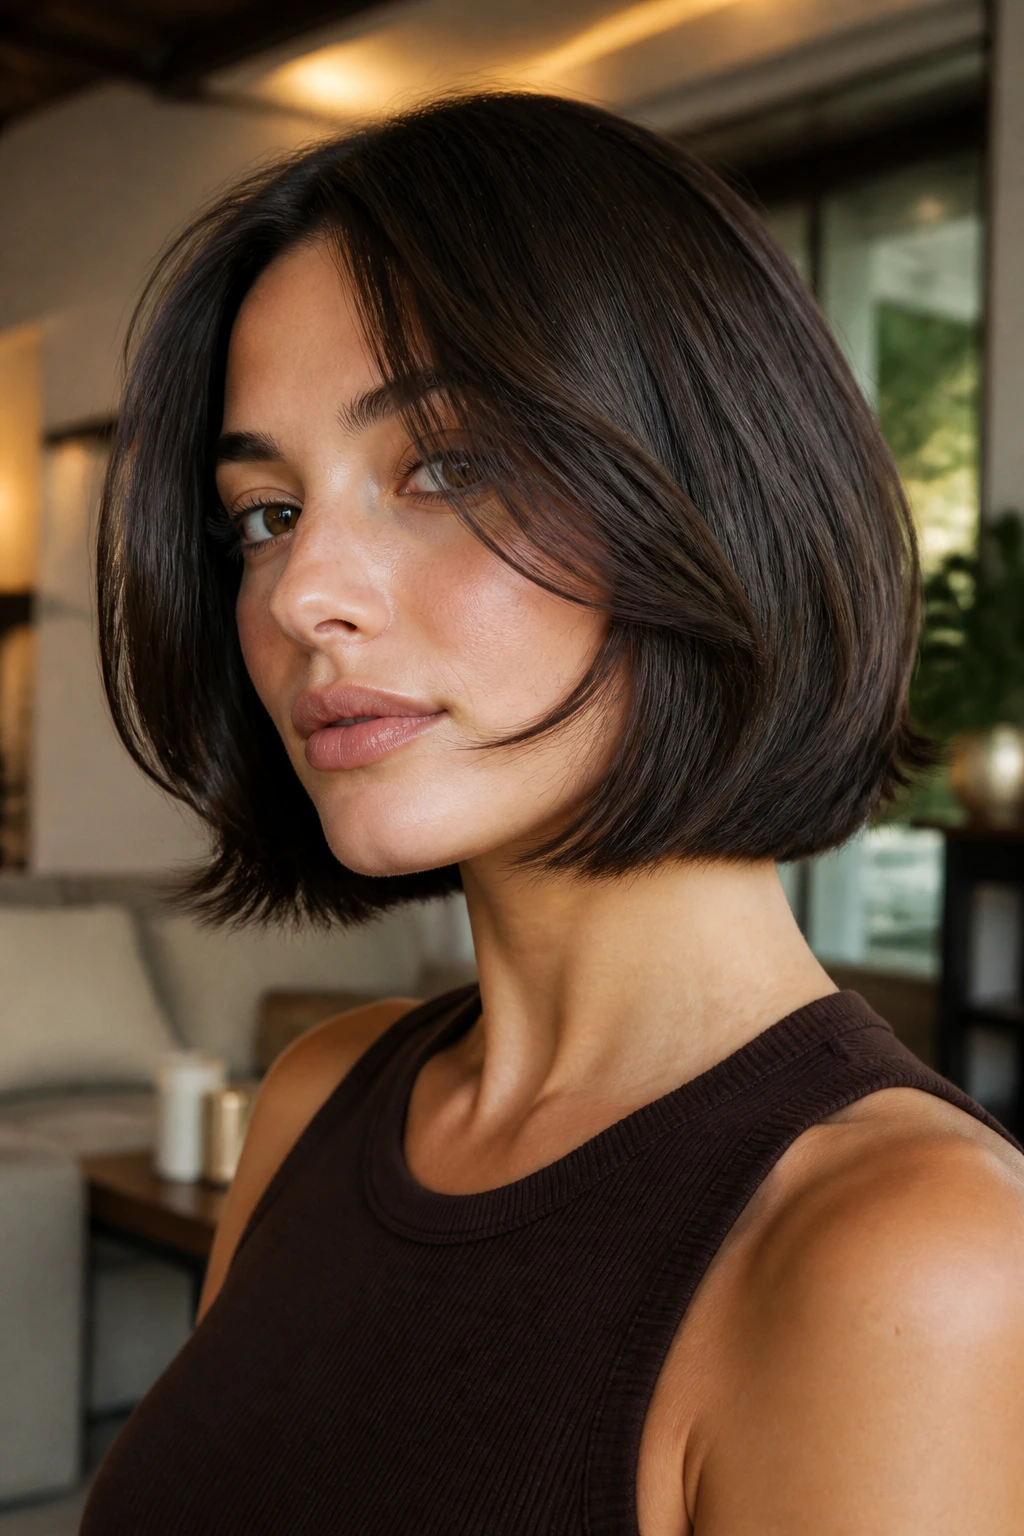
A bob with face-framing layers needs a little attitude or it can look too polite. The jawline flick solves that. The front pieces land near the jaw, then bend out just enough to show movement at the edges. It’s a clean shape with a little swing, and that swing makes the face look more awake.
This cut is sharper than a soft lob, but less severe than a blunt bob. It works especially well on straight or slightly wavy hair because the flick shows up clearly. If your hair is very curly, the same idea works, but the layers need to be cut dry or close to dry so the shape doesn’t spring up too far.
Keep the back slightly shorter than the front if you want the jawline pieces to stand out. If the whole bob is one level, the frame gets lost.
10. U-Shaped Long Layers
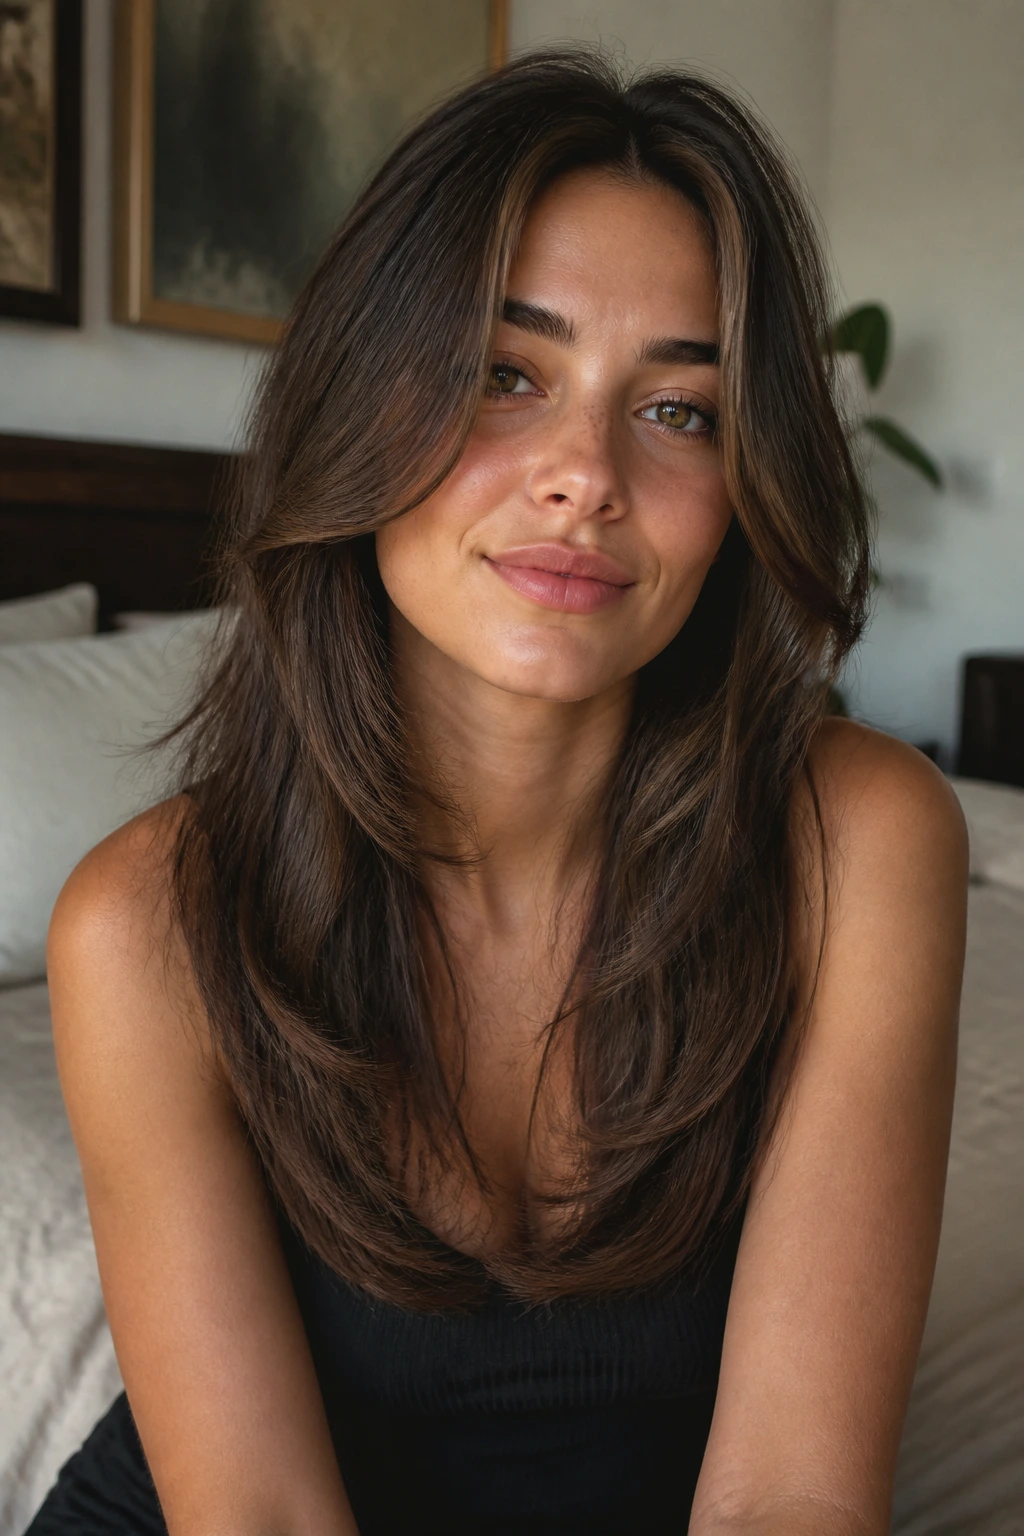
U-shaped long layers are a quiet classic for a reason. The longest hair stays full in the back, while the face pieces and side layers create a gentle curve that hugs the face instead of hanging straight down. The U shape is flattering because it doesn’t cut across the body of the hair in a harsh line.
I like this version on people who want movement but do not want a shaggy look. It gives a subtle lift near the front, especially when the shortest pieces are kept around the cheekbone or mouth. On dense hair, the shape helps lighten the perimeter. On finer hair, it keeps the length looking thick because the bottom line stays intact.
A middle part shows the curve clearly. A side part makes it softer. Either way, the frame should connect smoothly, not end with a blunt shelf.
11. Shag Layers with a Clean Face Frame

A shag can go messy fast if the front isn’t controlled. The clean face frame is what keeps it from sliding into “I did this myself in a bathroom mirror” territory. The layers can still be choppy through the body, but the front should have a clear shape that starts around the cheekbone or lip and flows into the rest.
This version is good for wavy hair that wants texture without losing its outline. It also works on straight hair if you like a lived-in finish. I prefer a softer shag over a super ragged one; the cleaner front pieces make it easier to grow out and easier to style with a brush, which matters more than people admit.
Use a salt spray only at the roots and mid-lengths if you want the front to stay piecey. Too much on the ends can make the layers look dry.
12. Razor-Soft Layers for Sleek Hair
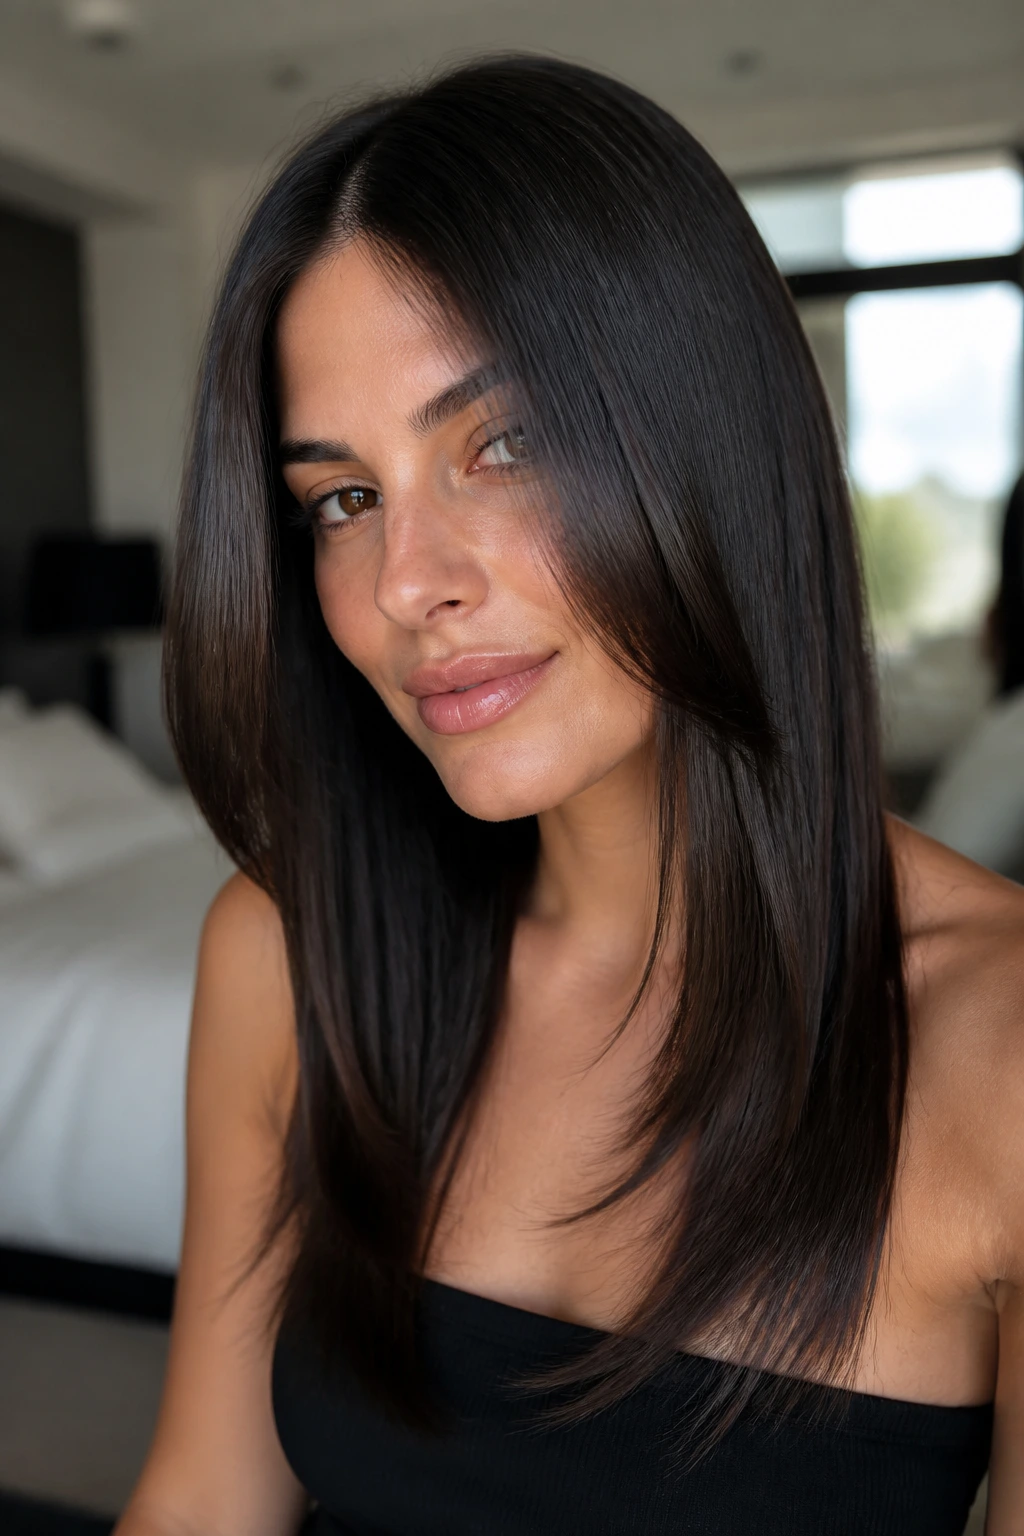
Straight hair can handle a razor if the texture is healthy and the goal is movement, not structure. Razor-soft face-framing layers create a very light edge at the front, almost like the hair has been airbrushed into shape. The effect is subtle, but on sleek hair it shows up fast.
This is a good choice when blunt layers would look too blocky. The razor softens the edges so the front bends instead of sitting in one hard line. If your hair frizzes easily or splits at the ends, I’d skip a heavy razor and keep the cut done with scissors. The technique matters. So does the condition of the hair.
Use it when: you want a polished, narrow frame around the face and you’re willing to blow-dry the front smooth.
13. Curly Halo Layers
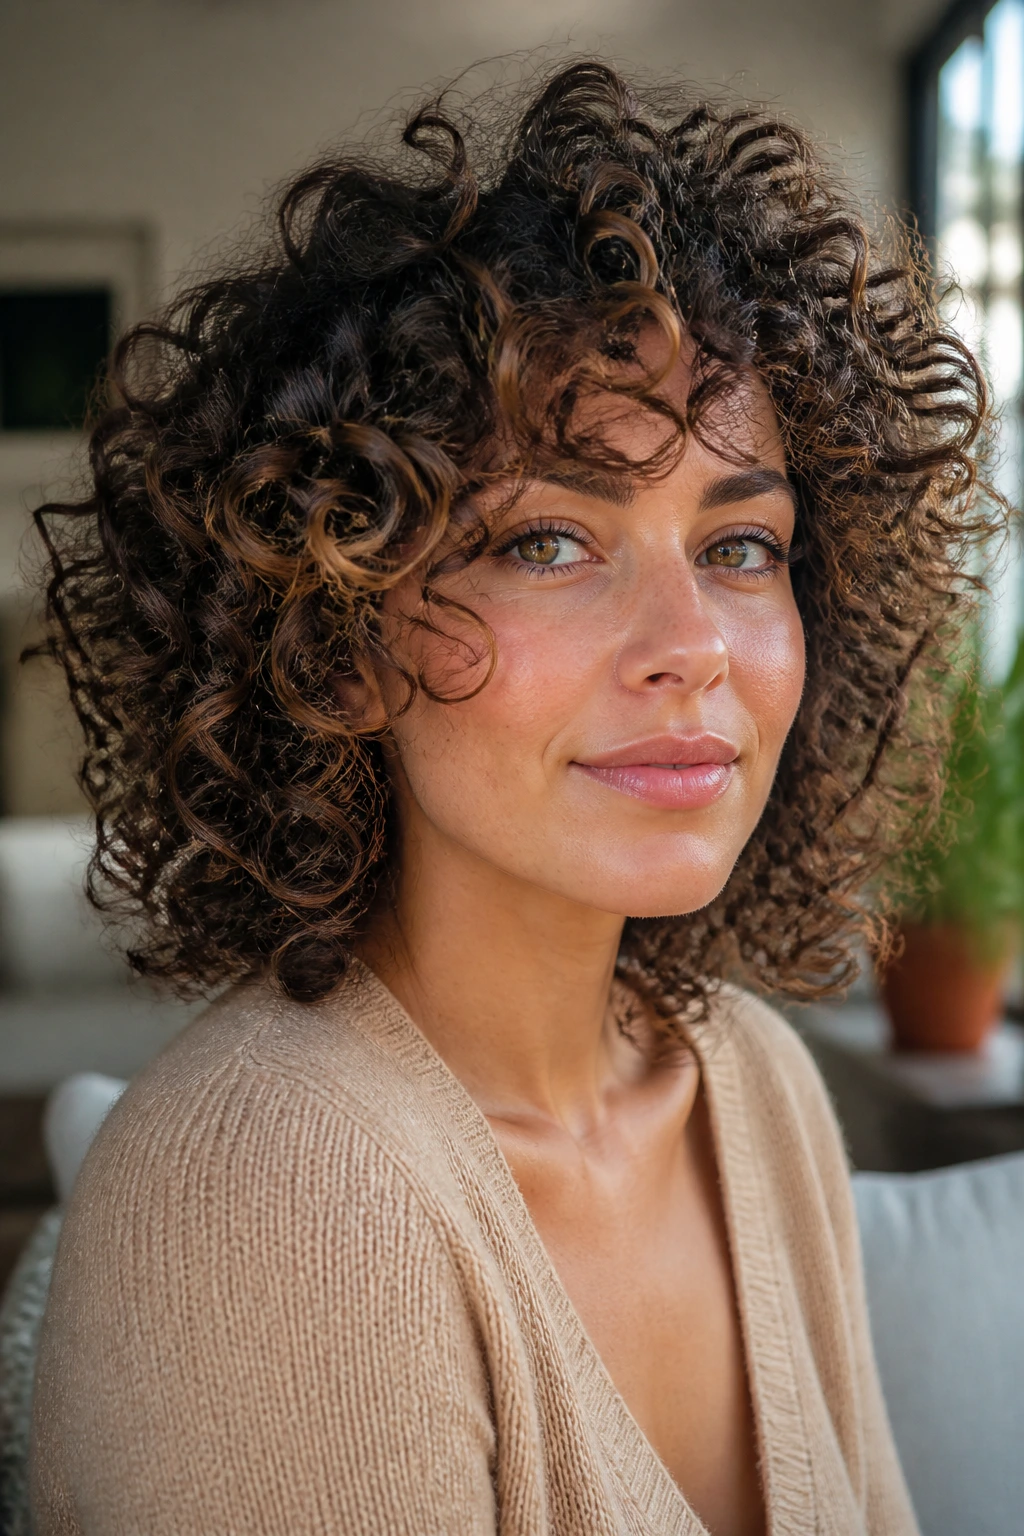
Curly hair needs face-framing layers cut with the curl pattern in mind, not against it. A halo shape means the shortest pieces sit high enough to lift the face, while the rest of the curls fall around them like a soft ring. It avoids that awkward triangle shape that happens when curls get too wide at the bottom.
The trick is dry cutting or at least cutting while the curls are close to their natural dry state. Curly hair springs upward, and face pieces that look perfect wet can jump three inches shorter when dry. That’s not a small detail. It’s the whole haircut.
Let the front curls sit near the cheekbone or upper lip depending on shrinkage. The layers should support the curl pattern, not fight it. A diffuser helps, but a good cut matters more than any product.
14. Invisible Internal Layers
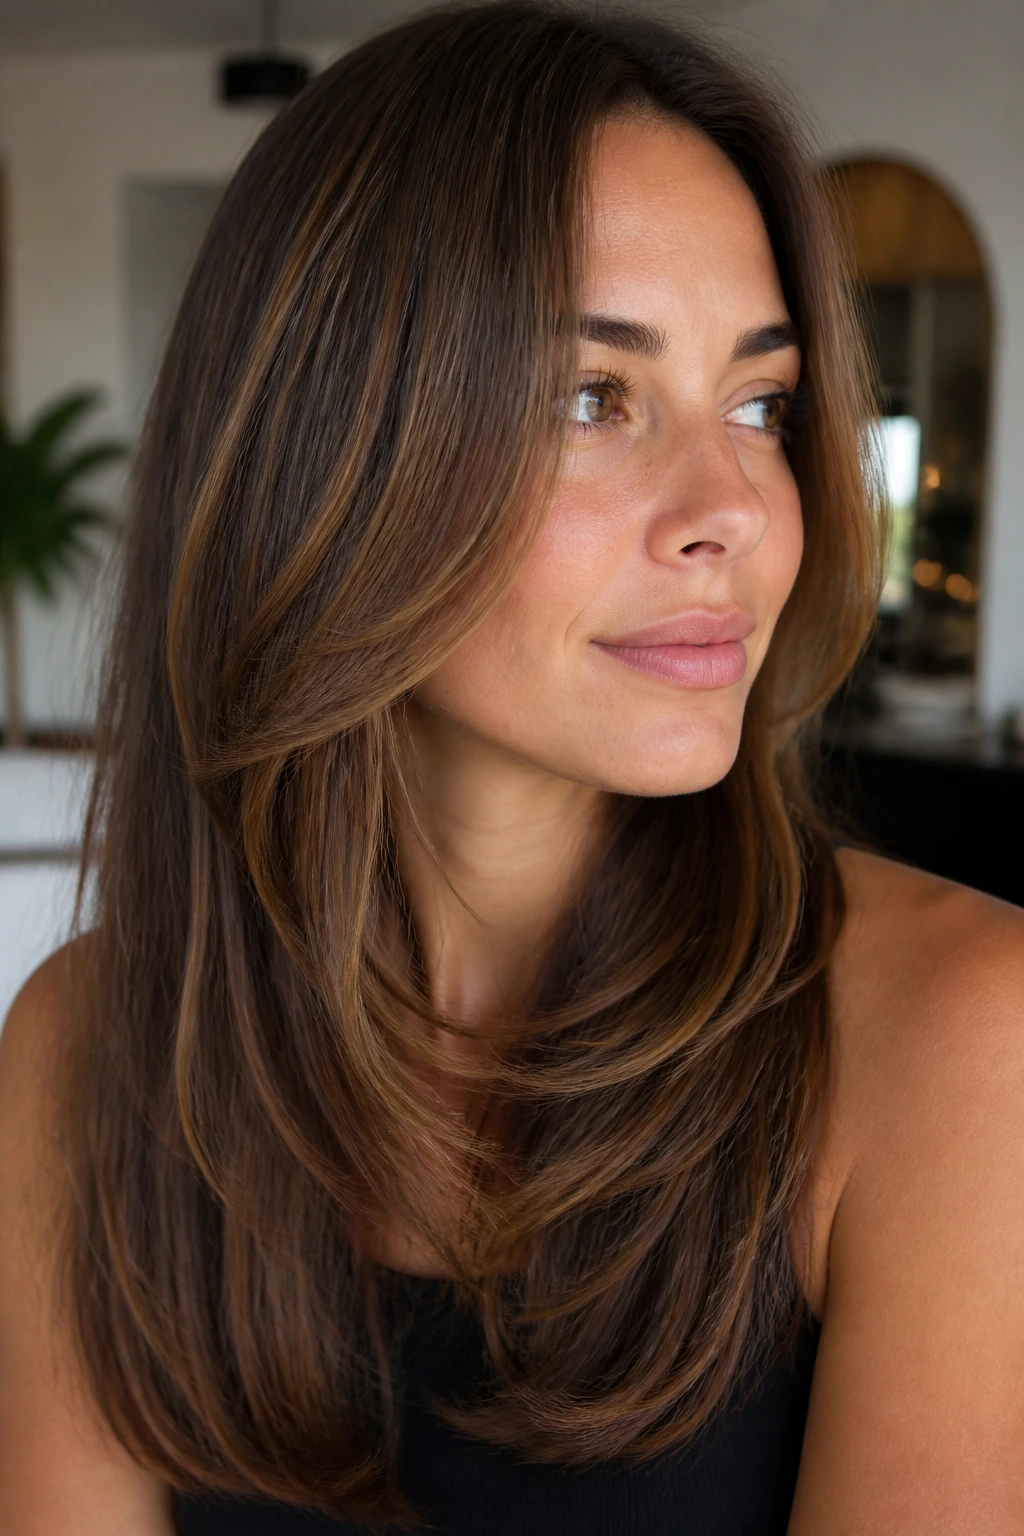
Some people want face-framing layers without seeing obvious steps. That’s where internal layering comes in. The shortest pieces are hidden inside the shape, so the outside line still looks full, but the front has movement and less bulk where the hair falls across the face.
This is one of the smartest cuts for dense hair. It takes weight out without turning the haircut into a choppy mess. The face frame can still start around the cheekbone or jaw, but the softening happens underneath, so the hair feels lighter when you tuck it behind the ear.
I like this for clients who say they want “something” but don’t want to lose length. Fair enough. This version keeps the visible line calm and the styling easier.
15. Minimal Face-Framing Layers

Not every flattering cut needs obvious layers. Sometimes the best move is a tiny shift at the front—just enough to break the boxy line around the face. Minimal face-framing layers are almost invisible until you tuck the hair back and notice that the shape opens up around the cheeks.
This works especially well if your hair already has a bit of bend or if you hate the feeling of a lot of short pieces around your face. Ask for the front to be dusted into a soft angle that blends back into the length. That gives you movement without giving you a haircut that feels busy.
When this is the better choice
- Your hair is fine and loses volume quickly.
- You want a subtle change, not a dramatic new shape.
- You wear your hair up often.
- You want the cut to grow out with almost no drama.
16. S-Curve Layers for Long Faces
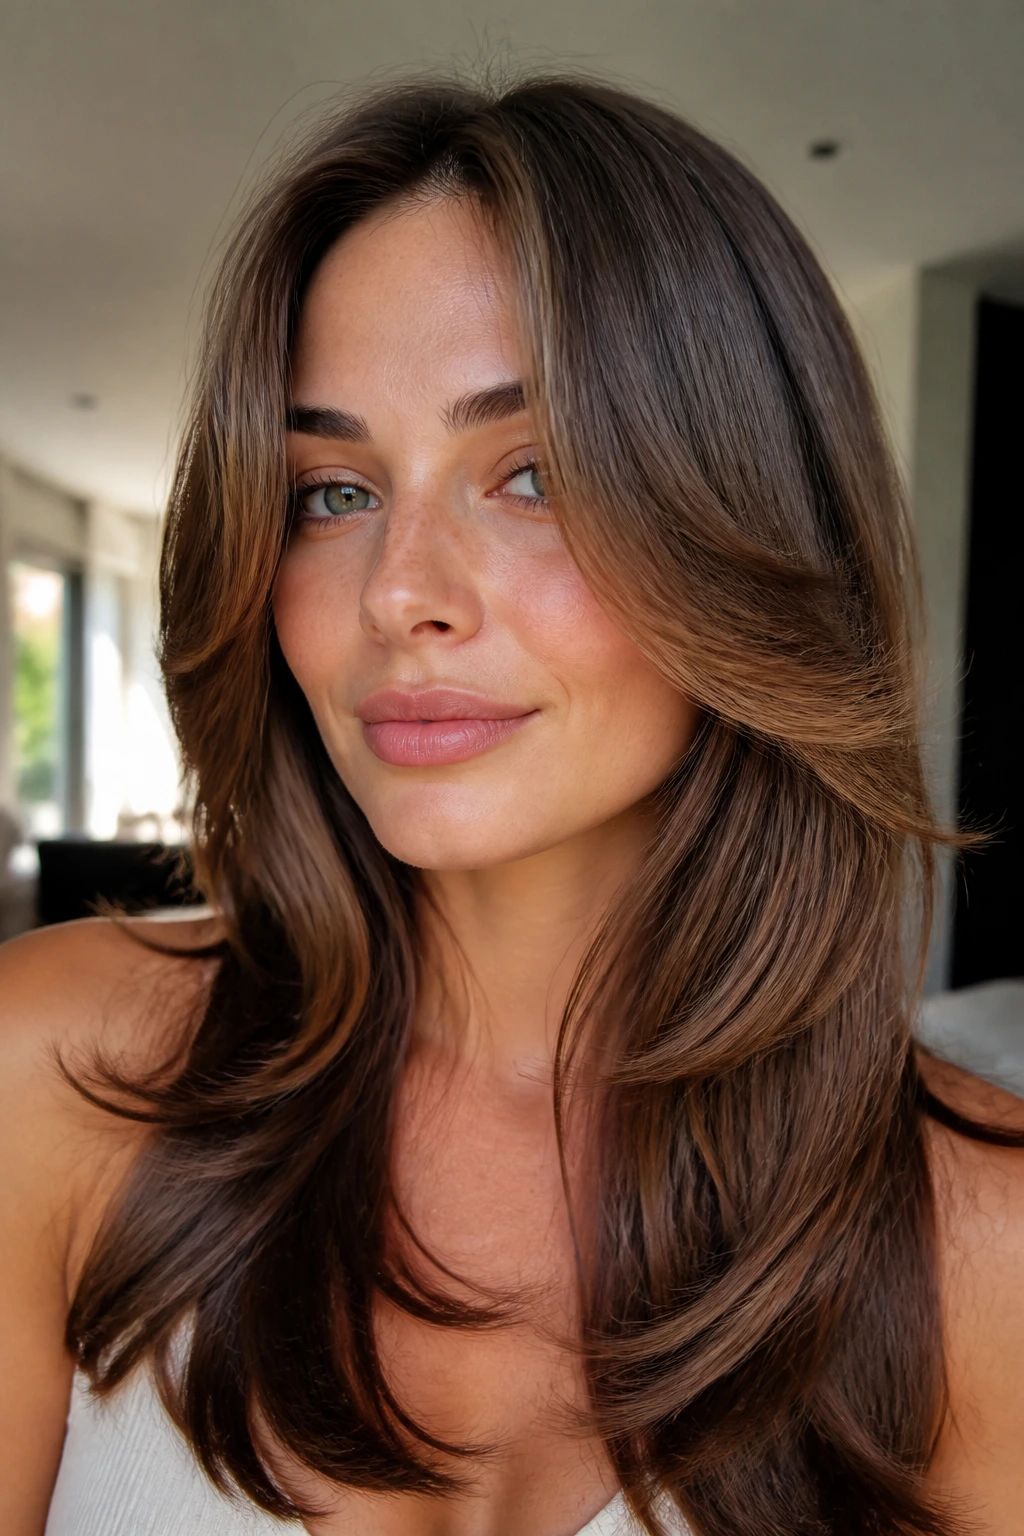
An S-curve layer is all about soft movement that widens the face a little at the cheekbones. Instead of falling straight, the front pieces bend in and out, which breaks up length and gives the eye somewhere to pause. On long faces, that sideways motion matters.
The cut should not be too narrow at the jaw. That can pull the face down visually. Better to keep the shortest layers around cheekbone height and let them drift into a wider mid-section. The whole point is to create a little curve without making the front look puffy.
This shape looks nicest when styled with a round brush or a large curling iron. You want a gentle bend, not a tight curl. Tight curl reads as a different haircut. And that’s not what this is.
17. Forehead-Softening Layers with Light Fringe
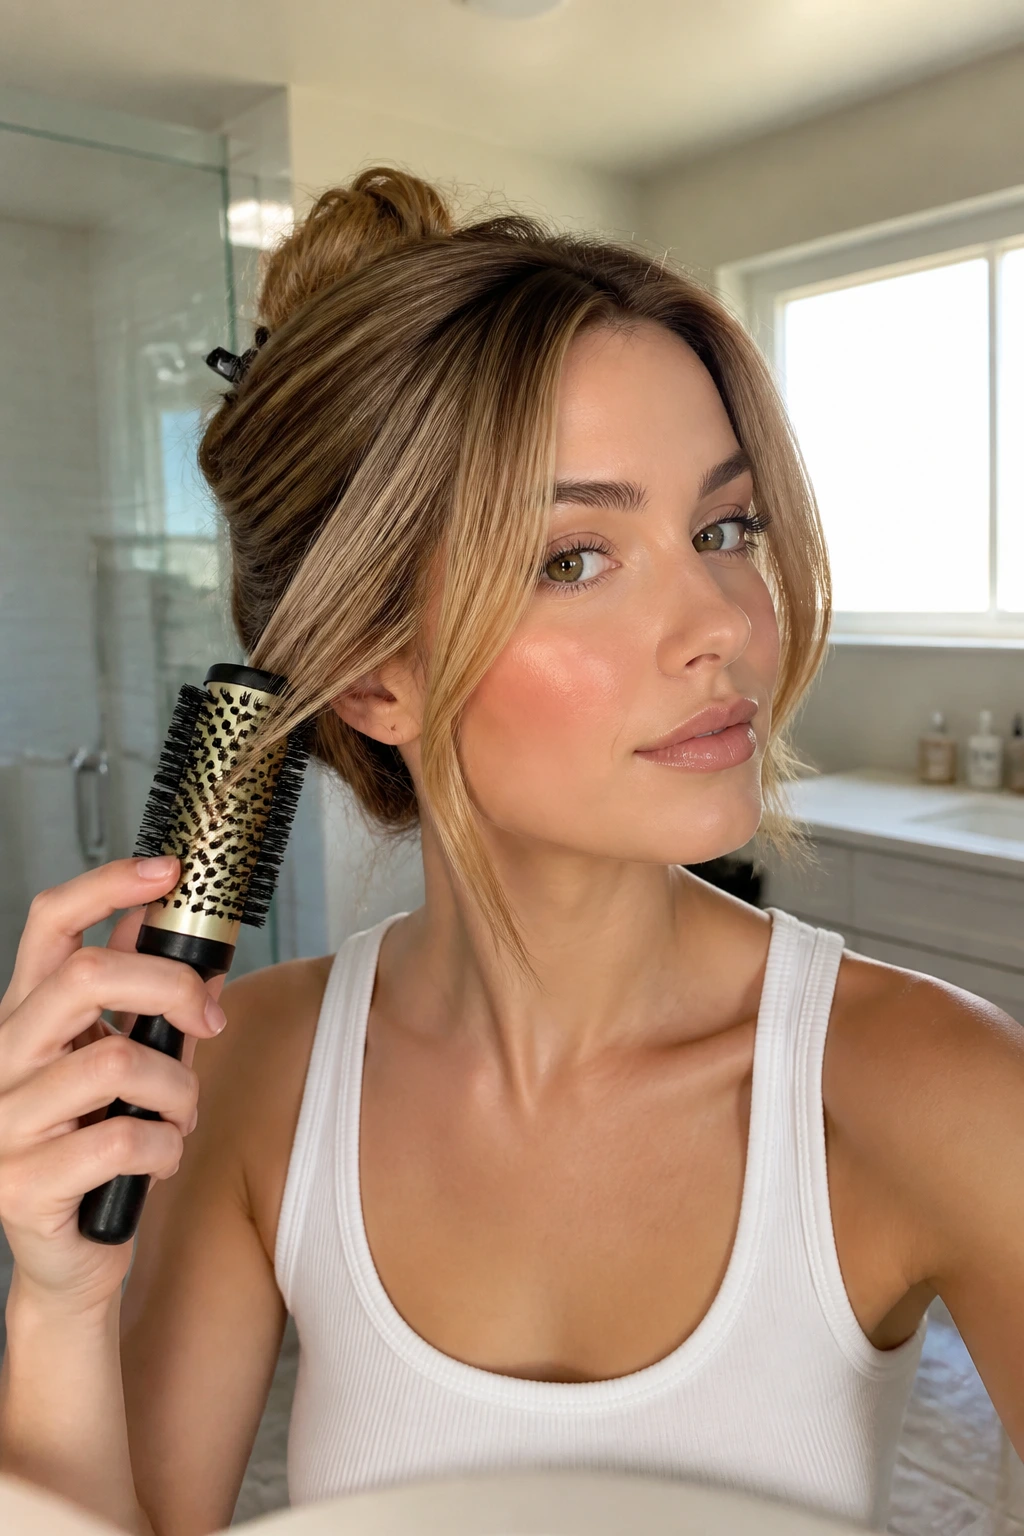
A broad forehead can take a lot of face-framing styles, but the ones that work best usually use a light fringe or a narrow opening in the center. The front pieces brush the forehead without hiding it completely, which keeps the cut from feeling heavy.
I like this if you want softness around the temples. The shorter parts should sit just below brow height or at the cheekbone, depending on how much coverage you want. A narrow curtain fringe can do a lot here, especially if it tapers quickly into longer layers.
The key is not to over-thicken the fringe. A dense bang can overpower the face and make the haircut feel boxed in. A lighter, separated front looks more modern and is easier to tuck aside on hot days or lazy mornings.
18. Layered Lob with Cheekbone Lift
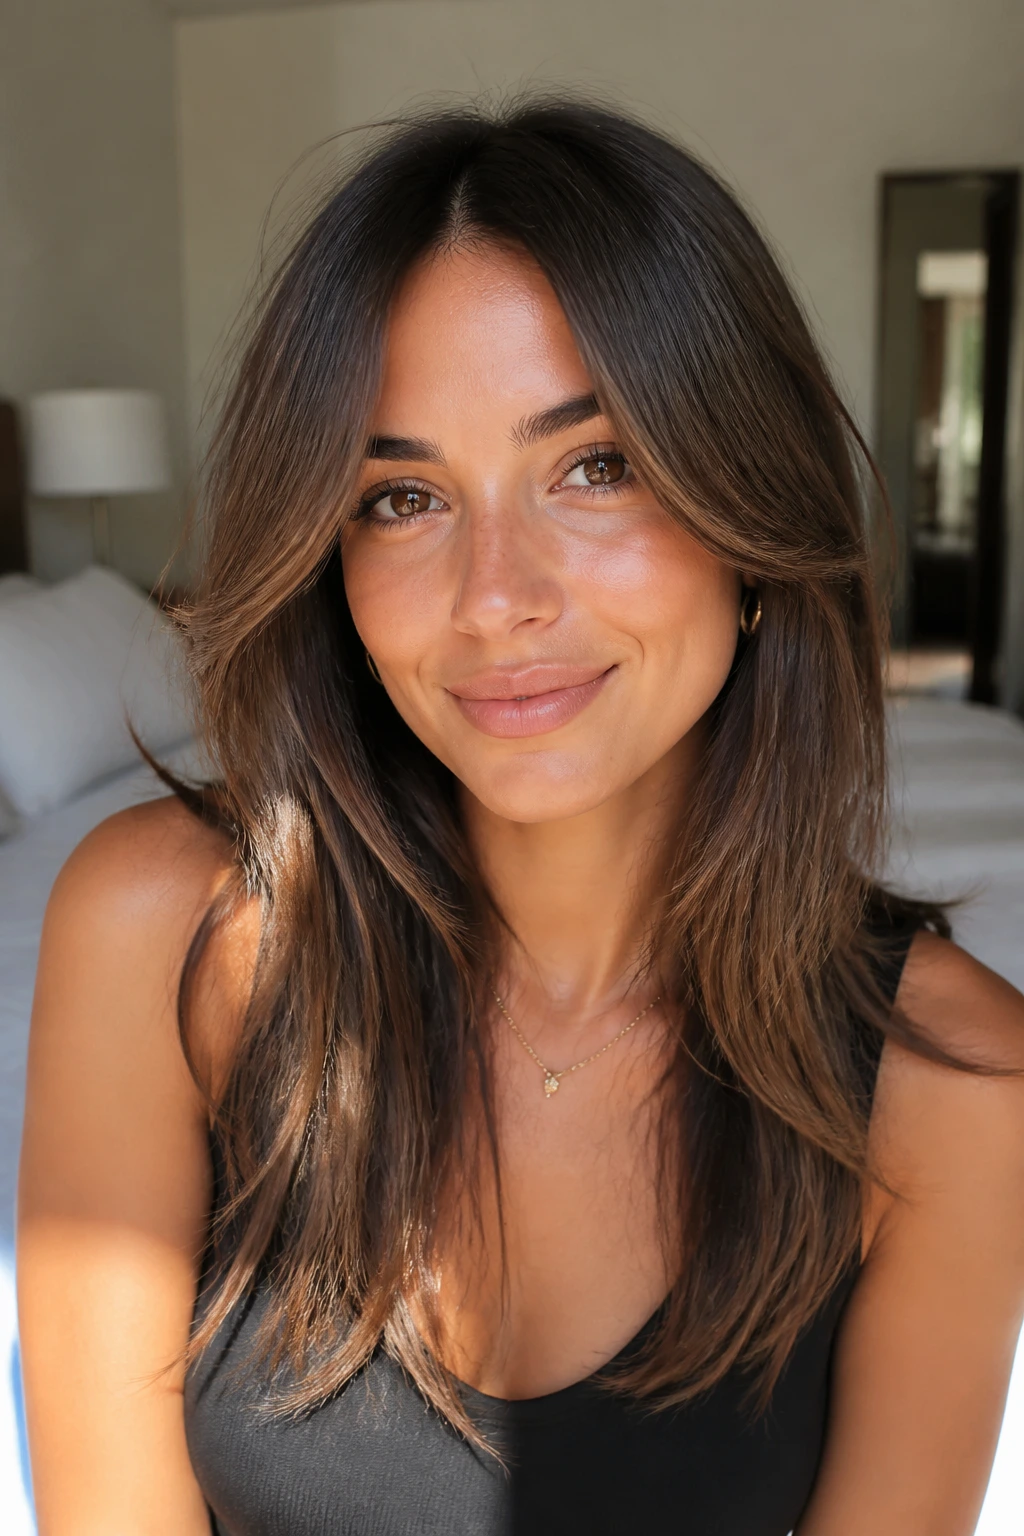
A layered lob lives or dies on where the front pieces land. Put them too low and the cut feels plain. Put them around the cheekbone and the whole shape wakes up. That lift is what makes the lob feel styled even when you’ve only blown it dry in ten minutes.
This cut is a favorite of mine for medium hair because it gives enough length to tuck behind the ear, but the face frame still matters when the hair is loose. The shortest layers can start just above the jaw, then angle down toward the collarbone. The silhouette stays clean.
If your hair flips out at the ends, that can work here. A slight outward bend gives the lob personality. Just don’t let the flip take over the whole head. Small and controlled is better than cartoonish.
19. Polished Wolf Layers

The wolf cut gets messy fast if the front isn’t softened. A polished version keeps the shaggy energy at the crown and through the interior, but gives the face a cleaner frame that starts around the cheekbone or mouth. That balance is what makes it wearable outside a photo shoot.
This style suits people who like texture but hate looking unkempt. The layers should feel tousled, not hacked apart. If the front is too short, the cut can start to look disconnected. If the front is too long, you lose the shape that makes the wolf cut interesting in the first place.
A little blowout cream and a diffuser or rough-dry finish usually do the job. You don’t need a lot of product. The cut should carry the style.
20. Blowout Layers That Flip In
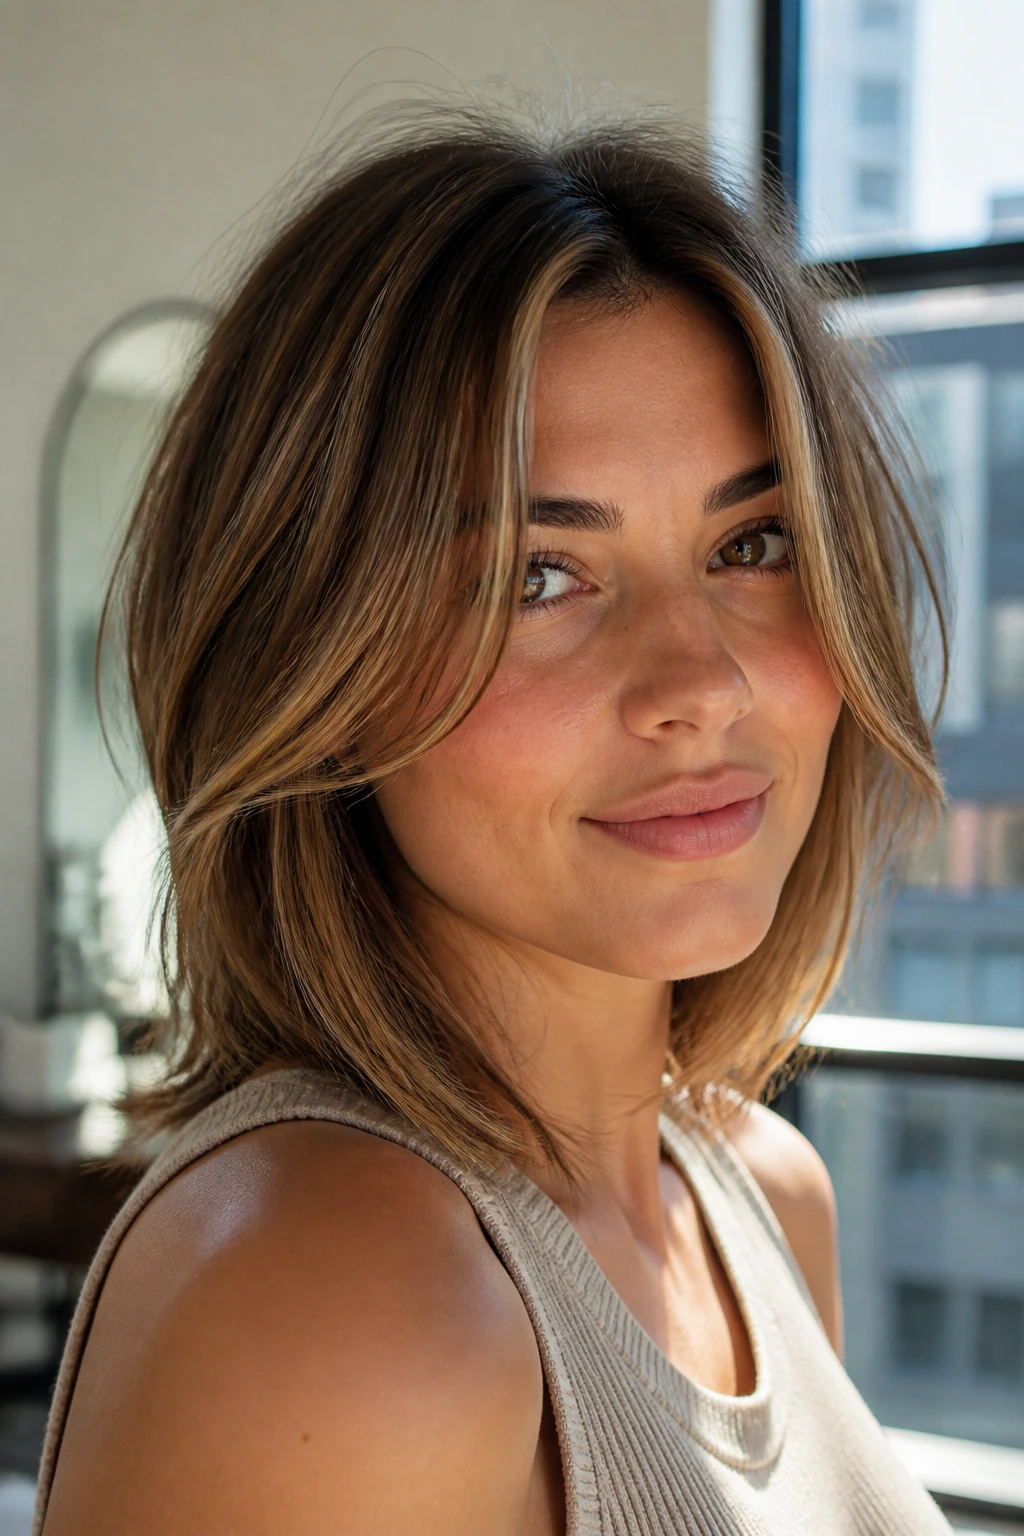
Some face-framing layers are built to live their best life with a round brush. This is one of them. The front pieces start near the cheekbone or lip, then curve inward toward the neck or collarbone, creating that smooth salon blowout line that never seems to go out of rotation.
The flattering part is the movement at the jaw. The inward bend pulls the eye inward, which makes the face look more open and the hair look fuller where it matters. On medium-density hair, this can be a very good compromise between sleek and soft.
Use a medium round brush and finish with the cool shot. If the ends look too puffy, switch to a slightly larger brush. Smaller brushes add bend. Bigger brushes add smoothness.
21. Tapered Layers for Fine Hair
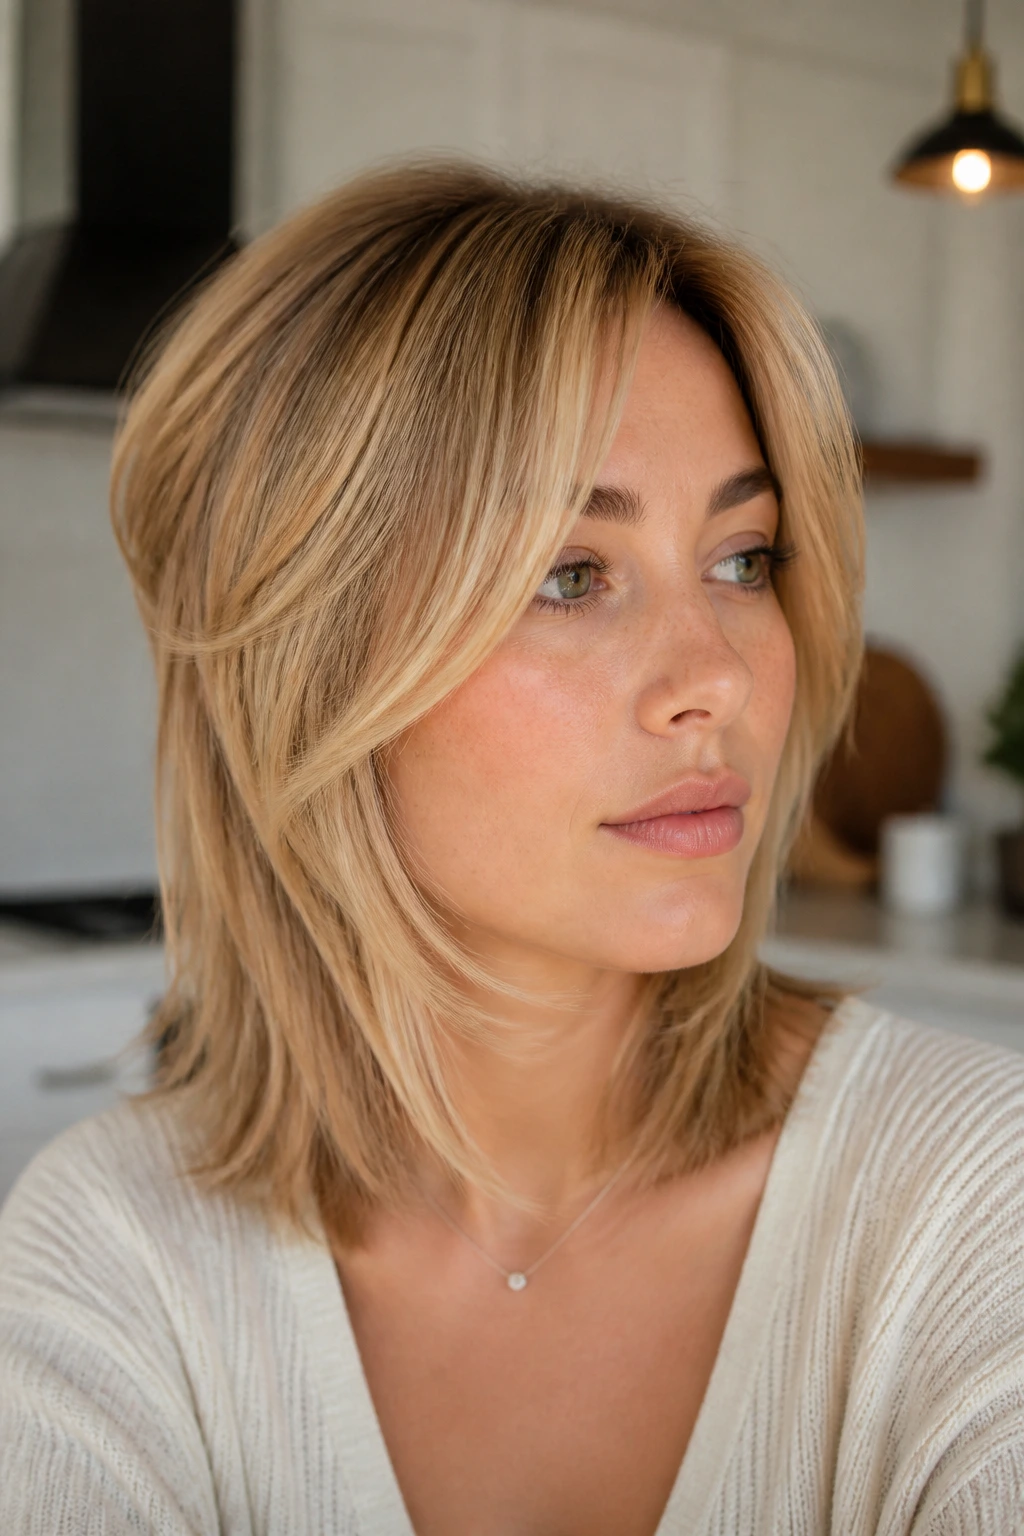
Fine hair needs shape, not weight. Tapered face-framing layers do the trick by easing the front pieces from shorter to longer with almost no hard line. The cut looks light, but it still gives the face something to hold onto.
I prefer these layers when the hair tends to collapse at the temples. A soft taper creates the illusion of more fullness around the cheekbones without sacrificing the body of the cut. If the layers are too short, fine hair can start to look sparse. That’s the mistake. Keep the front grazing, not chopped.
A root-lifting spray and a quick blow-dry upside down at the crown can make a big difference. Then smooth the front pieces with a brush so the shape stays neat.
22. Long Face-Hugging Layers for Coarse Hair
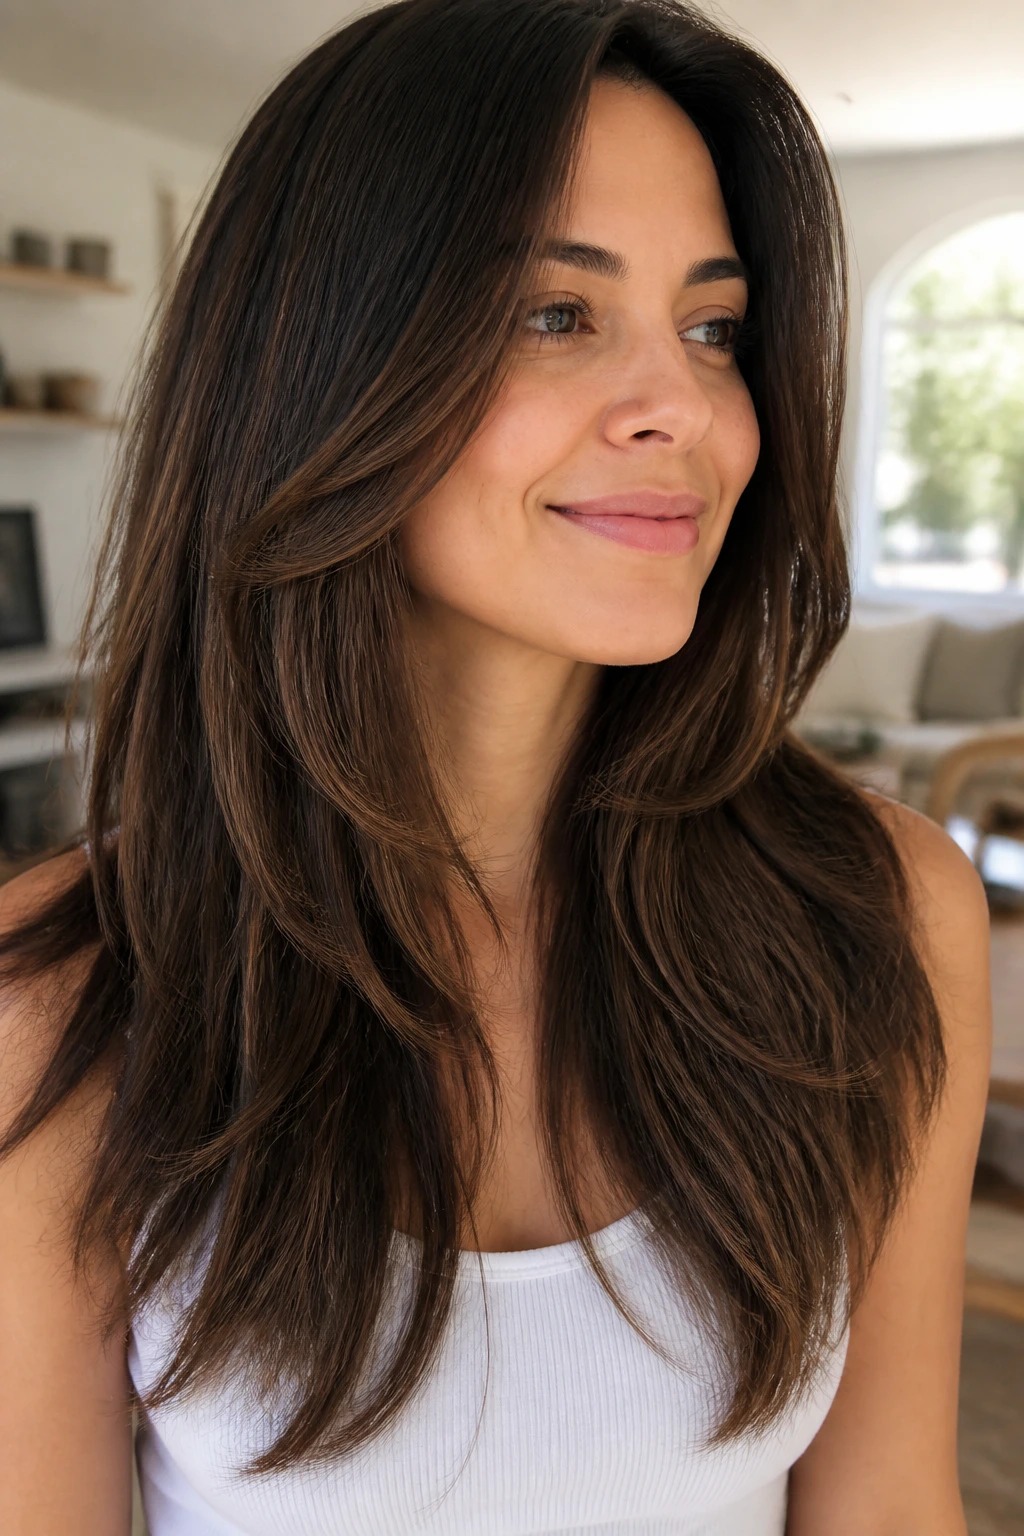
Coarse hair often needs a frame that respects its density. Long face-hugging layers do exactly that. They start lower, usually around the mouth or chin, then curve in close enough to soften the sides without creating a bulky halo.
This is a good answer if your hair feels heavy around the face and you don’t want to remove too much width. The longer front pieces keep control. The soft curve keeps the layers from looking blunt. It’s a sensible haircut, which is not a bad thing at all. Sensible haircuts are underrated.
If your hair is thick enough to stand up on its own, ask the stylist to remove bulk inside the front sections too. That helps the frame fall instead of sitting out from the head.
23. One-Length Plus Front Frame
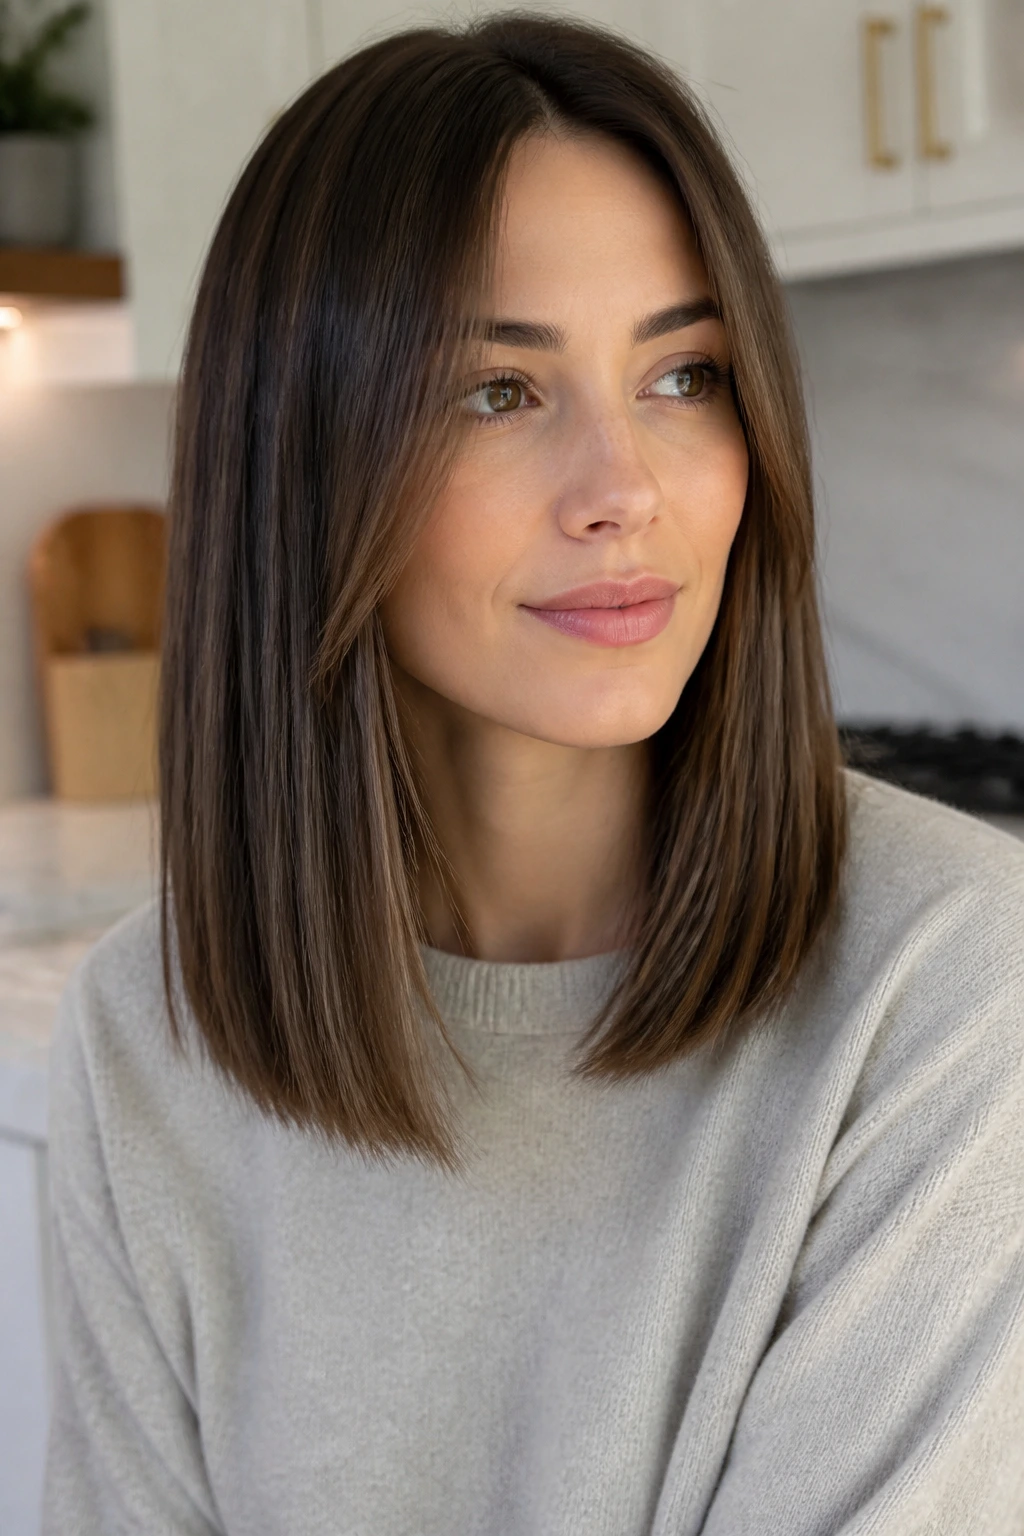
This is for people who swear they don’t like layers but secretly want a little movement. The body of the hair stays one length, and only the front gets framed. It’s the cleanest way to add shape without changing the whole haircut.
The nice thing about this shape is how predictable it is. You know where the length lives. You know where the movement lives. Nothing gets too fluffy. The front pieces can start at the cheekbone, lip, or jaw depending on how much softness you want. If your hair is straight, that little front movement is enough to make the whole cut feel less flat.
It also grows out with less visible drama than a full layered cut. That’s a real advantage if you wait too long between trims.
24. Pixie Grow-Out Layers with Long Sides
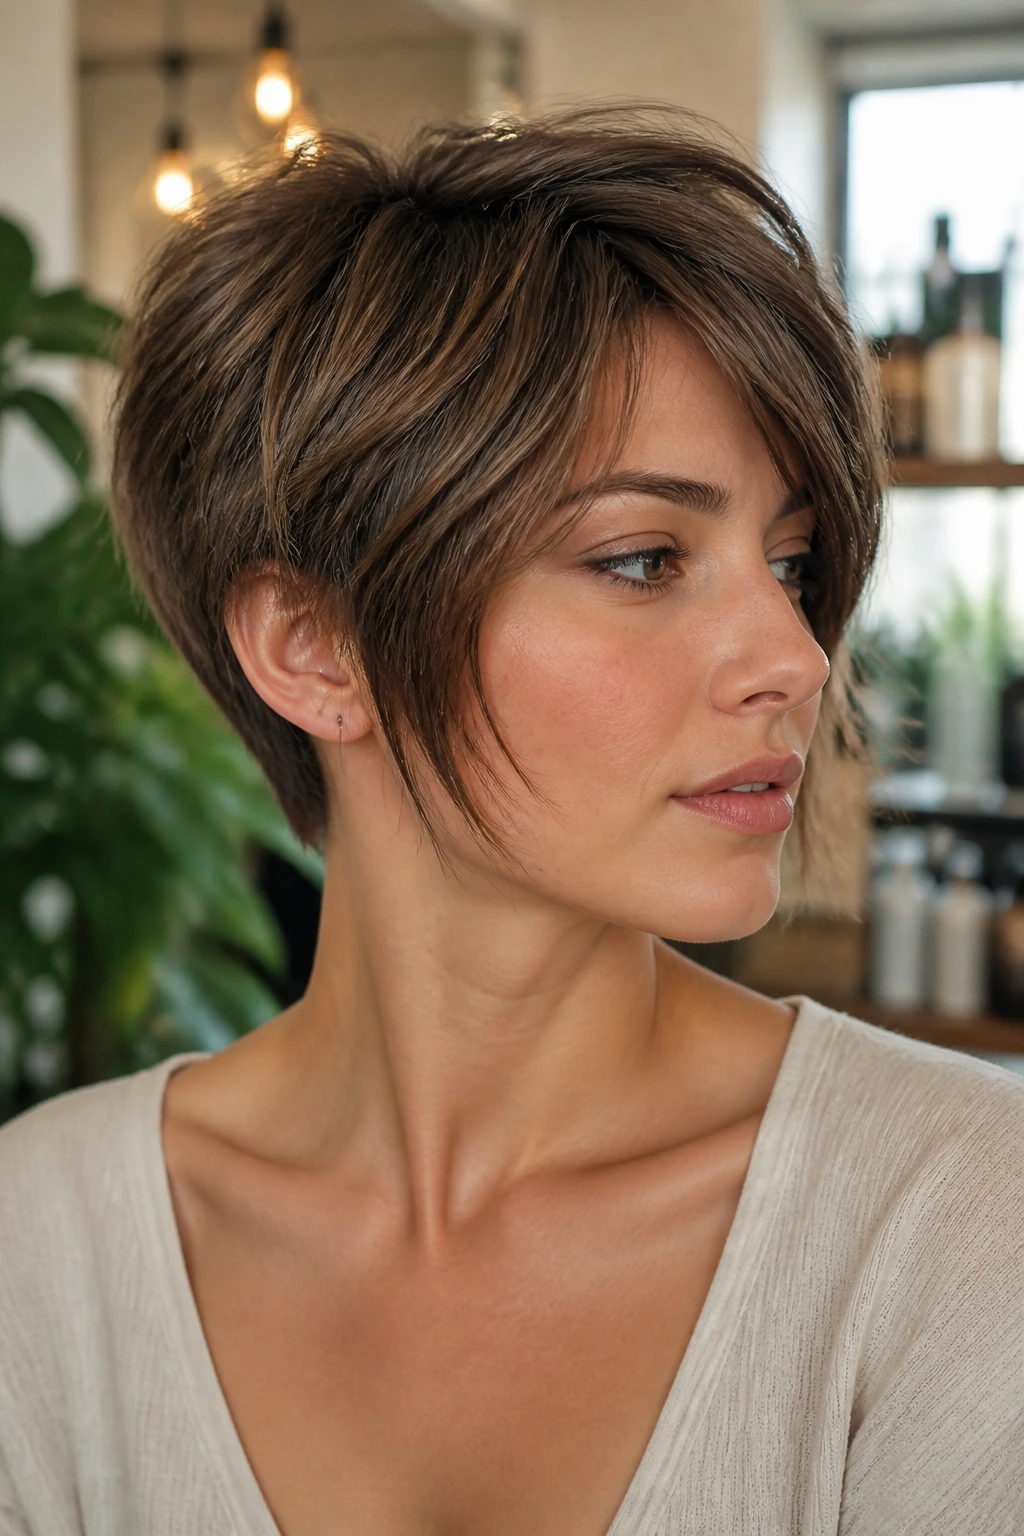
Pixie grow-out stages can look awkward unless the front is handled well. Long side layers smooth the transition. They let the cut keep some softness around the face while the rest of the length catches up.
The key is to keep the longest pieces near the ear and cheek, not only on top. That way, the growing-out shape reads as deliberate rather than half-finished. If your hair is straight, the long sides can tuck behind the ear cleanly. If it’s wavy, they add a little bend that makes the grow-out less stubborn.
This is one of those cuts that rewards patience. Trim the nape and around the ears carefully, then leave the front alone long enough to connect again.
25. Air-Dry Layers with Natural Bend
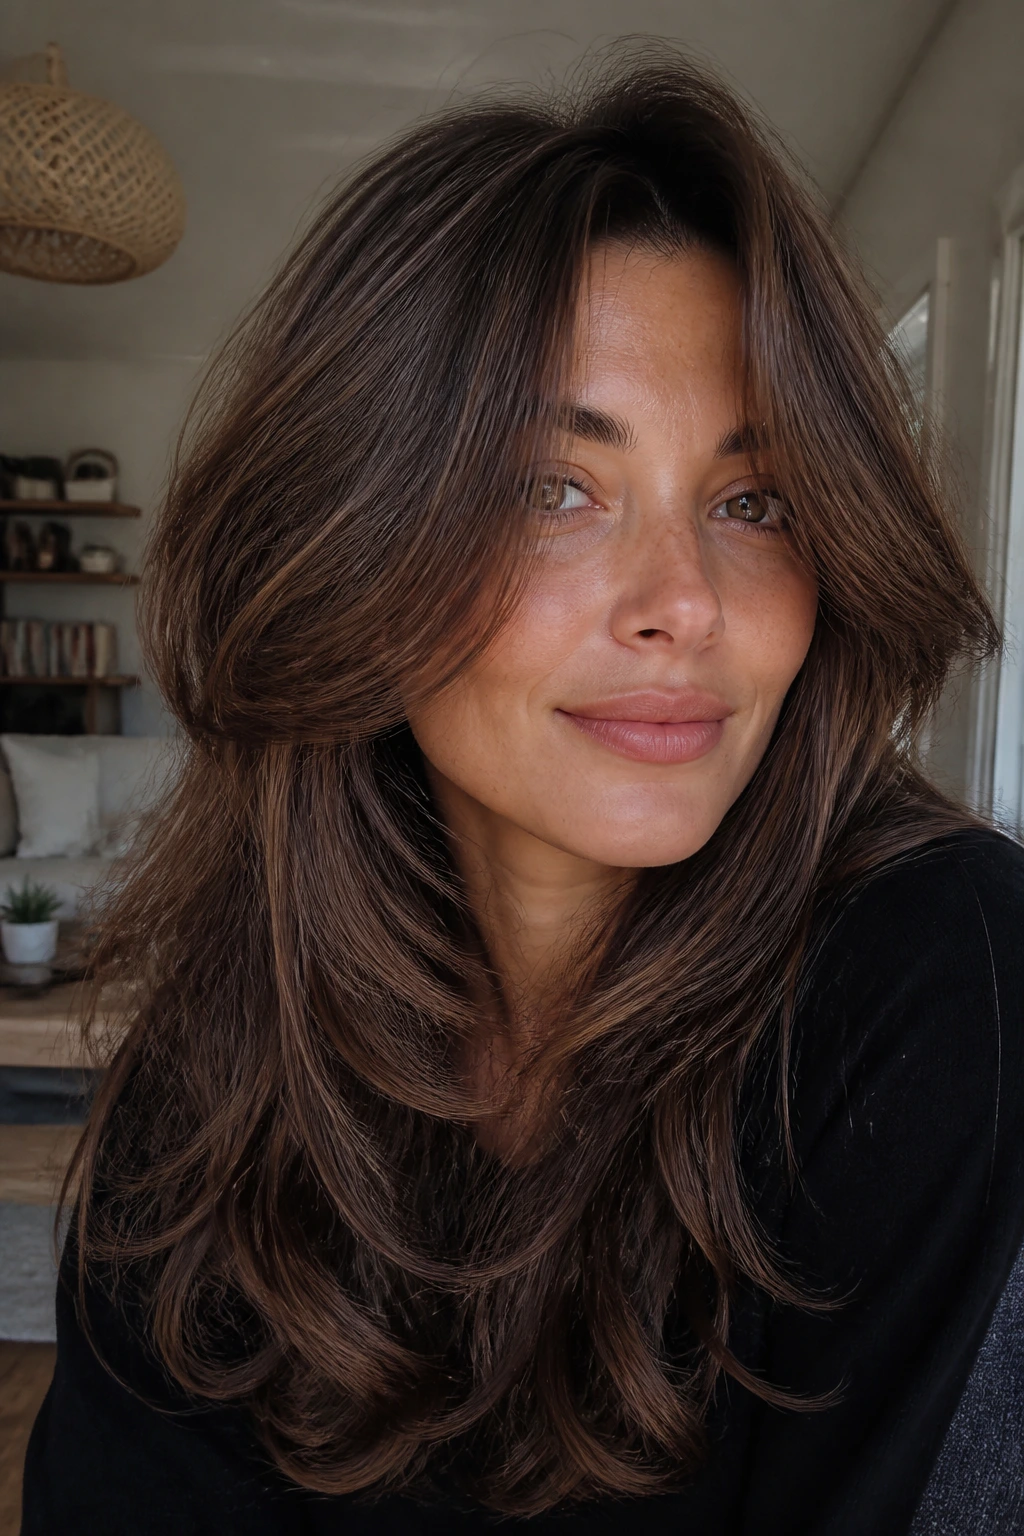
Not every face frame needs a polished blowout. Some are built for air-drying, and those are the ones that tend to save time on real mornings. The layers should encourage the hair’s natural bend instead of forcing a shape with heat.
This works especially well on wavy hair that wants to dry in a slight curve around the face. The front pieces should be cut so they fall into the wave pattern, not fight it. Too much thinning can ruin that. A little cream, a scrunch, and a shake at the roots can be enough.
If you live in heat or humidity, this shape can be a lifesaver. It holds up better when the cut is designed to move with the texture instead of against it.
26. Deep Side-Part Balance Layers
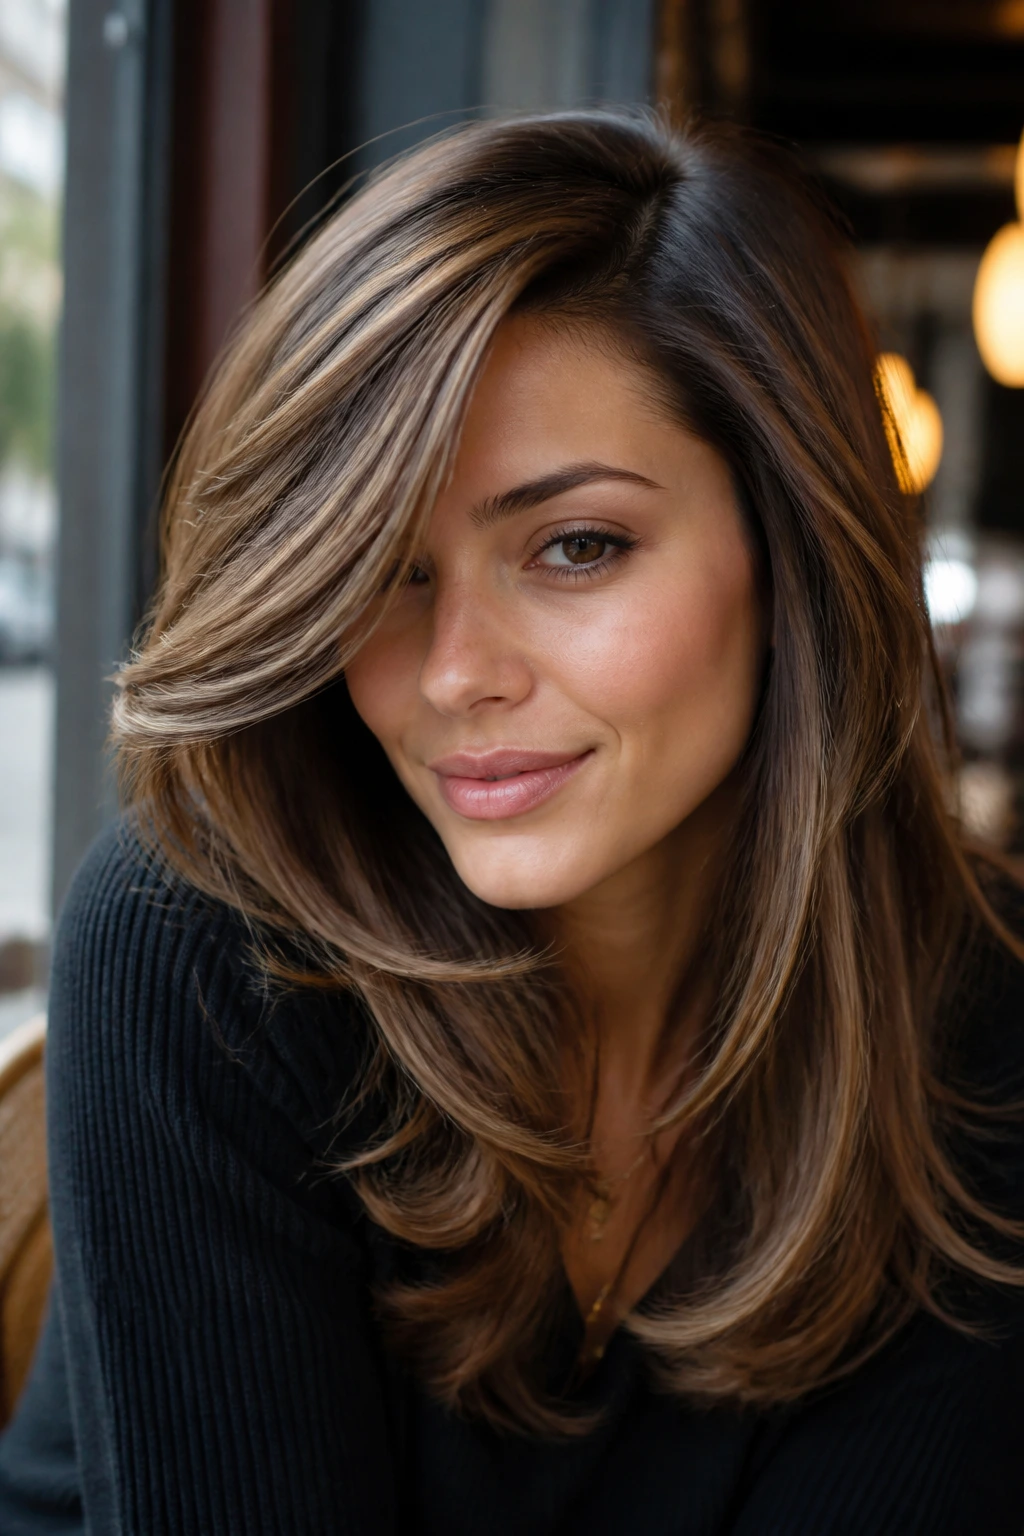
A deep side part can rescue a haircut that feels too symmetrical. It adds lift on one side and a soft curtain on the other, which is useful if your features are a little uneven or if one side of your hair falls flatter than the other.
Tell the stylist where you usually part your hair. That detail changes everything. A good side-part layer should open the face on the fuller side and leave enough length on the other side to tuck or sweep back. The cut needs a bit of asymmetry to feel alive.
I like this shape because it gives you two styling moods without changing the haircut. Wear it with the part deep for drama. Wear it more centered for calm. Same cut. Different energy.
27. Soft Halo Layers for Coils
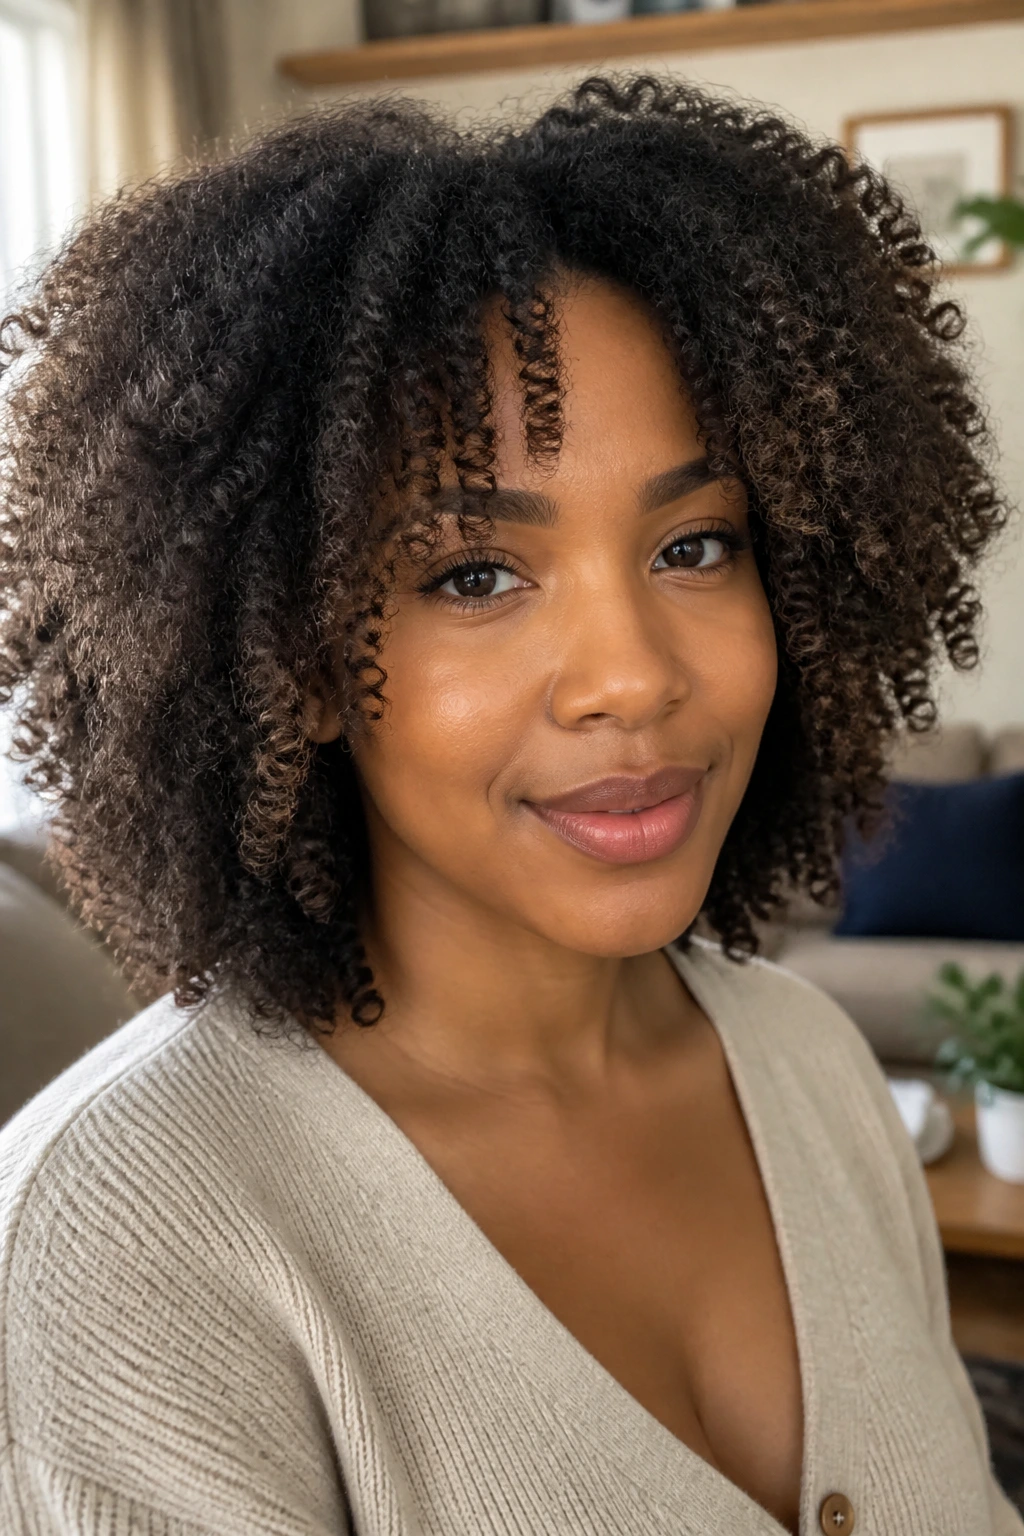
Coily hair does best when the face frame respects shrinkage and volume. A soft halo of layers can lift the shape around the temples and cheeks without making the cut look chopped up. The shortest pieces might sit much longer when dry than they look in the chair. That’s normal.
This is one of the rare cases where dry cutting or dry shaping is worth asking for. Coils move a lot. A wet cut can lie to everyone in the room. When the face-framing layers are adjusted to the dry shape, the hair keeps its roundness and the front still opens the face.
A diffuser helps, but don’t over-handle the front while it dries. The curl pattern needs room. Squeezing it too much can flatten the very shape you just paid for.
28. Textured Ends with a Clean Face Frame
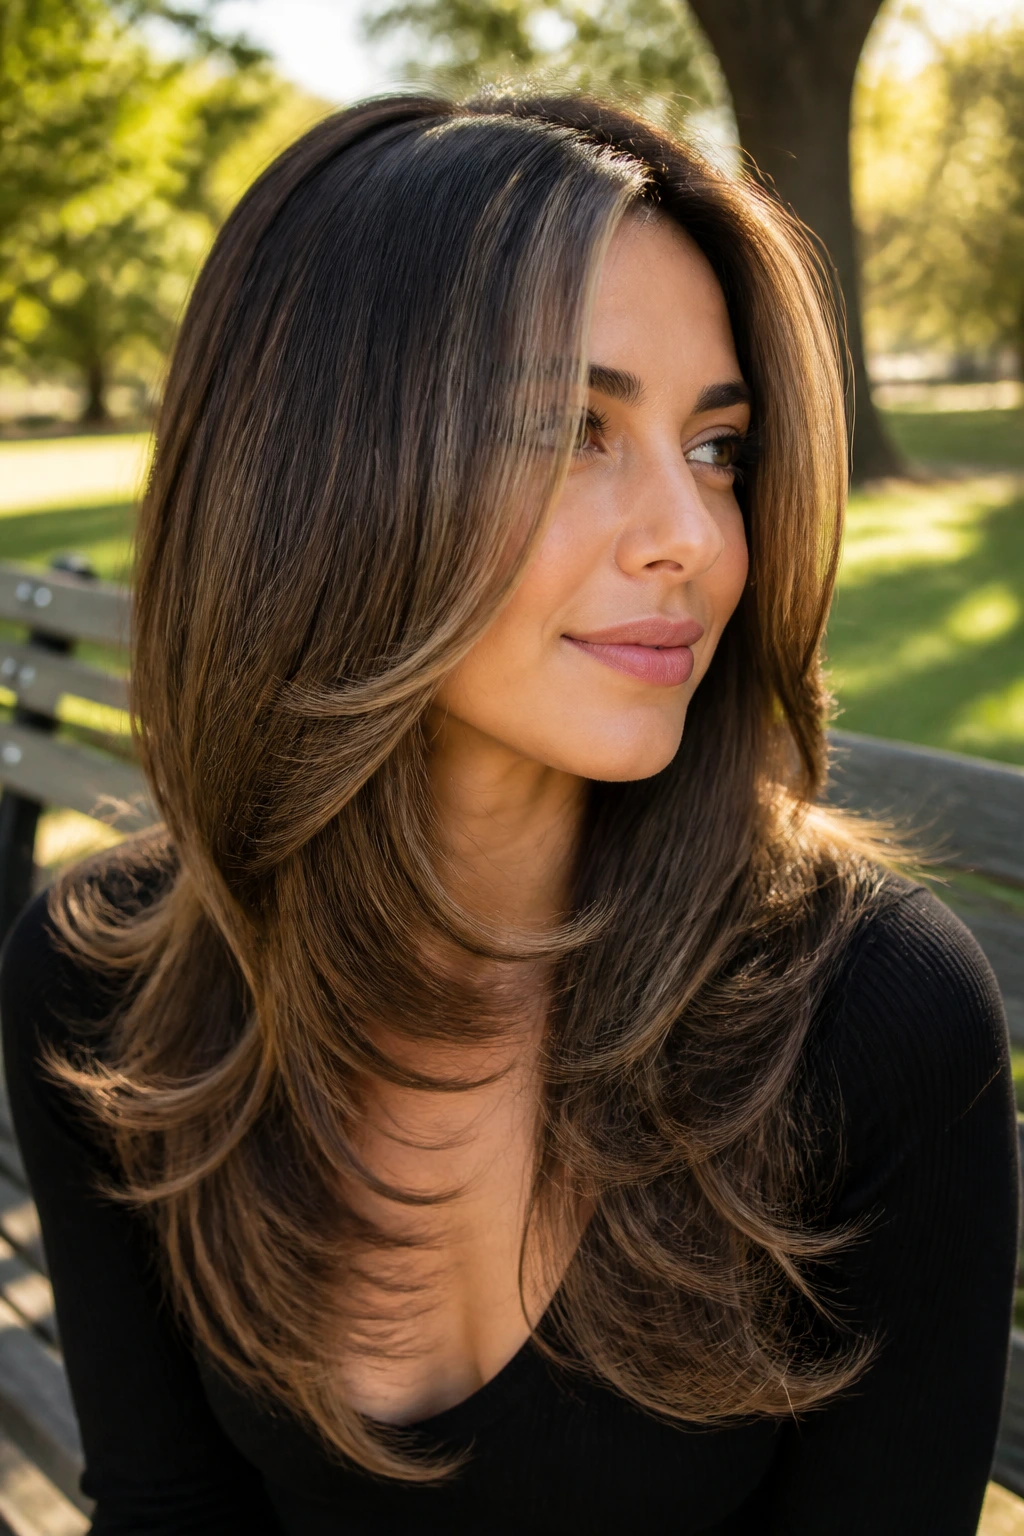
Some people want texture everywhere except the front. Fair enough. Textured ends with a clean face frame keep the perimeter airy while leaving the front pieces more deliberate and smooth. That contrast makes the face frame stand out.
This shape works nicely on medium and long hair when you want movement but no shag mess. The ends can be point-cut or softly layered, while the front pieces stay a little more defined. The result is easy to style because the front can be smoothed with a brush while the rest of the hair stays relaxed.
If your ends tend to split, this cut is a smart choice because it doesn’t rely on razor-heavy texture. Clean front lines, soft body, less fuss. That’s the appeal.
29. Long V-Cut Layers
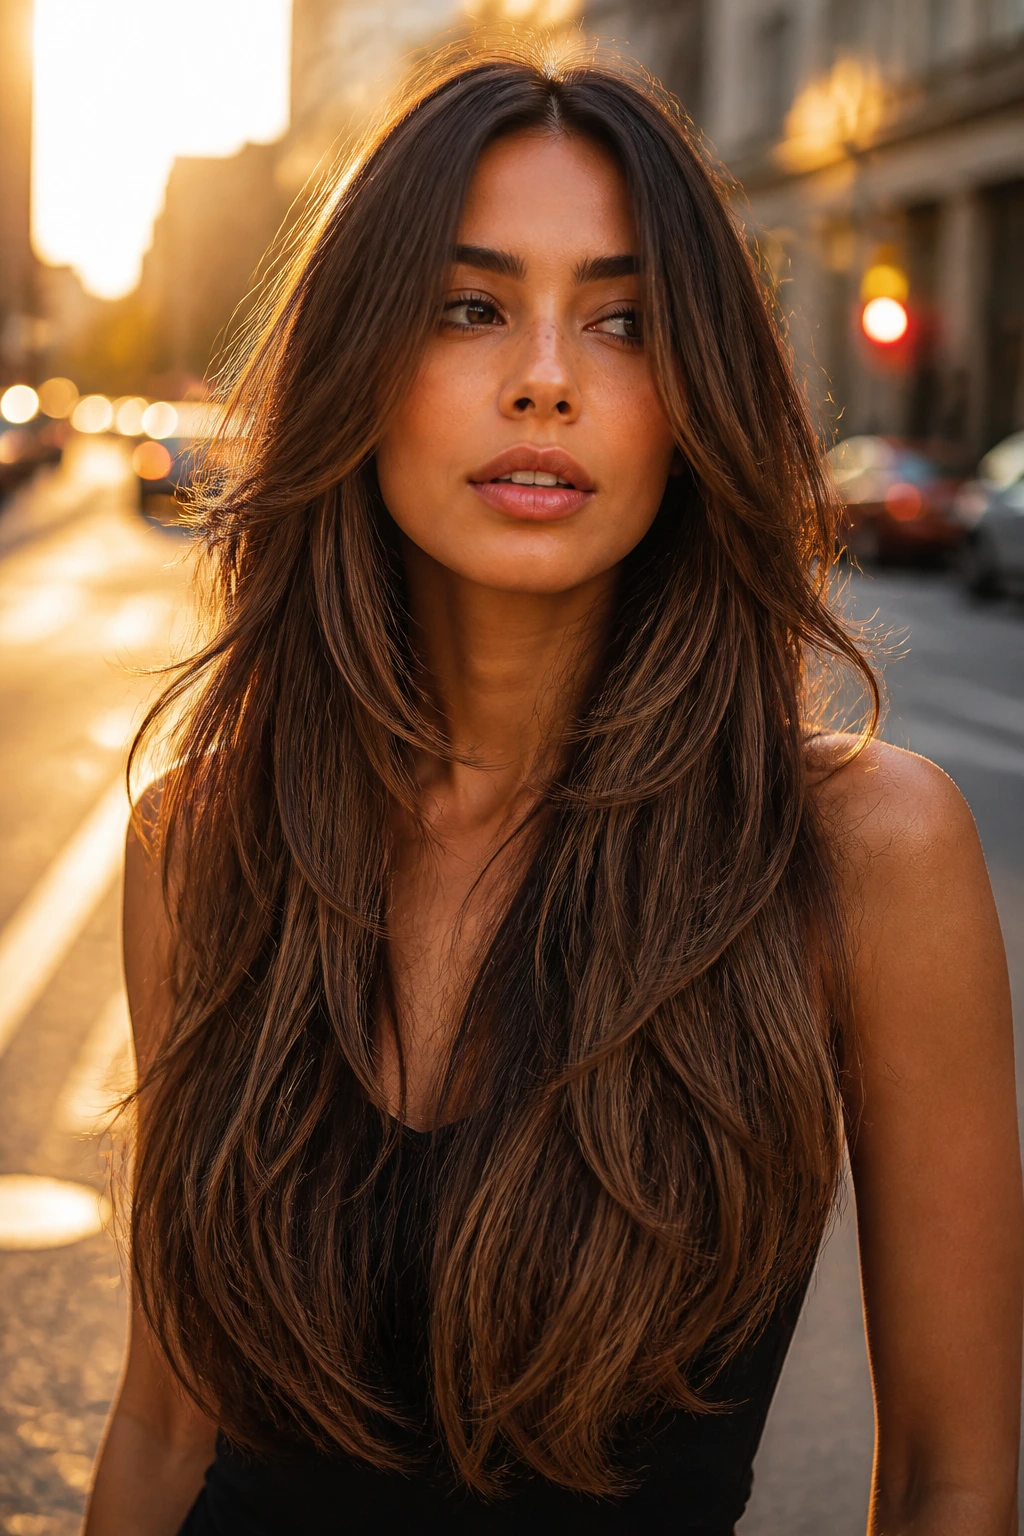
The V-cut is bolder than a U shape. The back falls to a sharper point, and the face-framing layers angle forward to keep the shape from feeling too severe. On long hair, that front angle can look very striking, especially when the shortest pieces touch the cheekbone or mouth.
The V line gives the length a bit of direction. Instead of hanging straight, it narrows toward the back while the front keeps the face open. This is a good move if you wear your hair down a lot and want the shape to show from behind as well as the front.
It’s not the softest option in the list, but it’s one of the clearest. If you like structure, this is your lane.
30. Shoulder-Length Rounded Layers
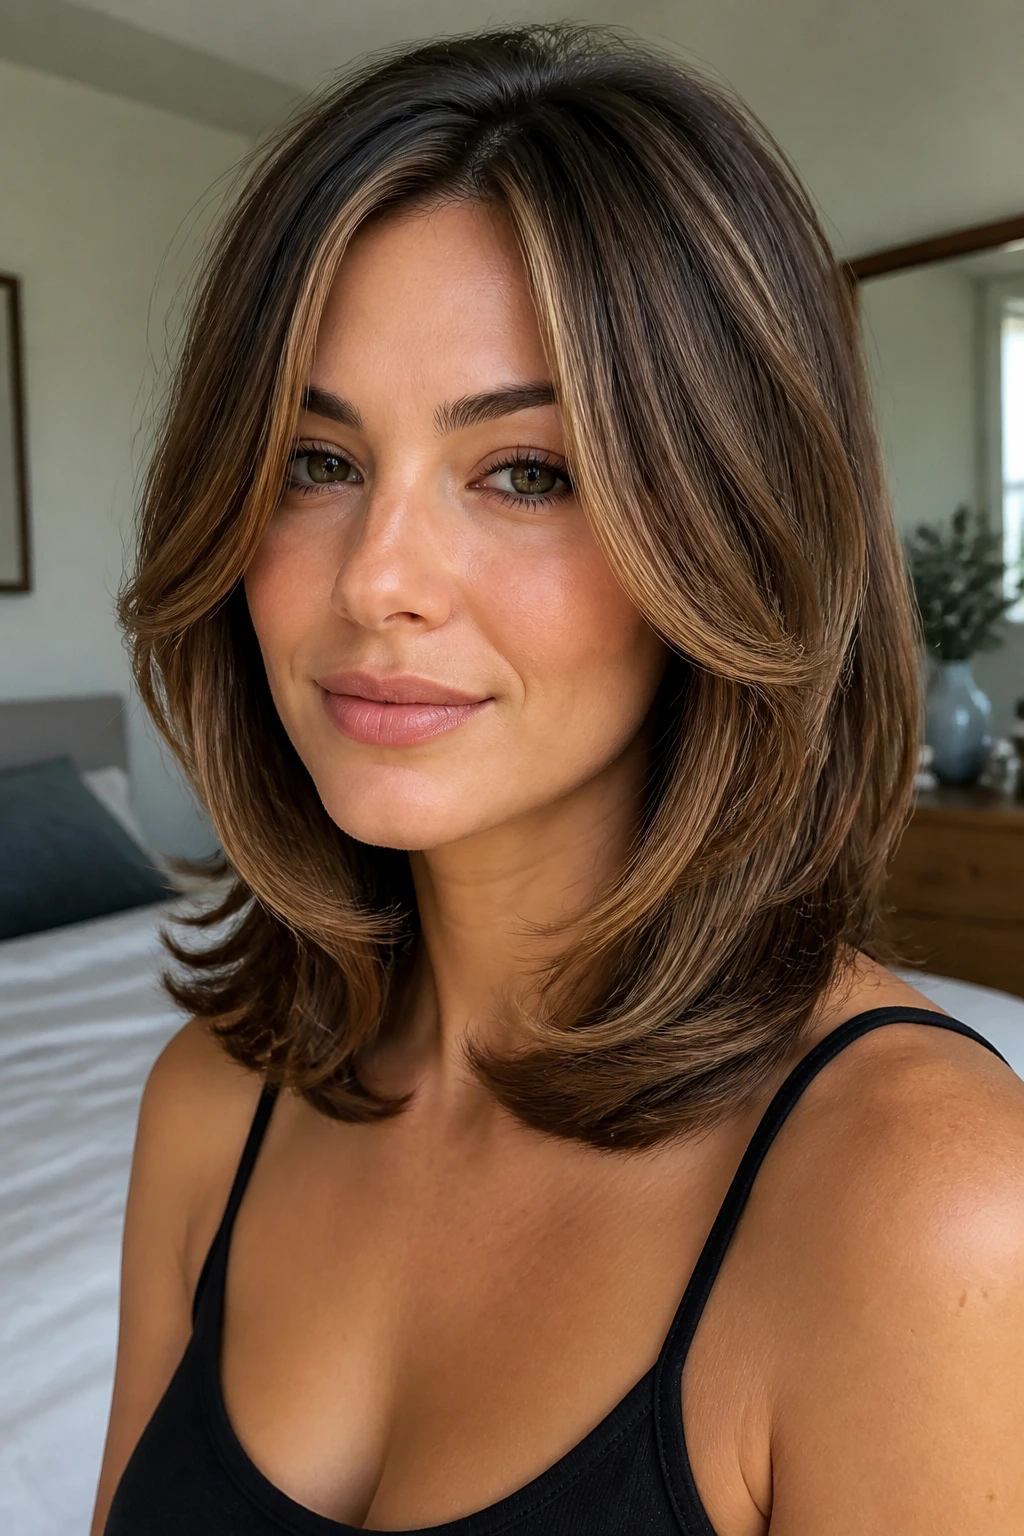
Shoulder-length hair has a bad habit of getting stuck at the shoulders and flipping in odd places. Rounded layers fix that by softening the front so the hair can skim instead of snag. The face-framing pieces should curve into the cut rather than sit as a separate layer block.
This is a solid choice for people who want something flattering but not fussy. The shape keeps the shoulders from looking boxy and gives enough movement for ponytails, clips, and tucked-behind-the-ear styling. If the front starts around the mouth or chin, it helps the whole cut feel lighter.
A medium round brush and a little heat protectant can make this cut behave fast. It’s one of those styles that looks better with a tiny bend than with a huge amount of effort.
31. Lifted Layers for Heavy Hair
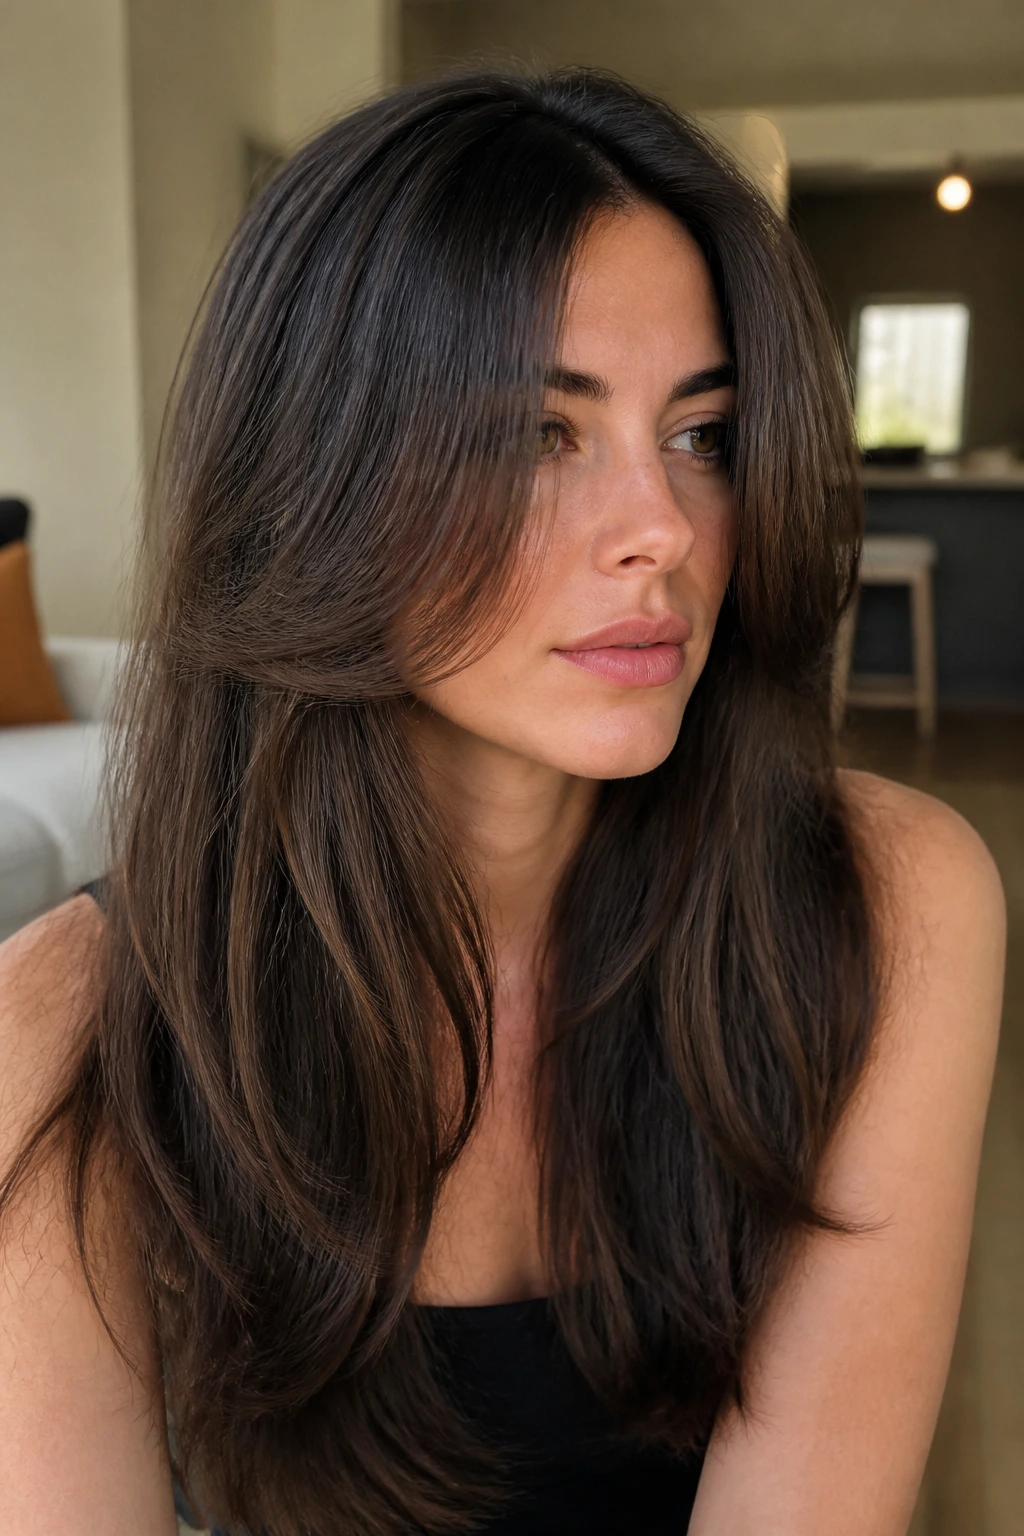
Heavy hair can drag a face down if the front isn’t lifted. Lifted layers move the weight upward by removing bulk at the right spots, usually near the crown and through the front interior. The face frame stays visible, but the haircut no longer sits like a block.
The shortest front pieces often work best around cheekbone level, then the rest should fall away in a tapered line. That stops the haircut from getting too wide at the bottom. I like this especially on thick, straight hair that takes forever to dry. A little shape can save a lot of time.
Ask for bulk removal with care. Too much thinning on heavy hair can create frizz. Just enough is the goal.
32. Bardot Layers with Curtain Fringe

This is the glamorous one. A Bardot-inspired face frame pairs a soft curtain fringe with layers that sweep away from the center and fall into longer sides. It gives the face a lifted, open shape that feels a little retro without looking costume-y.
The curtain fringe should be light enough to separate into pieces, not dense like a wall. The side layers then take over at the cheekbone and jaw. That transition matters. If the bang is too heavy, the whole haircut feels closed in. If it’s too sparse, the frame loses impact.
I’d choose this when you want the hair to look styled even on days when you’ve only done the front. A quick round-brush set makes a huge difference.
33. Piecey Layers for Flat Straight Hair
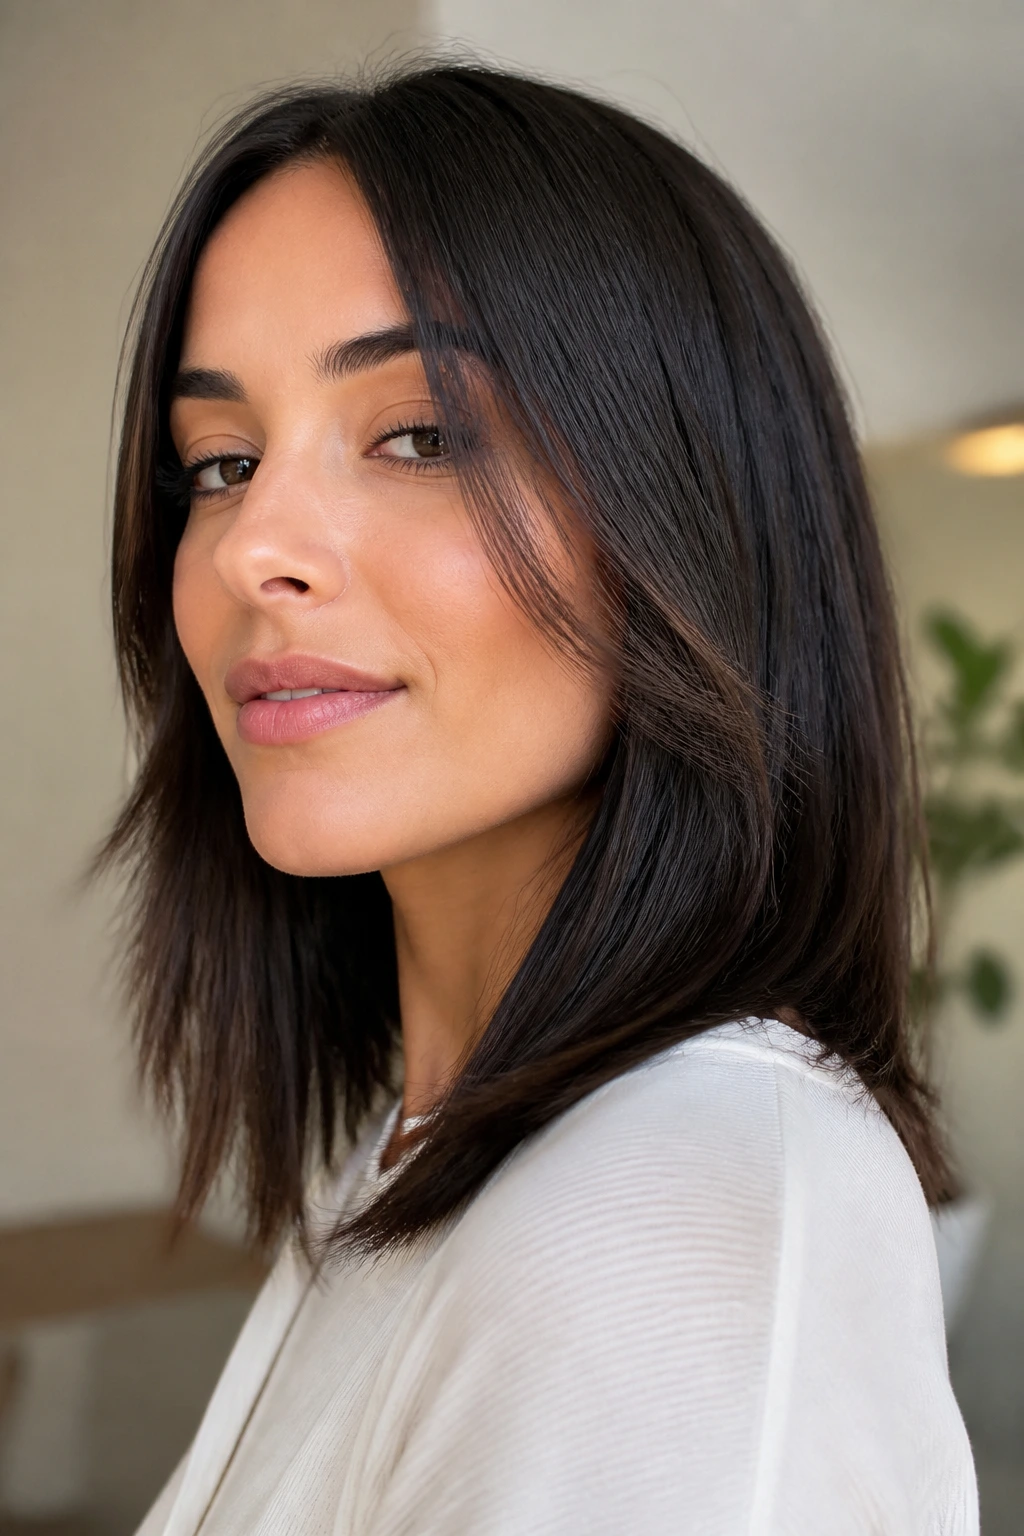
Flat straight hair needs definition around the face, not a pile of volume everywhere. Piecey layers create little bands of movement through the front so the cut doesn’t go limp against the cheeks. The edges should feel separated, not fluffy.
A small amount of texture at the ends can help, but the real trick is the placement. Put the shortest pieces around the cheekbone and keep the rest long enough to move as one shape. That way the layers read as intentional pieces instead of random snips.
Use a lightweight texture spray only on the mid-lengths. If you spray the roots too hard, you can end up with stiff, crunchy hair that still lies flat where you want lift. Annoying. Easy to avoid.
34. Neck-Grazing Layers at the Jaw

This cut sits between short and medium, which is part of its charm. The front layers graze the jaw and neck, softening the line where a lot of haircuts go boxy. It’s a smart shape if you want to show off a jawline but not expose every angle.
The neck-grazing front can make a short cut look elegant instead of severe. It also works well with tucked styles, because the front pieces still fall back out with a soft bend when you release them. That little movement makes a huge difference in how the haircut reads.
Keep the back slightly tapered so the front has room to sit close without puffing. If the nape is too bulky, the whole style starts to feel bulky too.
35. The Custom Salon Blend
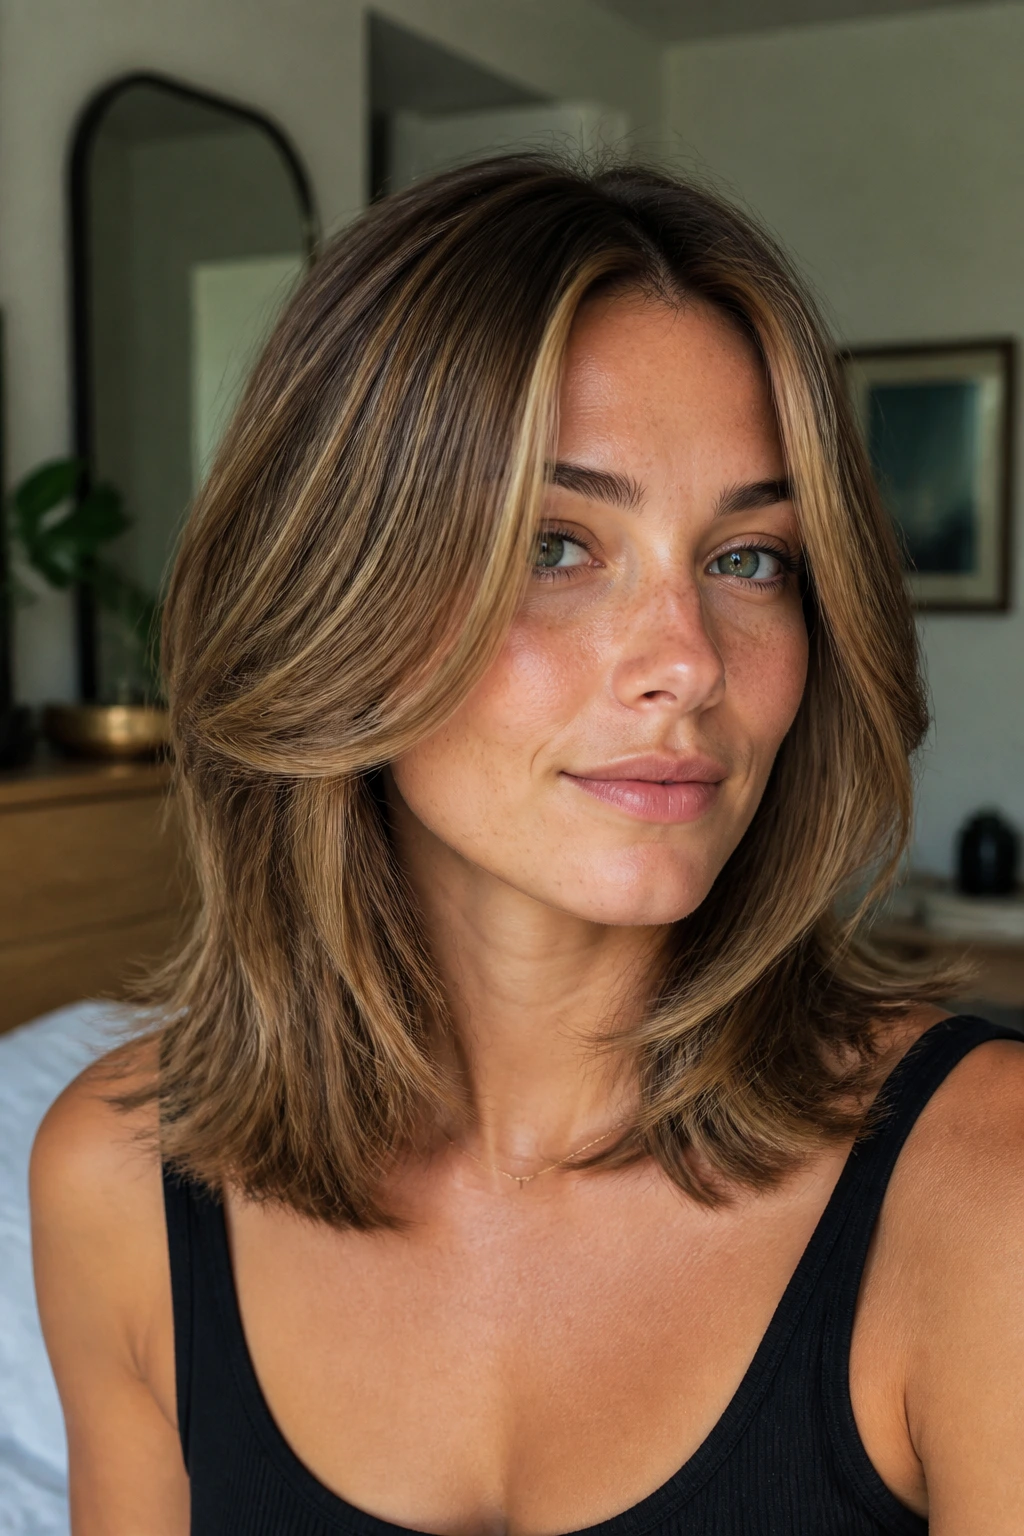
This is the one I recommend when a client says, “I like parts of three different haircuts.” Fair. That’s usually the right answer anyway. A custom blend pulls the best part from the cheekbone frame, the collarbone length, and the internal movement you need for your texture.
The point is not to copy a trend piece for piece. It’s to build a front shape that matches your face, your part, your density, and how much time you’re willing to spend with a brush. If your hair is fine, the blend should stay light. If it’s dense, the blend can carry more weight. If it’s curly, the whole cut should be planned around shrinkage first, not last.
This is the most practical “face-framing layers” idea in the whole list because it starts with what your hair already does well. That’s usually where the flattering cuts begin.
How the Front Layers Should Sit on Your Face
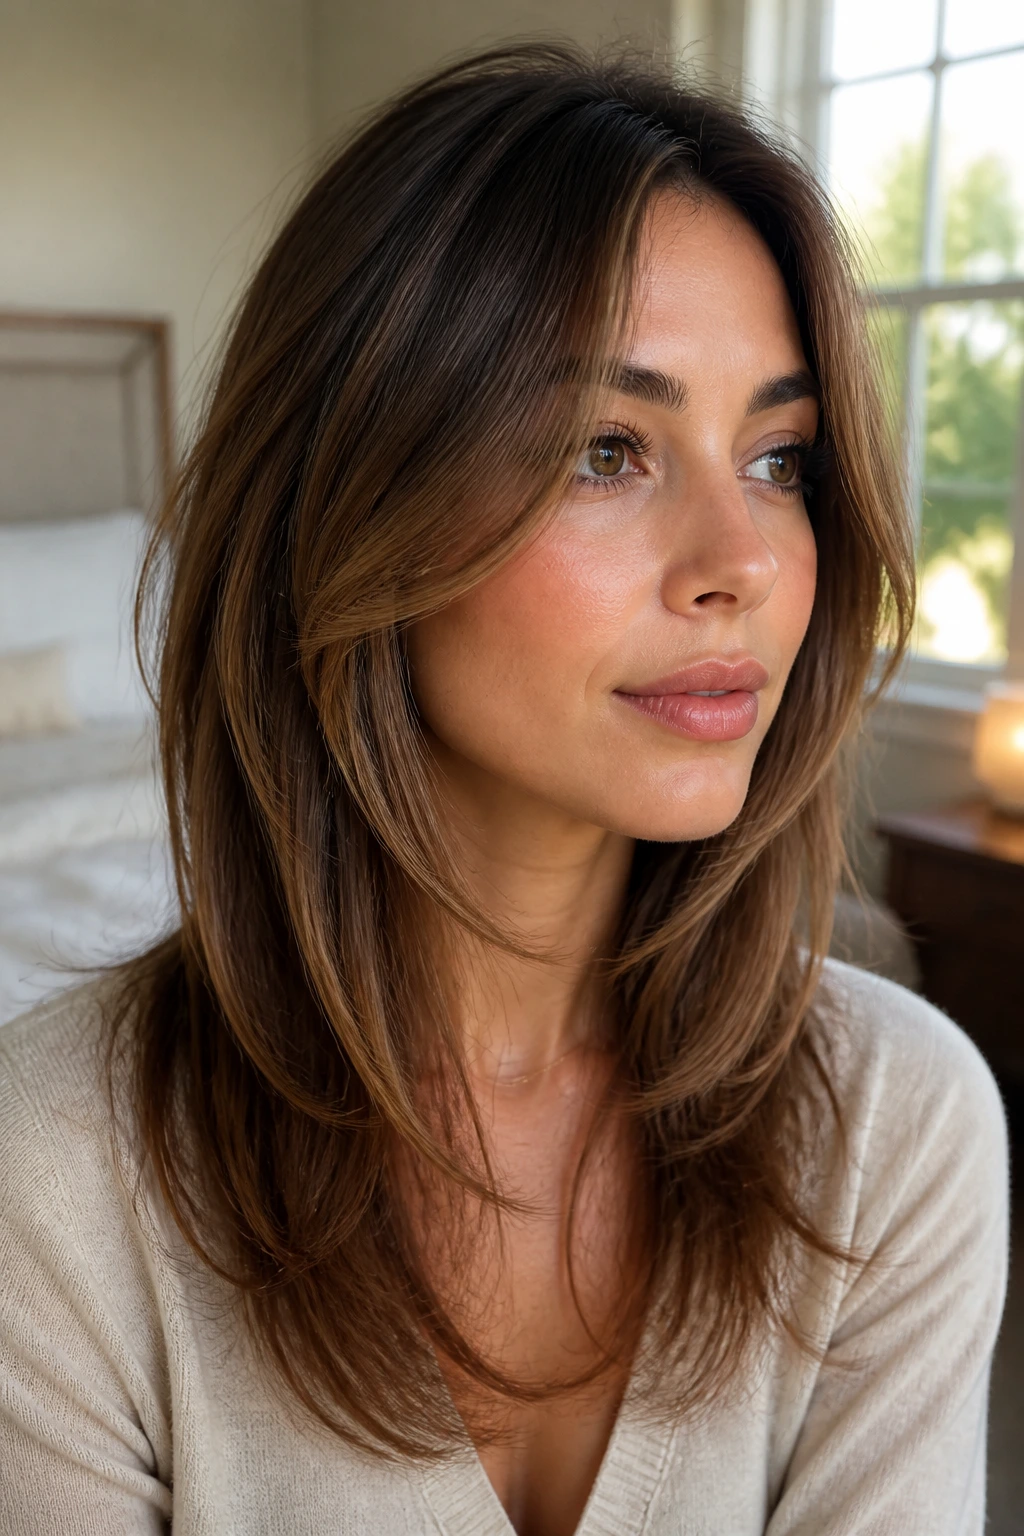
A good face frame is not only about length. It’s about where the eye lands first. If the shortest pieces hit too high, the cut can feel sharp in a bad way. Too low, and the face frame disappears into the rest of the hair. The sweet spot is usually somewhere between the cheekbone and jaw, but the right point shifts with texture and density.
I like to think about the front as a small piece of architecture. The cut should open the face, then guide the rest of the hair downward in a line that feels clear. That’s why the same haircut can look soft on one person and heavy on another. The difference is not magic. It’s placement.
What changes the shape most
- Part line: middle parts show symmetry; side parts add lift.
- Density: thick hair can take more removal; fine hair needs restraint.
- Texture: curls shrink, waves swell, straight hair shows every angle.
- Neck and shoulder length: hair that sits on the shoulders needs a different front angle than hair that falls past the chest.
What to Ask for at the Salon So the Layers Don’t Miss
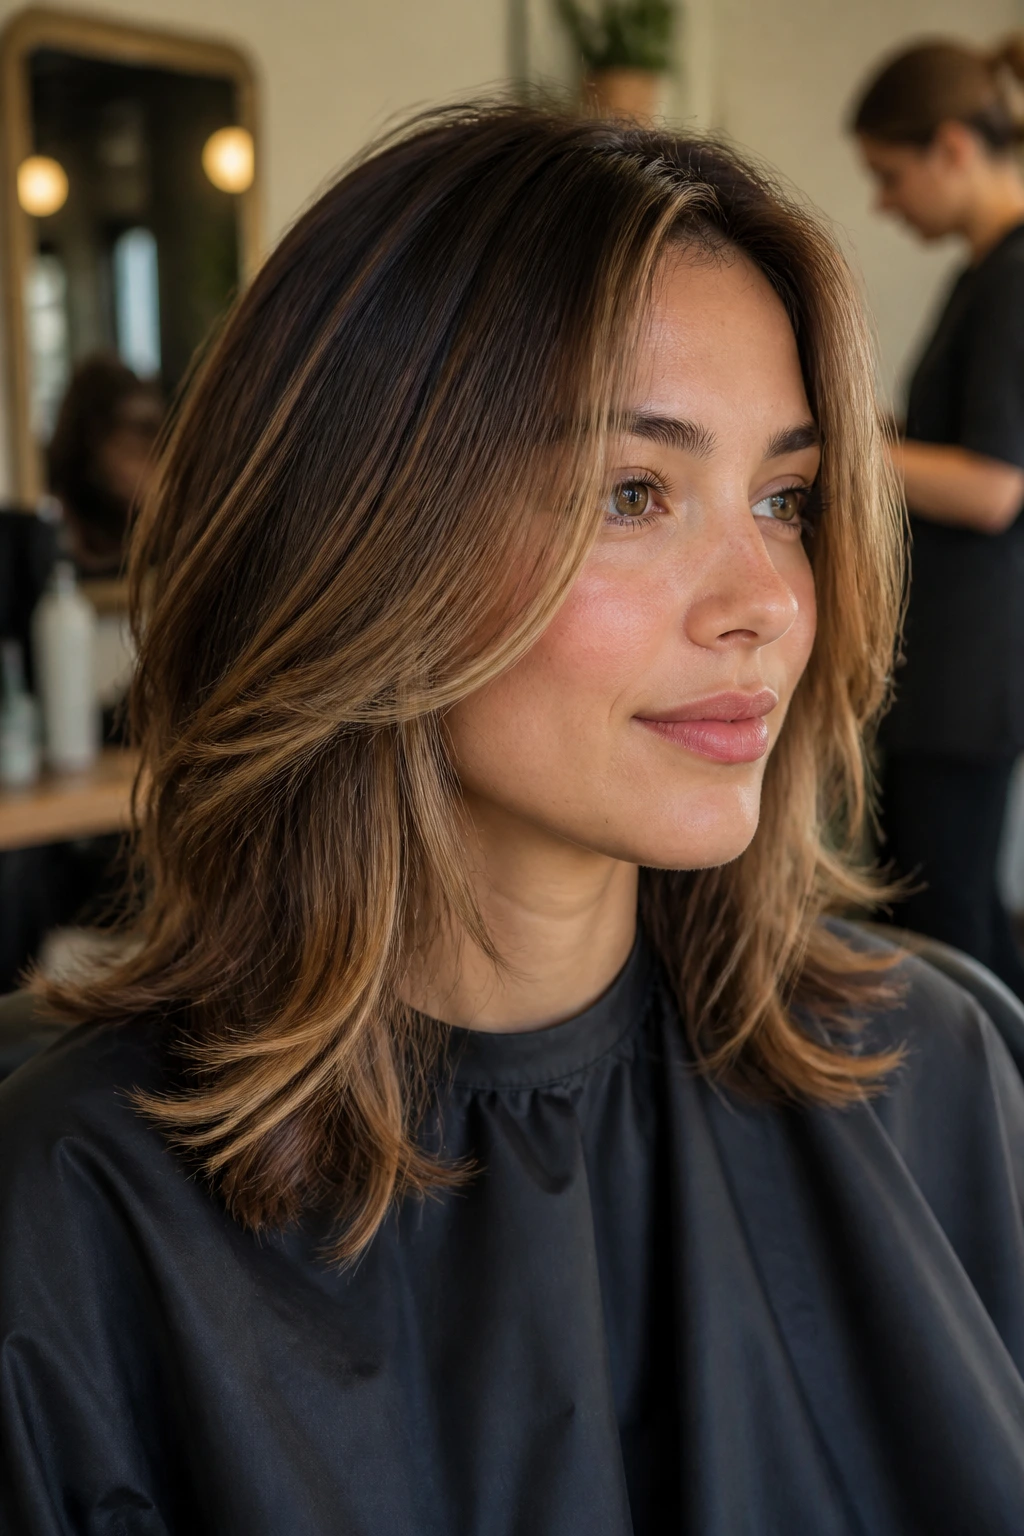
Bring photos, but bring useful ones. Two pictures that show the front and one that show the side will tell your stylist more than ten saved screenshots with different hair types. Point to the exact place where you want the shortest piece to hit—cheekbone, lip, chin, or collarbone. That landmark matters more than the model’s smile or outfit.
Say what you do not want. If you hate a disconnected shag, say so. If you want to tuck your hair behind your ears, say that too. If your hair flips out badly, say that before the scissors come near the front. Those little details change the cut fast.
Also mention how you style your hair on a normal day. If you air-dry most mornings, a blowout-inspired frame may not be your friend. If you flat-iron only the front, tell them. The cut should fit the way you live, not the way a photo looks on a screen.
Tools That Make Face-Framing Layers Easier to Live With
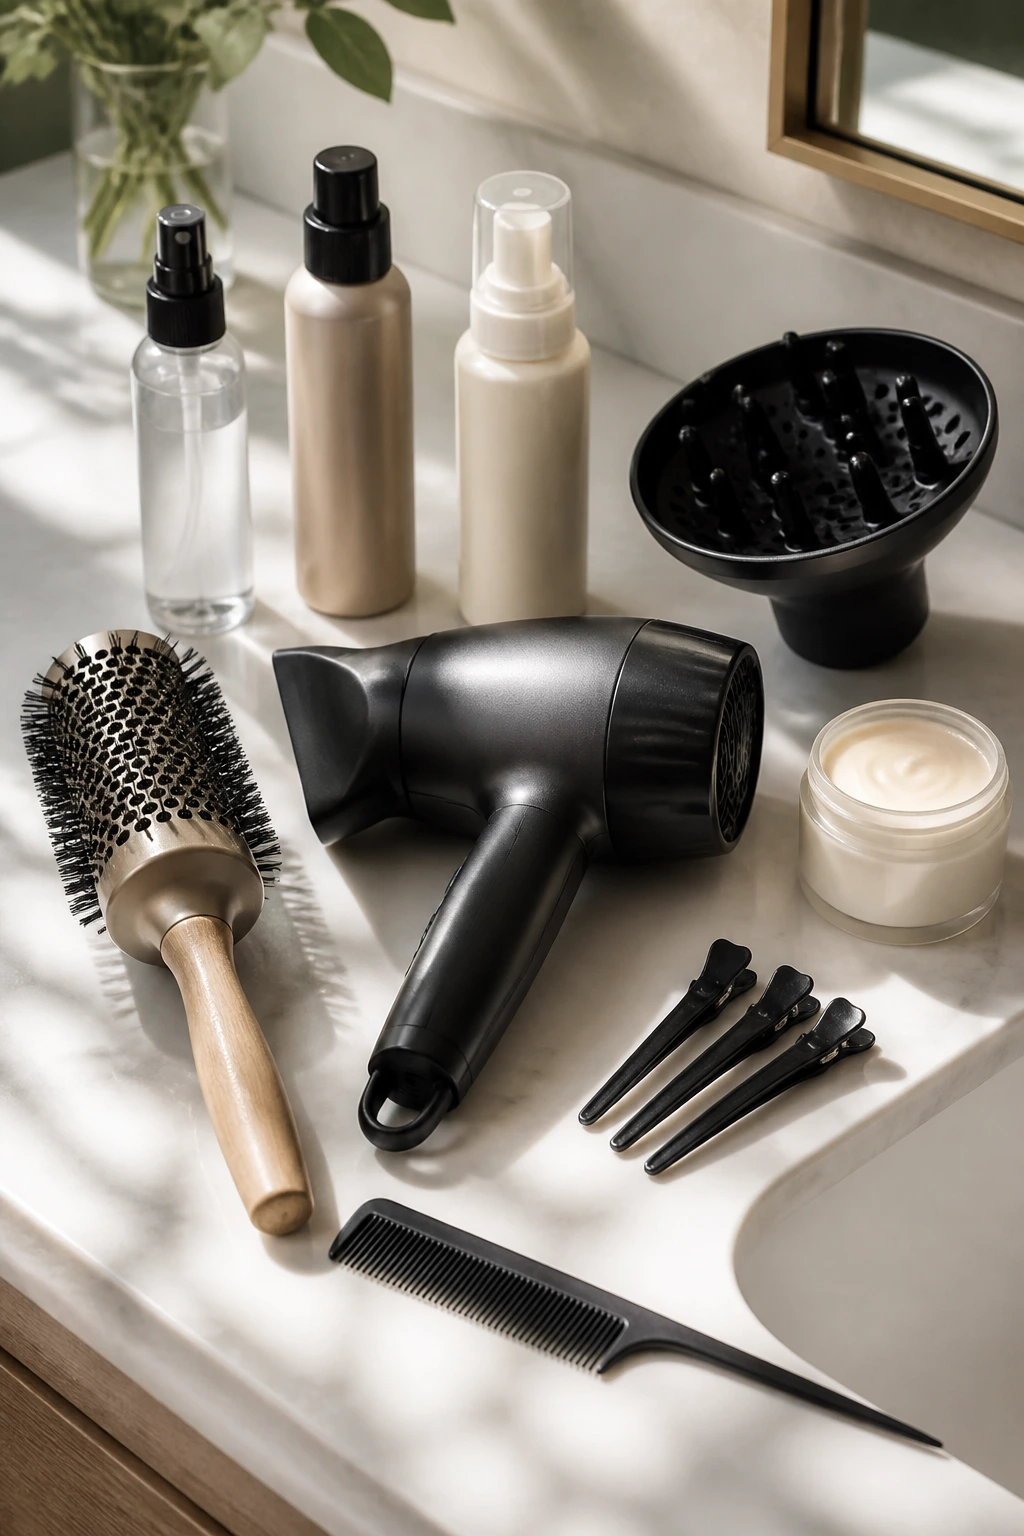
You don’t need a drawer full of gadgets. You do need a few things that stop the front pieces from doing whatever they want.
- Round brush, 1.25 to 2 inches: Small enough to bend the front, large enough to smooth it.
- Blow dryer with a nozzle: Directs the airflow so the face pieces don’t blow apart.
- Heat protectant spray: Keeps the front from drying out if you style it often.
- Light mousse or root lift spray: Helpful for fine or flat hair that needs a little rise near the front.
- Light styling cream: Good for wavy, curly, or coarse hair that needs the frame to sit together.
- Fine-tooth tail comb: Handy for clean parting and sectioning the face pieces before drying.
- Clips: Keep the rest of the hair out of the way while you work only on the front.
- Diffuser: Worth it if your layers live on curls or waves and you want them to keep their shape.
How to Style Face-Framing Layers Without Fussy Styling
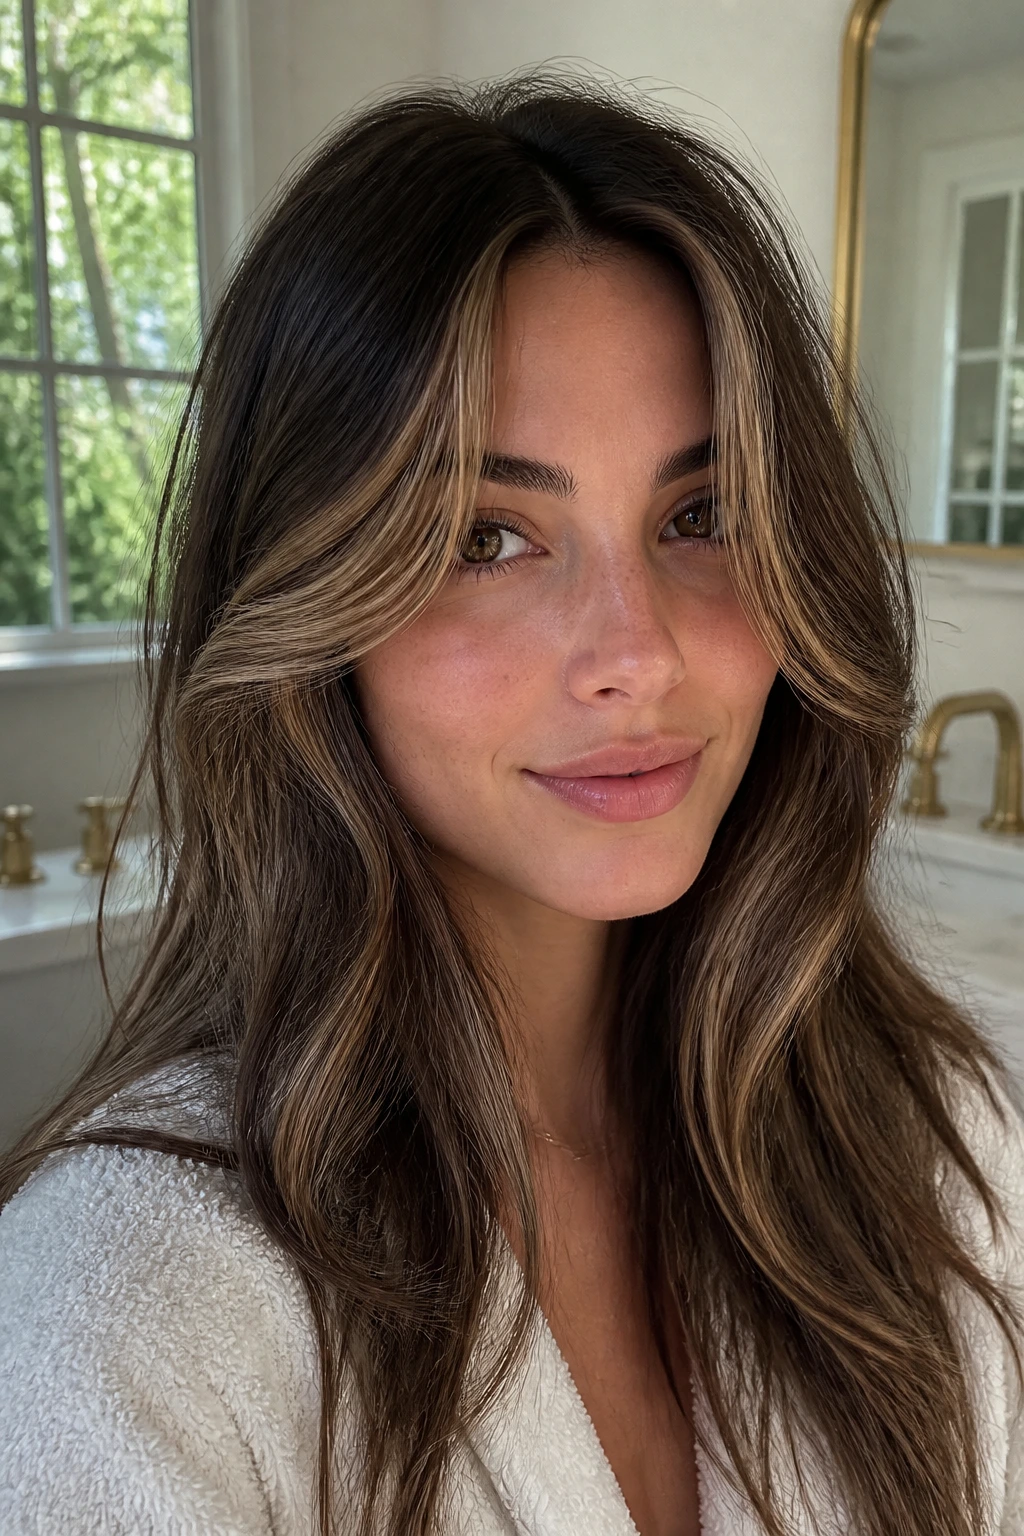
Blowout finish: Wrap the front pieces around a round brush, direct them away from the face, then curl the ends slightly back in. That keeps the frame soft instead of flipped outward at random.
Air-dry finish: Twist the face pieces once while damp, then leave them alone. Touching them too much can make them frizz or split apart. Let the natural bend do the work.
Curl and wave finish: Use a curling iron only on the front pieces if the rest of the hair already has texture. A single bend around the face is usually enough. You do not need spiral curls from root to tip.
Quick tuck style: Push one side behind the ear and leave the front piece loose on the other side. This works best with cheekbone or chin-length layers because the asymmetry shows the shape.
Updo support: Pull the rest of the hair up and leave the frame out. That’s the whole reason face-framing layers are worth having; they make a bun or clip look finished with almost no effort.
Practical Tips That Make the Cut Look Better for Longer
Placement tip: If you’re unsure between two lengths, choose the longer one first. You can always go shorter at the next trim, but overcutting the front is how people end up growing out a mistake for months.
Texture tip: On curly or wavy hair, ask to see the front pieces dry before anything gets taken shorter. Shrinkage is real, and it is rude.
Styling tip: Work the front pieces first when you blow-dry. If they set crooked, the whole haircut can look off even if the rest is fine.
Cost-saver tip: A good face frame can buy you time between full cuts. You may only need the front cleaned up every 6 to 8 weeks while the rest grows.
Common Mistakes to Avoid with Face-Framing Layers
Making the shortest piece too short. The front can start looking like a fringe instead of a frame, and the grow-out gets awkward fast. Fix it by keeping the shortest point at or below the cheekbone unless you truly want a bang-like effect.
Ignoring the natural part. A center-part haircut cut for a side part will fall wrong every time. Tell the stylist where you wear it before they pick up the comb.
Over-thinning fine hair. A razor-heavy front can make thin hair look wispy and tired. If your hair is delicate, ask for soft scissor work and very light texturing.
Letting curls spring up unchecked. Curly face-framing layers can jump higher than you think. The fix is dry cutting or at least a careful dry check before the final snip.
Styling every piece the same way. The front usually needs more control than the back. If you curl everything equally, the frame gets lost and the haircut stops looking intentional.
Variations and Alternatives to Try
The Soft Curtain: A center part with cheekbone-starting layers and longer sides. It’s the easiest option if you want movement without a big visual change.
The Jawline Softener: Longer front pieces that sit at or just below the jaw. This works well on square or angular faces because it blurs the edges rather than cutting across them.
The Volume Builder: Shorter front layers paired with internal lifting through the crown. Choose this when your hair lies flat and you want the face to look more open.
The Curl-Friendly Frame: A dry-cut version shaped around shrinkage. Best for curls and coils that need the cut to honor the pattern instead of fighting it.
The Low-Key Grow-Out: Minimal face-framing layers with a mostly one-length body. This is the safest choice if you want a soft change that won’t ask for constant upkeep.
How to Keep the Shape Between Trims
Face-framing layers grow out faster than people expect because they sit right where you look in the mirror. A cleanup every 6 to 10 weeks keeps the front from dropping into your eyes or flipping into a weird, heavy line. If the rest of your haircut is long, you can often stretch that a bit farther. The front usually tells on you first.
At home, keep the front pieces clean and lightly styled. Oil and heavy product build up fast around the face because your hands touch that area more. A tiny amount of styling cream or mousse goes farther than people think. When the front starts looking greasy, the whole haircut looks older than it is.
If you’re growing the layers out, ask for micro-trims instead of a full reshaping. That keeps the front connected while you move the shortest pieces lower by small steps. It’s slower. It also works.
Frequently Asked Questions
Are face-framing layers good for thin hair?
Yes, if they’re kept soft and not too short. Thin hair does better with subtle framing around the cheekbone or jaw than with a lot of chopped pieces, which can make the ends look sparse.
What’s the best length for face-framing layers?
For most people, cheekbone to jaw is the sweet spot. Cheekbone layers add lift; jaw-length layers soften stronger angles. Anything shorter should be chosen on purpose, not by accident.
Can I get face-framing layers with curly hair?
Absolutely, but they should be cut with shrinkage in mind. Curls often need to be shaped dry or nearly dry so the frame lands where it’s supposed to after the curl springs up.
Do face-framing layers work with bangs?
Yes, and the combo can be excellent. Curtain bangs, bottleneck bangs, and soft side bangs all blend well with front layers because they create one connected shape instead of two separate ideas fighting each other.
How often should I trim them?
Most face-framing pieces need a touch-up every 6 to 8 weeks if you want them to stay crisp. If you like a softer grow-out, you can stretch that longer and just keep the edges tidy.
What if my front pieces flip out badly?
That usually means the layers were cut with the wrong angle for your hair pattern, or the ends are too blunt. A quick round-brush bend inward, a larger brush, or a slightly longer front shape usually helps.
Should face-framing layers be cut wet or dry?
Wet works fine for straight and some wavy hair, but curly and coily hair often needs a dry check. The more your hair changes as it dries, the more useful it is to see the shape in its natural state.
Can I ask for face-framing layers if I wear my hair up a lot?
Yes, and that’s one of the best reasons to get them. Even a ponytail looks more finished when a few front pieces fall loose around the face.
The Cut That Changes the Whole Silhouette
The best face-framing layers do something quiet but important: they make the face and the haircut speak to each other. You notice it when the front pieces land in the right place and the whole shape feels less heavy, less boxy, less ordinary. The hair still looks like your hair. It just behaves better around your features.
If you’re taking a photo to the salon, zoom in on the front pieces and ignore the rest of the noise. That one detail—the shortest point, the bend, the connection back into the length—usually decides whether the cut feels flattering or merely trendy. And once you’ve got that shape right, everything else gets easier.
