



The easiest way to ruin a first highlight appointment is to ask for too much brightness too soon. Hair can take a lot, but your confidence usually can’t. The best highlight ideas for beginners do something smarter: they change the hair enough that you notice it every time you pass a mirror, then they grow out softly enough that you’re not panicking three weeks later when your roots show.
That’s why I love beginner-friendly highlights that work with placement, tone, and contrast instead of trying to brute-force a big transformation. A little caramel around the face can do more than a whole head of pale blonde if the placement is right. Fine babylights, a shadow root, a soft money piece, or a lived-in balayage can make hair look fuller and richer without the stripy, high-maintenance feel that scares people off after one attempt.
A lot of first-timers think the main choice is color. It isn’t. Placement matters more. If the brightness sits where your hair naturally moves — around the face, along the top layer, through the ends, or in ribbons that follow a wave — the result looks intentional even when it’s subtle. That’s the thread running through all 35 ideas below. Some are warm, some are cool, some are barely-there, and a few are a little bolder. All of them are friendly to a nervous first appointment.
Why These Highlight Ideas Feel Easier to Wear
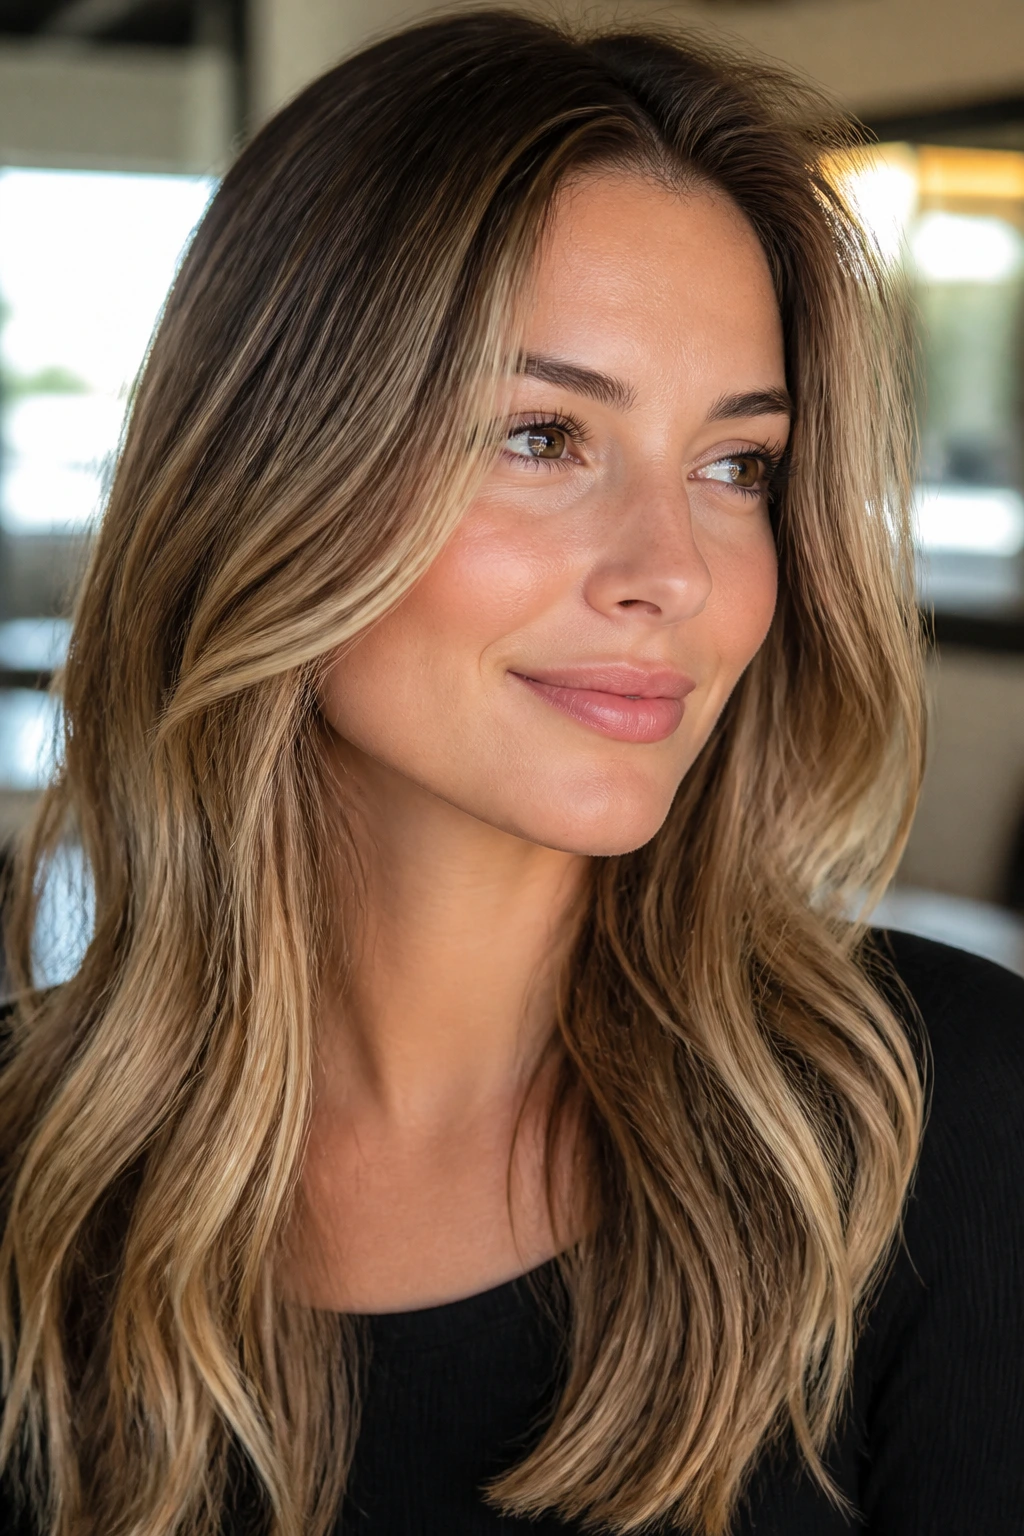
-
Soft Grow-Out: Most of these looks keep the lightest pieces away from the root line, which means the regrowth looks blended instead of obvious.
-
Placement Over Drama: Face-framing pieces, top-layer highlights, and ends-only brightness can change the whole shape of the hair without forcing you into all-over lightness.
-
Tone Matters More Than People Think: Caramel, beige, honey, ash, mushroom, and bronze each sit differently on the hair, and the right undertone keeps highlights from looking brassy or too stark.
-
Better for First Timing: These ideas are built for salon appointments where you want a noticeable shift without needing a full color correction if you change your mind later.
-
Works With Texture: Waves, curls, straight hair, bobs, lobs, and pixies all show highlights differently, so the list includes looks that flatter more than one hair pattern.
-
Room to Adjust: A beginner highlight should leave you space to go brighter, warmer, cooler, or denser next time. That flexibility is part of the appeal.
1. Soft Caramel Face-Framing Highlights
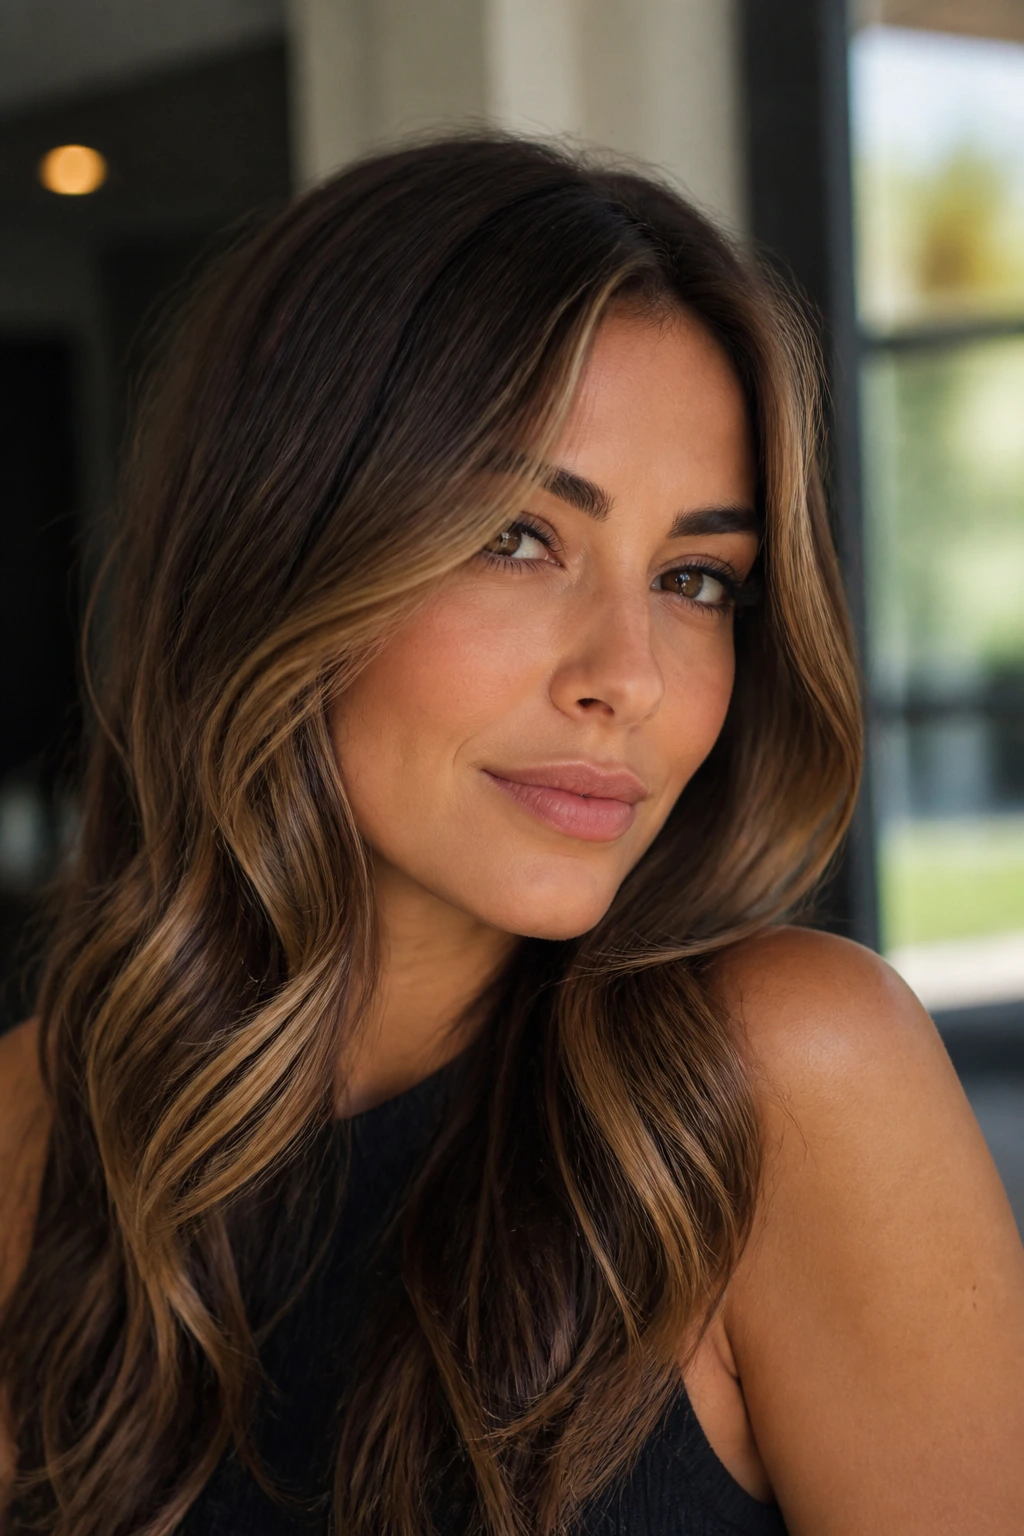
Caramel around the face is the kind of highlight that makes people think you “did something” without being able to name exactly what changed. The brightness sits where your eyes go first, so the effect is immediate even if the rest of your hair stays close to your natural color.
This is a good first move if you have brunette hair and want something warm rather than icy. The pieces can be thin and feathery, or a little wider if you want more payoff. I prefer this look on shoulder-length cuts, because the lighter streaks fall near the cheekbones and jawline instead of disappearing into the back.
Why It Works for Beginners
The root stays mostly intact, so grow-out is soft. The color also skews warm, which is friendlier on a lot of brown bases than pale blonde ever will be.
If you’re nervous, ask for a “soft money piece” rather than a bright stripe. That wording alone tends to keep the result gentle.
2. Honey Balayage Through the Mid-Lengths
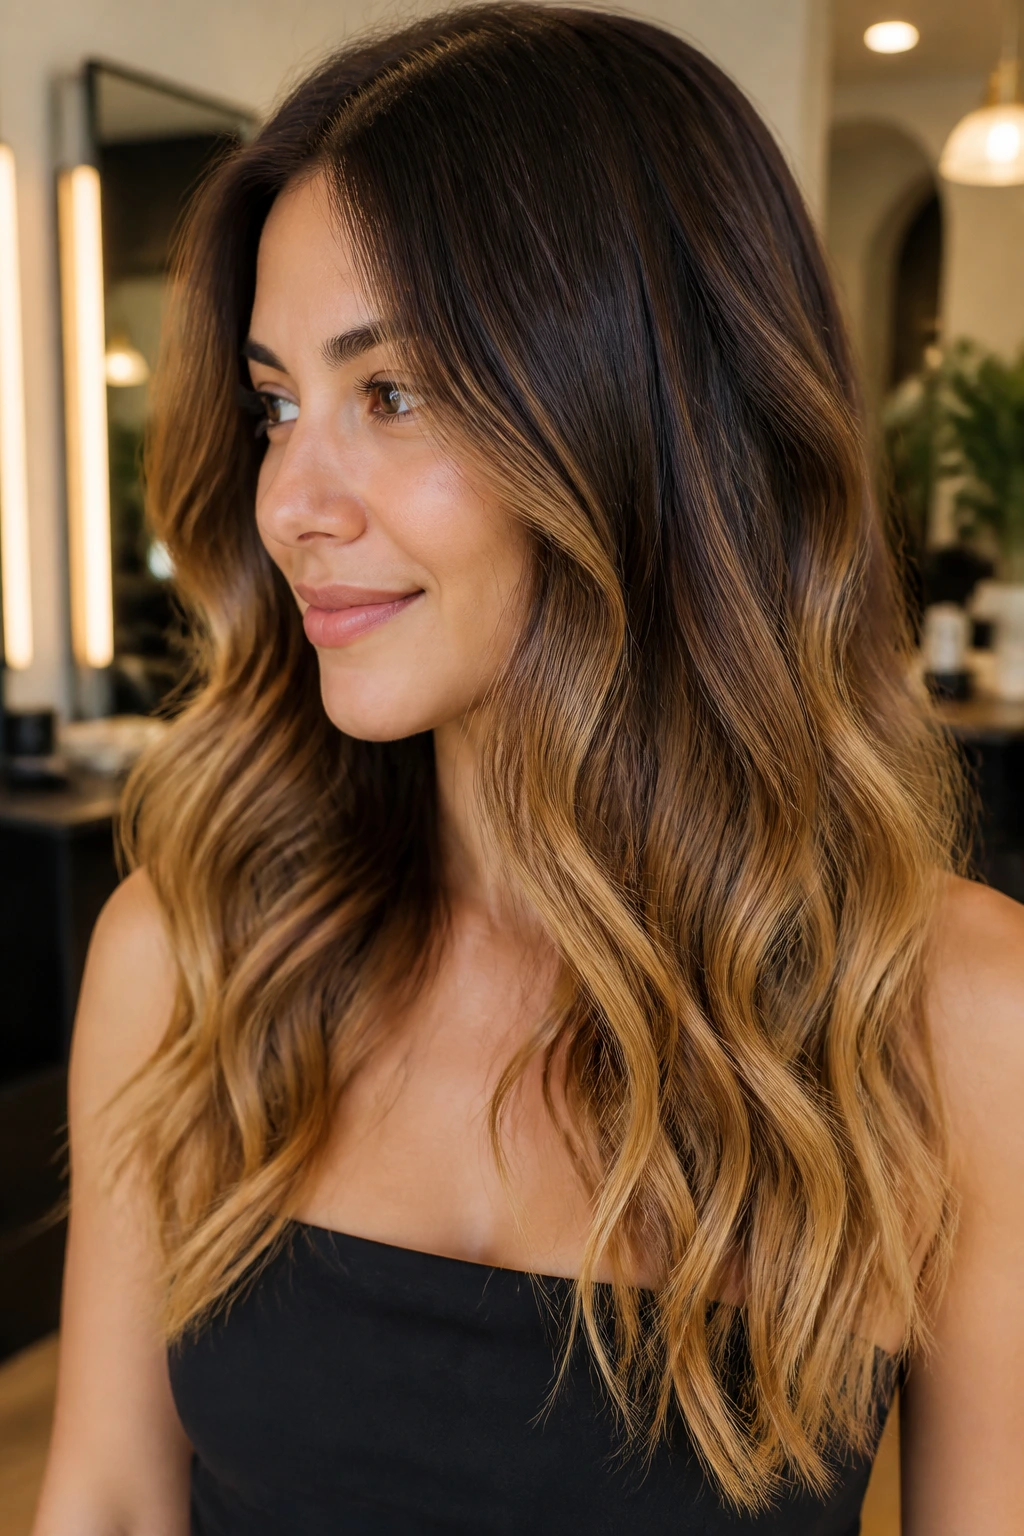
Honey balayage is basically a warm wash of light that starts around the middle of the hair and gets brighter as it moves downward. It has that sun-kissed feeling people chase in photos, but in real life it looks even better because the melted placement keeps the hair from reading striped.
This works beautifully on medium to dark brunettes who want visible change without a hard line at the roots. The color should look like it lives inside the hair, not pasted on top of it. That’s the whole charm. Ask for a soft hand-painted finish and keep the brightest pieces around the front and upper layers.
A clean blowout shows it off best, but loose waves make the honey tones feel richer. Straight hair can work too, though, especially if the stylist leaves a little depth underneath so the dimension doesn’t vanish.
3. Fine Babylights on Brunette Hair
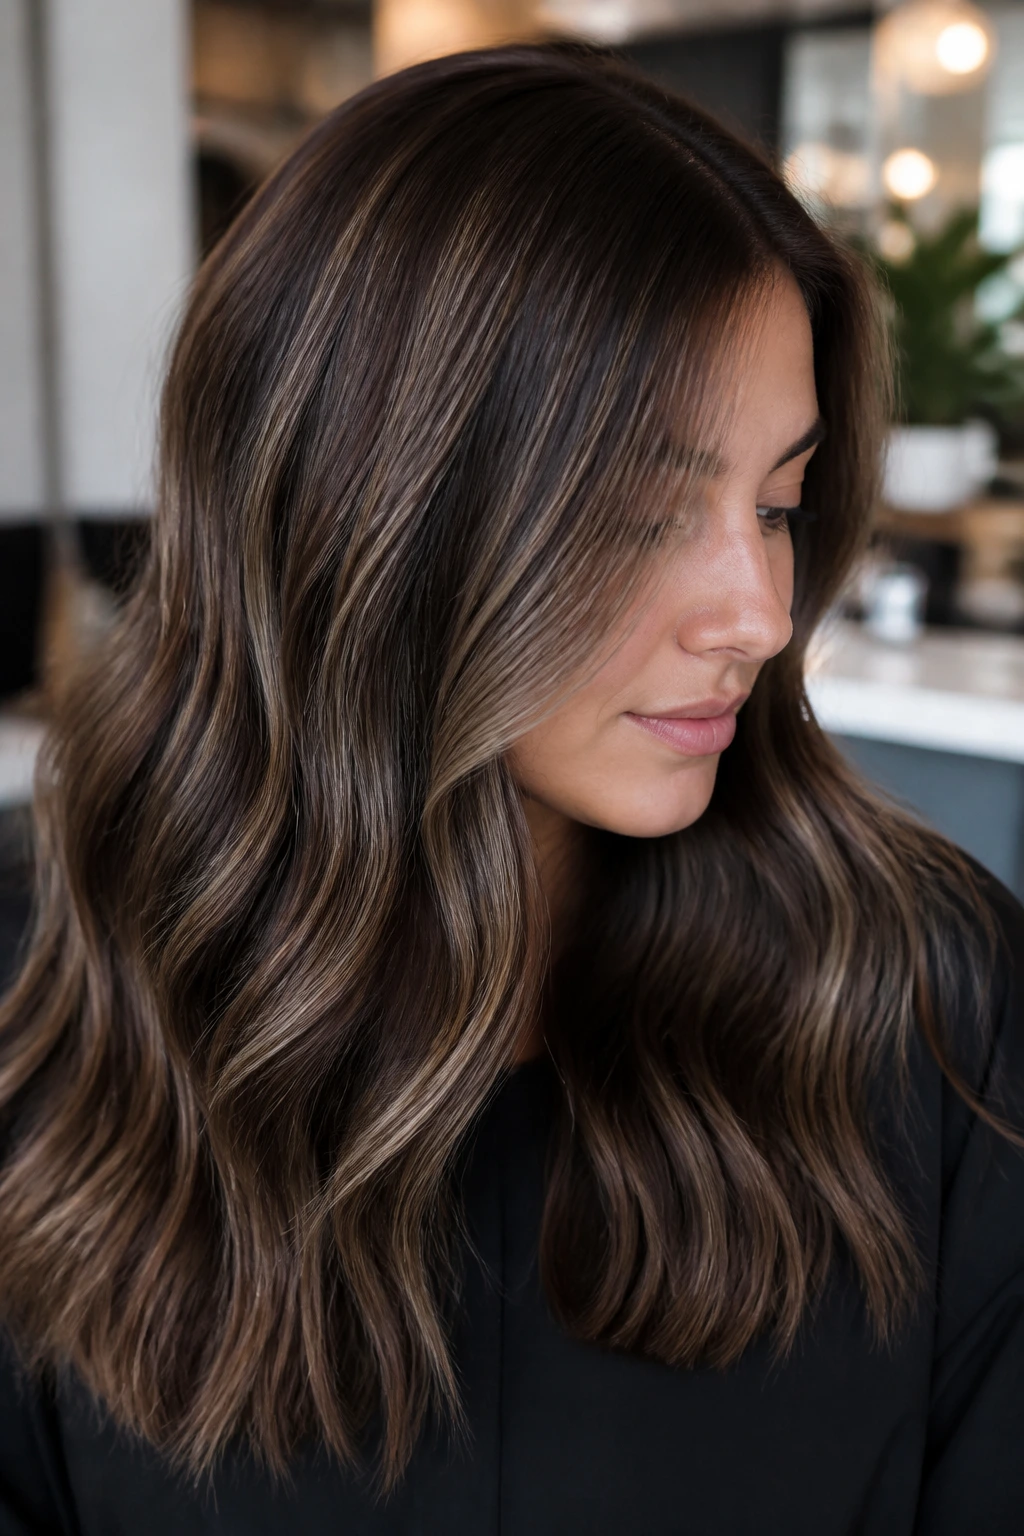
Babylights are the quietest version of highlights, and that’s exactly why beginners should pay attention to them. The pieces are so fine that the result reads as shimmer rather than streaks, which is a relief if you hate seeing obvious foil lines.
On brunettes, babylights add movement where the light hits the hair without changing the overall identity of the color. The best part is that they make flat brown hair look more expensive. Not louder. Just better.
Best For
- Medium to dark brunettes who want a softer first appointment.
- Fine hair that needs dimension without chunky contrast.
- People who want their color to grow out in a very forgiving way.
Ask for tiny woven sections rather than wide slices. If the stylist starts talking about making them “dramatic,” steer it back down. Babylights are supposed to whisper.
4. A Chunky Money Piece for Instant Brightness
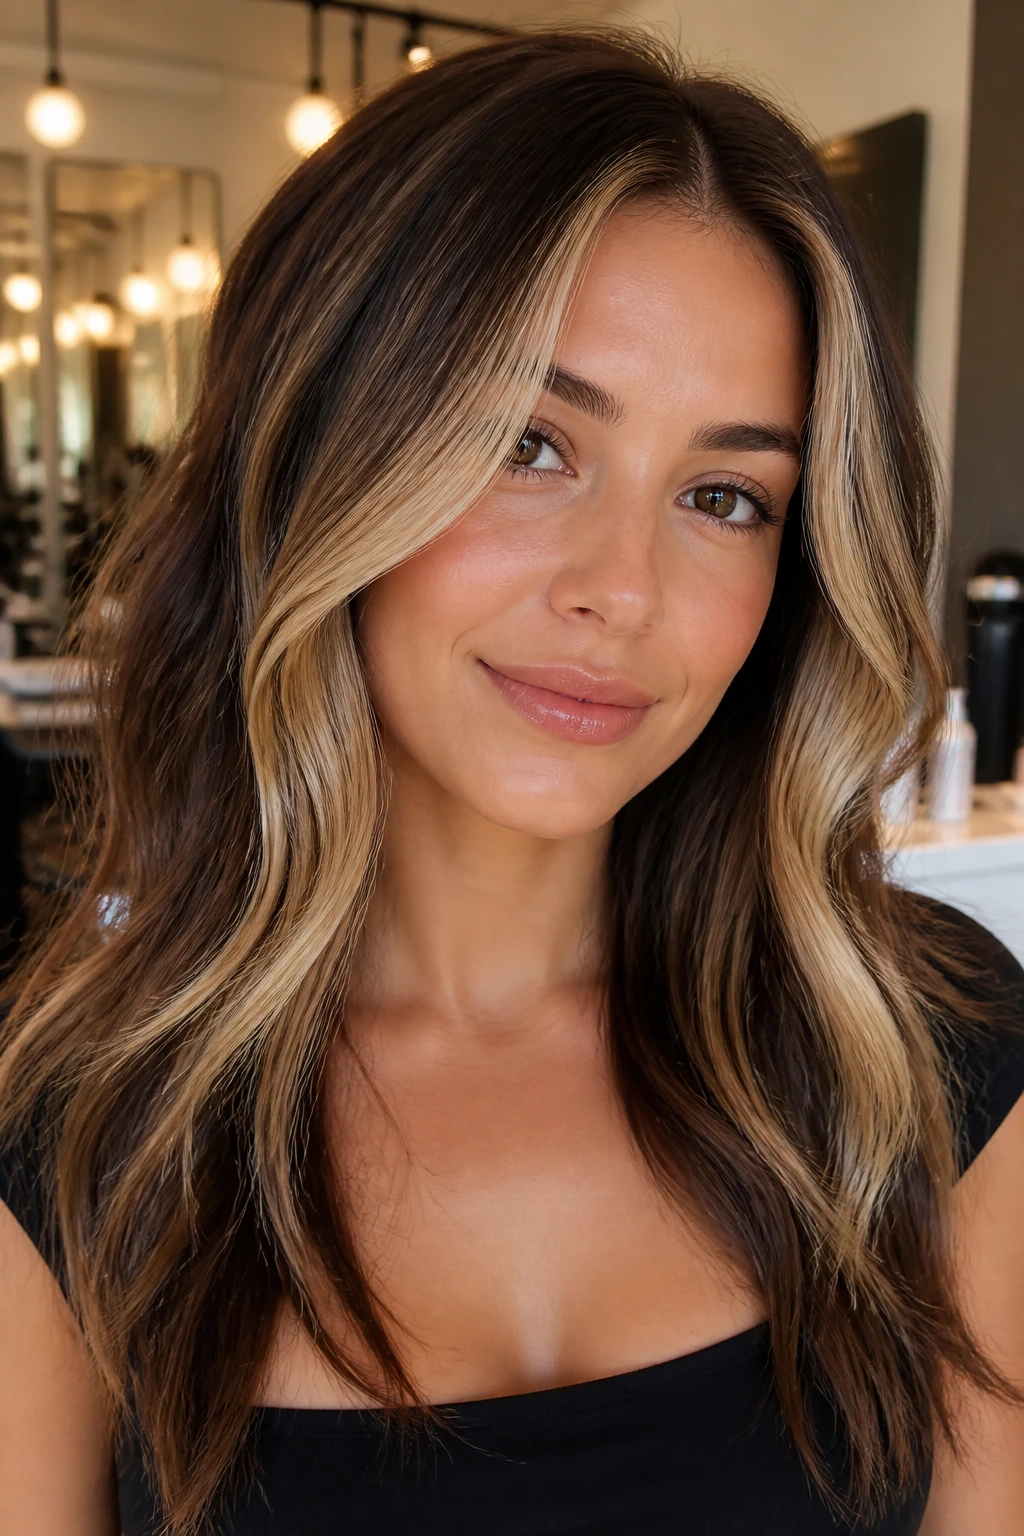
A money piece is the fast answer when you want one clear change and don’t want to light up the entire head. The face frame gets brighter, the rest of the hair stays grounded, and the whole style suddenly has a point of focus.
I like this for beginners who want a little more attitude. It’s easier to maintain than full highlights because the brightness is concentrated in one place, and it can make even a simple ponytail look polished. The trick is not going too white too soon. A soft beige blonde or warm honey money piece is much easier to live with than a blinding platinum stripe.
Ask for the front pieces to be blended into the top section so they don’t look cut off. If you wear your hair tucked behind the ears often, this is one of those highlight ideas that keeps paying off.
5. Beige Blonde Ribbons on Dark Blonde Hair
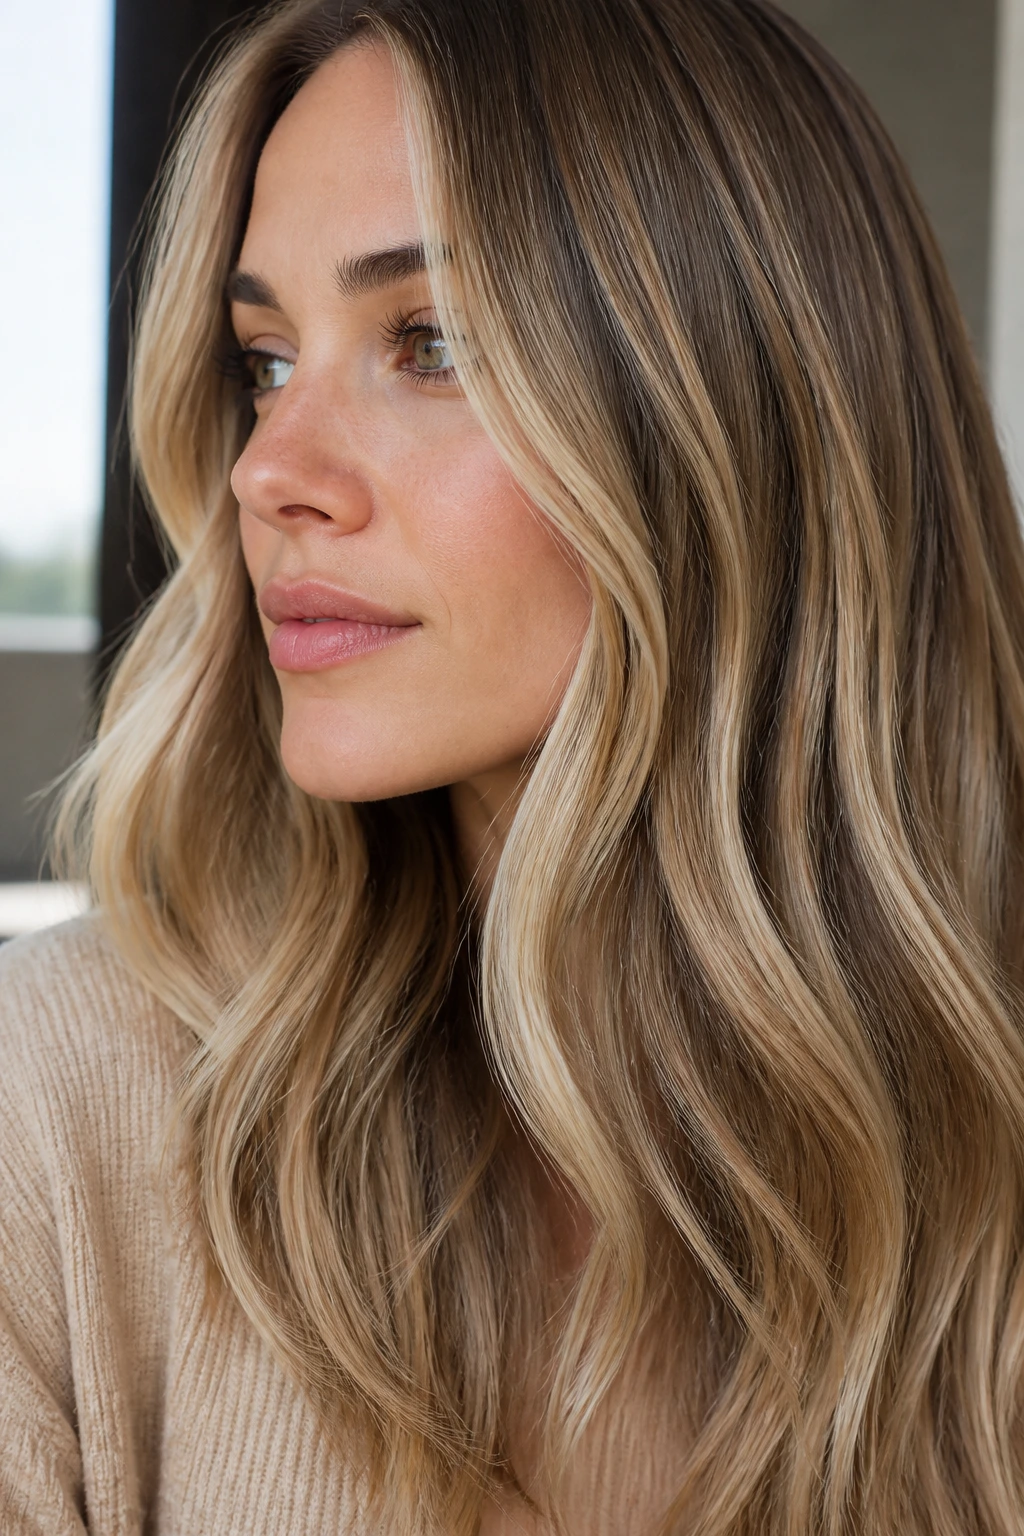
Dark blonde hair can take highlights that are brighter than people expect, but beige is the safest place to start. It sits between warm and cool, which keeps the hair from turning yellow or orange while still looking lighter.
The ribbon placement gives the color movement without breaking the base apart. Think of it as quiet brightness threaded through the hair rather than painted on in slabs. On shoulder-length cuts, beige ribbons can make layers look deeper and cleaner at the same time.
If your natural color already leans a little ashy, this tone keeps the whole look polished. If your hair runs warm, beige helps dial back the gold so the highlights don’t drift into brass territory.
6. Mushroom Brown Highlights for a Cool Shift
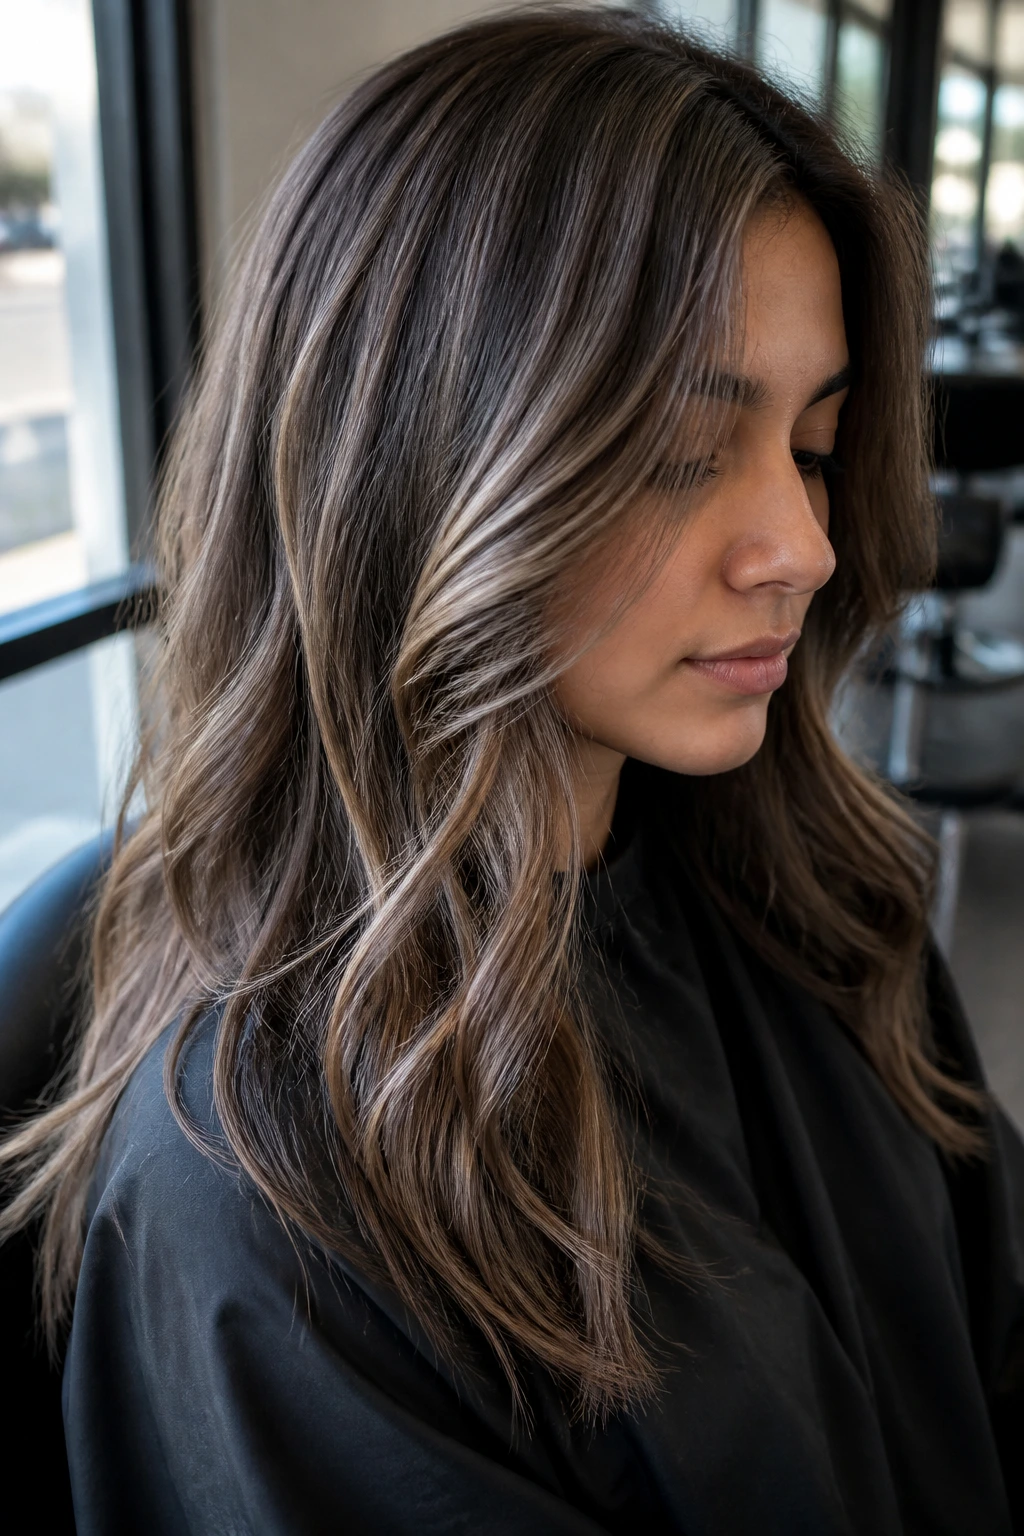
Mushroom brown is one of my favorite tones for people who want dimension but do not want warmth shouting at them from the mirror. It lives in that muted gray-brown zone that feels cool, soft, and expensive in the least irritating way.
On a brunette base, mushroom highlights don’t scream “highlighted.” They create depth. That makes them great for beginners who are drawn to subtle changes and want to avoid the classic orange-brown problem that shows up when lighter pieces are too golden. Ask for a beige-gray gloss over the lightened sections so the tone stays soft instead of drifting warm.
This look tends to behave especially well on straight or slightly wavy hair, where the tonal shift is easy to see. On curls, it can look beautifully smoky if the colorist places the lighter ribbons where the curls separate.
7. Copper Peekaboo Panels Underneath
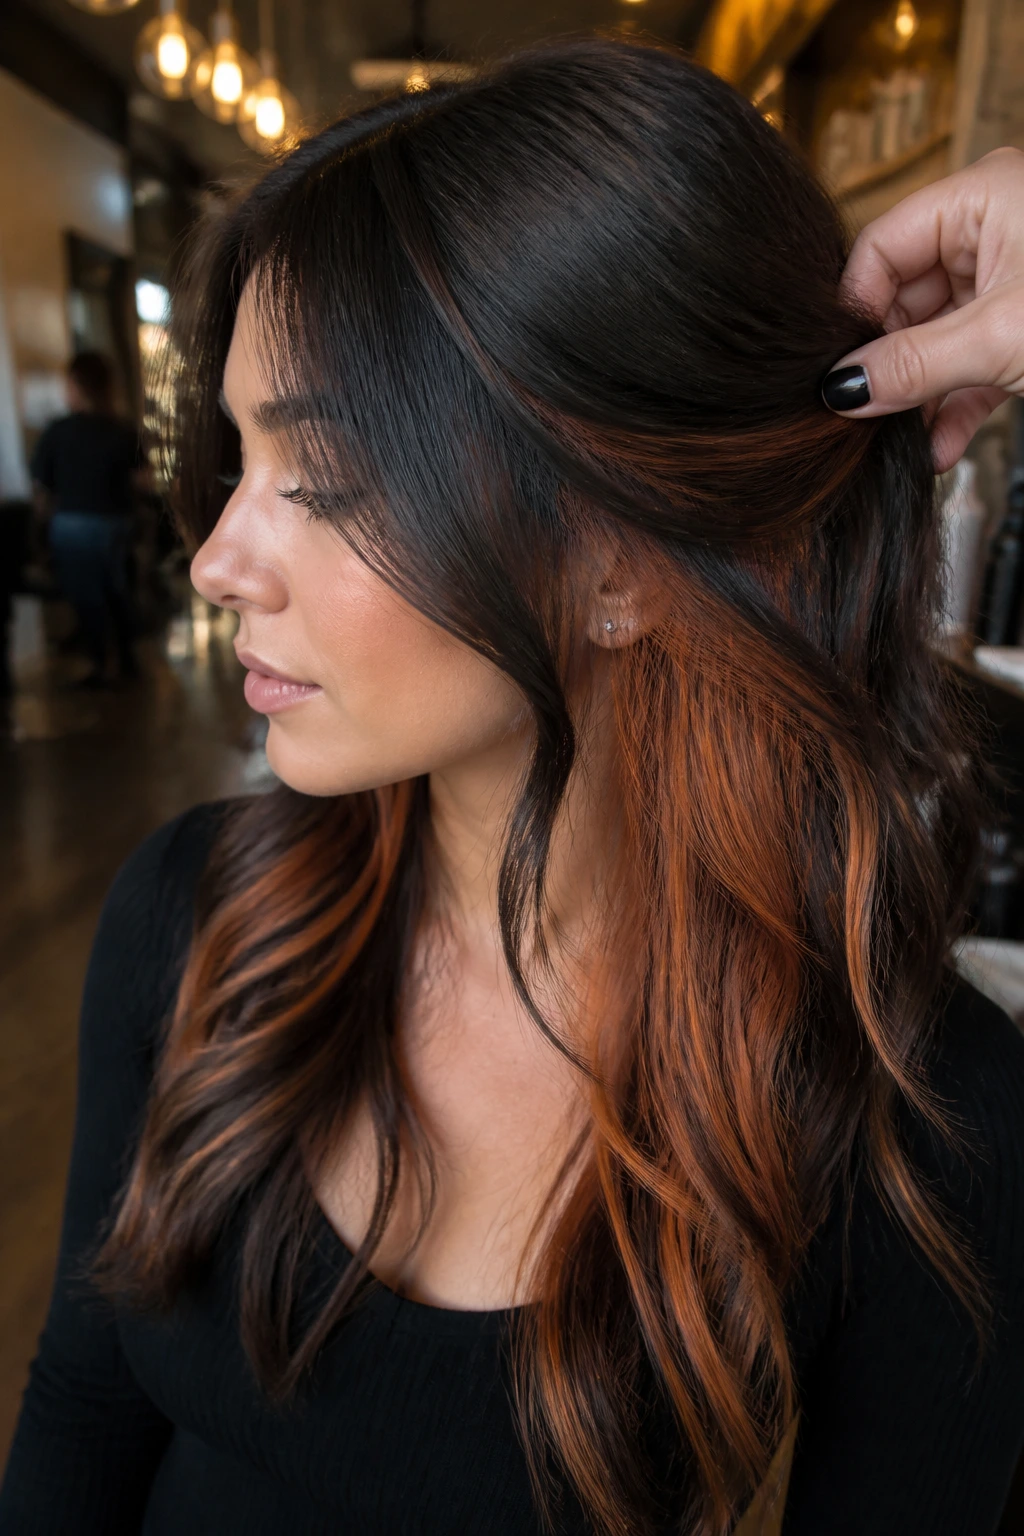
Peekaboo color lives underneath the top layer, so the bright pieces show when the hair moves, flips, or gets tucked behind the ears. Copper is a smart beginner choice because it gives warmth and personality without needing the whole head to go lighter.
This is a fun one if you want something a little less obvious in professional settings. The color can be tucked away for work, then flashed on purpose when the hair is styled differently. The contrast is half the fun. On dark hair, copper peekaboo panels can look especially striking because the red-gold tone catches light fast.
Keep the top layer close to your natural shade and let the underneath pieces do the talking. That balance is what keeps the look wearable instead of loud.
8. Ash Brown Micro-Highlights
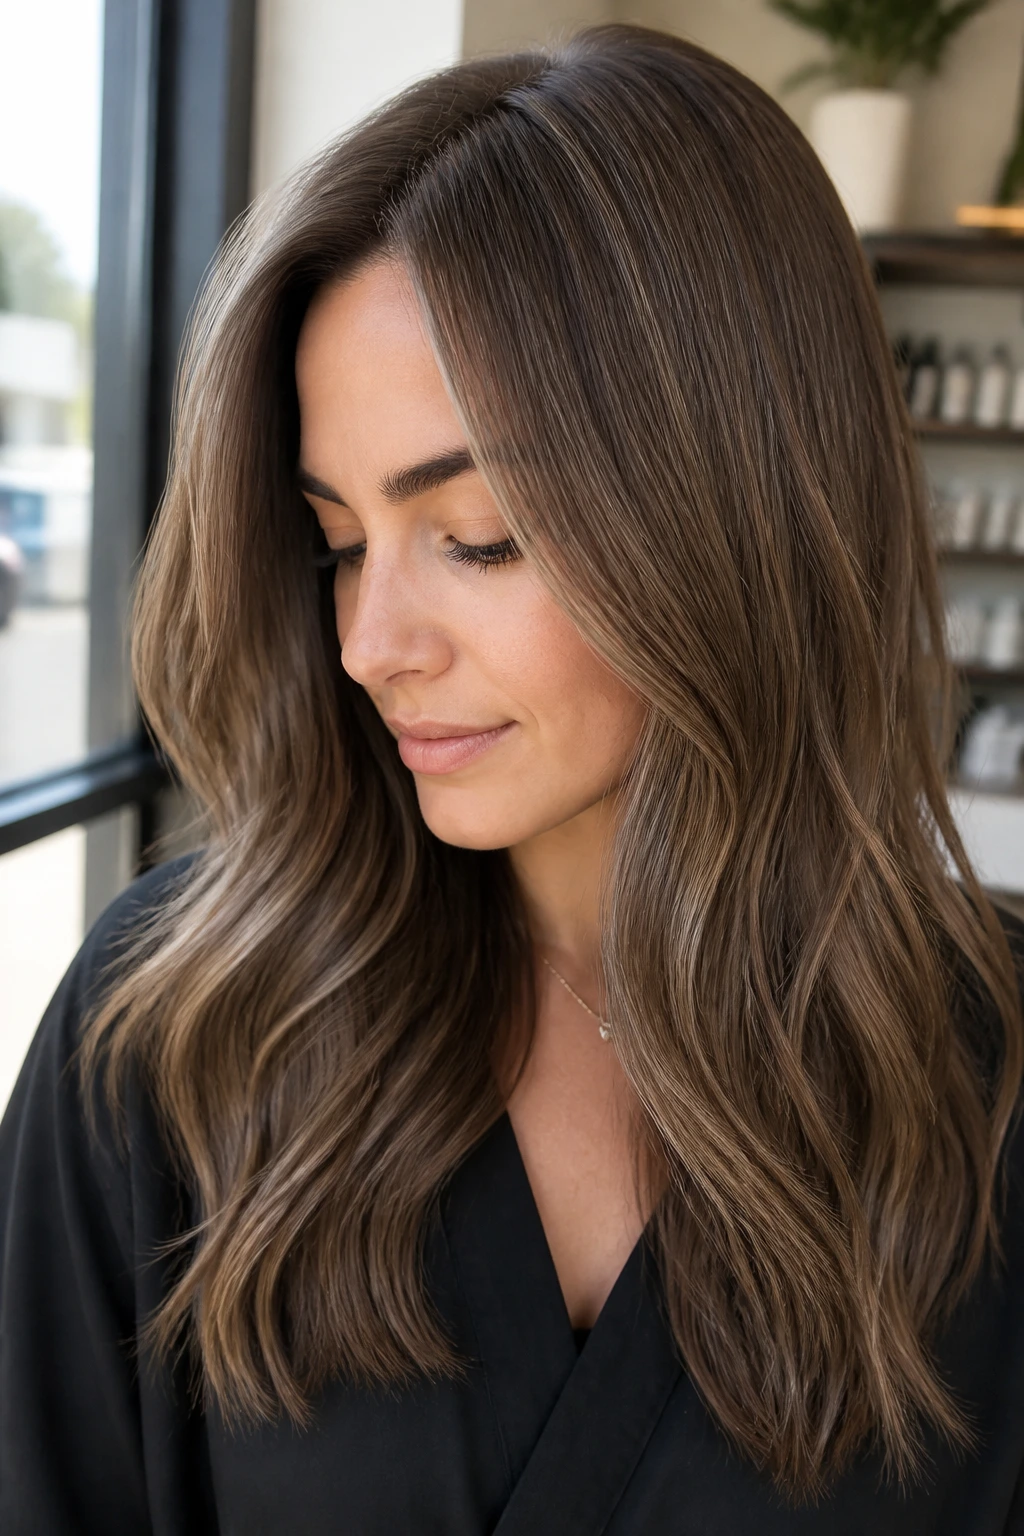
Ash brown micro-highlights are for people who want dimension but refuse to look stripy. The pieces are so narrow that they blur into the base color, giving the hair a cooler, softer surface.
This is especially good on fine hair, where chunky highlights can look too bold or too separated. Micro-highlights make the hair look fuller because the eye reads the whole head as more layered. They’re subtle in a very useful way. You can wear them every day without feeling like the color is wearing you.
If your natural base is already brown and you just want a slight shift, this is one of the most beginner-proof options on the list. It’s also one of the easiest to keep looking neat as it grows out.
9. Vanilla Blonde Ends on Long Hair
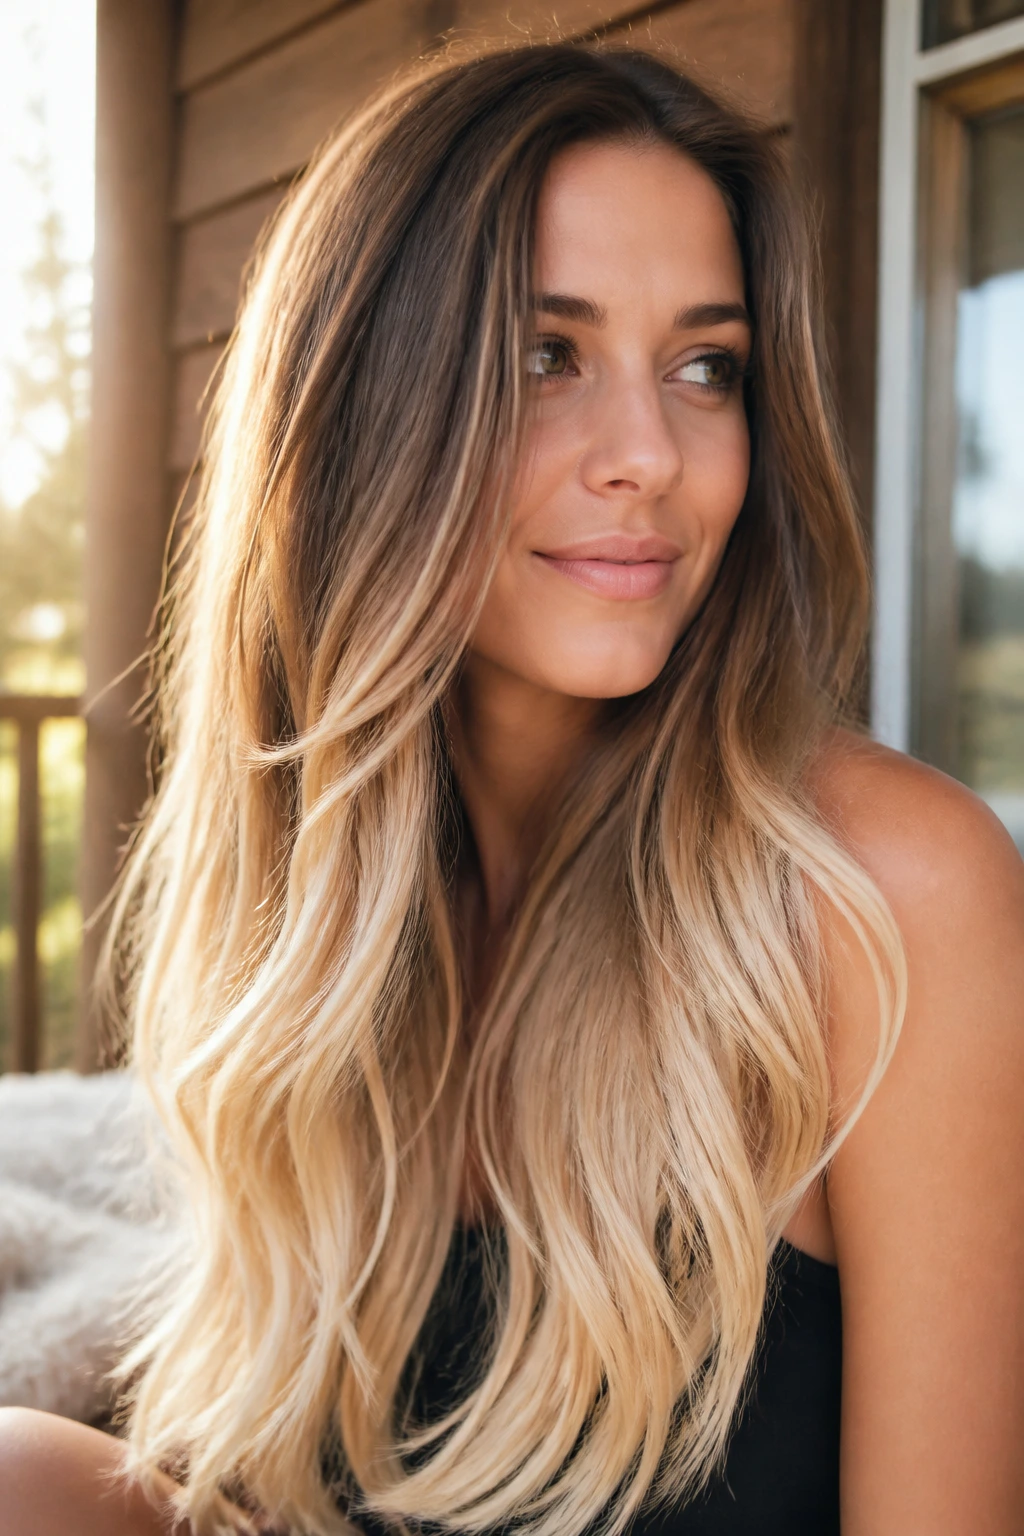
Vanilla blonde ends give long hair that breezy, sun-lightened finish without forcing the roots into a high-maintenance zone. The top stays closer to your natural color, while the ends carry the lighter payoff.
This works best when the hair has some length to show the transition. On long layers, the pale ends catch every bit of movement, especially in a ponytail or loose wave. The key is to keep the blonde creamy and not too icy unless your base already suits that direction.
I like this look because it feels youthful without trying too hard. It also keeps the brightest color where the hair usually tolerates lightening best: farther from the scalp and close to the part of the hair that gets the most sun.
10. Ribbon Highlights That Follow the Wave Pattern
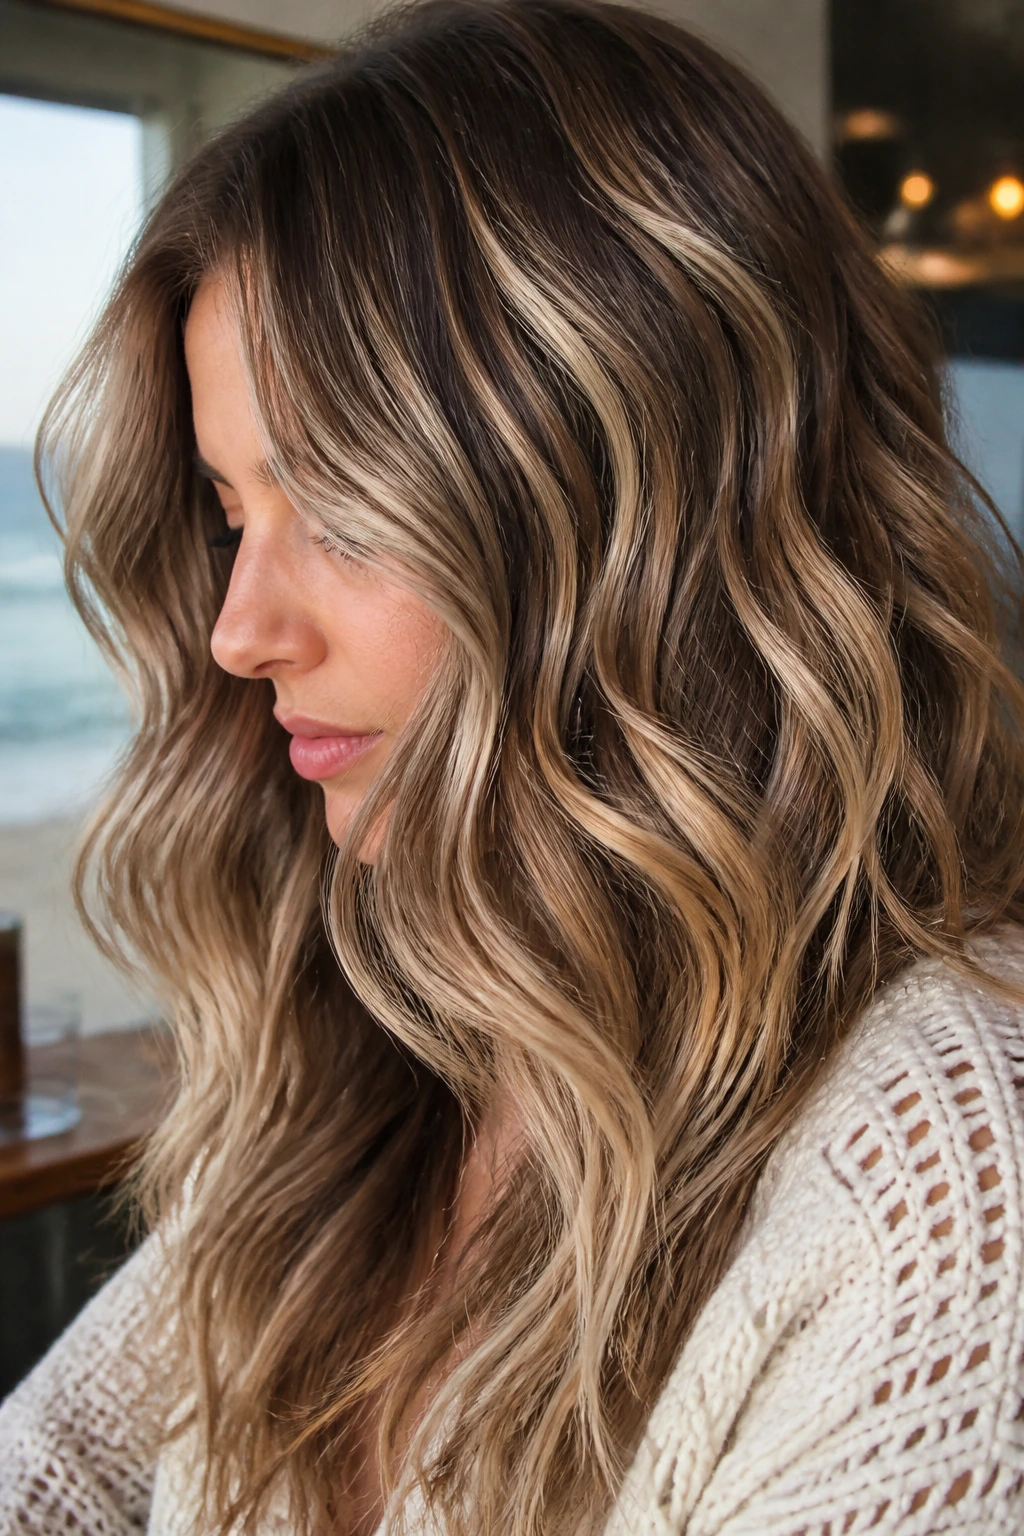
Wavy hair loves highlights placed in ribbons because the bend of the wave naturally breaks up the color. Instead of looking painted on, the brightness winds through the texture and shows up in movement.
Ask for the lighter pieces to follow the curve of the waves, not fight against them. That placement makes the hair look fuller and gives the shape more definition. It’s a better use of color than random streaks that disappear when the hair dries.
What to Watch For
- Avoid all-over chunky placement if your wave pattern is loose.
- Keep the brightest pieces near the surface where the light can hit them.
- Let the underneath stay deeper so the ribbons have contrast.
This is one of those styles that looks better the messier it gets. A rough dry and a little texture spray often show the dimension more clearly than a flat iron ever could.
11. Sandy Beige Ombre
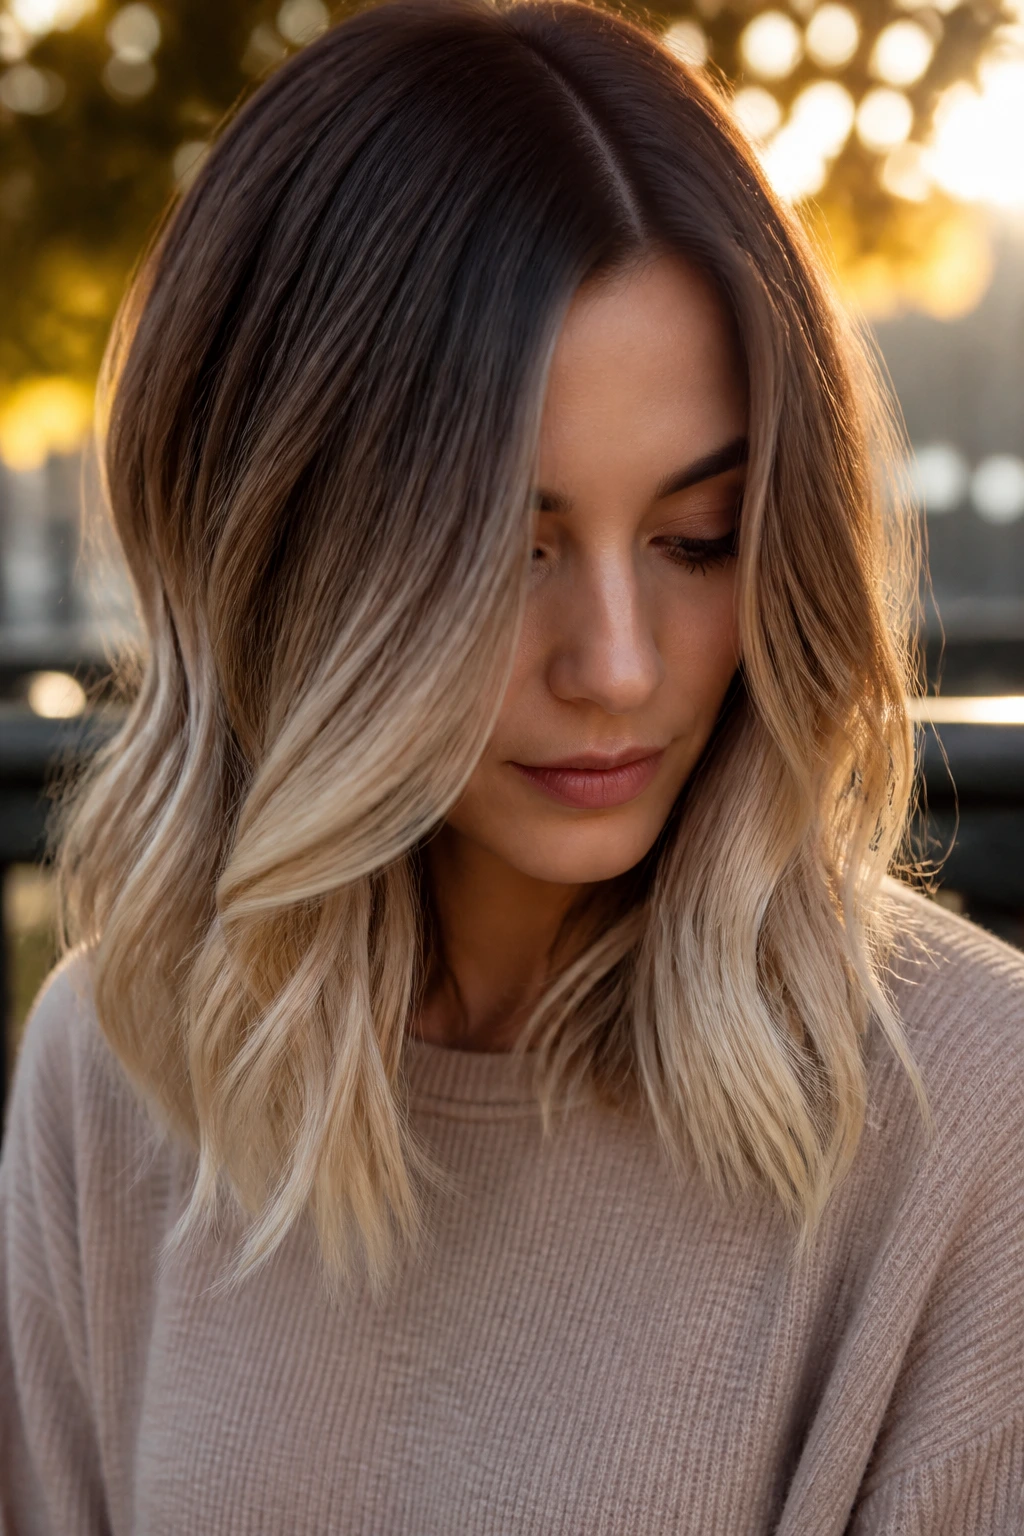
Ombre is still one of the gentlest ways to test highlights because the lightness lives mostly on the lower half of the hair. Sandy beige keeps the ends soft and neutral instead of tipping orange or yellow.
The dark-to-light transition should be smooth, not abrupt. That’s what makes the style feel forgiving as it grows. If you’re a first-timer, this is a nice middle ground between doing almost nothing and committing to a full lightening service.
It works particularly well on shoulder-length and longer hair because there’s enough length to show the fade. On a blunt cut, the change can feel a little harsher. On layers, it flows more naturally.
12. Espresso-to-Mocha Dimension
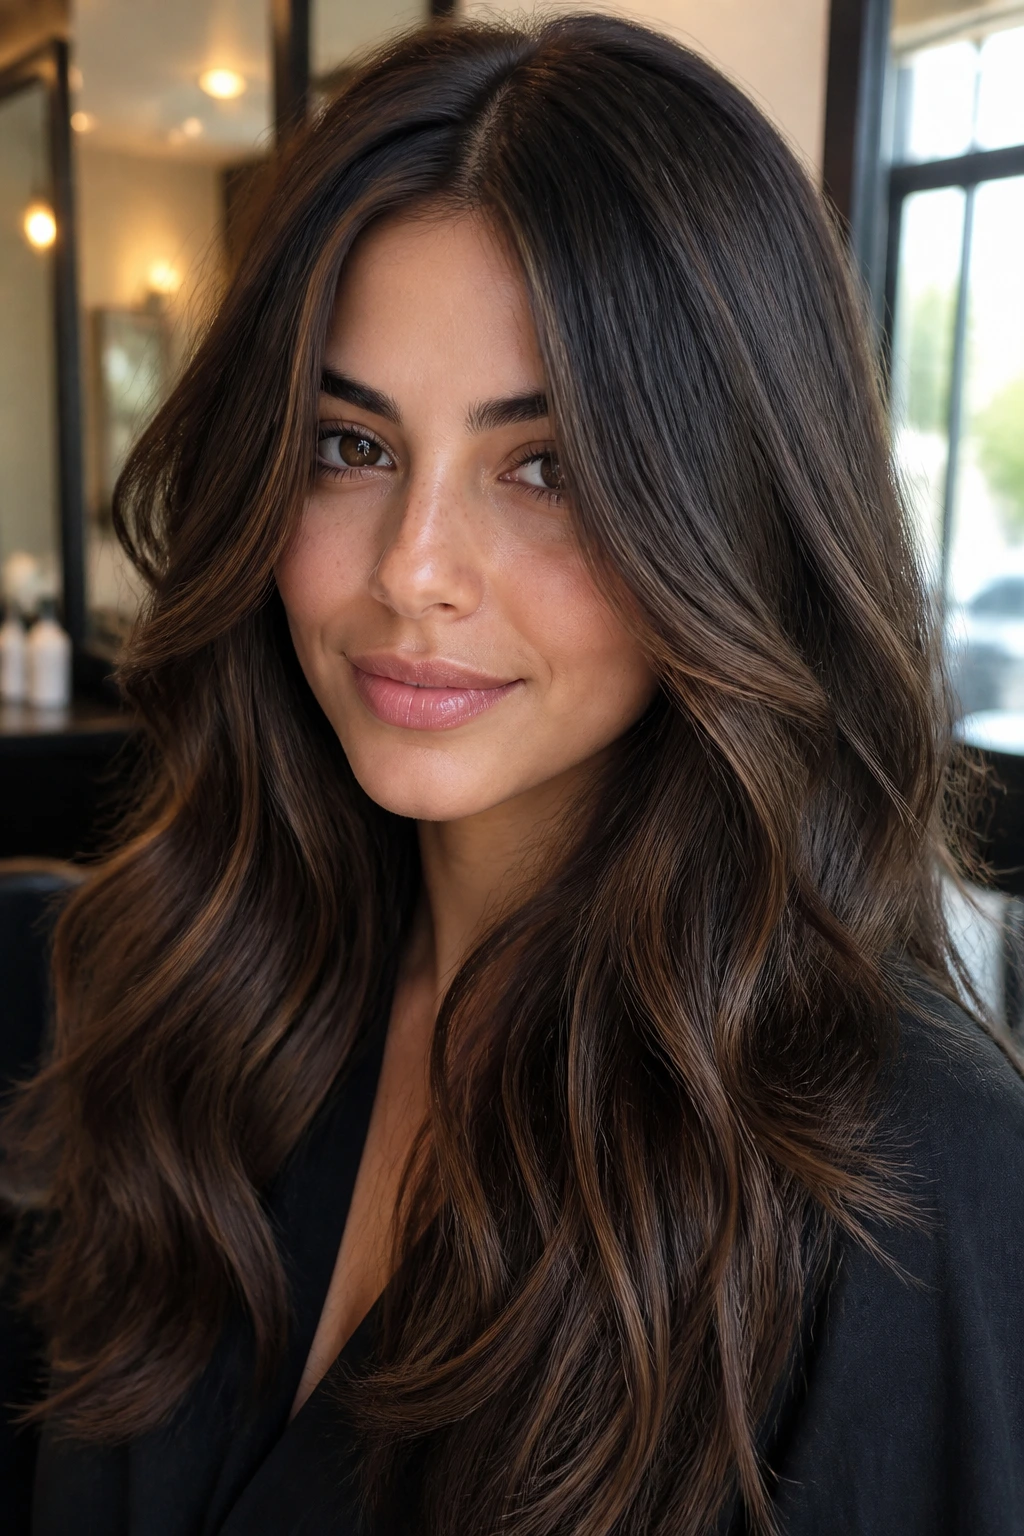
Not every beginner highlight needs to be blonde. Sometimes the smartest move is just to bend dark brown hair a shade lighter in places so it looks richer and more dimensional.
Espresso-to-mocha color is ideal if you want barely-there lightness that still catches the eye in sunlight. It keeps everything in the brown family, which makes it easy to wear and easier to maintain. The contrast should be soft enough that the hair still reads as one color from a distance.
This is the kind of look I’d recommend to someone who says, “I want change, but I’m scared of looking highlighted.” It solves that problem neatly.
13. Cinnamon and Maple Highlights
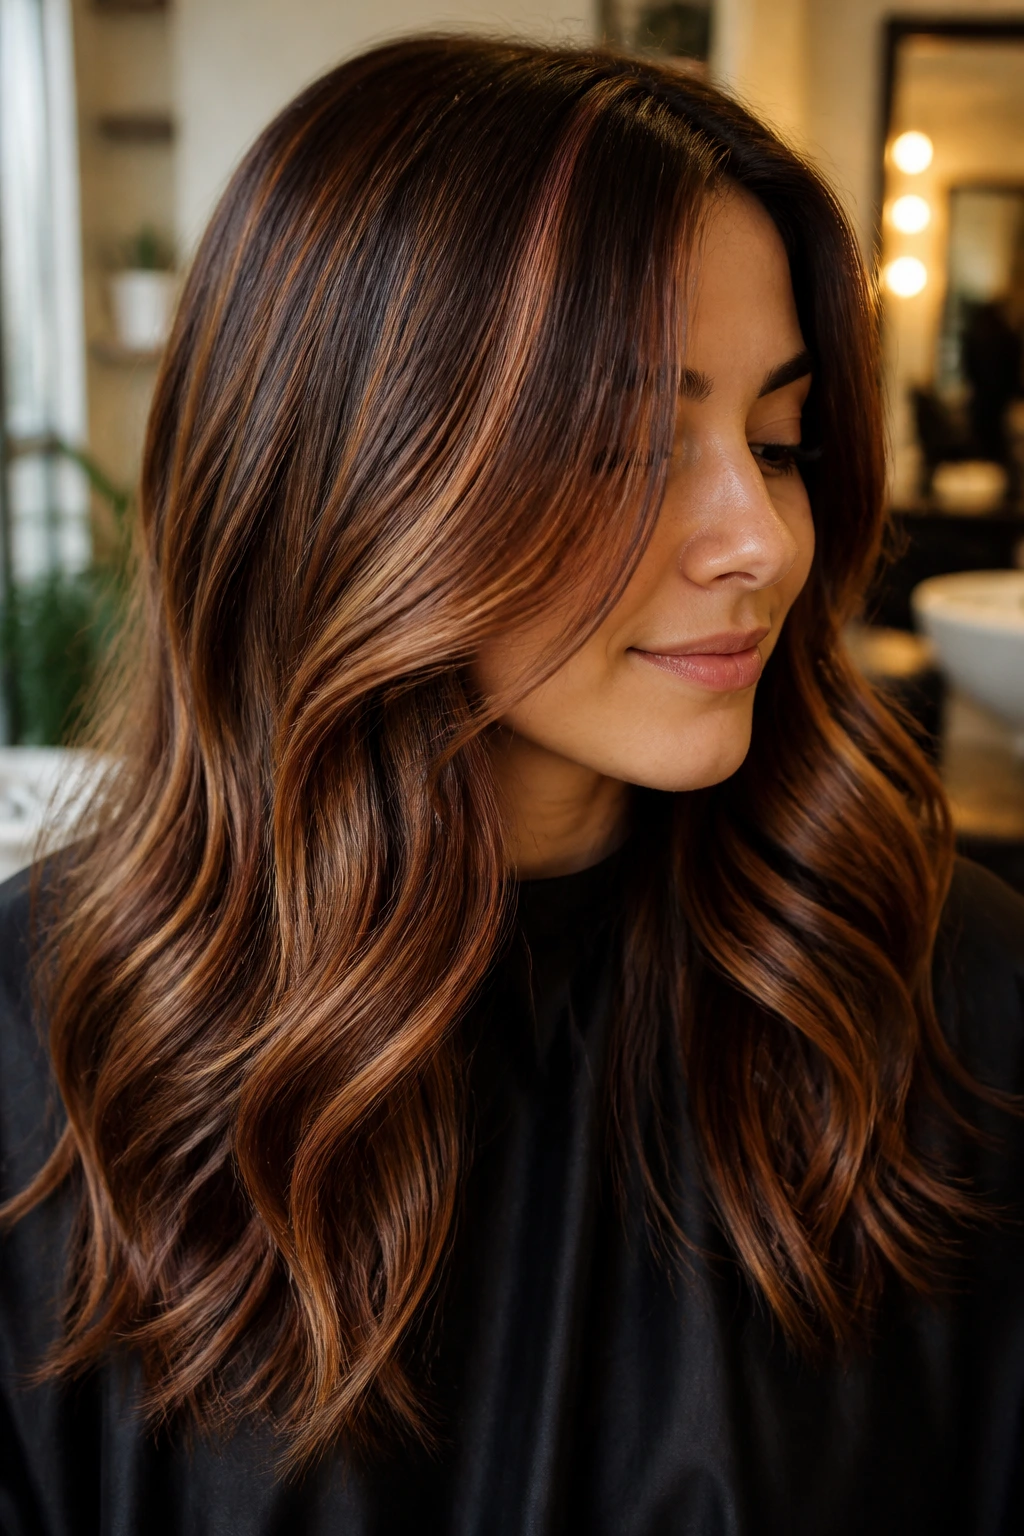
Warm brunettes often look better with color that leans red-brown rather than pale gold, and cinnamon-maple highlights do exactly that. The result feels rich, almost glossy, with a cozy warmth that flatters olive, golden, and neutral skin tones.
The brightness here is less about going lighter and more about changing the tone. That matters. A few well-placed cinnamon pieces can wake up brown hair more effectively than a heavier blonde service that turns brassy after a few washes.
If your wardrobe already leans earthy — camel, rust, cream, olive — this kind of highlight can tie the whole look together without feeling fussy.
14. Champagne Highlights on Light Brunette Hair
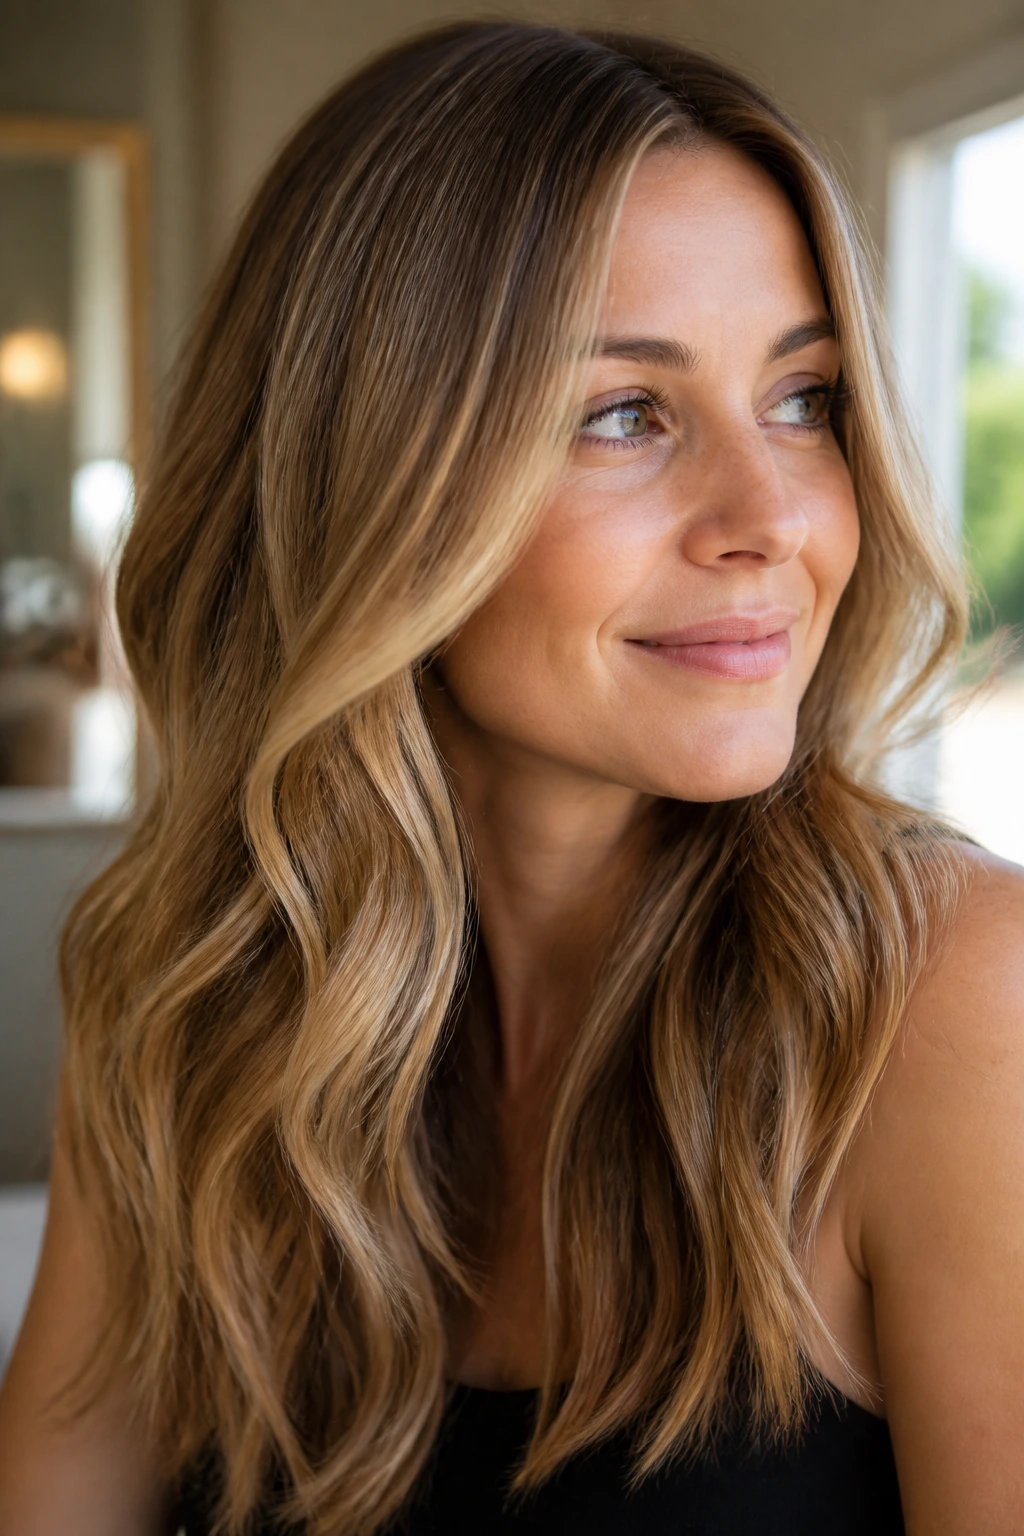
Champagne is a beautiful beginner tone because it lives in the soft zone between beige blonde and pale gold. It has enough lightness to be noticeable, but not so much that it reads harsh against light brunette hair.
This shade works well when you want the hair to look polished and bright around the face. The effect is clean, almost luminous, especially on smooth blowouts. Ask for champagne rather than pure ash if your base has any warmth at all; the result usually feels more believable.
It’s one of the better choices for anyone who wants to flirt with blonde without making the jump all the way there. That middle step can be a blessing.
15. Wheat Blonde Foils for Straight Hair
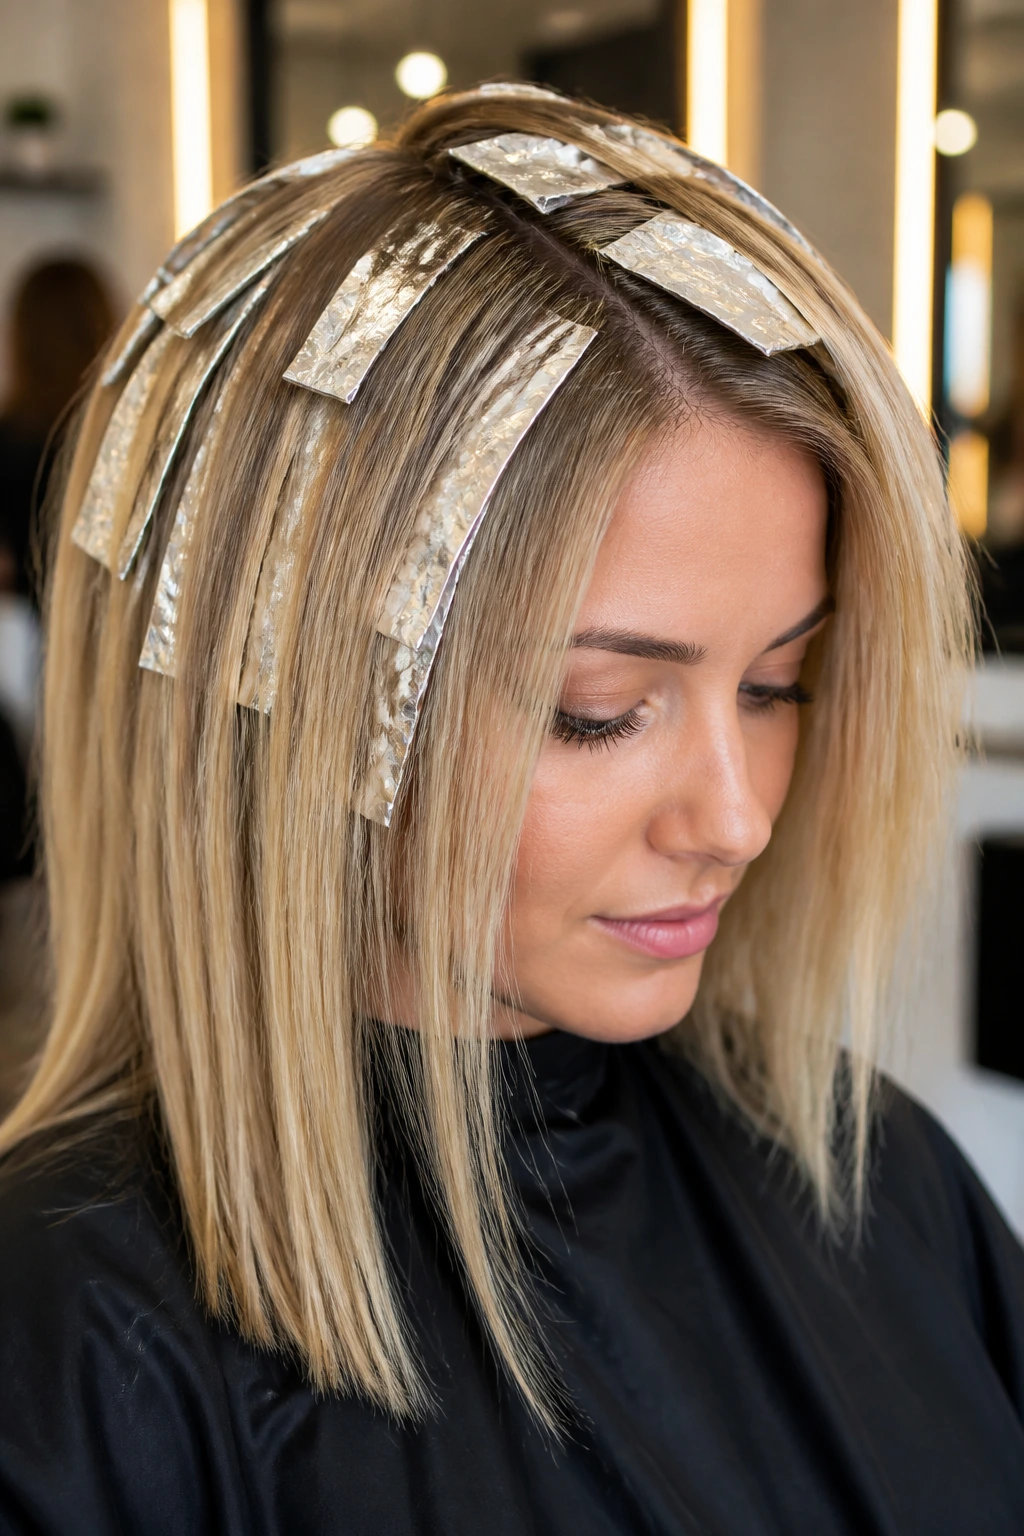
Straight hair shows every placement choice, which is why foils can be so useful here. Wheat blonde sits in a mellow, natural-looking range that doesn’t scream bleach, and the clean lines of foil placement keep the result controlled.
The best straight-hair highlights usually have a little structure to them. You want enough spacing that the hair doesn’t turn into a blur, but not so much that the pieces look stamped in. Wheat blonde is especially good because it feels soft and sunlit rather than icy or striped.
A middle part makes this look sharper, while a side part softens the whole thing. Either way, the shape of the cut will matter almost as much as the color.
16. Auburn Tips on Deep Brunettes
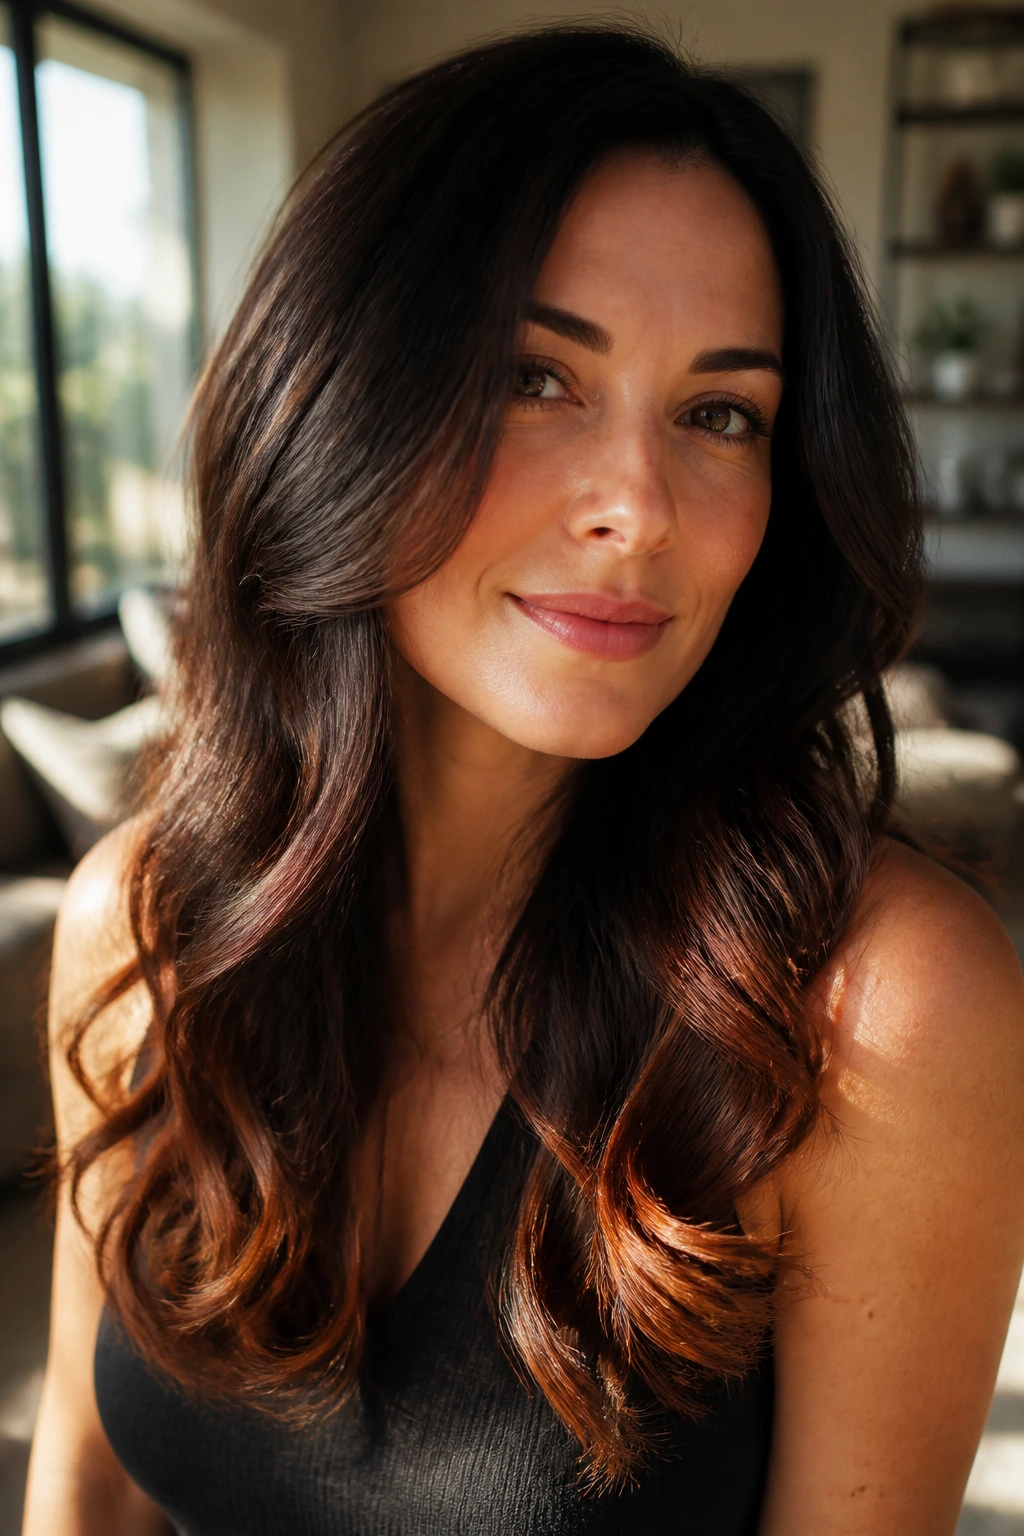
Deep brunettes can carry red tones better than a lot of people think, and auburn tips are a very approachable way to test that. The color sits mostly on the ends, where it can glow without forcing the root area to lift too far.
This is a moodier highlight idea than caramel or honey. It gives dark hair a little flicker of warmth, especially when the ends move. On layered cuts, auburn tips can make the edges look more alive instead of heavy.
If you want something that feels seasonal without actually being tied to a season, this is a nice choice. It has personality, but it doesn’t require a dramatic overhaul.
17. Sun-Kissed Mid-Length Balayage
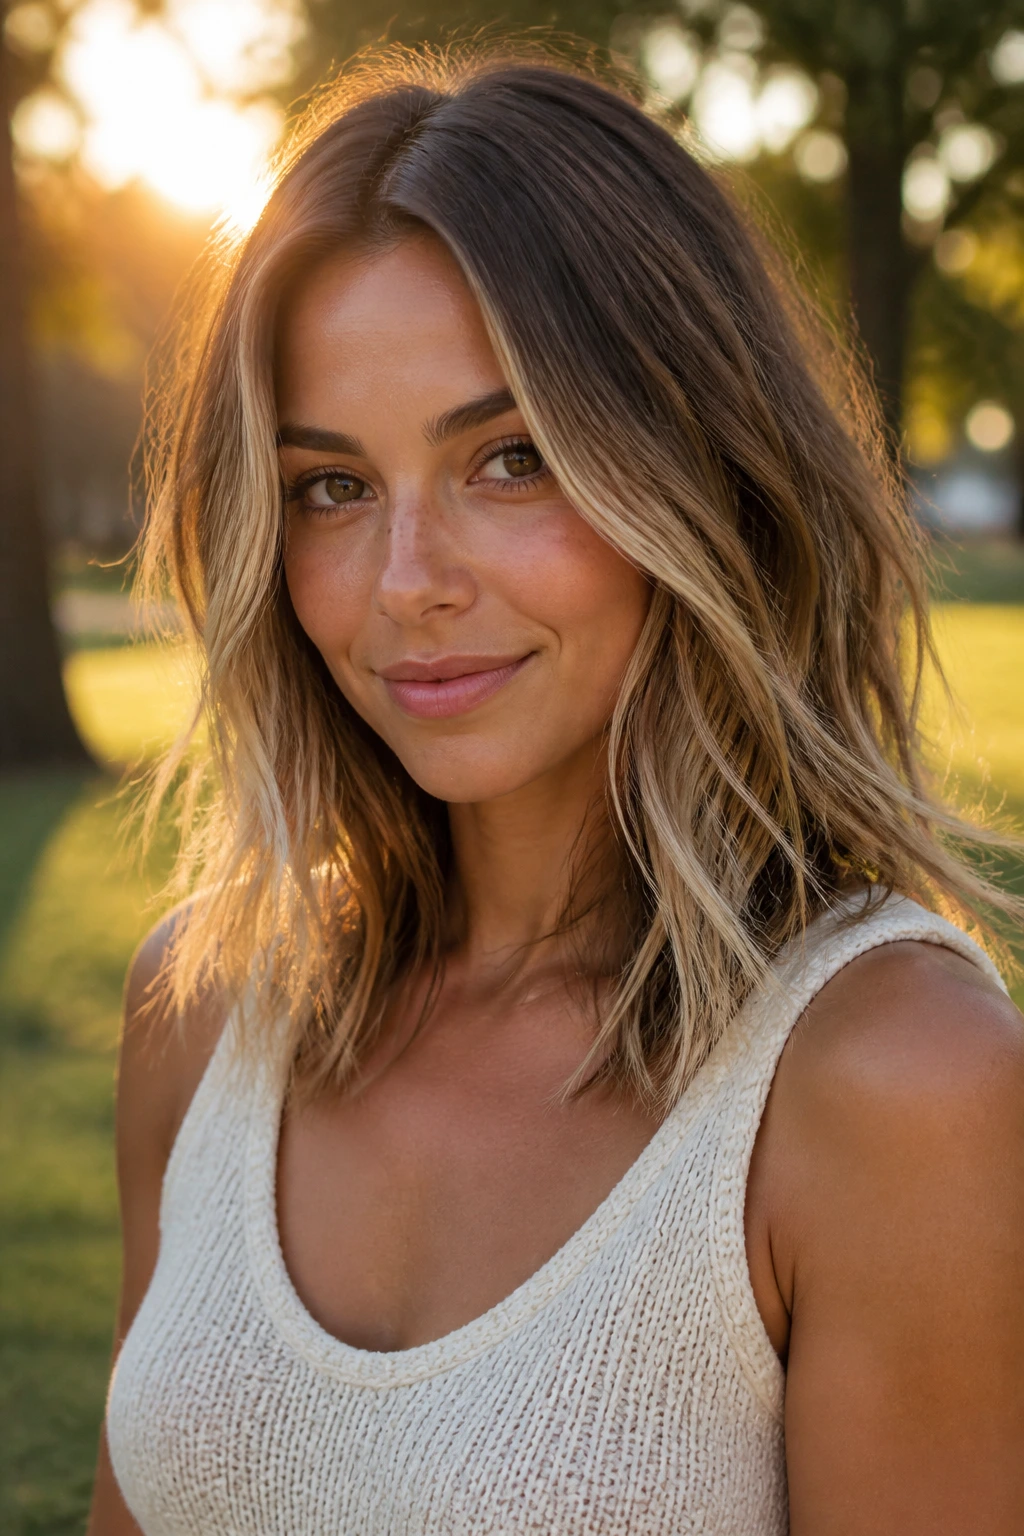
Mid-length balayage is one of the safest first highlight ideas because it puts brightness where the hair already gets the most visual movement: around the shoulders, collarbone, and top layers. The root area stays calmer, and the lighter pieces frame the cut instead of taking over it.
The “sun-kissed” part works only if the pieces are soft and the blend is smooth. Harsh contrasts can turn the whole thing into a stripey mess. A good colorist will keep the lightening a little higher around the face and lower through the back so the hair looks balanced from every angle.
This is the look I’d point a cautious beginner toward if they want something flattering without being obvious. It’s hard to overdo when the placement is thoughtful.
18. Toffee Highlights on Long Layers
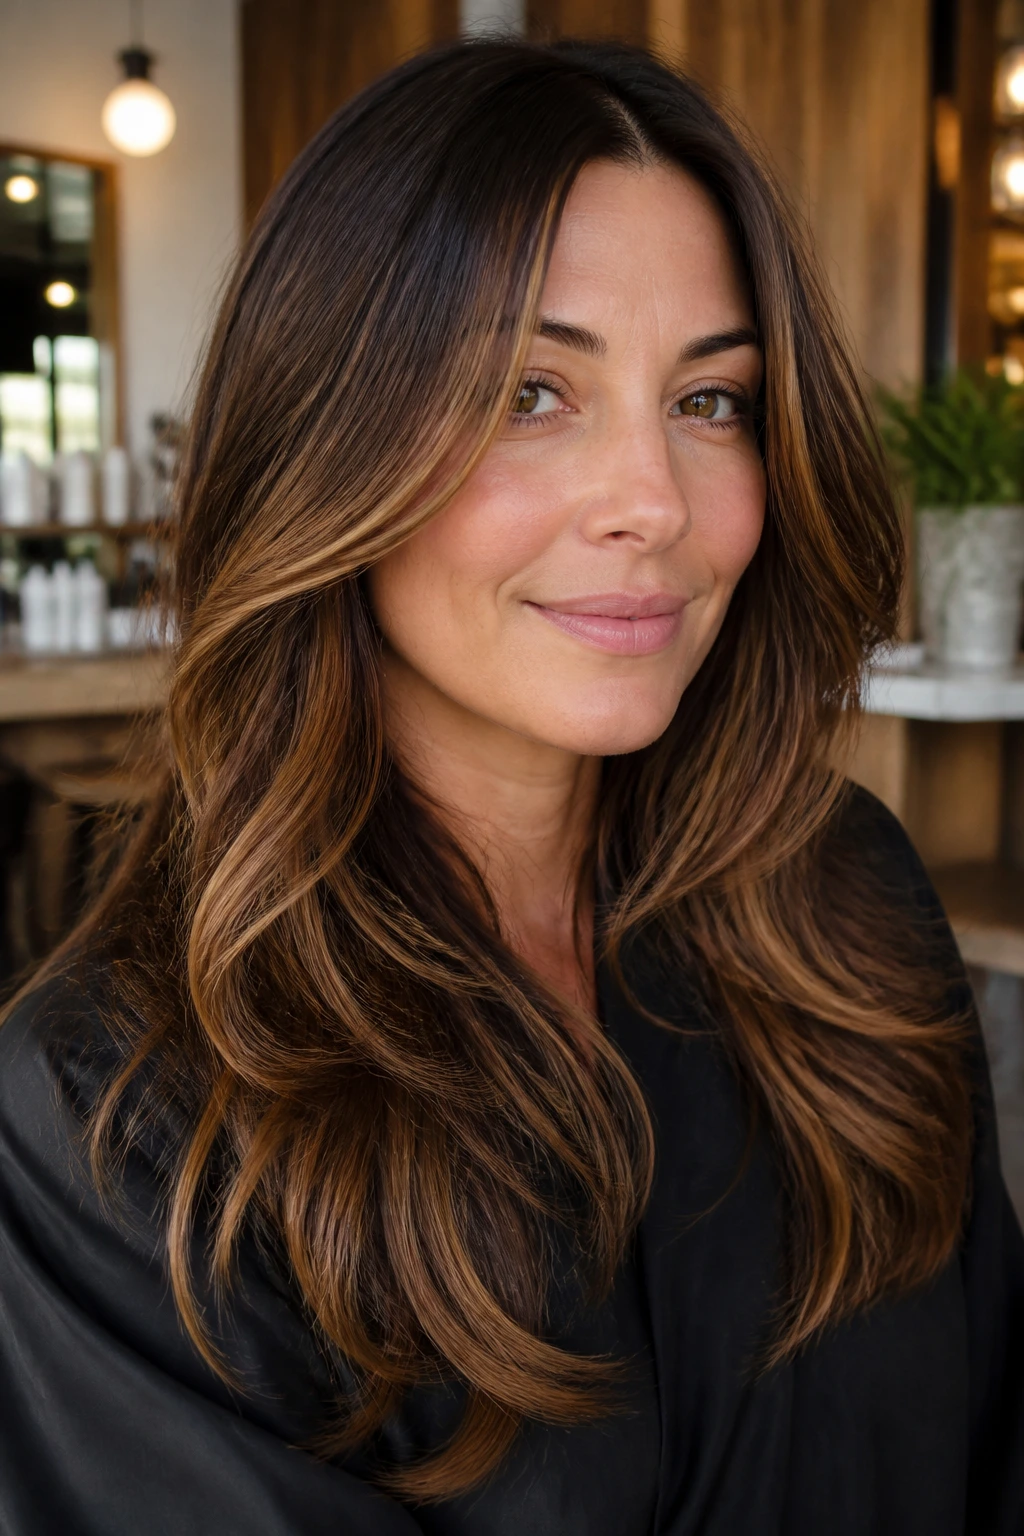
Toffee sits in that warm, caramel-brown neighborhood that seems designed for layered hair. Long layers give the lighter ribbons room to move, which lets the color show off without needing a heavy contrast.
This is a good choice if your natural hair is medium to dark brown and you want more texture. The warmth softens the edges of the cut and makes the layers look a little more feathered. It’s the kind of detail people notice without necessarily knowing what changed.
Ask for the light pieces to be concentrated around the face and along the outer layers. That gives you a flattering frame and keeps the underlayers grounded, which is a practical thing on busy mornings.
19. Rose Gold Glaze Over Blonde Pieces
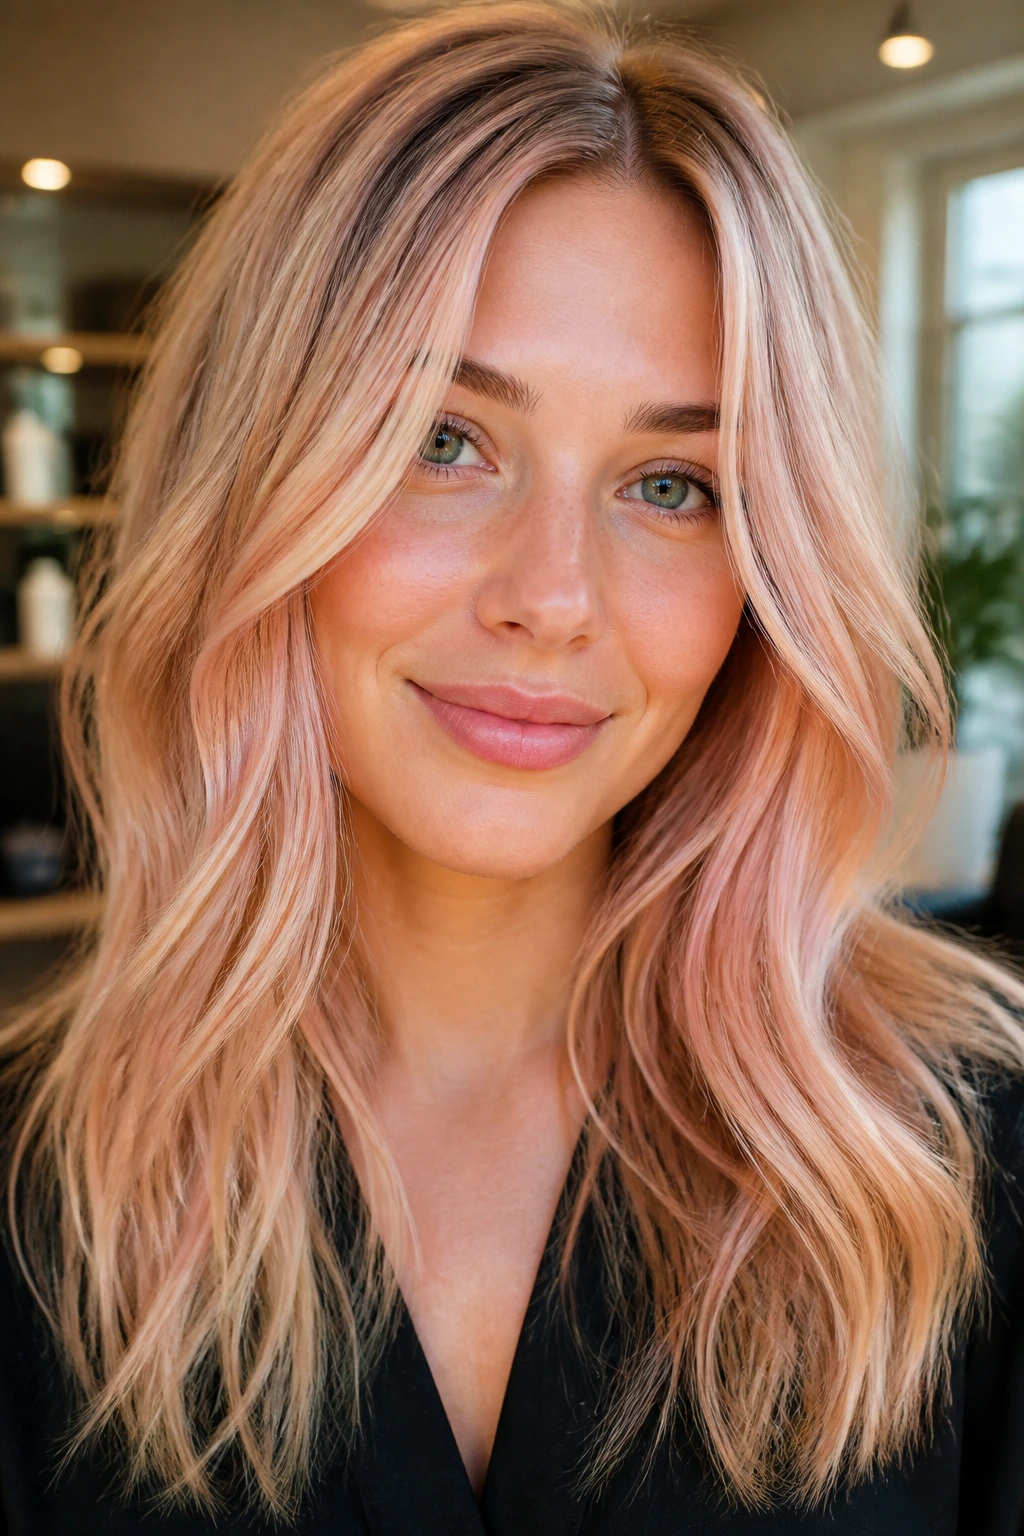
Rose gold can sound like a big commitment, but on blonde pieces it’s often more of a soft glaze than a full color shift. The hair takes on a blush-metal sheen that looks pretty without turning full-on pink.
This is best if your hair is already lightened and you want to warm up the tone in a slightly playful way. It’s not the most low-maintenance option on this list, but it is beginner-friendly in the sense that it doesn’t require a dramatic new shape or placement. The color can fade gently, which is part of the appeal.
If your style leans romantic or a little polished, rose gold is a nice break from the usual beige-and-caramel lane.
20. Bronzed Balayage on Black Hair
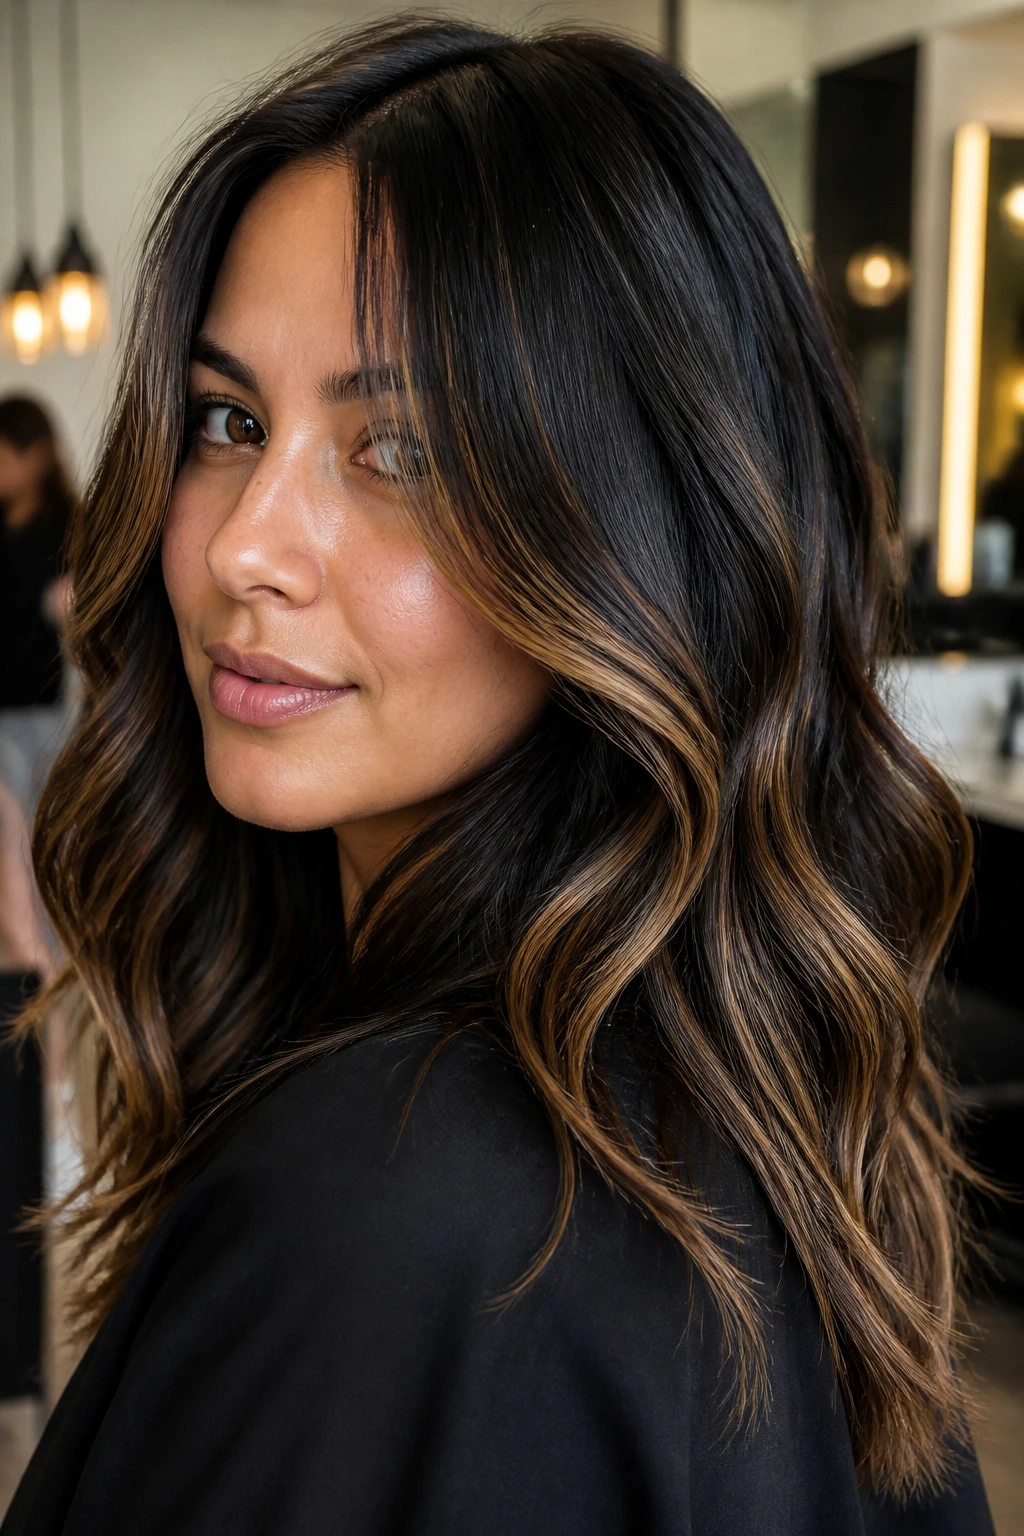
Black hair needs respect when you lighten it. Bronzed balayage is a smarter first step than trying to chase blonde, because bronze gives you visible warmth and sheen without asking the hair to go all the way pale.
The result can be gorgeous when the lighter pieces sit mostly on the surface and around the face. From a distance, the hair still reads dark. Up close, it glows. That contrast is what makes bronze so useful. It lets dark hair change without losing itself.
This is one of the few looks on the list where I’d be blunt: bring this to a colorist who understands dark bases. Bronze on black hair can go from rich to muddy if the tone isn’t handled carefully.
21. A Lived-In Highlight Blend with a Shadow Root
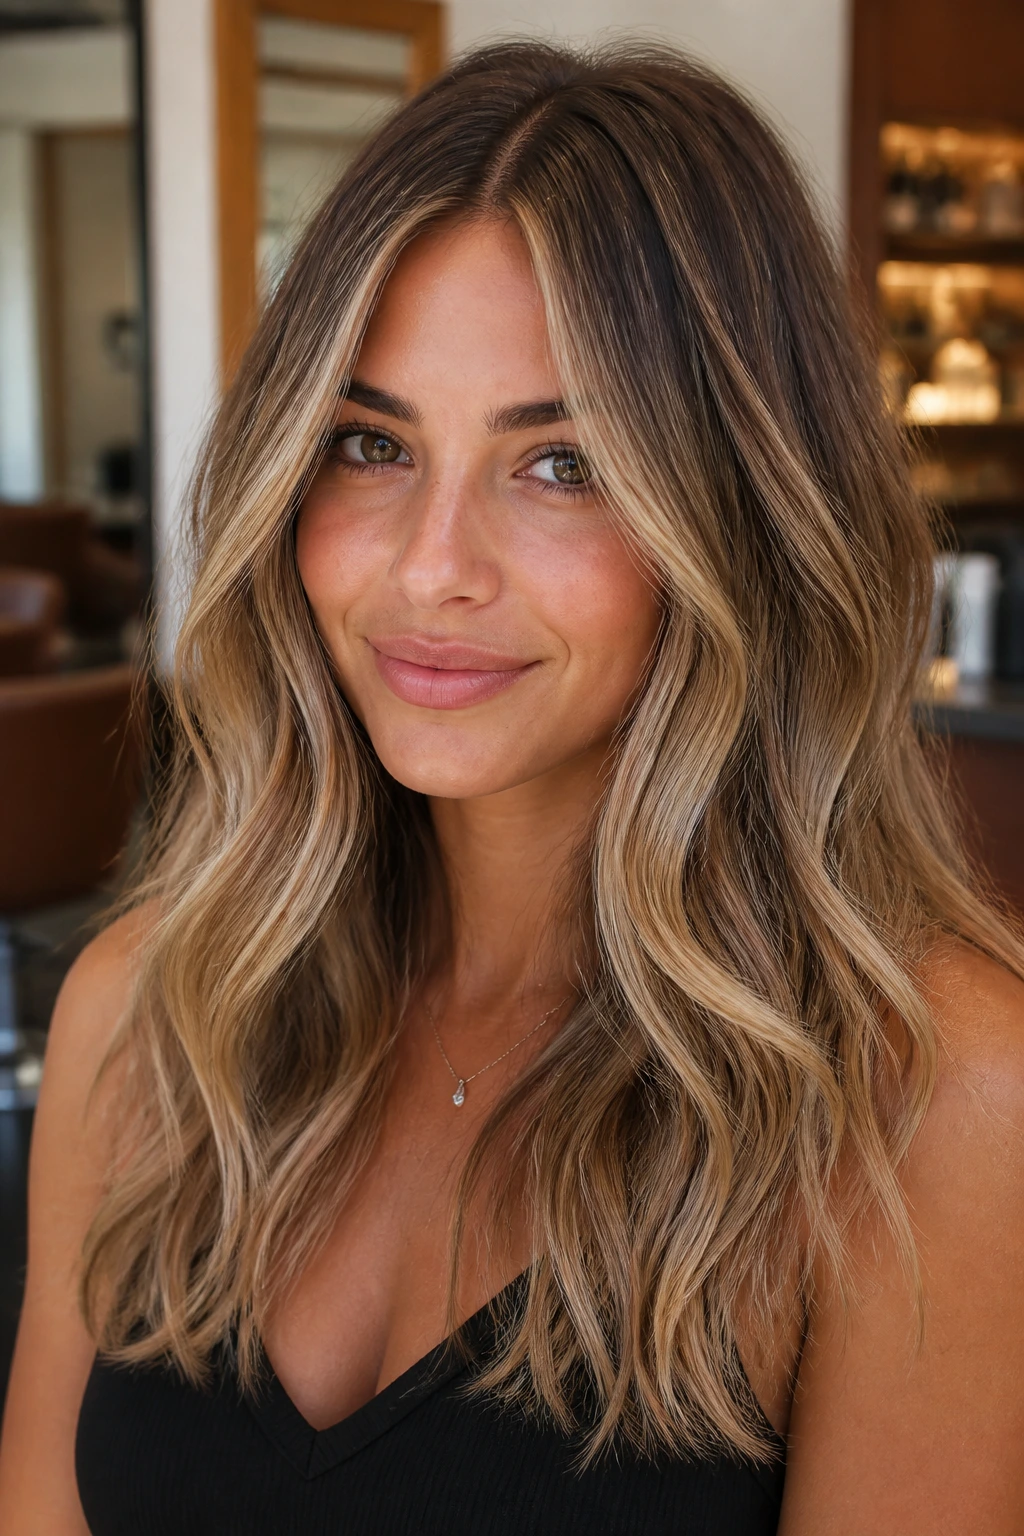
A shadow root is the easiest way to make highlights look less precious and more wearable. The root area stays a shade deeper, which softens the line as the hair grows and makes the whole color service feel calmer.
This look works across brunettes and blondes because the point isn’t the exact tone. It’s the blend. The lighter pieces should appear scattered and natural, with the root melt doing the quiet work in the background. That’s why this option is so beginner-friendly: you get the brightness without the constant root panic.
If you want a style that can survive a few extra weeks between appointments, this is one of the strongest candidates.
22. Partial Highlights on the Top Layer Only
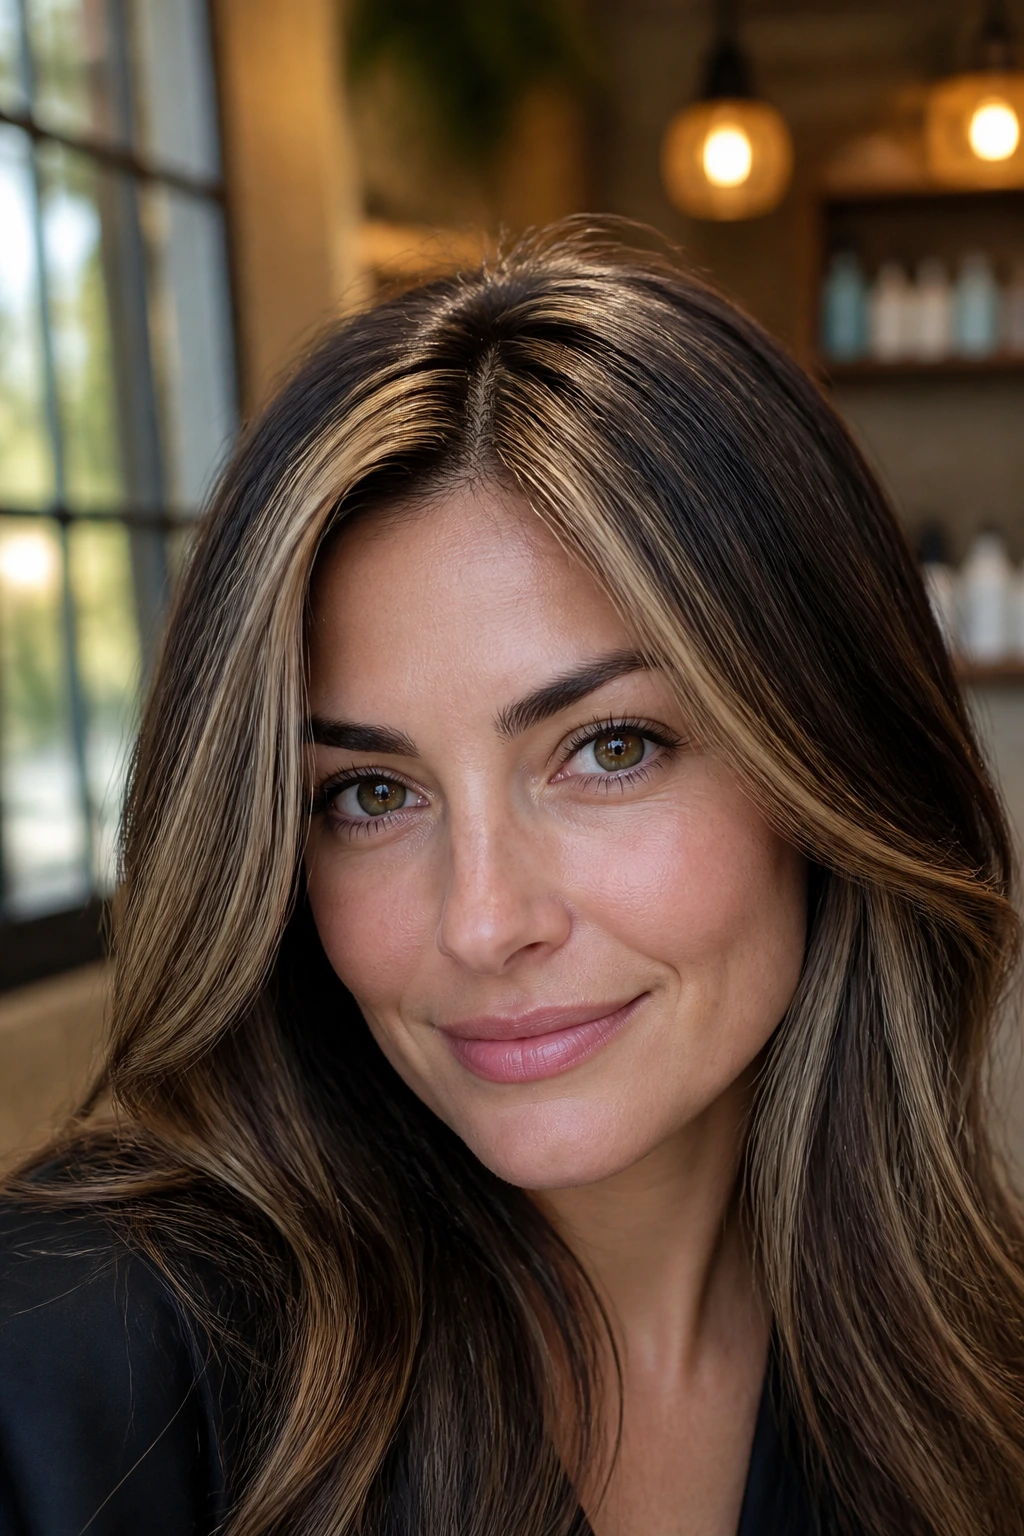
Partial highlights are the “I want change, but I do not want to live in the salon” answer. By keeping the lightening on the top layer, the color still reads clearly when the hair moves, but the lower sections remain close to natural.
This is a smart place to begin if you’re testing how much brightness you actually like. It’s also easier on the budget and usually quicker in the chair. The downside is that the effect is smaller than a full head, but for a first attempt that can be a feature.
Ask for the color to be concentrated around the part line and crown so the hair looks brighter in the places people actually see first.
23. Curtain Bang Highlights
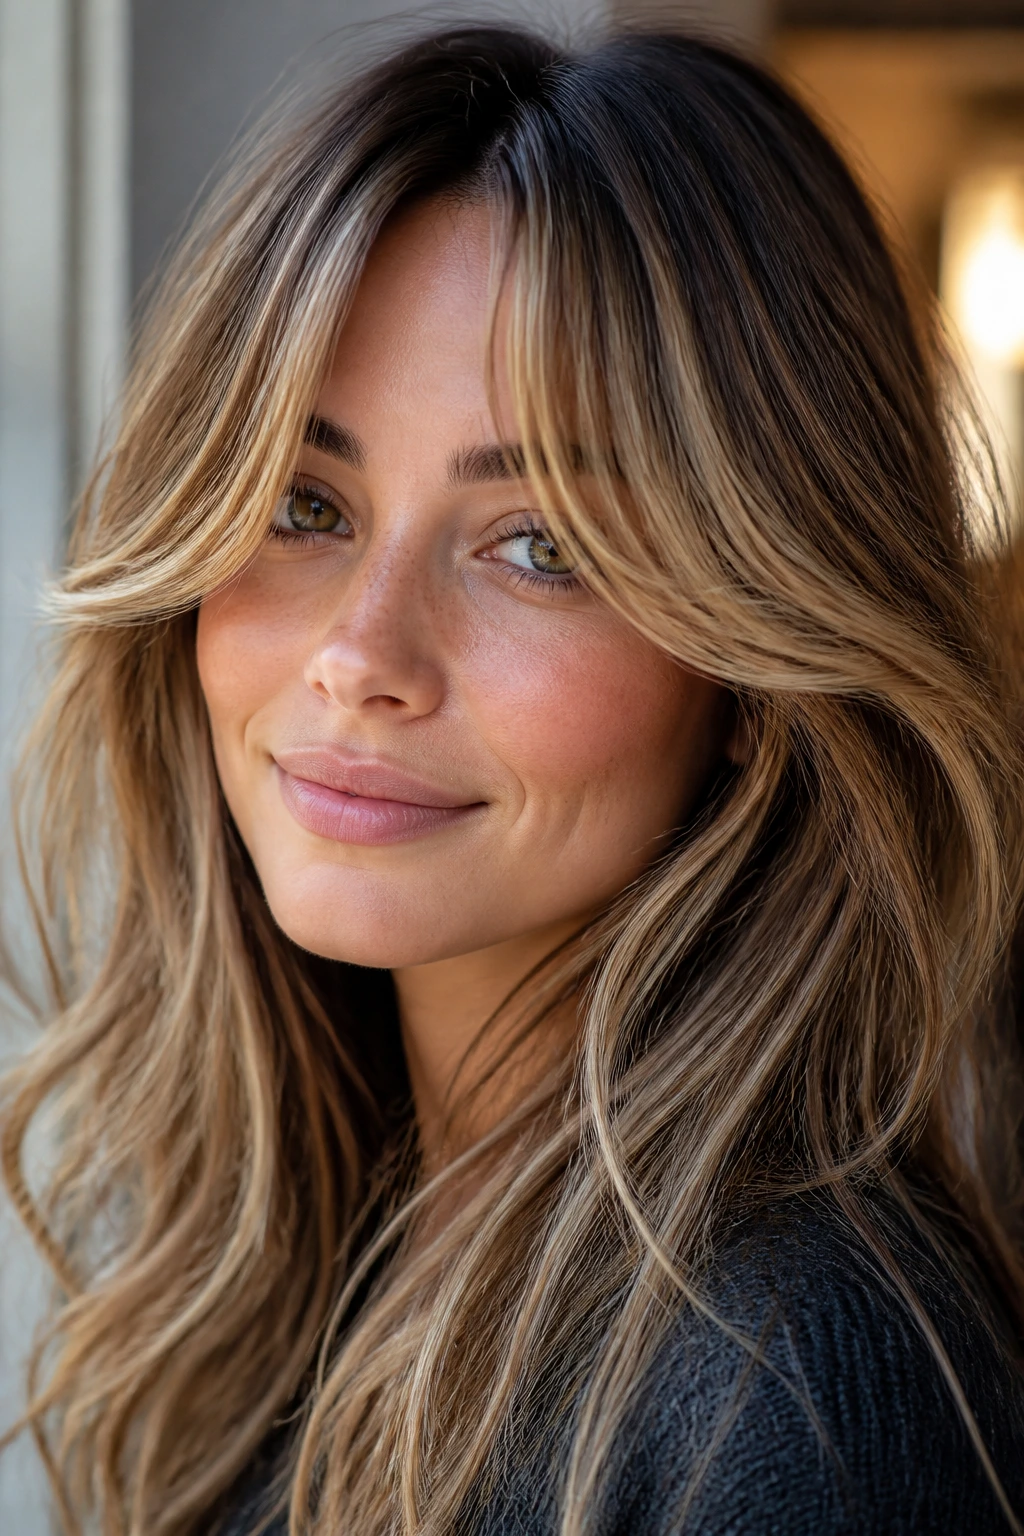
Curtain bangs are already doing visual work for your face, so adding a few lighter pieces there can make the haircut feel fresh fast. The brightness sits where the fringe parts, which gives the style shape even on lazy days.
This is a nice choice if you want to experiment without coloring the whole head. It’s also useful for someone who likes keeping the rest of the hair deeper. The contrast between the bangs and the lengths can be small or obvious depending on how light you go.
If you style your bangs with a blow-dry brush or round brush, the highlight placement becomes even more visible. And yes, it can be addictive. Just a little.
24. Face-Frame-and-Ends Placement
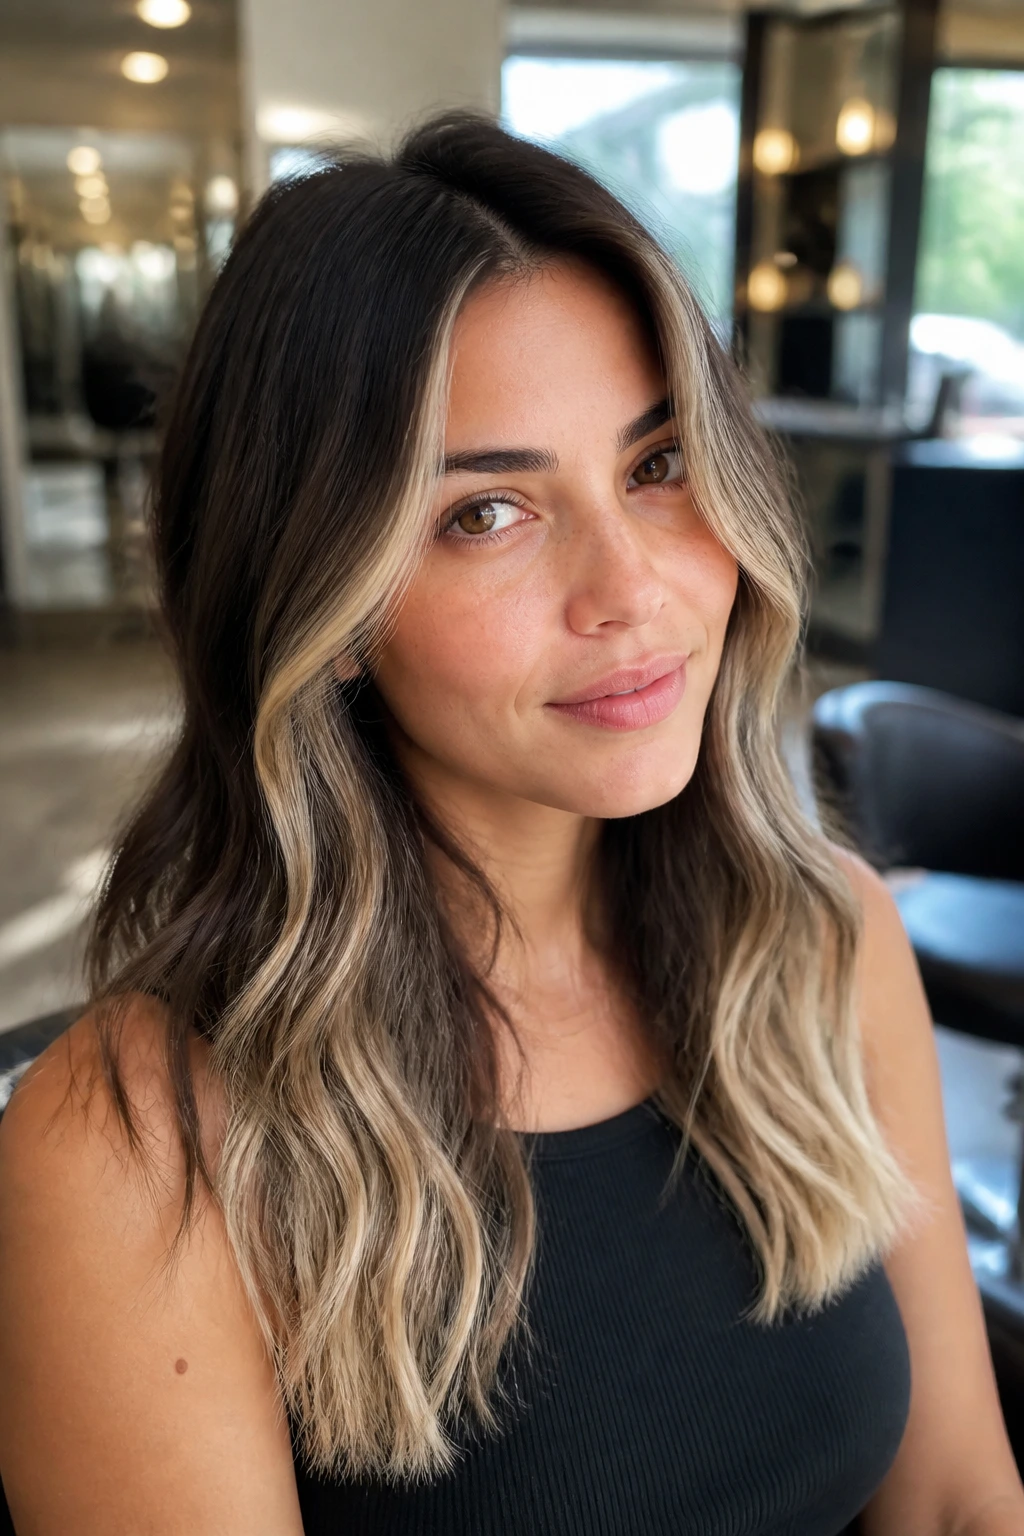
This is one of my favorite practical beginner formulas because it gives you brightness at both ends of the visual story: the front and the tips. The middle stays more natural, which keeps the color from feeling heavy or overdone.
The face frame wakes up the complexion. The ends make the cut feel lighter and less blunt. Together, they create the impression of a larger color service than you actually got, which is a nice little trick when you want maximum payoff without full-head lightness.
It’s especially good on medium and long hair, where the ends have enough length to show movement. On shorter cuts, the effect can feel choppy unless the stylist blends it carefully.
25. Smoky Beige Blonde
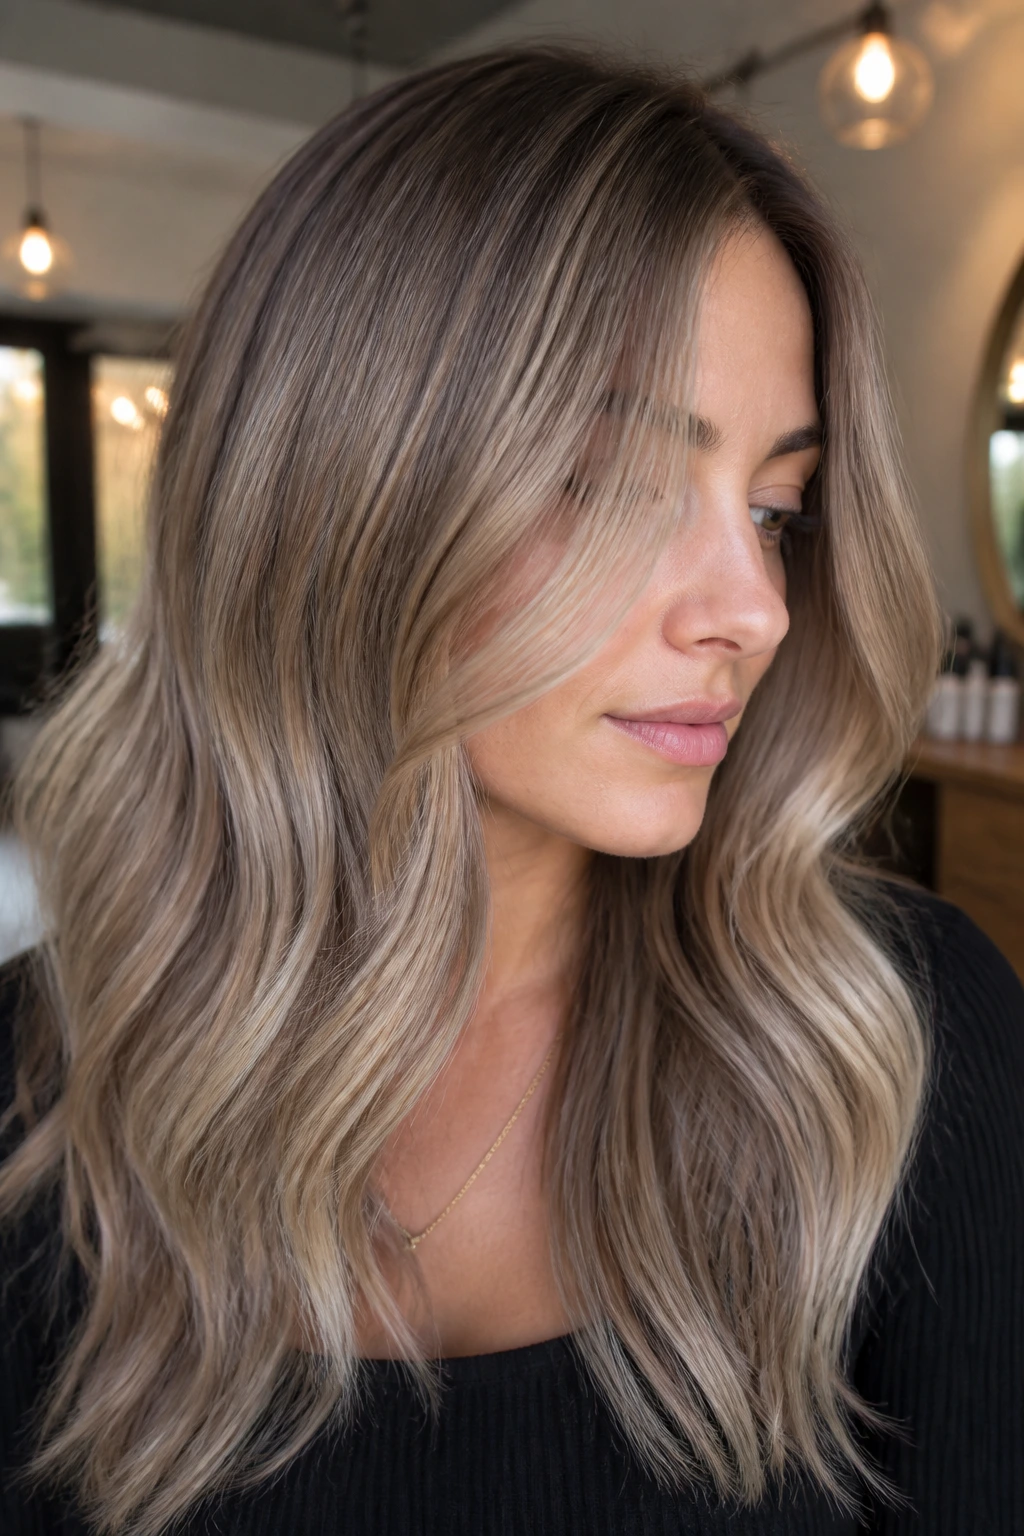
Smoky beige blonde is what happens when blonde gets toned down and made a little softer around the edges. It’s cooler than honey, less severe than ash, and easier to wear than pure platinum for most first-timers.
This color sits beautifully on natural blondes and light brunettes who want a subtle change. The smoky tone helps the blonde look intentional instead of overly sunny, which can be a problem if your base hair tends to go gold fast. It also looks good with low-key makeup and neutral clothing because it doesn’t fight for attention.
If you’ve ever liked blonde in theory but thought it looked too bright on you in practice, this is a strong middle path.
26. Golden Peach Highlights
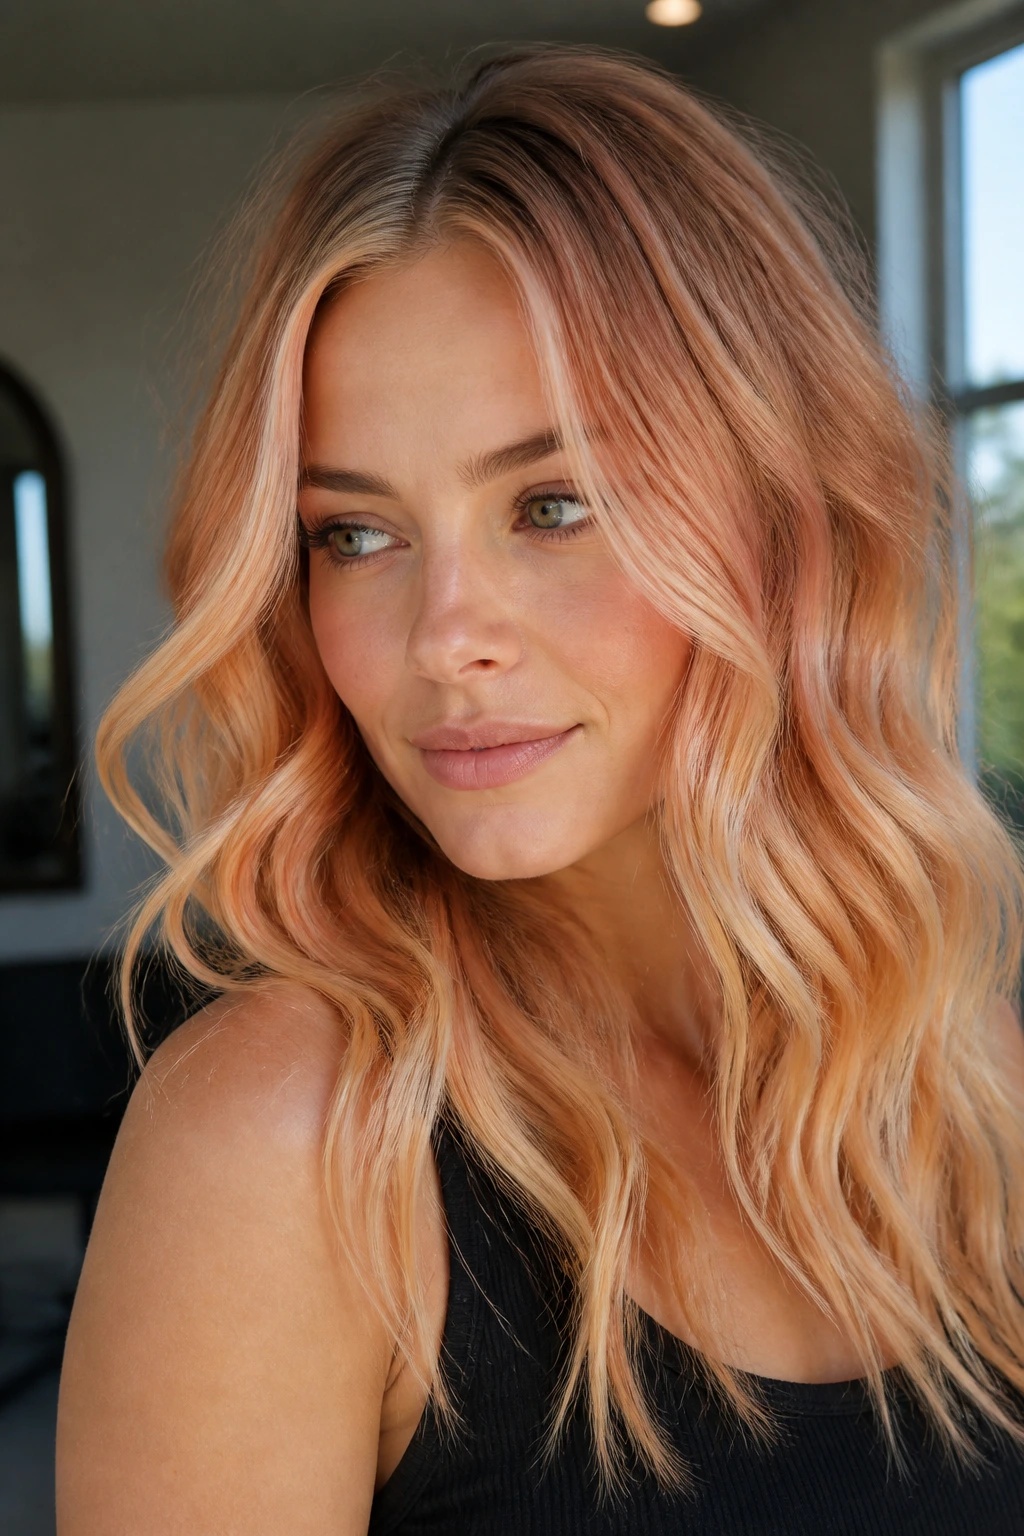
Golden peach is a sweet spot for anyone who wants warmth with a little personality. It’s lighter than copper, softer than strawberry blonde, and much easier to wear than a neon fashion shade.
On blonde or light brown hair, the peach tone can make the hair feel fresh without turning it into a costume. It’s especially pretty on soft layers and wavy cuts, where the color shifts between gold and blush as the light moves. If you want something that feels playful but still polished, this is a smart entry point.
I’d choose this when a client says they’re bored of beige but not ready for something loud. That’s usually where peach shines.
27. Dimensional Bronde
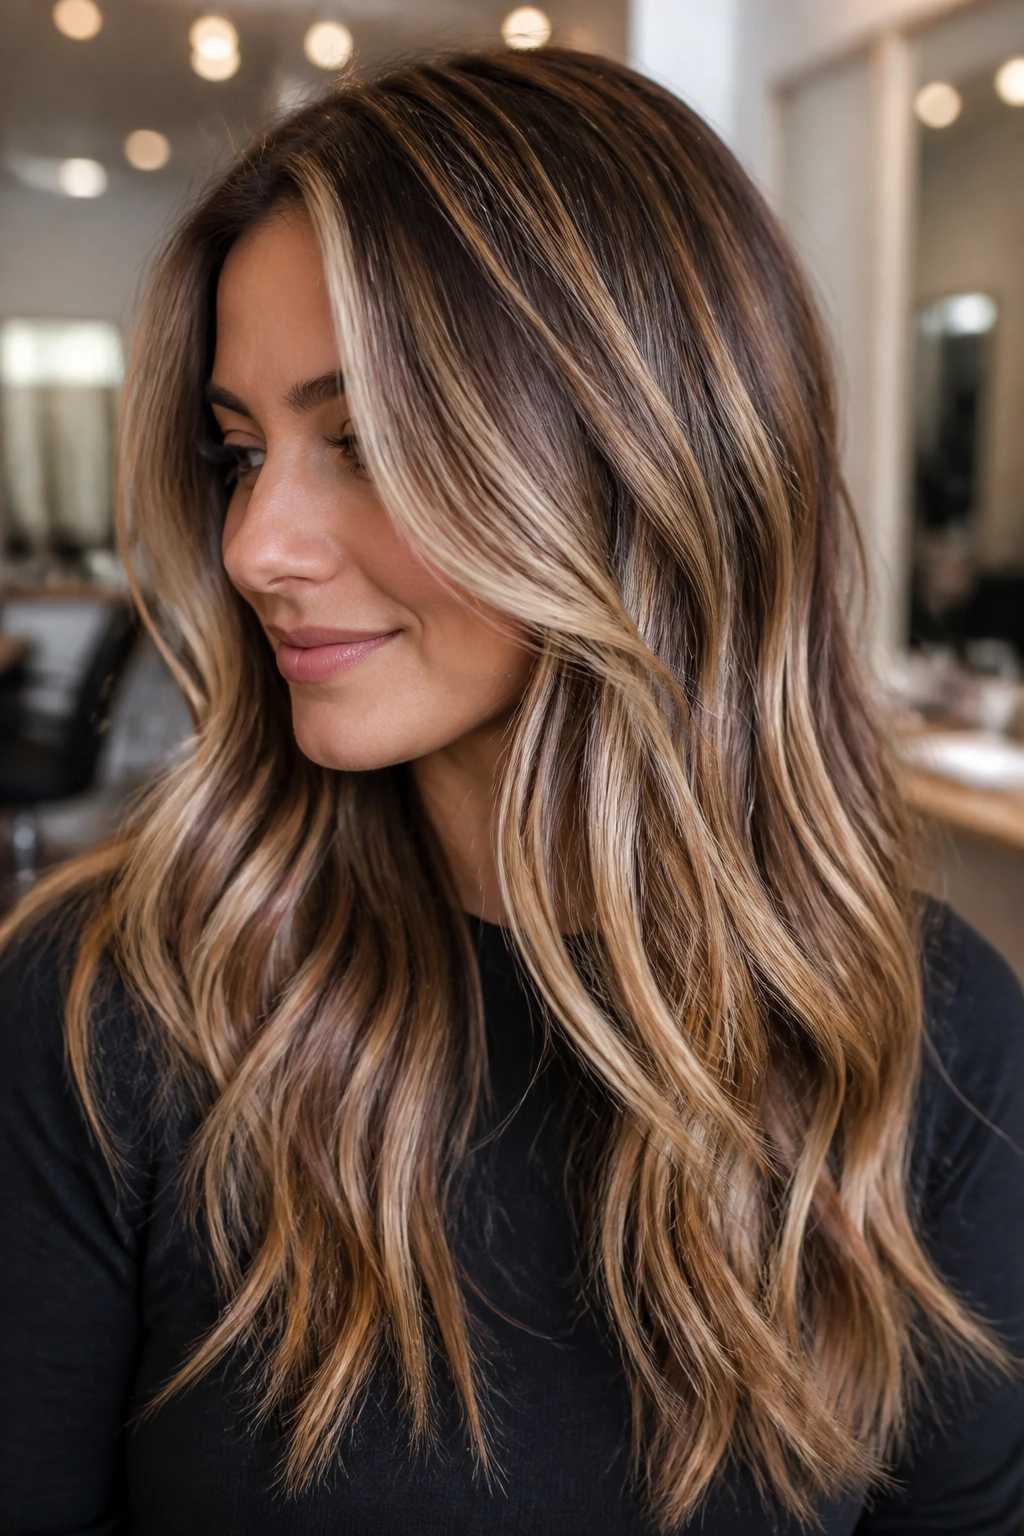
Bronde is one of the best beginner color ideas because it doesn’t force you into one camp. The hair sits between brown and blonde, which means you get brightness and depth in the same appointment.
Dimensional bronde works because the tonal range is wide enough to look natural. The lighter ribbons can be beige, caramel, or soft gold, while the base keeps the color anchored. That balance makes the hair look thicker in a lot of cases, especially on medium-density strands.
If you’re not sure whether you want to be blonde or brunette, bronde is the answer people arrive at for a reason. It keeps the door open.
28. Pearl Blonde Accents
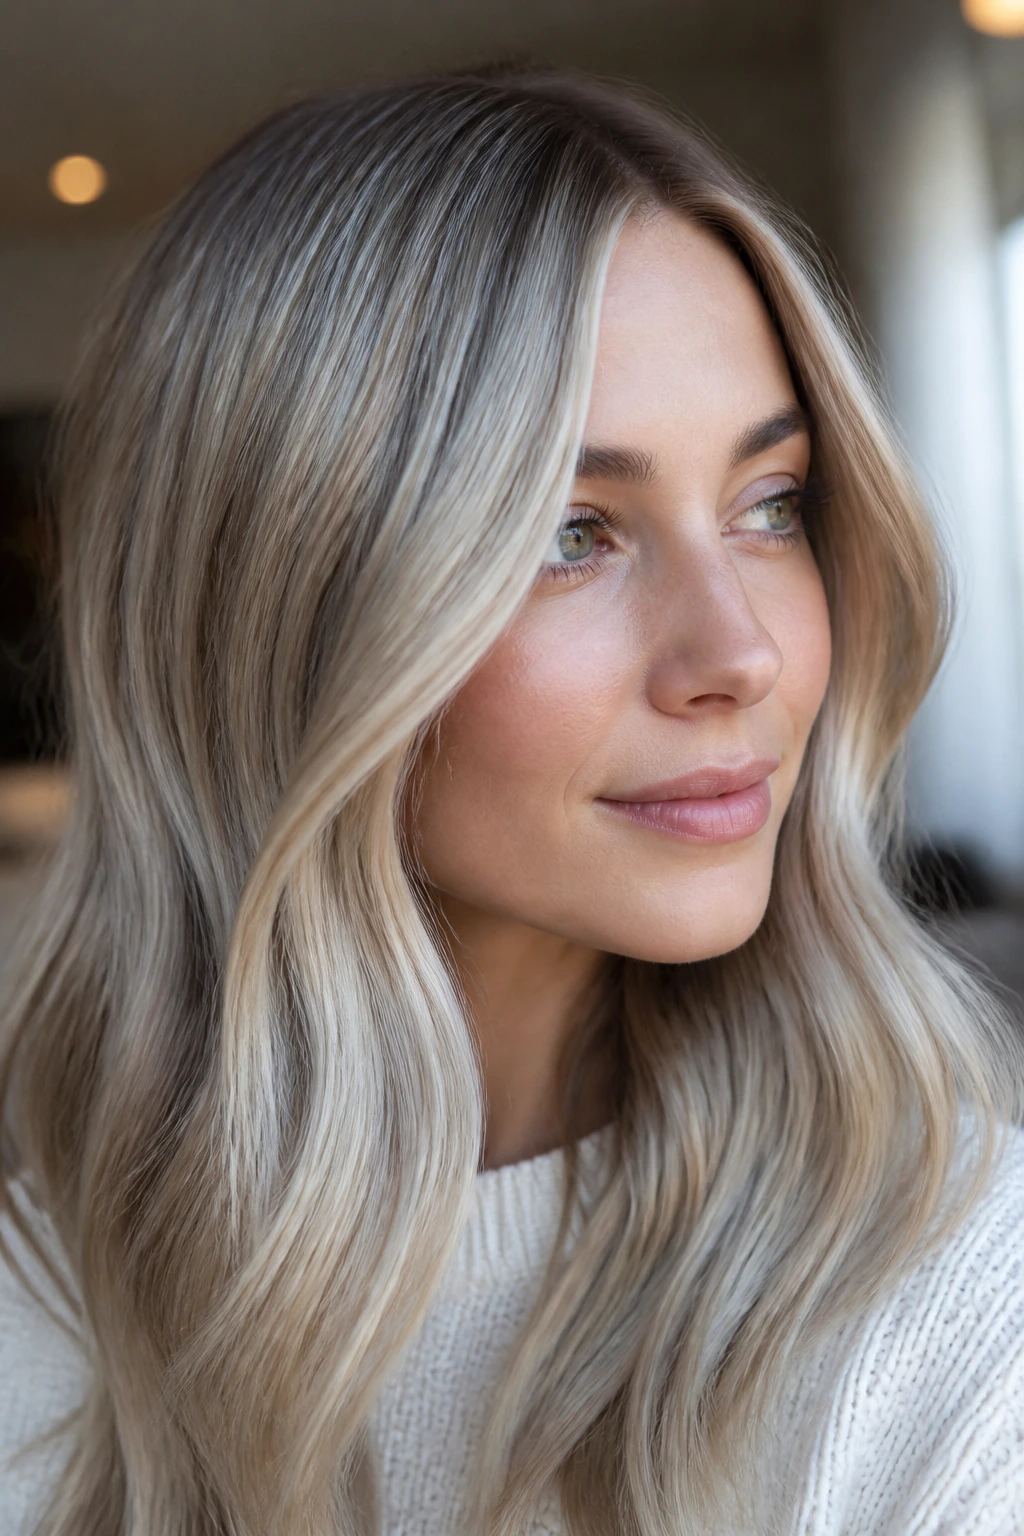
Pearl blonde is cool, glossy, and a little refined. The tone has a soft, almost shell-like finish that can make blonde pieces look cleaner and more polished than warmer shades do.
This works especially well on light bases that already lean neutral or cool. The accents should stay scattered rather than packed together, because pearl blonde can look stark if every strand is lifted the same way. A few lighter ribbons around the top layer and face are often enough.
If you like bright hair but don’t want gold tones, this is a useful path. It reads calm, not loud.
29. Soft Platinum Tips on a Short Cut
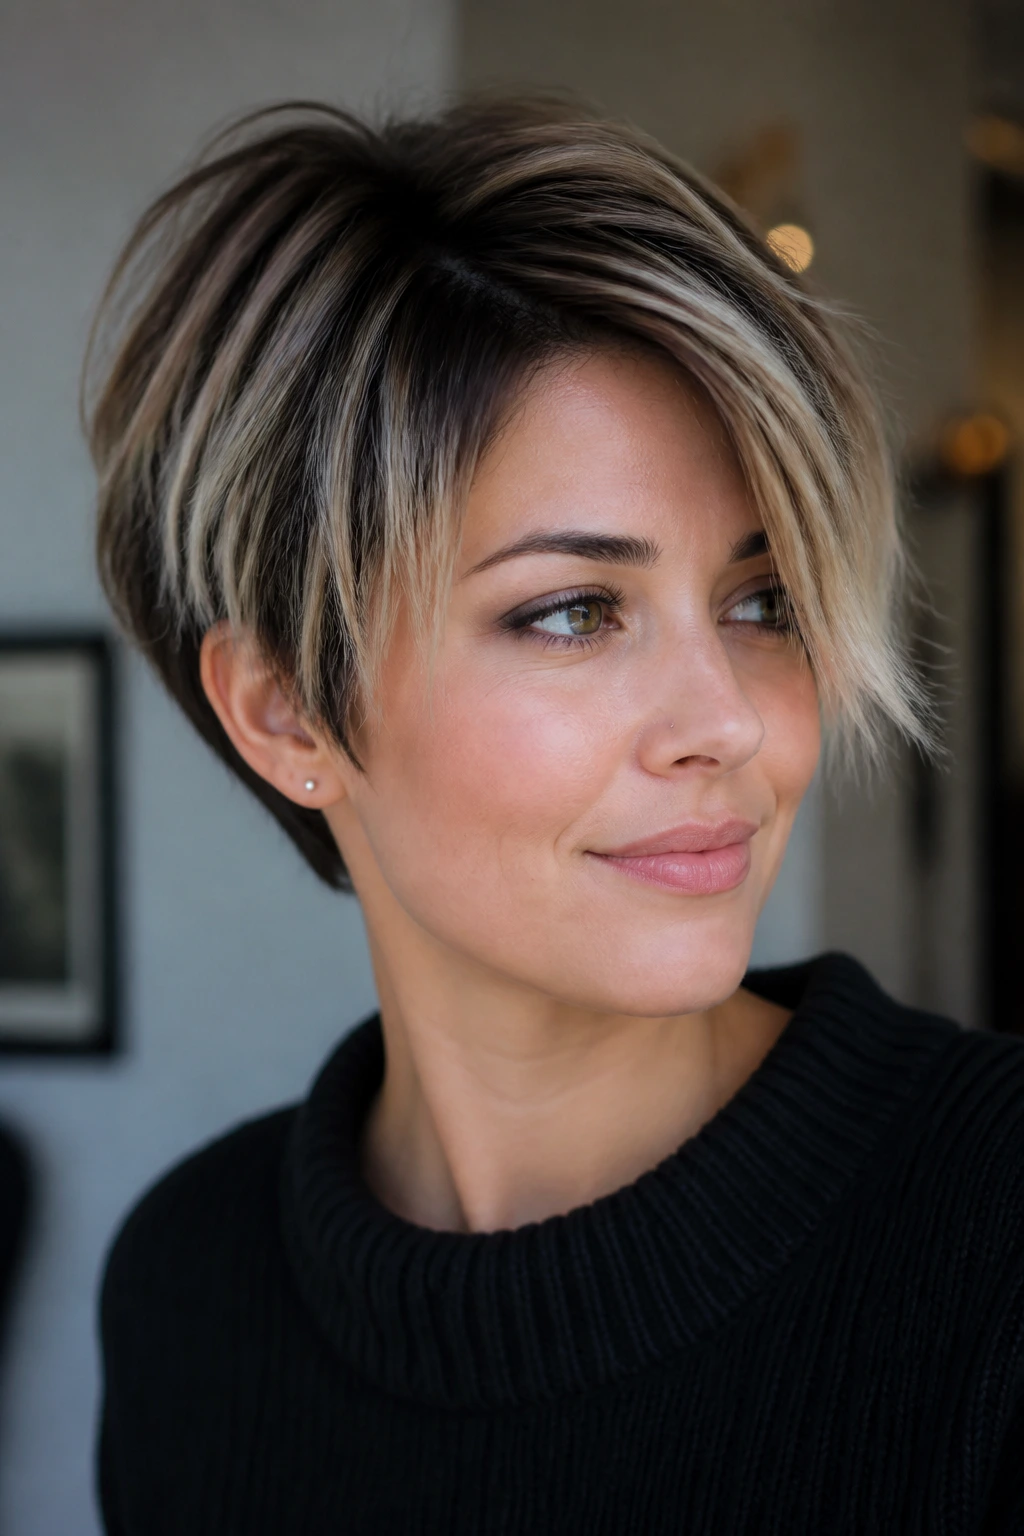
Short hair can handle boldness more easily than people assume, especially when the brightness is limited to the tips. Soft platinum on a bob or pixie adds shape and edge without turning the whole cut into a maintenance project.
The key is softness. You want the ends lighter, not fried-looking or chalky. On short cuts, that contrast can make the texture pop in a way that flat color just can’t. The haircut starts doing more of the work for you.
This one is better for beginners who want an obvious change but don’t need a full head of bright blonde. It feels deliberate even when the actual color service is restrained.
30. Sliced Highlights for Thick Hair
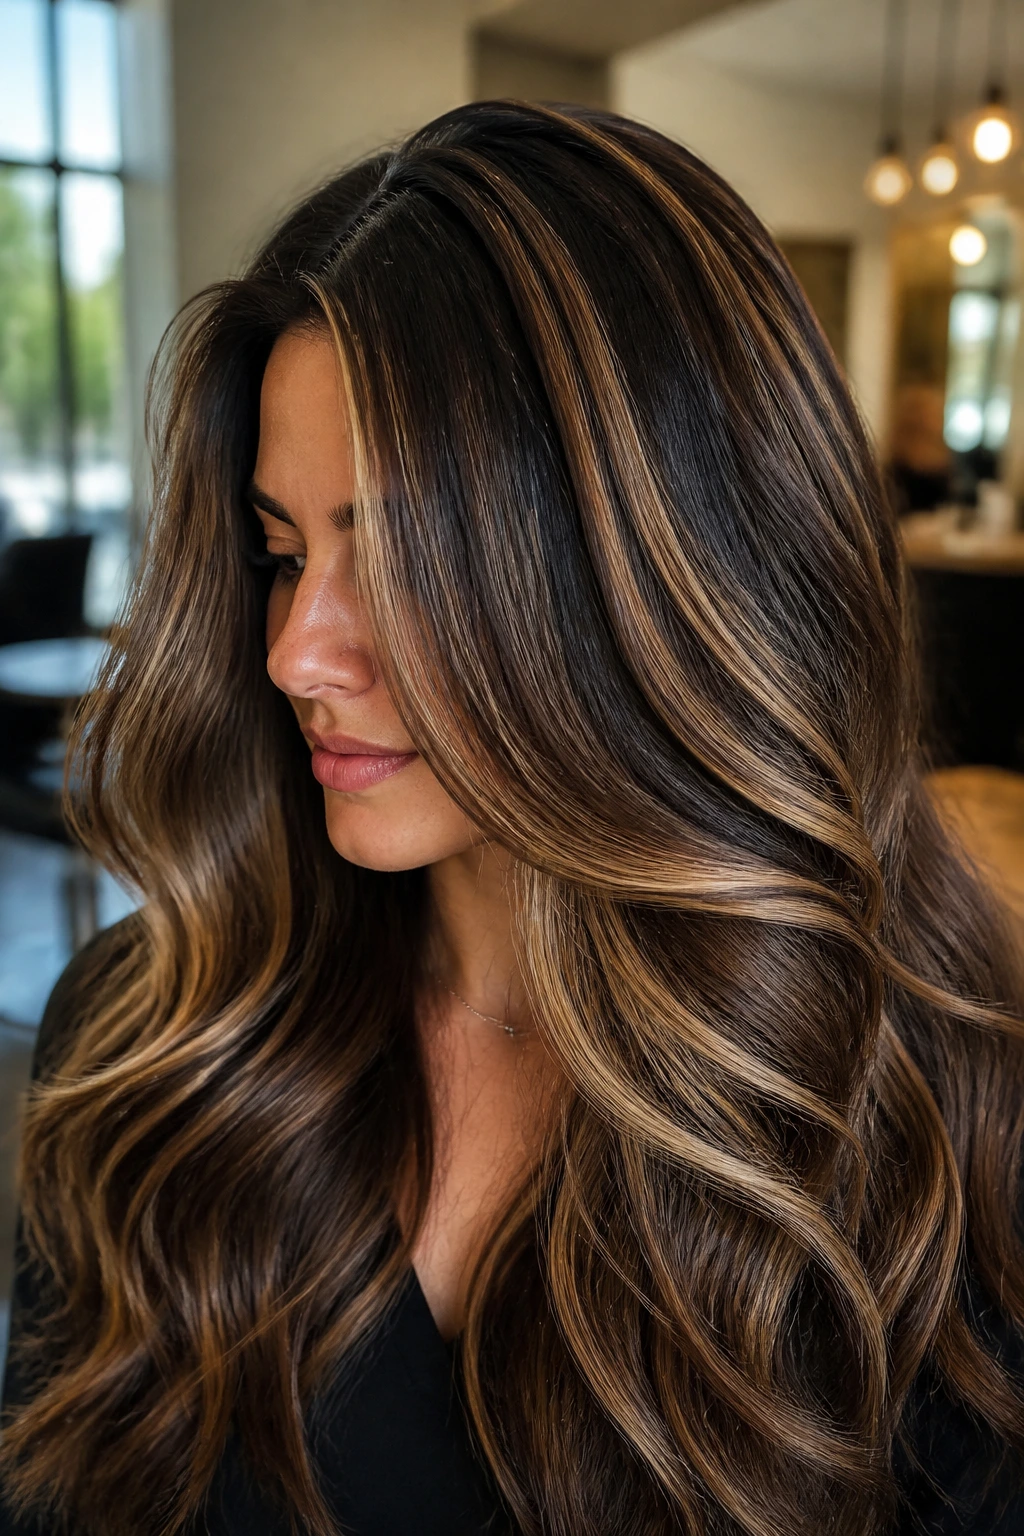
Thick hair can swallow tiny highlights, which is why sliced placement often works better. The colorist takes larger, cleaner sections, so the brightness actually shows up inside the density instead of getting lost.
This is a good beginner option if your hair is heavy and you want to see dimension from across the room. It creates visible movement in long or medium-length hair and can keep thick cuts from looking like one solid block. The slices should still blend, though. You want visible contrast, not harsh stripes.
If you’ve been told your hair is “too much” for subtle highlights, sliced placement is worth asking about.
31. Soft Copper Balayage for Warm Skin Tones
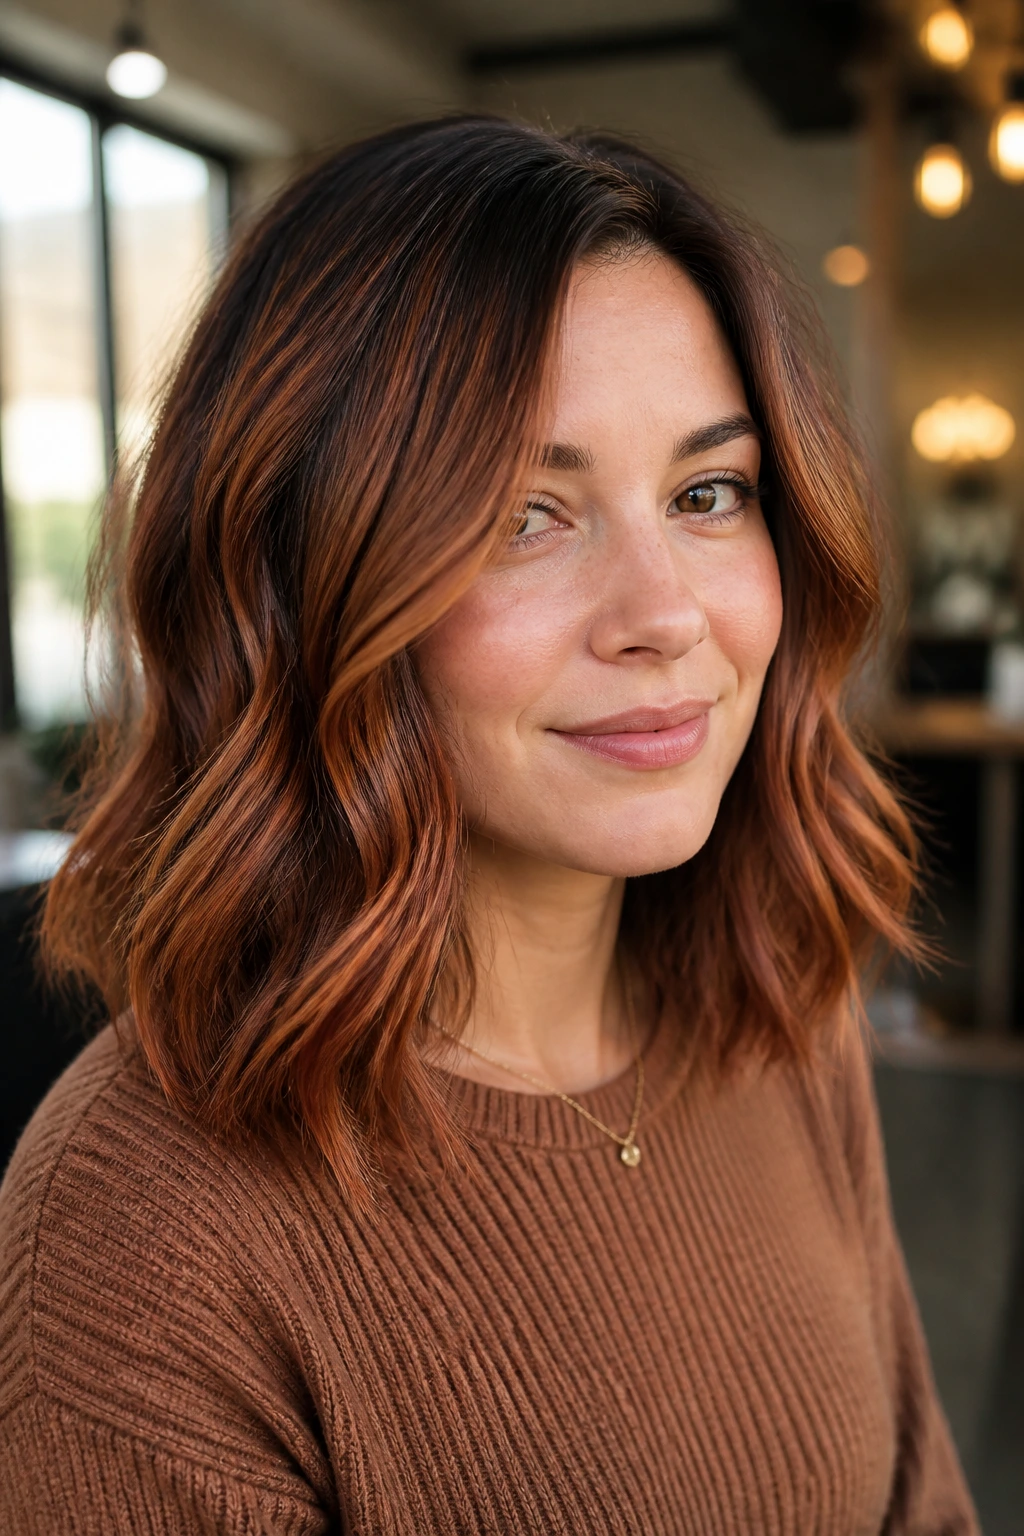
Copper can flatter warm skin tones in a way that feels almost unfair. The right copper reads rich and healthy rather than fiery, especially when it’s painted in soft balayage ribbons instead of packed everywhere.
This style is a good first color move if you want warmth but not gold. The copper adds a little spark, the balayage keeps it low-pressure, and the result can make brown or dark blonde hair look fuller. It’s especially nice in loose waves, where the red-gold pieces catch light at different angles.
If you’ve always suspected warm tones suit you but never knew where to start, this is one of the friendliest entry points.
32. Sunlit Pixie Highlights
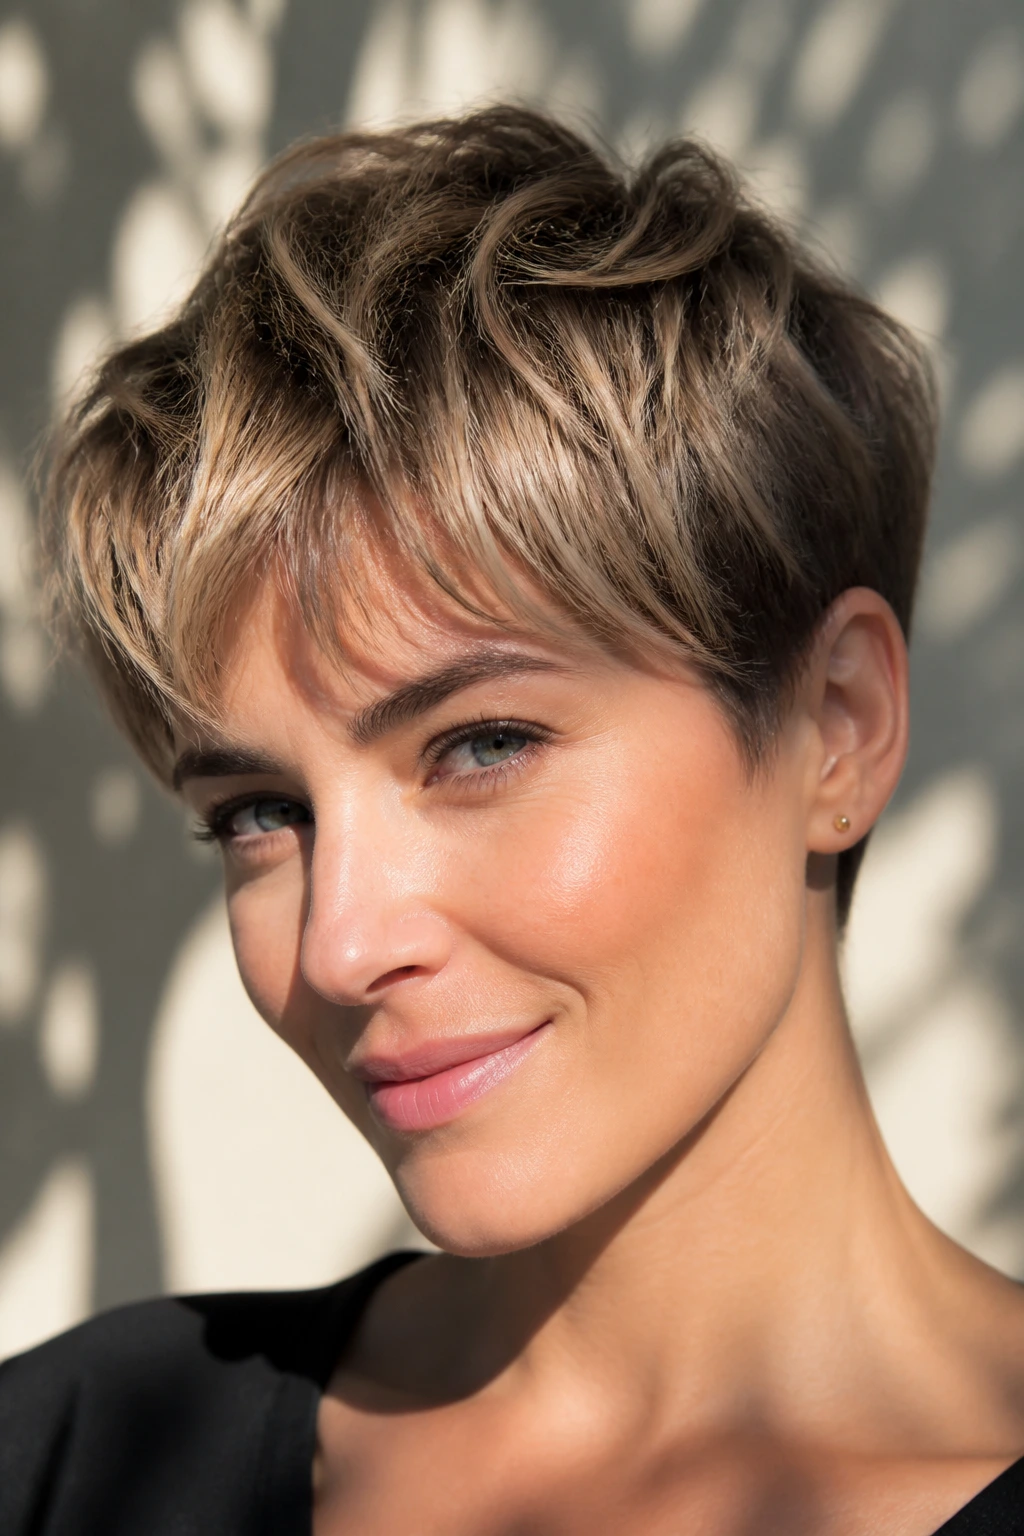
Pixie cuts can look flat fast, which is why tiny highlights around the crown and fringe make such a difference. Sunlit pieces add texture without needing long hair to show the effect.
This is a smart beginner choice if your hair is short and you don’t want to commit to a dramatic color transformation. A few brighter pieces around the top can make the cut feel airy and modern. Keep the color close to your natural base so the pixie still feels easy to wear.
Short hair is unforgiving when the placement is sloppy. The upside is that when it’s right, the whole cut looks sharper with very little product.
33. Glossy Mocha Highlights
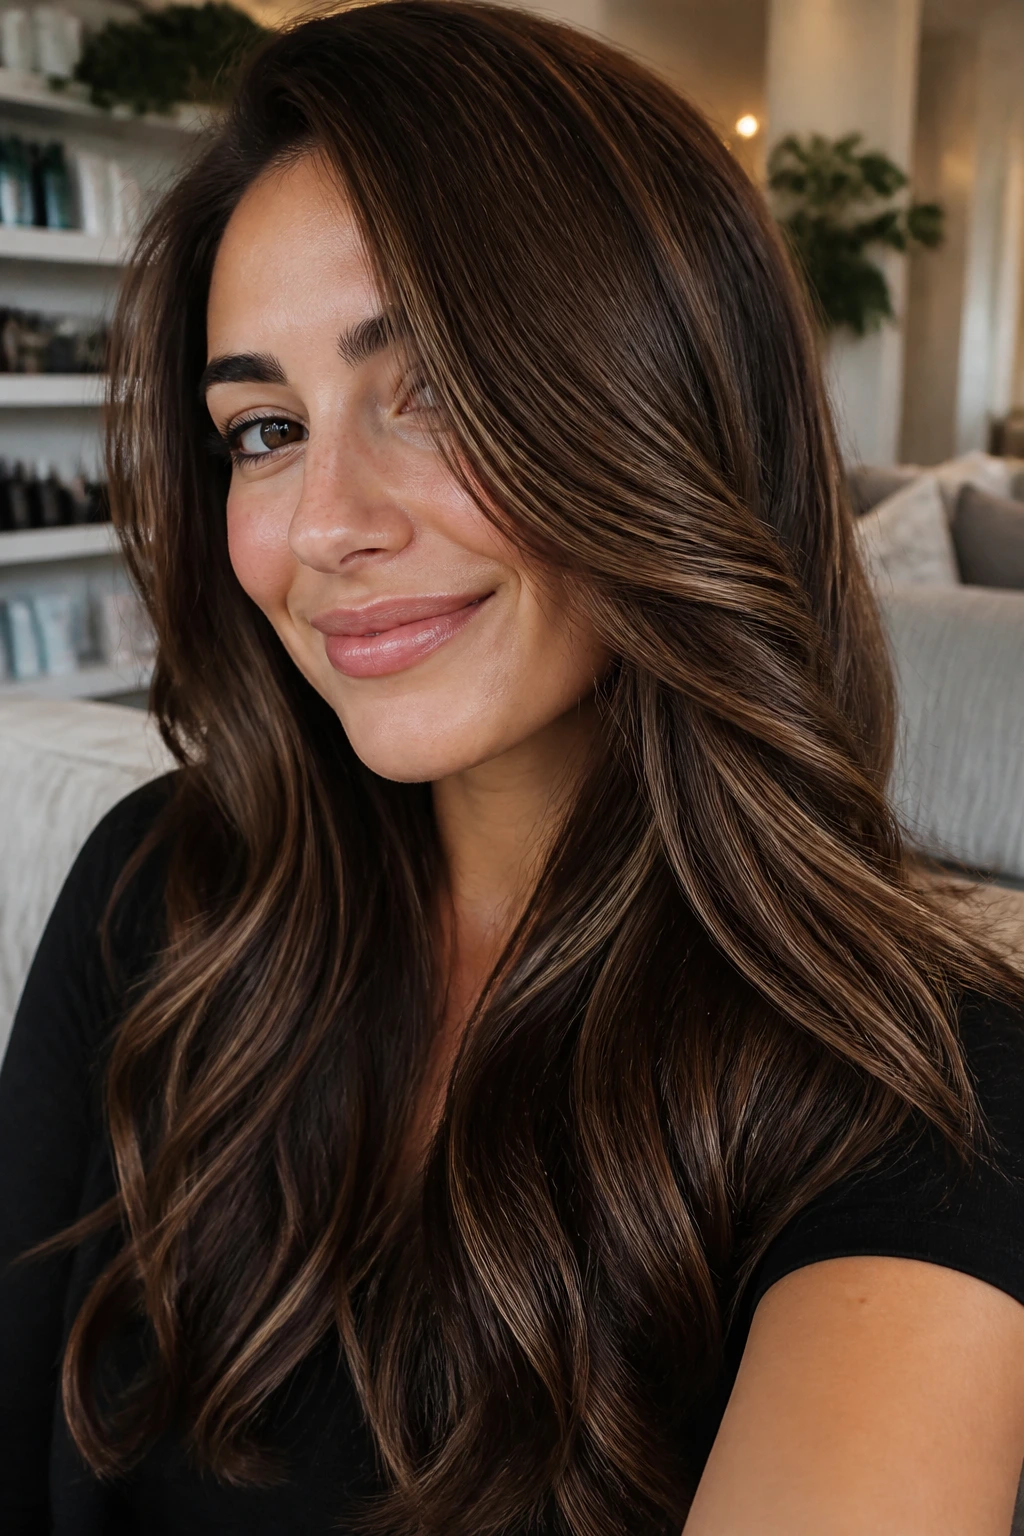
Mocha highlights are for people who want shine first and lightness second. The tone stays in the brown family, but it catches light in a way that makes the hair look smoother and more dimensional.
This is a quiet, smart option for beginners who are nervous about visible blonde. It’s also useful if your hair is already a rich brown and you just want a little movement through the lengths. The best mocha highlights are subtle enough that the hair still reads cohesive, not pieced apart.
If you like hair color that looks expensive without announcing itself, this is one of the strongest picks in the whole list.
34. Rooted Blonde with a Deep Shadow Base
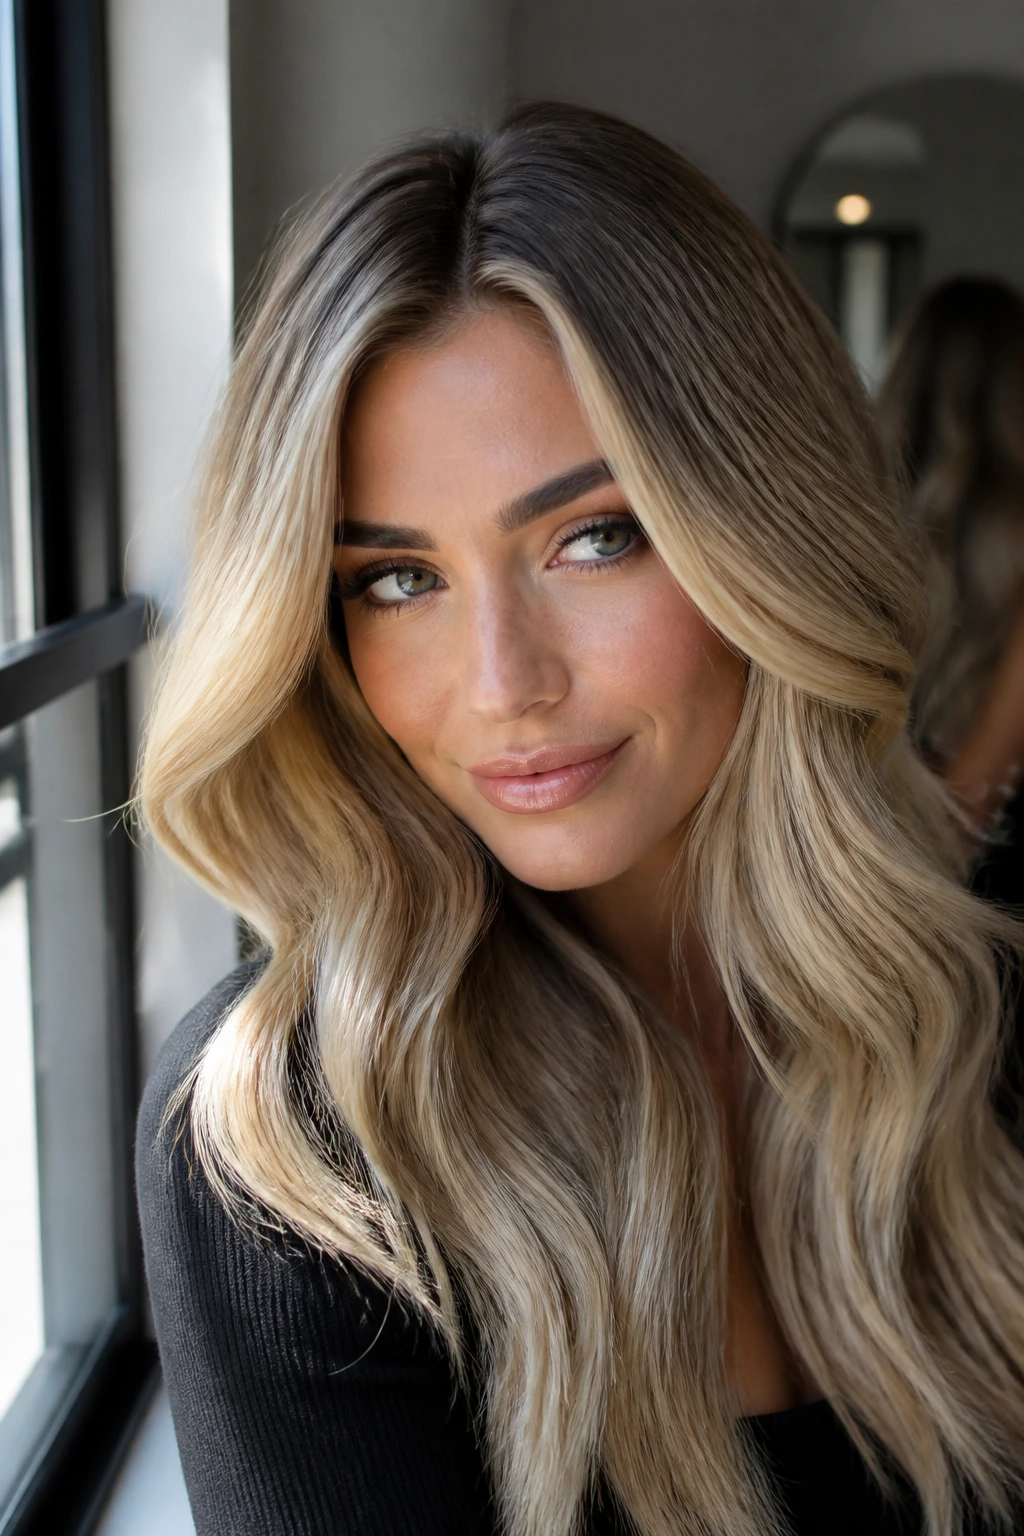
A deep shadow base gives blonde a place to land. Instead of pushing brightness all the way to the scalp, this look keeps the root dark enough to soften regrowth and make the overall blonde feel more grounded.
This is a good choice for beginners who want a more obvious blonde result but don’t want the upkeep to feel punishing. The contrast between the dark base and lighter mids and ends can be beautiful on long hair, especially if the blonde itself stays creamy rather than icy. The shadow base is doing a lot of invisible work here, and I mean that in the best way.
If you love seeing blonde hair on other people but worry about how fast roots show on your own, this is the kind of compromise that actually holds up.
35. Tortoiseshell Highlights for Brunettes
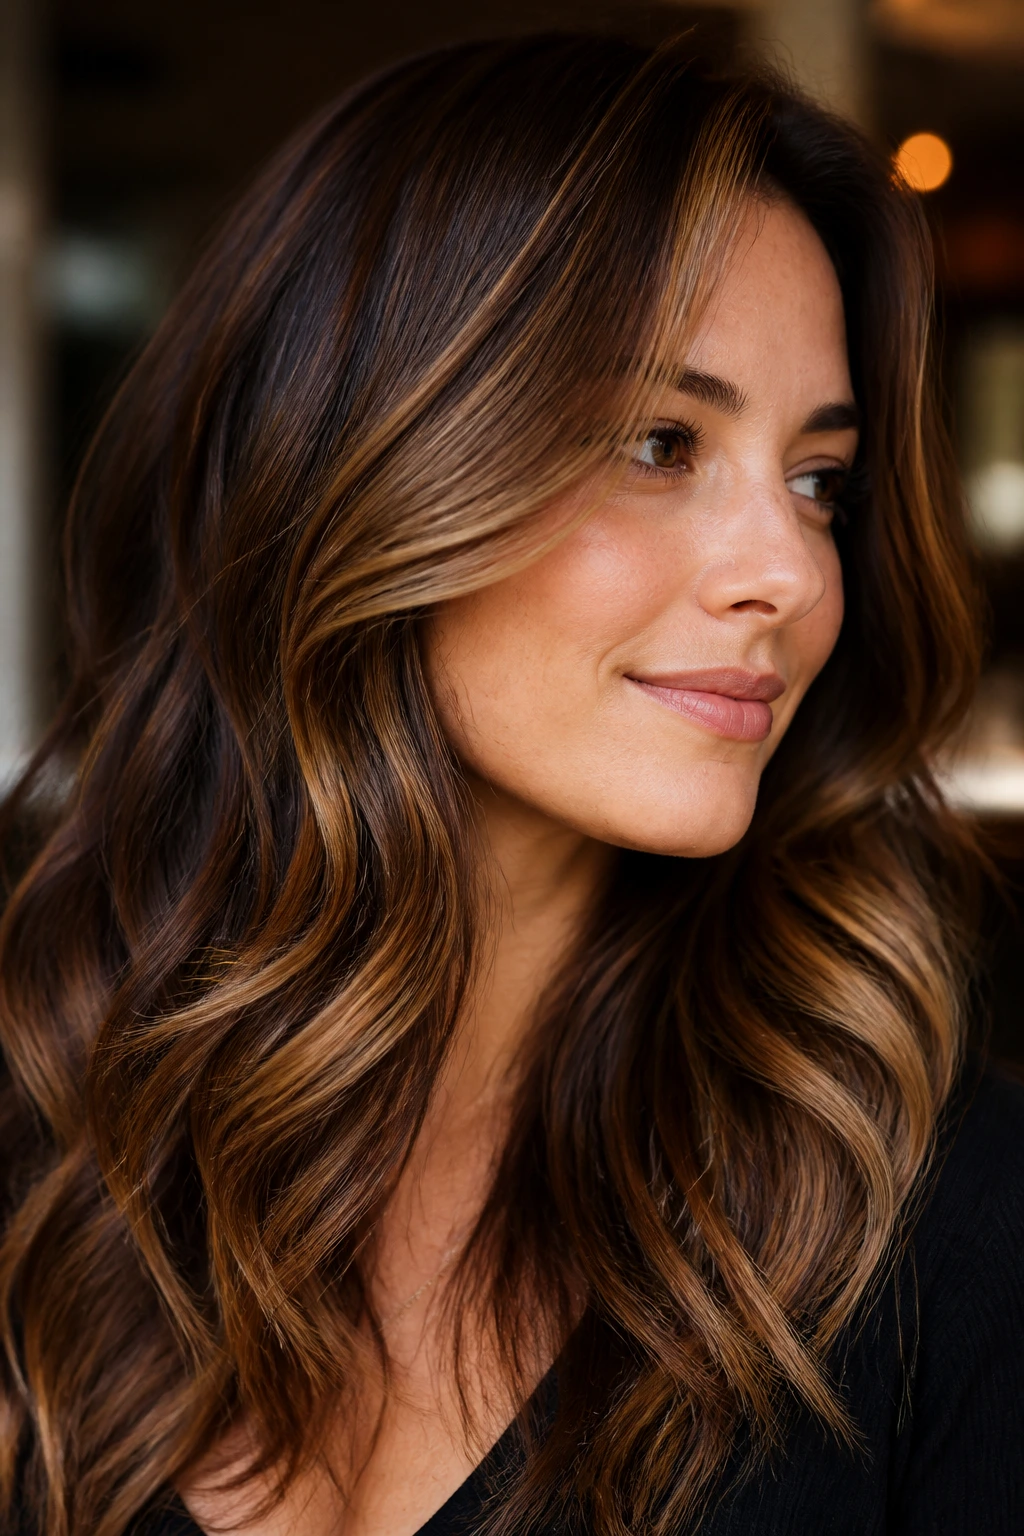
Tortoiseshell color mixes caramel, amber, chestnut, and soft brown in a way that looks natural but never flat. It has enough variation to keep brunette hair interesting without forcing a dramatic jump in lightness.
This is one of the prettiest beginner color ideas because it feels layered and expensive without looking fussy. The tones melt together, so the hair catches light differently from one section to the next. That’s a good thing. It makes even simple blow-dries look finished.
If you want to stay brunette but get more movement, tortoiseshell is a hard style to beat. It’s warm, dimensional, and far less intimidating than a full blonde transformation.
Why Placement Matters More Than a Big Lightening Leap
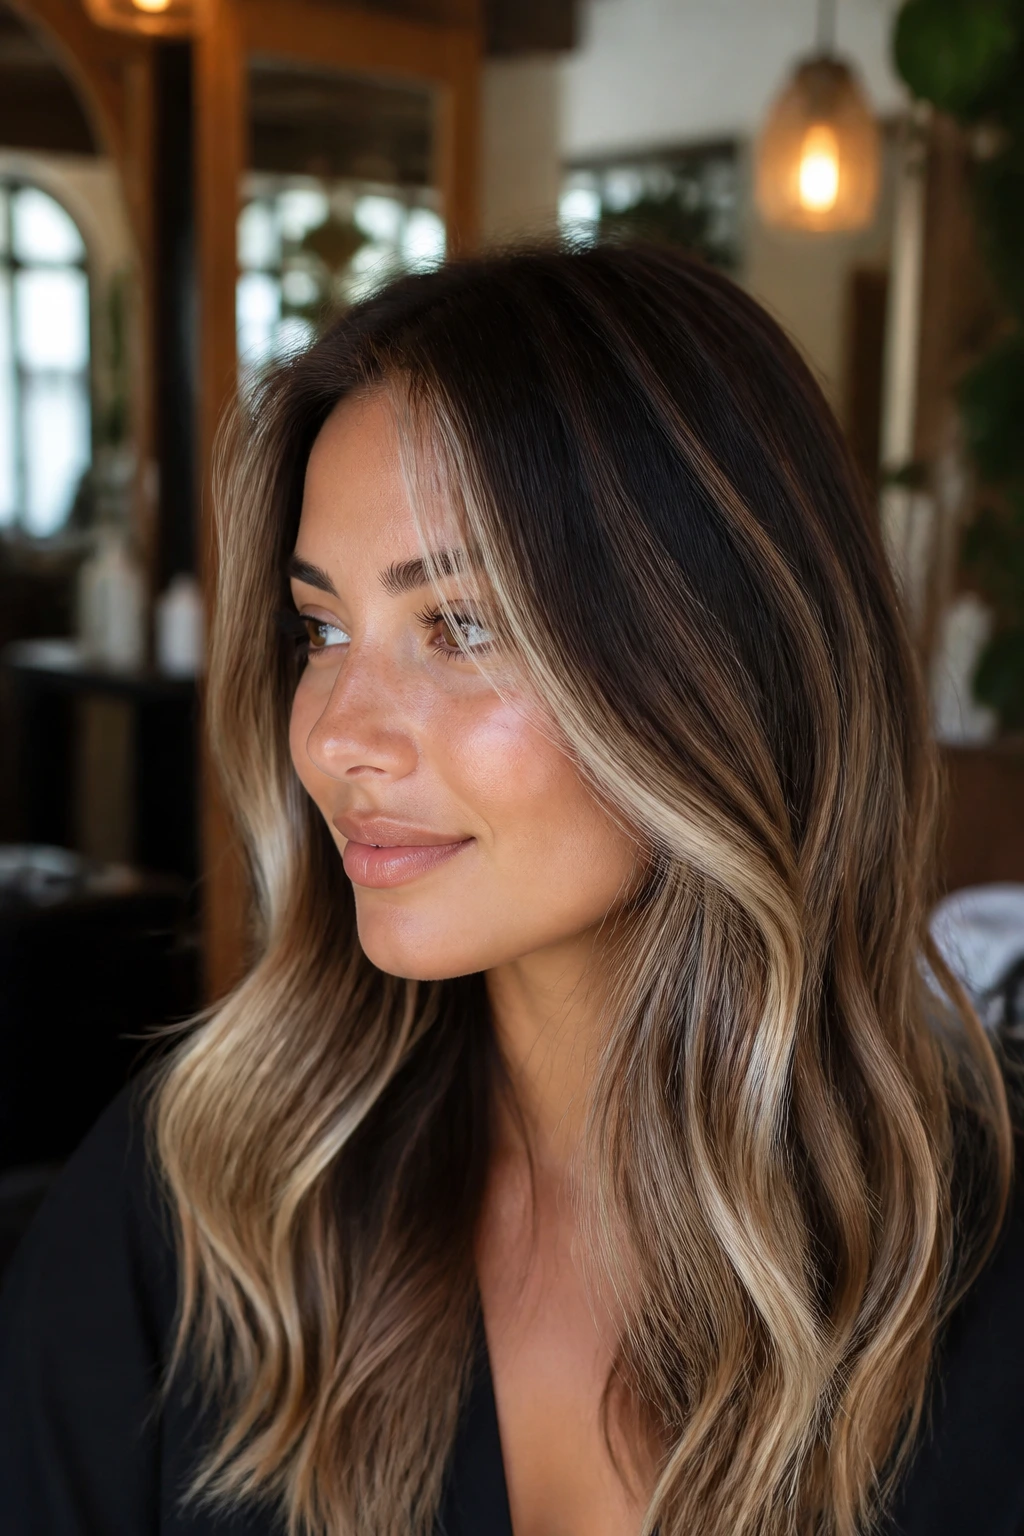
The first thing beginner highlights need to do is stay believable as they grow. That’s why face-framing pieces, partial highlights, shadow roots, and softer balayage placements show up so often in this list. They let the bright spots live where they’ll be noticed, while the rest of the color service stays calm. That calm is the whole point.
A good colorist thinks in zones. Front pieces can be brighter because they soften the face. The top layer can carry more light because that’s what people see from above. Ends can take extra brightness because they usually look healthier with a little lift. The root area? That’s where you earn your future peace of mind.
If your hair is curly, the pieces should sit where the curl opens. If it’s straight, the lines need to be cleaner. If it’s thick, bigger slices may read better than tiny weaves. Those are the little decisions that make beginner highlights feel custom instead of generic.
Essential Tools for Talking Highlights and Keeping Them Happy
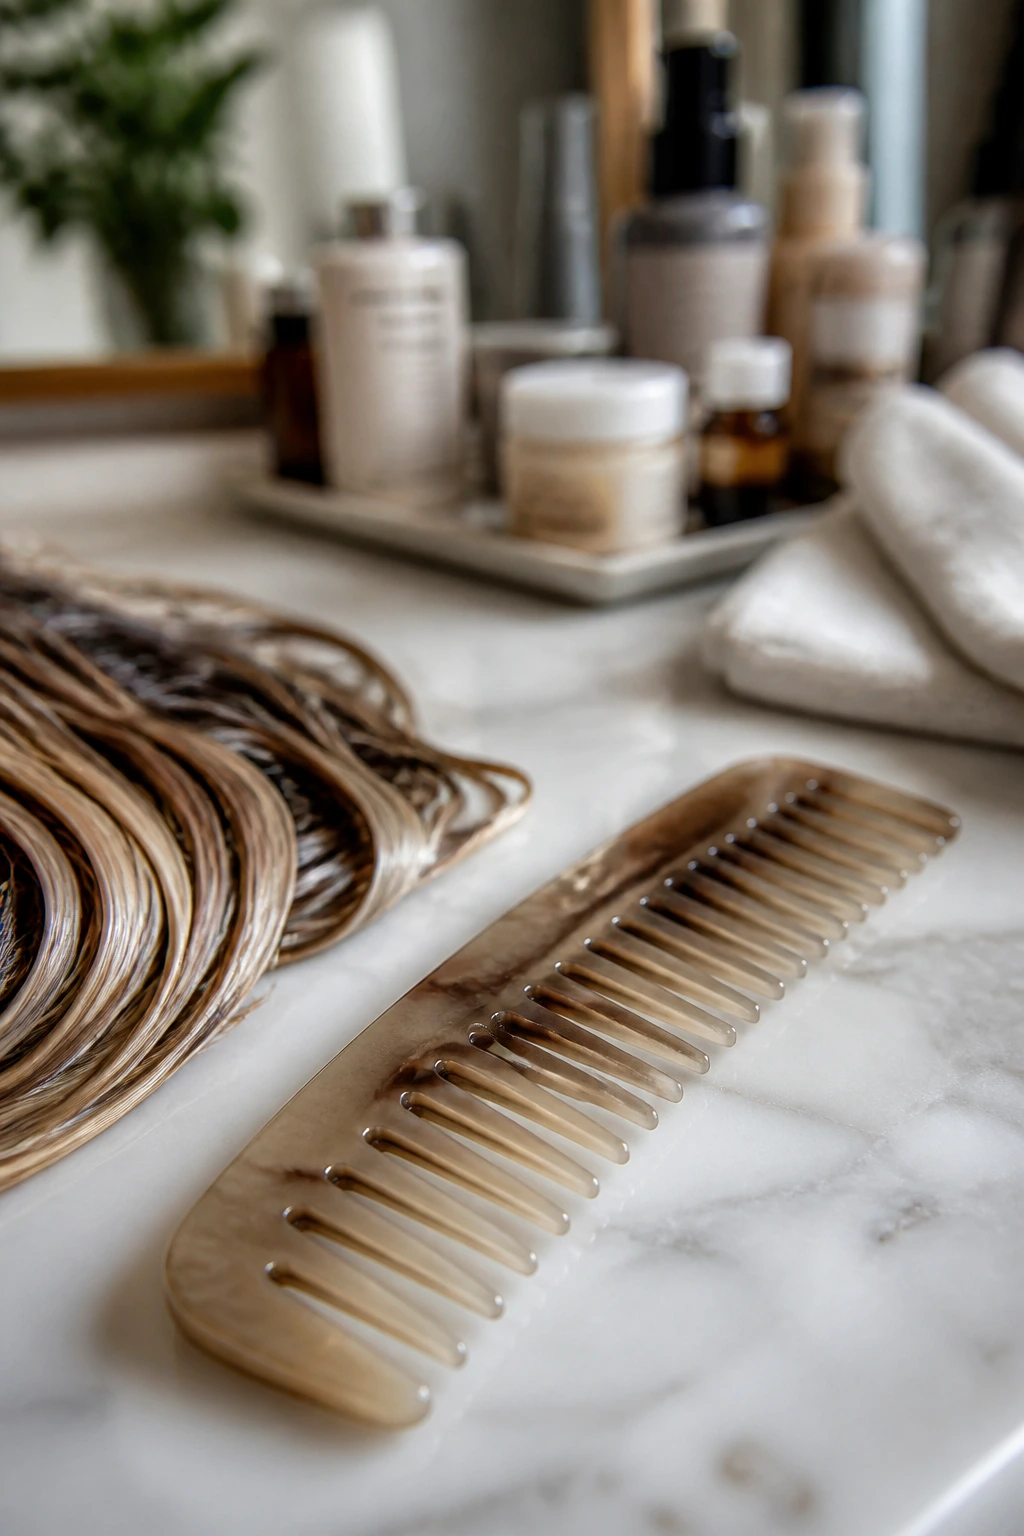
- Reference photos with your own base color in mind: Bring pictures that match your starting shade, not just the color you wish you had.
- Color-safe shampoo and conditioner: Regular shampoo can strip tone fast, especially from caramel, copper, or beige highlights.
- Purple shampoo or blue shampoo: Purple helps blondes stay clean; blue is often better for brunettes fighting orange warmth.
- Deep-conditioning mask: Lightened hair gets dry at the ends first, so a mask once a week can help the hair stay smooth.
- Heat protectant spray: If you blow-dry or use a flat iron, this is non-negotiable. Keep the spray light so it doesn’t dull the tone.
- Wide-tooth comb: It’s gentler than a brush on damp highlighted hair and helps keep breakage down.
- Hair clips for sectioning: Useful if you like styling the hair in clean parts or doing at-home glossing.
- Microfiber towel or cotton T-shirt: Rough towels can rough up the cuticle and make highlighted hair look fuzzy.
- Gloss or toner appointment: Not a tool in the drawer, but a useful salon resource when the tone starts to shift warmer or duller.
- Satin pillowcase or bonnet: Less friction overnight means less frizz and less color-wear on the surface.
How to Choose the Right Tone Without Guessing
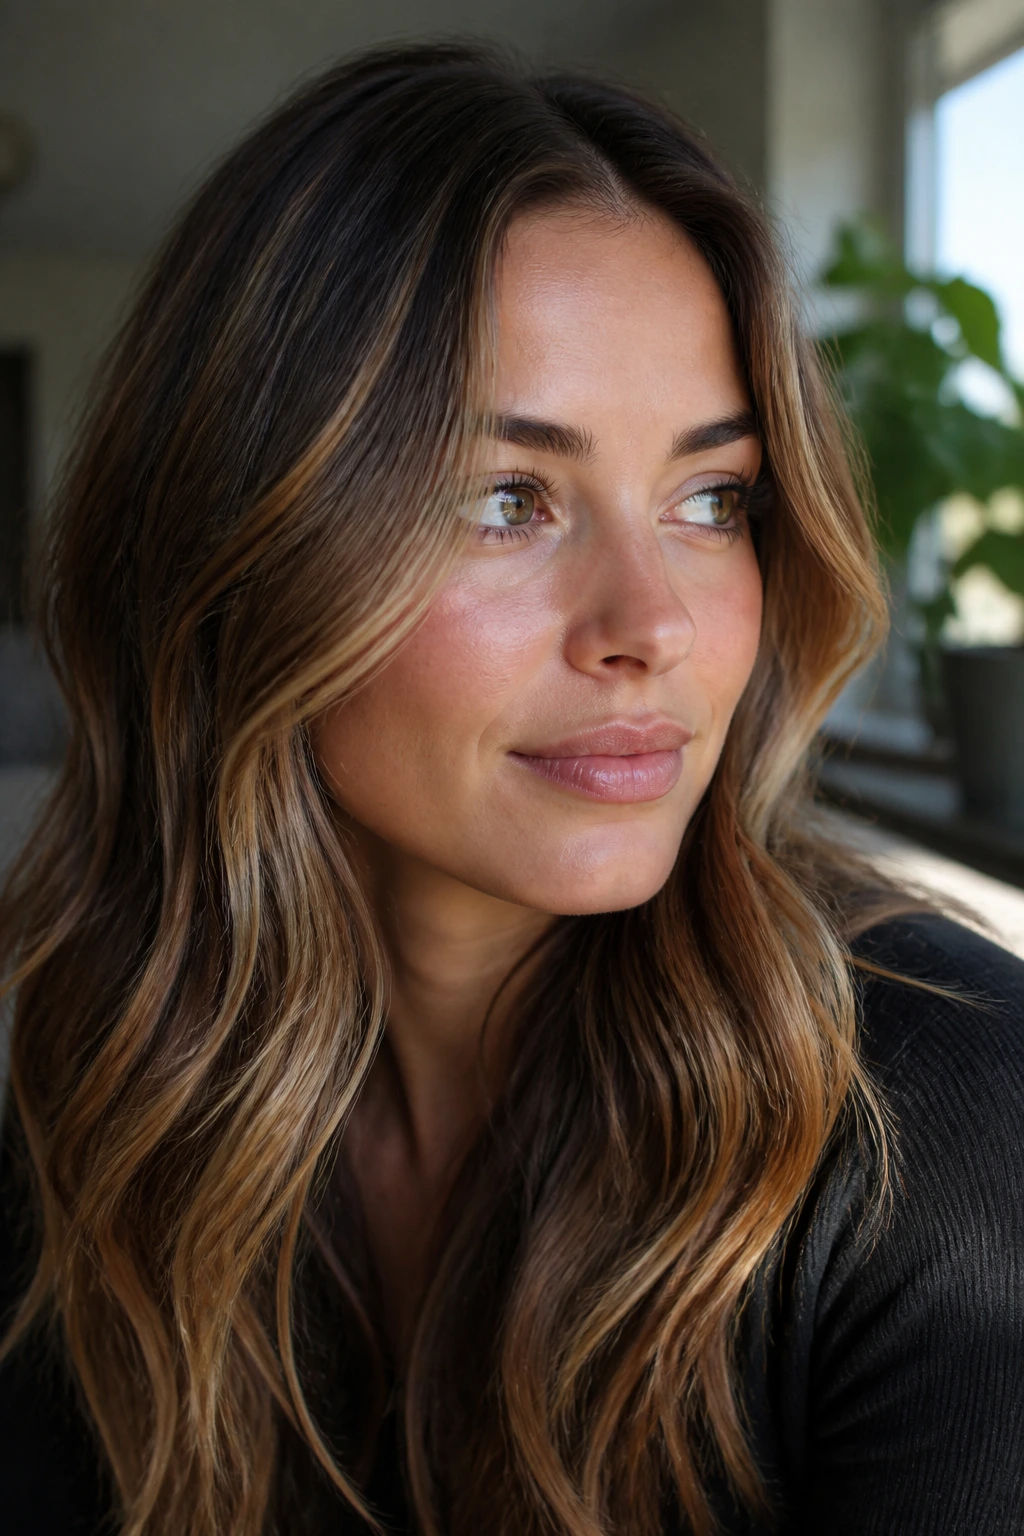
The easiest way to pick a highlight tone is to start with your base color, then decide how much contrast you actually want to see. Warm brunettes usually look good with caramel, honey, toffee, bronze, cinnamon, or soft copper. Cool brunettes tend to like beige, ash, mushroom, smoky blonde, or pearl tones more. If you try to force the wrong tone, the hair can look expensive for about six minutes and then strangely off.
A second filter is upkeep. Bright blonde, platinum, and pale pearl need more toning and more care. Honey, beige, bronde, and shadow-rooted balayage are gentler if you do not want to babysit the color. That’s one reason beginners often do better with something a little softer than their first instinct. The hair can always go brighter later.
Undertone is the last piece people skip, and it matters. If your skin usually looks better with gold jewelry, you may prefer warmer highlights. If silver tends to flatter you more, cooler beige or ash shades may sit better. None of this is magic. It’s just matching the color to the face instead of chasing a photo with a completely different base.
How to Wear These Highlights So They Show Up Right
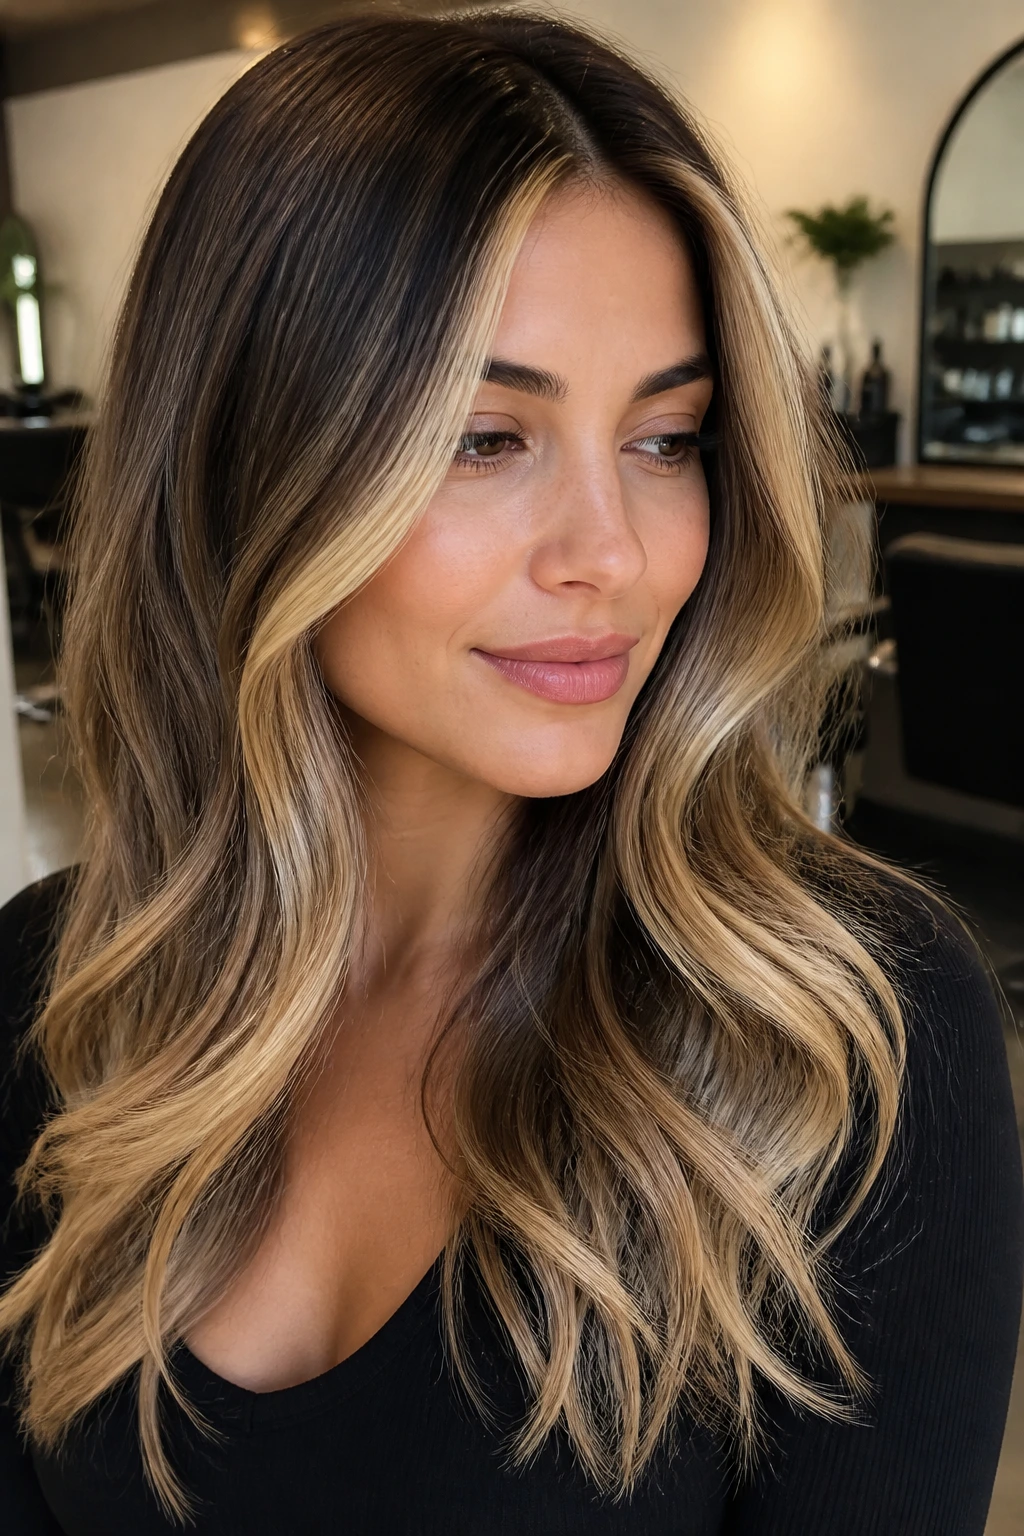
Placement: Put brightness where the eye lands first — around the face, on the top layer, or through the ends — if you want the highlights to read even when your hair is tied back.
Cut Pairings: Layers, curtain bangs, lobs, pixies, and wavy cuts all reveal highlight placement differently, so the haircut matters as much as the tone.
Styling: Loose bends and blow-dried volume show dimension better than stiff, over-flattened hair. You do not need curls; you need movement.
Maintenance: If you want softer upkeep, ask for a shadow root, partial highlights, or balayage. If you want more visible brightness, money pieces and sliced foils will give you more contrast.
Additional Ways to Make the Color Feel More Like You
Glossing: A clear or tinted gloss can warm up caramel, cool down beige, or add shine to brunette highlights without changing the whole placement. It’s a small service with a big visual payoff.
Customization: If you like a little drama, keep the front brighter and the ends softer. If you prefer subtlety, spread the brightness thinner and let the base stay visible.
Serving Suggestions: For highlights, the “serving” is really the styling finish — a smooth blowout for polished dimension, loose waves for ribbon-like movement, or a rough dry for curls that need the color to pop.
Make-It-Yours: Warm tones suit people who love bronze, cream, and earthy makeup. Cool tones fit better if your hair wardrobe is gray, black, silver, navy, or crisp white. That part gets overlooked far too often.
How to Keep Highlights Looking Fresh Between Salon Visits
Highlights usually look best in the first few weeks after toning, when the shade is still crisp and the contrast is clean. After that, the hair can start to drift warmer, flatter, or a little dry at the ends. That’s normal. The point is to manage the drift instead of pretending it won’t happen.
For most beginner-friendly highlight looks, I like a rhythm of color-safe washing, one deep-conditioning mask each week, and heat protection every time the hair gets styled hot. If your highlights are blonde, beige, or pearl, use purple shampoo sparingly — once every 1 to 2 weeks is often enough. Too much and the hair goes dull, smoky, or lavender in a way that looks tired fast. Blue shampoo can help brunettes keep coppery warmth in check, but the same rule applies: use less than you think.
Balayage, bronde, and shadow-rooted highlights can usually stretch farther between salon visits, often around 10 to 16 weeks depending on how fast your hair grows and how obvious you want the contrast. Babylights, partial foils, and brighter money pieces may need refreshes sooner if you want them to stay sharp. If the ends start to feel dry before the color looks wrong, book a gloss or trim before you panic about the tone. Dry hair makes good color look worse.
Variations and Adaptations to Try
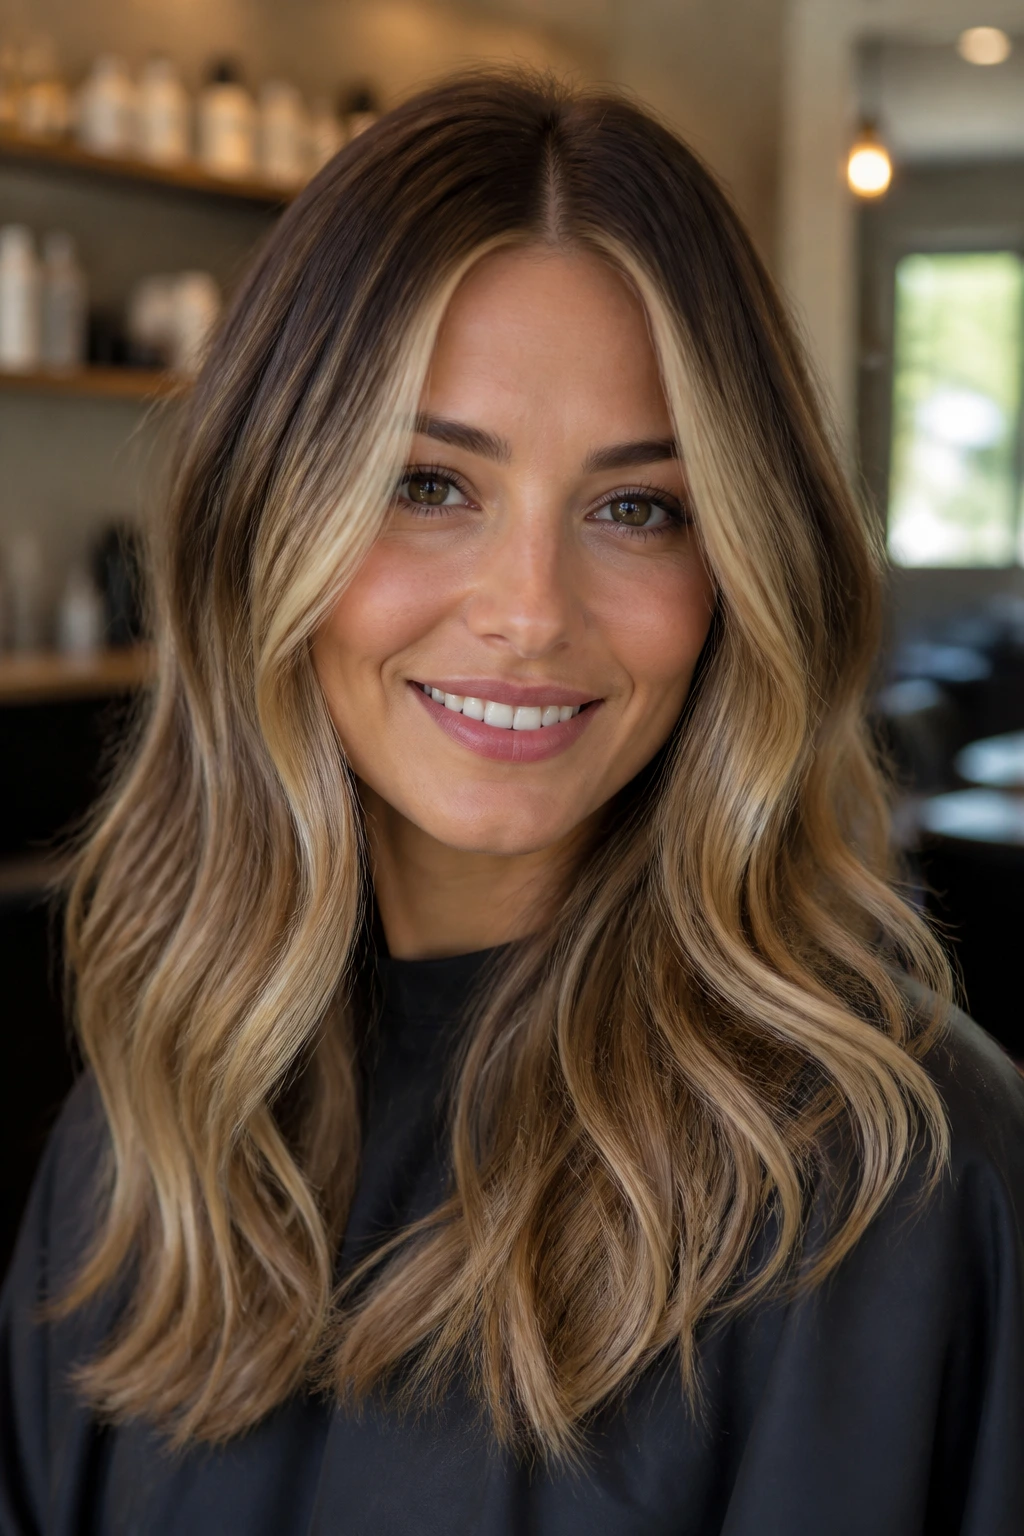
The Barely-There Starter Set: Choose babylights, a soft shadow root, and one or two face-framing pieces. This keeps the color change gentle and makes grow-out easy to ignore for a while.
The Warm Honey Route: Build the look around caramel, honey, toffee, bronze, or cinnamon. It’s a strong choice for brunettes who want the hair to look richer and a little sunnier without turning blonde.
The Cool Beige Route: Swap warmth for mushroom, ash, pearl, smoky beige, or neutral blonde. This version suits people who dislike gold tones and want the hair to feel softer against cooler clothing and makeup.
The Bright Front, Quiet Back Version: Keep the money piece, curtain bangs, or face frame brighter and leave the back closer to the base. It gives you impact where it matters and keeps maintenance sane.
The Curl-Friendly Version: Put ribbons where curls separate and bend, not in straight lines across the head. The color appears more natural because the texture breaks it up for you.
The Low-Visit Version: Ask for balayage, a shadow root, and a blended end tone. This is the one I’d choose if your calendar is already busy and you do not want to live by the touch-up clock.
Common Mistakes to Avoid When Picking First Highlights
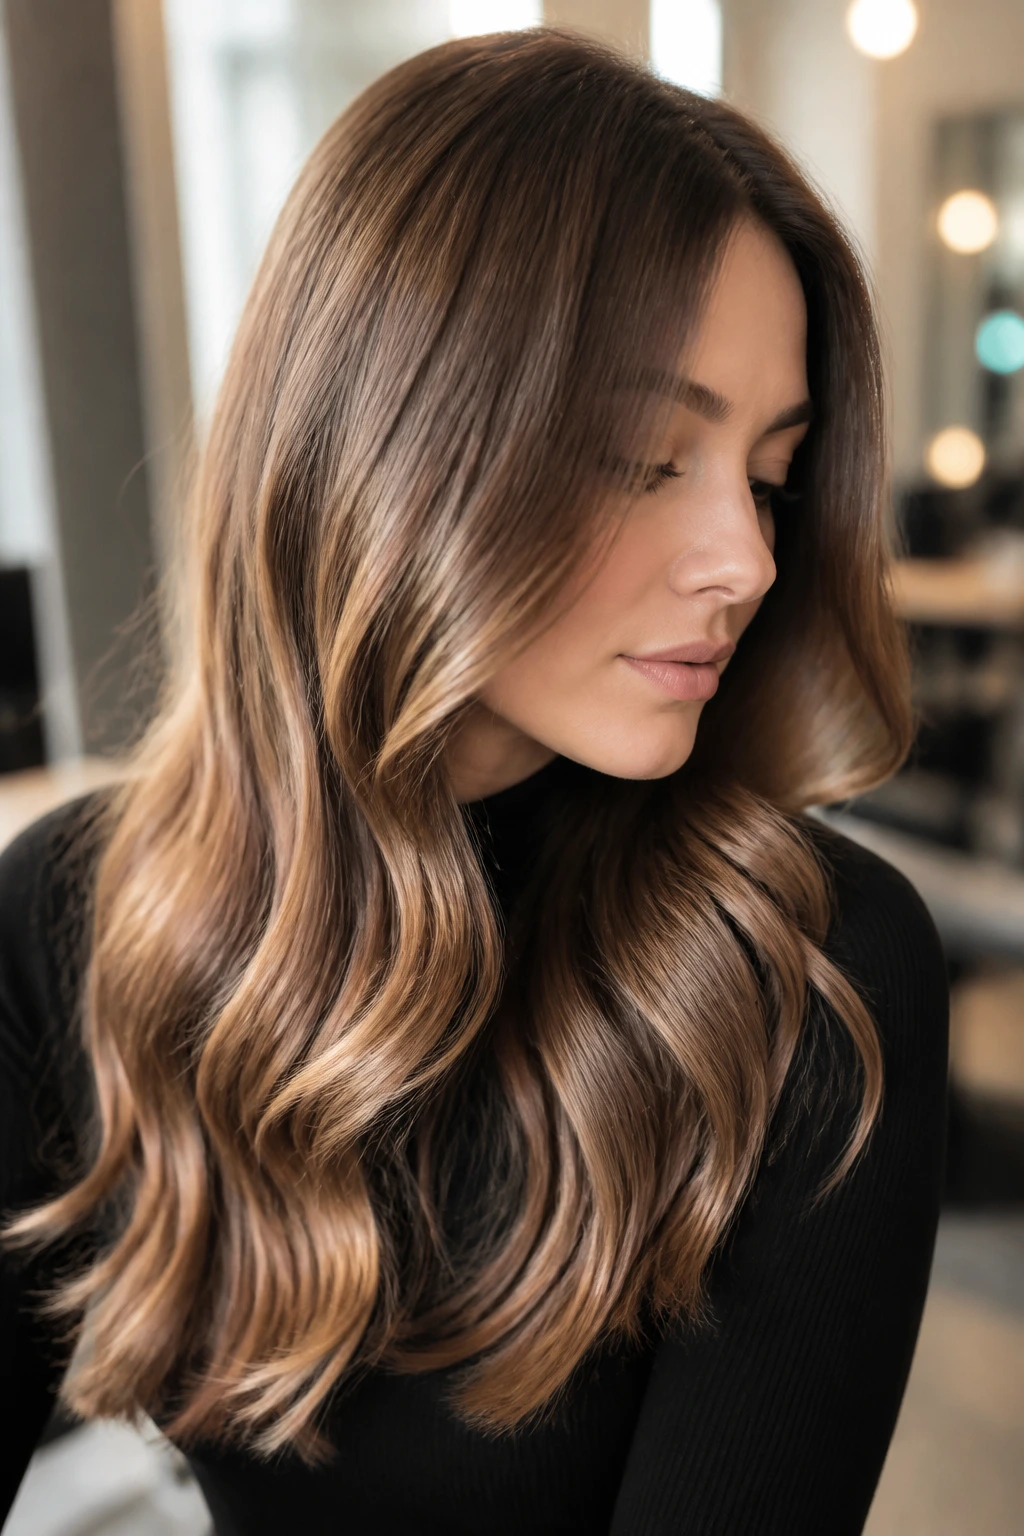
The biggest mistake is copying a photo without checking the base color underneath it. A honey balayage on medium brown hair does not behave the same way on black hair or dark blonde hair. The fix is simple: bring photos that match your starting point, or ask your colorist to translate the look for your hair specifically.
A second mistake is going too light on the first visit. People see platinum or icy beige and assume that’s the goal. Sometimes it is. Often it’s not the smartest first step, because brighter highlights can be harder to tone and more demanding to maintain. Start softer if you’re unsure. You can always add lightness later.
Another one: ignoring undertone. Warm skin and warm hair tones often play nicely together, but not always. Cool ash or pearl can flatten some complexions, and very gold highlights can go orange fast if your base already runs warm. Ask for a tone that fits your natural shade rather than fighting it.
Finally, a lot of beginners forget that highlights need a care plan. If you bleach hair and then use random shampoo, skip conditioner, and blast it with hot tools, the color will look rough before it actually grows out. The hair needs moisture and gentler handling, even when the placement is perfect.
Frequently Asked Questions
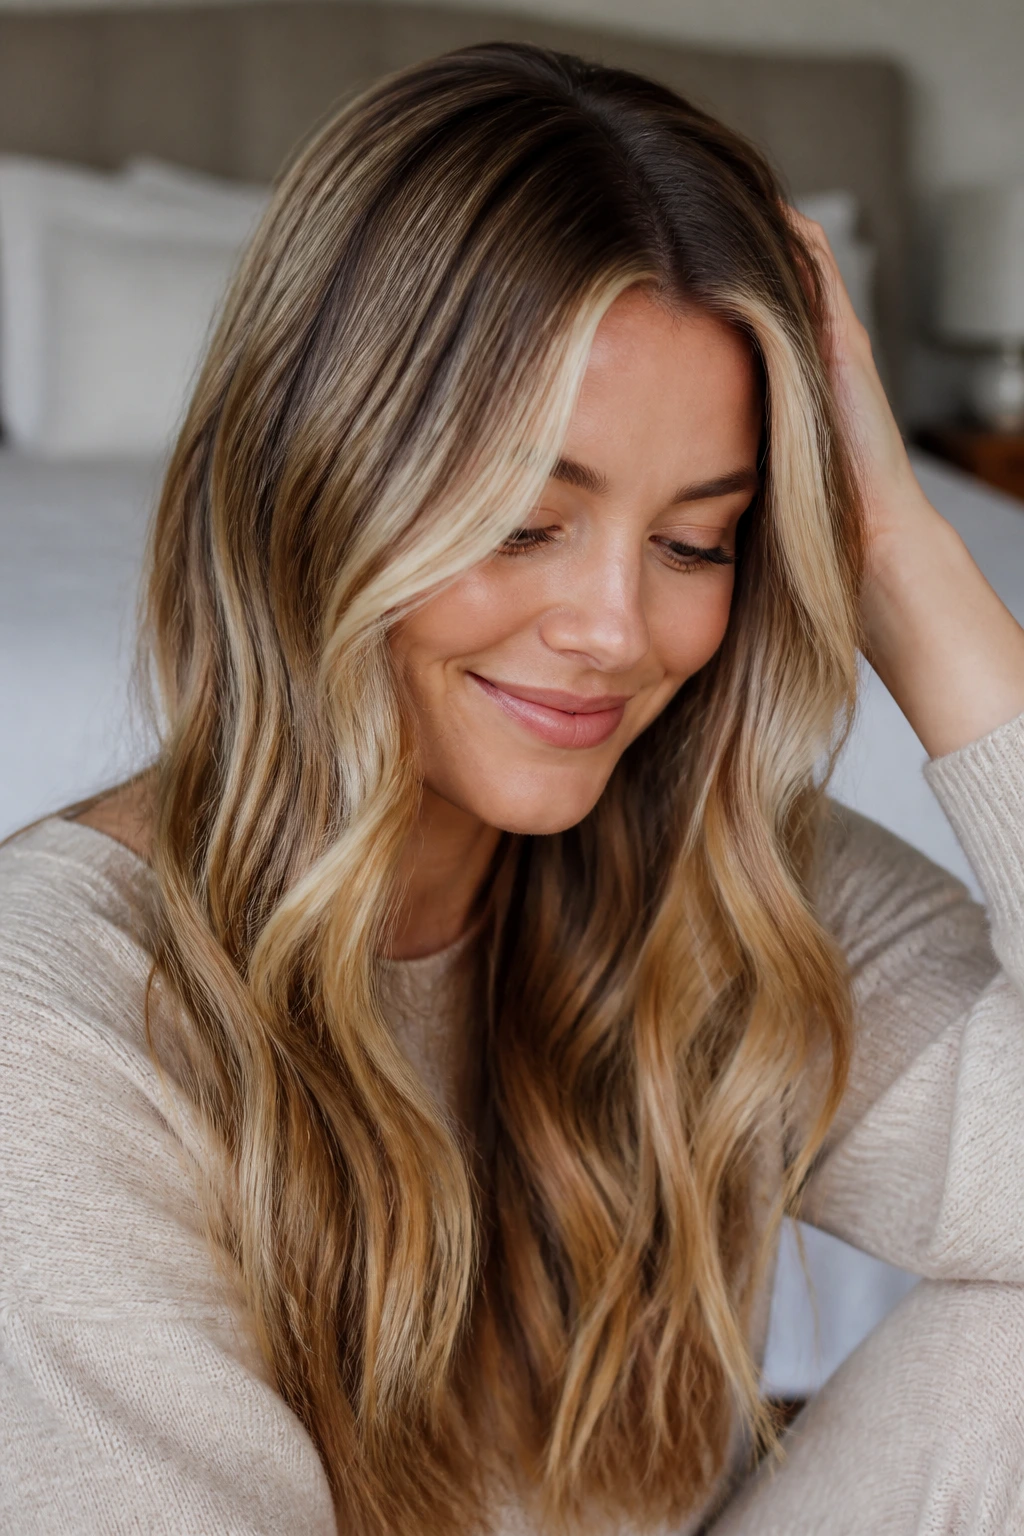
Which highlight idea is easiest for a first-time appointment?
Soft caramel face-framing highlights, babylights, and a shadow-rooted balayage are some of the easiest starts. They give you a visible change without locking you into a harsh grow-out line.
Can highlights work on very dark brown or black hair?
Yes, but the tones usually need to stay warmer and deeper at first. Bronze, caramel, auburn, and soft brown dimension tend to be more forgiving than trying to jump straight to pale blonde.
How often will I need a touch-up?
That depends on the placement. Face-framing pieces and bright money pieces can need attention sooner if you want them crisp, while balayage, bronde, and shadow-rooted color can often stretch longer between visits.
Are babylights or balayage better for beginners?
Babylights are better if you want the softest possible result. Balayage is better if you want a more visible change with a gentler grow-out. One is finer; the other is looser. Both are beginner-friendly for different reasons.
What if I already have box dye on my hair?
That does make things trickier. A colorist may need to work more slowly, choose warmer tones, or use more than one appointment to get a clean result. Bring honest information about what’s on your hair now. It saves a lot of guesswork.
Do cool blonde highlights need more maintenance than warm ones?
Usually, yes. Ash, pearl, and smoky beige tones can lose their clean look faster if the hair pulls yellow or gold. Warm tones can shift too, but they often age a little more softly.
Can curly hair wear highlights without looking stripey?
Absolutely, as long as the placement follows the curl pattern. Ribbons, surface painting, and face-framing pieces tend to work better than rigid lines that ignore where the curls actually fall.
What should I bring to the salon consultation?
Bring 2 to 3 photos, one photo of your hair in natural light if you can, and a quick note about how much upkeep you’re willing to handle. That conversation is worth more than any trend photo.
A Softer First Step Into Lightness
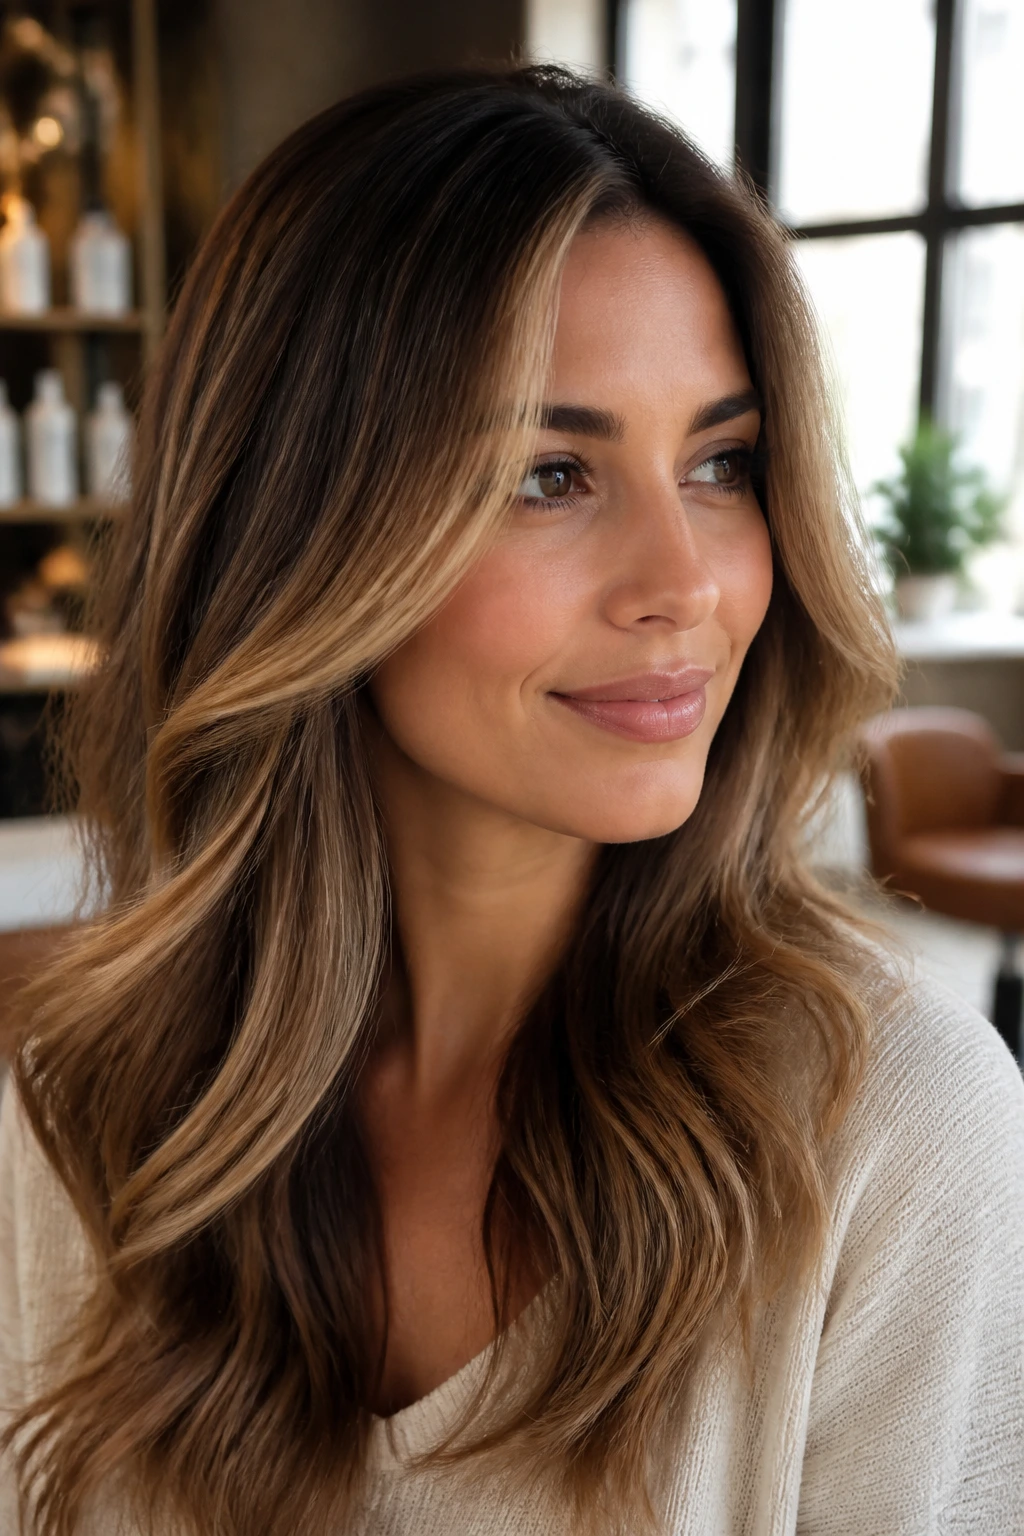
The best first highlights are rarely the loudest ones. They’re the ones that fit your hair, your schedule, and your tolerance for upkeep without making you feel like you settled. Caramel around the face, honey through the mids, a clean money piece, a shadow root, a beige bronde blend — those are all different versions of the same idea: let the color do useful work.
If you’re new to highlights, start with the look that gives you room to breathe. That’s where the smart choices live, and hair always looks better when it still feels like yours.
