



A beehive can make a plain haircut look deliberate in under ten minutes — if the crown is built correctly and the sides stay controlled. That’s why retro beehive hairstyles keep showing up in bridal folders, music shoots, and last-minute dress-up plans: the shape does the heavy lifting. It adds height, pulls the eye upward, and leaves room for earrings, lipstick, or a sharp neckline to do their part.
The look is older than the costume-party version people sometimes picture. A real beehive can be glossy, soft, braided, messy, or pin-straight at the sides; it can sit high on the crown or tuck into a low bun that only hints at the silhouette. The difference lives in the structure. Teasing creates the core, smoothing keeps it readable, and the finish decides whether the style feels polished, punk, romantic, or a little bit all three.
I’ve always thought the best versions are the ones that understand restraint. Too much volume in the wrong place turns the hair into a helmet. Too little lift and the shape disappears. The sweet spot is a clean ridge at the crown, a controlled perimeter, and enough personality somewhere else — a scarf, a braid, a bang, a glossy finish, something with a point of view. That balance is what makes the next forty looks worth sorting through.
Why These Beehive Looks Earn Their Space
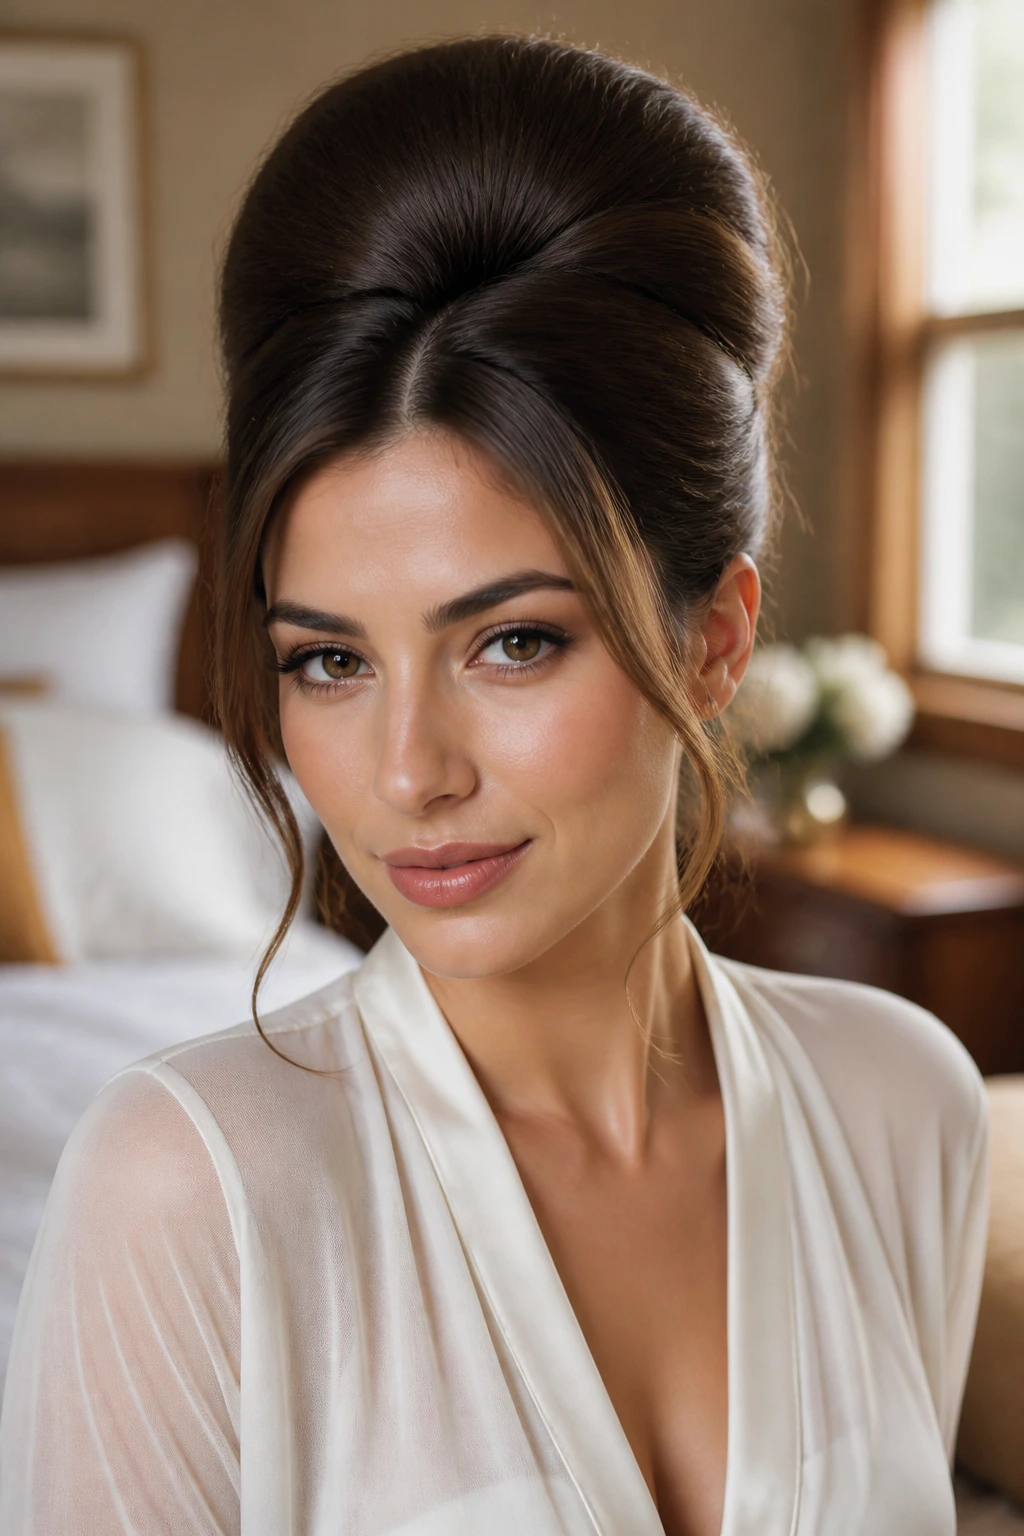
- Range of height: Some of these styles lift only the crown by an inch or two, while others build a full silhouette that changes the whole line of the head.
- Works with different lengths: You can fake a beehive on a bob, stretch one over long hair, or tuck one into a ponytail when you want movement below the crown.
- Accessory-friendly: Scarves, veils, headbands, pins, and combs sit naturally against the lifted crown because the shape leaves clear space around the face.
- Easy to tailor: The same basic structure can read bridal, pin-up, office-safe, edgy, or soft depending on how much shine, teasing, and face-framing you leave out.
- Better than it looks on paper: Once the base is pinned and the outer layer is smoothed, a quick mist and a few fingers at the front can bring it back after a long day.
1. Classic Crown Beehive
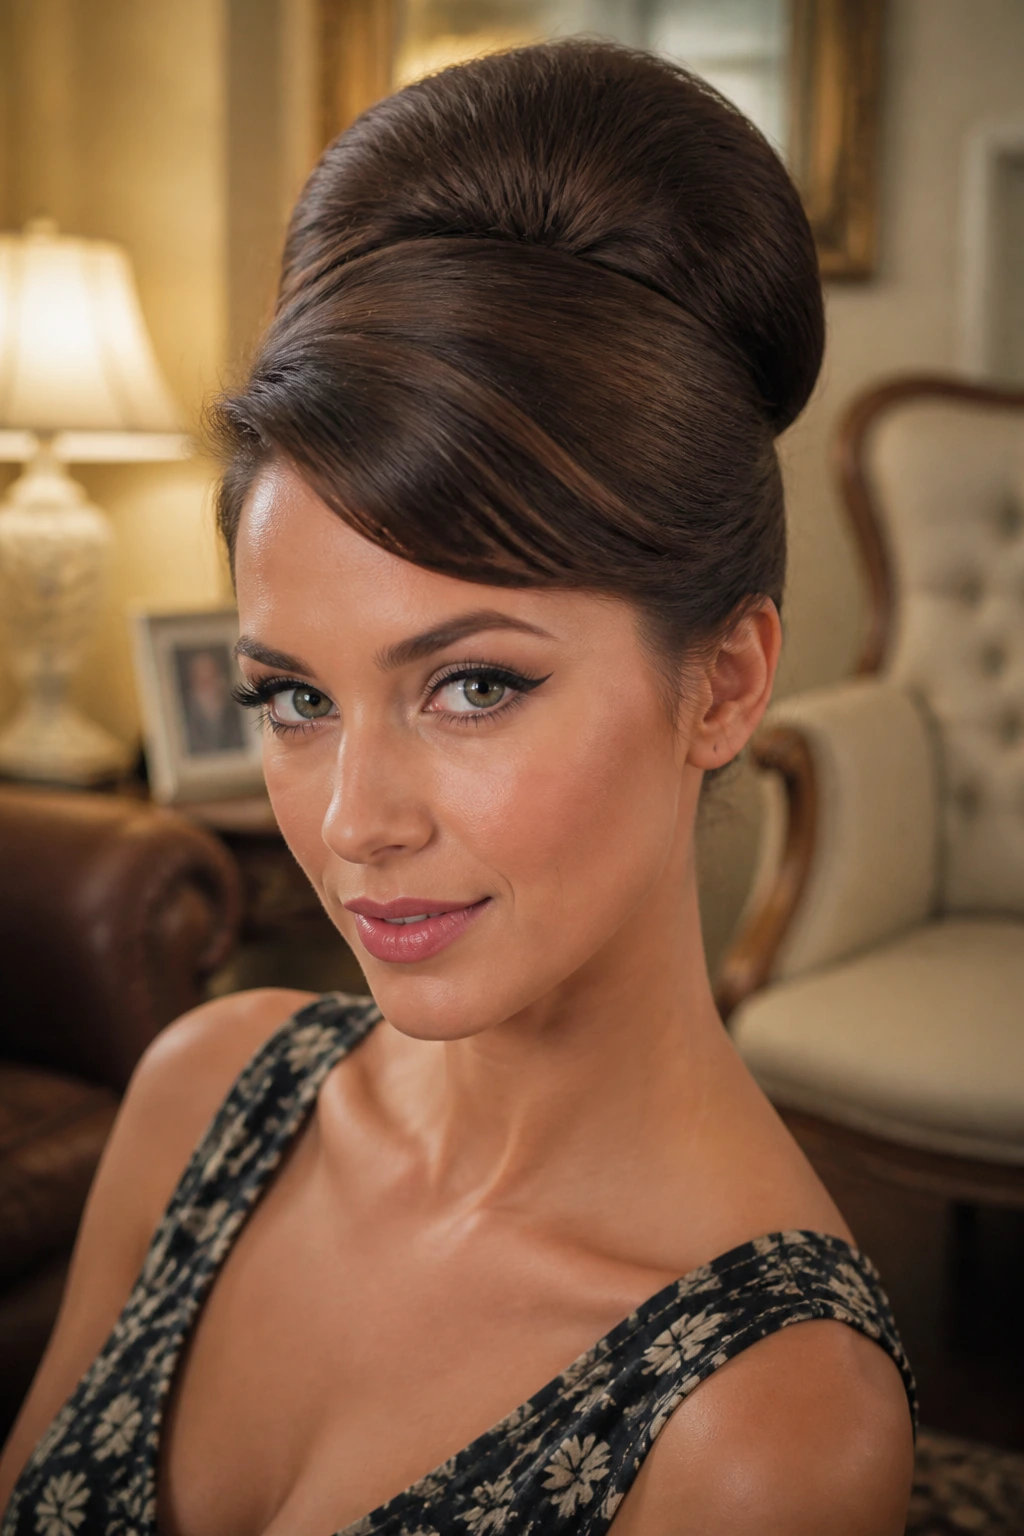
This is the version most people picture first: high crown, smooth sides, and a rounded top that sits just behind the hairline. It has a clean, almost architectural line, and that is why it still feels strong instead of dated. The shape does not need extra decoration to work.
Build it on second-day hair if you can. A little grit gives the teasing comb something to grab, and the surface layer smooths easier after the base is packed and pinned. I like this one for formal dinners and photos because it holds its outline well under indoor light, where soft styles can disappear.
2. Half-Up Bouffant Beehive
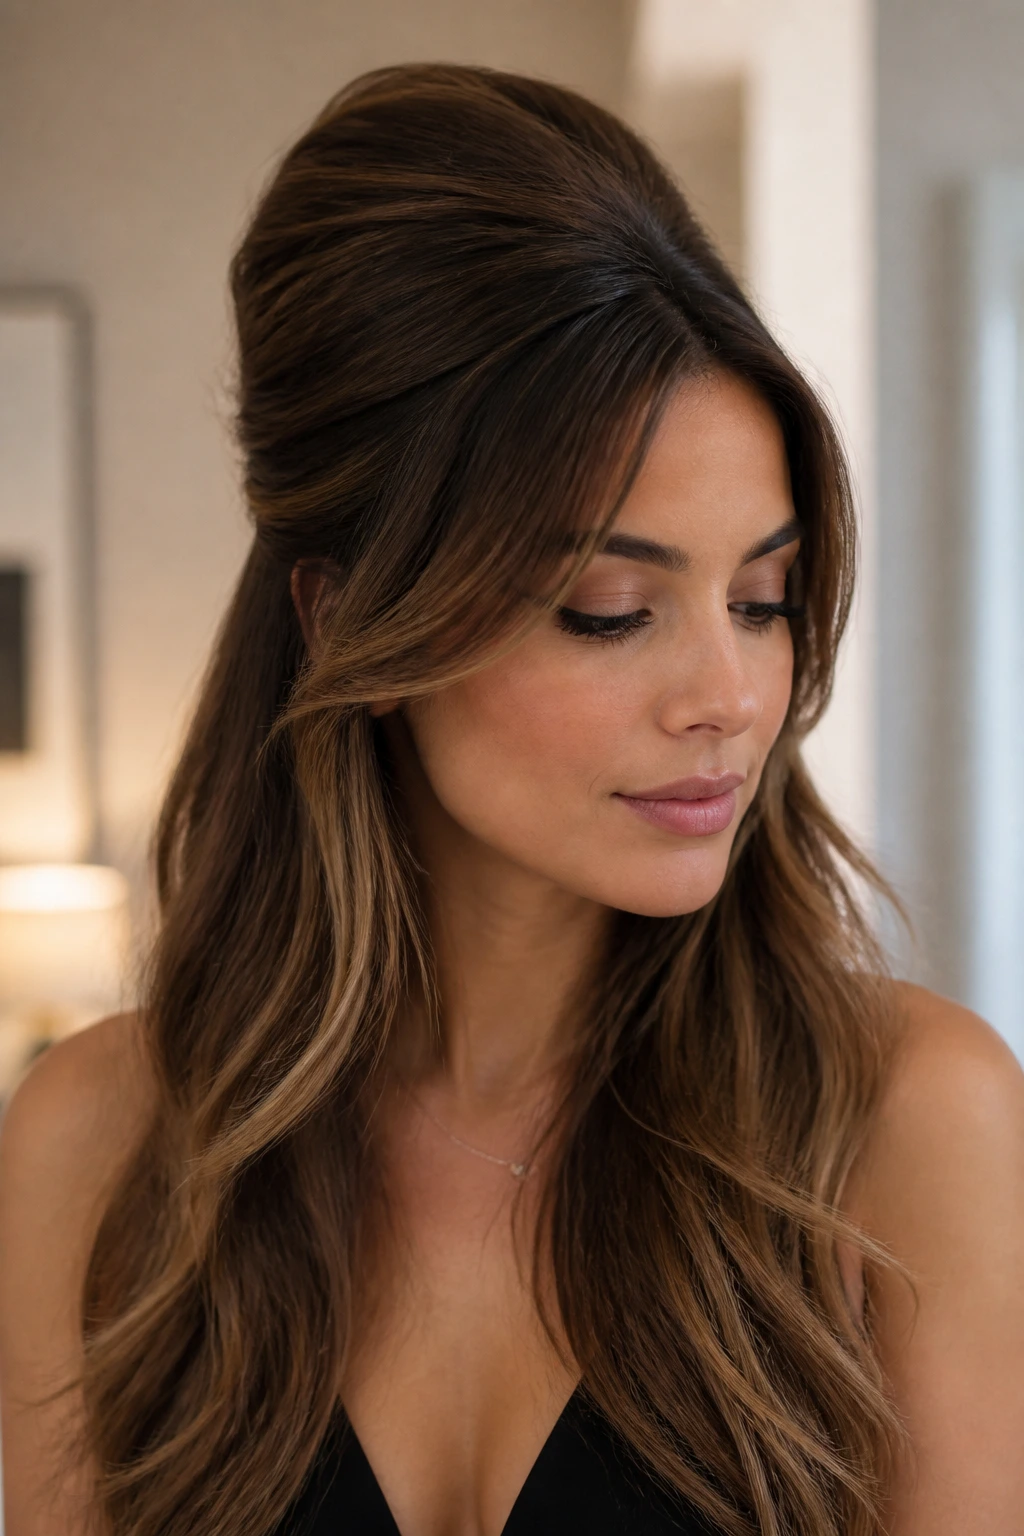
This version keeps the top lifted and leaves the rest of the length loose, which gives you movement without losing the retro shape. It reads a little lighter than a full updo, and that matters if you hate the feeling of every strand locked in place. The crown still gets height, but the ends keep the look from feeling stiff.
What makes it work is the contrast: a teased crown, a smooth half-up section, and the rest of the hair falling in waves or straight lines beneath. If your hair is medium to long, this is one of the easiest ways to wear a beehive without committing to a full pin job. It also plays well with low-key makeup and a simple top.
3. Sleek Side-Part Beehive
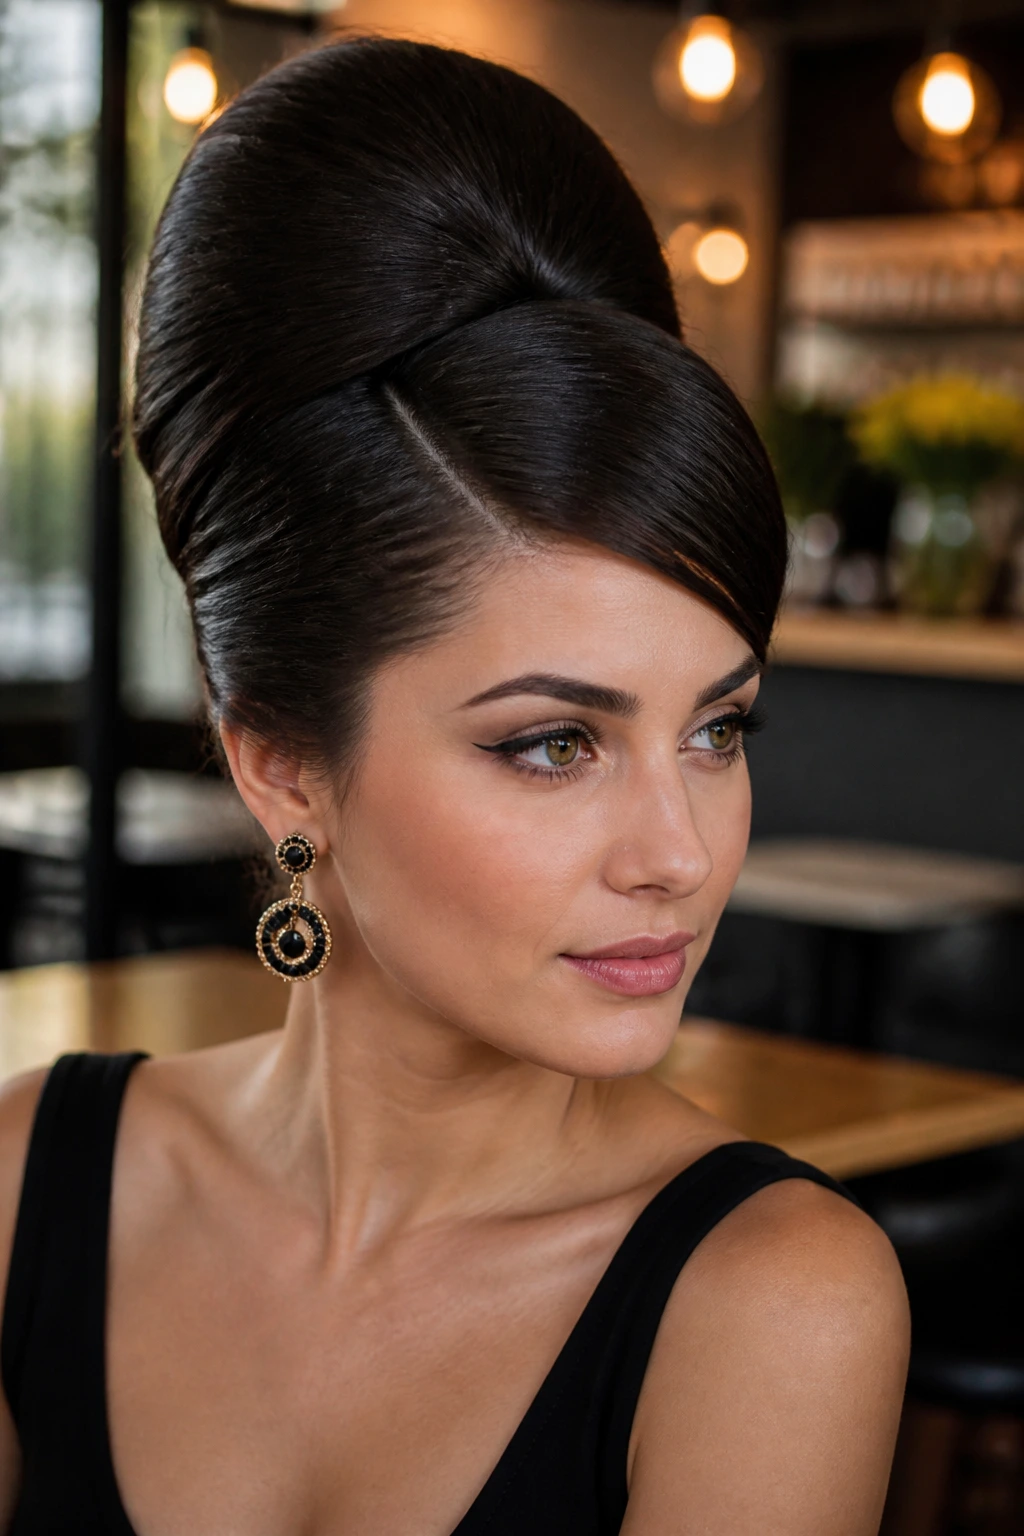
A deep side part gives the beehive a sharper edge. Instead of a centered, balanced dome, the volume leans to one side and creates a long line across the forehead that feels elegant and a little dramatic. It’s a small change, but it changes everything.
The side sweep is especially nice when you want the height to feel more refined than playful. Keep the front smooth and let the lift begin slightly off-center, then pin the deeper side close to the head so the shape doesn’t puff at the temples. This one looks especially good with a strong earring on the open side.
4. Rockabilly Beehive Ponytail
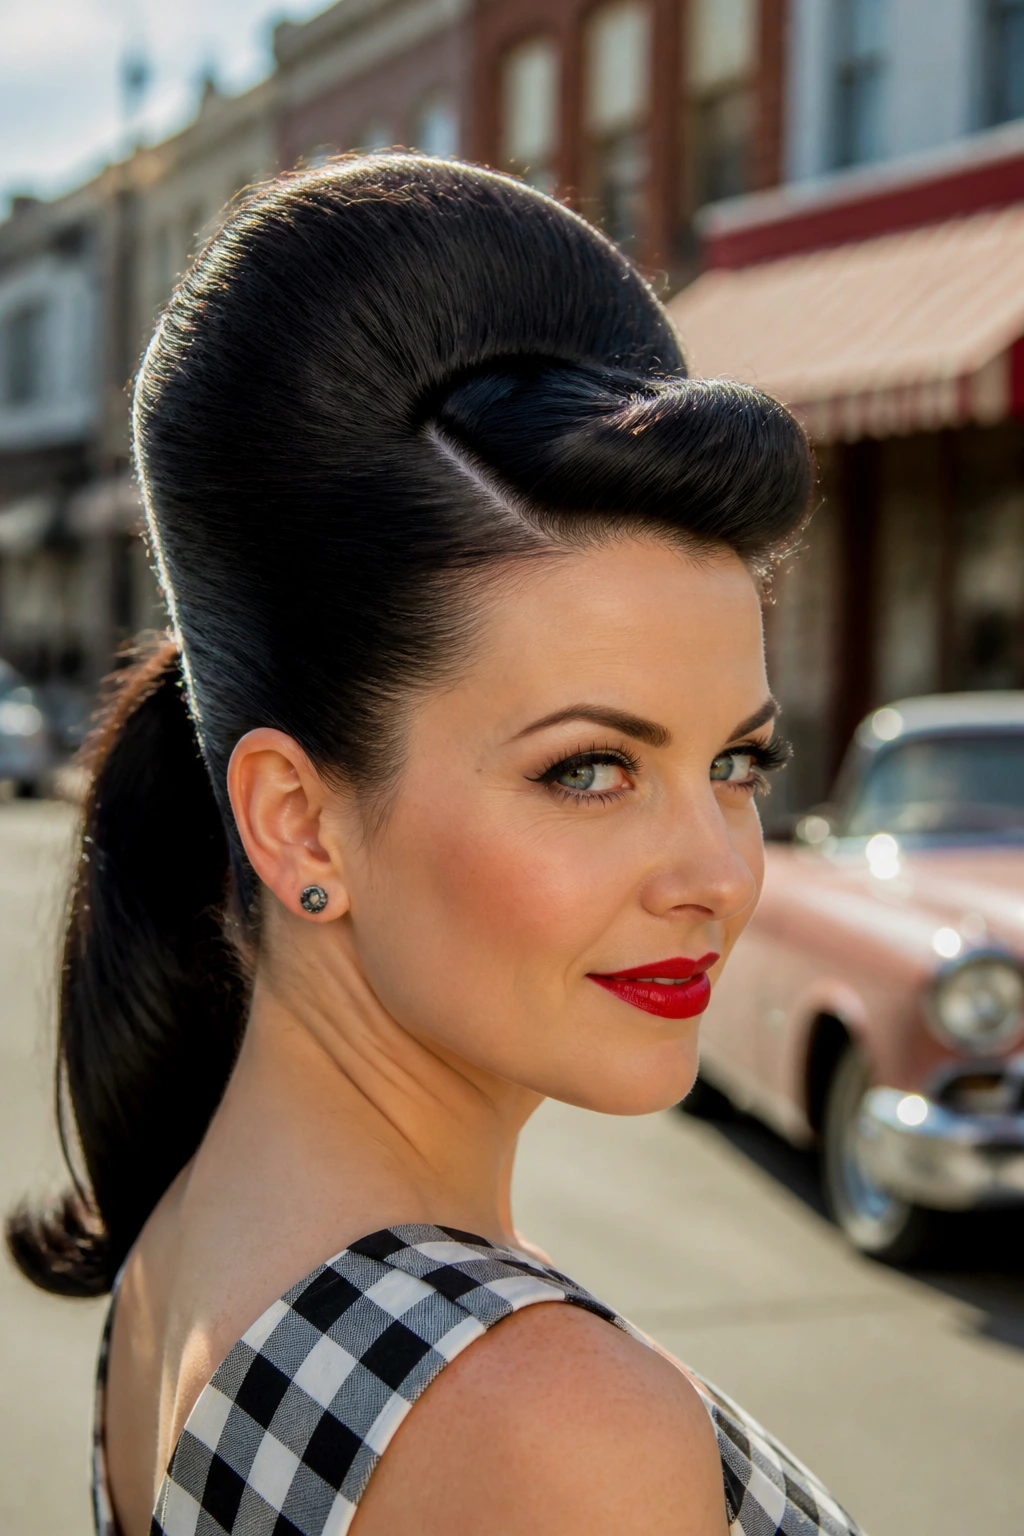
Picture a tall crown, a narrow waist of hair, and a ponytail swinging underneath. That’s the attitude here. It has more movement than a standard beehive, which makes it feel less like a museum piece and more like a style with a pulse.
The trick is to keep the ponytail low enough that it doesn’t fight the height at the top. Secure the crown first, then smooth the ponytail with a brush and wrap a small section of hair around the elastic. A bright lip or winged liner suits this look well, but even without the makeup it has enough shape to carry itself.
5. Beehive with Curtain Bangs
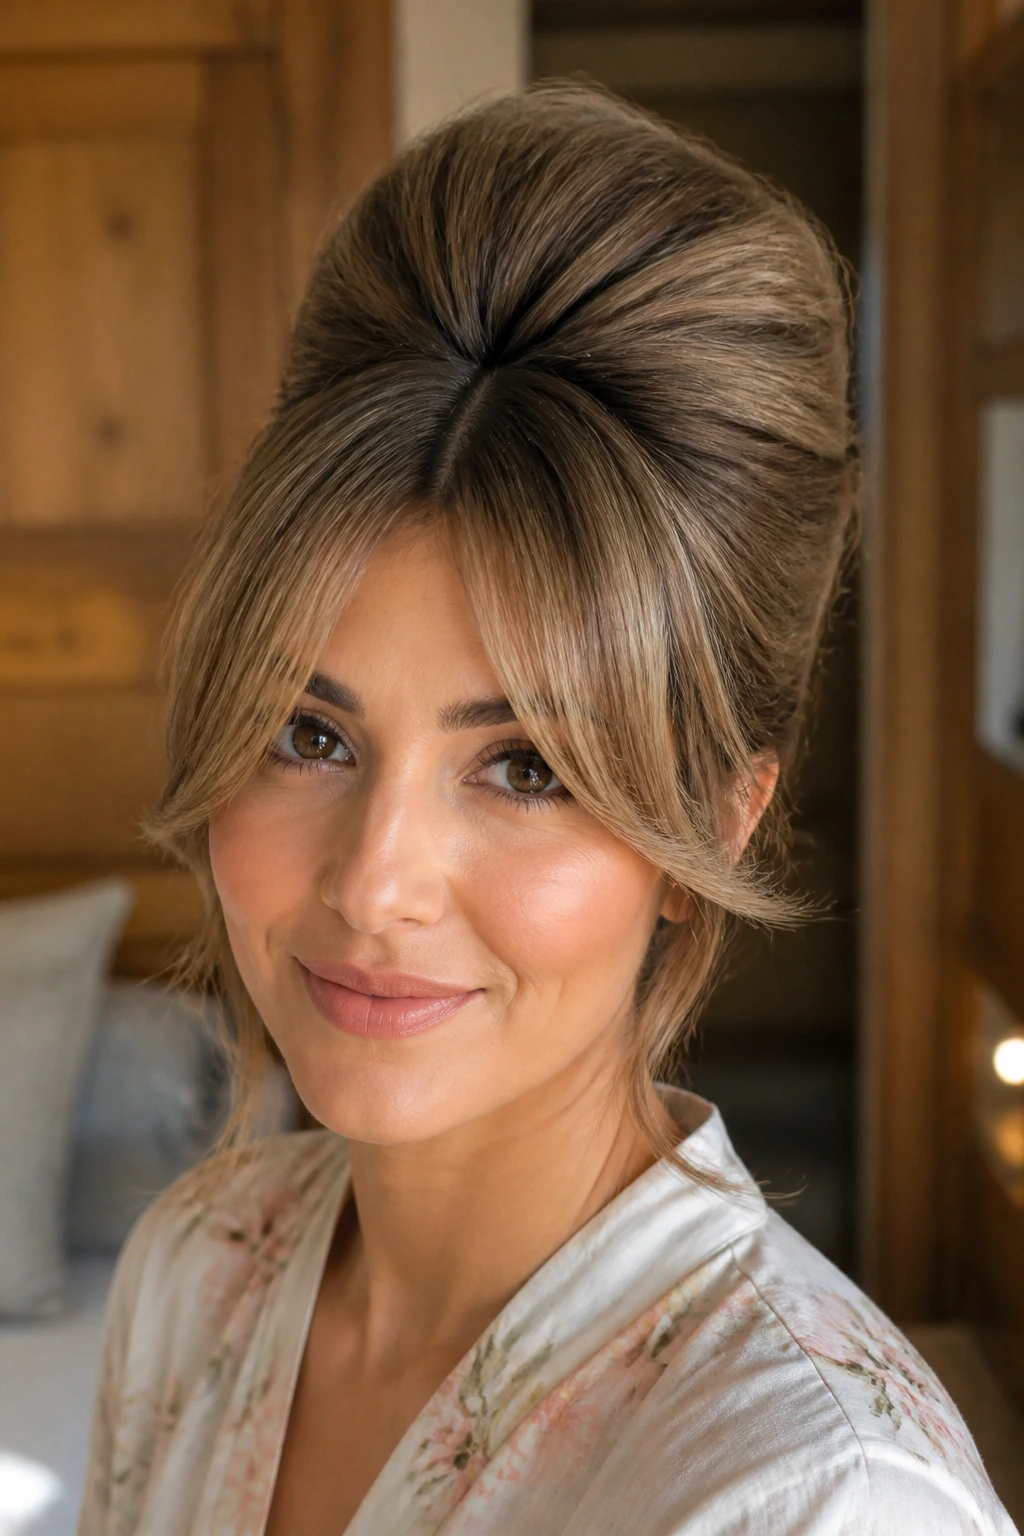
Curtain bangs soften the front line and stop the beehive from looking too severe. Instead of a hard wall of height, you get a lifted crown with a face frame that parts gently near the brows. It’s a smart choice if you like retro hair but do not want a full-on pin-up finish.
Keep the bangs airy, not heavy. If they’re too blunt, they’ll compete with the volume at the crown and flatten the shape around the forehead. This one works especially well when the rest of the hair is slightly waved, because the movement at the ends balances the neatness up top.
6. Scarf-Wrapped Beehive
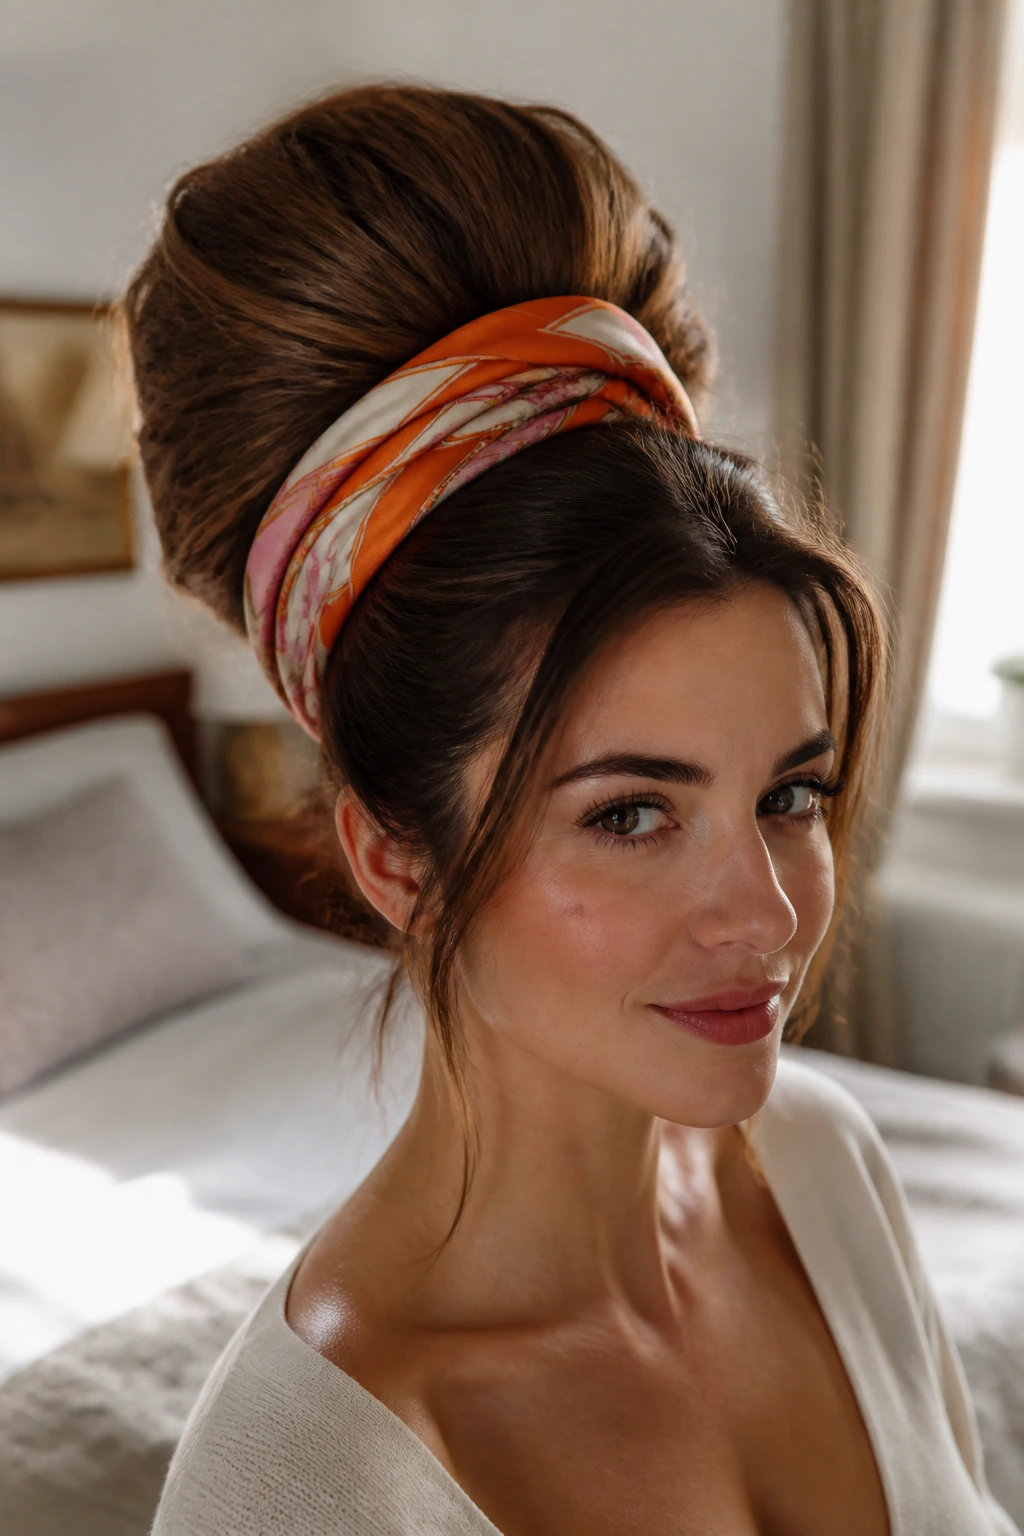
A scarf does two jobs at once: it adds color, and it makes the style feel less precious. Tie it around the base of the crown or fold it into a narrow band that sits just behind the hairline. Either way, it gives the beehive a clear finish point.
I like this look because it hides pins without hiding the structure. A printed silk scarf can soften a tall beehive, while a cotton band gives it a more casual, daytime feel. It’s a good fix for hair that needs a little help staying put, since the scarf acts like a visual anchor.
7. Teased Low Chignon Beehive
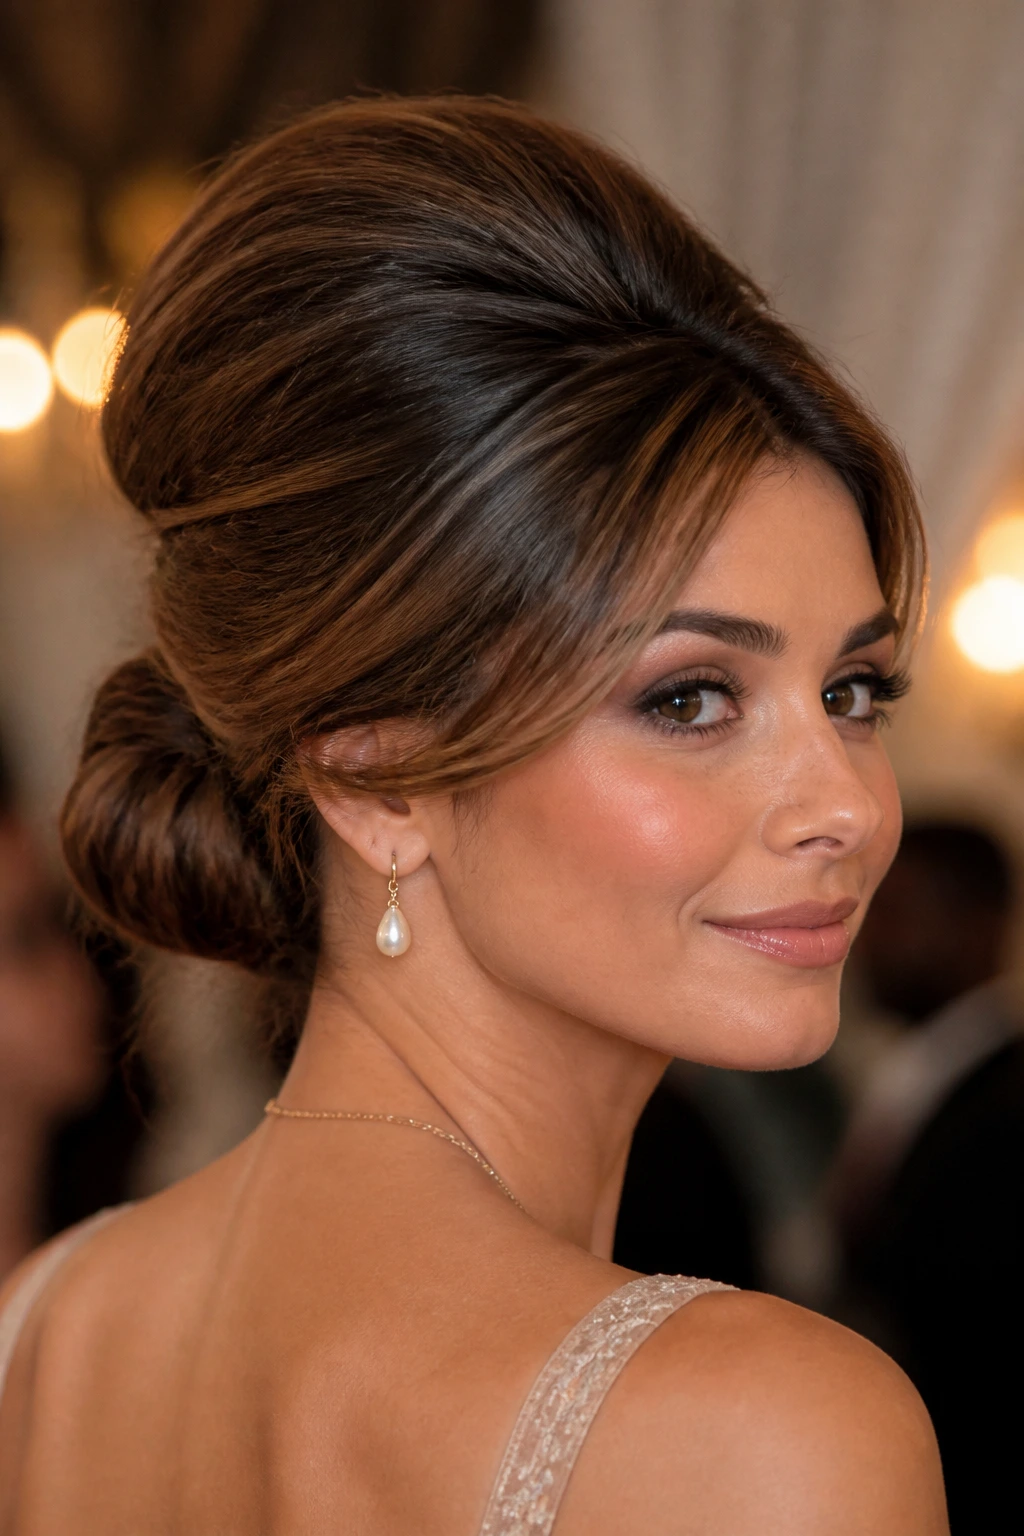
This is the understated cousin in the family. The lift stays lower and the hair is rolled or tucked into a chignon at the nape, so the silhouette reads as polished rather than towering. It’s still a beehive, just one that knows when to lower its voice.
That lower placement makes it useful for long events, office parties, or any setting where you want the nod to vintage styling without the full height. A smooth top layer and a compact bun keep the lines clean, and a few hidden pins at the base will do more work than one giant spray session ever could.
8. Braided Halo Beehive
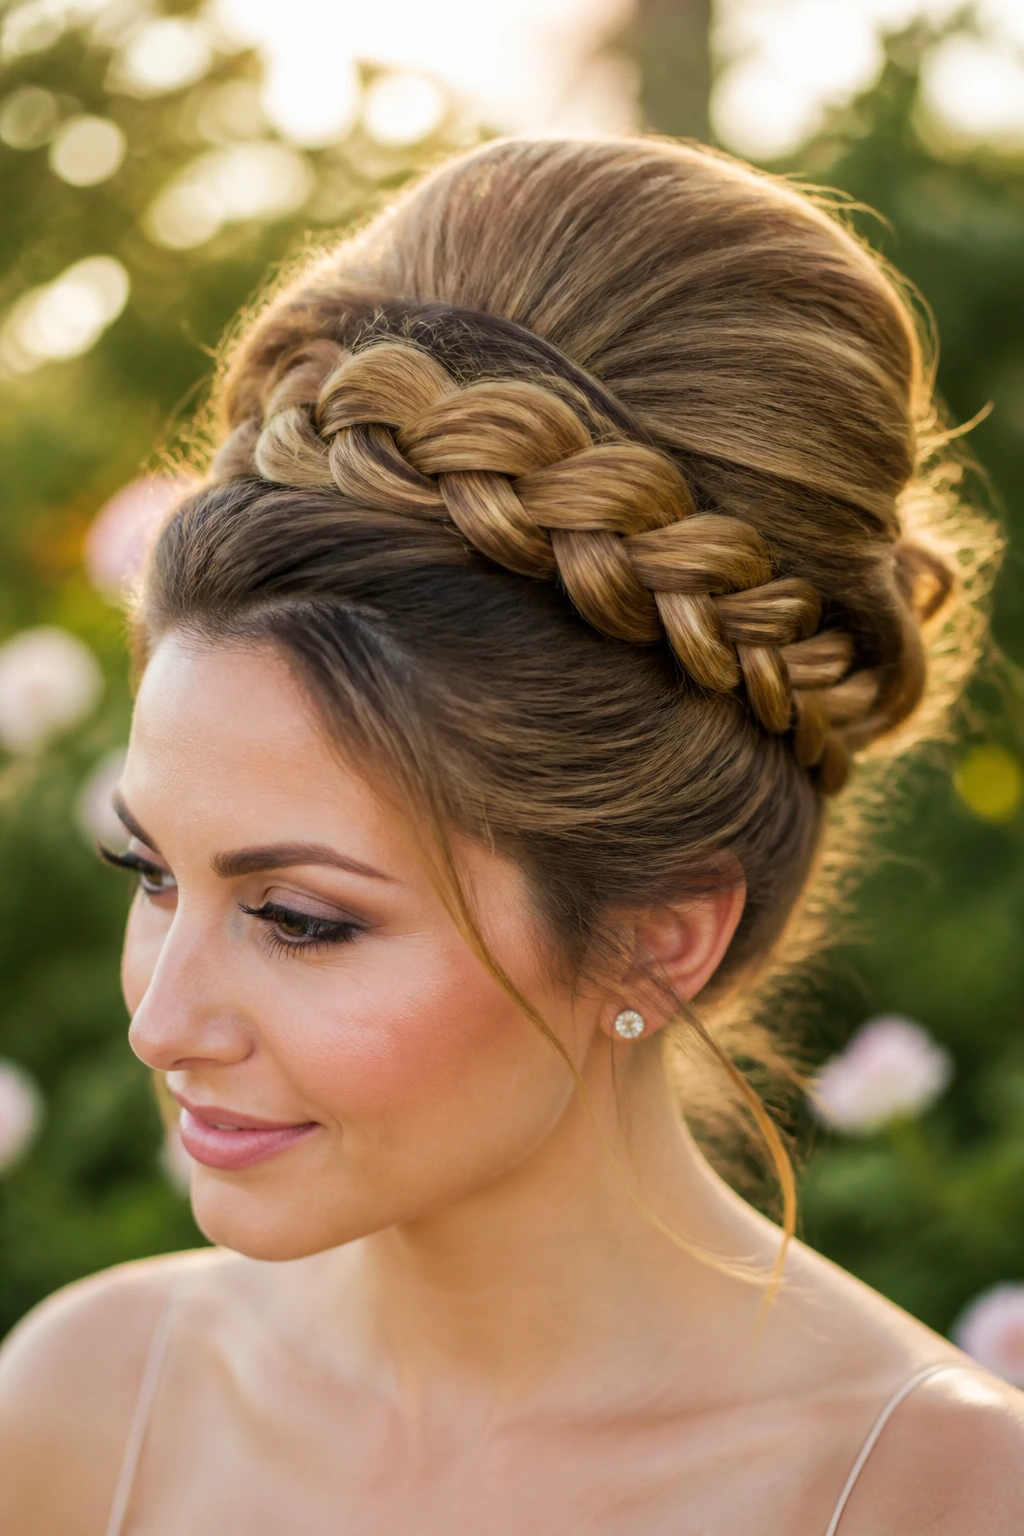
A braid wrapping around the crown gives the style a handmade feel that plain teasing can’t match. The lift sits underneath the braid, so the beehive shape is there, but the braid changes the surface and makes it look more deliberate. It also helps disguise any rough spots where the teasing meets the smooth outer layer.
If your hair is long enough, braid one side and pin it across the top, or build a thin halo braid and tuck it into the back of the lifted section. This version is useful when you want texture without frizz. It’s one of the few beehives that can survive a little wind and still look like it meant to be worn that way.
9. Mini Beehive for Short Hair
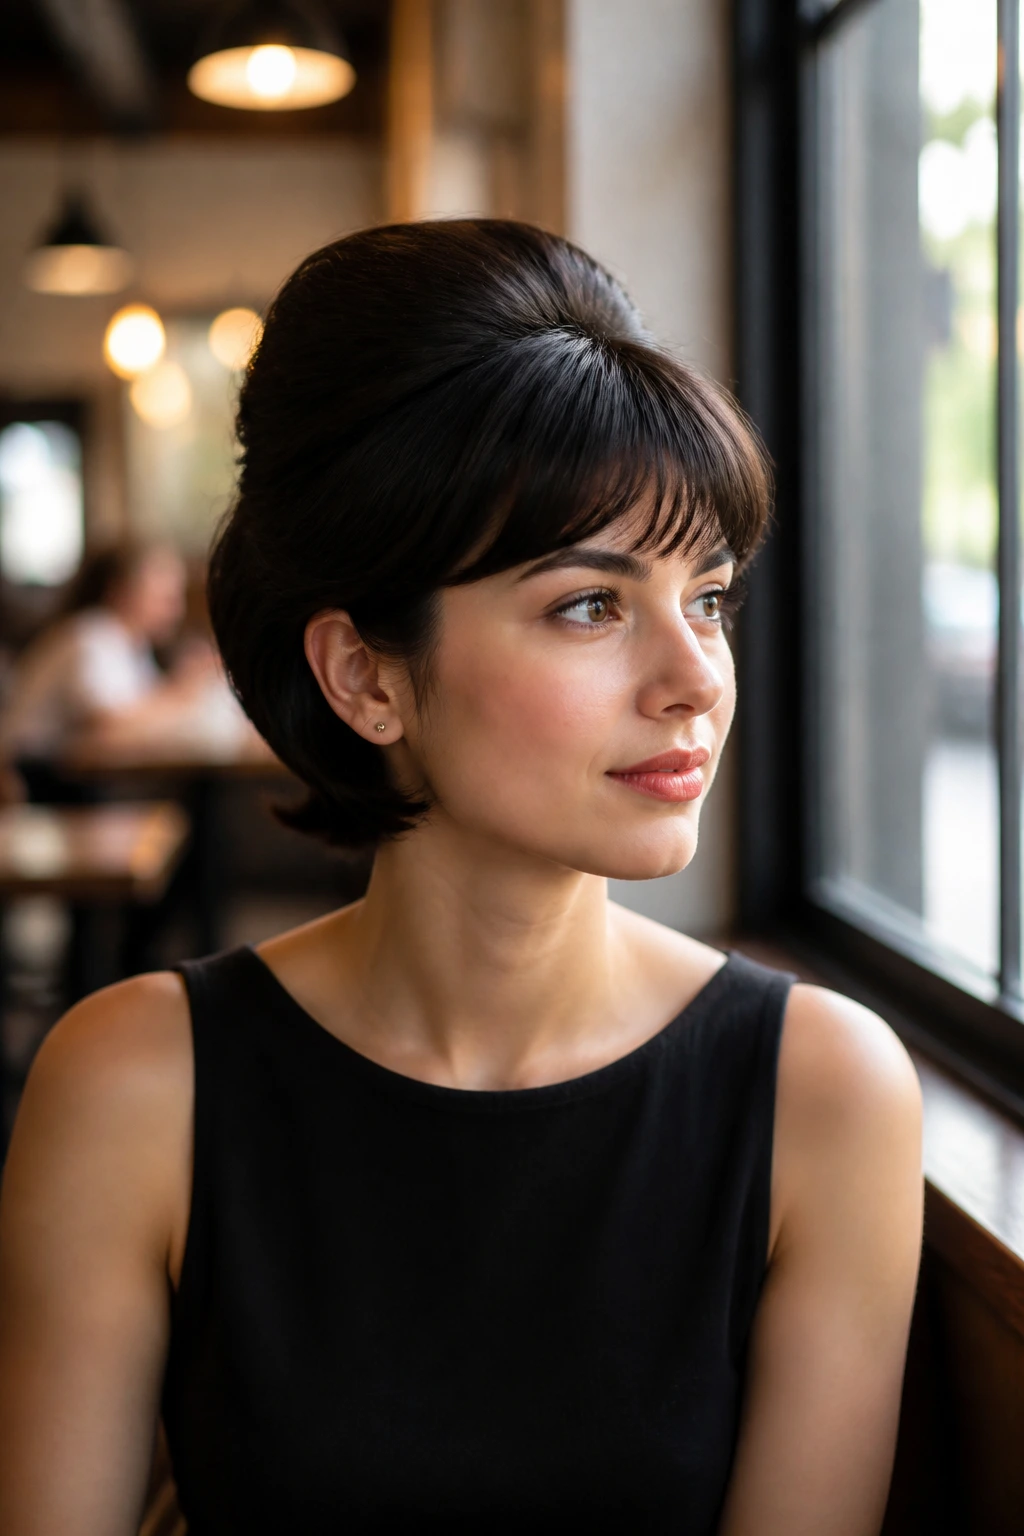
Short hair can absolutely pull this off. The scale is smaller, the lift is tighter, and the shape sits closer to the crown, but the idea is the same. A mini beehive on a bob or lob looks sharp because it doesn’t try to fake length it doesn’t have.
The easiest way to do it is with a small padded bump or a tightly teased crown section, then smooth the top layer and pin the sides back. Keep the rest of the cut tucked in or curled under at the ends. This version is one of my favorites because it proves the silhouette matters more than the length.
10. High Beehive Ponytail
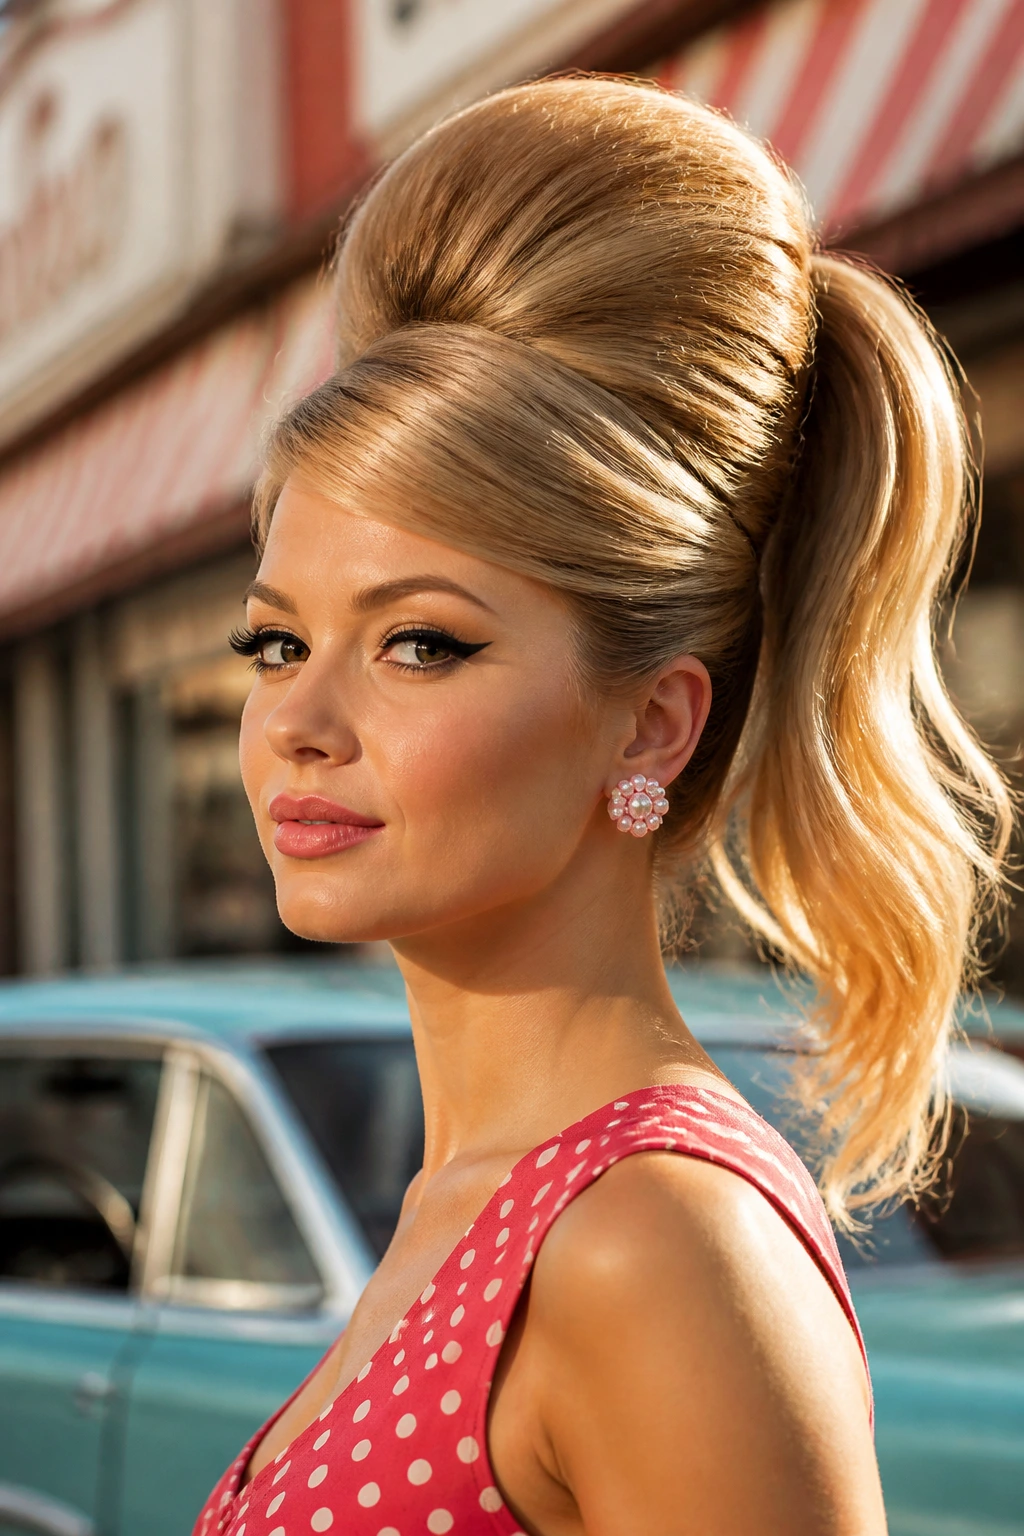
This one goes bigger and more upright than the rockabilly version. The ponytail sits high, almost at the same level as the lift, which gives the whole style a more lifted, energetic line. It’s bold without being complicated.
A good way to keep it from tipping too far back is to secure the teased section first, then anchor the ponytail just below the highest point of the crown. Wrap a strand around the elastic and leave the tail smooth or lightly waved. If you want the beehive shape to read from across the room, this is the one.
11. Retro Bride Beehive
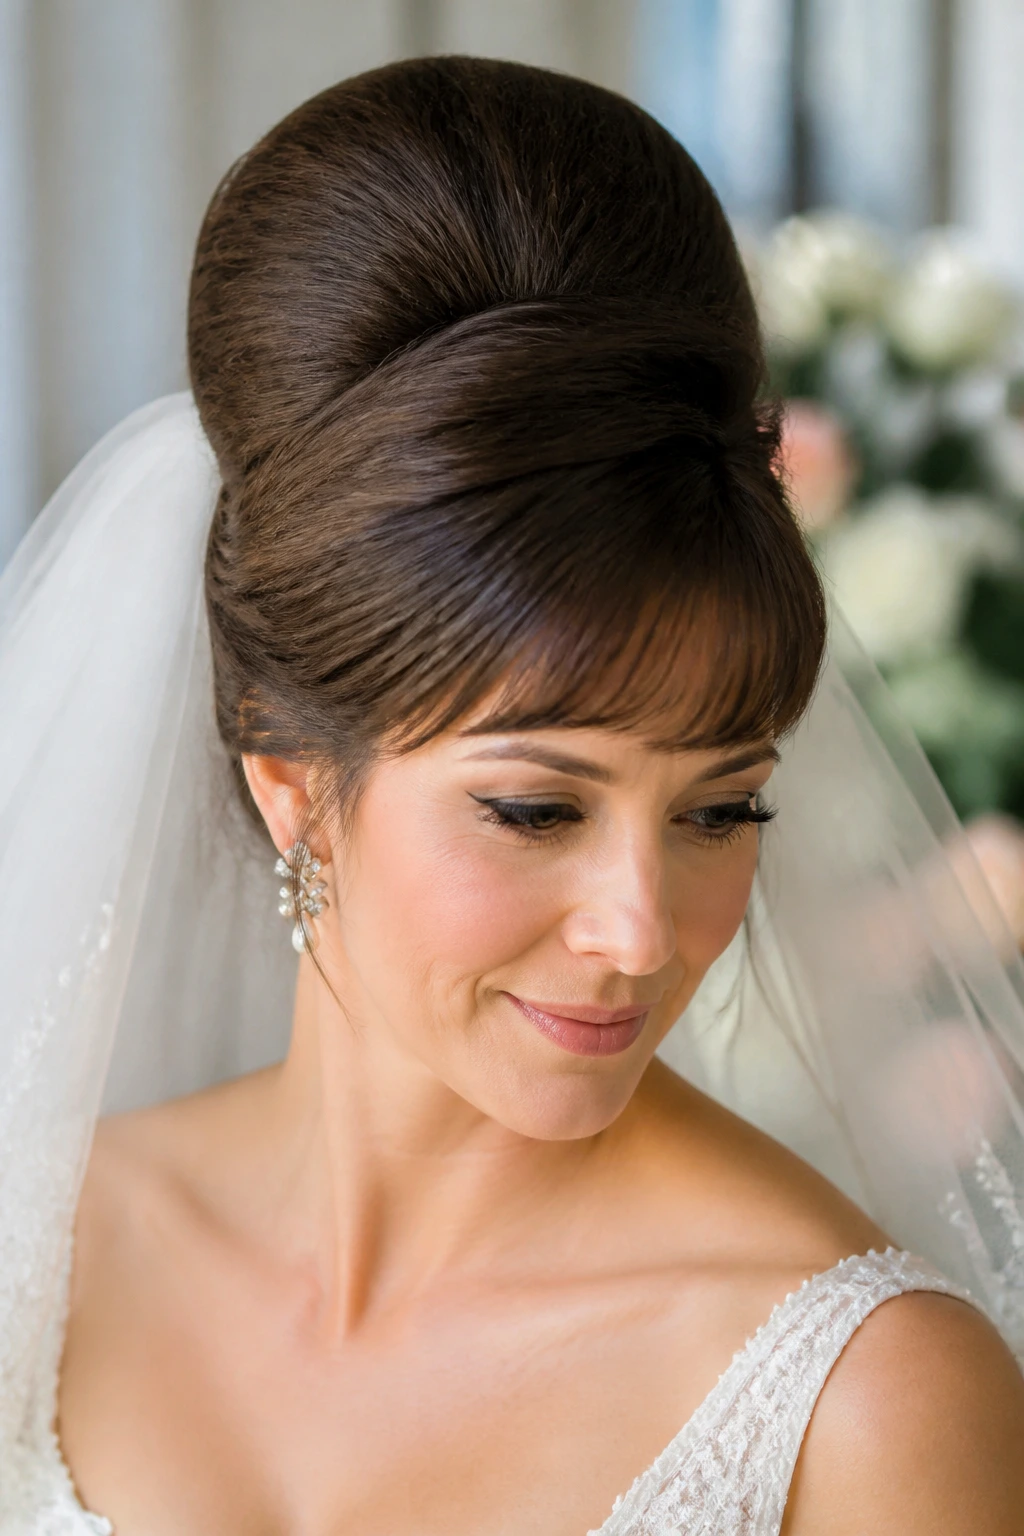
This is where the beehive gets its softer manners. A bridal version usually has a cleaner crown, careful pinning, and enough smoothness to sit under a veil or a comb without popping out in odd places. Pearls, veils, and a neat side sweep all sit well here.
The best bridal beehives don’t fight the dress. If the gown has a busy neckline, keep the hairline smoother and the crown slightly lower. If the dress is simple, a taller shape adds the drama. The result should feel secure enough to survive a long day of hugs, photos, and movement — because wedding hair has a job to do.
12. Double Beehive Pigtails
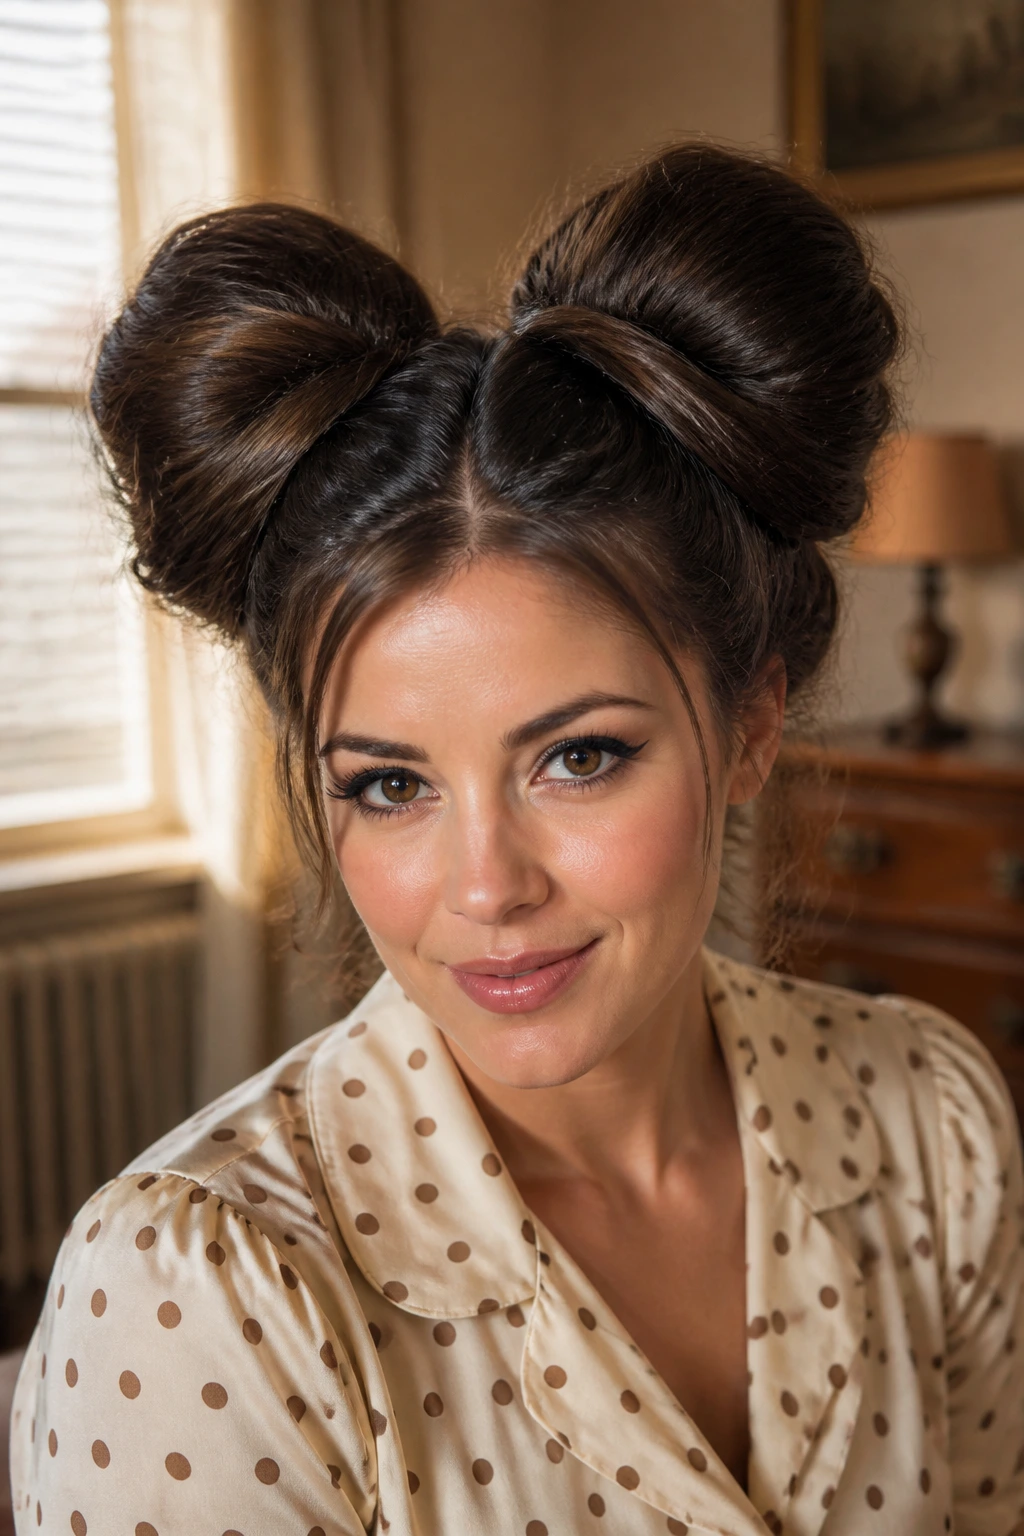
Two smaller beehives can be more playful than one big tower. The symmetry gives the style a graphic feel, and the twin shapes keep it from getting too serious. It has attitude, but it also has a sense of humor.
Keep each side balanced without making them identical down to the millimeter. A little unevenness actually helps, because a perfectly mirrored pair can look stiff fast. This style works especially well with bold makeup or a plain outfit, since the hair already brings a lot of visual weight.
13. Beehive with Victory Rolls
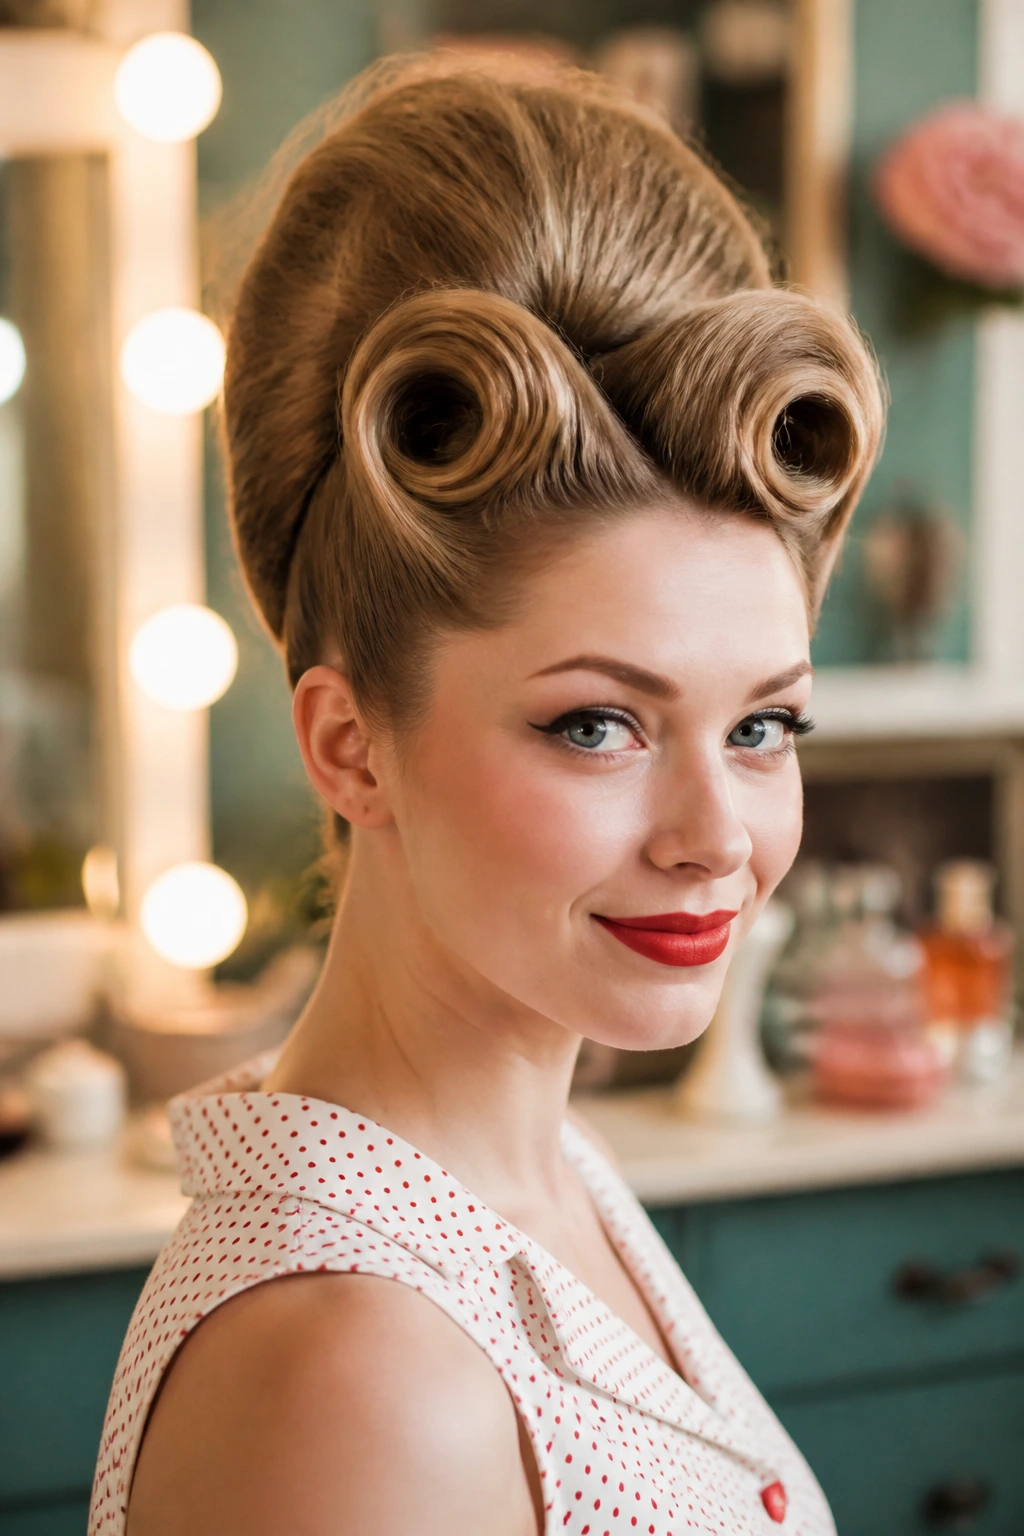
Victory rolls at the front turn a regular beehive into a full pin-up set piece. The rolls curve the hair away from the face, then feed into the crown lift, which makes the shape feel connected instead of stacked on top. It’s one of the most recognizable vintage combinations for a reason.
Use this version when you want the front of the hair to matter just as much as the height. A little sheen helps the rolls show their shape, but don’t drown them in product. The style benefits from clean lines and a firm base, not a slippery finish that makes everything collapse by lunchtime.
14. Messy Textured Beehive
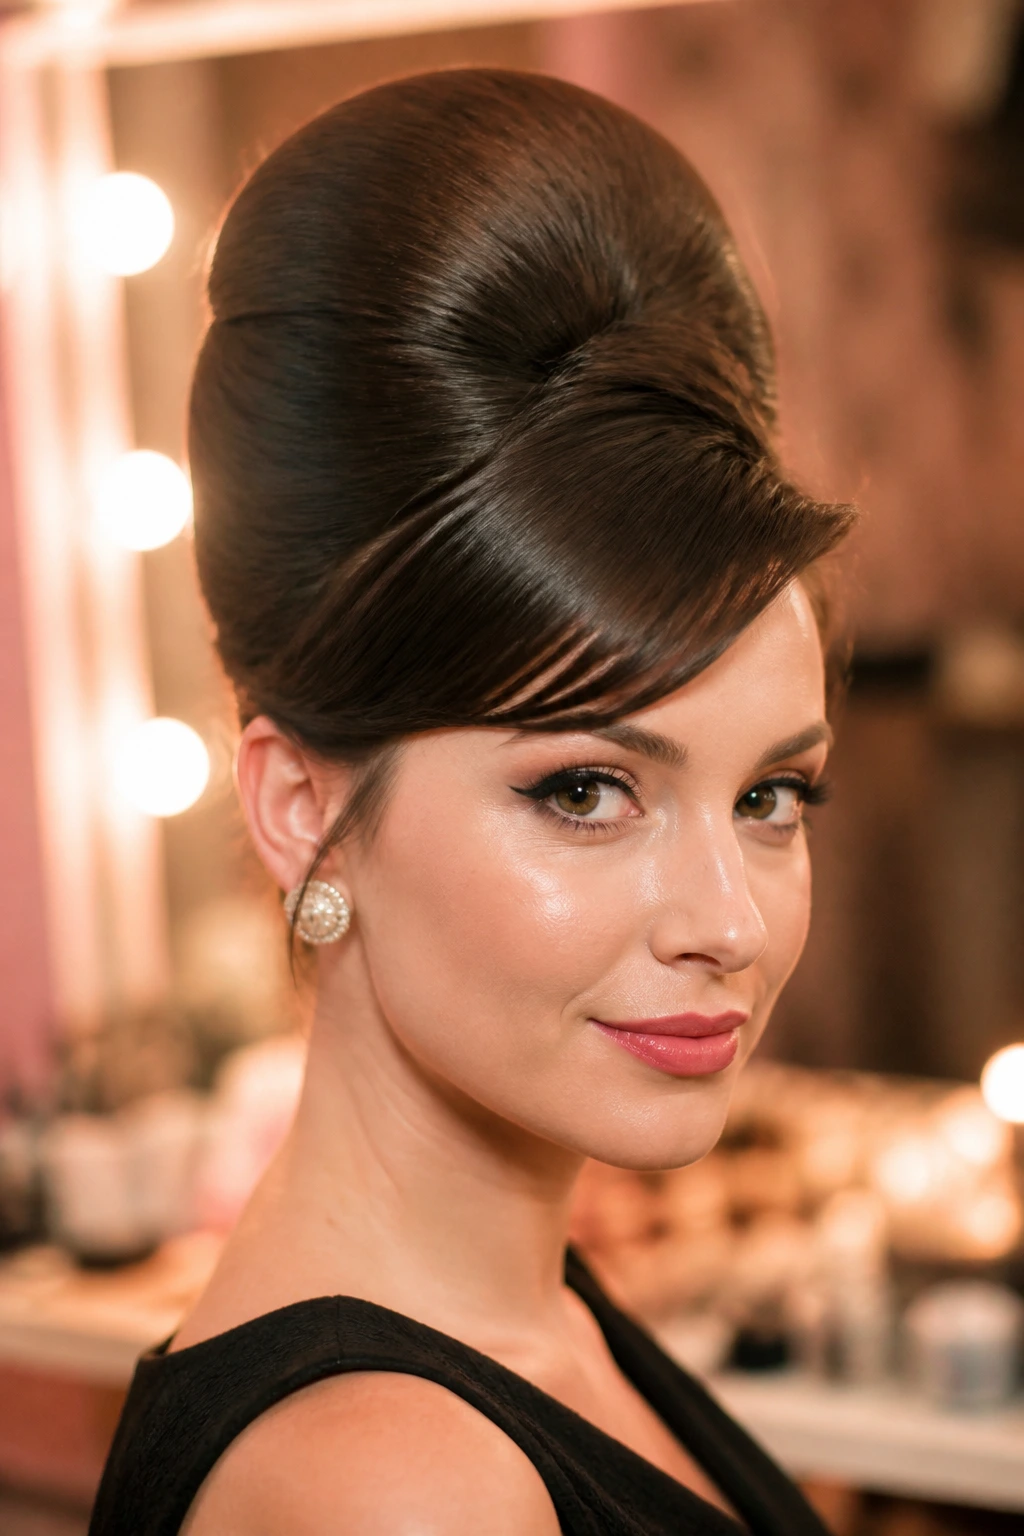
A beehive does not have to be lacquered within an inch of its life. The messy version keeps the lift but loosens the surface, leaving a few lived-in pieces around the temples and crown. It feels less costume-y and more like a style you could wear to an actual dinner without changing your whole outfit.
The key is controlled mess, not chaos. You still need a firm base under the top layer, but the finish can be piecey, matte, and slightly undone. If your hair is naturally wavy or a bit frizzy, this one is easier than the glossy versions because it uses texture as part of the look instead of fighting it.
15. Glamorous Side-Swept Beehive
This is the one that leans into drama. The hair sweeps across the forehead and over one side, then lifts at the crown before dropping into softer length on the other side. It has a long, sloping line that flatters the cheekbones and gives the whole style a red-carpet feel.
I like it when the shoulder on the heavier side is bare, because that lets the hair become part of the neckline instead of crowding it. Keep the root area secure and the sweep smooth, then let the lower length move. It’s not a quiet look, and it shouldn’t be.
16. Beehive with Headband
A headband can tame a beehive or sharpen it, depending on the width and finish. A thin band gives a cleaner line, while a padded or jeweled one turns the crown into a more obvious focal point. The accessory sits naturally where the lift begins, which is why this pairing works so well.
This version is useful when you want the style to feel finished quickly. It also helps hide the seam between teased roots and smooth top hair. If your hair slides out of volume easily, a headband can add both grip and a visible border, which makes the shape easier to read.
17. Faux Bob Beehive
A faux bob and a beehive belong together more often than people expect. You keep the crown lifted, then tuck or pin the length under so it looks like a shorter cut from the front and side. The result has that old-screen-star trick of making more out of less.
The important part is the end shape. Curl or roll the ends before pinning them under, or the tucked section will look flat and unfinished. This style works especially well if you want the neck to stay visible, since the hidden length creates a clean line around the collar.
18. Curly Beehive Updo
Curly hair changes the entire feel of a beehive. Instead of smoothing everything flat, you can build height and let curls add softness around the edges or through the tucked back section. The result looks fuller without needing as much teasing as straight hair often does.
Stretch the roots a little before you start, then shape the crown and let the curls do the rest. If the curl pattern is tight, leave a few ringlets free at the front or nape so the style doesn’t read as one solid mass. This version has a nice built-in rhythm; the hair moves when you move, which is half the fun.
19. Sleek Shellacked Beehive
This is the glossy, firm version that knows exactly what it’s doing. The crown is smooth, the sides are controlled, and the finish has enough shine to catch light cleanly without looking greasy. It’s the opposite of messy, and that contrast is why it works.
A fine mist of strong-hold spray over the outer layer keeps the shell smooth while the hidden teasing holds the shape underneath. Use a boar-bristle brush for the surface, not a flimsy plastic one, or you’ll drag the top layer into little bumps. The style looks best when every line feels intentional.
20. Bubble Ponytail Beehive
The bubble ponytail adds segmented volume below the crown, so the beehive and the ponytail feel like two parts of the same story. It’s a smart way to make a tall crown feel less static. The sections down the length keep the eye moving.
Start with the beehive base, then secure the ponytail and add small elastics every few inches. Gently pull each section outward to form soft bubbles, but stop before the shape looks overstuffed. This one is especially good when you want vintage height at the top and something more playful at the ends.
21. Low Beehive Bun
A low bun with crown lift keeps the profile neat while still giving you that retro rise. The bun sits at the nape, which lets the crown take the stage without the style going huge. It’s one of the most practical shapes in the group.
The beauty of this version is that it stays tidy from every angle. Use hidden pins to anchor the bun, then smooth the crown enough to show the arc without flattening it completely. If you like wearing strong necklaces or a higher collar, this style leaves enough room for both.
22. Voluminous Crown Puff Beehive
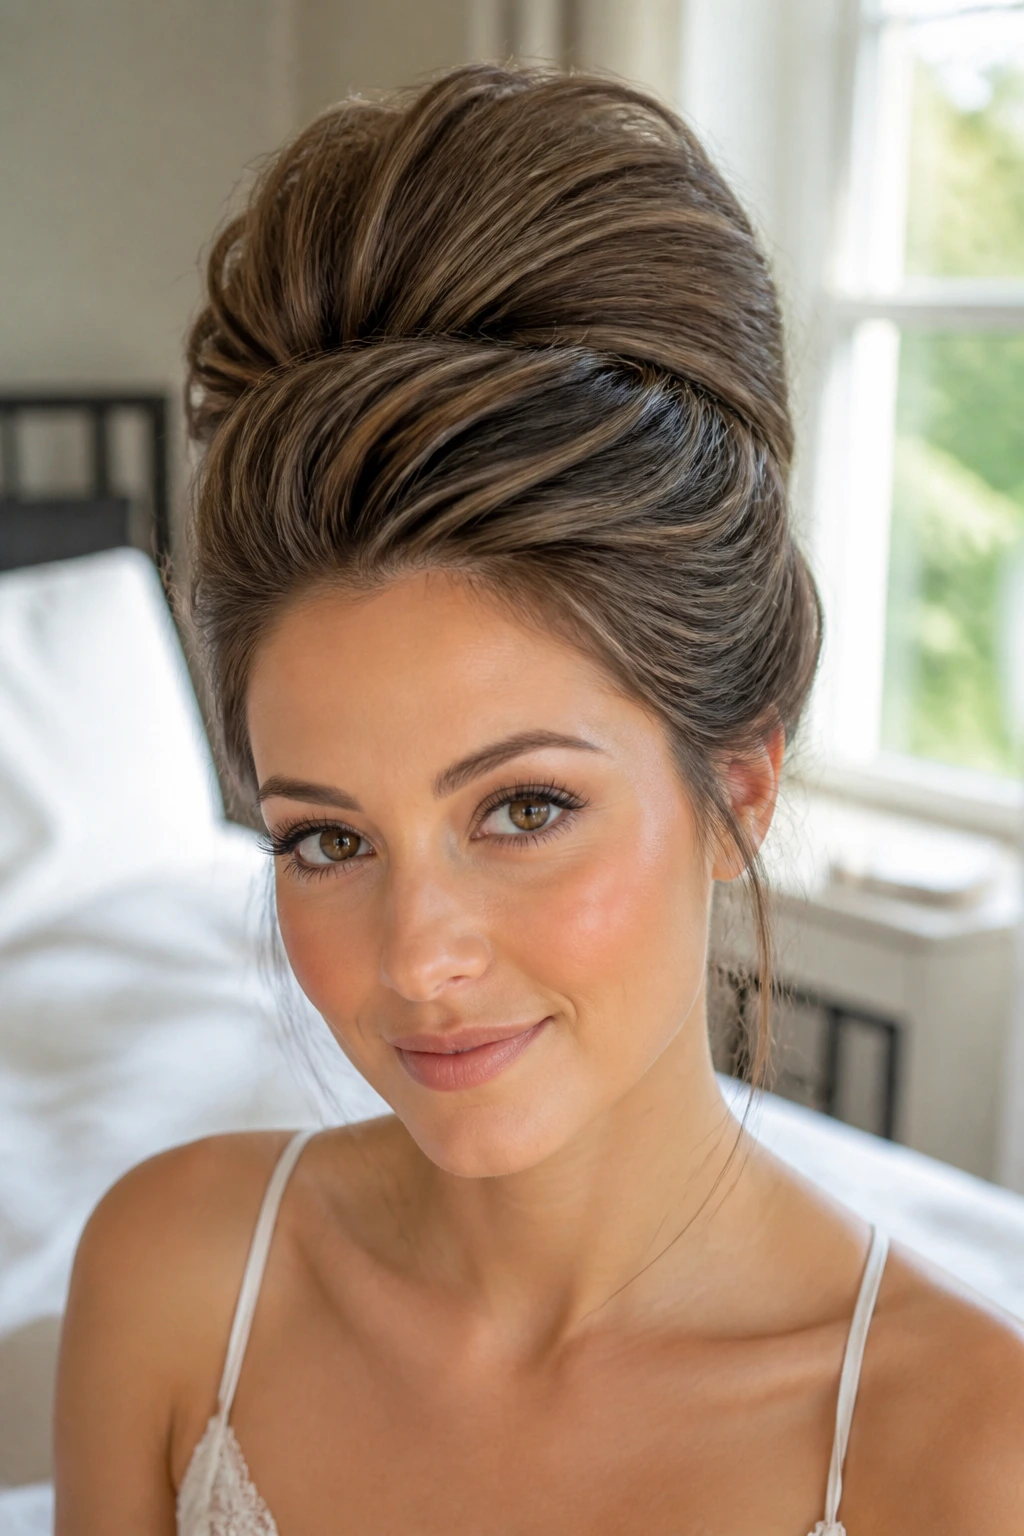
This is the version that works best when the hair already has natural texture and body. The crown puff lifts high and stays full, while the sides can be controlled or shaped back depending on how dramatic you want the line. It has more air in it than a sleek beehive, and that gives it life.
Keep the roots stretched and the crown section separated before shaping, so the puff doesn’t collapse into the rest of the hair. A touch of edge control at the hairline can keep the front clean while the top stays rounded. This one proves a beehive doesn’t need to be straight hair in a tight shell.
23. Pin-Up Beehive with Rolled Ends
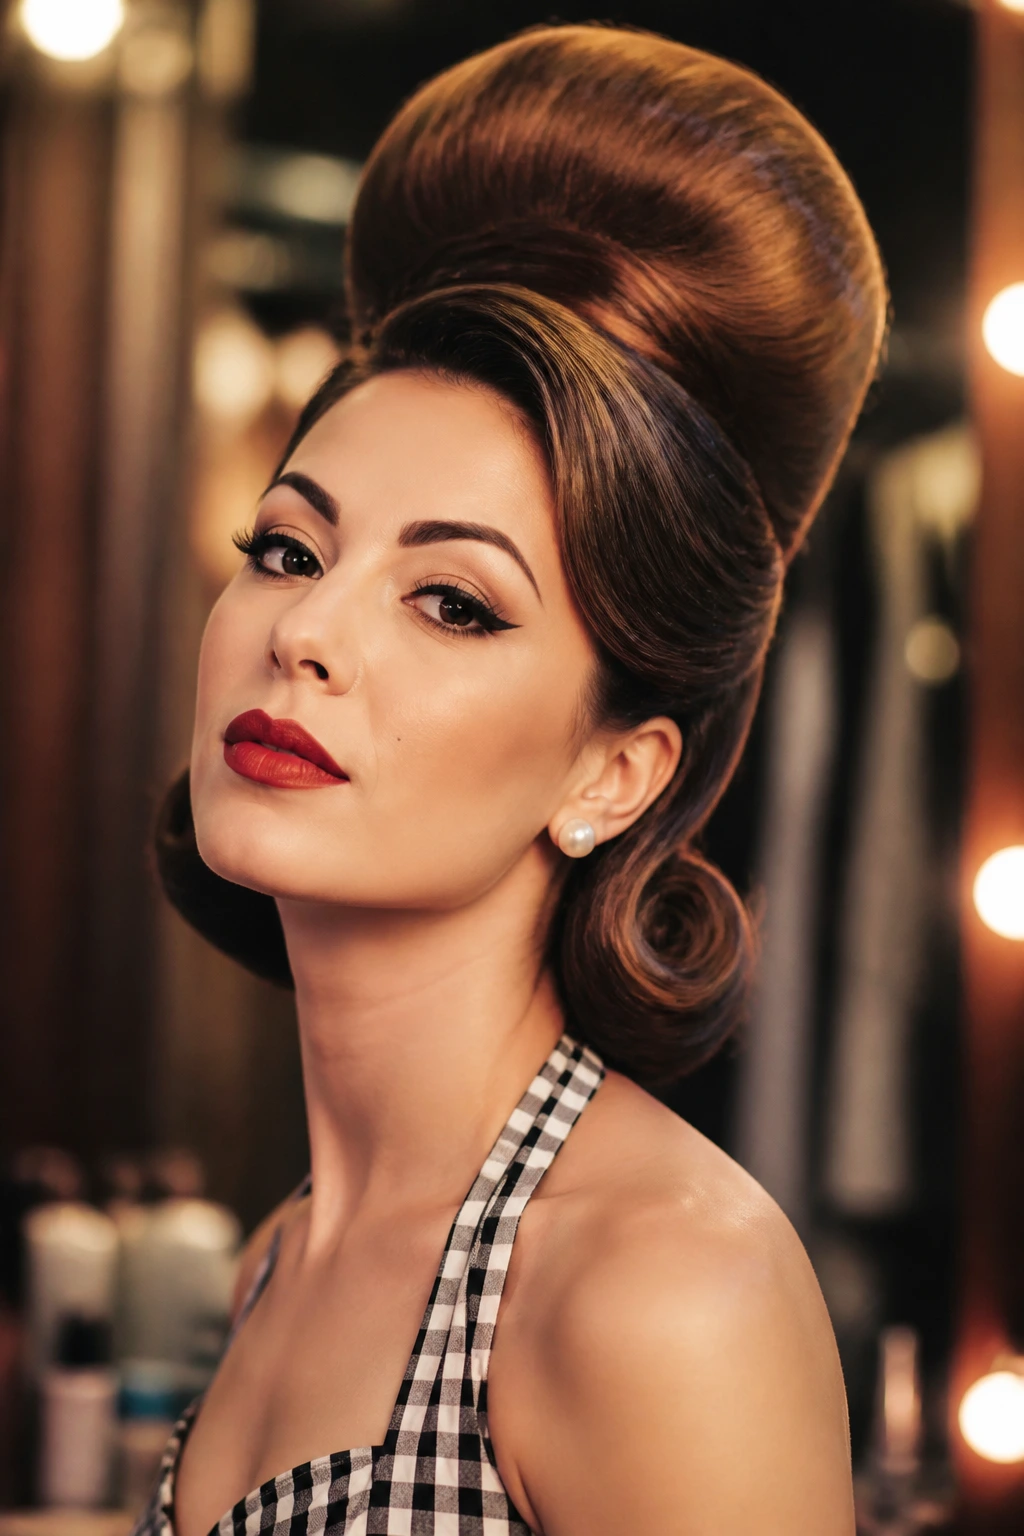
Rolled ends make the lower half of the style feel finished instead of forgotten. The top carries the height, but the ends curve inward or outward with a deliberate turn that nods to classic pin-up styling. It’s a good choice when you want the bottom of the hair to do some of the work.
Use the rollers or a large iron to set the ends before you build the crown. That way the shape stays smooth and the lengths do not look like they were pushed into place as an afterthought. This style pairs well with a fitted dress or a top with a defined waistline, since the rolled ends echo that same shape.
24. Beehive with Braided Bangs
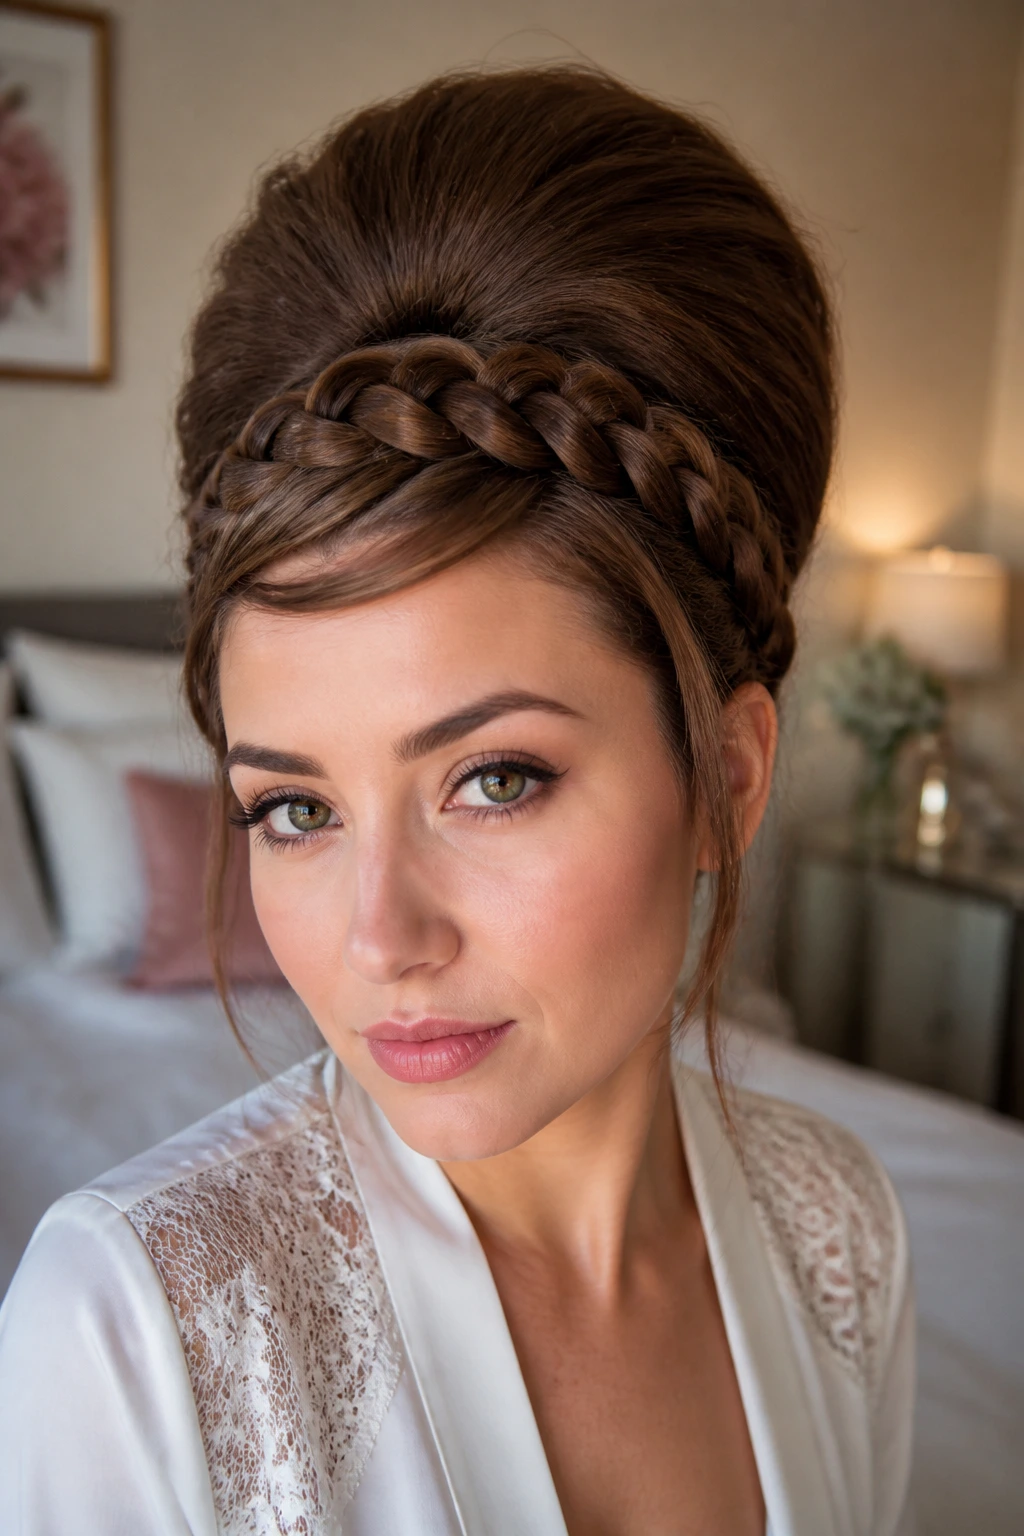
A braid across the front gives the beehive a little edge and keeps the hairline tidy. It also changes the texture at the front, which is useful if your bangs grow out in awkward stages or if you want the forehead area to stay controlled. The braid becomes a visible detail instead of a workaround.
Feed the braid back toward the crown and pin it where the lift starts. That creates a clean transition from braid to volume without leaving a lumpy seam. It’s a nice way to make the style feel more handcrafted, especially if the rest of the look is simple.
25. Feathered Fringe Beehive
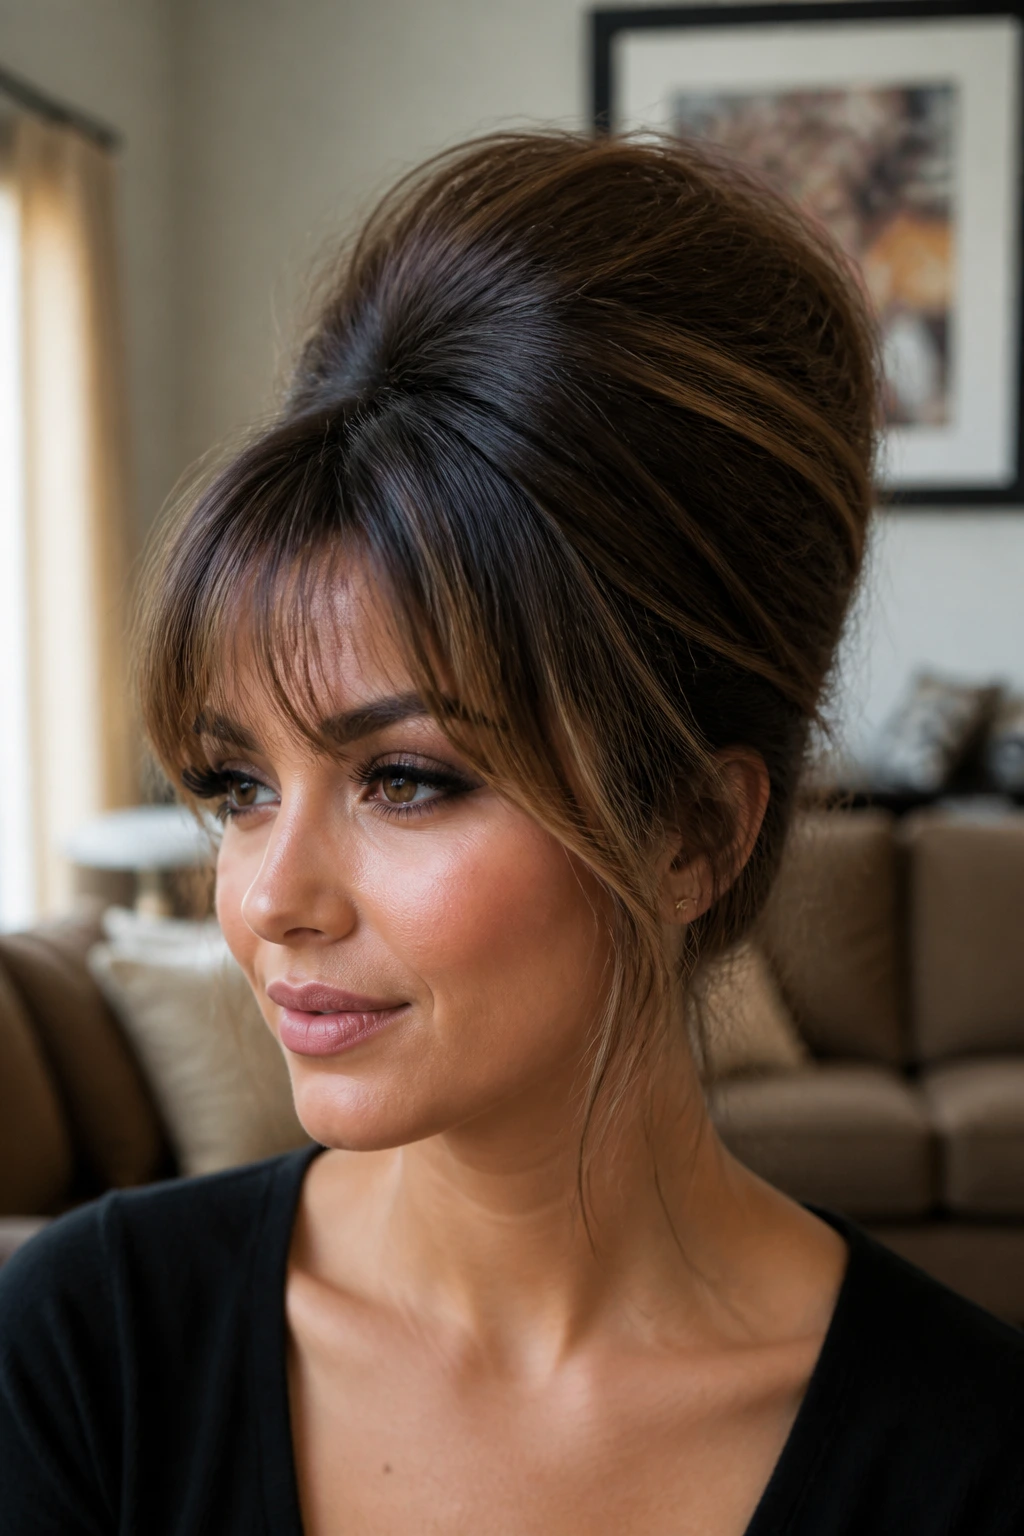
Feathered fringe softens the whole silhouette. Instead of a rigid front, you get layers that flick lightly over the forehead and blend into the crown shape. It takes the edge off the beehive and keeps it from feeling too severe.
This one works well with layered cuts, because the fringe gives the style movement even when the crown is quite high. Keep the ends of the fringe light and separated, not heavy and packed together. The overall effect is a little looser, a little more undone, and that can be a relief if you do not want the hair to feel overbuilt.
26. Glitter-Clip Evening Beehive
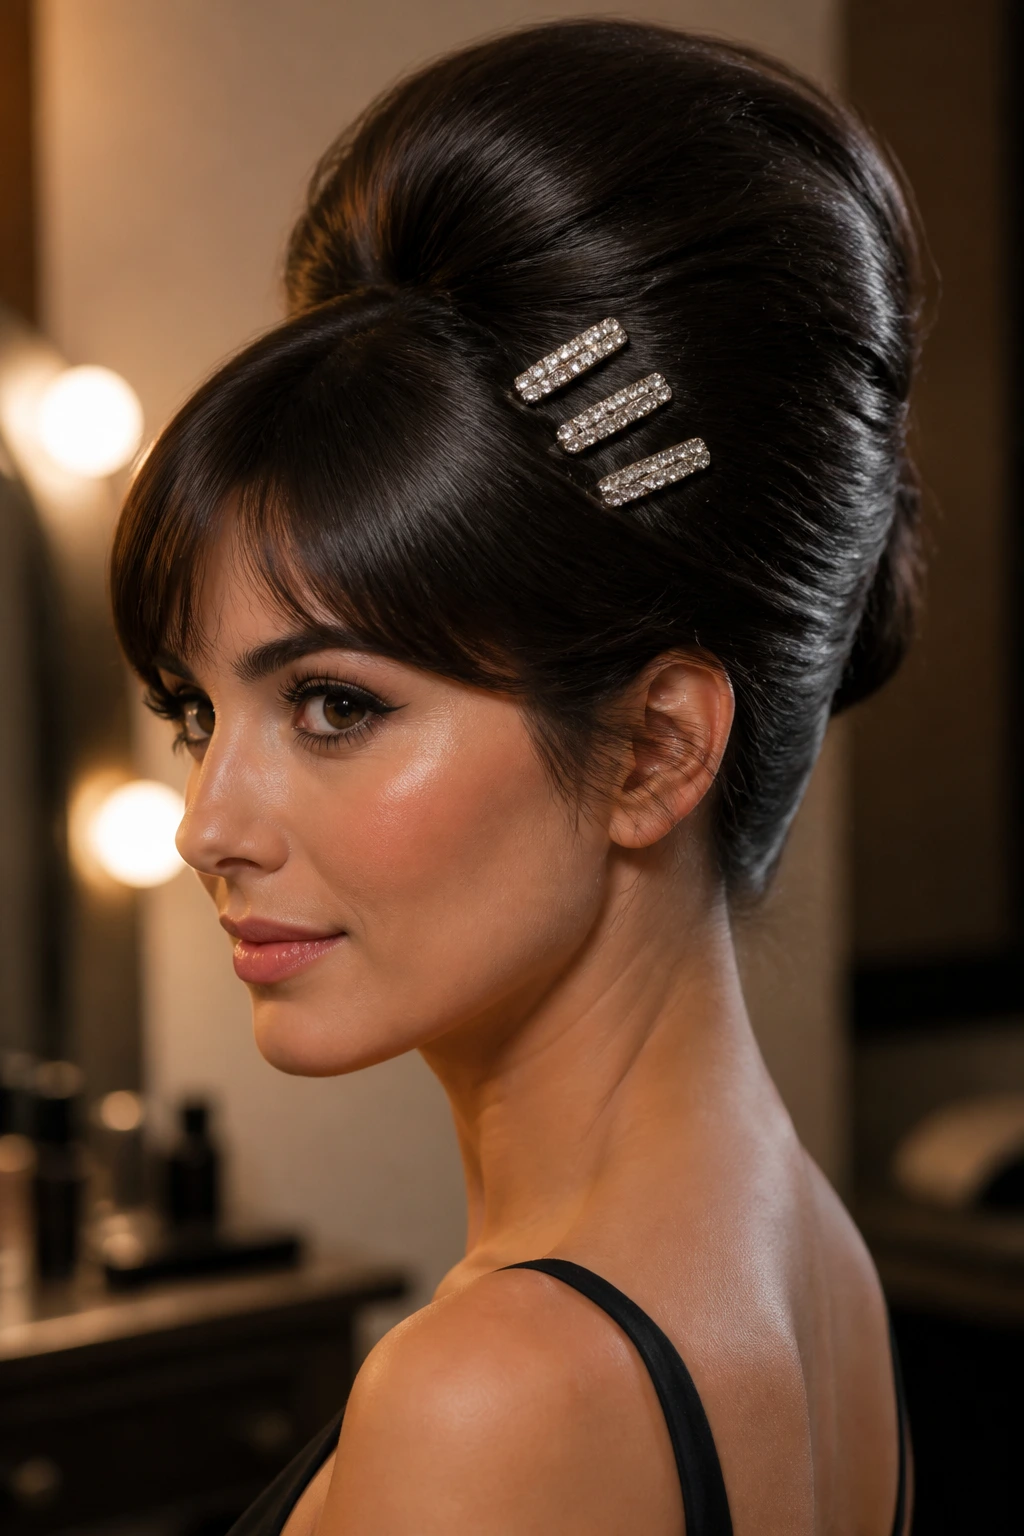
A few glitter clips can turn a basic beehive into an evening style fast. Place them near the side sweep or along the edge of the crown so they catch the shape instead of hiding it. The shine from the clips gives the look a sharp point, especially under dim light.
Do not scatter too many. Three well-placed clips beat a dozen tiny ones that fight the volume. I like this version for parties where you want the hair to do the talking without adding a headband or veil. The beehive gives you the base, and the clips give it a finish.
27. Office-Ready Soft Beehive

This is the subdued version that keeps the lift but skips the theatrics. The crown rises gently, the sides stay close, and the finish is matte or softly polished instead of stiff. It reads like a controlled blowout with a little extra structure hidden inside.
The trick is to keep the height modest and the shape narrow. If the crown gets too wide, it starts looking costume-like fast. This version works when you want polished hair that still has some personality, especially with a blazer, a simple blouse, or anything with a clean neckline.
28. Festival Beehive with Micro Braids
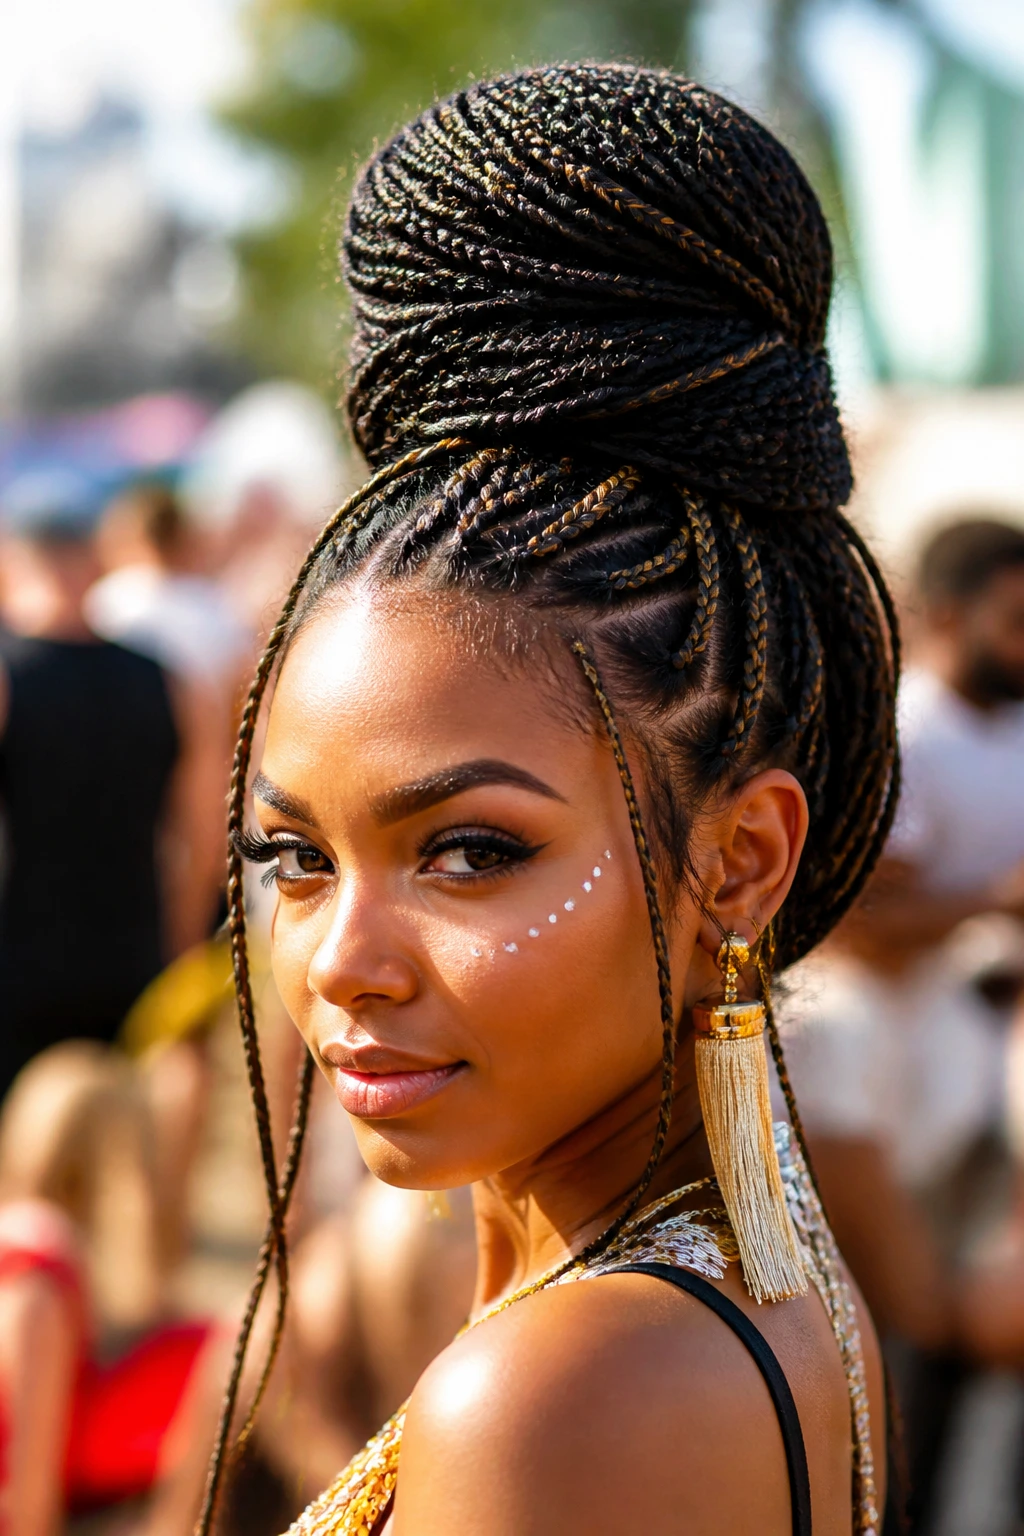
Micro braids bring texture and detail into the beehive without weighing it down. They can thread through the crown, wrap around the base, or hang in thin sections near the face. The style feels busy in a good way, which suits a setting where hair accessories and texture are part of the fun.
Keep the lift structured so the braids do not disappear into a puffy mass. A few small braids are enough; too many can muddy the silhouette and make the crown look crowded. The point is to keep the beehive readable while giving it enough texture to feel playful.
29. Soft Bouffant Half Pony
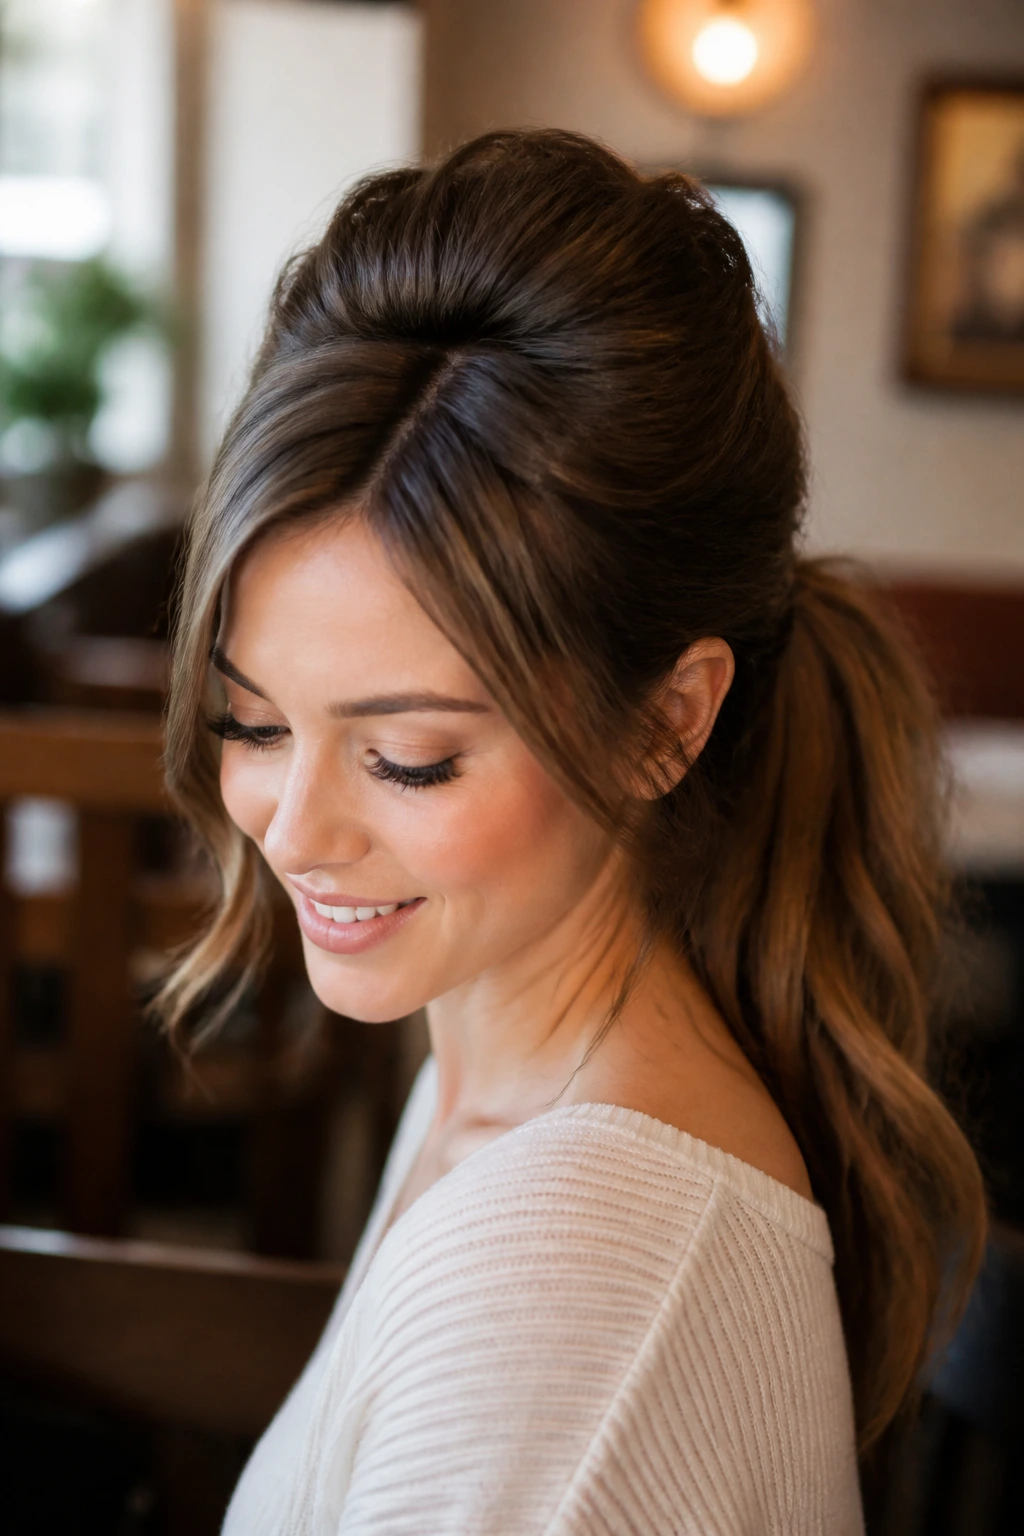
This one lives between a bouffant and a ponytail, and that in-between space is exactly why it works. The crown rises, the sides stay smoothed back, and the ponytail drops with enough softness to keep the style from feeling locked in place. It’s a good compromise when you want polish but still want hair movement.
If your hair is long, leave the tail loose and brushed through rather than tight and segmented. If it’s finer, add a little texturizing spray to the ponytail so it doesn’t hang too flat under the lifted crown. The shape is gentle, but it still reads as intentional.
30. Twisted Side Beehive
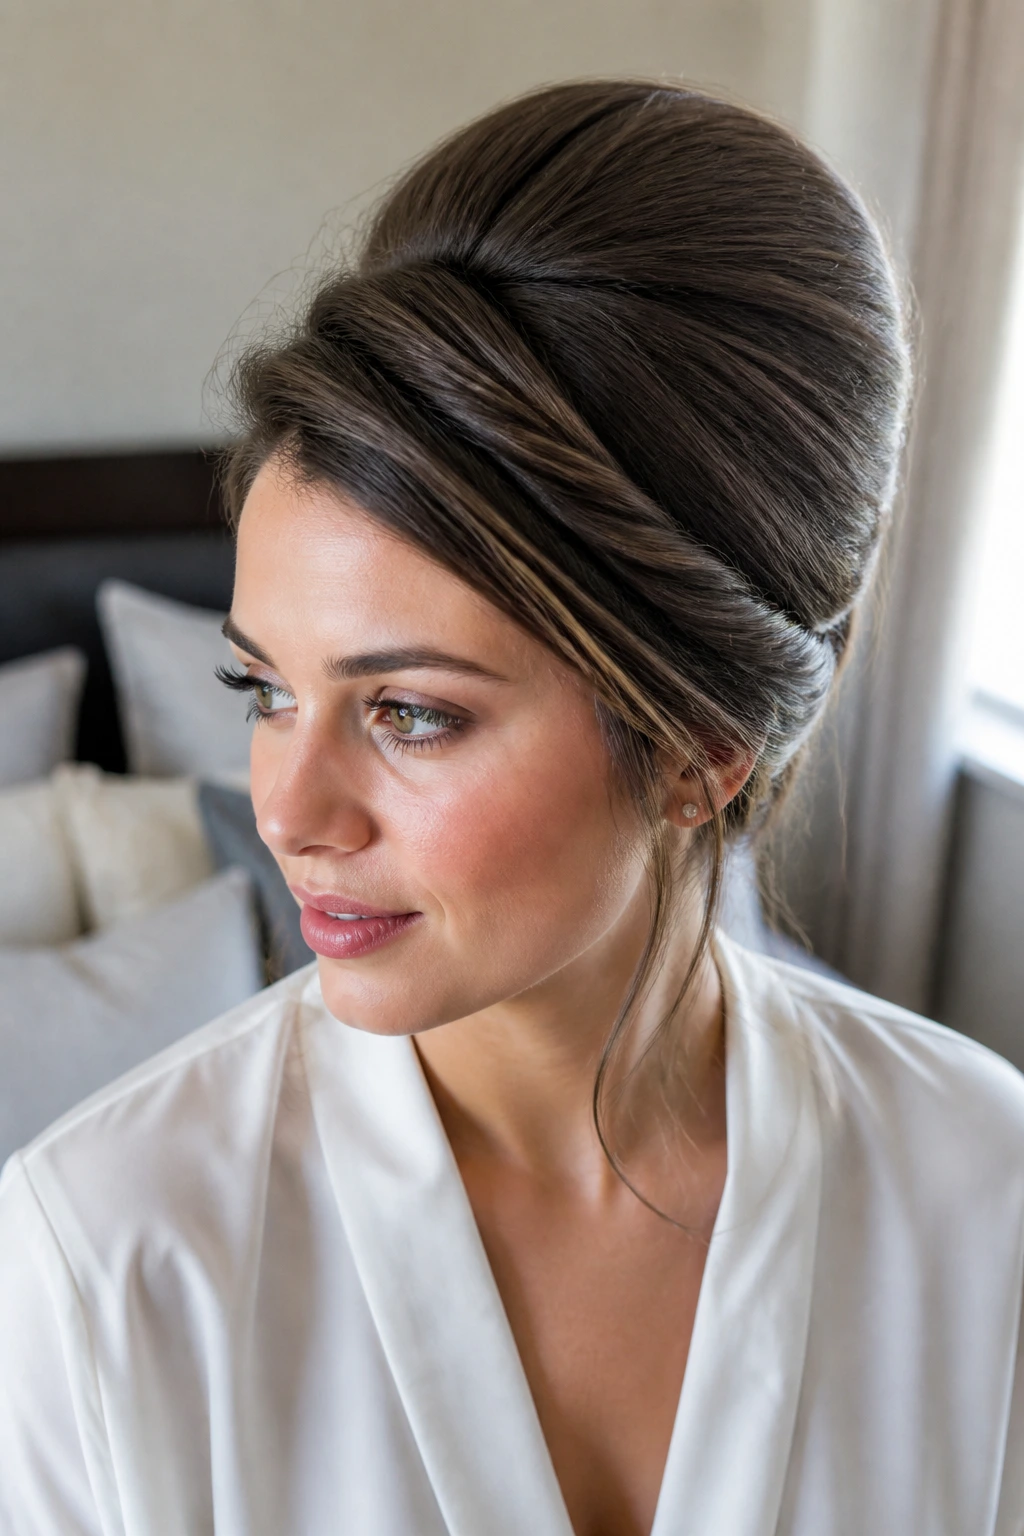
A side twist gives the beehive a built-in direction. The hair is pulled from one side, twisted back, and then lifted into the crown shape, which creates a diagonal line that feels a little more modern than a straight-on beehive. It’s subtle, but not boring.
This is a good choice when you want the front to stay clean without using a braid or a hard side part. Twists are easier to loosen and reshape than braided sections, which makes the style flexible if you need to adjust the balance. I like it with earrings that move a little, because the side sweep leaves them room.
31. Y2K-Inspired Beehive
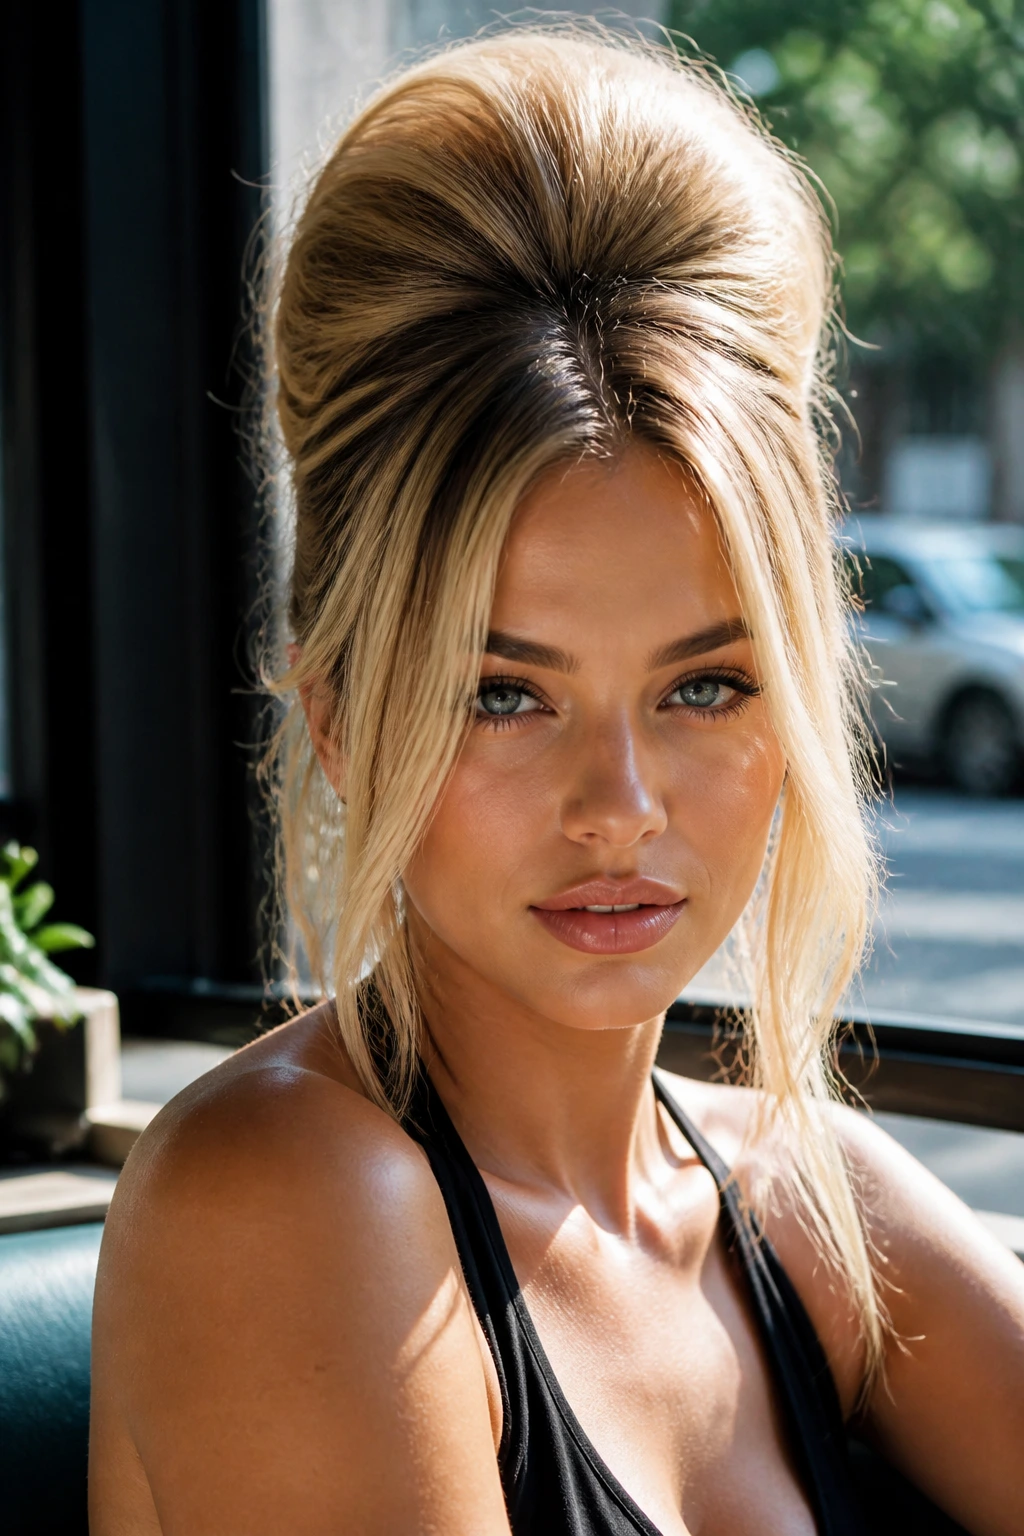
This version takes the beehive shape and plays it against face-framing strands, shine, and a slightly exaggerated bump. It is less about pure vintage accuracy and more about borrowing the silhouette for a newer, cheekier mood. The result can feel playful instead of stiff.
Let a few tendrils fall forward and keep the crown lifted but not too lacquered. The shape should read from the front, but it does not need to be severe. If you enjoy mixing eras, this one lets the beehive step out of the archive and into a messier, more casual zone.
32. Sculpted Editorial Beehive
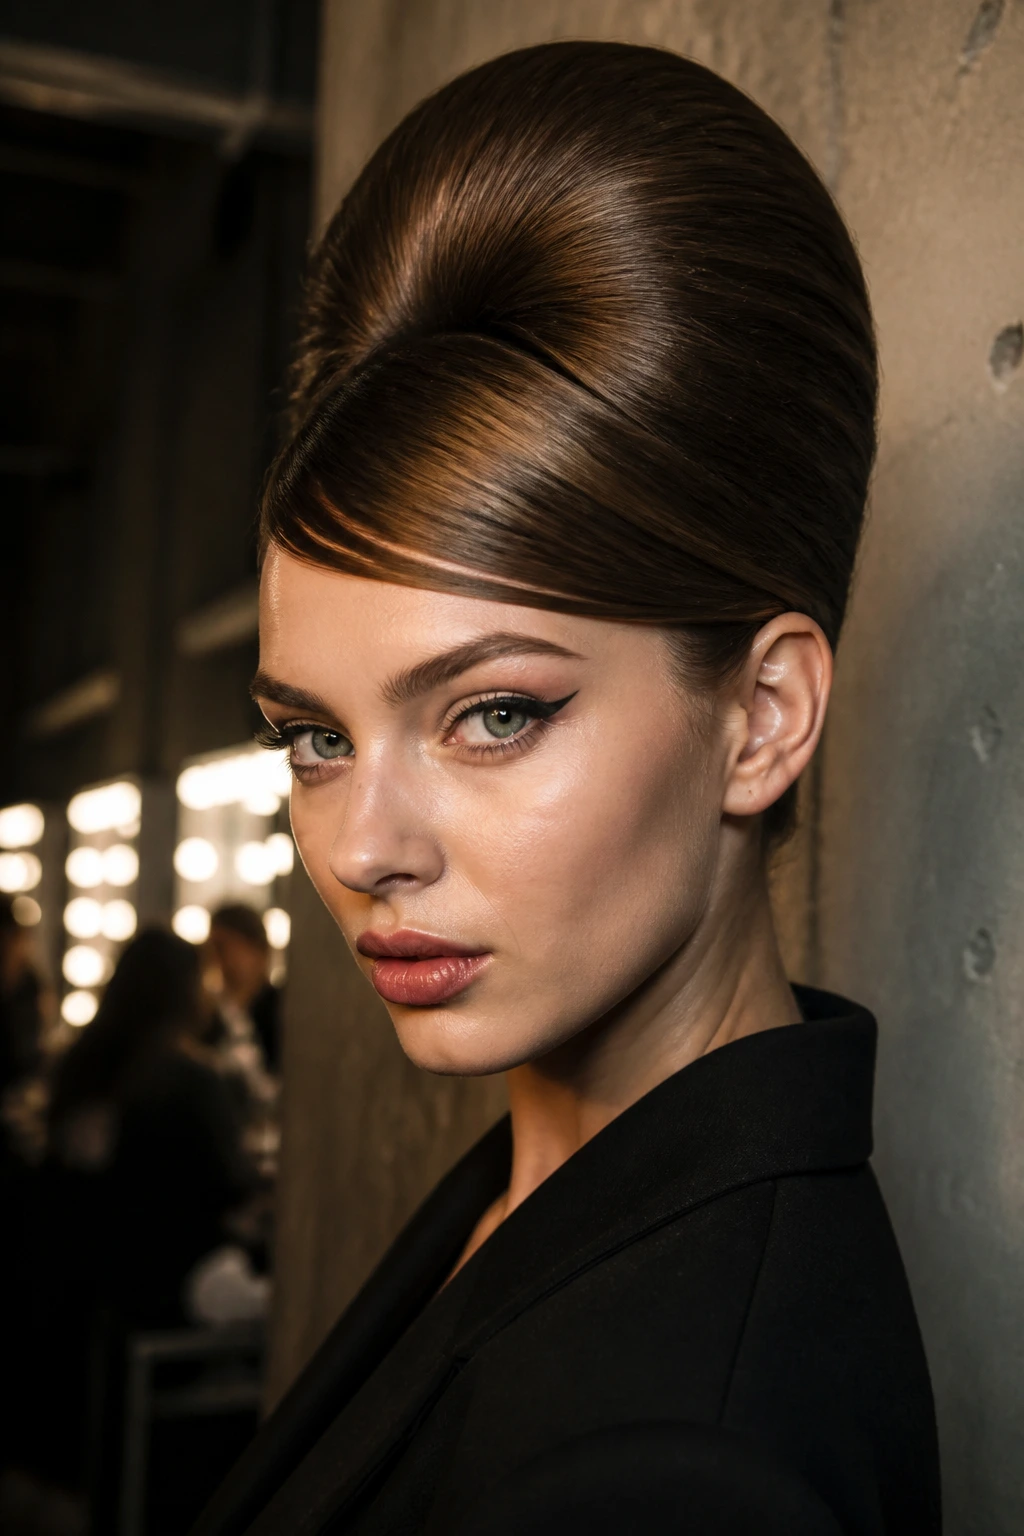
This is the sharp, fashion-forward version with stronger lines and a more deliberate finish. Think clean side sections, a clear crown ridge, and a silhouette that looks planned from every angle. It has a little runway attitude without needing a lot of extra decoration.
The key is precision. The more exact the sectioning, the cleaner the final shape. Keep the surface smooth and the structure firm, then let the overall outline do the work. This is the beehive for sharp tailoring, bold brows, and hair that needs to hold its nerve.
33. Wet-Look Beehive
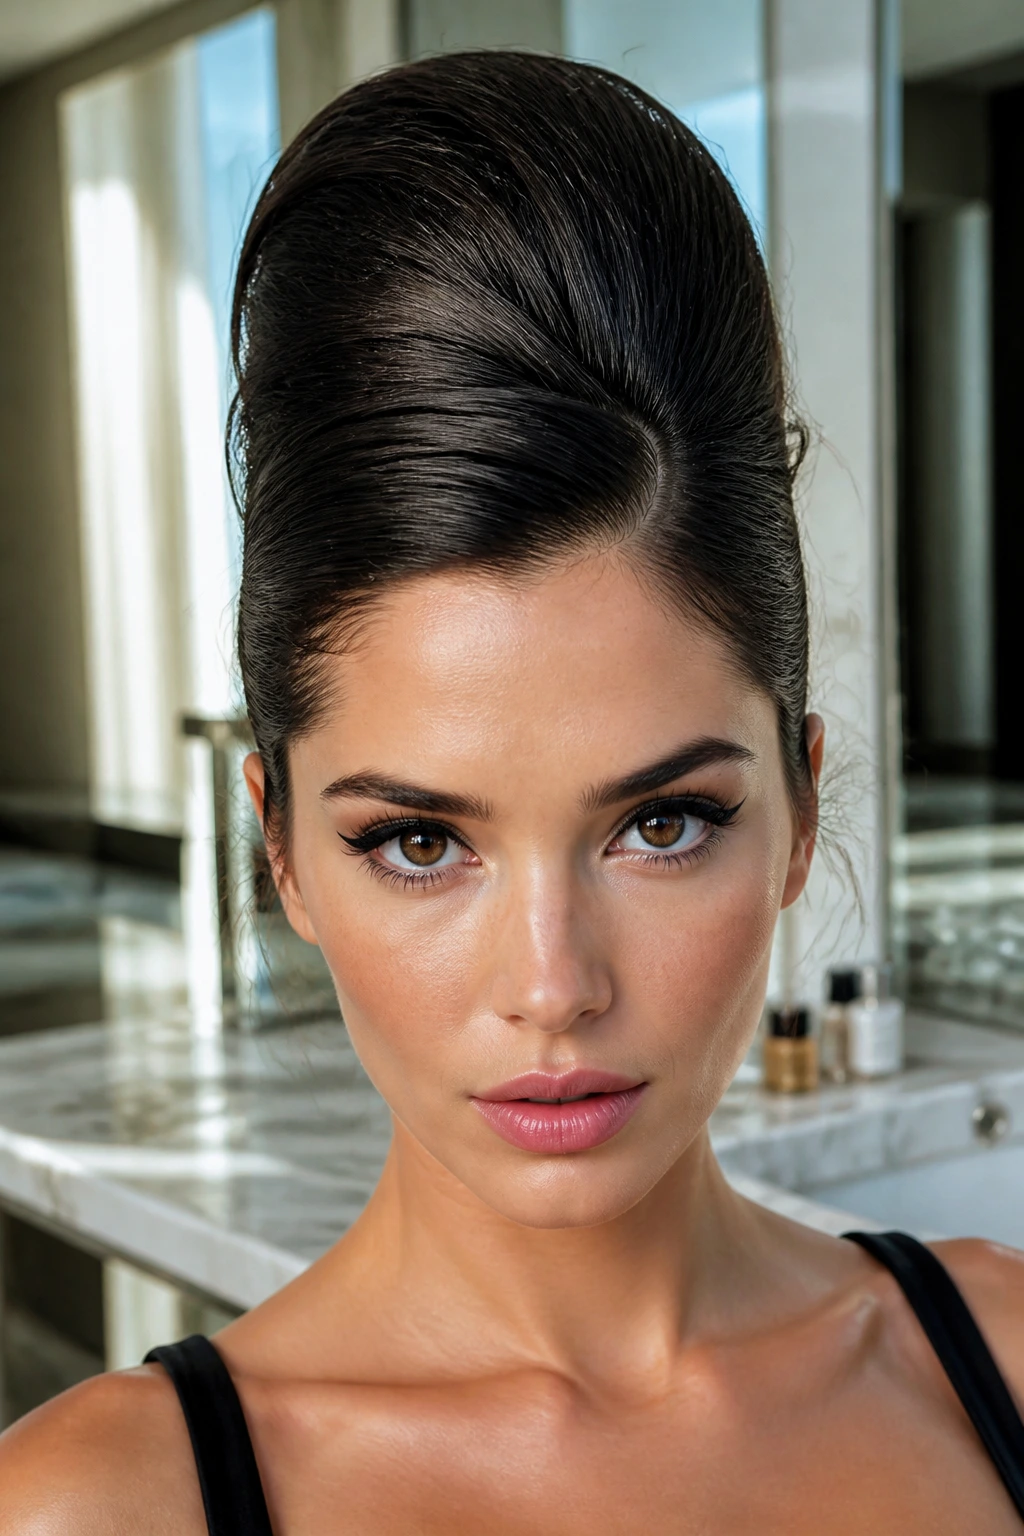
A wet-looking finish changes the entire mood. The crown still has lift, but the sides and surface are slick and reflective, which makes the shape feel modern in a very specific way. It’s a nice answer if you like drama but don’t want the soft, fluffy version.
Use gel or a shine-heavy styling product only where you want the surface to stay controlled, not through the teased core. The contrast between the slick perimeter and the lifted middle is what makes this one work. It can be a little unforgiving, though, so keep the sectioning neat.
34. Romantic Beehive with Loose Tendrils
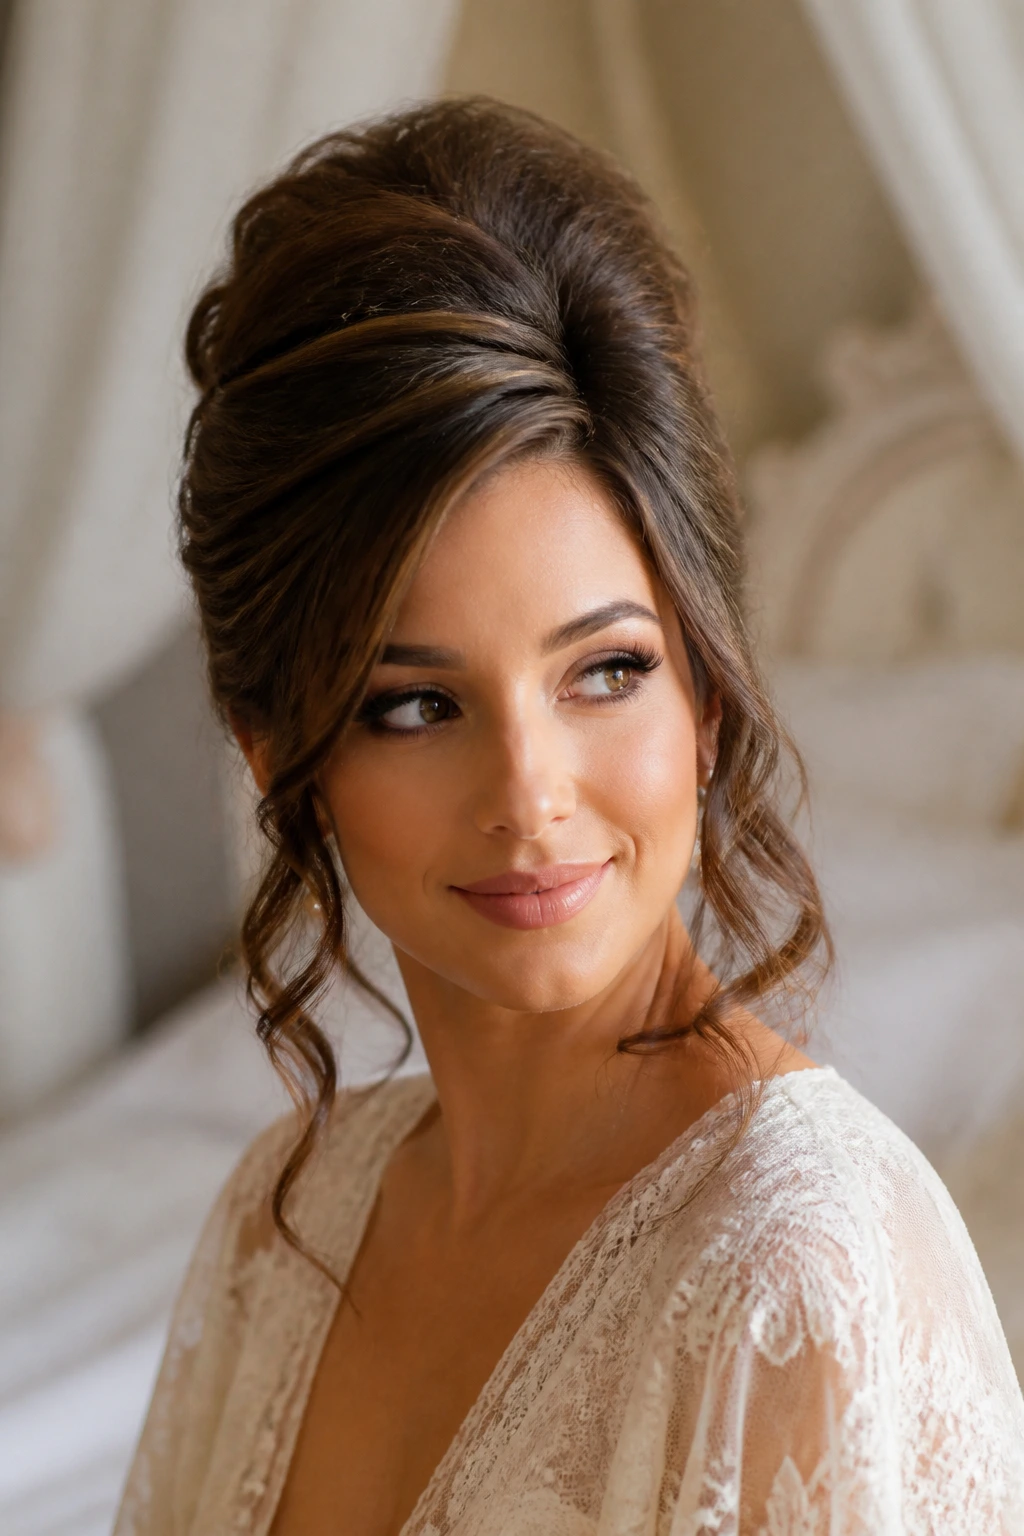
Loose tendrils soften the beehive in exactly the right places. Instead of a fully swept-back face, you get a few strands left to move around the cheekbones and jawline. The crown still rises, but the mood shifts toward soft and airy.
This version suits softer fabrics, lace, or dresses with movement. Leave the tendrils out before you pin the rest of the style, or you’ll end up tugging them loose later. The shape stays vintage, but the feel is gentler and less locked in.
35. Short Bob Beehive Accent
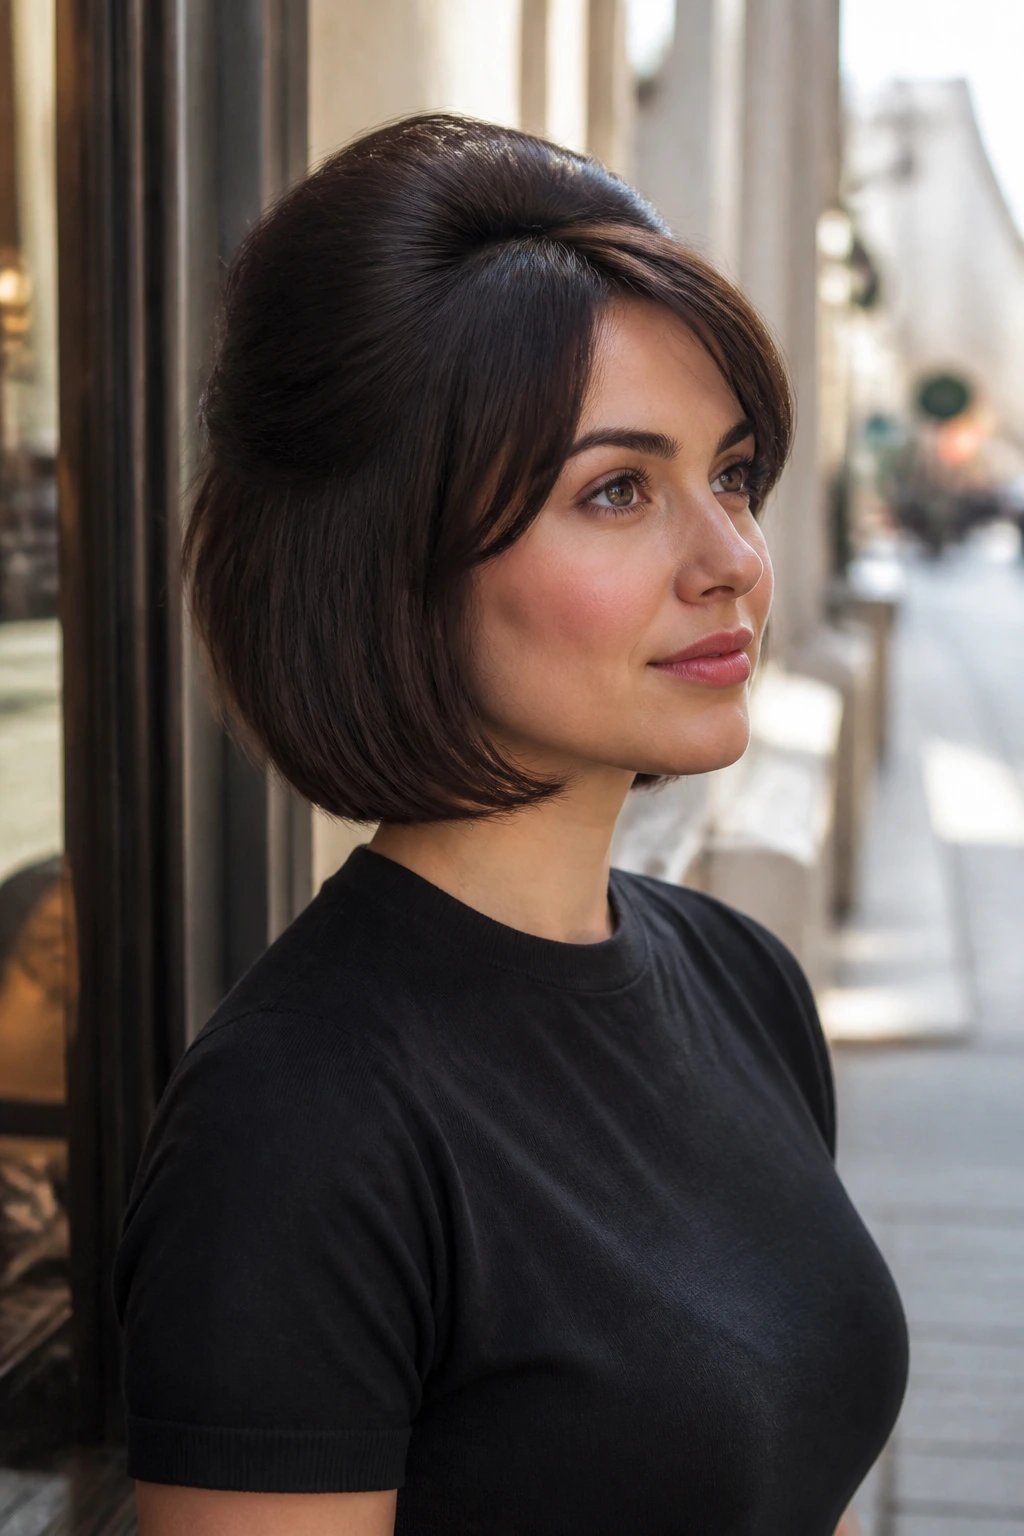
A bob does not need a full tower to nod to the beehive. A small crown accent, a little backcombing at the roots, and a smooth side finish can be enough to change the line of the cut. The point is suggestion, not imitation.
Tuck the ends under and let the top carry the visual weight. If your bob is blunt, the contrast between the straight edge and the lifted crown can look especially strong. This is one of those styles that proves restraint can be more interesting than height.
36. Tapered Natural Hair Beehive
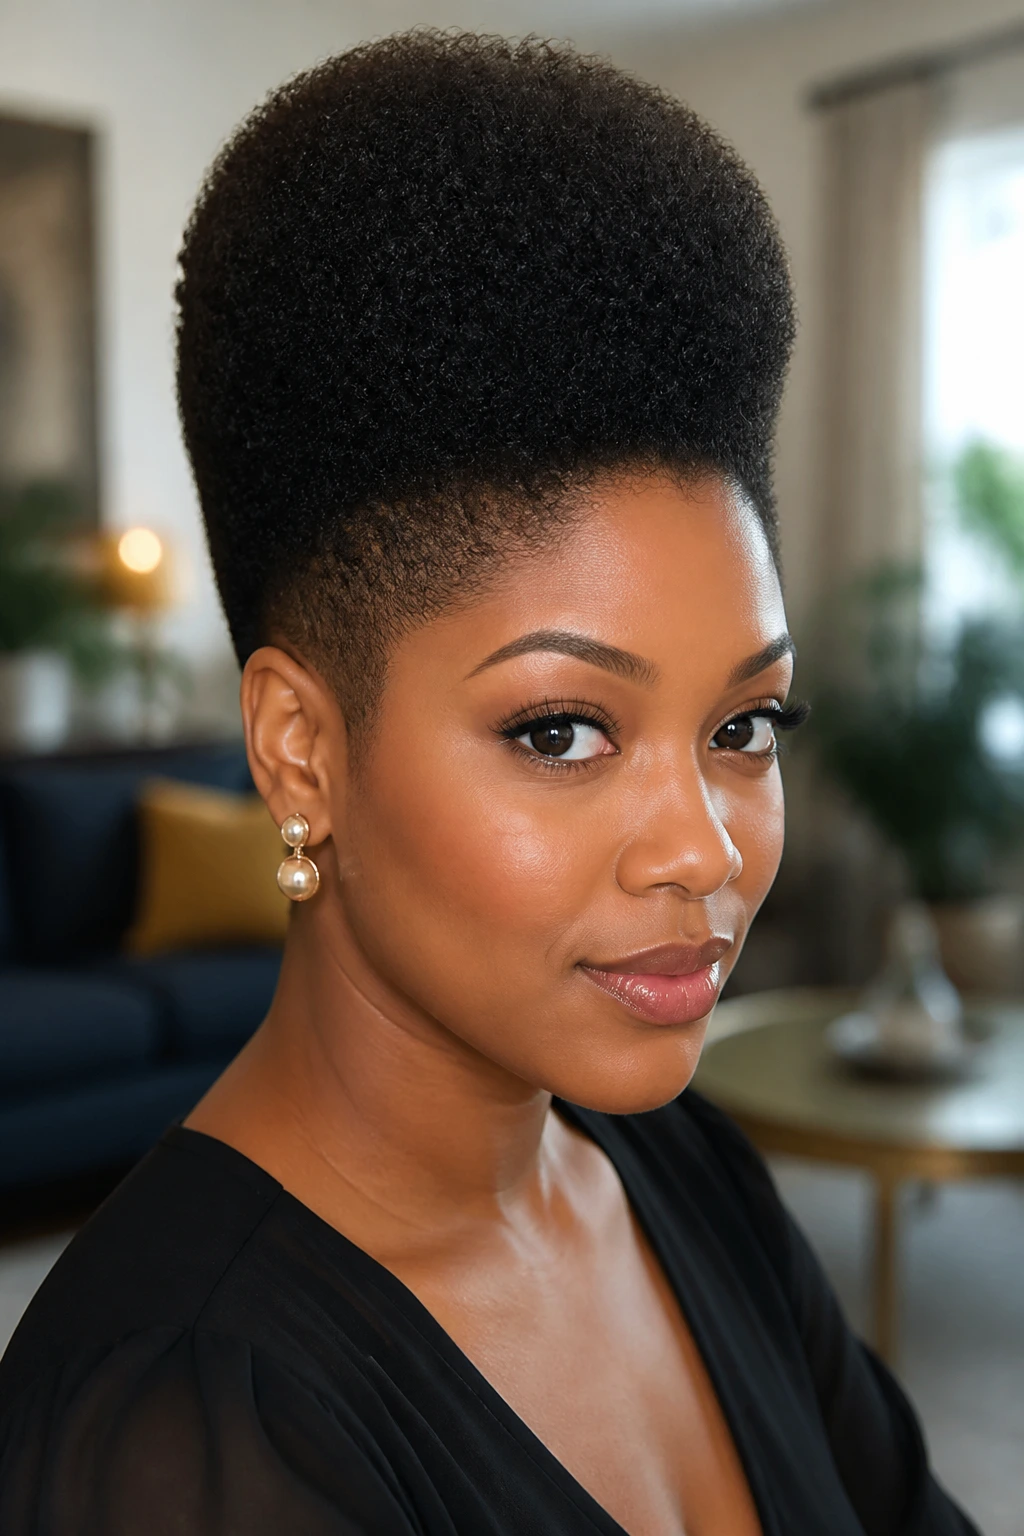
Natural hair with tapered sides gives the beehive a shape that feels clean and grounded. The volume rises at the crown while the sides stay close, which makes the silhouette easy to read. It’s a smart way to keep height without fighting the natural form of the cut.
Use moisture and stretch where needed, then shape the crown so it holds its lift instead of shrinking back. Edge control at the hairline can keep the outline neat, but don’t overdo it and flatten the texture. The best versions keep the crown lifted and the rest of the shape honest.
37. Color-Pop Retro Beehive
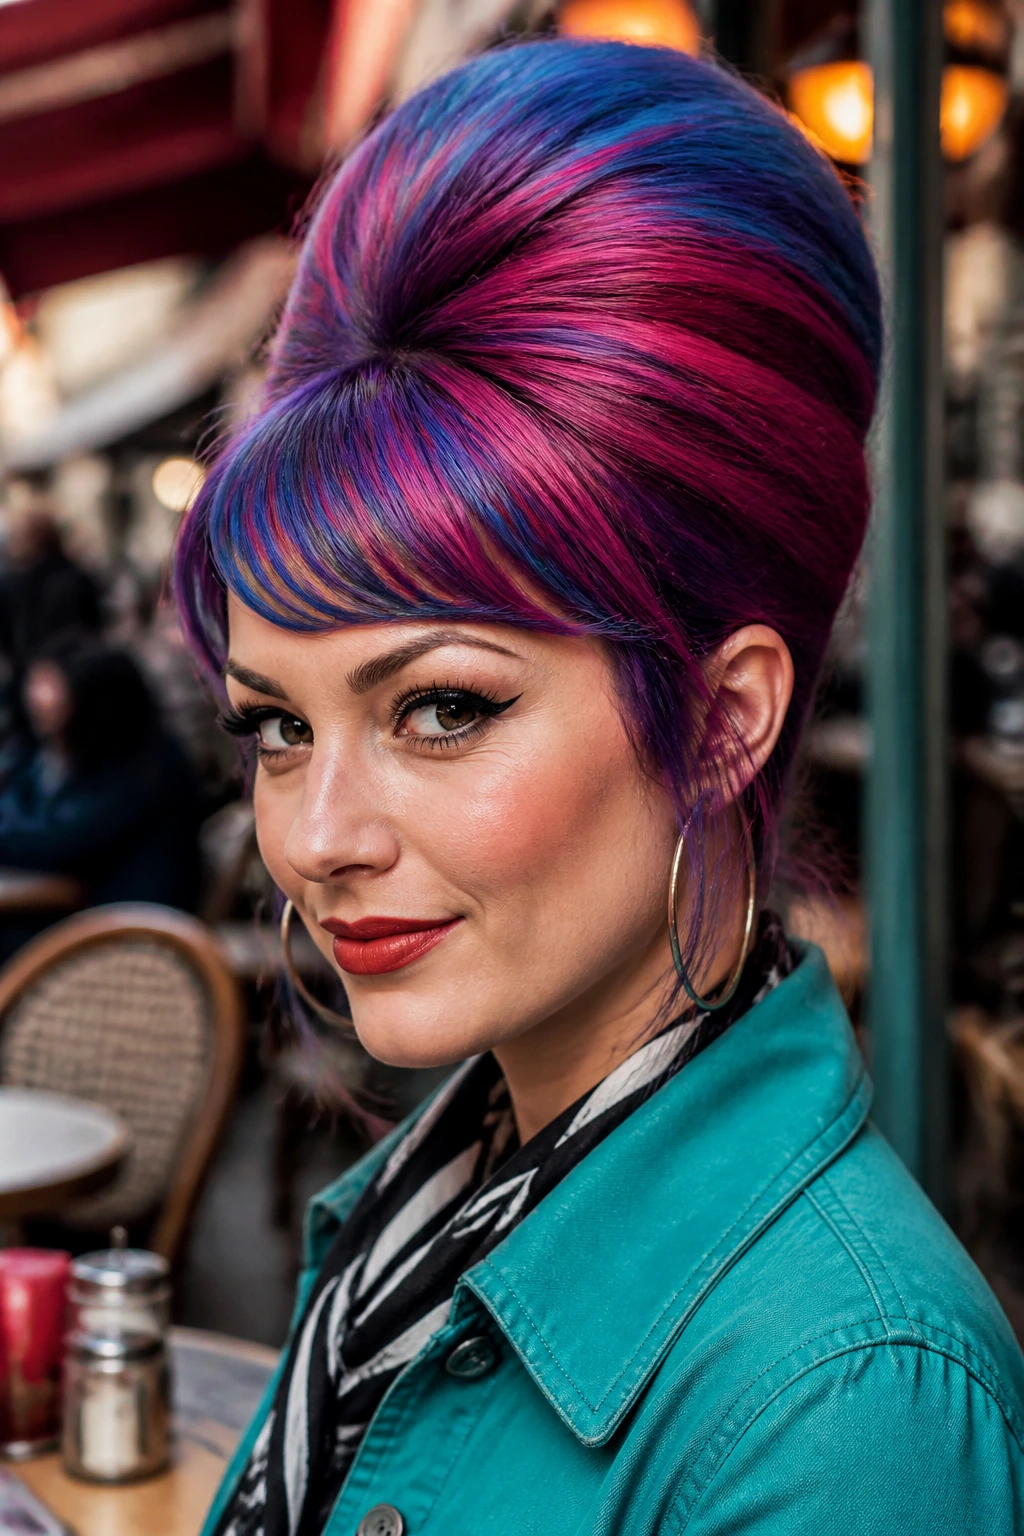
A beehive is a very good canvas for color because the shape itself already draws the eye upward. A bold streak, a glossy highlight panel, or a saturated all-over shade can make the lines of the style more obvious. The color helps the shape speak.
If the hue is vivid, keep the styling a touch cleaner so the silhouette does not get noisy. If the color is softer, like copper or espresso with shine, the lift can be more dramatic. Either way, the point is to use color as part of the outline, not just decoration on top.
38. Veiled Cocktail Beehive
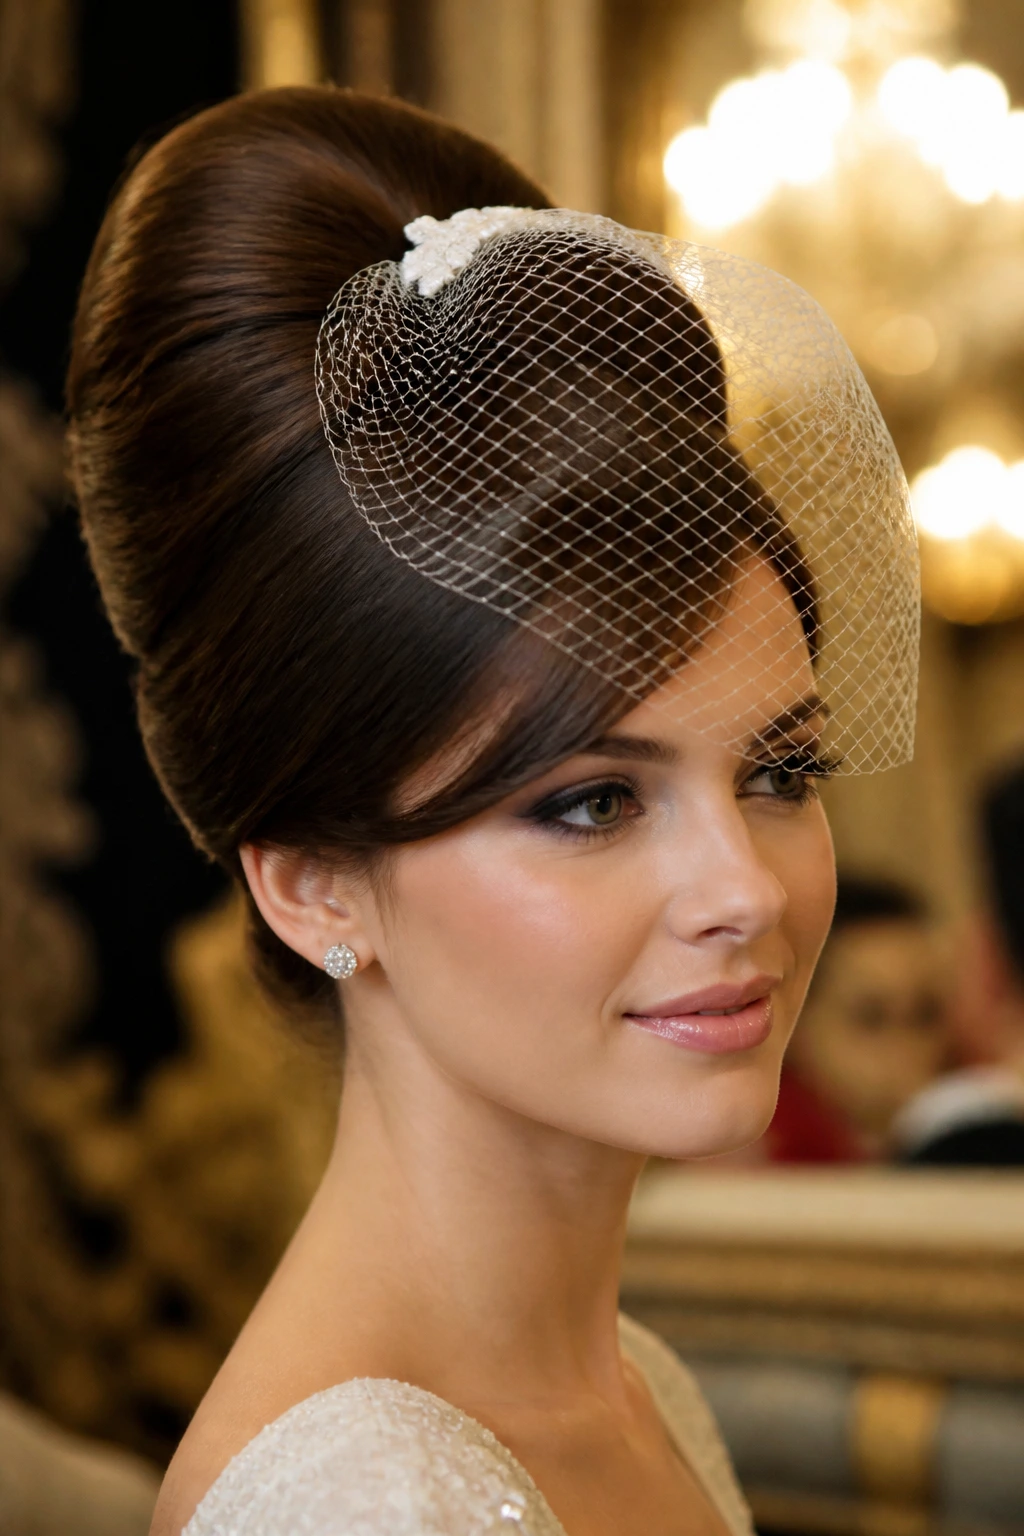
A short veil or netting detail can make a beehive feel event-ready without pushing it into bridal territory. The veil sits well because the crown already gives it a place to rest, and the resulting shape feels a little mysterious. It’s elegant in a contained way.
Place the veil where the lifted section begins, not so far forward that it hides the face. The beehive should still be visible beneath it. This version is strong for evening events because it lets the hair stay the main event while still giving you something special at the surface.
39. Braided Crown Low Beehive
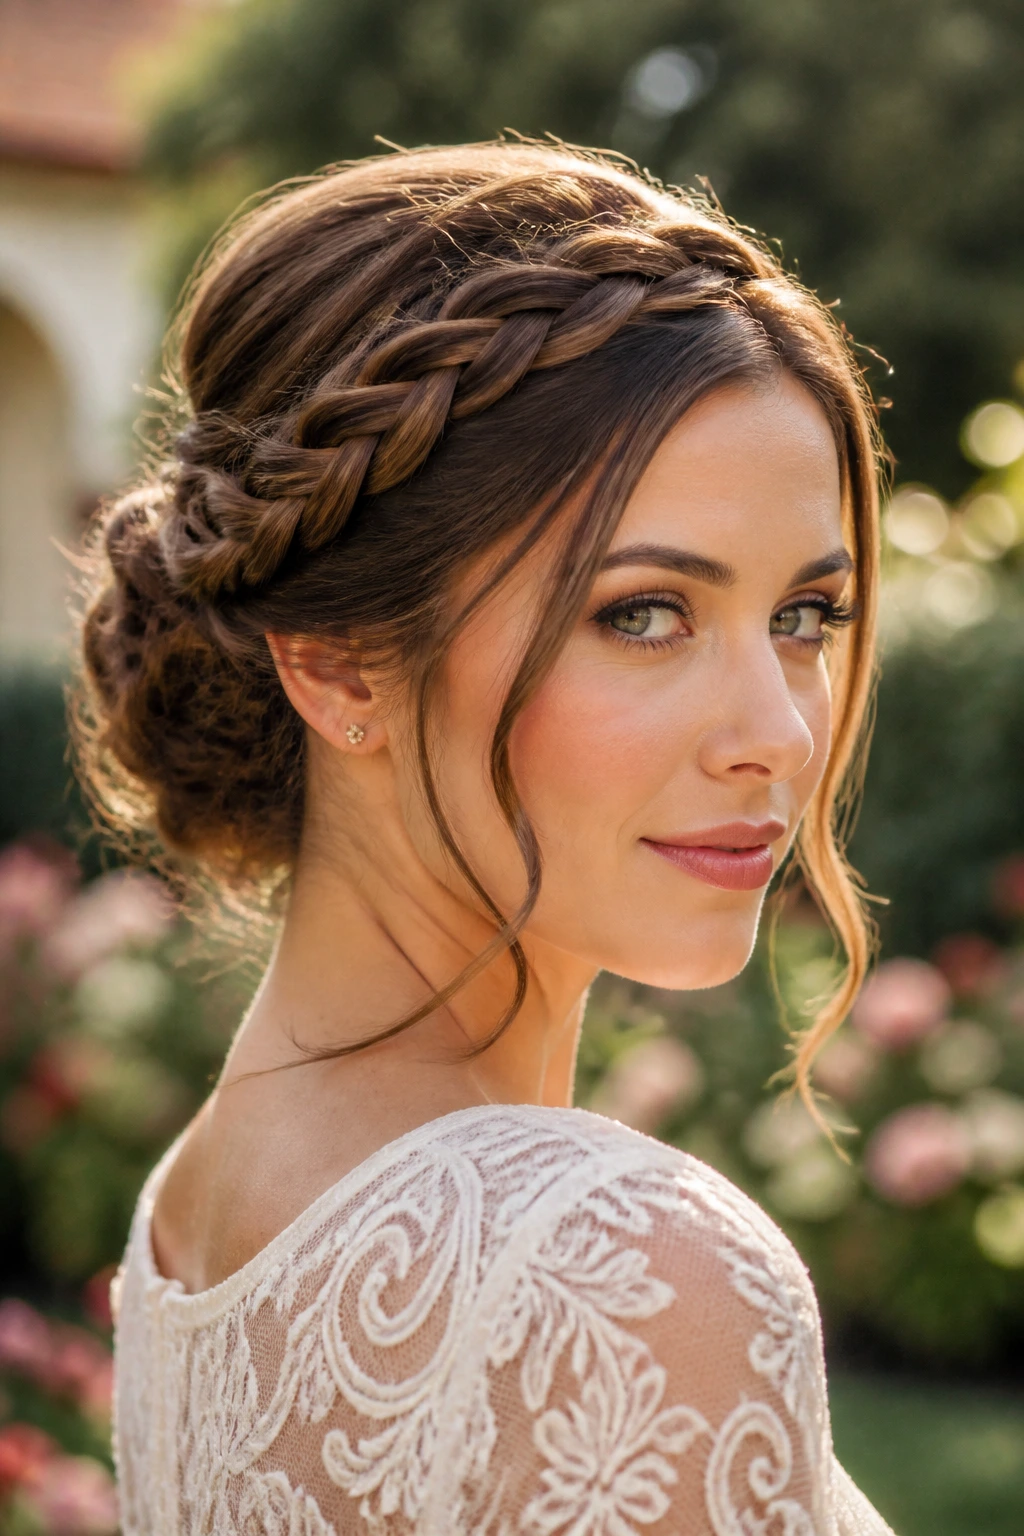
A braided crown and a low beehive make a tidy pair. The braid wraps the head, then the lower lift adds a retro note without creating a tall silhouette. It’s controlled, neat, and surprisingly good for long wear.
This is one of the easiest ways to make a beehive feel softer from the front and more detailed from the back. If you want a style that can survive a full day without feeling too high-maintenance, this is a solid choice. The braid gives you structure, and the lower height keeps the whole thing calm.
40. Evening-Ready Tall Beehive
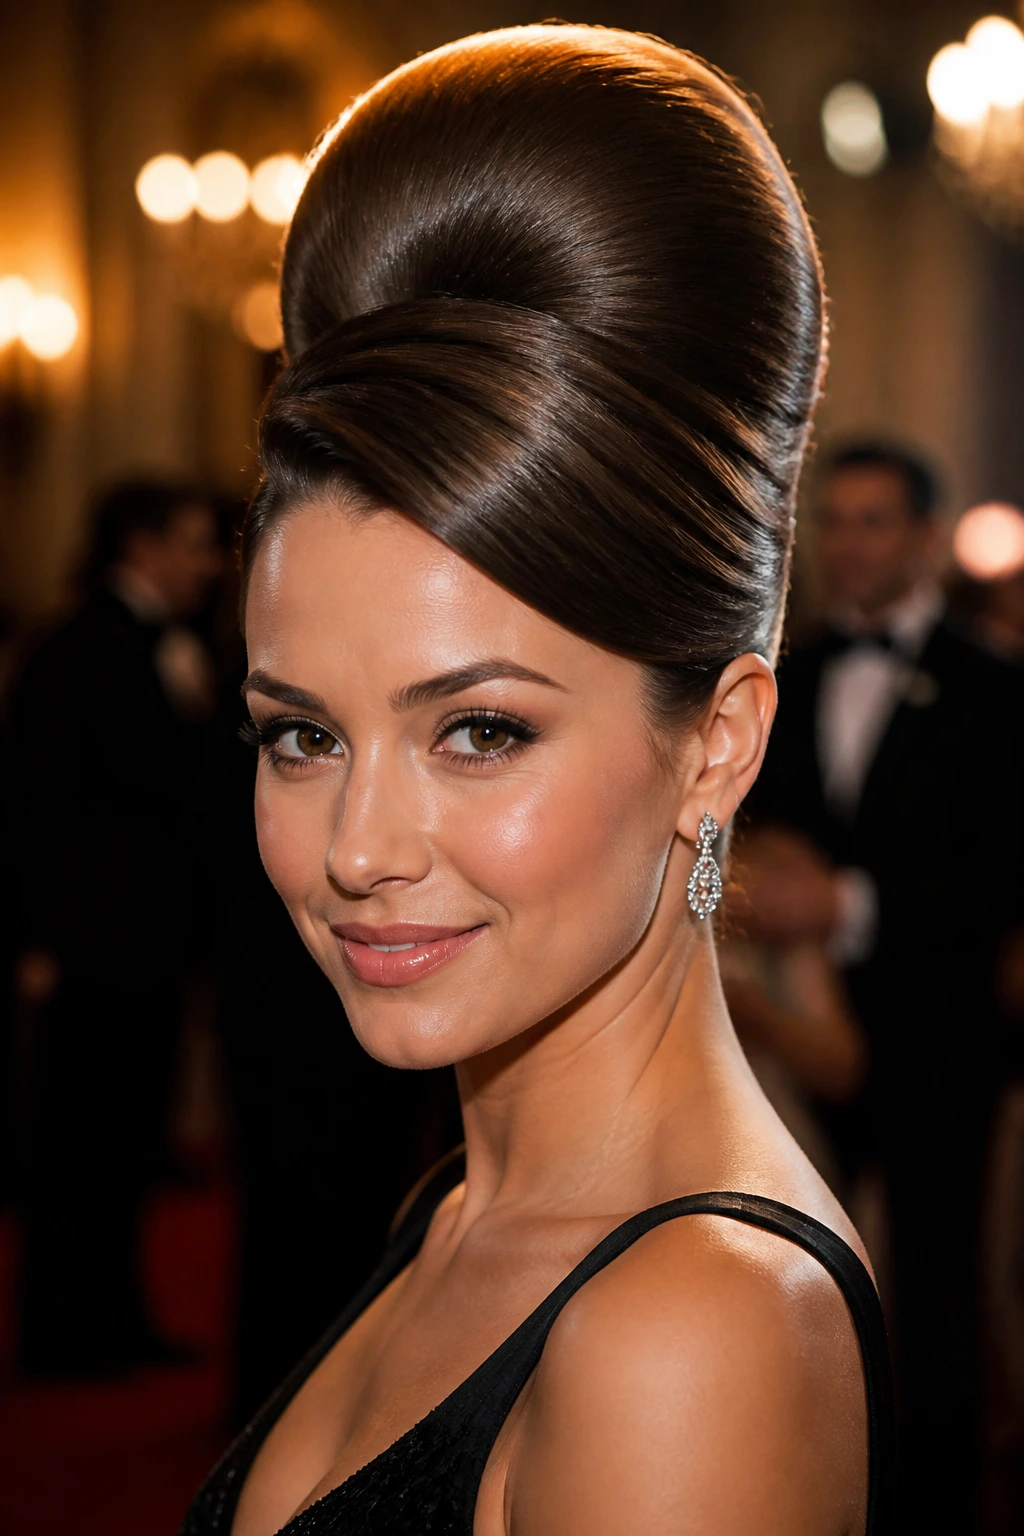
This is the full statement shape. The crown rises high, the sides are smoothed tight, and the finish is polished enough to stand up to formal lighting and a little distance. It’s the version that says you planned the hair first and built the outfit around it.
The most important thing here is balance. If the top gets too wide or the sides stay too soft, the silhouette loses its edge. Keep the outline clean, hide the pins well, and let the height stay proud. When it’s done right, the style has presence before you even turn your head.
What Gives a Beehive Its Lift Without the Helmet Effect
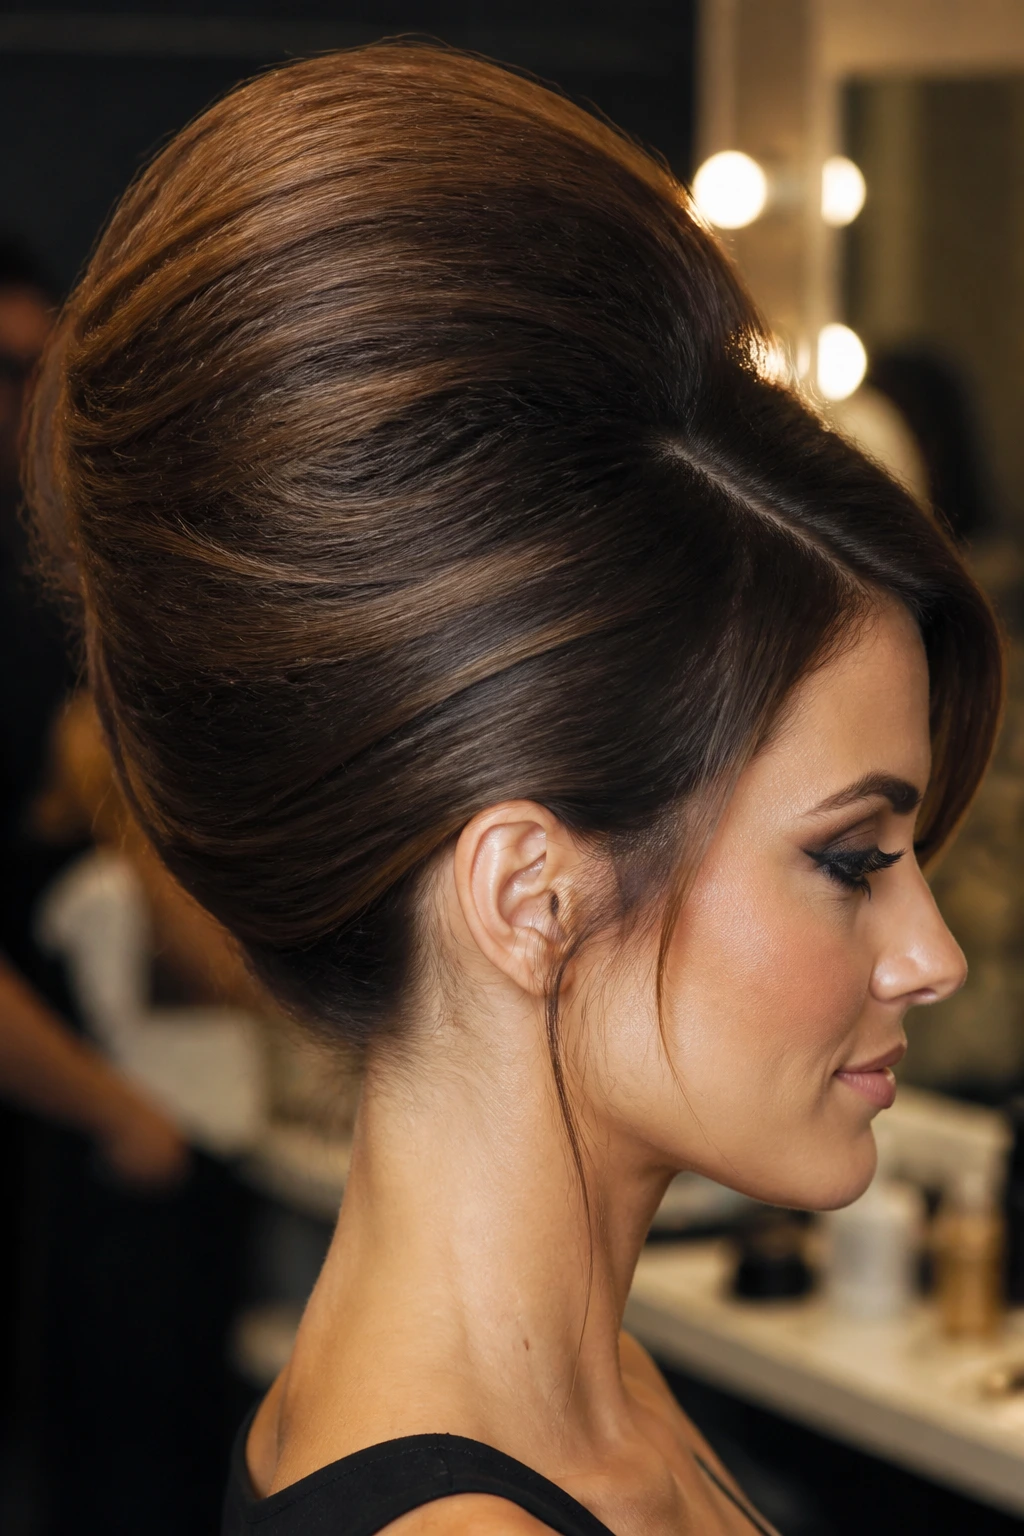
A good beehive looks tall because the hair inside is doing hidden work. The outer surface can be smooth as glass, but underneath there’s usually a scaffold of backcombed sections, crossed pins, or a light padding piece that keeps the crown from collapsing. That hidden core is what gives the style its shape; the top layer just makes it readable.
The mistake people make is piling volume everywhere. That makes the temples puff, the sides swell, and the whole style feel heavy. Better to build the height in one controlled zone — usually the crown and upper back of the head — and keep the perimeter close. The eye reads the lift faster when the rest of the outline stays clean.
The hidden scaffold
Think of the inside as the engine. Tease in small sections, not giant chunks, and anchor them where the hair naturally wants to fold back. If you’ve ever had a beehive slip flat in an hour, the problem was usually the base, not the shine.
The surface layer
The outer layer should be smooth enough to show the curve, but not so tight that every tiny bump shows. A boar-bristle brush and a light hand help here. Press the top hair over the teased base, then pin from the underside so the front stays soft.
The balance line
A beehive looks best when the height sits slightly behind the hairline, not directly on top of the forehead. That tiny shift keeps the face open and stops the crown from crowding the features. It’s a small placement choice, but it changes the whole read of the style.
Essential Tools for These Retro Beehive Hairstyles
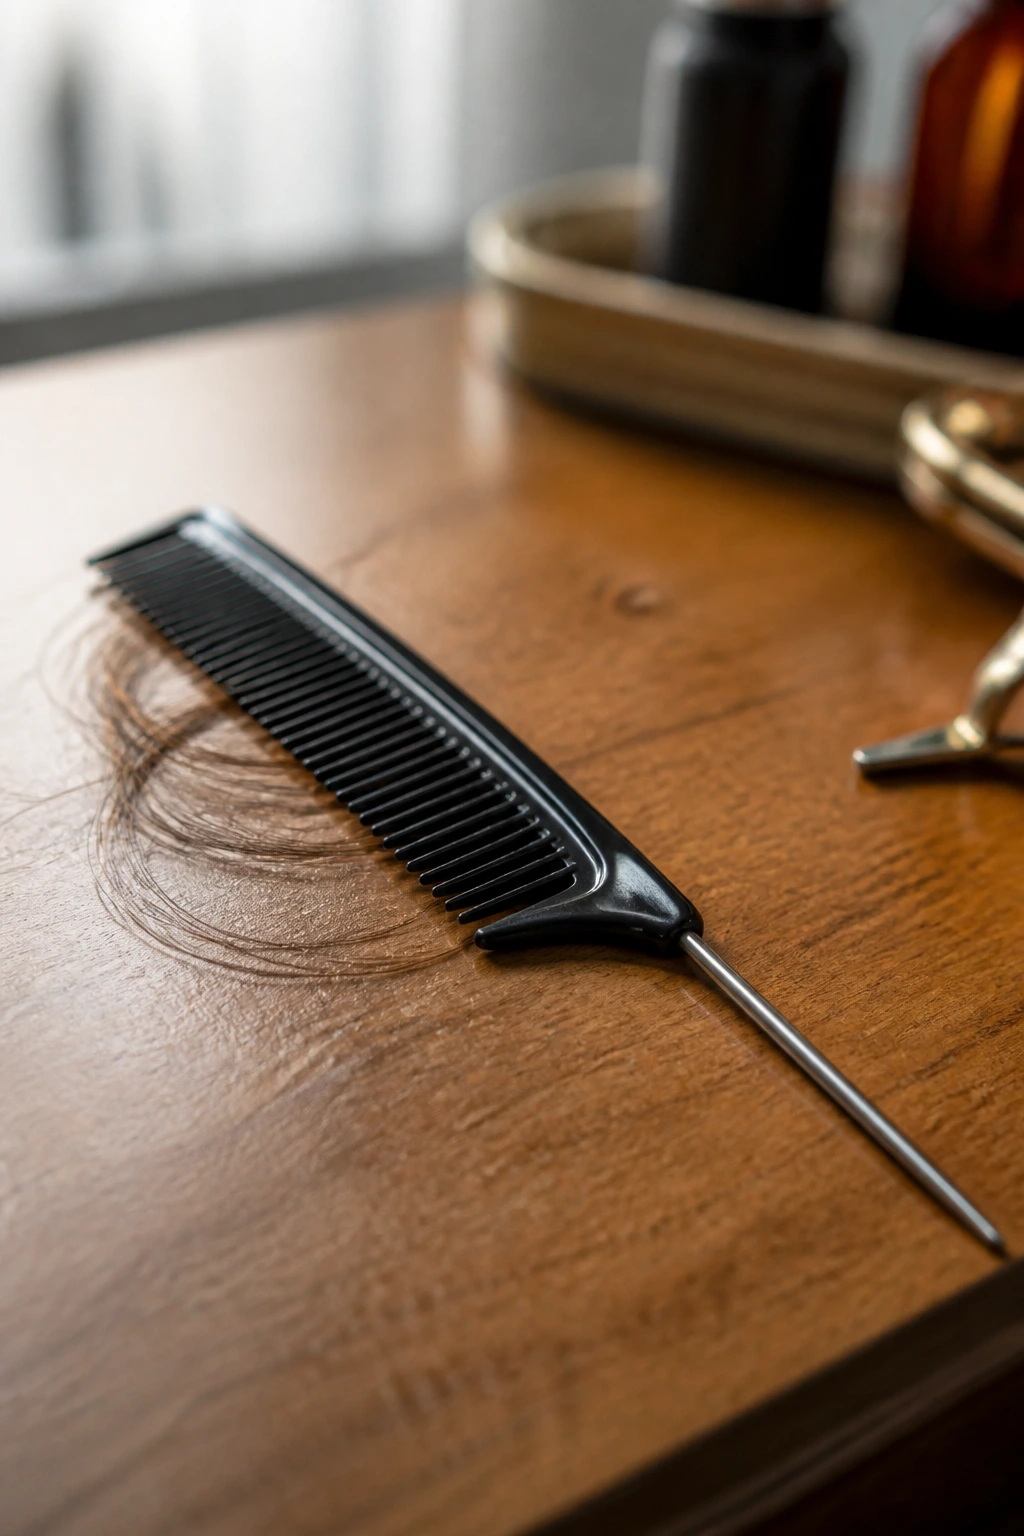
You do not need a dressing room full of gear, but a few tools make the whole process less fussy. The right comb matters more than people think. A rat-tail comb with a pointed end helps section the hair cleanly, while a teasing brush or fine-tooth comb creates lift without tearing through the lengths.
- Rat-tail comb: Essential for parting, sectioning, and lifting the top layer over the crown.
- Teasing brush or fine-tooth comb: Good for building a compact base; a brush with short bristles creates tighter lift.
- Boar-bristle brush: Best for smoothing the outer shell without flattening everything underneath.
- Duckbill clips: These hold sections out of the way while you build the crown.
- Hairpins and bobby pins: Use both if you can; hairpins are better for holding shape, bobby pins for locking it.
- Strong-hold hairspray: The style needs hold at the outer layer, not just the ends.
- Texturizing spray or dry shampoo: Adds grip, especially on fine or clean hair.
- Heat protectant: Necessary if you’re curling the ends or setting waves before shaping.
- Hair padding or a small bump insert: Useful for short or fine hair that needs a little extra structure.
- Silk scarf or net: Great for overnight preservation and for a few of the accessory-heavy styles.
Smart Product Choices for Teasing, Smoothing, and Hold
The product shelf can get crowded fast, and most of it is unnecessary. For beehives, three things matter more than anything else: grip, smoothness, and memory. If a product gives you one but destroys the other two, leave it on the shelf.
Texture products come first. Dry shampoo and texturizing spray are useful because they give clean hair a little friction, which is what teasing needs to stay put. Fine hair often needs more of this than coarse hair does, but even thick hair can benefit if it’s freshly washed and slippery.
Hold products should match the finish you want. A firm spray gives the clean shell and keeps the outline from drifting, while a flexible spray works better for the softer, tousled versions. If you soak the hair in spray before the shape is set, it can turn sticky and hard to reshape; that’s not control, that’s glue.
Smoothing products should be light. A pea-sized amount of cream or serum on the outer layer can calm frizz, but too much will make the crown slide. If you use edge control or gel near the hairline, keep it to the very front and sides so the teased core stays dry enough to hold shape. That little bit of dryness is part of the structure.
How to Wear These Beehive Looks
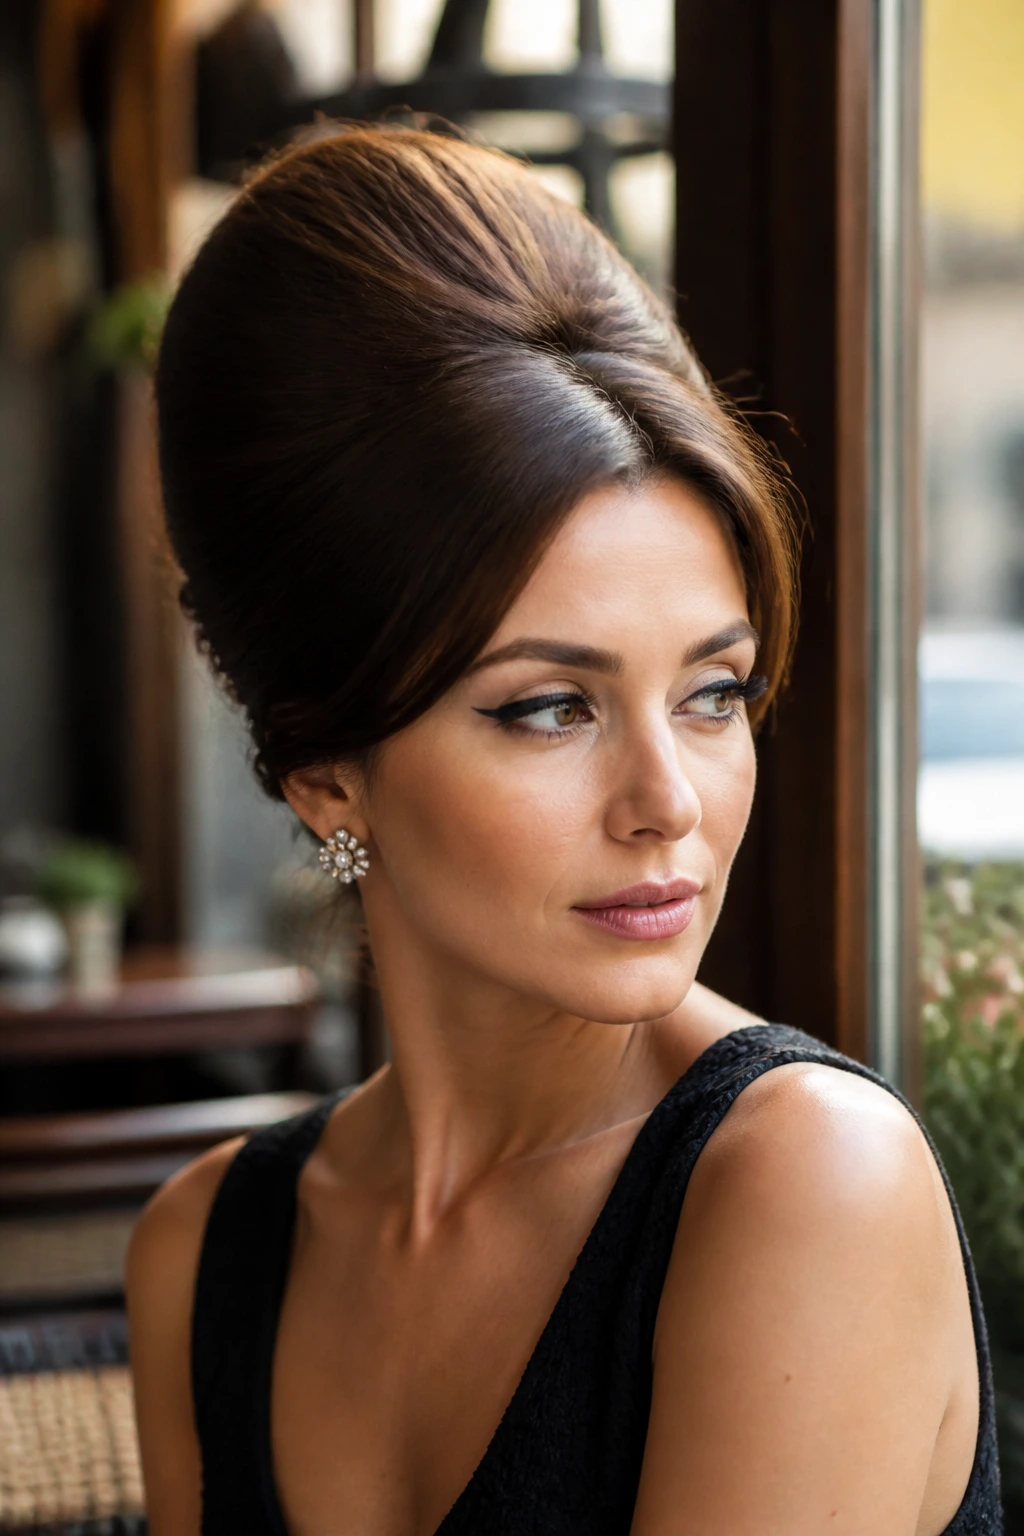
Occasion: Tall, glossy versions work well for formal events, photo shoots, and evenings when the hair needs to hold its outline under bright light. Softer half-up shapes, mini beehives, and low crowns fit daytime settings better because they keep the silhouette visible without taking over the whole head.
Outfit Pairing: High necklines and tall beehives can fight each other unless the style is kept narrow. Strapless tops, open collars, simple crew necks, and clean shoulder lines give the hair room to breathe. If the neckline is already busy, pick a smaller shape and let the accessories do less.
Face Shape: A taller crown can lengthen rounder faces, while a softer side sweep can balance longer faces. That’s not a rule carved in stone, but it does explain why placement matters so much. Moving the lift half an inch back or forward can change how the eye moves across the face.
Accessories: Big earrings love a beehive because the lifted crown leaves empty space beside the cheeks. Scarves, veils, combs, and barrettes can sit at the base or side of the shape without fighting it. If you wear one bold accessory, let it have room; the style already brings its own height.
Extra Lift, Shine, and Texture Tricks
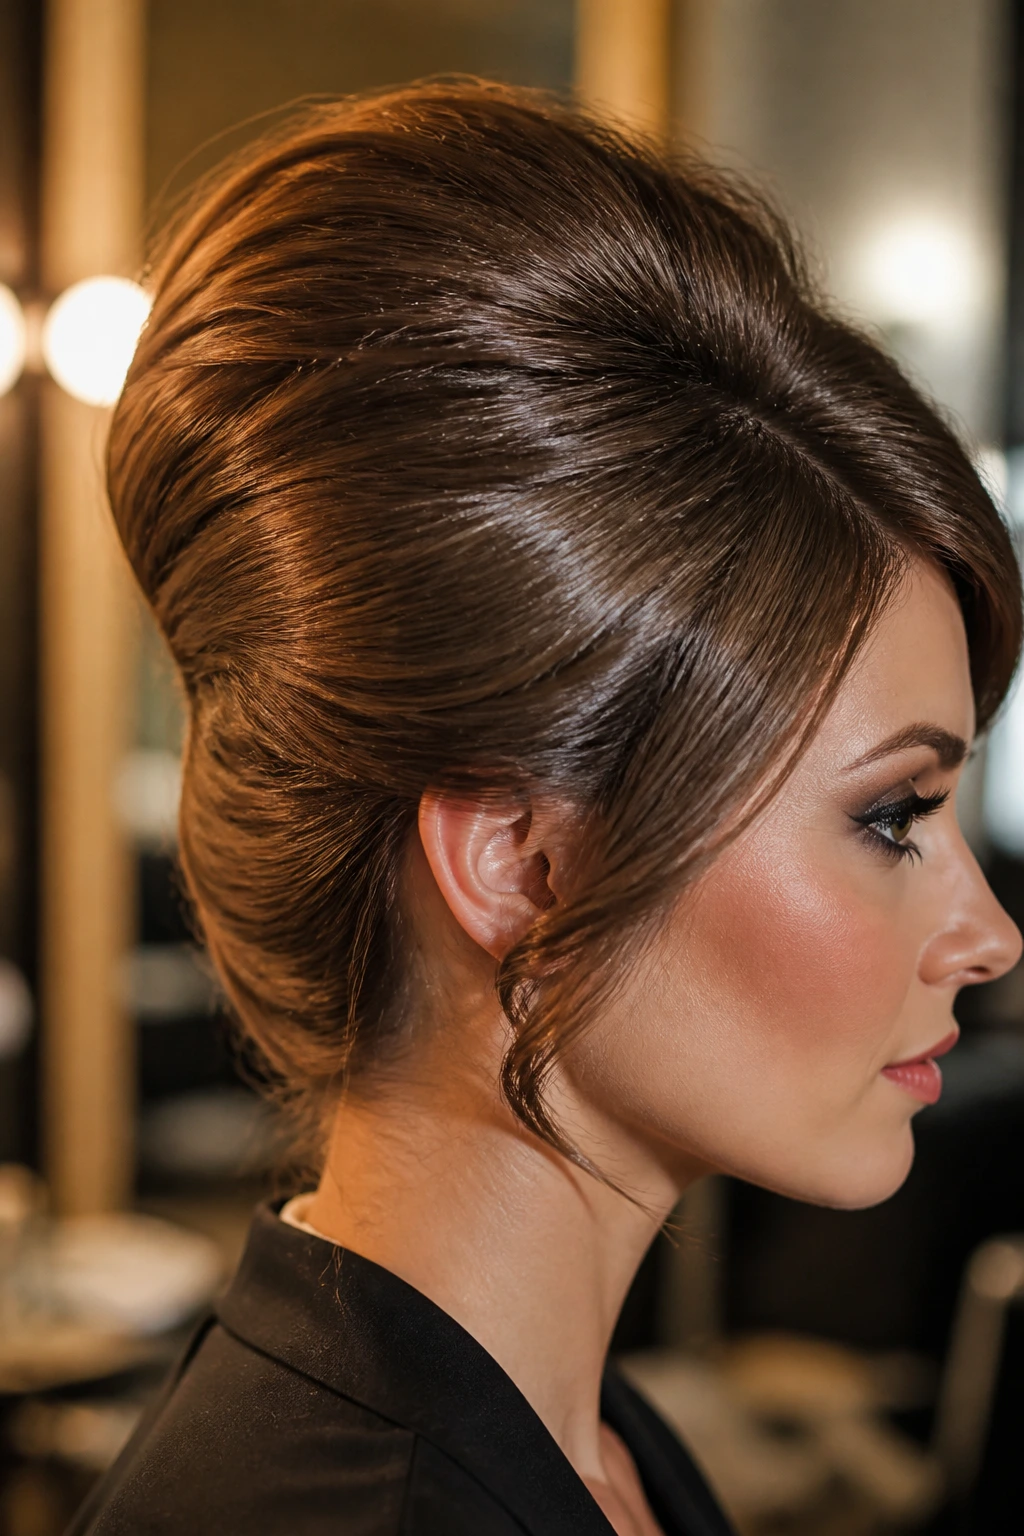
Lift: If your roots collapse quickly, set the top section with a blow-dry first, then cool it before teasing. Warm hair remembers shape poorly; cooled hair keeps it better. Even a minute with the dryer on cool air can make the crown feel less flimsy.
Smooth Finish: Use a boar-bristle brush only on the outer layer, not the teased center. That keeps the shell sleek while the inside stays packed. If a bump appears, pat it down instead of dragging the brush through the whole crown and breaking the structure.
Texture: Fine hair likes dry shampoo at the roots. Curly hair likes a little stretch and then a few loose pieces left alone. Coarser hair often needs less teasing and more shaping, because it already has body to work with.
Make-It-Yours: Add a scarf for a daytime version, a veil for formal wear, or a few pearl pins for a cleaner finish. If you want the style softer, leave a small curve around the temples and a touch of movement at the ends. If you want it sharper, slick the sides and keep the crown narrow.
Make-Ahead, Sleep, and Next-Day Reset
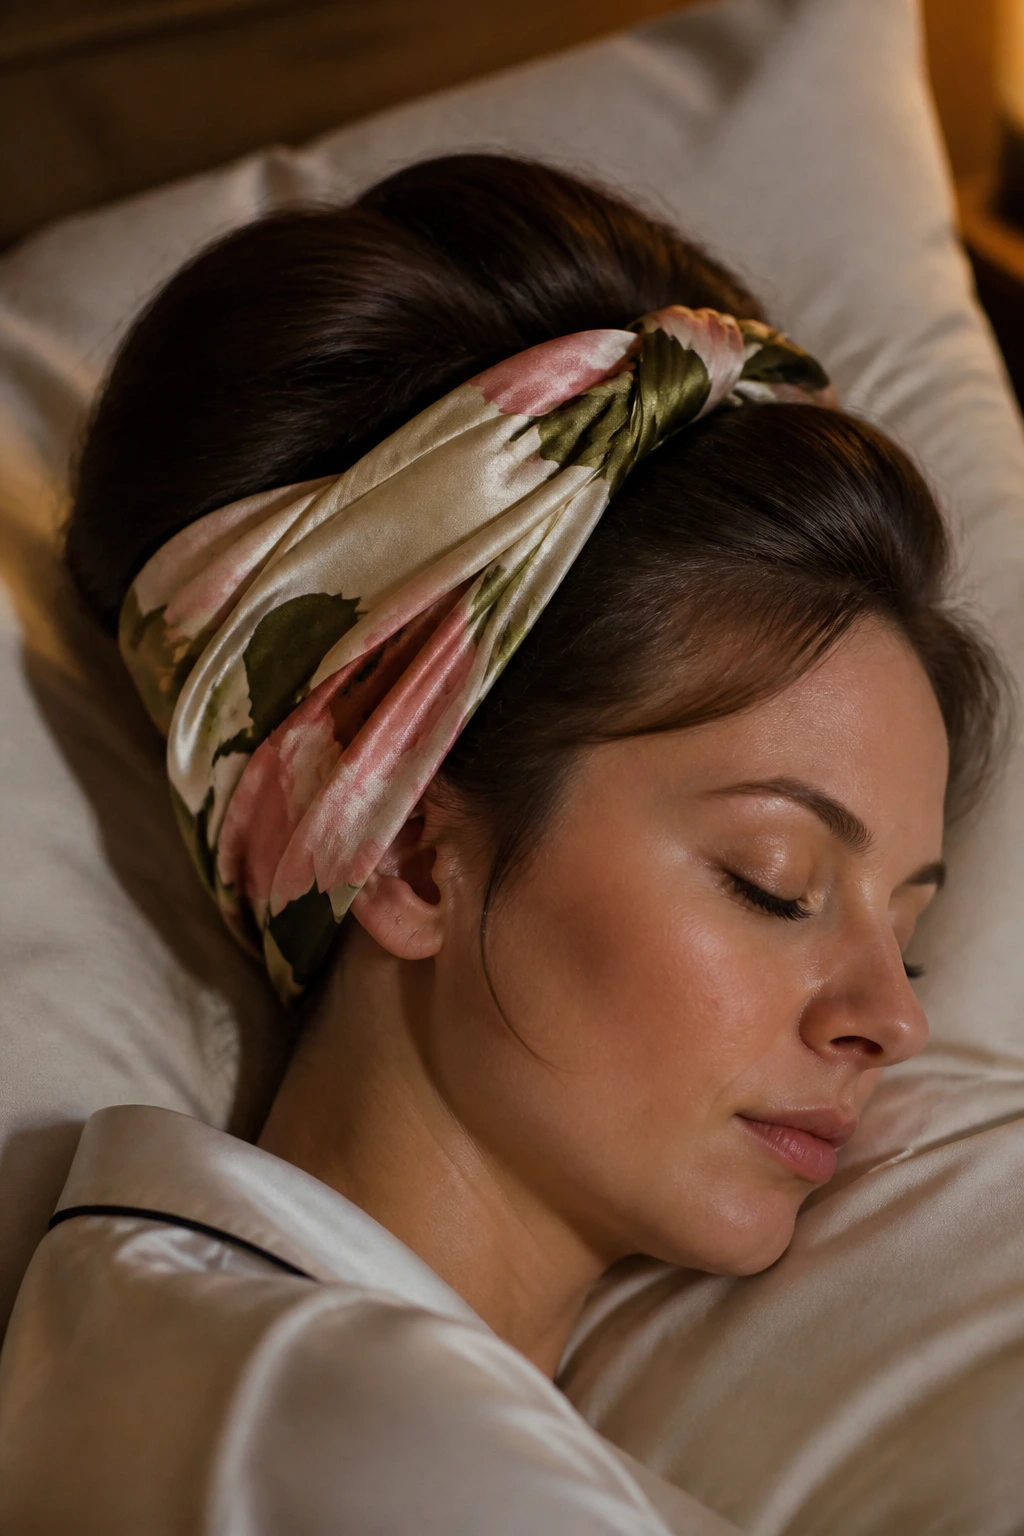
A beehive usually keeps its shape best on the day it’s set, but a well-pinned version can survive overnight if you treat it like a structure, not a loose style. If you’re styling for an event, set the curl or blowout the night before, then build the crown the next day. Hair that has already cooled and settled tends to hold better than hair that’s been rushed from damp to pinned.
For overnight wear, a silk scarf or bonnet helps a lot. Wrap the crown loosely so you do not crush the height, and sleep on a smooth pillowcase if you can. In the morning, mist only the surface with a little water or setting spray, then lift the roots gently with your fingers rather than a brush.
A soft beehive can usually be refreshed for a second day. A taller, shellacked version often needs a full reset after one long day, especially if you’ve been outside or touched the hair a lot. If the style starts to sag at the crown, do not keep spraying the top layer over and over. Unpin a few hidden points, lift the base again, and re-anchor the shape. That takes less time than trying to persuade flat hair to stand up by force.
Variations and Adaptations to Try
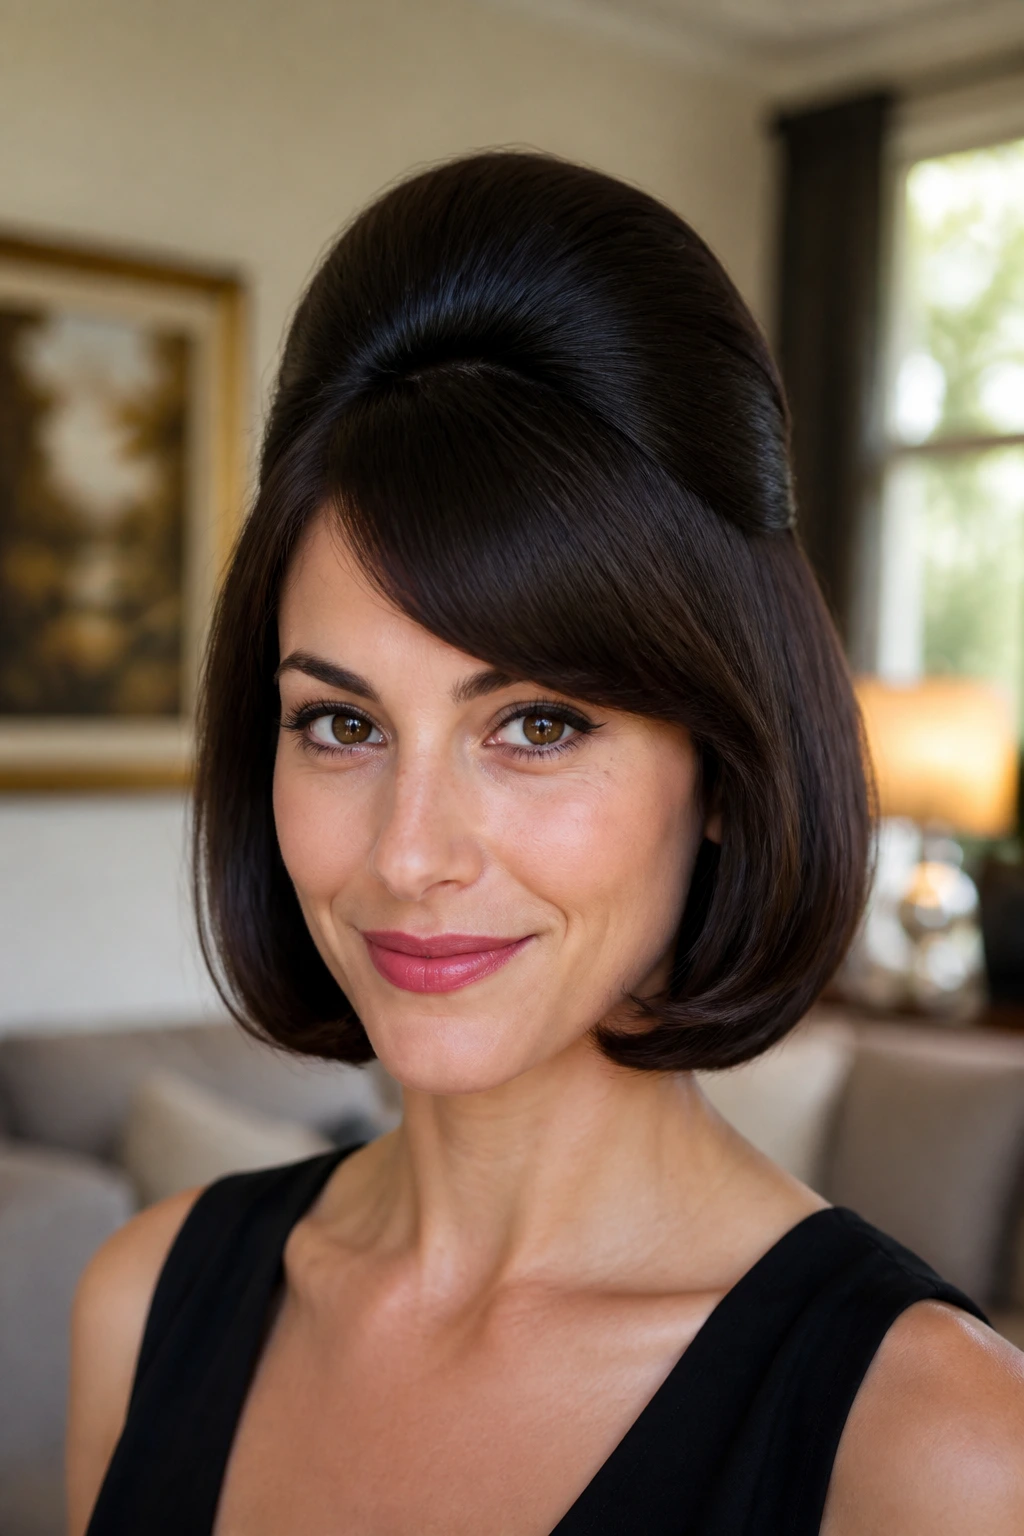
Fine-Hair Cushion Lift: If your hair is fine, start with a small padding insert or a tiny rolled support hidden under the crown. Use dry shampoo first so the roots have grip, then tease in tighter sections than you would on thick hair. The goal is support, not bulk, because fine hair can get stringy if you overwork it.
Curly-Crown Lift: Let curls do some of the volume work for you. Stretch the roots, shape the crown, and leave the texture visible through the lengths or the tucked back section. This version looks better when you respect the curl pattern instead of brushing it into submission.
Short-Hair Illusion: For a bob or lob, use a narrow bump at the crown and tuck the ends under tightly. Add a side part or a fringe so the style has something to frame the face. The beehive silhouette still reads, even when the length is modest.
Low-Drama Daytime Beehive: Keep the crown low, the finish matte, and the accessories minimal. This version is the one I’d pick for lunch, work, or a daytime event where you want a nod to retro hair without looking dressed for a costume party.
Big-Night Shellac: If the goal is drama, go taller, shinier, and firmer. Use more precise sectioning, stronger pins, and a stronger finishing spray. This is the style that works under bright event lighting and stays readable from a distance.
Common Mistakes That Flatten the Shape
Starting with hair that’s too clean: Freshly washed hair often slips and slides because the cuticle is too smooth. If that’s the situation, dry shampoo or texturizing spray at the roots gives the hair something to hold onto.
Teasing the whole head: If every section gets roughened, the style turns wide instead of tall. Build the lift in the crown and upper back, then keep the sides tighter so the silhouette stays focused.
Placing the height too far forward: When the beehive sits too close to the forehead, the face can look crowded. Shift the base slightly back and let the front layer smooth over it; that usually fixes the balance right away.
Using too much spray too early: Soaking the hair before the structure is set makes it sticky and hard to adjust. Build, pin, then spray the outer layer in short passes.
Skipping hidden pins: A style can look fine for five minutes and fail the second you move if it isn’t anchored properly. Use pins under the crown, not just around the edges, and cross them where the structure needs support most.
Frequently Asked Questions
How long does a beehive usually take to do?
A simple mini beehive can take 15 to 20 minutes once you’ve practiced the sectioning. A fuller, event-style version with curls, padding, or accessory placement can take 30 to 45 minutes, especially the first few times you build it.
Can short hair really do a retro beehive?
Yes, and it often looks sharper because the shape is easier to control. A bob or lob usually needs a small pad, some root teasing, and careful pinning under the crown so the length doesn’t pop out in random places.
What’s the best hair type for this style?
There isn’t one single winner, but hair with a bit of texture tends to cooperate fastest. Fine straight hair needs more grip products, while curly or coily hair often needs less teasing and more shaping. The style can work on all of them if you adjust the base correctly.
How do I keep the crown from collapsing?
The crown usually collapses because the base is too loose or the hair is too slippery. Tease in smaller sections, pin from underneath, and let the sprayed outer layer dry before you touch it again.
Does teasing damage hair?
Repeated rough teasing in the same spot can break or rough up the strands, yes. Keep teasing local to the root zone, use a detangling spray afterward, and avoid doing a heavy backcomb on the same section every day.
What can I do if my beehive looks too stiff?
Loosen the finish, not the structure. Pull out one or two soft front pieces, soften the sides with a brush, or replace the hard shell with a more flexible finishing spray. The style usually feels better once there’s a bit of movement around the face.
Are these styles hard to sleep in?
A tall, lacquered beehive is not comfortable to sleep in, and I wouldn’t try. A softer half-up or low version can survive overnight if wrapped with a silk scarf and pinned securely, then refreshed the next morning.
Can natural curls or coils work with a beehive?
Absolutely. In fact, textured hair can make the crown feel fuller with less teasing. The trick is to stretch the roots, keep the perimeter neat, and let the natural texture show where it helps the shape.
A Shape Worth Keeping
The beehive survives because it knows how to do one job well: it changes the whole line of the head with a single move. A little lift at the crown can make a haircut feel sharper, an outfit feel more finished, and a face frame feel more deliberate. That’s a lot of work for one silhouette.
Start with the version that fits your hair length and your patience level, not the tallest one on the page. Once you know how your roots behave, how much spray your hair can take, and where your pins like to sit, the rest gets easier. Then the beehive stops feeling like a throwback and starts feeling like a tool you can reach for whenever you want the shape to say something.
